Leaderboard


Popular Content
Showing content with the highest reputation on 12/28/2019 in all areas
-
4 pointsGood news is I have fixed it! Turns out you were right @grannyknot the arms were bent and an hour with a vice and hammer and trial fitting it now goes up and down very smoothly. Really appreciate your advice in this! Now to fix the heater lol Ash4 points
-
3 pointsIf you really believe it's not that bad I'd hate to see a really rusty Z. Rust never sleeps and by the time it's this visible there are real problems. Well that's your opinion and this is mine.3 points
-
Ok. I sold the car to a local. Nice kid. $15,500. Good enough.3 points
-
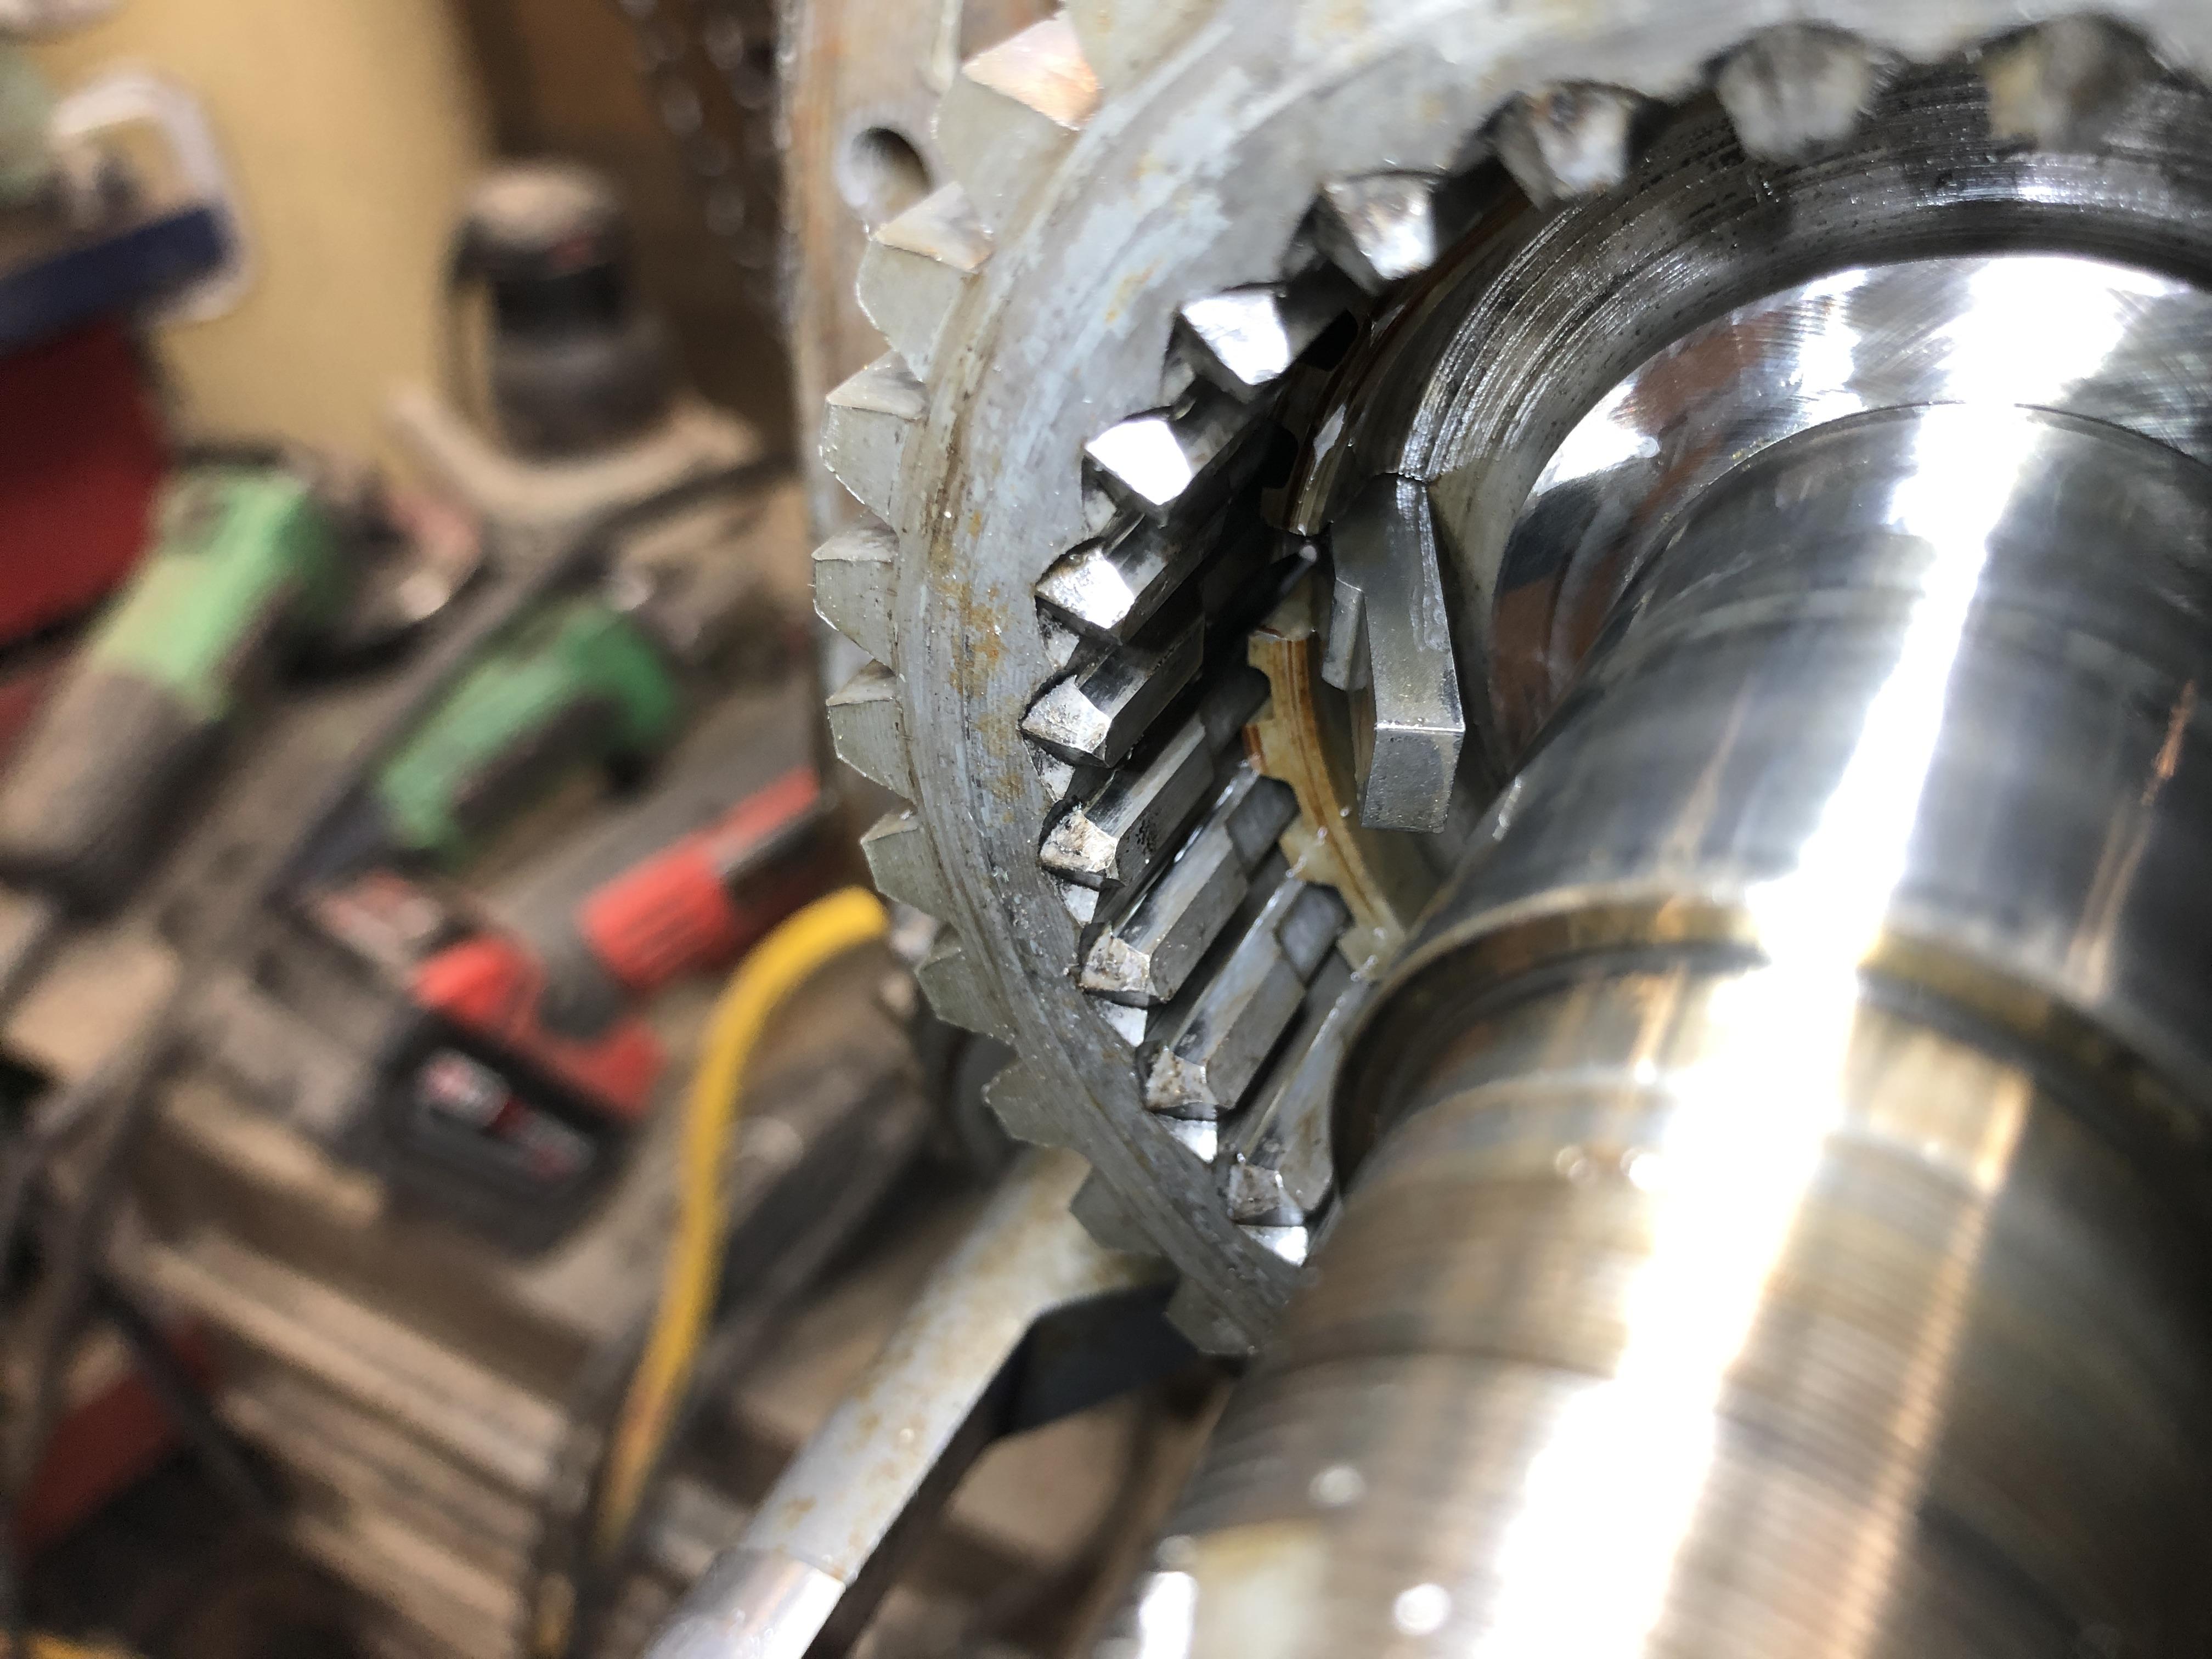
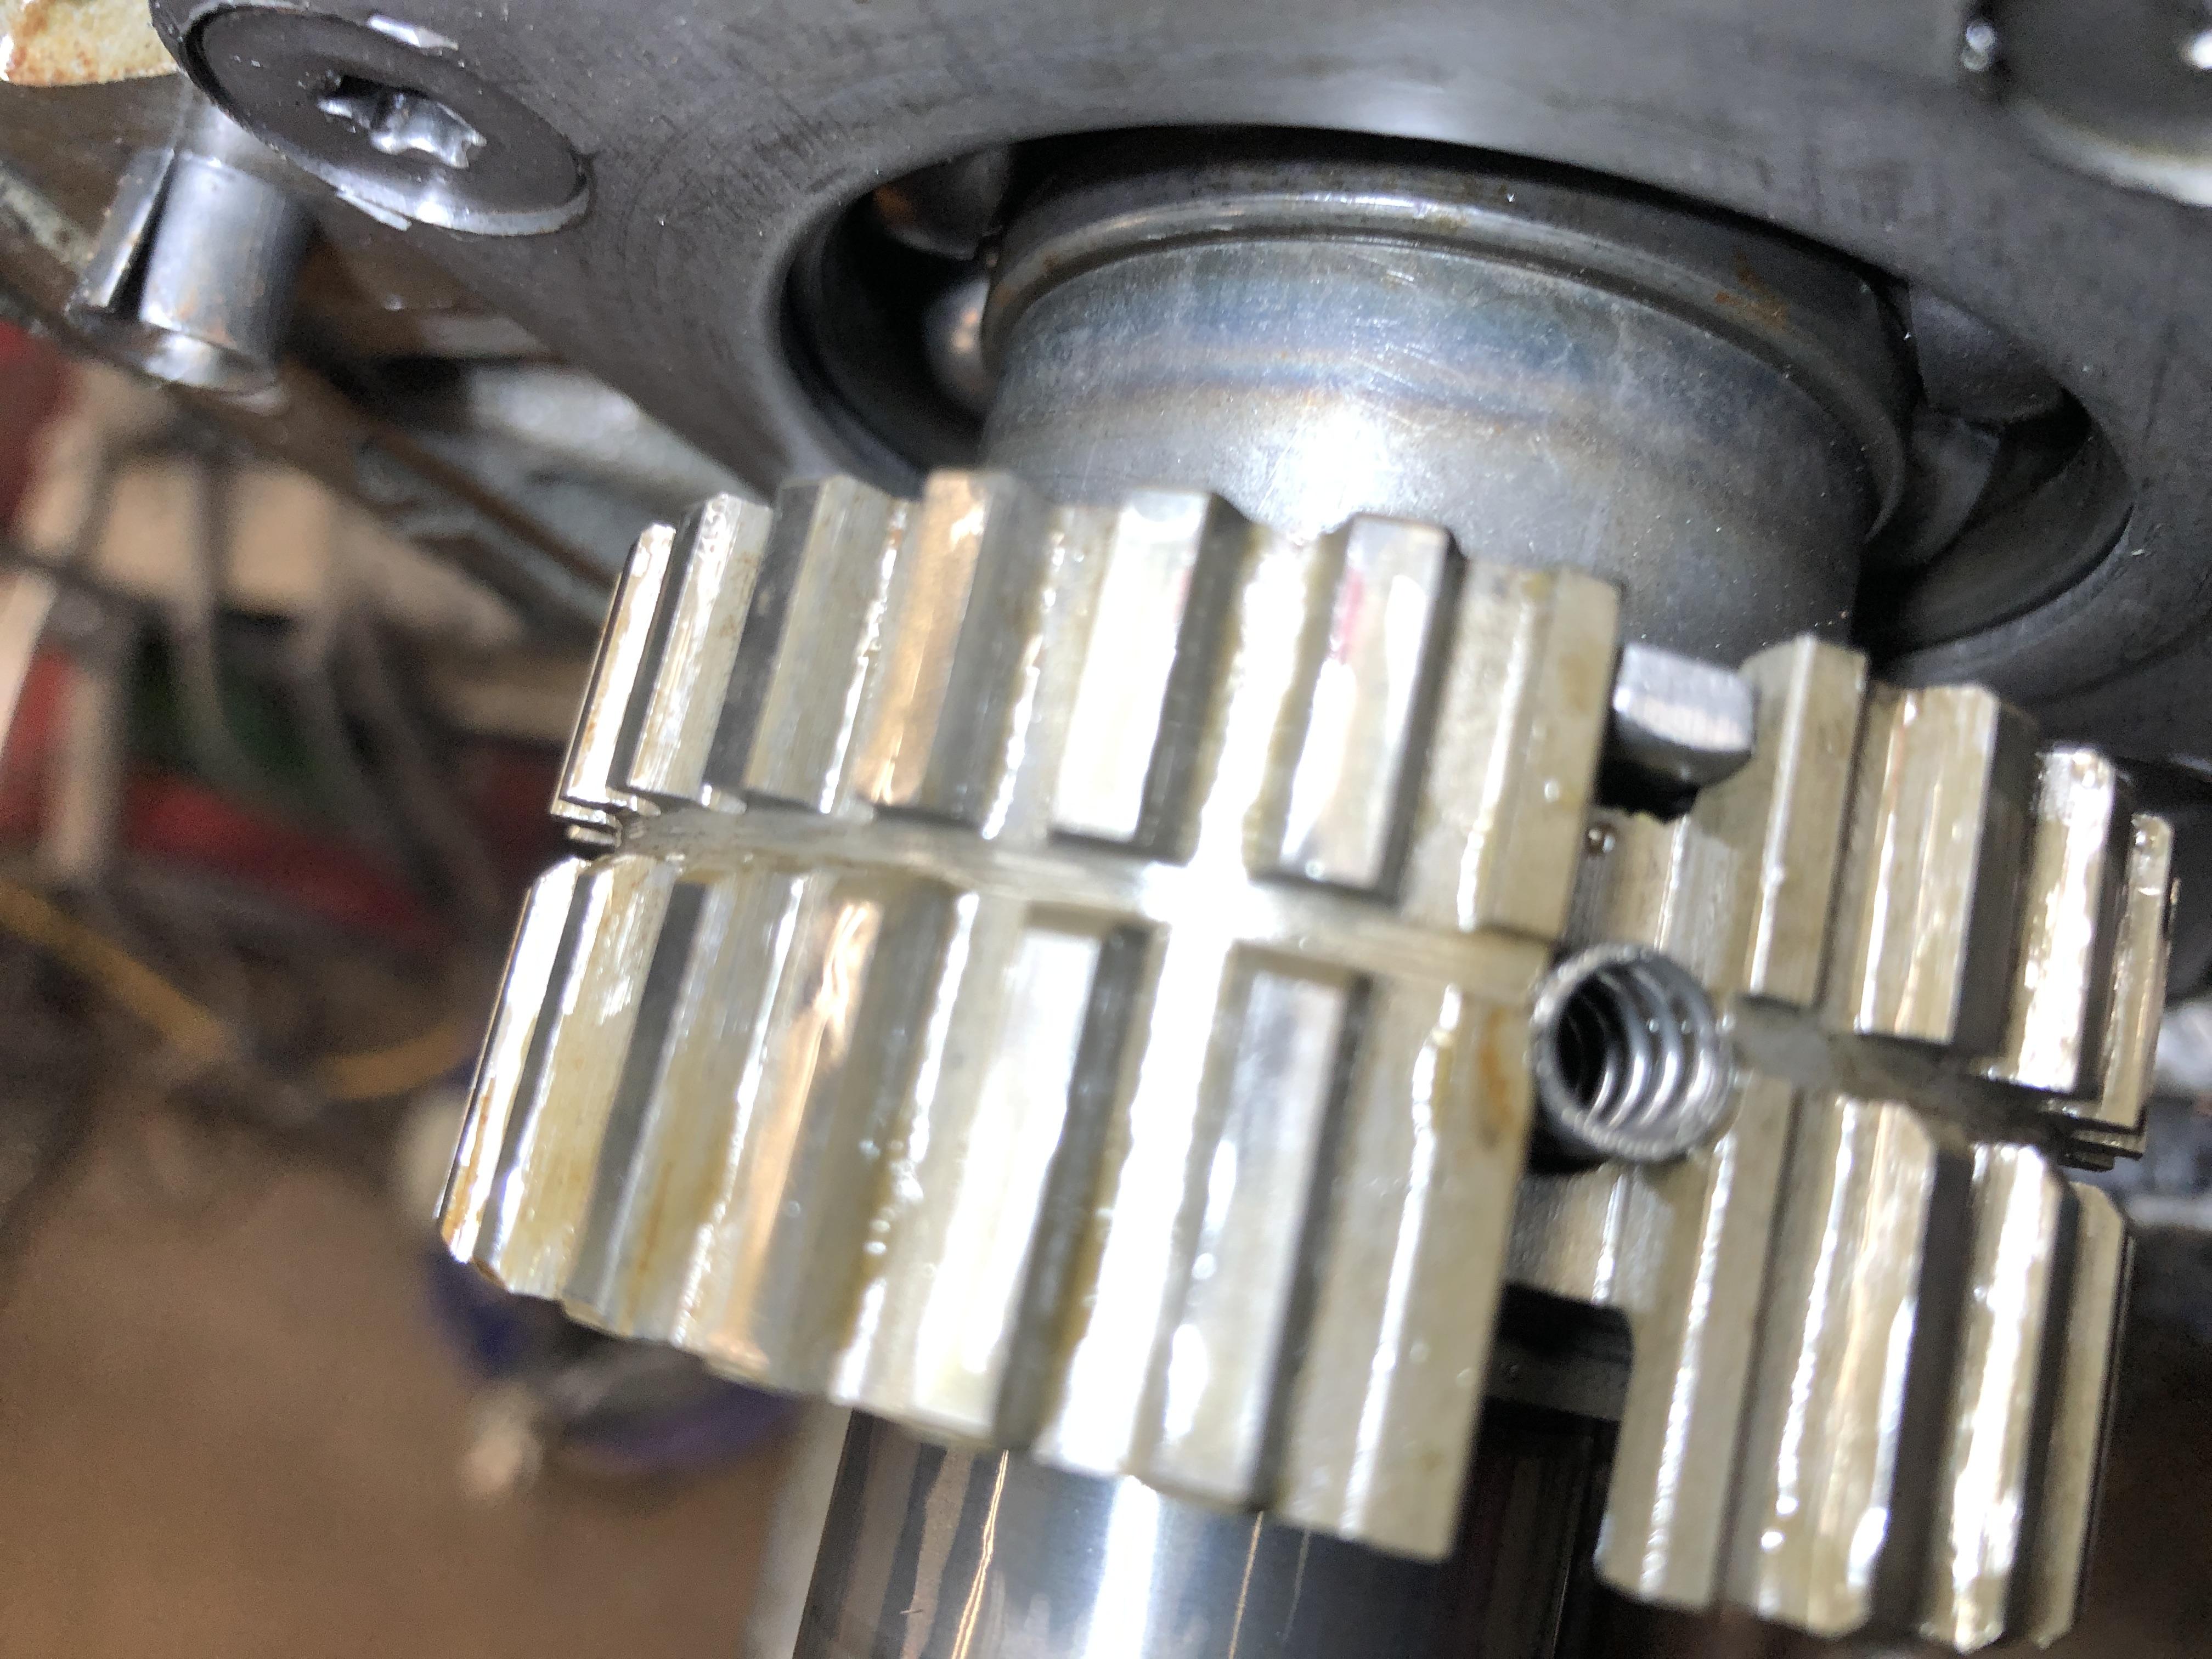
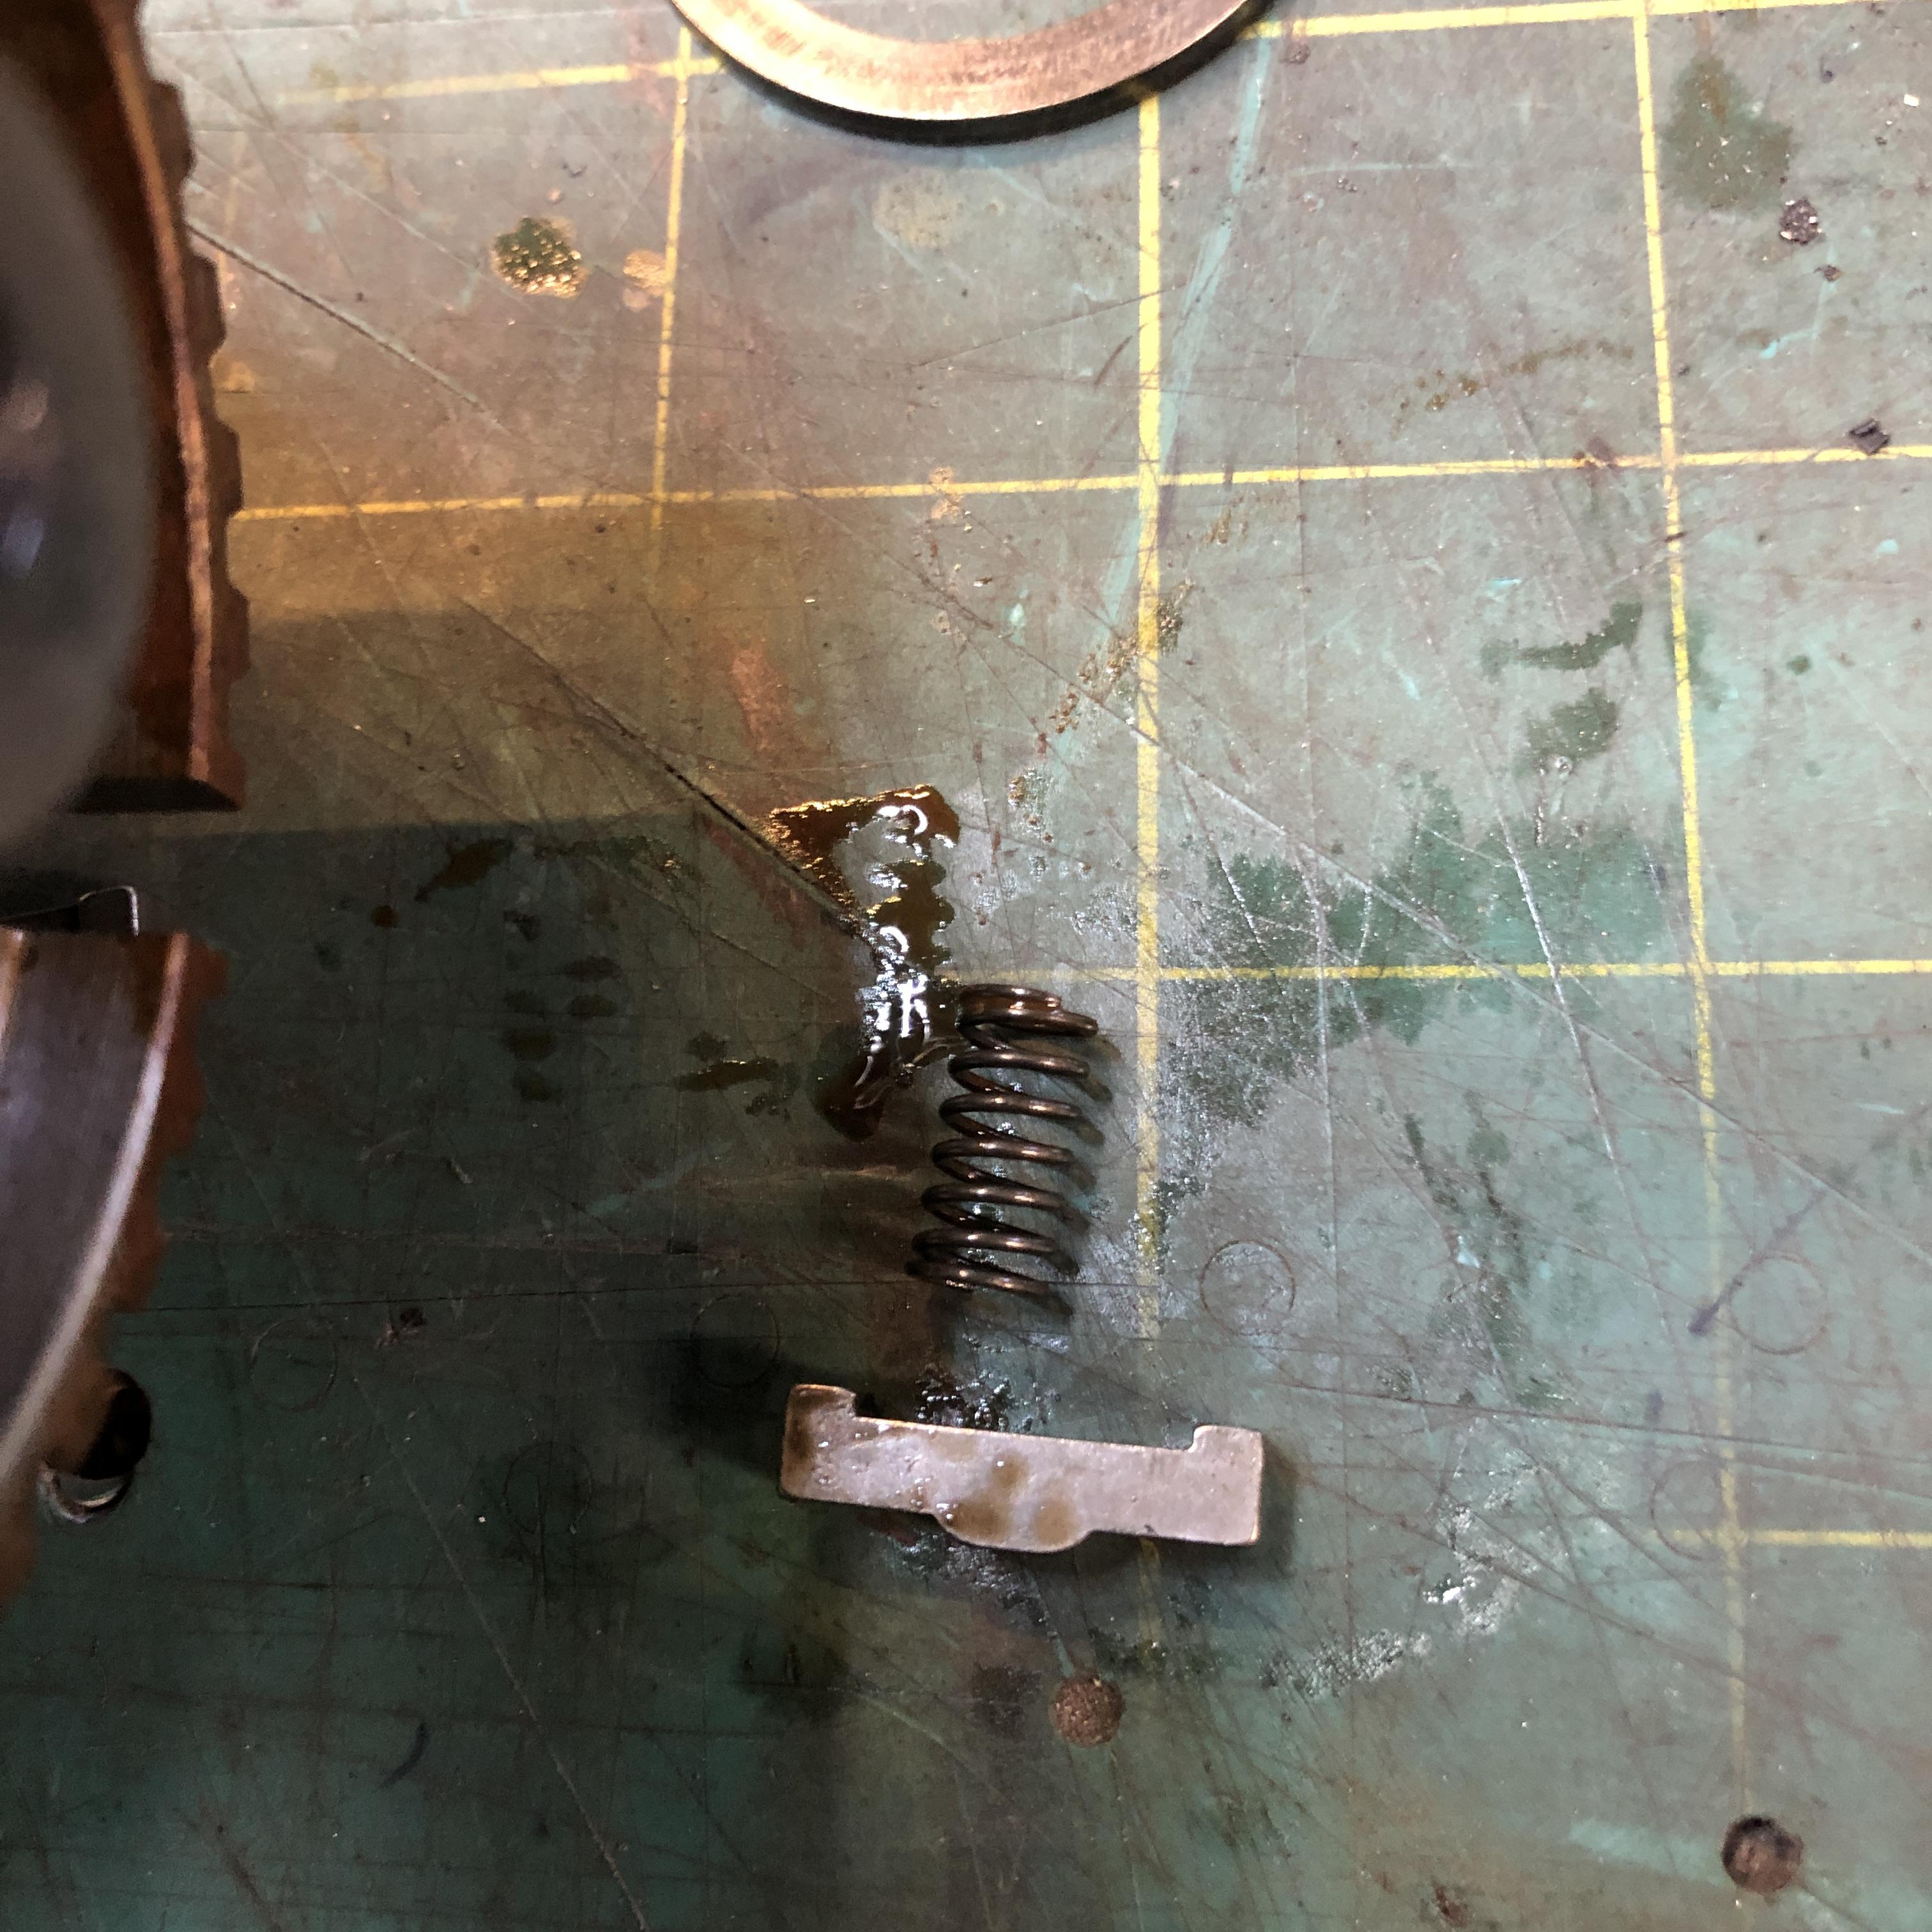
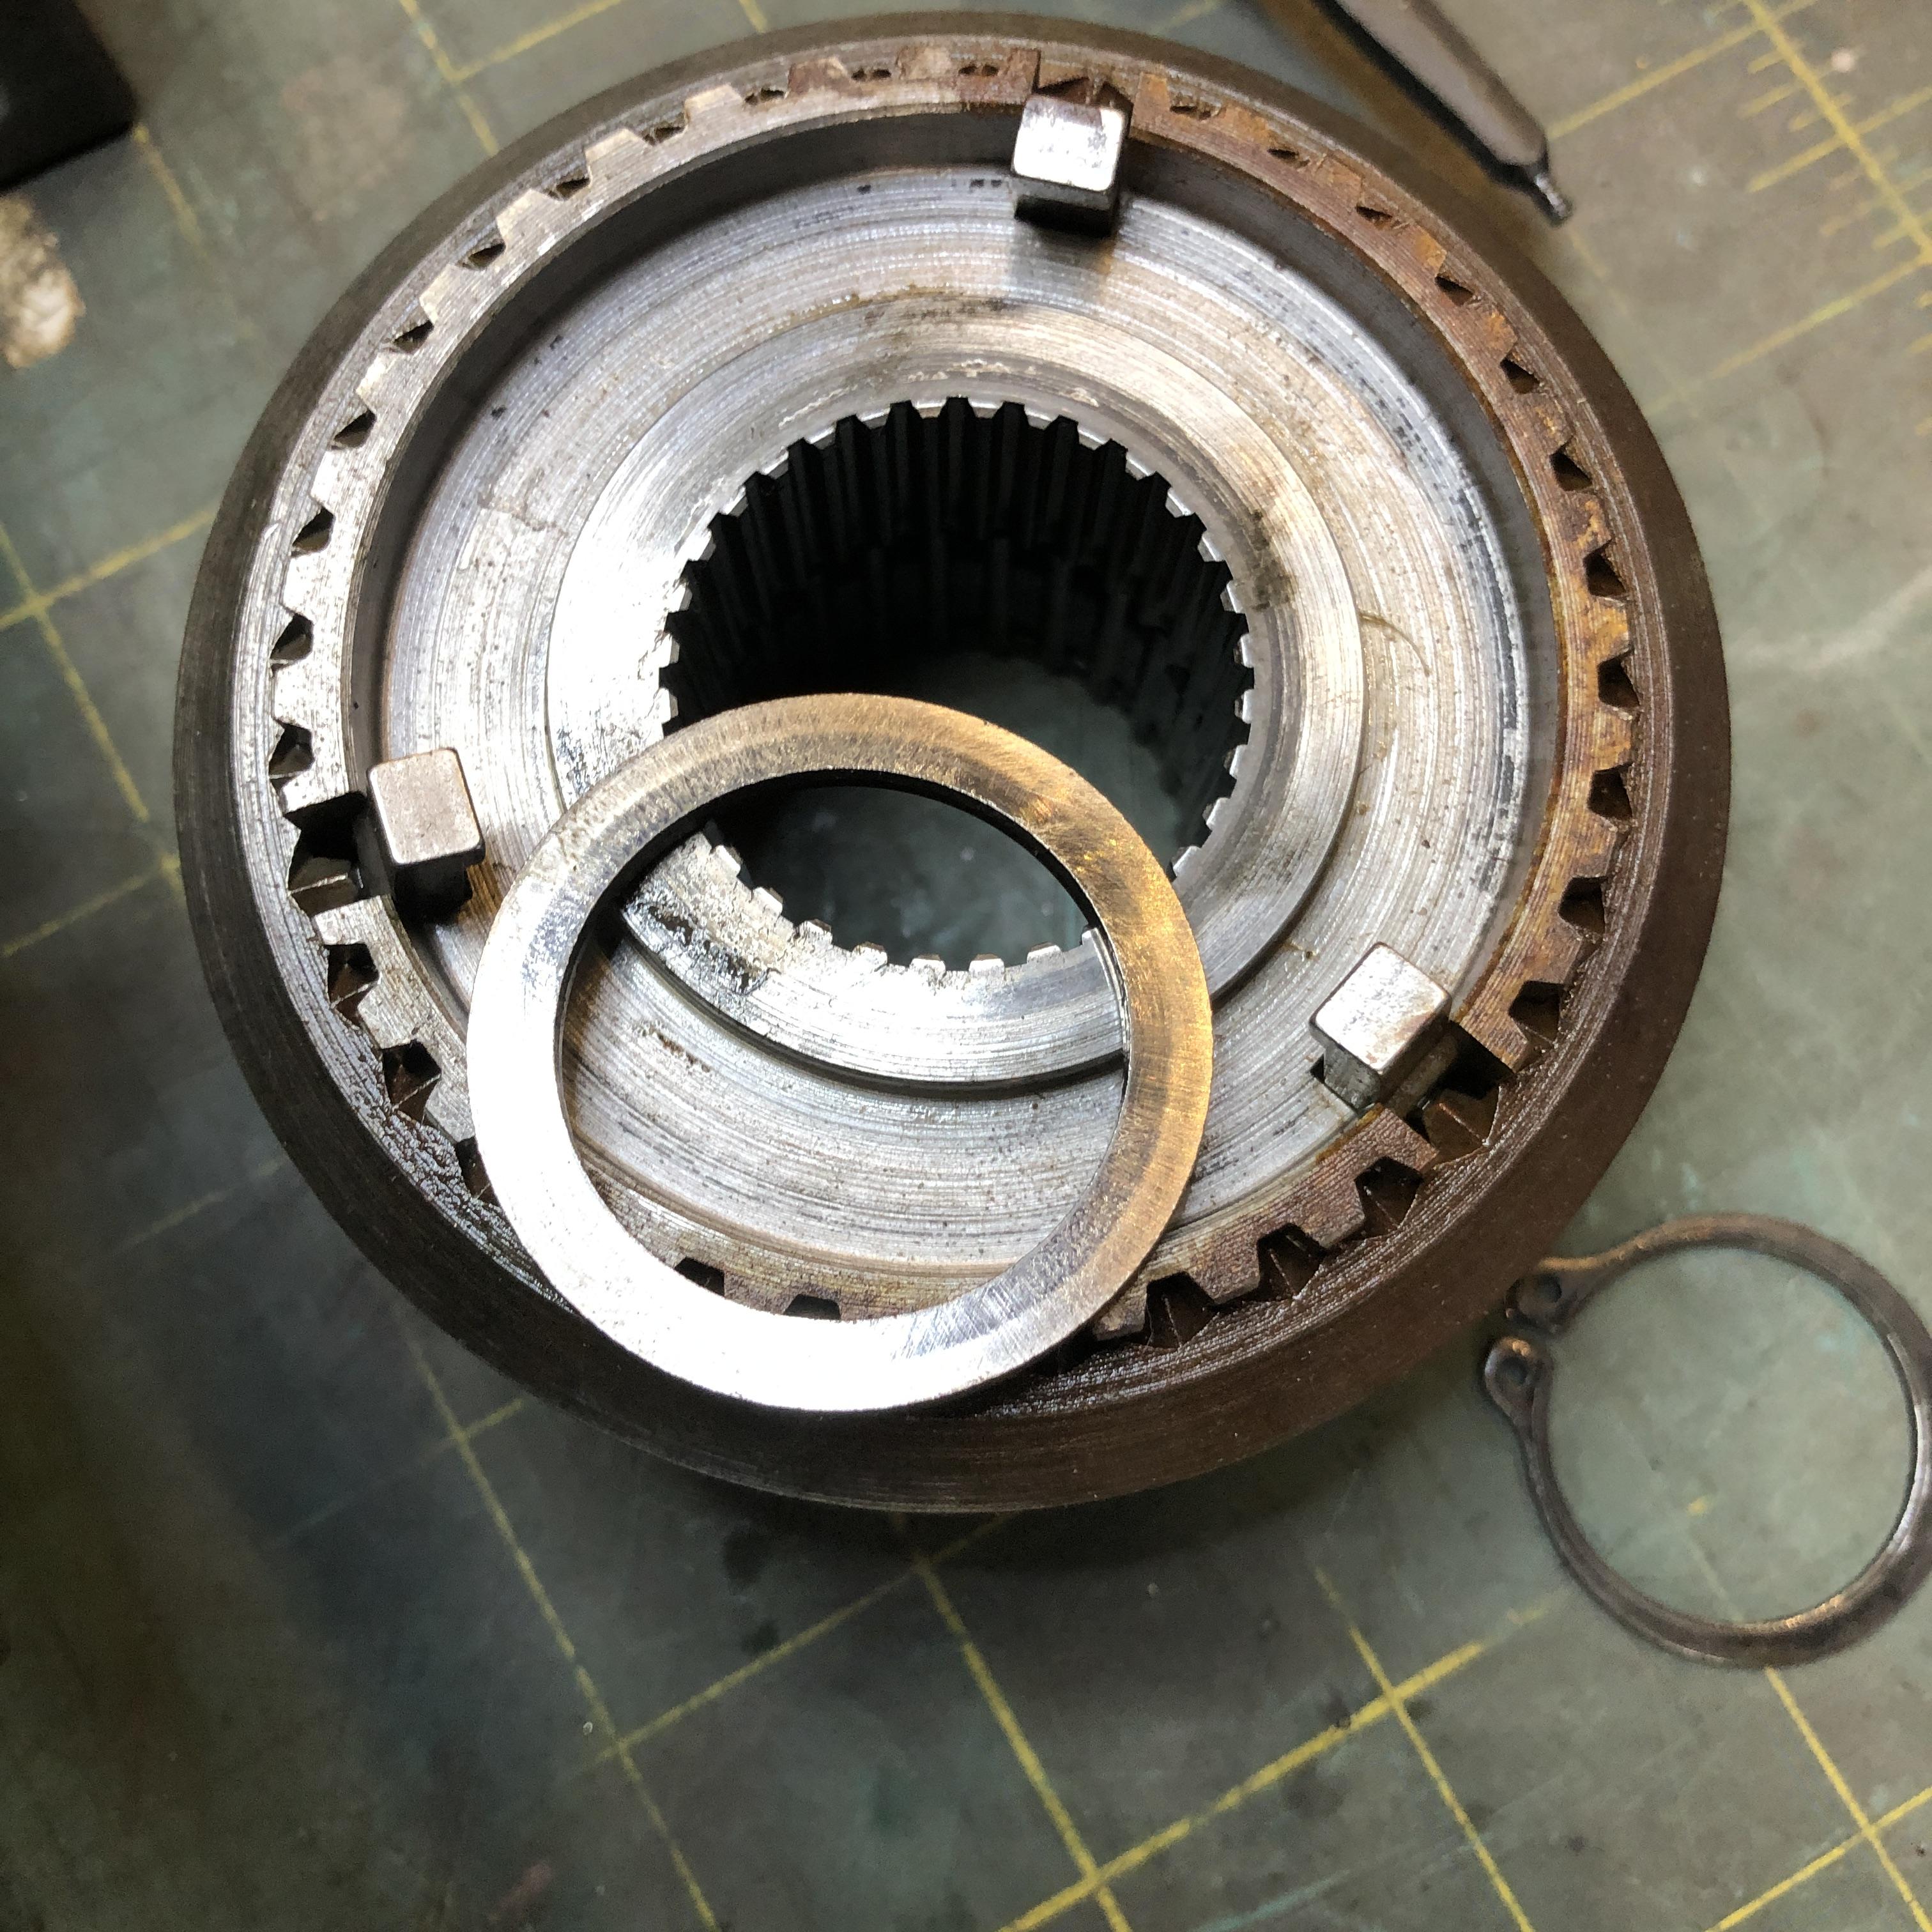
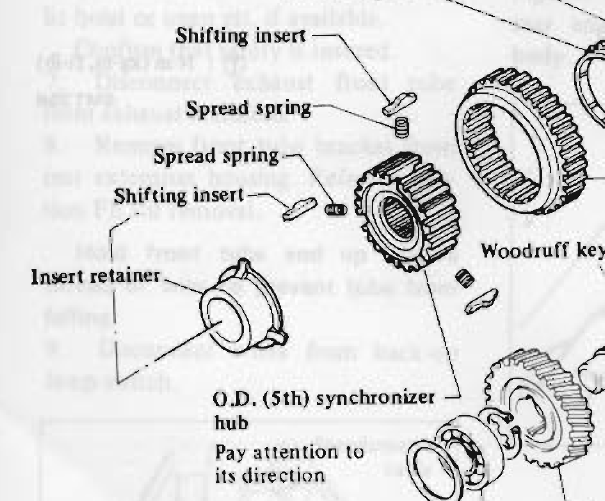
And now that Christmas is over, the real fun begins. First up is something for the "tips" section I guess. Part orientation. The FSM mentions in several sections to ensure part orientation/direction is maintained. They however spend zero time showing you the correct orientation of the parts. So. Let's begin with the 5/reverse synco hub and it's nasty little springs and shifting inserts as they are called. First the syncro hub. It has an offset circumferential groove in the outer teeth, not shown in the FSM pic above. Put the groove more to the front to orient it properly. Front is at the top of the picture, obviously the intermediate plate is there are were are taking pictures of the 5th/reverse parts that are in the rear of that plate. Second, the three little shifting inserts. They have an offset bump on the outer face. Put the bump toward the front. Oh, and bump OUTWARD. The spring touches the flat bottom The FSM shows the three shifting inserts, but the one lower right incorrectly shows the bump to be offset to the REAR. The other two are sort of ambiguous. The bump on each insert is definitely toward the FRONT (left side of the screen grab picture). This picture was taken as I was disassembling the hub. Shows the LONG end of the insert facing toward the camera (rear). Front of the trans is into the picture, so the short end is facing FRONT (can't see it, it's in its groove in the hub) I've confirmed this insert orientation on all the other trans I've taken apart. The other hubs have the same type of inserts but they are symmetrical. Their bump is just like the 5th gear ones, but it's in the center. You can't confuse them with the 5th gear inserts, these have little legs on the back side as well. Here in the picture they are shown with their mating springs in the correct orientation, with the bottom of the picture being outward.


 2 points
 -
2 pointsThanks! No. A random guy who lives 5 mins away from me had a bunch of stuff in his garage and basement. More on that later ?2 points
-
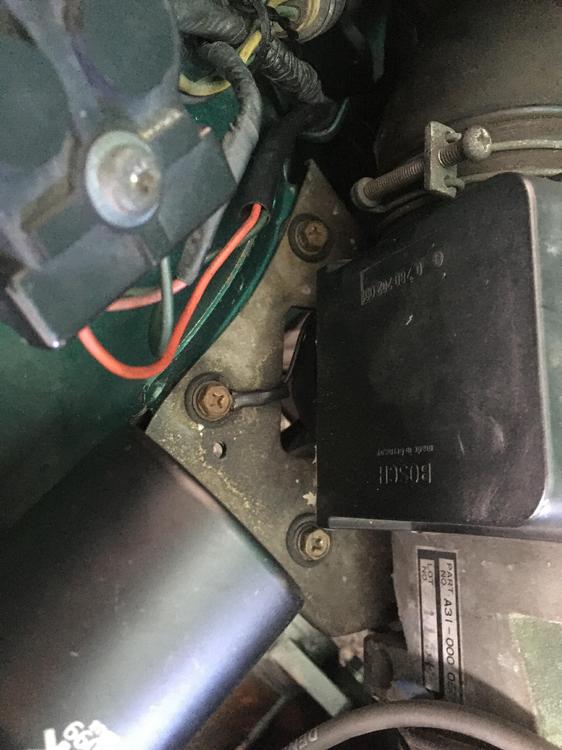
1 pointok that looks like mine, only diff is the extra ground wire from the green wire on the term block that mine has. A guess here, the AFM is electrically isolated from the chassis due to the use of the rubber gromments used to mount the plate to the chassis (I presume to damp vibrations). So with all that air flowing thru the alum body of the AFM it could build up a static electrical charge with out the ground lead. So that lead makes since but my grounding of the diff green wire does not. My play is to get one of the HEI modules as ZH has mentioned just as a backup, will wire it up and just control the coil by choosing which module is hooked up. I read some comments by ZH in another thread where he just left the OE stuff in place and would just disconnect the signal at the OE module and then hook this one up under the hood. All this is really just so I don't get stranded on one of my long road trips, so a tested backup system would be nice to have. oh btw my test stand engine does NOT have the AFM grounded, something I will take care of since I don't want to smoke an ECU.1 point
-
You've changed a young person's life. Like Charles said, "good for you".1 point
-
1 pointDave, my ‘75Z (California Model) has a single ground wire with an eye connector.
 1 point
 -
Nice, did you tell him about the club? ? Glad you were able to get the car sold to someone who will appreciate it. Mike1 point
-
1 pointI went thru the same problem after my resto. Barring worn hinges as a root cause, keep trying the push-down procedure as you have been doing. I do recommend you pull the grill (only five screws) to be able to get to all the mounting bolts easily from the front as you or a buddy apply pressure to the leading edge of the hood. I kept the torsion rods in place when doing mine.1 point
-
1 pointI just go up to the parts counter with all the part numbers written out on a piece of paper, hand it to him and ask him to look them up. Never tell them what year the car is, you just get that blank stare. John, can you post a pic of the parts you are looking for? I have several distributors just for parts.1 point
-
1 pointThe change would have been due to the implementation of retractable seat belts, that began with the 260z.1 point
-
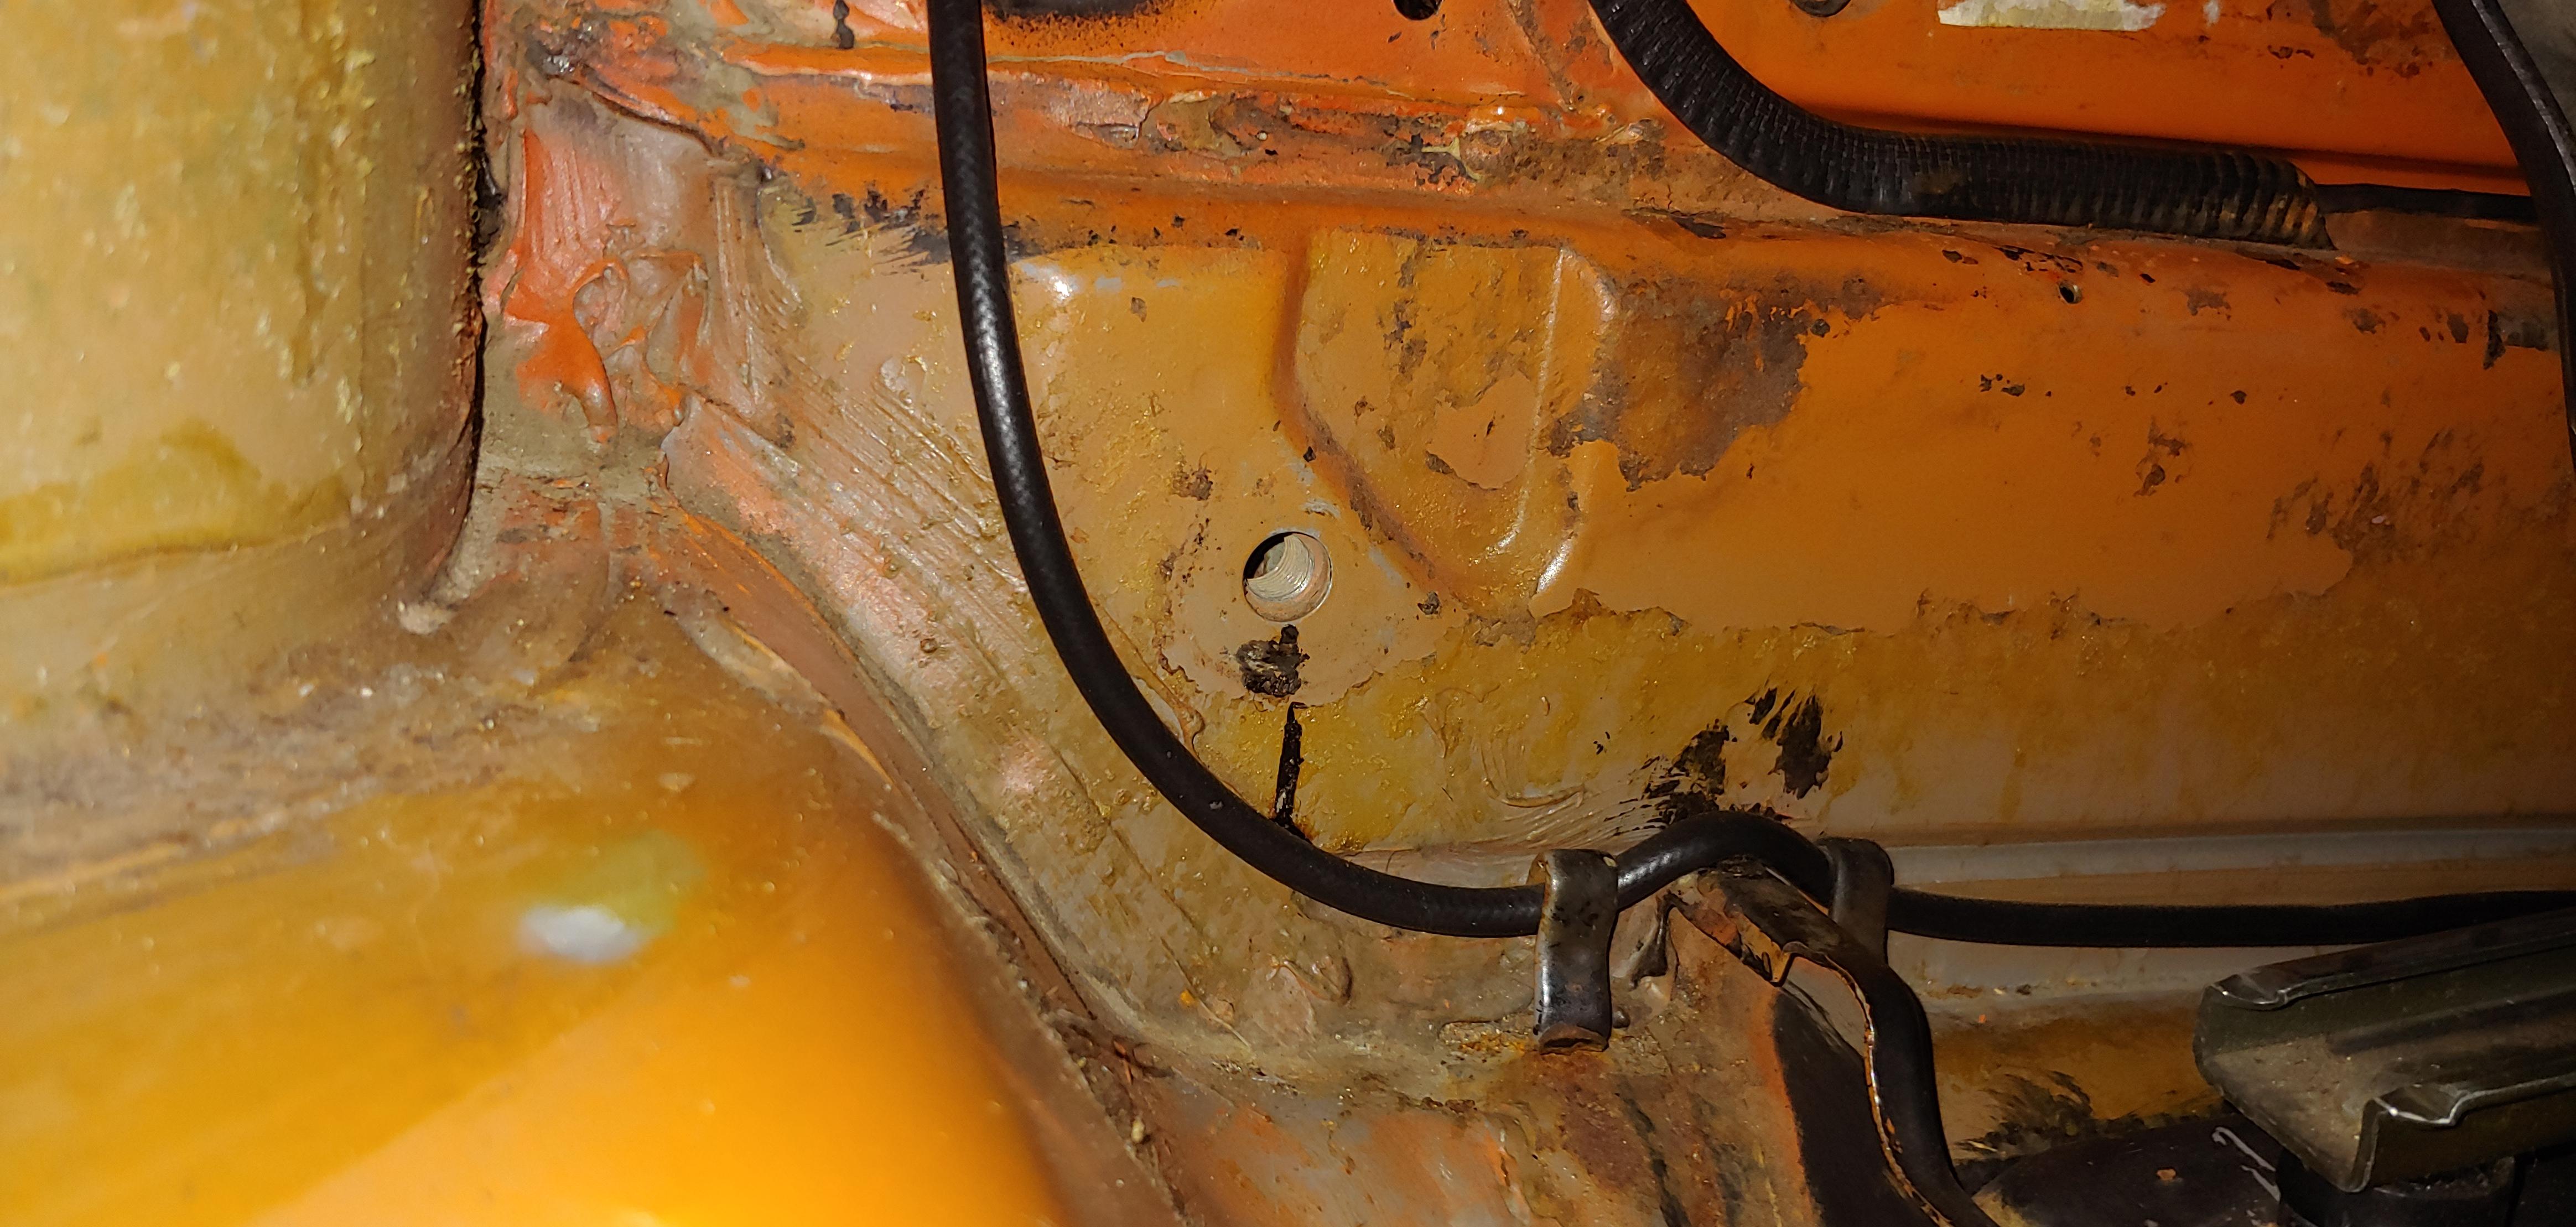
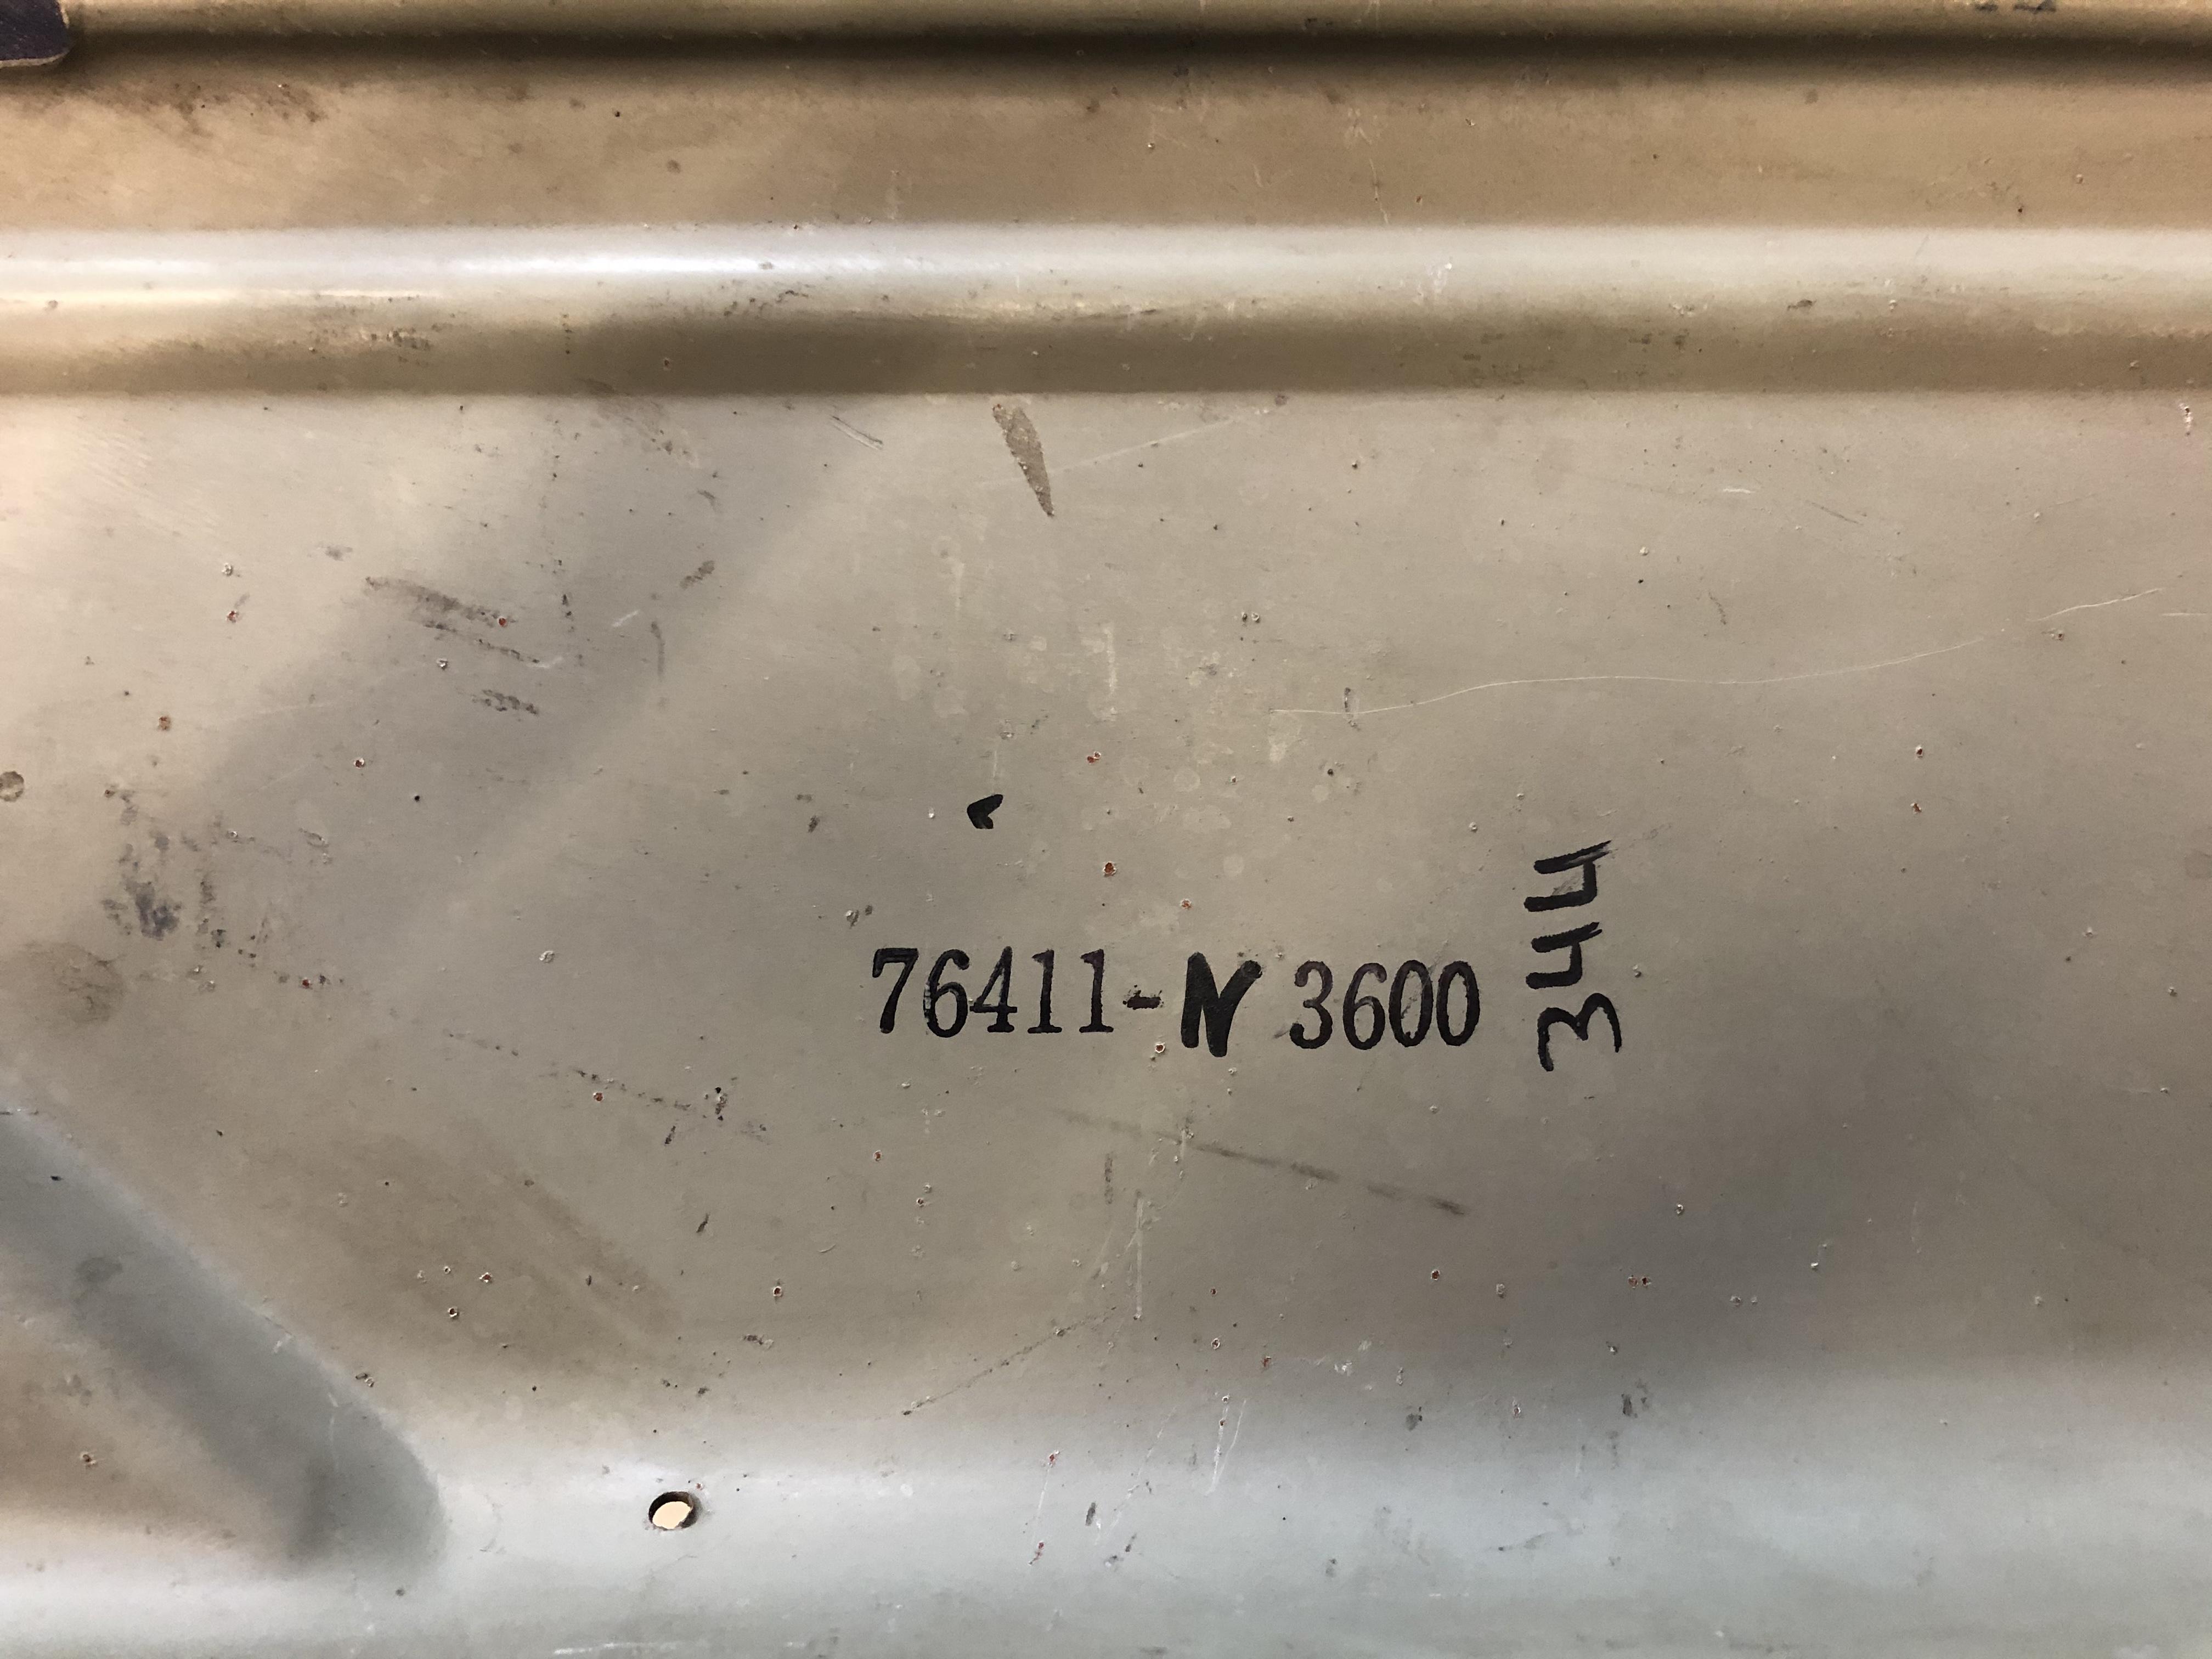
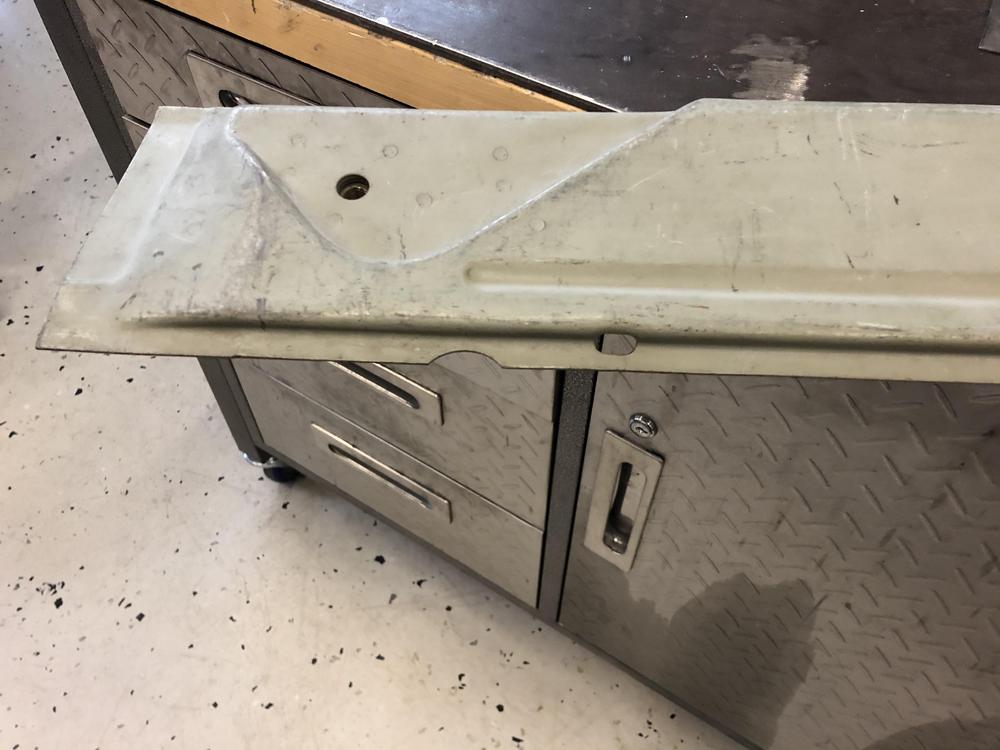
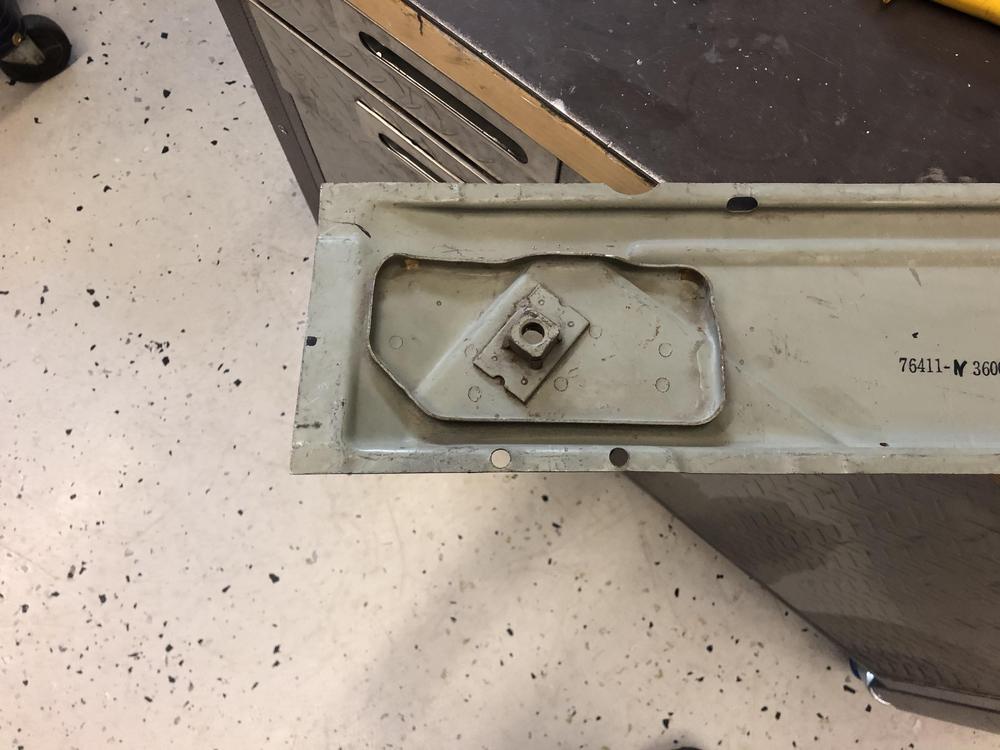
1 pointGood score, here's a bit of info. Your part 76411-N3600, is for a 260Z, 70-73 240Z would be 76411-E4600. The 240Z inner has a different depression at the seat belt attachment bolt point. Here's what mine looks like in that area:
 1 point
 -
1 point
-
1 pointWOW! I have a 75 and that car is really in bad shape. It's what I would call the Datsun submarine---It's been under water most of it"s life and 58K miles? More that likely it has 258K on the car. I would be hard pressed to go higher than $500, honestly, but your better to walk away. You will put $25k into that car just to make it safe to drive and that's you doing ALL the work. I've seen several really nice cars lately for about $5k. They are out there just be patient. Ron1 point
-
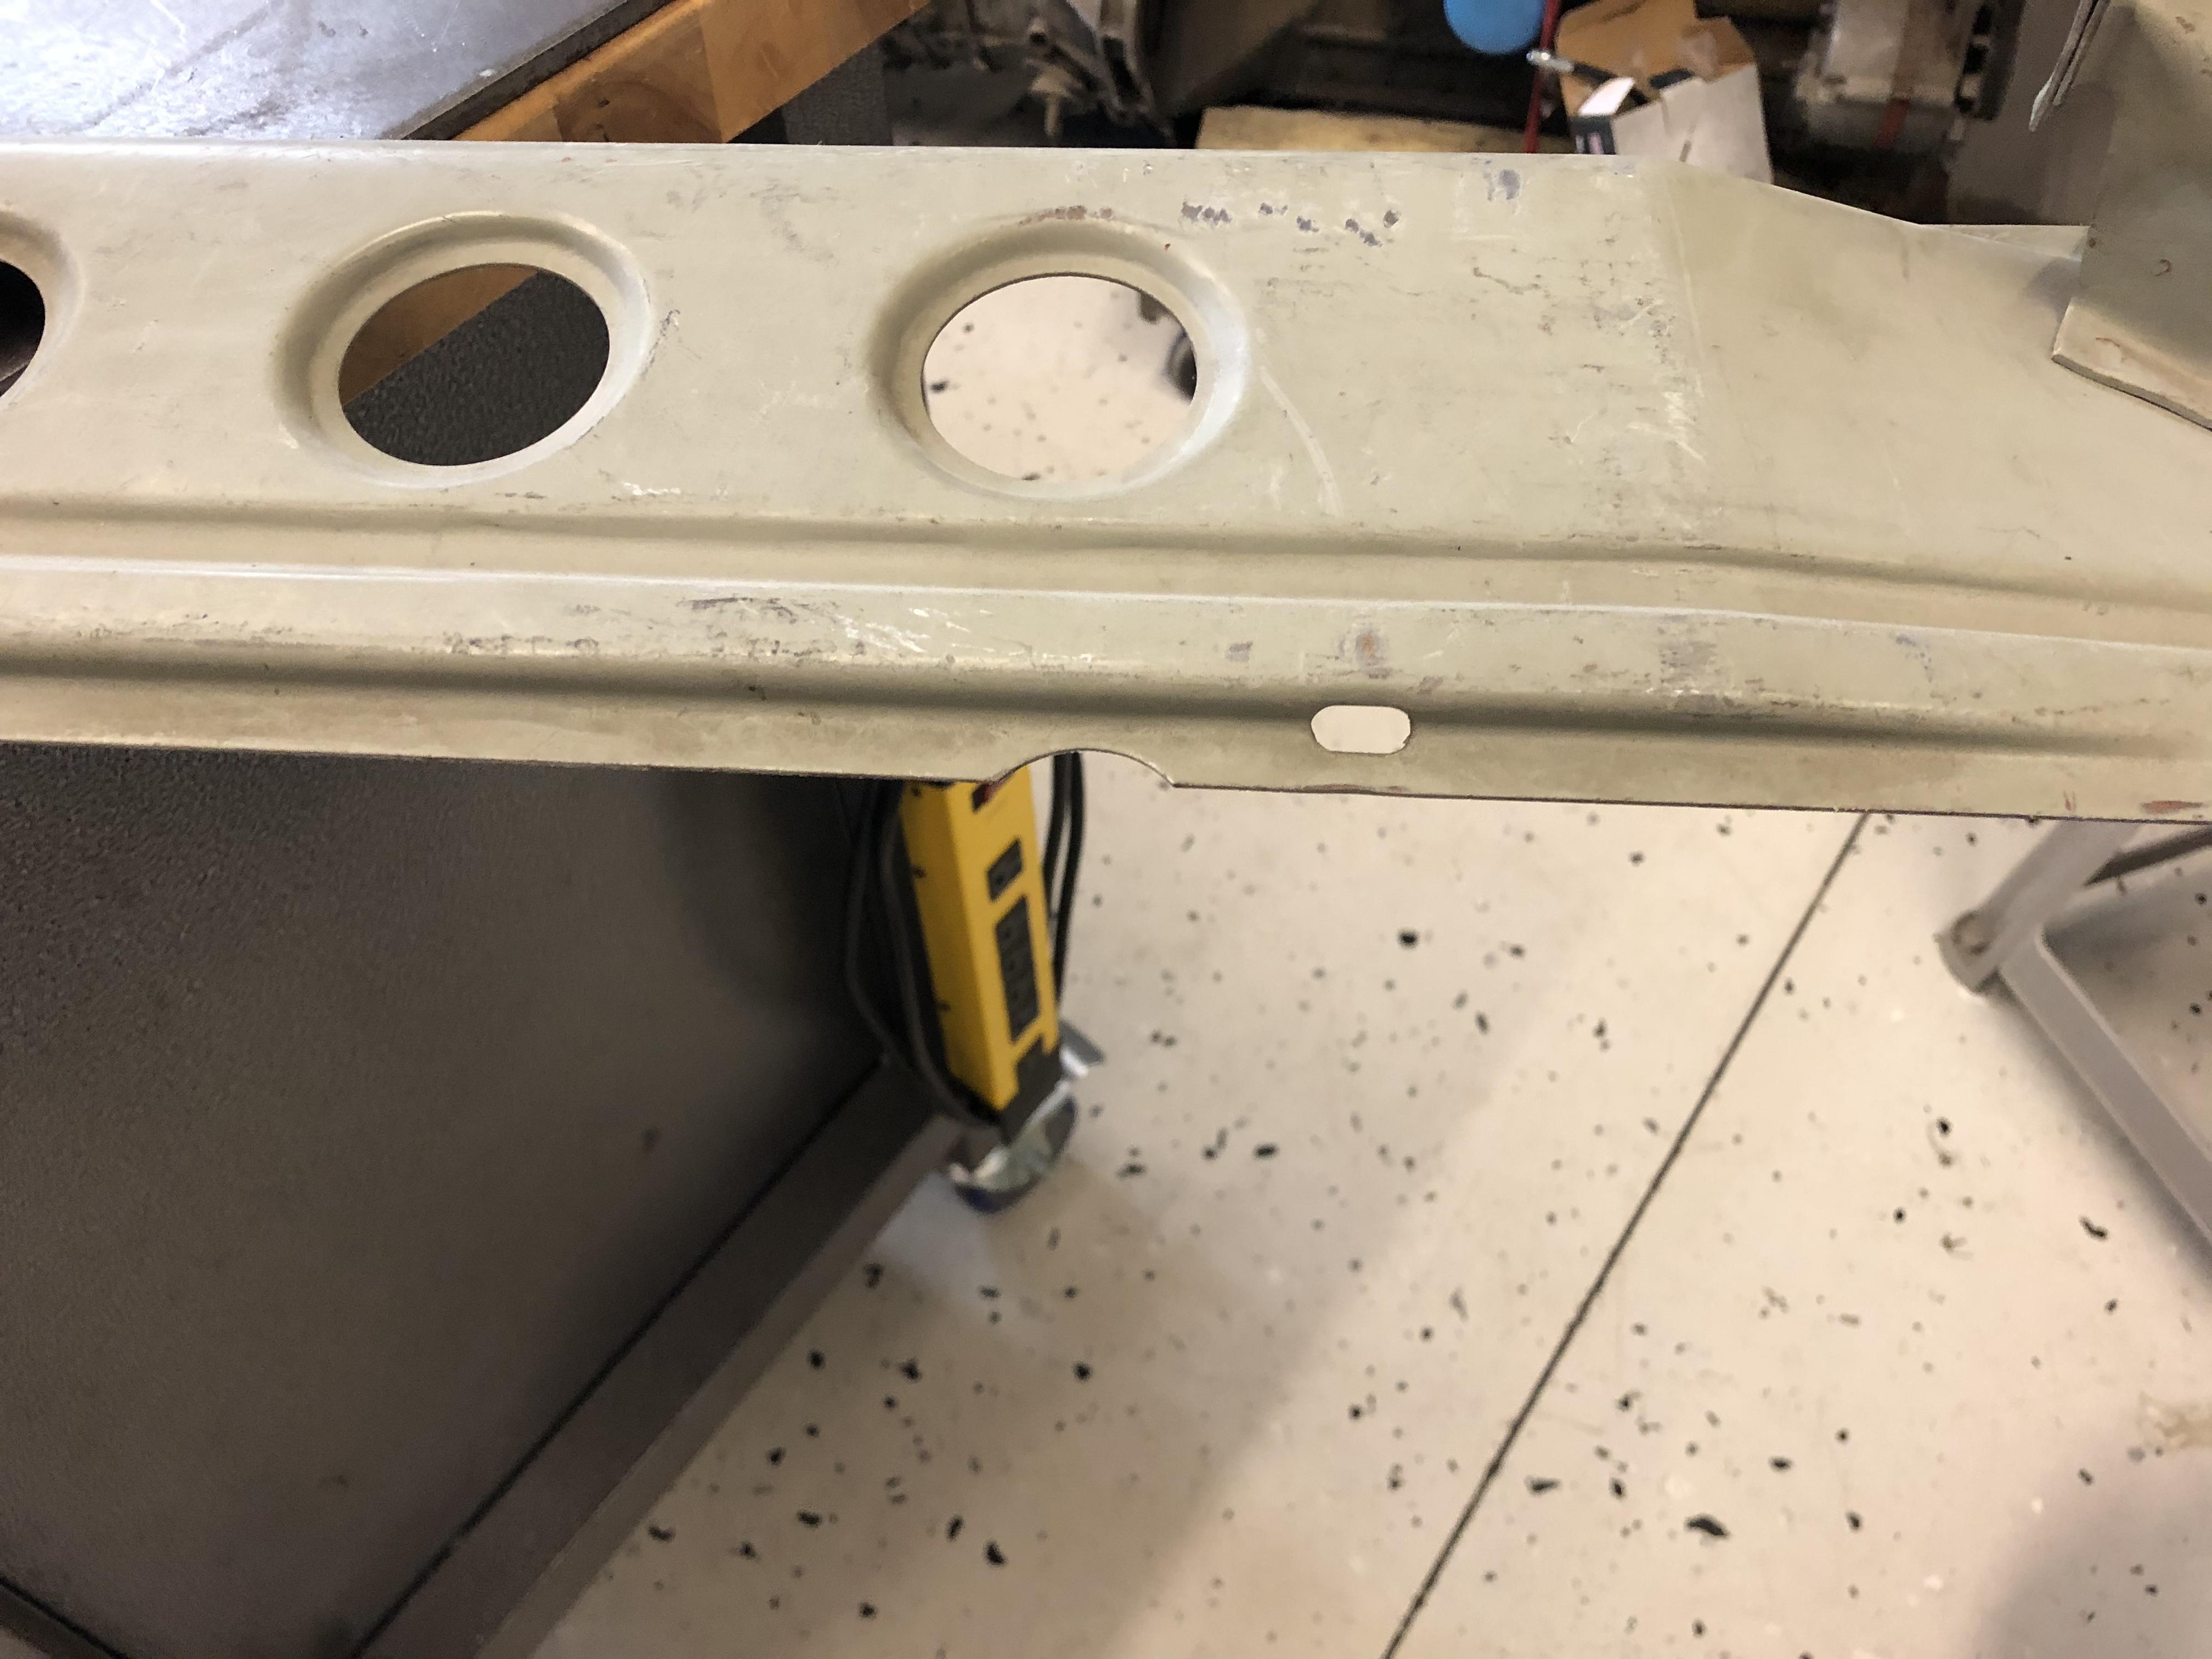
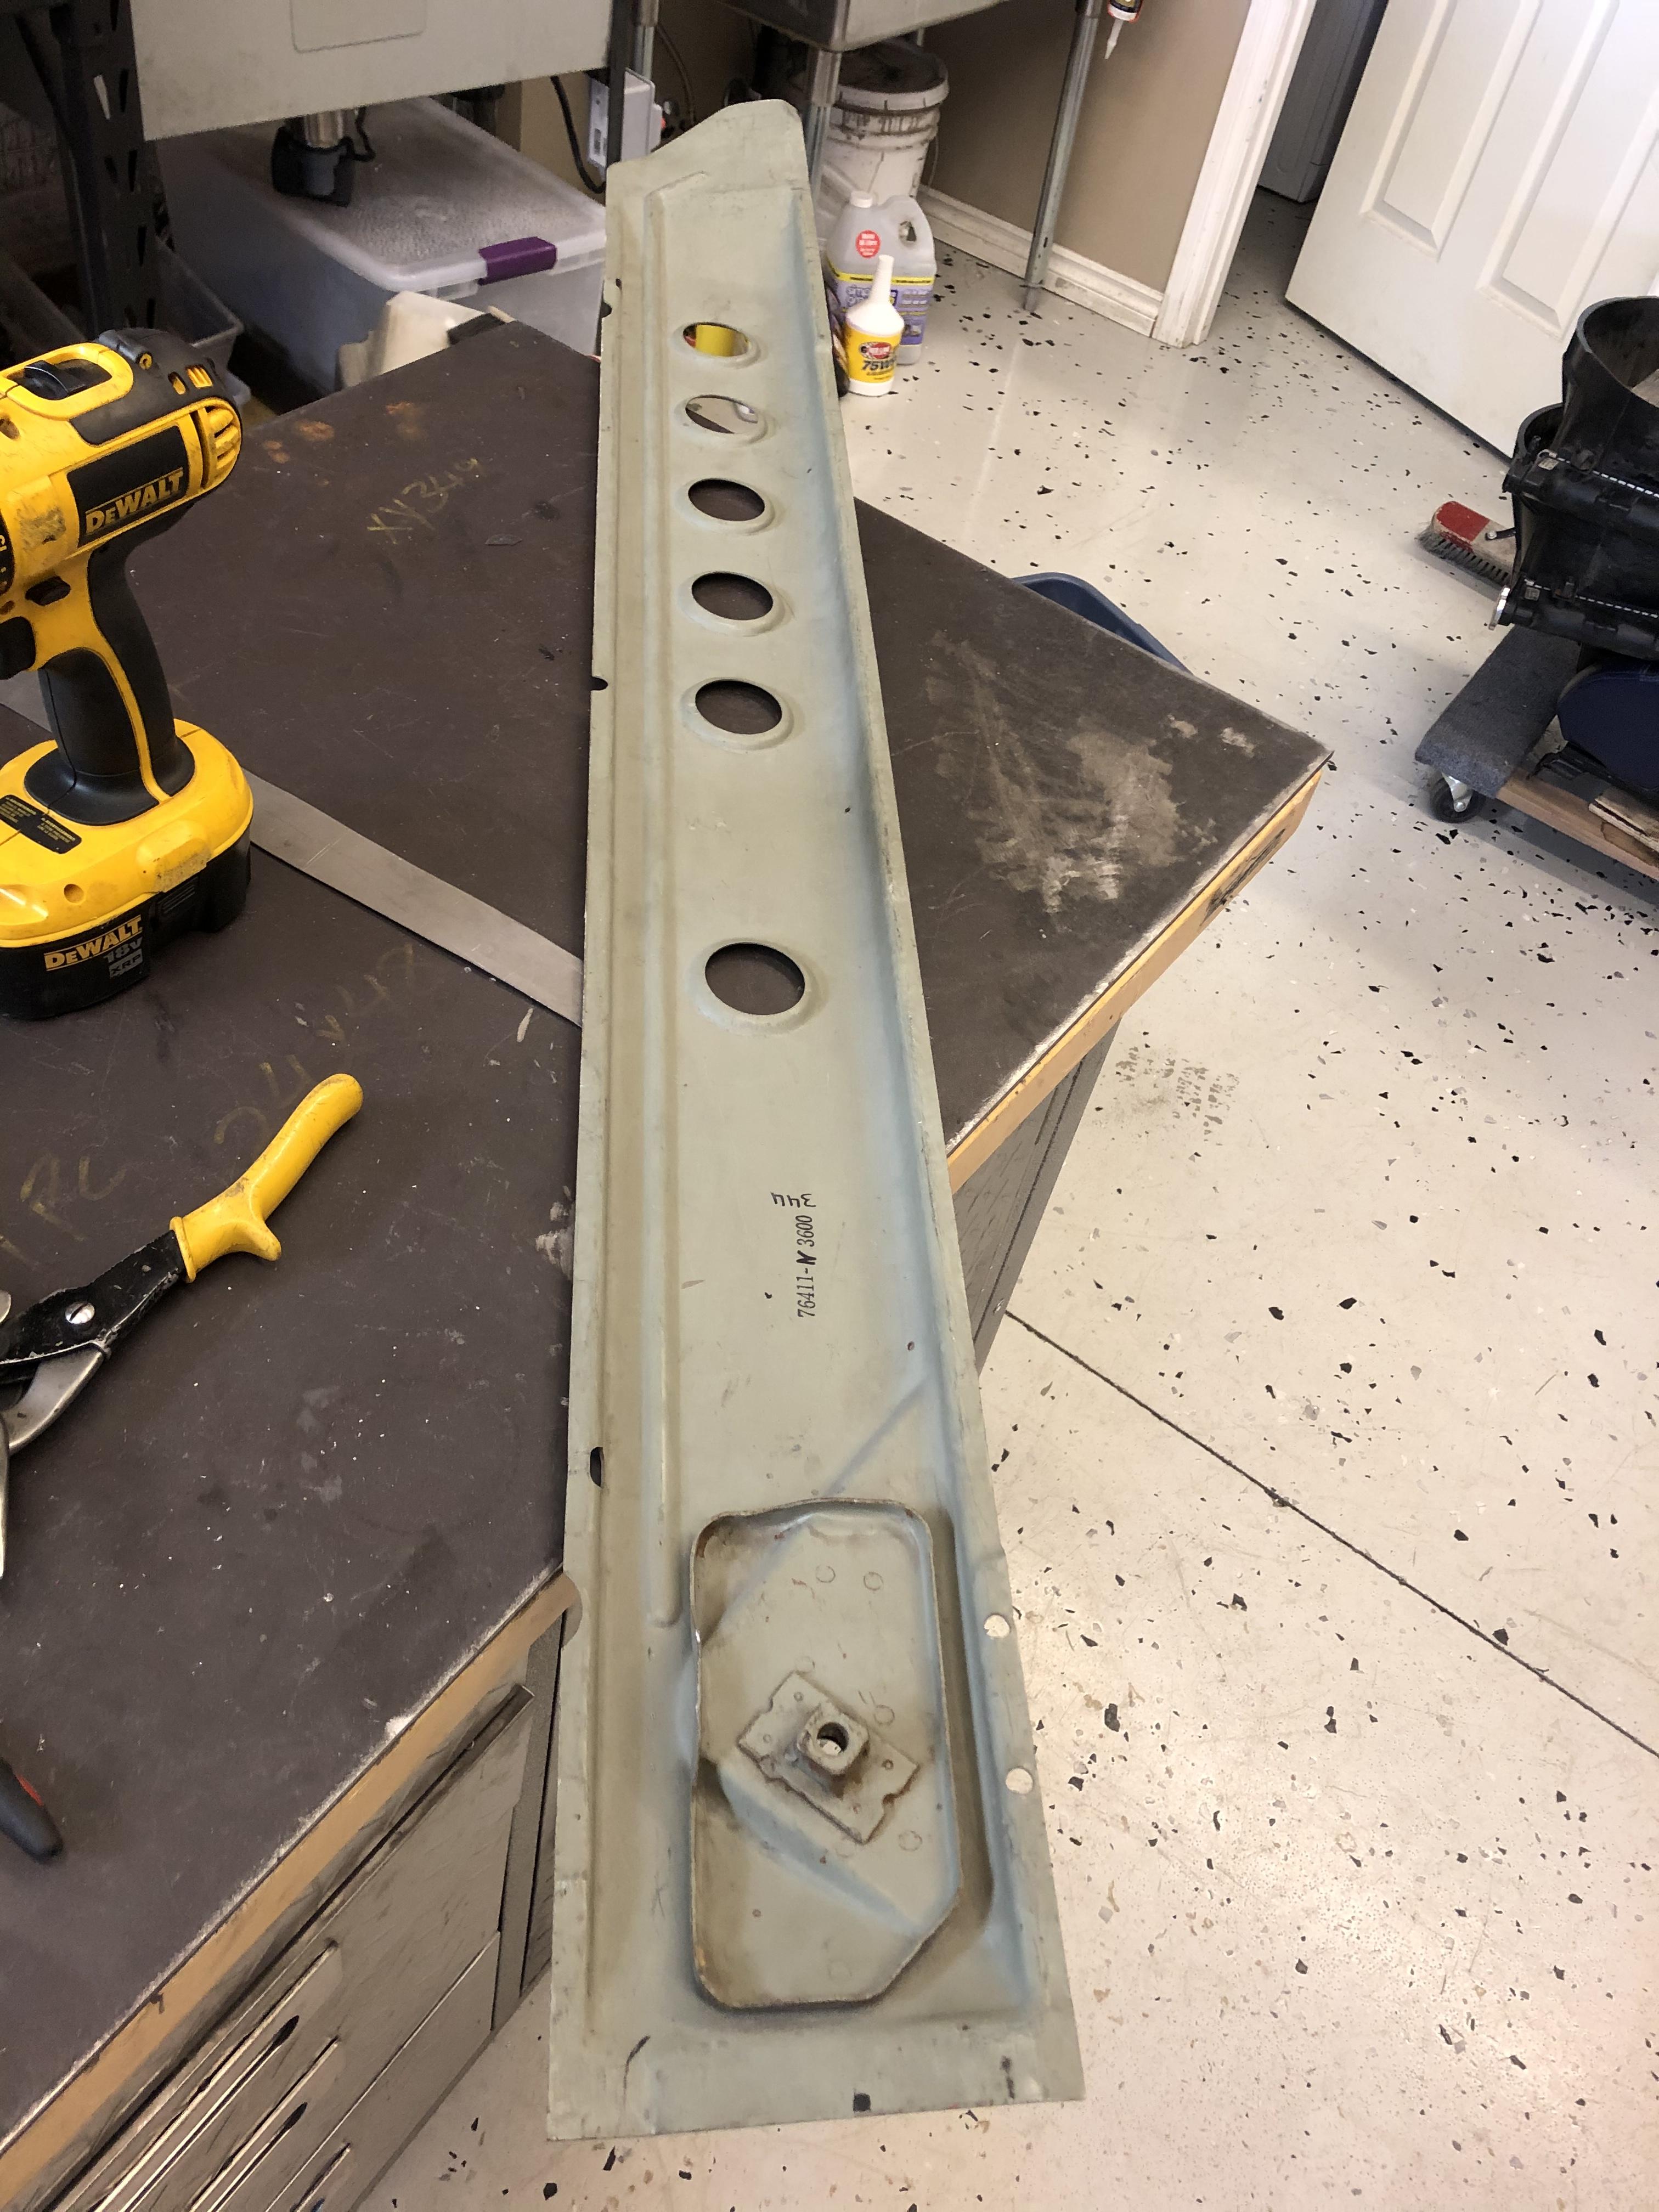
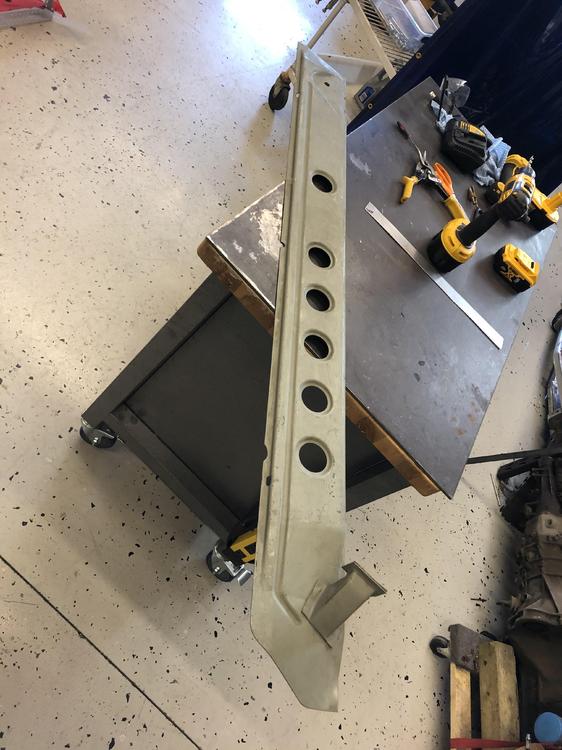
1 pointScored a NOS inner rocker panel during a recent garage sale... Part number suggests it is from a 73? Can anyone confirm? Interesting! I did not realize that they cut drain holes in the lower section. All the shells that I have seen are pretty rusty in this area.
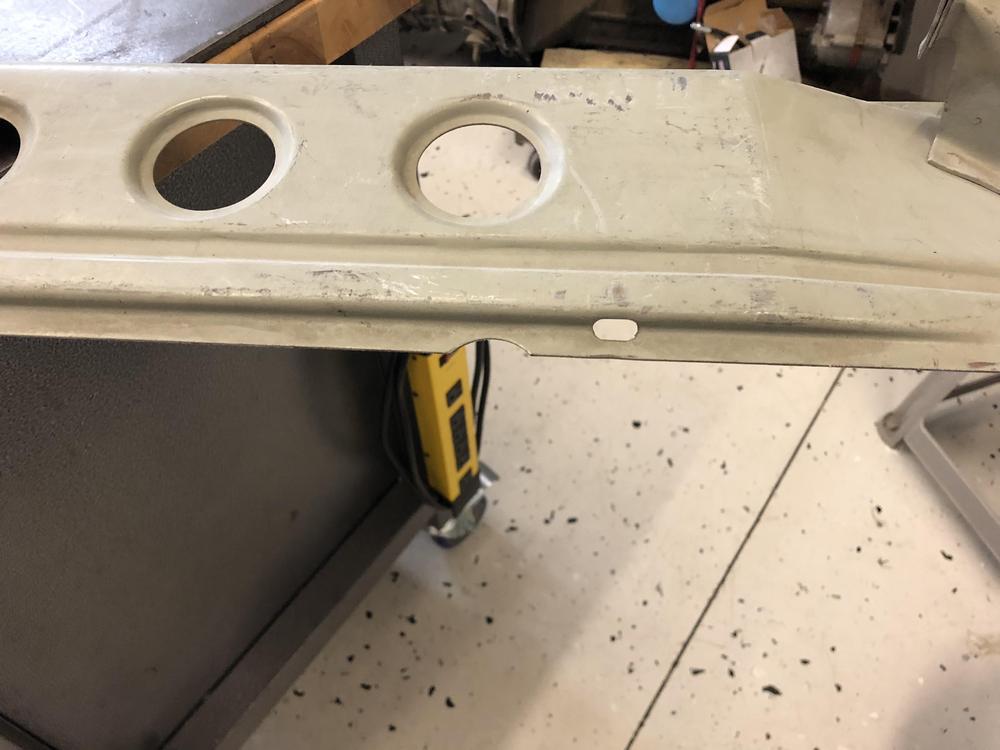

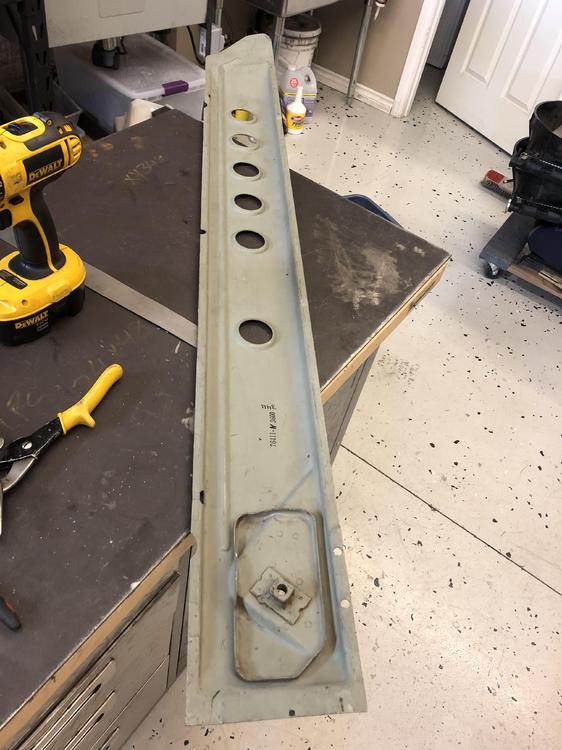 1 point
 -
5th July 1970 Its Yasunori TOSHIMORI in his 432-R at the inaugural race for the Hokkaido Speedway circuit. He took a win in the GTS class. The Hokkaido Speedway circuit, located in Shiraoicho - not so far from Noboribetsu's famous onsens and within reasonable travelling distance of Sapporo - seemed like it might become the focus of racing activity for the island of Hokkaido when it opened in 1970. But sadly it was to close in late 1973 after some fatal accidents and legal wranglings, not helped by the 'Oil Shock'.
 1 point
 -
It is sad to see how a couple of those "expert" posters with ulterior motives will dominate the dialog on a 240Z auction and denigrate a car for the sole intent of promoting their own vehicles. You are wise not to post on BaT, as your car would be in the cross hairs of the verbal elementary school food fights that is now so common each time a good 240Z is posted.1 point
-
Morton took a great line into turn one. Late braking on the outside. Real great execution.1 point
-
A comment was made about radios; no, they don't have radios necessarily. This is vintage racing, not pro racing. And John's brakes were not cold. He just came out of turn one. John drove into the back of Brian, plain and simple.1 point
-
I never raced in historic events, just SCCA. They were both past the spinning car on the left when the Chevron took the line into the kink. The Chevron was ahead - it was his line. Morton plowed into the back of him. That's the way I see it.1 point
-
I think if the cars and drivers were switched, John and Randy would be saying that the Chevron drove straight into the Z. In fact, that's what they do seem to be saying anyway, isn't it? I have the utmost respect for Morton and I am - of course - a Z fan, but it needs saying. Looks like he certainly had a better view of the incidents unfolding on his left, which explains why he was moving to the right side of the track ahead of Morton. I know it's all too easy to Monday Morning Quarterback this, but the key point(s) here are the incidents unfolding on the left side of the track in turns one and two. Ploughing into a crippled/stationary car because the regulations state that you should "maintain a predictable line" is not the best interpretation of the rules, so the Chevron driver was doing the right thing in my opinion.1 point