Leaderboard
-

240260280
Free Member6Points4,442Posts -

wheee!
Free Member4Points4,607Posts -
conedodger
Free Member3Points12,516Posts -
motorman7
 Subscriber
 3Points2,228Posts


Popular Content
Showing content with the highest reputation on 06/17/2019 in Posts
-
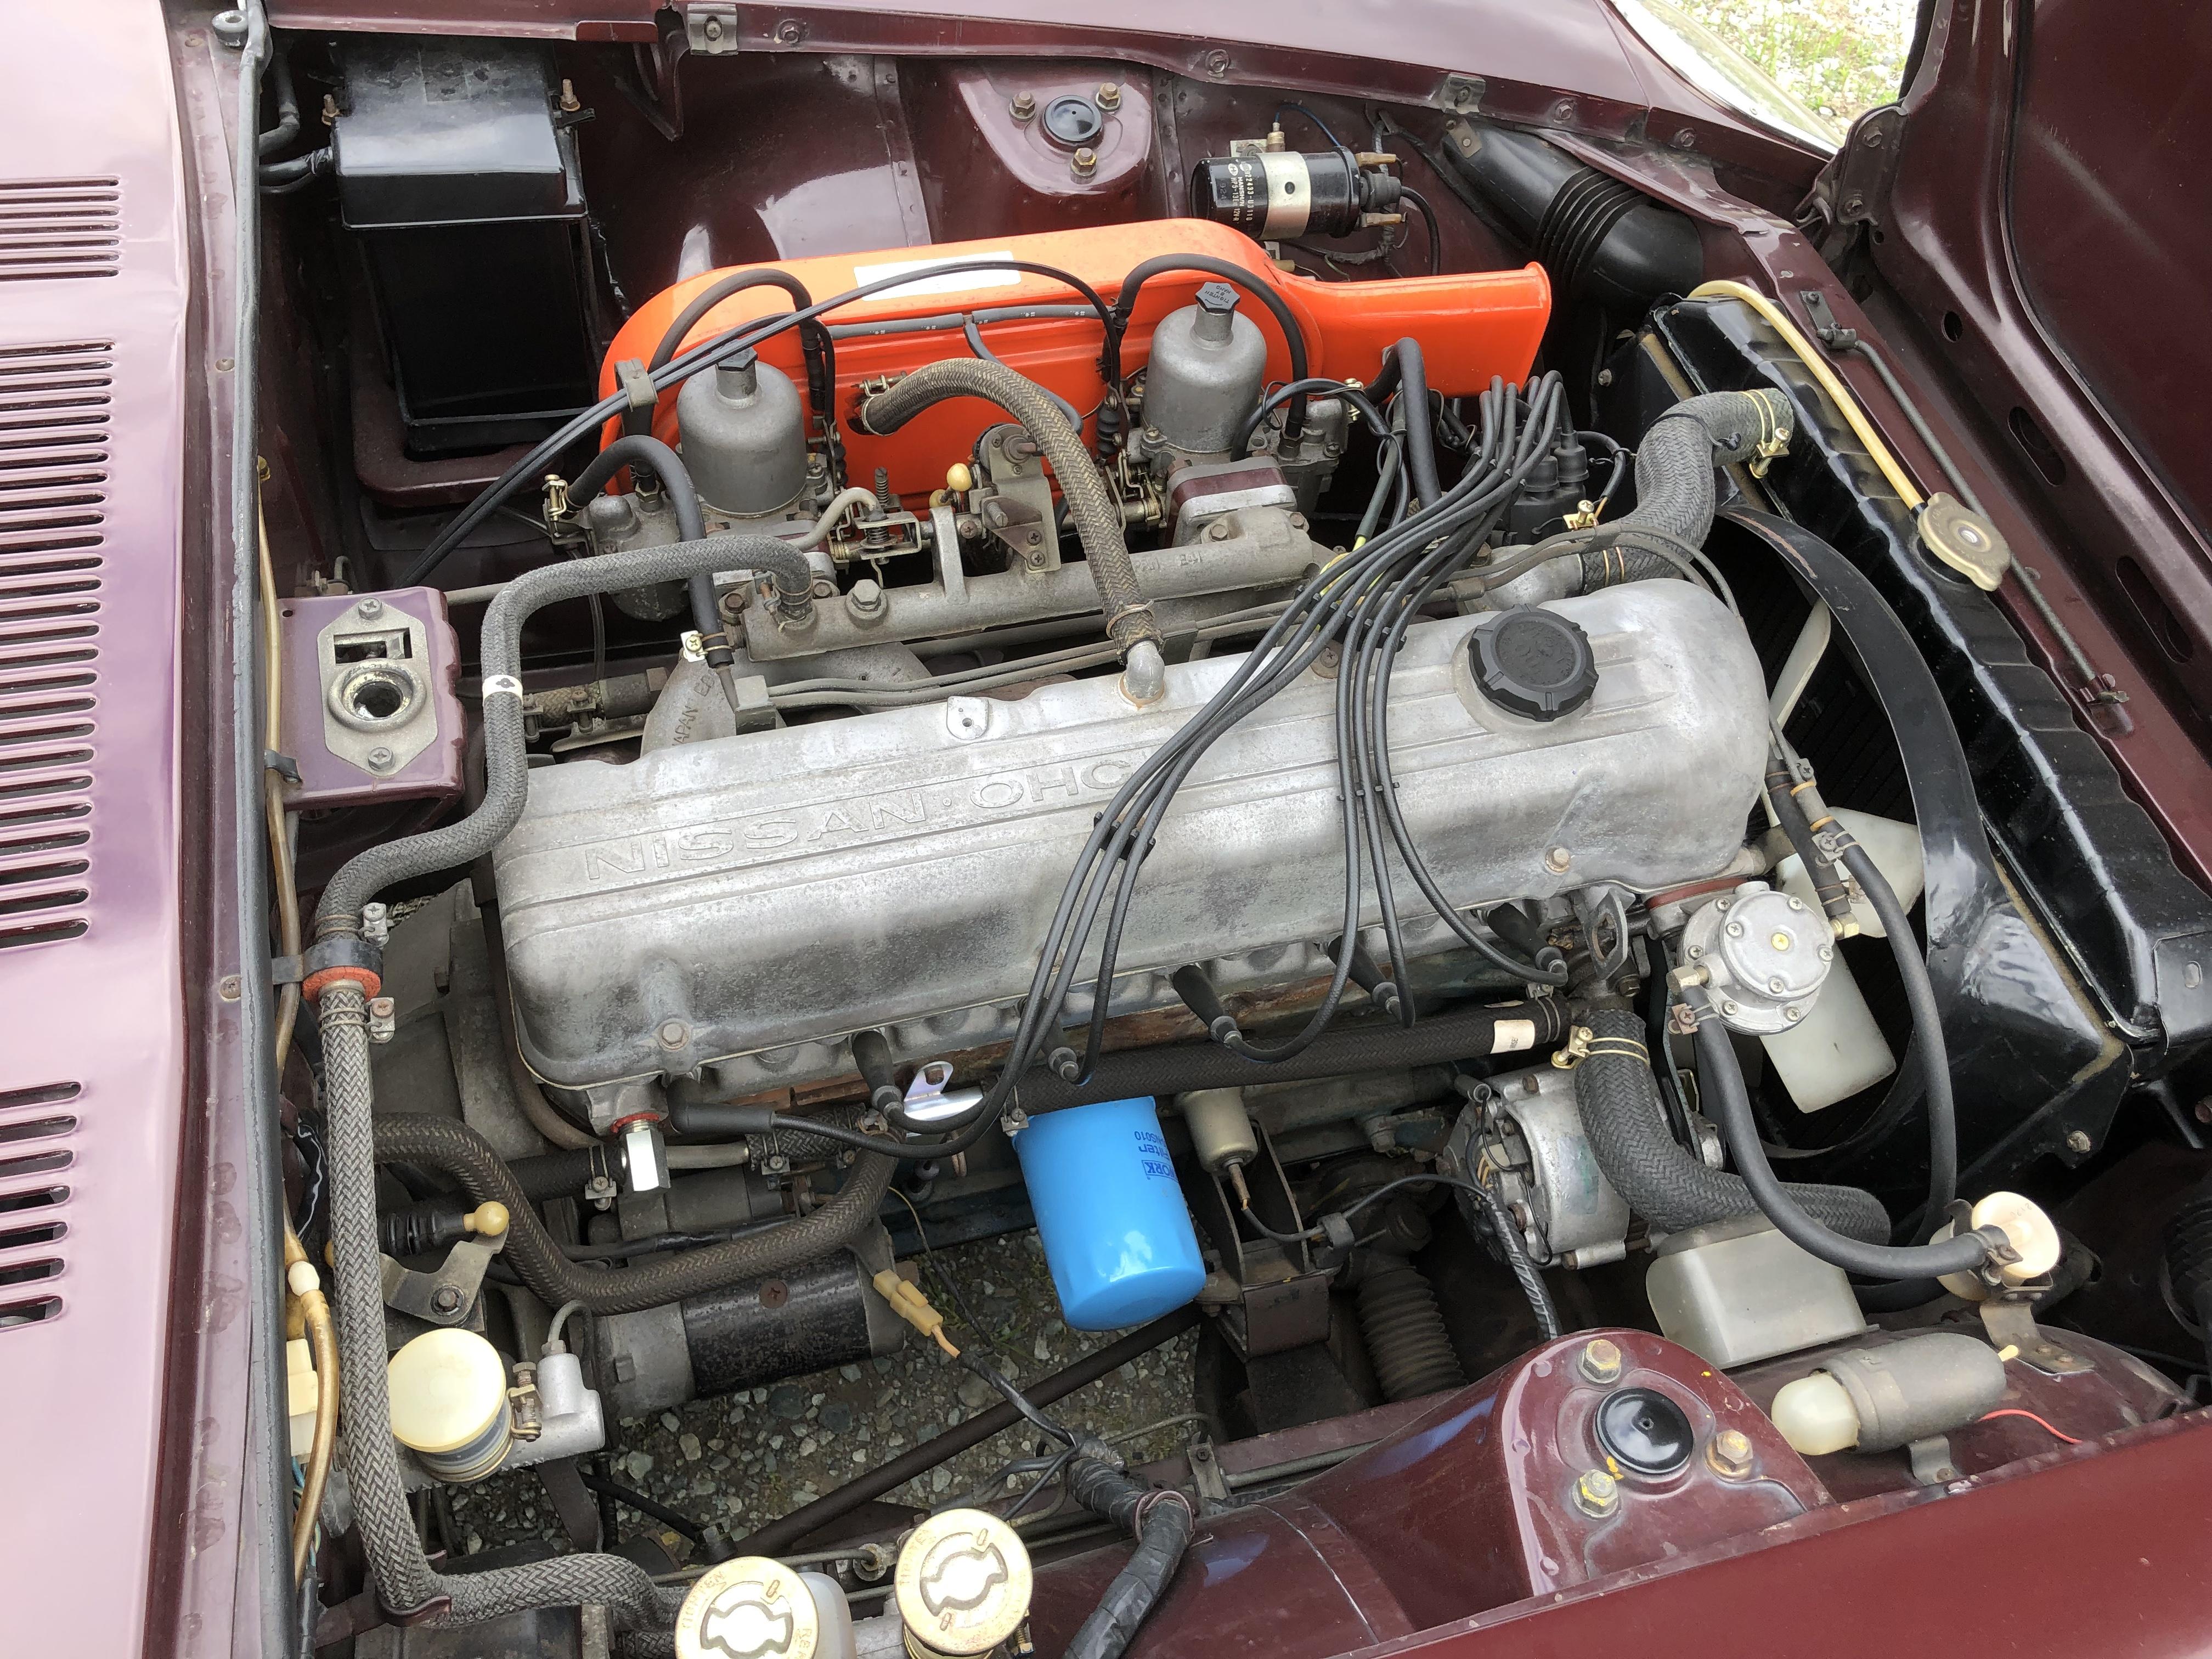
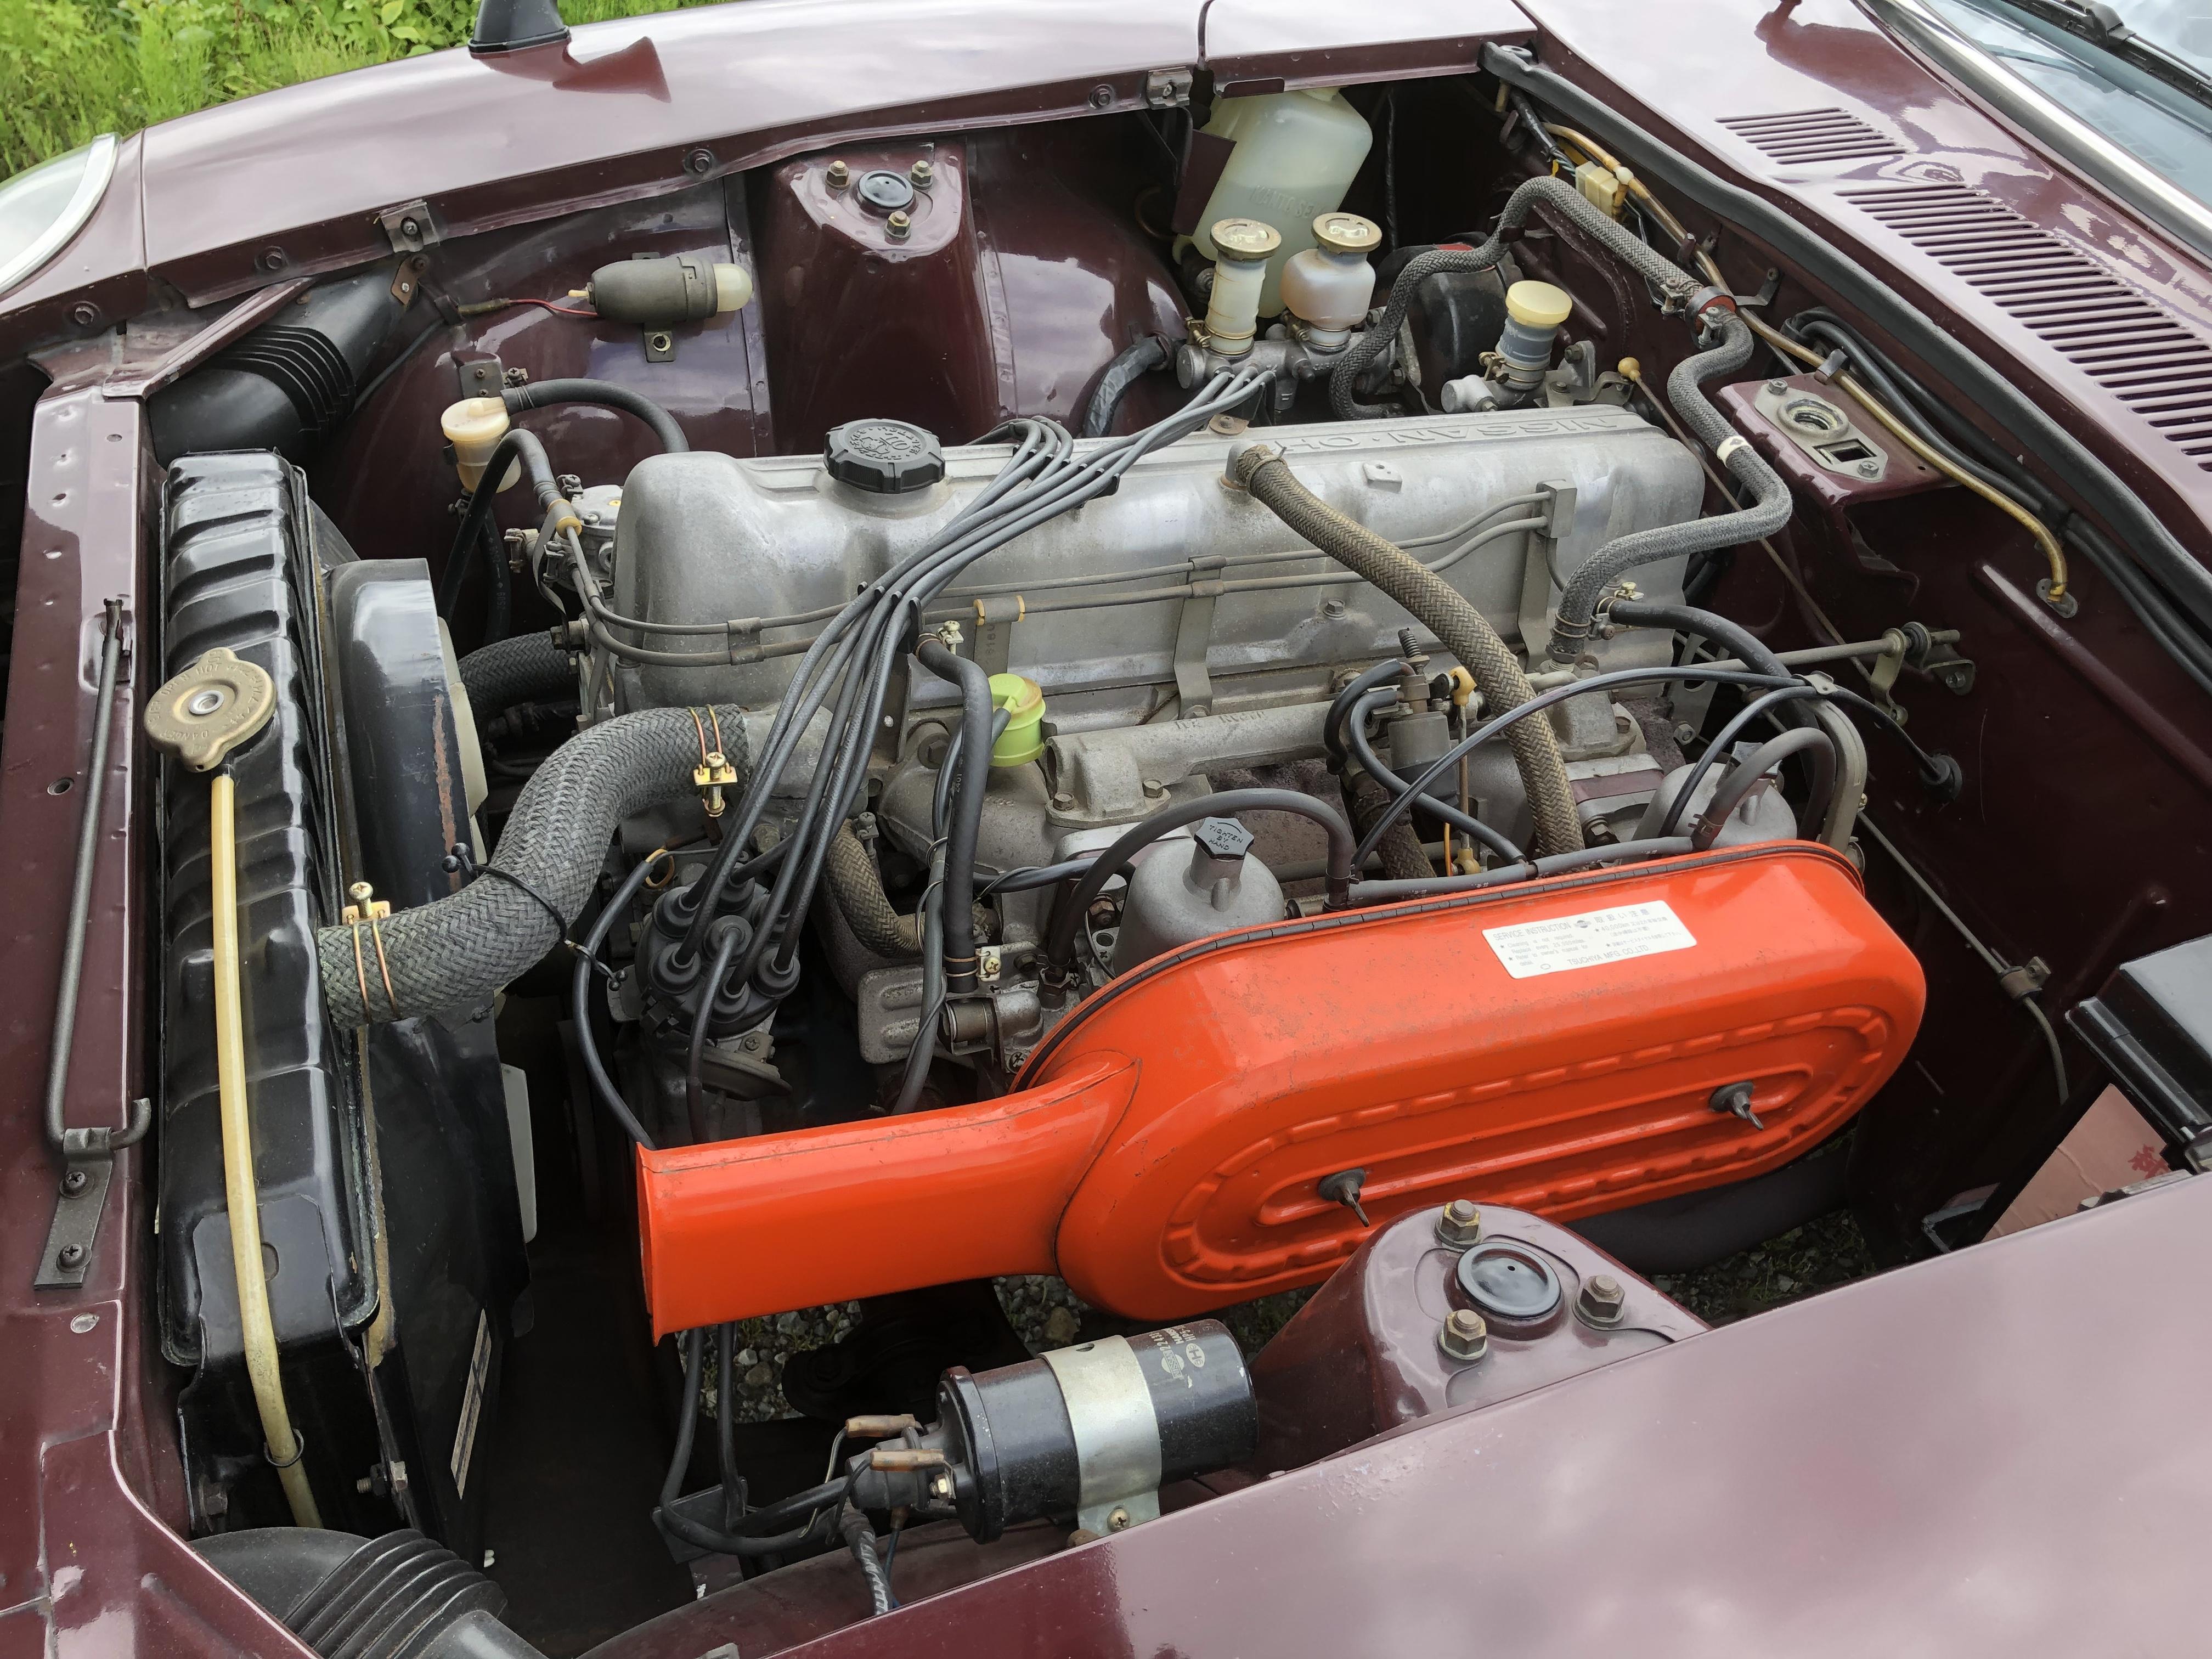
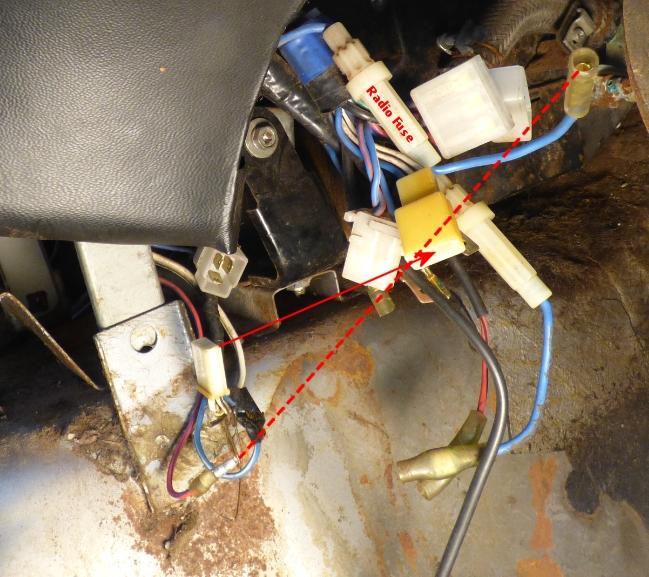
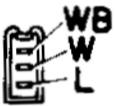
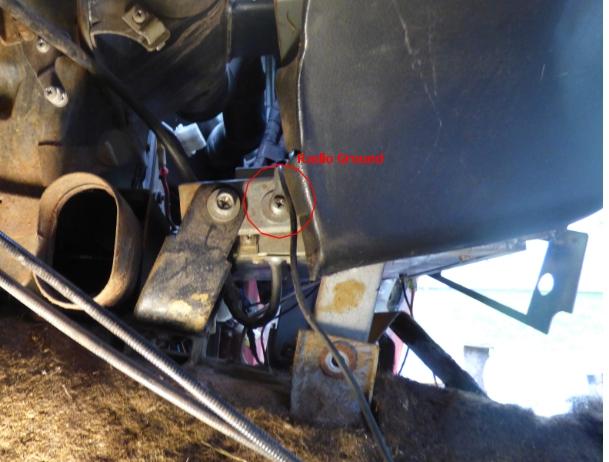
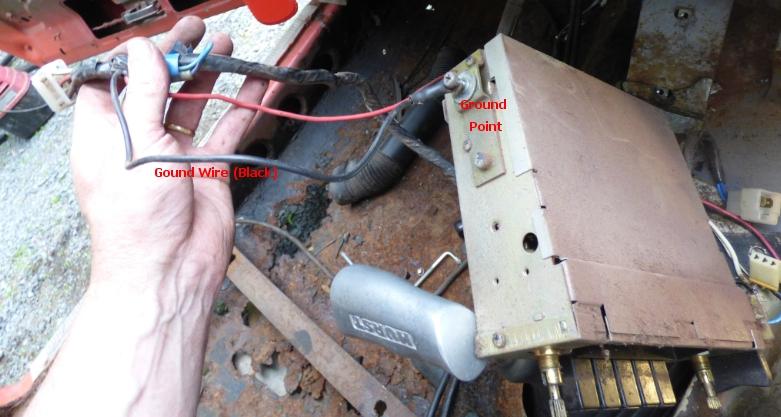
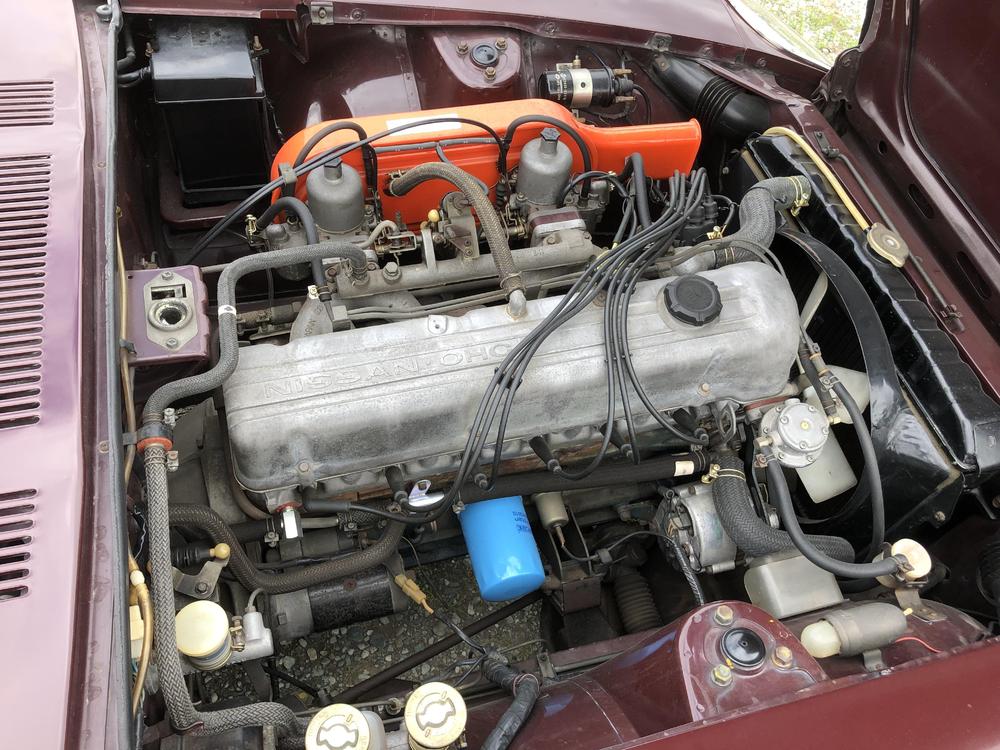
3 pointsJust took these today and now they are helping a friend. Thought I'd share Figure 1 is from the 240z schematics. The schematics are more or less logical connections and do not show connector details. It shows the power, ground, antenna and back light wiring to the radio. (figure 1) The FSM gives details of the connector from the body wiring harness (from the back of the car). Figure 2 shows the 3 pin Molex-type connector. It has the two speaker wires (white and white with black stripe) and one back light power (blue). (figure 2) The photo below shows the corresponding connections on the radio unit. The molex connector has 3 male pins carrying the backlight signal(blue with red stripe) and the speaker signals (white and white with black stripe). A separate wire (red with blue stripe) carries the power. The power cable has a male bullet connector. The radio case is grounded to the metal brackets holding it. A ground wire from the small harness to the heater and fan unit has a ground wire that secures to the driver's side of the radio mounting screw (round head Philips) The photo below shows the wiring harness where the radio connects. The power connects to a female bullet pigtail (blue) of an inline fuse. The 3 pin molex has a female counterpart in the harness. Below is where the ground wire attaches (on driver's side of radio) Below is photo showing the extracted radio and heater harness mock-up. On the 9-70z, the heater harness has the ground wire to the radio.


 3 points
 -
2 pointsYou are right wheee! No parking brake. I park on level ground in 1st gear, and if I ever lose my brakes while tearing down the highway, I’m just gonna yell “Wheee! “2 points
-
2 pointsThank you sir! That was a brilliant read and good food for thought. I definitely saw an increase in the dips after going to a more free flowing header / exhaust. It also seems there is hope to tune out, or at least minimise the dips. I do think I can get a few more ponies out across the mid range and the top end once the needlework is done. The torque curve quite consistently follows the AFR curve and drops off at the top as soon as the AFR starts to lean up (lean being relative - below 14 but above 12.8). Ordering needles today, so the weekend should prove to be interesting. In the interest of science, I plan to sort out the carb tuning to work well with the existing header, power run, then re-install old header / exhaust and do a power run to see the difference in the mid range and top end. It will cost me another 250GBP but as the man in Dirty Harry said (for those old enough to remember) - “I gots to know”, so it will be worth it! And for those not old enough to know it ...2 points
-
I know. I emailed them a couple of years ago and they basically told me they don’t care about the Canadian sales. Everything is done in US dollars so they see the benefit of the low Cdn dollar and the swings of the currency. Too many Canadian companies are doing this and it makes me angry. One of the few that advertises in both currencies is BQuiet sound deadener products out of Lethbridge Alberta. Their site is in both US and Cdn dollars and they ship in Cdn dollars too.2 points
-
2 pointsThis motorcycle tuner had similar problem with rich dip at the start of acceleration. He could not tune it our with carbs so he set up reflectors in the exhaust to deal with the issue. http://www.drdyno.com/AIM_2006-06.html2 points
-
1 pointOne Way, I'm not sure if it's the same for the '78Z, but my '75Z has two sizes of hoses, 2" and 1.5" (approx.). For the 2" hoses, I used the Dorman 96002 Blower Fan Hose. For the 1.5" hose, which goes to the footwell vents, I used the Dayco 80165 Autoflex Defroster Duct Hose. I hope this helps!1 point
-
Nice! I'm glad it actually worked. Clean install!!1 point
-
1 pointWhat spark plugs are they? If they're too cold then they can foul at idle and cause misfire until they're back in the self cleaning temp range and clean again.1 point
-
1 pointI already have two heat shields installed. The stock one at the rear of the carbs and another aluminium one under the carbs. Thanks for keeping me away from buying an unnecesary electric fan.1 point
-
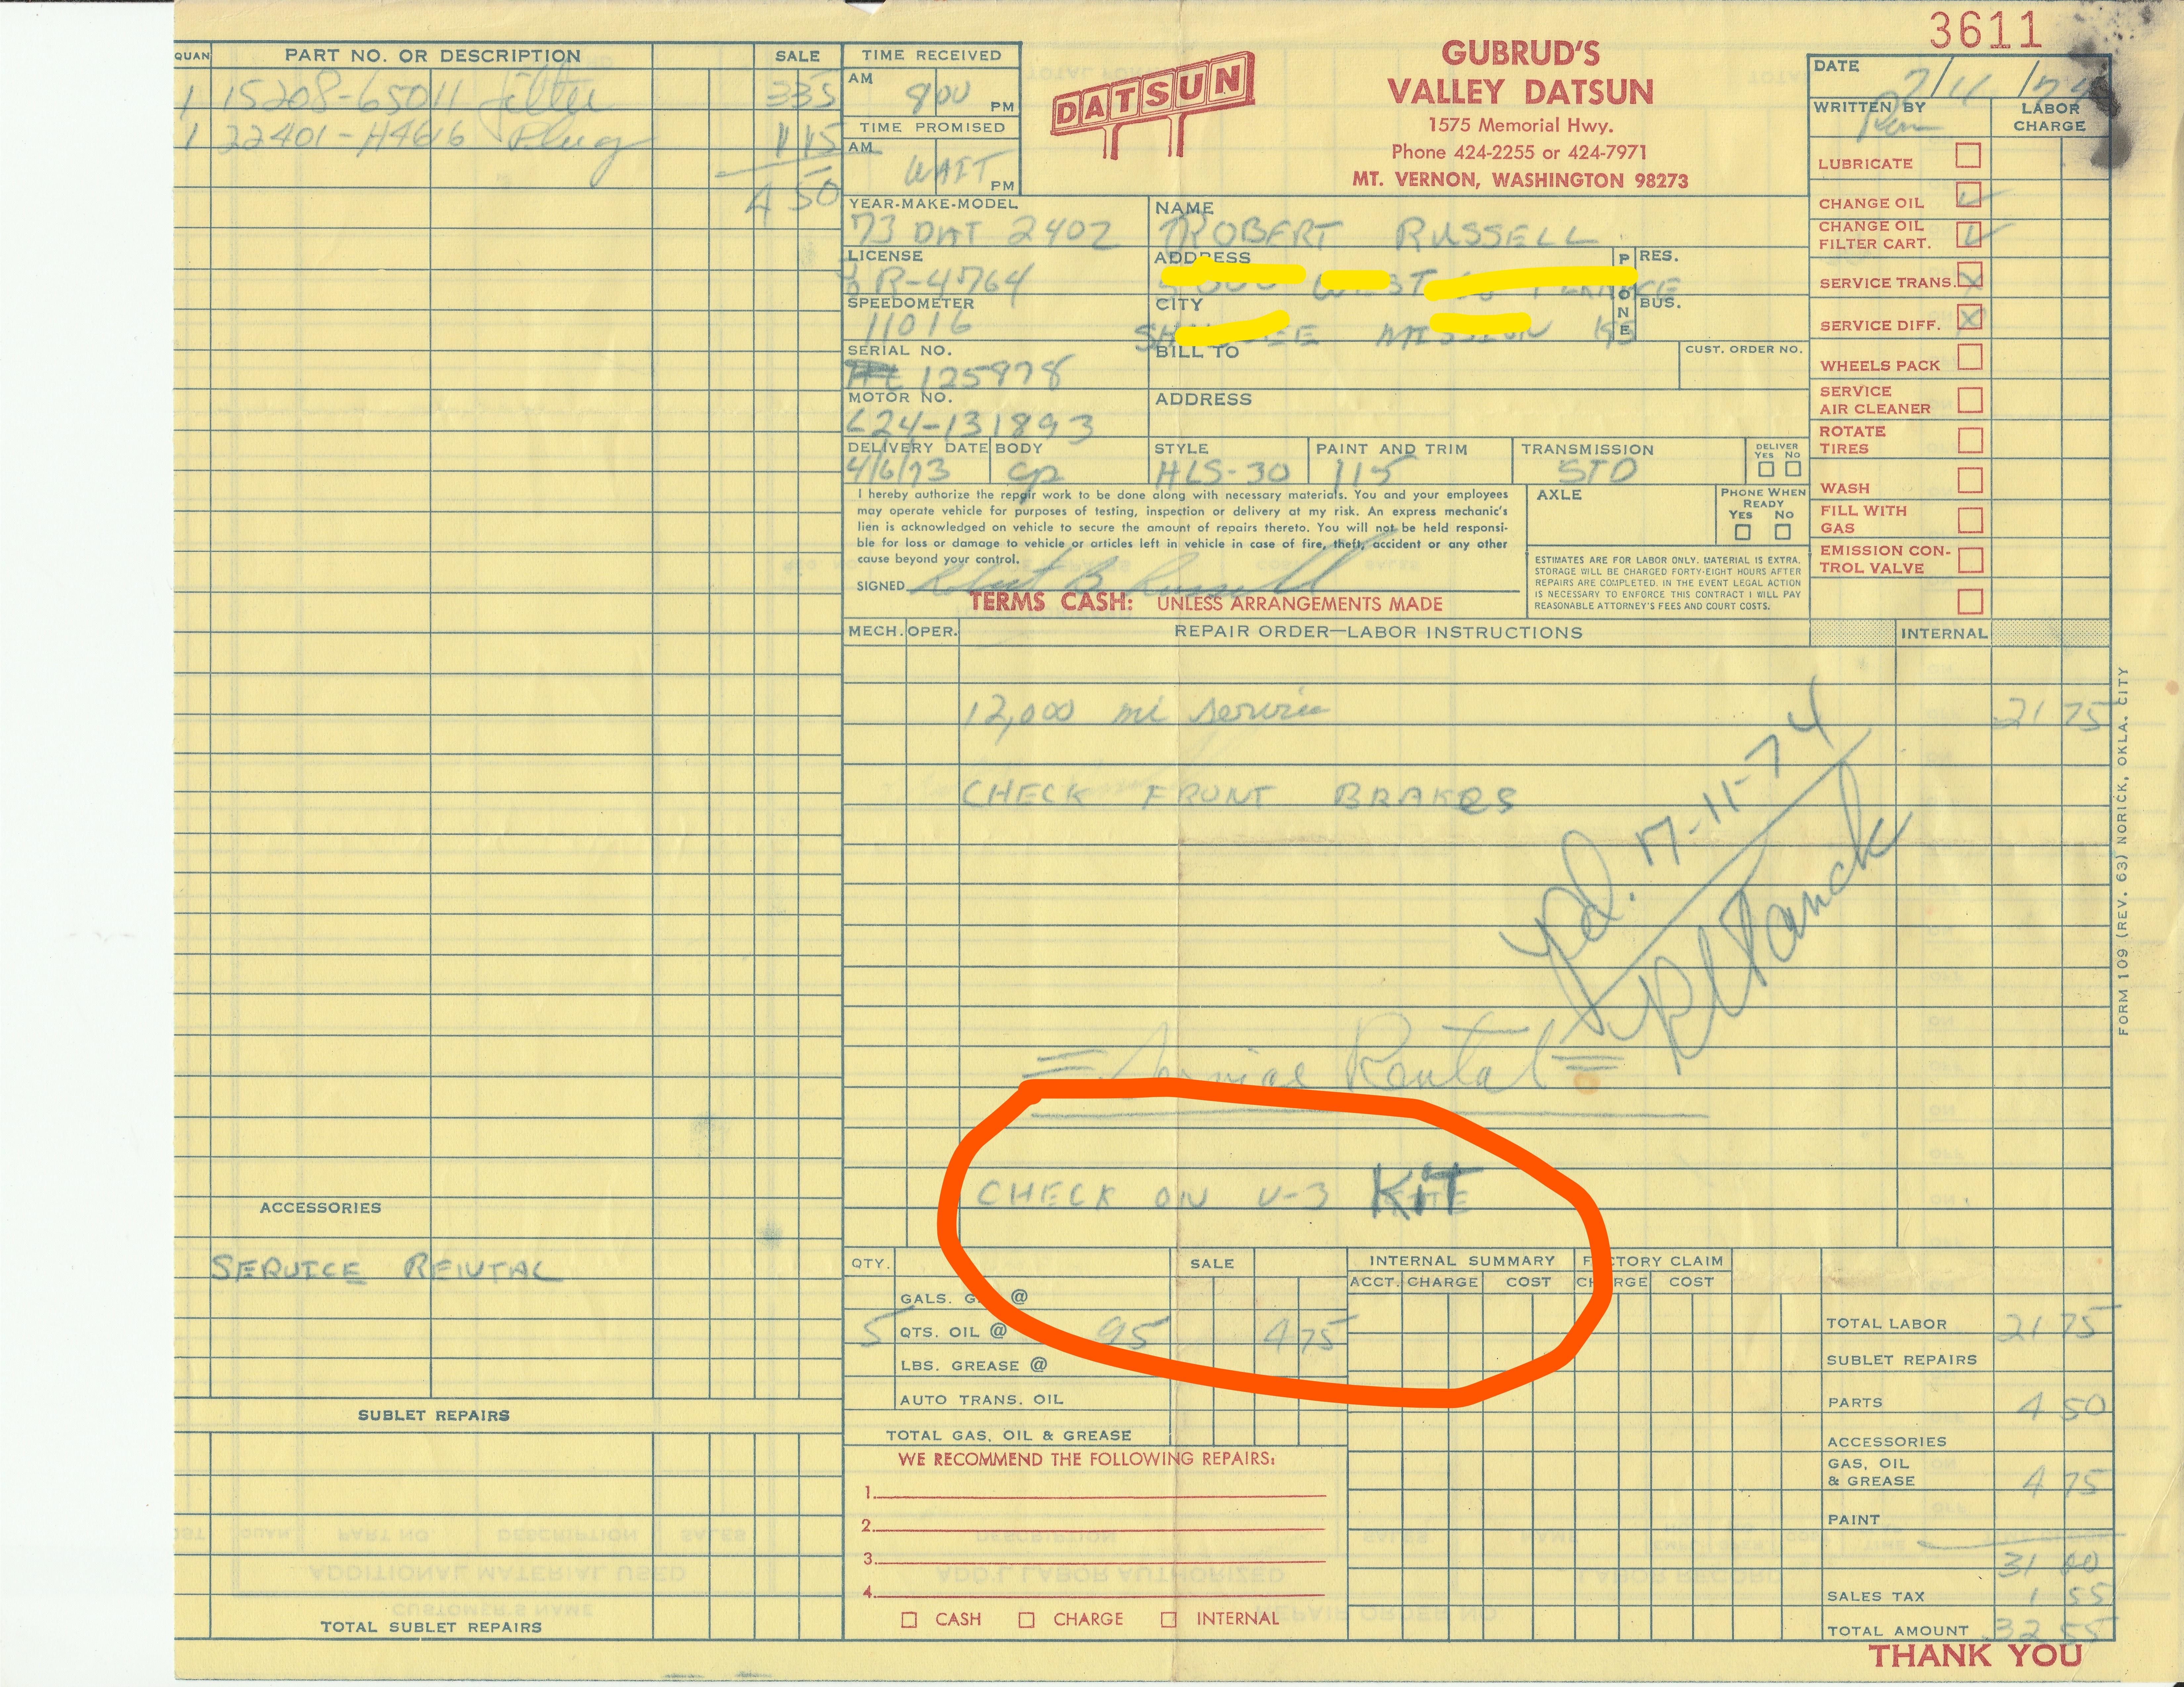
My car (the subject of this thread) was mfg'd 10/72, although the V3, kit which I recall included the fuel line insulation and the electric fuel pump, was not installed until July '74. (after returning from an 8 month Navy deployment). If the "lip" was part of the V3 kit, I never realized that. But I do not know when else that would have been installed. I just found the work order where the V3 kit was installed, although it has no details about what was in the V3 kit:
 1 point
 -
A photo confirming some of Carl's information. On my 6/73 build date 240z the radiator core support to hood seal attaches to a spot welded fin which matches the rise of the hood profile. (just to the left of the hood prop rod)
 1 point
 -
1 pointOh yeah, it’s all good. I have come too far to stop now. It was just a disappointment. I will fix the doors and then, just like the crappy quarters, it will all be water under the bridge.1 point
-
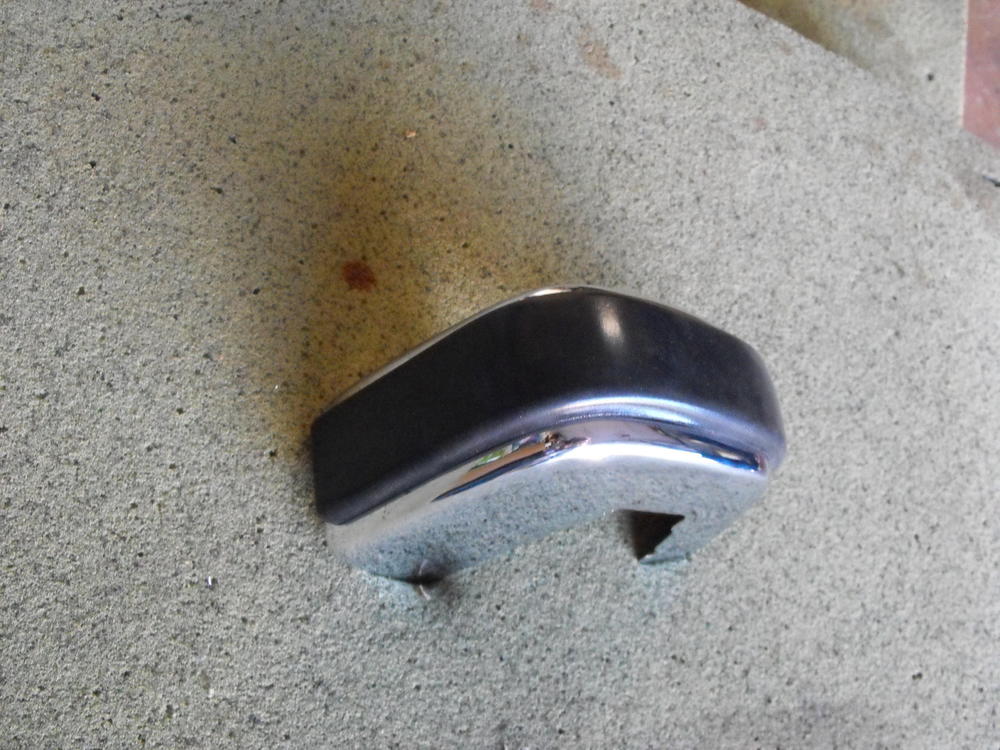
Correct - the "lip" on the radiator core support is one of the items first tried by the Nissan Field Service teams working with the Local Datsun Dealership mechanics. The idea block air flow over the top of the radiator and core support - to force more of it through the radiator. Yes they had a rubber seal that mated to the hood. The one’s installed at the Dealerships were bolted on or screwed on - on later 73’s they were spot welded on at the factory as standard equipment. As far as I can see the factory started adding them around 12/72 or 01/73. Carl B.1 point
-
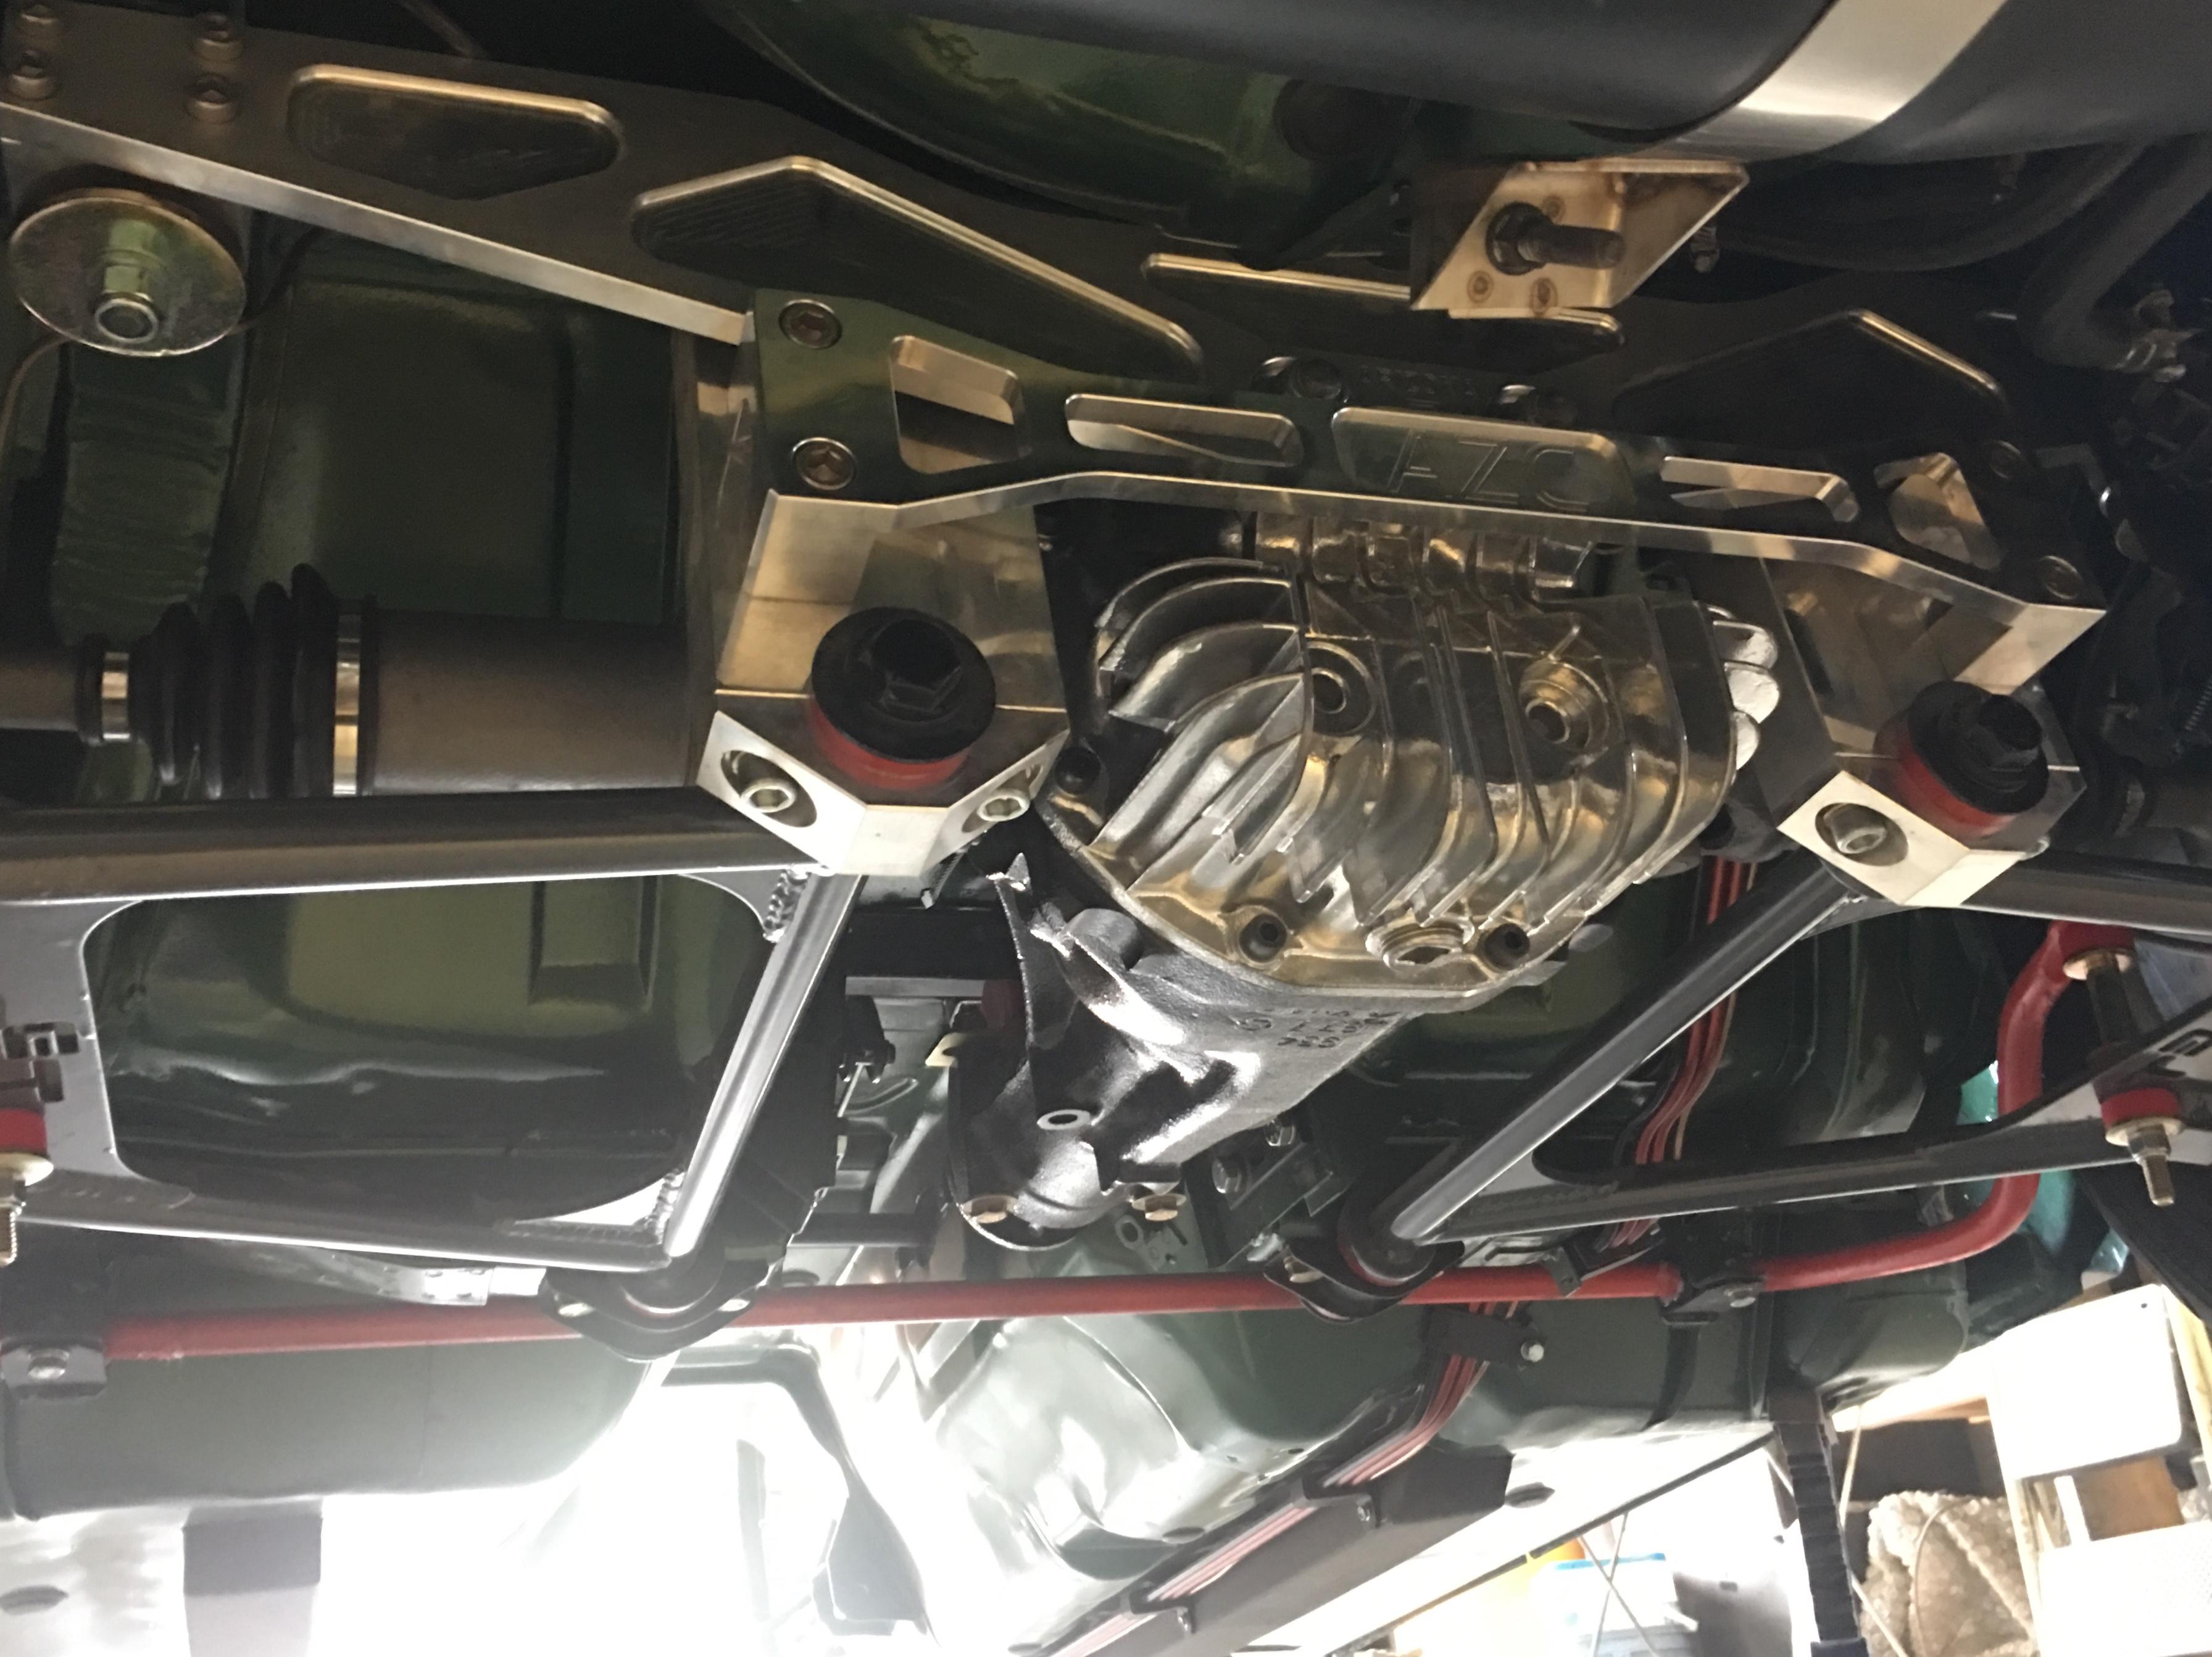
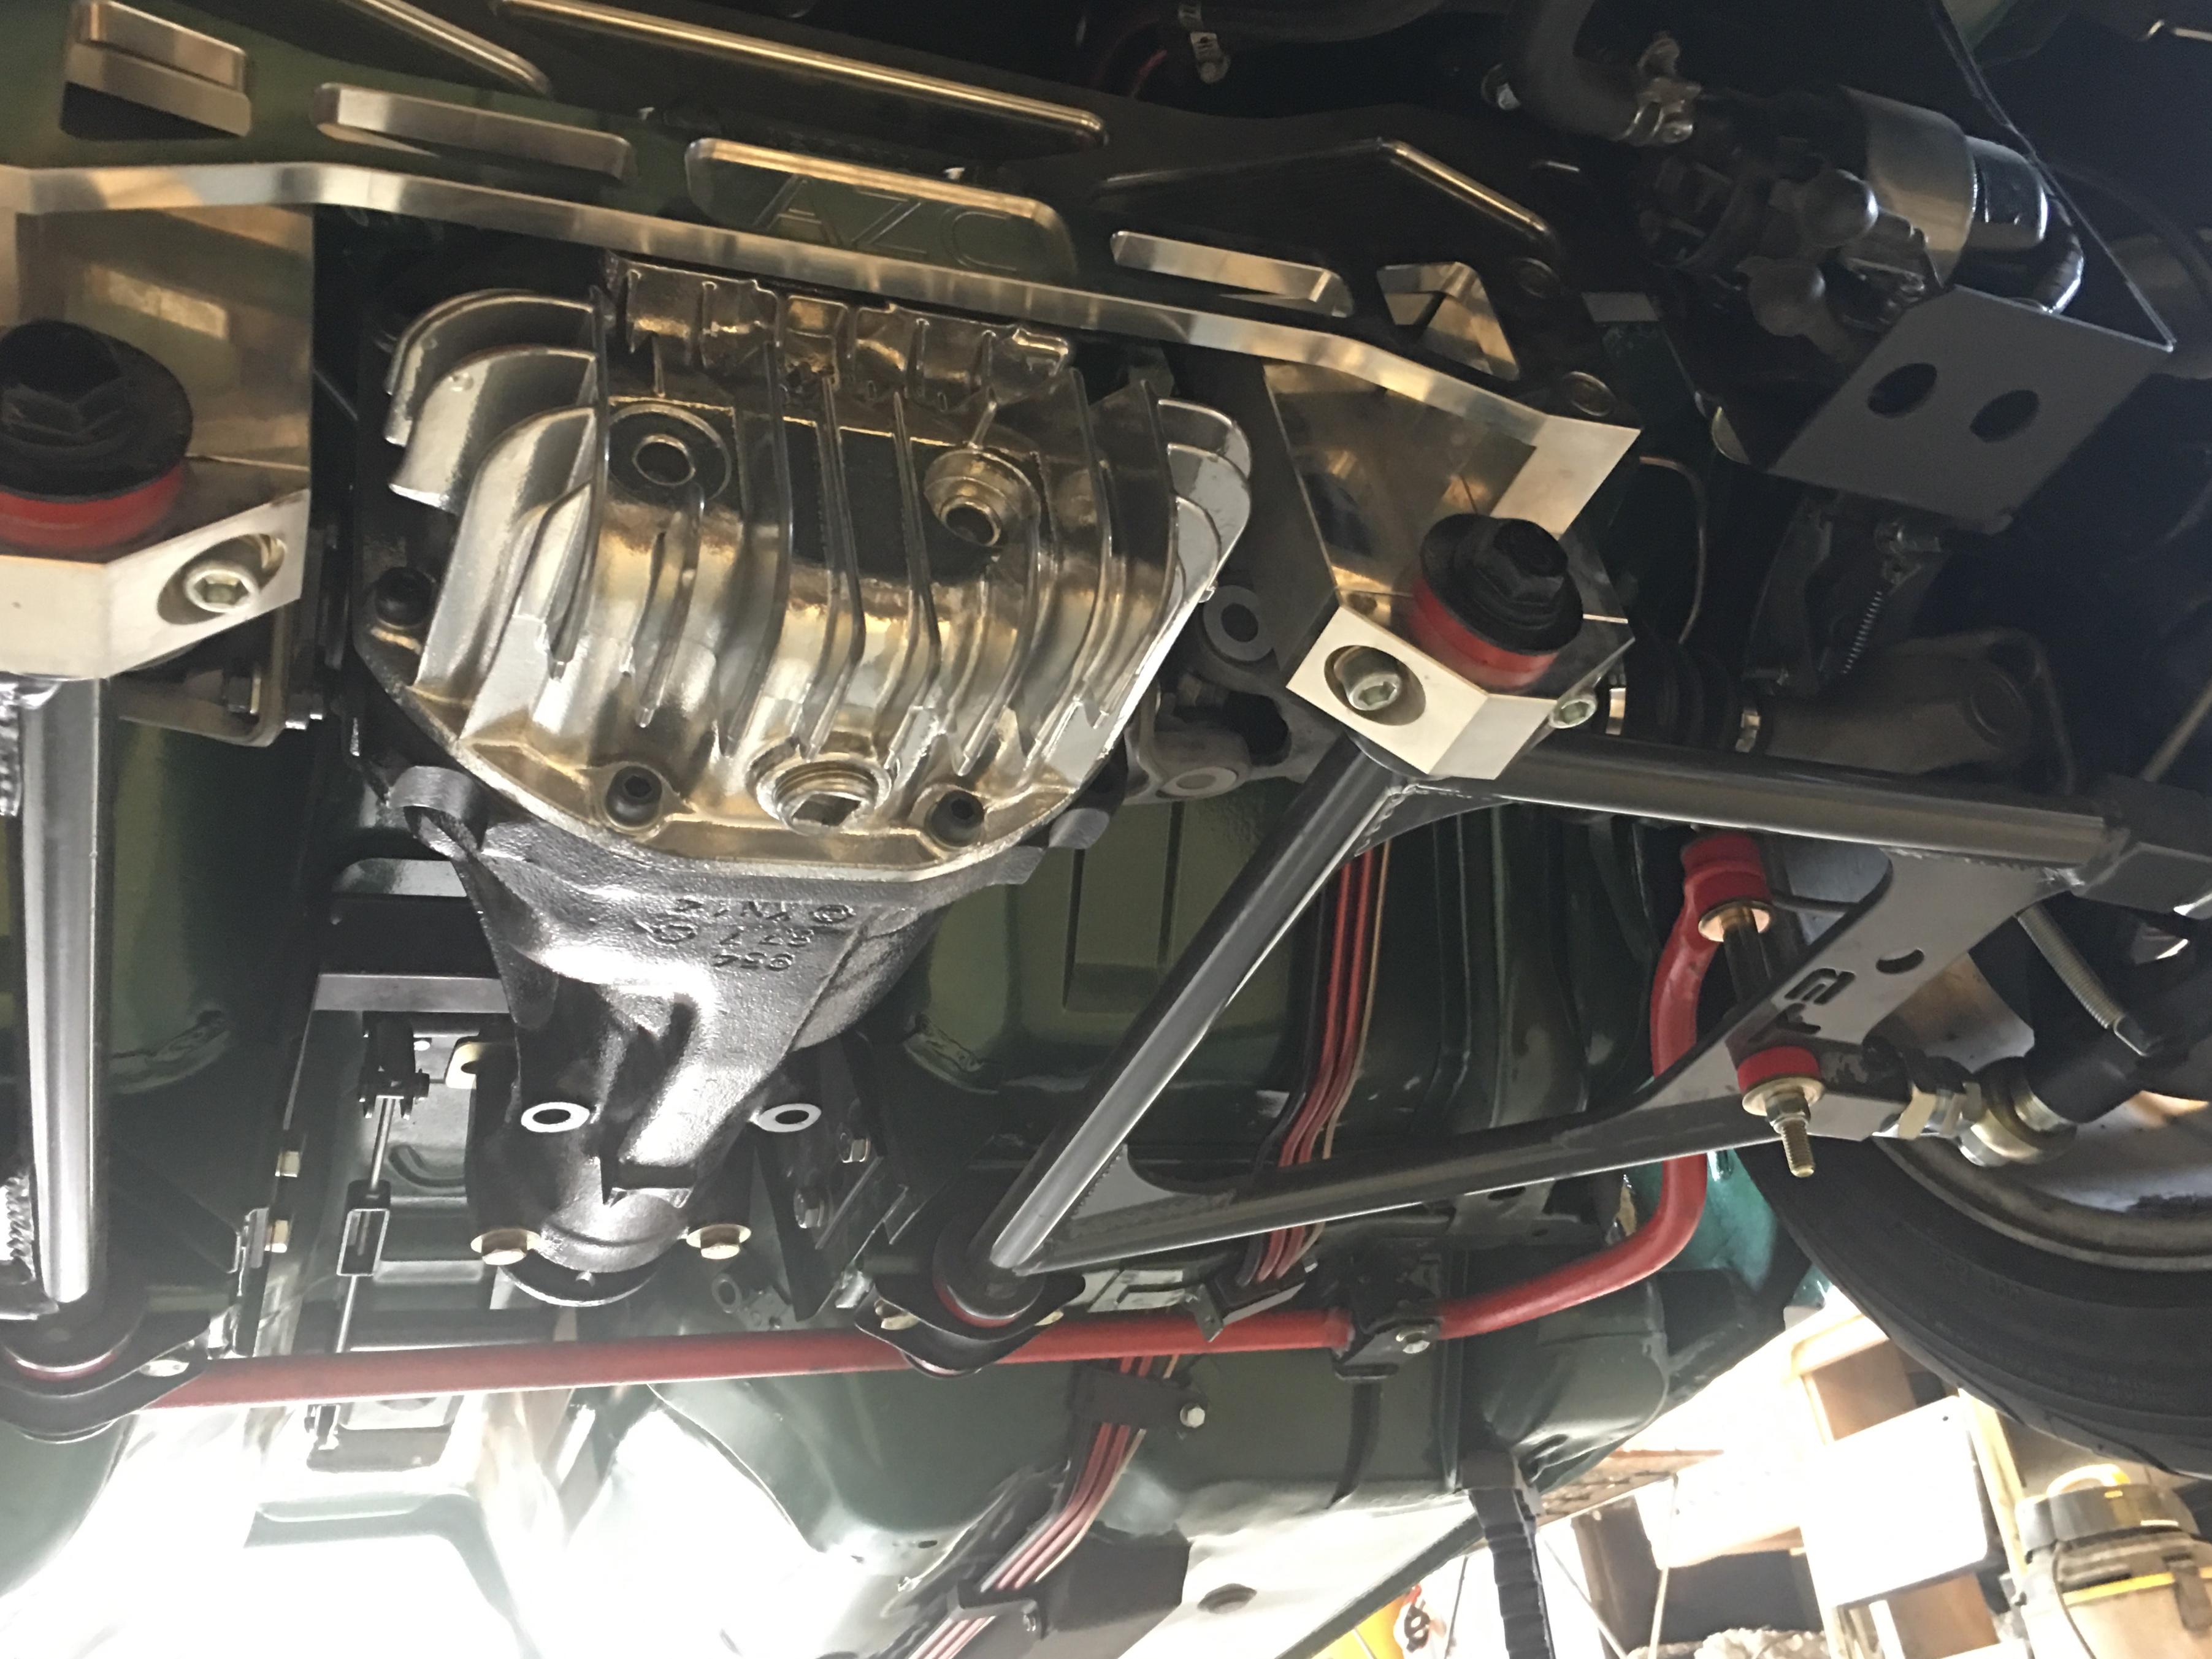
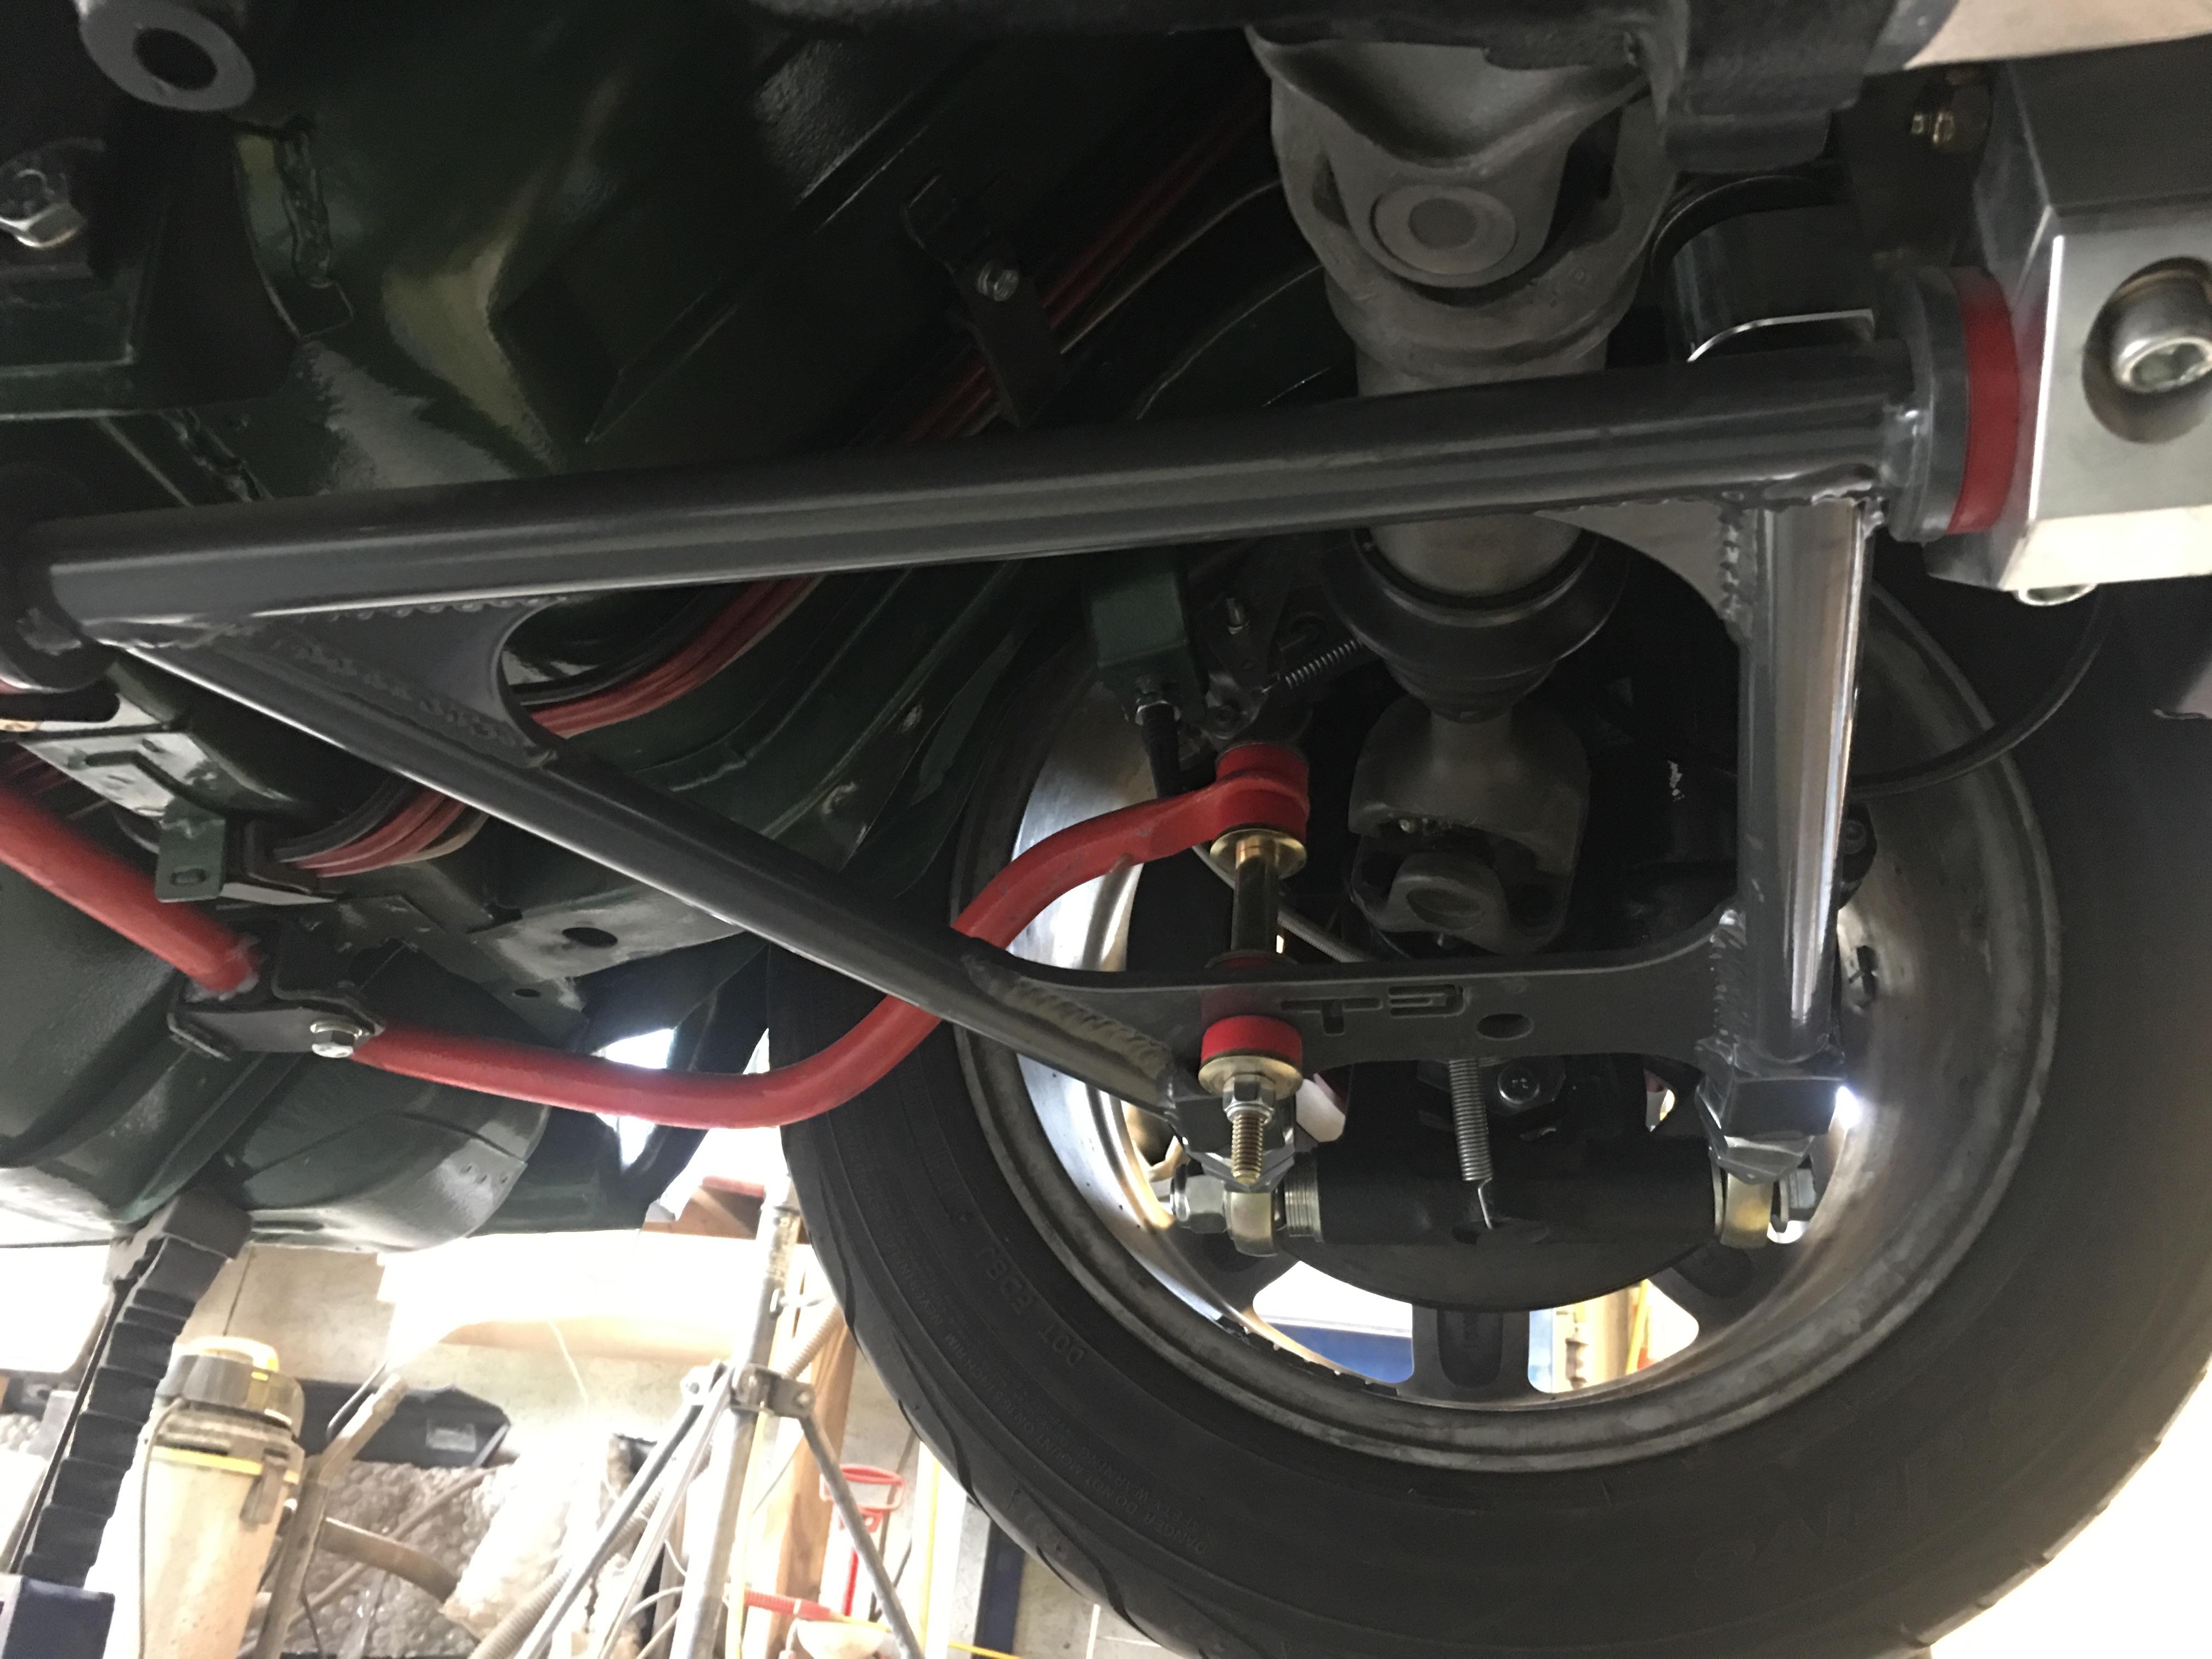
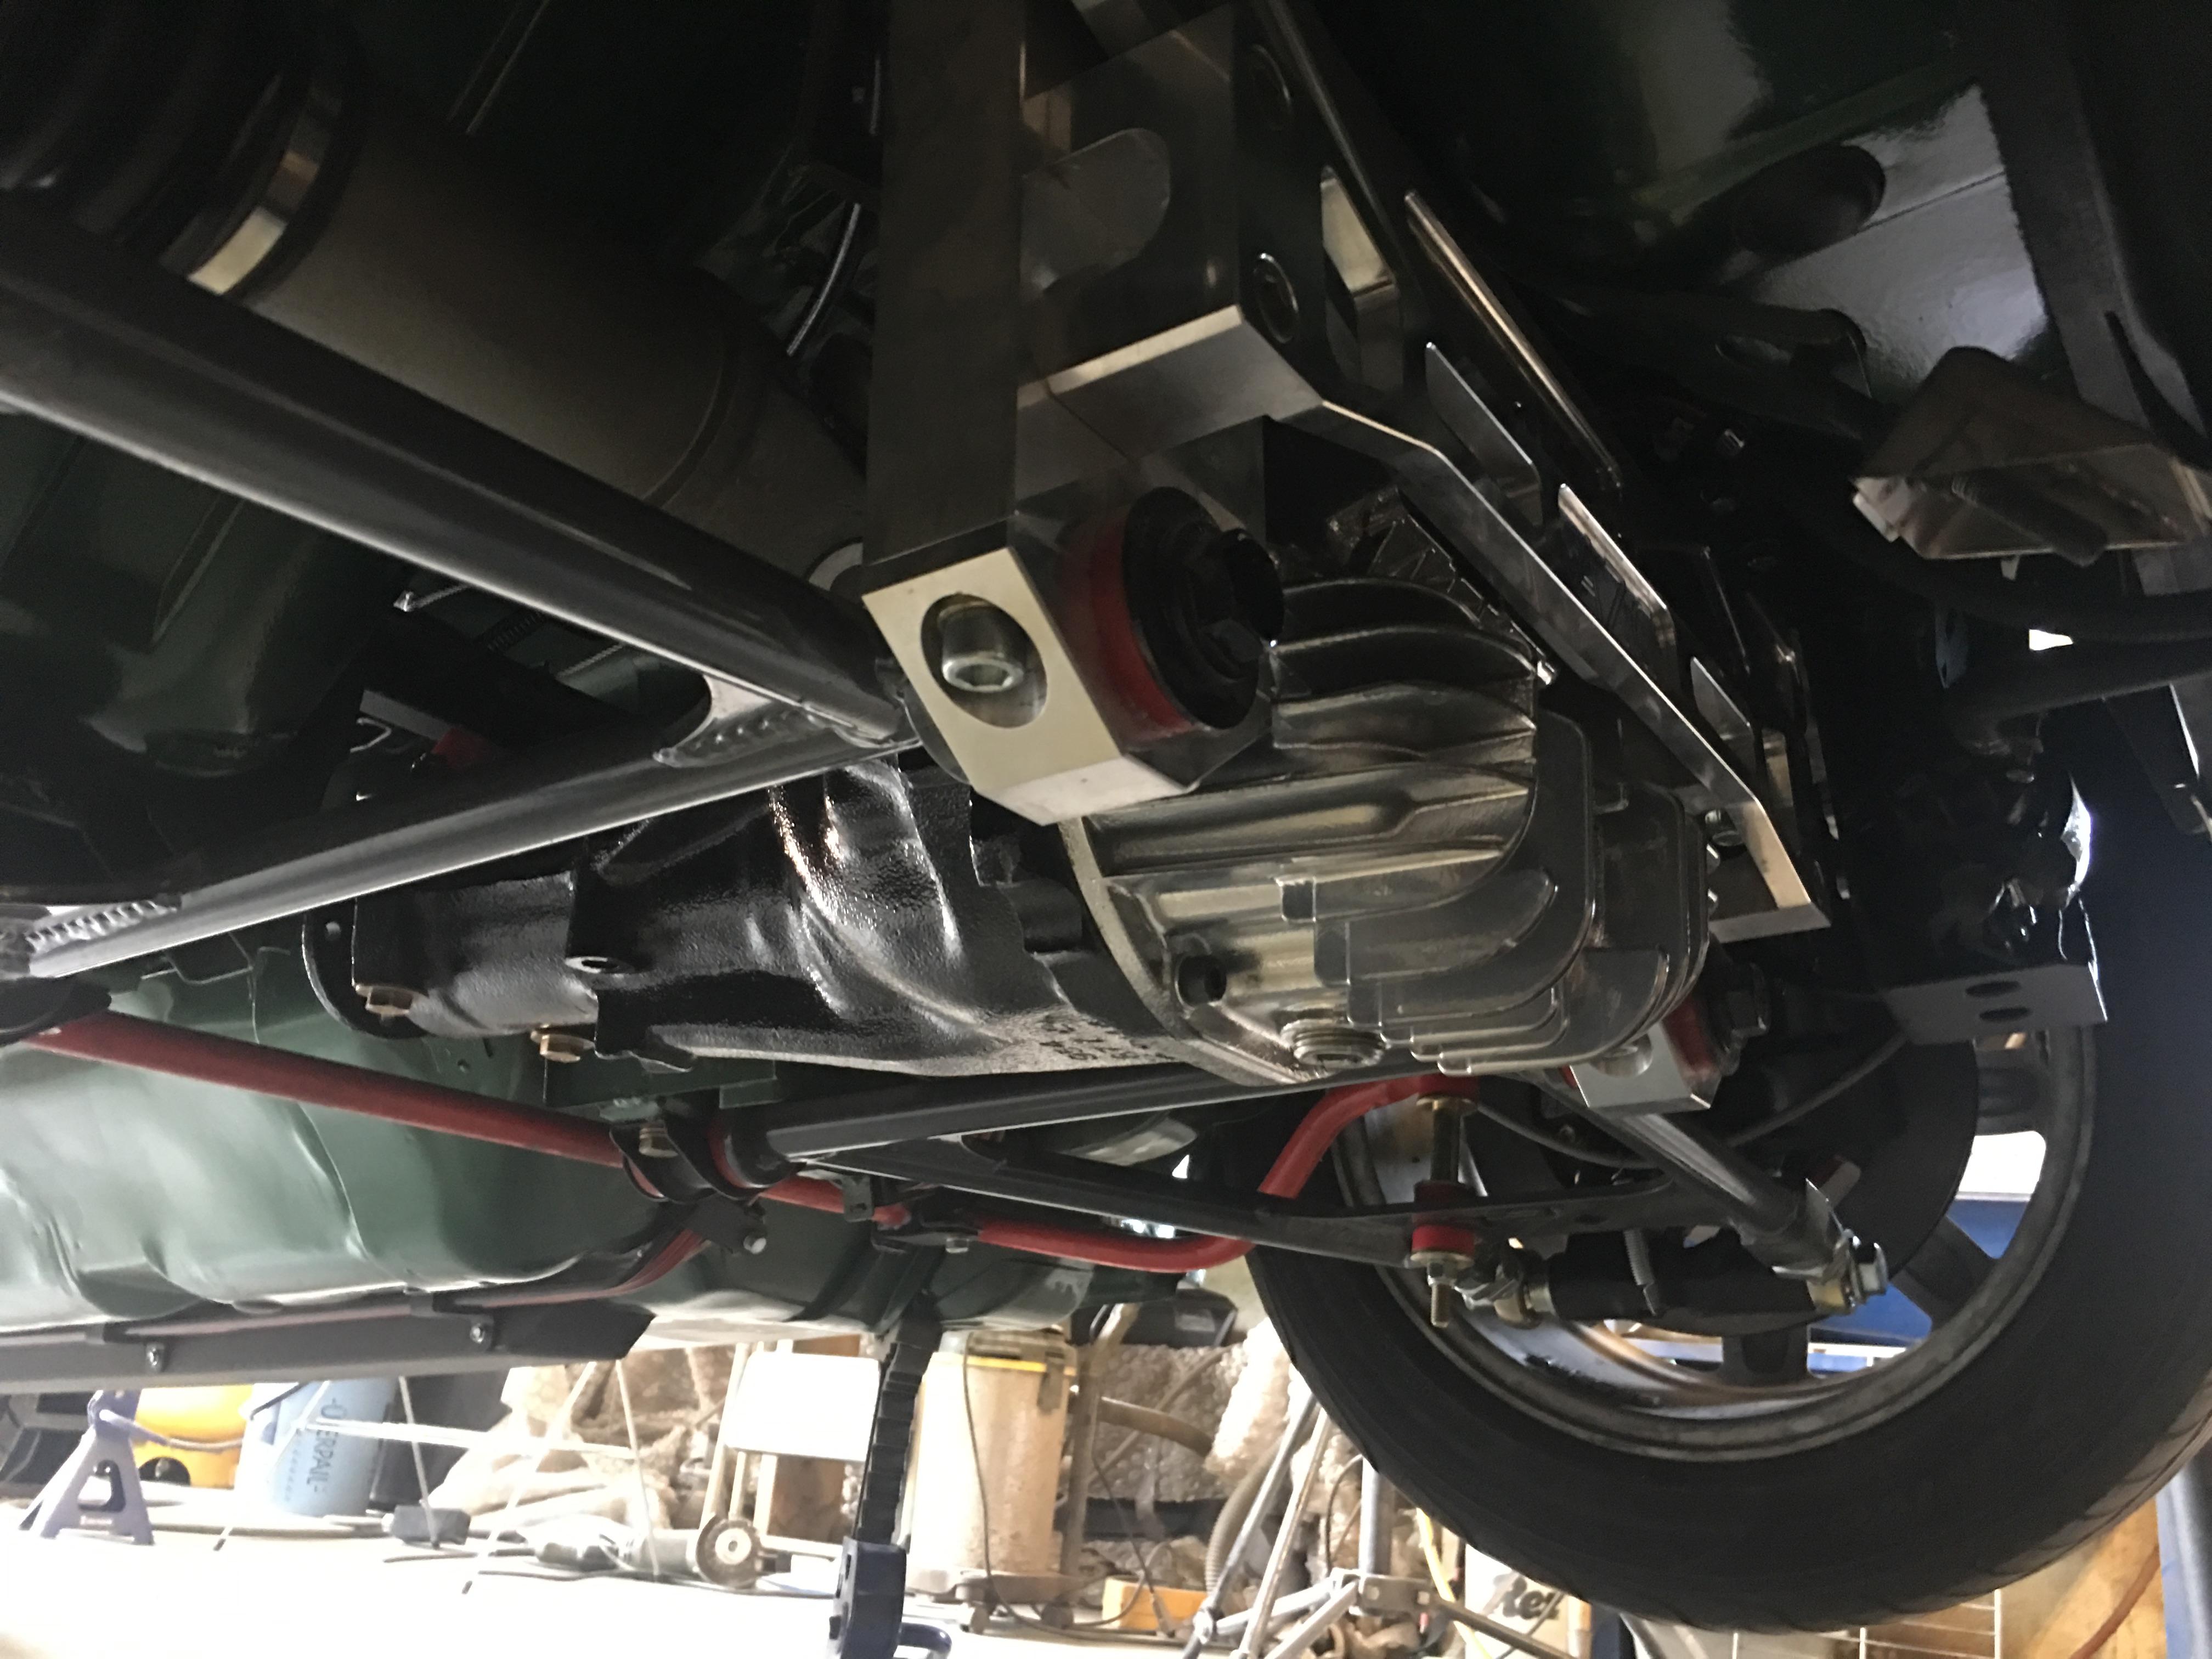
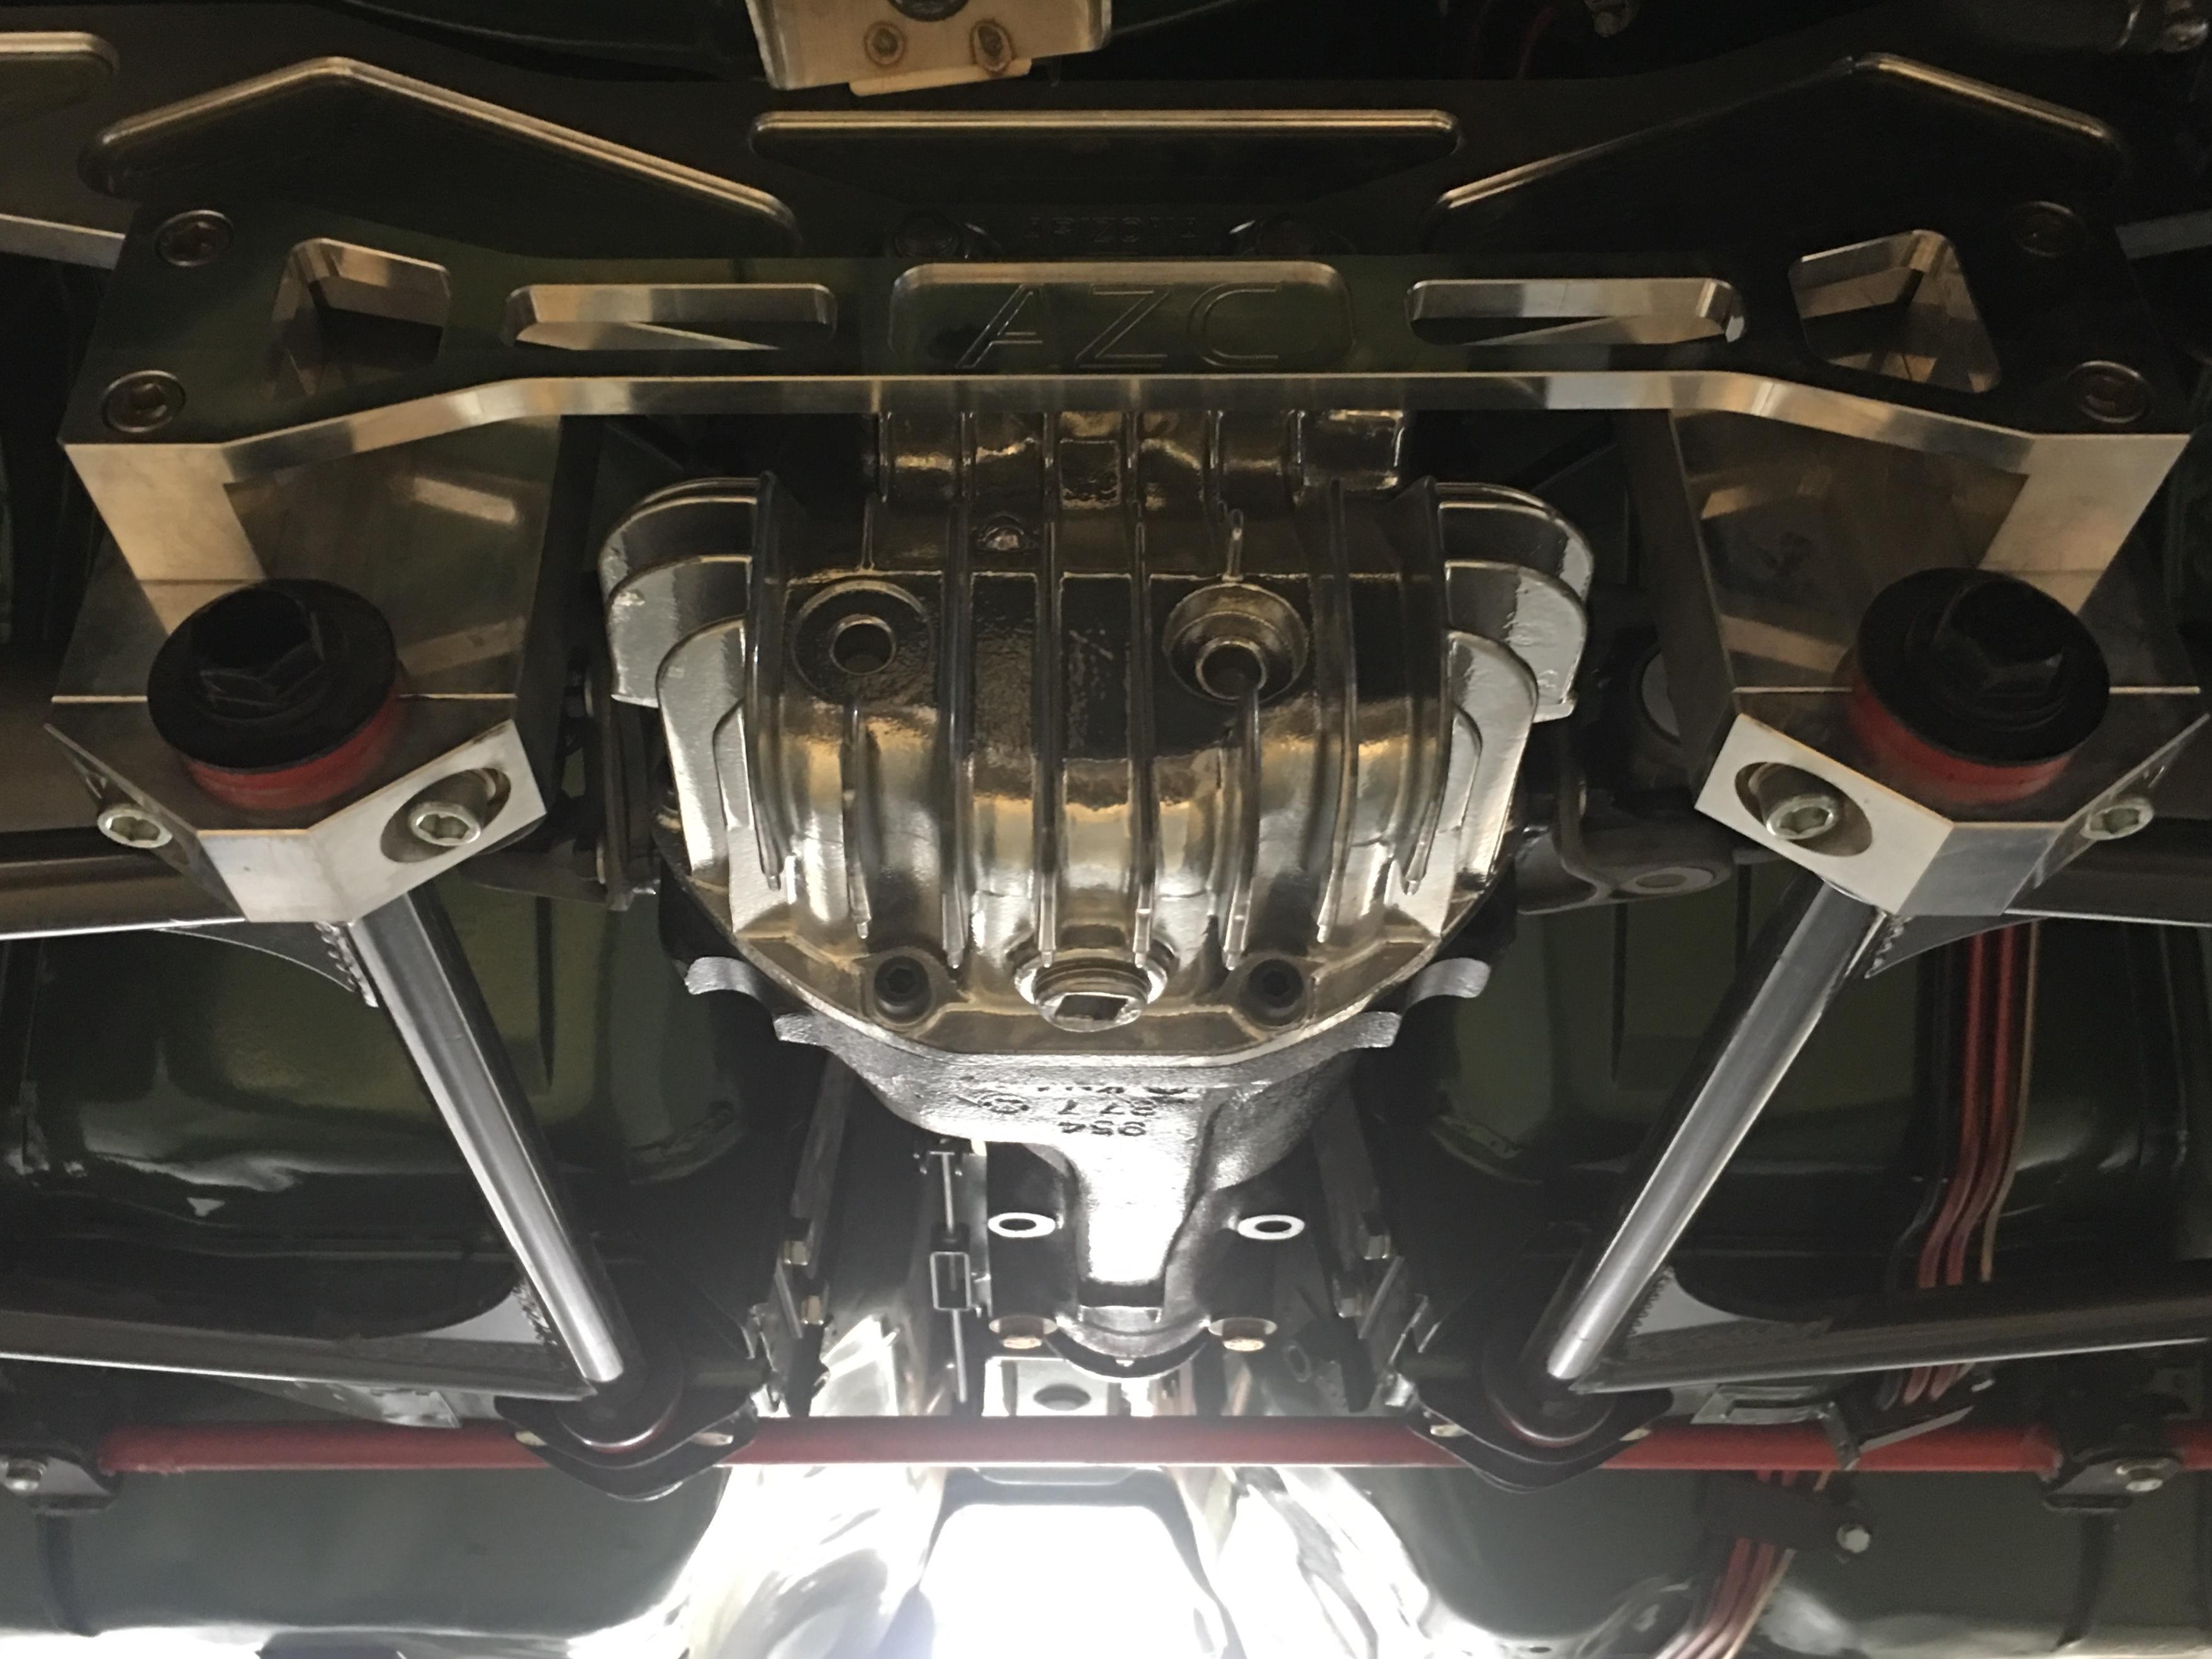
1 pointI have found my share of wood screws too but they are usually holding patches on to the floor pans. I was just going through your rear end suspension pics above, that is some sharp looking hardware, when you put the pedal down you're going hook up.1 point
-
Perfect, thanks Philip. I'm glad I didn't throw away that short hose with the reducer. So here is the after pic.
 1 point
 -
1 point
-
? I bought Bquiet on your recommendation... still in boxes...Blue.1 point
-
All of the wheel bearings have been replaced, and I had a fun drive home. According to my friend, Nissan tended to use minimal grease on the wheel bearings. Fortunately, the stock rear bearings held up well over the 45+ years of use. There is less vibration in the steering wheel, too. I helped him diagnose a couple of electrical problems in his 73 turbo-swapped car. It's great to have a Z buddy you can swap favors with.1 point
-
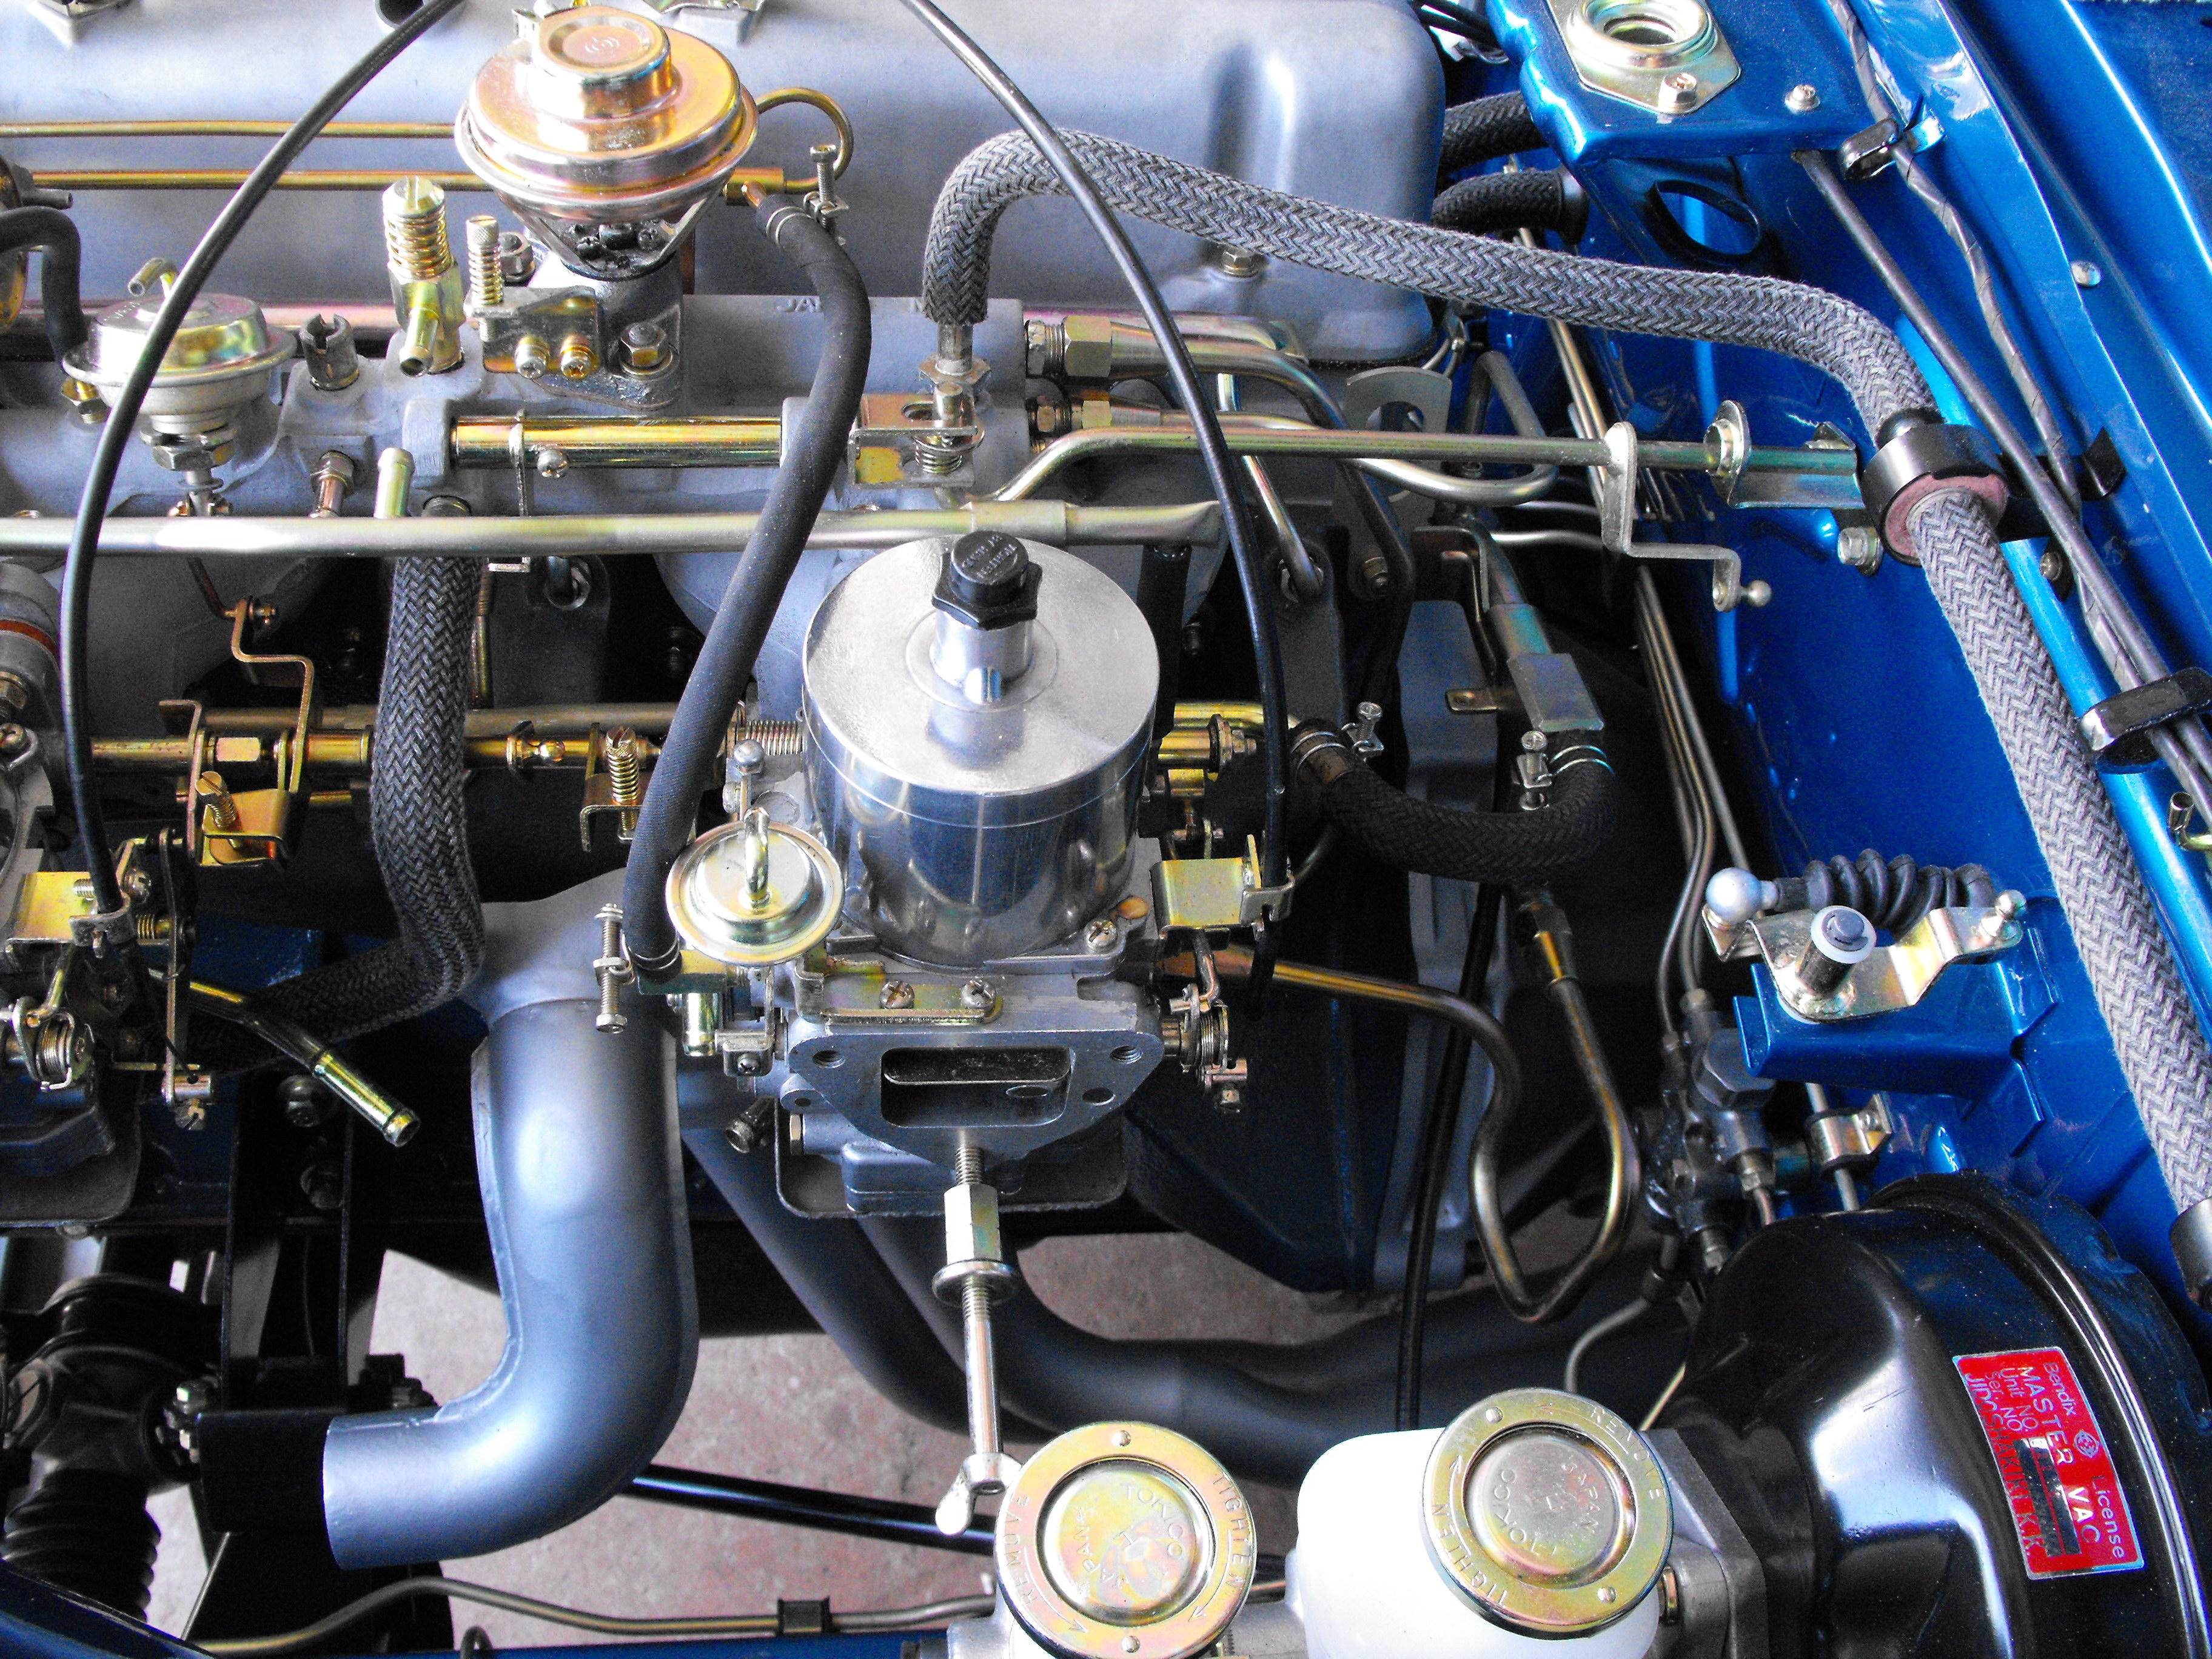
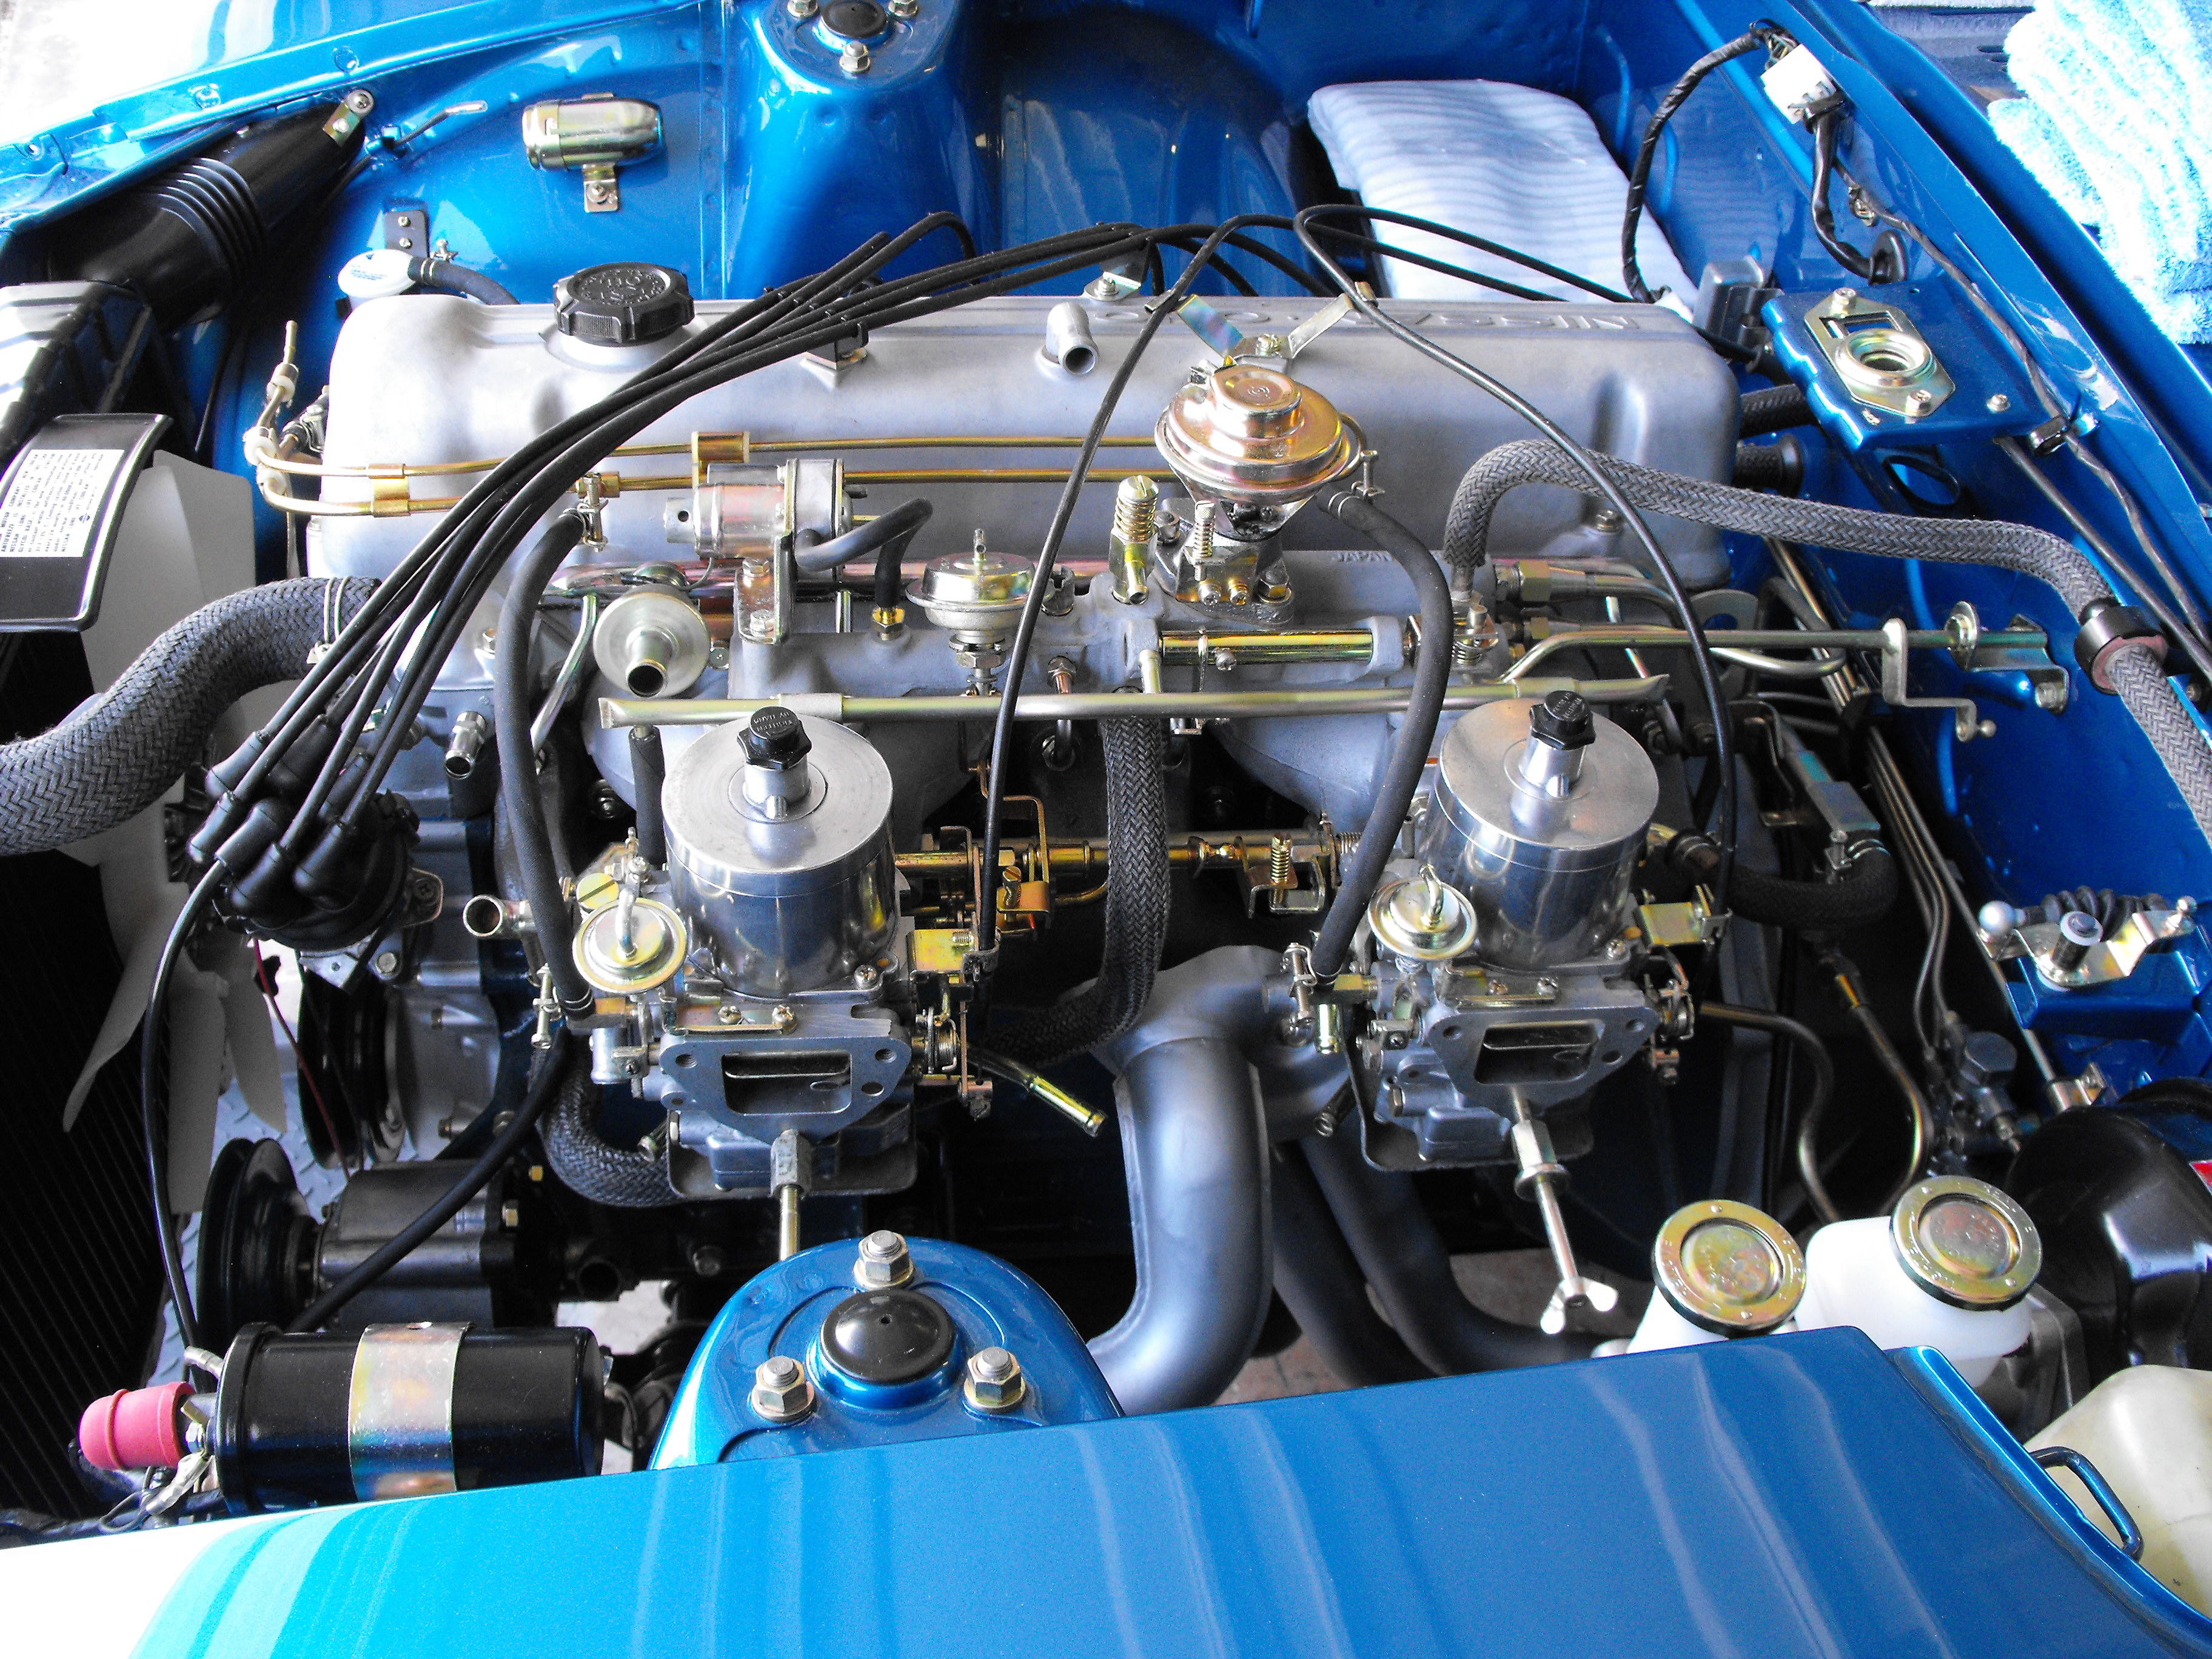
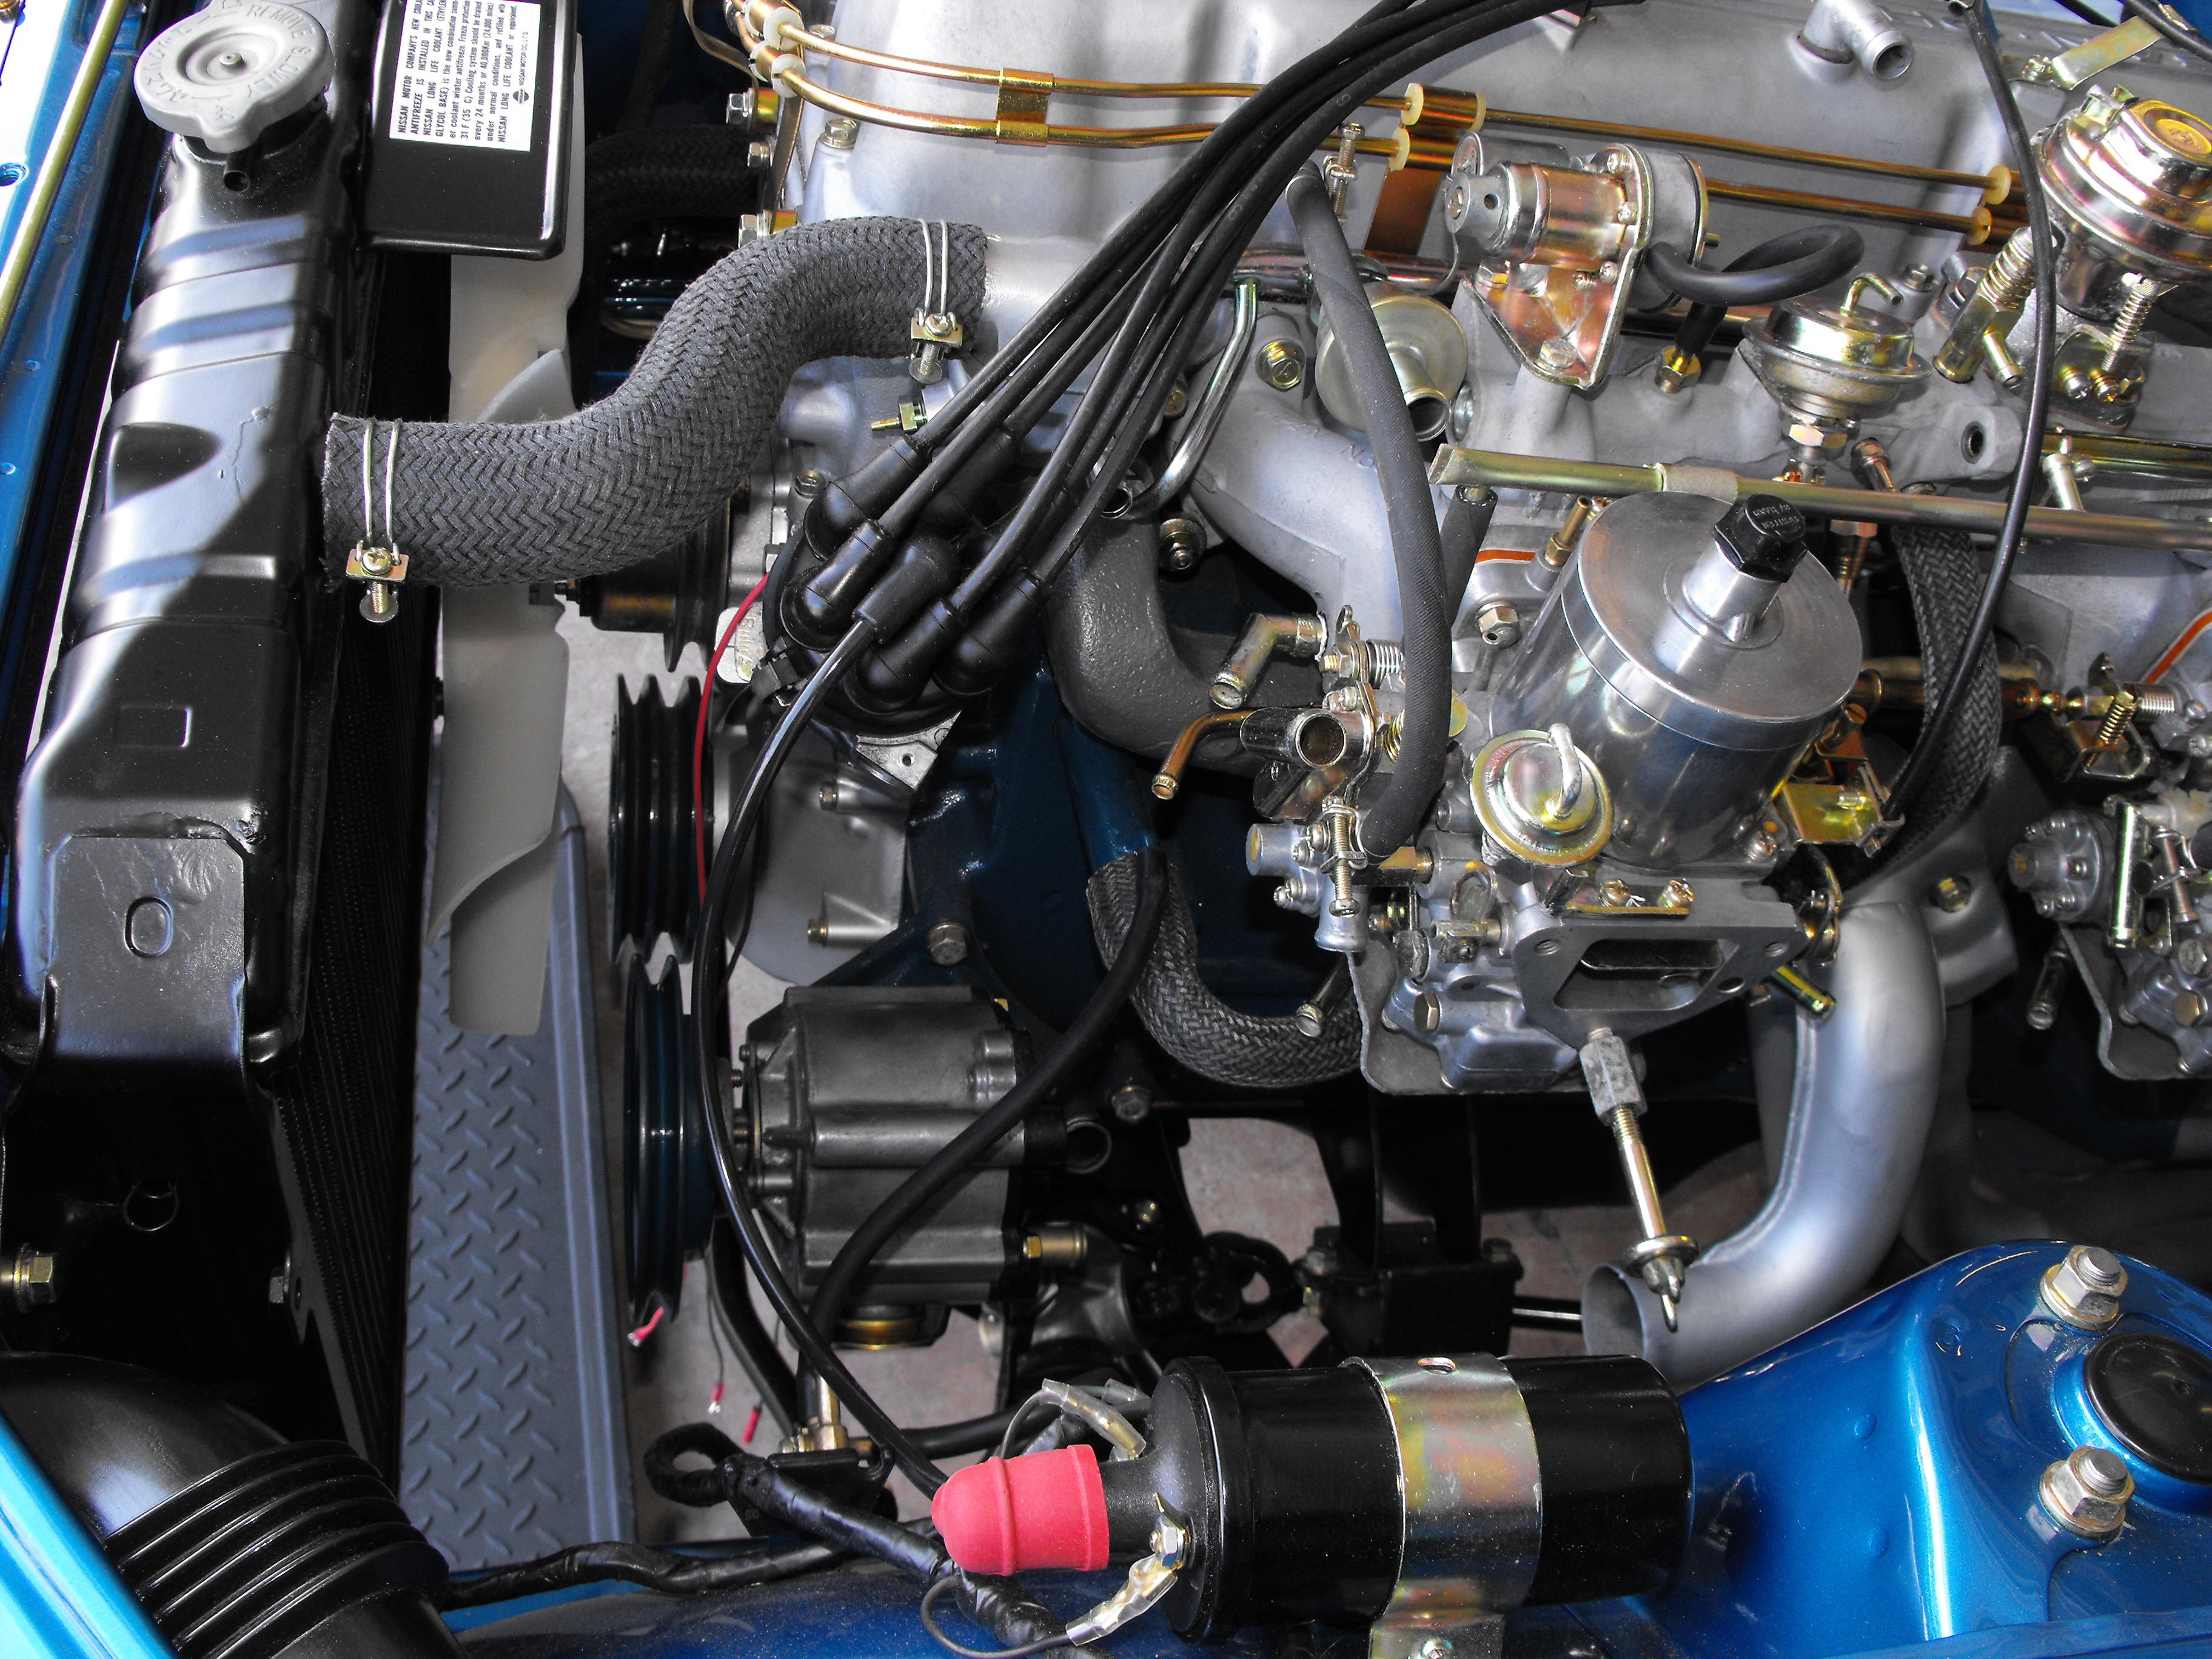
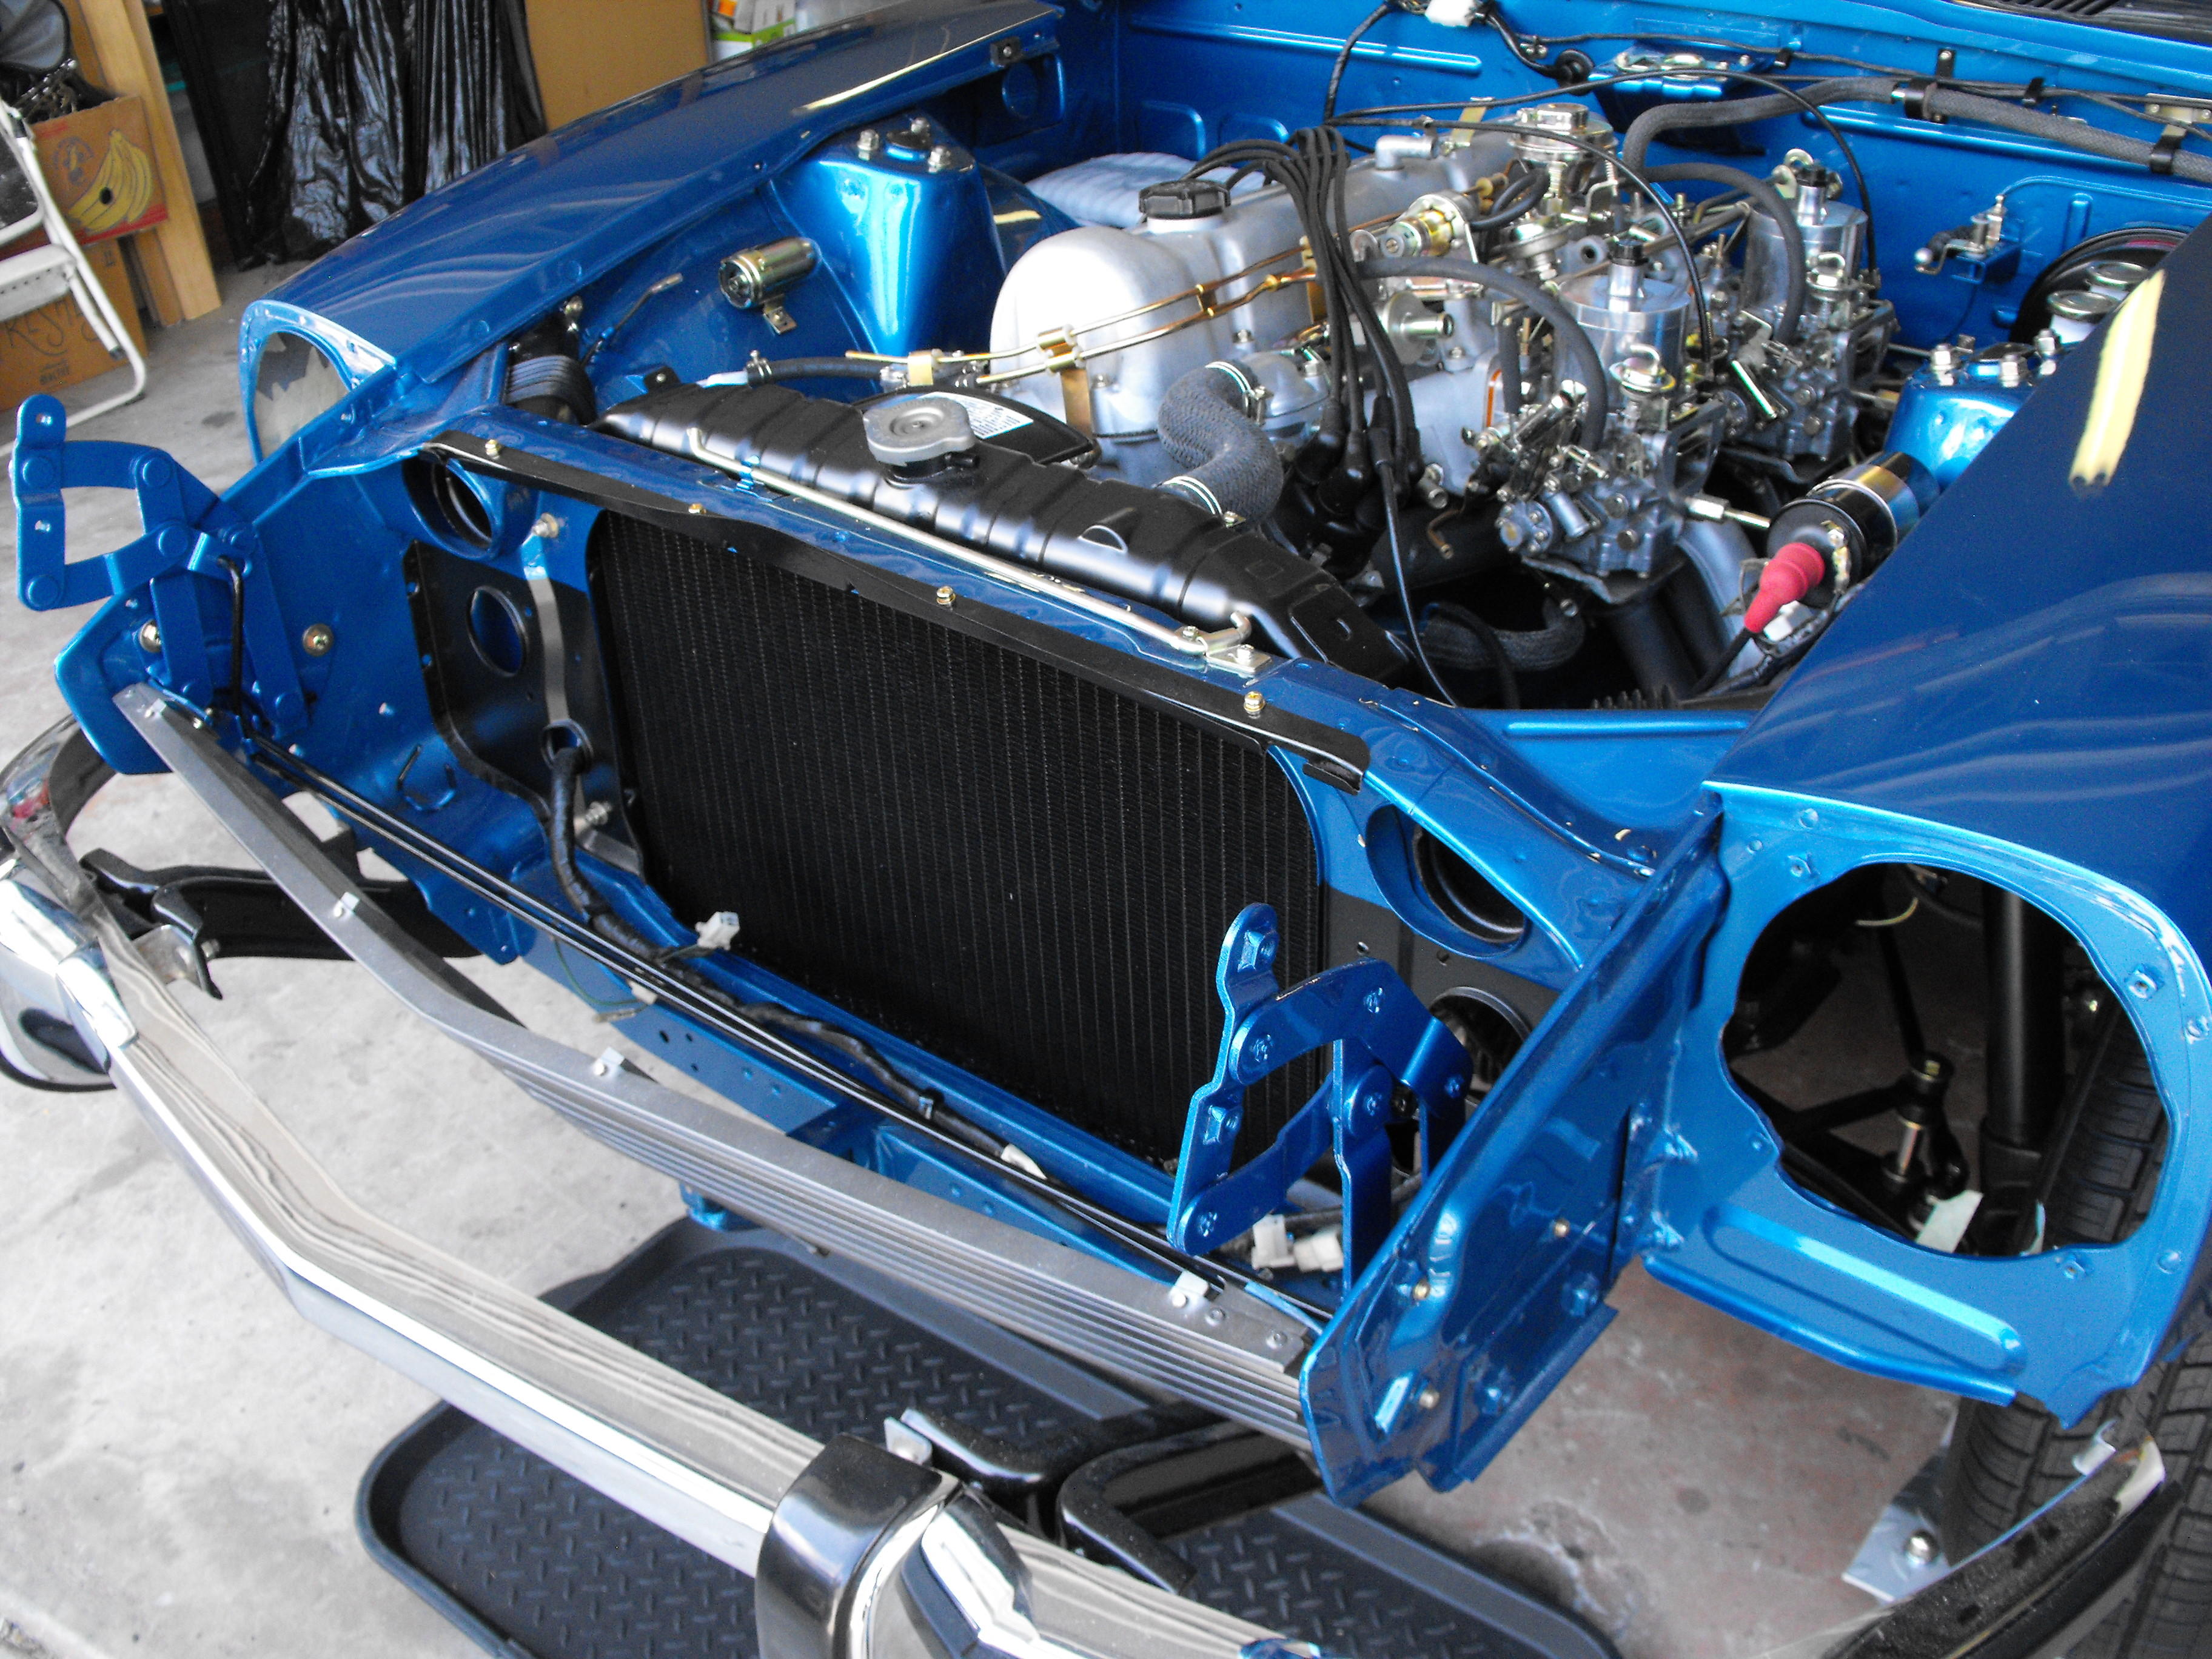
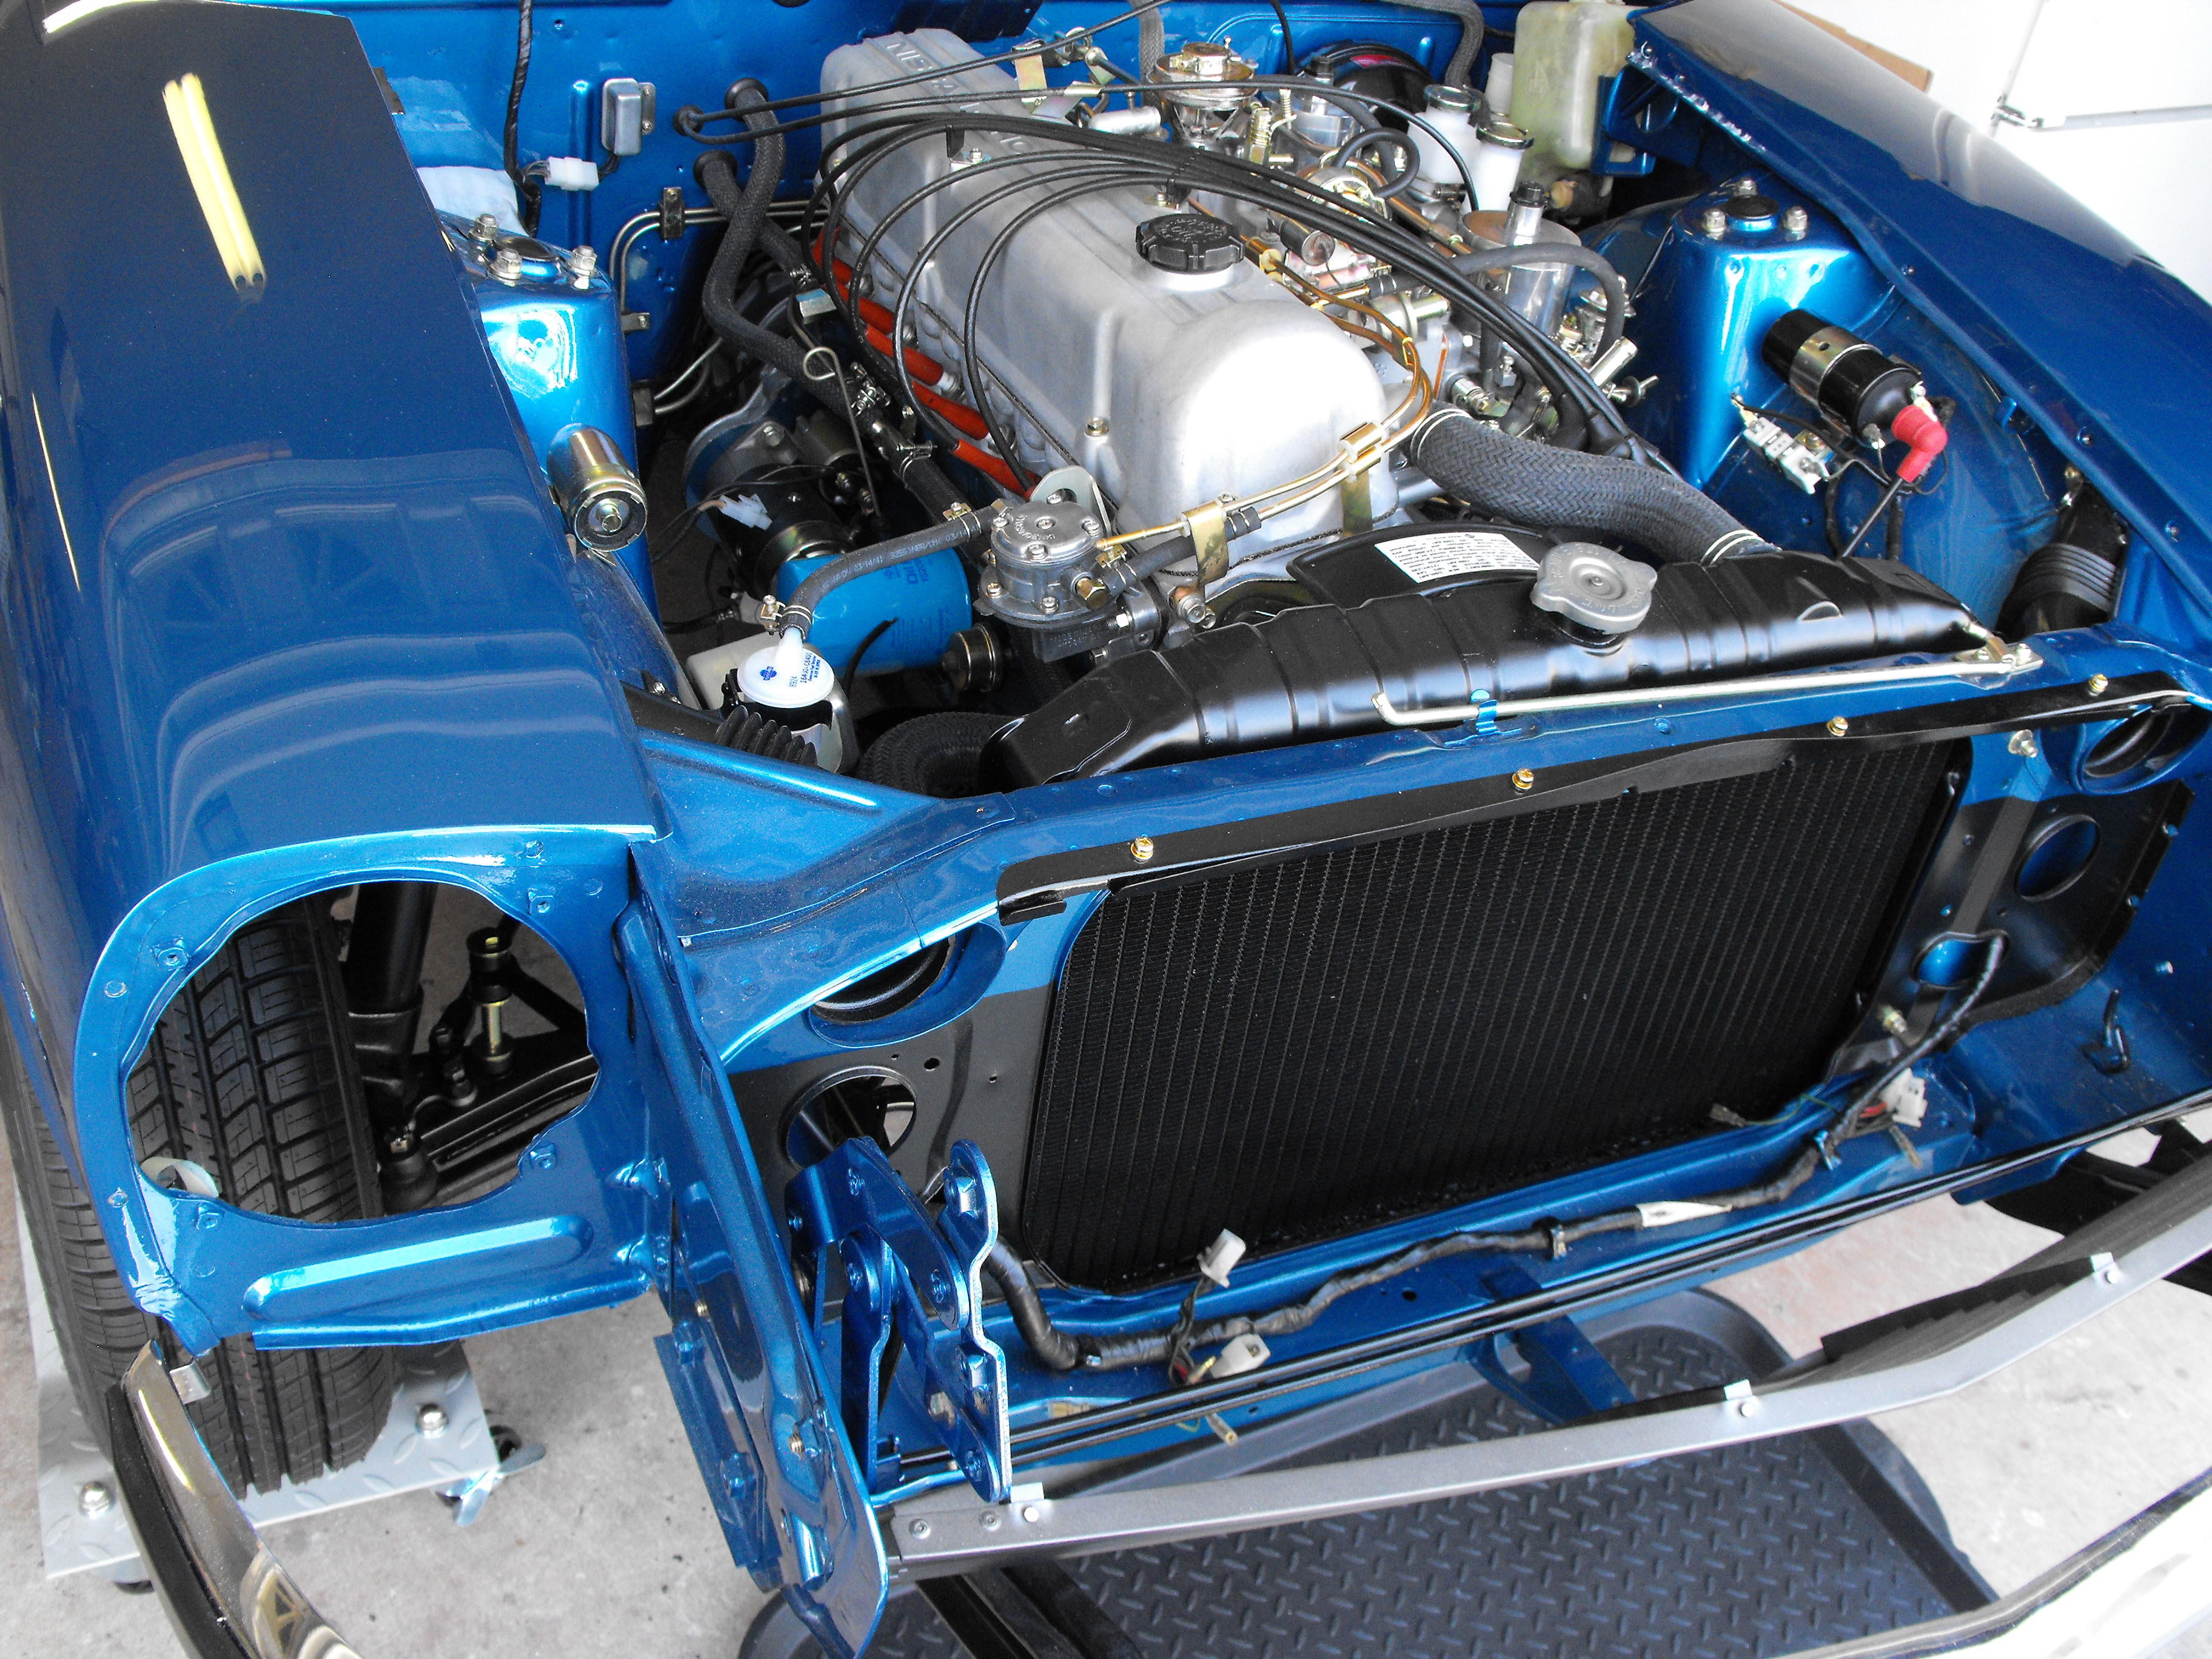
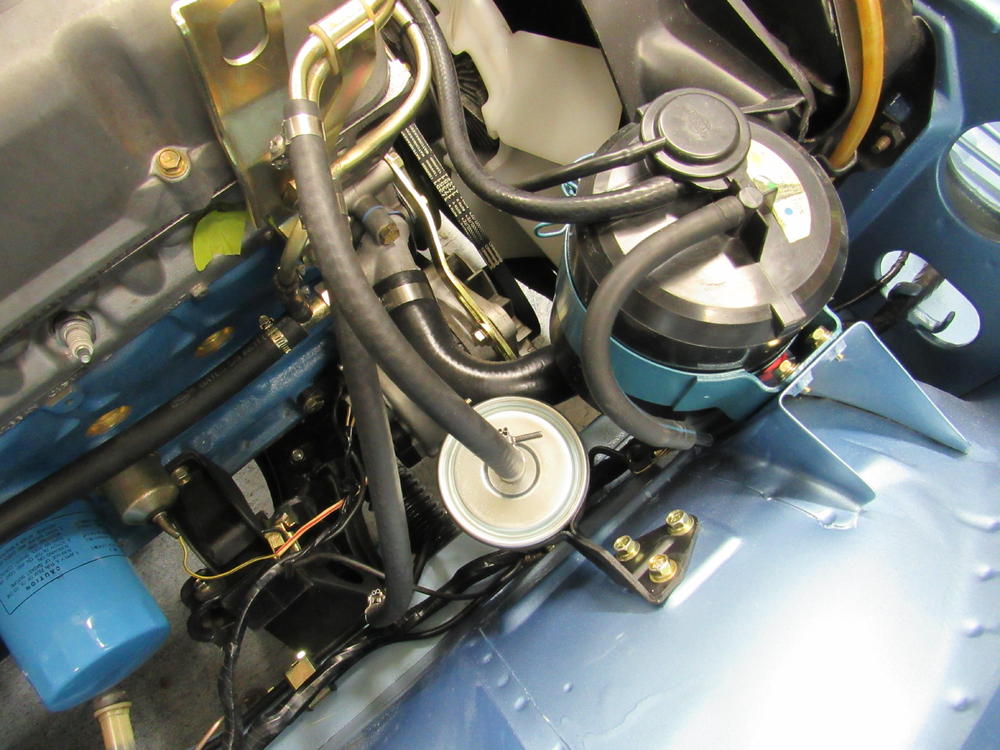
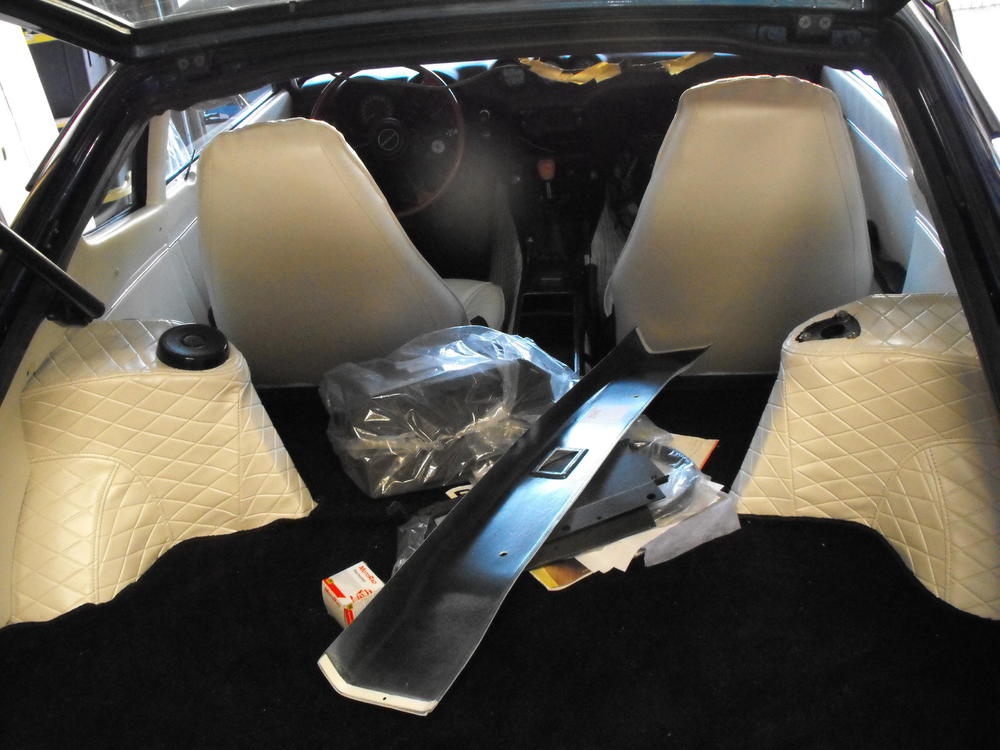
Installed the plated parts. Started the install of the plumbing for the flat tops. Boy, lots of tubes here. Here are the latest pics. Also installed the fuel door and hinges.


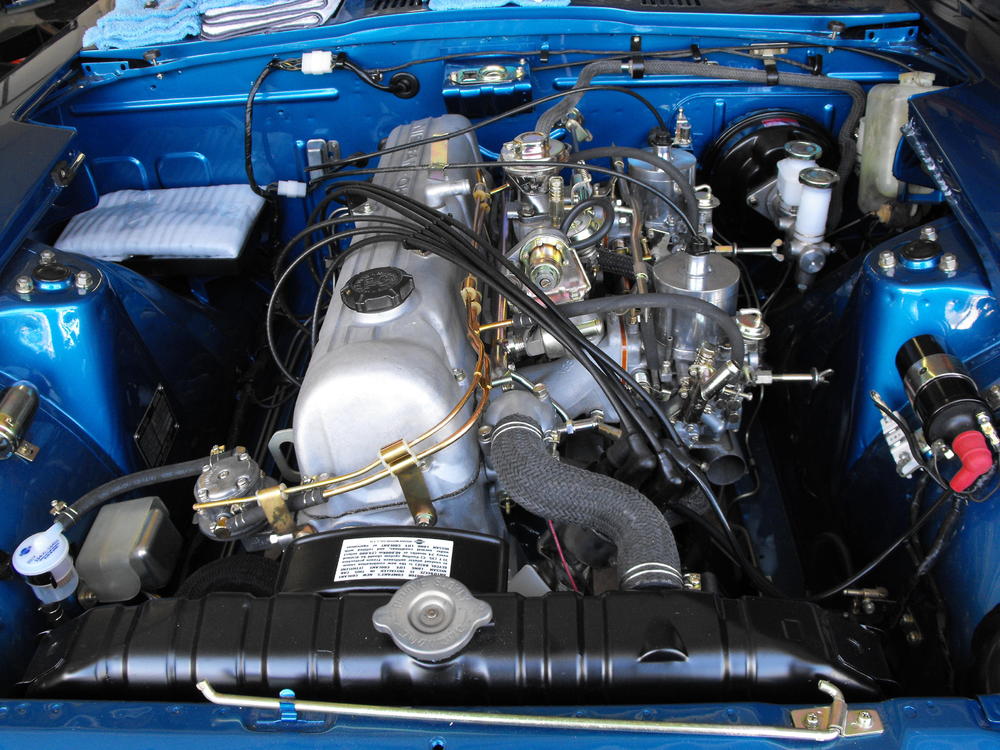

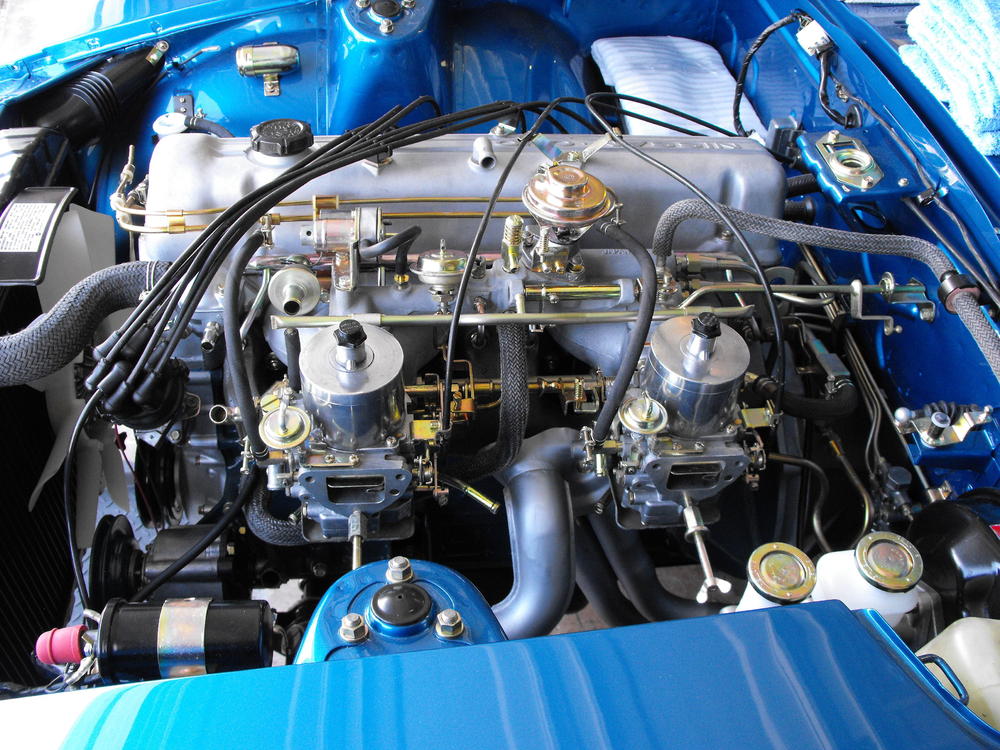


 1 point
 -
1 point
-
1 point
-
I had a bad fuel pump when I bought my car. Sat foe 18 yrs. I pulled it out and after tapping on it with 12V power applied it all of a sudden began to run. Never had a problem again with it . I also cleaned the screen in it. I agree with getting an OEM pump. They’re actually extremely durable and I heard the aftermarket ones are hit or miss. You need to confirm your are getting 36 PSI to the injectors if it’s still running bad. Most guys buy a $20 inline pressure gauge and install it in the line exiting the fuel filter. It’s a good diagnostic tool also for future issues. Good luck. Sent from my iPhone using Tapatalk1 point
-
It's been sitting for two years. It's not going to run great with out some diligent work. Connections need to be cleaned and there may be varnish in the fuel system that may have to be dealt with1 point
-
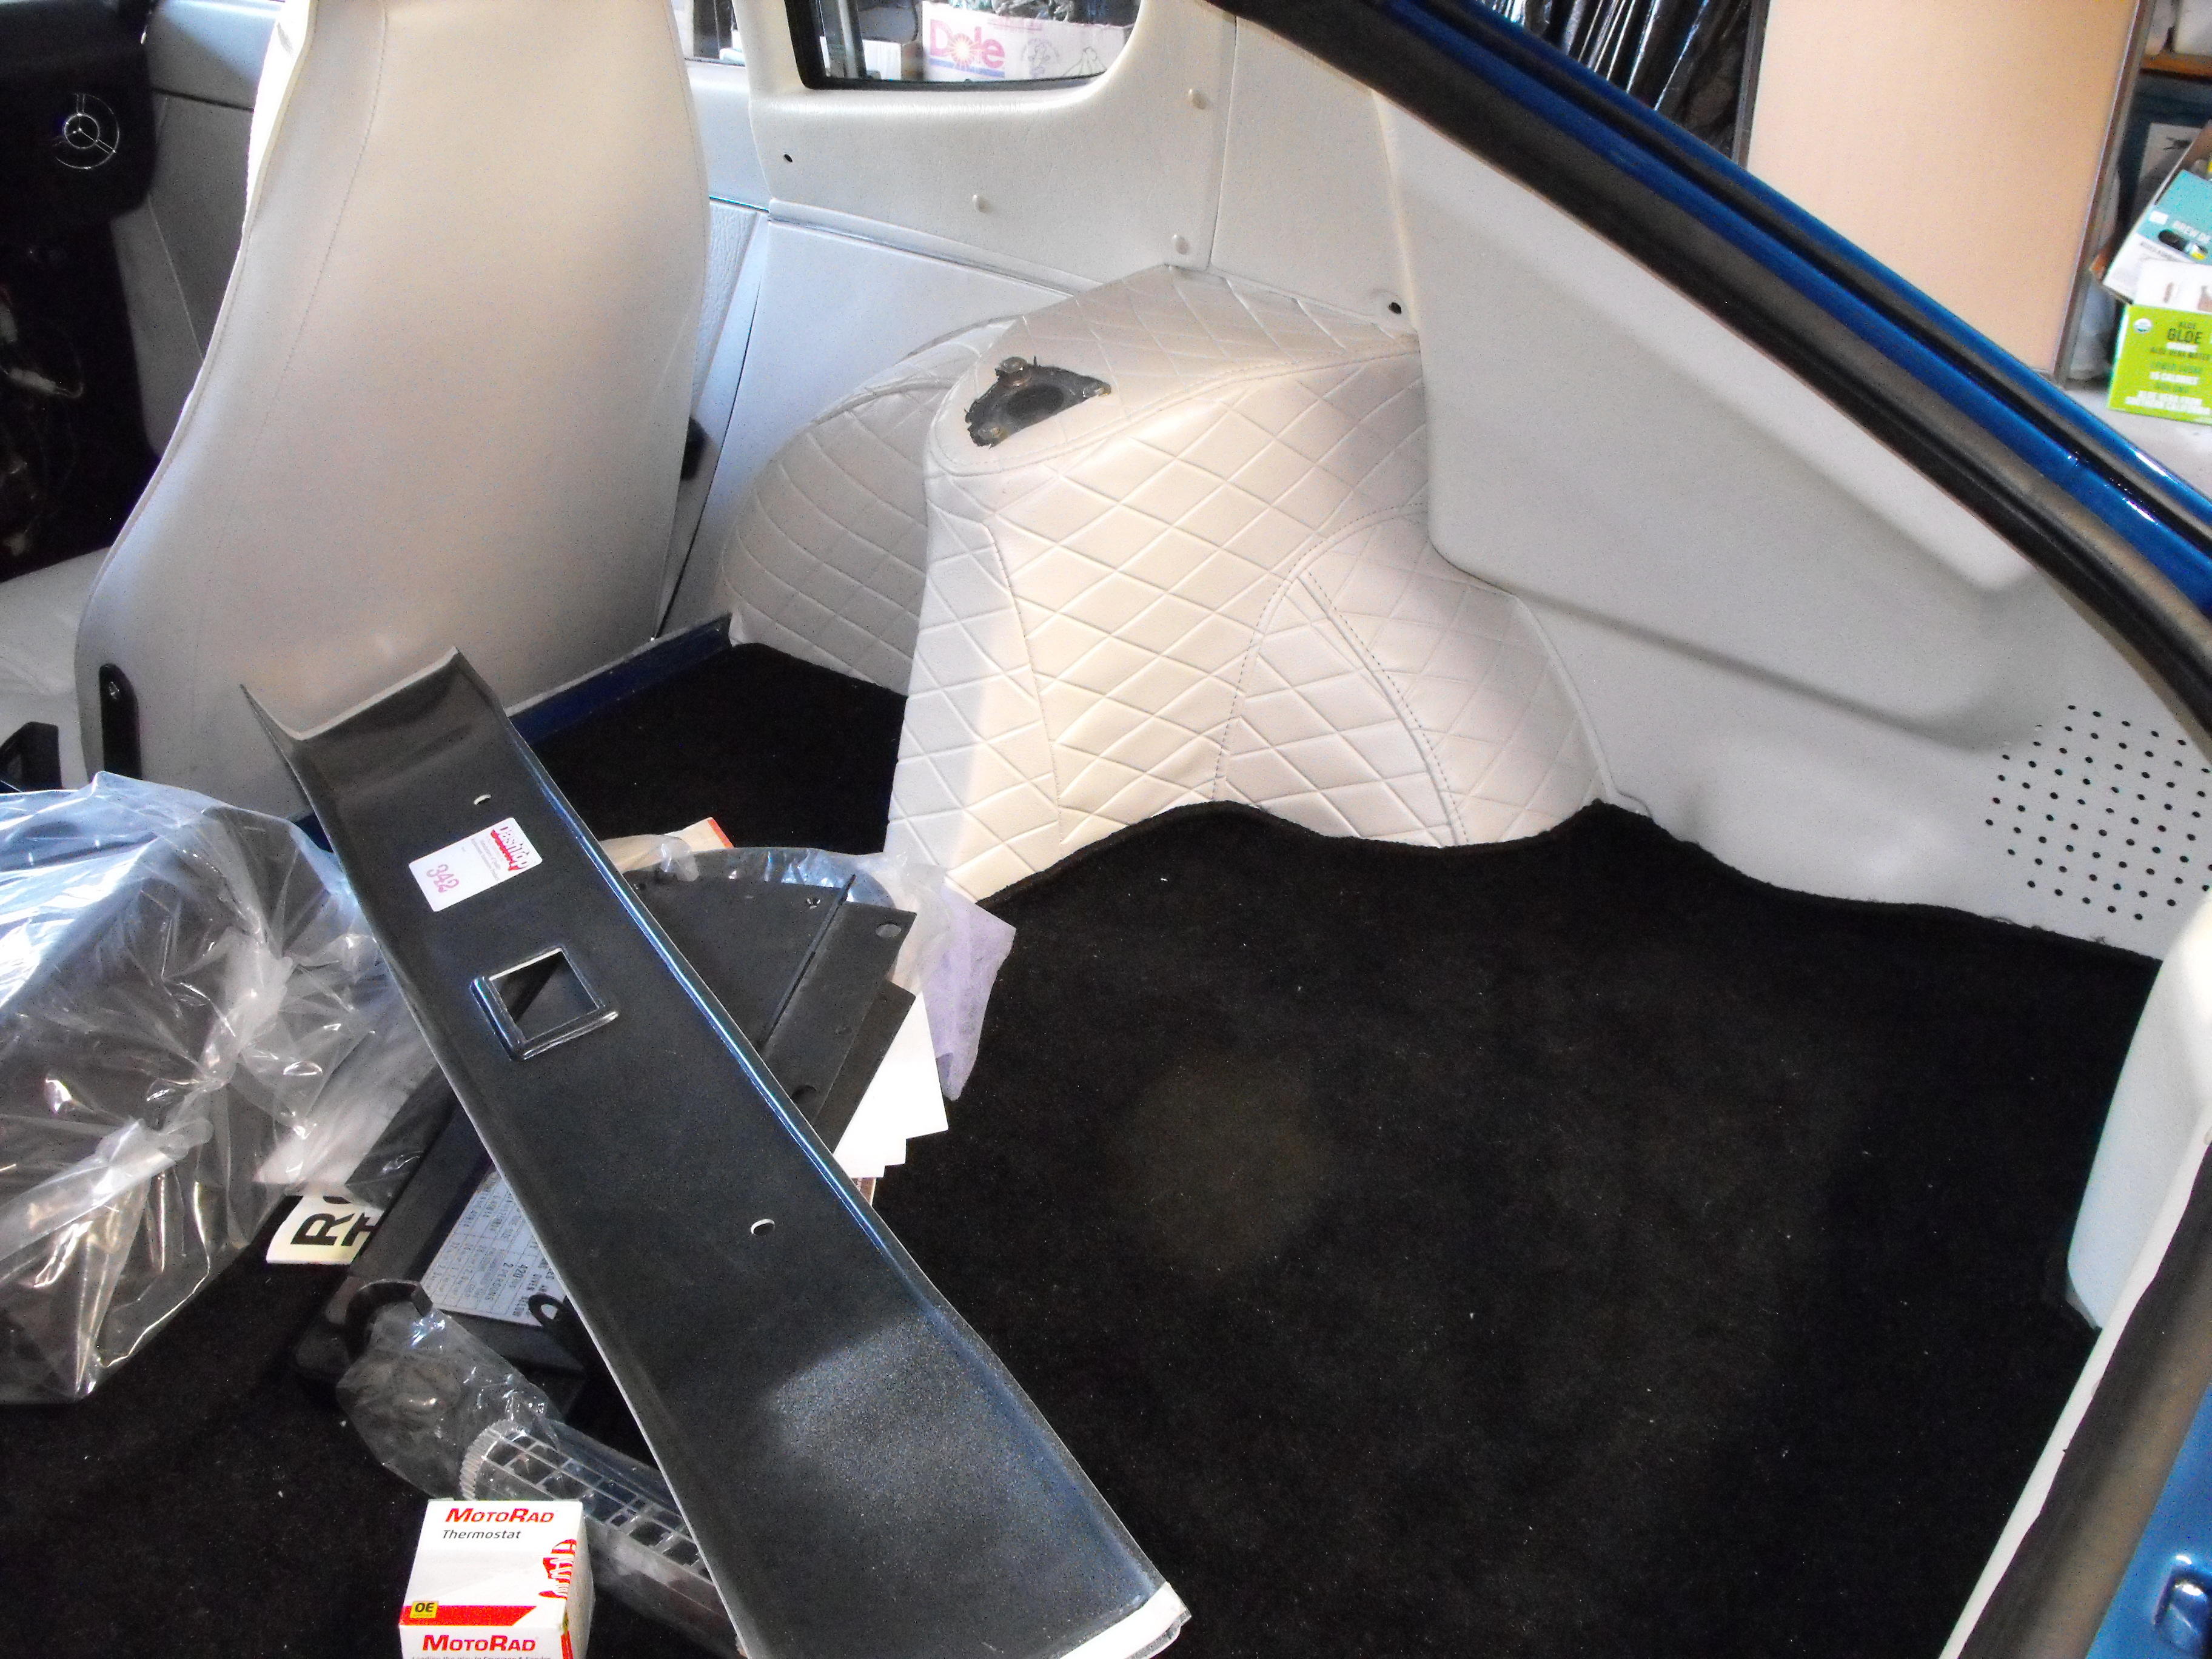
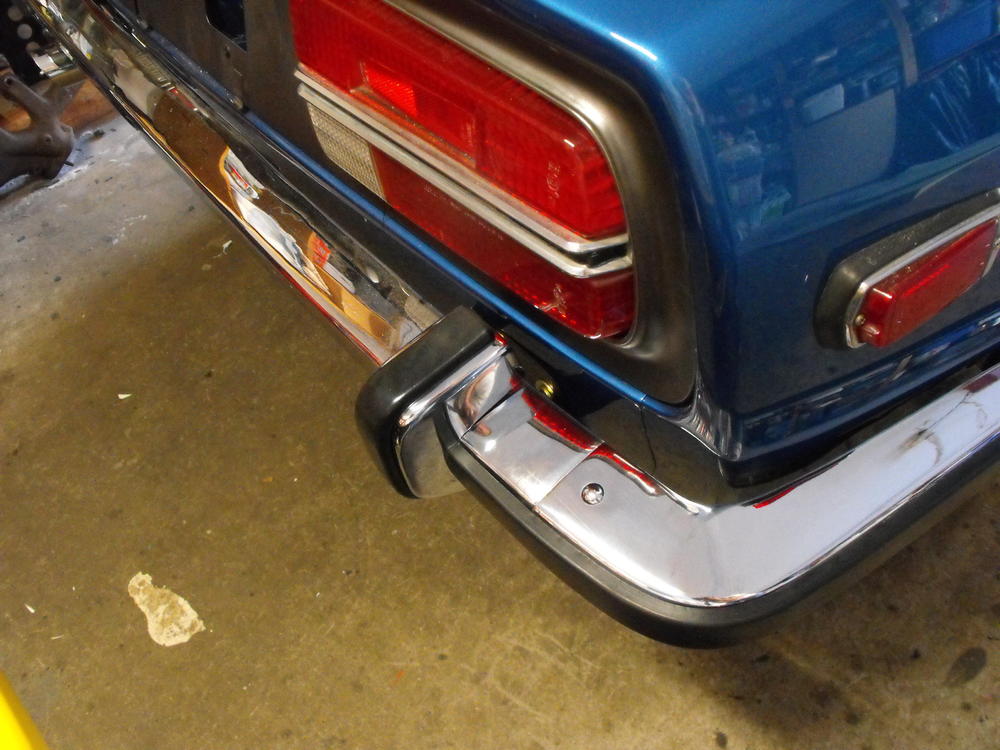
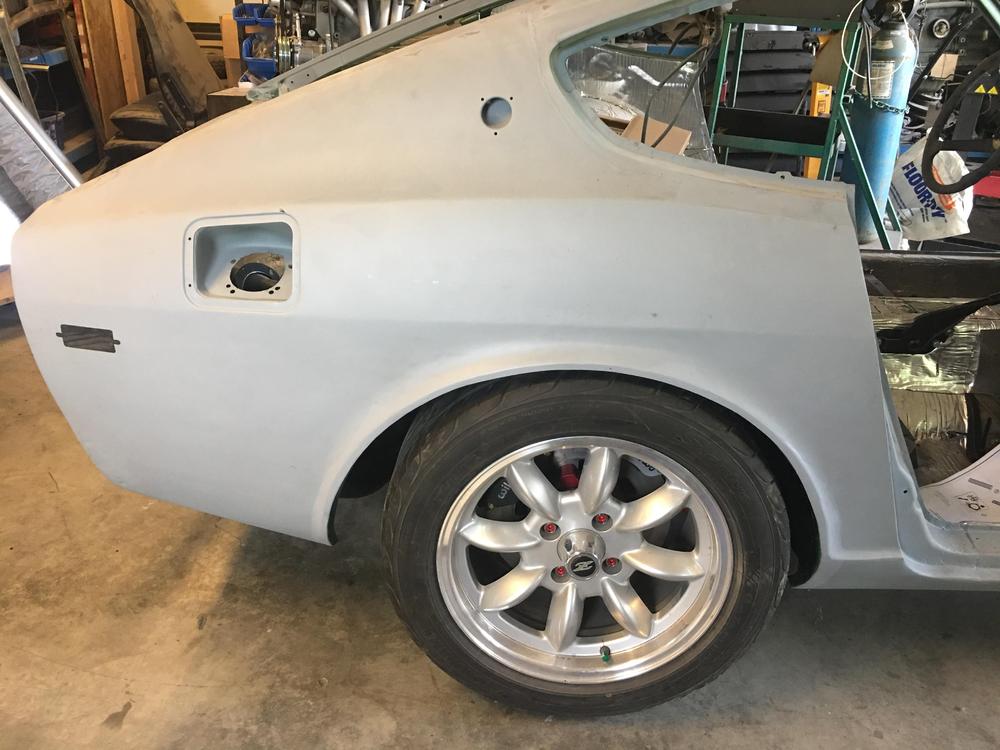
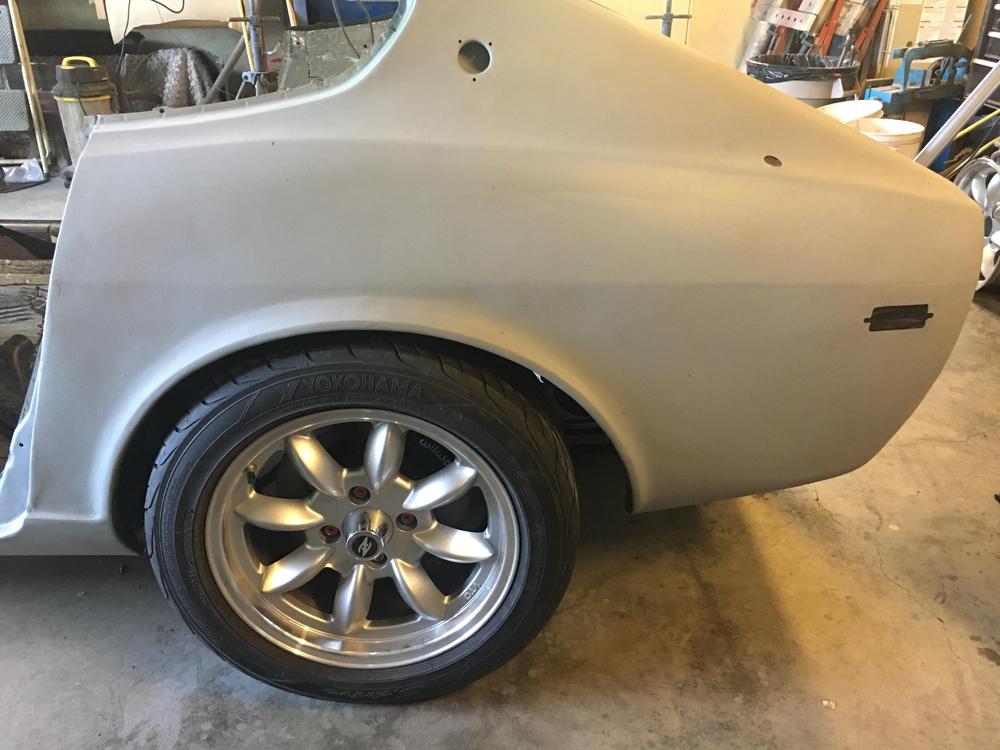
The rubber piece for the '73 bumperette's is impossible to find. So, I figured I would order the earlier (70-72) bumperette rubber and see how that fit. Actually, it fit pretty well. The length of the rubber strip is exactly the same and the two end studs are also in the correct location for attachment. However, there are two center studs on early rubber and just one on the '73, and the locations are different. To make the early rubber work on the '73, I cut off one of the studs (The one that sits on top of the metal stud that attaches part to bumper) and drilled a hole in the bumperette where the other center stud would land. This worked very well and am pretty happy with the results. I put in the last of the vinyl and panels (just a few final fasteners and rivets to install). I ended up going to the local auto upholstery shop to have them hem up the wheel well cover portion that had the missing hem. It took them just 10 mins and was cheap, $10. The vinyl was fairly easy to put in, the panels were again a challenge. The holes do not line up well. I will probably send a note of to the manufacturer, letting them know about this issue. The new chrome vents came in.....thanks @Zup I will pick up the last up my plating items today along with the fenders.


 1 point
 -
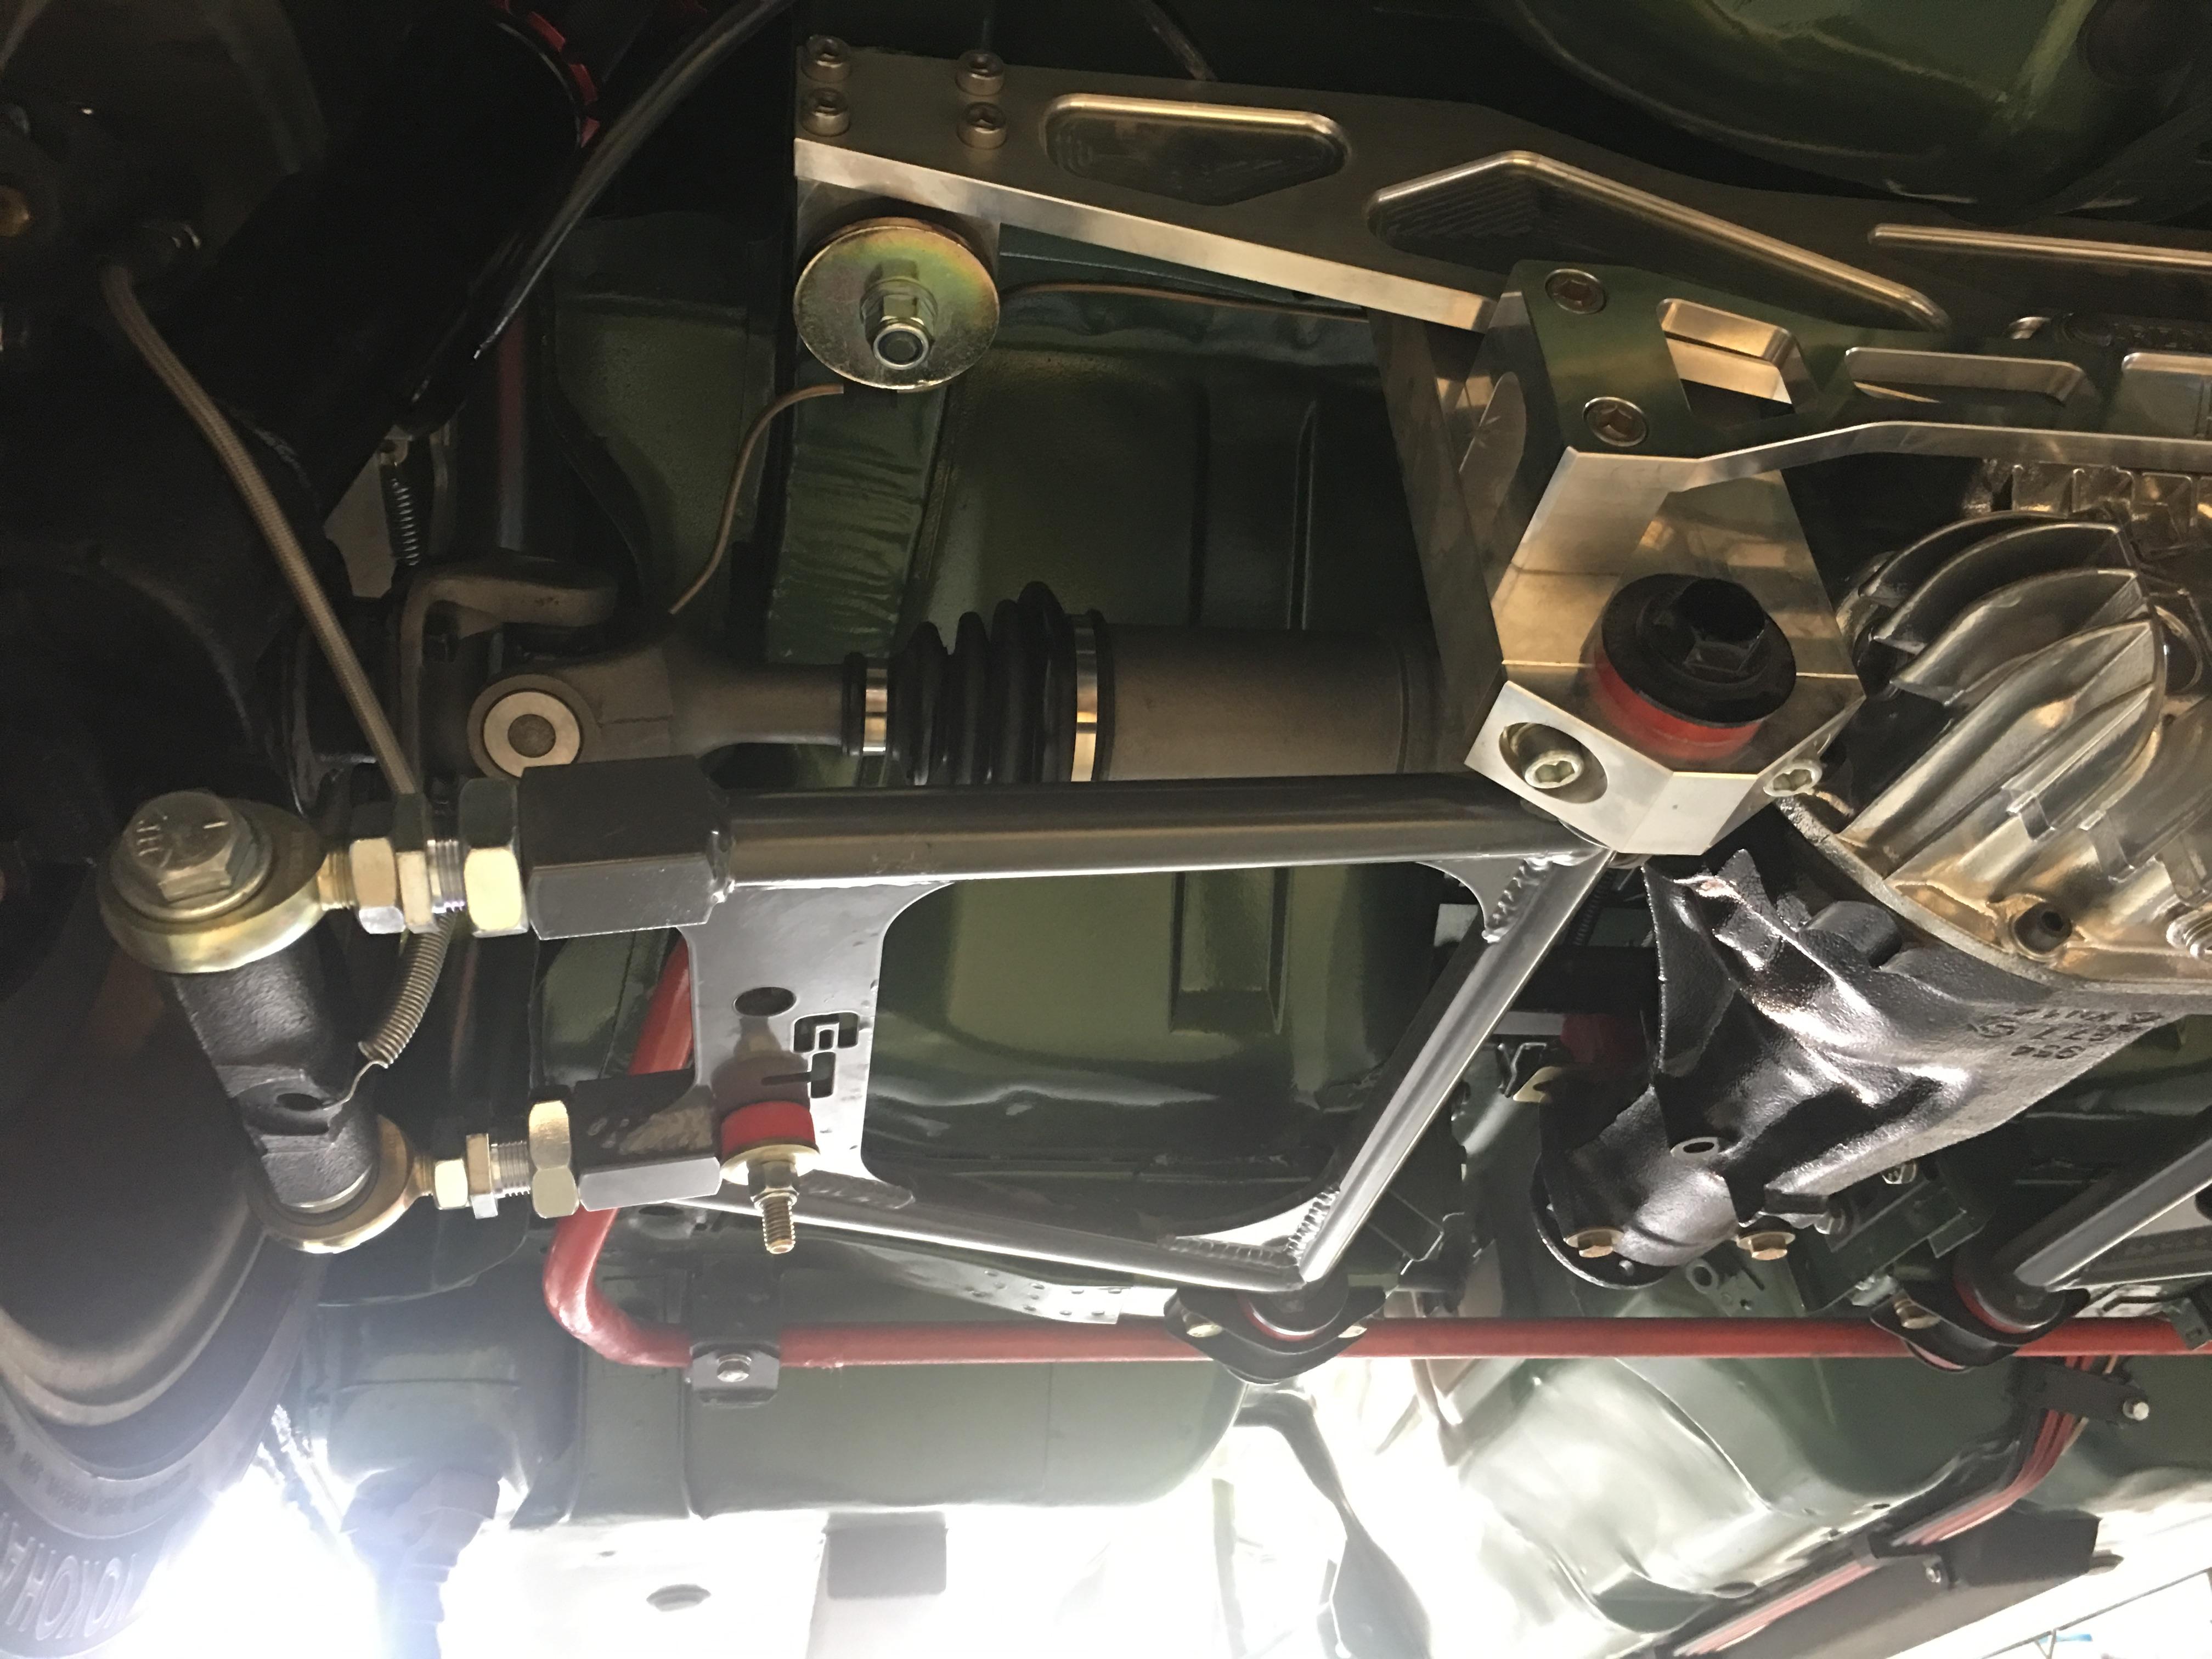
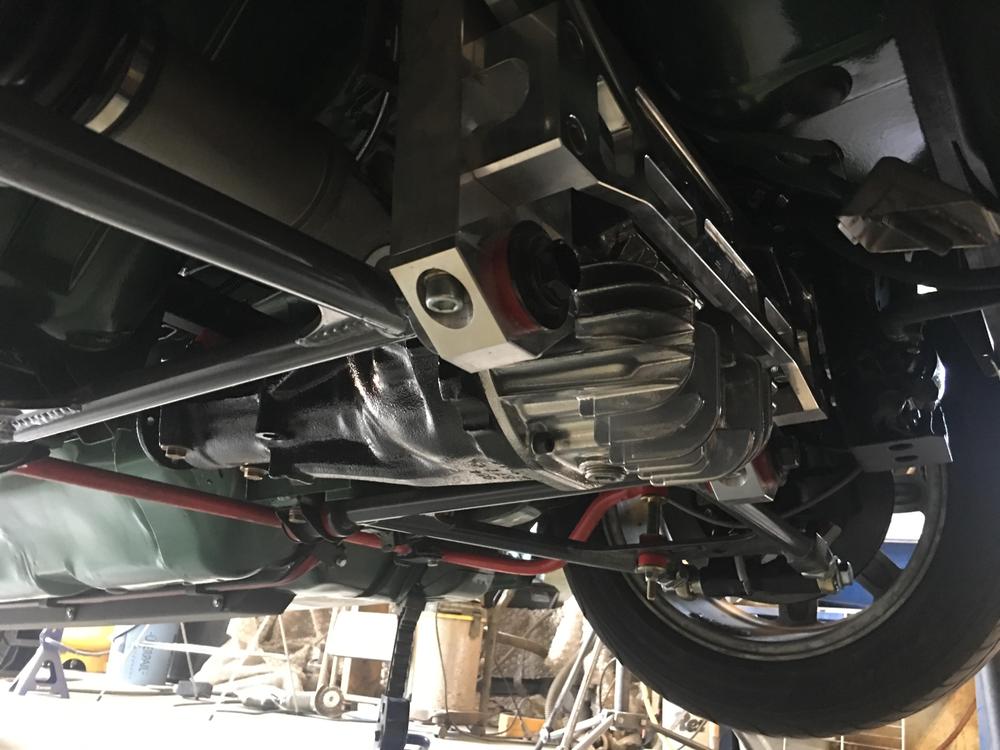
1 pointWell today is a milestone. The car is finally sitting on all four wheels with brakes attached and parking brake working! Some final shots after I filled the diff and greased the U joints.


 1 point
 -
1 point
-
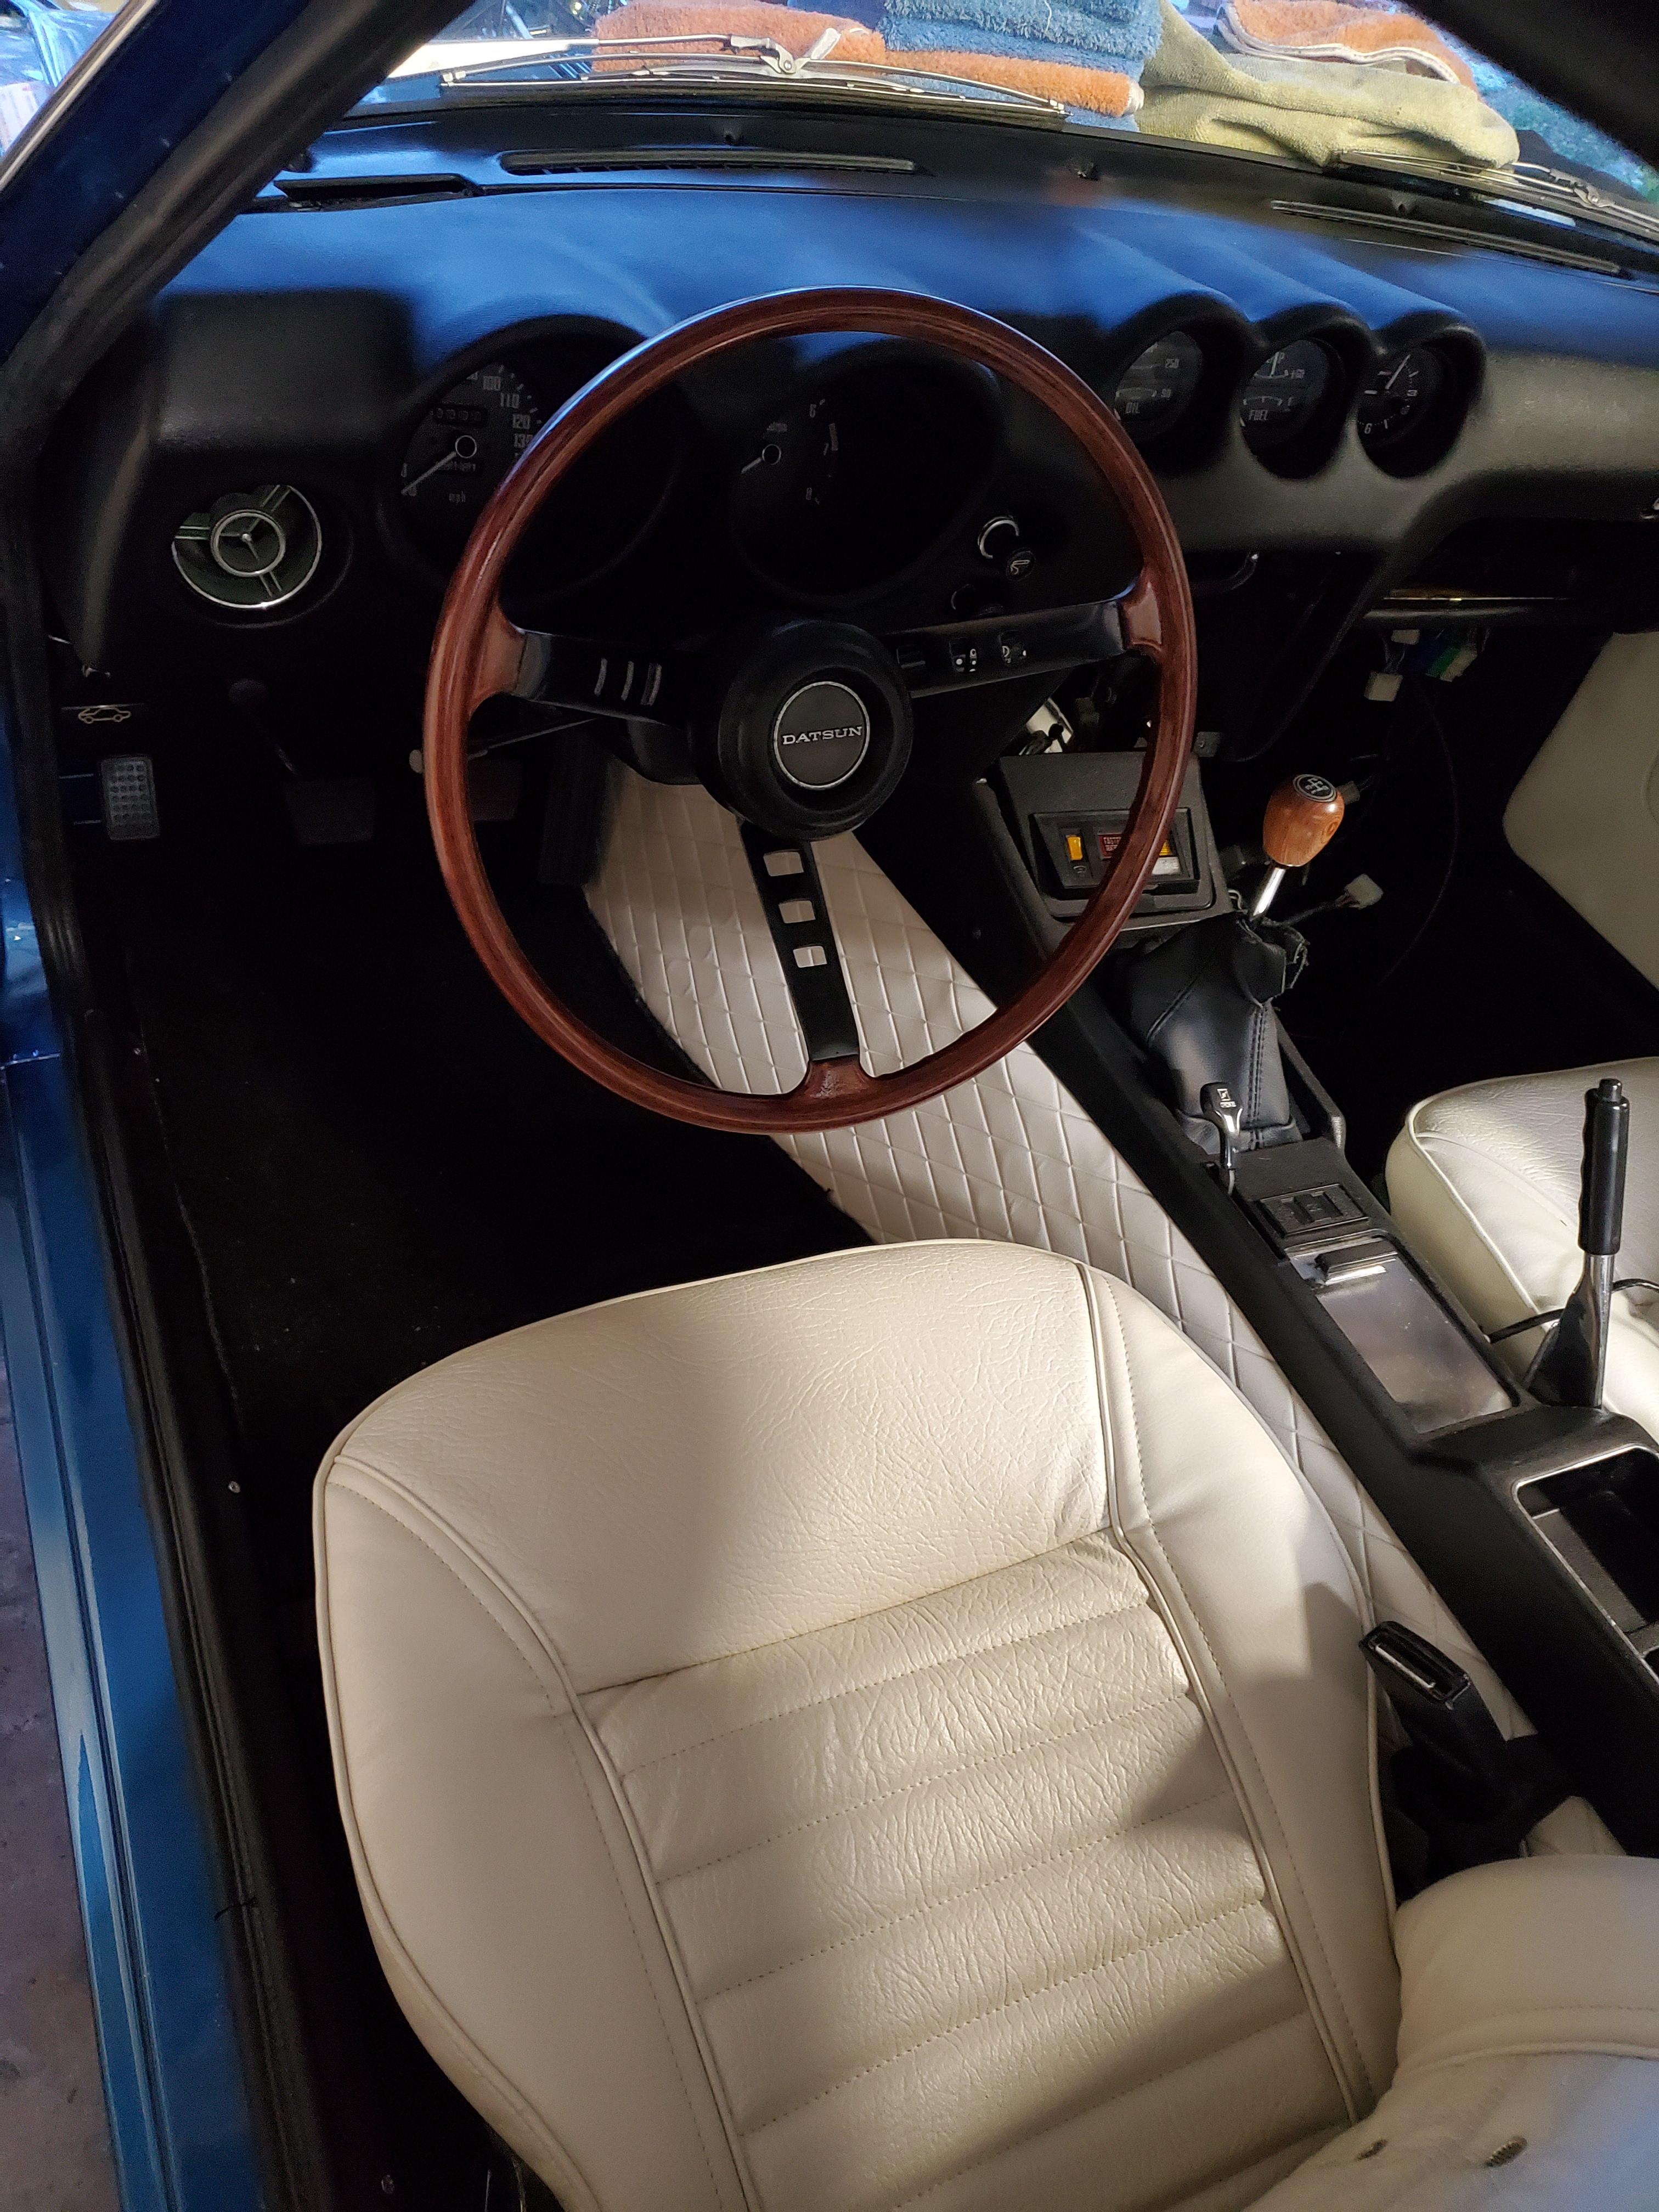
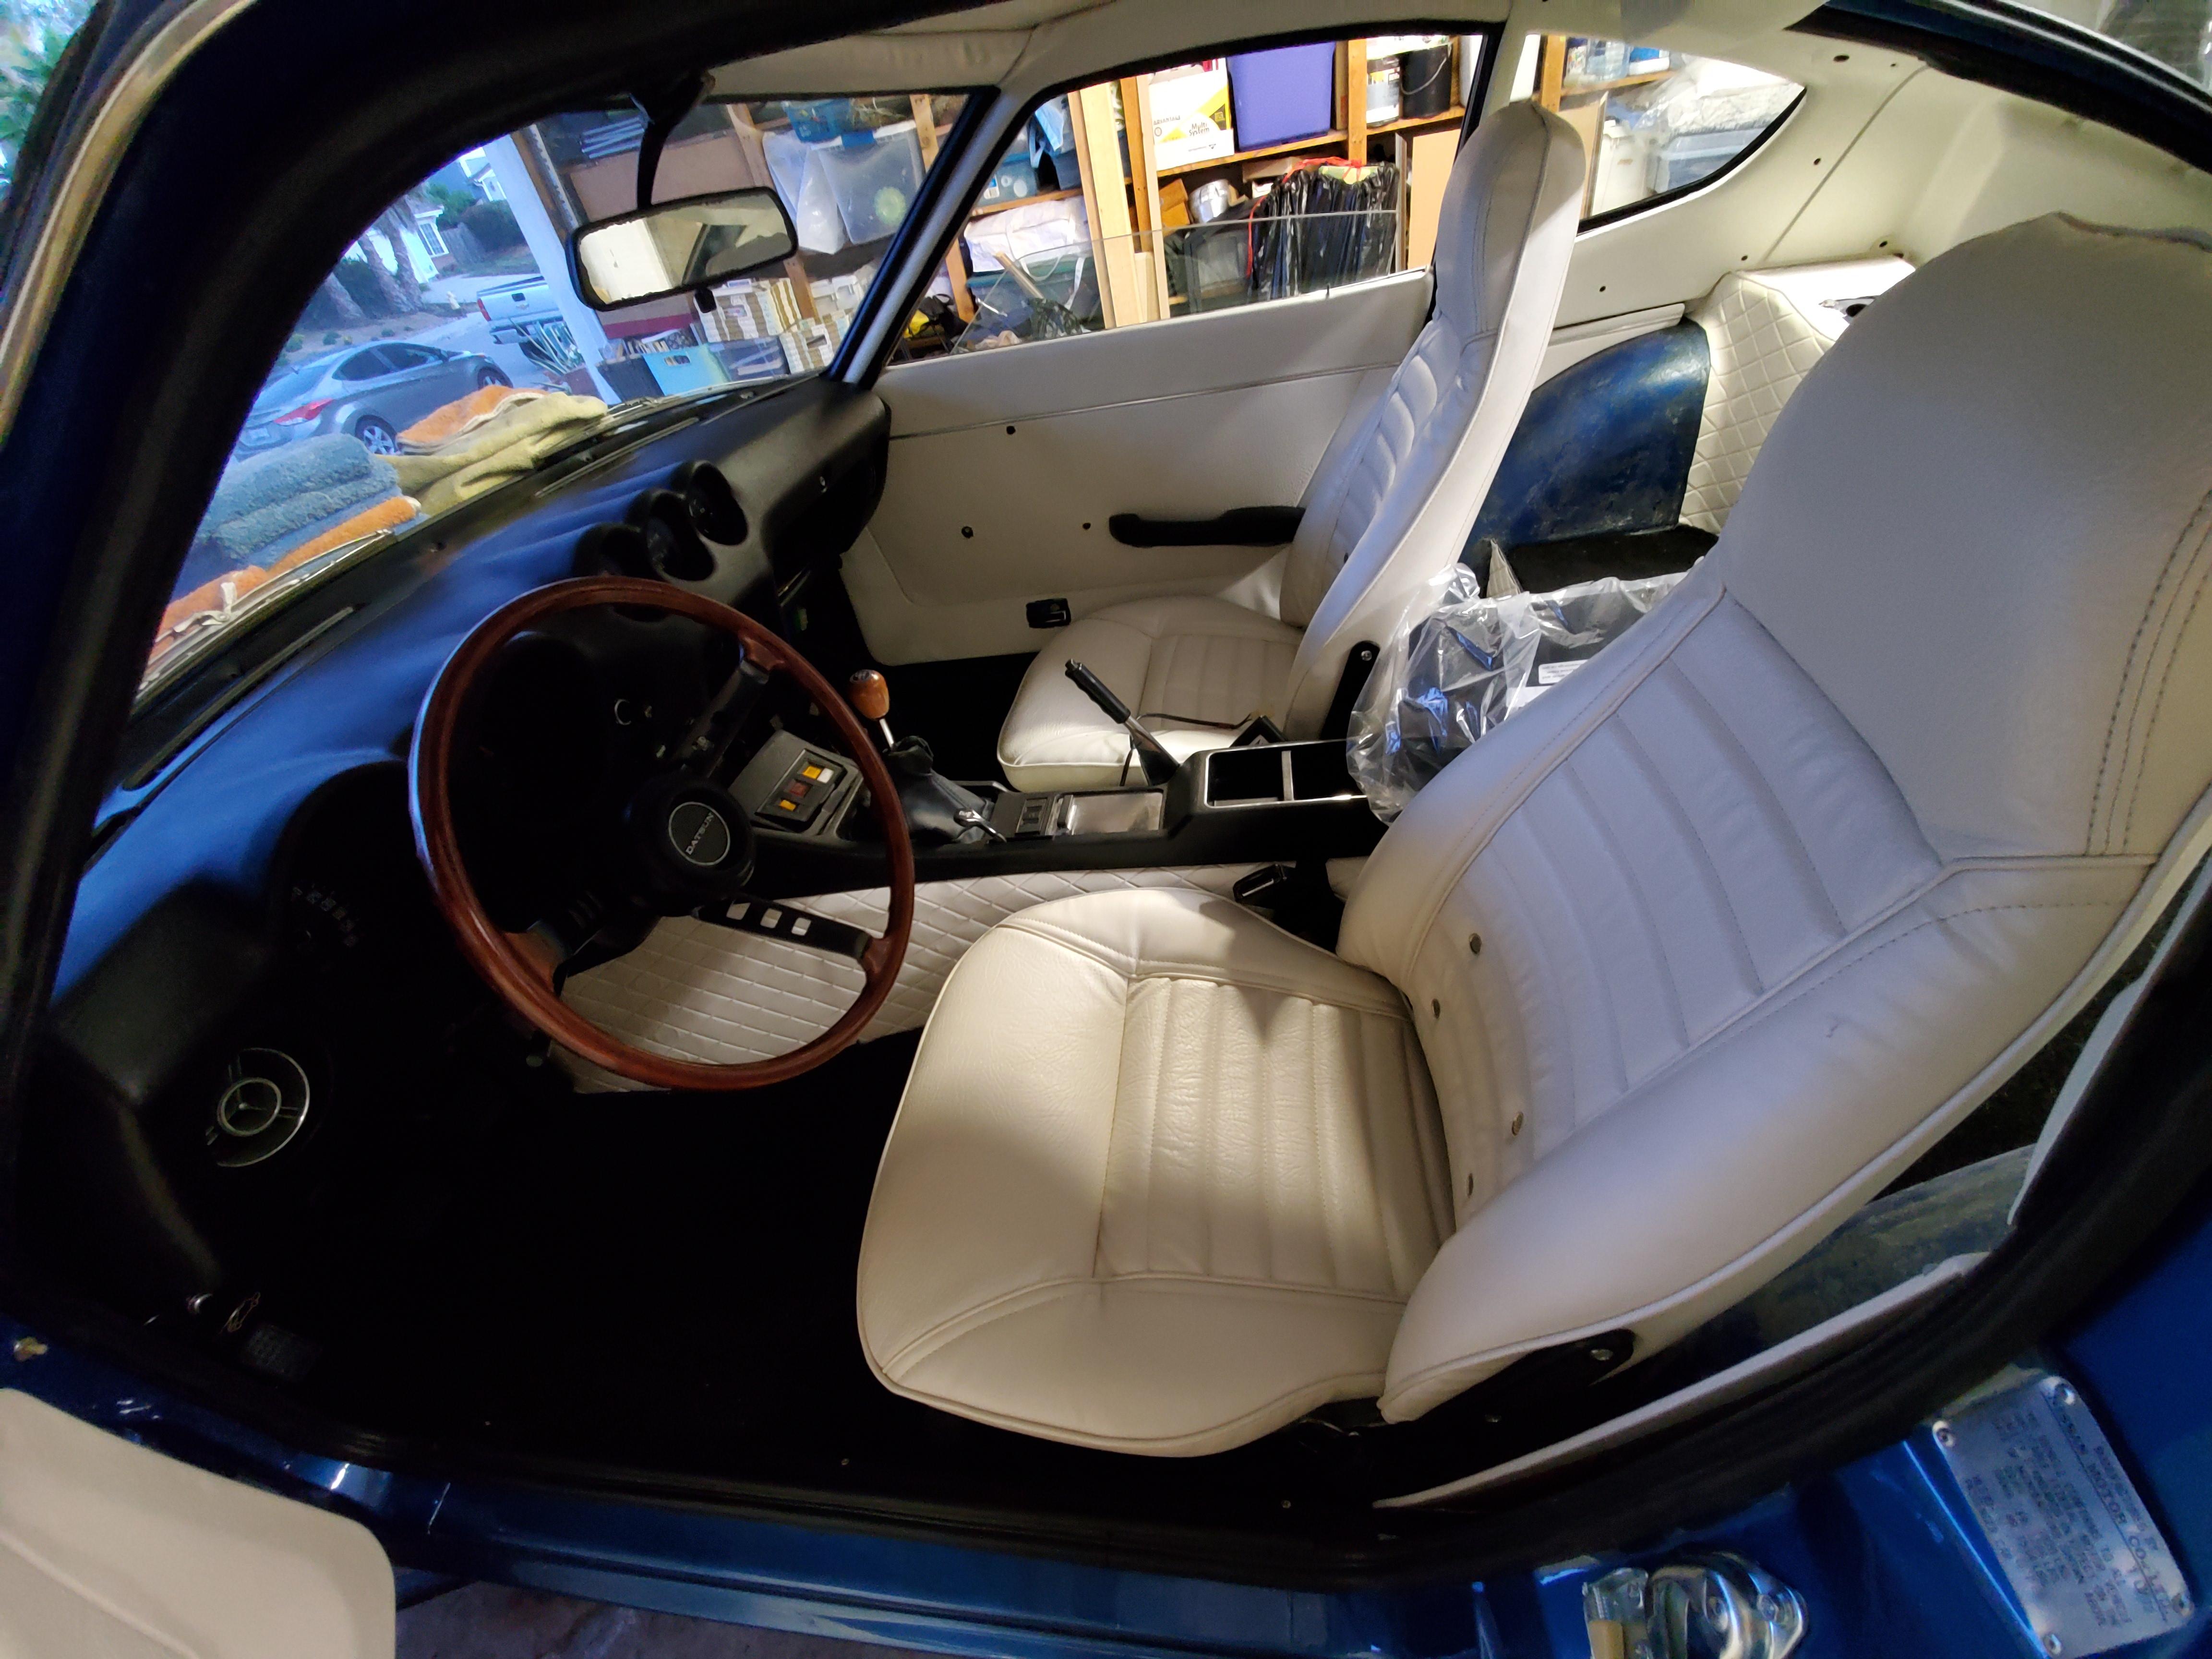
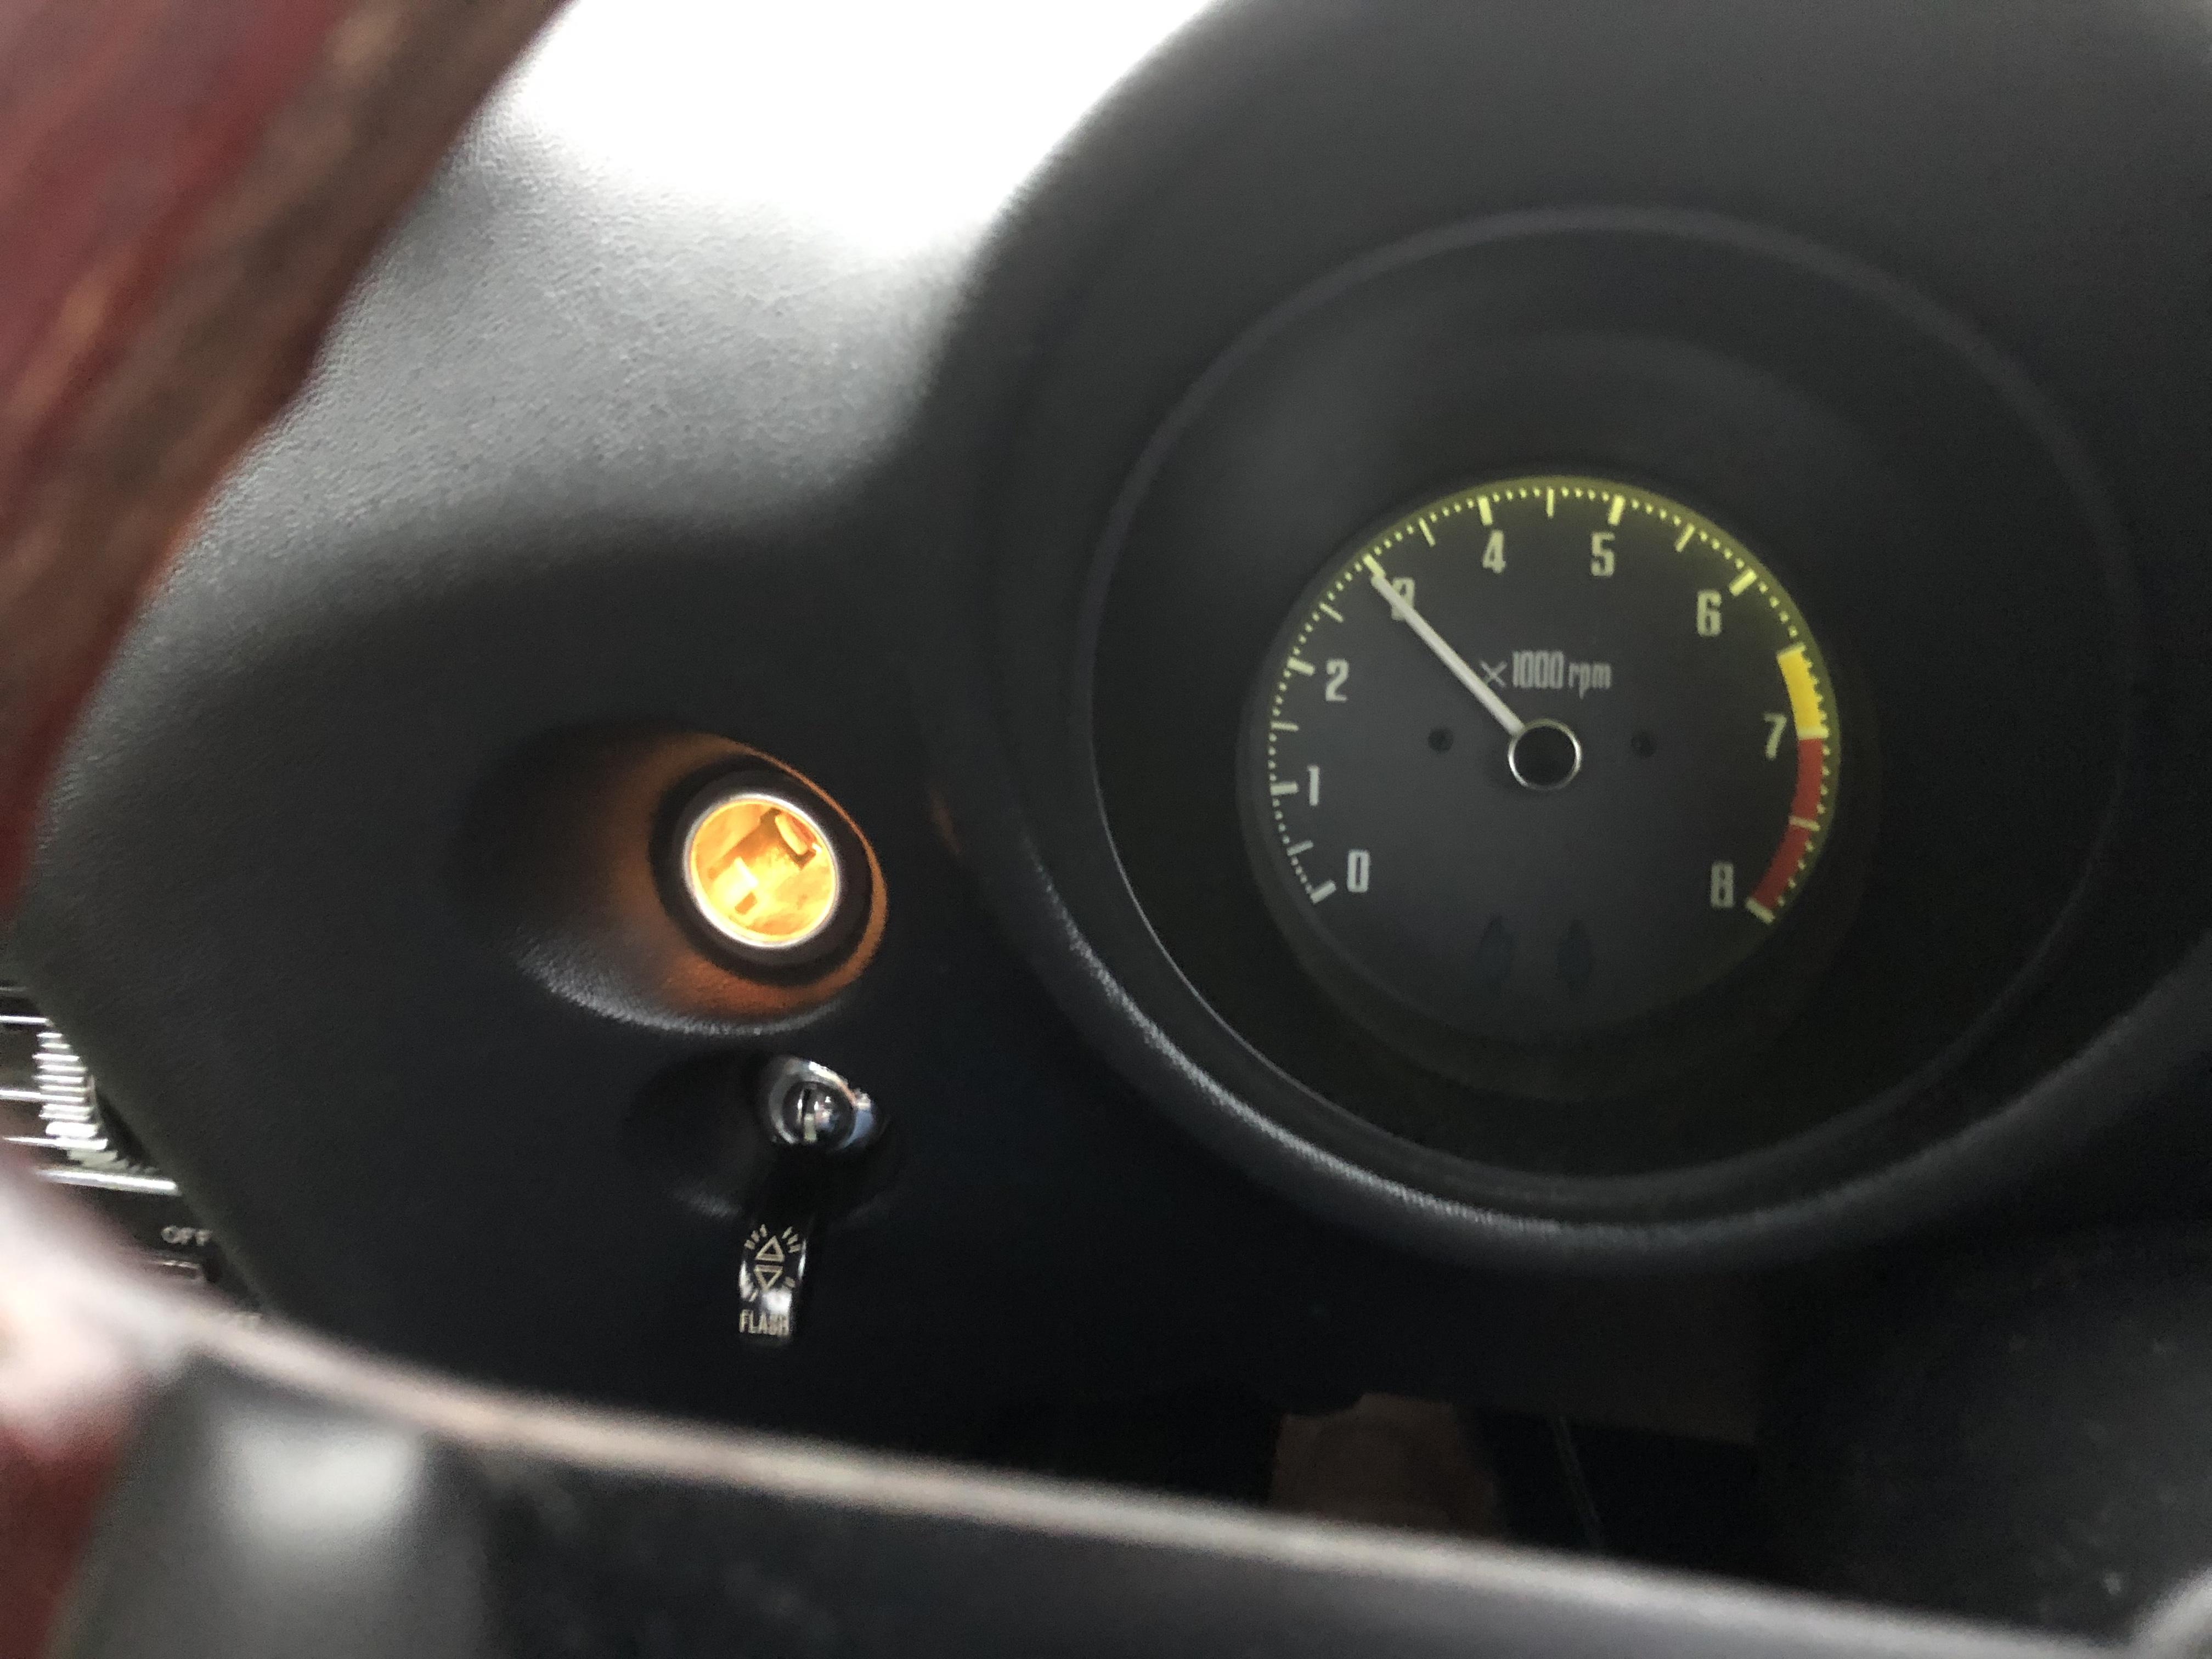
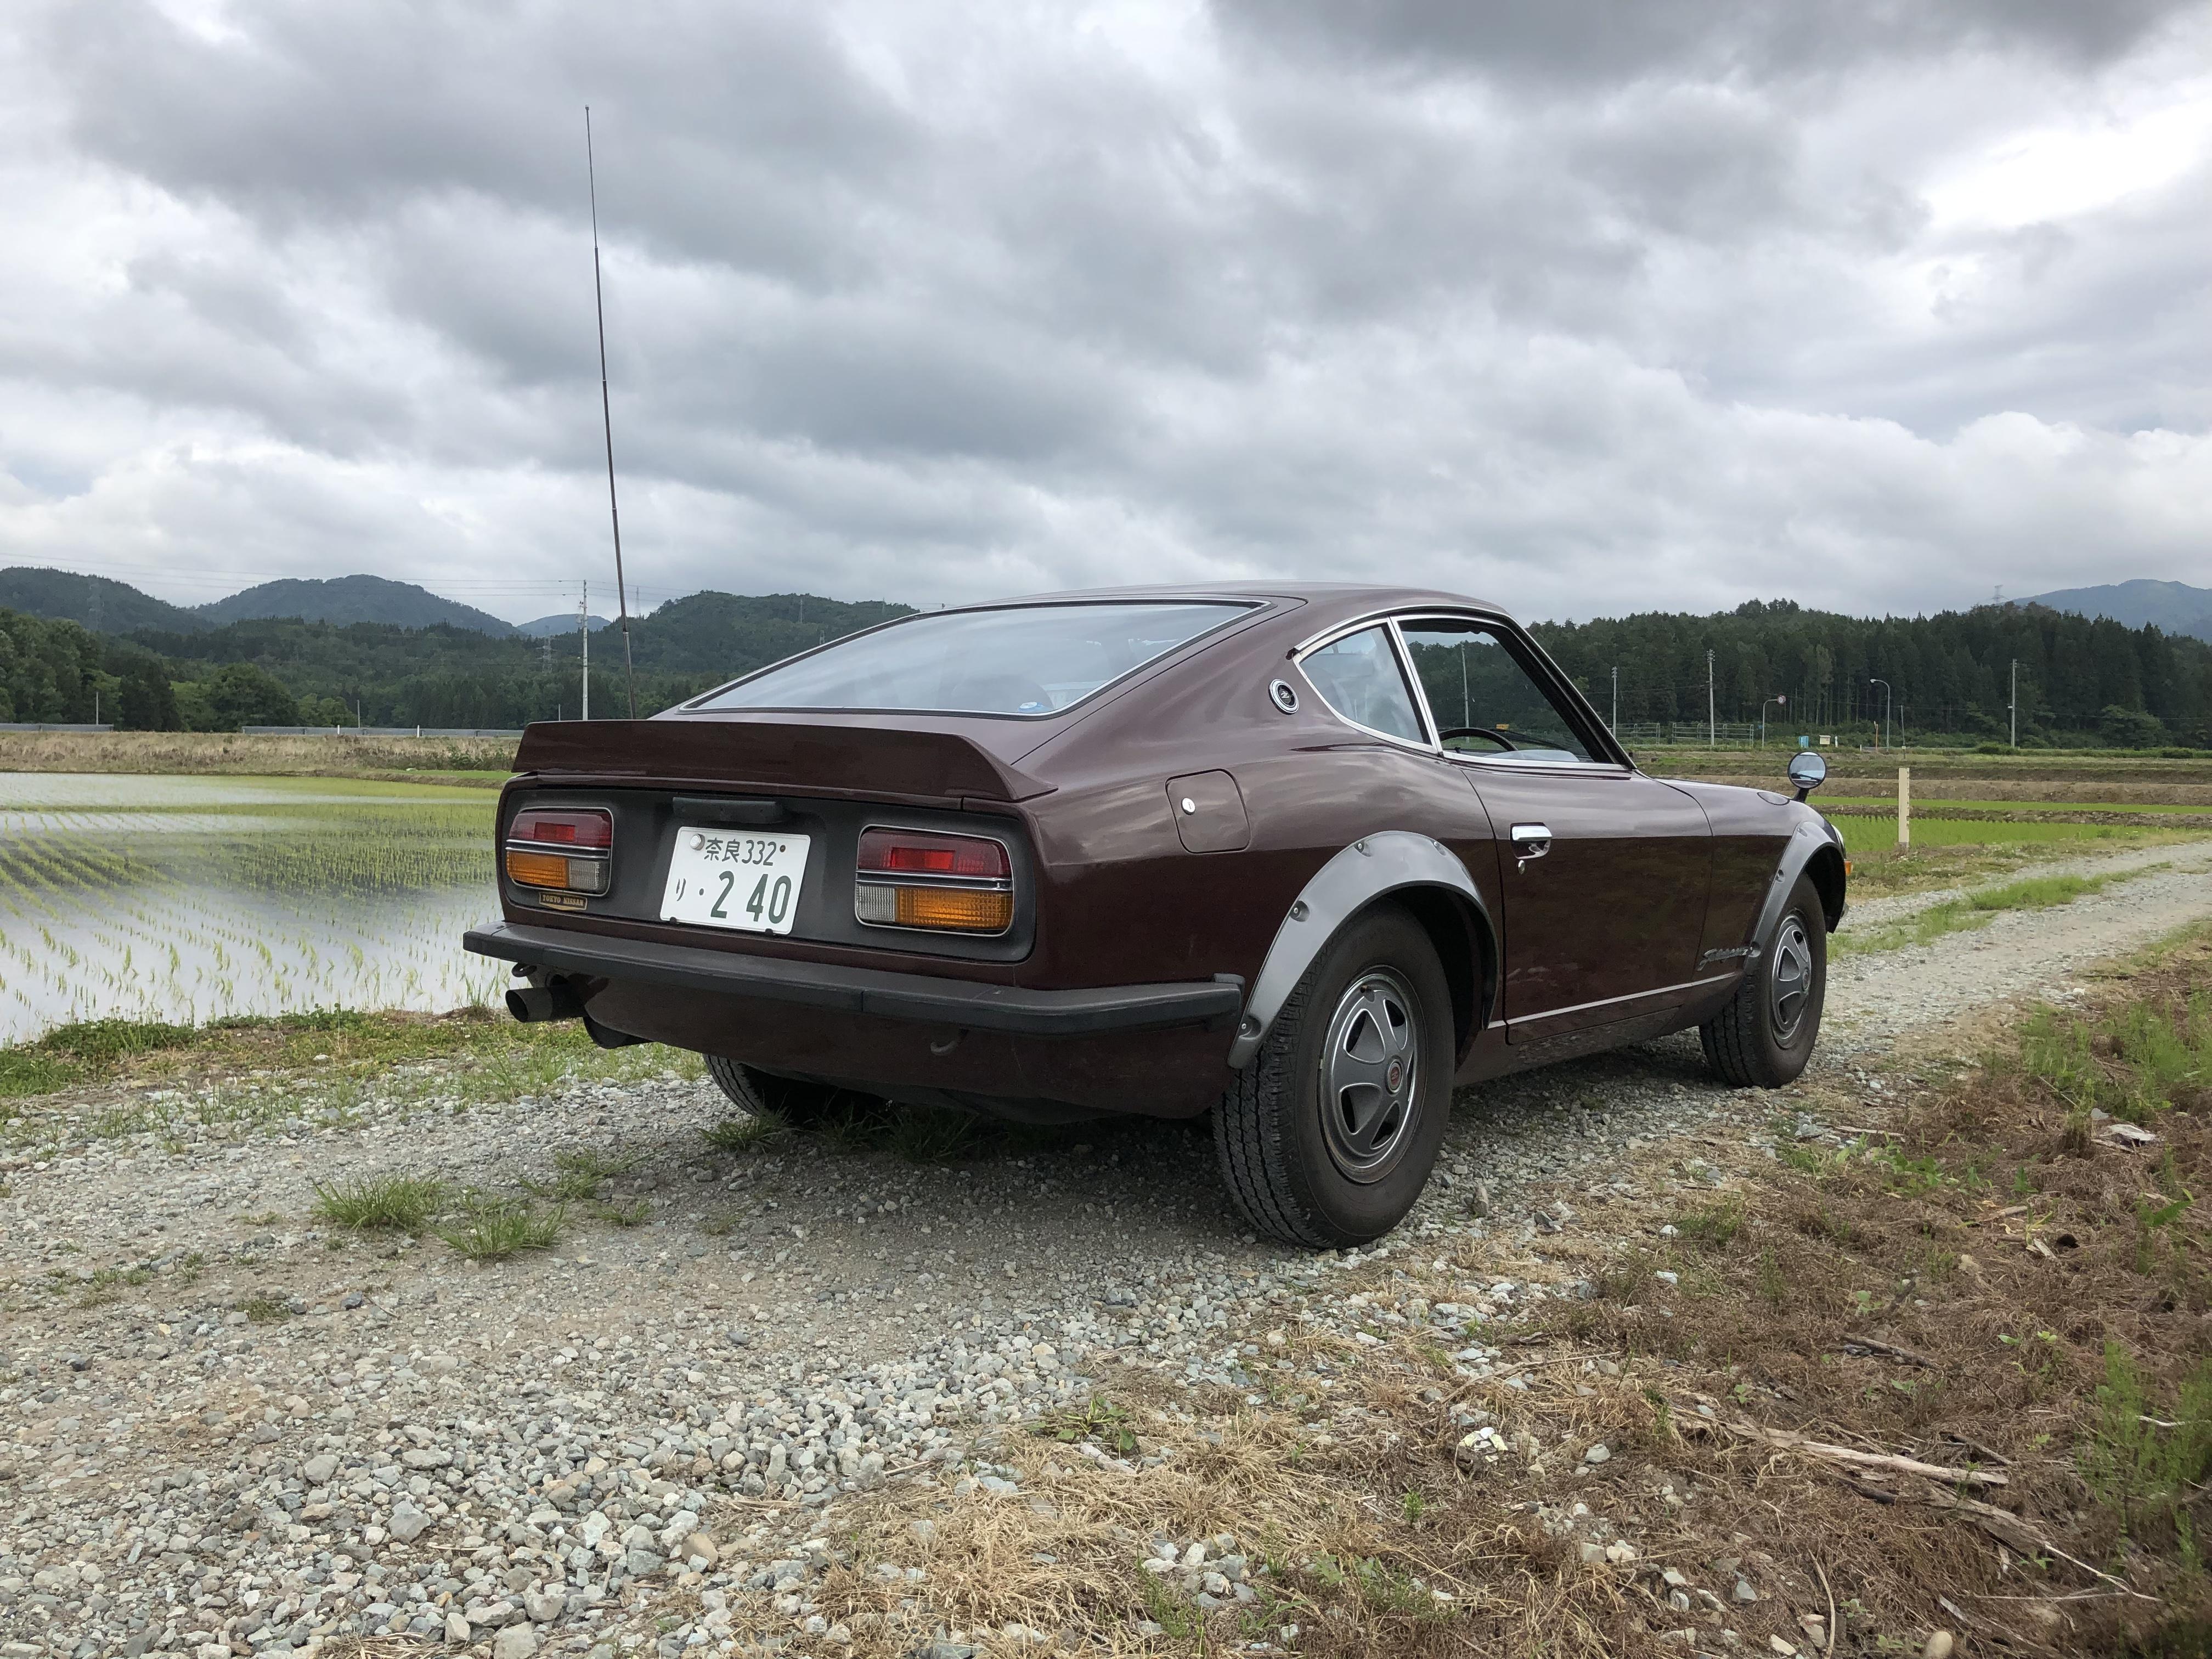
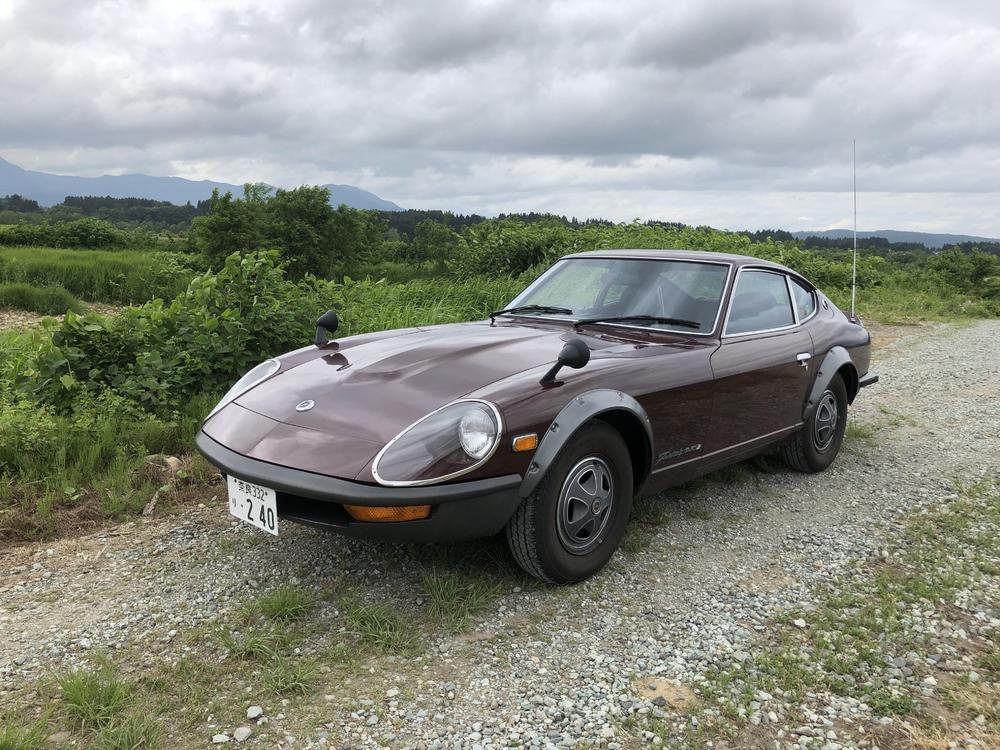
1 pointToday I arrived home from 1800km round trip in four days . I took my ZG for this journey, I must say “ ZG is the best partner for grand touring . If you have a properly tuned L24 with G-Nose , you would not want to have one more camshaft , nor one more carburetor. ? A fuel consumption is way better than Z432 . This time my ZG scored 13km per litter (30 mile per gallon ) when doing 100km/h (60m/h ) Highway driving . Quiet , stable , and powerful. My non-restored ZG still can go anytime anywhere . Hub caps stick to the wheels always ! Kats PS : I have a question , is this cigarette lighter cooperated with an illumination also equipped for export models after Sep 1971 ? Fairlady 240ZL / 240ZG and Z432 have the illuminated lighter .


 1 point
 -
If you follow the wiring path from the circuit diagram: 20amp fuse -> GY hazard (6) -> hazard (7) GY -> brake light switch -> GY turn signal switch -> WR AND WB -> (harness that runs under dash & connects to body harness near glove box, runs down right side of car to rear -> GB AND GR at taillights. If you disconnect both GY from brake switch, ONE them should have constant battery voltage. The other should not. IF neither have battery voltage, problem is in the flasher switch. IF voltage is present on one, connect them together and check for voltage on GY at turn signal switch. IF voltage, check for voltage on both WB and WR on turn signal switch. IF no voltage, turn signal switch is bad. IF voltage, check the connectors between the dash harness and the body harness near the glove box then go to rear of car and check harness and connectors to tail lights.1 point
-
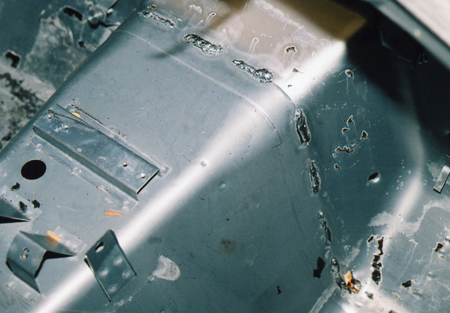
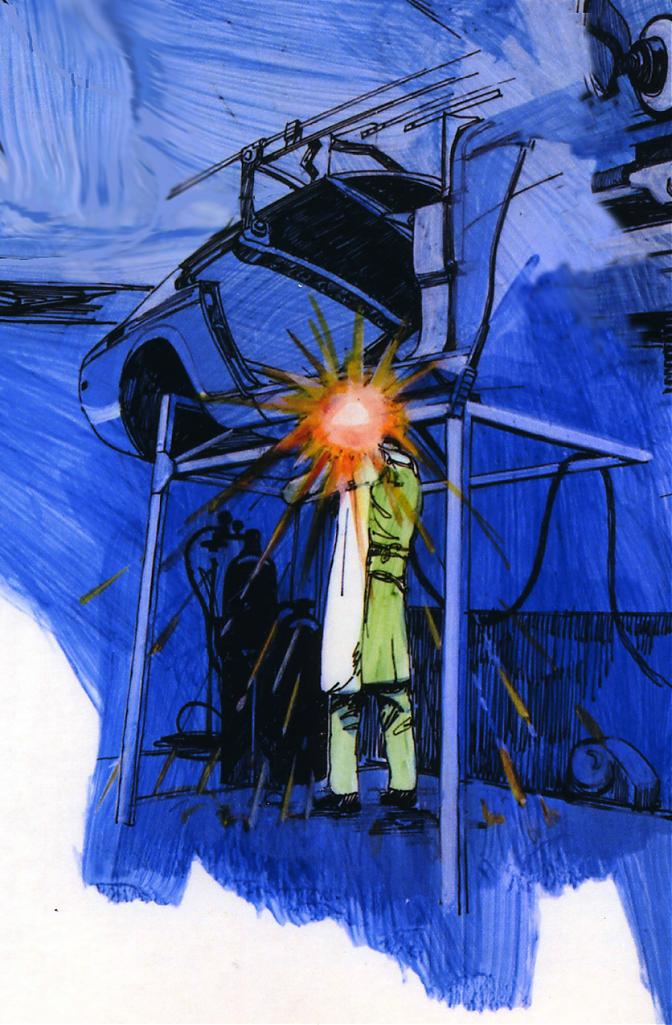
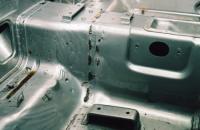
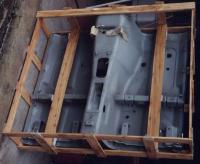
1 pointHere are some pictures of how the bodies were fabricated out of sheet metal stampings. See the stitch welding over the tunnel? At some point, the floor sub-assembly was placed on a jig and welded to the firewall and front frame assembly.

 1 point
 -
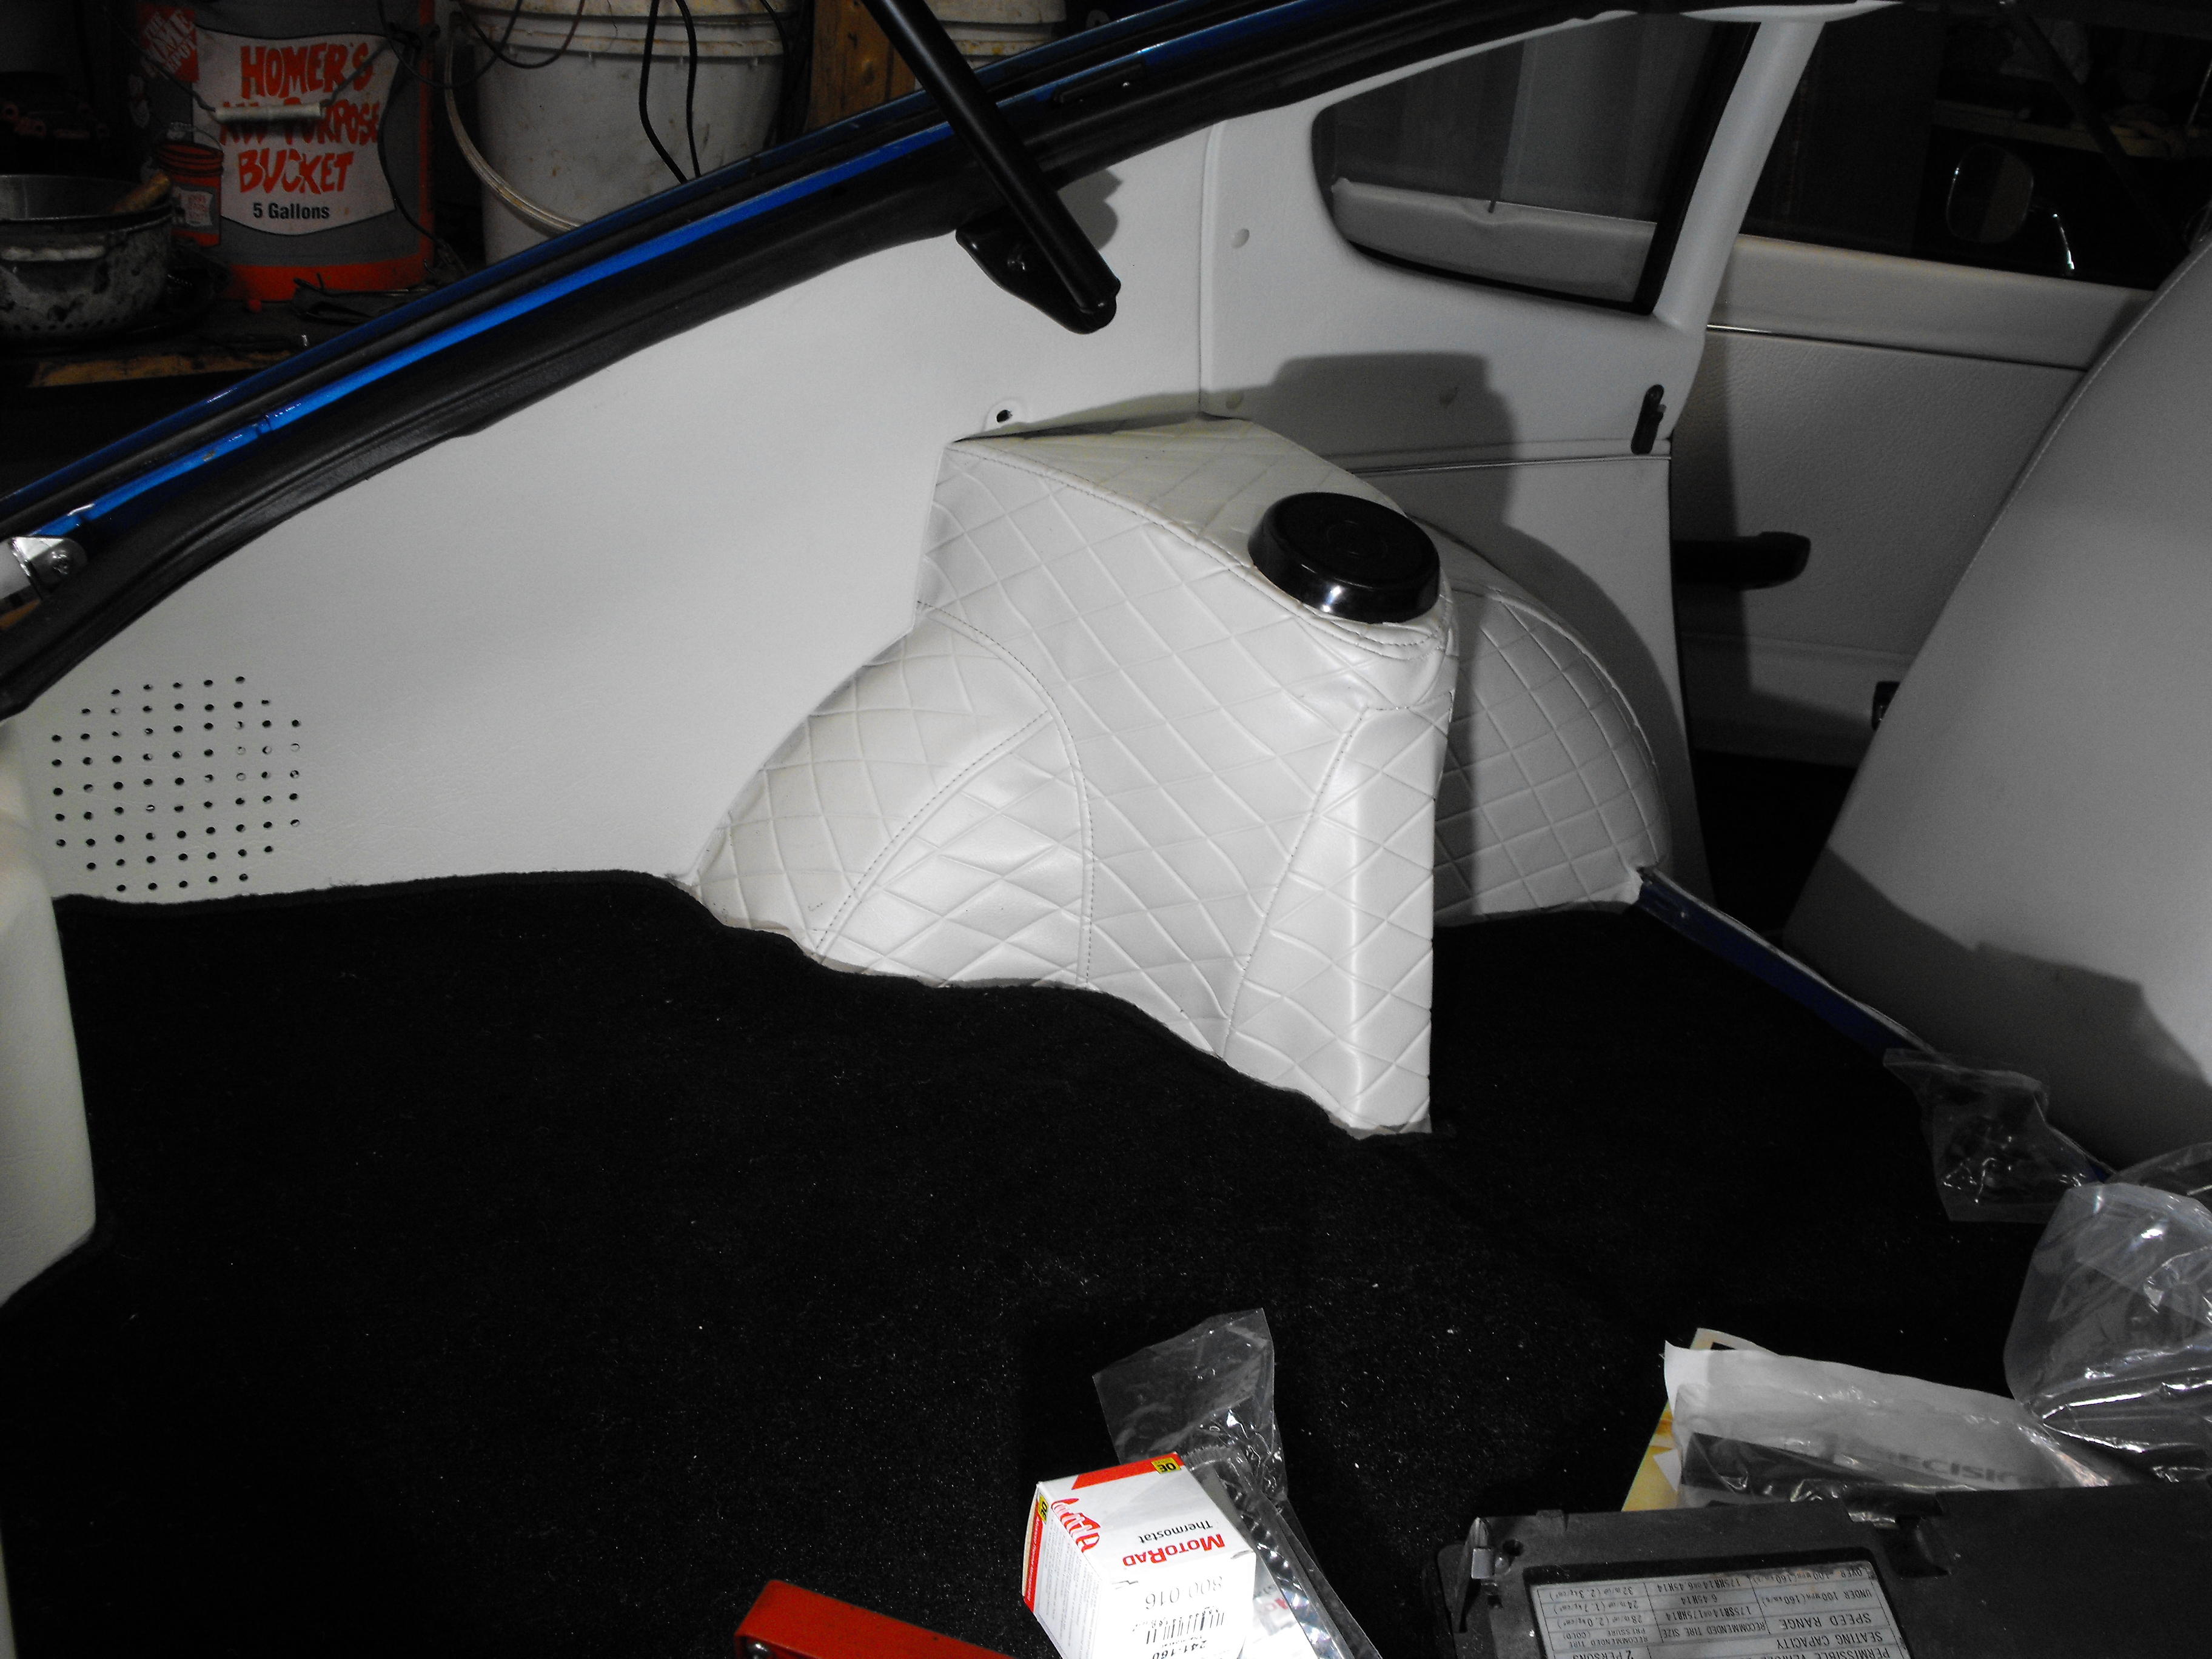
0 pointsEvery day brings a new chapter in the history of this Z. Today I began tear down of the driver door. I quickly discovered that the door had seen some major repairs at some point in its life. The lock and door handle assembly had been welded in from a donor car along with some new metal along the bottom of the door. The poor metal repair resulted in some heavy body filler sculpting again.... almost half an inch thick in places. The door glass roller was broken, the regulator was bolted in with wood screws, the jagged metal of the speaker hole, the missing vapour barrier and resulting goo everywhere... I lost the desire to continue in the hot sun. I put my tools away for today and I will tackle it again another day. Very disappointed to see that much work needing to be done to make this door useable again. Oh well.... No pics today. I was too disgusted to look at it any more.0 points