


Leaderboard
-

siteunseen
Free Member7Points15,115Posts -

wheee!
Free Member6Points4,607Posts -
Joseph@TheZStore
 Vendor3Points105Posts
 -

ConVerTT
Free Member3Points422Posts


Popular Content
Showing content with the highest reputation on 02/08/2019 in all areas
-
3 points
-
3 pointsSorry for the slow reply. As far as these being genuine Koni creations, I can say that about a year ago, Greg started digging through all our suspension parts to find proper strut housings and so forth to ship off to them for the engineers. A year and lots of work later, these are the result, and they were 100% designed and created by Koni to their Sport Yellow spec of struts. Here is the official Koni release: http://www.koni-na.com/en-US/NorthAmerica/News/News-Releases/KONI-Sport-Performance-Dampers-for-Classic-’70-83/. Don't be surprised if Lee from Koni himself jumps in here at some point. Koni has been absolutely awesome through this process, I think we're all lucky to have Koni wanting to invest in Classic Z's. As far as the bump stops, by "proper" they basically meant having properly designed and undamaged units, trimmed if needed based on spring height. These units do not come with bump stops. The factory rubber ones are acceptable, and our urethane ones might be the best bet for progressive "bottoming", in addition to the fact that they fit the shaft sleeve diameter perfectly. As far as the Koni "Silastic" Foam Rubber (i.e. Silicone) bump stops, they look like a great progressive option as well. They are not model specific, and may not fit as snugly as our urethane ones (we're going to get some and try, and let you know), but we're looking into offering those as well. Assuming the Amazon seller has the right part pictured, you can see one of those ($26.56 each? Ouch!) here: https://www.amazon.com/Koni-70-34-54-000-0-Bump-Stop/dp/B001G99RKS. As far as the hardware shown above, the top left is the shaft sleeve. The sleeve fit is perfect. I'll try to find a spring seat if possible and show some of it fit together. Below that in the image of course is the top locking nut. On the bottom left of the image is the I-realize-now-I-should-have-exposed-that-in-the-image-better Gland Nut. I'm looking for inexpensive options for tools so you don't have to use a pipe wrench. Will advise. On the top right of the hardware shown is of course the adjuster knob. Since you get one with each strut, you can loose three of them and still be ok... ? On the bottom right is their "washer" to go on top of the Gland Nut. It is designed with channels and waves, the purpose being an added layer of protection for the seal underneath, as it will direct away any air pressure when bottoming, or road junk that bounces up there, so it doesn't end up crammed on top of the seal. We'll work on a digital version of their instruction sheet, but they are a bit generic and have nothing special I can see beyond standard info. Other than the placement of the disc and the Z-specific sleeve (which aren't shown on there anyway), there isn't anything that would surprise anyone who has gone through cartridge install before. They do however have a diagram showing you how to place the adjuster knob in your glovebox... ? I'll check with Hector on Illumina's. It won't surprise me if he has experience with them and can offer some comparisons. Stay tuned. You may have seen it on our website already, but here is a quick illustration of the adjustment: https://youtu.be/HM83qhwRB30 James will be following up if we missed anything. Thanks for the interest!3 points
-
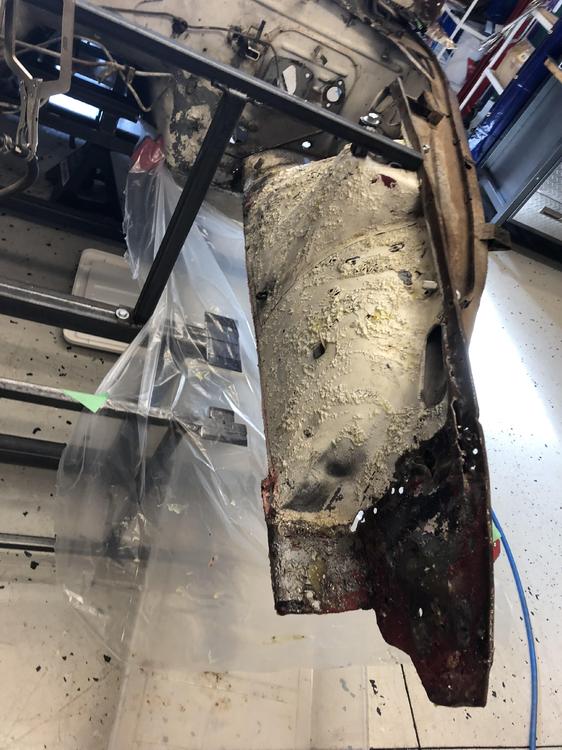
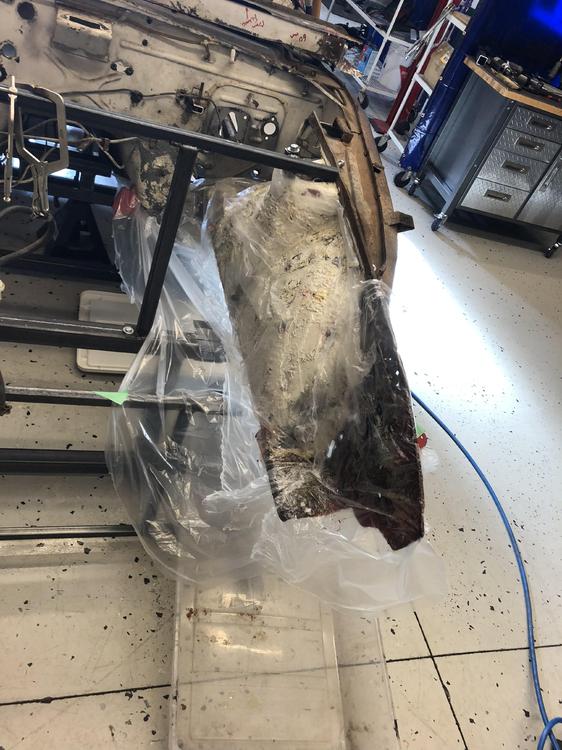
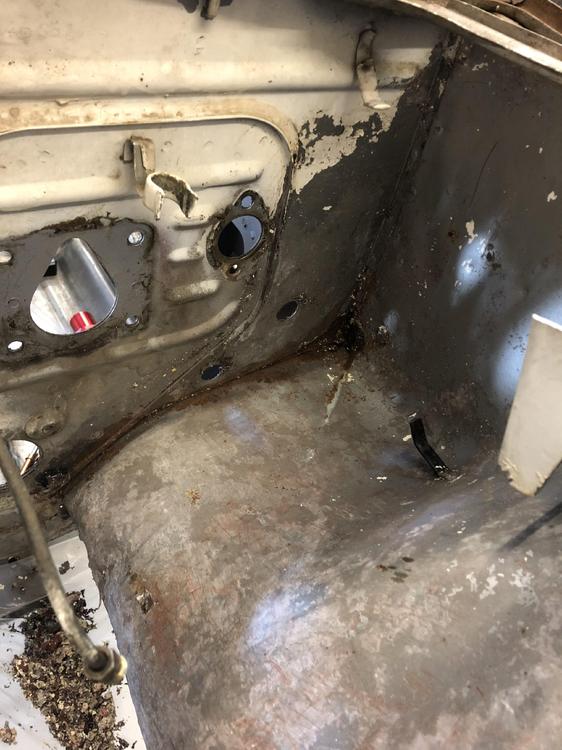
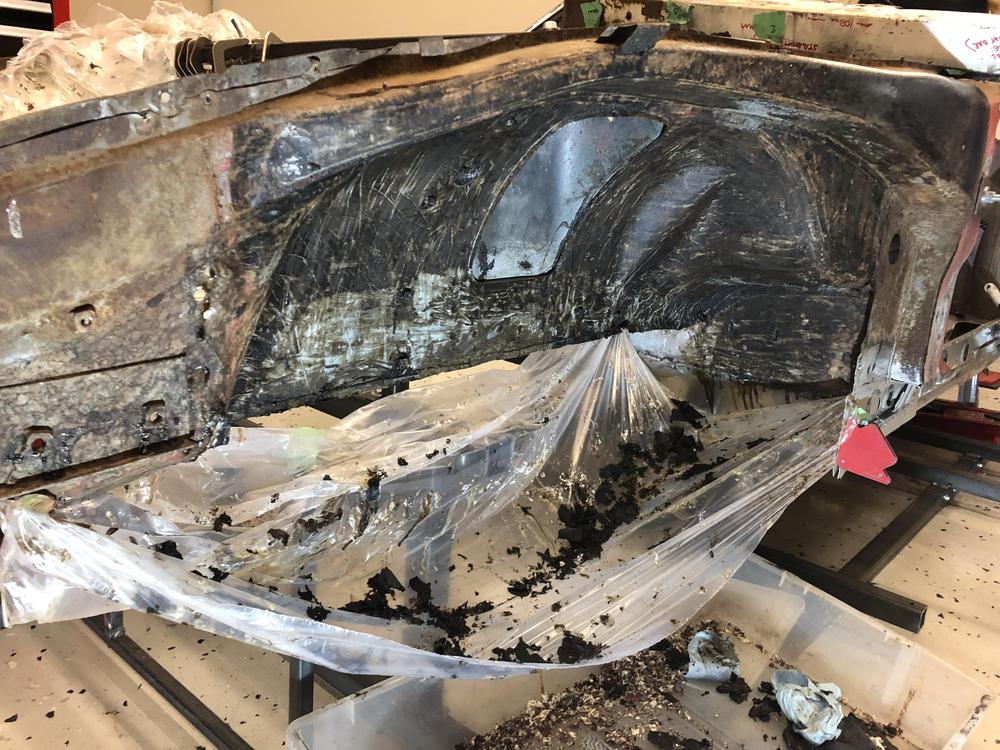
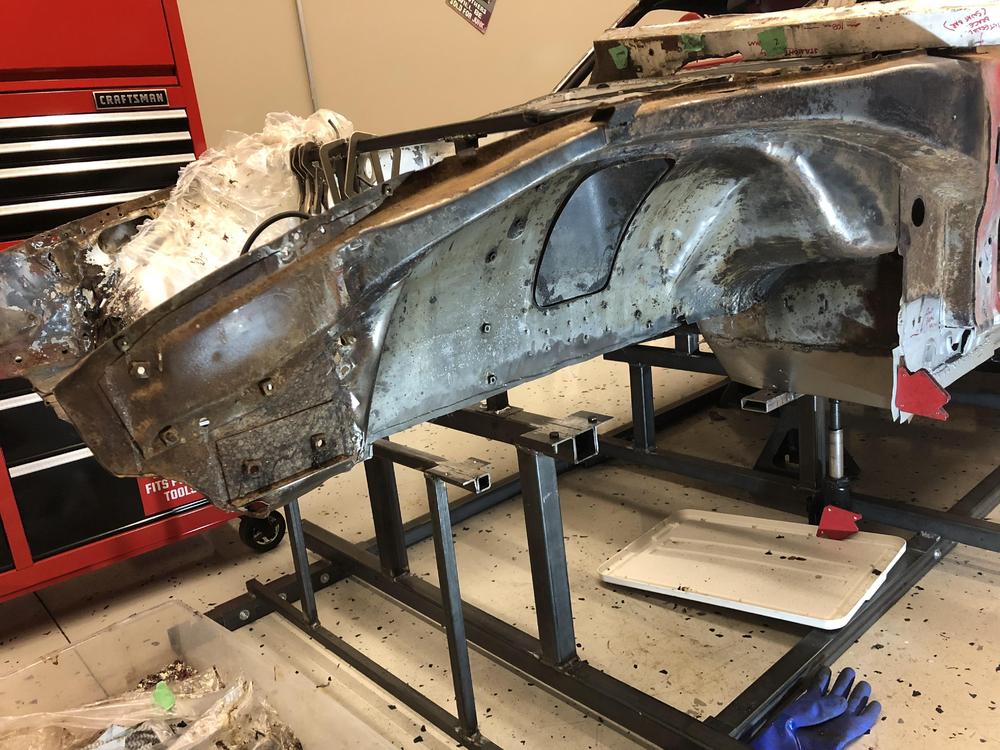
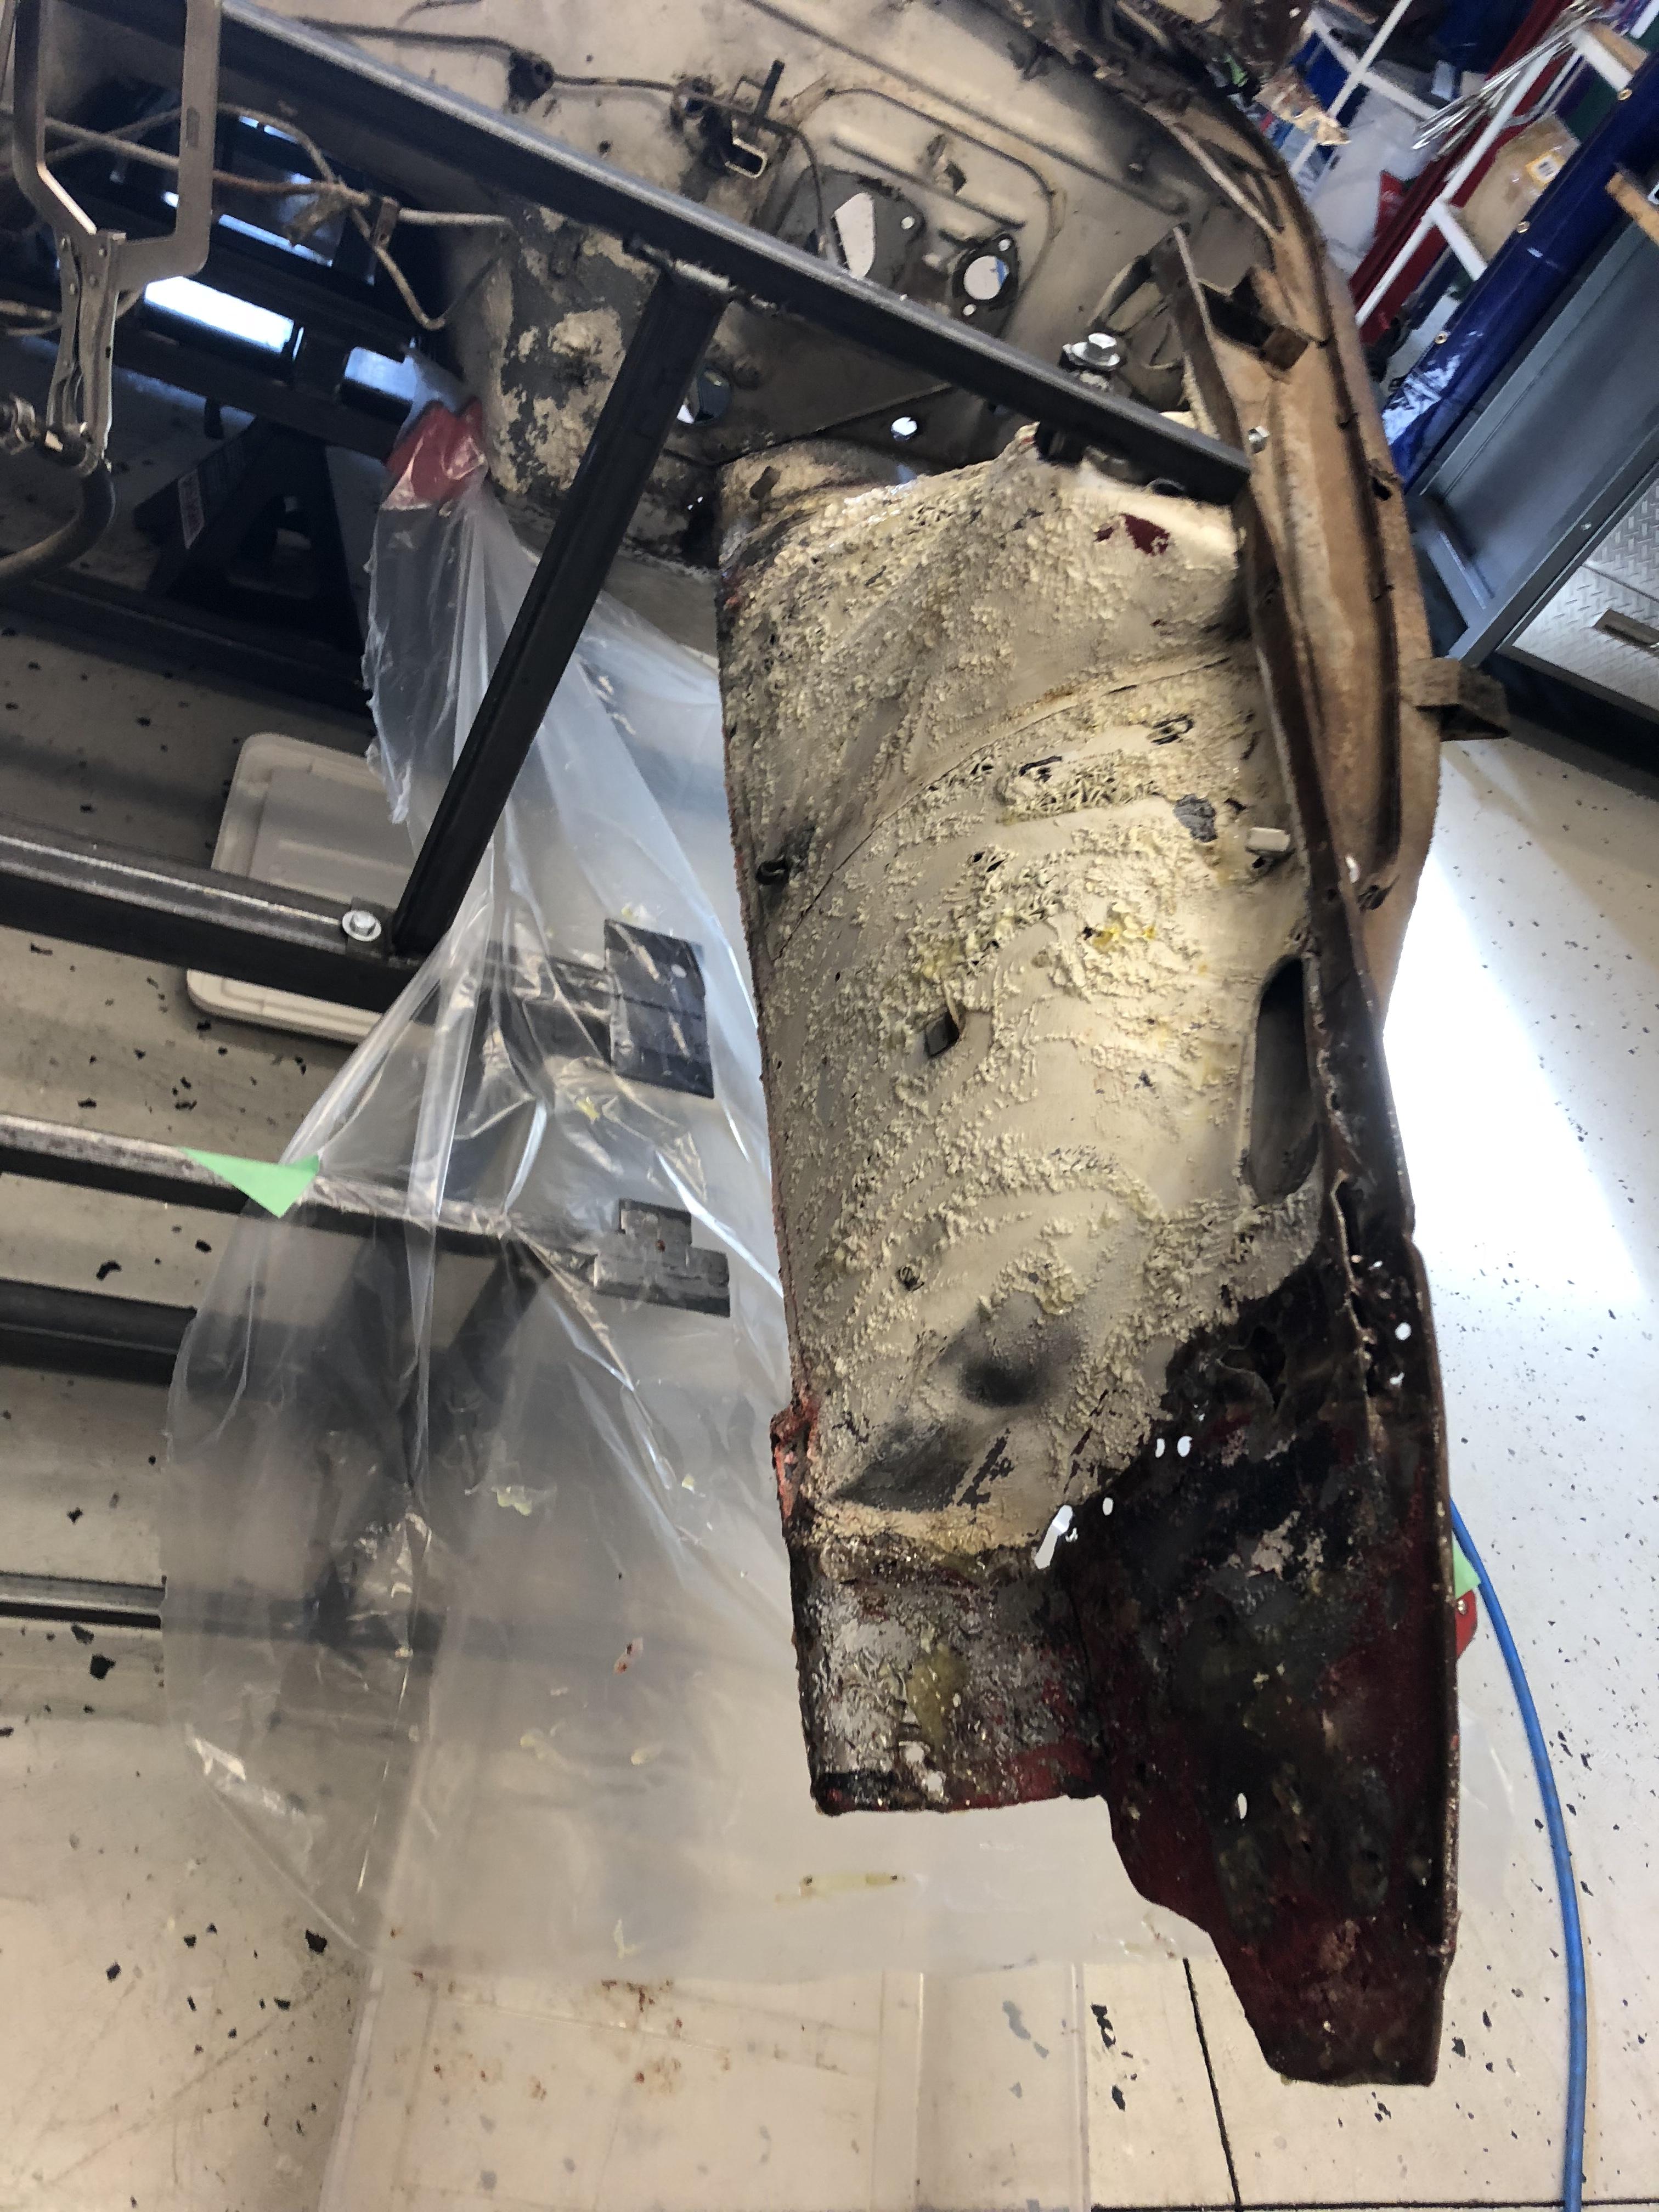
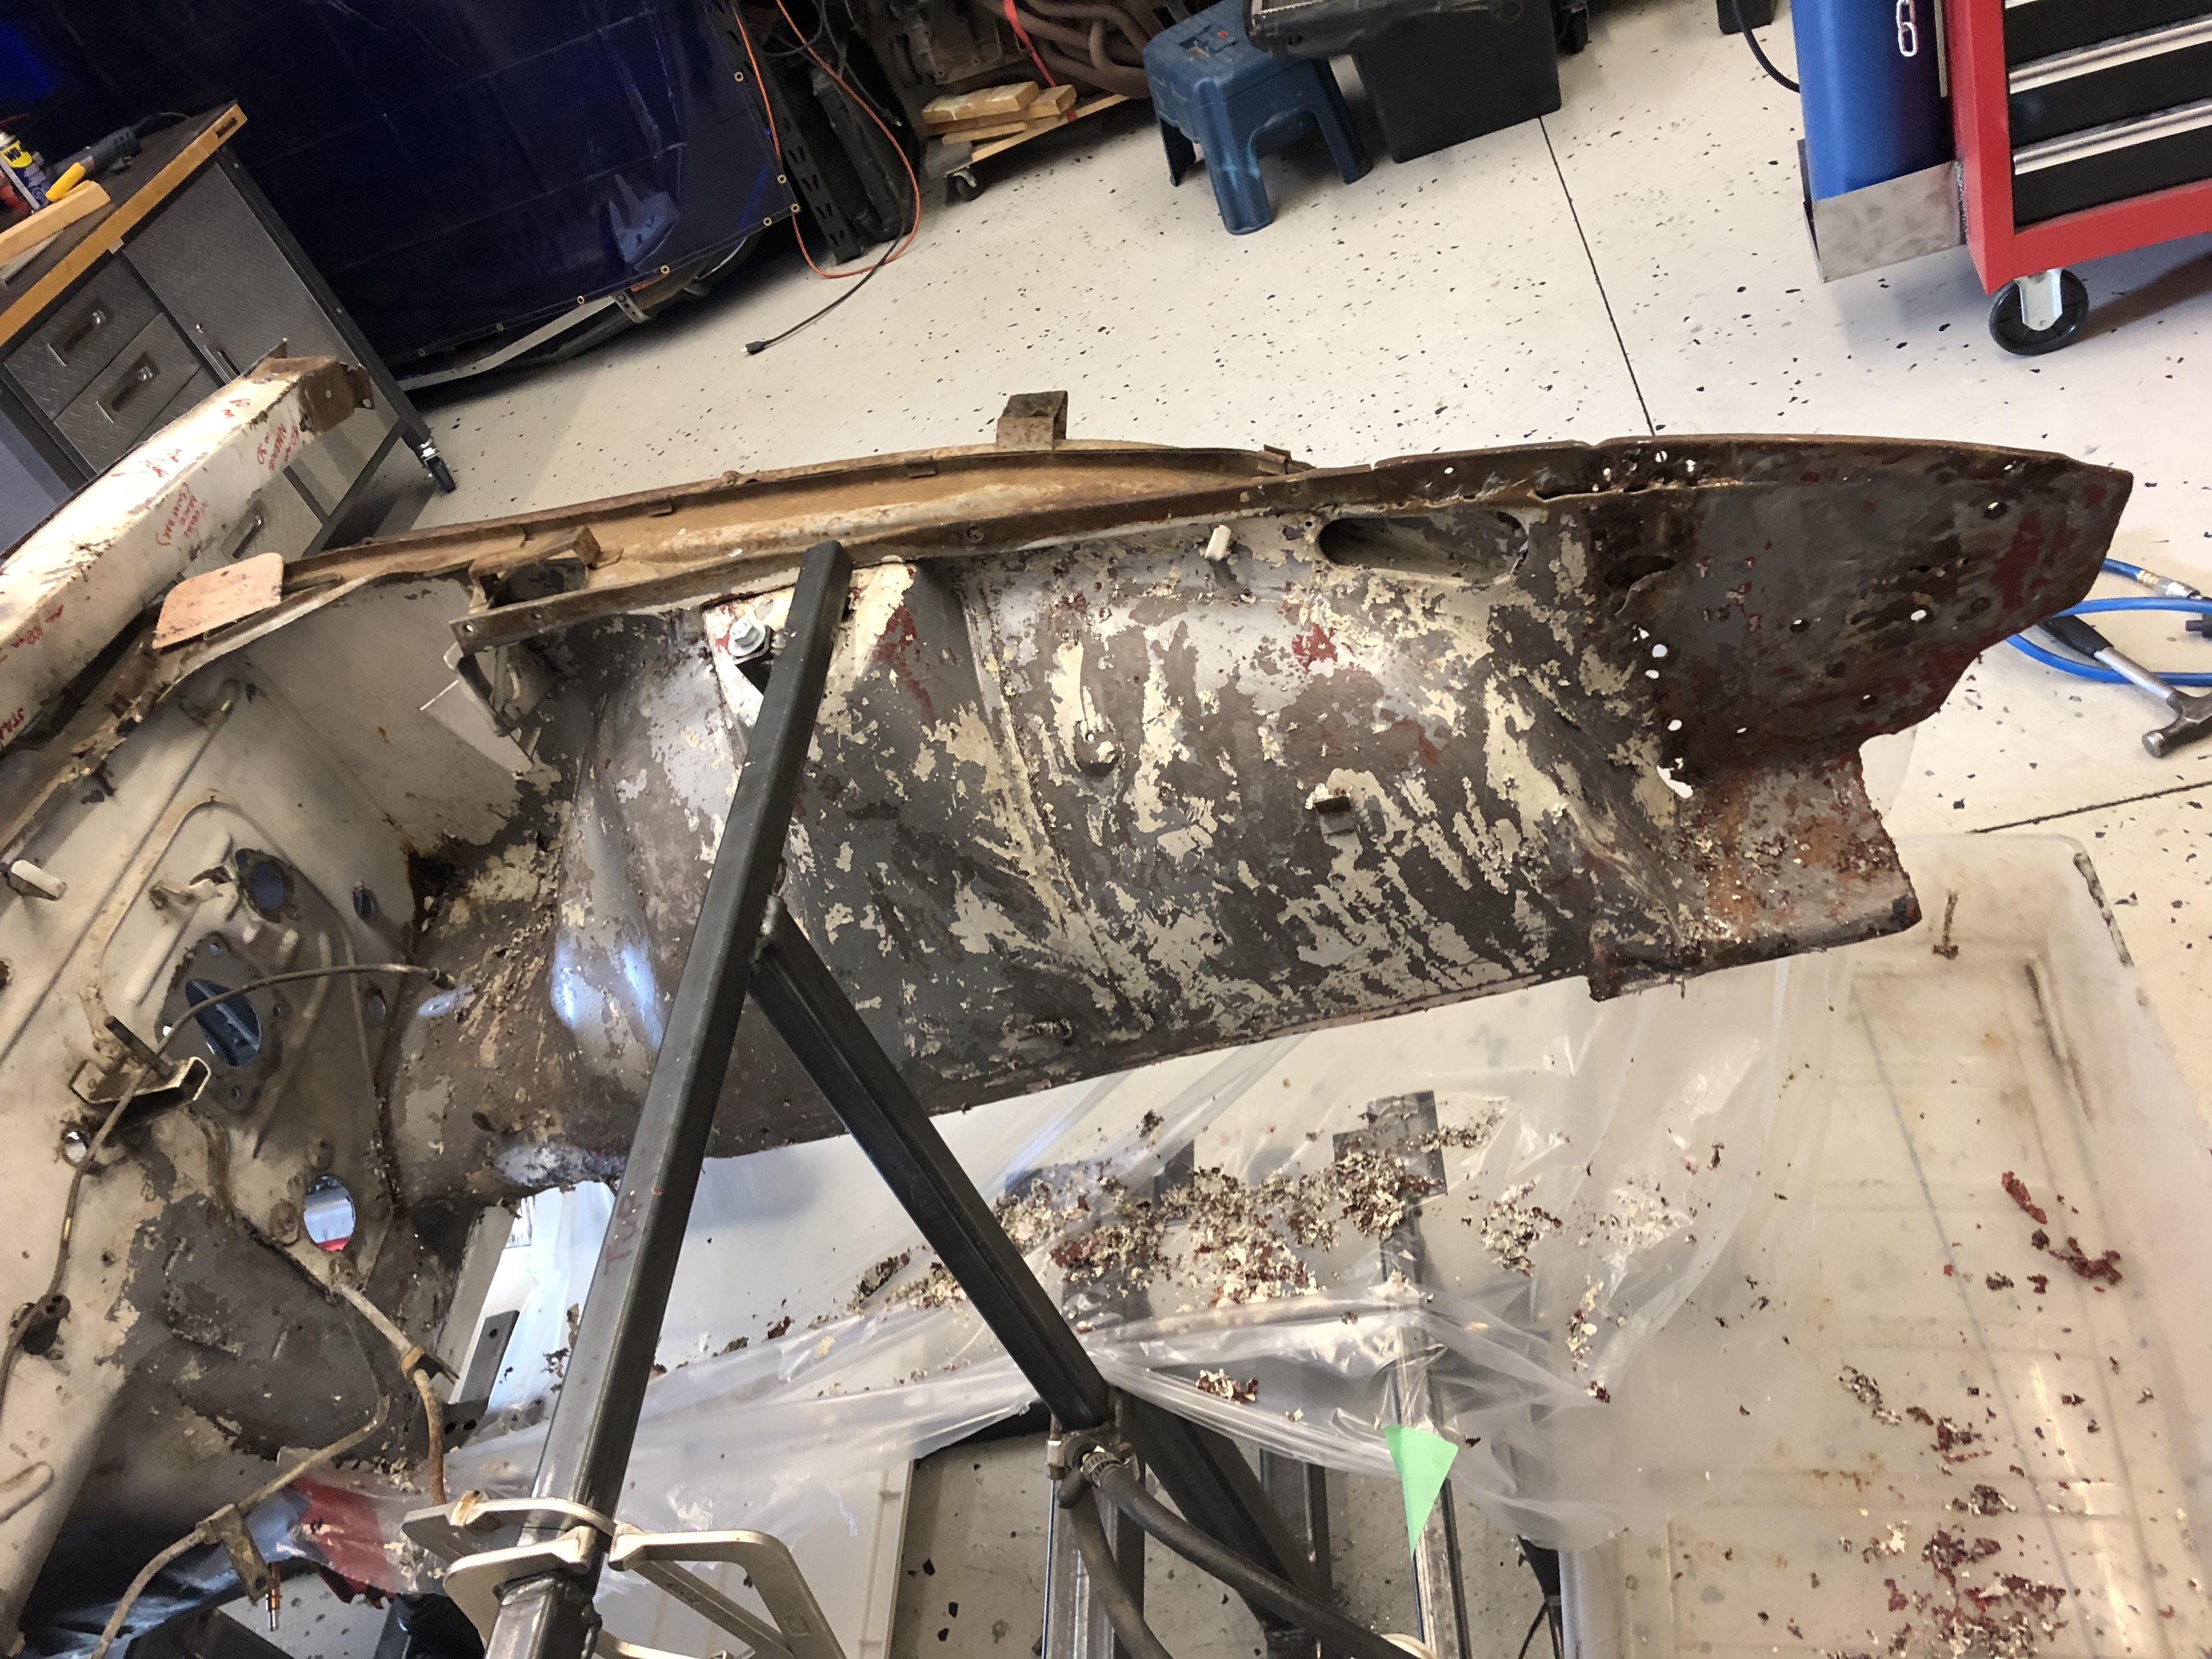
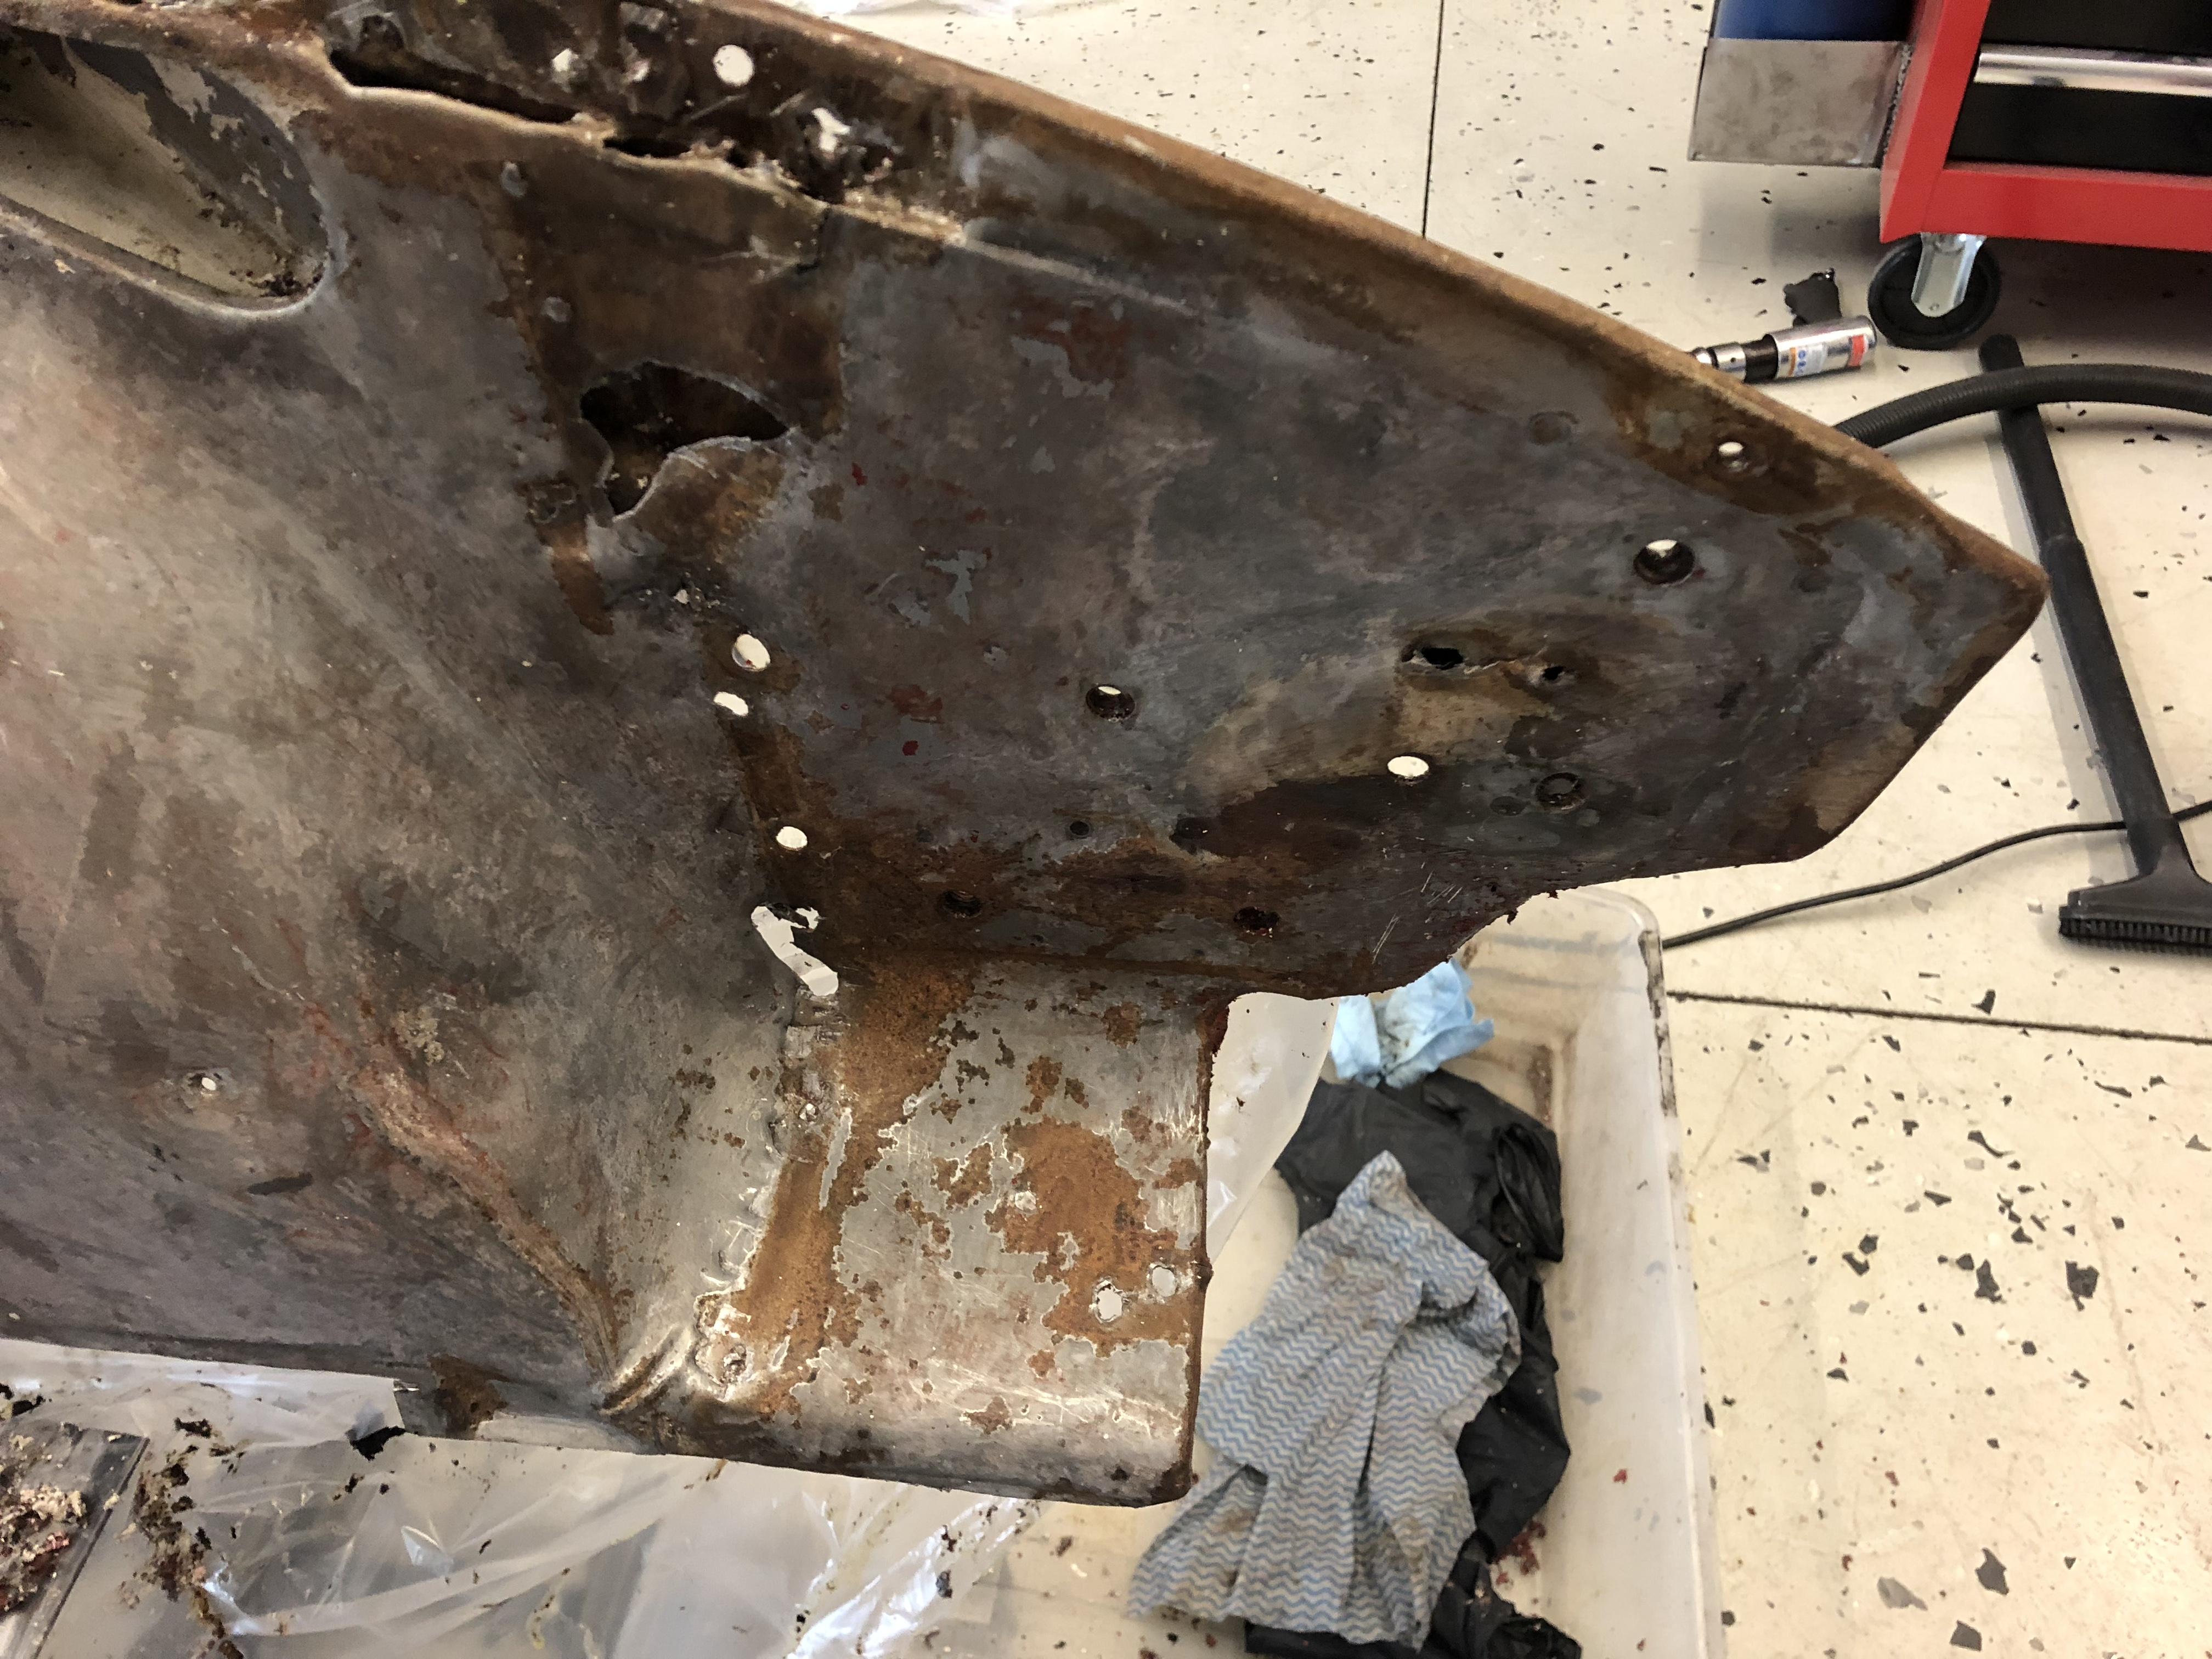
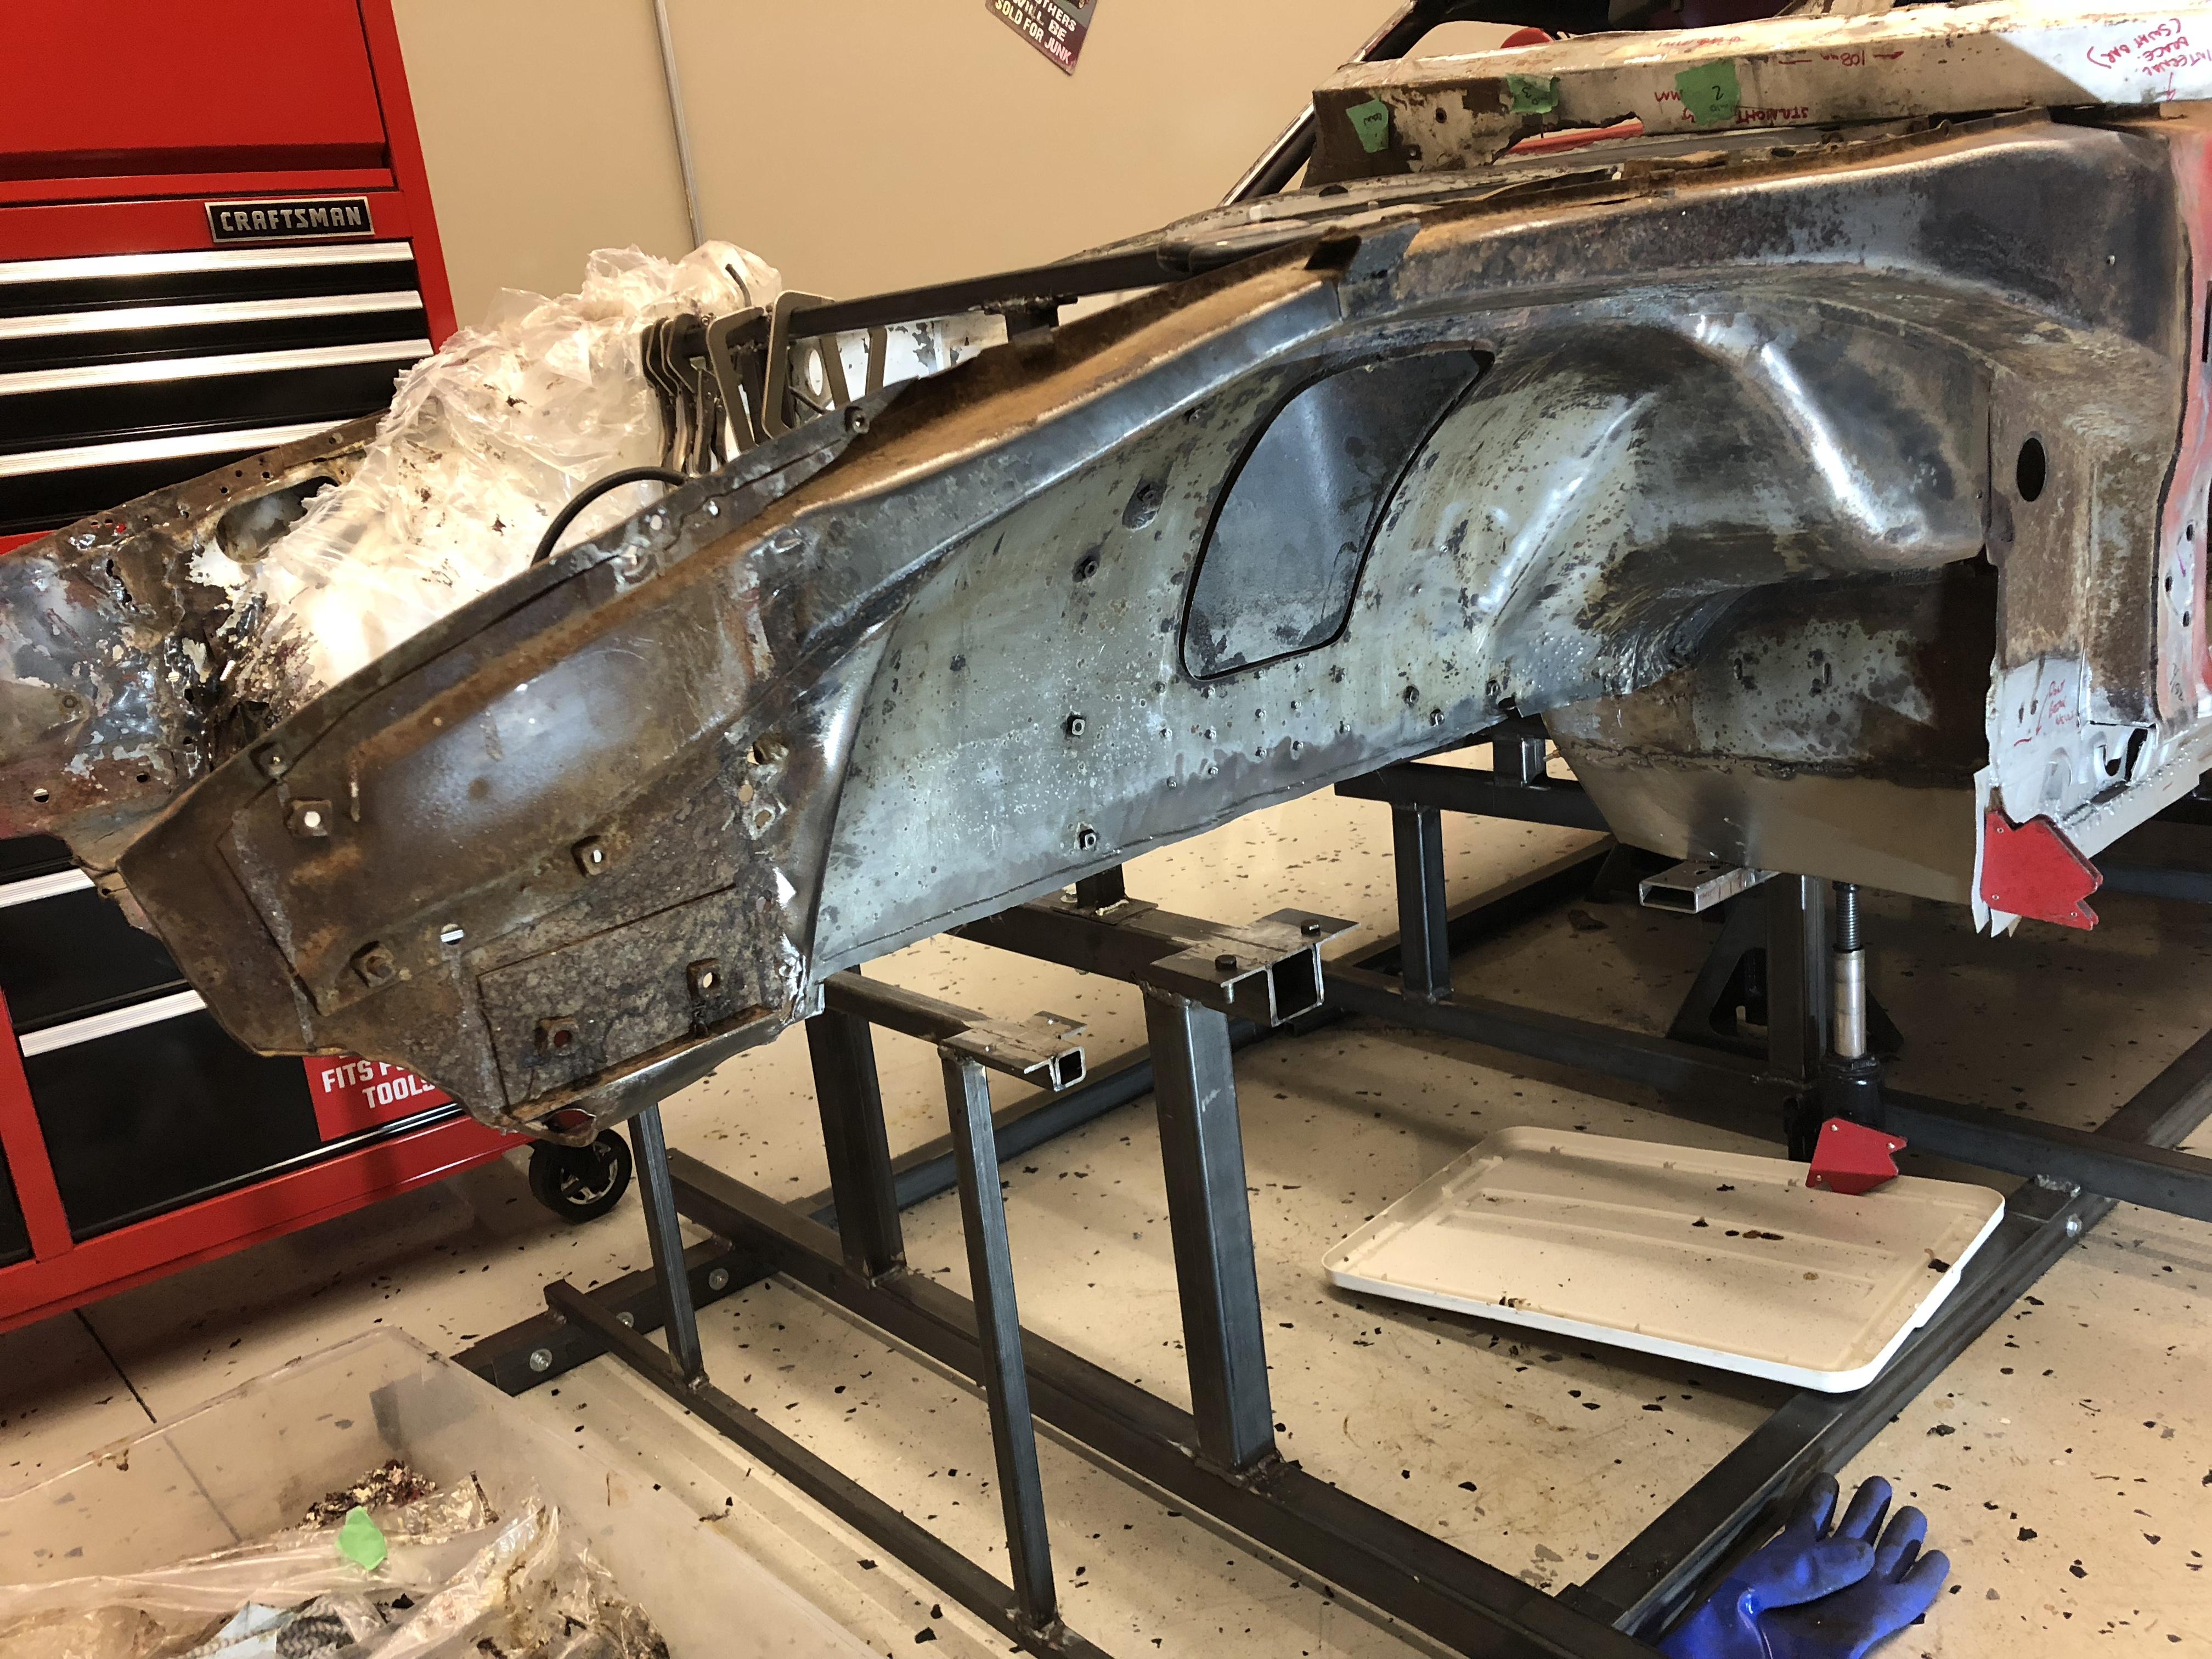
3 pointsWell its been a few days. The rails are pretty much done. Time to get ready to weld so ....AIRCRAFT STRIPPER time! Yay! Personally I prefer chemical to mechanical stripping. Wear a respirator. First pass ... I always “bag” the panel after a generous application, especially on vertical panels. Keeps everything wet a bit longer and cuts down the fumes .... Good start, but looks like it will need a looks like it will need a second pass.... Much better after a second pass... Panel looks pretty clean. Rusty at the firewall and under the rad support as expected... p ] So while I was waiting, I thought I would try the stripper on the undercoat in the fender well. I have been told that it will NOT work on undercoat .... ...but it sure did! Softened it right up so that I could scrape it off with a putty knife ... Finnished it up with WD40 on a rag and a wire wheel on some of the stubborn stuff. Tomorrow we weld! Cheers all!


 3 points
 -
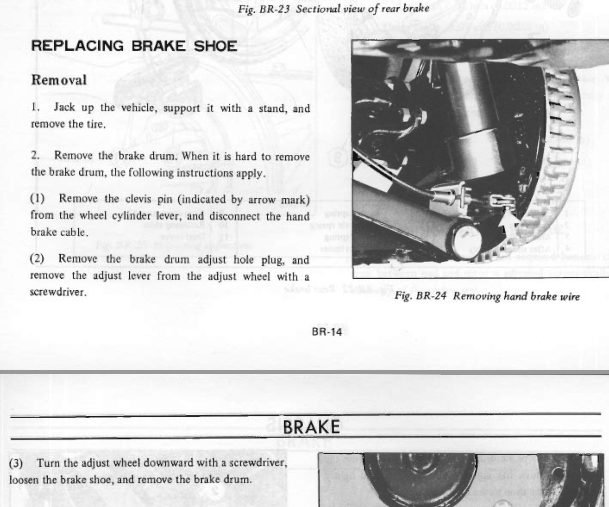
Ok, I got it. The adjuster is in the front of the wheel. I got both rear wheels off, took the brakes off cleaned and reinstalled. So I did my first rear brake job. Old parts, but now I know how.2 points
-
Gloves and mask, pretty much all the time in the shop!2 points
-
1 point
-
1 point
-
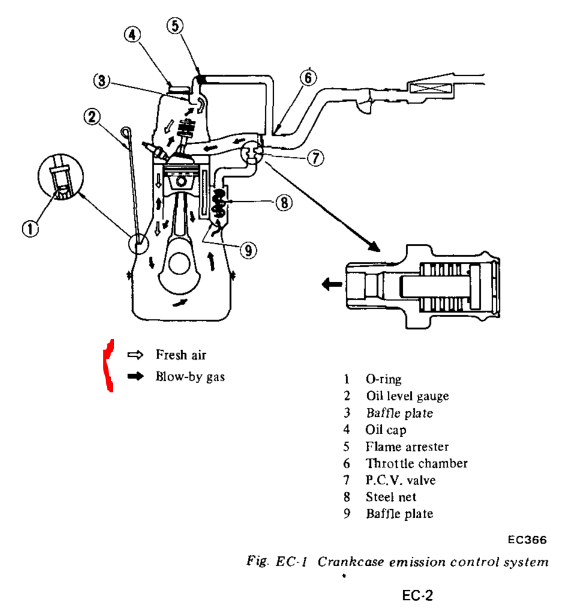
1 pointThe video kind of "blew by" it but he did show the catch can with a filter on top, at 3:31.
 1 point
 -
1 pointI couldn't tell how that catch can works. If both ports are open, with no check valves, then it seems like he just moved the typical little breather down below the manifold and off of the valve cover. Really, he could have just blocked the valve cover port and run the one hose to the catch can. It wouldn't be "positive" ventilation anymore, there's no vapor flow, it would be like a 1960's set up. I don't think Nissan gave a crap about crankcase ventilation until EFI days. They don't seem to write anything about it until then. Here's a diagram showing gas flow. I had a friend who rebuilt the engine in his Camaro and it would just spew loads of blowby out of the valve cover breather when he got on it, until the rings broke in and sealed. The whole point is "what do we do with this blowby?".
 1 point
 -
1 pointinstalled 2nd "new" fuel pump and it appears to hold its prime! thanks much for the tip! gary1 point
-
1 point
-
1 pointI have two of them but they are out at the shop and I don't have any photos of them right now. I'll send you a PM this weekend. Both are used and in pretty good condition... and I DON'T want $ 895! OMG1 point
-
It's amazing how many parts were still good though. I am using the mustache bar, aftermarket swaybars and the front crossmember on my race car after I modified the pivot points. I'm sure there are many others as well that I can't think of at the moment. ?1 point
-
1 pointNone of the stock components are re-used basically. I will have new heater lines, new vent hose, all new evaporator and condenser, new blower etc etc This will be a modern replacement of the old system. It should provide a nice quiet, leak free version of the old basic functions, but also give me AC! Of course, that means a bunch of new lines and a compressor and drier and yadda yadda yadda, but it will be worth it.1 point
-
1 pointI agree it certainly is the fastest but it also comes with the danger of the stripping chemicals hiding in the seams and crevises then seeping out after the new paint is on causing breaks in the paint, then the rust starts all over again (ask me how I know). A small fine wire brush and an air gun along the seams helps a lot removing the last of the stripper. Looking good, I really like your plastic sheet trough under the work area, I'm going to try that next time.1 point
-
You might be out there beating, burning, and torturing things but make sure you do what Patcon suggested first,
 1 point
 -
I saw the pipe, but didn't know what it was. Miles and miles away!!!1 point
-
Grease used back in the day contains lead. Take the necessary precautions or don't.1 point
-
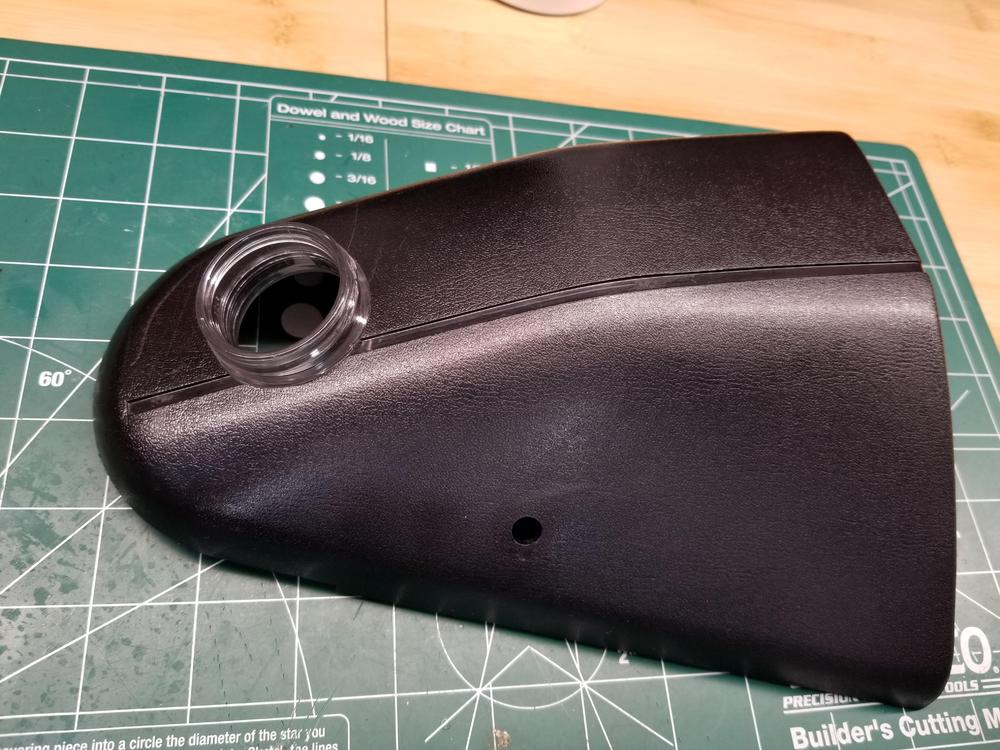
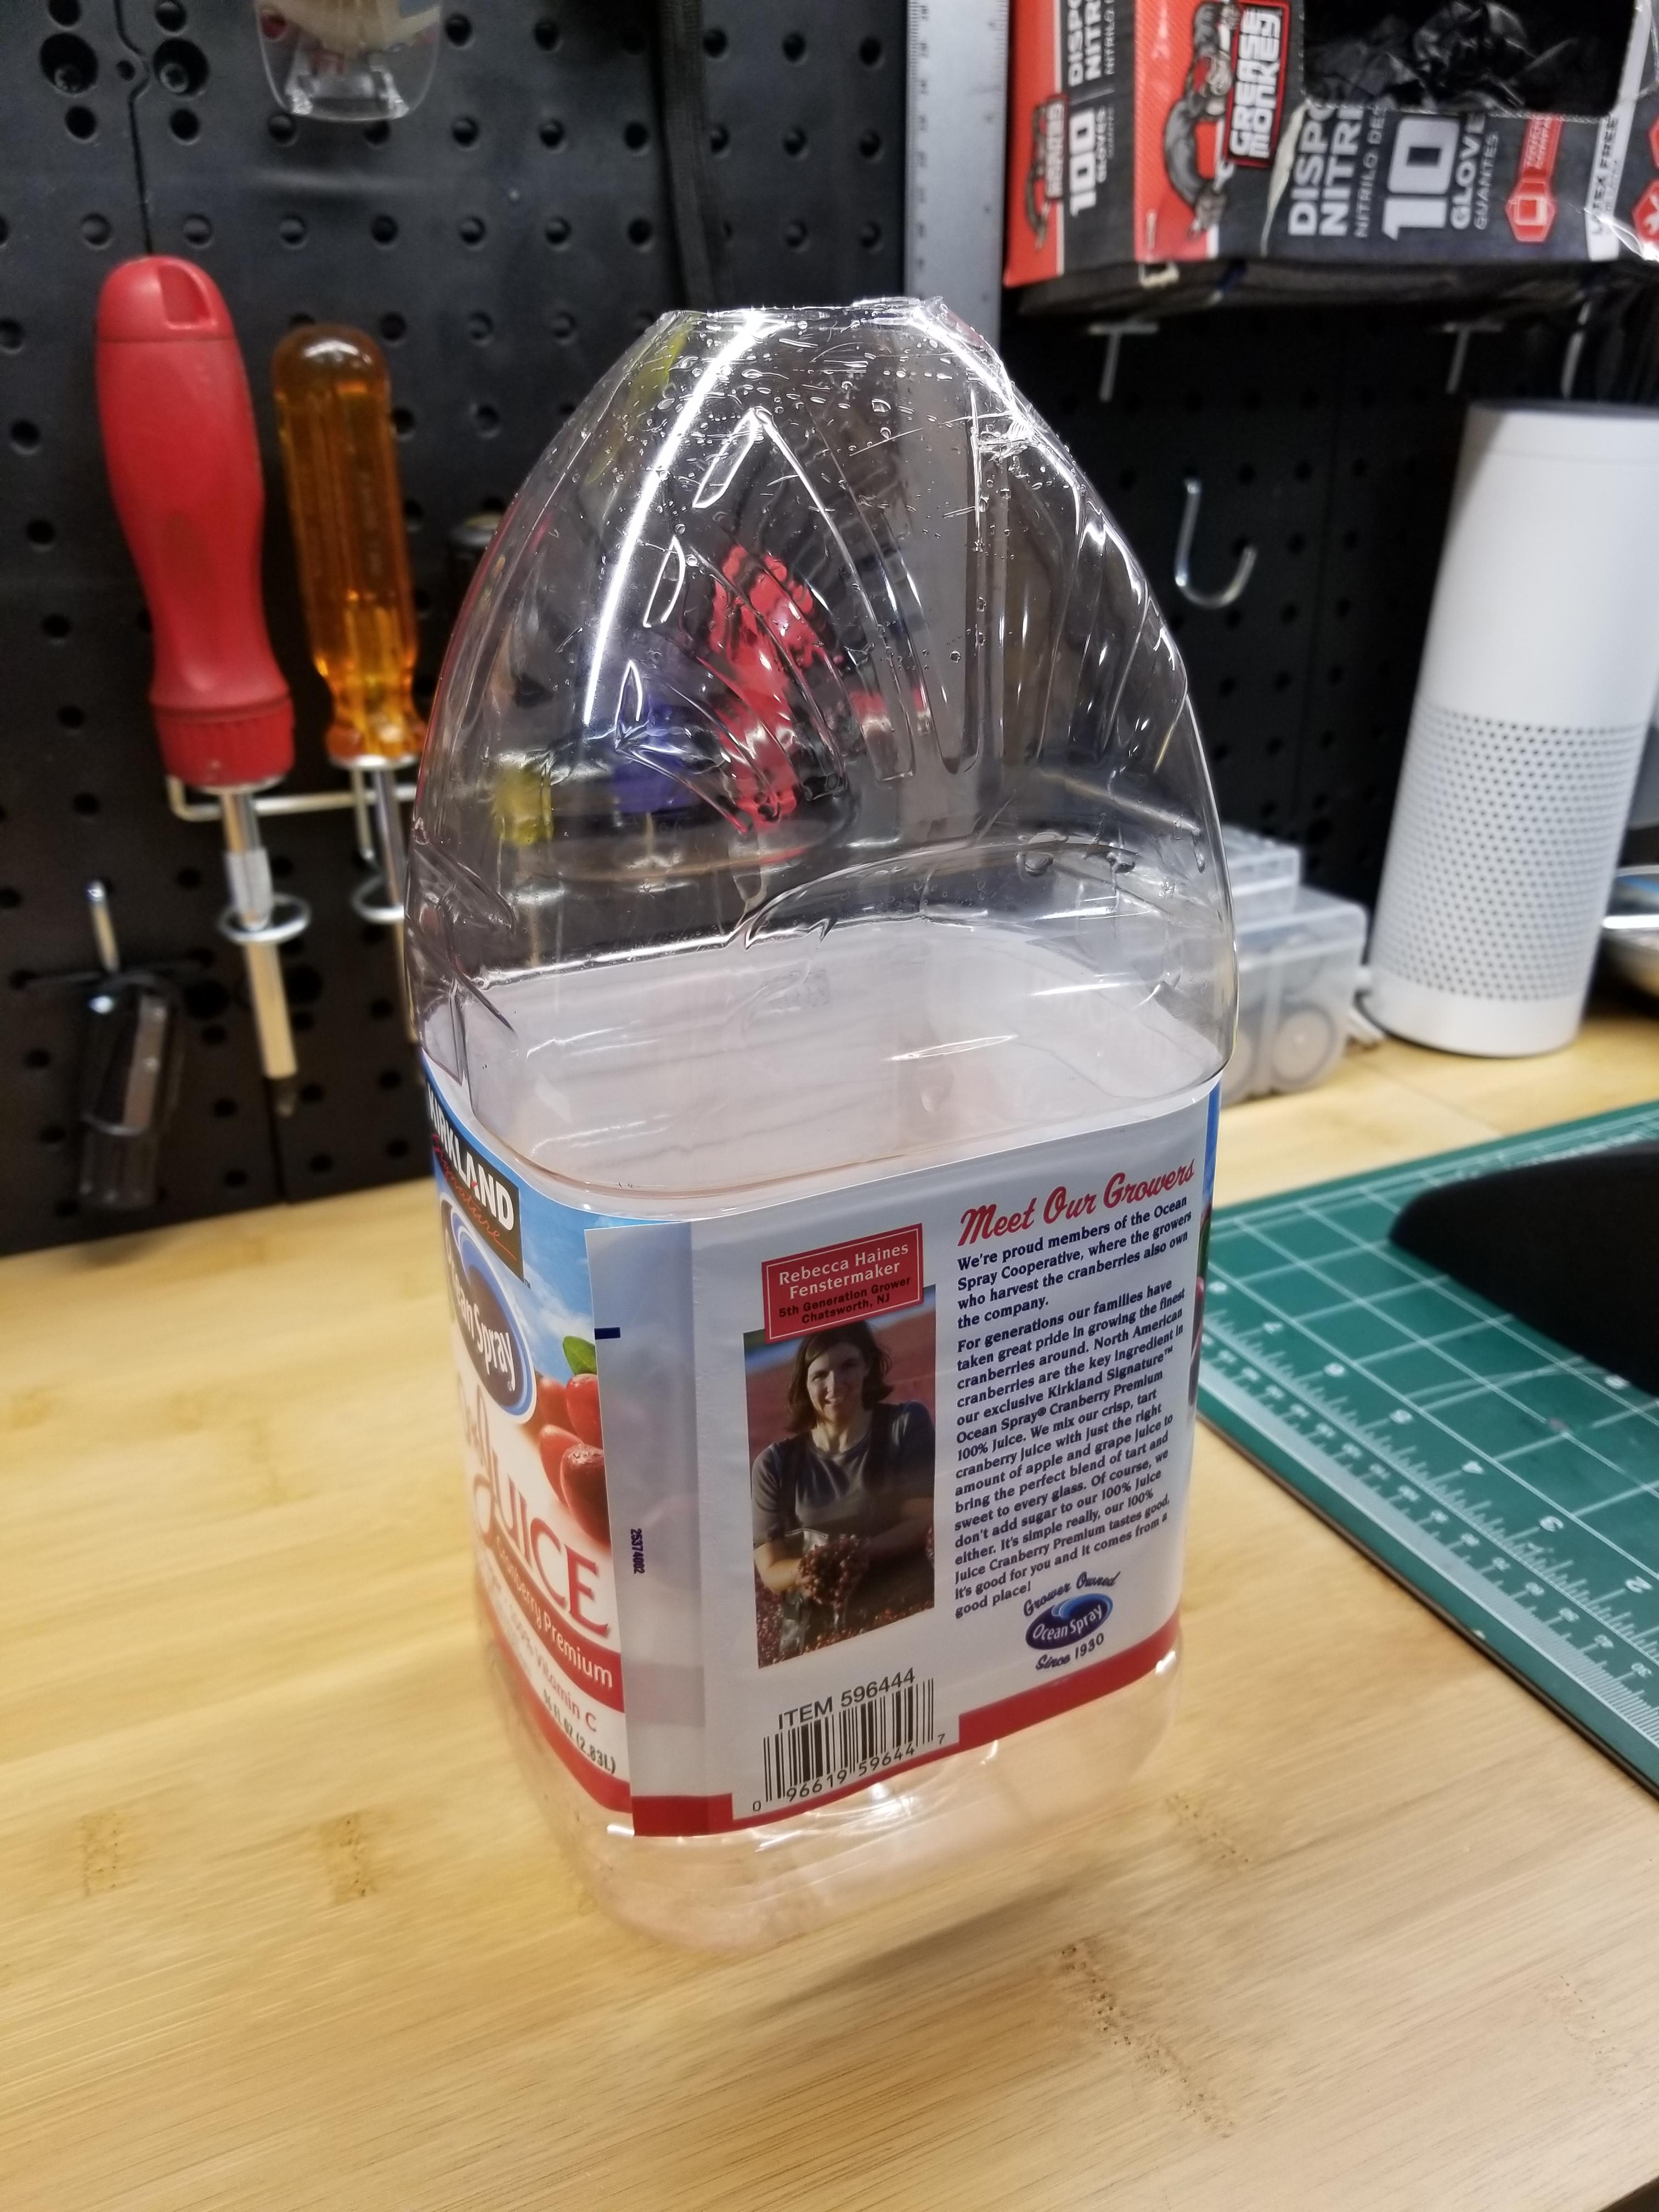
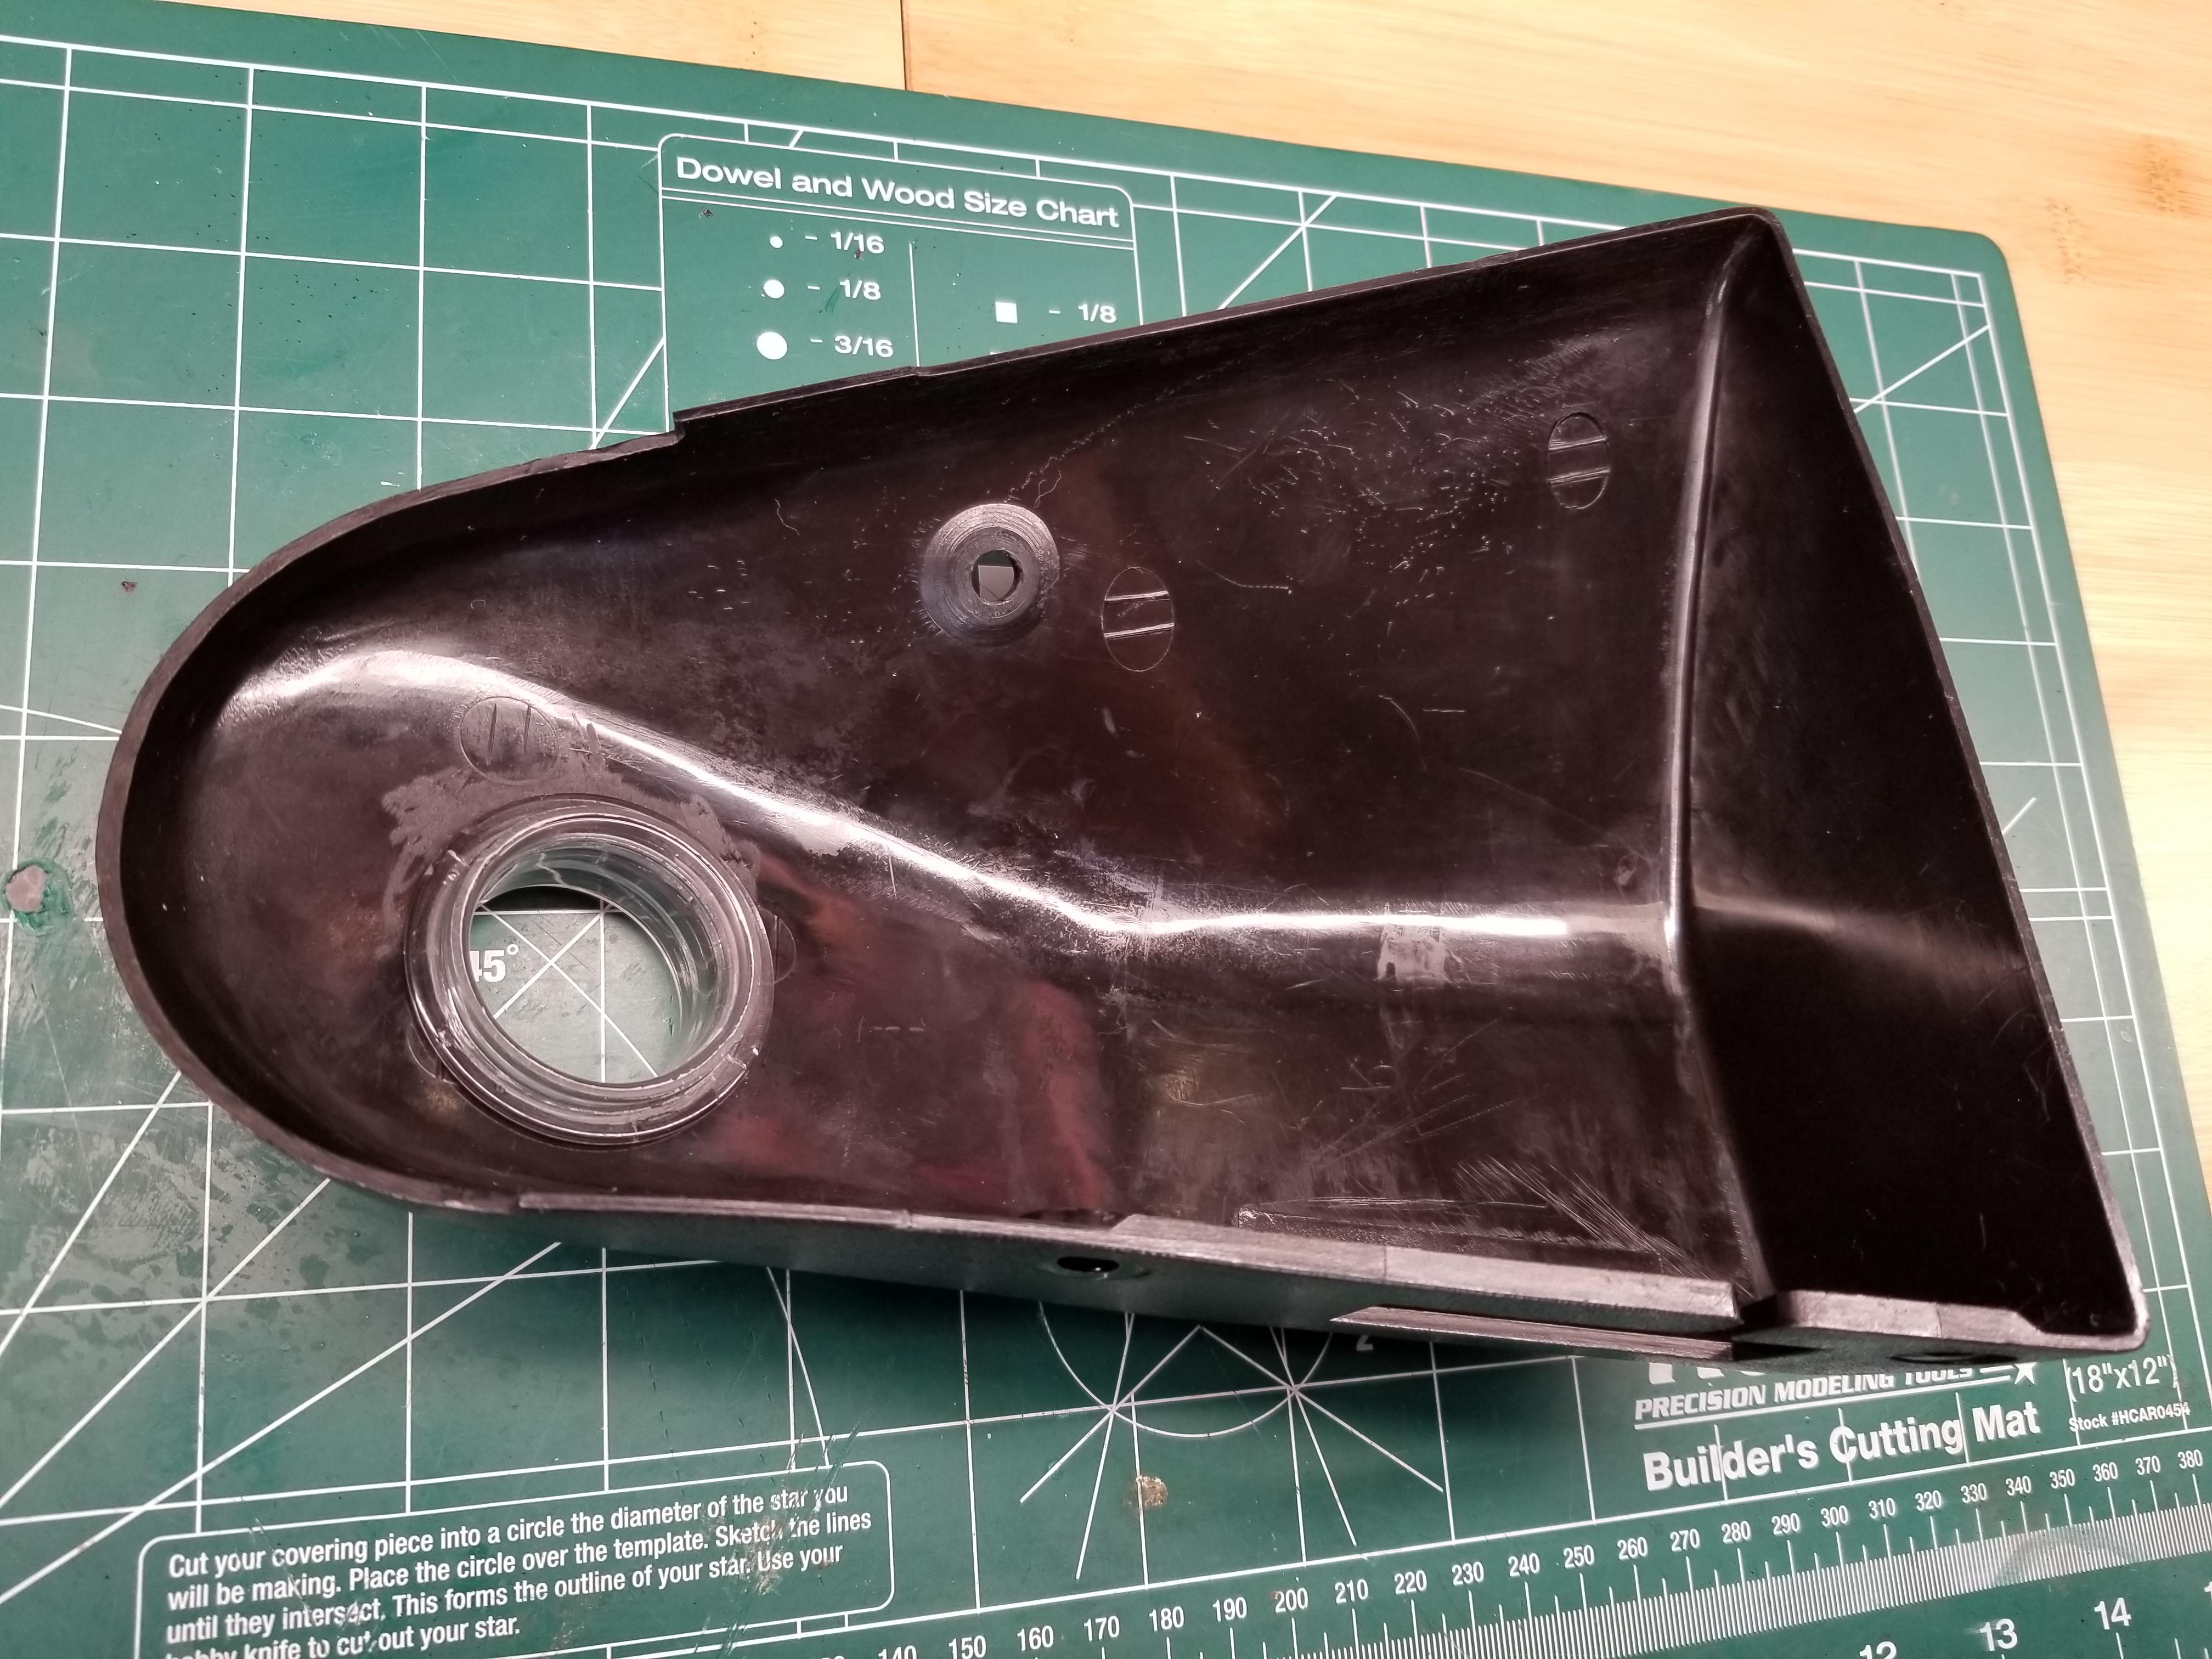
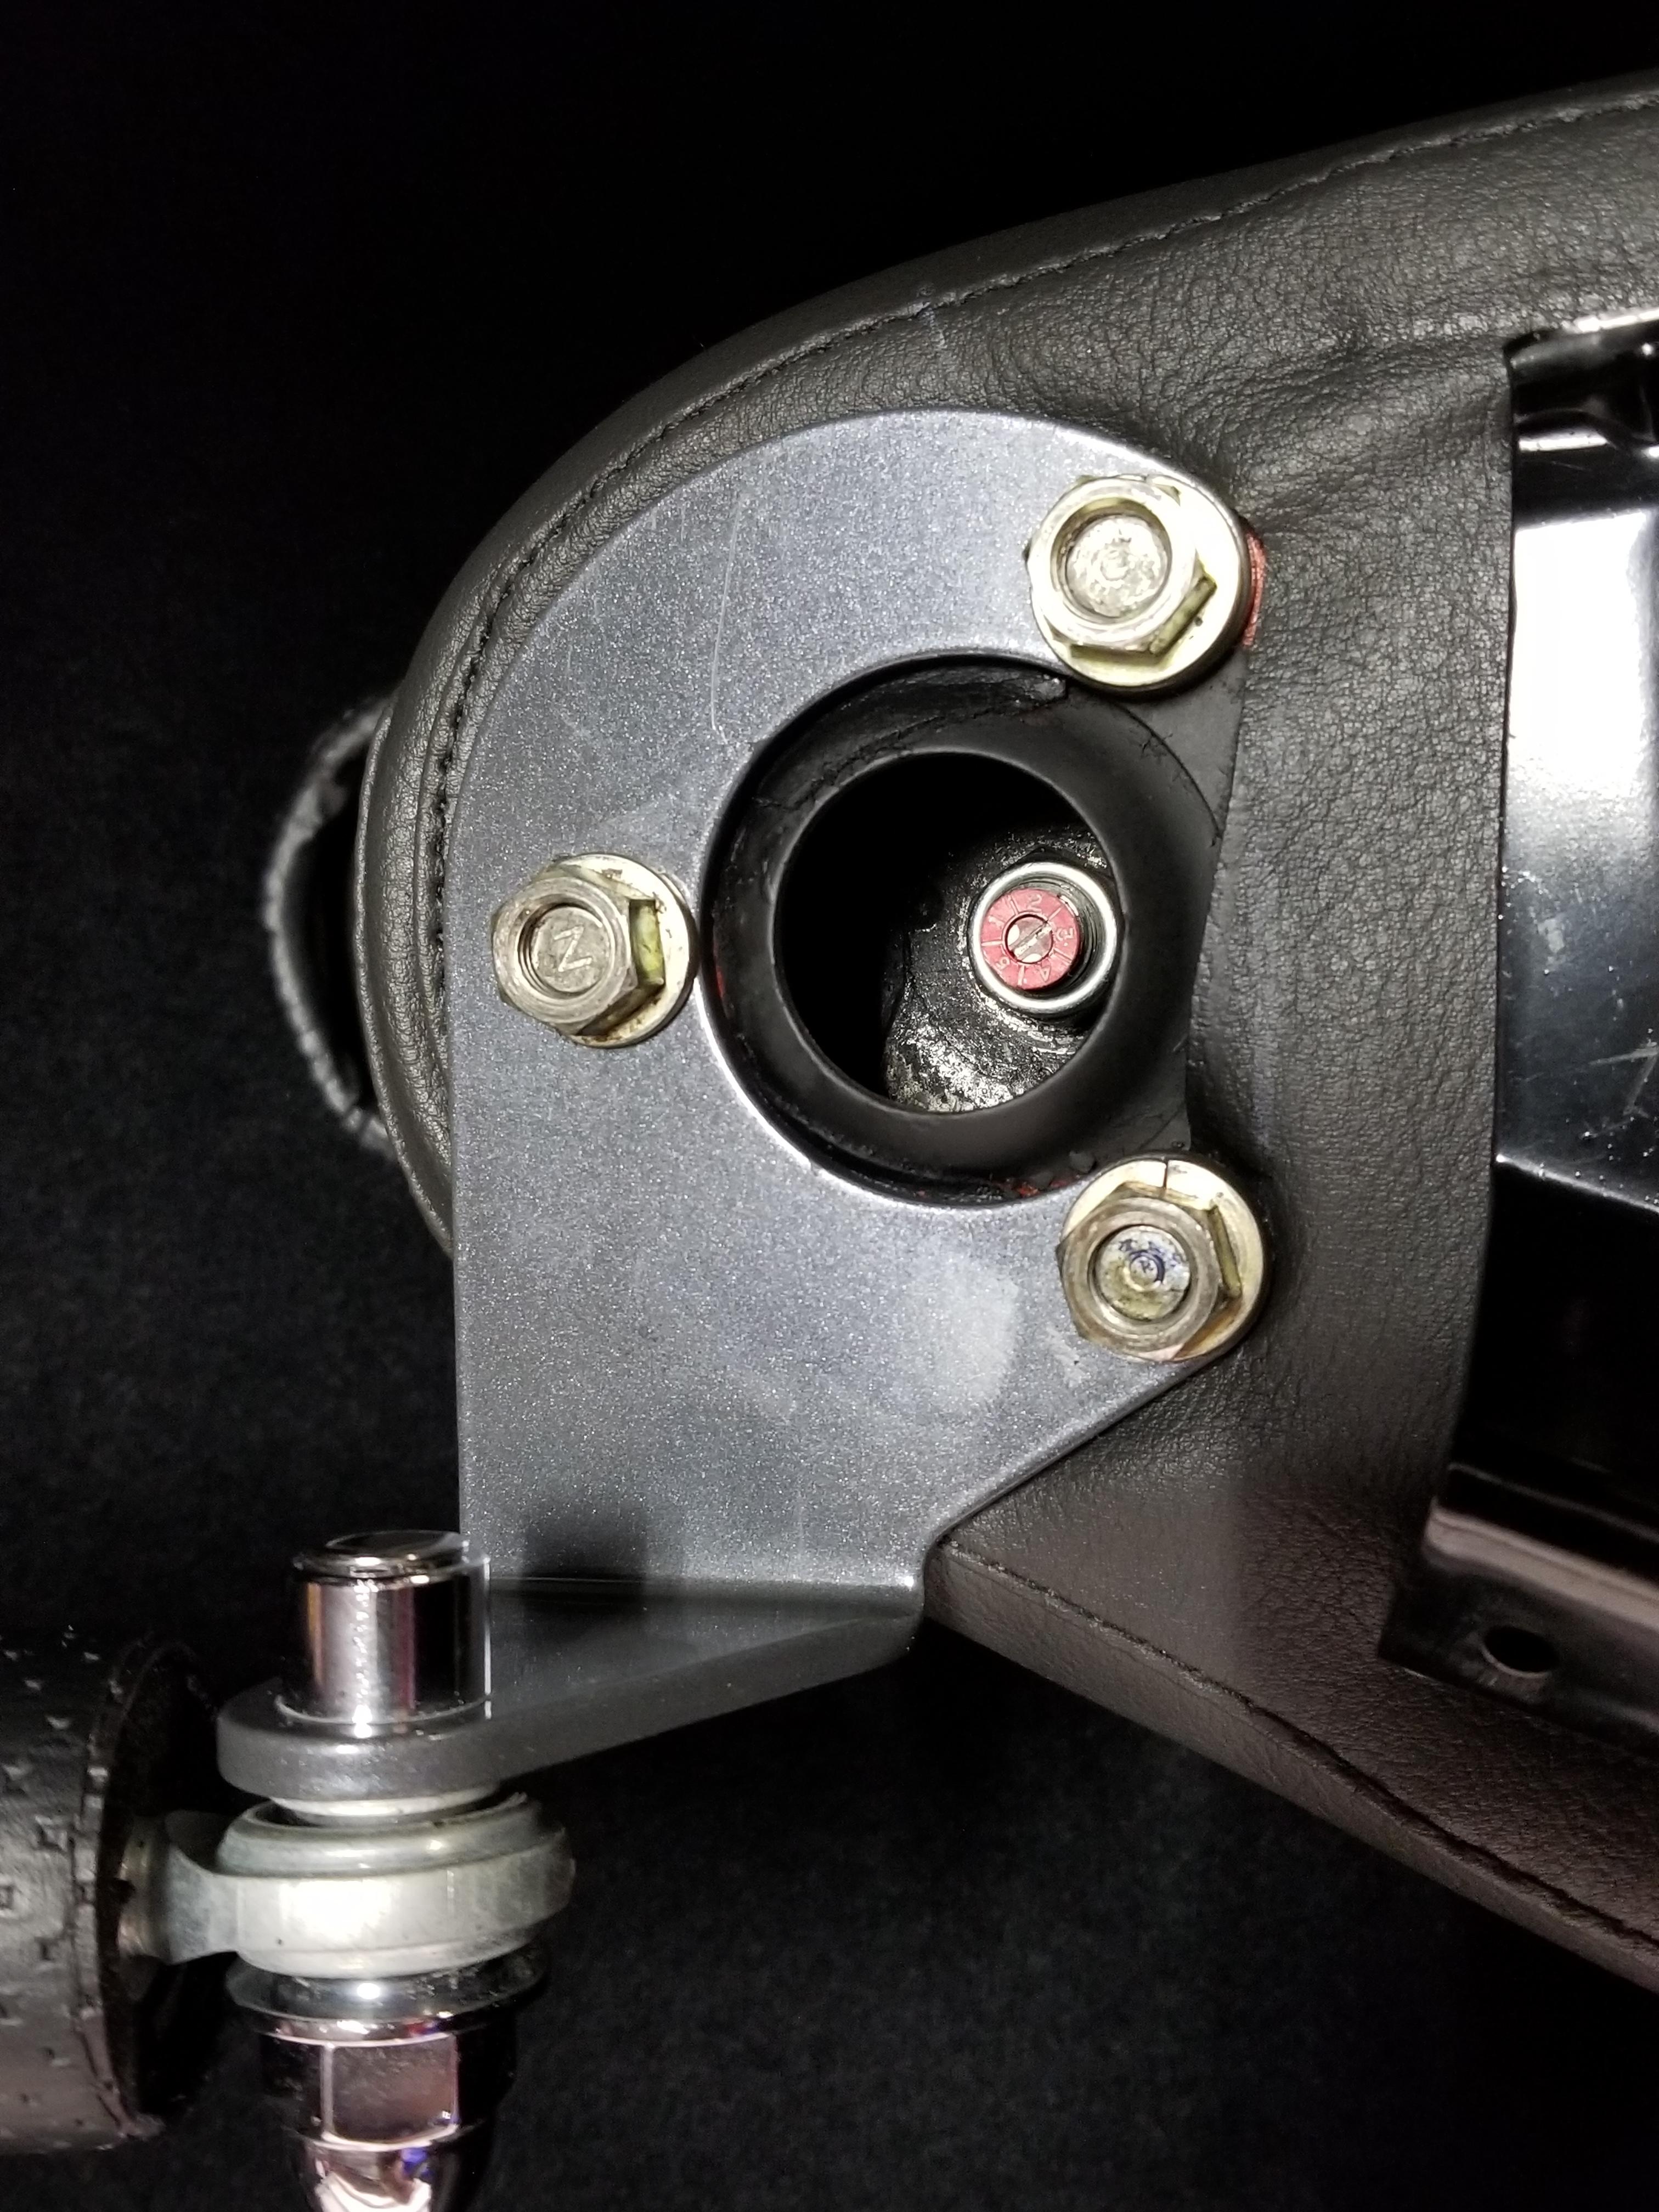
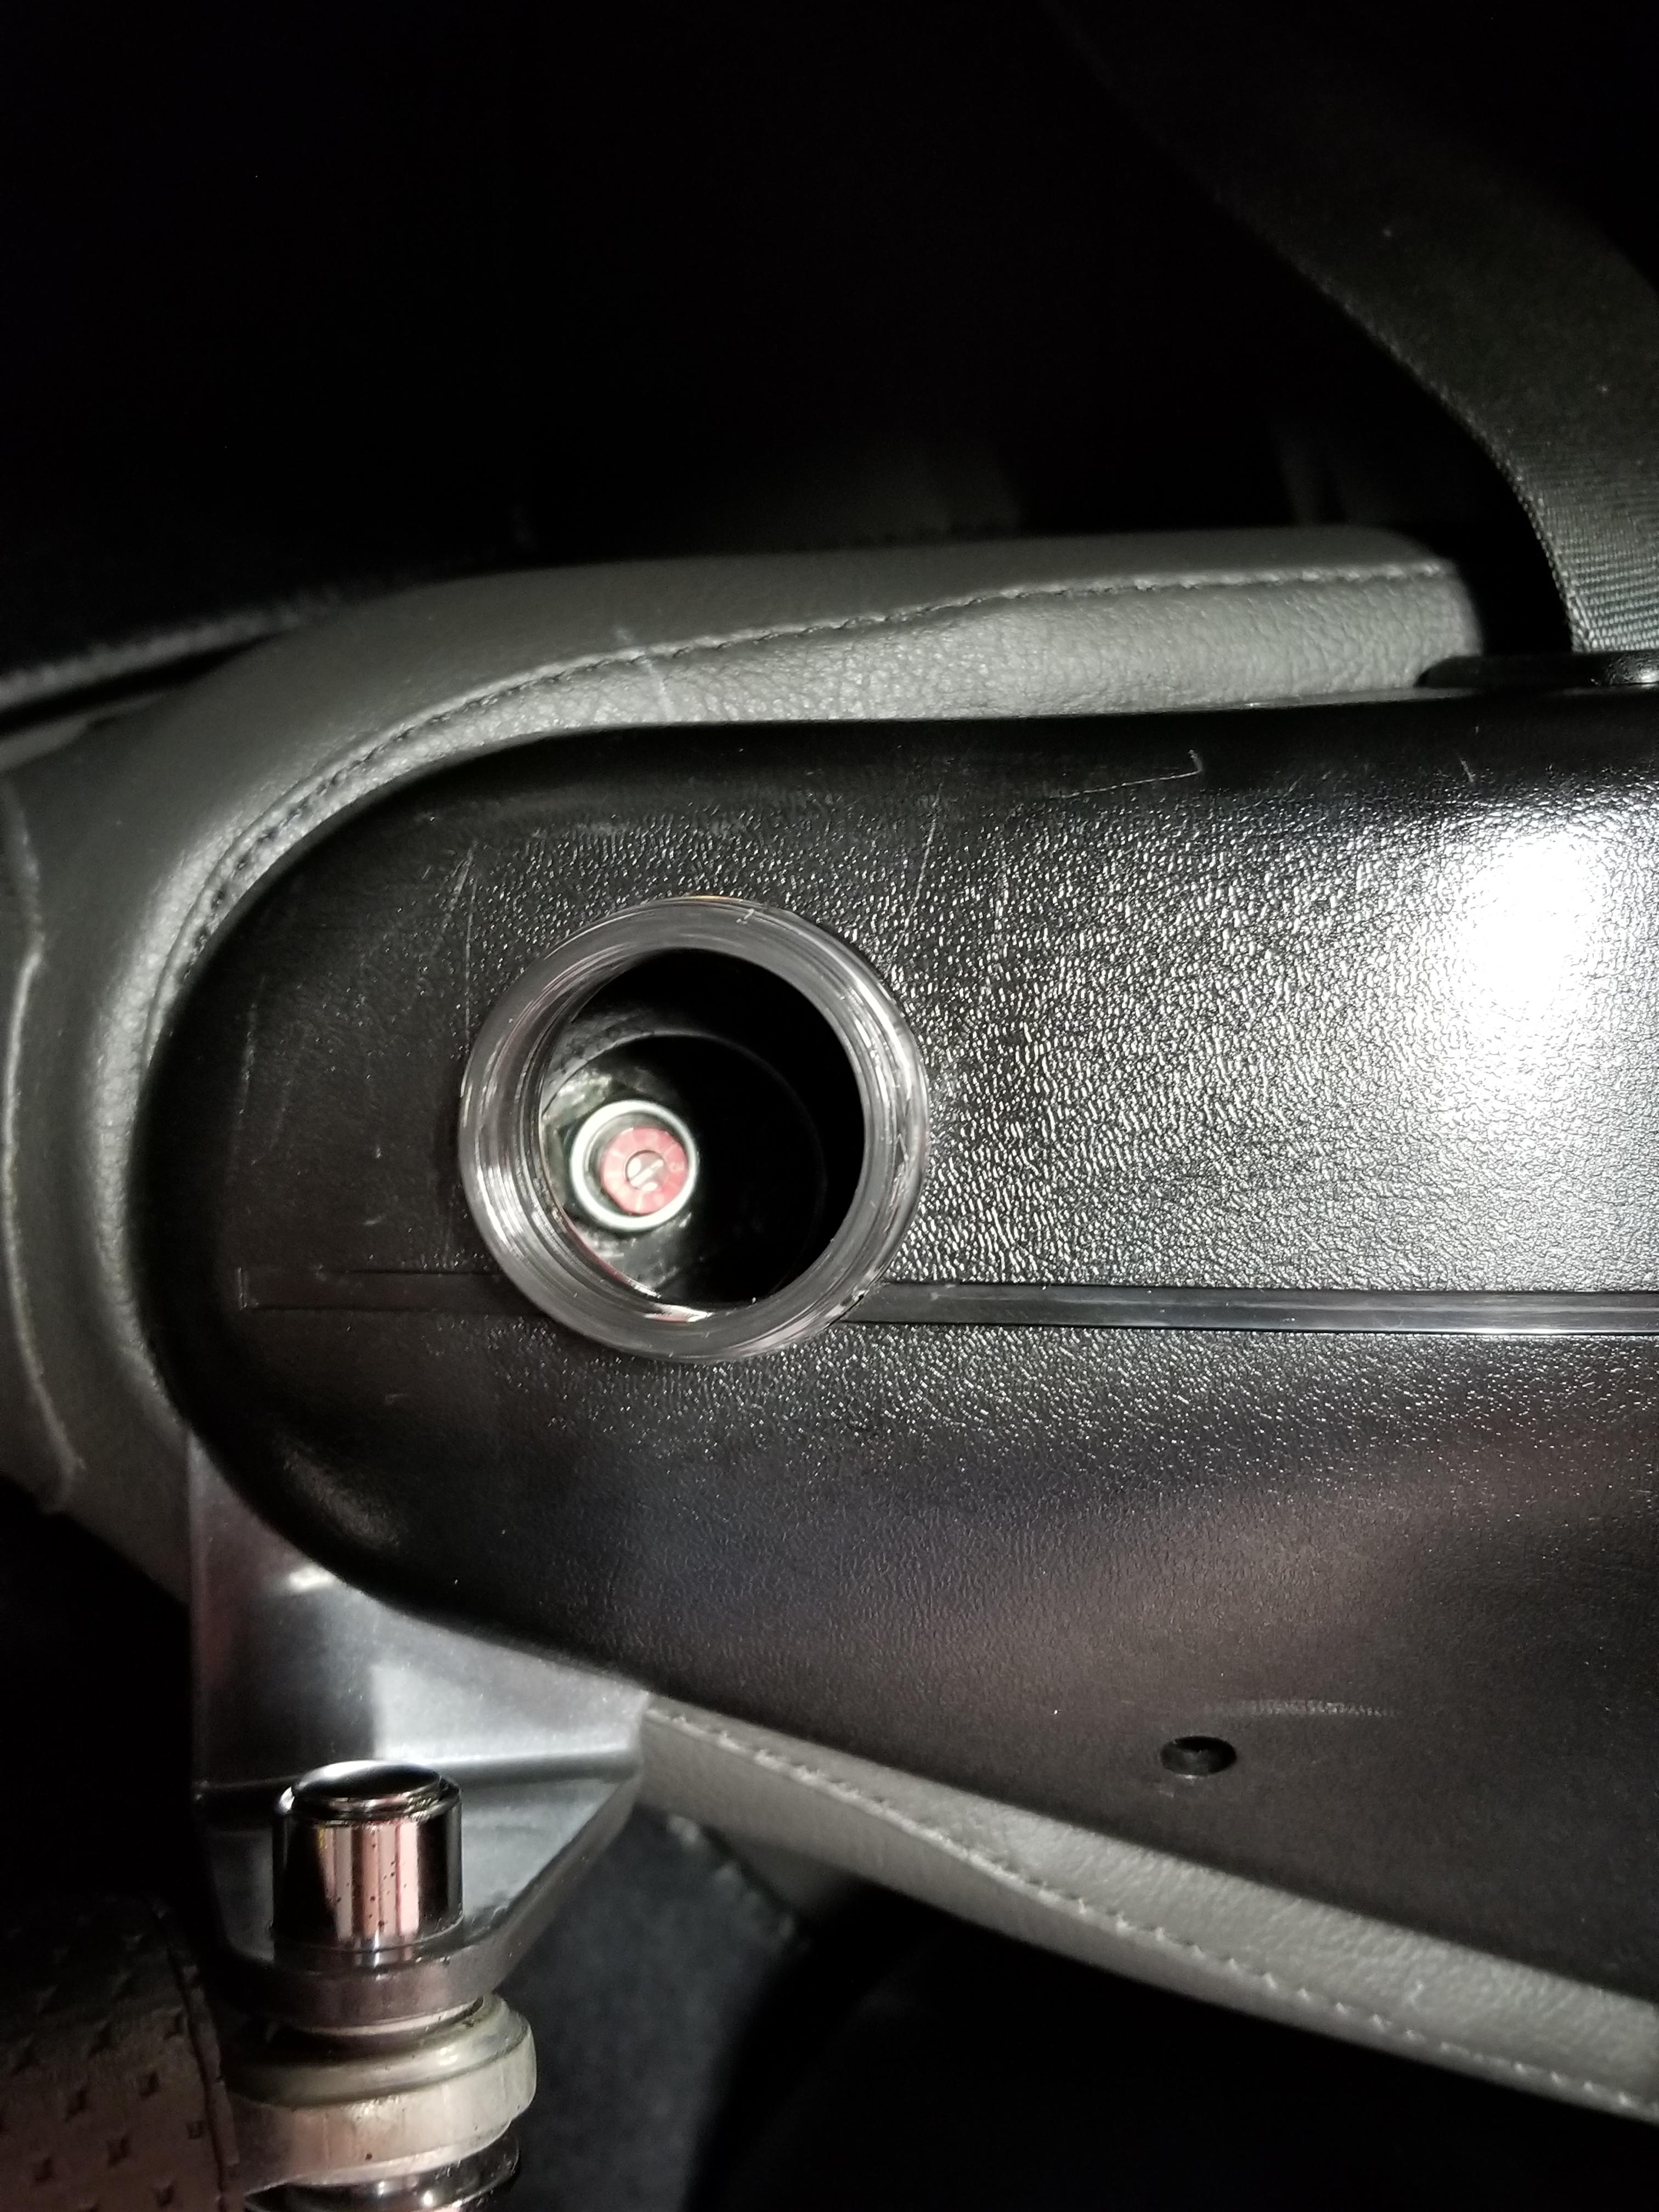
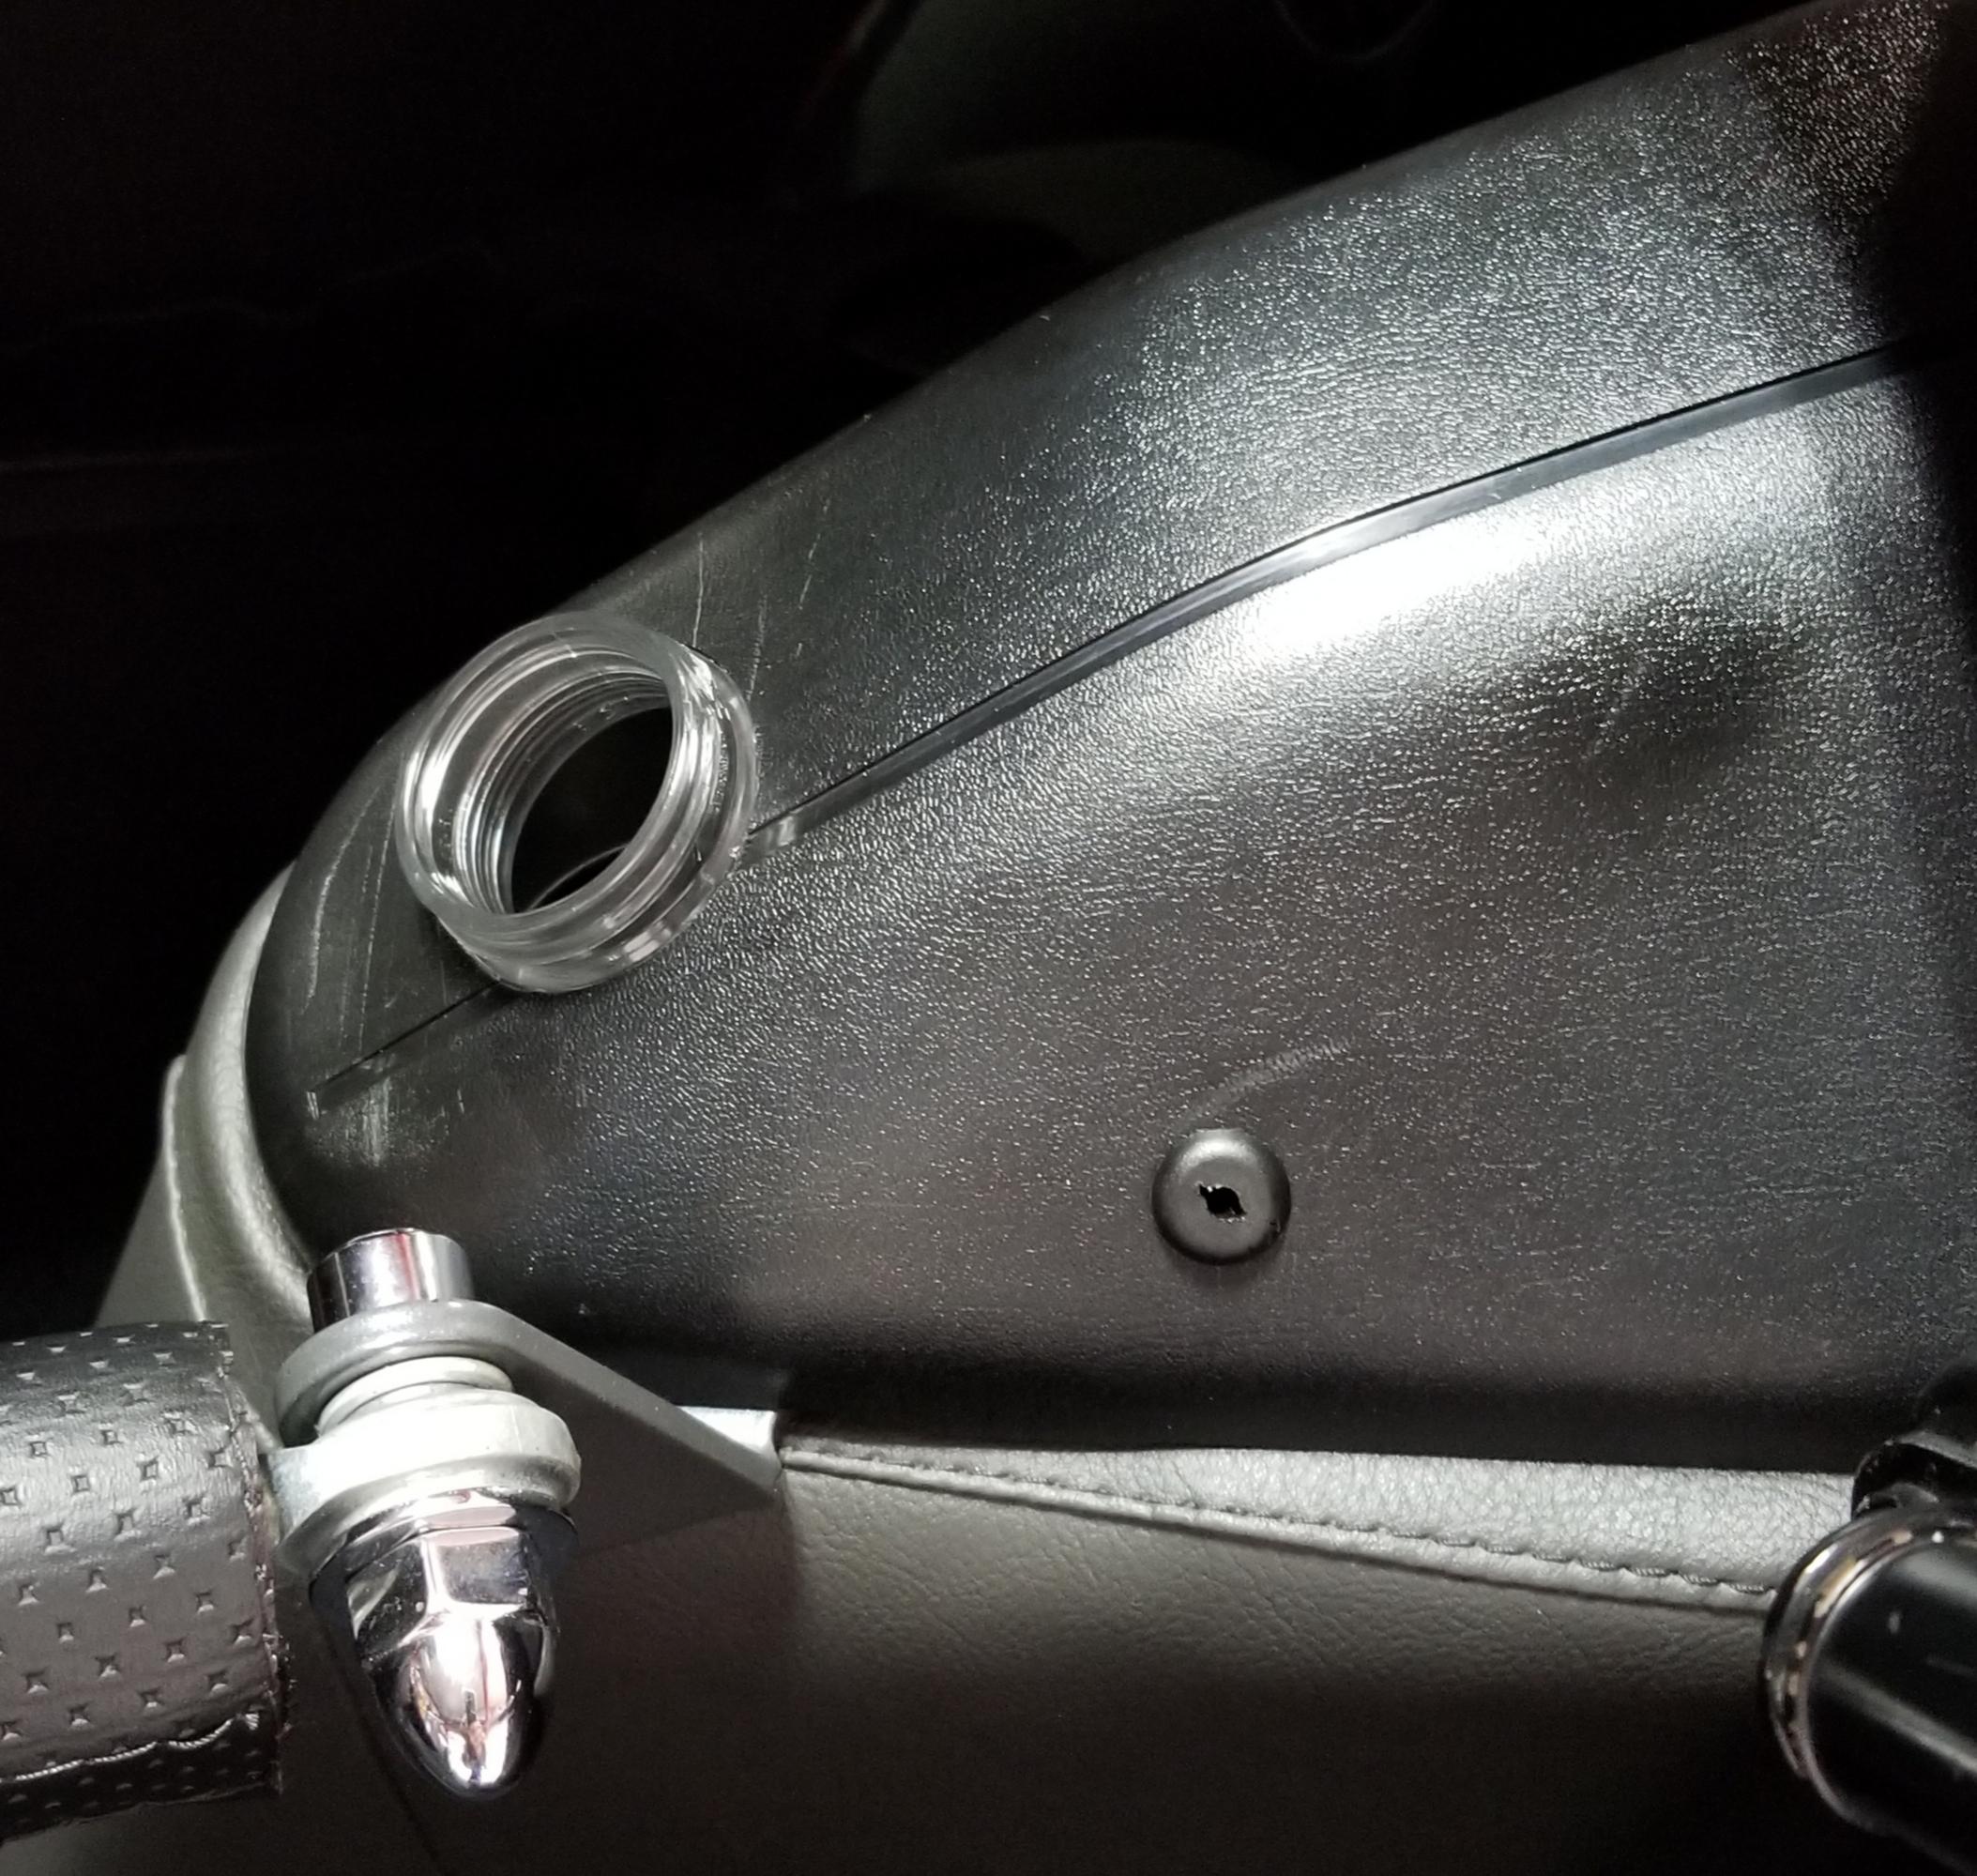
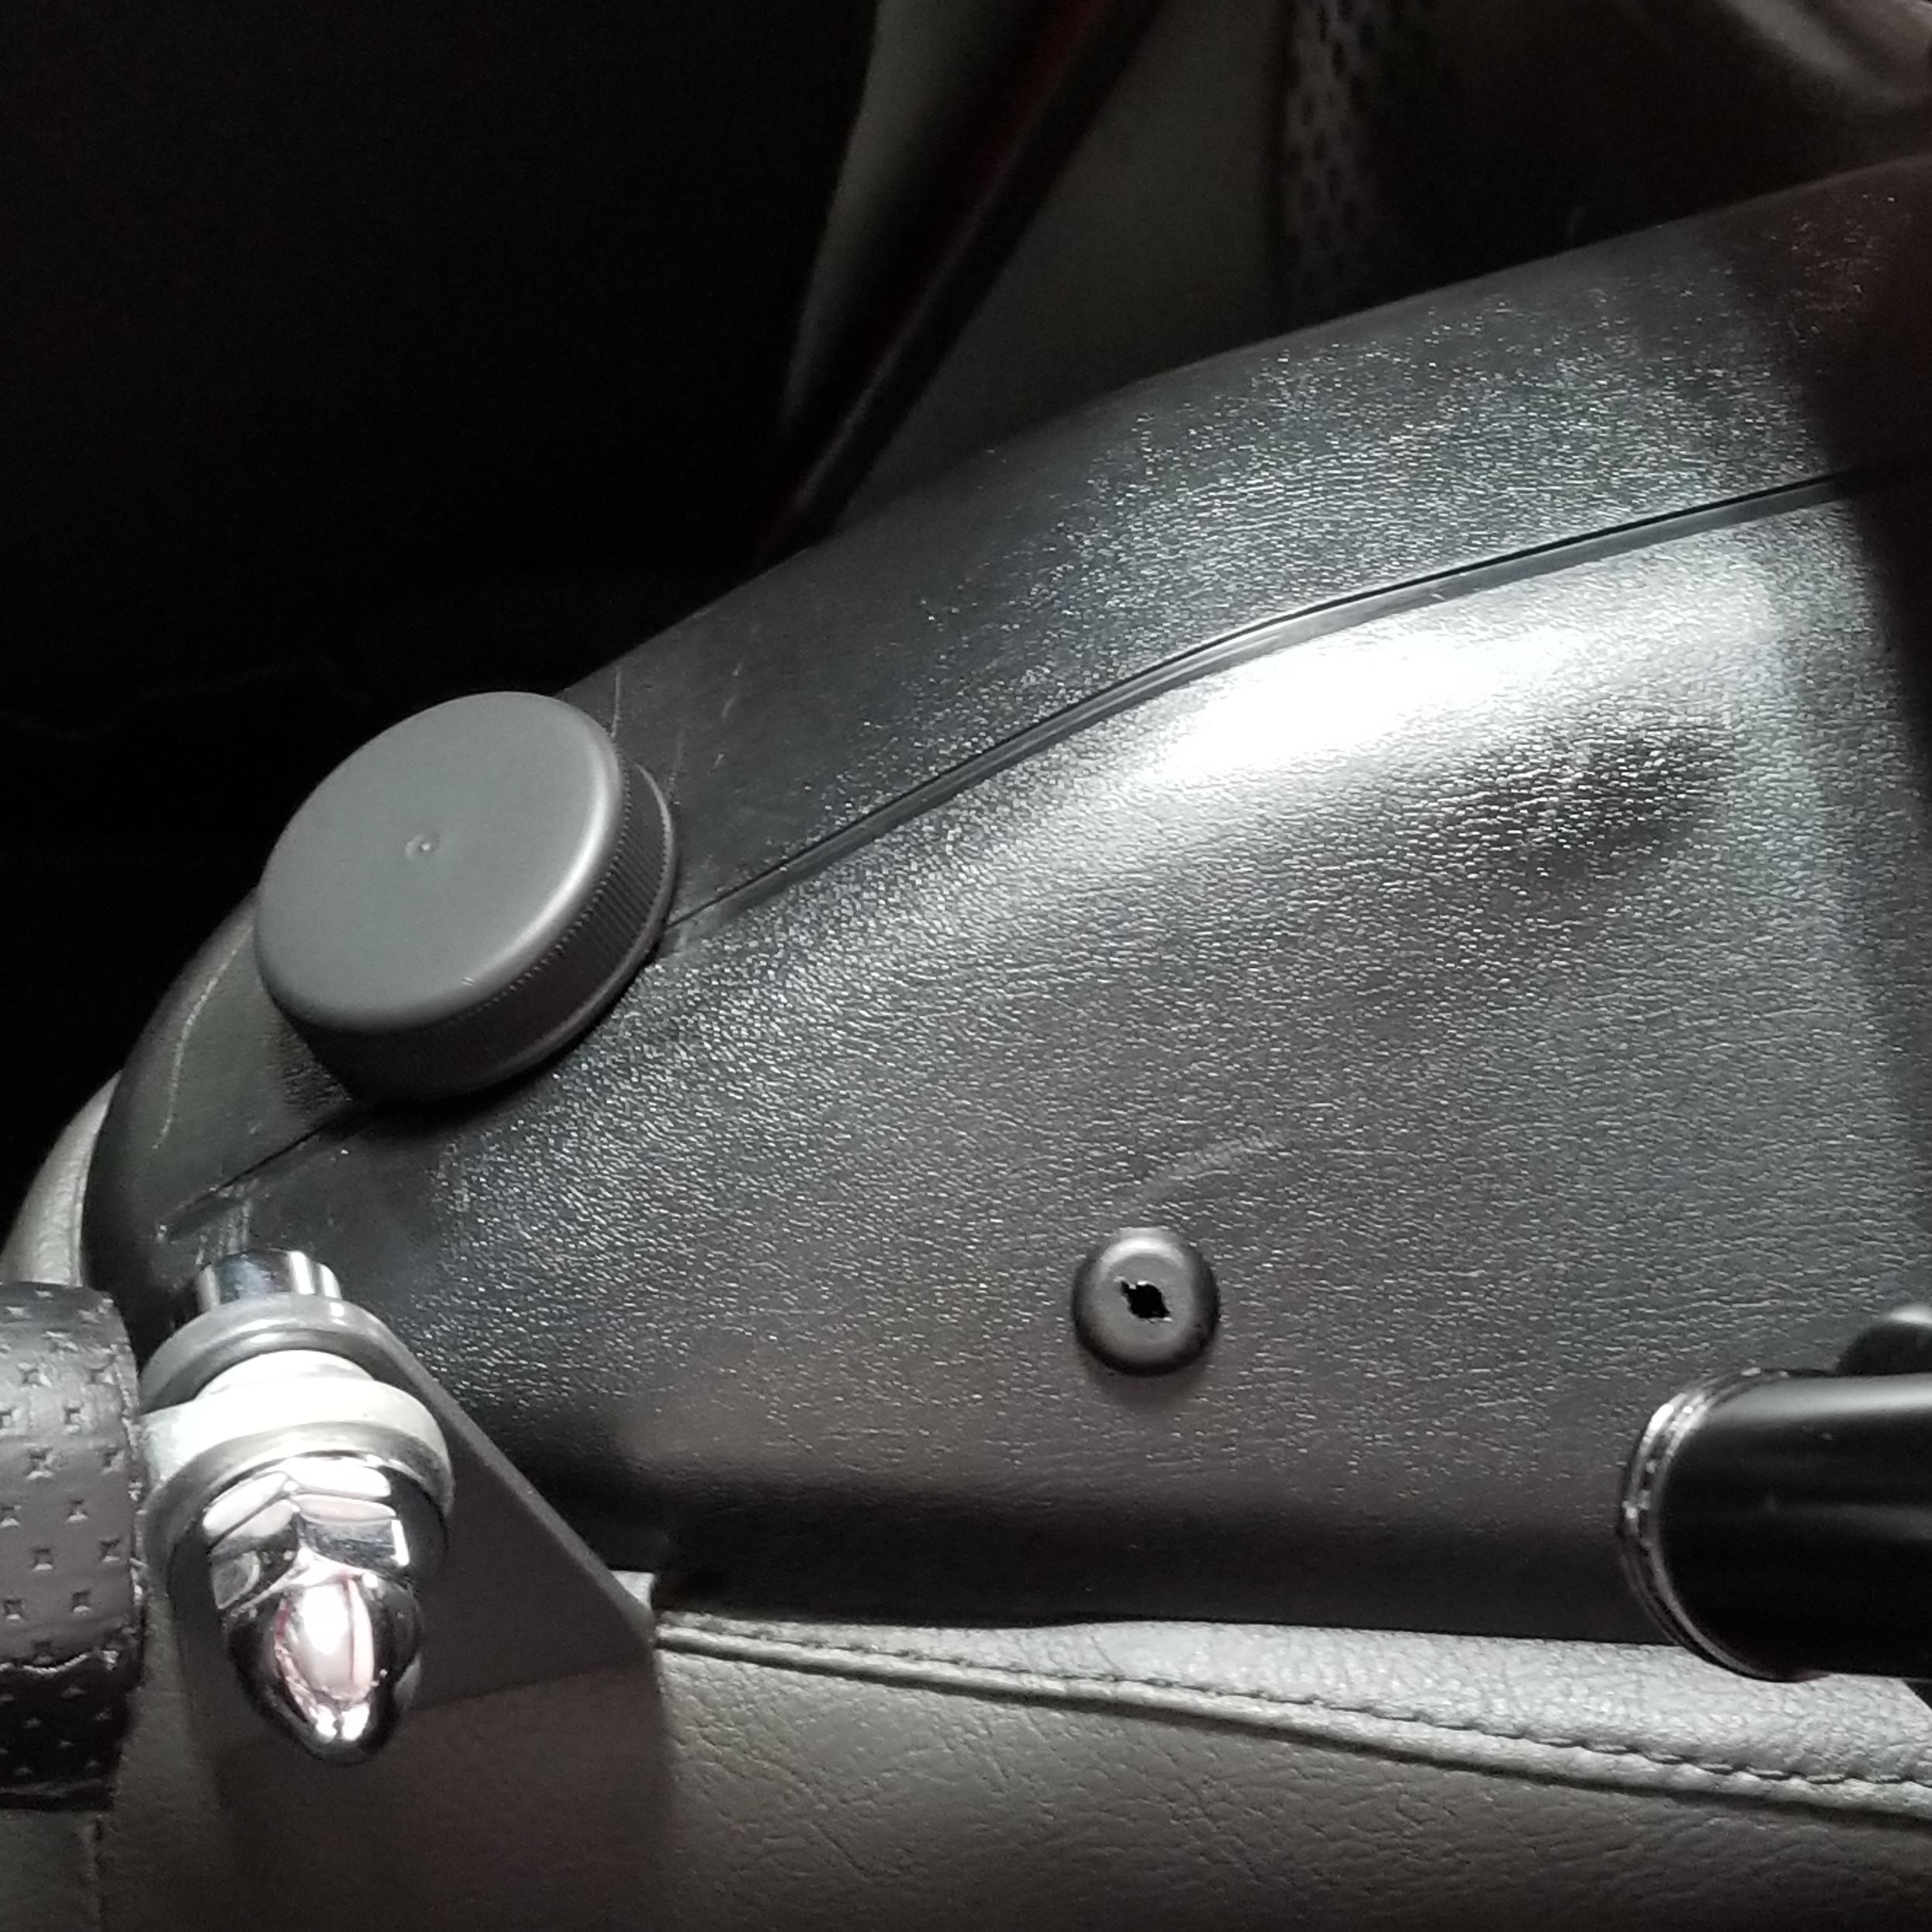
After playing around with my suspension setup and changing my mind a few times as to setting the dial on my adjustable Tokico Illumina struts, I got tired of broken and lost retaining pins for the strut tower covers and decided to fabricate an easy access port for the dial on the top of the rear strut. I used a 2.5" diameter screw cap and "neck" from a juice bottle (hard clear plastic) and adapted it to the strut tower cover. Took about an hour total time (and drinking tons of cranberry juice) but now I can dial in my rear struts as easily as my fronts now.


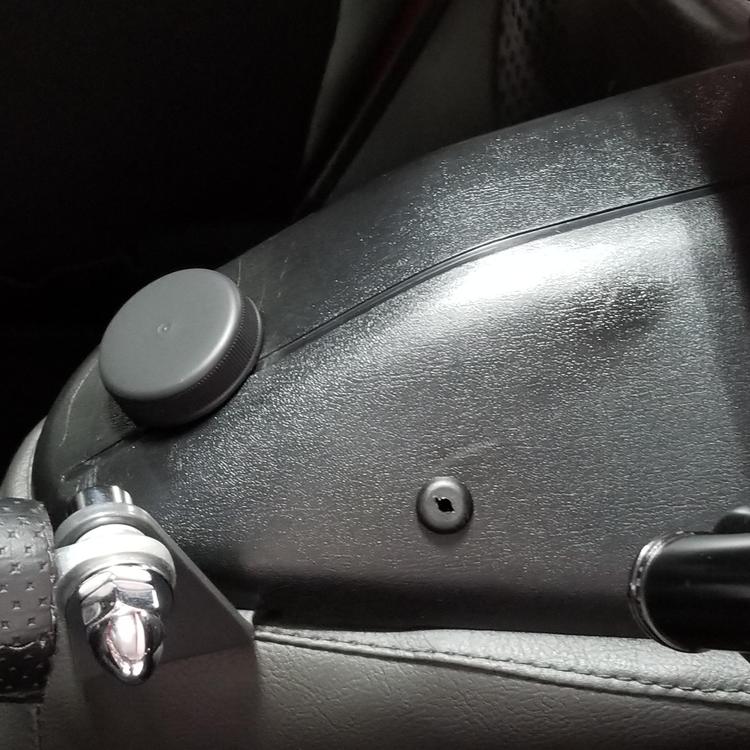
 1 point
 -
Very nice! The corks from Grey Goose are useful in many ways.1 point
-
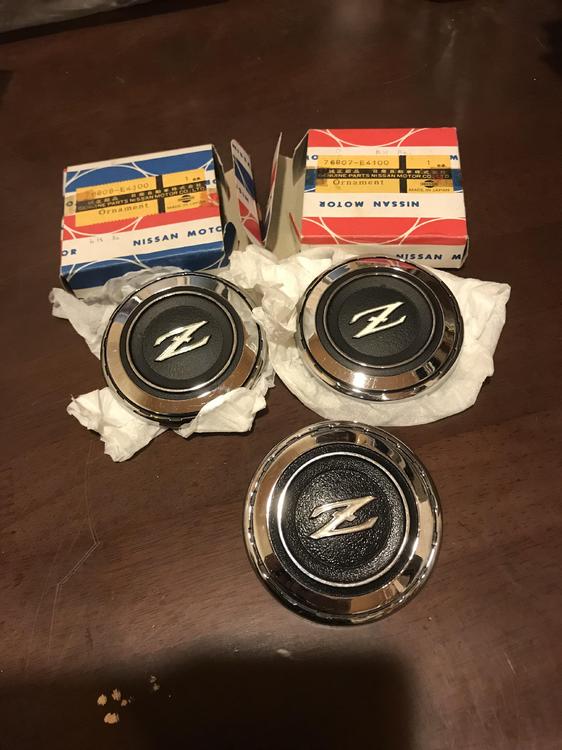
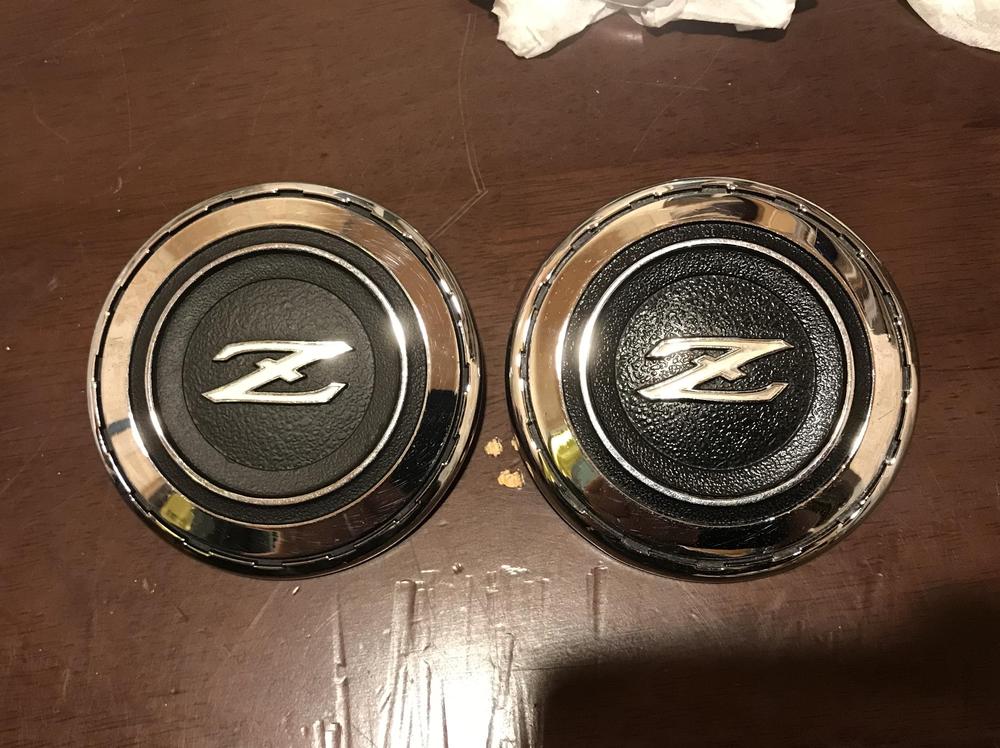
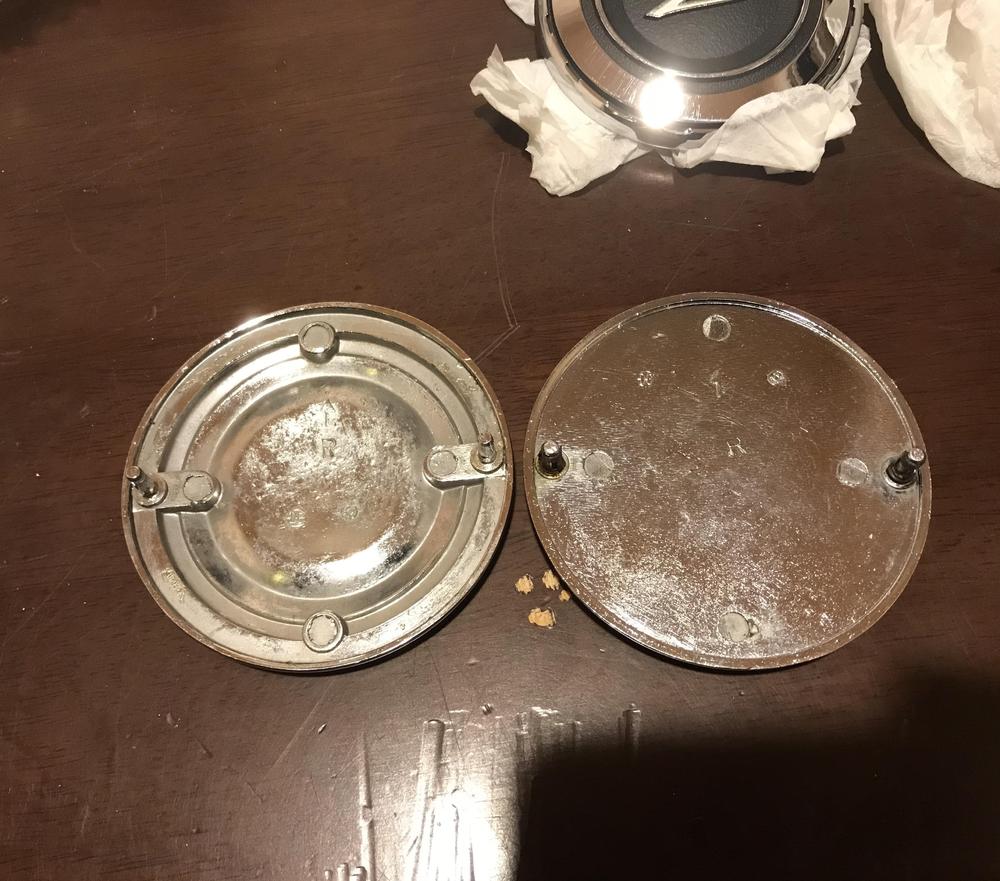
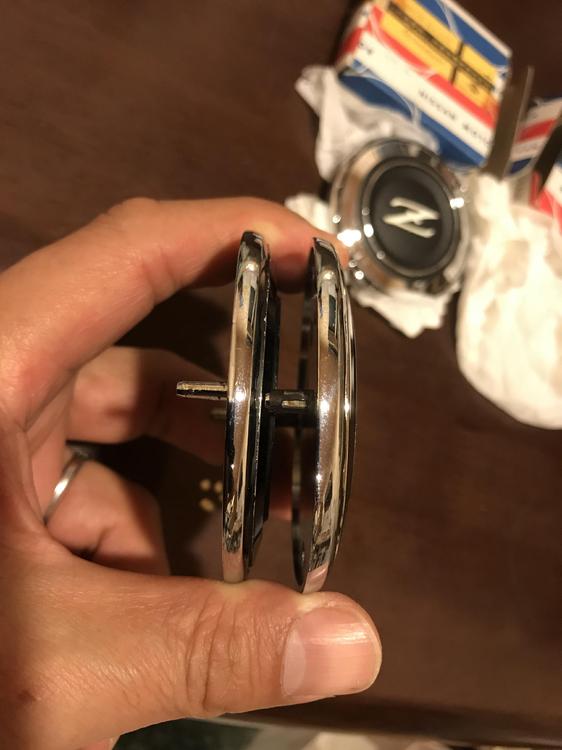
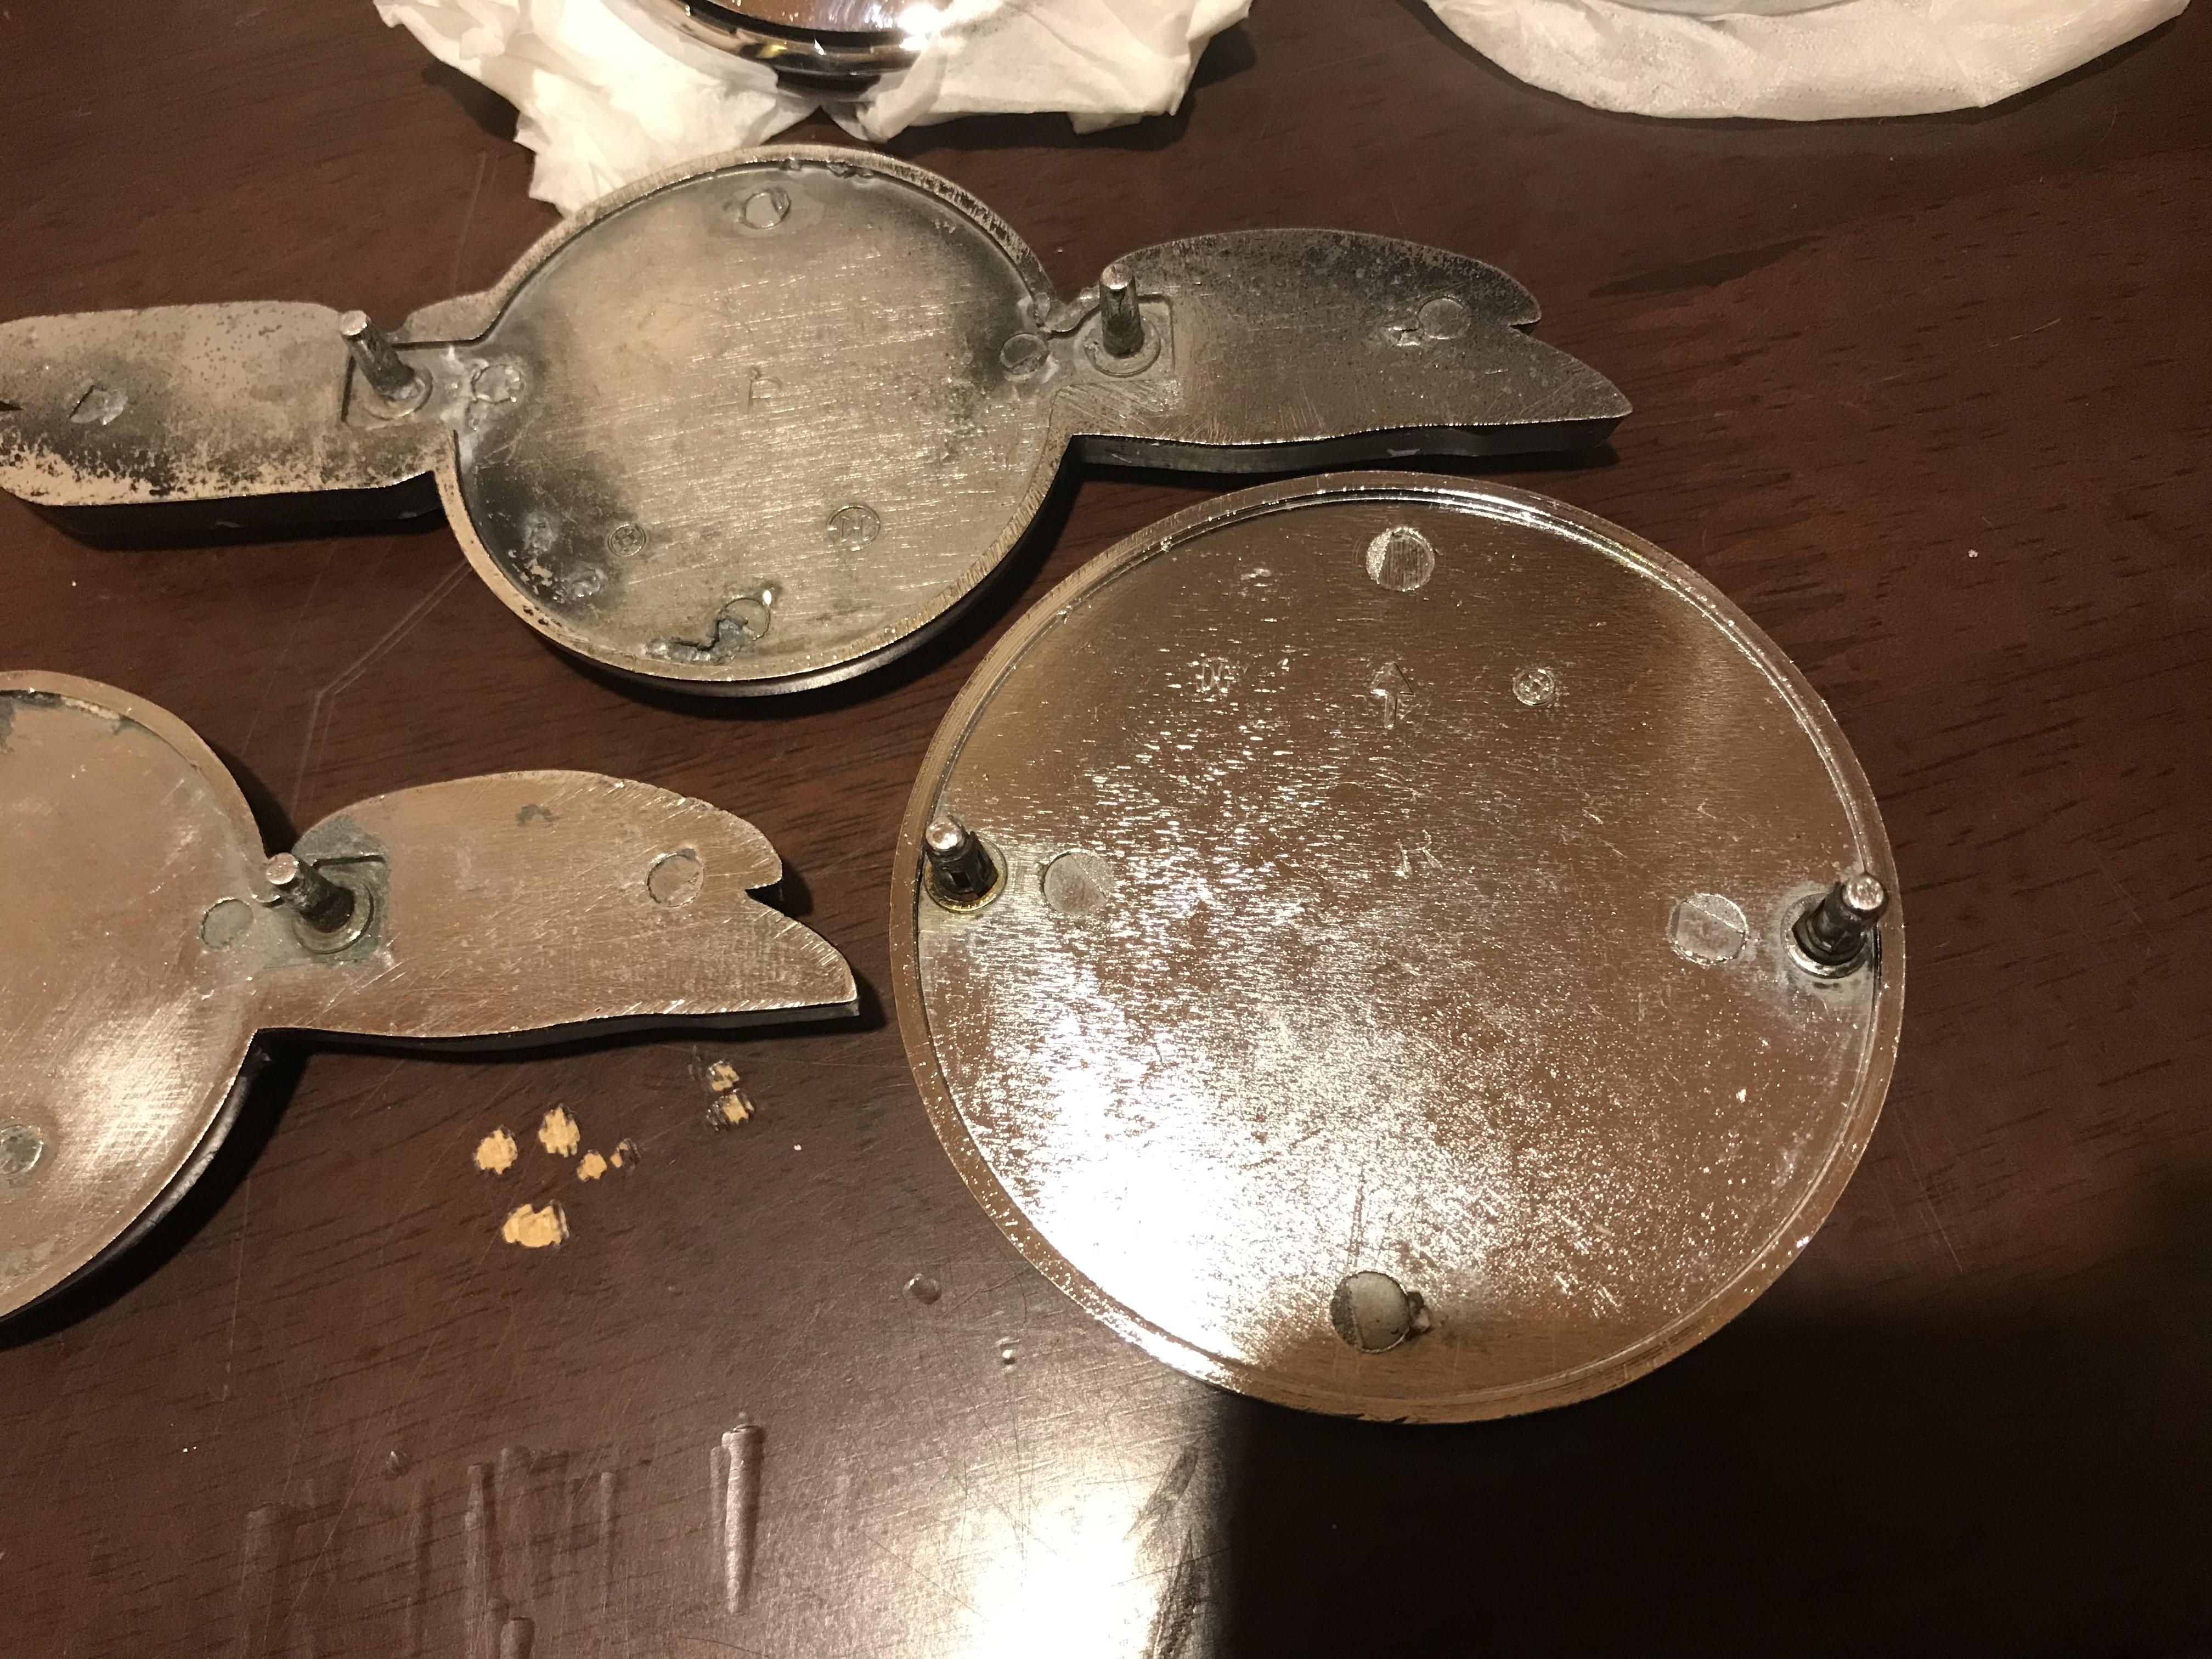
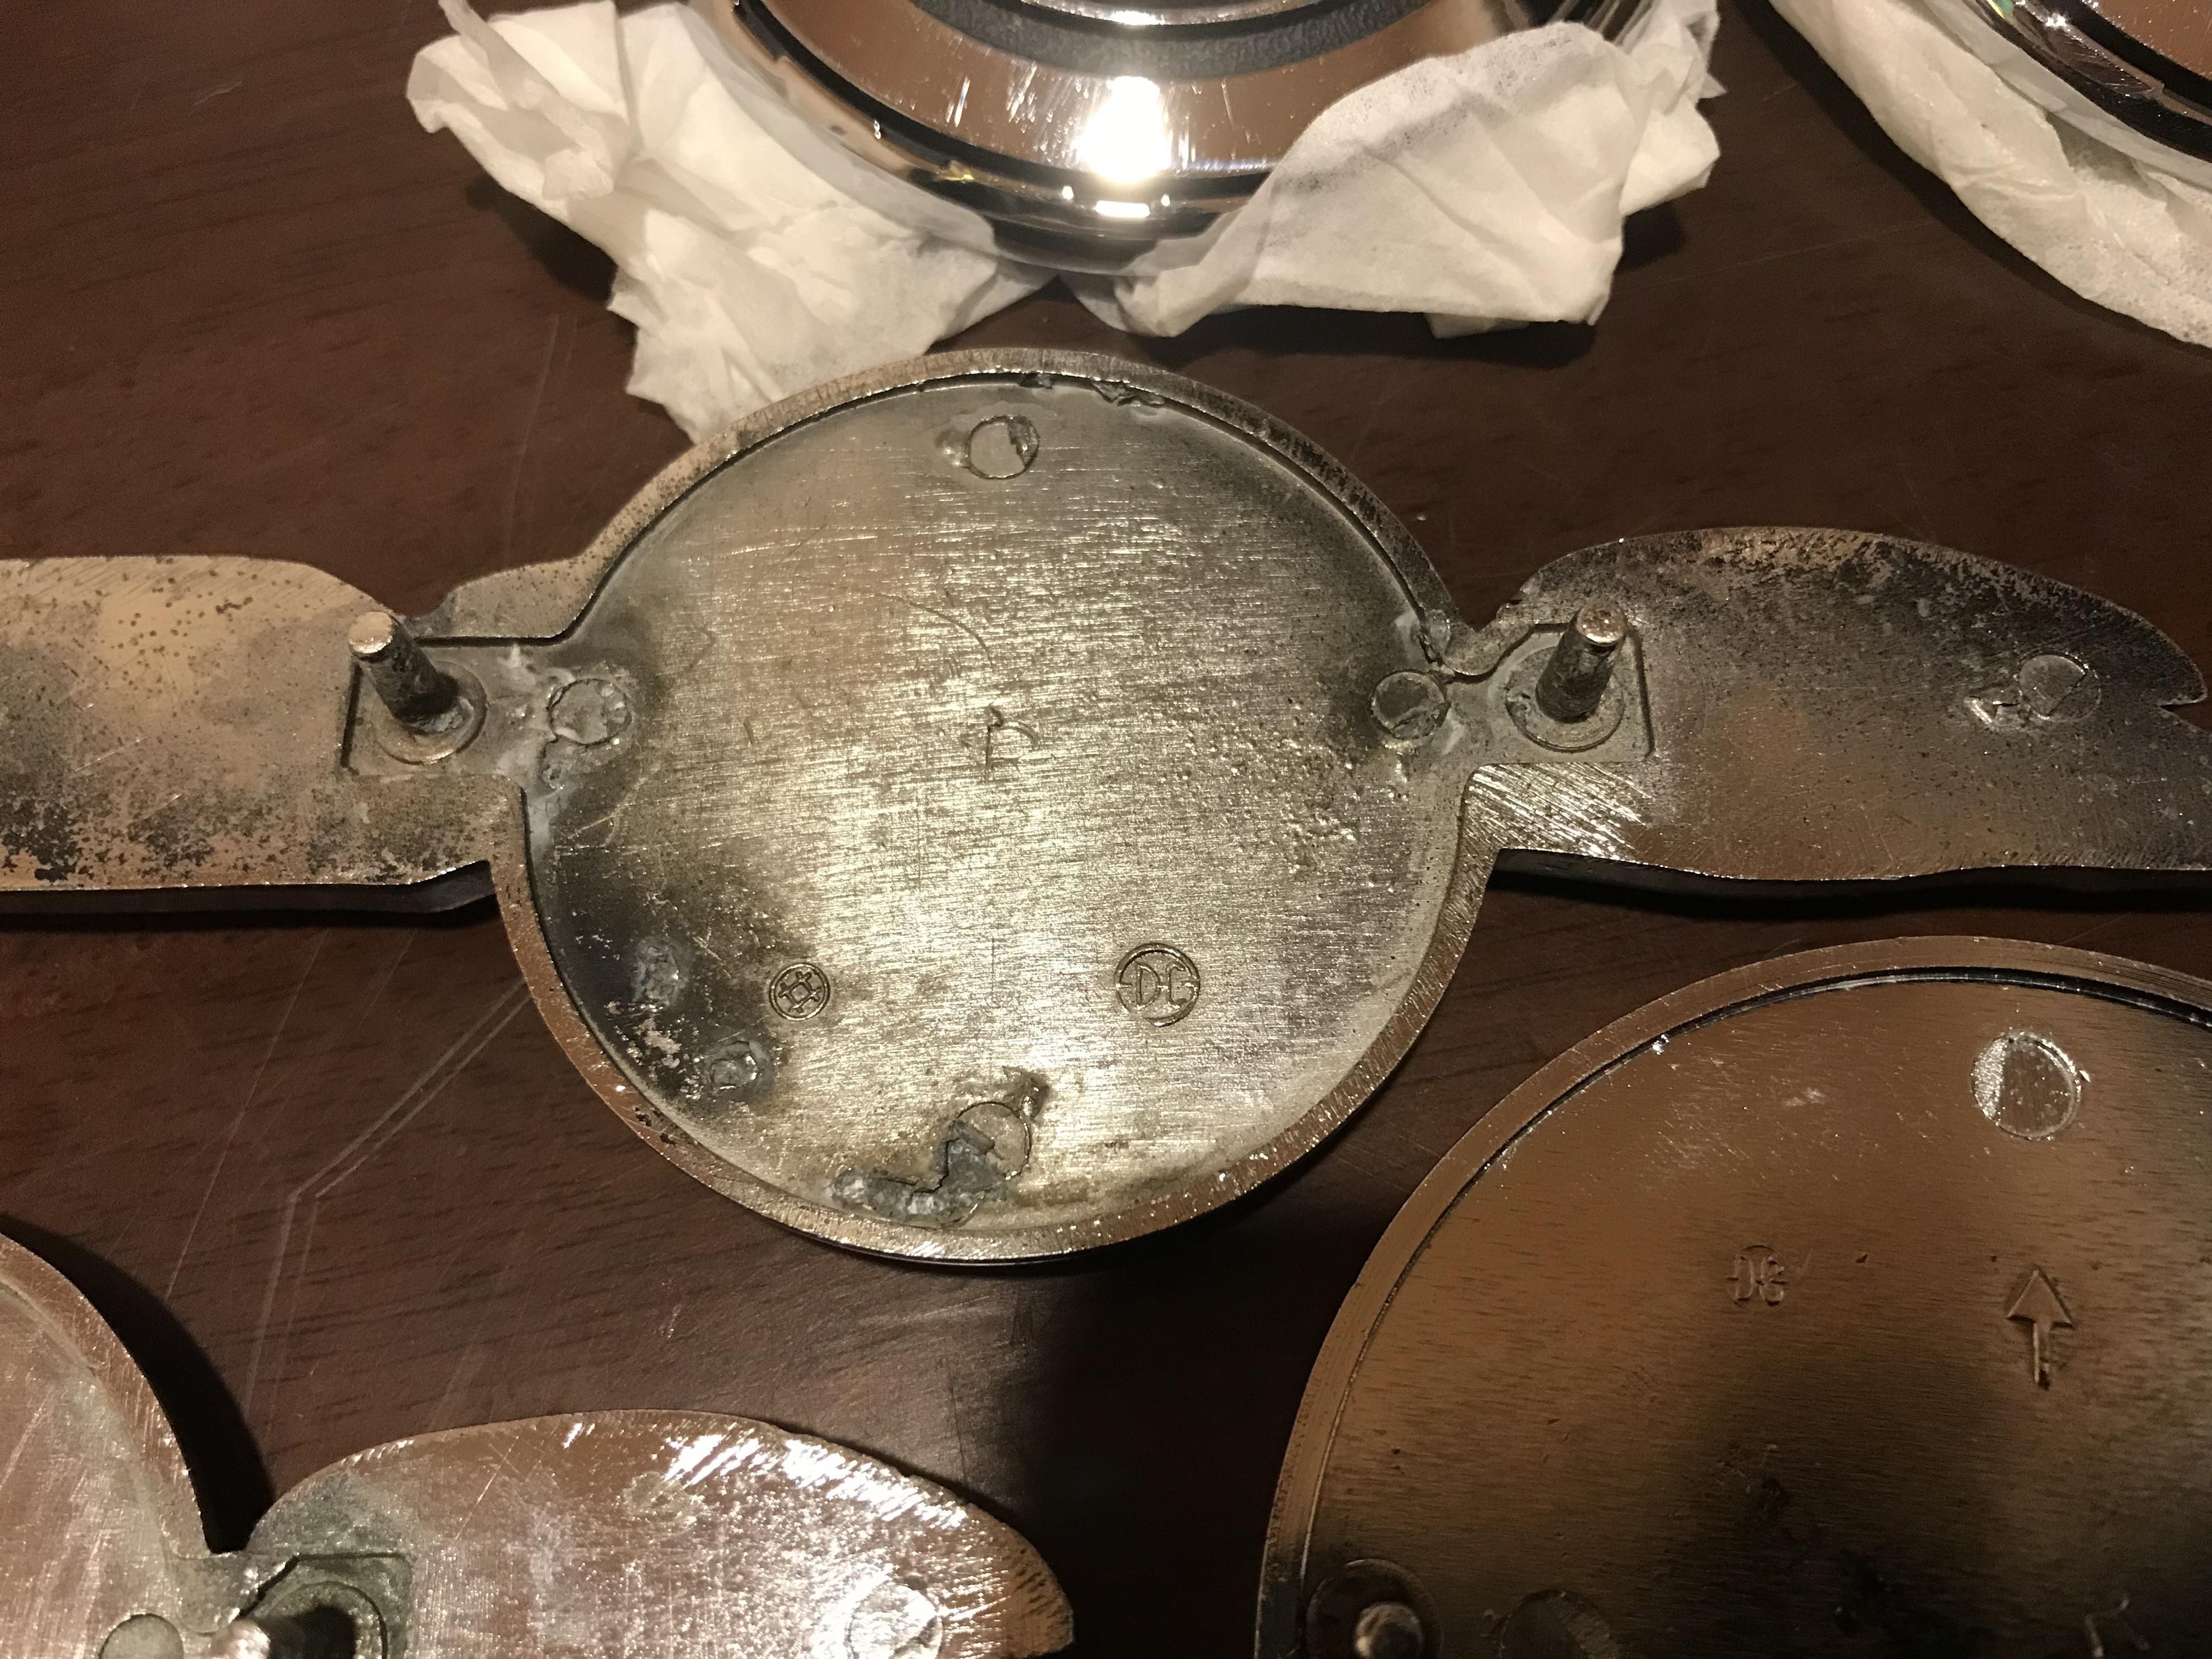
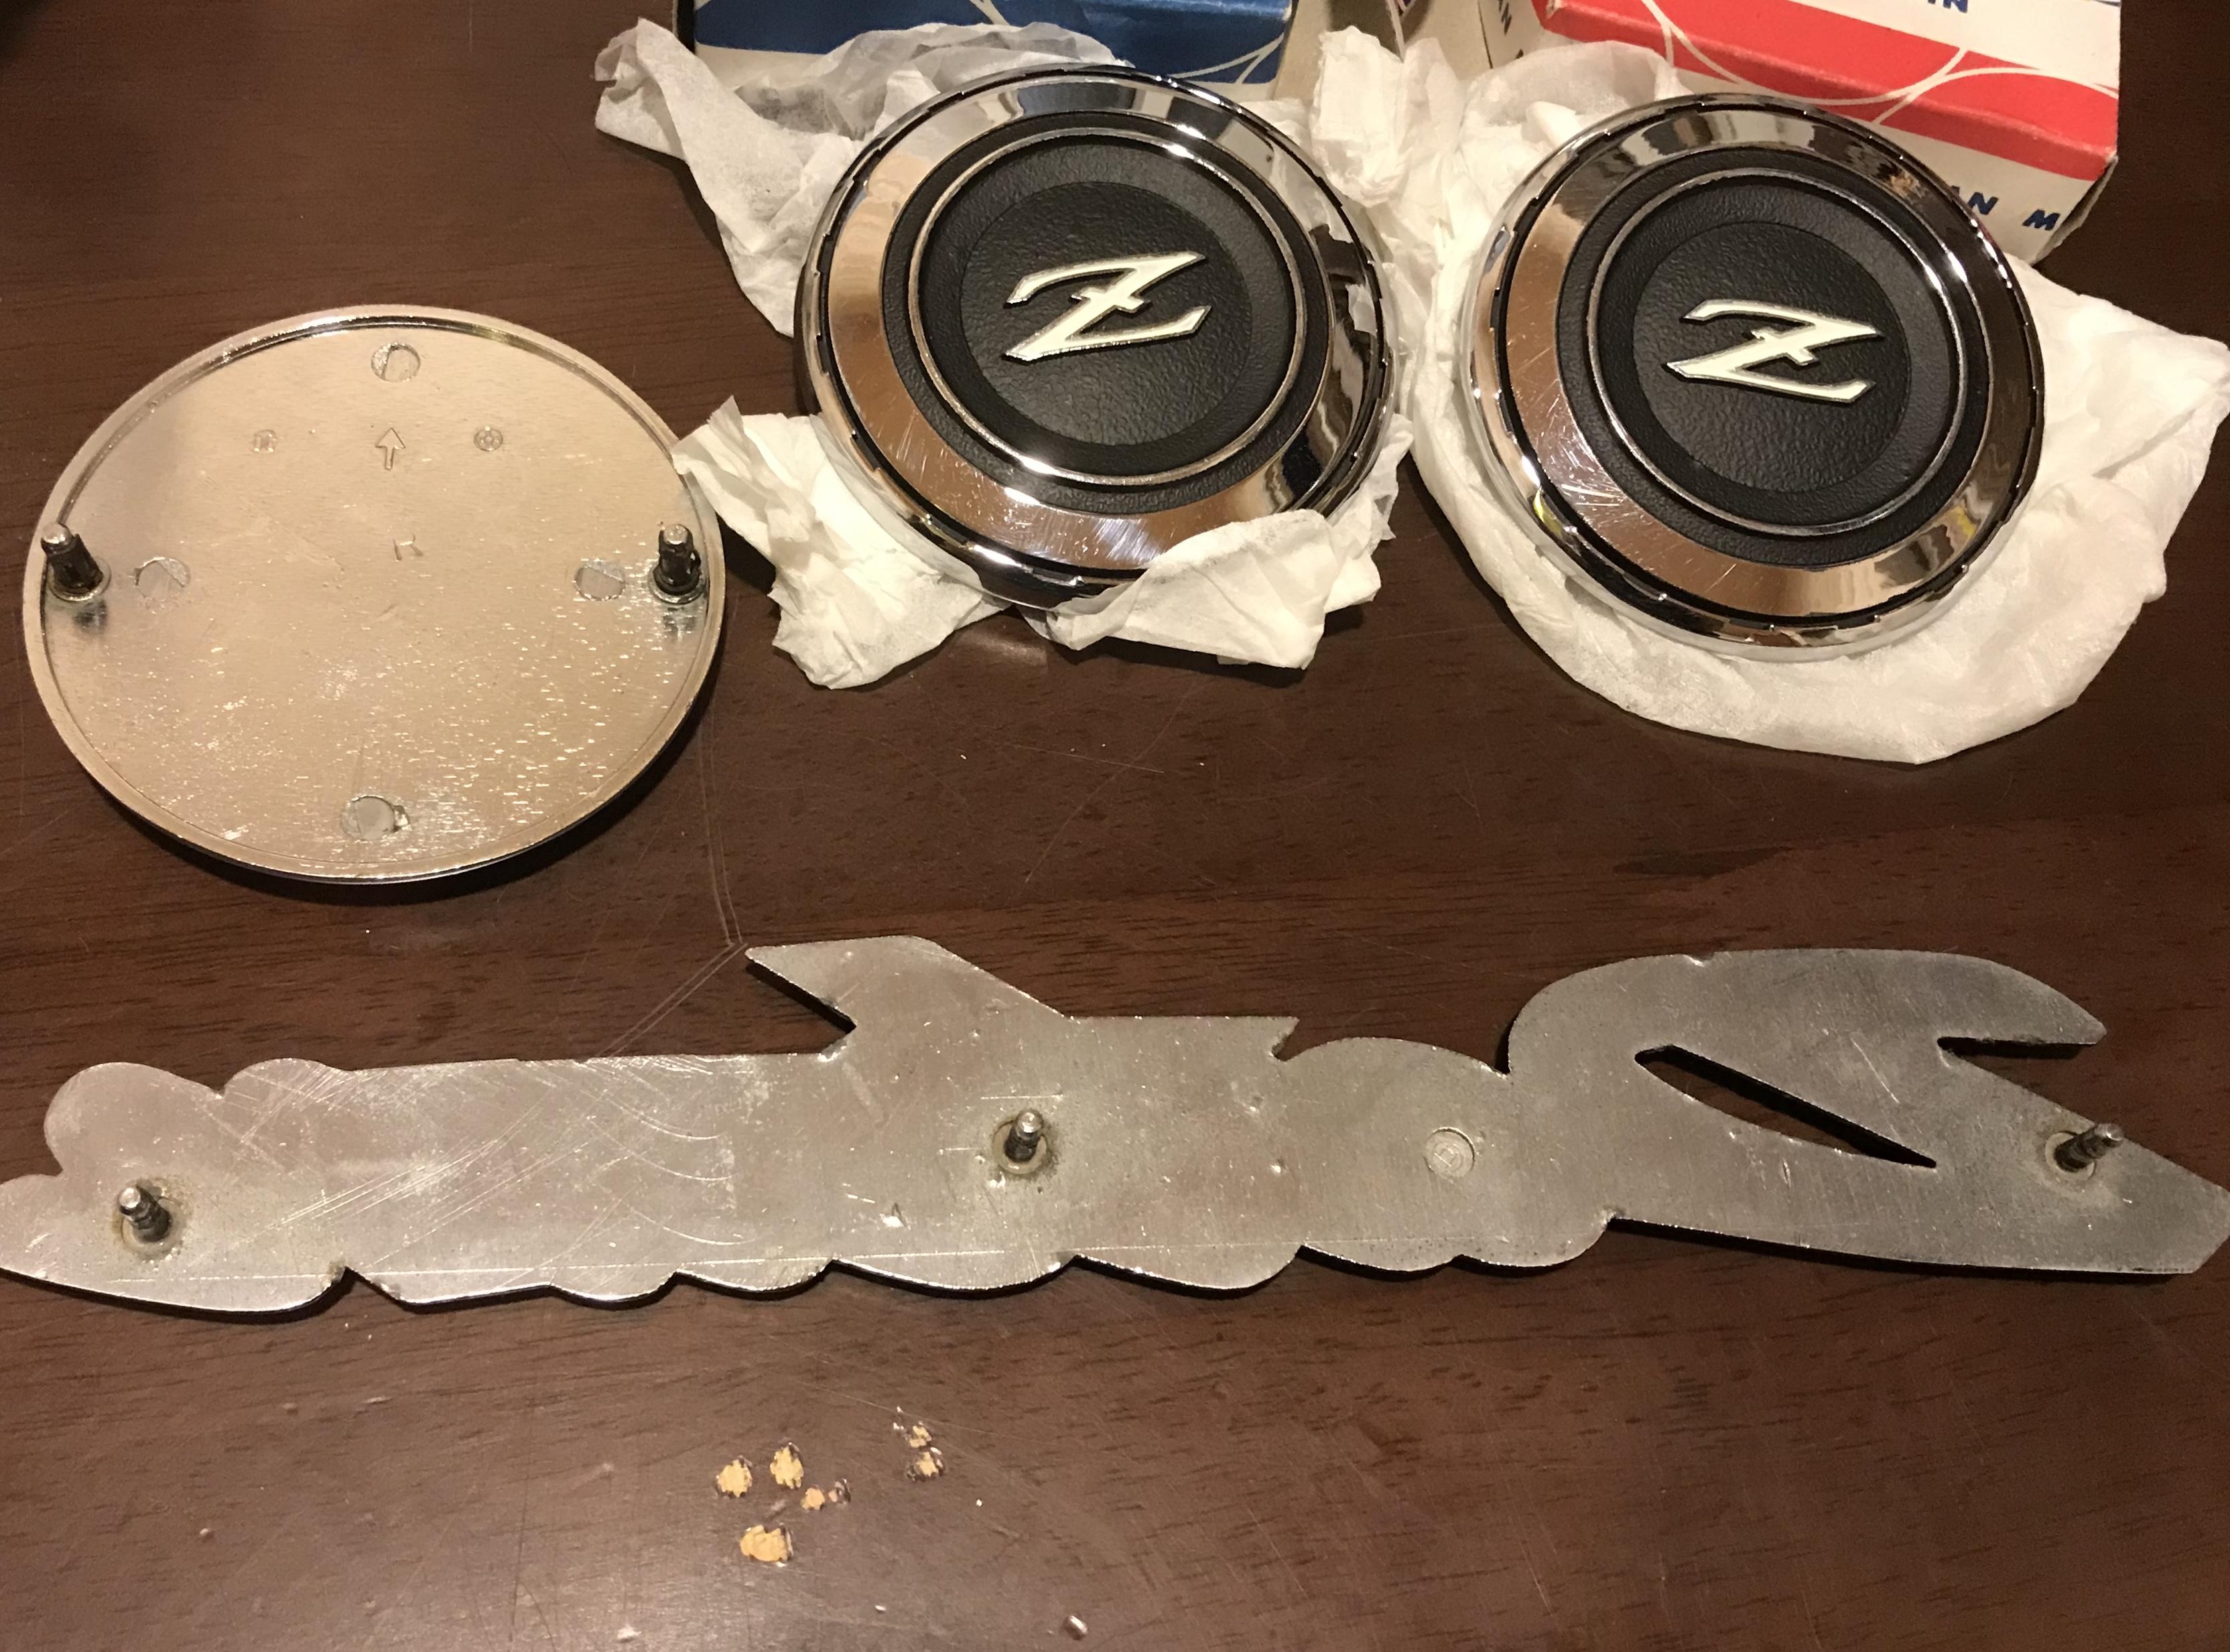
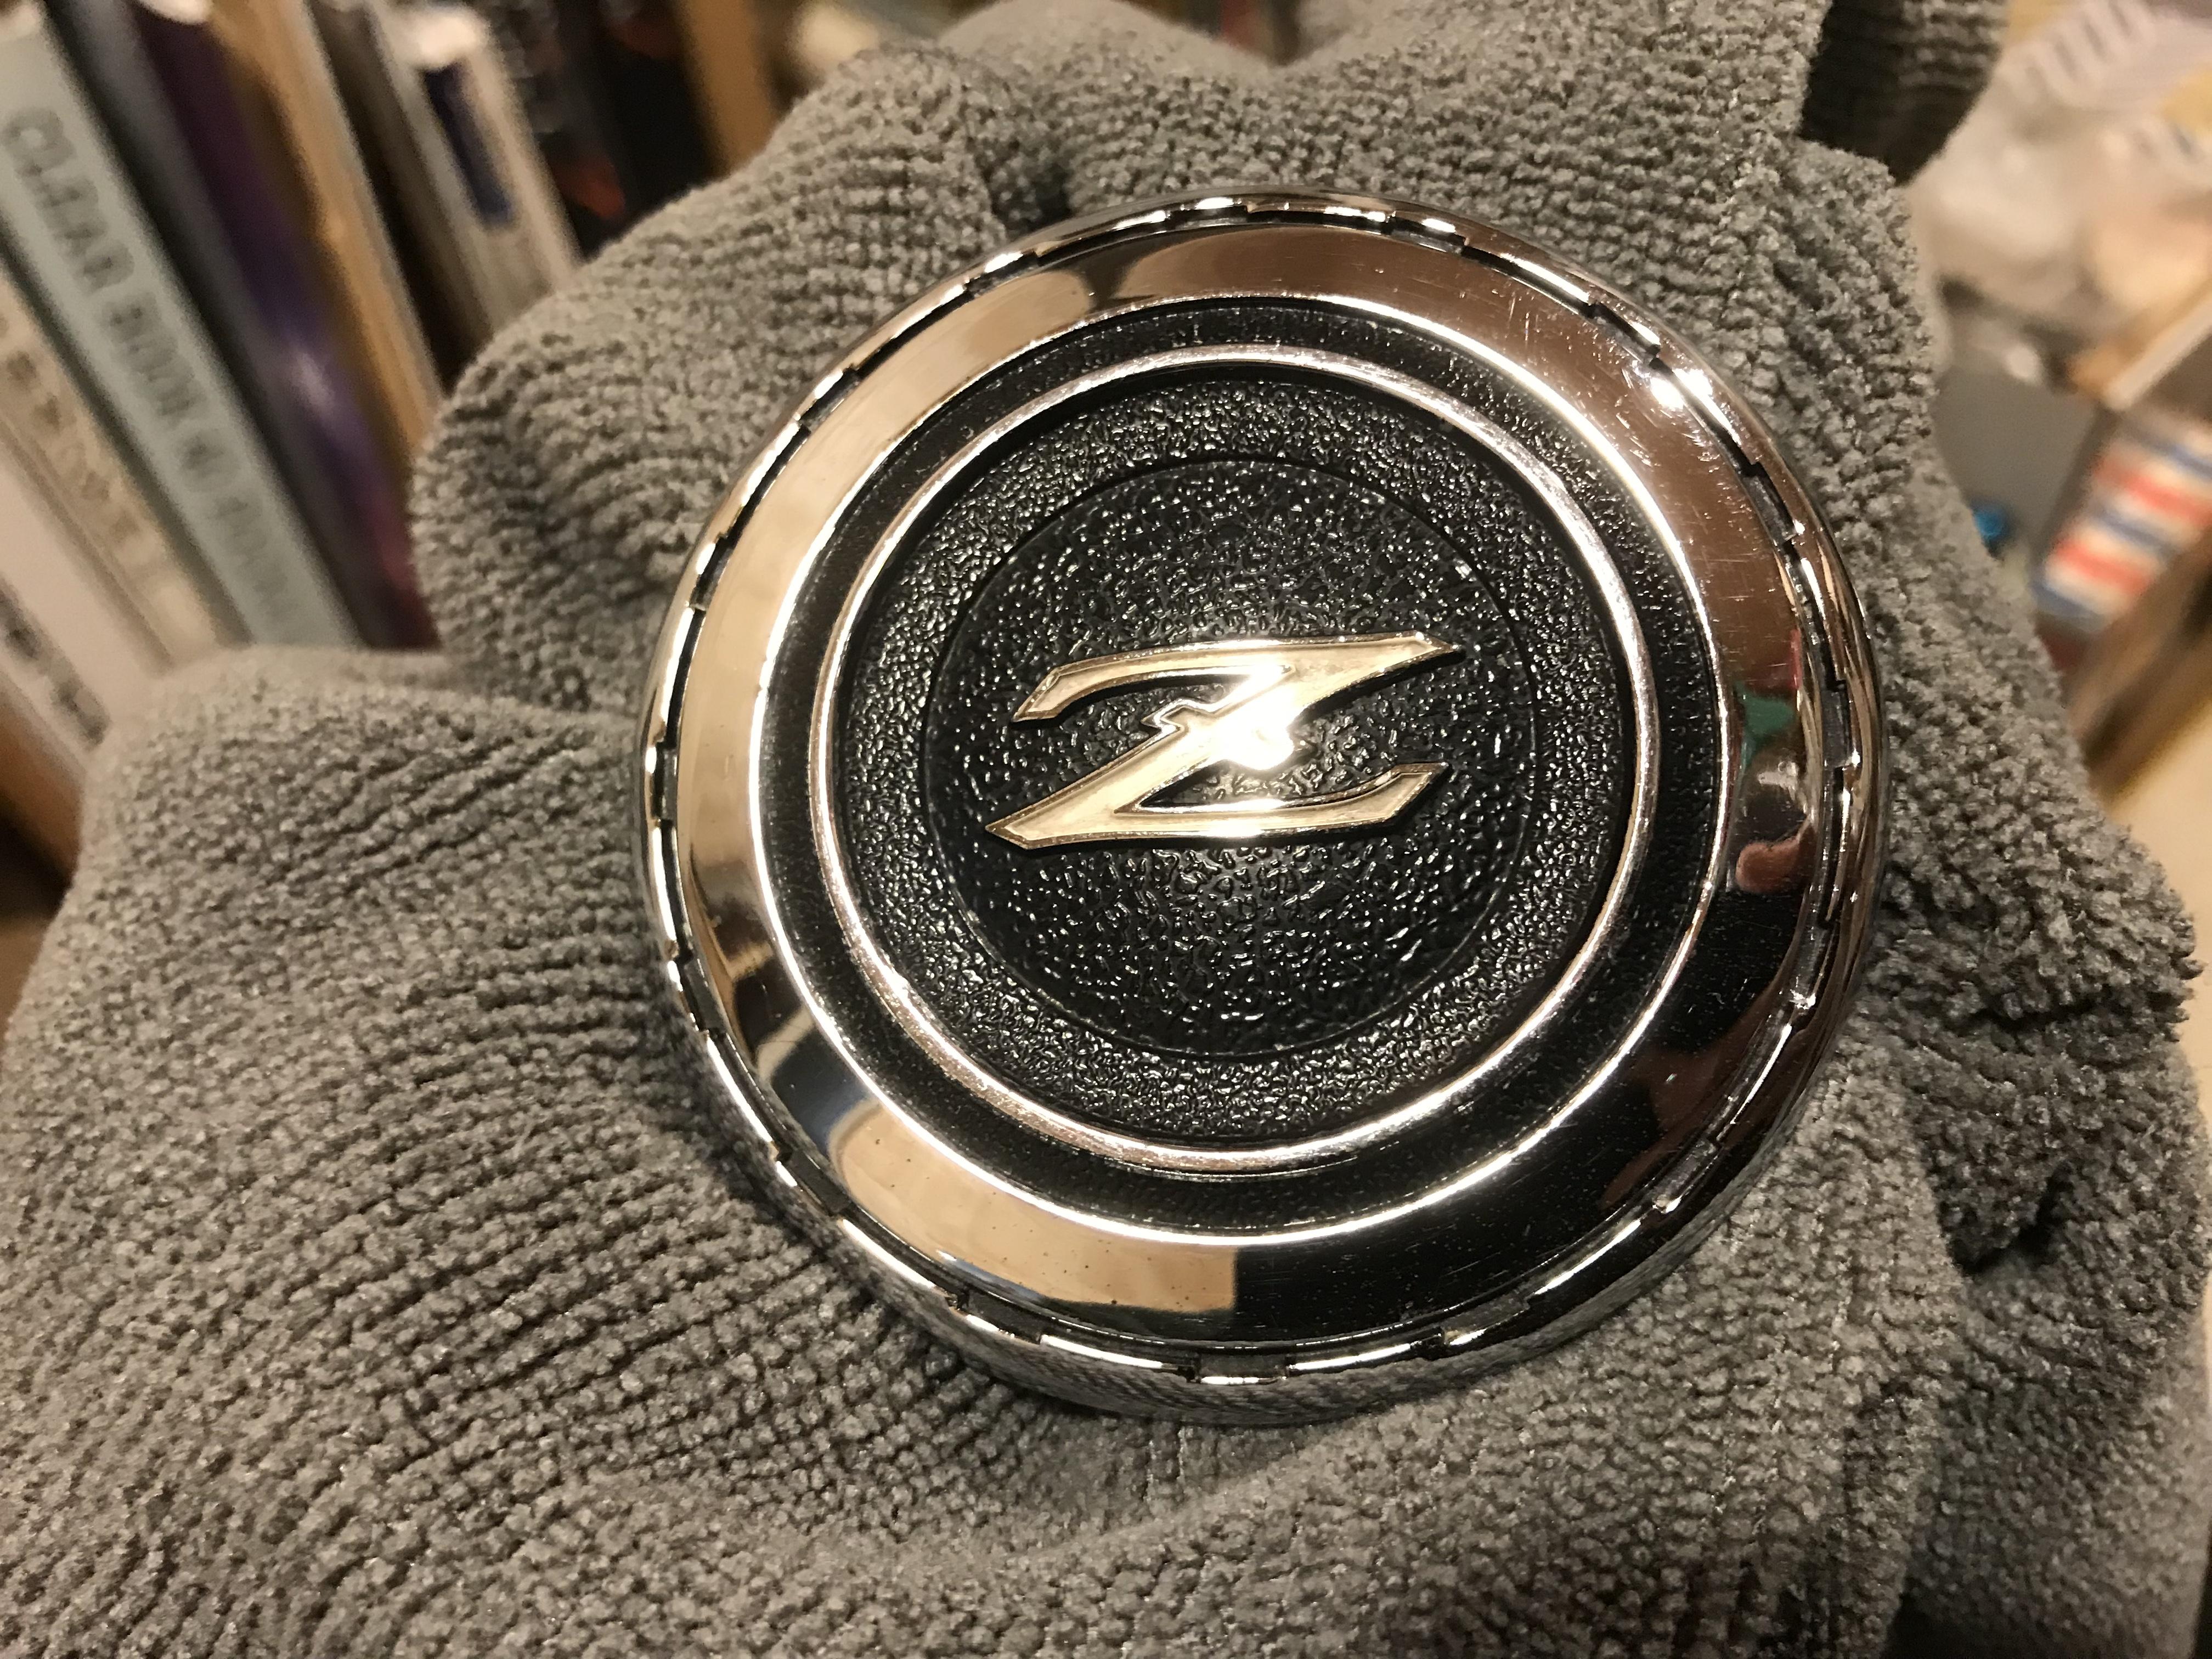
Comparison back of the solid emblem family. Kats


 1 point
 -
Hi Blue , thanks for the picture and your statement is very interesting, we need to discover it . Today I would like to show you this , A Fairlady-Z ‘s solid metal quarter emblem , an ultra early emblem . I have got this recently, and this is Right side quarter emblem as you can see “R “ on it . Attached pictures show the difference between hollowed metal emblem and solid metal emblem. I found the solid emblem is a little bit thicker than hollowed emblem. And it is so heavy to compare the hollowed emblem. I am impressed with this solid emblem is so clean and shiny, almost identical to the hollowed ones which are literally New In Box . I asked the seller if he has a solid Left quarter emblem, but he did not . As we already know , nearly 1000 Japanese Zs ( L20 and S20 models ) were produced by the end of Dec 1969 . This quantity is almost double of export S30s ( L24 model ) , but I cannot be optimistic, it is so hard to see the early production Fairlady Zs nowadays. Kats

 1 point
 -
1 pointWelcome aboard. You'll love how easy they are to work on and all the info that's out there already. Whatever you run into has been done 1000 times before but now with photos.1 point
-
1 pointWelcome @z8987 ! Tantalizing photo! Hopefully just the start of your Z story. If Carl steered you, you got sage advice regarding Z cars. A $3500.00 entry fee into this world is unheard of these days, so congratulations on your purchase. From the photo it looks to be a really nice start. Please post more. (your first project is to adjust the wipers to a proper park position---) Judging by what you have said, the Z may be among the best bucks you could spend to return to a remembered moment in your life. Again---Welcome---you've got a lot to enjoy ahead!1 point
-
1 pointLuckily I am Electro Optronics tech and have the pins/skills to rebuild this. Just disappointed when things like this happen. Make-work projects that should be straightforward.1 point
-
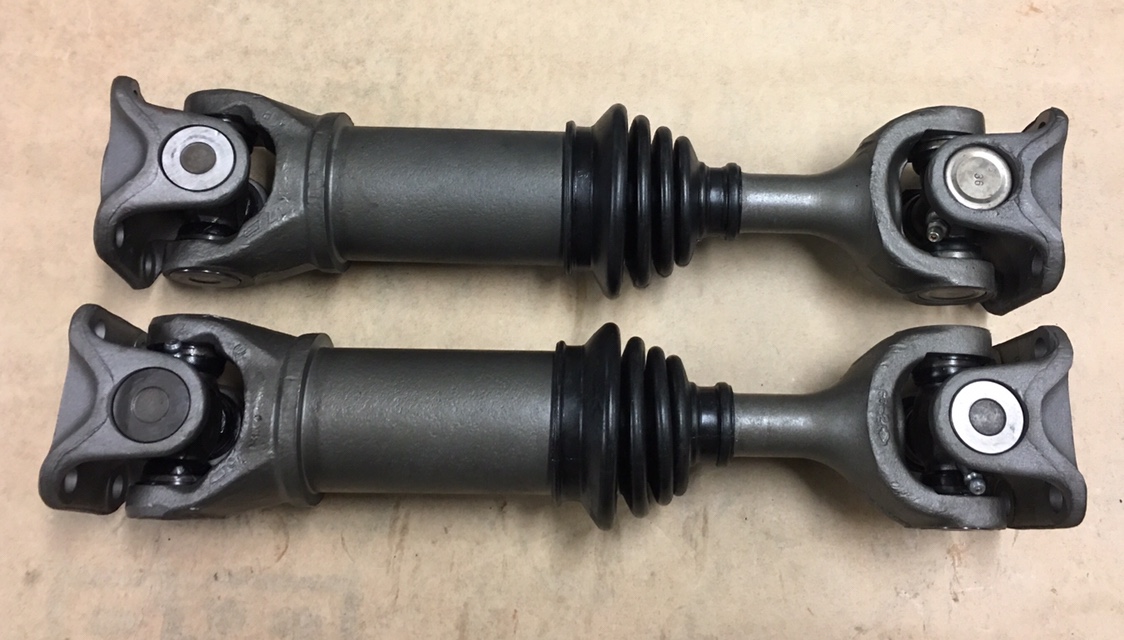
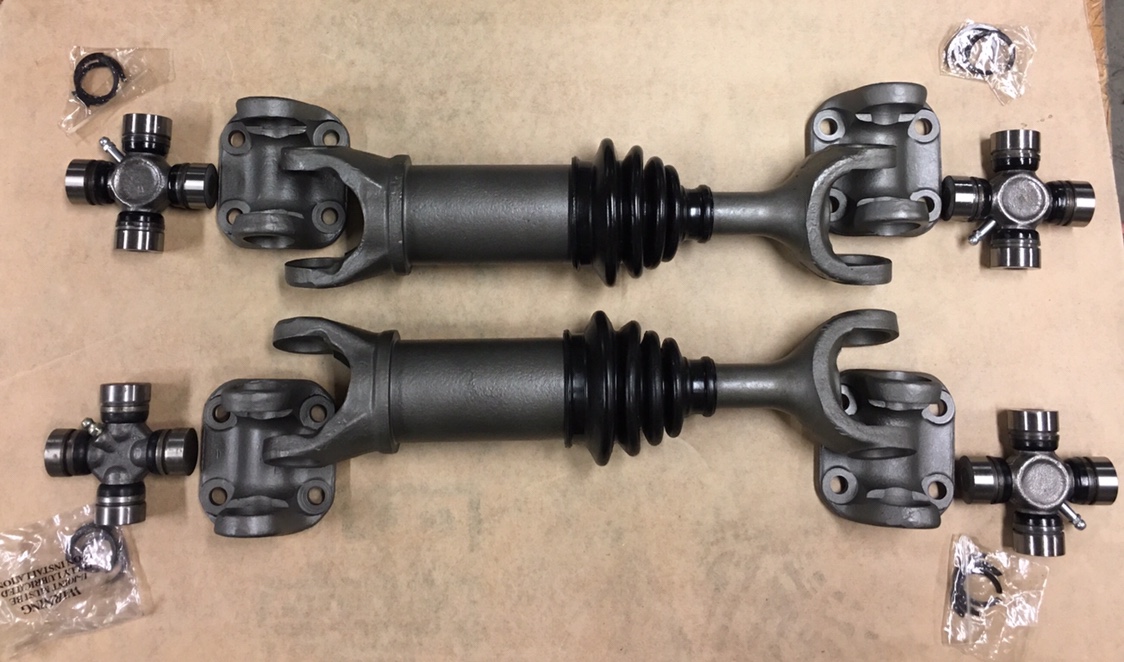
1 pointSKF UJ393 or MOOG 393 or Precision 393. All of them have grease nipples. I have 3 SKF and one Precision u-joint. Best I could do as they ordered them in and they were all listed under the same part number at NAPA.
 1 point
 -
1 point1 point1 pointI'm betting along those odds myself. Zup will come down here and slap me upside the head if I break it. Coming in from the back was an idea but they have a rubber back pad glued to the mirror. I've already called my local Nissan parts guy and they have plenty for some reason. But no windshield wipers.1 point1 pointOk, and BTW... I don't know who is taking the bets, but I give it 60-40 in favor of you chipping the edge of the mirror before this is all said and done. Yes, I said it. Sorry.1 point


Important Information
By using this site, you agree to our Privacy Policy and Guidelines. We have placed cookies on your device to help make this website better. You can adjust your cookie settings, otherwise we'll assume you're okay to continue.