Leaderboard
-

kats
Free Member5Points2,215Posts -
Patcon
 Subscriber
 4Points11,142Posts
 -

siteunseen
Free Member3Points15,115Posts -
RIP260Z
Free Member3Points364Posts


Popular Content
Showing content with the highest reputation on 01/08/2019 in all areas
-
3 pointsWe got stomped and know it. Congratulations Clemson! Here's my sign for today's special. It made the local news. ?
 3 points
 -
2 pointsHello Kats, Your praise and enthusiasm for my site means a lot Kat. Thank you. It has taken a lot of effort, hours to do this site, whether tracking down period magazine articles from Japan (I am still missing some) and working every single kanji by stroke, finding it electronically, pasting into Word, the translating via Google. So far, I must be up to around 80,000 kanji done. (No, google translate image on phone won't work on old faded print, where I had to use a hand lens). Plus, it gave a feel/understanding of Japanese kanji, and Japan as a whole, doing it the "long" way. Making sure the english sentences are short/un-complicated, so Google can give a better (though maybe not correct) kanji for me to post up. It does bug me slightly that the Japanese is maybe not quite correct, but as long as a Japanese person can get the right idea of what I am saying. As HS30-H said to me, how maybe Japanese websites have perfect English. I wanted the CSP311/A550X/Toyota 2000GT/S30 (as all their stories are joined/flow) be as good as I could find. That meant bypassing most of what was/is written in the western print (though it was still researched, read and cross referenced) and going back to where the story happened. Japan. My hope Kats, is someone in Japan sees my site, and this helps me get more information, to make the story, better, fuller, with thoughts, ideas and drawing, anything. Patcon, I know. But it means that I have to go right back, no hiding, and it also means I can put my stamp on it, e.g. it will have larger fuel tank fabricated, and to match, I already have a refurbished/newly screen printed fuel gauge saying my larger fuel tanks volume, rather than stock. You won't notice, unless you know where to look. I am currently looking at doing some injection molding...2 points
-
2 pointsi do believe the pics are about 20 years old. the story behind the car is that shes my grandmas car. my grandma was a truck driver back then. she bought her new. drove her for a while here and there around town. then she made her way to storage. she has been stored in a insulated semi truck trailer off the ground and covered for about as long as the pics are old. we are getting ready to cut the lock on the trailer and bring that beauty out and show her to the world. So I am trying to learn as much as i can about her so that i can have somewhat of an idea of what I am working with before we bring her out. I know shes gonna need some love to get her back on the road. just want to make sure i do it right. such an amazing car don't want to mess her up. so anything i can find out about her will be greatly appreciated.2 points
-
2 pointsHi Ian . I am so impressed with your website, simply fantastic ! You have been dedicated so much for the history of the car , I can see how much effort you have put into it . You are not Japanese , there might be some difficulties to do the work . Amazing! And I am so happy that you wrote about A550X , https://csp311.net/a550x-development-history-a550x開発の歴史/ this page , I think everyone must read it . You put what I ( Nissan designers too of course!) wanted to say . To know about S30 developing story , your article back up what was happening at that time in Nissan , Yamaha , Tonouchi , Toyota , etc . I am 100% with you Ian , Mr. Goertz did not do anything about S30 styling, He never had a chance to be involved S30 development because he left Nissan before the project began . A thing that he left to Nissan designers was , how to make clay models and how to use the tools . So some people may say without his teaching , they could not make a car . But , this does not mean anything about S30 styling . Thank you so much Ian . Kats2 points
-
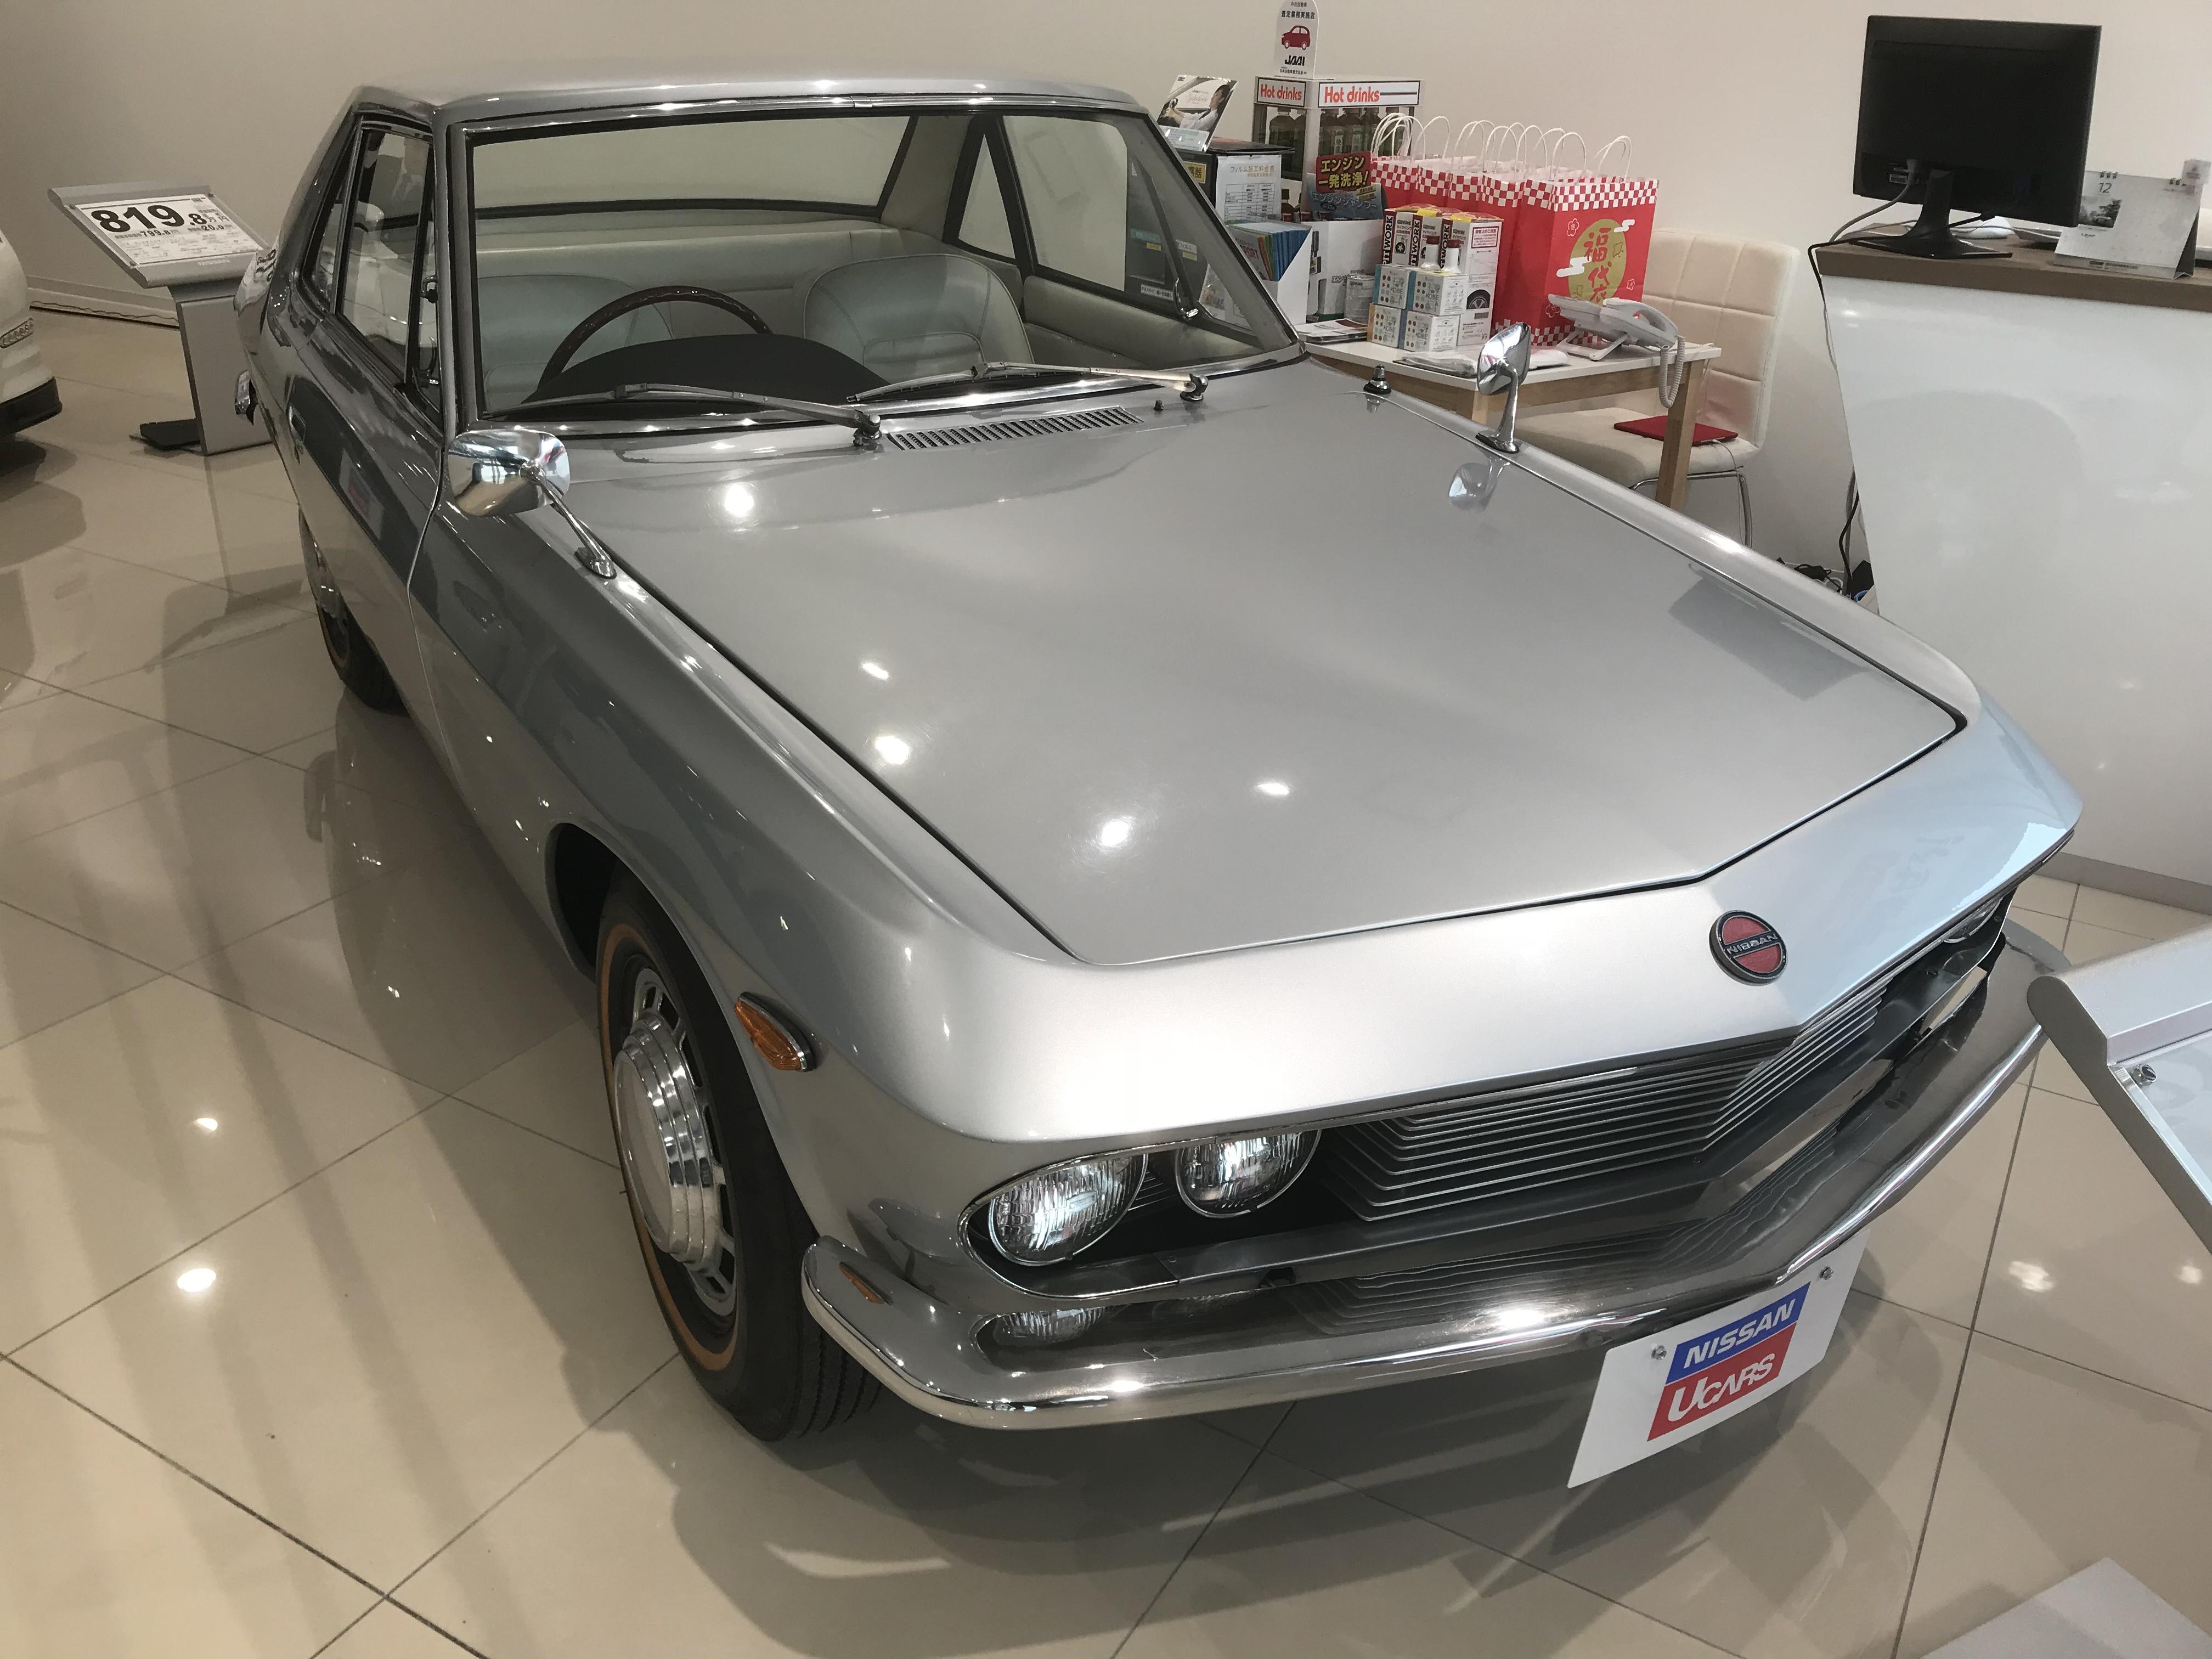
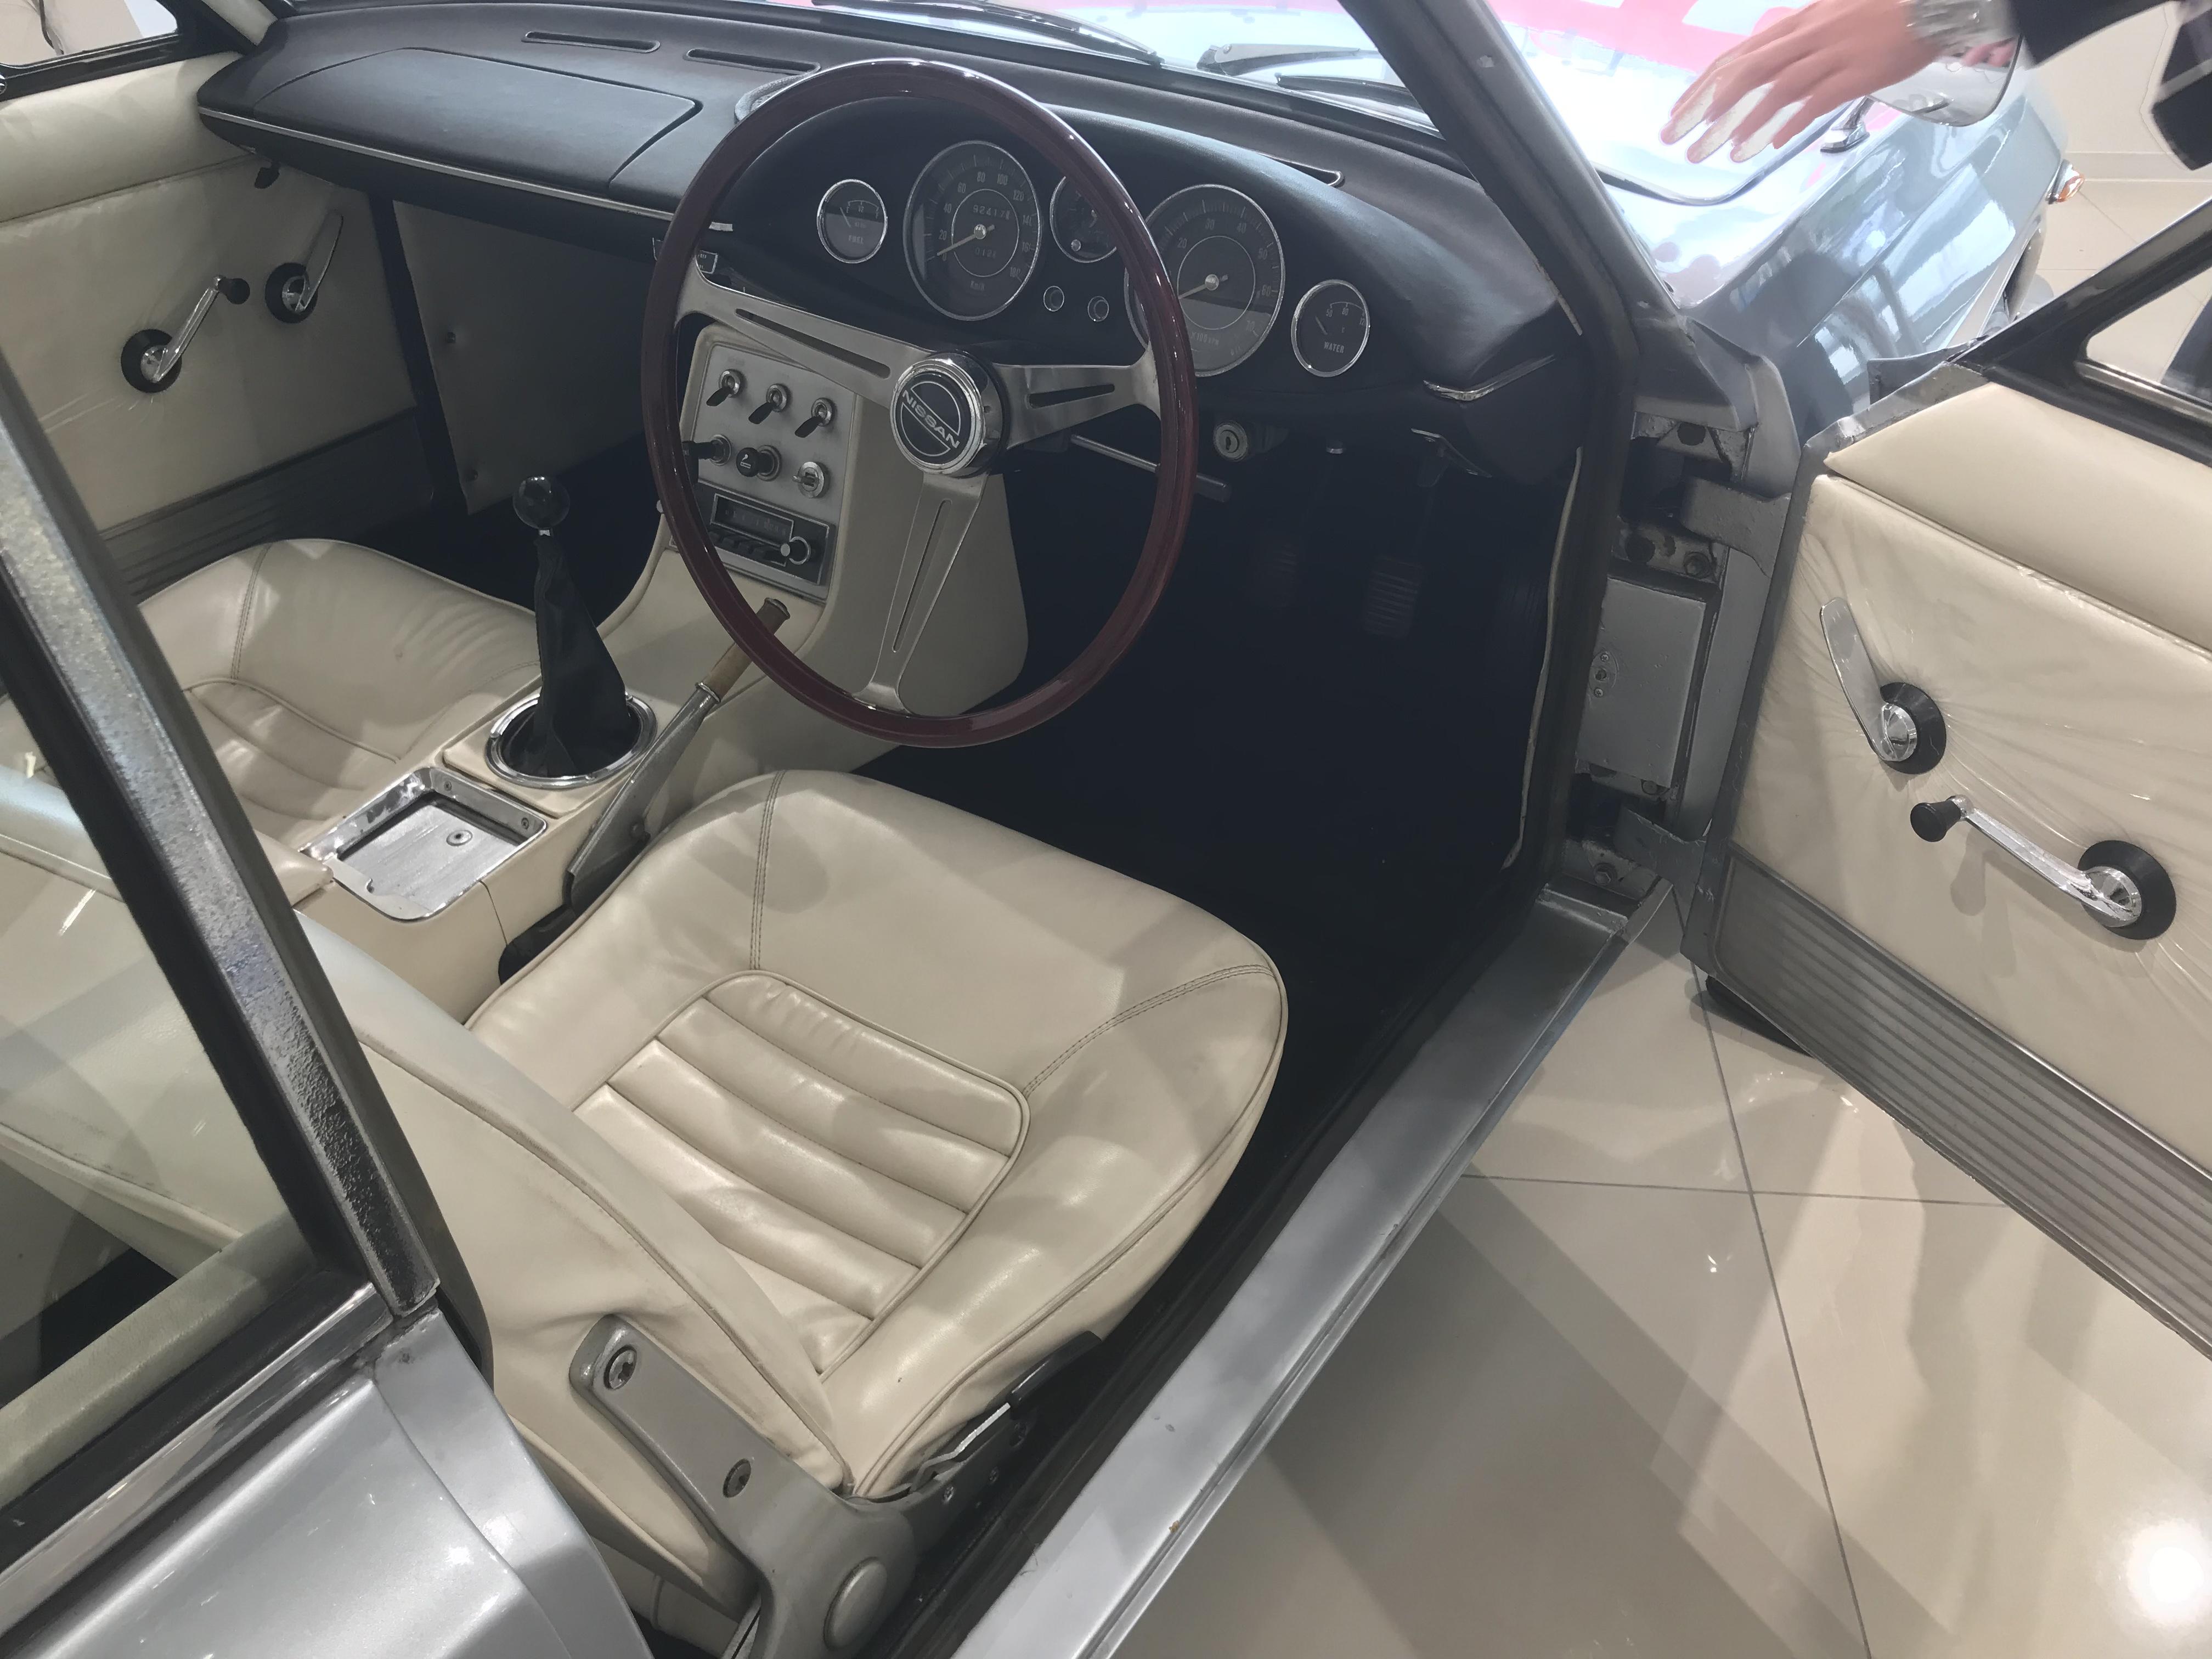
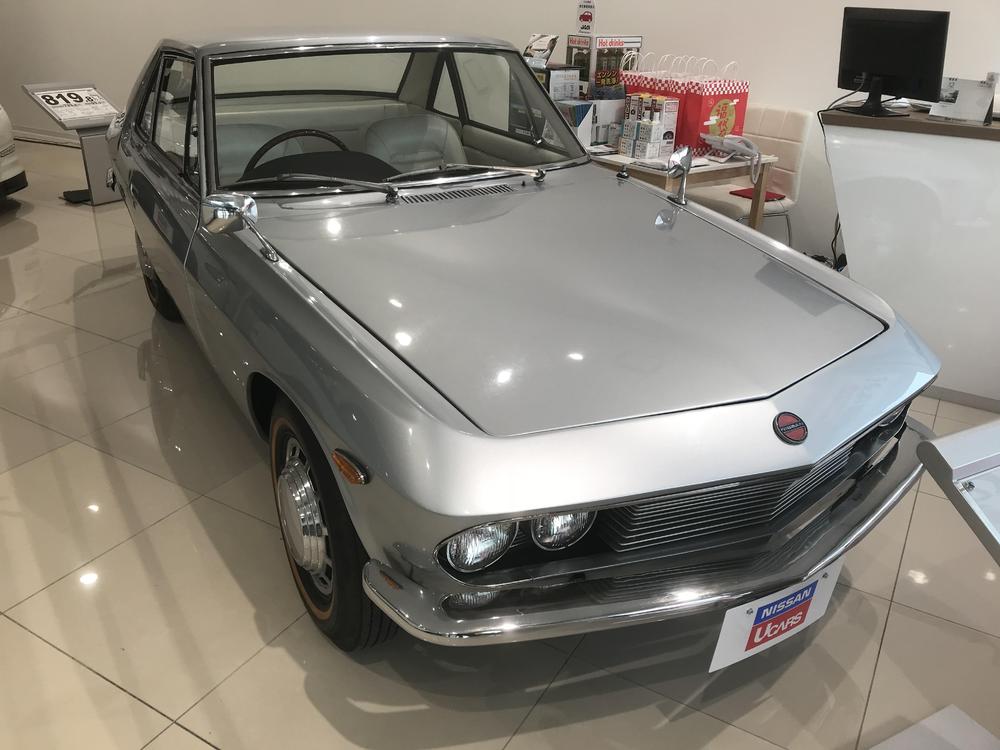
2 pointsYesterday I visited a used car dealer just 5 minutes drive from my house, I saw a Silvia which used to be in a museum next to my car . I really love this car , I sat in the driver’s seat , I felt the taste is very similar to Dino 246 , this is old fashioned but very beautiful . A small interior space and looks , and much better quality than S30 , just gorgeous! I tried to find things which are carried over to our S30 cars , yes I found some . Ian , you will love this car . Kats


 2 points
 -
1 pointMost of the angle style magnets have a strong magnet between two pieces of metal. The magnetic field represents a horseshoe shape (if you have ever stuck it on a pile of filings...) between the two sides of the magnet (north and south poles). The welder creates a path from the wire (positive) to the ground clamp. If the magnetic clamp is IN THE PATH of the welding circuit, the magnetic field of the clamp will repulse the flow of electrons from the weld contact point. Most of the time, moving the magnetic clamp or the ground clamp will alleviate the issue.1 point
-
1 pointIt looks like a 280Z with the Jim Cook body kit, and the stock running gear, from what's been shown so far. So, 280Z EFI straight six. You're in the right place if you want to get it running. The tires are shot though, and there will be some work if you want to get it running and drivable. You won't find a better site for help to get it back up and driving. Good luck. Sorry site. Truth...nice to see another name on top.1 point
-
I've seen it work with two tricks... First is to flatten the top of the grease cap a little (as mentioned above), but in the case of @GGRIII, they still wouldn't fit. Hopefully he'll chime in with any details I miss, but I believe the solution was to snap the caps into the front wheels first before mounting the wheels on the car. Problem is that if you try to snap the caps in after the wheels are mounted, the little plastic retainer fingers have to move inward to get past the retaining ledge. But with the rotor casting in the way, there isn't enough room for the fingers to move in. But once the caps are fully installed, the fingers snap back out just a little and it's enough room to clear the rotor snout.1 point
-
You got nothing to beat yourself up about! You will probably be the only person who would ever see those flaws! Looks great!1 point
-
1 pointWhat search terms are you using? If the car has been in a locked trailer for 20 years, it's unlikely that Grandma had a website or a blog at the end of the last century unless, in addition to being truck driver, she was also a techie. Dennis1 point
-
1 pointLove it Kats, I have only ever seen 1 or 2 in person. The last 1 I saw in Australia in person was in 1998. I was at School back then, and I managed to convince 2 of my best friends to jump over the fence and go down the road to look at this car in person. It had sadly been hit in the rear boot area (but fixable), and the original wheel was gone, but most of the interior was still there. It was in that "Gold" colour, but it had faded many times over. Wish we had camera phones back then. I did see the same car again in a shopping centre car park a few months later, but that was it. Would love to know what happened to it, hopefully it was saved.1 point
-
Ha, funny Charles, I had the exact same thoughts: a little bit of body work, remove some trim, scuff, mask, shoot. Why, that sounds EASY! When or whether I reshoot this car or take on another project in the future, the experience has been tremendously valuable. YouTube videos, internet comments, and the like help make it accessible, but as you say, there's simply no substitute for doing it.1 point
-
1 pointIf people knew your motivation or goal, they might be more inclined to help or even search for it with you. The random ask doesn't always work.1 point
-
1 pointThere's a lot of work waiting for you in your car! Good luck with it!1 point
-
Finally got around to installing the harmonic damper I received for my 280 from Jeff "JSM" about 6 months ago and all is good. There was some question about its stability because of the small crack in the rubber portion of the pulley. I just Trimmed it down flush with the pulley and it looks as if the crack was never there. Plus I had a shop check it out and they said it is good.1 point
-
Installed my X-mas aftermarket power antenna. Power up, Power down and shiny to boot!1 point
-
Did you press the brake pedal at the same time? There's no reason for pressing the clutch pedal to cause it to die unless you have a loose wire under the dash. The clutch system is completely separate from the engine control system. But the brake pedal does pull vacuum when you press it, and a bad booster can cause a vacuum leak. An easy way to separate fuel supply from electronics is to try starting fluid. If it starts then dies with each squirt of fluid then it's probably a fuel supply problem, either from the tank or from the injectors. If it doesn't start with fluid then it might be something like the ignition control module. I had a bad 1978 ECU in the past also. It would just die completely, then restart after waiting. Anyway, starting fluid will tell you if you have good spark and timing. Make sure you squirt in to the intake manifold itself through a vacuum port.1 point
-
1 pointVery, very nice Kats, any Silvia (csp311 only) I love to see. It is a pity it is missing a few things, grab handles above door, sunvisors, and has Bluebird 410/411 hubcaps. But still lovely. Hopefully, the restoration of my one will be to a very high standard (it is so far with the length I am going to..) For those who are interested, this website is rather good for the design/launch/motorsport of, what could be described as Nissan's first super car. https://csp311.net/ (Oh, did I say the website is mine?)1 point
-
1 point
-
1 pointSo I started to work on these panels. I tried to lay down the first bead and I was like "What the heck!" I know I am becoming senile but I thought I turned the gas on. Yeah went through that a couple times. Righty tighty-lefty loosy. All good... Maybe I bumped the regulator. I turned it way up. I can hear and feel the gas coming out the tip. Plenty of pressure in the bottle. Maybe it's a contaminant? I had a new piece of copper as a back up behind the hole. You can see it in one of the pictures. I took it out and it welded fine. Here is the catch. I had the "bright" idea to use a magnet to hold the copper piece in place. The magnet I have is a very strong rare earth magnet. You just about can't pull them off a surface with your fingers. So I held the copper back under there without the magnet and the welds were still fine. The magnetic field was doing that to the weld puddle. So it makes me wonder if my other magnetic holders affect the weld puddle too. I will have to keep an eye on that.1 point
-
1 point
-
If you had debris in your fuel system you may also have clogged your injectors. You can pull them and test them. Let me know if you want specifics on doing that. It requires building a small nozzle adapter and a battery. Also work for cleaning them out, which is what I did. I start by checking you getting fuel, and that its at the right pressure. ~36 psi. When was the last time your changed your fuel filter? Sent from my iPhone using Tapatalk1 point
-
1 pointI was asked to regenerate the parts list order/s required for the install of the vintage air mini gen II. Below is the information for the mock-up box that vintage air loans out to help customers understand the size of the package that has to be installed inside the car. It helps you understand where to put the evaporator and hose connections. I cotacted vintage air and this was the info that they gave me. I decided that in my case it would not be necessary to actually mock-up the install. I was confident that I could get everything to fit based on other installs that I had read about. I would add that vintage air was responsive and helpful. “The shipping box measures 26 x 20 x 20. The evaporator assembly measures 11" high by 11.5" wide x 8.5" deep and will sit up against the firewall and a small portion of the bottom of the unit will sit down below the bottom of the dash. You would see about 2" to 3" of the bottom of the case. The switch kit we have for this system is separate from the original and can be placed under the steering wheel or in the console out of site. You can go to our web site at autoacsolutions.com and to to instructions for more on installation of the system. Click onto our indash a/c instructions. If we can be of more assistance let me know. I will be working messages off and on through the weekend and will try to answer as soon as possible.” The only disappointment that I had with Vintage air was that they could make it a great deal easier to order a complete system. I would suggest that they spend some time reading some of the different popular forums searching for reasonably good installs and create a parts list for some of the popular classic installs. Obviously, it would be nice to place a single perfect order that contains everything you would need. I have been able to do this a couple of times. Sadly, this was not one of those times. Below is the first order that I placed. The error of my ways is immediately apparent: I did not use the Horizontal slide panel. I did use the York to sanden conversion bracket – but I have heard that there are better solutions out there. I used vintage air’s ez-clip kit. I also purchased their plier which I think is well worth the expense. It was easy to use. It allowed me to create the customized hose routing that I wanted. I am still in the throws of restoring my car so I do not have any experience with the quality of this connection system, but I have high hopes that it will not leak. I liked the idea of using the bulkhead connectors and so I bought two. One for the AC hoses and one for the heater hoses. If I had to do it again, I might separate the hoses a bit more; just to make it easier to connect the hoses. The bottom line is don’t get ahead of yourself. Order what you need. As best I could tell there is no discount for larger orders with the exception of shipping cost. 66005-VUZ-A MINI GEN II W/DEF EA 1.00 0.00 470.00 470.00 main unit (heater/def/AC) inside car 49110-SHQ HORIZ SLIDE PANEL (MACHINED) EA 1.00 0.00 75.00 75.00 slide controls 63375-VUE DEFROSTER DUCTS (SET) EA 1.00 0.00 19.95 19.95 04808-VUQ SD-508 POL COMP O-RING 134a EA 1.00 0.00 249.00 249.00 compressor 15815-VUB YORK TO SANDEN CONVERSION KIT EA 1.00 0.00 60.00 60.00 conversion bracket to mount compressor 547002 HOSE KIT,E-Z CLIP UNIVERSAL EA 1.00 0.00 360.00 360.00 clip kit (hoses+connectors) 420000-VUR EZ CLIP PLIERS EA 1.00 0.00 78.00 78.00 tool to install ez-clips 07323-VUC DRIER W/TRINARY SWITCH EA 1.00 0.00 59.00 59.00 drier 389602 STRM 2 WAY INLINE BKHD #6-#10 BLK EA 1.00 0.00 44.00 44.00 bulkhead connector /bracket (AC) 389803 STRM 2 WAY INLINE BKHD #10-#10 BLK EA 1.00 0.00 44.00 44.00 bulkhead connector / bracket (water inlet/egress for heater) 03263-VUC PARALLEL FLOW COND 14 X 24 W/BRKTS EA 1.00 0.00 149.00 149.00 condenser (to cool air before drier and return to evap) My second order was just foolish. Do not order hose connectors until you really understand your hose routing. In my opinion this is not possible until everything else is installed. With regards to the connections inside the car. My install works but, it would have been a lot easier for me if I had realized how little room there is in the cockpit. If you understand how difficult it is to make bends with these hoses and how much room you need to actually tighten the connectors then placement of the bulkhead connectors can be improved. This influences the selection of connector style (90 deg., 45 deg. straight, etc) I ordered a number of incorrect connectors. 347160-VUR EZ CLIP #6 STRAIGHT EA 4.00 0.00 17.00 68.00 AC and water connectors 347100-VUR EZ CLIP #10 STRAIGHT EA 1.00 0.00 19.10 19.10 347200-VUR EZ CLIP #10 45 DEGREE EA 1.00 0.00 24.50 24.50 347180-VUR EZ CLIP #8 STRAIGHT EA 4.00 0.00 16.00 64.00 347380-VUR EZ CLIP #8 90 DEGREE EA 2.00 0.00 18.25 36.50 318000-VUR EZ CLIP AC HOSE #10 PER FOOT FT 8.00 0.00 5.75 46.00 347962-VUR EZ CLIP #6 CLIP EA 8.00 0.00 0.60 4.80 347960-VUR CLIP #6 CAGE EA 4.00 0.00 1.05 4.20 347902-VUR EZ CLIP #10 CLIP EA 4.00 0.00 0.65 2.60 347900-VUR CLIP #10 CAGE EA 2.00 0.00 1.40 2.80 347982-VUR EZ CLIP #8 CLIP EA 12.00 0.00 0.60 7.20 347980-VUR CLIP #8 CAGE EA 6.00 0.00 1.15 6.90 Third order: 347260-VUR EZ CLIP #6 45 DEGREE EA 1.00 0.00 20.00 20.00 more AC /water connectors and clips 347300-VUR EZ CLIP #10 90 DEGREE EA 2.00 0.00 19.75 39.50 347900-VUR CLIP #10 CAGE EA 2.00 0.00 1.40 2.80 347902-VUR EZ CLIP #10 CLIP EA 8.00 0.00 0.65 5.20 347960-VUR CLIP #6 CAGE EA 1.00 0.00 1.05 1.05 347962-VUR EZ CLIP #6 CLIP EA 2.00 0.00 0.60 1.20 121018 HARDLINE 90 HEATER FITTING EA 2.00 0.00 7.00 14.00 121004 HARDLINE STR HEATER FITTING EA 2.00 0.00 7.00 14.00 The final order that I placed was for controls so that I could use the original 240z climate control panel. 11458-VUS SWITCH 3 SPEED BLOWER ROTARY EA 1.00 0.00 11.25 11.25 knobs I needed to use orig. 240z control panel 49457-VUI KNOB CONTROL (ROTARY) EA 1.00 0.00 1.50 1.50 20558-VUP LABEL BLOWER SWITCH EA 1.00 0.00 3.00 3.00 I know some of you will be interested in the total cost of the install. I made a few mistakes that were somewhat costly. And the total cost of these orders also includes the EZ-clip system and plier and extra parts. So, if you add all of the figures the total is approximately $2154. I would estimate that there is approximately $300 worth of material that I did not need or use (panel, bracket, hose connectors ..etc) There is a $75 plier. I did not calculate the additional charge for the ez-clip system. The reason I bring this up is to be fair to vintage air regarding cost. If you compare the price of their system to another vendor make sure that you are comparing equivalent systems. Given the additional information/experience that I have at this point I would make the same choice and go with Vintage Air. I hope this helps and if you have a question, I will try to answer it.1 point
-
1 pointYes , I was thinking same thing, we always love to discuss about what is original . Kats1 point