


Leaderboard
-
HS30-H
Free Member6Points5,509Posts -

kats
Free Member4Points2,215Posts -

siteunseen
Free Member3Points15,115Posts -

wheee!
Free Member2Points4,607Posts


Popular Content
Showing content with the highest reputation on 08/18/2018 in all areas
-
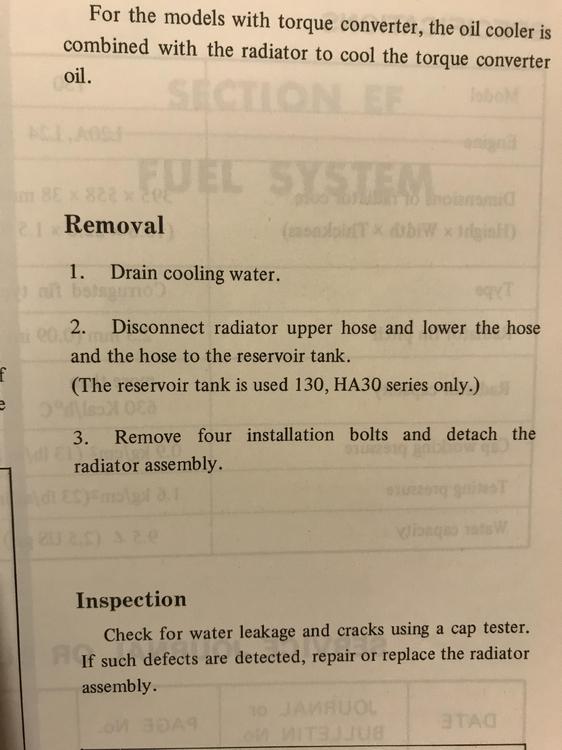
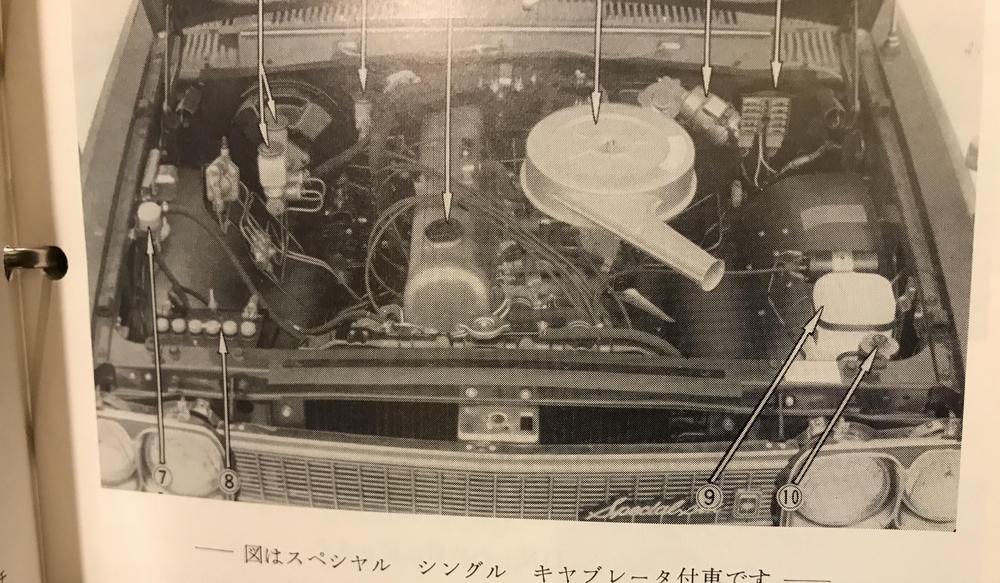
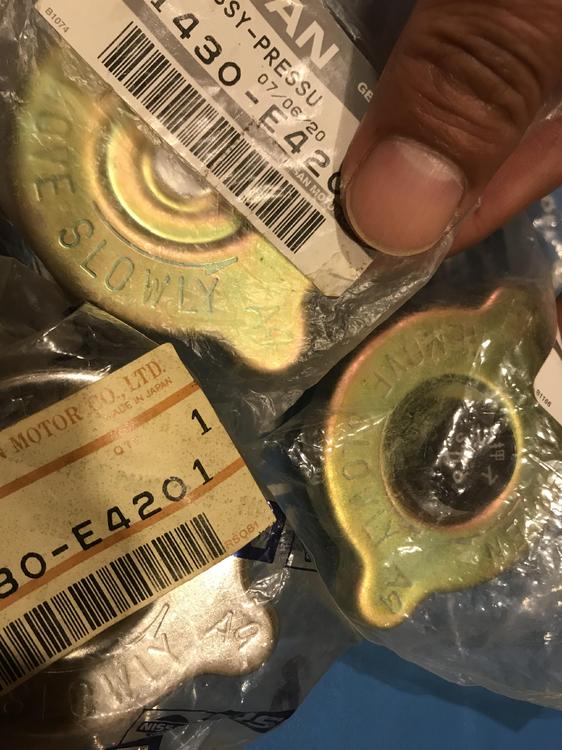
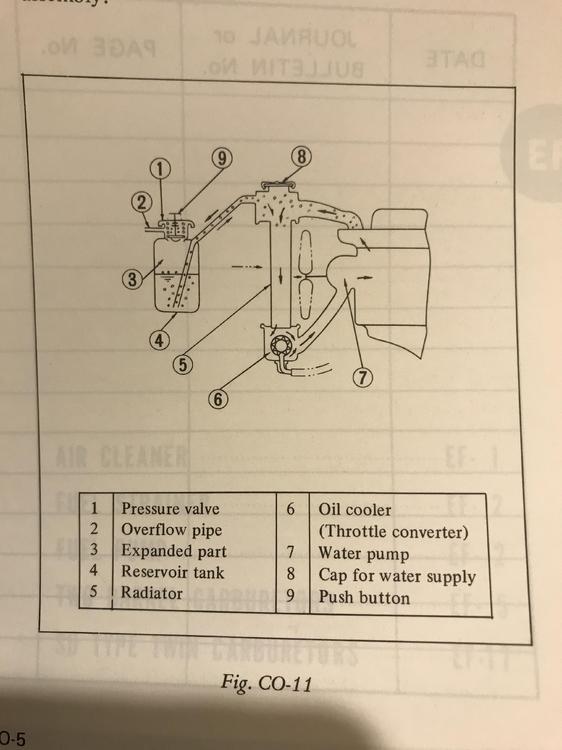
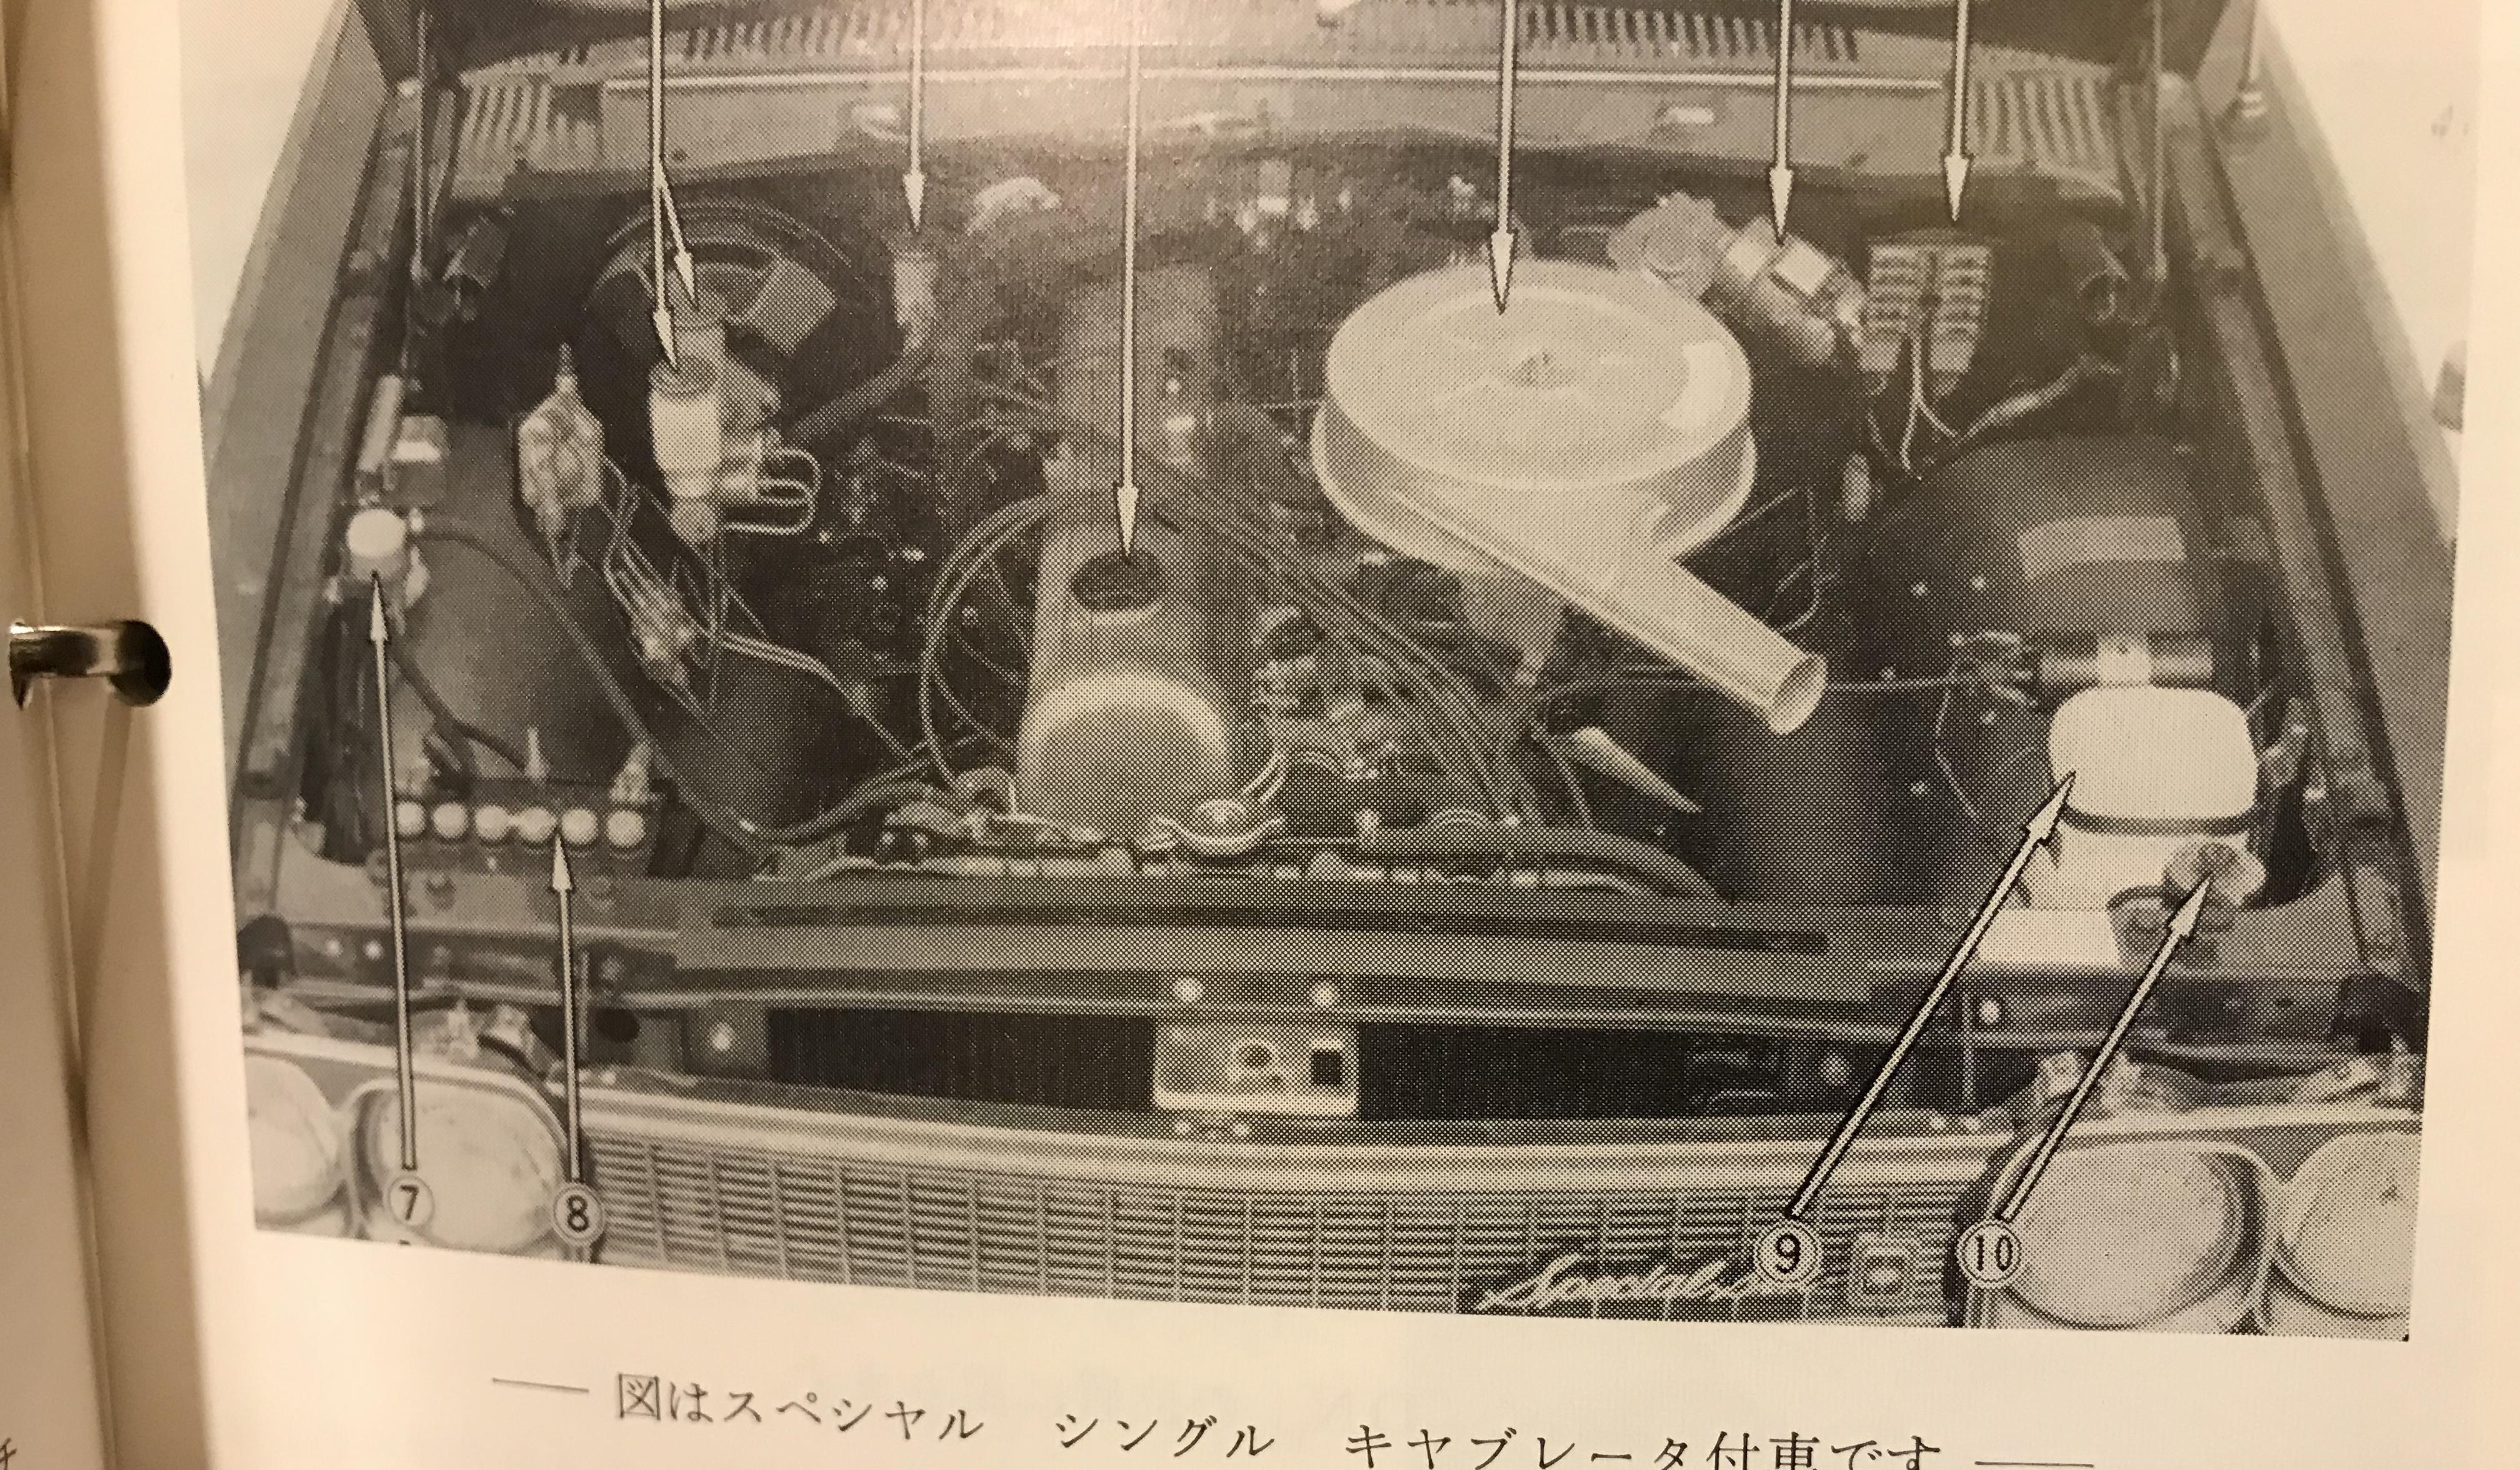
3 points3 points3 pointsThis statement would benefit from having a little bit of sunlight shone on it...3 points2 pointsKats, I have a 1968 factory manual for the (pre-'A') L20 six which has a nice layout drawing for the H130 Cedric's engine. It shows our early-type 'reservoir bottle' plumbed into the top hose area, a long way from the radiator cap. Clearly any pressure-relief type radiator cap that might be fitted on that particular model did not affect the function of the reservoir bottle system:2 points2 pointsTo begin with , Nissan Cedric, the coolant system . This is what we want to see , this picture explains exactly what the coolant moves between the reservoir tank and the radiator. We see the allows at the tube vice versa , and the radiator cap looks non pressure type , and the reservoir tank cap looks pressure type. This is excerpted from the L20A and L24 Nov 1969 manual . Also pictures from an owner’s manual of Nov 1969 Nissan Cedric. More to come . Kats


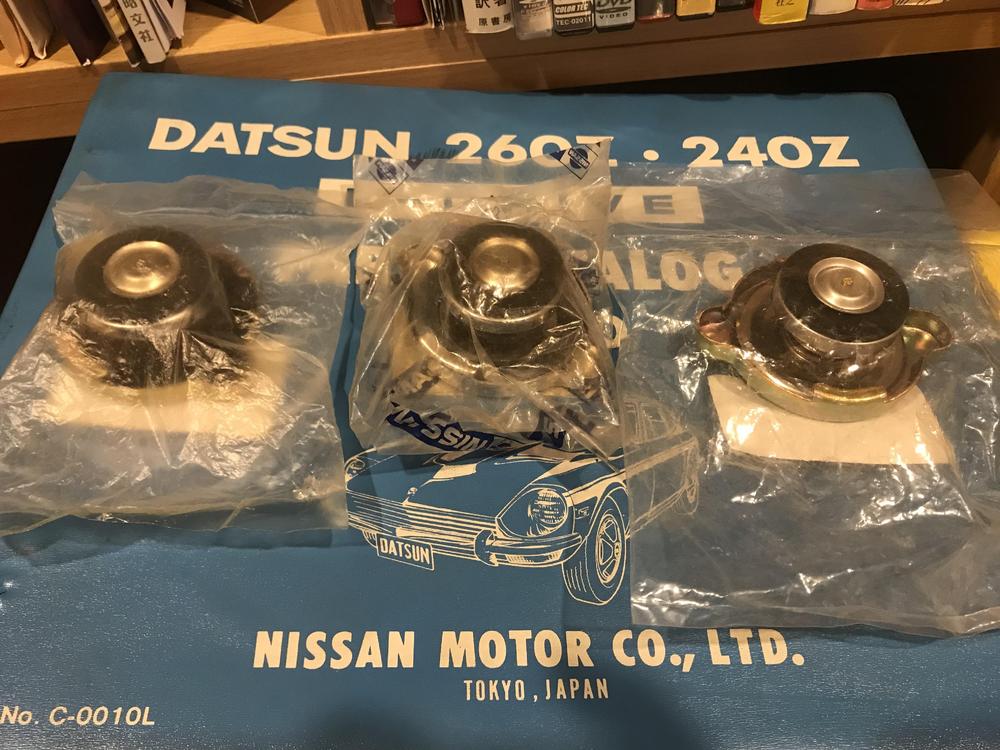
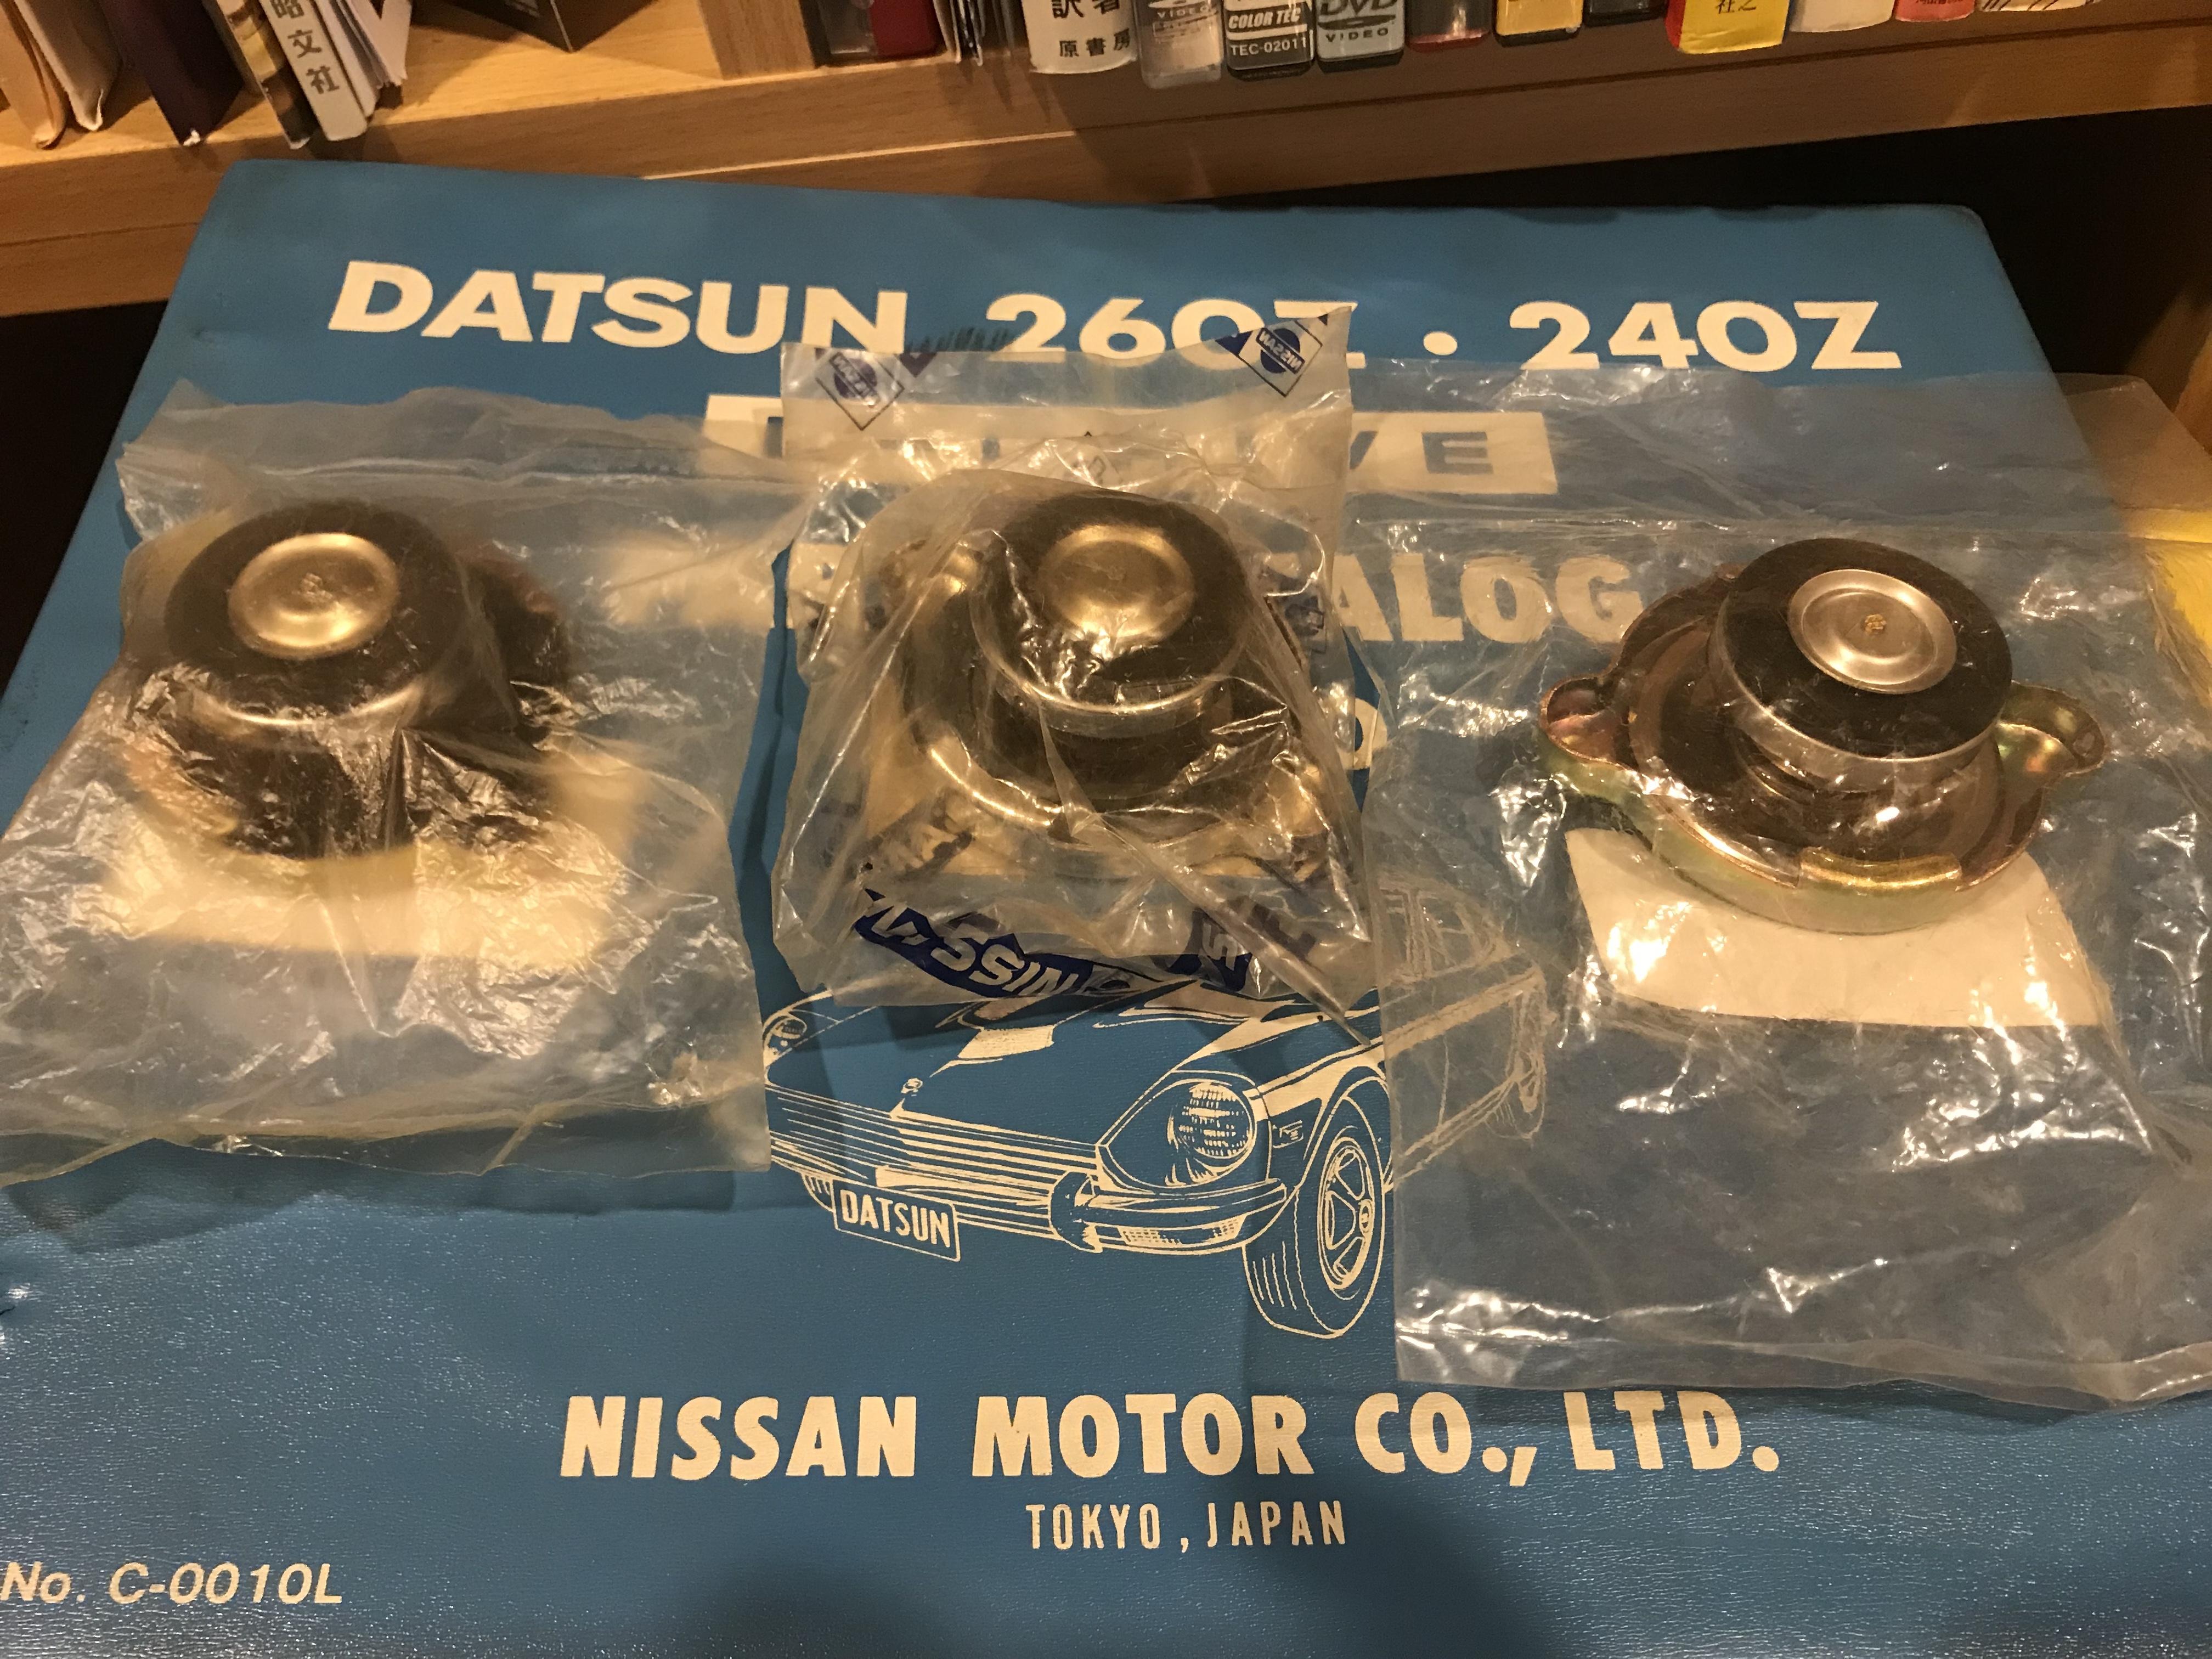
 2 pointsYes, I read every entry. Fascinating, but above my paygrade1 point1 pointI drool sometimes, and live in the sticks... can I join the club too.1 pointYou can stare at it for hours and the only reason that really fits well seems to be cosmetic. Just hiding that bolt. Probably bugged the heck out of some Nissan VP, "can't we do something about that ugly bolt head?", so they fabbed them up and stuck them on.1 pointIf only someone made cards for the 75-76 280’s....1 point1 pointThis will undoubtedly drive the value of all of our cars up. High profile versions of our S30’s will make the “not - so- rich” consider purchasing our modified and restored chassis’ at a premium price point. A rising tide lifts all boats...1 pointNope, I doubt it. If you find the strut is damage, you would be better of to replace it. I think it would be hard to straighten with out damaging the ID of the strut tube. That would make strut removal or installation impossible.1 point1 pointKats, I haven't been able to follow the part numbers, but all three of these caps appear to have the check valve which allows coolant to flow back into the radiator from the overflow can when the engine cools off and draws a vacuum. I'm not sure it will add anything to the discussion, but I did a little radiator cap repair work on my 280. Here's a pic of the cap disassembled. The inside (usually hidden side) if the check valve is in the upper left corner:
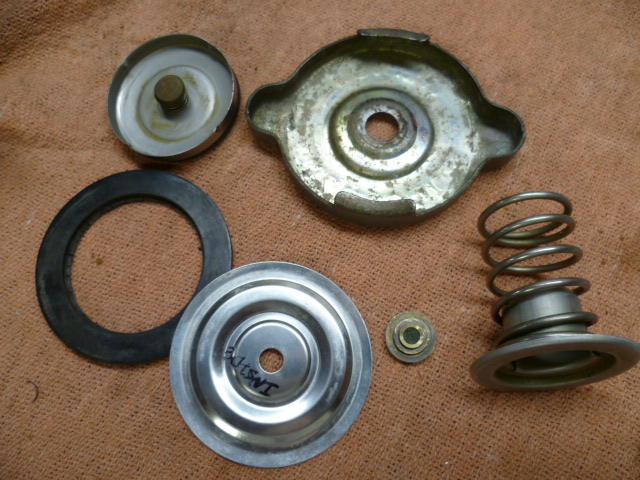 1 point1 pointWe are metric in Canada but lumber is not....except what you buy at Ikea. When I lived in Ireland I recall posted road speed being mph but posted distances being km.... sort of mixed like in Canada. For weather, wind speed was mph in Ireland but kph in Canada.1 point1 pointThanks Alan , it is a nice picture ! Back to this picture, what would have been like if there are two pressure relief type caps , on the radiator and the reservoir tank ? Now my Z432 is just like that , two pressure relief type caps. In my Z432 , can the coolant retun to the radiator when the coolant cooled down ? I have never driven my Z432 so hard , then I really do not know what would happen when the radiator overflowing. And my guess is , there would have been a pressure relief type cap only , would not have been a simple sealing cap. Because 21430-E4201 is the only part number for Z432/432R , and this is the pressure relief type cap . Kats
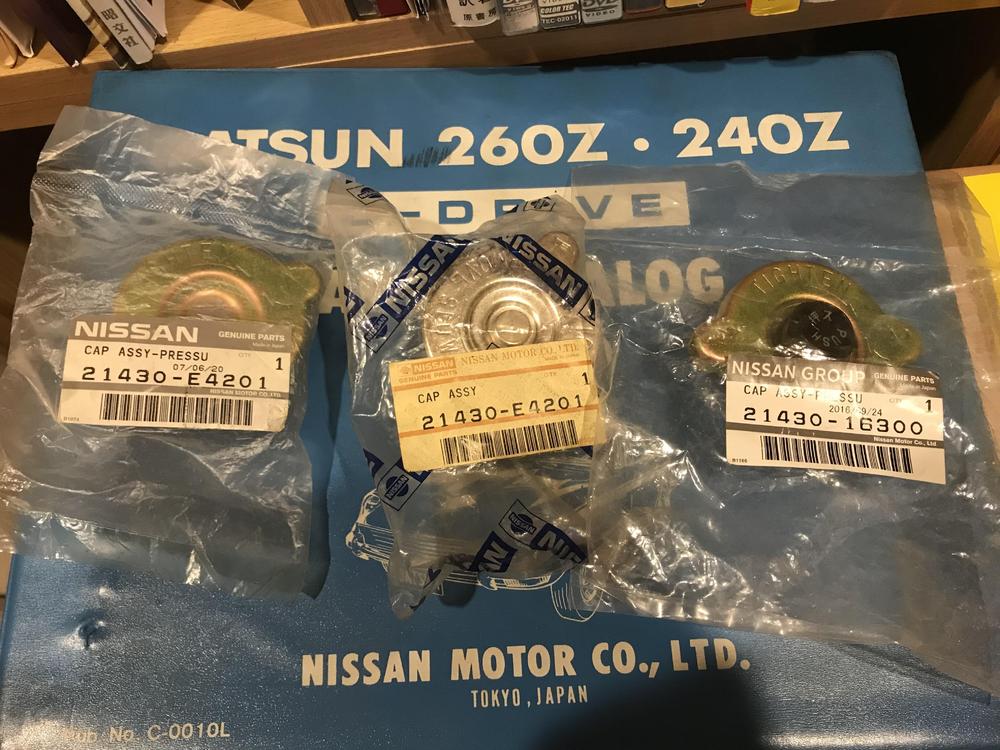
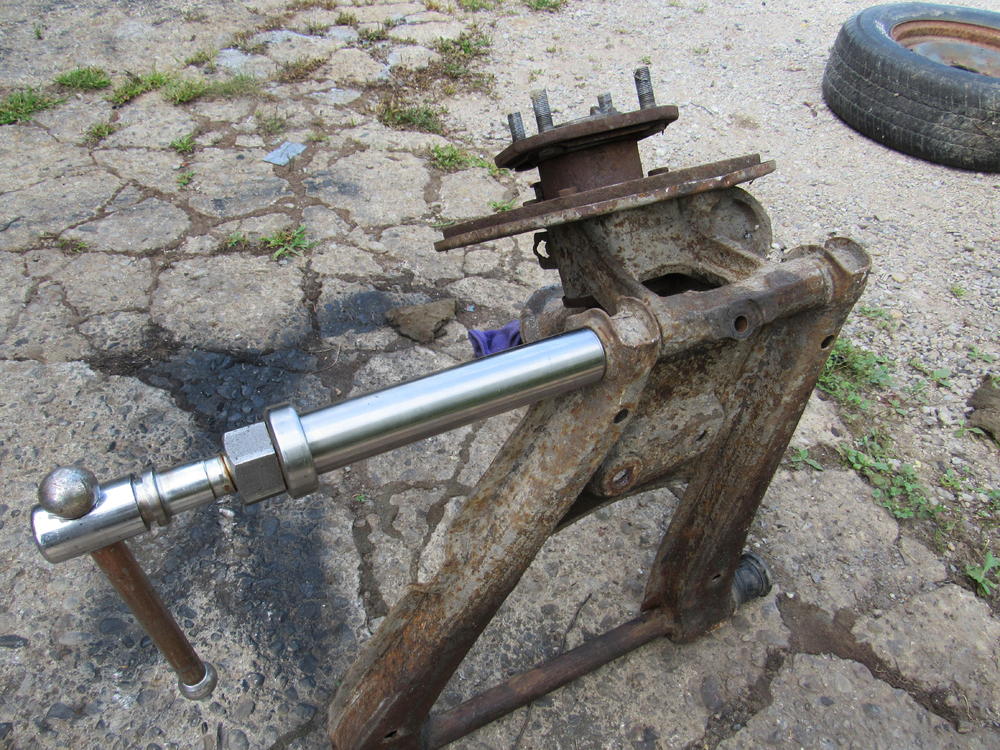
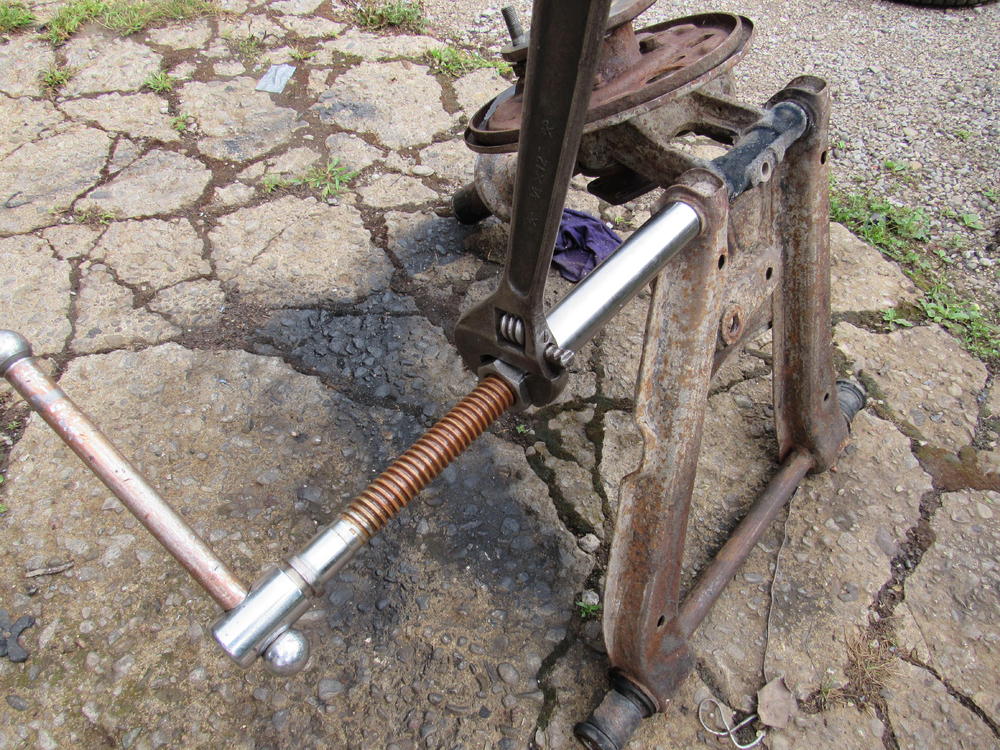
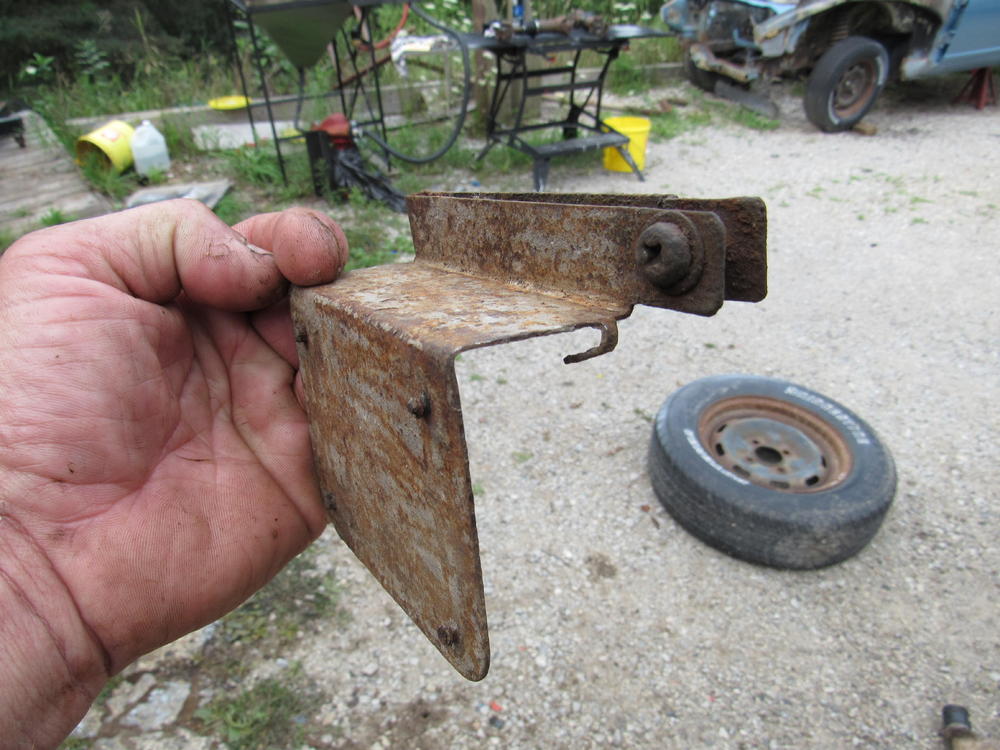
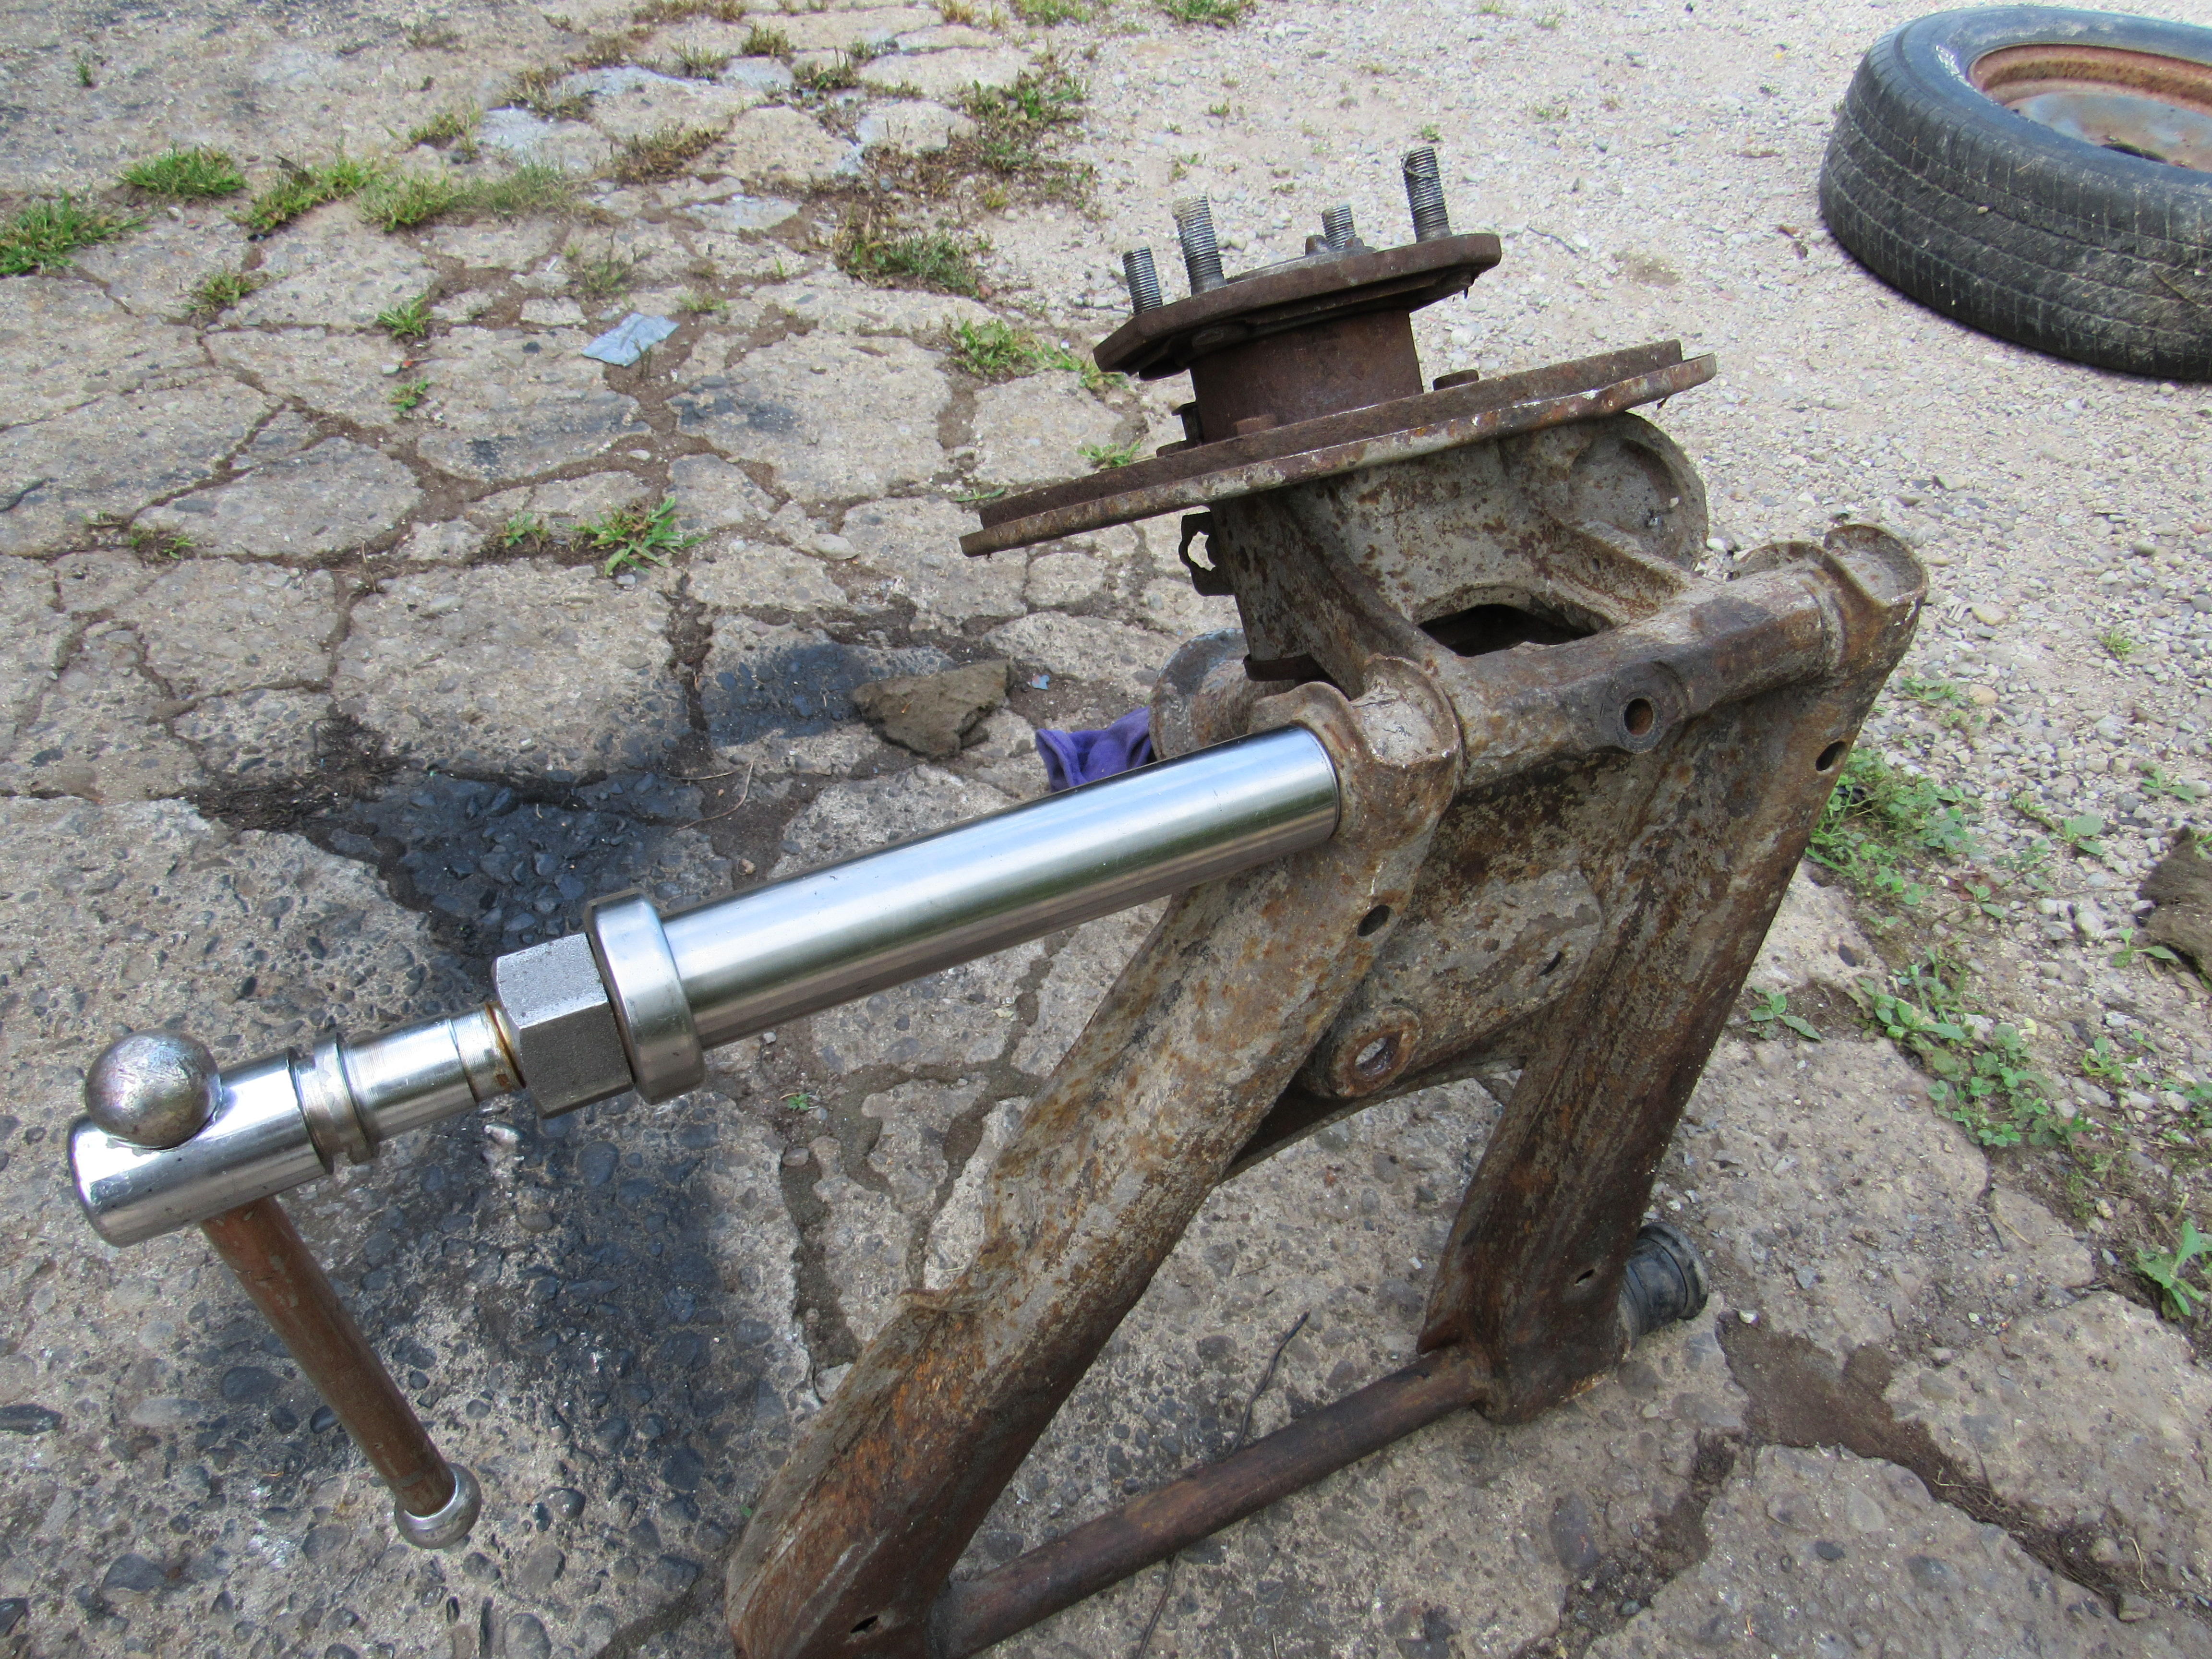
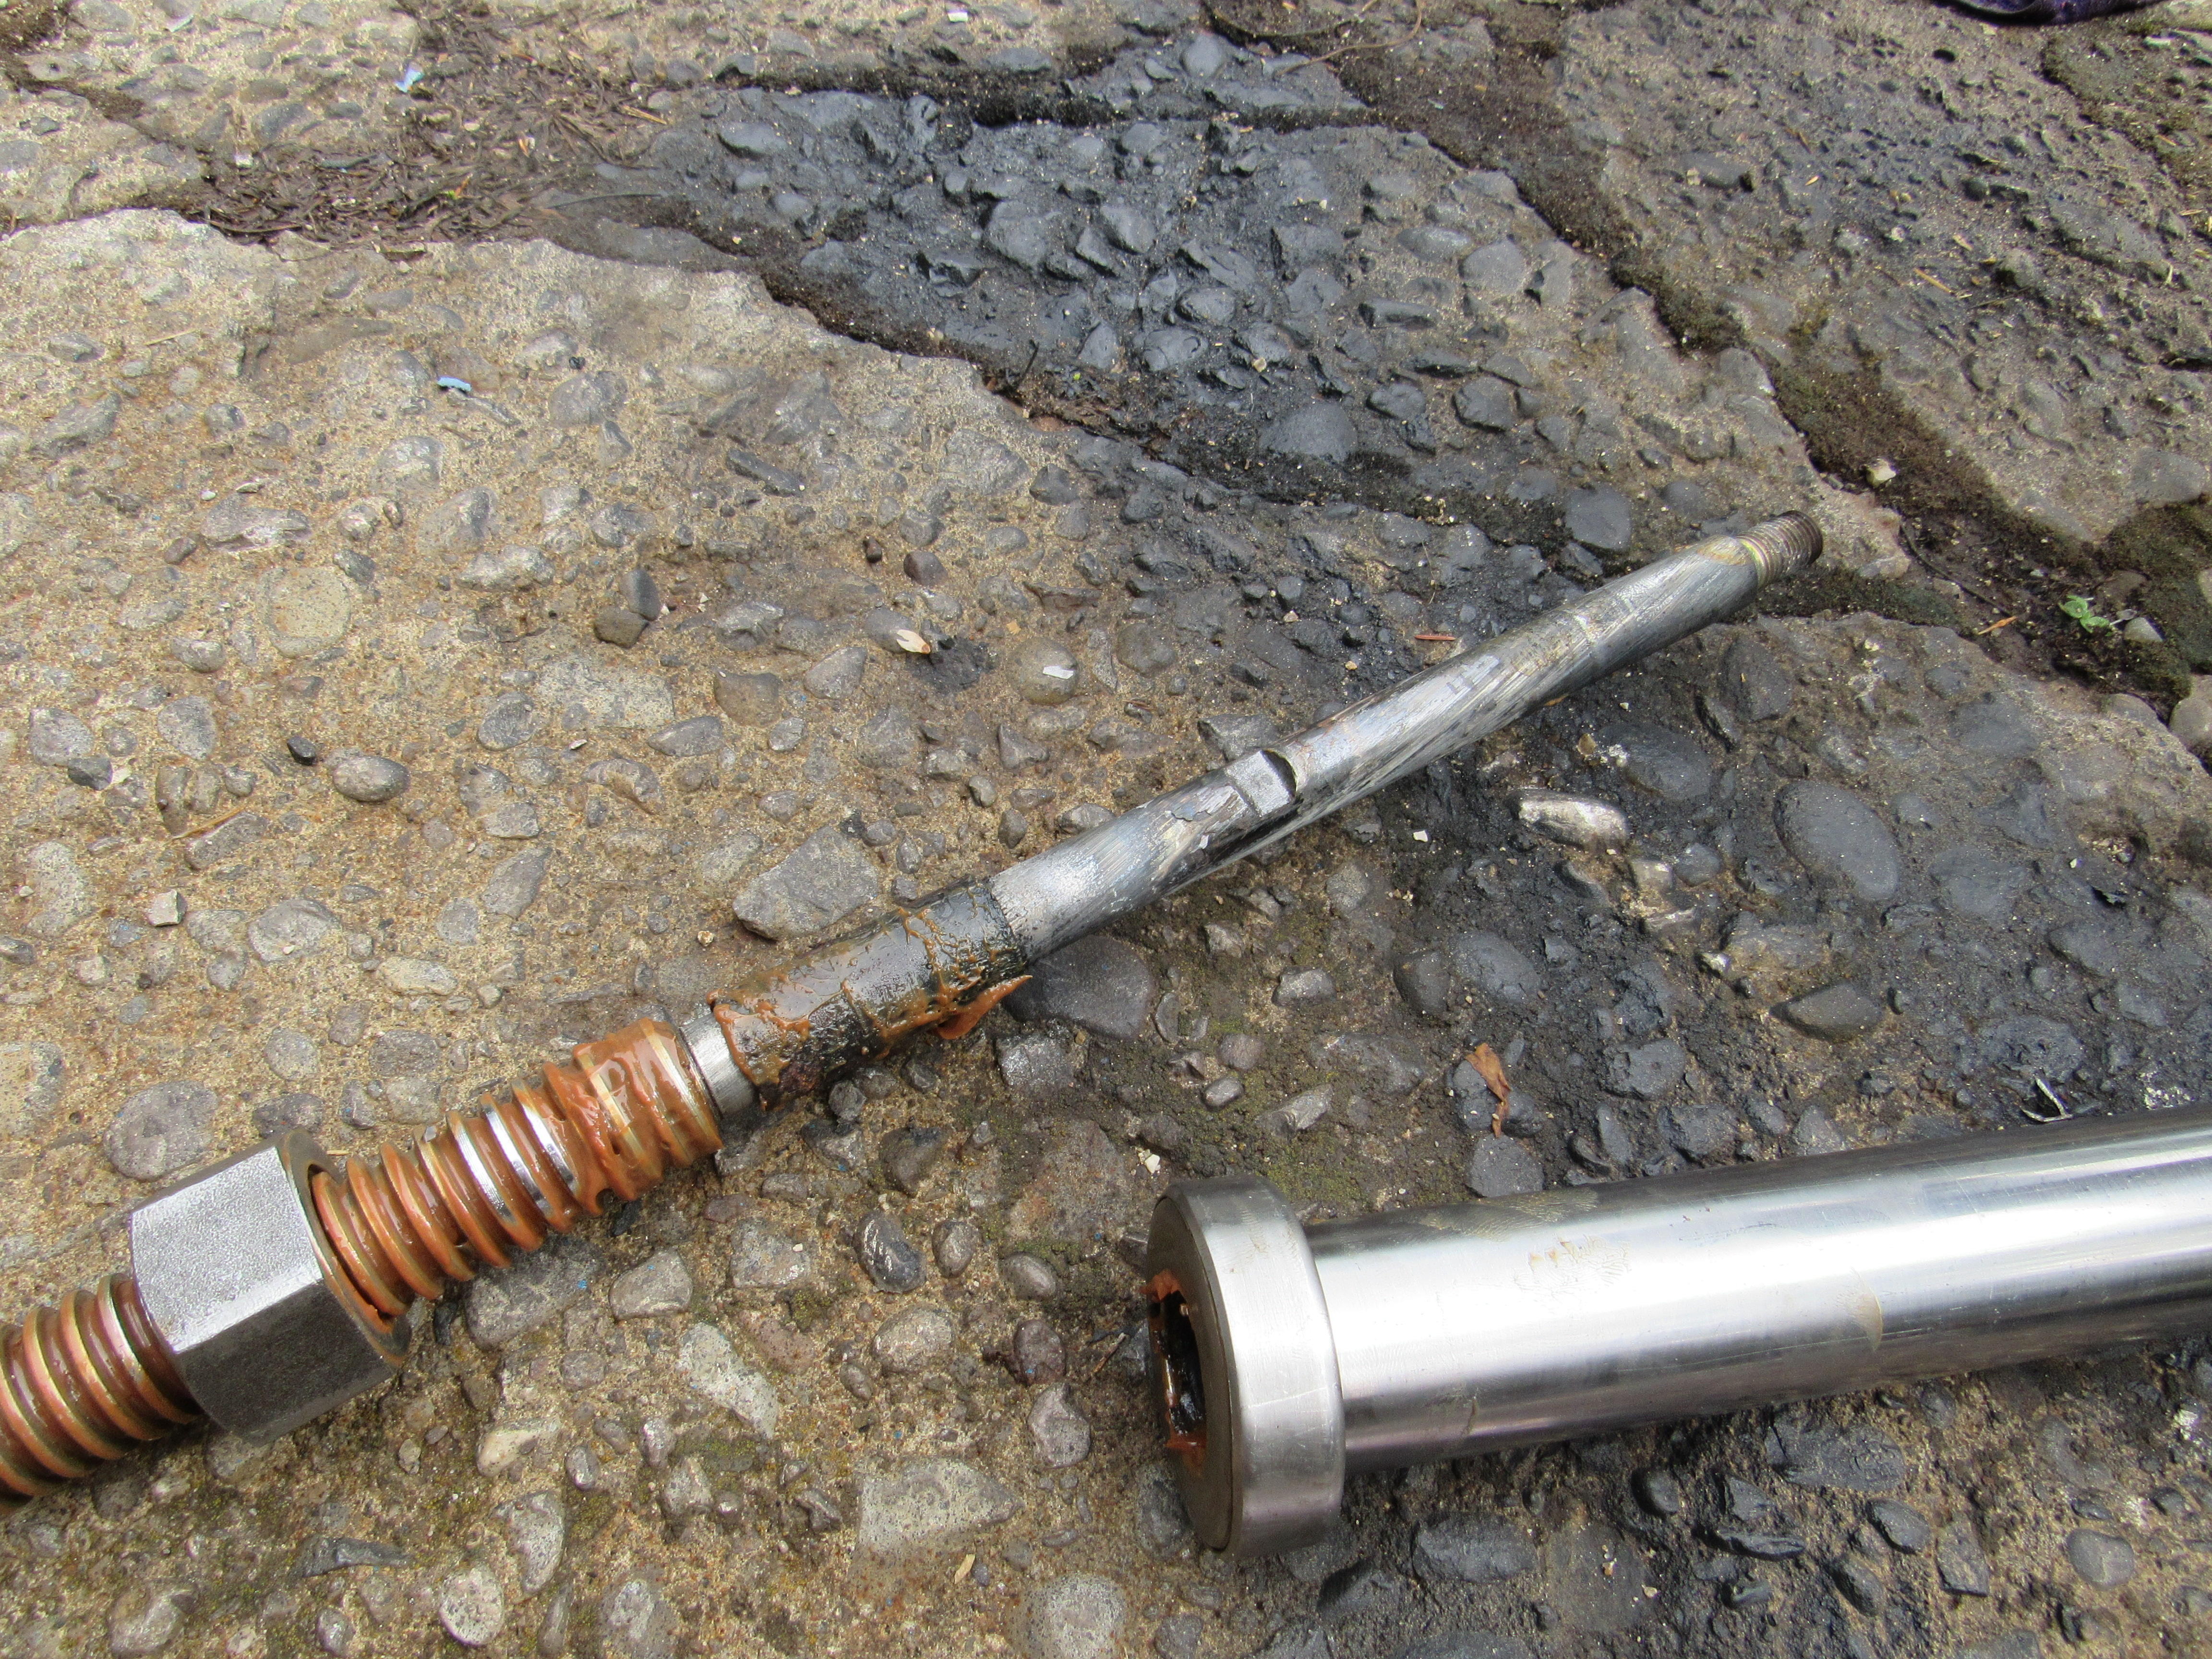
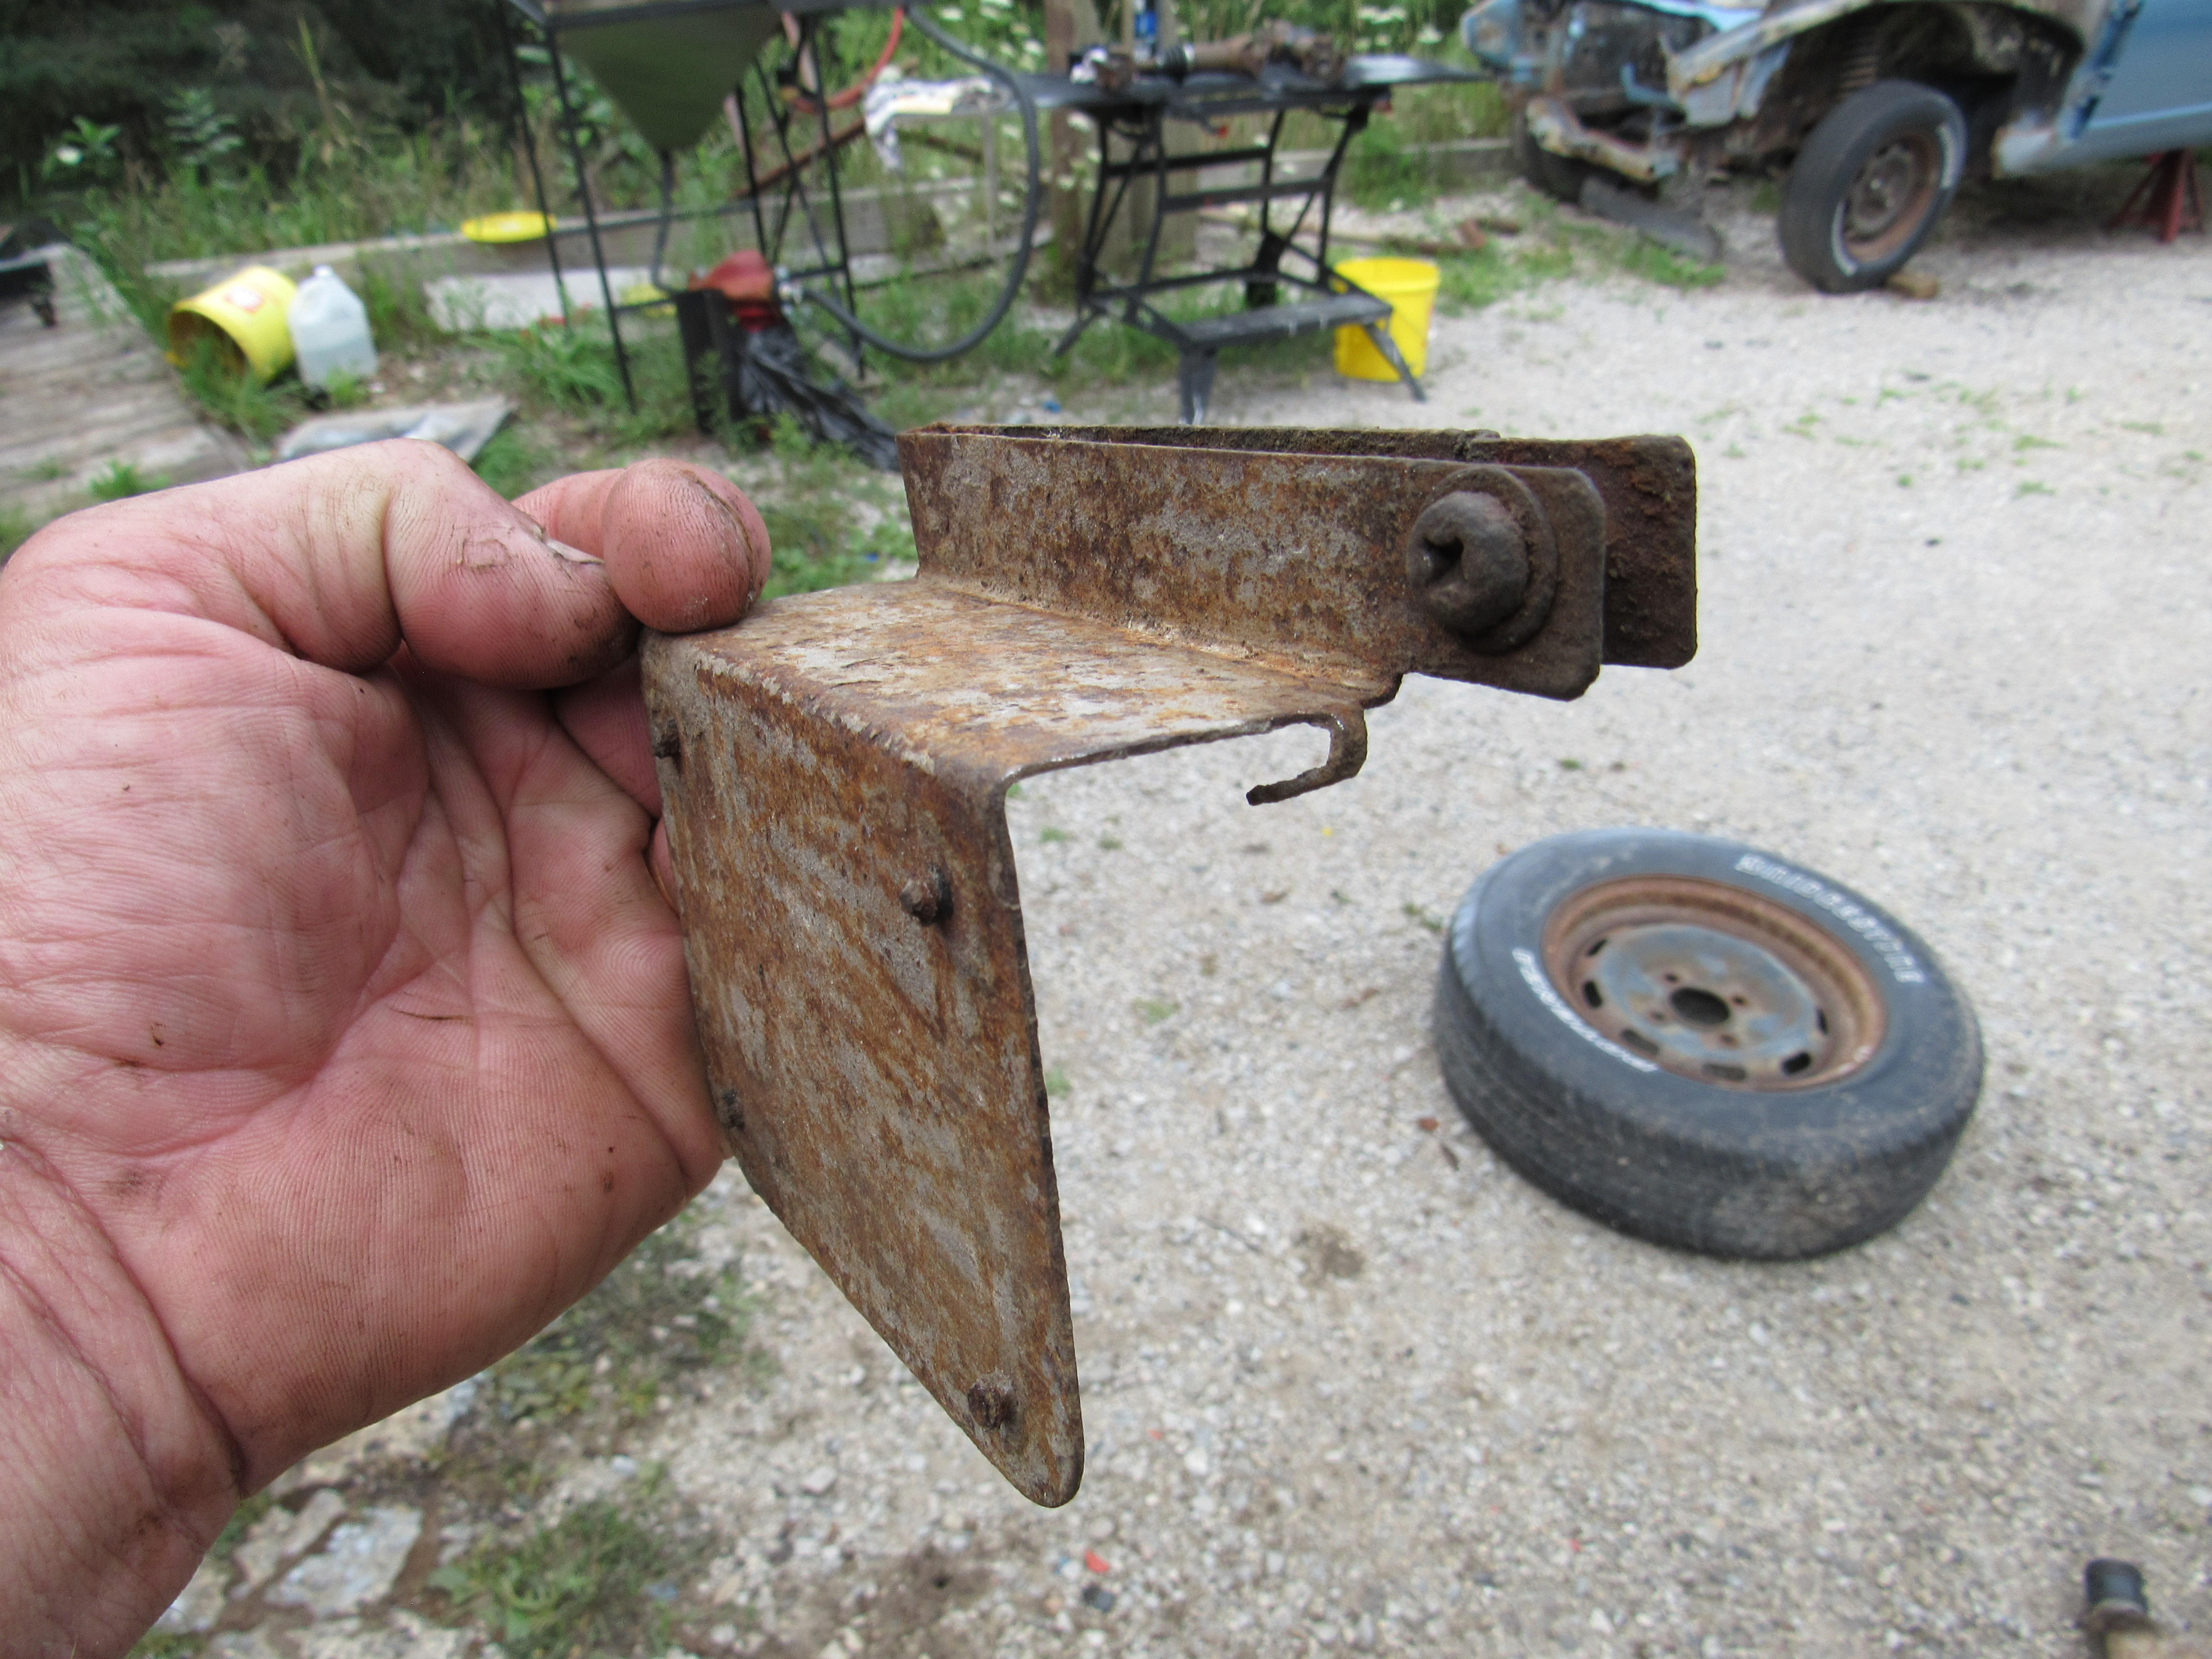
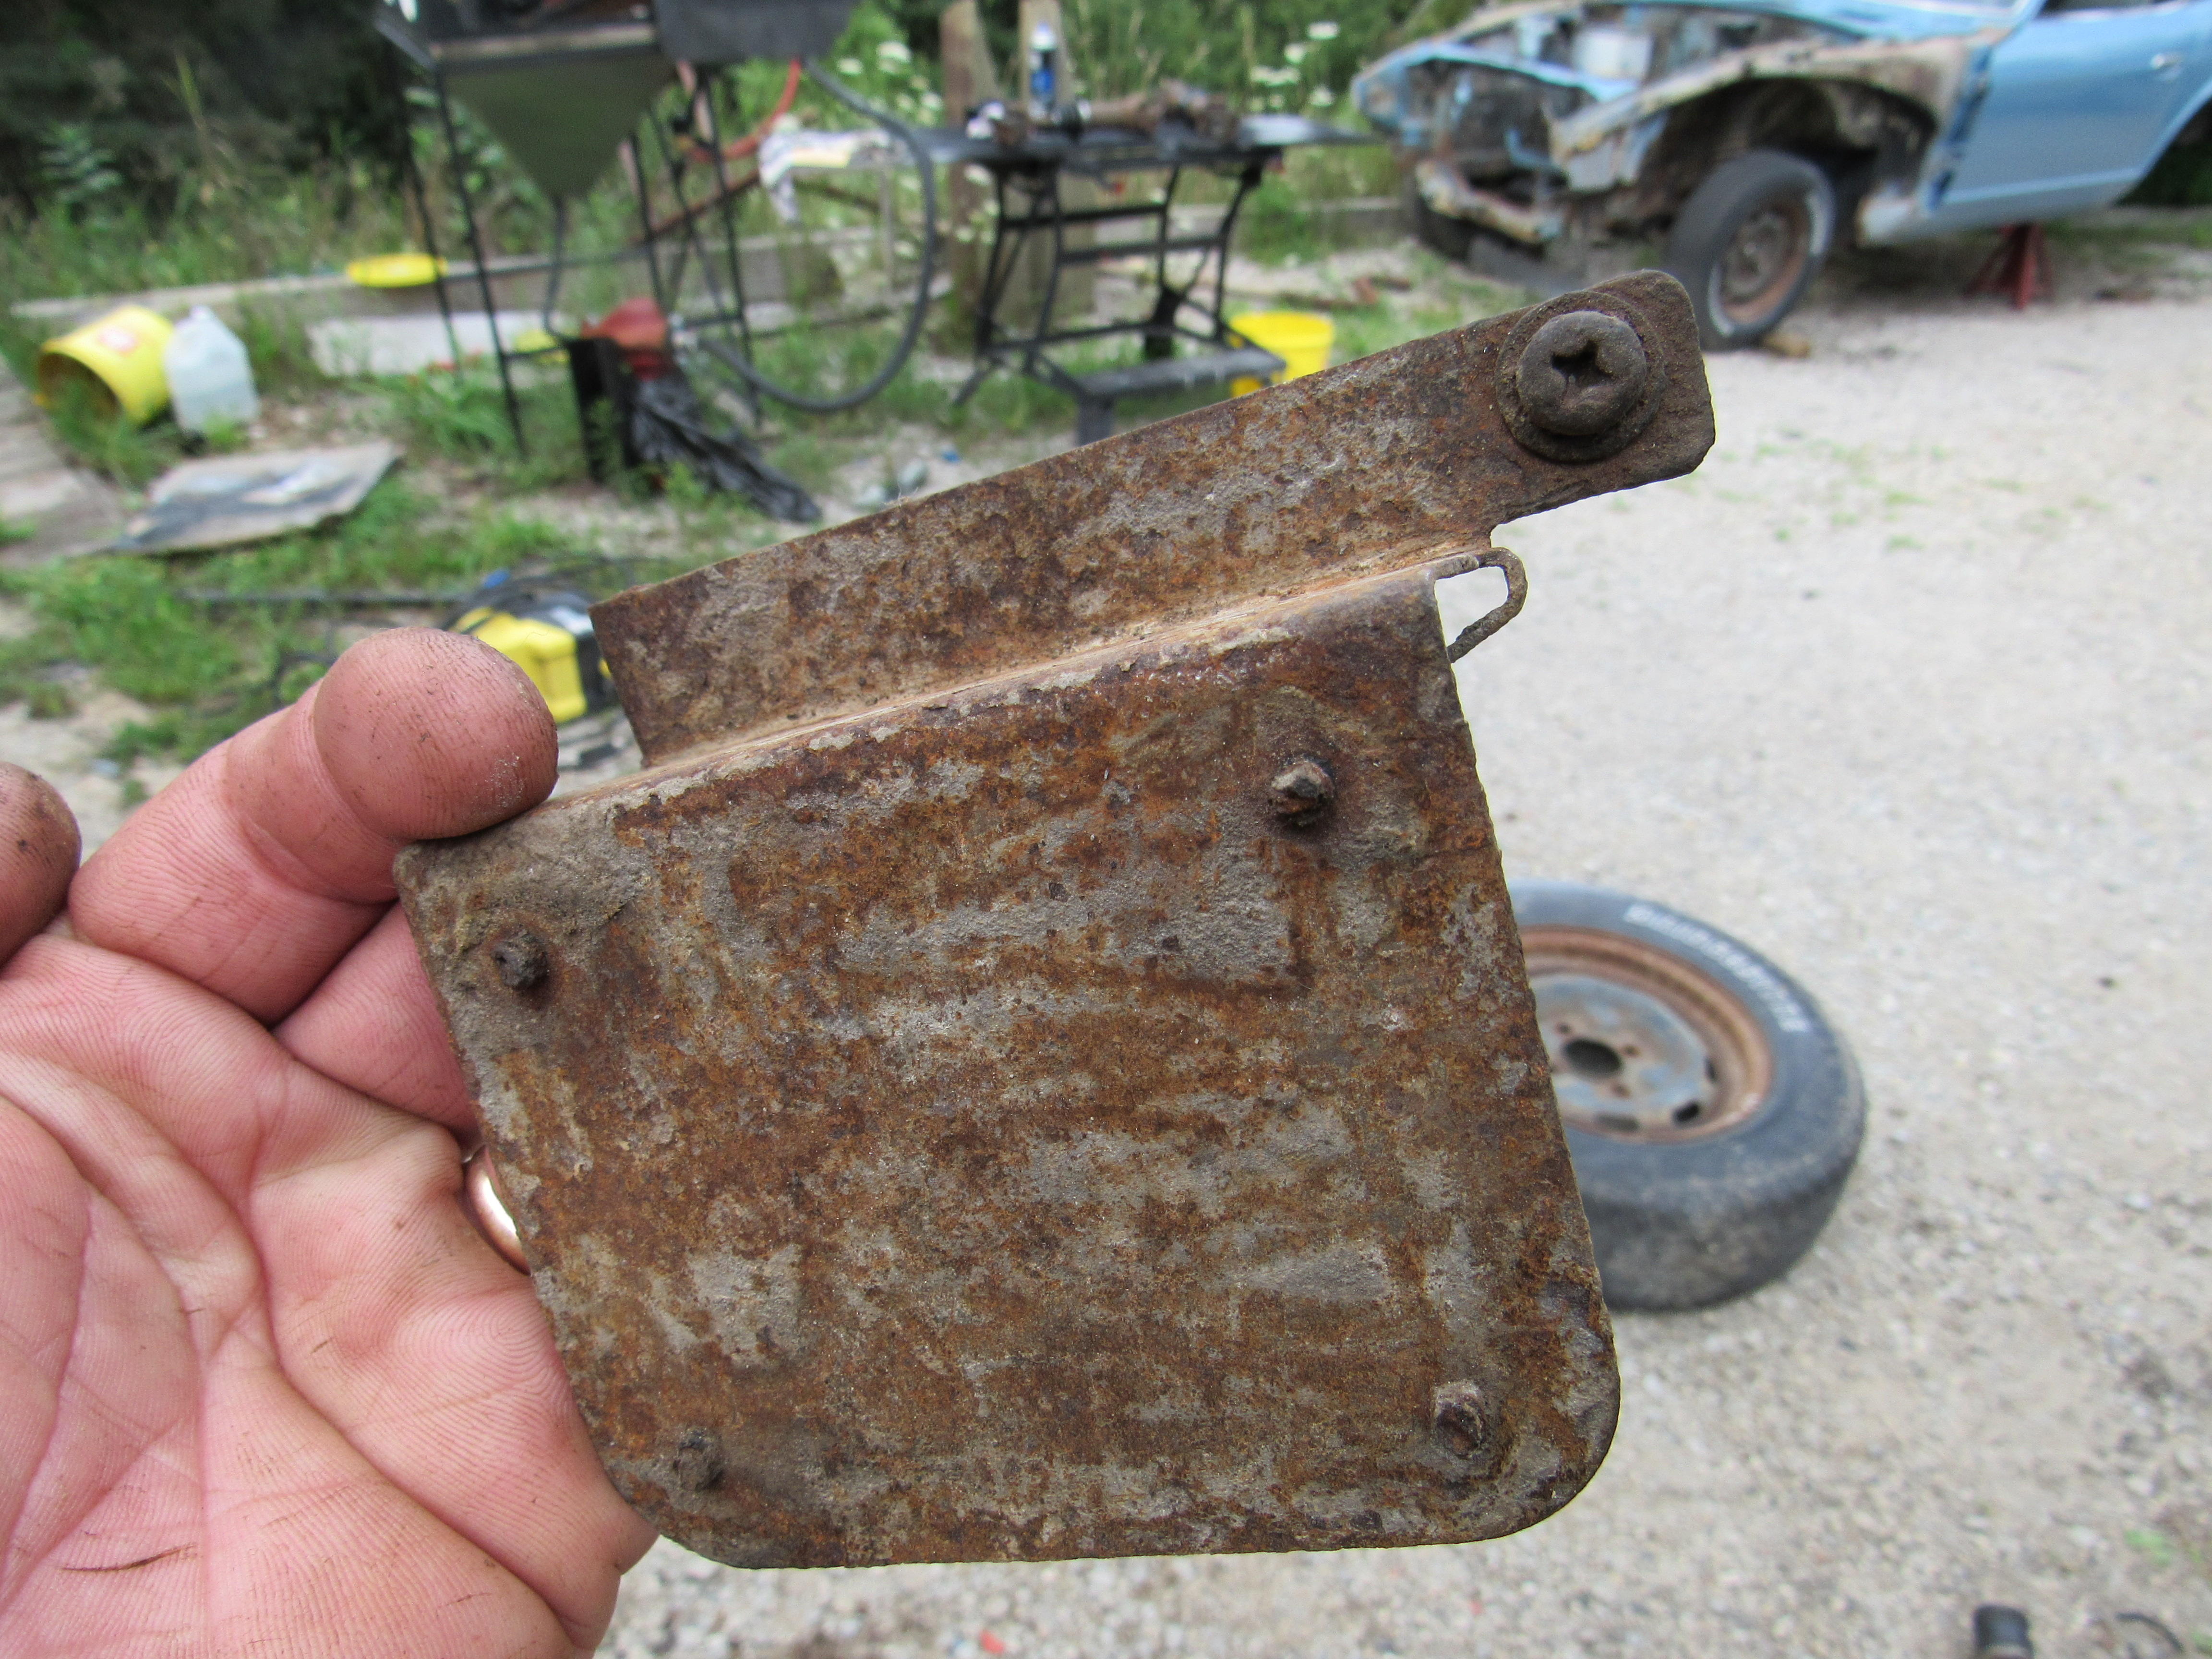
 1 point1 pointWe don't really have 2x4's in the US either. Once the lumber is dried and planed they are more like 3.5" (88.9mm) x 1.5" (38.1mm), much closer to the size Jeff is used to.1 pointIt's more likely to be something else entirely. A bent spindle would possibly cause all sorts of other problems, not least of which would be hub bearing trouble. I don't see it as the likeliest scenario here yet, so don't do anything rash. You need to fully understand the problem before you make any attempt at rectification.1 point1 point1 pointIf my guess is true, the early set up on the reservoir tank ( push botton cap ) is useless. It becaomes "over flow catch tank " like Alan said. I need to see other early Z432s as much as possible to clear my question. Kats1 point@Careless was kind enough to loan me his spindle pin stump puller, wonderful tool. It will pull the pin or pull the threads right off. I still had to heat the cast iron up with an Oxy/Acet torch but I managed to save both spindle pins and the wedgy lock pins. Anyone tell me what the story is with this cover? (last pic) It sits over the P/S rear control arm lock bolt, looks like it may have had a piece of rubber riveted to it in the past, not at all sure why it is there.

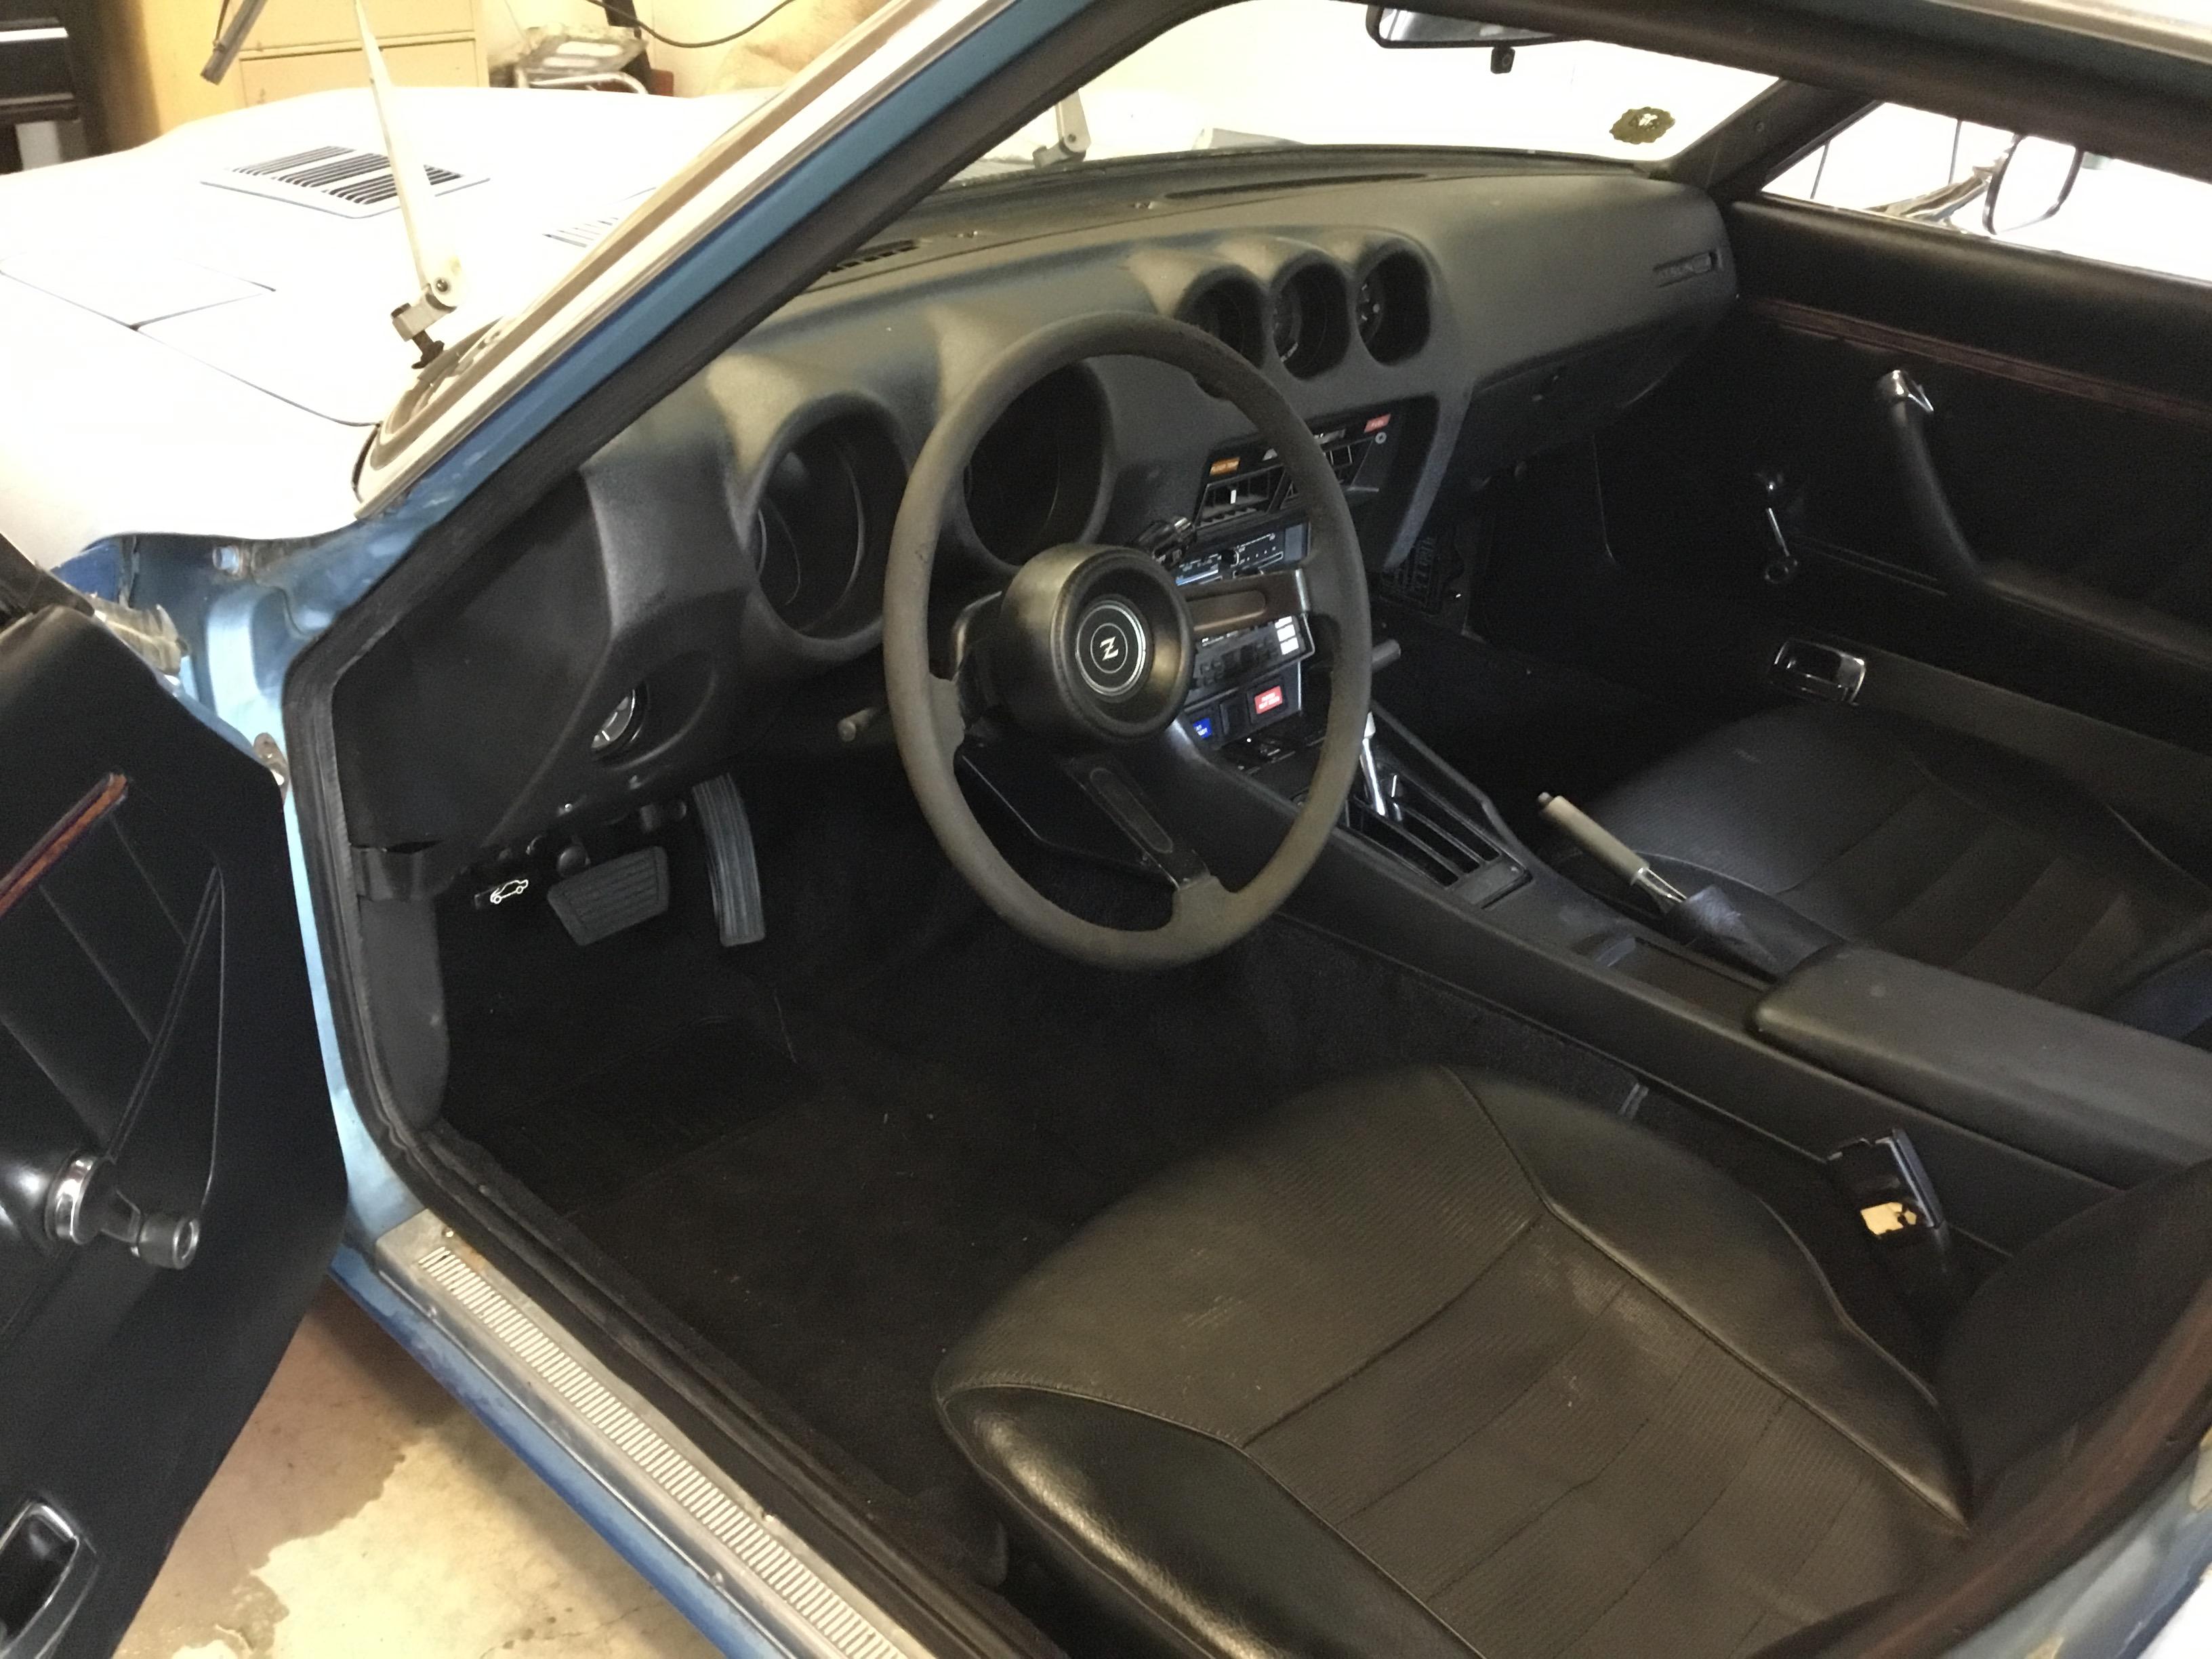
 1 point1 pointFound some from a 210/310 on eBay. I have a feeling they aren’t the same, but they were $15 for 4 so I too the gamble. We shall see. Sent from my iPhone using Classic Zcar Club mobile1 pointWell almost finished with this project . Interior is done as much as I’m doing . Also buffed out a fender just to see what I could get out of this neglected paint job. The owner will probably be upset because I won’t have the time or strength to do the rest of the buff . Disc replacement surgery Monday . If there’s any work that will tear up a back it’s running a buffer for several hours . I wanted the owner to see what he could do with this survivor- though I think this is a re- spray . Color doesn’t match and it looks like there’s two layers of paint . It will make a good 10 footer for sure . Of course the important detail is that this car is almost rust free( some small surface areas, no pitting . The dash cover is a Accu Form , which I thought was made pretty well. Fit pretty damn well right from the start. Just some gentle massaging .

 1 point1 pointDisconnect the wire from the sender, and ground it to the block. Turn on the ignition (no need to start it) and see if the gauge goes to full pressure. If it does, the gauge is good.1 point1 pointEpilogue: So, this is actually my first ‘contracted’ 240Z restoration (Yes, we had a signed contract). Overall, I would say that it went surprisingly well. The restoration was done within the contract estimated cost of $40K and time frame of one year (almost). The breakdown on the costs for the customer are as follows: Paint: $12,000 Parts and Material: $14,885.28 Labor: $12,476.25 For a grand total restoration cost of: $39,361.53 Payments for the paint were made by the customer directly to the paint shop Payments for parts and labor costs were made by the customer through Paypal. Payments were all made in advance in $1500 increments. When the $1500 was spent, I would send an invoice and then the next payment was sent. This process worked very well and the customer was very prompt with payments and very supportive. The customer was able to monitor the progress through the blog and was very communicative and supportive during the restoration. This was done by e-mail and not through the blog. It was actually a very nice way to do things. For the most part, the restoration went as planned. Below are some of the items that were lessons learned or different than originally planned or expected. 1. Initially, the plan was to restore the car to what Hagerty’s would consider a Condition #2 car, similar to my orange Z, which I consider a condition #2. However, after the paint job, the project was kicked up a level to where the car would be in the Condition #1 category. As I mentioned earlier, paint and body work quality is a huge factor in a restoration. https://www.hagerty.com/apps/valuationtools/1972-Datsun-240Z 2. Quality paint and body work is expensive. I was hoping to get the paint done for $5-10K. This is what I discussed with the customer. I got a number of quotes and even considered Maaco (they did a nice job on my yellow Z, not on my silver Z). However, I had seen Miguel’s work and really wanted a great paint job so I went in that direction. The total cost of the paint job was $14,000. The customer paid $12K of this and I paid out of my labor cost $2K. The reason I covered $2K of the paint job was that I had told the customer $5-10K for paint, and obviously we blew way past that. The other reason is that I charged labor for my early prep and body work, all of which was removed by Miguel. So, no fair to charge the customer twice, so the right thing to do was to pick up some of the cost. On the next car I do, after I remove all the parts, car will go straight to Miguel for paint. No need for me to do any body work, although stripping most of the paint would not be bad. 3. One more item on paint: I would consider my Orange Z a condition #2 car, primarily because of the paint. This orange Z that I just finished is about 90% in the Condition #1 state. As you can see from the valuation tools page, the price difference between the 2 conditions is more than the total cost of the paint. Aside from the paint, I would say the cars are almost exactly the same. If I had to do it over, I would have taken my orange car to Miguel. I think the ROI is worth it for the paint. 4. Scope creep: Every engineer has experienced this. There were a couple of things that we added that were not part of my initial restoration plan. Originally the car had the slotted mags. The customer and I discussed the pros and cons of putting on the steelies and hubcaps and eventually we went in that direction. That was a bit of a cost hit over the original estimate. Polishing the mags would be about $300. Getting a set of nice steelies and hubcaps was over $1K when all said and done. Also, we ended up going with a nice reproduction of the original OEM exhaust instead of just replacing it with an off the shelf system. The OEM reproduction came out great and looks and sounds super.. Nice choice on both items. I will do this same system on my white one as well. (Special thanks to Carl Beck for bringing this to our attention). 5. Organizing everything in large storage boxes by section works out great. I had an engine box, an interior box, and an undercarriage box. This makes finding parts much easier. 6. I do a lot of my own zinc plating, but when doing large projects, taking stuff to the plating shop is the way to go. There were several times I brought a lot of parts to the plating shop and just paid the minimum $75 lot charge. This is a nice way to go as it is quick and they do a nice job. Powder coating is also relatively cheap. 7. Time wise, paint took a lot longer than I was expecting. I was thinking 1-2 months. I think it took 5 months. Fortunately I was able to do the engine and some undercarriage items during this period. 8. Parts are starting to get hard to find. It has been very helpful to have the support of the classiczcars.com site in hunting some of these things down. Thanks everyone! 9. Not sure if I could do another one in a one year time frame. Need to take into account, Vacations, Birthdays, weddings, car shows, home maintenance etc. These are some of the items that stand out the most on the restoration. I will add more as things come to mind if they are significant.1 point


Important Information
By using this site, you agree to our Privacy Policy and Guidelines. We have placed cookies on your device to help make this website better. You can adjust your cookie settings, otherwise we'll assume you're okay to continue.