Leaderboard
-
240260280z
Free Member3Points5,426Posts -

Zed Head
Free Member3Points19,228Posts -
Captain Obvious
Free Member2Points10,081Posts -
Tomcat
Free Member2Points44Posts


Popular Content
Showing content with the highest reputation on 08/19/2016 in all areas
-
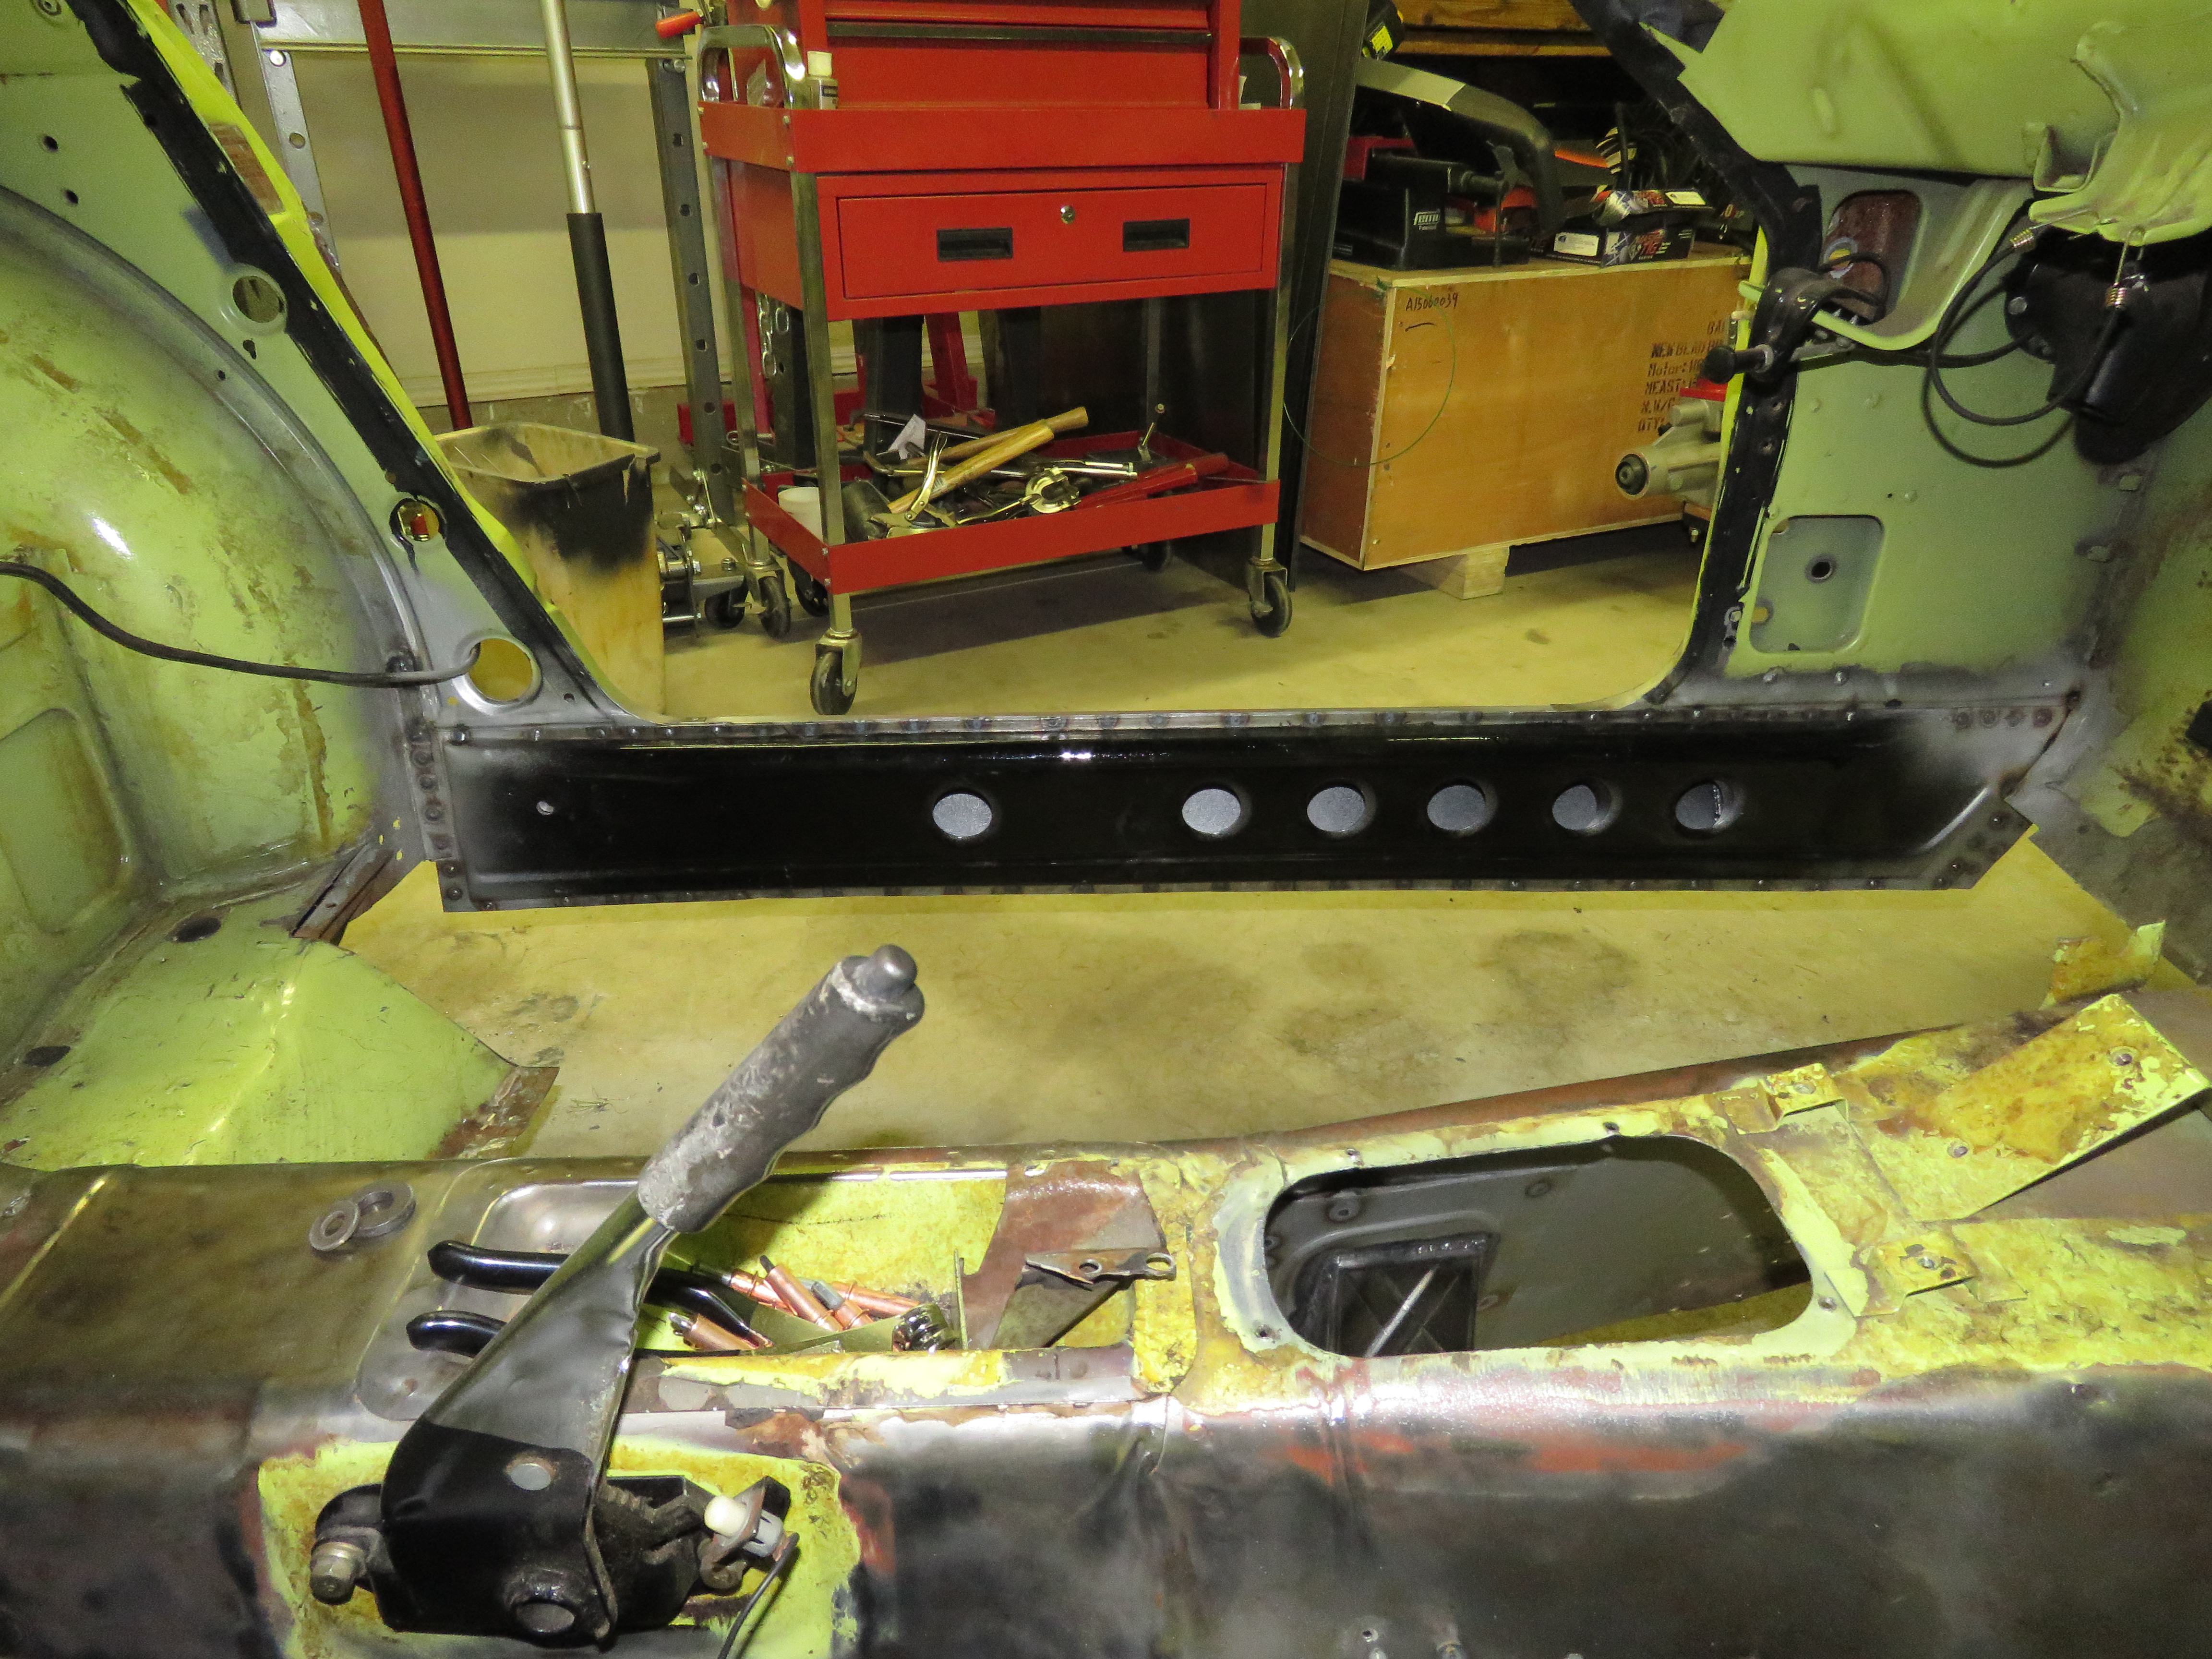
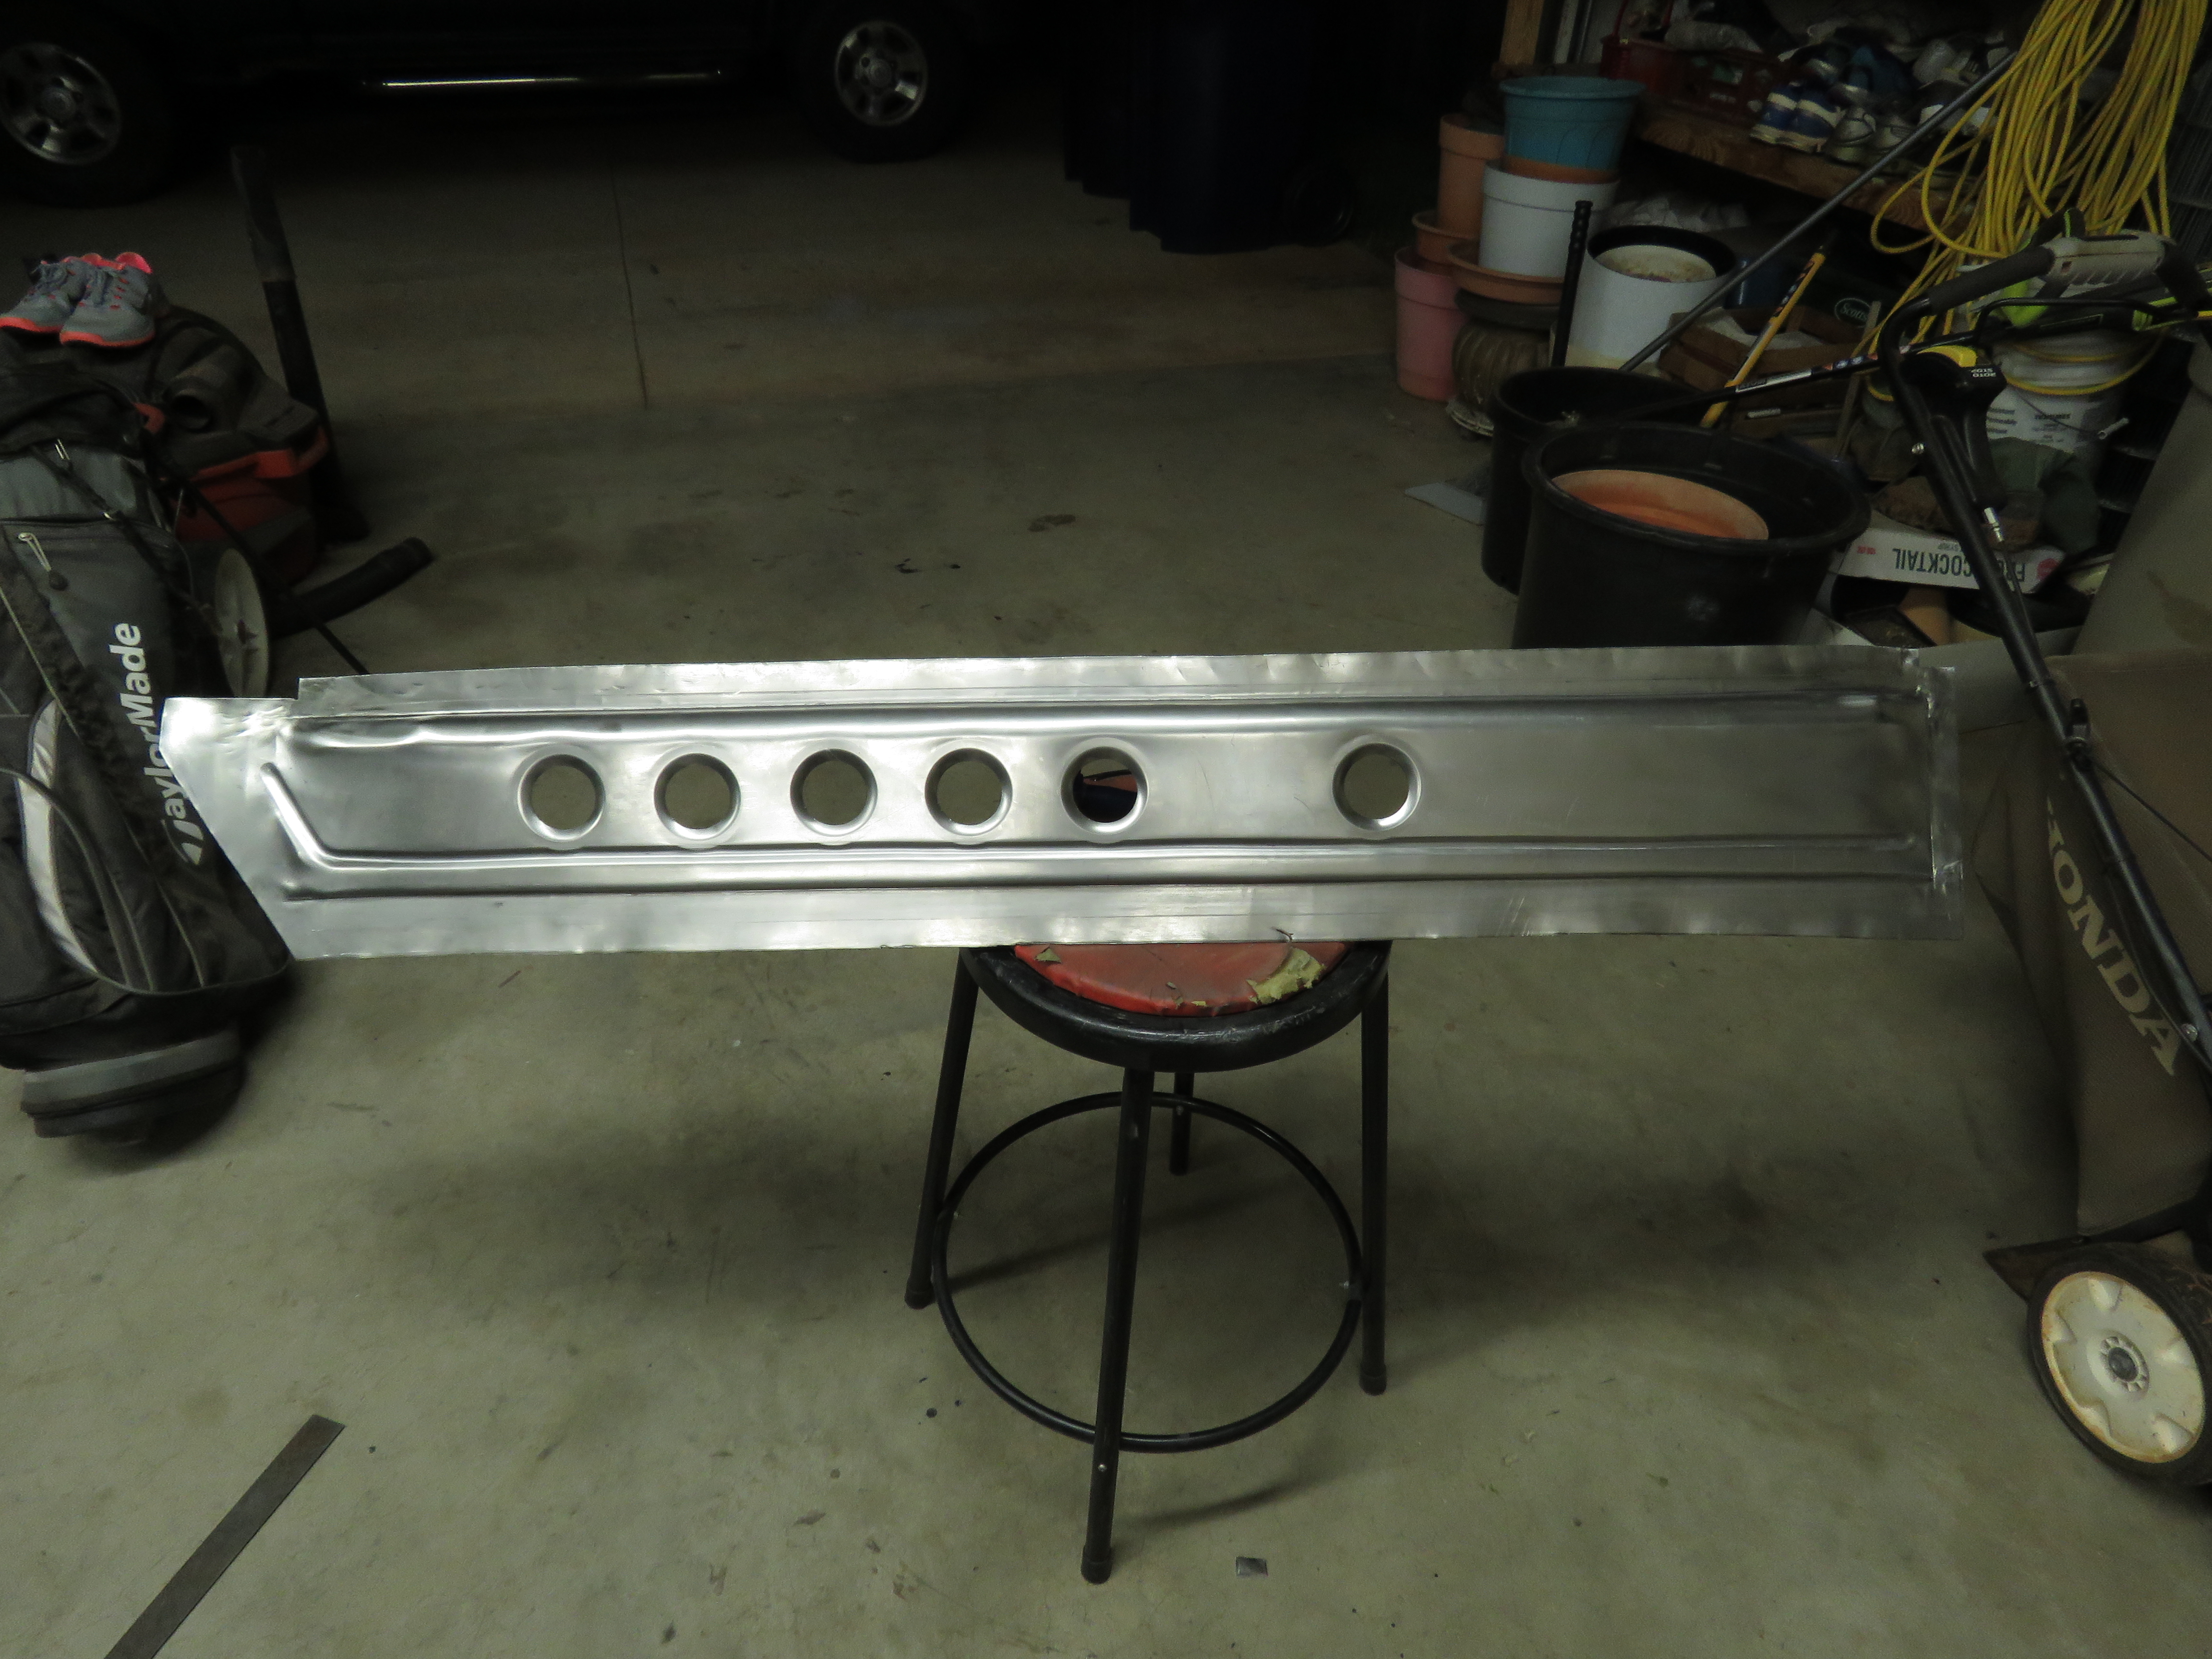
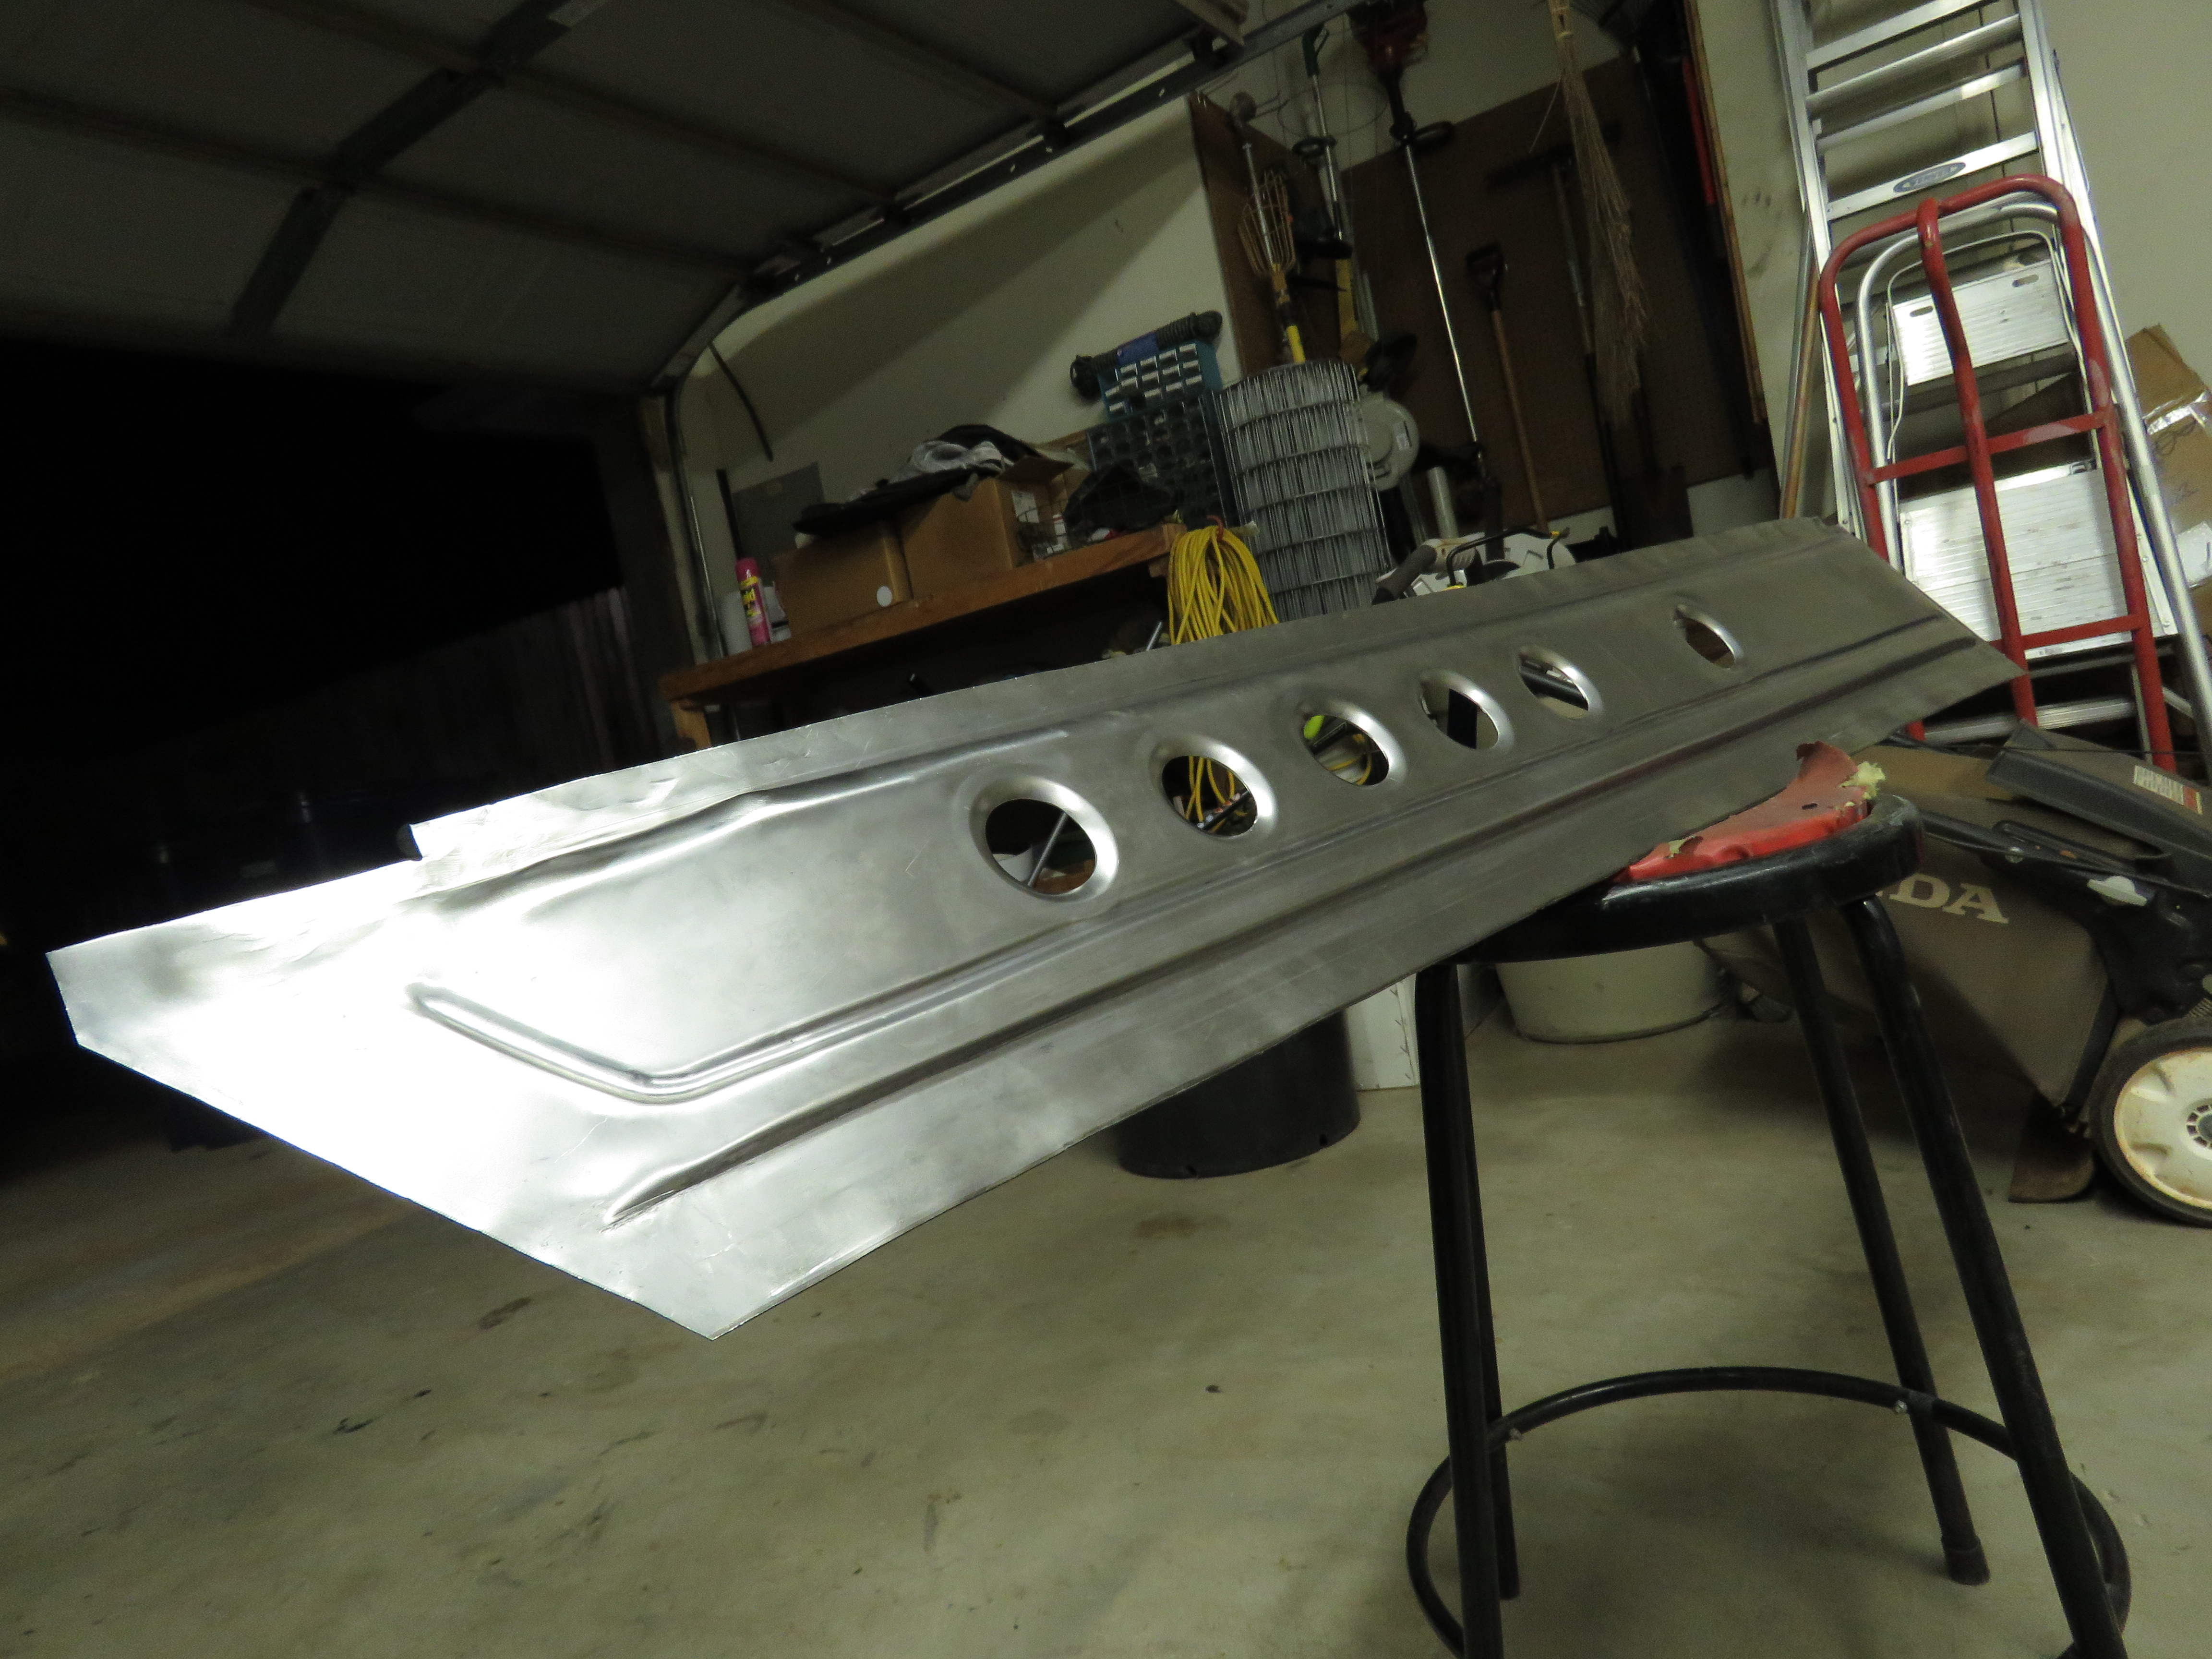
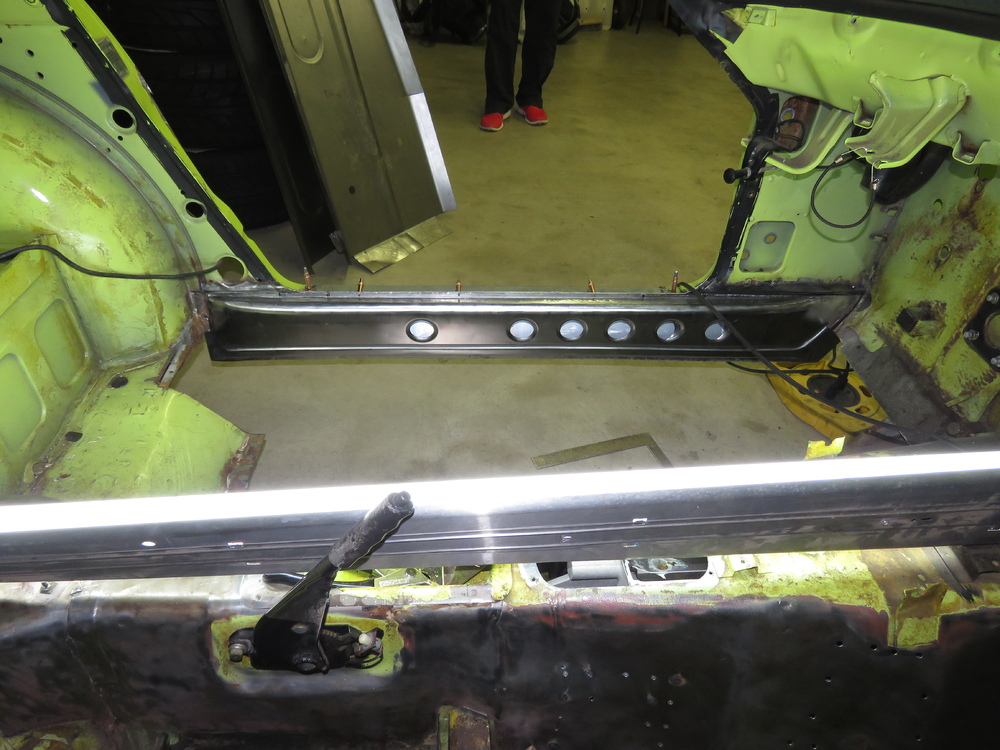
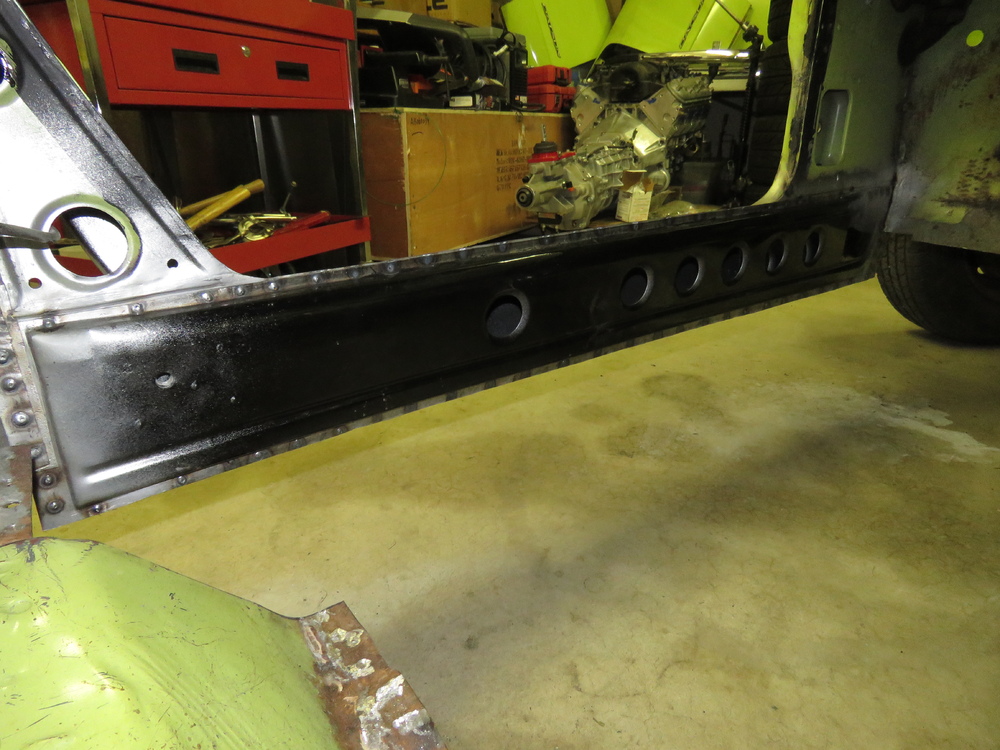
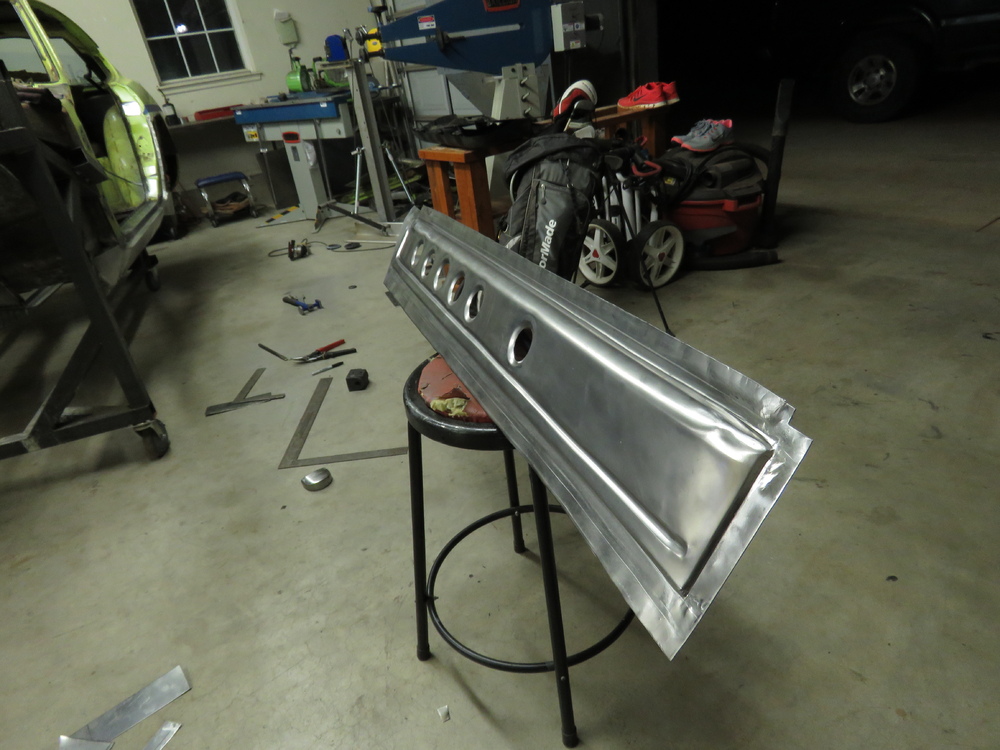
2 pointsThought I would post because I had some interest from some people asking if I would make these. Due to the amount of time and labor involved, it wasnt worth my while to make these for a those that asked. After all I have a project to work on of my own and other things I could be doing besides work . These inner rocker panels are replacements for a 240z as the pictures attached are those of my car. I am unsure about the 260z and 280z whether these would fit them or not. Please chime in if your certain to let others know. If enough people are seriously interested in getting these from me then please post up or send me a PM, if not then I guess this thread will be closed down. The inner rocker panels are constructed from 18g cold rolled sheet (CRS) metal which is just a tad thicker than the factory material (at least on my 240z). I use cold rolled as it is supposed to be a bit stronger than hot rolled and cold rolled has a smoother finish. These are not an exact match to the factory panels but close enough. The seat belt mounting plate is made from 1/8" (CRS) and the nut for the seat belt bolt is a harden Nut. If your Z suffers from rotted out rusted inner rockers then these panels would be great, save you the hassle of trying to do a questionable patch job... Price wise as of now looking at $380.00 shipped anywhere in the USA (out of Country may be subject to higher shipping rate) mainly because shipping a long box (60") like this is a bit pricey, but this is based on estimated shipping cost with Fedex, actual cost may differ which means if its lower then I can knock the price down. boxes and packaging material will be at my expense to ensure the panels arrive safely. Please note I do not have any already made except the ones pictured which are for my car. Let me know what you think and feel free to ask questions. I will keep this updated when it comes time to submit an order, if it gets this far. Thanks for Look!


 2 points
 -
Hmmm.....sounds like siteunseen is auditioning for the new Austin Powers sequel....."ChromeMember":)2 points
-
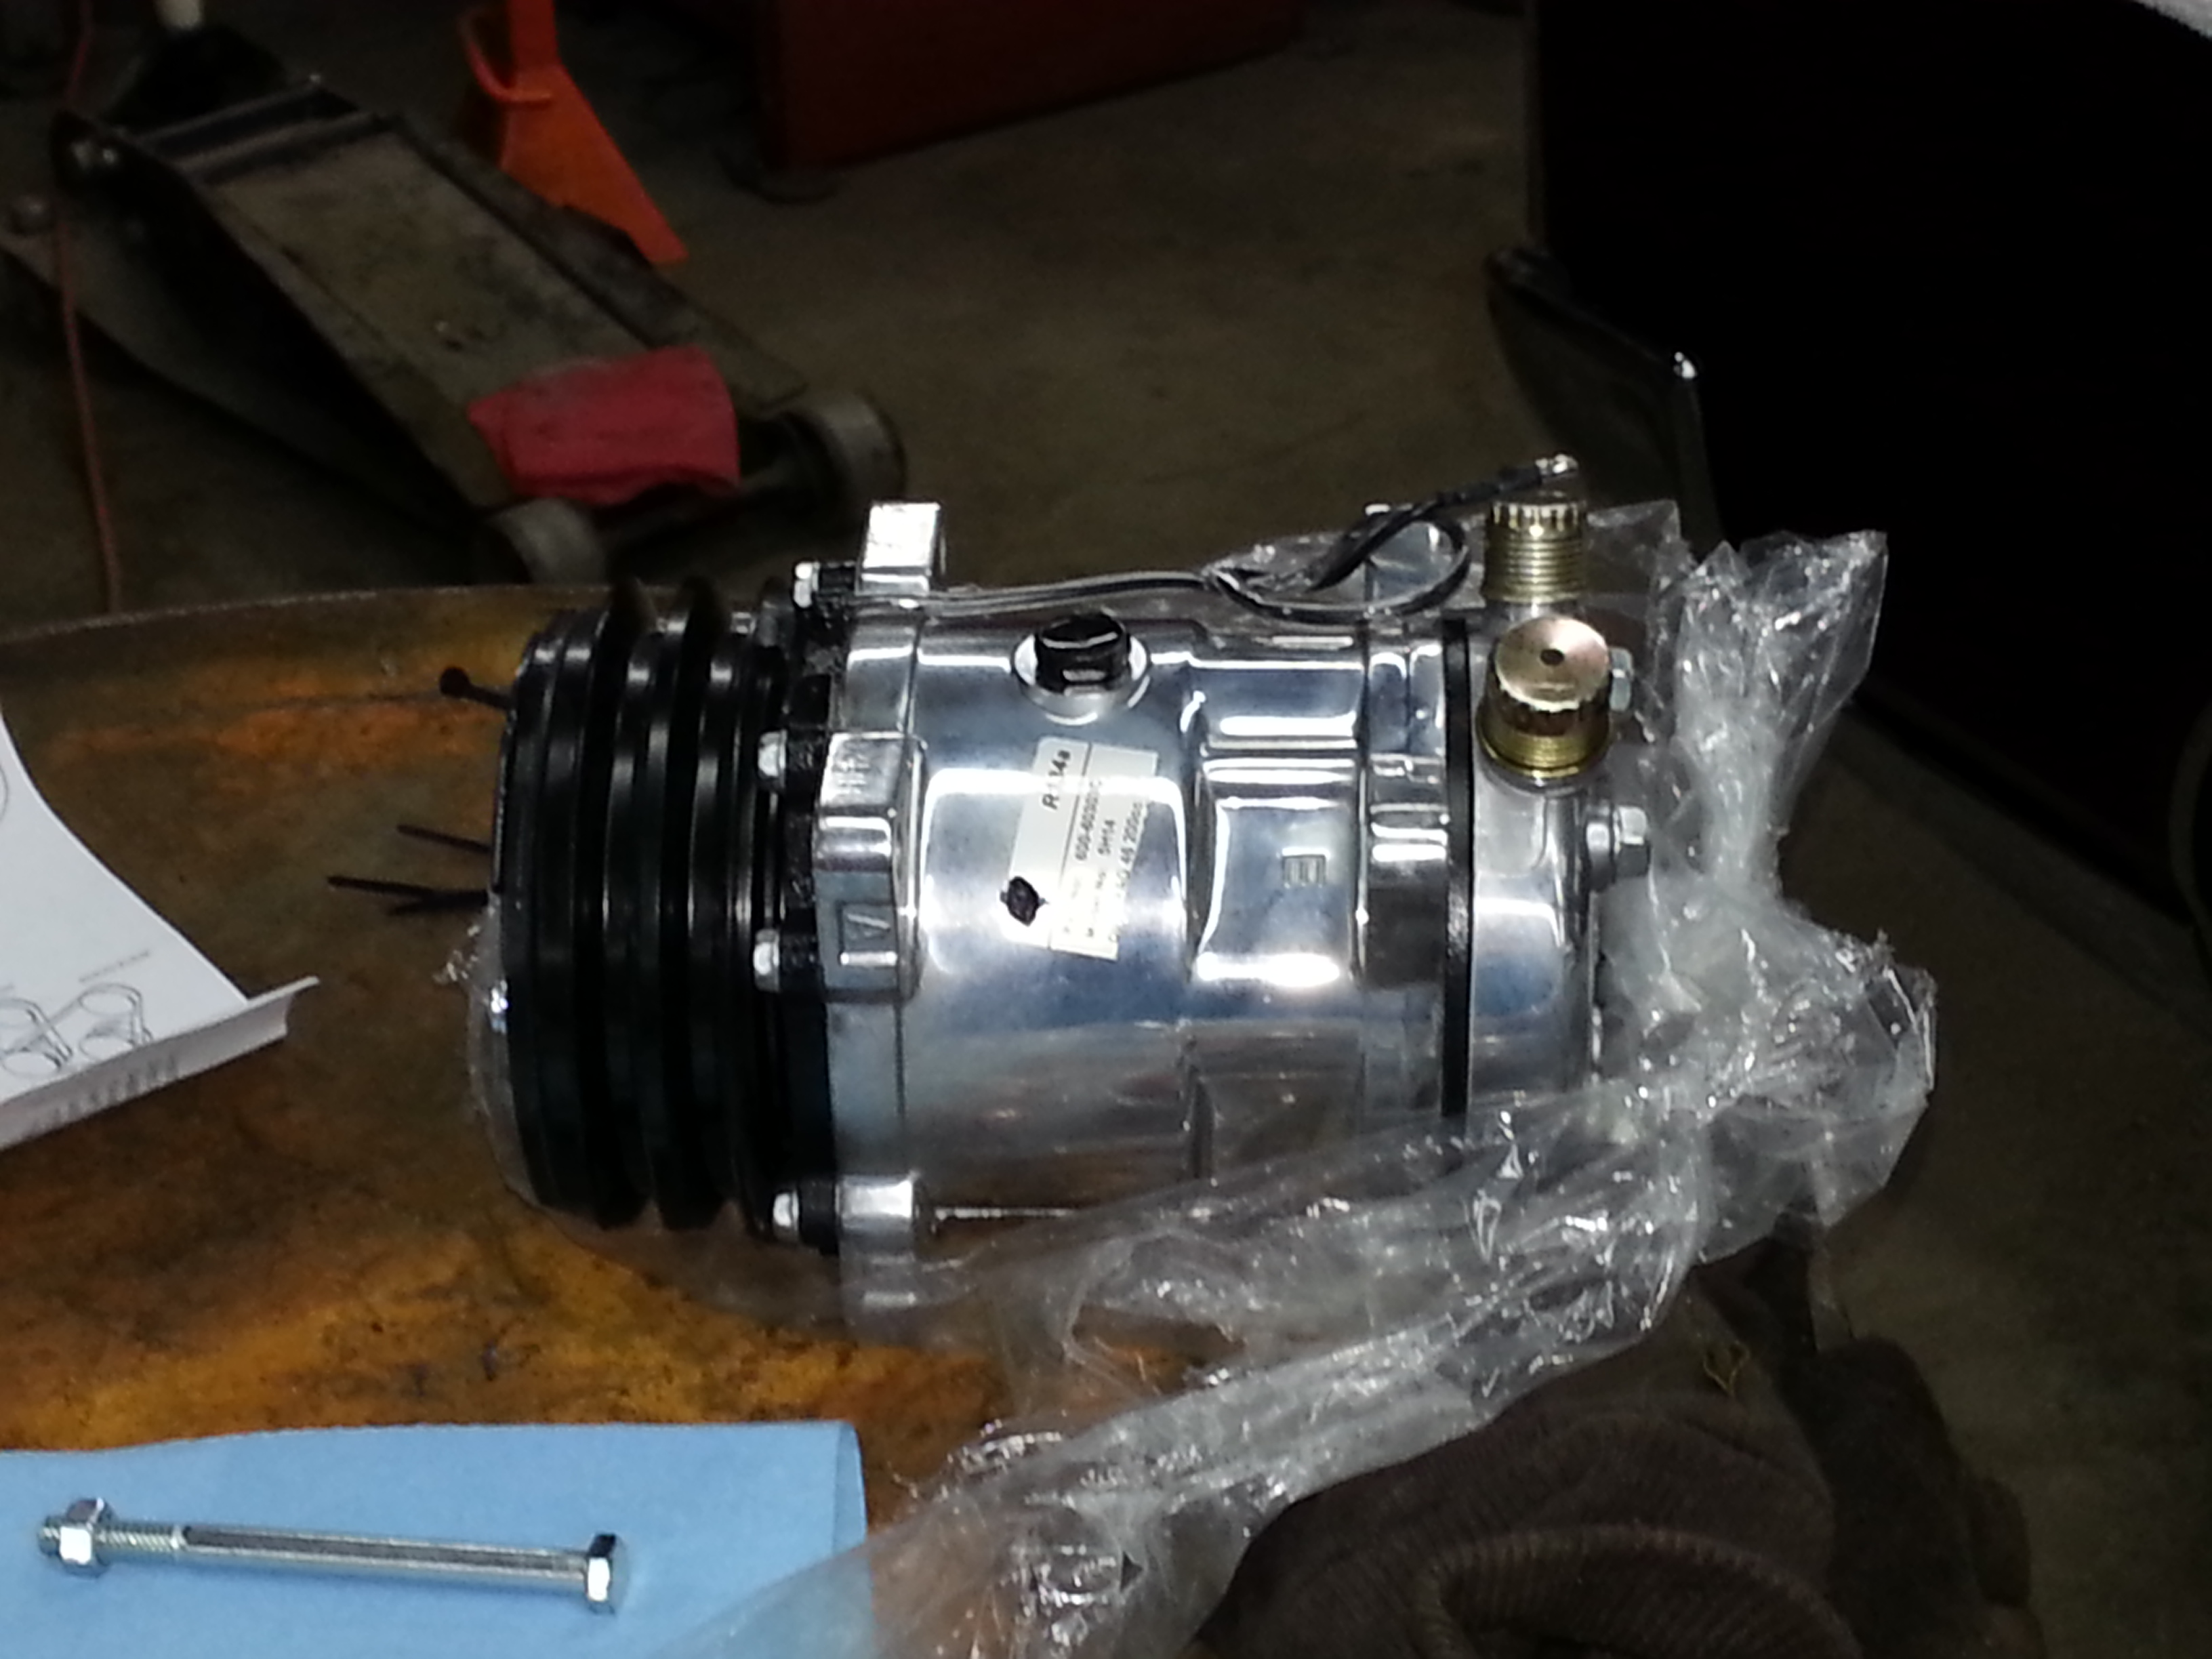
1 pointLast Tuesday I took RedBird to Sam, who is installing her new air conditioner. Yay!!! I went by today and took a few photos of the progress to share with you. Boy the compressor sure is shiny. I'm so happy that this is finally happening. I'll keep Y'all posted on her progress. Jai


 1 point
 -
What fuse are you replacing? You may just have a corroded light socket somewhere. The side markers are bad about holding water behind the lense and rusting out the socket.1 point
-
1 pointVery impressive metal-forming work, esp. considering the gauge and CR material. Price seems more than reasonable, considering the hours I expect you put into fabricating a pair. For a Z with rot in the dogleg area, the chance to put fresh, heavy-gauge sheet metal into the area where the safety belt mounts might be worth the price of admission all on its own.1 point
-
Yeah, from your reminiscing in the injured and bored thread, we know what you mean.1 point
-
@9teen7t240z I think your reserve is a tad high. You'd be smart for to change the format to "Buy it Now" at $15,101.001 point
-
XXX Beautiful!!! Can I assume a complete and stock interior (uncracked dash, AM radio, ash tray, coin tray, etc.) as nice as the rest of the car? No rust or body work ever? If so, and you had a picture or two of a nice underbody I'll say $27,916.43 unless it's stolen between now and then. BTW, what's your street address? Revised 8/19/16: $27,816.43 ... looks like the antenna button is missing.1 point
-
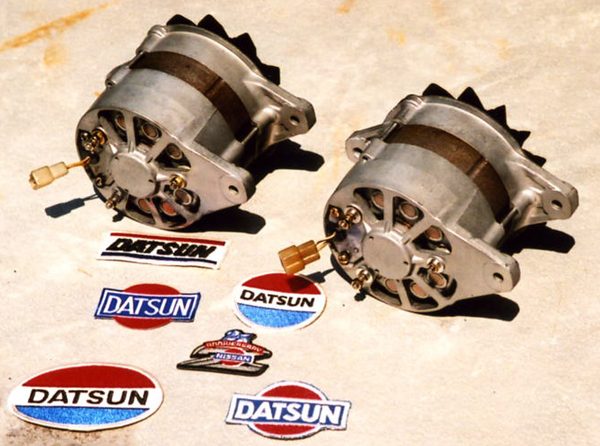
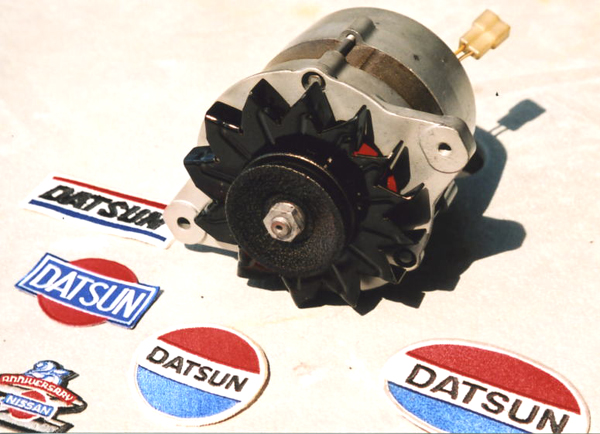
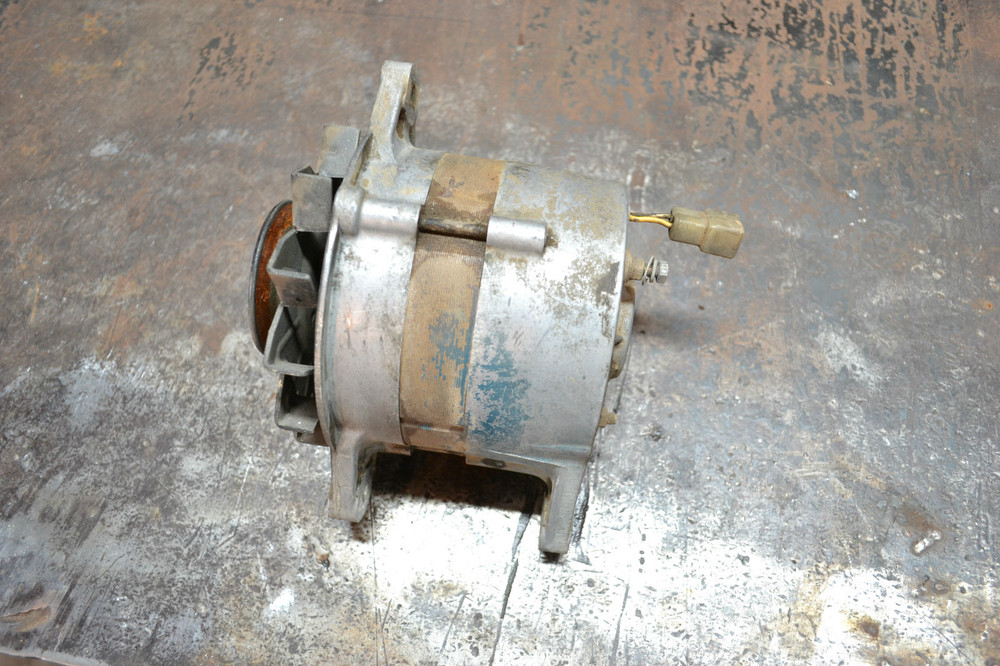
I had mine rebuilt some years ago - took these pictures when they came back from the shop. The symbol on the castings is Hitachi. The metal bands between the front and rear castings is supposed to be a dark green. The shop painted the fan and pulley but the fan is supposed to be plated. Kats has beautifully restored pictures on his web site, but I see that it is down at the moment. I'm a little confused at the moment about the capacity of the alternator. 40amp? 45amp? I would have to do some research. Blue engine paint overspray is common / original.
 1 point
 -
Hello Everyone: Mr. Shigeru Nagata (retired Nissan employee) wanted to provide a little more information related to Nissan’s use of full size clay models, in the Design Development Department starting in 1961. Mr. Nagata was assigned to assist Mr. Goertz as a translator, during Mr. Goertz time at Nissan. He was also responsible for the Design Development Departments implementation of the US FMVSS related to Interior Design. Mr. Nagata wrote a 9 page article, in English that he wanted to share with the American Z Car Enthusiasts. Toward that end I have added it to the Z Car Home Page, along with more introductory information about Mr. Nagata. I think everyone will find it very interesting. See: http://zhome.com/History/ShigeruNagata/SNagata.htm FWIW, Carl B.1 point
-
When I put my Pertronix in last spring I got the 2 black/white stripe wires mixed up, switched them around and the tach worked... up until 4000 rpm1 point
-
No doubt. My kids all drive older cars because they like my free labor. Deep down, I still like want to see points in my dist. and carbs on the manifold. I suppose I could bring myself up to date a little, because, after all, "I'm a man. I can change, if I have to, I guess. "1 point
-
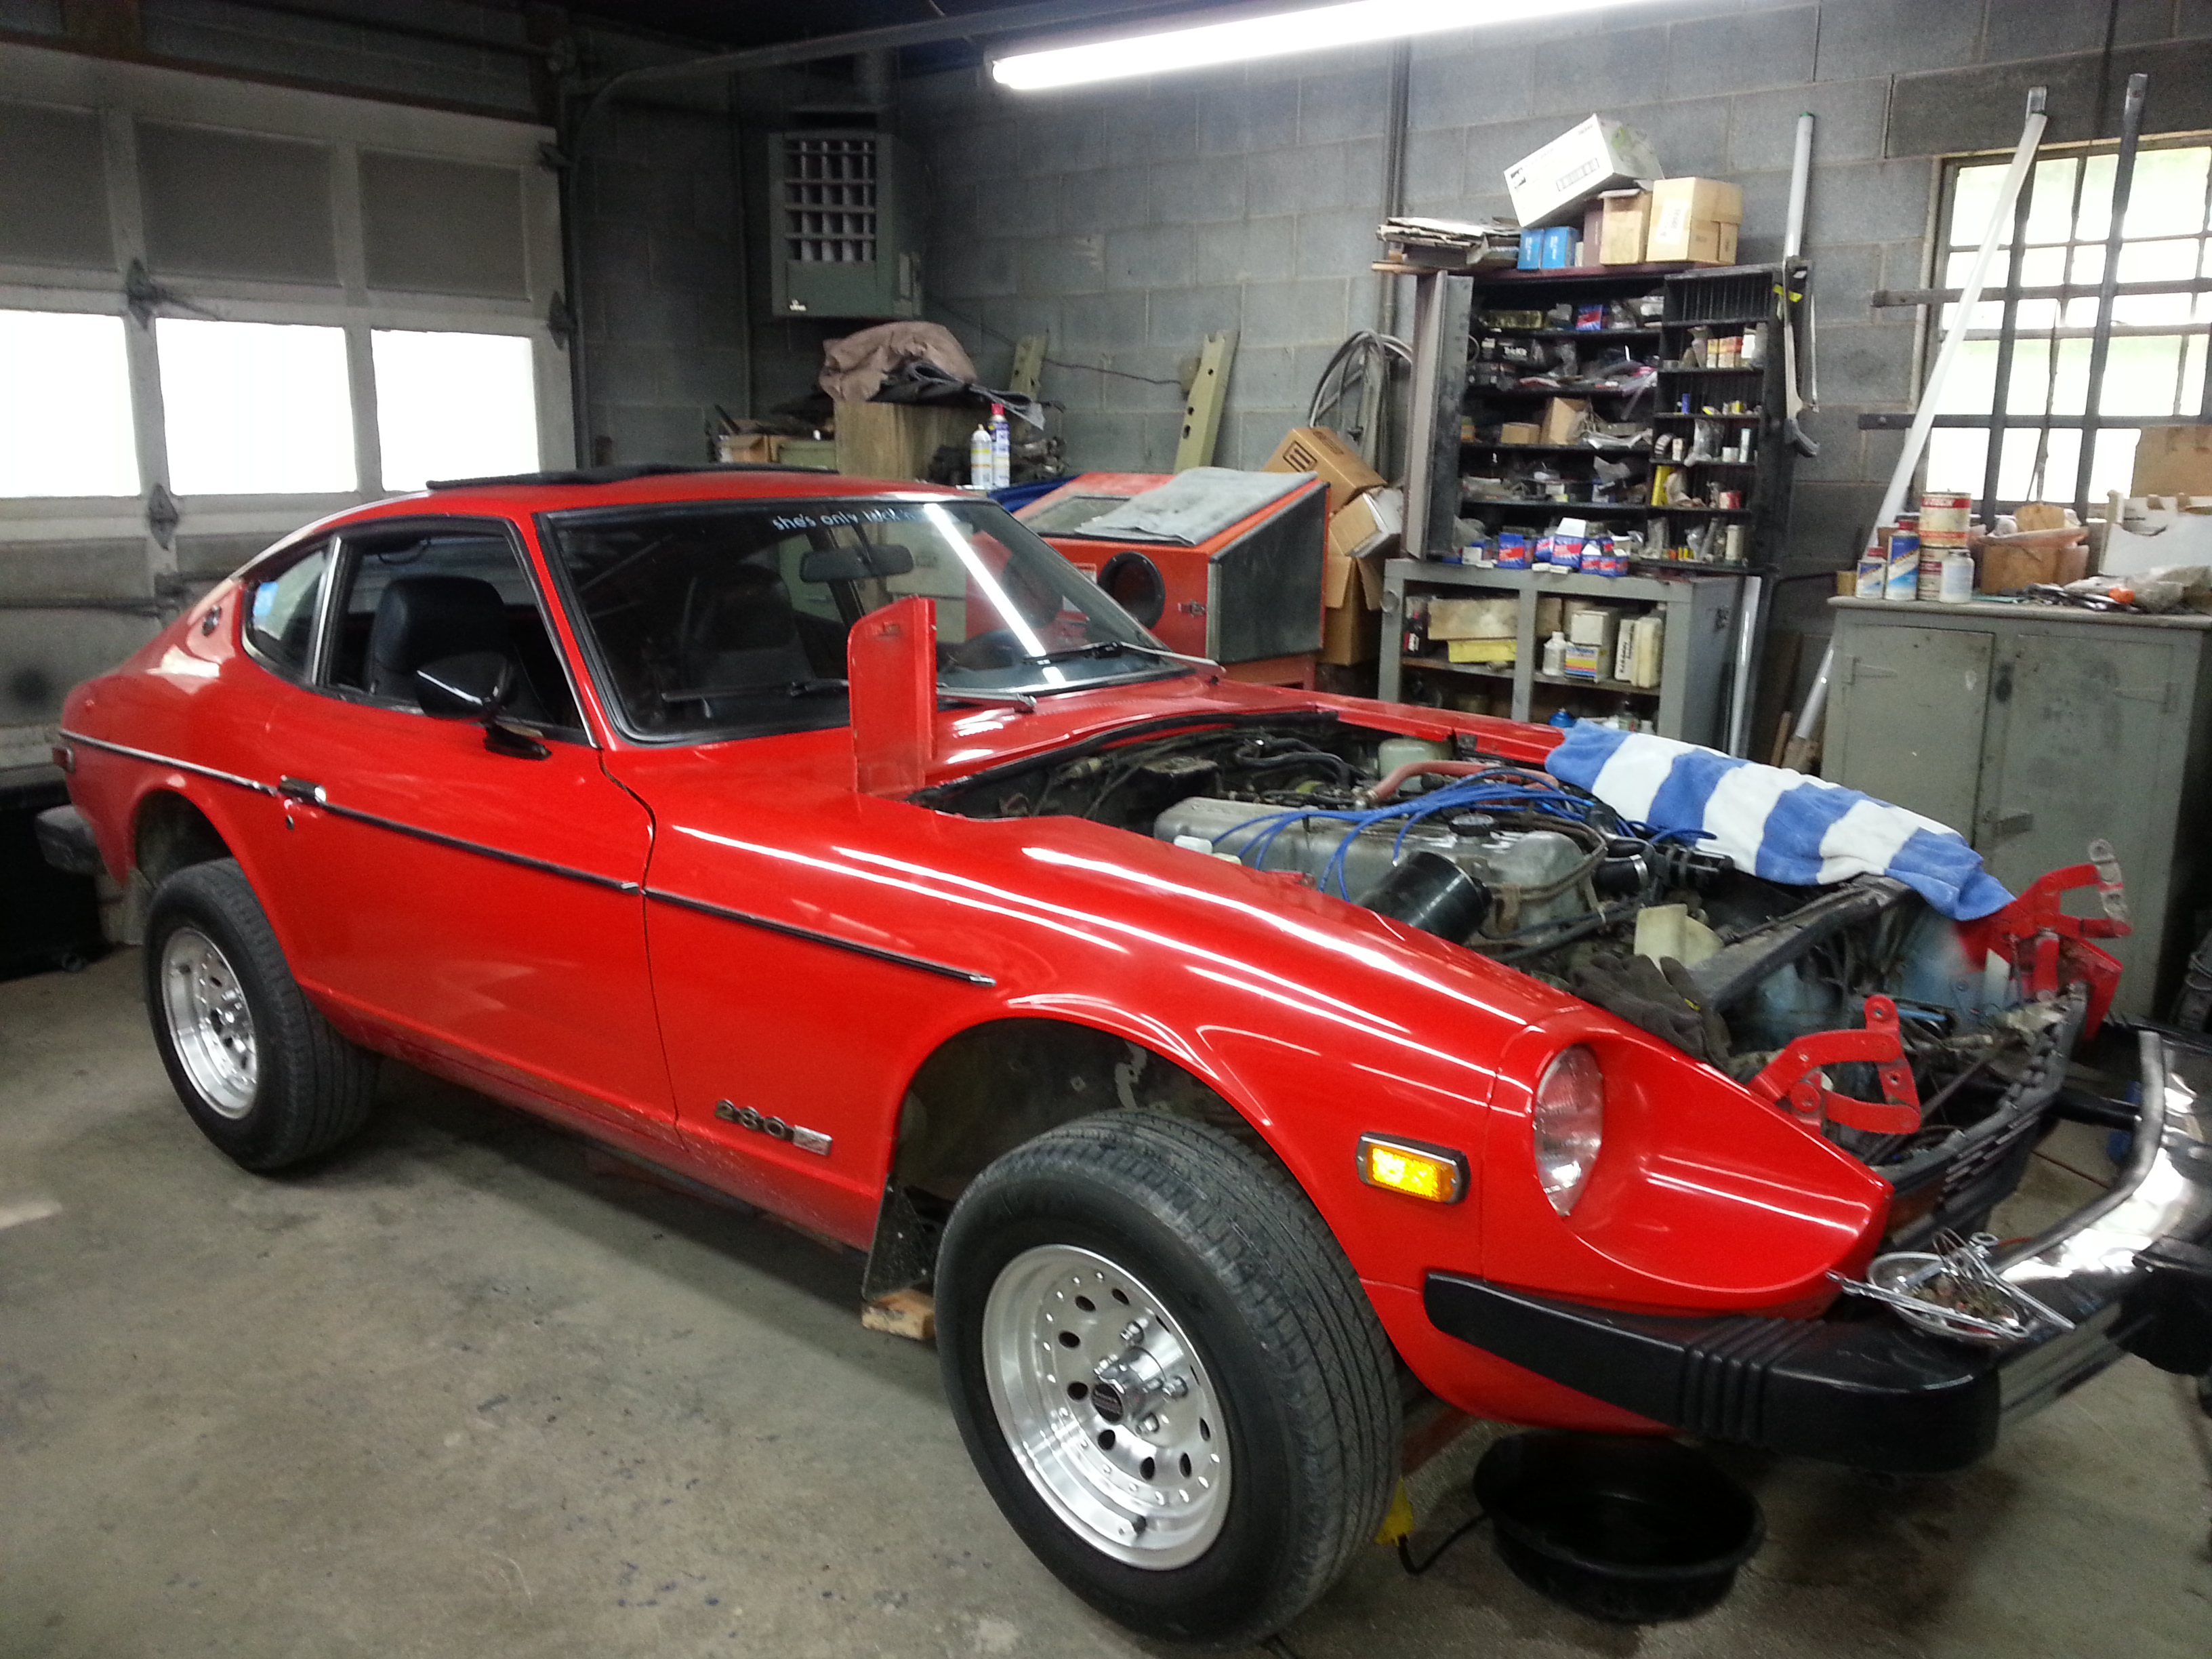
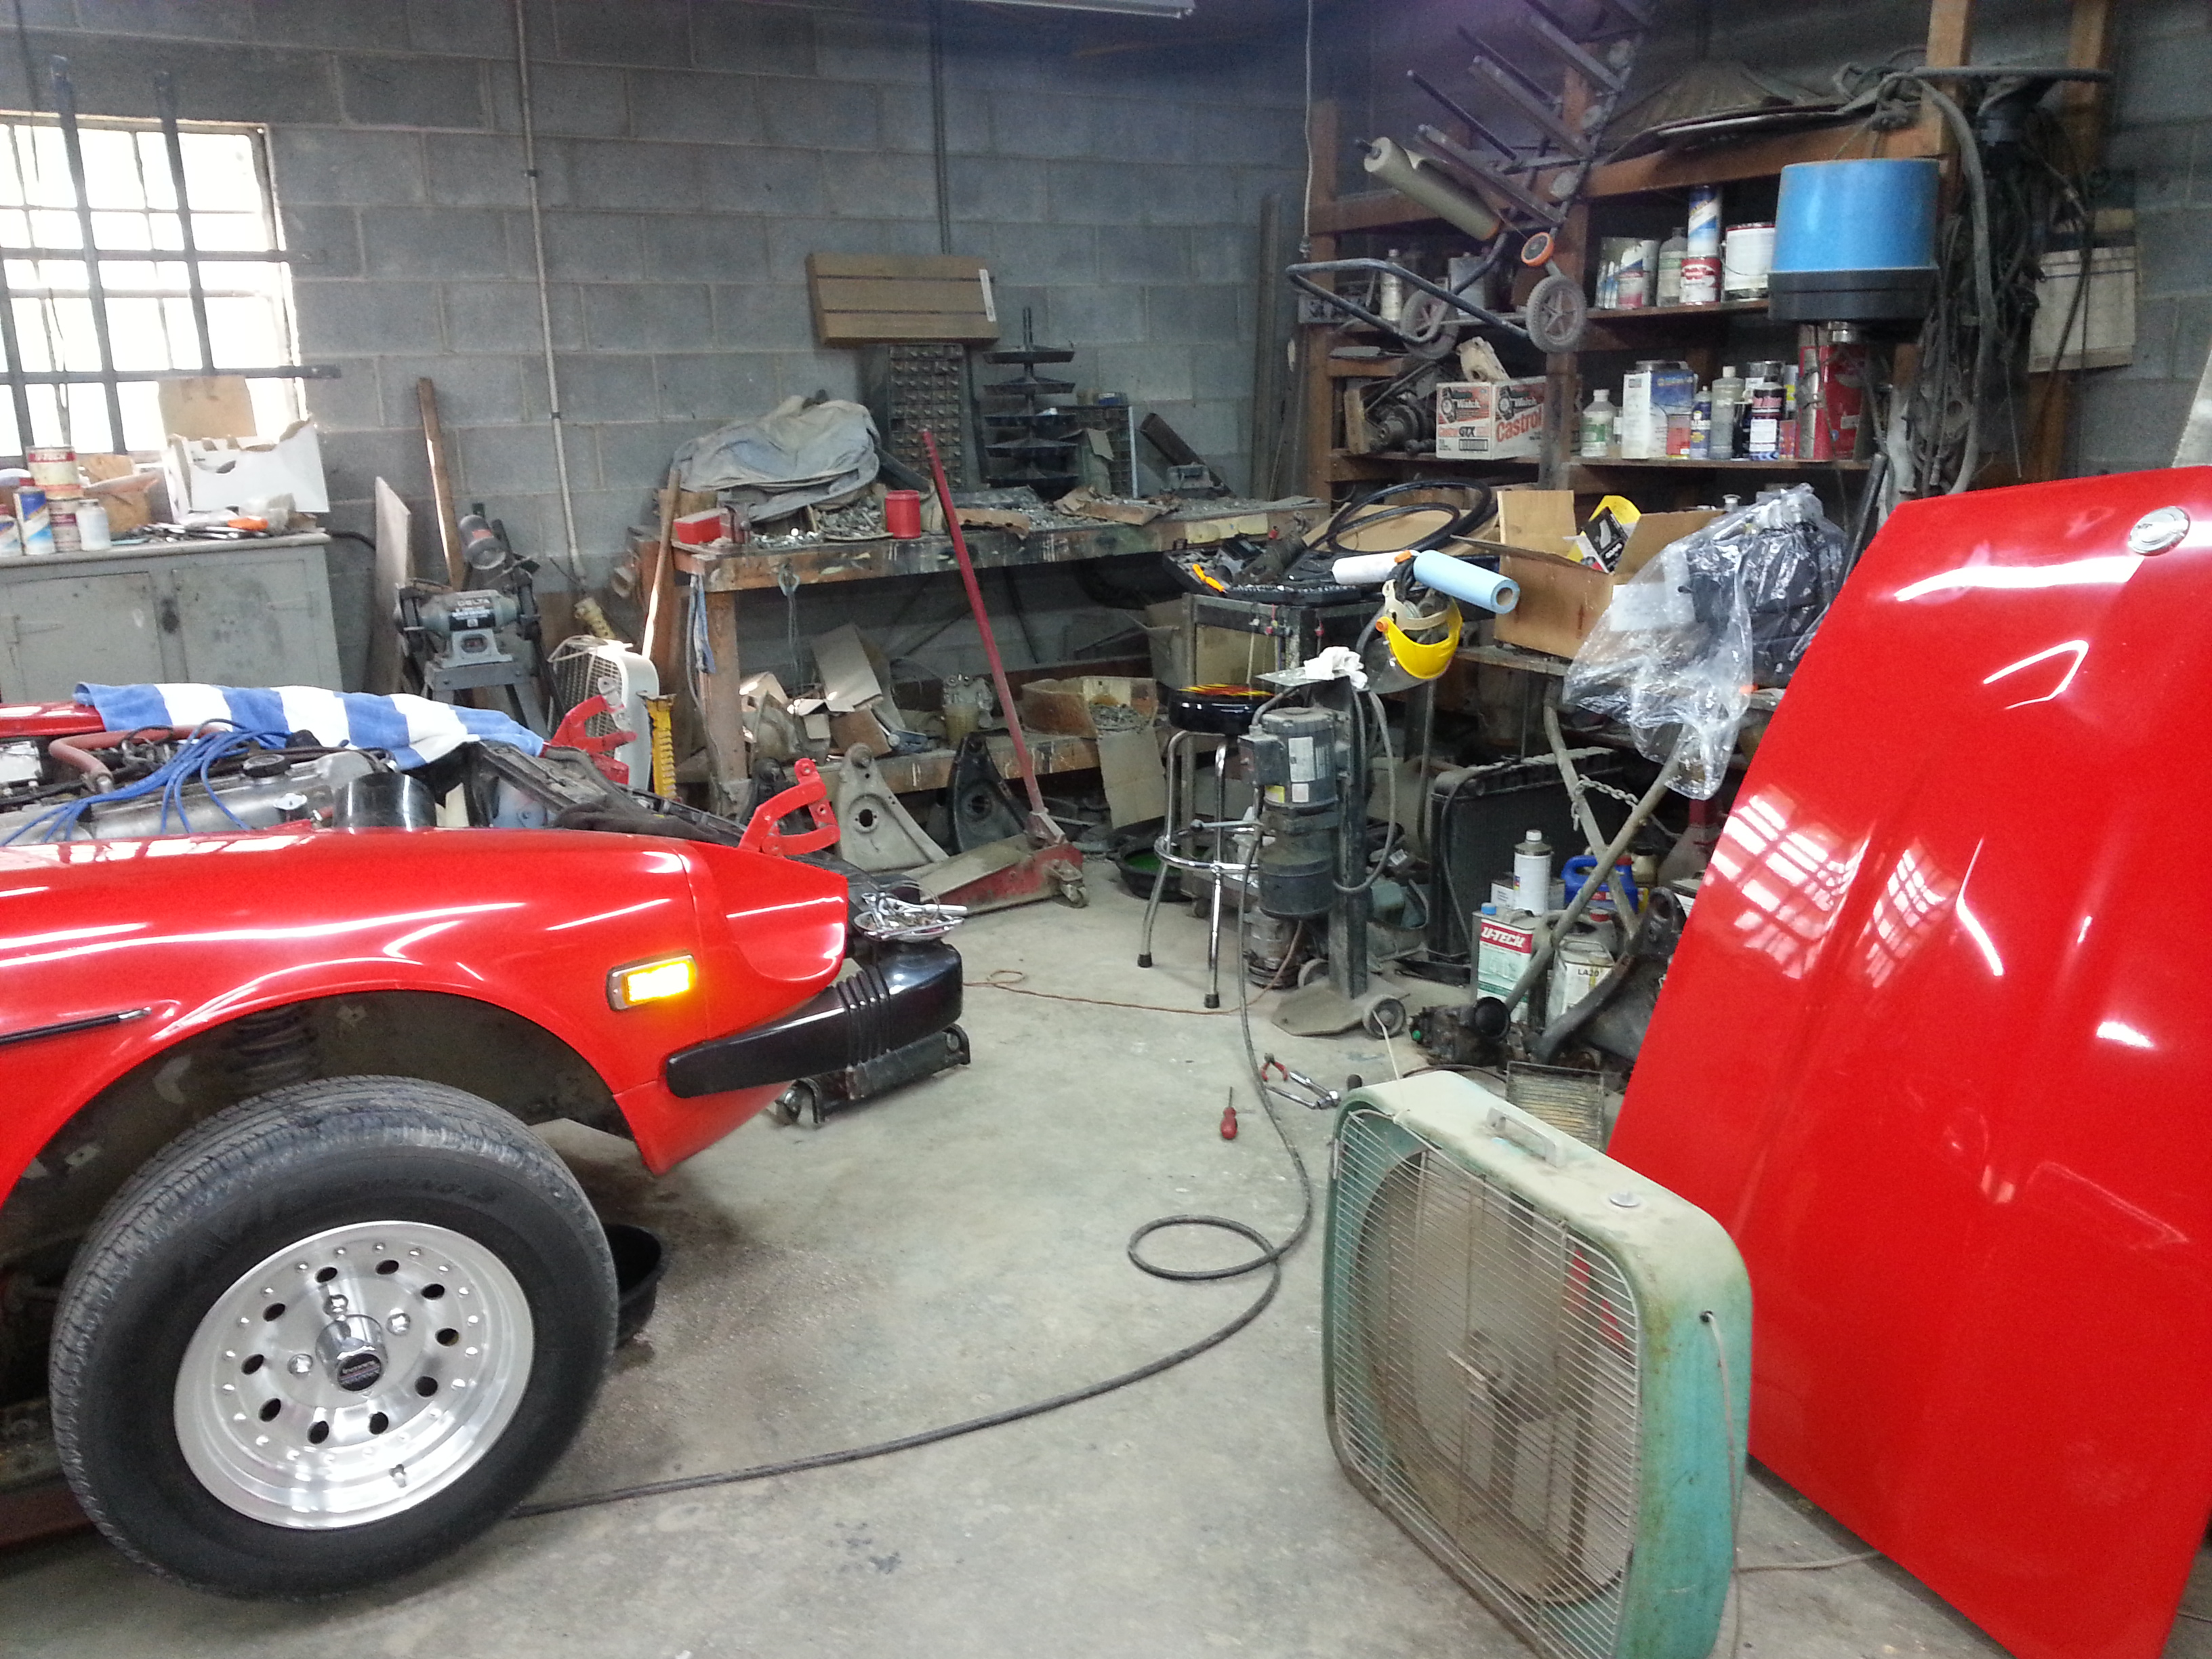
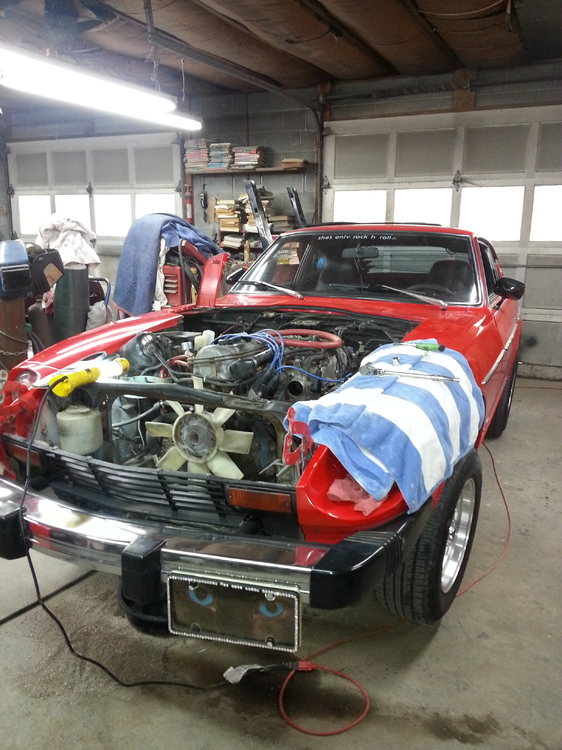
1 pointMini-Update: Been working on this car here, and Zup sent me some much needed stuff to put in place the sound deadening that was not installed in the car when it was repainted. He also gave me great tips on getting me set up to tackle the interior of the vehicle starting from its current stage. So far I've done the following: Attempted to repair steering rack. It came out great... except the pinion was worn out in the rest position and had a noticeable clunk when turning. I am going to attempt to transfer over the guts from the "rebuilt" rack if it's ok, and see how that works. That will allow me to drill out the hole on that rack to accept the oiling bulb. *** SIDENOTE *** anyone have pics of how the original steering rack boots were attached? Safety Wire? Band Clamps? Can't seem to find the answer. Installed some engine bay stuff. Ignition coil, voltage regulator, Inspection lamp, brake vacuum lines, throttle linkage, misc hoses. Did a lot of shopping around for other parts. Re-assembled distributor, but had issues with the cam weight advance plate (there's a thread I need to update too!) Finishing up a purchase for lots'o rubber parts from classiczcar community favourite, Steve. Only things left underneath are e-brake cable, speedo cable, KH brake valve and lines, gas tank, and exhaust Doing lots of interior research. I seem to be missing some parts (no surprise), but I'm still learning. Sandblasted many door/window parts, ready for plating- but that will be held off for a bit... Bought the carpet from JIM @ Chester & Herrods. I find it really awesome that an original and integral part of the history of these cars is alive and well (The person. not the carpet), and he is still producing the parts he made back when it all started (the carpet, not the people. lol) I've also been shopping for some jute as well. I think I narrowed down my search to the ones I like for matching the ones in this particular car in terms of original colour and weight/construction. I got it close. The variance in old/new jute is too wide of a range to be perfect within, but it's close. Hey- if it's available, I'll use that instead of something that just "does the job". Speaking of doing the job. I got another one on hand that I'm working on (more on that soon), and I have to extract the spindle pins, so I made this handy dandy spindle pin puller. Just as I was about to borrow some threaded rod from a friend and make my own tig-welded coupling nut to use on the spindle pins (so I wouldn't have to buy or ruin his threaded rod which was for his own custom tool), I walked into his shop and saw his trusty vice in two on the floor... And it was doomed for the garbage bin. My friend also has a lathe, so I drilled it about 50mm deep on center @ 27/64th inch drill size (it also already had a pilot hole started too). And in the lathe with the machine off and foot on the brake, I tapped the inside at M12x1.25, and it took forever. The steel is very hard (chrome vanadium?), and I had to back the tap out every 1/8th of a turn to clear it out and stop the tap from binding on the swarf/chips. But it all the way in very cleanly at the end of it all, and it went about 40mm deep with thread. My whole right arm felt like I was pitching fast-balls all day. Then I bought a "tapered needle roller banded thrust bearing". Apparently, banded just means its a thrust bearing set with the top and bottom race encased in a housing rather than provided separately as thrust washers. It's essentially a throwout bearing... I bought a thrust roller bearing but it was the 3 piece loose set, and the races were too thin and would get caught in the ACME threads. It had a small 1mm deep, 3mm wide step on the back for the bottom race, so I stepped the end of the DOM tube which I bought from the cut-off pile at my local metal distributor for $5, gave it a tap or two with a rubber mallet to get it on there nice and good- and then fuse welded the inside with a TIG welder so that the bearing doesn't go anywhere. I didn't want to ruin the shiny and clean aesthetic of the outside of the tube, so I chose to weld inside by extending the tig electrode farther than usual- but it was a good fuse. I then cleaned up the HAZ marks on the outside by putting it in the lathe and hitting it with some various grit sandpaper- and what you see there is the end result. Probably gonna shark hide it. It took me a little while, but I don't come across free ACME threaded rod often, and it was $110 for a 3 foot section at the fastener store, so I figured I'd make a proper tool that will outlast many spindle pin jobs. Price List TIMKEN T101 Bearing: $20 1" ID Seamless DOM Tube (1.5" OD I Believe): $5 1" ACME Nut: $5 Vice Gear Screw: FREE Lunch for lathe use: $15 TOTAL: $45 (ish) not including gas driving here and there- but whatever! Lets call it $50 bucks for a tool that will probably last longer than I do. The only thing that I'm not sure of is the ACME nut seems a little loose, but I have the original threaded slug from the vice that I can always cut and grind some flats onto, but it only seemed a little tighter. I'll try this first.1 point
-
Yup. I agree that using the original harness connection points would certainly be more desirable, and it sounds like you've got some sort of plan in the works. So I'll wait quietly and patiently to see what you're working on.1 point
-
Dave's (and MSA's) harness does not deal with the under dash combo switch harness at all. It "splices in" to the harness up front at the two head light connectors in front of the rad. This makes it possible to work with all the various 240 switch types, It "could" work just fine with the 280's as well, but the problem is with the new round, 4 pin (only three are used) weather proof connectors on the 280's. No one (including Dave) has found the plugs to build the head light harness to connect in at that spot. This is why I have seen discussion about putting the relays into the harness at the combo switch. But as you mention, there are differences in the plugs across the years at the switches. Anyway, I'm working on a solution that everyone will like. Simple, cheap(ish), high quality and retains ALL of the advantages of the original harness design.1 point
-
1 pointAnd that's the left-handed version. The RHD version comes with a lighter!1 point
-
1 point
-
Similar to Dave , Arne , Gary and Andrew - do the Harness upgrades and convert to the 60amp 280zx Alternator with Built-in Regulator. You'll need Dave's Regulator Adapter along with the Headlight & Parking Light harneses. I have H4 conversions to 100watts and they are outstanding with the harness. Last weekend I was caught in a terrible storm driving back from Saratoga Sprins on RT 87 - Thruway. They were oustanding. I also went so far as to install the MSA - MAXI fuse box, just to assure my overall electical system was in good shape. This cost roughly $75.00 last year. It was a plug in and I saved the old fuse box - not hard at all to do (10-15mins.) Lastly - I just installed this 240z Relay Starter Kit from eBay. It made a huge difference in starting when the car is Hot. My car now starts instantly and reliably in 90F heat. Link: http://cgi.ebay.com/ebaymotors/ws/eBayISAPI.dll?ViewItem&item=220393746648&viewitem= I feel much better about the electrical system and reliability after all these upgrades. If I had to do it over with limited funds - I'd do the following sequence for providing me the best improvement on my overall electrical system: 1) 60amp Alternator (w/builtin regulator) use Dave's Plug-In Adapter into regulator socket 2) Headlight Harness (Dave's) 3) Parking Light Harness (Dave's) 4) H4 headlight upgrade (MSA) 5) Starter Relay Kit upgrade (eBay - $15 plus shipping) 6) MSA MAXI Fuse box upgrade...(items 2 thru 5 will put less load on your fuse box). Good luck ....1 point
-
Not really. A new set of Halogens or H4's are still going to be dull without improving the power situation. The HLH will introduce relays into the system and the headlight will get their power directly from the battery, turning your combo switch into a switch that only sends a signal to the relays, rather than powering the whole circuit. Being a plug and play harness, you won't have to cut, drill or alter anything to instal and use the HLH. Just unplug your headlight plugs in front of the radiator, mount the relay pack using one of the Voltage regulator screws, connect the harness to your headlight plugs, connect the power wire to the battery, bolt down the ground wires using your lower vallance bolts that are located on the inner frame of the front end and you're done. With the harness in place, you can use any new set of lights that fit, including H4 conversion lights up to 100 watts without ANY issues to the system. Email me if you're interested. Dave1 point