EuroDat
Community Member
-
Joined
-
Last visited
Everything posted by EuroDat
-
OMG. Another canadian with a hobby tractor. Now the snow chains and the picture will be complete. Chris, The 500 is starting to come back to life in your caring hands. The parts are looking great.How is the body for rust? It looks good in the foto's, but we all know what happens when you start digging around.

-
The transmission with the porsche type servo synchros are the 5 speed usded in the roasters (short tale) and the 240Z outside the US and Canada. They have the code FS5C71A and later the FS5C71B. The "C" refers to the type of synchro ring. W is for Warner type ring. Of course there are some exceptions along the way with both syncrhos in the 5 speed transmission. Then you can find the warner synchros in 1st to 4th gear and the servo type in 5th.
-
It certainly sounds like your synchros are wearing down. Probably below minimum spec. A good oil could make all the difference. The GM AC delco oil suitable for brass synchros has yielded good results for some members here on this forum. That or Redline MT-90 75W90 GL-4 gearoil. Btw: The A type transmission (F4W71A) uses the same synchro rings in second gear as the F4W71B the FS5W71B and the early FS5W71C transmissions (the 71C without the reverse synchro). All four gear have the same synchros. Only fifth is little smaller in diameter.
-
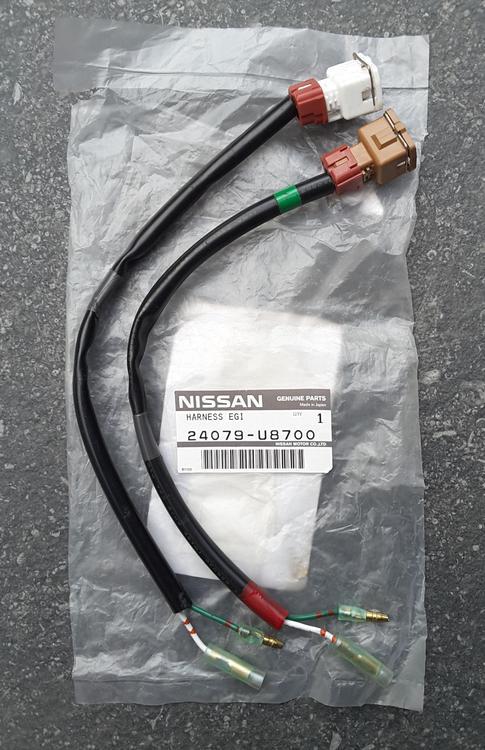
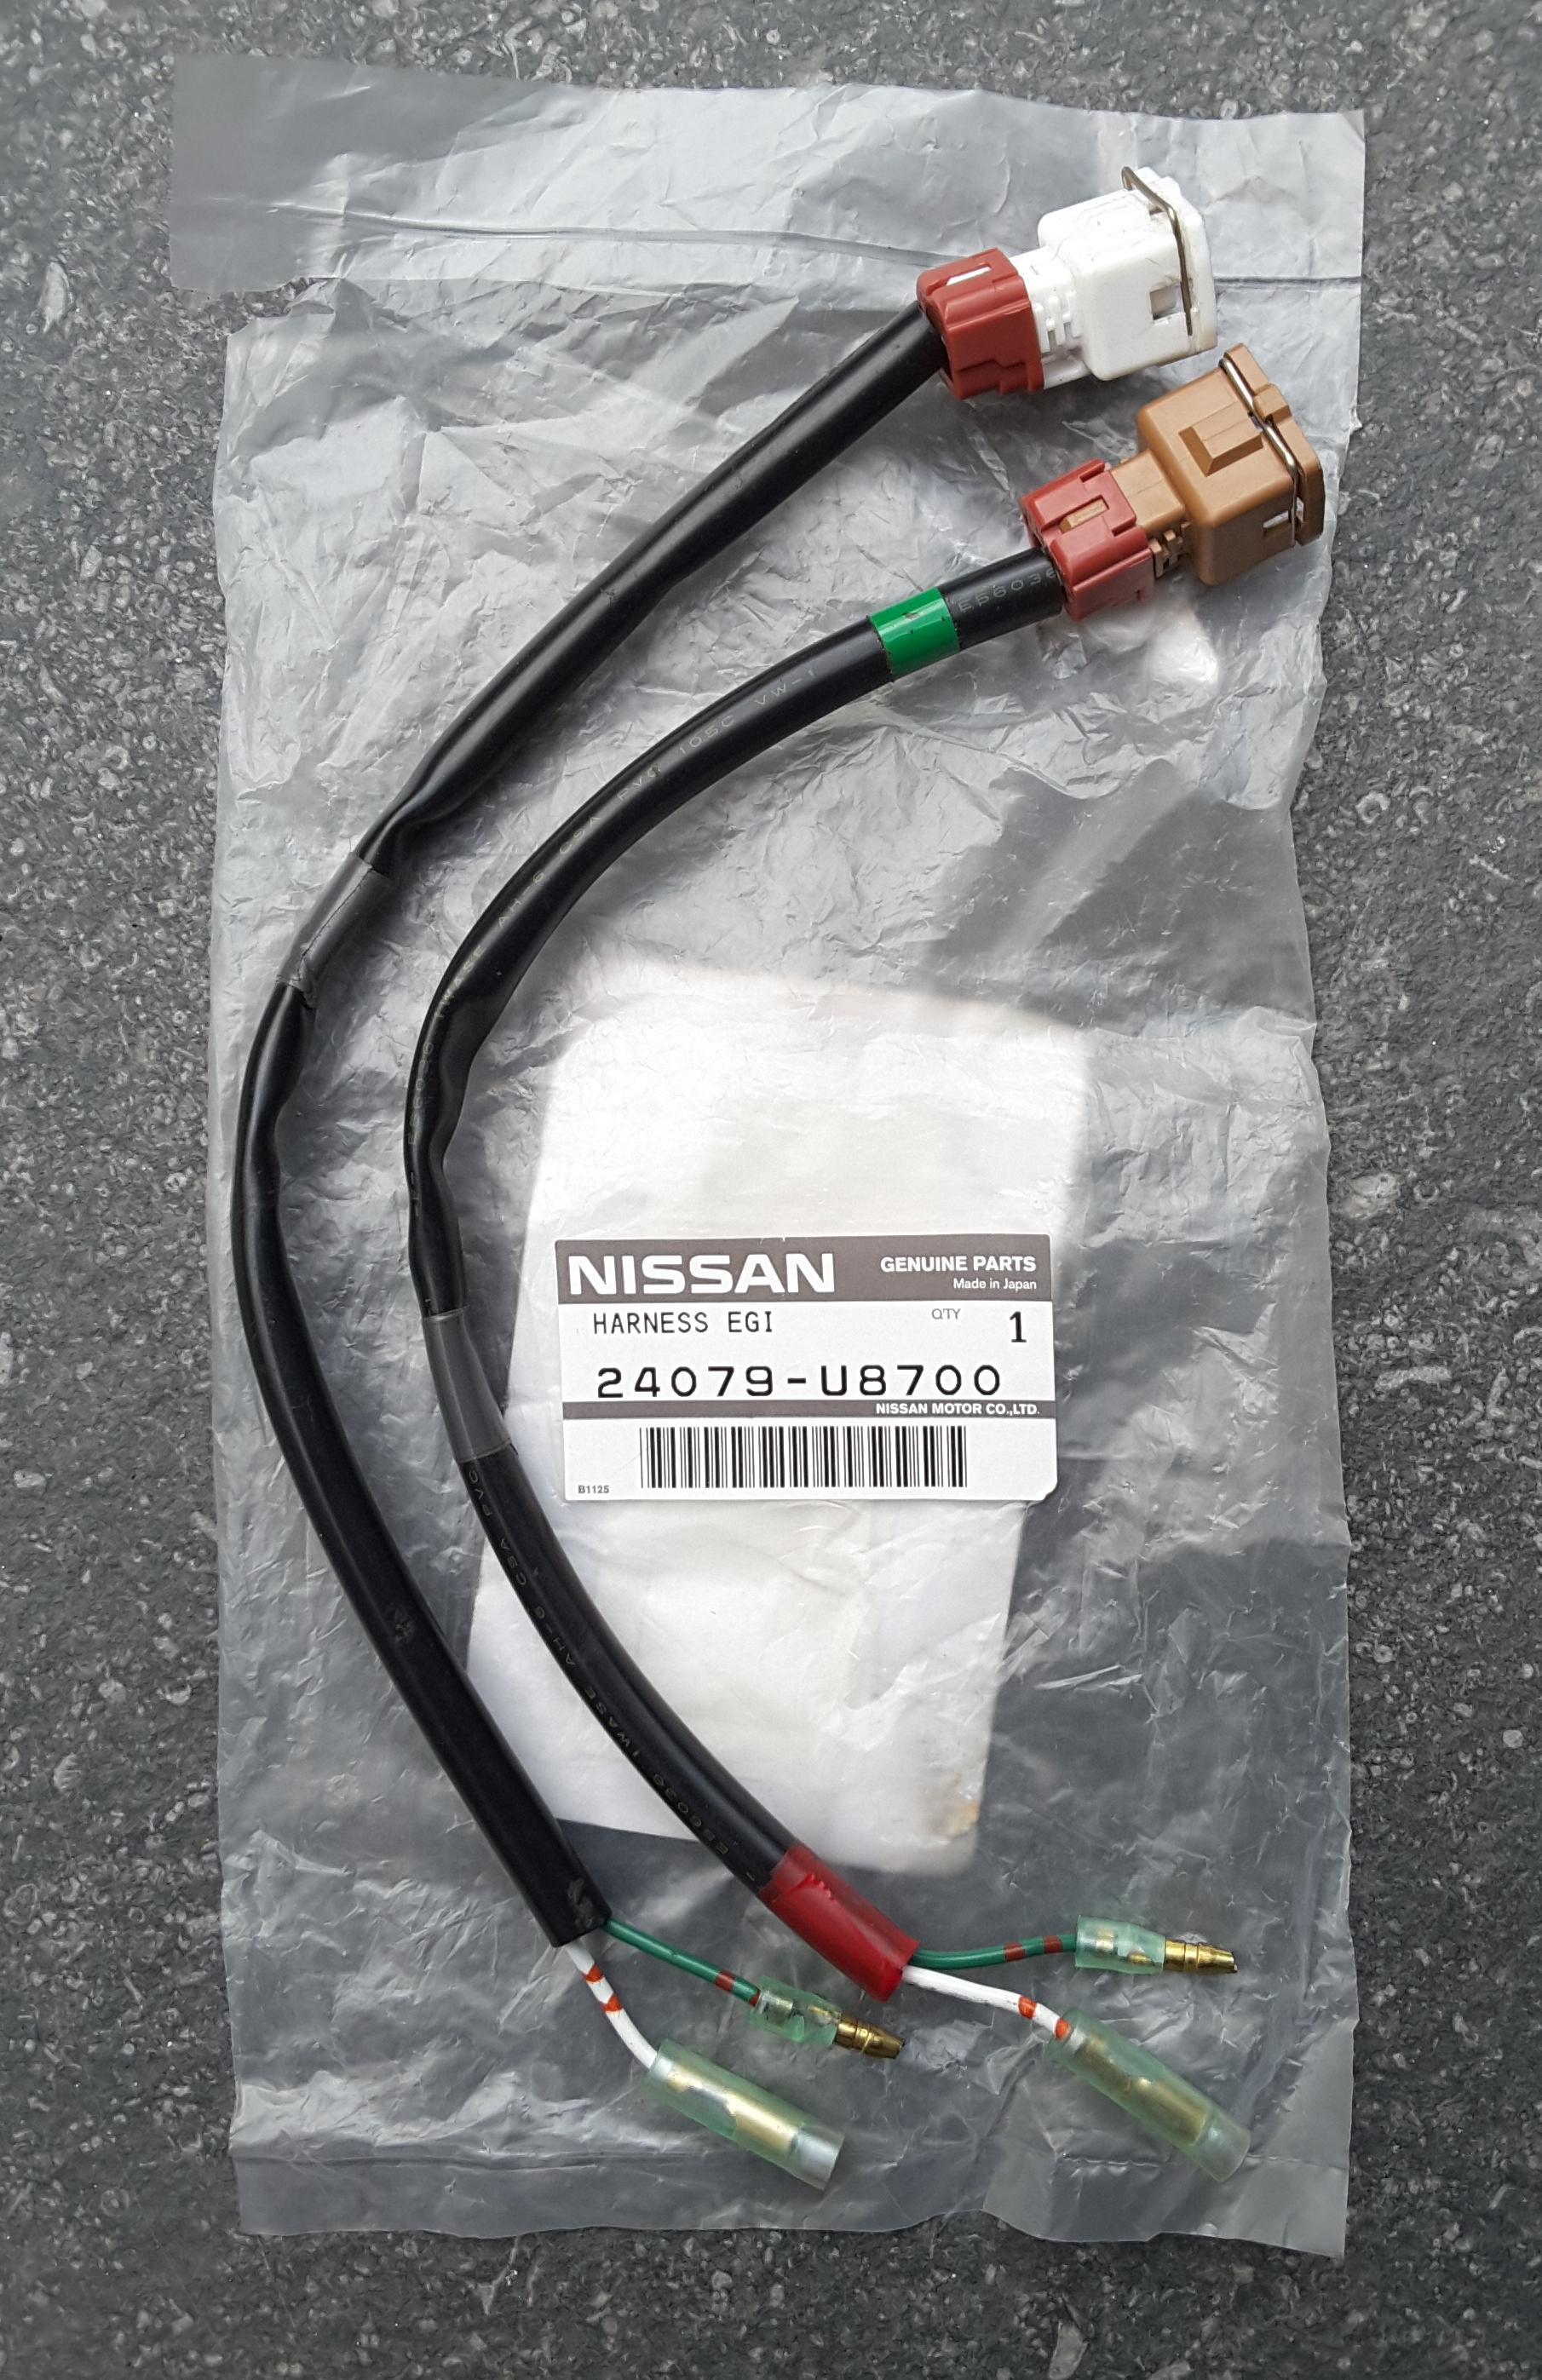
And to add to the confussion this is the genuine replacement harness from Nissan with P/N: 24079-U8700. It is actually for the later model 79-81 280ZX iirc. 280Z Original p/n was 24079 N4202 and 24079 N4203
-
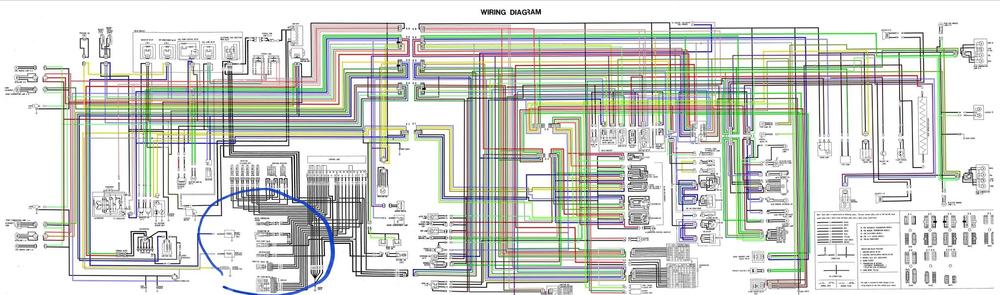
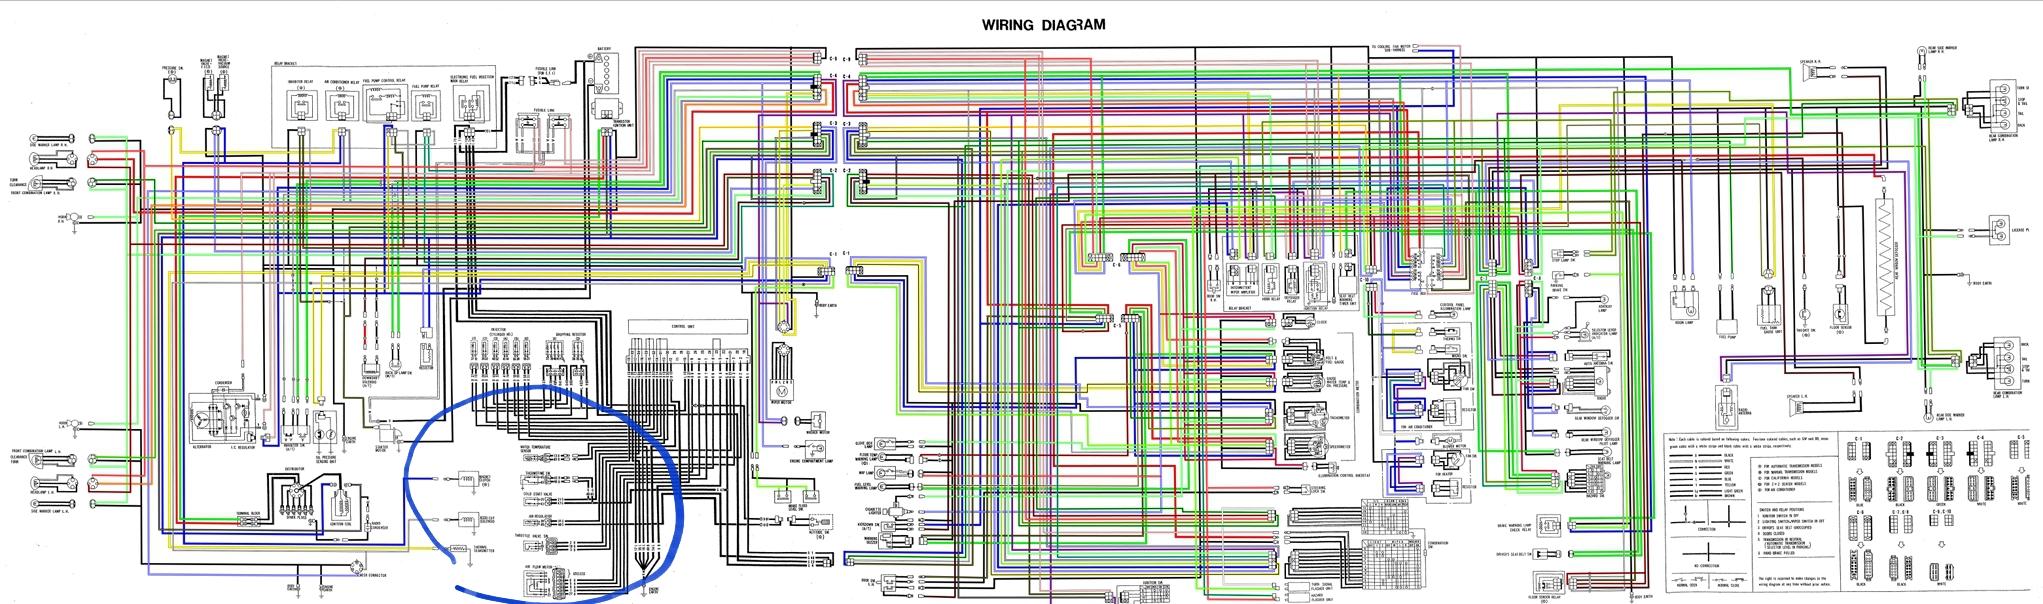
It is in the wiring diagram. You can find it here in Resources - downloads - wiring diagrams. The FSM in section EF - Engine fuel only shows the ECU terminal numbers for diagnostics. The diagrams start from page EF-24 and show the different tests in that section of the FSM.
-
I know of two Zed door seal manufactures, Vintage rubber and Pacific Rim. The seals made by Vintage rubber are far superior than those from Pacific Rim. Who sells what, I don't remember. I used the Kia sportage seals and find them very good. Compression is about 25% which is reccomended for a good seals without deforming the window frame. You will need to cut and glue the seal at the top rear of the window section. The Kia seal will work on the rear hatch, but it is a different profile and has about 40% compression which makes the lid harder to close. No cutting required. I purchased 3 from Kia in South Korea for $37,50 ($12,50 ea) and $8,50 shipping.
-
That should solve your problem. That plate is spot welded to the inner body.
-
Captain, Did you make any progress on this? Interested to see any results. I want to do that on my front struts and the bottoming issue will not be a problem for me because I'm correcting height gain from when I removed the 280Z bumpers. Height gain front was a little over an inch so I will be returning to the height before the bumper mod. Chucks idea of shortening the top insulator mount is interesting. I have a couple extra sets to play with, but reluctant to sacrifice a set. I would like to investigate the perch mod more.
-
On these injectors it doen't make any difference.
-
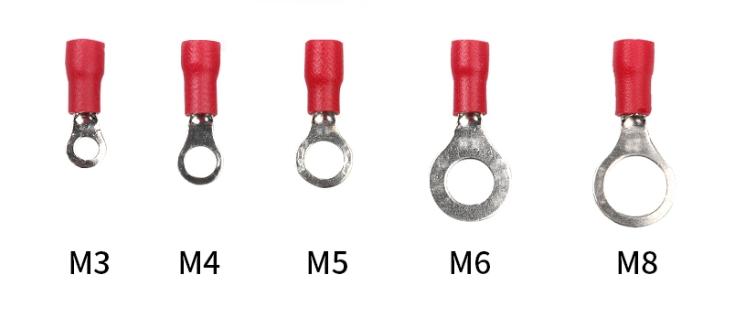
You can make one very easily with two 8mm eye terminals. It is about 10cm long iirc
-
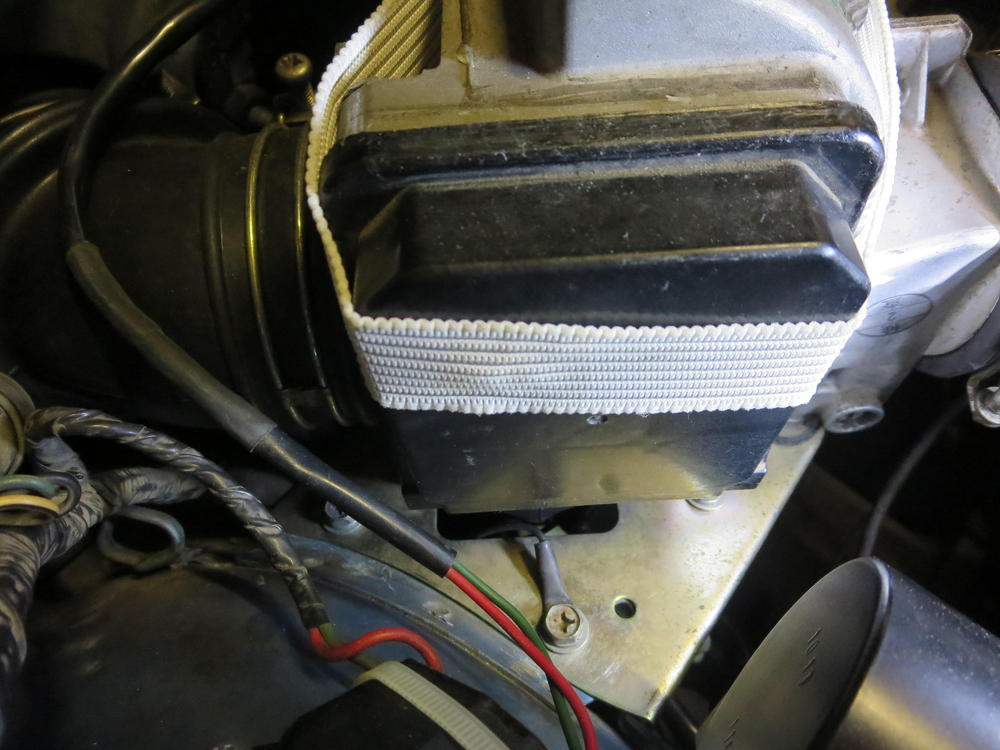
Here is a better photo

-
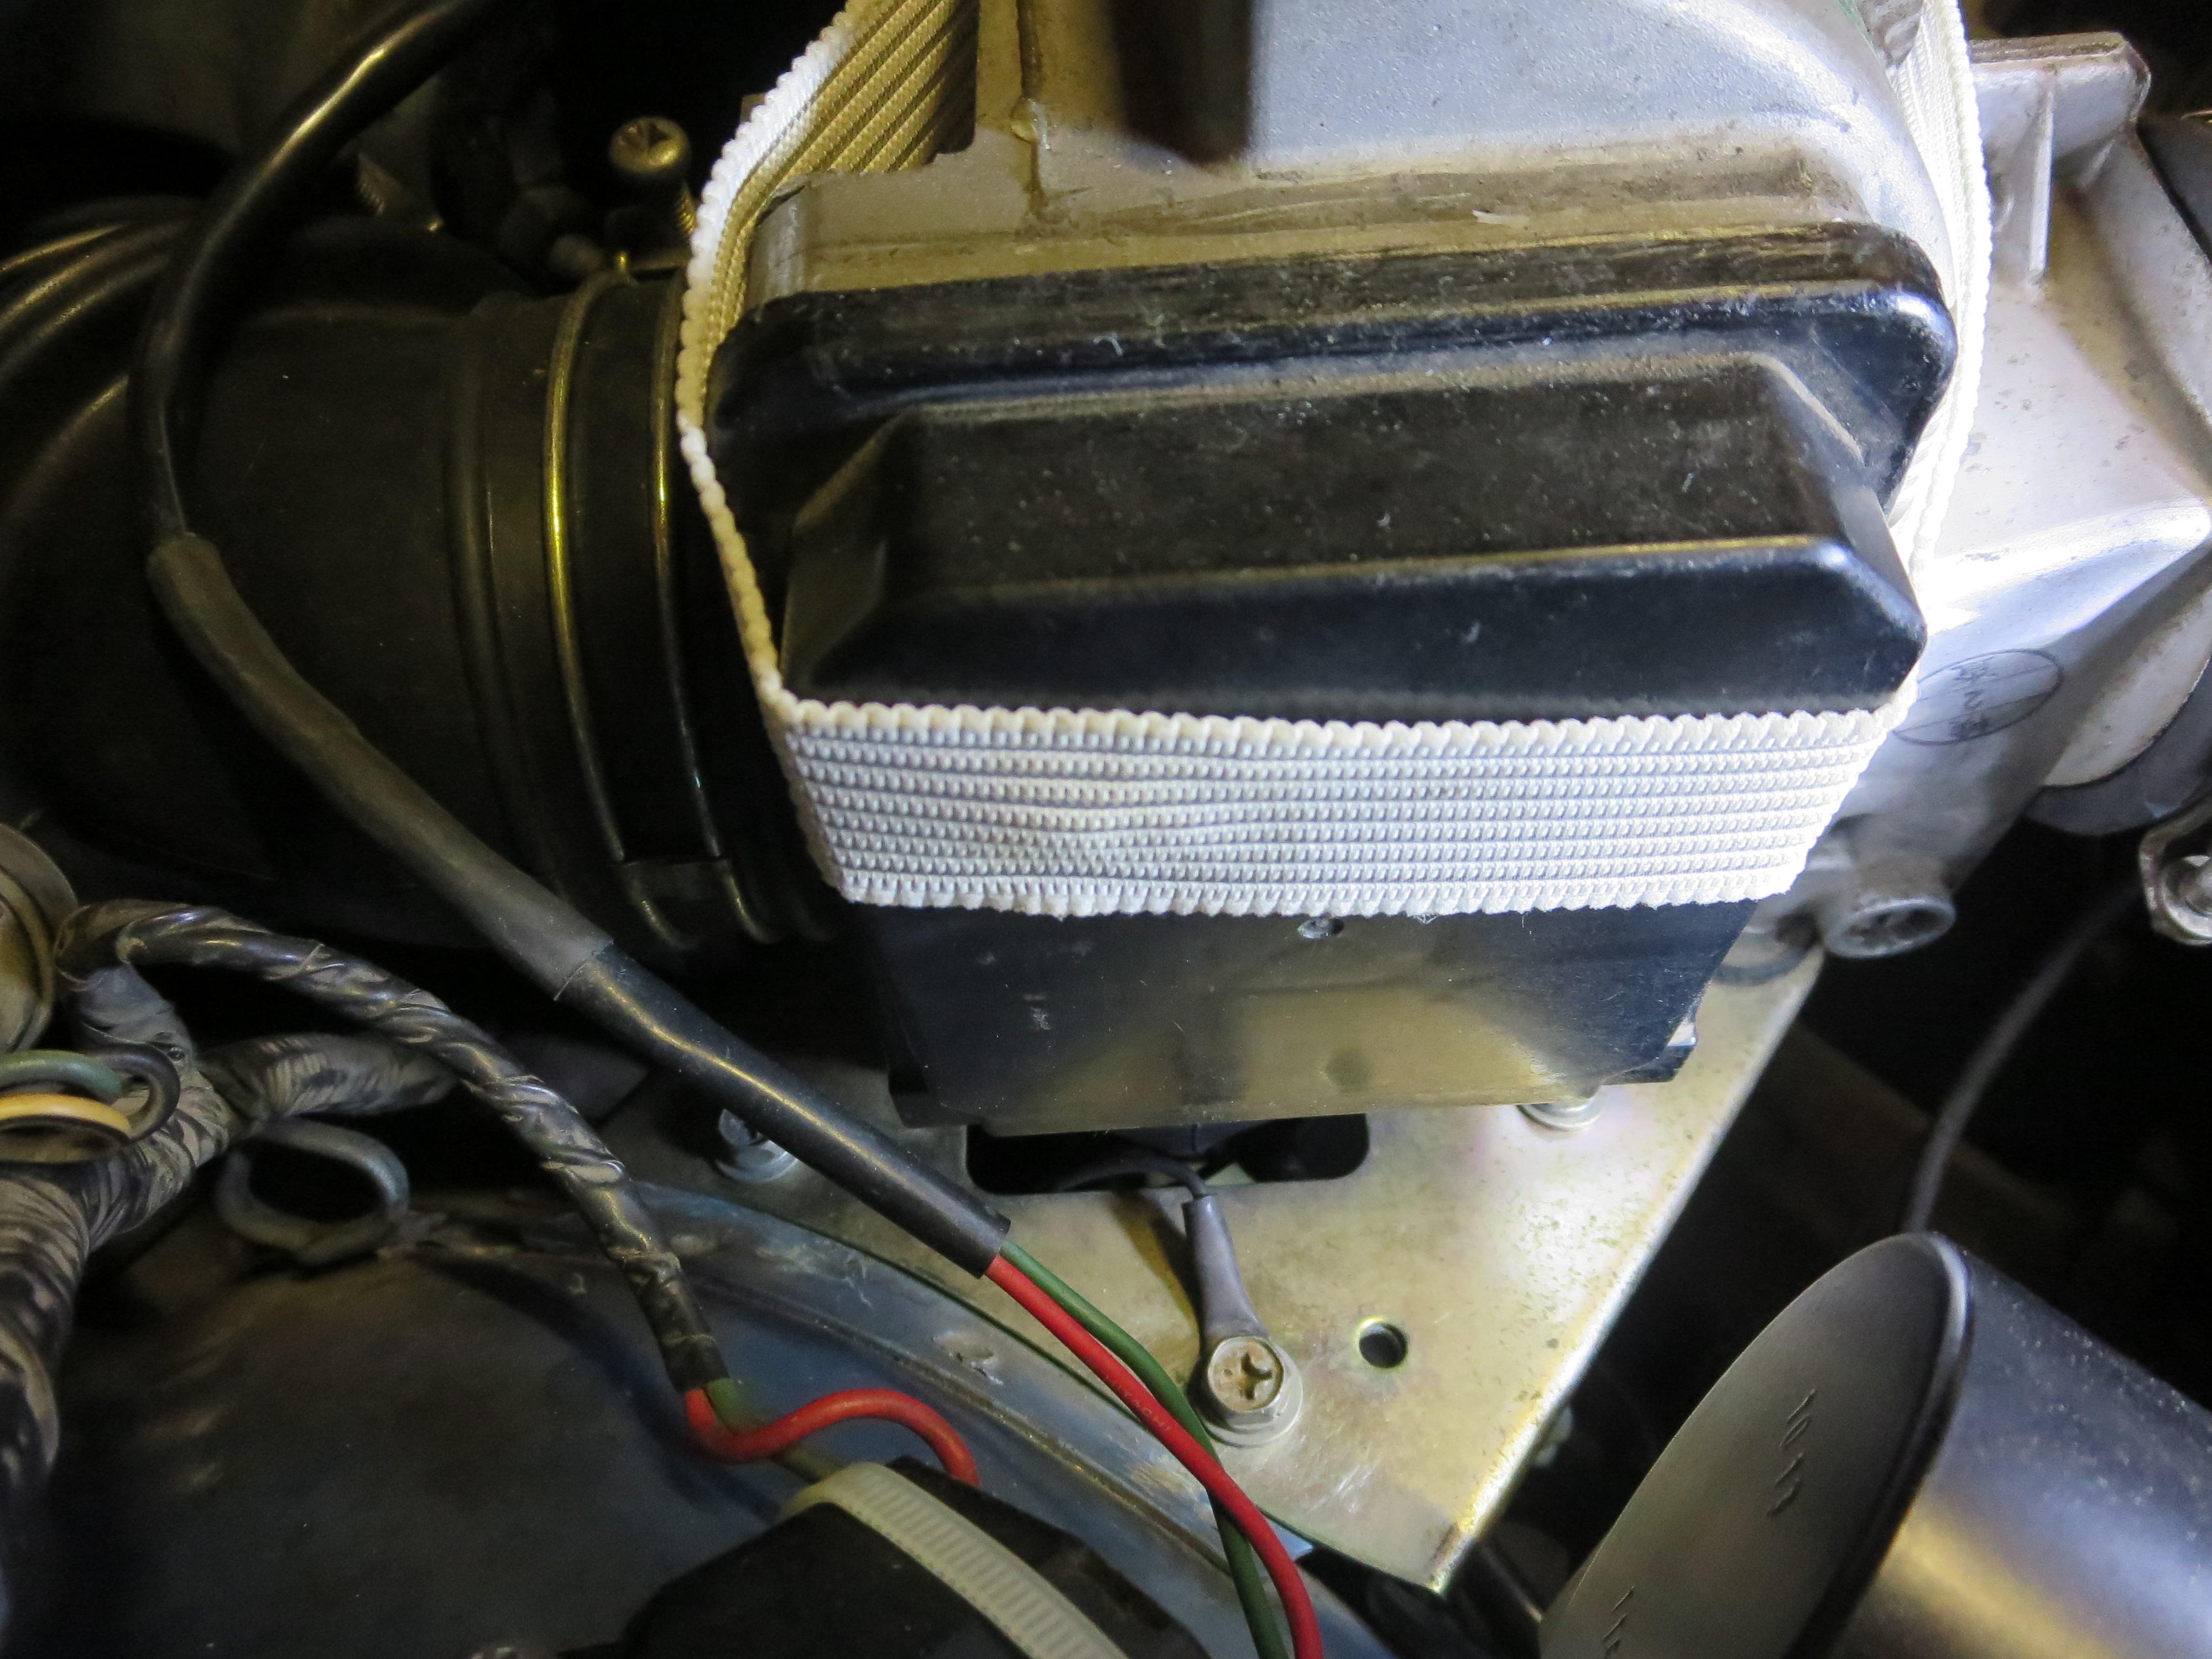
There is a wire with two round eye terminal about 15cm long. It connects under the efm and to one of the mounting bolts. It grounds the afm because the afm is mounted with rubber vibration dampers and rubber hoses. The air passing through it can built up static electricity and effect the circuits. You can see it in this photo
.thumb.JPG.531653ae168c79787e1c95515c3f7cee.JPG)
-
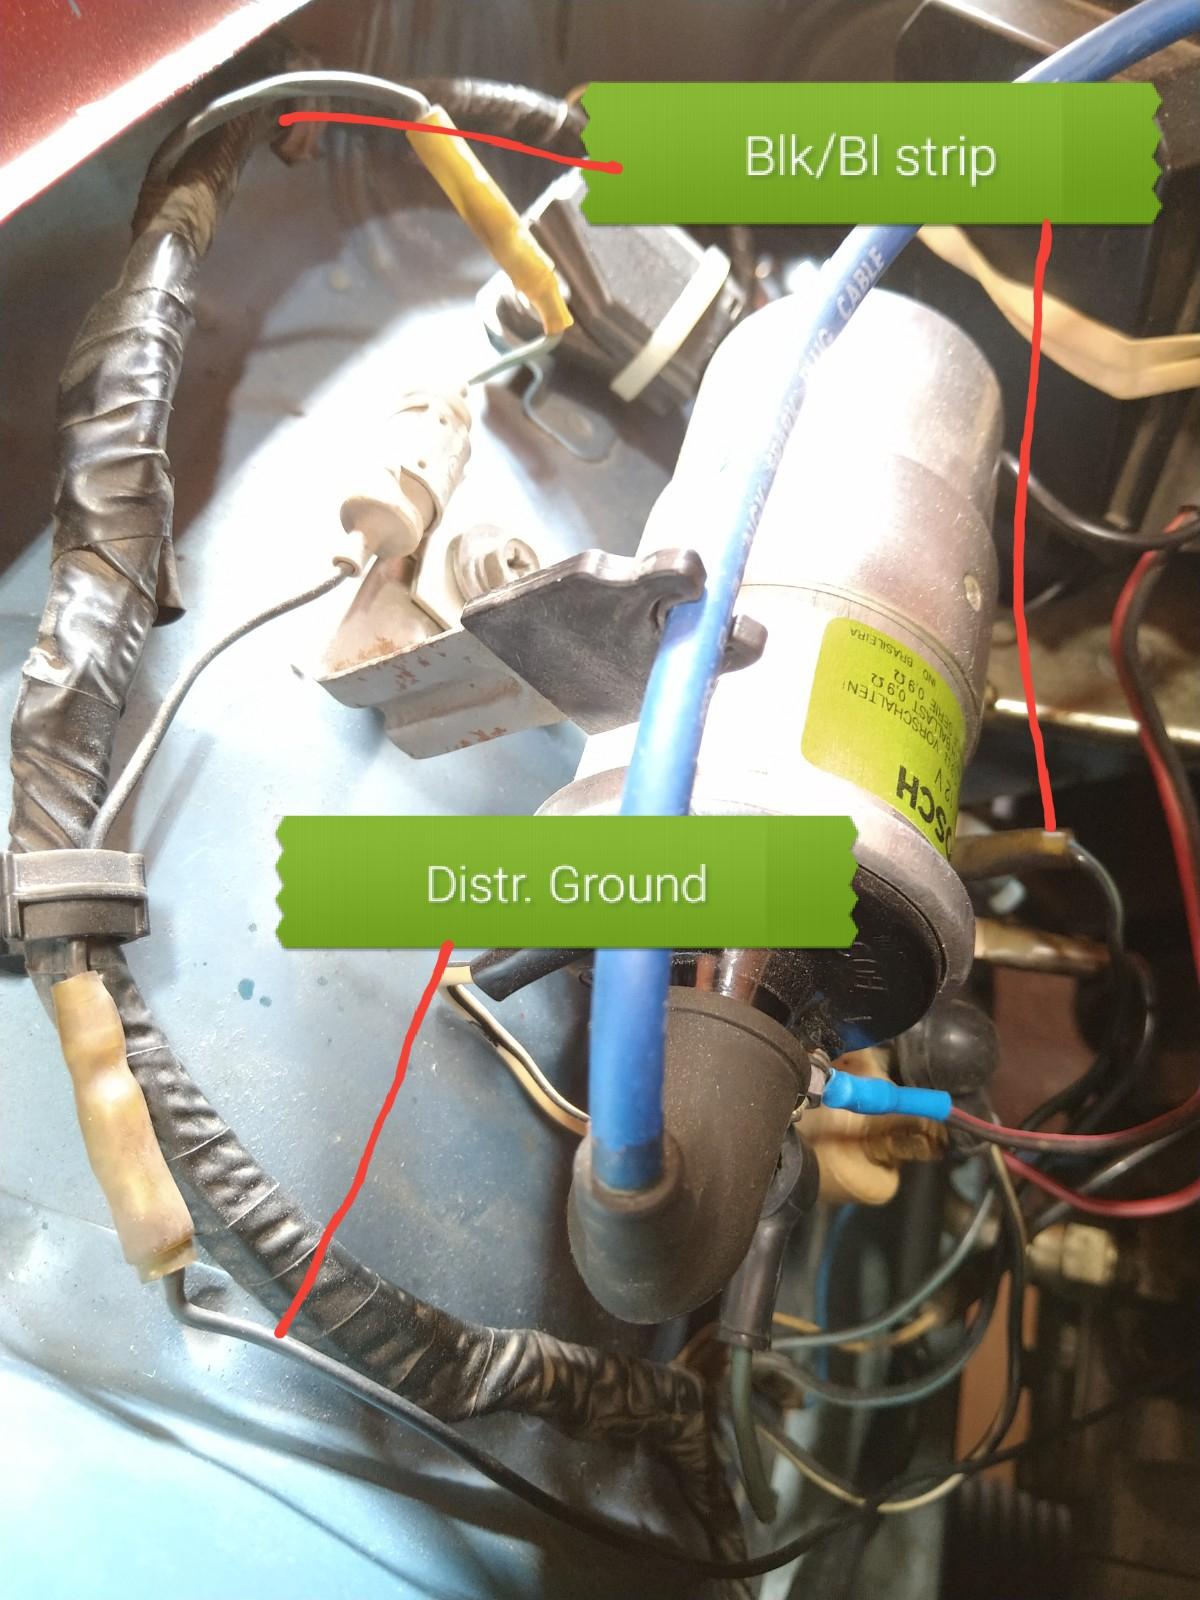
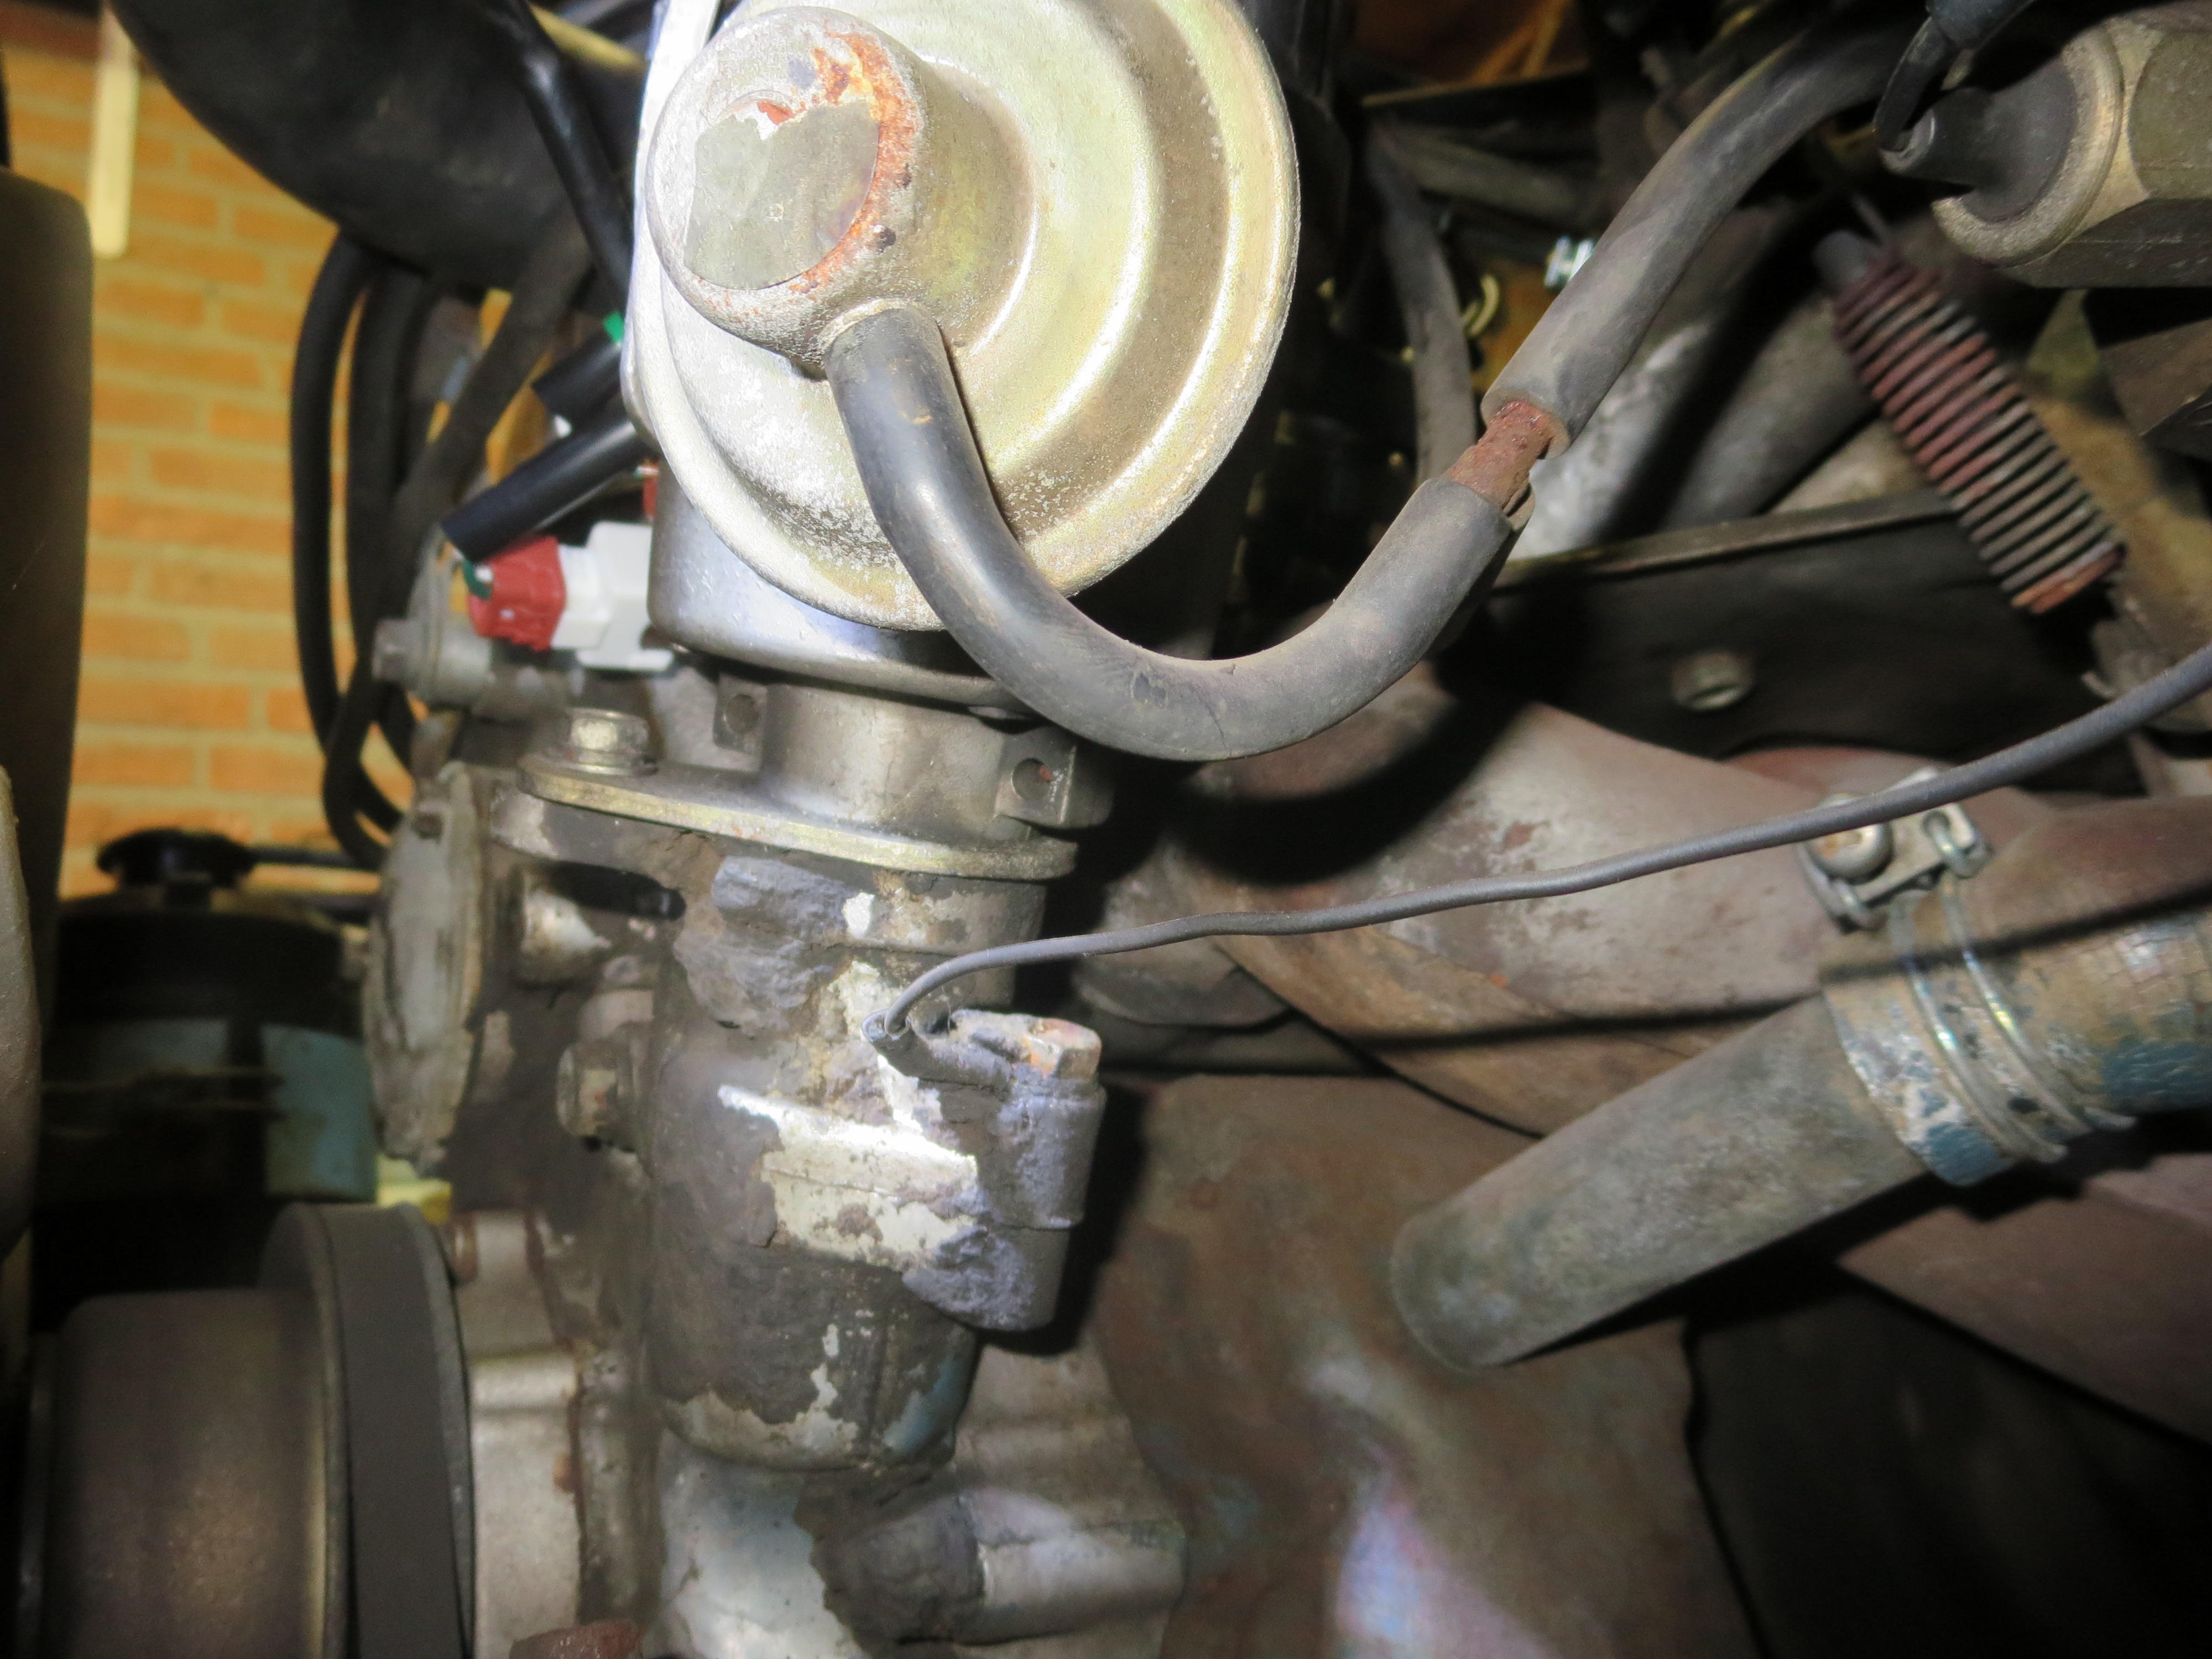
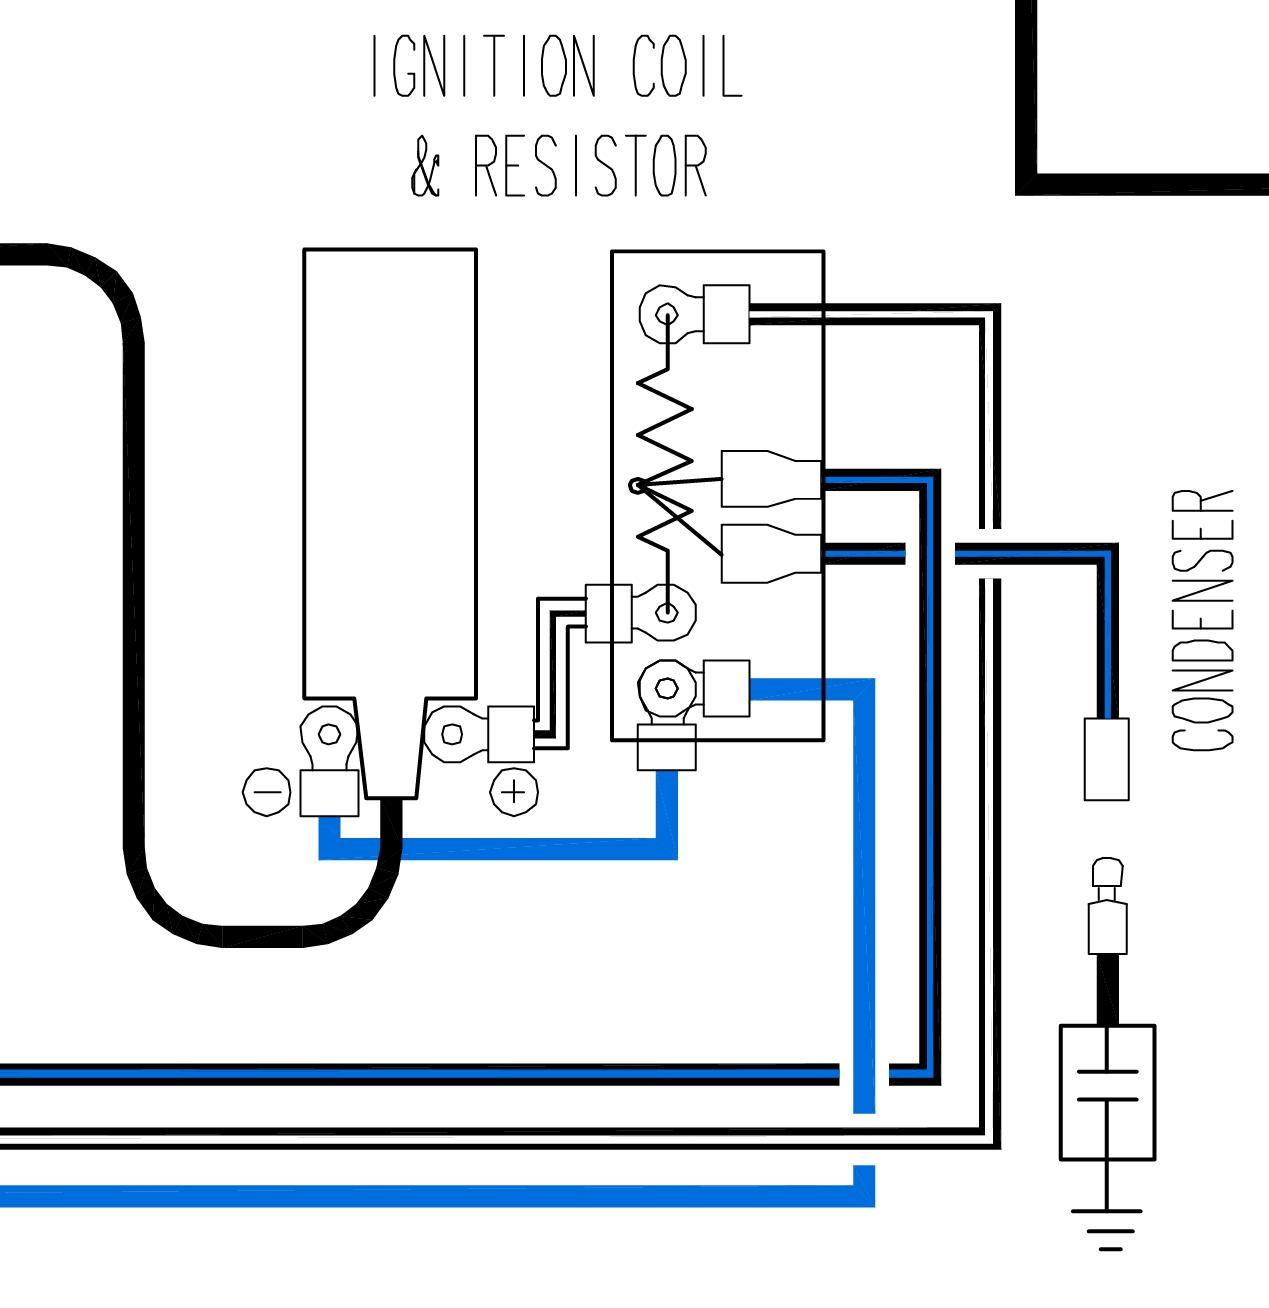
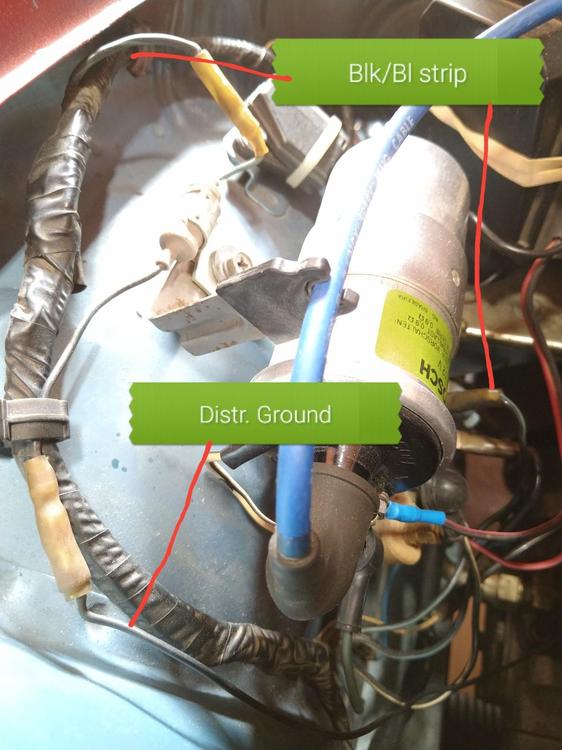
The front bullect connector conects to a Black/Blue strip wird in the harness. It goes to the ballast spade connector in the middle of the ballast risistor. One of the wires with a spade terminal in the middle section of your ballast resistor should be Black with a blue strip. It goes into the harness going to the front of the car and comes back out somewhere between the coil and AFM with a bullet connector. The other end of the condensor connects to a black wire that goes to the M6 bolt on the distributor mount.

-
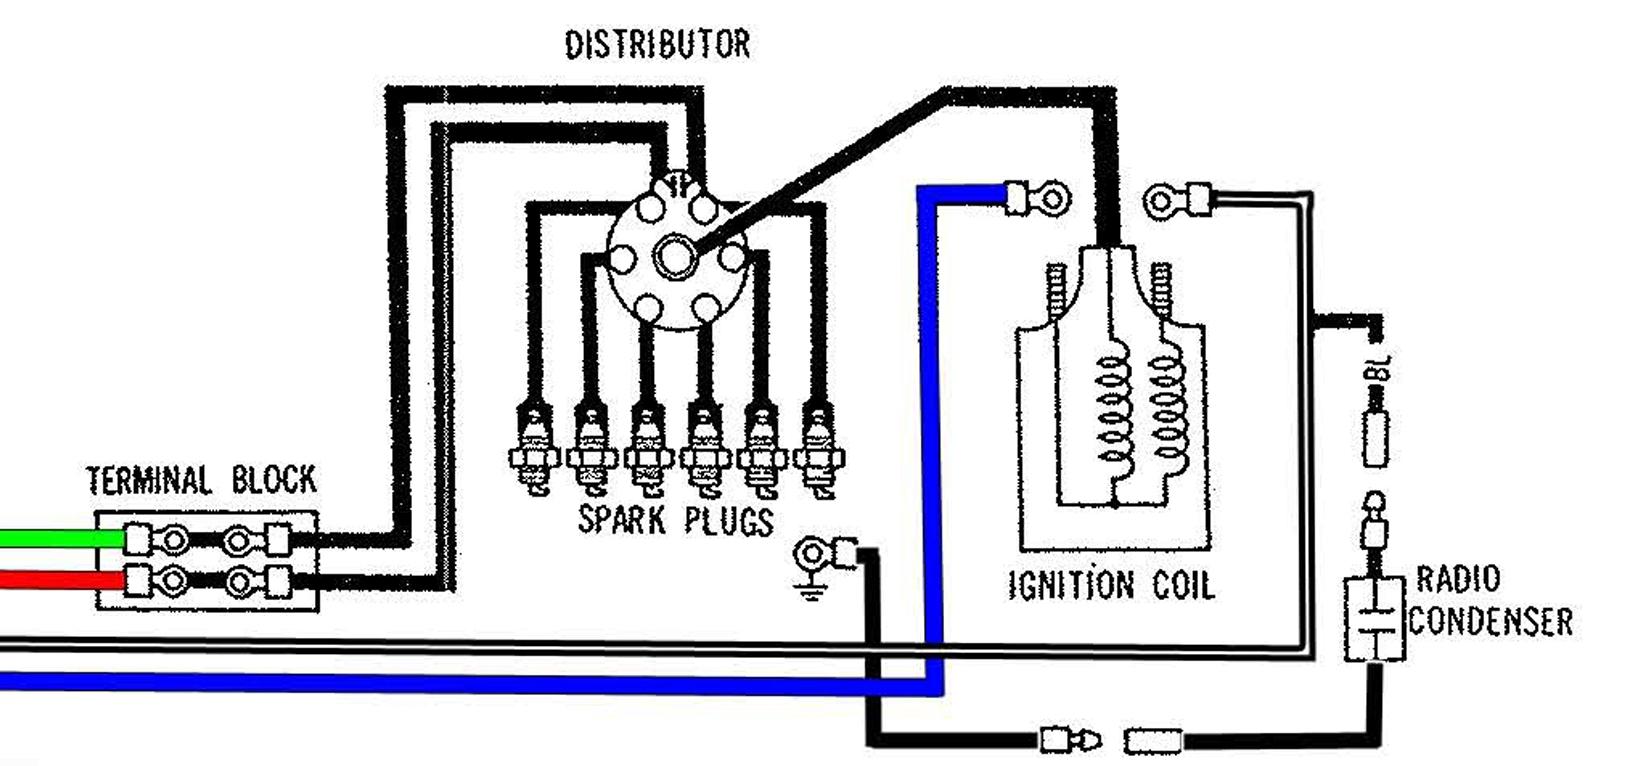
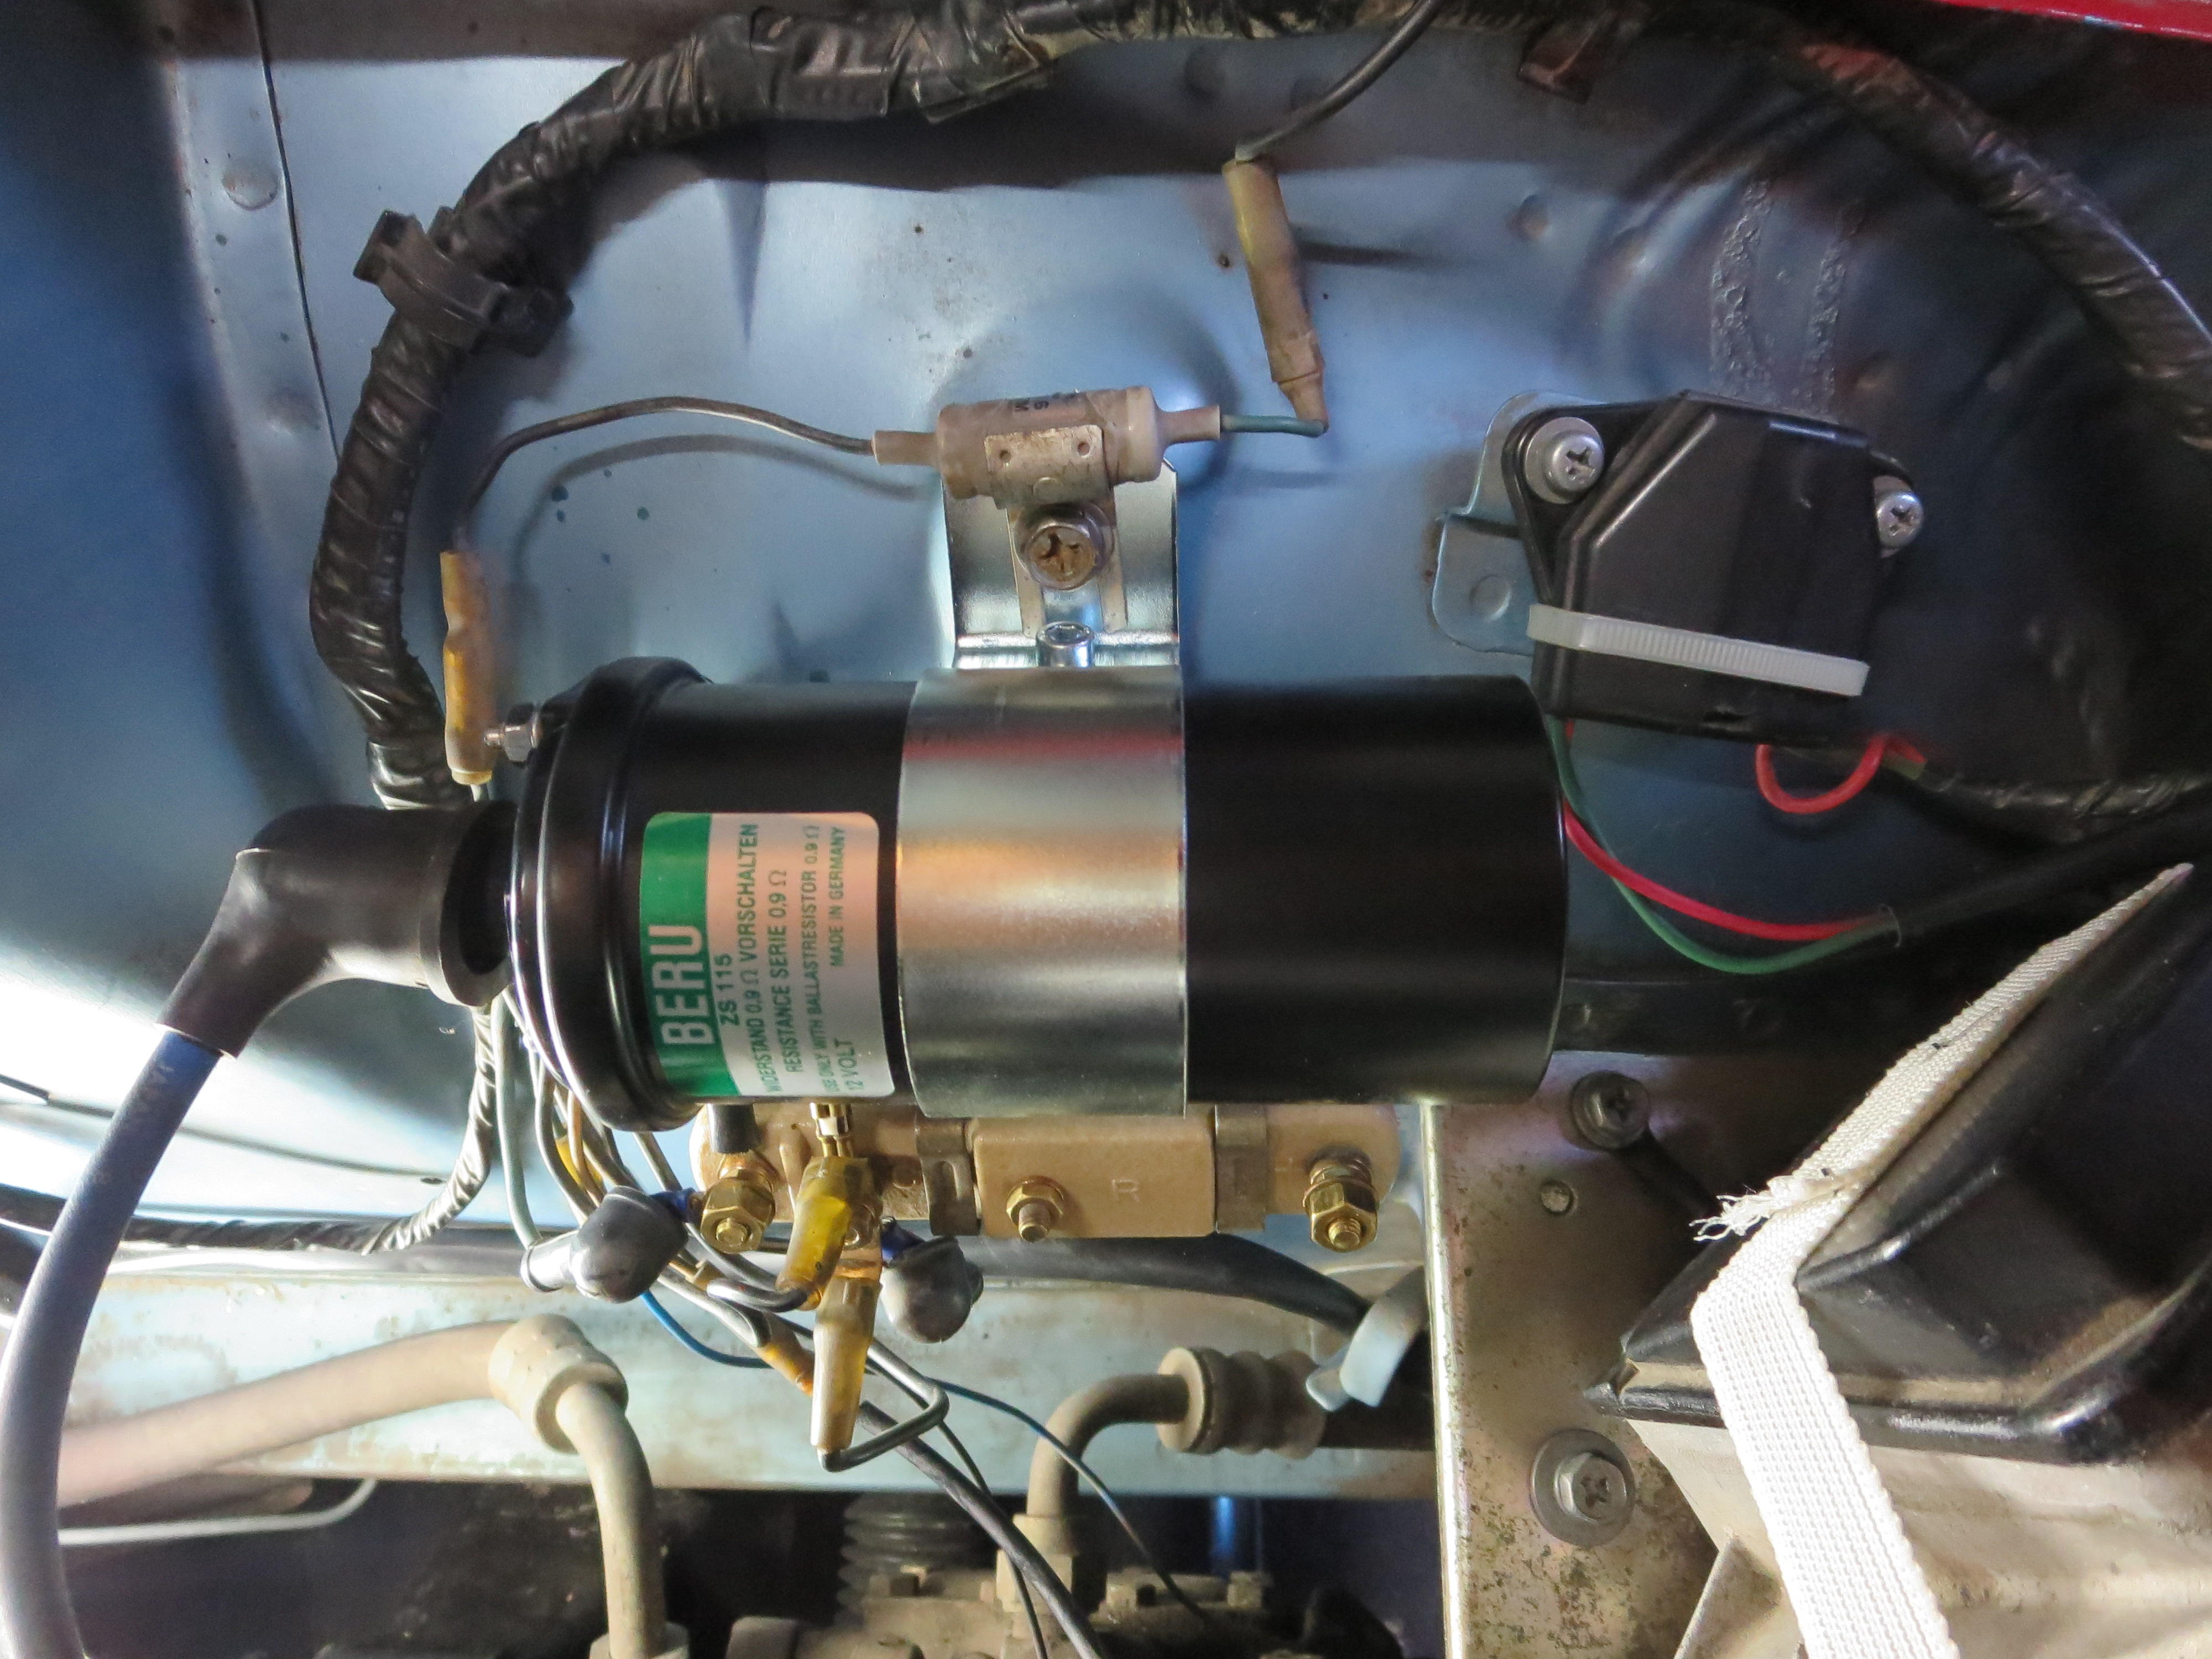
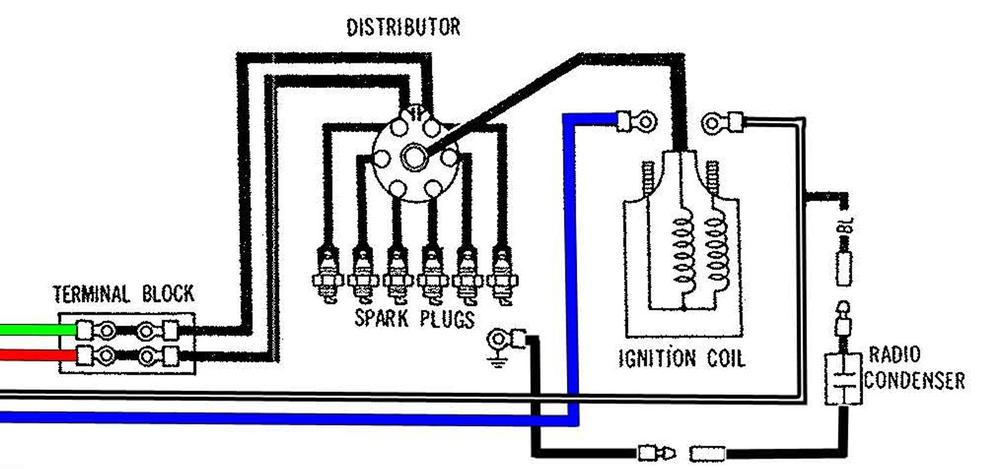
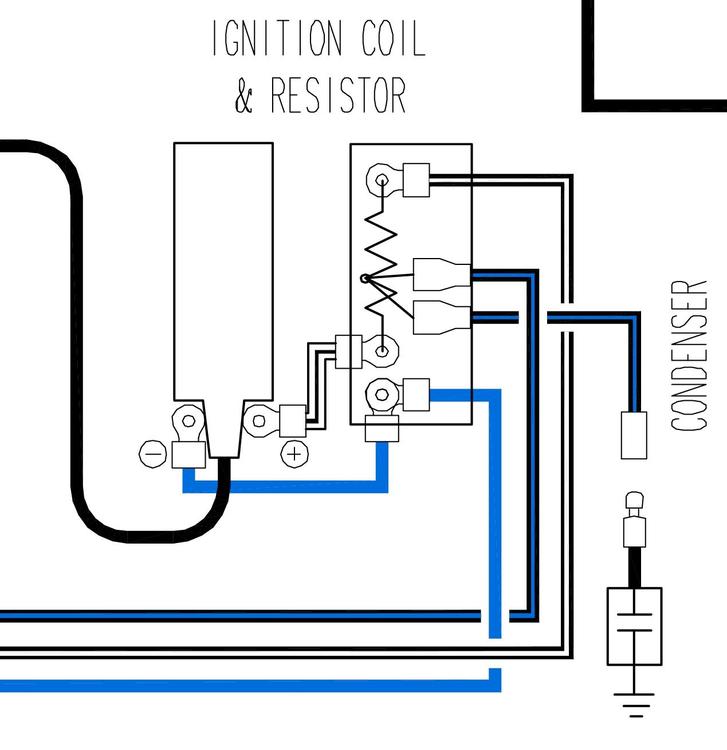
The condensor on the californian 77 280Z is funny dubble ended condenser. One end goes to the midle spade terminal on the ballast and the other goes to the distributor. The spade wire goes to a bullet connector to the condenser. Can you trace the two spade wires on the ballast and see where they go? The color 1977 wiring diagram (not original nissan diagram) doesn't show it clearly, but the 1978 does. Note the 78 doesn't use a ballast because they switched to a 12v coil. The condensor wire splices into the coil positive wire.
-
Here is a photo of the spade connector and how it connects to the ballast.

-
Here is a topic on injectors
-
Do you mean speedo or tacho? I can't see how the coil would influence the speedo, being a mechanical driven device. Can you also give some details about the car. Your user name is 240Zadmire, but the photo is clearly a californian 280Z. Going by the inductor terminal block left of the coil. That spade terminal goes on the ballast resistor for the coil.
-
It just makes it easier to fit them to a couple of injectors, but it doesn't effect the function of thr connector. Any EV1 connector will fit. If originality is not an issue then I would stay away from the original EV1 connector. They had a difficult spring release mechanism and are a pita toget off the injector. The ones you have in your link and the ones I posted are the quick release "squeeze" type connector and must easier to remove.
-
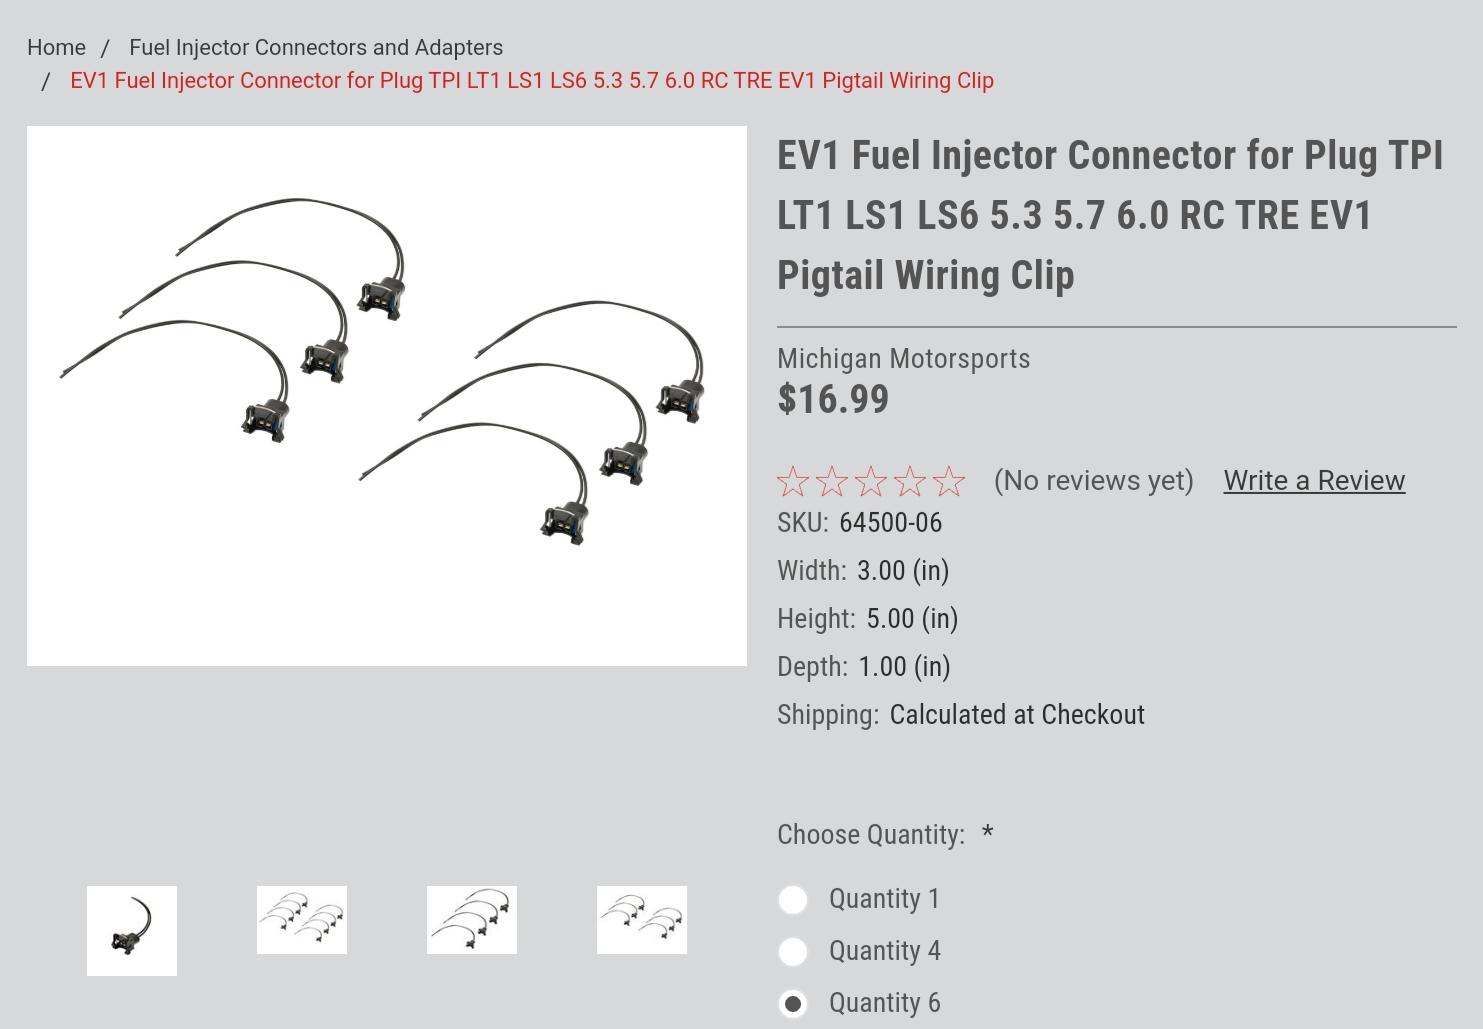
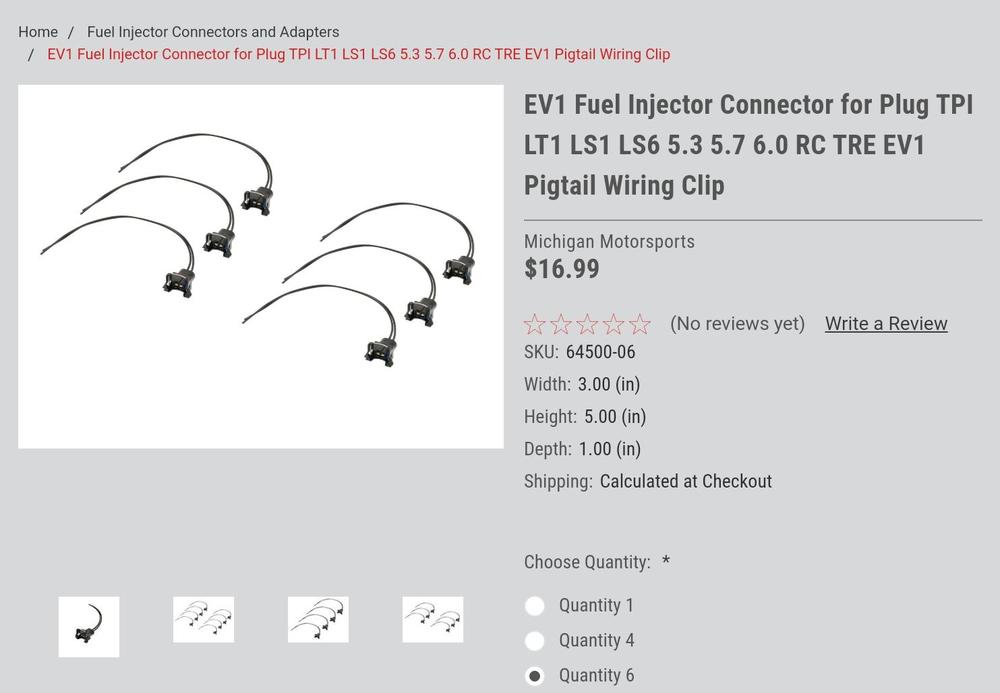
Yes. They will fit the original 280Z EV1 injector. I used something similar to these https://www.michiganmotorsports.com/fuel-injector-connectors-and-adapters/ev1-fuel-injector-connector-for-plug-tpi-lt1-ls1-ls6-5-3-5-7-6-0-rc-tre-ev1-pigtail-wiring-clip/ They are shorter and give a little more room to click them onto the injector.
-
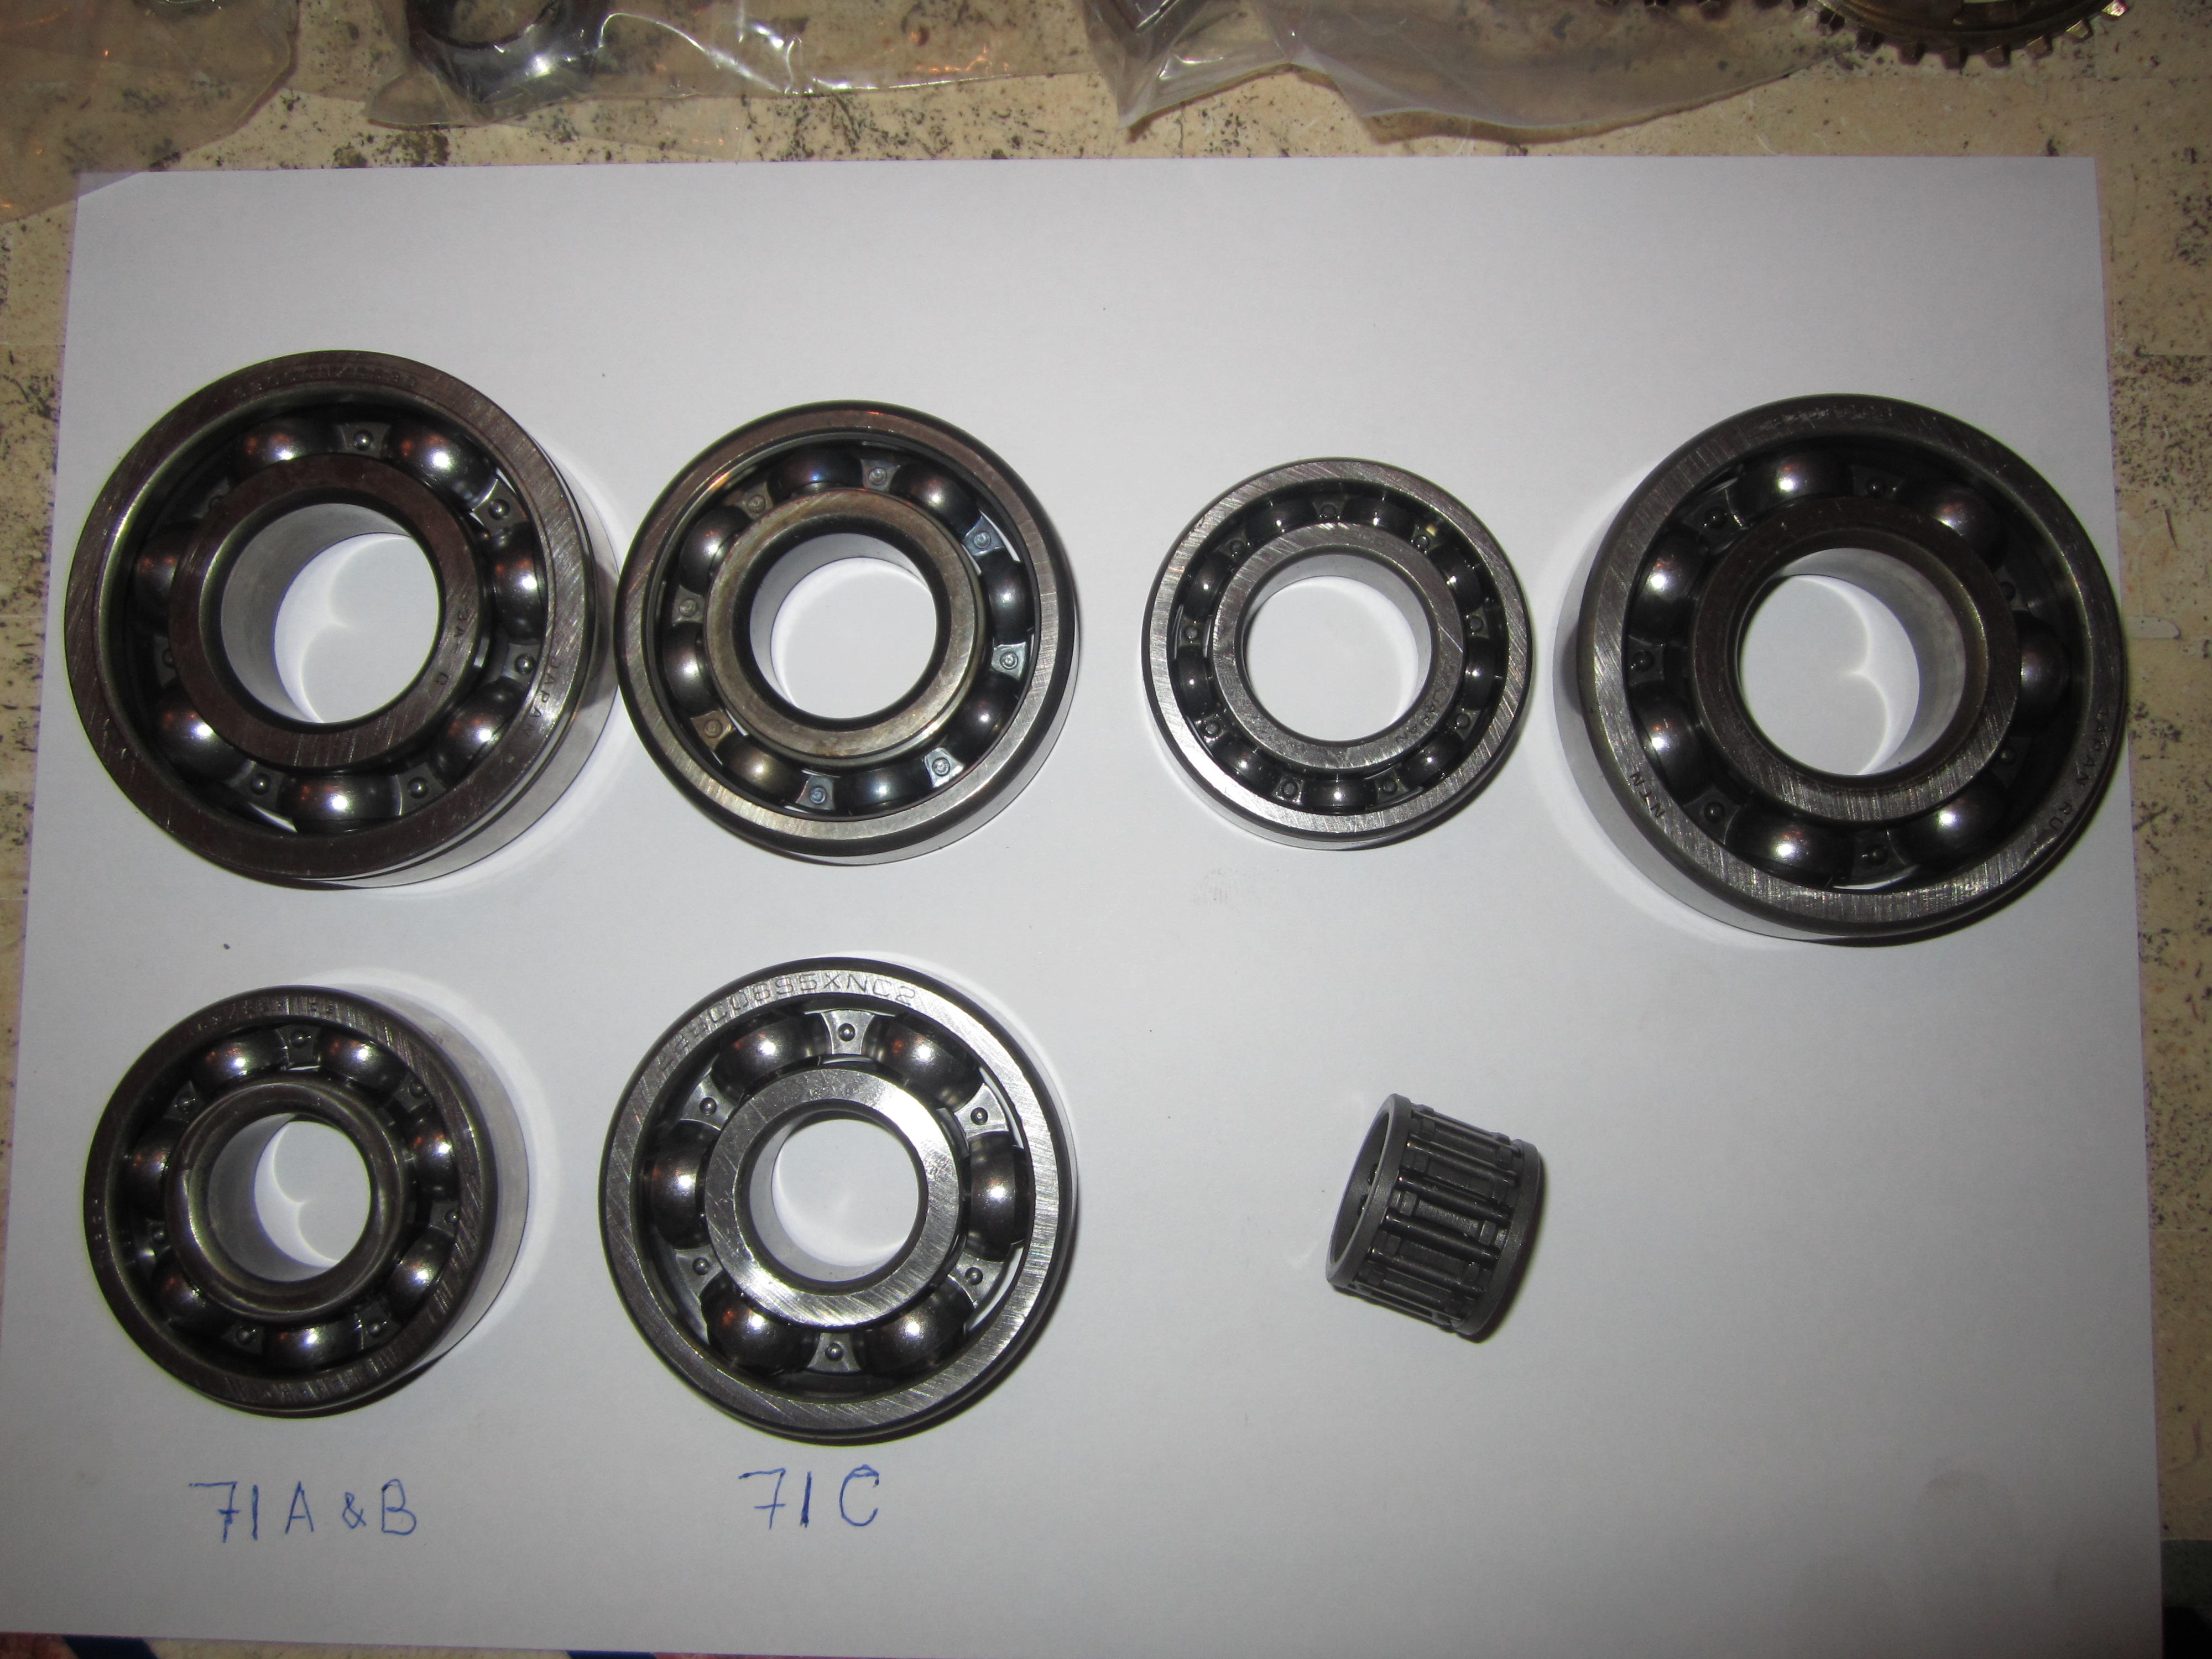
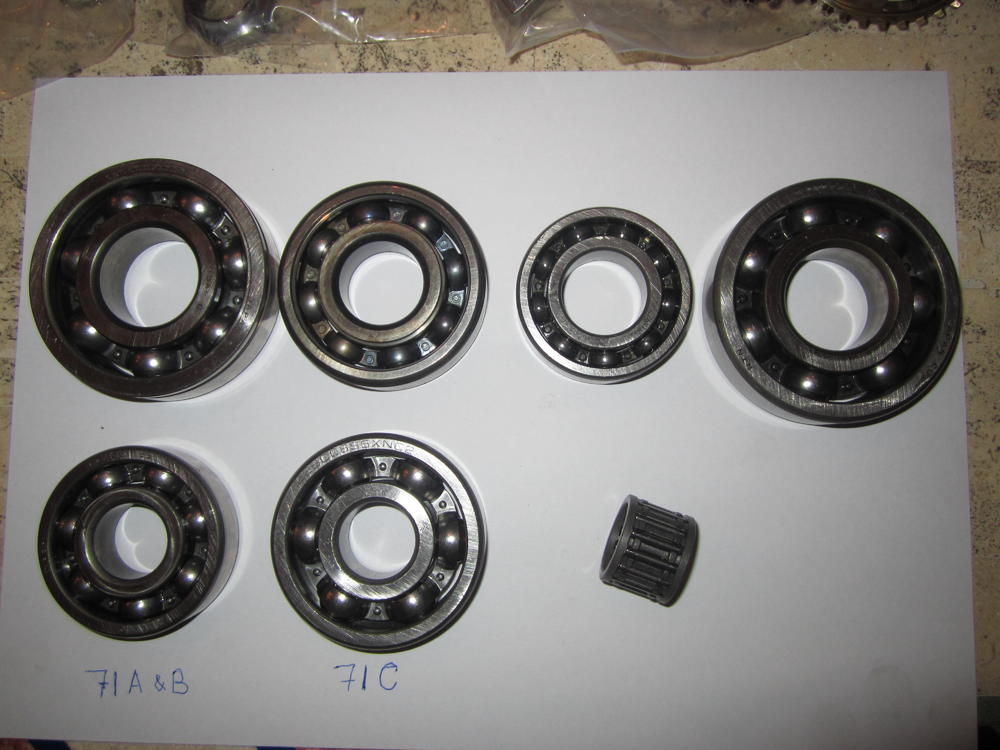
The standard kits with have the two bearing in the adapter plate. Those two bearings are generally the ones that give most of the problem. Note: Some kits comes with a larger front counter shaft bearing for the 71C transmission. All the synchos and bearings, with exception of the front counter shaft bearing are the same for the 71B and 300ZX, 200SX 71C transmissions.
-
That is a piece of bearing cage on the drain plug magnet. Most probably from the counter shaft (sometimes called cluster shaft) bearing in the adapter plate. If you want to rebuild the transmission, I would strongly advise dismantling it first to asses the condition. A rebuild kit could be enough to restore it to good working condition, but it might have a lot of other damage where a replacement transmission would be the better option. If you want a parts list, see link in downloads section.
-
As I said, digging up memories from 33 years ago working in an automatic transmission shop. We use to do an "upgrade" in the commodores. It was a simple heavier spring set in the valve body. You could get these transmissions to churp the tyres going to second gear with a bit of tweaking in the valve body. Normally the converter will just touch the flex plate or maybe a couple of mm off. 1/8" is getting close to maximum, but it should pull together. I don't think the 3mm is a problem. The 23mm covertor to flexplate when the transmission is fitted is a problem. The convertoer has two prongs to drive the oil pump. Can you measure them they should be about 20mm if my memory serves me correctly? 23mm will mean if you get it to bolt up to the flexplate, the pump will disengage.
-
1/8" of an inch is ok. Normally they just touch or have a couple of mm. You mentioned the transmissions turns with the engine. You should be able to turn the converter by hand using fingers or a screwdriver to line up the bolt hole to the flex plate. If you can't get the converter to turn without turning the engine then the center section on the convertor is probably not lined up with the back of the crankshaft and not entering the crankshaft. How did you fit the transmission. Did you use the bellhousing bolts to pull it in or did it push up by hand? It's been a long time since I seen one of these in pieces, and that was in a VL commodore. Memory is fading. Can you post some photos of the convertor.
-
That doesn't sound right at all. Can you remove the converter from the transmission and test fit it to the flex plate. I think there might be something going on there. It should slide onto the bolts. Make sure when you refit the converter to the transmission to turn slowly while gently pressing it into the pump. The two prongs wil click into the notchss and you will feel the converter slide in. Btw: In Australia you could buy a performance upgrade kit for the 4N71B transmission, which is basically the 3N71B with a lockable sprag clutch. They used the RB30 engine with the 4N71B in the Holden VL commodores in 1985.
-
Looking at your photo of the clutch disc and pilot bearing. It doesn't look like it's lined up enough to get the input shaft to slide into the pilot bearing. I would try to line up the disc a little more. Feel around the outside of the disc and check if it is centered on the pressure plate. You can do that at three positions through the pressure plate cover. You need to get it within 1/2 mm. DON'T pull the transmission into position with the bolts. You could damage something. Just jiggle the back of the transmission it around and push. It should slide in.


.JPG.ec70e6d49c2acb31596037960af090db.JPG)