


Captain Obvious
Community Member
-
Joined
-
Last visited
Everything posted by Captain Obvious
-
I'm no regulator expert, but I think you need to determine if your regulator is designed for bypass configuration or dead-head configuration. That will tell you which way you need to plumb it. If it's dead-head, you need to put it in the supply line and (probably) cap off the original return line. If it's bypass, you need to put it in the return line in place of the stock restriction orifice.
-
I haven't studied the wiring diagram really thoroughly, but it looks like the one side of the shunt (the white wire side) only goes to the fusible link that goes to battery (+), and the voltage regulator. I'm thinking that because of the way things are wired, with the VR out of the circuit, most of the current will find another path instead. Basically, the wires to the ammeter are self-contained. Those two wires originate in the shunt and go to one place and one place only... The ammeter. They do not make connection to anything else anywhere in the car. So one of three things is going on... 1) The shunt goes open and all the current tries to go through the ammeter instead of the shunt. 2) You really DO have 60A flowing through something. Since you didn't see smoke and everything seems to be working correctly, I doubt this one. 3) One of the two wires leading to the ammeter coil are shorting out to something else. Since the polarity seems to flip, I doubt this one too. Of course troubleshooting is always difficult from a distance, and that goes double for electrical issues, but that's what I got.
-
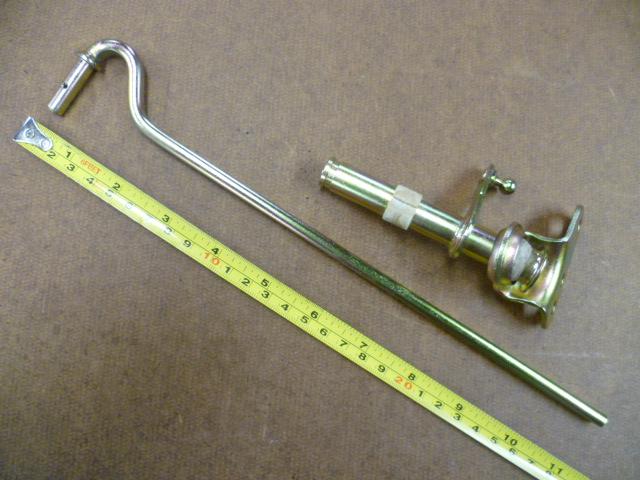
It looks like the newer design will bolt up. I'm kinda surprised. Here's a pic of the dimensions on what I have: Send me a PM and we'll see if we can reach an agreeable agreement.

-
Hmmm... My first guess is that your shunt connections are (were?) intermittent. The ammeter is supposed to sense a tiny tiny fraction of the total current that is flowing in the system. It does that by letting the vast majority of the current go through the shunt, while the tiny remainder heads off to the gauge coil. It's a current divider based on the resistances of the shunt and the ammeter coil. But if the shunt goes open-circuit in the right (wrong?) way, all the current will try to go through the ammeter coil. Probably pegging the ammeter in the process.
-
If I get a chance, I'll take another pic today with a tape measure up against the bolt holes so you can see if it's the same as what you currently have.
-
That old flat-top part should get you out of the woods for now. It really wants a bearing support closer to the end, but I think it should be OK for now. So here's what I have. Question is... Will the pivoting mechanism mount to your firewall? Are the mounting holes in the same location(s)?

-
Yeah, me too. After all the stuff I've screwed up, I might be an expert on some of it. Yarb, The progress looks good.
-
Live long and prosper.
-
If your car came without A/C, the four speed switch won't mate with the HVAC sub-harness. In order to change over to the four speed switch, you'll need the different blower resistor and HVAC-sub-harness. (Note that the four speed blower resistor also requires the different sub-harness.
-
Haha! Well not for long! Keep screwing up like that and you'll soon be as experienced as the rest of us! Haha!!
-
Many different ways to lengthen the linkage, so whatever works easiest for you. If you take a good pic of the piece that mounts to the firewall, I'll snap one of the later version. If it looks like the new one will swap over as a bolt-up, I've got one here and a longer shepherds hook that I could part with. You could just bolt that in and go. I'll snap a pic of that if I get a chance and you're interested.
-
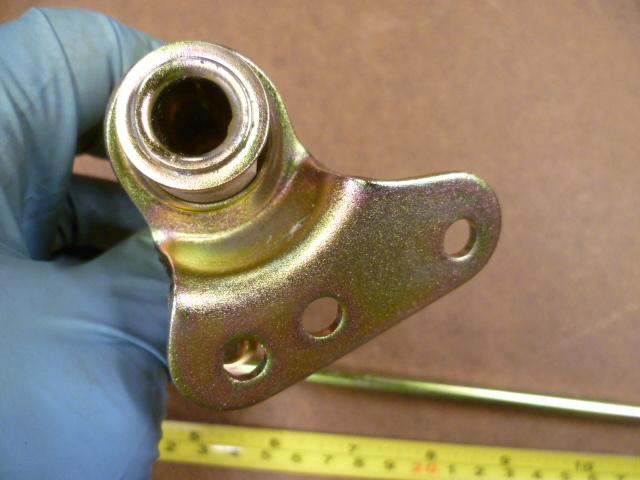
That center hole is not a spot weld. I suspect that was a locator feature. So you drilled out about the only part that is NOT holding it on. Haha!! Not a big deal. Stuff like that happens.
-
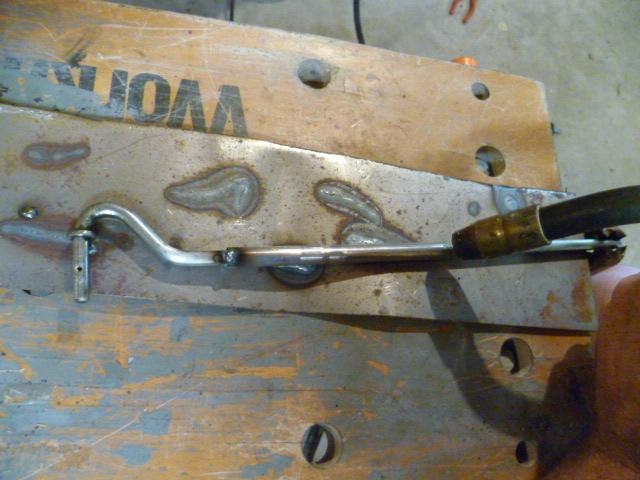
Right. When you switch to the 240 style balance tube, you'll find that your old shepherds hook is too short. Not the most beautiful thing in the world, but you can cut your original in the middle-ish and weld on a piece of tubing to take up the gap. Here's one from a 74 260 as an example. I believe they changed the pivot mechanism that mounts to the firewall and the shepherds hook design between 73 and 74, so yours won't look like this. But the concept is the same: Extendo mod used on a 74 that switched to a 240 balance tube: And here's a pic after the welding is done and cleaned up a little and installed. Note the newer design throttle linkage pivot on the firewall. Seen on the right side of this pic: So I don't know if the newer design pivot will bolt right up to your firewall, but if it does, you could switch to that and a longer shepherds hook from a 280 or ZX.

-
LOL!!! I'm really going to miss comments like that from 2020. Oh wait... Nevermind. We'll have a whole year of them in 2021, so it's all good!
-
All I picture is Andy Kaufman.
-
In addition to smoothing out variations in piston position. the damper prevents the piston from rising too quickly under acceleration conditions. The delay in the piston rise temporarily richens up the mixture just like an accelerator pump would. So the accelerator pump function may not be direct like the Weber's pump, but the intent is the same. There's a brief note about the function on page EF-19 of the 72 manual. There's probably other (maybe better or more detailed?) in other years FSM's, but that's the one I put my finger on first. And to answer your original question about the springs... The springs would affect the mixture under all conditions, not just acceleration. The thickness of the damper oil would only have an effect upon increased engine load, but the springs affect everything.
-
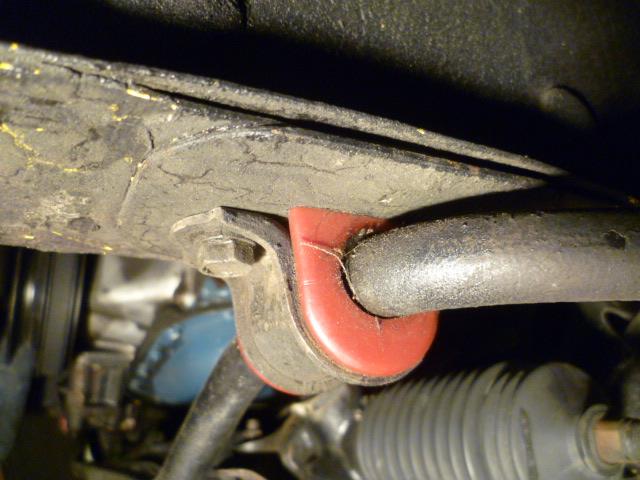
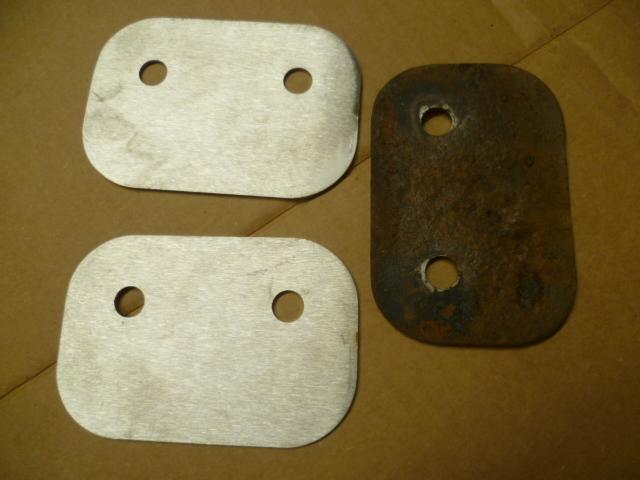
The front sway bar mounts to the frame with a thin piece of metal between the two. I'm not exactly sure what they were thinking when they put that thin piece in there, but here's what the originals look. Note that the shape changed over the years... The 240 parts is smaller than the 260-280, but here's what it looks like on the 260-280: Unfortunately, the pieces on my buddies 260 don't look so good. His plates are rusty and bent: So I had replacements laser cut out of 304 stainless. Nice new shiny parts: Hey, it's the little things, right?

-
Hahaha!!! You French kiss your dog in the mouth! Sorry for the thread diversion. It's just good TV from the olden days.
-
I don't know what year they started, but my 77 used the MIC mark-1 connectors. Been a while, but if I remember correctly, that's what they used to connect the engine bay harness to other harnesses under the dash? And I think I was messing around with them for the same reason you are. Headlights.
-
Thanks for the details El Cheapo. Now I just have to wait for spring!!
-
Merry Christmas to all, and to all a good night.
-
Yeah, that's pretty far up there. Haha! Your mother sews socks that smell!
-
Good. I liked that one. If I were buying, that's the kind of car I would be looking for. Unrestored, but unmolested. Used, but not abused. I didn't read any of the chatter on BAT, but the pics looked like they weren't trying to hide anything. No pretense, just an honest, well loved used Z with all the warts you would see on a normal Z car. I'd rather fix them myself than pay for someone else's work already done. Although, if the price for that kind of car is now up to 27.5K, I'm not sure I have the $$ to be in the market.
-
So El-Cheapo From The North, the sensor for your LM-1 looks like your normal O2 sensor? Threads and all?
-
Awesome. Glad they were the right parts! So I went back through my notes and I've purchased from Digi-key, Newark, Onlinecomponents, but never Mouser. I'm assuming I didn't go through the effort to set up an acct there, but it seems like maybe I should.


