


Captain Obvious
Community Member
-
Joined
-
Last visited
Everything posted by Captain Obvious
-
I don't really need the spring back. Keep your distributor together in the event that you need to put it back in for some reason. As for the problem you're having with your tach, there are a couple people here on the forum who have done the 123 ignition thing... Hopefully some of them will chime in with some help? I've not messed with that unit myself, but if you can't seem to generate any help elsewhere, I'll do what I can.
-
Hahaha!!! Someone had to do it!
-
This is awesome... I don't have to even get involved!!
-
I might have a pair of white armrests. SEM sprayed black. Seriously. I'll check. As I remember, it comes off pretty easily. Haha!
-
I'm all kinds of confused... Either I don't know what you're looking for, or you don't know what you're looking for. Or maybe both. You say you want a digital temp signal to your ECU, but then you say you're running carbs. What is this ECU doing if it's not controlling the engine? Is it some aftermarket ECU who's name we might recognize? Controlling ignition timing only or something? And I don't think there's any sensor that is going to send a DIGITAL signal to any ECU. I think they're all analog sensors and converted to digital by the ECU. Are they actually using DIGITAL sensors on the new cars?
-
Thanks for filling in the details. I took a look through my pics and now that I look through them, I'm not sure my bracket has been shortened at all. I've got a pic of an alternator with file marks on the inside of one of the mounting ears. I took the pics, and it was important to me at the time to concentrate on the mounting ears. The implication being two things: 1) It may have been my alternator which was modified, not the bracket, and 2) My memory has reached the point where the details are falling out the bottom. My brain is full.
-
Haha! Now that's a possibility I had not considered! Quite possible! I think I've distracted this thread enough...
-
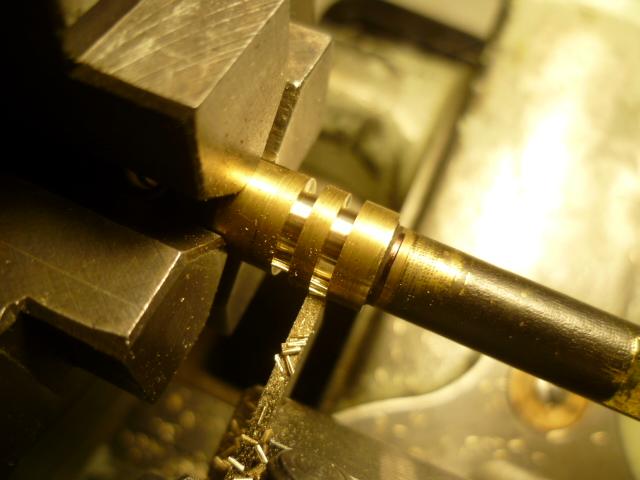
Yes, the O-rings are carefully placed so they run inside the bushings, thereby providing a seal (in theory). As for what the shaft is contacting while rotating... I haven't done any high level study to actually scientifically determine the contact locations, but my expectation is that there will be still be contact between the shaft and the bushings, but the O-rings will act as sort of a "spring" to center the shaft in the bushing. My belief is that centering spring will do two things: First, it will reduce the contact pressure (and hence future wear) between the shaft and the bushing, and... Second, the compliance of the O-ring will provide a seal against vacuum leaks "on the big gap side" even when the shaft is pressed fully to one side inside the bushing. I lube them when I put them in and haven't had any problems, and while my sample size is small, I haven't had any problems so far. One set has been running trouble free for a couple years now. Just another technique I sometimes employ in my carb servicing "business".
-
Haha! I'm a former Alfa owner, and while not currently part of that community, I can tell you that there are two things that really get under the craw of Alfa owners... "Alpha", and "Romero". Just poking a little fun at Bill's typo. Hopefully good natured.....
-
Building back up with new chrome is a technique used often to repair shafts. But they're expensive shafts that make a $450 replacement seem like a bargain. Big hydraulic cylinders, etc. So yes, that's absolutely a viable technique to fix the wear, but might not be cost effective. I don't think you want to entertain turning down the shaft ends just for sleeves. Alignment would be very difficult. Would probably be easier to just make a whole new shaft. As for sealing the vacuum leaks, you're right... Plugging the short end is easy. It's the inboard ends that are more difficult because of the linkage stuff. My solution is O-rings on the shafts. This pic is for a flat-top I'm working on, but the concept is the same:
-
-
I'm confused... A real Alfa owner would never, ever, never, ever, ever call their car an Alfa "Romero". Ever.
-
What modification(s) do you have to make in order to run the GM alternator? The reason I ask is that I have a lower mount here that has been modified (slightly shortened by my PO), and I'm not going to use it. So if it works for you, it's yours for the cost of shipping? I ran it for a while with a washer or two to take up the resultant gap, but have since switched back to an OEM mount that has not been modified.
-
All of the bushings I've seen in the Hitachi carbs are steel. I've never seen one made from brass or bronze. For you guys saying the bushings are brass or bronze (@RIP260Z and @Namerow), Have you seen brass or bronze bushings with your own two eyes? Have you used a magnet to verify? Also, I've never seen a steel throttle shaft. Everything I've seen are coated brass. Early ones are chrome plated and later ones are low friction greenish coating, but they're all made from brass underneath. Again, can anyone confirm that they have really really seen steel shafts? Got any pics?
-
Out of curiosity... If someone buys this car for $5K, can it be used as a Lemons car again? Haha!!
-
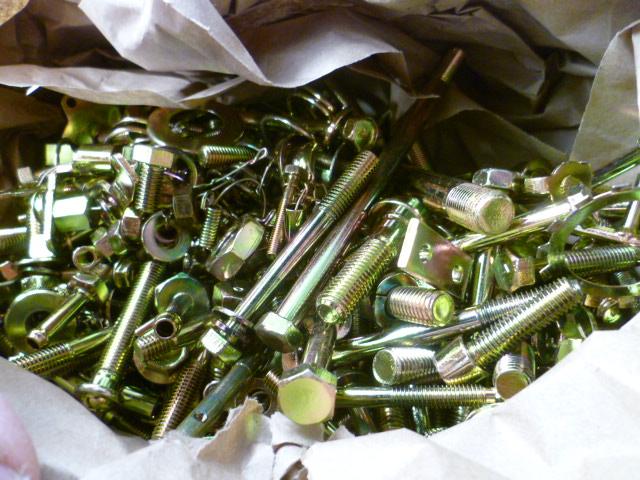
Oh. Well nevermind then. All the timing covers are the same. I've got all the hardware for the ZX timing plates, so we're all set. It's all in the box:
-
Makes you wonder if they did it on purpose as a gimmick. Haha!!
-
Yeah, the JC Whitney catalog was like the Sears catalog was to the previous generation. Then came the internet for the car parts. Then came Harbor Freight for the cheap tools. Then came Amazon for everything else. The last order I place with JC Whitney was in 2014 and it was for KYB strut inserts for my 280Z. They had the best price I could find at the time. That order was on-line, but I remember the days of actually picking up the phone and calling them. I have fond memories of them as well. I didn't even have a VW, but I used to enjoy looking through all the pages and pages of bug parts anyway!
-
Huh. Well whadda you know? A local Z buddy of mine is (I think) planning to use his Z front cover on his ZX motor. Why? I believe the answer was "Because it's cleaner." Haha! I'm going to have to mention this to him...
-
What's old is new again. Carparts.com is JCWhitney. I ordered parts from some on-line entity way back when the internets started going commercial and I think it was carparts.com. I probably have some old yellowed receipt in a box in some file somewhere under the roof, but it's certainly not worth the time hunting for it. In any event, they fizzled and went dark. Probably competition from places like Rockauto doing the on-line thing better than they did. But in the middle of 2020 I got an email from JC saying they were re-launching the carparts.com thing: "JC Whitney has stayed in motion for more than a century, and we are constantly evolving to bring our customers quality auto parts at the best value. That’s why we’re excited to announce our first-ever line of accessories and overall relaunch on CarParts.com, where we’ll be able to provide you the same dedicated service, but upgraded with an even better shopping experience, along with the right parts to do the things you love—and to do them better! We’ll be moving over on July 16, 2020, and look forward to getting you set up in our new home. If you have a JC Whitney account, we’ll automatically create one for you on CarParts.com. Your JCW order history, address list, and My Garage details will still be available on CarParts.com after the change. Once migrated, you will receive a welcome email and we will automatically include you in our VIP Email List. For more information on account and email subscription transfers, orders in progress, warranties, and more, please visit the FAQ section on our history page." So what is old, is new again.
-
So I don't have any additional advice to make the install any easier, but I was thinking about your clutch problem a little more since we talked. I took a look at the exploded parts pics in the manual and I stick to the theory we discussed that there's something wrong with the valve that closes off the fluid reservoir when you push the pedal down. The valve is probably stuck open or the front seal is messed up. Either of those could occur maybe from leftover chips from the manufacturing process as ZH mentioned. In any event, good luck with the replacement and I hope your shoulder holds up! Try knocking on the outside of the master a couple times with a plastic screwdriver first... Maybe (longshot) if the front valve is just stuck, you might be able to knock it into temporary working position.
-
-
Ozzy says it's just a hand in the bush.
-
It's big, it's heavy, it's wood.

-
So any 78 that left the factory black was a Black Pearl? Or could you get black without it being a full "BP"?


