Namerow
Community Member
-
Joined
-
Last visited
Everything posted by Namerow
-
Charles: Thanks for the continued documentation of your build, complete with your detailed pix and comments. I find these 'build' threads a lot more interesting than much of the other commentary on CZCC. But maybe that's just me.
-
Yes, I think that's the post that I remembered. Good find! Not sure that most would be willing to go with the author's two-piece design strategy, but at least he provides a template for making your own. However, you're still going to be challenged in finding something that matches the 1970's material that Nissan used. The squeeze-and-stuff procedure that I posted earlier does work, but requires a bit of practice.
-
These are the notes I made after managing to install my OE glovebox liner from the front... · With the Liner tipped at about 45 degrees off vertical, rest the front edge of the Liner's floor on the lower ledge of the dash opening. The lower corners of the Liner should sit about ½” outside the lip of the dash opening. · Rotate the Liner upward on its front lower edge as far as it will comfortably go with the lower corners still sitting outside the dash opening. · Working from behind the dash, push the lower corners of the Liner inward so that the Liner's floor buckles. Squeeze until the lower corners of the Liner clear the lip of the dash opening. Working from side to side, push the lower corners of the Liner into the dash opening until the front edge of the Liner's floor is sitting in its proper location. · Pivot the Liner upward on its front lower edge until the front edge of the Liner's roof panel is only about 1” short of full insertion into the dash opening. · Grasping now at the centre of the front edge of the Liner's roof panel, push the lip inward (down) until both top corners of the Liner clear past the inside corners of the dash opening · Job done Additional thoughts: As noted by someone else, you may end up creasing the liner in the course of attempting this install (the OE liner feels like it was made from recycled egg cartons). It takes a lot of patience (and dexterity), but it can be done. Several years ago, I believe that someone posted on this website a template for making your own liner. Alternatively, you can probably make your own without too much effort. Options for materials would be thick cardstock or thin poly-plastic sheet. Poly-plastic sheet would probably need to be notched along the fold lines to generate good edges. Once you have your car's dash removed, this job becomes really easy! I, too, recall that there was -- at one time, anyway -- a vendor who was offering a molded plastic liner.
-
The following is a collection (by me) of comments made by various CZCC members over the years on the topic of removing and installing the glovebox liner from the dash. It's a interesting topic (and probably a contentious one, too). I'll follow with a second post, in which I recorded the steps I took to install the liner into my dash from the front. From the Front Removal... · You must detach the lock latch and lamp before you can pull the glove box out. · Remove the Phillips screws that hold it in the dash. Pull the glove box light out of its socket. Then collapse the liner -- top and bottom and a little on the sides -- and slide it out. Yes, a couple of R&R's will make a new one look old. Installation... · Owner 1: The cardboard glove box will go in from the front. It's pretty tricky, but I've done it many times without destroying anything. I wish there was a straightforward procedure I could lay out for you, but honestly, it's just one of those things I always do by trial and error and the process of "which side to bend inward" seems to vary each time I do it. Just go slowly and be careful not to "over-bend" any parts of the cardboard. · Owner 2: You kind of have to squeeze it a bit to get it in place. I suspect this is one reason that so many of us tore them up trying to get them out. The blower fan housing and defroster vent tube get in the way. The cardboard will bend enough to get it in but still return to the proper shape (although perhaps with a few wrinkles). · Owner 3: I'd forgotten how much you have to contort the liner to get it out. I managed to pretty much destroy my old, brittle liner in removing it. I was a bit worried about damaging the new one while installing it, but it came through just fine. · Owner 4: I have always done this with the blower and air box in place. In fact, it's been trickier in my case than I imagine most of you will have because one of my large-diameter A/C hoses is routed right behind where the glove box needs to go. If it were not there, I think the extra clearance would make it easier. From the Back · Jim Arnett: For those without A/C, here is an alternative approach that avoids turning the glove box into an ugly piece of origami: remove the heater fan motor to gain clearance space and pull the glove box out the back. · A.N. Other: I'll have to second this method as I had a NOS glove box and didn't want any blemishes on my resto! Just remove four bolts and the fan motor (with plenum still attached) drops right down. Be careful not to let the mounting tabs scrape or gouge anything in the process.
-
There was probably only one Nissan assembly-line employee who knew how to successfully install the glovebox liner. When he/she retired, Z production ended. 😄
-
Longtime CZCC member Grannyknot put a BMW M6 engine in a Z a couple of years ago. Prior to installing the engine in the car, he created his own test bench so that he could evaluate the engine and consider wiring strategies. You might pick up some useful information by reading up on how he did it... Thinking about installing an BMW M6 engine in my Z - Page 7 - Build Threads - Classic Zcar Community
-
Thanks for taking the time to post the follow-up. It might just inspire me to replace the headliner in my car.
-
-
Legitimate question. Unfortunately, I'm not aware of any convenient answer. With 15+ years on this site, I don't recall anyone ever having addressed this question in the past. Nissan engineers quite rightly decided that the positioning of the T/C rod bracket mattered only in terms of the location (X-Y coordinates) of the centrepoint of the hole where the T/C strut passes through the bracket. They were concerned only in terms of pulling a frame straight after a collision. The possibility that the T/C bracket might, by some circumstance (like yours), become detached from the frame rail was irrelevant. To get the answer you're looking for, you'll need to do some measurements of the bracket, focused on your own approximation (or calculation) of where the aforementioned strut/bracket intersection centrepoint lies relative to the front or rear end of the bracket. After that, you can reference it back to where, say, the flange of the frame rail where it joins with the firewall. Geometrically speaking, it's a tricky-but-not-impossible challenge (depends on where you gave up on math when you were in high school). Maybe someone here will have the enthusiasm to do it for you! 😎 In terms of how your Z wilI brake and corner, I suspect that the accuracy of the fore-aft positioning of the bracket relative to the firewall needs to be no better than plus/minus 1/16".
-
Very nice photo documentation and write-up. Looking forward to your next installment.
-
@zKars You got?
-
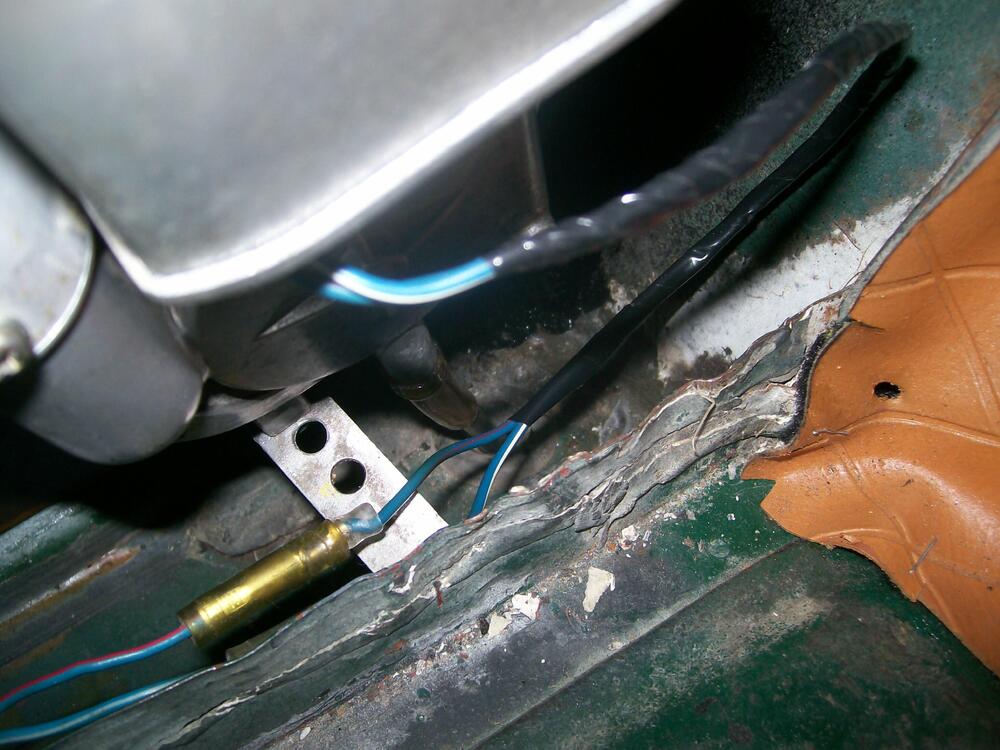
The metal strap just keeps the base of the antenna body from moving fore-aft or side-to-side. It doesn't support any of the weight. Instead, the weight of the antenna body is supported entirely by the fender mount (where the mast pokes through fender). In the picture below, the strap is obvious, but the body-mounted stud is hidden. If you look closely, you'll also see the drain tube and the point where it exits through the grommet at the bottom of the body cavity (this is also the place where the little centre pins for the interior panel plastic rivets go to die).
-
I remember reading an industry website several years ago where the writer predicted that the only distinction between mainstream brands of power tools would be aesthetics (colours, textures, legacy, etc). Looking at what I see in 2025's North American market, I'm inclined to agree. But I think that only applies to ~ revered old-school USA brands like Porter, DeWalt, B&D, etc. For comparison, look at what's happened to old-school non-automotive brands like 'Schwinn', 'Singer', 'Sunbeam', 'GE', 'RCA', etc. Offshore' brands (Bosch and Makita come to mind) might have a little more to offer than just marketing. Unfortunately, there's no universally-accepted evaluation standard. These days, it's just the 'Wild Wild West' of YouTube evaluators Caveat emptor.
-
Great post. This info really needs to be added to 'Knowledge Base'.
-
It's there strictly for water management (by design, it can't contribute to sealing off exhaust gases from the cabin because covers only the top and sides of the hatch opening, while remaining completely open to the outside at the bottom). If your Z is a later-model 240 (where there are no vents on the lower hatch surface), the most likely culprit will be your main weatherstripping ("the large weatherstrip that's been installed years ago"). It may have lost some of its original shape after years of living 99% of its life in a crushed state while the hatch is closed. IIRC, some owners also found that the gasket around their taillights housings had deteriorated, allowing exhaust gases to enter the cabin through the rear panel. If your Z is an earlier-model 240 (vents on the lower hatch surface), that's a whole different (and more challenging) ballgame. There are several threads on the CZCC site that discuss problems (several) and remedies for this design.
-
I remember the vendor, 'Auto World', from back in the 1960's (I still have their 1965 catalog sitting on my book shelf). I didn't realize that they were still in business. The website pays some homage to the original operation, but doesn't make it clear whether there's a historical link between 'then' and 'now'... "Oscar Koveleski founded Auto World in the basement of his home in Scranton, Pennsylvania in 1958. The small mail order hobby business grew to great proportions and became known for its annual product catalogs, which were filled with every car-related item an adolescent hobbyist might desire." The current iteration of Auto World is based in South Bend, Indiana.
-
I just used the link that Zkars provided in his #2 post. The Gyraline website currently features their Black Friday deal and offers the option of having the price displayed in the currency of the customer's location. IIRC, I had to select the 'G1' (iPhone) or 'G2' (android) product first, add it to my Cart, and then go to the Cart to see the price. I tried this posing first as a Canadian customer, and then as a American customer. The quoted price in Cdn $ for a Canadian customer was significantly higher (numerically) than that for an American customer -- but maybe that was purely the result of performing a currency conversion. Additional costs for shipping/handling and duties/tariffs might get tacked onto the Canadian price afterwards and not become visible until later in the check-out process. A quick internet search indicates that Gyraline was incorporated in Delaware in March 2024, with operations based in California and Texas. I have no idea where they do their manufacturing. Given the the nature of the design and the relatively low production volumes, it could be as simple as contracting out to a US-based additive manufacturing company ('additive manufacturing' = commercial-grade 3D printing).
-
Good question (and my mistake). The research project that I reviewed involved the development of an app for a smart watch.
-
For the 'G2' android version, the Black Friday sale price (15% discount) is US$340 (plus shipping, tax, etc). Lots of videos on You Tube, by both the manufacturer and users. This little device may have a lot of auto shop owners scratching their heads about the investments they've made in their alignment systems. The gyro capabilities of smartphones, coupled with their communications capabilities, are being exploited in a lot of different fields. One example is medical, where smartphones are being used, on behalf of seniors living alone, to intelligently detect and assess falls in the home and then communicate such events to family or caregivers.
-
And, as I noted in 2023, that NAPA kit seems to be NLA. But do your own checks. You might just get lucky and find one sitting on some NAPA shop's shelves. I just re-checked my old files. The NAPA kit (PN 6601000) was described as a 'RANCO HTR-100' rebuild kit. It was evidently applicable to the heaters used in the Studebaker Avanti, so it's conceivable that it was used across the entire Studebaker line (Lark, Hawk, etc). A little snooping around a Studebaker owners club website might turn up a lead. RANCO appears to have been swallowed up by Robertshaw. Most of the focus for the RANCO product line these days appears to be in electronic temperature controllers used for commercial/industrial heating systems. I suspect that the 'RANCO' of 2025 may be nothing more than a brand name (i.e. it's unlikely you'll find a RANCO factory with a parts desk). Just one thing, though: I see that NAPA Canada lists something called a 'URO Parts Heater Valve Repair Kit'. A little checking indicates that URO Parts is a brand marketed by A.P.A. Industries (Simi Valley, CA). A.P.A. provides aftermarket parts (incl. cooling system parts) for a variety of European, Asian and North American cars and trucks. In their website, they say: "A.P.A. specializes in accurate reproduction parts for classic vehicles, including a wide variety of items that are no longer available from the dealer". Maybe there might be some leads there. The heater control valve design used in the 510 and Z probably wasn't unique to Nissan. In fact, the Nissan heater design bears certain resemblances to the British 'Smiths' unit that was used in so many UK cars back in the 1950's and 60's. A little investigation along these lines might turn up a British shop that specializes in heater restorations and has a back room filled with obscure parts like a little rubber washer that will fit your 510's control valve. Try this link for a starting point... The MG Experience - Smith's Heater Restoration
-
Thanks for this latest photo essay. Lots of good insights here into how multiple panels come together in this complicated and structurally-important section of the car. You did some very nice work in forming the two big replacement sections for the upper frame rail. Can you talk a bit about how this was done? Also: What was the gauge of the sheet metal you used? In the 4th photo, there's what appears to be a right-angle drive power tool, with a 3" sanding disk mounted in the chuck. Is this your go-to tool for grinding welds? Who makes it?
-
Seat cover fit might suffer. In essence, you'll be increasing the height of the side bolsters by 1 inch. The centre panel of the seat cover would end hanging in space above the carved-out foam. Occupant weight will force the cover down onto the foam, but the look (baggy) when the seat is unoccupied might make you wish you'd never tried it. I suggest that you run the idea by an experienced auto upholstery pro before you break out the carving knife
-
Post some pictures of the rebuilt damper after you get it back.
-
Fifty-year-old rubber exposed to heat, cold, vibration and air pollution. Aftermarket replacements are available. Your chances of finding a NOS unit are low. Your chances of finding a good-condition used unit are better, but will require you to rely on the quality of the seller's photos. There are a couple of businesses (Damper Doctor, Winslow Mfg) that will re-core your old unit.
-
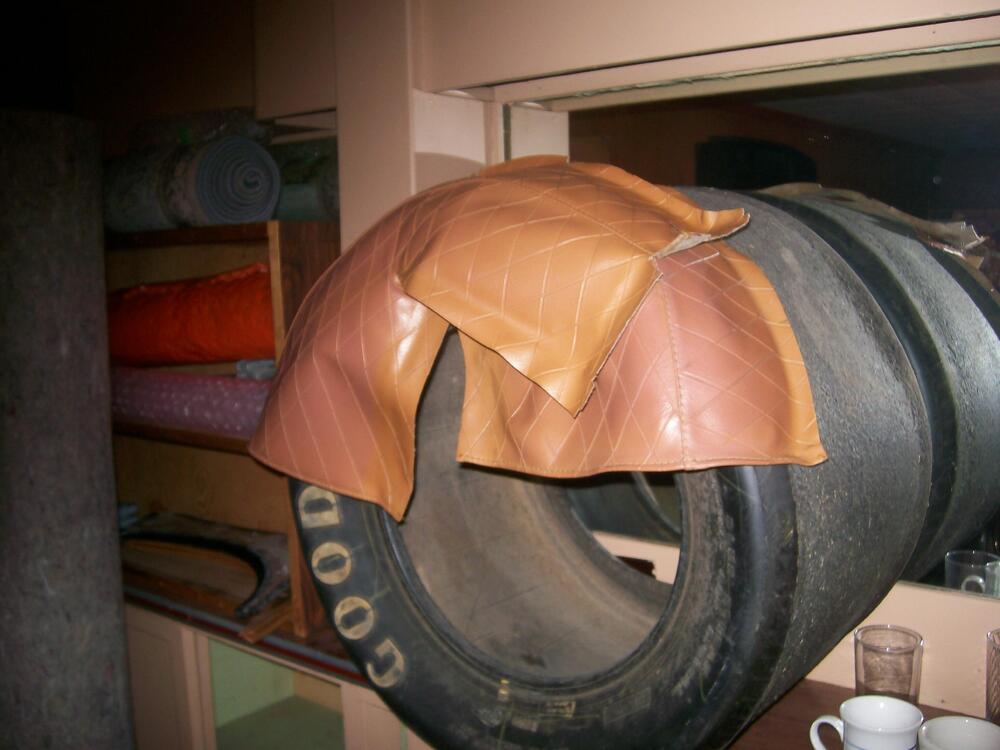
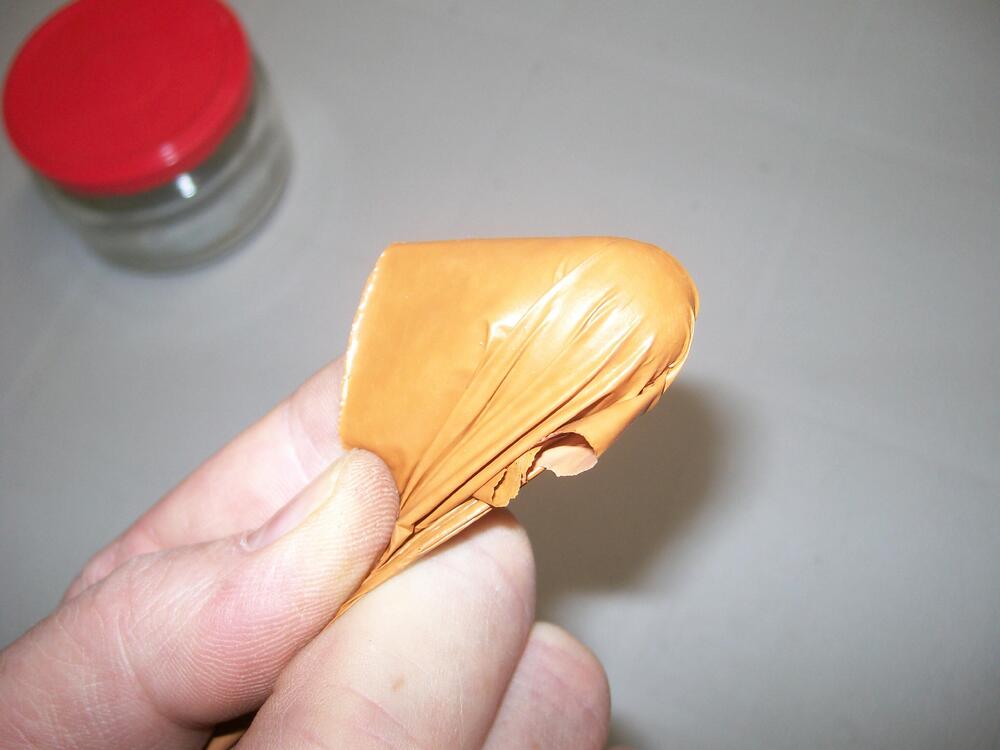
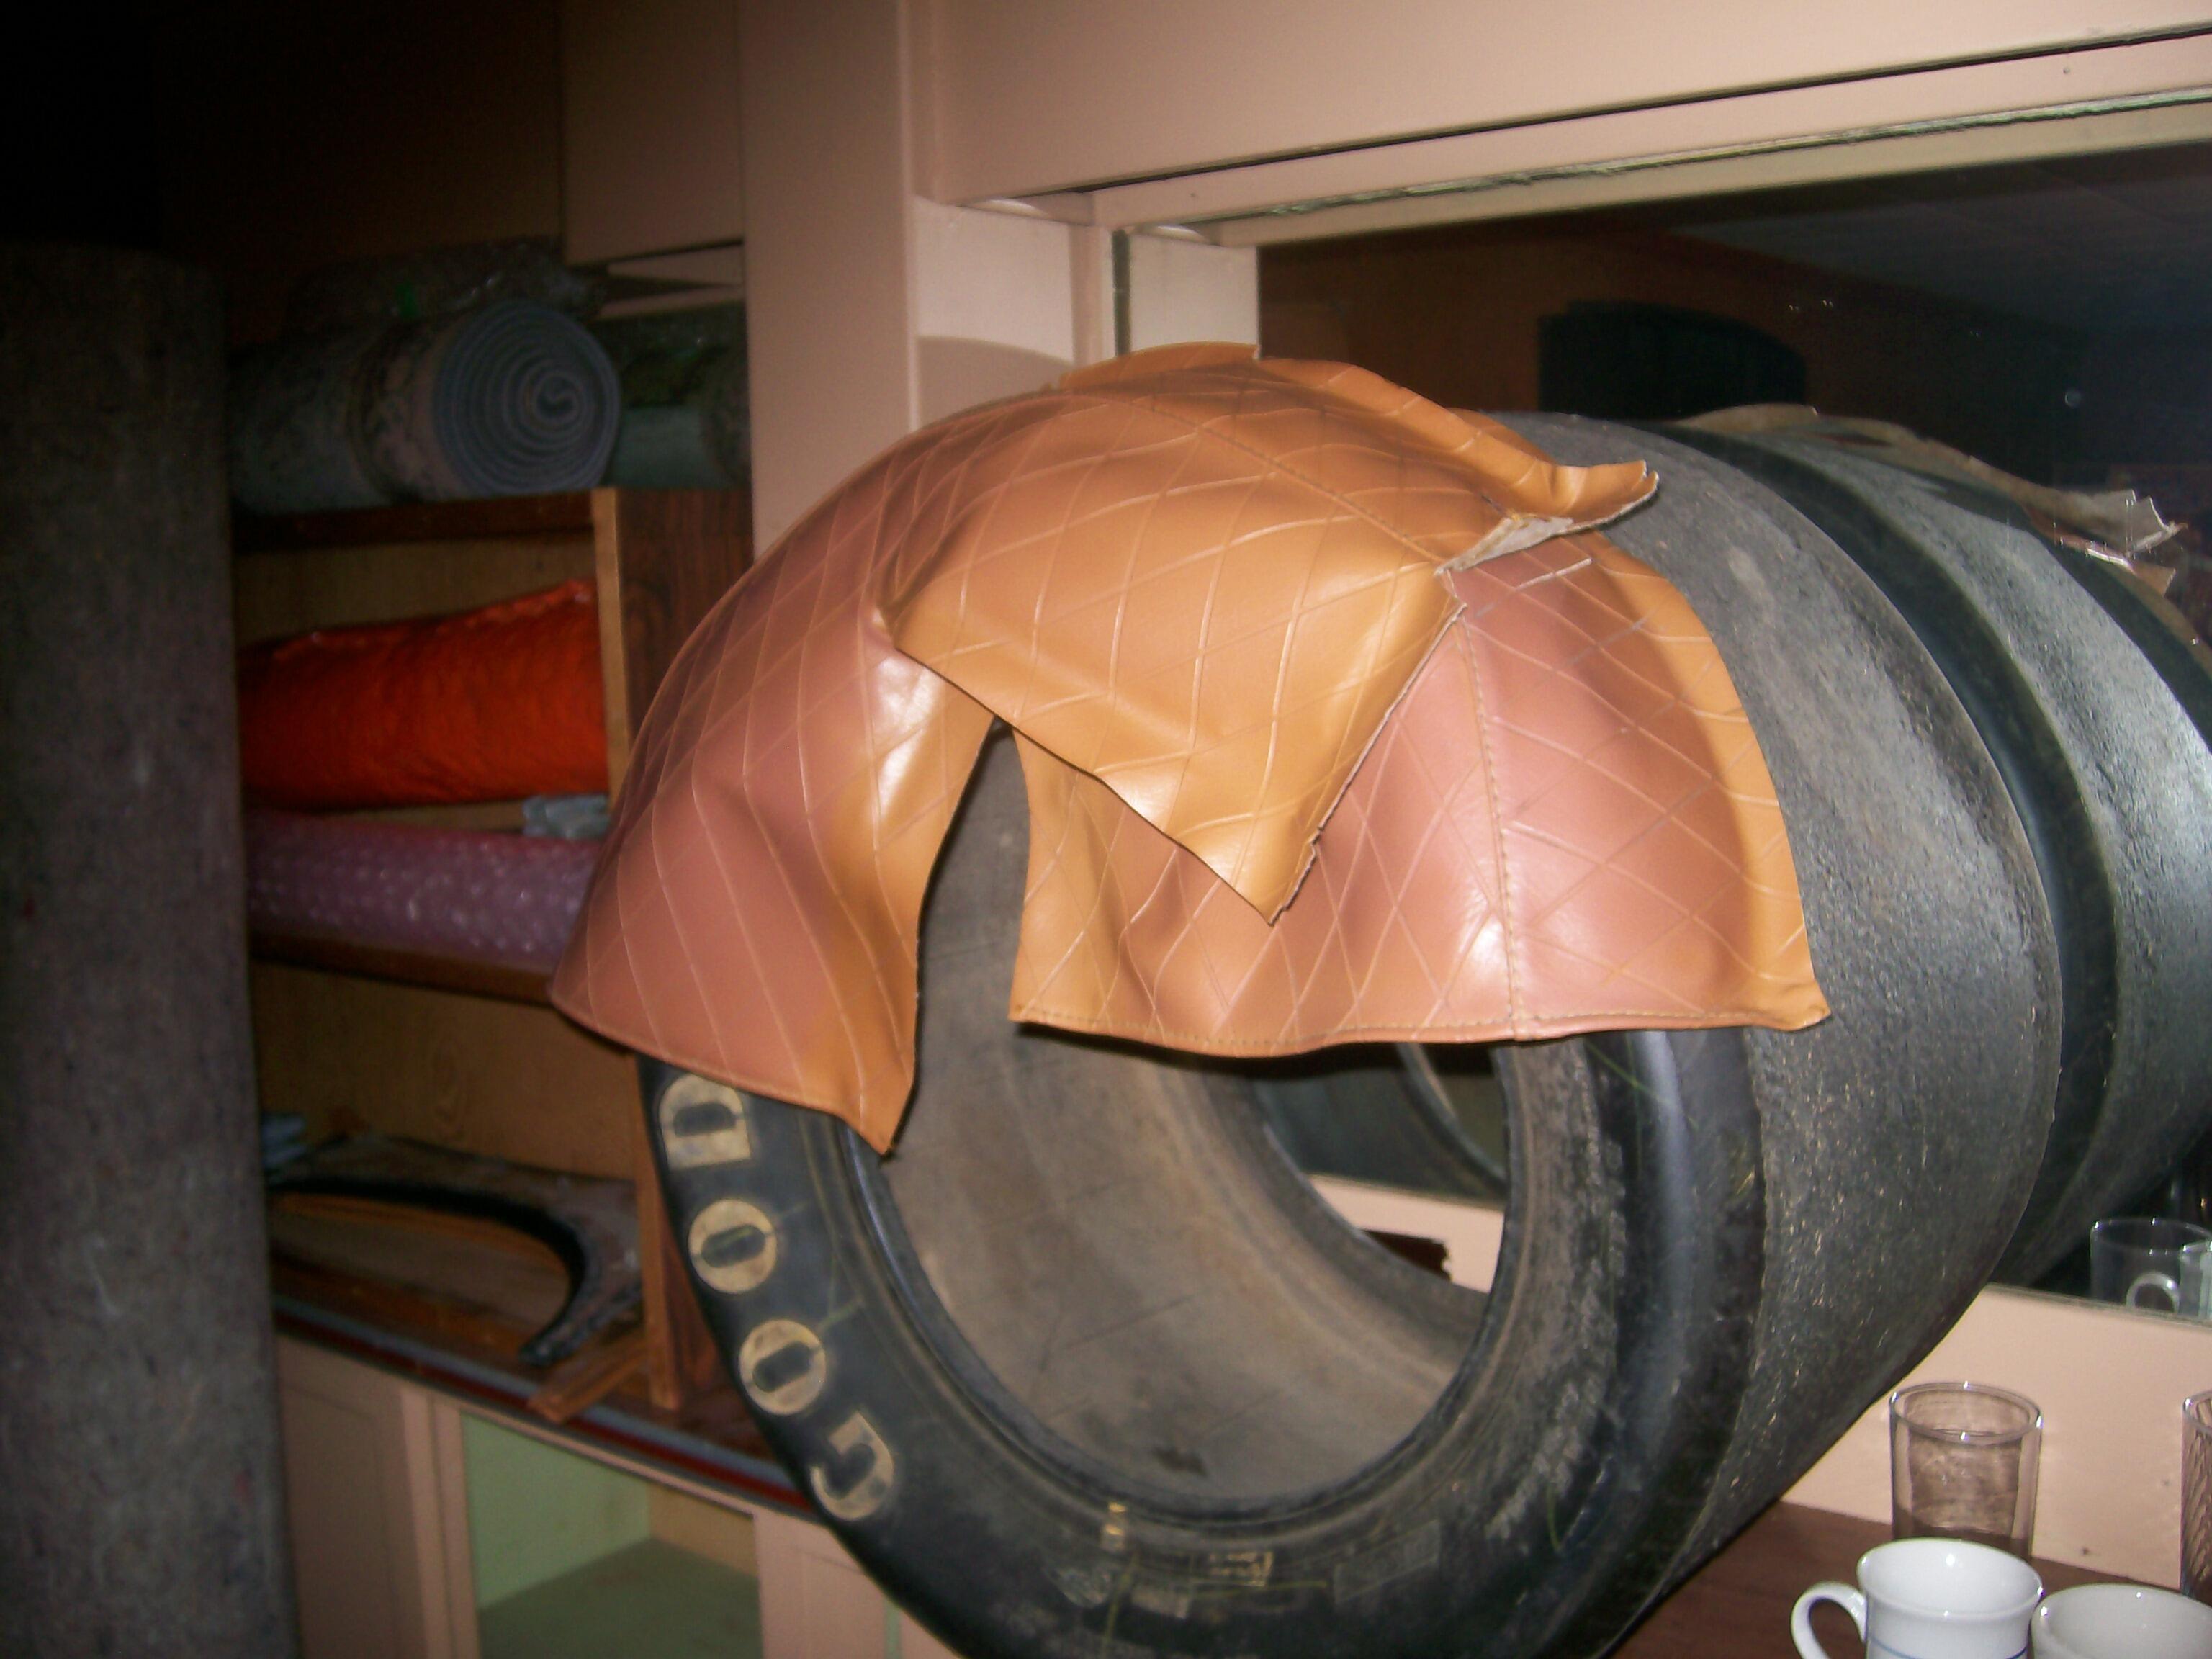
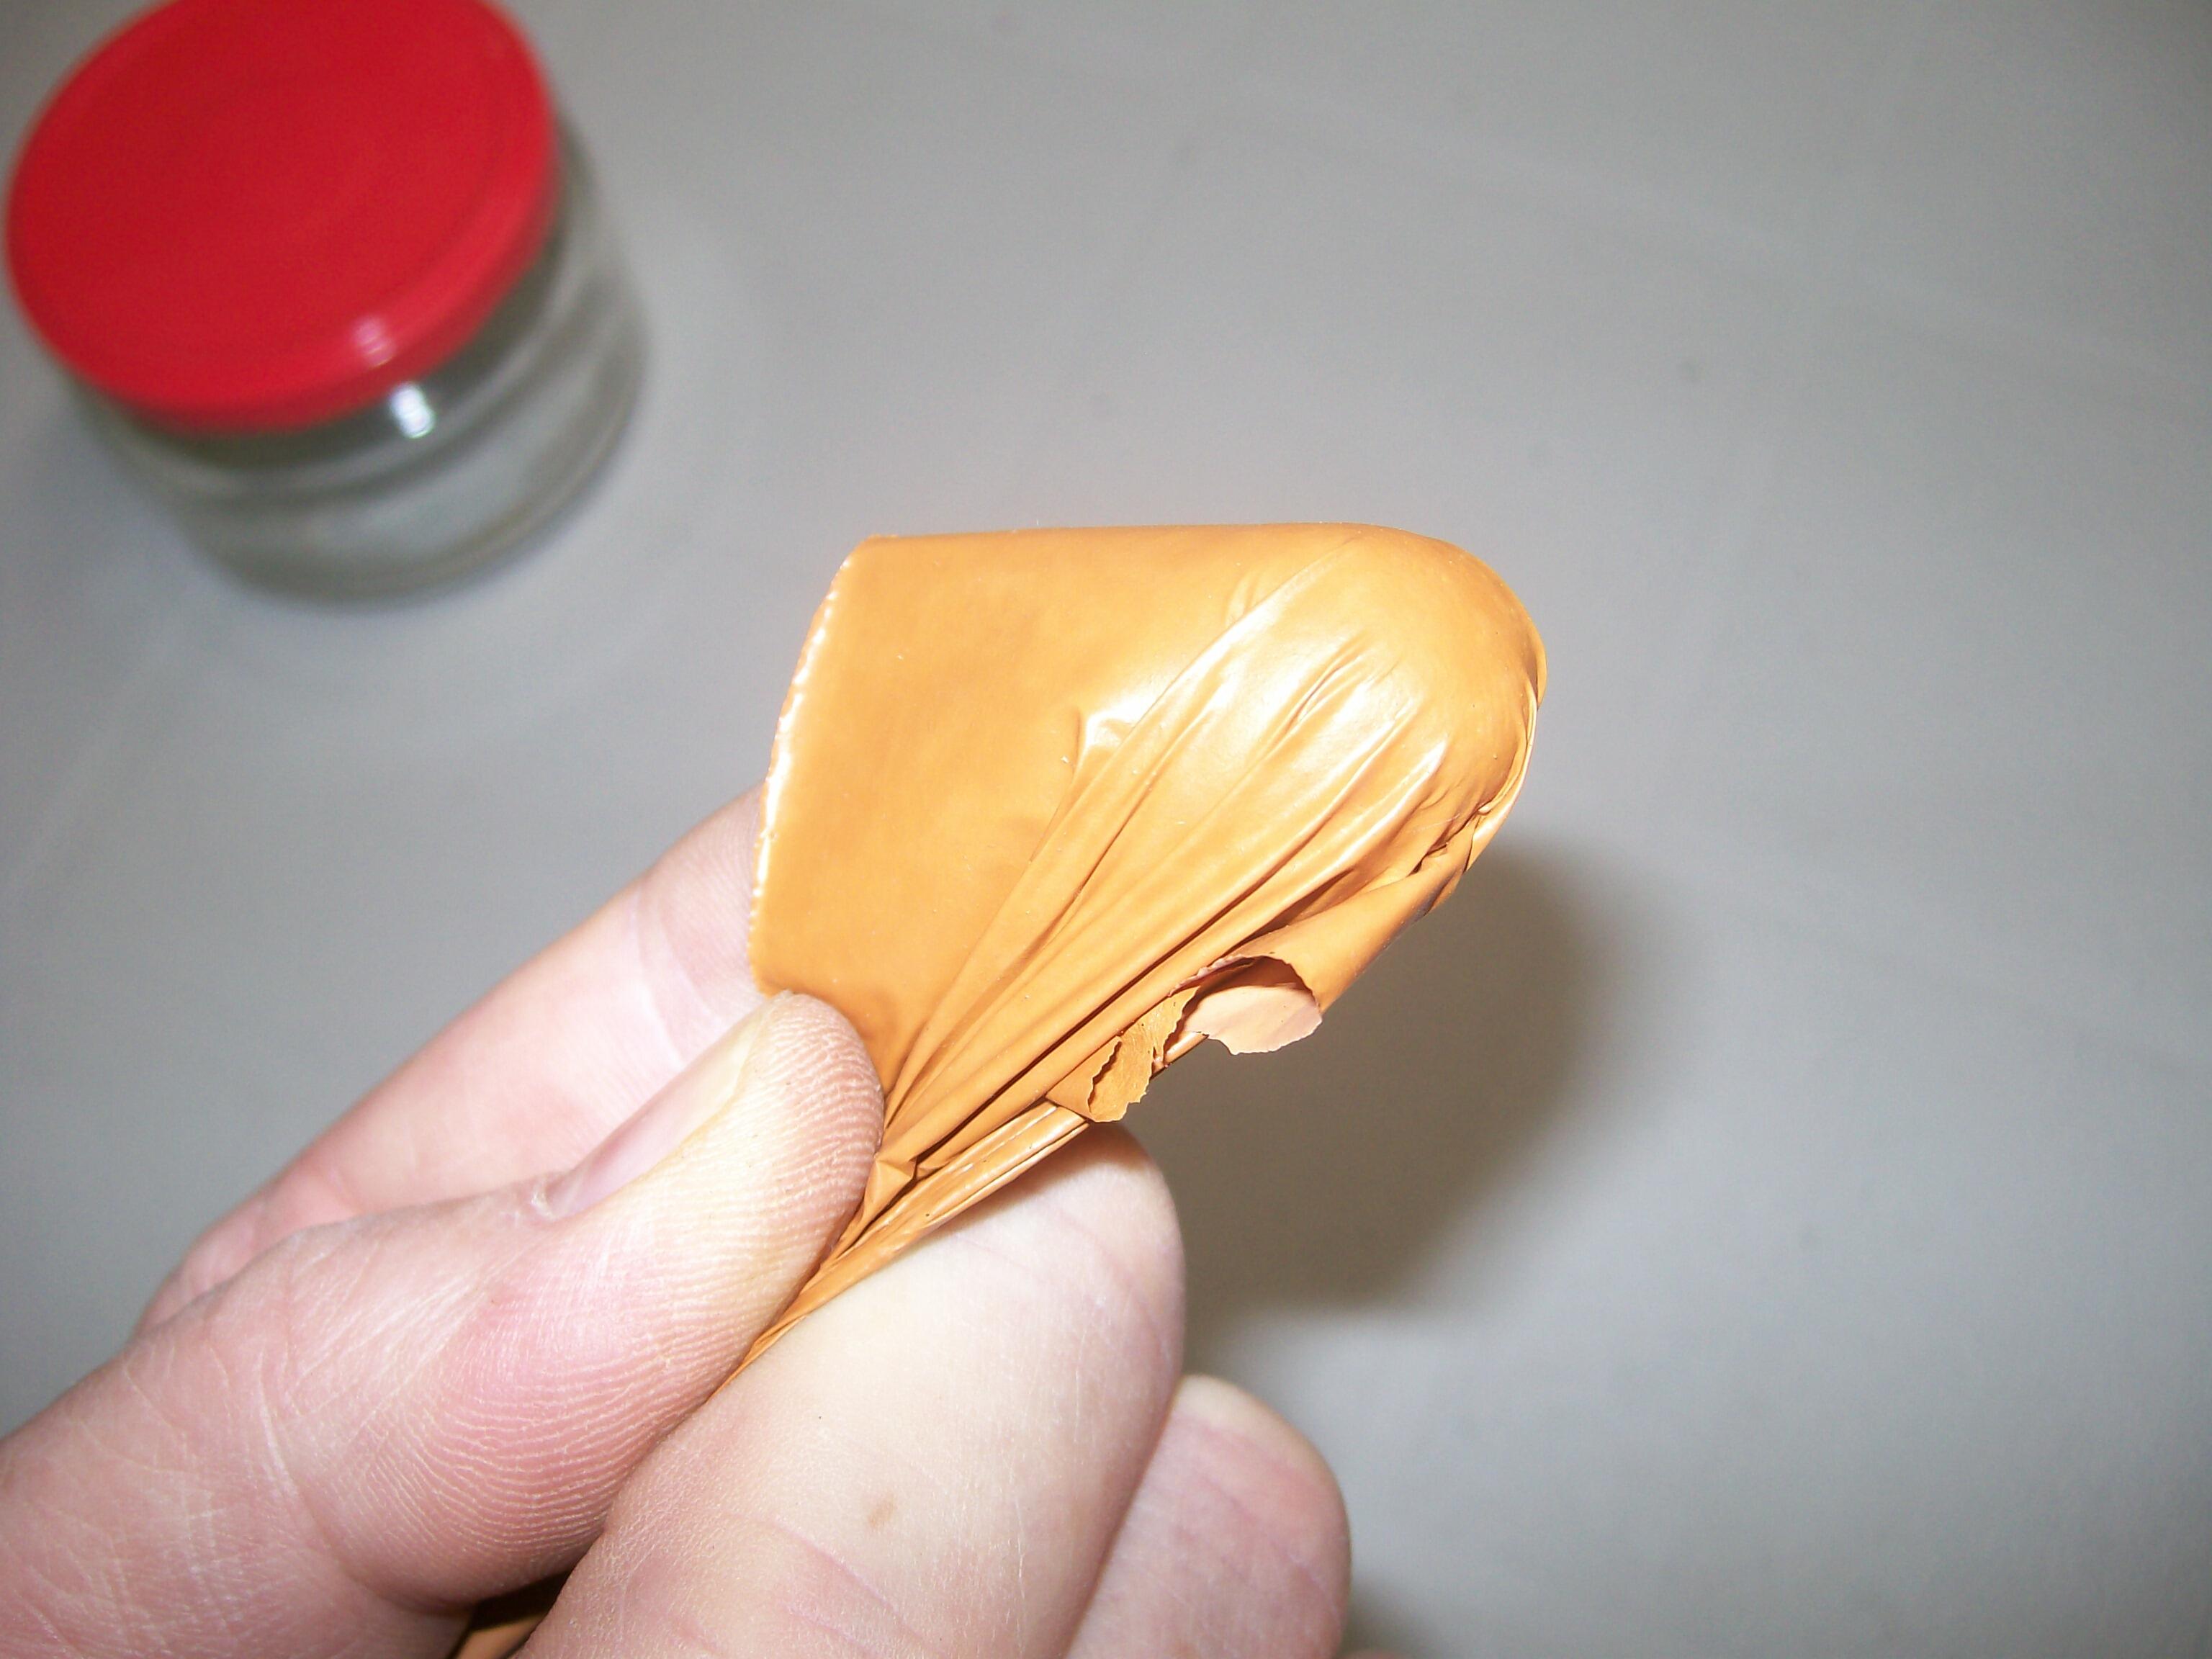
You might also consider using vinyl paint. I used it to re-colour my Z's interior (from black to butterscotch). Pix below should give you an idea of the flexibility and adhesion characteristics (I've seen zero evidence of paint lifting over the ten years since I originally did the application). It sprays on easily using an HVLP gun and doesn't require much in the way of surface prep. It took me three coats to achieve full coverage over the black soft and hard trim pieces. We had a supplier in the Toronto area (Parasol) who would custom mix colors from a customer-supplied paint chip (my results we spot-on, based on a small piece that I snipped from the hem of my new butterscotch seat covers). I expect you'll be able to find a comparable supplier somewhere in the U.S. south-east.