


AZ-240z
Supporting Member
-
Joined
-
Last visited
Everything posted by AZ-240z
-
I’ve used Plasti Dip and it works great! It can be brushed on as well as dipped and looks as good as original rubberized tabs. A couple of coats or whatever looks best to you.
-
A lot has to do due with shape of a 240z fuel tank. The top of the tank on the passenger side is higher and that is where the sender resides. The majority of the 15.9 gallons is contained in the lower half of the tank. This may make sense once you look at the tank and location of the sender.
-
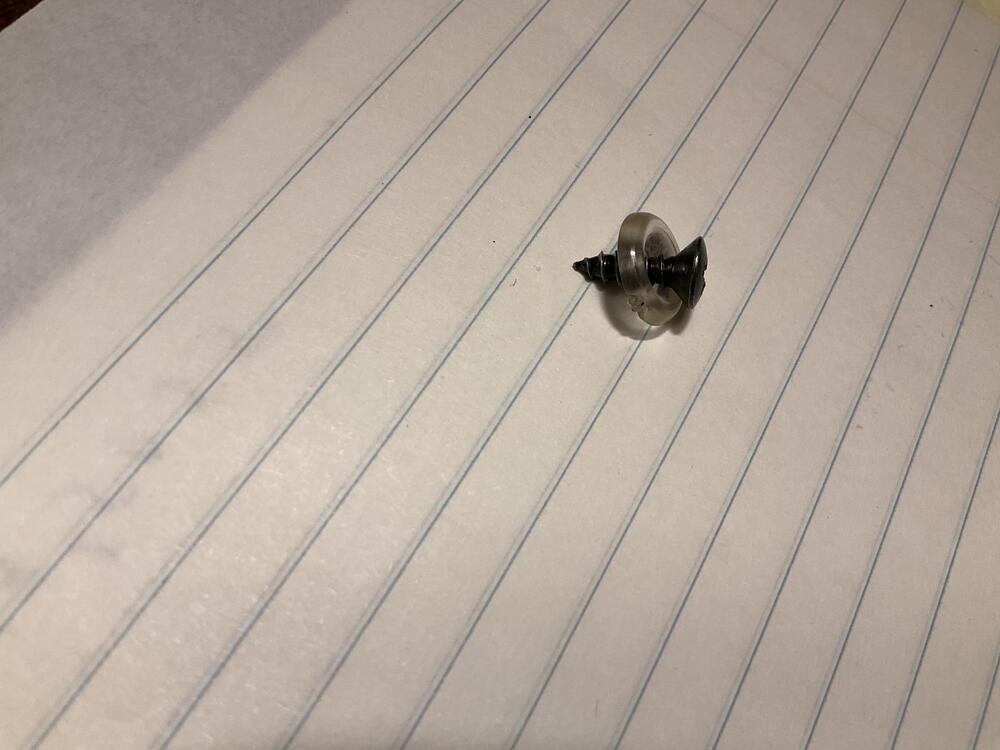
If you want to take a deep dive into these door panel screws and finish washers, here is a thread I started about 16 years ago.
-
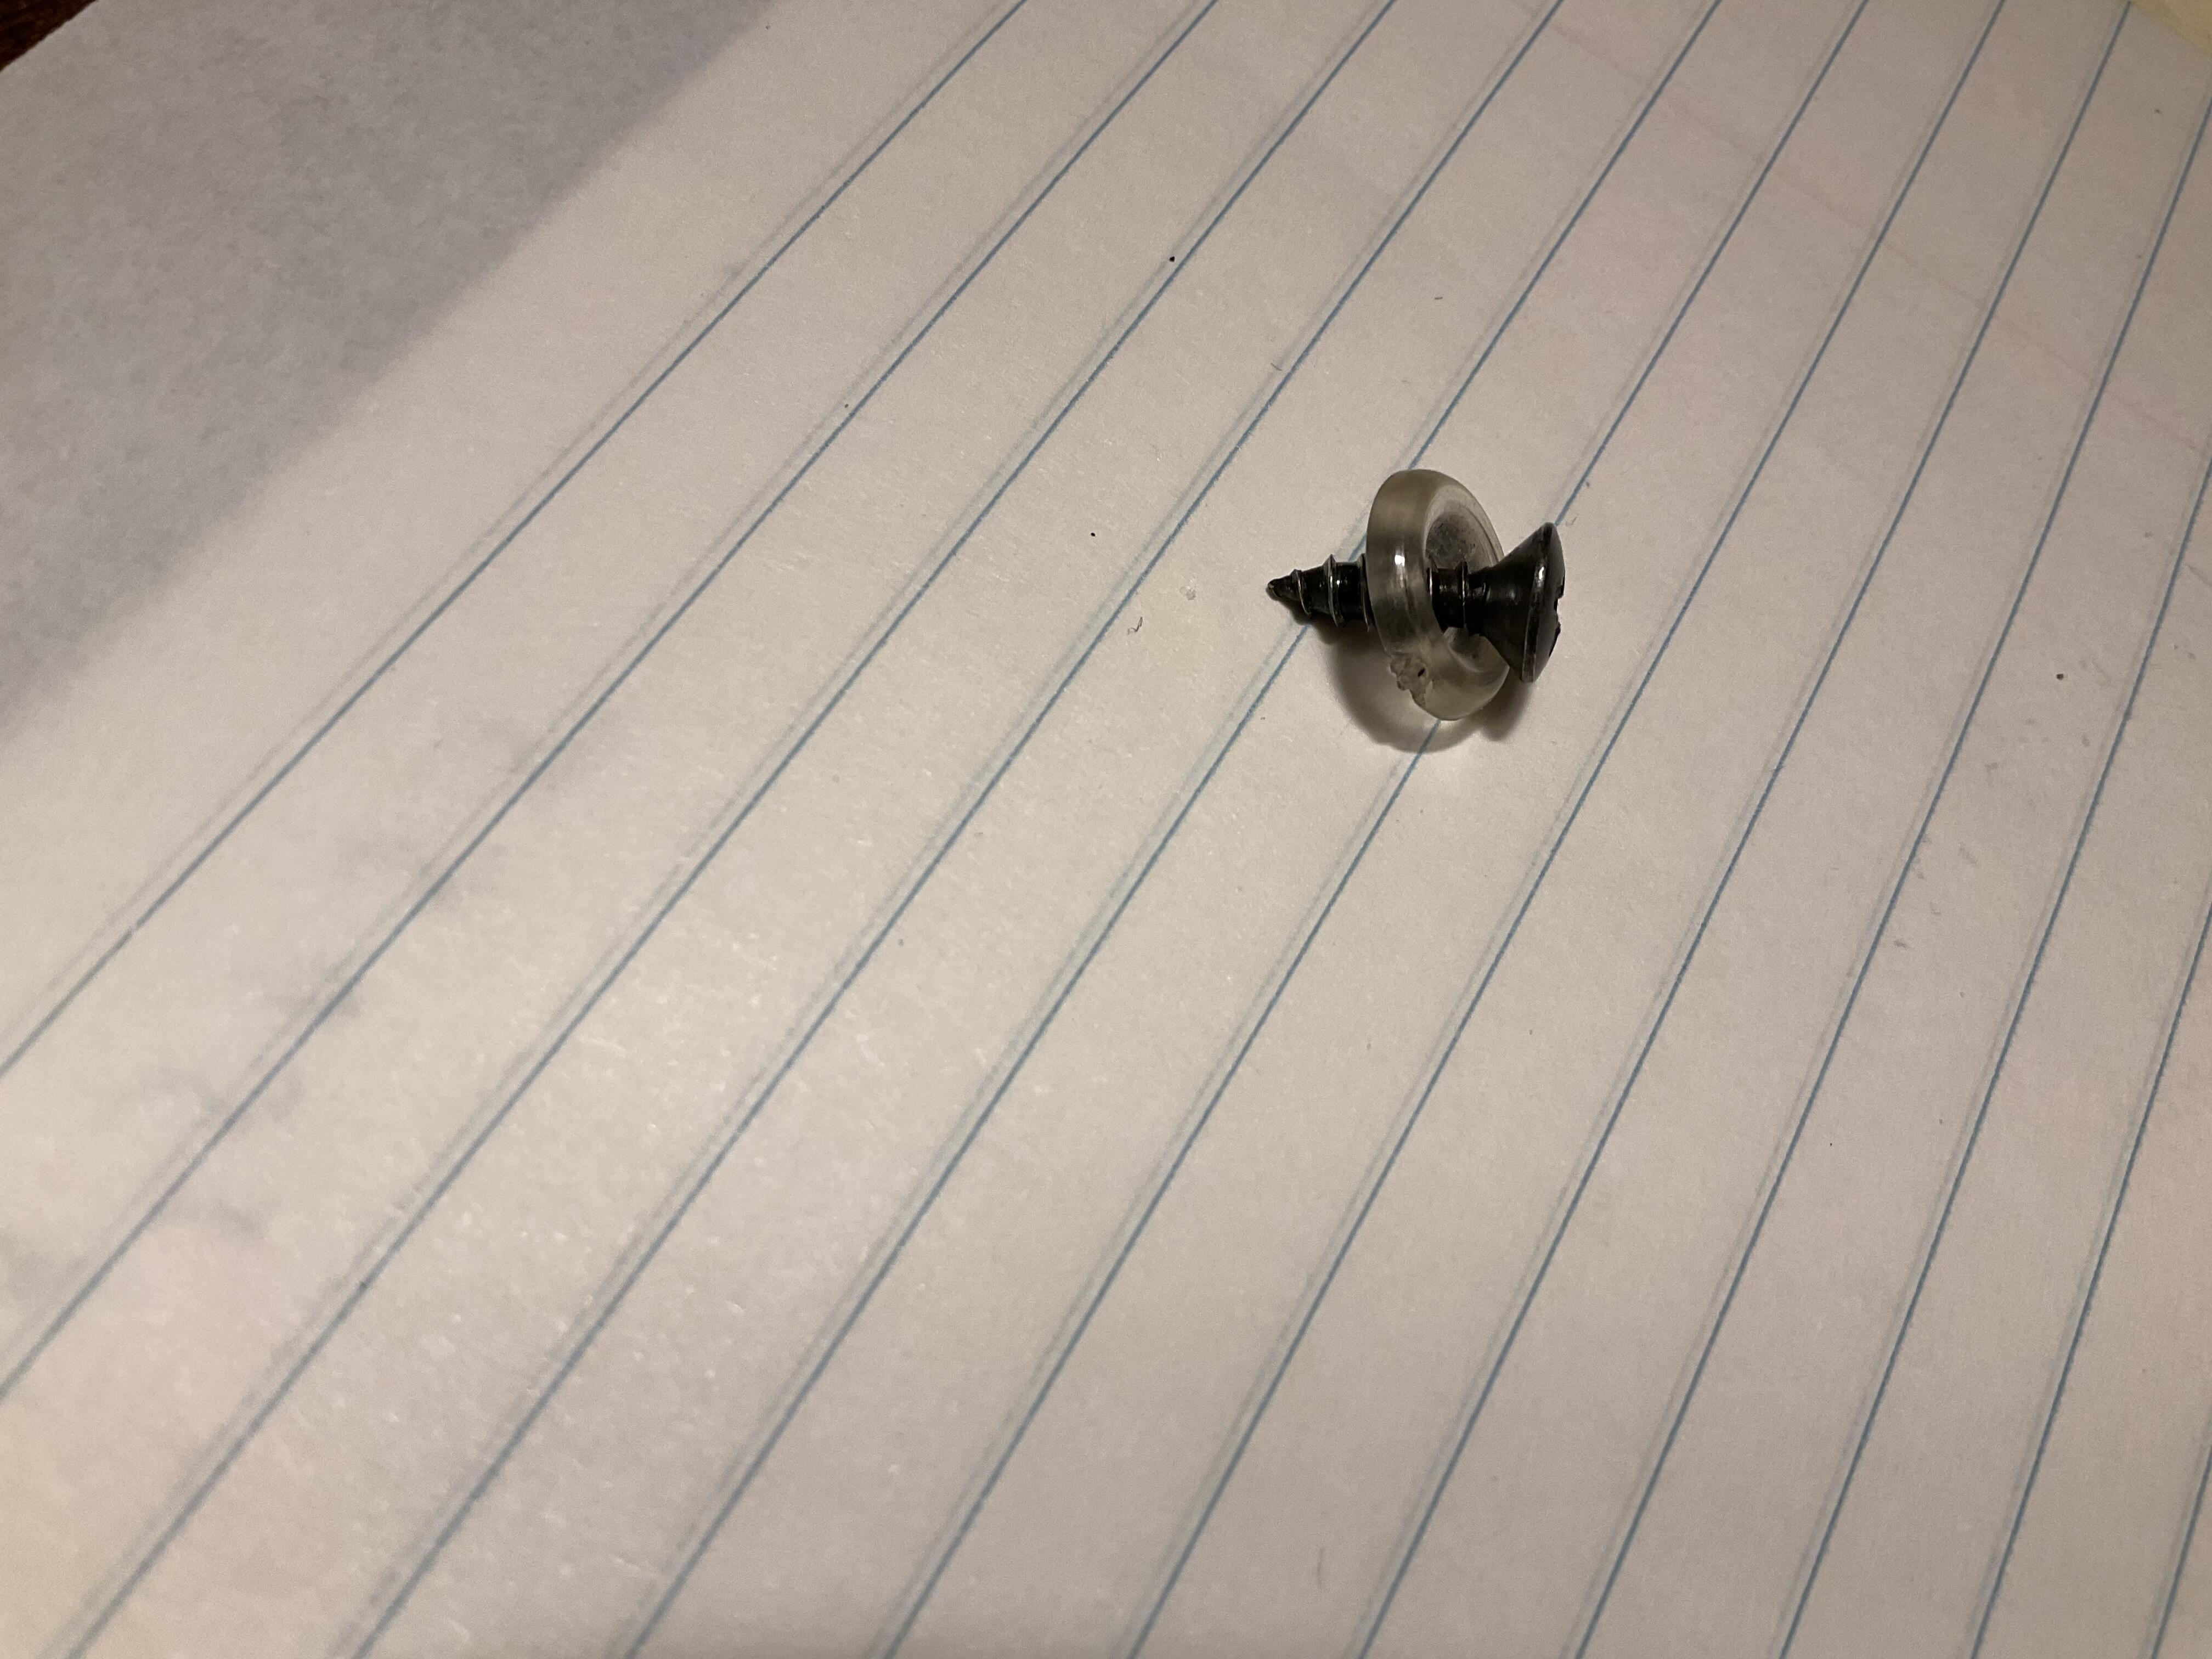
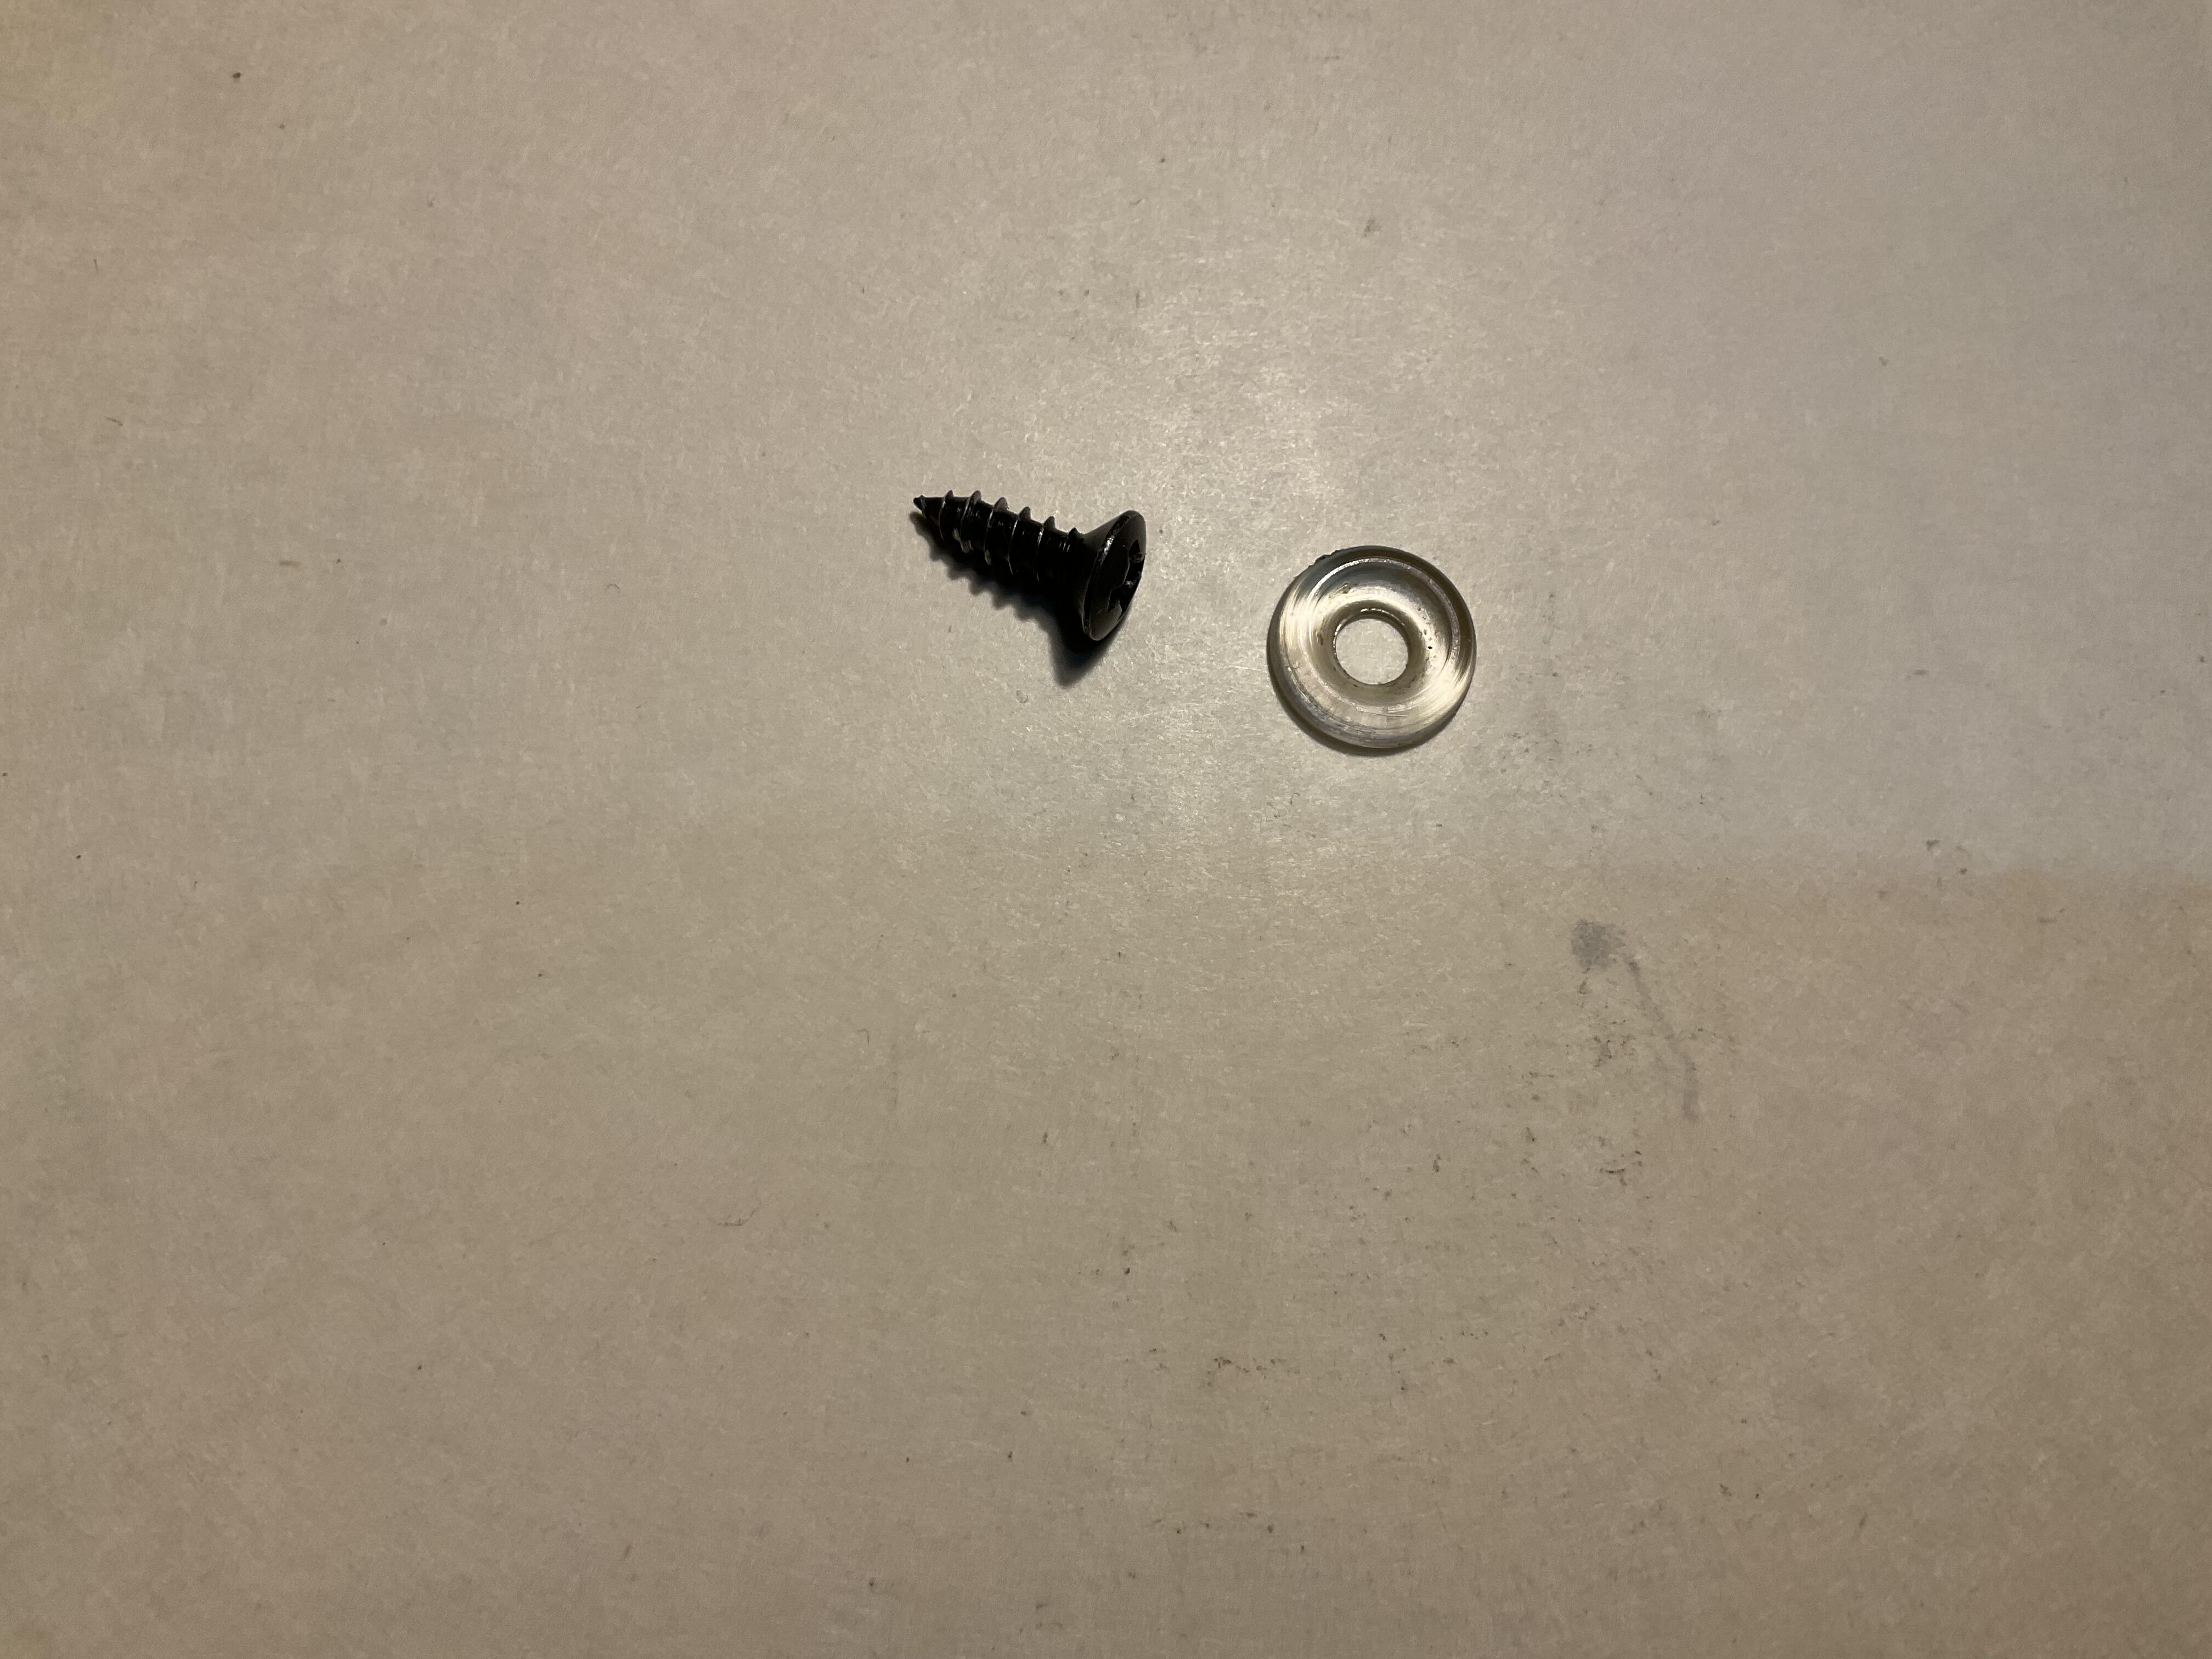
Dave, I have a 1971 series 1 car, so not sure if what I have would be the same for your 280z. the original trim screw for my car is a black oxide, self tapping, oval head Philips screw. The finish washer is a clear plastic rounded, or dished washer. The screw measures approx 9mm of thread length with a total length of approx 13mm. See photos below. Hope this is what you are looking for.

-
I’ll have to agree with 26th. The proportions are wrong. The air dam opening should be narrower, and the upper grill opening should be wider than the air dam opening. Don’t know if this makes sense, but the styling makes the front end look heavy. Think of the bumper placement on my 240z as it divides the grill opening. Just my thoughts.

-
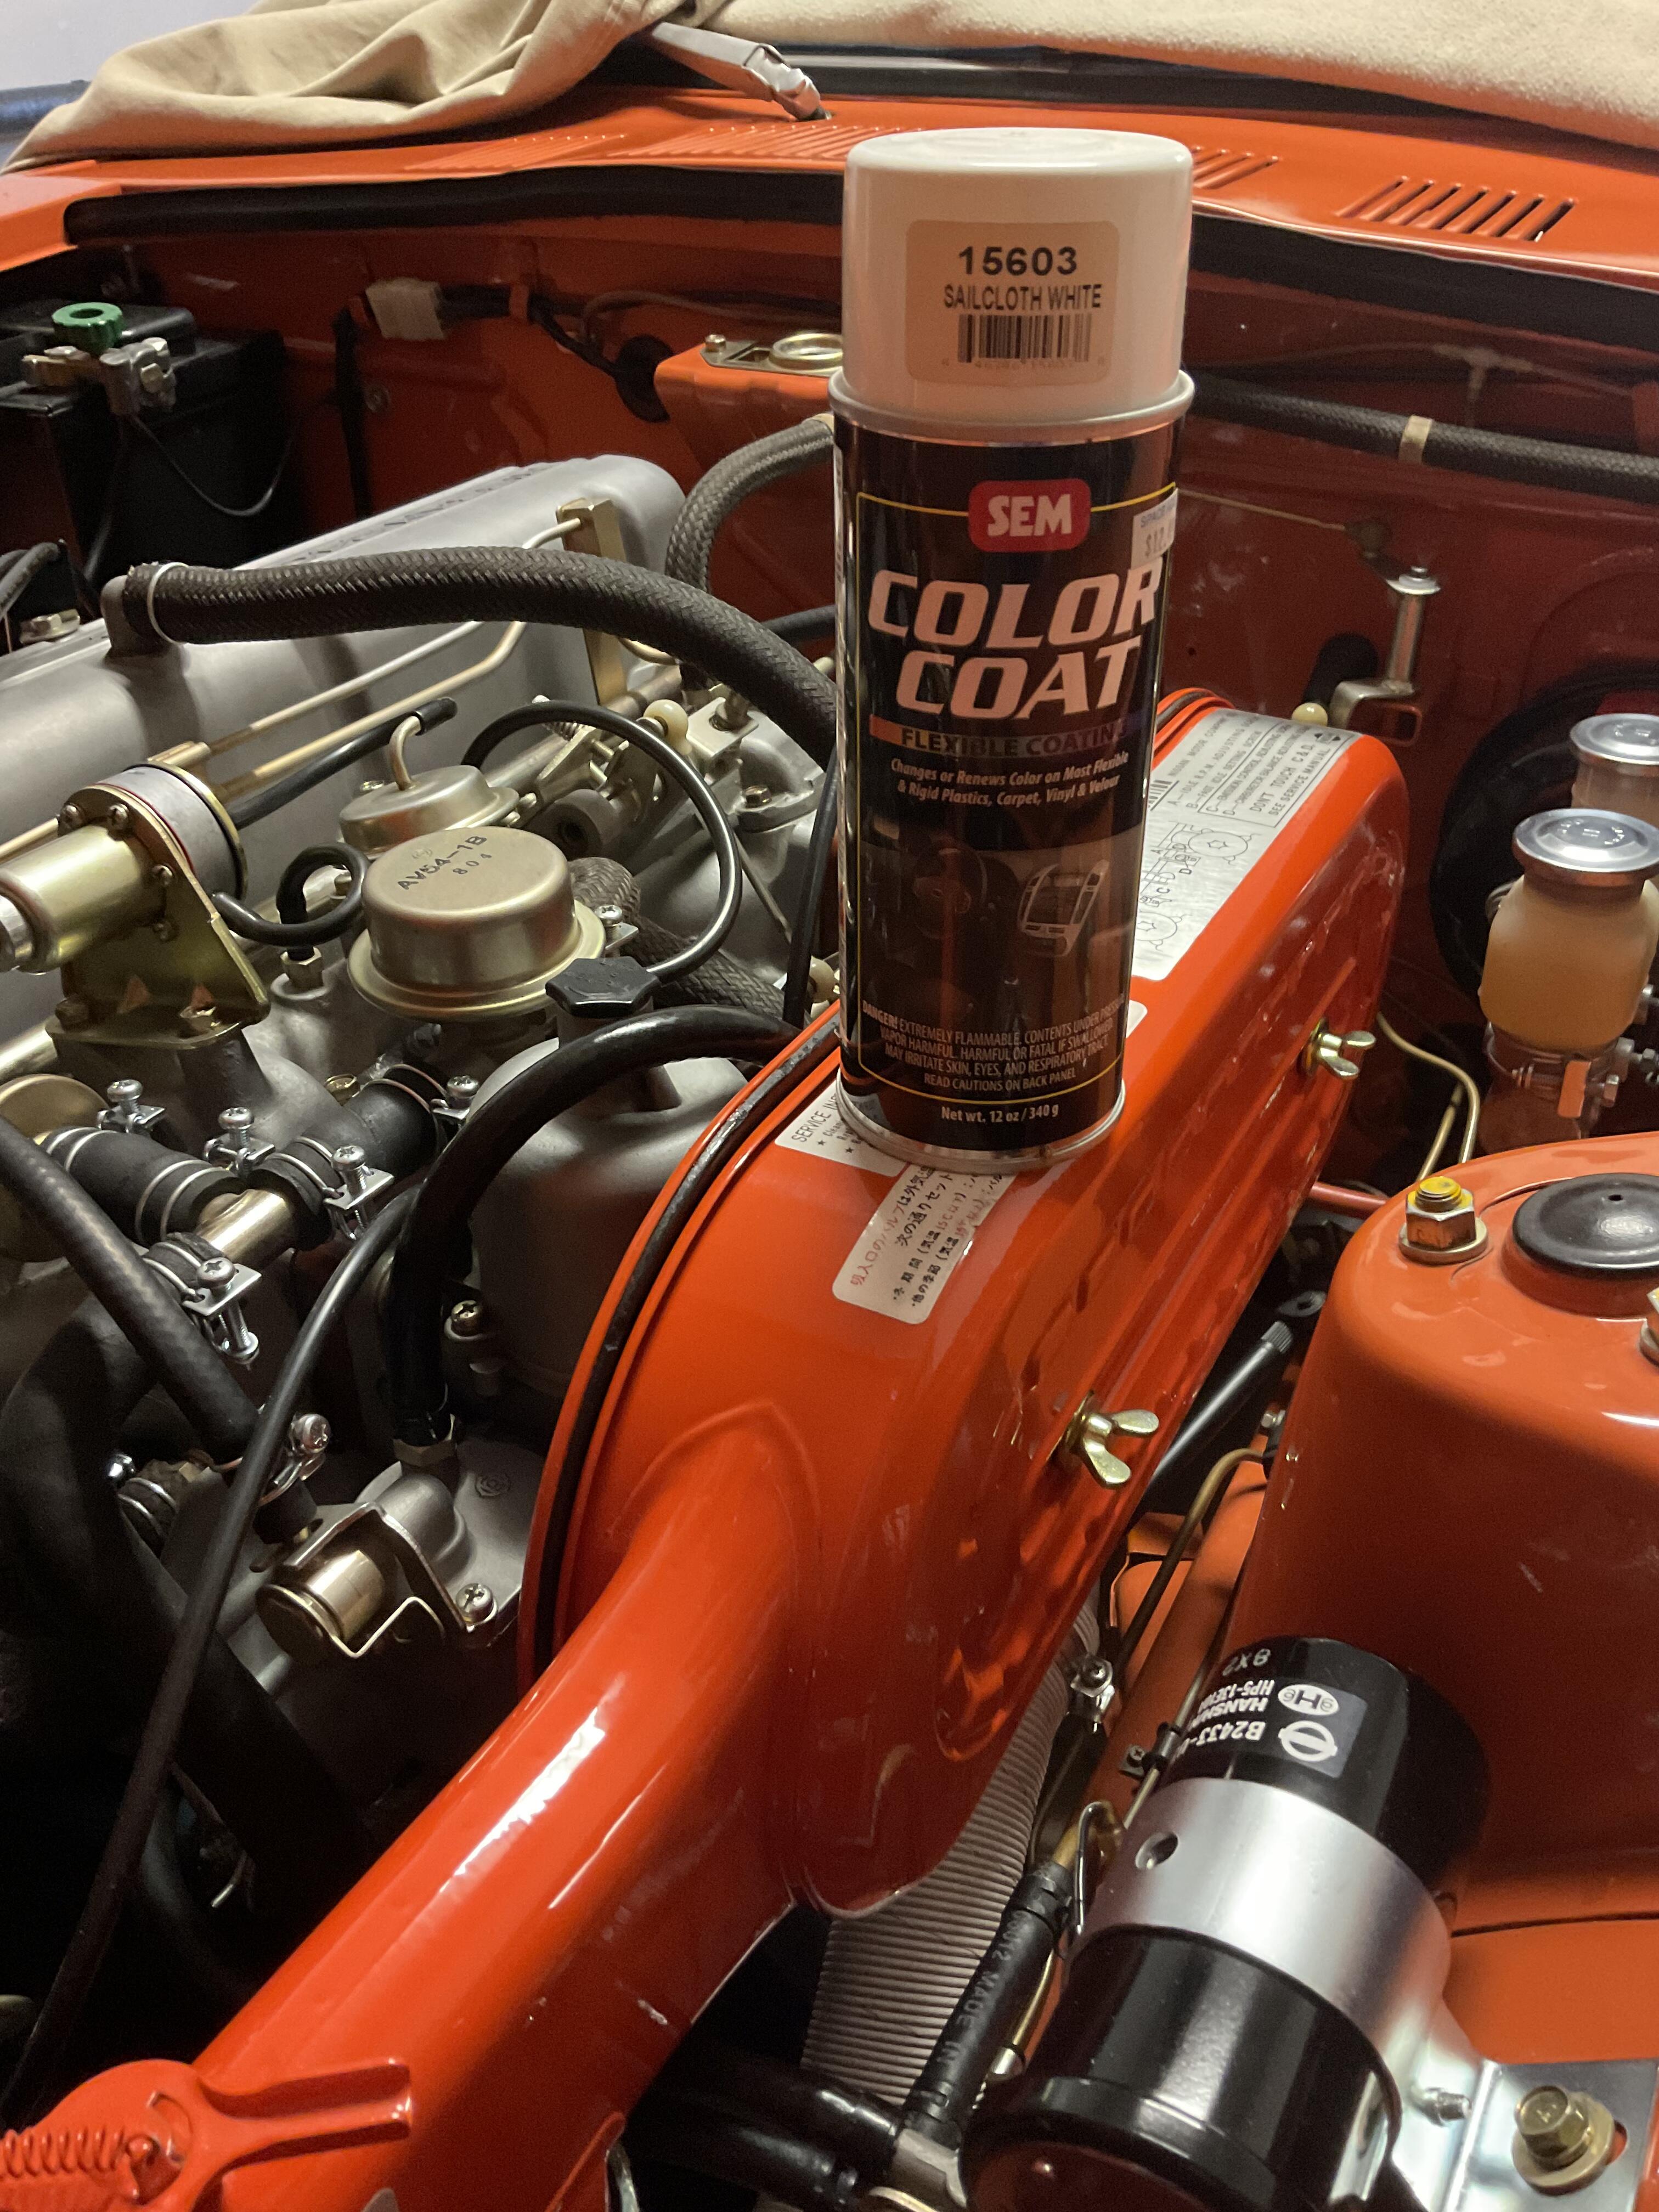
Hi Jerry. Just a thought. If originality is important, my car’s riser tube is original. the outside is some kind of fabric and is very close to “sailcloth white”, a paint I used to refresh mine. See pictures below. btw, good to see you back! Dan

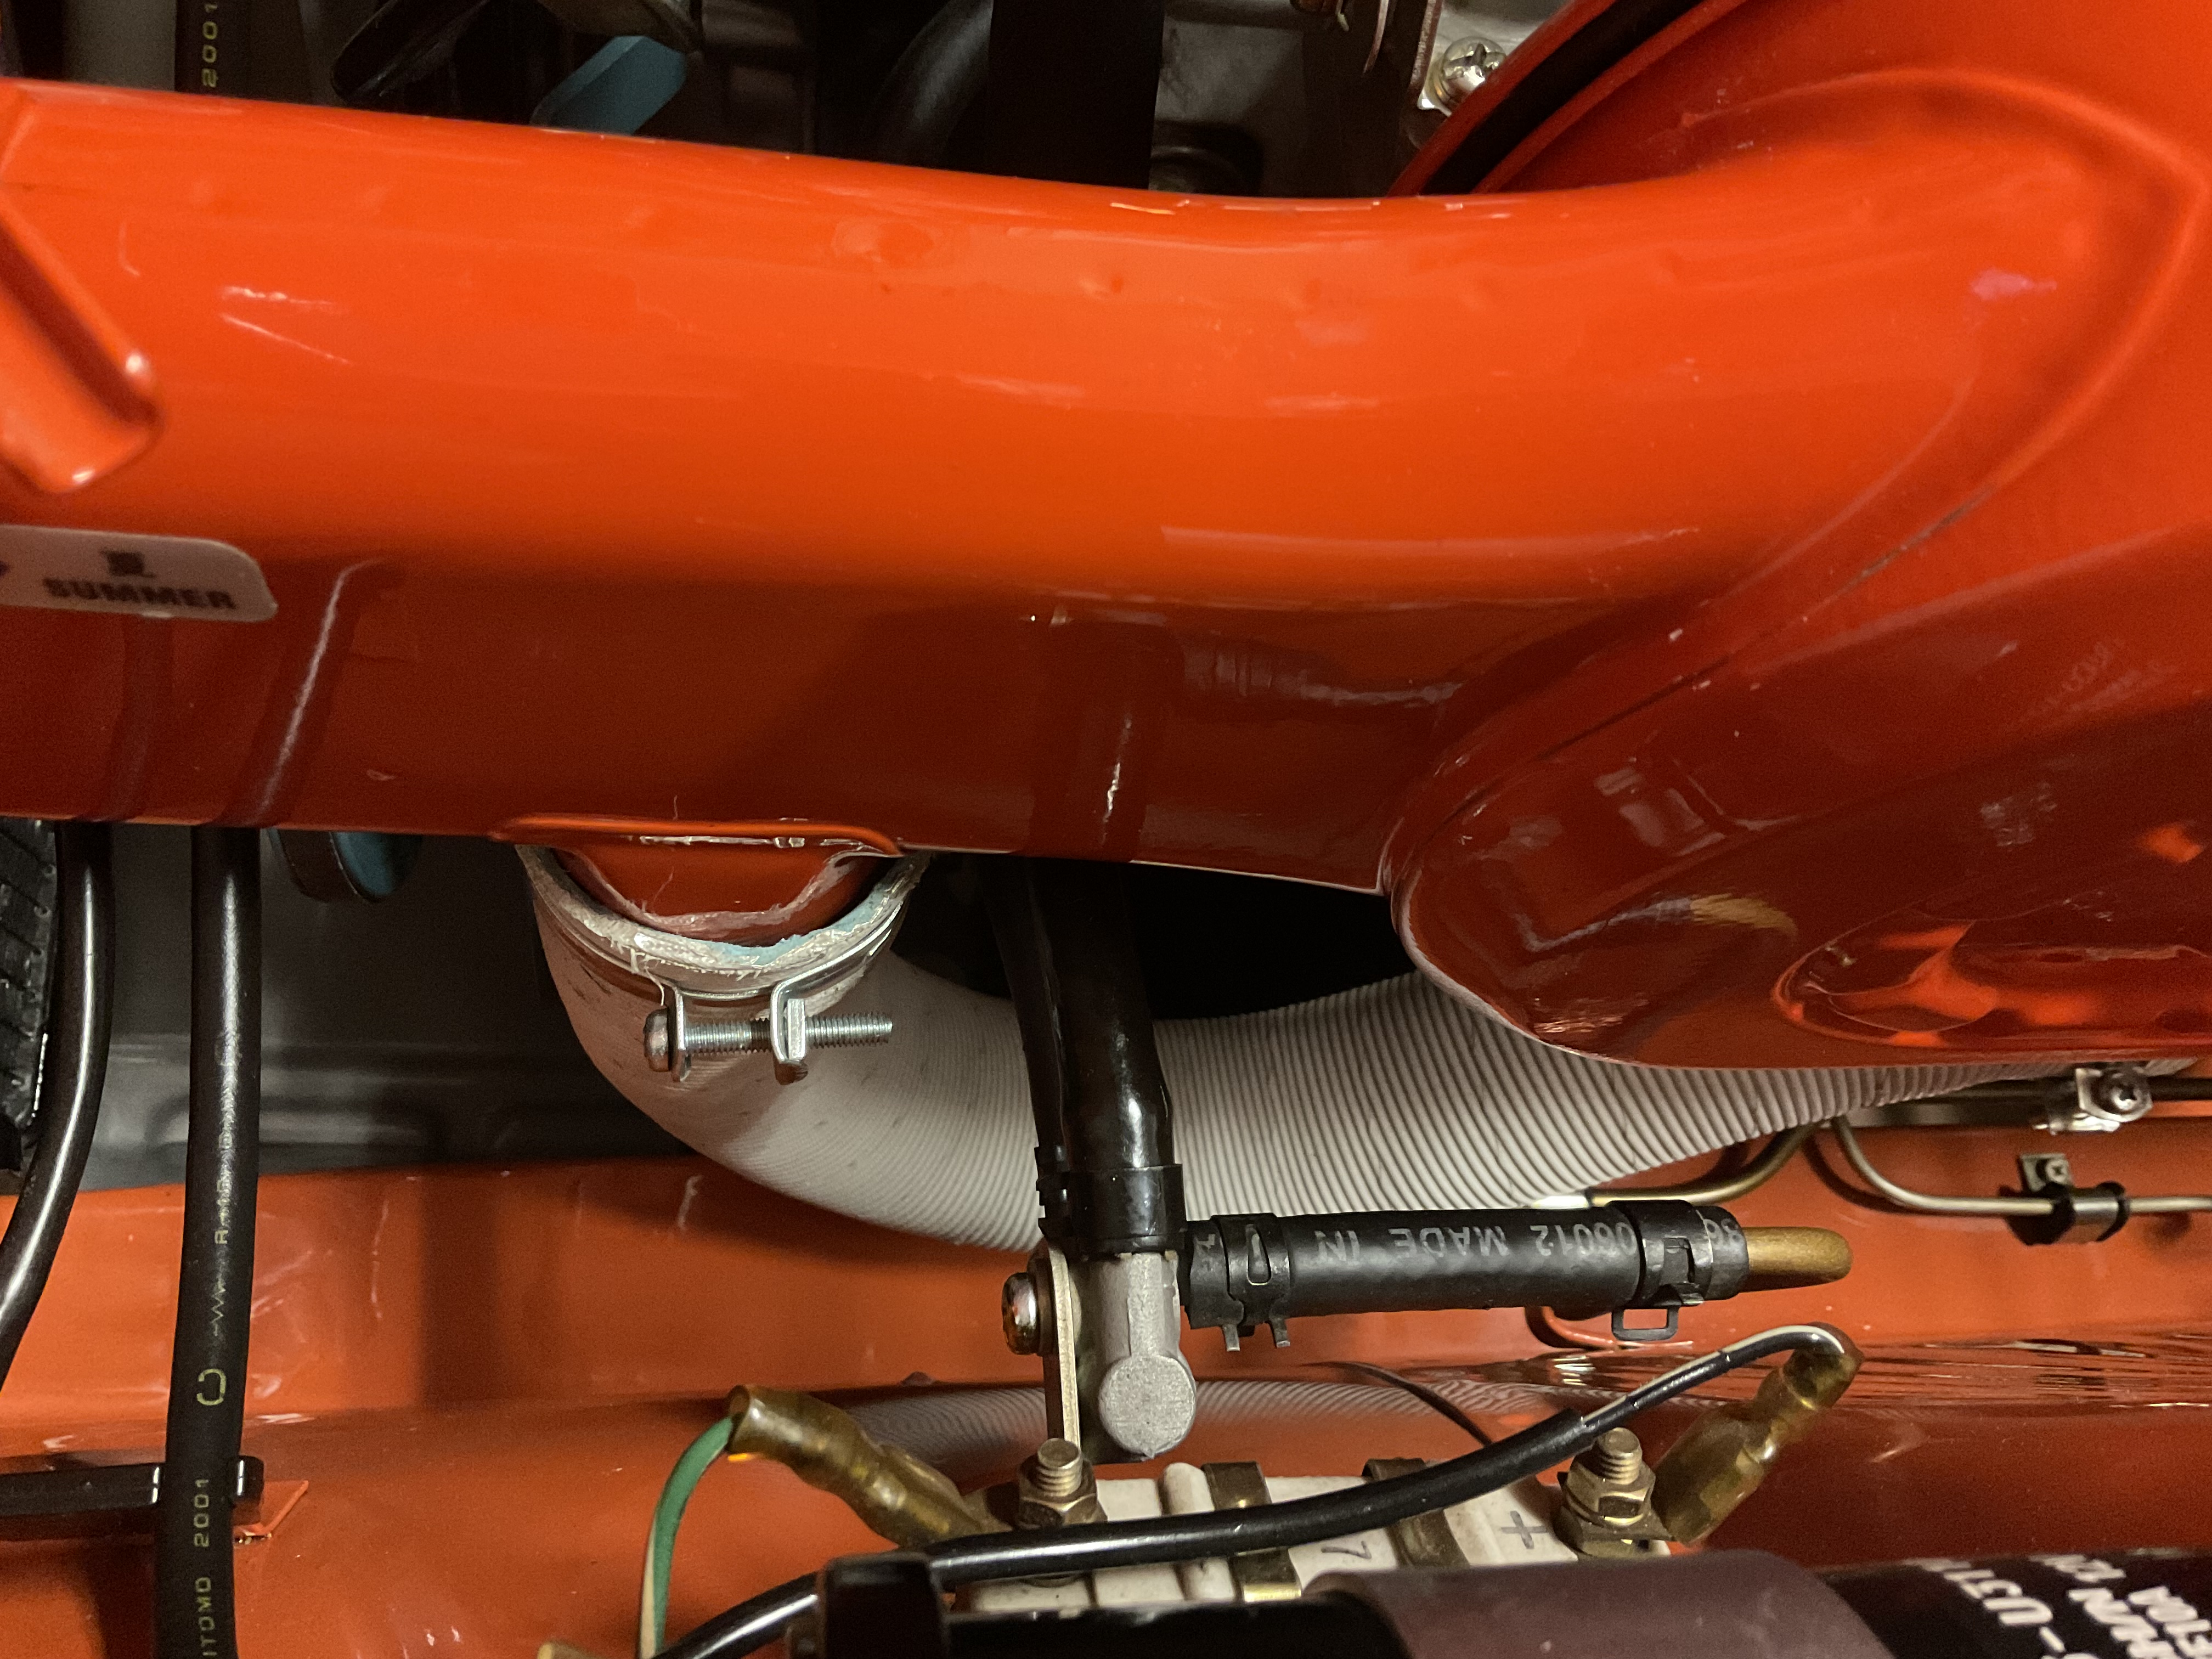
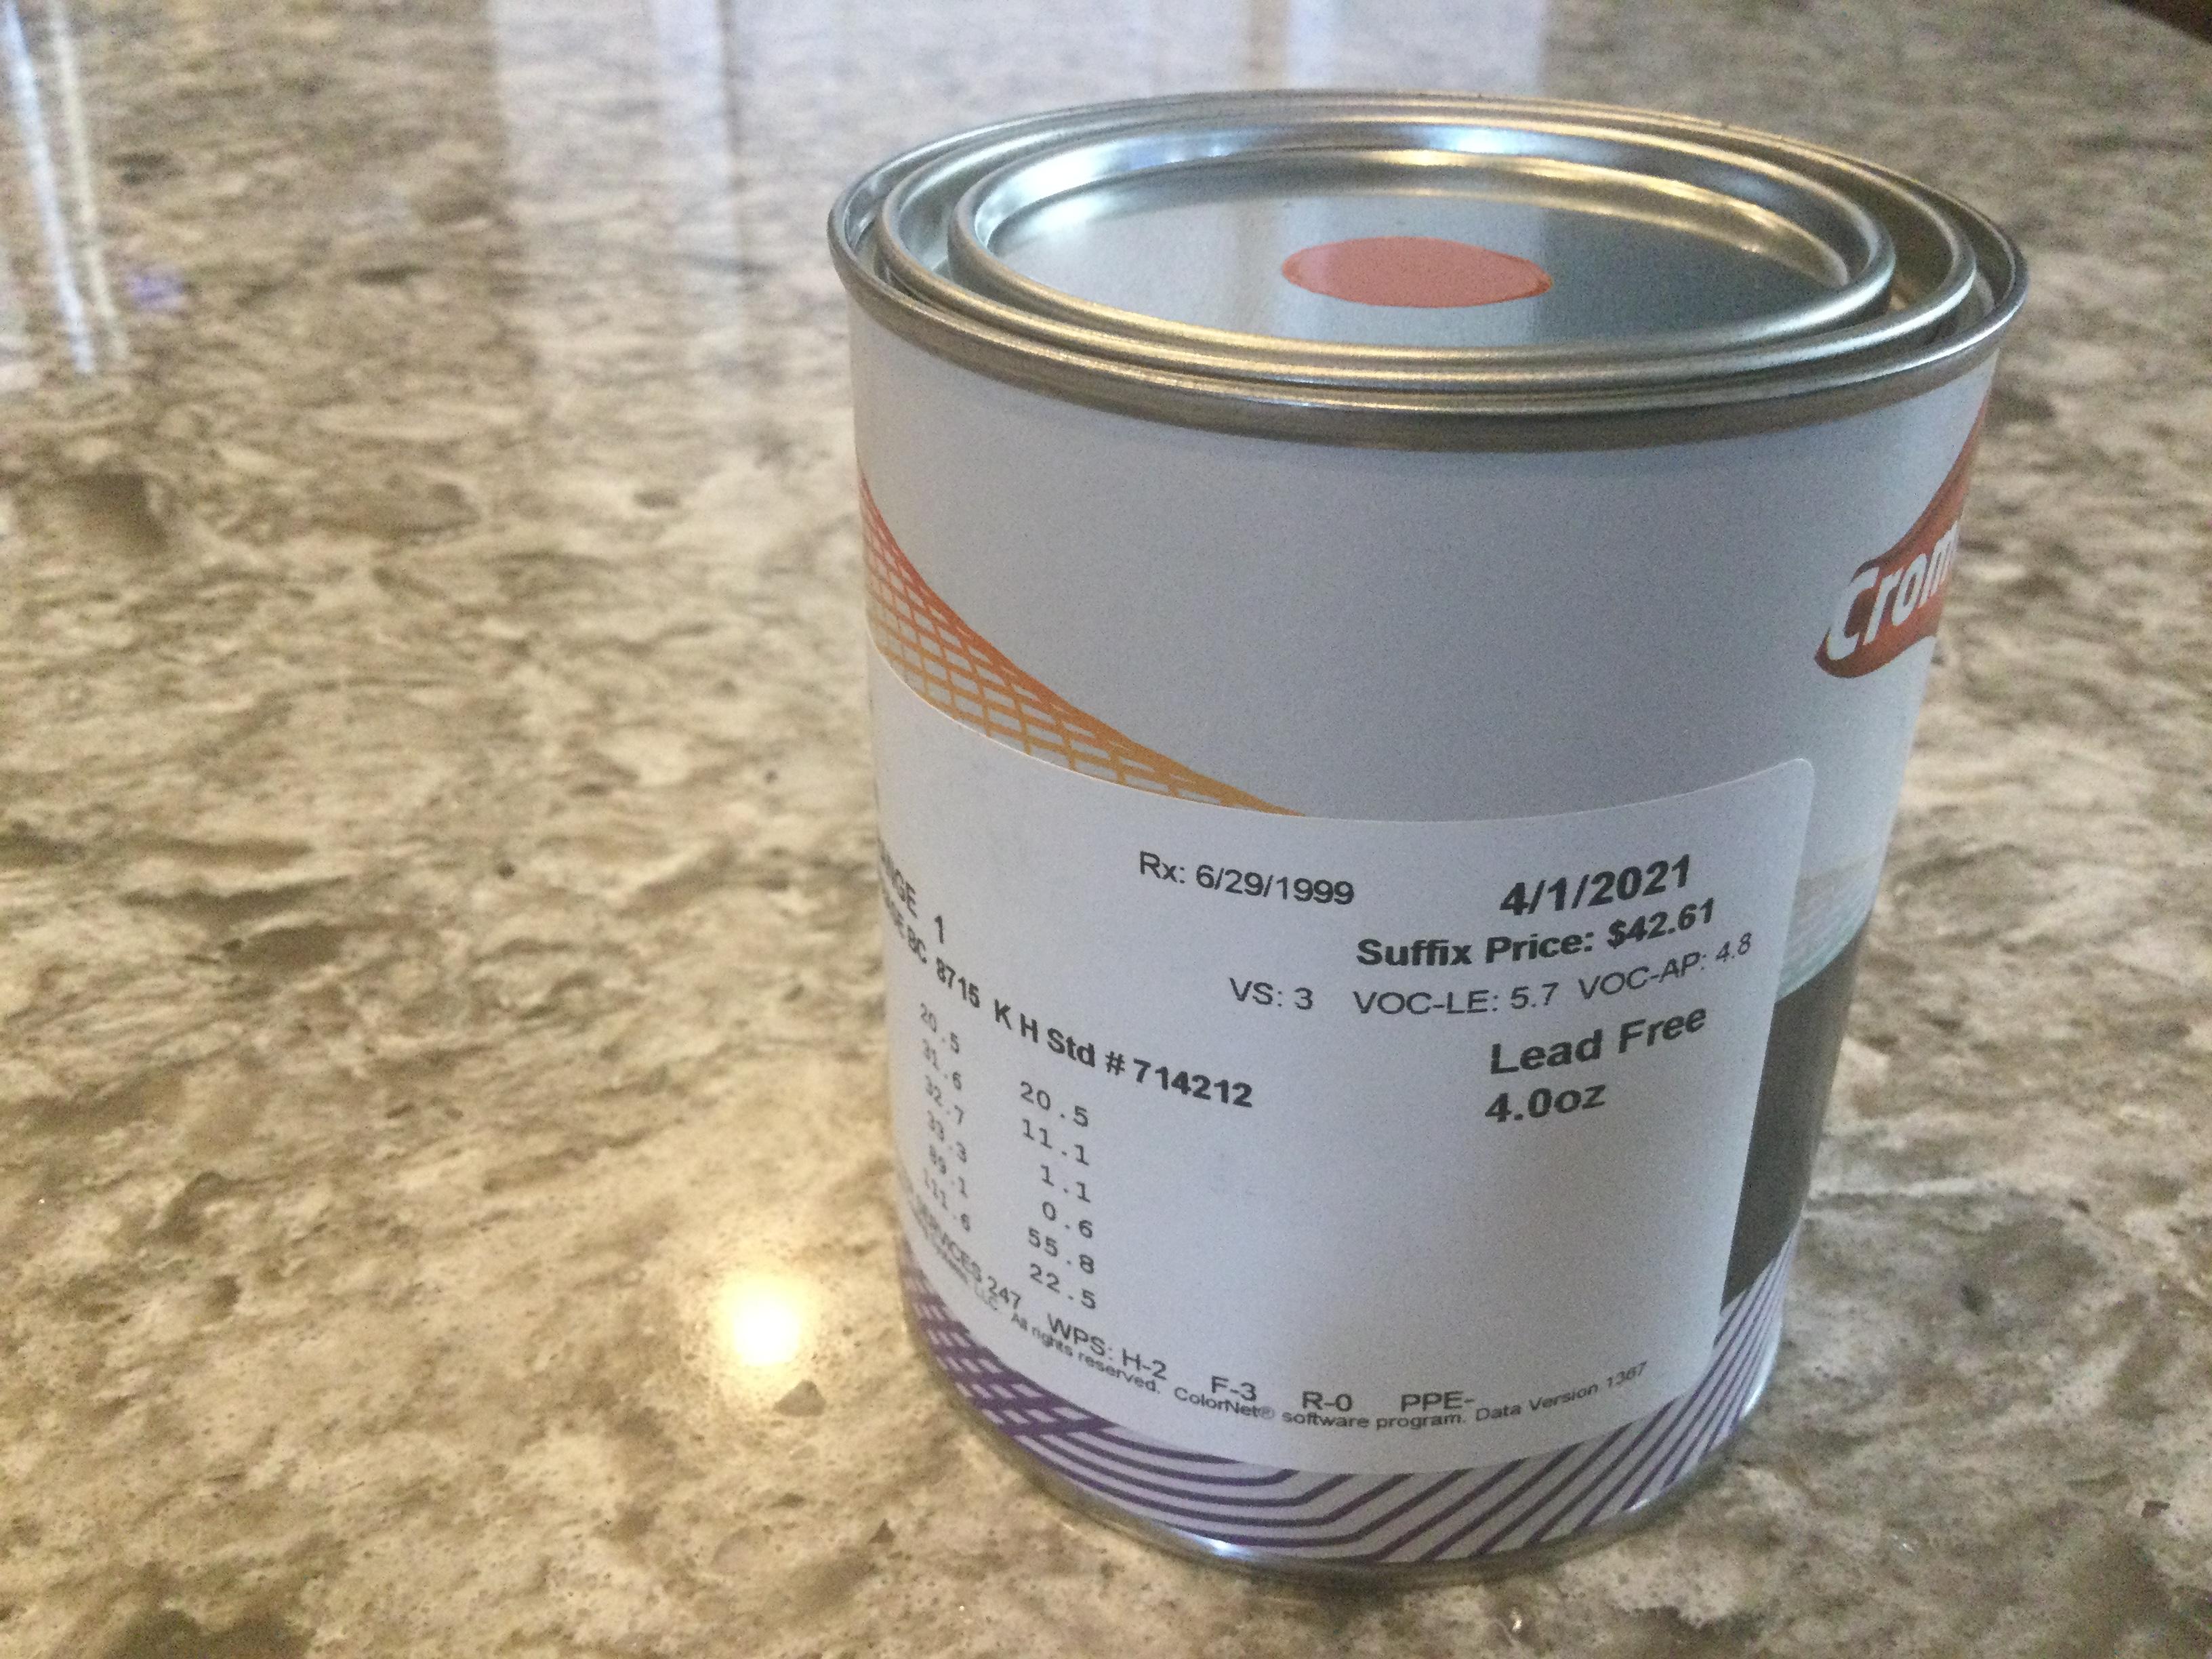
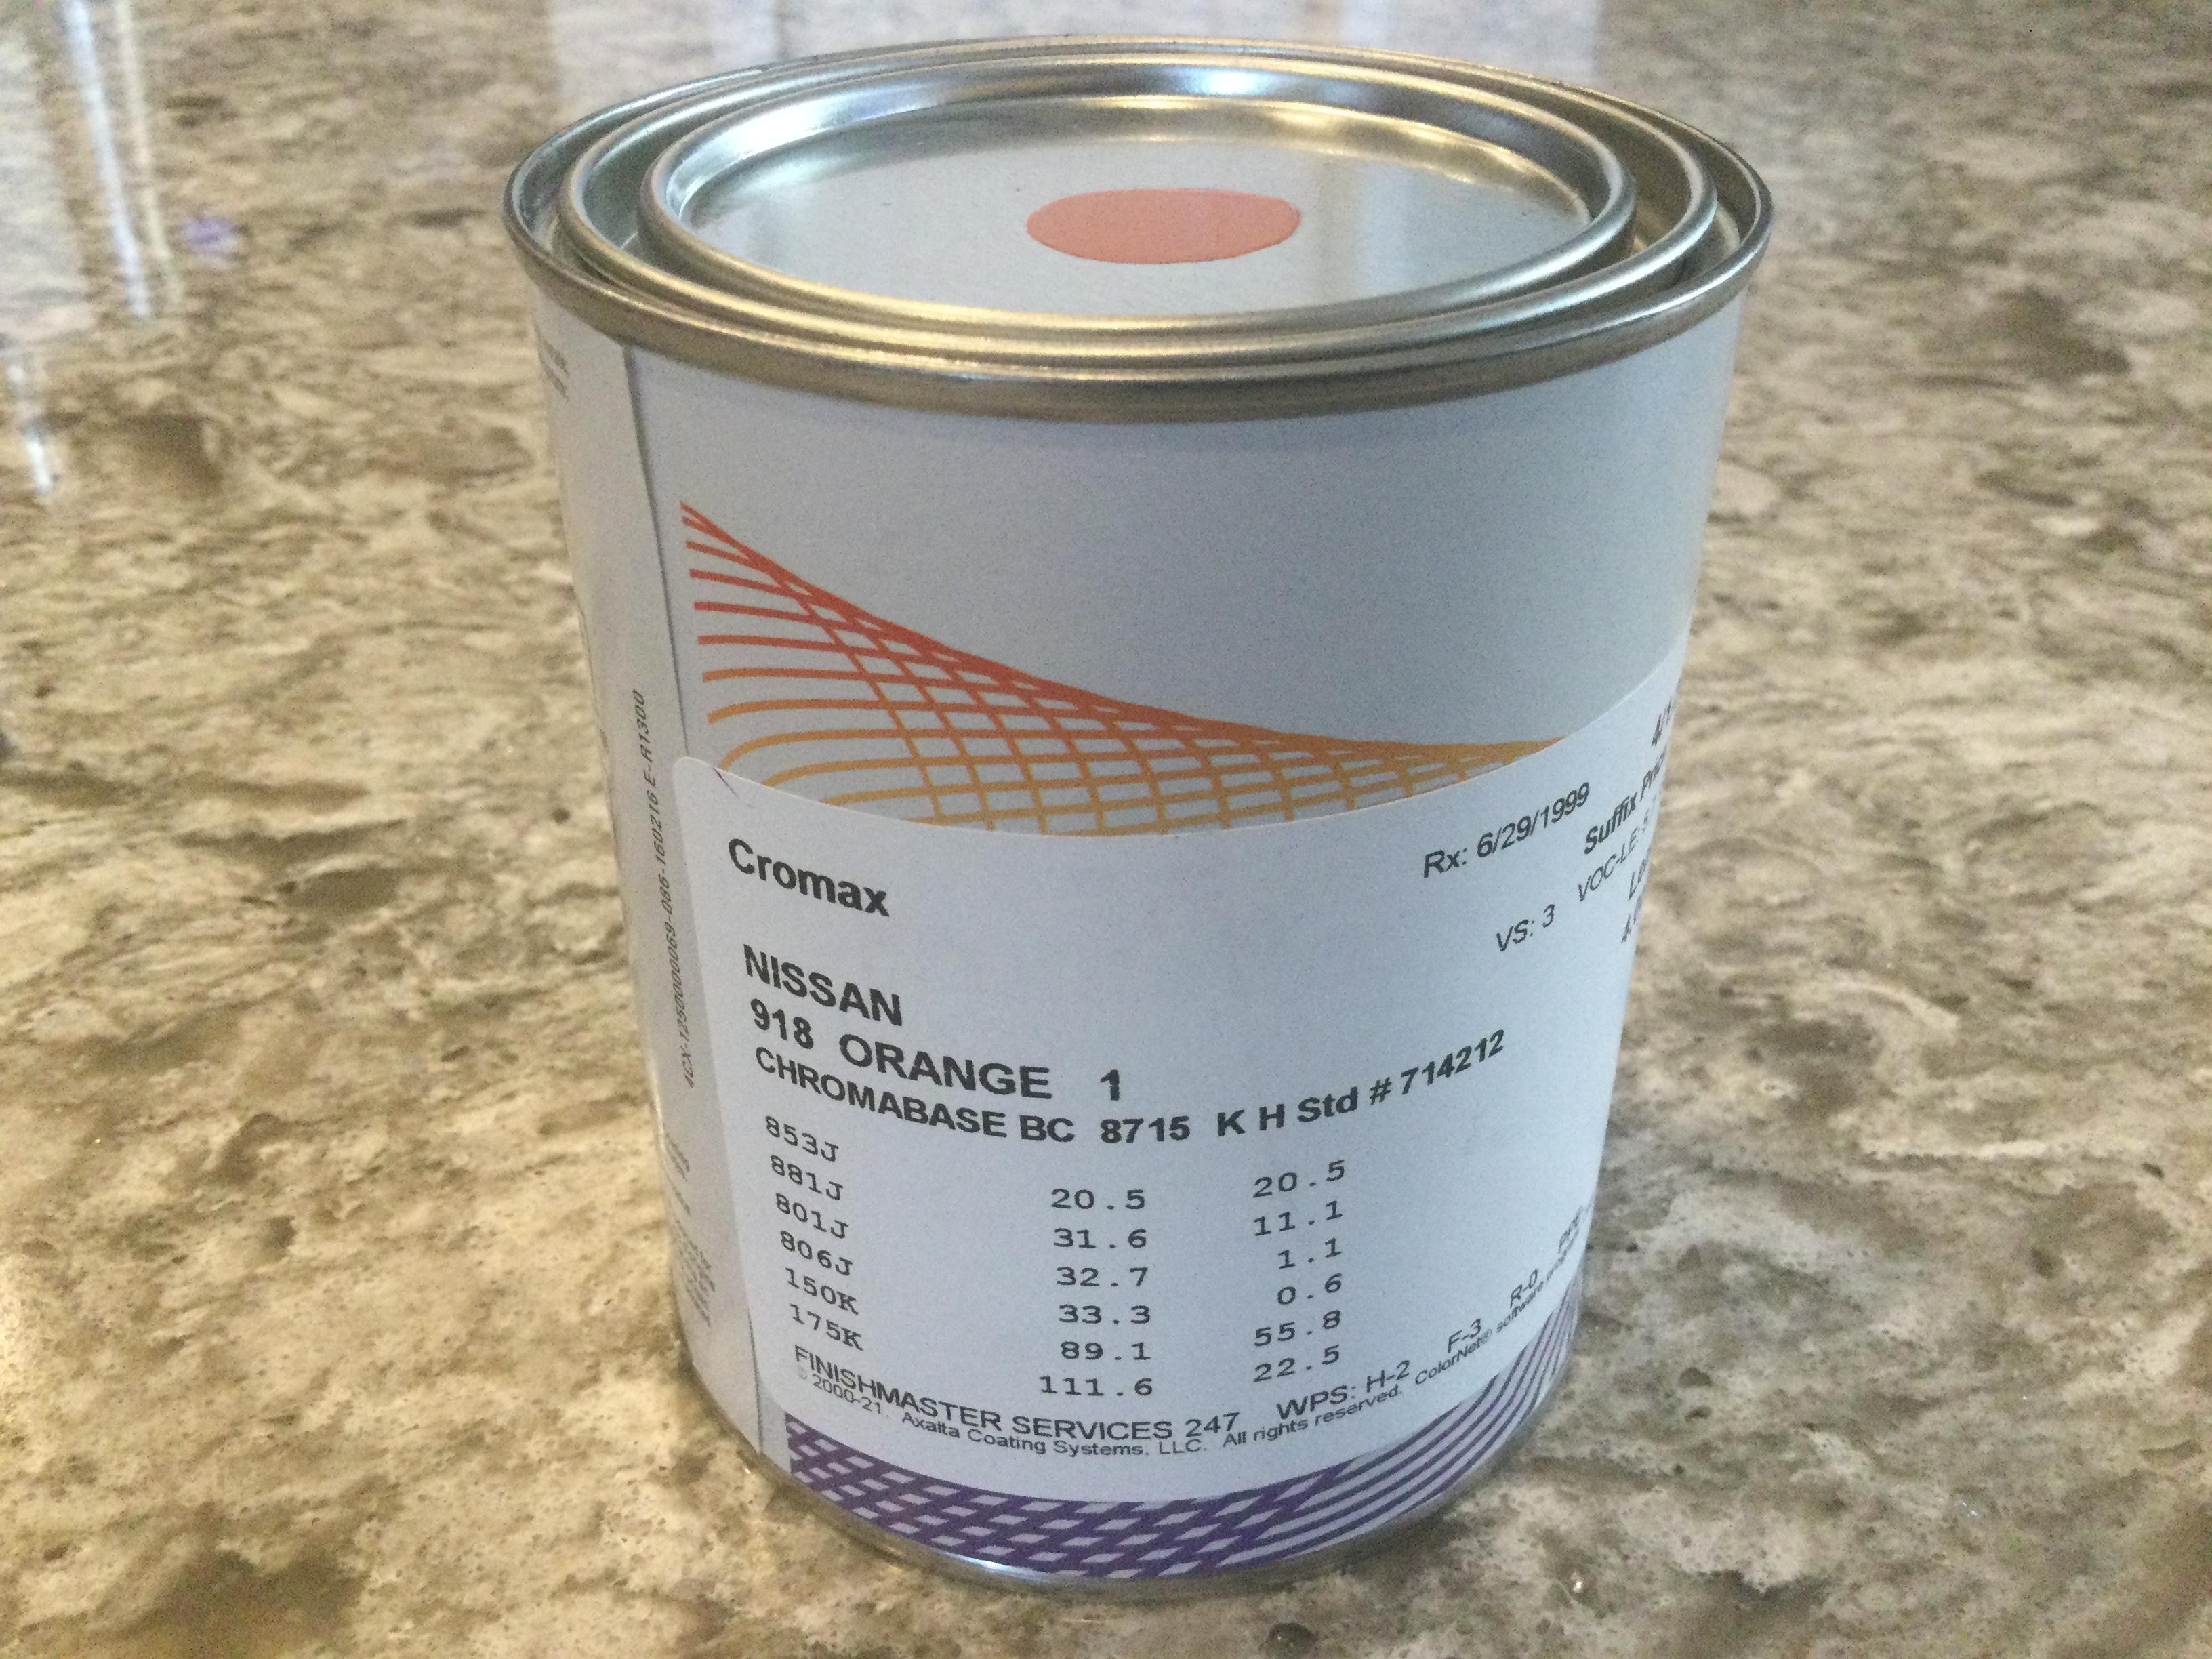
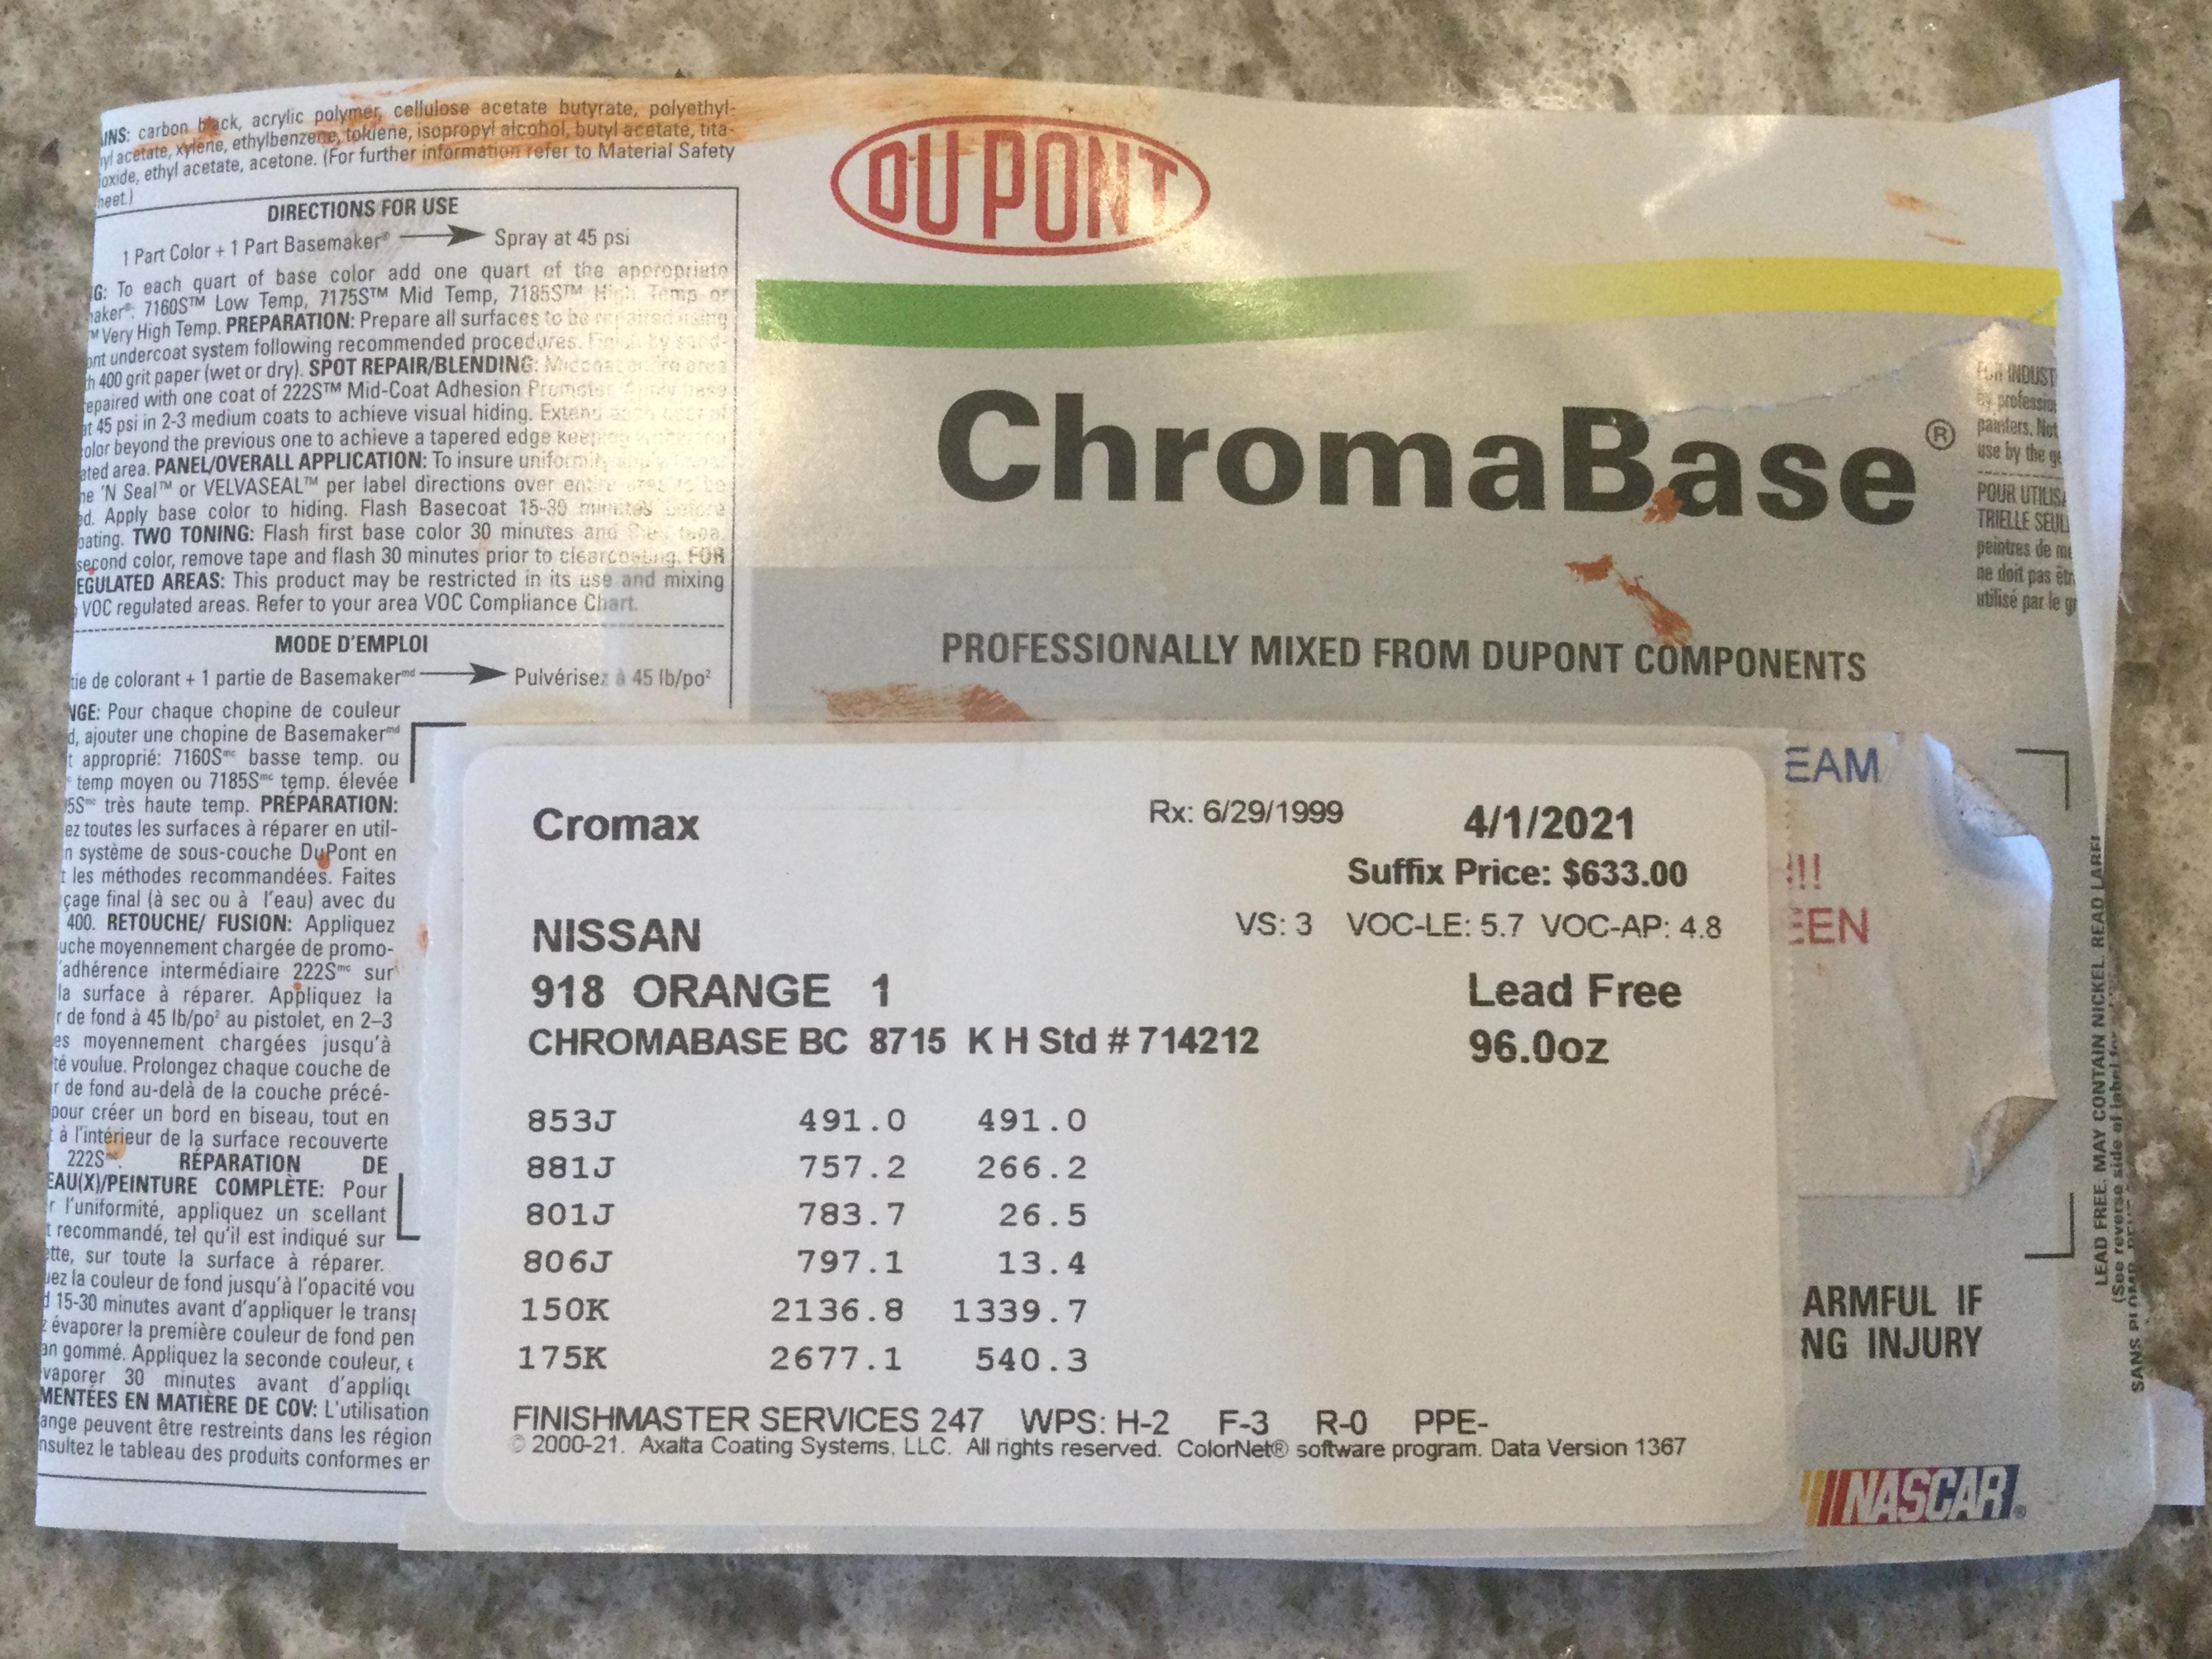
 Scroll down to #6 and you may find what you’re looking for. https://www.mgexp.com/forum/mgb-and-gt-forum.1/clark-cars-of-prescott-arizona.2955328/ DanAfter seeing this thread, I had to go out to the garage and check out my D612-52 dizzy I picked up on eBay, supposedly off of a barn find parked in 1978. Also came with a nice set of Sumitomo plug wires dated coded 1977. anyway, after tearing it down, it also only had the single spring, FWIW. DanThis may help describe this parking light switch location.Maybe this will help in clarifying my my posts on the 918 formula. here is the formula on the can of 4ounces of touch up paint I just bought. I’ll leave it to the experts to decipher the numbers. Dan
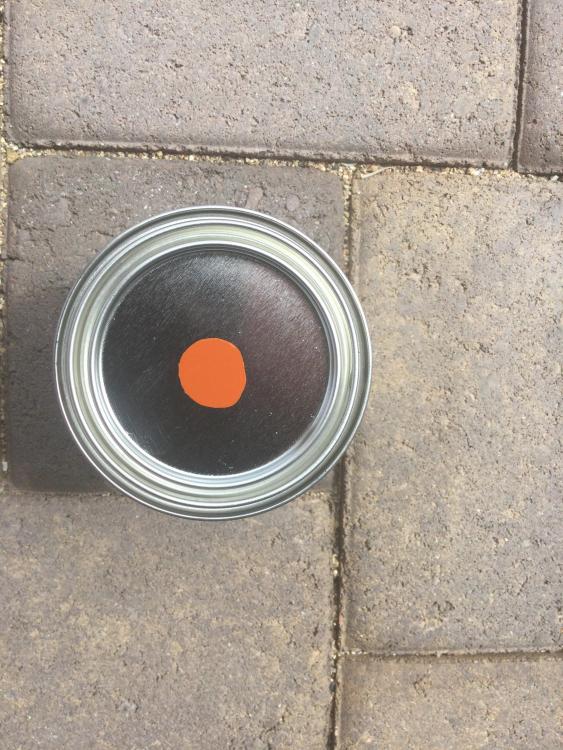


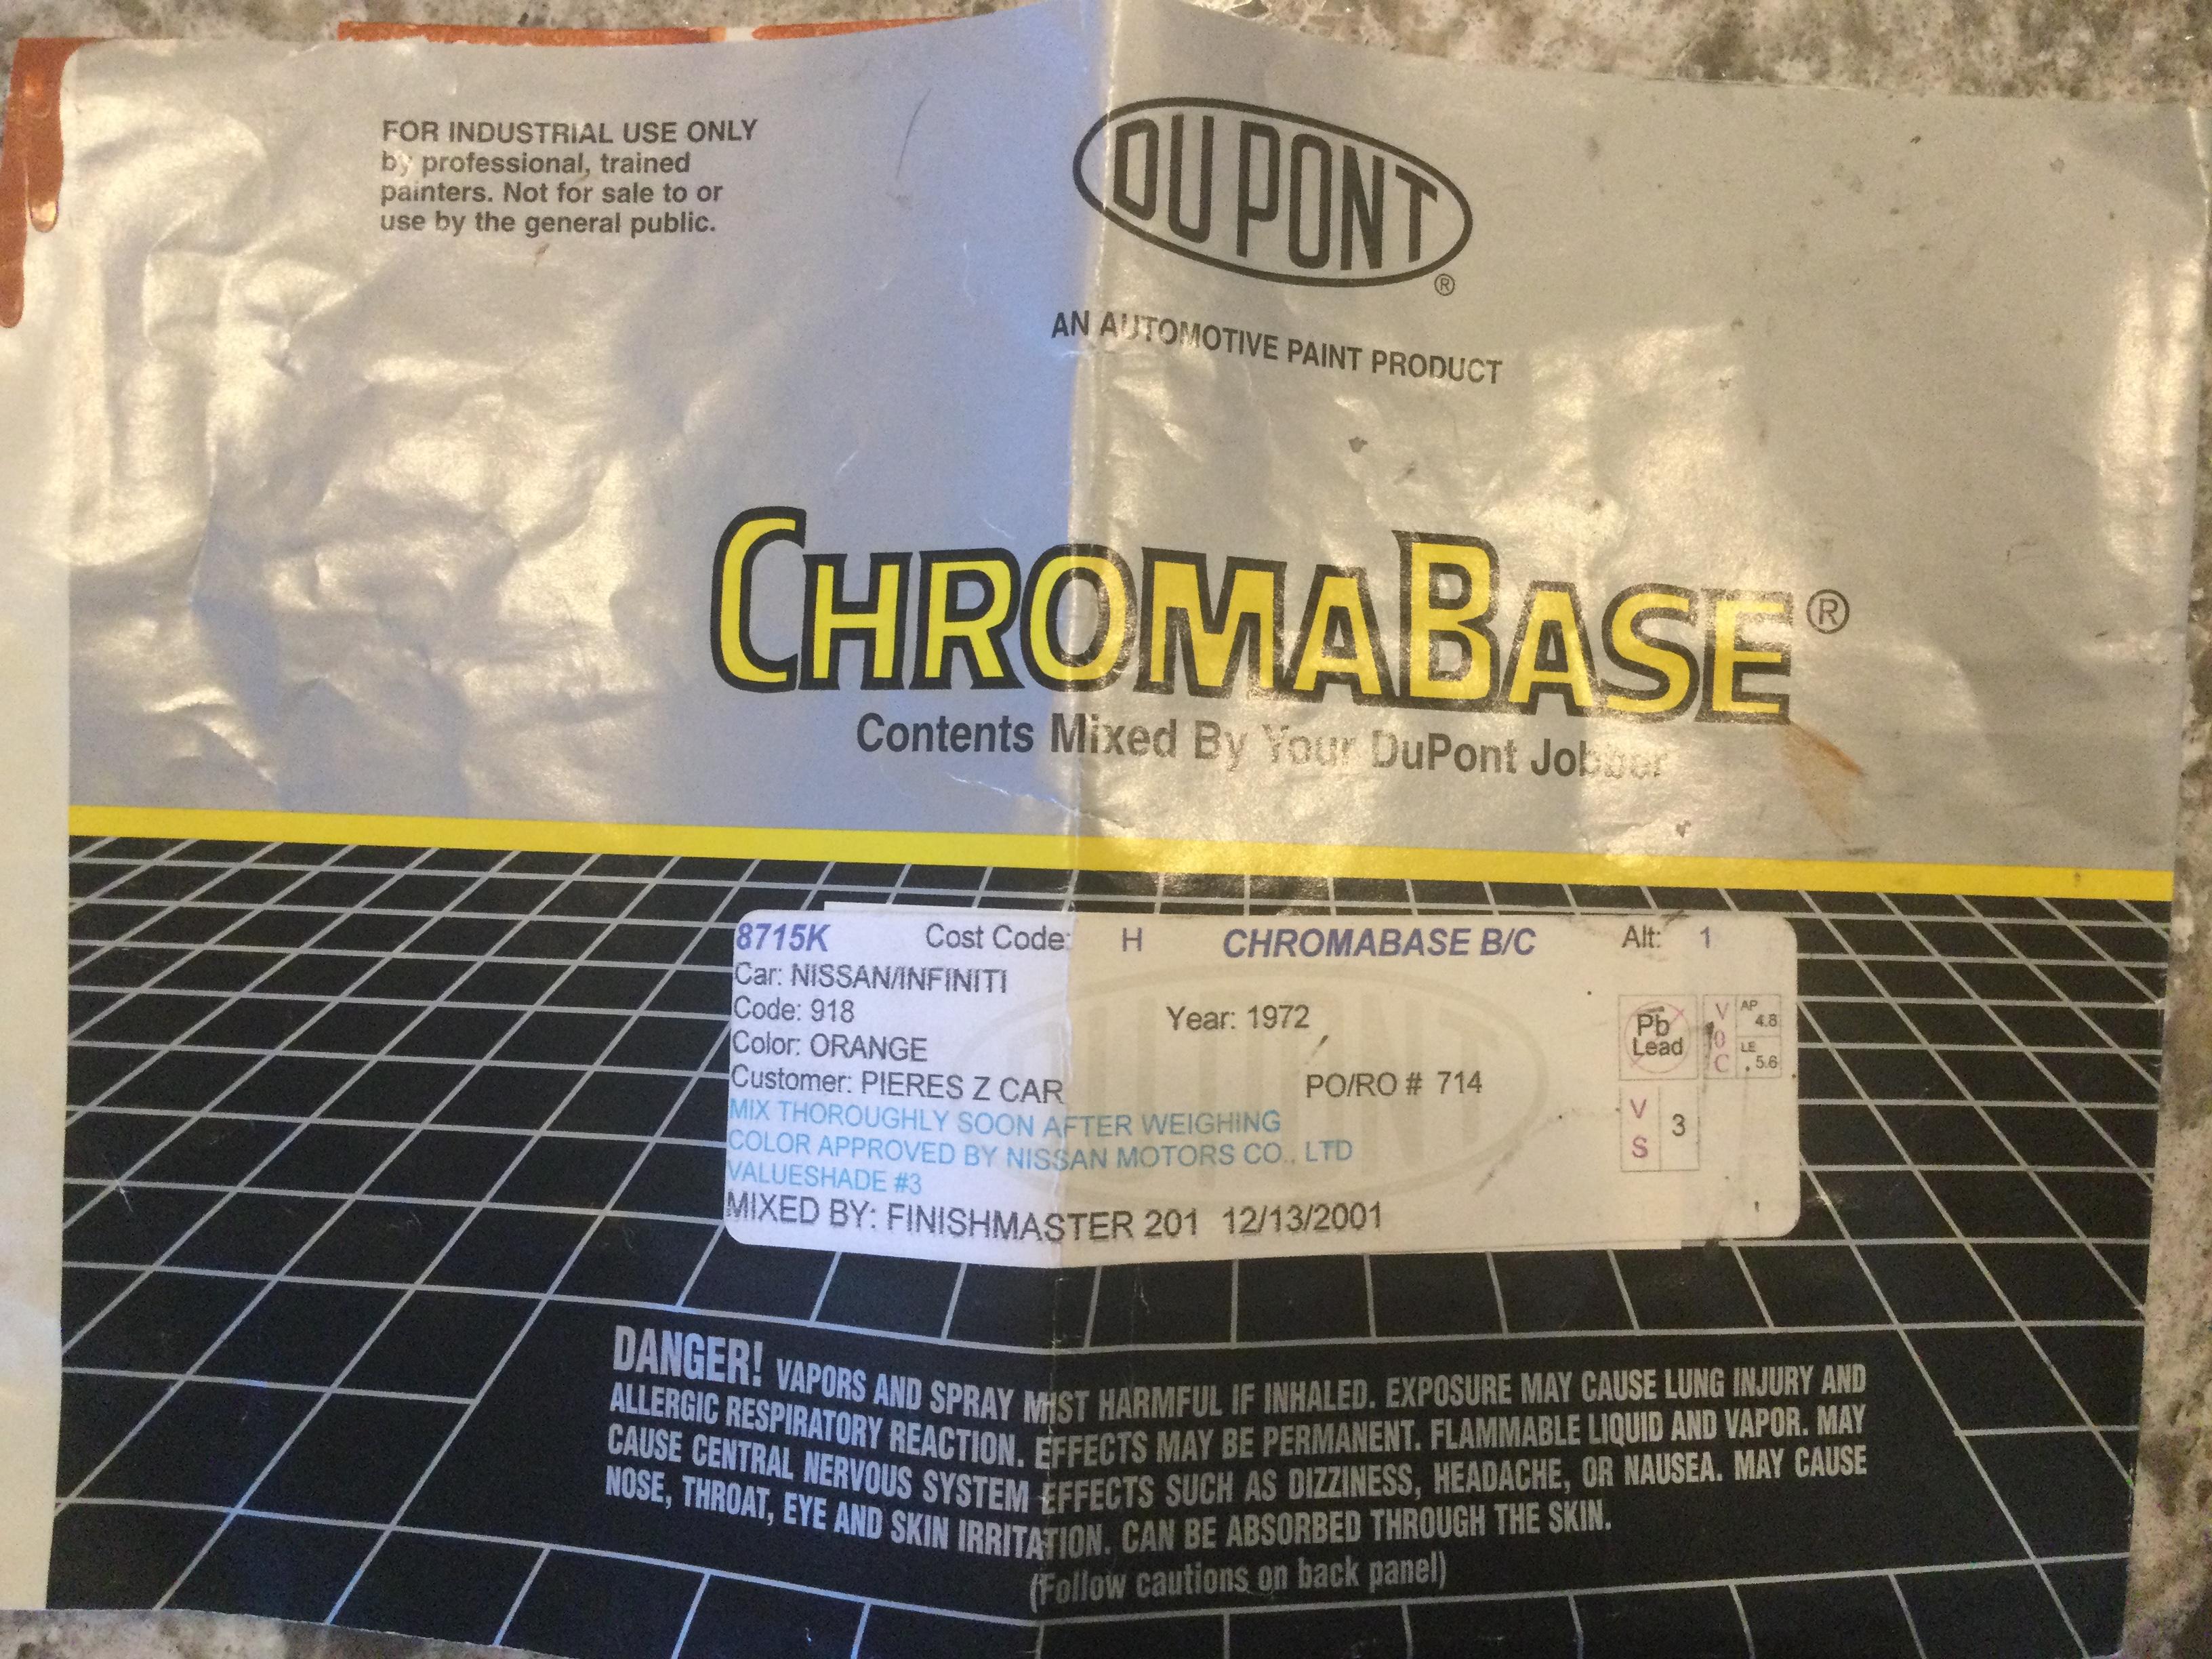
 The first formula I posted that had the Red Orange amount misprinted Was actually 490.?. This number in the updated formula I just got on 4/1/2021 is very close at 491.0 as seen in my last post. For a valid comparison, the mix size for both formulas is 96 oz (3-quarts). I am no expert in deciphering paint formulas but where is the big difference, site? The amount of touch up paint they mixed for me was just 4 ounces, so maybe that is the confusion in the columns of numbers.Wally, yesterday I went to my Finishmaster paint supplier in Phoenix for some touch up paint. Here is the correct paint code for Nissan 918 Orange by DuPont ChromaBase paint which was used on my car (see previous posts for pictures) for all who may be interested in the correct factory finish color. Dan
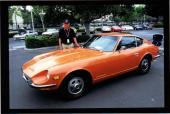
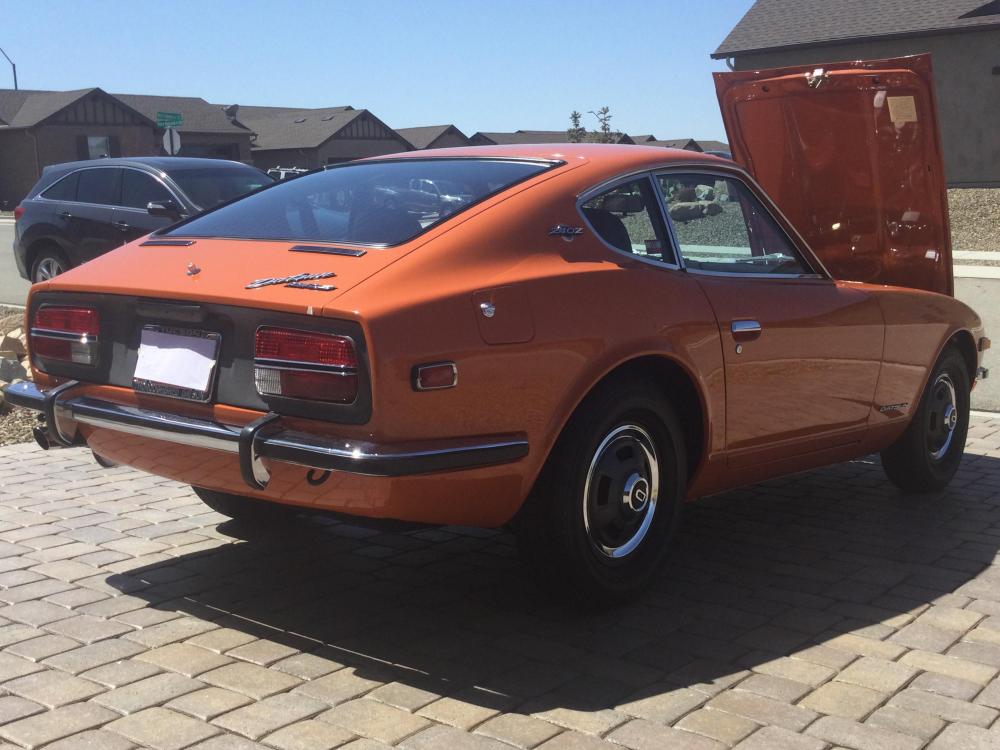
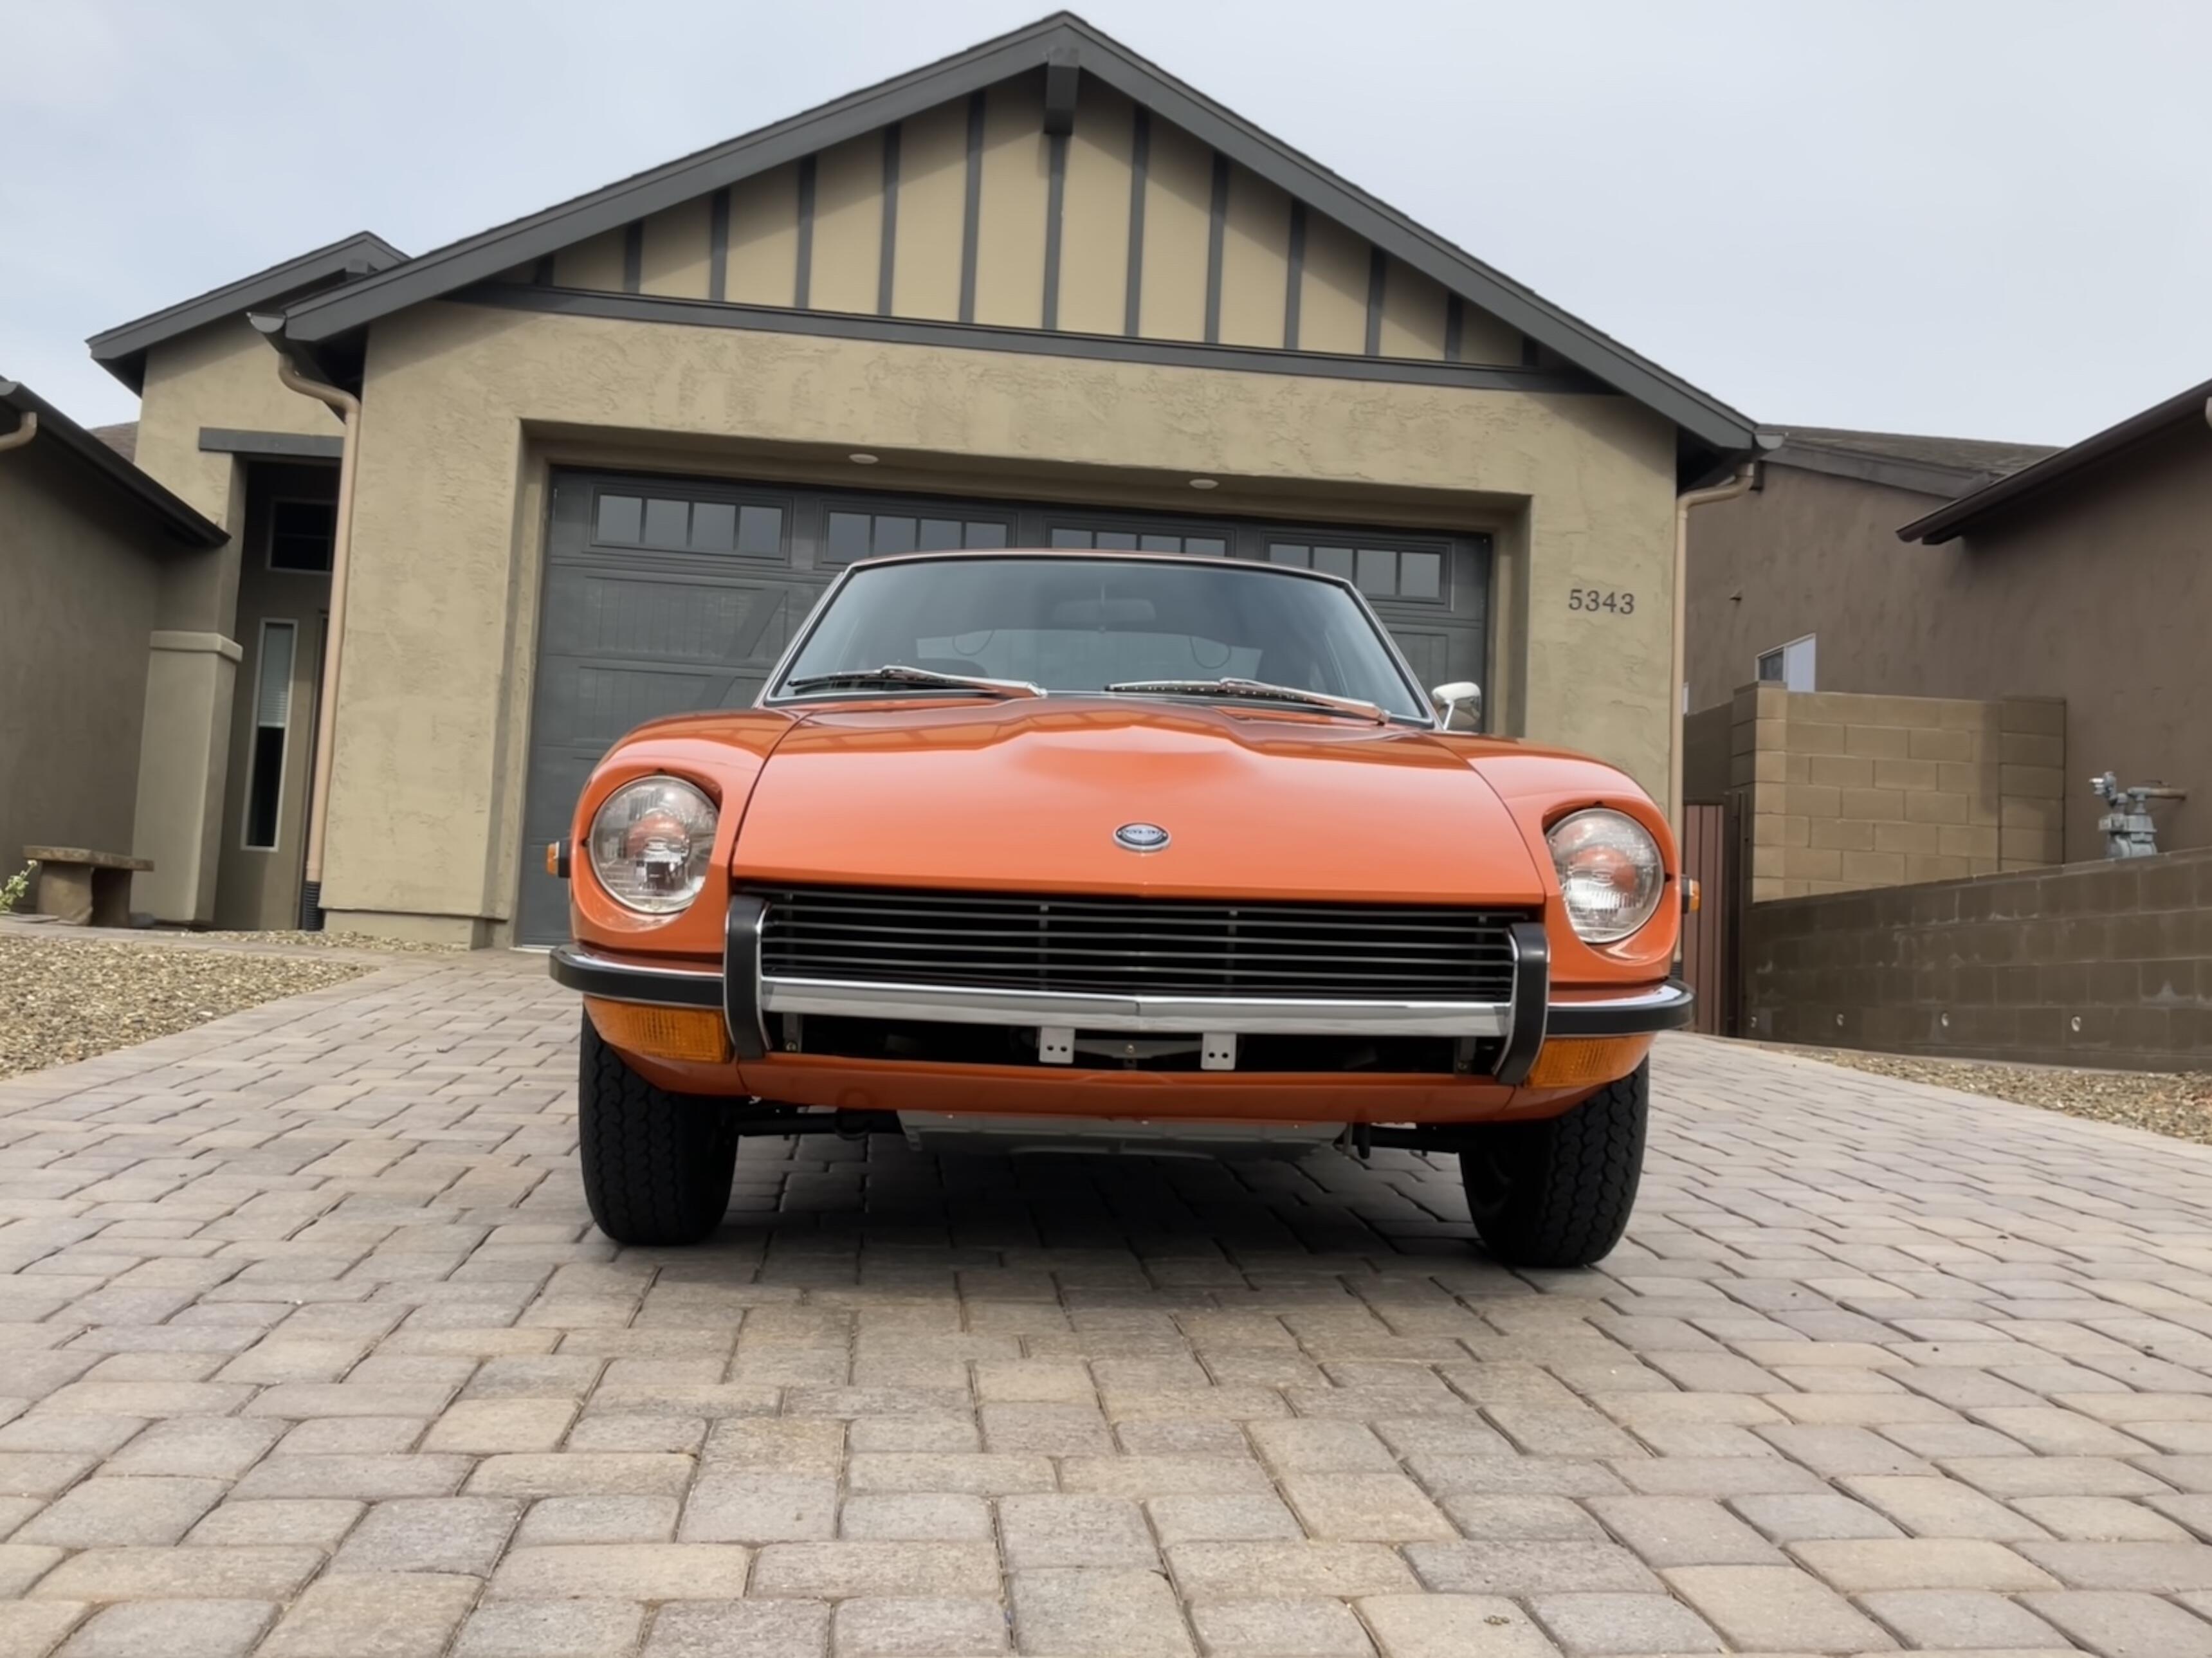
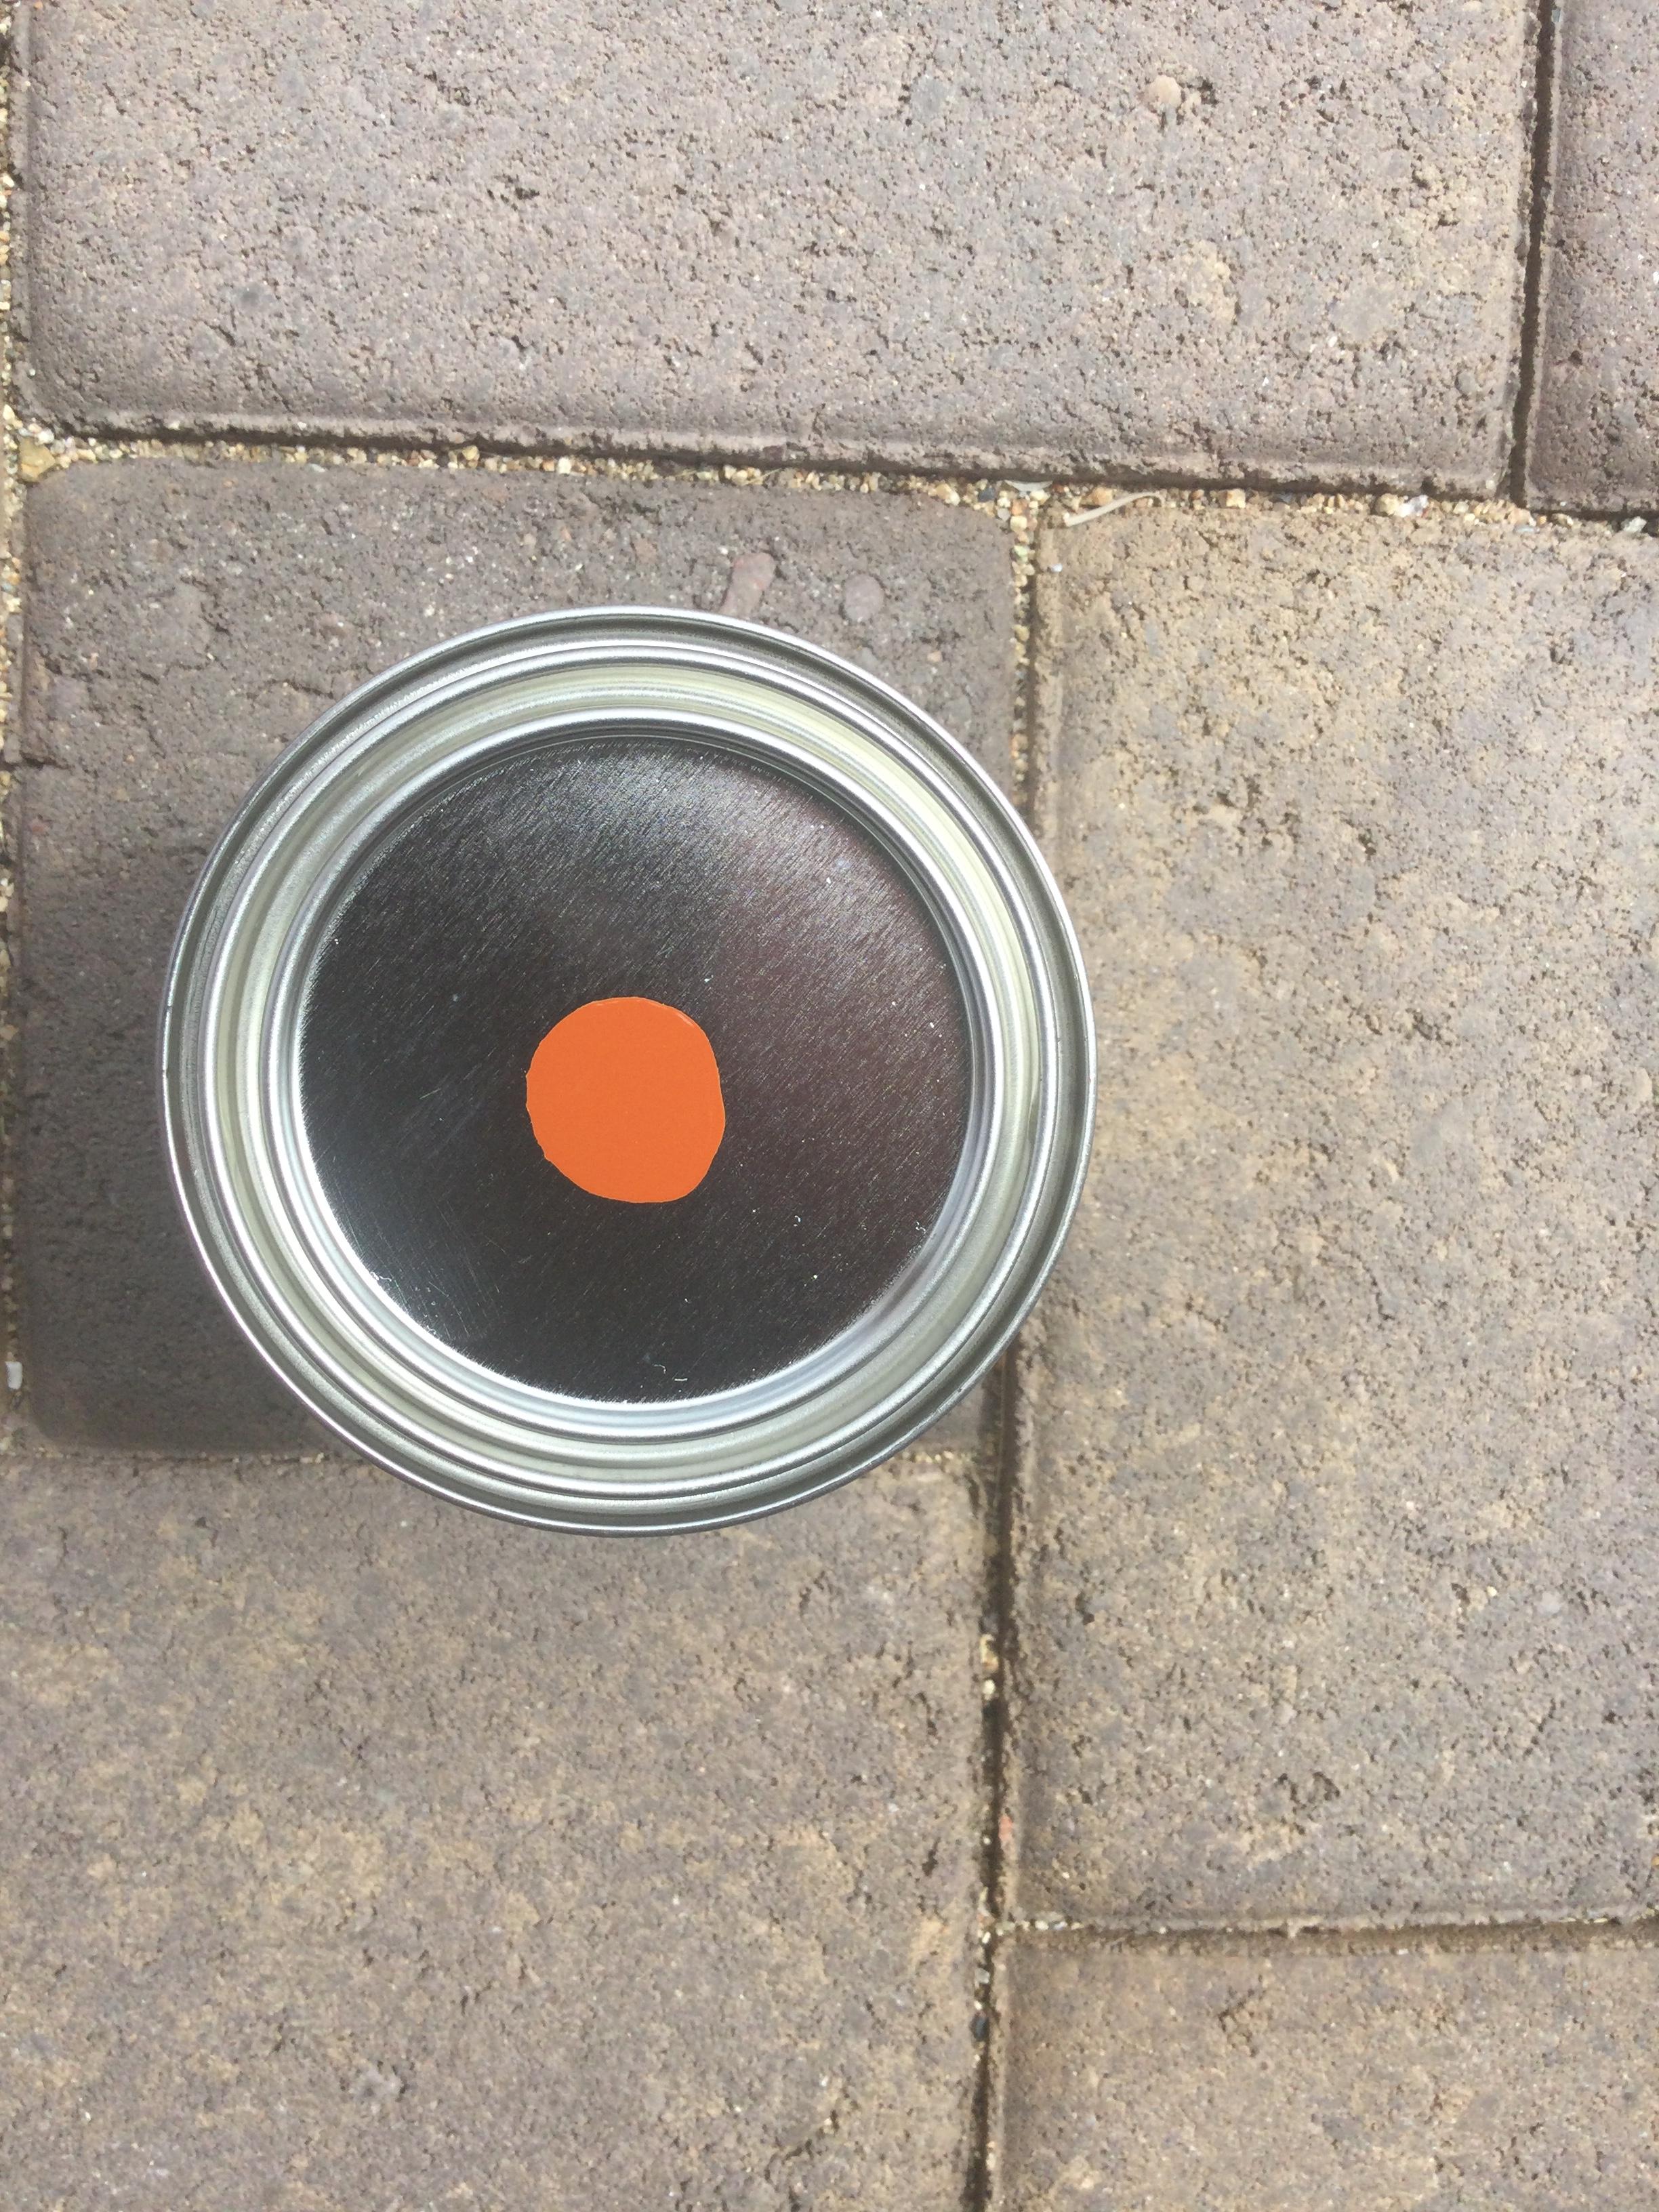
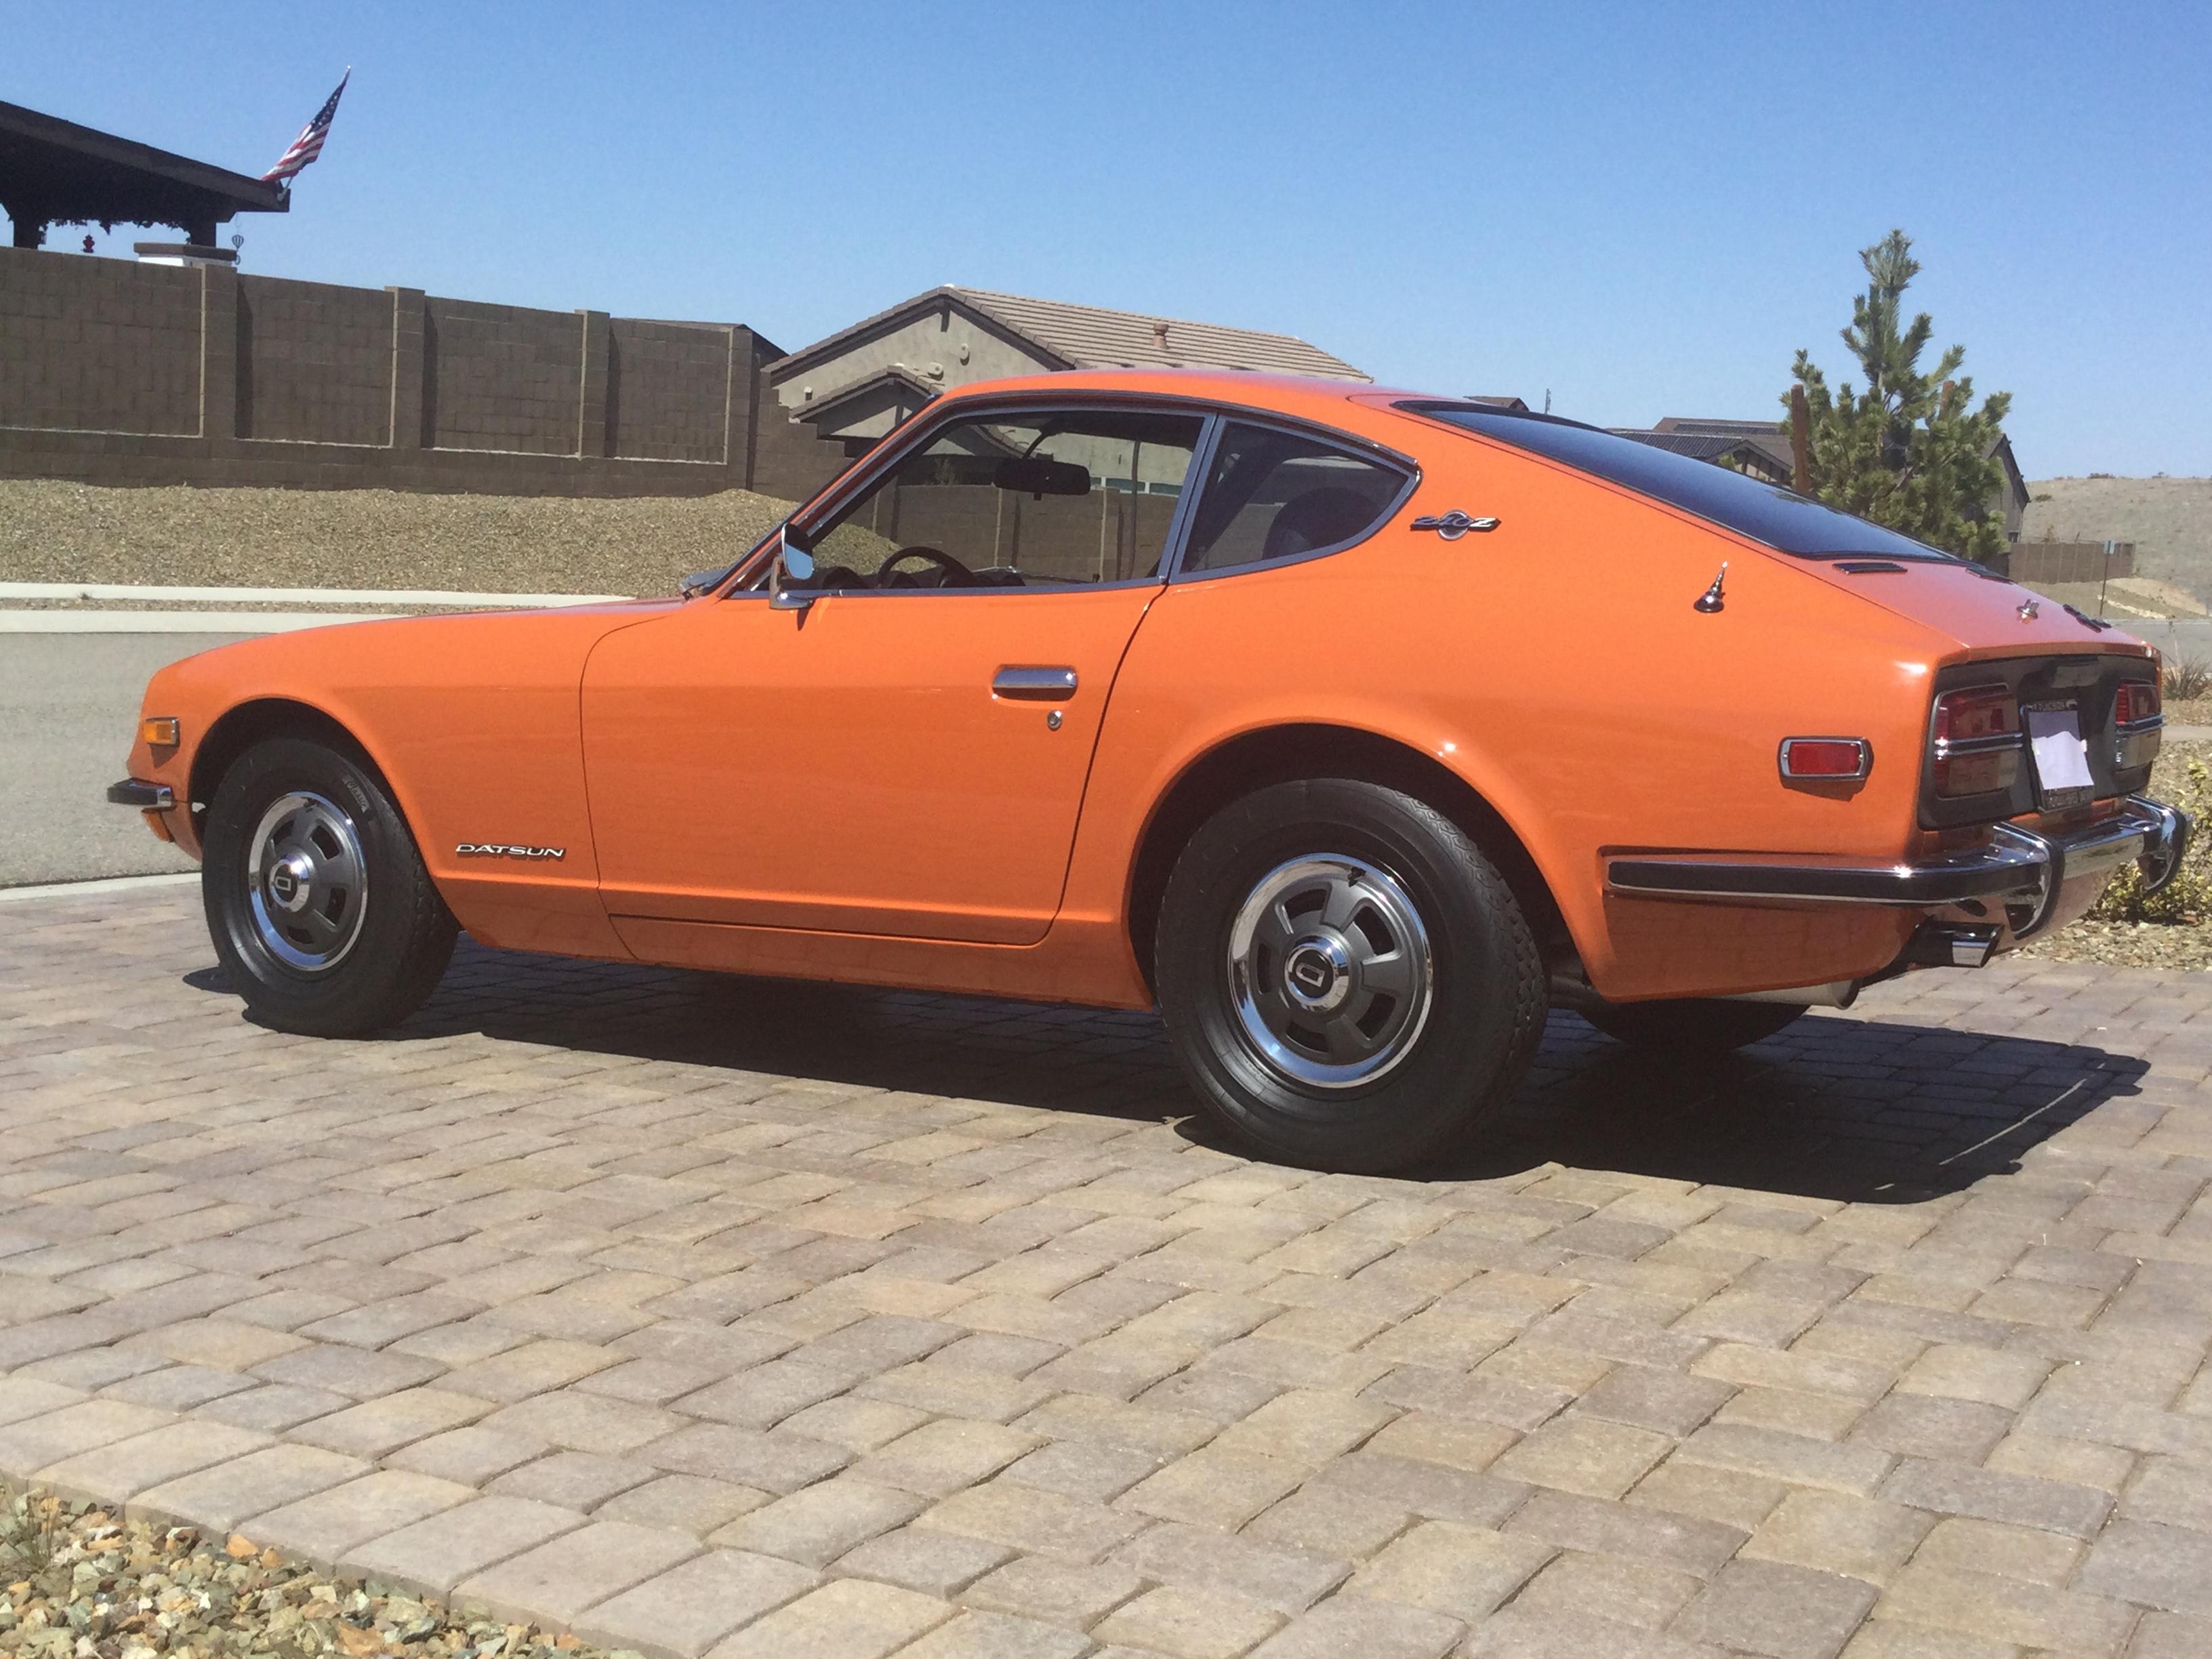
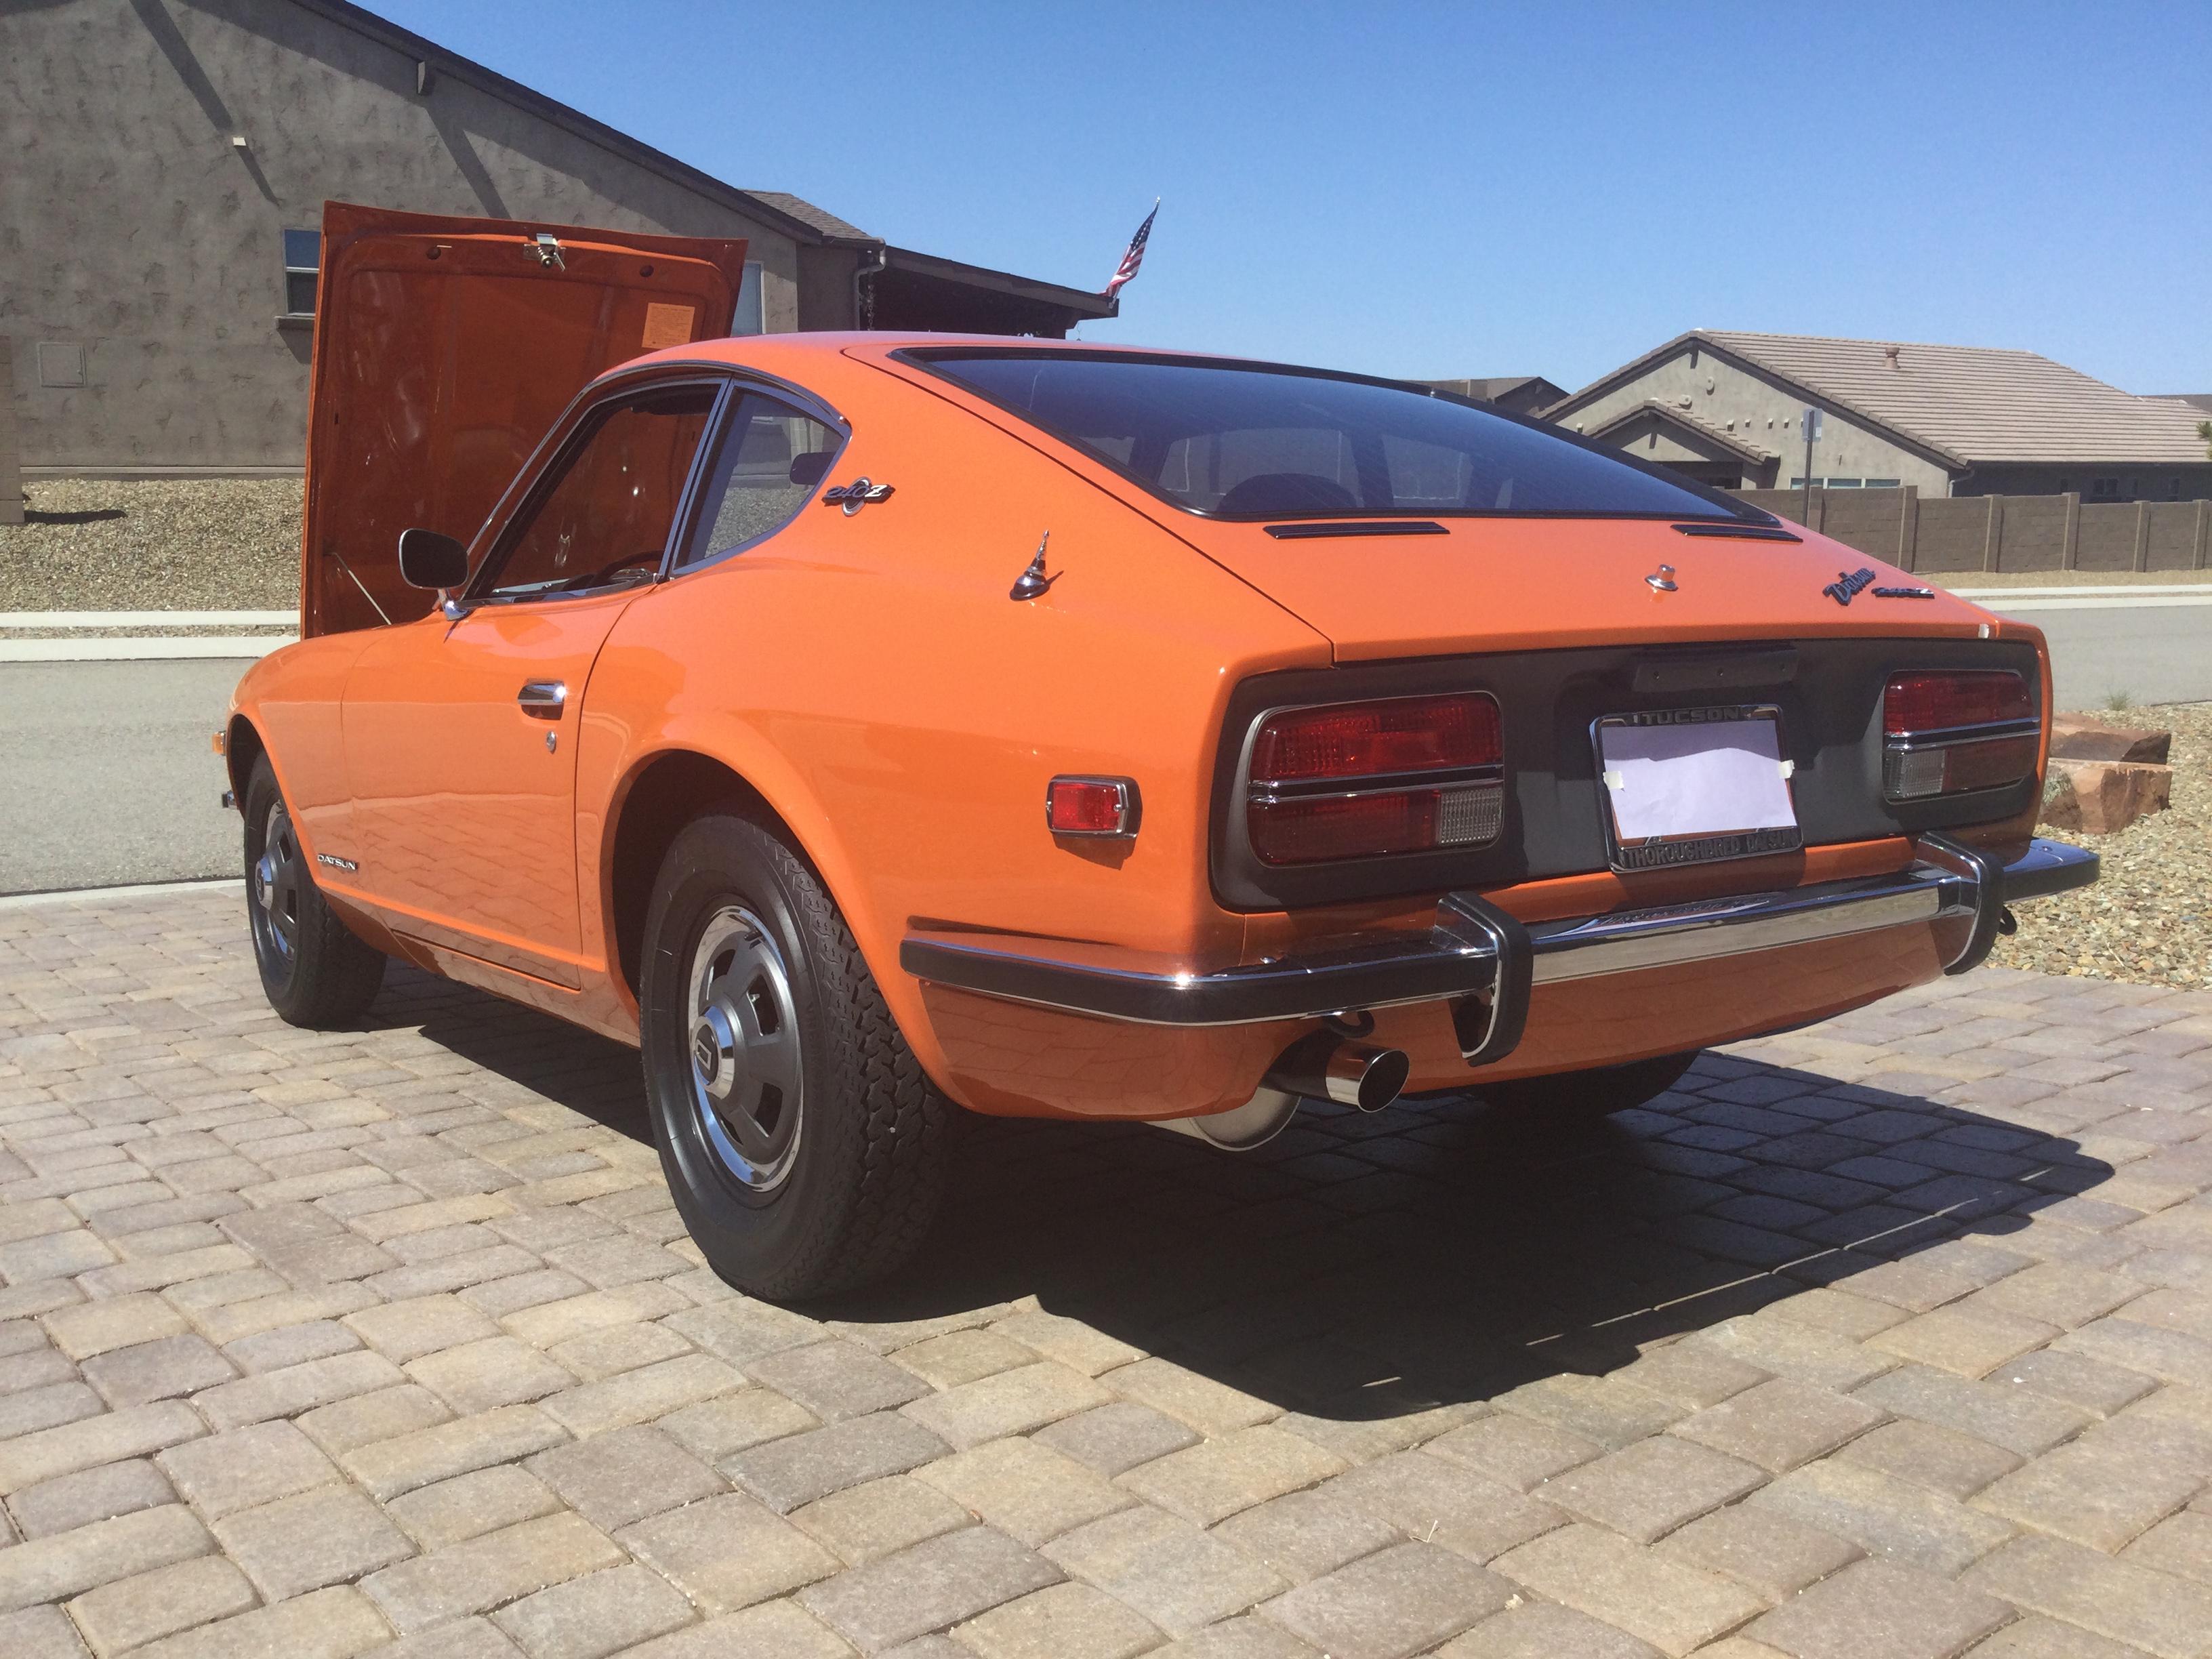
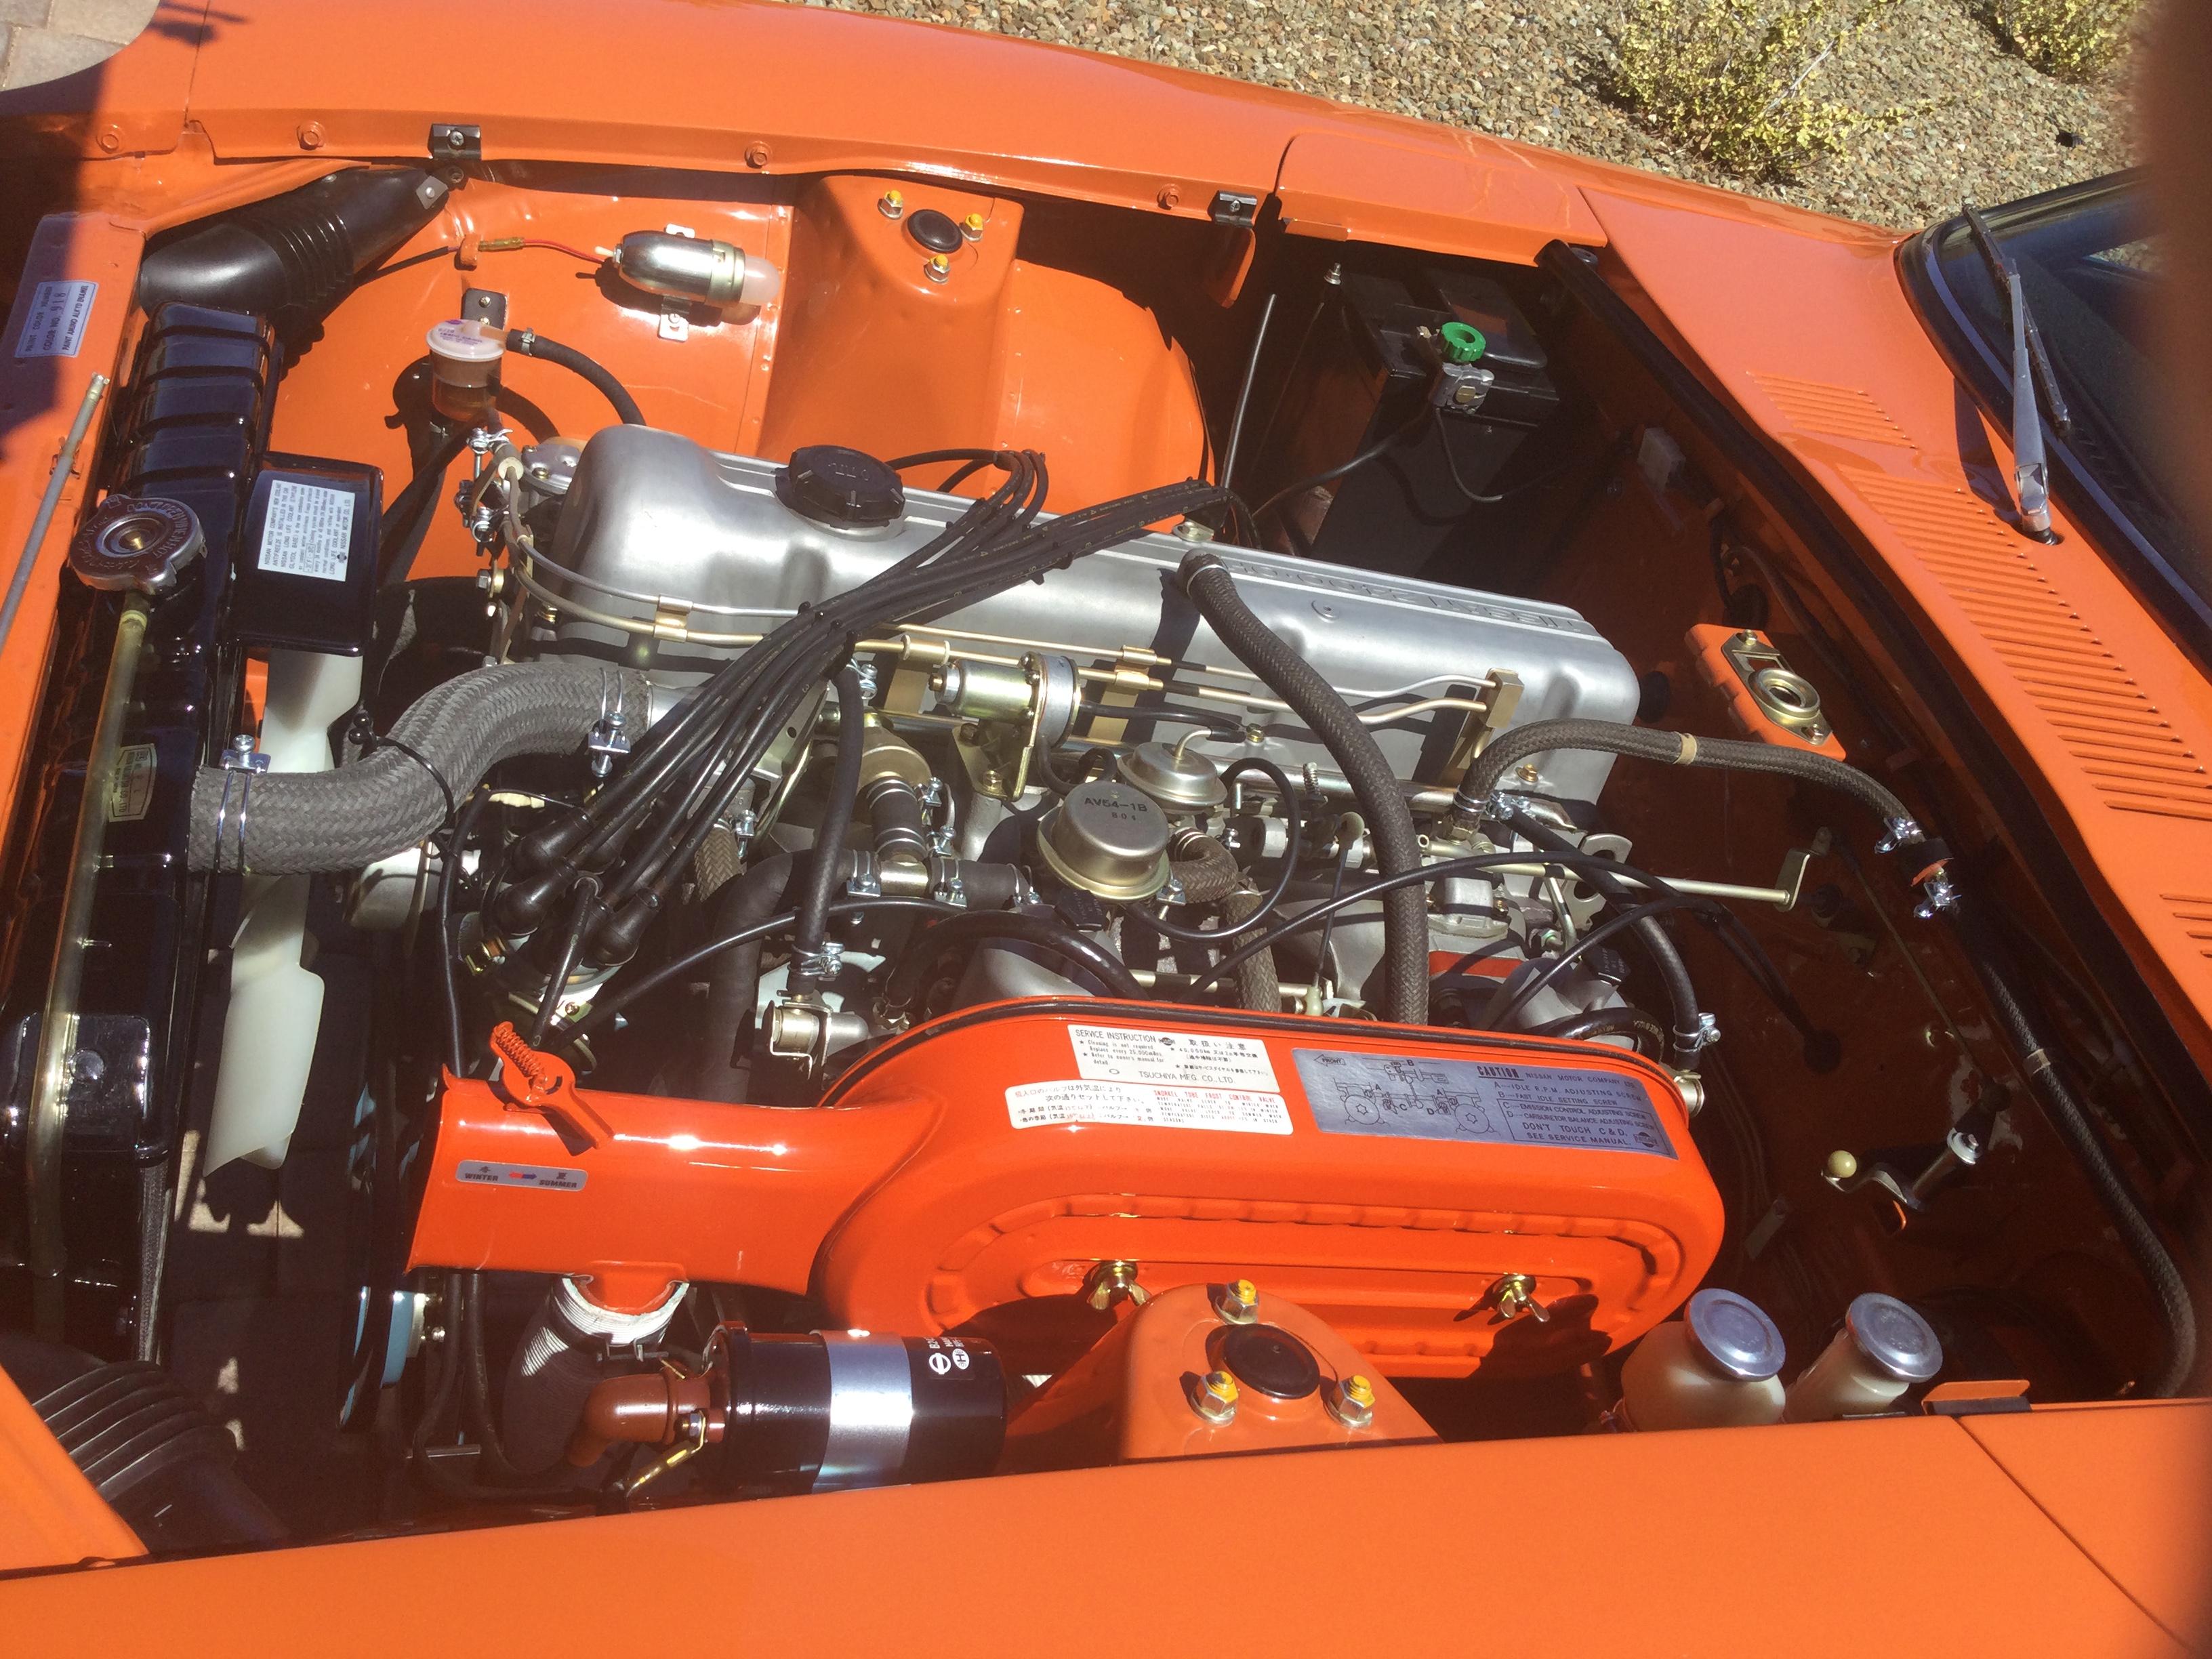
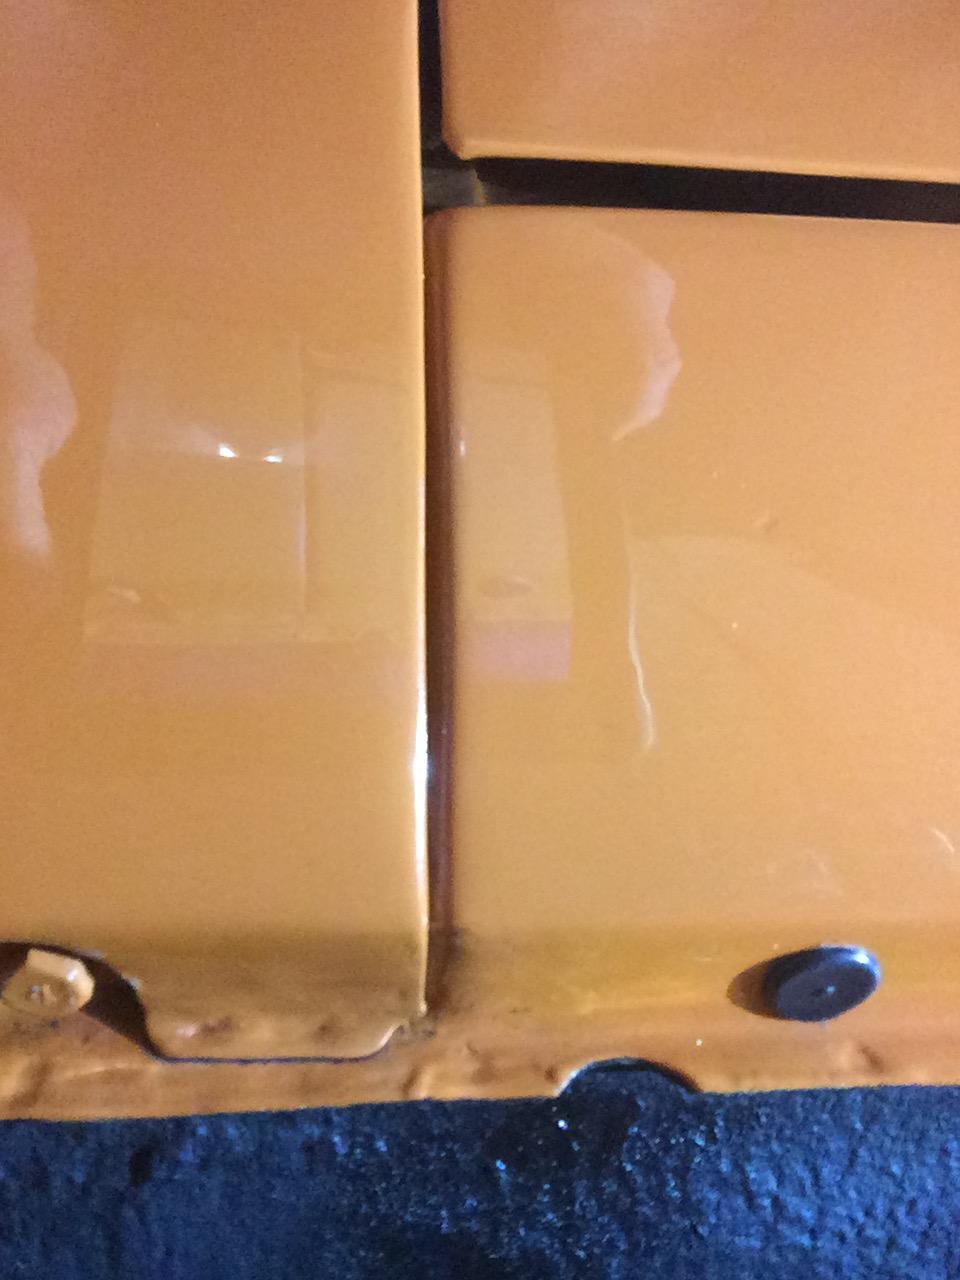
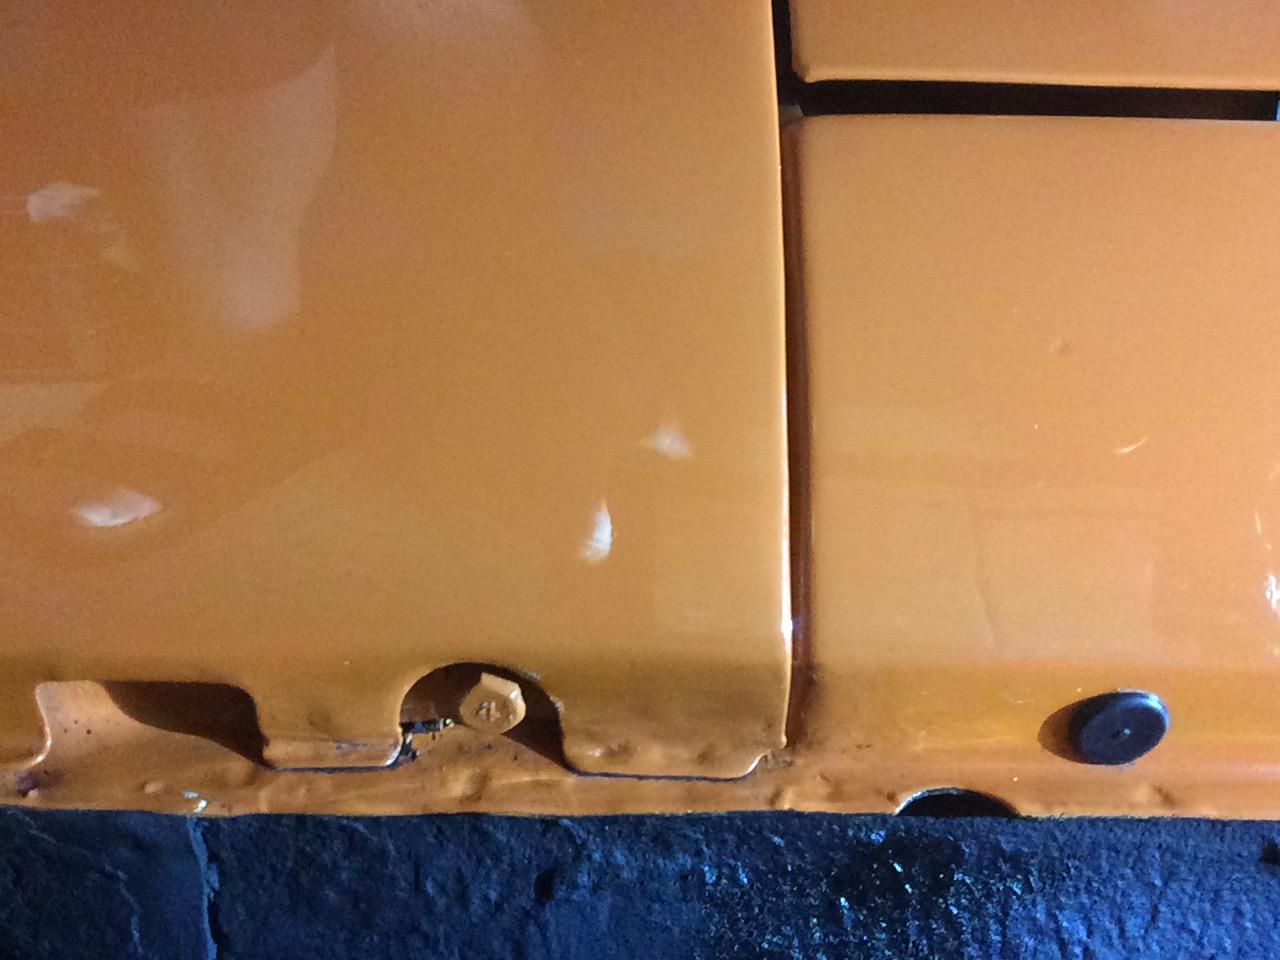
 Why would you need to remove these items if they are perfect? Cover them in plastic and paint the car!. you won’t find an original or good facsimile of the headliner or diamond vinyl that would pass as a good reproduction, but I could be wrong. The foam on the back of the headliner will tear.Thanks, Wally. My car actually came off the deal’s showroom with slotted mags. When restoring the car, I found this set of hubcaps with their date matching steel wheels, (matching my car’s production date) on eBay. Seems the seller’s dad, when purchasing his 240z about the same time I bought mine, had the dealer replace these with slotted mags and stored these originals in his attic for the next 40+ years.Much appreciated, @siteunseen . @Wally , I got the car out into a clear Arizona morning for a few pictures of the 918 finish taken with my iPad.. I included an under-hood picture for color contrast to validate the orange hue.


 Sorry Wally, I would only be guessing. The first number looks like a “1”, and the other numbers could be ” 0 or 9 or 8”. Given the other additive codes, a local auto paint supplier could probably figure the “Red Orange” amount. I’ll try to get a whole car picture tomorrow, but here are a few in-garage pieces.


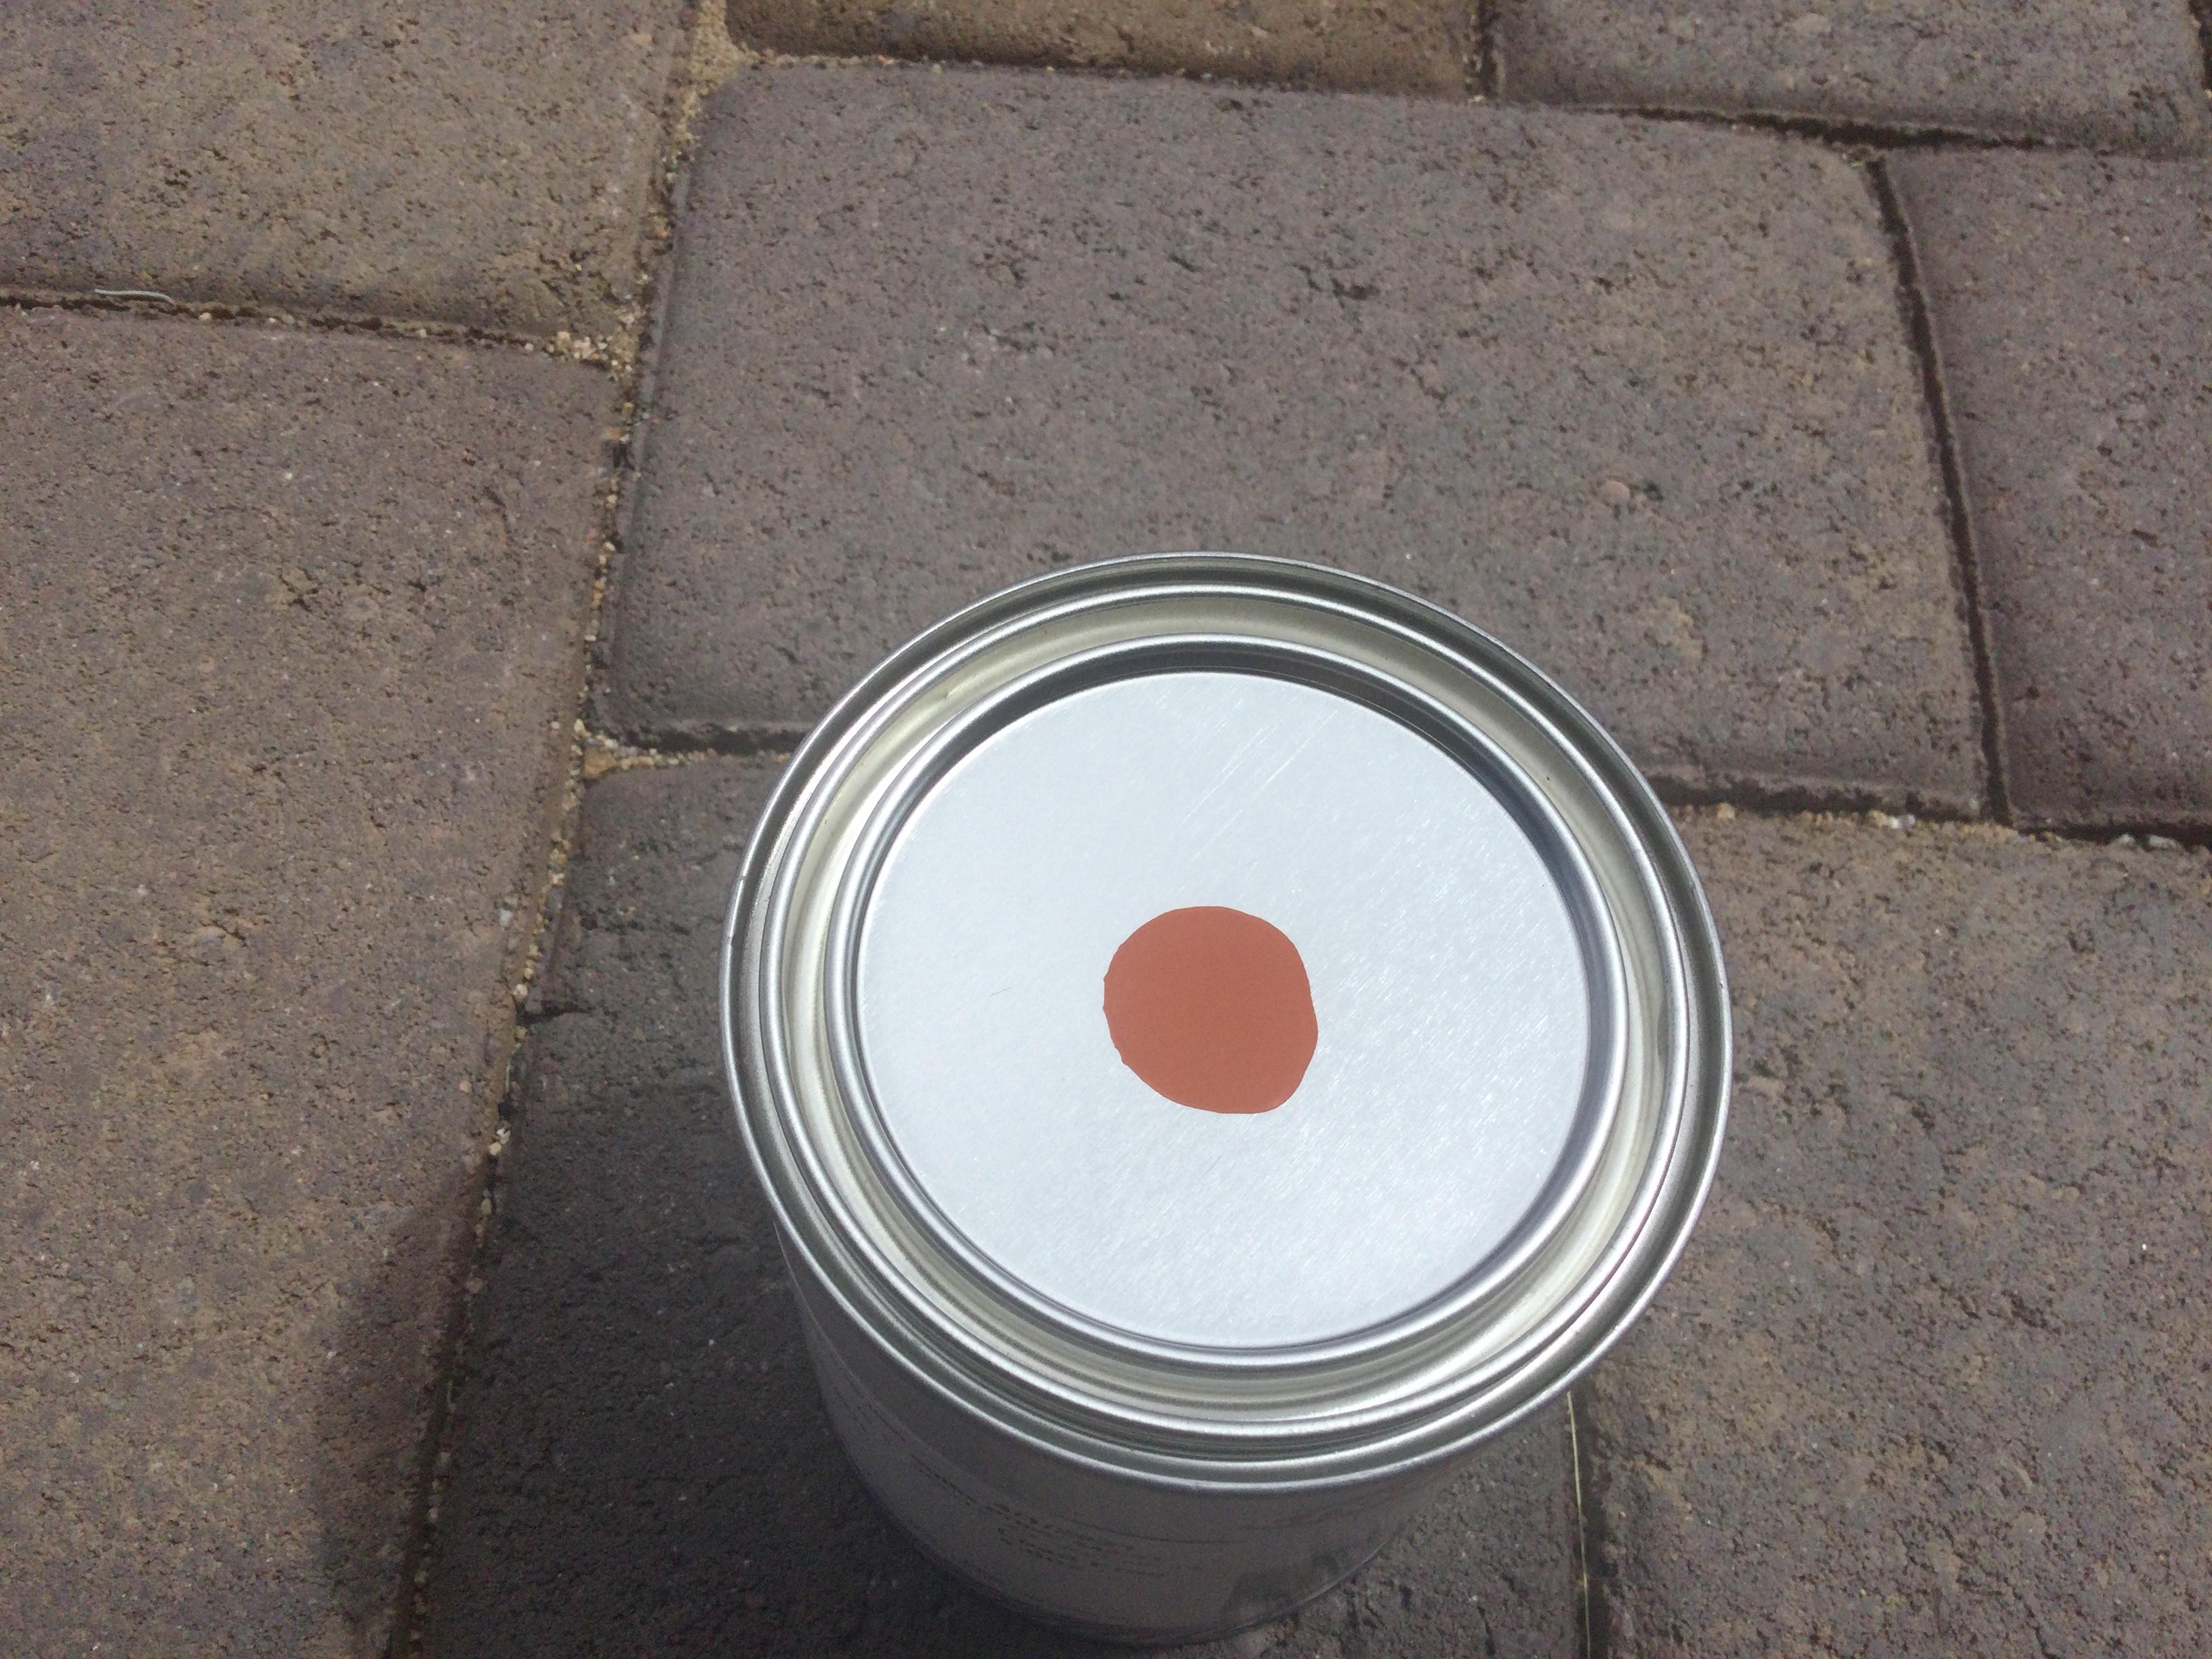
 Wally, Pierre Z did my car restoration about 19 years ago, and he also did most of the restorations in the Vintage Z Restoration Program just before my car. Needing some touch up paint myself, I just came across this label and believe it to be the base coat paint used on my car. The label, seen below, includes the formula and manufacturer. Disclaimer if you decide to use this, but thought it may be of interest to everyone. Dan
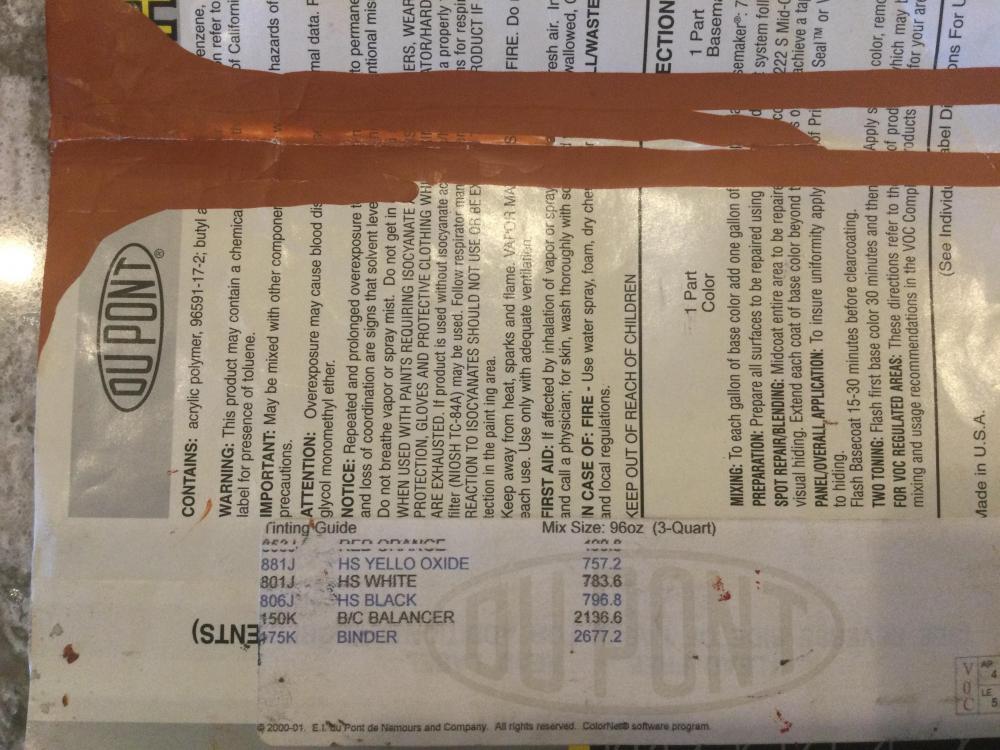

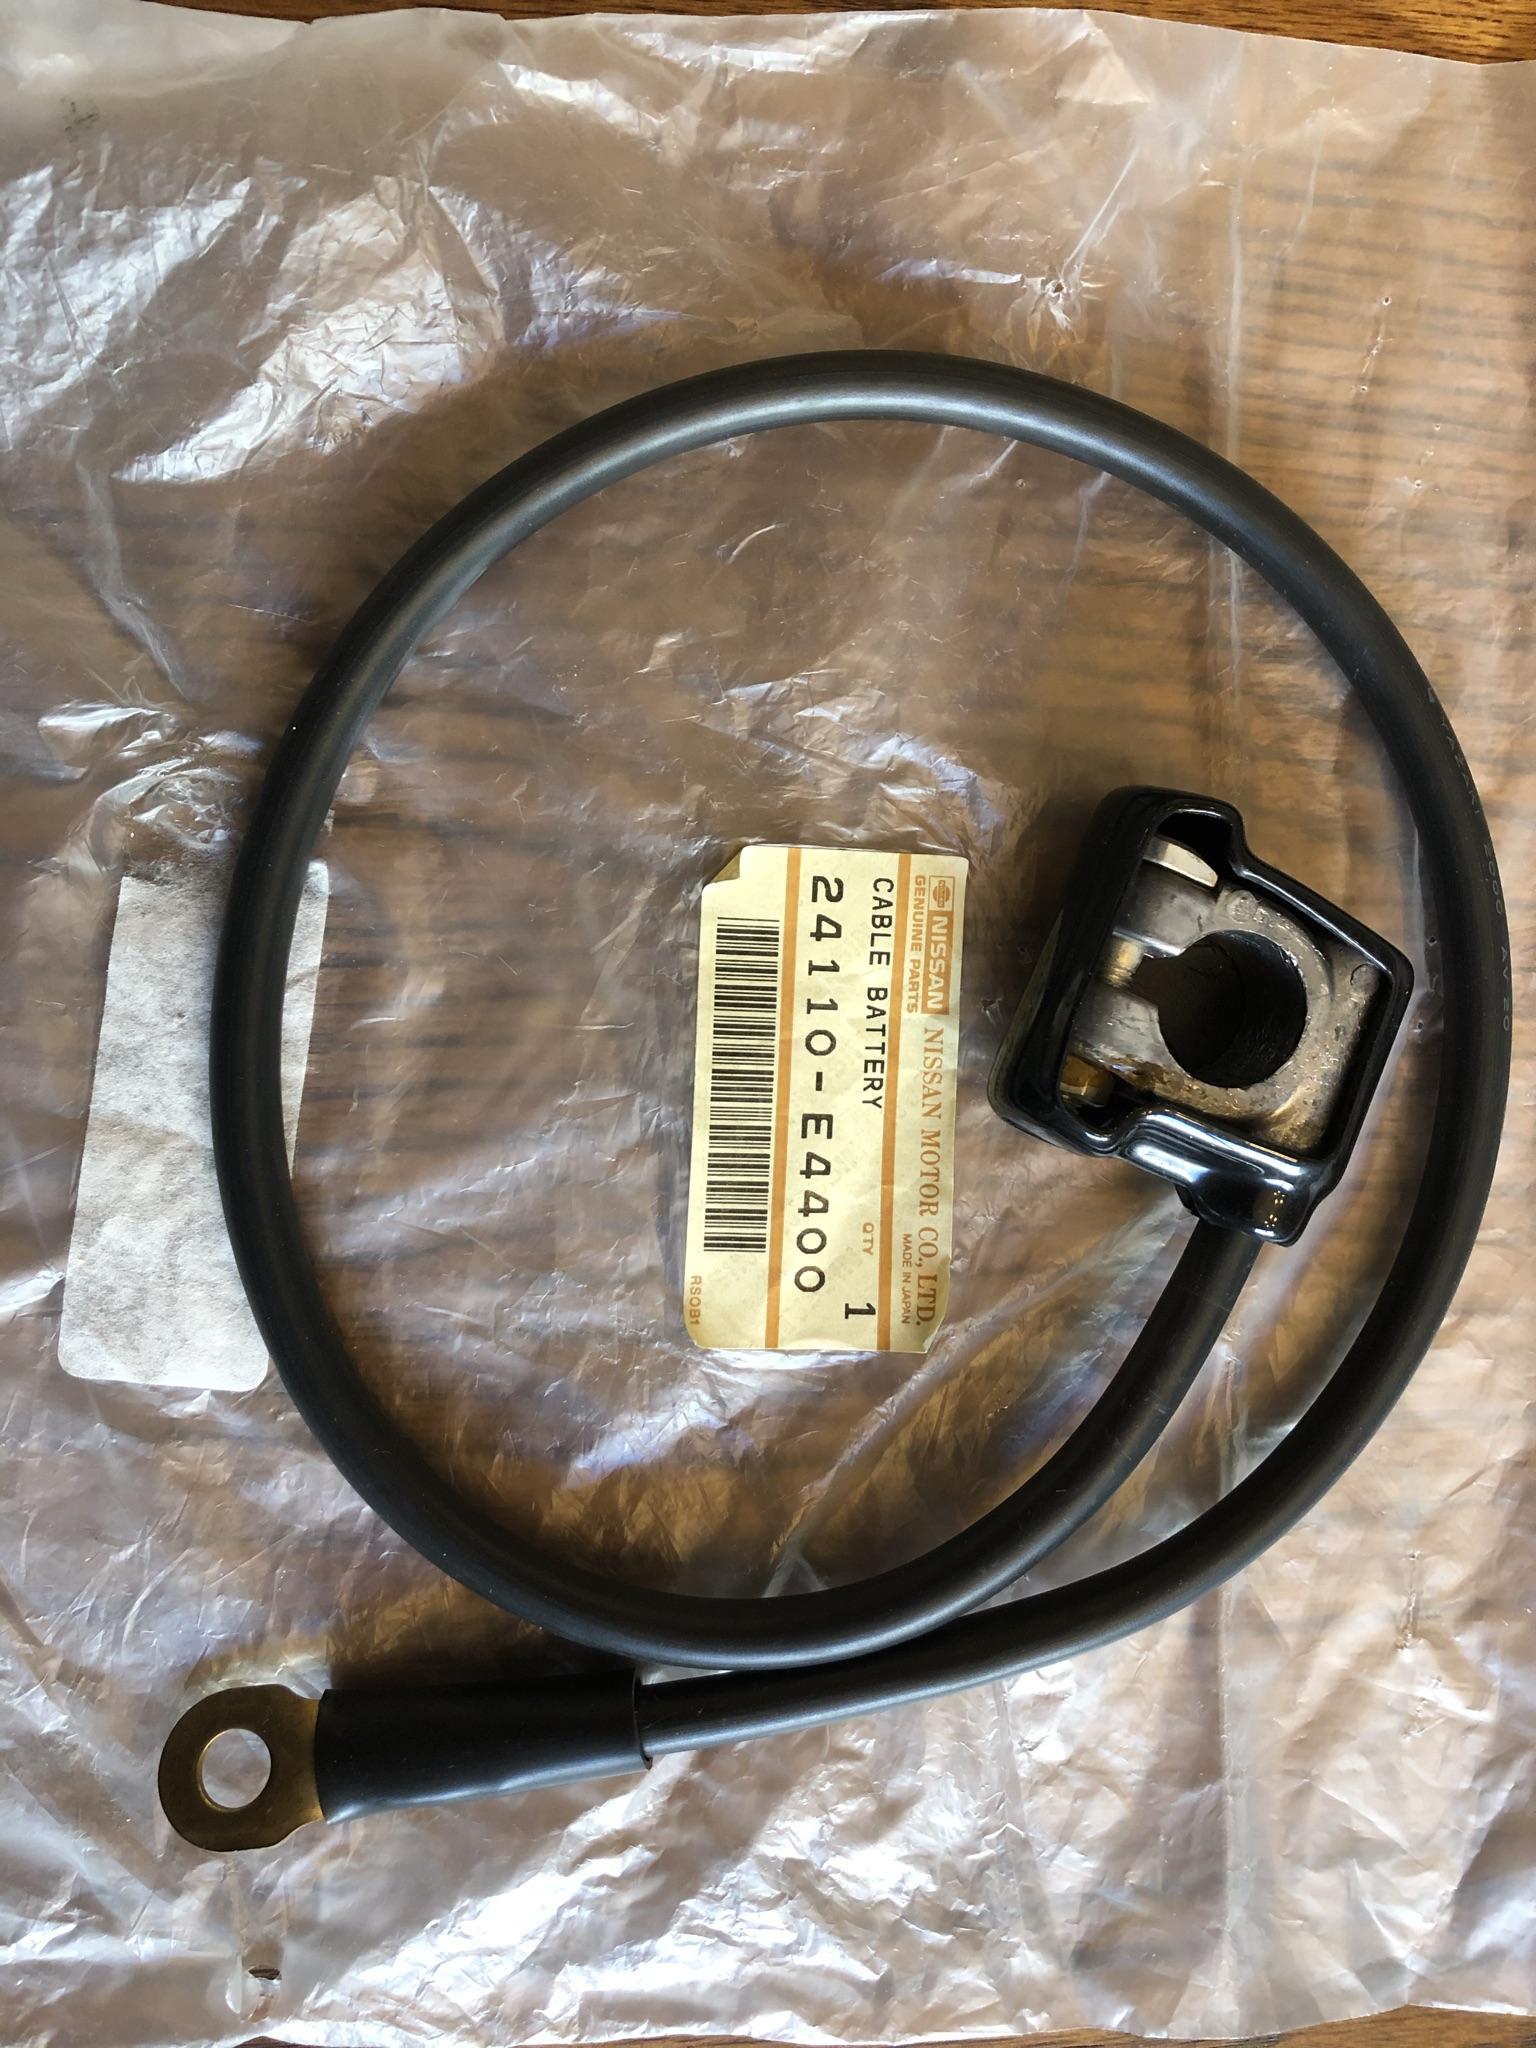
 Jim, are you sure that the center panel uses “hex-head bolts” behind the license plate.? I’ve alway used the same plastic rivets used to secure all of the finisher panels, for a total of eight. DanAs far as originality is concerned, this would probably go un-noticed except for the very discerning ( guilty here!). there is some very fine (small) print on NOS OEM battery cables. Point deduction/probably not.
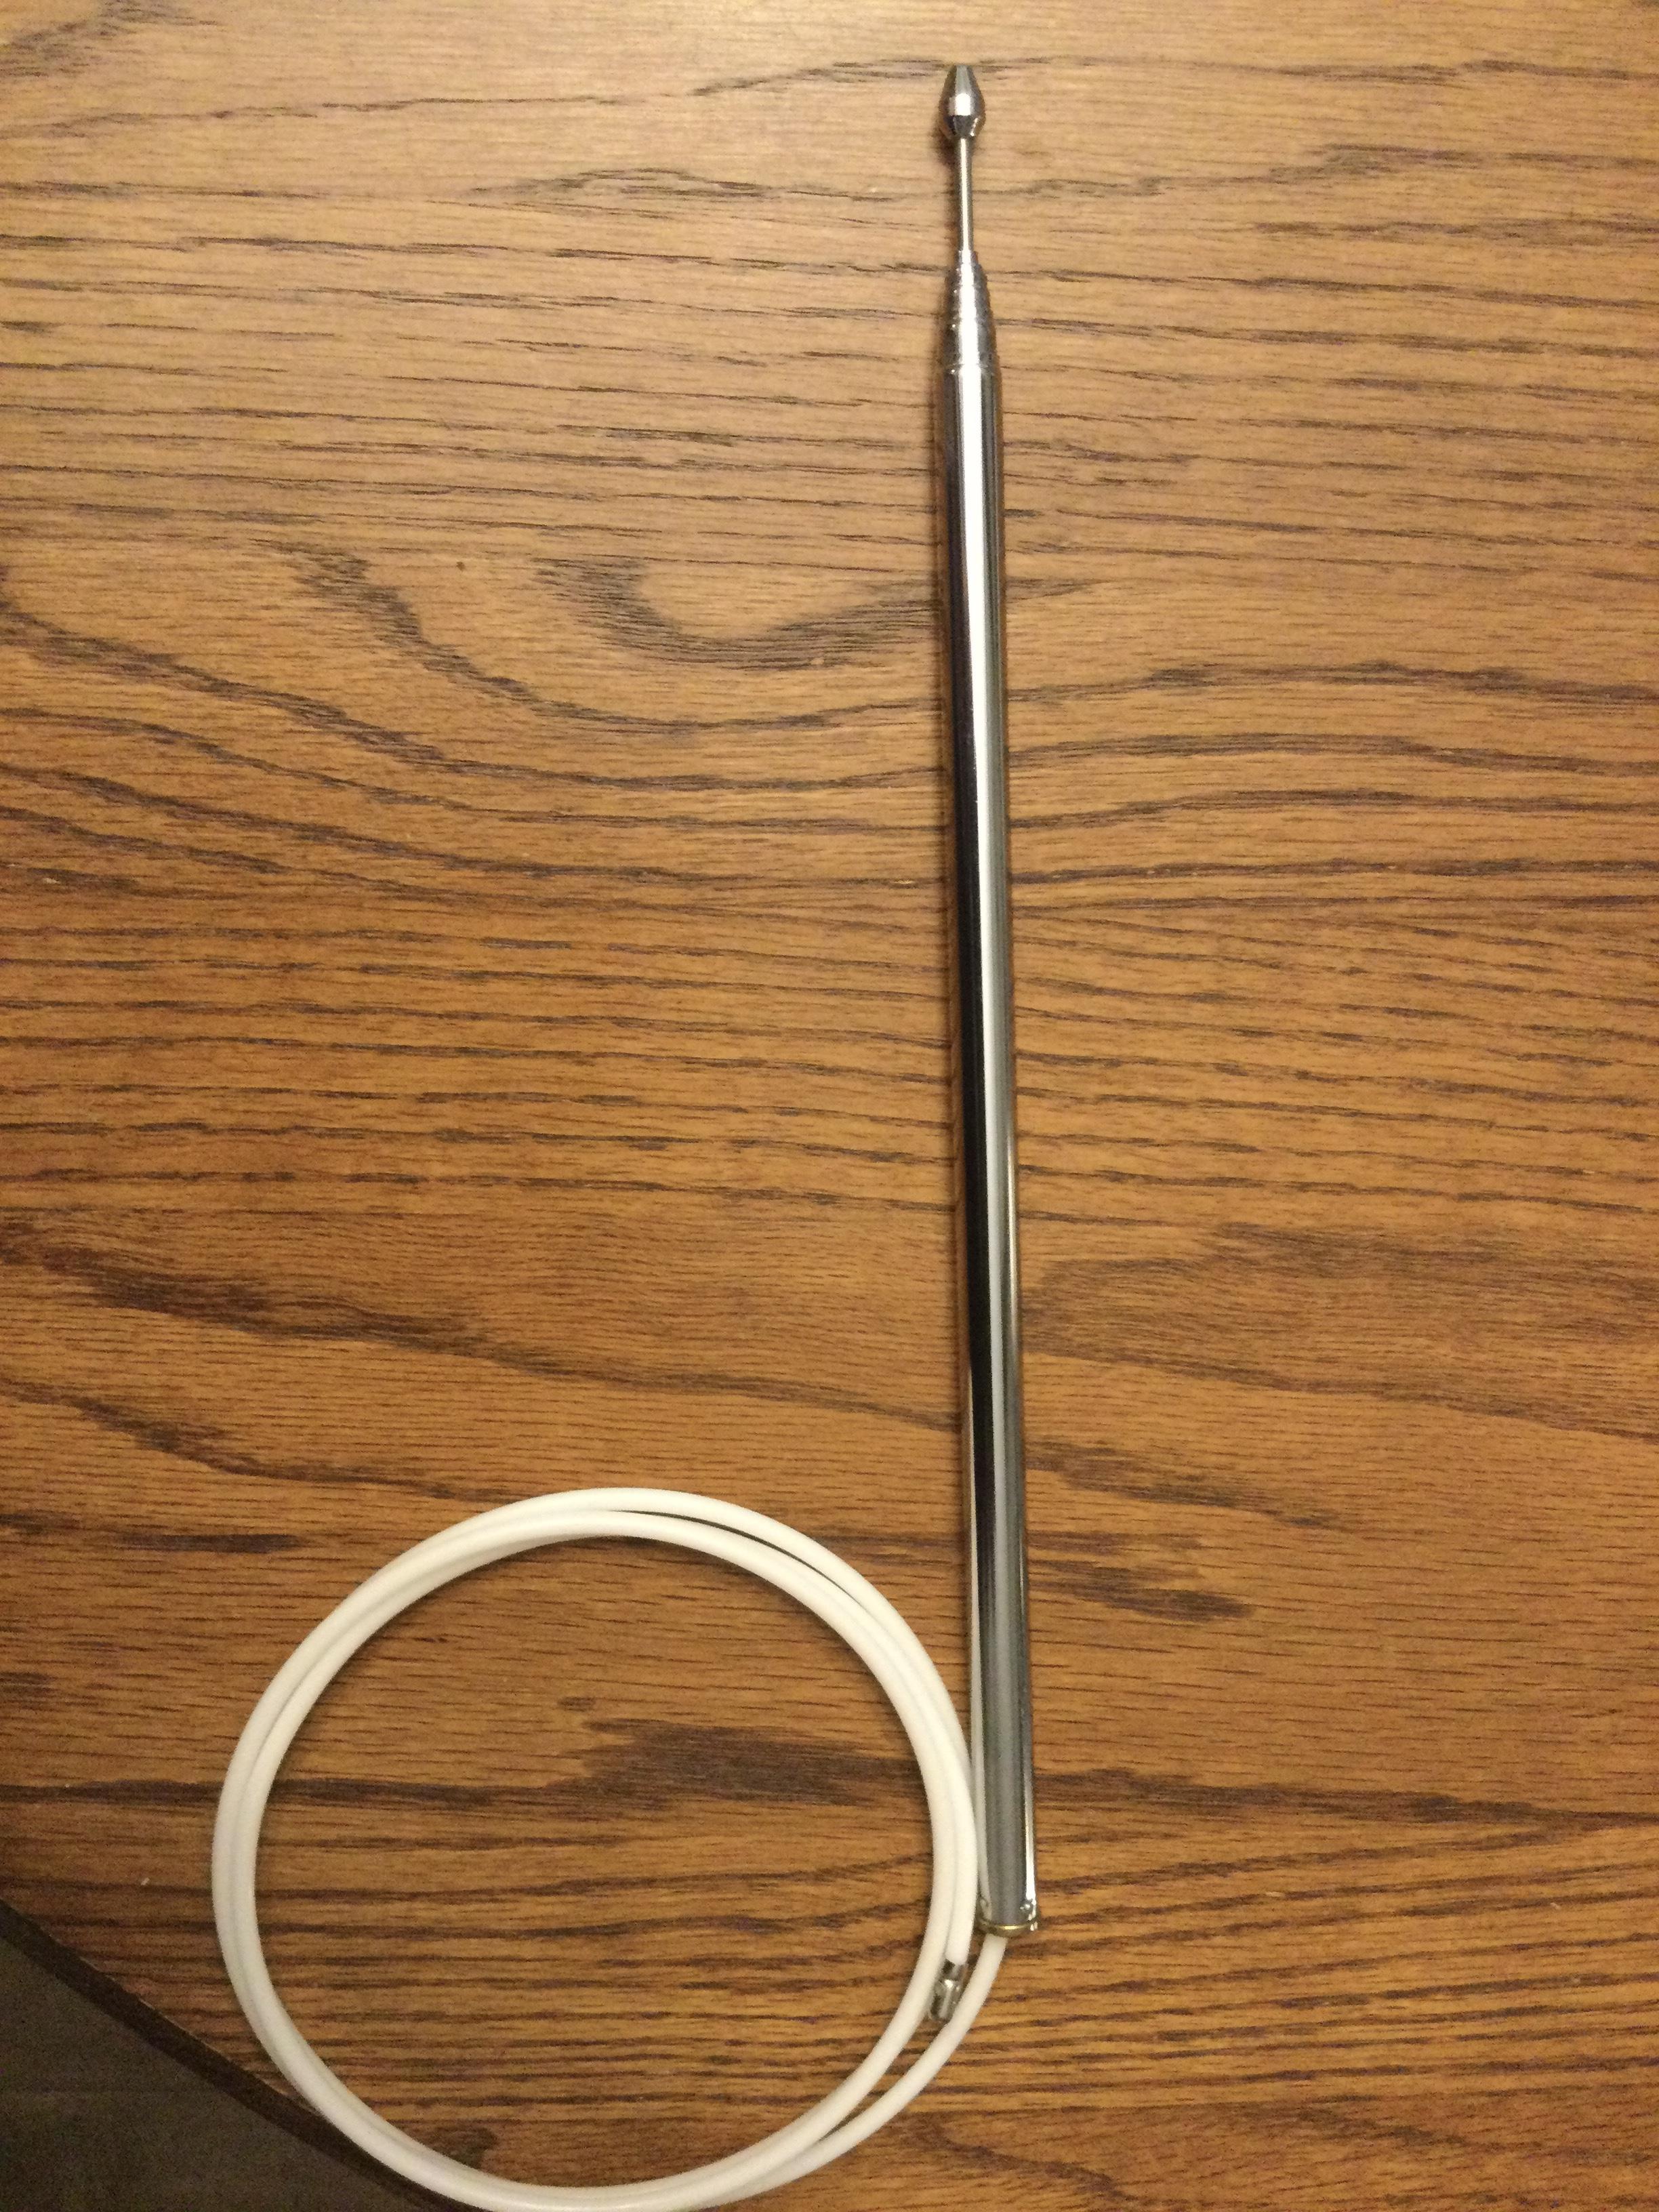
 If you look more closely at his web site , you may find that ordering out-of-stock parts from him may still be an option, given that he makes reproductions. https://www.240zrubberparts.com/apps/webstore/https://www.240zrubberparts.com/ I think you will find that antenna drain grommet here, as well as many other reproduced, and hard to find, rubber parts for our Z cars.Yea, looks kind of iffy to me. Here is the one I made for myself.😂


Important Information
By using this site, you agree to our Privacy Policy and Guidelines. We have placed cookies on your device to help make this website better. You can adjust your cookie settings, otherwise we'll assume you're okay to continue.