Leaderboard
-
.JPG.cfcada9cf1c1b502df3f5f2f2ca3ff36.JPG)
SteveJ
Free Member6Points9,646Posts -
AK260
Free Member5Points999Posts -
grannyknot
Free Member5Points5,158Posts -
Patcon
 Subscriber
 4Points11,142Posts


Popular Content
Showing content with the highest reputation on 09/30/2023 in all areas
-
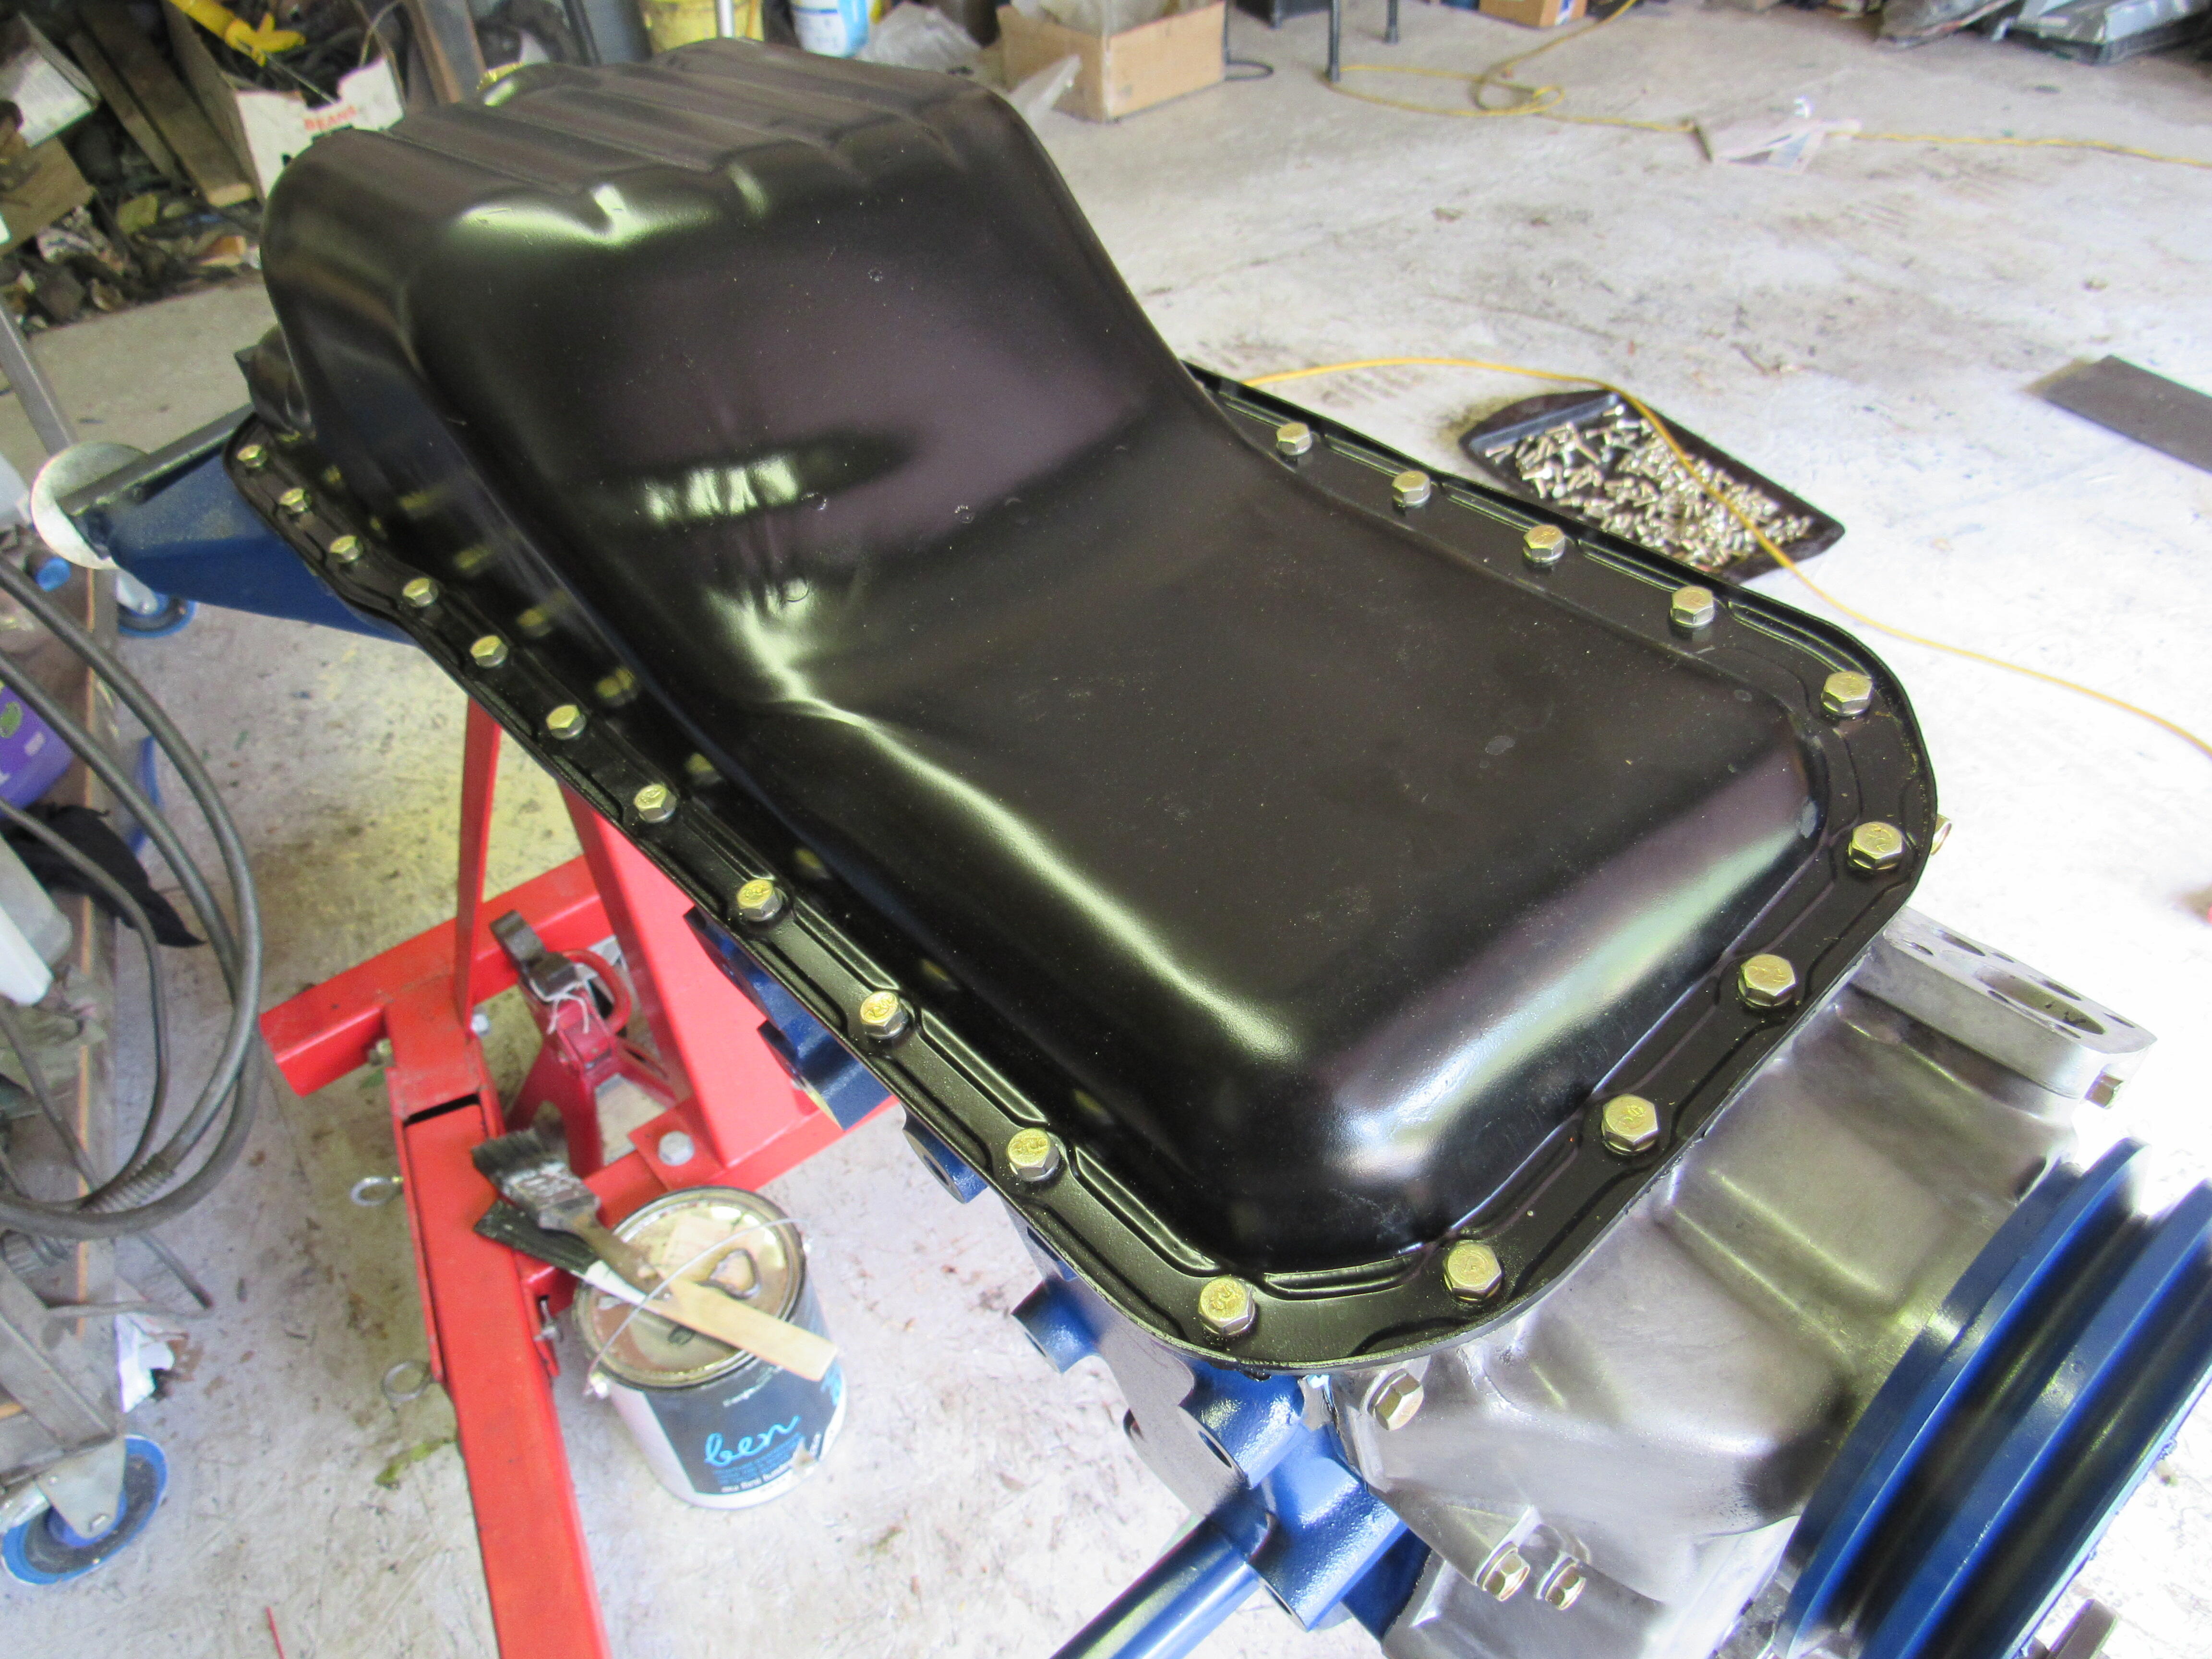
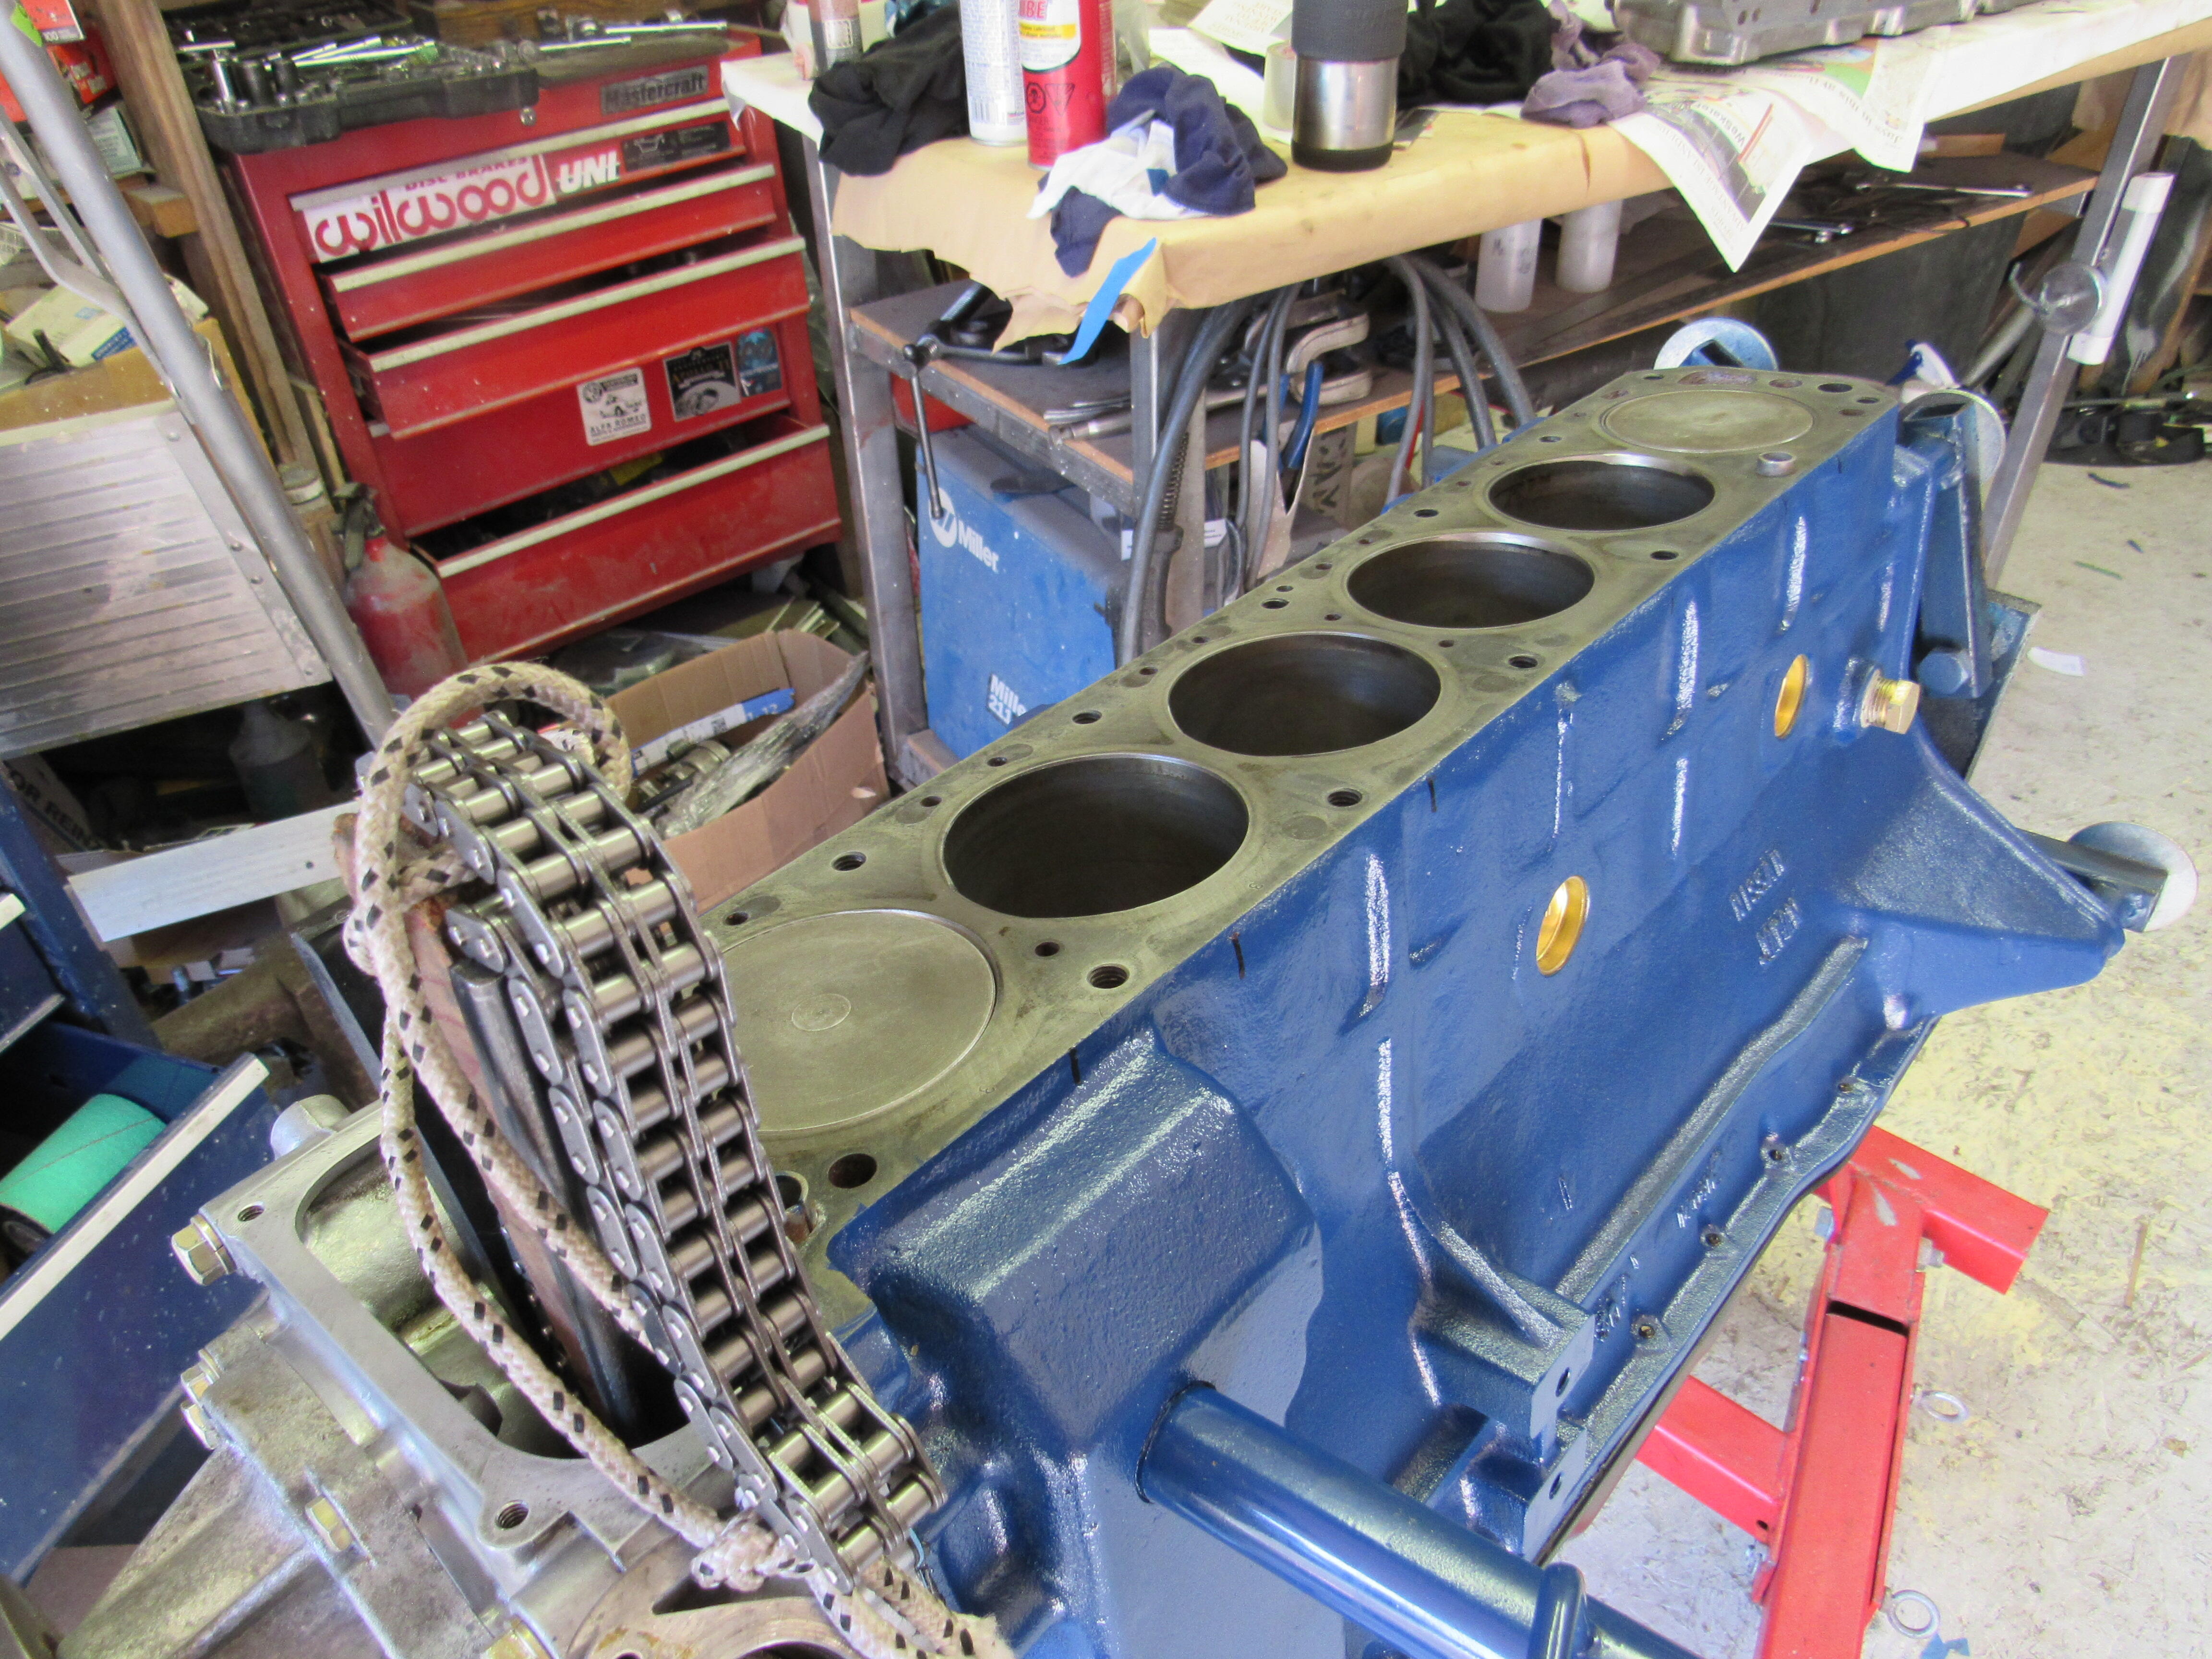
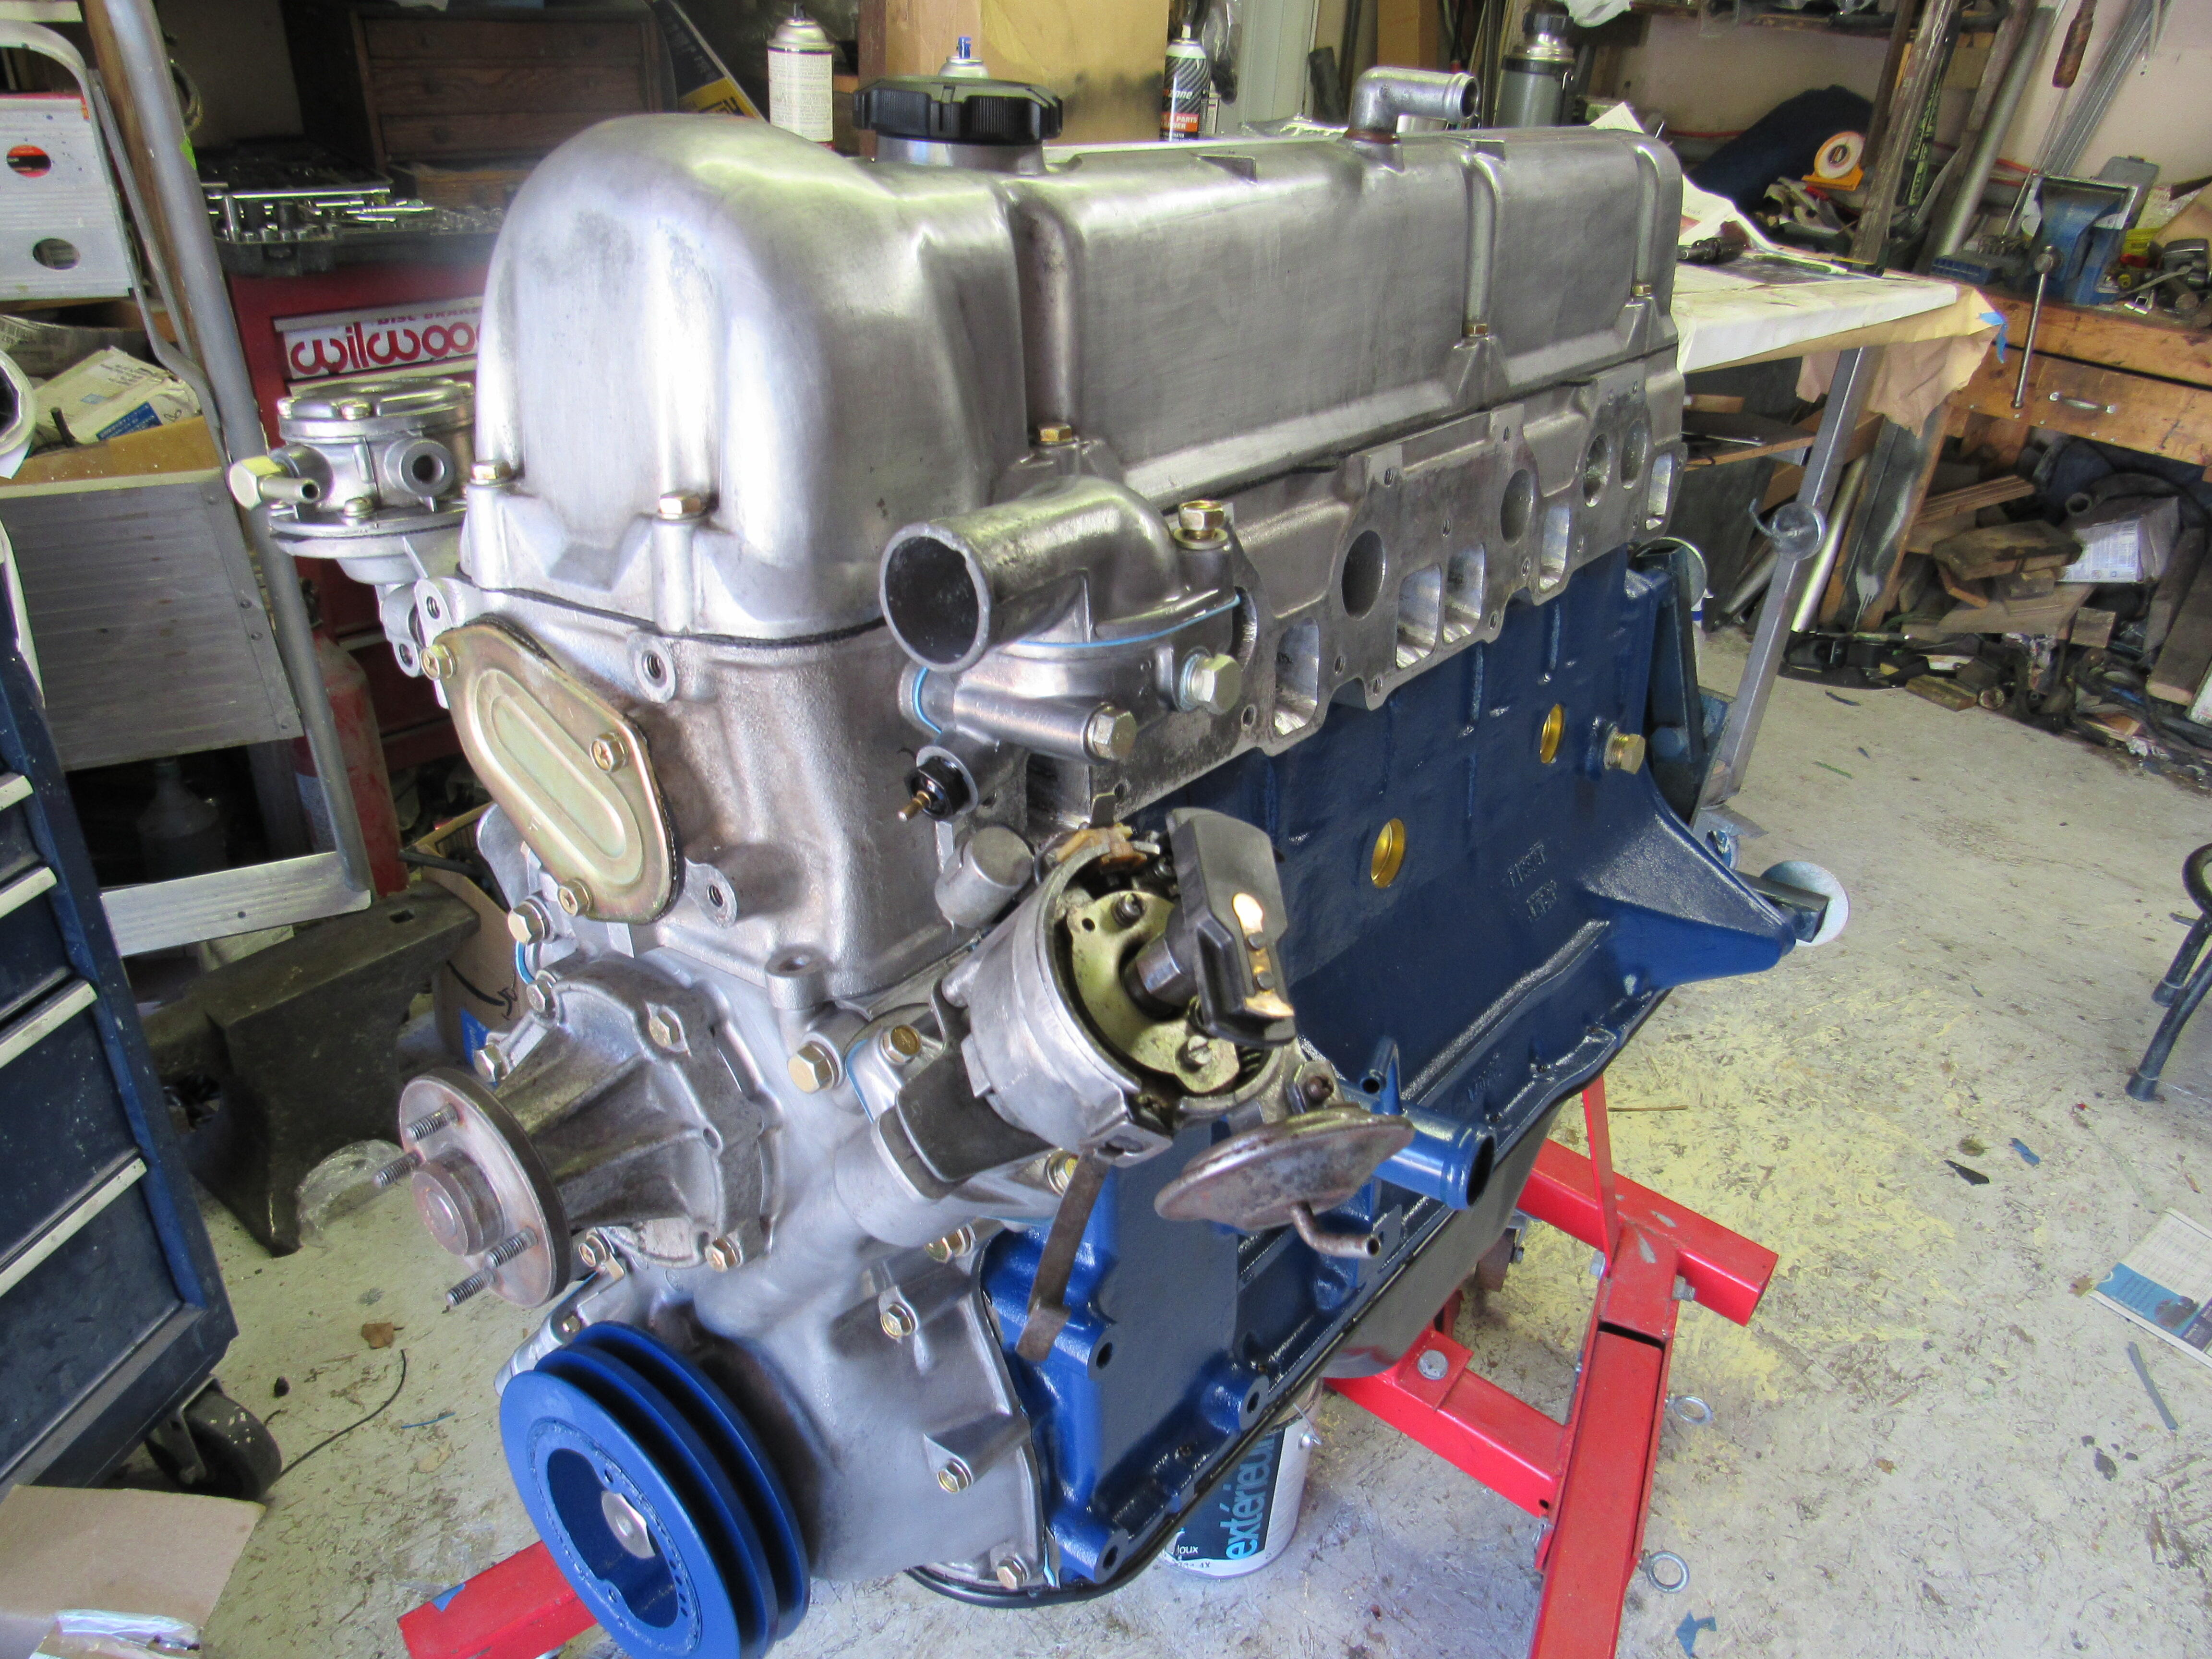
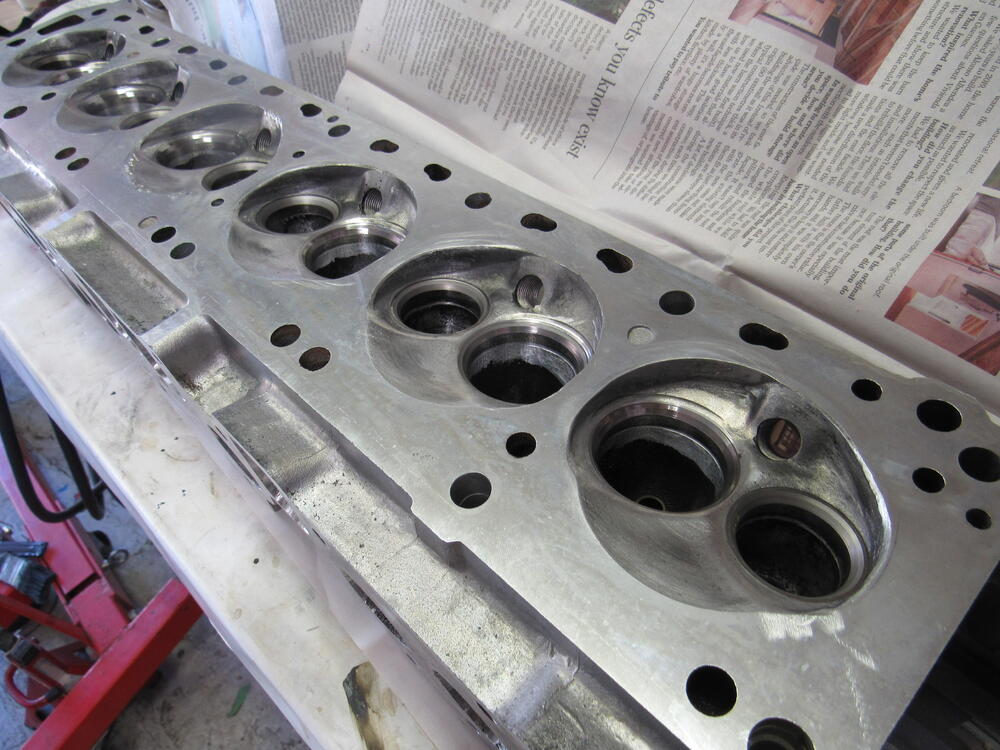
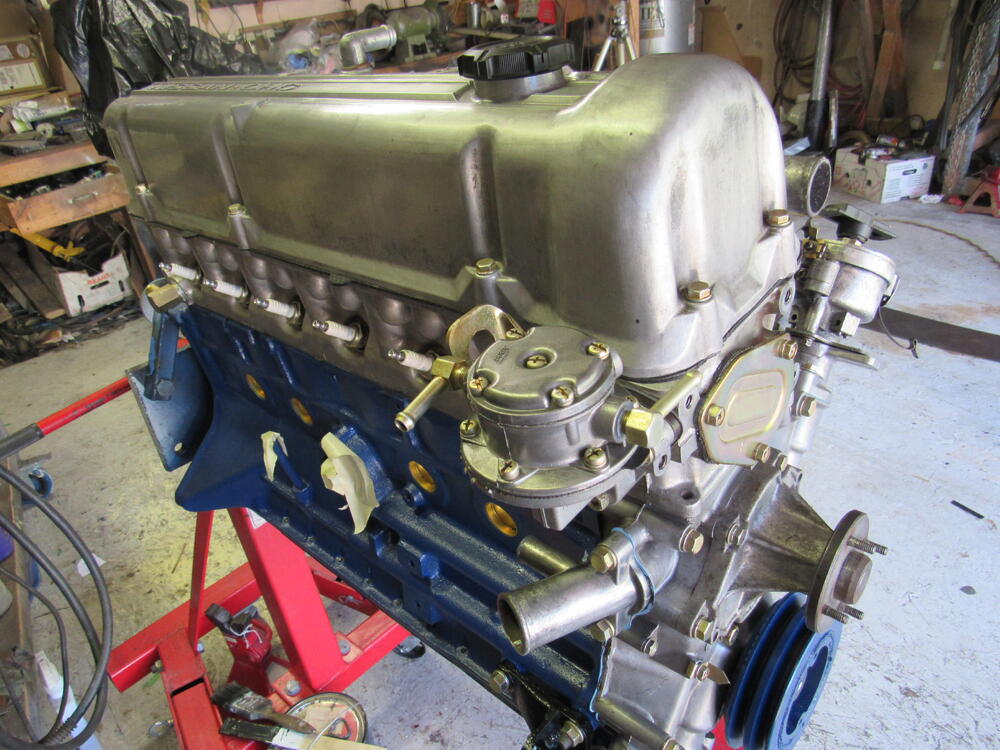
3 pointsI've been working on another project the last 2 months but that is done now and back on to Dave's 240 Finally got the head back from the machinist so assembled the engine today, the larger L28 valves will let it breathe easier. I'll wrap it up now and store it under the bench now until the spring. Next up get the body into the shop.


 3 points
 -
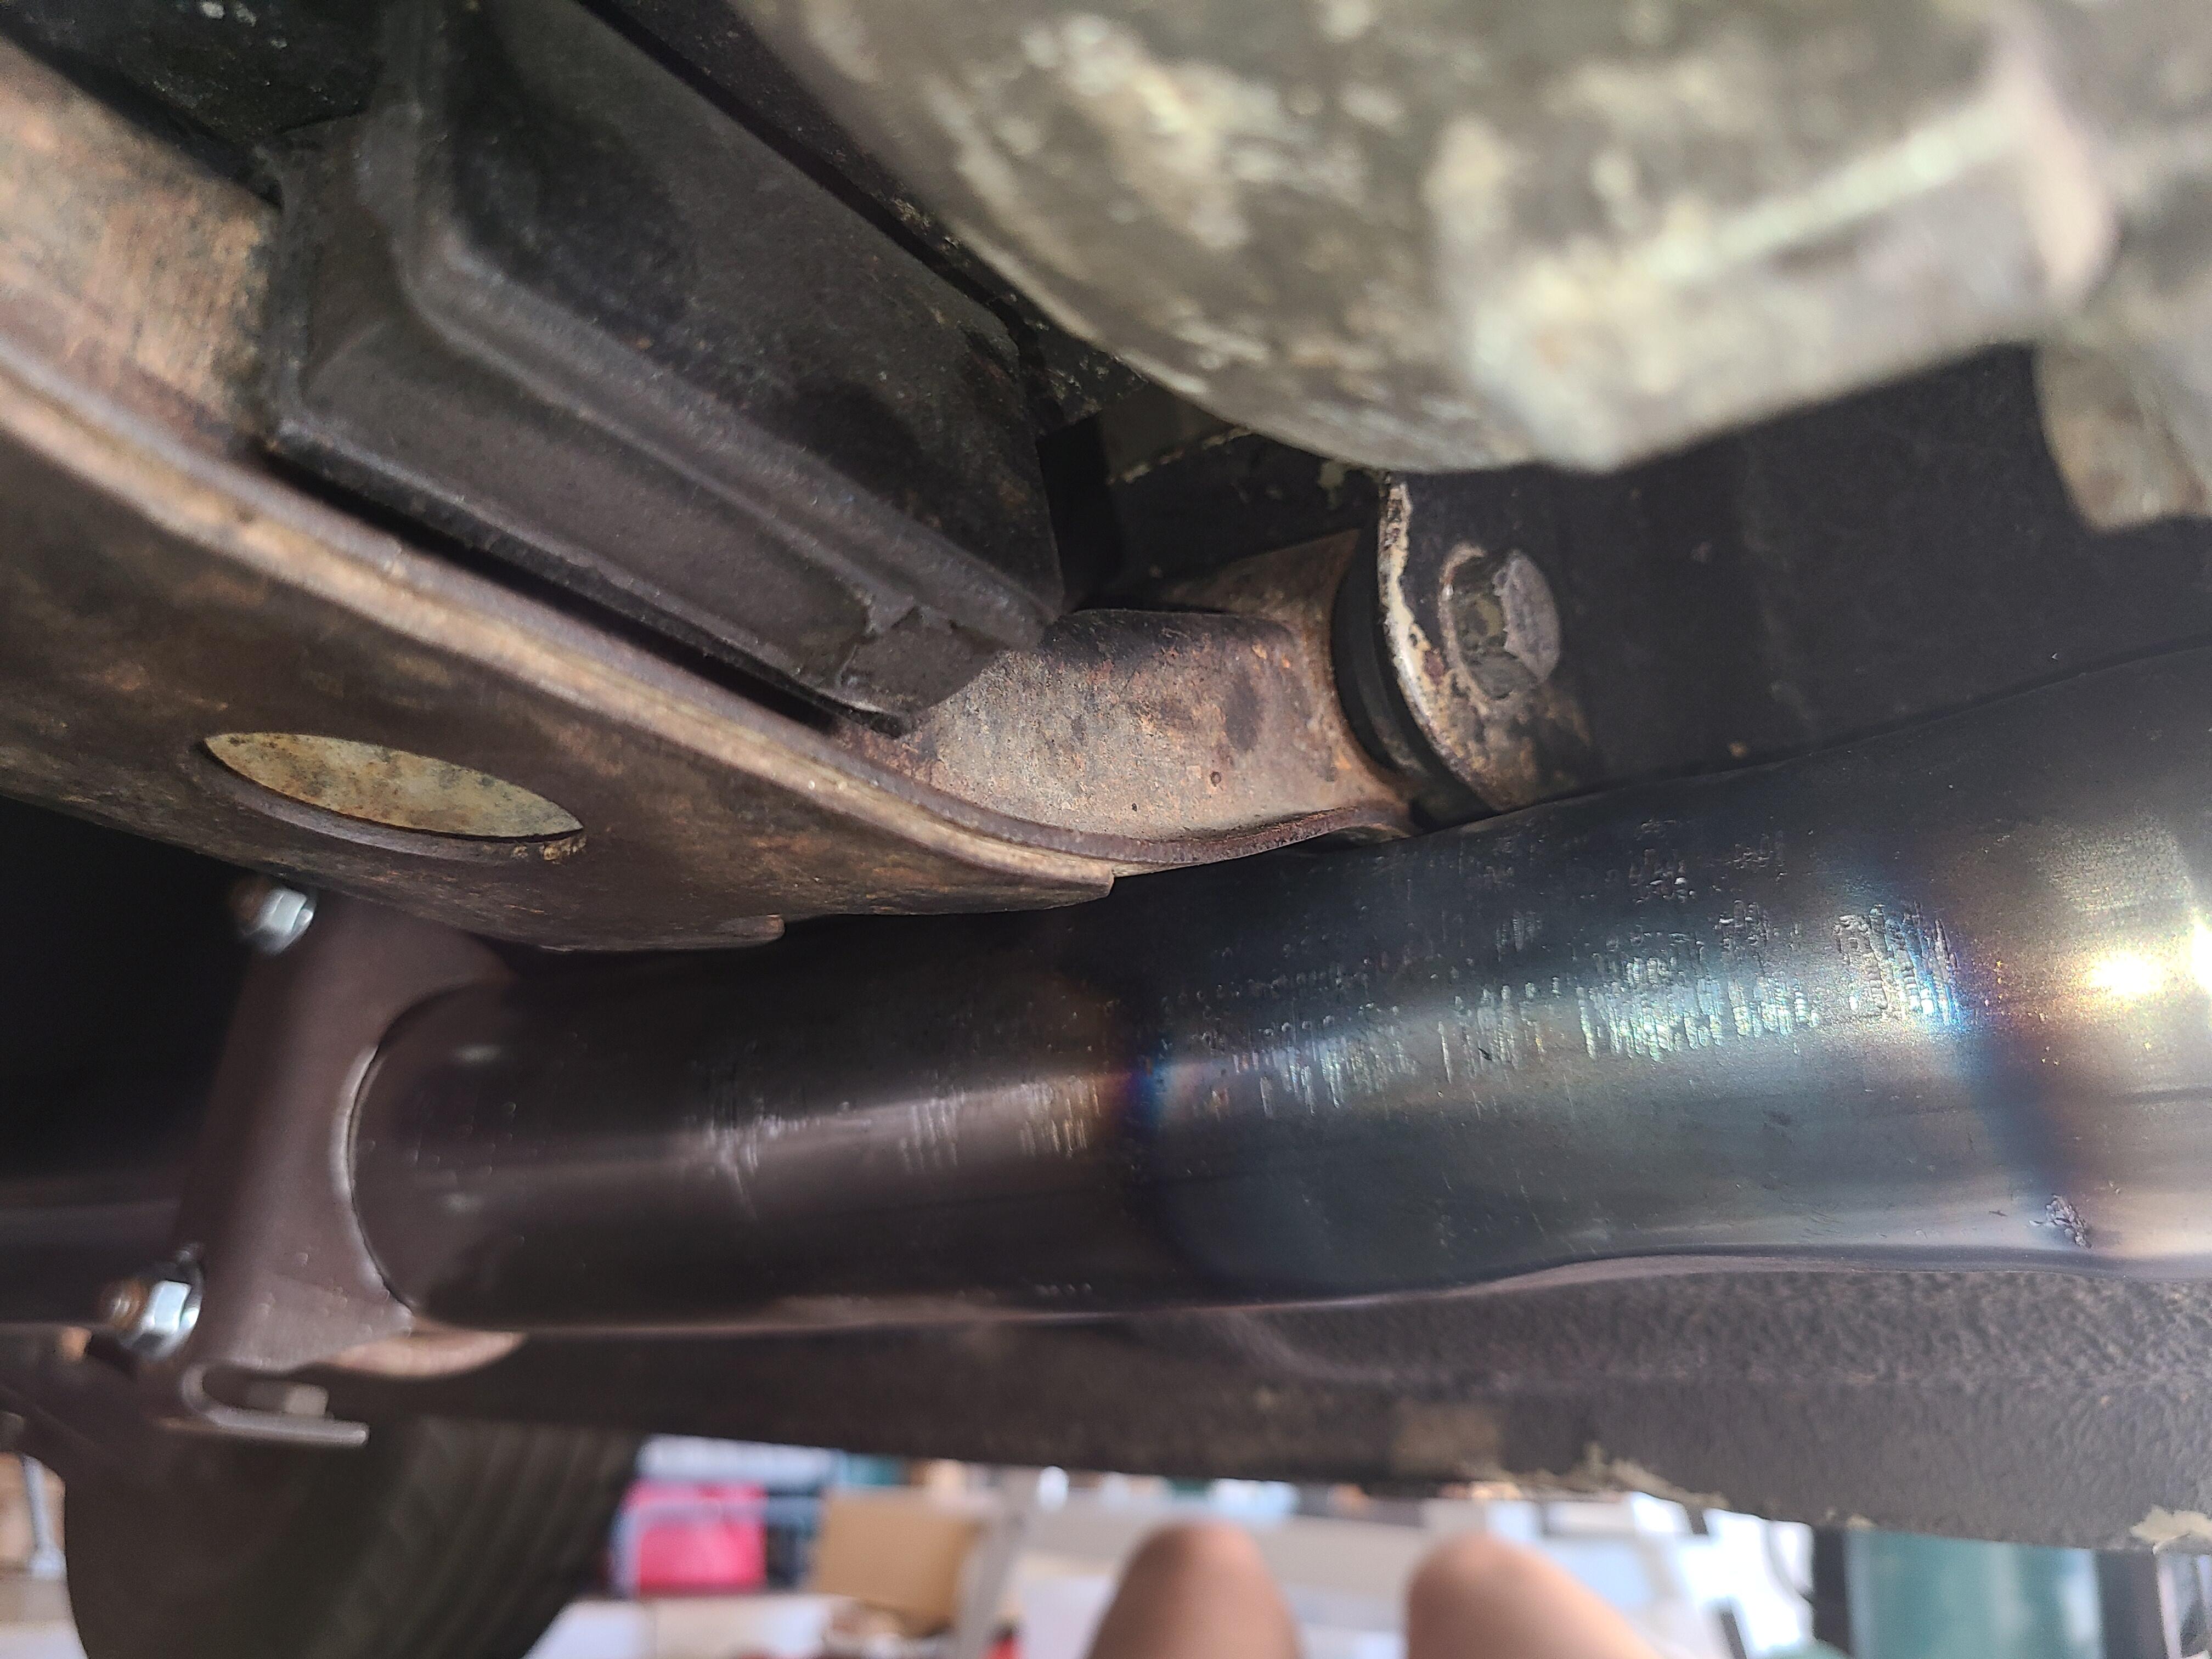
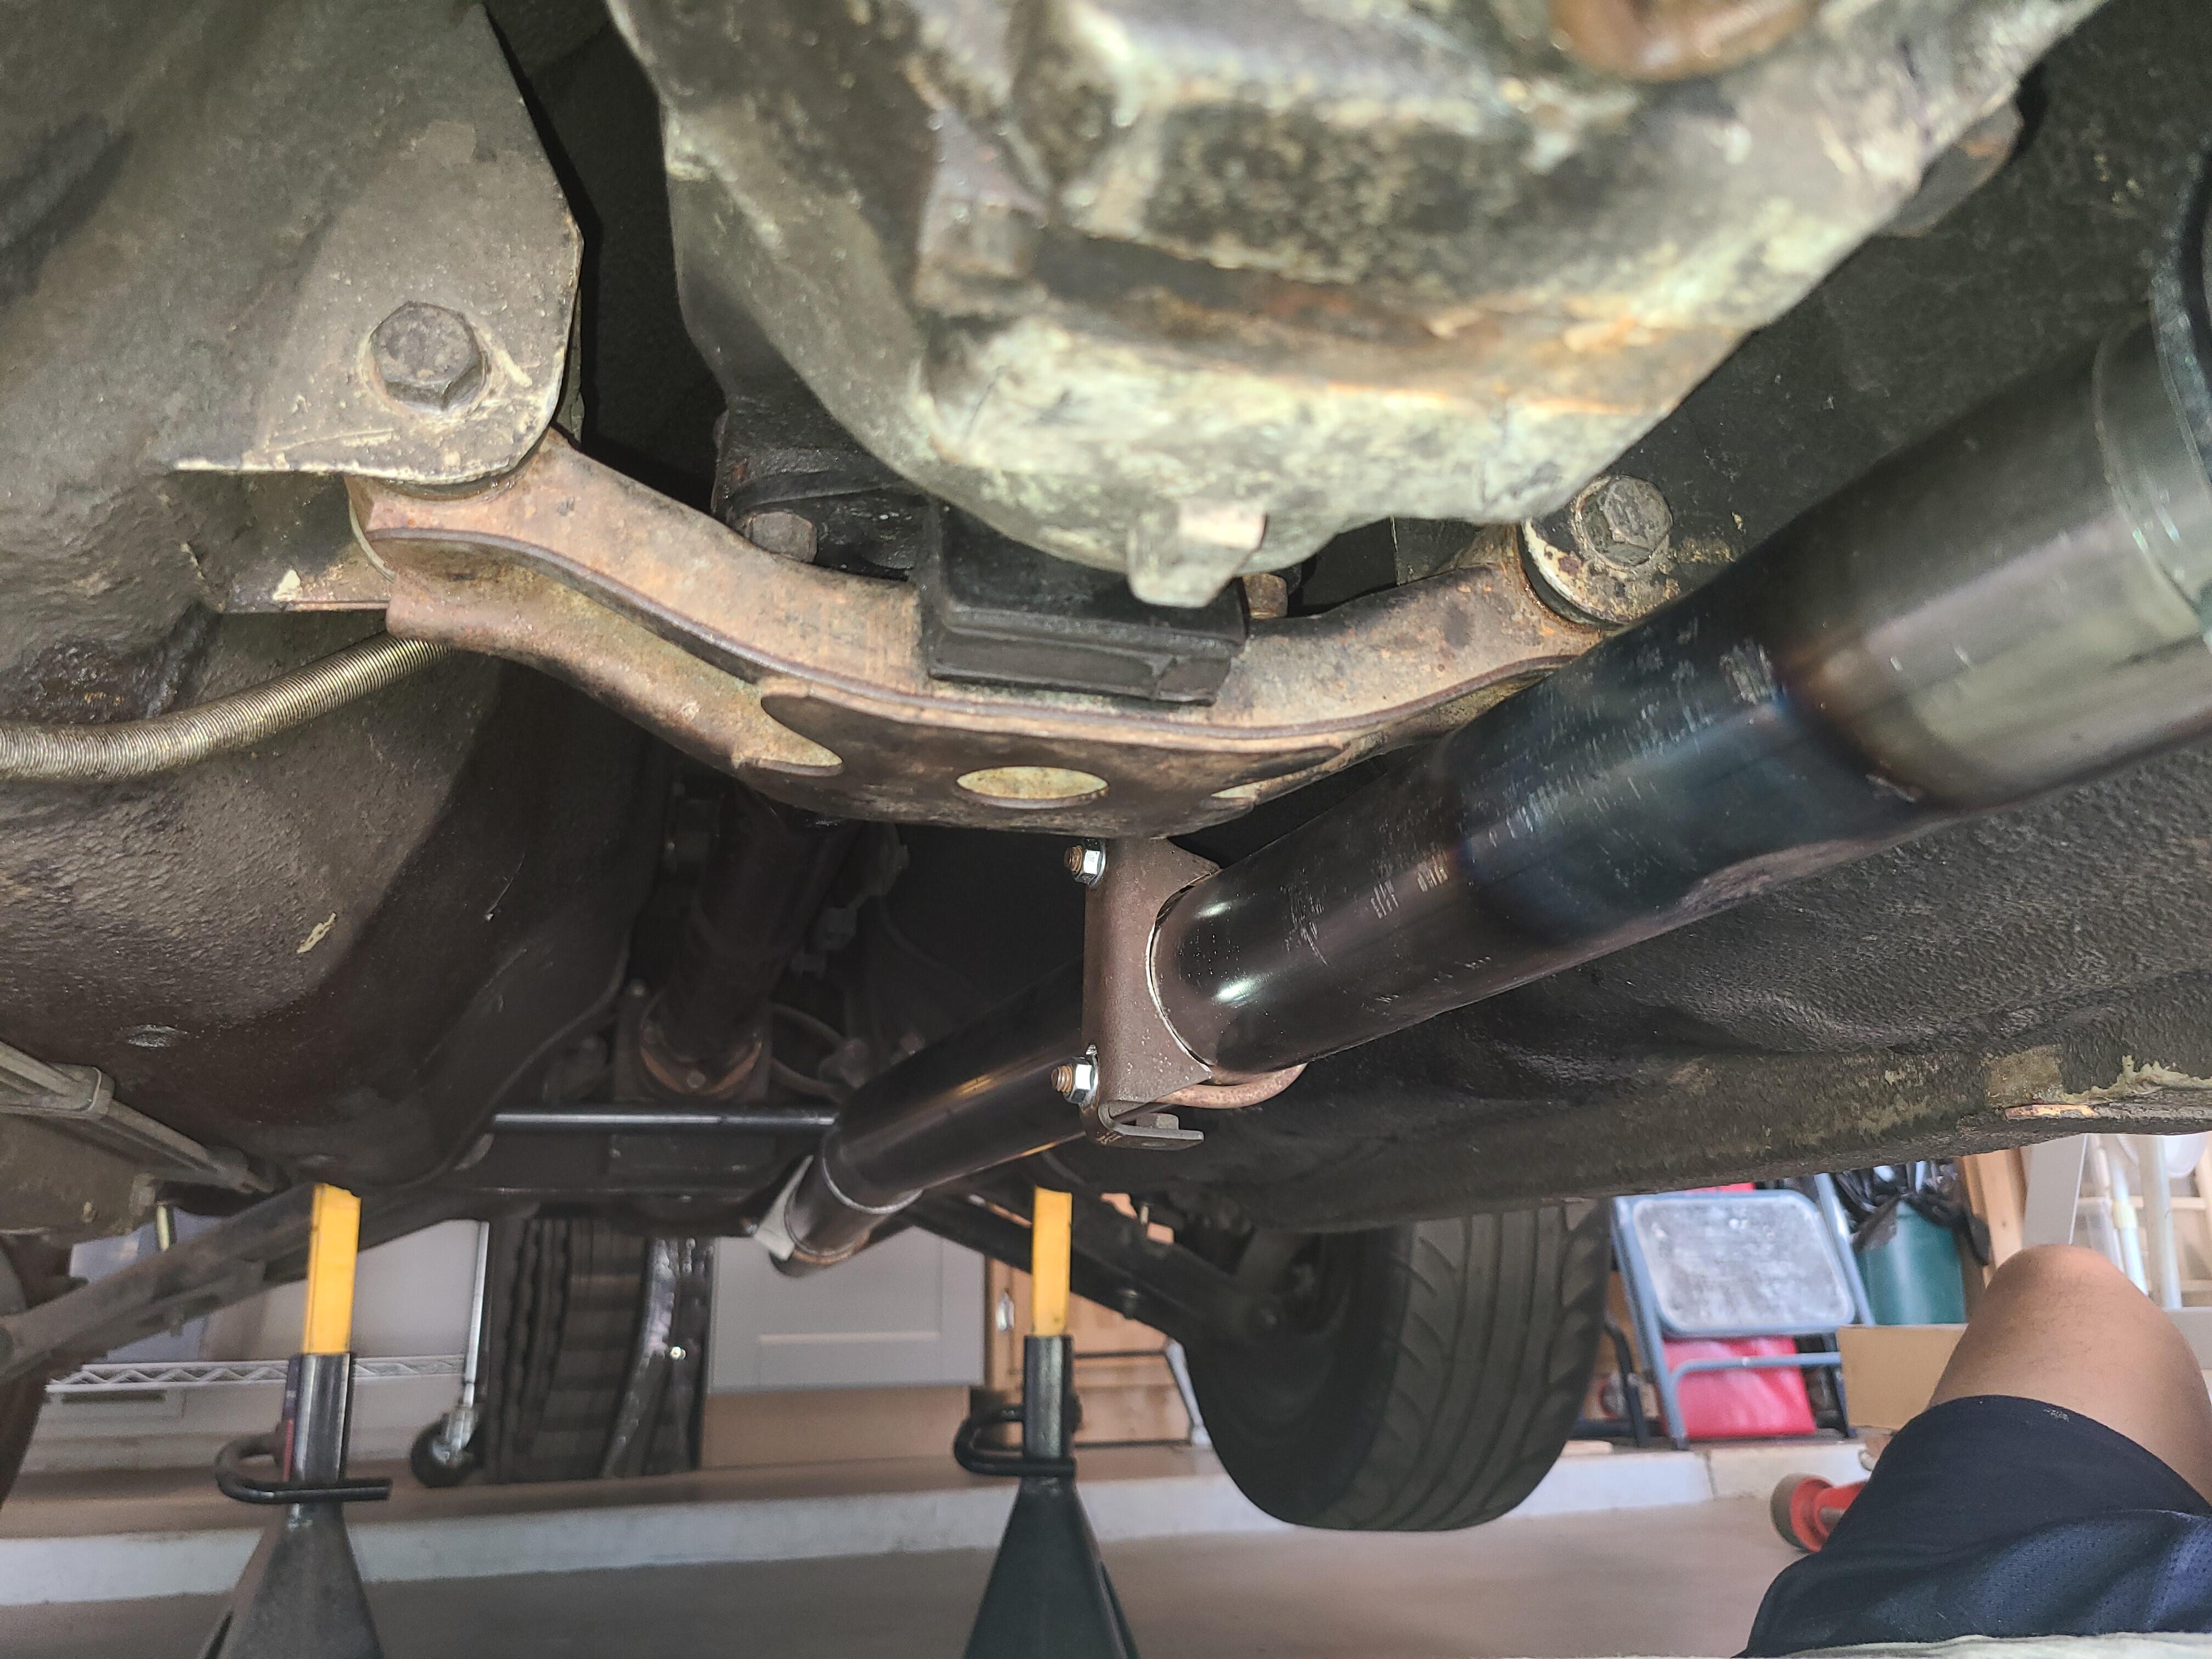
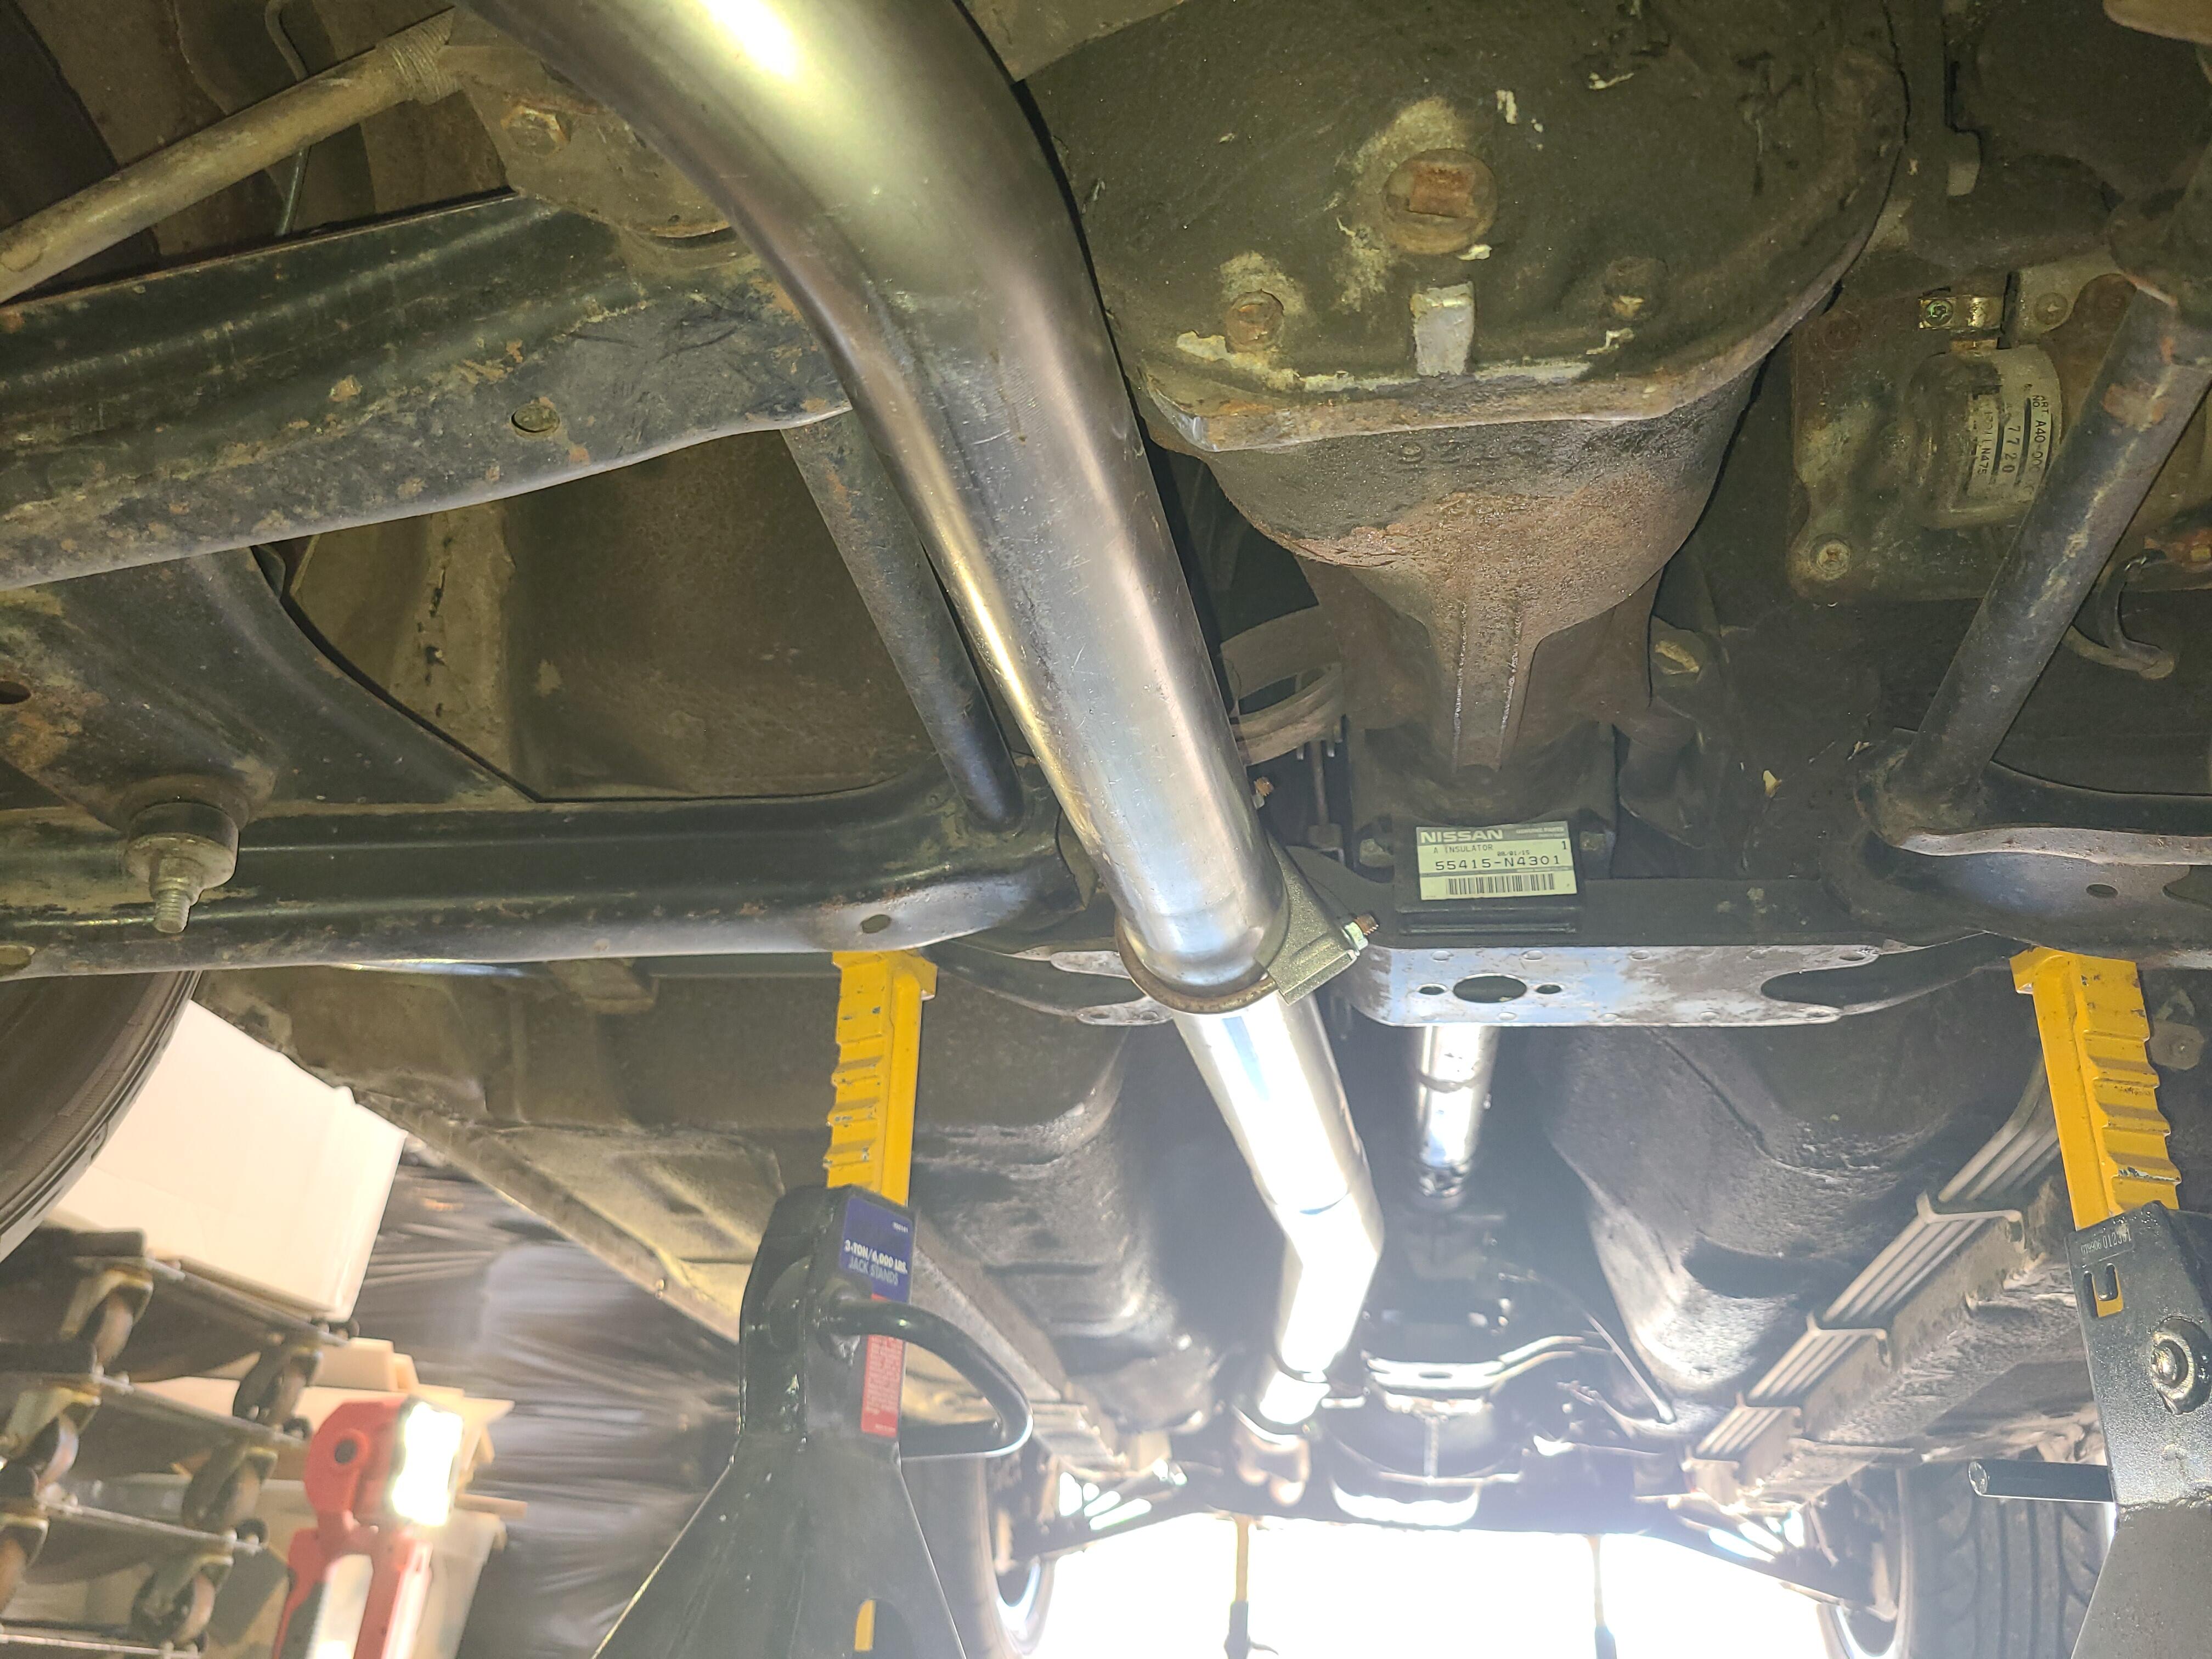
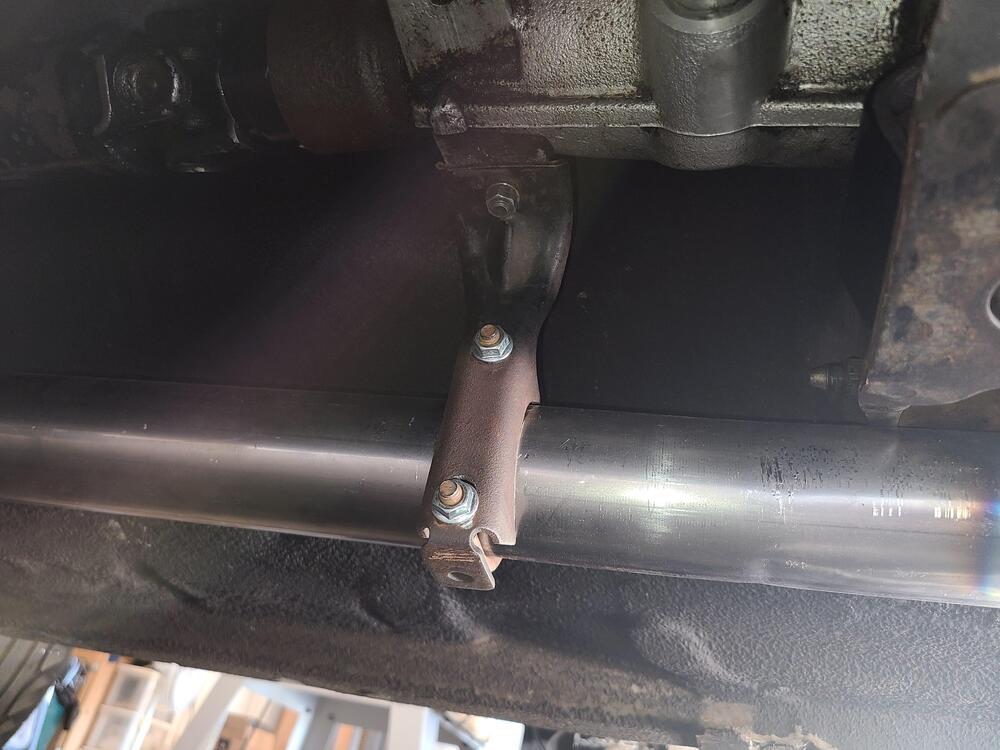
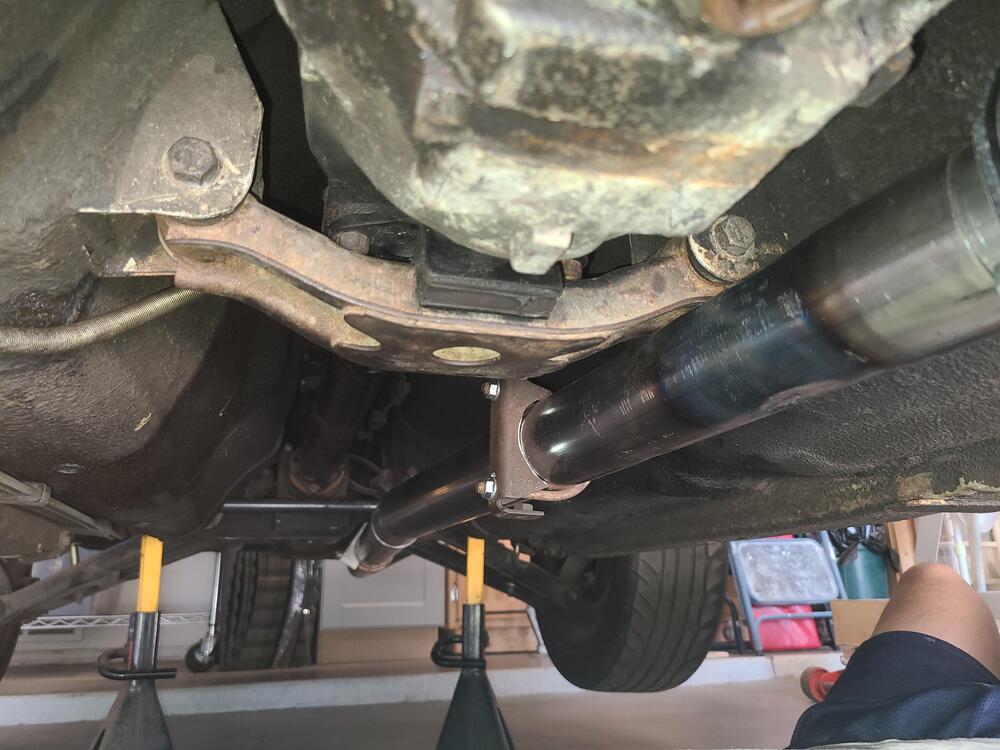
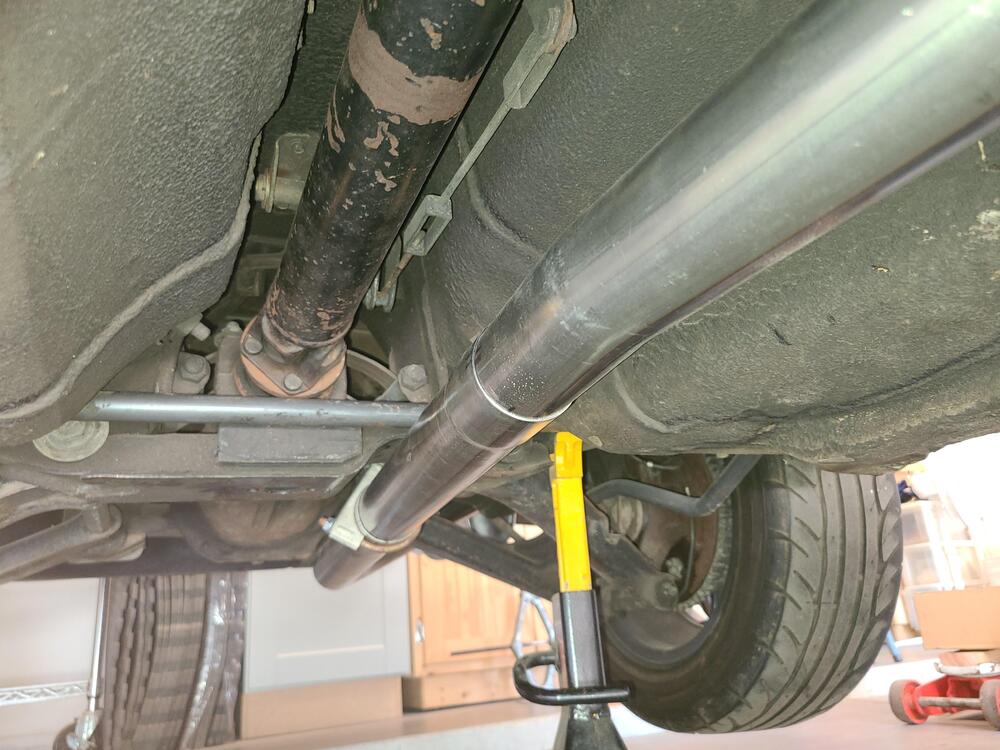
I got my 2-1/2" collector from Jegs, so I got the exhaust on today. The AZ Z Car header is terrible. The outlet points right at the trans cross member, so I had to heat and beat the MSA pipe a lot to get it to fit. I modified the OE exhaust hanger to fit the 2-1/2" pipe and, of course, I had shortened the Z pipe between the axle and the muffler. Overall, the system now fits great everywhere except right behind the header, where it is still too tight to the trans crossmember. I just need to go buy two more exhaust clamps. I ordered MT90 (or so I thought) from Amazon and it arrived this morning. I opened the box and saw MTL. Somehow, I put the wrong one in the cart, so back it goes. My MT90 will be here tomorrow, so I can't get it off the jackstands and hear the exhaust yet.


 3 points
 -
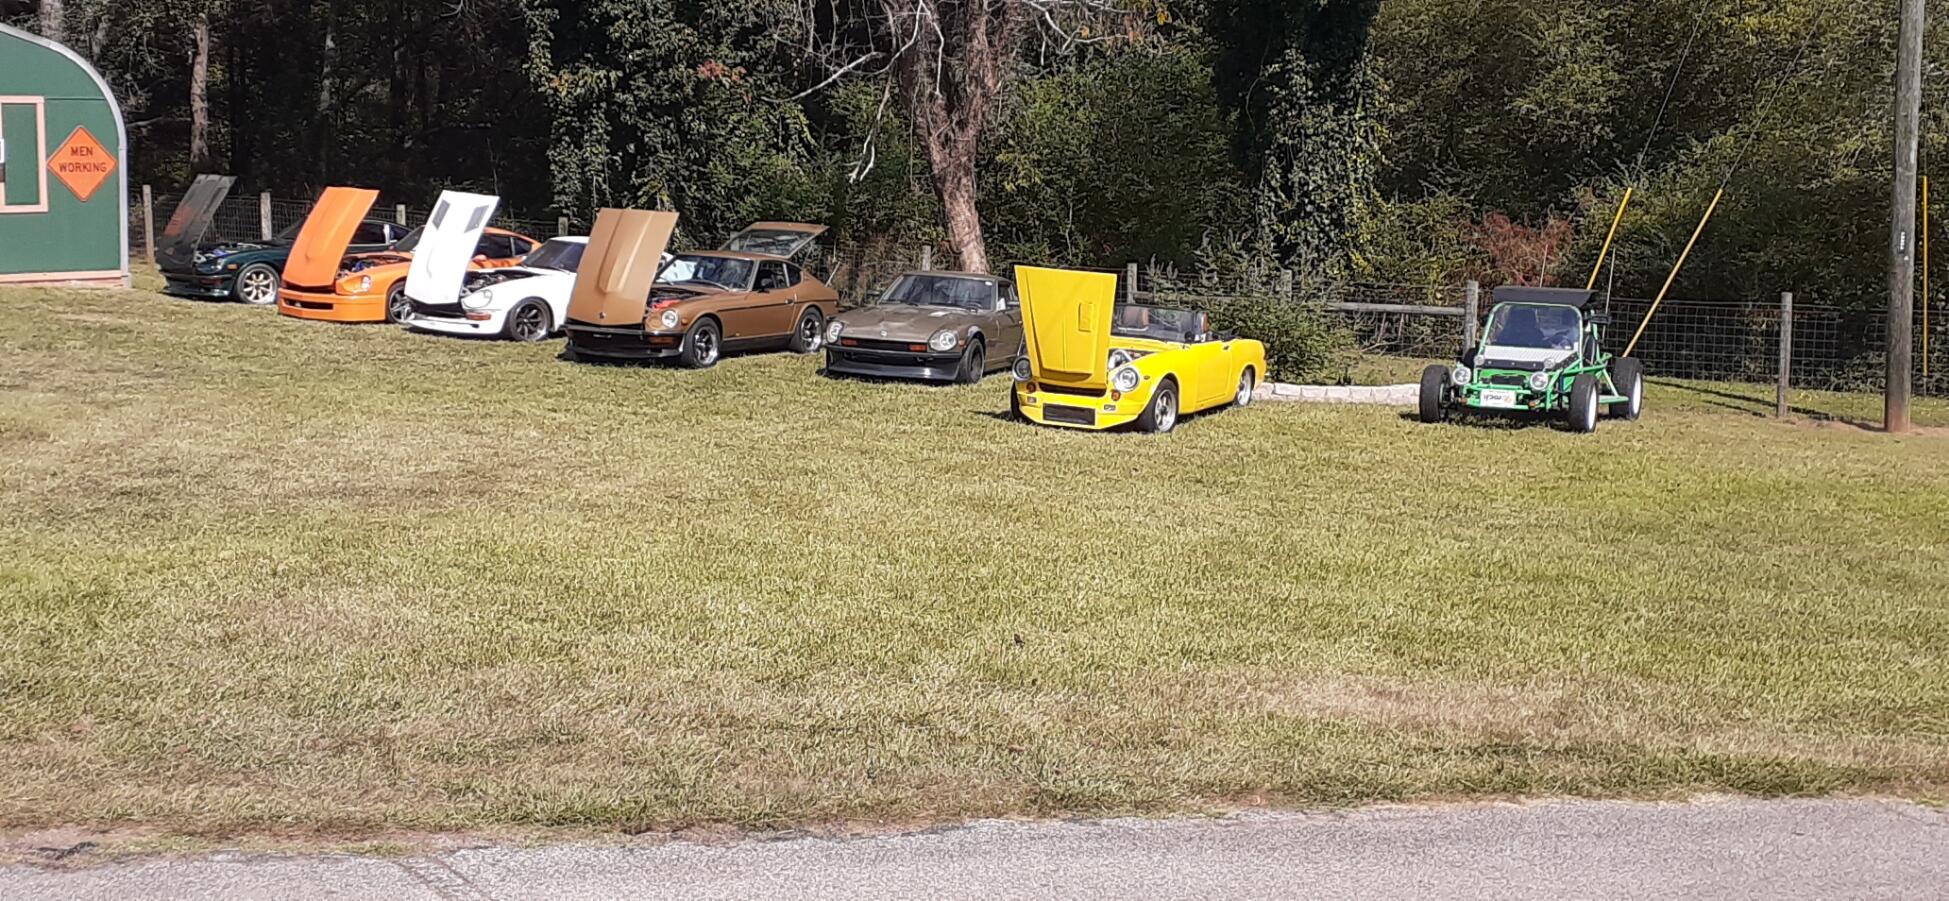
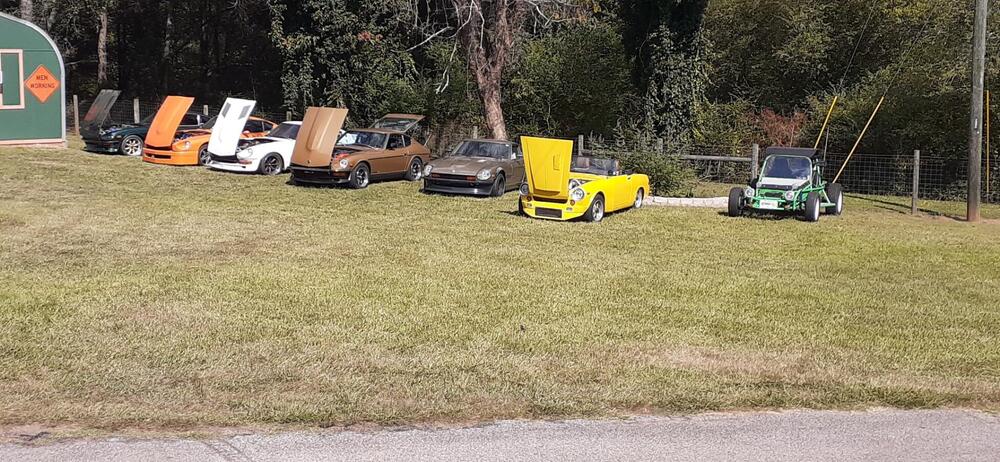
Today I was celebrating the birthday of a brother from a different mother. He also happens to be a Z enthusiast. Every car in that photo except for my 260Z and the 280Z between my car and the Roadster is his. Plus he still has the 240Z he bought from Redwing (Jai) in his garage waiting to be reassembled. Since it was his birthday, I got the horns and speedometer working in his Roadster. He swapped a 240Z for the Roadster. The Roadster has a 2.4L turbo engine in it. Unfortunately, the wiring looks like it was done by a body guy, and the body looks like it was done by an electrical guy. I've been helping him sort out electrical gremlins and install better connectors. He's done a lot of work on my 260Z in the past, so I'm just returning in-kind. A few other Zs showed up along with a 240SX and a G60. There was even a 65 Mustang 2+2 and a 1st gen Camaro SS on hand. There was one strange guy there who was saying something about needing to go to Czechoslovakia to rescue his platoon as he left.
 2 points
 -
2 points
-
2 points
-
2 pointsGreat question, sir. What's happening at this point is that the bar on the diaphragm is not opening the contacts. Before you disassemble, connect your ohmmeter to the horn and tighten the volume screw slowly until the resistance goes up. Then back it down some. Test again and see if the bar can open the contacts.2 points
-
It’s a VW colour, code LD5Q (P1P1) Shadow Blau. In early 2000s it was a rare colour reserved for the high end models but now it’s very readily available on much of the VW line up. The previous owner sprayed it and I have to say, the car does look great in this shade. It really brings out the lines and the bright work. But being a darker colour, it’s a total PITA for showing any small scratch or dink or dust particle ;) Looking forward to seeing the finished product in your car!2 points
-
2 pointsYes, the threading is standard righty tighty but looking from the bottom. So from above, everything is backards. If you can't adjust it out with the mixture nuts then it's a float level issue2 points
-
1 point
-
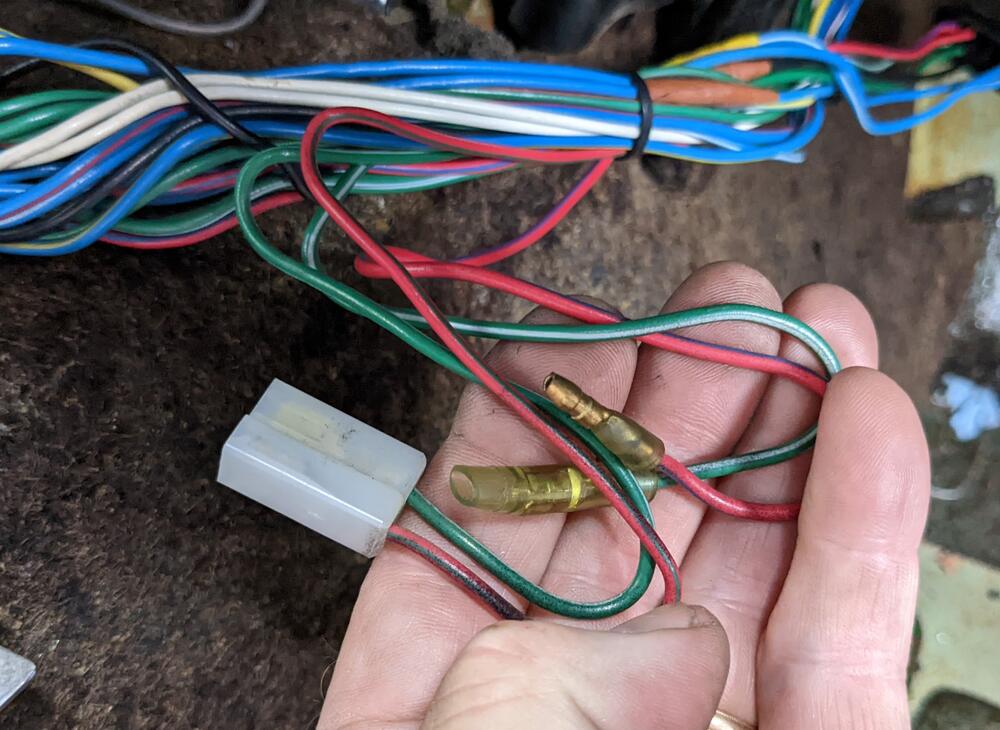
Yes - mine has the wiring harness in place - CaptO pointed it out when I posted this pic 😊
 1 point
 -
1 point
-
1 pointIf your rubber is giving off black residue, then it’s pretty dry / has had UV reactions etc. I would consider something like this: https://www.theleathercolourdoctor.co.uk/car-rubber-seal-reviving-kit-contains-cleaner-and-conditioner-classic-vintage/ But there are a tonne of rubber dressings out there. I use them on the Audis - while we don’t get very cold winters in the Uk we do get some super freezing mornings a few days a year and I’ve found rubber seals freeze to each other unable to open the door - so it’s worth considering them on your more modern cars too.1 point
-
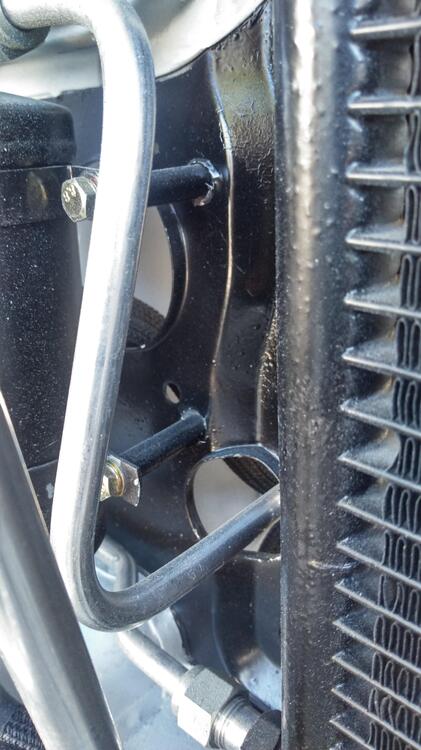
1 pointThe receiver drier I did not want it in engine compartment. I made mounts from aluminum rod, drilled and tap with 6mm tab. Something else Vintage air will make hard lines for you. There is a you tube video showing how to measure and bends you can make.
 1 point
 -
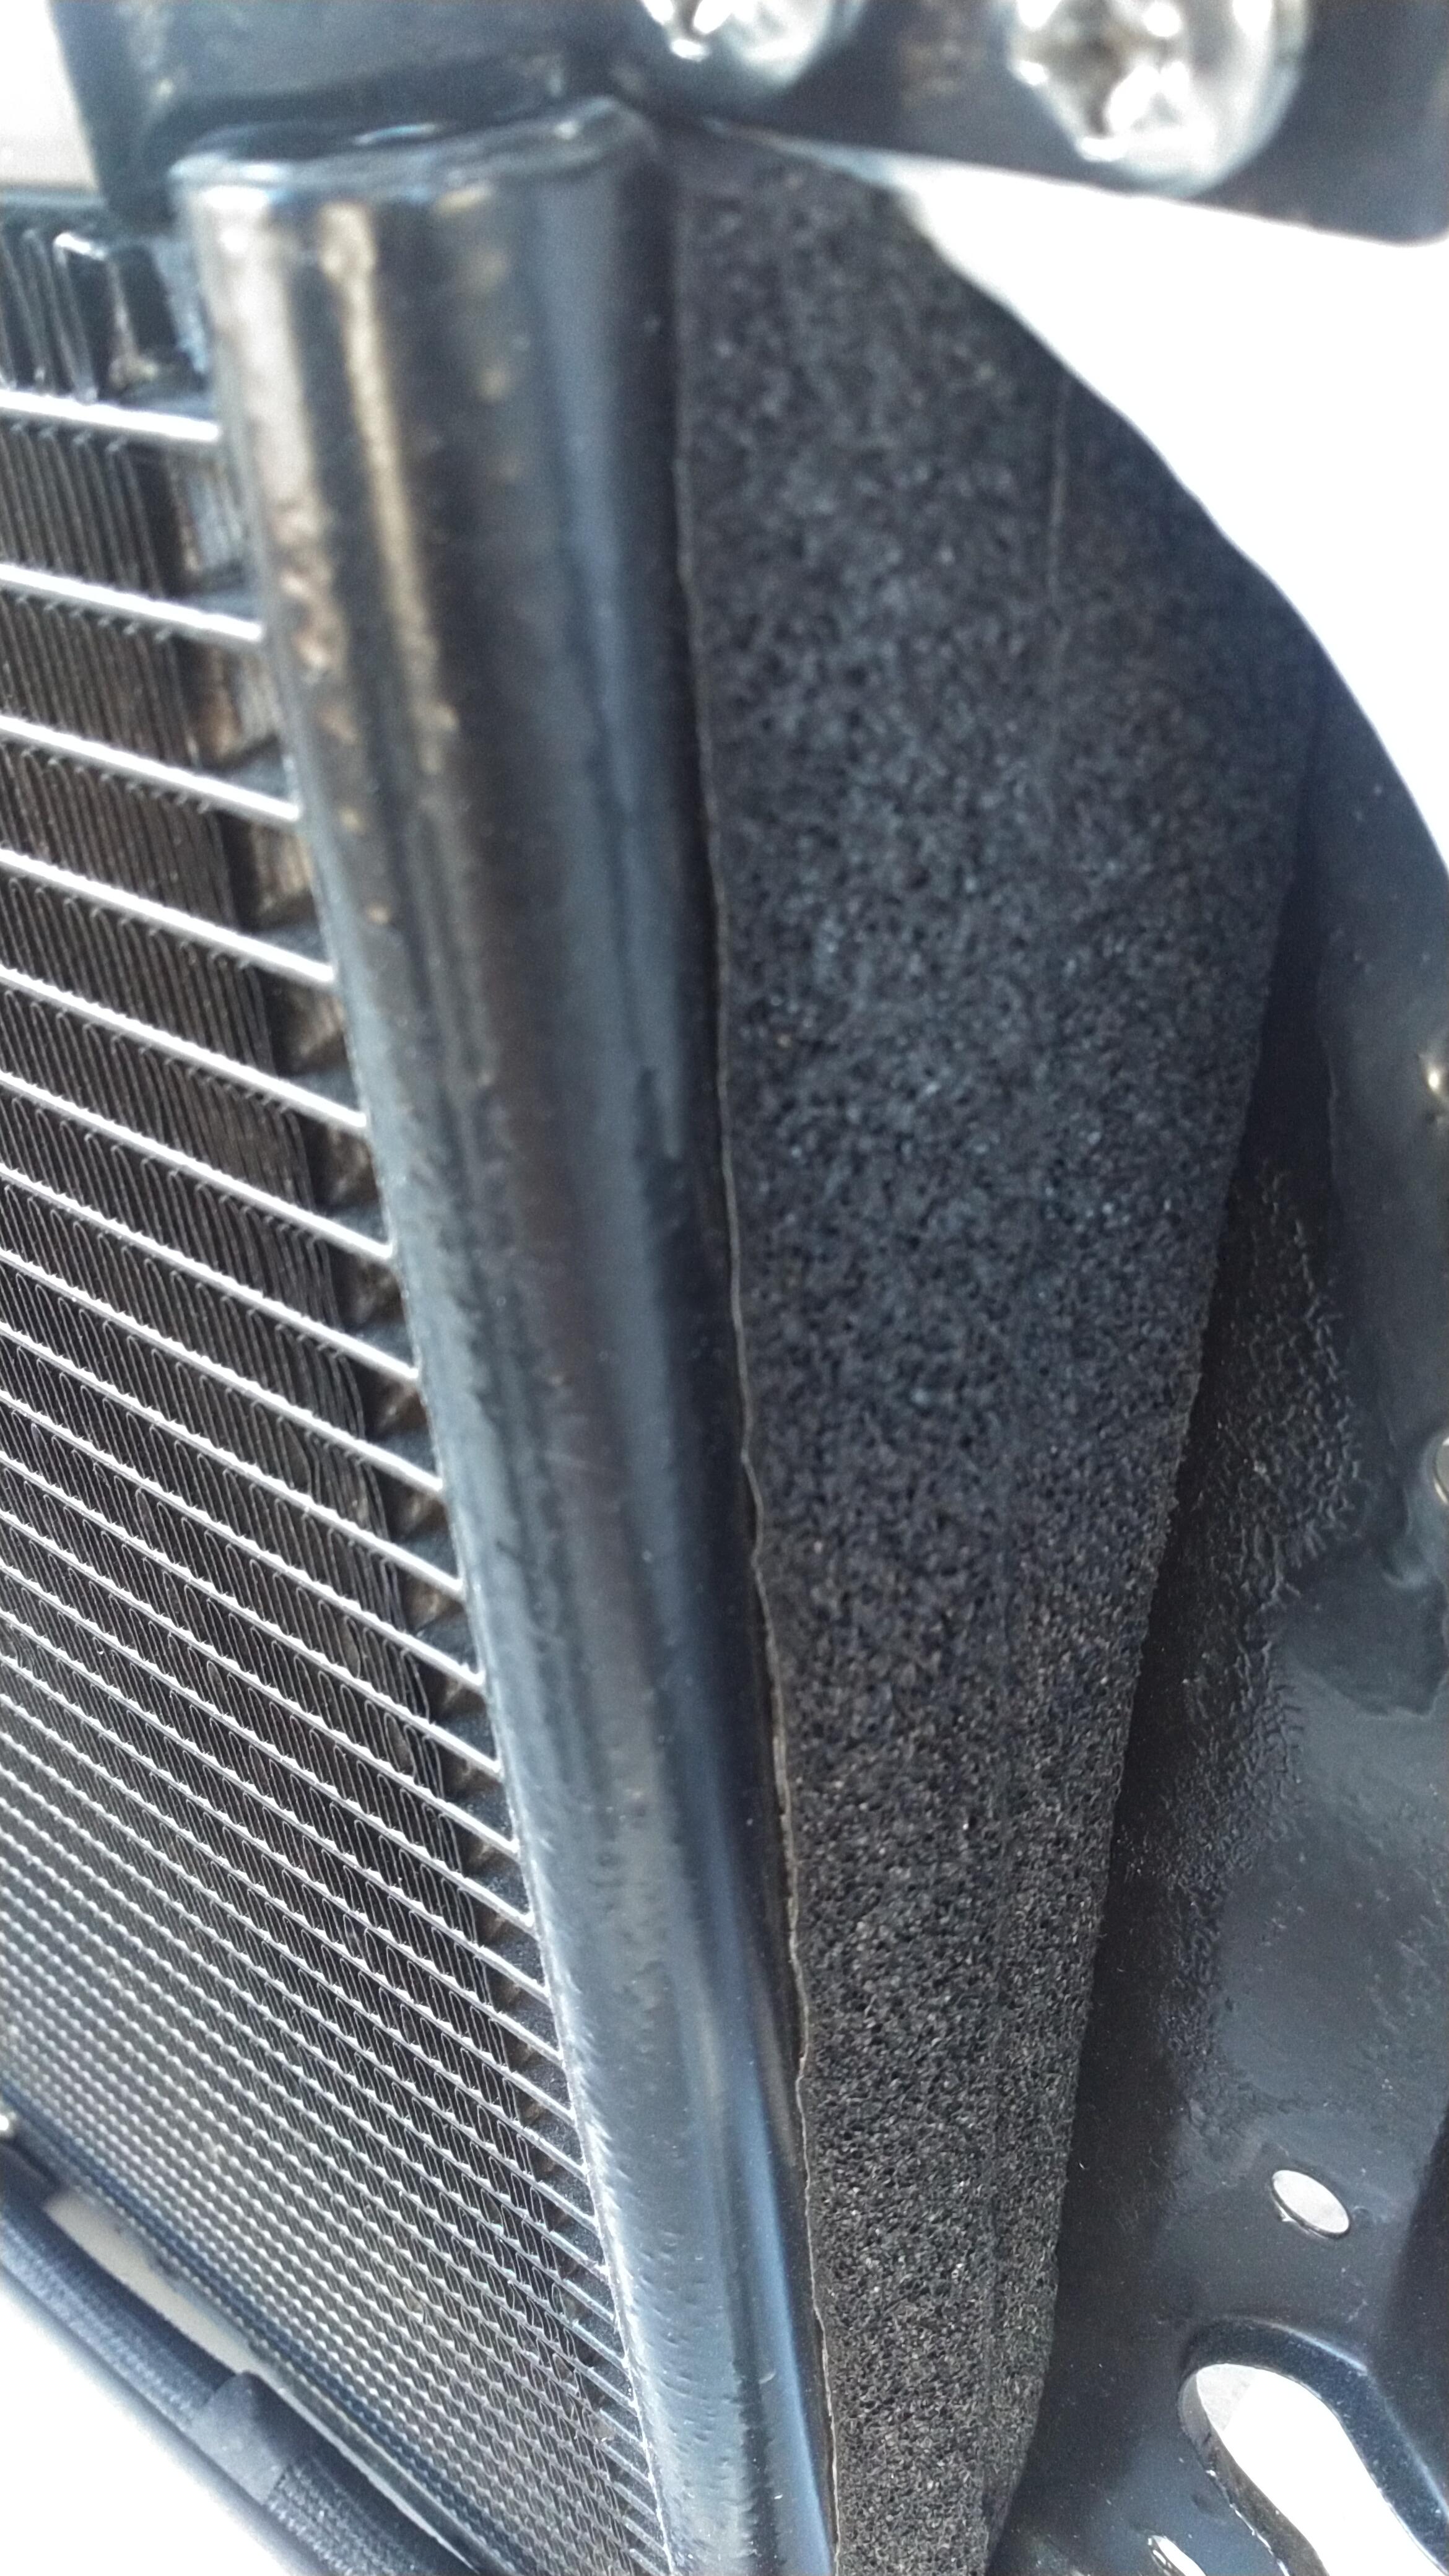
1 pointIf you decide to use the hard lines from Vintage air do not use cheap tube benders purchase Imperial benders that are far better. I purchased mine from e bay at appox $40 (used). Another trick with using tube benders is to put a little grease on tool helps making a smooth bend. I was use dense foam between condenser and core support. This keeps all the air pulling though it and not from the sides. I do same with my radiator
 1 point
 -
Np on your comments. But it may also be helpful if the pins are broken on the badge, but the badge is good.1 point
-
OK don't hate me, but cheapo ebay one for £129GBP - had other UK club members have good experiences with them so for the price it was worth a try as the original 2 row rad had started weeping. https://www.ebay.co.uk/itm/394847457594 (Price has gone up since I bought it, but not by much) Two of the 4 holes didn't quite line up so I had to gently modify them on the rad to fit. The fan shroud is a standard one, but again, I had to modify the mounting points for it to fit. In fact, I drilled and tapped the tabs where the shroud hangs so that I could screw the shroud on at those points. I'll log on from my phone in a moment and upload some photos. As with any job on the Z, the moment you take something off, you have a) better access to something else to deal with, find surface rust to treat, c) start re-doing all sorts of other stuff and before you know it your 1 hour job turned into 9.5 hours! So I gave it a quick test in the driveway with a 10 mins fast idle at 2.5K rpm with ambient temps of somewhere between 20-25 degrees C and bonnet shut. With mech fan only, the temps only went ever so slightly over halfway. Proper test run this weekend once I re-wrap the loom I unwrapped to do neatly (because that was vital to my cooling project, right?). Hole mods - see sharpie marking before I drilled / filed it. Modifying rad and fan shroud Had to protect the fins during install as they are more delicate than the copper / Nickel ones on the original rad1 point
-
1 pointYes. Seem to be good quality. https://www.thezstore.com/product/3354/fiberglass-headlight-case-right-70-78-240z-260z-280z1 point
-
1 pointClockwise and counterclockwise adjustments are made imagining you're viewing the bottom of the carb. Try reversing the adjustment directions.1 point
-
1 pointIt's HBM not HTM , yeah they have pretty good stuff, I believe most is made in Taiwan. I use a lot of their stuff in my workshop for many years now, not much problems, work fine. When they where still in their old building, i allready bought there. Their populairity has exploded now1 point
-
1 pointSome sort of rubber conditioner. Not Armoral. Do some research and you will find something that conditions rubber.1 point
-
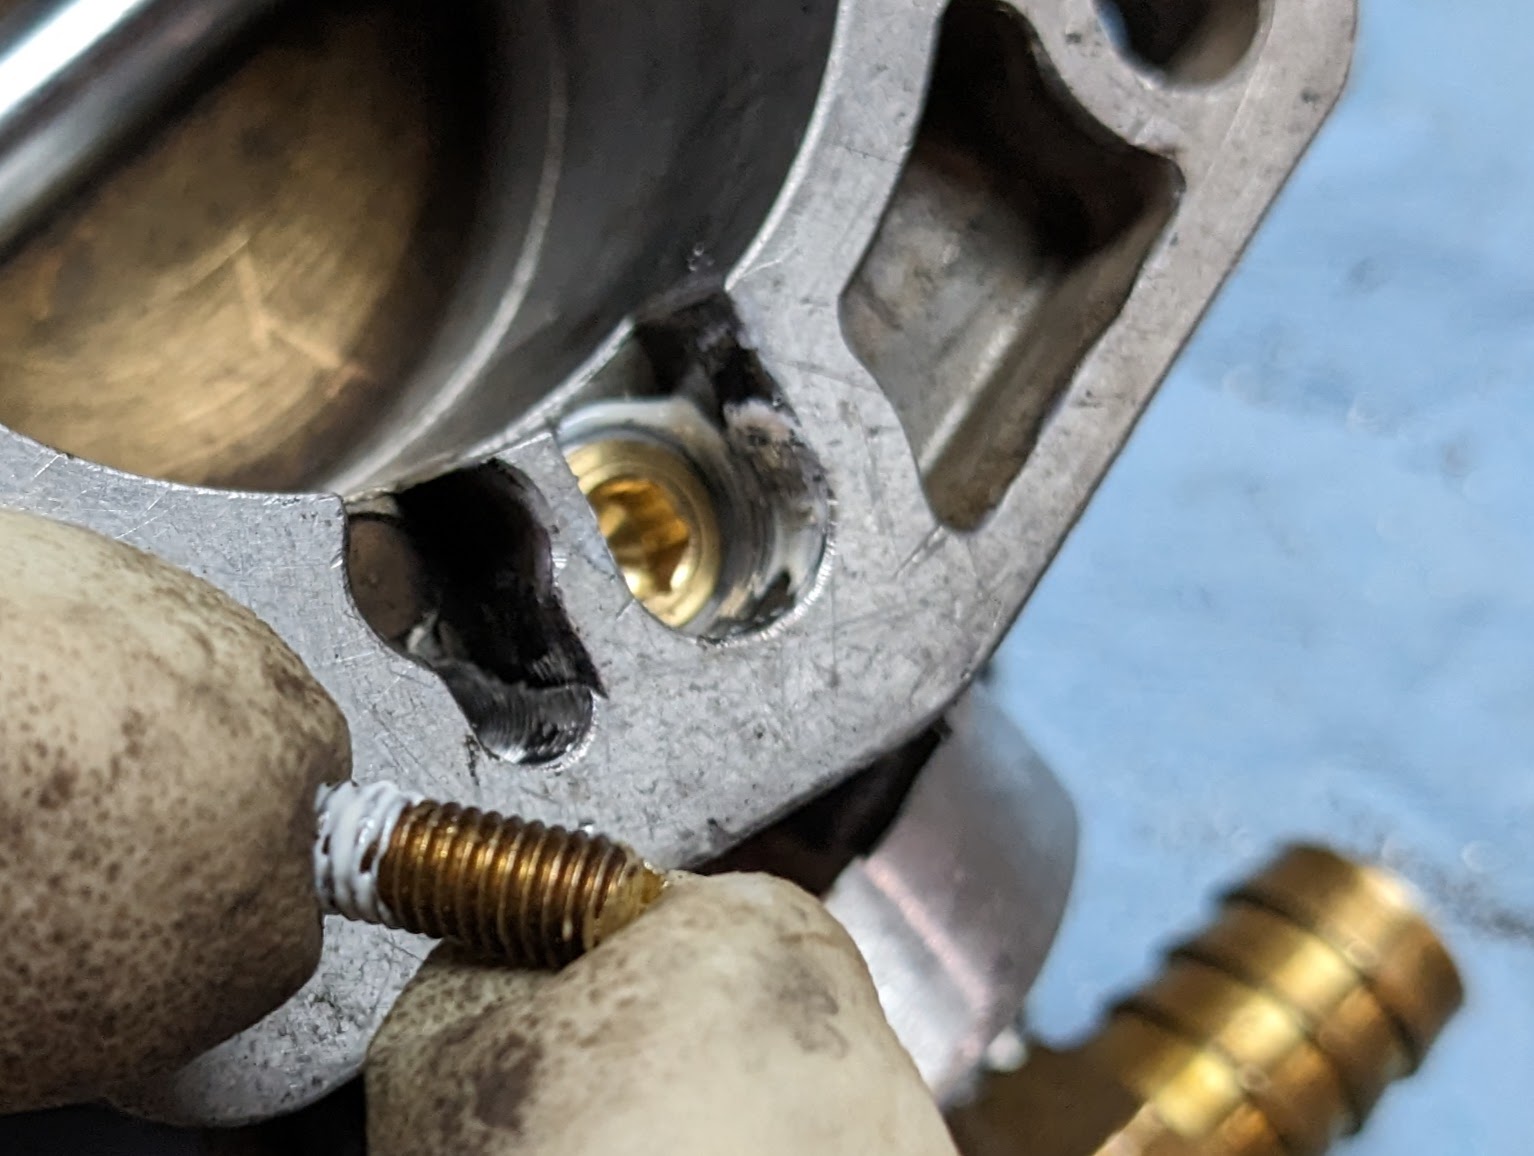
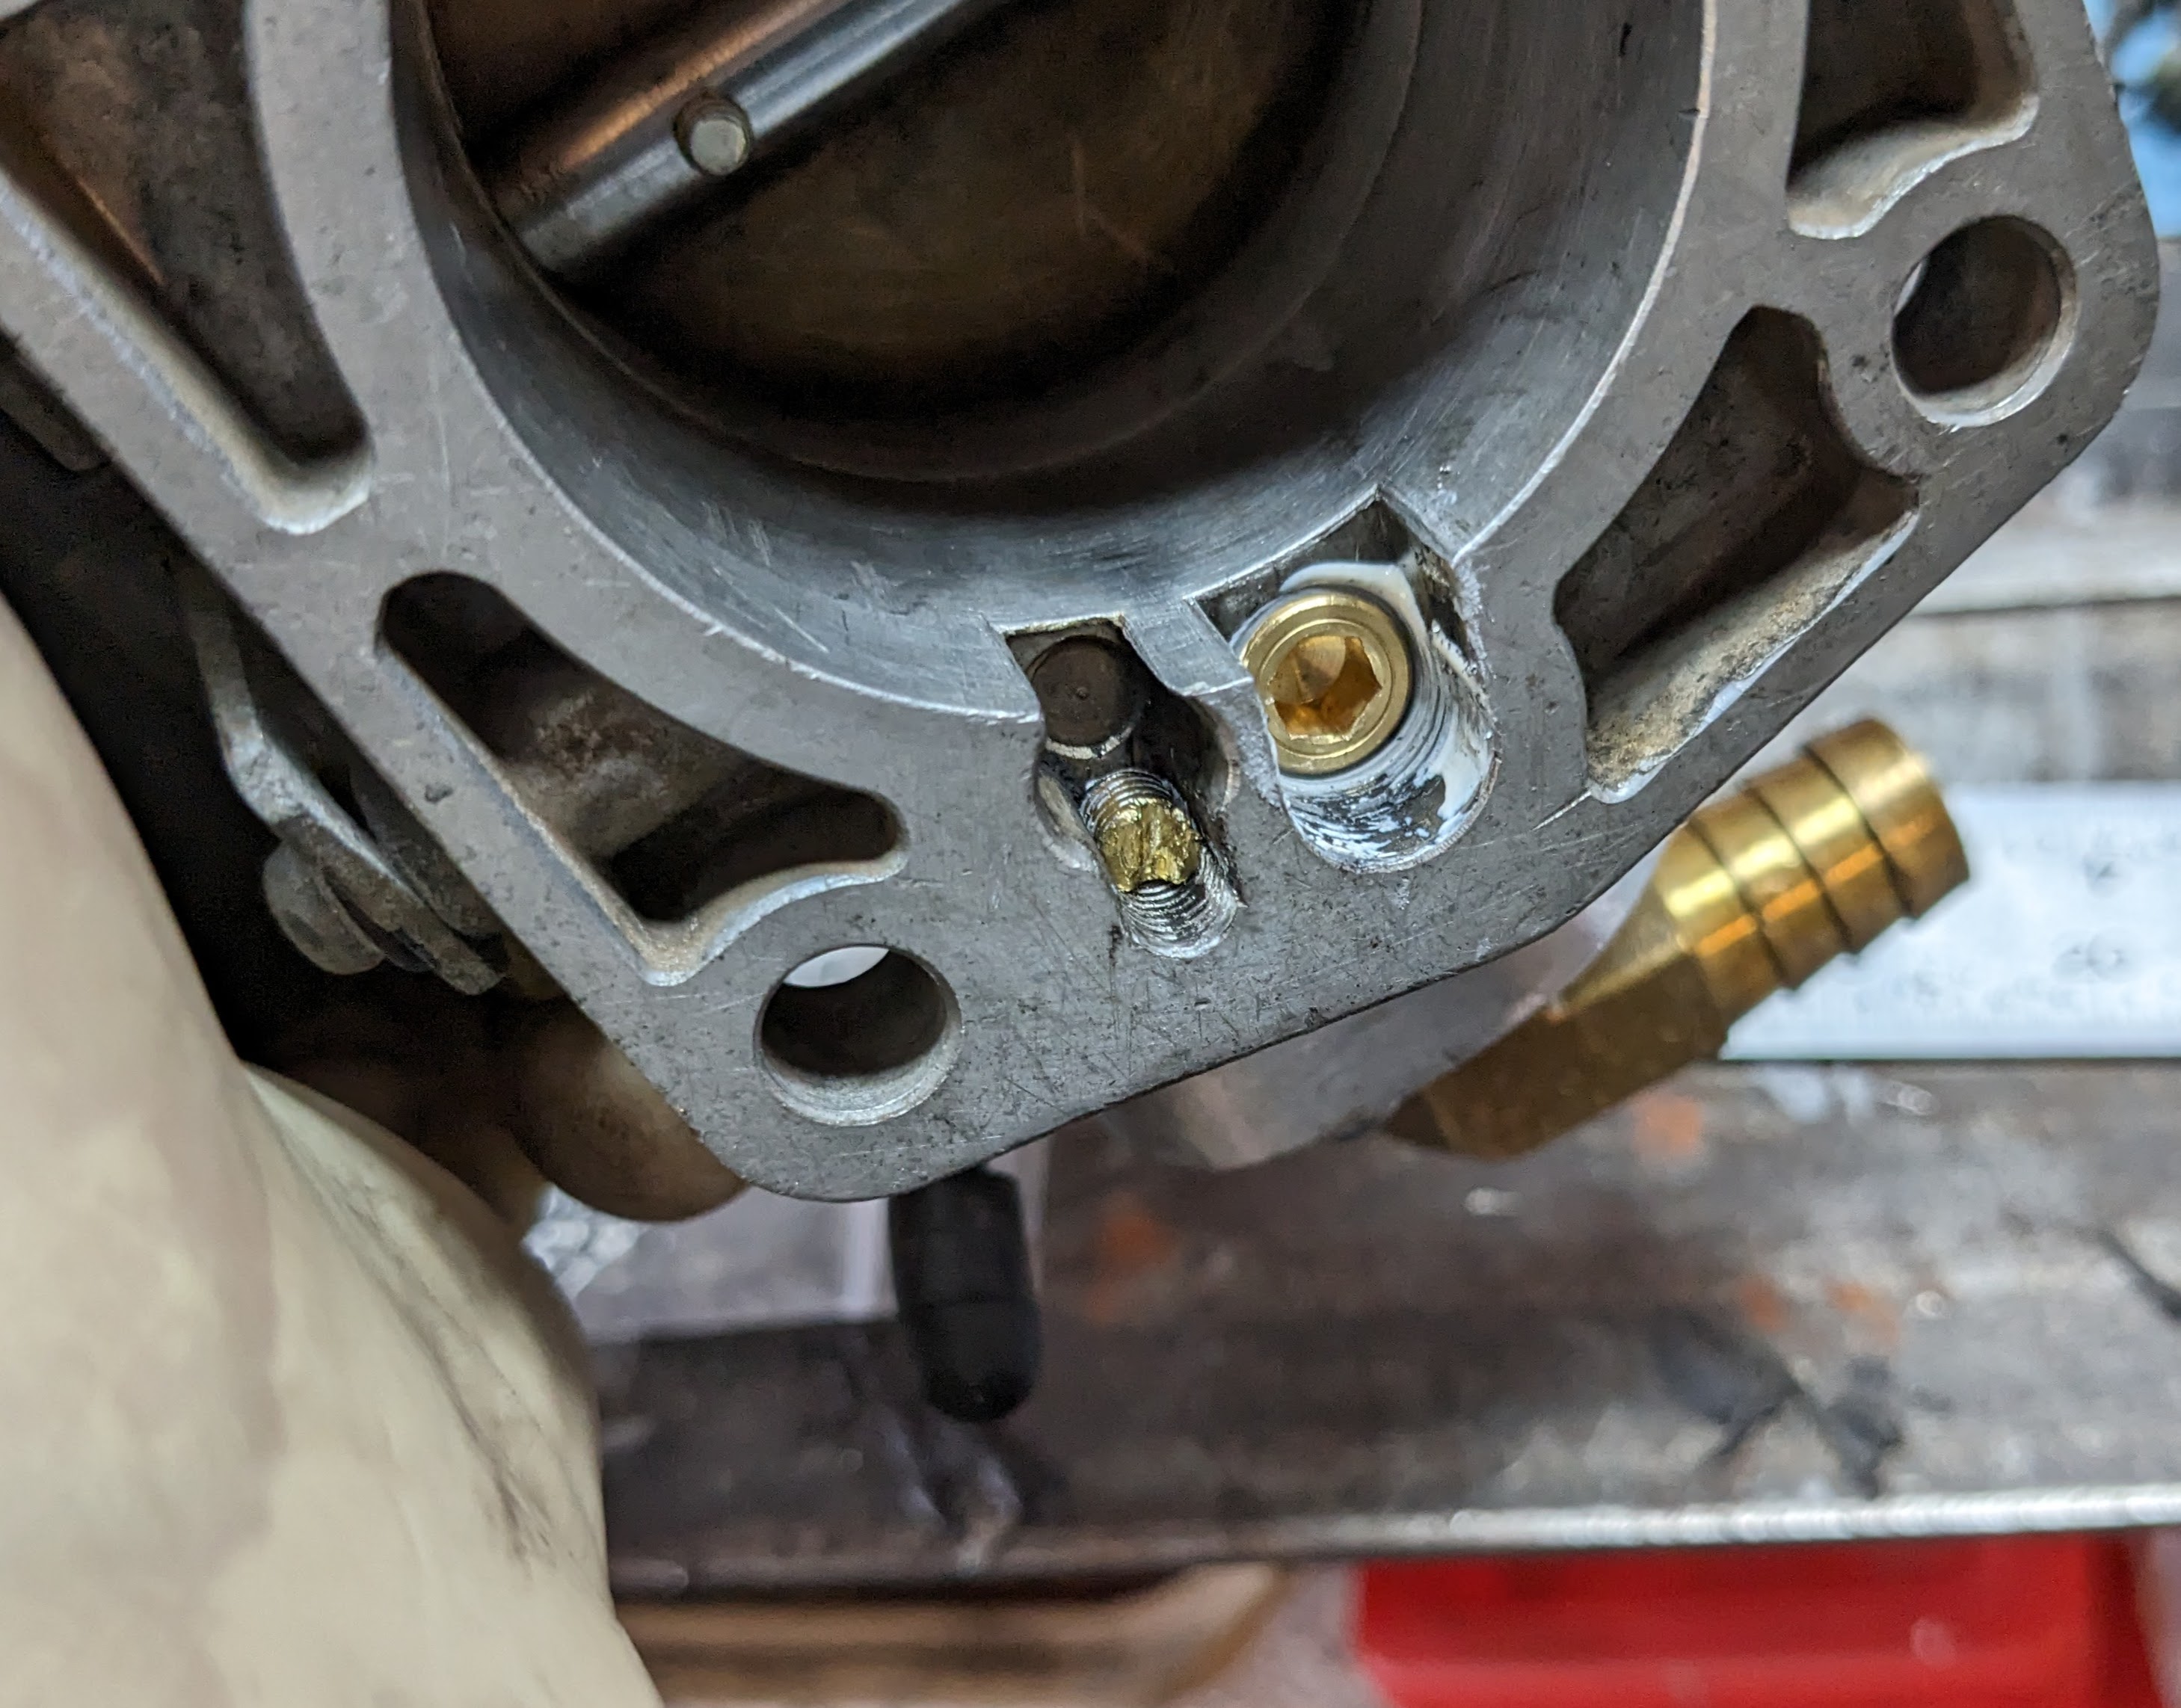
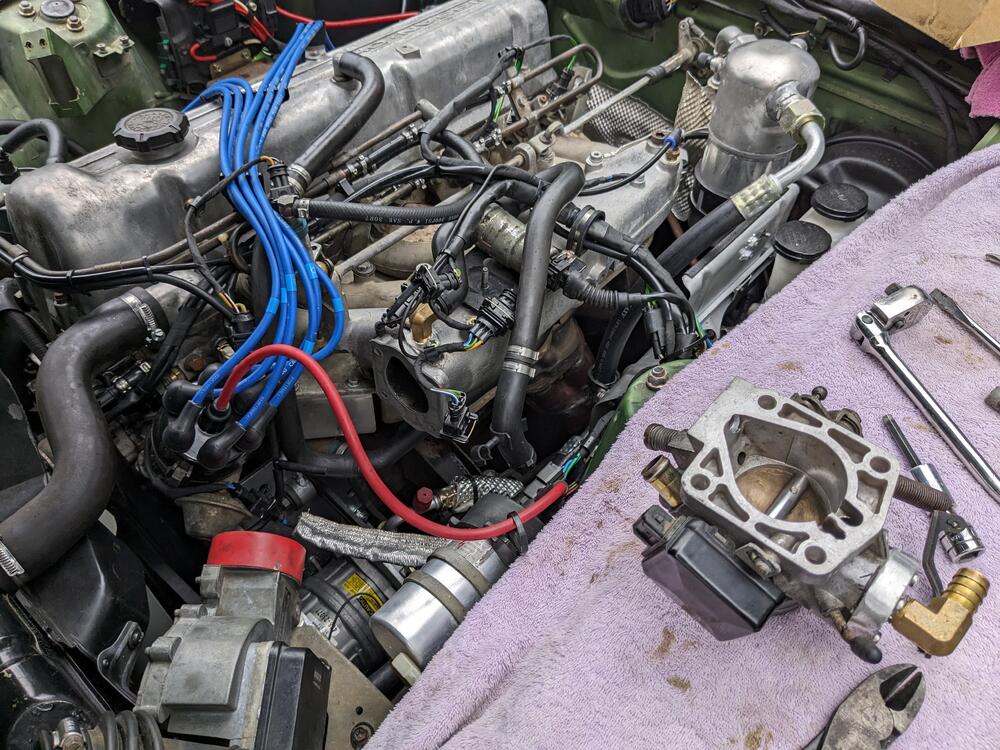
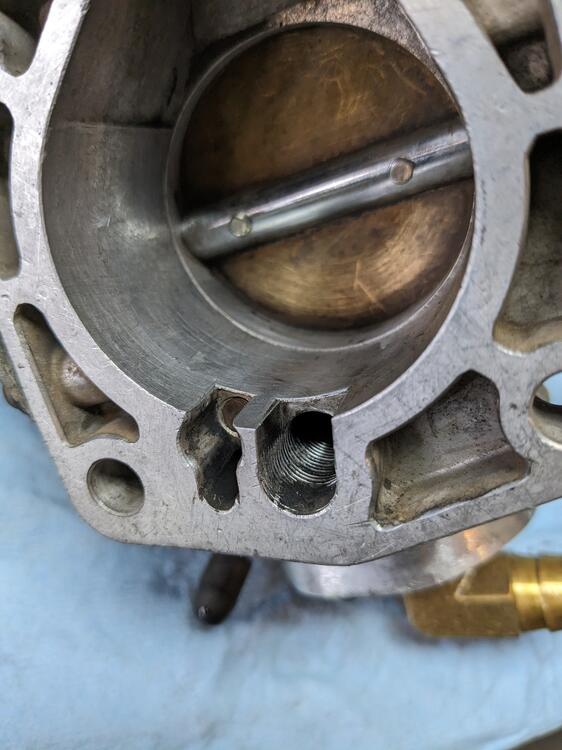
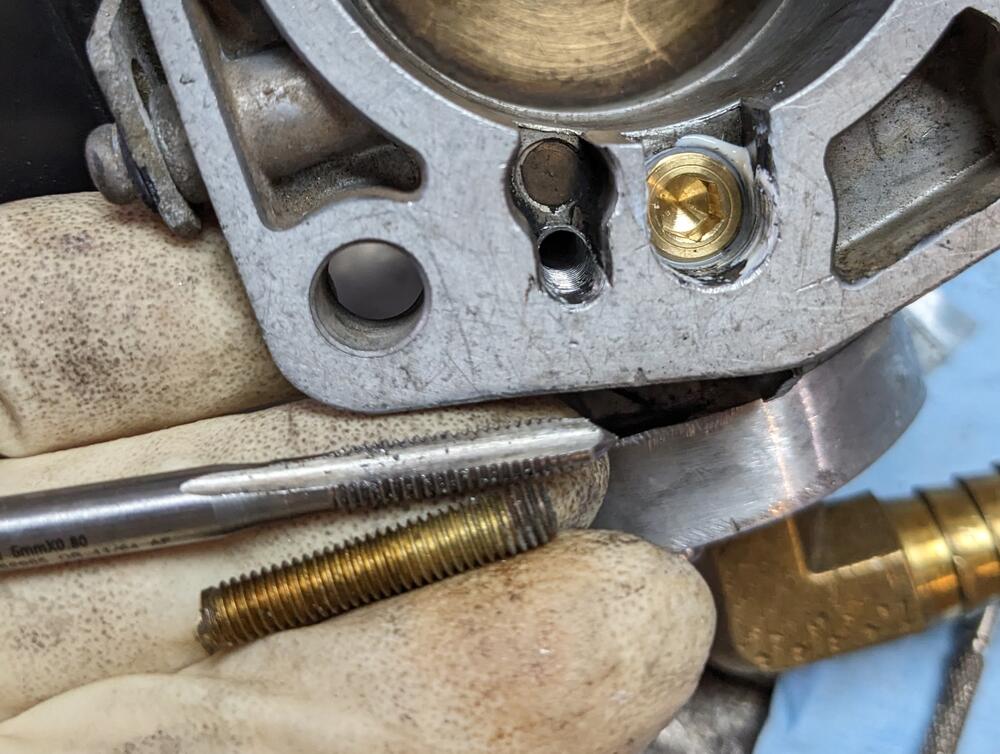
OK - so I had a break in the rain this morning, so I was able to remove the TB during one clear patch, address the ports I hadn't closed off, then get it back on during another break in the rain Larger port I tapped with 1/8" NPT thread sealant on plug tapped smaller port with M5x1, used the snapped off stud from the ignition ballast to make a plug done Back in. Ran the motor - don't have the tach installed, however the rpm's felt much more in line. A little low perhaps, so I ran it to normal op so I could check the base setting. With CIS, the easy way to do that is close off the low vacuum tube from TB to the IACV. It stalled out, so base was too low. Opened the idle thumbscrew a couple turns (I had completely bottomed it out) & got the idle what felt around 750. Releasing the tube, the idle motor cycles & the idle rises to what feels like 850-900 range. I will set it more accurately once the tach is in, but it feels good. Motor revs freely & returns to idle.


 1 point
 -
Yeah, sorry. For some reason I thought the modifications you made under the throttle body took that into account. I've just been so awestruck with your productiveness and the scale of the prolific improvements that you've been making. I must have been blinded by the bling somewhere else. On edit... You said "I'll remove the plate I made & plug the front side port." Make sure you plug the correct side. If I understand your idle air controller plumbing*, you want to plug the high vacuum side of the throttle plate and use the low vacuum side for your idle air supply. So I'm not sure what you meant by "front side port", but I'm just bringing it up to make sure you think about it. * (which is not guaranteed)1 point
-
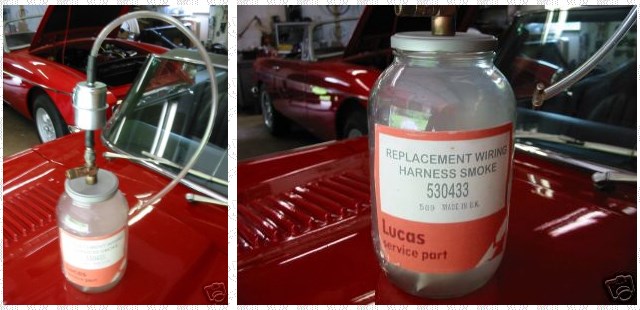
After you get things put back together you should get the "Smoke replacement kit". These were initially created for Lucas wiring in British cars, but I think they'll work in ours too. 🤣🤣
 1 point
 -
1 pointI actually consider it a fortunate mistake because it gave me a better understanding of how the horns work.1 point
-
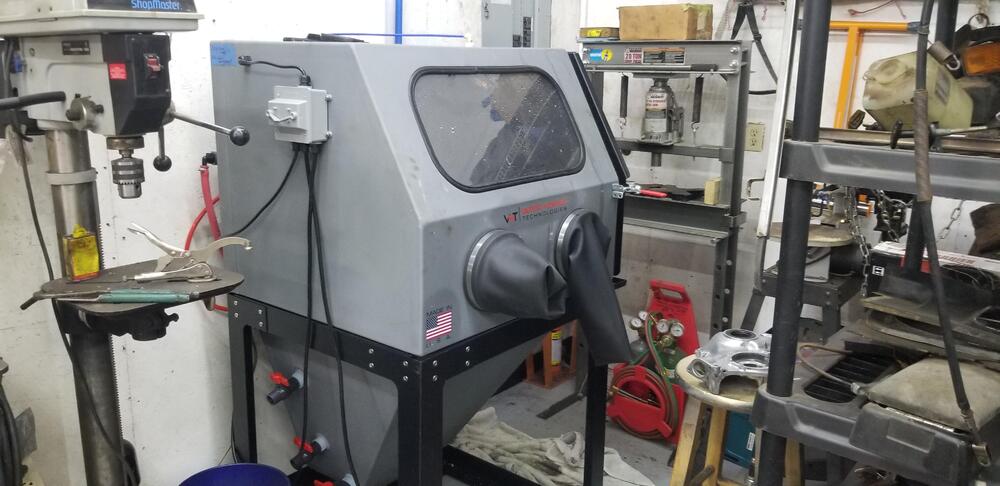
1 pointPicked up my vapor honing blast box today. Had some time to try out a few parts. Not too bad. I think I am going to like it. I have made a good bit of progress over the last few weeks. I will post up some pictures tomorrow.

 1 point
 -
1 pointAbsolutely right! Loving how that inspection lamp came out!!! I geeked out on my box of shiny bits ... Obviously my wife was delighted with me laying it all out and labelling on the kitchen counter! Does anyone else here think we need to get a life?1 point
-
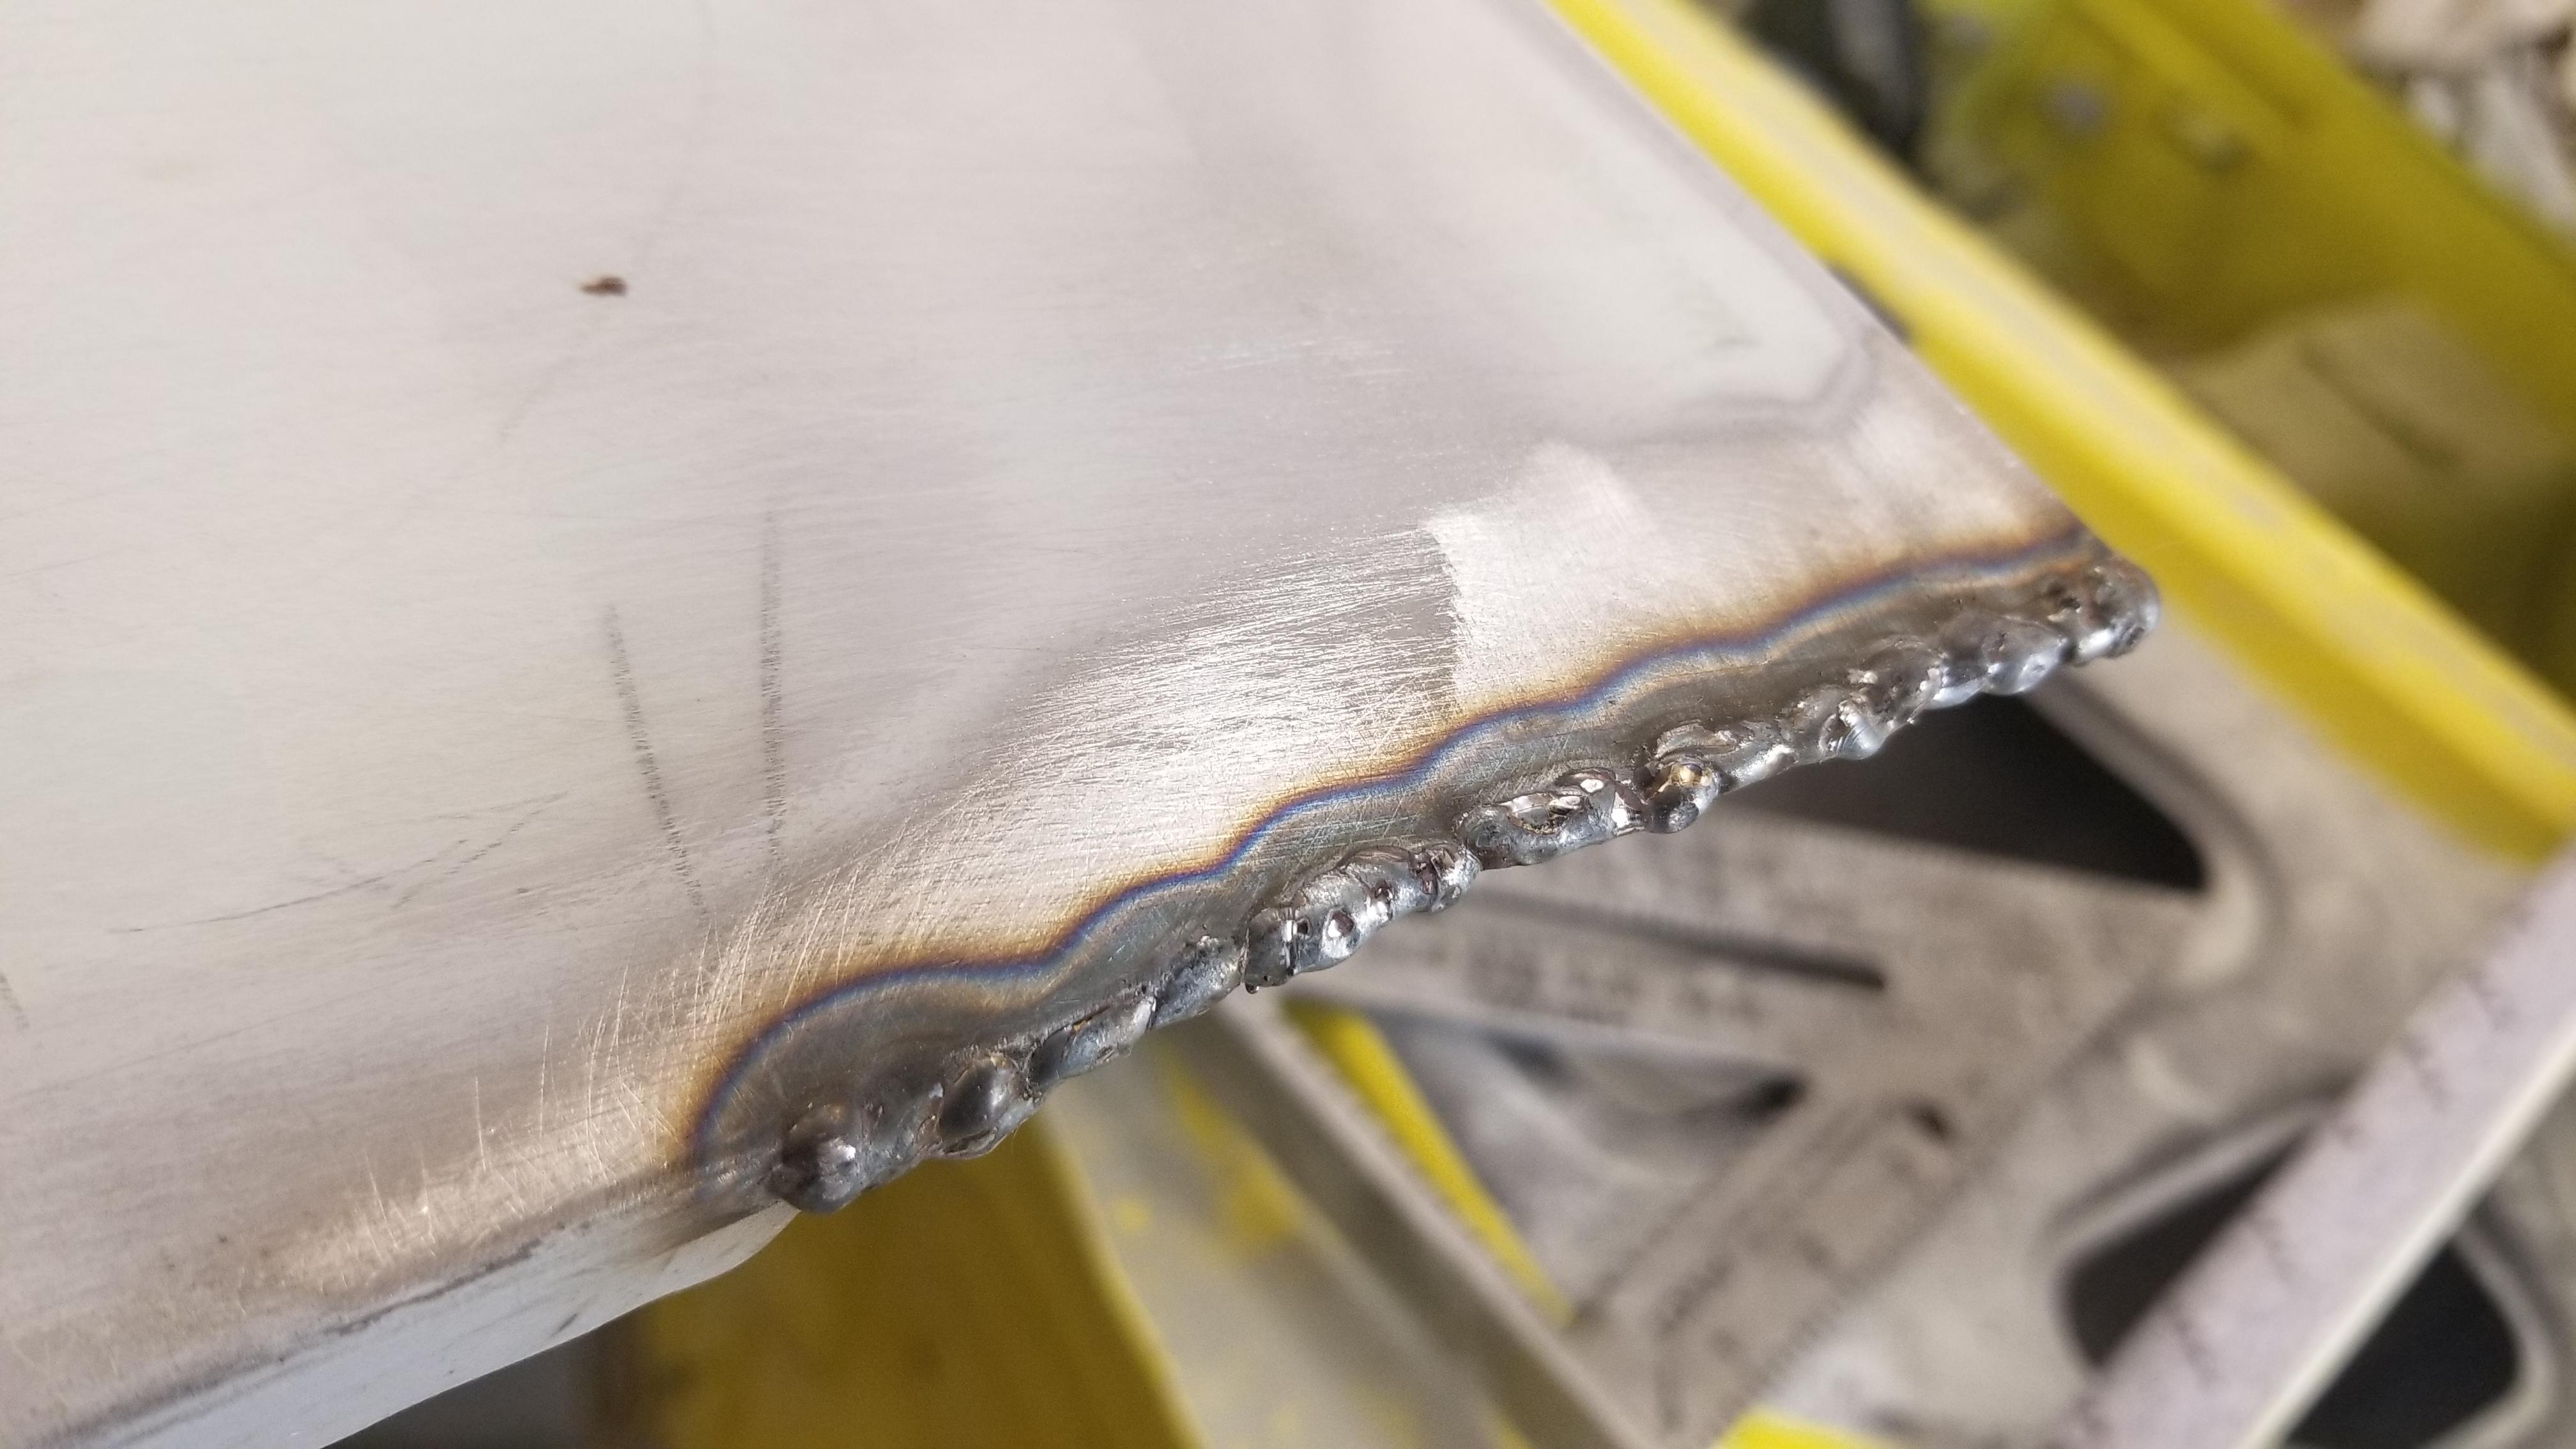
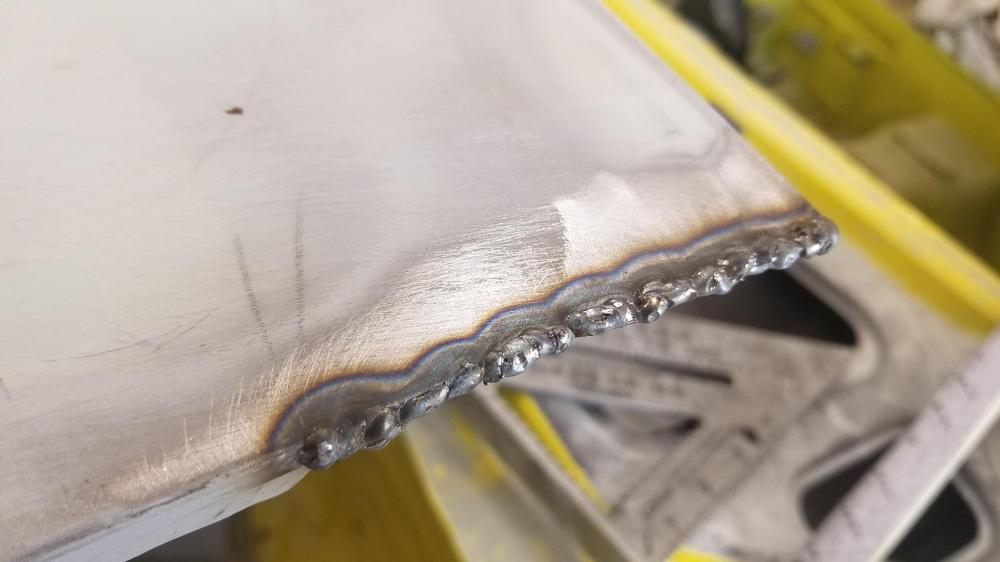
1 pointSo I started to work on these panels. I tried to lay down the first bead and I was like "What the heck!" I know I am becoming senile but I thought I turned the gas on. Yeah went through that a couple times. Righty tighty-lefty loosy. All good... Maybe I bumped the regulator. I turned it way up. I can hear and feel the gas coming out the tip. Plenty of pressure in the bottle. Maybe it's a contaminant? I had a new piece of copper as a back up behind the hole. You can see it in one of the pictures. I took it out and it welded fine. Here is the catch. I had the "bright" idea to use a magnet to hold the copper piece in place. The magnet I have is a very strong rare earth magnet. You just about can't pull them off a surface with your fingers. So I held the copper back under there without the magnet and the welds were still fine. The magnetic field was doing that to the weld puddle. So it makes me wonder if my other magnetic holders affect the weld puddle too. I will have to keep an eye on that.1 point
-
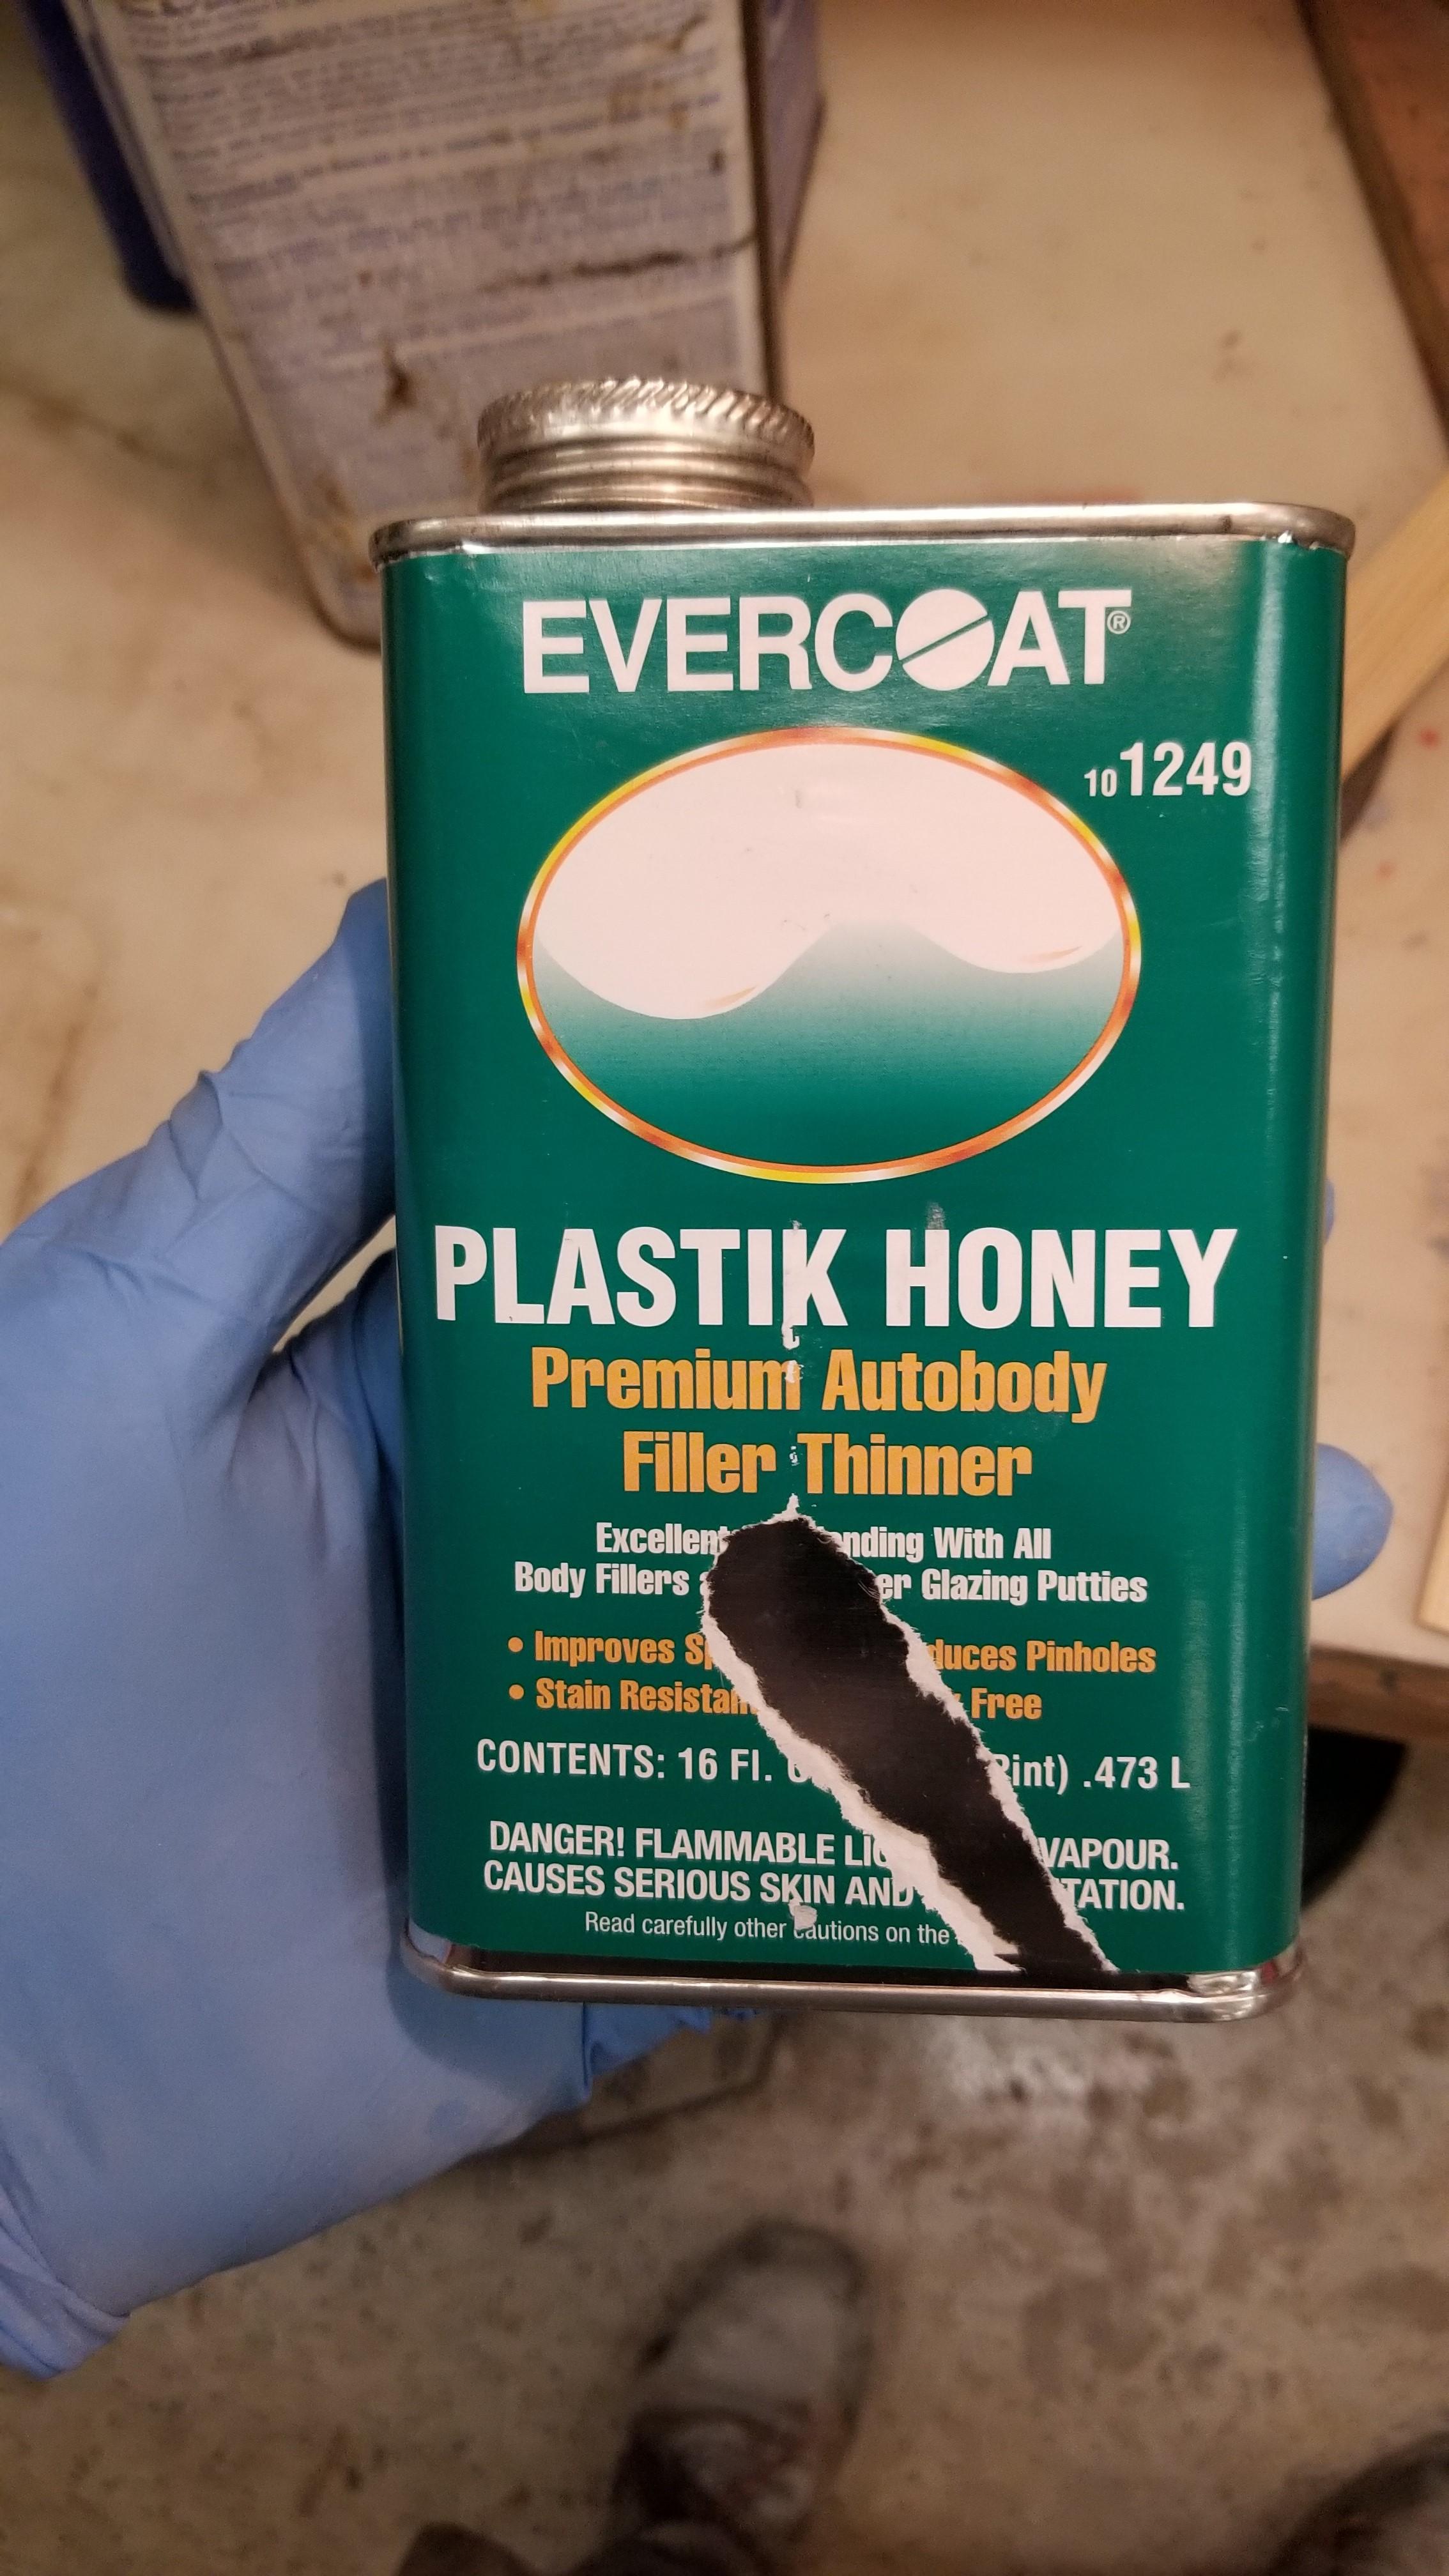
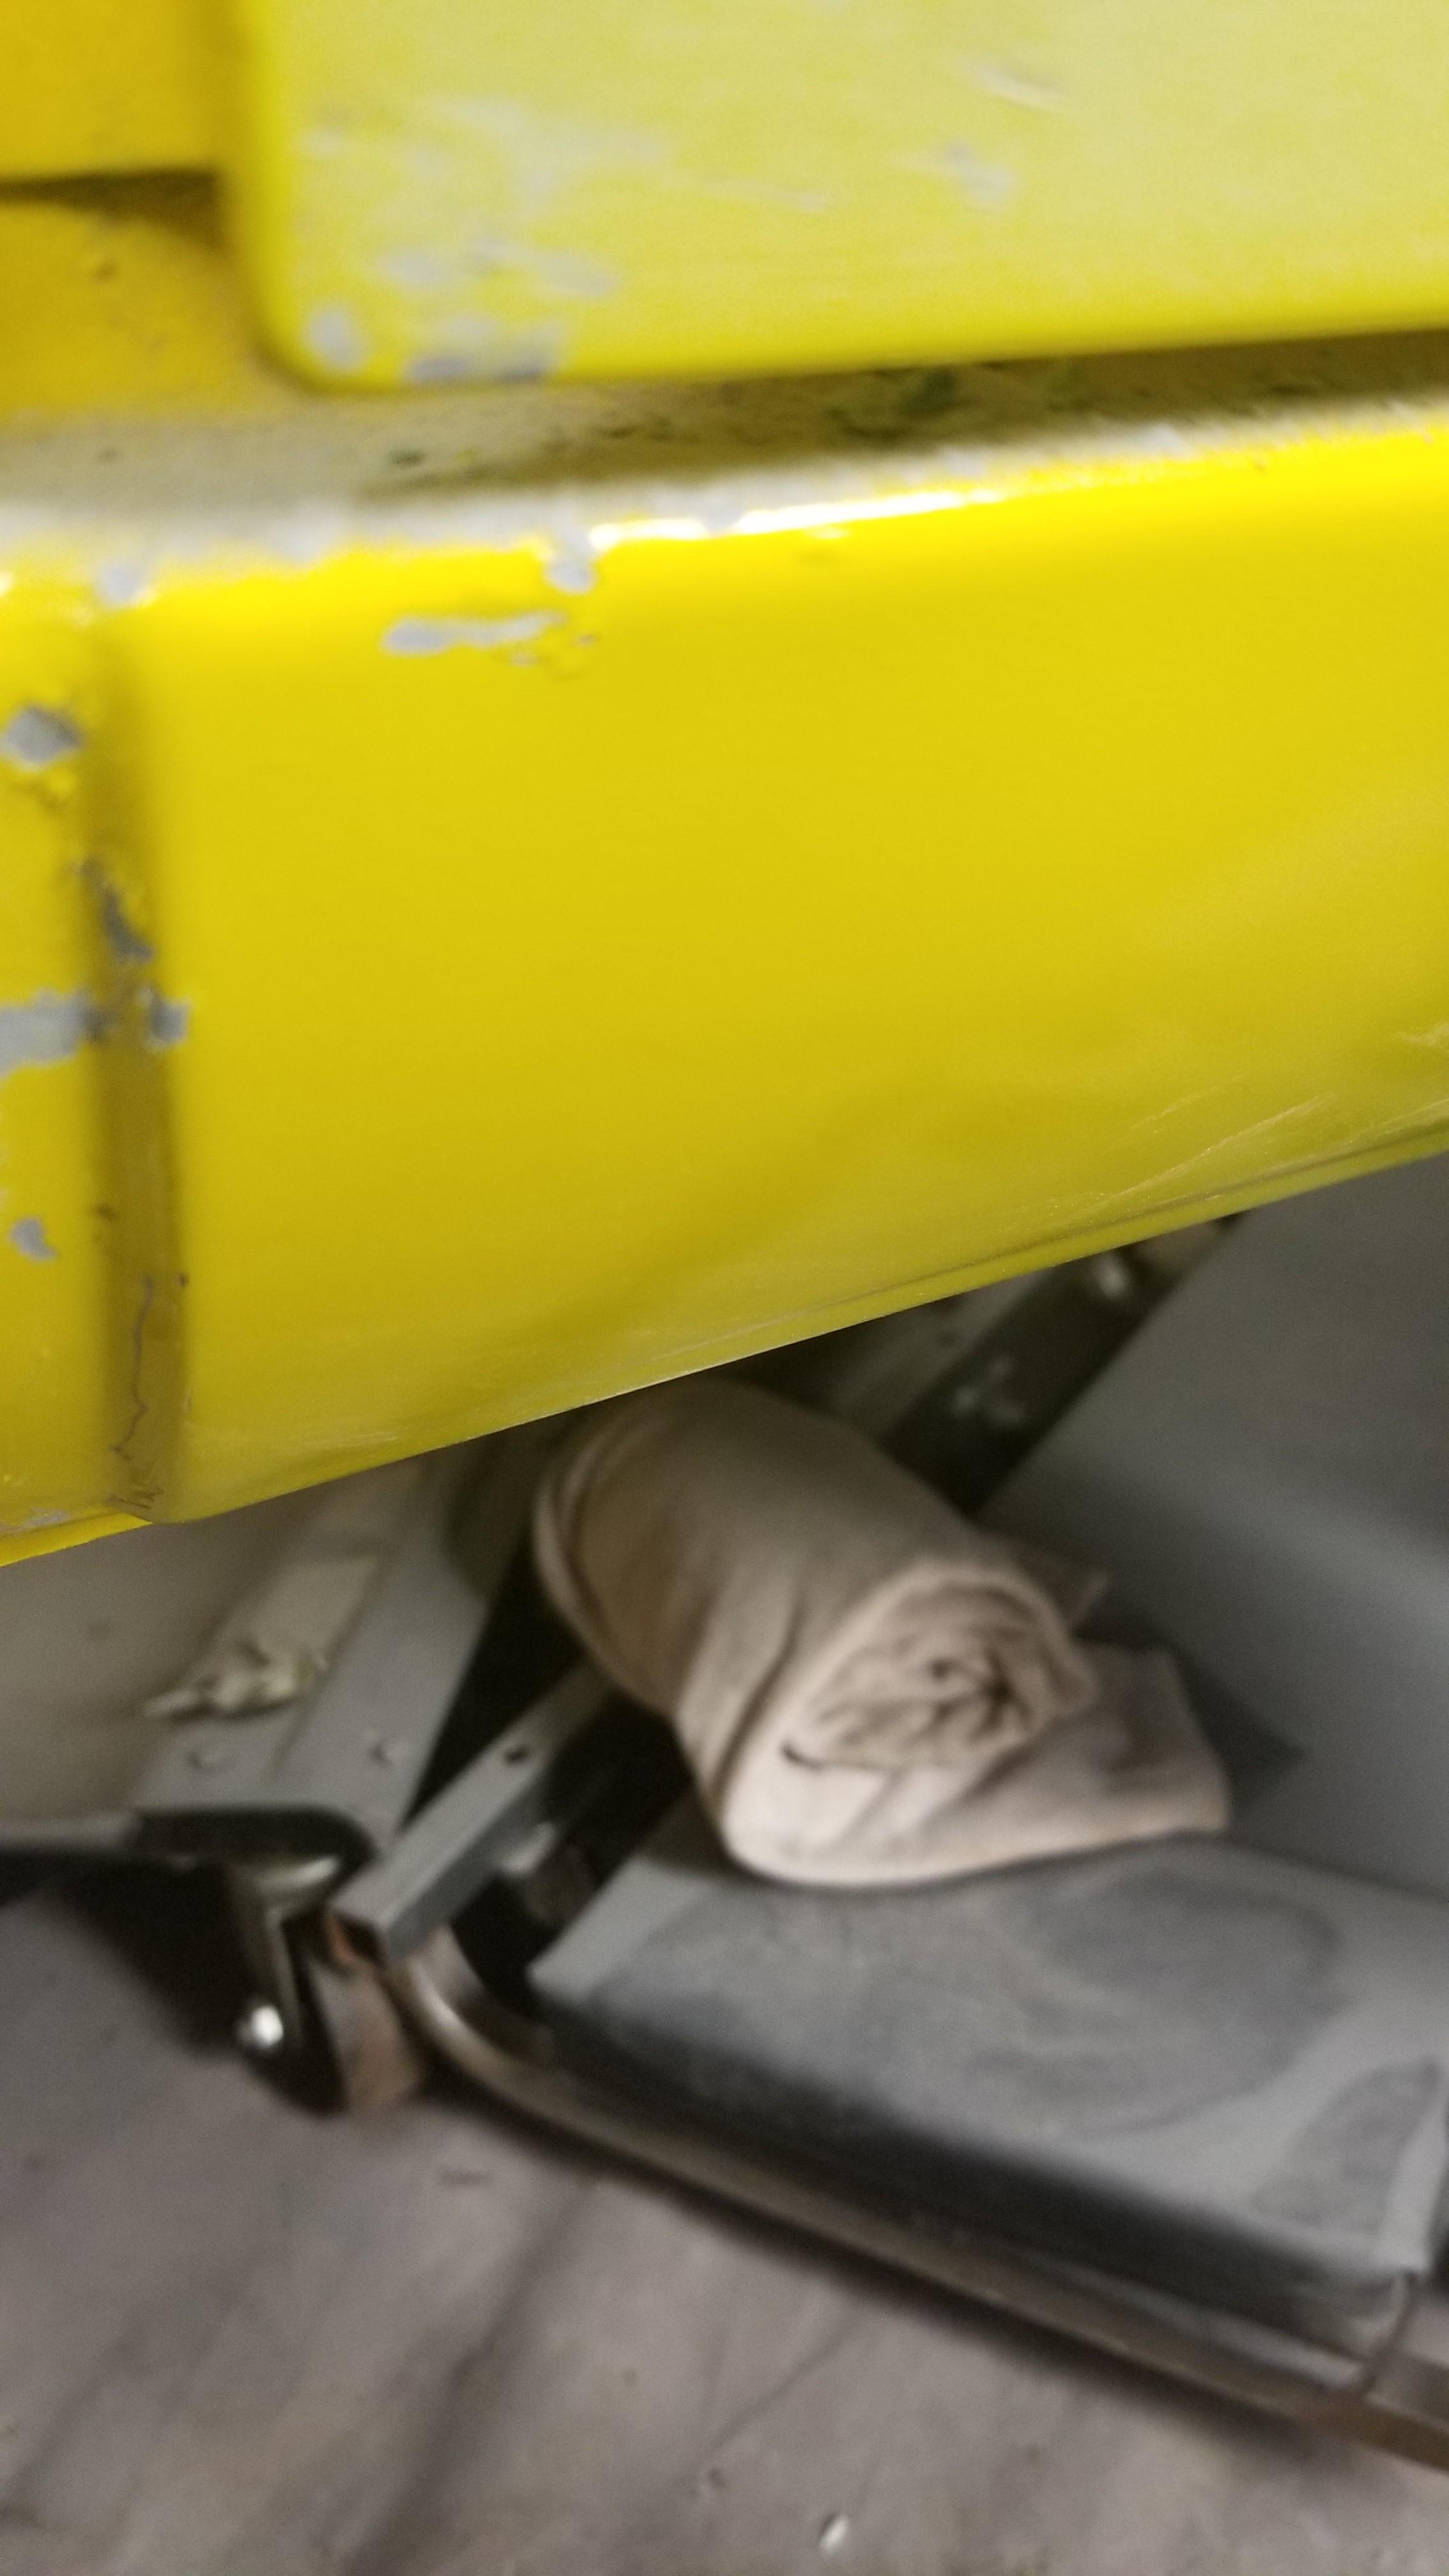
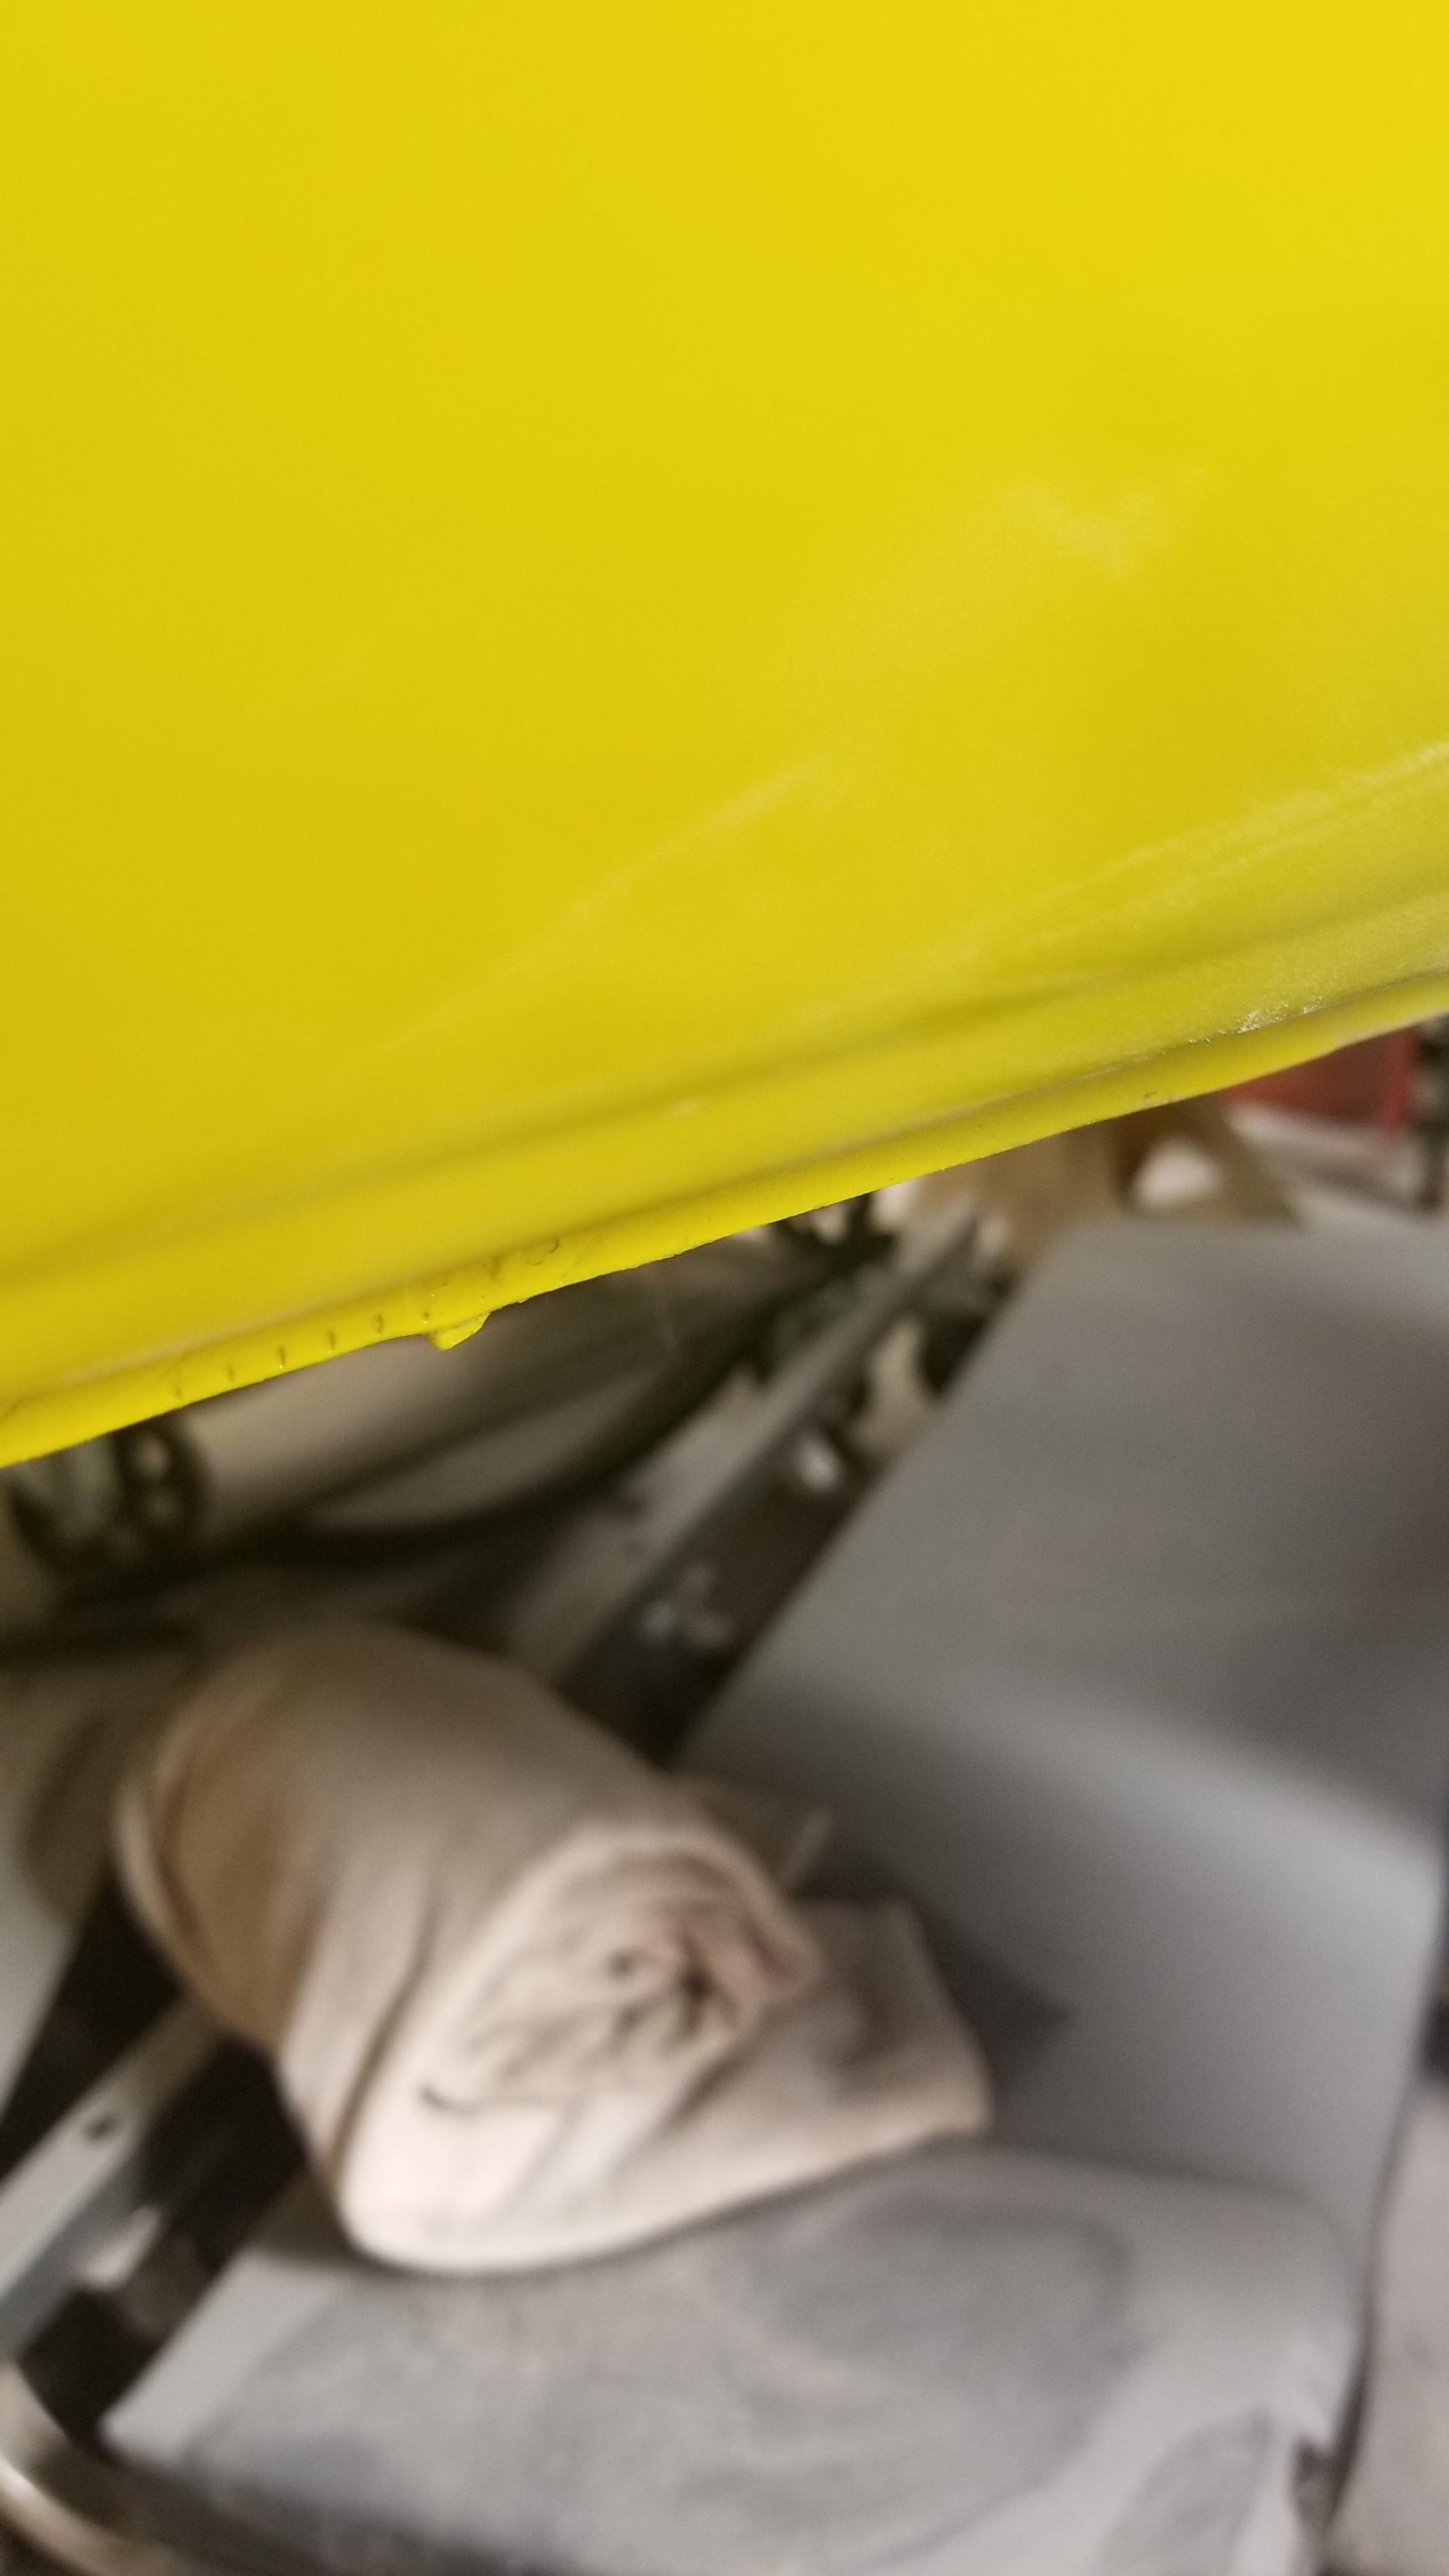
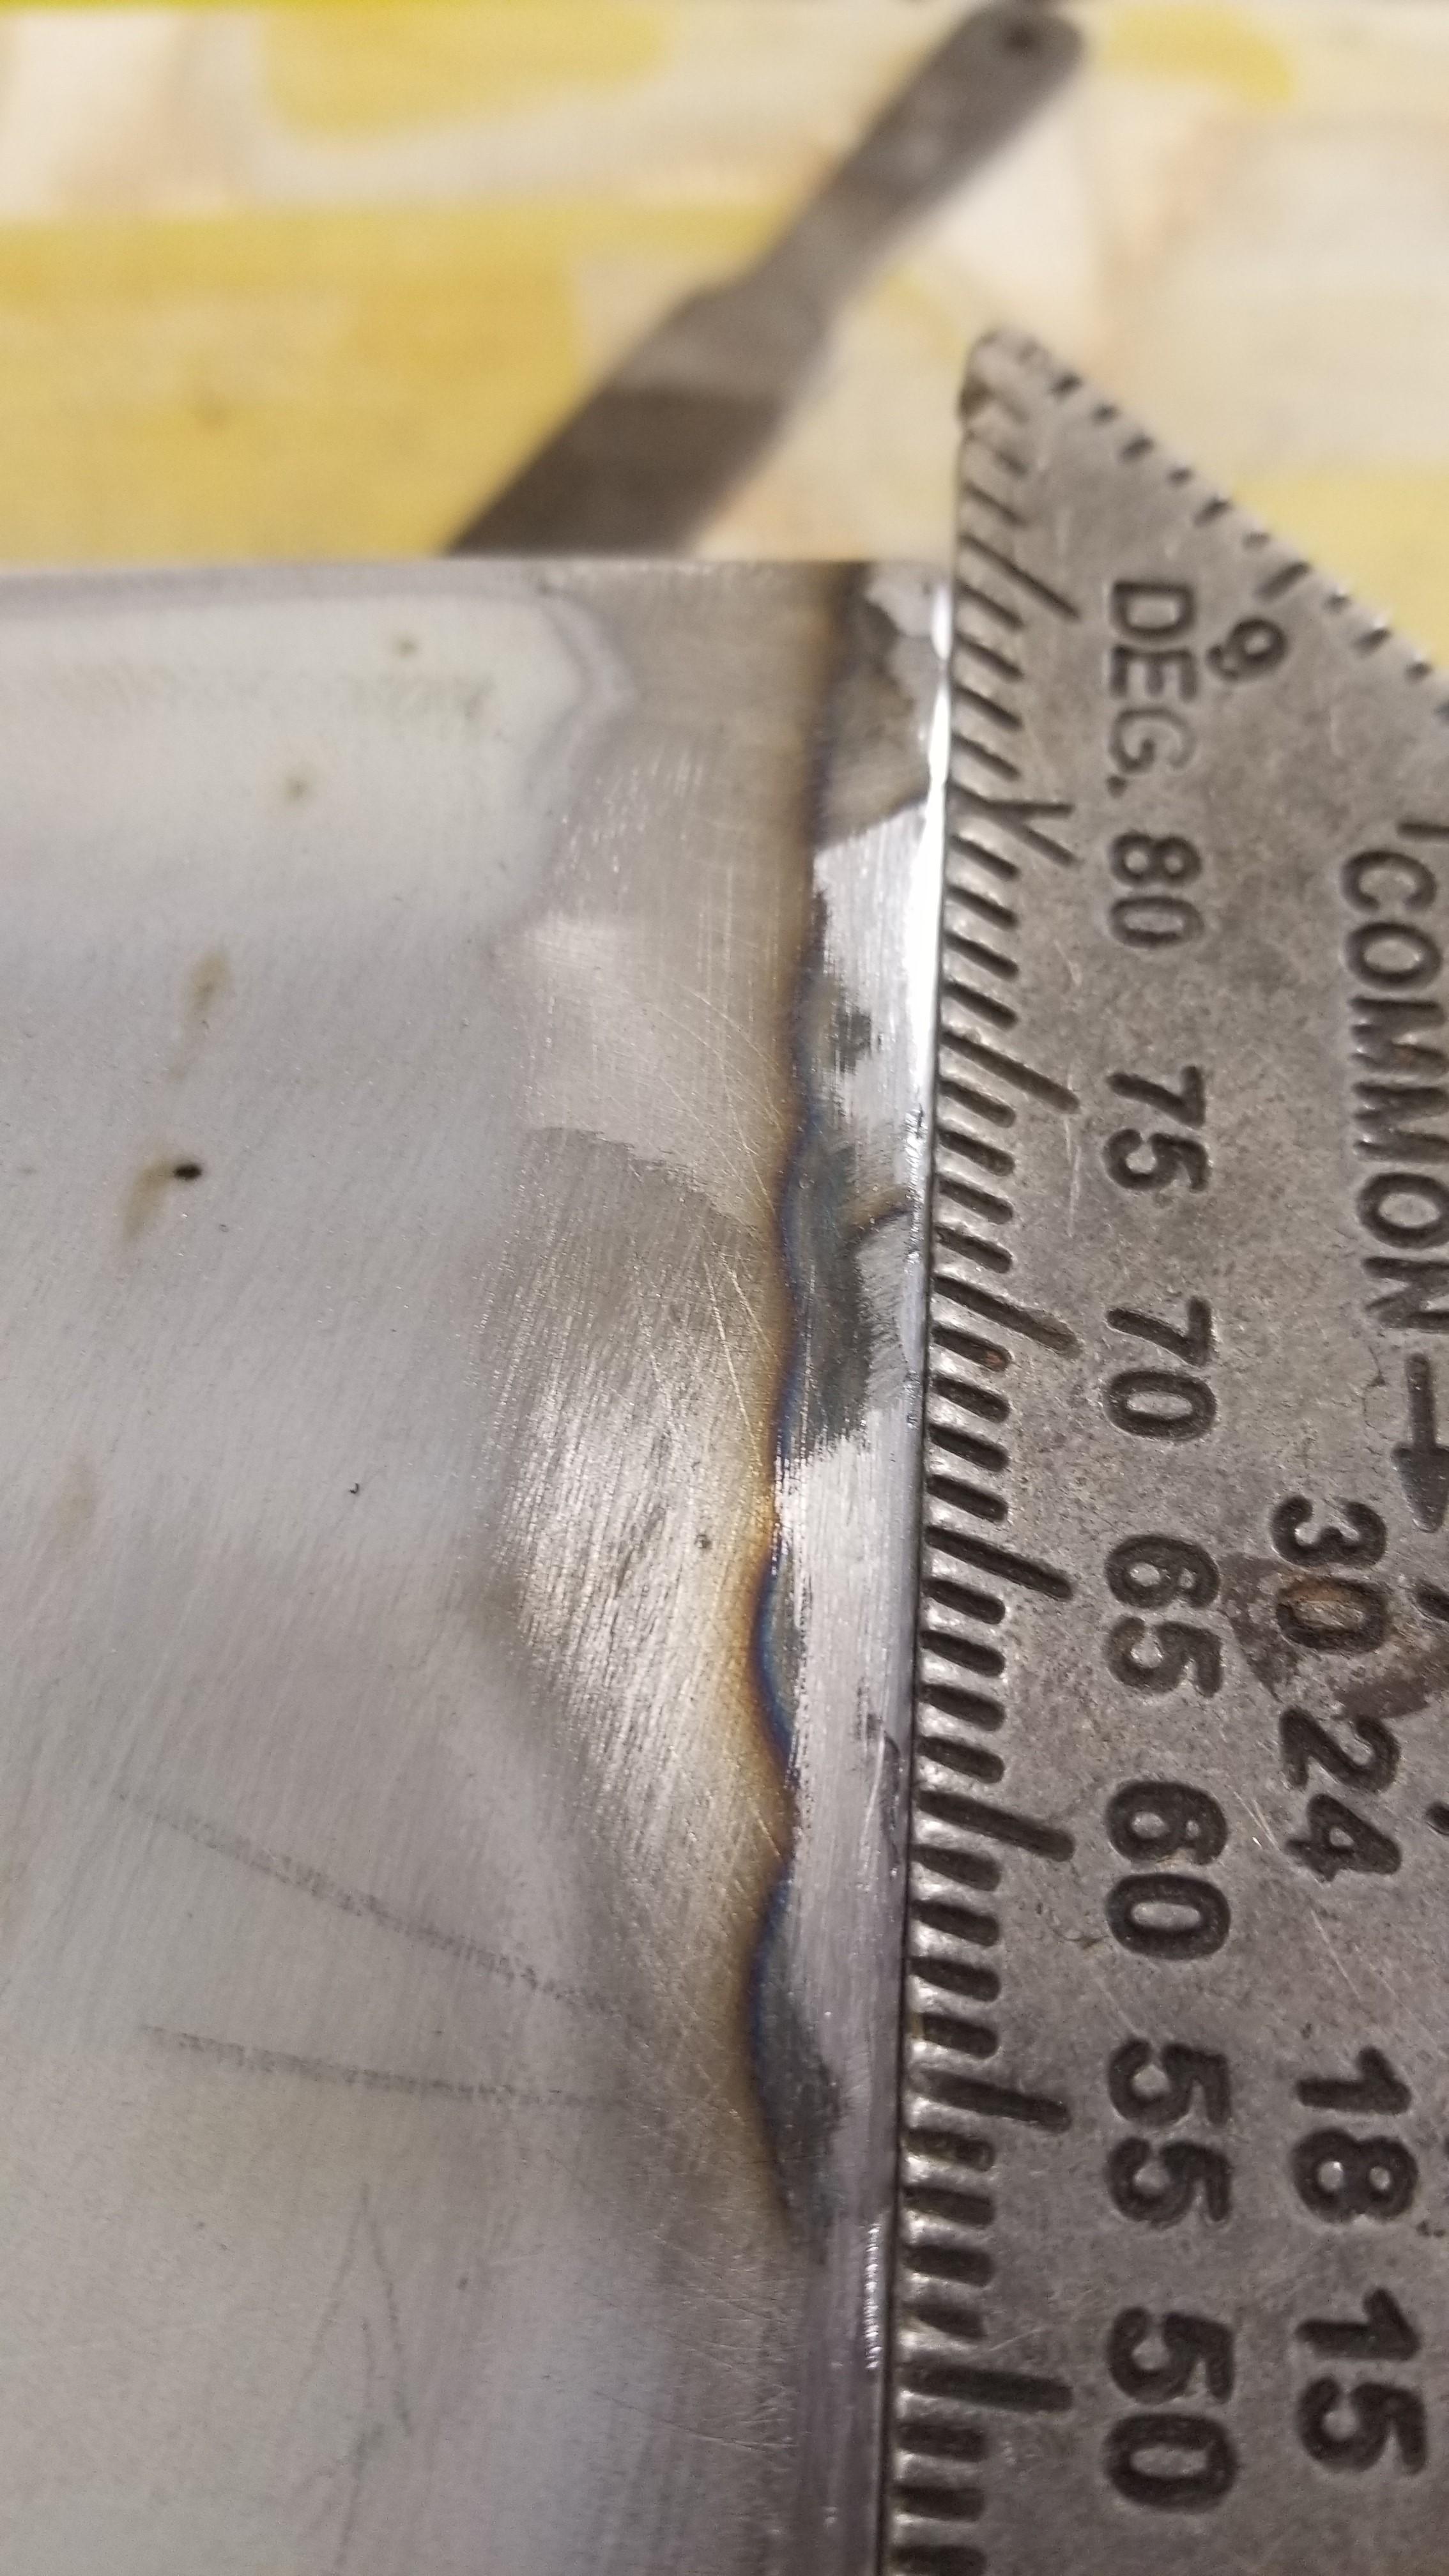
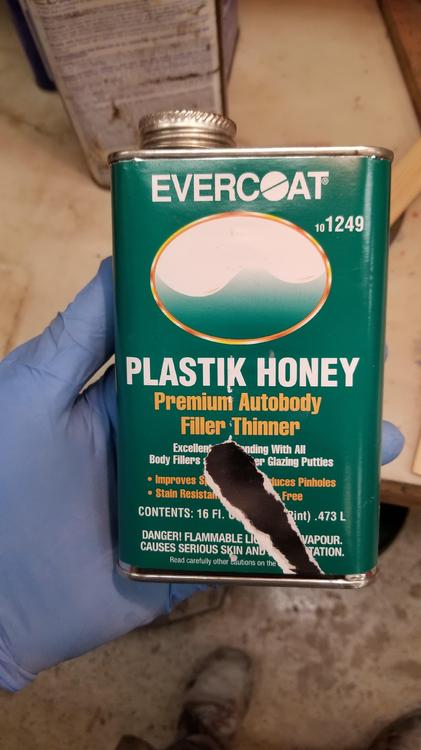
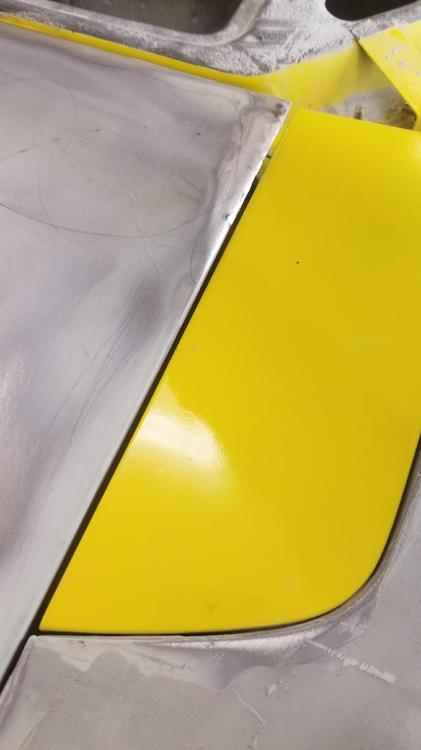
1 pointOk we have another episode of "Ugly Welds" So I was looking at the drivers side of the hood and it wasn't right either. So I broke out the welder again, but I ground the primer back further so I wouldn't have to blow the flames out after each weld. A little welding Then some grinding with a 2" Roloc and then some flat file hand work. I actually made a second pass on this side to weld up some of the voids Looks ok now. I ran a coat of fiberglass to seal any pin holes and shape it up. On a different note, I need some feedback from you guys. I was blocking the rocker panels and there is a pretty straight groove near the bottom of the rocker. Is it supposed to be there? It is on both sides and pretty consistent. So I don't know if it's factory or if somehow the car got damaged exactly the same way on both sides. Which seems kind of odd, but maybe. In the second picture, it's the upper shadow line. It's maybe 1/2" to 3/4" from the bottom edge of the rocker where it turns under the car. They appear to run the full length of the rockers. Here is the tip of the day. I use Evercoat fillers. They cost a little more but they sand nice and work easily. Sometime thought the filler is difficult to get pulled out thin enough. Well, one day when I was browsing Evercoat's site trying to figure out the differences in each of the fillers they made. I came across this From what I have found online, it's straight styrene. It has a golden color and you use it to make the filler more flowable. I put some filler on the mixing board. Then you add some honey and mix it up. Then you add hardener, then mix and fill. It lengthens the working time of the filler and the filler has more of a glazing putty consistency. I really like it. I could almost just add a cup or so to the gallon can of filler to reduce it, instead of doing each individual batch.


 1 point