


Leaderboard
-
Tirnipgreen
Free Member5Points237Posts -
Patcon
 Subscriber
 5Points11,142Posts
 -
JDMjunkies.ch
Free Member5Points637Posts -
HS30-H
Free Member4Points5,509Posts


Popular Content
Showing content with the highest reputation on 09/12/2023 in all areas
-
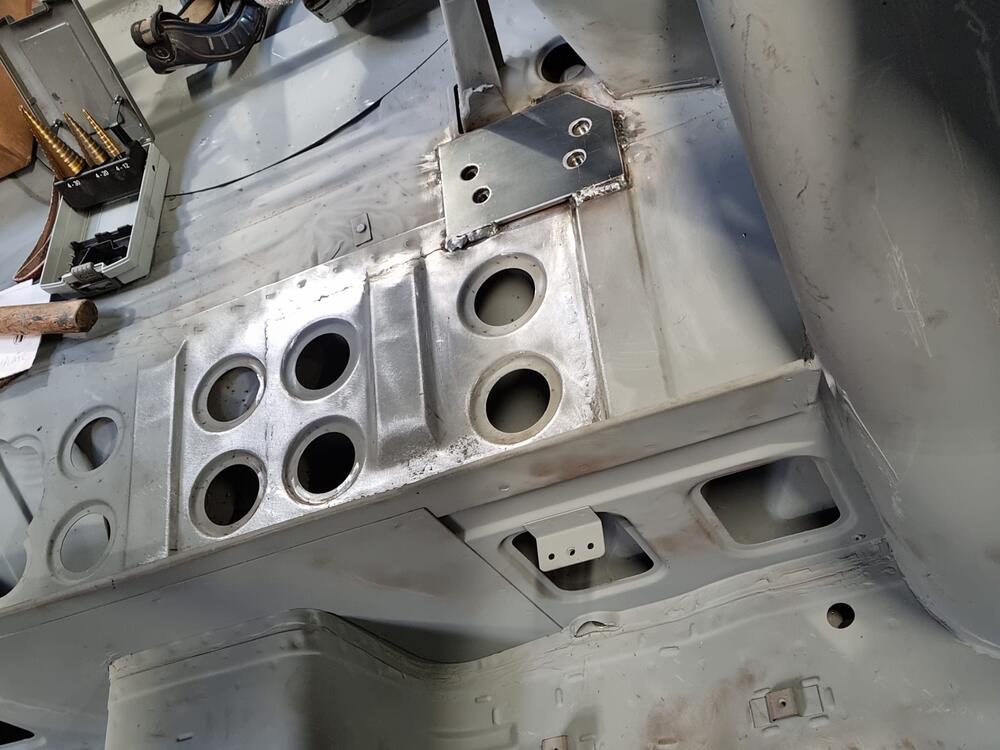
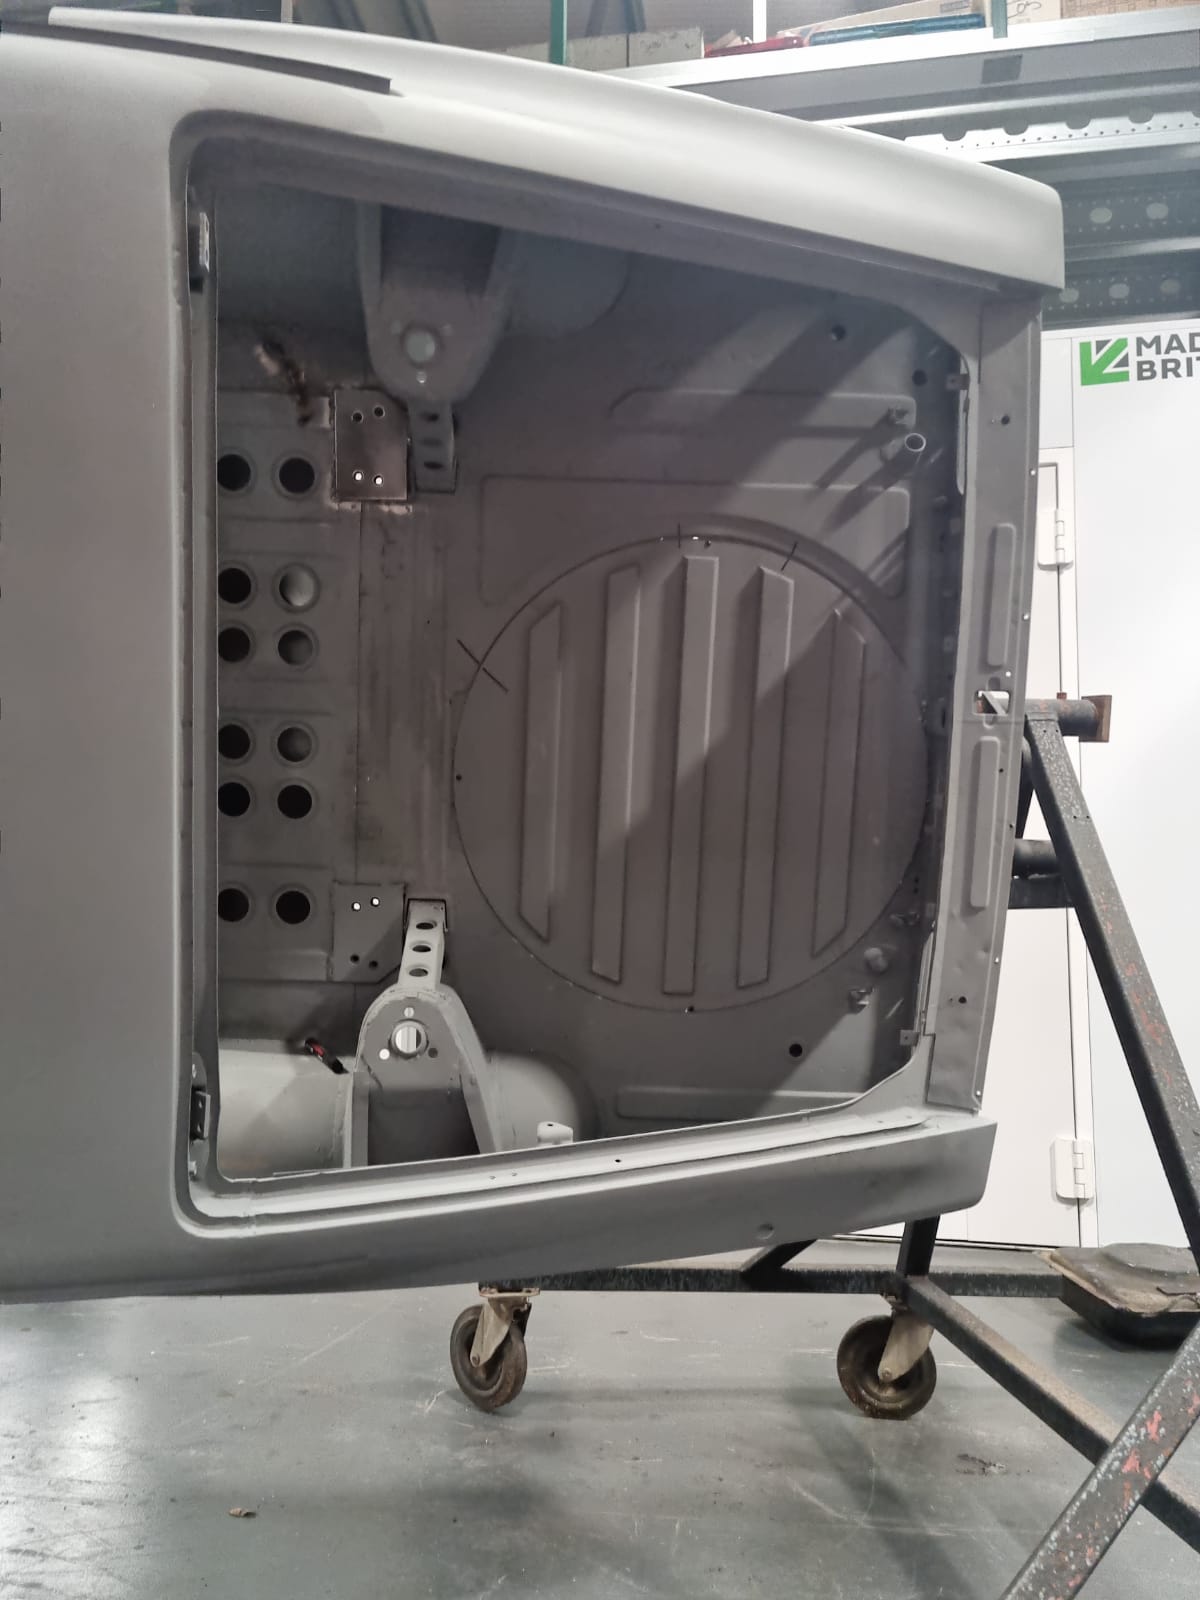
Technically, I believe the two flat plates that sit underneath the two vertical drop mounts were meant to be welded to the rear deck floor. That would be a good reason for them often disappearing when the bars were removed from cars and sold on. I've got a 'normal' Nissan Sports/Race Option 4-point bar kit in my 432-R replica car, and an original Nissan Works rally version in my ongoing Works Rally 'Test Car' replica project. The difference is that - on the Works Rally type - they moved the two vertical drop bars and mounts further apart so that two stacked spare wheels/tyres could be carried onboard, and they added a steel arrestor strap and a hinged clasp to hold them down (adjustable for one, or two, spares). All the side mount points are in every car, so they are a bolt-in. It's just the vertical drop mount plates that need to be added. Here's how the Works style plates were welded into my 'Test Car' project:
 3 points
 -
2 points
-
I didn’t know that Mizukami Auto produced such a nice roll-bar! I would like to see it in person if I like to have it in my car. A set of flat plates which is going to be welded on the rear floor as for securing the bottom brackets isn’t not shown, is that included? I attached a picture of genuine roll-bar which was sold on Yahoo auction, I still regret that I didn’t make a bid. Recently I became to know that the seller of the roll-bar was my GTR friend! This original set was also missing a set of flat plates. Maybe it was very difficult to take off the plates from the rear floor. Kats

 2 points
 -
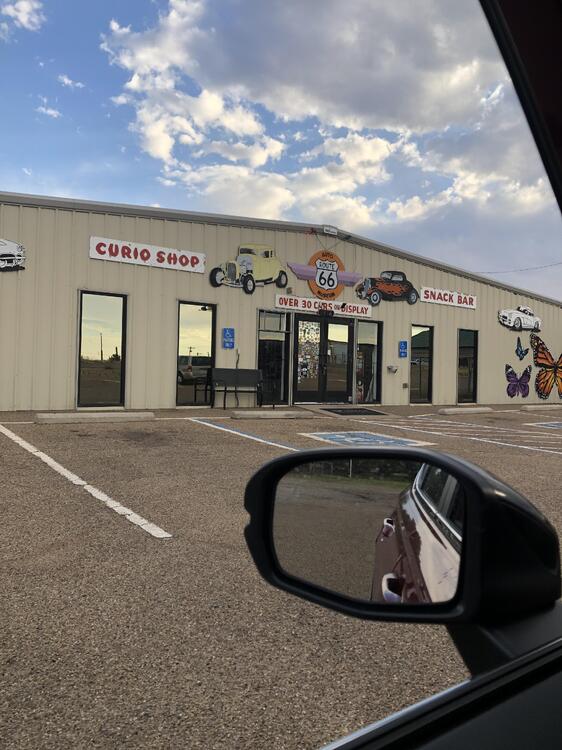
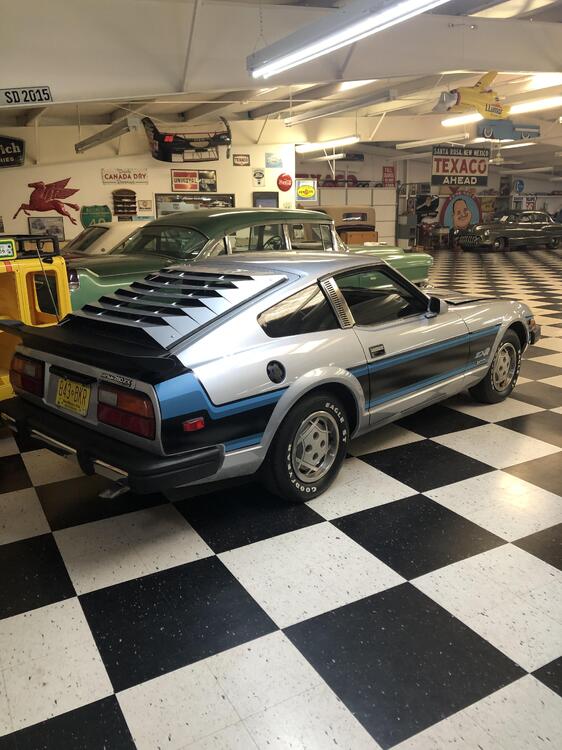
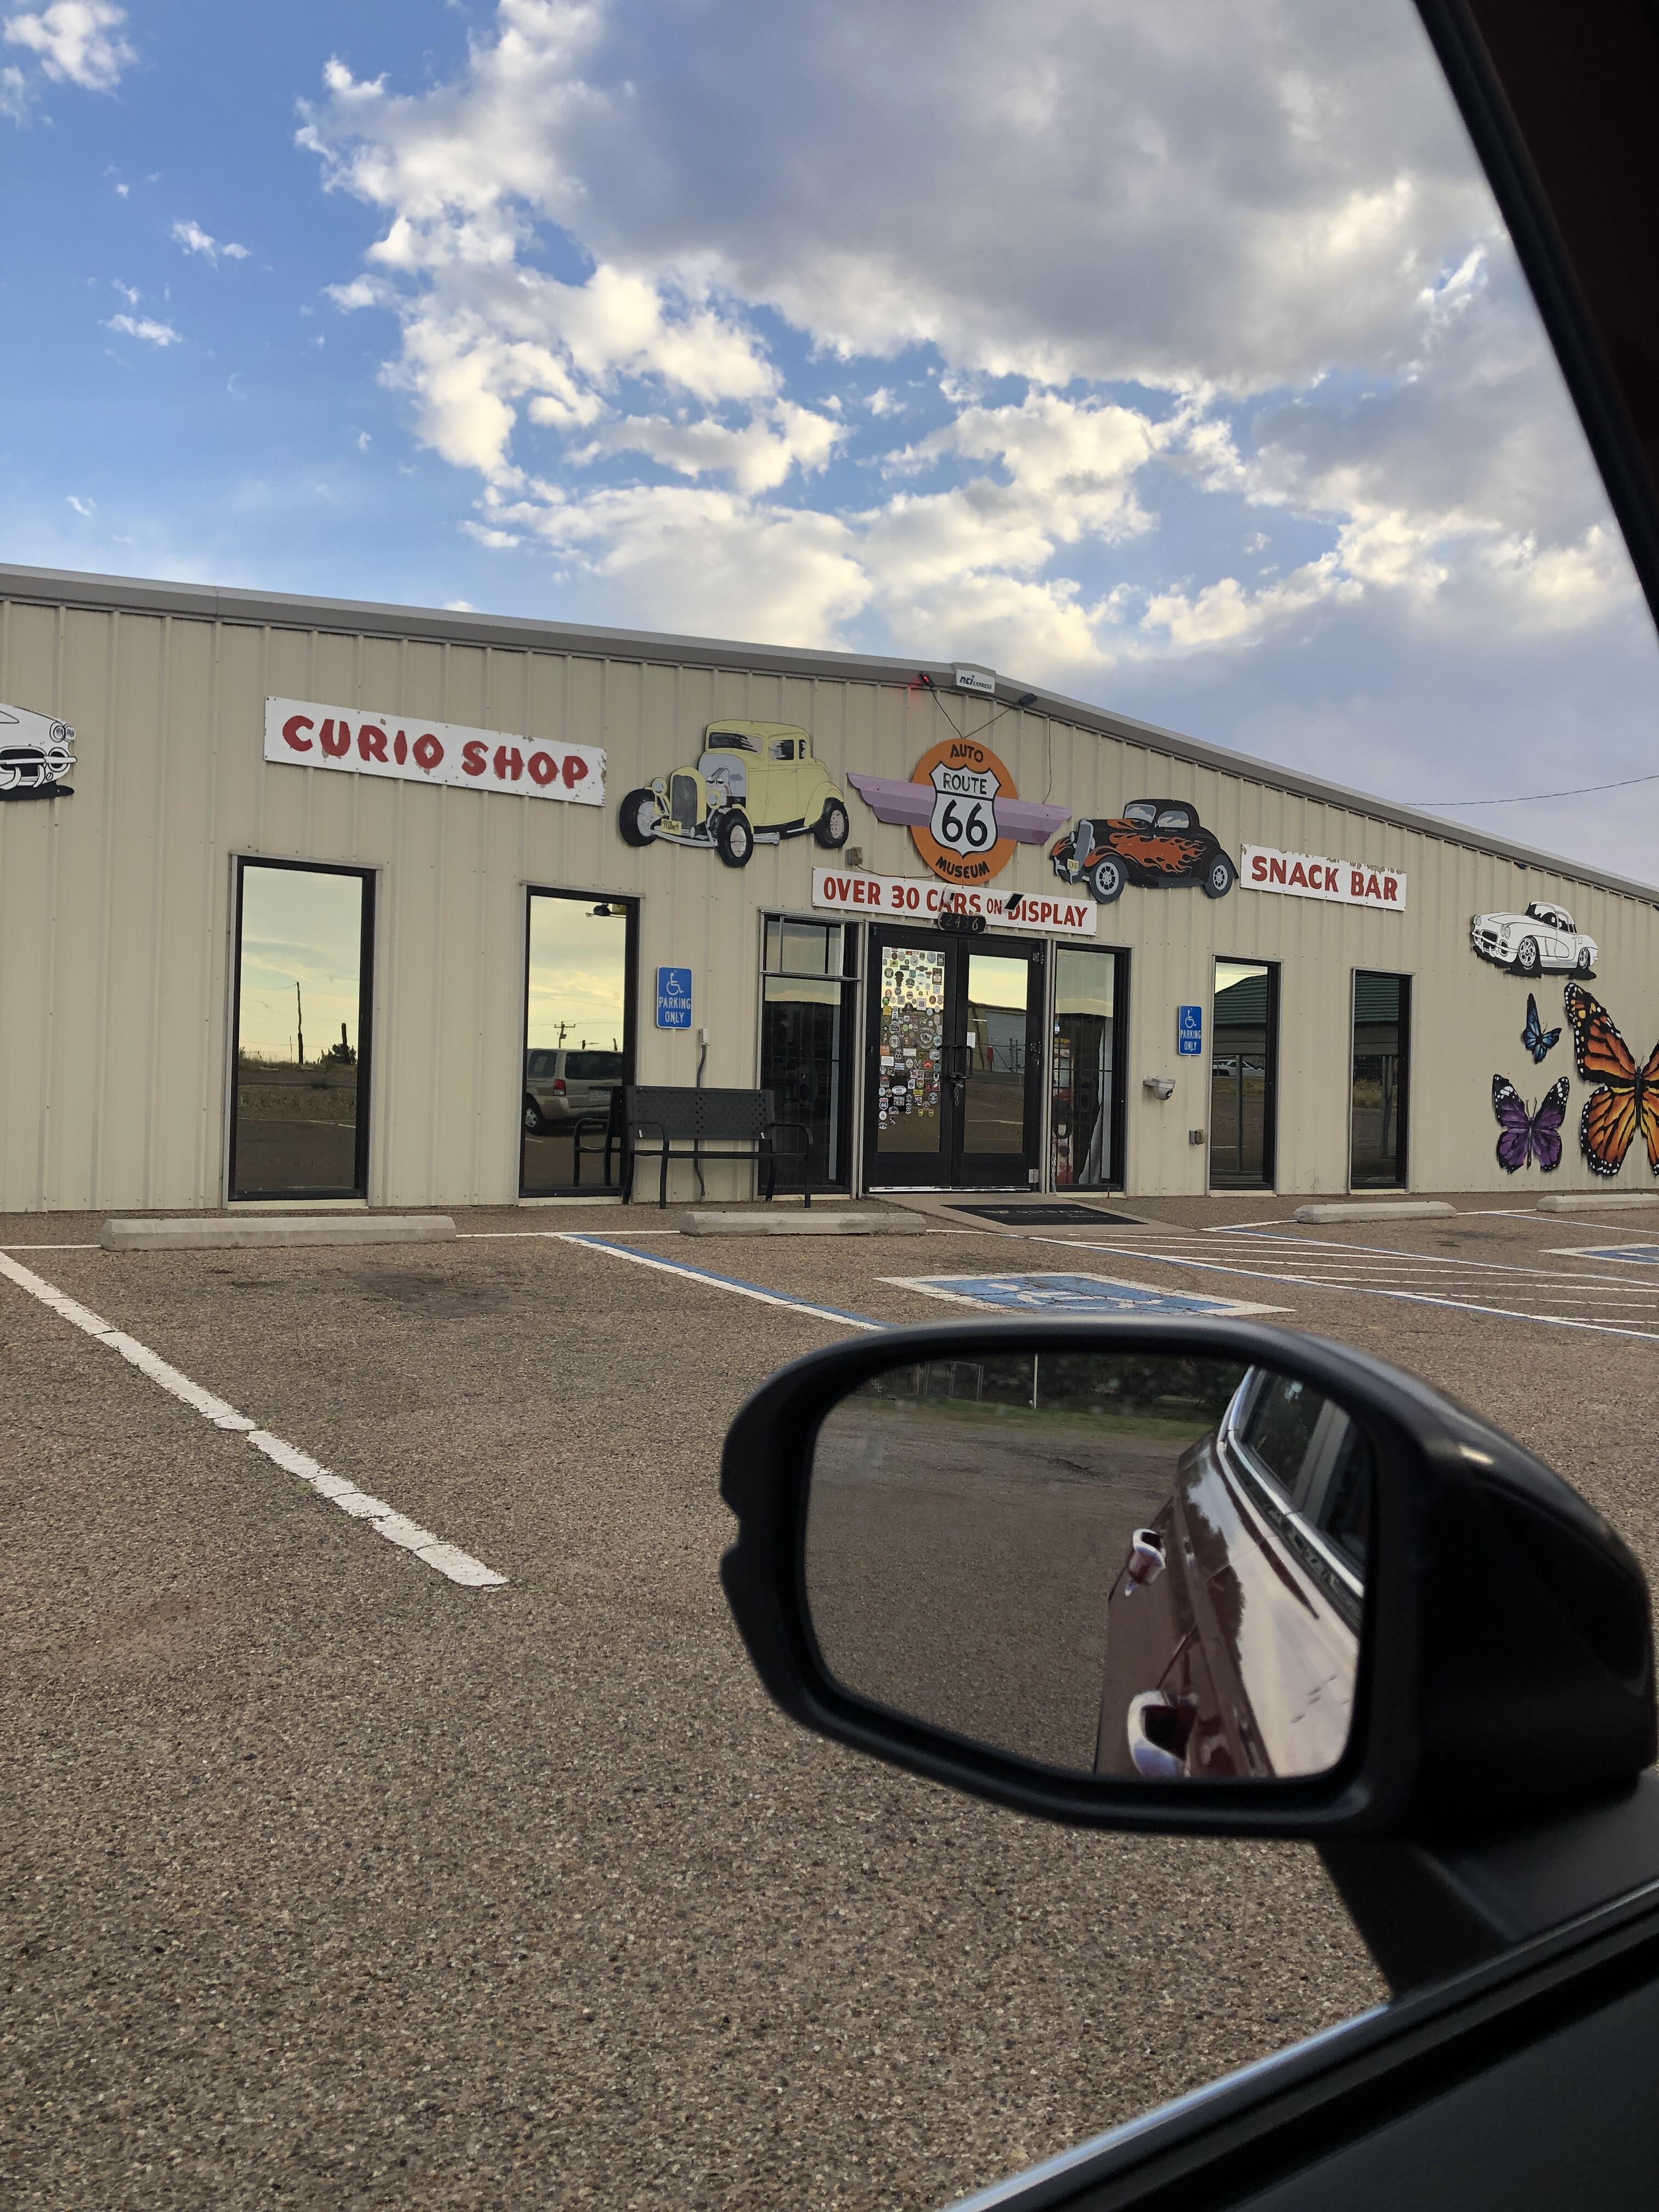
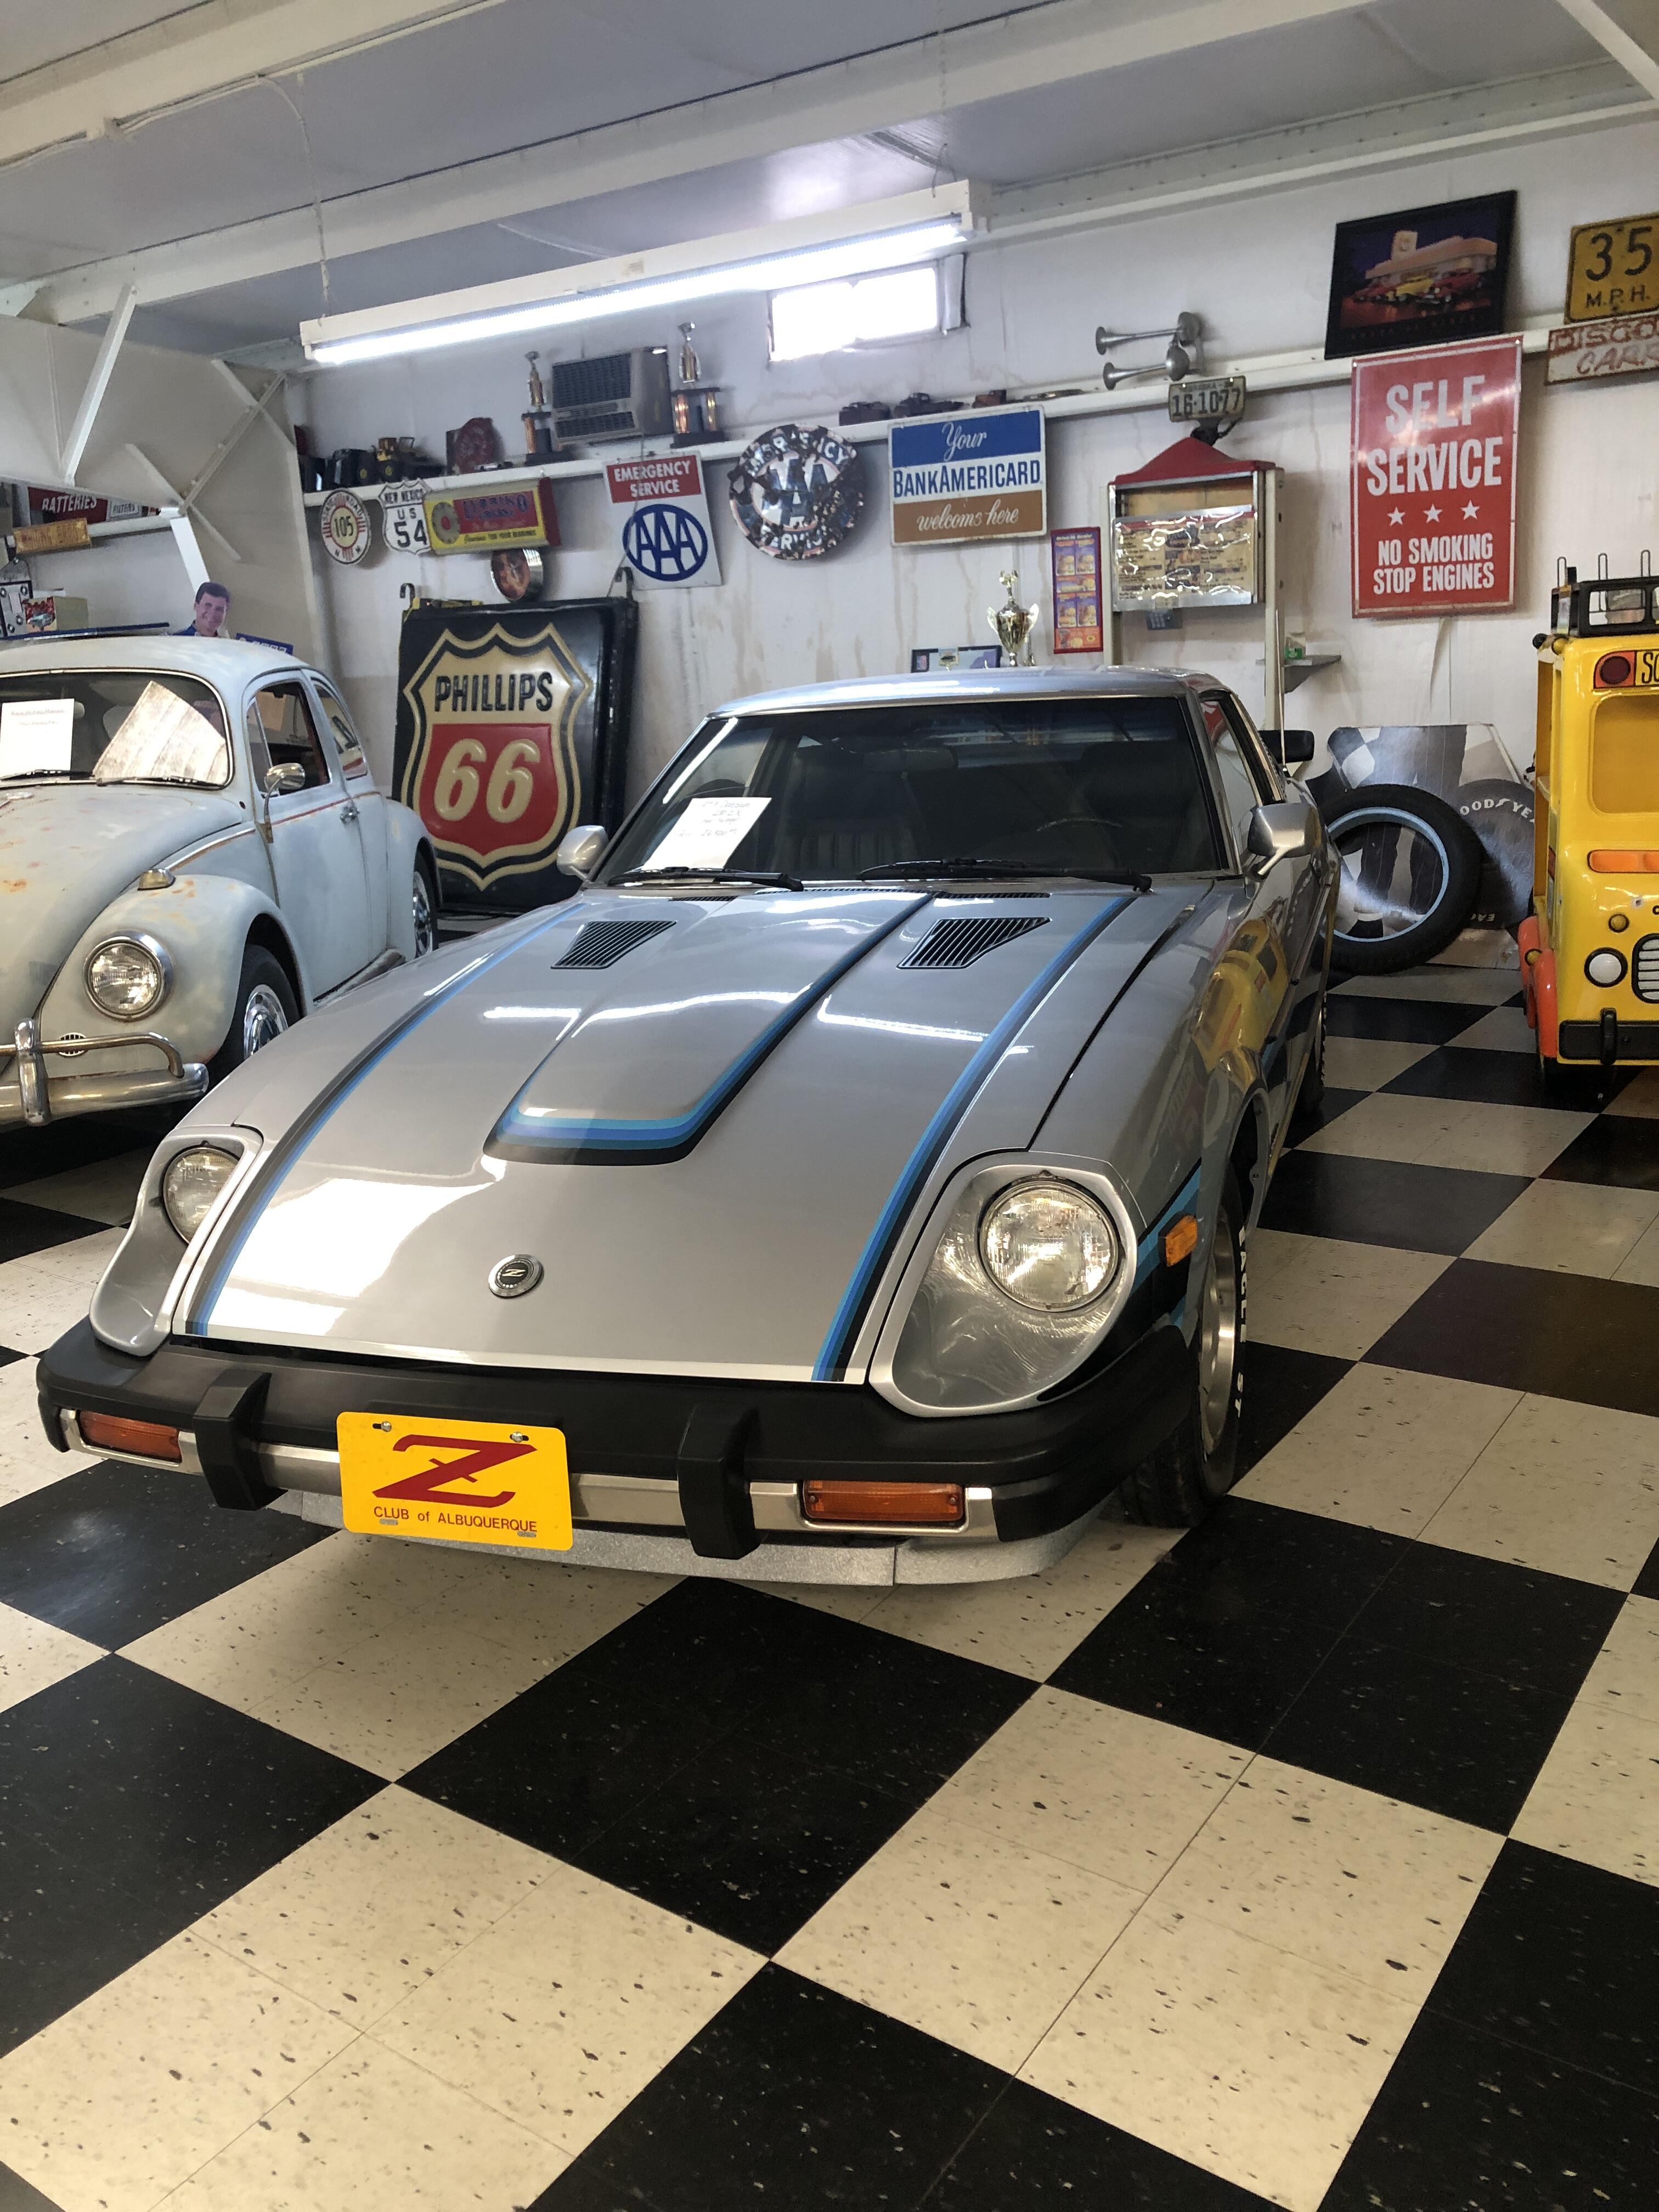
2 pointsI just visited the Route 66 Auto Museum in Santa Rosa, NM (Link) and among the collections is a Datsun 280ZXR: Several other non-Datsun cars and one of the largest collection of Route 66 memorabilia I have ever seen!!! Enjoy. Keith

 2 points
 -
After closer inspection i think the first figure of the second part of the number is not an "1" (one), but an "I" (large "i") I tweaked the following photo a bit for better visibility: The top mount is also quite strange and doesn't look like something i've seen on a Z. it's basically a big flat dish with some holes. The diameter is much larger then for e.g. the rubber stoppers on the 240Z factory struts. The spring diameter seems similar to the ones from the Z (haven't compared in detail yet), but might look smaller, because of the large disk on top. Unfortunately i'm a bit busy in the next few days and won't find the time to work it out, but i hope next week i'll be able to go through some old compe catalgoues etc. And i'm happy to get any input from you if you have an idiea what car the "I" refers to. 🙂 I Always appreciate your inputs and thoughts 🙂 That might also be a great idea to ask them if we can't figure it out by the swarm-knowledge in this great Forum 🙂2 points
-
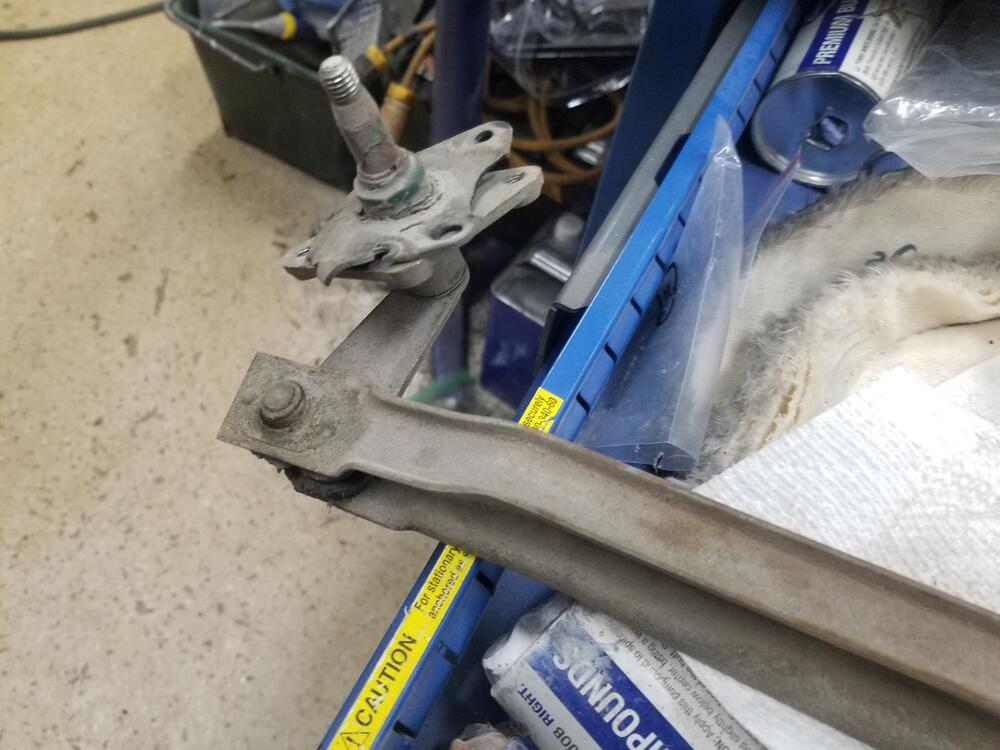
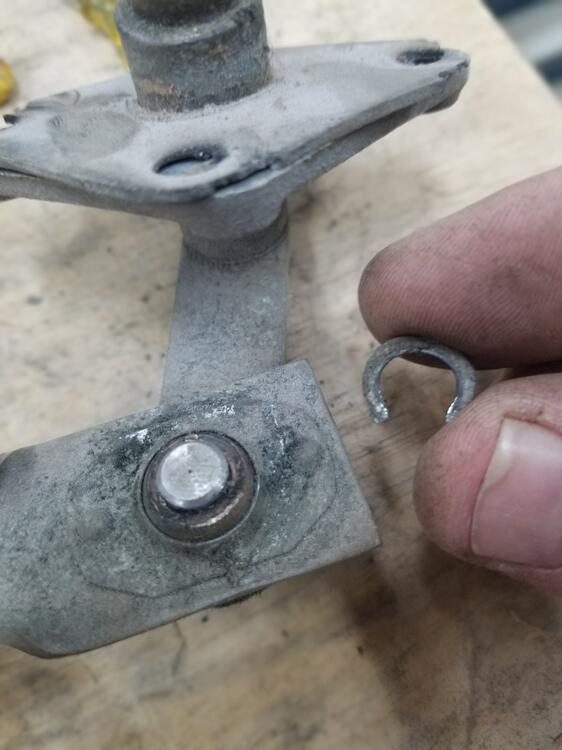
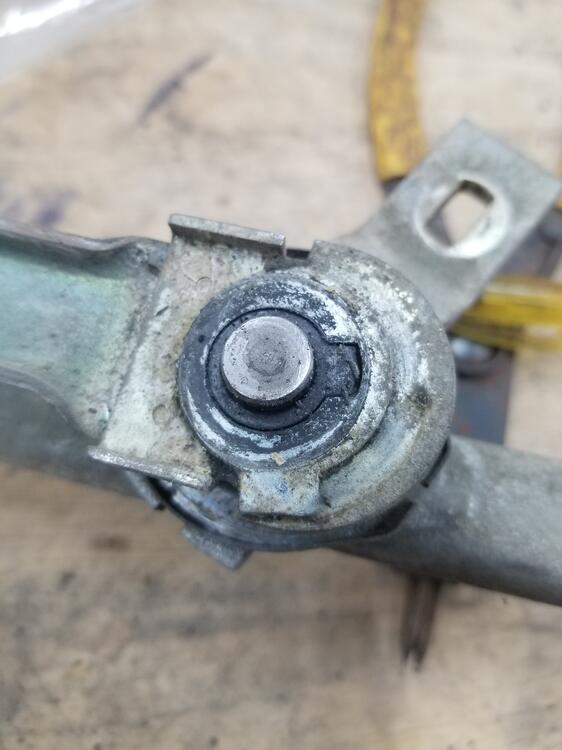
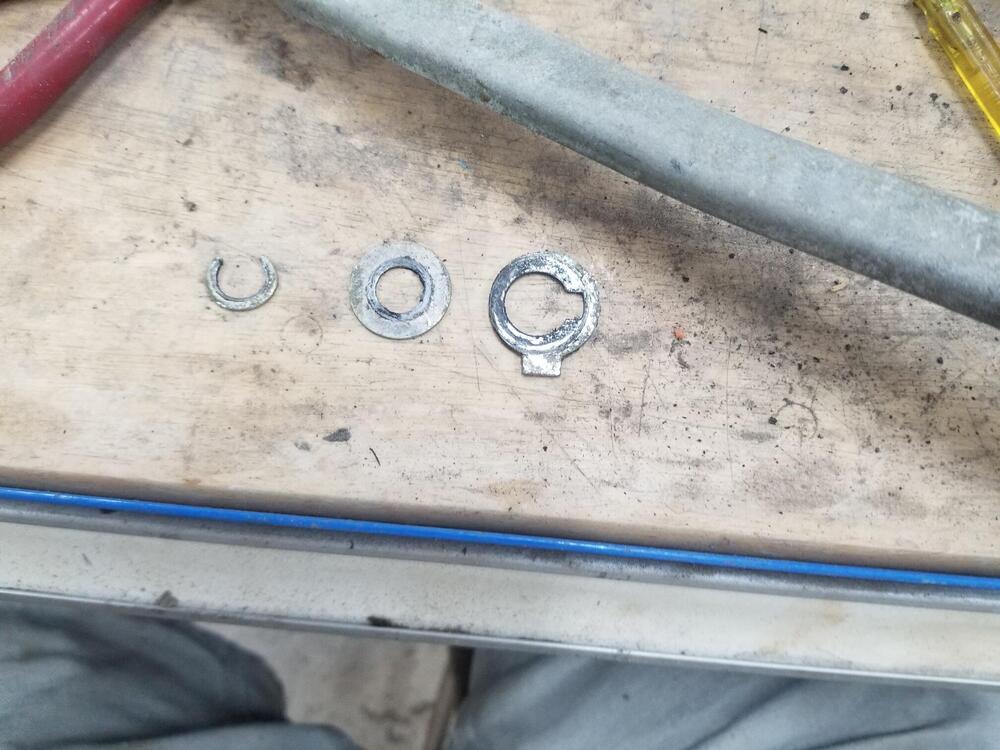
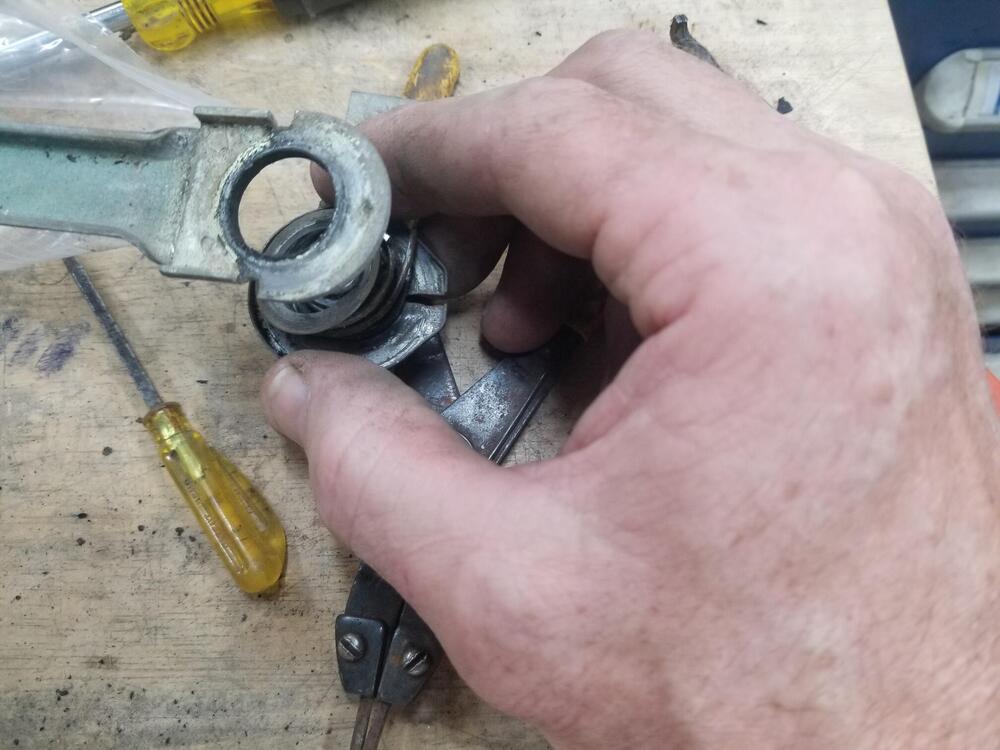
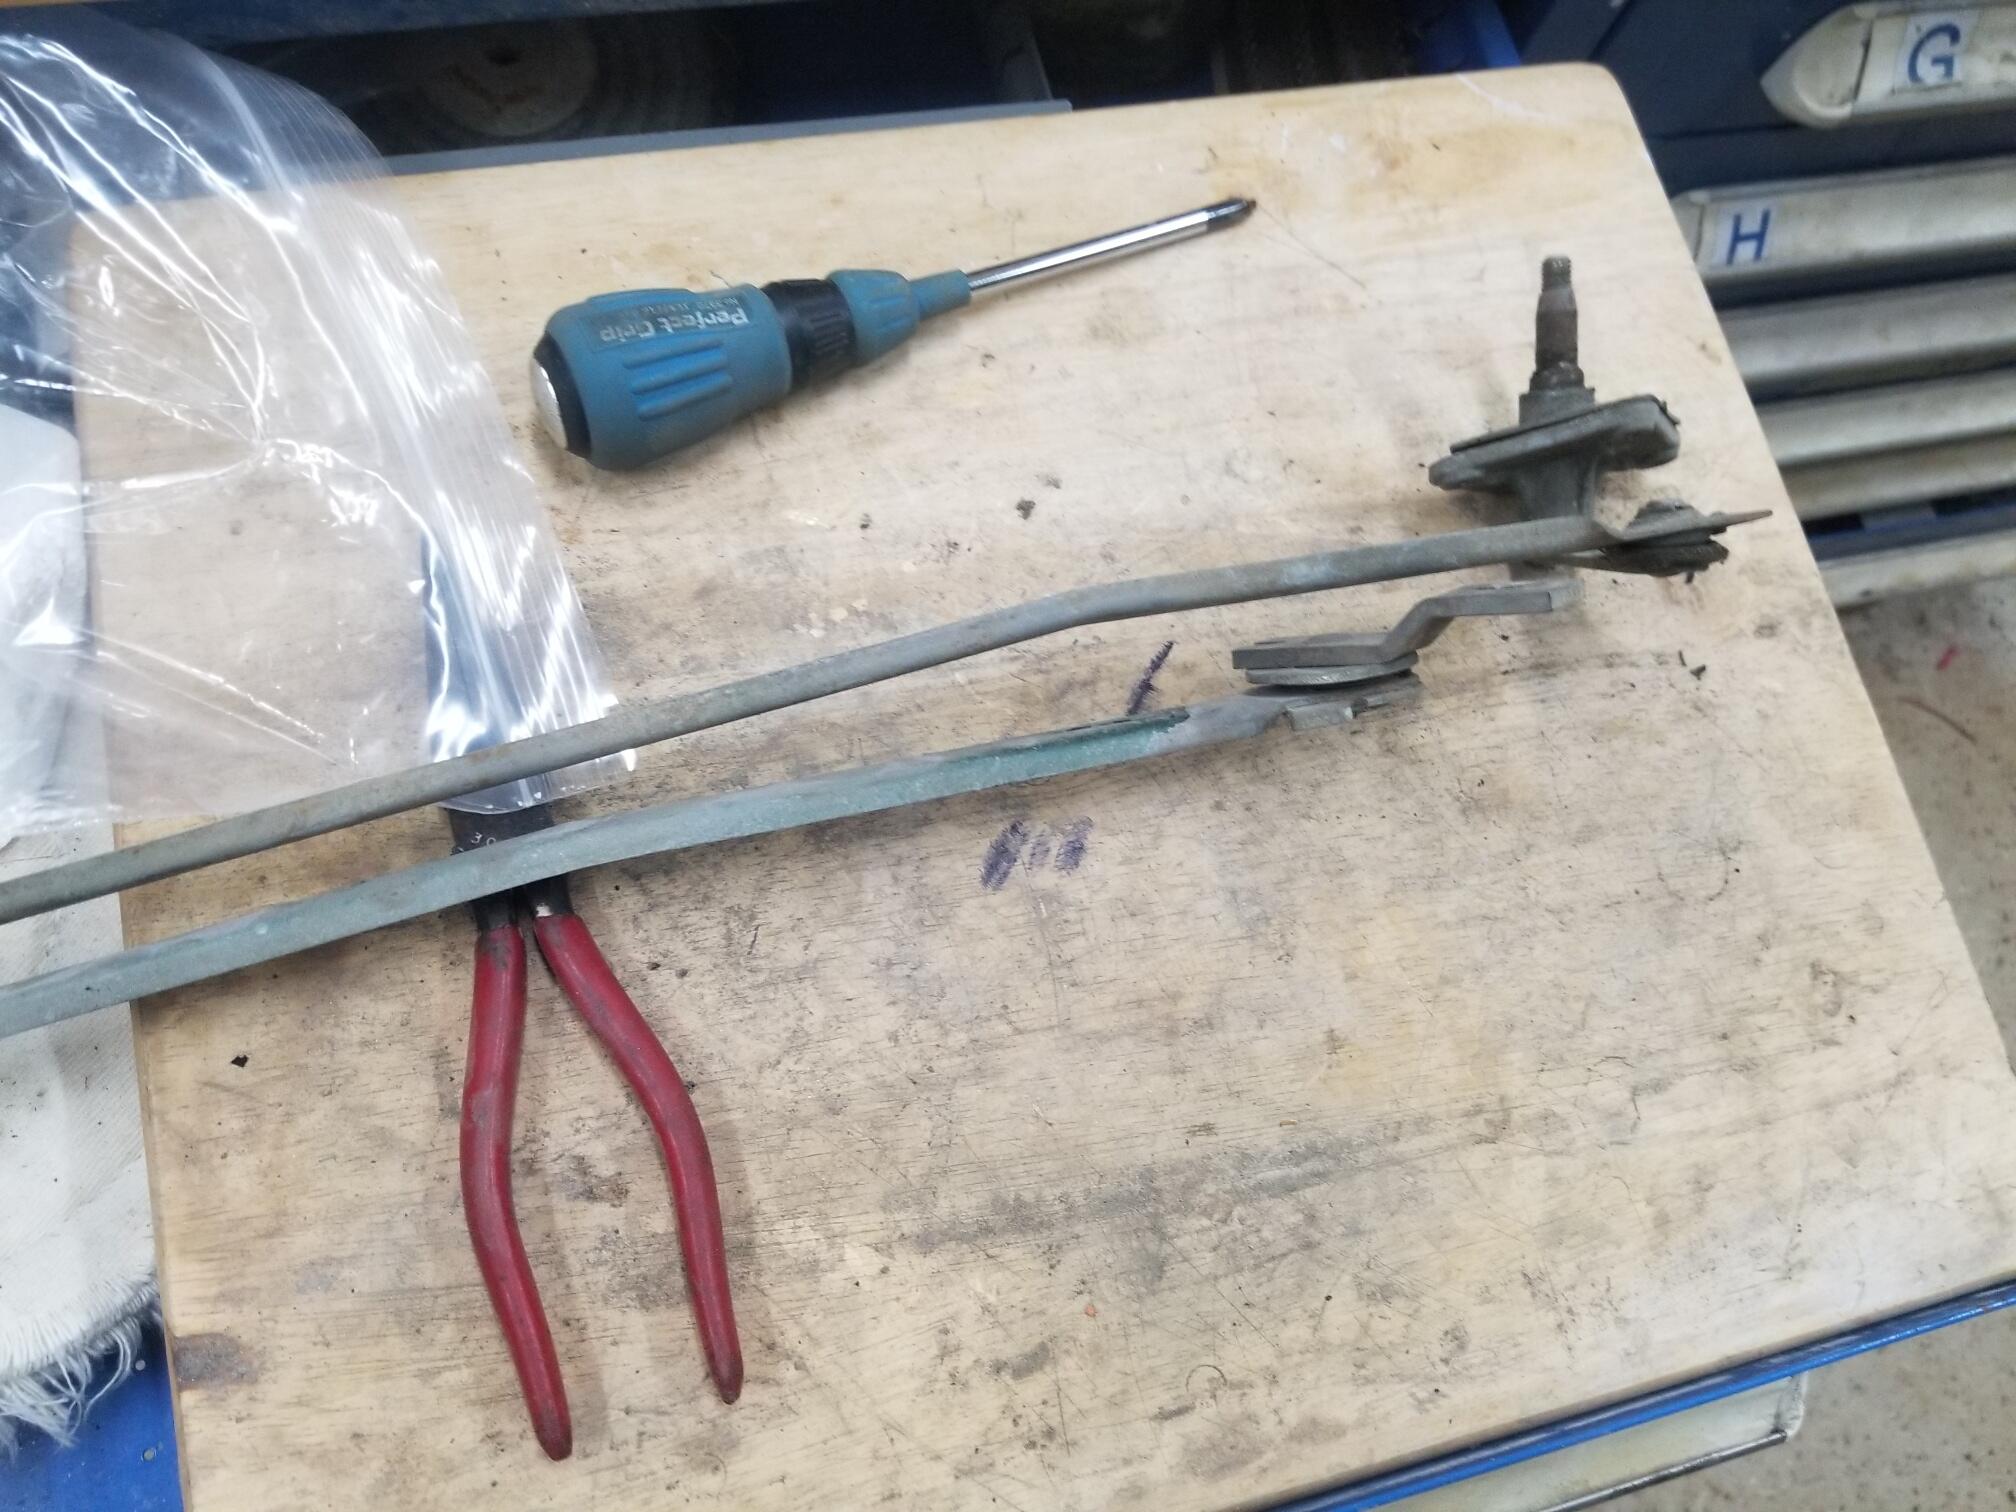
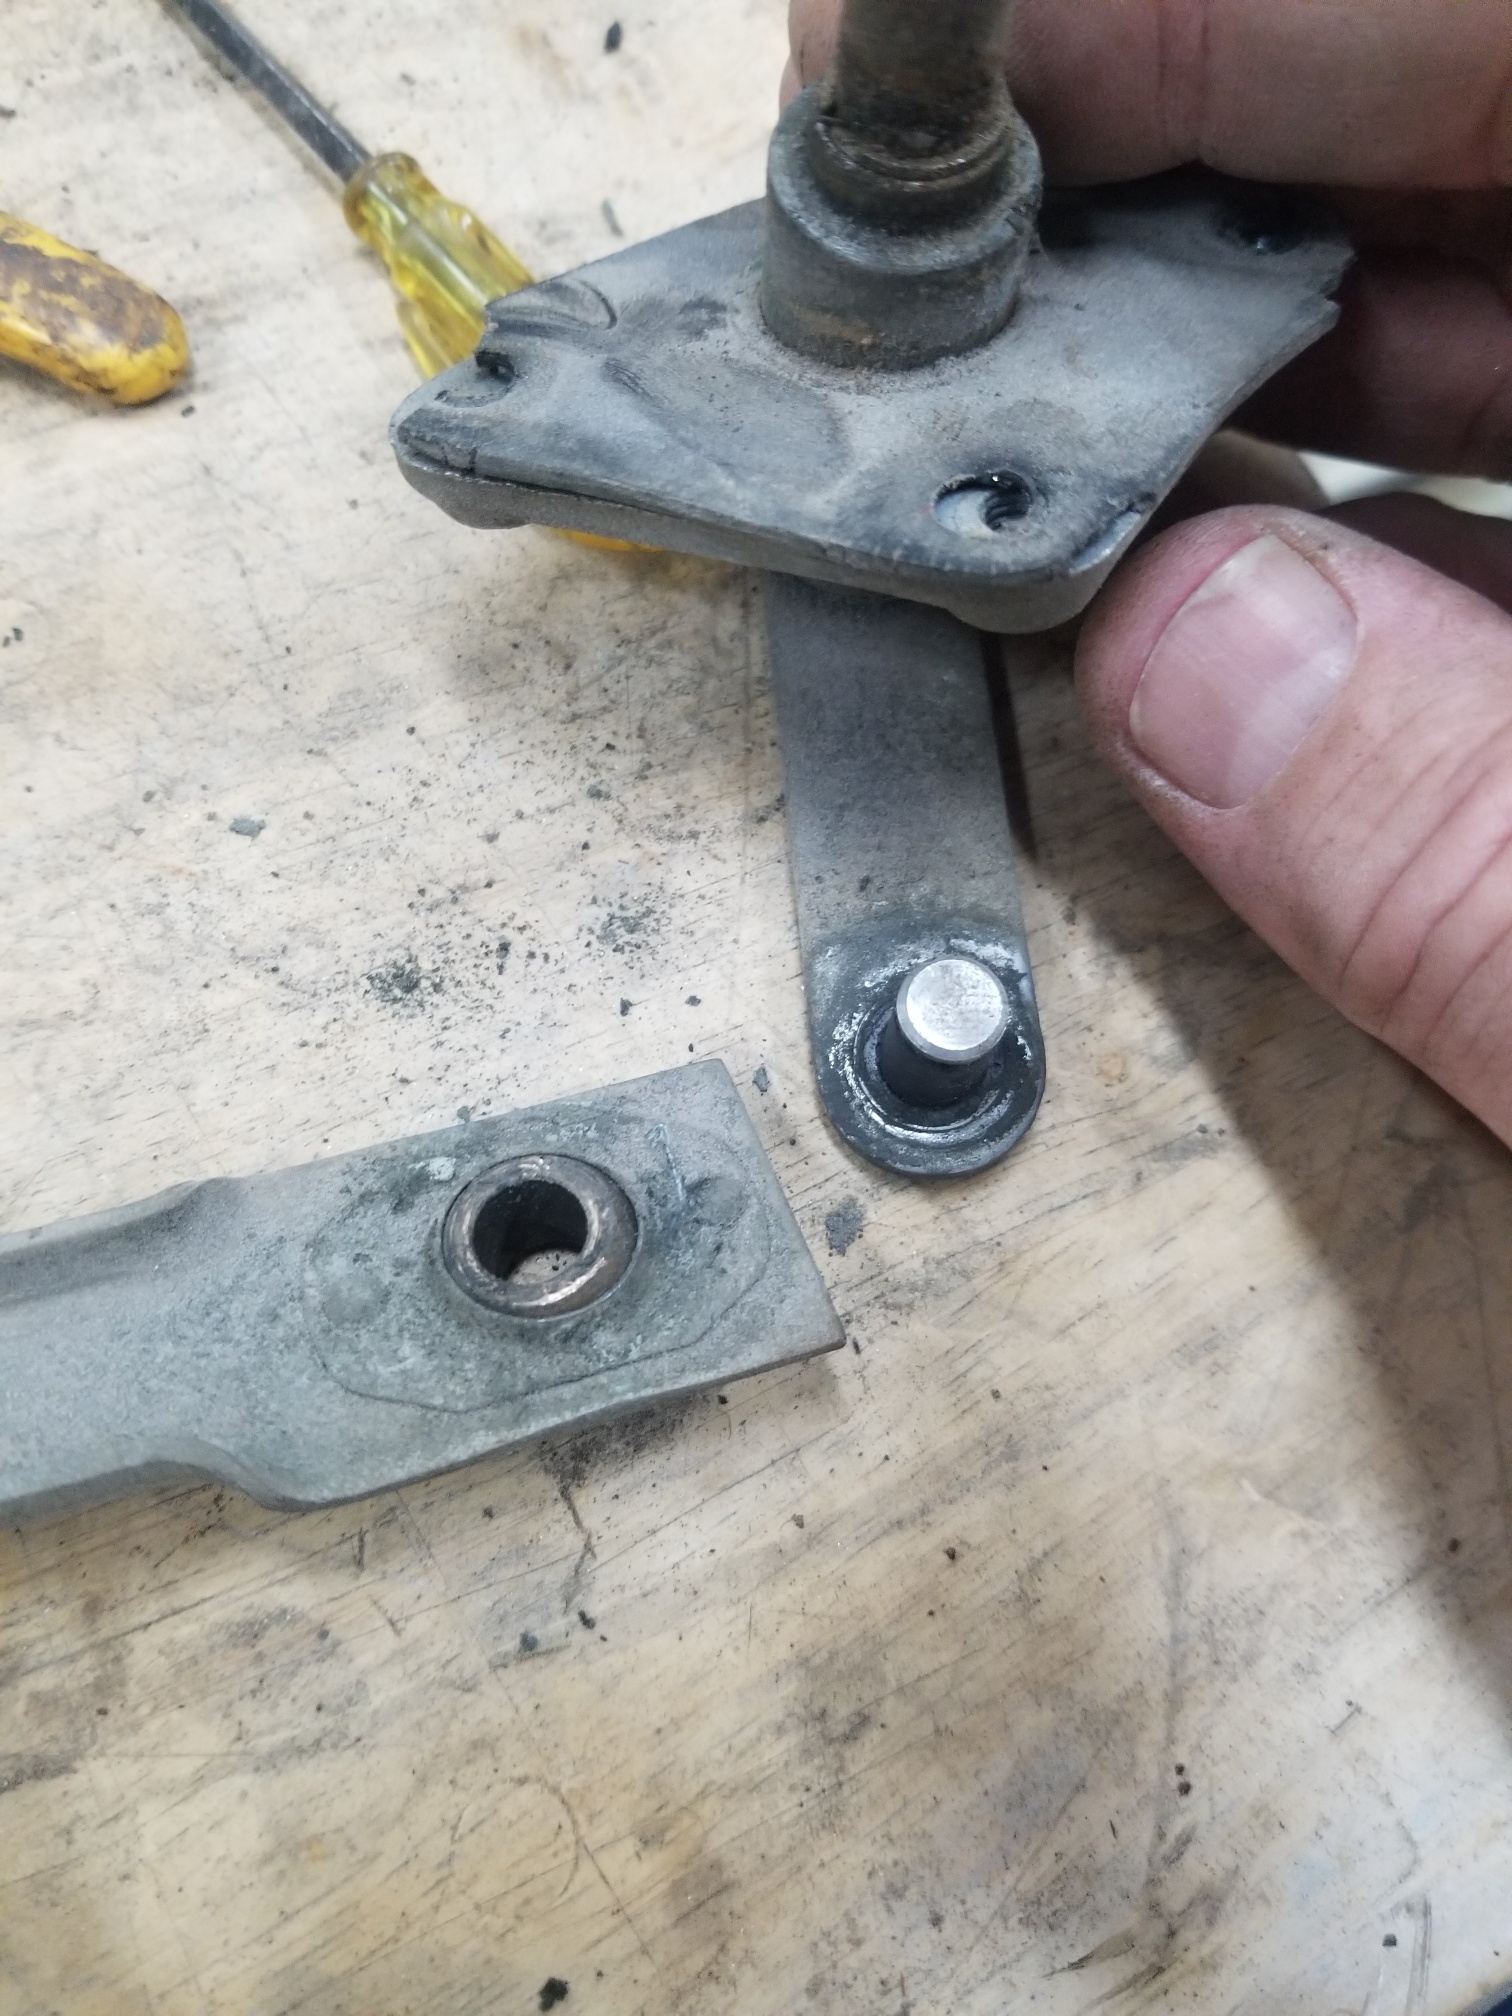
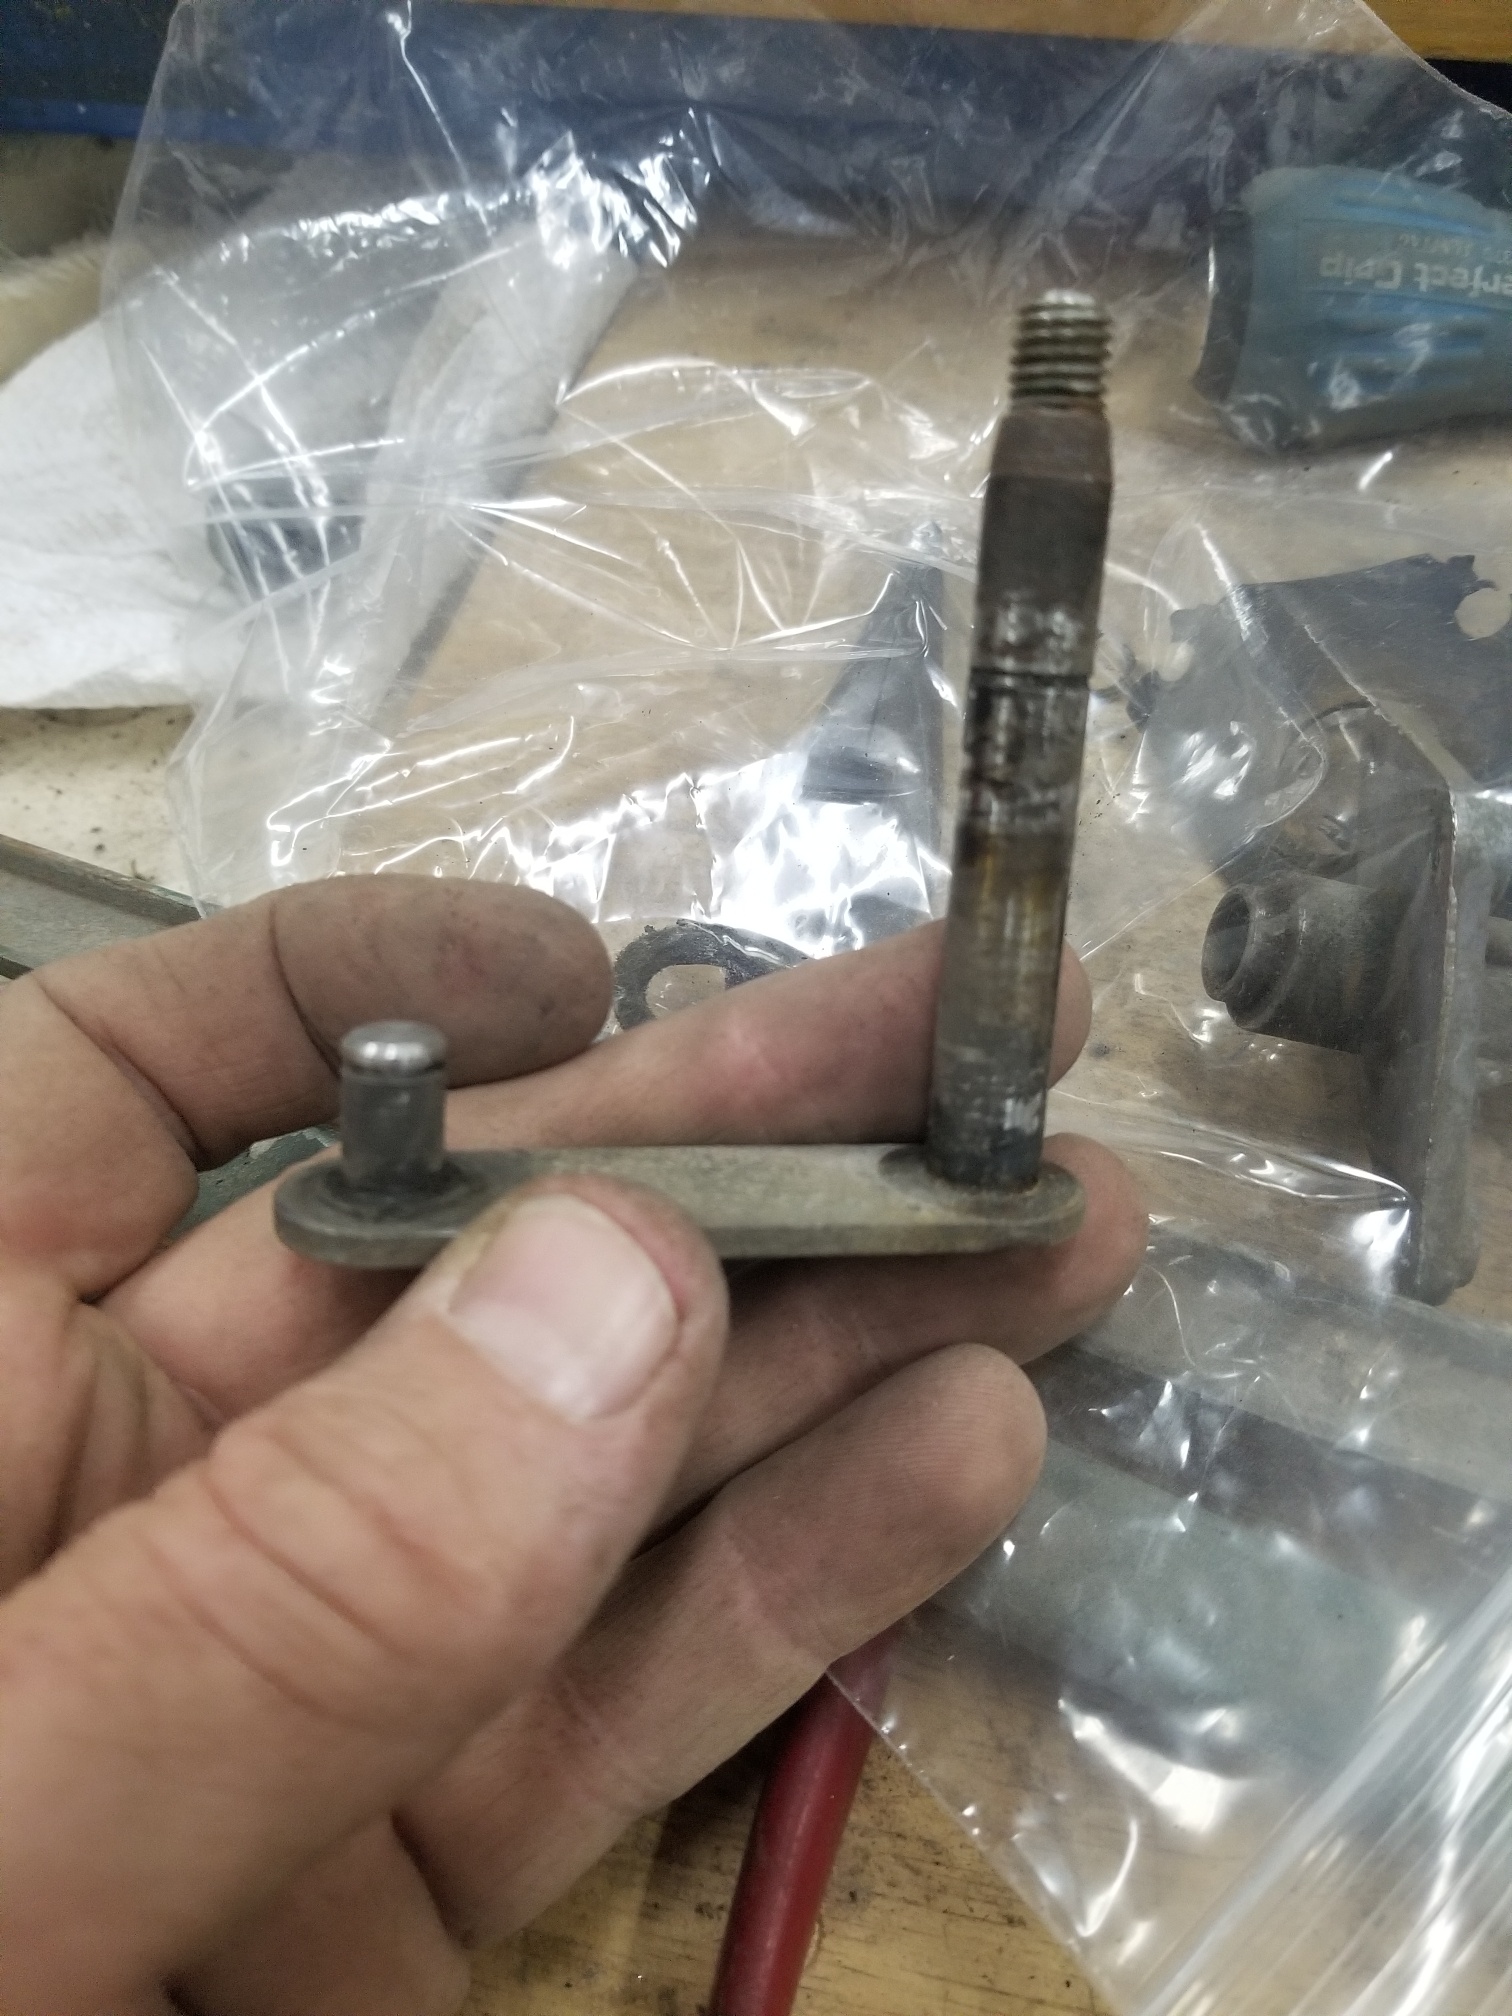
1 pointI have 3 sets of wiper mechanisms on the bench. I finally decided I would rebuild them and plate them since I have some other items that need to go to the platers. Since I didn't know of a comprehensive rebuild thread on CZC I thought I would make one I did the break down today So you need to be sure on reasssembly that it looks like this or you're gonna have problems!! I started on the single pivot end The little clips aren't spring steel. The bend open. I might go back with snap rings on reassembly Then the felt. I am working on replacements for these Also shows the rubber seal that is on the face of the wiper pivot base


 1 point
 -
1 pointI highly recommend you visit the POR 15 website to educate yourself on products for your repairs. As @Patcon recommended, once you remove all of the affected metal you need to neutralize any remaining surface rust. The POR product "Metal Prep" is one of those products and it leaves a protective barrier coating that is ready for your primer or other product. Here is your starting point: https://por15.com/1 point
-
1 pointBondo ( plastic body filler) is really not a suitable material for dealing with rust holes. It is not water proof so moisture can travel through it and continue the rusting process. Grannyknot is correct that the hole is probably larger than you suspect once you get back to sound metal. I also agree with the sentiment that you need to get the metal clean. I would also add a step of treating the rust with a phosphating chemical. This chemically converts what minor rust is left. If I was going to try to fill a hole after this and didn't have access to a welder then I would use short hair fiberglass resin. Fiberglass resin is totally water proof after it's cured. But bare in mind that fiberglass resin gets much harder than filler! It's harder to shape and finish well. Once the hole is sort of filled and sealed up you can use filler over the primed resin to make it smooth.1 point
-
1 pointIf you must use “bondo” on bare steel (don’t! Prime it first, epoxy primer is good), use the short strand fiberglass filler rather than regular light weight filler. It soaks up WAY less moisture from the air than standard bondo. Standard bondo on bare steel is the fastest way to get that steel rusty and have that bondo go byebye.1 point
-
1 point
-
Oooh really love the expanding the spring idea !!! In my experience the lemon juice only fails if your parts are covered in grease - so I tend to bathe the greasy stuff in thinners first. The horn didn’t need it though - but the hand brake mechanism did!!1 point
-
1 pointI actually consider it a fortunate mistake because it gave me a better understanding of how the horns work.1 point
-
Super fascinating Alan!! I wish I could have either type of roll-bar, it is a long way to achieve it. Thanks for the pictures JDMjunkies.ch and Alan, I am (I am sure we! ) looking forward to seeing the both car when complete. Kats1 point
-
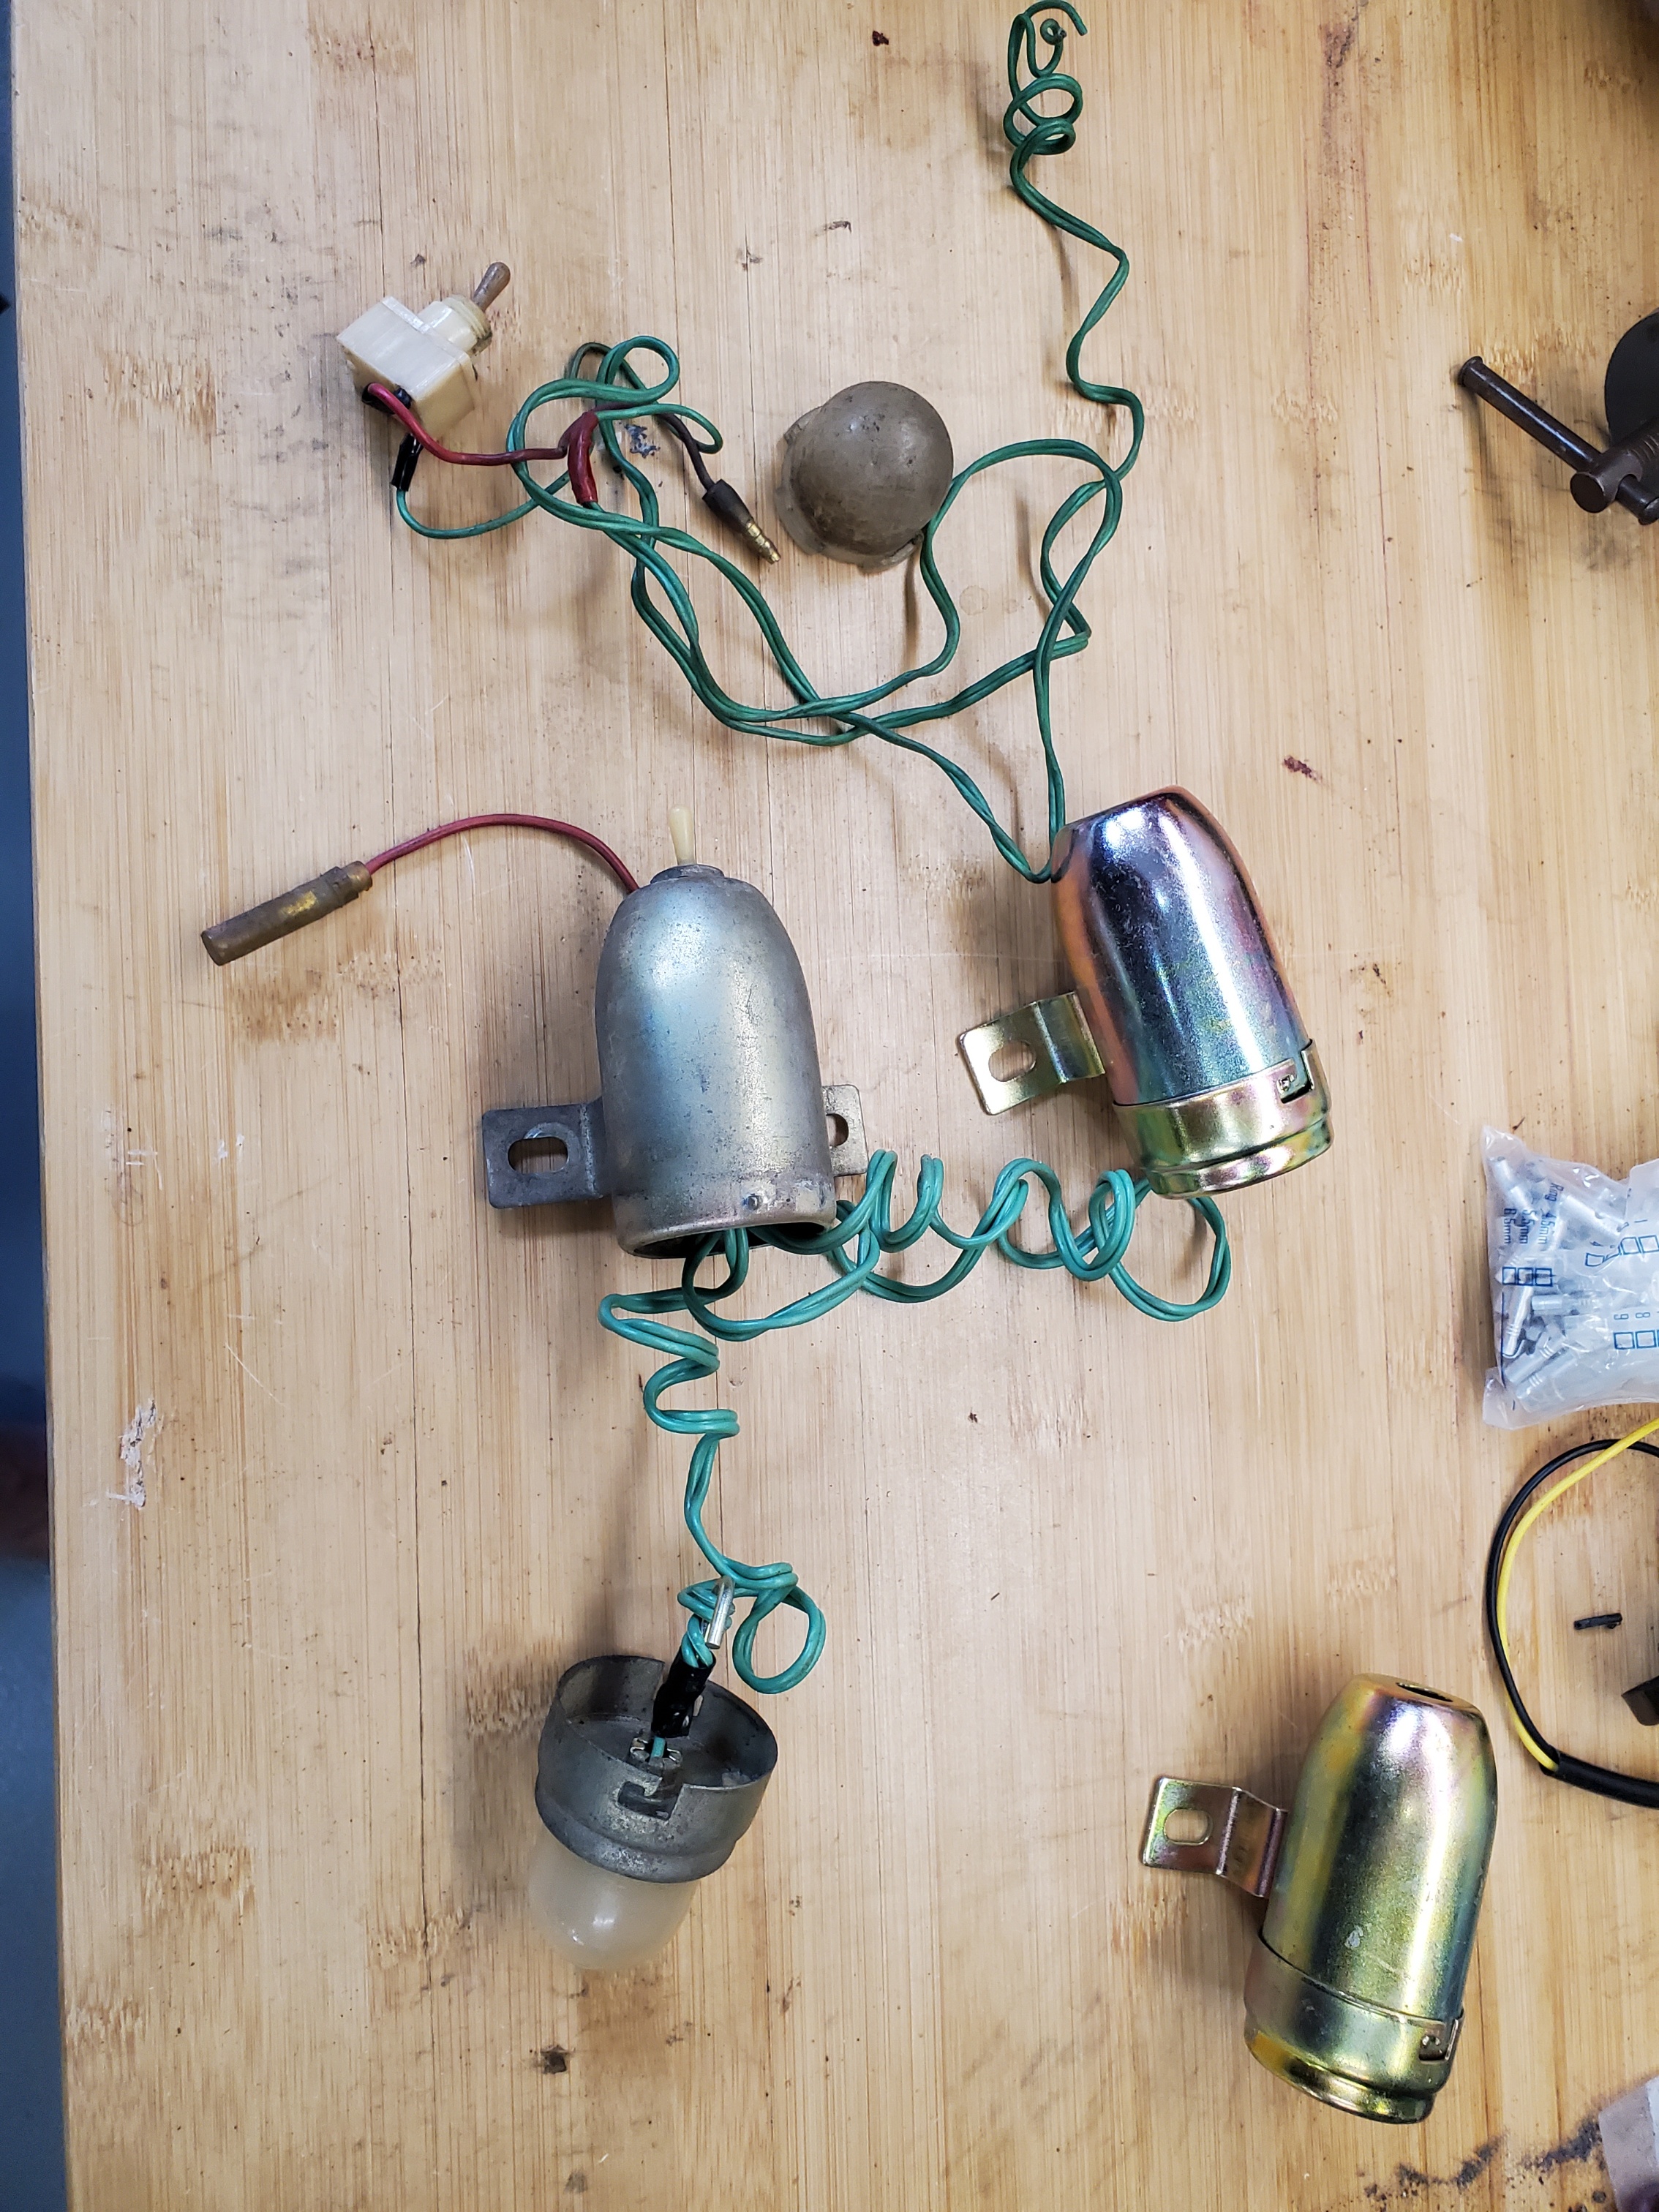
1 pointSo last night I wanted to see if I could improve the sound from the horns @Tirnipgreen asked me to work on. One was nice and strong. I wasn't going to mess with success. The other wasn't working, though it worked before. I could tell it was pulling in the diaphragm, but the contacts weren't opening. This was verified by taking current measurements on that horn and one that worked. The non-working horn was pulling a lot more current. I tweaked on the parts repeatedly, but I couldn't figure out why that one horn would not work. Finally out of frustration, I took the other horn apart to compare the diaphragms. The problem then stuck out like a sore thumb. Whoever reassembled the diaphragm on the horns didn't put the parts back together in the right order on the non-working horn. The fiber washer was on the wrong side of the bar between the diaphragm and the bar. This is how is should be. So when the diaphragm tried to open the contacts, it was still providing a path to ground for the coil. With the coil still energized, the diaphragm wasn't moving. Once the diaphragm was assembled properly, the horn worked just fine. With the new knowledge, I decided to re-shoot the video to go over the details of the horn. I just have to edit the new video.
 1 point
 -
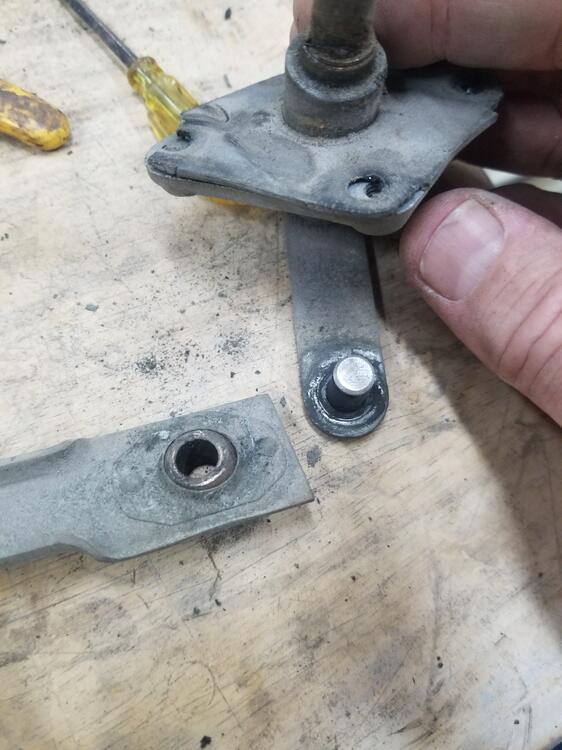
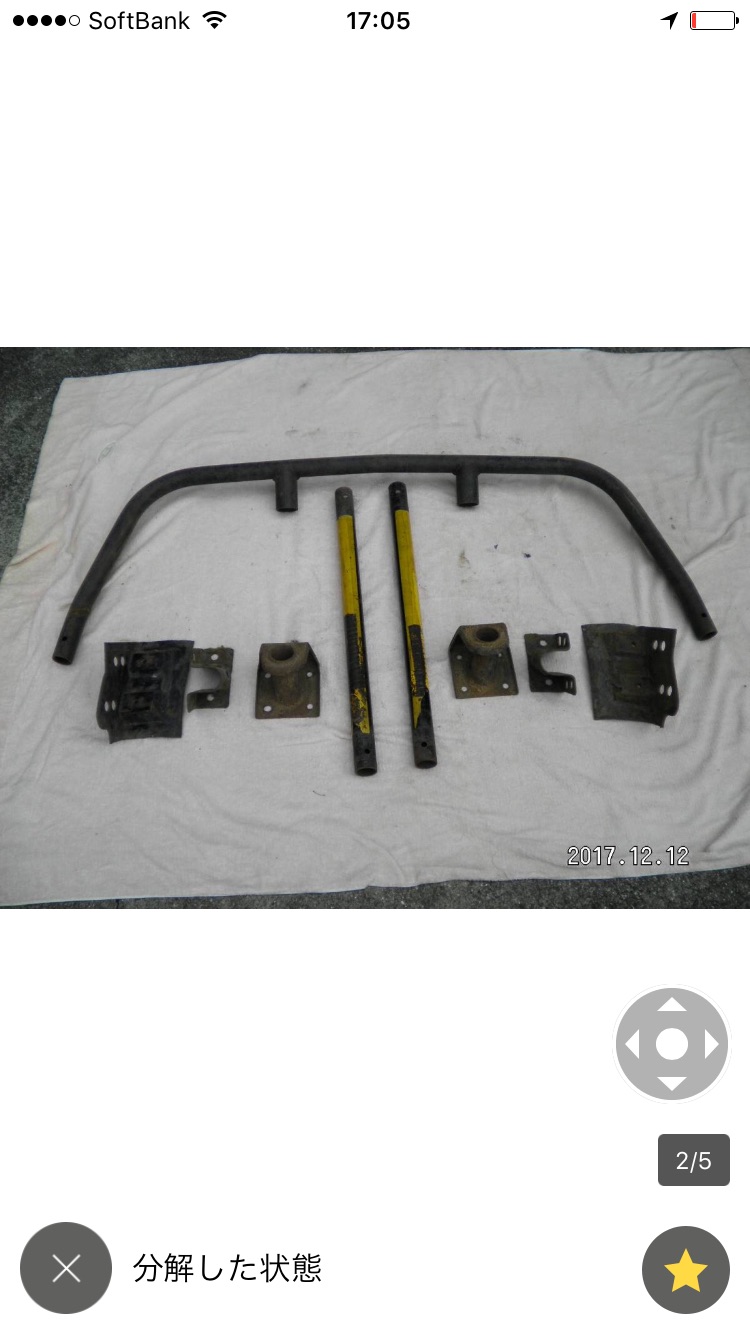
Beautiful rollbar you found there. It's not often they pop up for sale these days. Yes the two detachable plates are included. see grey plate in the picture below from my Mizukami replica:1 point
-
Thanks AK, When i got something rusty that needs a restore i try that trick.. Thanks! In the past i had trouble with parts that had some old paint on them and when they came back from passifying they where not perfect as they don't take off the paint first .. they just throw it in the tanks to clean and passify them. That ment i had to clean them myself and bring them back again.. And.. Don't forget to put a strip of metal in the springs to get them perfect..
 1 point
 -
Hello chap! I don’t have an exact formula for it but suffice it to say I use a half a table spoon of salt per 1 litre. The key is to wash out the lemon juice straight away with water and dry off completely as it rusts almost immediately when it hits oxygen!! Here is what I ended up with the next day after soaking. Then I clear coated the inside to make sure it doesn’t rust. The horn does make a louder noise but as you said it needs adjusting. I need to do the 1000 grit negative connectors clean up next to ensure a decent connection. For info and interest the coil measures 1.6ohms. Which means 7.5A before contacts break and assuming a perfect square wave when it operates means it’s taking an average of c.3.25 amps. I also put the horn onto gasket paper and scalpeled out my own gasket before reassembly. Haven’t sealed it yet for obvious reasons.1 point
-
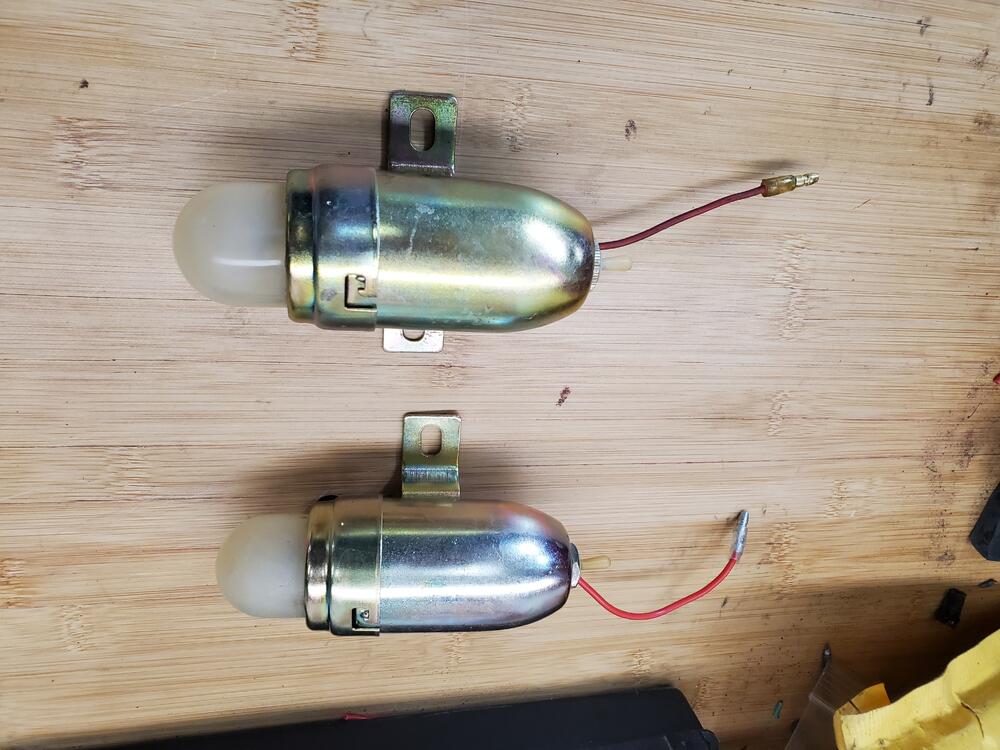
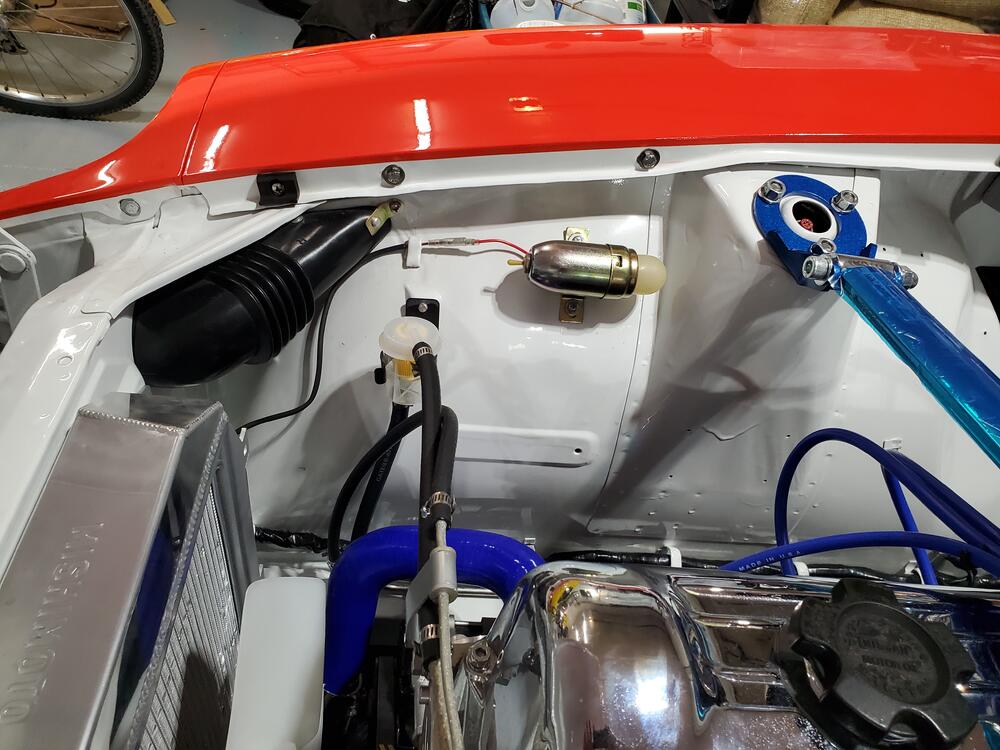
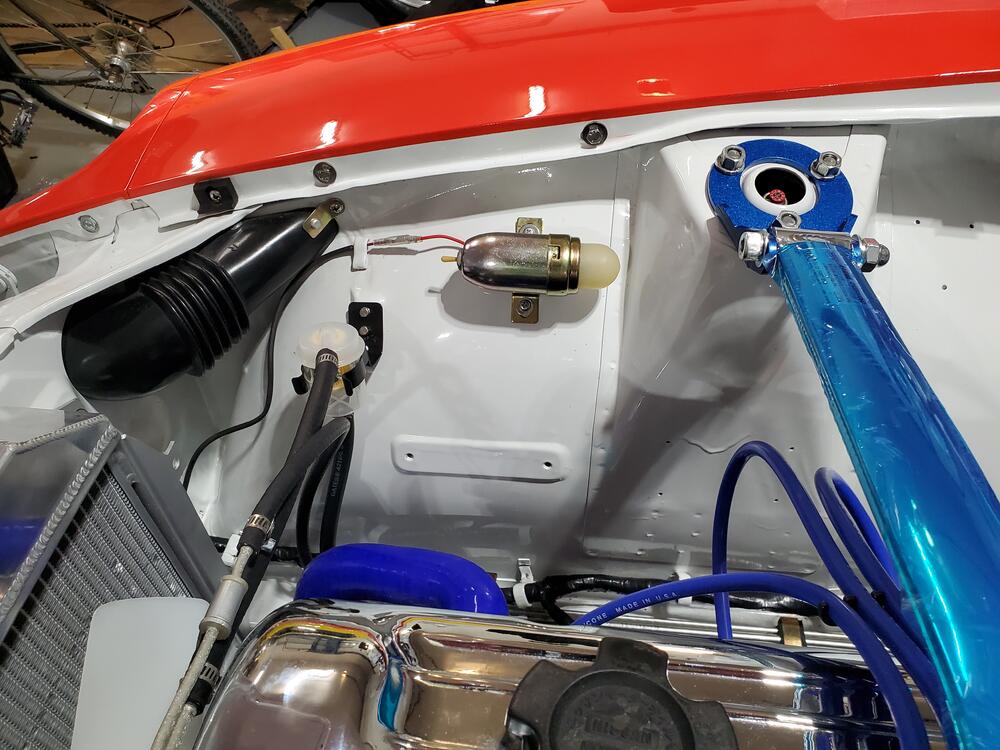
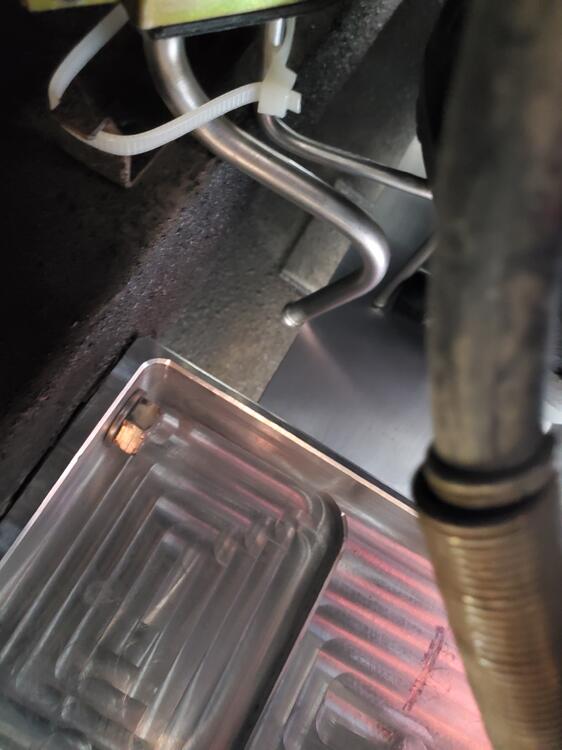
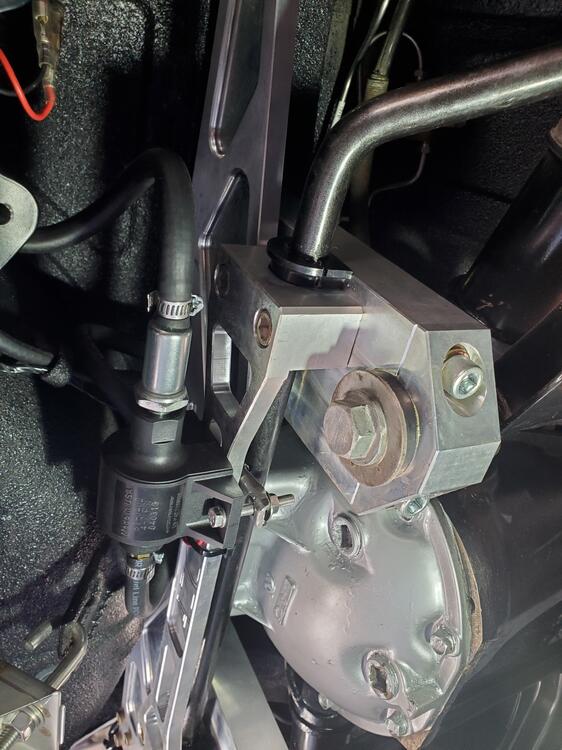
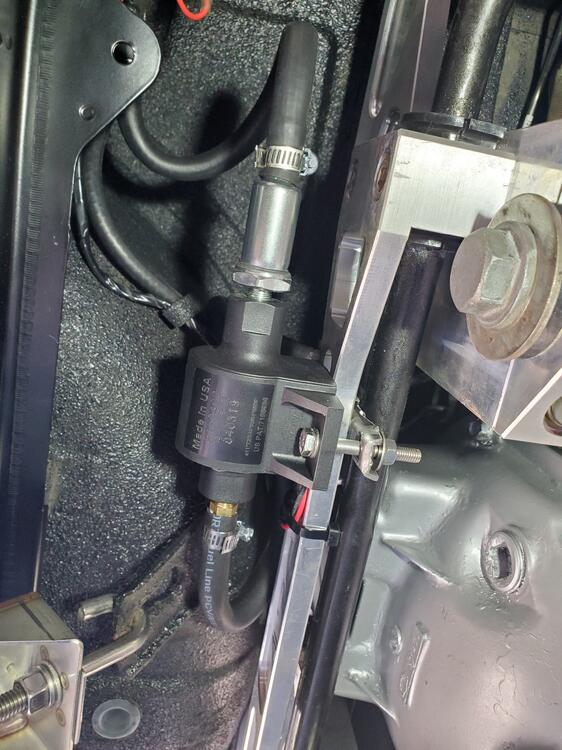
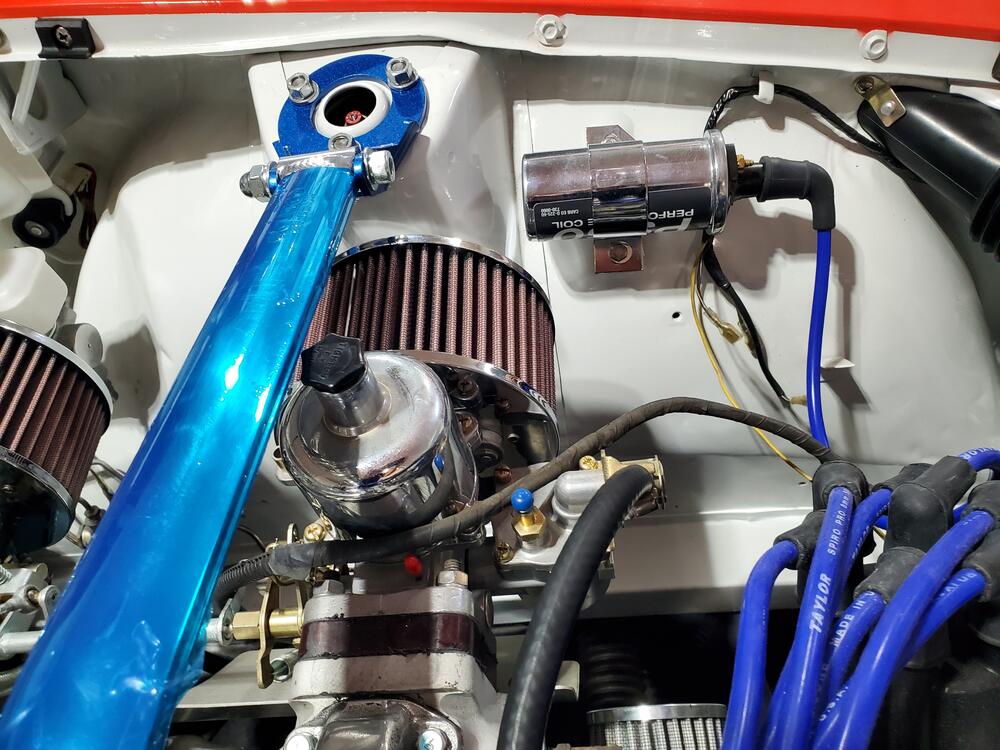
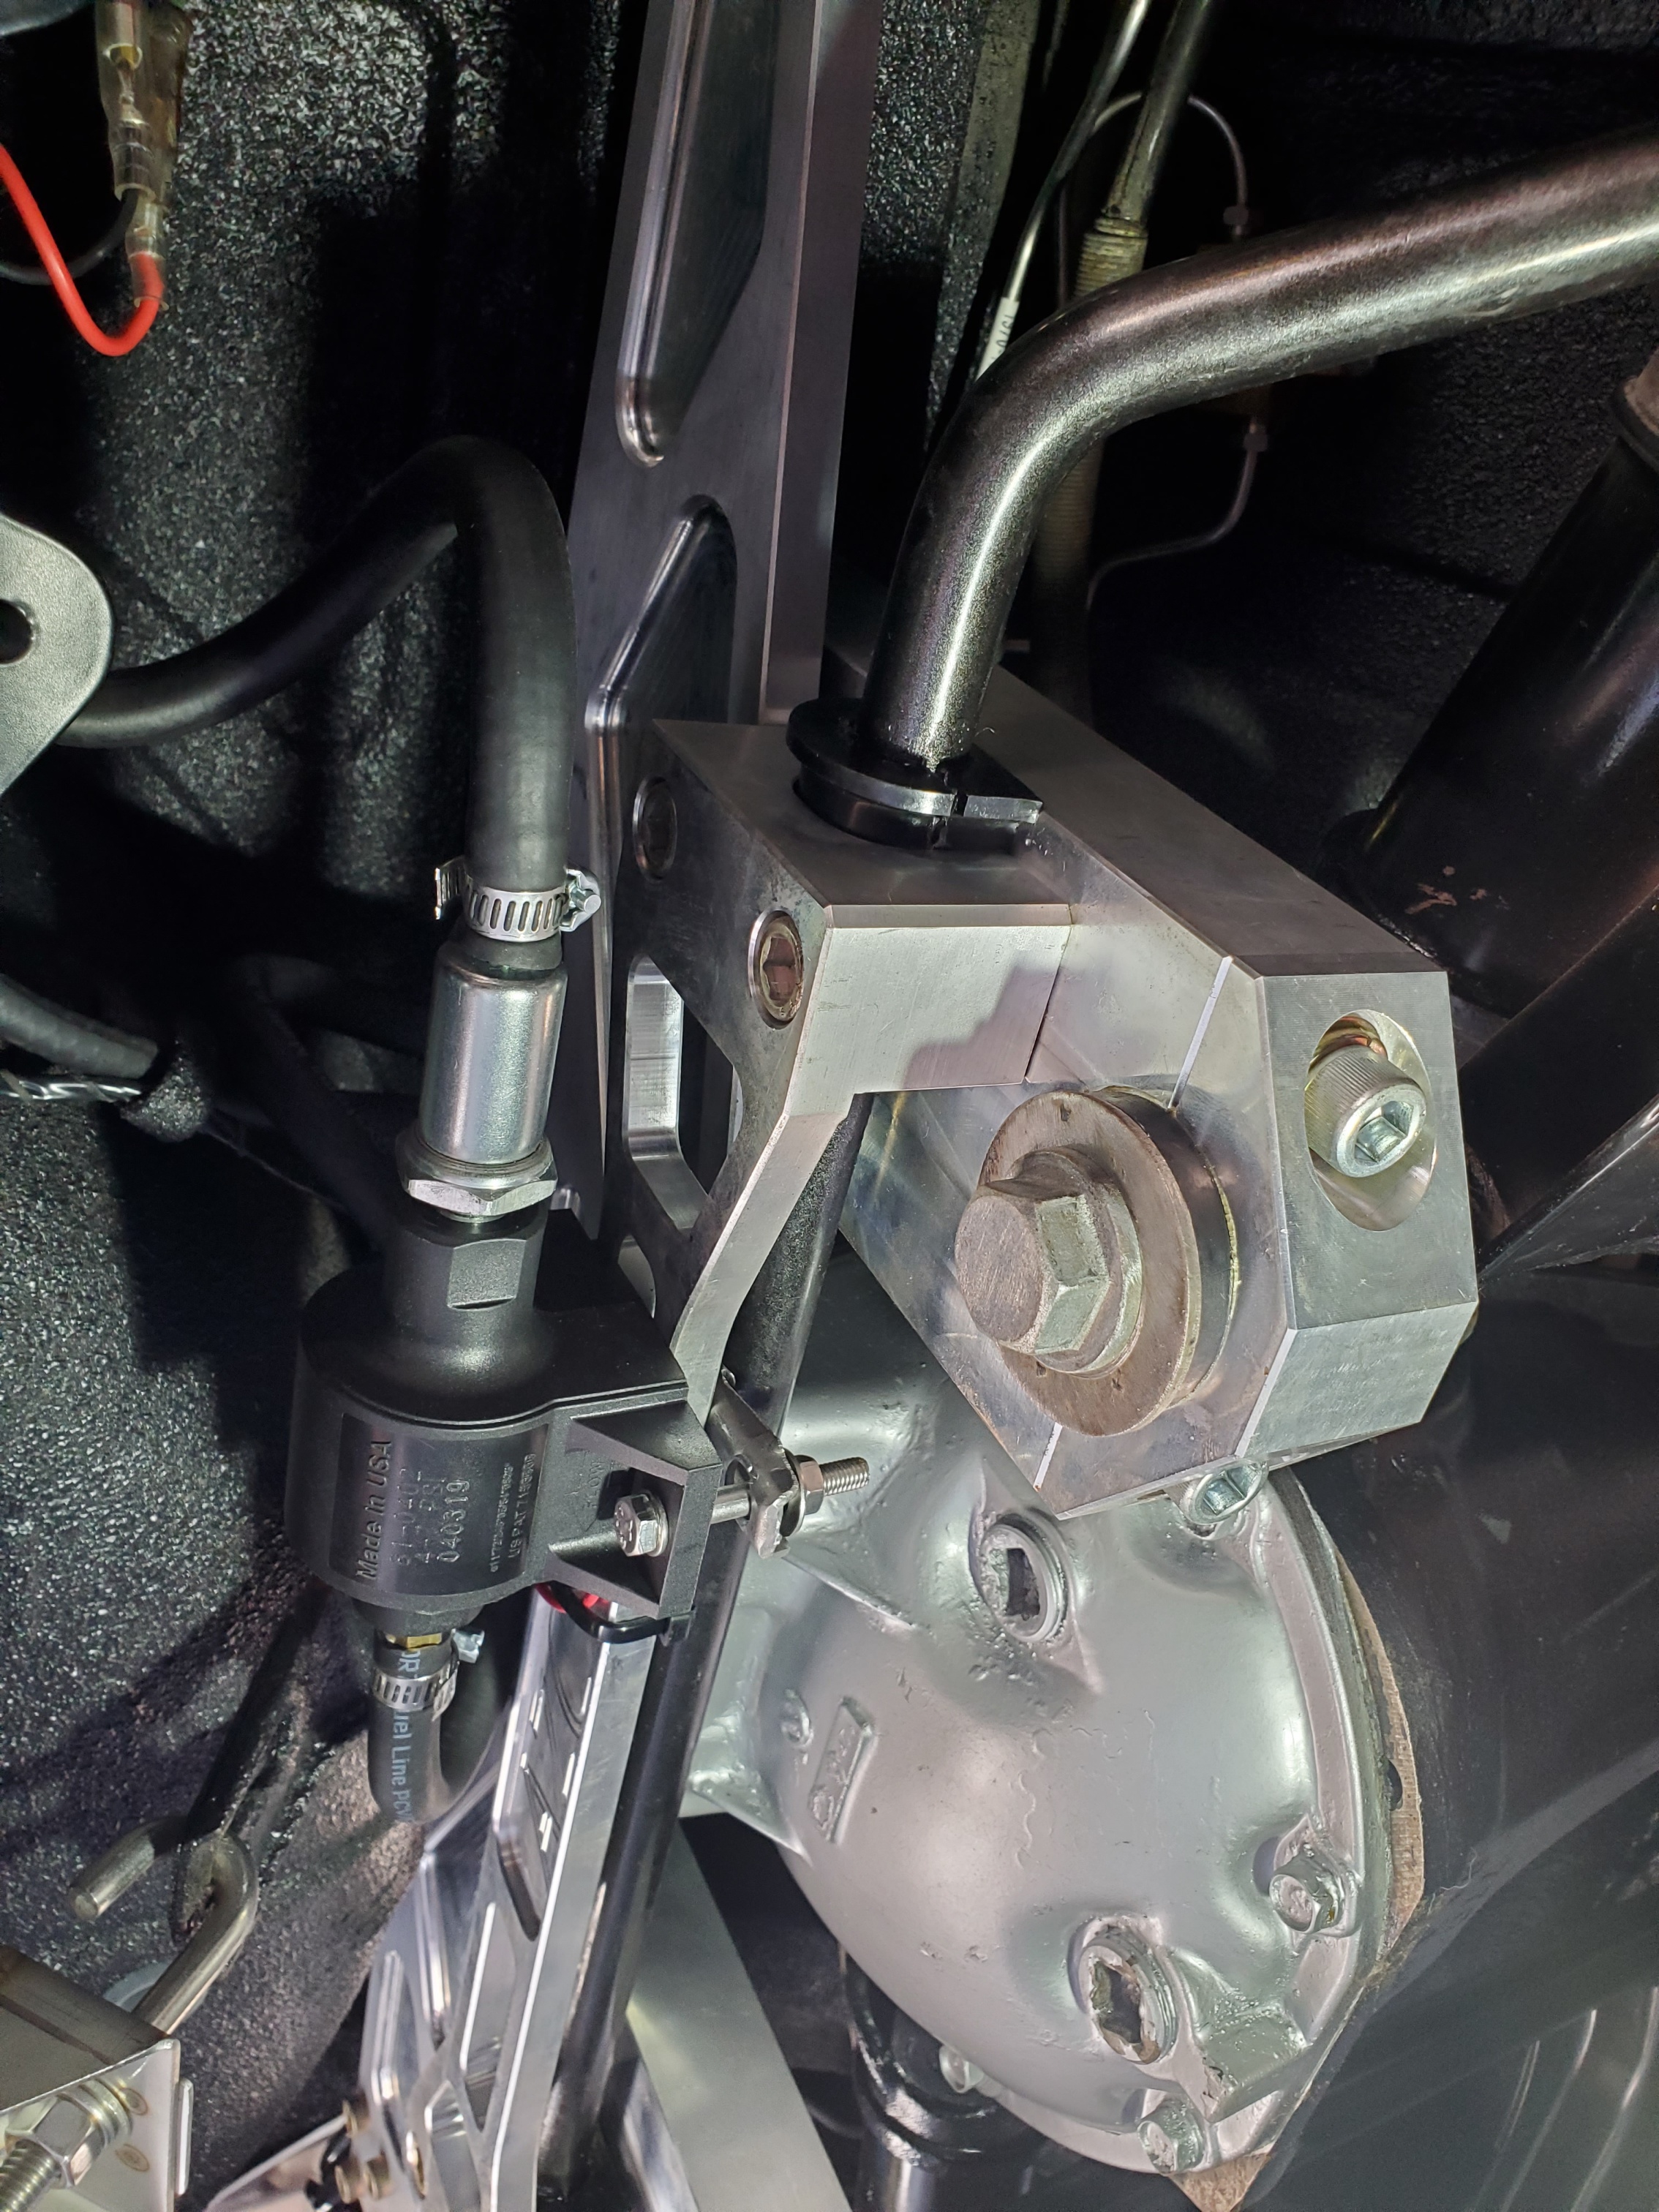
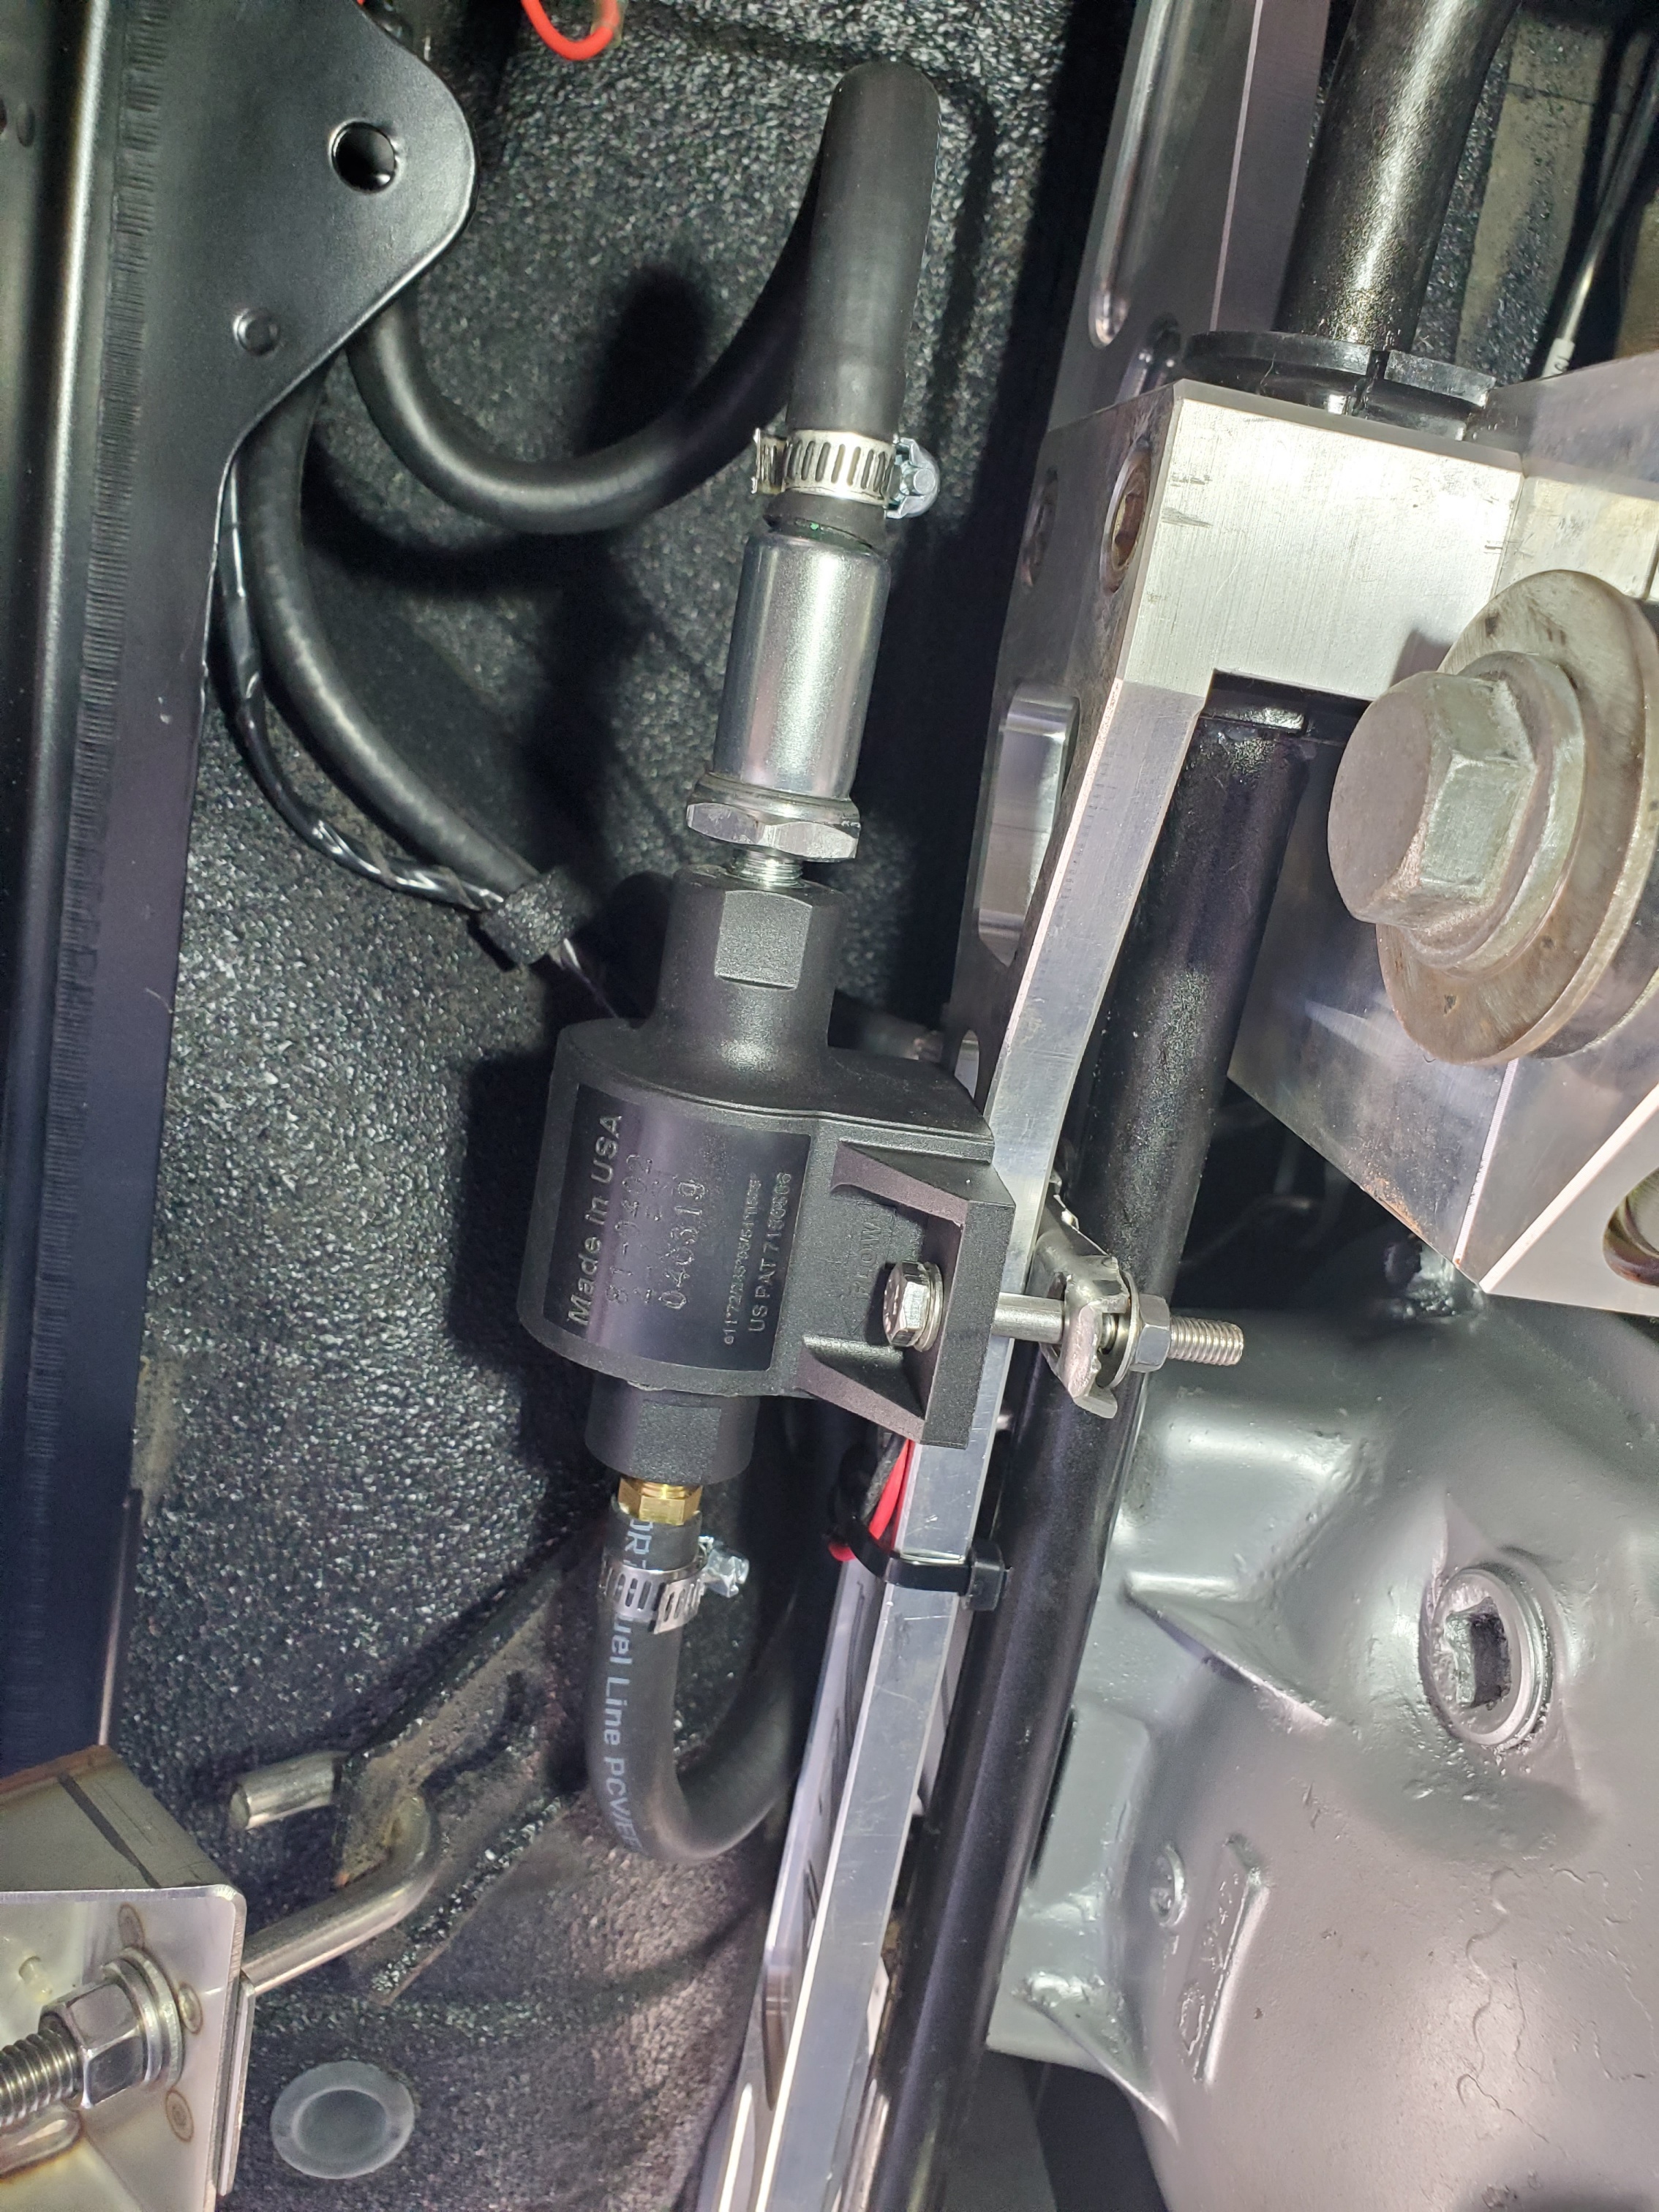
1 pointI had some spare housings for the engine light, so I put a couple together. The original was pretty corroded. The white dome on top is definitely very hazy and opaque, so I cleaned it as best as I could. It would be nice if someone would contract a mold for these and have some nice translucent ones made. I installed the most silver looking light as it better matches the engine bay colors. I installed the fuel hoses to the electronic fuel pump, tank and forward metal lines under the car. The metal lines had to be reformed slightly as they were crashing into the rear suspension parts as shown in the pic below. Such is the curse of aftermarket parts. Anyway, everything worked out nicely with a little tweaking (not to be confused with twerking). Hoses routed smoothly and installation is pretty clean. I am trying to figure out a clean way to route the carb float bowl vent into the small K&N air cleaners. I would like to drill a hole in the base of the air filter and route the hose into the air cleaner, but that leads to a pretty sharp bend in the hose, and it collapses. A right angle fitting would work better. I will have to look around a bit and see what is available. Not sure what other options there are without things looking too messy. Pics below.

 1 point
 -
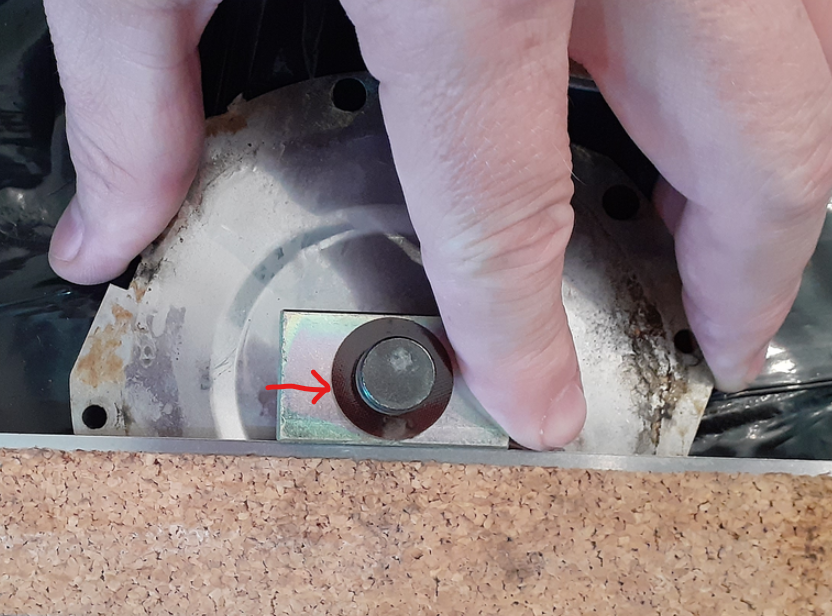
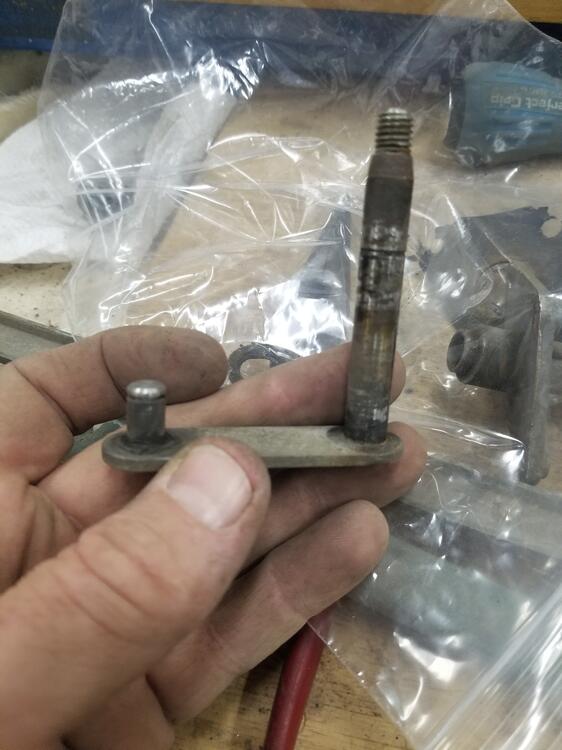
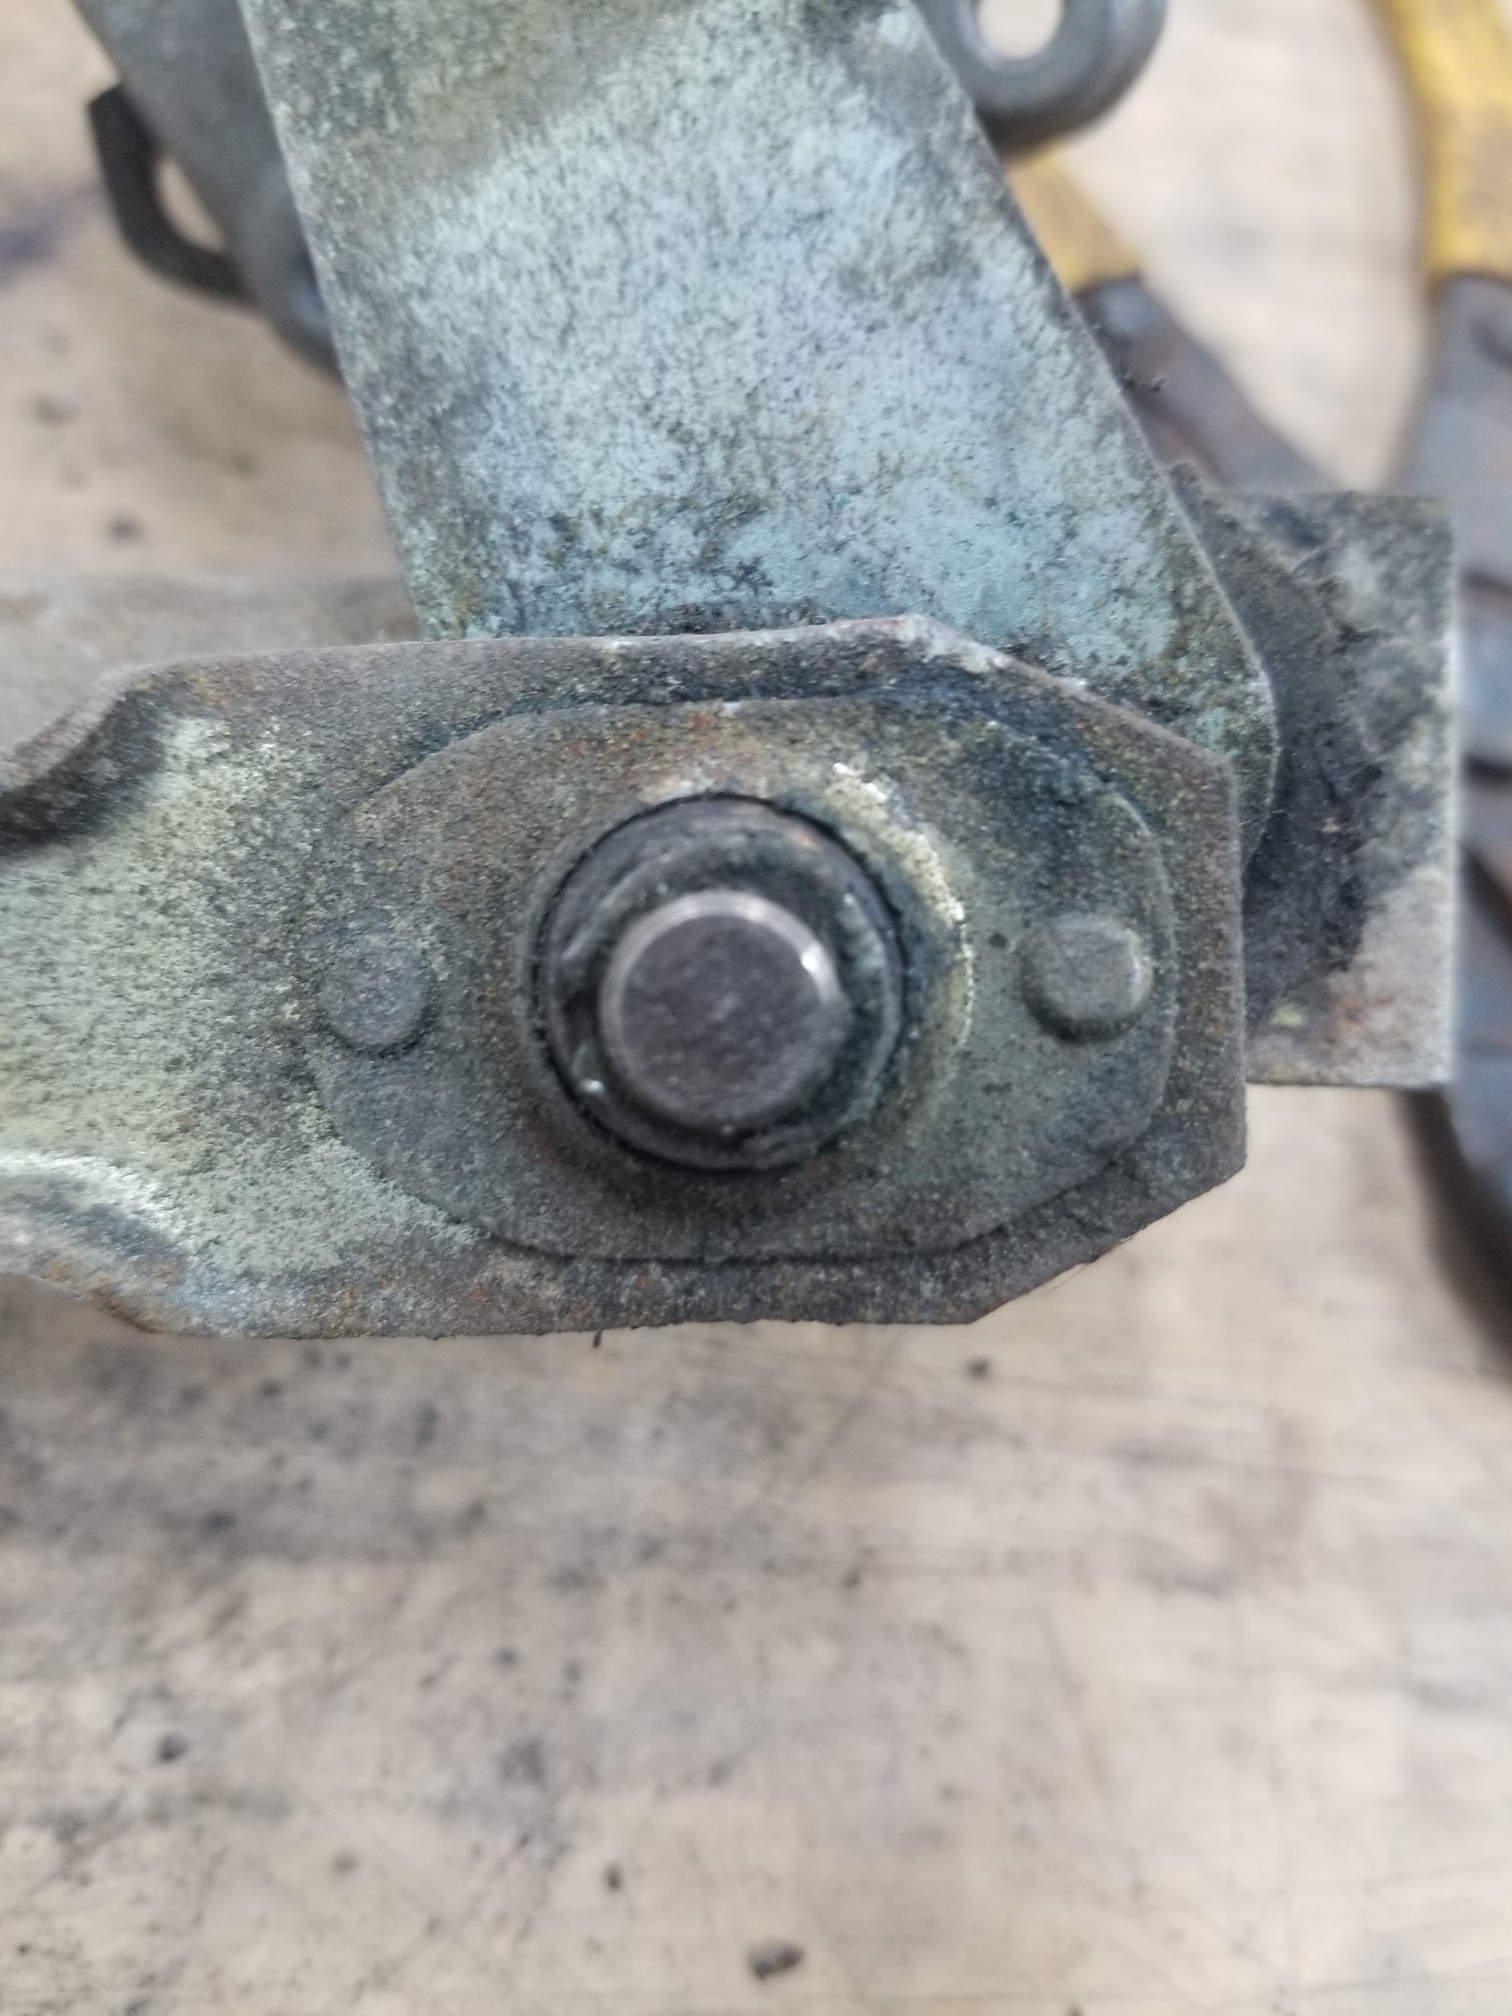
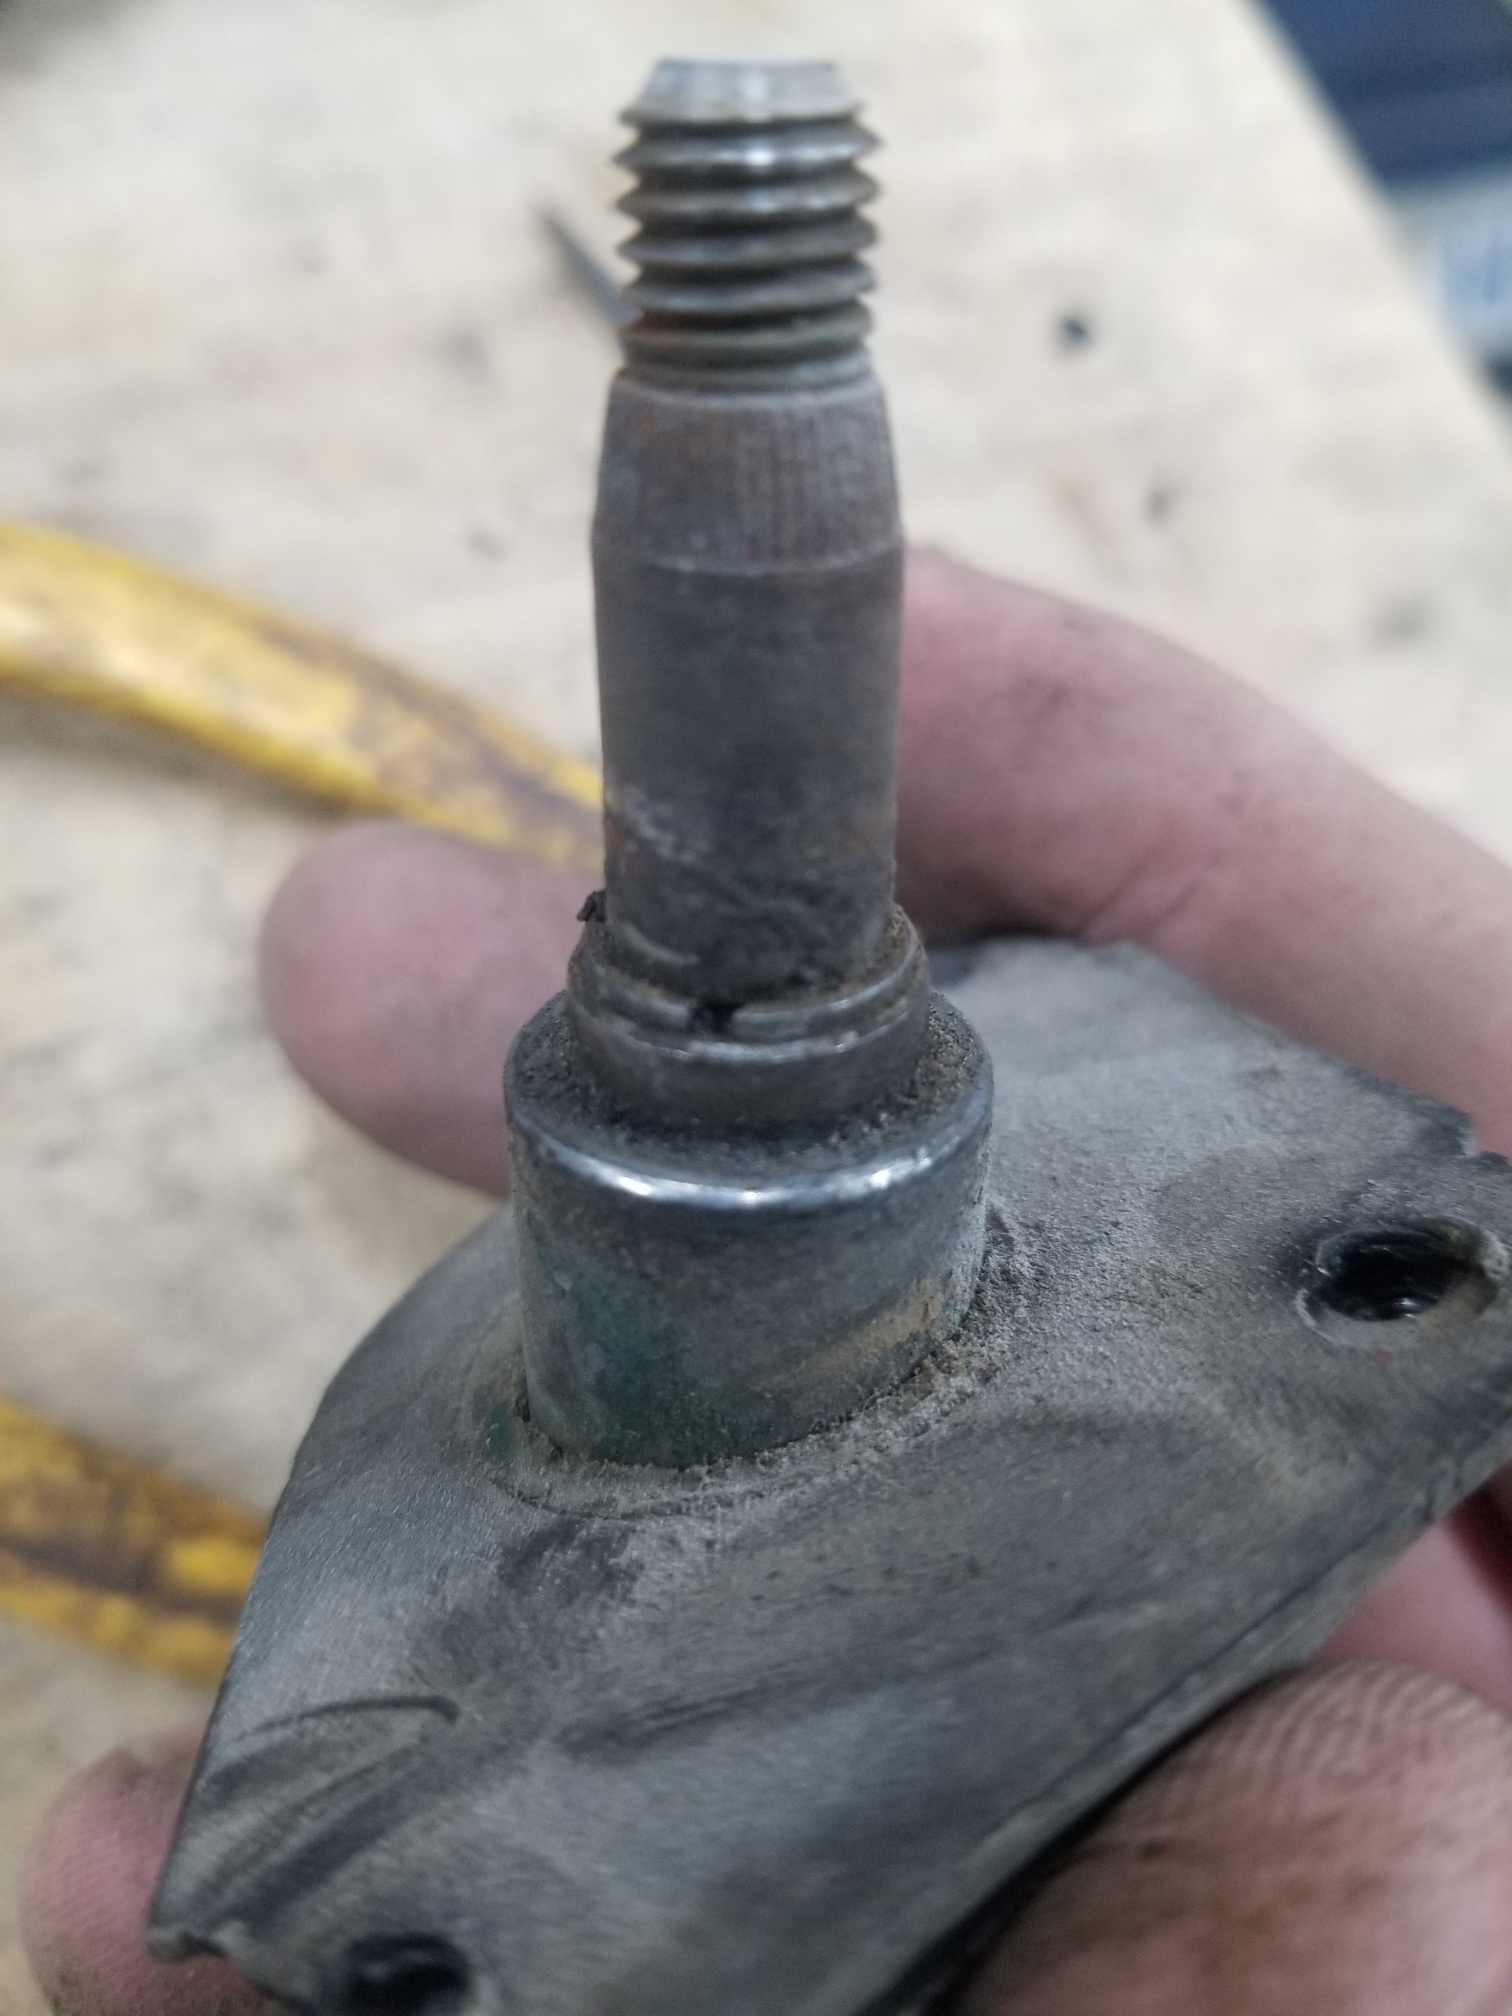
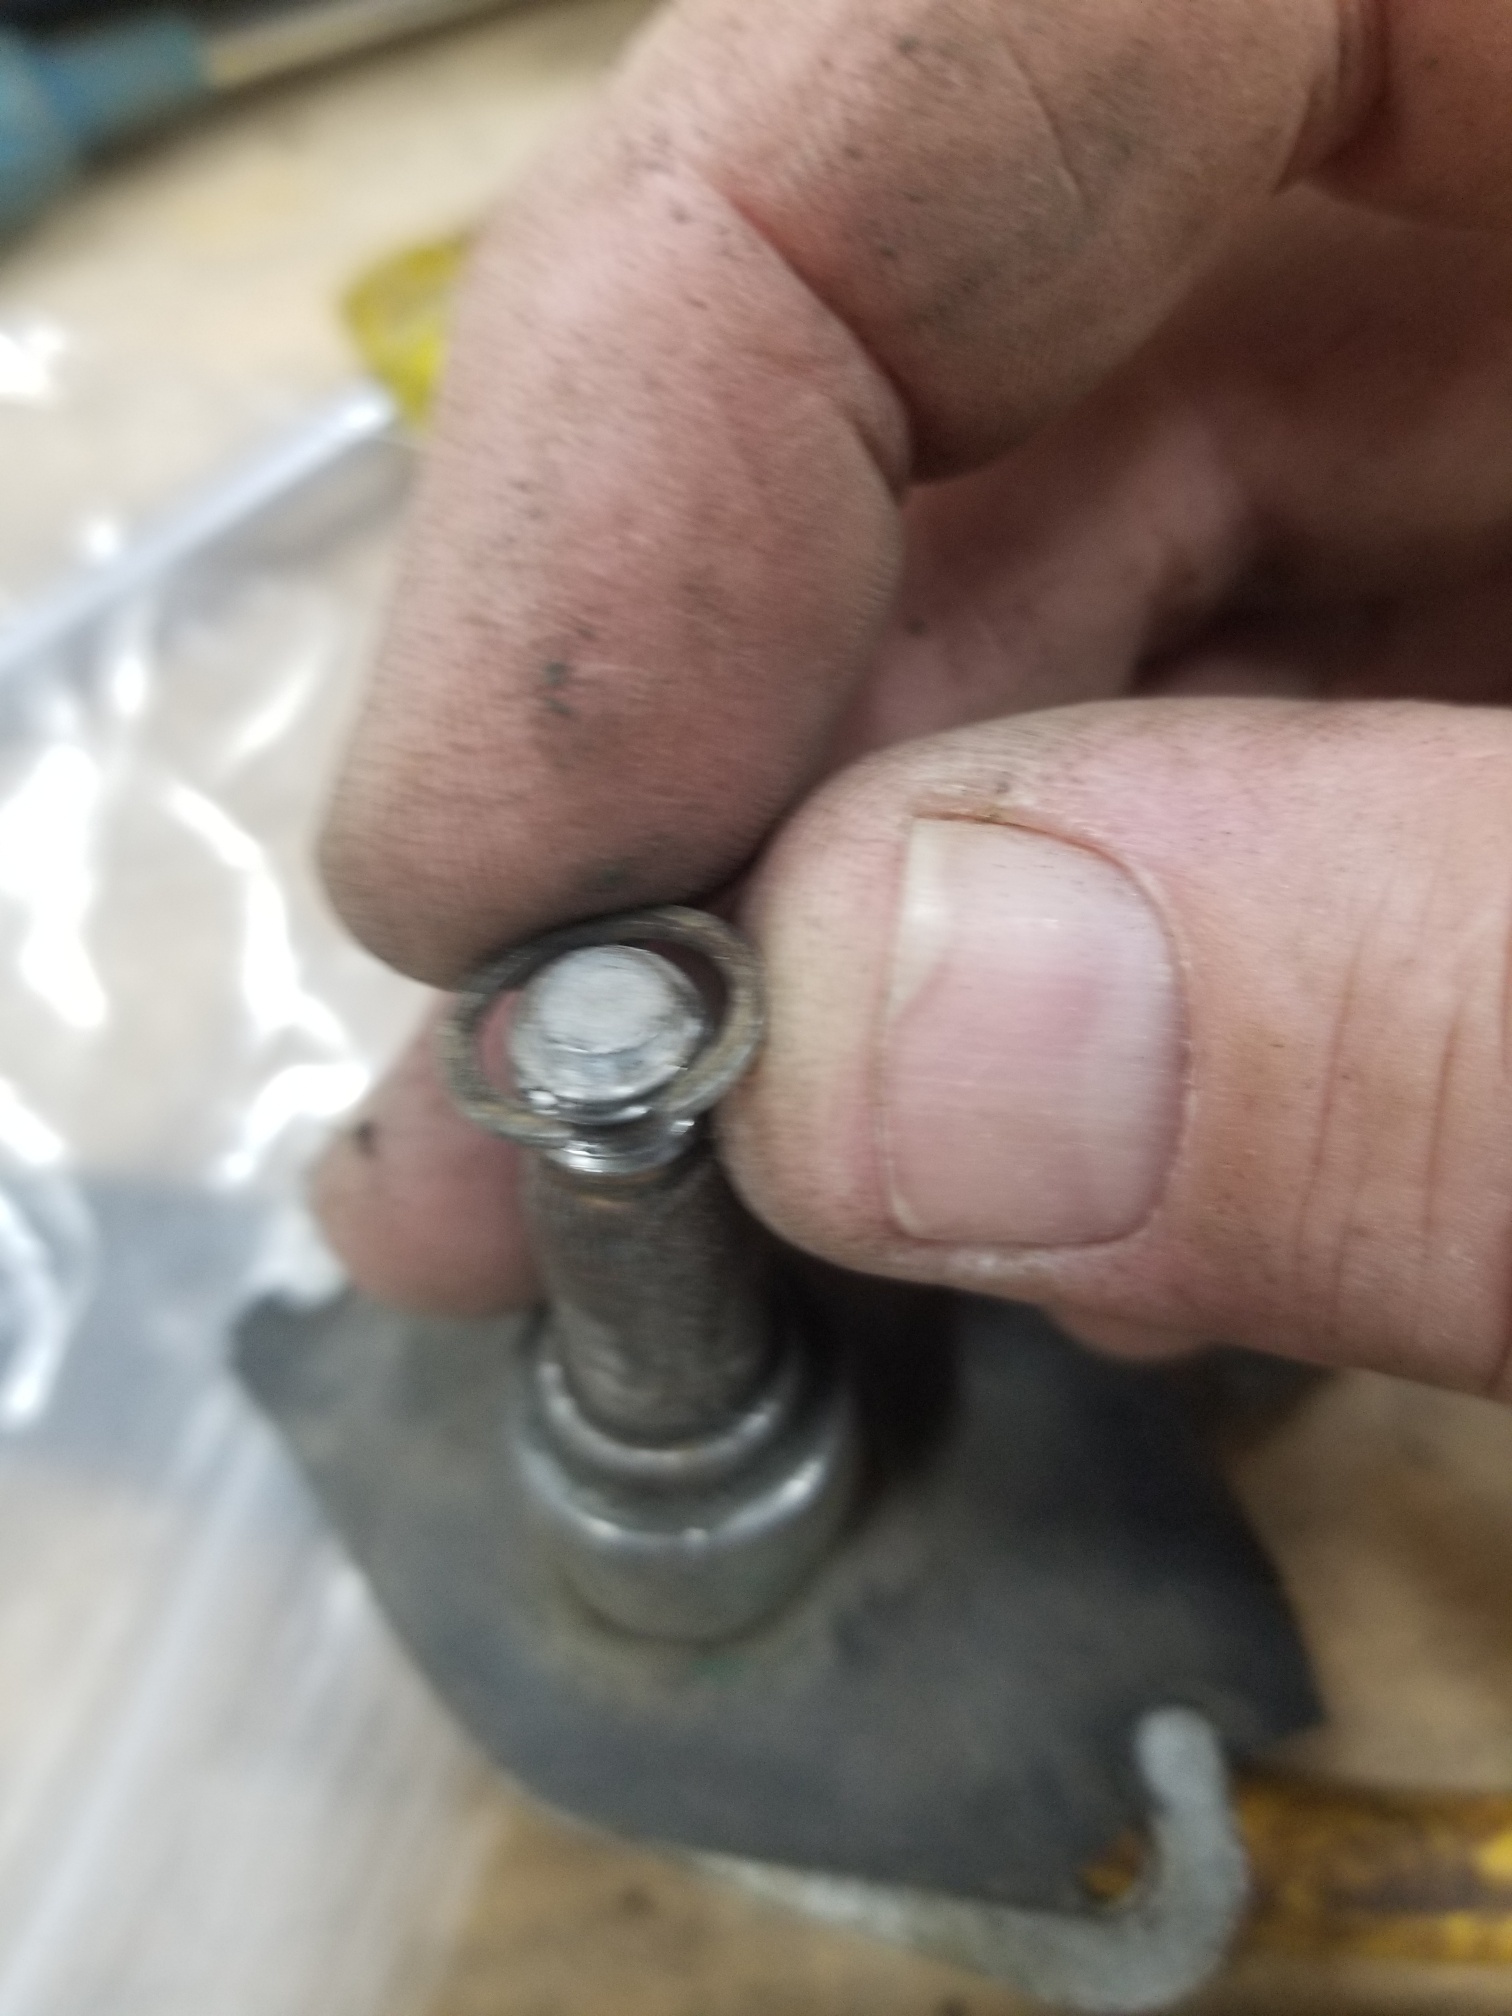
Yes, I've noticed that in the last few years. Sneaky! There were a few other Nissan models that had fairly similar front hub/spindle castings. Some of them probably fit the S30 series too. Is the second half of the part number indeed '16230'? Usually I'd expect an official strut for Nissans of that period to have an alphabet letter at the beginning of the part number suffix which is a great help in identification. I'm guessing that Kayaba/KYB themselves might be helpful in giving you a positive identification? Edited to add: That top mount might also be a clue? Can you post a picture of it from the top? The spring looks to be smaller outer diameter than I'd expect too.1 point
-
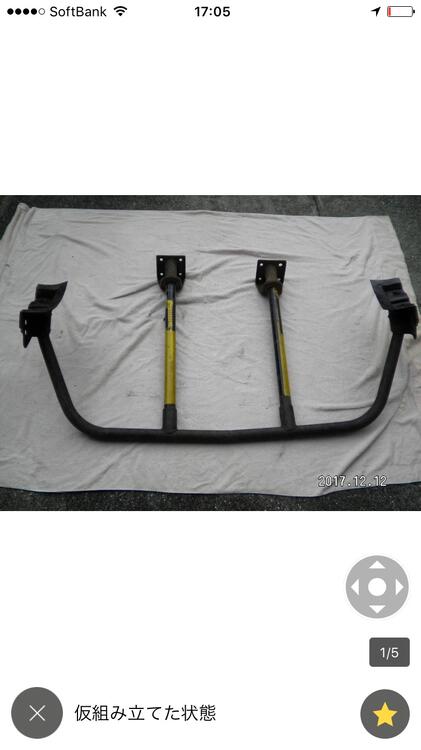
1 point
-
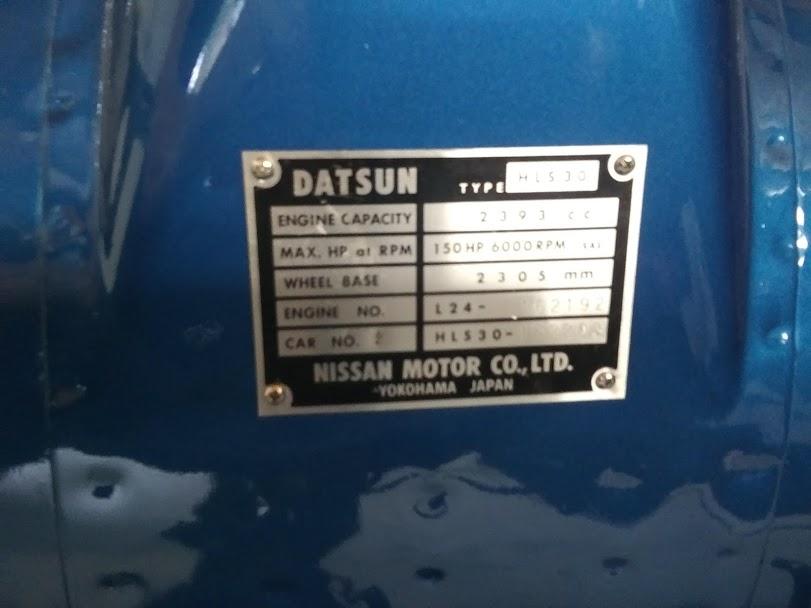
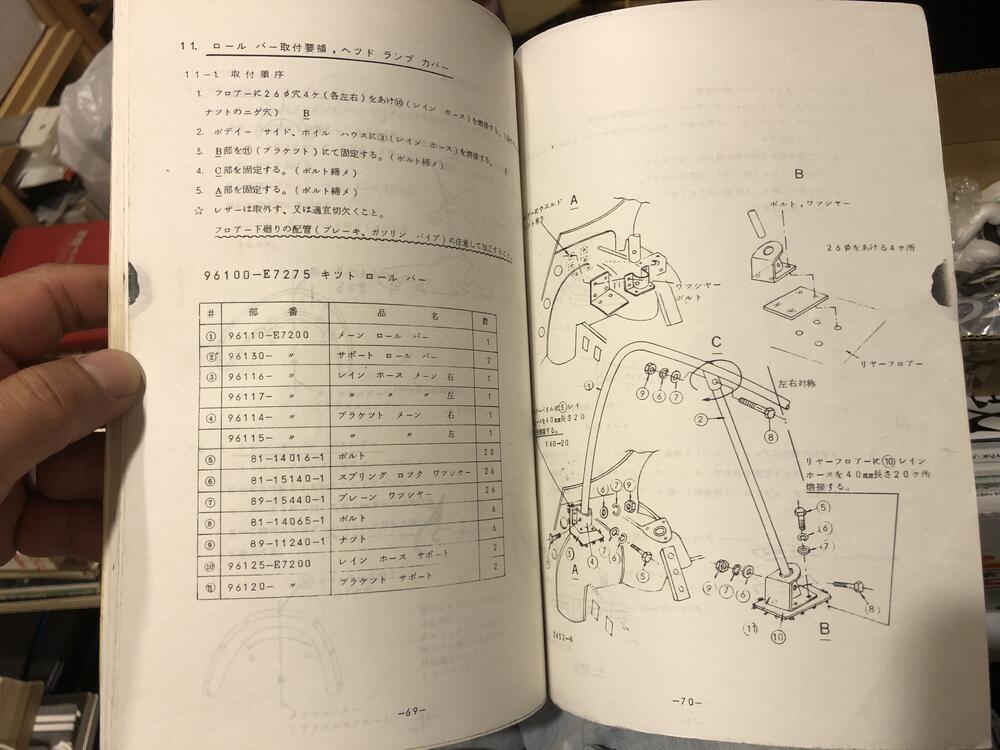
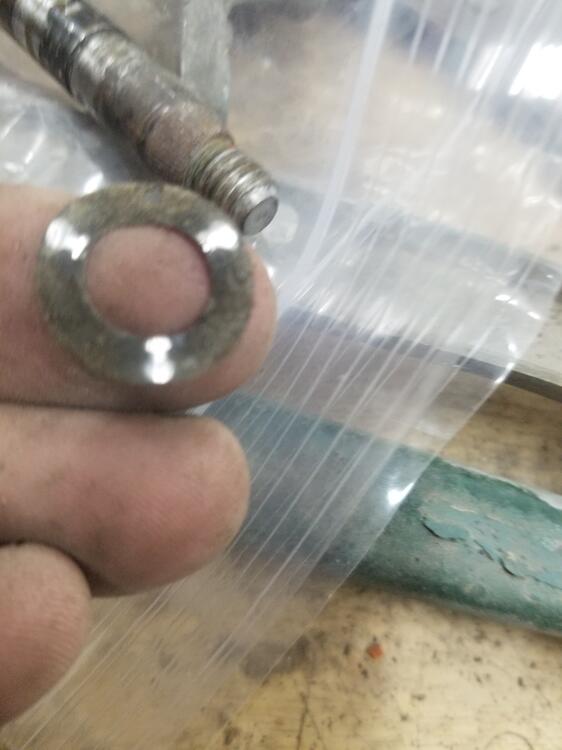
Today i got a long-awaited delivery from Japan. it constisted of three parts: 1) An OEM Adjustable factory competition suspension by KYB. I still need to investigate a bit. I'm not even 100% sure if this was intended for this specific version of car, and i know there were many different versions of adjustable suspension around. Especially this part (I assume it's to adjust the push / pull pressure rate?), ius not seen on all of these adjustable suspensions. As you can see it's not in the best, but restorable condition and one spring is missing, so i got it quite cheap. that's the reason i bought it. Mainly to investigate further and figure out the details. Here a quick reference (top: Adjustable / bottom factory Euro spec 240Z): Meanwhile i was even able to buy a second (complete and better condition) set, which is still in japan and will take another few months to arrive here. but yeah, it will definitely give me further insights. I will definitely need to find some time to find out more and will share the details with you. Here is a reference picture from the Competition / Sports option catalogue: 2) The second item i got is an OEM Sports Option / Competition rollbar replica by Mizukami Auto (JP). According to mizukami it is an 1:1 Copy of an OEM rollbar they have in their shop, but with some improvements to simplify installation and fitment. I think the main difference are the mounting plates on the wheel arches. . Which seem somehow pre-assembled (welded) vs the single screwed-together puzzle-pieces you get from an OEM bar, but otherwise seems to be a quite similar design. What is not visible in my photo is a separate lower plate on the wheel-arch mounts, since they are screwed to the mount sin the picture. but they are detachable, just like the original ones. Since an OEM bar is almost impossible (and expensive) to find these days, i thought this would be the next-best option. I have to say the quality is really high and it looks pretty good and the single pieces are quite complex, which justifies the not-so-cheap pricing. Unfortunately i don't have a chassis in-house at the moment to test fit it. So the next best thing was this cheap mock-up. and i probably even did it the wrong way around without the car as a reference... Nevertheless, it looks good. Here's a reference from the JP Competition / Sports option catalogue (see single plates at the bottom left and right). And here's an installation guide from the Race and rallye preparation manual. From what i understand, every OEM Z should have the installation points prepared in the chassis to install this, but again i was not able to verify this without the car on site at the moment. 3) OK and last but not least i also got this drian plug from Mizukami auto. I mean it would be a shame to not add some small gimmicks when placing a big order, right? Despite a few questionsmarks i think the suspension is quite rare and cool and useful and the rollcage definitely better then the Saito full rollcage i had originally purchased many years ago. Also in terms of registration as a historic car and the general MOT in switzerland. More updates on the suspension topic will definitely come soon and i will also try to test-fit the rollbar as soon as possible.1 point
-
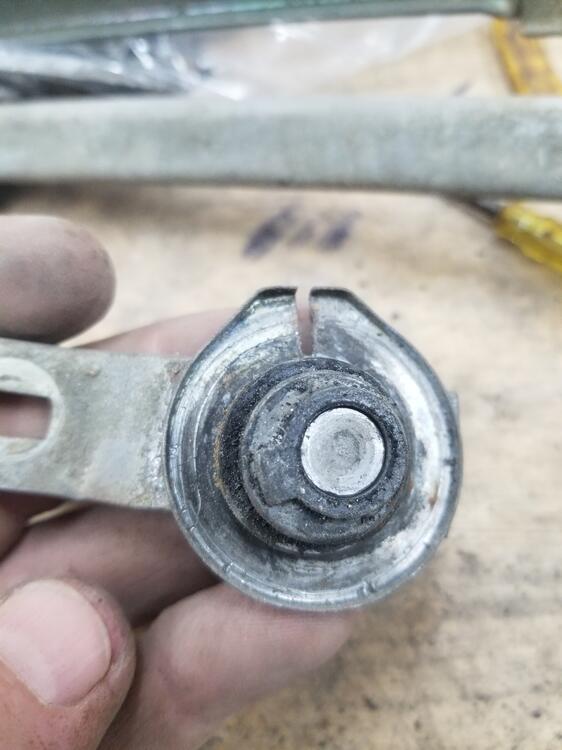
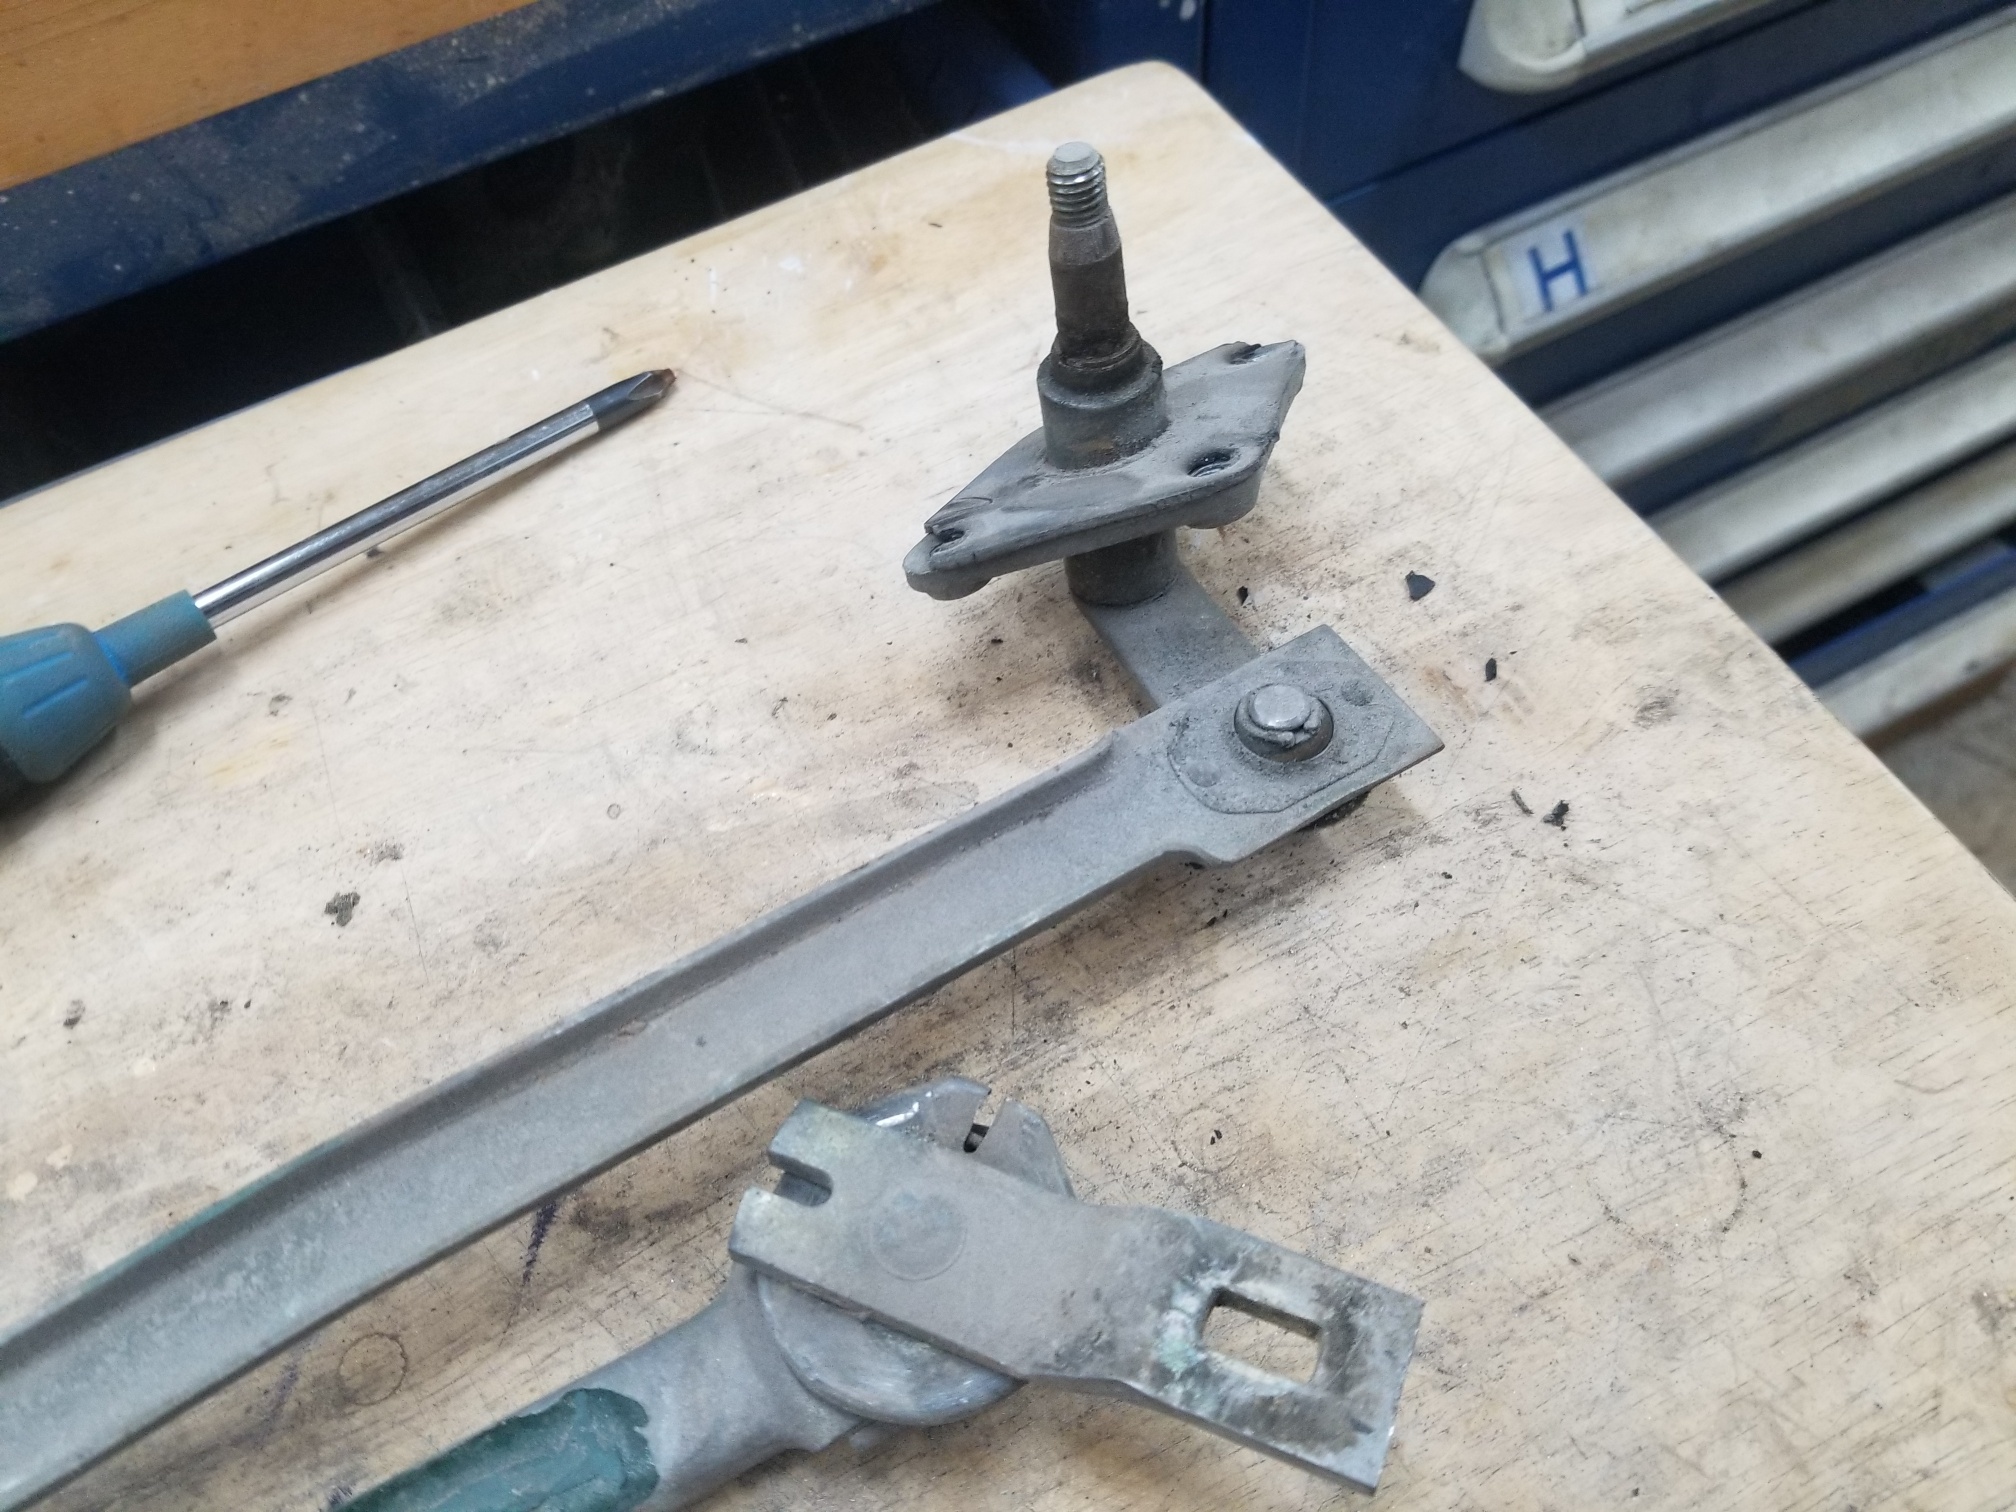
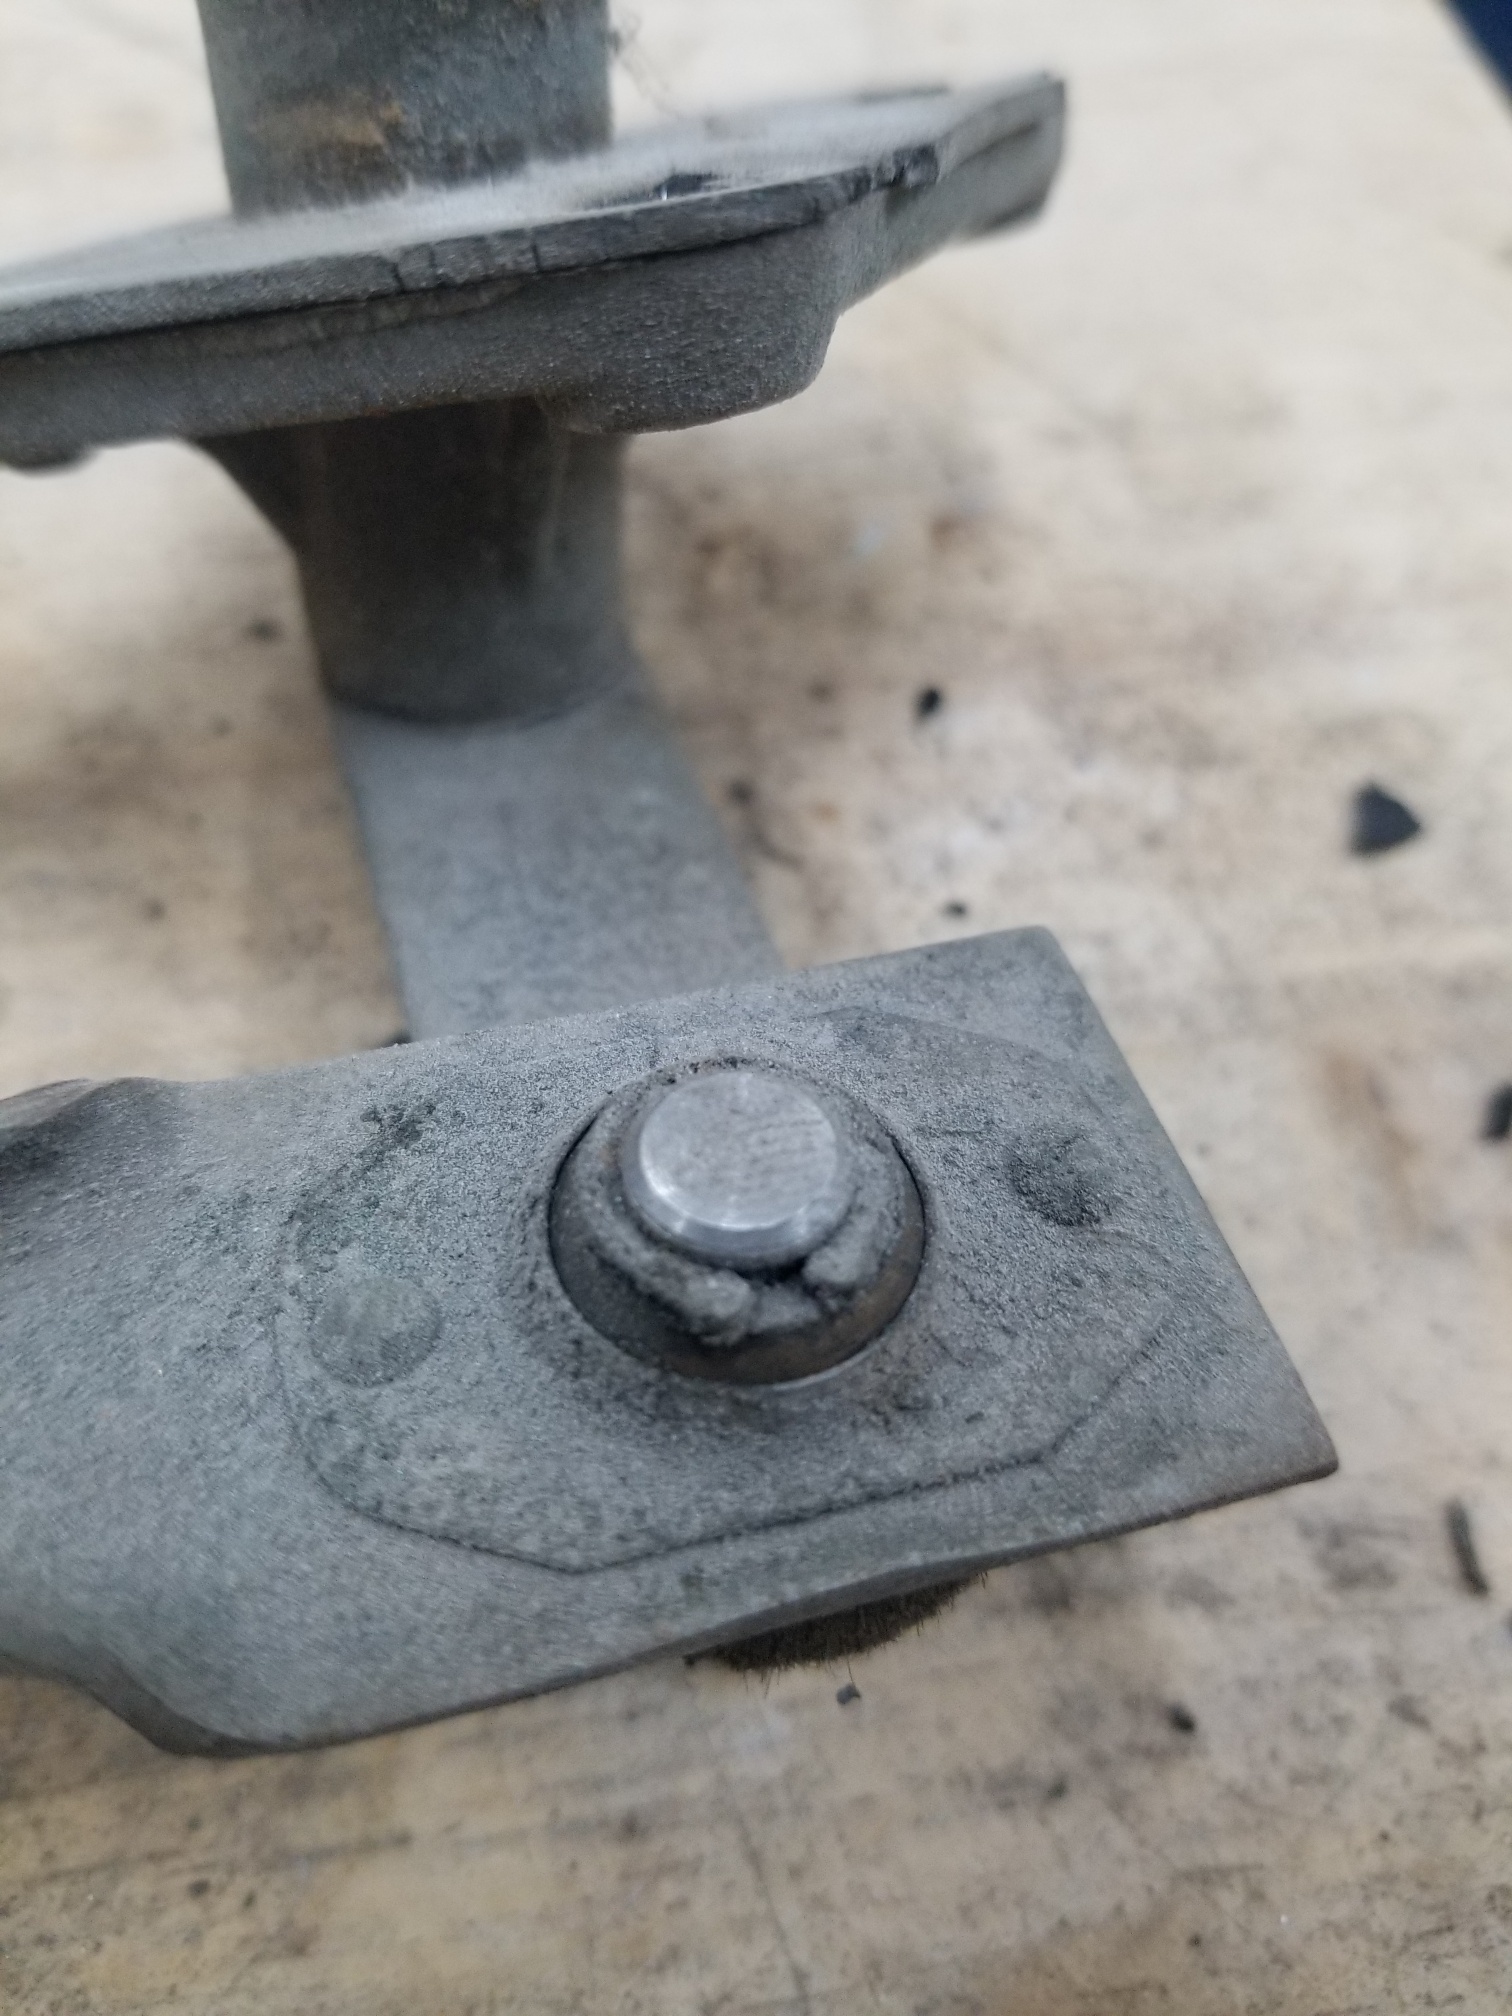
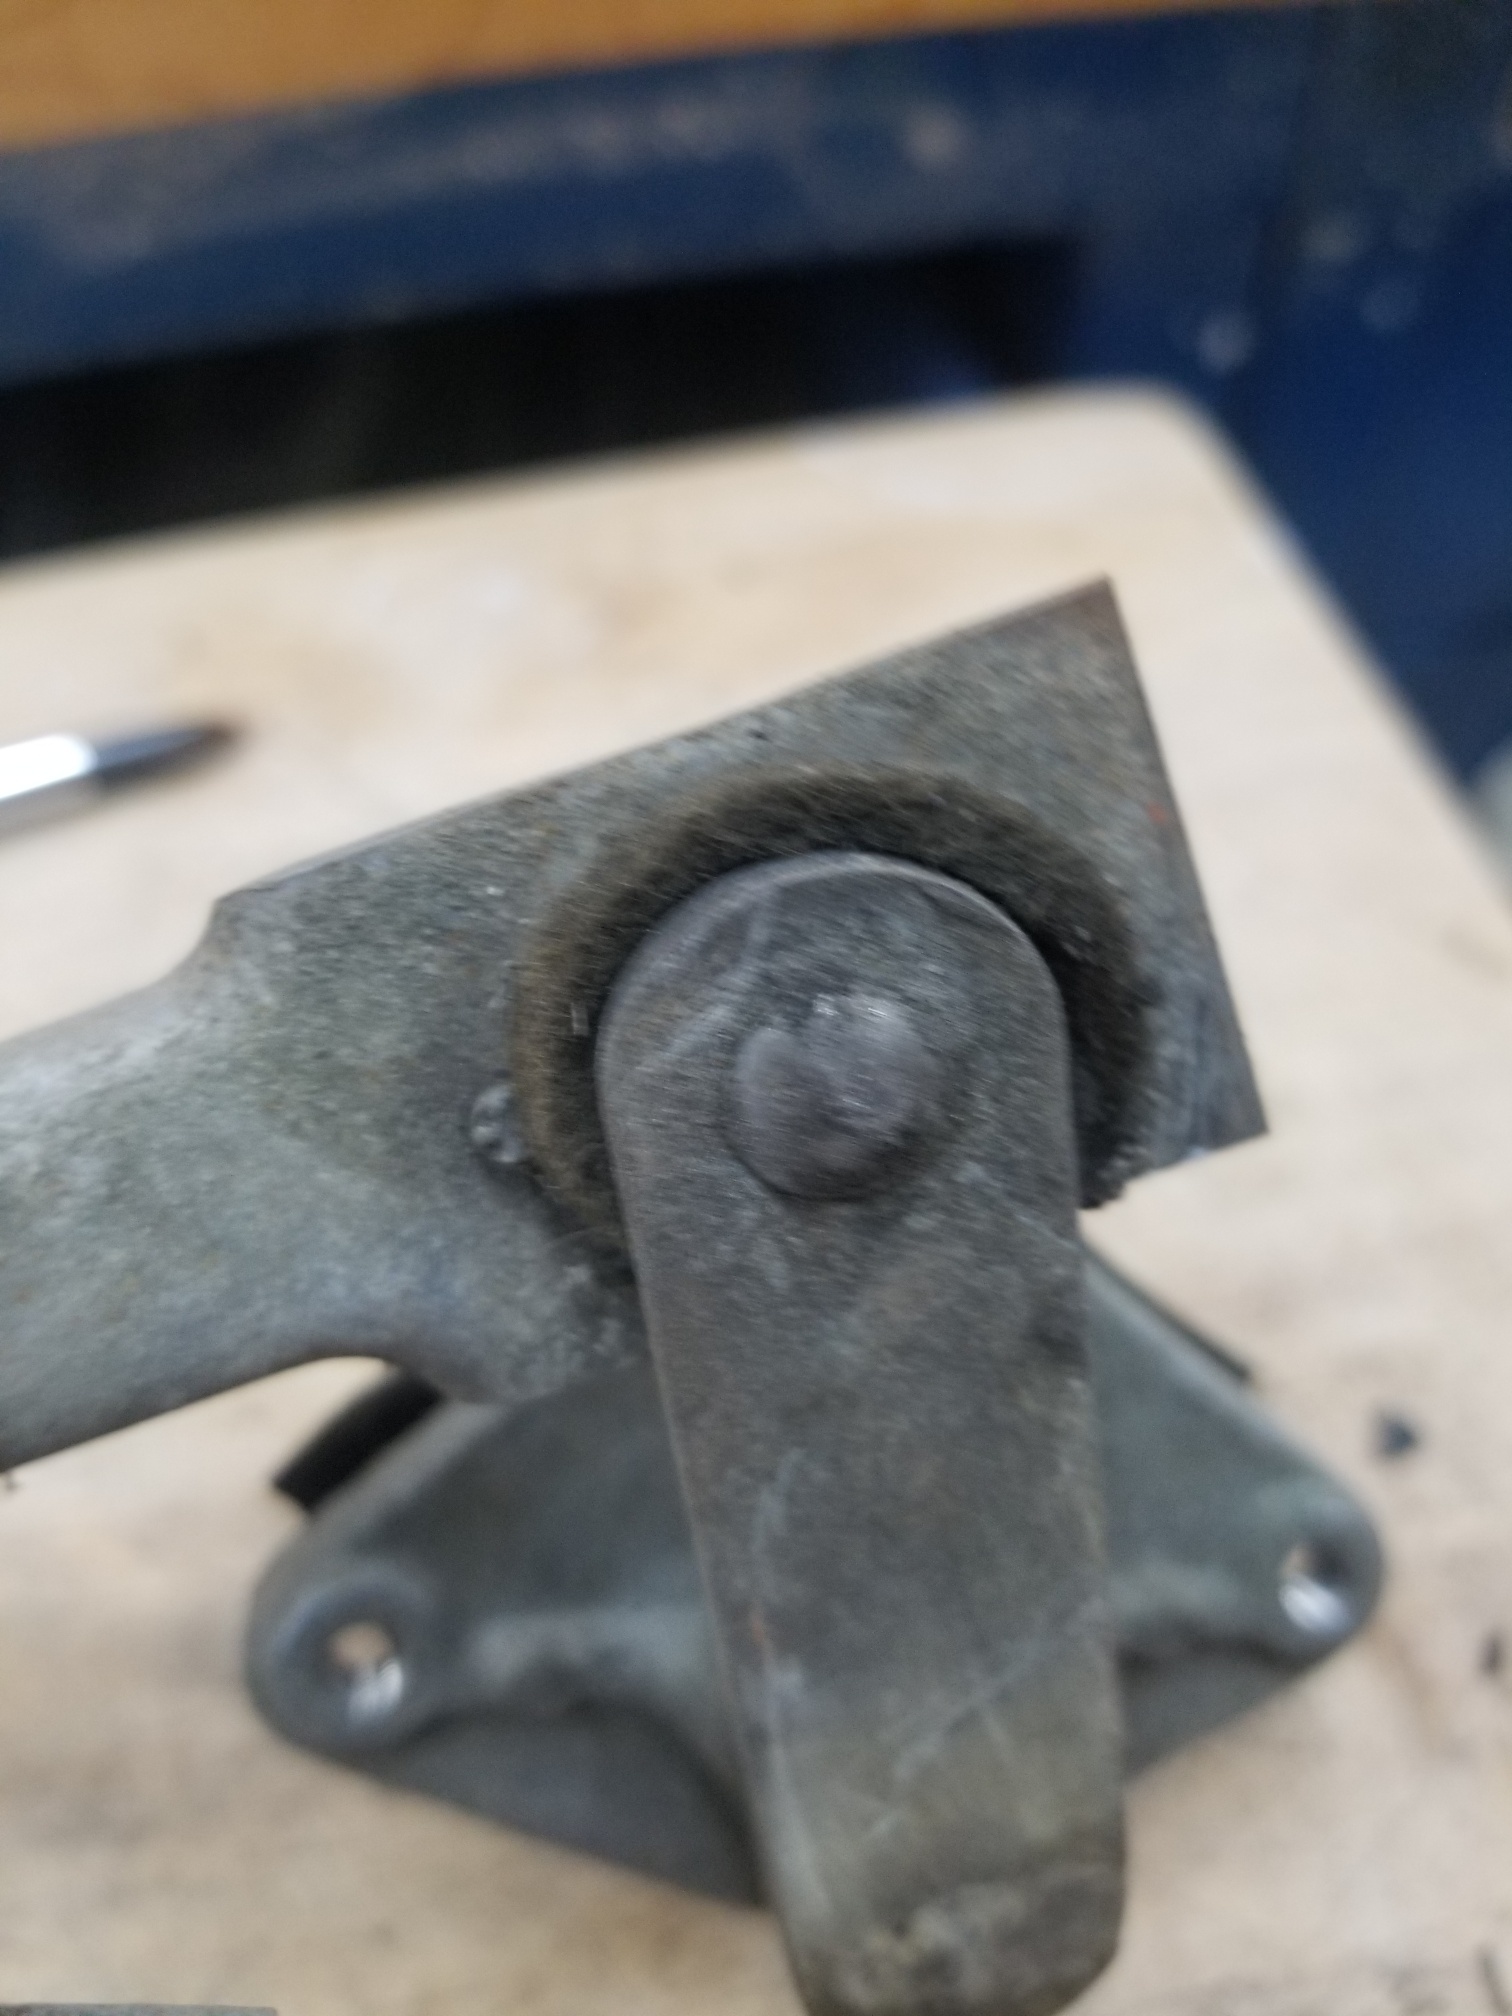
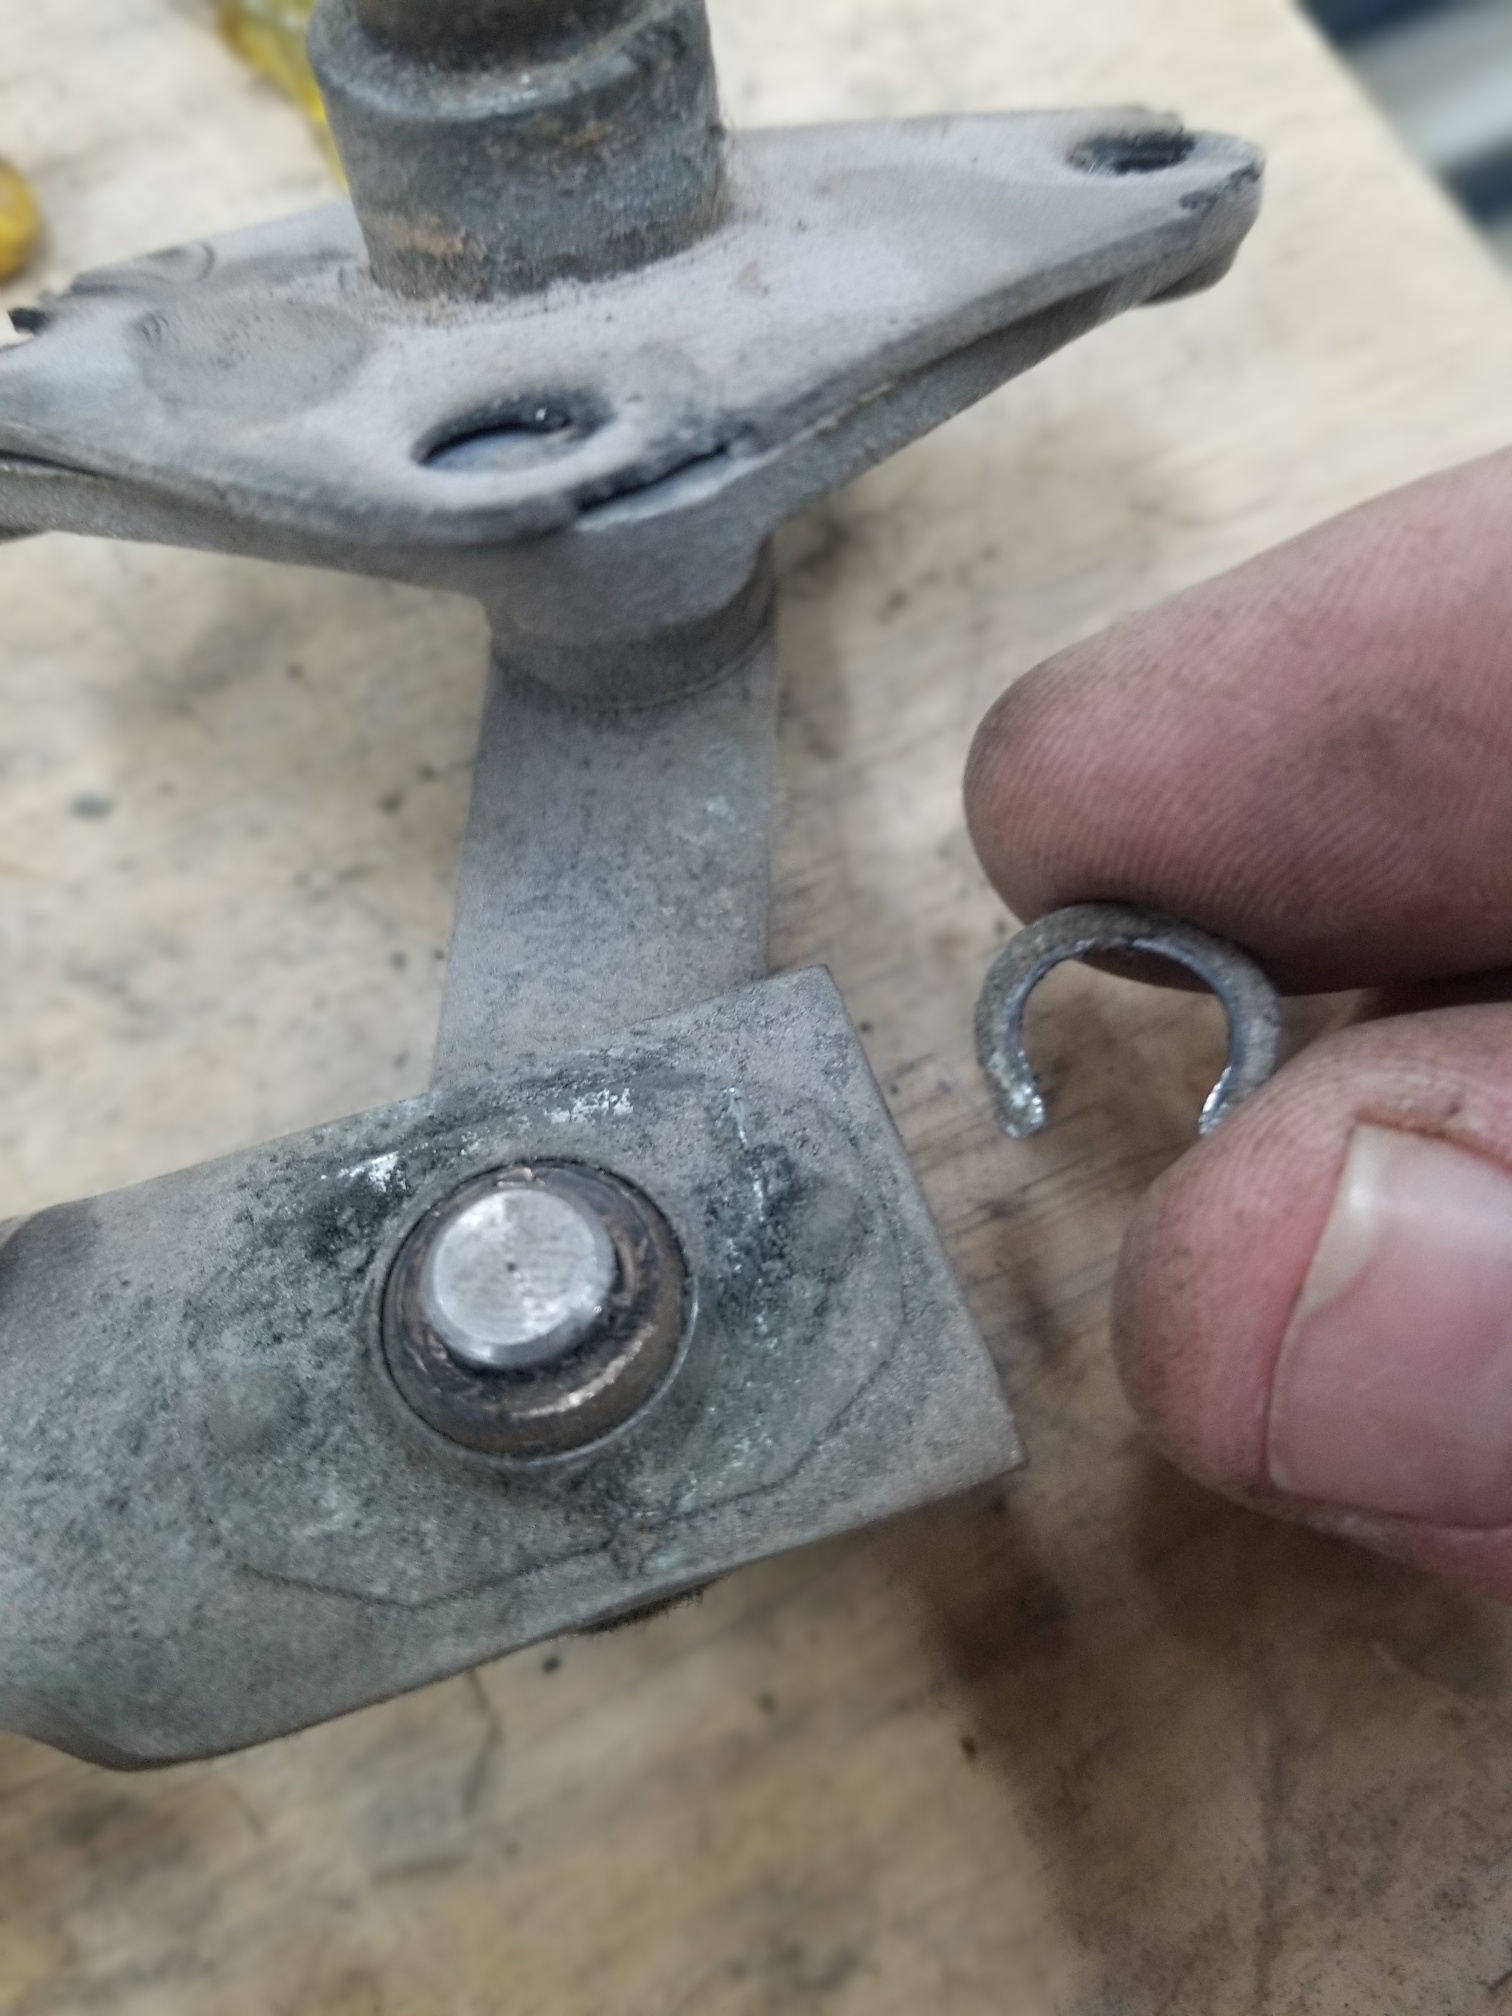
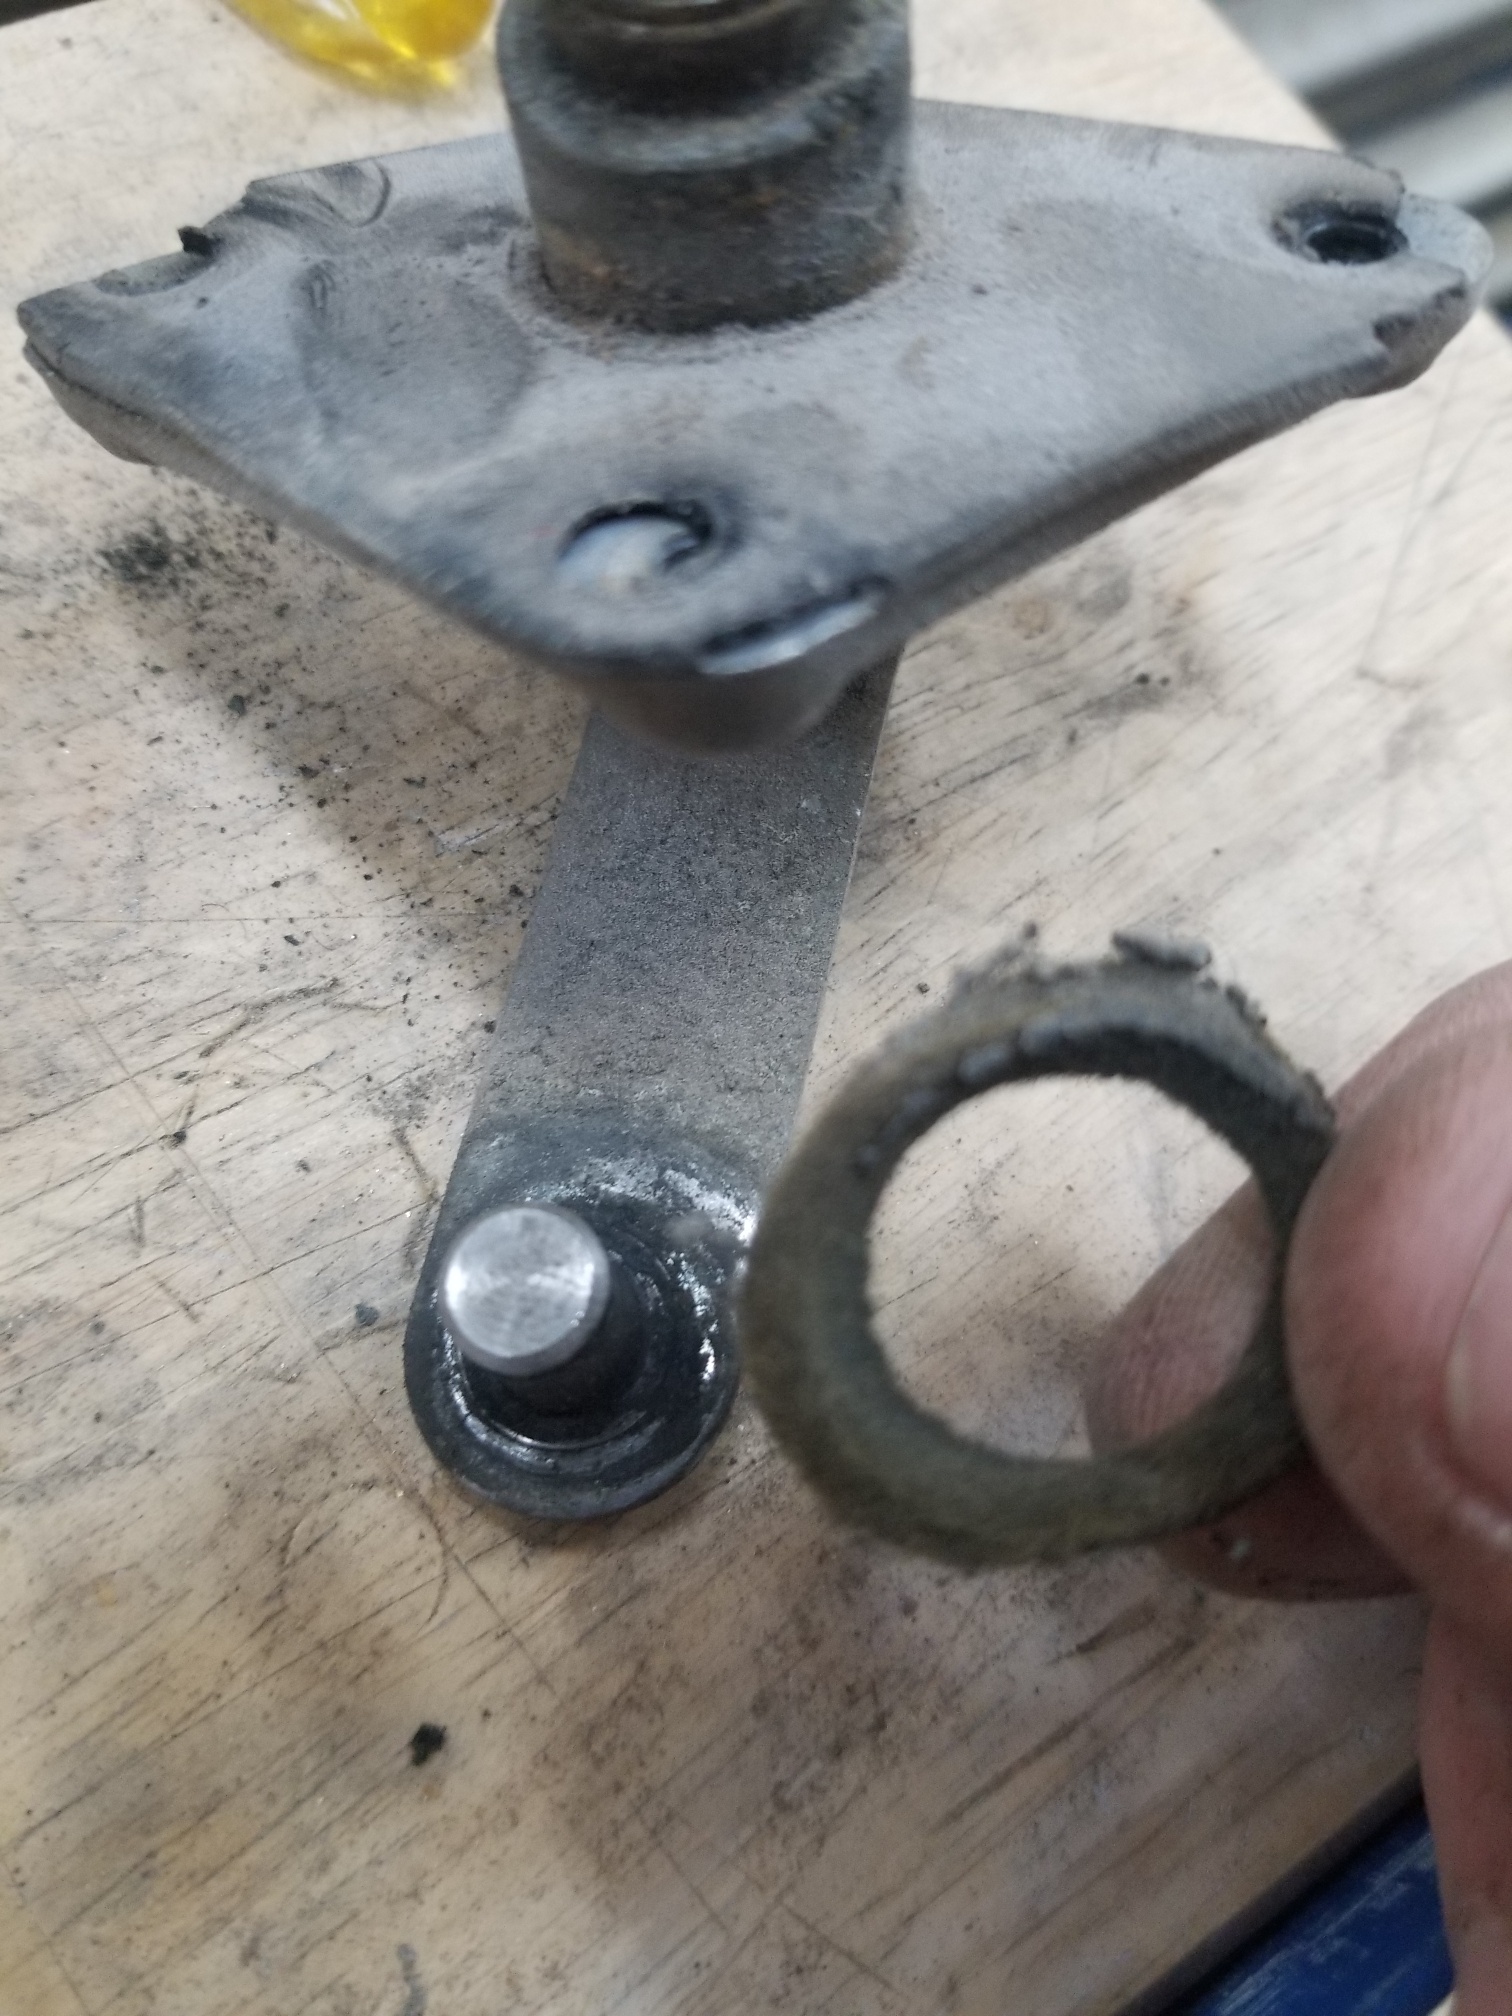
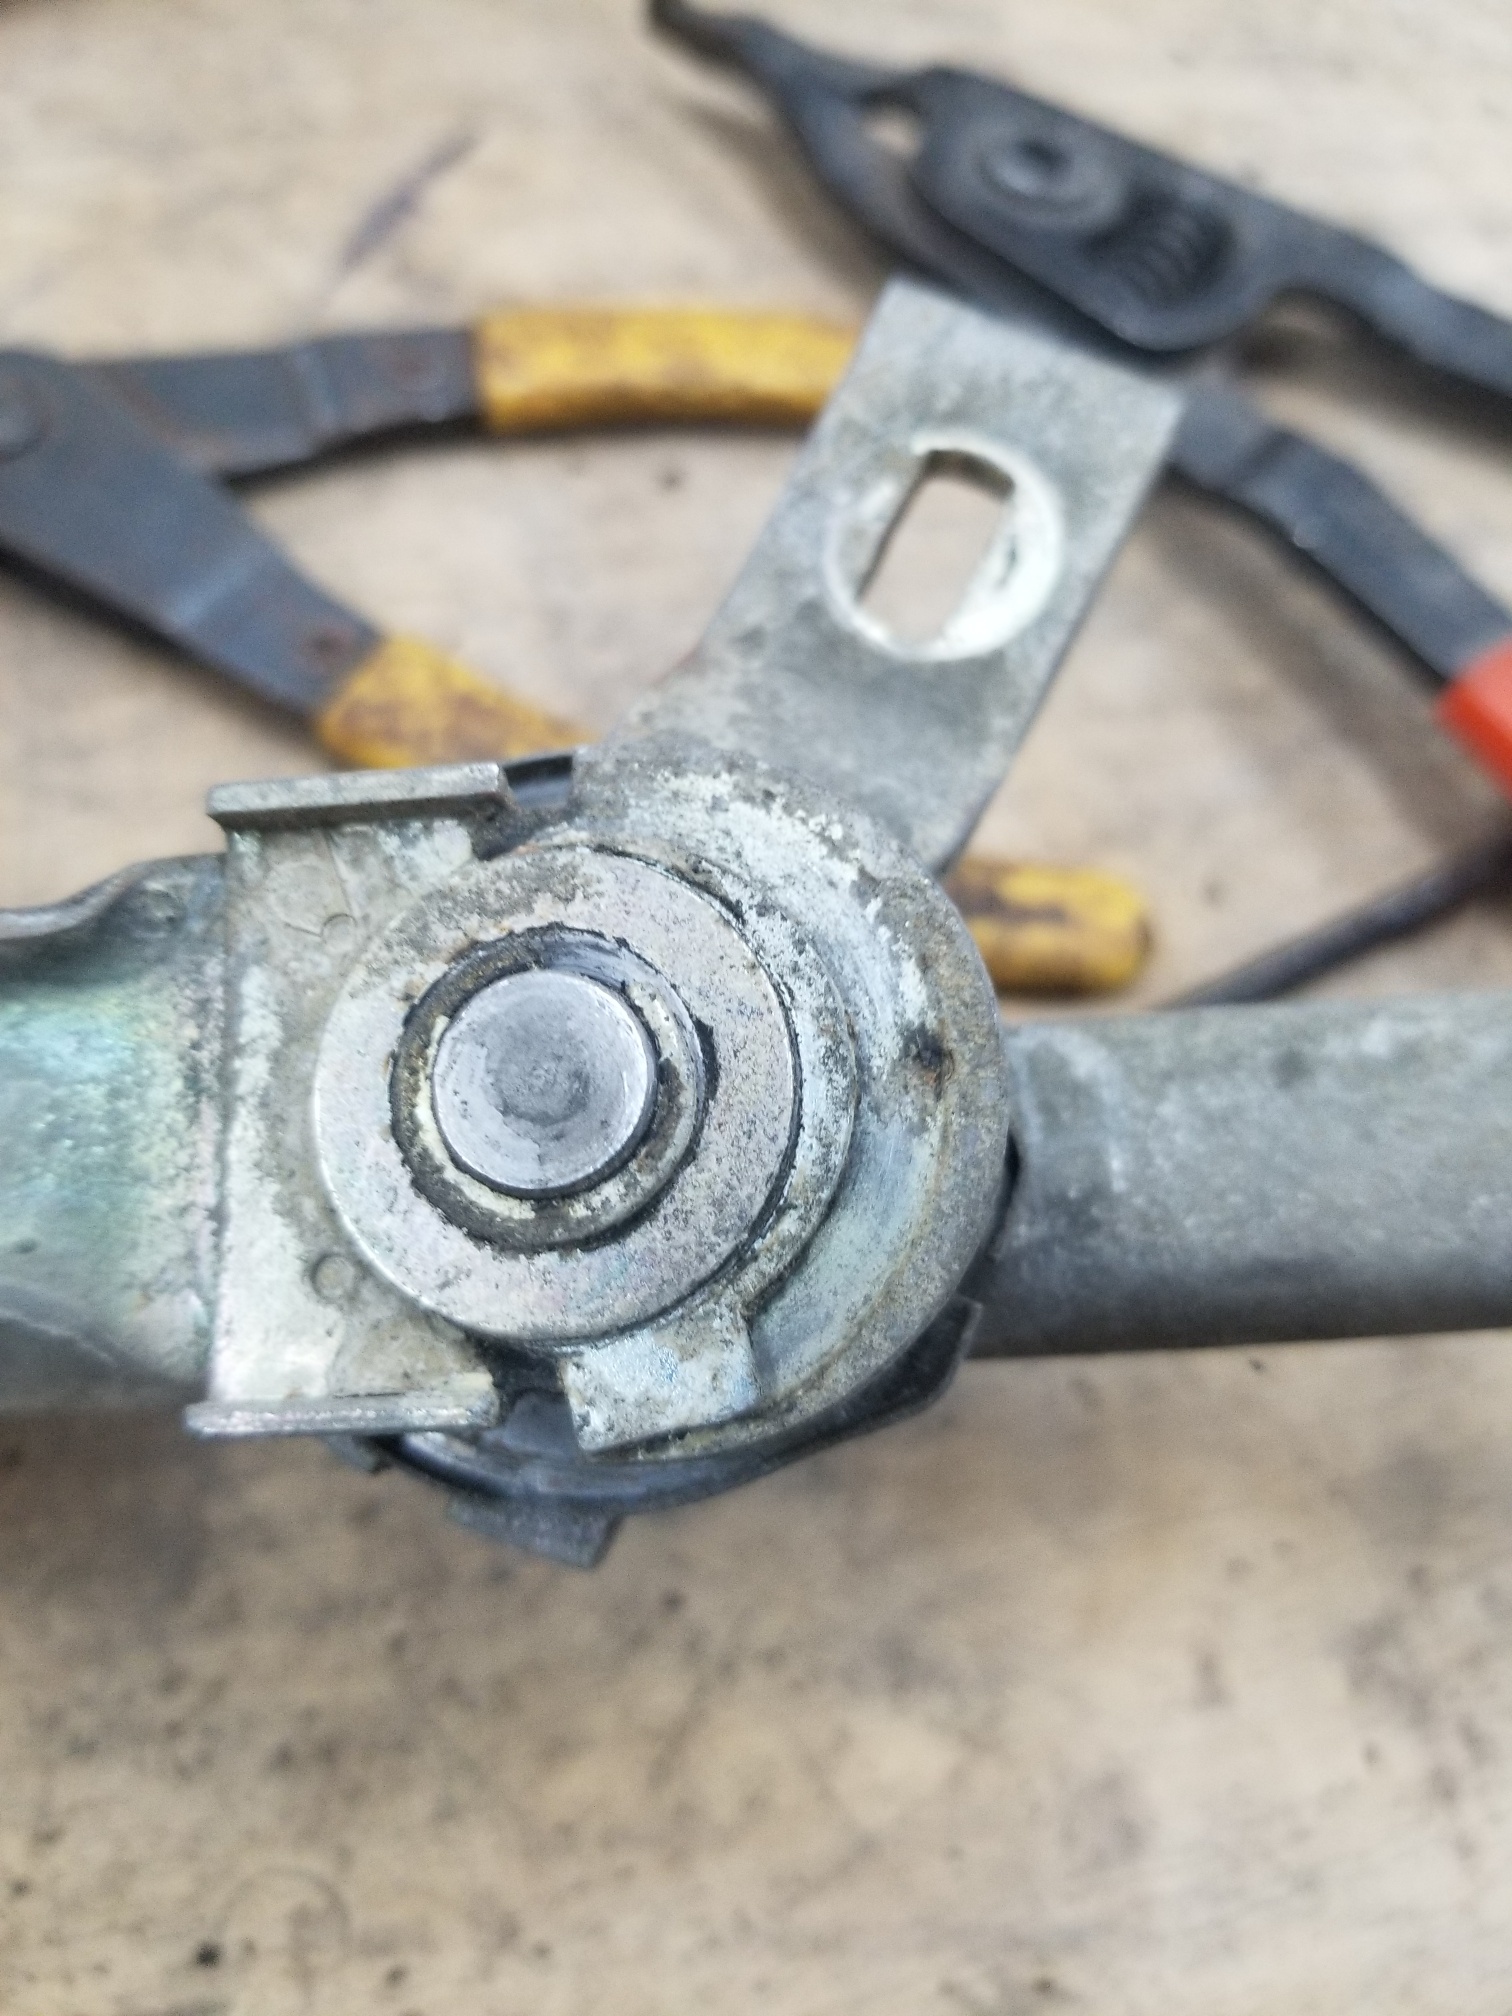
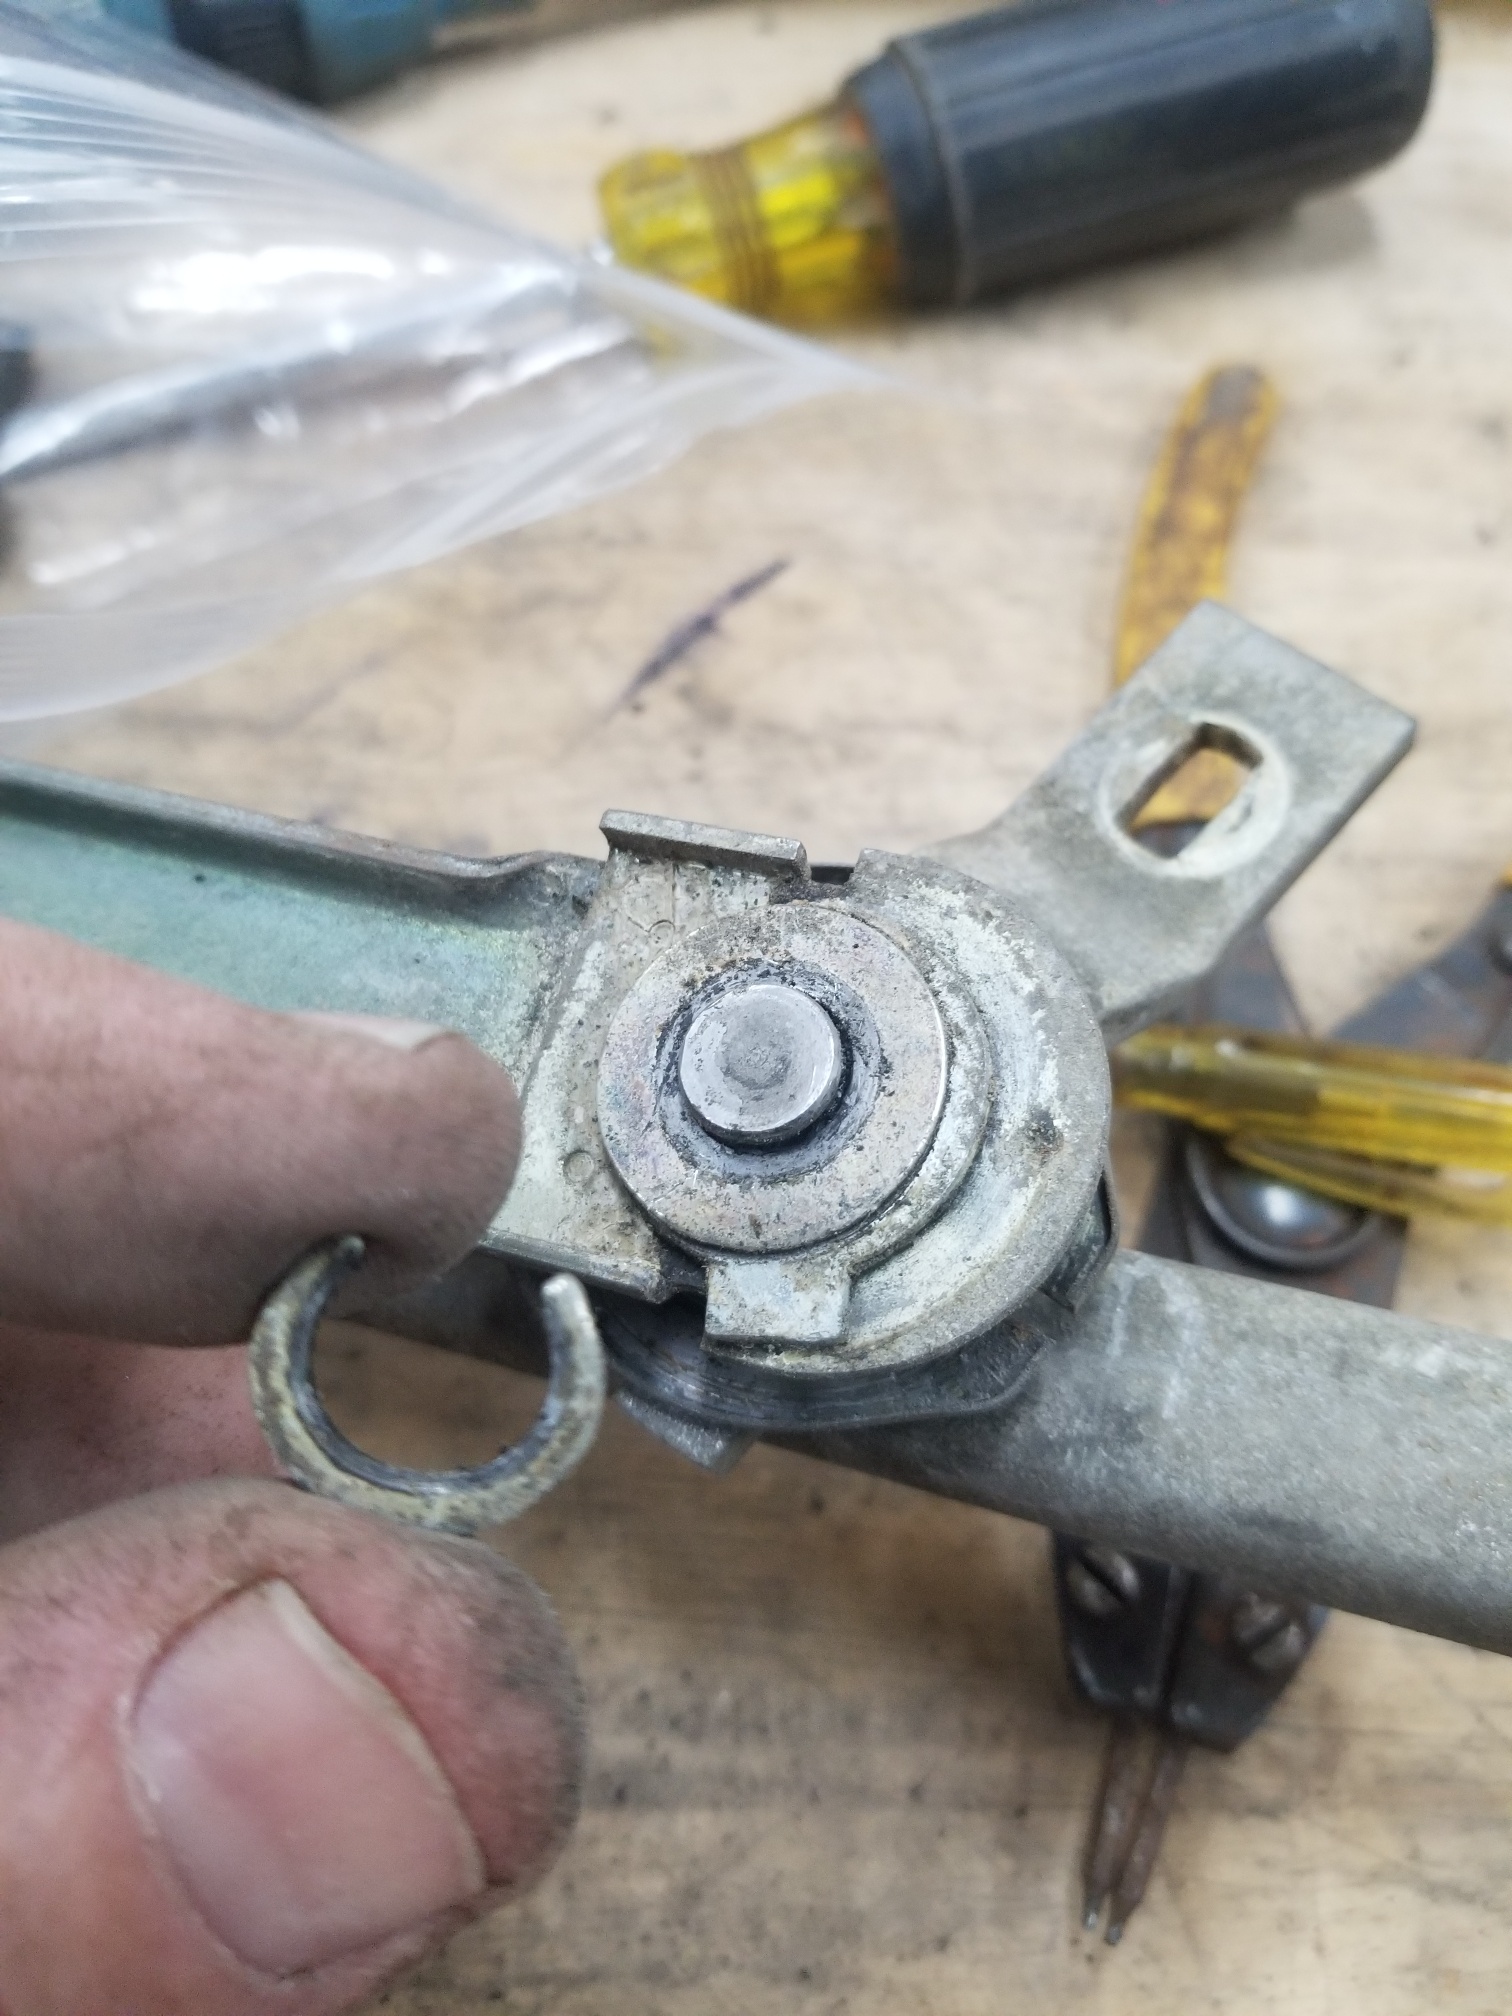
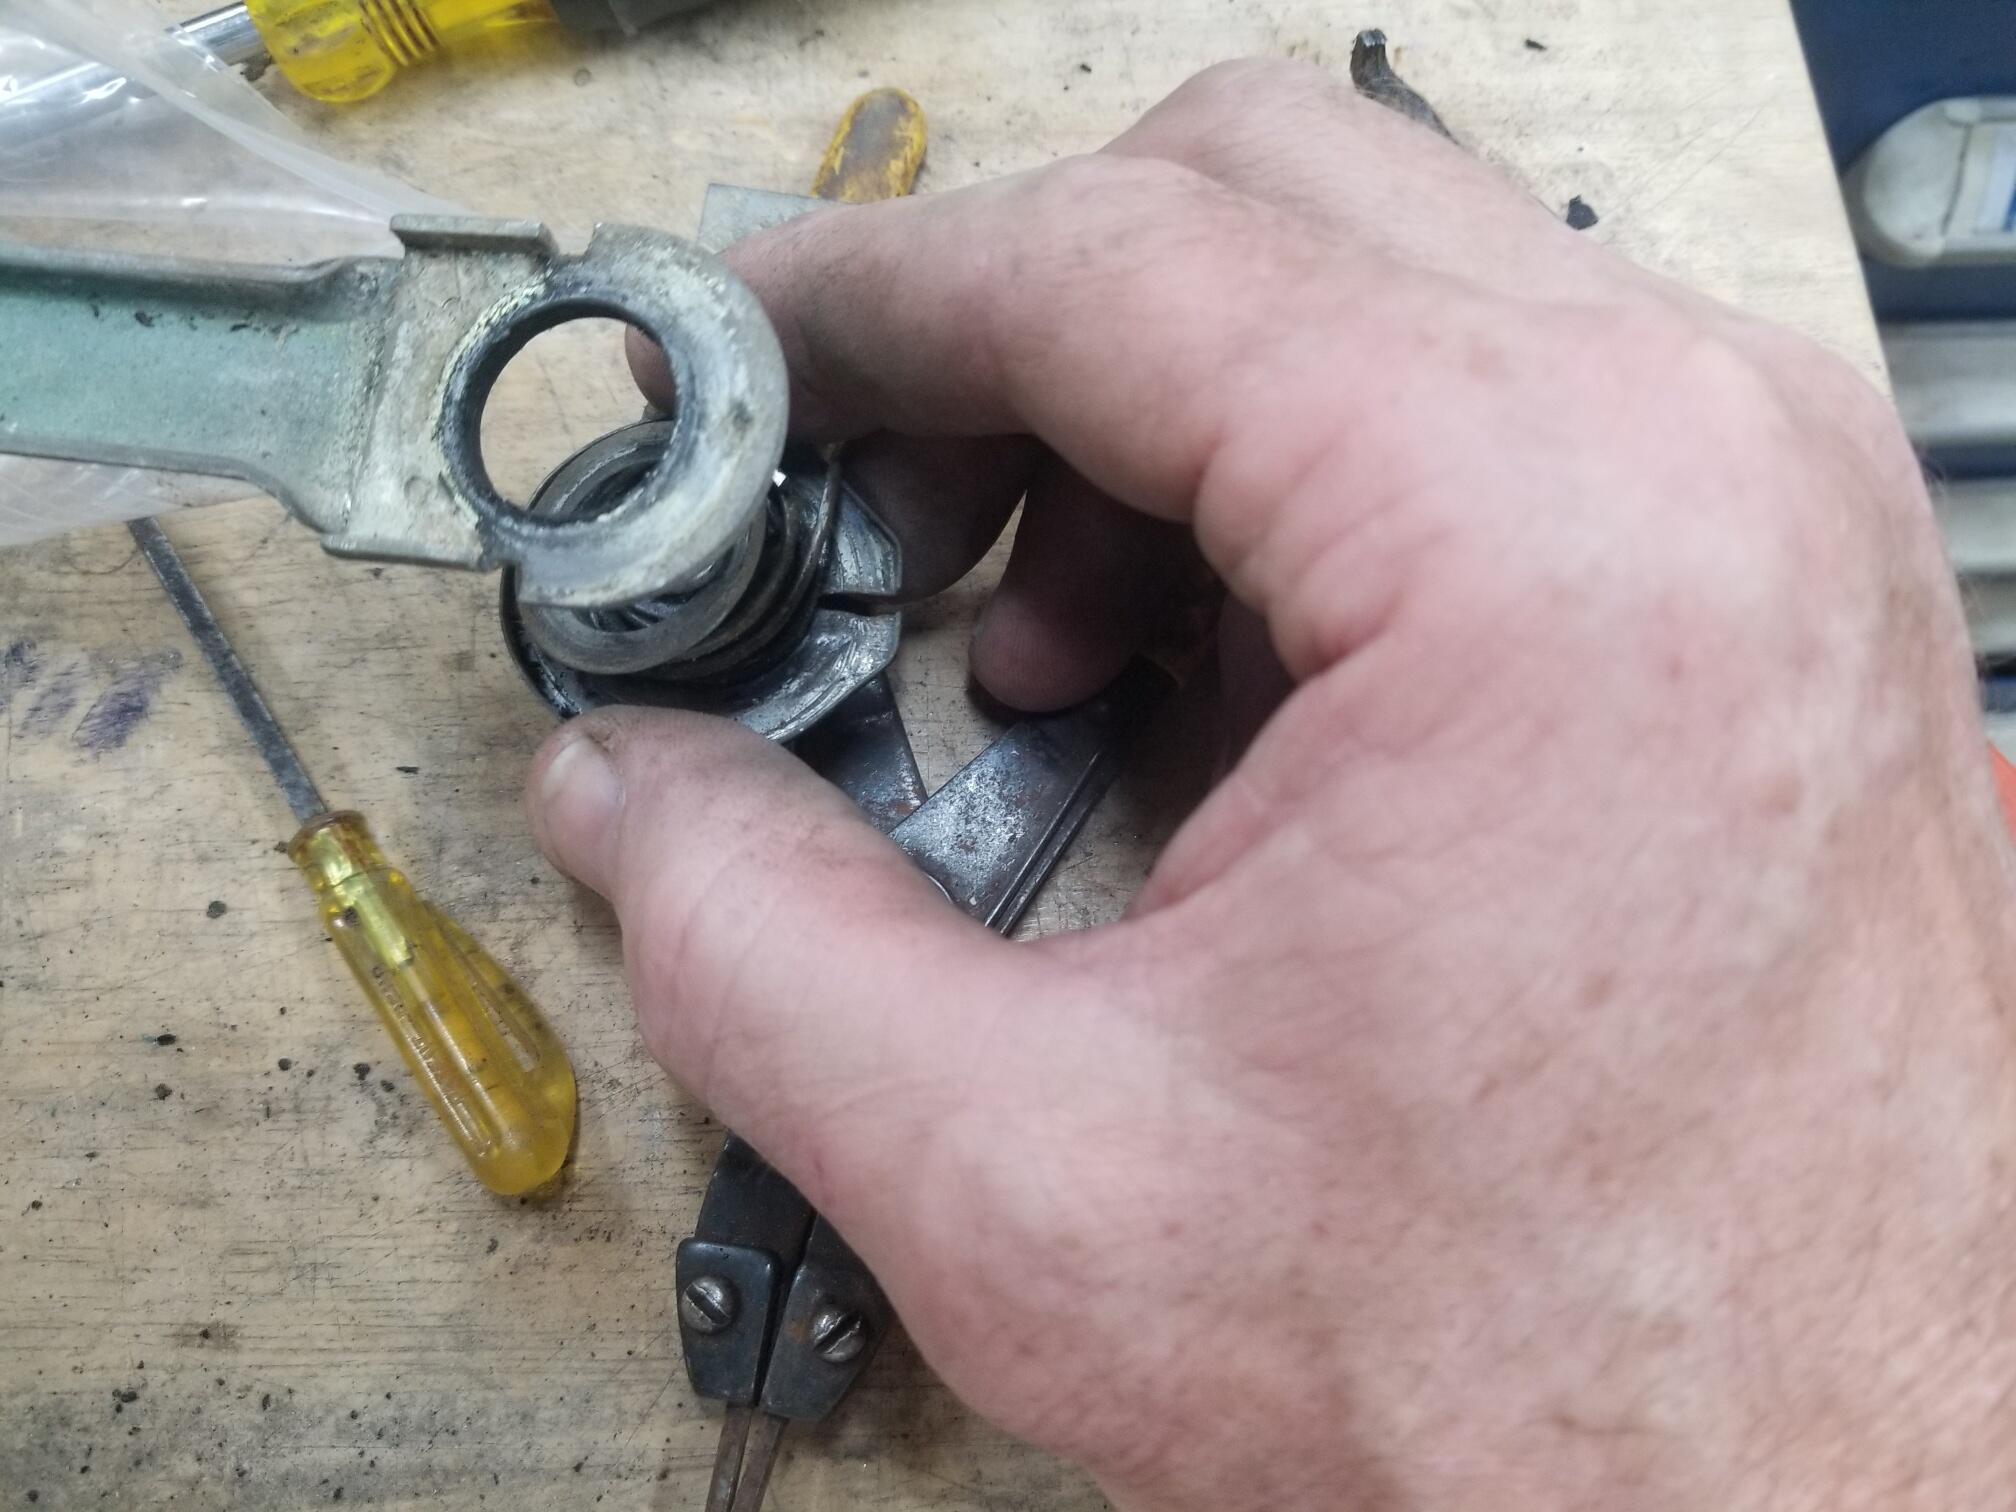
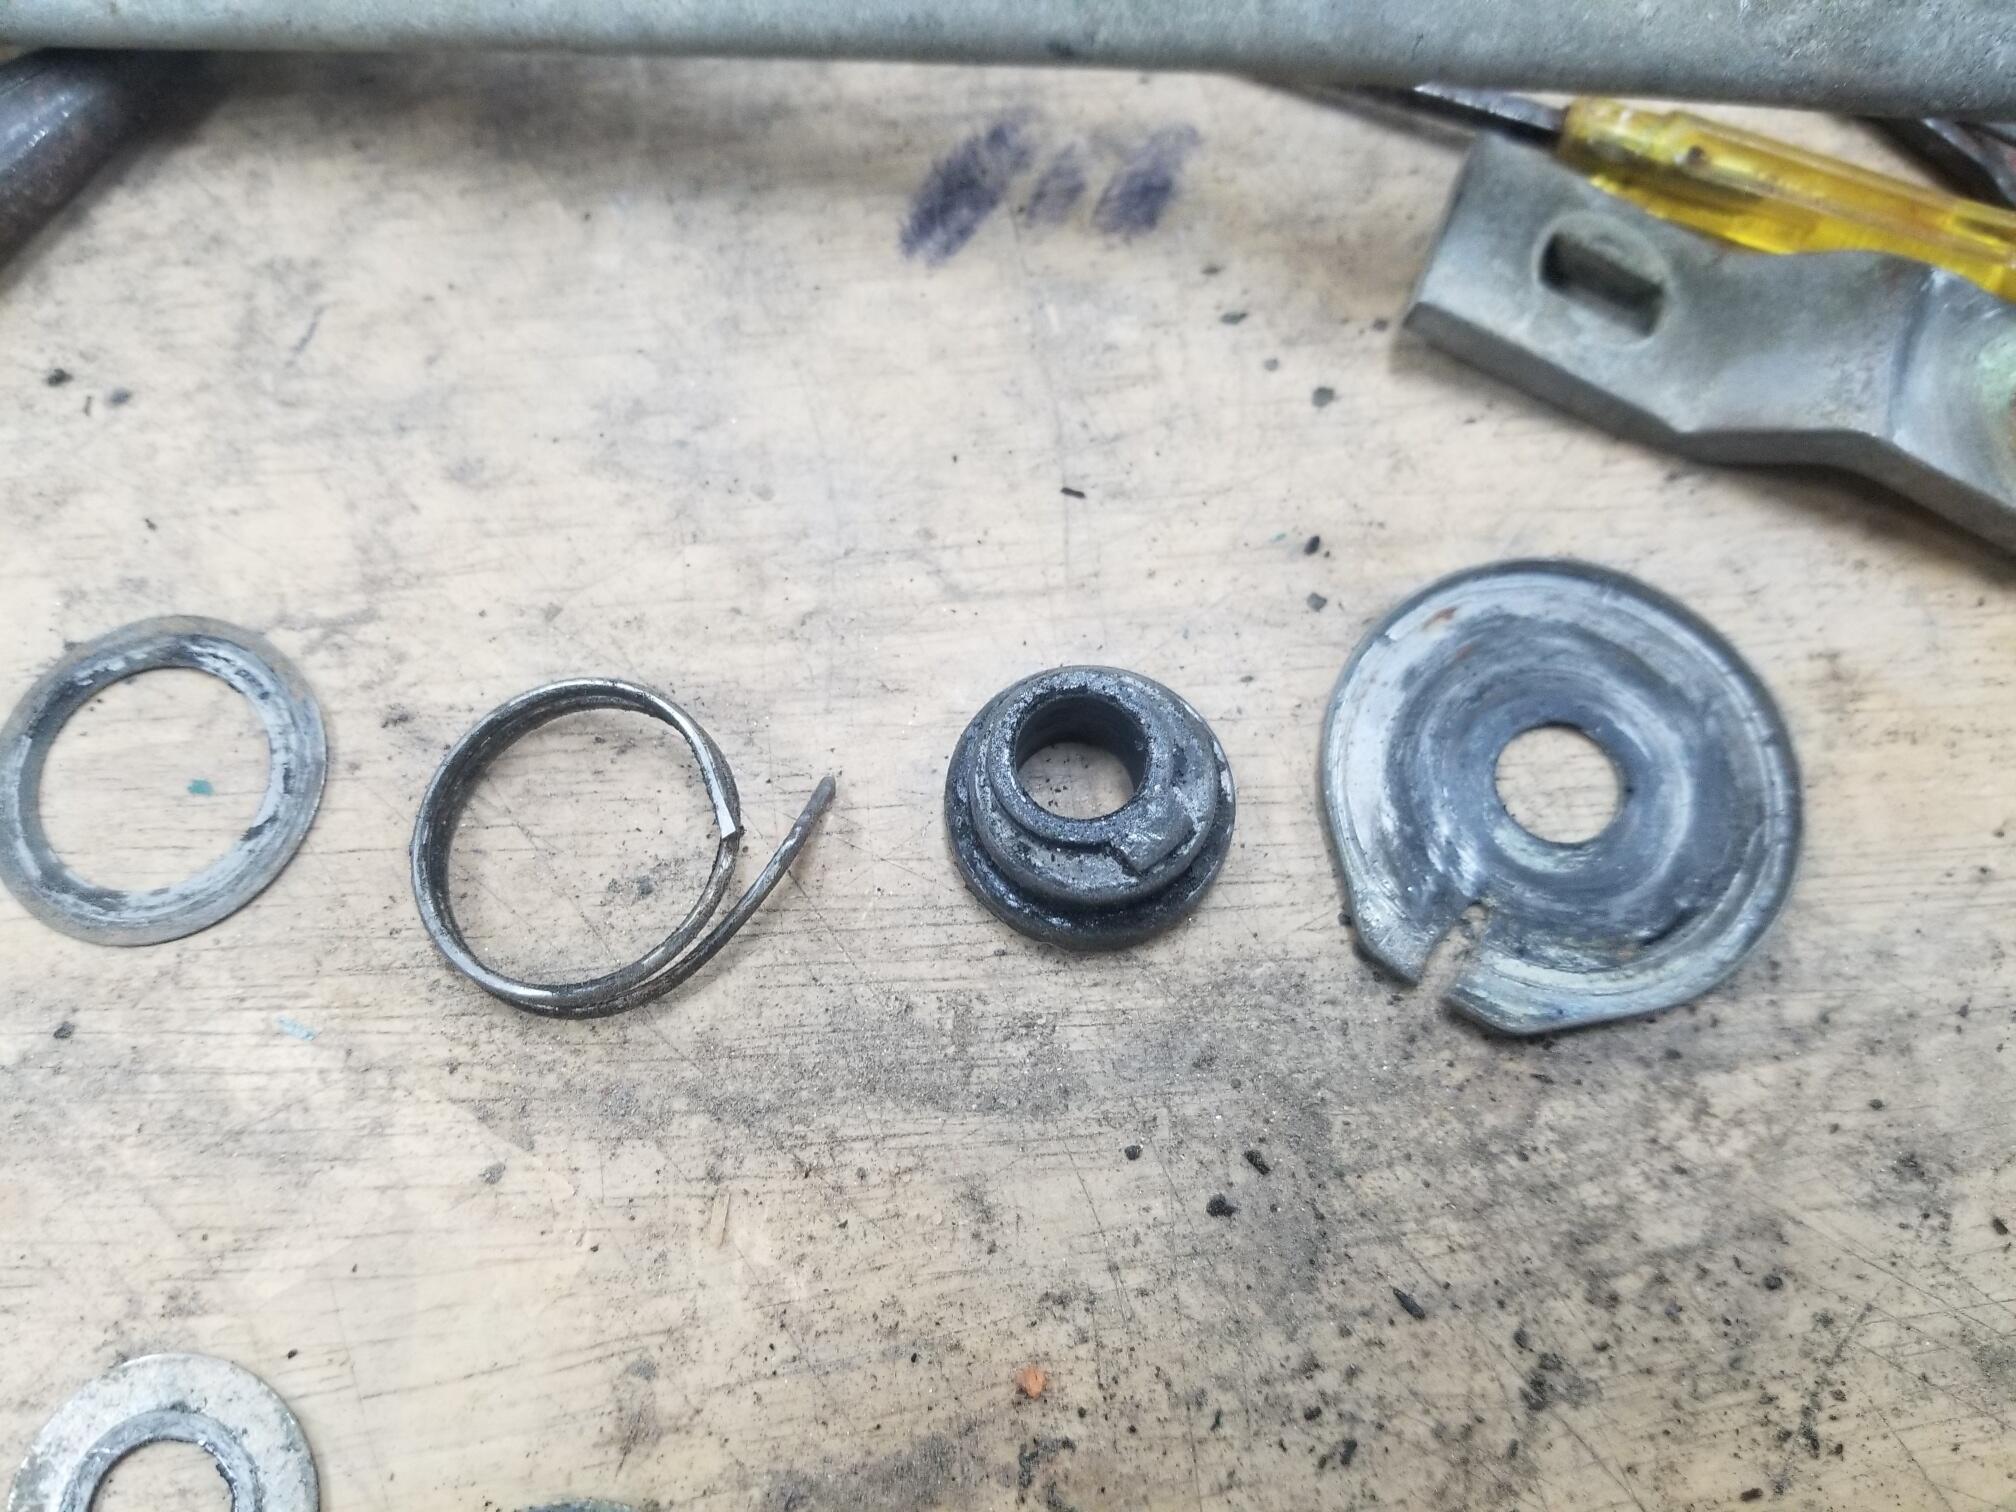
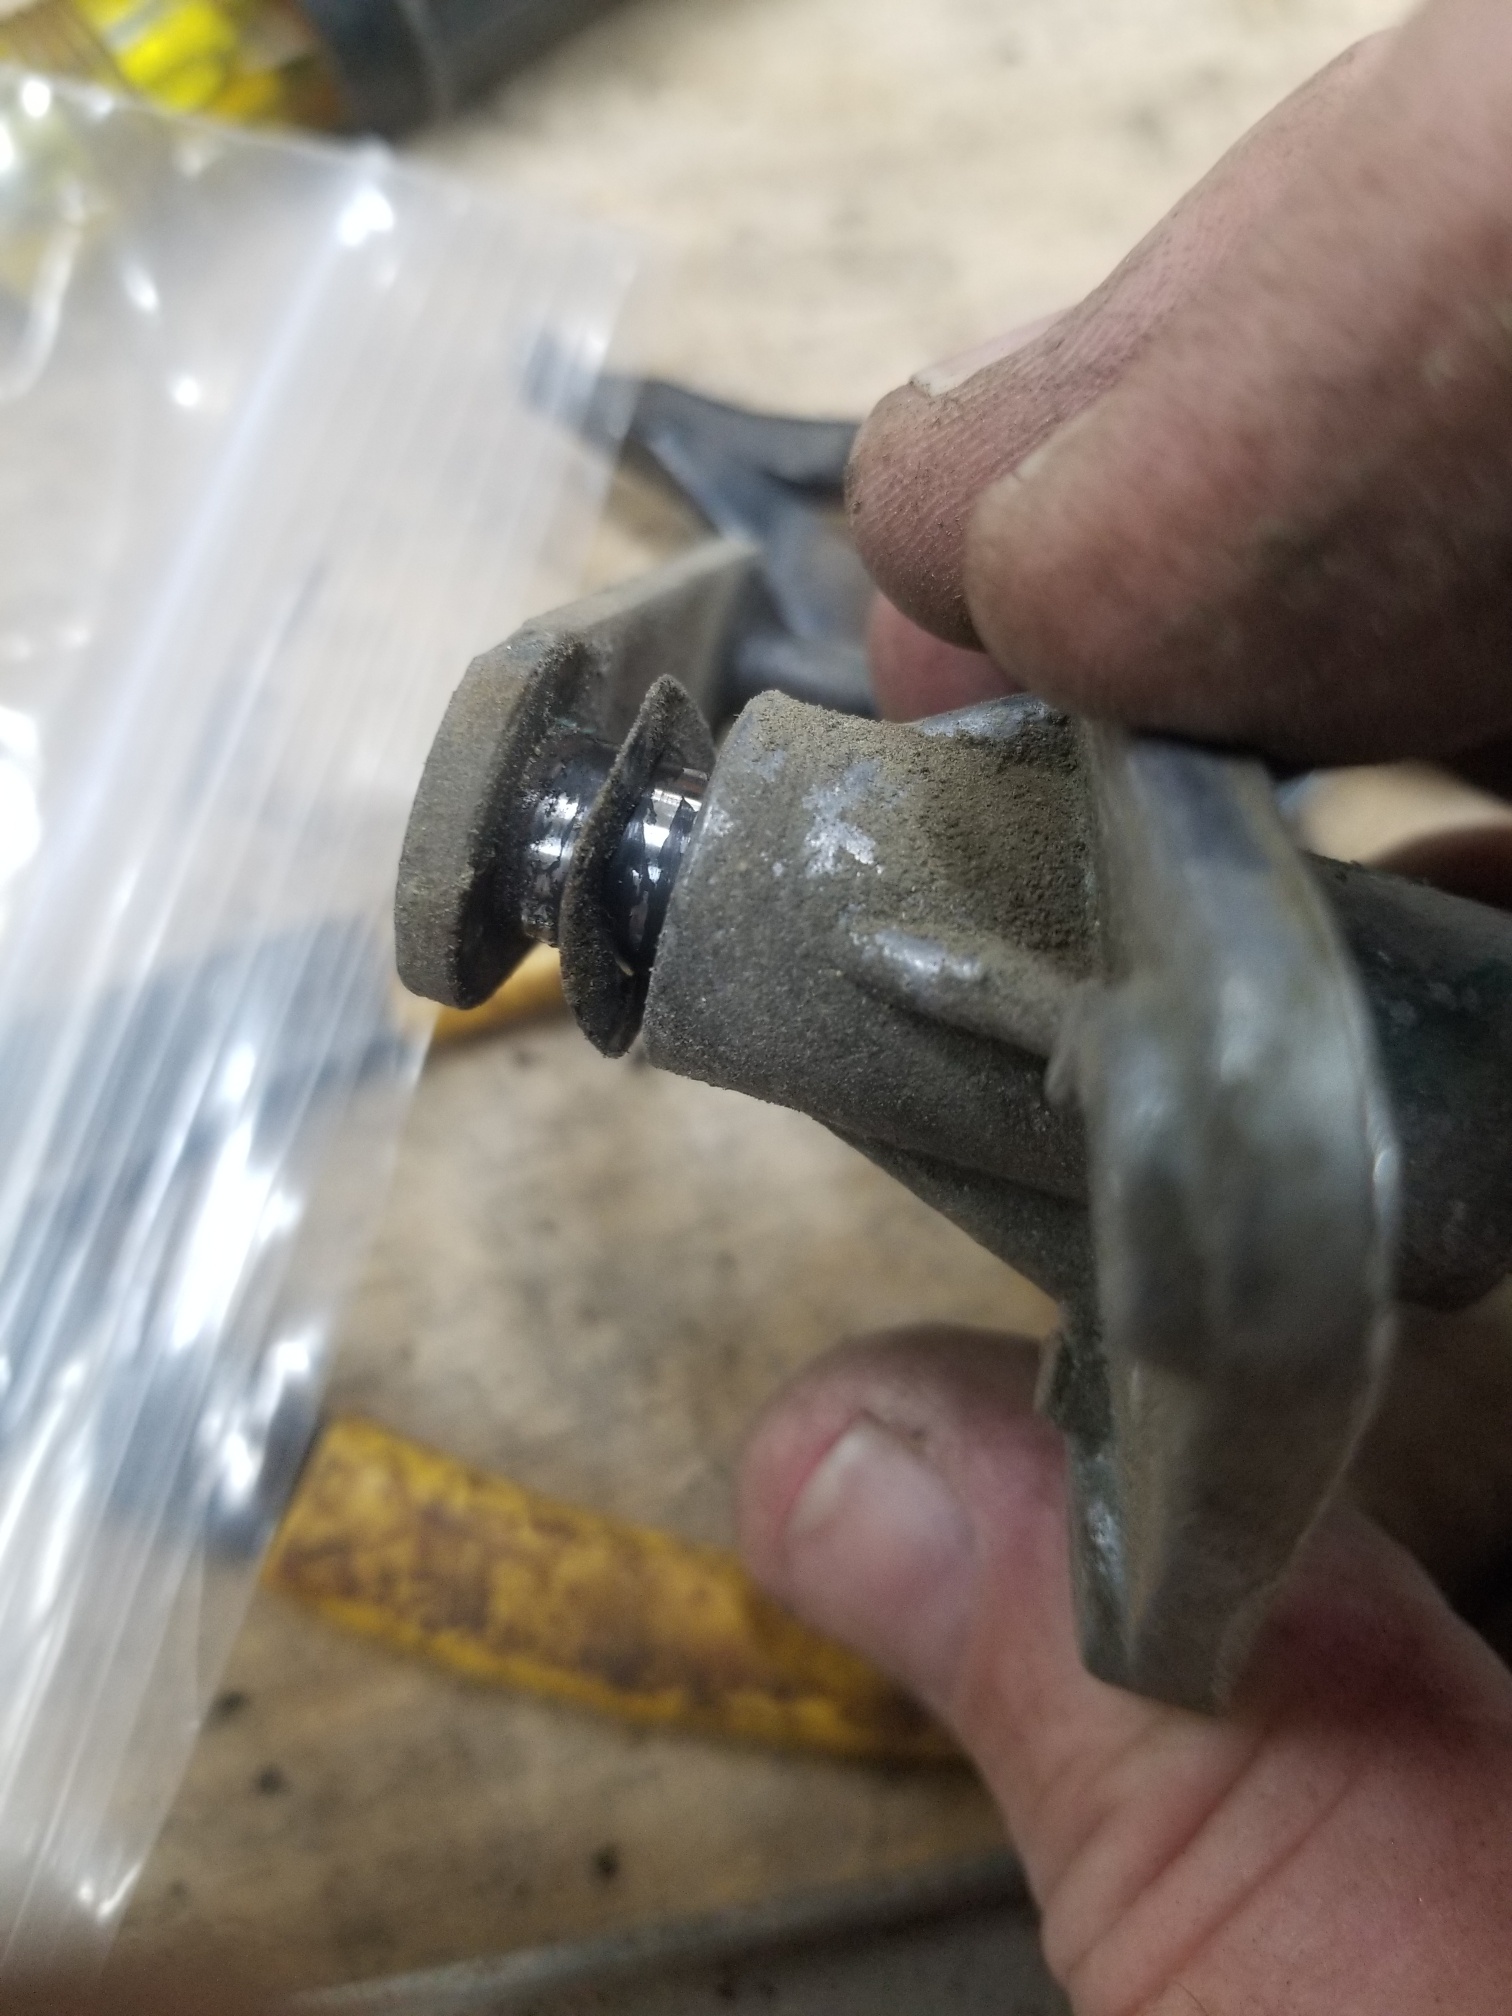
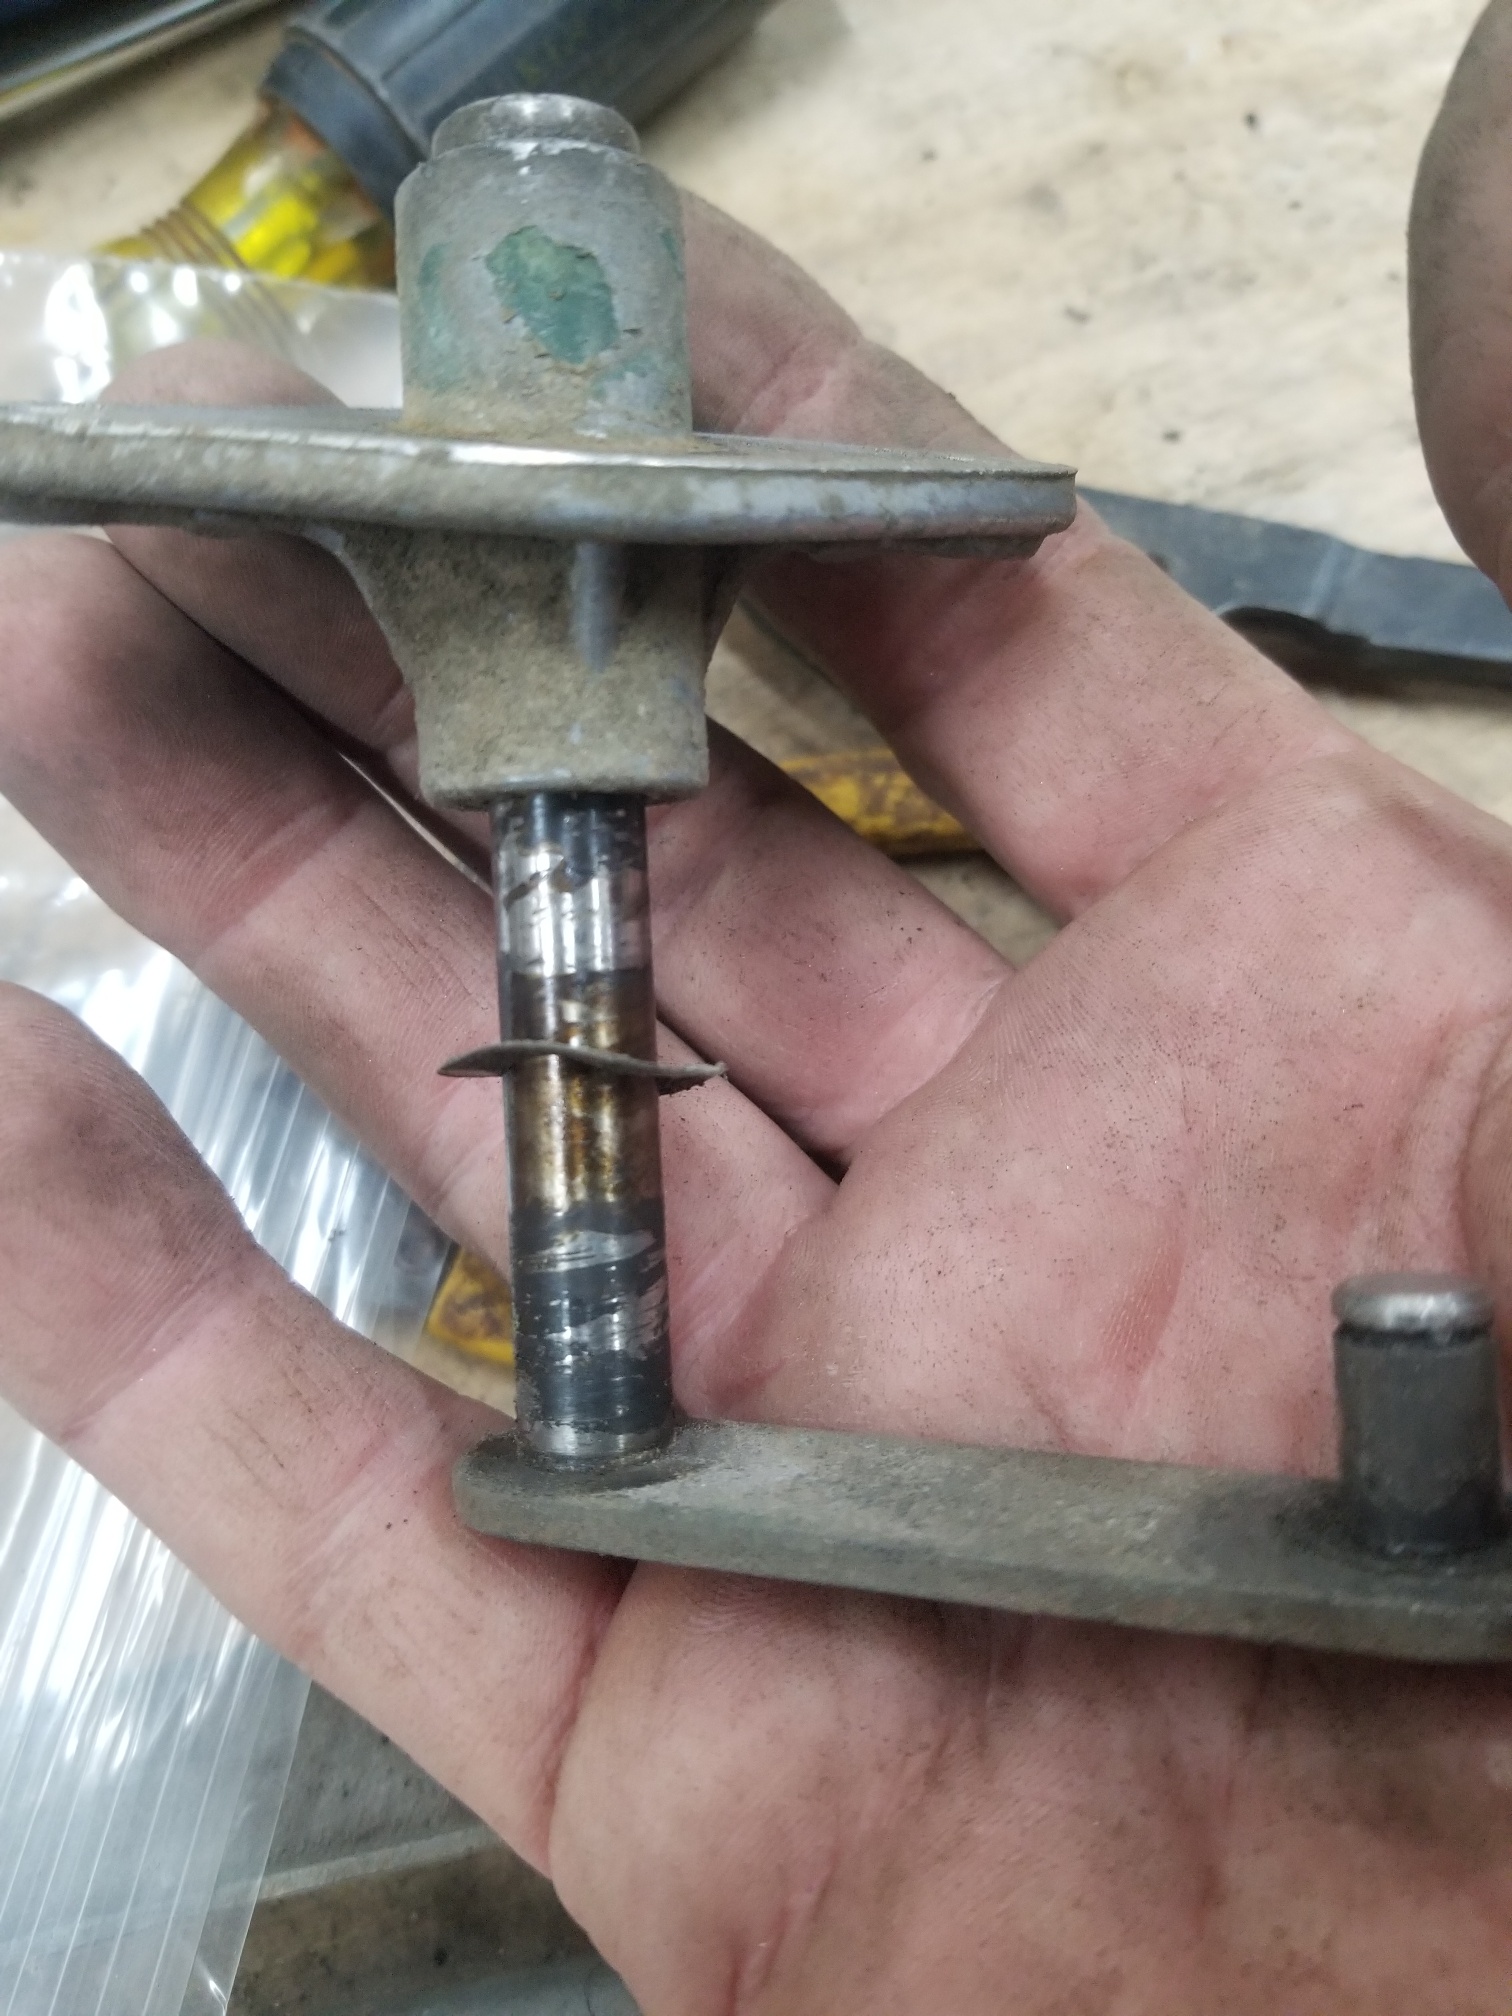
1 pointThis is what the single side spindle looks like This is the drive end of the linkage Order of the top pieces Be careful when disassembling this! There is a spring under here and the first one I did the spring and washer went flying. Order of the lower pieces Another pivot


 1 point
 -
1 pointOn the wiper side of the pivot there is a tiny spring steel ring. Like a little bull ring. I need to find a source for these. Some of them were rusted away When you pull the wiper spindle out of the base there is a wavy washer at the bottom to prevent wear


 1 point
 -
1 point
-
I got @Tirnipgreen's horns working and got an old pair of horns from my 260Z working, too. I posted information here: I did shoot some video that I need to see about editing into a YouTube video.1 point
-
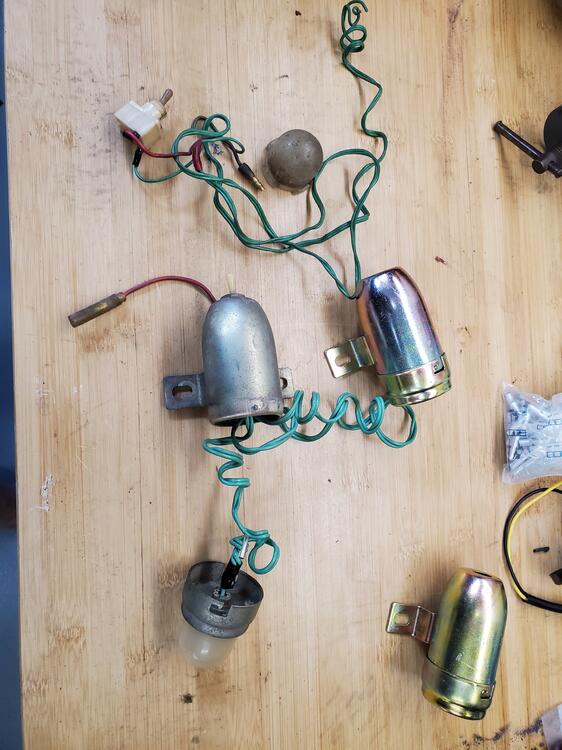
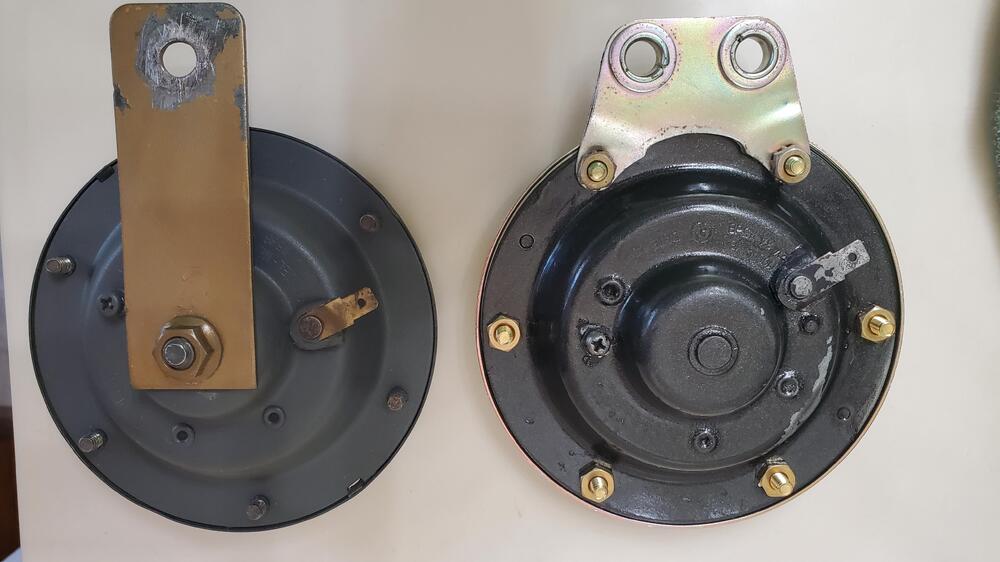
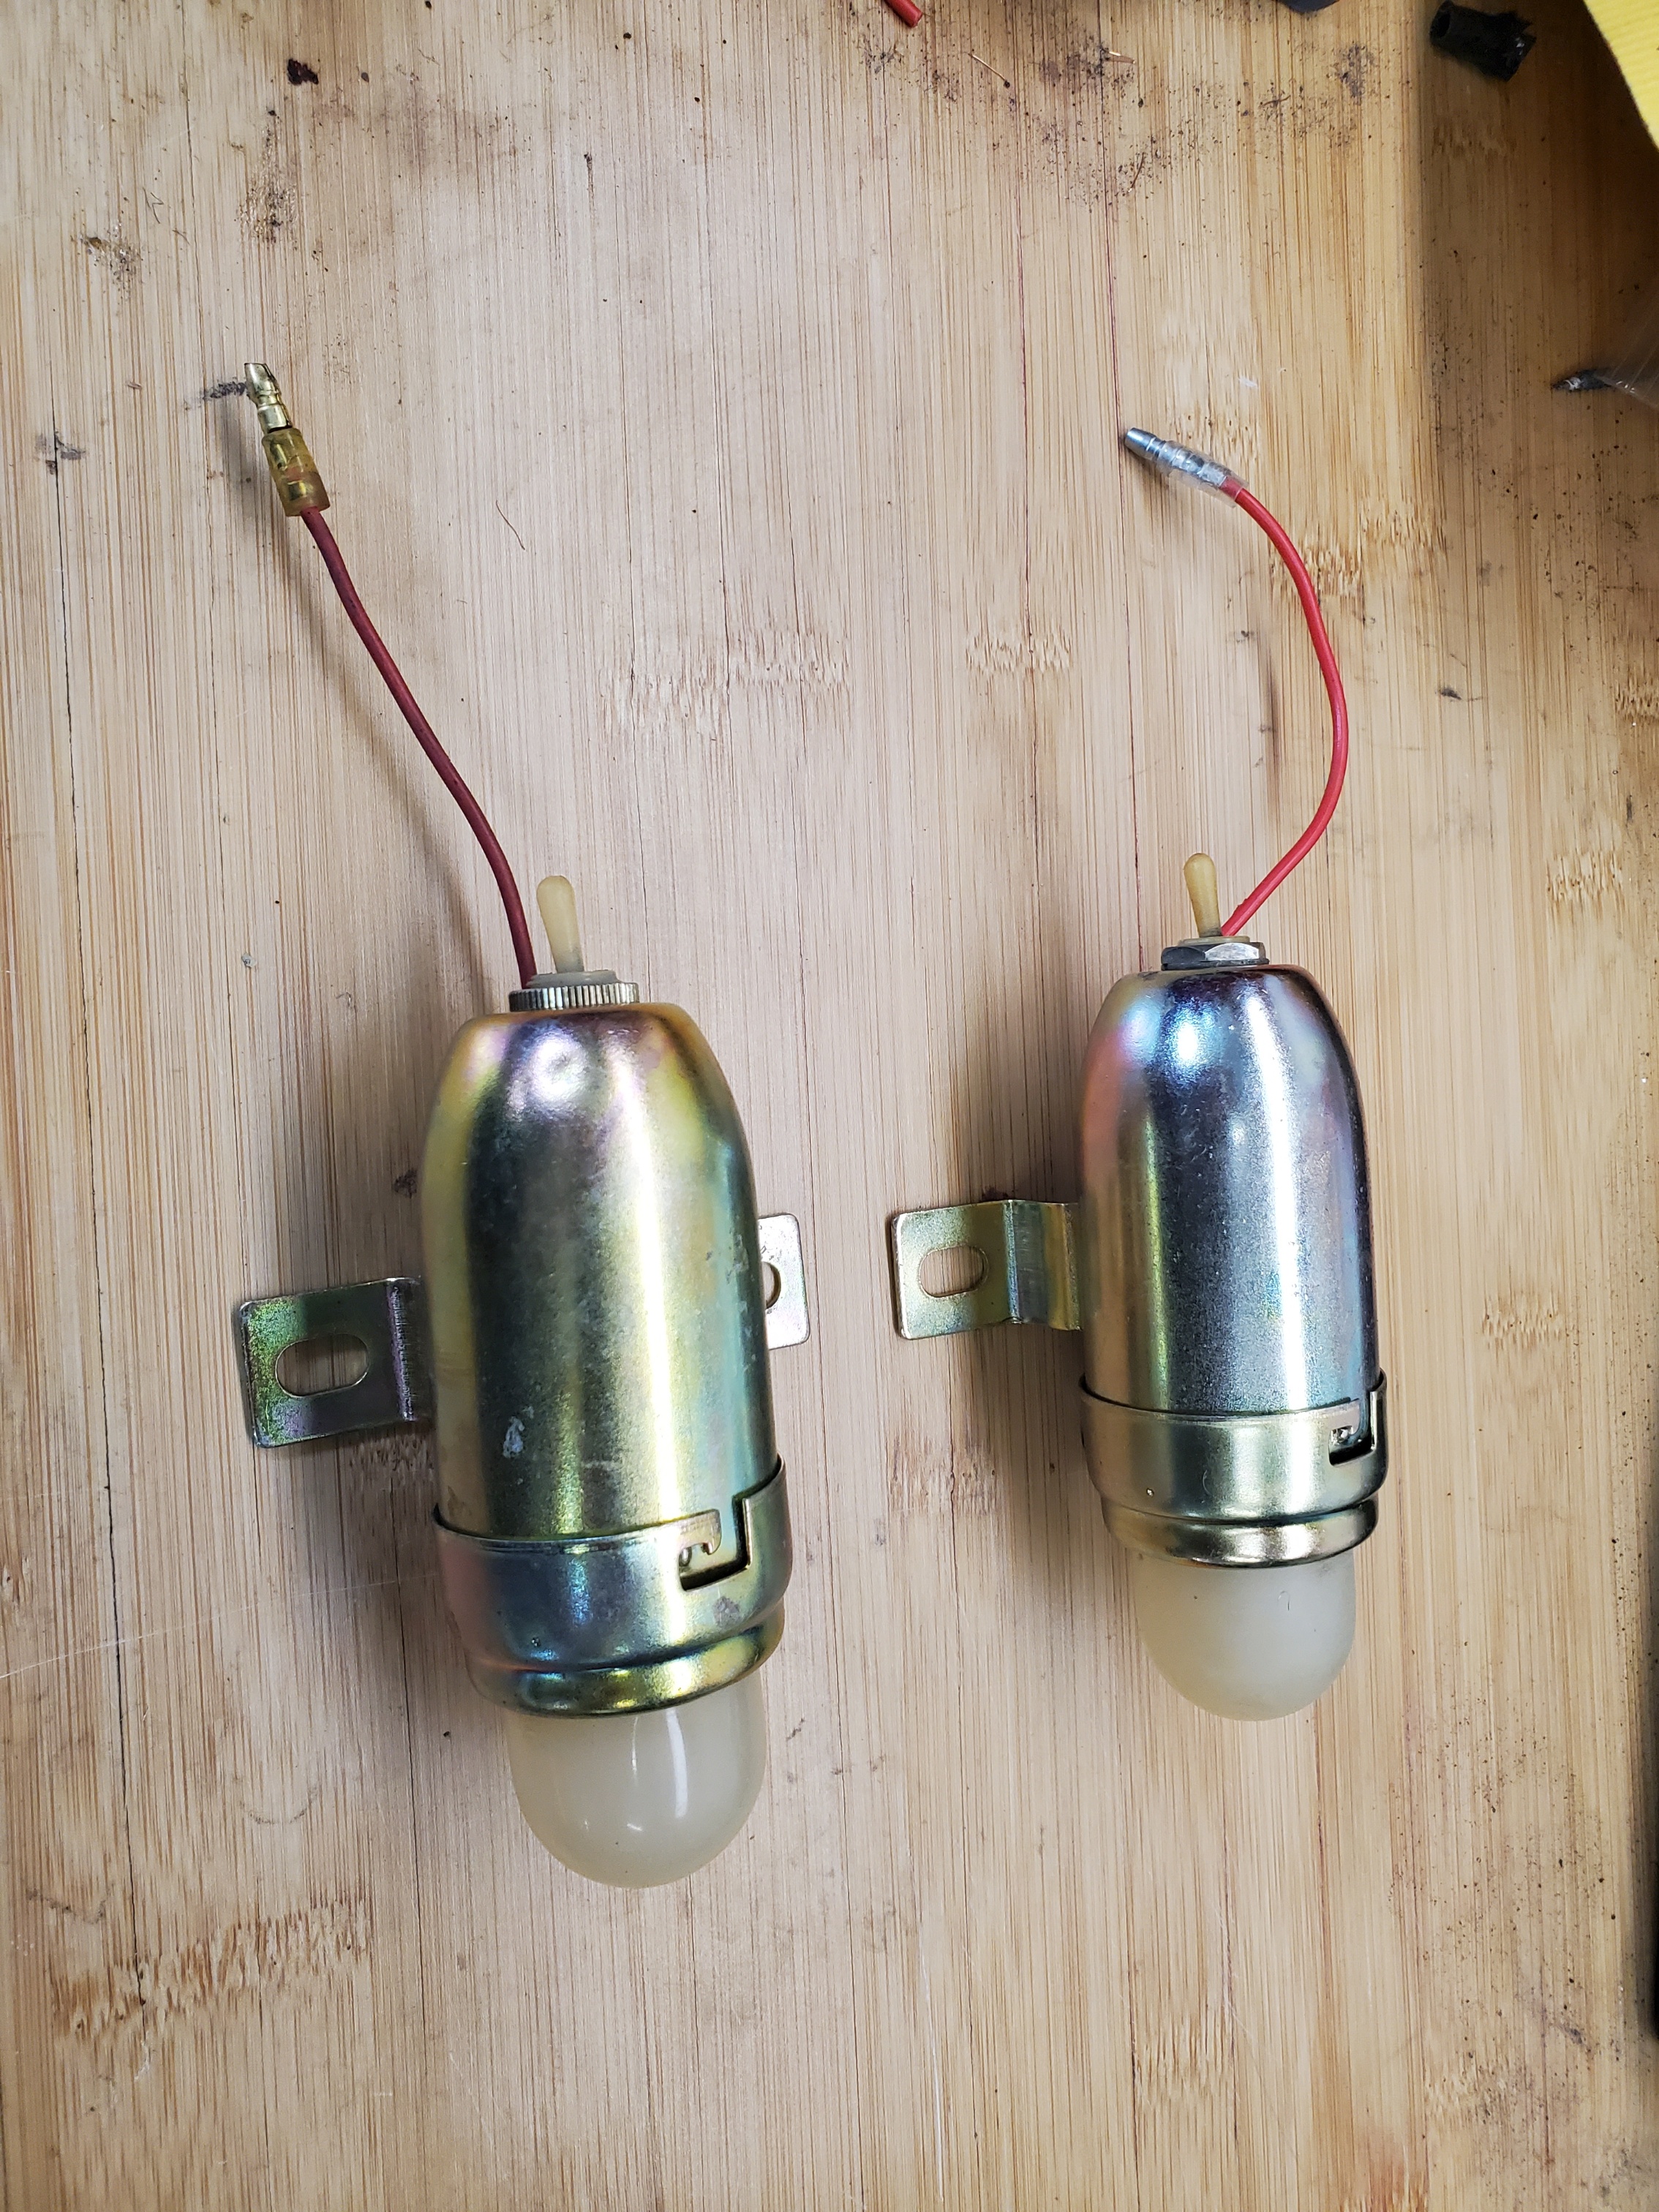
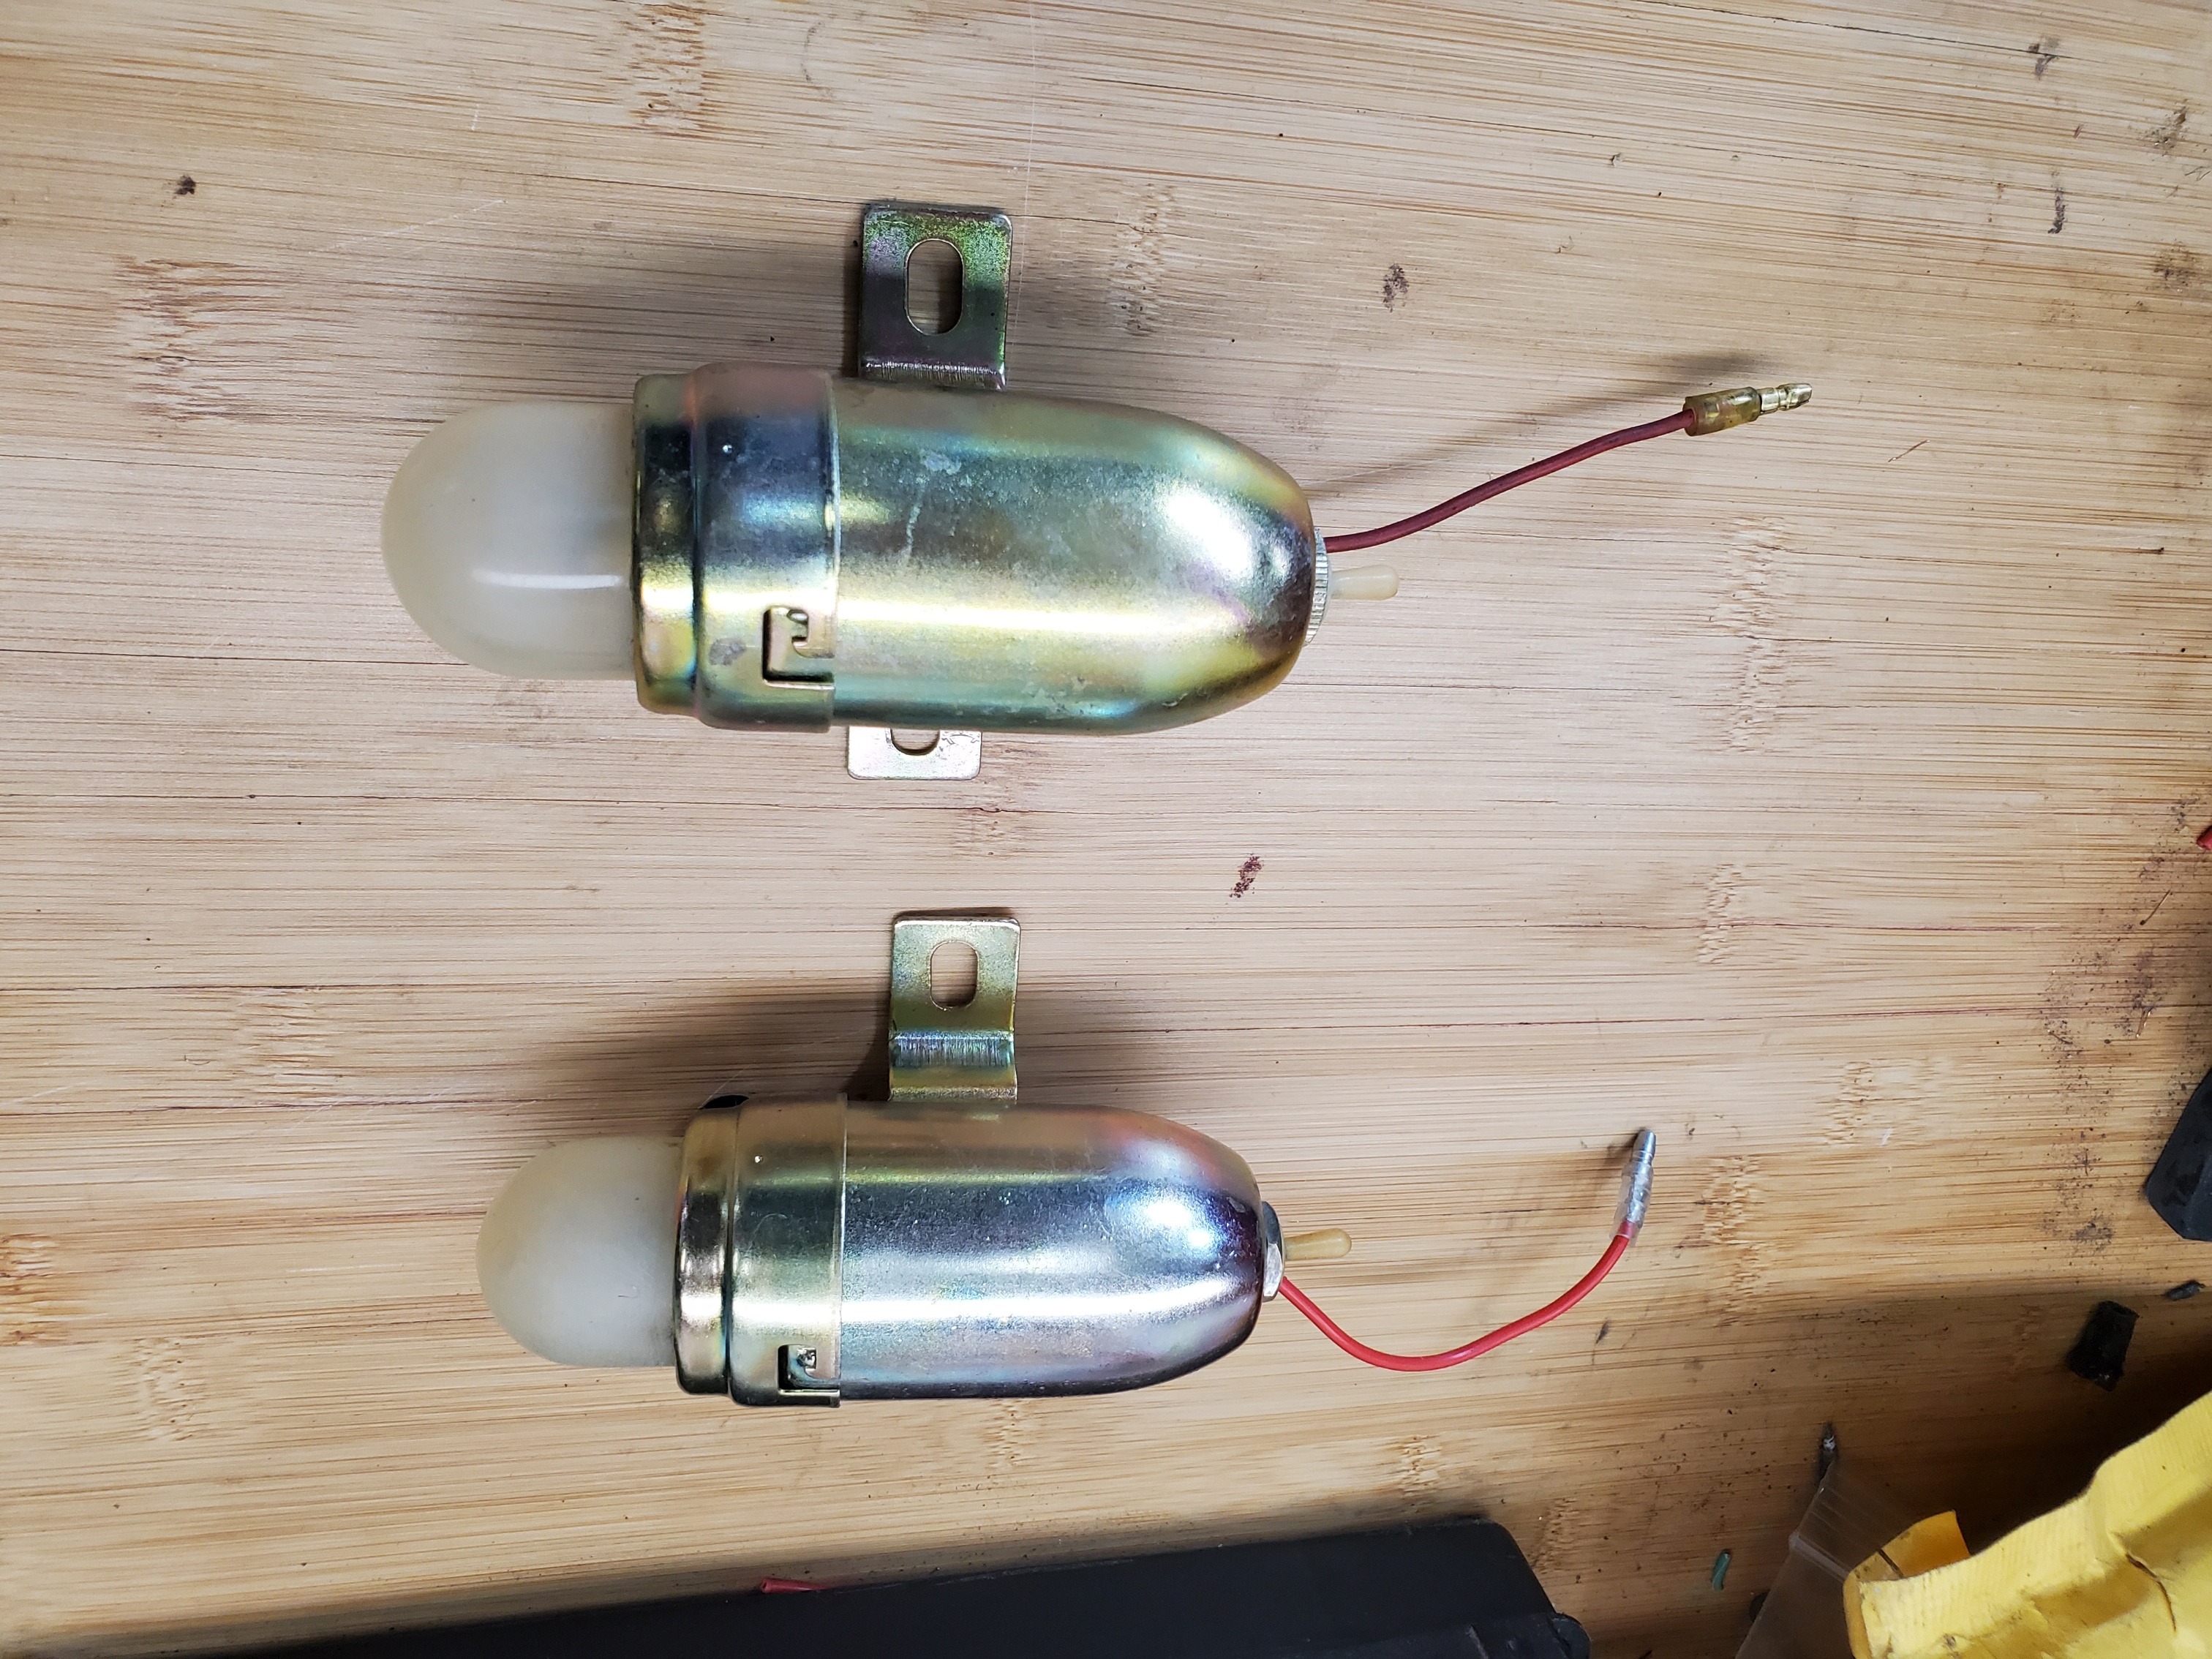
1 pointI think the gold plated "ring" on the front is actually supposed to be kind of an olive green. That being said, mine are like yours. BTW SteveJ has mine "tooting"...! Awesome...!1 pointYes the plated version is the 240Z version. The other one is a 280Z. I think there are 3 basic models of the S30 horns and probably more finer differences in the 3. The left horn in you photo is the later 280Z version. The single metal strip bolts to the bumper shock. The right horn is from the 240Z. There is also a variant on the 240Z version, I think it came in the 260Z and maybe the later 240Z. The have the same mounting bolt pattern as the 240Z, but the bracket connects to a single bolt on the back of the horn like the 280Z. See photo.
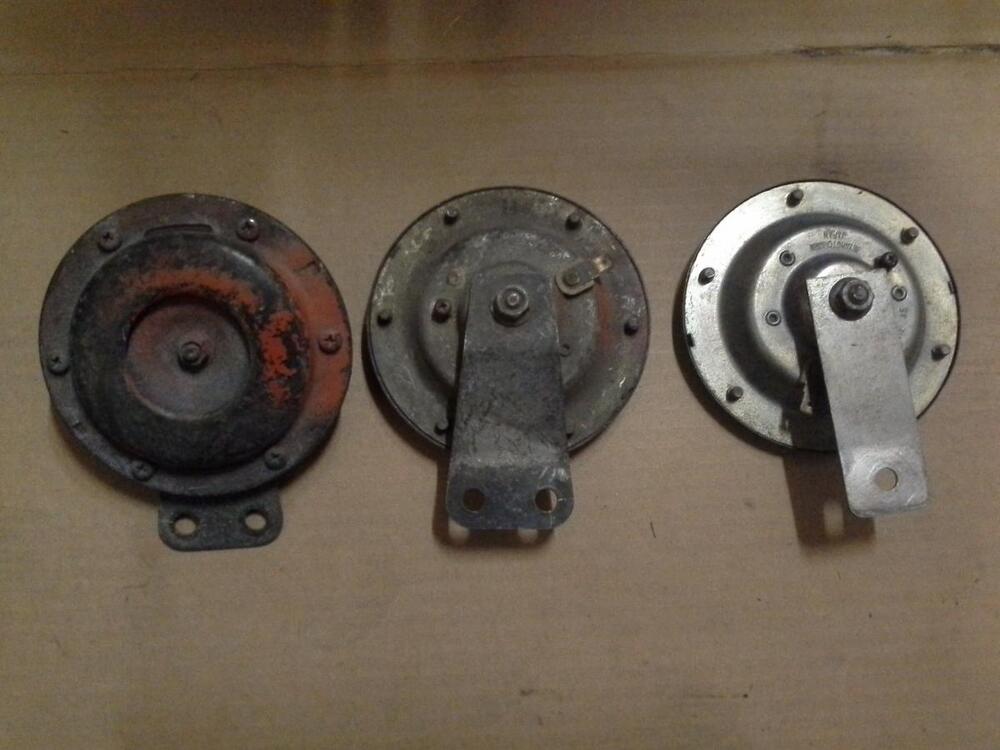 1 pointReading this thread and it inspired me to work on my horns. I have a pair nicely plated that was going in the car when I noticed the older ones were a different style. Did a quick search but didn't really see anything leading to the difference. I'm hoping the plated ones are appropriate for the 6/71 and was wondering what the right color was for the inner front and back non plated sections. I'm assuming the plated pair is right since the frame has two holes for mounting. The PO used this straight metallic plate and single mount point.
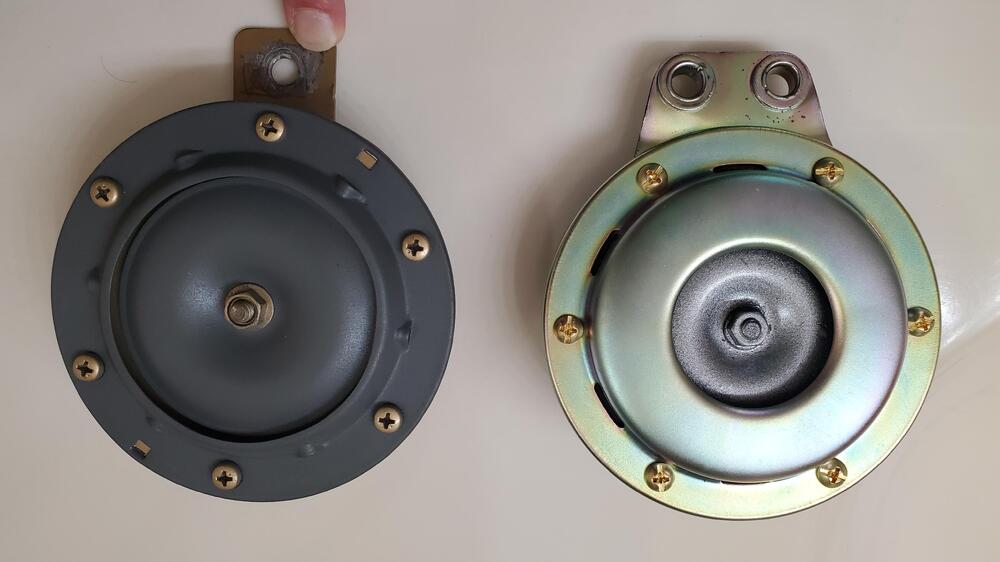
 1 pointNice way to clean parts, how much salt (grams) in the liters of lemonjuice? Also some water or?? What i remember from my horns they need a new adjustment to work right but i think you know that. There is a screw for that in the back of the horn i belief (immsmr).1 pointThought I would jump in. SteveJ is working on my horns after I quickly became frustrated with their lack of function. I had the parts plated and powdercoated and then reassembled them with a rebuilding kit from a guy in Canada that was available on Ebay. The kit contained Mylar self-stick gaskets and all the nuts and bolts. The gaskets were a bit difficult to deal with after peeling off the backing. I didn't really like that they were sticky-back. Anyway, I thought I had reassembled them correctly, but got nothing out of them in terms of noise or vibration...hence enlisting Steve to come to the rescue. He may regret taking the project on, but I appreciate his kindness...Thanks, Steve...!1 pointRecently, at the bodyshop i got asked what piece of metal this is between the original floorpan and the repair patch they put over it. I had to admit that i don't know if it was original or not, but the welds definitely looked like OEM Spotwelds. After asking on the Classic Z Forums, i got the information that this was a factory reinforcement plate for the floorpans. Unfortunately it was not listed in any of my parts books, so i guess, it was either added to the cars during the assembly process withohut proper documentation, or it was part of the original floor pan part and never sold separately. A friend of mine has his car over at Romas from DCW Classic at the moment for some bodywork and told me, they currently have such plates removed from the car and he could give me the exact measures so i can replicate them: See following photos for your own reference: So i thought it's easy for my bodyshop to replicate them with all the photos and measures. Now while searching the interwebs for something else today, i accidentally stumbled on those ready-made replacement panels from ZCardepot for 19$ per side: https://zcardepot.com/products/floor-pan-reinforcement-sheet-metal-240z The only thing that makes me a bit unsecure, is the fact that they're stainless steel. I have no clue how good it is to weld stainless steel to regular steel. I know you need a bit of a special welding technique or electrode, which any bodyshop should be able to handle. But my main concern is corrosion, as i know metals tend to have so called "contact corrosion" aka "galvanic corrosion" when two different metals are put together? Not sure in this case however. the pieces should be easy to replicate from scratch, but hey, you need to have something to think about, right? 🙂1 pointI think that I would try to sell it as is. There may be someone out there with the desire for an early Z and the skills to restore it. However, I wouldn't be able to resist the urge to get it running if the engine will turn over. And, having been there before, prep it for a test run around the neighborhood.1 point


Important Information
By using this site, you agree to our Privacy Policy and Guidelines. We have placed cookies on your device to help make this website better. You can adjust your cookie settings, otherwise we'll assume you're okay to continue.