Leaderboard
-
grannyknot
Free Member7Points5,158Posts -
Patcon
 Subscriber
 6Points11,142Posts
 -
davewormald
Free Member4Points128Posts -

Racer X
Free Member3Points1,877Posts


Popular Content
Showing content with the highest reputation on 06/23/2023 in all areas
-
Well your first issue in my mind is you need to stick with stock efi. That rules out most mods. You can probably tinker with the setup but the problem comes in when you cant tune the system for a deviation. Also you would be searching for dished not domed pistons. To really determine the bore condition you would need a way to measure bore ID. 3 places down the bore. Side to side and front to back. If there's no lip at the top of the bore you might could just hone if your measurements are good. But you might hone and then have to bore and re-hone. It sounds like these shops are approaching this from past experience and the highest percentage of success. As for the crank, if it mic's out, is round and looks good, a light polish would be better than grinding. It's easier (maybe lazy) of the shop to bore and grind. The upside for them is they know for certain the crank is true and round. They also know the bores are all true, cylindrical, straight, consistent and without taper. All good things. It also takes some time to do all the checking versus just chucking it uo and punching it out. These old Nissan blocks were made out of really good metal and these shops may not have a lot of experience with how well they hold up4 points
-
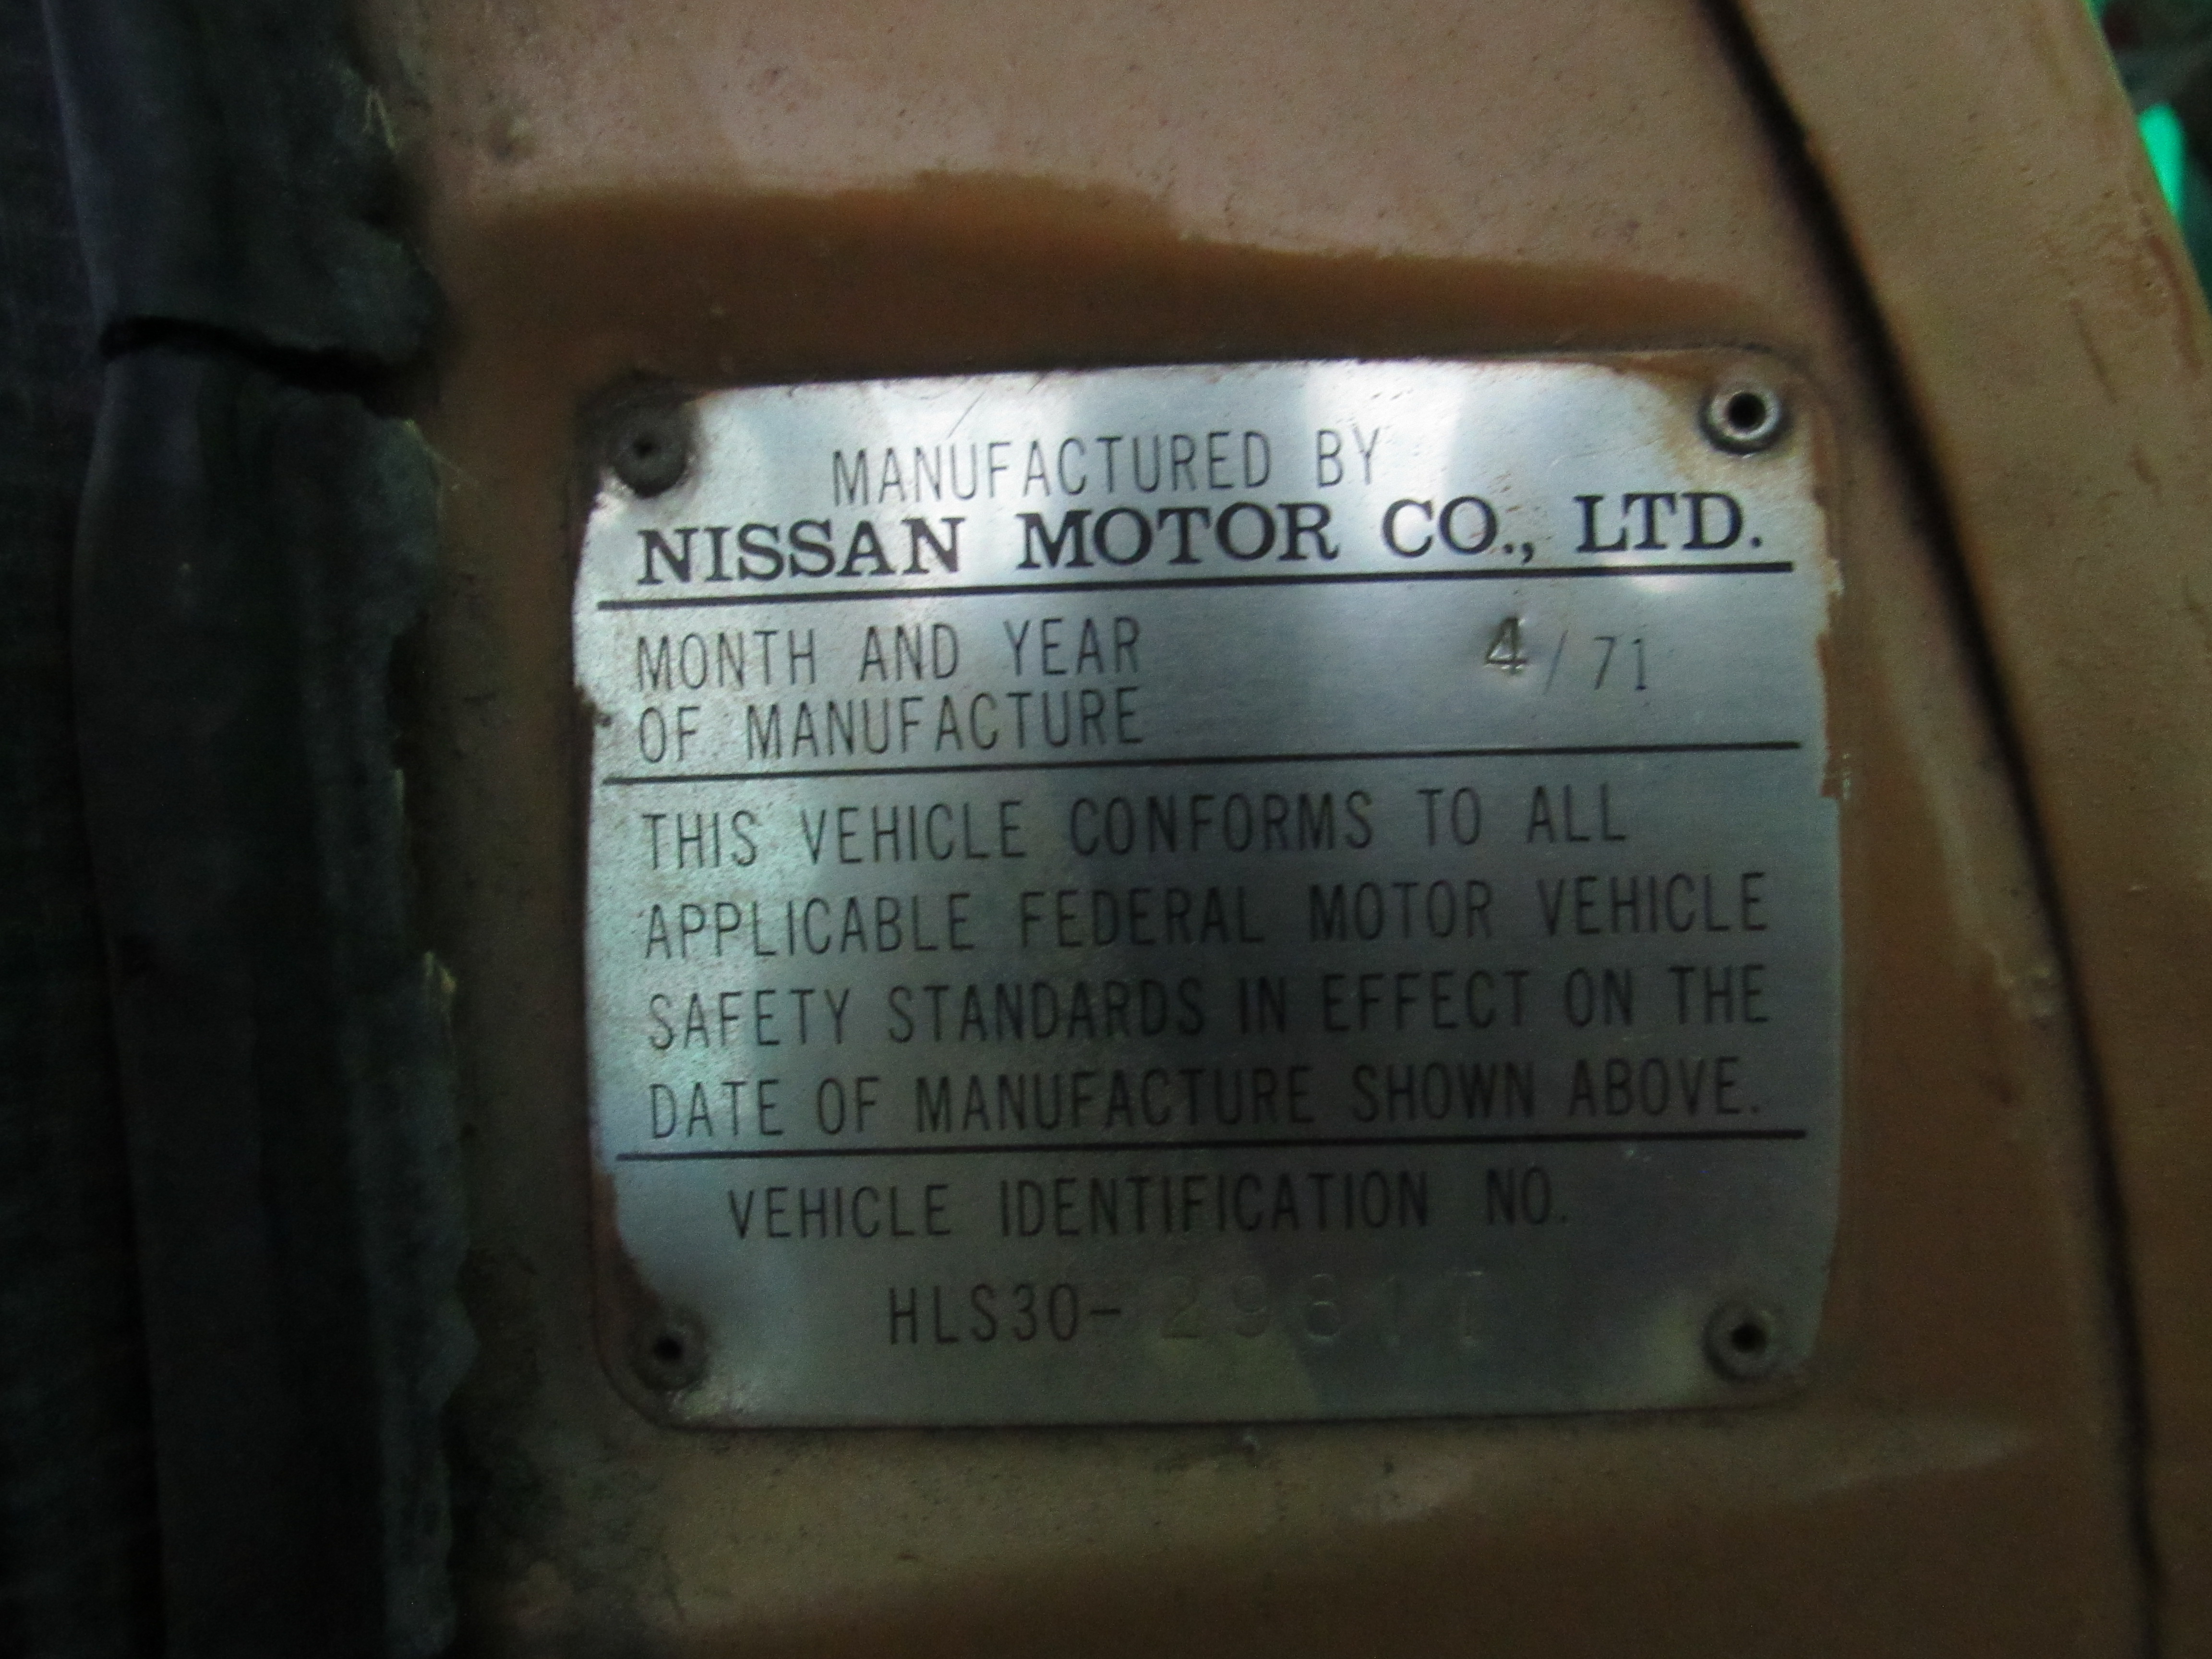
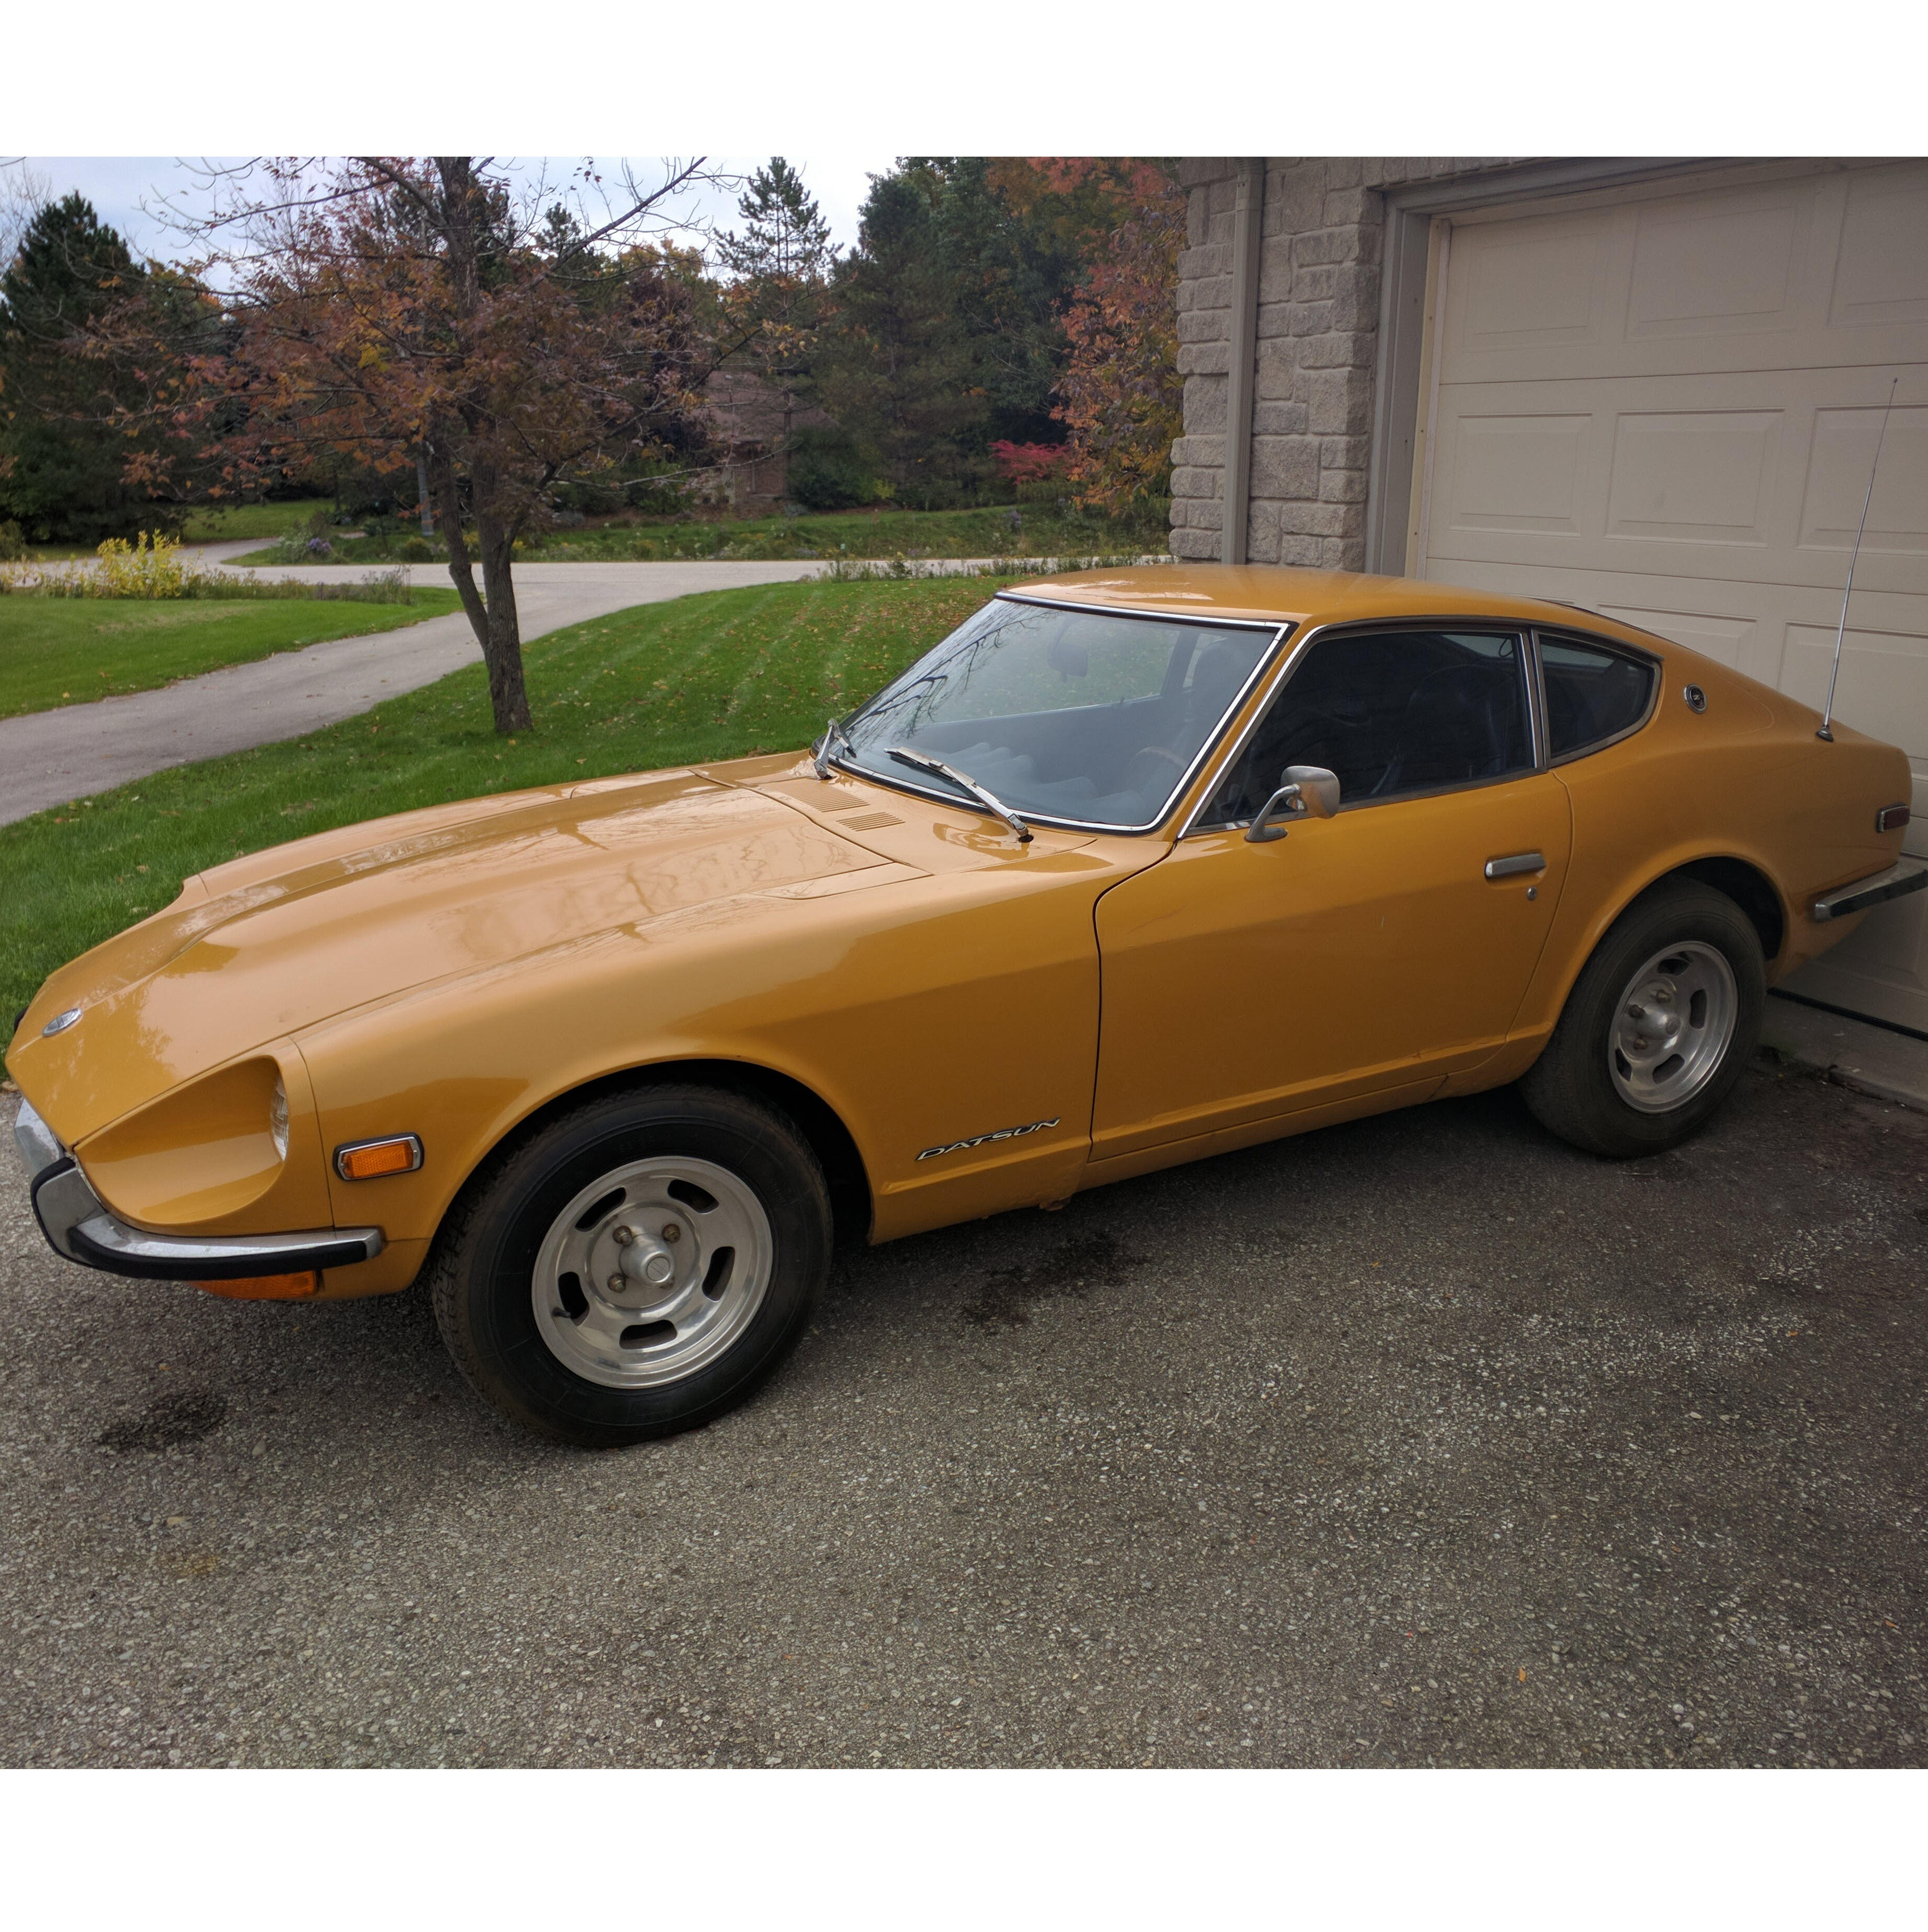
4 pointsSo first I'd like to say how excited I am to have @grannyknot working on the car! I first joined this forum in 2020, and saw that he was one of the few local Ontario members, and one who had done some really cool projects. I hoped we'd be able to meet up at some point. This is even better! The "short" history of this car, as known by me, is that I bought it in 1994, from the late Ken Stahl, of Ken's Mostly British/The Z Doctor, who had purchased it in Georgia and trailered it to Ontario. I don't know anything about its history prior to that, though I'd like to. I'd had 1973, and 1972 240Zs back in the mid-80's and a 280ZX after that. I guess this one was an early mid-life crisis car. I drove it for about five years, winter(!) and summer while commuting 70km to my office in downtown Toronto. My lack of time and maintenance over those years resulted in the car becoming unreliable, and it was starting to rust, so I parked it in my garage for 20 years! During that time, I somehow managed not to think about it at all, until someone told me about the green Z that sold for $300k on BAT. Not that I'll ever sell the car, but it made me go and poke at it, which rekindled my old obsession. I'm no mechanic, but I was able to kick off the slow process of reviving it starting in 2020. I posted a couple of times about what I was doing in this forum: and The time I had available to work on the car evaporated last year when we decided to sell the house in the country (on 2.5 acres with a three car garage) that we'd lived in for more than 25 years. I've just moved to a condo we're renting for a year in Collingwood, Ontario. I finally had to admit to myself that I wouldn't be able to continue to work on the car in the condo's underground garage. As mentioned above, I was pretty excited when I messaged grannyknot on this forum and he said he was looking for a new project. Let the fun begin!4 points
-
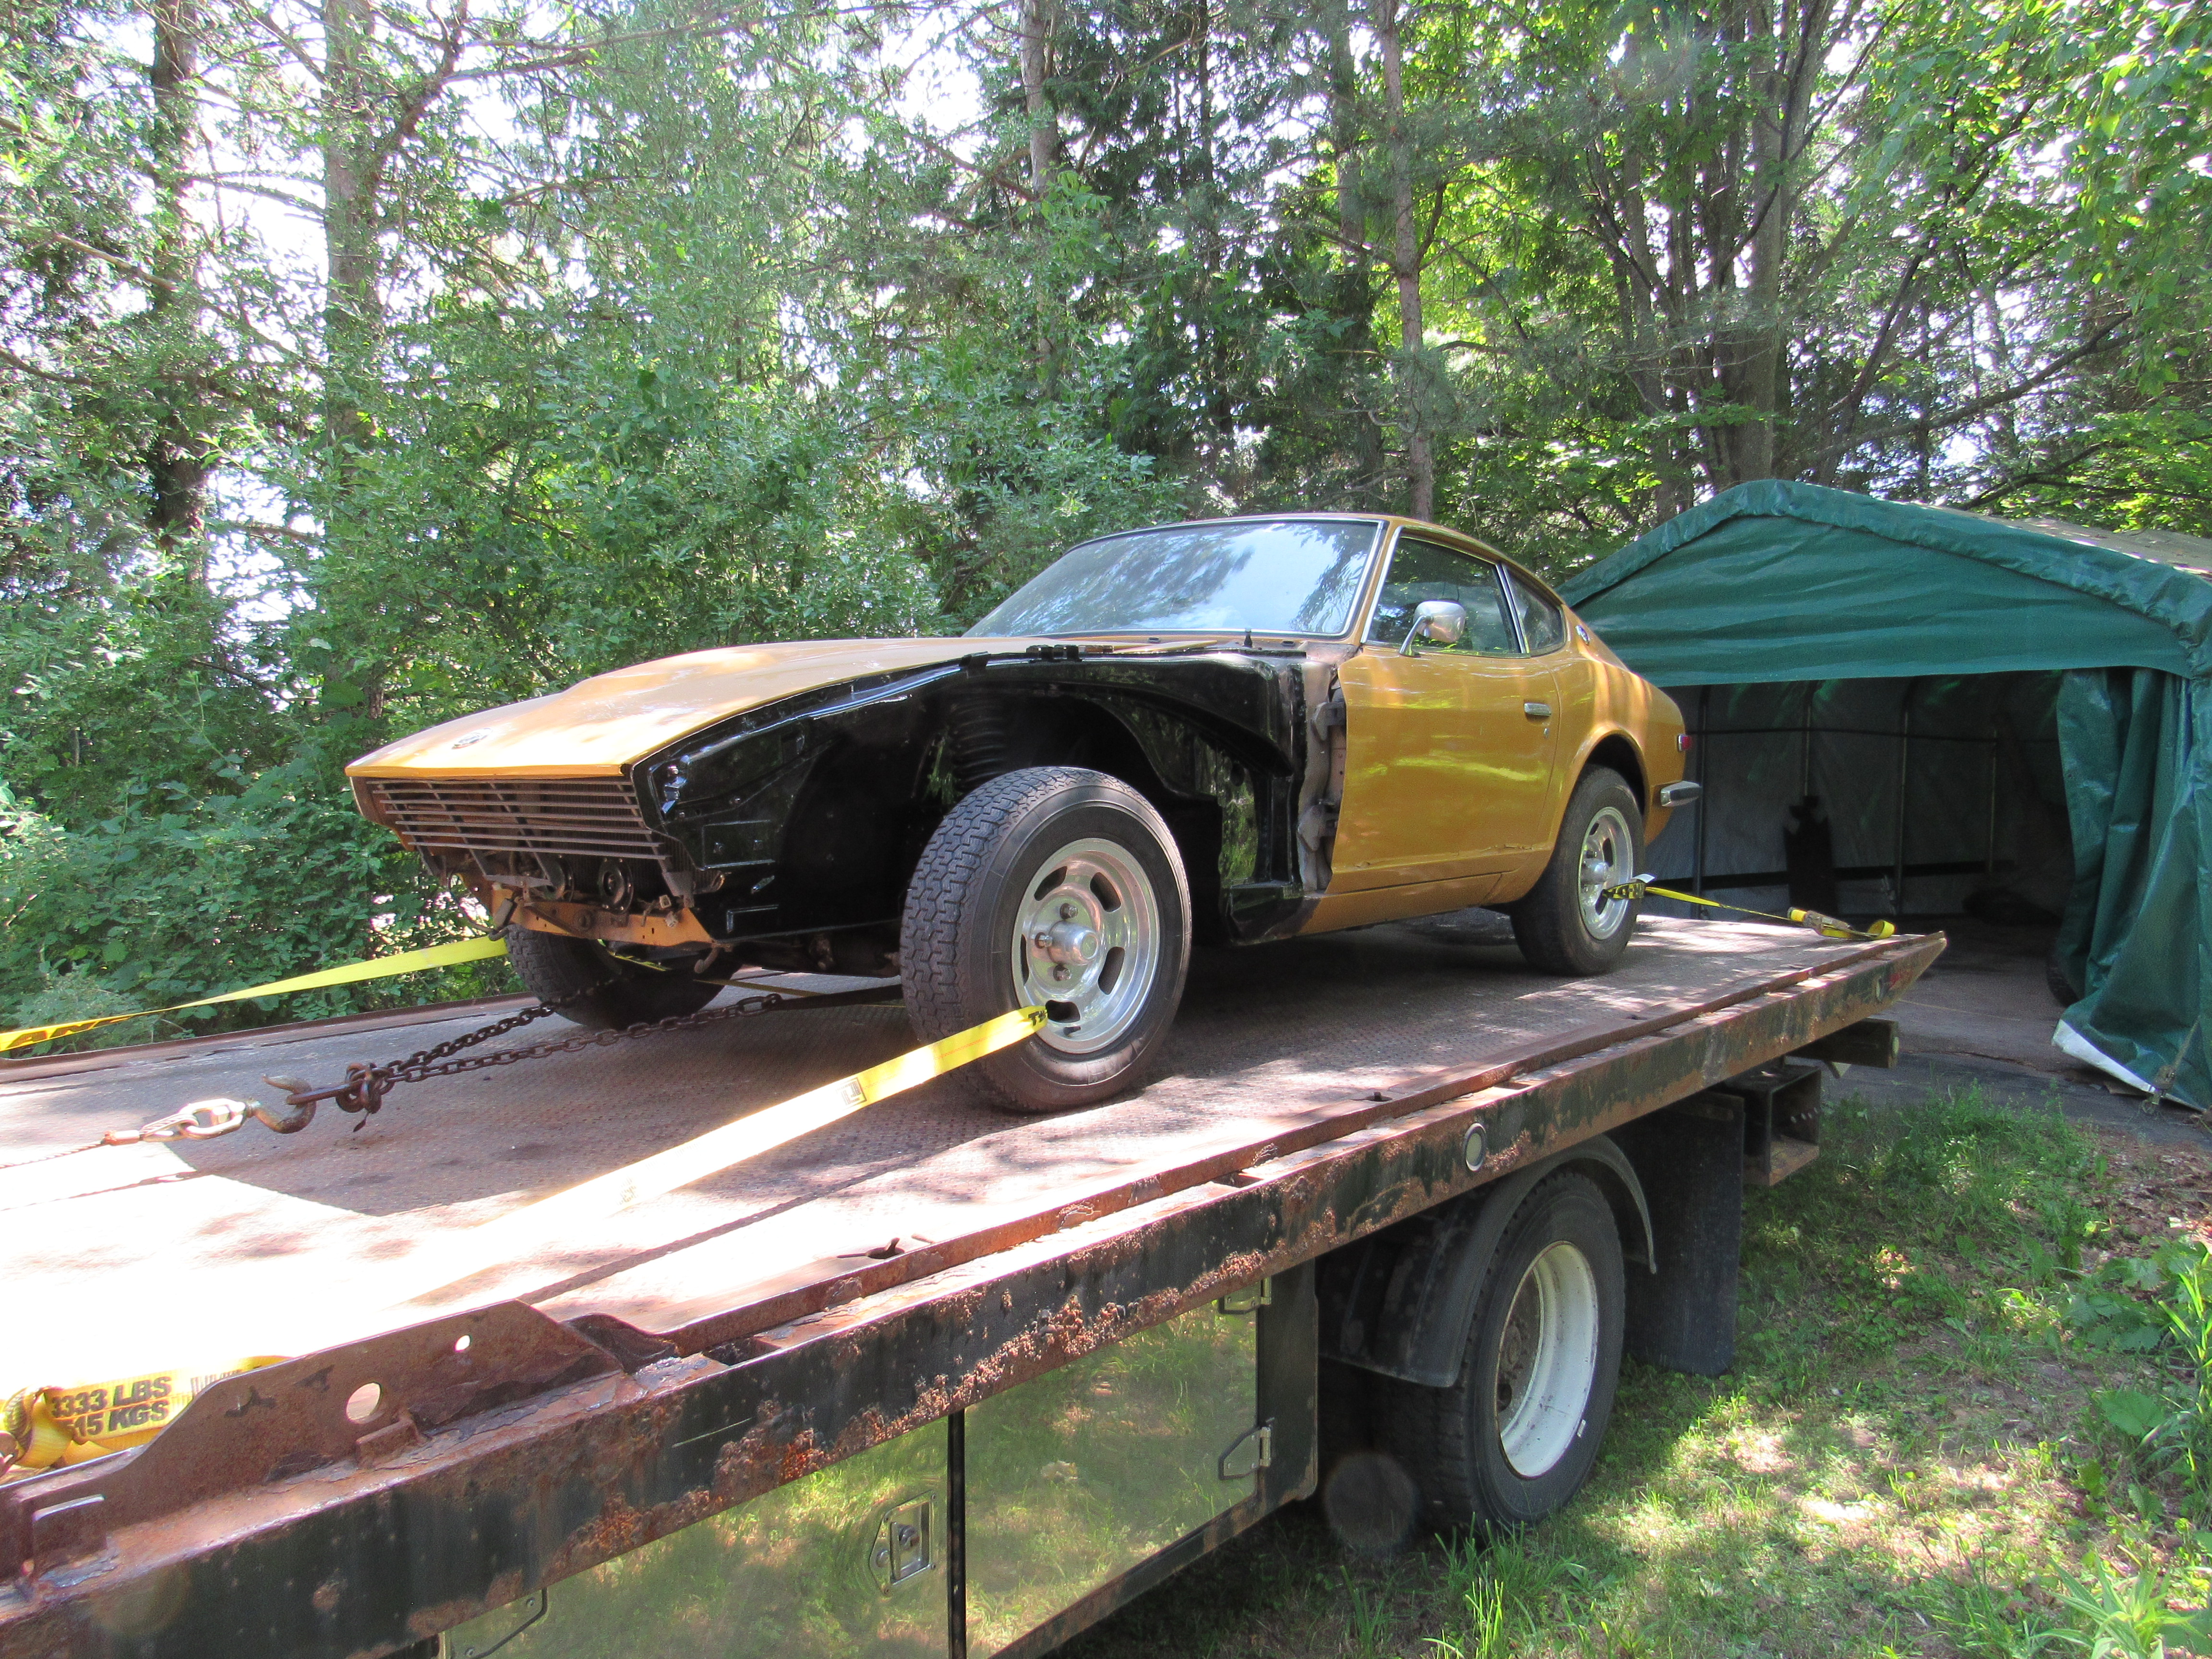
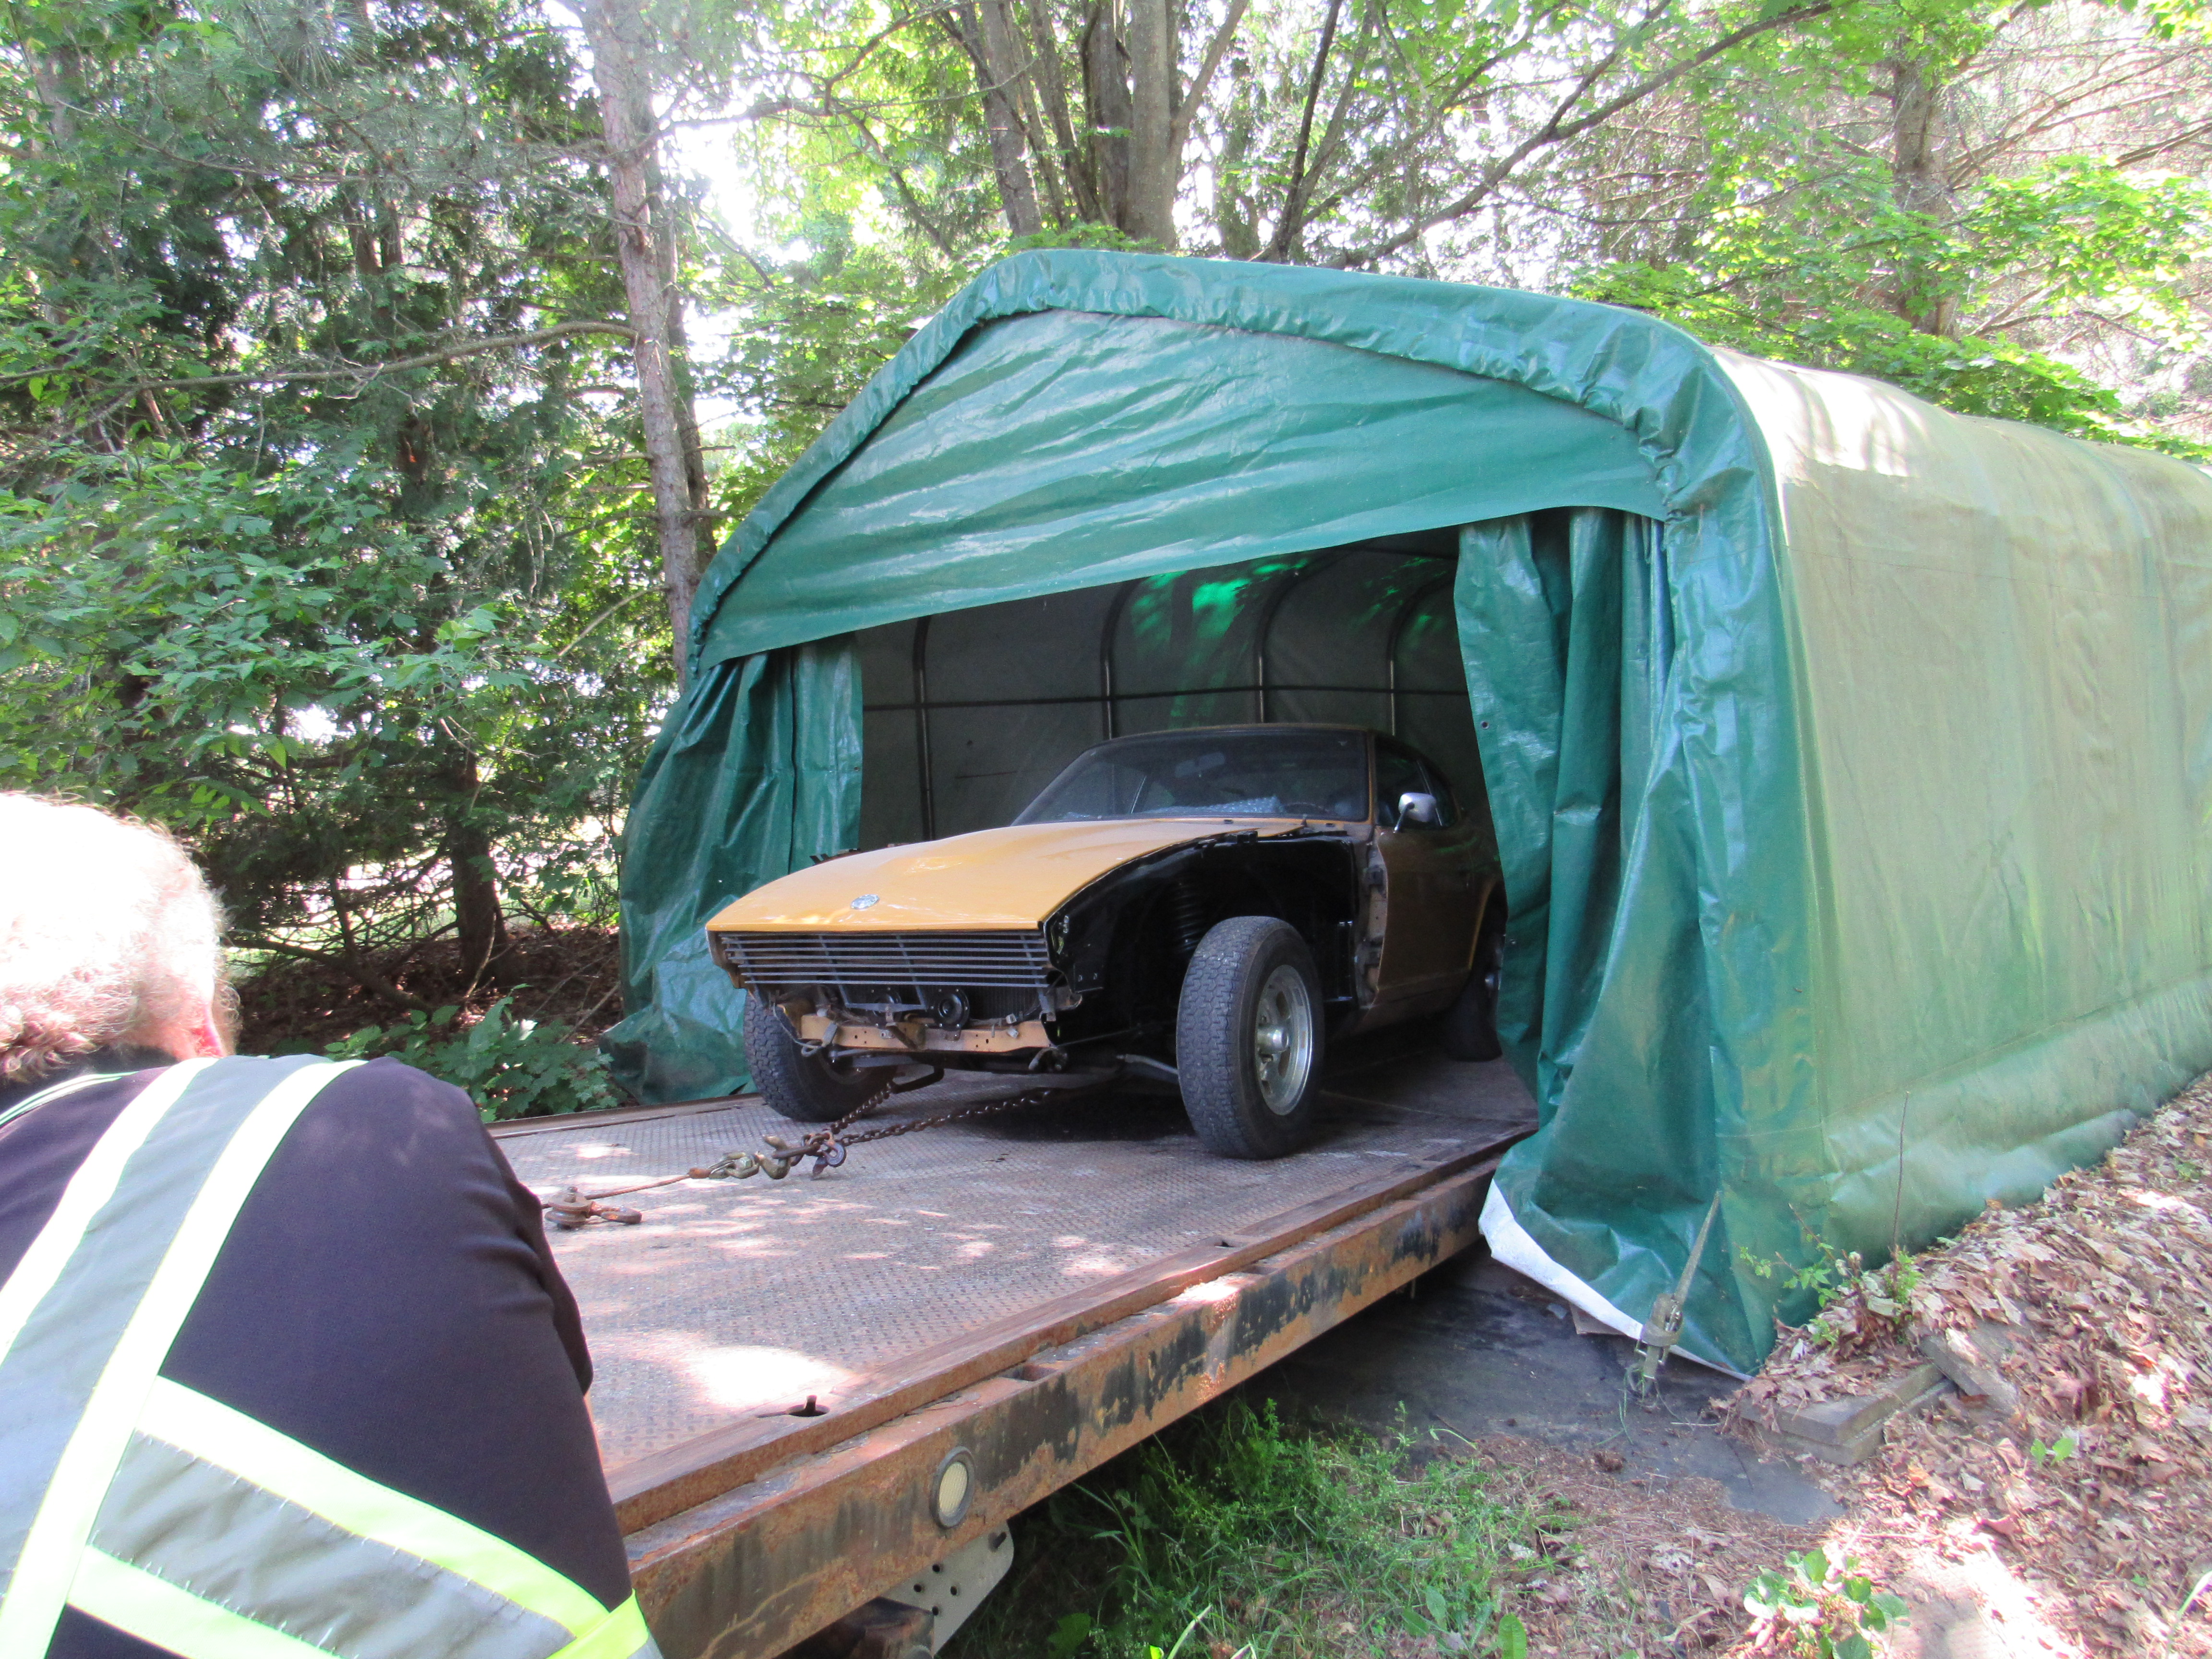
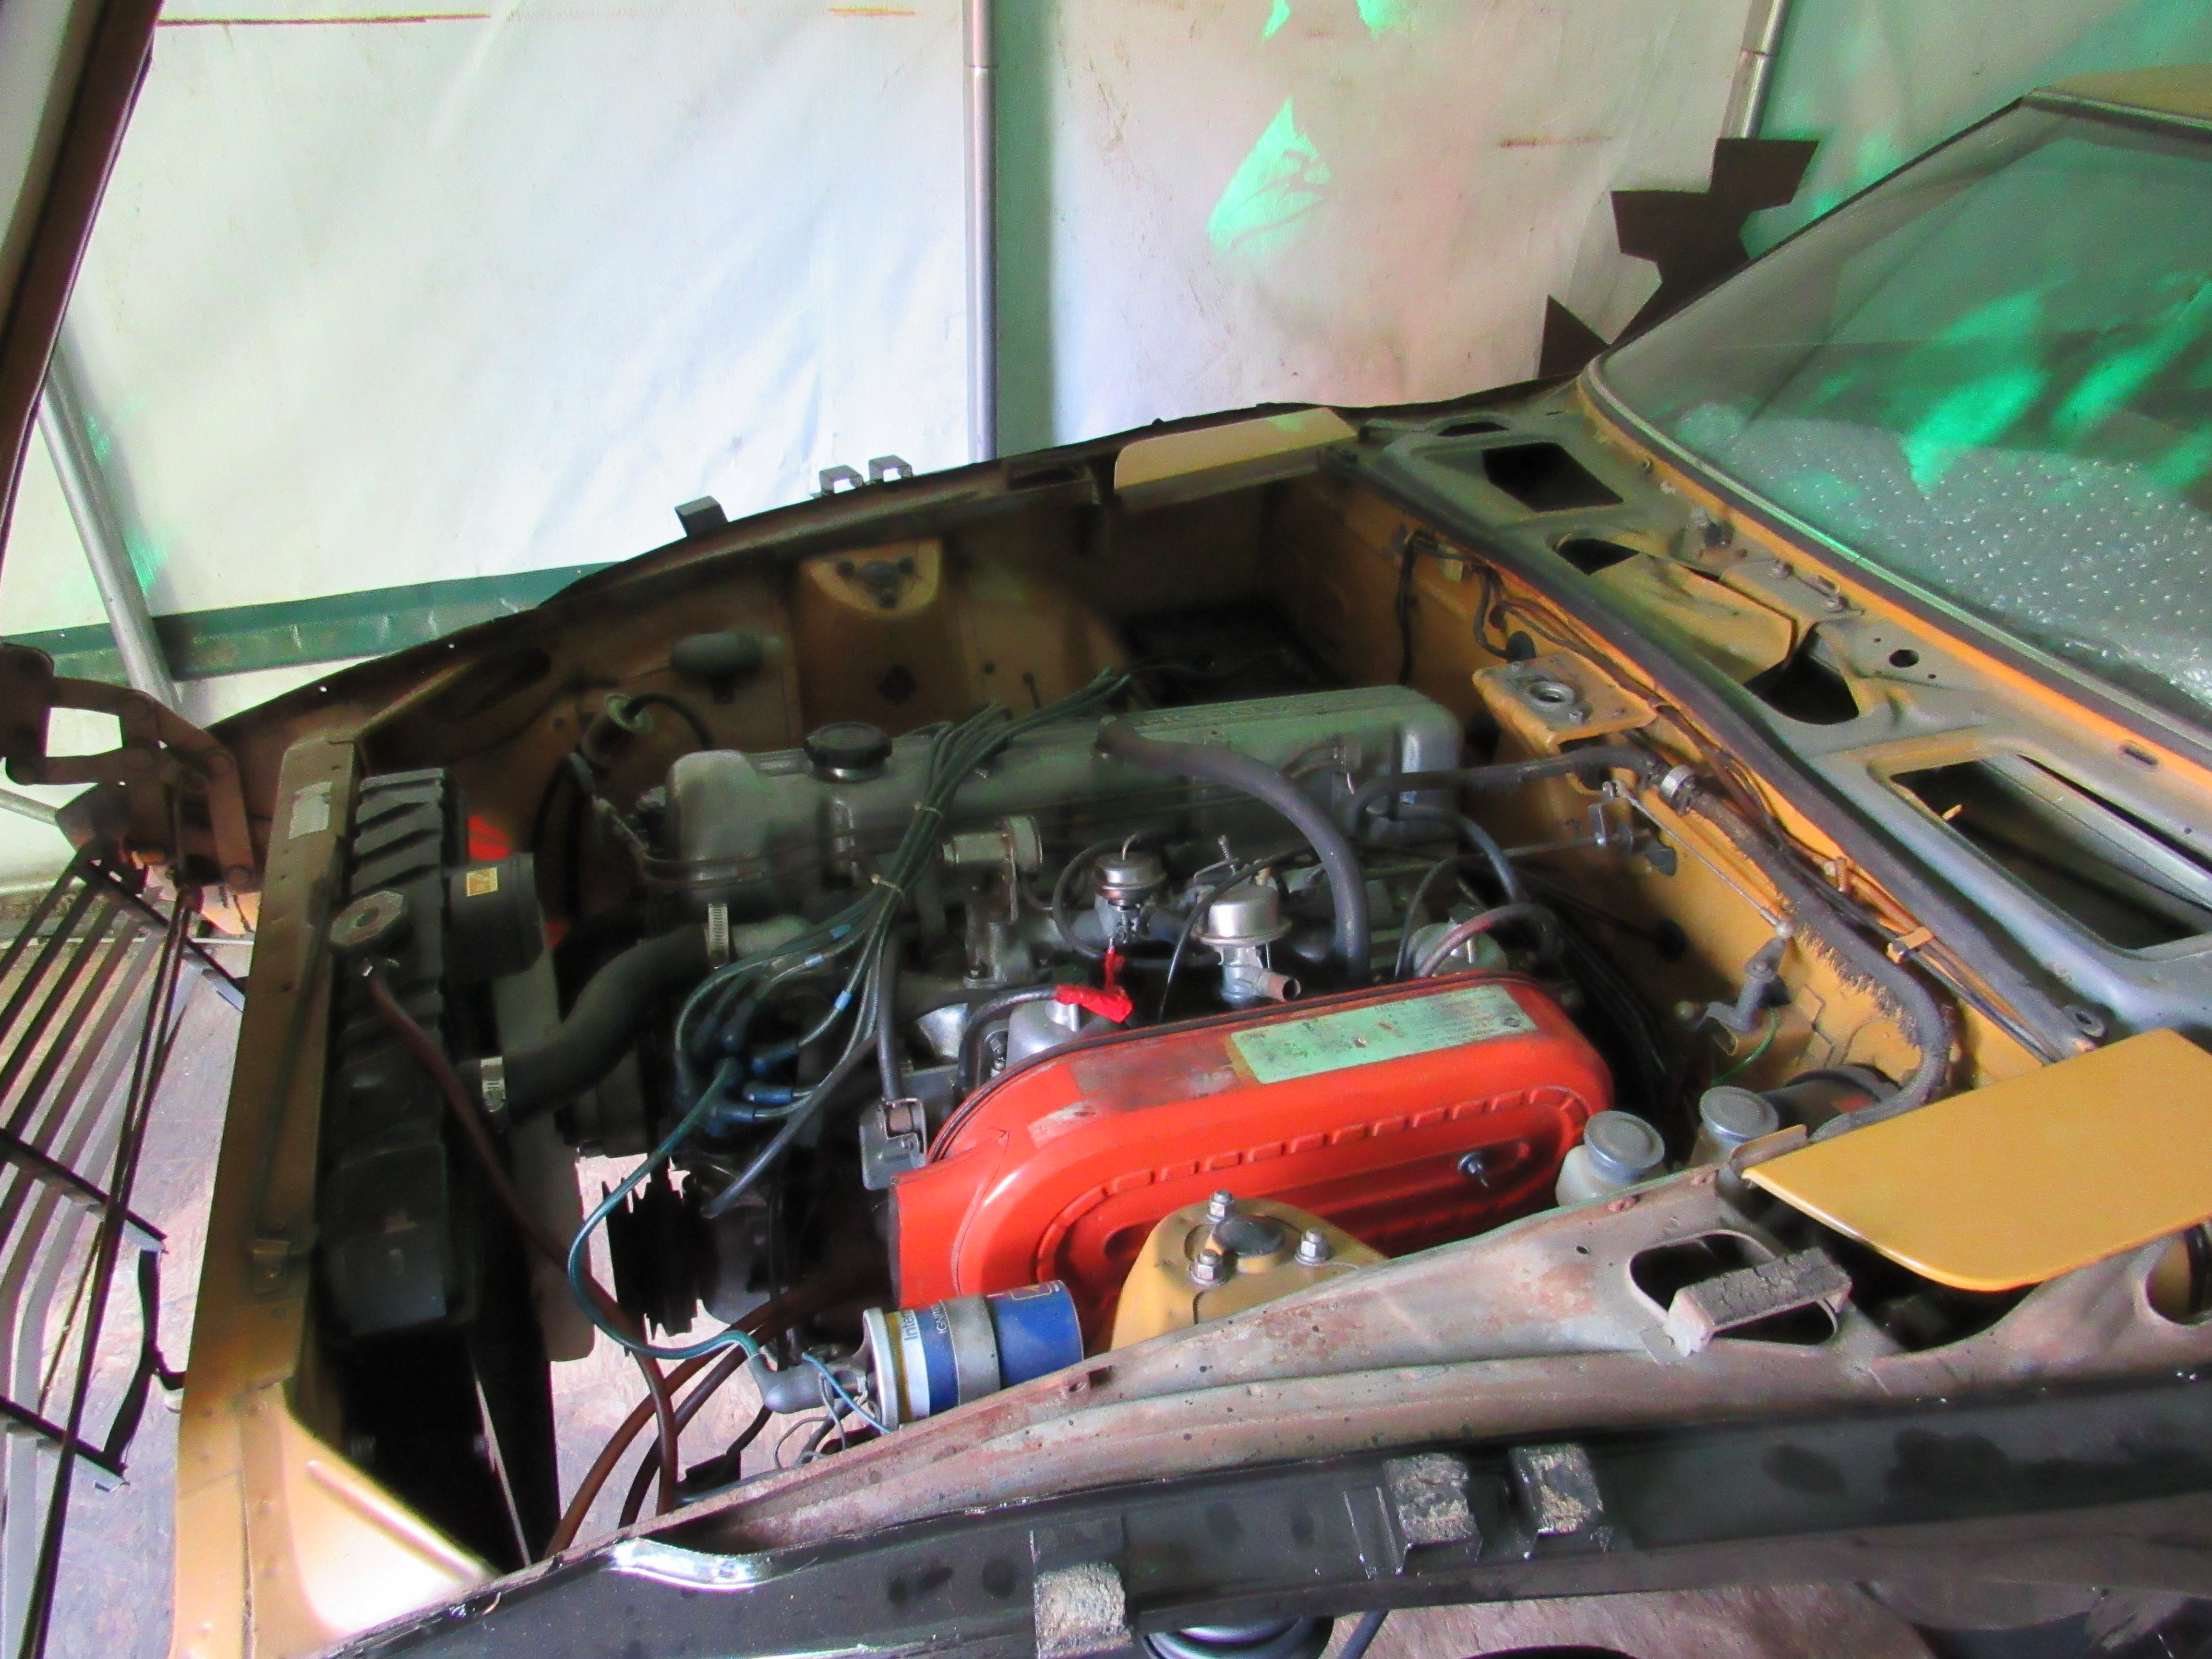
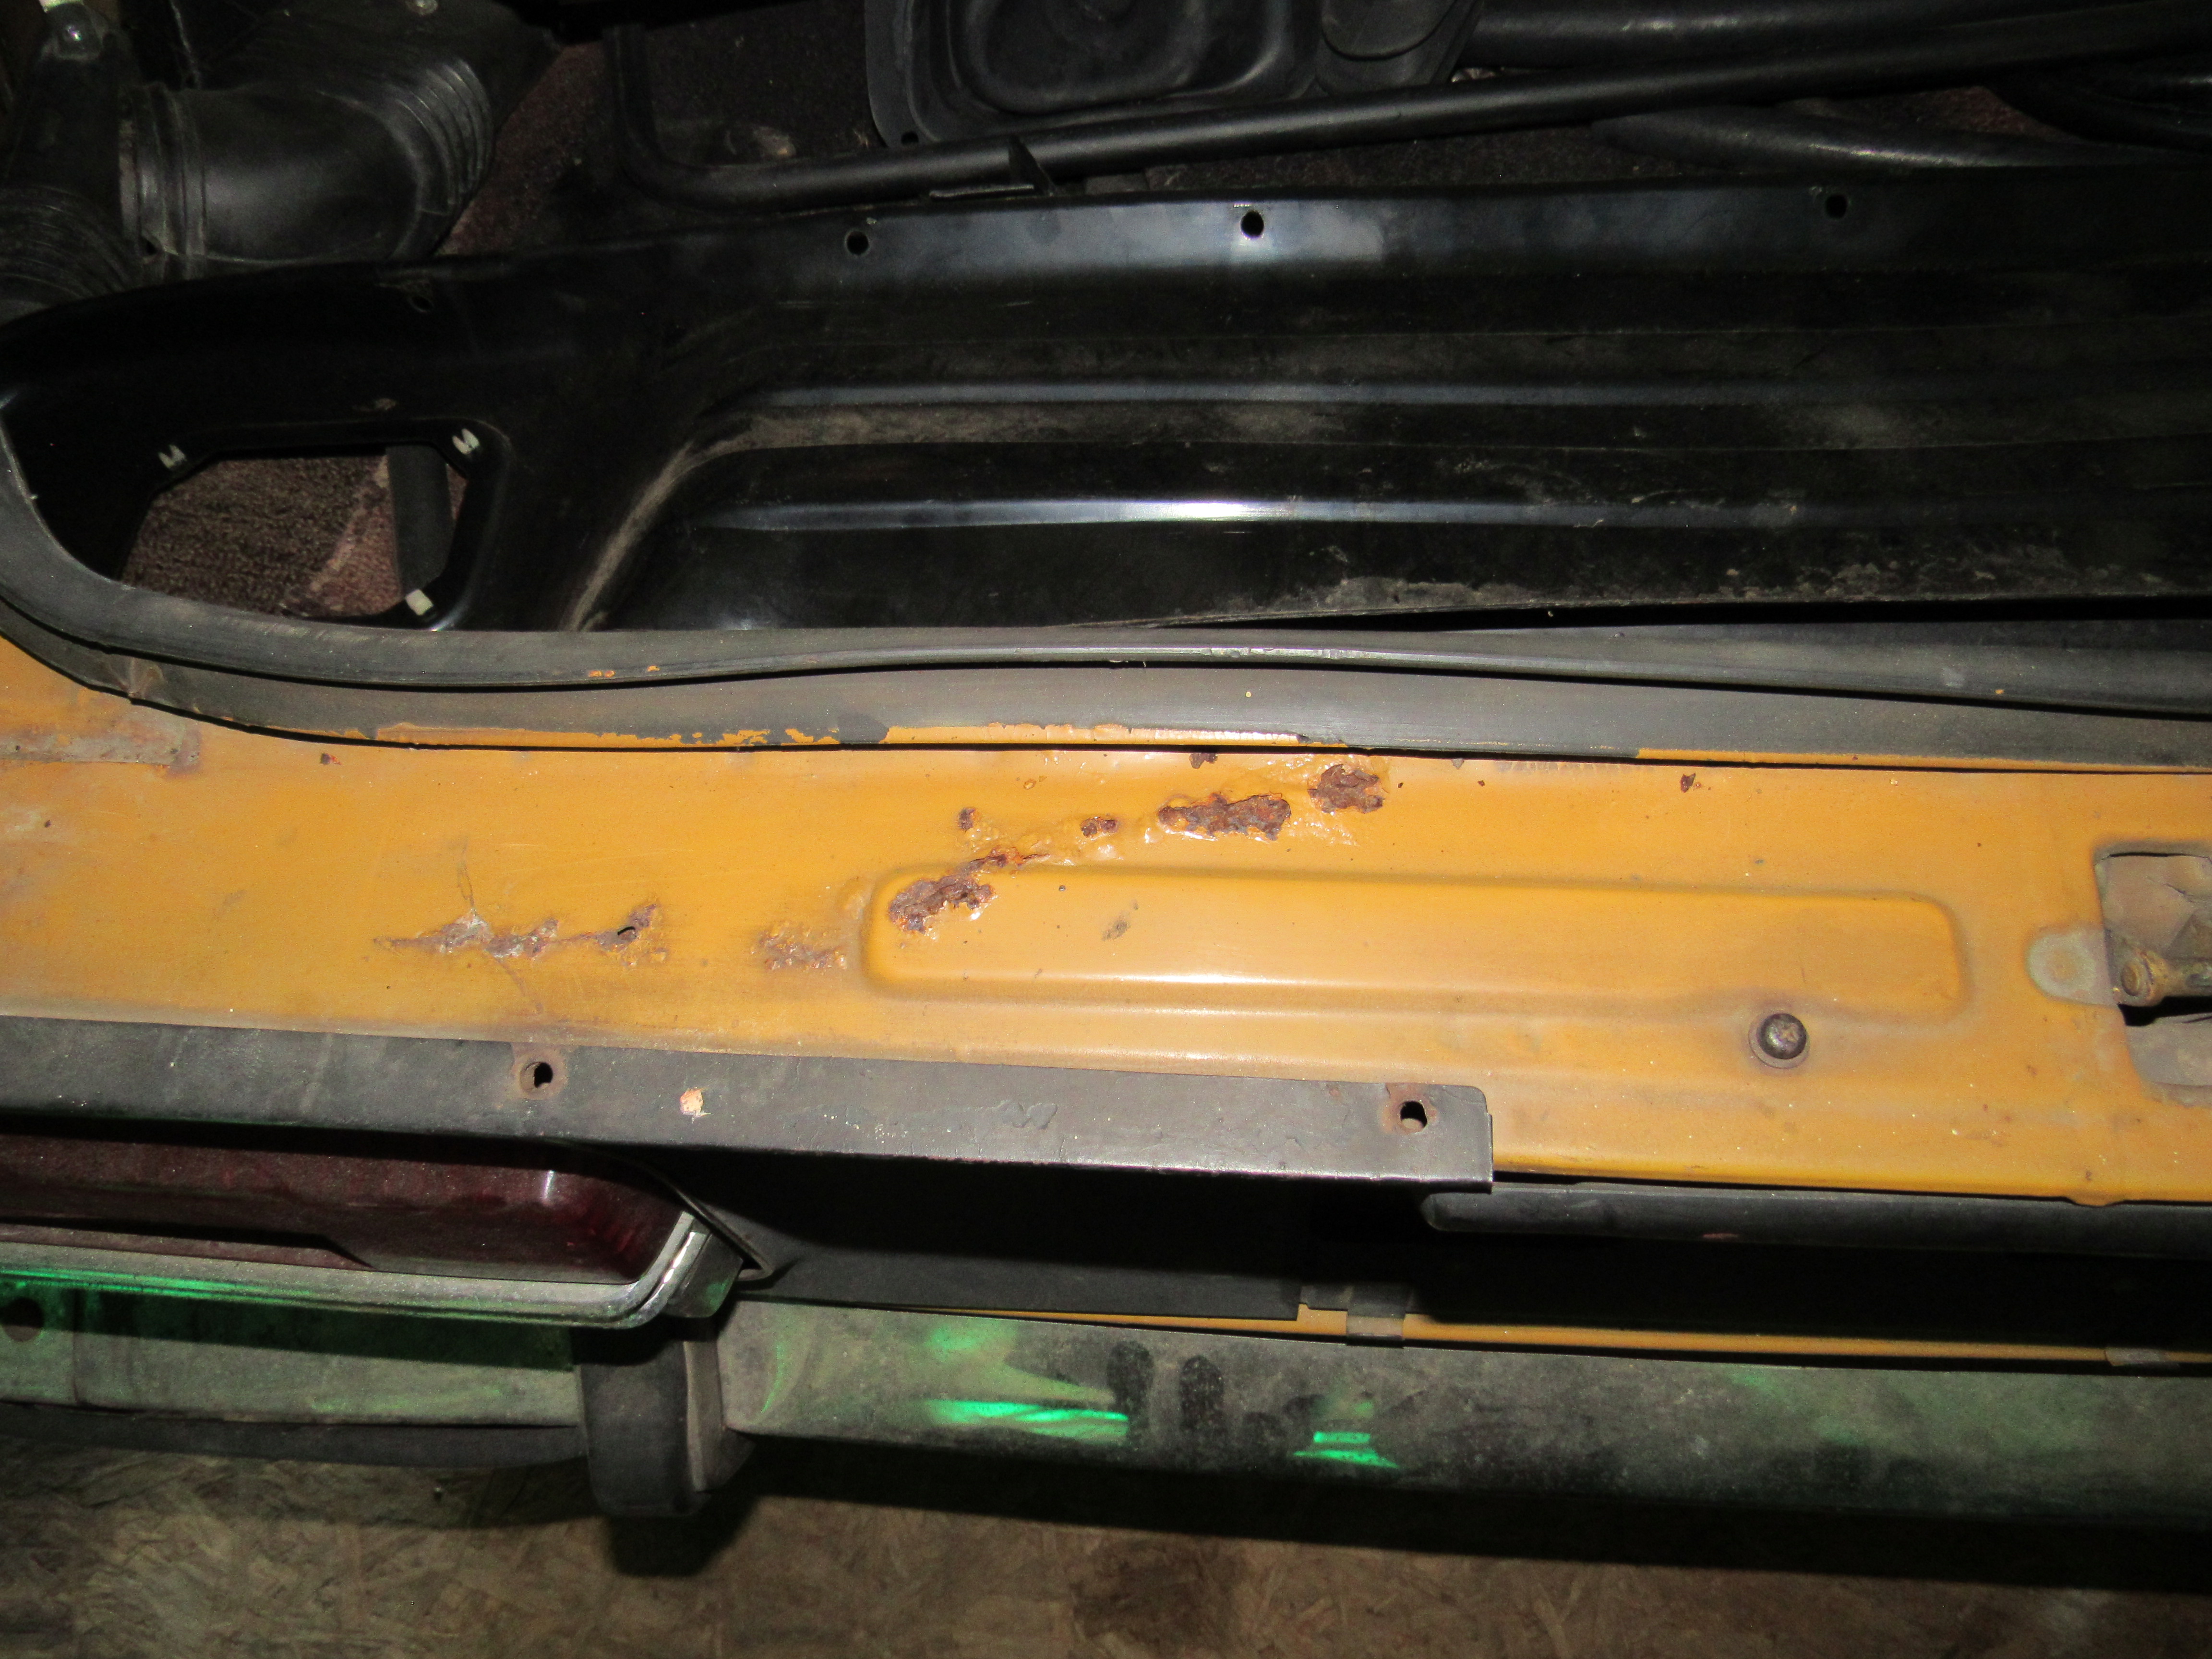
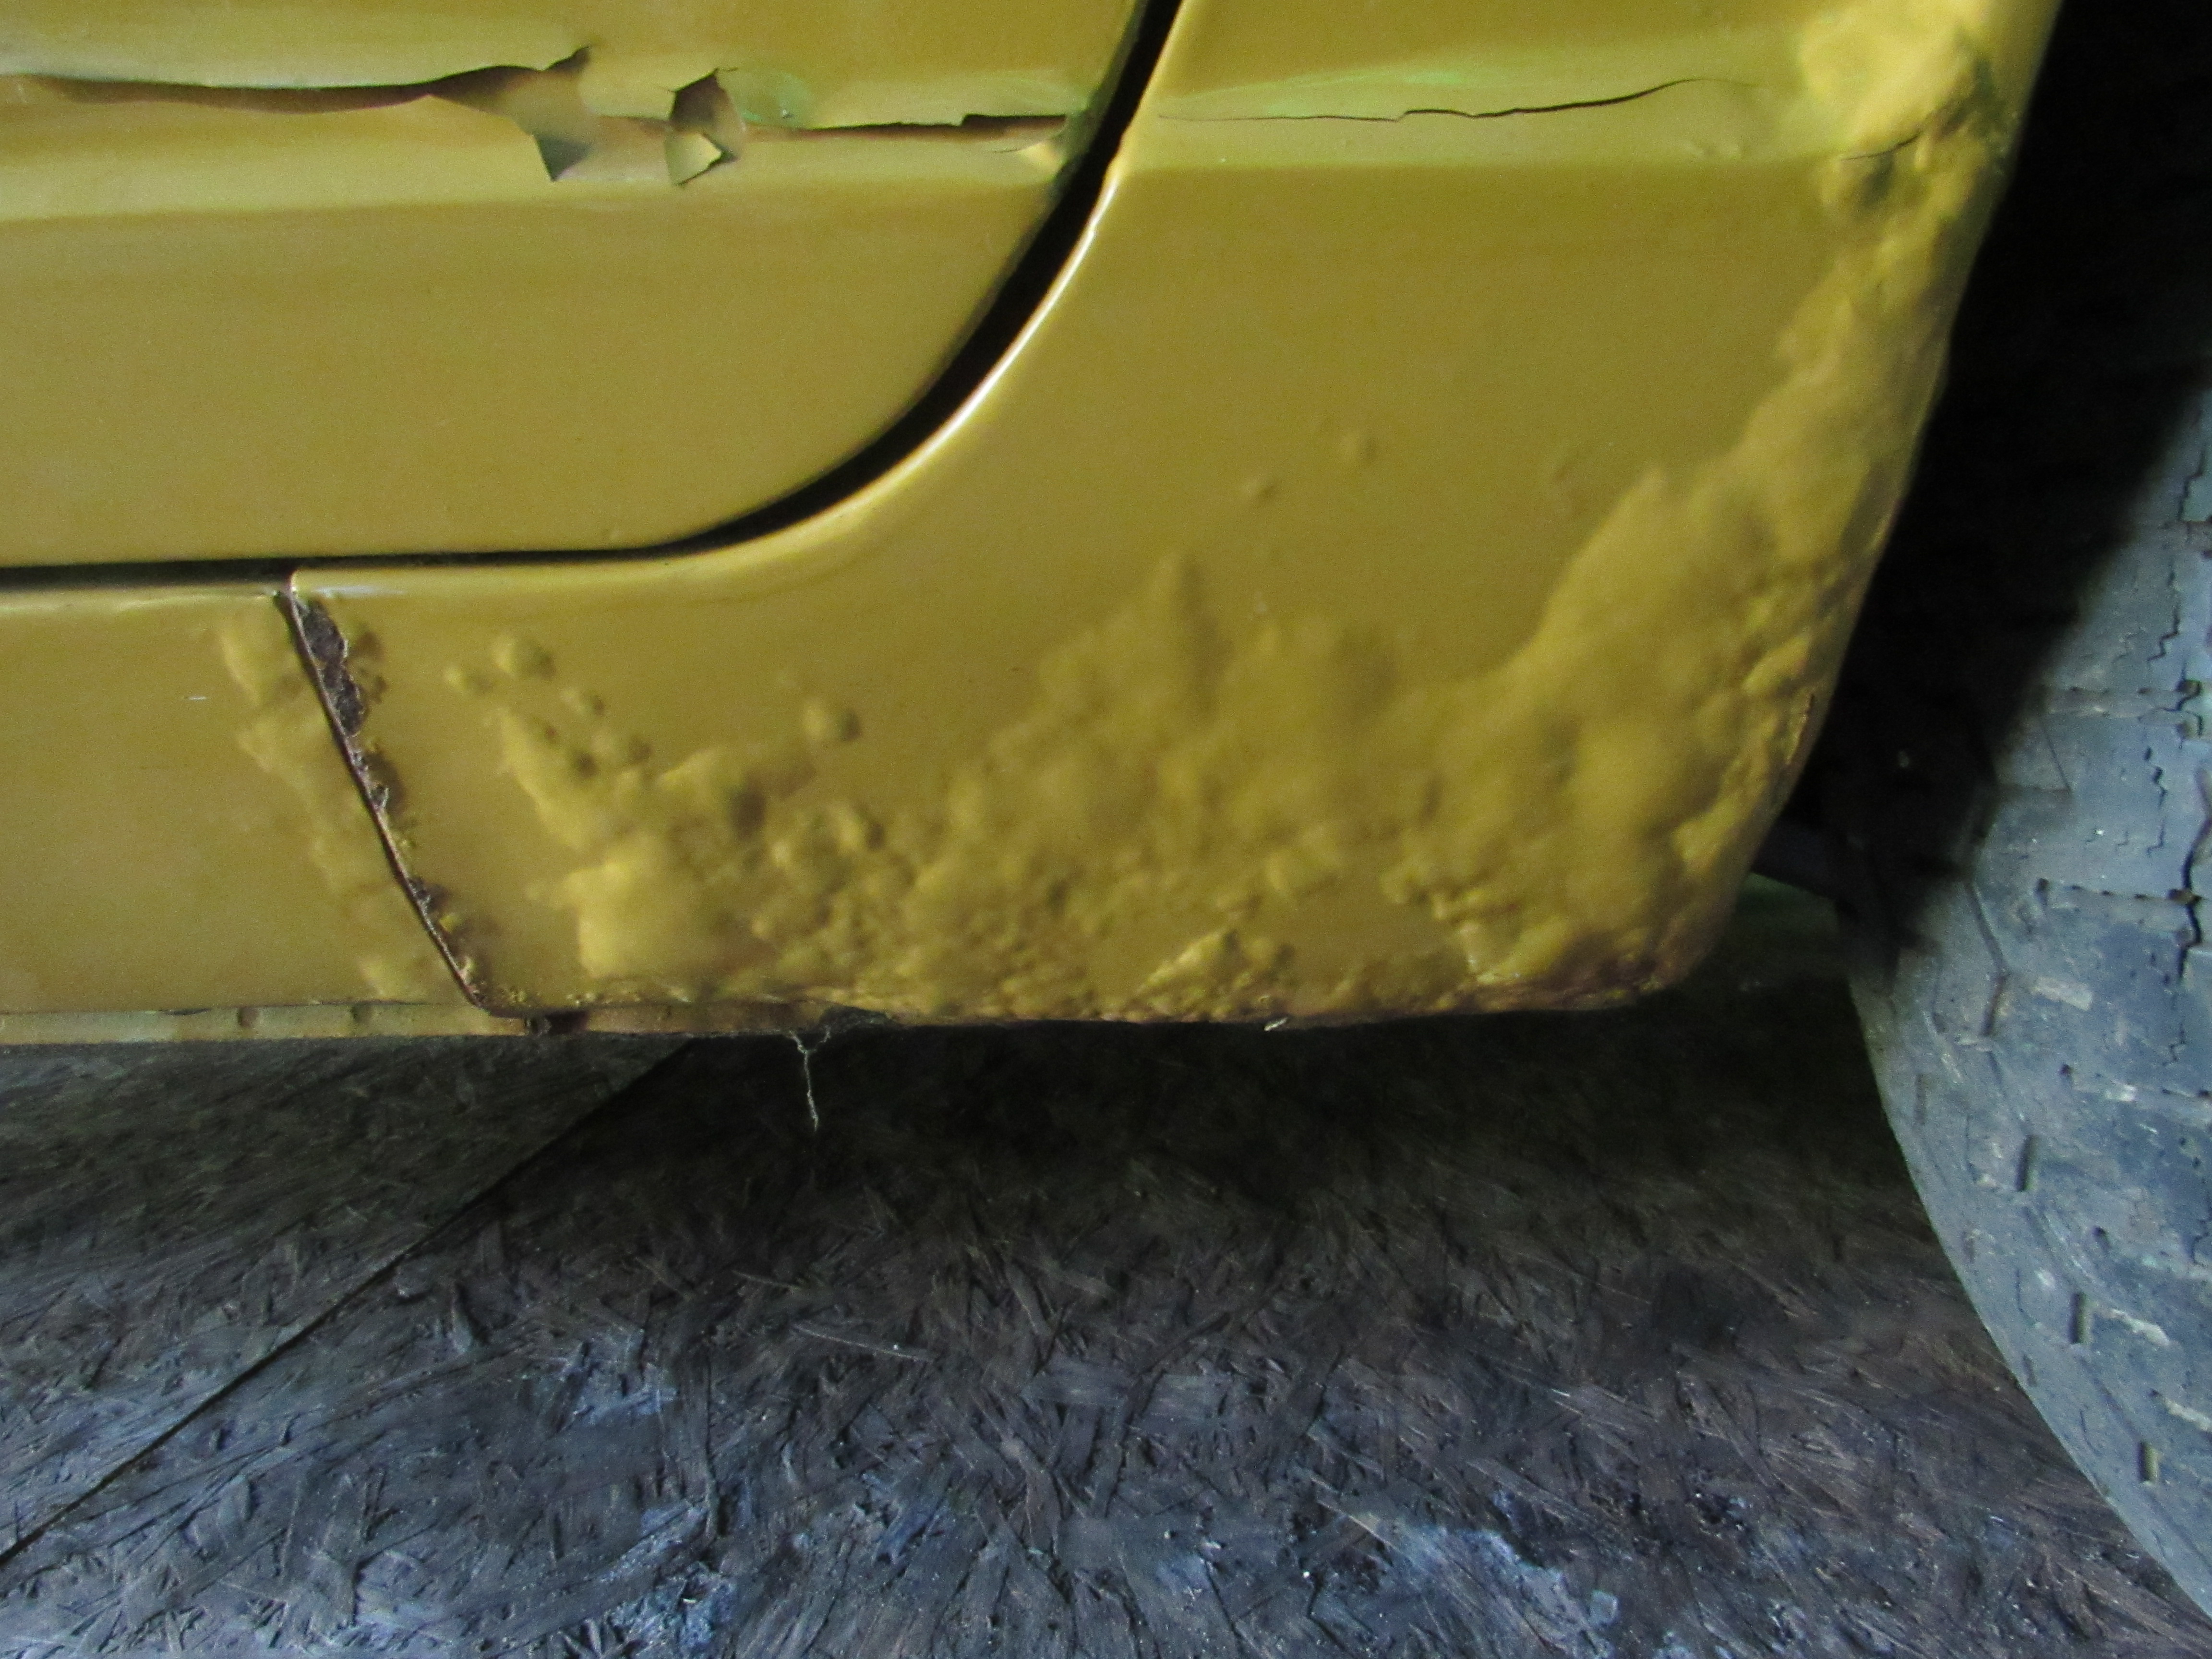
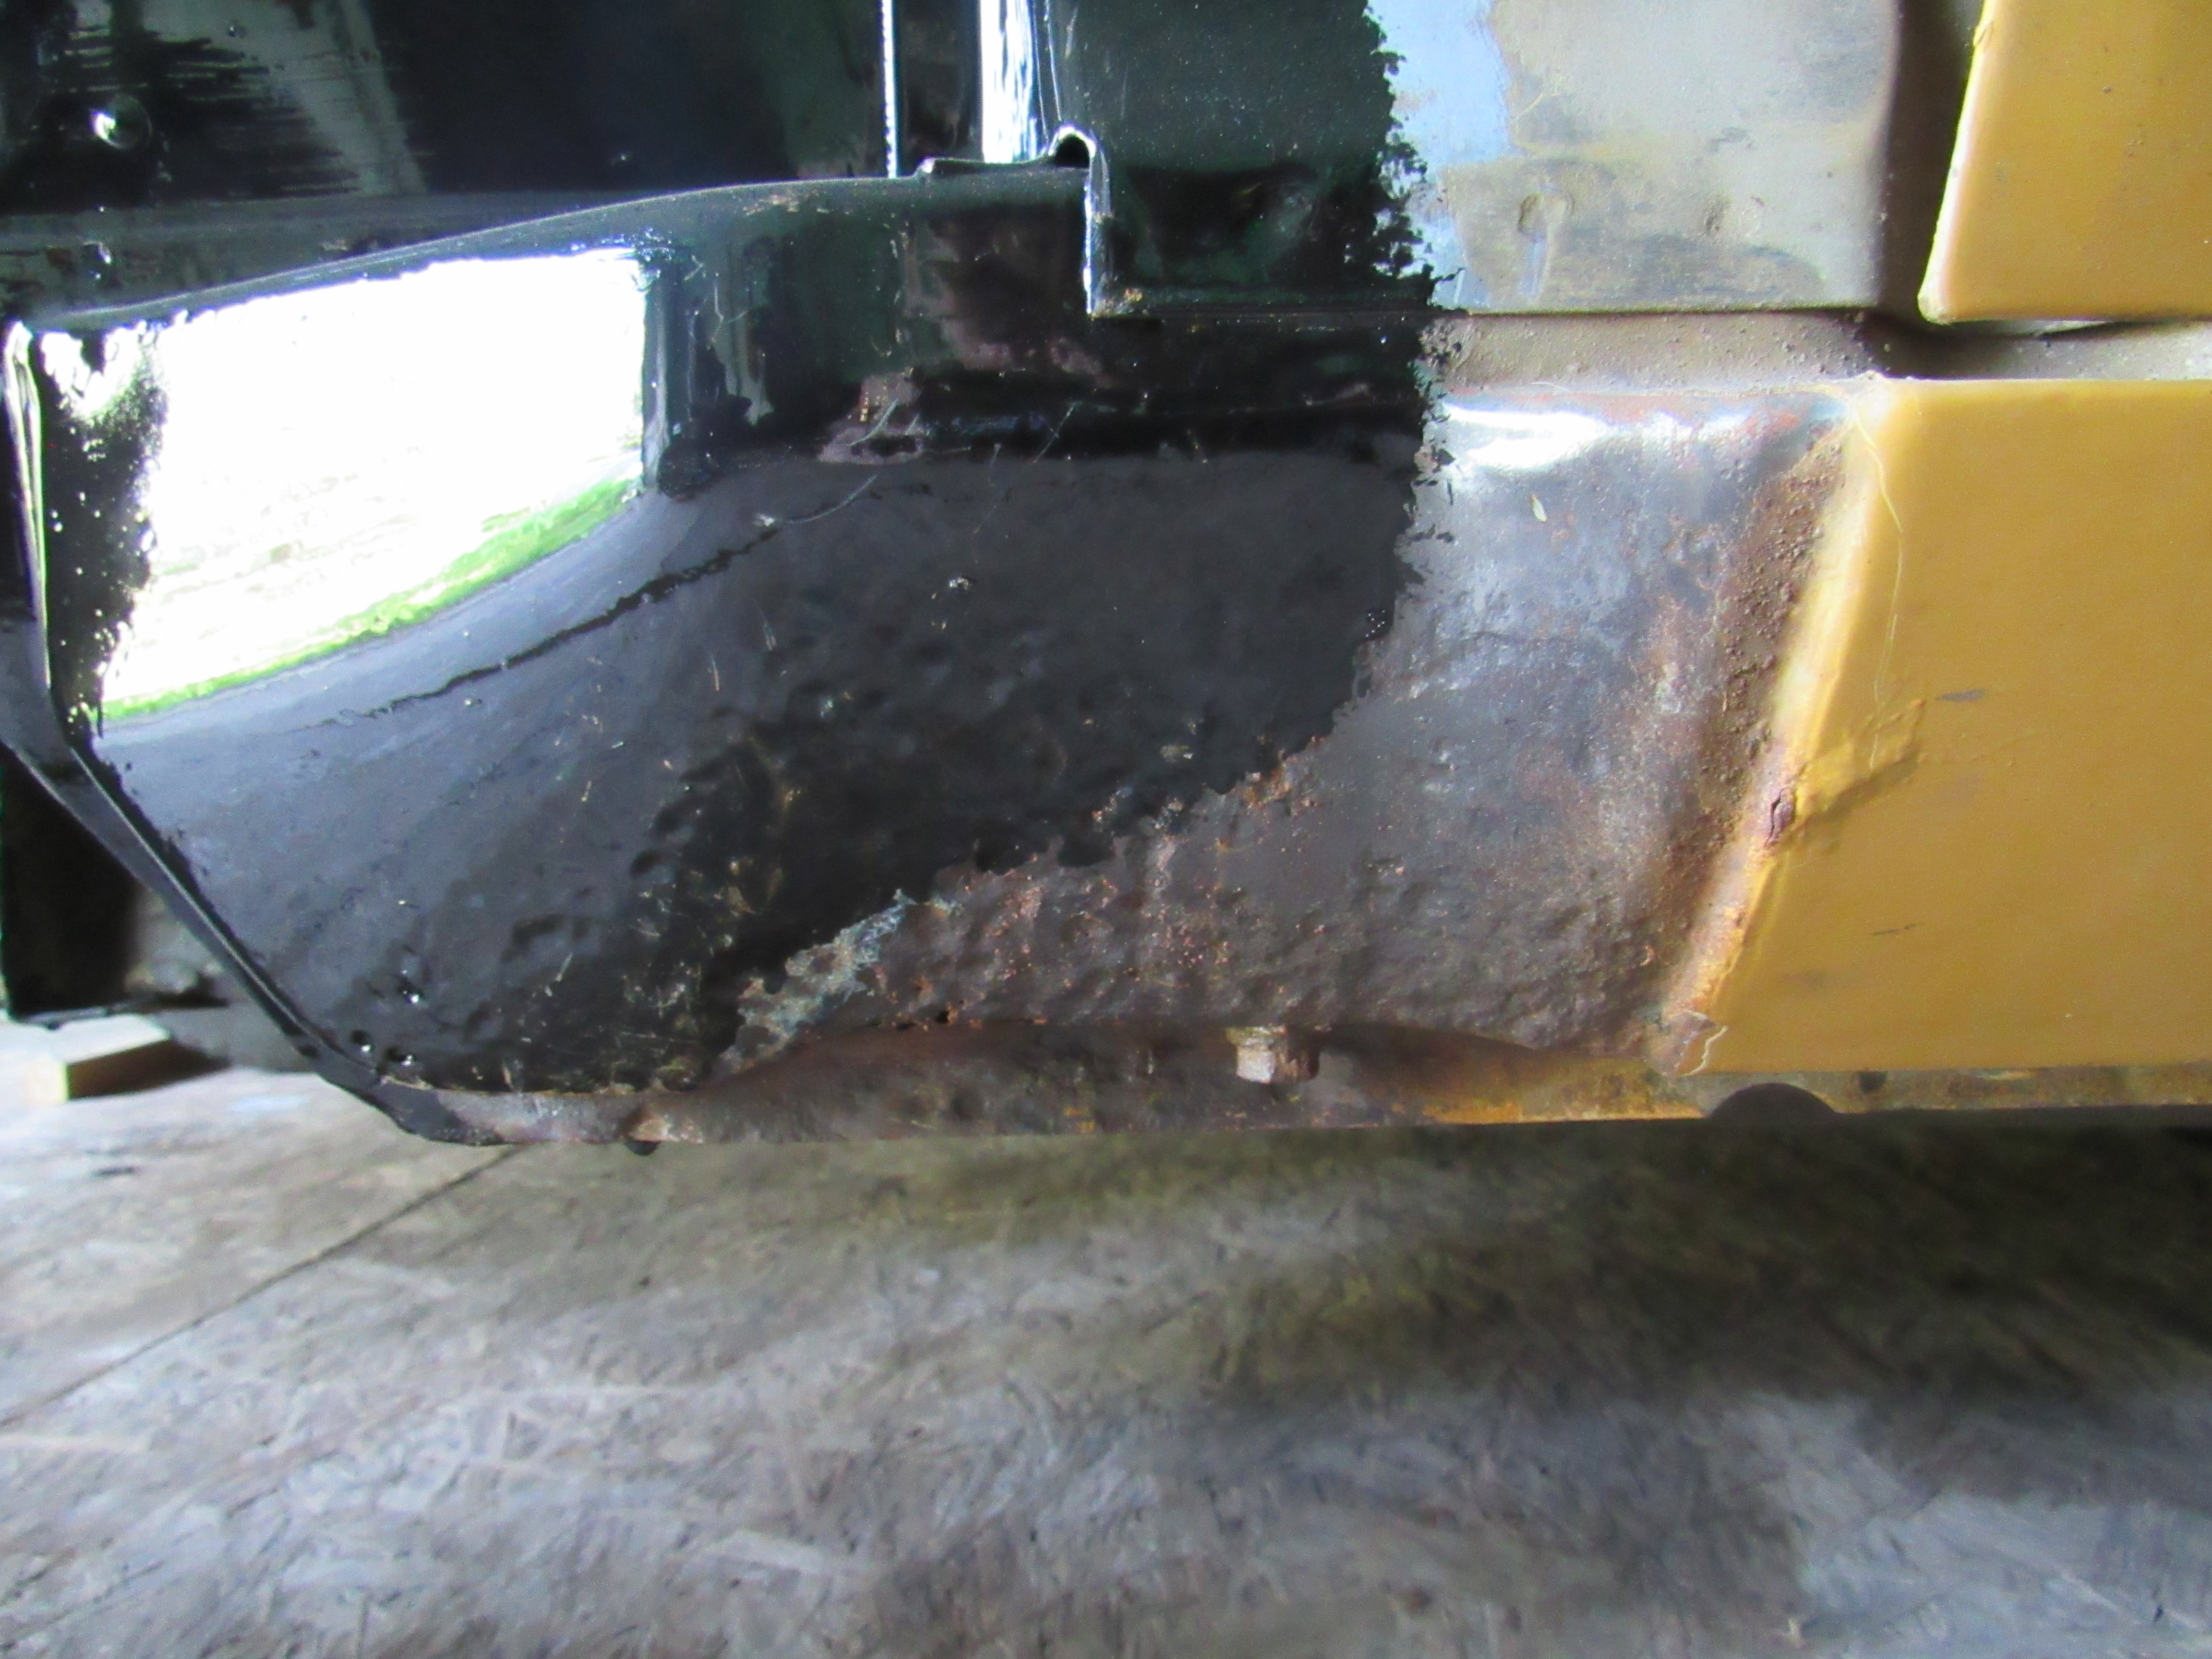
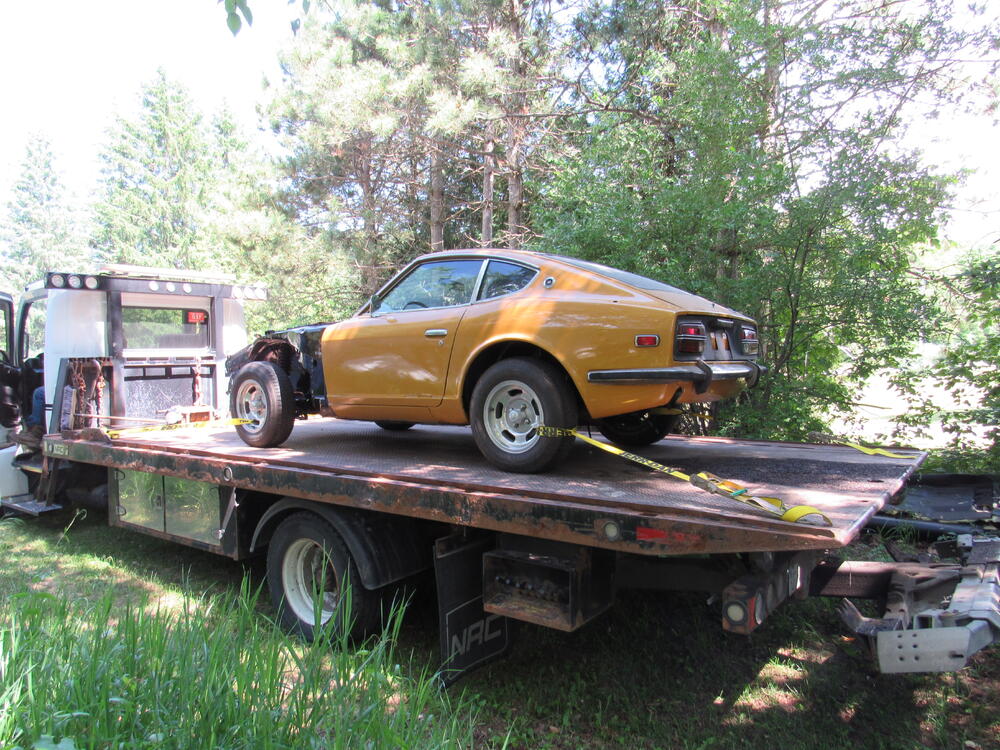
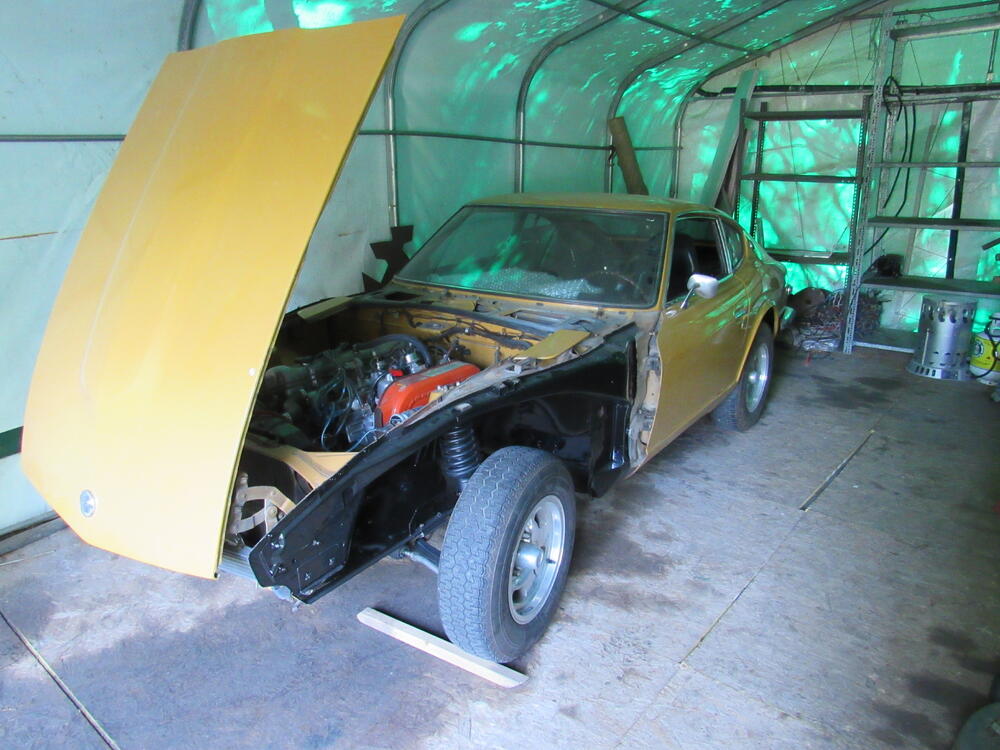
3 pointsHey guys, back again with a new project! I'll let Dave fill you in on all the cars history but over the next nine months will tear her down and address all the issues that haven't been tackled already. From what I understand, over the last couple of decades Dave has been working slowly restoring individual parts and doing some body work. He has done some very nice work as you will see, for right now I'm going to take stock of what still has to be done and make a plan for this winter when I'll bring it into the shop for rust surgery. At first glance it has rust in all the usual areas but overall is a good candidate to become a very nice driver. After we backed it down off of the flat bed and into its spot, I opened the door and was greeted by that lovely musty old car smell, dried mould, stale gas with a hint of mouse pee, Glorious! I hadn't realized how much I missed that scent. Just a few pics to start with and many more to follow.


 3 points
 -
It sounds like you have already removed the head, a compression test before tear down would have answered a few of your questions. I have deglazed cylinder walls on L24-28 engines before and installed new stock rings on original pistons with good results but those blocks were only slightly down on compression and had consistent numbers across all cylinders. If your cylinder walls are truly polished with no signs of crosshatching then you are probably looking at a rebore. At this point you will have to do some careful measuring with a bore gauge to determine where your cylinders are compared to the specs, you also might consider picking up a good used L28 and installing that.3 points
-
I agree with the others on the wall condition. Vertical lines would concern me. Possible ring scratches or skirt dragging. Also the mottling at the top of the cylinders concerns me. Not really sure what that is, possible corrosion damage? I absolutely agree with Racer, that its hard to tell what the engine really needs with out Mic'ing it. Also be careful on grinding the crank. I had a hard time finding over sized bearings on a L20 build2 points
-
How can any competent machinist say the crank needs ground, or the cylinders need bored, if he hasn’t actually inspected and measured them? A domed piston will net a higher compression ratio, not lower, requiring even higher octane fuel. Why not use pistons with the same top configuration as the original? Also, using EFI or carburetors won’t make any difference regarding compression ratio and fuel requirements. It will still be a fuel/air mixture entering the combustion chamber.2 points
-
The seller agreed to lower his price to $400 for the set of 4 and meet me around 30 miles from my home so I decided to go ahead and purchase them. I figure they will be a good winter project.2 points
-
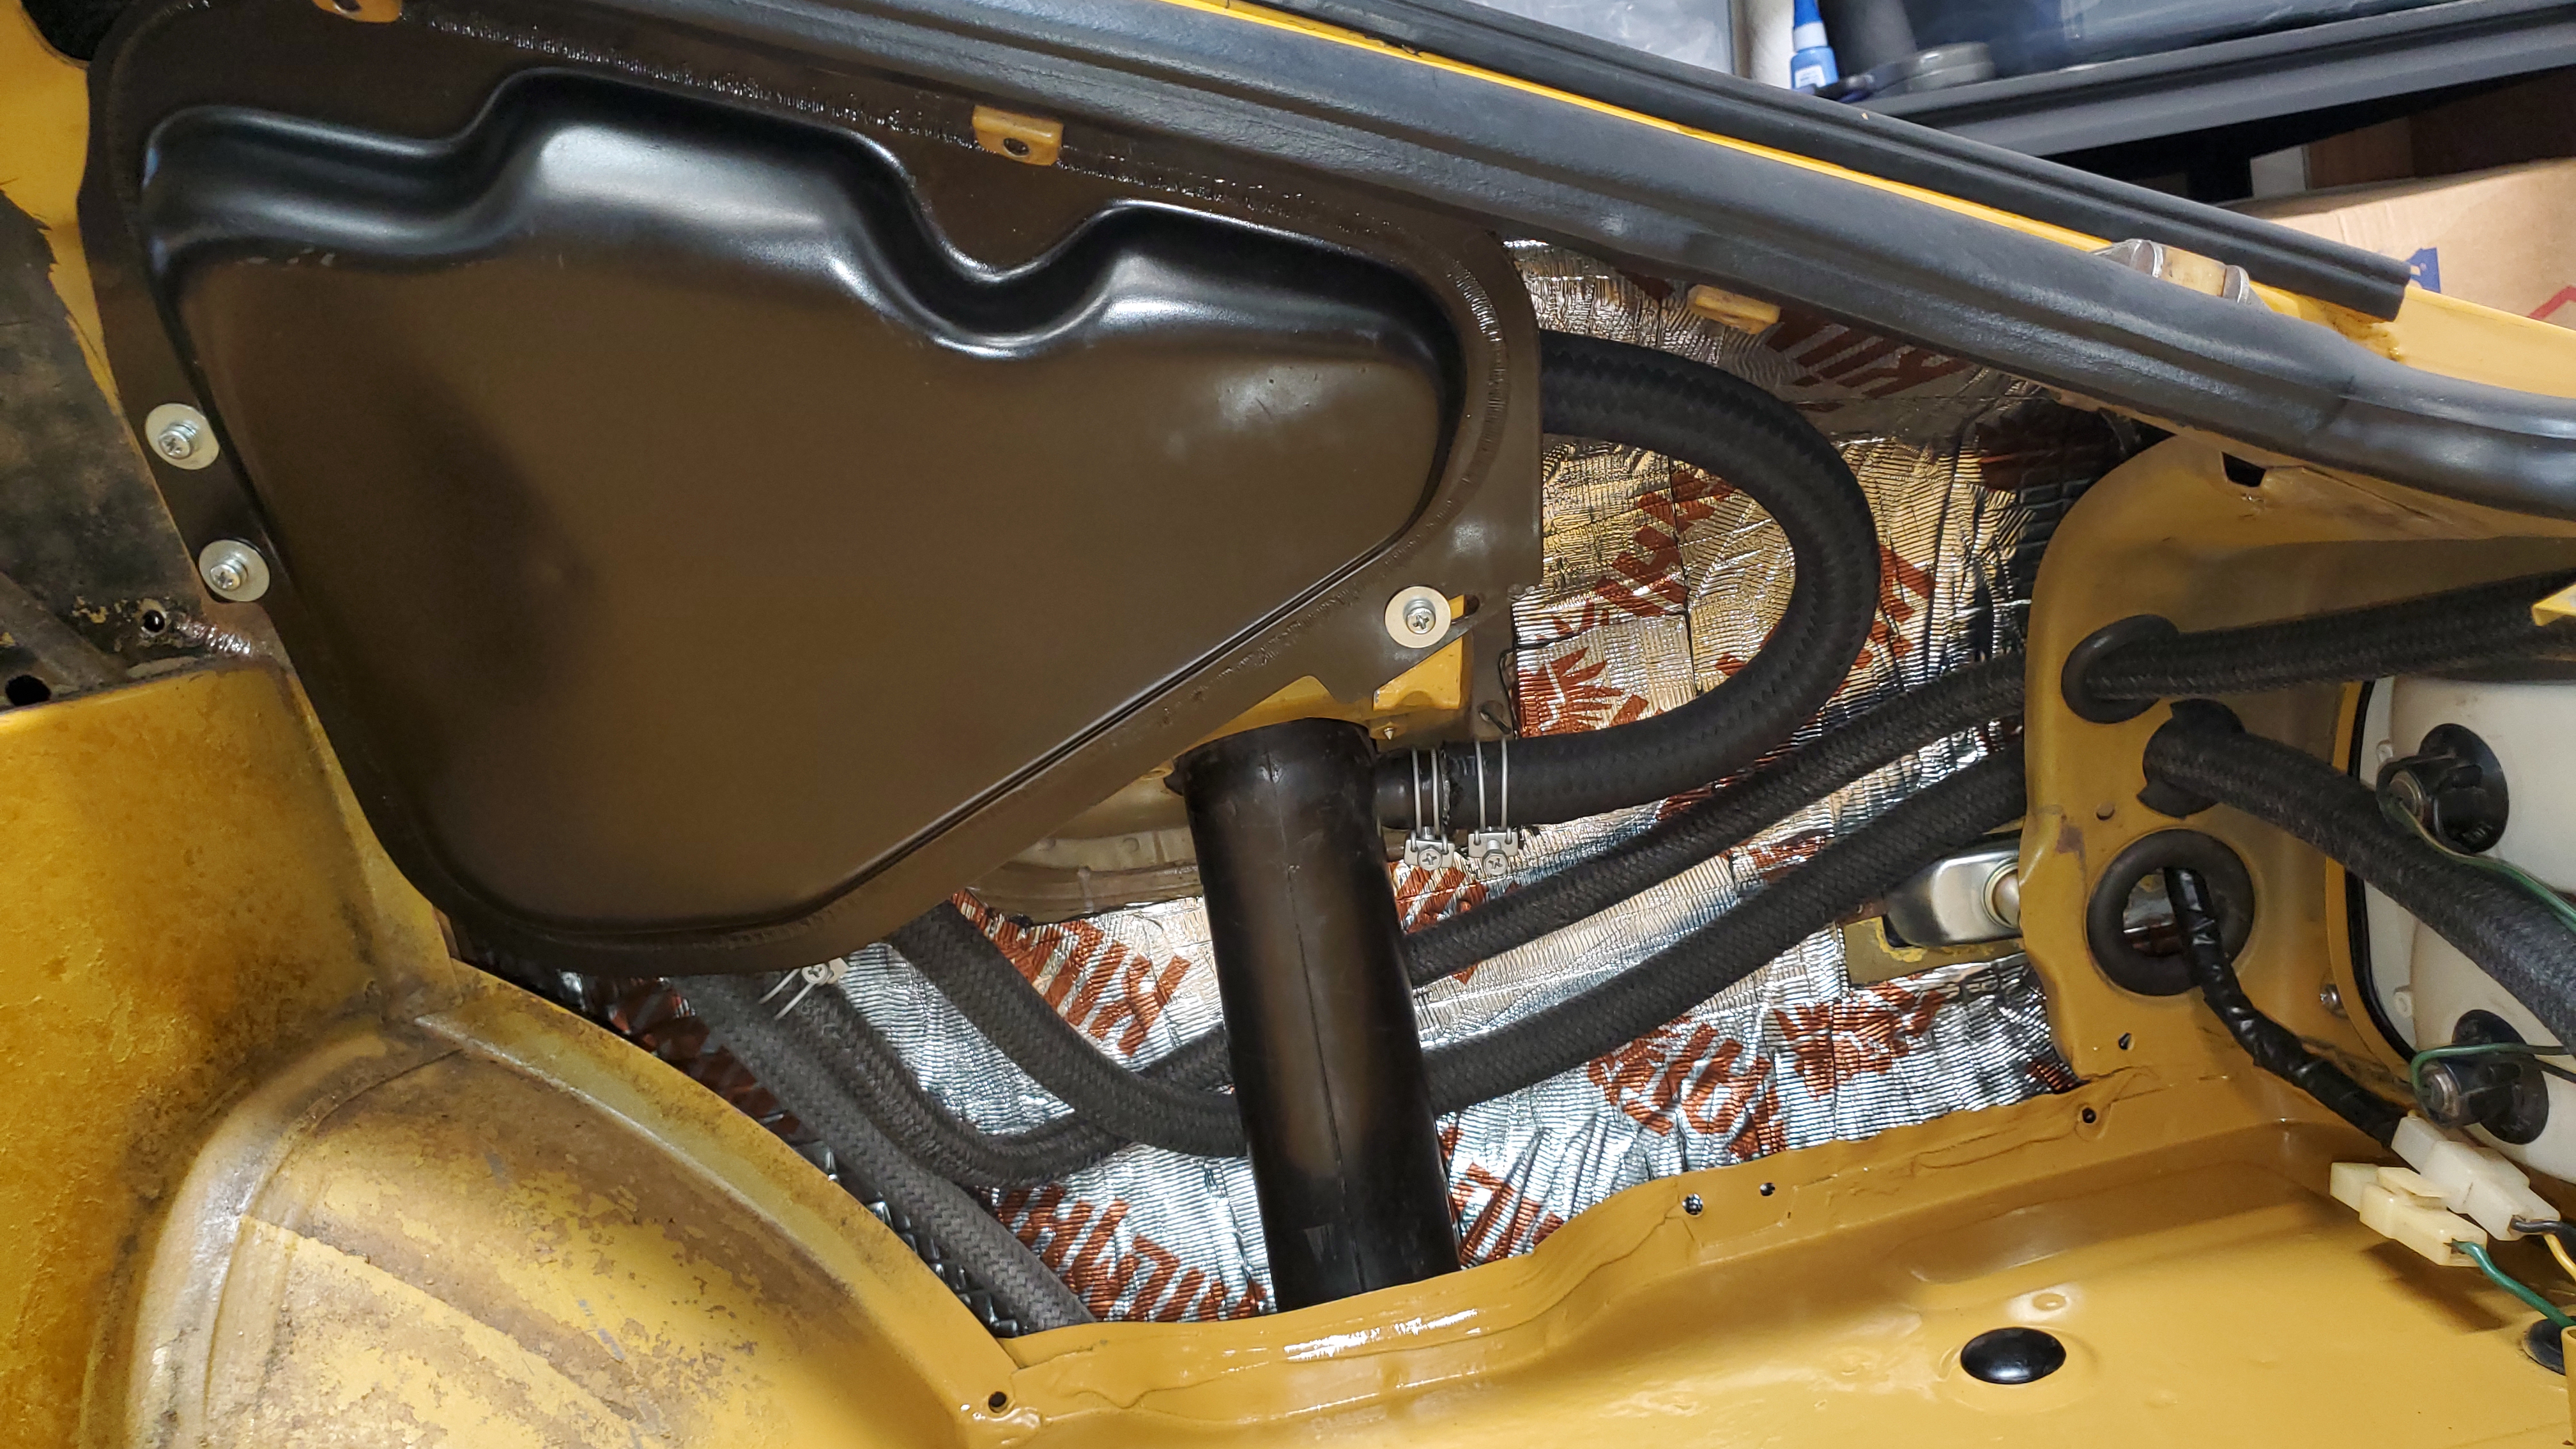
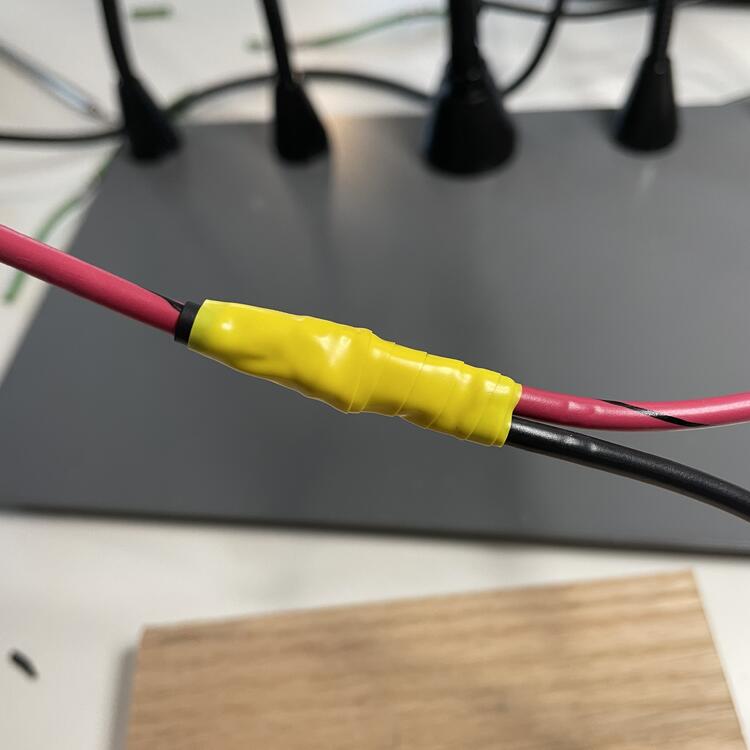
2 pointsI started assembling the body harness this week. I figure if the thicker insulation of the marine wire is going to be an issue it will be in the dashboard. The body harness doesn’t have to get crammed into a tight space the way the dash harnesses do, so I’m safe on this one. I’ve cut the 15 main wires that come from the two connectors at the firewall to the same length as the original wires plus an extra 14 inches to allow for putting on my connectors and any discrepancies in my measurements as I go along. For splicing I’m referring to a guide that my dad pointed me to. It’s a supplement written by Ford for for techs to work on ambient lighting in trucks and has some good diagrams for various types of splices. Here’s a PDF: 2013_truck_ambient_lighting_9-25-2012.pdf Some of the splices are a little chunky for my taste, but they’re super strong even without solder, so I’ll continue referring to it. Here’s a finished Center Splice (the first example in the guide) connecting the door switch to the wire running to the room light without cutting any wires: I’m using heat shrink on these to seal them up, but I’m also wrapping them with tape in the same colors Nissan used for referencing purposes. This particular tape came from Identi-Tape and is really nice and would probably be enough, but I have the heat shrink so I’ll use it too.
 2 points
 -
Today I removed the fusible links, and rewired the two circuits. The first link was fed directly from the starter, then that one goes to the shunt, then that feeds a connection somewhere under the dash, that then comes back & goes through the 2nd link. So, I eliminated the feed from the starter to the fusible link #1. Ran a new feed from the battery to the secondary panel, then added the output from the fusible link to a fused connection. Added a Maxi fuse to replace the second fusible link secured the Maxi fuse holder to the cover. While I had the harness open, I decided to add the H/L relays. The high beams didn't work at all, until I futzed with the connectors under the column - the withe one on the bottom left, and the black spade. Offloading this circuits seems like a very good idea Cut 4 wire circuit to headlights - Red: R/S +, Red-Yellow: L/S +, Red-White: High Beam, Red-Black: Low Beam relays fitted under relay box Harness spliced - original bulb feeds now feed relay coils for H & l added the fused relay feed (30) - need to get more lower amp fuses though, all I have left are 50Amp, so I'll swap that out later function test before wrapping wrapped cleaned up starter connections, just main cable & (30) to starter relay2 points
-
2 pointsNice to have you back again! Looking forward to your always-insightful assessments and always-creative solutions.2 points
-
1 point
-
There is more to this than just compression. Bore, stroke, cylinder head prep, camshaft lobe profile . . . . You can't go wrong by sticking with the same setup the engine had to begin with. You're in California. There are a couple of knowledgeable and competent engine machine shops that are experienced with Datsun engines there. Rebello is the first that comes to mind. Also, the guys at Z Car Garage should be able to point you in the right direction.1 point
-
If it was my project I would put a list of parts needed together, with costs. Add them all up and compare to what a good used engine will cost. Evaluate against what your goals are. I put a short list together of the various parts I bought for my car when I was getting it back in to shape and the final number was pretty big. The small stuff adds up quick. Here's the basic engine that you are starting with, for comparison. https://www.ebay.com/itm/145108452163?mkcid=16&mkevt=1&mkrid=711-127632-2357-0&ssspo=743dF1EpST6&sssrc=2047675&ssuid=&widget_ver=artemis&media=COPY1 point
-
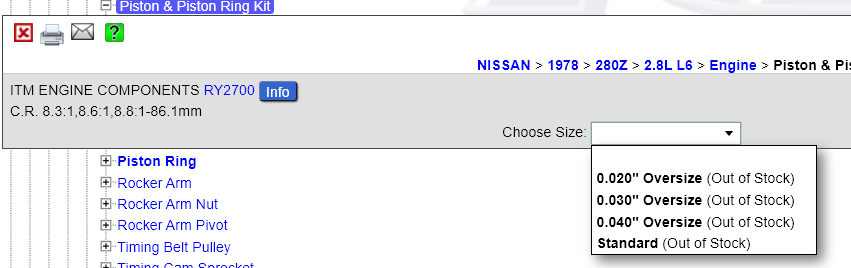
Similar conversations have happened over the last few years. You better check parts availability before going too far. Oversize pistons are not readily available. You could end up with a freshly machined block but no parts to put in it. Your engine will sit at a machine shop in out-of-stock parts jail, with a big bill waiting. I see what looks like rust pitting in addition to scoring. Looks like an expensive starting point. Probably better off to find a different used engine. They still pop up here and there. https://www.rockauto.com/en/catalog/nissan,1978,280z,2.8l+l6,1209260,engine
 1 point
 -
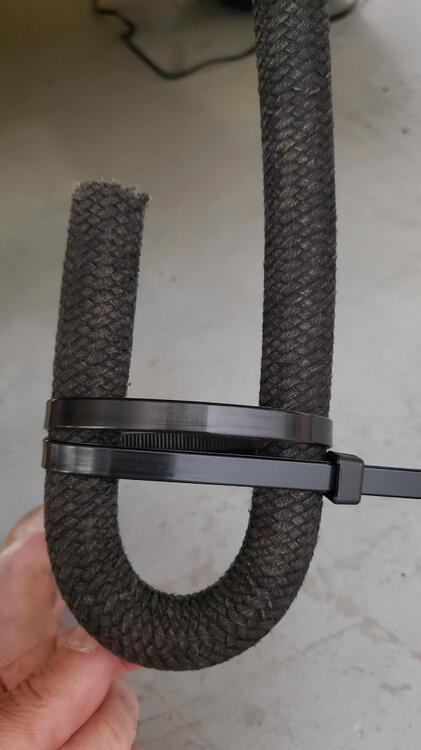
1 pointOk, finally after all this time got the hoses and the canister back in. Wasn't as bad as I expected except for all the bruises on my forearms from under the car 🙂 I was actually able to do all of it end to end without removing the tank. I pulled the shield and I'm skinny enough to fit under there and even reach between the rear body panel and the tank to get the dreaded bent hose on. There was just enough give in the body panel that i could keep it far enough away from the tank that a hand could get in there. Then used a real long screwdriver to tighten the clamp. When I get it up and started again we'll see if it holds 🙂 Here's the final product. Thanks everyone for all the advice and help along the way. And the door spring trick worked incredibly well.

 1 point
 -
1 point
-
1 pointBased on your photos, I concur with your assessment. With Relay A gone, you have no problem with the alternator upgrade.1 point
-
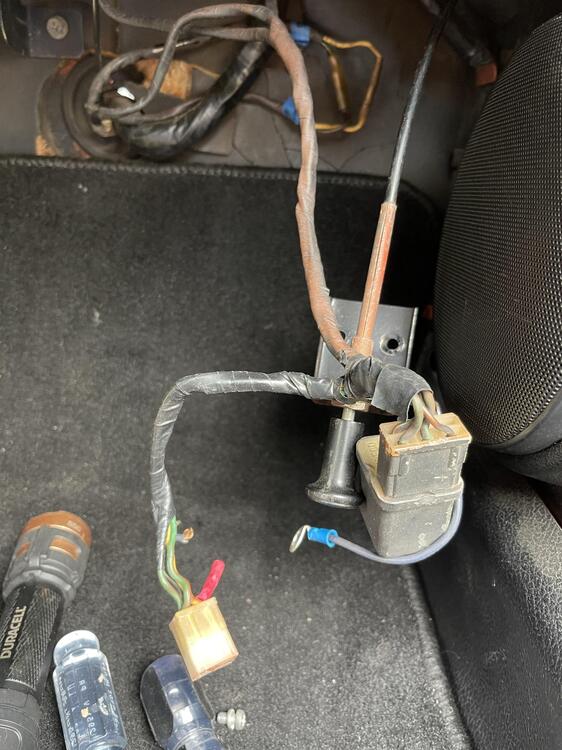
1 pointOkay, took some time to cleanup the relay bracket, some were screwed in the wrong location, and labeled them. It looks like relay A is missing, but B is there. This must be part of the fuel pump harness fix, goes out to the starter solenoid and fuse box/ignition. The relay A connector looks a bit hacked. Maybe I'll remove it altogether some day. Battery seemed fine this morning, engine cranked over as usual. Thanks for the help! Ken

 1 point
 -
1 pointAs your resistance is about 29 ohms.. that's too high.. It should be lower then 10 ohms.. my 280zx of 44 years old has around 5-6 ohms.. (and it has 1 line broken and i know the spot.. repair with silverglue.. is jobnr10232..😒) I'm sure you have multiple interruptions in your lines (look with a magnifying glass and you will see the spots were it's broken!) Use some silver glue (Little is enough) and put it on with a very small pointy brush.. careful! Silverglue is very expensive as it contains a lot of silver and it conducts electricity very well! You can buy it in a few grams container.. anyway.. we can here in the Netherlands. 😏1 point
-
Oven cleaner and a brush work really well on rims.1 point
-
As I was thinking about this a bunch of memories passed through my head in voice over type thoughts. "Is this one exhaust or this one?" Do they just alternate from here? Exhaust - intake - exhaust - intake... No? Crap. The engine's tilted. Up is not Up". Is this still hot? Should I start over? It was perfect before I tightened the lock nut, now it's too tight. Does it matter if it's hard to get the feeler gauge in? Am I scratching the cam lobe with the feeler gauge? Where's my small sledge, I don't want to bleed anymore. #1 is a B___h! I should have wiped that oil off the edge before it dripped down the side of the engine. Wow, I really wacked something when the nut came loose. Hope nothing got bent. I could have just taken my time setting them cold, then rechecked them when they're hot. And that's just in the first hour.1 point