Leaderboard
-
emccallum
 Subscriber
 7Points428Posts
 -
inline6
Subscriber4Points1,282Posts -

Zed Head
Free Member3Points19,236Posts -

siteunseen
Free Member2Points15,115Posts


Popular Content
Showing content with the highest reputation on 06/12/2023 in all areas
-
4 pointsI finally got the motor back and installed. Ran it for the first time today. Fingers crossed it seems ok, slight hint of smoke when revving, but nothing like before. I haven't had a chance to do any fine tuning. Just happy its back together and not creating a smoke screen. We replaced the rings with a new set (Hastings). Best he can figure is the oil rings were poor quality and weren't scraping the oil. He didn't like the way they felt or looked. I am really good at removing and installing the engine. Pro tips.... Leave engine mounts loose on motor. Have a good load leveler on the hoist. I rigged mine so I could use a 3/8 impact on it, instead of the handle. 20230611_205016.mp44 points
-
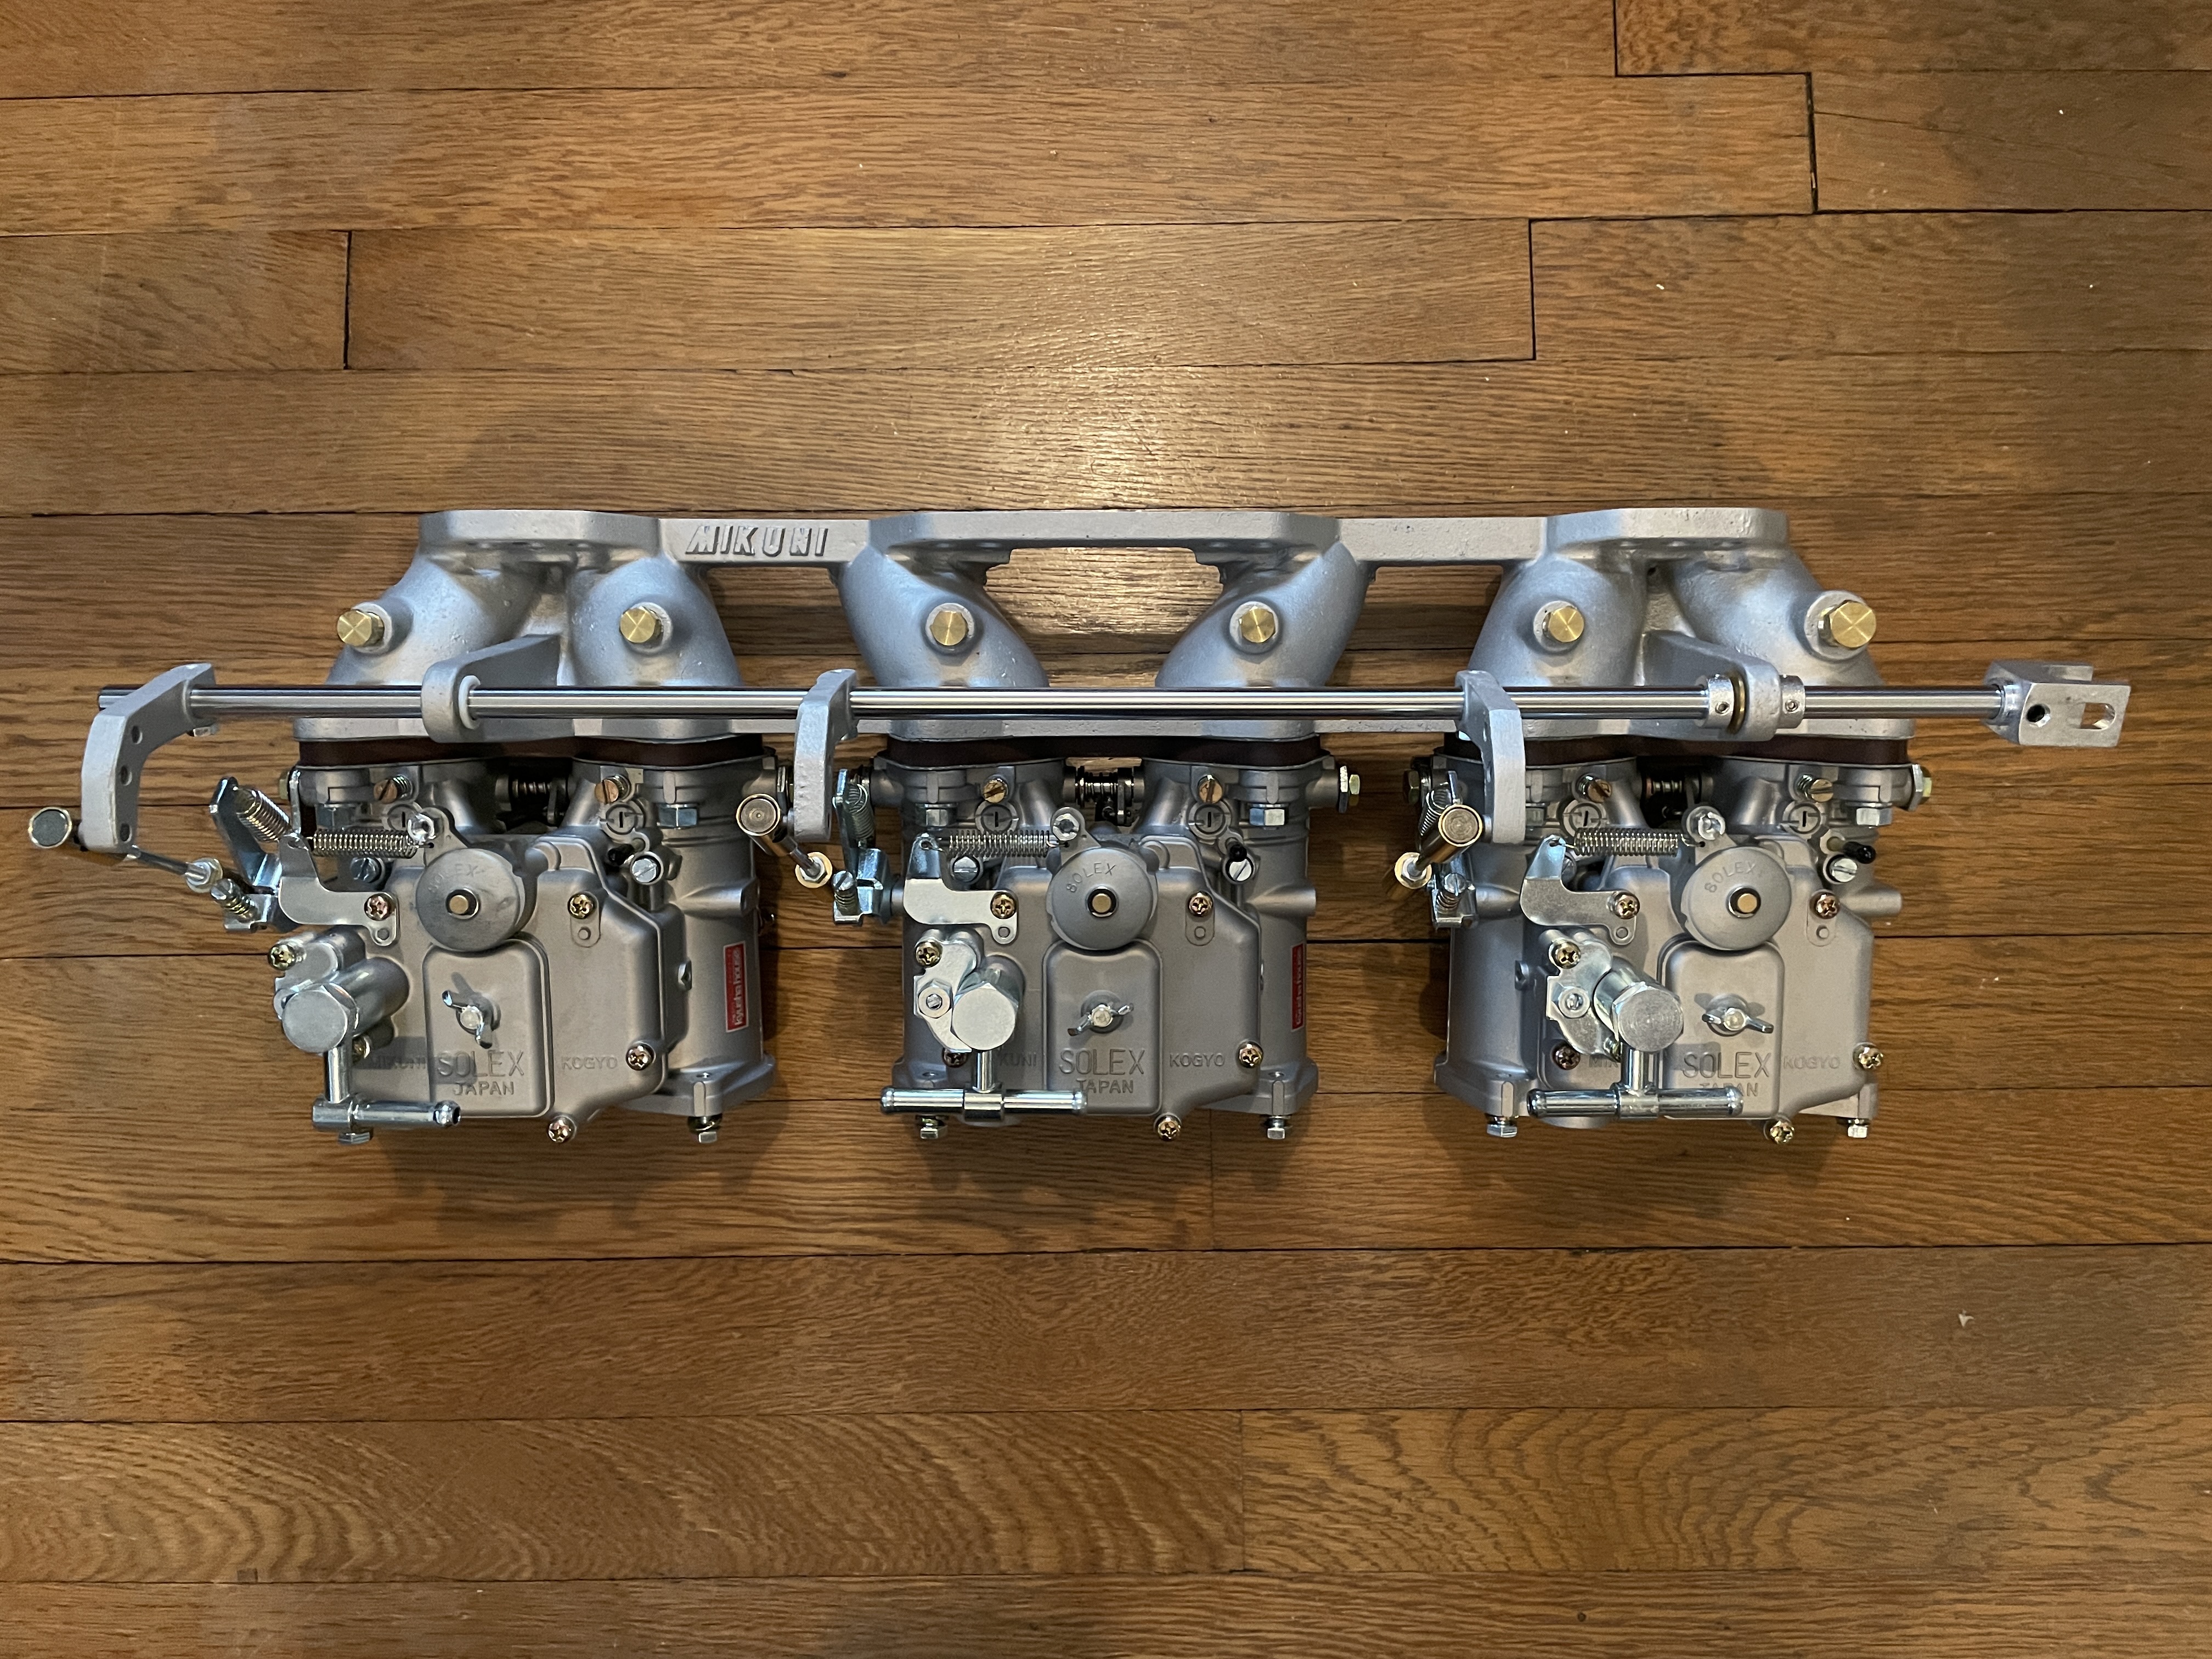
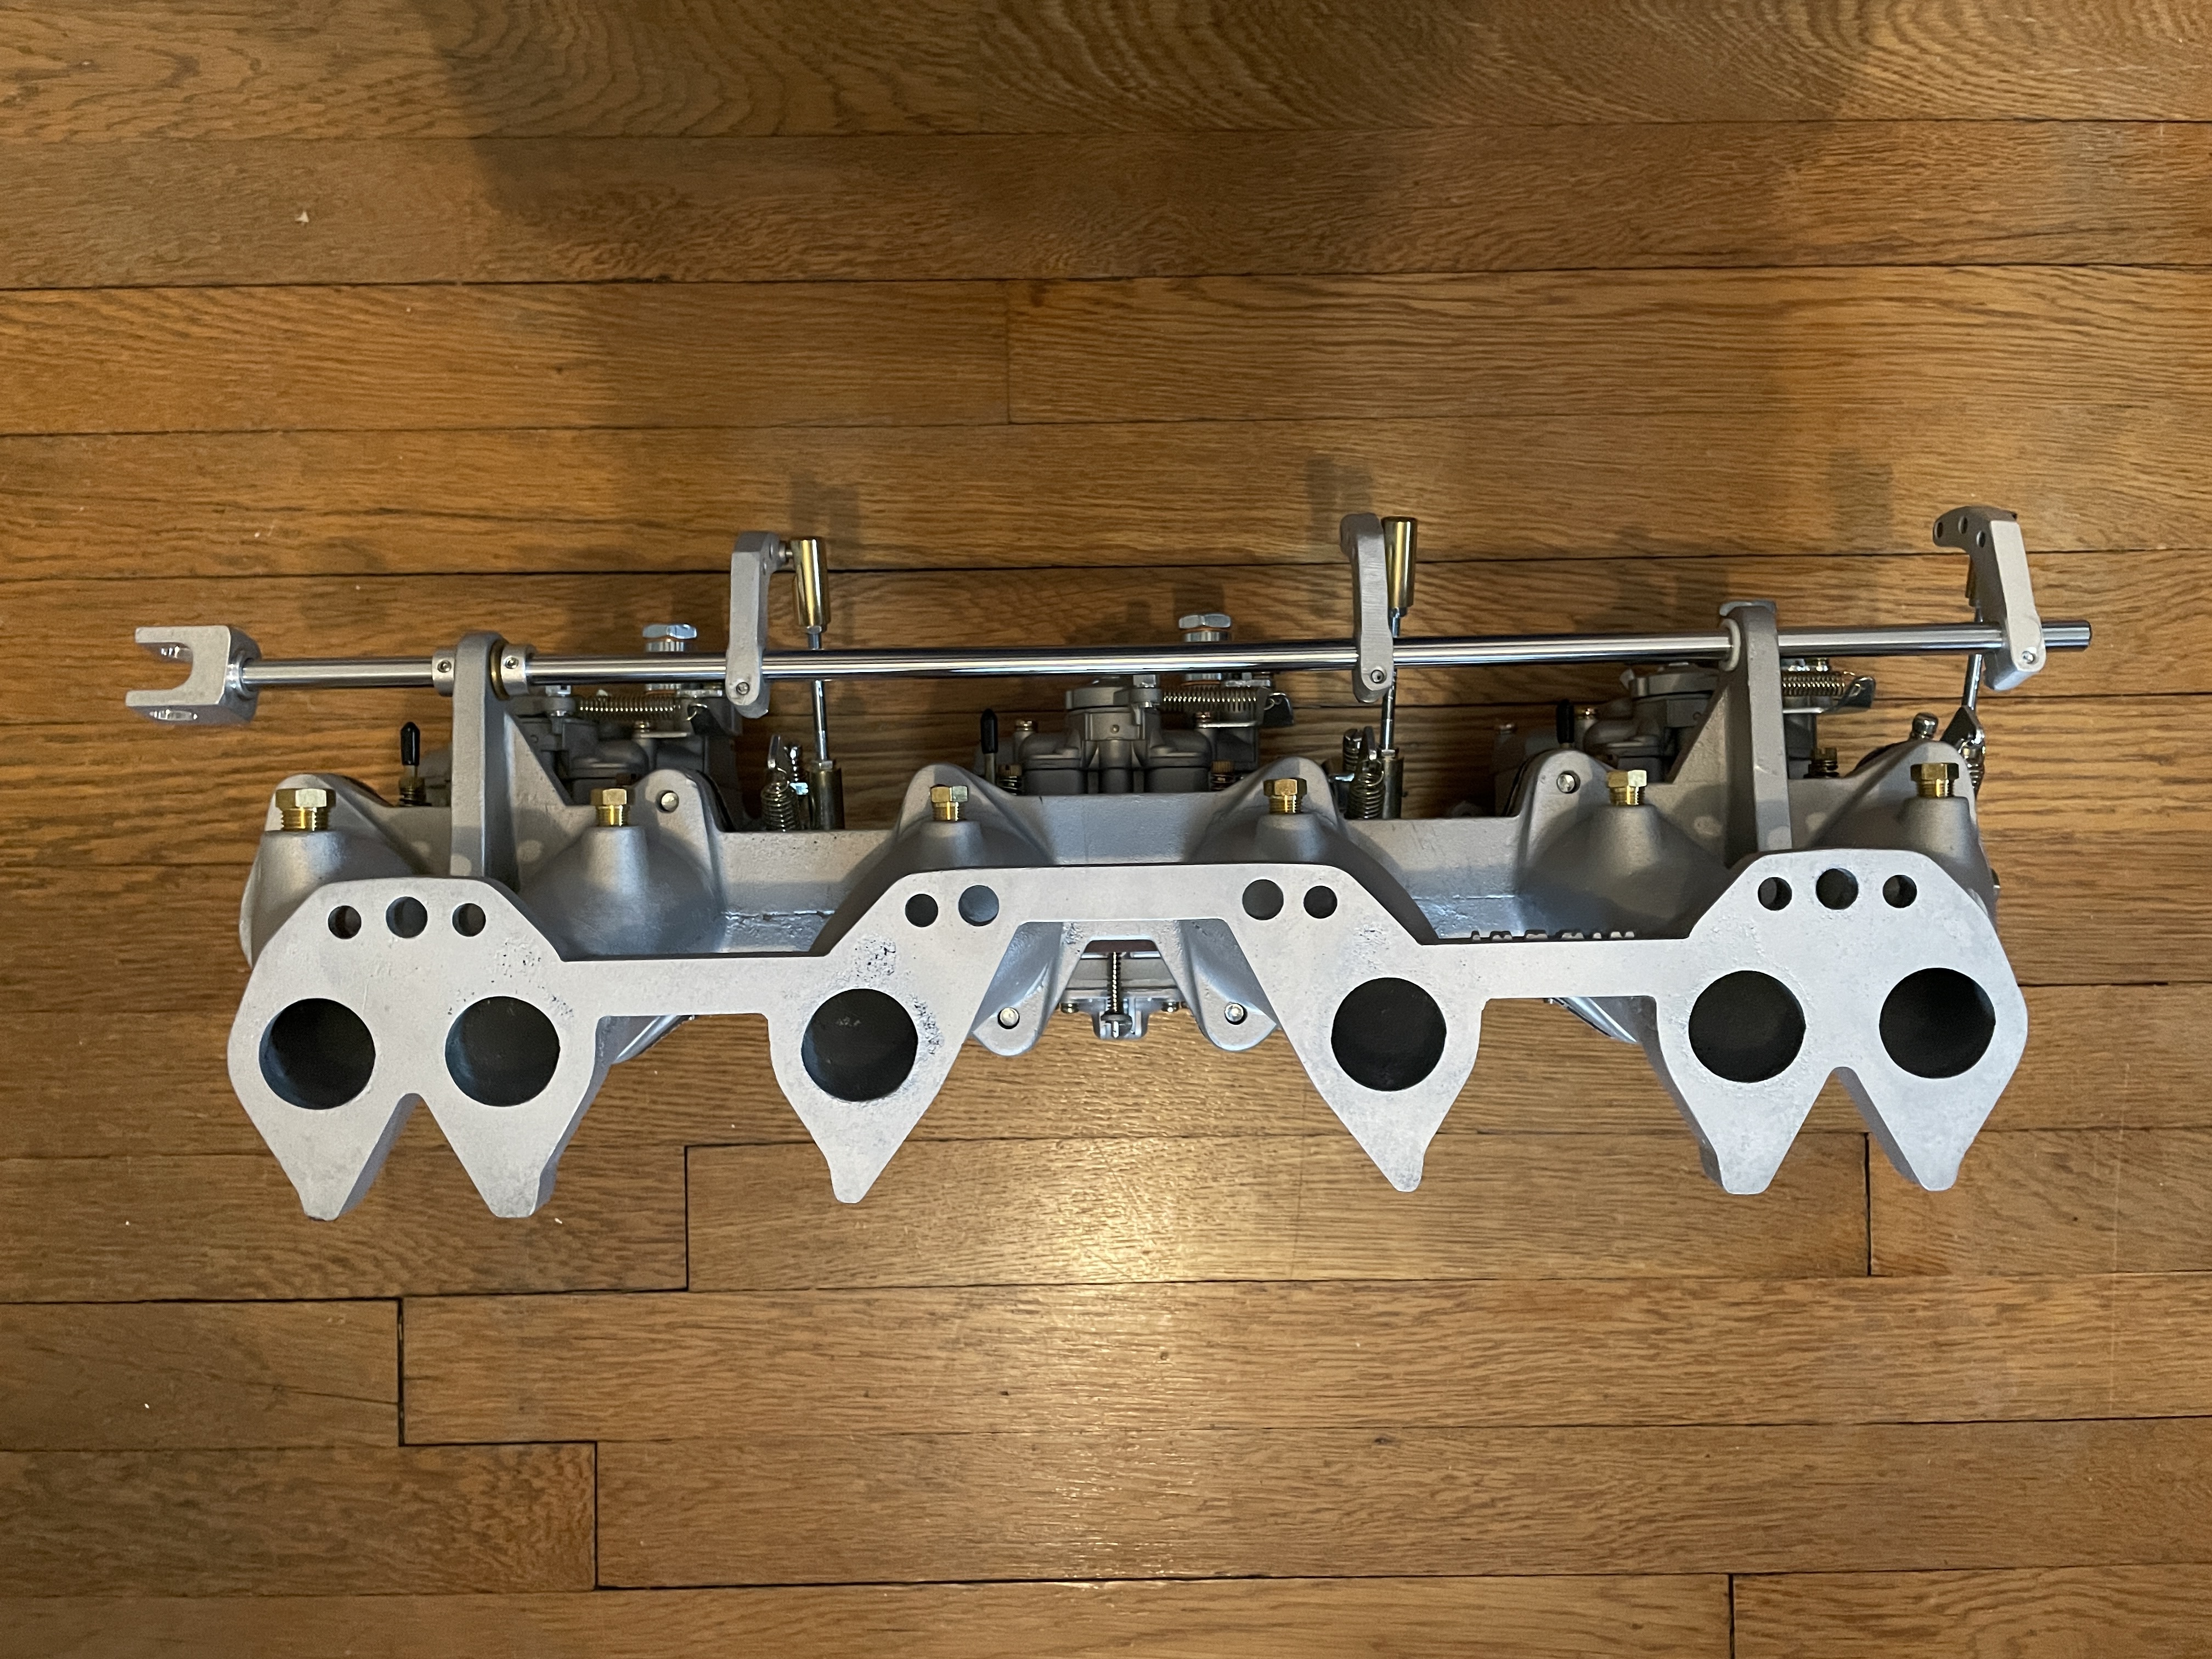
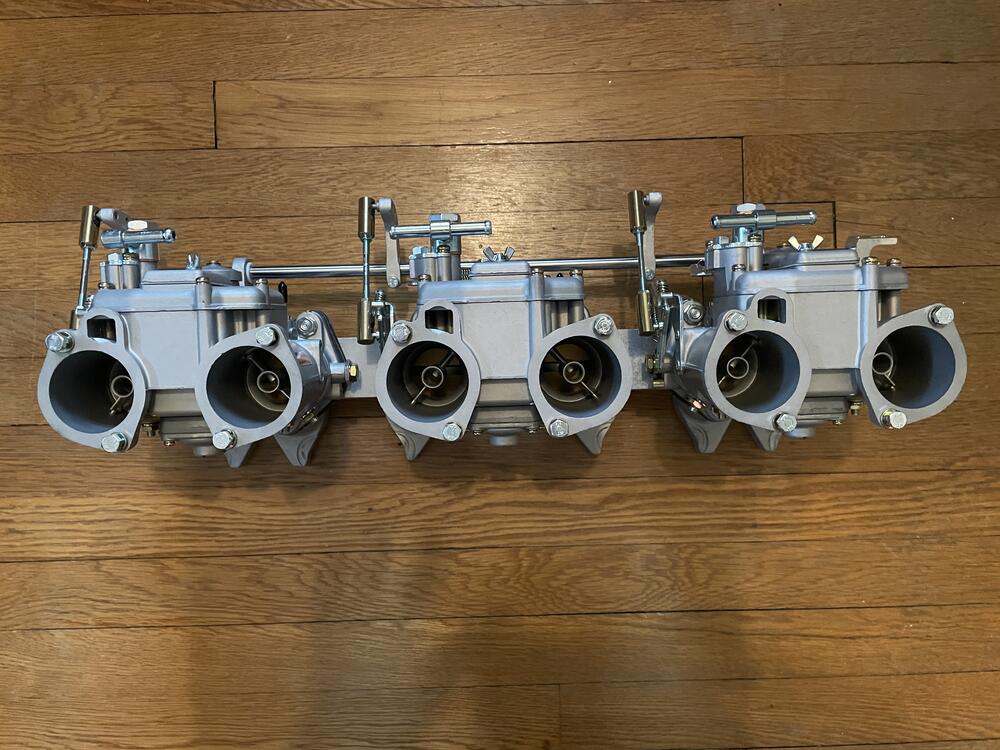
2 pointsNew treasure! 3 Mikuni 44 PHHs. I bought these on Yahoo! Japan back in December. Jesse Streeter helped me get them Stateside and I had them rebuilt by Taka at Kyushu House, who moved to Houston in the middle of the rebuild, hence the delay. They look fantastic. The manifold also looks pretty good considering it was pretty beet up when I bought it. It had no linkage and needed to be vapor blasted, but there are very few imperfections. Just some putting on the surface that mates to the header gasket. Can’t wait to get them running.

 2 points
 -
2 pointsThanks guys. Fingers crossed. I still have a ton of work to do. Yarb, valve lash is set per specs. I don't know why it sounds so loud in the video. Much quieter in person.2 points
-
It was in a barn. There's potential. Looks like that back bumper was ripped off when they tried to pull it using a strap on the bumper. At this point, do no more damage while cleaning and inspecting seems in order.2 points
-
On my 12/70 car that wire was wrapped under blue tape on the harness like the wire in the bundle in the cabin for an electric fuel pump. The wire has power when the key is in the run position. It was perfect for me to use for my fan relay when I converted to electric fans.1 point
-
Kind of coming around to it. I found this great thread here, with templates to create your own new tar mats, and link to place to buy similar-to-Z mats. Lots of paint involved, and probably overall a solid extra 7 days of labor, but... Probably the right thing to do.1 point
-
That's a pretty low number car. I am generally opposed to parting these cars out, but there are always exceptions to that. Being stored in a field is really hard on the underside of the car! I don't think I would try to start it. I might oil the cylinders and see if it will bar over but starting takes a lot more effort and it will most likely need a rebuild no matter what. The upside is a great amount of the needed metal to restore the underneath has become available in the last few years and more is available every day.1 point
-
I have stripped all the tar from a 240Z. I was surprised to find more rust in places that seemed impossible. Like in the center of a tar mat, that was sealed all the way around. If you don't remove it, you'll always wonder what is lurking under the tar.1 point
-
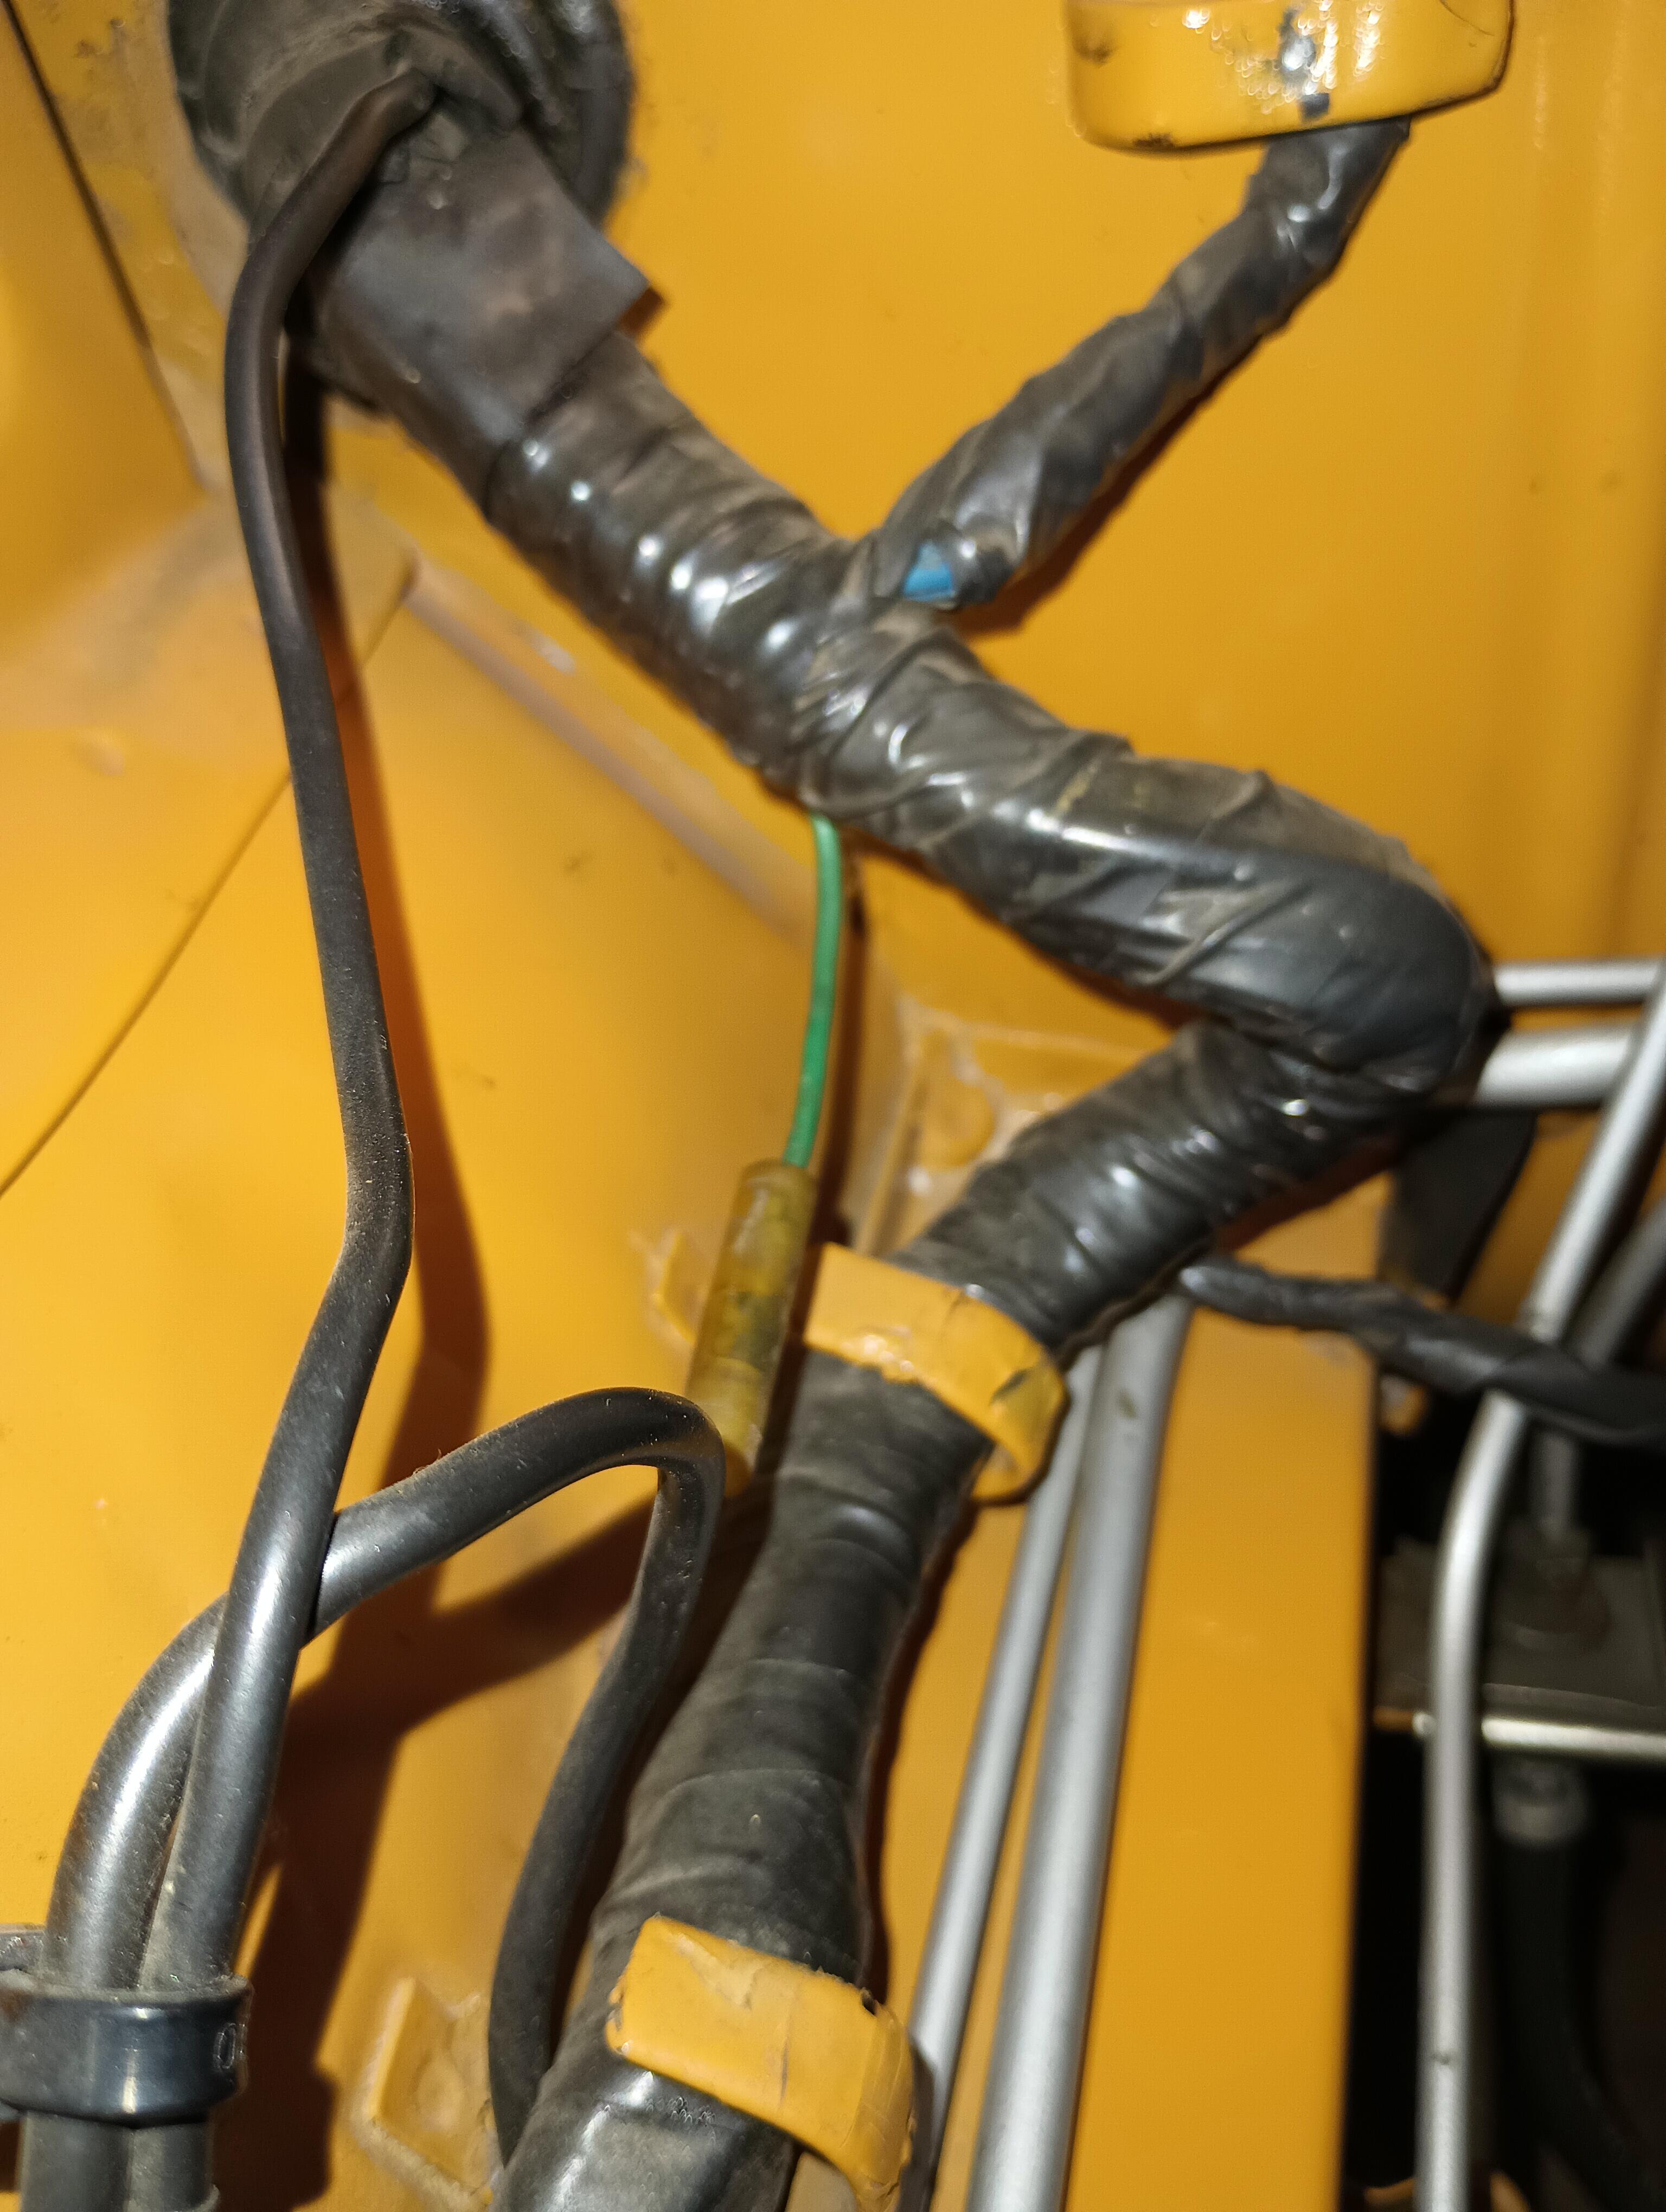
That connector is idle on my car also, a solid green wire. if the wiring harness was common to the auto transmission car, given the location it might be part of that function.
 1 point
 -
Check out this ugly one that is currently up for auction on eBay:
 1 point
 -
It's a year ago that this topic was on the "today's listing" and i haven't worked on the car for over a year.. It's still on the lift in the garage.. When the heating stopped working in the garage and i got to ill to work on it.. it came to a halt.. So.. in the coming month i get some heat pumps installed in the house AND in the garage! (Normally i would install these myself. but no energy..) Also the carport is worked on and it will get much bigger, from 6 to almost 12 meters long! (I try to get it finished in august i hope.. normally a days work for 2 people.. 😞 ) As for the 280zx, i'm only looking for a nice trunk cover in blue.. Here a pic of my (sold long ago) red/black inside 280zx 1983. trunk cover.. It's so damn frustrating to be a handy man with no energy.. Or like the energy of a 100 year old... I hope there comes a day that doctors find out what the hell is wrong with me. 😒
 1 point
 -
Soo. time for another update from the bodyshop. After the floor pans got prepared and made sure that everything fits: They got welded in and attached to the frame rails: Next then was the inner rocker panel: Along with the rear rocker extension the seatbelt mount and seat rails: And the rear section of the floor pansl. Looks really need. and completely differnt to the RH side, where we used the older type of floor pans and lots of homemade panels. What is missing now is the little factory reinforcement piece (see previous post from the bodyshop). and the outer rocker panel. there we currently have a little fitment problem and need to find out if it's the replacement panel or something else is misaligned, Overall i'm again very happy with the work and attention to detail. I always expect more progress when i go there and then i'm disapointed when i see it looks more or less the same than 1,5 weeks ago, but then i start to look and realize all the small details they had to fix, paint, adjust, test, modify, etc. And then i think about the time it took the previous bodyshop to do the same (in a less good result) on the other side and then i'm super happy again. Overall i'd say that already more than 1/4 of the work is done, and that in only roughly 5 weeks. so if the continue like this, it wil be definitely ready in fall. Nice1 point
-
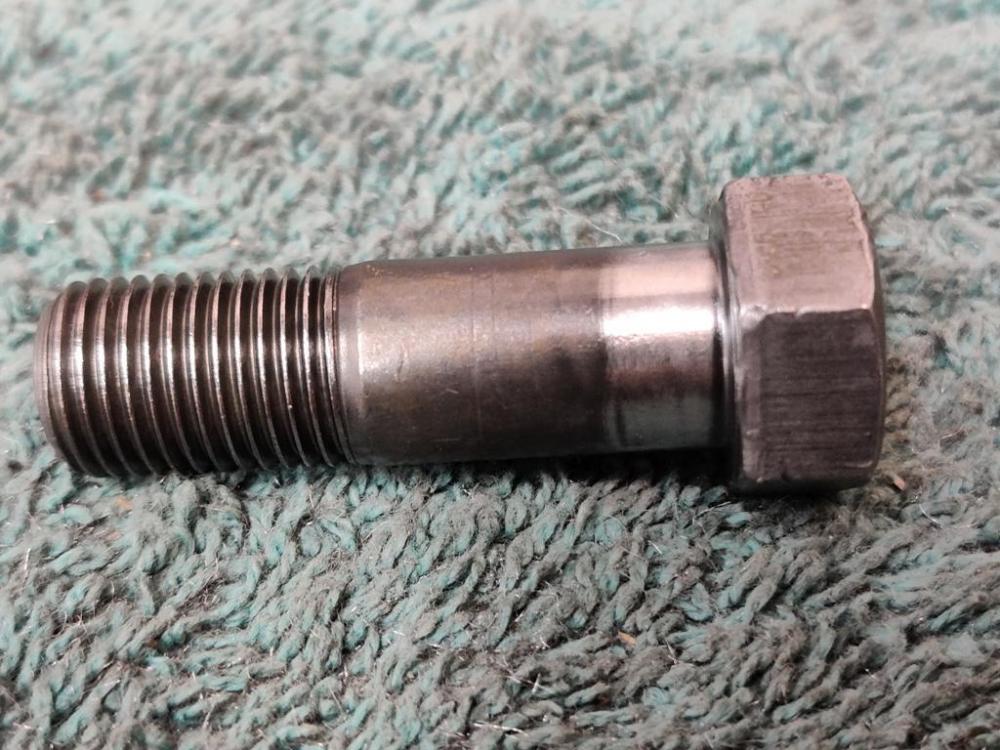
1 pointWell there's your problem right there, California Datsun. I used Hasting chrome faced rings on my 240 rebuild. Any machine shop can get those and the price was reasonable.1 point
-
1 pointI dont have any pictures but I just got off the phone with the engine guy. He said oil rings were collapsed. He said they were total garbage. He said the compression rings were already showing wear that he didnt like. I sure wish I knew the name of the rings we used. I wish I would of had a recording of him when I asked if they were in right side up! I got an earful. It looks like its going to work out. I will keep the gang posted.1 point
-
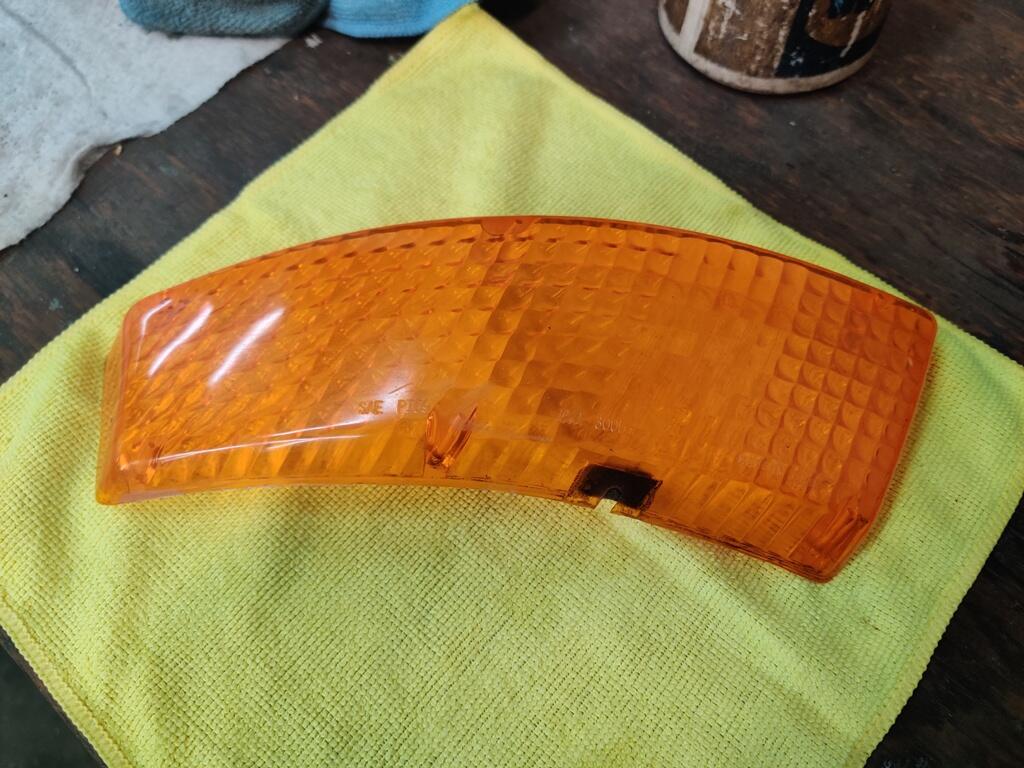
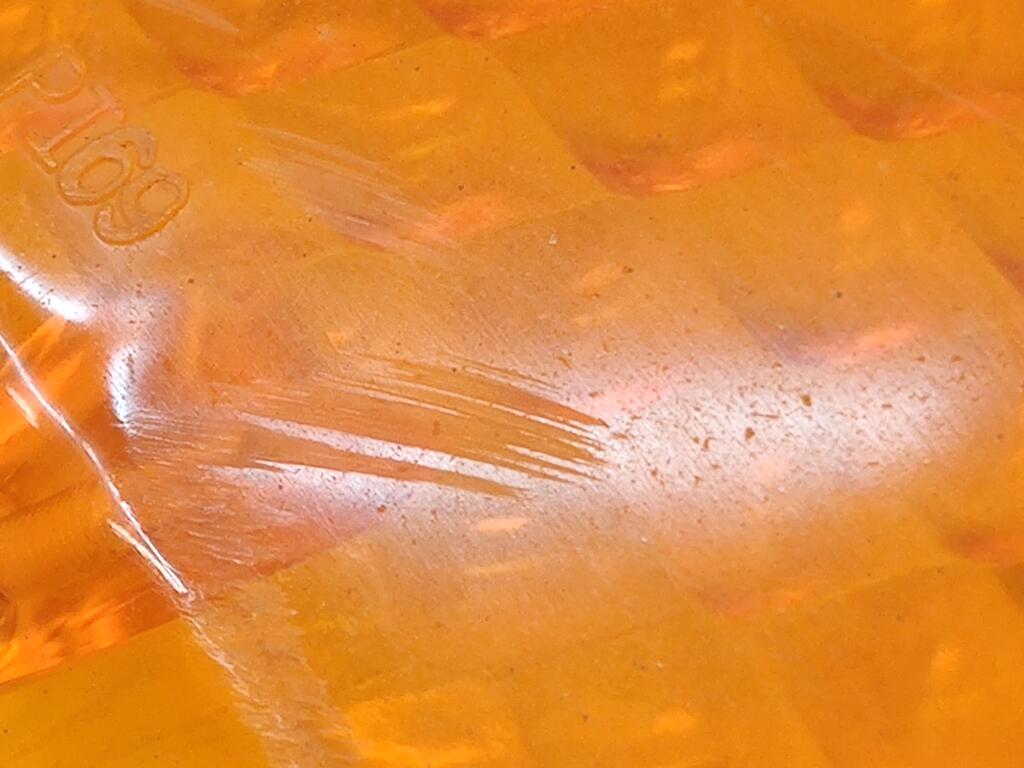
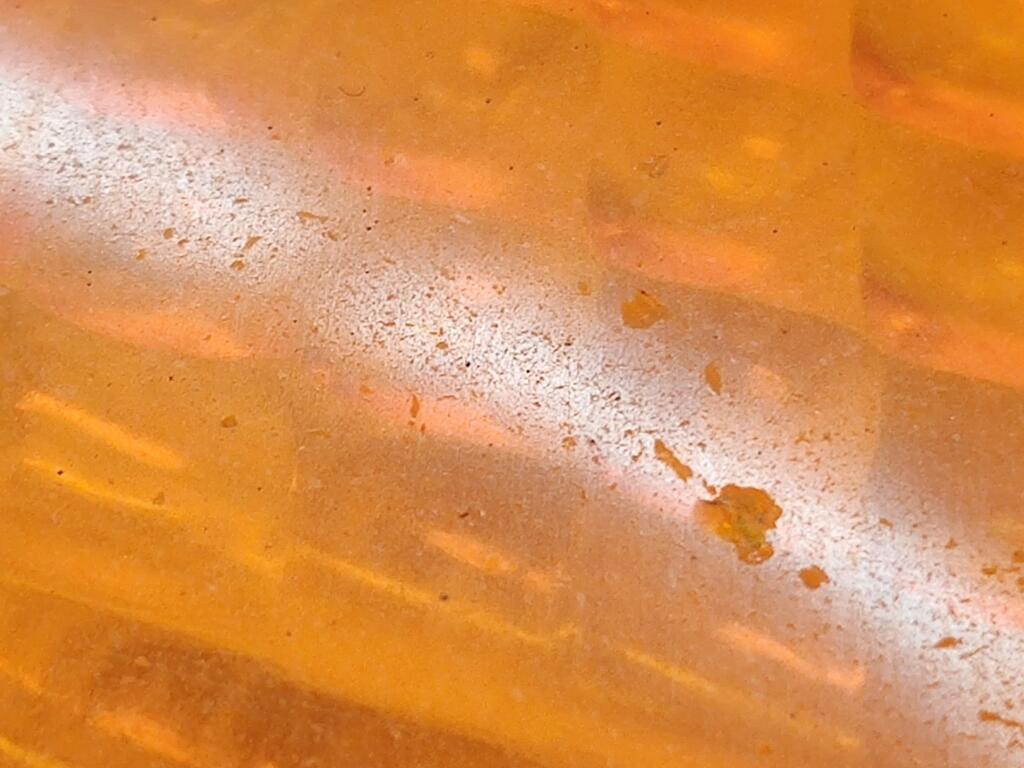
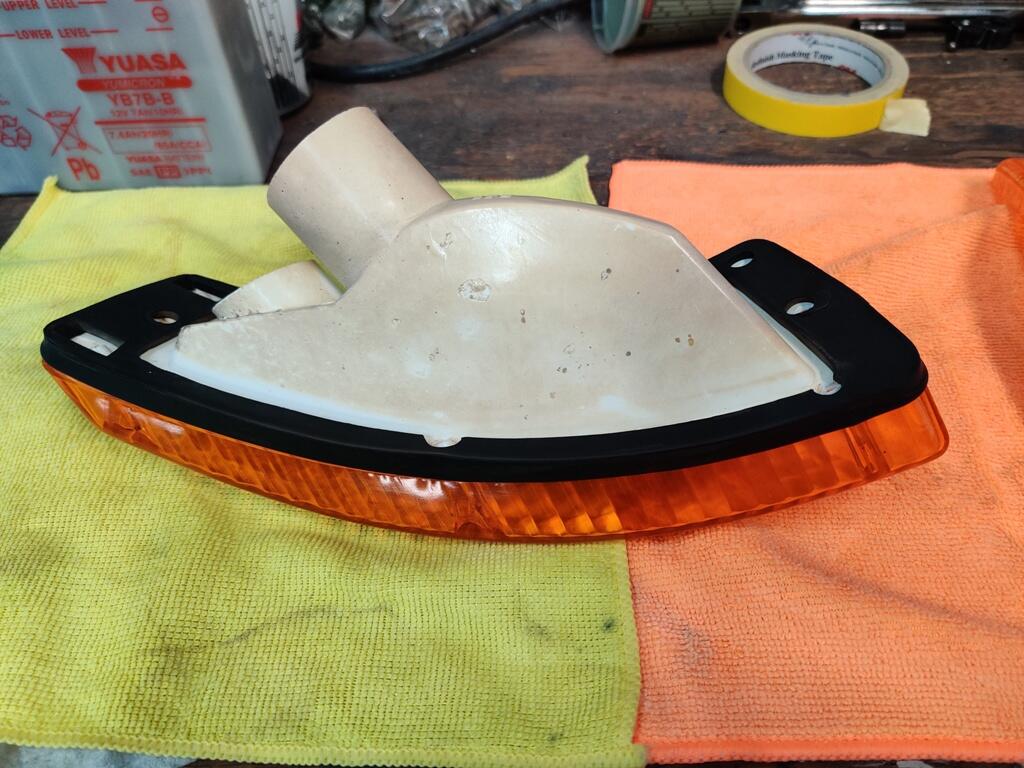
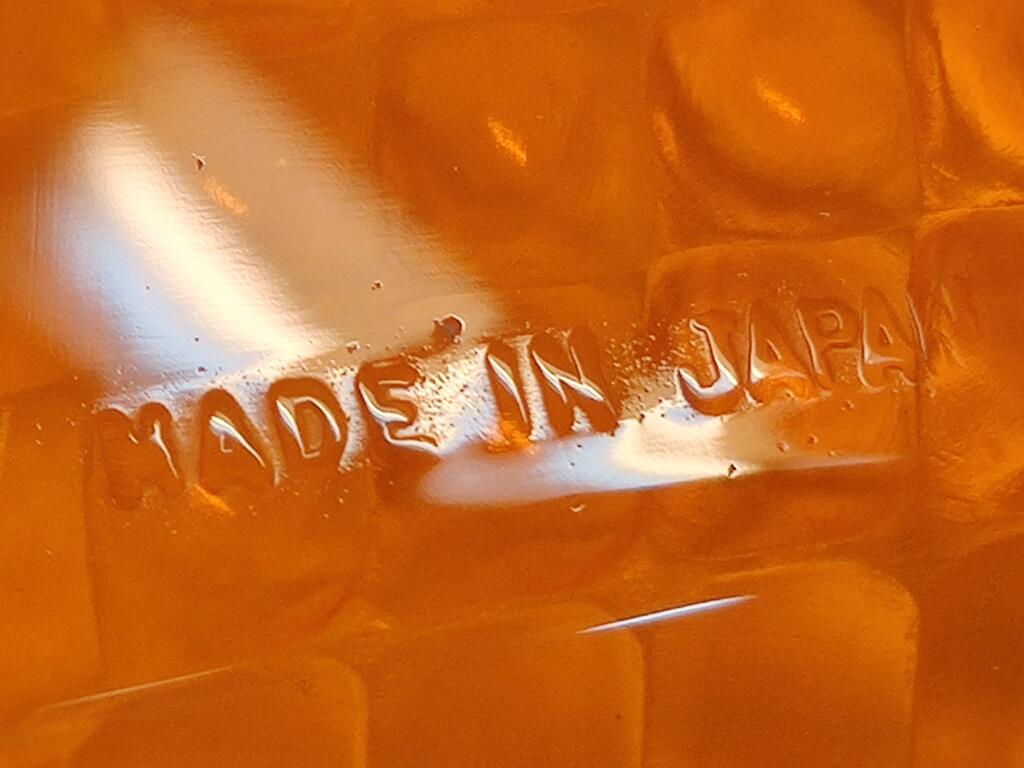
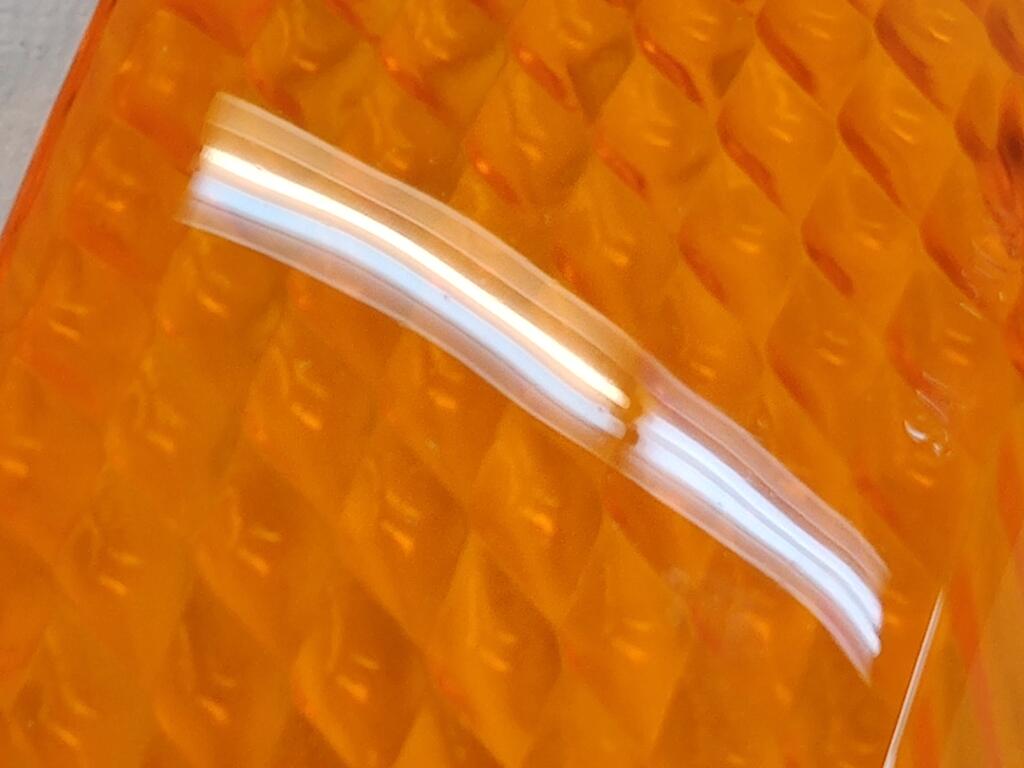
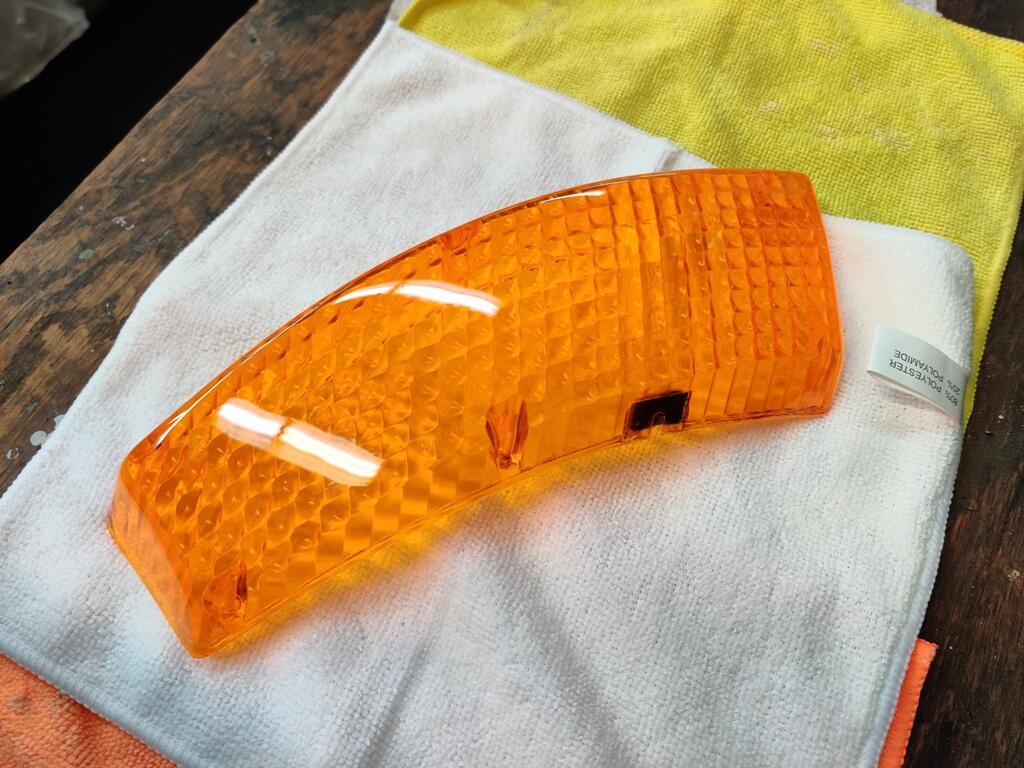
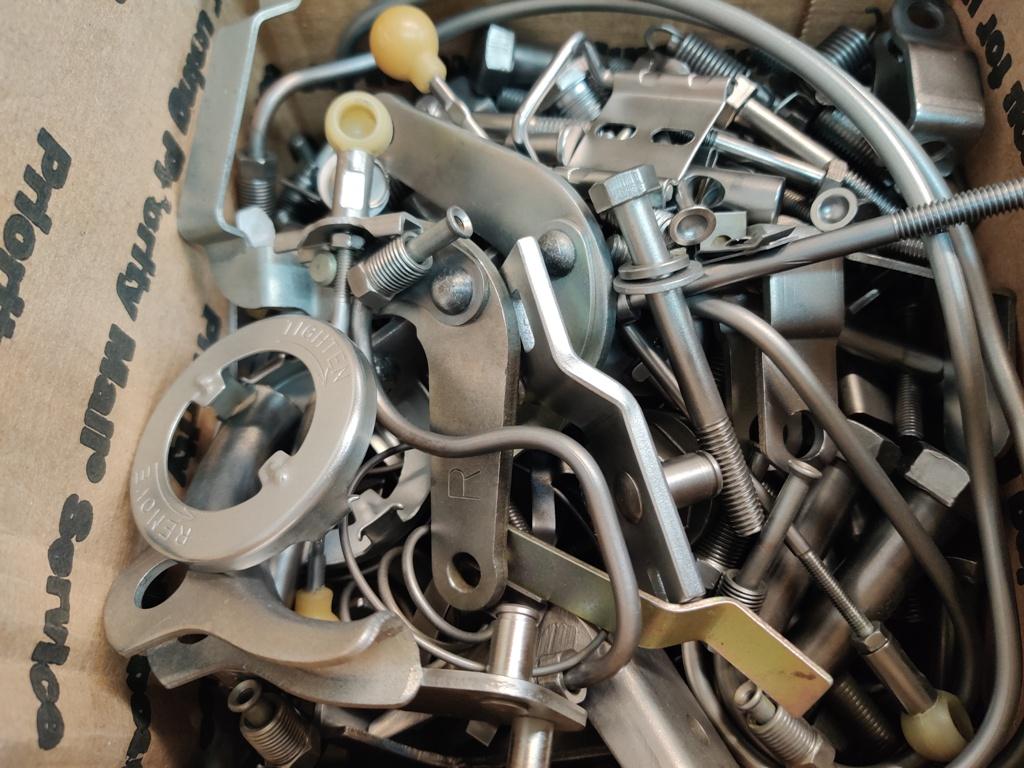
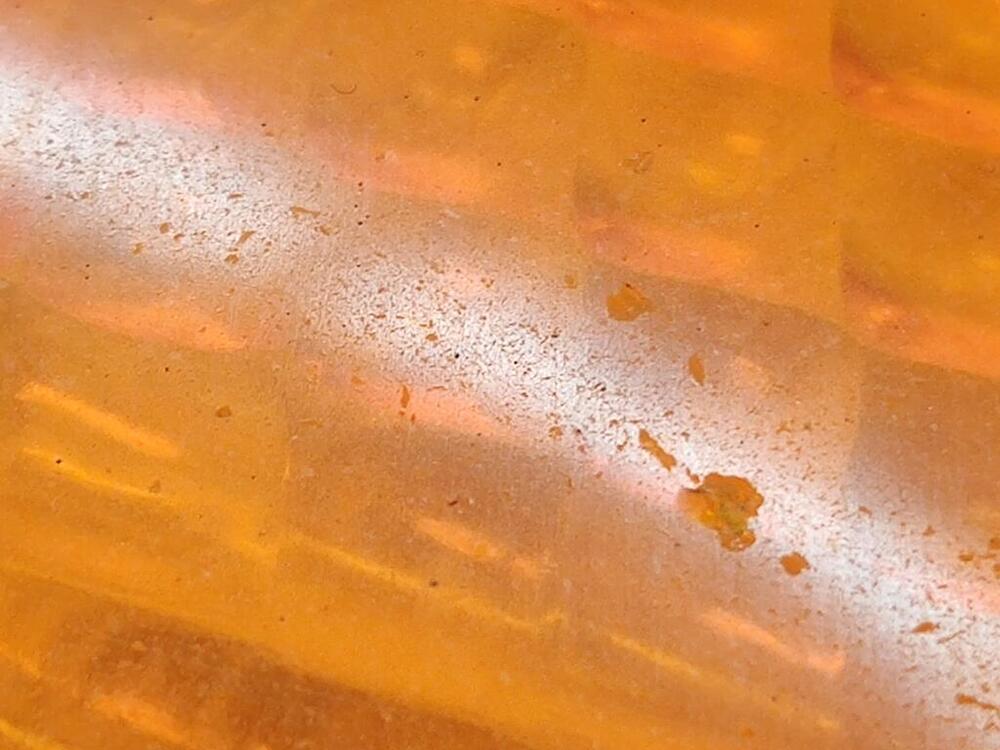
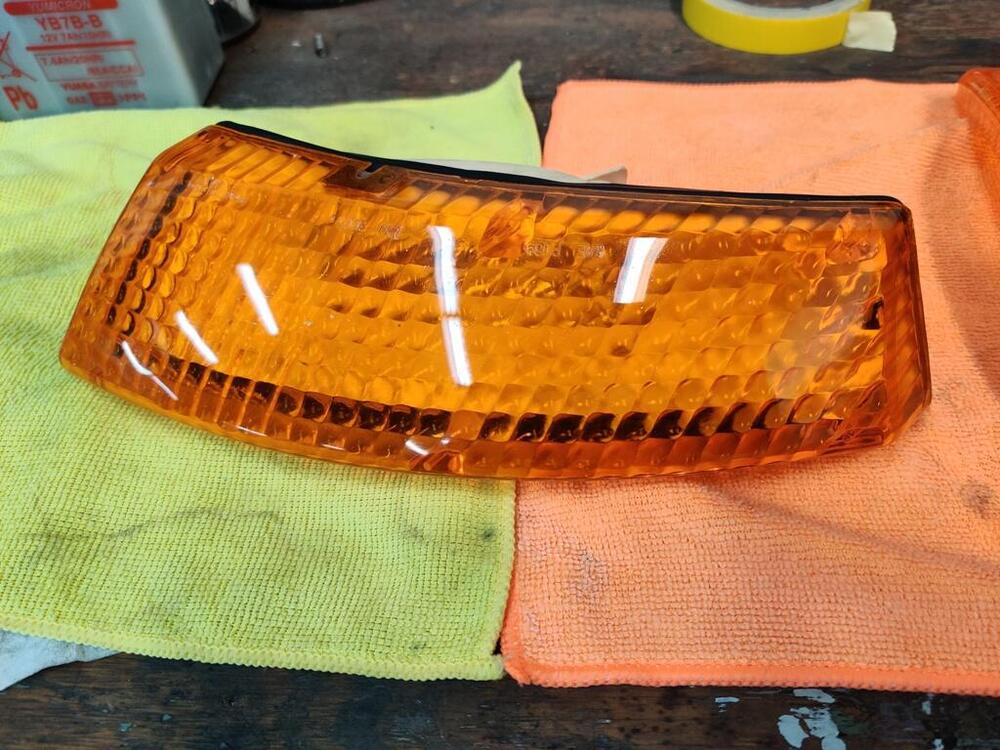
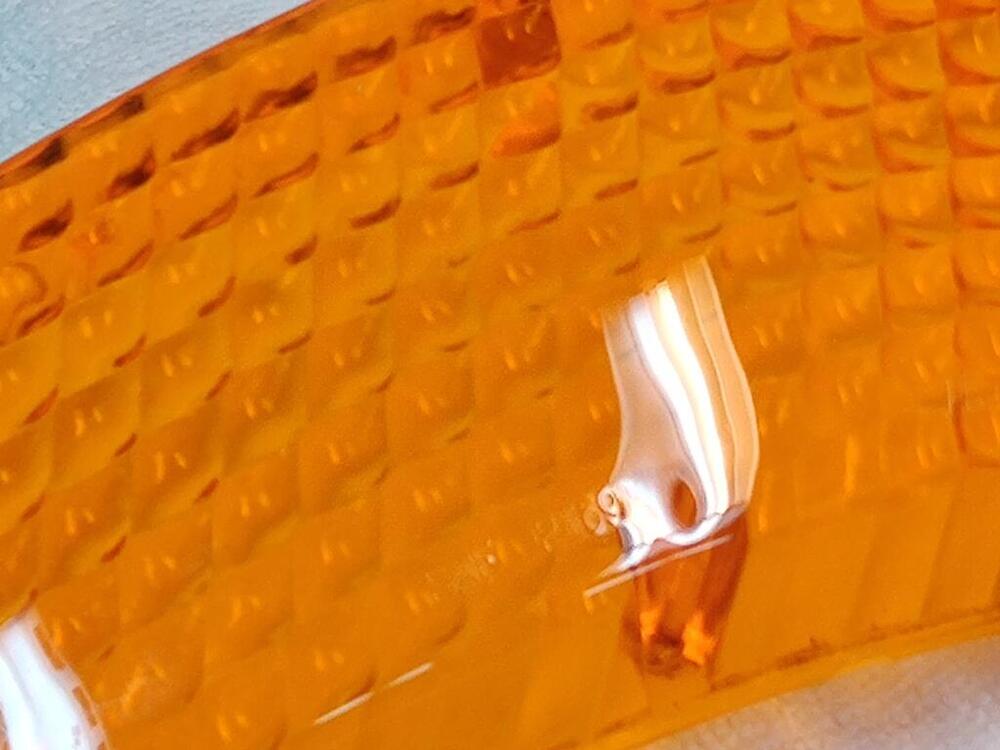
While waiting for fasteners to be re-plated, I find myself looking for little projects to complete. I went about restoring the front turn signal assemblies yesterday and today. These front lenses get a lot of abuse... essentially, they get sand blasted over time. These are likely original to the car. They look ok at 10 feet, but get up close and you can see they are quite dull. And, they have taken some impacts from rocks and road debris. The close ups were taken at 5X magnification. I used several grits of sandpaper and performed a wet sanding process. I started with 320 grit, then moved on to 600, 1000, 1500, 2000 and 2500. For the first two grits, I left tape in place to protect the lettering. After wet sanding, I buff with Meguiar's compounds and foam buffing pads. #83 first, then #7 "Show Glaze", using different buffing pads to keep from mixing. While I didn't achieve perfection, the results are pretty good. Next up will be the rear tail light lenses. They will be easy in comparison because they don't take the sandblasting impacts like the front lenses.


 1 point
 -
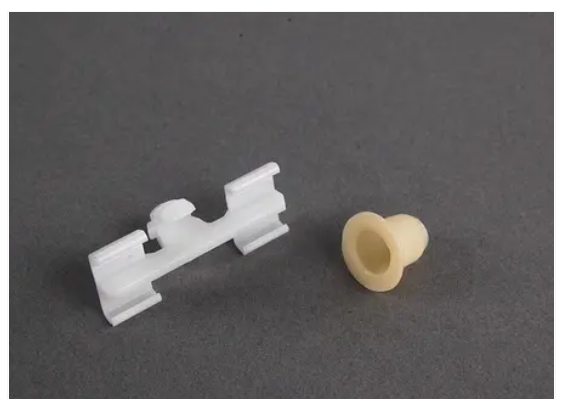
Ha! Some of it is obsessive - no doubt. I appreciate your input. My first car was a 4-door 510. Being just 16, it was a prized possession, and I used to wash it about every week. Water got into that car and under the floor mats something fierce. One day, to trace the sources of the leaks, I set up a hose so that water showered down heavily on the car. After about 20 minutes, I got inside and looked to see how water was getting in (I had removed the kick panels and floor mats, etc.). I was quite surprised to see that a main point of ingress was one of the bolts clamping the LF door hinge to the car. A steady stream of water was wicking along the bolt threads from outside to inside the car and running downward from there, collecting into a pool on the floor. Interestingly, though I thought the windshield seal might be leaking, it was not. I also recall finding that if I pointed a spray of water from the hose at the c-pillar vents, water would fly in... it would get directed upwards by the internal part of the vent, and then drop down onto the trunk floor, where gravity would direct it to the lowest area under the rear seat bottom. When I restored my first 240z in 1993, I had to reconstruct the dog leg areas of the car with new metal. A few weeks after I got the car painted I was shocked, and upset to find standing water in the dog legs of that car. I couldn't figure out how it was getting in and just drilled a hole in the bottom of the dog leg area so the water that was collecting there would drain out. For this car, I'd like to know that when I wash it, or if I get caught in a thunderstorm with it, no water will enter through the emblem holes and dribble down into the dog legs, or down into the back edge of the rear hatch. Newer cars tend to utilize water proof solutions like this BMW clip, which utilizes a rubber plug, of sorts: Given my previous experiences, I figure I might as well address these known water entry points.
 1 point
 -
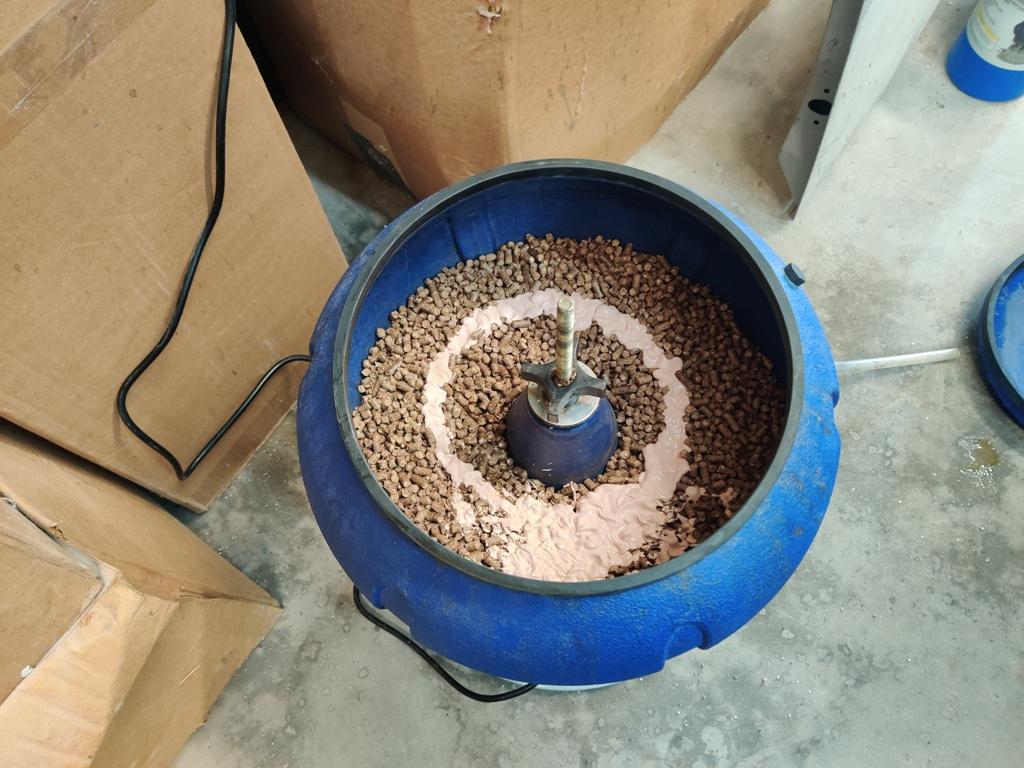
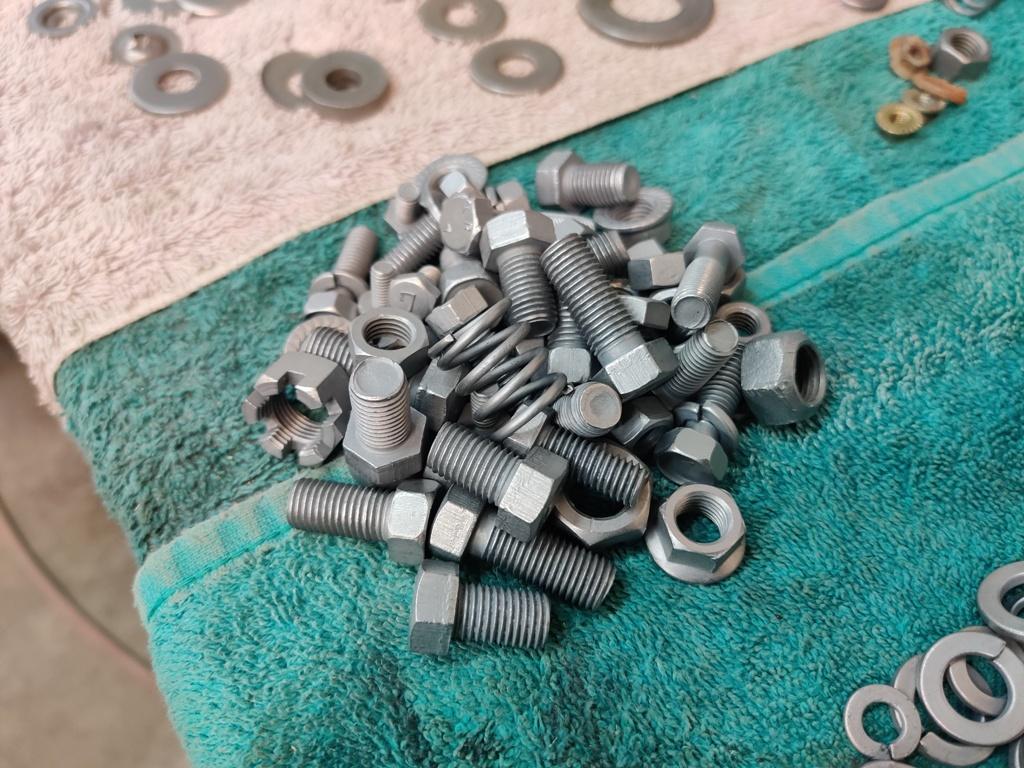
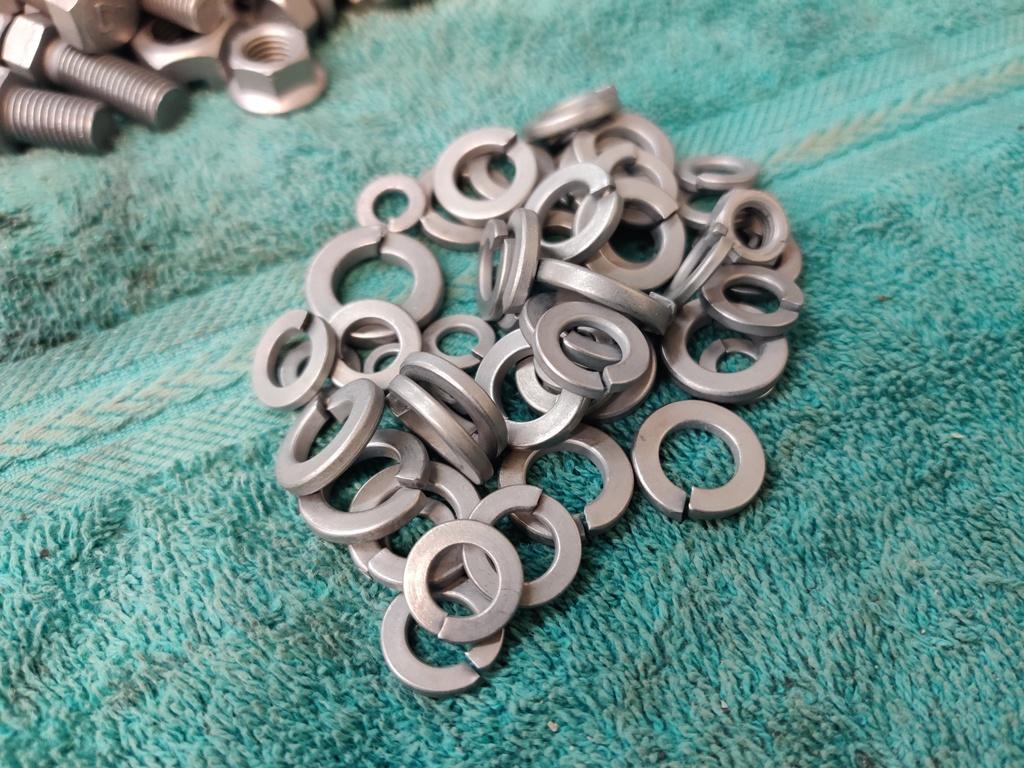
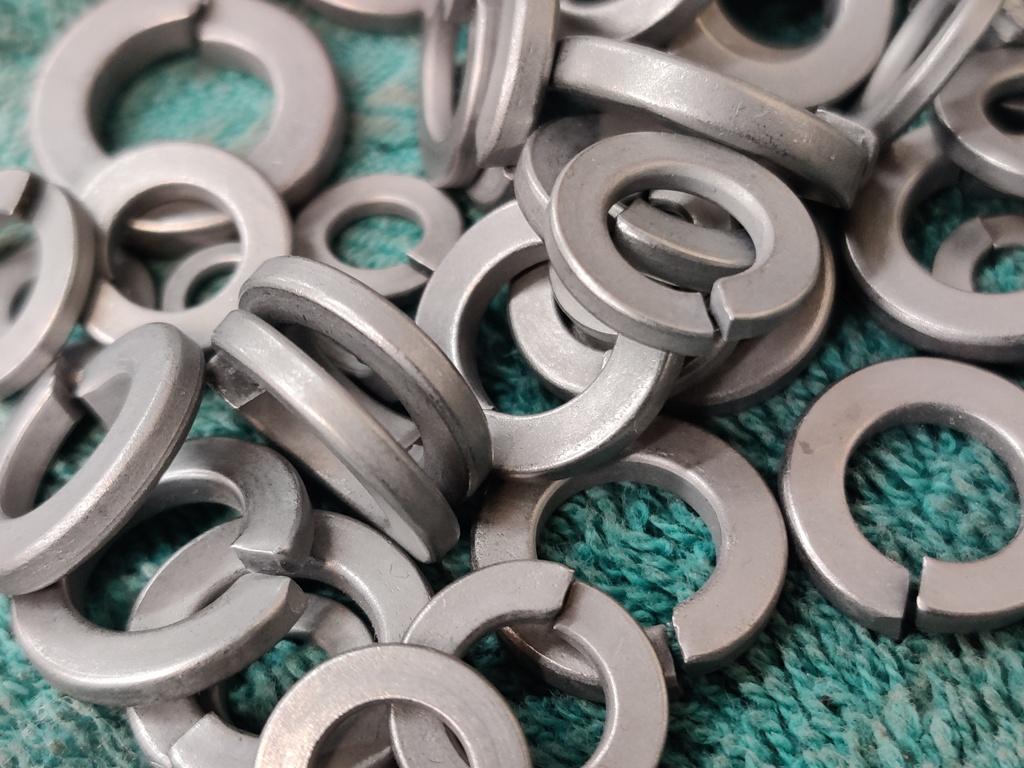
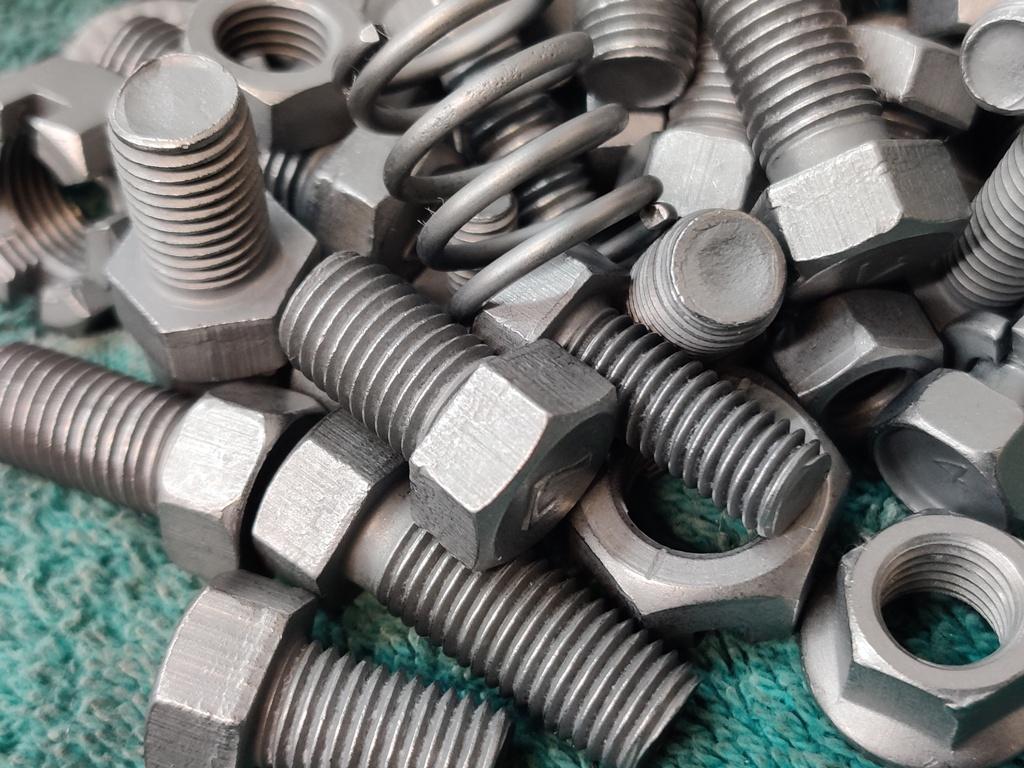
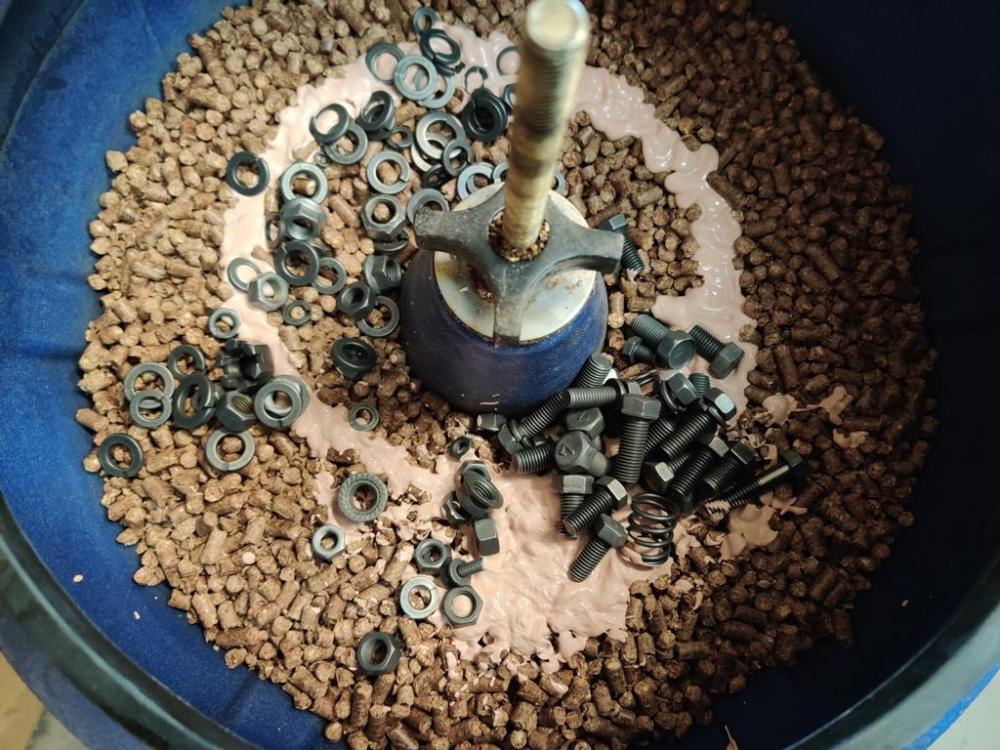
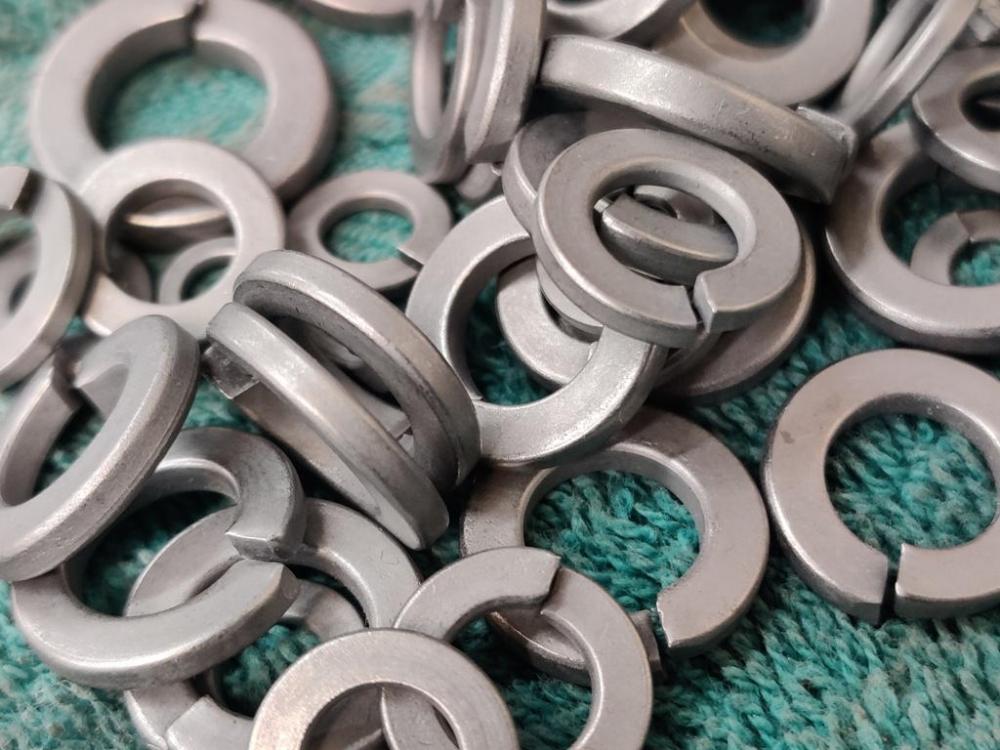
It has evolved some, and now it consists of: Using these glass beads from Northern Tool and Equipment, important for size of grain, and bead blasting at 90 psi with a 1/8th inch nozzle to remove all rust, and to establish a consistent finish. I use one of these baskets and find that putting a variety of hardware (big and small) is great for trapping the parts in place so I can blast them without them flying around too much. For large parts, you don't need to use the basket, and you can then go back over them with the pressure at 50 psi to put a smoother, easier to "second stage prep" by hand, finish. For all hardware (bolts, washers, nuts, screws and odd small bits), I go straight from glass bead blasting to tumbling in one of these vibratory tumblers. I now use a stainless steel media (bought from Southern Shine Tumblers on Facebook). See pic below. It consists of tiny little bits of stainless steel that are good at getting into tight spaces, like between threads, phillips head recesses, etc. And now I use it dry. I was using water and a bit of citric acid, but I think that is best for doing brass shell casings. I was fighting keeping the parts from starting to oxidize/rust, and have found that the media works better and faster dry... to put a nice finish on the hardware. Time in the tumbler is about 2-3 hours. For large parts that I can't tumble, I use a Dremel tool and the little wire wheel brush attachments after glass bead blasting. For final, more consistent finish, I follow wire brushing by hand rub the large parts with #0000 fine steel wool. Doesn't take a lot of work by hand, but the combination of using the Dremel followed by fine steel wool by hand does end up taking some time. The glass bead finish can be altered on aluminum parts, by the way. It can look really nice, if after going over it once with 90 psi, you lower the pressure and go over the part slowly. Extending the distance from the gun tip to the part also smooths out the finish, giving it a nice satin look. I am still experimenting, with some aluminum parts, but a once over with 90 psi to clean followed by a once over with 50 psi achieves a really nice finish.
 1 point
 -
1 pointPop the little screw out, put a Zerk fitting in and grease them up. They'll probably last another 50,000 miles.1 point
-
1 pointFor my suspension I used 7776 flat black rattle can, it’s held up pretty well to me running off track and getting loads of mud and dirt on the under side. I’ve also done Por15 rust encapsulation, then a topcoat with spray cans. If you take the time you can get a fairly nice outcome. Just make sure you go through all the steps, acetone washing, primer ( I do 2 layers) , then paint (I do 2-3 layers). The key is to have very clean prep, you always start out dirty and rusty, and clean with each step all the way to installation. But after that getting down under the car is not too bad, plus it’s shiny 🙂 do you have a 1/2” air impact gun? That will take the bolts out, might be hard to do with hand because it wants to spin. if you don’t have an air impact imma take the time to say consider getting an electrical one from Milwaukee tools, it’s a beast of a tool, makes working on cars not too bad.1 point
-
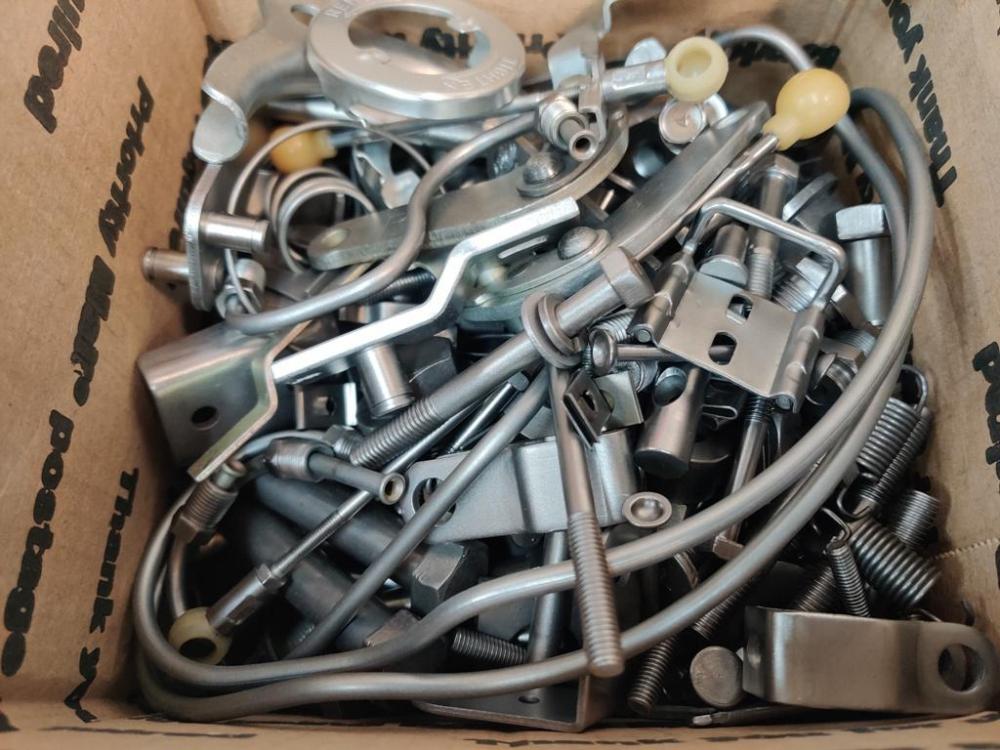
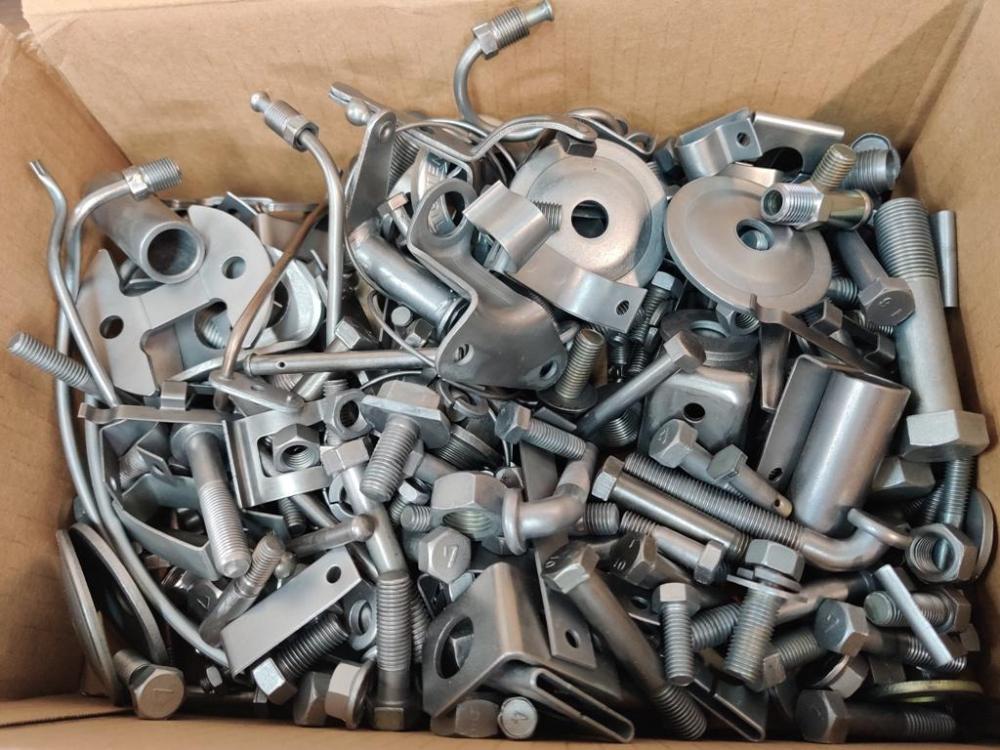
I continue to track down hardware and run it through the process of glass bead blasting, followed by vibratory tumbling with stainless steel bits. And now, I have experimented with another round of vibrator tumbling using corn cobb and Semi-Chrome metal polish. Interesting results with that last one. Some of my hardware came out of the stainless round of tumbling looking a bit dark. On the left here is a "dark" bolt after I hit it with the dremel tool and wire brush. You can see the shiny, lighter silver part. My theory is that the parts in that batch didn't move around fast enough to keep oxidation from making them dark. The right amount of water and citric acid needs to be in the tumbler or the action is "too slow" (I think). Anyway, I experimented with adding corn cobb media and metal polish, along with a bit of laquer thinner for kicks under the theory that it would tamp down the dust a bit and not cause oxidation (rust). After tumbling for a few hours, here is what the dark hardware looked like: They are notably lighter in color. Additionally I blew them off with compressed air, immersed them in a jar of laquer thinner, and blew them off with compressed air again. Close up pics: After all of that, I still ended up using the dremel and a wire brush on the bolts. I am still thinking about a solution that will polish the parts without doing each by hand with a wire wheel. But, at least the amount of time with the wire wheel is low after the other treatments. The box of hardware is getting more and more full. 🙂 Shuffled a couple of times for pics:


 1 point
 -
You have to type Roadster into the search box. I don't know why they tuck it away like they do. https://www.wescoperformance.com/roadster-seat-belt-chrome.html1 point
-
These work good on the bigger lines. Oil based fine point sharpie, silver and white. Heater panel, radio and the console, horn pad etc. Thanks for that tip @psdenno
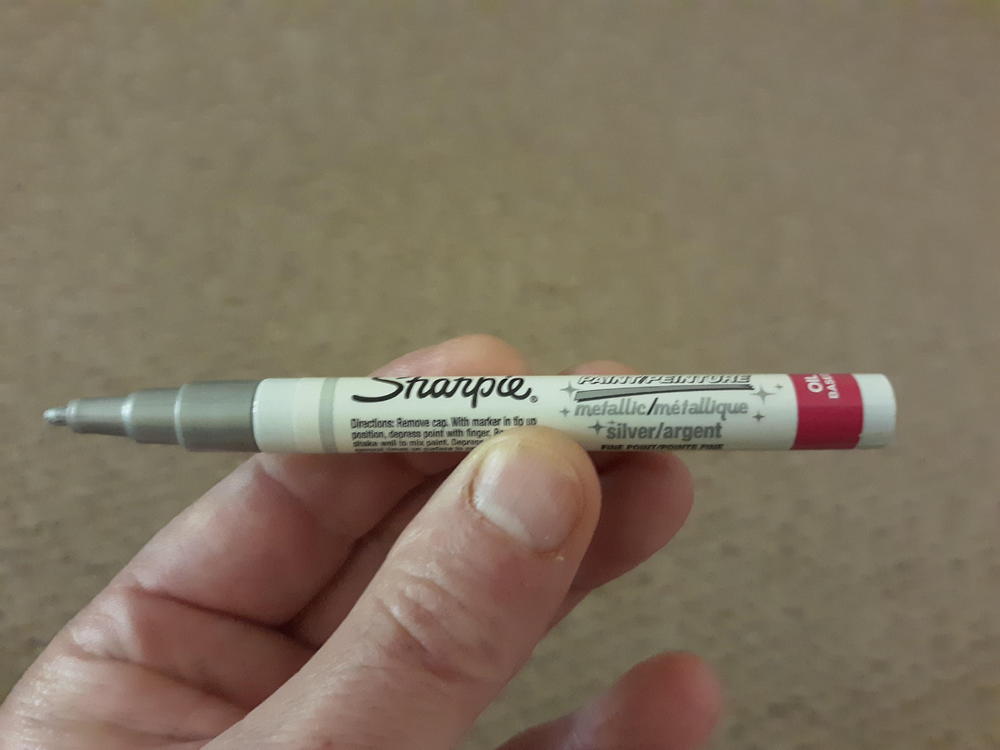 1 point