Leaderboard
-

kats
Free Member10Points2,215Posts -

Racer X
Free Member4Points1,877Posts -
Mark Maras
Free Member2Points3,719Posts -

Zed Head
Free Member2Points19,238Posts


Popular Content
Showing content with the highest reputation on 09/08/2022 in all areas
-
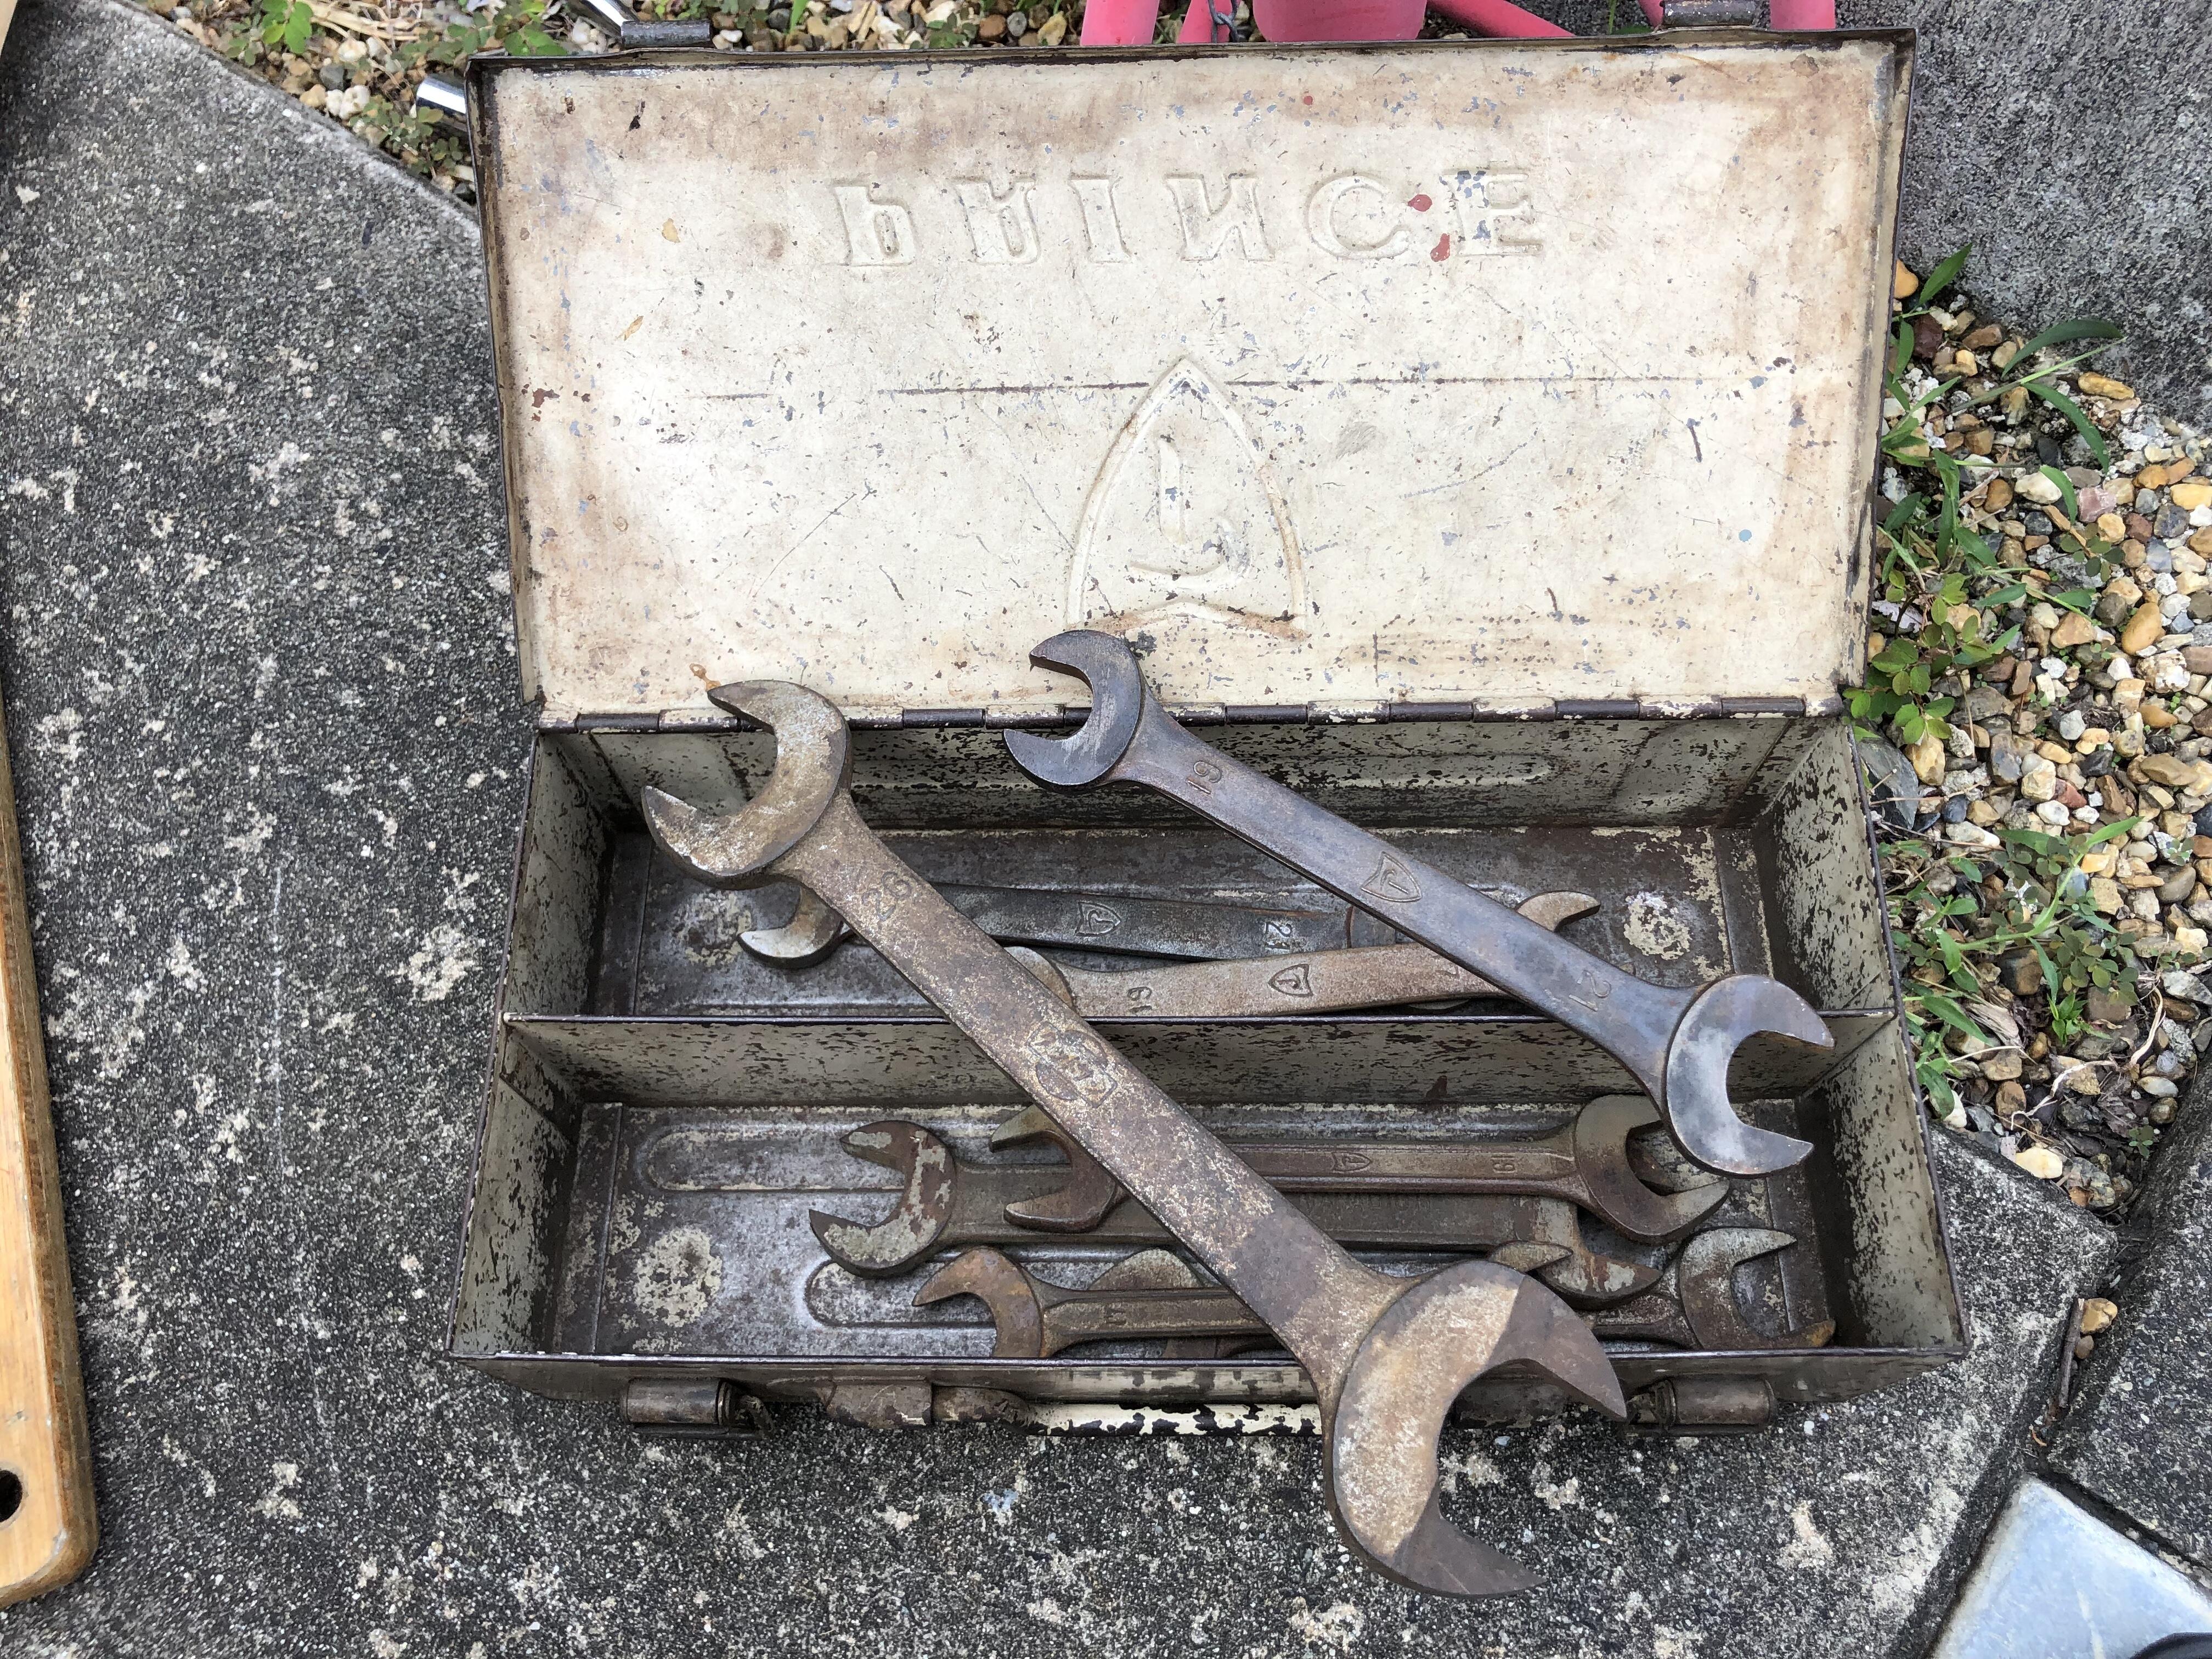
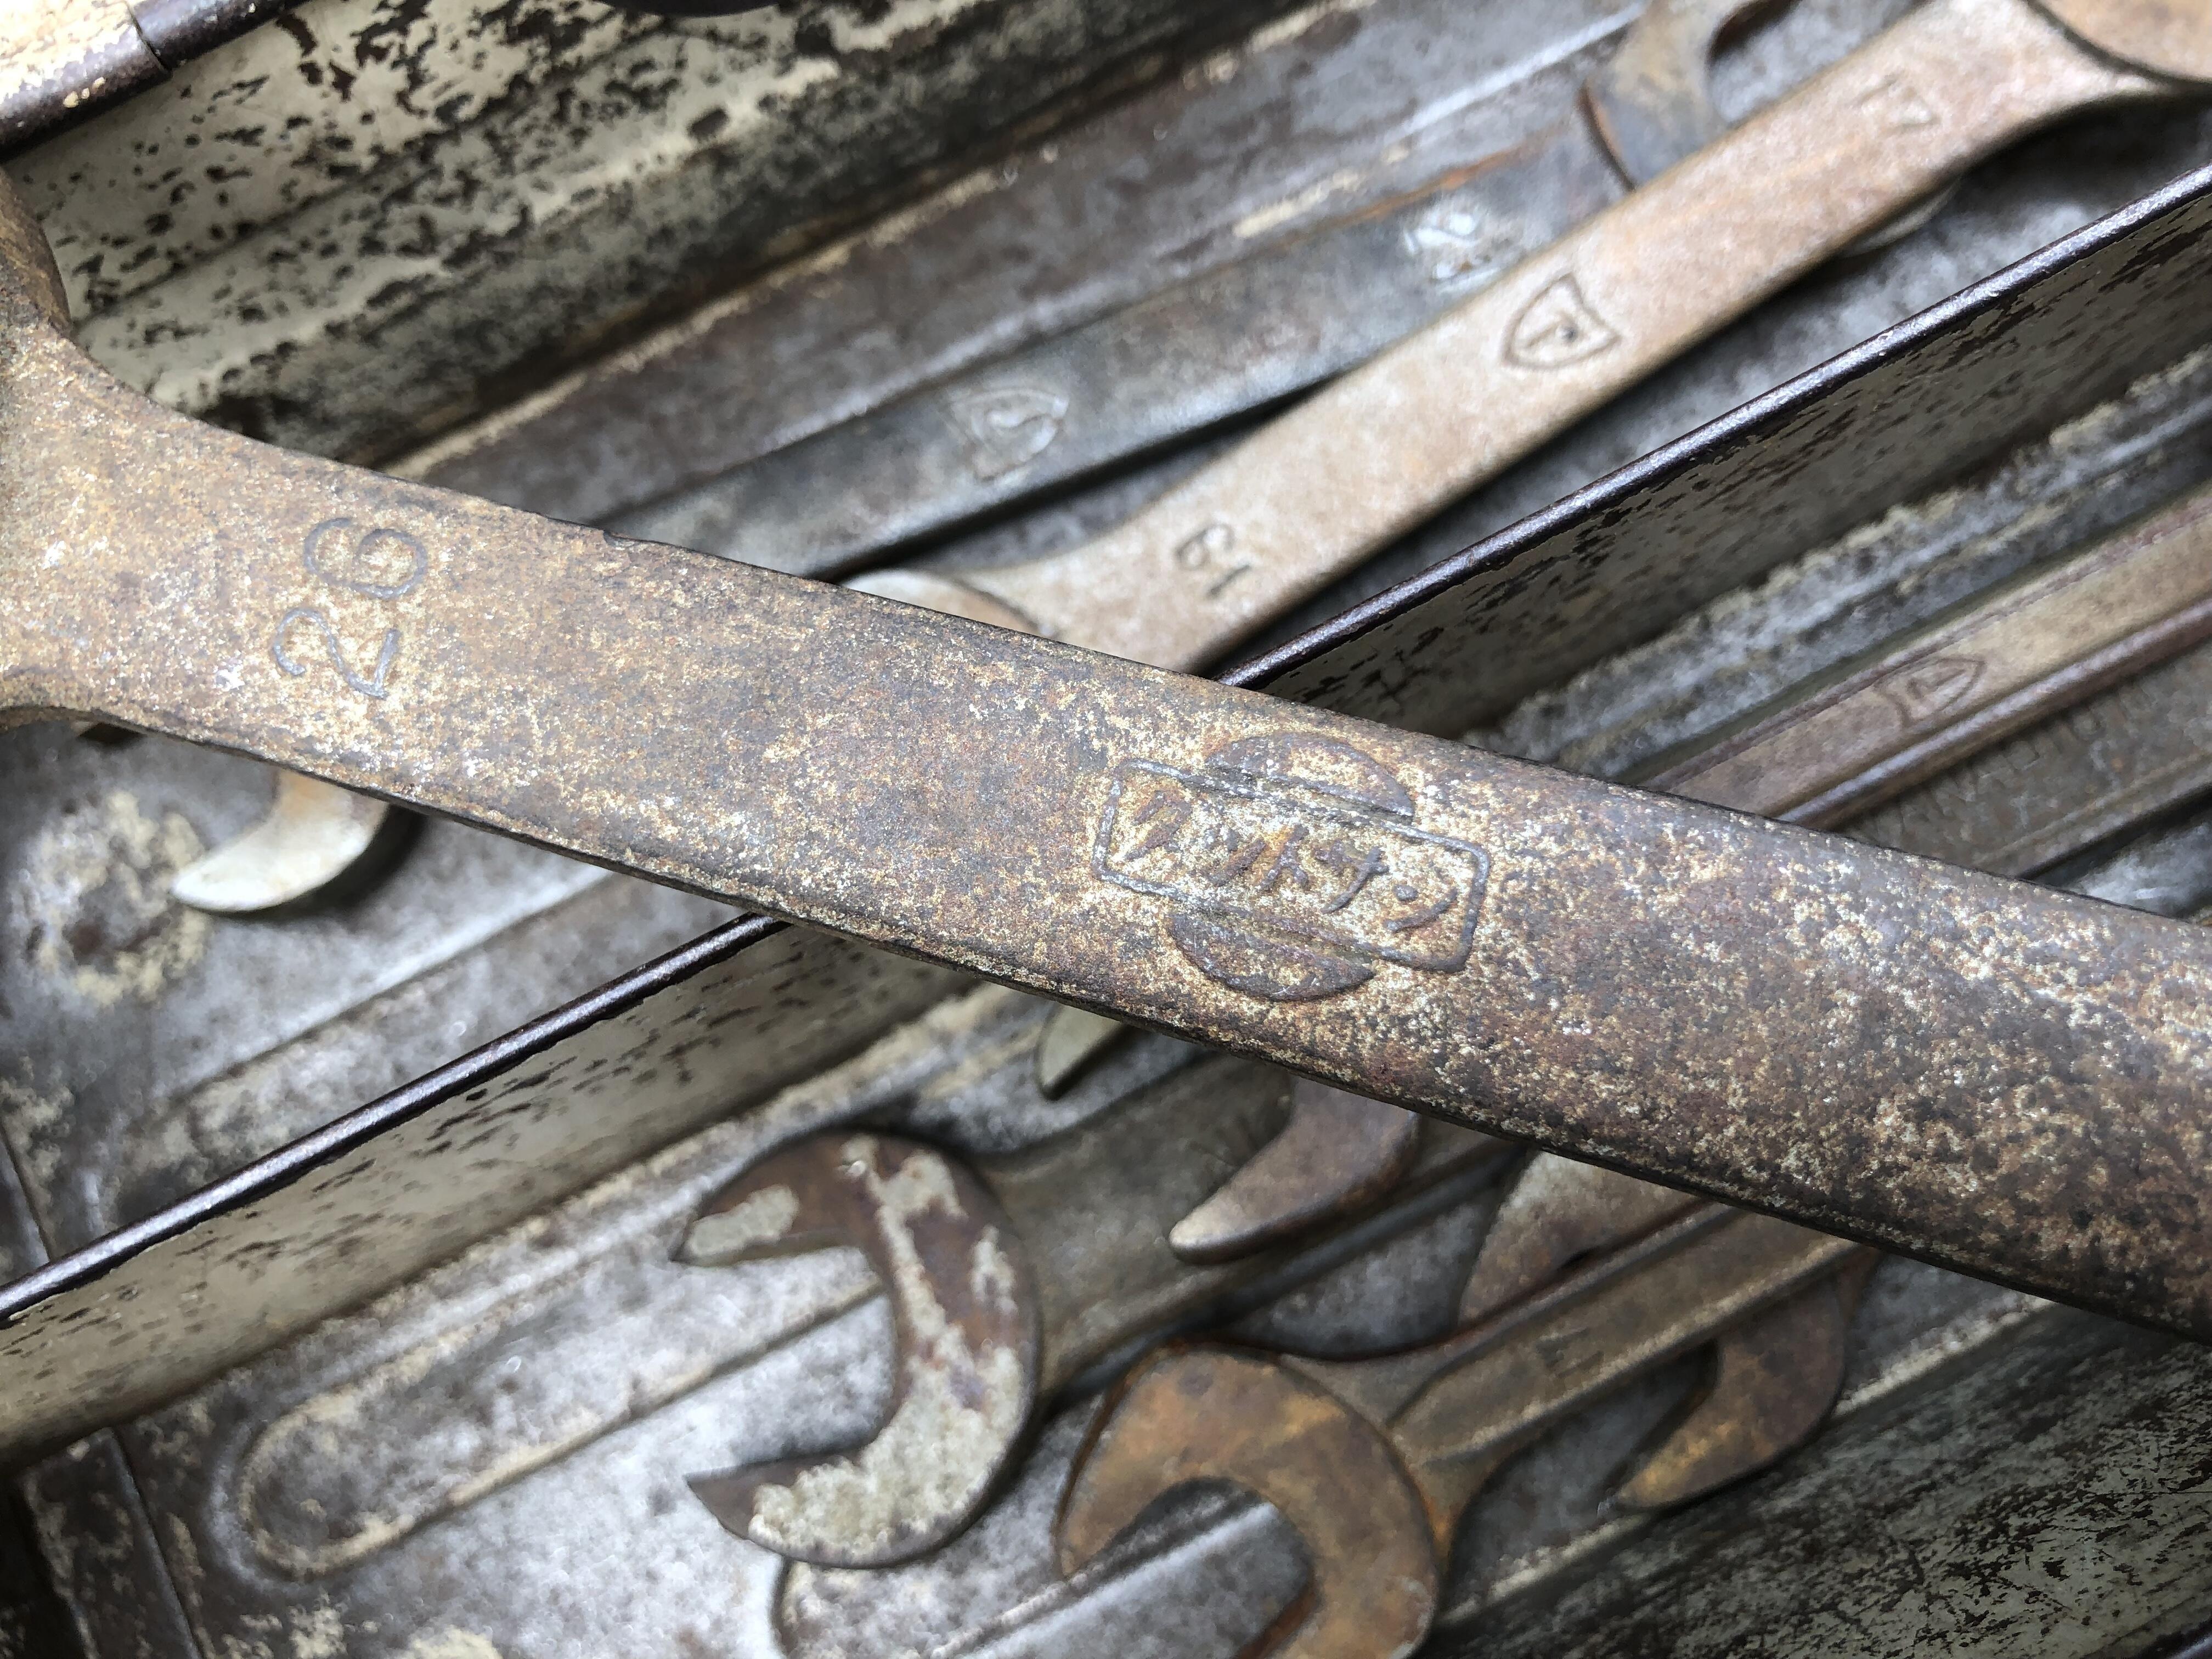
5 pointsHere is my tool box , Prince tools are inside in the box . I found one big wrench which has name ダットサン(Datsun) I think it is very old tool , maybe before WW2 ? Kats


 5 points
 -
3 pointsNow my 240Z look like this . I add some old pictures for references. Kats


 3 points
 -
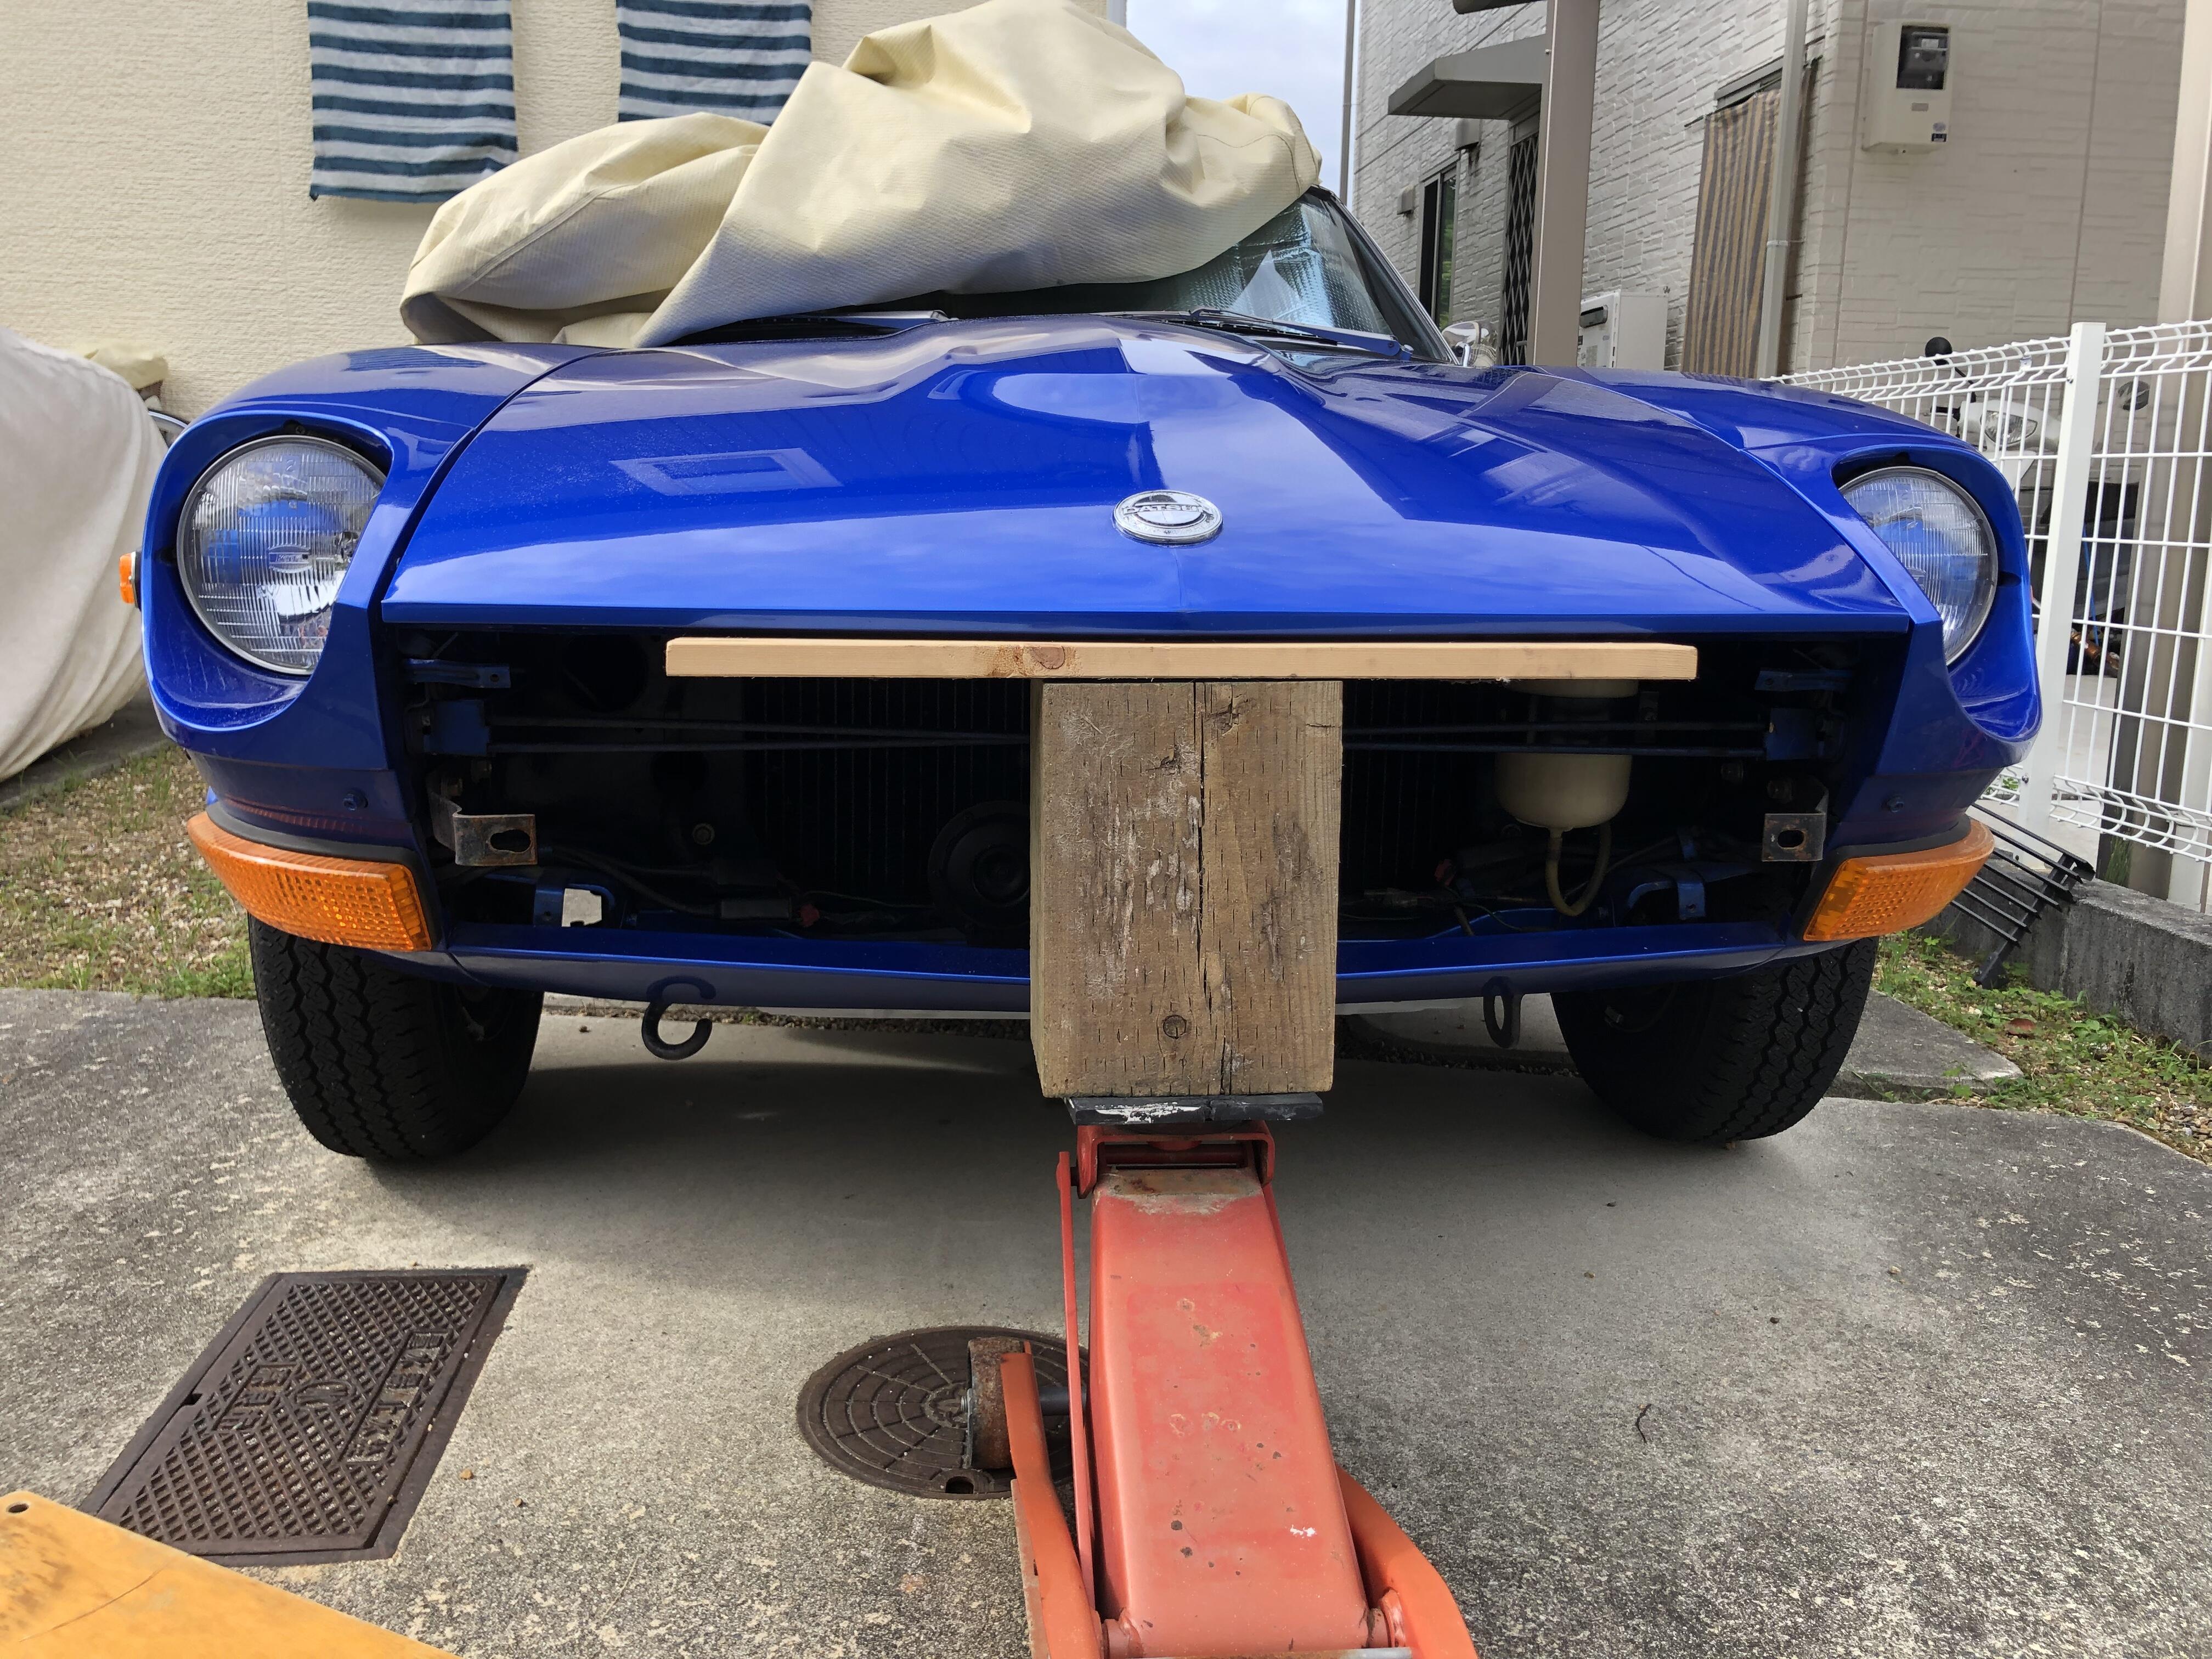
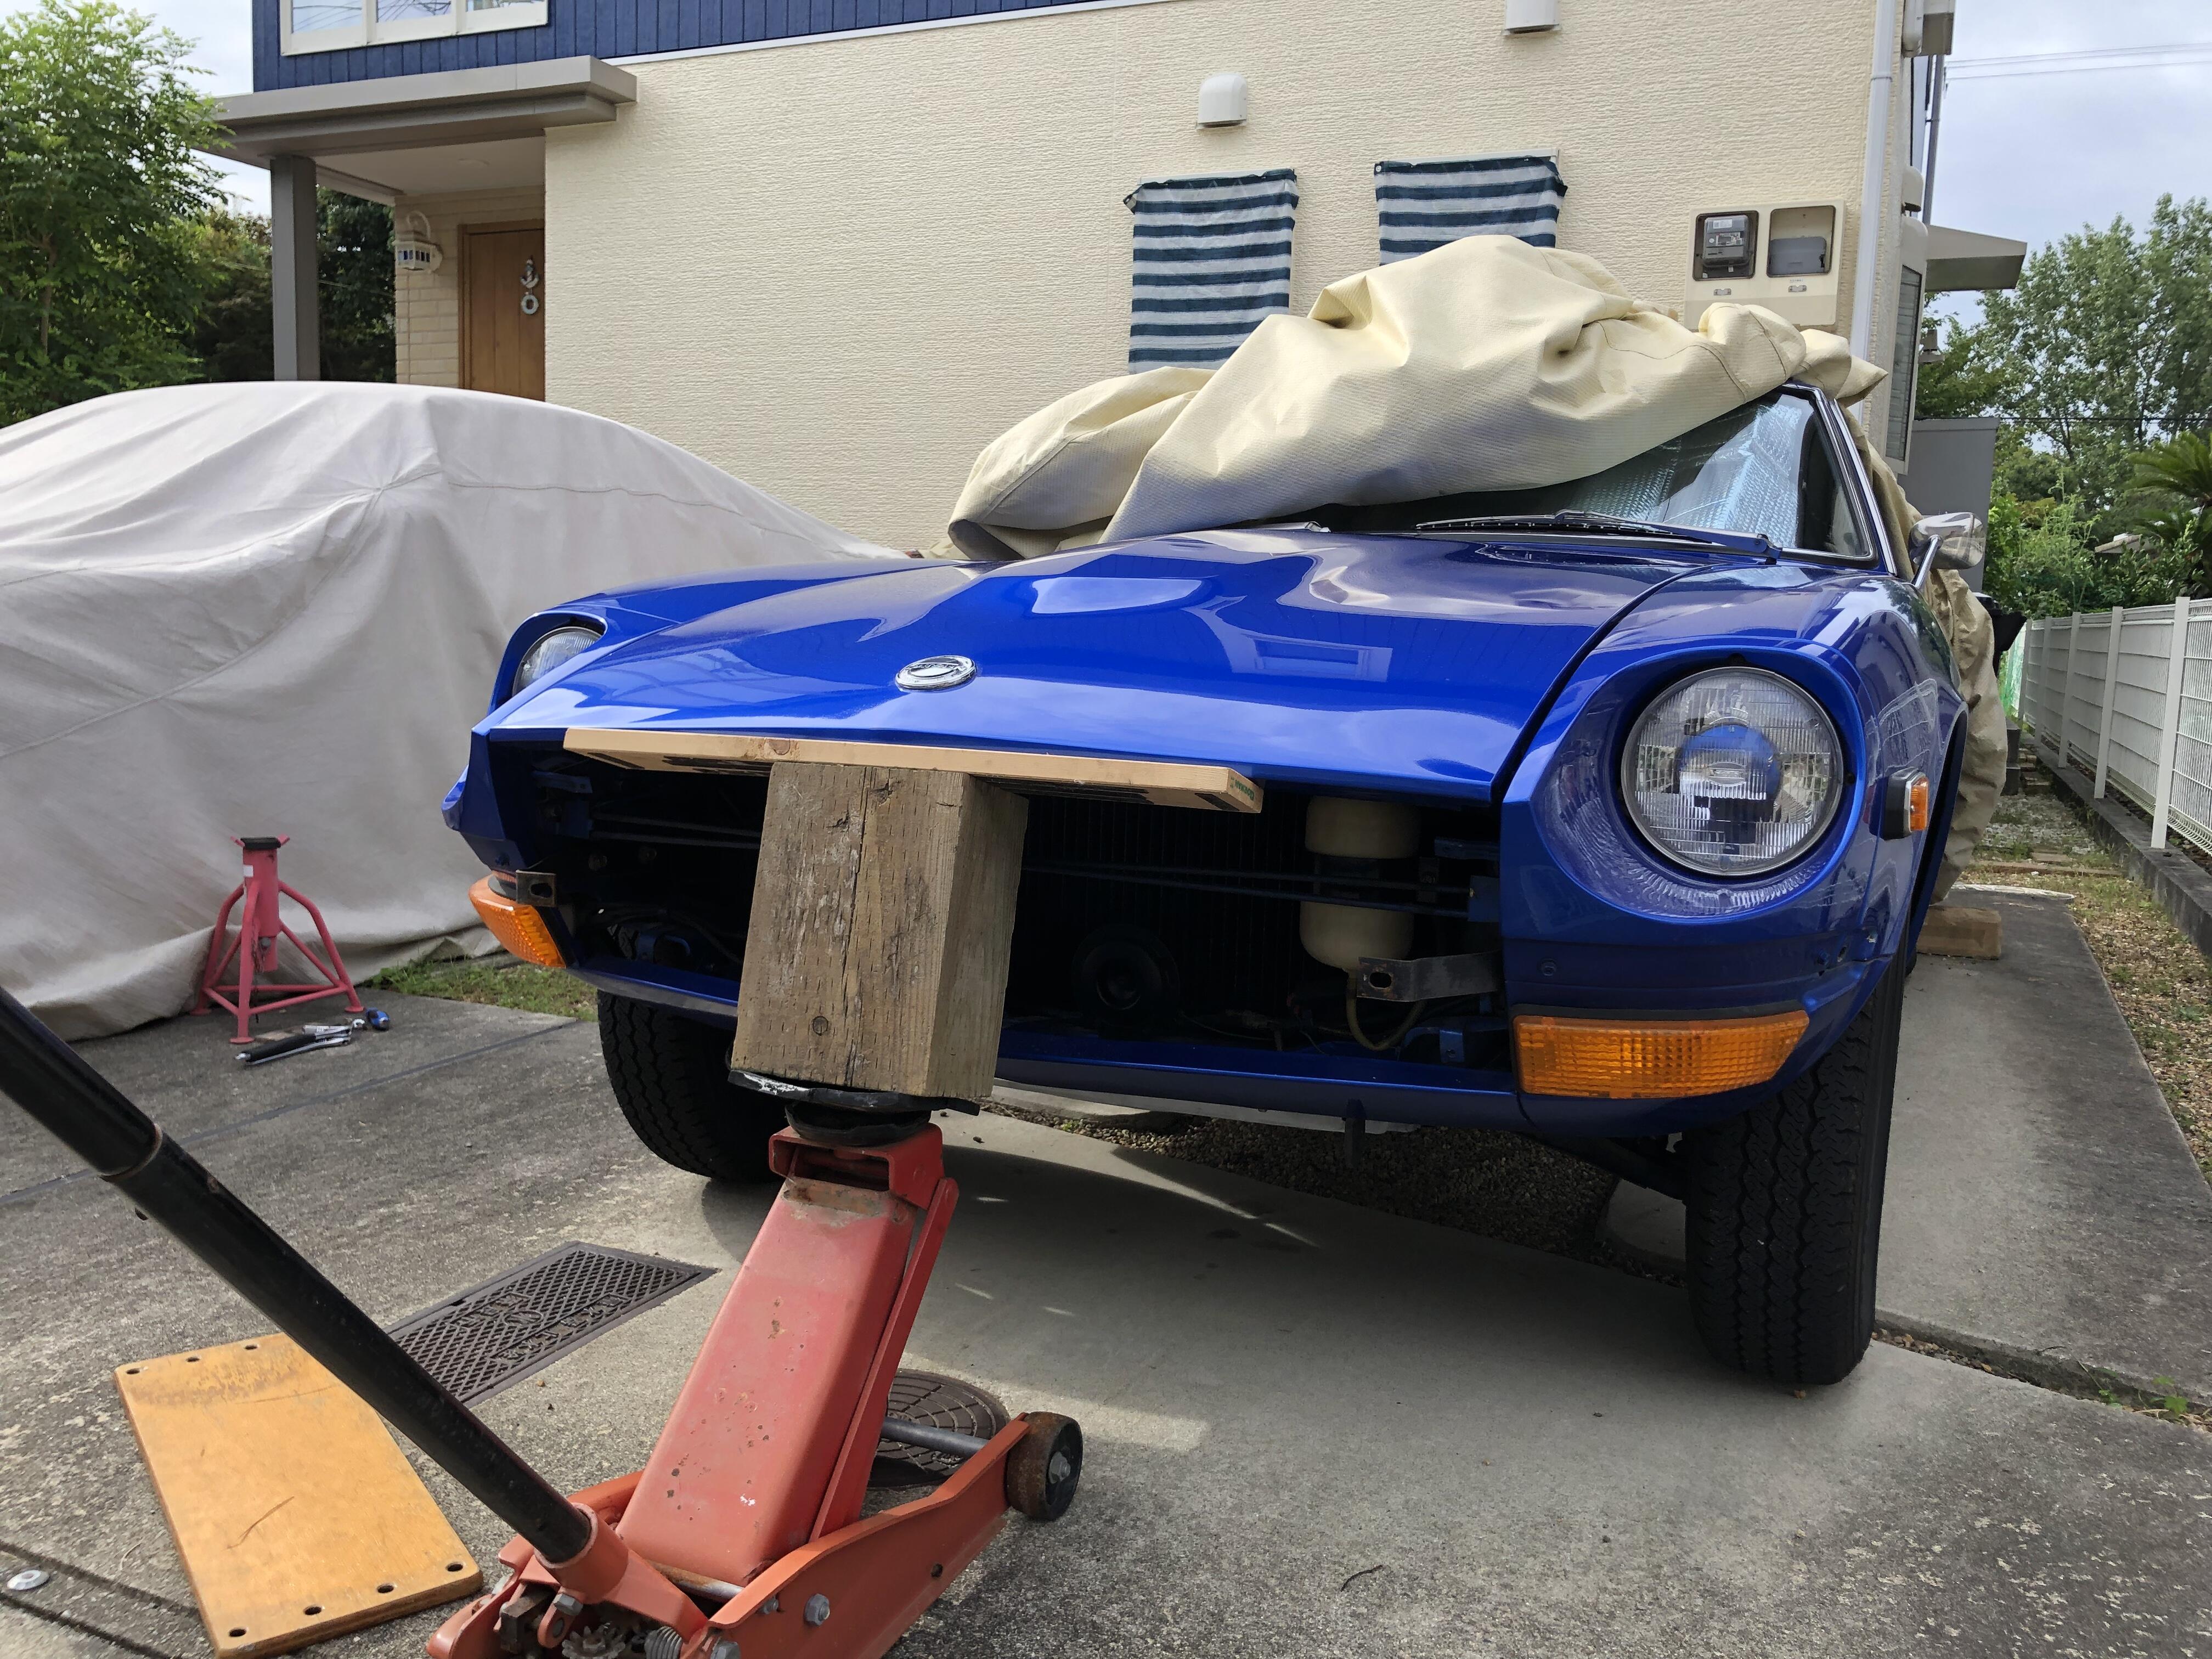
2 pointsHi , I have been unhappy with my 240Z’s bonnet. The top center edge was pointing down quite noticeably. I wanted it lifted up as we have seen it in original, un damaged bonnet. All I have seen old pictures show me beautiful, a bit far from the bumper than the both left and right corners. So , I did it by my self . It is a crazy thing , It was abrupt method. I used a jack with wood pieces to push the top center of the bonnet. Gradually and carefully lifted it up , I was so scare when I was doing it . It turned out quite nicely, I must say I am happy with it. I don’t see any crack or bumpy , shrink surface . I will do some bonnet hinges adjustments, also may require some head light case and fender adjustments . Please see the pictures ! Kats


 2 points
 -
Did you post about this before? Seems familiar. A dial indicator, or even a stick on a brick, might tell you something. Set it up and spin the various items in question.2 points
-
Yup:) Going to attack it on Sunday. As you know I just got the car rolling after two years of absolute peril, so putting it back on stands for what will likely be an extended period of time hurts the soul.1 point
-
1 pointThe headlight kit arrived in the noon mail today. Very nice. Came with instructions.1 point
-
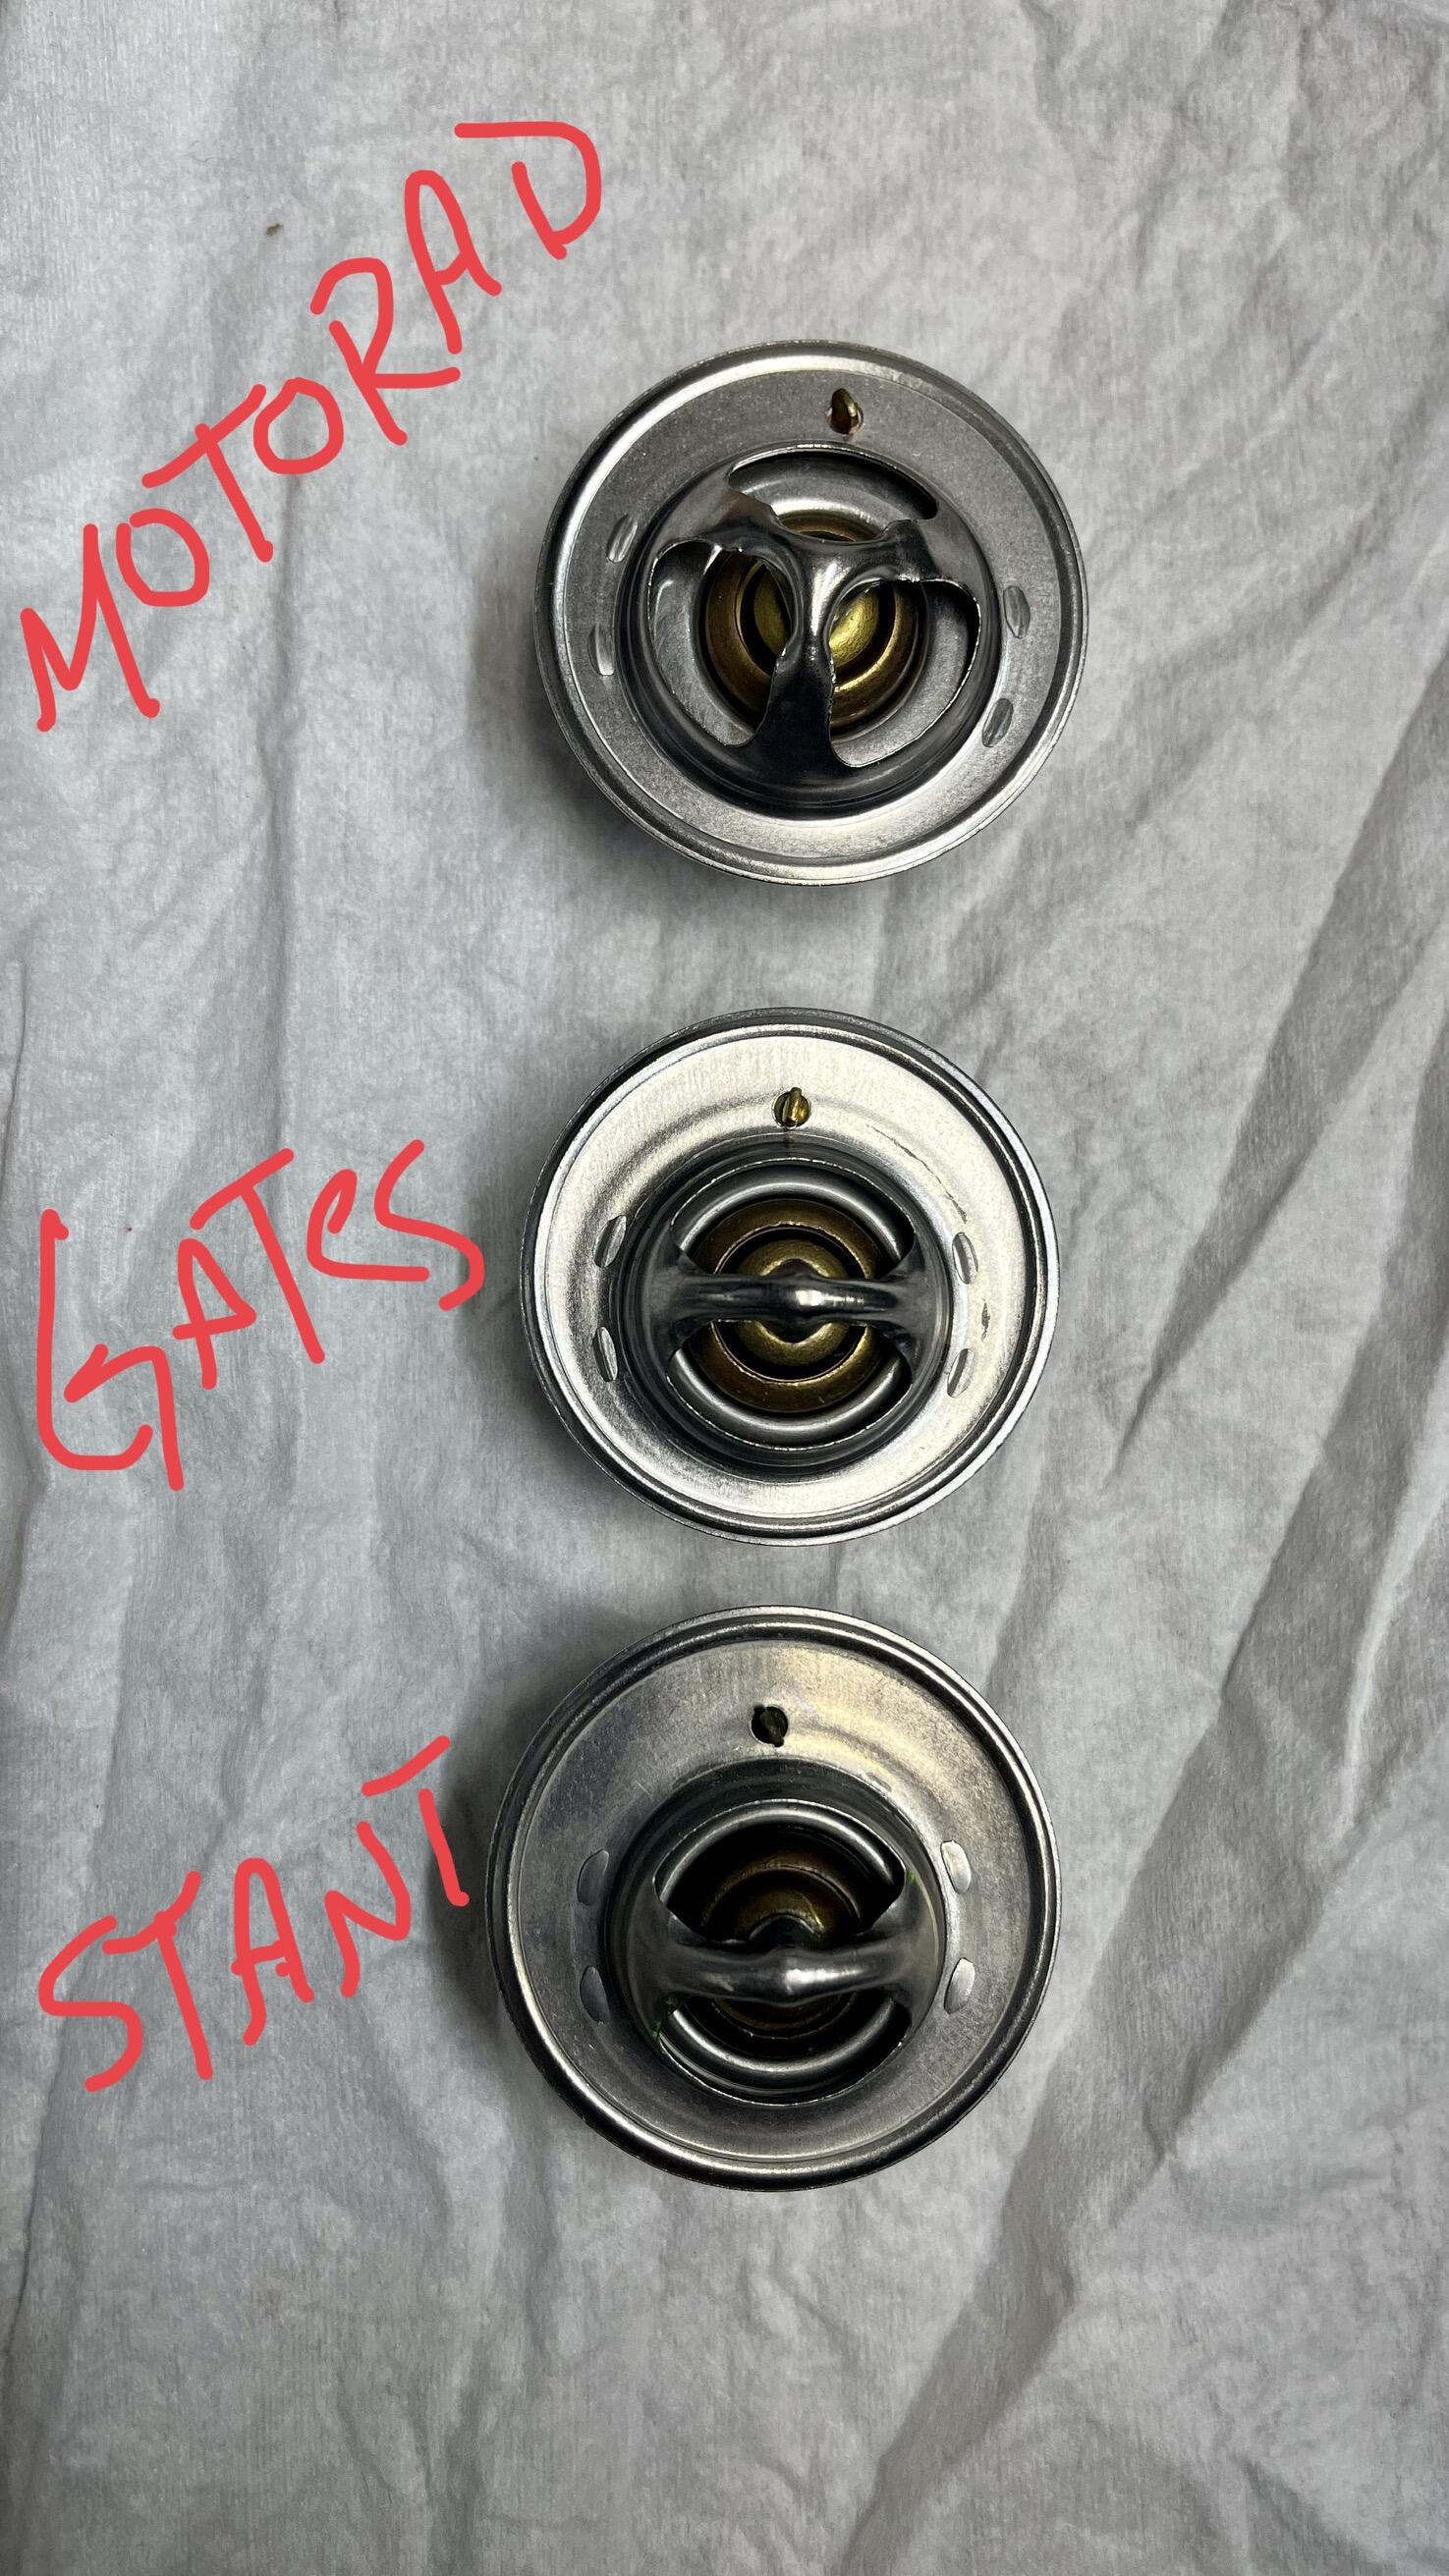
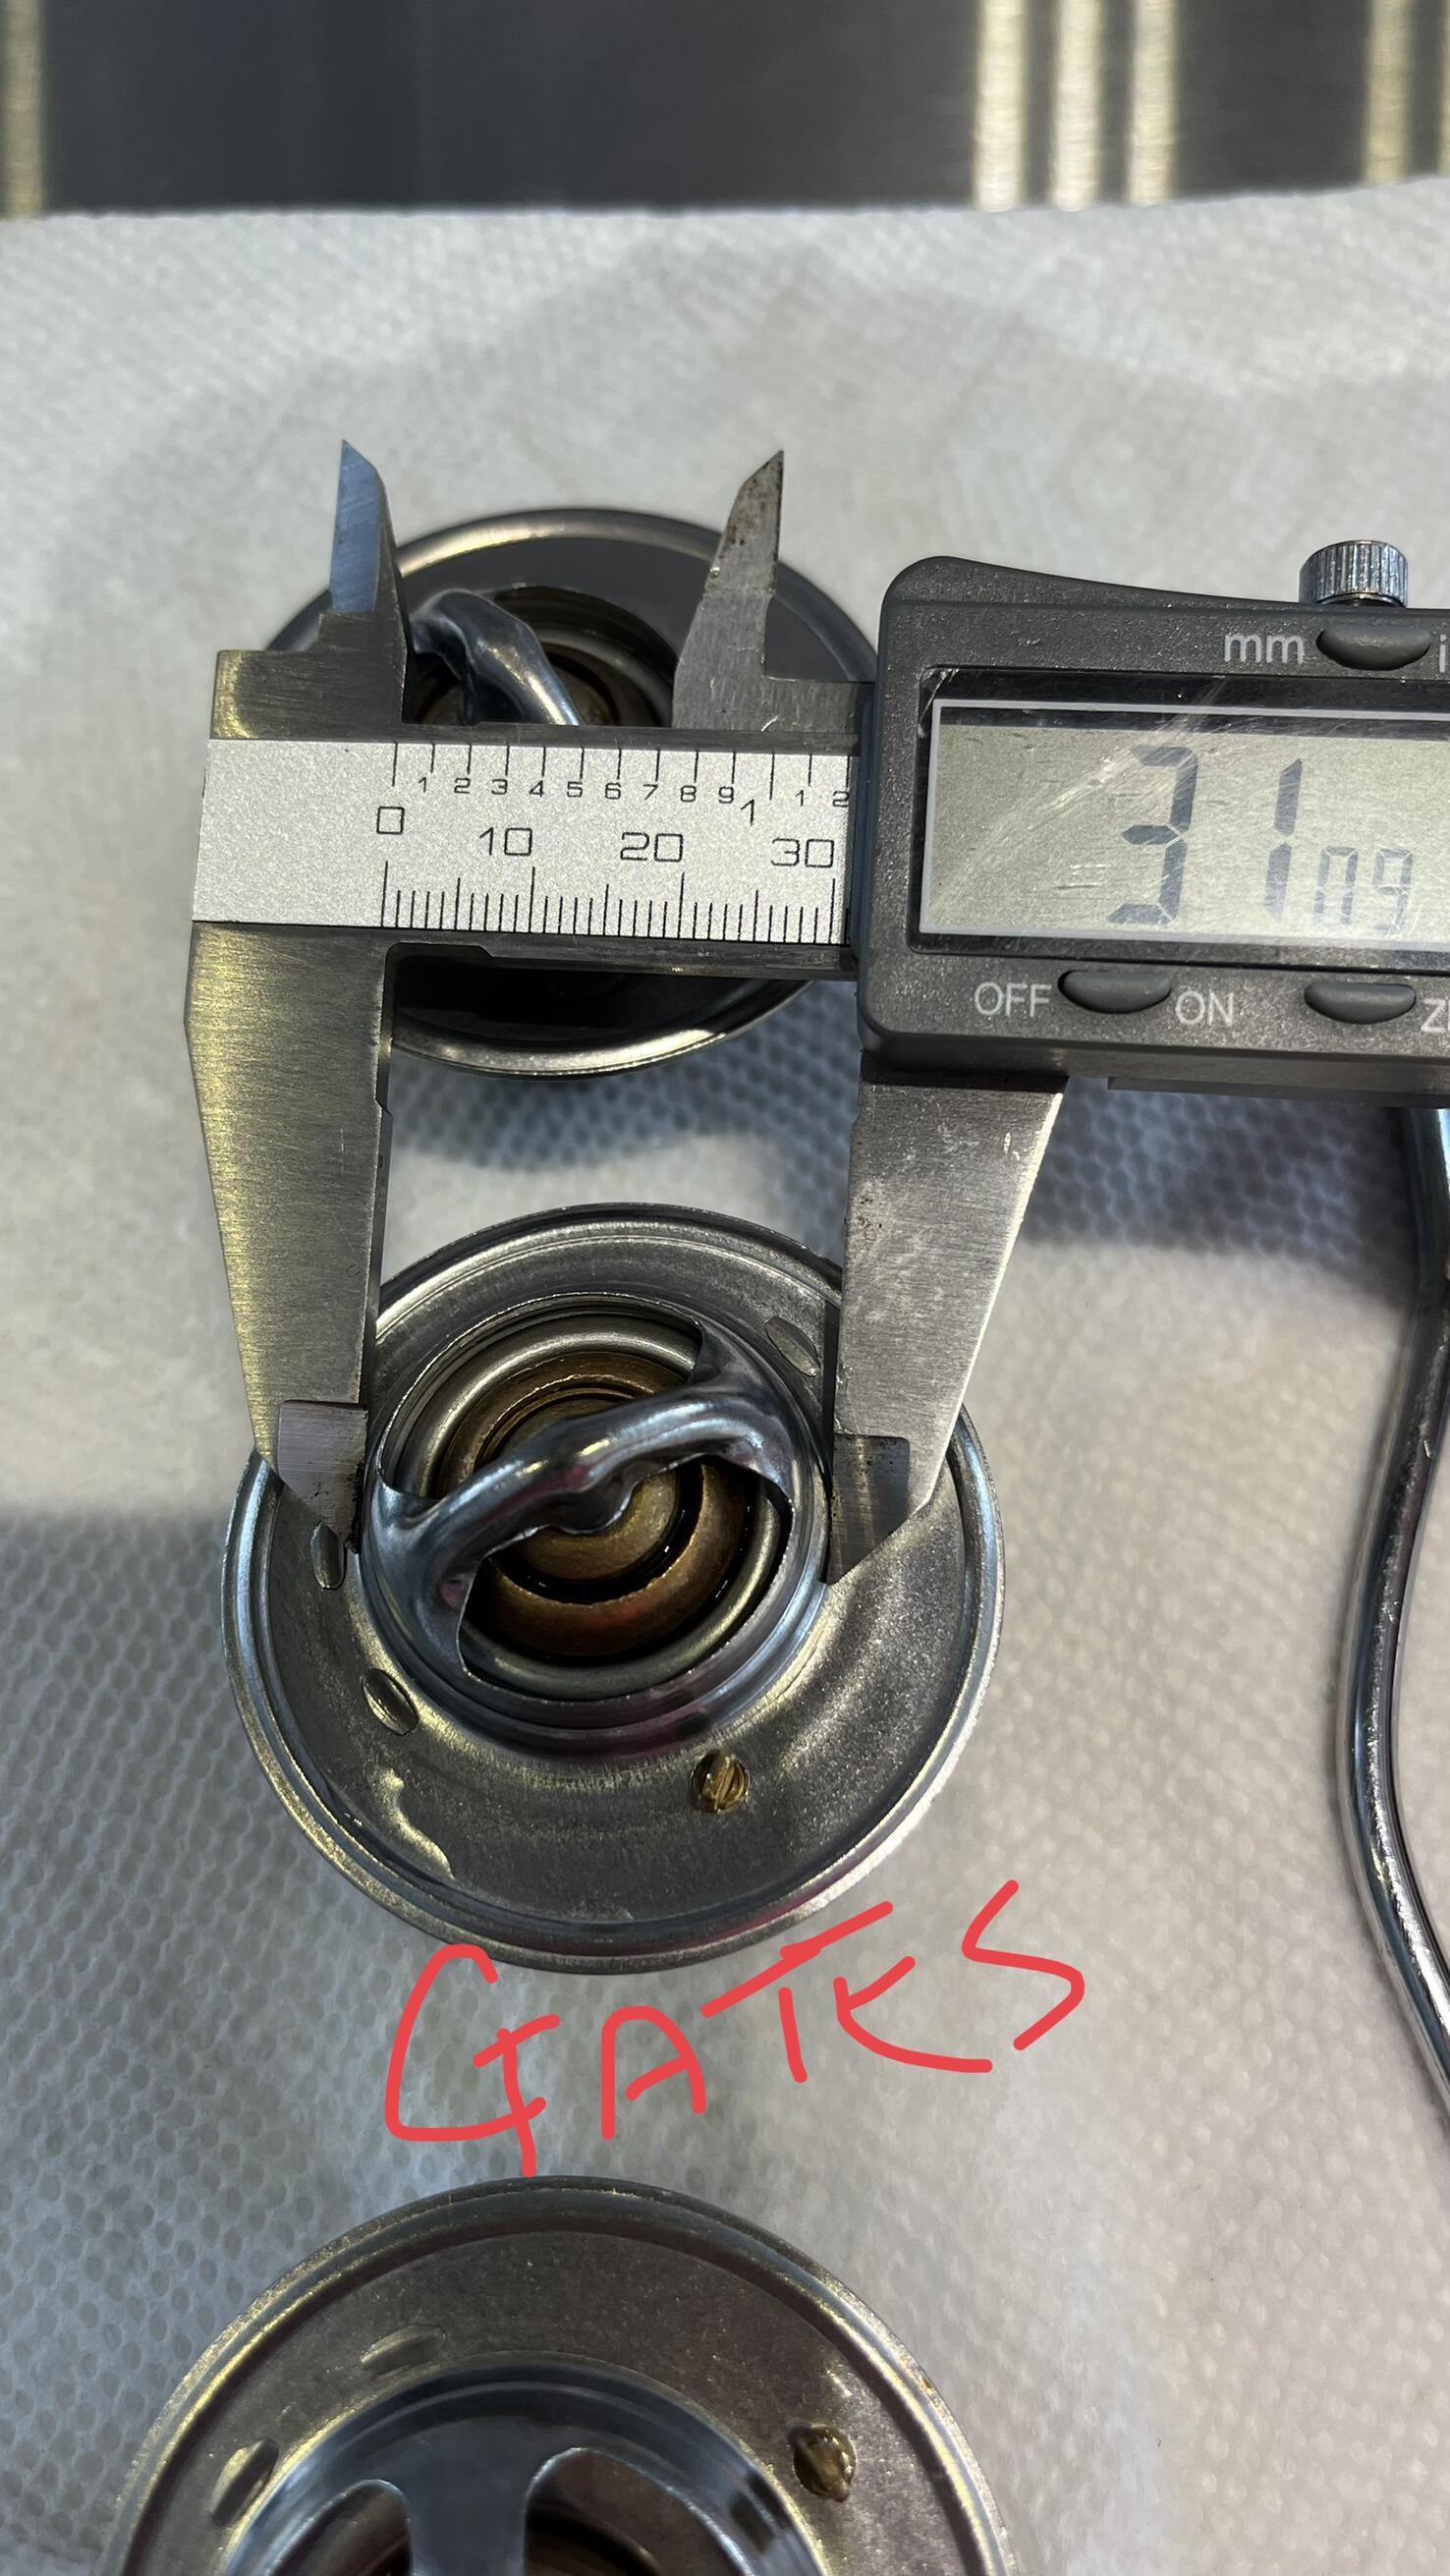
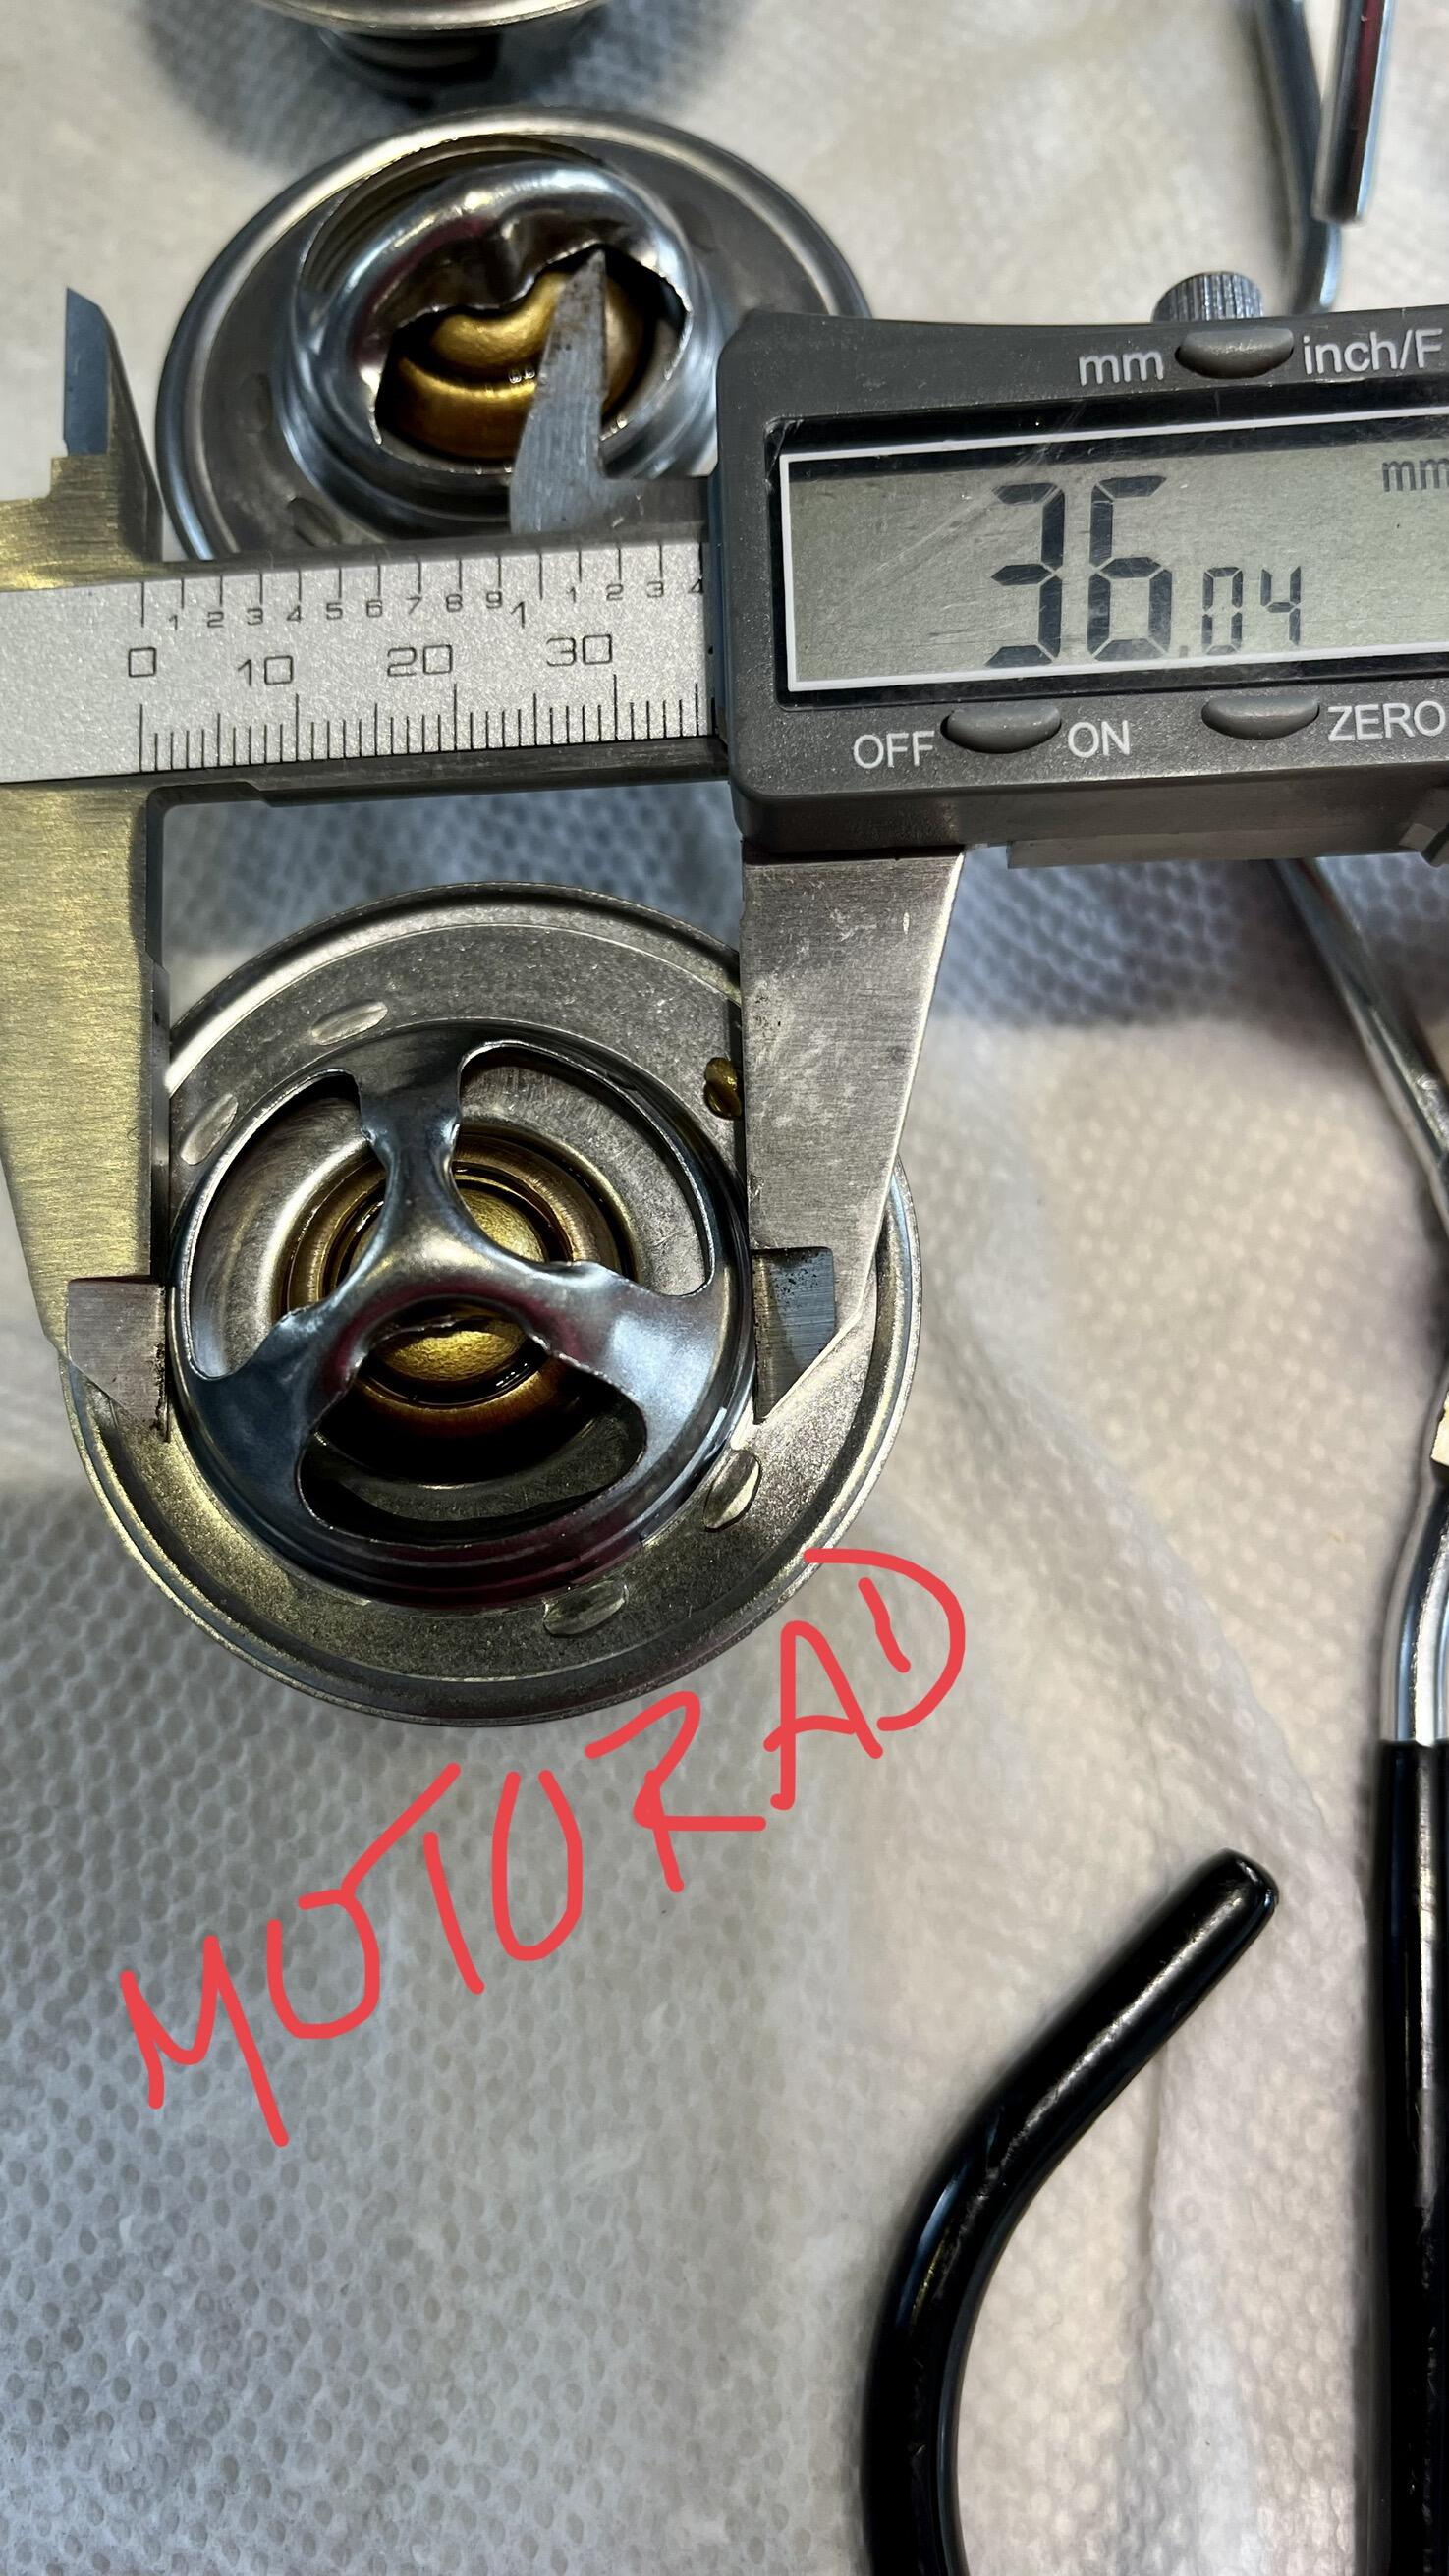
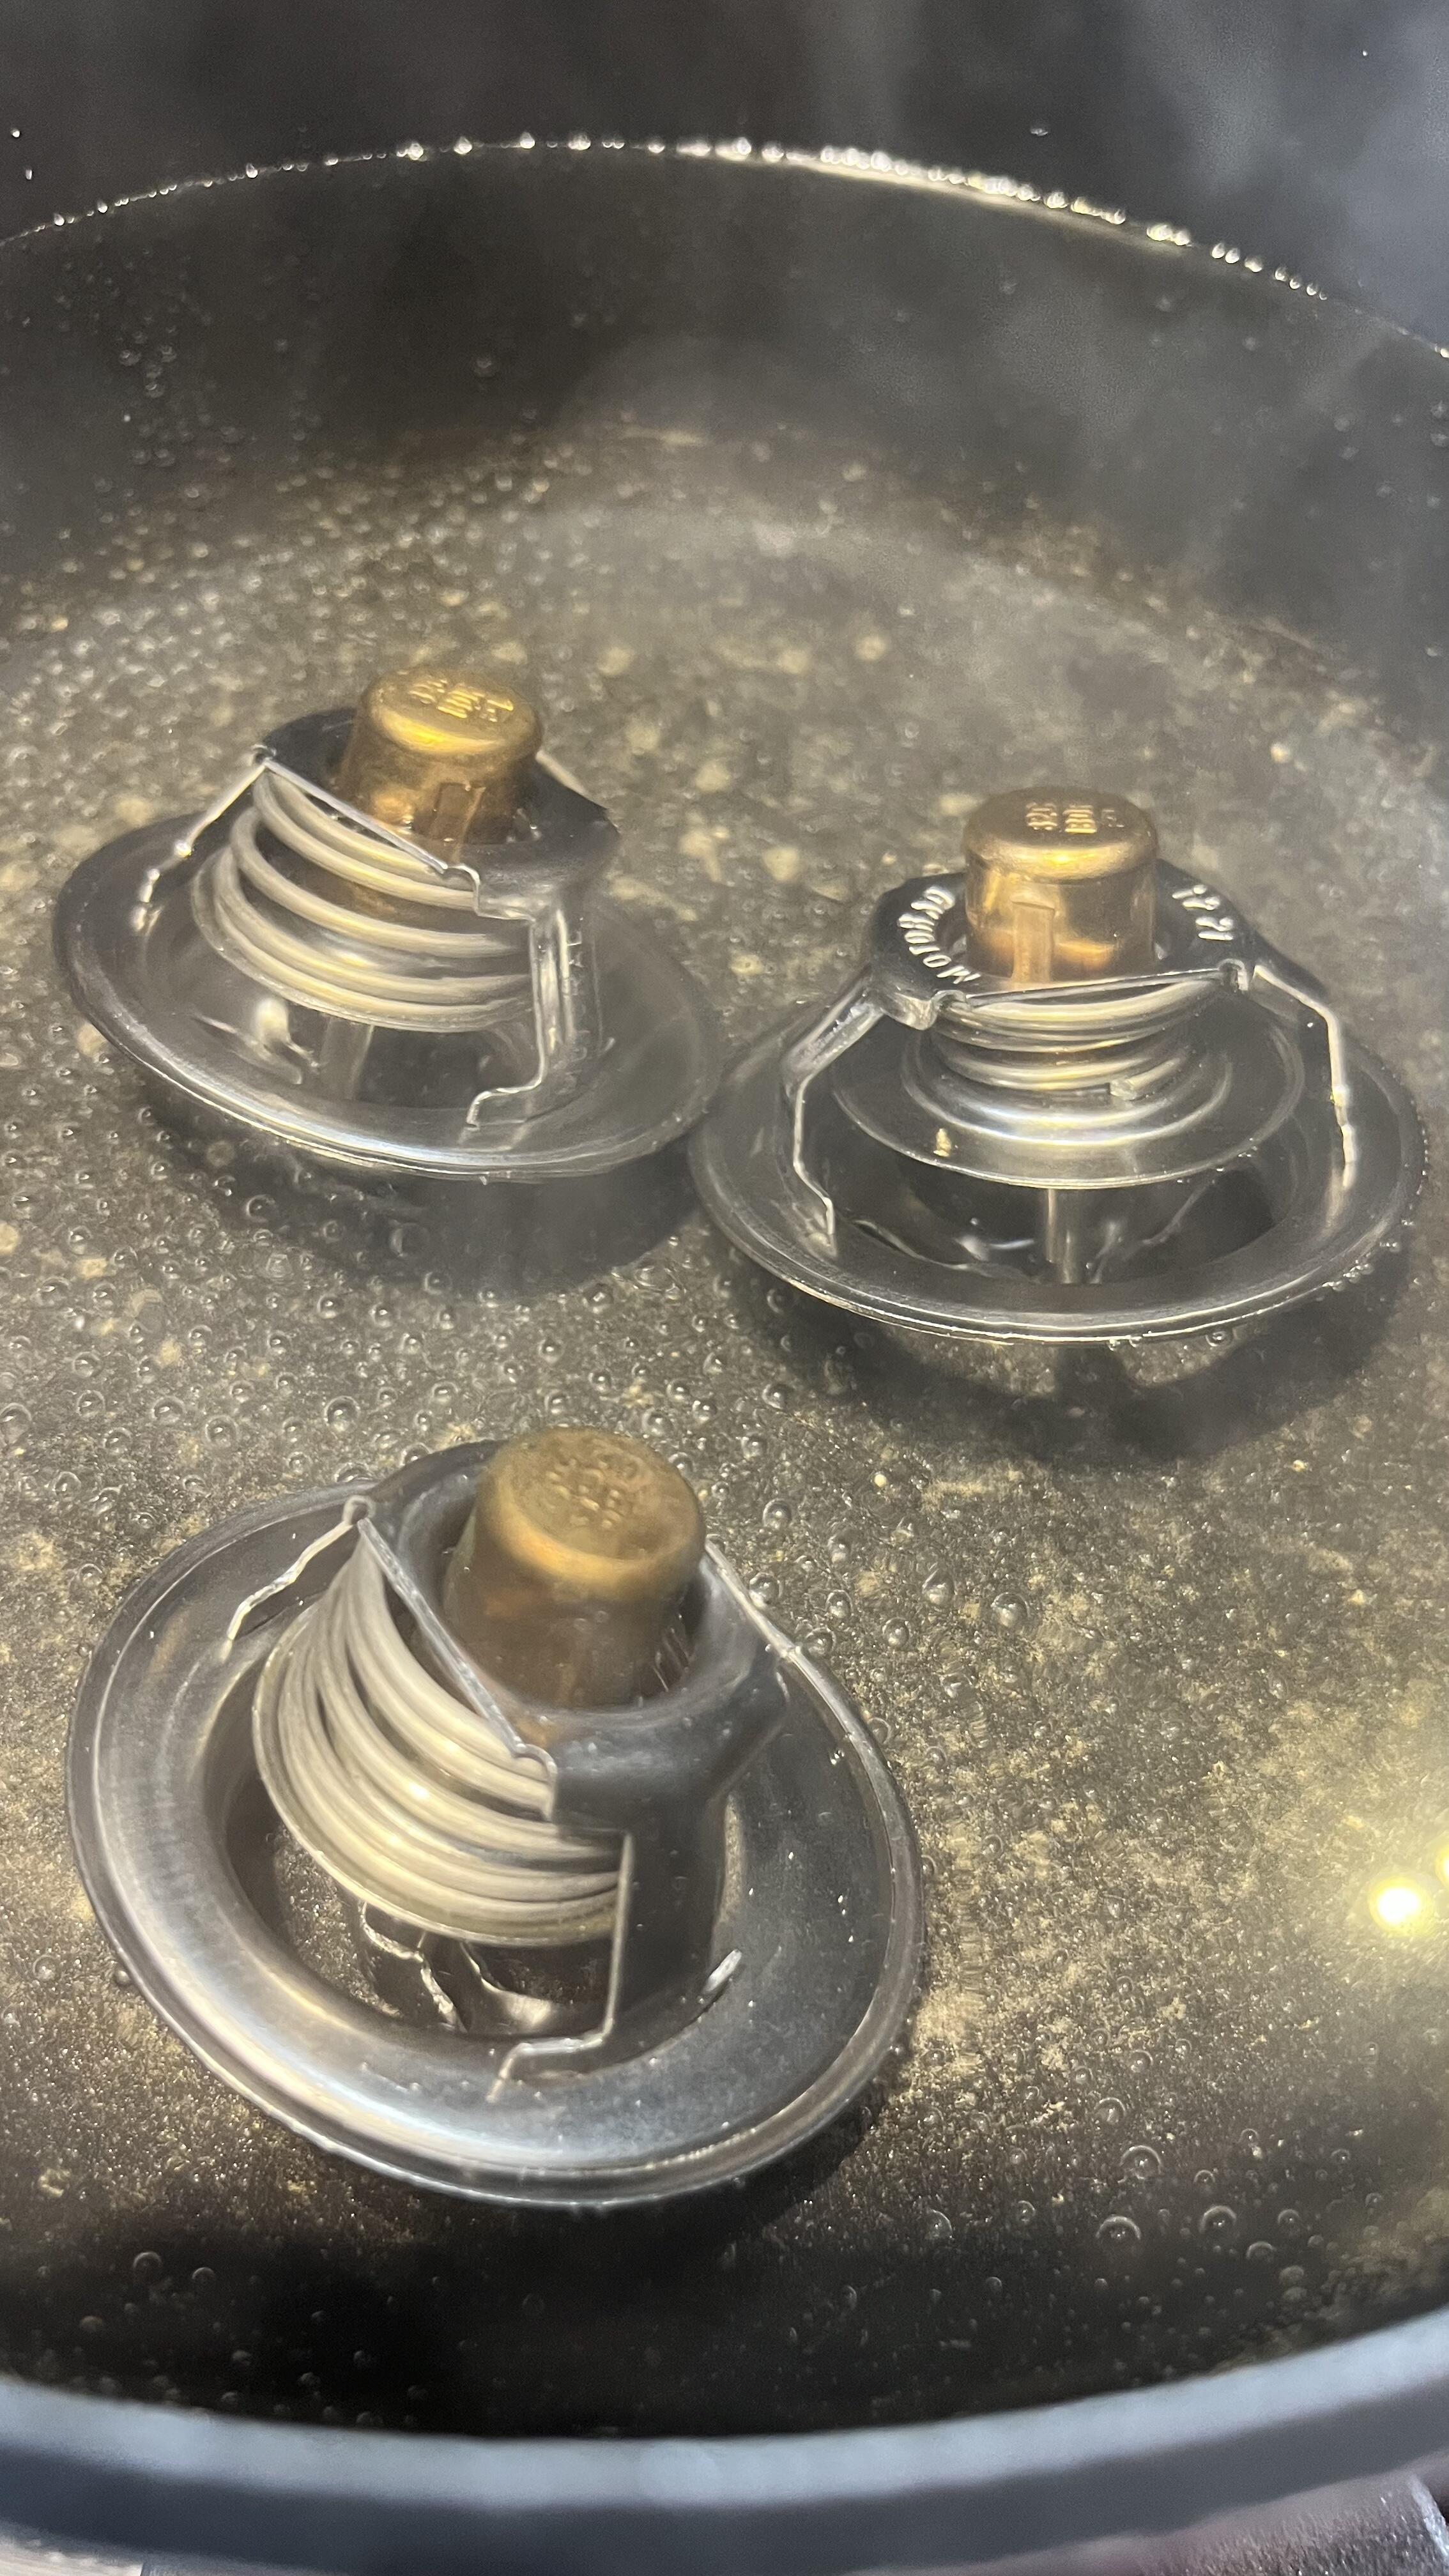
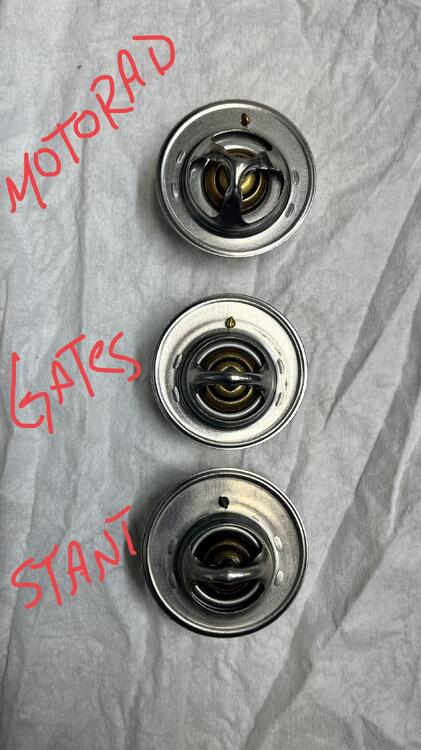
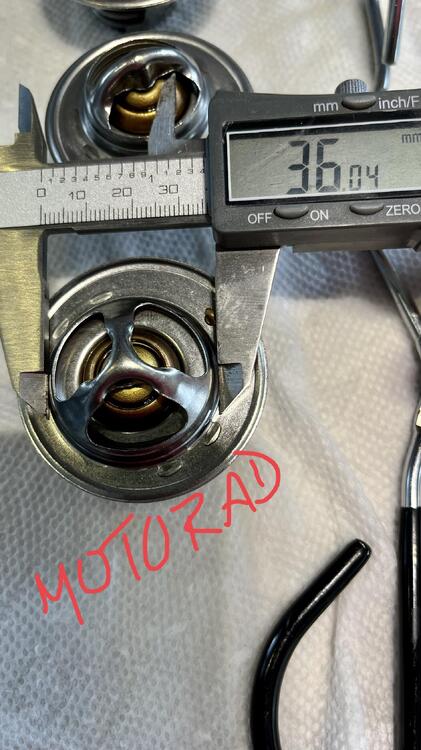
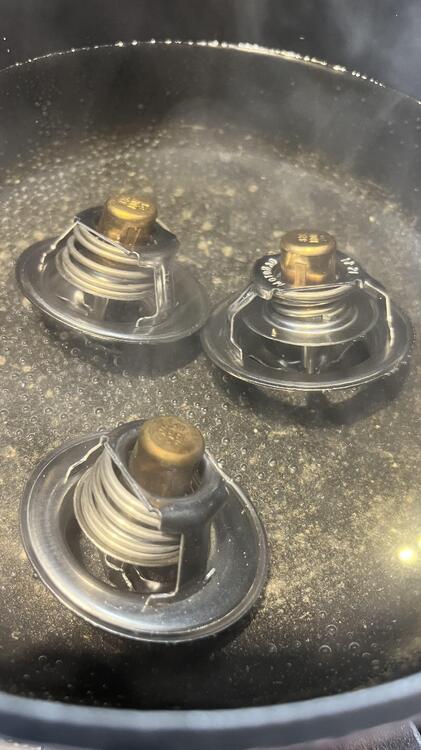
1 pointThank Chaz. Here’s the update. I’ve mounted and wired up the E12-80 module as depicted above. Temporarily wired it to the distributor just to test and the car started right up and ran fine. With this new location I was able to test my other modules some Nissan some aftermarket. It took no more than 1 min to conduct the swaps. I received the HEI but still waiting on the heat sink to arrive, should be her tomorrow. I took some temperature samples after letting the engine get to operating temperature. The base of the distributor was around 150 deg F and the module located next to the AFM was running about 120 deg F. Touching it felt pretty hot to the hand. I’d like to see it run cooler, if possible. I guess I could get crazy and mount a mini fan that is used to cool computer processors, would be easy to do but probably not required and a total over kill. I wanted to go back and discuss my thermostat findings. I ordered two extra thermostats and after removing my old one I tested all three in a pan of water on the stove. There brands were Stant (old one I removed from ca4), Gates (premium grade) and MotoRad (high flow). After the tests they all opened per the FSM and at 189F we’re full open (these were all 180f spec) . I’ll put pics below of each, The MotoRad look the best made, because it had a more robust construction but it also had a 5mm wider opening at full operating temp than the other two. The Stant and Gates look identical. Here it is on Rock Auto where I bought it. Car temp gauge seems to go to about the F in the middle of the temp gauge now. Before it would go past a bit. https://www.rockauto.com/en/moreinfo.php?pk=4483860&cc=1209248&pt=2200&jsn=10415


 1 point
 -
@SteveJ ... if you decide to use original rubber for the mustache bar bushings, I have a tool you can use in your press to bend the metal properly into place. If you decide to go with polly, leave the sleeves from the original mustache bar bushings in place. Just burn out / cut out the rubber.1 point
-
From your description it is confusing about what is ‘bent’. Is this something you see? Can you post a picture of it? When not assembled, off the car, slide the companion flange onto the shaft. It should slide on all the way without resistance. The parts that fit inside the bearings is where there is an interference fit. Using anti seize on the splined portion is a good idea on assembly. It will aid disassembly later on. Finding a vibration can be difficult. As Mark mentioned, different parts of the drivetrain rotate at different speeds, and understanding this can help locate the source of the vibrations. You mentioned vibrations in the steering wheel. That suggests the vibrations are coming from the front of the car, not the rear. If you feel the vibrations in the seat, that suggests the vibrations are coming from the rear of the car. If you suspect the companion flange is bent, use a dial indicator and check for runout. It is an easy check, and the FSM should have a spec for it. Also check the runout on your wheels, halfshafts, driveshaft, differential pinion and output flanges. Be sure to closely examine the tires too, looking for damage, shifted belts or unusual bumps in the tread. Be sure the tires are properly inflated.1 point
-
It is possible that the Teflon tape will insulate the sending unit from the engine, blocking the path to ground. Most auto parts stores carry small vials of an assortment of thread locking and thread sealing anerobic compounds for a couple of bucks.1 point
-
That’s why I suggested the LocTite 542. A drop or two of an anerobic thread sealant will seal without interfering with the electric ground path.1 point
-
Hey @Zed Head just cause my car is green and slow, doesn't mean I am a turtle too. 😂 @ckurtz2 I answered your PM. I should be able to help you out.1 point
-
Yes, if you put up more than let's say 1,5 rounds.. so just use a little not 3-5 rounds because that will isolate your sensor from ground. better use a drop of liquid loc-tite. You can use teflon (PTFE) tape but if the meter does not give any oilpressure you know you used to much tape 😉 !!1 point
-
I'll definetly shoot a PM his way. Ok so, I finally got a buddy in the passenger seat with a speedometer app on his phone (mine no work haha). Anyways the official symptoms are. The shaking is super bad at around 45-65mph. At the lower end at around the 40-45 the steering wheel noticeably shakes, and then that fades away at about 65mph. However at 65 the entire car is shaking really bad, but the duration of the vibrations is much faster instead of thump thump thump. The car is pretty much smoothed out entirely at around 79-81mph and it feels much closer to normal, however its slightly still there. It then gets worse as I go faster to about 100. To sketchy for me to try further, and found no reason to. Now for the fun part, I had an extra set of hands so I had him feel around the car where the vibration was the worst without telling him which side had the boofed stub axle. Well he identified the strut tower at the passenger rear as the worst, which essentially confirms that my vibration's epicenter is from the wheel well where the bad axle is. So I think I am going to skip pulling the driveshaft and focus on this as the priority.1 point
-
Taking the prop shaft to a good shop is how I (they) found a little dimple dent in another shaft that had a vibration problem.1 point
-
Too late. But I am shooting a video of the work. Besides, I found one loose bolt on the front passenger side shackle. 🥺 I think I can fit under the rear end like this.
 1 point
 -
If you don't mind sharing, I'm curious at what speed the vibration occurs? I chased a MAJOR high speed vibration (sounded and felt like 500 lb. bee trapped in the car) in my 240 that started at around 80 mph. I changed the half shaft u-joints first. Vibration was the same. New prop shaft u joints cured the vibration. The prop shaft spins 3-4 times faster that the half shafts and is more prone to vibration.1 point
-
The oil pressure tap on the engine block is a tapered pipe thread, originally JSP if memory serves me. It is very close to 1/8” pipe thread, and a 1/8” pipe fitting will work. Pipe threads seal by slight deformation of the threads as the fittings are tightened, so additional sealant is more insurance against a leak. Some Teflon thread paste will do, or you can use a hydraulic thread sealant such as LocTite 542. I’ve used it for years with no leaks, and there is still enough metal to metal contact to allow the sending unit to ground. Take the sending unit out, clean the threads on it, and the block. Examine the threads on both to ensure there is no damage or cracks, apply a few drops to the threads and assemble. Don’t overtighten, just snug enough to keep it from leaking.
 1 point
 -
I think you have the same sensor there as the 280zx.. the one with those 2 contacts? They tend to leak right through the sensor and oil comes out on the contact-side! When they do this they are also prone to giving a lower pressure on your meter.. best to put a new one in..1 point
-
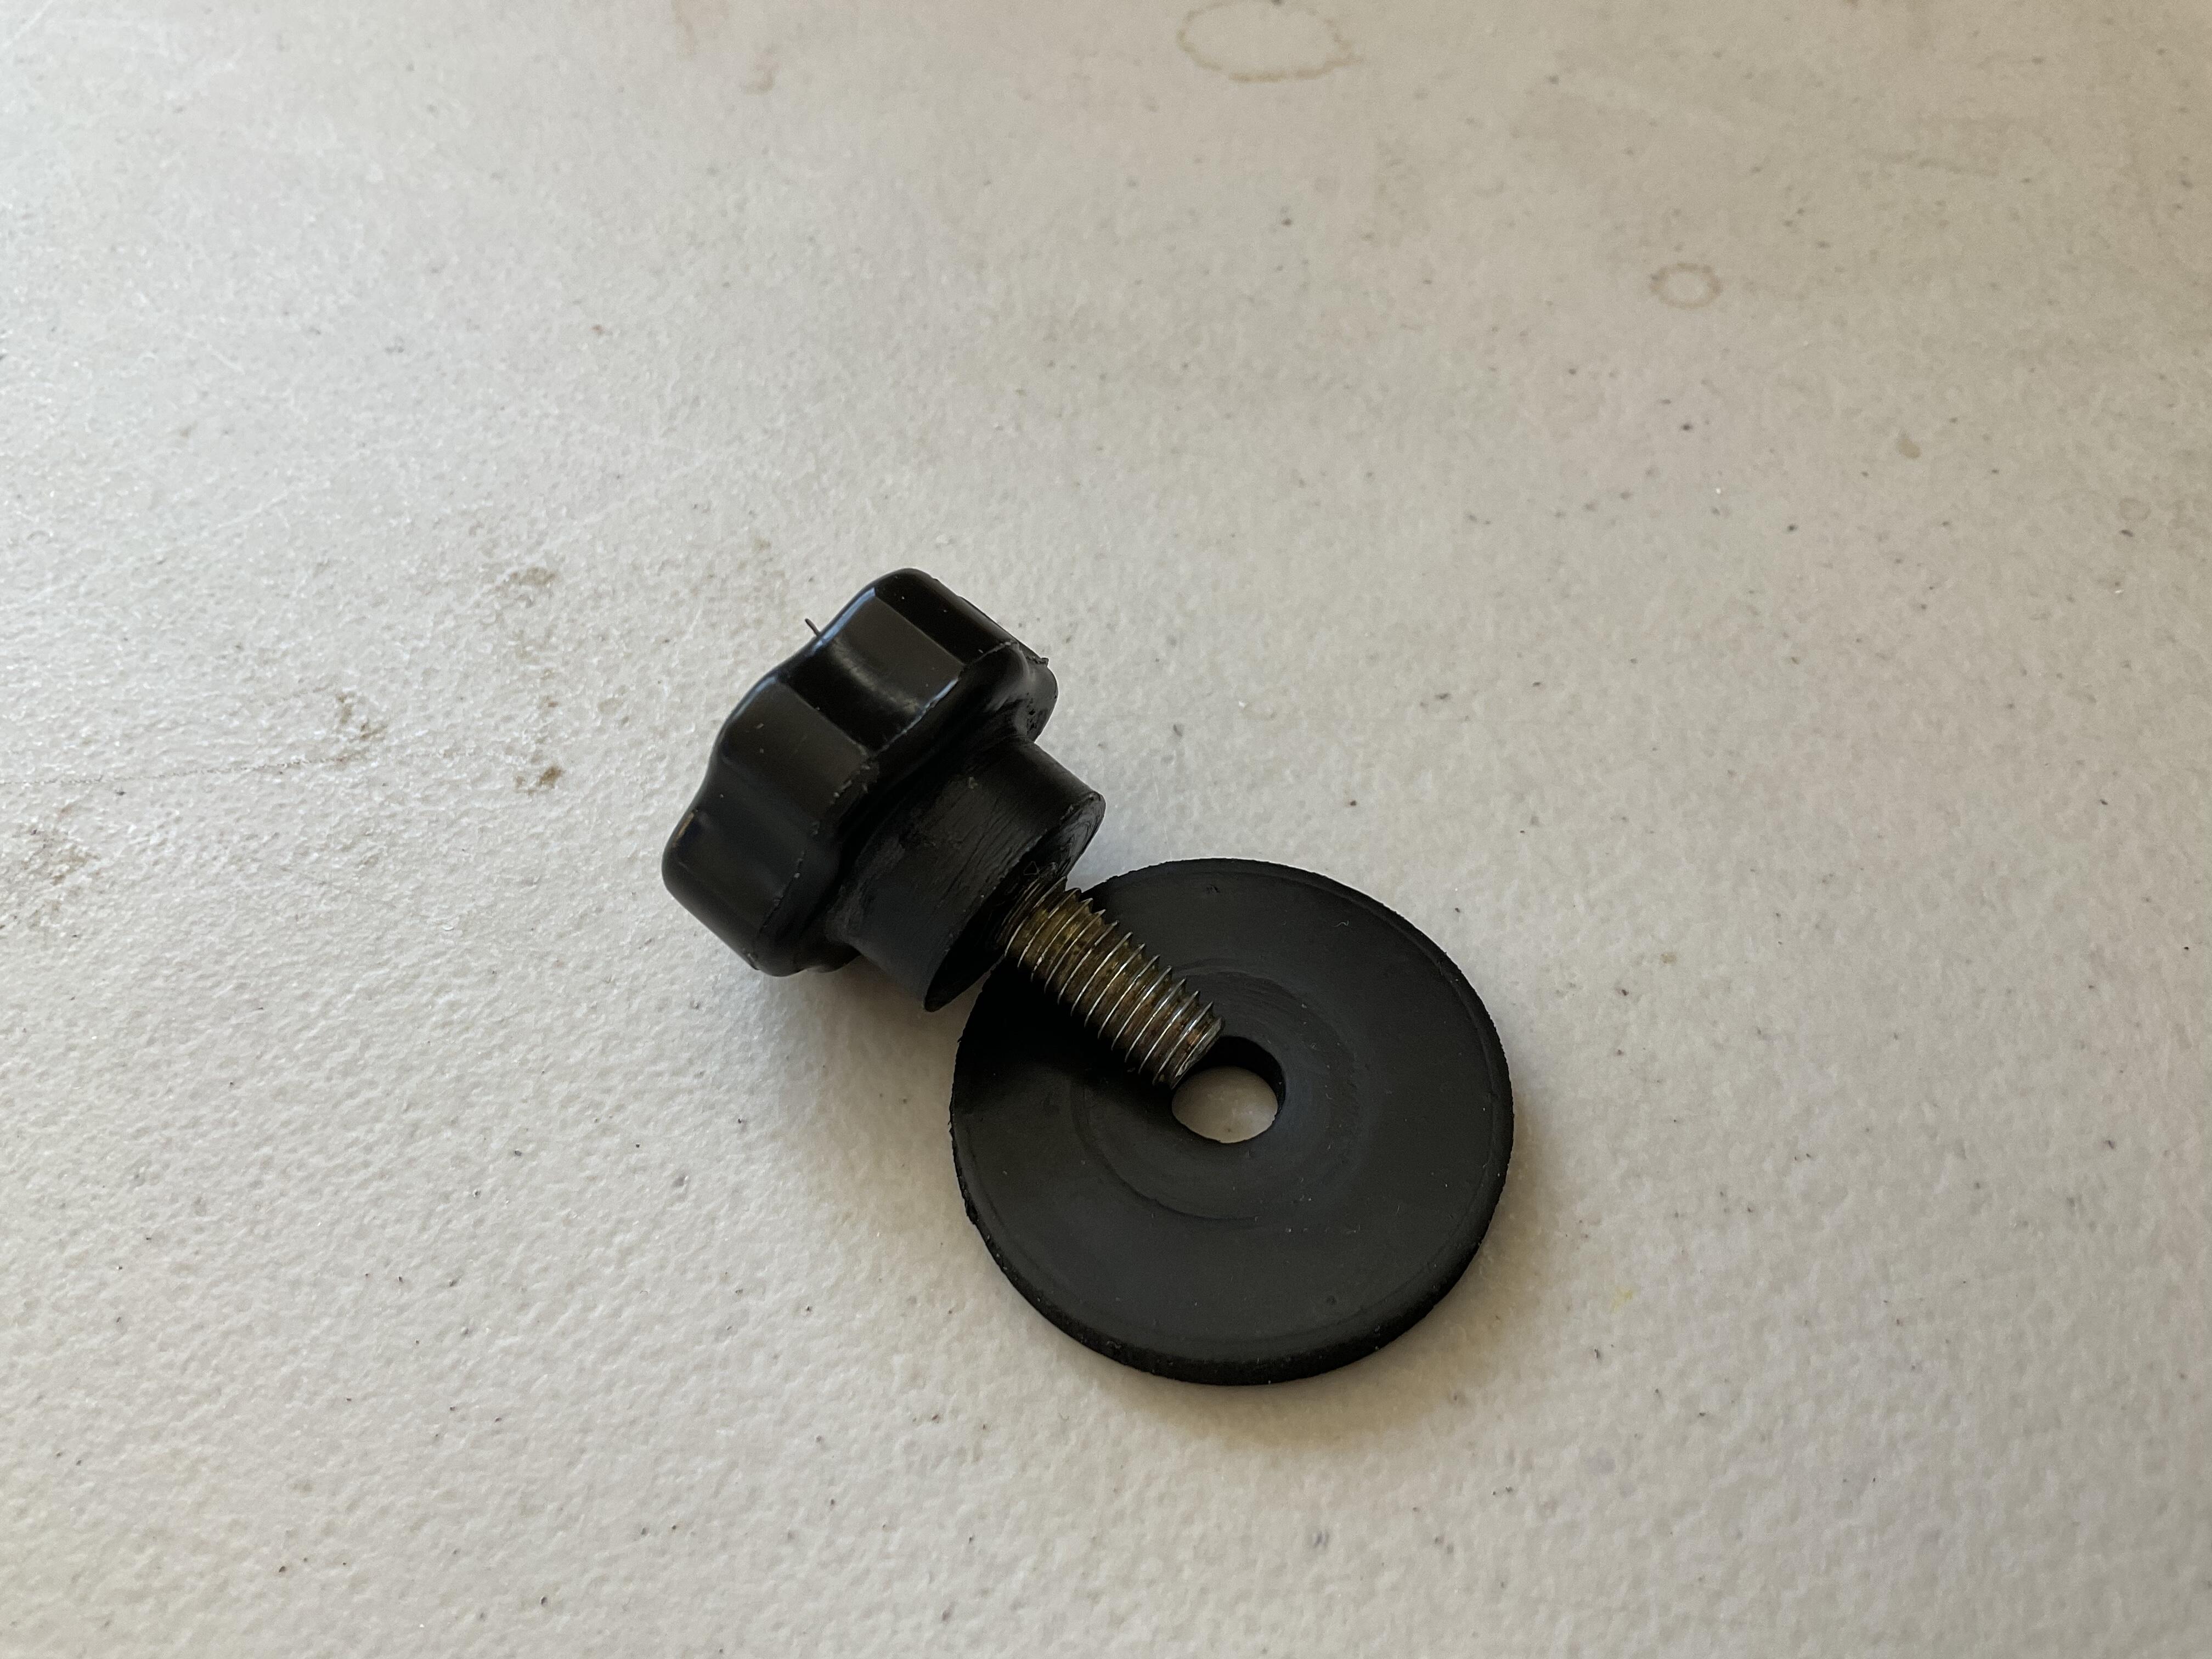
1 pointI, too, have a pair of NOS storage covers on my Z. As Kats said, I take the hold-down knob off completely, and use a fairly thick and large black rubber washer for a bigger footprint and flexibility for soft, even pressure.
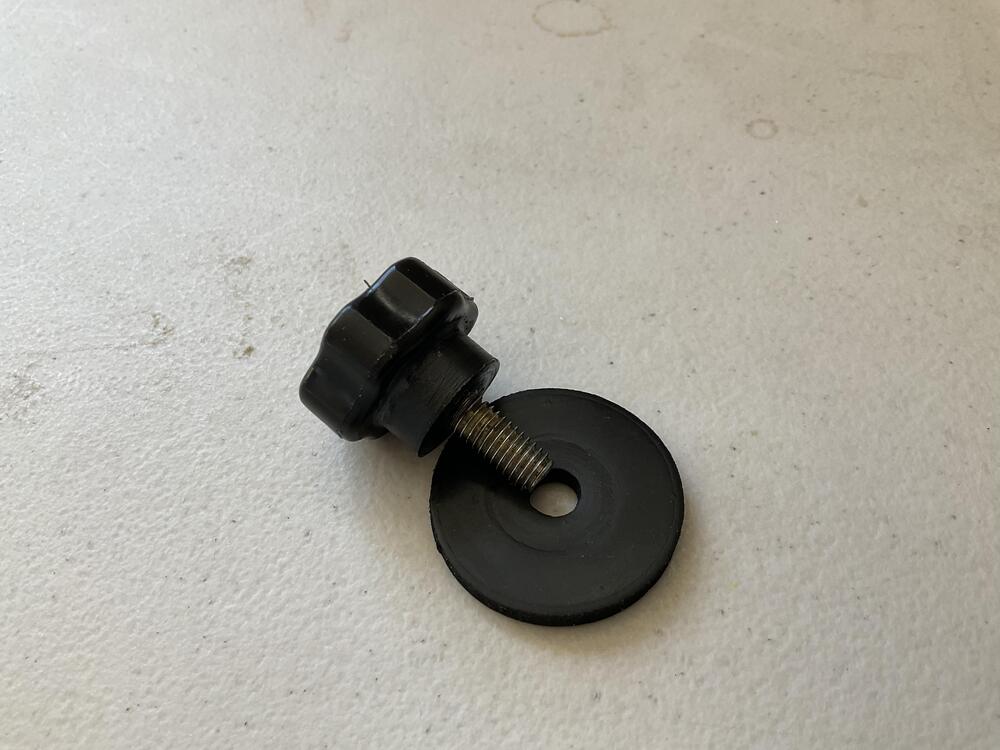 1 point
 -
1 pointYou are dealing with 50+ year old plastic here that will have gotten more brittle over the years. Consider bonding a thin reinforcement on the underside - one solid strip with a notch to match the factory shape. That plus @kats recommendation for a thin rubber washer under the knob should help hold back breakage.1 point