Leaderboard
-
Captain Obvious
Free Member4Points10,081Posts -
inline6
 Subscriber
 4Points1,282Posts
 -
.JPG.cfcada9cf1c1b502df3f5f2f2ca3ff36.JPG)
SteveJ
Free Member4Points9,646Posts -

CanTechZ
Free Member3Points1,311Posts


Popular Content
Showing content with the highest reputation on 08/12/2022 in Posts
-
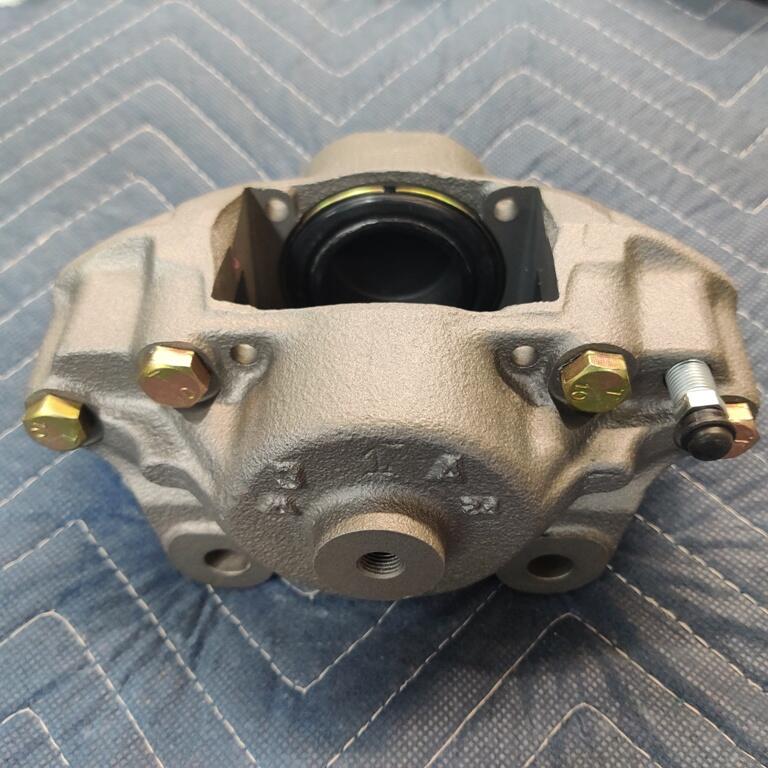
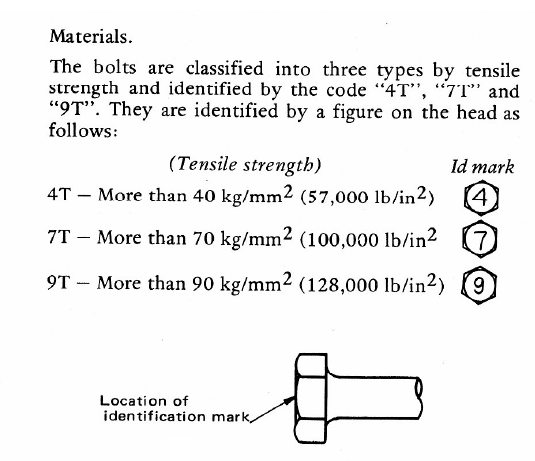
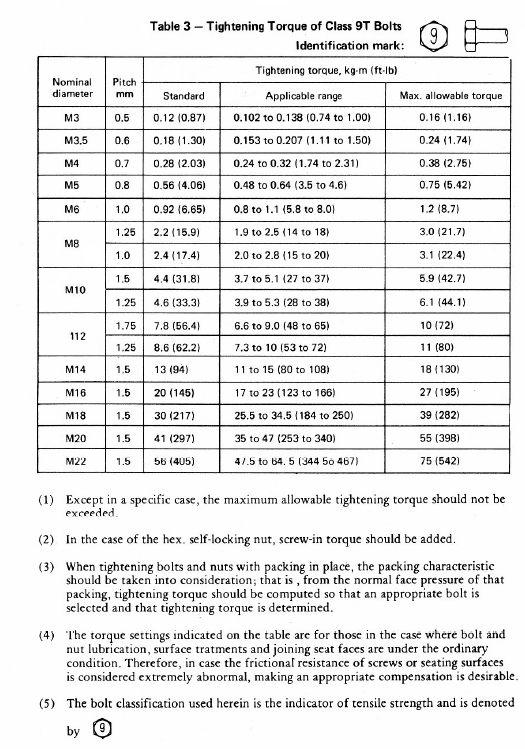
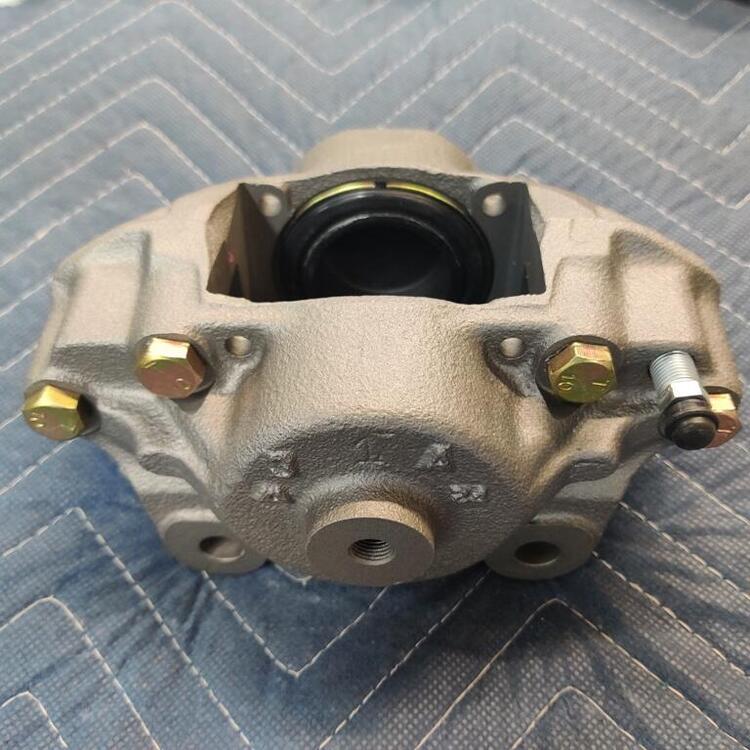
3 pointsYour calipers look great. I see that the M10's that you are inquiring about a torque spec have a 10T marking on the heads. The Datsun (Nissan) general torque spec book shows tensile strengths and torques for 4T, 7T and 9T bolts. It would likely be safe to assume that a 10T bolt would be 11% (= 142,000 psi) stronger than a 9T and likely could be torqued 11% (= 31 - 42 ft-lb) higher than the 9T spec as well. Extrapolated values are for M10 x 1.25. General-Datsun Torque Specifications.pdf
 3 points
 -
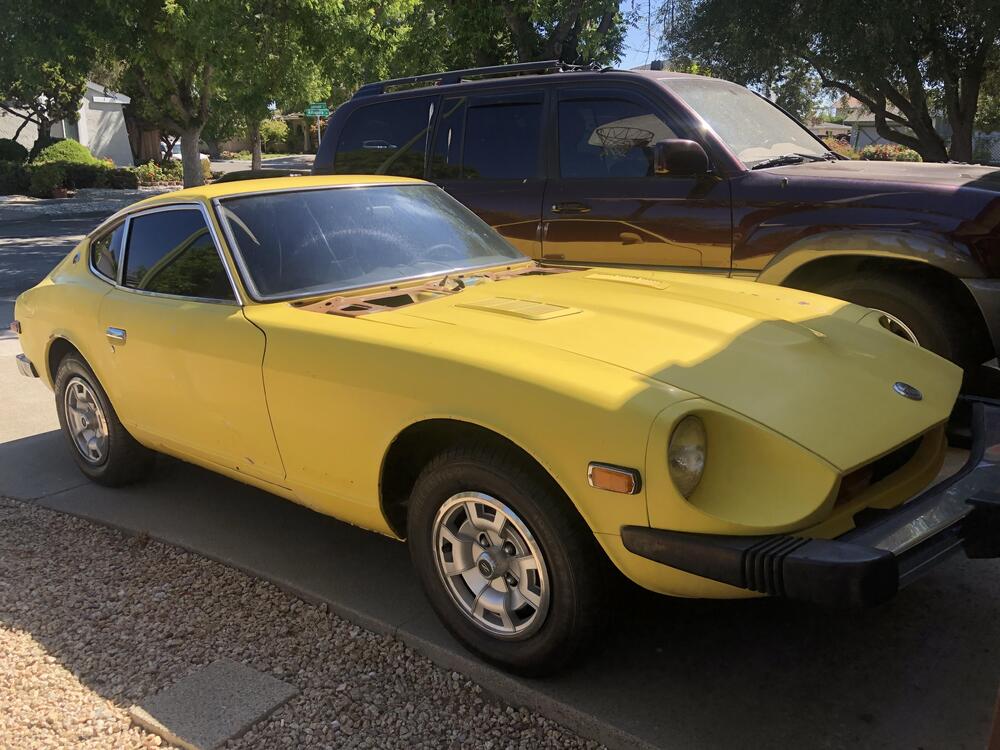
This week I removed the sound deadening/tar mat from the car as preparation for blasting. To be honest I was really dreading this job but in the end it was actually not that bad! I ordered 5kg of dry ice for the occasion. This worked an absolute charm for the boot area. Leave the ice on the matting for a couple of minutes and you can start to hear it cracking. Then use a scraper and it comes off in big slabs. the transmission tunnel area is much more difficult, dry ice can be used on the top flat surfaces but doesn’t work on the sides, I tried hanging plastic bags with dry ice in them but it just doesn’t get as cold… for the sides of the transmission tunnel a heat gun and scraper worked great for me, trick was to get it hot enough to lift off the metal but not so hot that it melts completely. and end results… still finishing up the bracing, only managed to add a cross brace for the rear of the car as I’m going to remove the entire rear valance.3 points
-
2 pointsOk, I will go with 38 ft-lbs.2 points
-
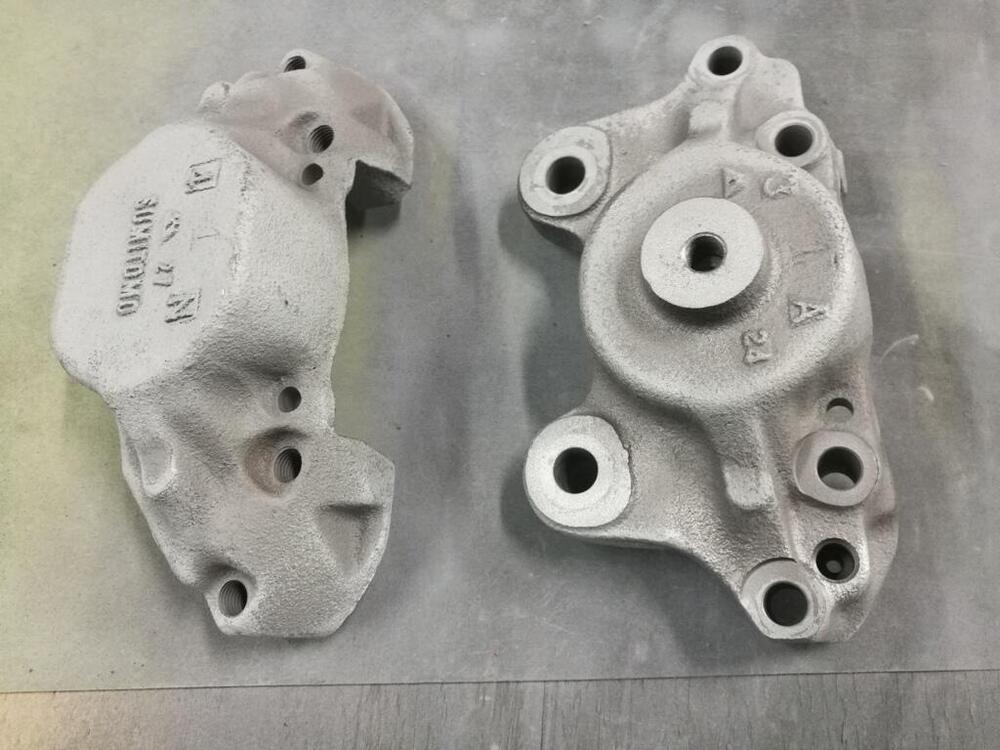
2 pointsRegarding correct side, I learned the hard way one time. So, always remember, bleed screw location is at top. The calipers were painted with zinc primer, and then https://www.eastwood.com/ew-spray-gray-detail-paint-aerosol-12-oz.html. To me, it looks close to the original finish color of most calipers that I have seen. I like the finish. On this member's page, there are pics of a new old stock caliper. "Zinc rich" primer: Waiting for final torque of bridge bolts:
 2 points
 -
2 pointsI’ve done the same to two piece calipers, for the same reasons. For the bolt torque I used a setting appropriate for the bolt size and grade. A general torque chart lists 10mm x 1.25 grade 8.8 bolt torque at 36 ft lbs.2 points
-
I don't mind waiting. The early birds can help find the problems for Nissan before I buy.2 points
-
1 pointTime for a side quest: In my continuing saga to clear my basement and get this Lego kit of a car together, I was cleaning the shift lever that came with it. Yes, it was a loose part in a cardboard box when I got it. Not, I didn’t get any info with it. From what I can tell this is a five speed lever. The piece below the pin hole is 37.5 mm from the end of the ball to the crease where the lever becomes sort of spherical: It’s identical to the long lever that came in my transmission, which is a five speed out of a truck. I think I’m good to go, but if anyone sees a red flag here, let me know. This week has had a string of happy accidents, and the PO’s good up here worked out for me if my research is correct.
 1 point
 -
I don't understand what the AC has to do with the turn signal fuse. Just wondering, is this an original Nissan AC or did someone install an aftermarket one at a later date, possibly with wiring something related to the AC to the turn signal circuit?1 point
-
Good presentation. Thanks. A few questions: What was the cost of the dry ice? You would have paid in Australian $, of course. How was it packaged for transport? How did you handle it when working with it in the shop... gloves? garden trowel? Was 5 kg enough?1 point
-
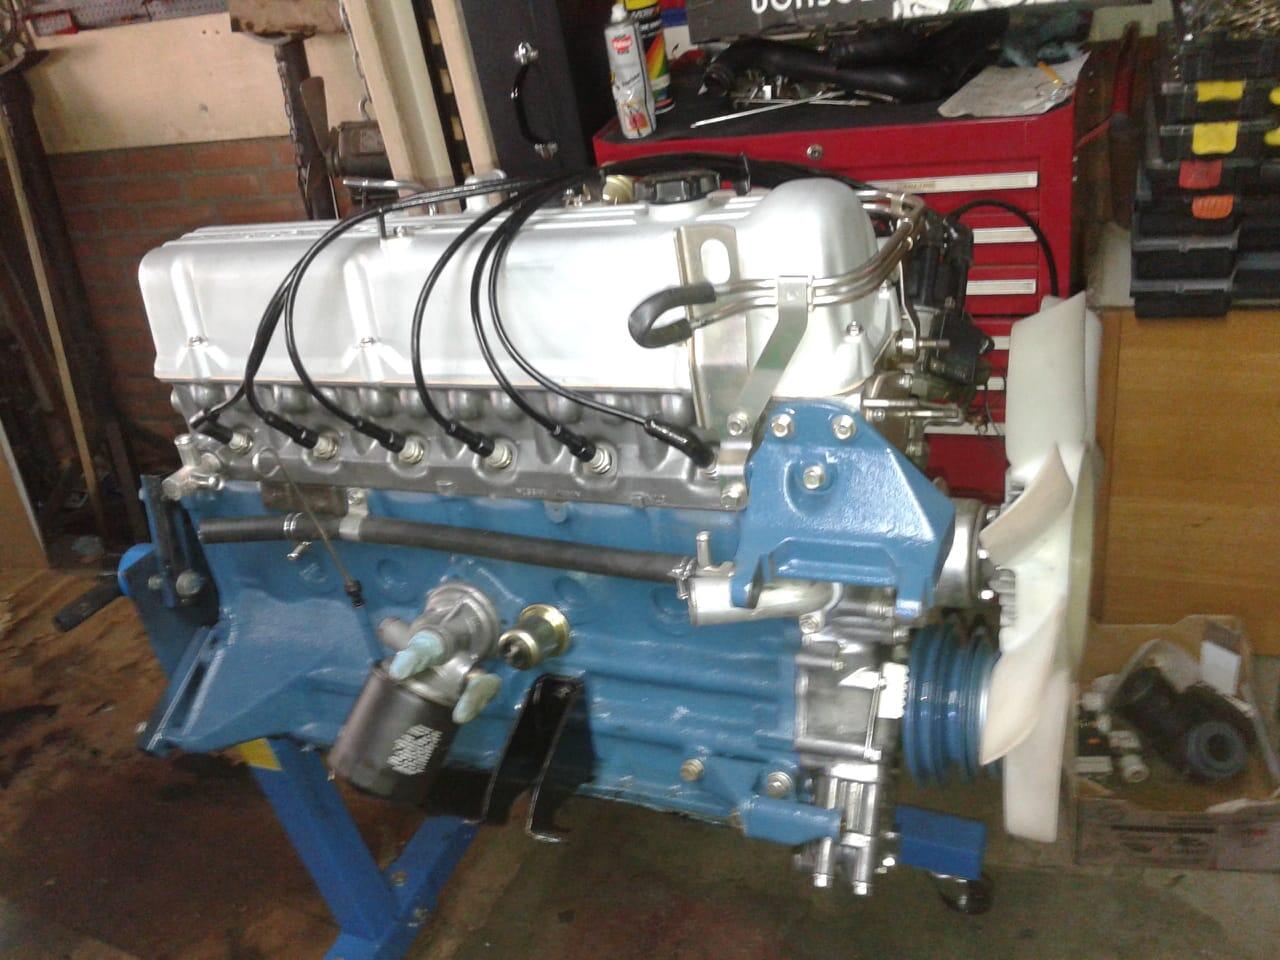
1 pointNot if you might have a early zx engine-head.. like the N42.. it does have a provision for a mech. fuelpump. As you can see here on the front of the engine side.. (On the right.) In the 280zx there are the 3 bolts that connect the powersteering pump.. behind the blue part is a big hole for the fuelpump
 1 point
 -
Today you can buy a infrared thermometer for a few bucks.. saves you a lot of guesssing..1 point
-
1 pointI'm not sure I would want to stretch a 115 wide tire out onto a five inch wide rim. My thoughts on the matter while I was in the thick of it: "I didn't move the space saver tire over to the 280 original spare wheel because I was worried that the 280 spare wheel was too wide. The space saver tire was originally on a four inch wide rim and the original 280 spare wheel is five inches wide. I wasn't comfortable stretching that narrow tire out to a five inch wide rim. I think you could use a 4.5 inch wide rim, but since I was in there messing around anyway, I took the opportunity to make it as narrow as possible"1 point
-
1 point
-
1 point
-
Remove the wire from the oil pressure sender and short the wire to the chassis. The best way to do this is have a wire with an alligator clip on one end and a normal male bullet connector on the other end. Clip the wire to the shock tower or negative terminal of the battery and connect the bullet to the wire for the oil pressure sender. Go in your car. Put the key in ON (don't start the car) and watch the oil pressure gauge. If it shoots up, you probably have a bad sender. Definitive diagnosis would be to confirm with a mechanical gauge. See this thread for info on installing a mechanical gauge:1 point
-
What gear ratio did you end up with? OSG diff? Where are the pics?! 😇1 point
-
Yep, turned out to be broken teeth in the R180 open diff. Replaced it with a rebuilt R180 LSD.1 point
-
1 pointI've made a, wait for it...... huge mistake! You are already in the old. You just need the fuel pump for your SUs. My bad!1 point
-
1 pointI would do the ZX as much as possible but not all the EFI wiring, run SUs.1 point
-
1 pointI understand that sentiment, and I share it, being a professional restorer myself. To that end, I’m completely comfortable with preserving the original, low mileage drivetrain on a pallet while enjoying a “play engine” so long as it is reversible when it is time move the car to a new owner. After all, I do intend to drive the car quite a bit during my stewardship.1 point
-
1 pointComing along… Appreciate the support of all you guys. It has been the lifeline for this Z.
 1 point
 -
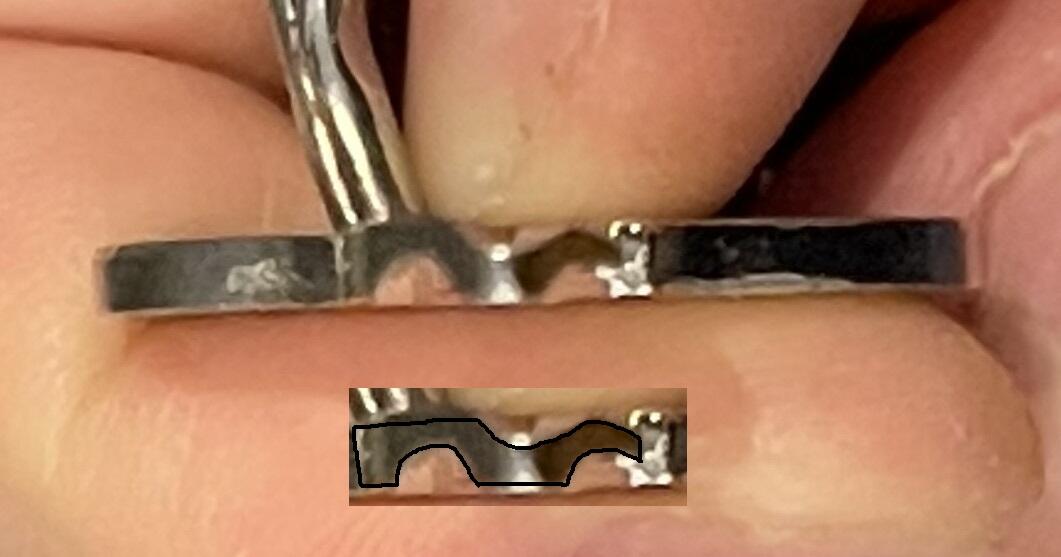
1 pointYeah, I found that wiki page as well and there's a lot of good info on there. But about your key blank and trying to use one of those titanium keys... Those TI keys are all for the double sided cut and there's no way they will fit your cylinder. Regardless which blank your lock uses, it's a single side cut and those TI blanks are for the newer double side cut. When they describe blanks, they look at the cross section profile from the part you hold in your fingers (they call it the "bow"). And if I modify your pic and flip it around so you are looking at that profile from the bow, it looks like this: And that still looks like an X1 / MZ12 or DA20 / D80K.to me.
 1 point
 -
1 pointWow what a wealth of information thanks for sharing that love reading through that stuff , I’ve been doing as much research as I can and that sure has a lot ! I’m trying to get keys that at least look original to the untrained eye , for my doors DA23 and ignition seems to be DA20. I’m a particular person and they aren’t serious problems , so appreciate all the insight that much more . Sent from my iPhone using Tapatalk1 point
-
1 pointThis may not answer your question, but I thought the info on this page was interesting with regard to Datsun keys: http://datsun1200.com/modules/mediawiki/index.php?title=Keys1 point
-
1 point
-
1 point
-
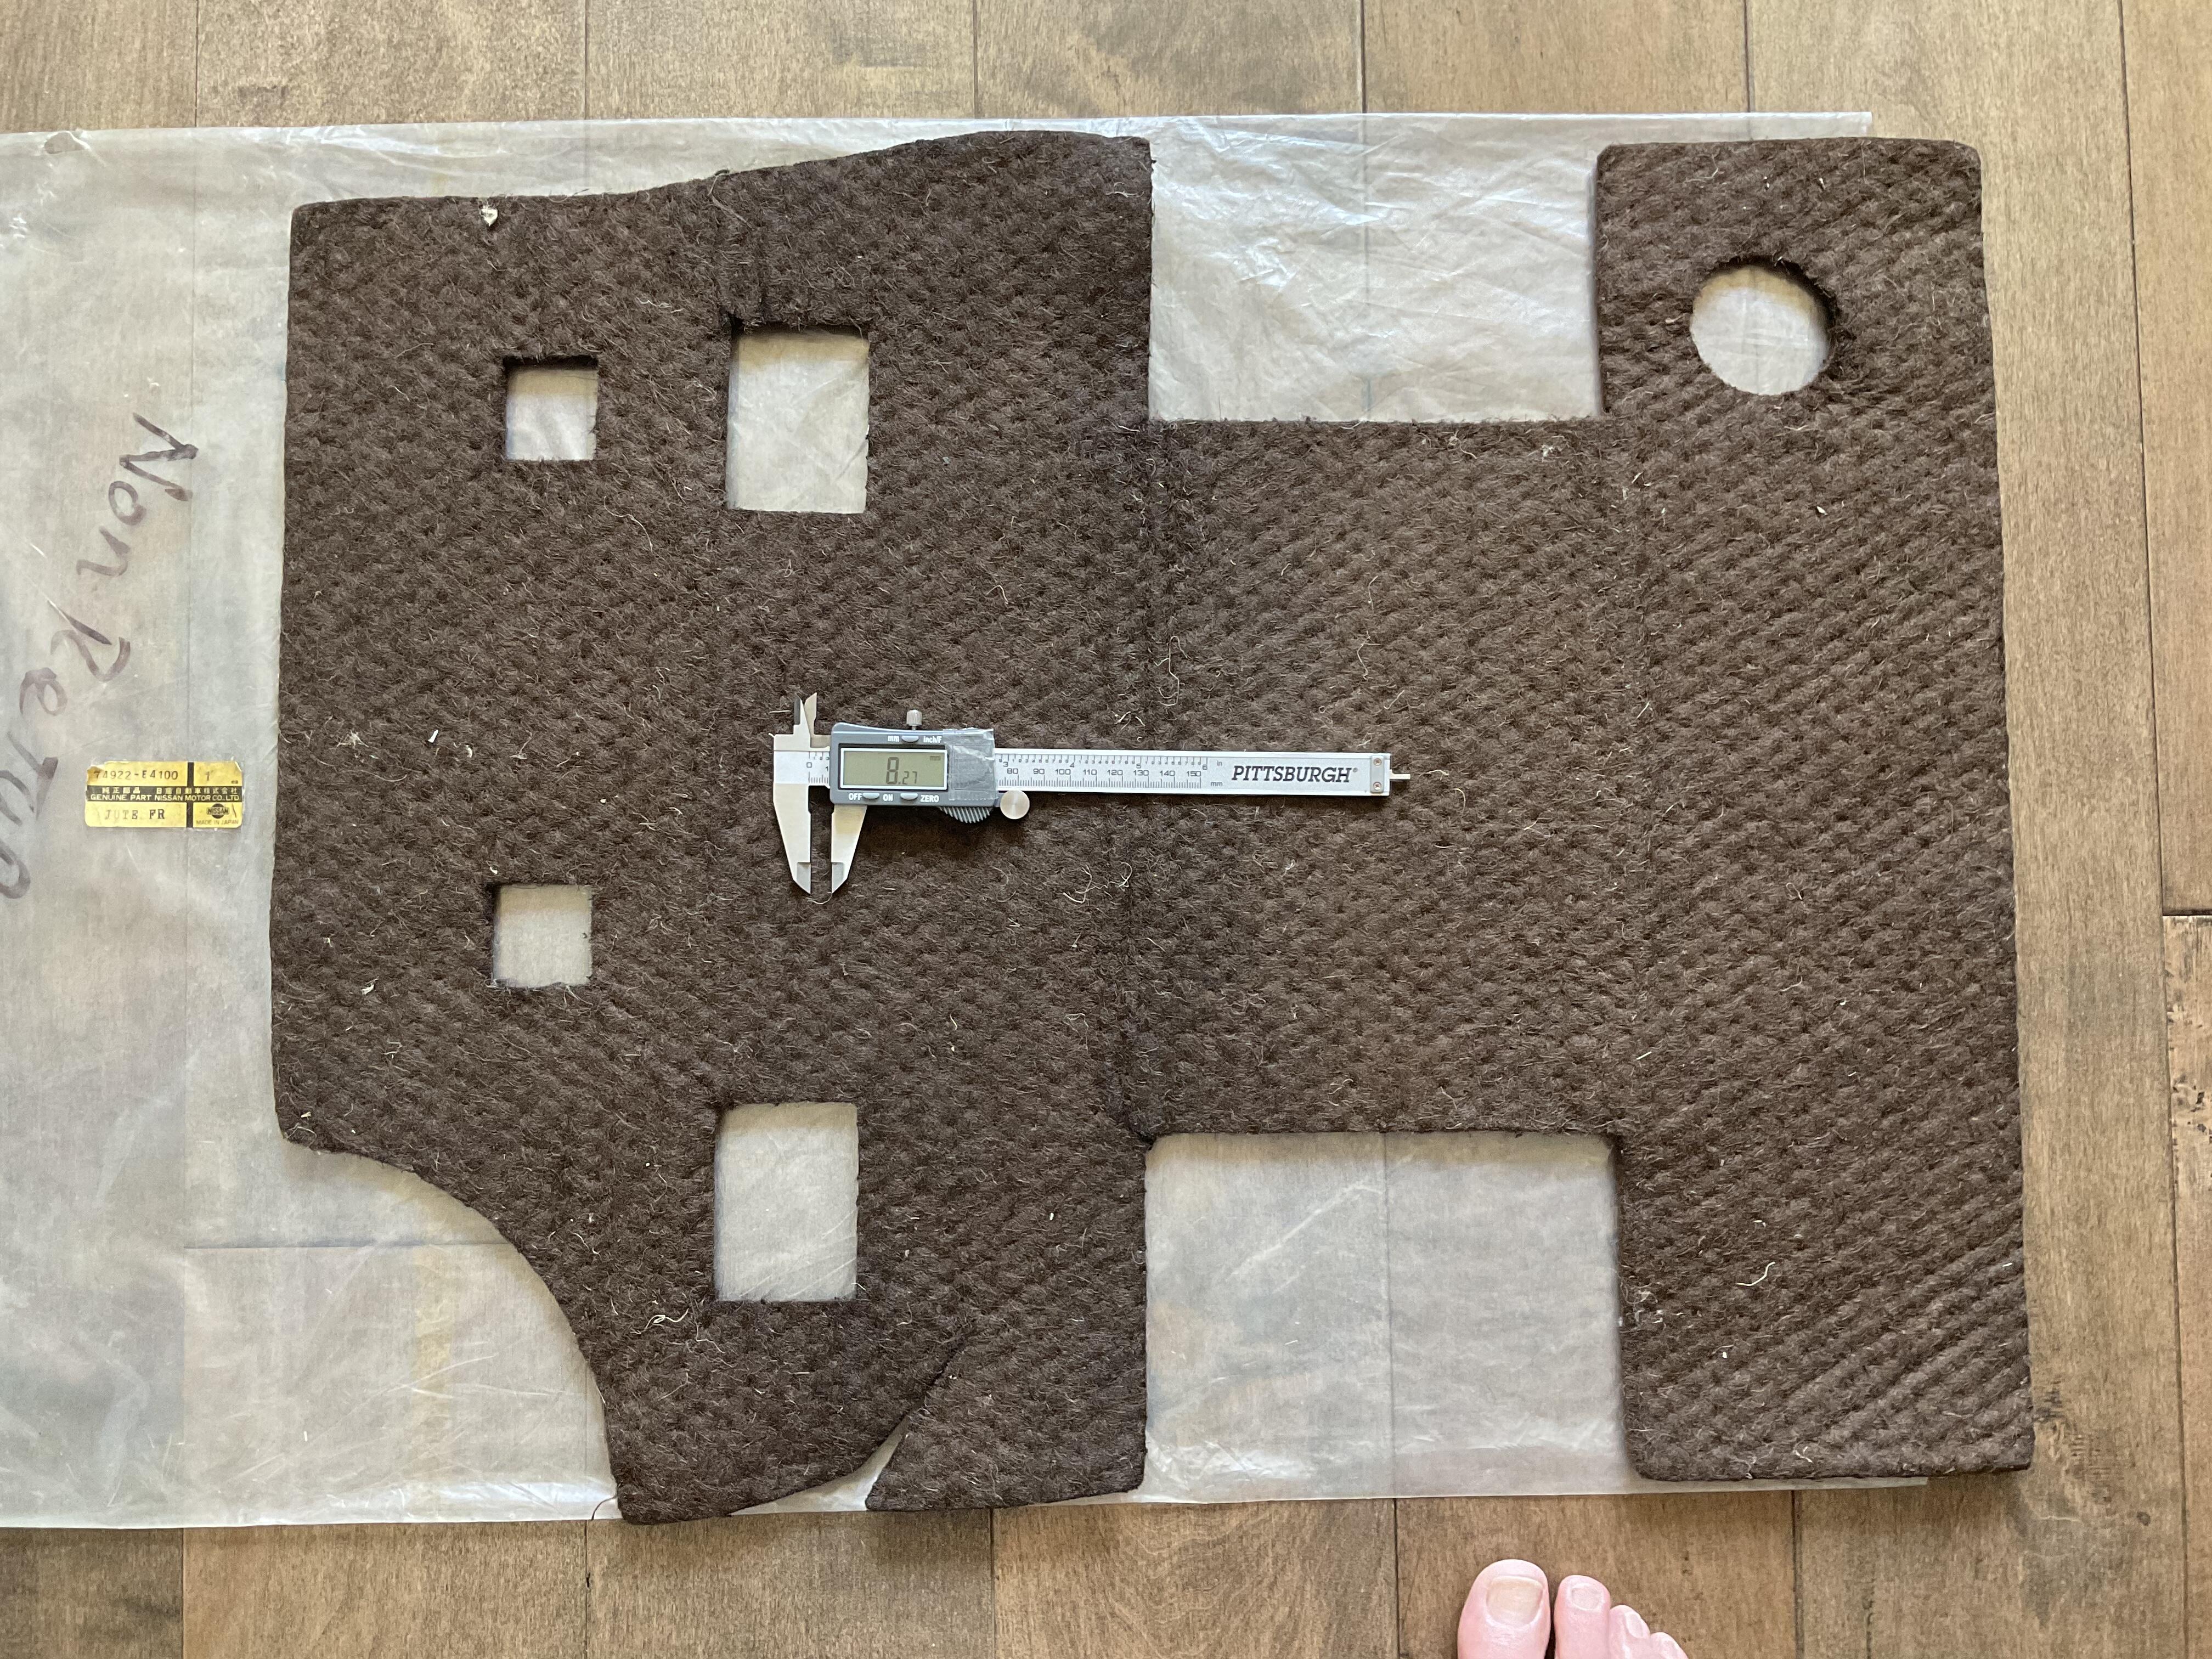
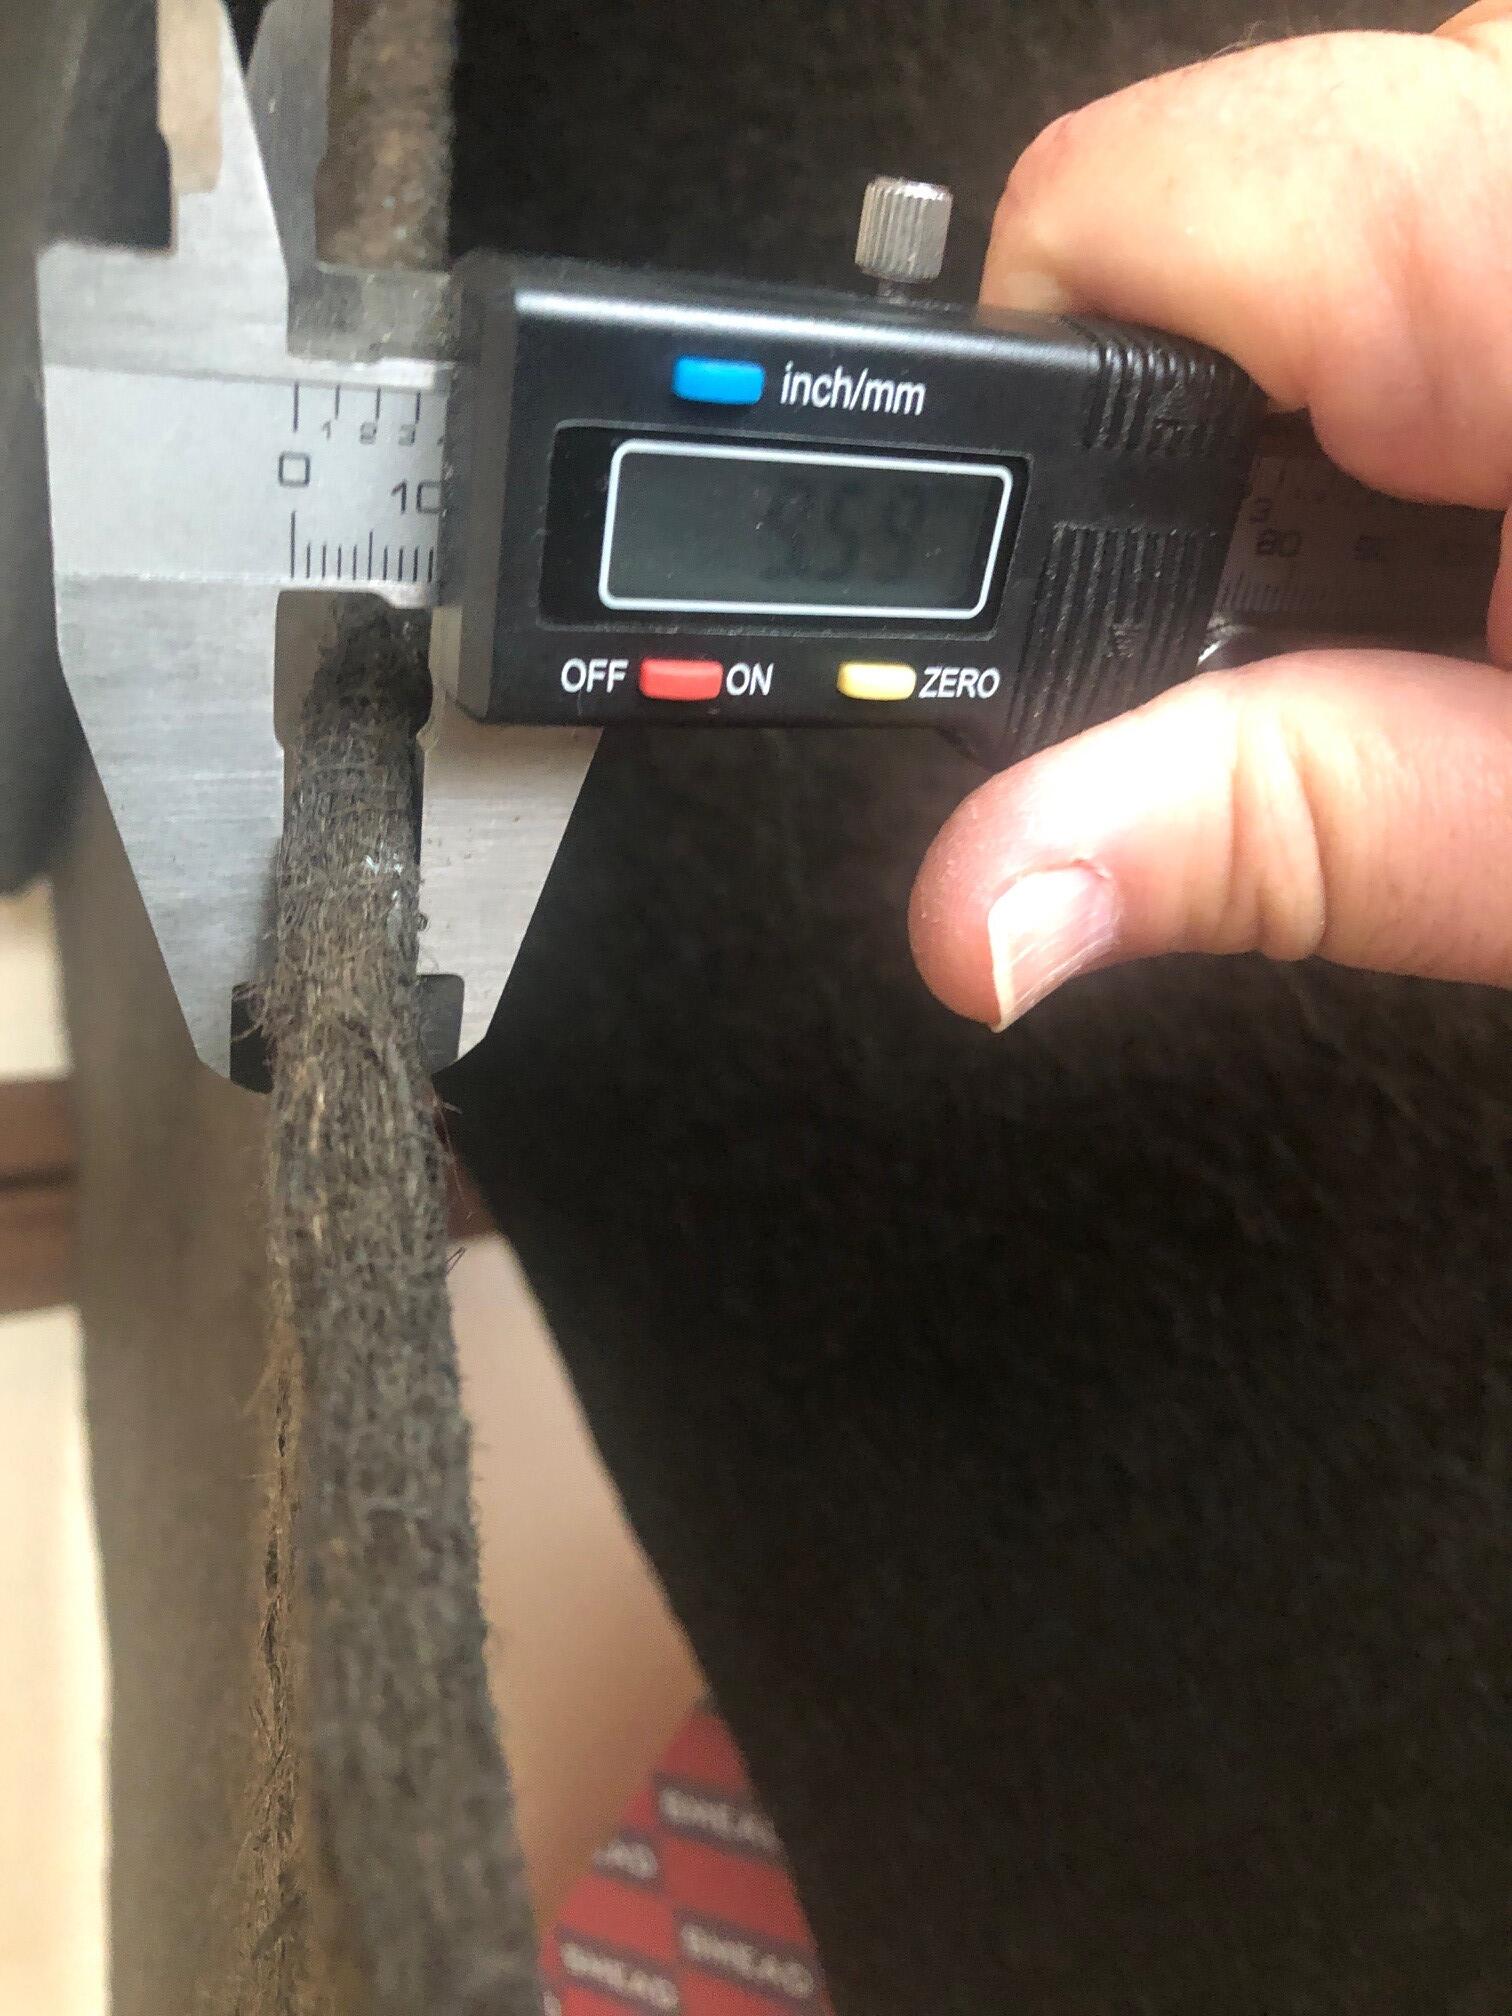
I have a piece of NOS jute for the 1969-70 passenger side under-seat and tool storage area that measures 8.27mm in thickness.
 1 point
 -
1 point
-
1 point
-
1 point
-
1 pointFor USDM, the early Z (Series 1) was delivered with a rubber mats. A California based trim shop (Chester and Herod Auto Carpets, not located in Texas) manufactured a five (5) piece carpet set which was generally installed or included in the rear hatch area prior to the vehicle being delivered to the dealer. Some dealers overlayed the carpet on the rubber mats. Some dealers removed the rubber mats prior to installing the carpet. It is still unclear whether the jute underlay was factory installed under the rubber mat. Why would Nissan have an underlay (that could potentially trap moisture) under a rubber mat? Sound deadening perhaps? Keith1 point
-
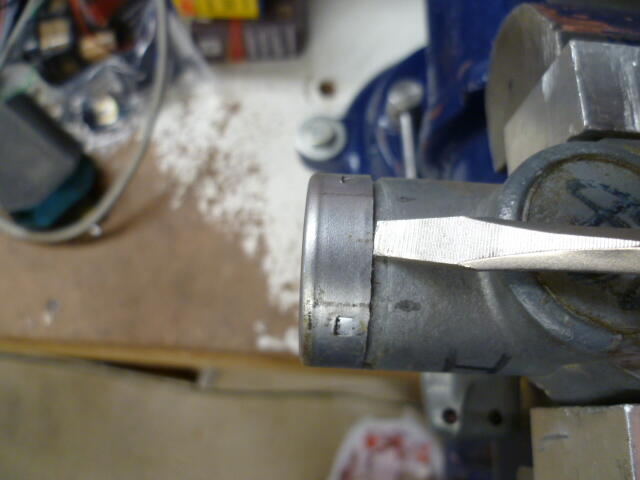
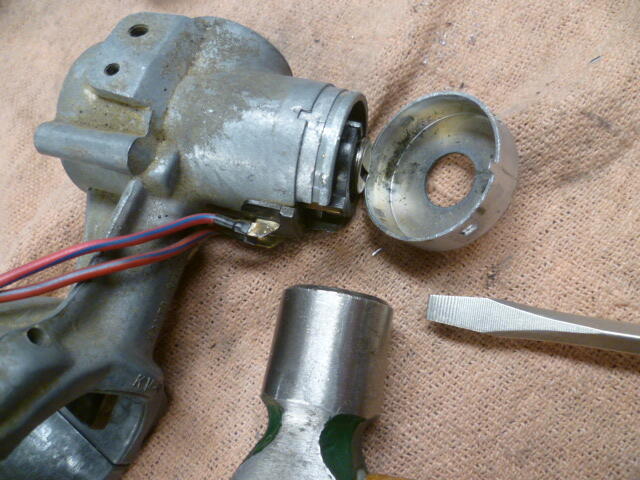
1 pointYes, those two wires are for the warning chime. You can find the switch on the wiring diagram labeled as "Steering Lock Switch". On the wiring diagram, you will find it between the dimmer rheostat and the turn signal switch. The colors of the wires right at the switch are shown as red/w and black. I suspect that's what those pair of red/blue wires connect to at the harness end. And as for being able to move the switch over to the new lock assembly, it would depend on how accurately the new aftermarket copied the original assembly. I suspect that the switch might port over OK, but I'm not so sure about the semi-circular black plastic actuator arm. Here's some pics that might help:
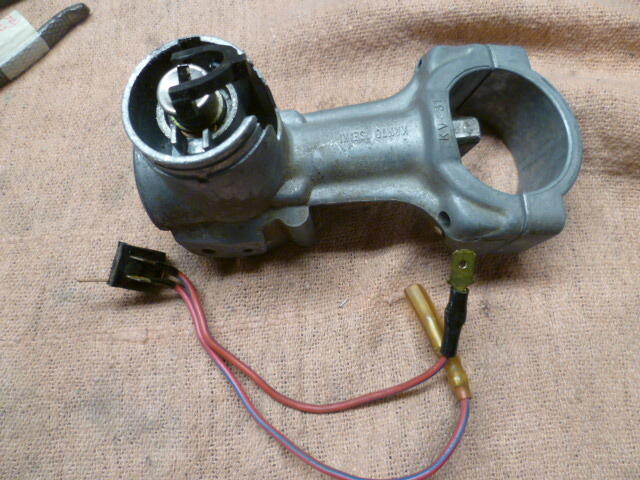 1 point
 -
When you want to weld something, clean it thoroughly on both sides.. (in one of the last pics i see you did not clean the blue part..) It's not just that you can weld it much better, the fumes are toxic and you only have one set of lungs .. Never inhale those fumes of welding, aluminum is even (much) worse than stealwelding.. you really need a extractor hood. I often blow some compressed air over a weld when it's cooled down a bit, ( get some "clean" air at your workplace) always good to have the compr. air at hand... when something gets on fire you simply blow it out. Also always a fire-extinguisher at hand is standard. (at least a bucket of water.) And don't do it like this guy, welding near or under flammable stuff... WOW !!1 point