


Leaderboard
-

Av8ferg
Free Member6Points1,538Posts -

dutchzcarguy
Free Member4Points2,677Posts -

Zed Head
Free Member4Points19,238Posts -
Namerow
Free Member3Points1,553Posts


Popular Content
Showing content with the highest reputation on 08/03/2021 in all areas
-
3 pointsGetting all the stars aligned for the big pull. Picked up a unused 1 ton engine hoist on CL for $100. Cheaper than renting one for a week. I’m sure there will be work stoppages and challenges I run into that could push my timeline out 30 days. Shooting for a week? Also got a leveler for $34 at Harbor Freight. I primed and painted my transmission to match the engine block yesterday. It’s looking good. I’ll start disconnects tomorrow. -Cooling System - Wiring - Exhaust - drive shaft from transmission - slave cylinder . Starter -multiple misc items. Sent from my iPhone using Tapatalk3 points
-
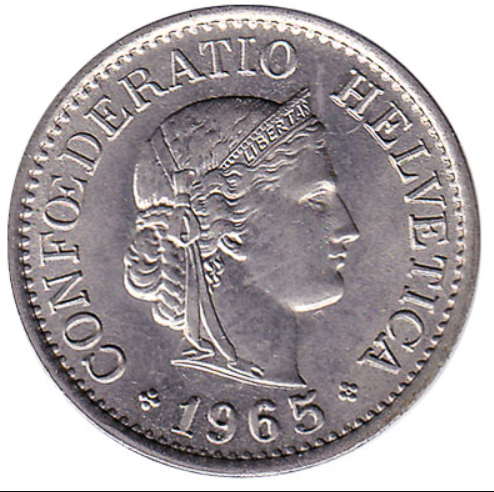
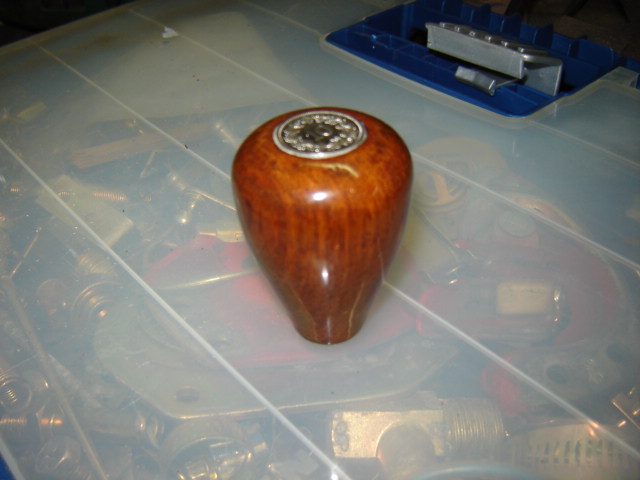
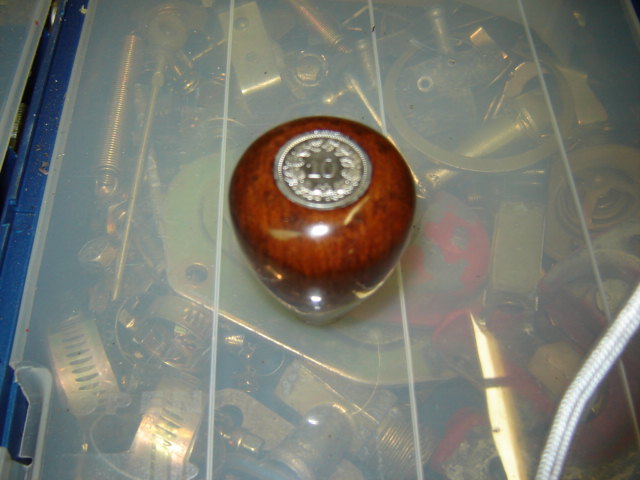
3 pointsHelvetica... Switserland (swiss) coin of 10 rappen! I must have brought it home in 1986 when i was in Zürich/Regensdorf the home of Studer-ReVox! Thanks racer, you made me look/google for the 10 cent coin.. and this one came up..
 3 points
 -
3 pointsYour emphatic "nopes" don't encourage further help. Which Vancouver are you in? These guys fixed my wiper motor. http://www.philbingroup.com/philbin_rebuilt.htm3 points
-
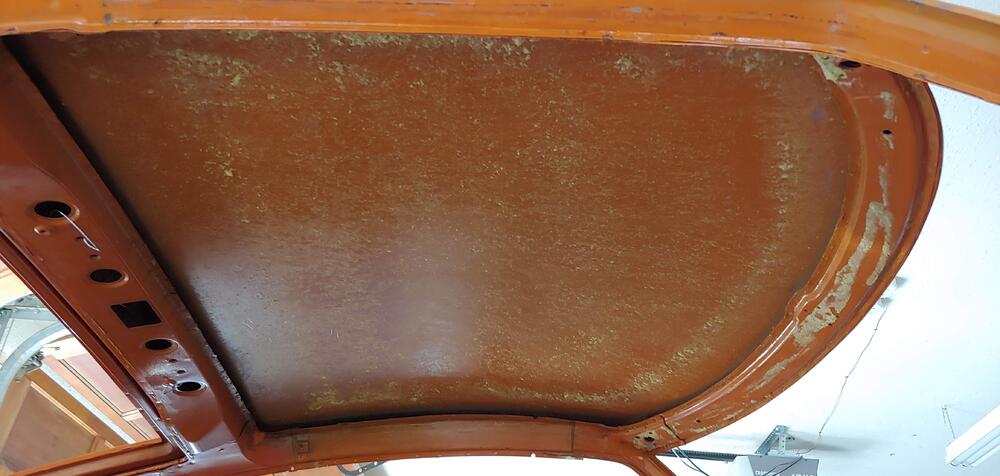
3 pointsThanks for taking the time to photo-document. These pix will be a great reference for others. They also give us interesting insights into the design and assembly strategies that Nissan was using fifty years ago when the Z was launched.3 points
-
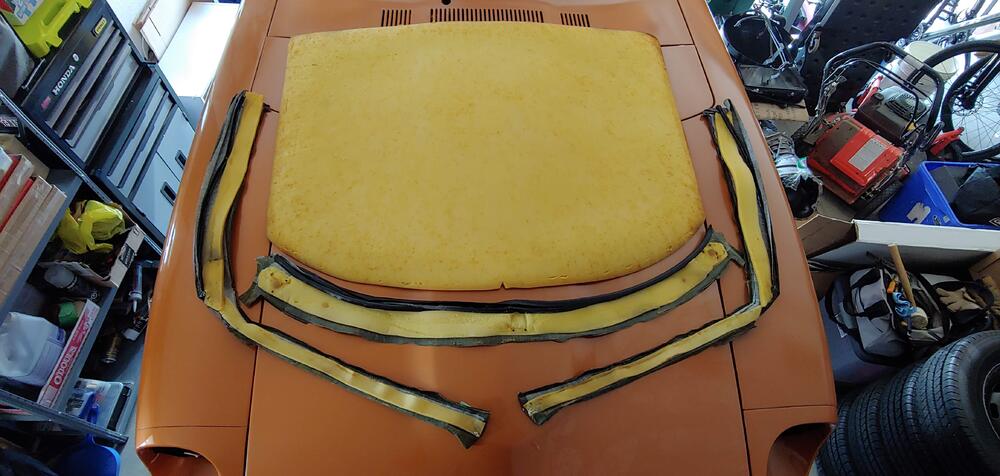
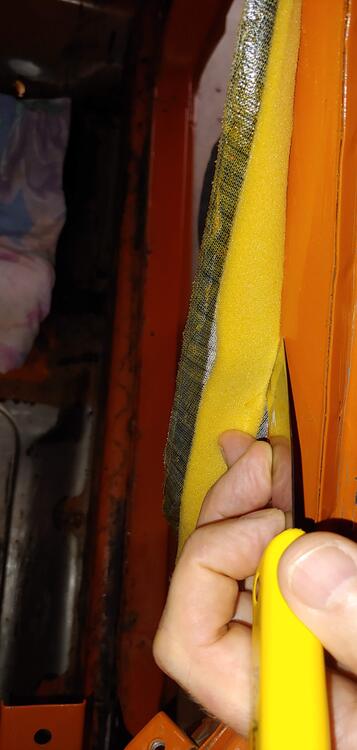
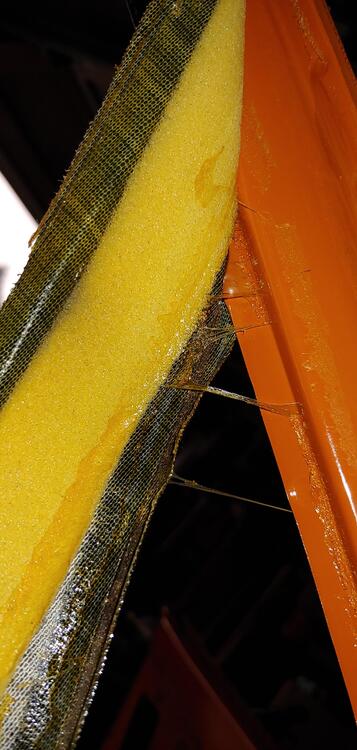
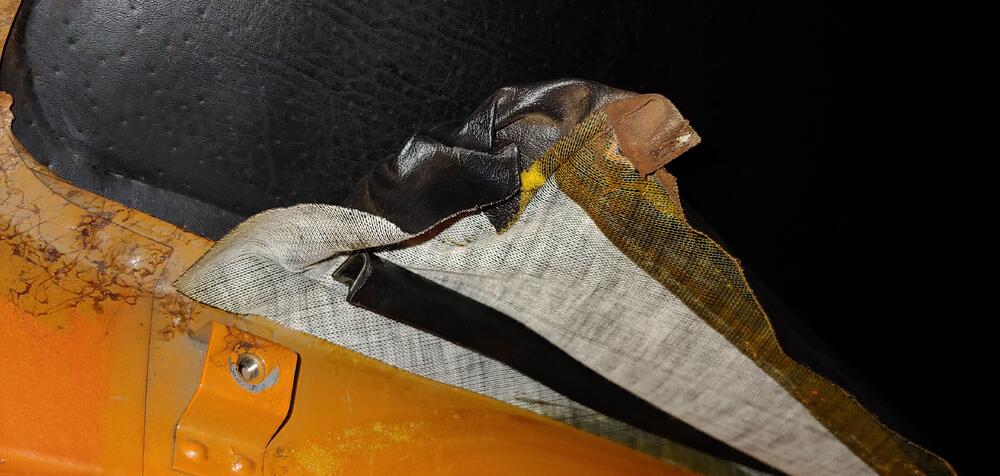
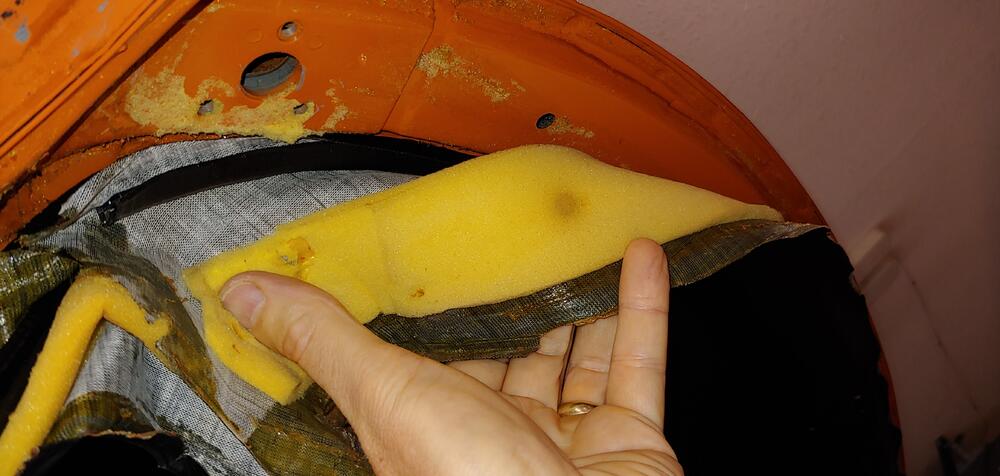
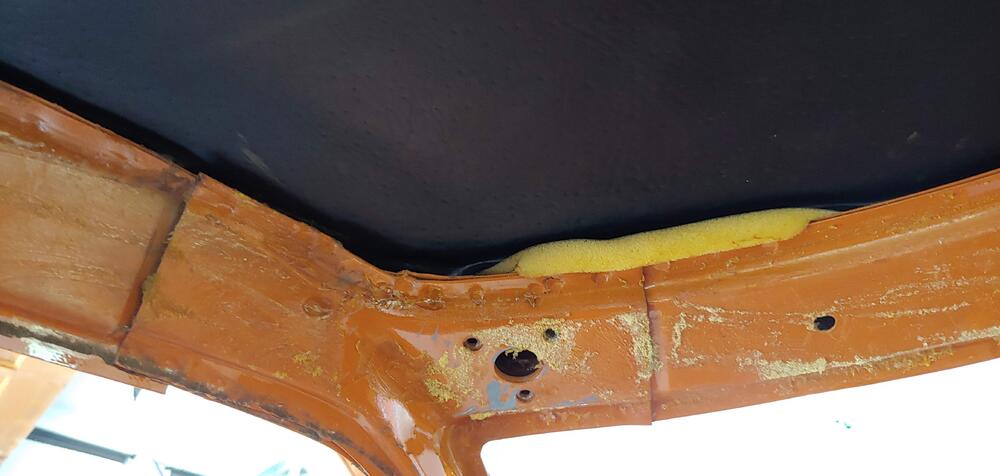
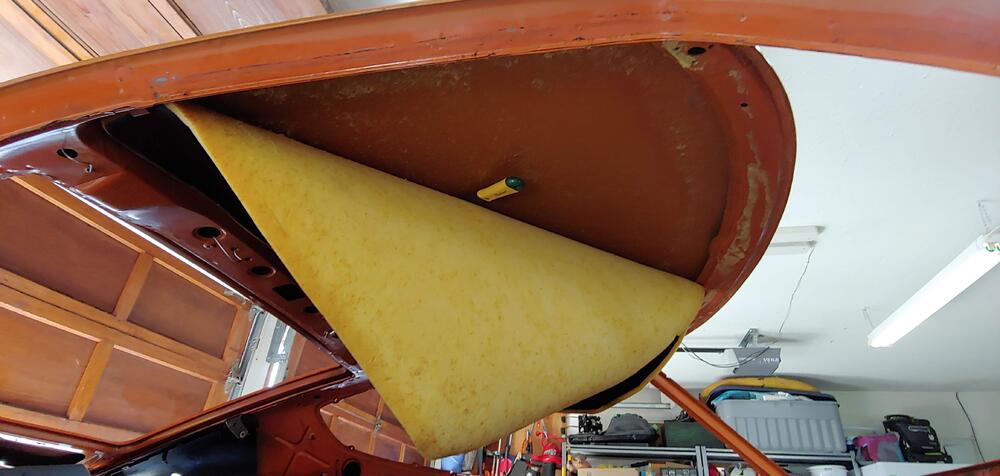
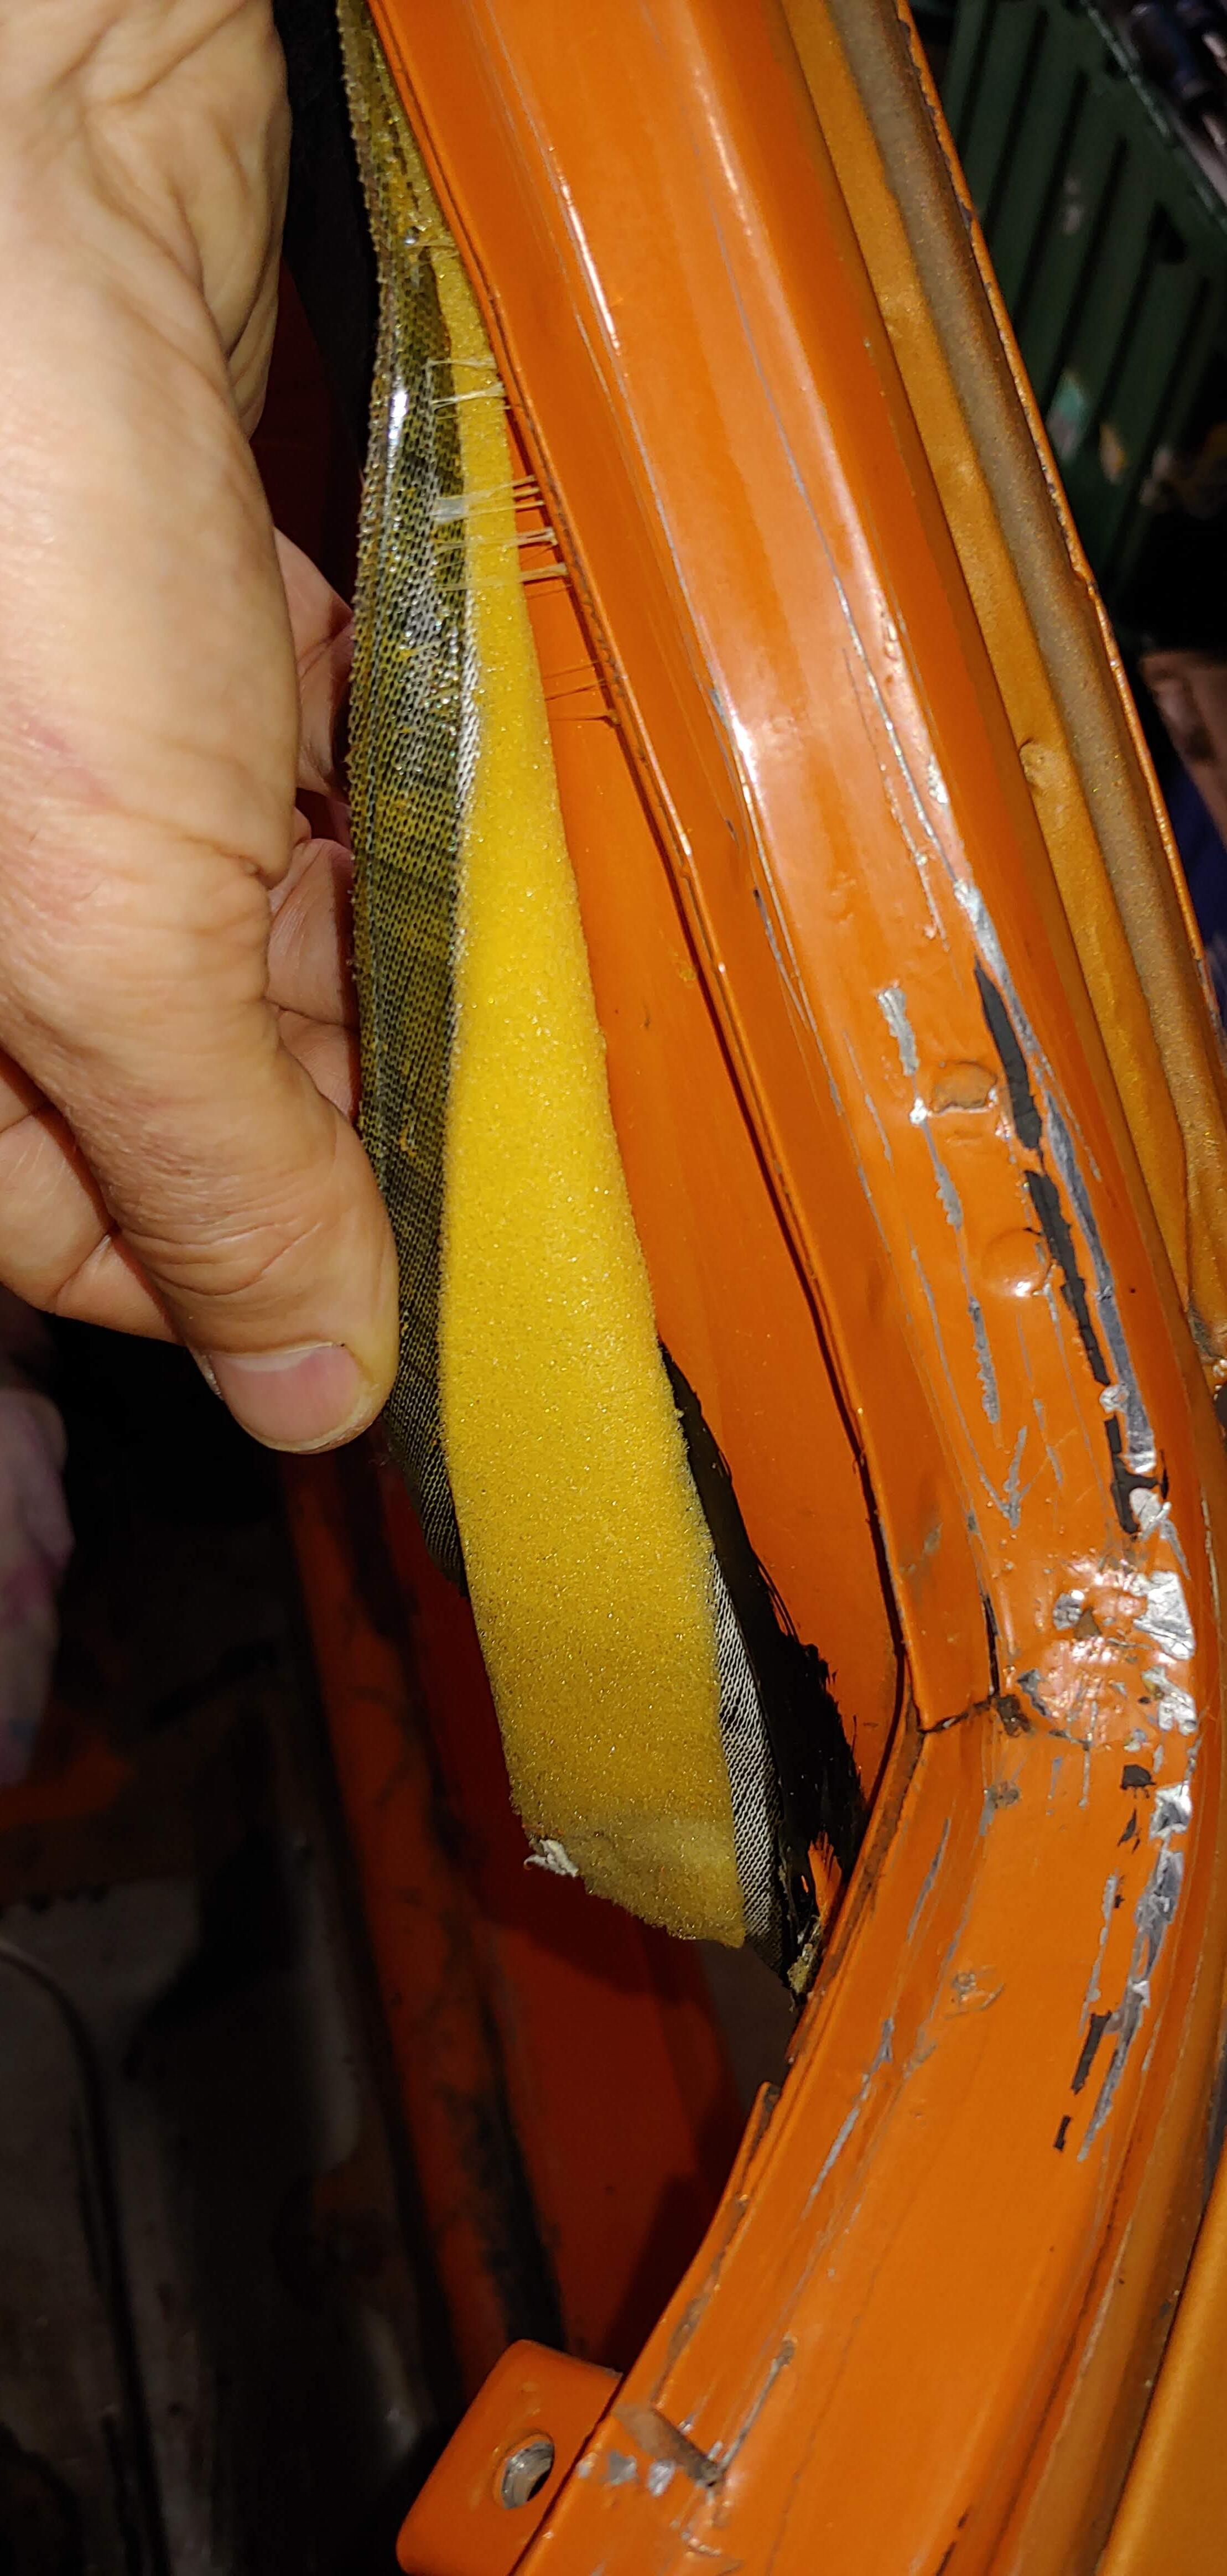
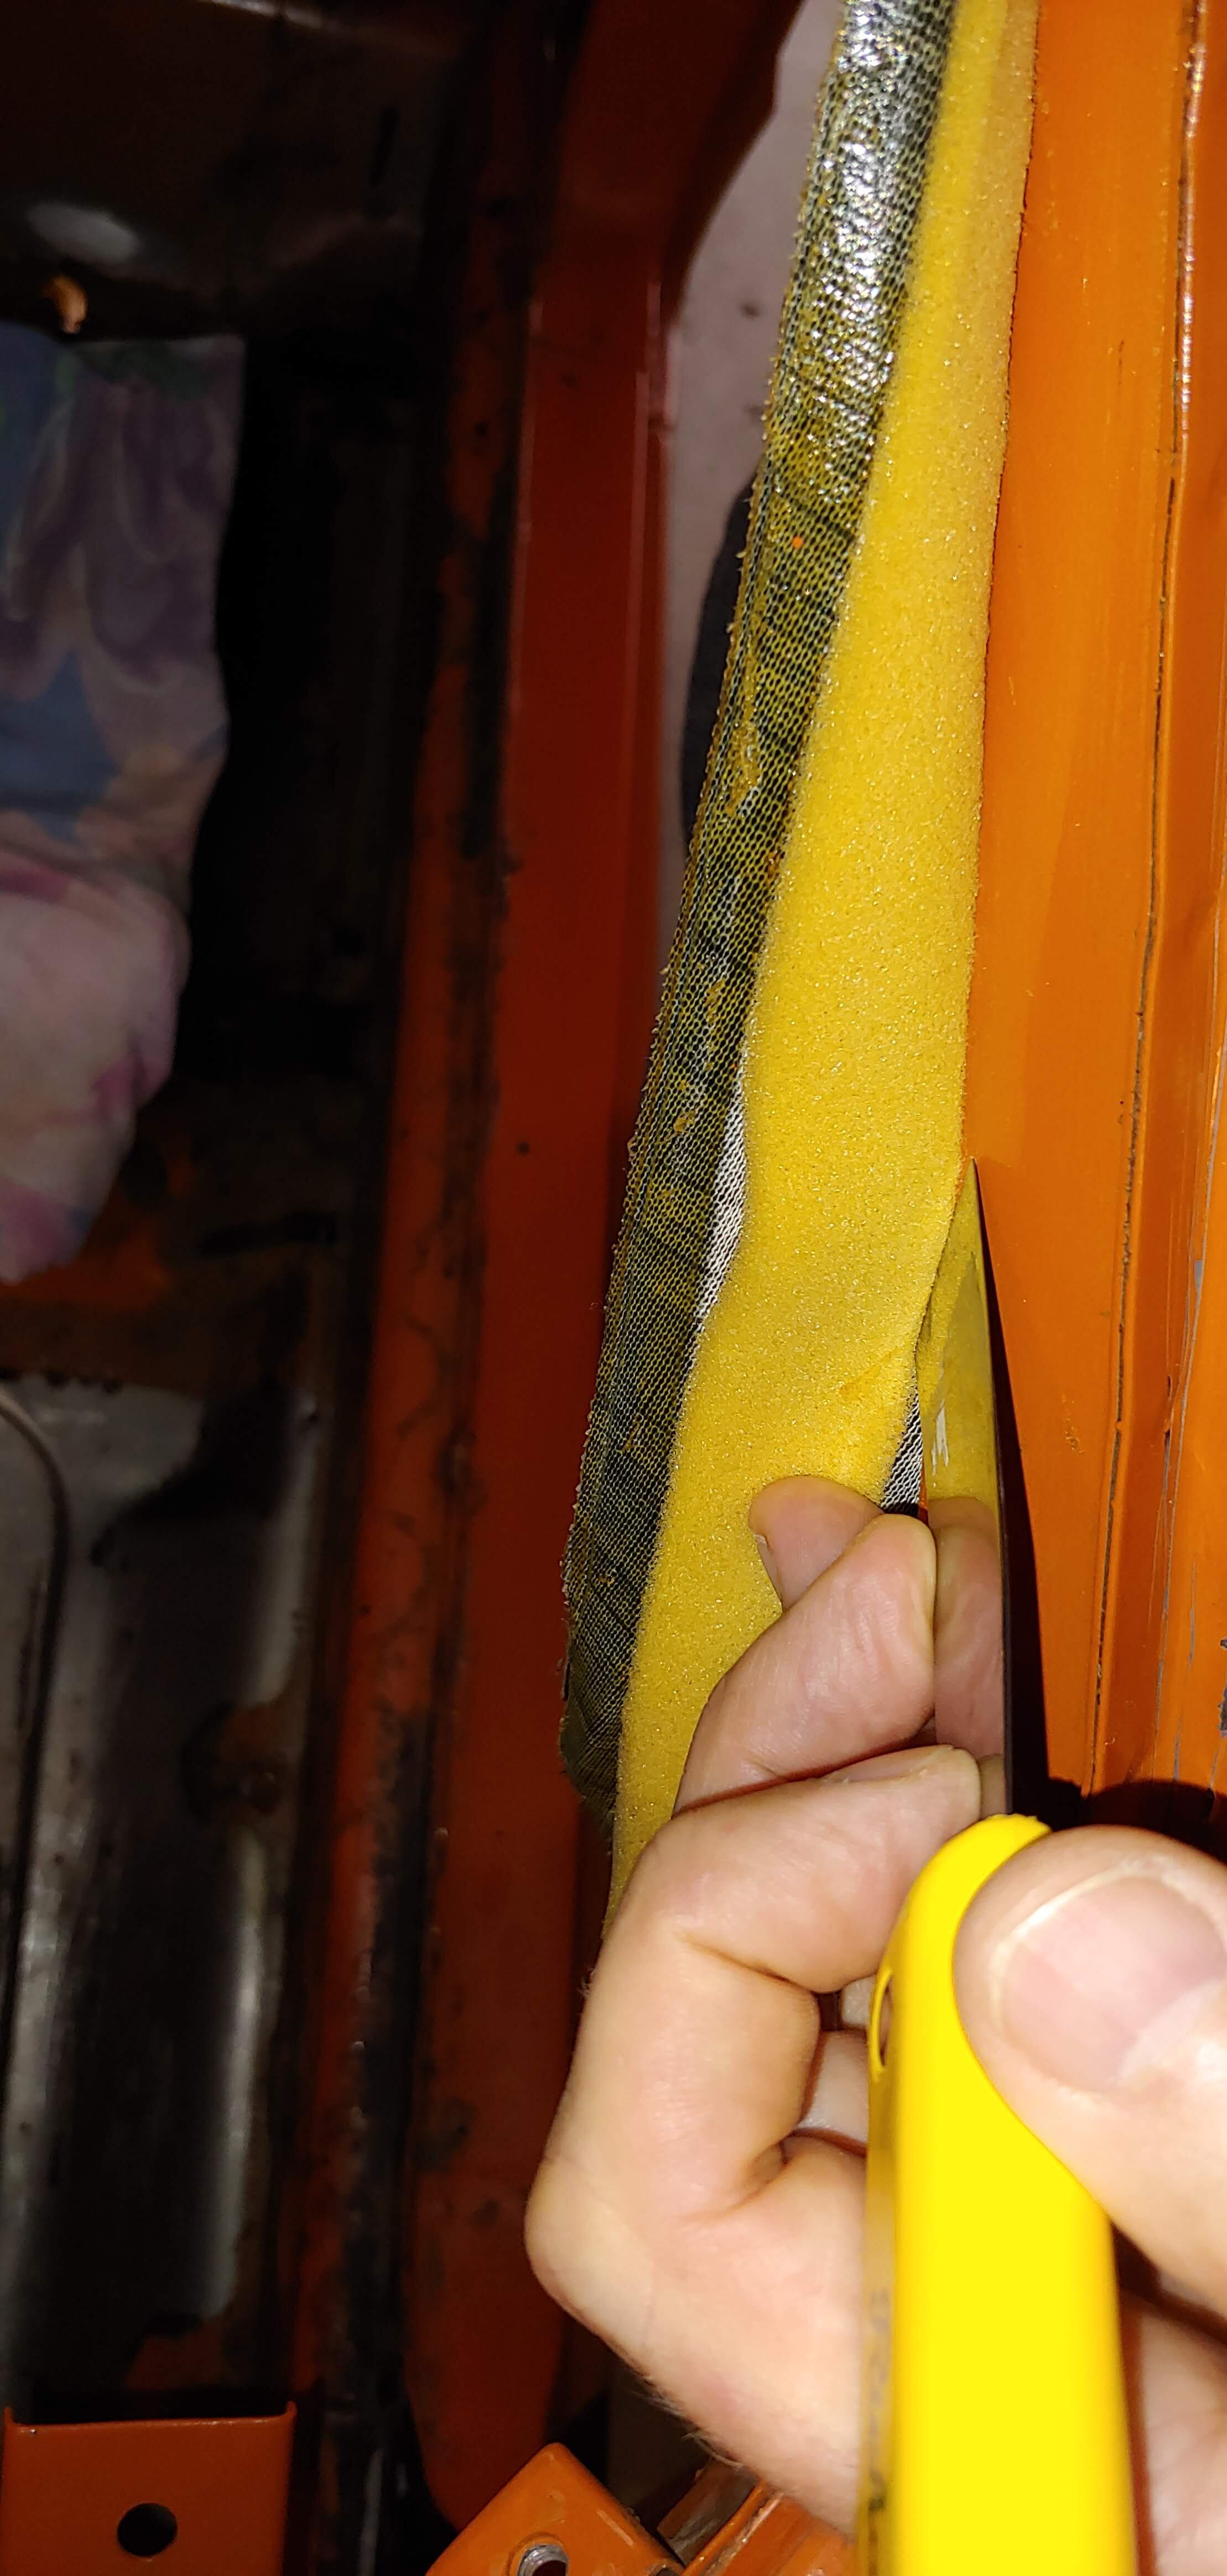
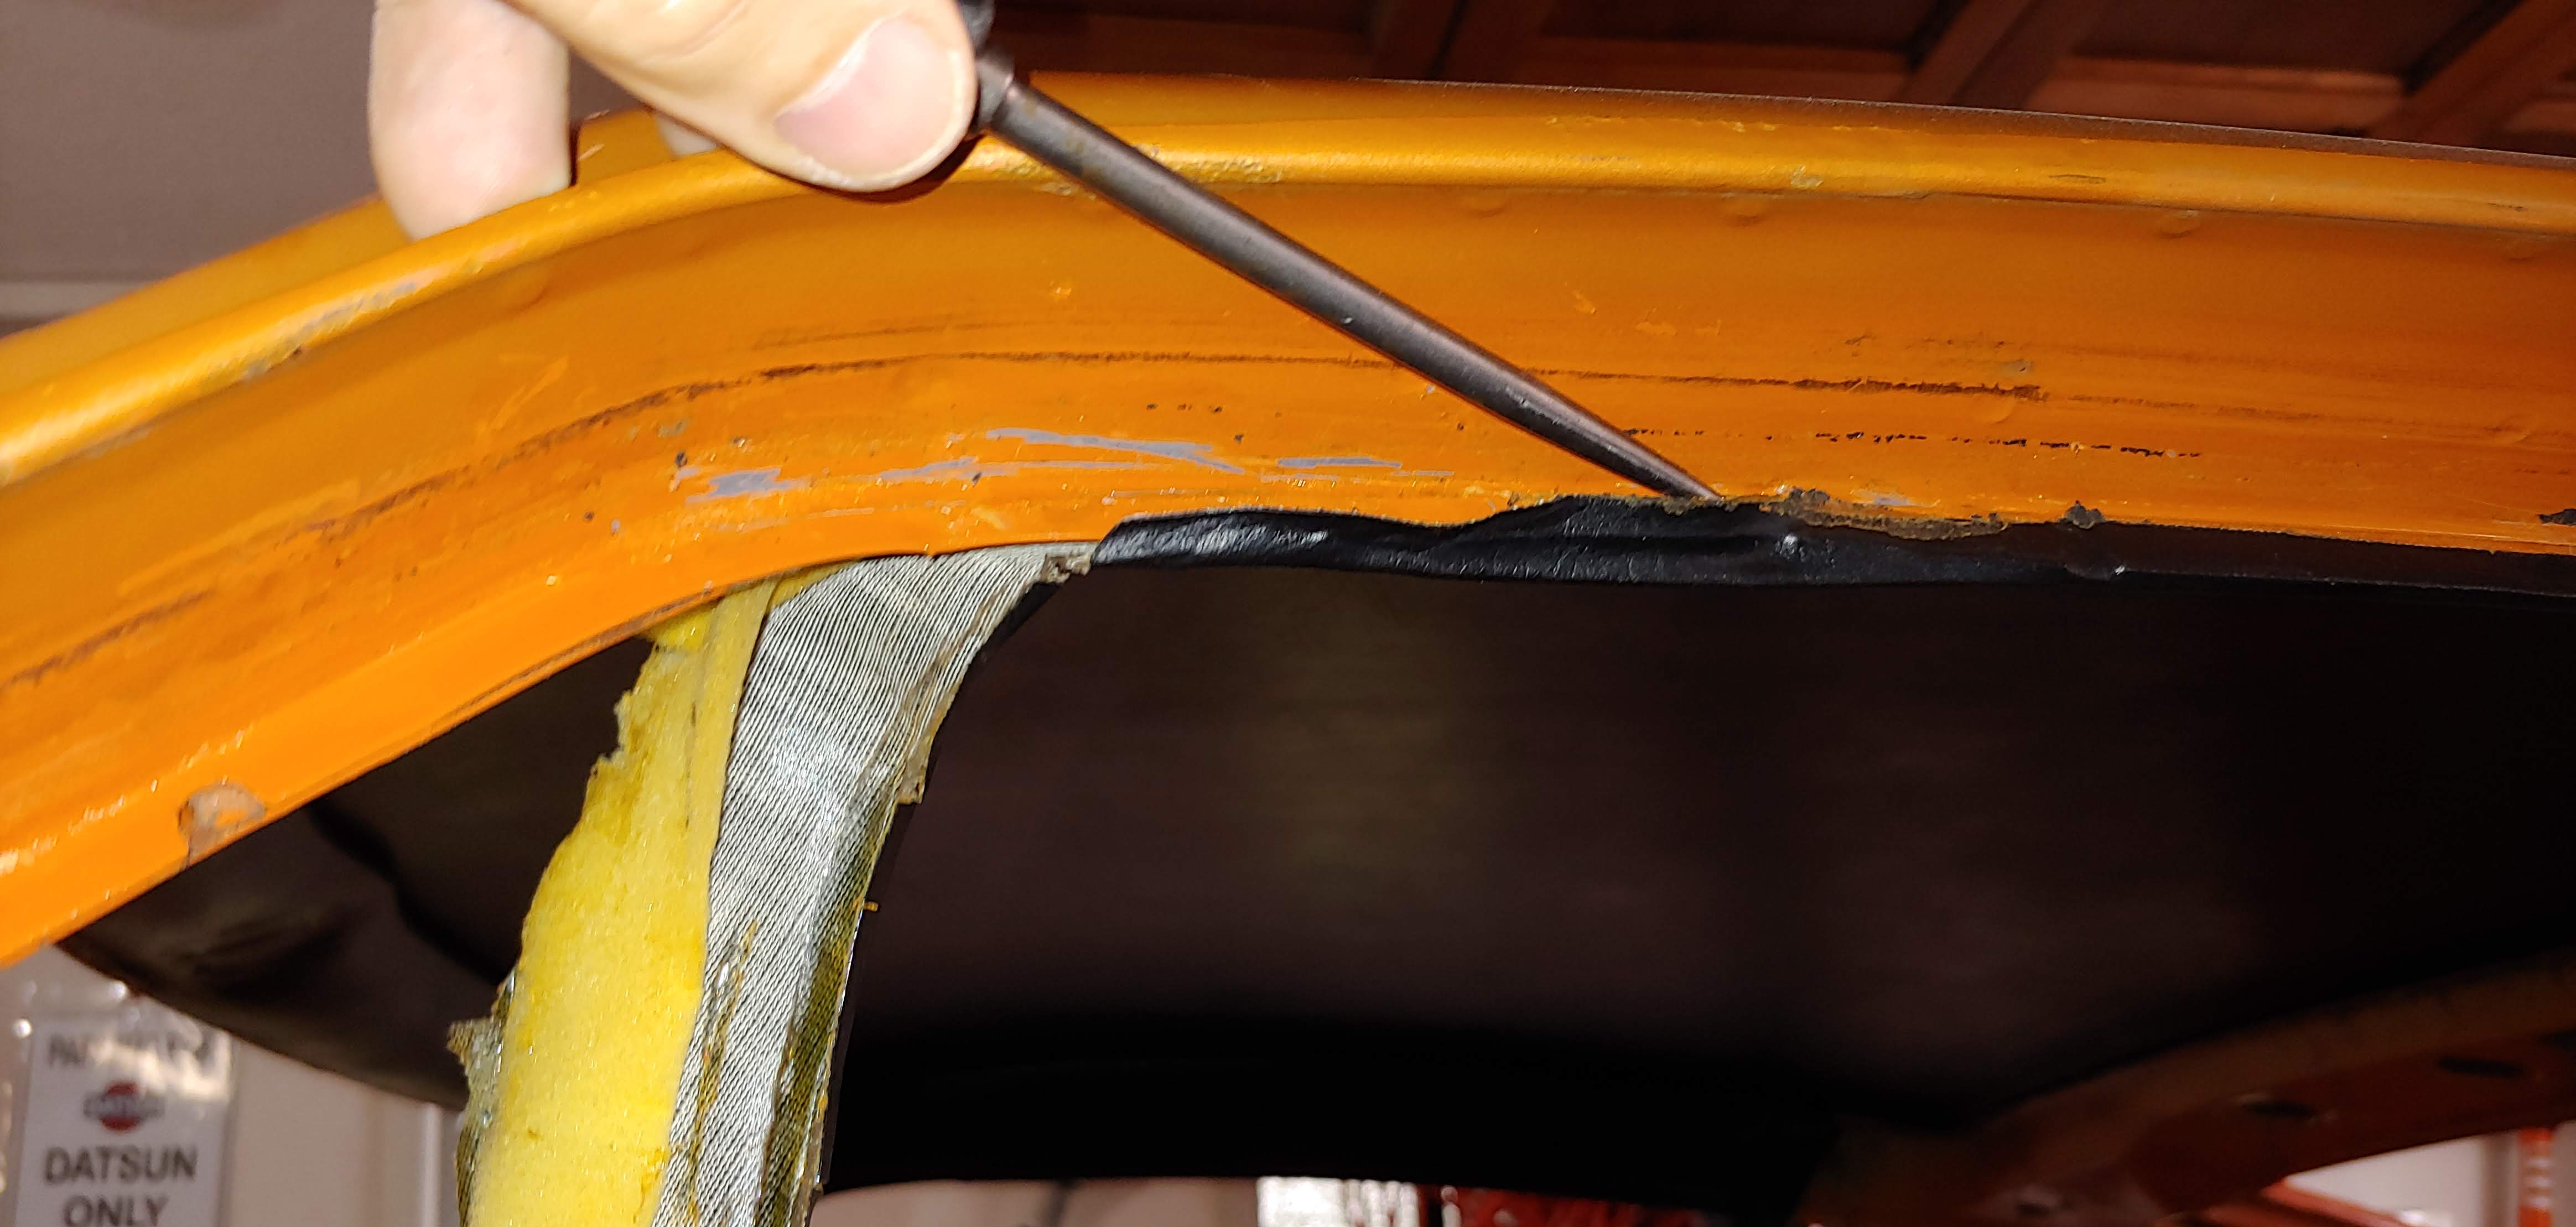
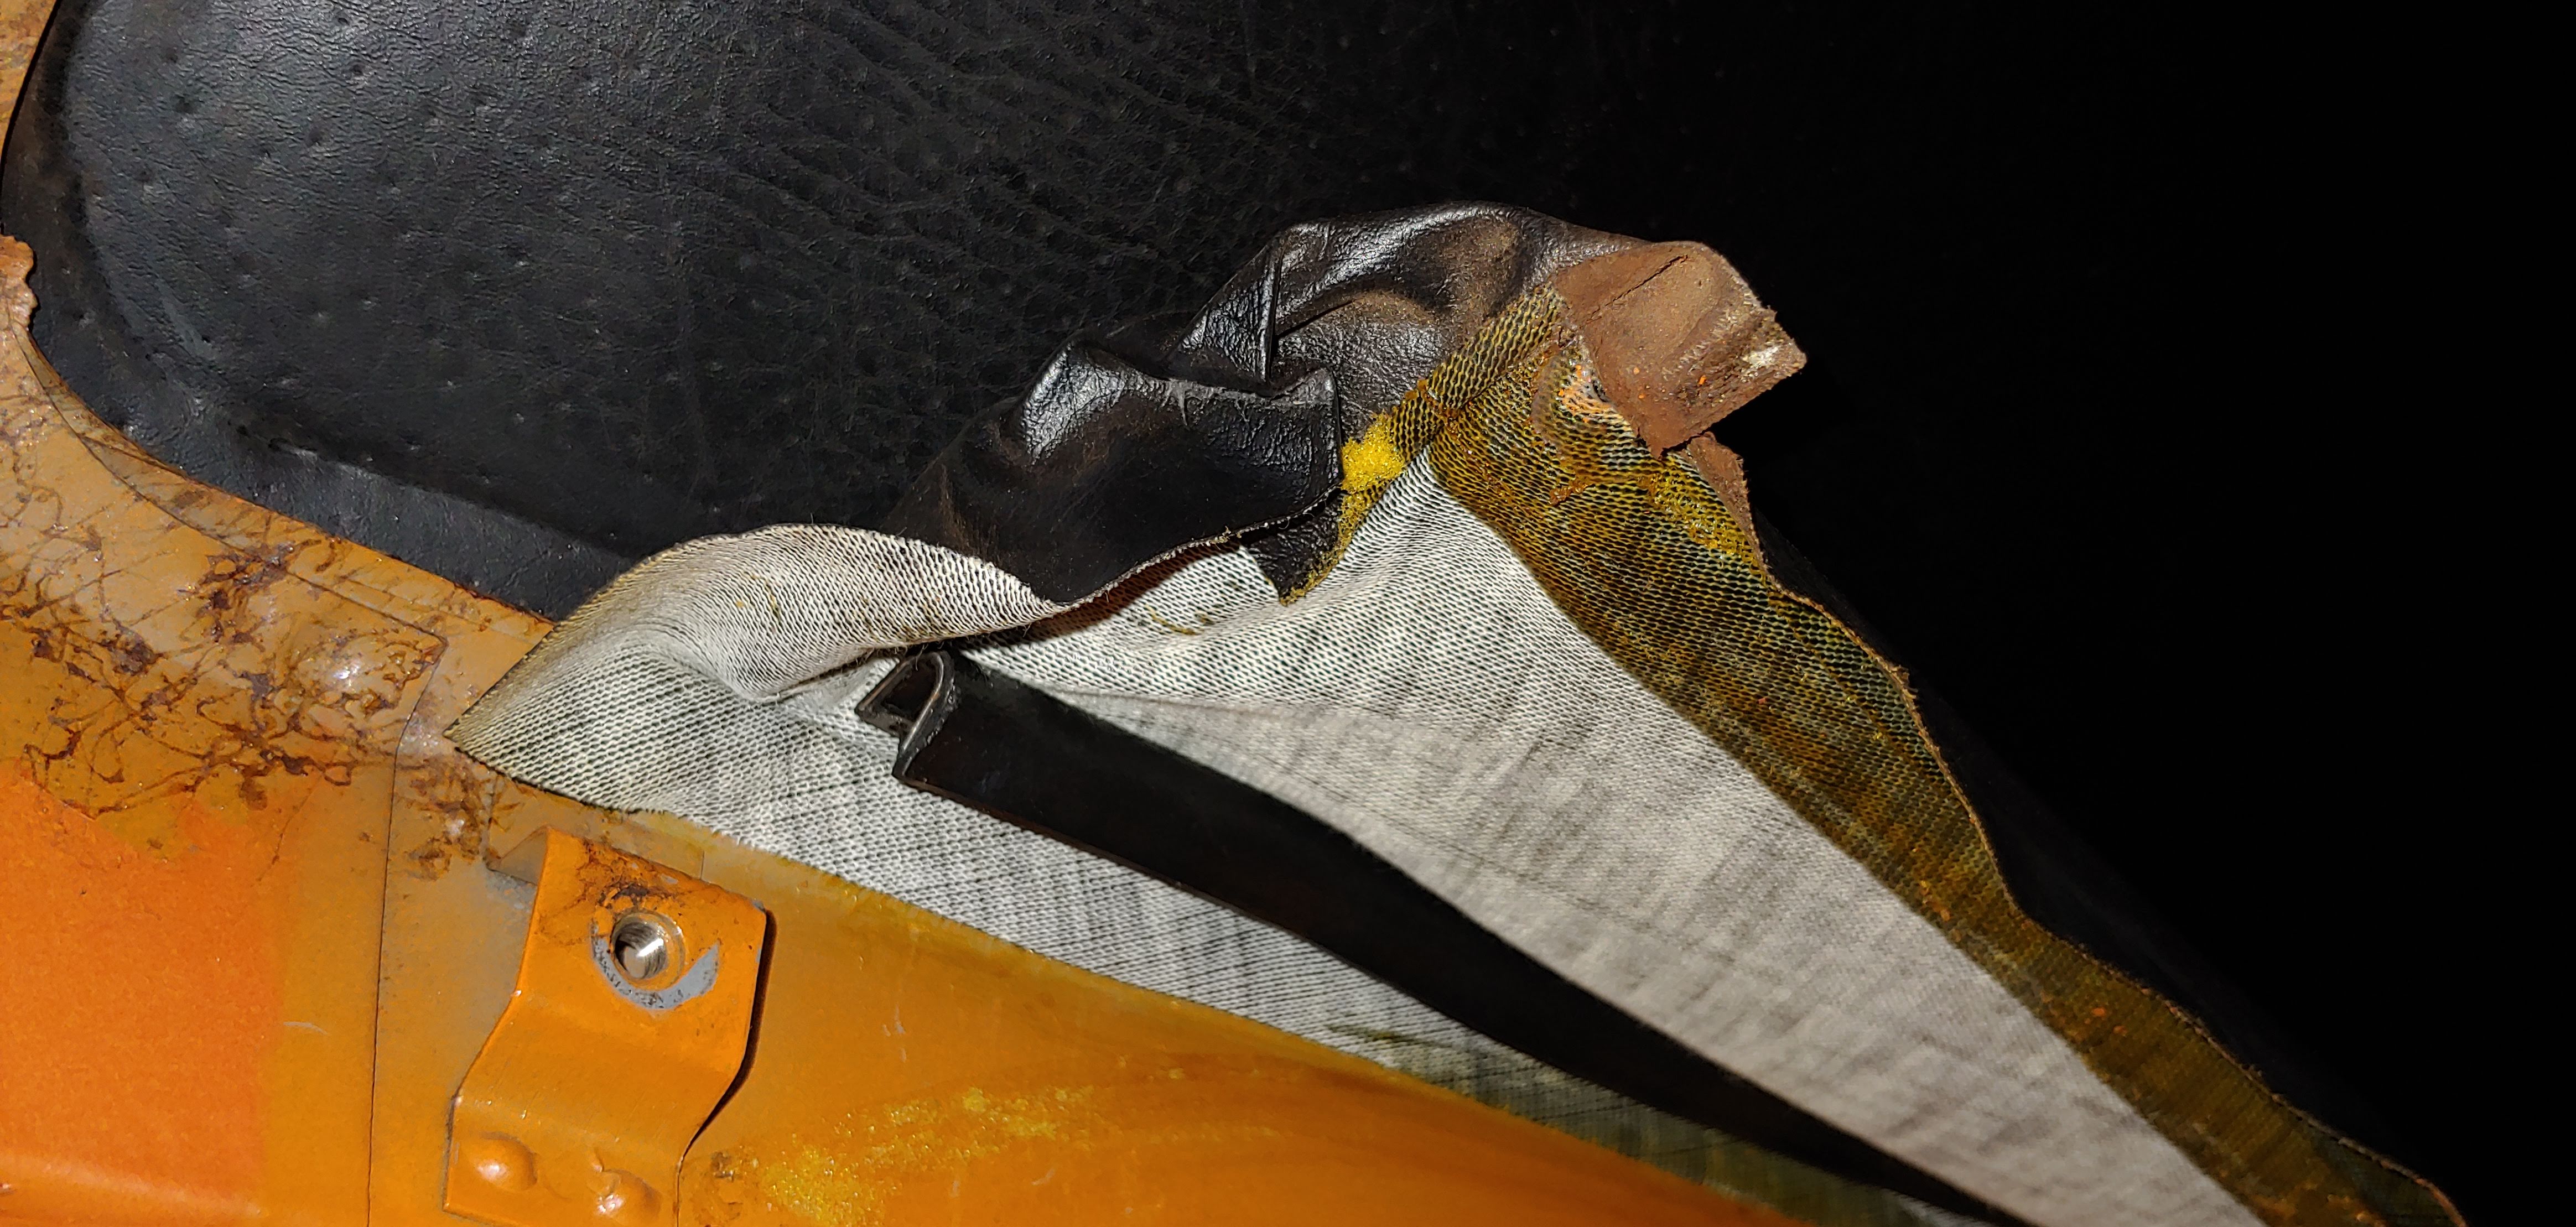
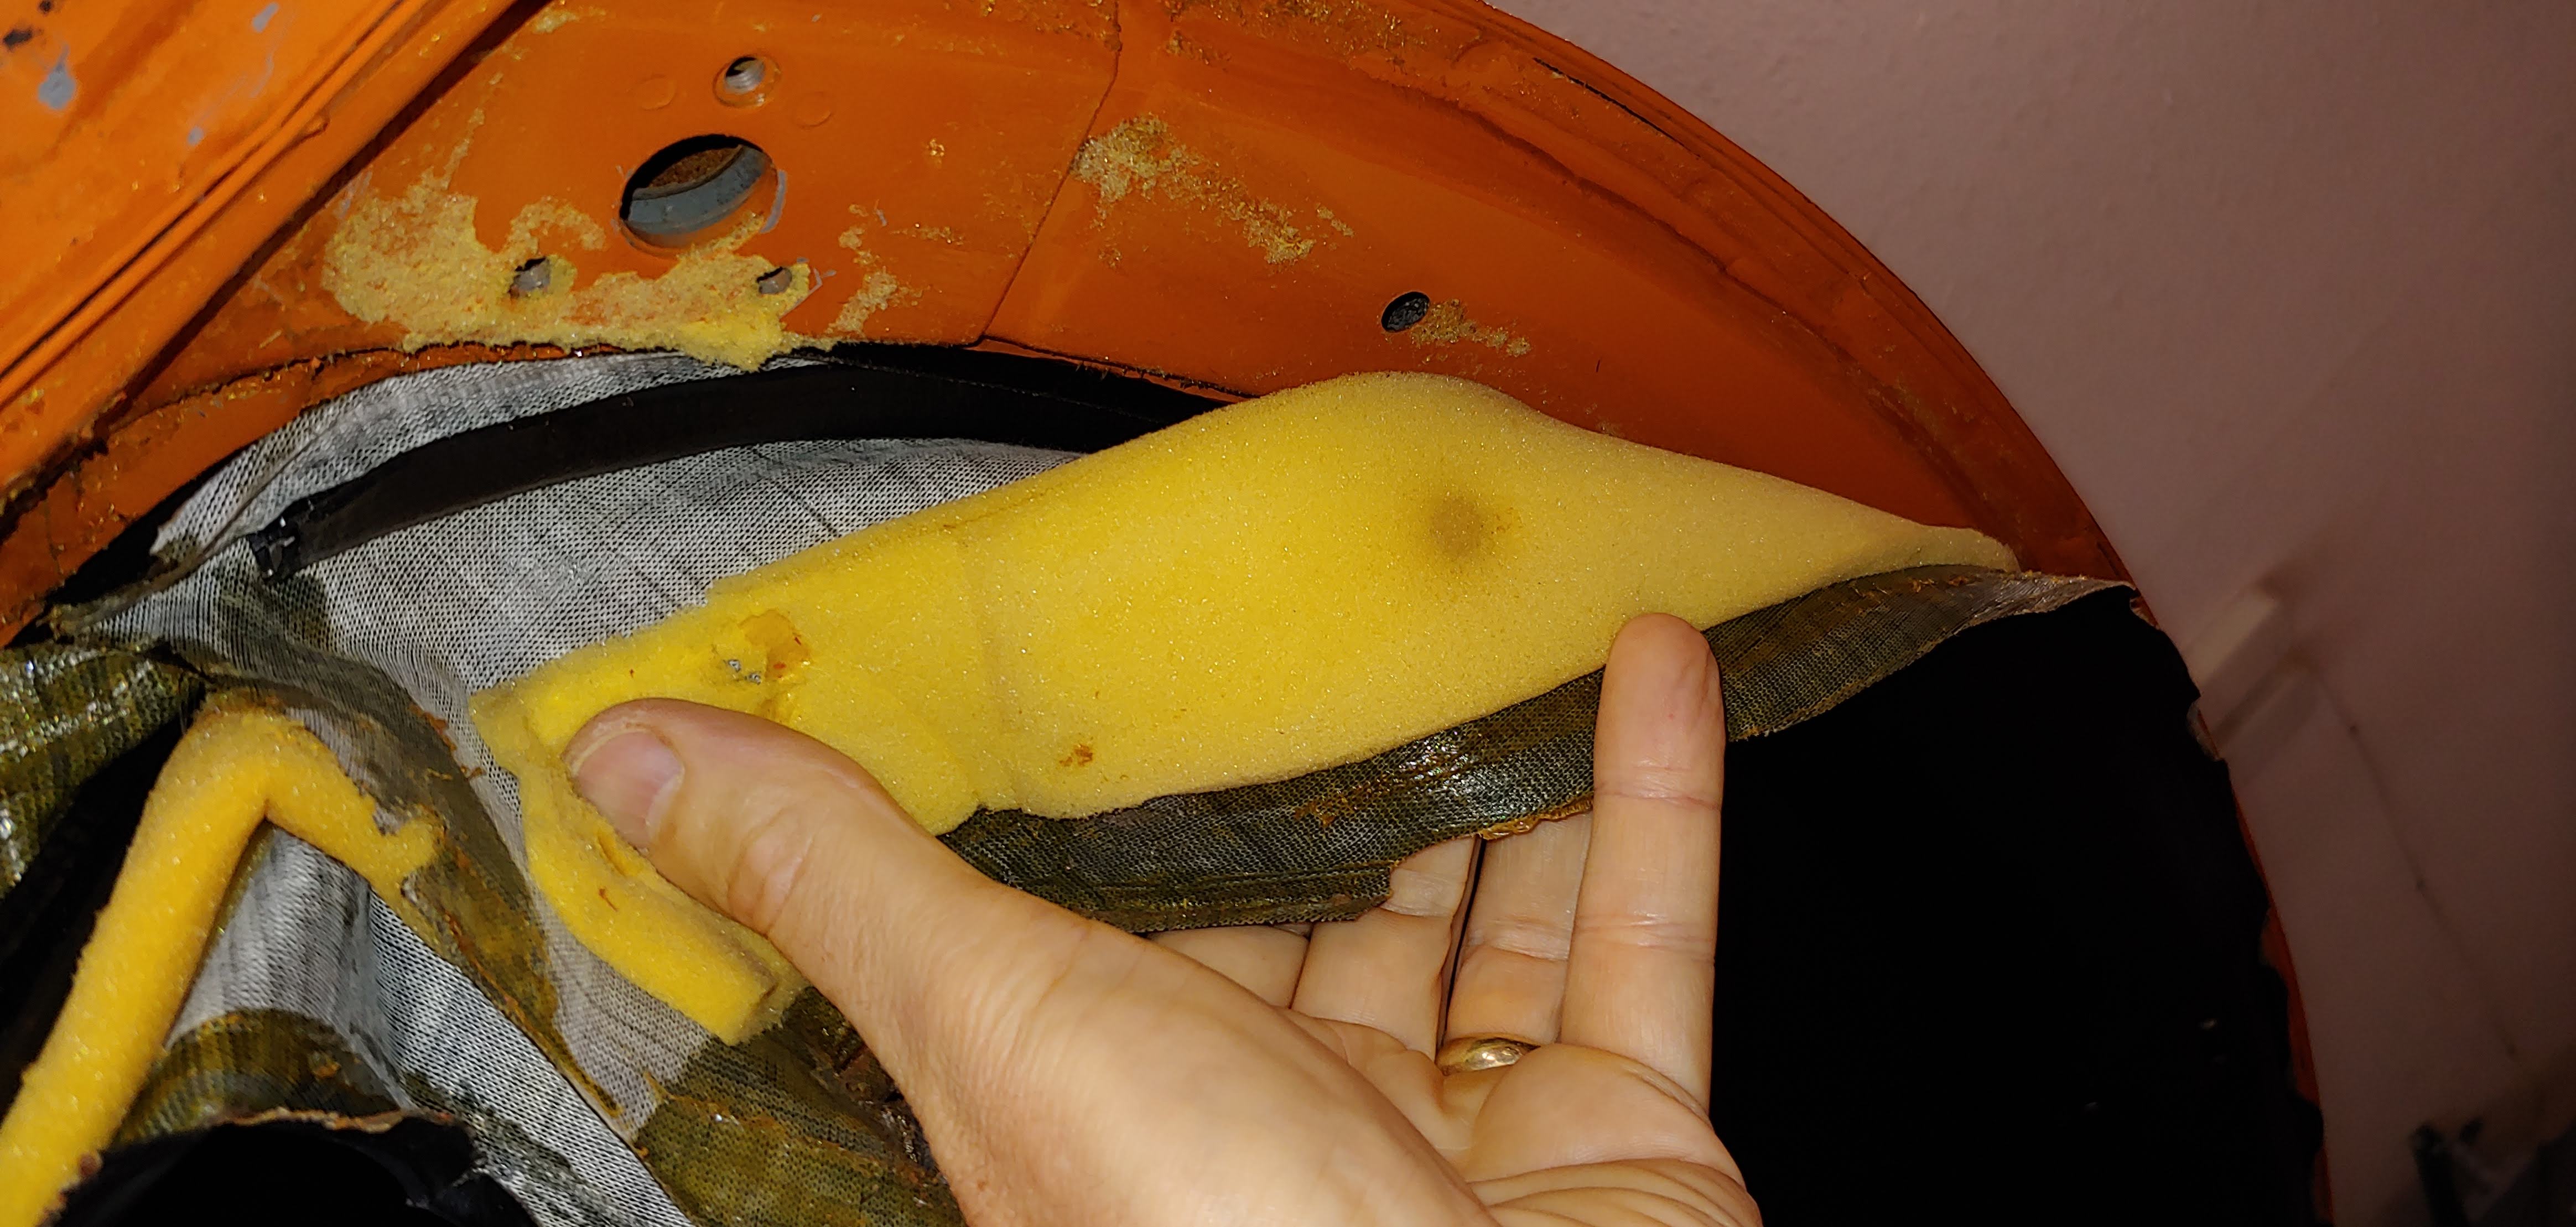
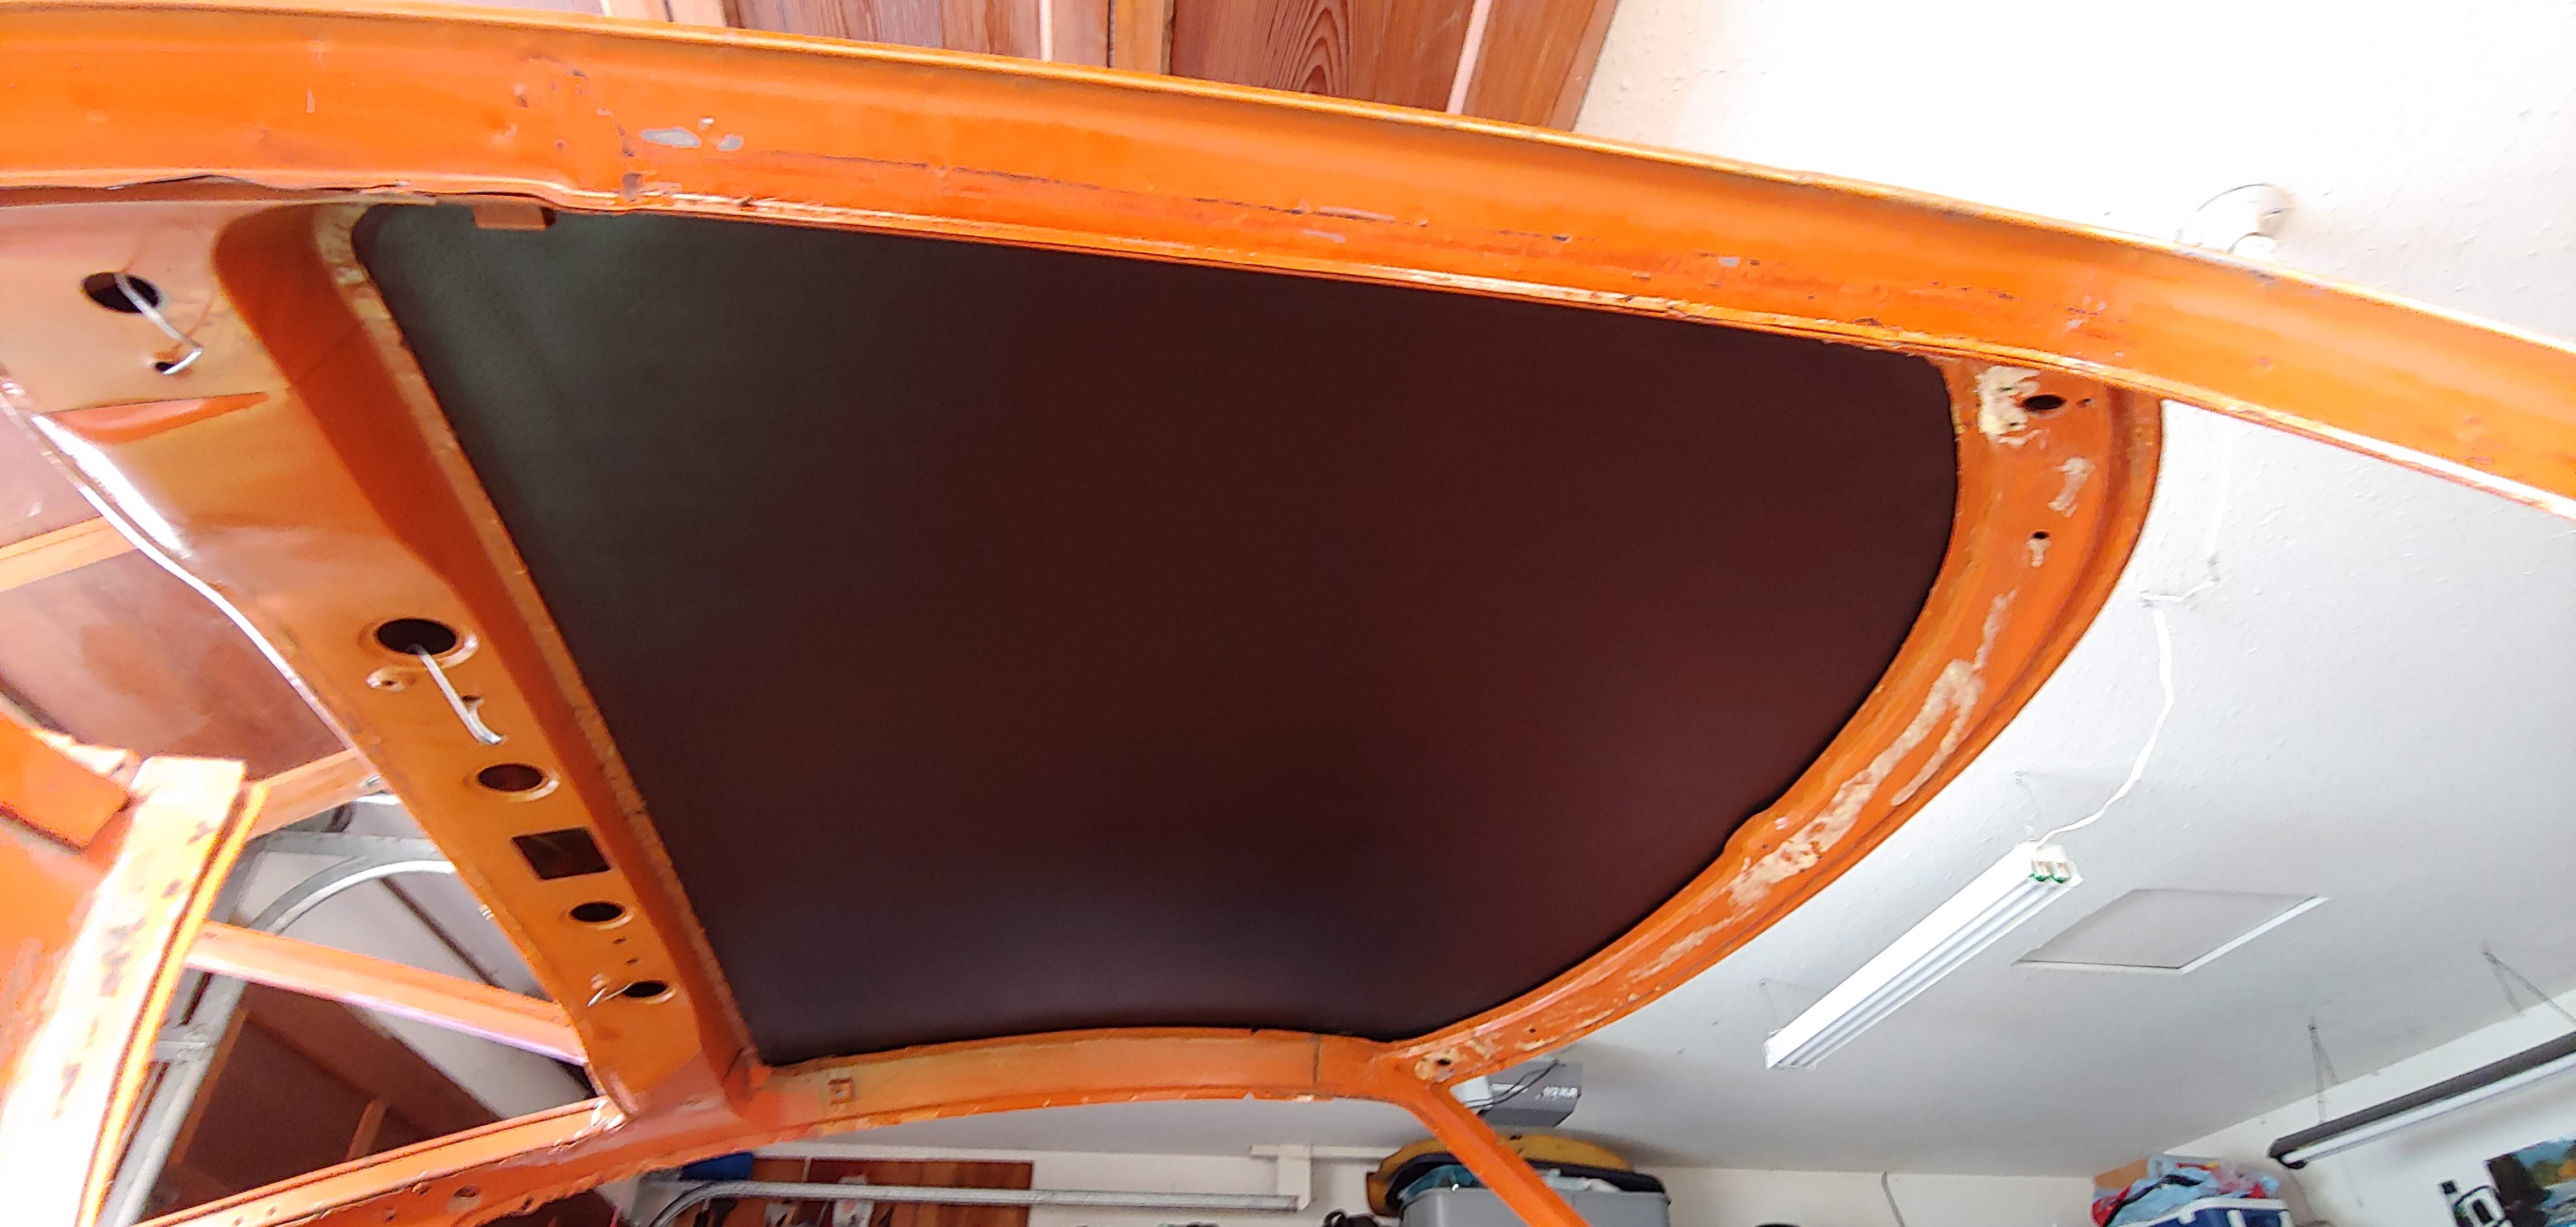
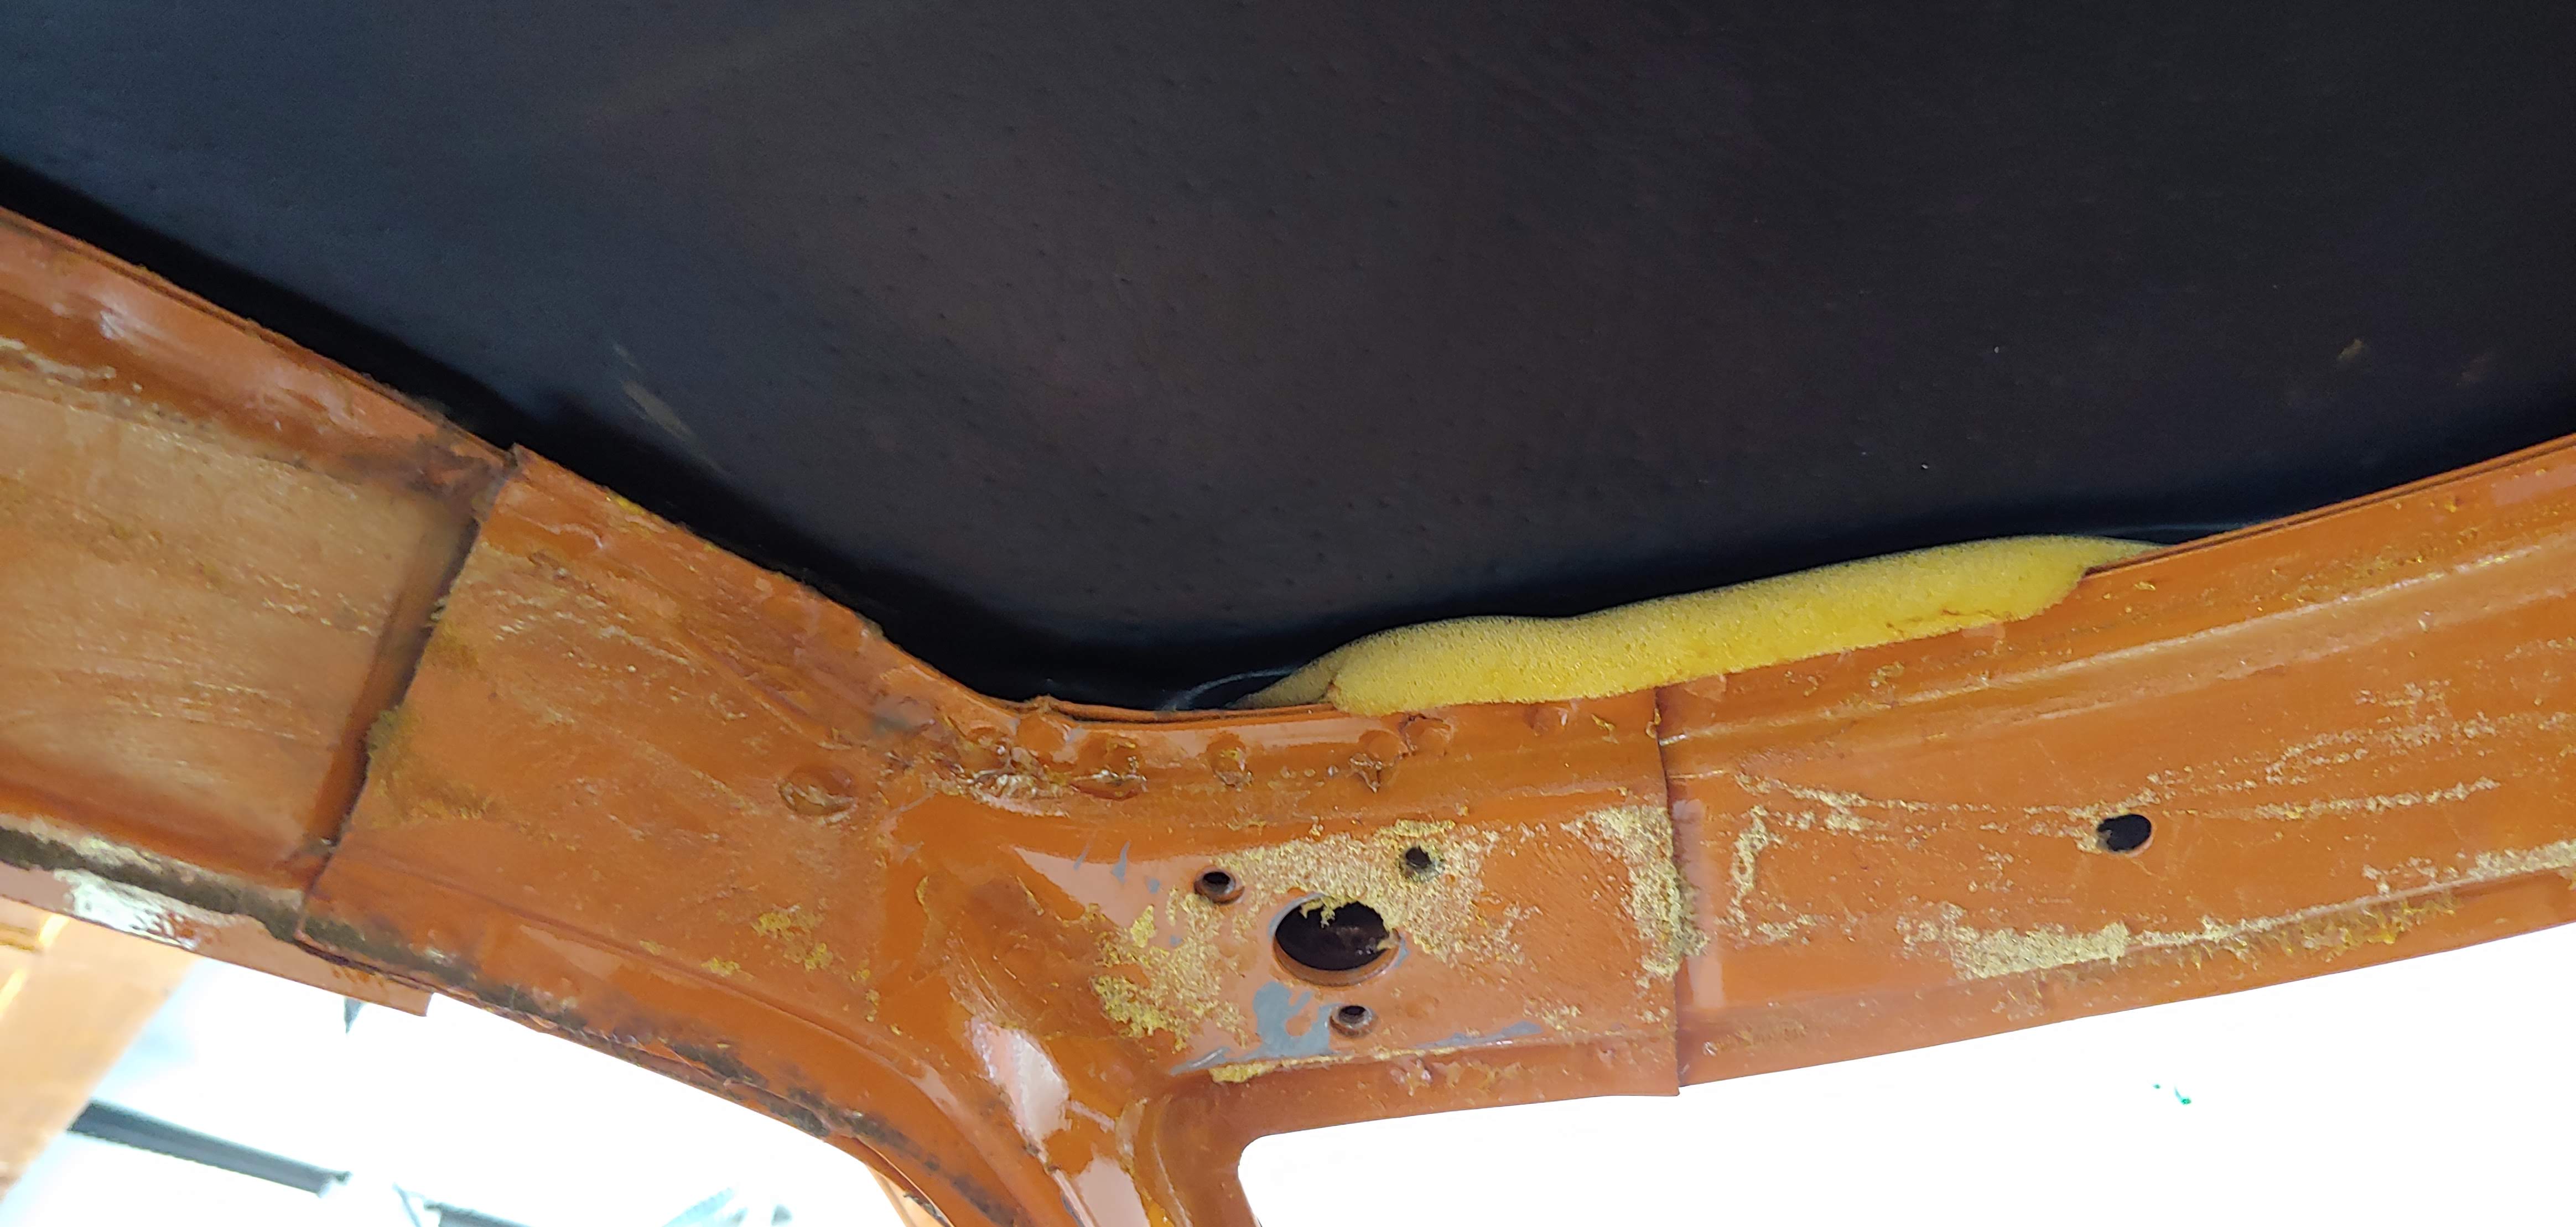
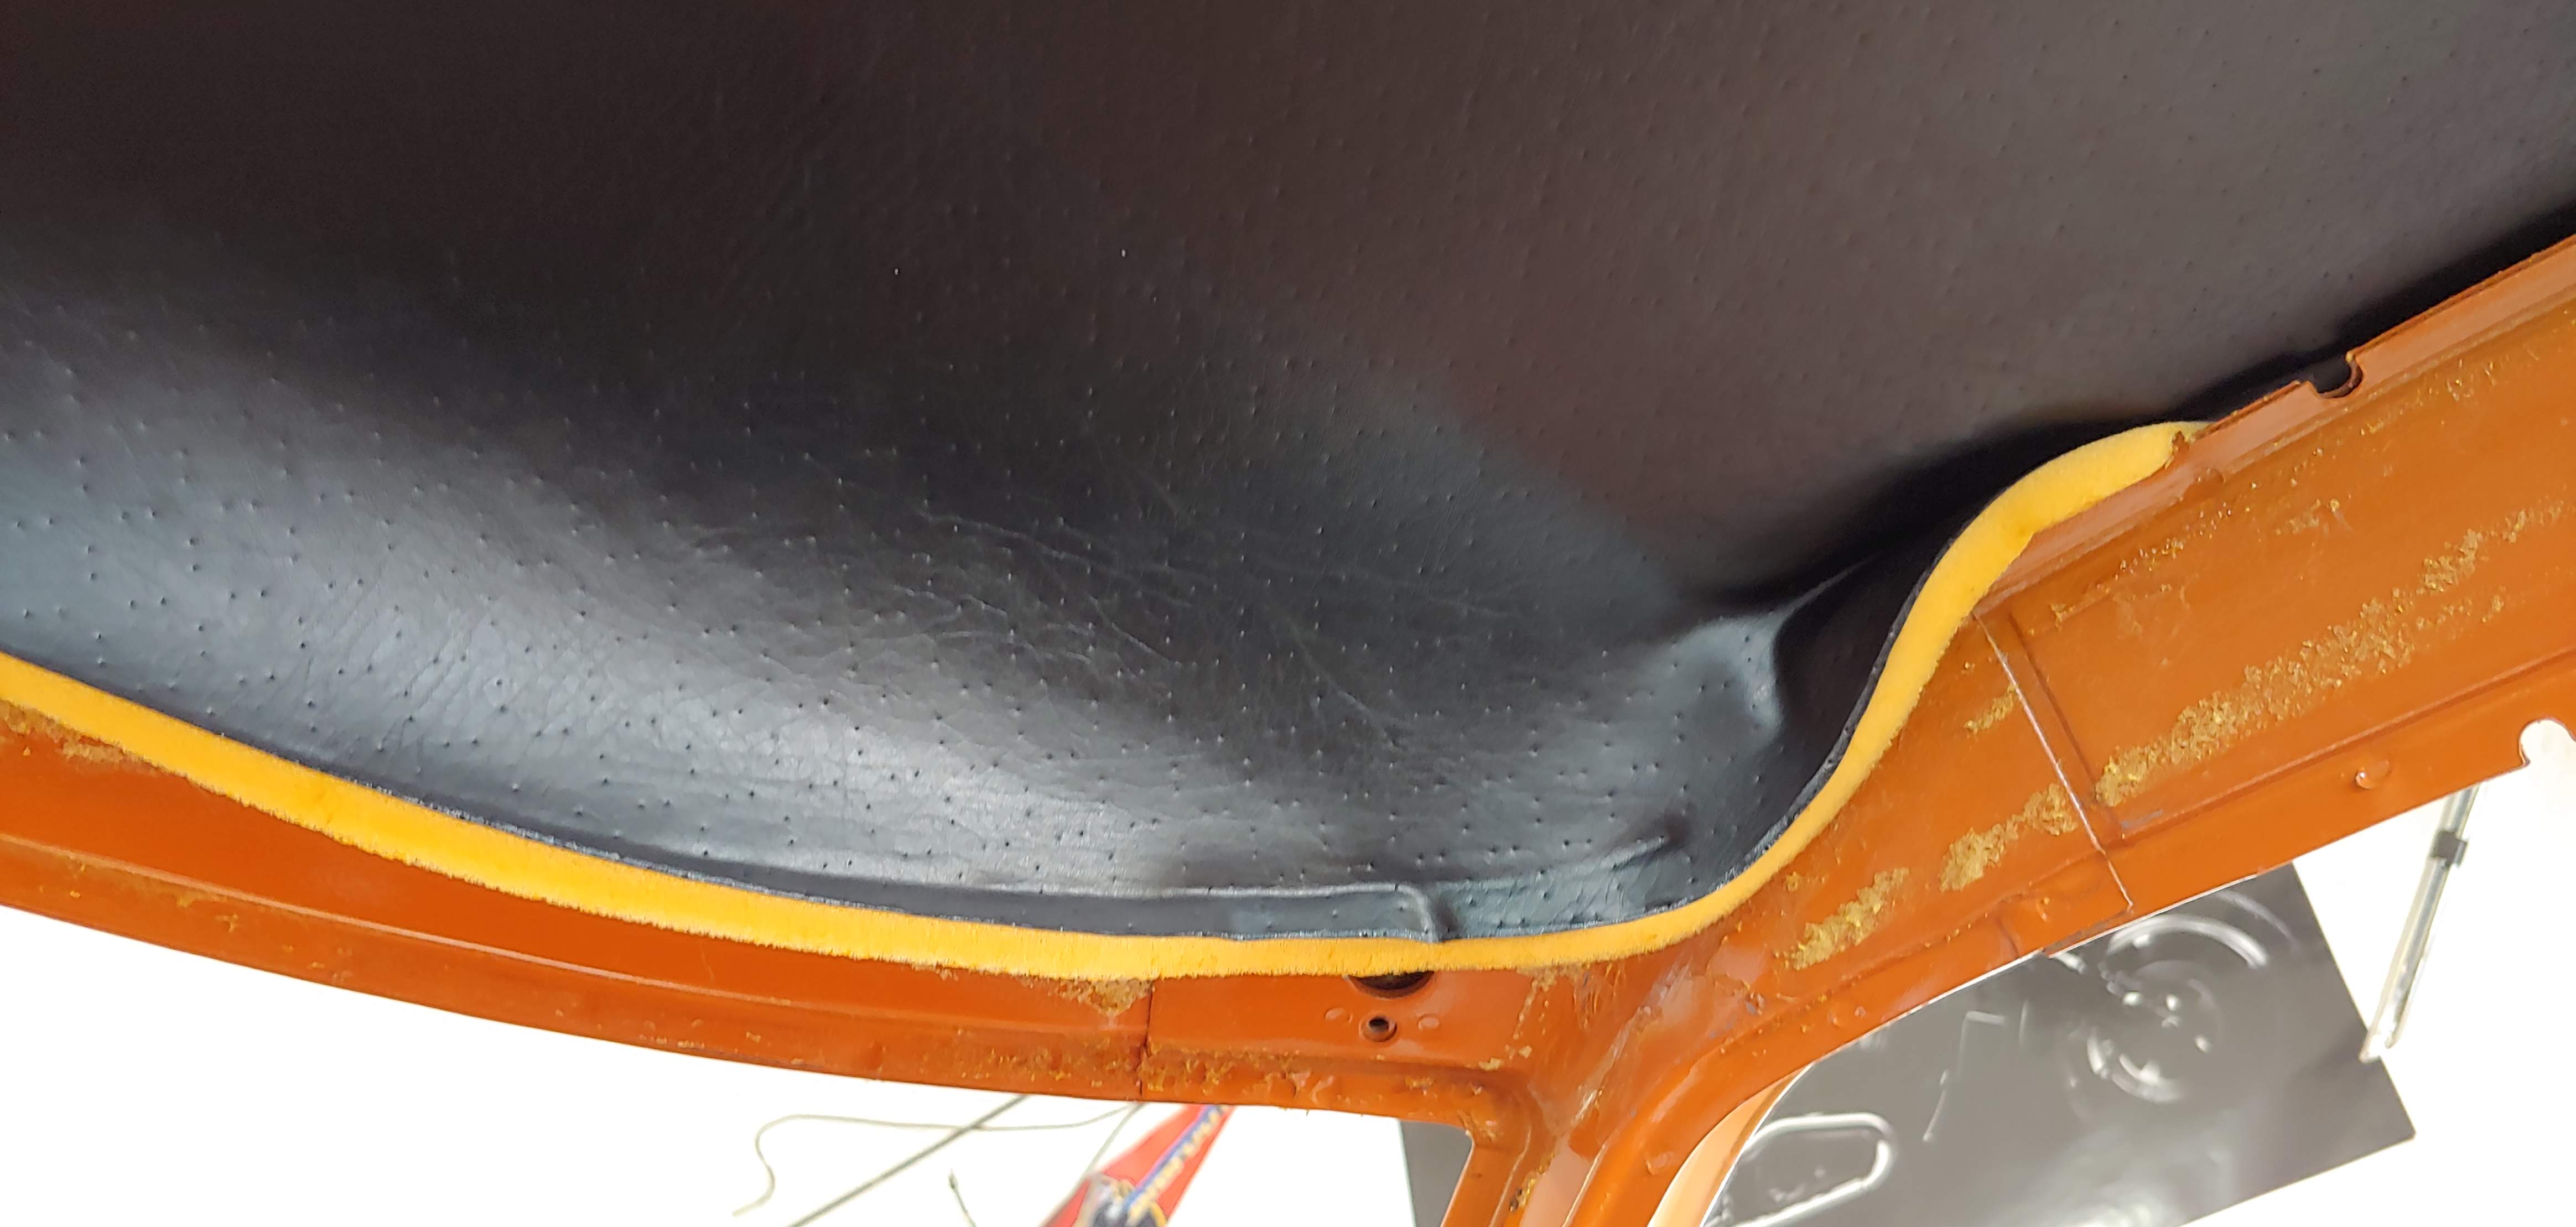
3 pointsThis weekend I removed the headliner and surrounding padded vinyl trim and A-pillar trim. I had a little anxiety about doing this as they are are in very good shape. Luckily all came out with no issues and will be reusable, including the foam padding. I took lots of pictures of the joint details to help when I reinstall. Here are some pictures of my process, the only tools I used were a 1.25" paint scraper with corners rounded off and an awl. I started at the lower end of the A-pillars and carefully peeled back the vinyl exposing the foam padding. In some areas I could do this with just my fingers and other areas I had to use the scrapper to break away the adhesive as I pulled. When I got to the vinyl over the door opening I used the awl to break the adhesive as space was limited. For most of the length the foam was glued at the edges to I had to go very slow using the scraper gently while keeping light tension on the foam. There is also U shaped welting that holds the vinyl to the roof frame that had to be pulled away. After removing the A-pillar and over the door opening trim I used the same process for over the windshield opening. For the headliner I found that there was no adhesive where it tucked into the roof frame but there was a very uniform coating of the adhesive on the rest. To get started I poked my little finger in to the hole for the LH visor mounting bracket pushing the unglued edge of the headliner and at the same time gently pushing inward with the fingers of my other hand until I had exposed the edge of the headliner foam. From there I could work the unglued edge out of the frame for the full perimeter. I freed the headliner using the scraper with a short jabbing motion, keeping light pressure on the roof and holding the headliner with light tension with my other hand. I had the scrapper at about a 30 to 45 degree angle to the roof while doing the scrapping. Using this technique very little of the foam was damaged. All in all it when quite smoothly and there was very little foam reside left on the steel. It was definitely worth taking my time to be able to salvage everything.


 3 points
 -
2 pointsGood luck with it! Don't scratch that nice paint job. Those HF levelers are nice but scary when you're working by yourself. They pop and are jerky when using them while loaded down with the motor. That little handle is useless, put a socket on the other end. Grease the bottom rail the roller rides on, makes it a little smoother. I found an old post of mine showing what I did. Might help you too. Here's some reading for ya. Below the videos it's stuff from classiczcars.com. https://www.google.com/search?q=engine+leveler+classiczcars.com&client=ms-android-americamovil-us-revc&ei=_6wJYZWmJtScwbkPxba40AY&oq=engine+leveler+classiczcars.com&gs_lcp=ChNtb2JpbGUtZ3dzLXdpei1zZXJwEAMyBQgAEM0COgQIHhAKUJuaAVjkrAFgxrkBaABwAHgAgAHIAYgB5g2SAQYwLjExLjGYAQCgAQHAAQE&sclient=mobile-gws-wiz-serp Skateboarding comment. I always put my right foot down on the toe box of my tennis shoes and used that as a brake. Pissed my Mom off but what didn't eh? I had to google "eh" to figure out what @Racer X meant.2 points
-
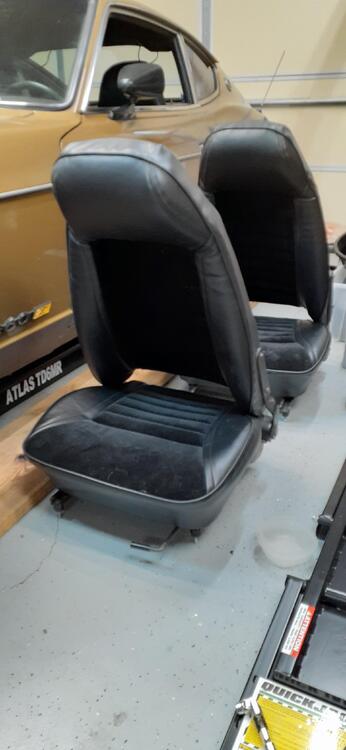
2 pointsI started putting the seats back together last night, but I ran into a glitch. I counted and recounted the screws, and I found I was 1 short. The wife made a Home Depot run today to get a M8x1.25 machine screw and some 5/16 star washers. I used the new screw on the first seat, and as was putting the second seat together I noticed I had an extra screw. Apparently my counting skills were not what they should have been yesterday. So the seats are together and ready to go into the car. I'm going to pull the center console first because I want to replace it. The replacement console is sitting the hatch area of the car.
 2 points
 -
2 pointsIf you get your light in the correct orientation, you should be able to see the scratches left (made) by wet sanding after a fairly simple buffing pass. Once you've scratched the surface of the paint, you're trying to make the scratches so small that the human eye doesn't really notice them anymore. That's what polishing is. Believe me, you are NOT making the scratches completely disappear - no matter how much you buff and polish. (waxes make the paint look shinier by filling some of the surface scratching) The type and quality of the final coat used can make a huge difference when it comes to sanding and buffing. Some clearcoats buff out very well (easily) and some are a little more stubborn. I think you should look very closely at the surface and see the scratches, if they're not minimizing with a concentrated buffing pass, you need a more aggressive compound like those mentioned above. I use Meguiar's Ultimate Compound and it's not very aggressive. Try one of their "heavier cut" compounds if you still can see surface scratches. But remember that it's grit, and you're removing material from the surface - don't burn through. Another note I might add is that your clearcoat should be clear. You should be able to see through the clear to the base coat like you're looking through glass - if it's cloudy, it's wrong. If it's cloudy, no amount of surface buffing will make it go away. So determine if your lack of shine is surface scratches or cloudy clearcoat.2 points
-
2 pointsI think Jay Leno is a good guy. Maybe not an expert but well informed and intelligent. I have no issue endorsing a product you believe in. He doesn’t seem like the type to talk up a product and not use it and you see that all over the advertising world. I’m interested in the product because we already know water is bad for your engine. My old motor in the car has corrosion off the chart, the water pump impeller total disintegrated, core plugs rusted through. Sure I don’t know the history, maybe a PO ran straight tap water or urine in an emergency?? I do know water based coolants have drawbacks. I’m like the idea that you can open the radiator cap on a hot engine and it doesn’t blow up in your face. I really like the idea of never changing it ever again. Doing radiator fluid is messy and then you have issues disposing of it after, (I bet it’s really fun)...that the part that isn’t all over your driveway afterwards. Sent from my iPhone using Tapatalk2 points
-
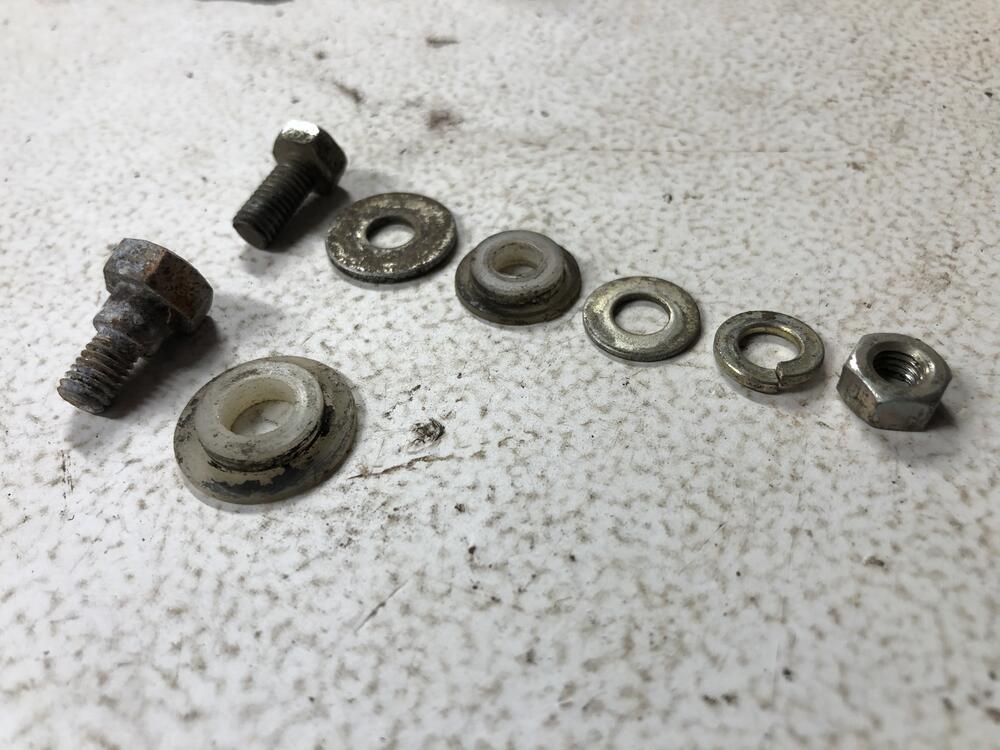
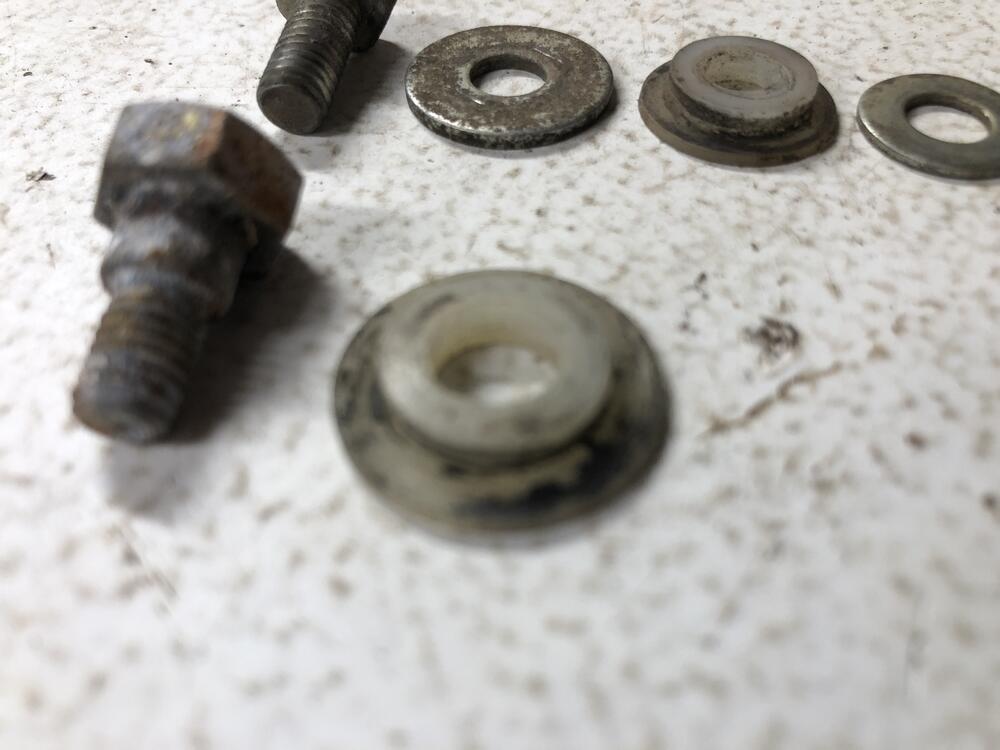
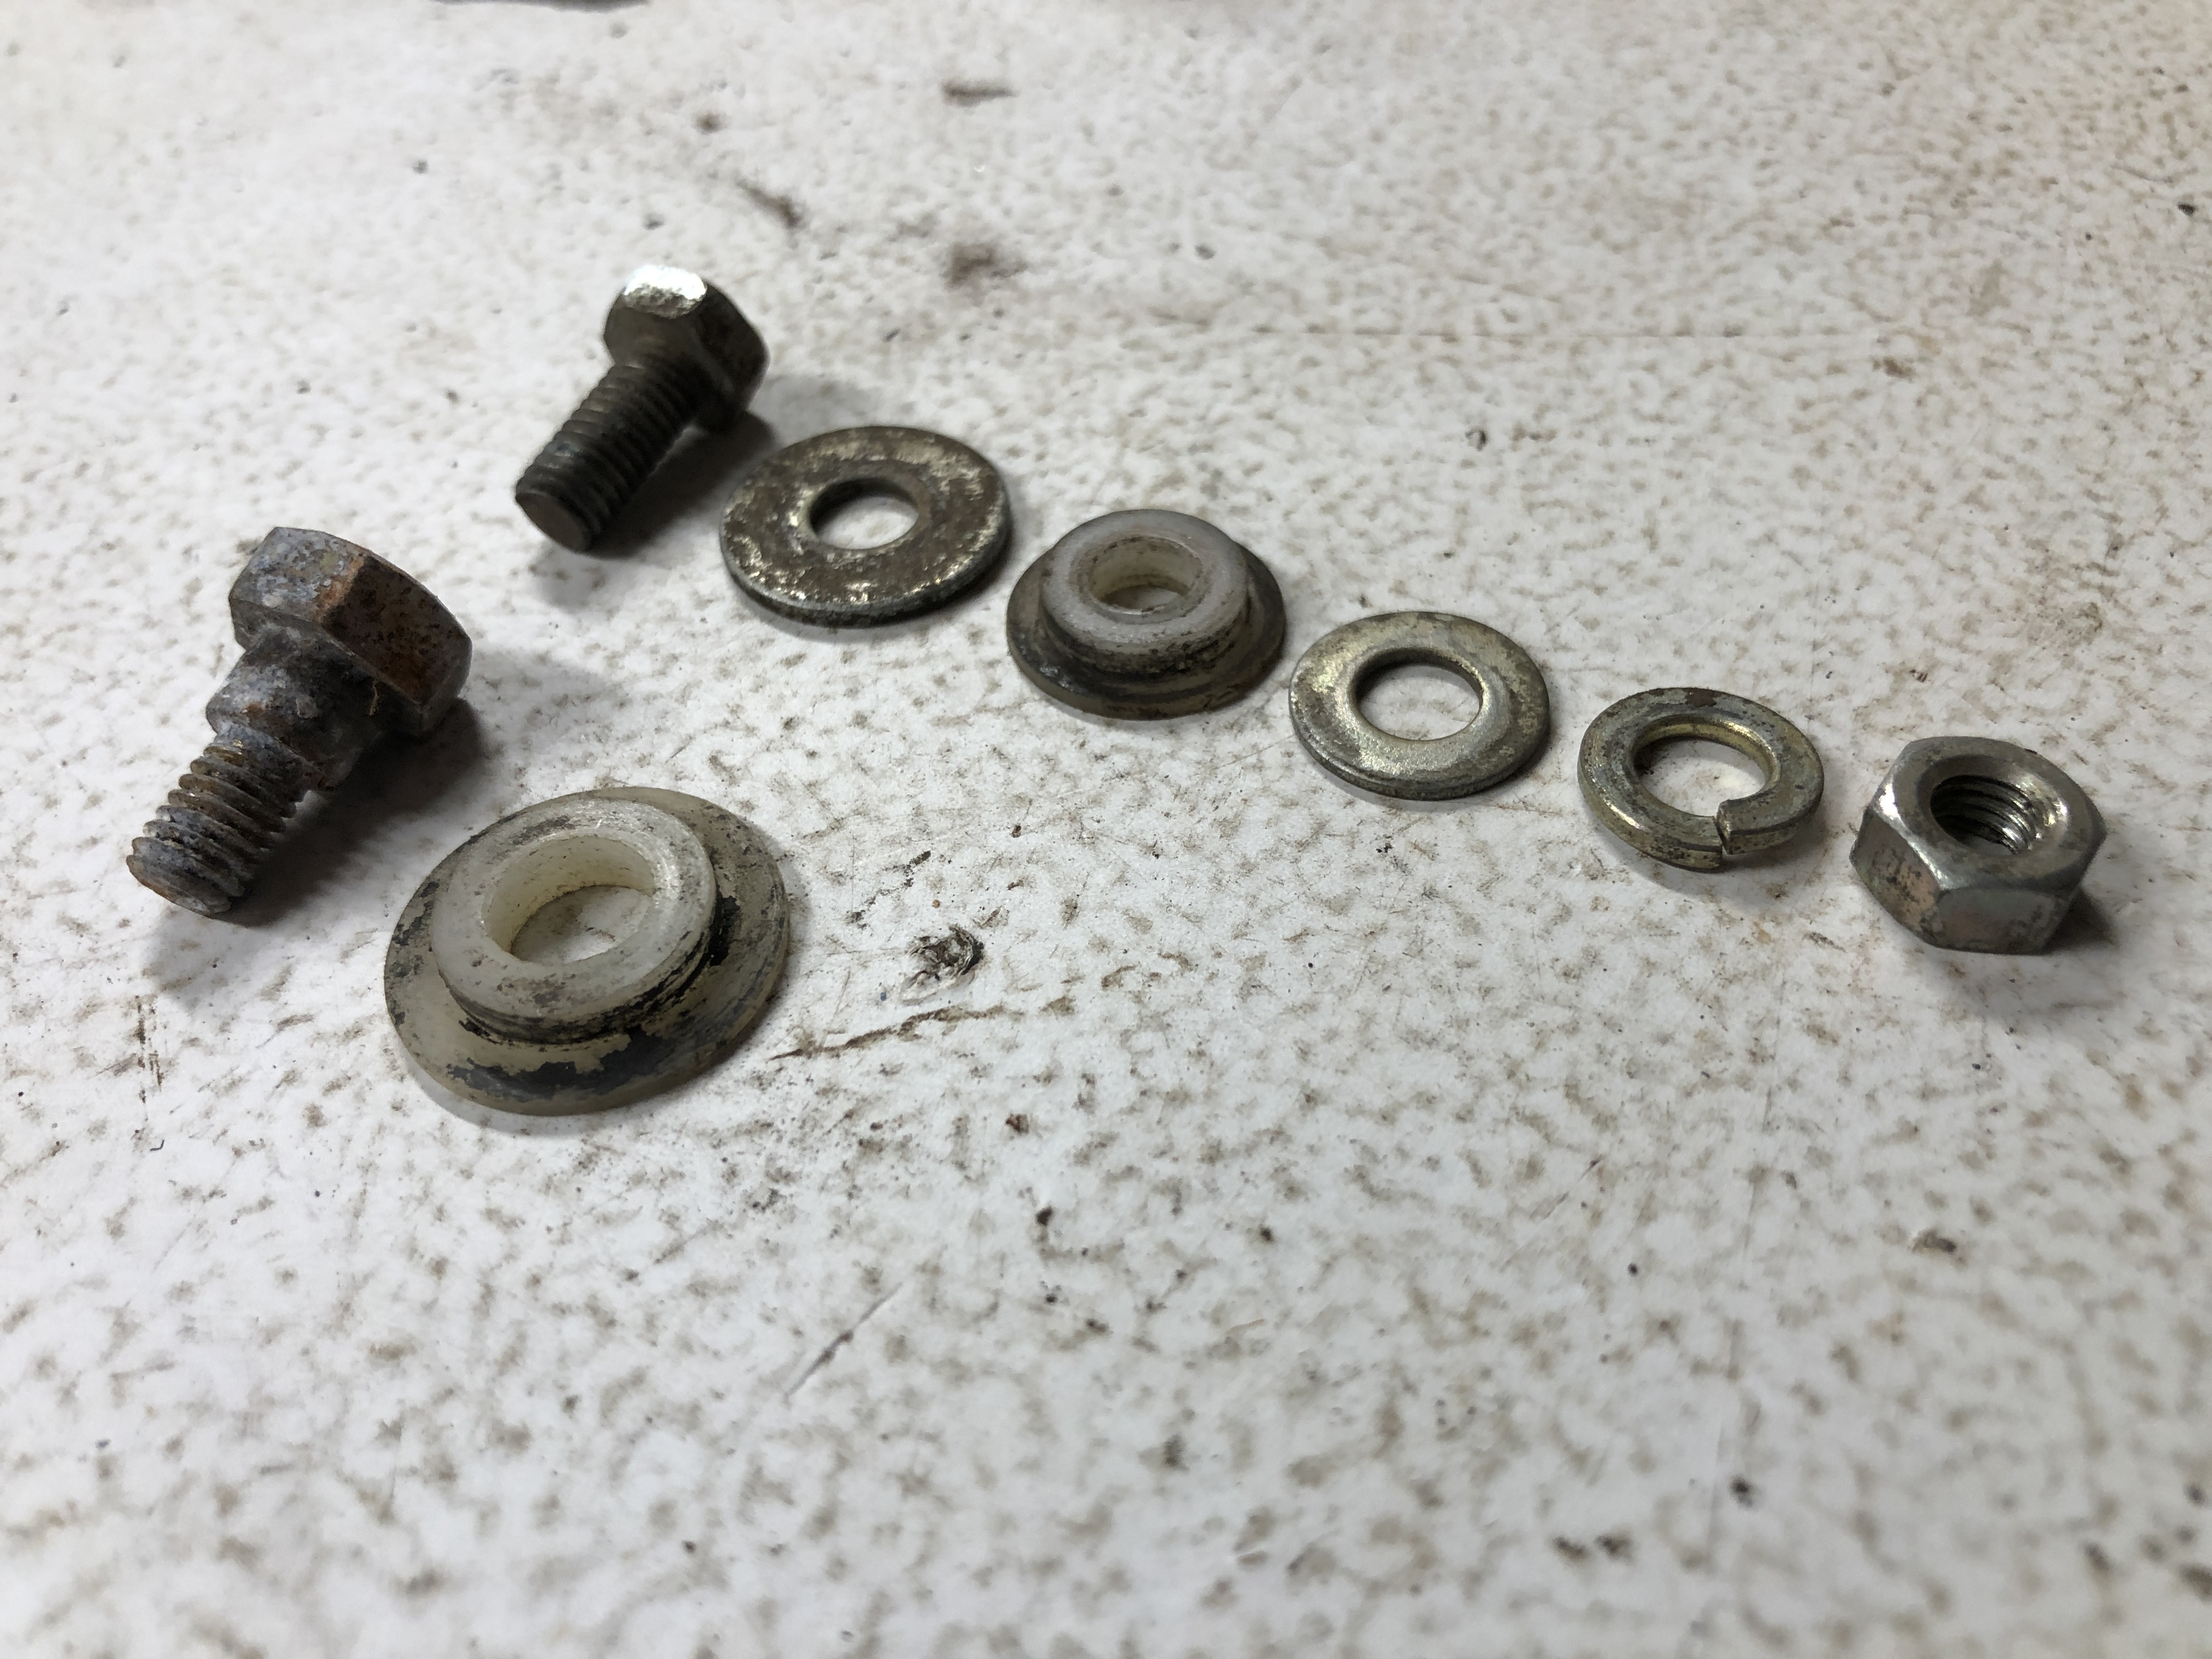
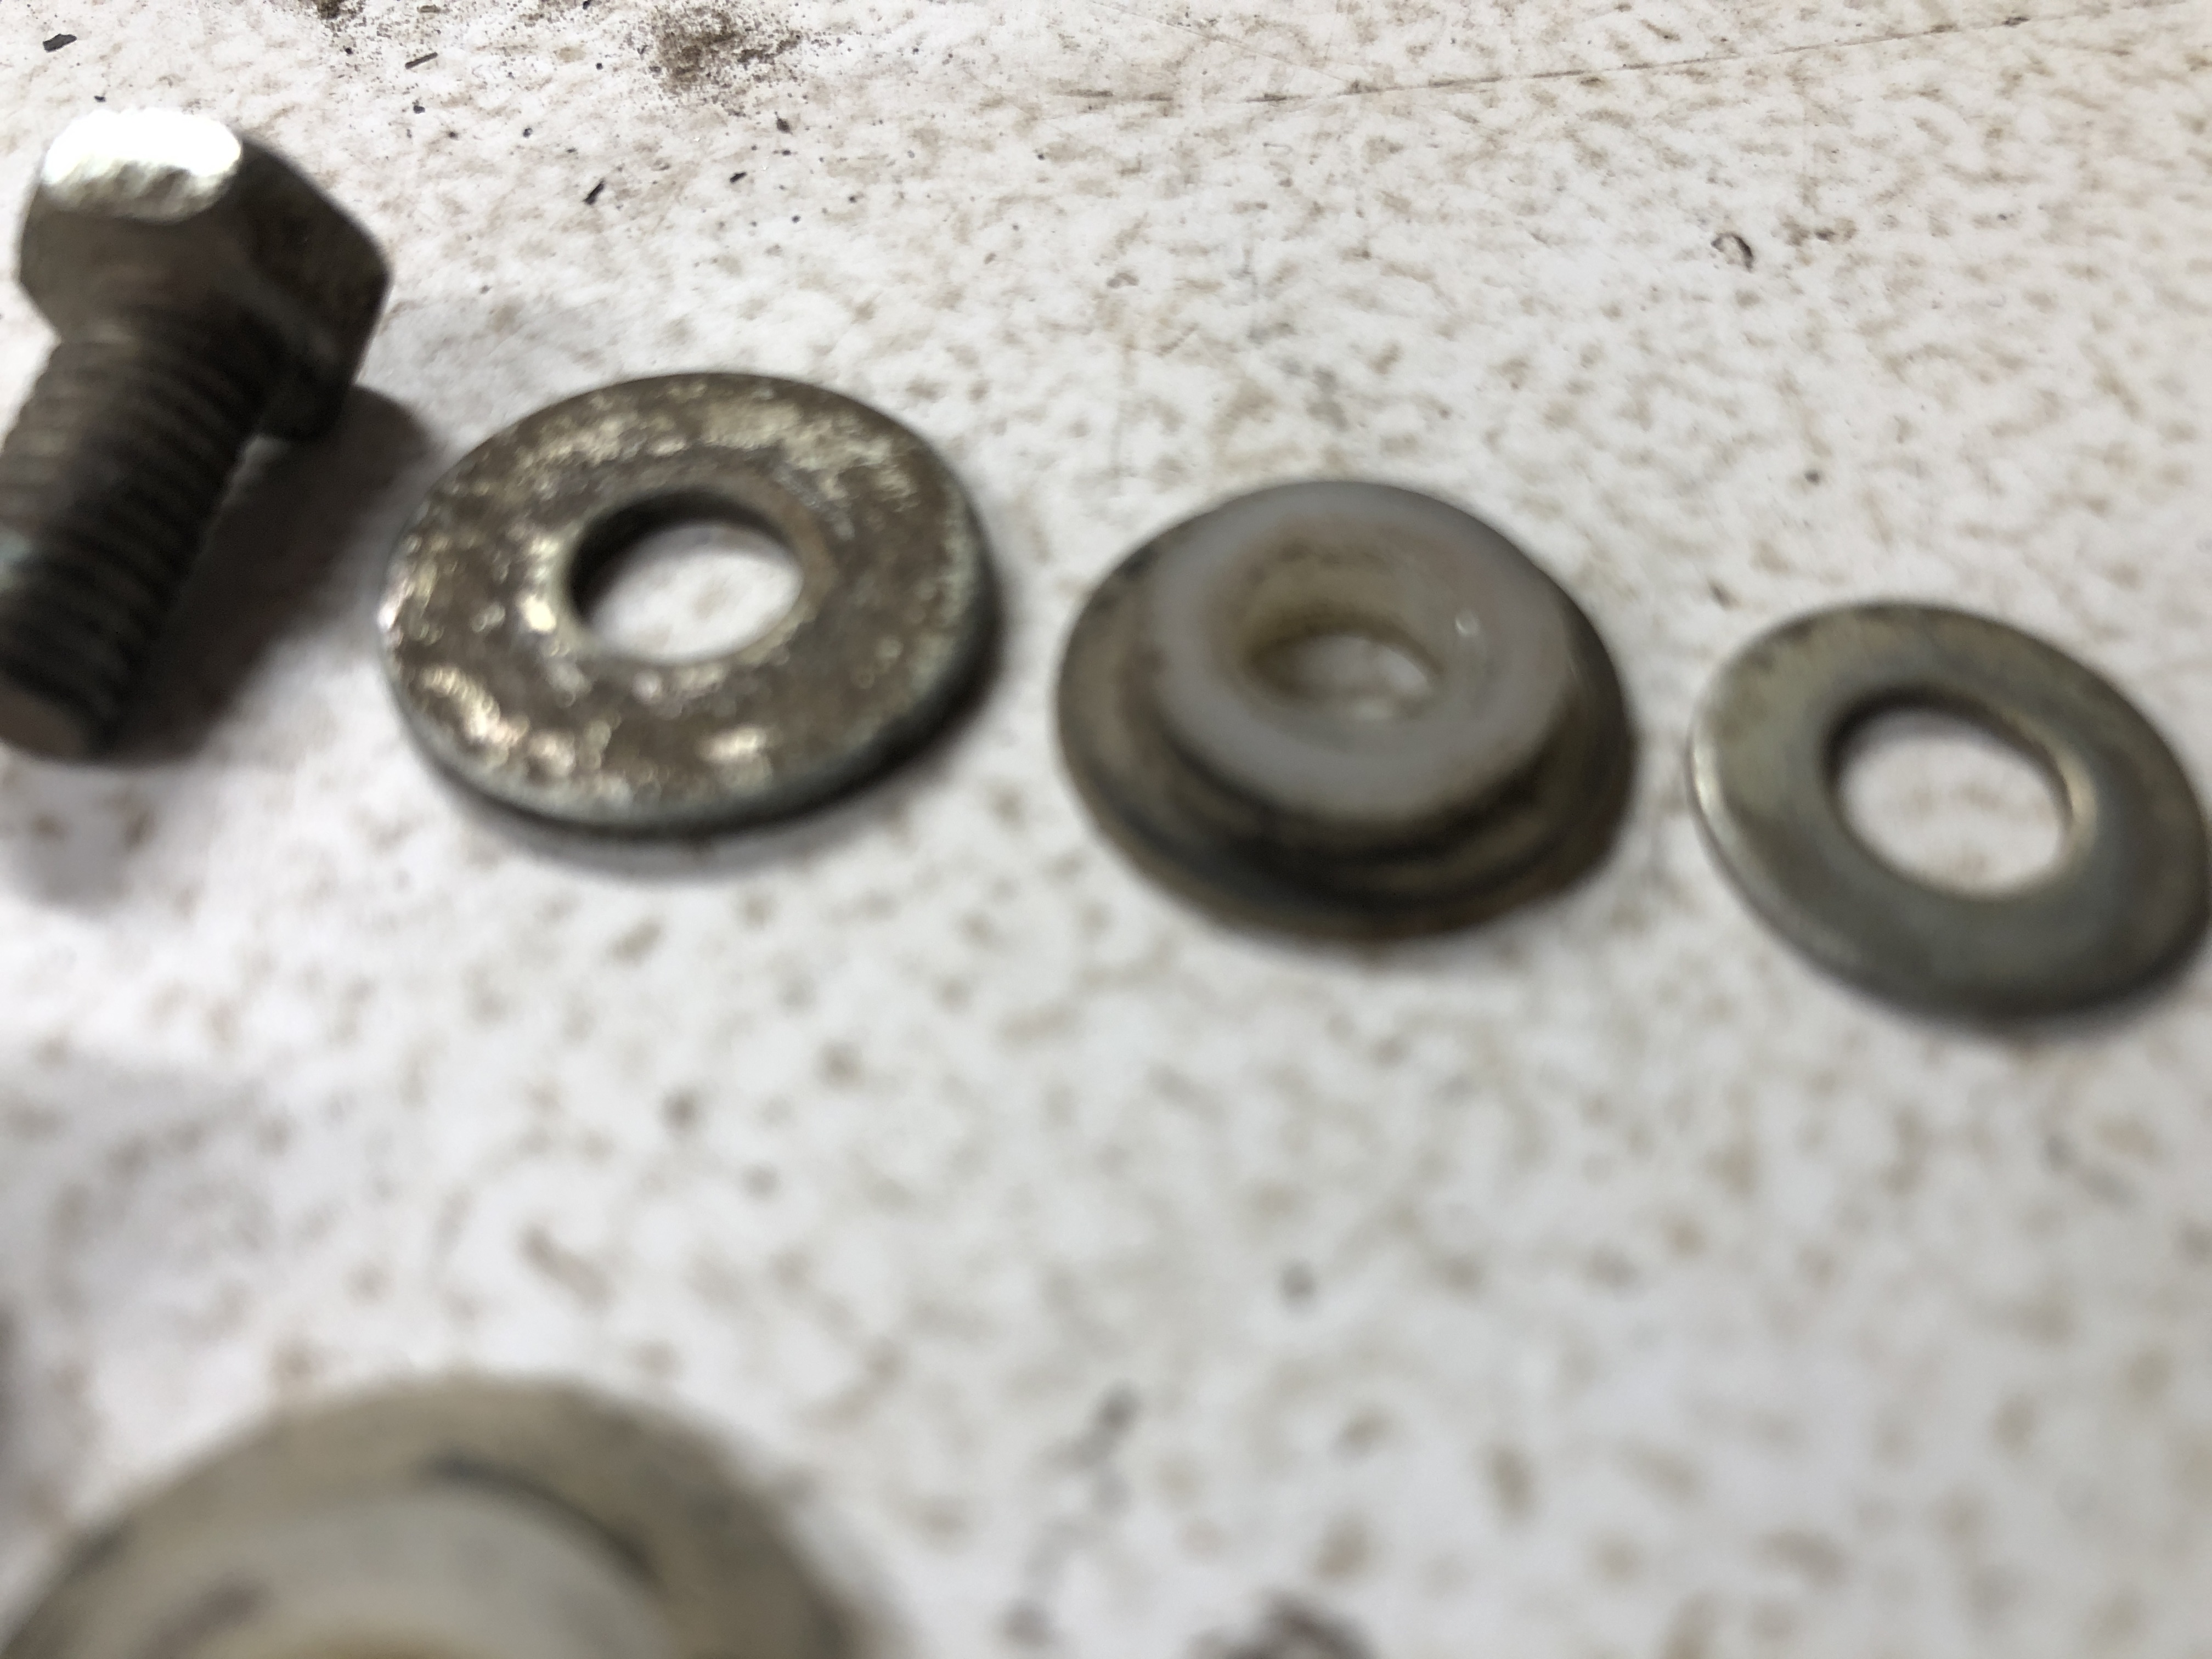
I seem to have one of each type. Small type uses a simple bolt, larger type uses a shoulder bolt. Both are M6 Now you’re going to make me measure everything, aren’t you? PS. The bottom row larger style would have the same flat/lock/nut as shown in the top set I’ve certainly found all manner of “user selected” hardware that more or less functions as a rotation point. Not all that critical as long as there is little slop and pivots freely. And will continue to do that for a long time.

 2 points
 -
2 pointsNope. Not an American dime.2 points
-
1 pointGreat pics of what you found. I suspect the oil breather pipe from your L24 would fit the new L28 and allow you to retain the flow guide valve piping. If not, you could cap the one inlet nozzle on the flow guide valve to retain the one from the fuel tank. BTW - hold on to all those little OE spring clamps and refinish them in satin black for originality.1 point
-
1 pointSub category. What's the most valuable lesson I've learned for my Z. There's at least 3 different length oil dipsticks for our cars. Make darn sure you have the right one for your motor or you'll overfill it and have a drip after running the car. I did this and had a drip or two off my oil pump until I figured out I had a 2.8 stick in a 2.4 motor. Drained about half a quart and my garage floor is a dry as my dogs food.1 point
-
1 point
-
1 point
-
1 pointAnd, any typical antifreeze has corrosion inhibitors. The Evans system always seemed like an expensive last resort to me. For the racers with overheating problems. https://prestone.com/ There have been some interesting discussions over on Hybridz about it. TimZ has a high horsepower engine and uses it. Put these words in Google - site:hybridz.org evans timz1 point
-
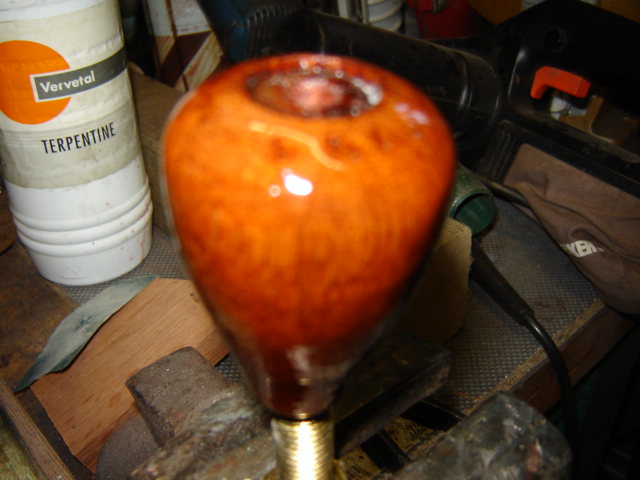
1 pointTo test it can be used.. but for real use is birch much to soft.. use some oak from a old bookcase or so. (and if the test comes out great you can use the wheel!) I used mahogany. also for a gearlever knob. I made it on a wood lathe of a friend. Halfway.. lots of coats Ready.. The 10 stood for 10 years of restoring haha.. btw.. till this day i don't know where that coin comes from, have a good look and tell me .. is it a American Dime?? uh?? It's in my 240z from 2007 till today and functioning OK! Used a coin on top, and the lower part (with the threads) of a old knob.. (It's inside you can't see it.)

 1 point
 -
1 pointI haven’t but I also don’t feel like being a cripple any time soon. As kids we used to “hillside” on our skateboards. I grew up in the Bay Area near San Francisco and we had serious winding hills where I lived. We would cannonball run down these hill that we’re over a mile long and we would weave down the hill sideways to slow down. We’d hit like 40 mph (had to tighten the trucks up big time to be stable) To do it we’d lay backwards and put one hand on the road. We had homemade gardening gloves what were massively wrapped in duck tape and had layers of plastic; the stuff used to protect the bottom of your skateboard. So you’d lay the glove down and push your trailing leg forward causing the board to skid sideways and slow down. You’d S turn like this all the way down the hill. It was epic fun but we had some close calls with oncoming traffic. Don’t tell me how I survived my childhood. Sent from my iPhone using Tapatalk1 point
-
1 point1 point1 pointhey Z people! I bought a stearing wheel on ebay several years ago I restored it and put in on my Z ... it looks great. The horn has never worked. I replaced an old momo stearing wheel with the Z wheel and the horn didn't work on that either. The z wheel didn't have any wires coming out of it from the horn button. The only thing that I noticed was two metal rings that are on the horn button that if you were to push the horn the metal rings would contact and then the horn would work.... right? But where are the wires? I still have my origanal 240Z horns and they work just fine, I just don't know how to get it to work with my horn button. I can't tell you how many times i've wanted to honk at stupid drivers and I can't, HELP! Matt1 point1 pointKeep an eye on it, so that the wire doesn't catch against the steering wheel surface and then gets bent and makes contact with the steering column....that would make the horn sound continuously. Glad it helped! E1 point1 pointIT WORKS!!!!!! once I got the relay wired right the horns worked great! now all I need to do is make a little brass, (or some other flexable conductive metal) "brush" and connect the red/black wire to that and I will have a horn that works when you push the button. I could have used that about 10 times today:mad: stupid drivers. Anyone have any tips on makeing a brush? Thanks for all of your help guys! great relay explanation E. Matt-1 point1 pointFast explanation of the B H S initials: B = Battery H = Horn S = Switch The Green wire is the one that INTERNALLY (in the Relay) is switched but connects to the HORN. H on the Relay. The Green/Black is the one that connects to the steering wheel, to allow the Horn Button at the wheel to finish the circuit to ground. This in essence is the SWITCH or S on the Relay. The Green/Red is the power, and it comes directly from the Fuse Box, (4th fuse down on the Left side, 10A), and it connects to the Battery B on the Relay. Some of the old time American cars had a "stutter" relay, which when actuated would actually stutter on and off allowing the horns to blow. The Z's does not. What this means is that you can provide 12VDC directly to the Green Wire at the Relay and the horns should sound. This should tell you if the horns need rebuilding or not. If they do not sound, the problem could be that the connections to them are corroded and need cleaning, OR that they need to be taken apart and cleaned inside. Once you get the horns working, then you can address the missing contact arm coming off the turn signal assembly. But let's see if you get sound first. FWIW E1 point


Important Information
By using this site, you agree to our Privacy Policy and Guidelines. We have placed cookies on your device to help make this website better. You can adjust your cookie settings, otherwise we'll assume you're okay to continue.