


Leaderboard
-

siteunseen
Free Member4Points15,115Posts -
qz16
Free Member3Points147Posts -
Mark Maras
Free Member3Points3,719Posts -
Clay C
Free Member2Points108Posts


Popular Content
Showing content with the highest reputation on 08/26/2020 in all areas
-
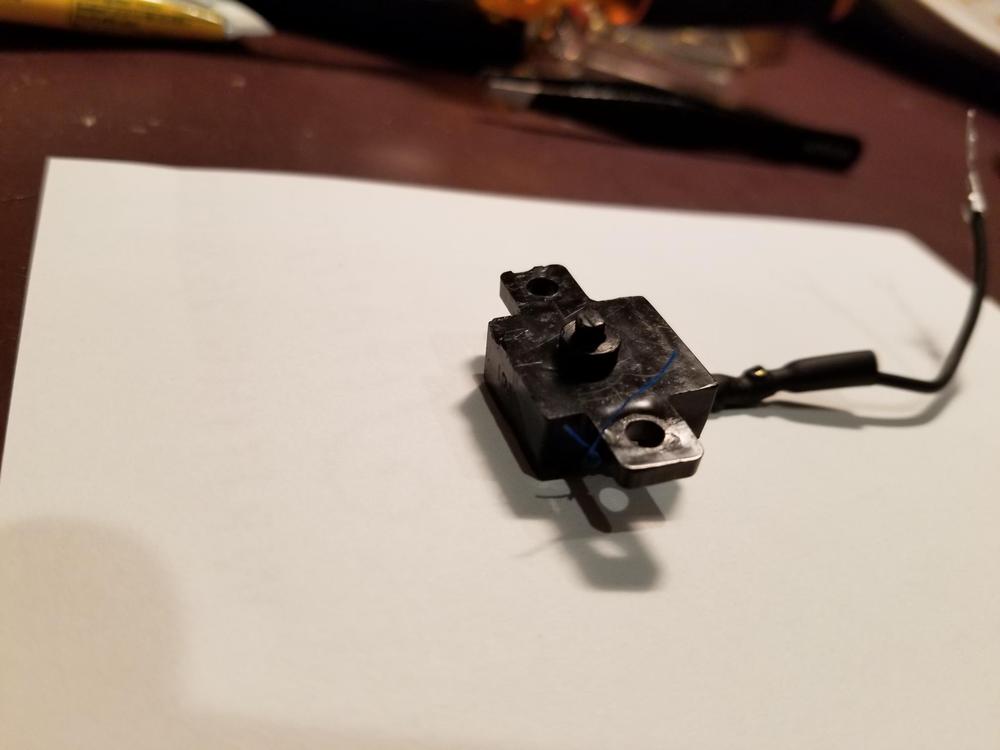
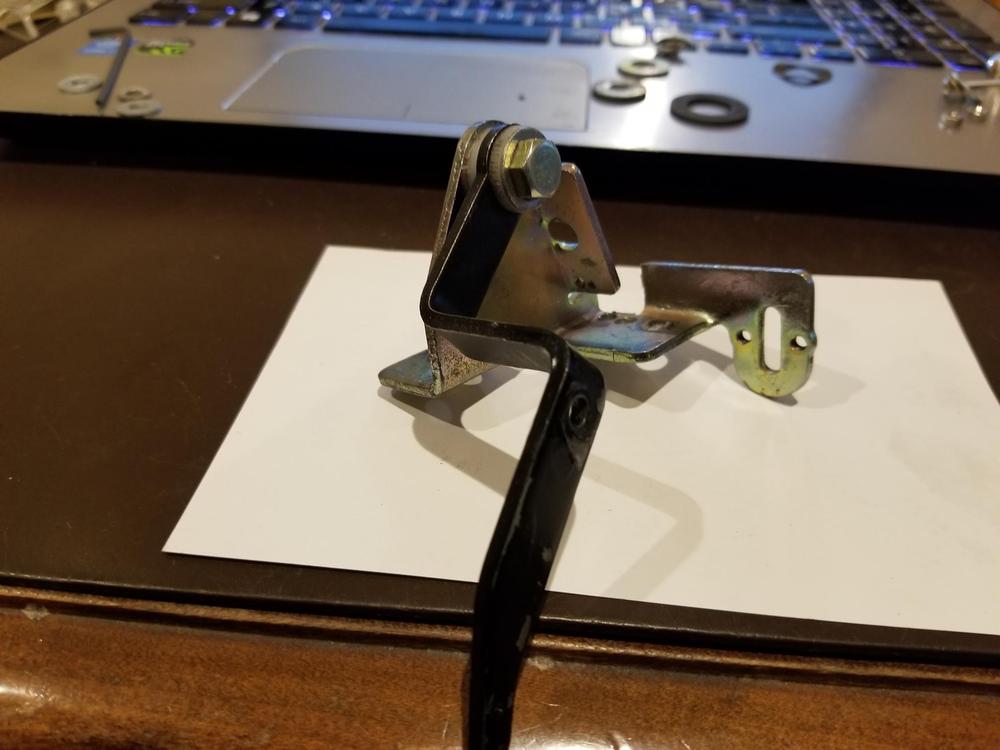
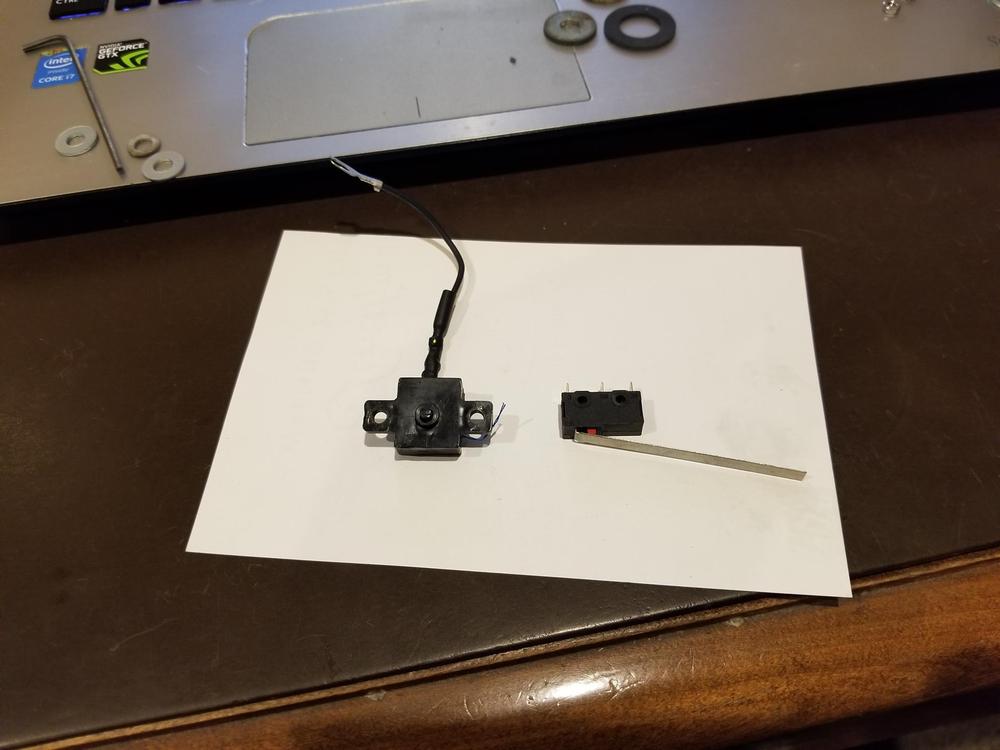
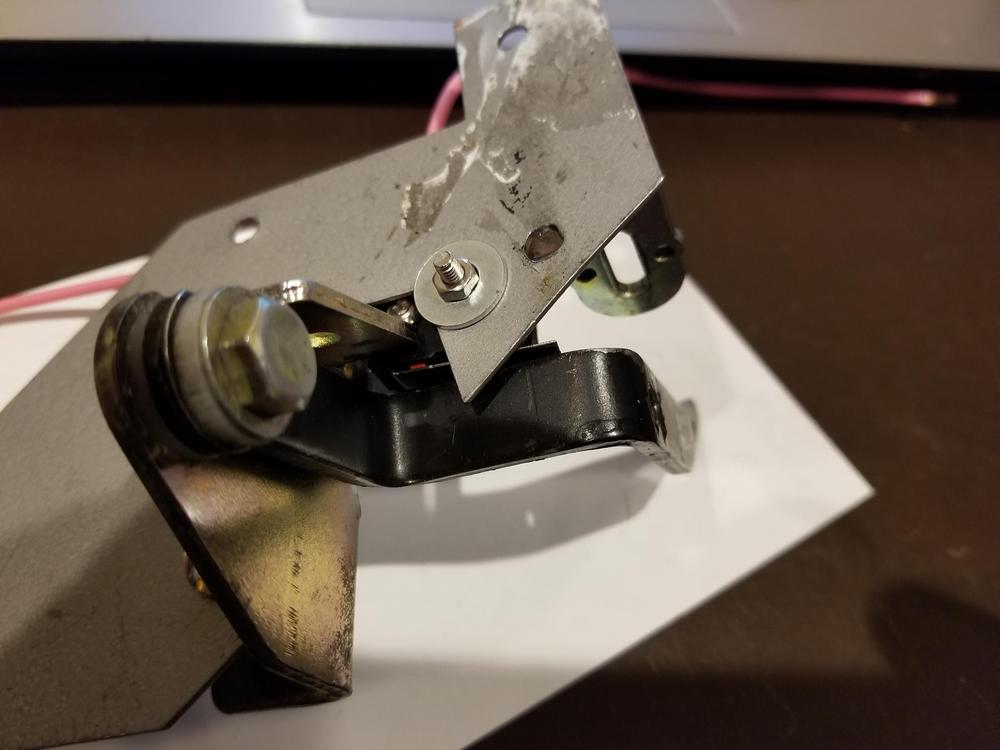
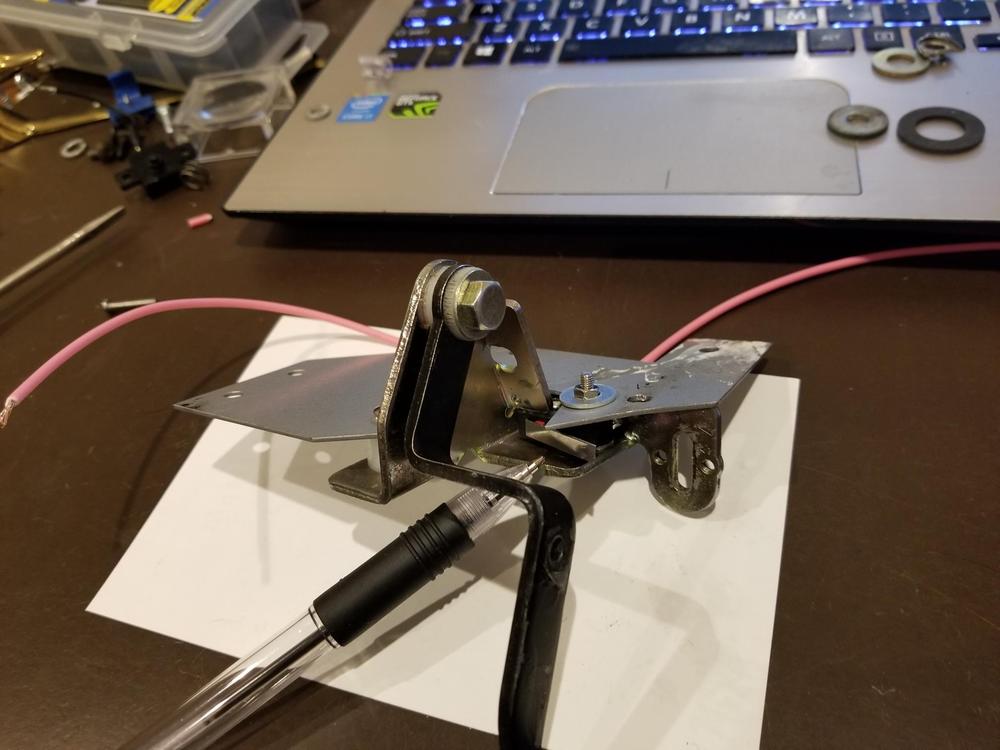
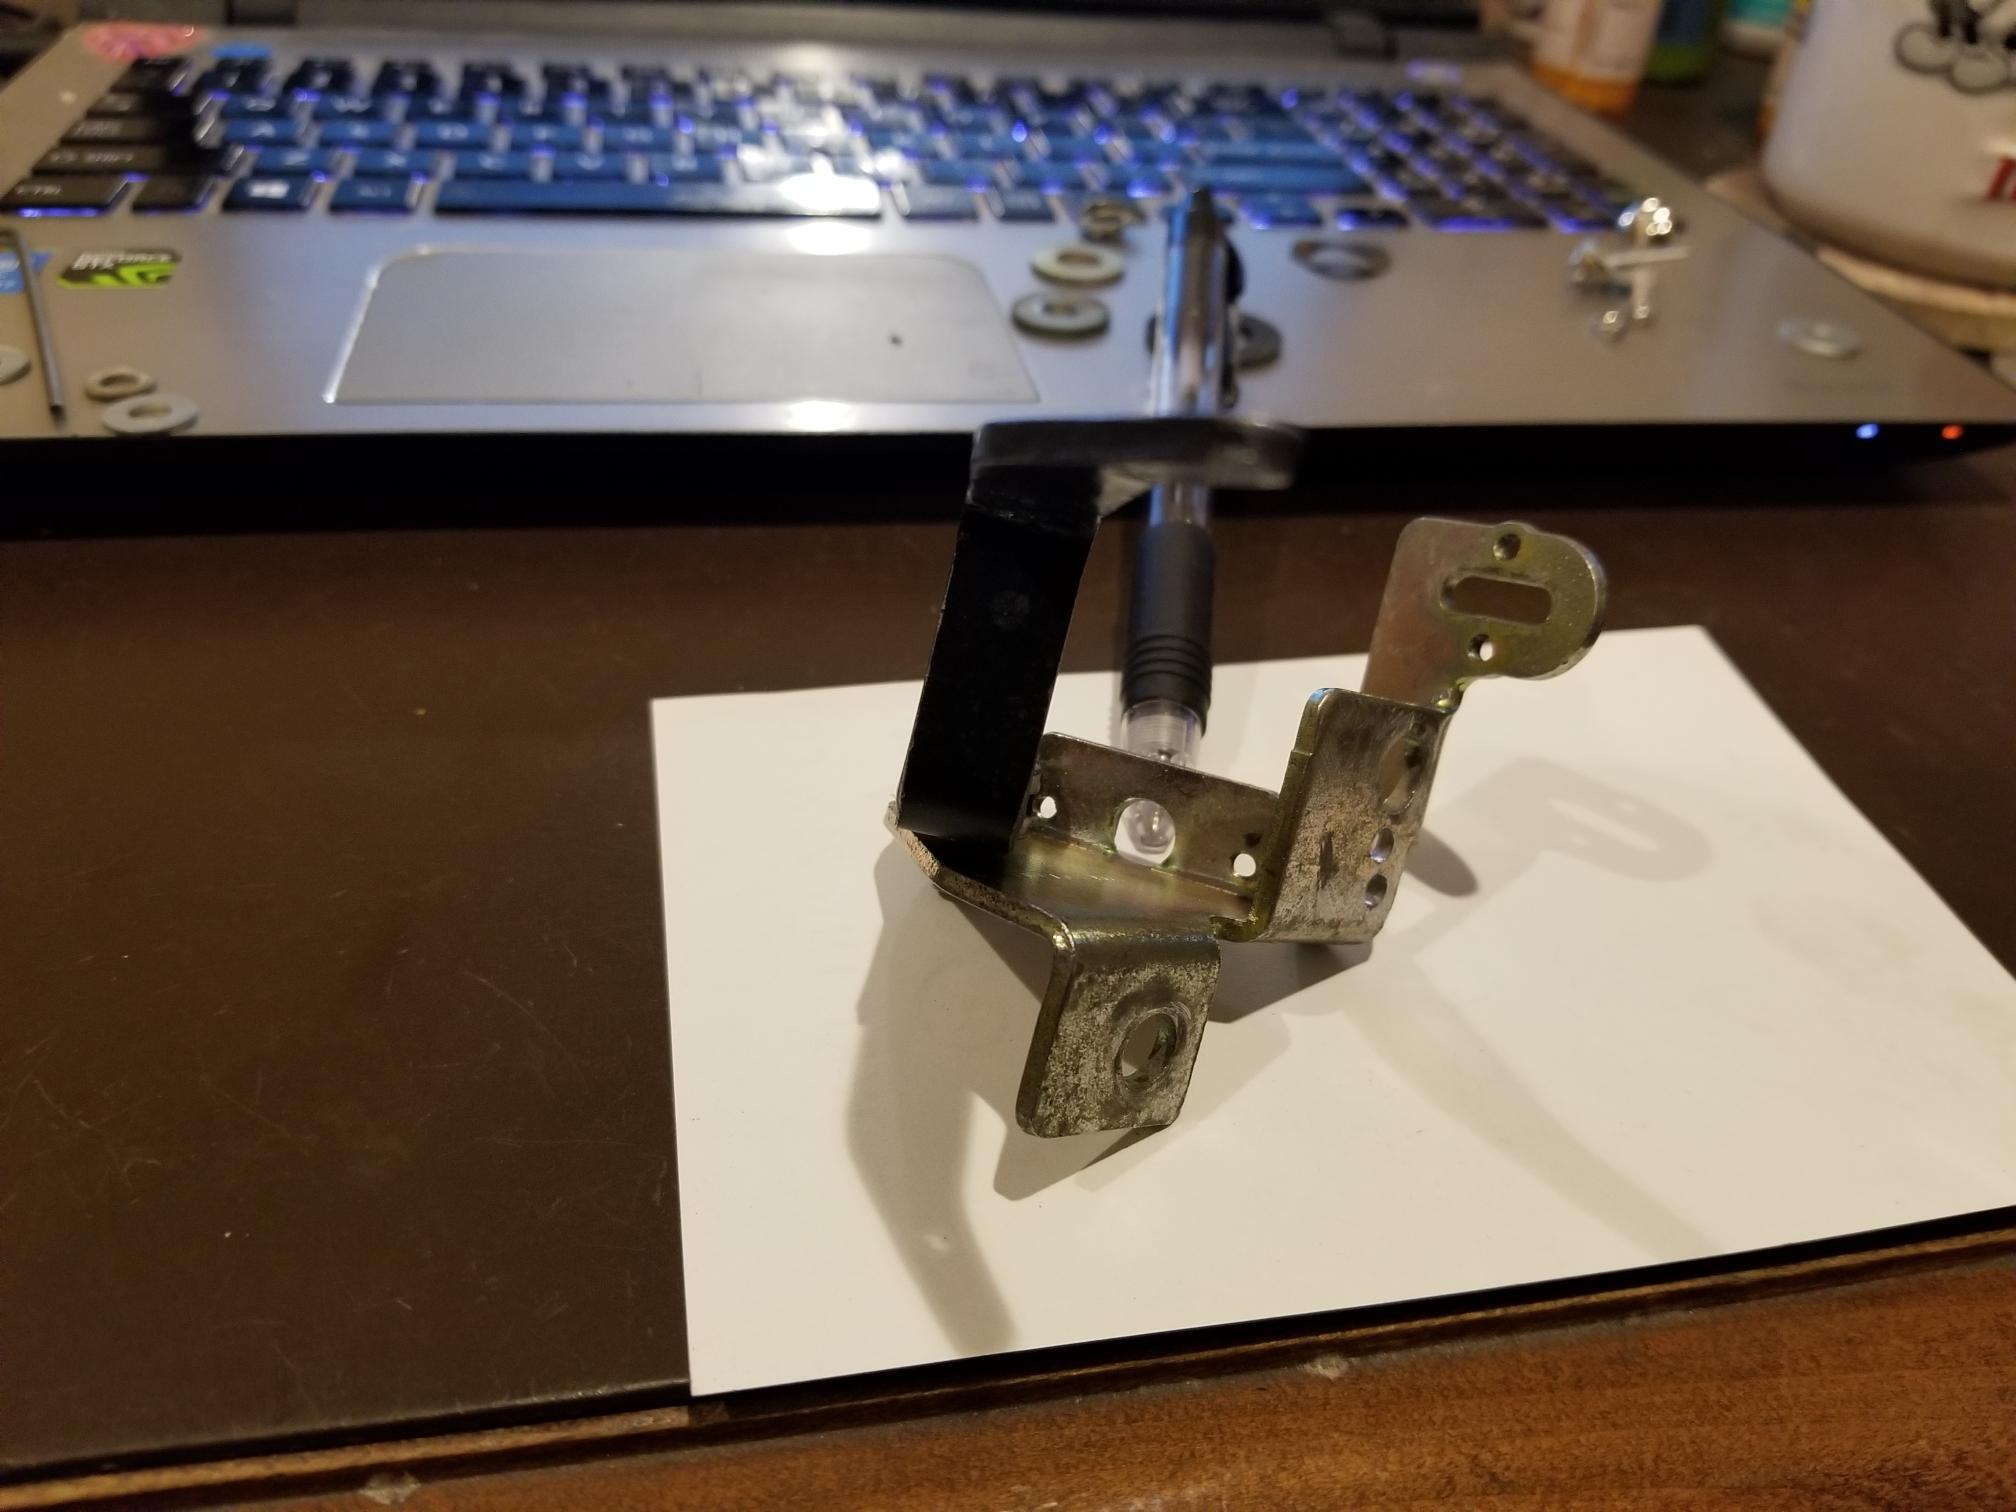
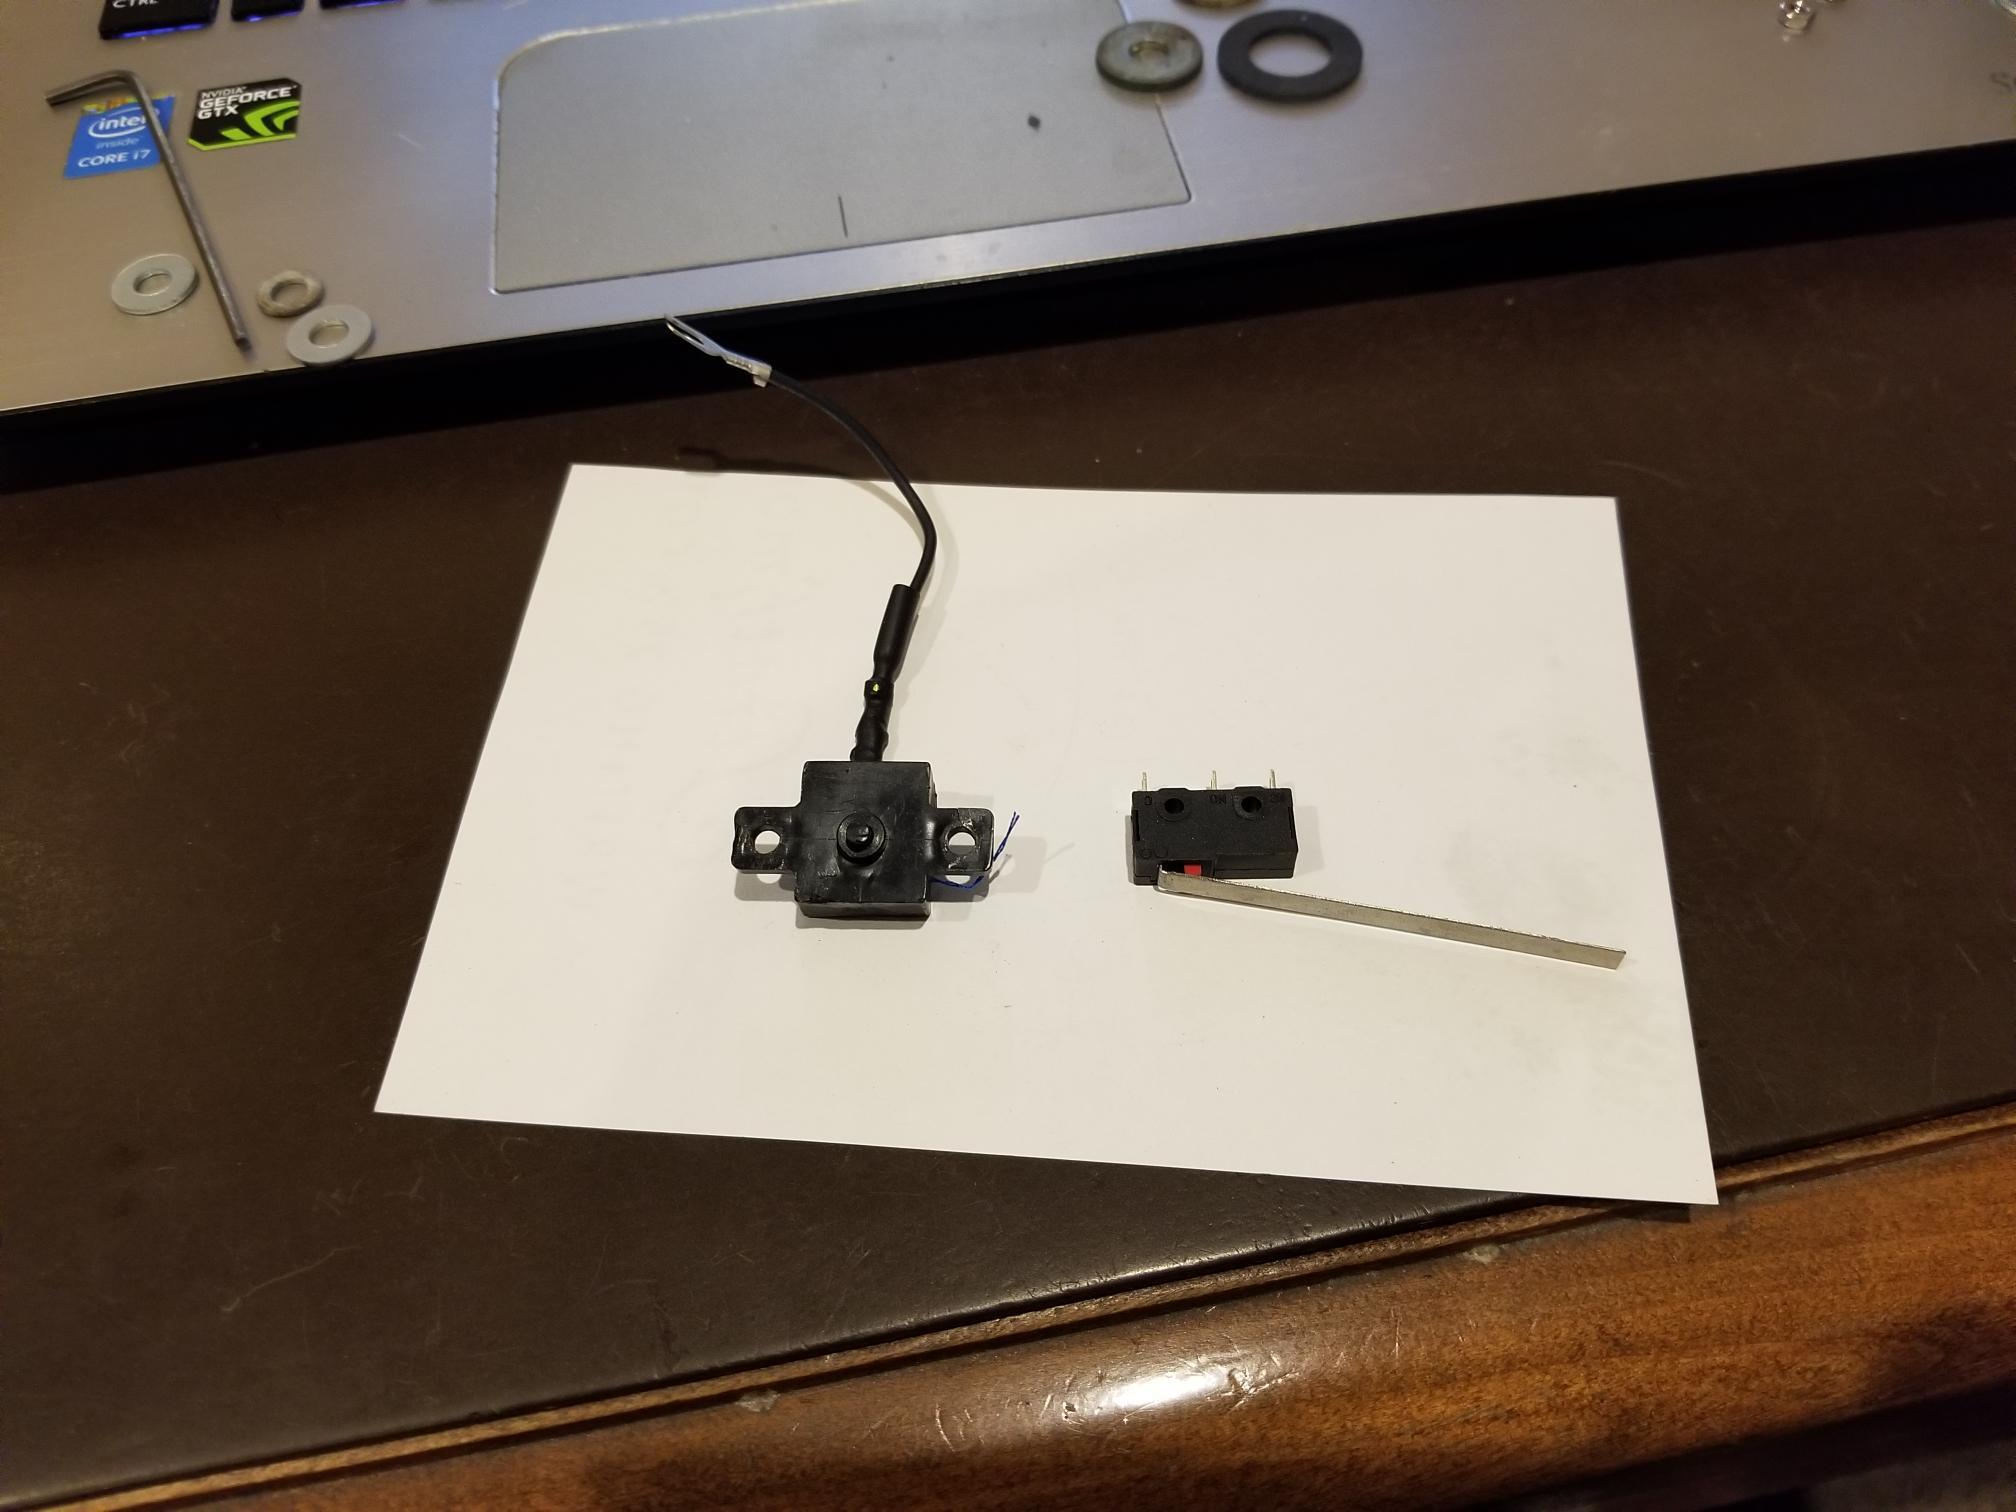
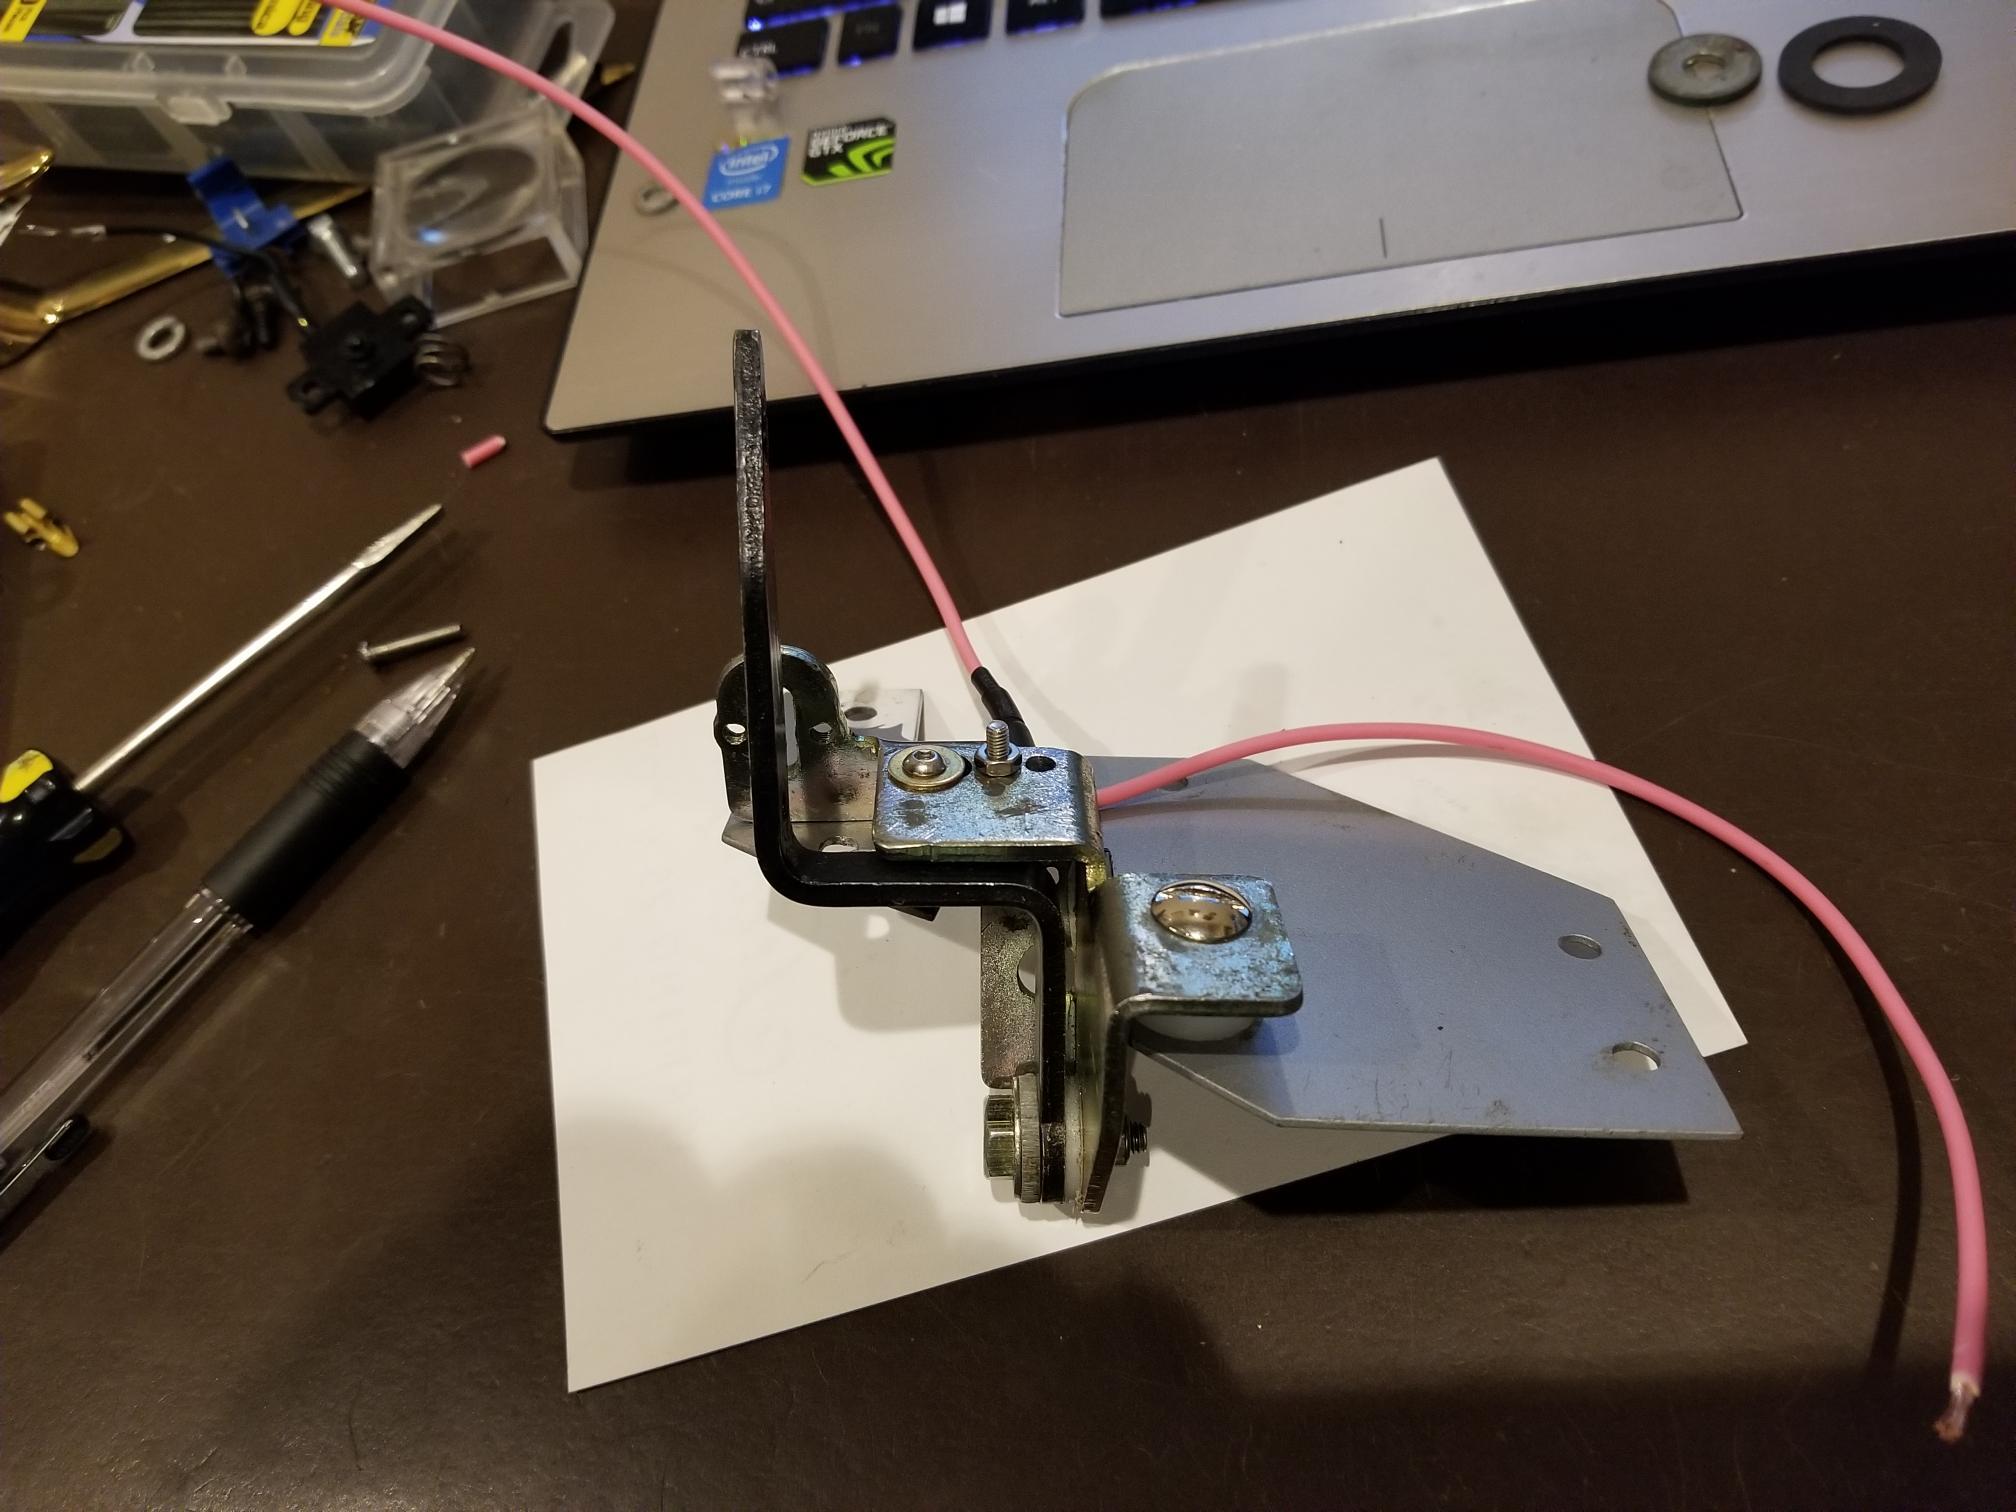
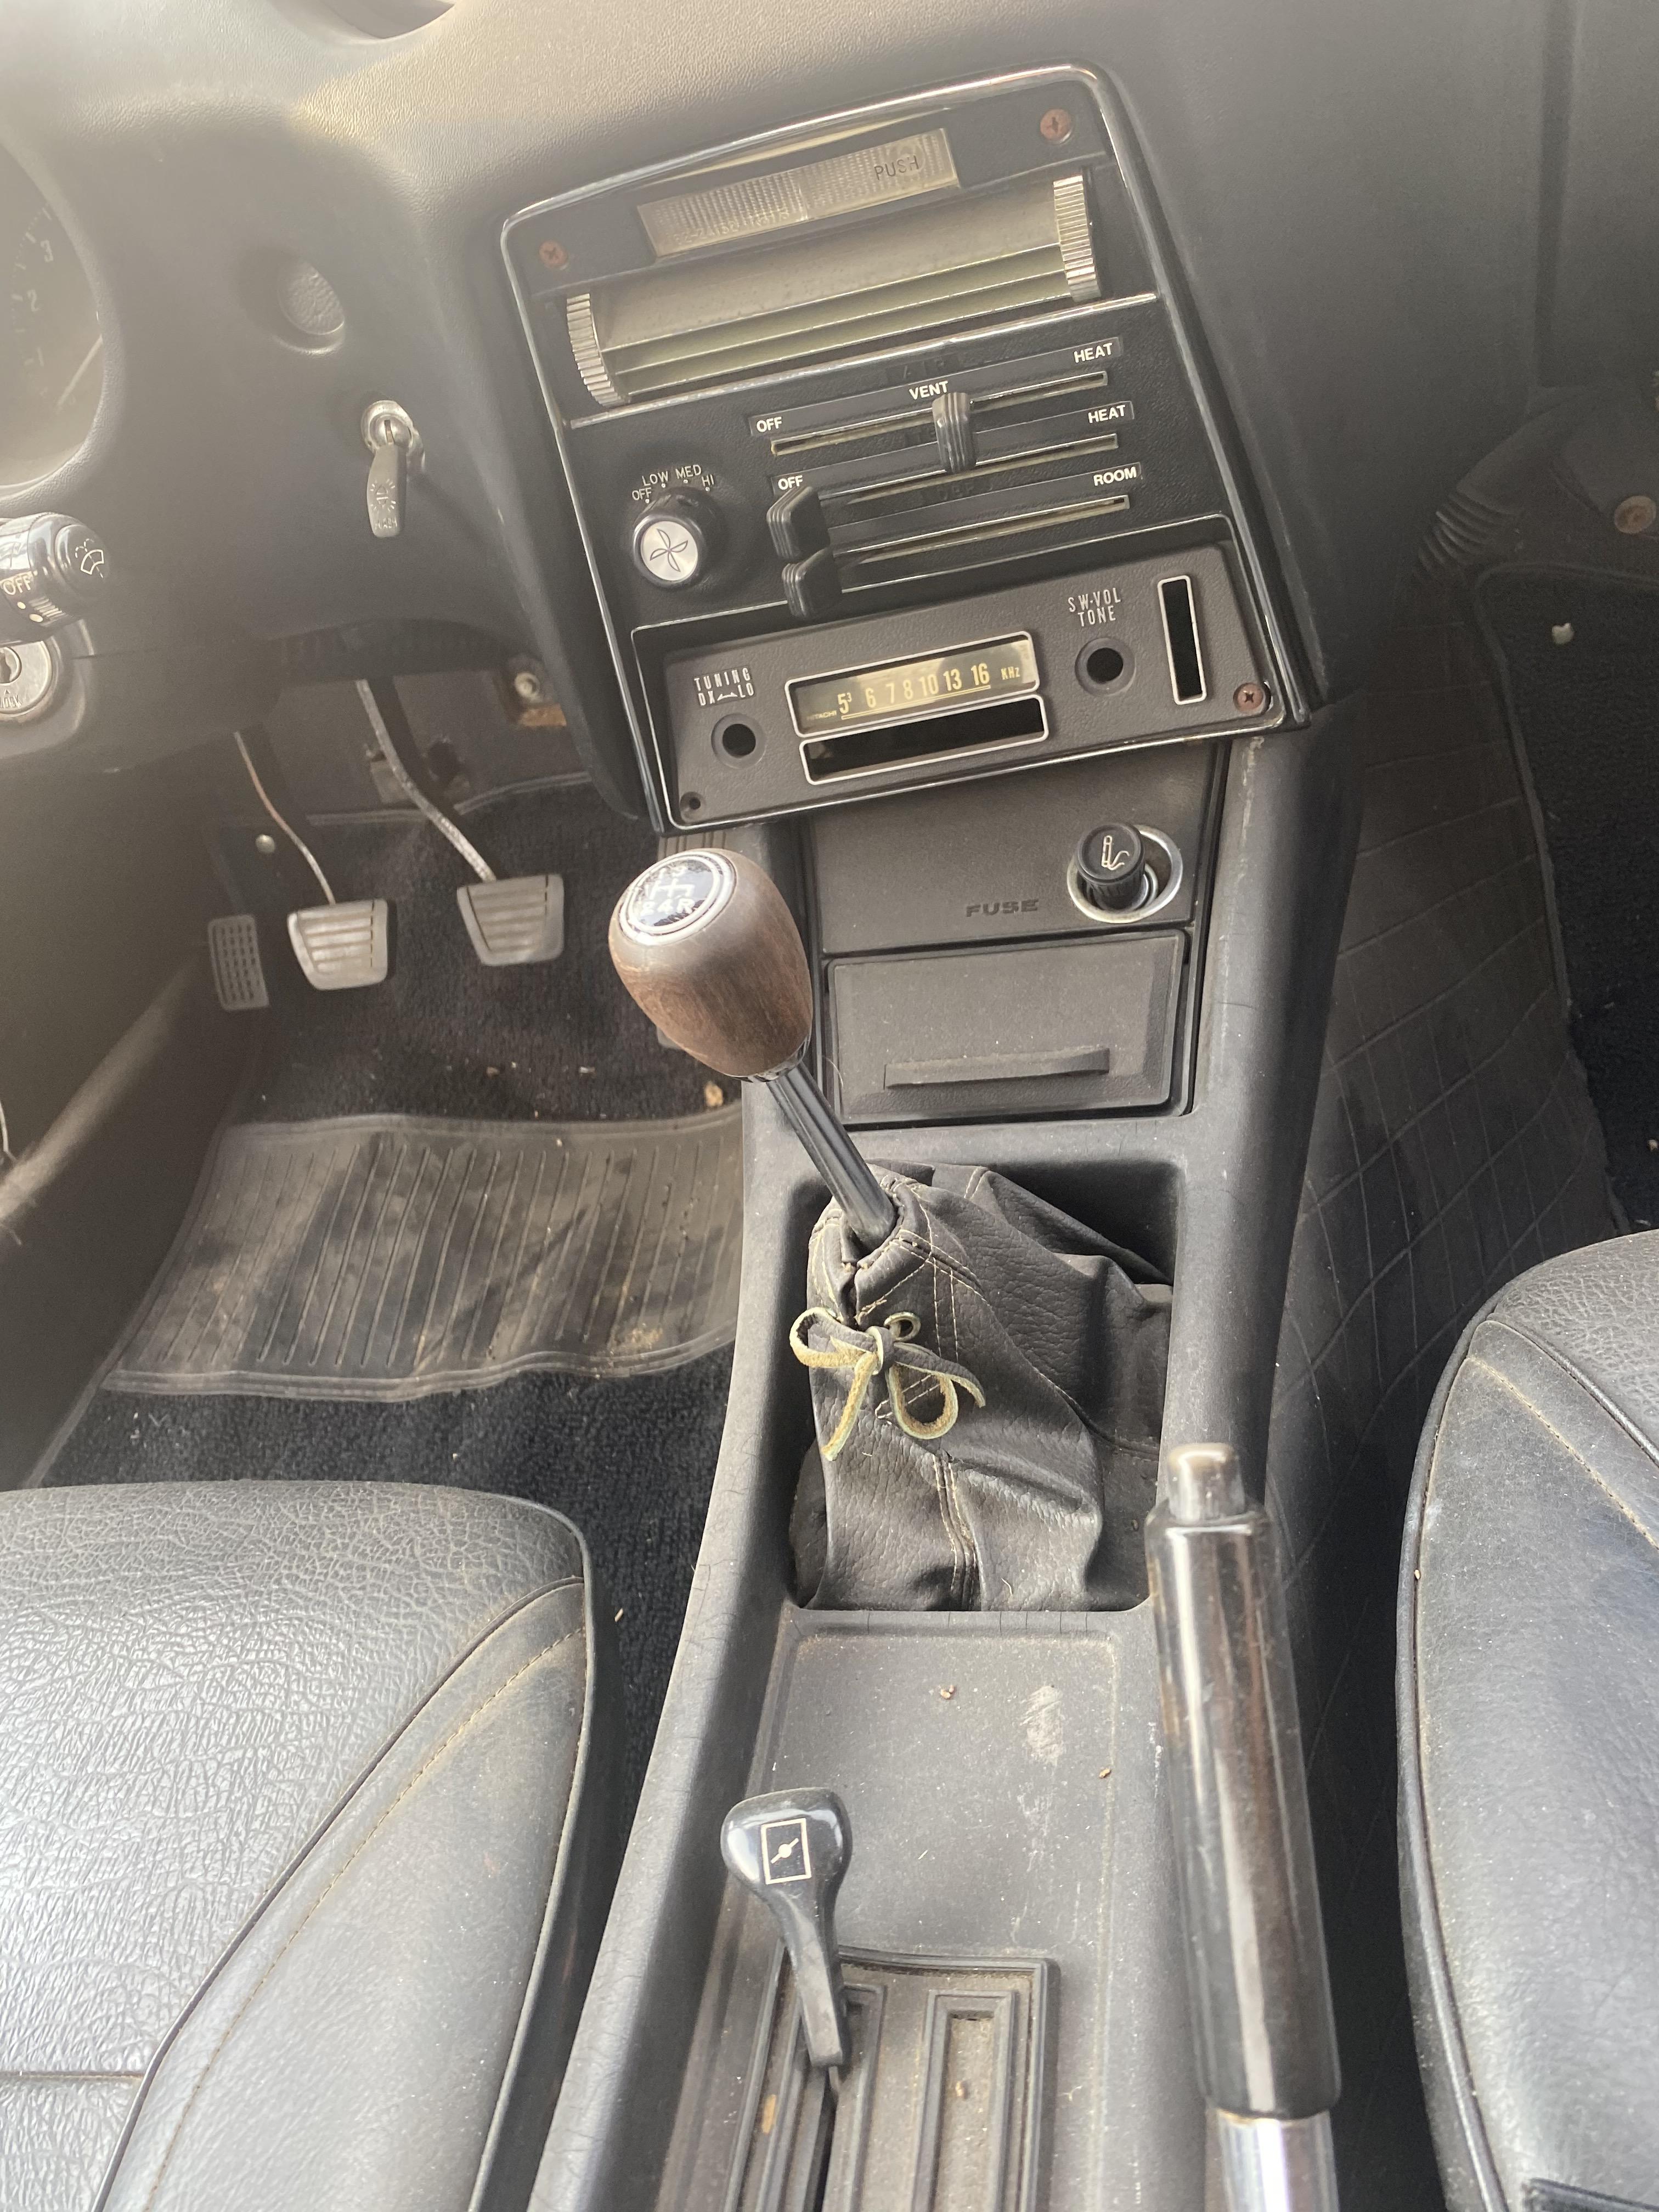
3 pointspreface: I am working on the restoration of a 73 240z. A mentor of mine used to say “The enemy of good is better”. I adopted this saying but often times I unfortunately ignore it. Our car “the bucket” has what I believe is its original center console. It has a single slot on the driver’s side for the choke control. At some time in the past the original choke control arm and bracket were replaced with a generic pull out handle and cable mounted where the cigarette lighter would normally be located. It worked well enough with the previous owner’s conversion to a Holey 4 barrel. I returned the car to a dual SU setup. The choke reminder lamp was also replaced with a blank piece of plastic. I could have used the generic control for the SU setup, but “the enemy of good is better”. I looked at the Console and I looked at the empty slot for the choke control and once again I ignored my training – “the enemy of good is better”. I located a choke control arm, original cable, and a choke indicator lamp. I purchased a bracket to mount them on the transmission tunnel so that the 40+ year old plastic console would not be stressed by the mechanical action of the choke control. I wired in the lamp taking a silly shortcut using power from the rear defroster switch. I believe the switch plastic failed and that set up a nasty sequence of events. Ultimately a short melted the plastic choke control switch before it could be protected by blowing a fuse. The hatch defrost circuit has a 20 amp fuse. It blew but too late to protect the mini switch. I know better but I made a number of silly mistakes that I am not proud of but my errors led me to a fix that I thought might help you. choke control switch alternative: if your choke control switch is not working and you need to replace it this might help. Above is the original choke control switch. Normally it has 2 leads, but one was weak and it broke, which probably helped to create the short that melted it. It mounts to the control arm bracket with two screws thru the holes on either side of the switch. Above is the control arm bracket. The pen is pointing to the hole where the switch button protrudes when mounted. The threaded holes on either side are to mount the switch. I could not locate an original plastic switch. I decided to use a limit switch and bought the following on Amazon. MXRS SPDT 1NO 1NC 5.5cm Hinge Lever Momentary Push Button Micro Limit Switch AC 5A 125V 250V 3 Pins 12 Pcs. Hard to believe but 12 switches cost less than $7.00. Above is the original switch on the left and the switch that I bought on the right. The nice thing about this switch is that there are three pins which allow you to alter its definition. Depending on which pins are used the switch can be either normally open or normally closed. The issue for me was a mechanical one – mounting the switch. Naturally it does not mate to the control arm bracket in the same fashion as the original. There are two holes that go thru the body of the new switch. So the mounting orientation is off by 90 degrees and the red button is not long enough to protrude through the bracket like the original switch. I wanted to make as few changes as possible to the control arm bracket. Only one additional hole was necessary. I also cut part of the bracket to provide more clearance for the pin that returns to the indicator lamp . Above is the control arm bracket with the new switch mounted to it. The pen points to the lever (shortened) of the limit switch. If you look closely you see the red button that it contacts when the control arm (black handle) contacts the switch lever. The bracket is upside down in the picture. The control arm is in the activated position, equivalent to applying the choke for starting, pulling the cables, the indicator lamp would be lit. In order to mount the new switch I had to enlarge the mounting holes in the switch body. I enlarged them to accommodate #4 metric screws. There is at least enough room for this, just go slowly. The new switch is actually mounted to the horizontal plate that I bought separately to eliminate the need to attach the control arm bracket to the bottom of the center console. There are a lot of benefits to mounting it to the transmission tunnel. It is a real pain to remove/install the center console with the control arm mounted to it. The 40+ year old plastic is brittle and a common complaint Is that the control arm cable binds and the stress breaks the plastic center console. Above is a picture of the choke control in the inactive position, cables released. You can see the red button and the switch lever. They are depressed so continuity is broken and the indicator lamp is off. in the image above is the control arm and bracket. It is upright, the front of the car is in the direction of the keyboard. The arm is forward, the choke is off, the indicator lamp is extinguished. above is the control arm and bracket. Just in front of the original switch mount is where I removed a small part of the bracket for extra clearance for the pin the extends out of the new switch back. If you have any questions feel free to ask away.


 3 points
 -
3 pointsTry pushing a WD-40 straw down the overflow bung to see if the float is stuck. You should be able to push down then see the straw rise back up slowly. The fuel valve could be stuck open letting fuel continuously flow through. Good luck!3 points
-
Don't get in to a shouting match about mask wearing in a closet. Latest advice. https://www.businessinsider.com/6-foot-distancing-rule-is-outdated-oxford-mit-new-system-2020-82 points
-
1 pointpilgrim Super Moderator This week I pulled out my faithful old Radio Shack sound level meter and went for a drive. A couple of years ago I switched from rubber suspension bushings to poly, and I was convinced that my 83 ZXT is perceptibly louder inside as a consequence. The meter measures the noise level either of two ways, but (EDIT) I will just quote the relevant one. A-weighted, 500-10,000 Hz, which is the primary human hearing range and is the most used rating for workplaces and general sound levels. The human ear doesn't hear low frequency sounds as well as higher frequencies. C-weighted, 32-10,000 Hz on this meter, a wider sample but not as representative of human hearing. The results? At in-town speeds of 30-40 MPH, a pretty steady A-weighted reading is about 72-78 dB and every crack or expansion joint boots it to over 80dB. Highway sound levels are similar, but slightly higher and any time I go over pavement with expansion joints or cracks it jumps up another 10 dB at 76-86 dB. But anything over 80 is concerning. No wonder I think the **** thing is loud inside. Even at the A-weighted readings, the sound level is close to 80dB, the accepted level where hearing damage can begin with 2 hours of exposure. The difference in scale measurement is all low end frequency, and I think that's the result of the poly bushings - every bit of rumble and low end road noise is transmitted into the passenger compartment. I have a bluetooth radio in the car that links to my cell phone, but I can't answer a phone call traveling above 50 MPH because I can't hear the caller and they can't hear me on mic over the noise level. The carpet and sound deadening in the car are original, as the car is very well preserved from new. I expected a harsher ride, but it never occurred to me that the noise level would increase so much from the bushings. I'm thinking of going back to rubber bushings, as I don't really autocross this car and I honestly don't need them. Has anyone else installed poly bushings and noticed a noise problem?1 point
-
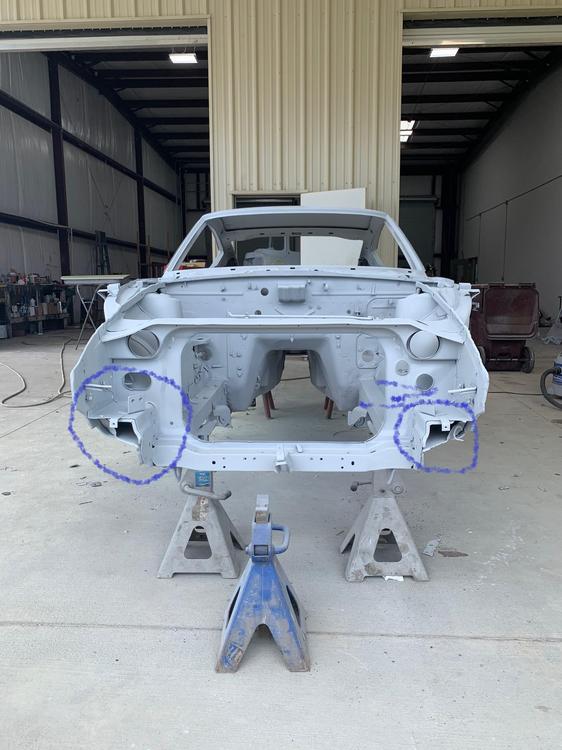
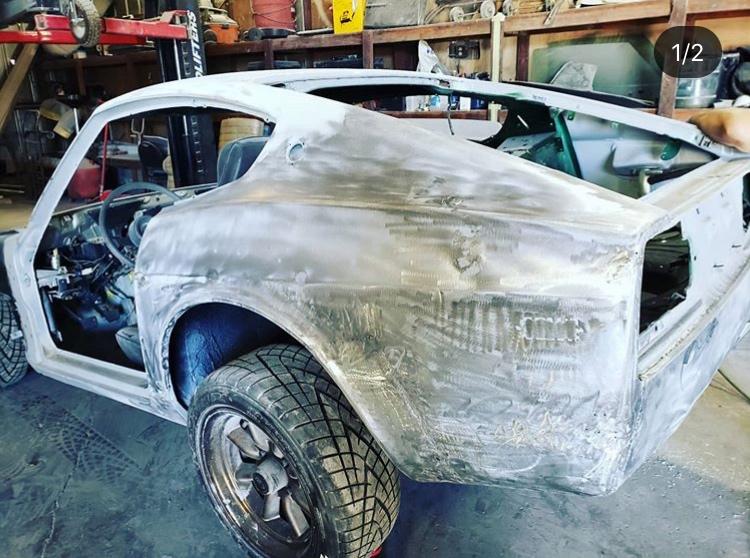
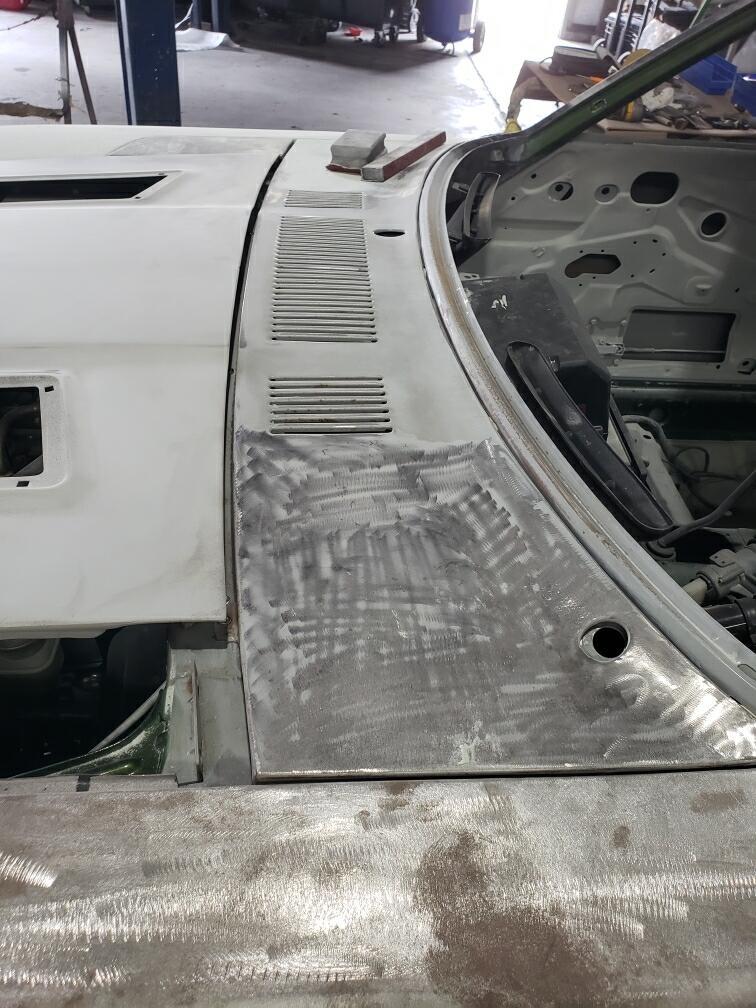
1 pointThis is what I didn't know....Those areas are definitly not the same as a 240! The original metal is there it is just covered up with other metal I can only assume was changed for some sort of crash rating law changes in 74-75? Of course the radiator support vertical panel is wildly different to go around all that mess. It is such a bonehead move on my part to spend so much time, money and effort trying to keep this thing as original as possible and restore this car back to normal. I really just picked the wrong car from the start. It looked good but I didn't know what I was looking at and the crap body work from the previous owners covered up a lot of problems. The interior was also in such good shape that I thought it was a good platform to start with. I'm sure people have done more with less and maybe its not so bad but the thought of me having cut a 260 front off and put on this car makes me want to throw up a little now! In hindsight I should have bought a better car but whats done is done and I aint starting over!
 1 point
 -
1 point
-
1 point
-
1 point
-
The WD-40 straw is a great idea. I'd also pull the float cover, inspect the needle valve for foreign matter holding it open, float and float pivot to find the reason for the excess fuel.1 point
-
1 pointYes.... ZcarDepot has both front & rear oem trim. Spendy at over $300 each kit. https://zcardepot.com/collections/weatherstripping/products/windshield-and-hatch-glass-trim-chrome-set-240z-260z-280z?variant=192816814490731 point
-
1 point
-
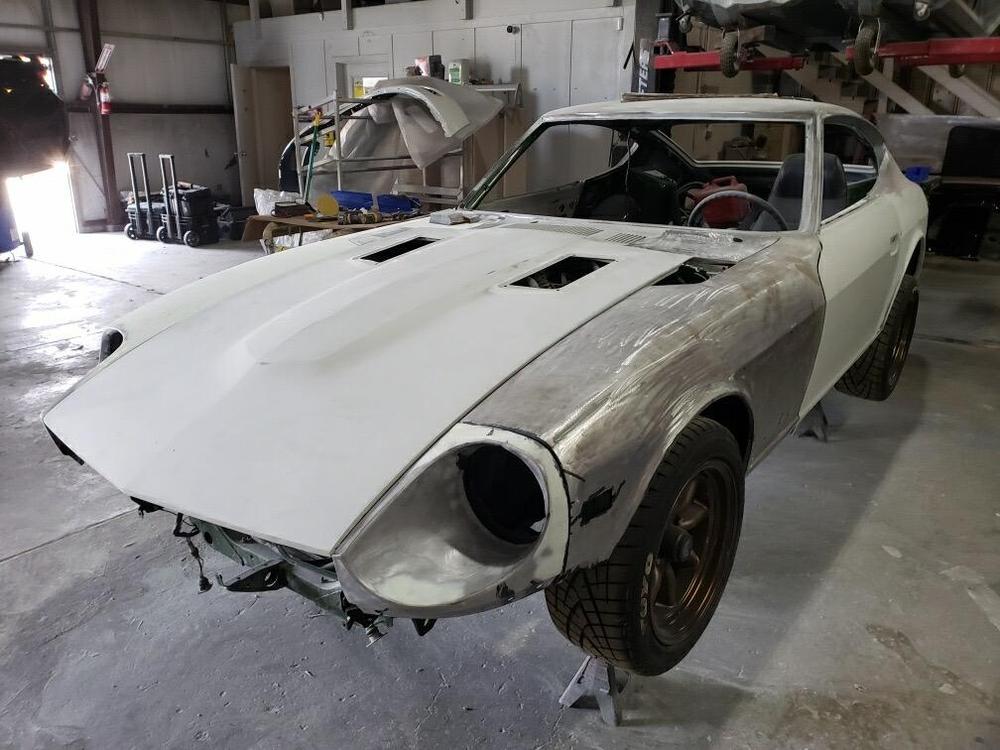
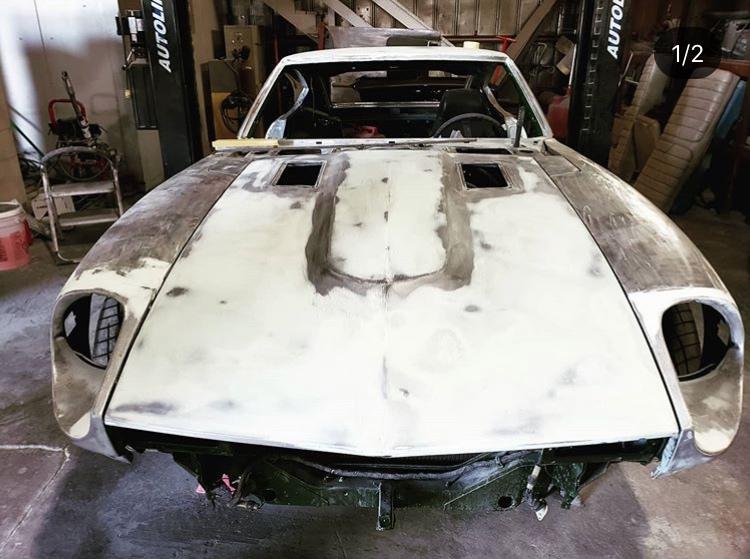
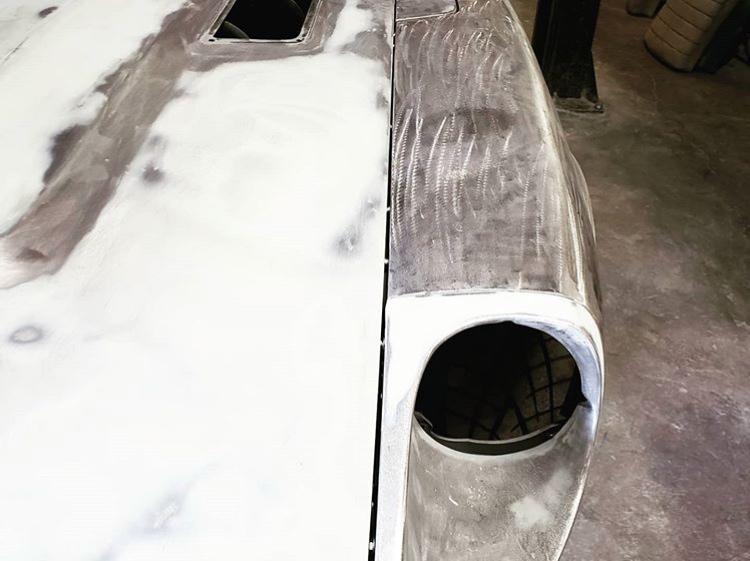
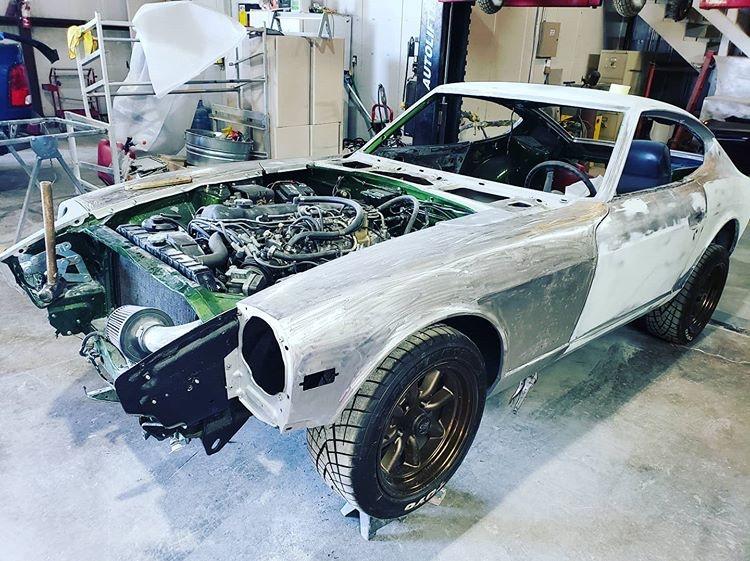
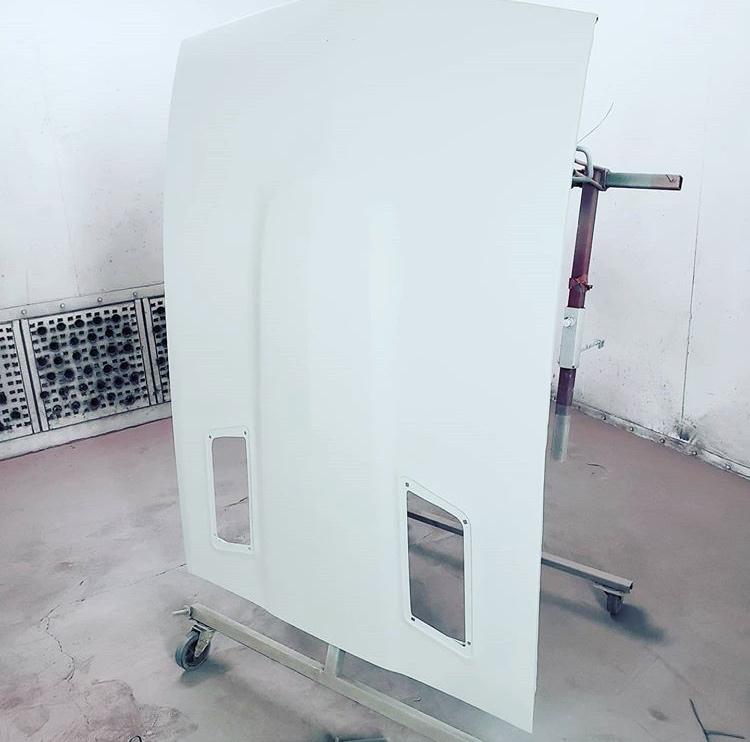
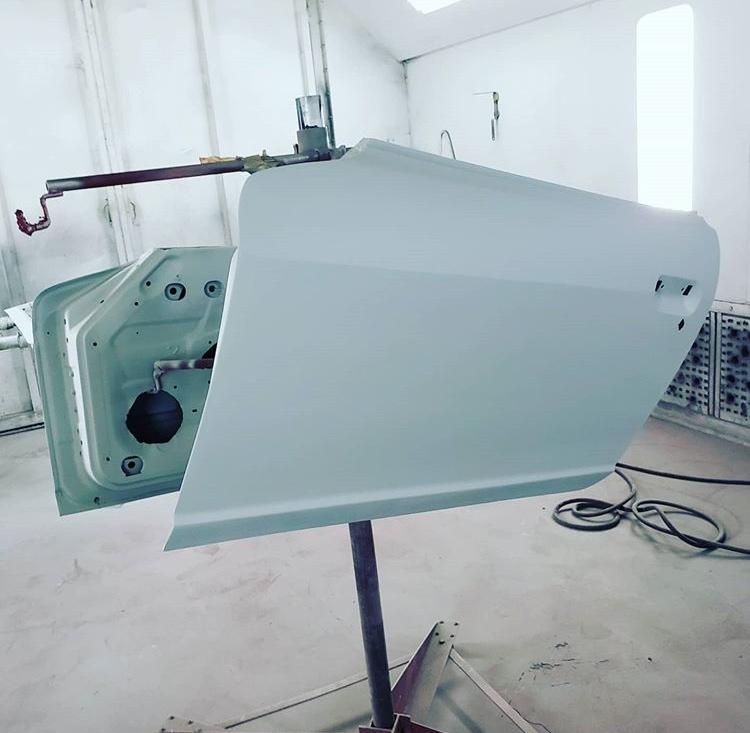
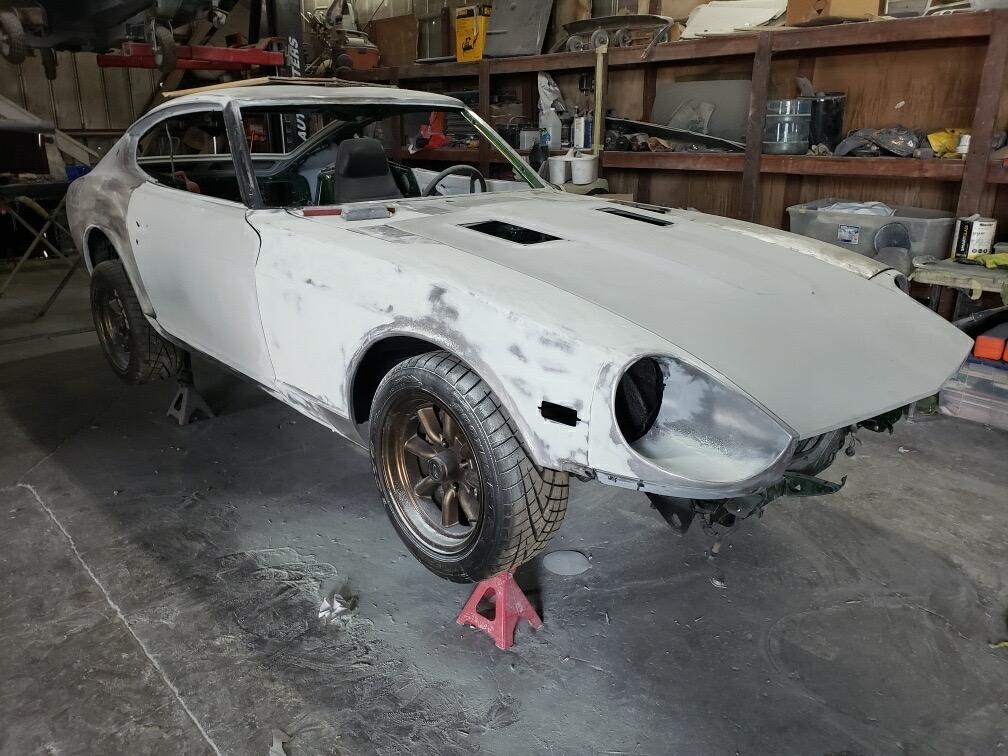
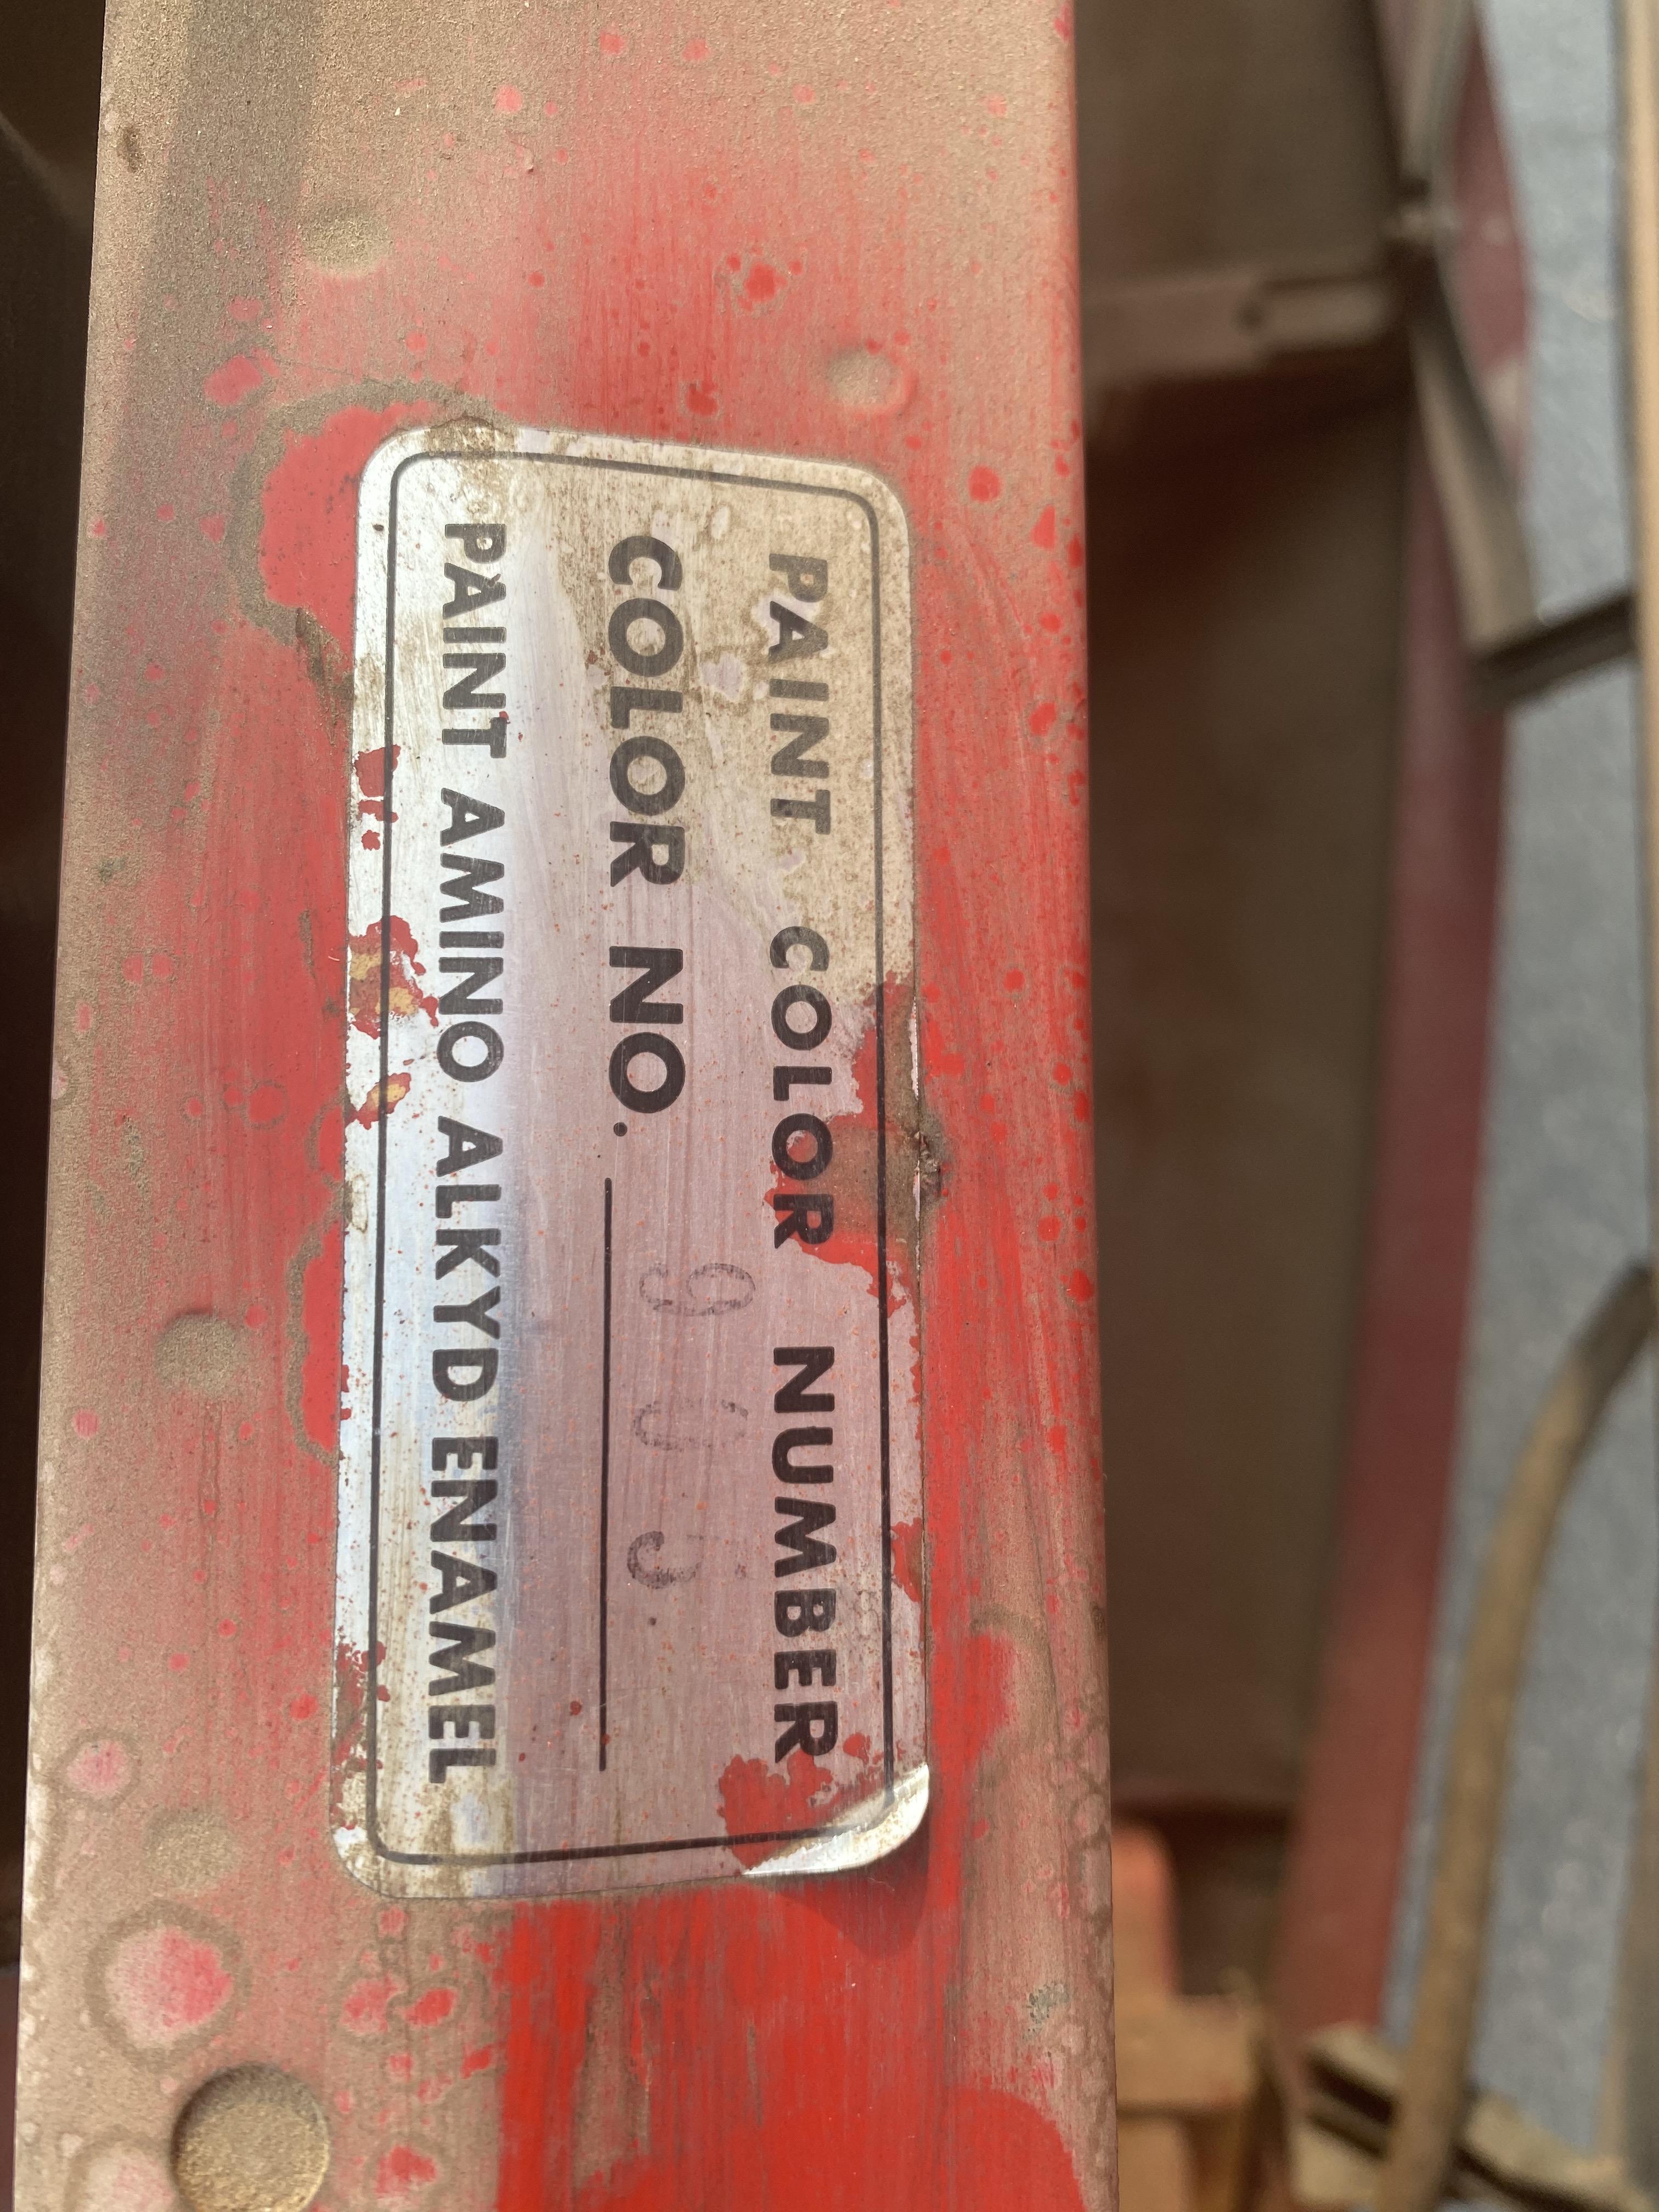
Some more progress photos. Slow progress but we finally got some high build primer on the hood and doors tonight. The plan was to have color on by end of the month but looks like it will be a week or so behind! Getting there!


 1 point
 -
If you are trying to compare your Z plugs to a modern cars plugs, dont. Modern car ignitions are much, much stronger and need to be respected. They can put you on the ground. The hotter ignition helps the plugs stay cleaner and they tend to be whiter1 point
-
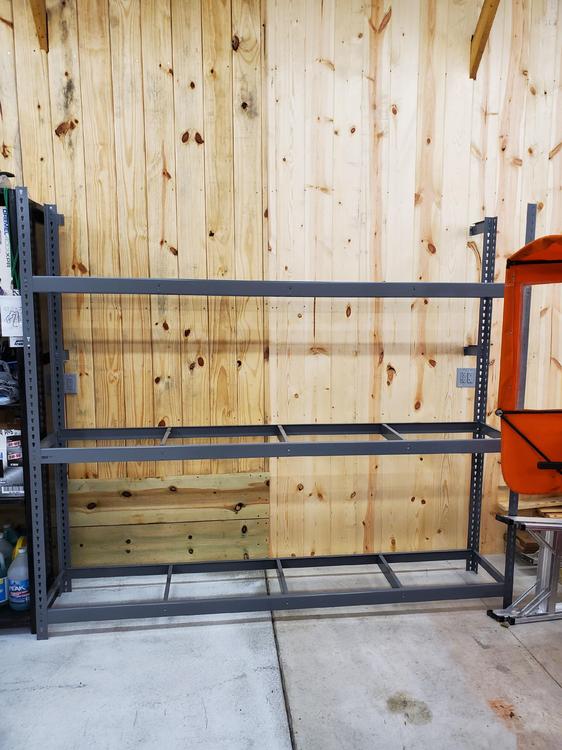
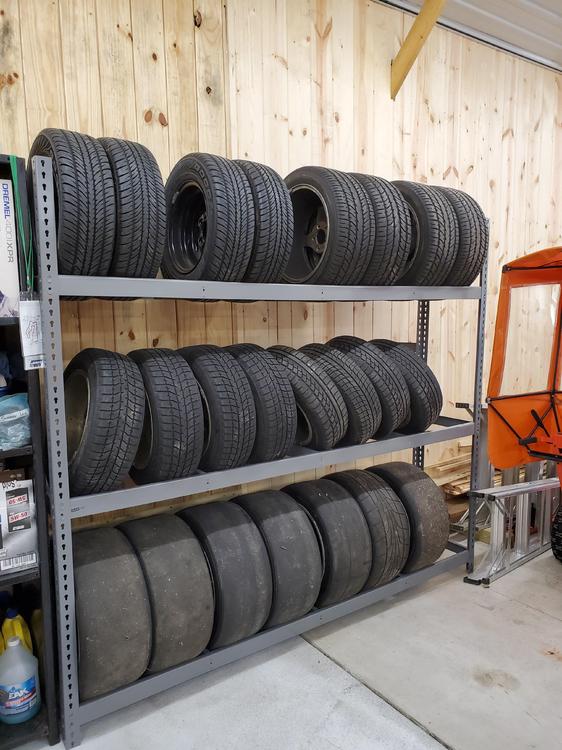
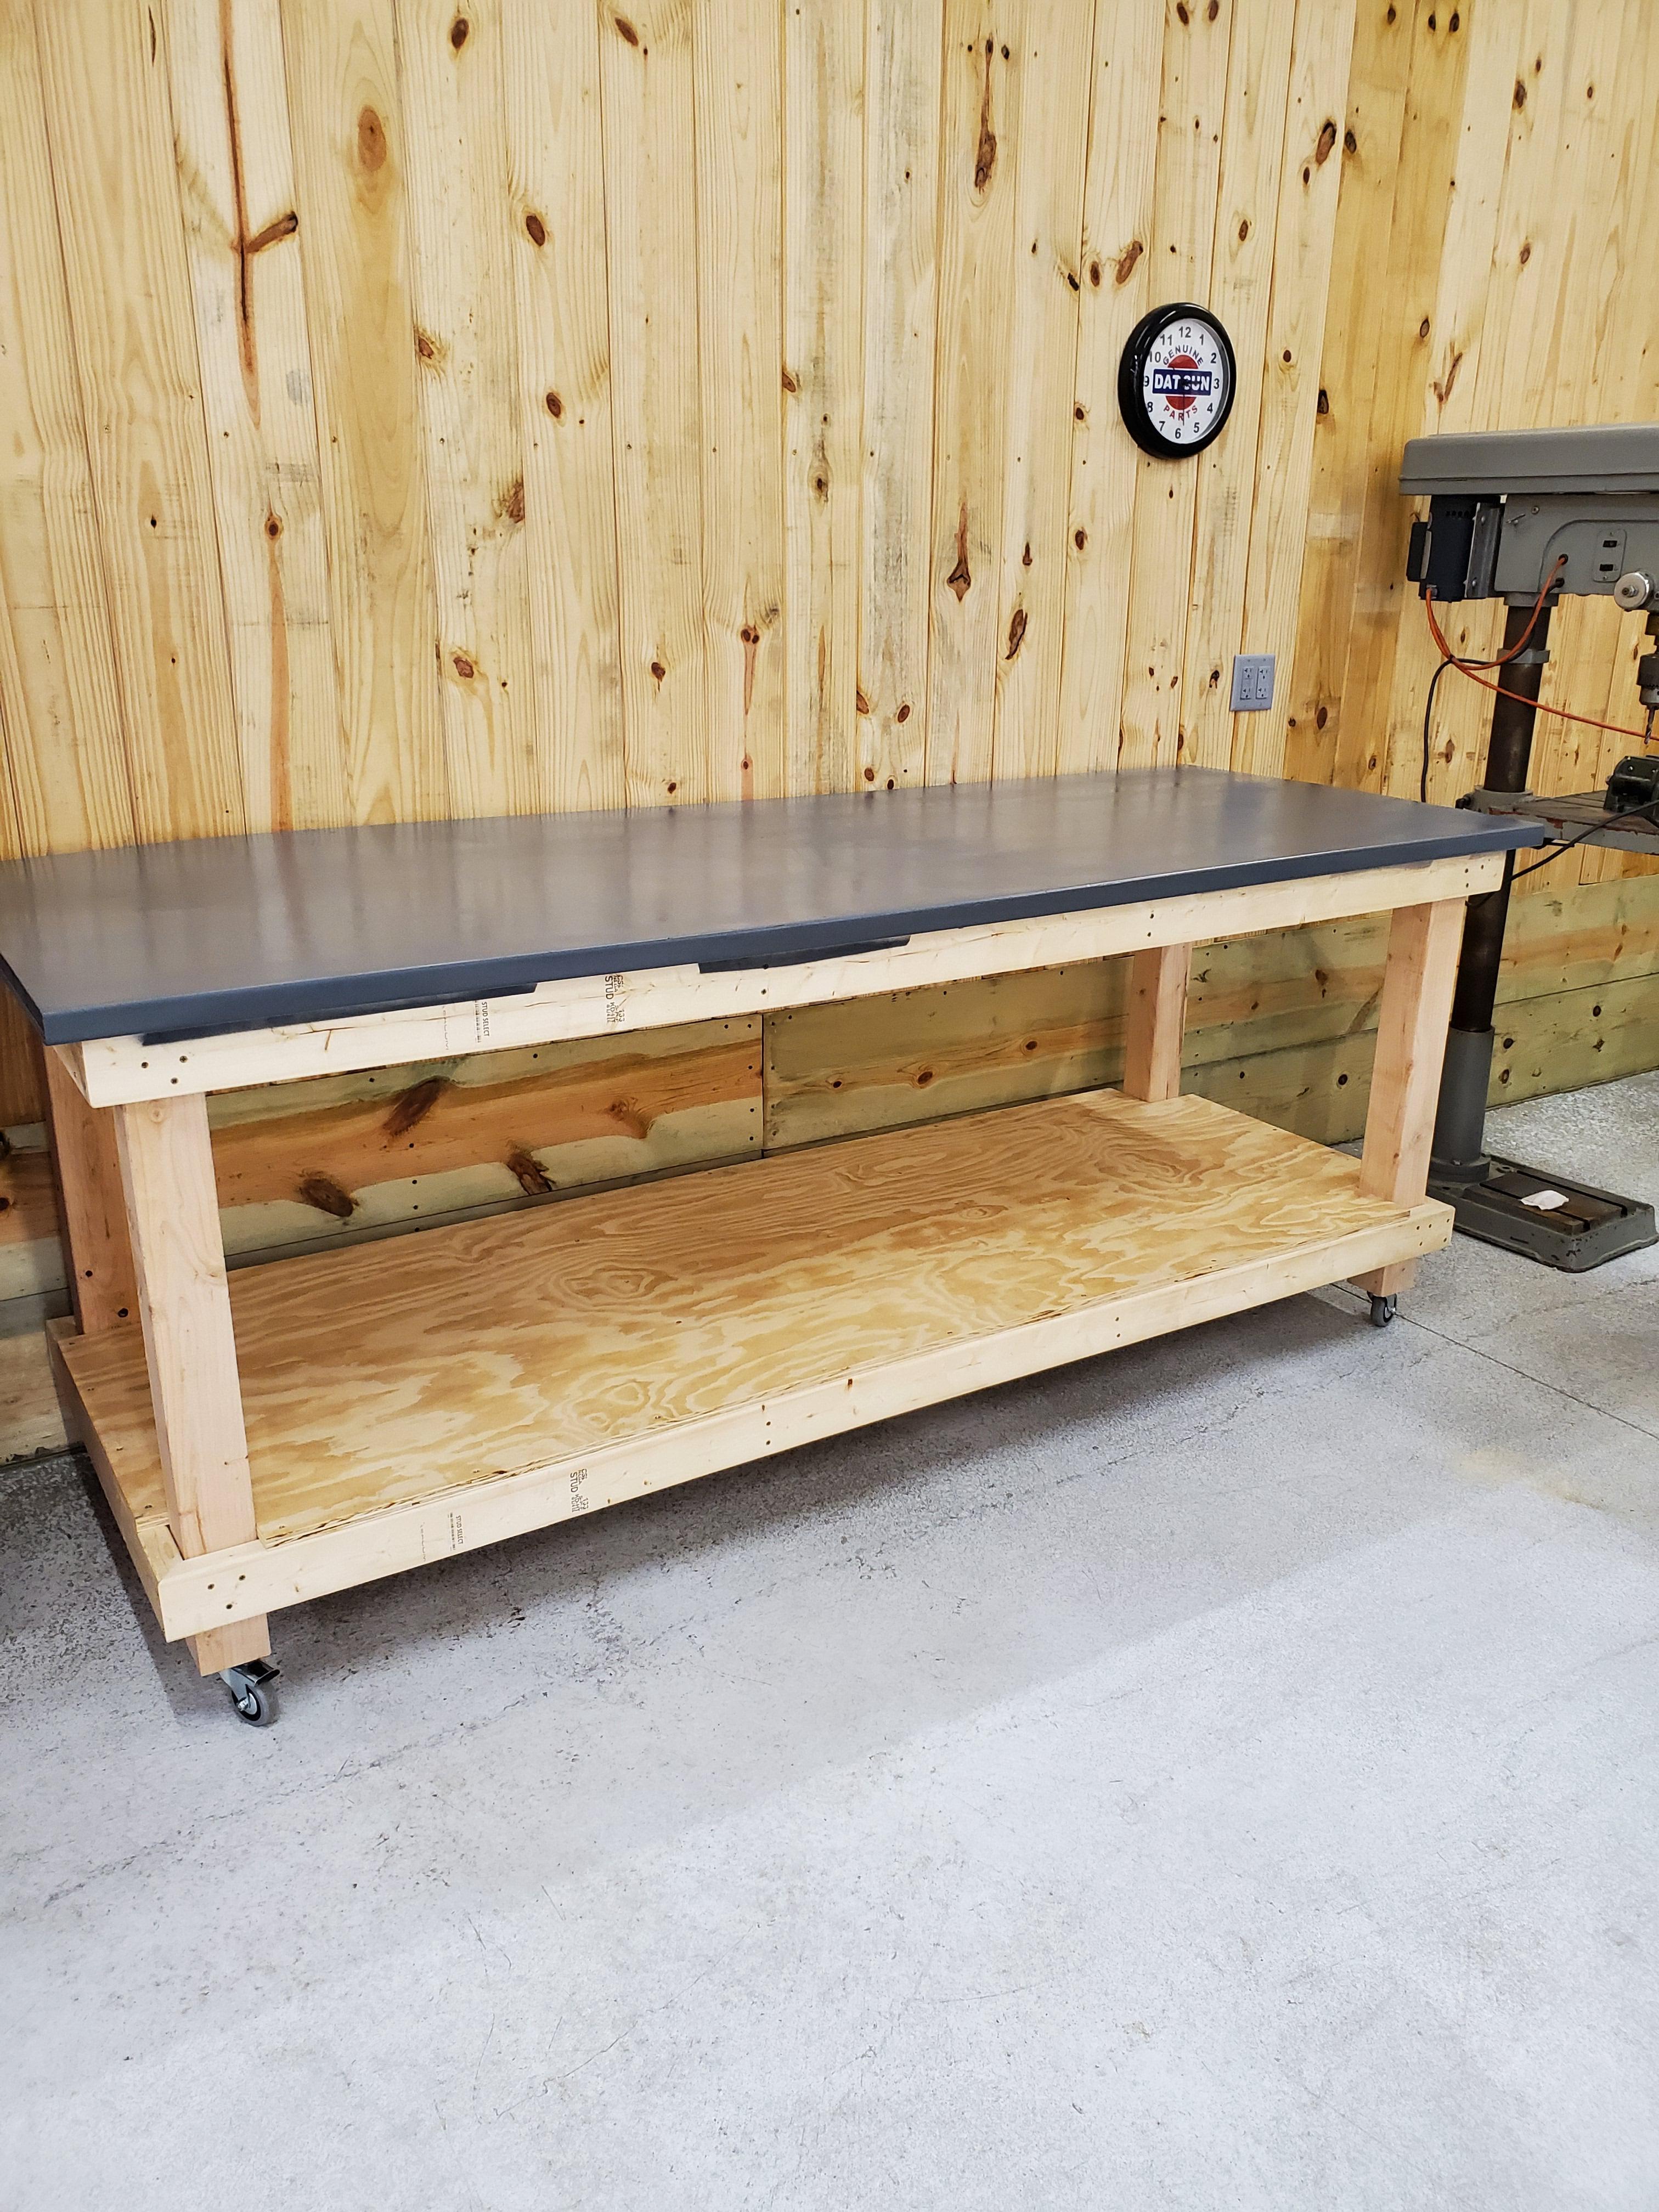
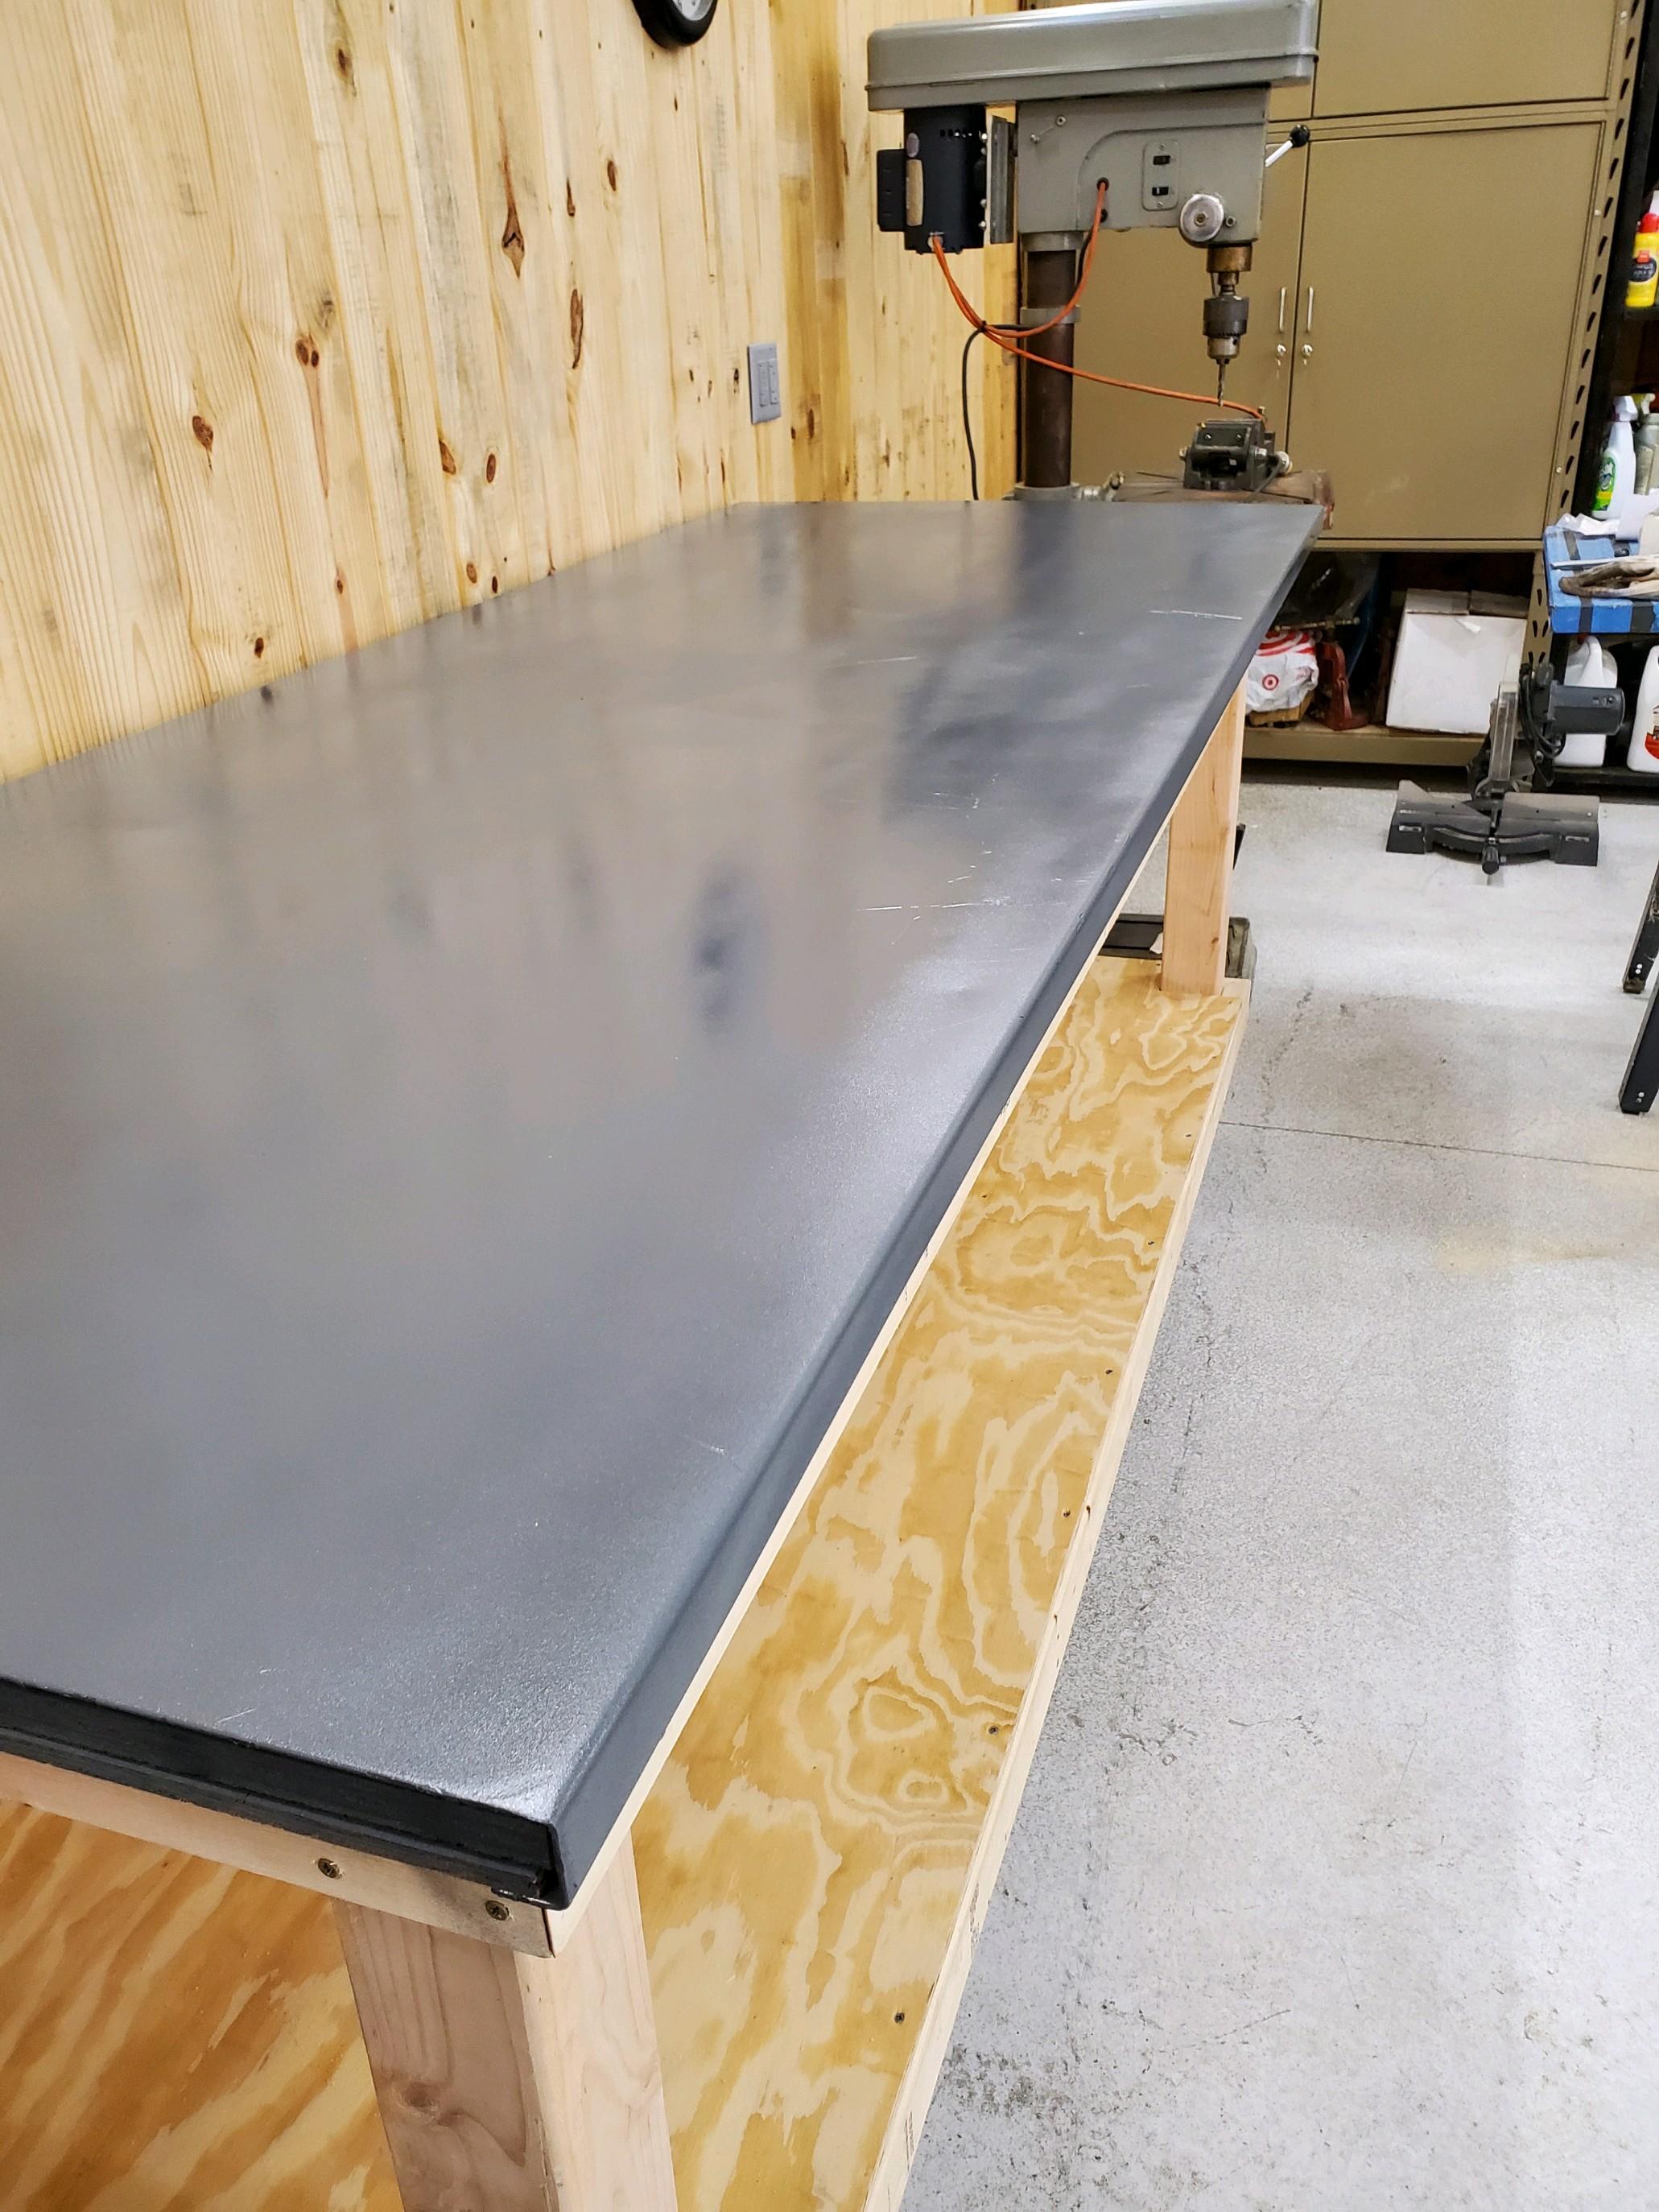
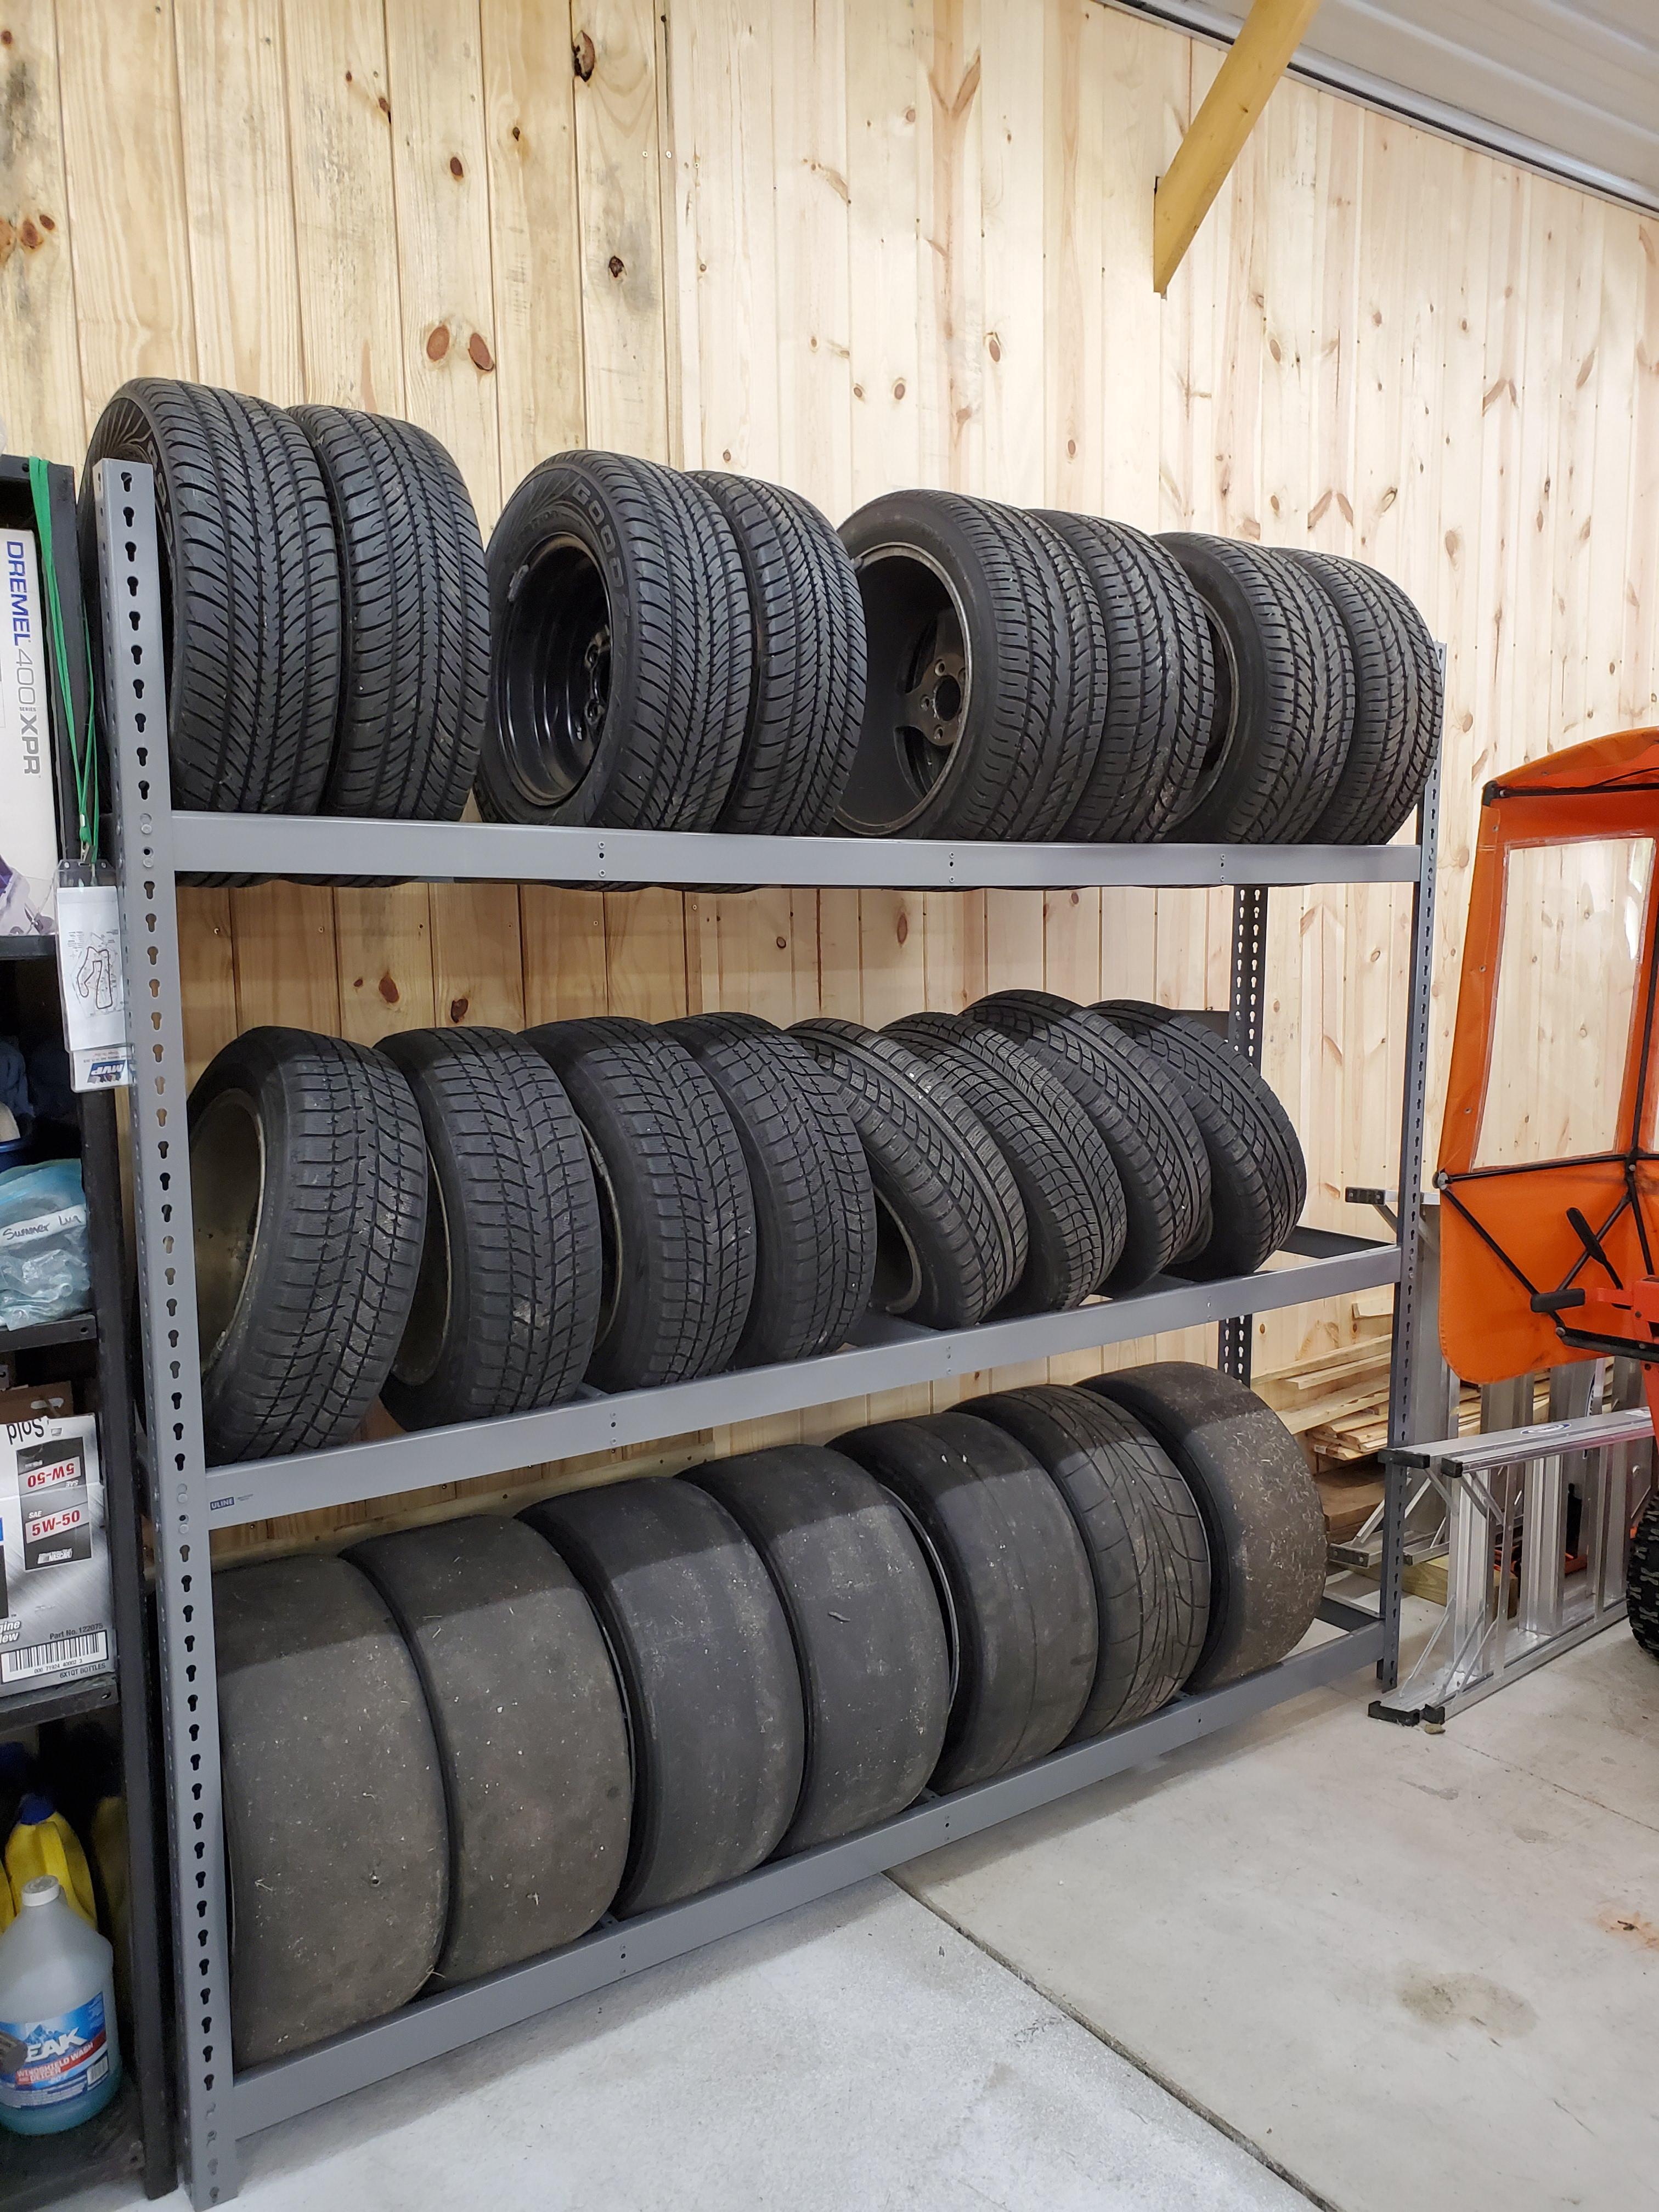
1 point1 pointI'm leaning (snort) to a fuel problem. I've experienced similar symptoms and found them to be water related. If you have any clear fuel filters, check those for water. I'd also pull a float chamber top to see if there is water in the bottom of the bowl(s).1 point1 point1 pointWell, I retired last month, so I finally had some time to build a work bench. I found a decent steel top, that was 8' x 3", which I ended up getting for free. Used 4"x4"'s for the uprights and 2"x4"s to tie it all together. Used 3/4" plywood for the shelf. I made the bench extra high so that I don't have to bend over to work on stuff. Also put it on casters so that I could keep flexibility in the shop configuration. I also picked up a really nice tire rack, so I don't have stacks of tires all over the place anymore. I will be getting the heater put in in the next few weeks. The lift is planned for the spring. That will about take care of building the shop. Now I need to find a new car project to work on!!!


 1 pointWent over to Vancouver Island on Sunday and spent the day on a cruise with a bunch of Datsun folks, it was a enjoyable drive. Everyone did the social distancing thing. @zKars I think you would know most if not all of these cars and their owners.
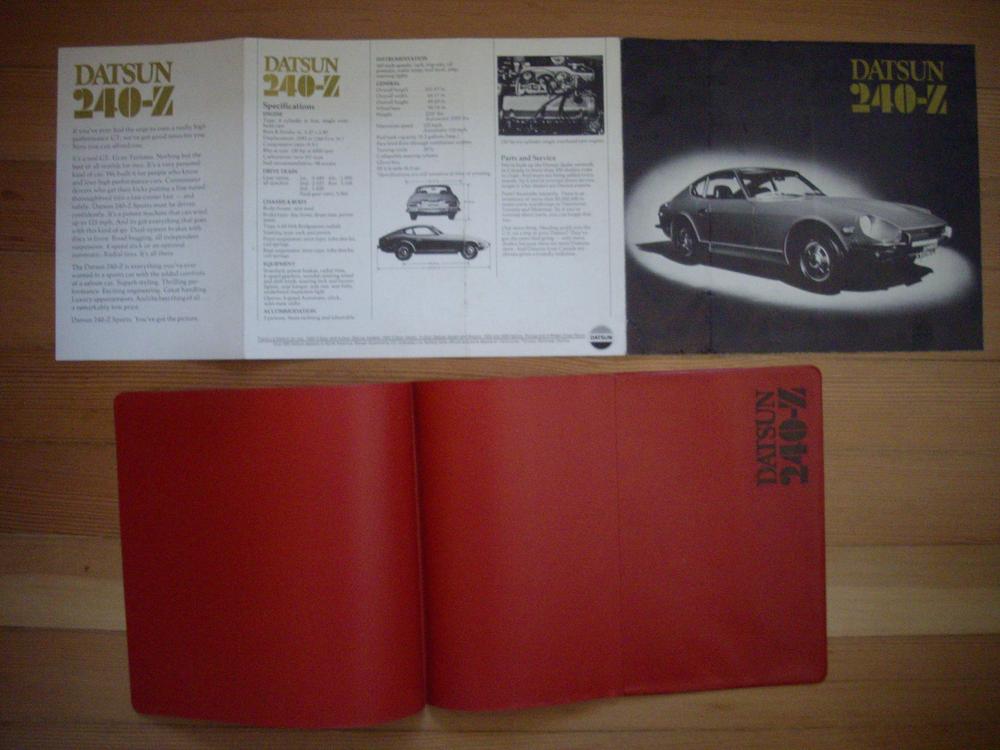
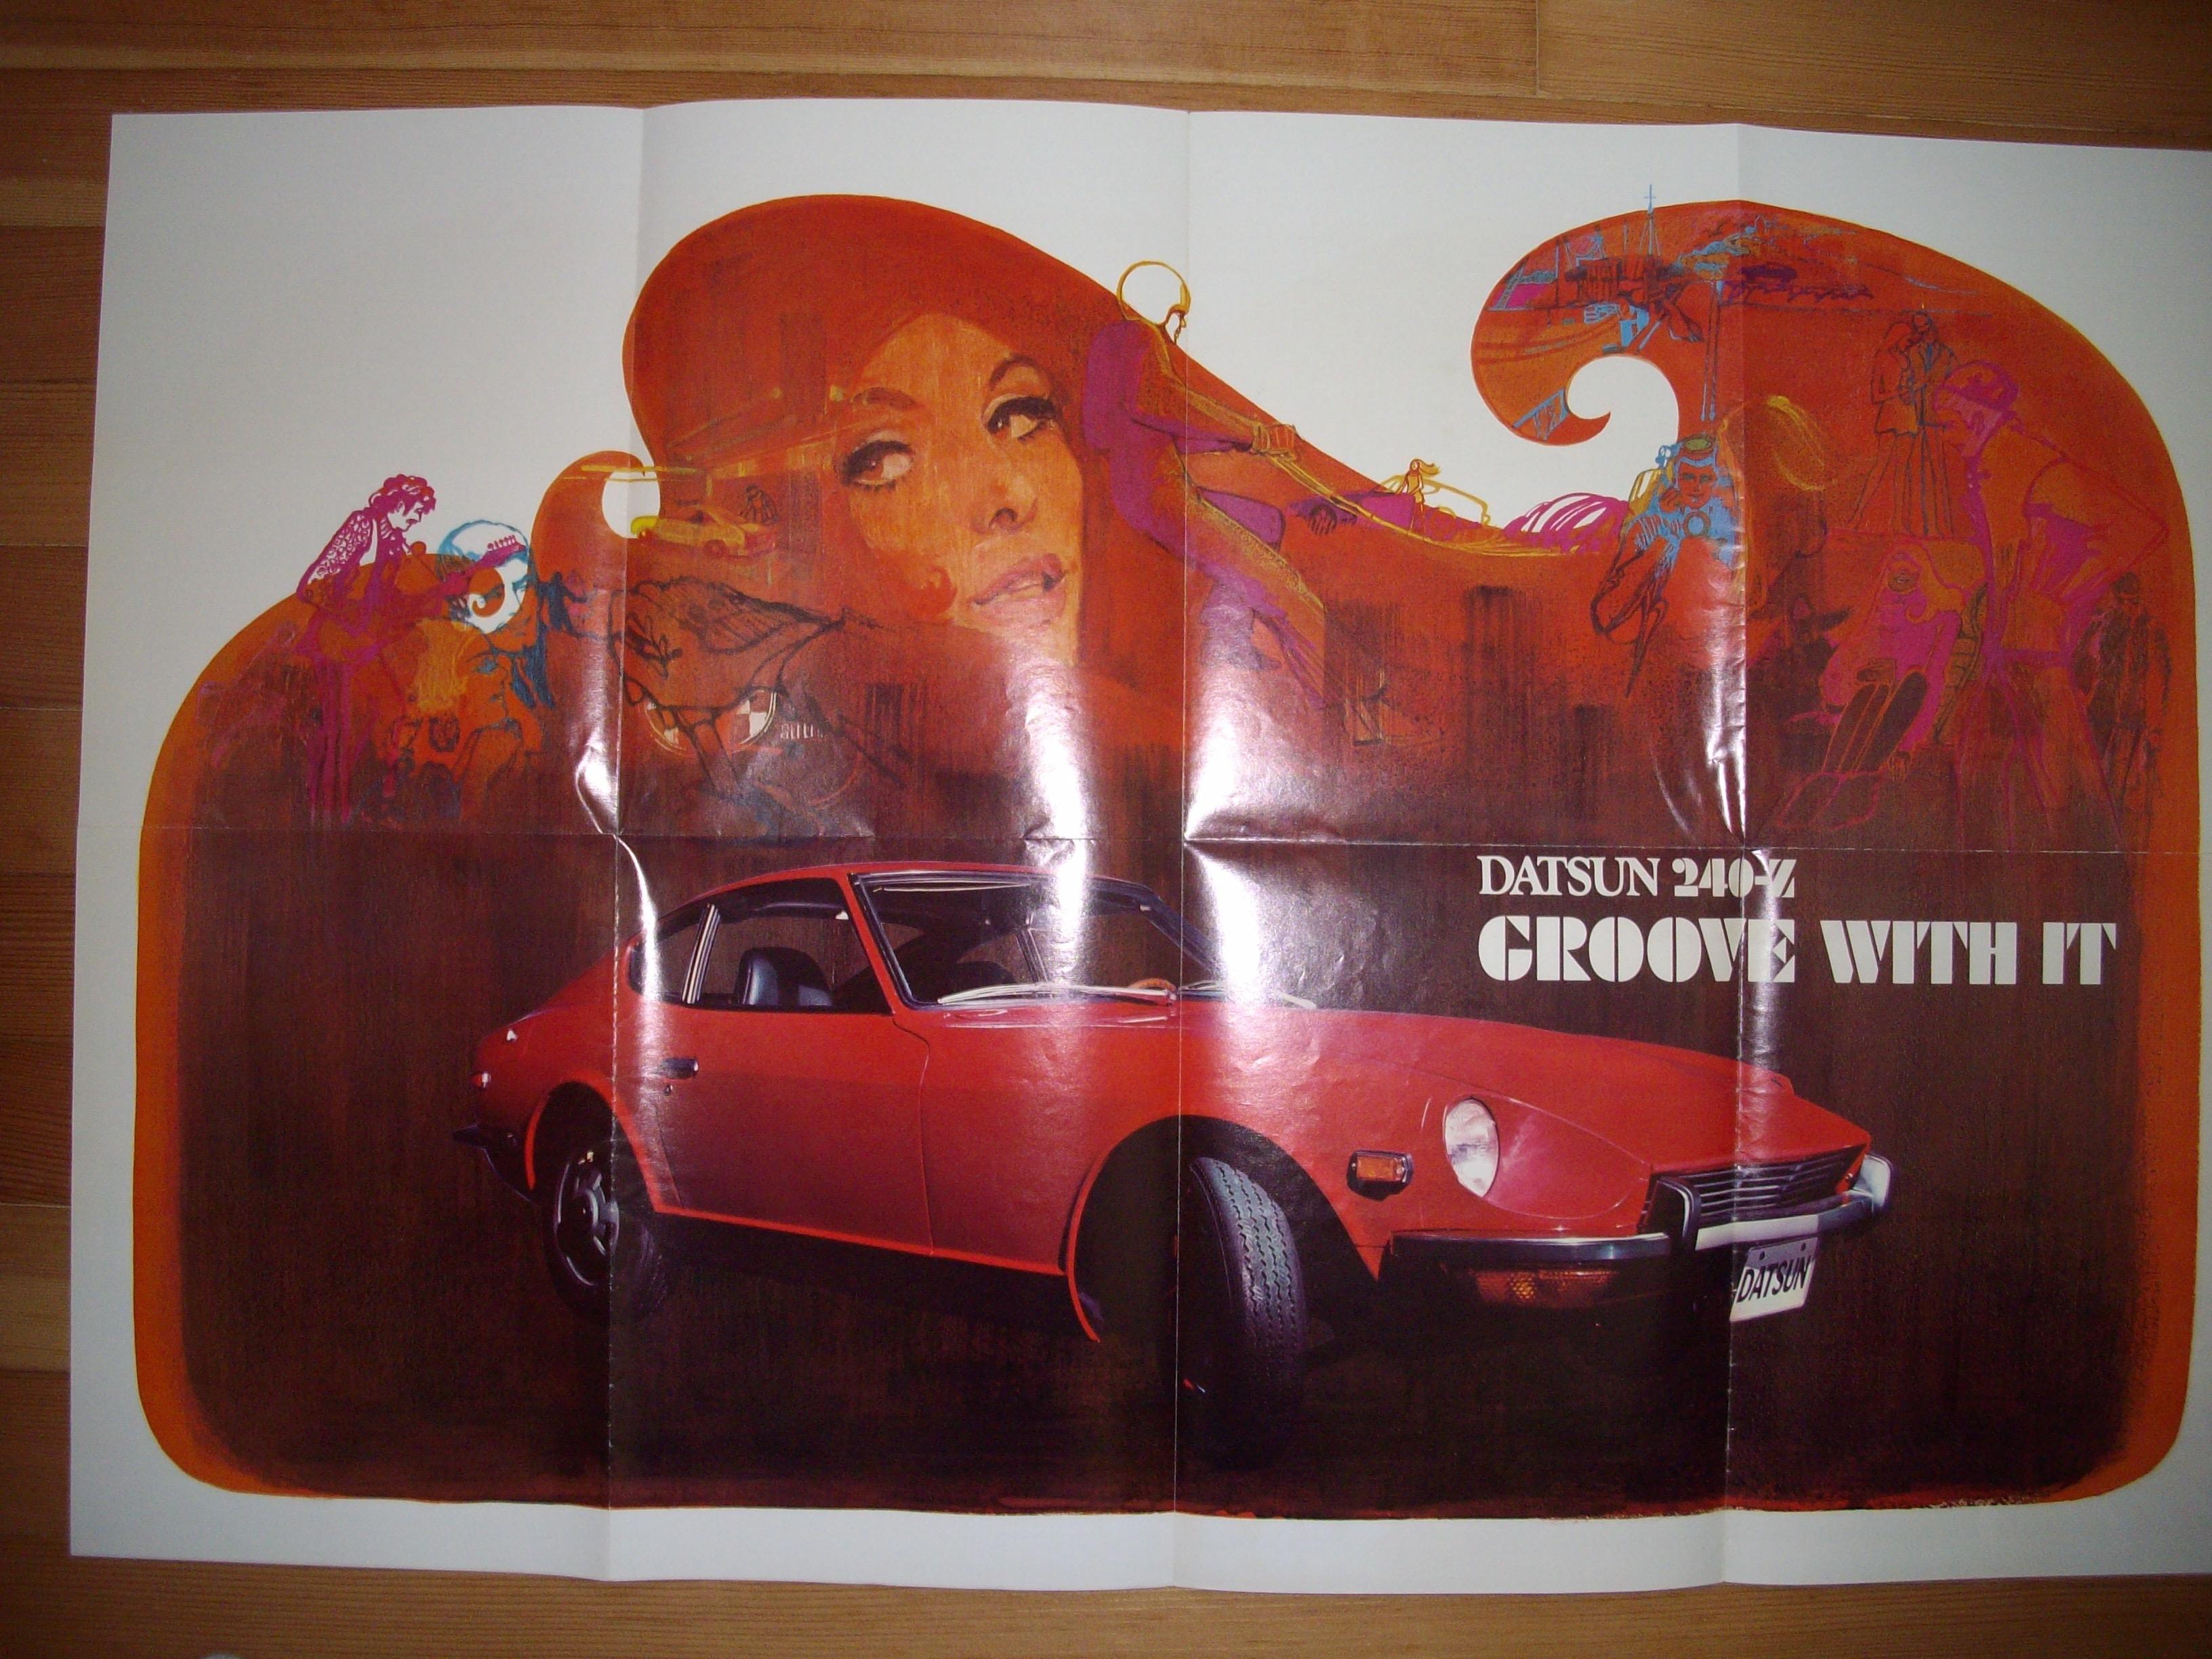
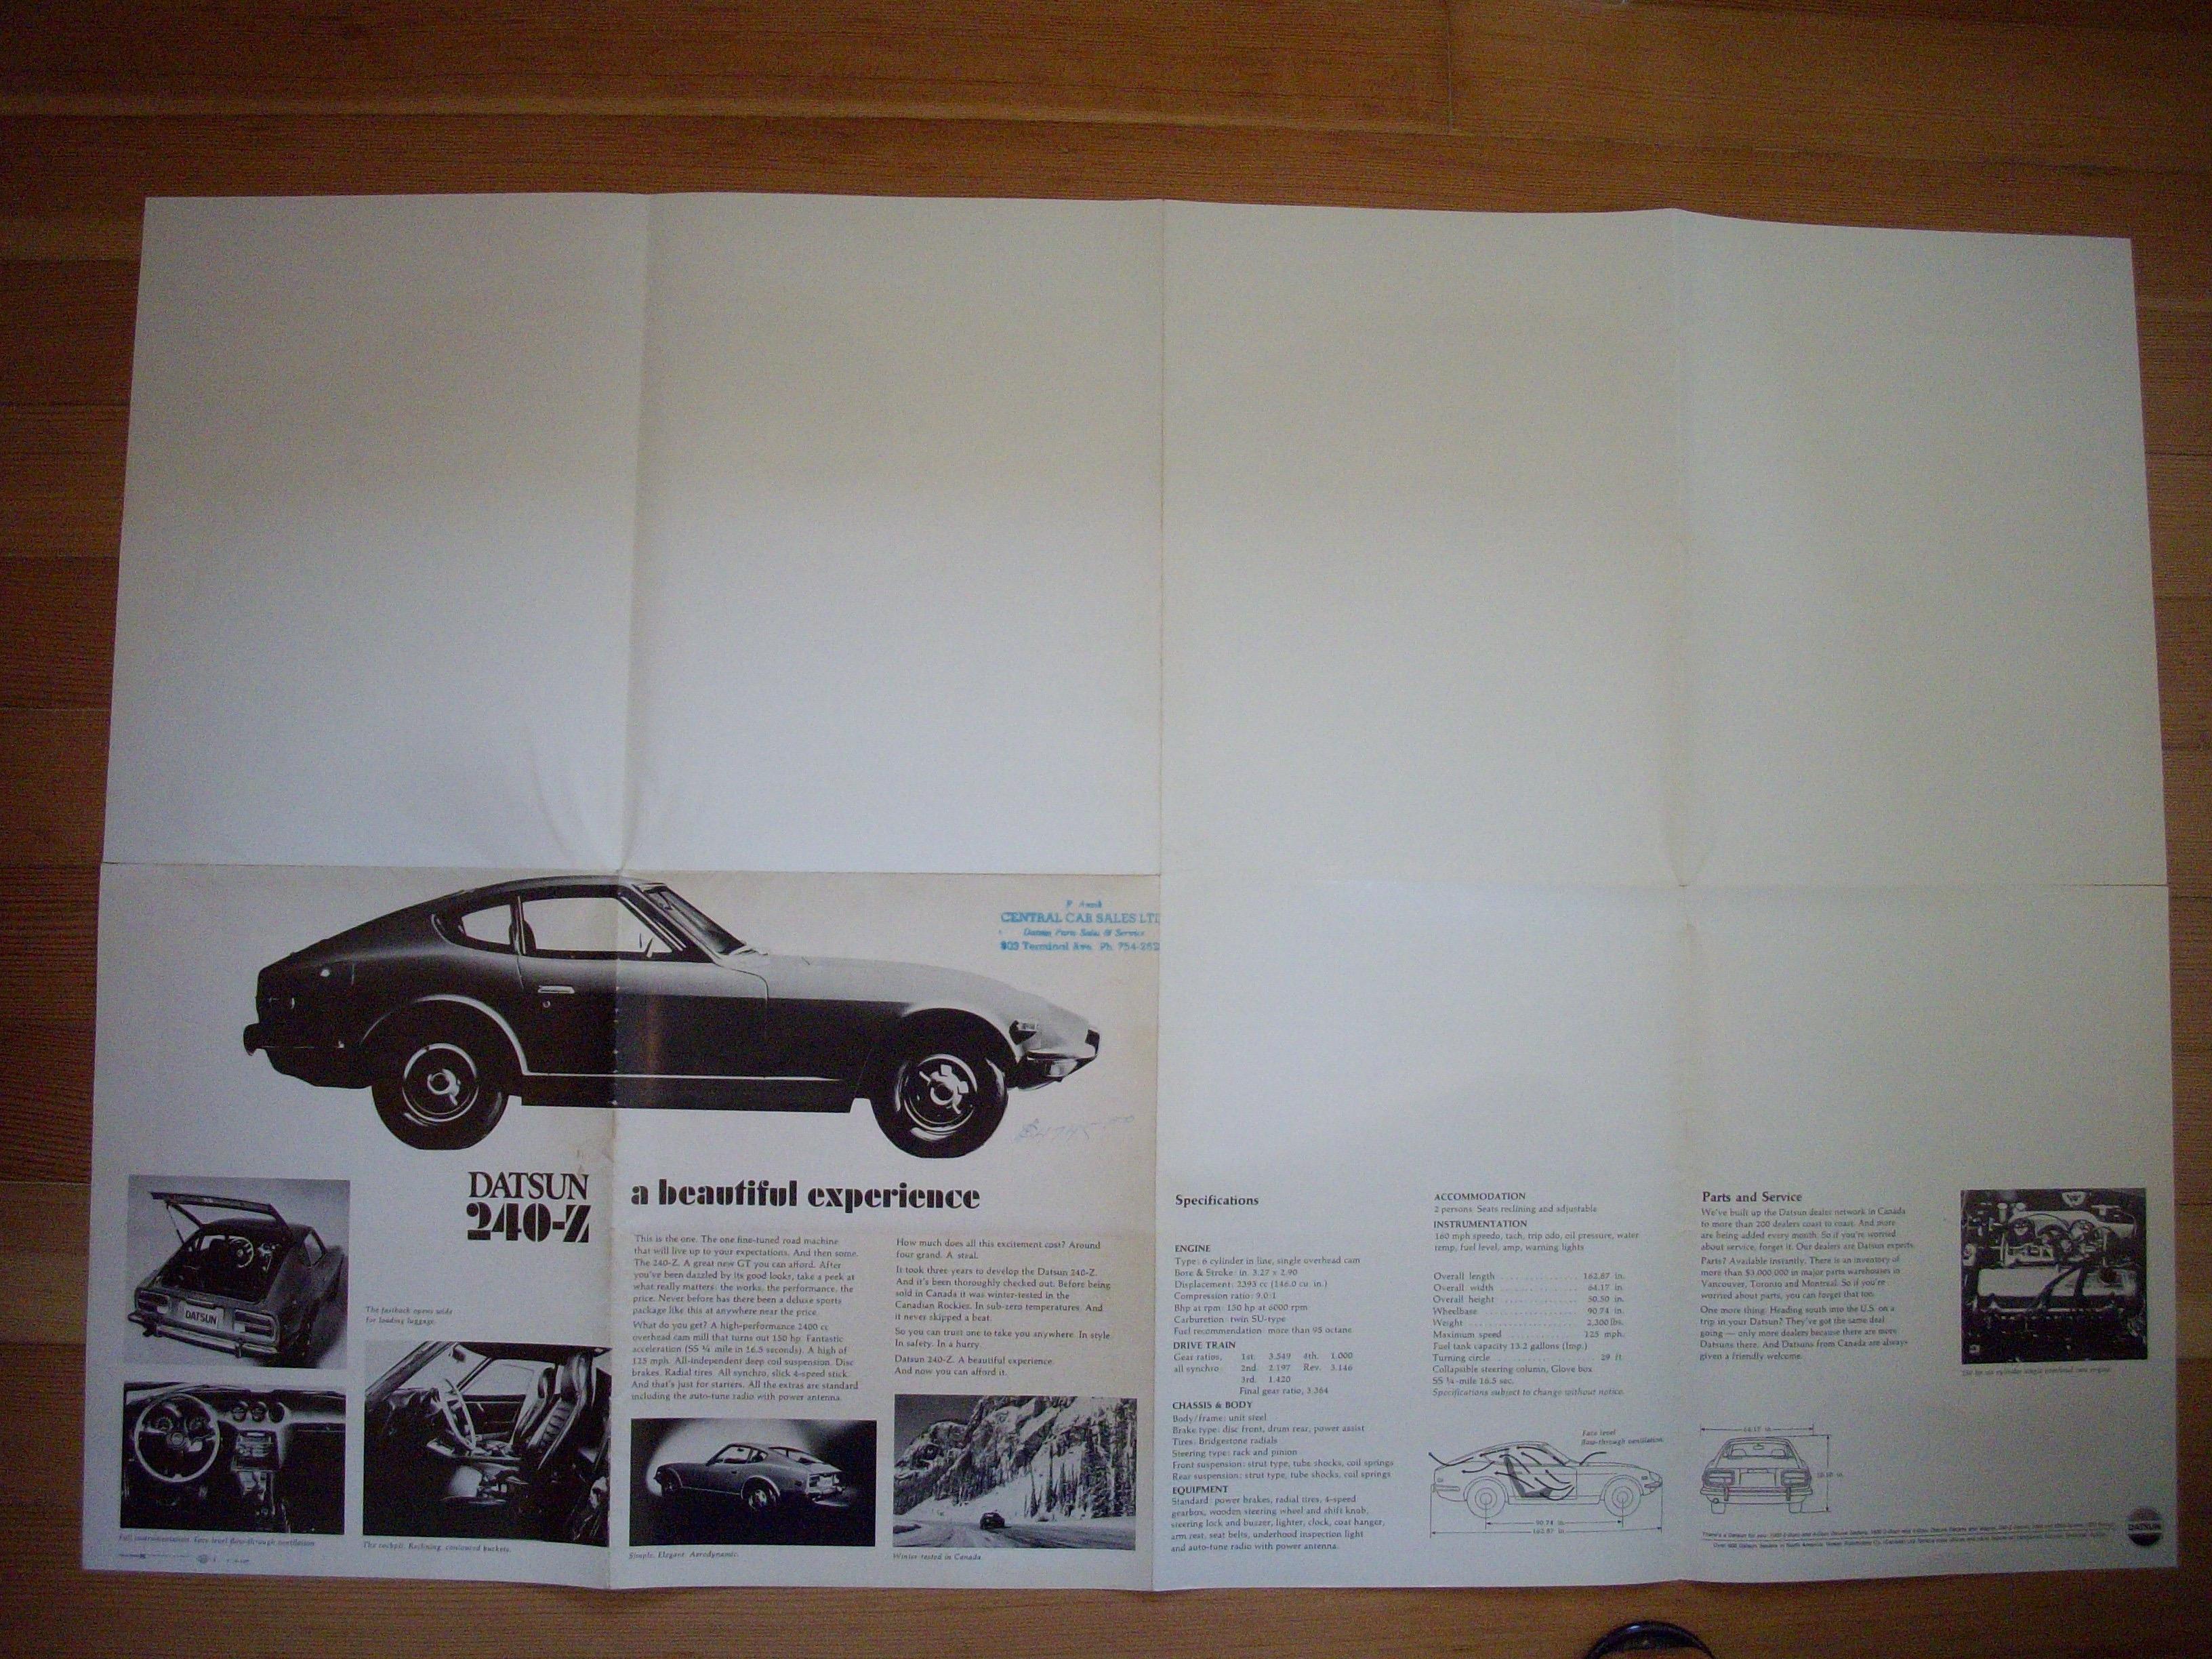
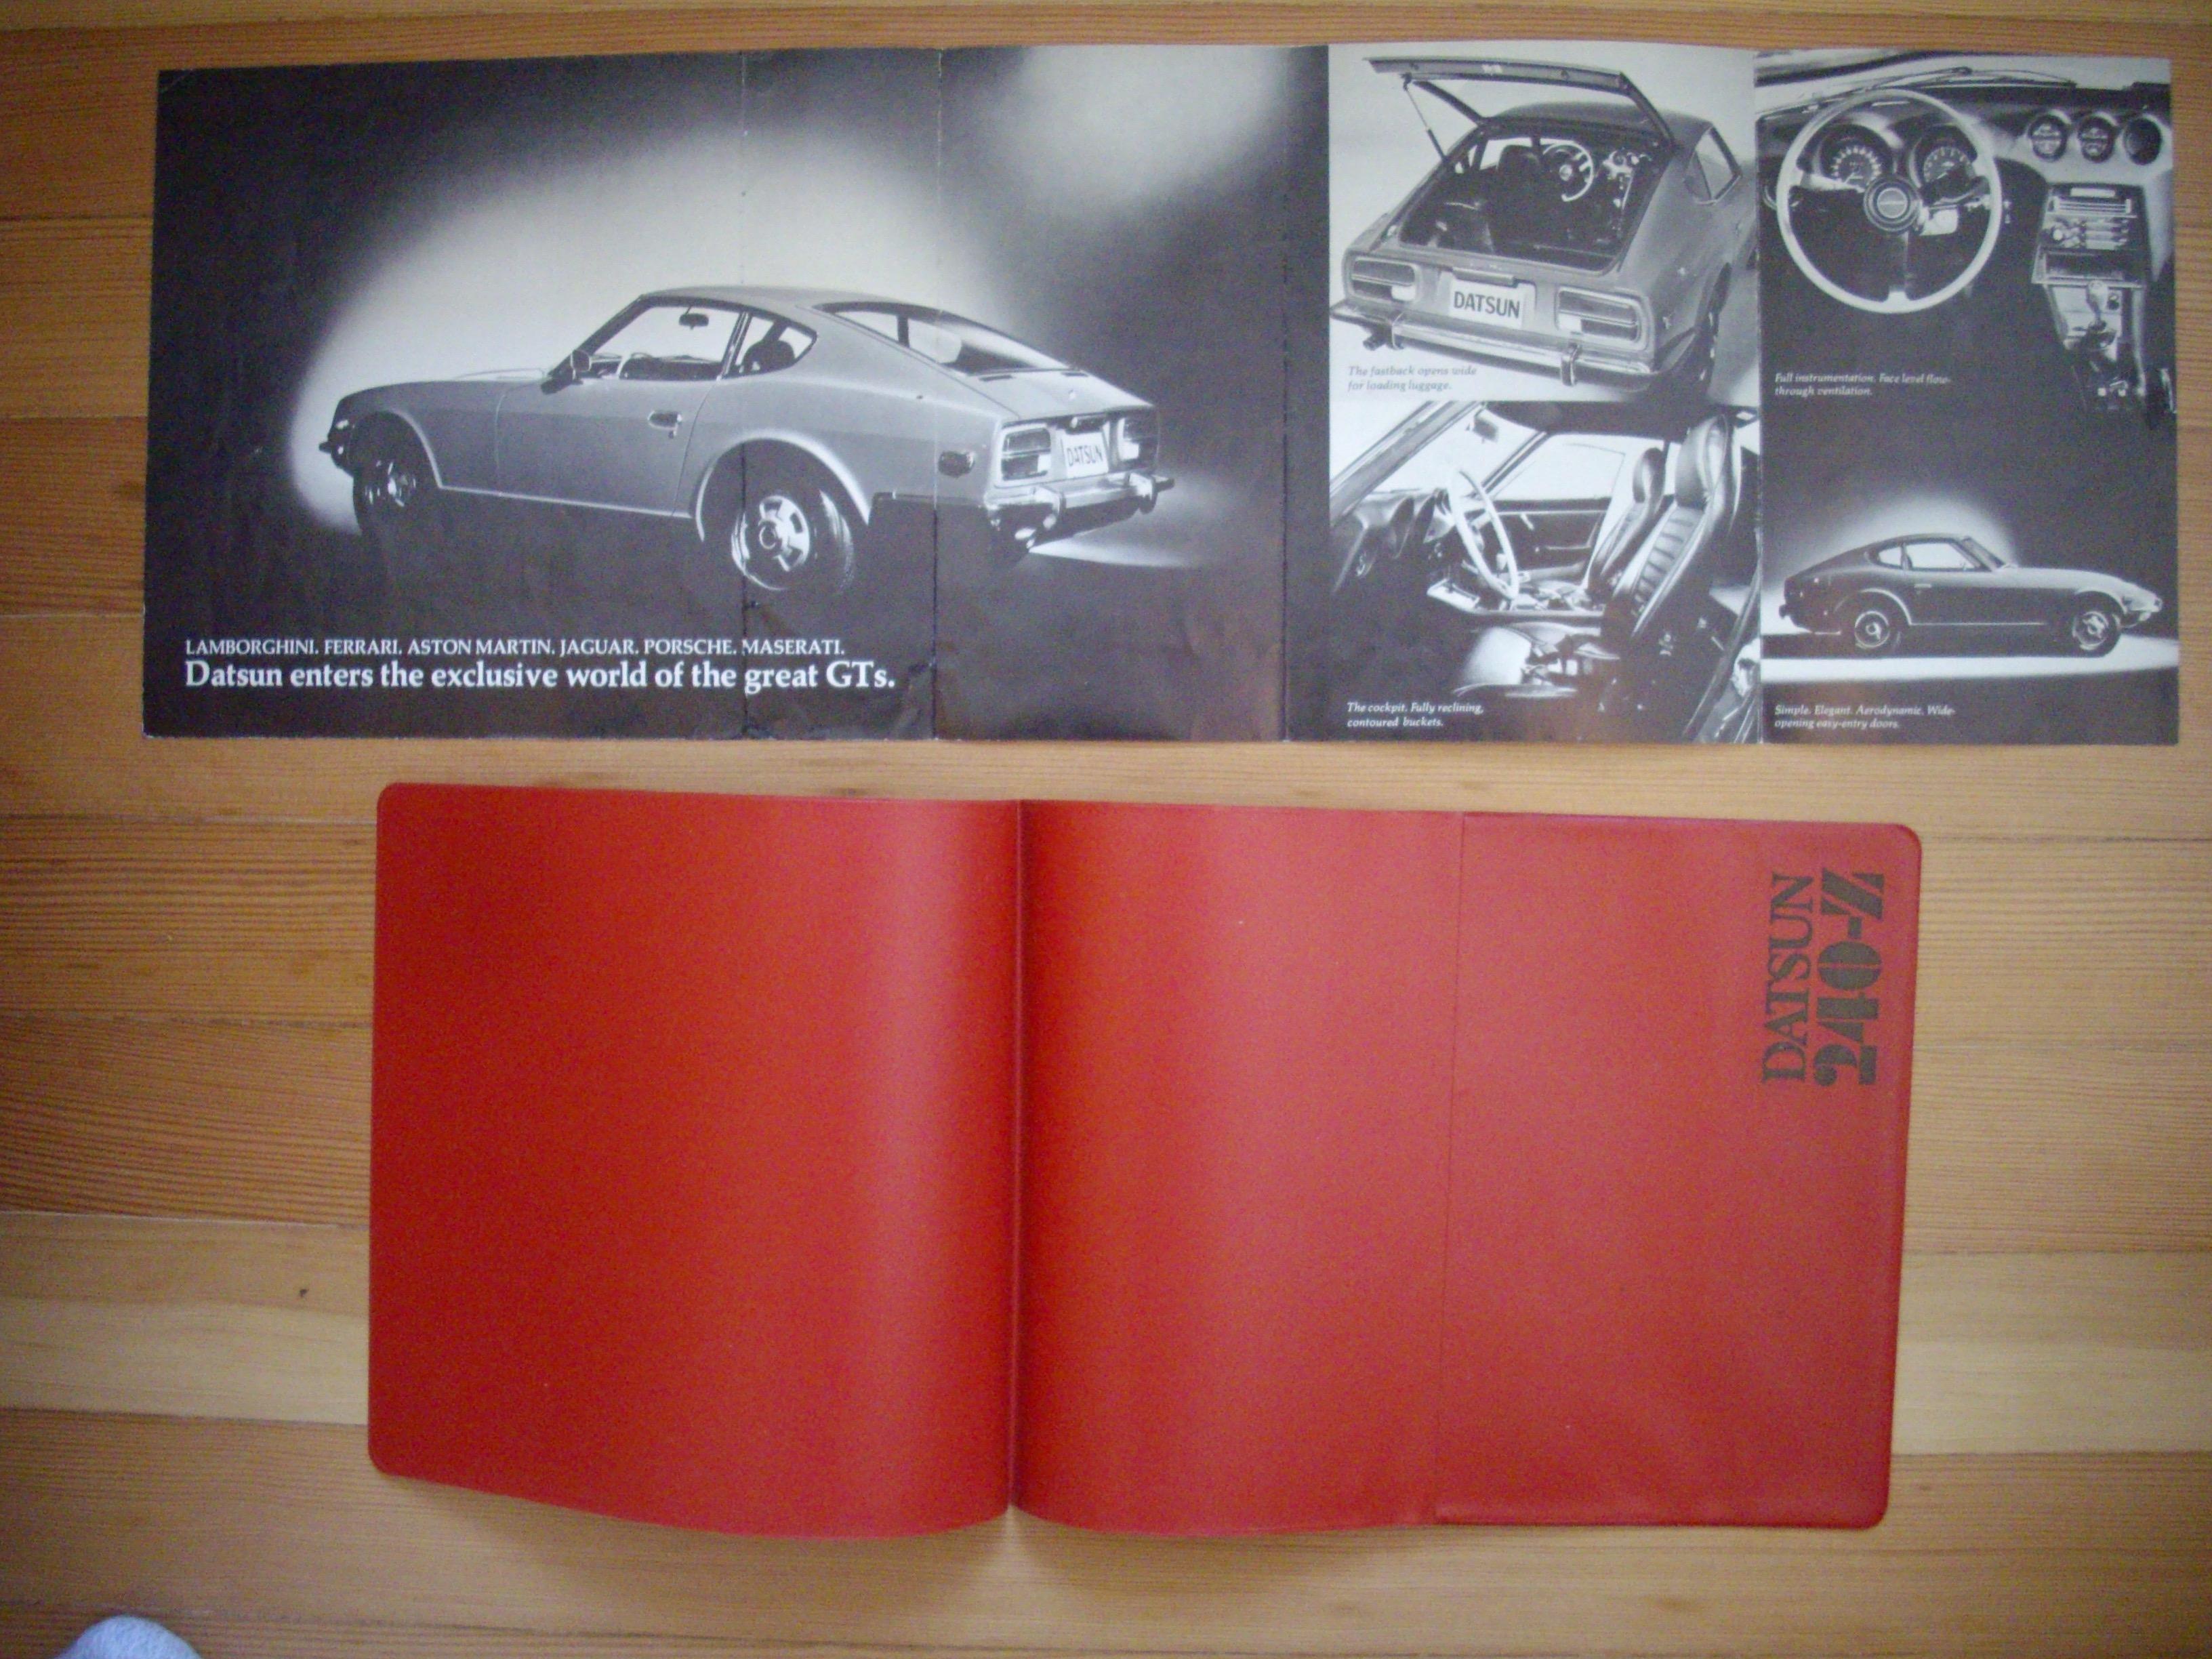
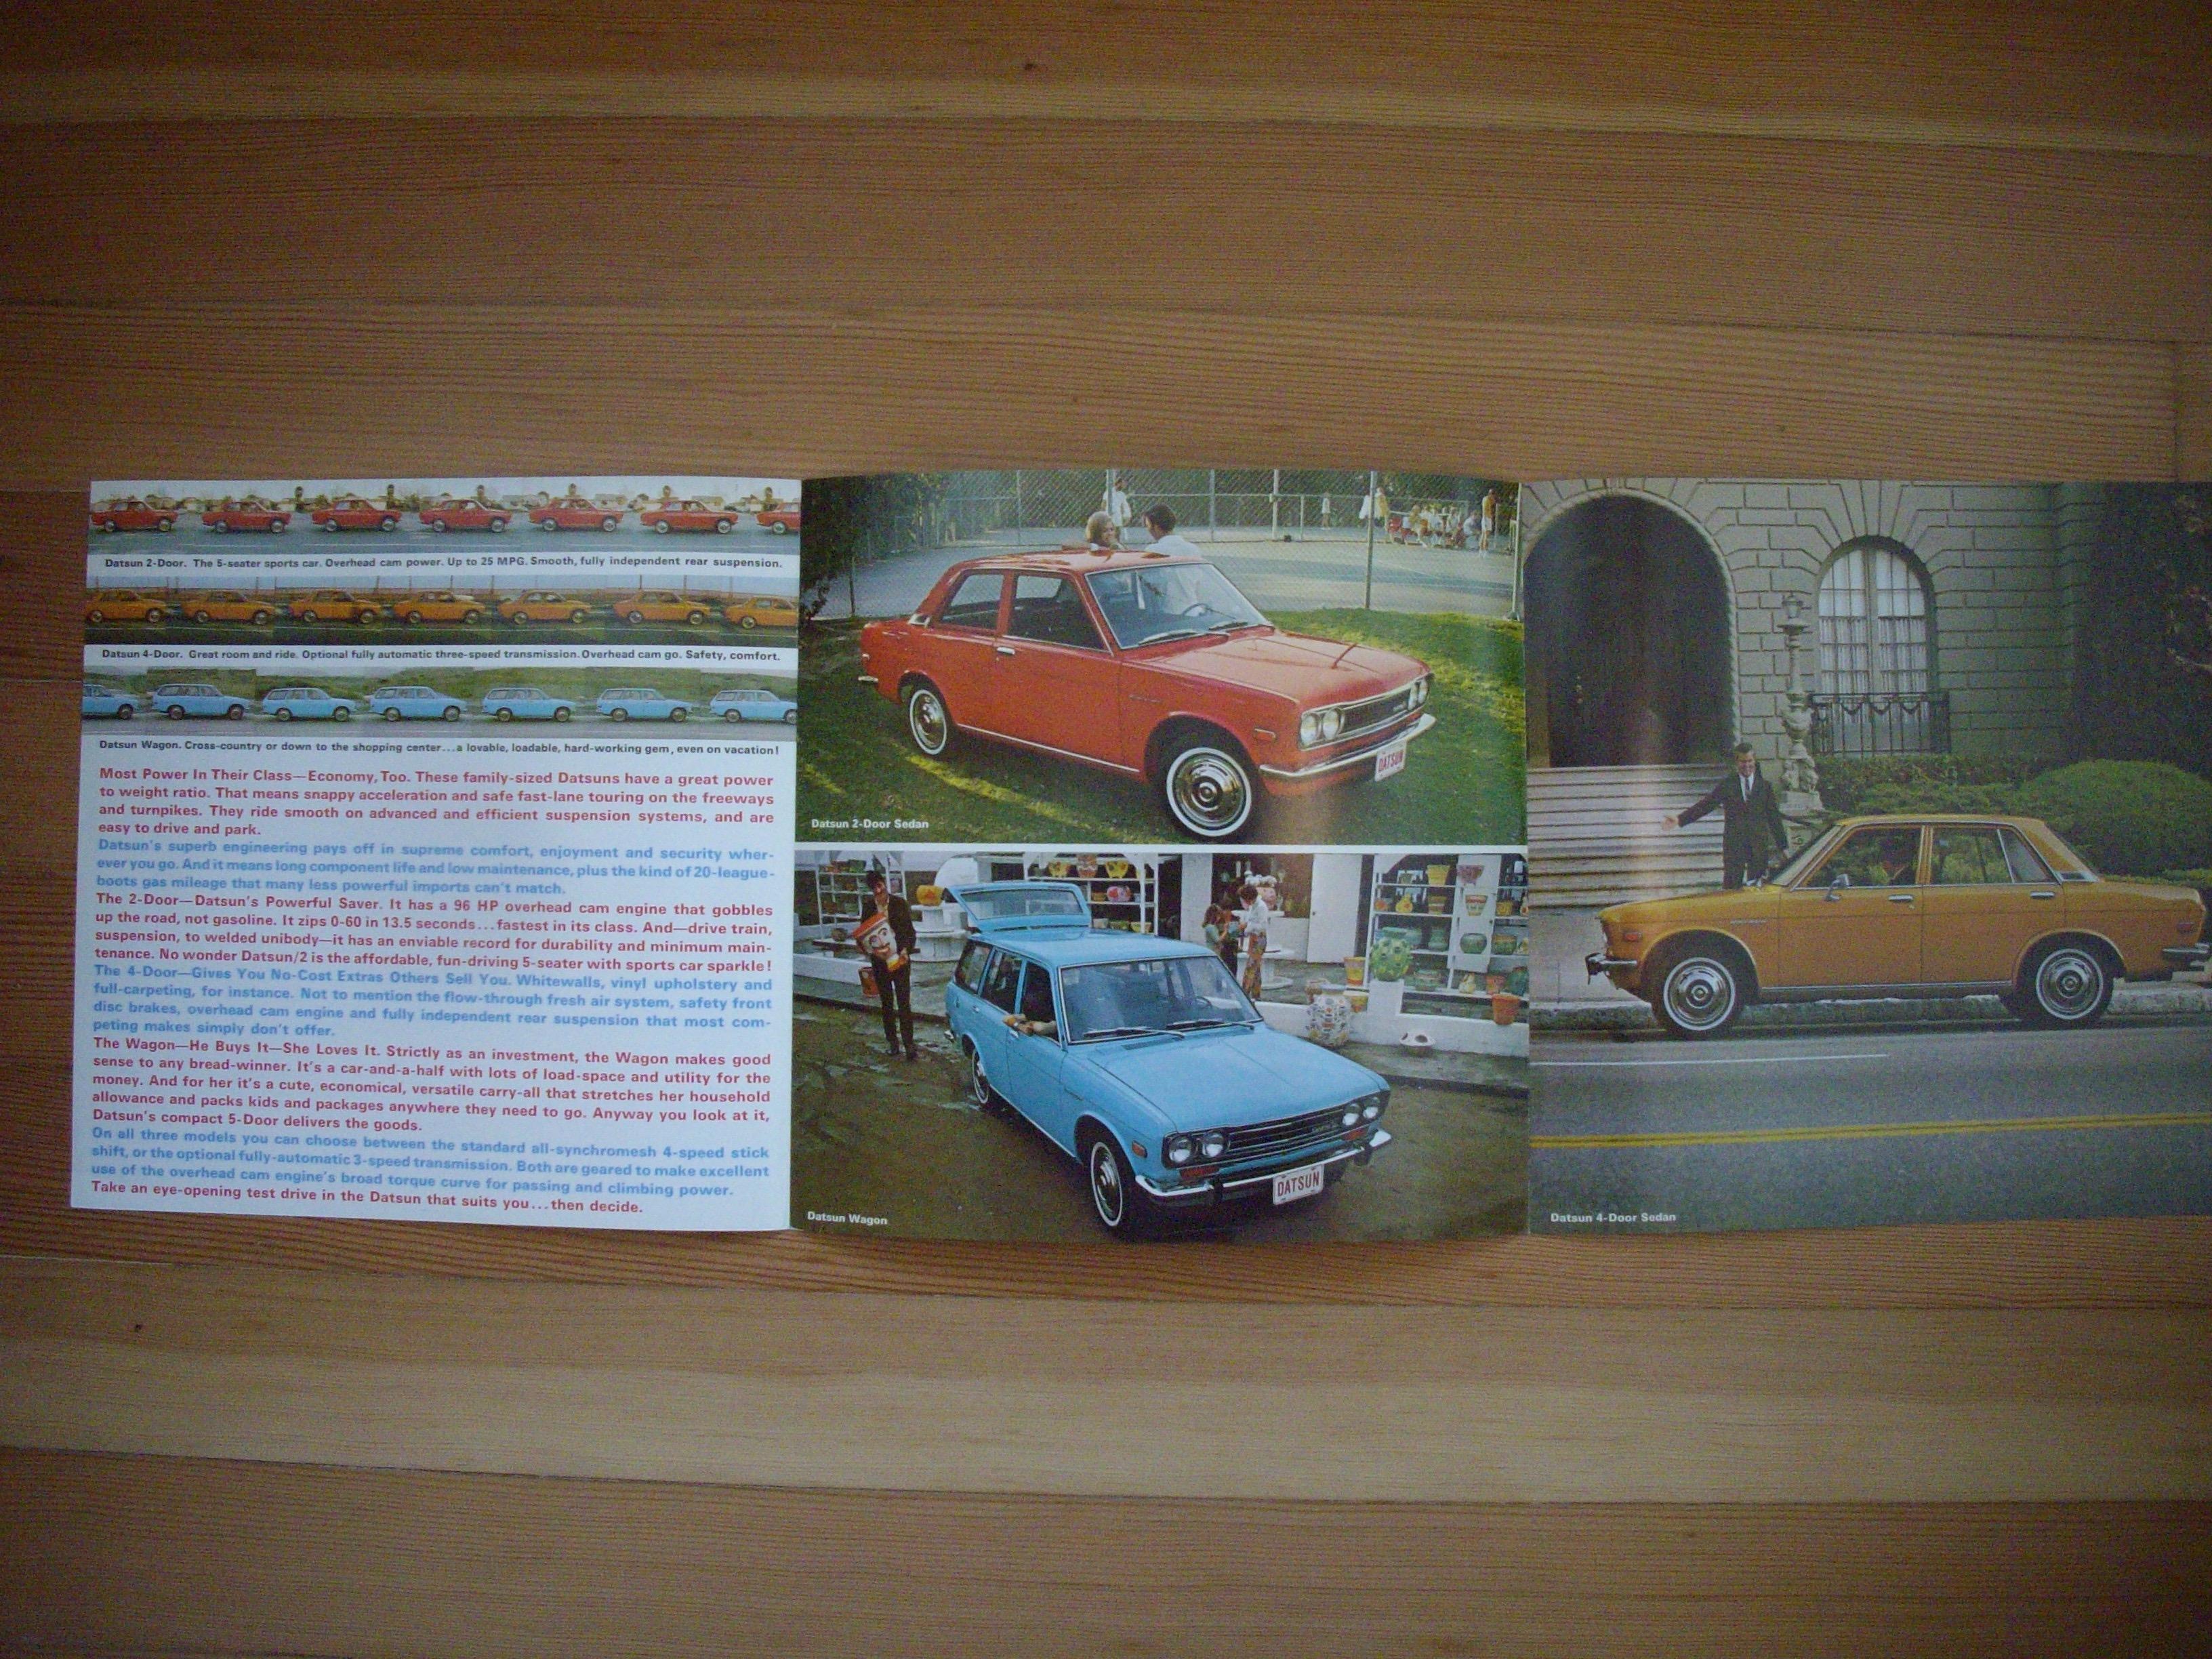
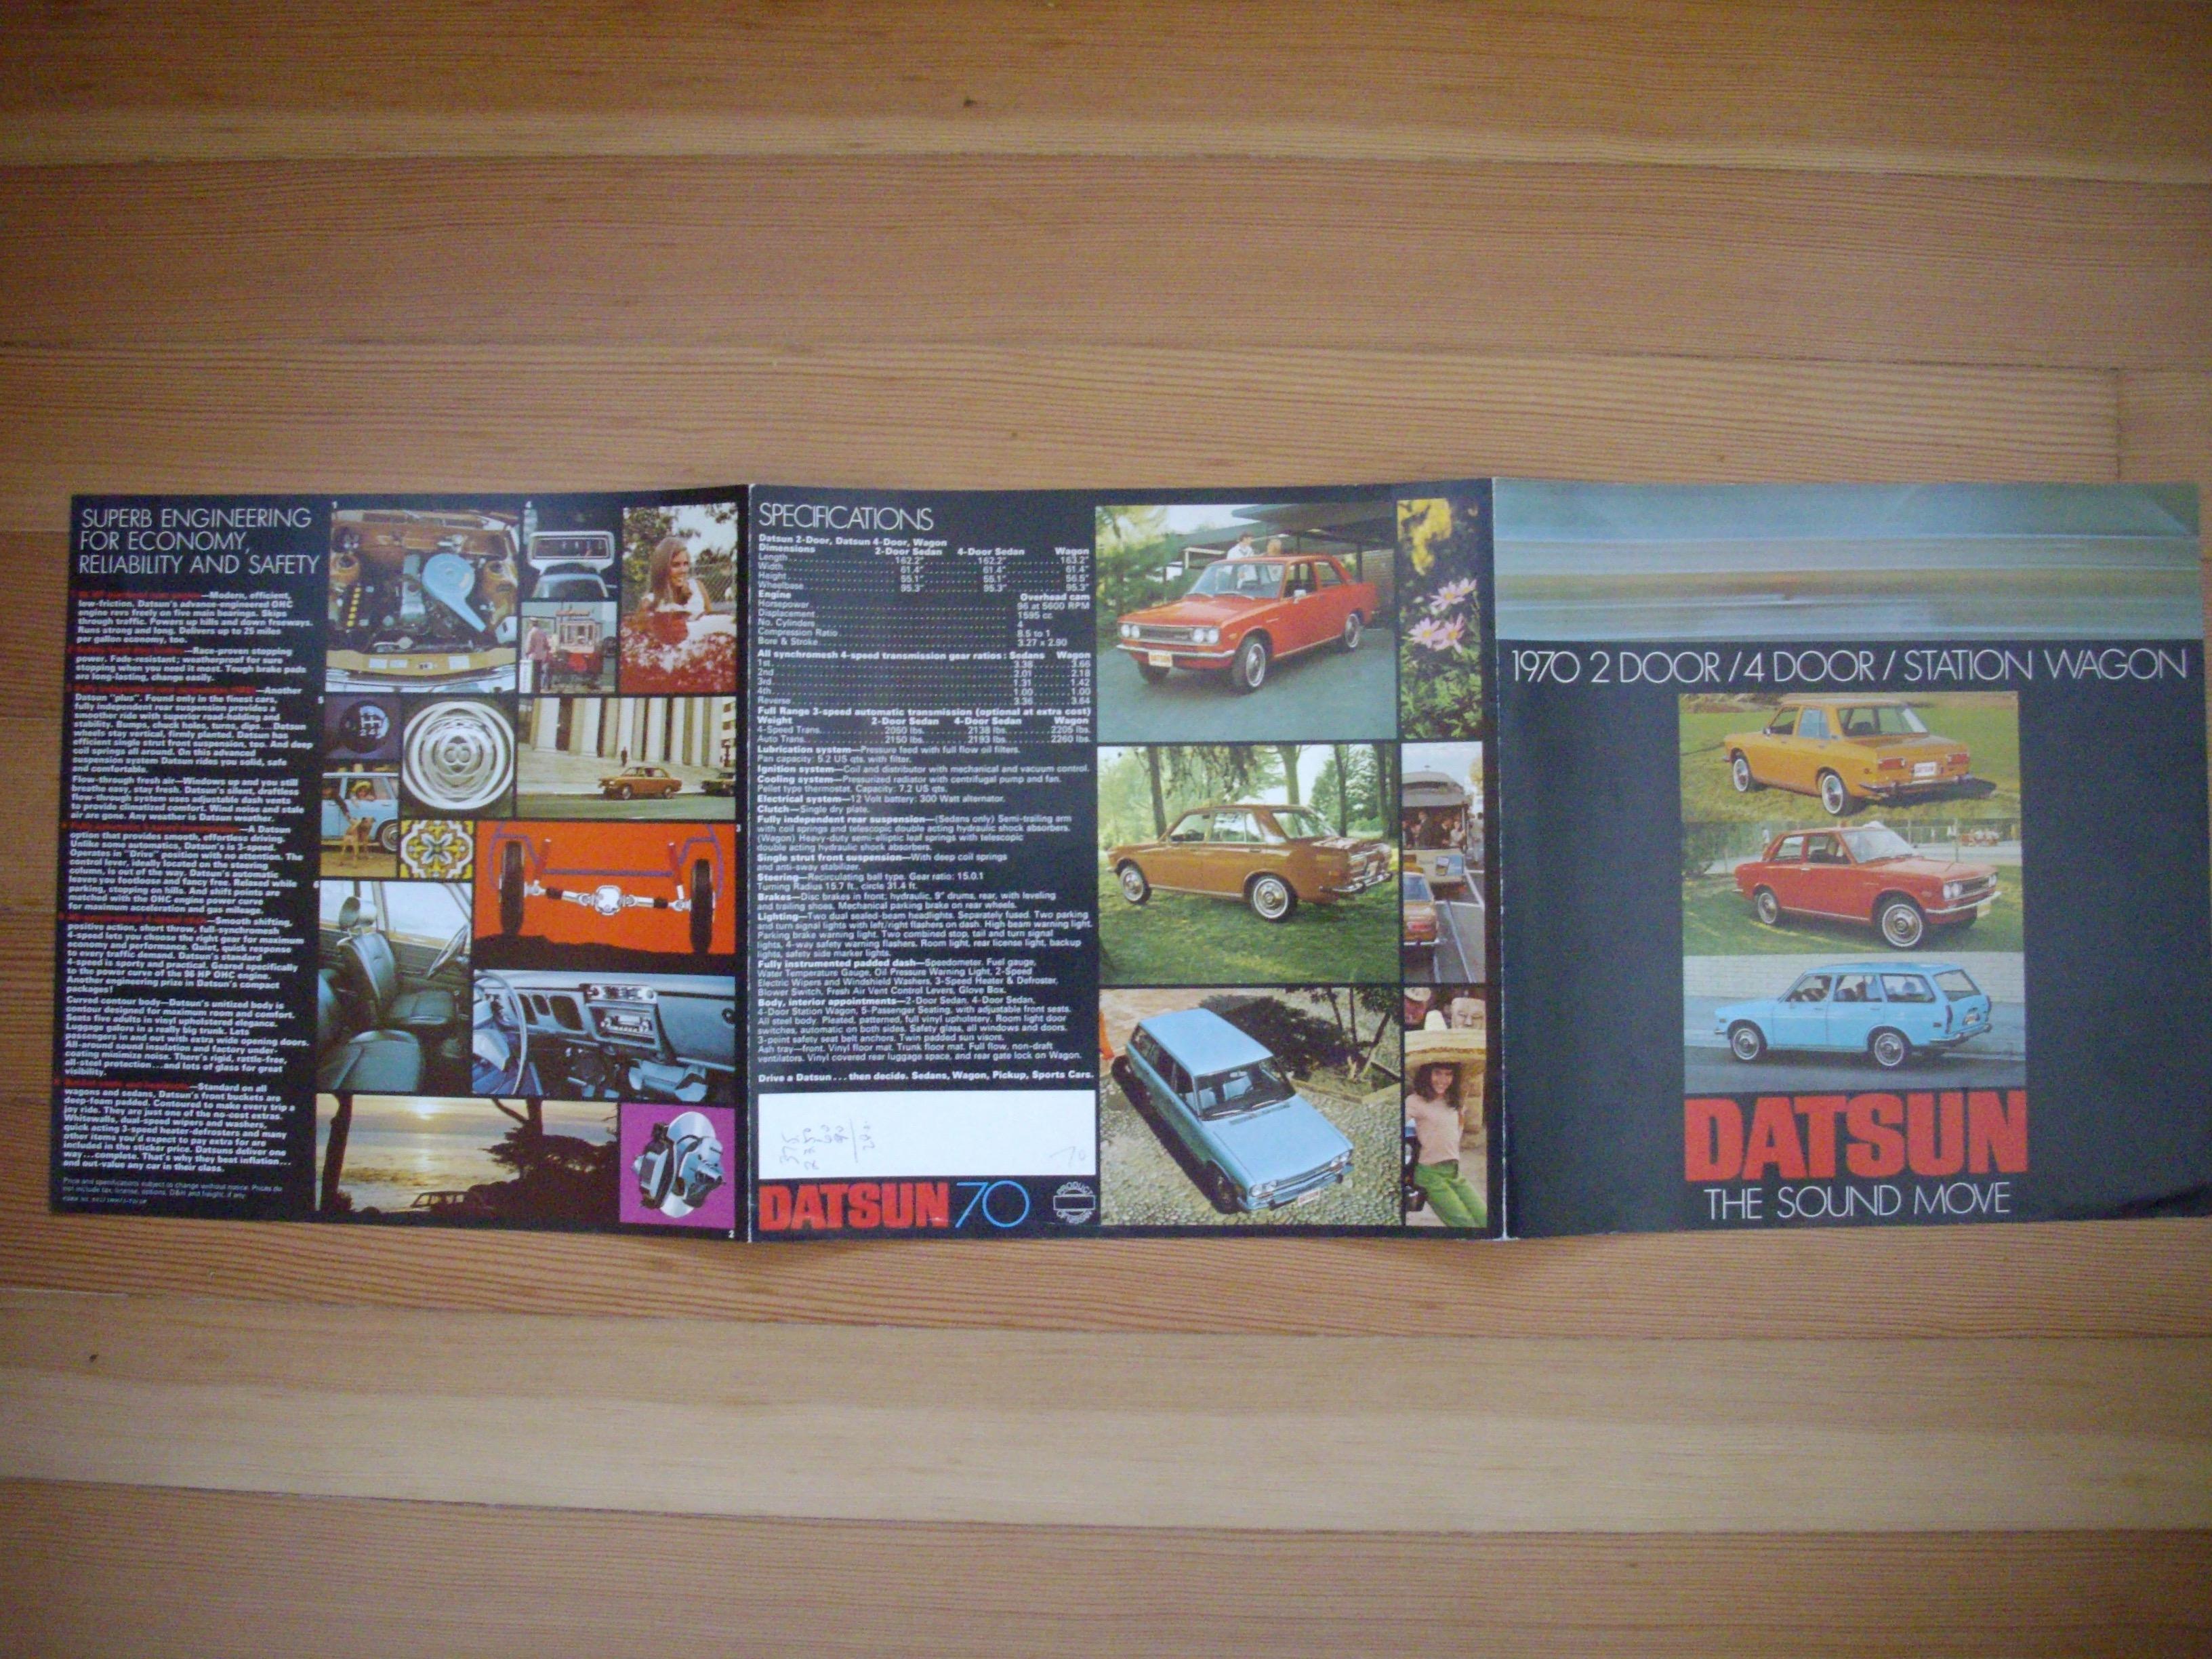
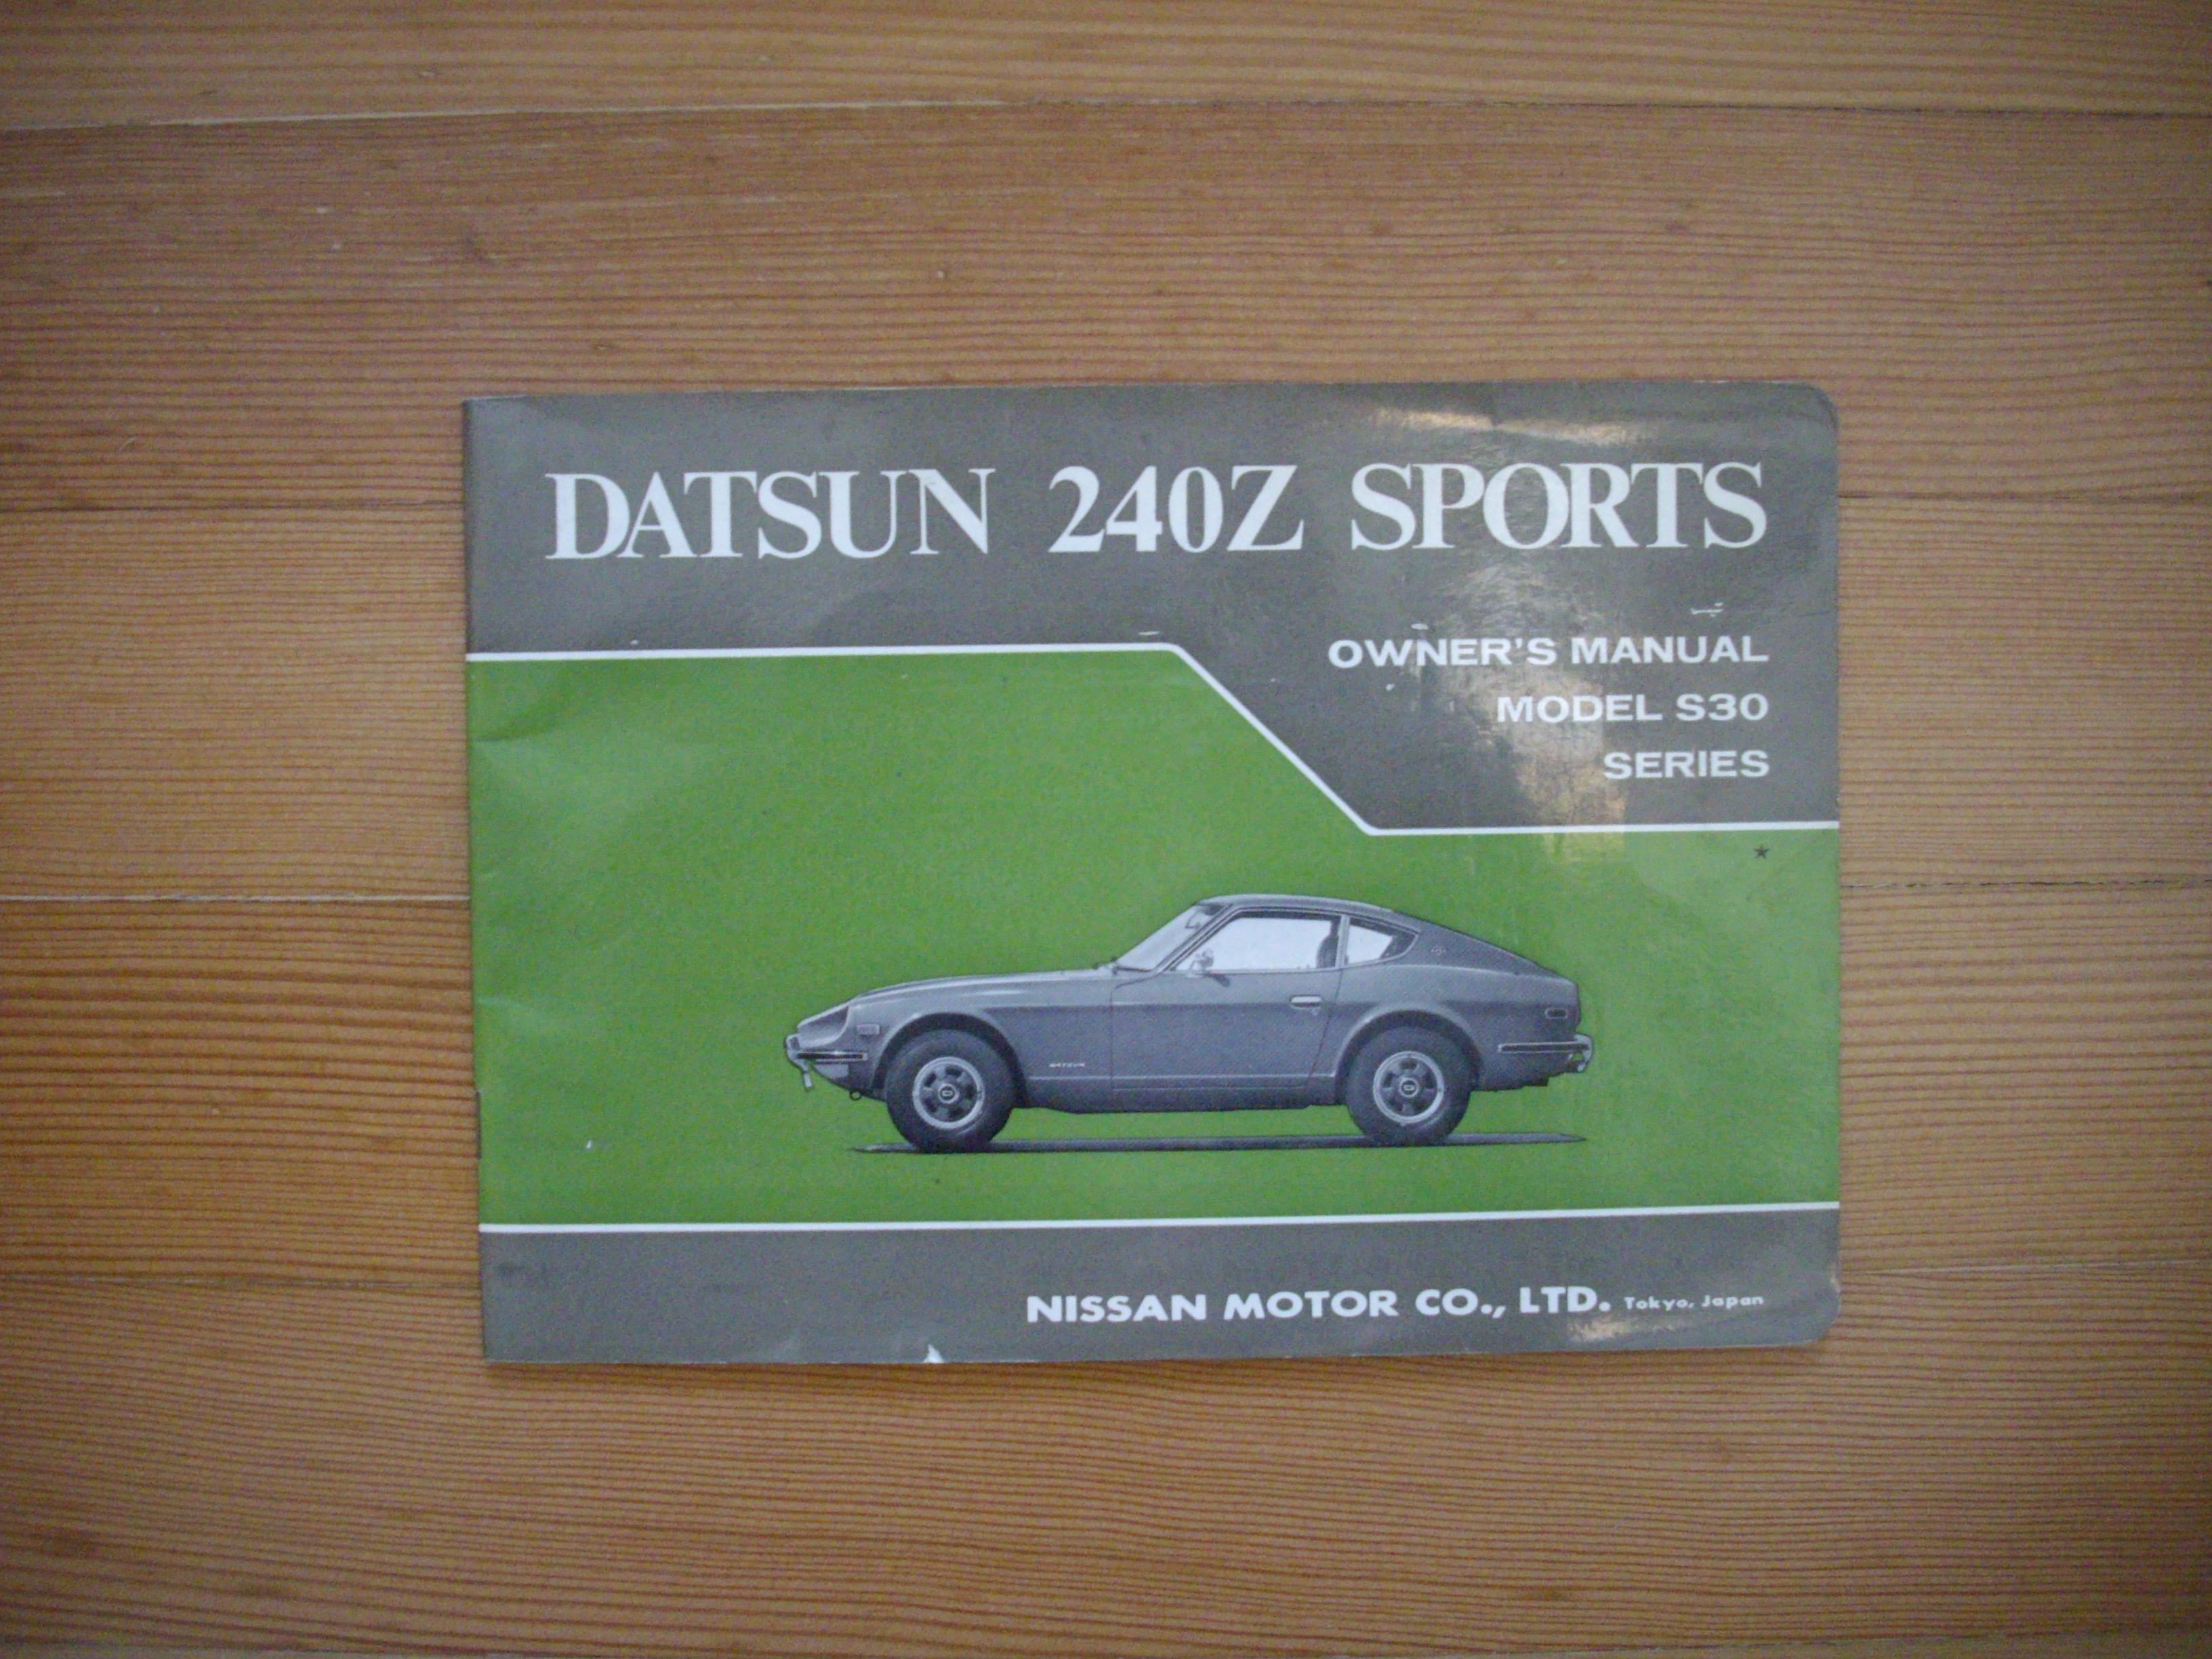
 1 point1 pointBut isn't the Z the most excellent automobile from which to siphon gas? There's hardly another that gives you such quick and trouble-free access! (As a side note - I have to emissions check my 260Z every year here in the Phoenix area. The twits at the emissions station have NO WAY to check my gas cap. I love seeing them take it off, scratch their heads, shrug their shoulders, put it back on, and PASS the gas cap because they can't test it! You have to take joy in life where you can find it...)1 point1 pointUse clear hose. You see it before it gets in your mouth. We had a fuel tank on a trailer for boat gas we could take to a gas station and fill up. Much cheaper than buying it on the river.1 point1 pointSo I was able to do a bit of trading with someone and ended up with a very nice canadian brochure, as well as a May 70 owners manual which will work well or my car. Included was a 510 canadian one as well.


 1 point1 pointReducing lift increases fuel mileage. It takes energy to lift the front and rear of a car and that energy comes from the engine. In a corner at the traction limit an additional 20 lbs. of less lift on the back can be the difference between the exiting the corner under control or having the rear end break loose. Turn 9 at Willow Springs will teach you that. Formula 1 teams spend tens of thousands of dollars to generate an additional 10 lbs. of downforce.1 point


Important Information
By using this site, you agree to our Privacy Policy and Guidelines. We have placed cookies on your device to help make this website better. You can adjust your cookie settings, otherwise we'll assume you're okay to continue.