Leaderboard
-
zKars
 Subscriber
 8Points3,770Posts
 -

siteunseen
Free Member7Points15,115Posts -
Captain Obvious
Free Member7Points10,081Posts -
pakz
Free Member3Points4Posts


Popular Content
Showing content with the highest reputation on 03/06/2020 in all areas
-
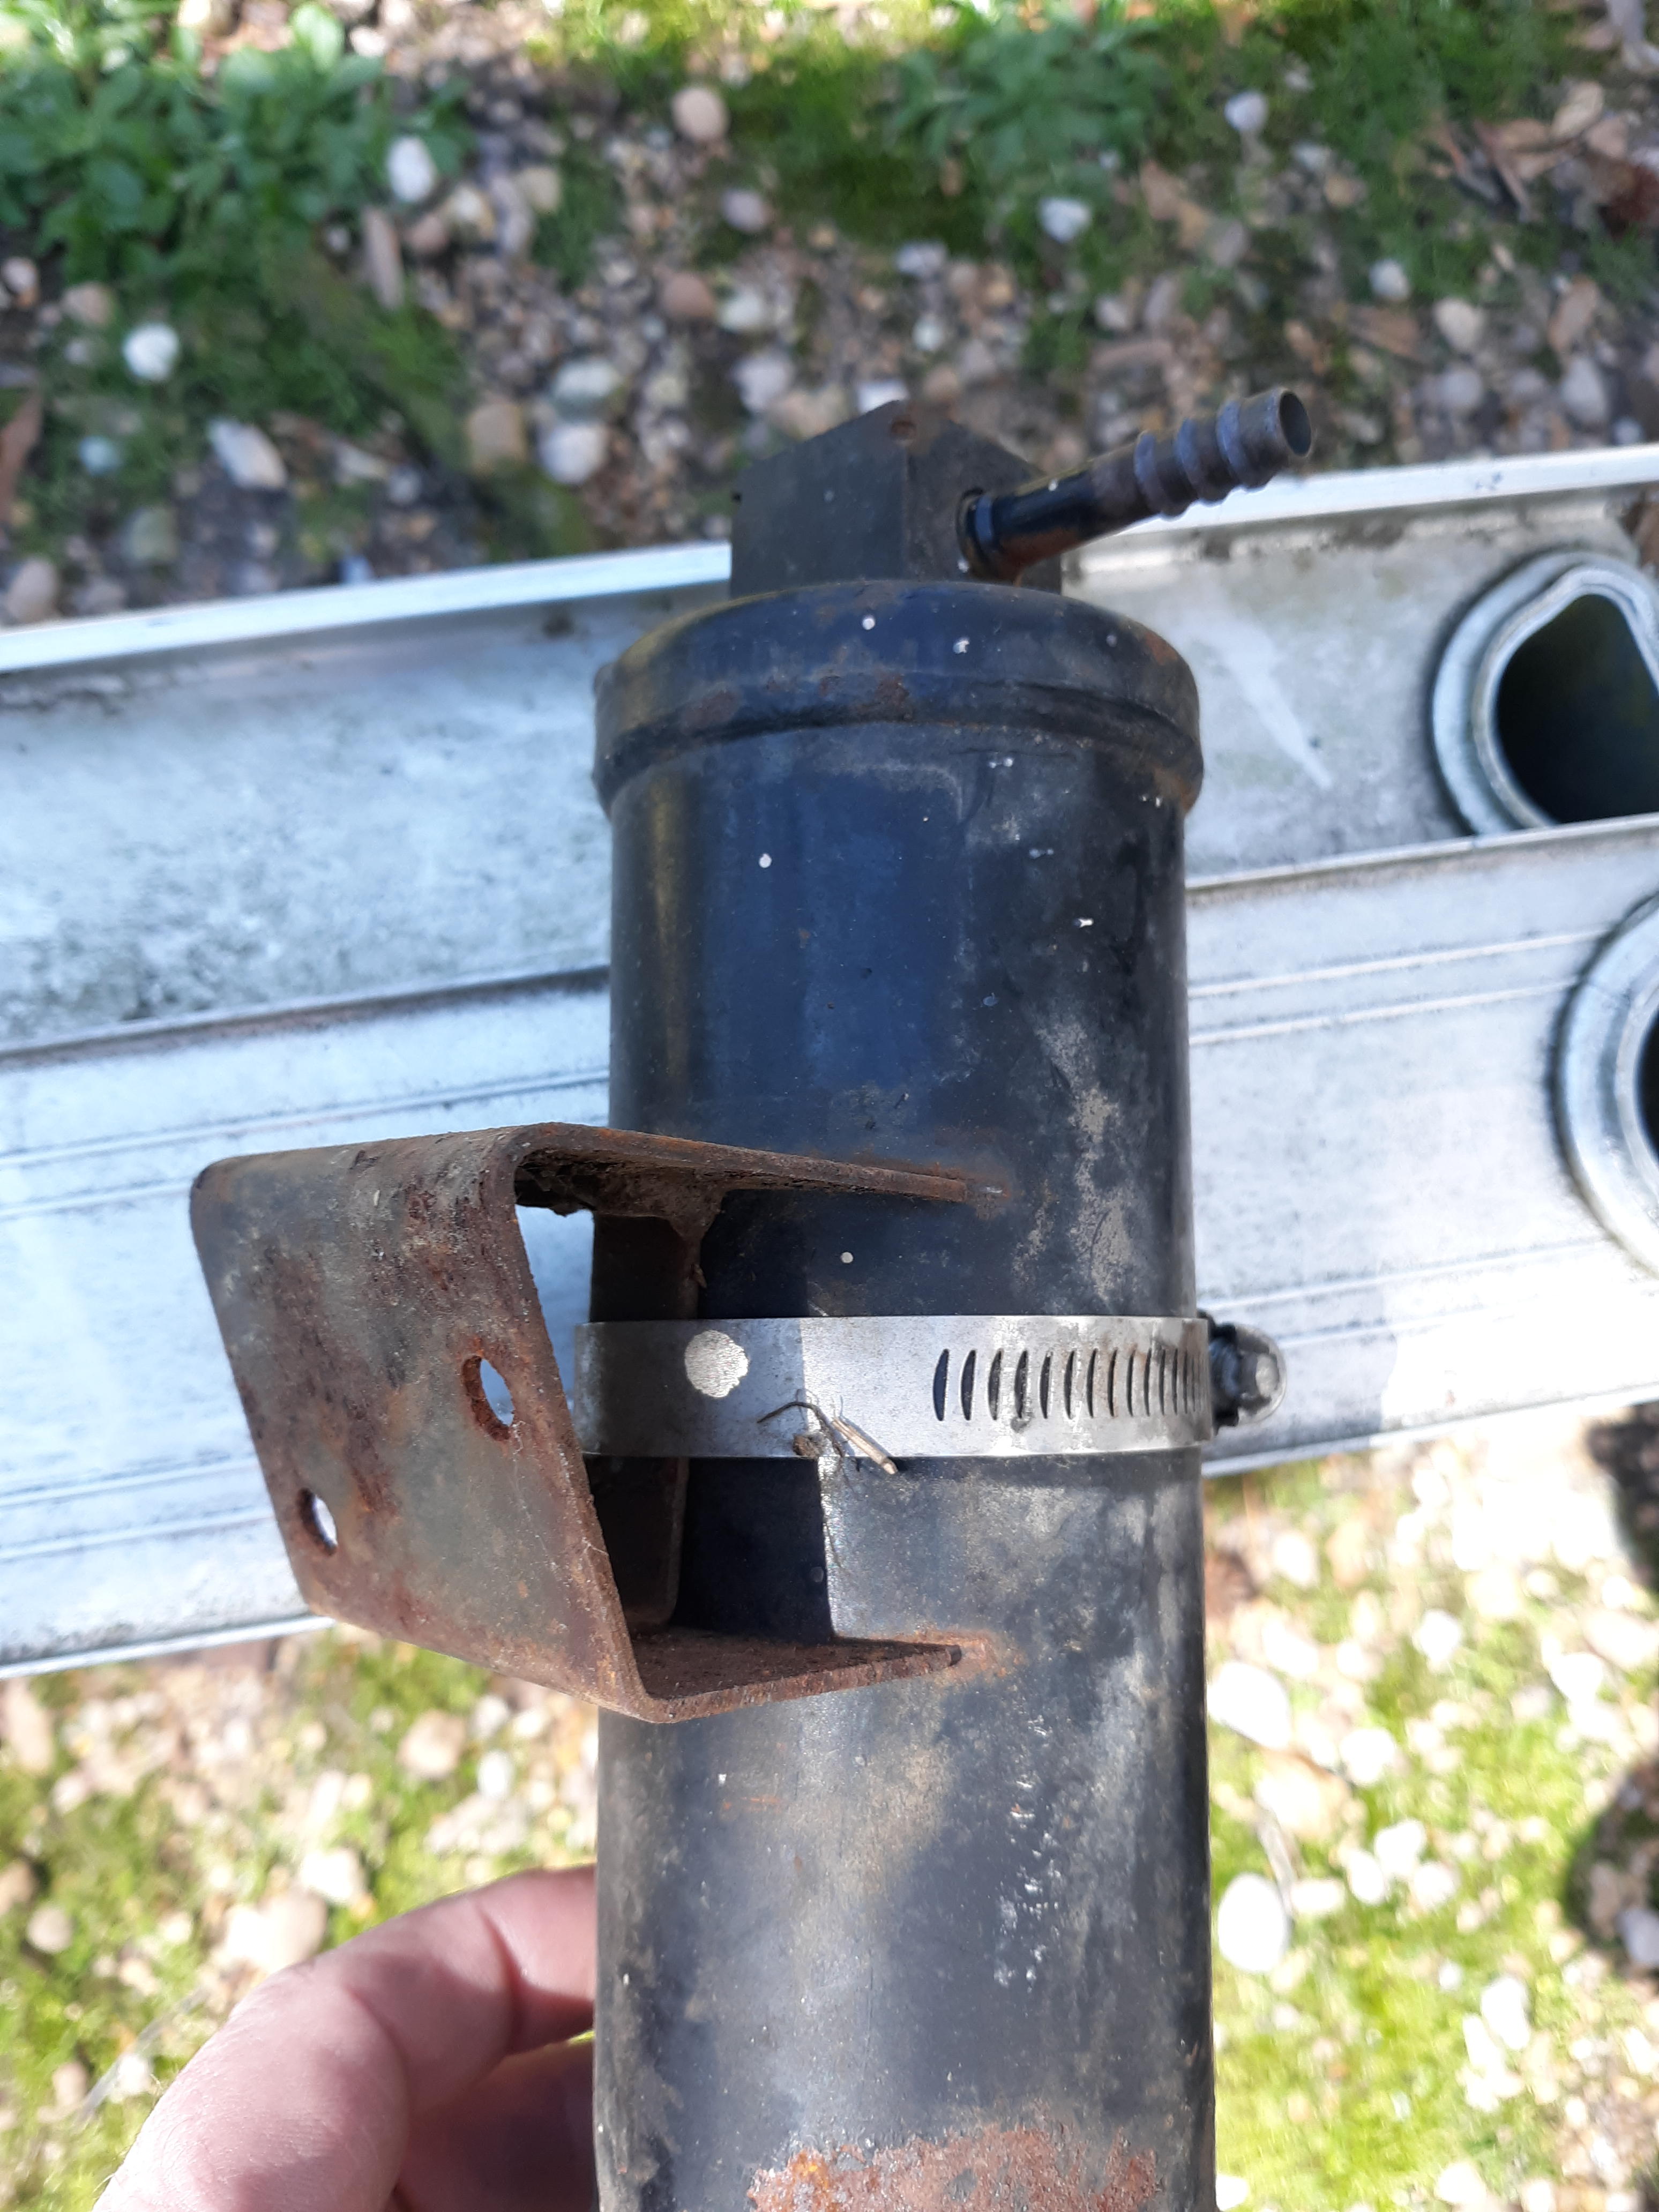
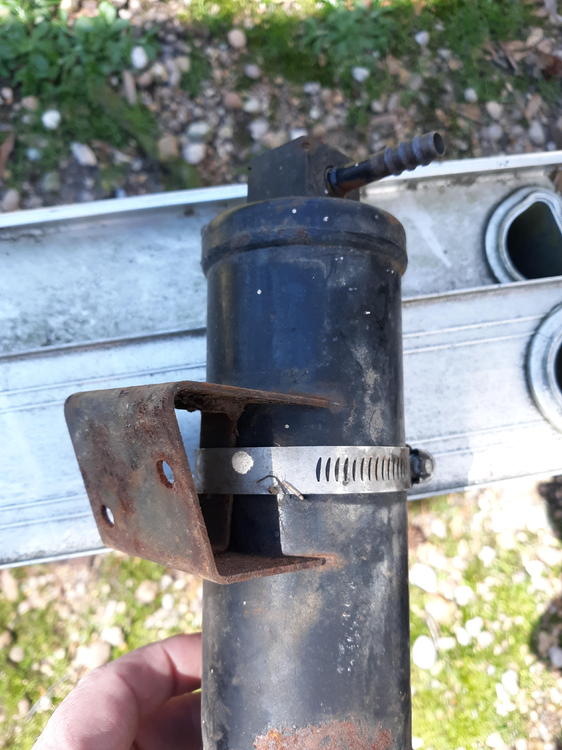
4 pointsHere's what I have. Looks pretty close to me. It's attached to the drier with a worm clamp. I thoght it would be nicer than that but it's the same as your picture. You pay shipping and it's yours. PM your info if you want it. Cliff

 4 points
 -
3 pointsThanks for the info guys. I bought the car around 12 years ago and drove it for a couple years. Have loved these cars since I first saw them. Moved around a bit and let it sit without starting it and then wouldn’t start. Was able to keep it in a garage the whole time and finally have a decent garage of my own to bring it to. Had to work rear passenger wheel with a small mallet and breaker bar to free it and get her to roll. I believe the engine is good but will take the precautions mentioned above. Thanks again siteunseen, zedhead and socal. I’m not too tech savvy but will learn how to navigate this forum. Will post some pics. Interior is pretty solid and odometer is around 56k, not sure if that’s gone around a spin or not but I’ve put very few miles on3 points
-
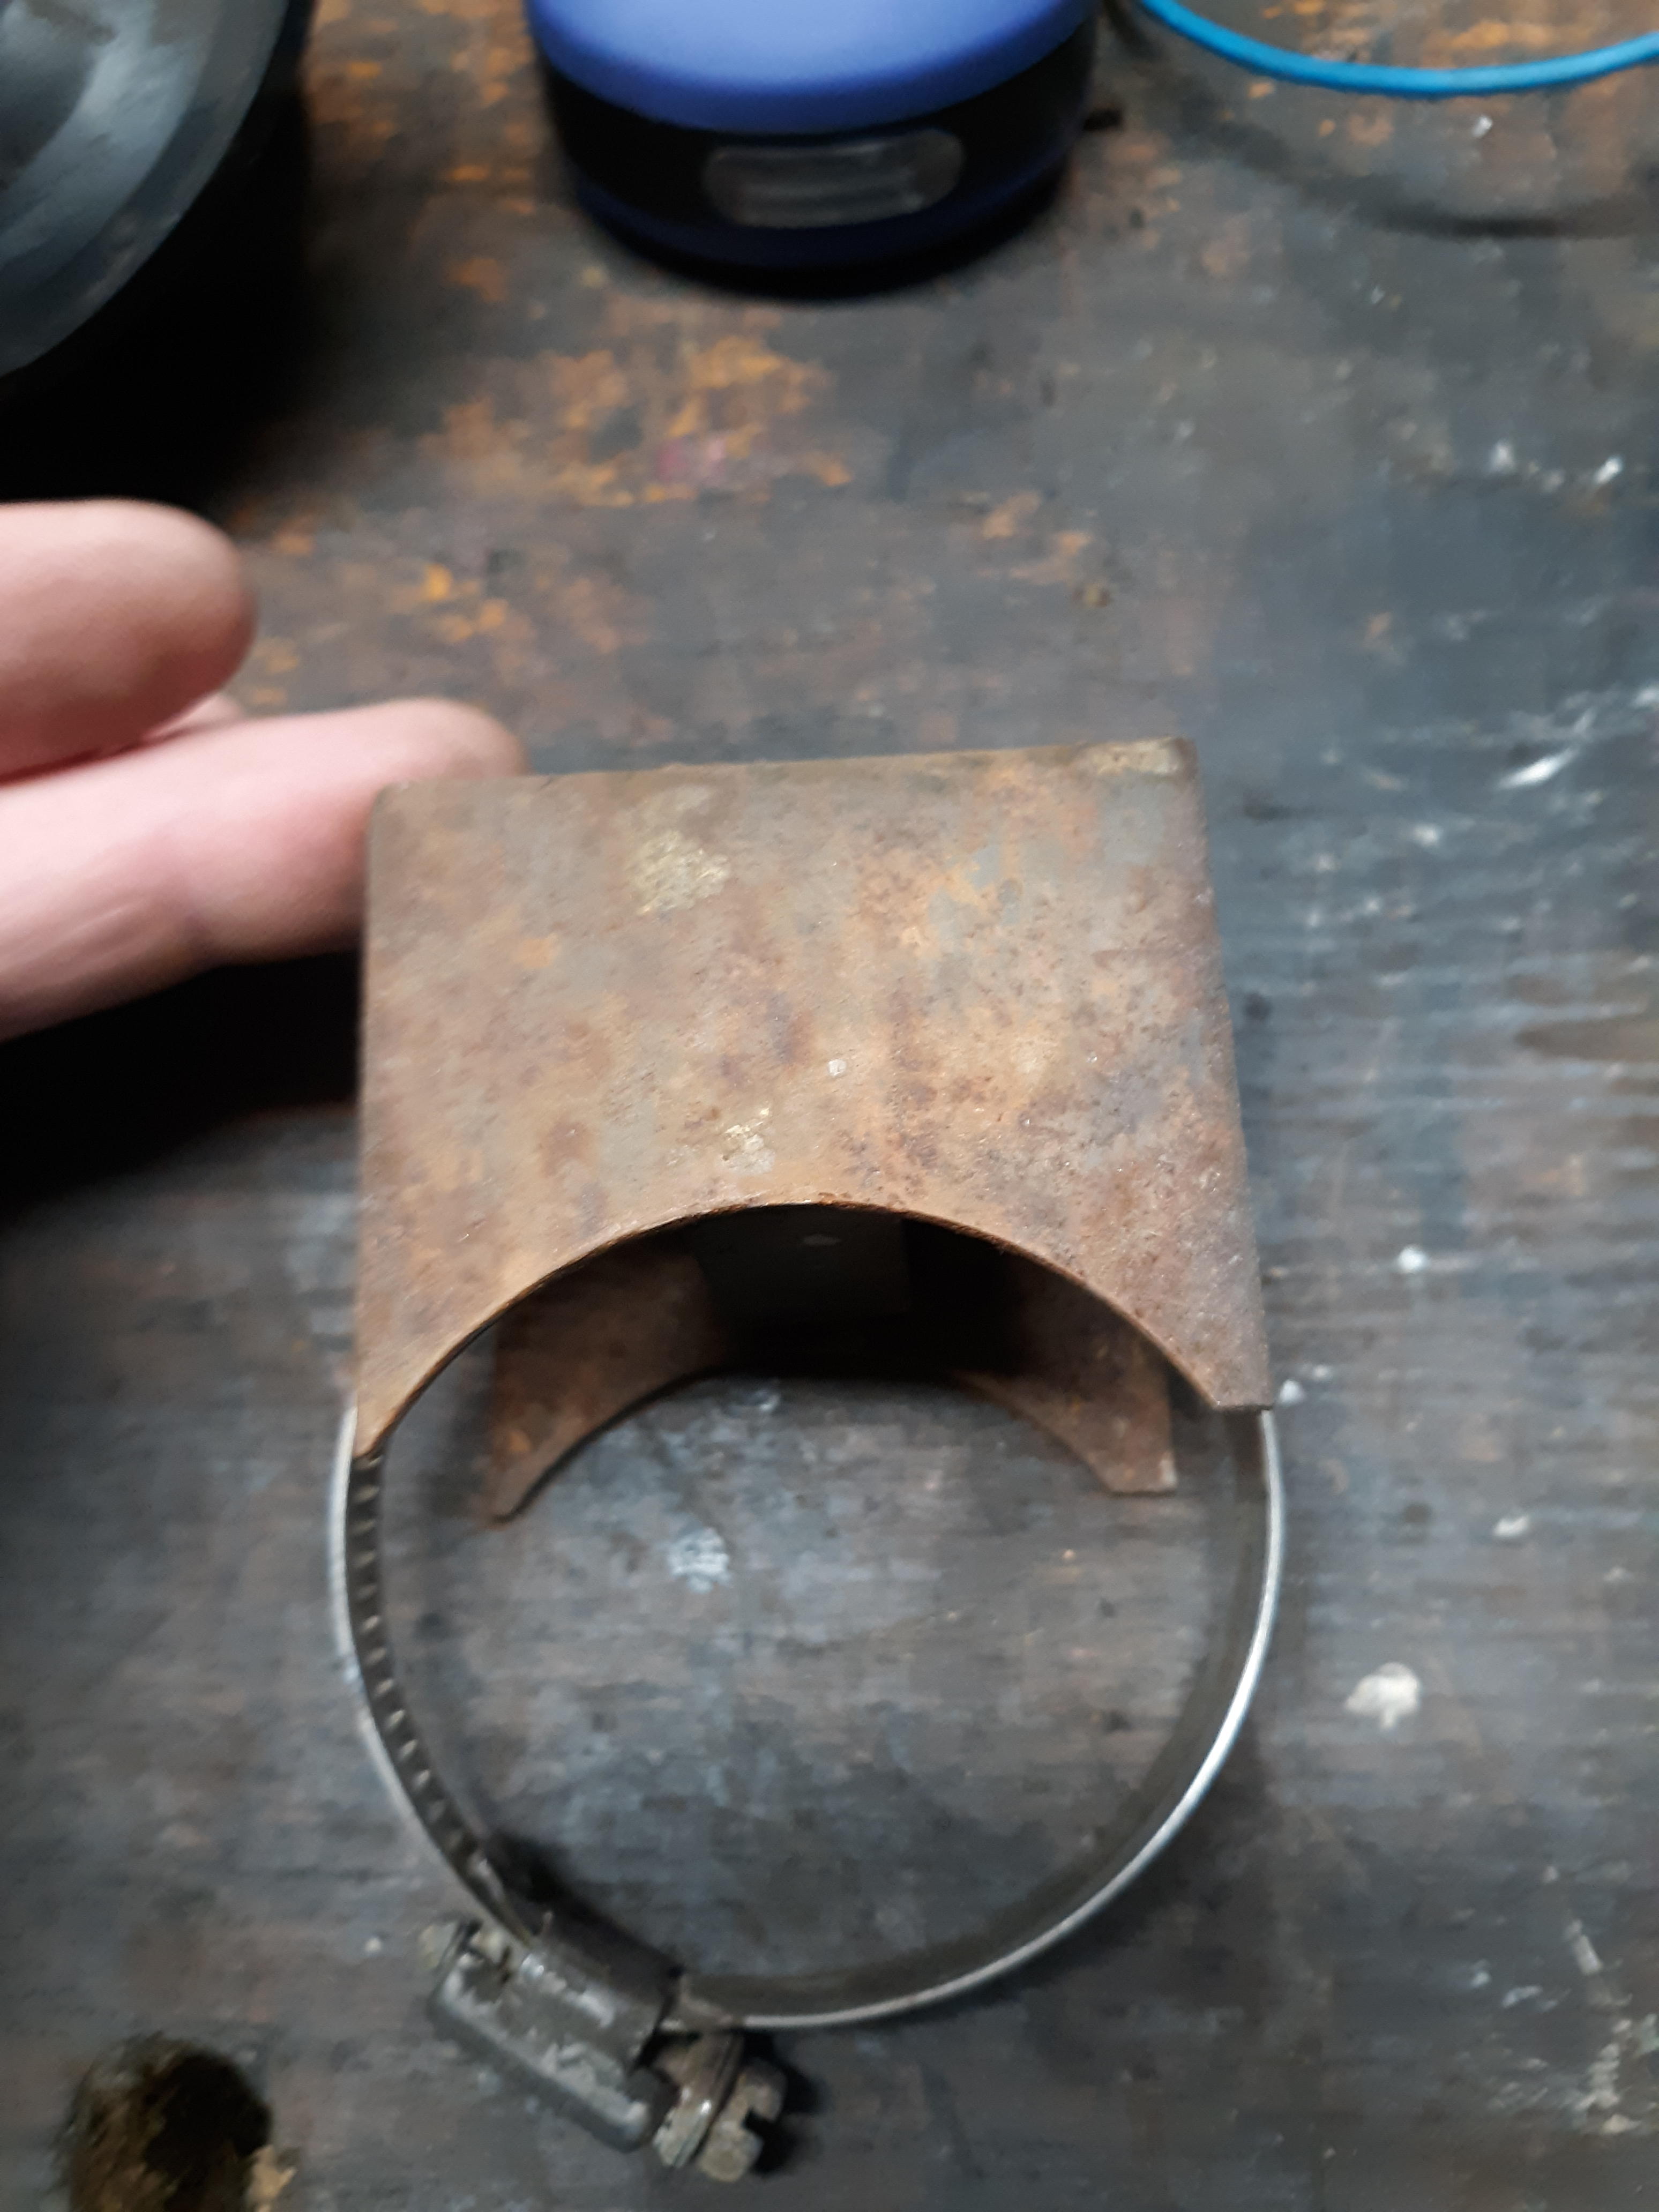
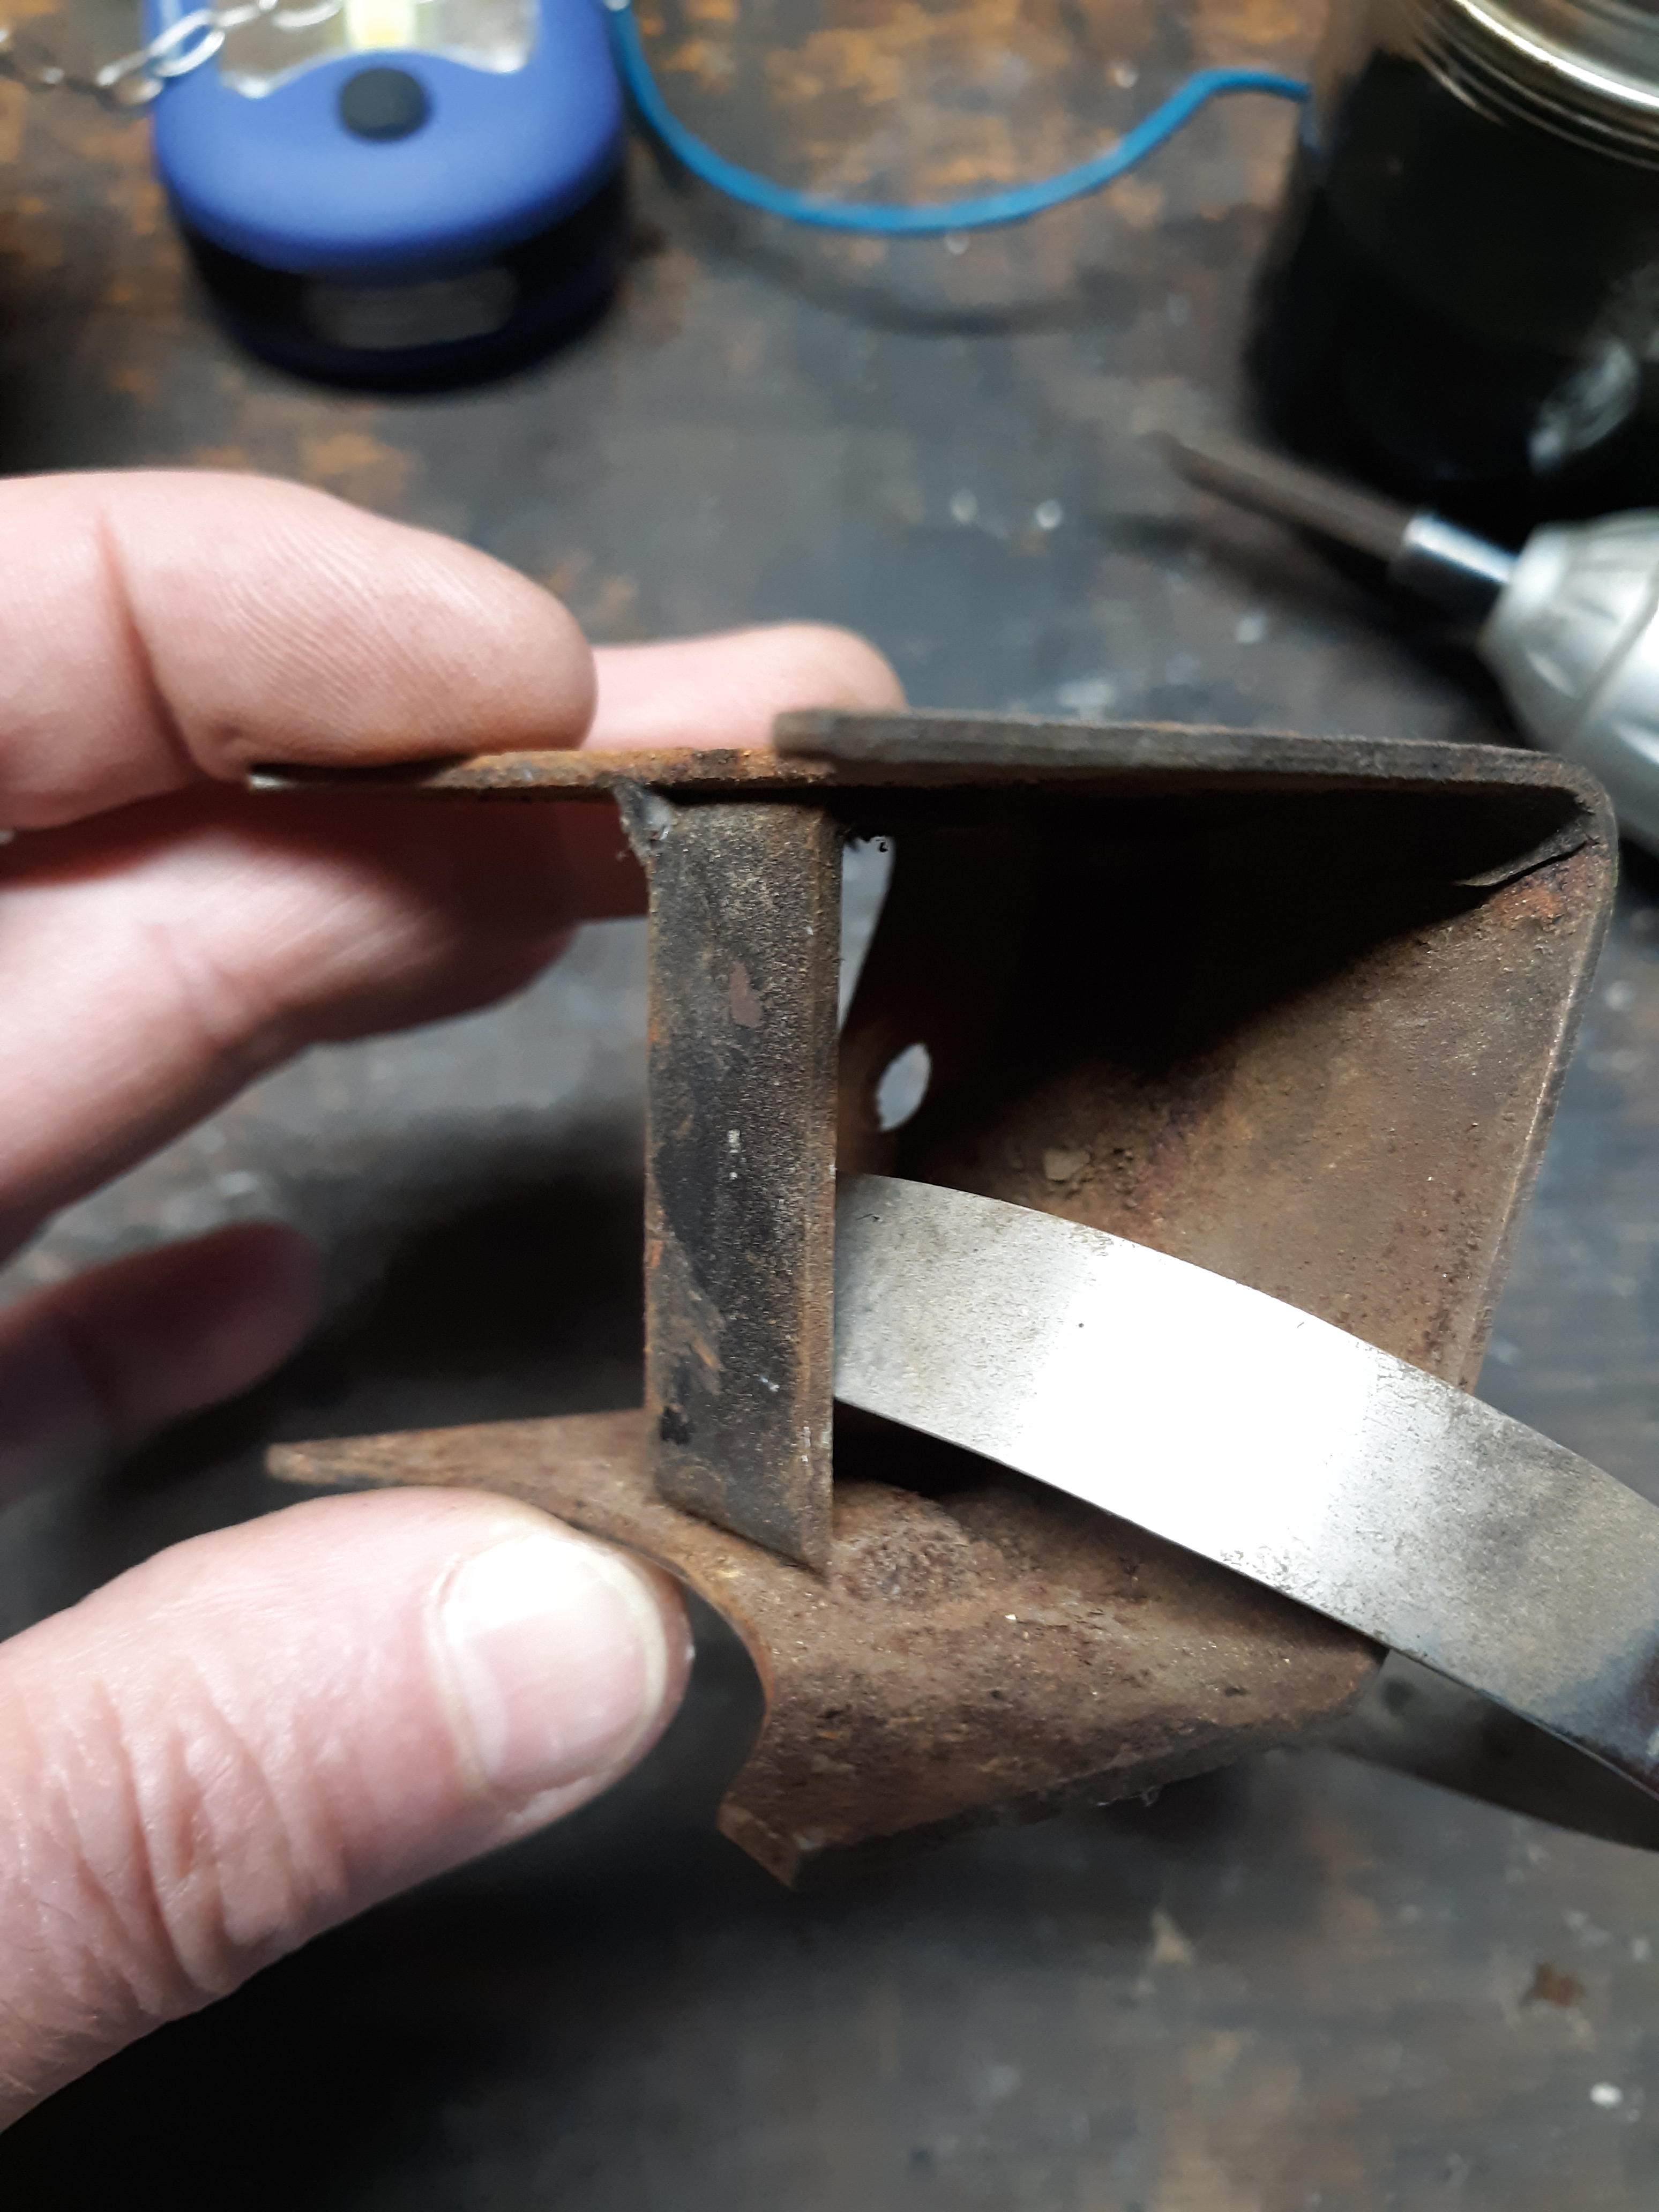
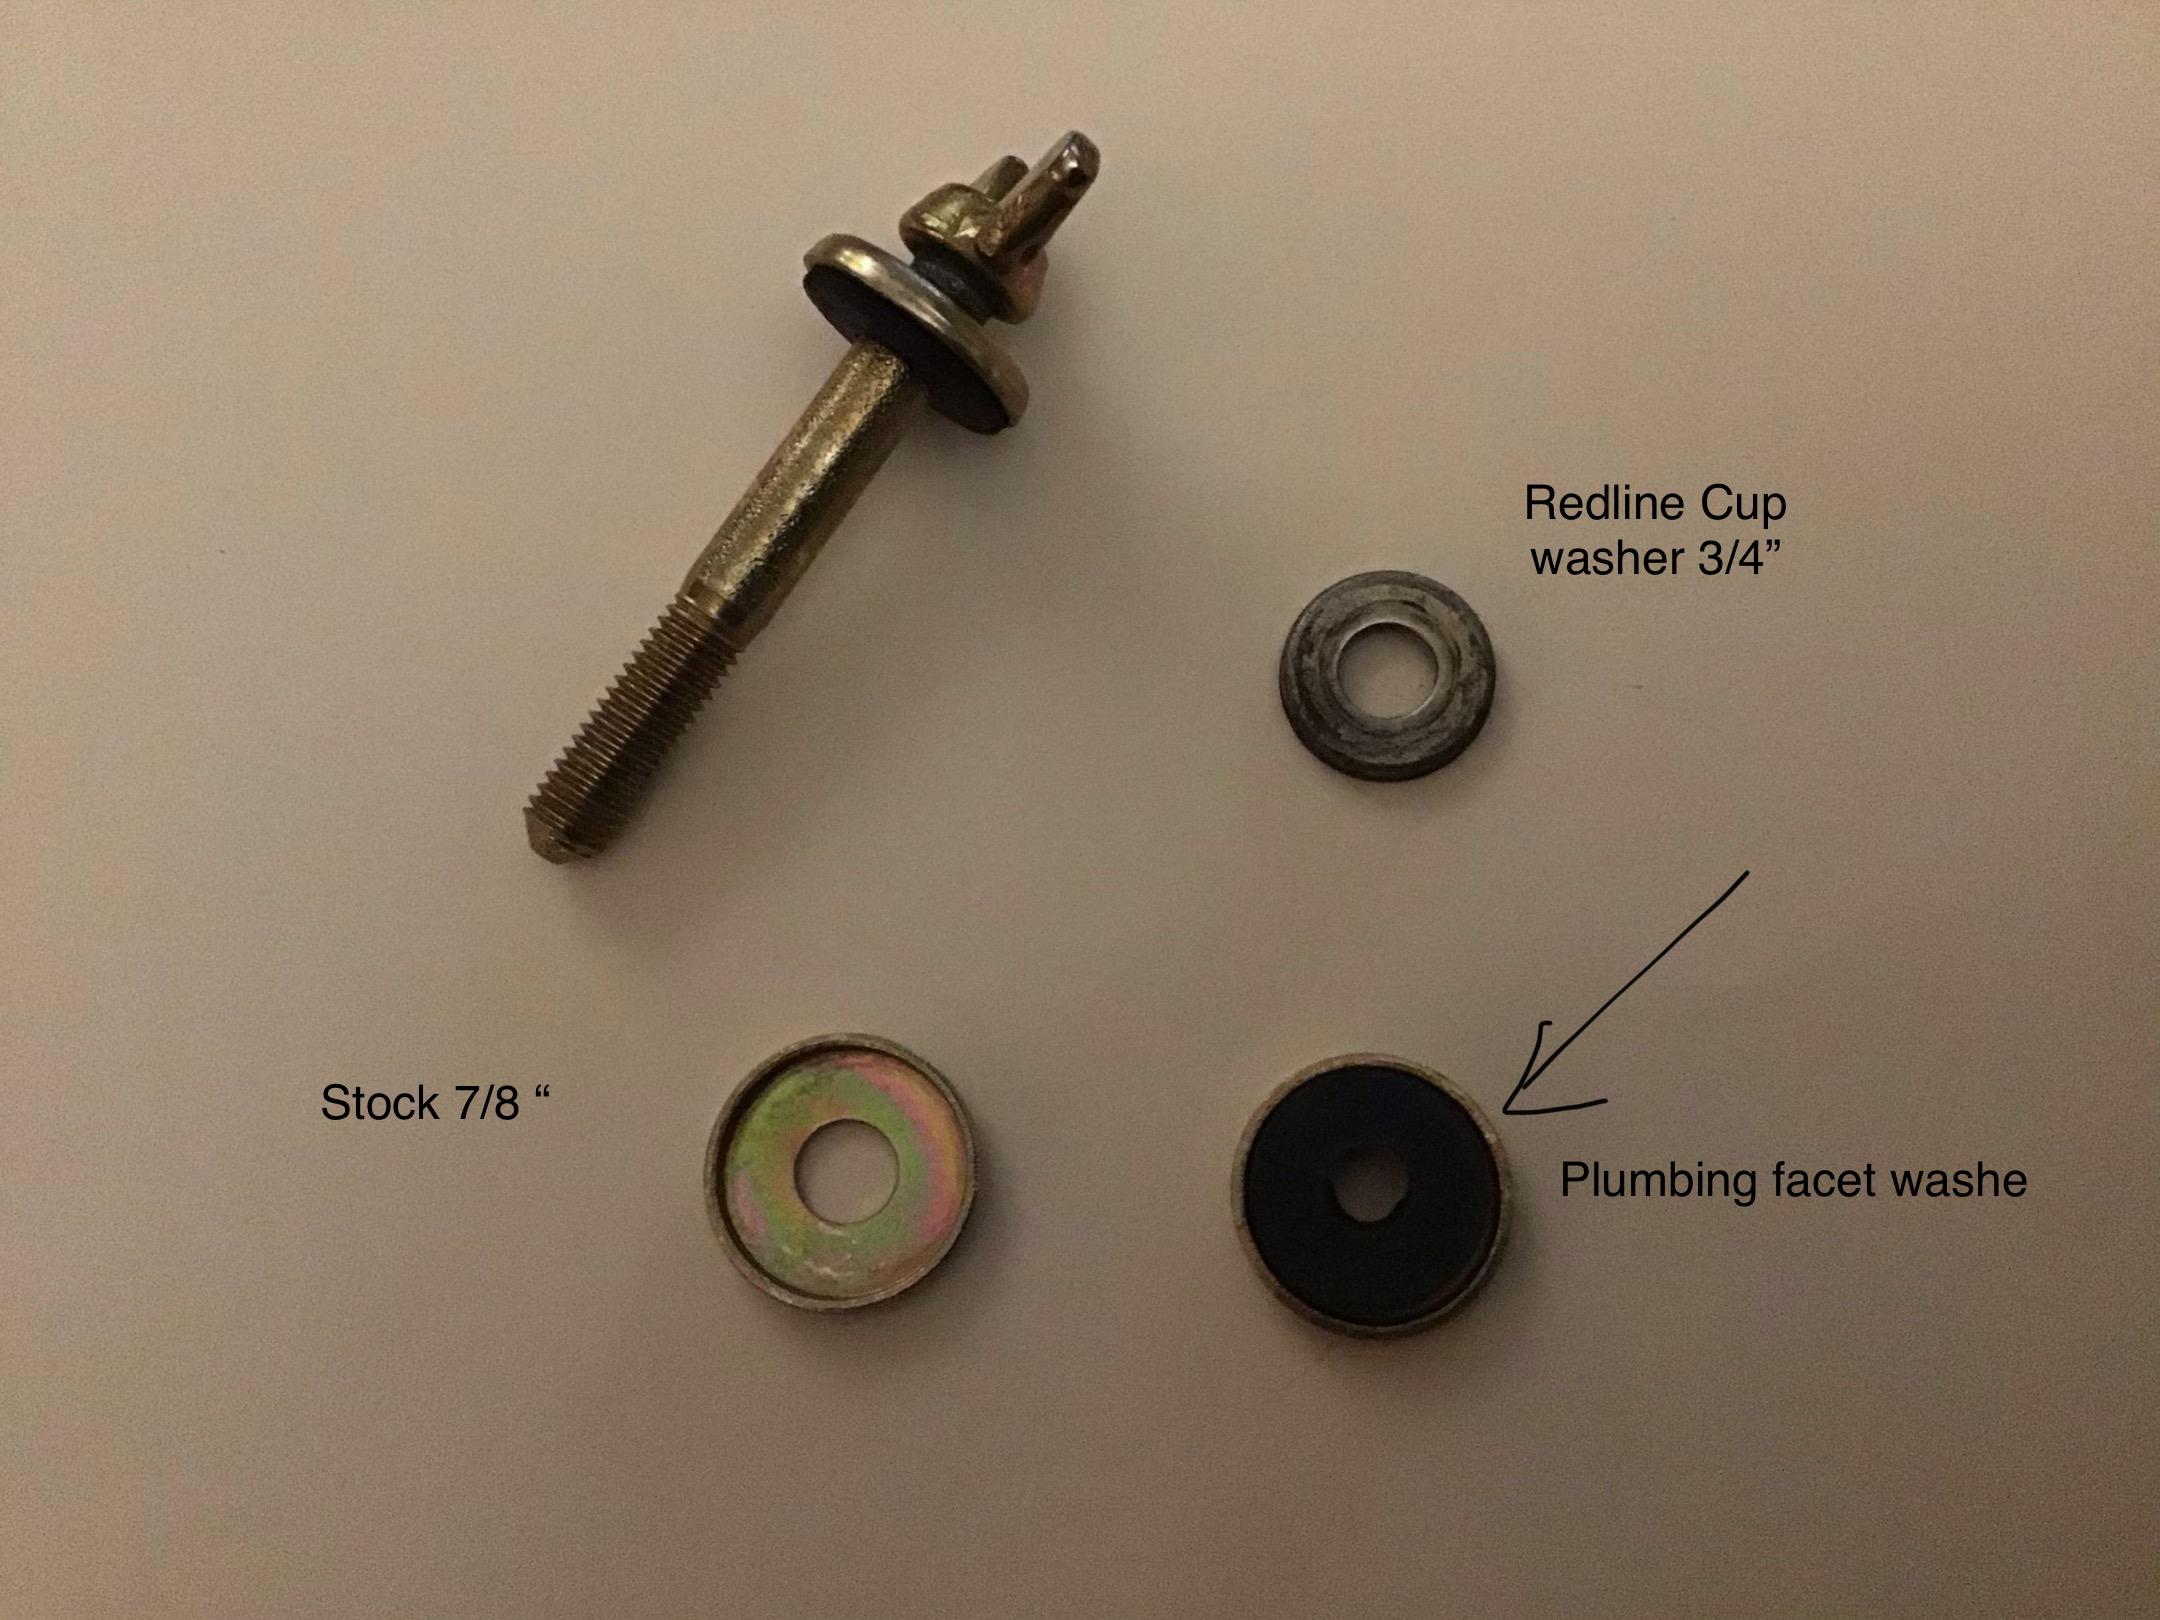
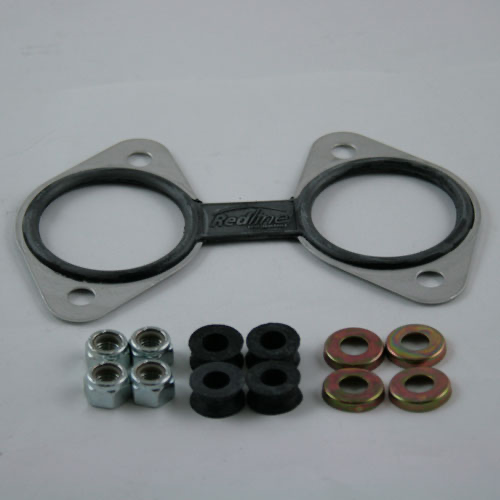
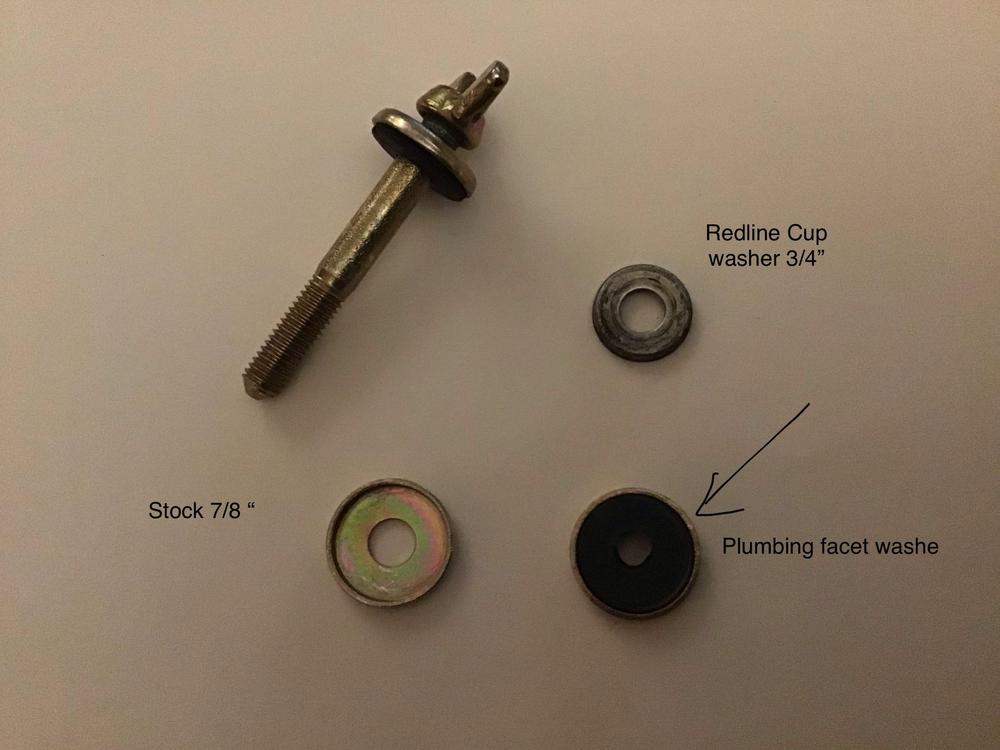
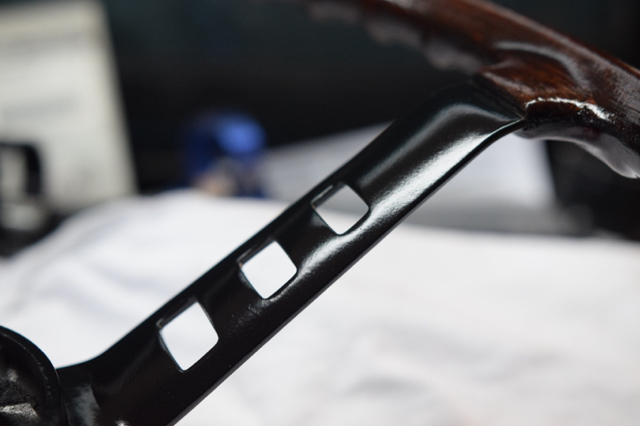
I have a decent little collection of the long wing bolts and the mating long “nuts” they thread into, but the one part of this assembly that I am lacking in is the little cup washer with the rubber grommet underneath. Been hunting for a replacement in the generic hardware world and have come up virtually empty handed. About the only thing close is from RedLine Performance in Auzzie land. Many of you may have touched these over the years if you’ve done side draft carb installations. Redline 52-110K Those cup washers lower right are perfect, well, they are 3/4” diameter while the real ones are 7/8”. There is one in the first picture top right. I contacted Red line and they do sell the cup washers separately, in fact they make them in-house! The Sku is 52-571B $2.58 I even asked them to please make them 7/8” See what they say. I had previously found a plumbing washer that duplicates the rubber washer in the stock cup washer so that part is easy. Now this leads to three things. First, everyone go search the interweb and see if YOU can find a supplier of cup washers. Second, Caption Obvious, machine me up a die to press flat 1” washers into lovely 7/8” cup washers! Simple. Third: You hoarders with a thousand of these already, contact me. I need a dozen.....
 2 points
 -
2 points
-
2 points
-
Haha! Ok, I think I have enough "stuff" laying around the shop that I can at least mock something up quickly and show you what I'm thinking of. And as for the heat treating, it's not quite like that. First - Make sure you know what type of steel you're working with. Not all steels have a composition that will react favorably to a heat treatment process, and even the ones that do, will have a different process depending on the composition. For example, above, you referenced an oil quench... Well that works great for "oil hardening steels", but not so good for "air hardening" or "water hardening". The three most common ubiquitous categories available everywhere are Oil, Water, and Air hardening varieties. I've got a bunch of "O1" (Oil hardening) laying around here and that's what I would use, but it's probably not the best choice for a die like that either. Would be OK, but not great. However, you've got no idea what you've got laying around, so I would just skip the heat treat process completely unless you're sure what you're working with or just want to experiment and see what happens. Second - The temperature you described above is not high enough. Needs to be full cherry red. One simple way to determine if you're hot enough is to use a magnet. The steel will actually lose it's magnetic characteristic when it's hot enough. It will be glowing red and it won't be magnetic. Then quench (using the appropriate method). Third - If the heat treat was successful, the part will be hard. Like real hard. Glass hard. File skates across the surface hard. Problem now is that the part is TOO hard. Too brittle. So you need to "temper" the part to draw back the hardness some. For that you re-heat the part but not as hot. "Straw color" is a term thrown around a lot. Heat the part "to straw color" and then let it cool slowly. After that, the part won't be hard brittle anymore and won't shatter like glass when you put in the press to make your washers. And don't forget that all the while, the glowing part has been oxidizing on the surface and by the time you grind the scale off, what's left is now the wrong size....... So you add to your long bucket list of projects, an argon purged heat treat furnace......... I would skip the heat treat and just make a new set of dies when the first one wears out.2 points
-
Sure, but I’d like you to show me how, not so much do it for me. I really need to stop getting distracted with fun little projects like this and get the next 510 in the shop and finish it’s resurrection. Heat treating. Heat until yellow, then plunge in oil right? Then call 911. I’ve been watching those knife maker shows....2 points
-
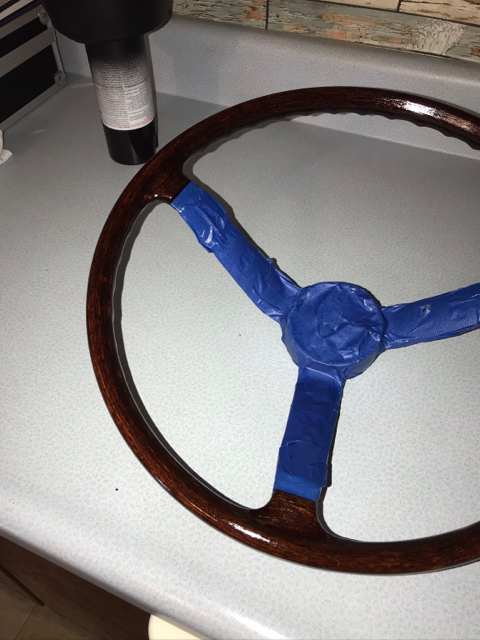
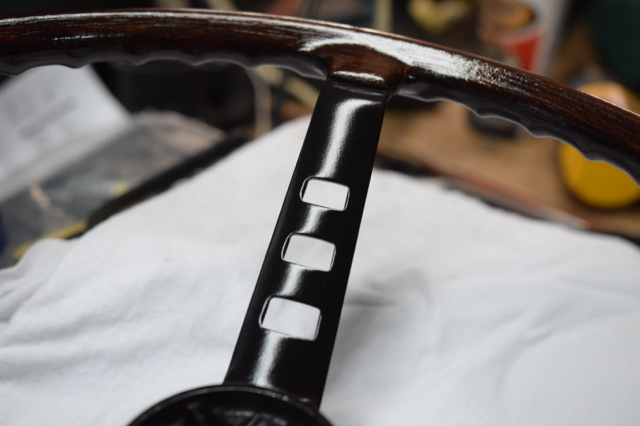
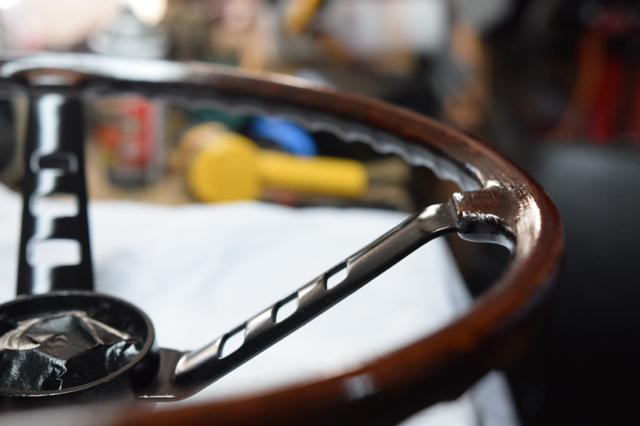
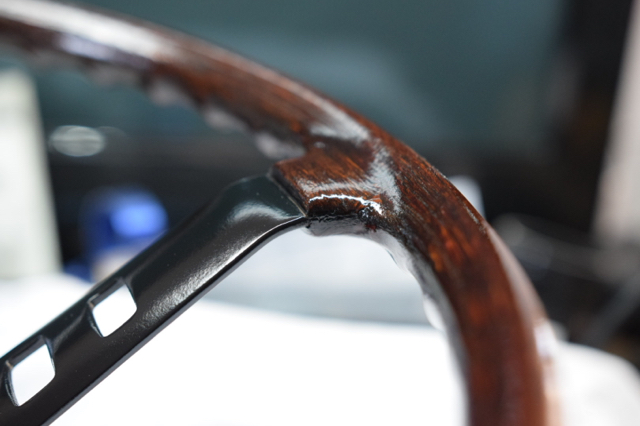
2 pointsPretty same process so many other have done 1st - Green Scotch‑Brite Scrub till you don’t see the nasty brown soapy water. 2nd - Stained Red oak 2 coats. Minwax 70040444 Wood Finish Penetrating Stain. 2 light coats and waited 2 days before adding Varnish. 3rd - spar varnish spray - 4 coats maybe 5 Minwax 33250000 Helmsman Spar Urethane Aerosol, 11.5 ounce, Gloss Waited 3 days for it to cure before moving to the center section. 4 - Black semi gloss 3 coats Let it sit a day before removing tape and tee shirt protecting the varnish. Sent from my iPad using Classic Zcar Club mobile
 2 points
 -
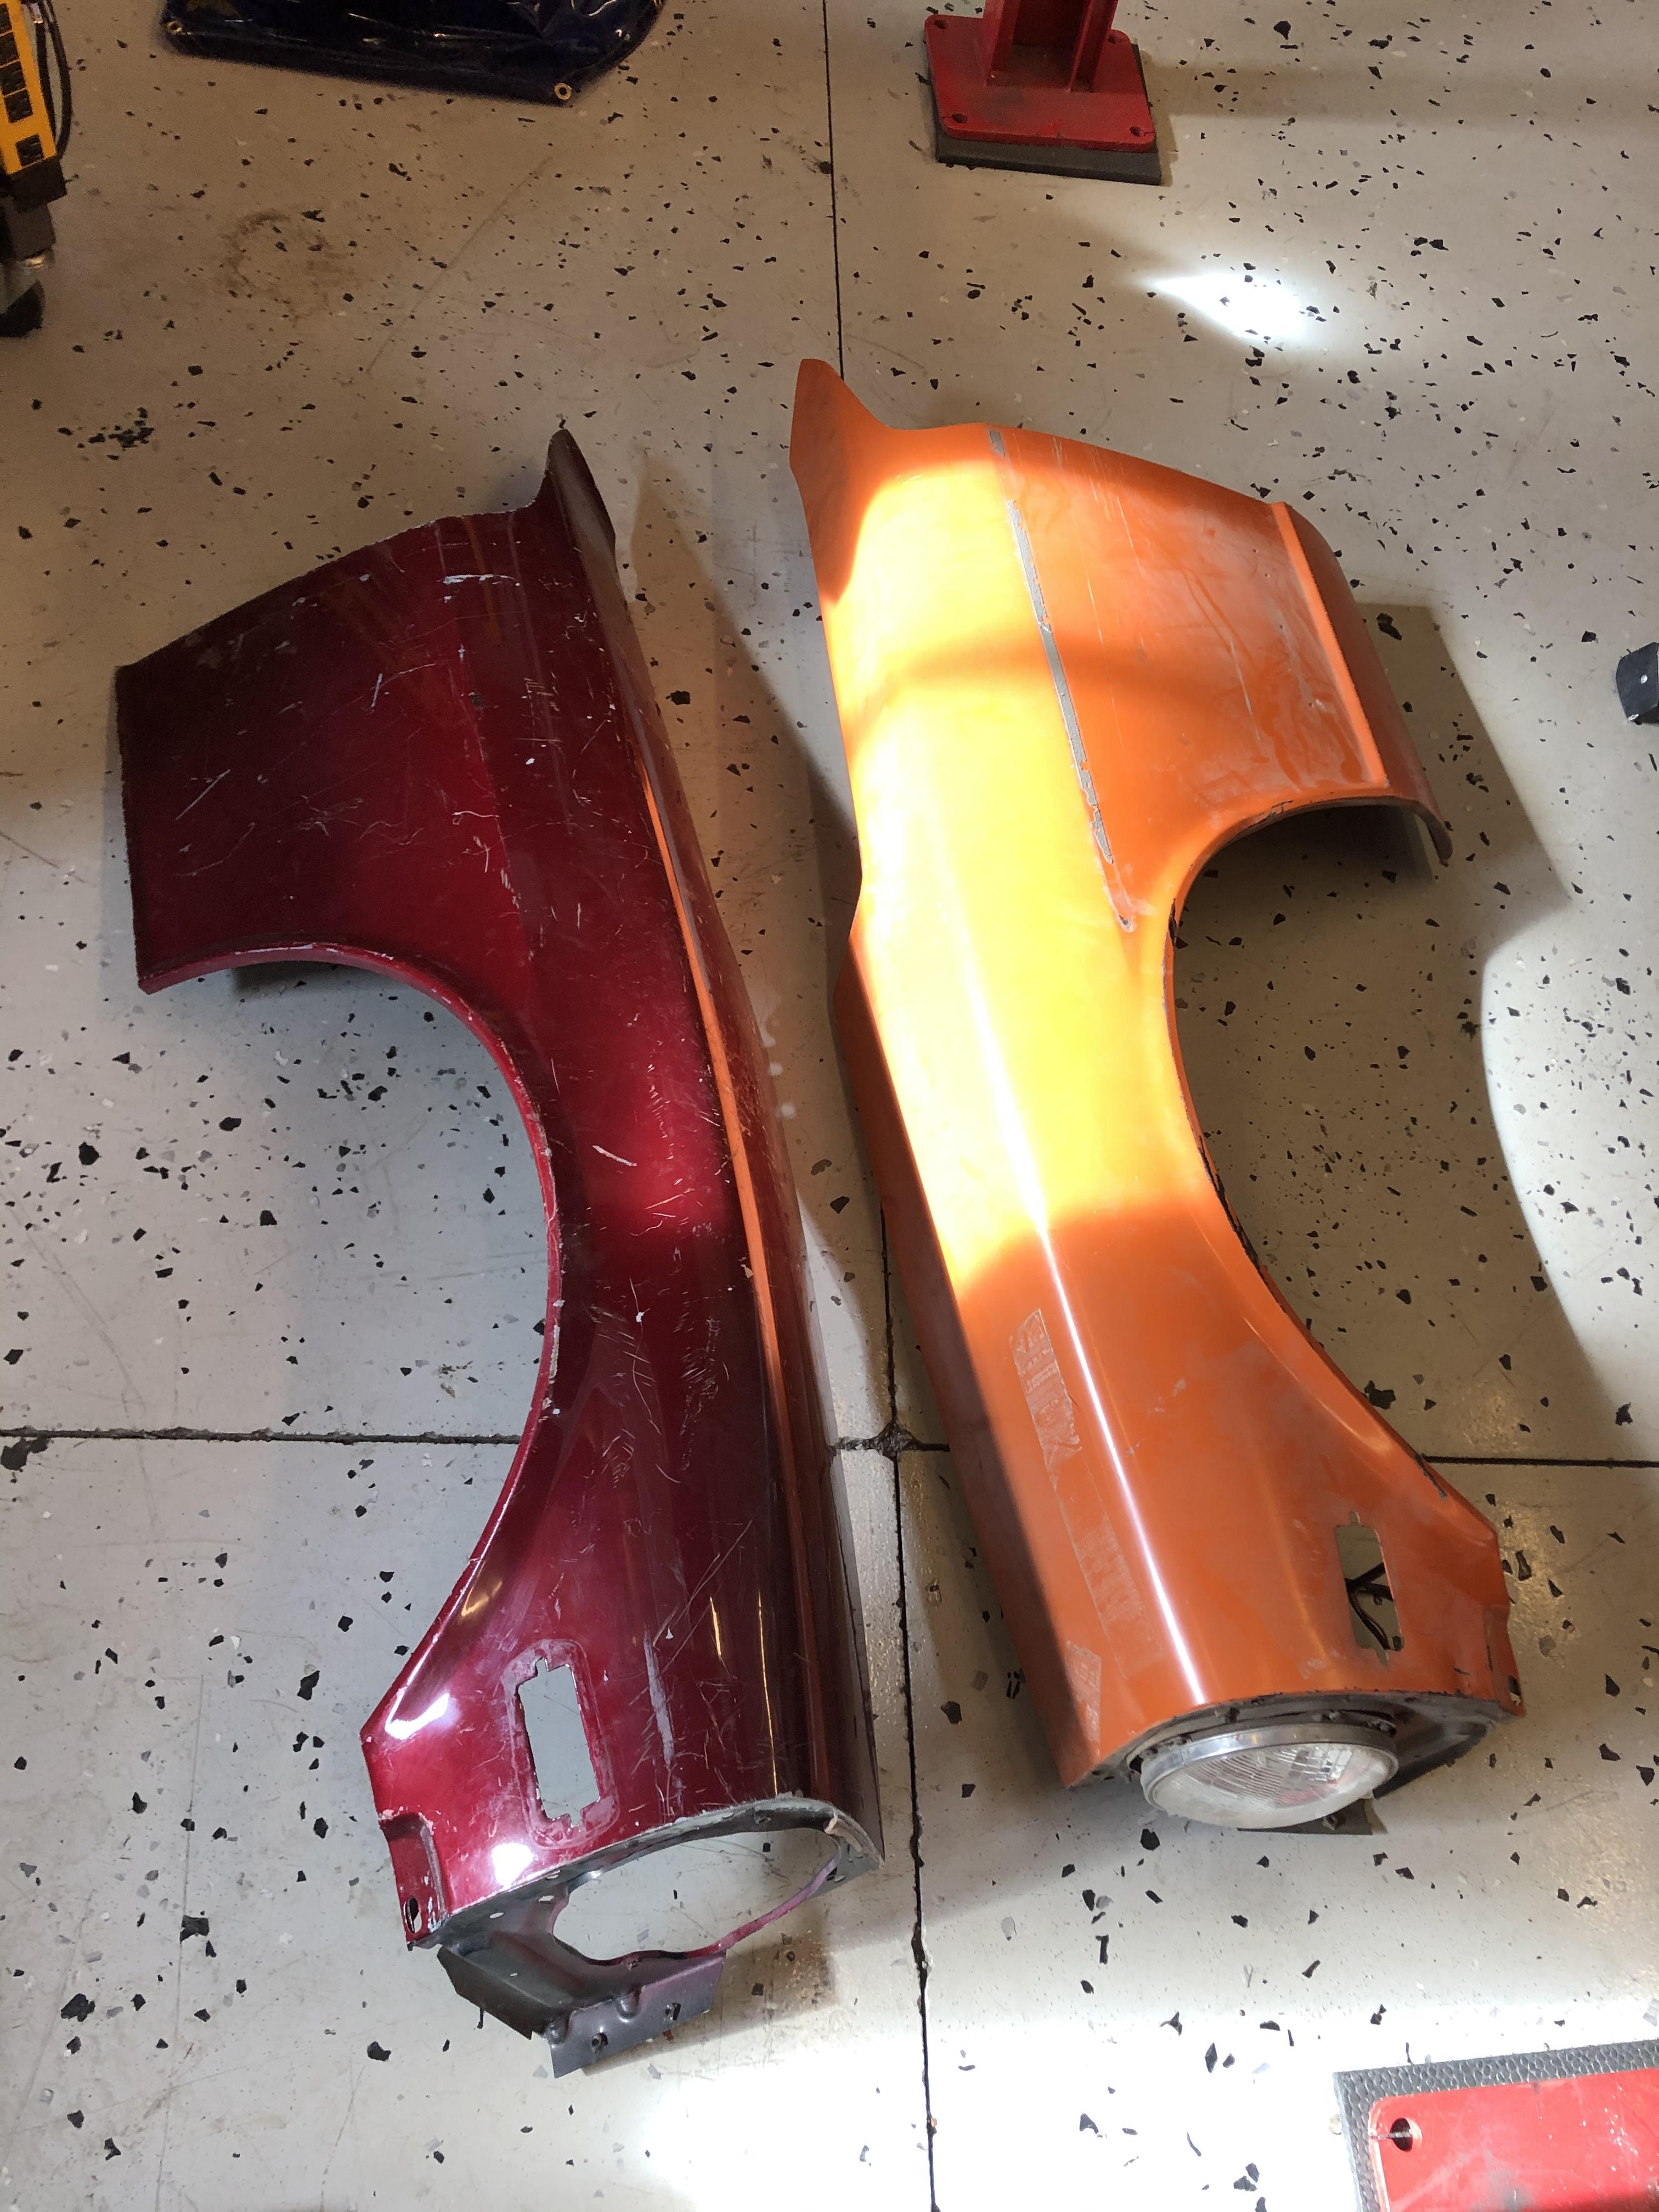
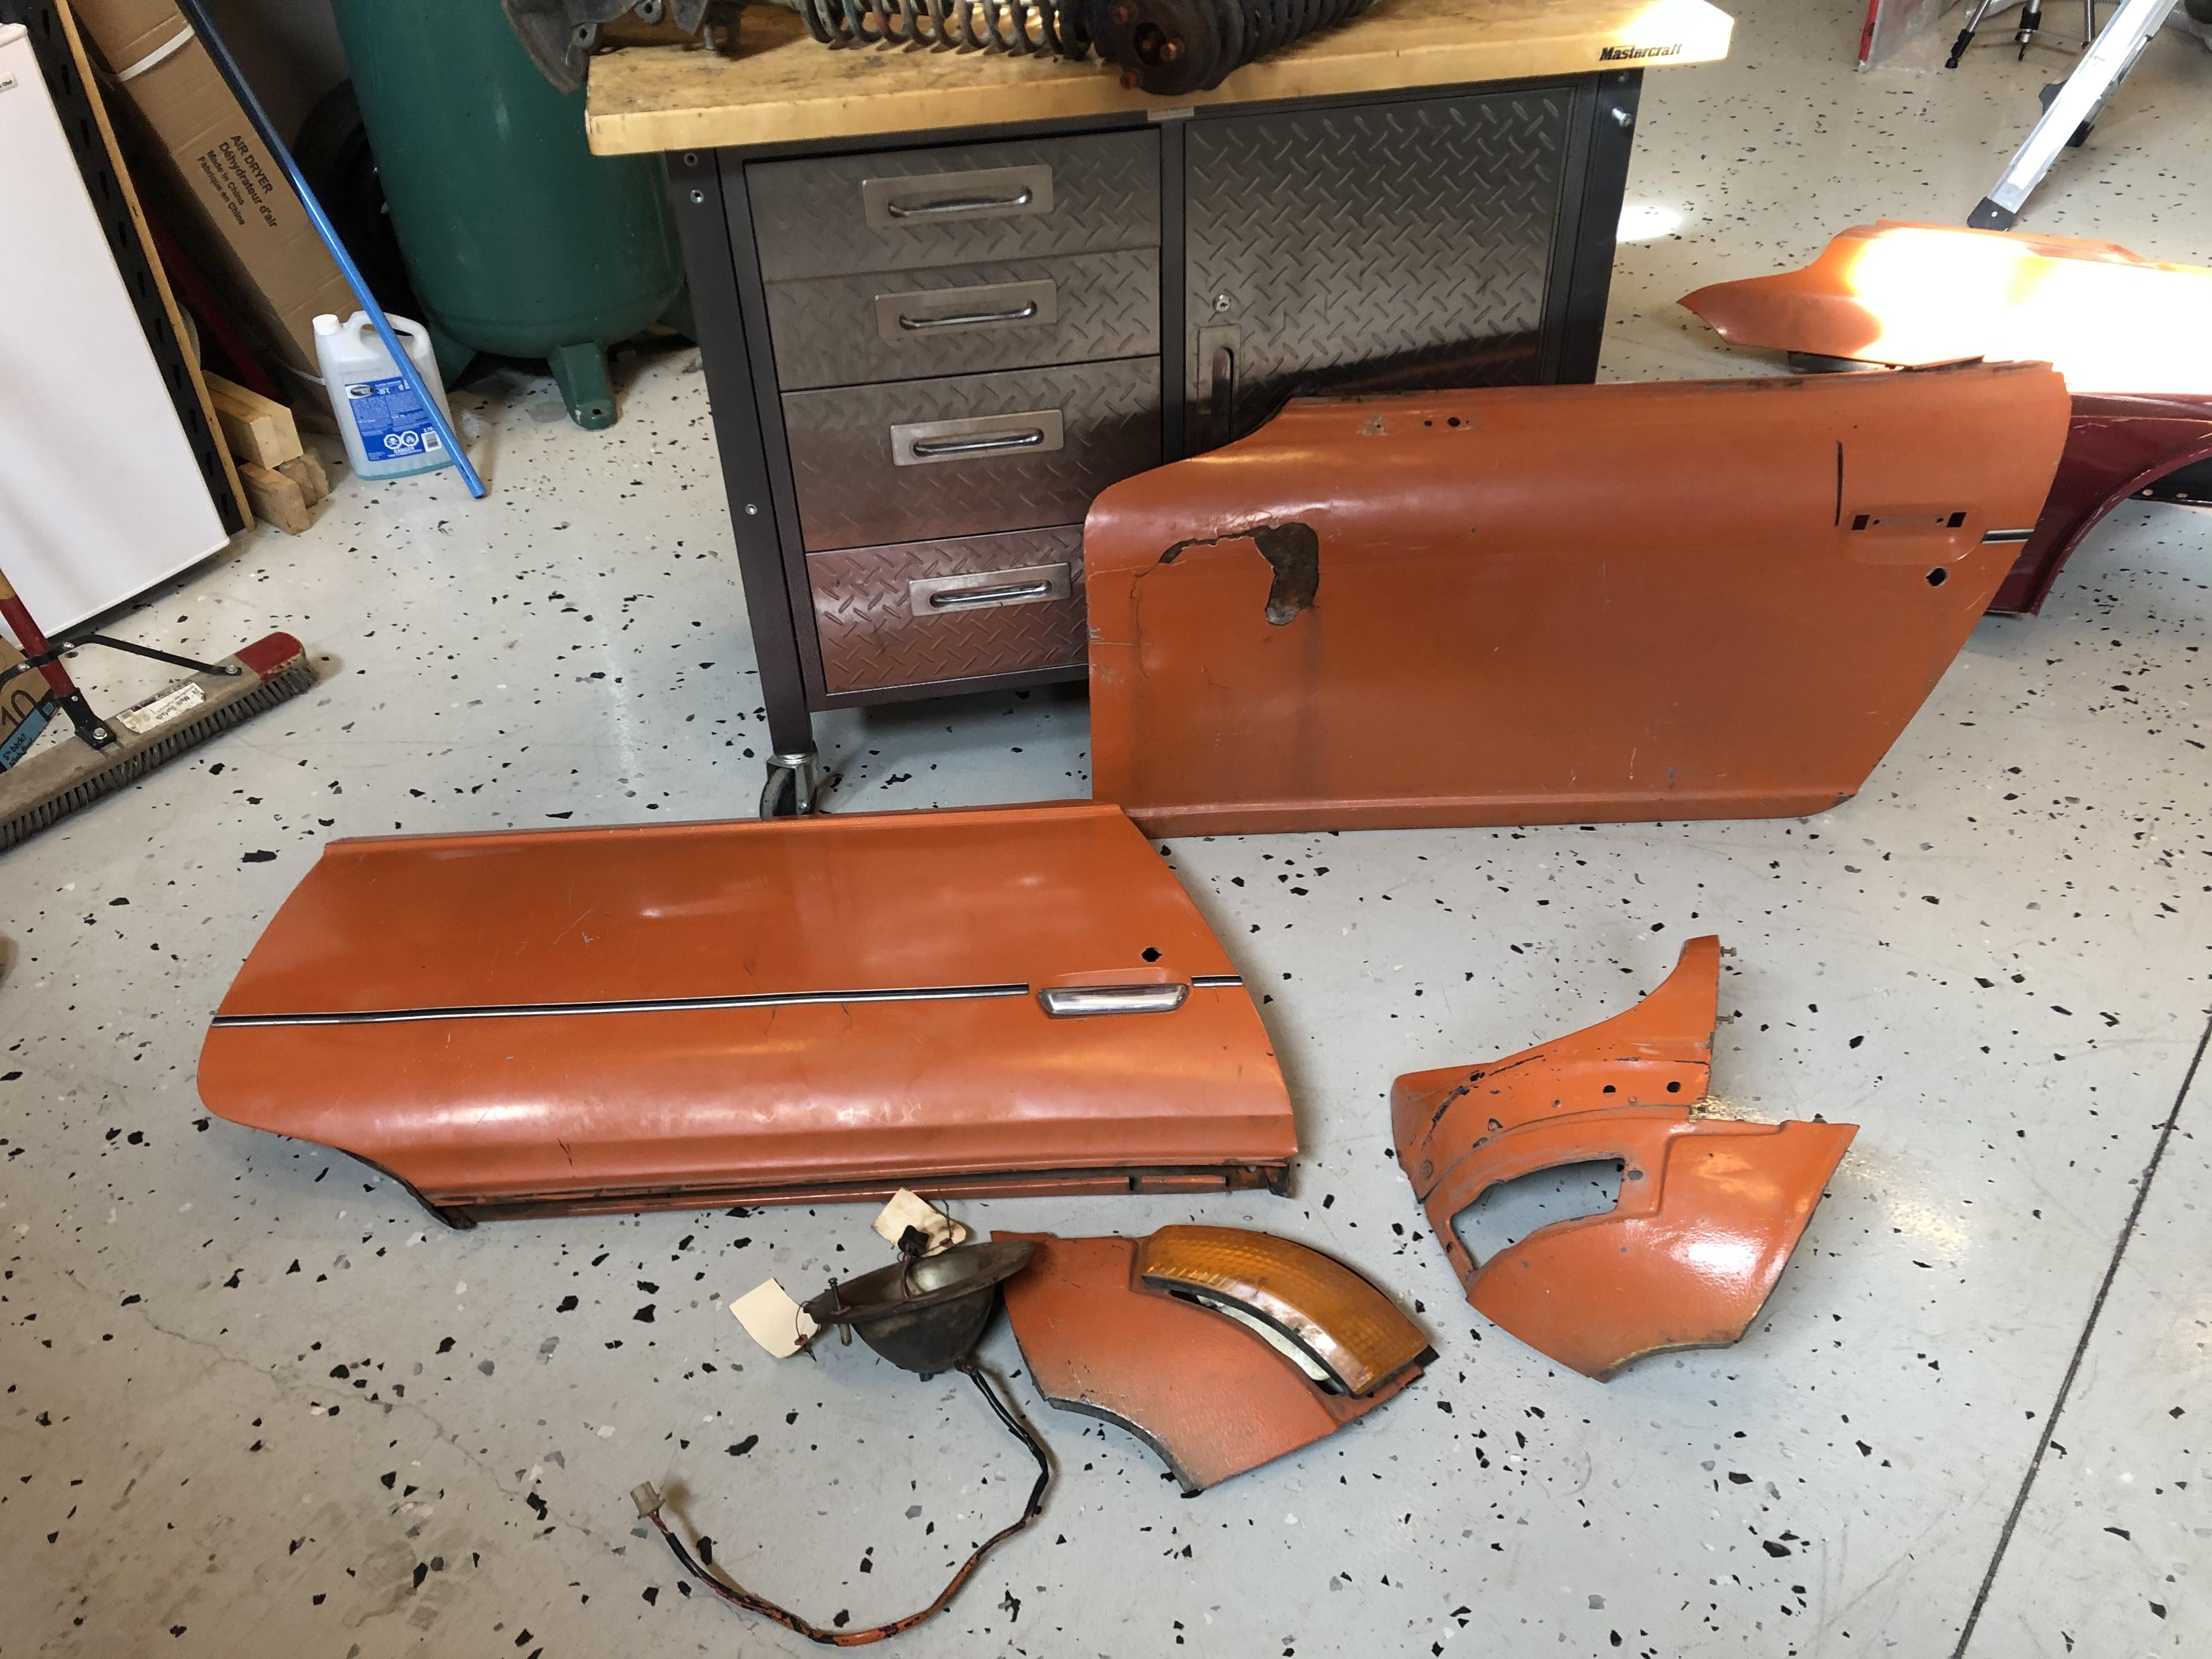
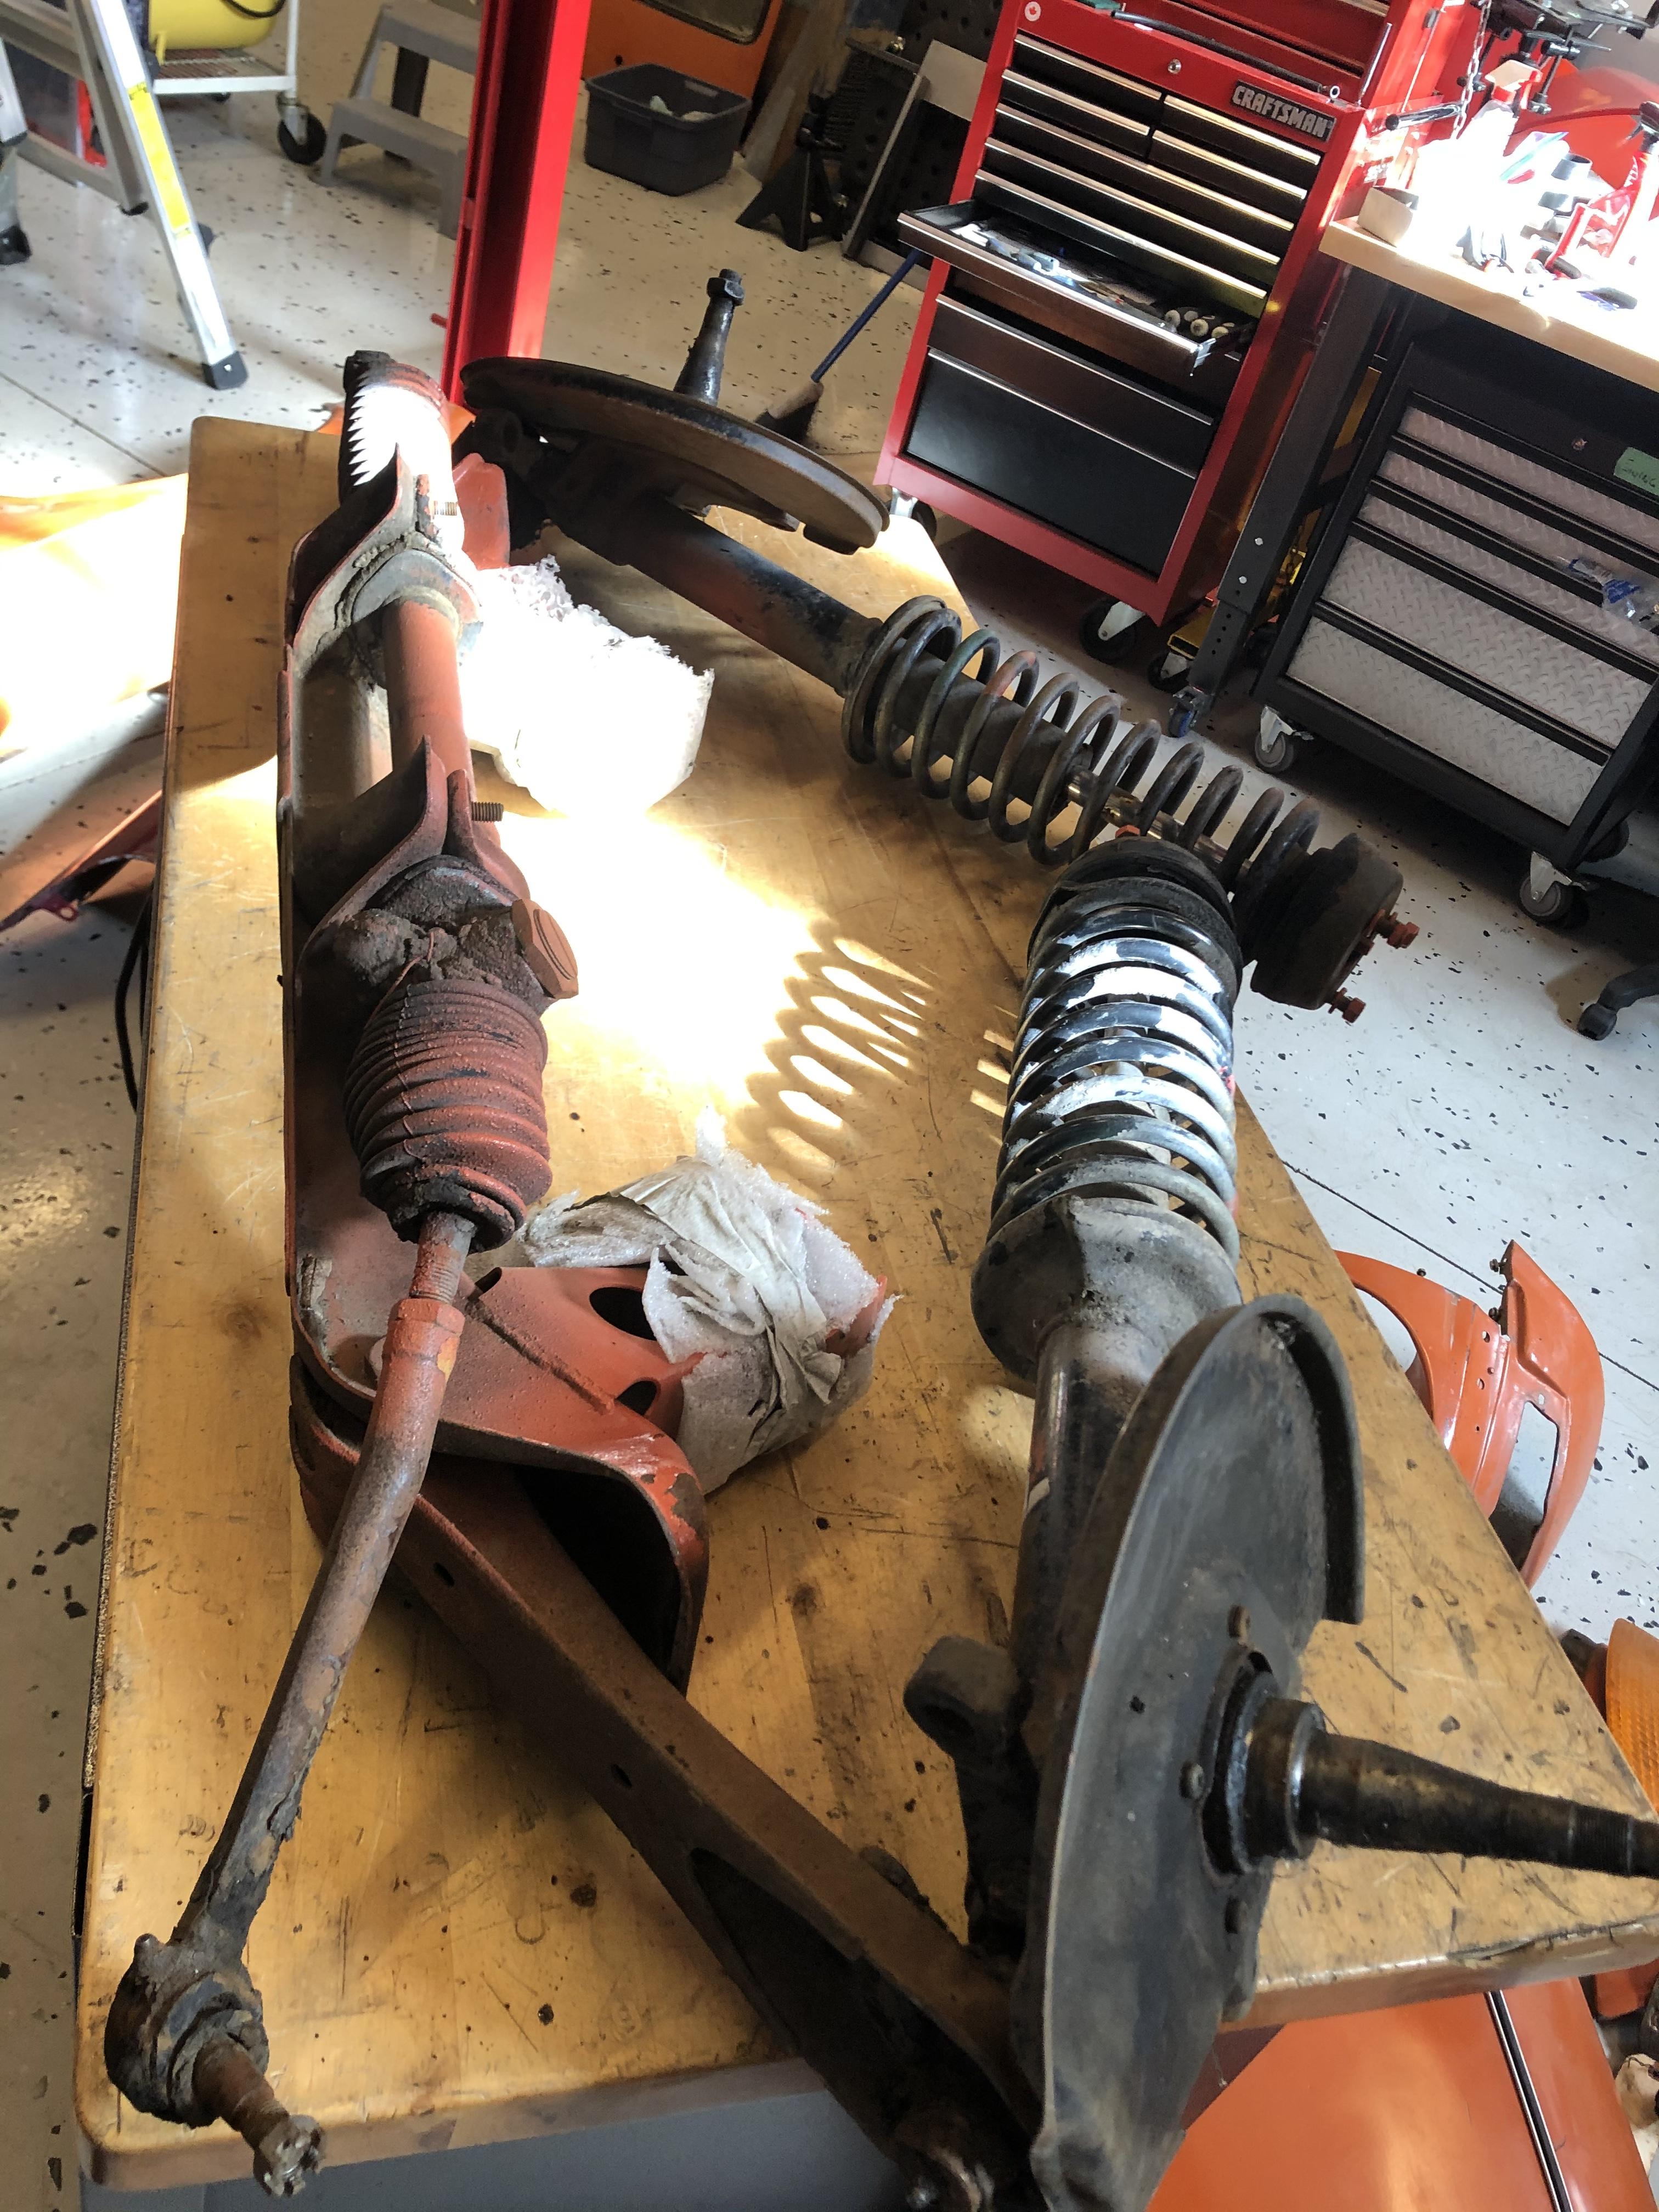
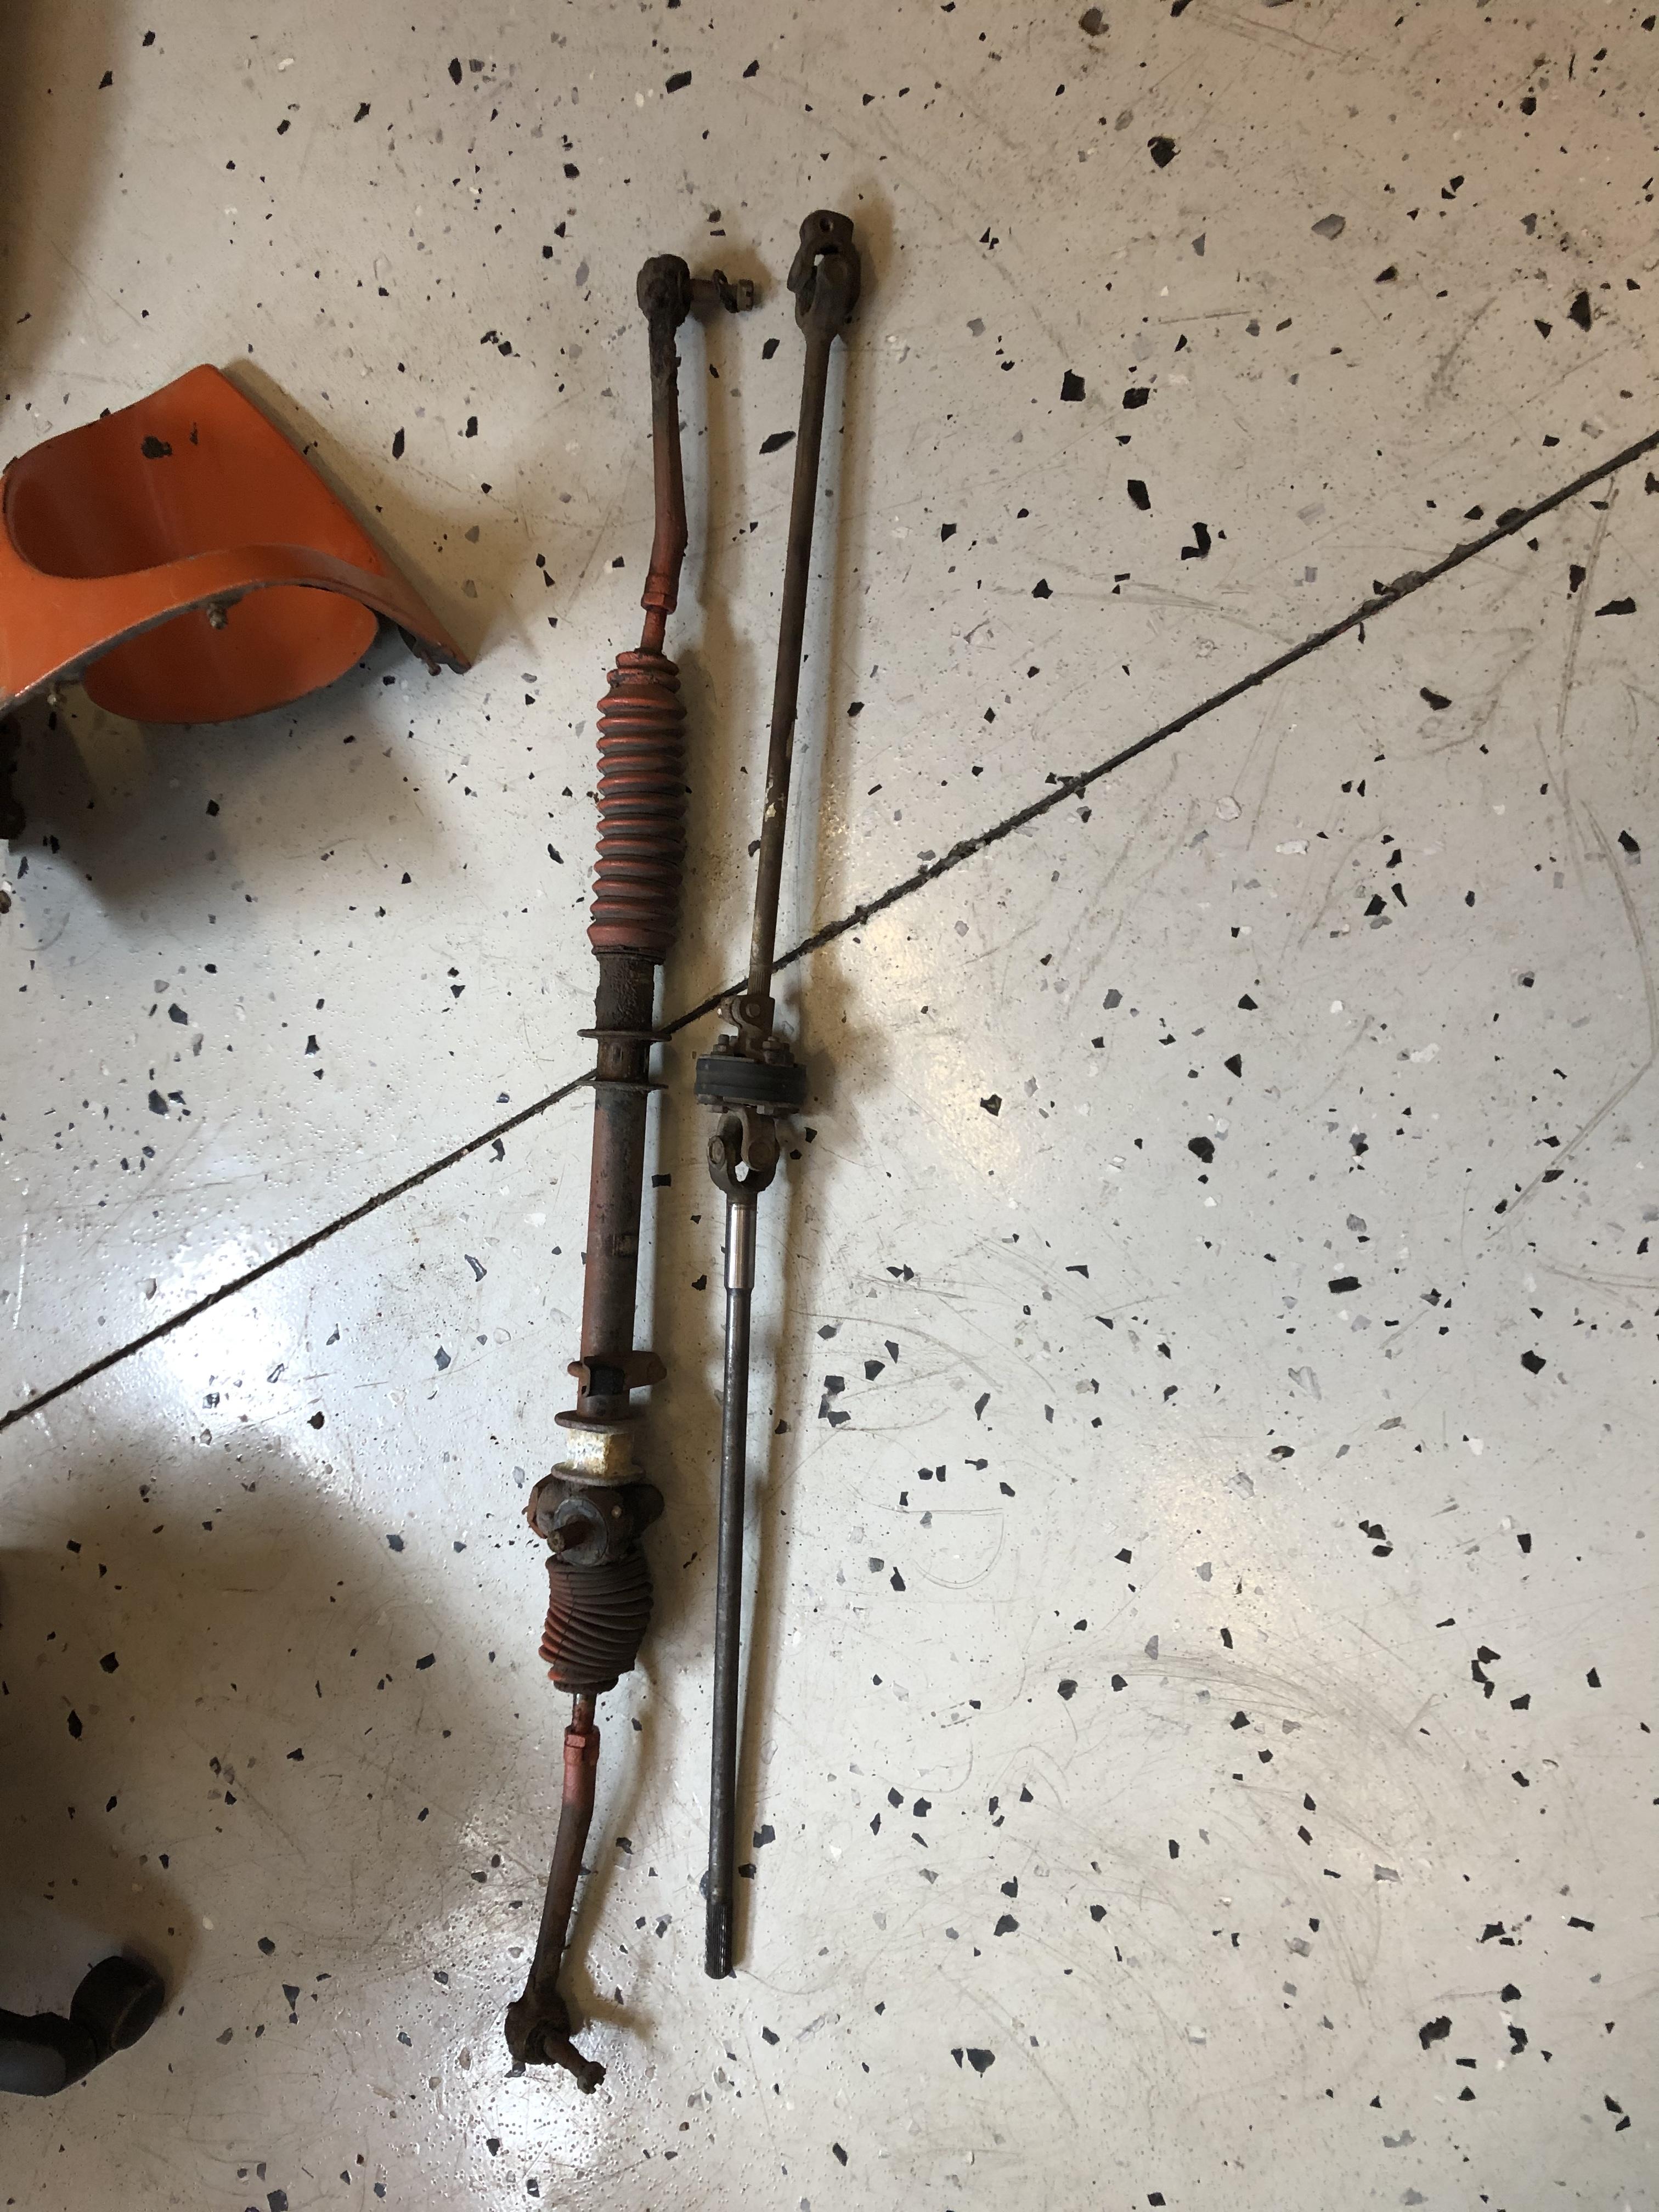
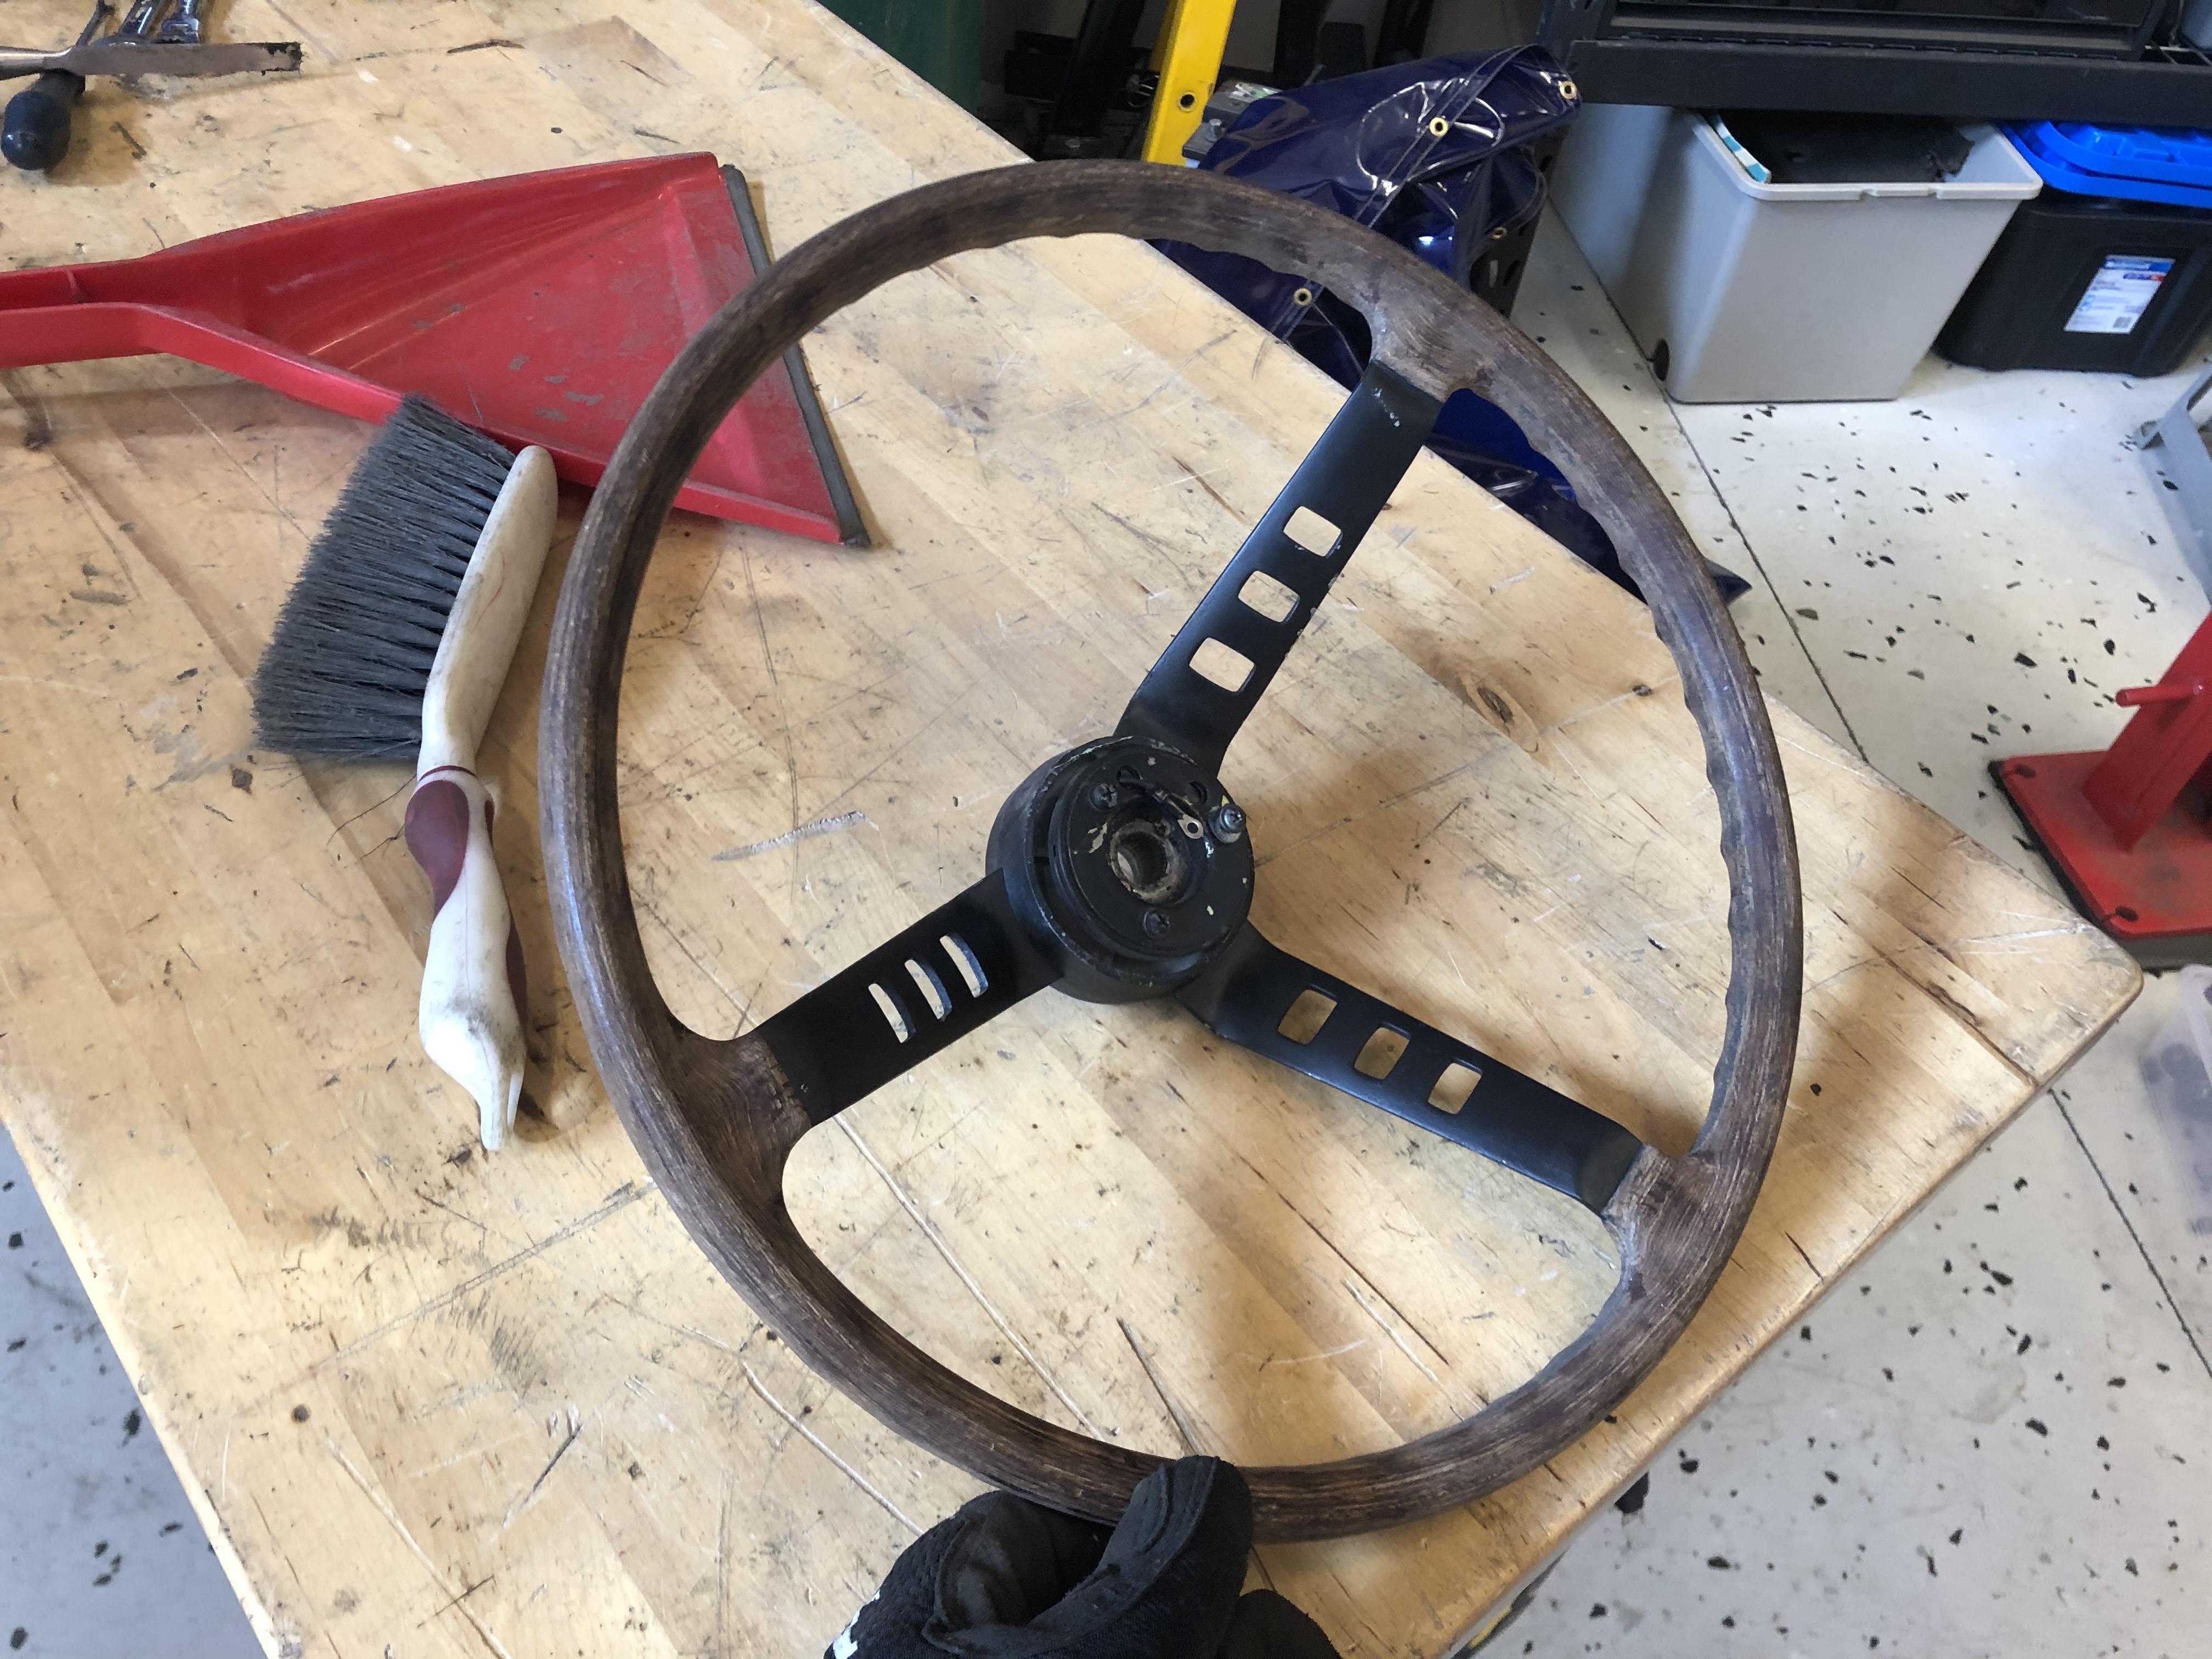
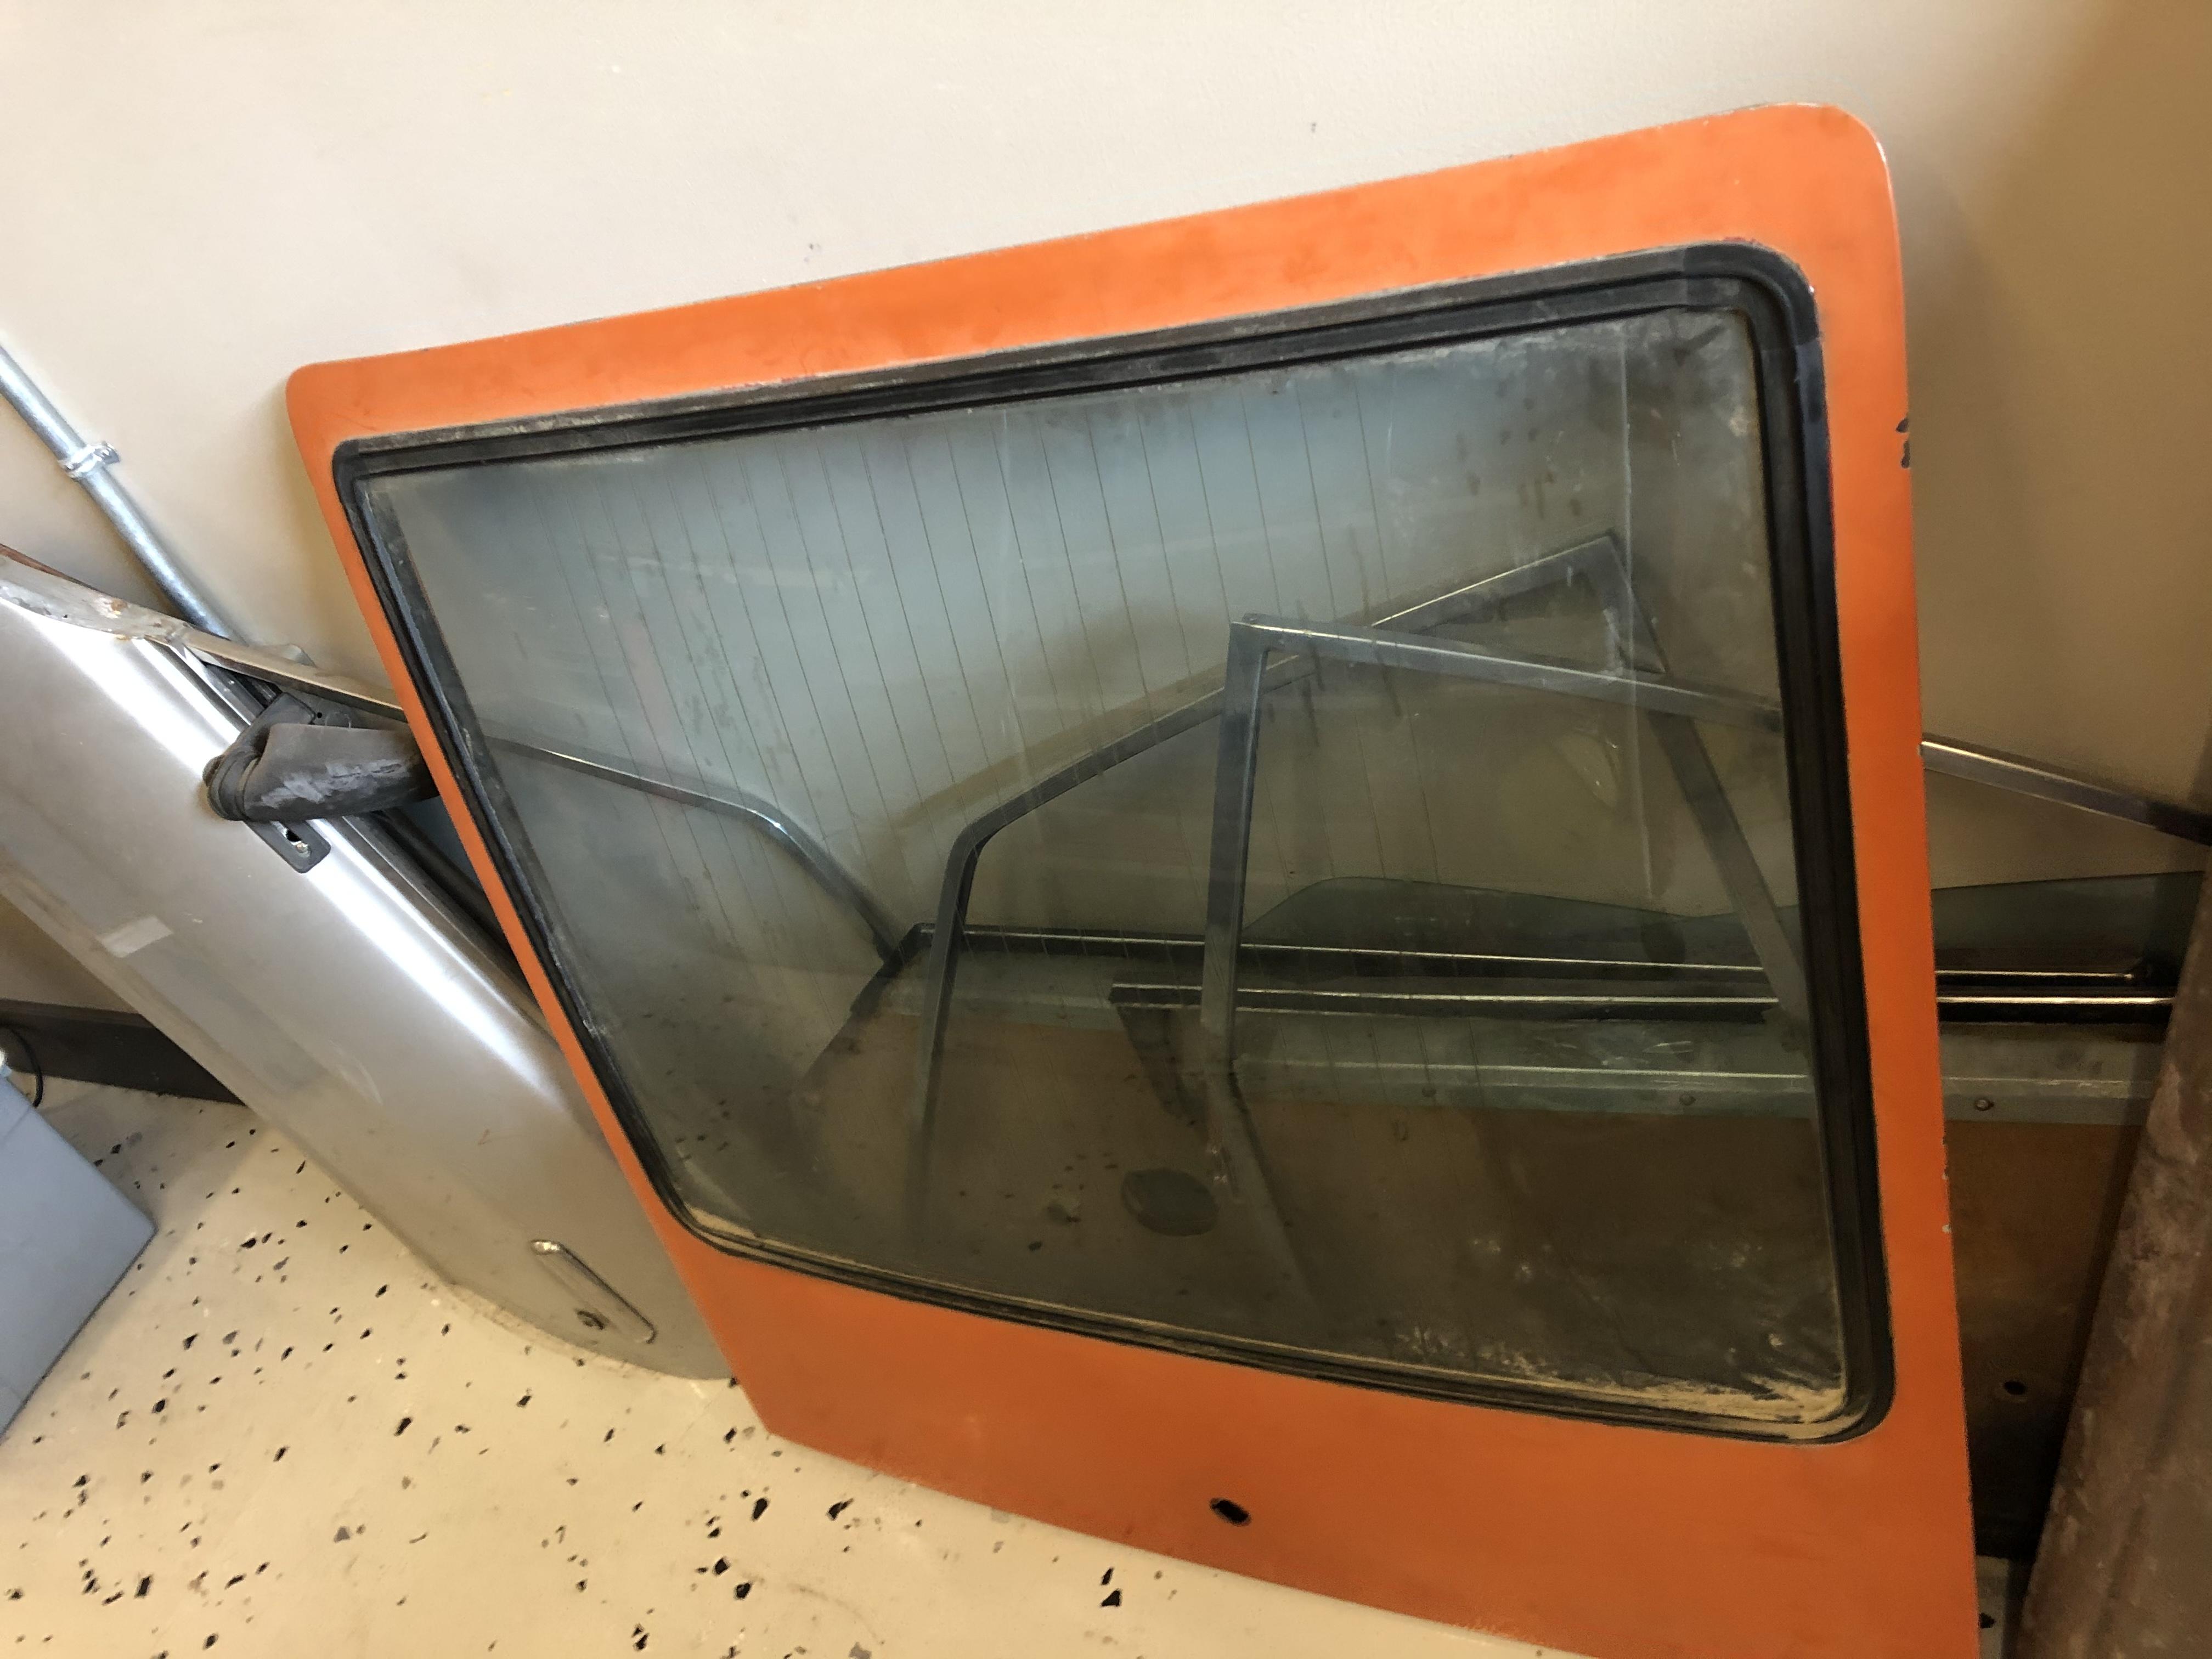
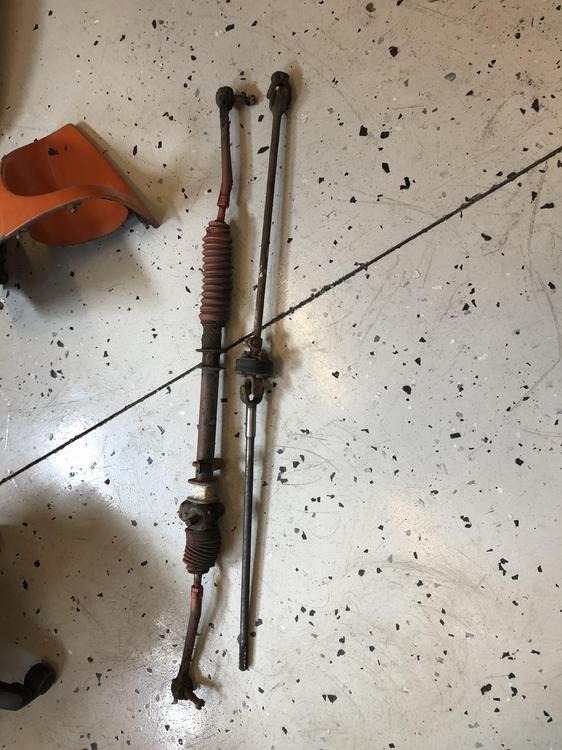
2 pointsPicked up a bunch of stuff from @Richard McDonelyesterday. A very nice gentleman with a beautiful 918 orange restoration underway .... He had a lot of great stuff for sale. Loaded my Avalanche to the brim - might have to go back ... I thought this was interesting. Vertical defrost but no vents .... Took a flyer hoping this steering rack is in better shape than it looks. I get a little nervous when someone has painted over the boots, bushings AND mud ??? Fortunately the rack moves smoothly from lock to lock. 30 minutes later had this ... and this ... ?? Grabbed a couple of fenders and a set of early doors to experiment with ... And couldn't resist this ... all in all, a decent haul ... might have to go back ?


 2 points
 -
WELL I finally got a chance to take the “new” (to me) fancy hybrid extra yummy tranny out for a drive tonight. The roads are clear here, temp is +5C, beautiful night for a cruise. I have to get this thing out of the shop tomorrow anyway to get the next project car in there, and we have a good cold snow dump coming this weekend, so now or never. I am happy to report the trans works very well. MUCH quieter over all than the old rattle box (better be with new bearings and such). All gears change easy, new synchros are doing their thing just fine. Up and down all gears. That fancy 62mm front bearing in my gingerly machined out bore seems happy, but only time will tell about how well the counter shaft bearings stand up to the abuse I will be giving it over the next few years. Even the reverse light is happily coming on with my modified shift rod with the 4 speed bell housing. Remember this is the one with mixture of a 720 truck ratio’s stirred with a 4 gear set from a close Ratio ZX 5 sp. The idea was that it gave a 0.65 ish 5th while retaining reasonable 1-4 The lower four gears are essentially identical to what i remember “feel” wise. 1st is maybe a tad taller, the 2-3 gap feels just a tad wider, but that 5th. OMG I love it. 2200 RPM at 100 KPH. The mighty 2.4 LZ has no trouble moving it right along. Going to make an excellent highway cruiser for this years planned trips. Feeling good. Now there’s a chance all my other one’s that are now re-built will also move a car down the road with little drama.2 points
-
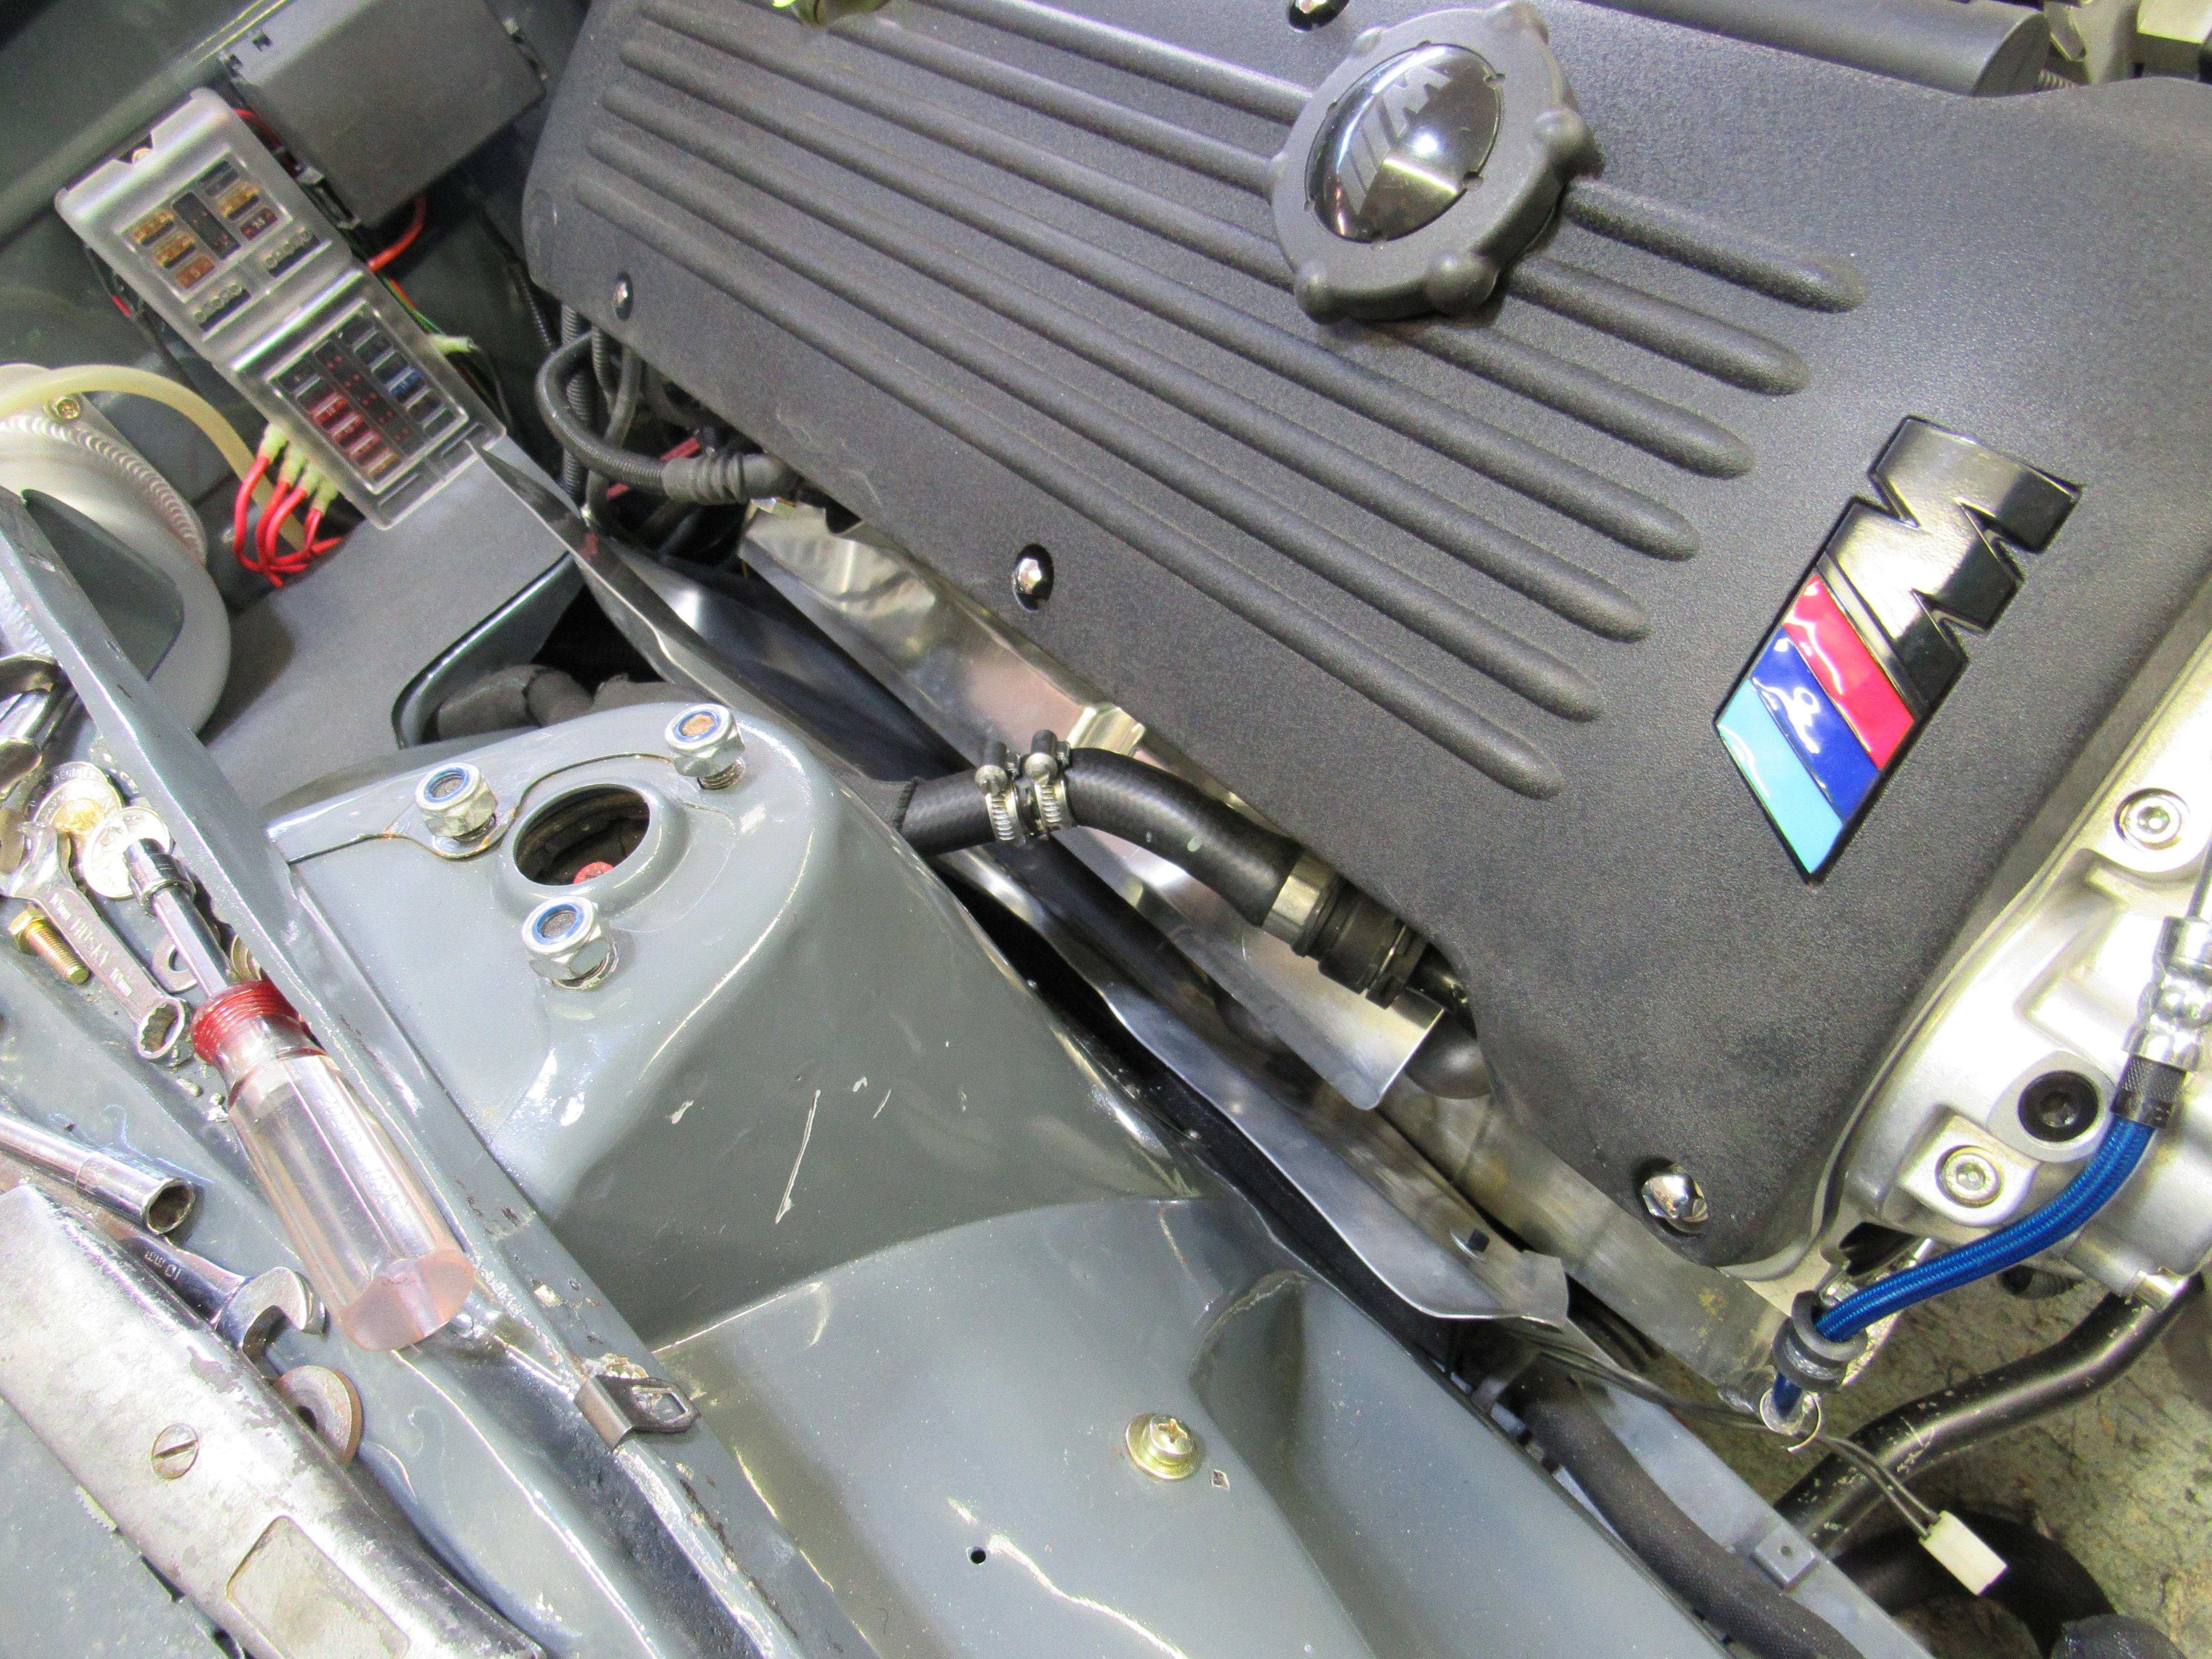
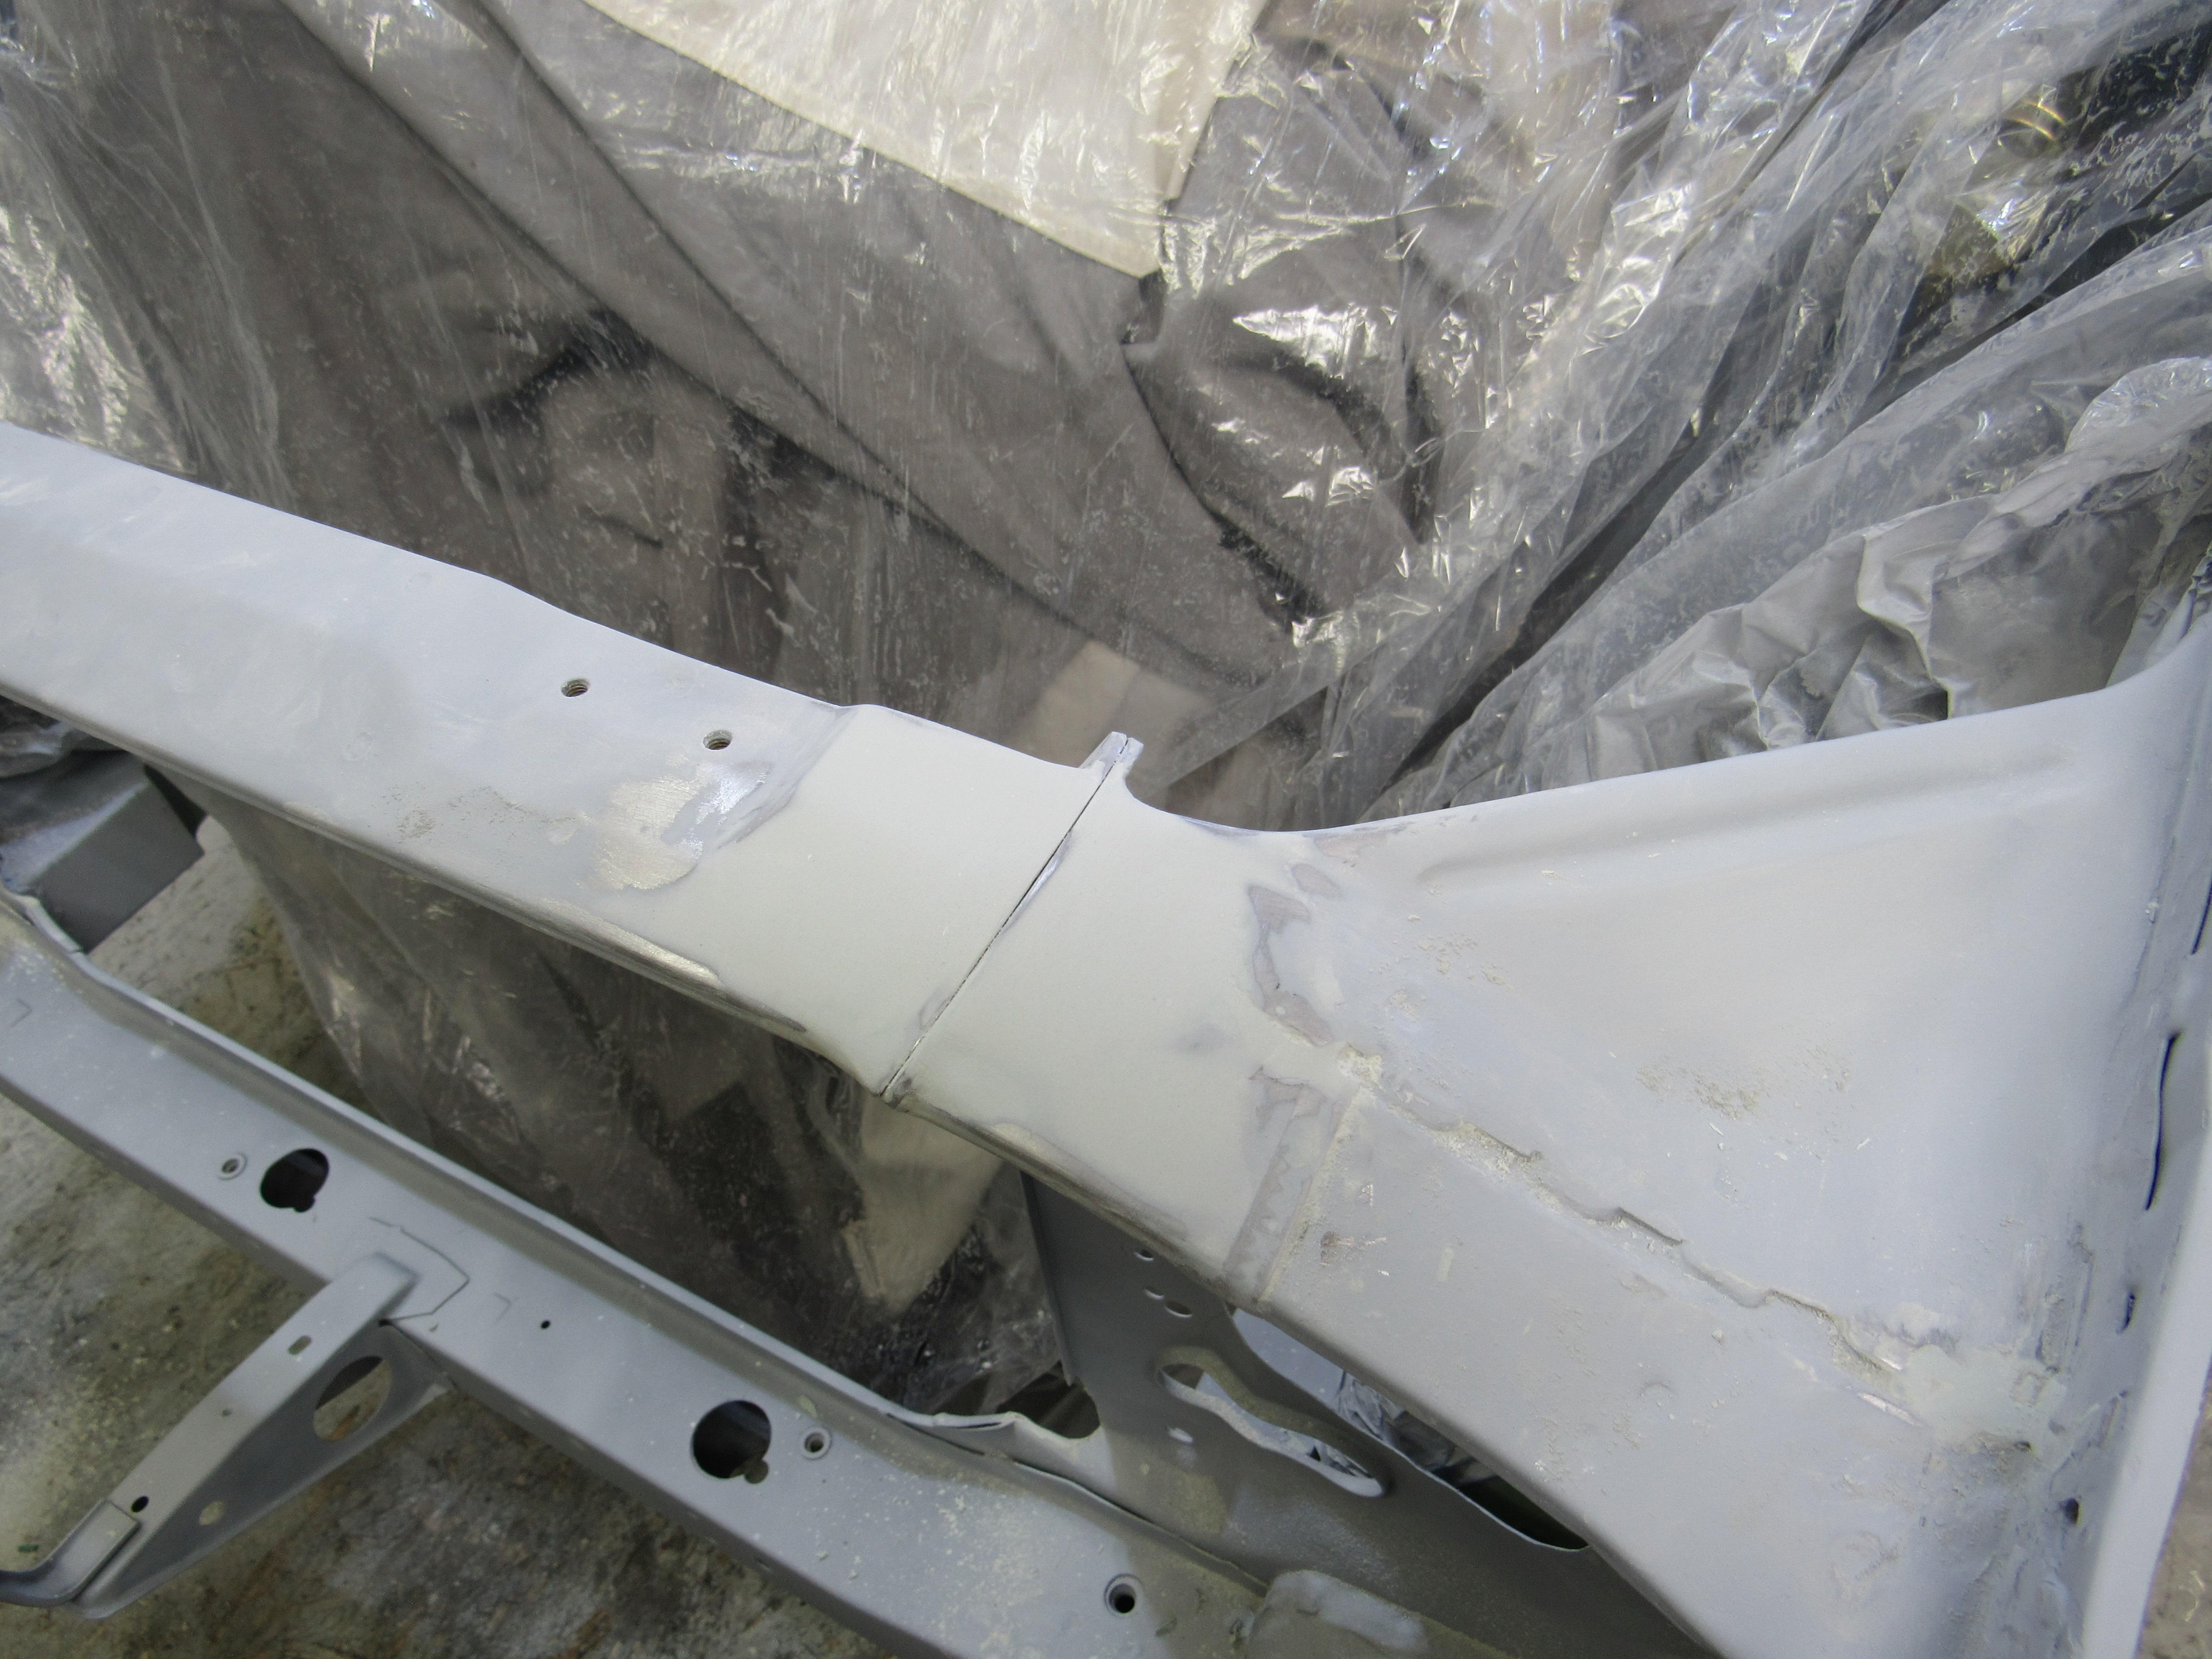
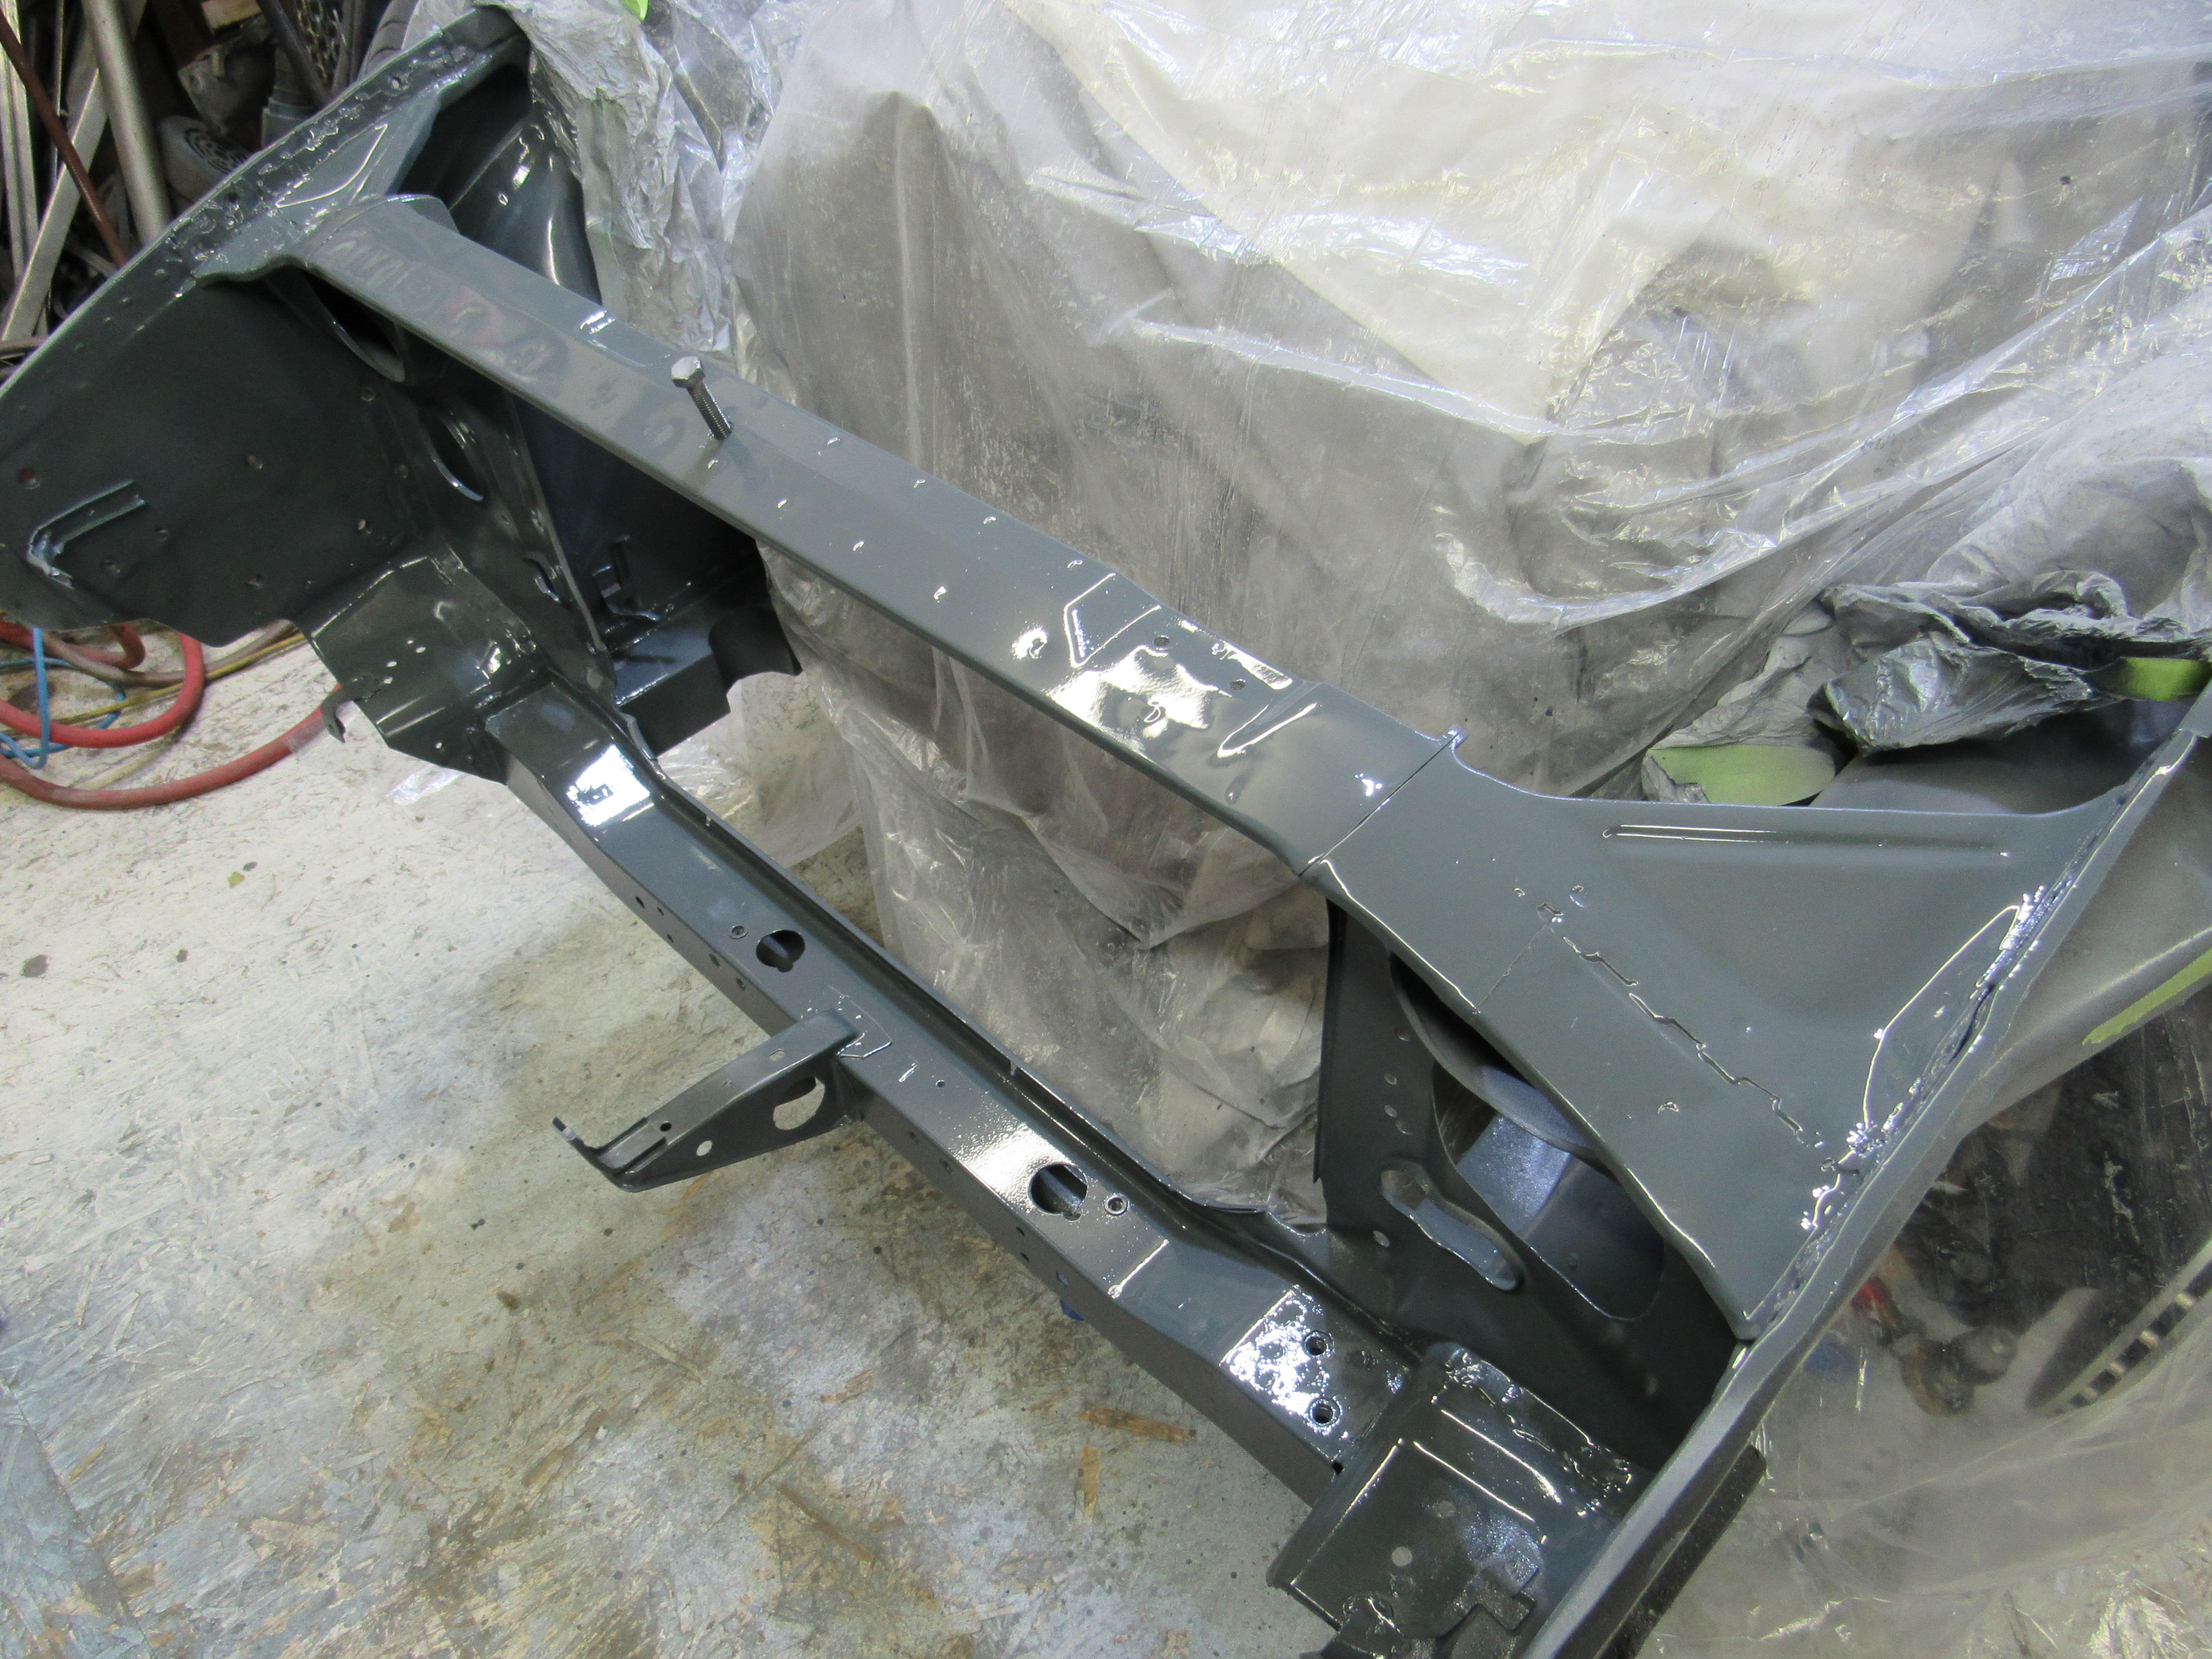
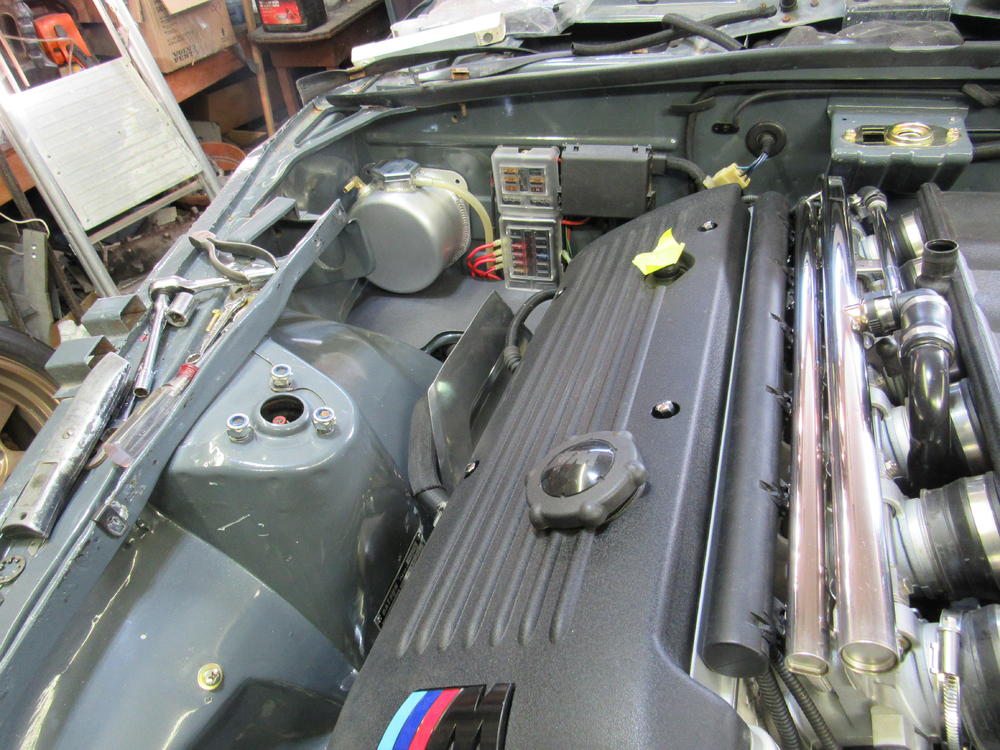
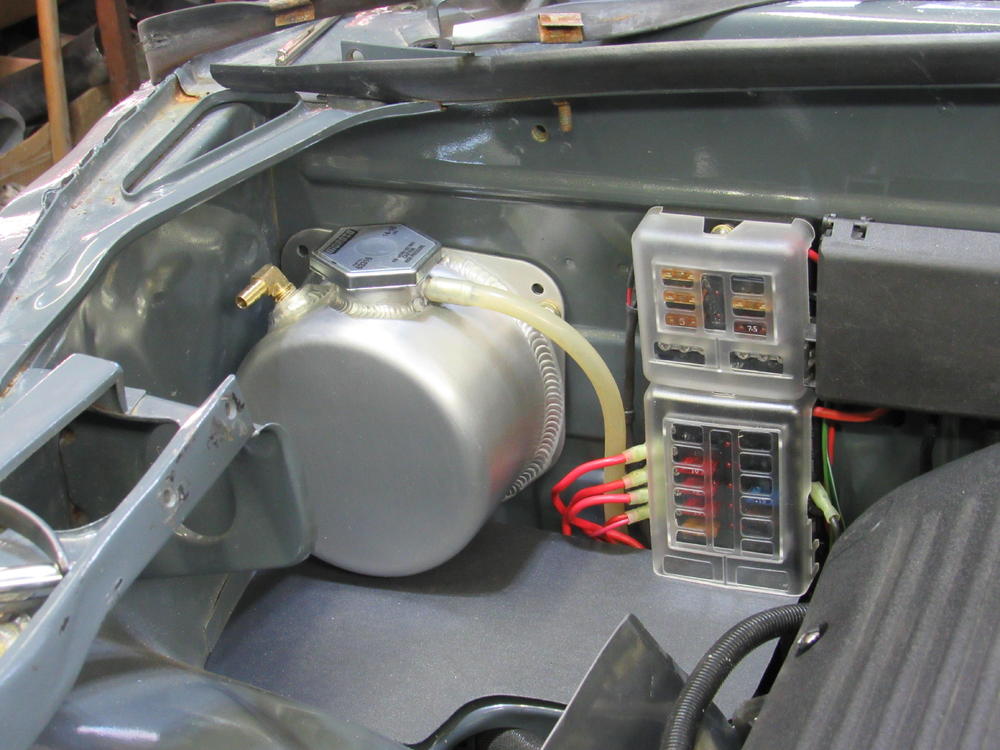
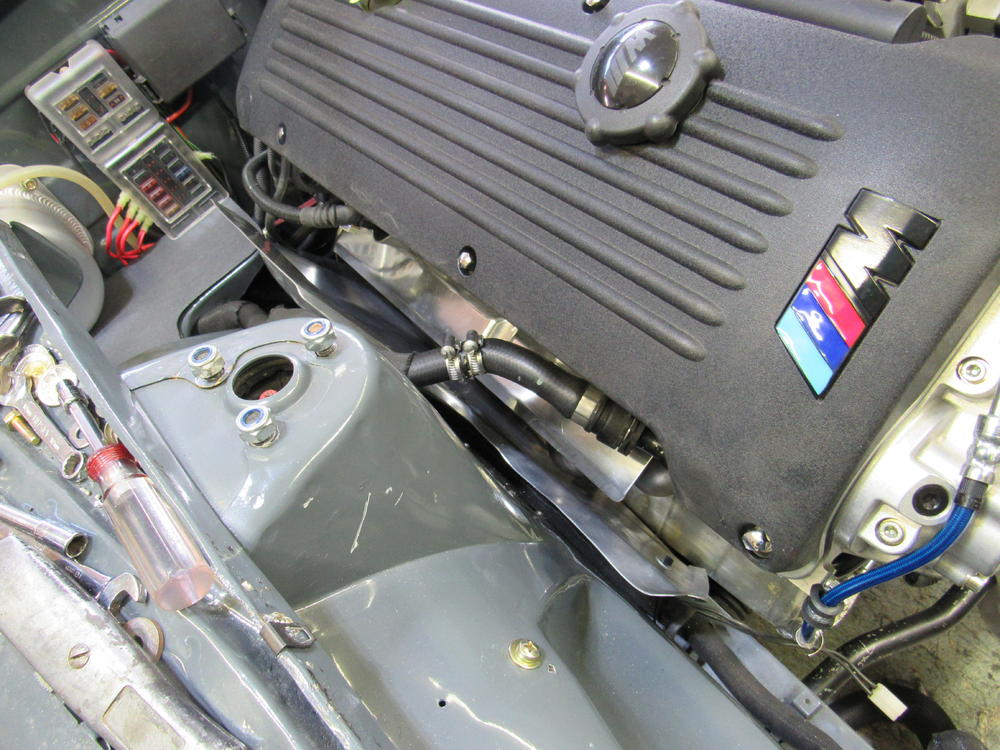
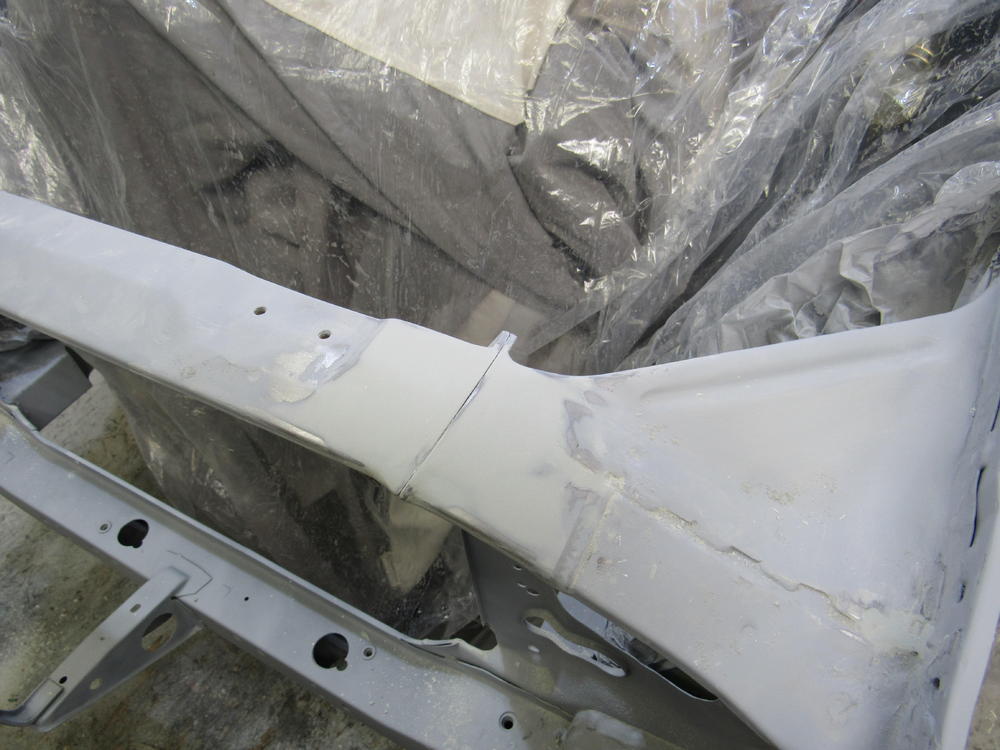
Big milestone today, the exhaust system is finished and installed now which allowed me to move along with installation of the heat shields, coolant pressure container and finish up the engine bay electrical. The rad support crossover got some filler, primer, colour and 2 coats of clear today so the rad and oil cooler can go in now, just waiting on one more fitting for the new fuel system and I think I will be ready to turn the key! Of course then I will spent the following week trying to track down why it won't start, that's my usual MO.

 1 point
 -
Excellent. Glad to help. I did a quick web search on the process and quickly came up with the following. This should help you get it right with fewer iterations: http://thelibraryofmanufacturing.com/deep_drawing.html Lots of good pictures and helpful rules of thumb. I should have looked first!1 point
-
1 pointNumber one thing would be that fuel tank, and the steel line can rust up (fuel and brake). Lots of problems can be traced back to poor fuel delivery. When I got an engine that sat for a long time, I did the marvel oil in plug holes, drained old oil out, new oil in, plugs out spin engine (if not stuck) and watch the camshaft spray bar to make sure oil pressure came up. Plugs out lets it spin faster to help with the oil pressure check. I also pour some assy lube on the cam shaft before cranking. You may need a new water pump if the anti freeze was not drained, the impeller can rust badly. Something to watch out for is the nuts are often seized and can sheer off easy making a simple job a all day affair. T stat and water pump are typical maintenance items that can break bolts and ruin your day. There are lots of techniques, most include some form of shock and heat approach. Nothing is sure fire, but if you just manhandle it with a big wrench you will surely tear off a few. Use of PB blaster and heat from a MAP gas torch is a good starting point. I like to tap them pretty firmly to shock the rust bond then tighten a bit before trying to loosen. Good luck and get some pics.1 point
-
I've contacted Randalla and asked if I can help with supplying my version while his is un-available. I'm awaiting his reply.1 point
-
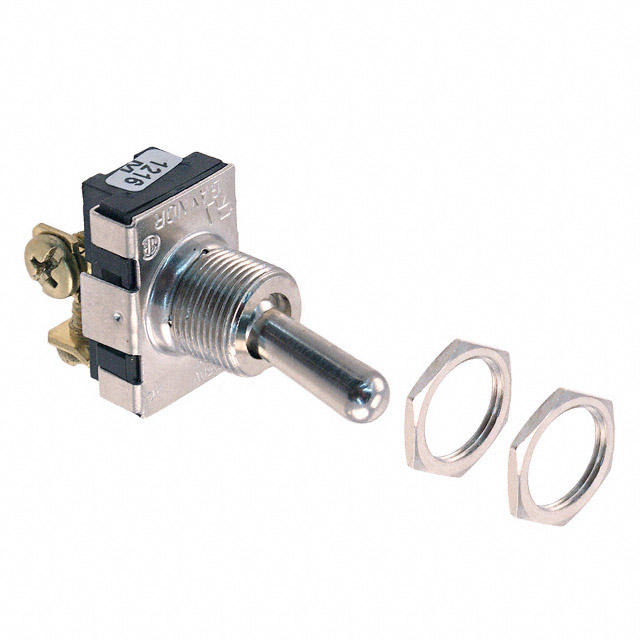
1 pointThanks again to @SteveJ for the link to DigiKey. Going thru their catalog I located this switch that has dimensions very close to OE. I've got 5 on order, will update this thread with fitment results when they arrive. https://www.digikey.com/product-detail/en/electroswitch/7105B/451-1156-ND/2679539
 1 point
 -
Making a set of dies to produce a suitable replacement for that cup washer should be an easy task on the lathe. Without heat treat, I don't know how many shots you would get out of it, but certainly enough to get you through the task at hand. But wait a minute..... Don't you have a lathe? Brain isn't able to pull the details from the corners right now, but someone here on the forum did some cold metal forming recently. Made some dimples in something or made some sort of formed washer? Don't remember who and I couldn't turn it up with a quick search. @ConVerTT , @grannyknot ?1 point
-
I would not be surprised if the car started out its life as an automatic transmission car. That would indicate that the wires would be for a neutral safety switch. Assuming the car is starting now, that would indicate the circuit for that switch was bypassed during the swap.1 point
-
Good results and welcome to the forum. Now lets see the car! ?1 point
-
1 pointBack in the 70's Elvis had it custom-relocated as it chafed his leg. Come on Alan.... so blatantly baiting ? You are far more clever than that!!!!! Still I am curious with your interesting facts!
 1 point
 -
1 point
-
Agreed! Me too! And as 240260280 pointed out, it's clearly Klingon. I believe it's three bat'leths bolted together.1 point
-
He apparently, according to the words on the page, installed the 123 directly after having the engine apart. Must have had the oil pan off to check the rod bearings, and must have changed the water pump. So a fair bit of disassembly. Put it all back together, installed the 123, and cranked it up. Then smelled smoke on the drive and the engine was struggling to run. That sounds like overheating to me. Breaking the rings on a single cylinder will cause the engine to run rougher but it will just keep going easily on 5 cylinders. Might burn some oil but it will probably run okay, on 5 cylinders. Seems like he did a repair and an "upgrade" at the same time, had a problem and blamed the upgrade. But it might have been the repair. Overheating can lead to detonation. I wonder if he got it fixed and realized the true cause. Who knows.1 point
-
1 pointMy 6-3-2 MSA header worked beautifully on both the mainly stock L26 (just ported) and highly modified L28. Never connected with anything other than high speed humps - as it does hang a bit low at the front, particularly if your car is lowered. That I also understood to be a heat-shield to protect your gasket. I did have to “adjust” it for the ZStory Race/Sport header and it’s a VERY solid bit of metal!! The lump hammer was out.1 point
-
1 pointThe parts look like 280Z parts if you compare to Rockauto pictures. If moozieman is 100% sure that it's the distributor then there's only one thing to do. Remove the distributor and check it out. The overall description doesn't really make sense anyway. Why would the rotor grinding on the cap cause the engine to die? The engine would happily just grind that cap and rotor in to dust.1 point
-
When all you have is a three jaw puller, the whole mother of invention thing kicks right in. I'd be proud to have built that.1 point
-
1 pointDon't try to crank it yet with that 10 year old gas. Drain that crap then put a filter straight out of the tank. This is a 280's but you'll get the idea. For my 240 a Fram G2 works best. http://atlanticz.ca/zclub/techtips/fuel/g3filter/index.htm Oh yeah, welcome to the forum. A lot of information here plus some laughs, mostly tongue in cheek stuff though. I/we kid around a lot. Post some pics of that 260! We enjoy looking at other peoples stuff.1 point
-
Bravo on the install video. ? Great Job! Just a follow up regarding this particular 123ignition distributor. Upon receipt of the unit, I installed it in my 1969 MGC where it has been working flawlessly since. New price on rotor after review. Plus free shipping in Continental USA. Thanks for the support from the Classiczcars. Hope this helps Ed1 point
-
Yes, install dizzy=use timing light. No question. Although a year old thread, I do want to chime in here. Since about the time this thread began, I have been running the (Bluetooth) 123ignition /Tune+ On a 260Z block / heads with twin SUs and SM needles. I also run a hotter coil (oil damped) Bosch Red is also ok. And I’ve bypassed my ballast resistor and rotor resistor myself. Why have extra resistance in your circuits, unless you still use AM radio? Heh, heh. No problems with the engine / timing in over a year of spirited driving. I love to tune it as I choose each day, depending on how I plan to be driving. I have several Curves, like 10 including the ‘Default.123’. I use an ipad and also my iphone. You can tune ‘one the fly’ (just +/- advance, you can’t change or save the curve-yet...). SO City it’s start & stop, so use a good idle maybe 10-12d BTDC at 750rpm -not my default map which as lower idle advance. Cruising the freeway or touring (I want better milage), twisty mountain canyons (lots of advance at high rpm). It’s cool to have variable Timing / vacuum advance curves, without playing with advance weights, or adjusting the position of the dizzy manually to change static advance. Some comments: The setup procedure with the LED light is only good for getting the engine running with the new dizzy. Then run the 123ign centrifugal map with 0 degrees up to 1500rpm in the app and set the engine (with the timing light) to match. I read somewhere that using the LED procedure can actually set 5d TDC static to ‘get the engine started’ easily. I didn’t see this myself, but it brings up the next point. Personally I wouldn’t run the default map and LED timing except to test, and certainly not on the road and under load. Do NOT set up static timing, it screws everything up, and you would have to ADD that to all the values 123ign “sees” in real time and when you add vacuum retard “maps” (which *will* kick in at 1500rpm by default) it gets way too confusing. That is IF you run a vacuum advance line / dizzy (I do)- most with triple DCOEs won’t (or can’t as there isn’t a common plenum). You confuse the123ign and more importantly yourself as to the advance you are running. I did write to Ed Madak, before install and he was very helpful The instructions are incomplete and they expect you have some knowledge. He said: “Hi Richard Setting the app to 0 and the number one cylinder to TDC is preferred as it will show exactly what you have set your timing to. Always confirm using a timing light and synchronize the app with the motor. Hope this helps“ It did help. So you don’t think I’m a fanboy, here are some issues I have experienced and tried to solve: 1. The install instructions are terrible. Read the above and take note, hard lessons learned, you must confirm you have TDC marked correctly on your harmonic balancer. Then use a good timing light, one with dialback if you can. I even made an ‘newbie’s guide’ (ymmv) of my 123ign install & posted it on YouTube: 2. These engines love advance, but personally I don’t exceed 35d advance even at 8000rpm (it’s never driven as a race-car). I also usually RPM limit at 7500, 123ign does random spark cut to keep to that limit. My tach is very accurate and the function works as advertised. I have a ‘hotter cam grind’ and don’t want to bend valves or blow a head gasket. 2. Problems I have had are mostly with the app: i) Sometimes it doesn’t load any curve, and seems to run whatever you save as Default.123 - so make that a gentle map with good idle but one where you will notice a big difference under acceleration (and can’t trash your engine). Butt dyno to the rescue. ii) The ‘map curve’ which does ignition adv/retard from vacuum is difficult to understand at first, I wish it had an option to change it to Hg (mercury), rather than Abs pressure (kP) which the dizzy uses. Yes, you can look up conversion. My default is very gentle, but I have more aggressive maps to run: Default MAP No. Abs Pressure (kP). Degrees Crank 1 0 0 2 29 0 3 30 5 4 45 7 5 85 0 6 100 0 7 200 0 Note: If the Map you’re reading is shown in Degrees camshaft, you need to convert to crank by using a x2 factor. That’s buried in the crap instructions. Crank rotates twice for every single cam rotation. Look at the gear sizes on the timing chain! So you multiply cam x2 to get crank degrees. ii) You can ‘immobilize’ your car in the app, which is a feature I like (I used to run a manual kill switch). It used to work correctly, but now when I go back to settings after disconnecting, the app looks like it’s ready to go. But it isn’t, the engine will die right away. You have to enable, then disable the function. On my New iphone anyway. Not ideal. Iii) The GPS speedo is rubbish compared to other iPhone GPS apps and Speedos on the market. Sometimes it says I’m doing 153 mph (yeah, right) sometimes 25mph and I’m doing a steady 65mph on the freeway. Mostly. But it’s okay as a check, my analog speedo isn’t accurate at some speeds (very low and above 60mph). So it can help ‘fill in the gaps’. iv) As discussed, the cap and rotor aren’t great, and way too expensive. Replace the cap and rotor with a Bosch one. The ‘71 280SL Mercedes and the ‘65 Porsche 911 2.0L base used the same cap, but that’s from memory. Buy products made in Europe, so Germany or Italy. Go to a Porsche site or Imports parts supply. Dizzy cap for 123ignition 123 Tune+ Bosch 1 235 522 060 or Beru VK102 Part Number for the rotor is: Bosch 1 234 332 024 or 1234 332 088 which supersedes the 024 WVE 4R1209 For example, a good quality rotor (Italian made) is also available here for $25 shipped: https://rover.ebay.com/rover/0/0/0?mpre=https%3A%2F%2Fwww.ebay.com%2Fulk%2Fitm%2F333529359496 I bought a Bosch cap NOS (in original box) on eBay for around $16, in fact I got two- and was happy. If I wasn’t (cracked or used) I would have sent it back for a refund under eBay/PayPal policy. Finally, the rotor should not come with a resistor, I’ve modified mine by soldering in a piece of ‘house wiring’ gauge copper wire No problems at all, but you may need to file the top of the wire flatter to have good clearance. Good practice would be to encase the copper wire run in epoxy, so you don’t get unwanted spark jumps. Especially if you run MSD 6AL and a hotter coil. v) No data logging. A huge disappointment, or has to track the data, why not be able to save a ‘pull’ to look back at what the dizzy (and the car) did. Fix this! That’s it. My experience has been quite good. These are machines. Cars and engines go wrong. You all know that. There’s probably more I could say, but I hadn’t intended to write a book when I started. If you’re reading this far, you have the benefit of what I’ve discovered. I like the 123i Tune+ dizzy and plan to use another one soon- maybe just the USB one as it could have a single standard tune. This is on a built stroker 3.xL with triple webber DCOEs, hot cam, etc. I’m not scared that if set up correctly, it won’t detonate your engine. It should default to a map that ‘still makes sense’ if it goes out. BTW the holes 4&5 on the L6 are more prone to failure than the others. Don’t ask me how I know...1 point
-
1 point
-
As a business owner, if I was being endorsed or using the endorsement of somebody convicted of fraud, I would want to be told. If I continue to use them, then that is my prerogative but I would at least like to be made aware of something that might not be readily known.1 point
-
1 point
-
Having trouble adding a video- but here's an update on my 240: HUGE shoutout and THANK YOU to everyone in this thread- especially 240260280 for all the help and advice! Please excuse the mess in the garage, it's usually immaculate hahah1 point