Leaderboard


Popular Content
Showing content with the highest reputation on 08/31/2019 in all areas
-
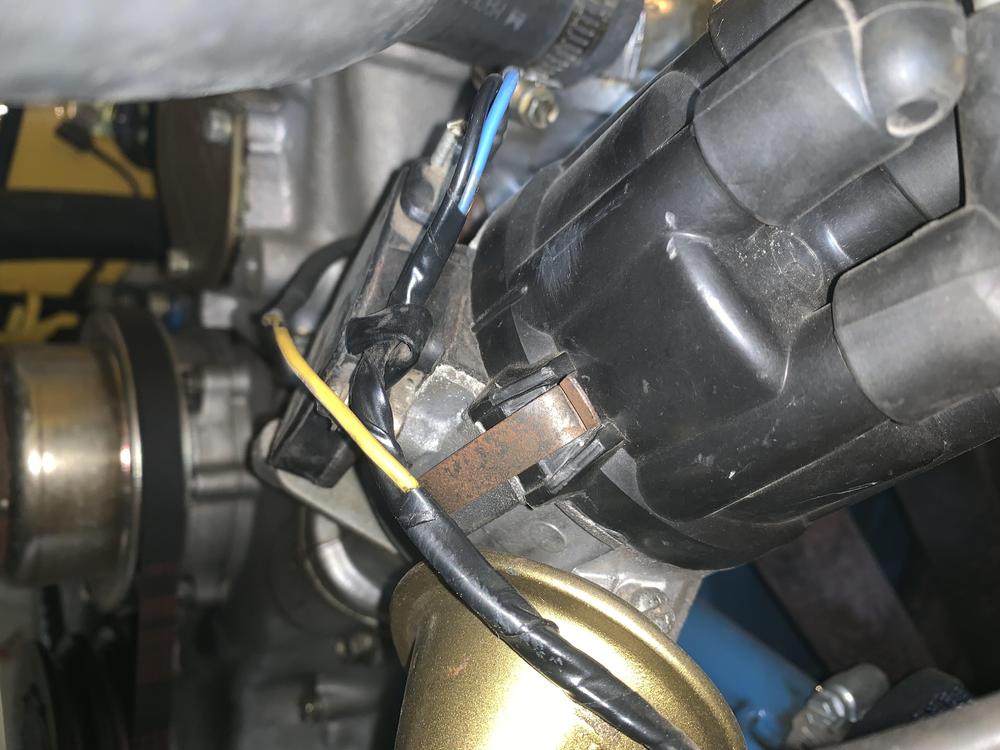
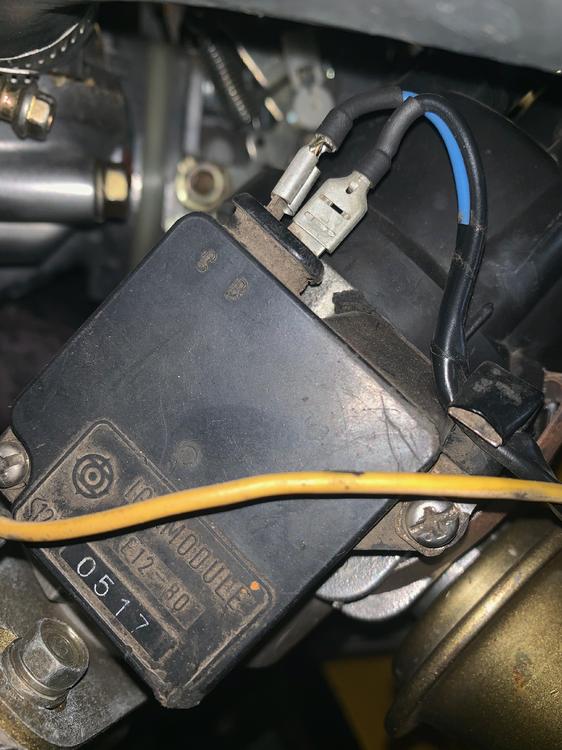
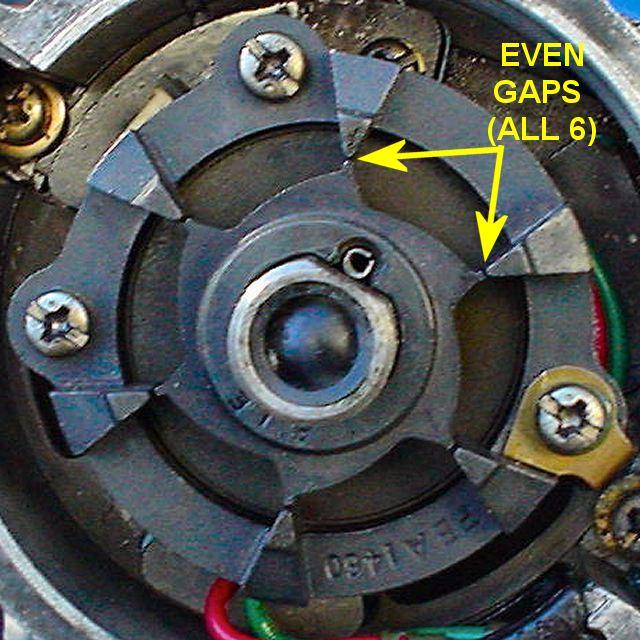
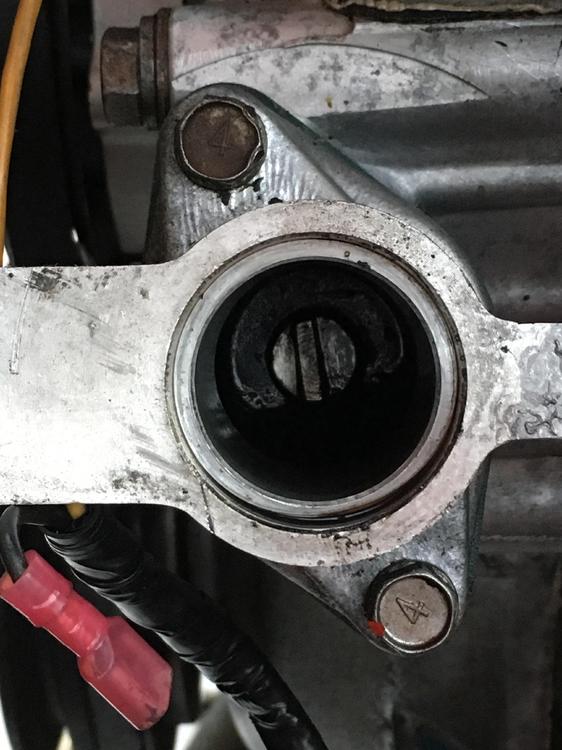
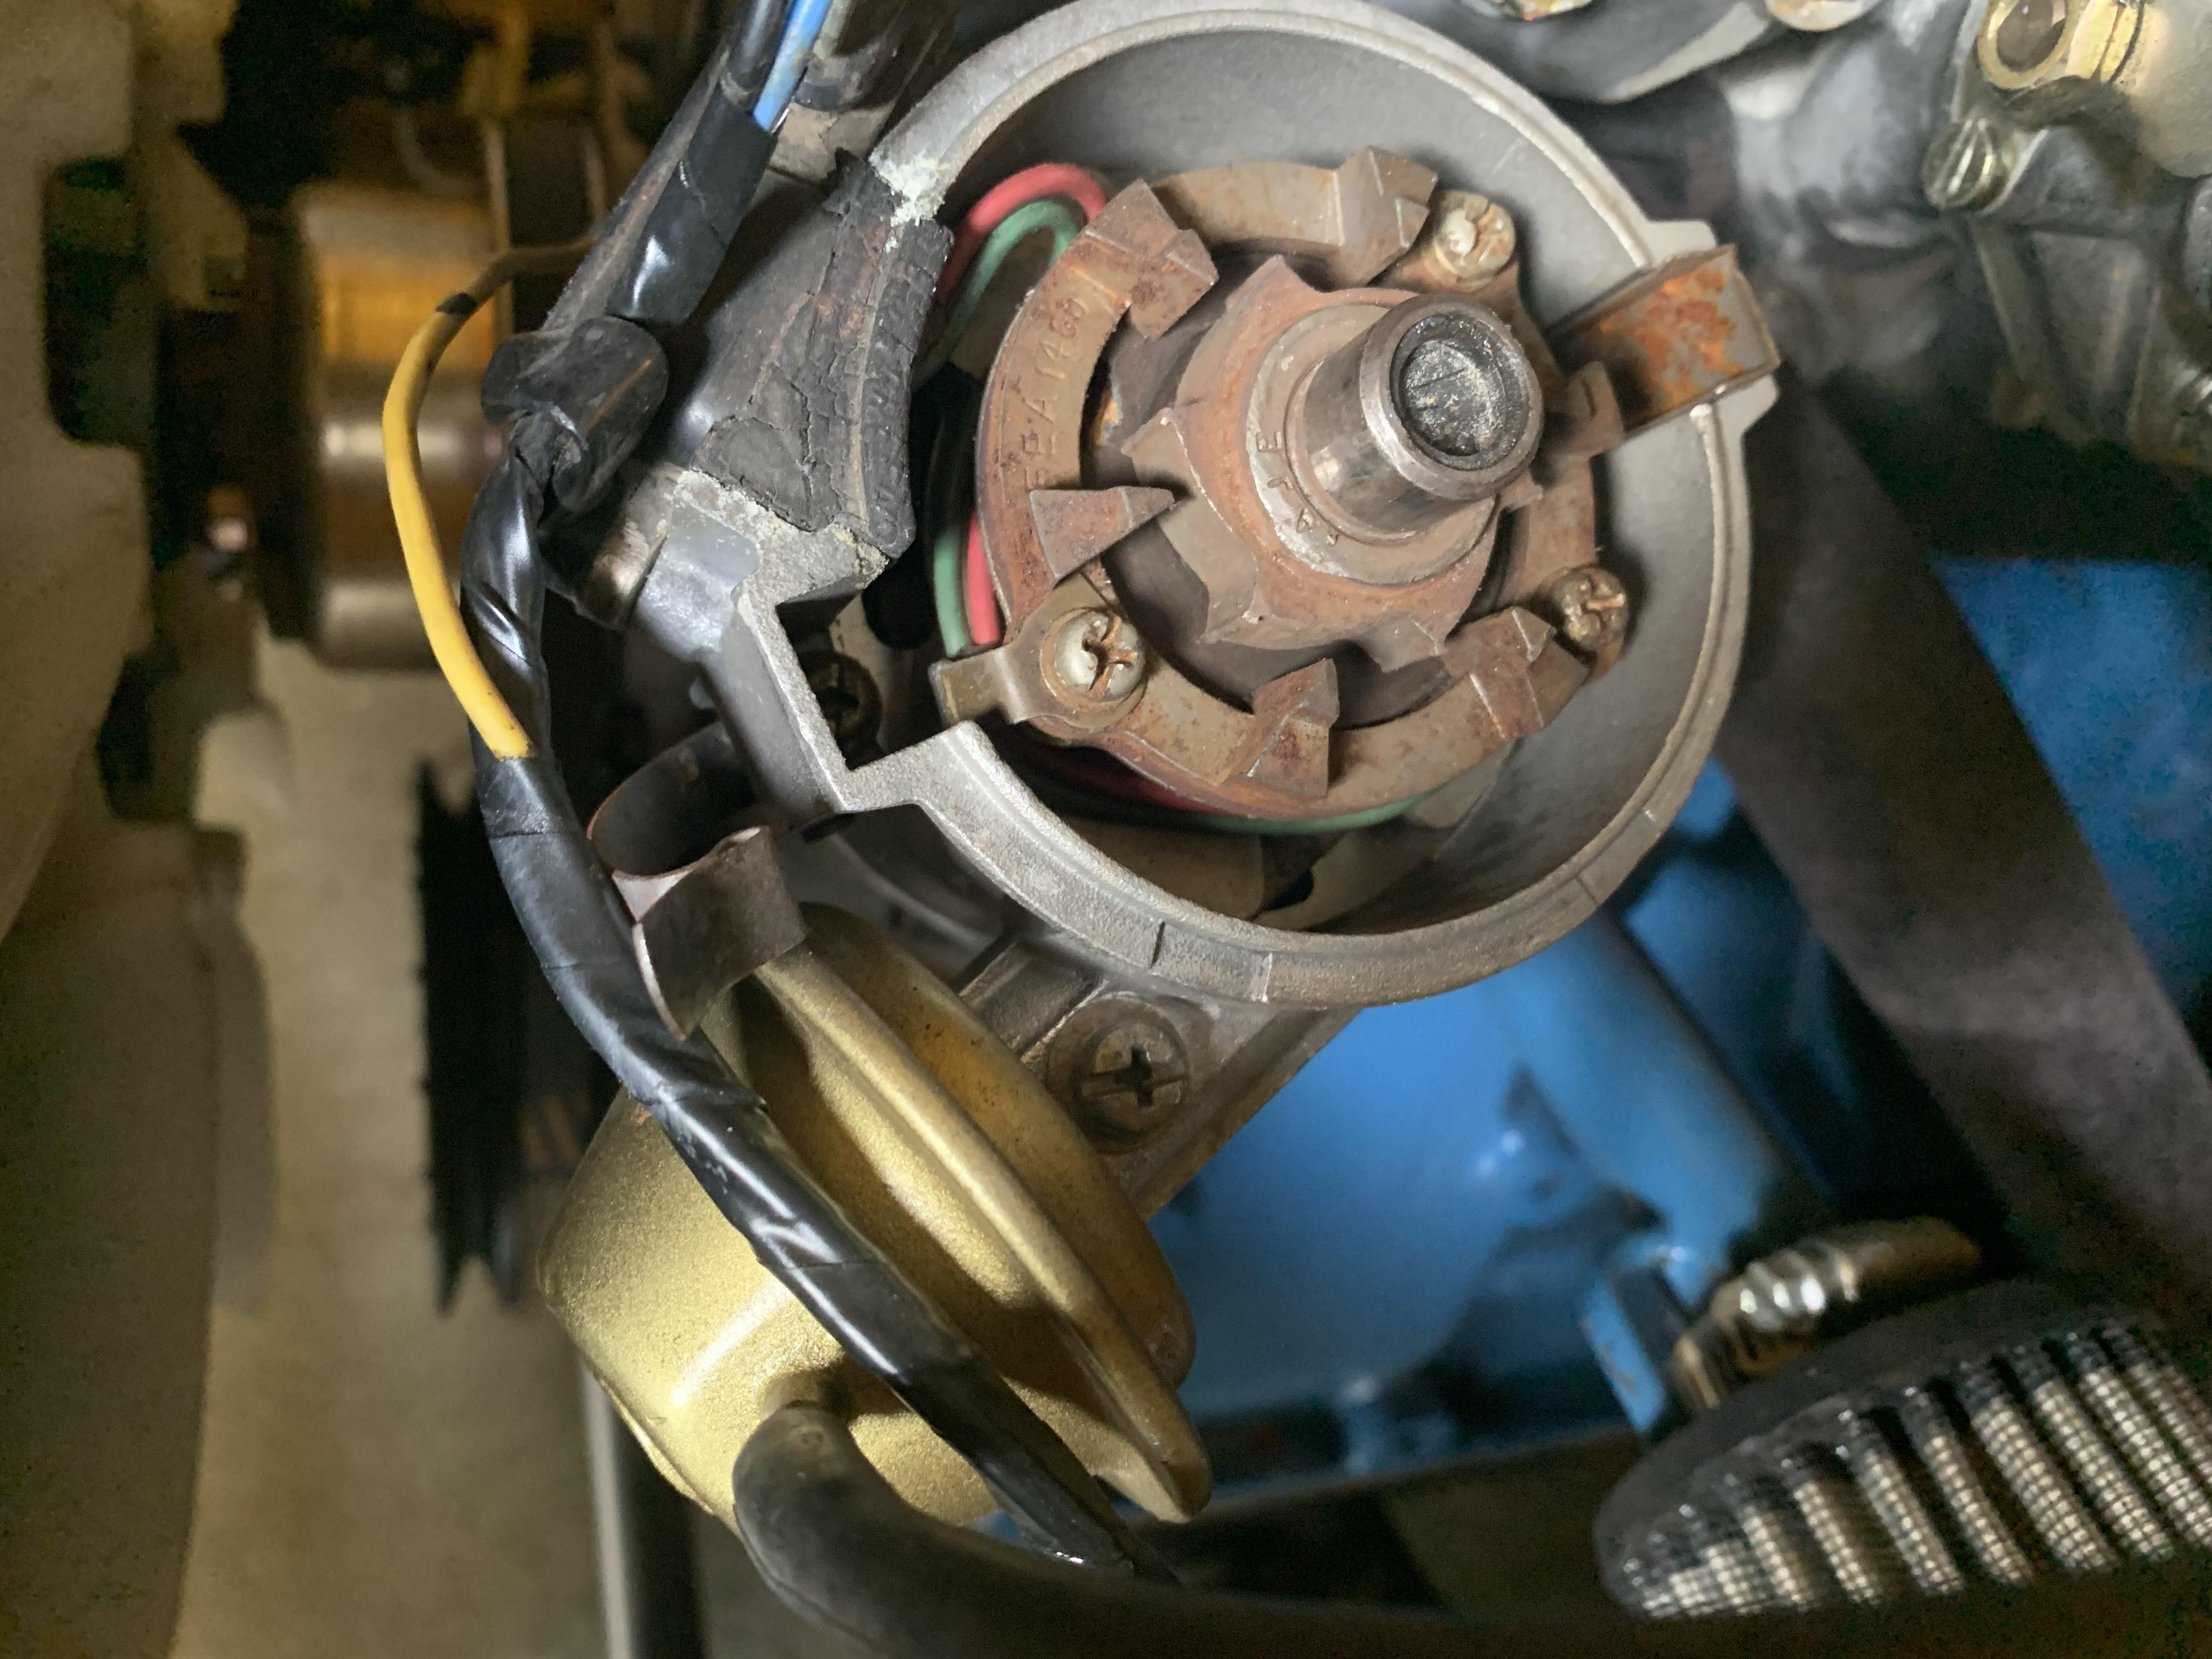
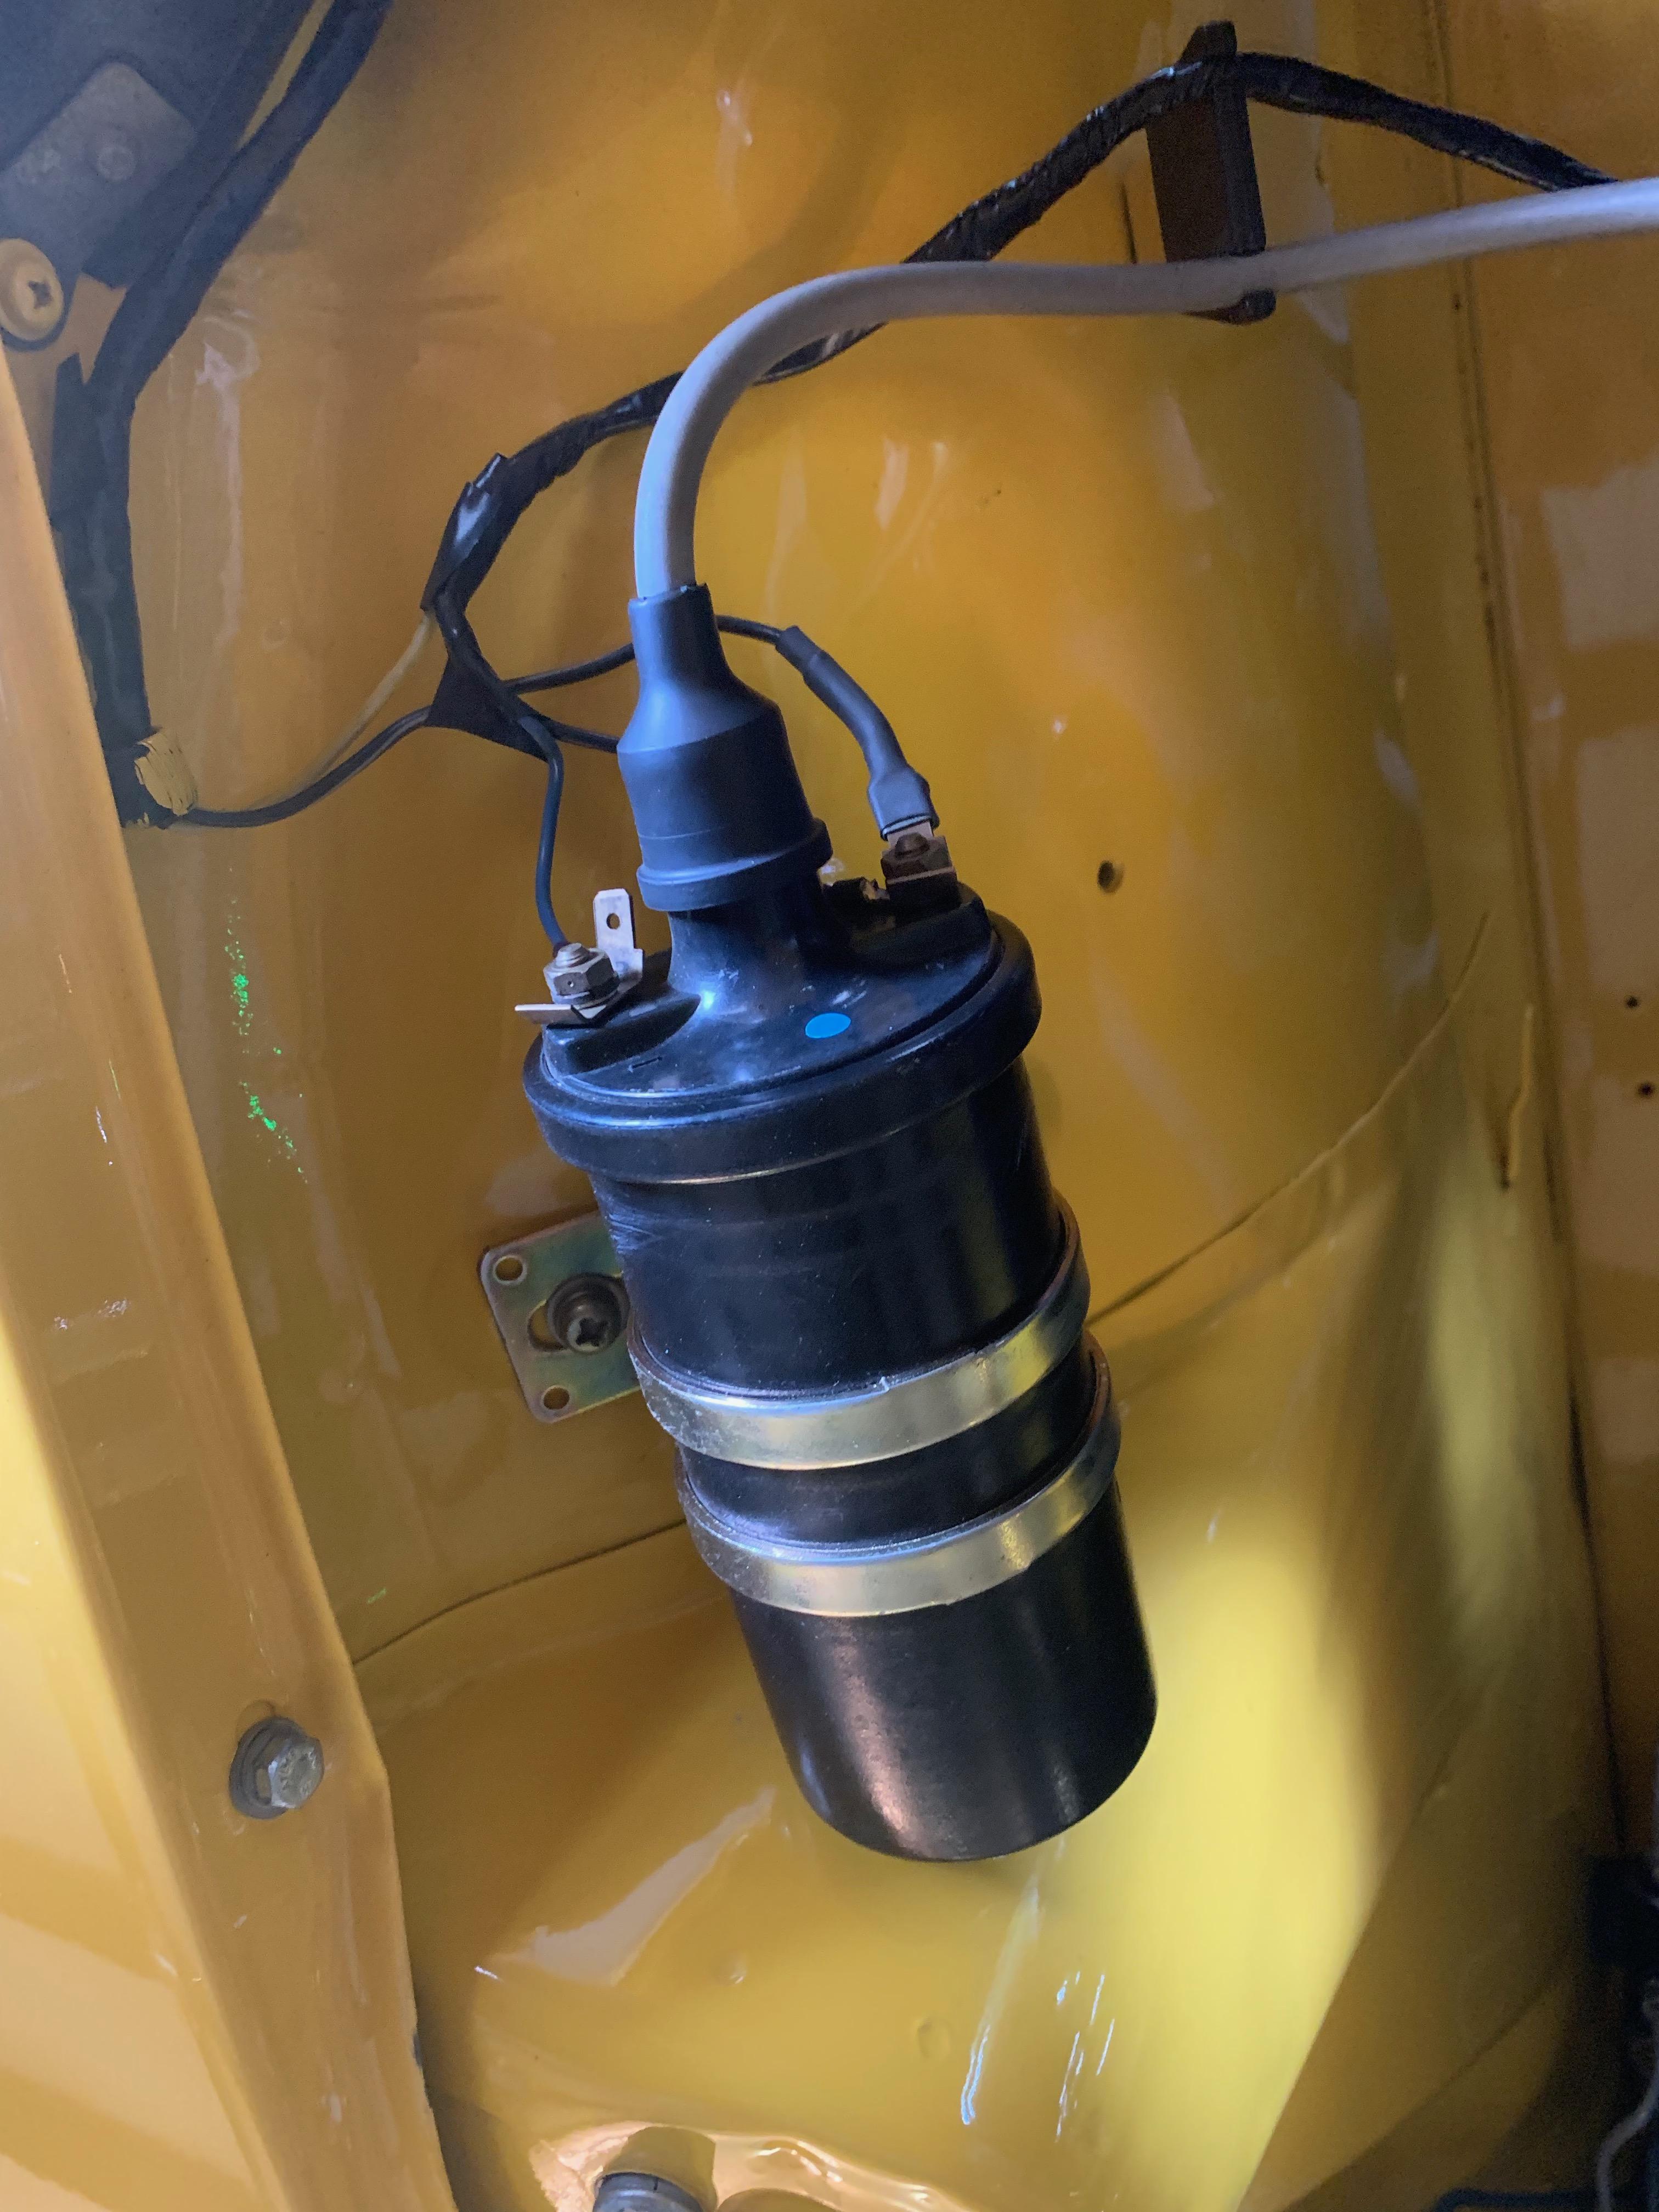
2 pointsHi all, There has been some recent discussion about HEI modules, distributors, and other related components lately... I decided to take a quick trip down to the garage and took some photos of my setup. I didn't do this conversion myself, so, I don't know much about it. However, from what I do know this is a 280z distributor conversion. My favorite part of this conversion is a huge reduction of clutter in the engine bay. It's also very simple and eliminates the problems associated with points under the cap. I have a 1971 Z, but, this is a newer generation distributor. If anyone is interested in further details, I can give Steve a call at Ztherapy to get the specs. Here are some photos. This is the internal rotor, notice that I no longer have points! Side of the distributor, showing the electronics mounted on the outside. And my favorite part! Clean and tidy!!!!

 2 points
 -
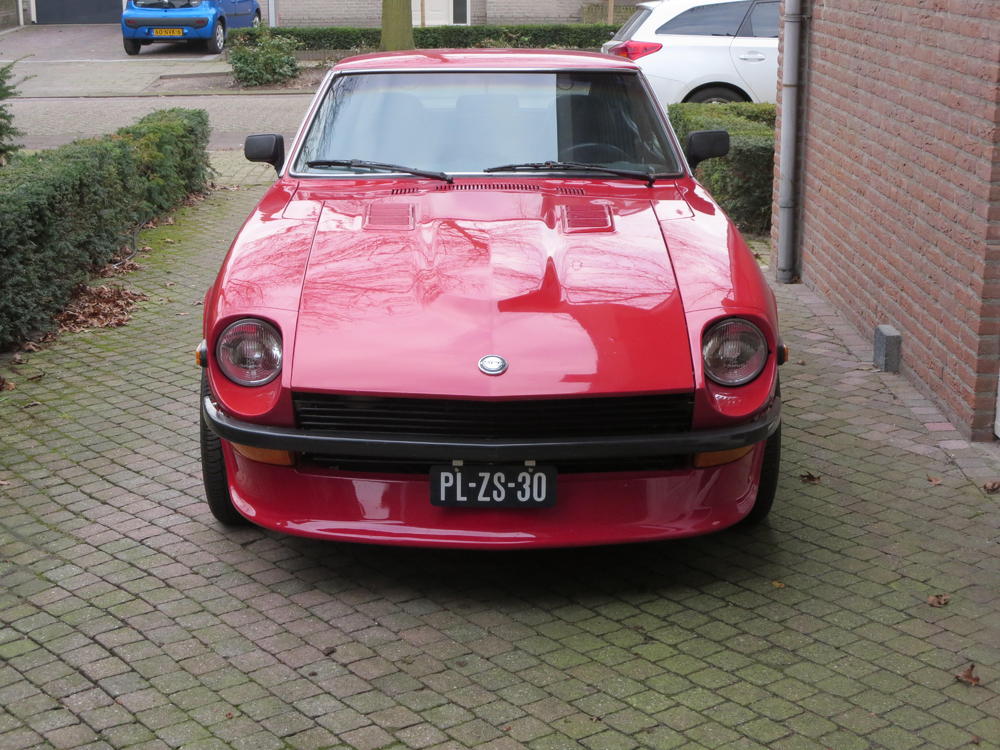
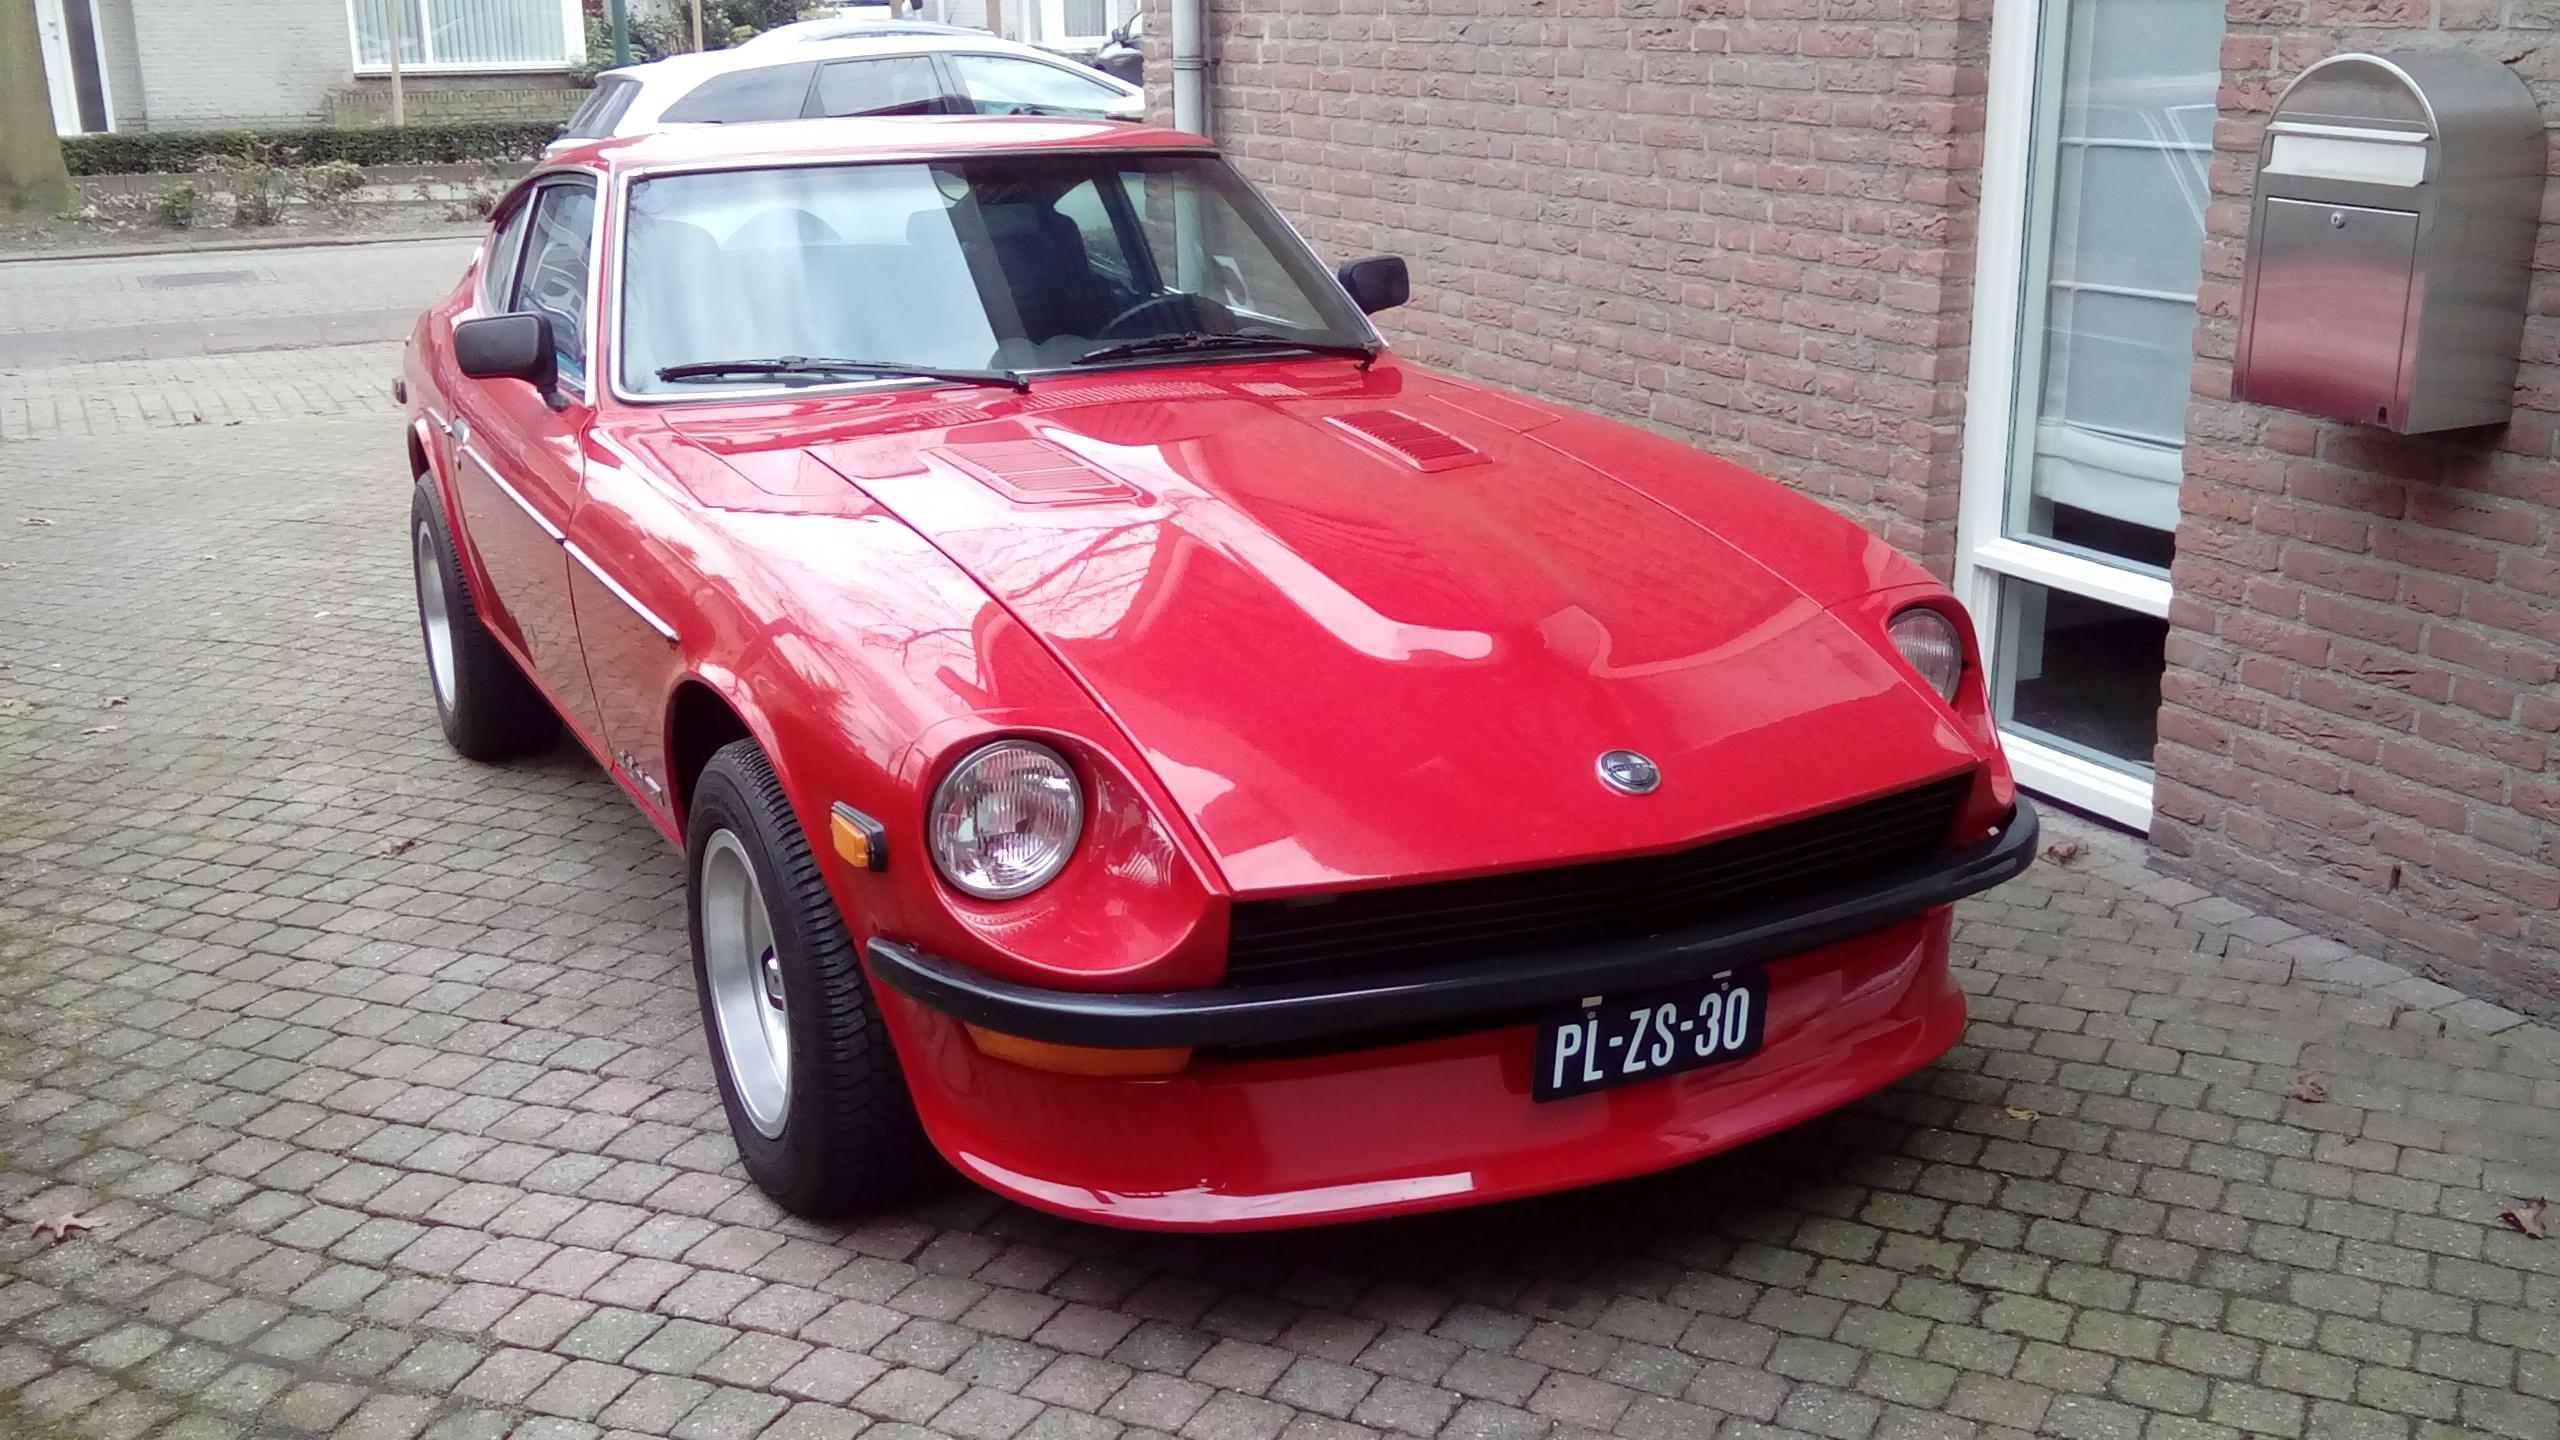
2 pointsI went for the Type 1 fibreglass for the 240Z since fitting the 240 valence is not possible with the lower 280Z frame. Looks neat with the modified 240Z grill.

.thumb.JPG.8ef0ef0e0442b66412f0e37b2ac1fe0f.JPG)
 2 points
 -
I orig thought that, but checked my test stand setup and noticed it was off kilter to and seemed ok.1 point
-
found these on American eBay but if you do a google search for 280z fuel injector screws, quite a few options come up and some might be more accessible for you. https://www.ebay.com/i/233306012858?chn=ps&norover=1&mkevt=1&mkrid=711-117182-37290-0&mkcid=2&itemid=233306012858&targetid=595076424168&device=c&mktype=pla&googleloc=9011117&poi=&campaignid=1689407462&mkgroupid=74365777588&rlsatarget=aud-622524042918:pla-595076424168&abcId=1140476&merchantid=6520324&gclid=CjwKCAjwtajrBRBVEiwA8w2Q8B6xG_uGo4QQOtuFHYTL8miOAM0rarcoMYrLlfhc16dnzueLFIfL5RoCx94QAvD_BwE1 point
-
Found the guy on ebay! Mainky OEM parts https://www.ebay.fr/itm/Datsun-Interior-Door-Handle-Escutcheon-Screw-Set-of-2-240Z-260Z-280Z-OEM-NEW/233306897817?hash=item36522cbd99:g:UW8AAOSw5ItbLTLz But shipping through ebay program is killing me! 30 buck to ship 12 injector screw....com'oooooon! Screw source? I buy!!!1 point
-
1 pointYou should also make sure the middle rotor is centered to the stator. Easy to do and they get out of whack. I was looking and "Blue" popped up! So thanks again! Now I won't do the whole @yomamma's.
 1 point
 -
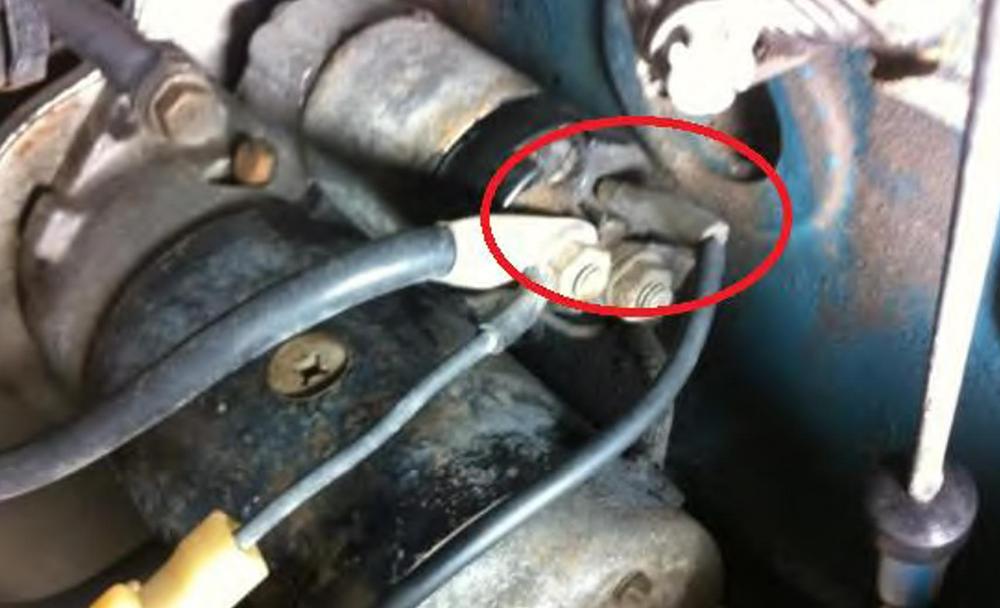
Pretty sure it's this one, circled in red and blue.
 1 point
 -
1 pointI found one on Amazon that was M12x1.25 and it fit, so all good now.1 point
-
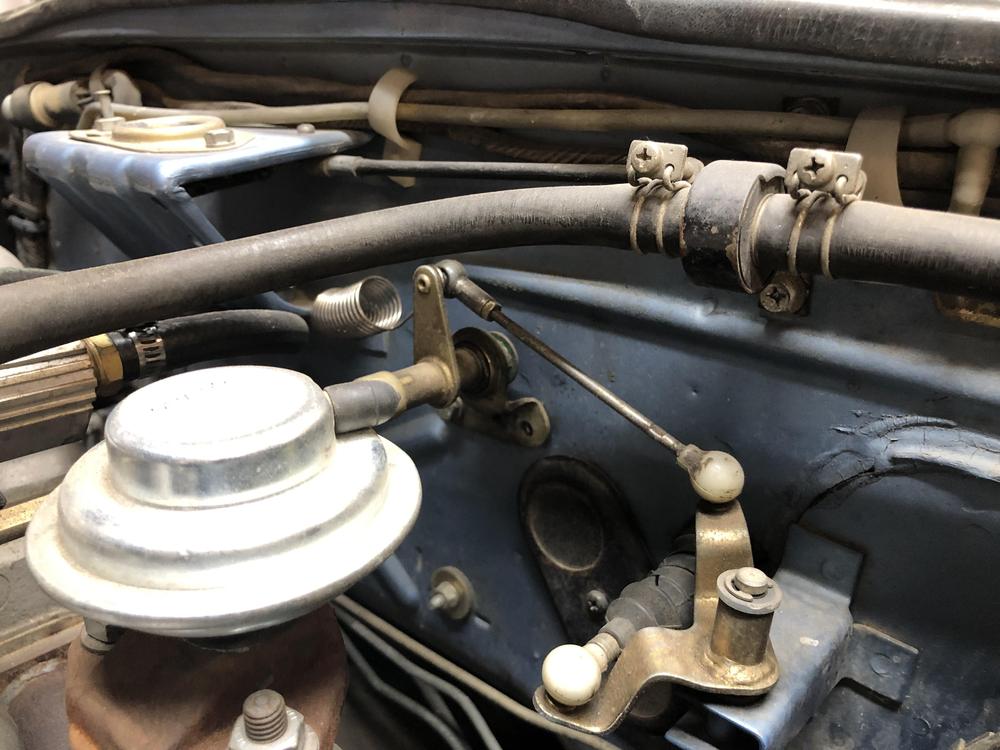
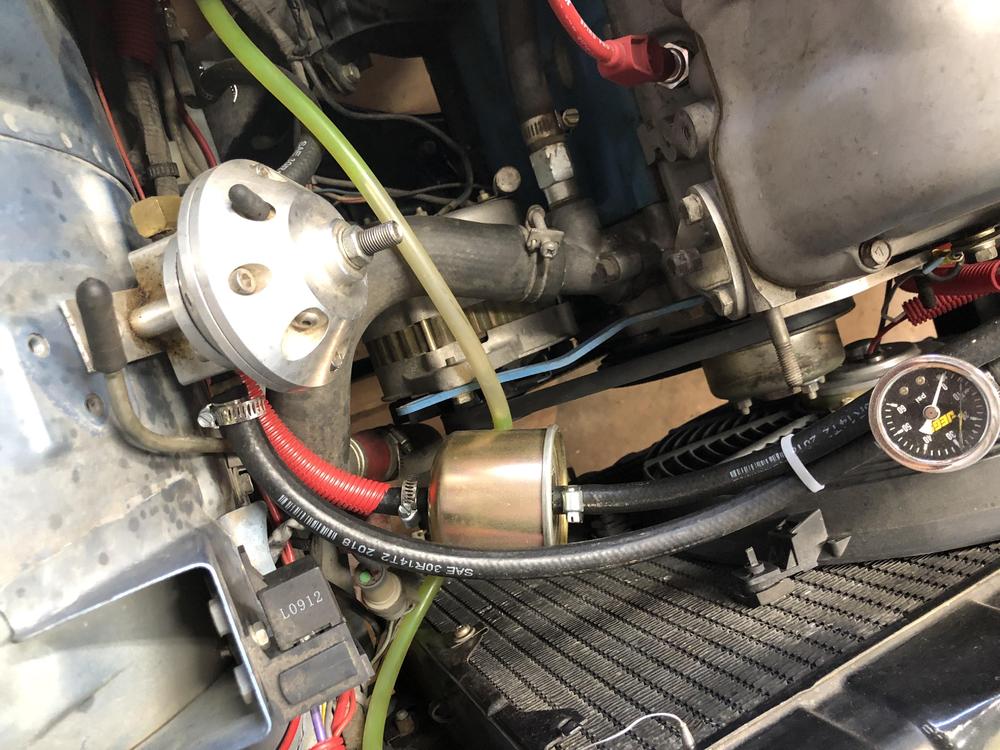
Thanks to everyone for all the quick responses. Really appreciate it. @SteveJ, thanks for the point to the right documentation. Have it now and have started reading. According the the previous owner, it had a cat and he took it off when he ditched everything else. Will look into that more. @EuroDat, I'm getting questions to the previous owner now. Did find out that he had swapped engines completely. It's an L28, but different number (doesn't match cars VIN). Will see what he says about the AFM and Cam. There is a BEGI fuel regulator, but it doesn't have a vacuum line hooked up to it so I'm assuming it's not doing much. I'll look through the boxes of stuff we got with the car to see if I can find the actual model number or documentation for it to look into this more too. Once my son is up to help, I'll start the car up and watch the fuel pressure and get notes back to you. @siteunseen, I've attached a better picture of the area you circled. I think it's just a spring back there.
 1 point
 -
1 pointRun the bolts in to their holes without the head and measure the distance from the bolt head to the block. If it's less than head thickness it's as good as it needs to be. In manufacturing, precision and accuracy cost money. There's no purpose to having all of the bolt holes the same depth so that spec would not be set that way.1 point
-
Btw. An easy way to run the pump is to remove the spade terminal from the starter motor and turn the key to start. That will override the safety feature (oil pressure switch or flow switch in the afm) without running or cranking the engine continuously.
 1 point
 -
1 pointThere's nothing like a good mystery story... As luck would have it, I have in my workshop a fully-reconditioned, stripped-down L24 block sitting on an engine stand. I also have a depth gauge! What I discovered is quite interesting... The block has 7 head-bolt holes along each side. The depth of all of the holes along the passenger (right) side of the block is 26.5mm Things are much more interesting along the driver (left) side. Numbering from front to rear, the hole depths are as follows: 1. 32.0mm 2. 29.0mm 3. 25.5mm 4. 32.0mm 5. 26.5mm 6. 32.0mm 7. 28.5mm These measurements should be considered accurate to +/- 0.5mm. Nevertheless, there's a substantial variation along the passenger-side. Why is this? I'd have to look at the head casting (not convenient). However, I expect that height of the bosses for the head bolts have variations as well. You also have to take into account that there are three different lengths of head bolts (the parts manual calls them 'S', 'M', and 'L'). They may have different threaded lengths, too, but I don't have a set conveniently available to check this. It seems to me that -- properly assembled -- each head bolt should end up with relatively full engagement of its threaded length. If you get their locations of the S, M, and L bolts mixed up, you may end end up with problems. I can't find any info in the L24 FSM. It only offers this cheerful note: 'Three different types of bolts are use (So be careful when in installing).' My Haynes manual does have a bolt diagram -- although it says there are only 2 different bolt lengths - 'Short' (S) and 'Long' (L). With that noted, Haynes says: Passenger Side: all 'S' Driver's Side - from front to rear: L - L - S - L - S - L - L Maybe Tom Monroe's book, Rebuilding Your Nissan/Datsun L24 Engine' offers more detailed info. Unfortunately, I've misplaced my copy. As a first step, I suggest that you use a depth gauge (or a 'calibrated' piece of wire) to ensure that all of the hole depths in your block are about the same as my measured depths. I'm pretty sure that they will be. It seems inconceivable that just the tip of a bolt would break off at the bottom of its hole. If one of these bolts snaps off, it's going to happen at the top of the threaded part, not half-way or three-quarters of the way down, so you should be able to clearly see the top of the broken bolt sitting at or slightly beneath the top deck of the block. BTW, all of the bolt holes are blind. That is, none are open at the bottom to some other water/oil passageway.1 point
-
1 point
-
anything worth doing, is worth doing three times. or more.
 1 point
 -
Wow, 2 grand. I have most of 3-4 sets in stock and upwards of 8 rear muffs. Trip to Vegas?1 point
-
Thanks. I'll give that a try as soon as I get the new o-rings. 11mm fit for me!1 point
-
Outer tie rod ends are easier than ball joints to replace. Just a nut at one end and a small ball joint at the other. Don't be intimidated. If you can change the suspension parts you can easily do the steering parts. The only trick is to match the length of the new rod with the old. Counting threads may be helpful if the rods are similar. FYI: The trick to doing a suspension is ensuring it is loaded with the car's weight before tightening to spec. To do this simply work on one corner and install all parts loosely loosely (with the car on jack stands) Note: do not fit sway bar endlink hardware yet. Then put a jack under the suspension corner you are working and jack until that part of the car lifts a few mm off the nearest jack stand. Then torque all nuts and bolts. The Tension/Compression rod must be snug but still free to swing up and down otherwise, if too tight, it will load your suspension. You should check this before connecting the free end to the control arm end. To do the sway bar, finish torquing both sides as per above then have the car on jack stands and put jacks under both front control arms/ball joint area to lift them up so that the endlinks can be fitted. Sway bar end links are hard to install with one side hanging.1 point


.JPG.5ac43e550e1e25a29f52eb39b67e449f.JPG)