


Leaderboard
-
gwri8
Free Member5Points1,385Posts -
bartsscooterservice
Free Member2Points1,900Posts -

siteunseen
Free Member2Points15,115Posts -
AZDatsun
Free Member2Points412Posts


Popular Content
Showing content with the highest reputation on 07/05/2019 in all areas
-
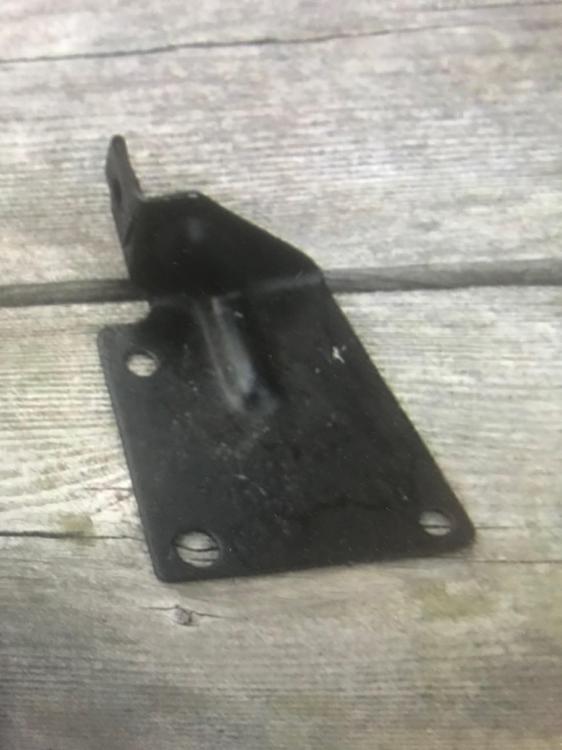
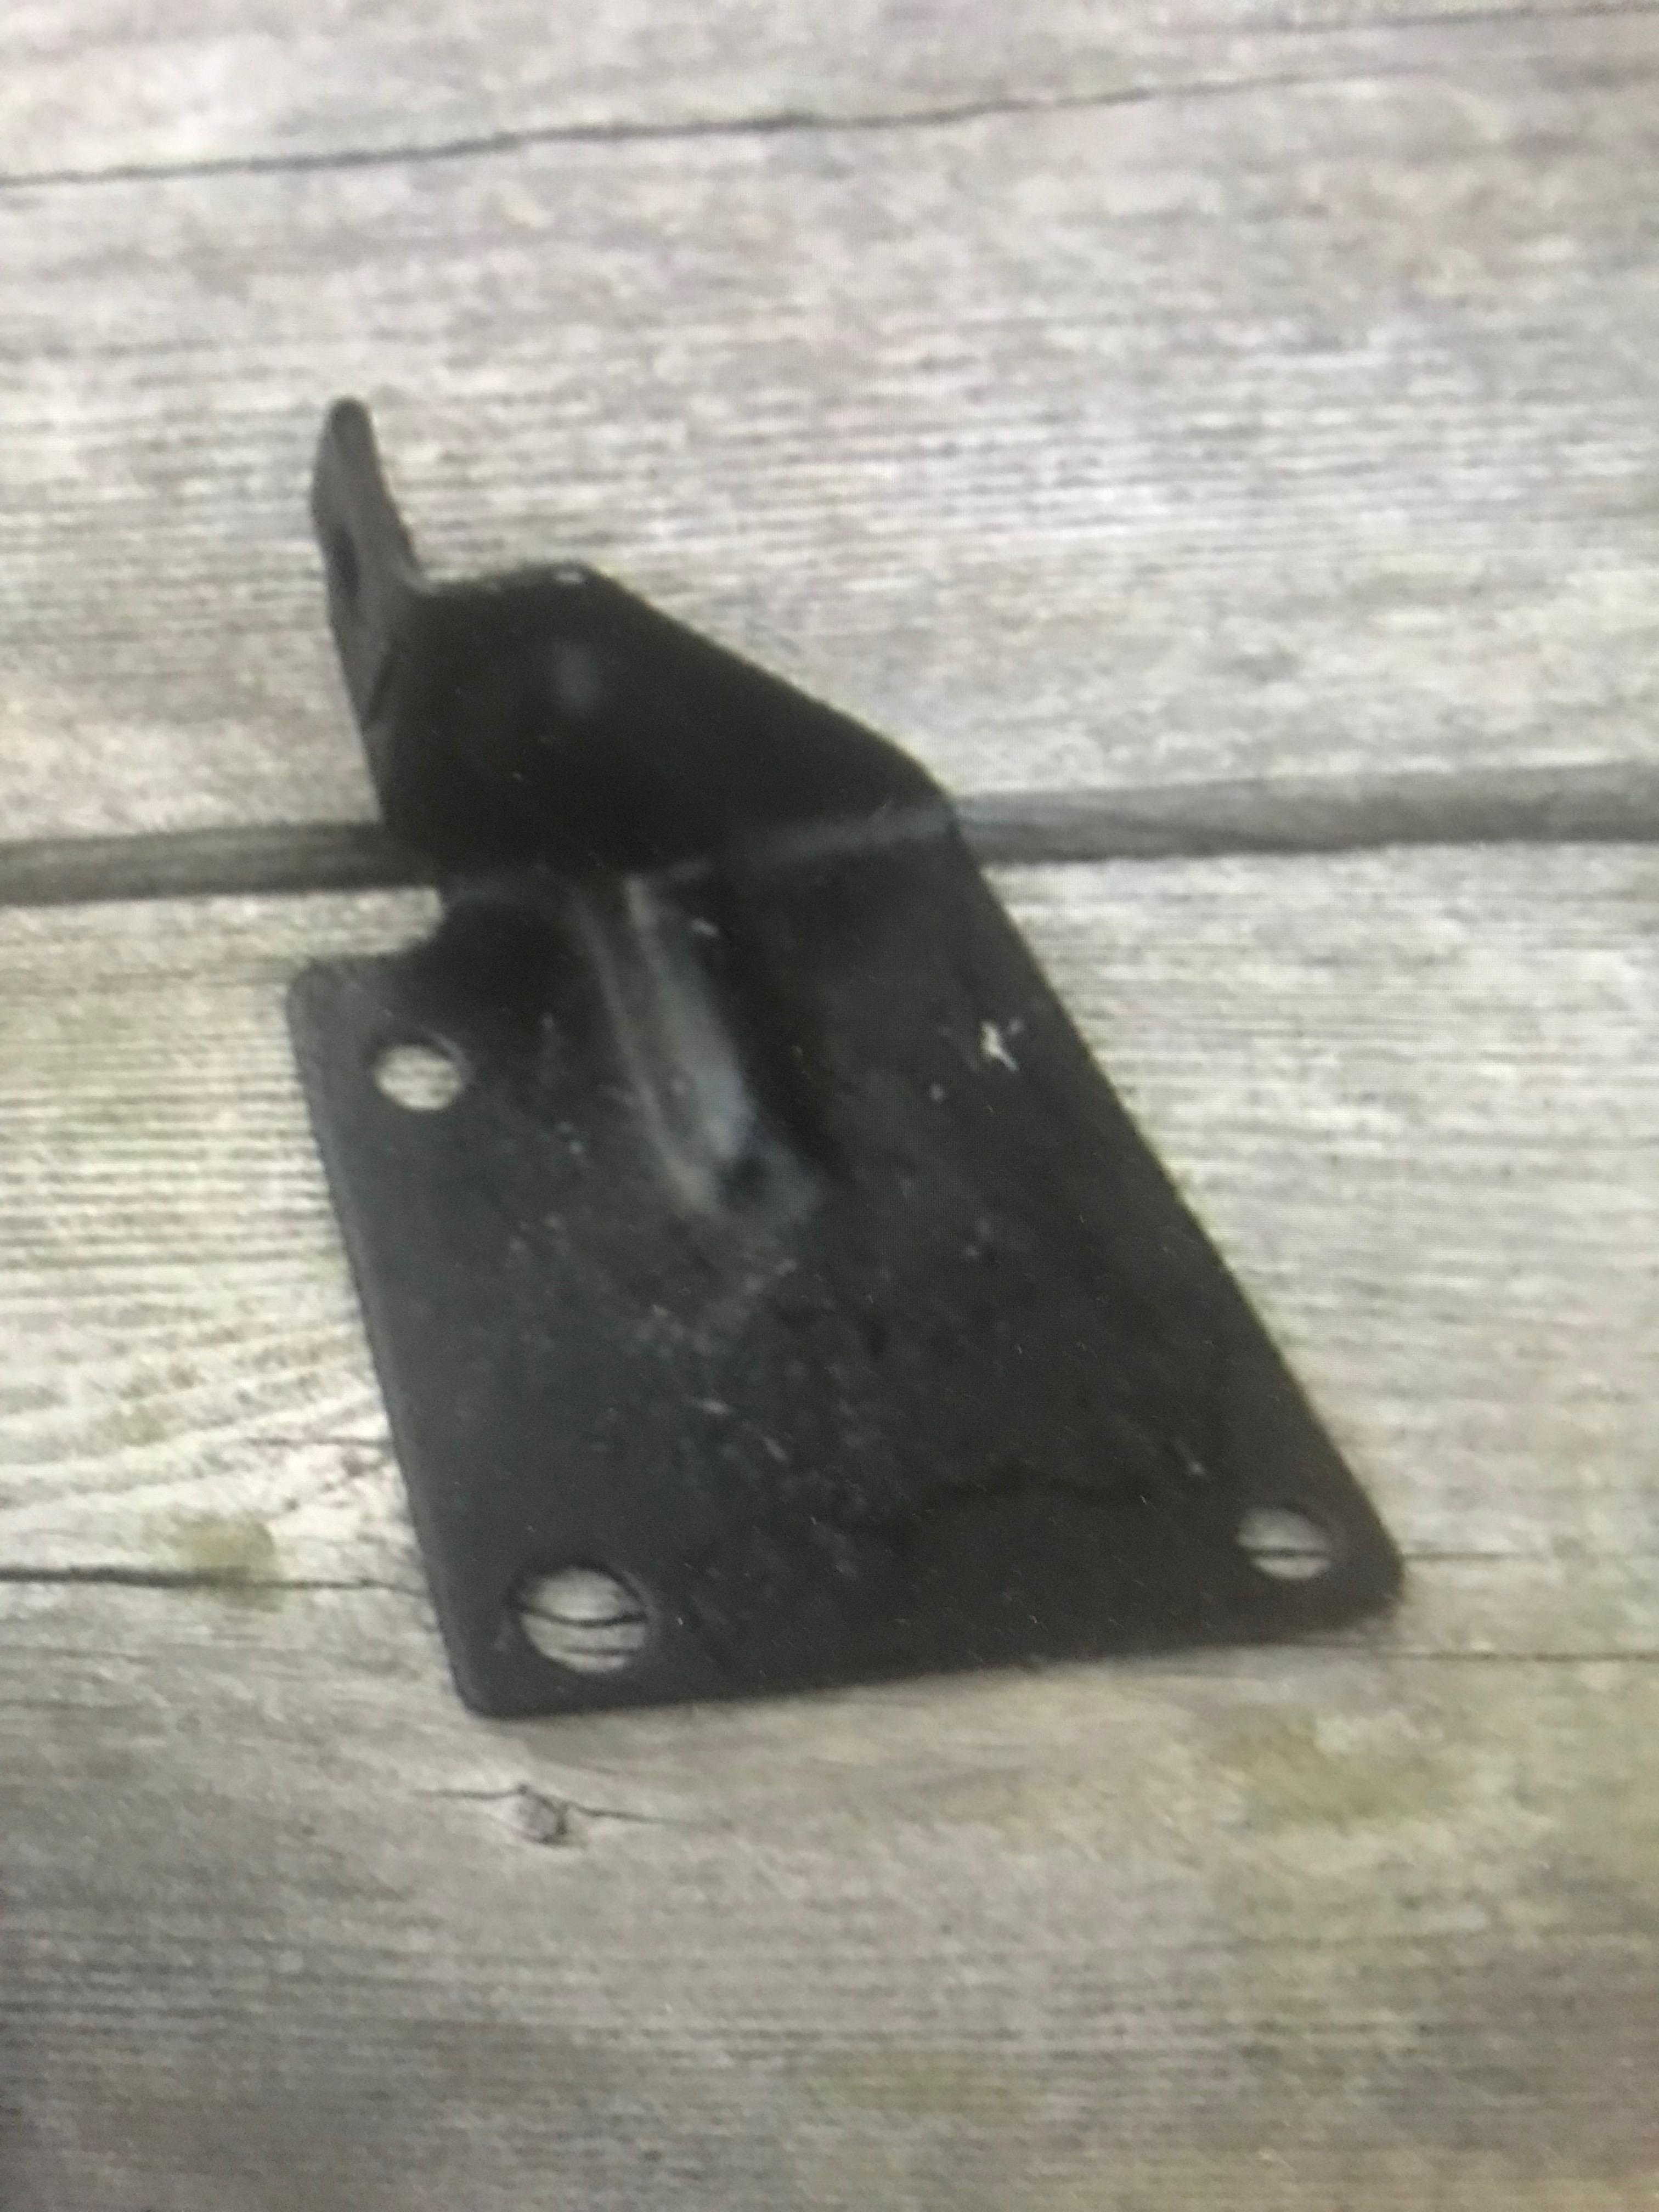
This flange goes here. It's the screw in support on the passenger side for the finish piece under the glove box. Sorry for the camera angle as I don't contort like I used to, but tilt your head to the left when viewing and you should be able to figure it out. I remember every thing in that tight area is kind of like a puzzle as far as which piece goes in first because some of them overlap. Good Luck!
 3 points
 -
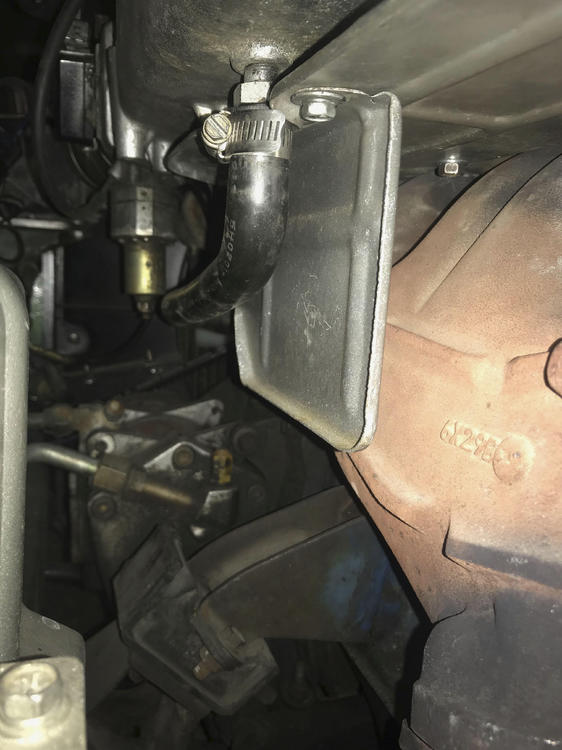
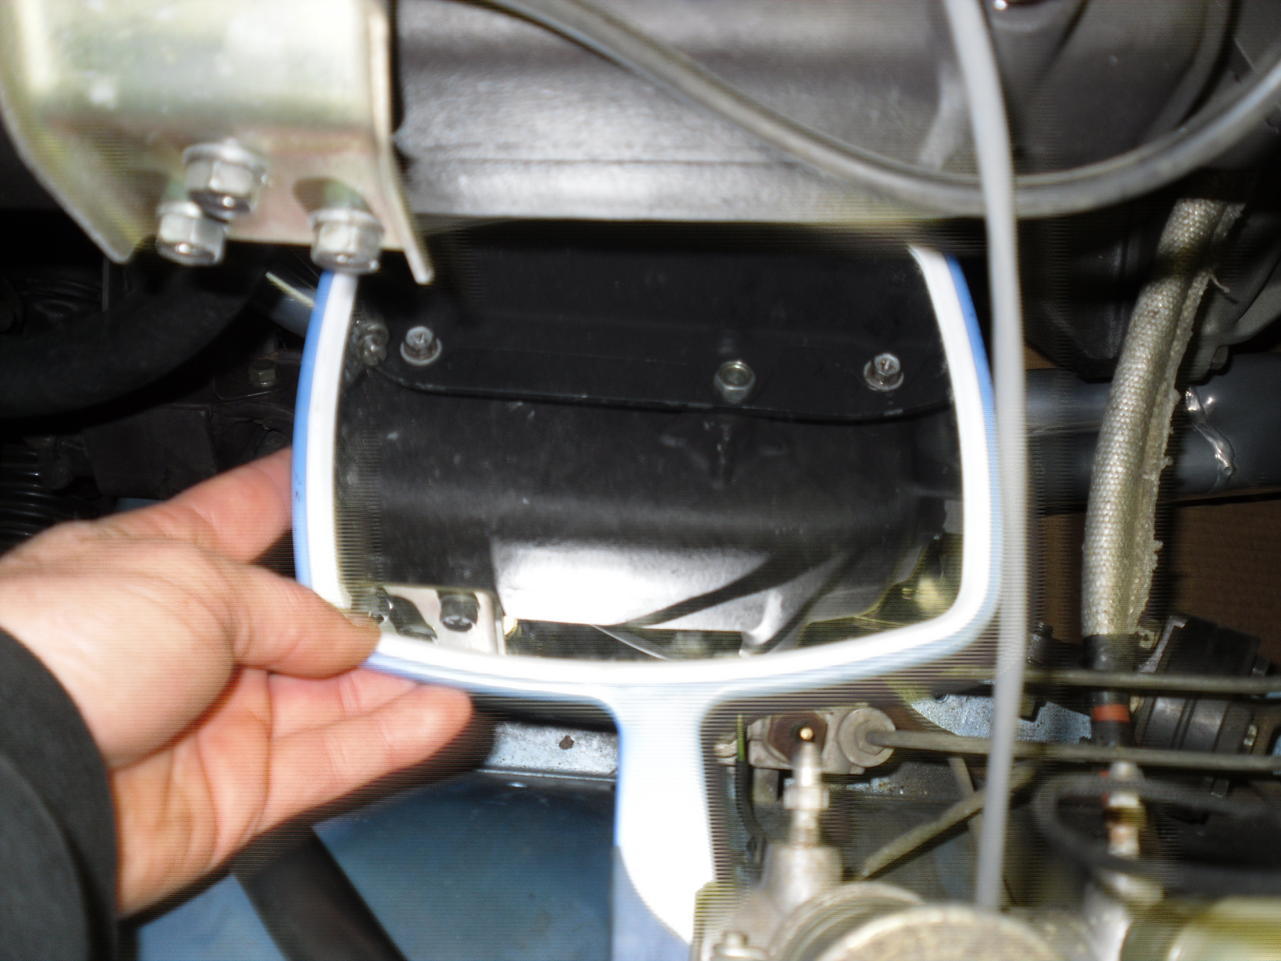
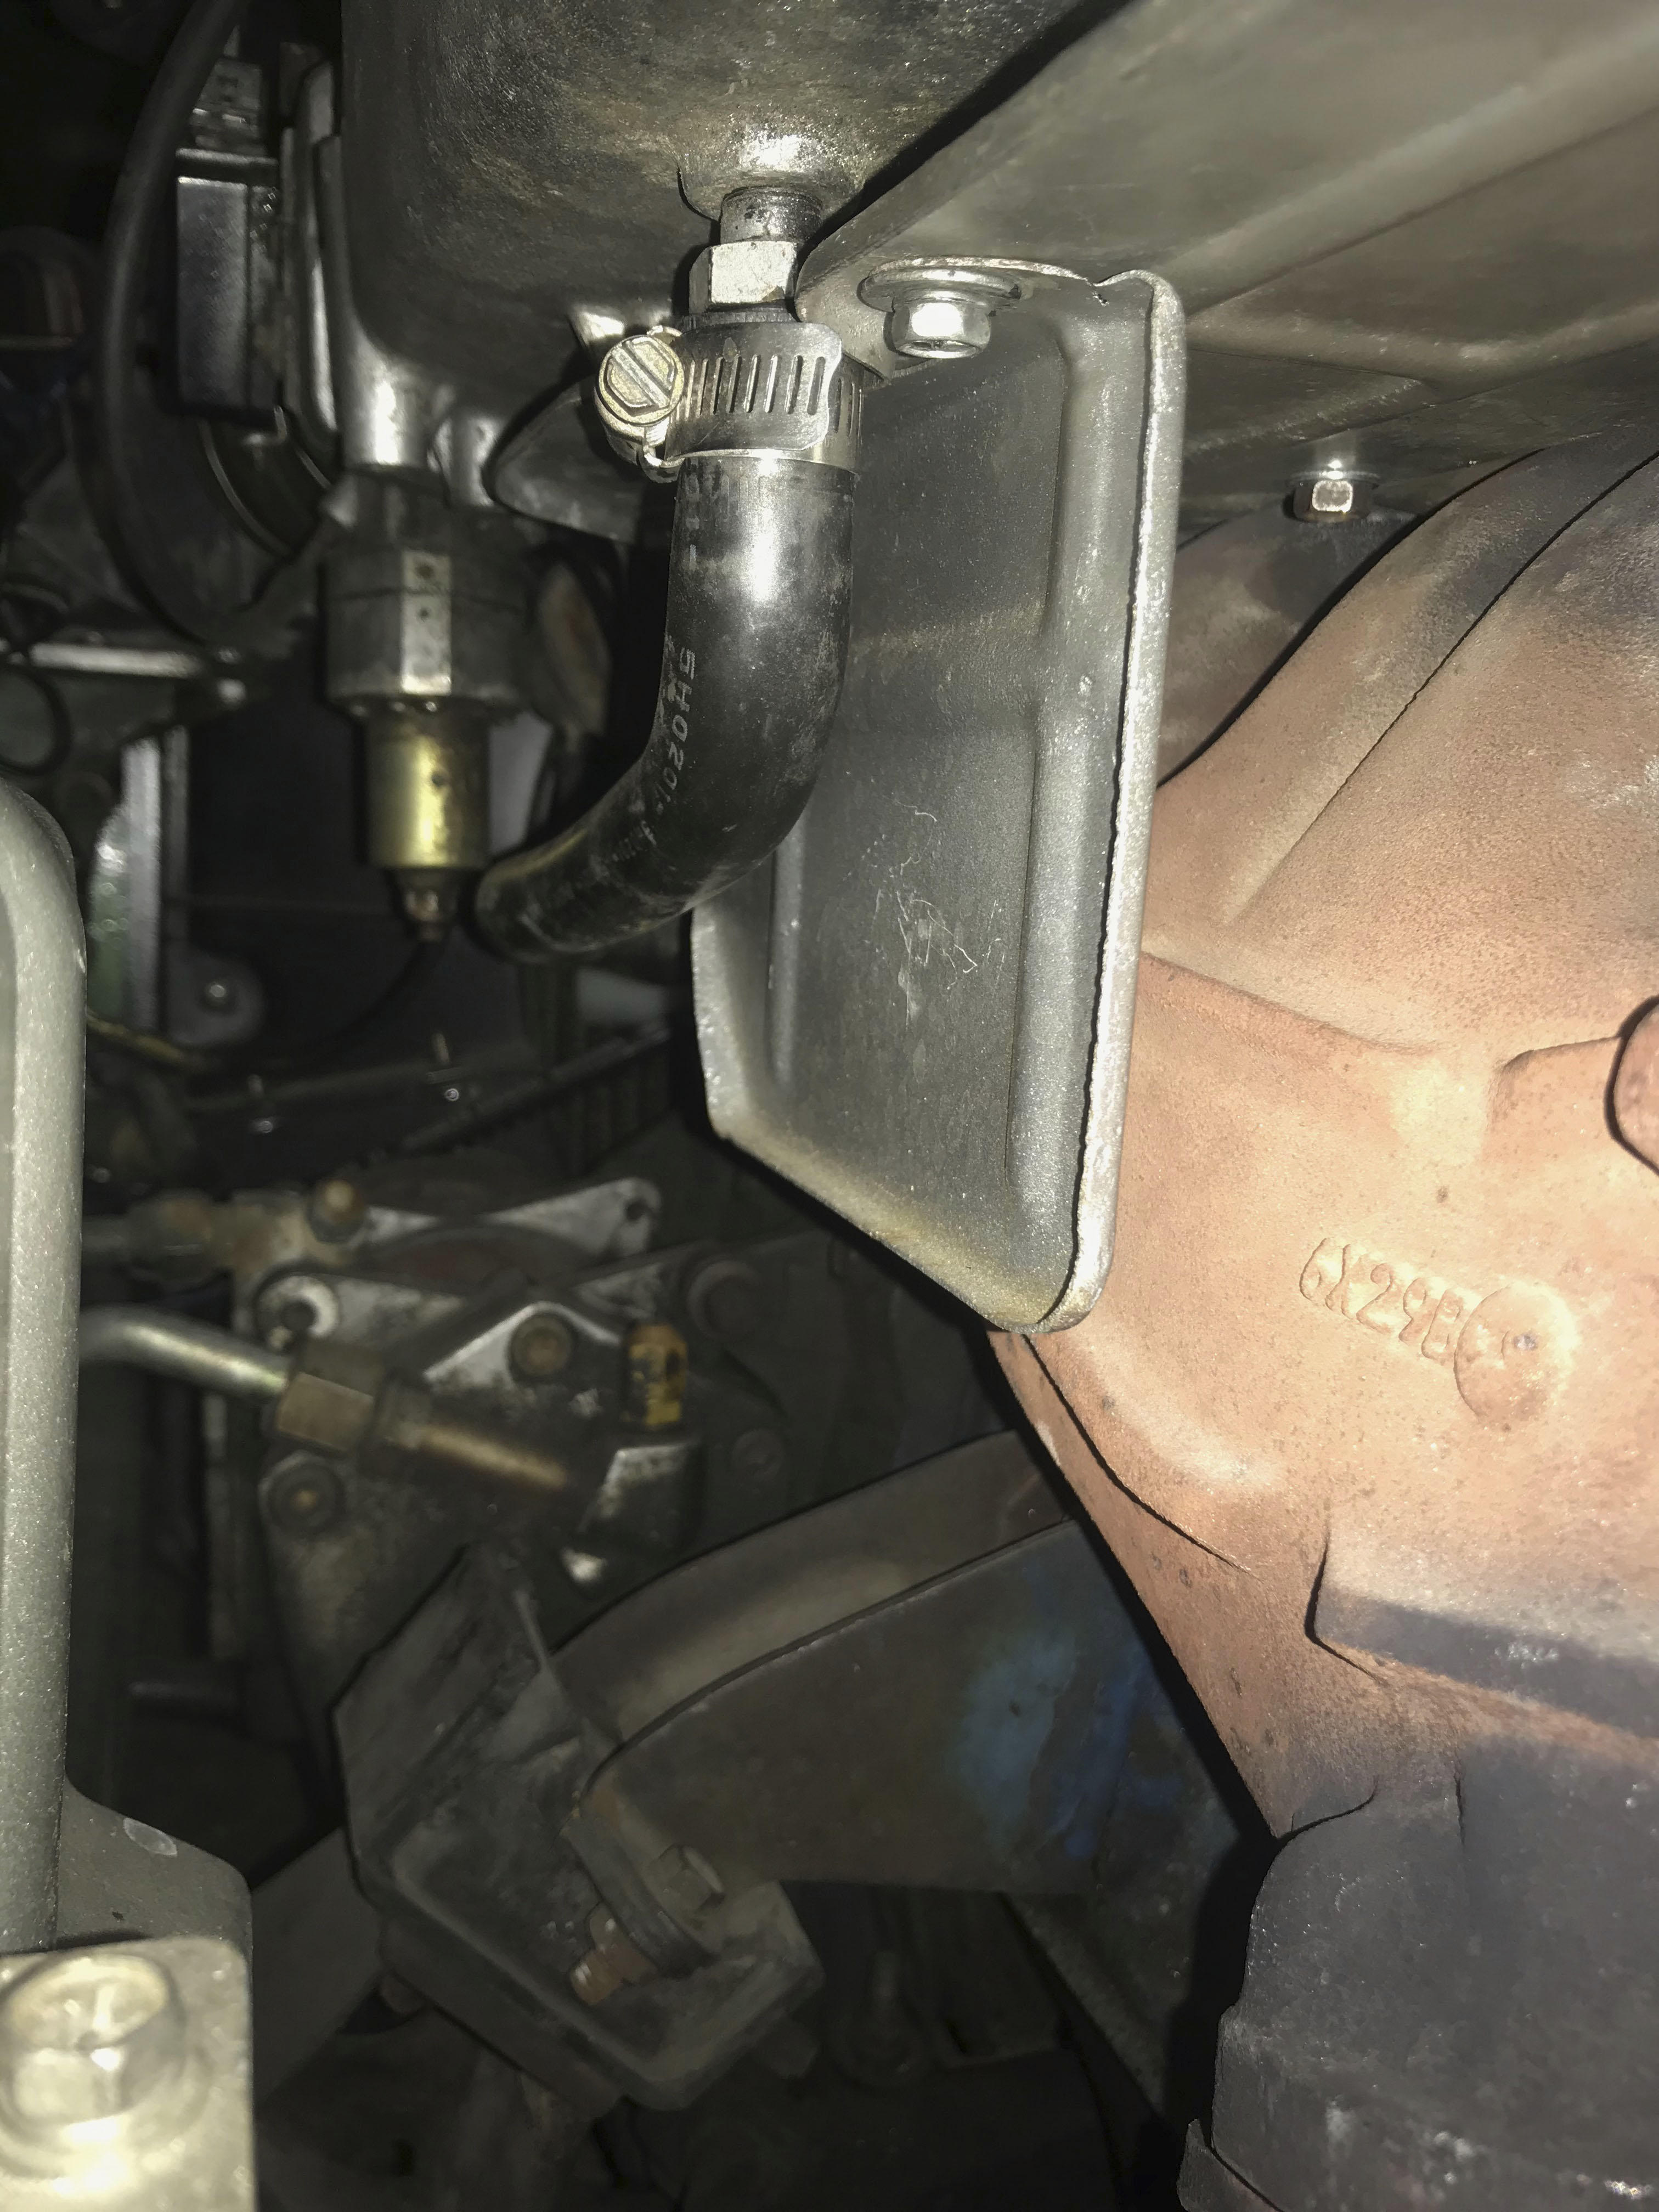
The silver heat shield mounts to the bottom of the intake heat shield it protects the hose going from the PCV valve to the side of engine Sent from my iPhone using Tapatalk2 points
-
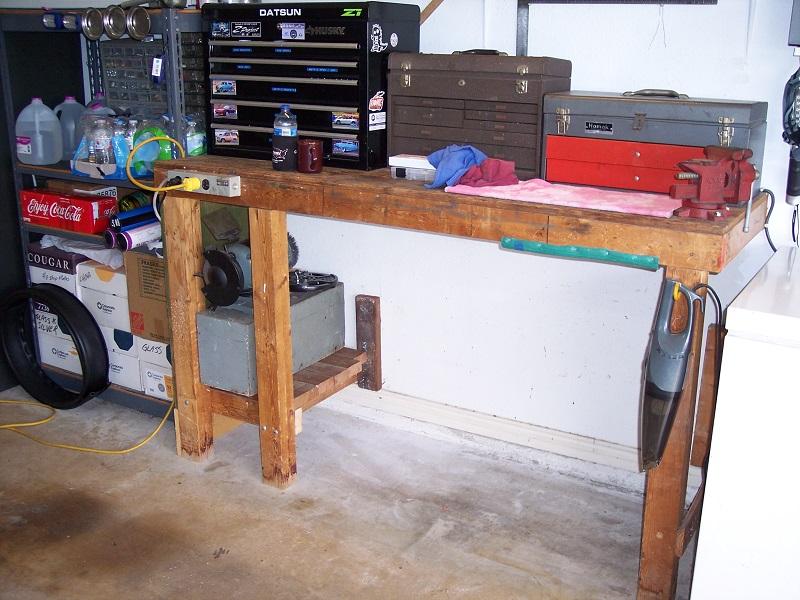
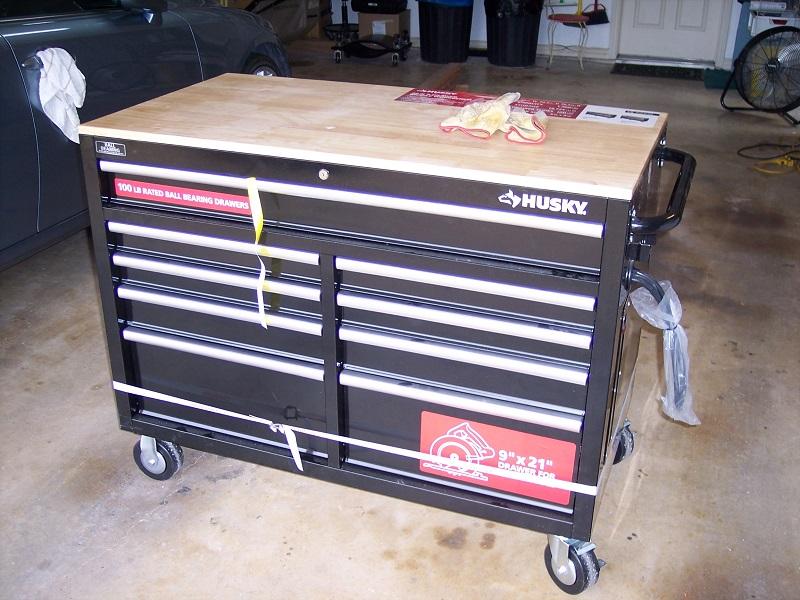
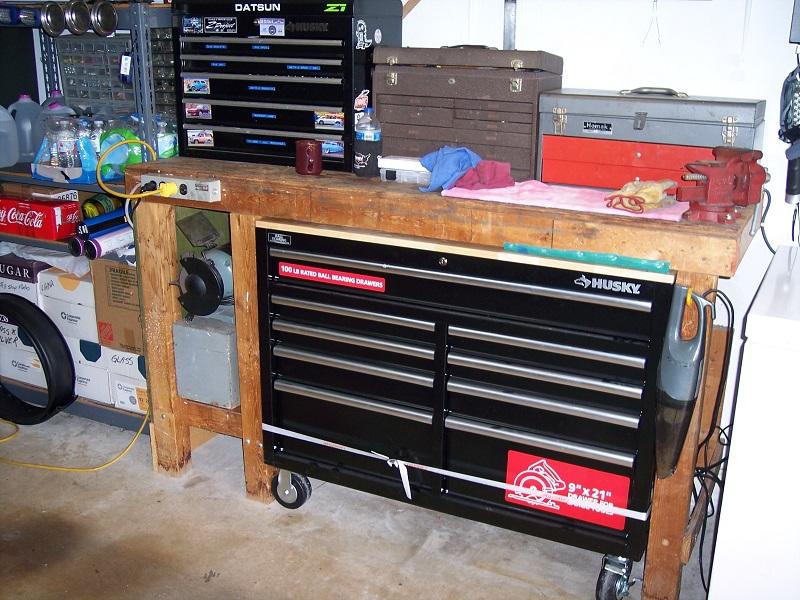
2 pointsI built my workbench over 30 years ago and put the deck height at 42" just to make work and tools a bit easier to get to. A few years ago I gave up some of the length to make room for a shelving unit. Of course this also reduced available space for tool storage, resulting in stuff stored in different spots around the garage. Further complicating things is that I keep three cars stored in a slightly oversized 2-car garage so floor space is already at a premium. I recently spotted a mobile workbench at Home Depot and took note of the dimensions. Checking under my bench I realized I fortuitously had the EXACT right sized opening for the unit. All I had to do was clear out and remove a shelf under the deck. The install took place yesterday, it looks like a custom install, and lots of tools now have a new and organized home!
 2 points
 -
1 pointHello, My name is Bart, and I've been on this forum before in the past, when I had a 73 240Z. That project never made it to much rust, and I sold it for parts. It's been quiet for a while,and personally I kept thinking of owning another 240Z in the future, but good ones are expensive here in The Netherlands, compared to the US. But since I started my own company, things got better financially, and last year I was able to afford myself another 240Z. This time a 71. -> HLS30 32581 Well I had to share it with you guys offcourse, here are the Z enthousiasts ! :classic: Learned from the past on the rust problems, I decided that I didn't want a " that kind of a project " anymore. The old Z cars are almost impossible to find overhere, but oneday thanks to some add on some classic car site, I ended up finding Joop Stolze Classic Cars in the West, and he had about 12 + z's standing there :eek: ... Here's his website: Joop Stolze Classic Cars This Z is imported from the USA, and I even got the previous owners information with it. See here: They where ranged different prices, but all where i quite a good shape. So I decided to take one with a little work to be done for a lower price, it had bad spots on the floor and a bit in the front, but this needed just a little welding. It looked liked the previous owner had jacked the floors up :mad: As it looked then when I picked it up: Because of my work, I don't have much time to work on the Z, cause I'm busy everyday untill late. I went looking for a classic car repair shop, and eventually found one, not far from my hometown. The car still needs Dutch license plates, but this will be done soon, when it's goes for the road safety check. Things that needed to be done where: - Engine tune up - Welding to the floors and front inside fenders. - New underbody coating. - Overhaul of brakes and suspension/bushes etc. - Rear bumper repair - Electrical repair, also alot of meters on the dash did not function. - Master brake cylinder replacement - small detail things exterior and interior. ( radio, antenna, etc ) - doors alignment = hell ! - EU headlights with integrated parking lights. - must be forgetting something! All that's left now, is some piece of the heater/blower towards the central panel, and dovetails ( for the doors ). Here are some pictures: ImageShack Album - 14 images ImageShack slideshow And now we are almost done: Hope you like it. Bart.1 point
-
When does it get silver painted? My new one is natural black rubber finish.
 1 point
 -
The control cables are just pieces of stiff wire that often get bent if people try to force them when they stick. Once that happens they are shortened, plus they flex at the bend, and don't work correctly. They can be straightened and will work again if they are lubricated. You'll have to take things apart to know what the problem is.1 point
-
1 point1 point1 pointHaha!! You guys are awesome!! Once I get my hands on some ill tempered sea bass, I'll be set!1 point1 point1 pointI haven't been driving much with the Z lately, the weather just started to clear up in June.. I did adjust the valves ( it was mostly the exhaust valves, which needed adjustement.. ) back to spec. Gave it some new oil and a nissan oil filter. When inspecting the car from underneath I found out the joints from the driveshafts where worn out.. So currently al 3 shafts are at a local rebuild shop. Other things to do are replacing the lower ball joints in the front, and the v belt for the dynamo. Expecting to have her back on the road in 2 weeks or so :) I also fixed to antenna. Nylon cord was broken off..1 point1 point1 point1 pointThis is the best shot I could get while the engine is in the car. It's looking from the master cylinder to the exhaust and intake. If I recall correctly two different size bolts, a 10 and a 12, go through that shield and the bigger heat shield. It will attach after the bigger heat shield is on. One of those "blind" installations where you can't see what you're doing.
 1 point1 pointJust for proof of concept, before I cut the second perch off, I tested the first one. Used a rubber mallet to tap the now liberated loose perch back onto the strut tube and position it a little lower than it was originally: And here's a shot showing the relative heights of the perches. You can tell by the position of the tab welded onto the tubes that the perch on the left is lower by about an inch. The idea would be to re-weld the perch back into this new lower position on another set of complete strut tubes. :
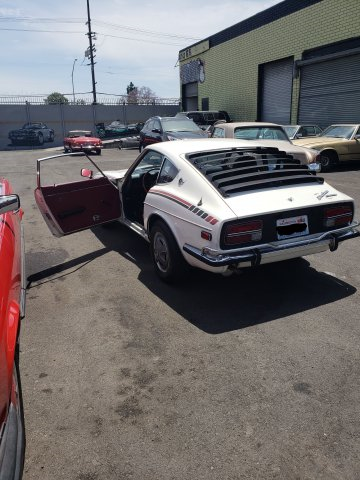
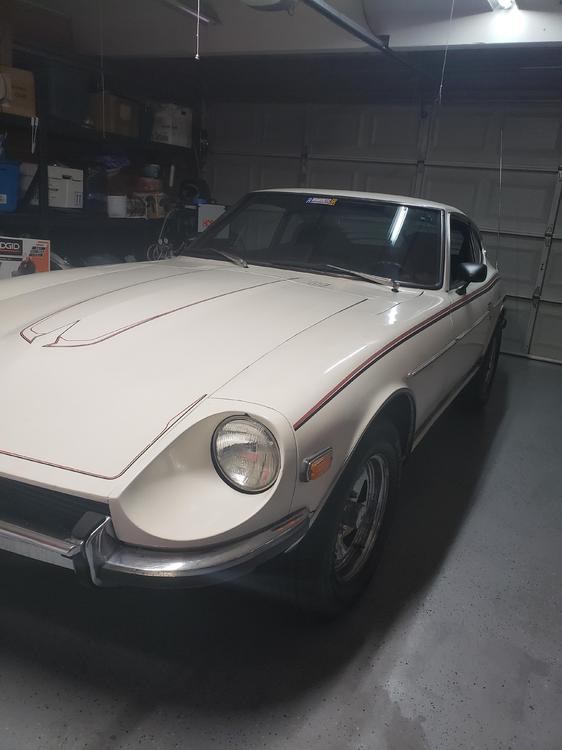
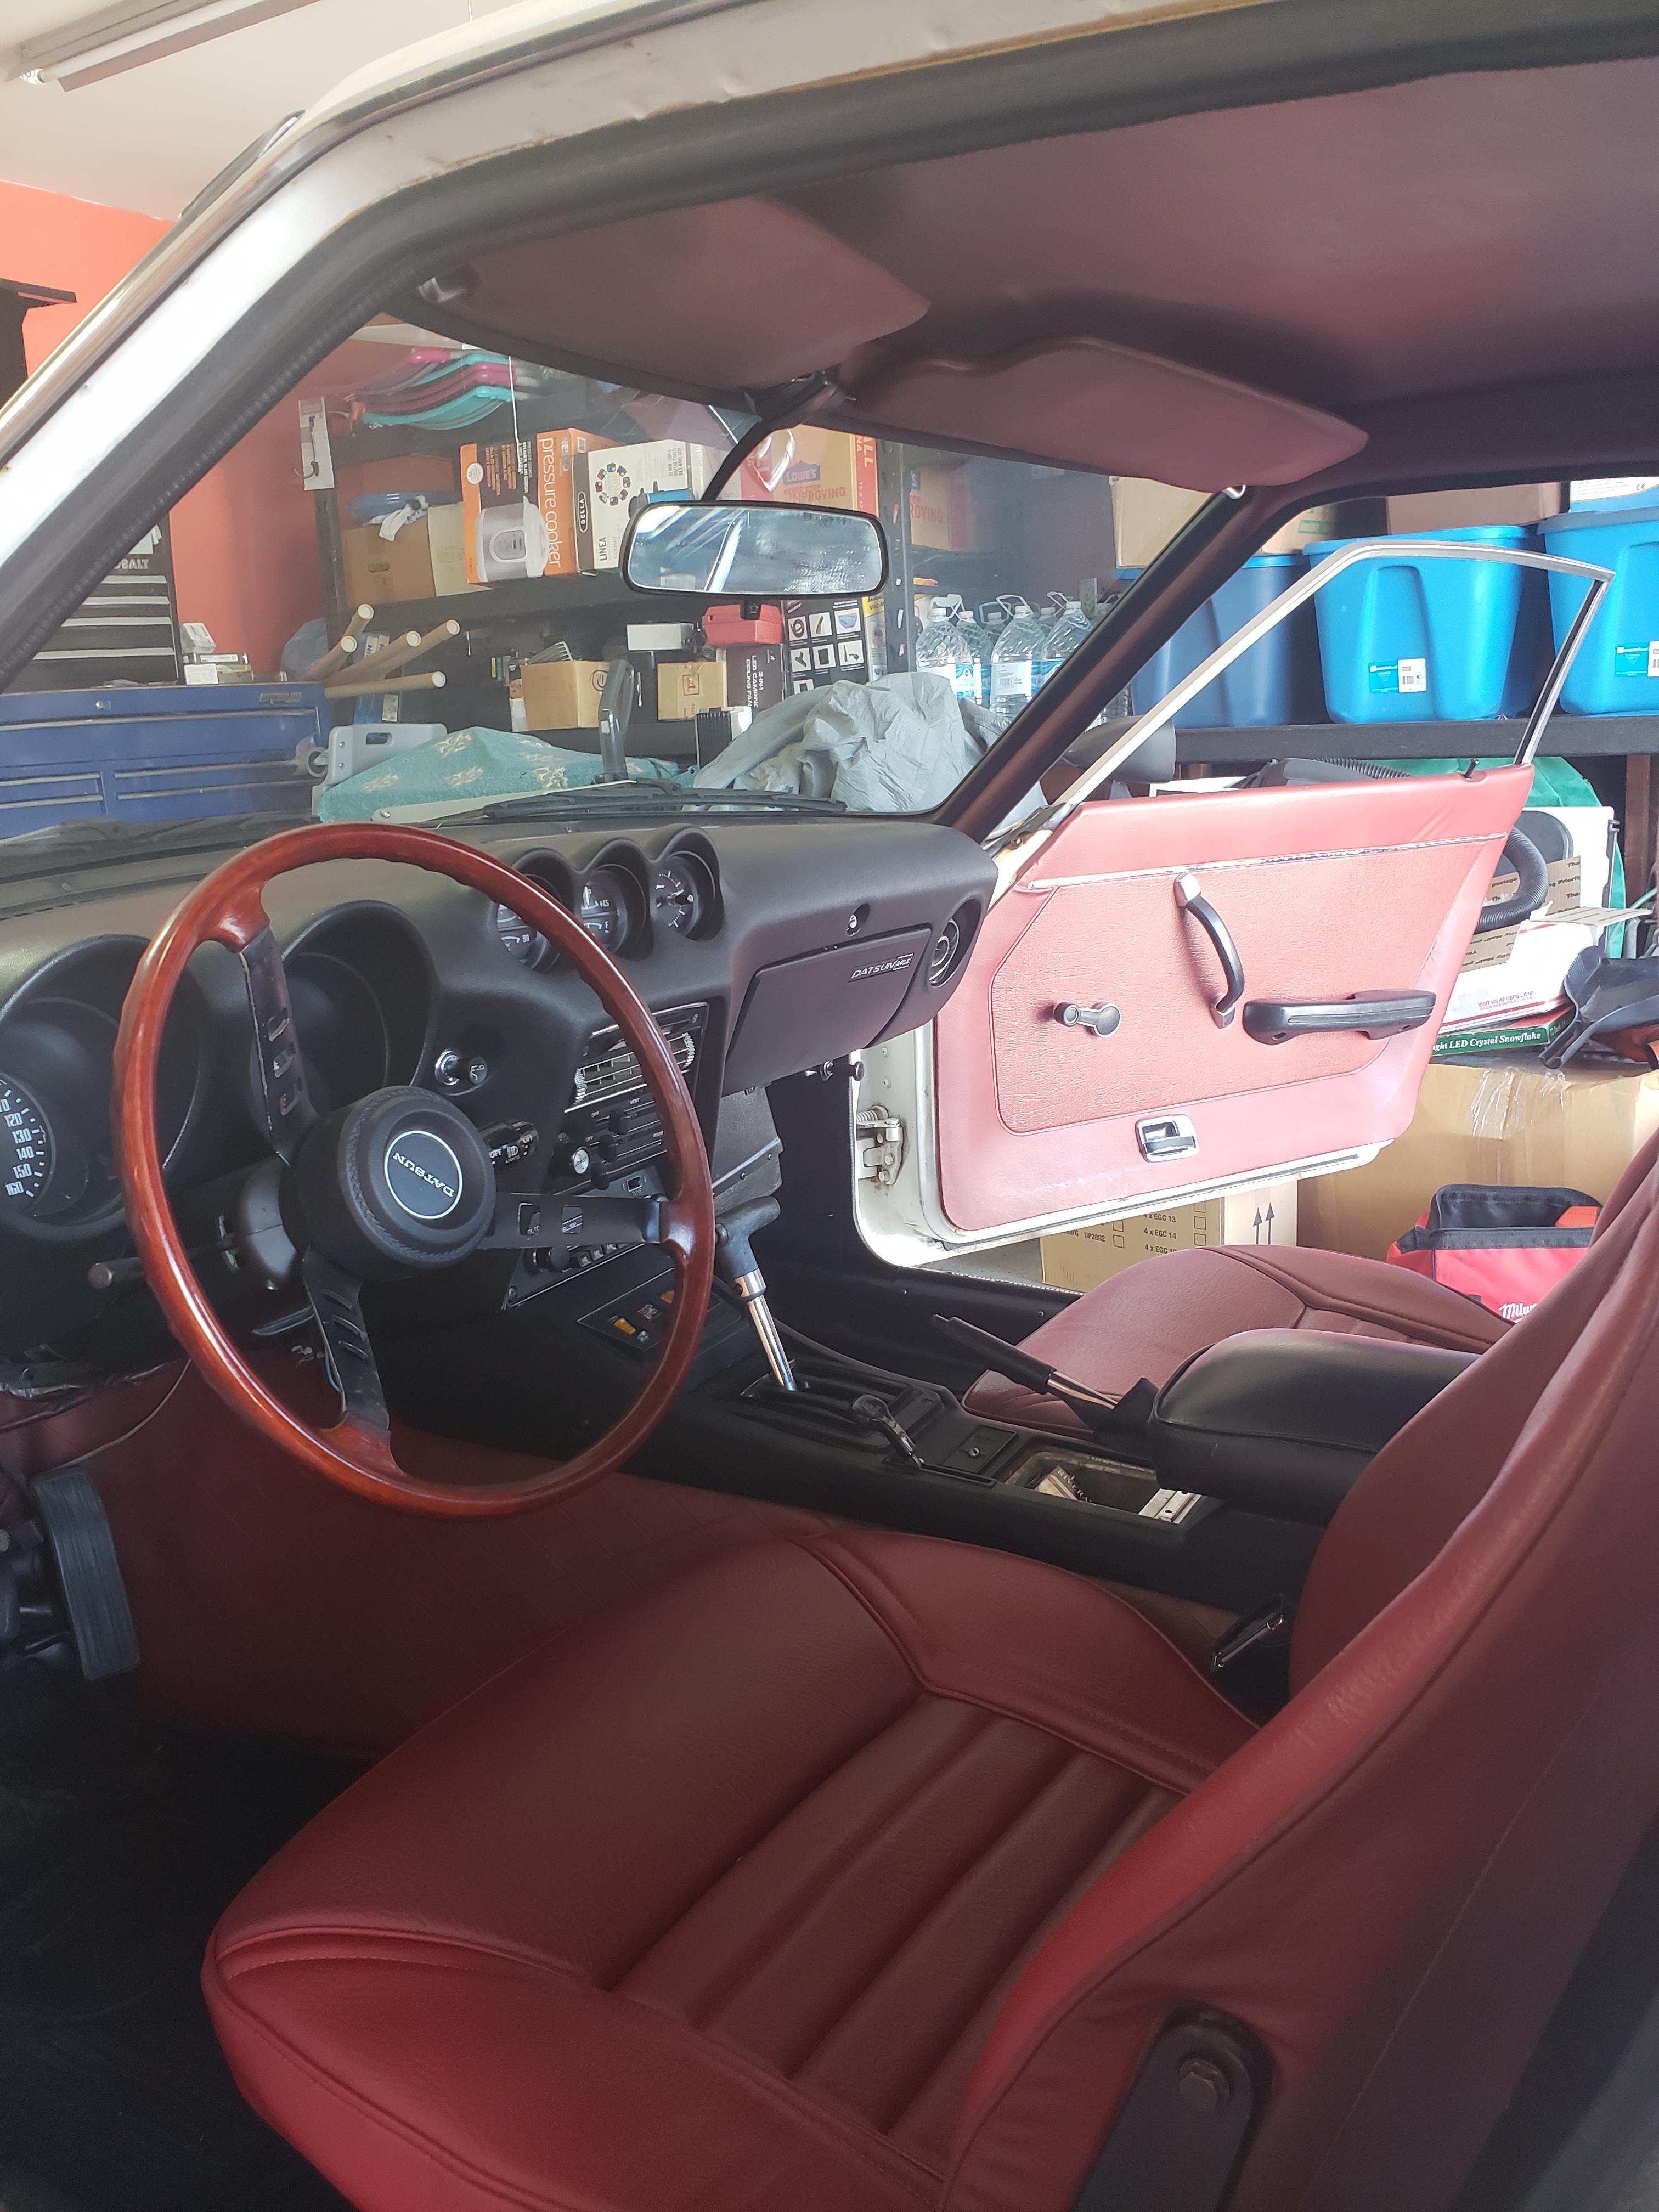
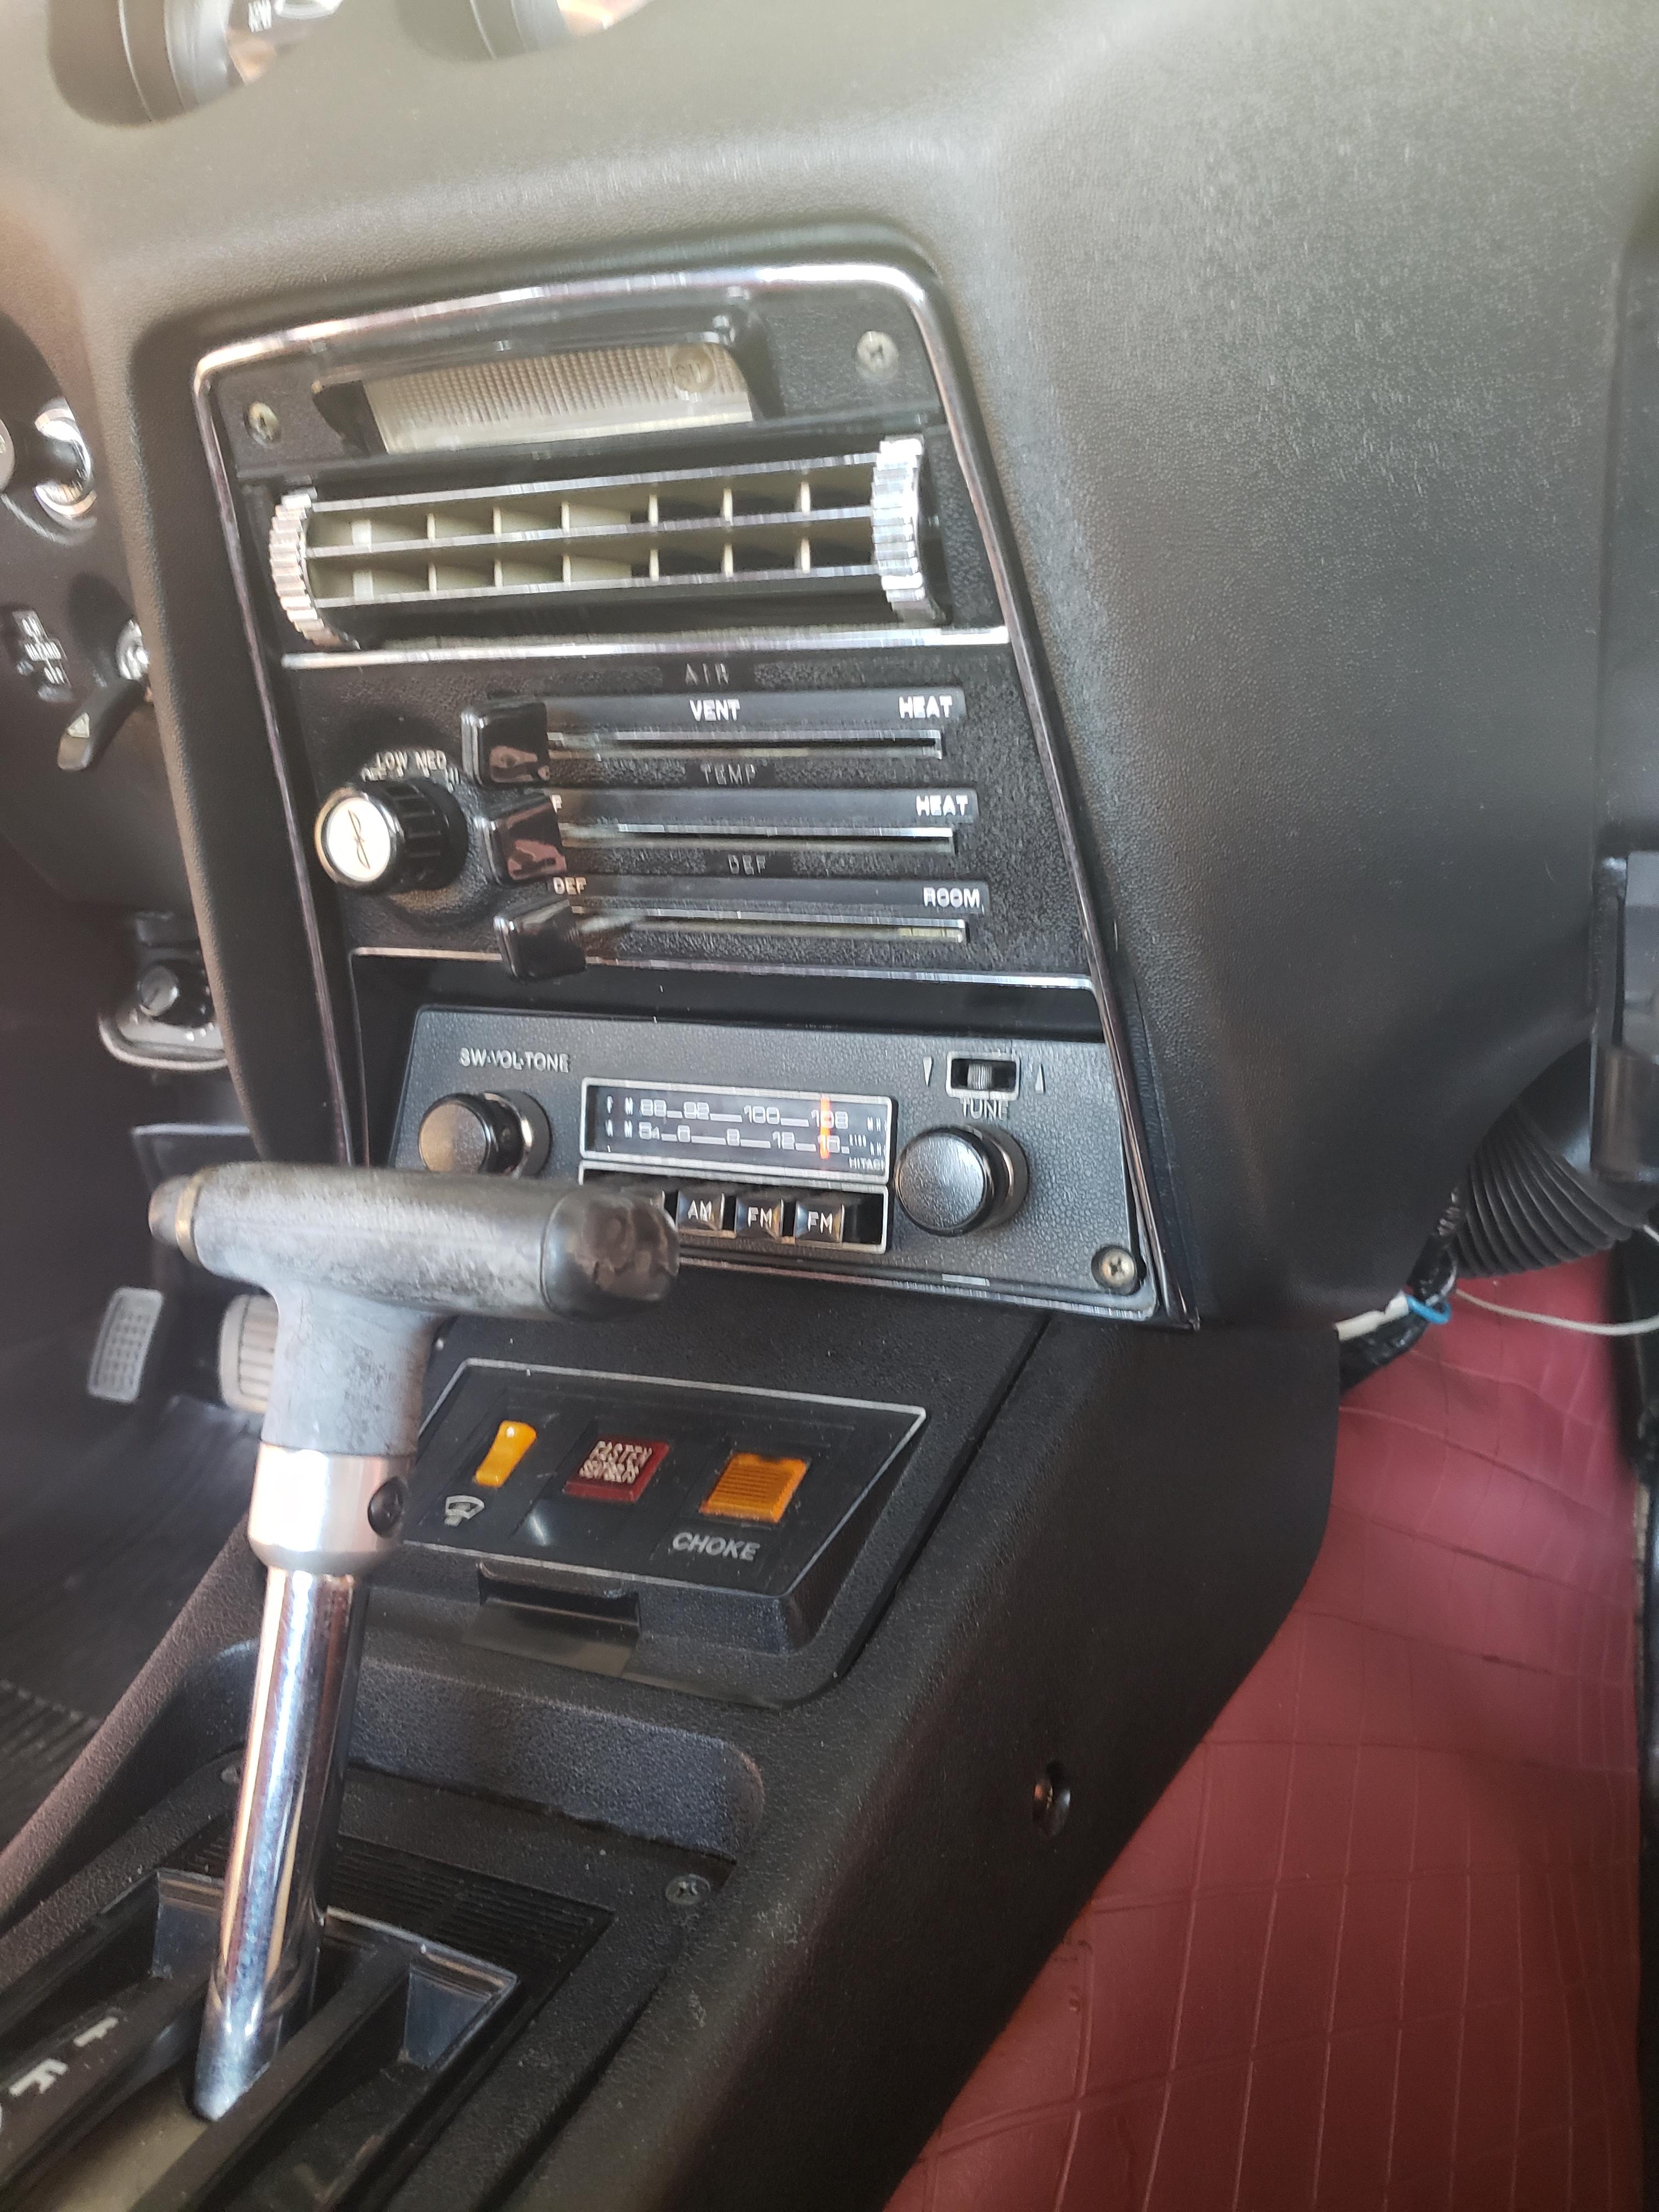
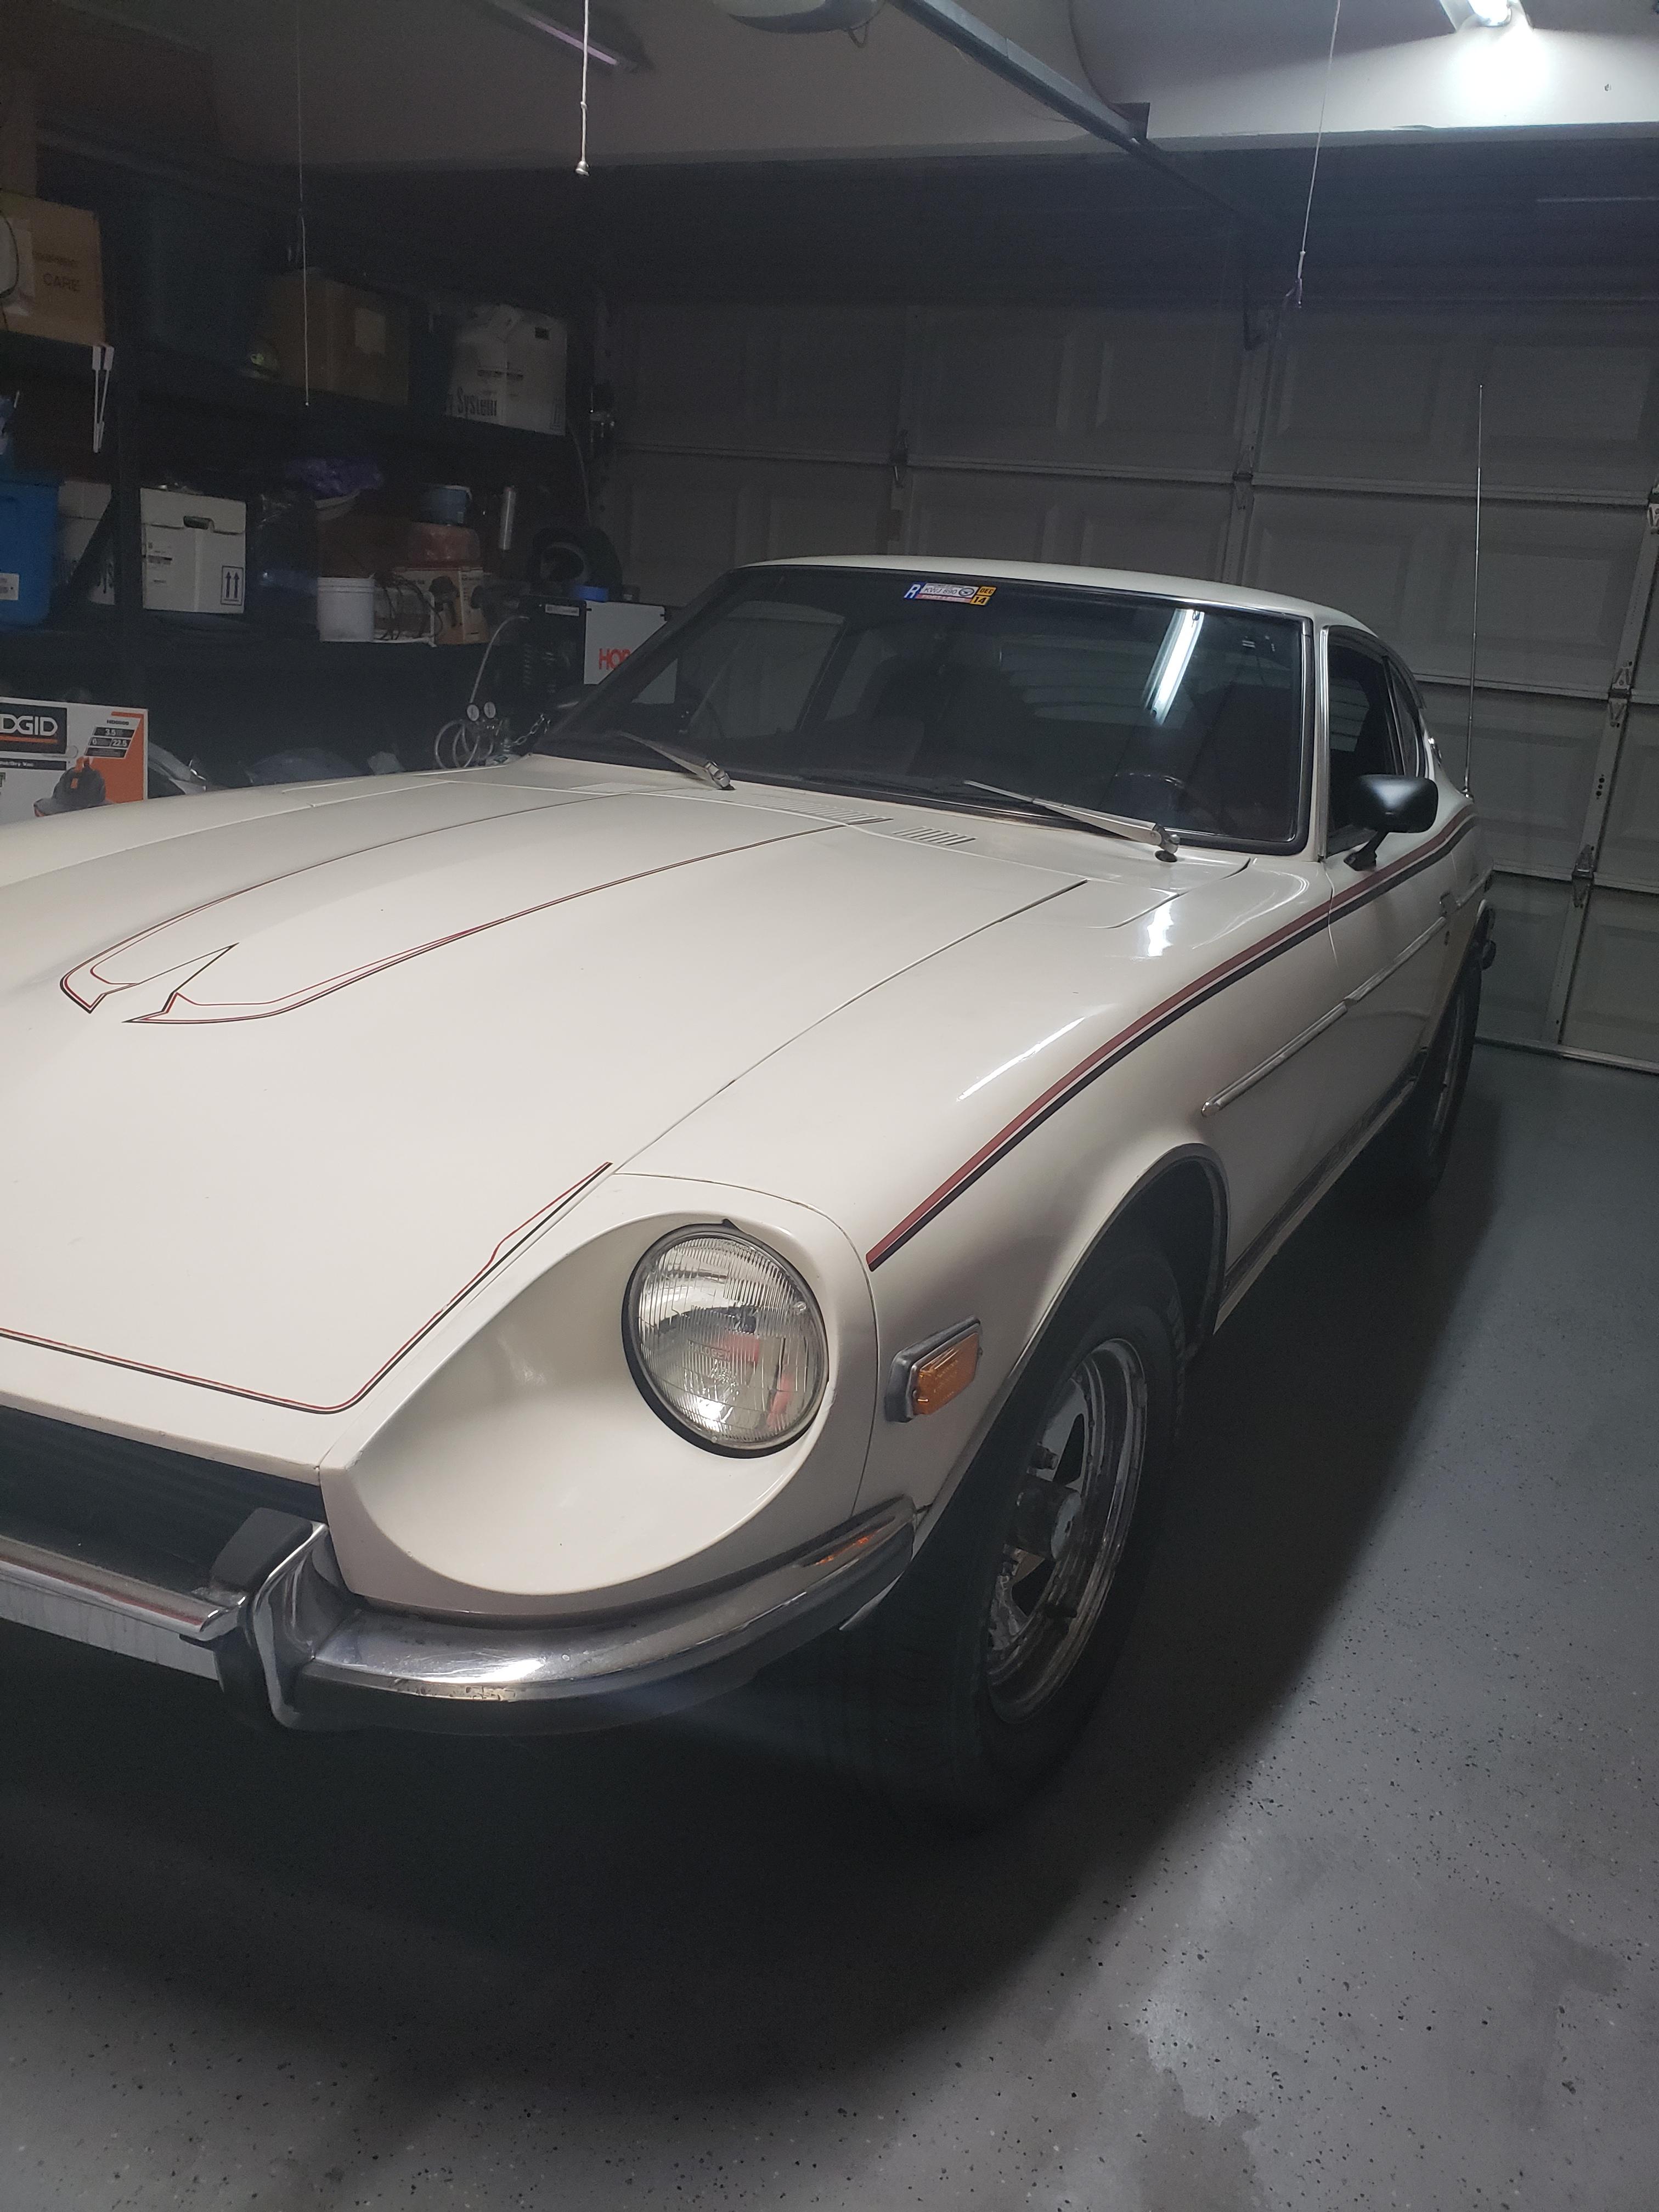
 1 point1 pointGood point, sir. I forgot to bring that up. Yes, it is a challenge, but you can get the bulb in the socket wrong. As Egon said in the movie Ghostbusters, "Don't cross the streams."1 pointYep, she's been kick'n both of my hind cheeks for over 24 years and shows no sign of letting up.?1 point1 pointHey guys, good afternoon. I recently got my hands on a 1972 240z and decided to join the forum so I can learn more about her and Z cars in general. She's an automatic and completely matching numbers. The car itself runs beautifully and drives great. I don't regret the purchase one bit. Its white with a red interior and is almost entirely rust free save for some minor surface rust in the battery area and a few other places. The original interior is in great condition. The dash is not cracked and all the gauges work. The car itself came with a lot of dealer options installed. It has the AC, Dual Racing Mirrors, Front and Rear Guard Rails, Shade Kit on the rear glass, Arm Rest/Glove Box, Parcel Bar, AM/FM radio and the 240z side stripe kit. Interestingly, it also came with a full set and spare of original Radial Snow Tires that were sold by Datsun dealerships. It also has the original floor mats. I think its only missing the luggage rack and air foil. Also, I don't know if this was a dealer option, but it also came with a pristine Beltek 8-track player in the glove compartment as well as two Beltek speakers installed in the trunk. I'm only the second owner, so I hope to learn a lot more about her. Thanks.
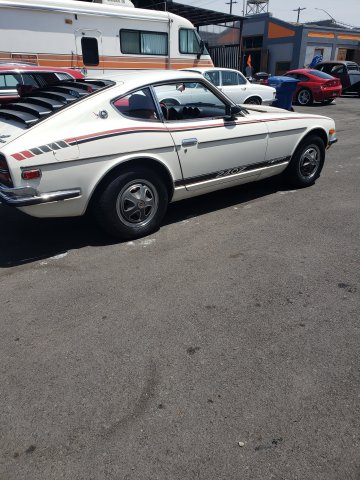


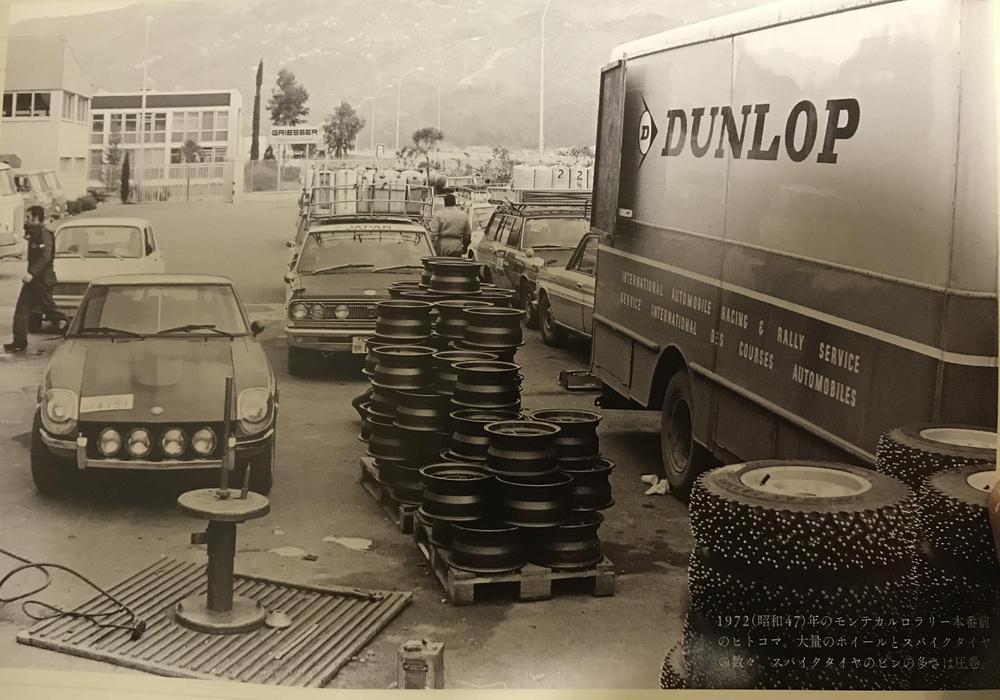
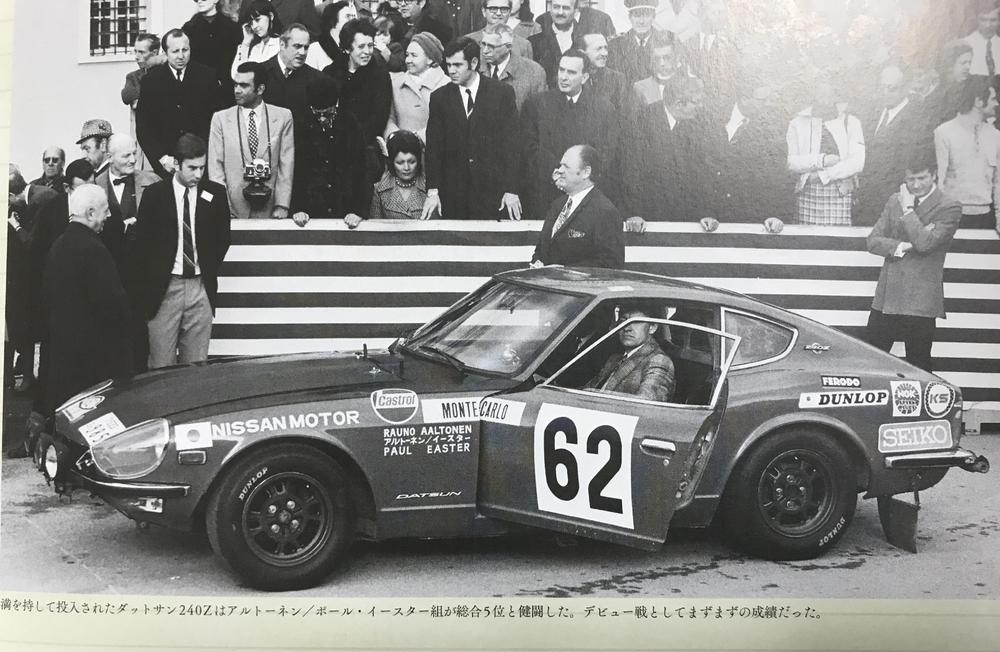
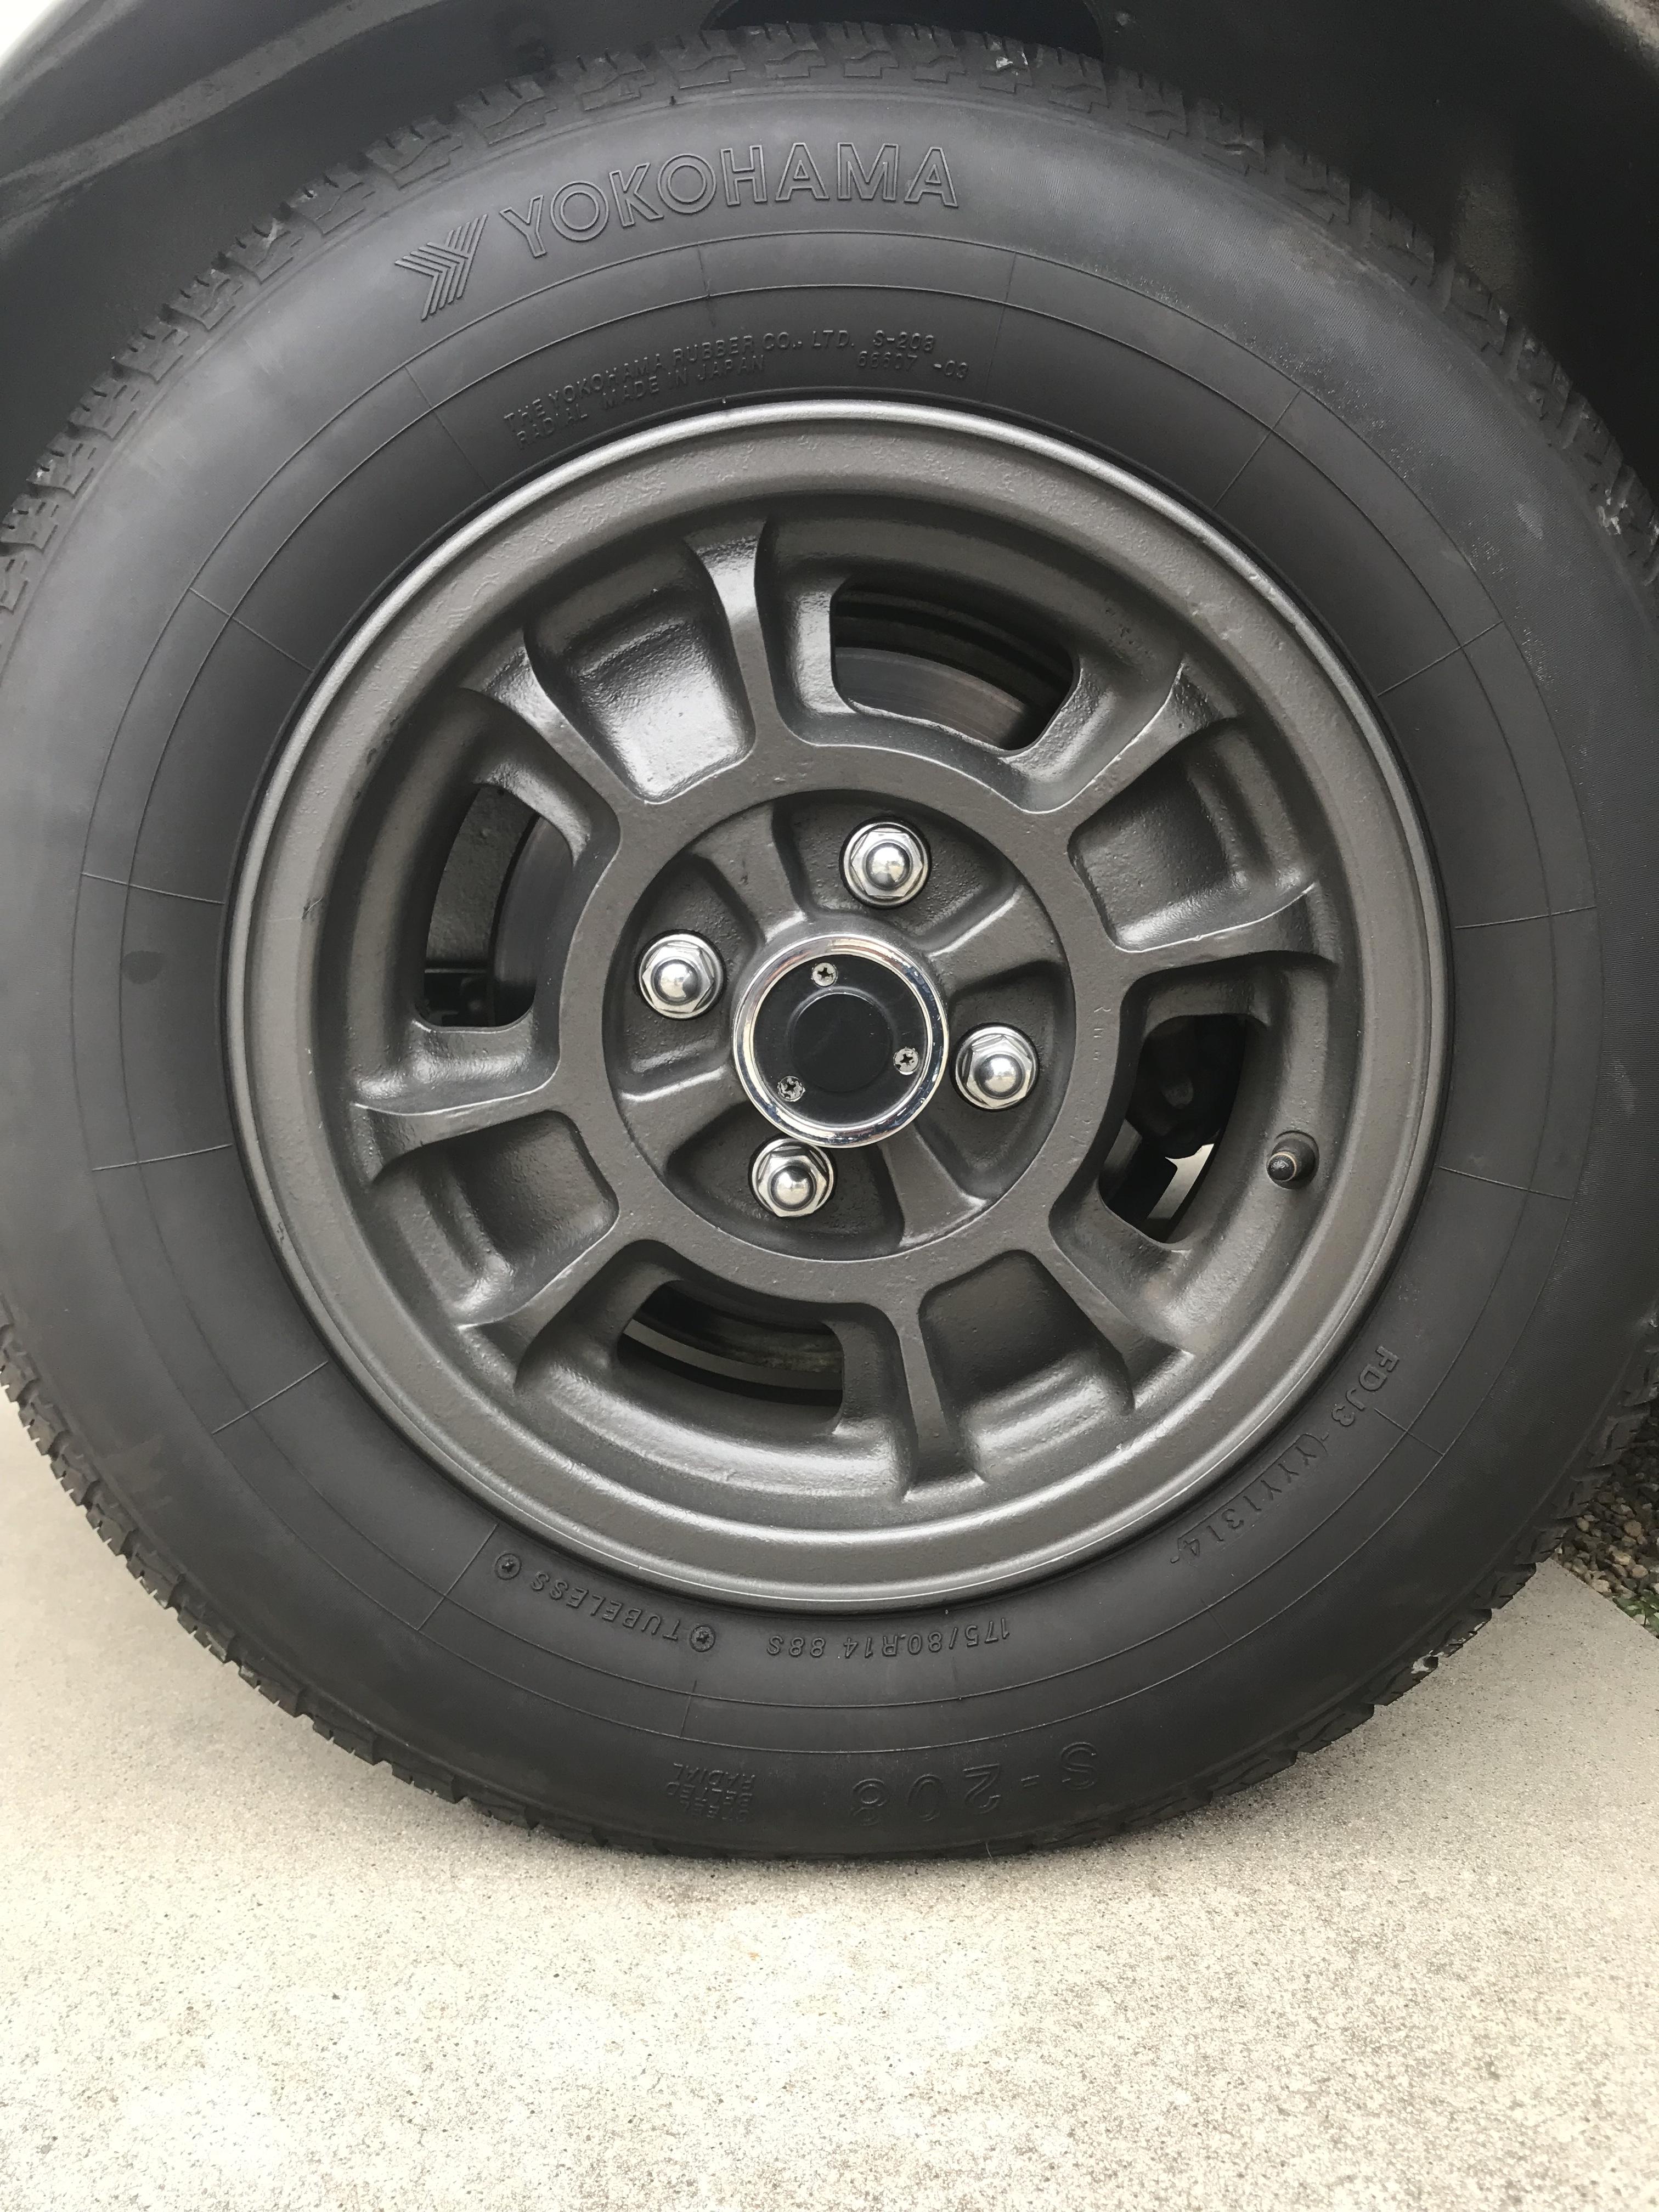
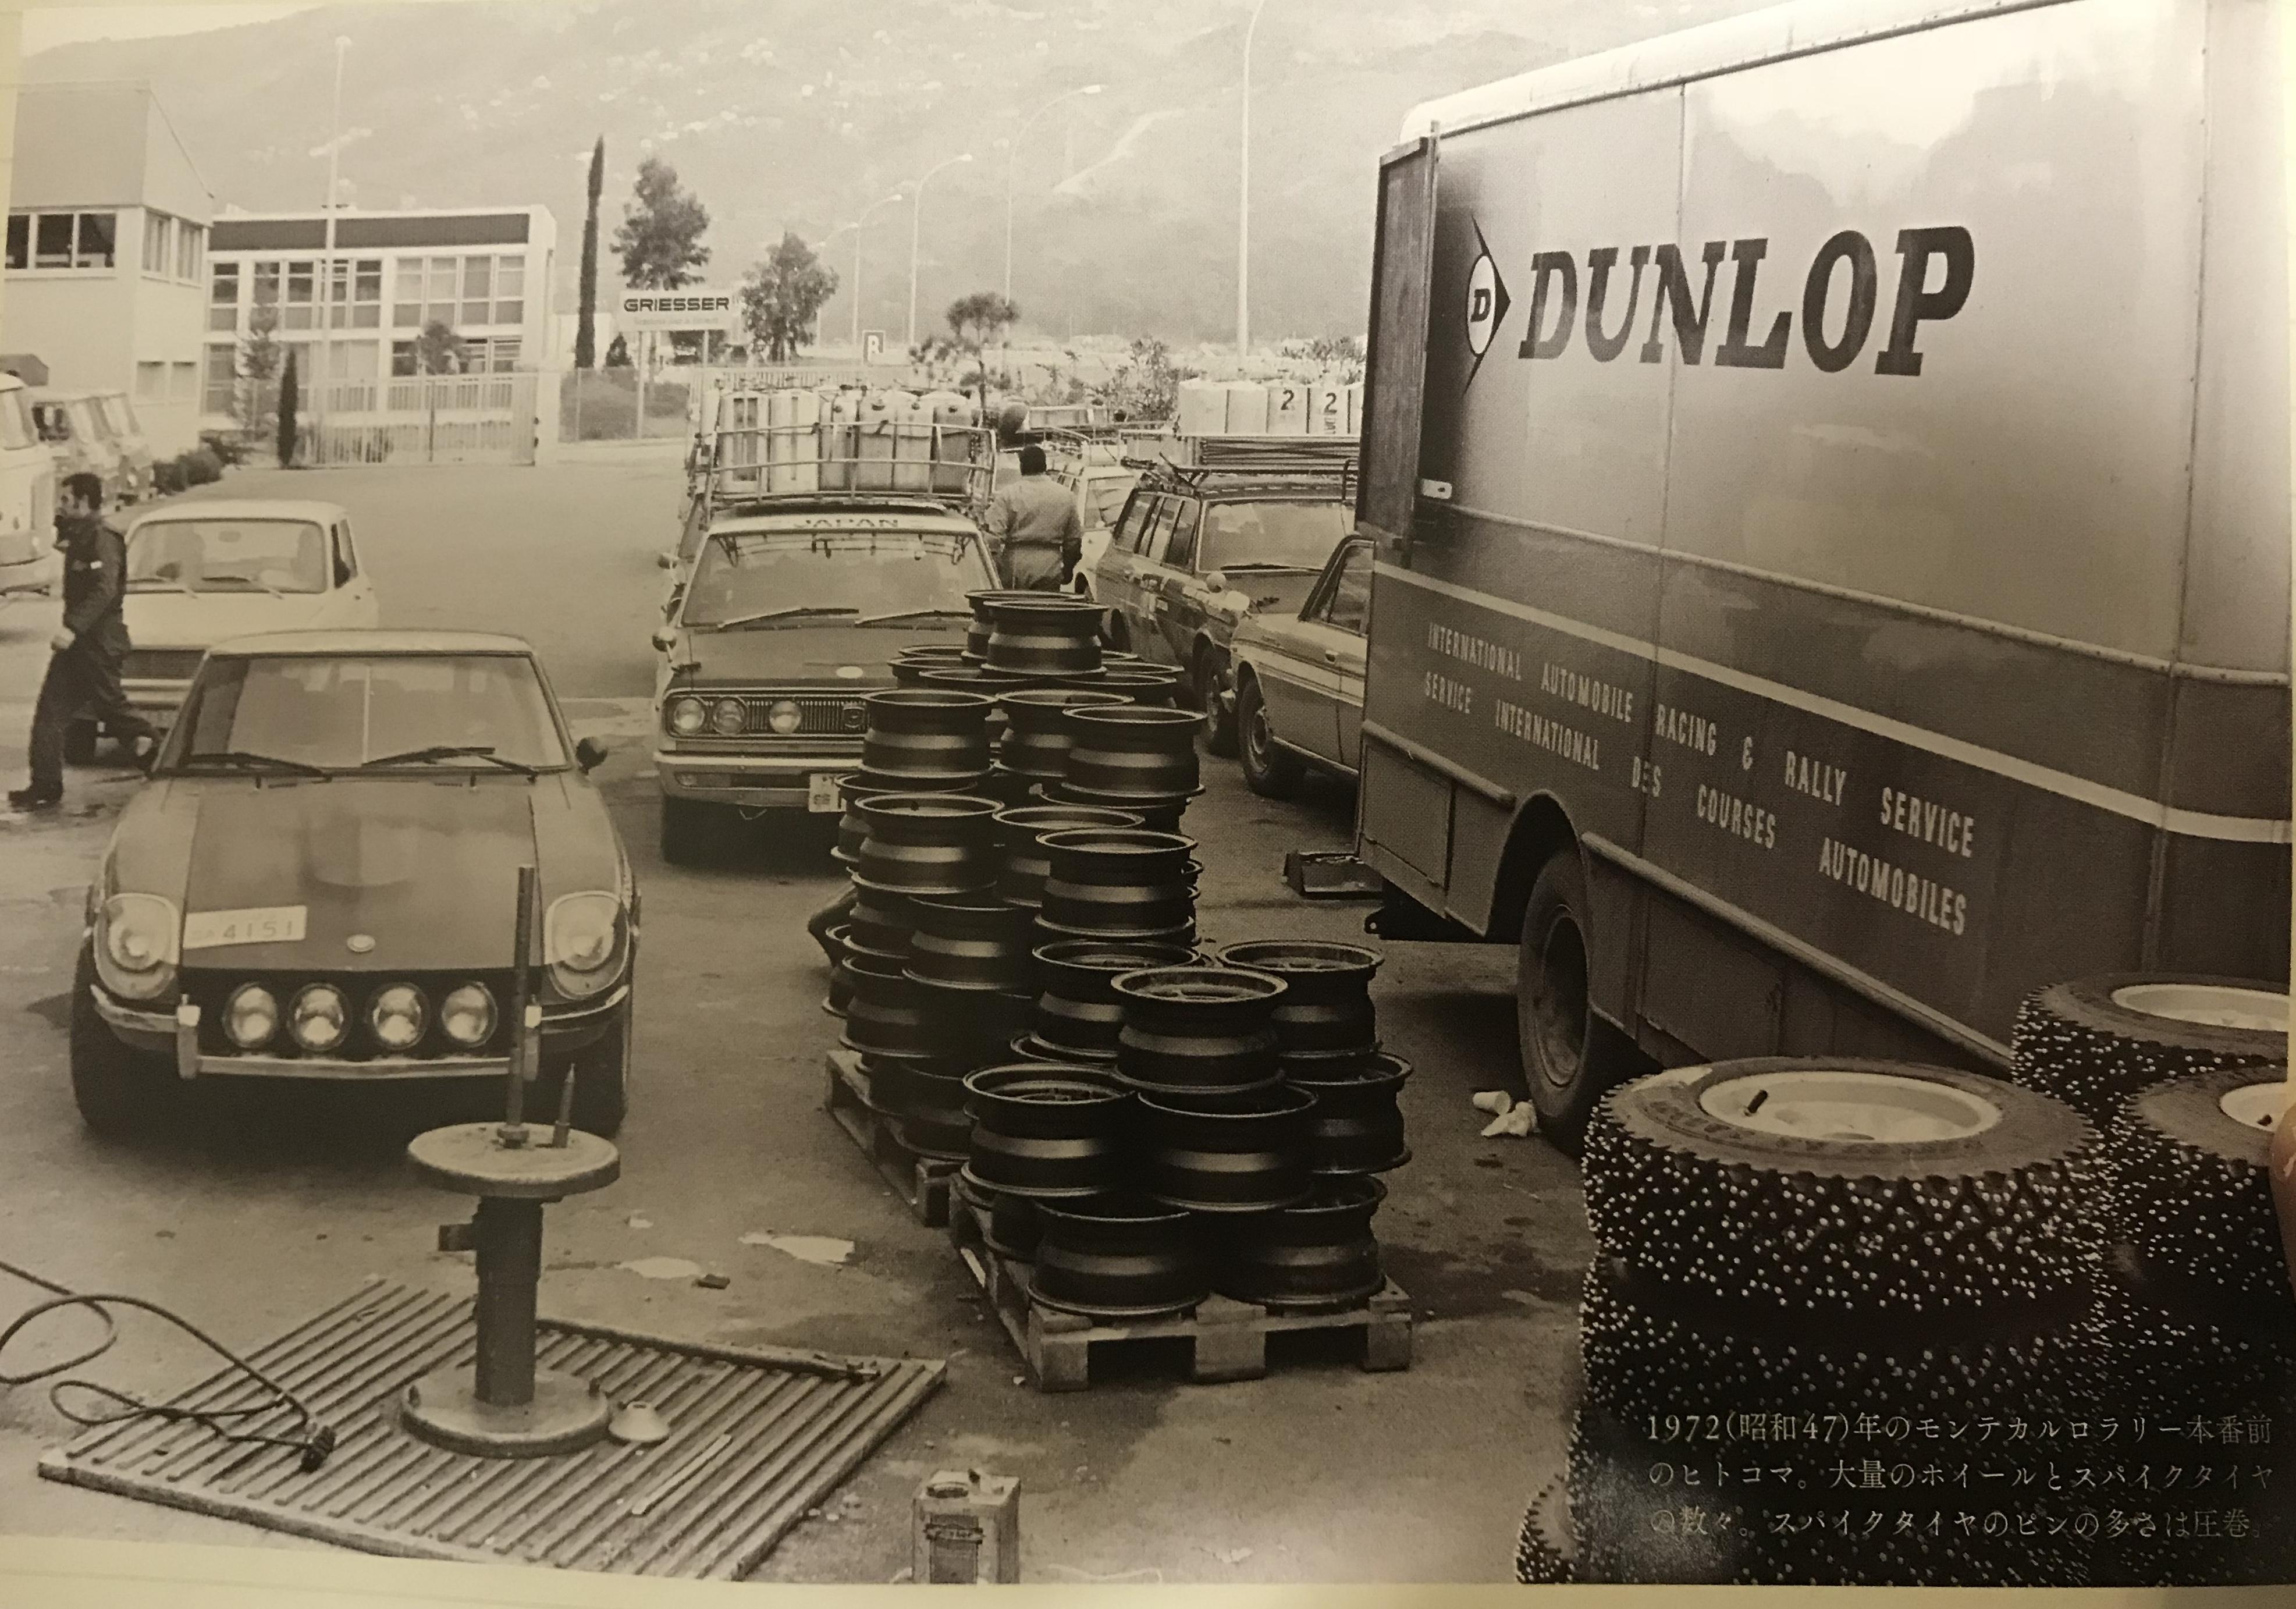
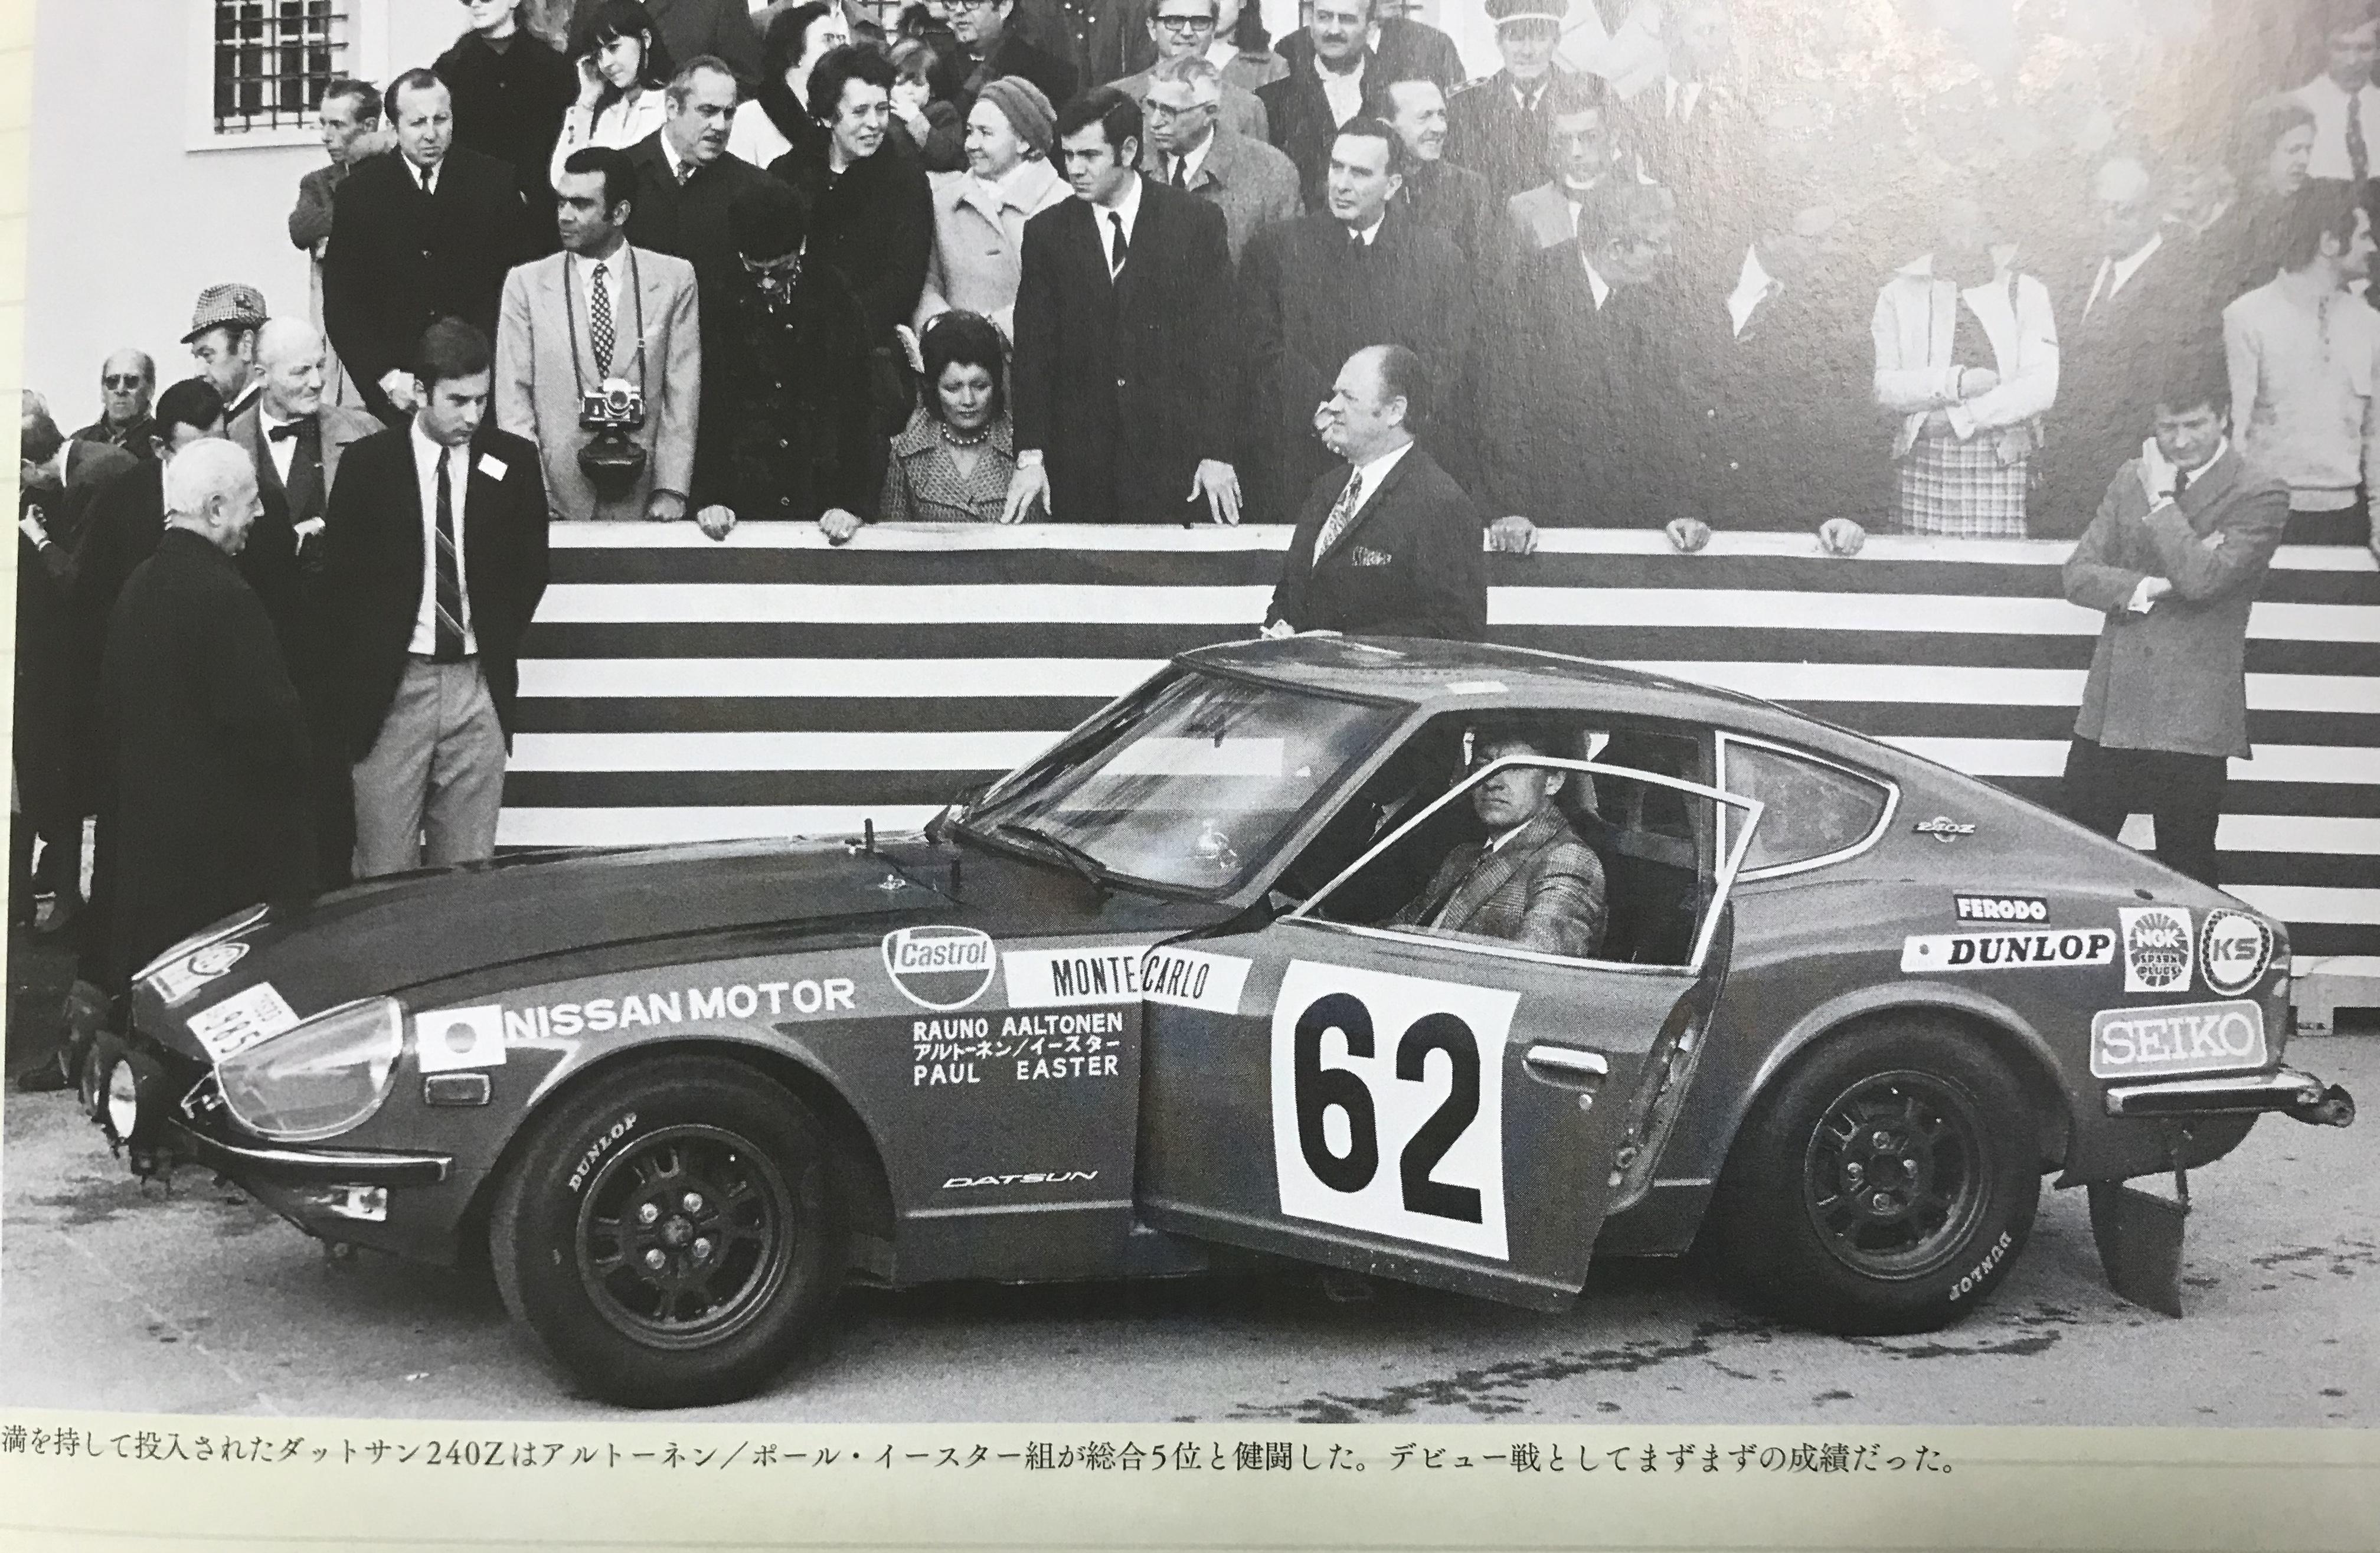
 1 point1 pointHi Gavin , I now found you have a wheel which is like Z432 type , but different off set , and non - center cap type . And is it taper nut type ? And it is not the same the one on the front of the 1971 Montecarlo Rally car . Alan , could you tell us how many types there were for the works rally car . The gold is Gavin’s wheel The gray is mine And two old pictures from Nissan Craft Magazine “Fairlady Z “ . Kats
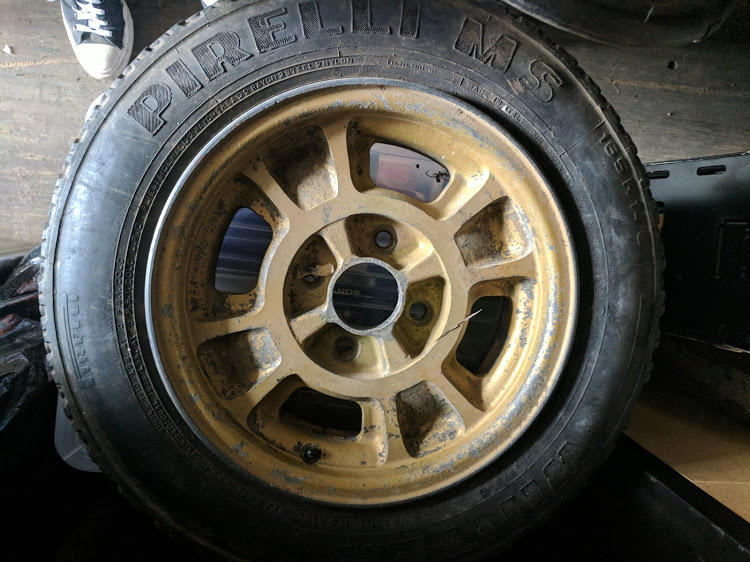

 1 point


Important Information
By using this site, you agree to our Privacy Policy and Guidelines. We have placed cookies on your device to help make this website better. You can adjust your cookie settings, otherwise we'll assume you're okay to continue.