Leaderboard
-
Captain Obvious
Free Member5Points10,030Posts -

240260280
Free Member4Points4,442Posts -
sweatybetty
Free Member3Points1,119Posts -
Hardway
Free Member2Points1,332Posts


Popular Content
Showing content with the highest reputation on 03/23/2017 in all areas
-
5 pointsHaha!! Thanks guys! Those are beautiful, but I've already started building my own using stone knives and bearskins. Now about the president part... I'm up for that!5 points
-
2 pointshttp://www.ebay.com/itm/Datsun-240Z-260Z-280Z-Electronic-Fuel-Injection-Analyzer-Kent-Moore-J-25400-/272599728744?hash=item3f7835c268:g:rhAAAOSwuxFY0b8l Maybe we should group buy it for him? And another interesting piece of kit: http://www.ebay.com/itm/1974-1979-Datsun-240Z-260Z-280Z-Transistor-Ignition-Tester-Kent-Moore-J-26350-/272599730588?hash=item3f7835c99c:g:oHYAAOSwol5Y0b~R2 points
-
Good news! I QC'd the second clip this morning and it is 100% spot on. I gave them the green light to make the other 99 and then send them off for clear zinc plating. Turn around is about 2 weeks from today. This will be a total of 100 clips (25 sets) I will be keeping 2 for myself and selling the remaining 23. Once I have all the clips in my hand I will post an official thread in the Garage Business forum. Zup, I have your clips and will be sending them back to you soon. Once i do I will PM you the details. Thank you again for letting me use them to get this project off the ground.2 points
-
Only the cool cars say A/C. Sorry, I couldn't let it pass.2 points
-
1 point^ Just checked MSA. There are different kits for the 240Z and 280Z. Not sure which ones PO put on my car. They are definitely Eibach Pros, but I can't remember the exact spring numbers. Just that the 01's are up front.1 point
-
1 pointObviously under priced. http://www.ebay.com/itm/1971-Datsun-Z-Series-/272600968865?hash=item3f7848aea1%3Ag%3A40cAAOSwo4pYREW6&vxp=mtr&nma=true&si=2%2FZ1t%2BZ13AsPA48YFLSQfyAjcW4%3D&orig_cvip=true&rt=nc&_trksid=p2047675.l25571 point
-
I just contacted the seller with an offer. If they bite I'll have it shipped to CO and we can divide the cost then. Anyone with a FI Z can then go to any hotel and have a tune up.1 point
-
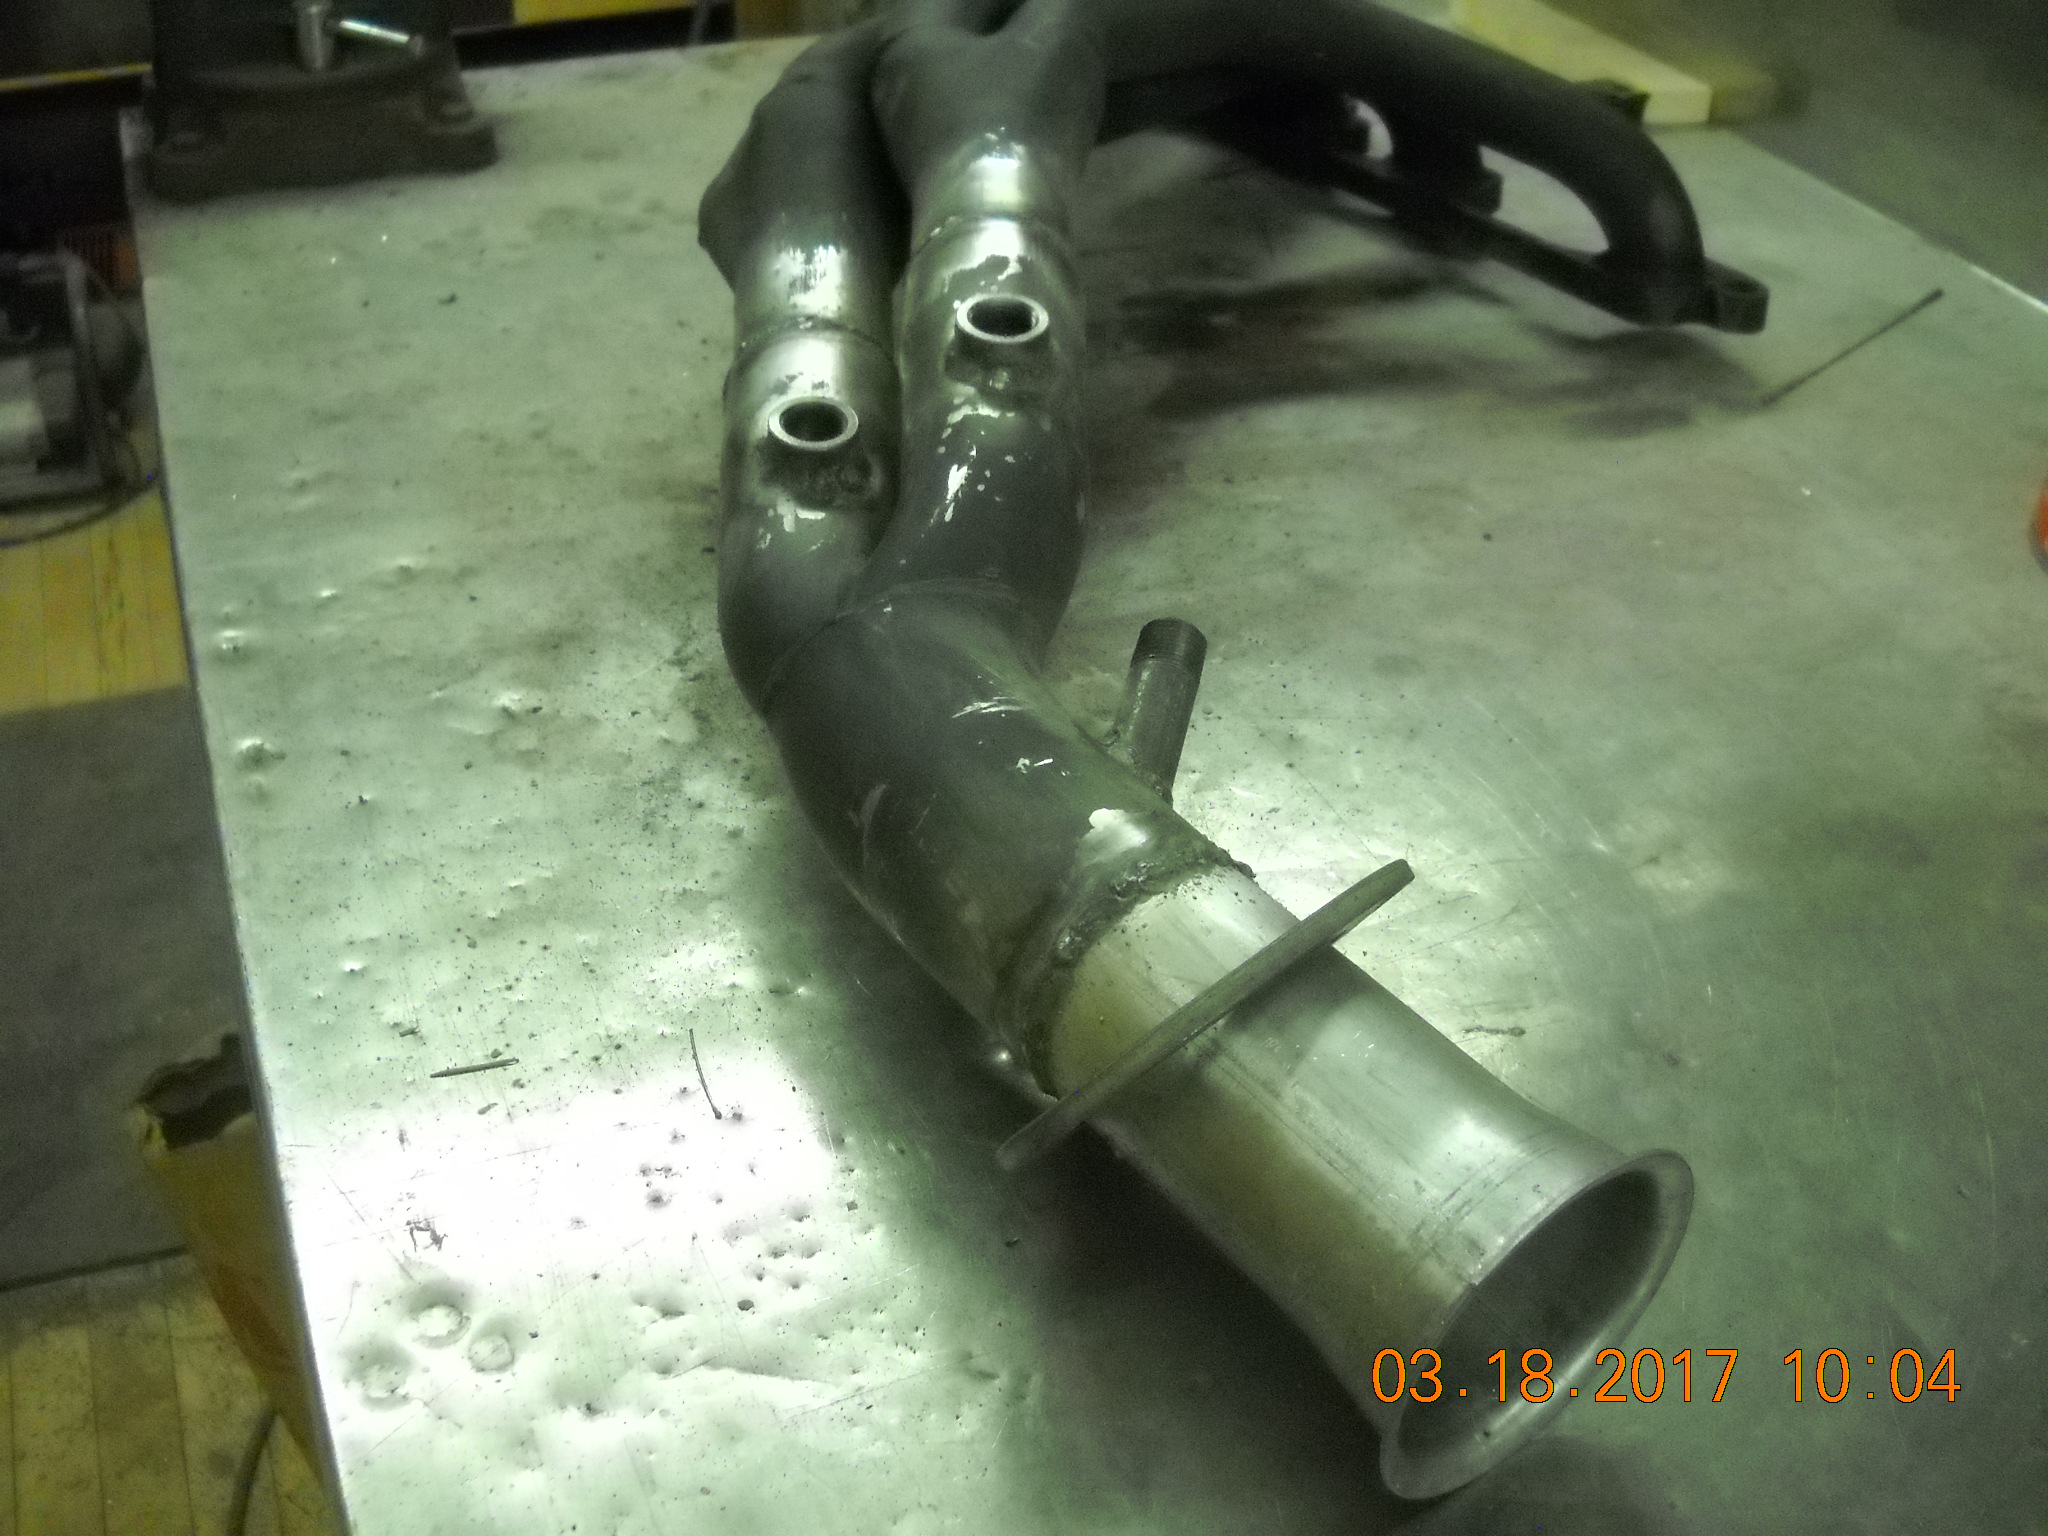
The muffler itself is ok. I haven't installed it to test fitment, but it looked pretty close to what was already on the car in terms of bends and size. The 2-to-1 downpipe... meh. not the greatest repro. it fits well, but the way it was made was, as i was told, to "save cost on production"... I've welded many exhausts as I've worked at a number of performance shops and I can say that's utter bullshit. Personally, I'd just make my own in the future, and I have 3 OEM exhausts now to make copies of. I found one while moving tucked under a storage rack. I have the very early stamped collector one, and two of the later 70+ side-entry merged ones, but I'm going to use what's there for now. As i understand it, the way it's joined on the 2nd last photo posted by katz is how the late 70 and on were constructed. A side entry from one pipe to the other... and that would be far easier to produce than how it's made on the reproduction, which merges two to a collector style cut, and then continues down with another single pipe attached to the end of the first merge collector. IMHO, close... but not close enough if you care that much. I understand that some feel "no one is ever going to see it" but the fact that this thread has photos of people willing to share the details negates that point, and having constructed exhausts myself... it would have just been easier to produce the late 70+ style as shown rather than "reproduce" one that is not identical to any of the OEM ones at all. If there is any interest in actually producing good OEM reproductions of both kinds, I may entertain doing so later in the year. I just don't want to step on anyone's toes by selling stuff that's already available, but I'm finding that the quality of said items is just not what I would expect given their simplicity. there has to be a market for discerning individuals, and some of the older Z repro guys are retiring... so I'm not sure if it would be acceptable just yet. I'm sure some people would be upset. sorry for the rant. just started getting to me recently, the more i try and assemble this car, i'm satisfied less and less with what's been purchased to complete it before I started working on it.1 point
-
I've owned and seen a lot of Zs and all of them have had the cone on the engine side. Chuck1 point
-
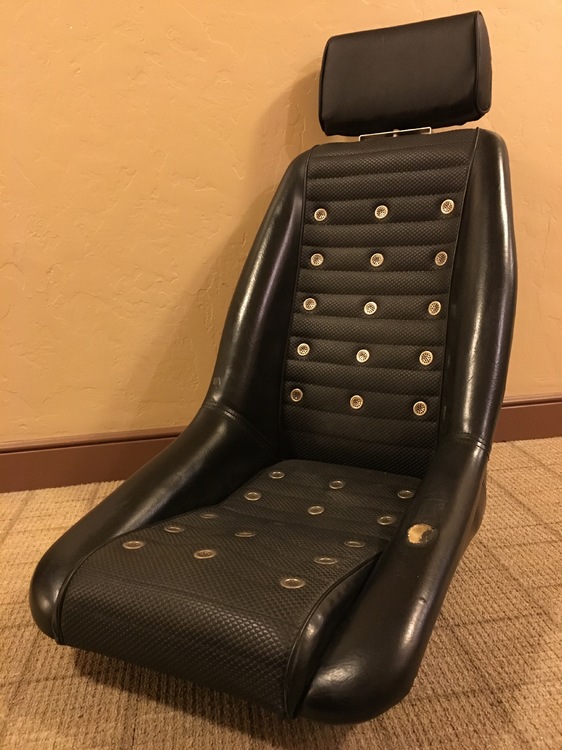
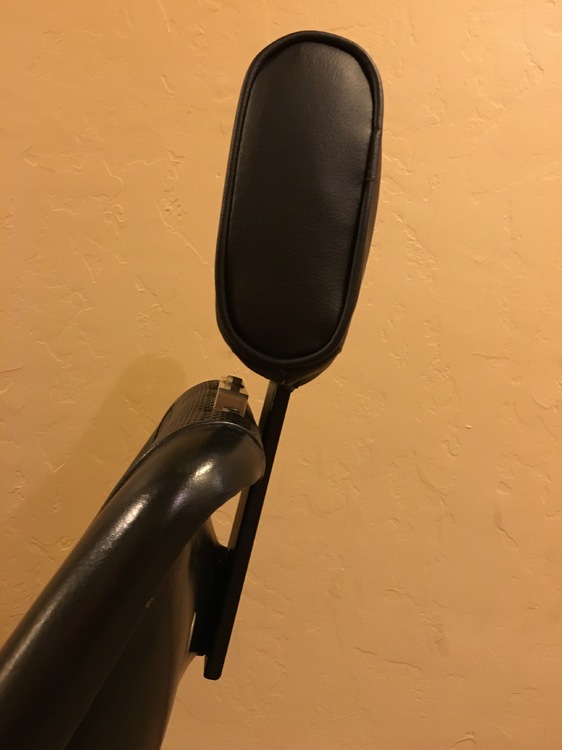
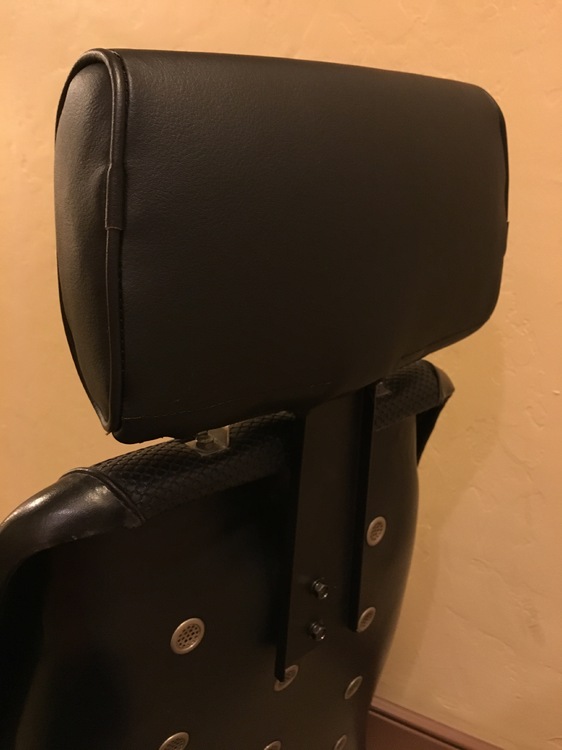
Hello Alan, Thanks again for sending me to Kameari Engine Works. I corresponded with Shigeo Mori and he was a pleasure to work with. I only wish I could speak and read Japanese and I have not yet written this quest off, but I need a plan... The headrest arrived today and the bucket seat will be installed in the next few months. Slowly my car is coming together and it is so exciting. With the headrest came a beautiful Kameari catalog. There is a lot for me to learn about the history of Kameari and I told Mori that I plan to visit him and his shop one day. Thanks again. Sincerely, Ben
 1 point
 -
1 pointwhat a crappy couple of days! i had the pig running, but didnt have any timing advance, el-cheapo trash plug wires from auto zone, and a loose rotor, a pos timing light that didnt work when i needed it to, and the distributor was 180* out!!! so i decided to pull the distributor and found the centrifugal weights were sticking. no problem. took it apart, lubed everything, and all was new. so i thought in the mean-time, since the distributor is 180* out, why not fix that, make it like it shows in all the books. i ended up pulling the oil pump 6 times before i found that lining up the little spot on the distributor drive shaft with the oil hole on the oil pump was wrong. doing so ended up 180* out. long story short, i now have everything lined up as shown in the fsm, but the rotor is 180* off, the car runs like a scalded ape, and i dont give a squat. my timing is set at close to 15* btdc at idle and runs up to about 37* at 2k rpms. sounds great. more to come...........its beer-thitry1 point
-
Here's a link called L-Series Engine Porn: https://photos.google.com/share/AF1QipOOstuMLWQ-T-nfkSMbw1tvyAboqyIZEECGlrSo1O7NPbcNEB-Of7X1-LCM-BVavA?key=VXlBaFpISGZBcTl1T1lTcVVuUEVwbWRwMkJPekdn Shows them installed both ways, but more examples seem to be tight side in the engine bay. The logic provided by @jfa.series1 does make sense but I like the look of the other way better and I think of the tight side as being a sealing lip to keep dirt, debris & fumes out of the cabin with the lip in that direction.1 point
-
Mine are like this. As far as I know these are original and have never been removed. Below is the best pic I could find from the 1971 FSM supplement, it's hard to see but to me it looks like the tight fitting end of the grommet is facing out. .
 1 point
 -
1 pointSo what I can tell you so far based on my rebuild is the following: 1. The 2 racks are different. According to the parts fiche that I have the original 240 rack was obsoleted in July of 73 which is when the newer racks started to be used in manufacturing. So I suspect some late manufacture 240's even had the newer rack. 2. Also the very original rack had a "grease reservoir" on the passenger end and this was supposed used to ensure that the rack was properly lubricated over time. However at some point before they switched to the newer rack they eliminated the grease reservoir and plugged it. Everything else remained the same as far as I can tell. 3. According to the parts fiche again, the end housing bushings have the same part number between the two racks so I presume from that that the rack and housing, at least dimensionally, are the same. I have just recently dismantled one of the early racks but have not yet had a chance to remove the end bushings to verify that the dimensions are the same between the two. 4. The big difference between the two different versions is in the pinion design. The original rack has a larger diameter pinion (gearing is the same) and only uses a ball bearing on the top side. The bottom end of the pinion rides in a brass sleeve bearing, which as near as I can tell is not serviceable. The FSM states that if there is excessive play in the brass pinion sleeve, the entire rack housing assembly needs to be replaced. I have not attempted to remove the brass sleeve bearing from the 240 rack that I have just dismantled, but I do plan to take a look and see if that is possible. The later rack uses 2 angular contact bearings, one on the top and the other on the bottom and both are serviceable. 5. The other major difference in the pinion area is the method in which the pinions are secured to the rack housing. In the case of the original rack, the pinion is held in place with a large C clip in the pinion housing itself. It then uses a large oil seal over the end of the pinion gear that is pressed into the pinion housing. On the later rack, the C clip is eliminated and they utilize an oval shaped bracket which goes over the end of the pinion (with spacers to ensure proper preload) and is secured to the rack housing with two bolts. All in all I believe that newer rack is an upgrade to the original as more of the internals are serviceable. 6. Finally, the rubber or poly rack bushings are different sizes between the two racks. That's what I know so far. As I learn more from the rebuild of the newer rack and the dismantling of the older one I will post updates. Mike.1 point
-
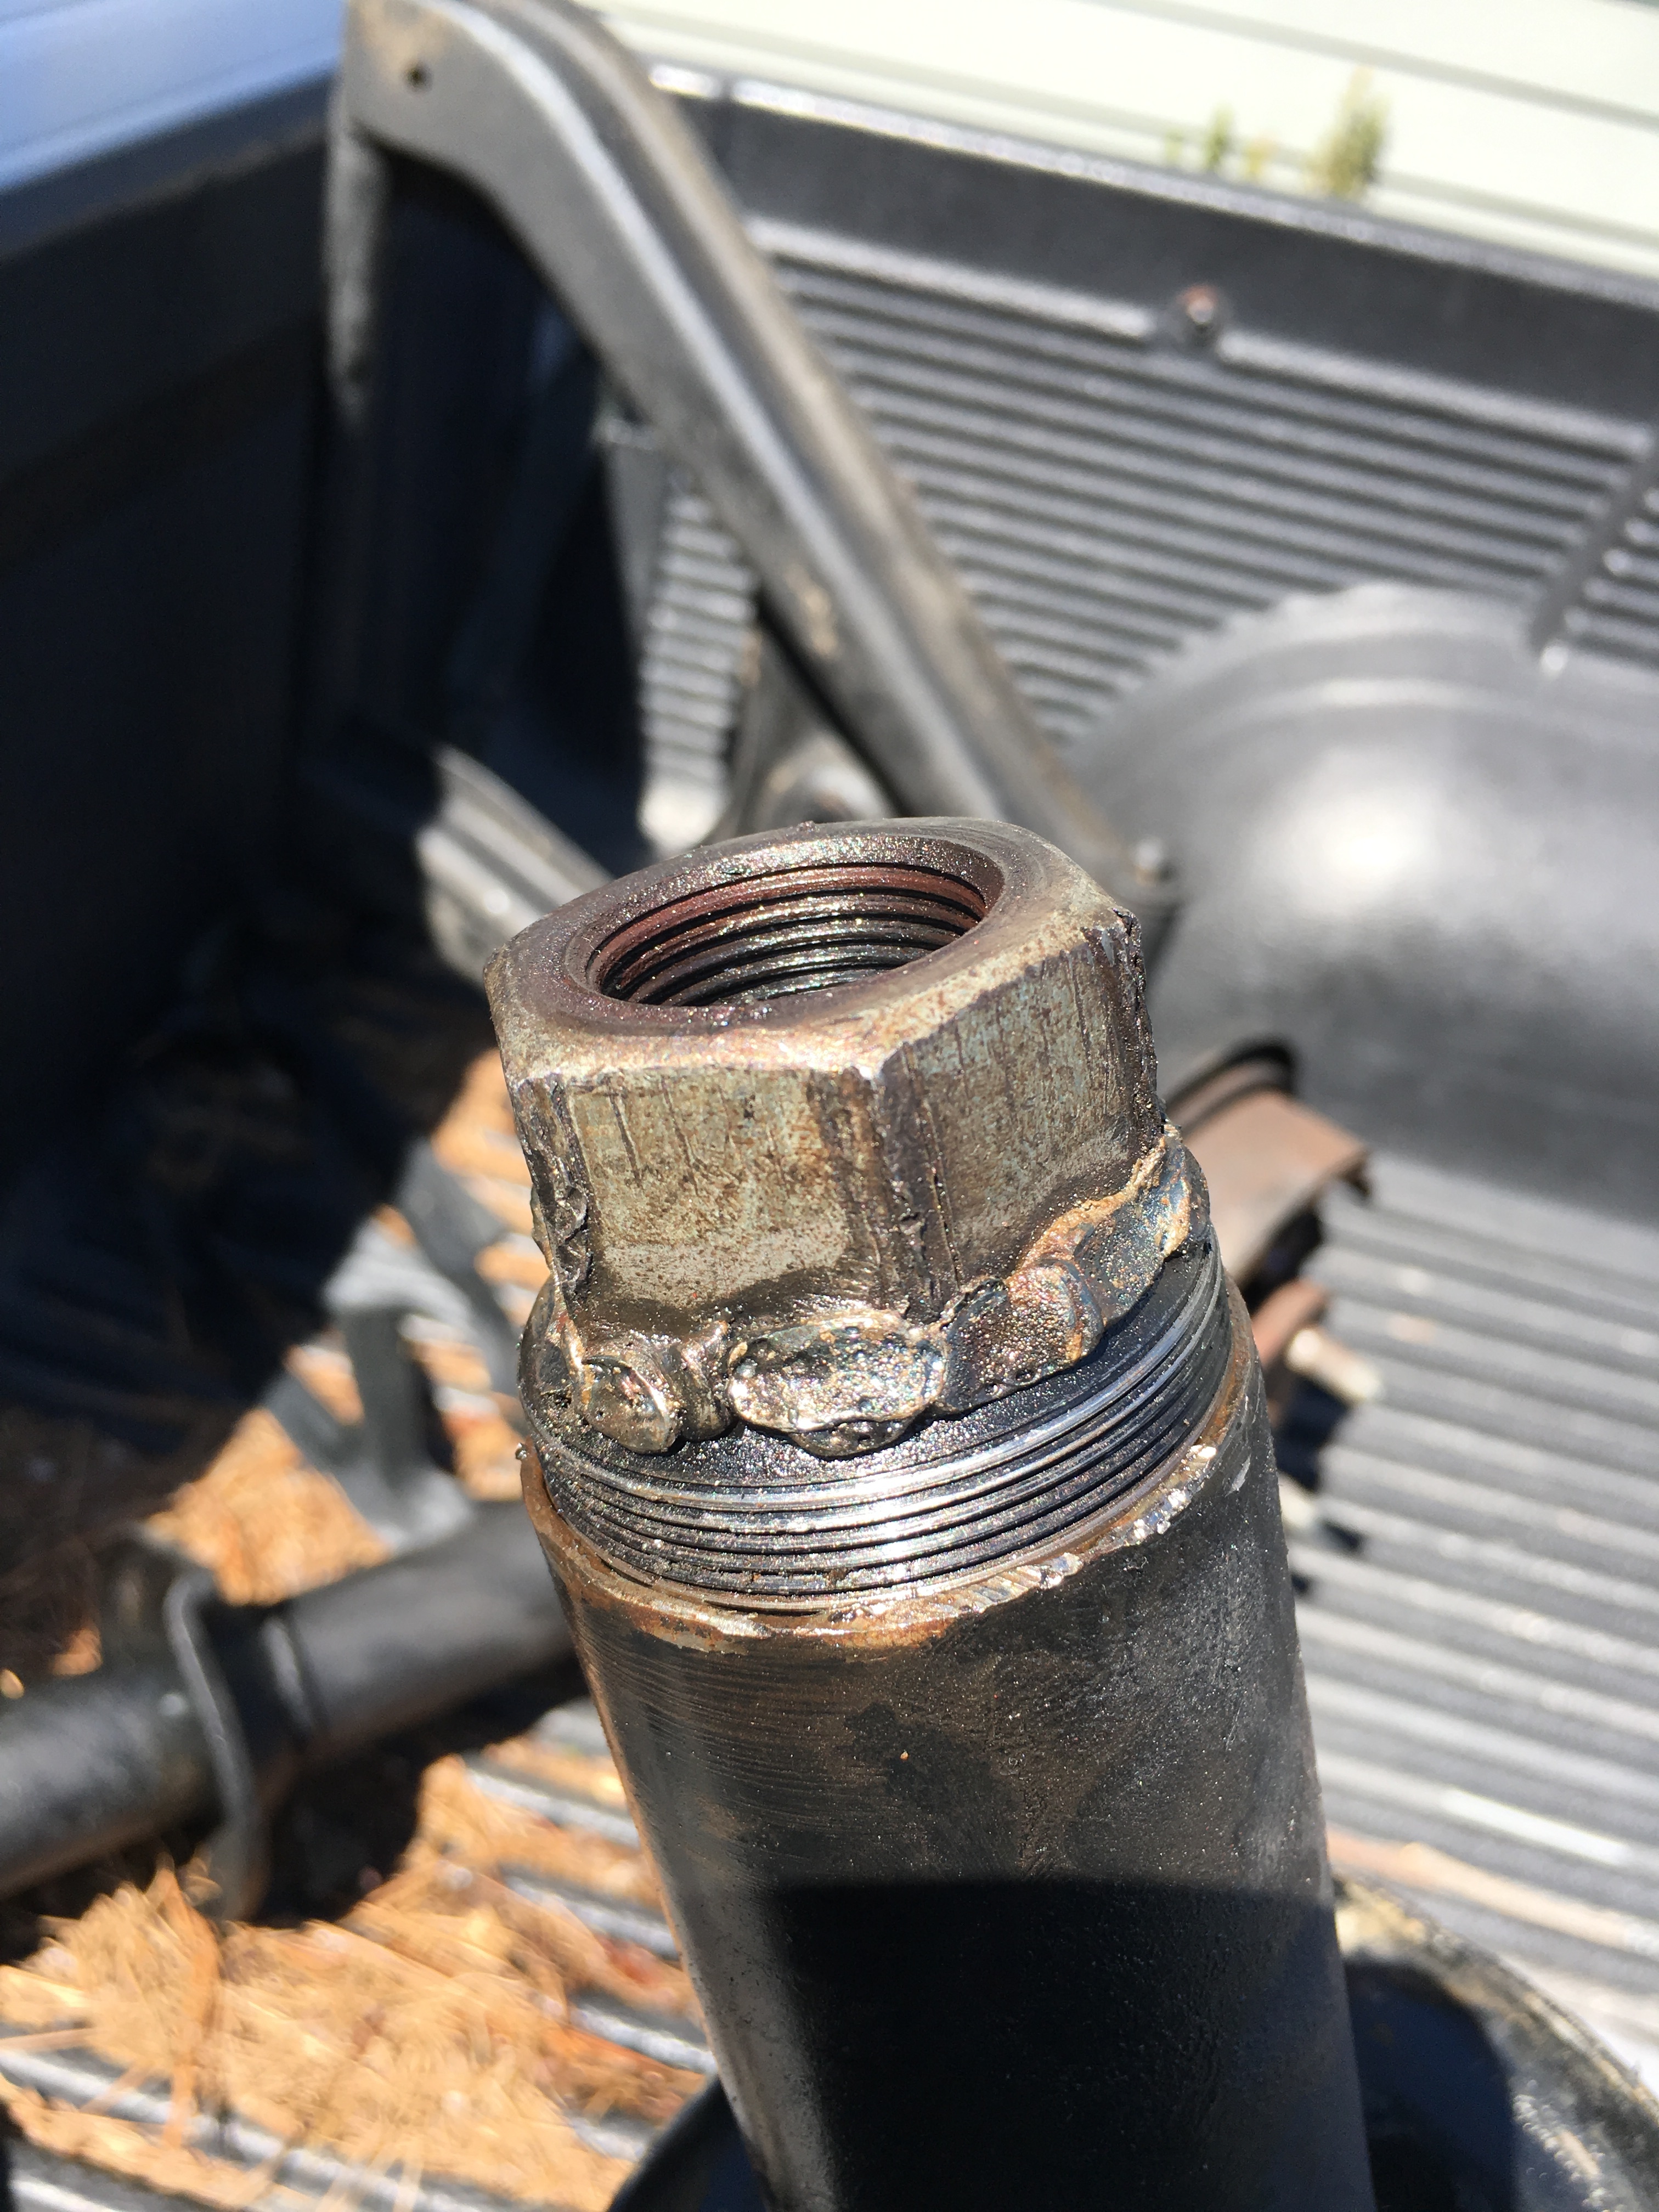
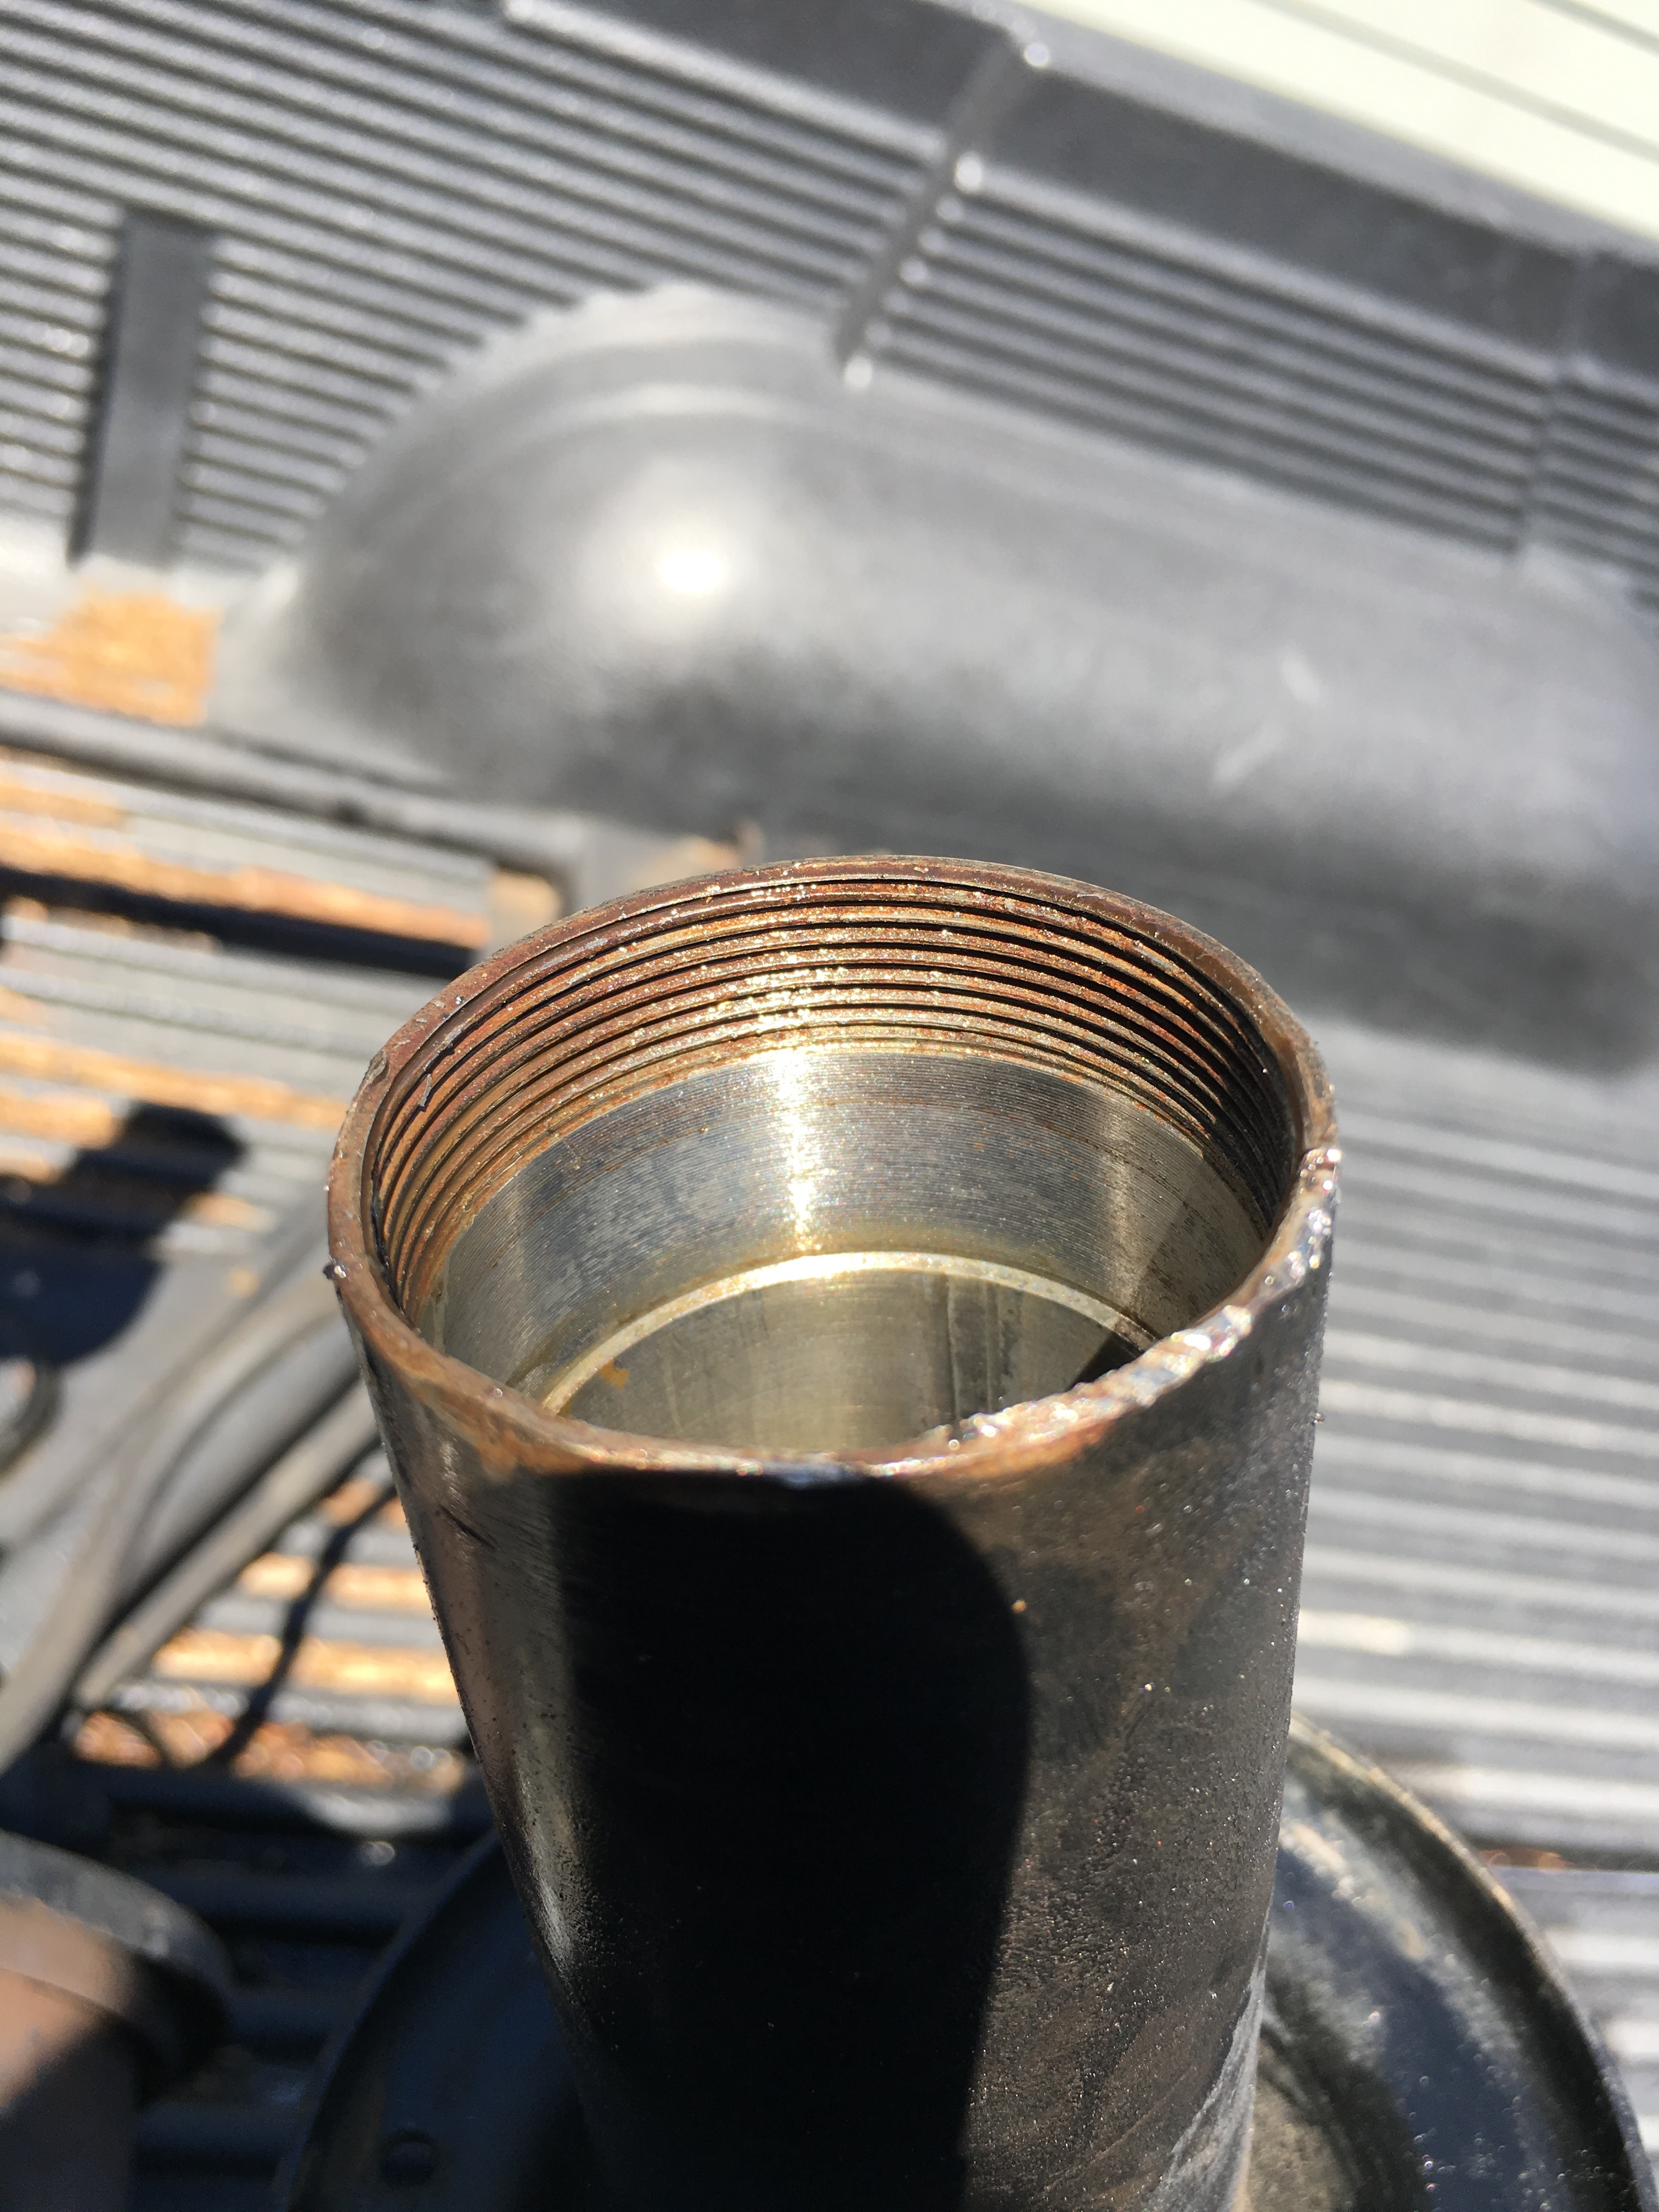
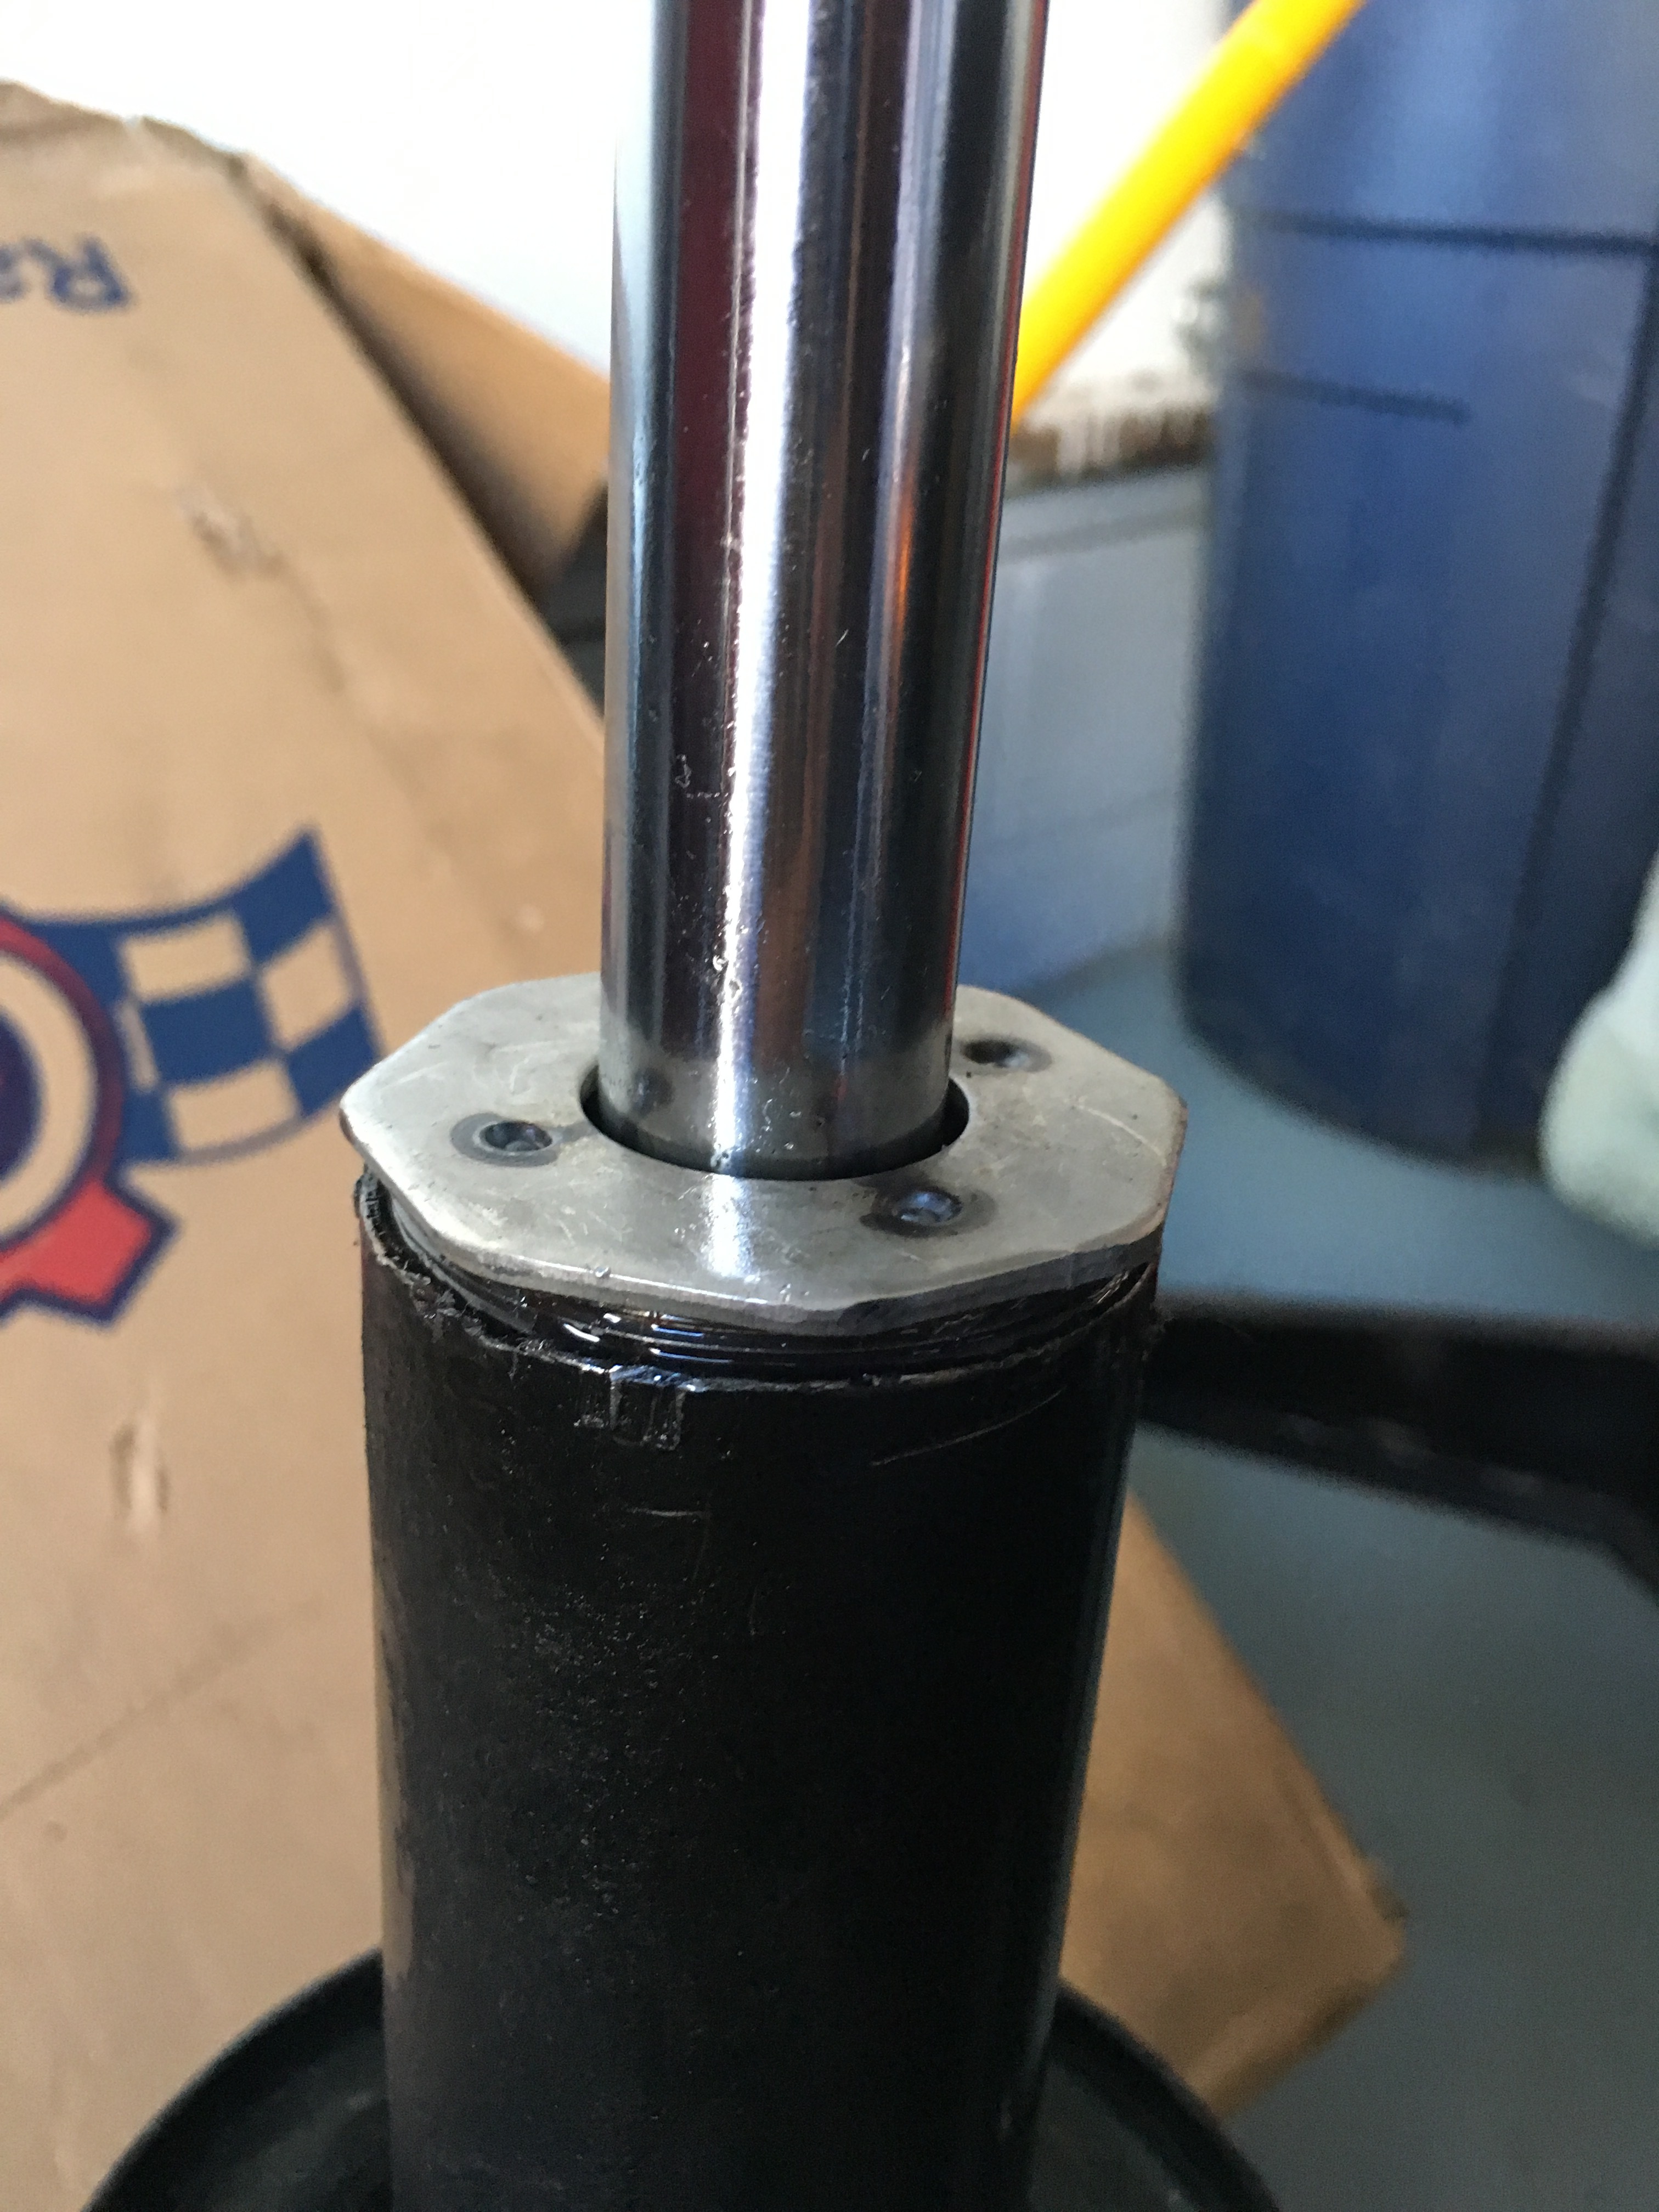
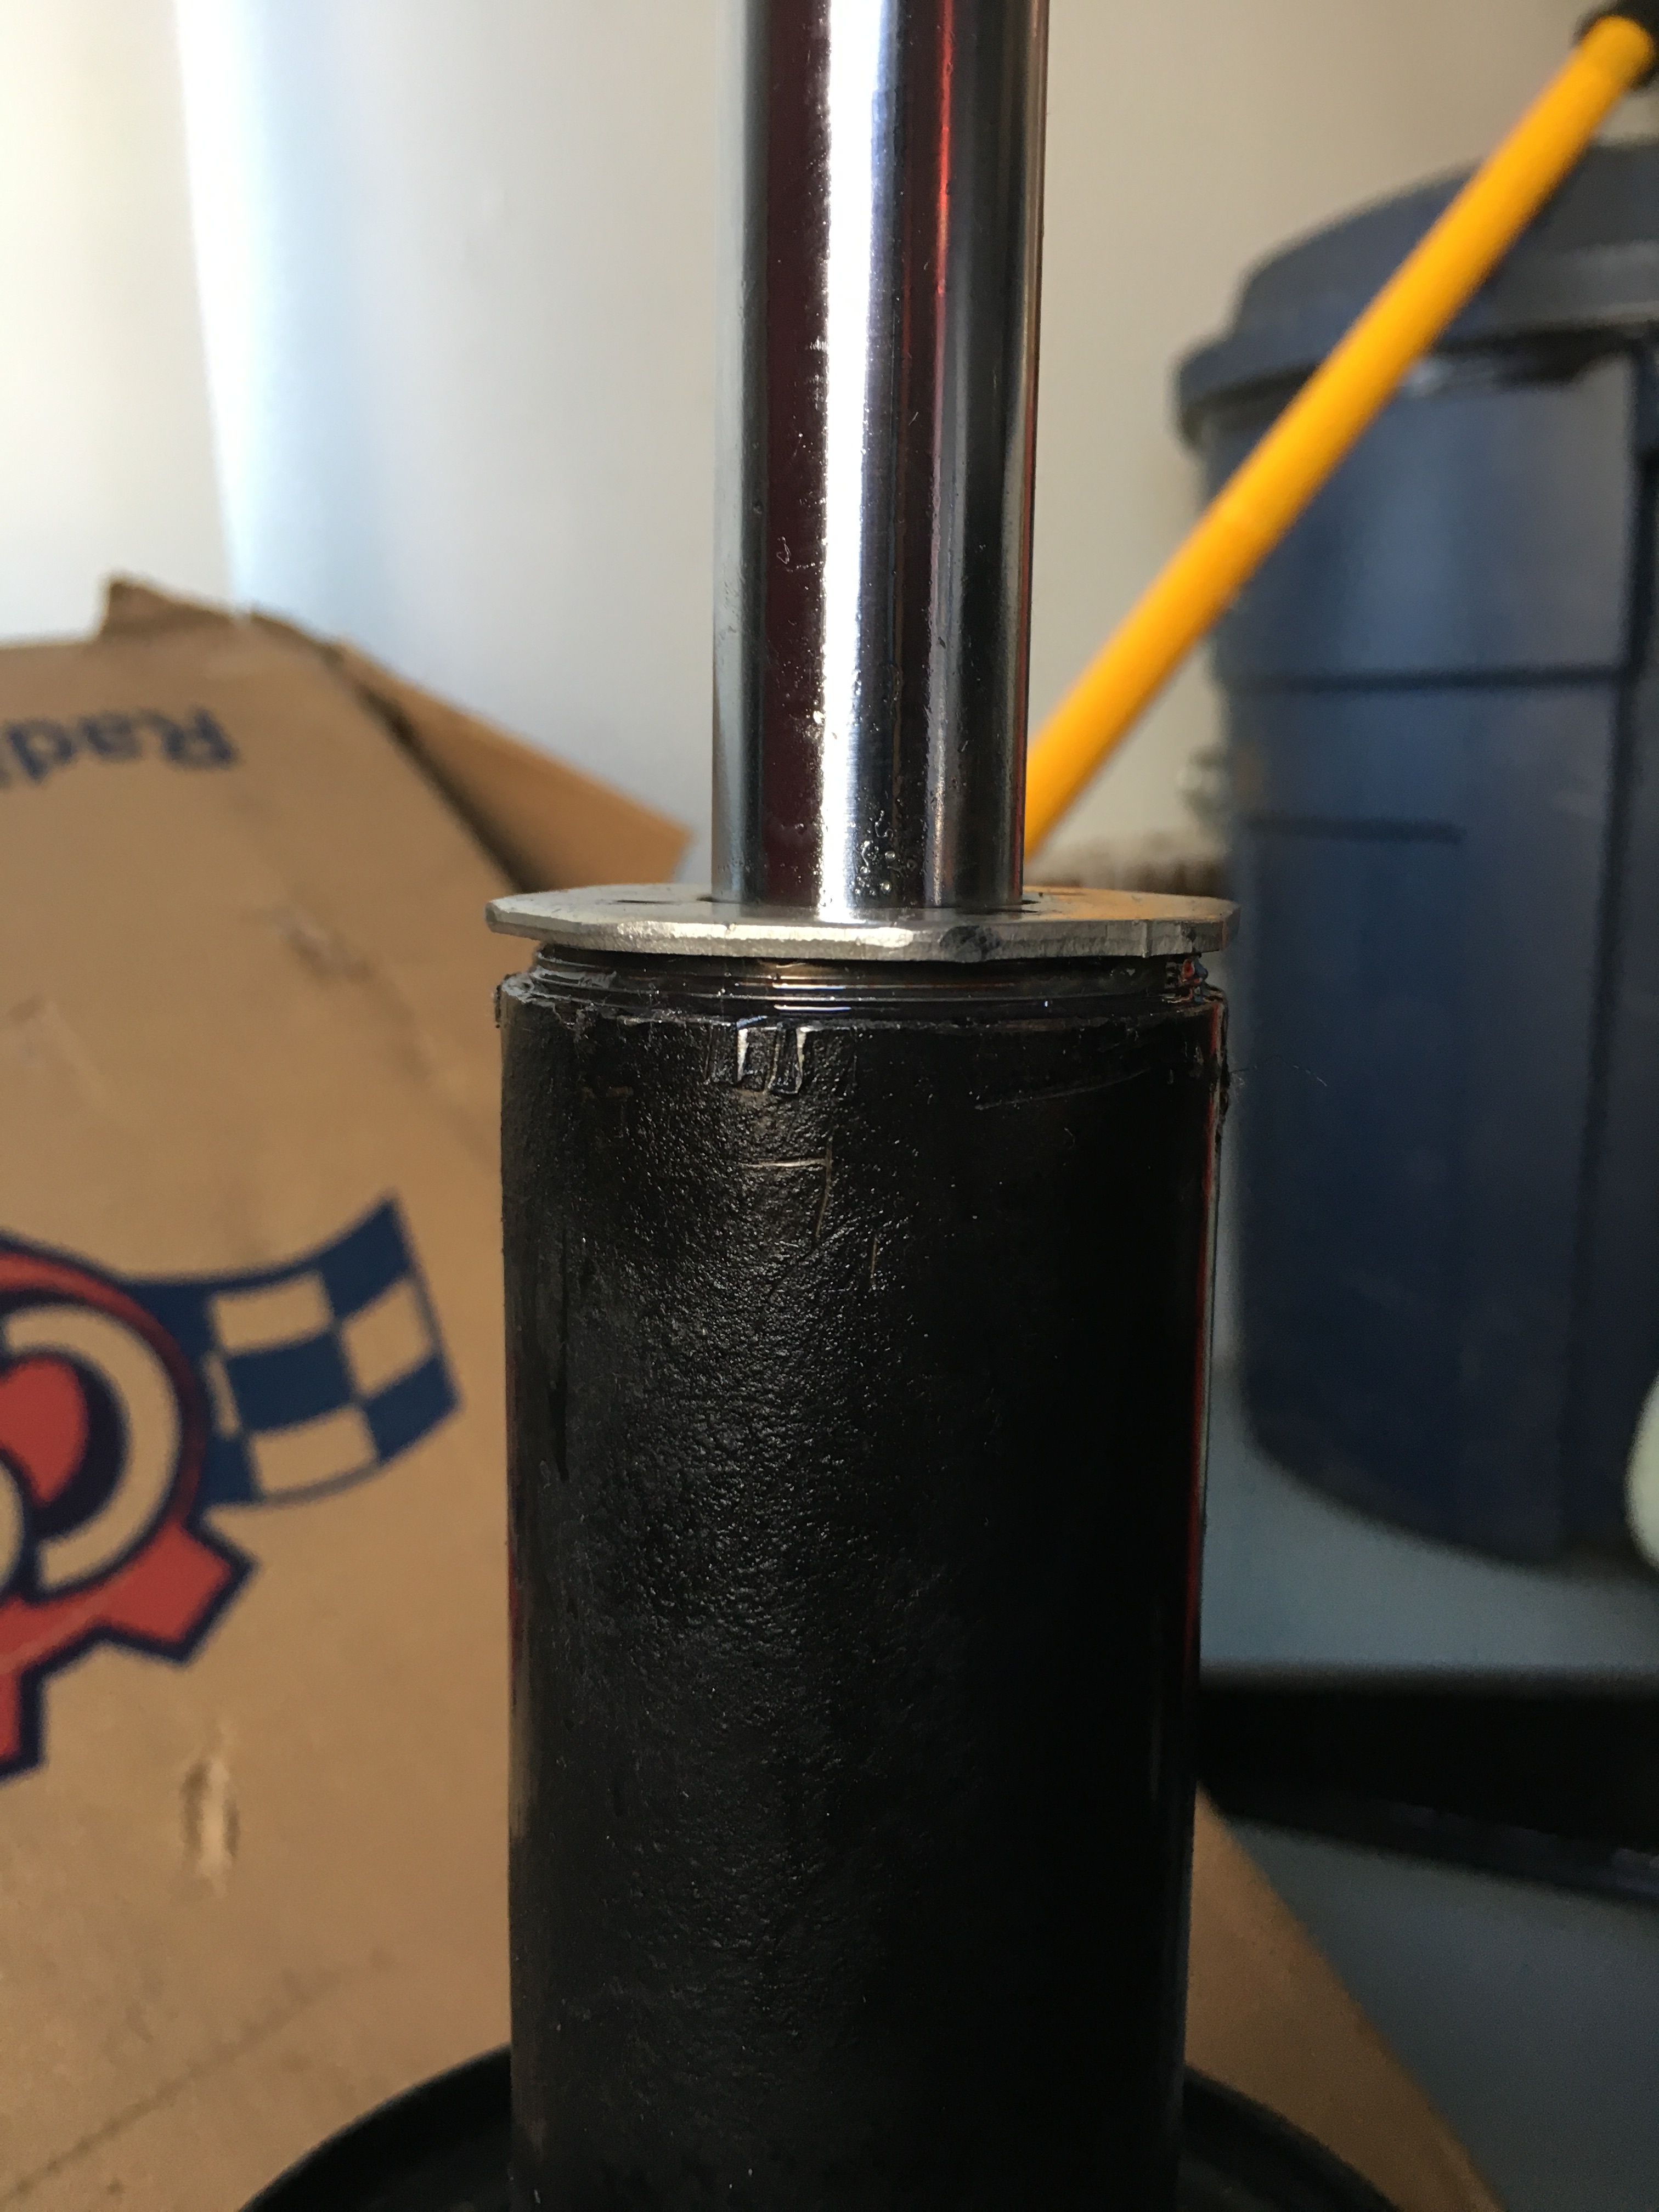
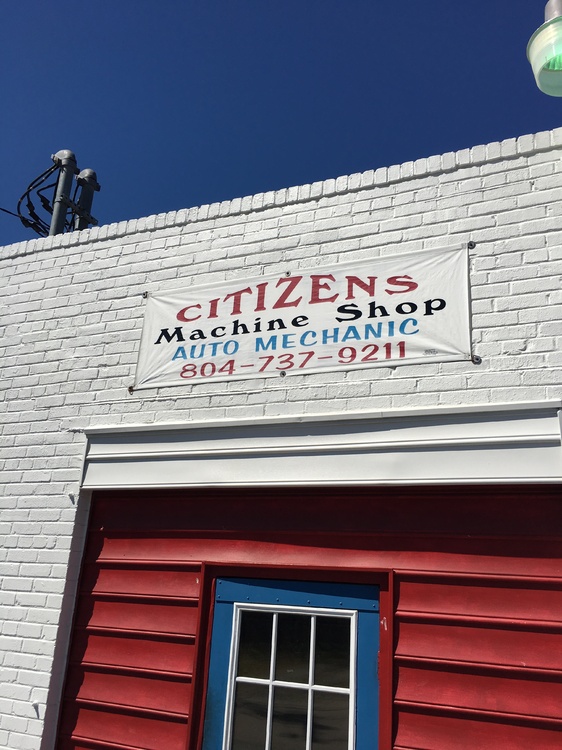
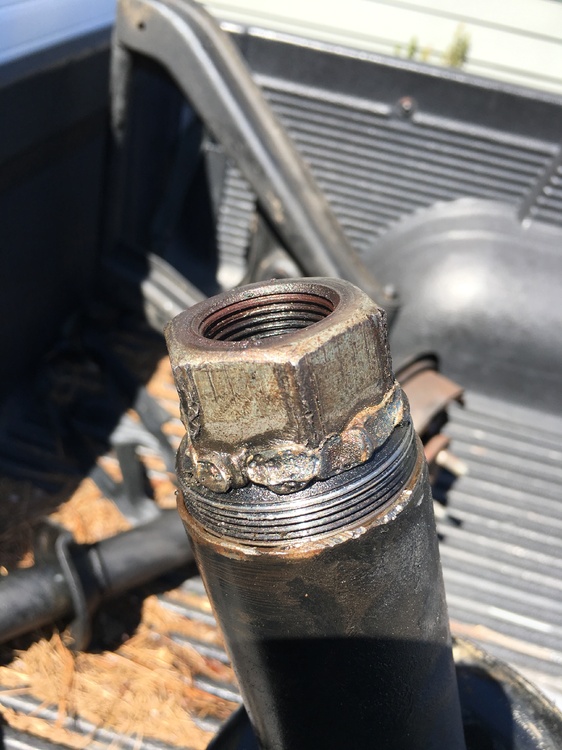
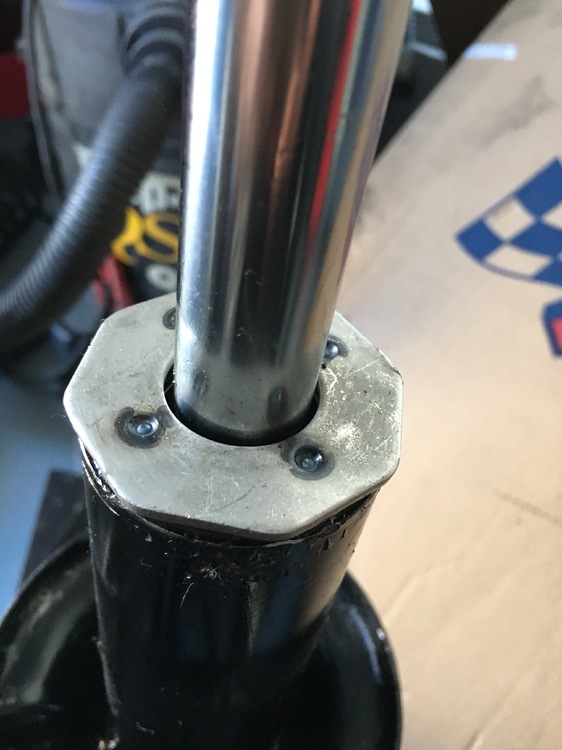
No harm, no foul....... Took it to Citizen's Machine Shop. They couldn't get em off either......not with the thin gland nut head anyway. Carlos welded a plumbing fixture to the top of the gland nut and used an impact wrench to get them off. Some jobs just can't be done at home. .......and brand new Tokico Blues installed


 1 point
 -
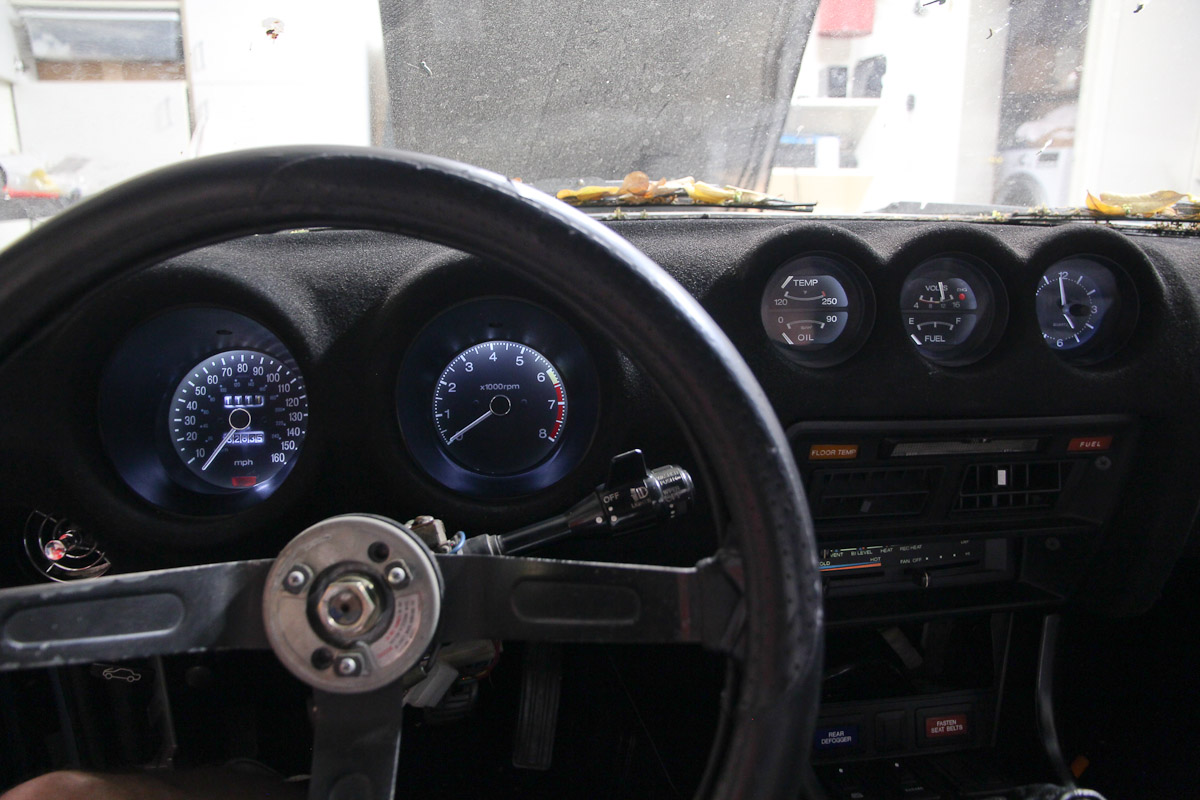
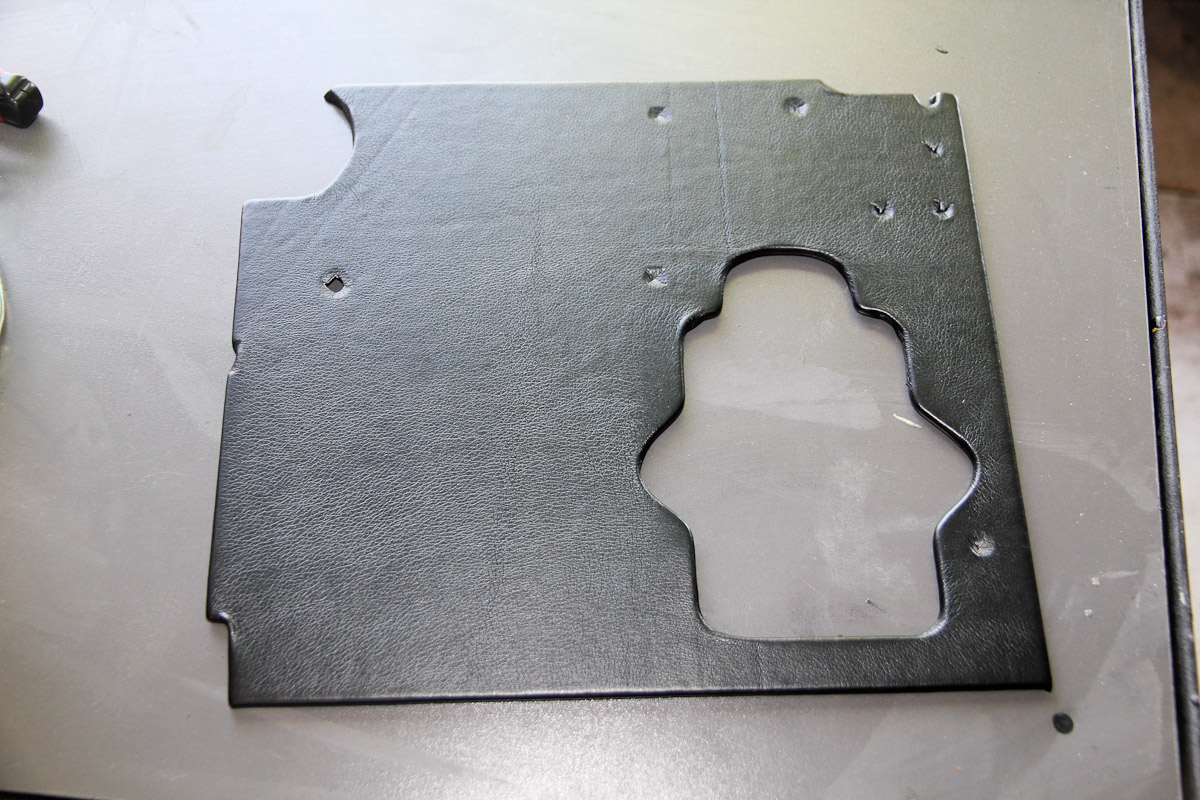
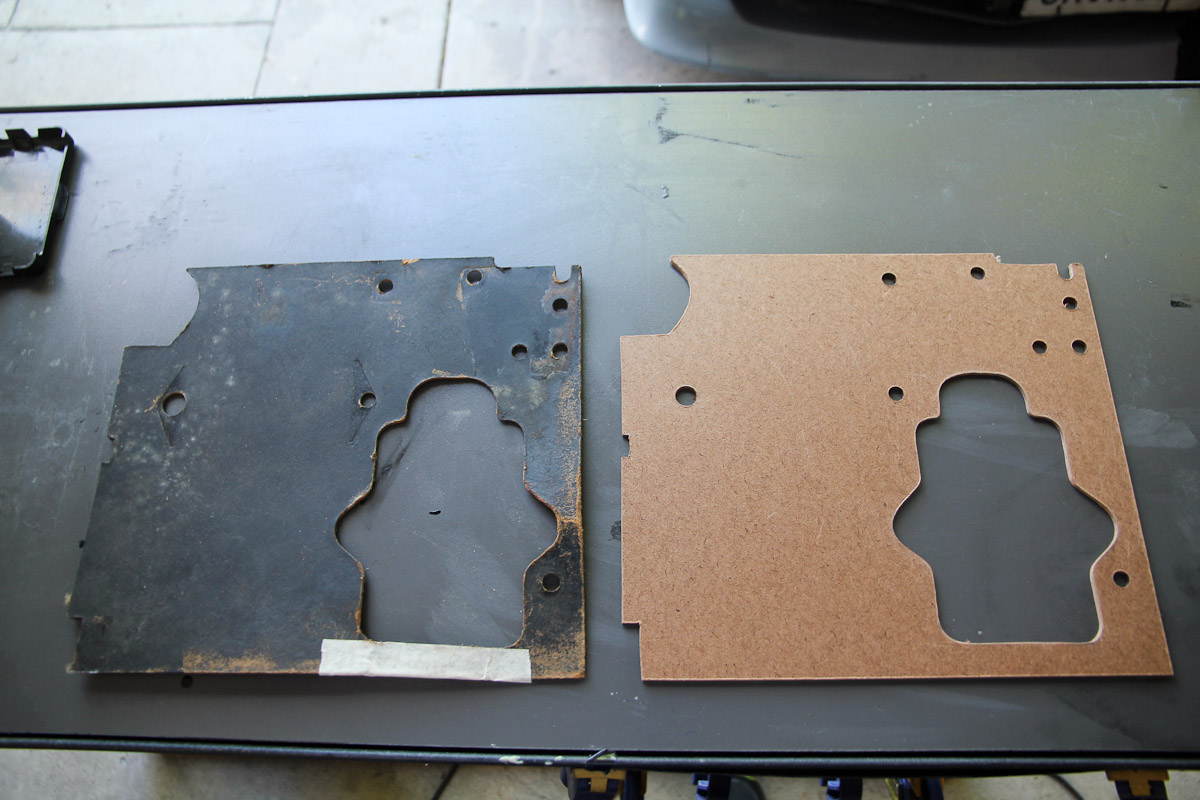
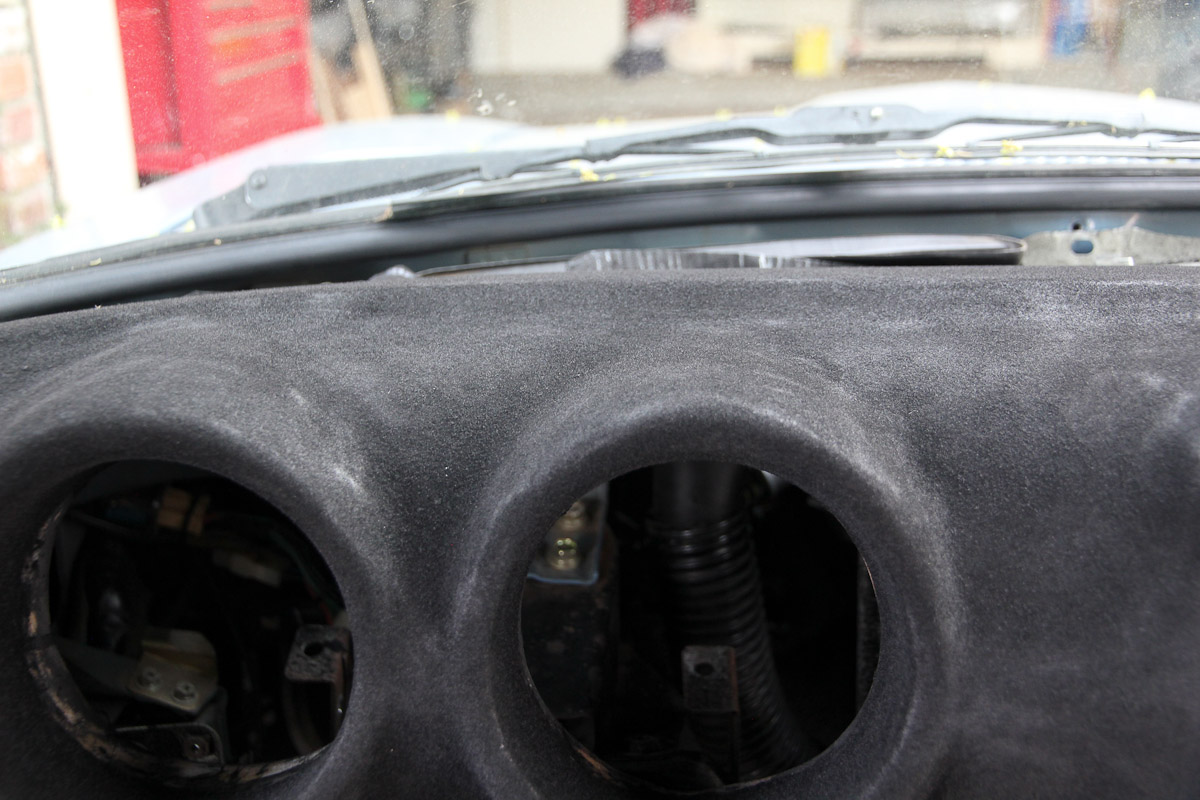
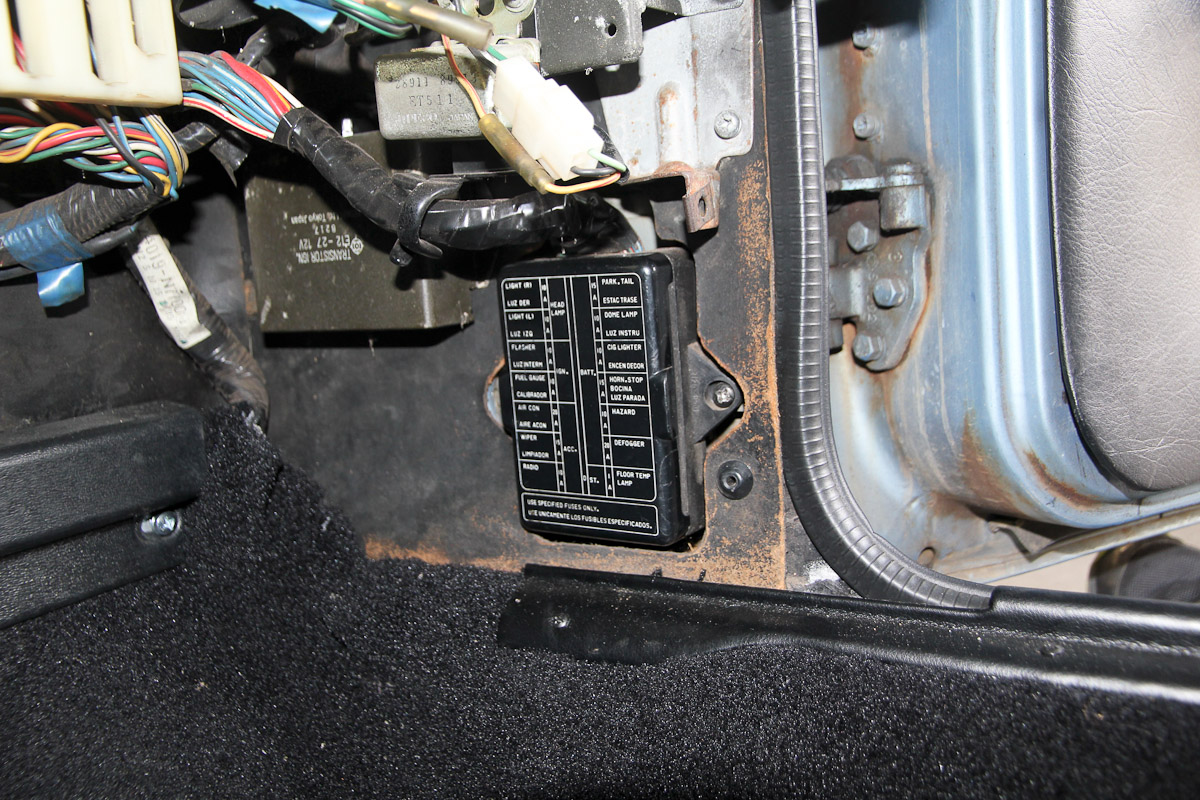
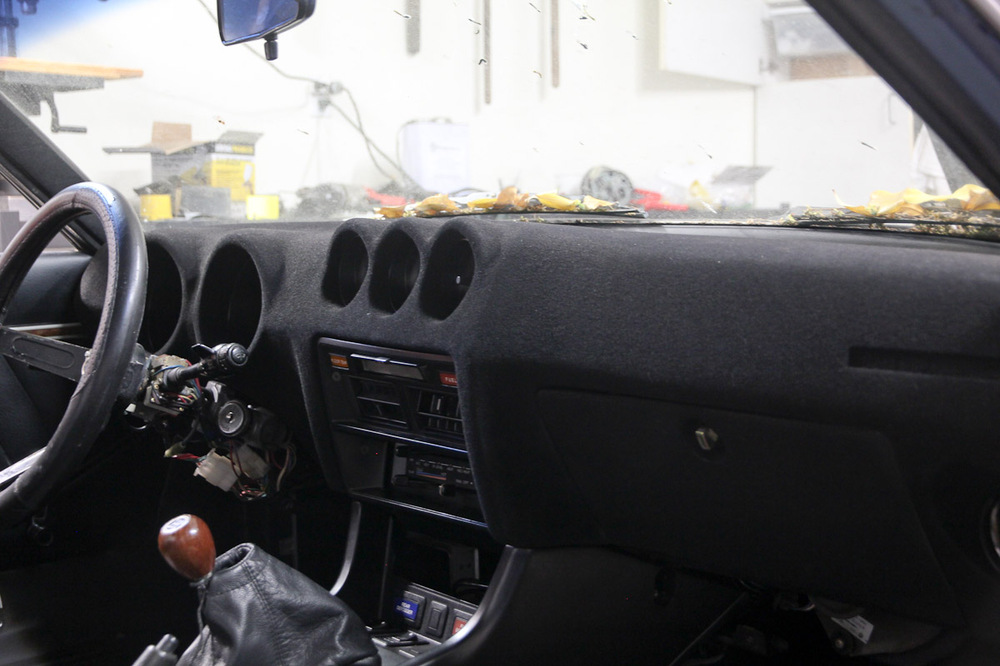
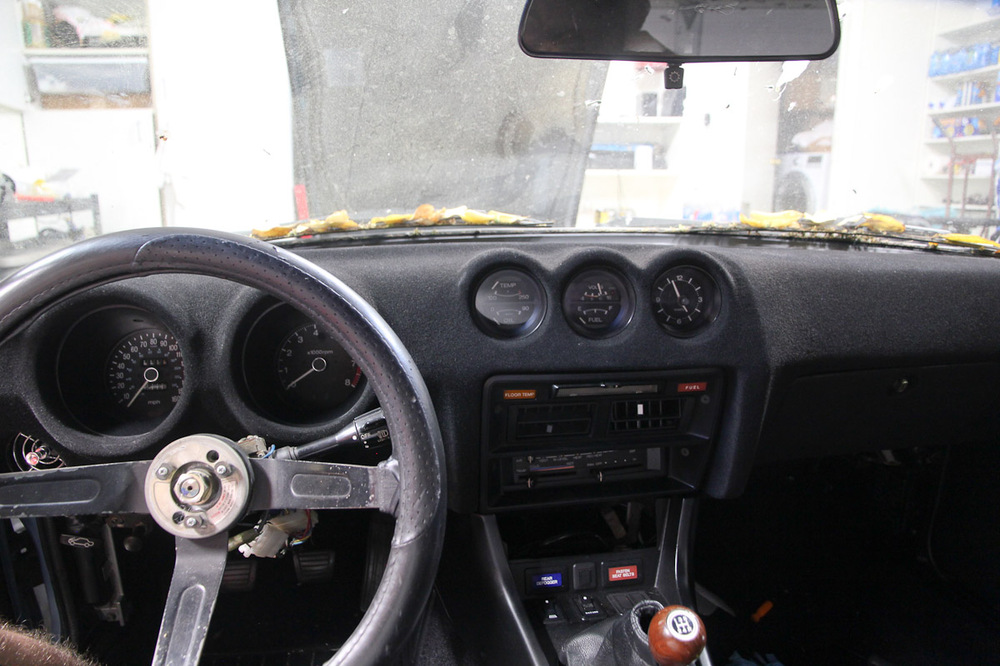
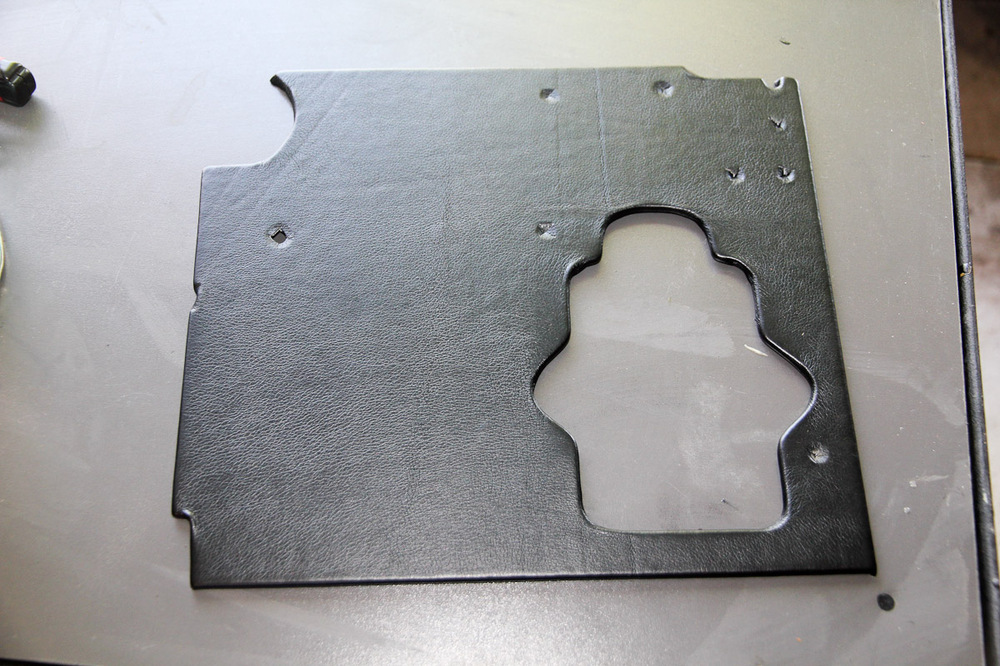
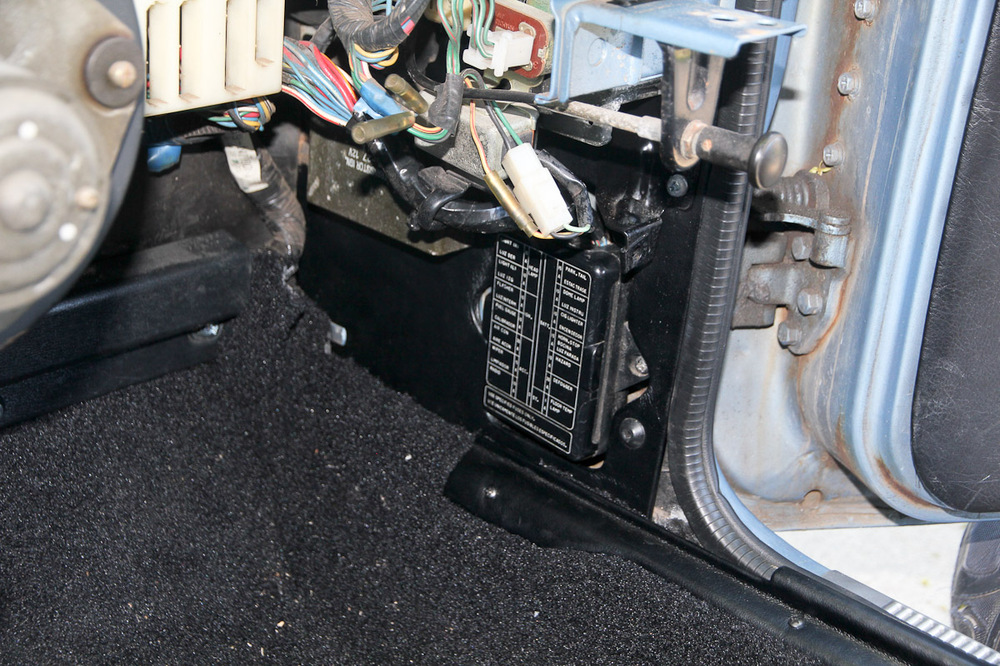
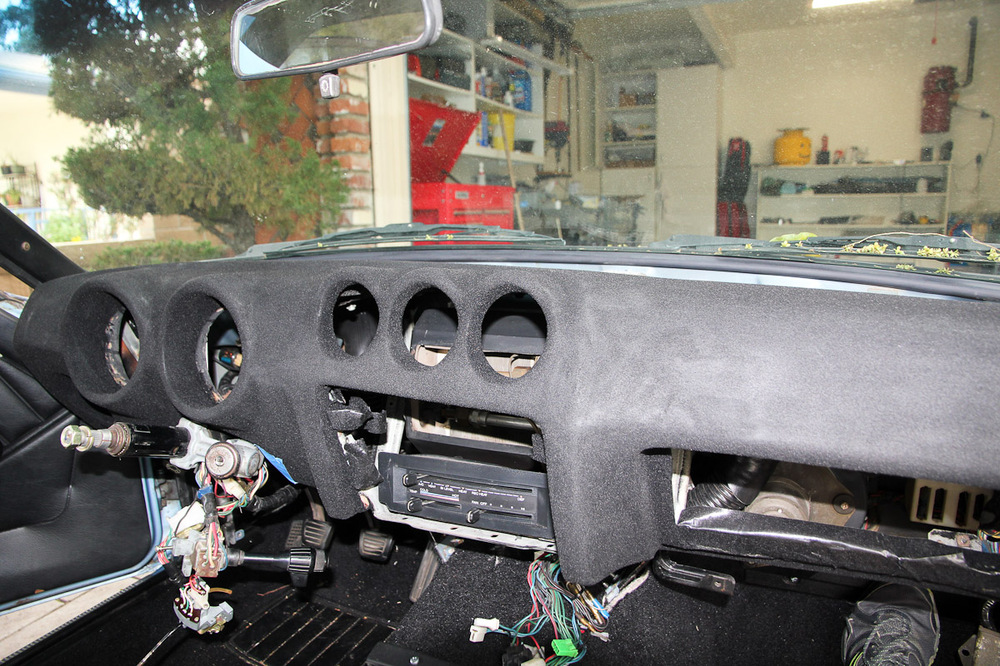
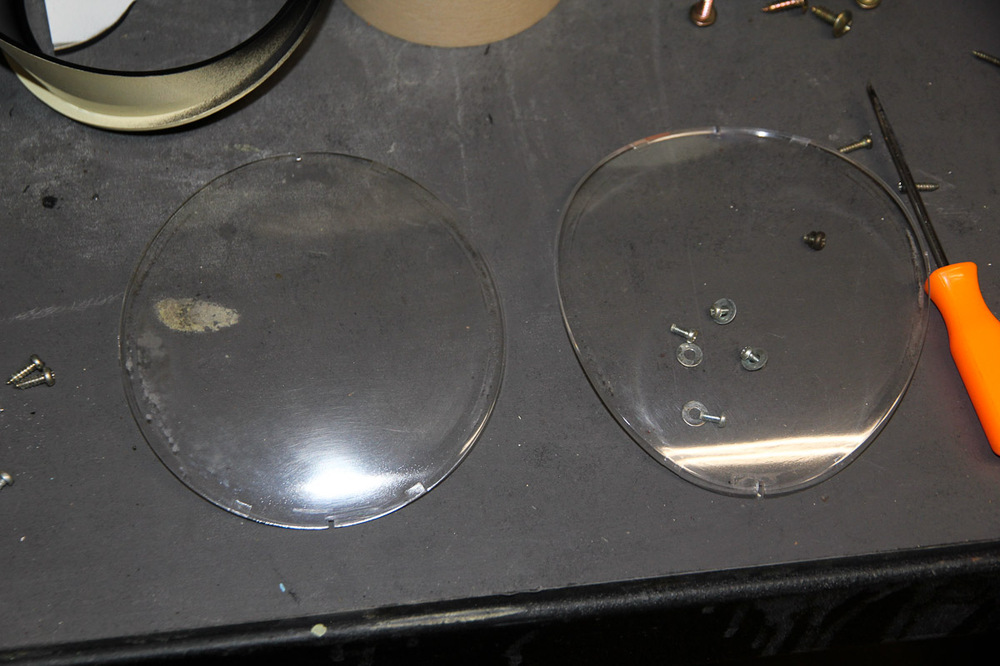
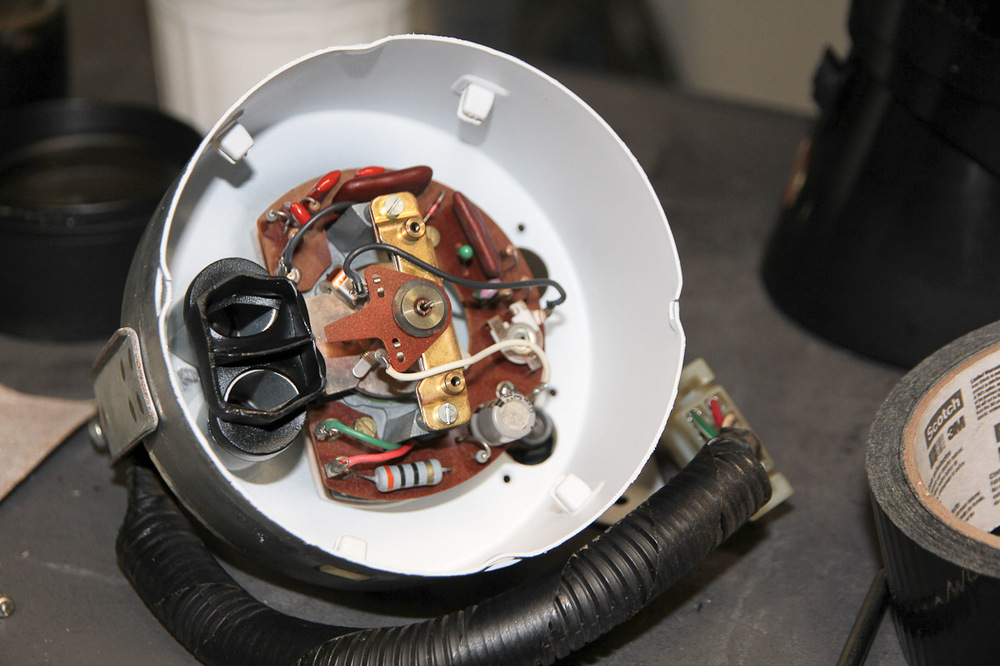
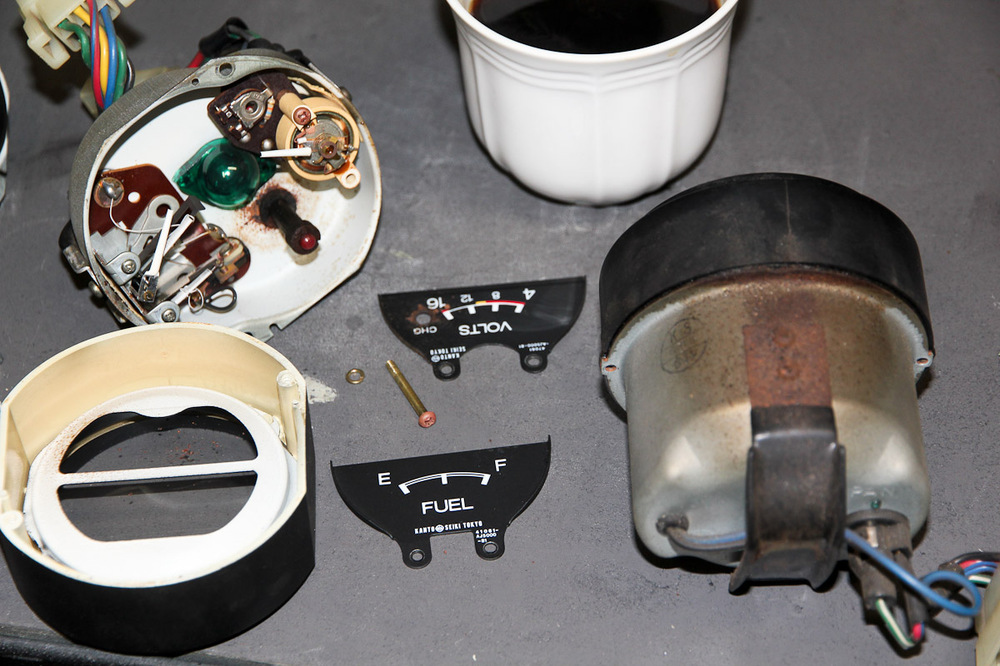
God help me, this'll be the last post on flocking a dashboard, because I'm done with it. Persistence kind of pays off though, so remember: if at first you don't succeed, try like eight more times, until you run out of patience and materials! Now that it's all said and done, I ended up getting the best (not great, mind you) results by spraying some slightly thinned Rustoleum over the already-flocked dash. I can live with the results for a while, even if they aren't perfect. If anyone else wants to do it, I still think my general advice of "don't" is probably best, but with the experience I had, I the conclusions I've come up with are as follows: An even coat of paint/adhesive is really important to achieving a good. Brushing doesn't seem to work well (some of the photos show the brush strokes fairly well). Spray it on. A thick layer of paint works better. Thin layers dry too fast. There's a very small Goldilocks zone though: too thick and it'll run. I think the size and complex shape of the Z dash are just not well suited to flocking. Getting the right amount of glue on there and getting the whole thing covered is much more difficult than I expected it to be. I got tired of taking the same pictures, but here's a few of the final flocking steps, before and after. This was also my chance to work on the gauges. They all got a thorough cleaning, paint touched up, and I scavenged the better bits and pieces -- lenses, brackets, etc. -- from the spare set from the other dashboard, and shot flat white paint on the insides of the housings to (maybe) increase reflectivity. I never liked the green, so all the filters were removed and the bulbs replaced with LEDs. Only snag in the whole thing was discovered after reinstalling the dash: the tach bulbs didn't work! The whole thing came back out and I found out the tach bulbs, for some reason, were getting -12 volts. Swapped the wires on the pigtail and all is good. Pretty happy with how they came out. One more "while I'm at it..." job: the fusebox surround had really seen better days, so I used it as a template to make a new one. I covered it with the same vinyl I've used on some of the other interior bits, which I think looks better than just painting it black. By some minor miracle, all the holes actually managed to line up. It's the little things.


 1 point
 -
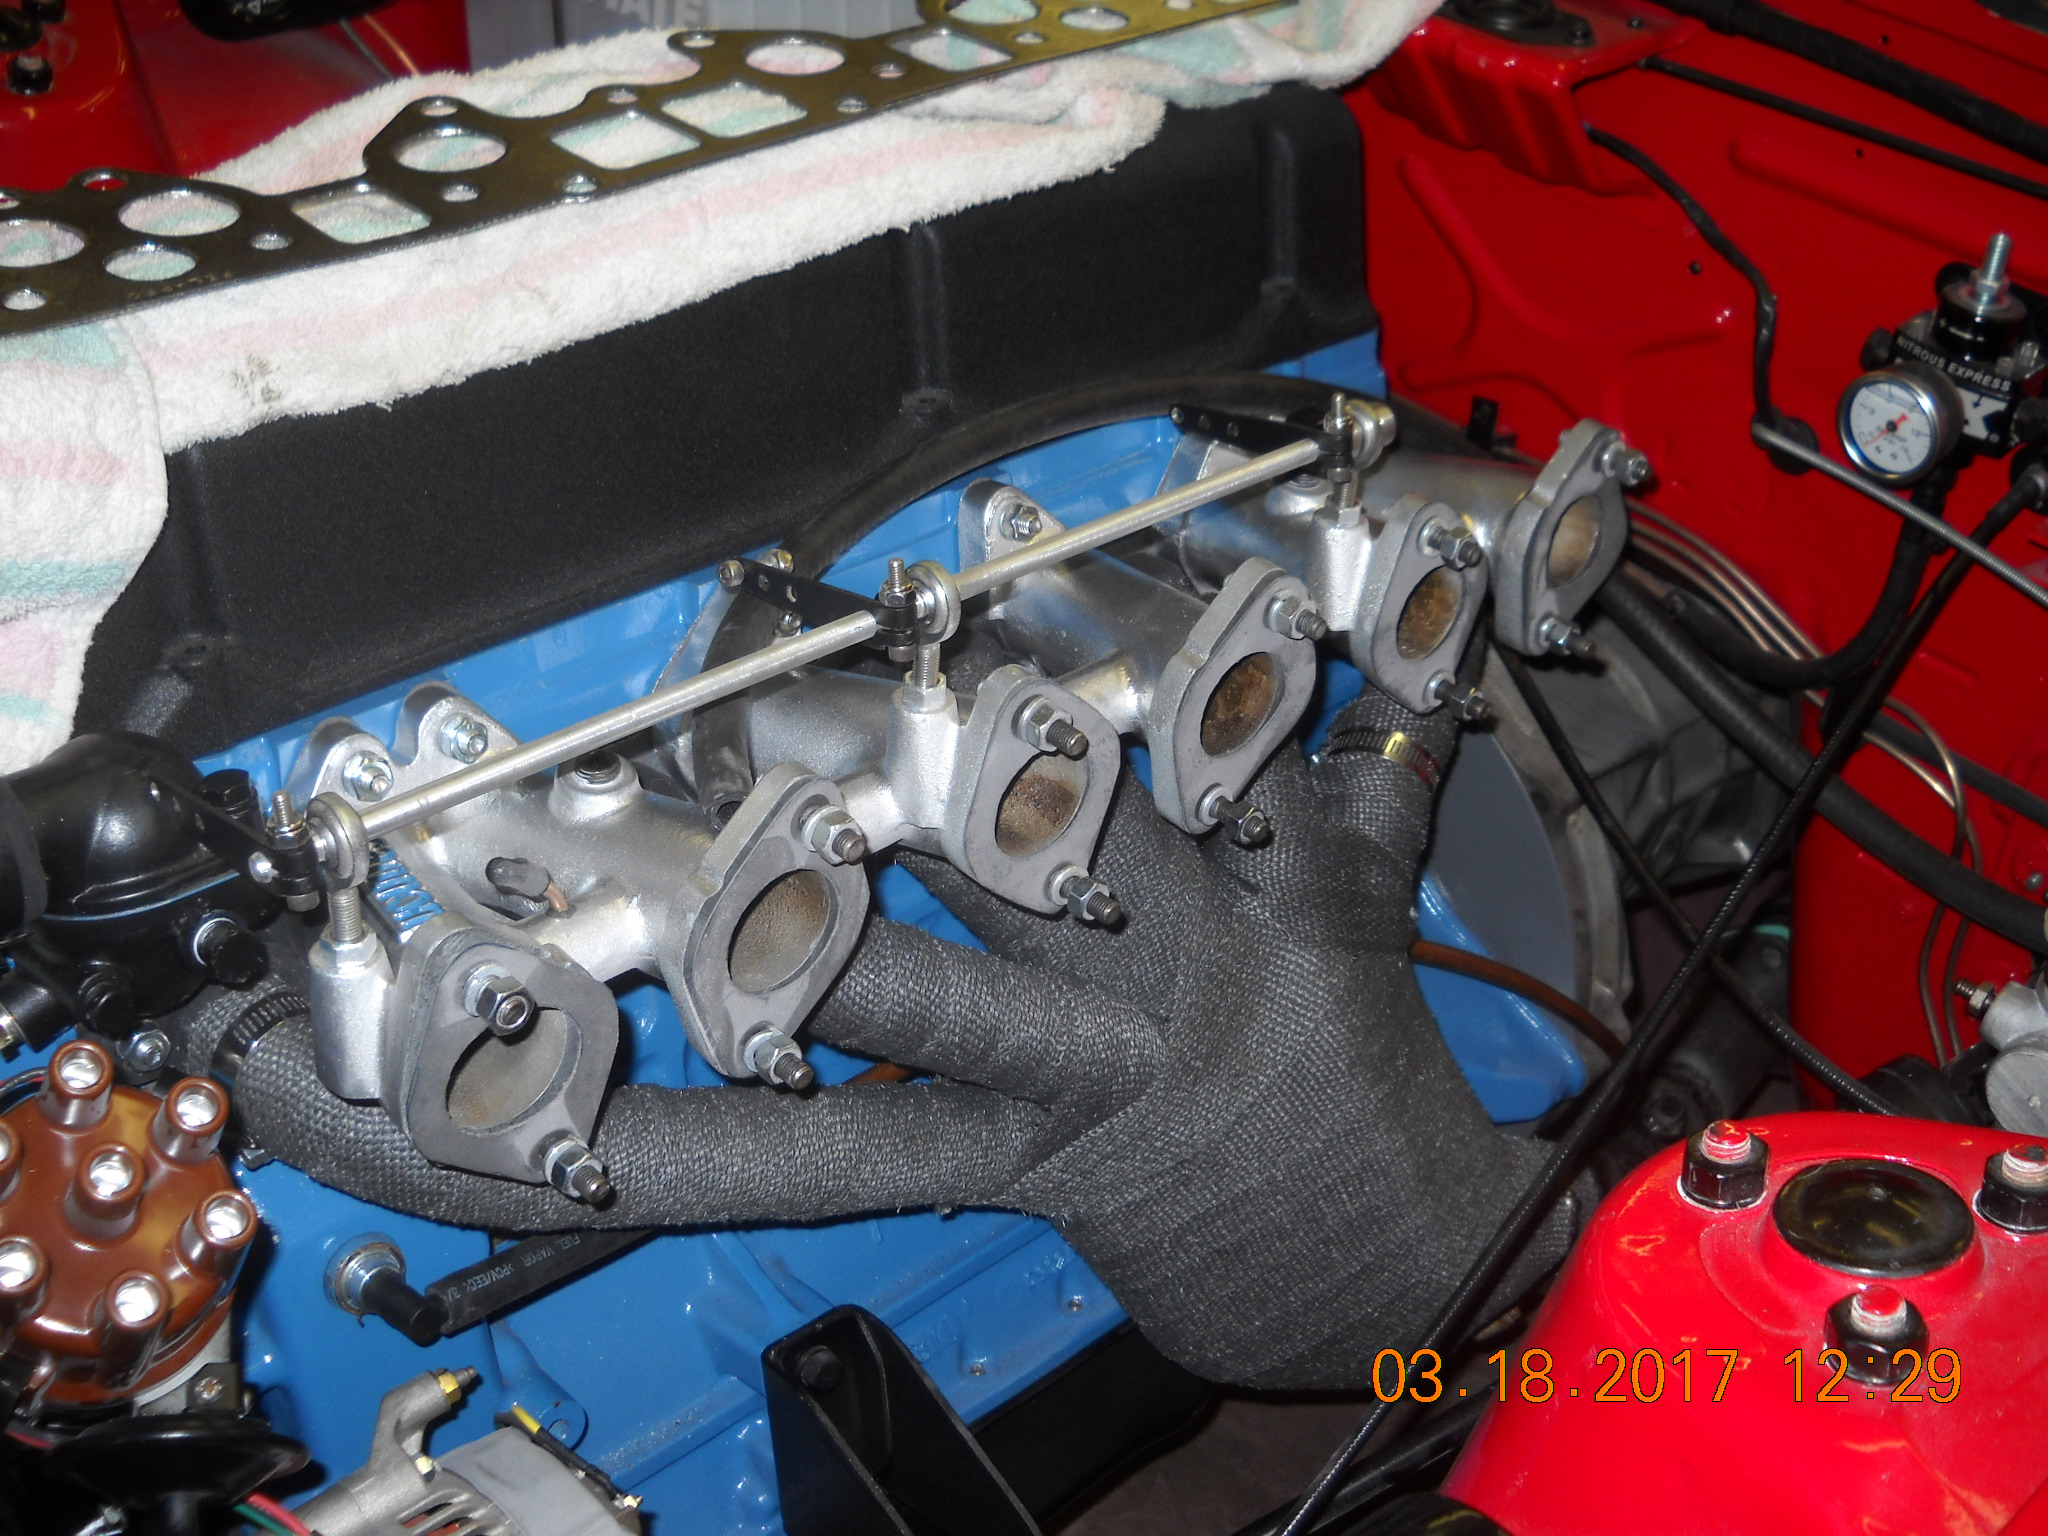
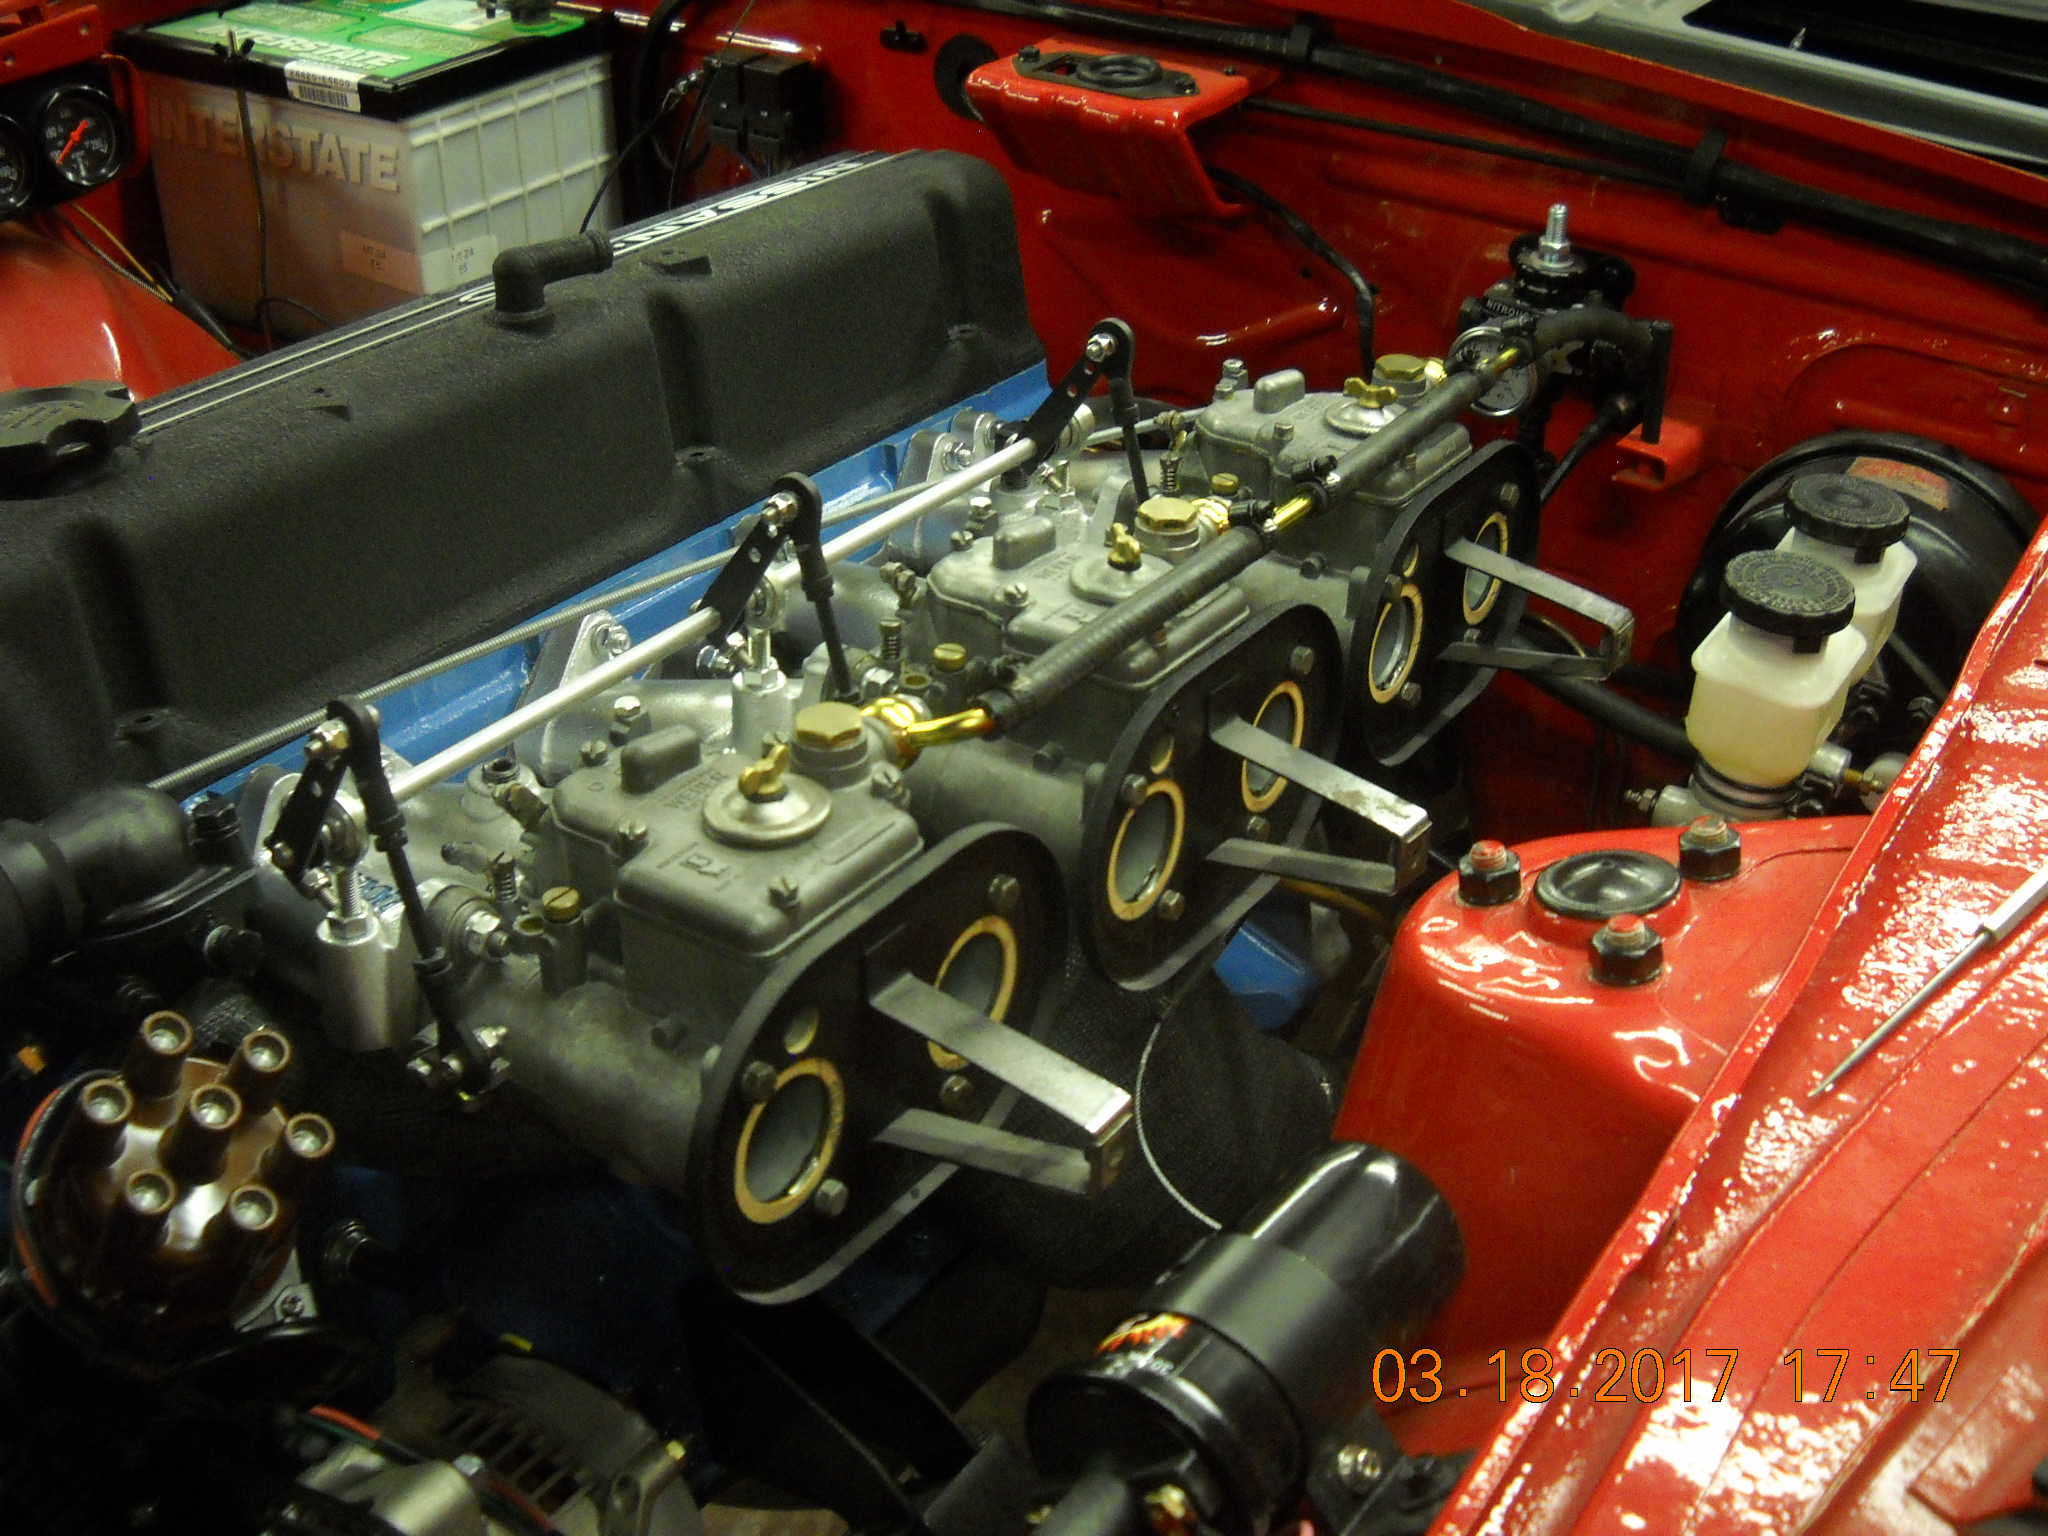
1 pointtoday was a great day to be sweaty!! msa exhaust came yesterday. got the header wrapped and the rest of it installed today. this is just the basic system and everything fit just like it should. here is a pic with the O2 bungs and pcv bung welded in header wrapped and intake installed carbs and air cleaners on. all im waiting on is lash pads and it'll be ready to fire up


 1 point
 -
1 point
-
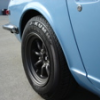
If this old 911 rust bucket sold for $29K, surely this Series I 240Z should sell for at least $2k, what do you think? http://bringatrailer.com/listing/1967-porsche-911-coupe-3/1 point
-
1 point