Leaderboard
-
Namerow
Free Member9Points1,551Posts -

Zed Head
Free Member4Points19,228Posts -
cbuczesk
Free Member3Points1,024Posts -
grannyknot
Free Member3Points5,158Posts


Popular Content
Showing content with the highest reputation on 08/15/2016 in all areas
-
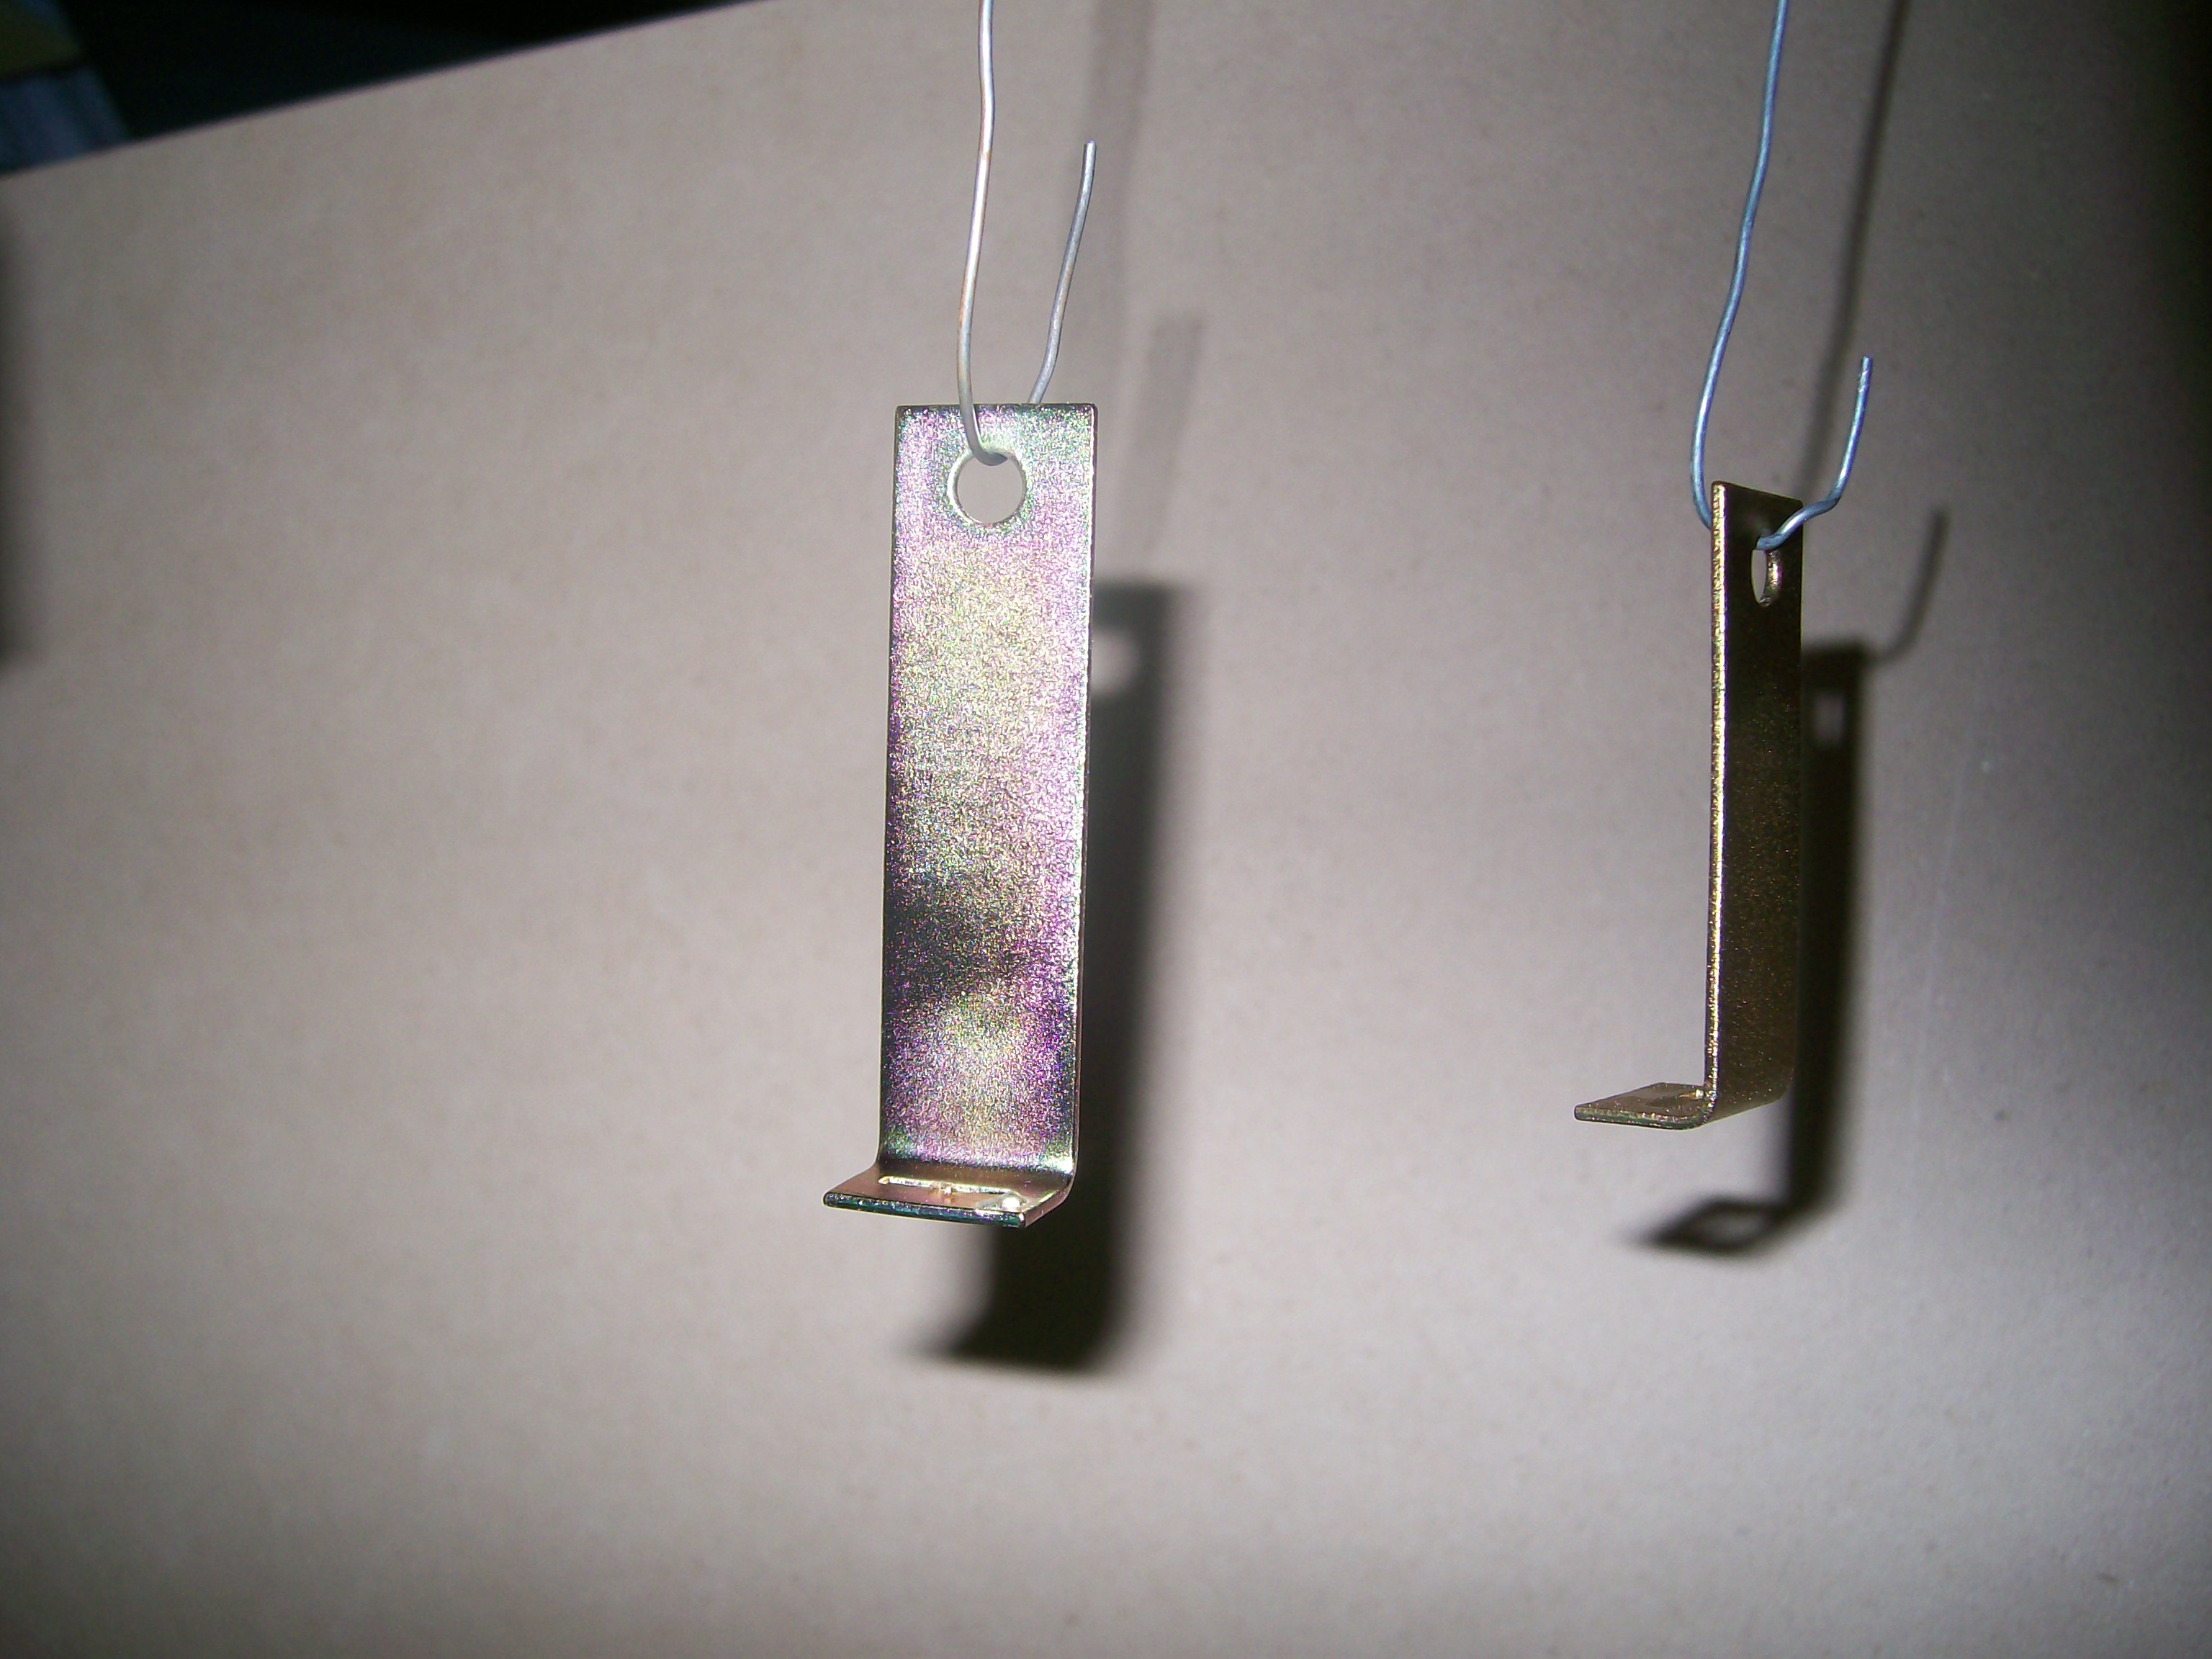
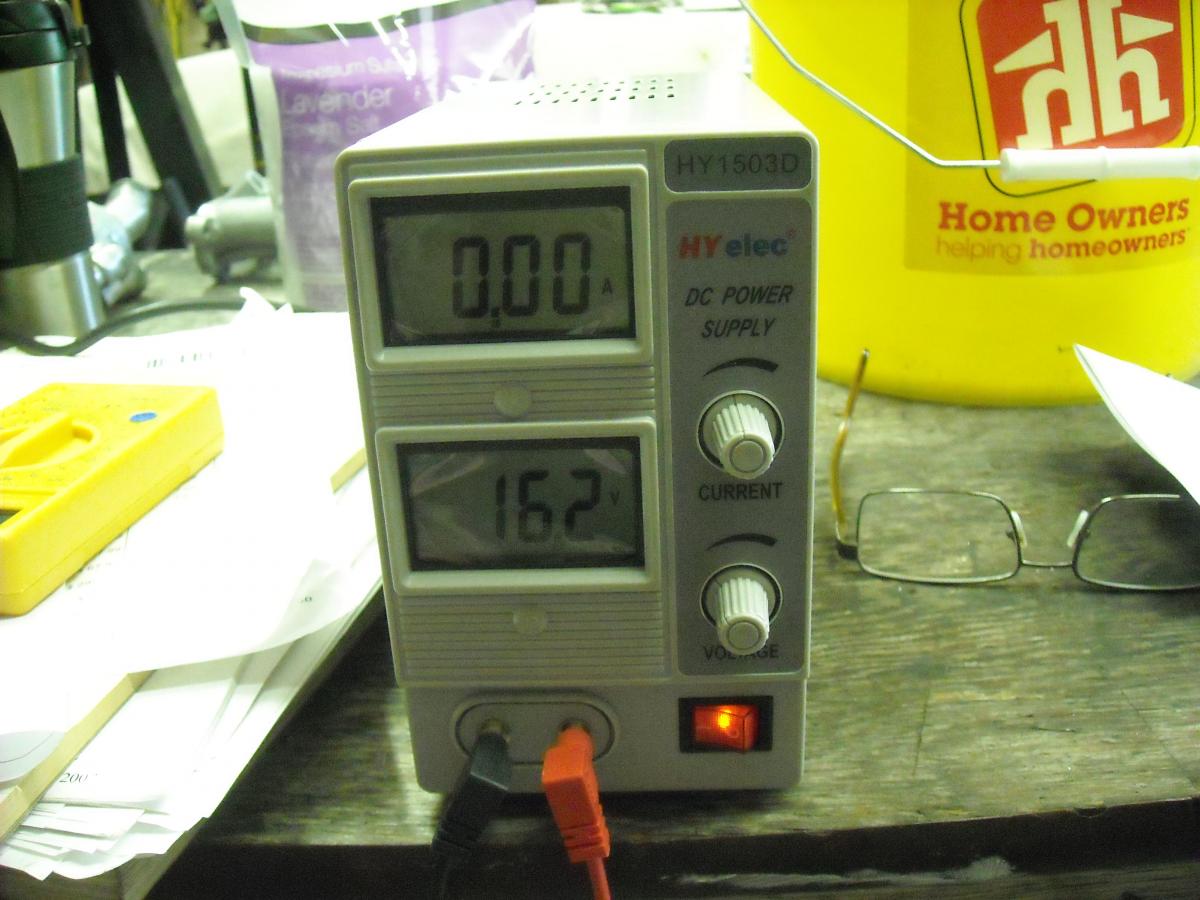
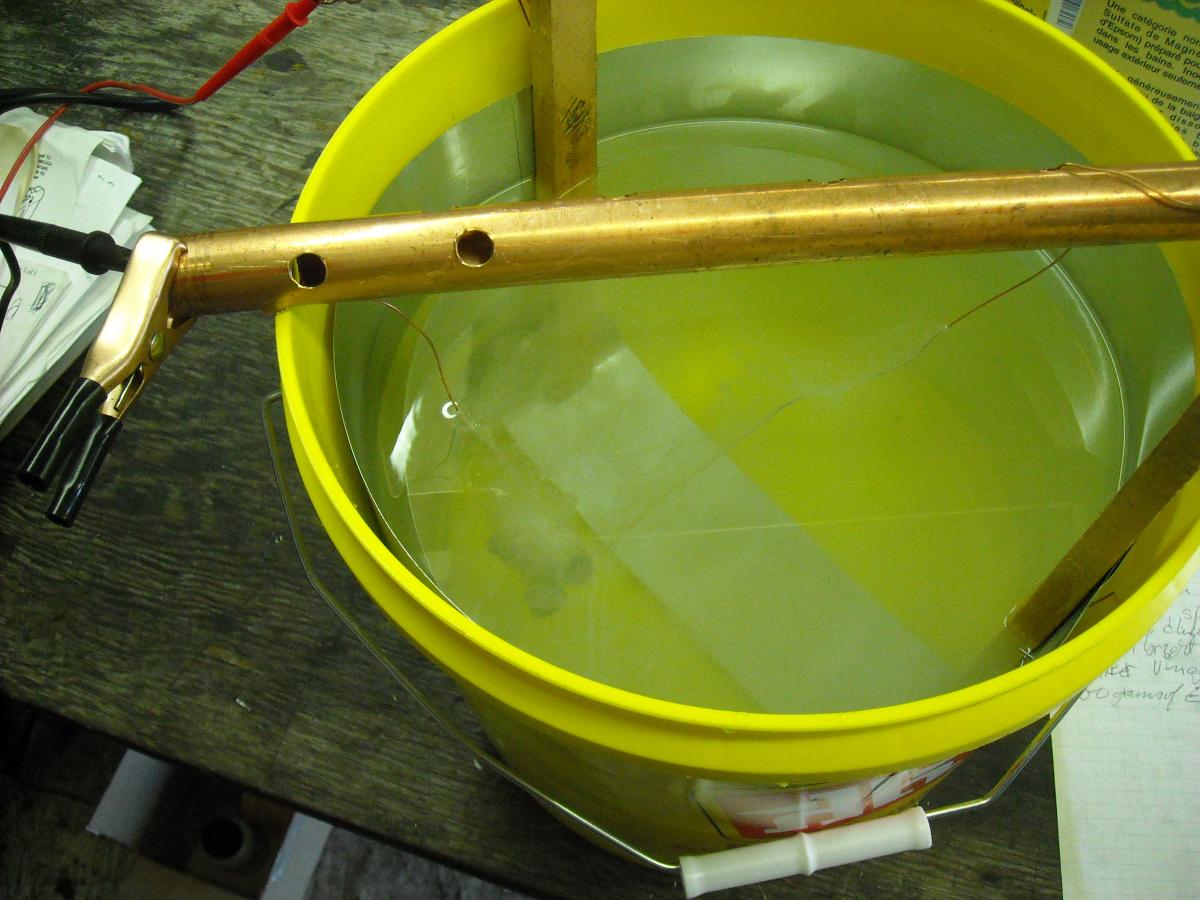
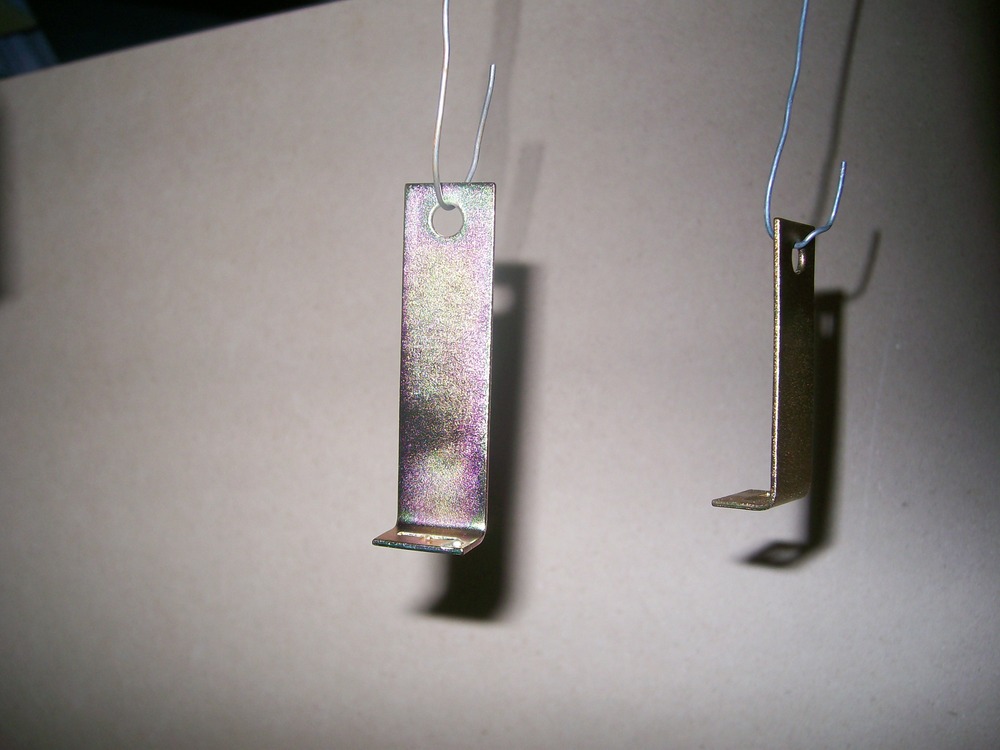
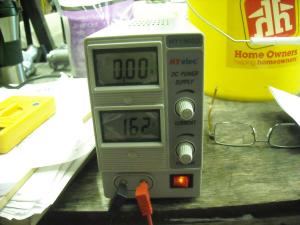
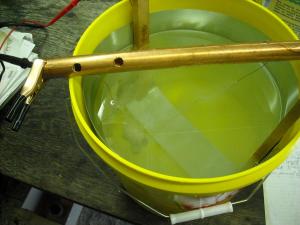
8 pointsWell, third time's a charm, it seems. After two lengthy and unsuccessful adventures with a DIY electrolyte set-up, I finally spent the money and bought the Caswell chemicals. It took me almost full day to create a new set-up... I created all-new baths (distilled water, muriatic acid, MEK solvent, Caswell electrolyte, Caswell blue chromate & Caswell yellow chromate). Every container was wiped down with alcohol before use, to make sure and manufacturing residue, fingerprints, etc. were gone. I also replaced my wire wheel (brass) with a new one, just in case the old one had acquired any kind of contamination. The acid bath was mixed at 1 part acid to 4 parts distilled water Electrolye and chromate baths were created according to the directions on the Caswell packaging (I didn't buy their manual).and added new ones for the electrolyte and the two phosphates) I used a fresh, single hoop of Moss-Boss zinc foil I added 1/2 teaspoon of Caswell's brightener liquid before getting started No heating used for the acid bath, nor for the two chromate dips My detergent bath consisted of a 4-qt crock pot full of distilled water, to which I added 400ml of liquid ammonia and a shot of dish detergent. I kept this at about 100 degrees F. Parts were scrubbed with a toothbrush, then rinsed off in a distilled water bath. The electrolyte bath was kept heated at between 100 - 110 degrees F during plating, with constant agitation using an aquarium bubbler. I pre-heat the solution with a hot water tank heating element, then remove the heater before I start plating. I started at 110 degrees. The temp dropped to about 100 degrees over the plating period. Plating current was set based on 140mA per sq.in. of part surface. I ran the part for 20 minutes, turning it 90 degrees at the 10-minute mark. I wasn't actually ready to get started with my first part (a brake line clip from the engine compartment) until about 3:00 Sunday afternoon. The part looked good coming out of the zinc plating step -- full coverage, dull light grey, no burning, no visible edge or corner effects. It got a quick swish in a distilled water bath, then into the blue chromate for a 60 s. dip. After that, it went directly (no rinse) into the yellow chromate dip for a 15s dip. Then a quick rinse with tap water. Then a 1 min. blast with a blow drier (running on HI heat). I can't tell you what a relief it was to see the part emerge like this... I'll post some pictures of my set-up later, along with some additional comments about settings and running multiple parts. I haven't tried any large items yet, so that remains an unknown.
 8 points
 -
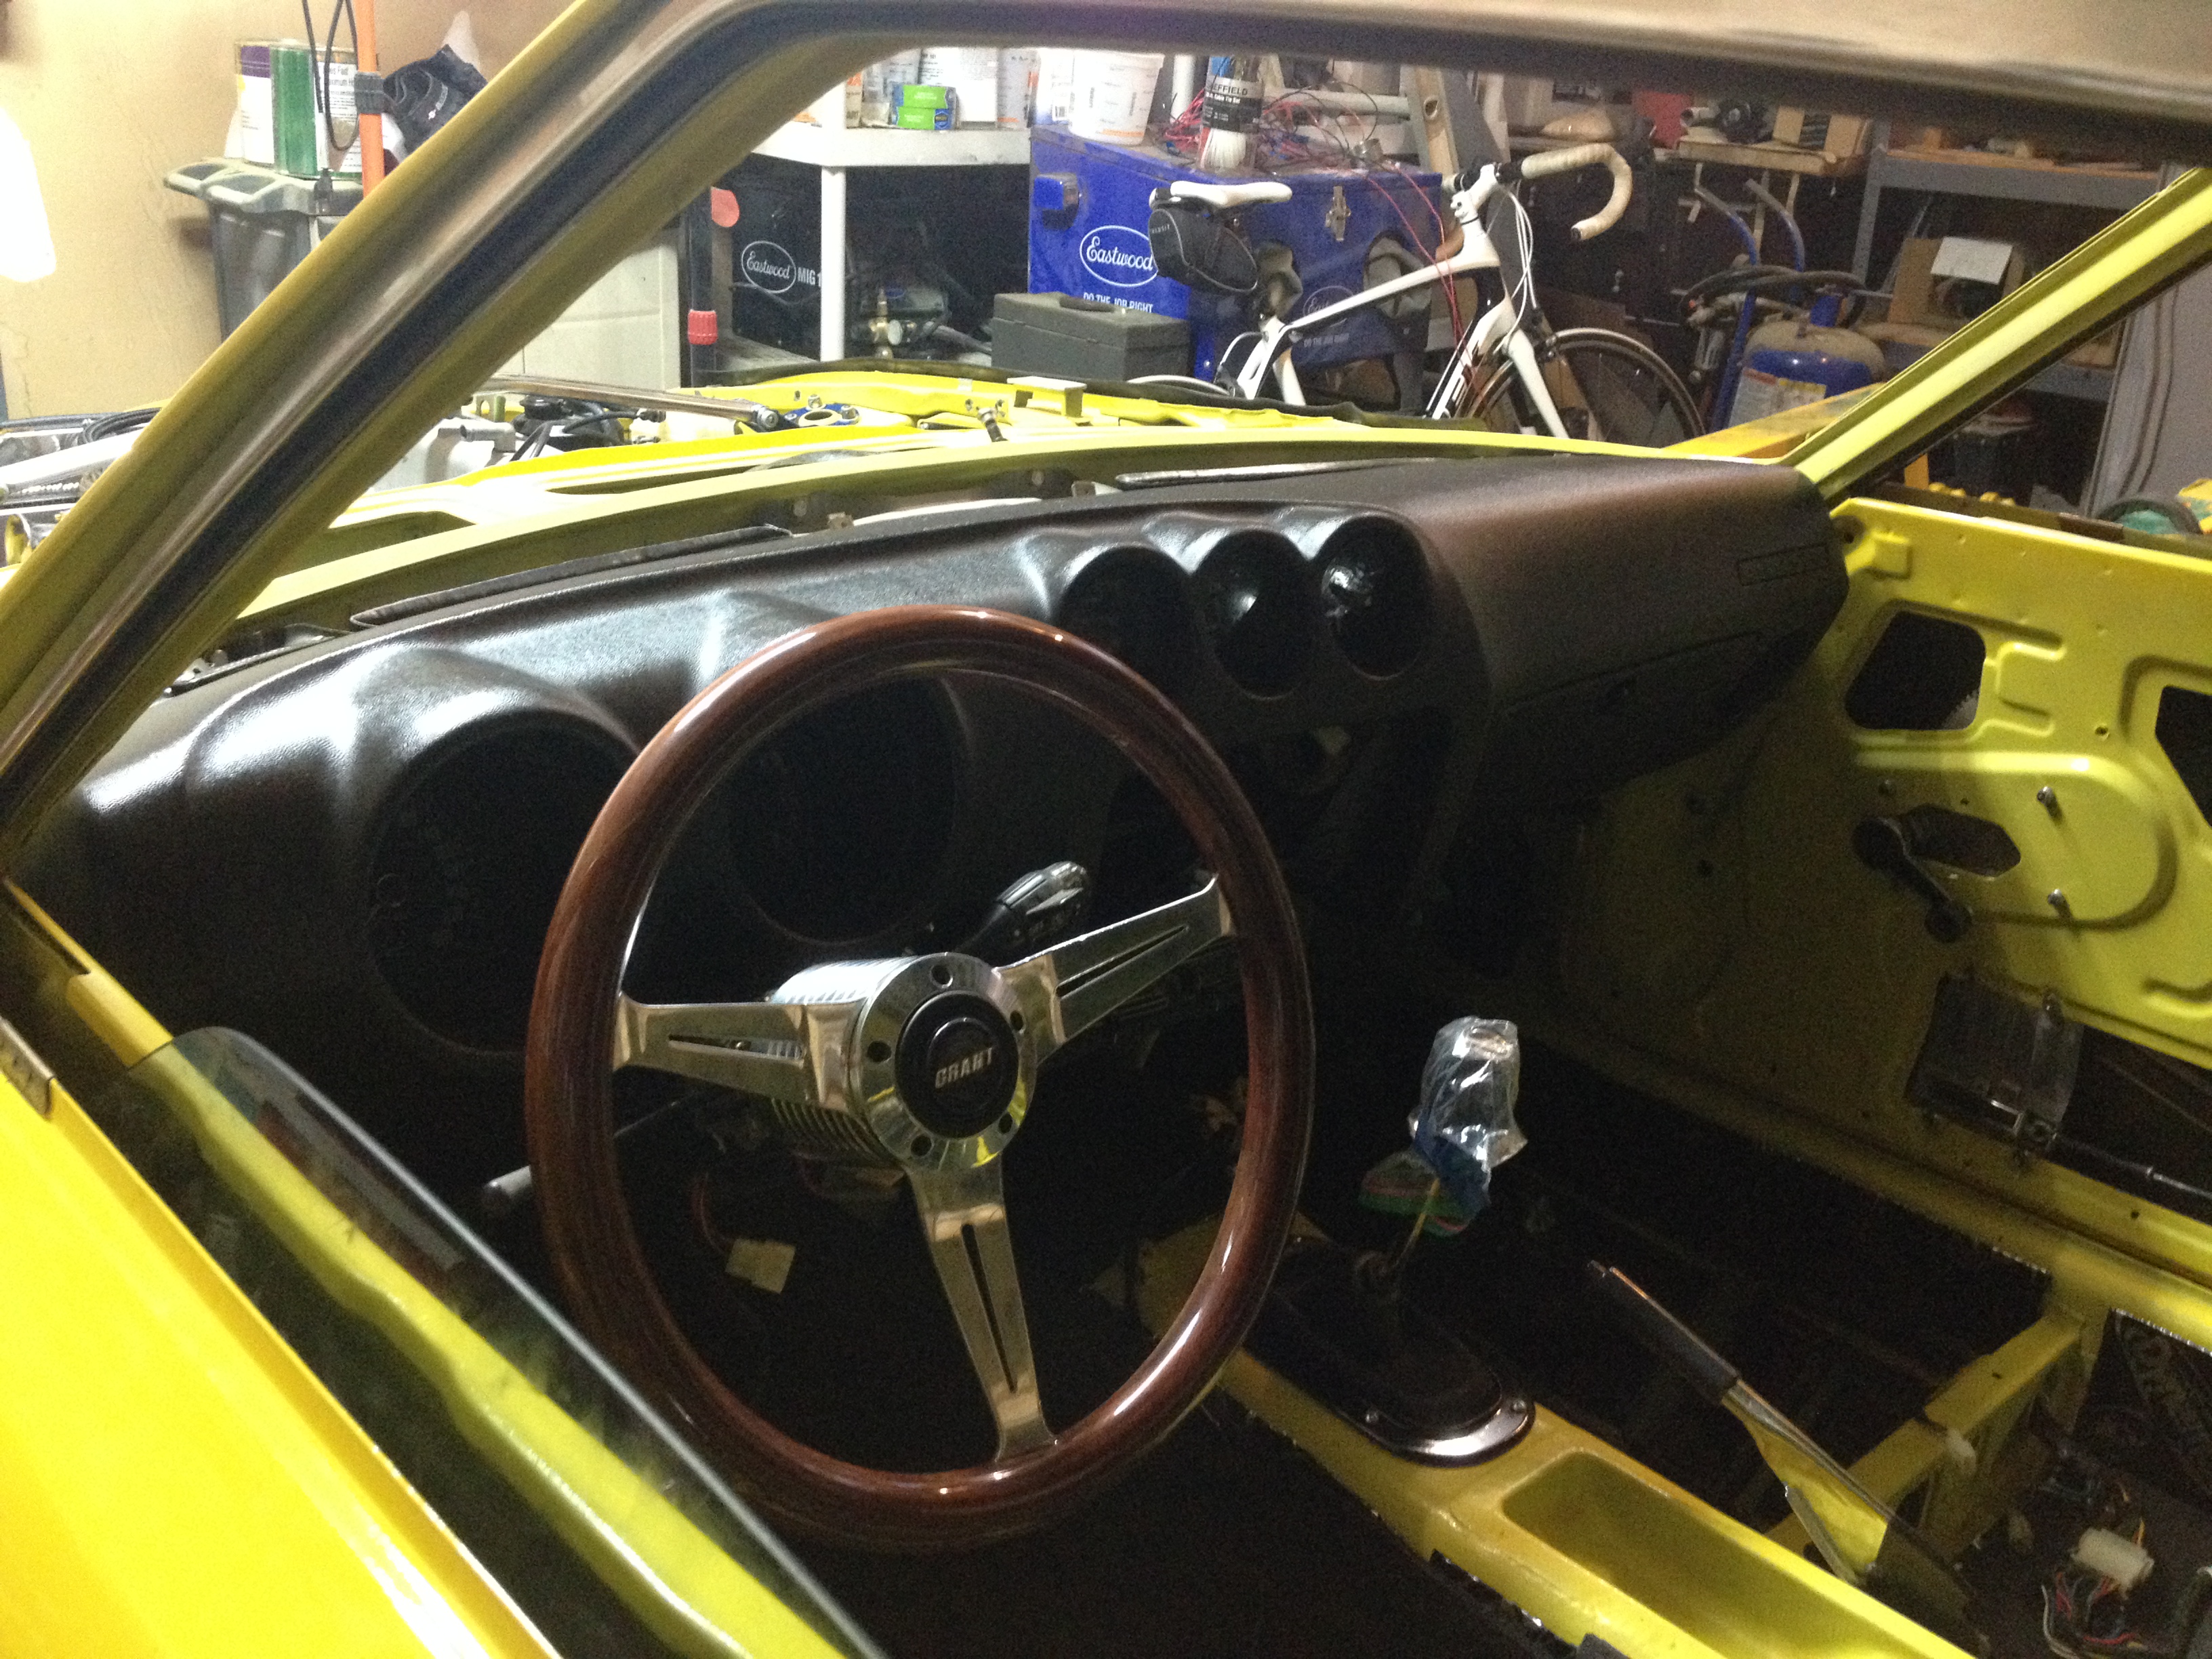
2 pointsCheck this out! I scored a crack-free dash on e-bay about a year ago. Now it's in the car. The car now starts on the key. Thanks SteveJ for the starter assistance! Fuel gauge works, oil pressure works, voltage meter works (but car wont charge). Temperature gauge does not work. I have ordered a new sending unit. I still have to install the interior, glass, and paint and install the front fenders, hood and valence. Oh, and for those who saw my post about gas tank woes, I cleared the blockage and I'm good to go.
 2 points
 -
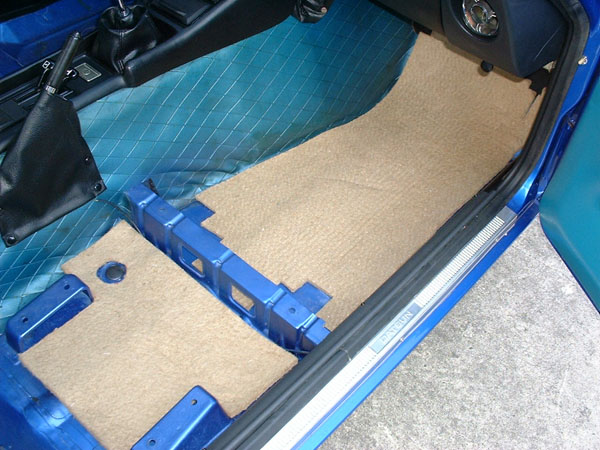
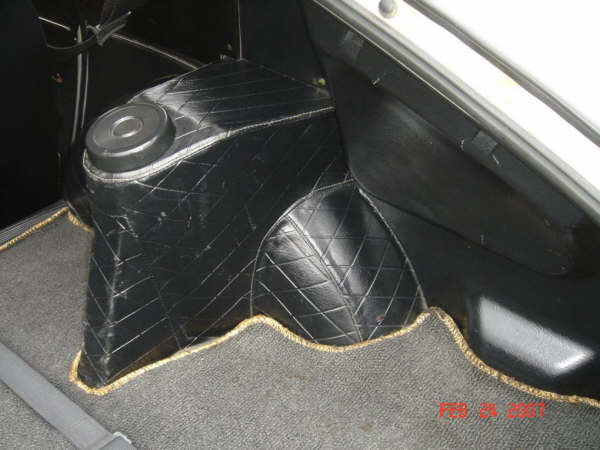
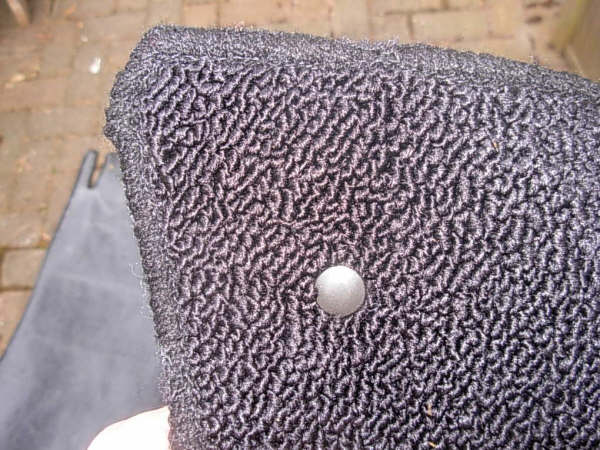
I had to do some serious digging to find the correspondence with Chester & Harod. Back to an old computer and search through the e-mails. Here is what was written in 2007: From Chester & Harod Auto Carpet Manufacturing (edited for grammar and speeling) Hi. We copied the rubber mats for our pattern but they had 5 prototype demos and they were all different floor. When they (decided) on the one that they would produce, they put a jack behind the passenger seat with a cut out on the rear mat for it & we made 1800 mats that we had to take back & make that cut out for the jack. Those rudder mats is what they (were) going to use until they saw our carpet. We can make rubber mats but carpet comes with padding. We can make wool carpet if you (want) it'. Hi We have the original pattern. The original was loop. We made carpet for the first 1970 Z (1800 cars) that (were) shipped to the U. S. A. We can make the carpet any way and out of any carpet you (want). Kats posted pictures of the insulation he bought for his blue 240Z. You will find his complete photographs in the archives. That's what it (NOS) is supposed to look like. I have some pictures from MikeB also. His early cars show faded out stitching from original. Finally, the edge stitching, loop detail and snap fitting from the new replacement carpeting. This is as close as you are going to get to NOS. I also want to mention that the early cars did not have a hook fitting welded to the floor under the front of the seat for holding the the front pieces in place. It was a Velcro pad glued to the floor. You can see the cutouts in the pad in Kats' car.
 2 points
 -
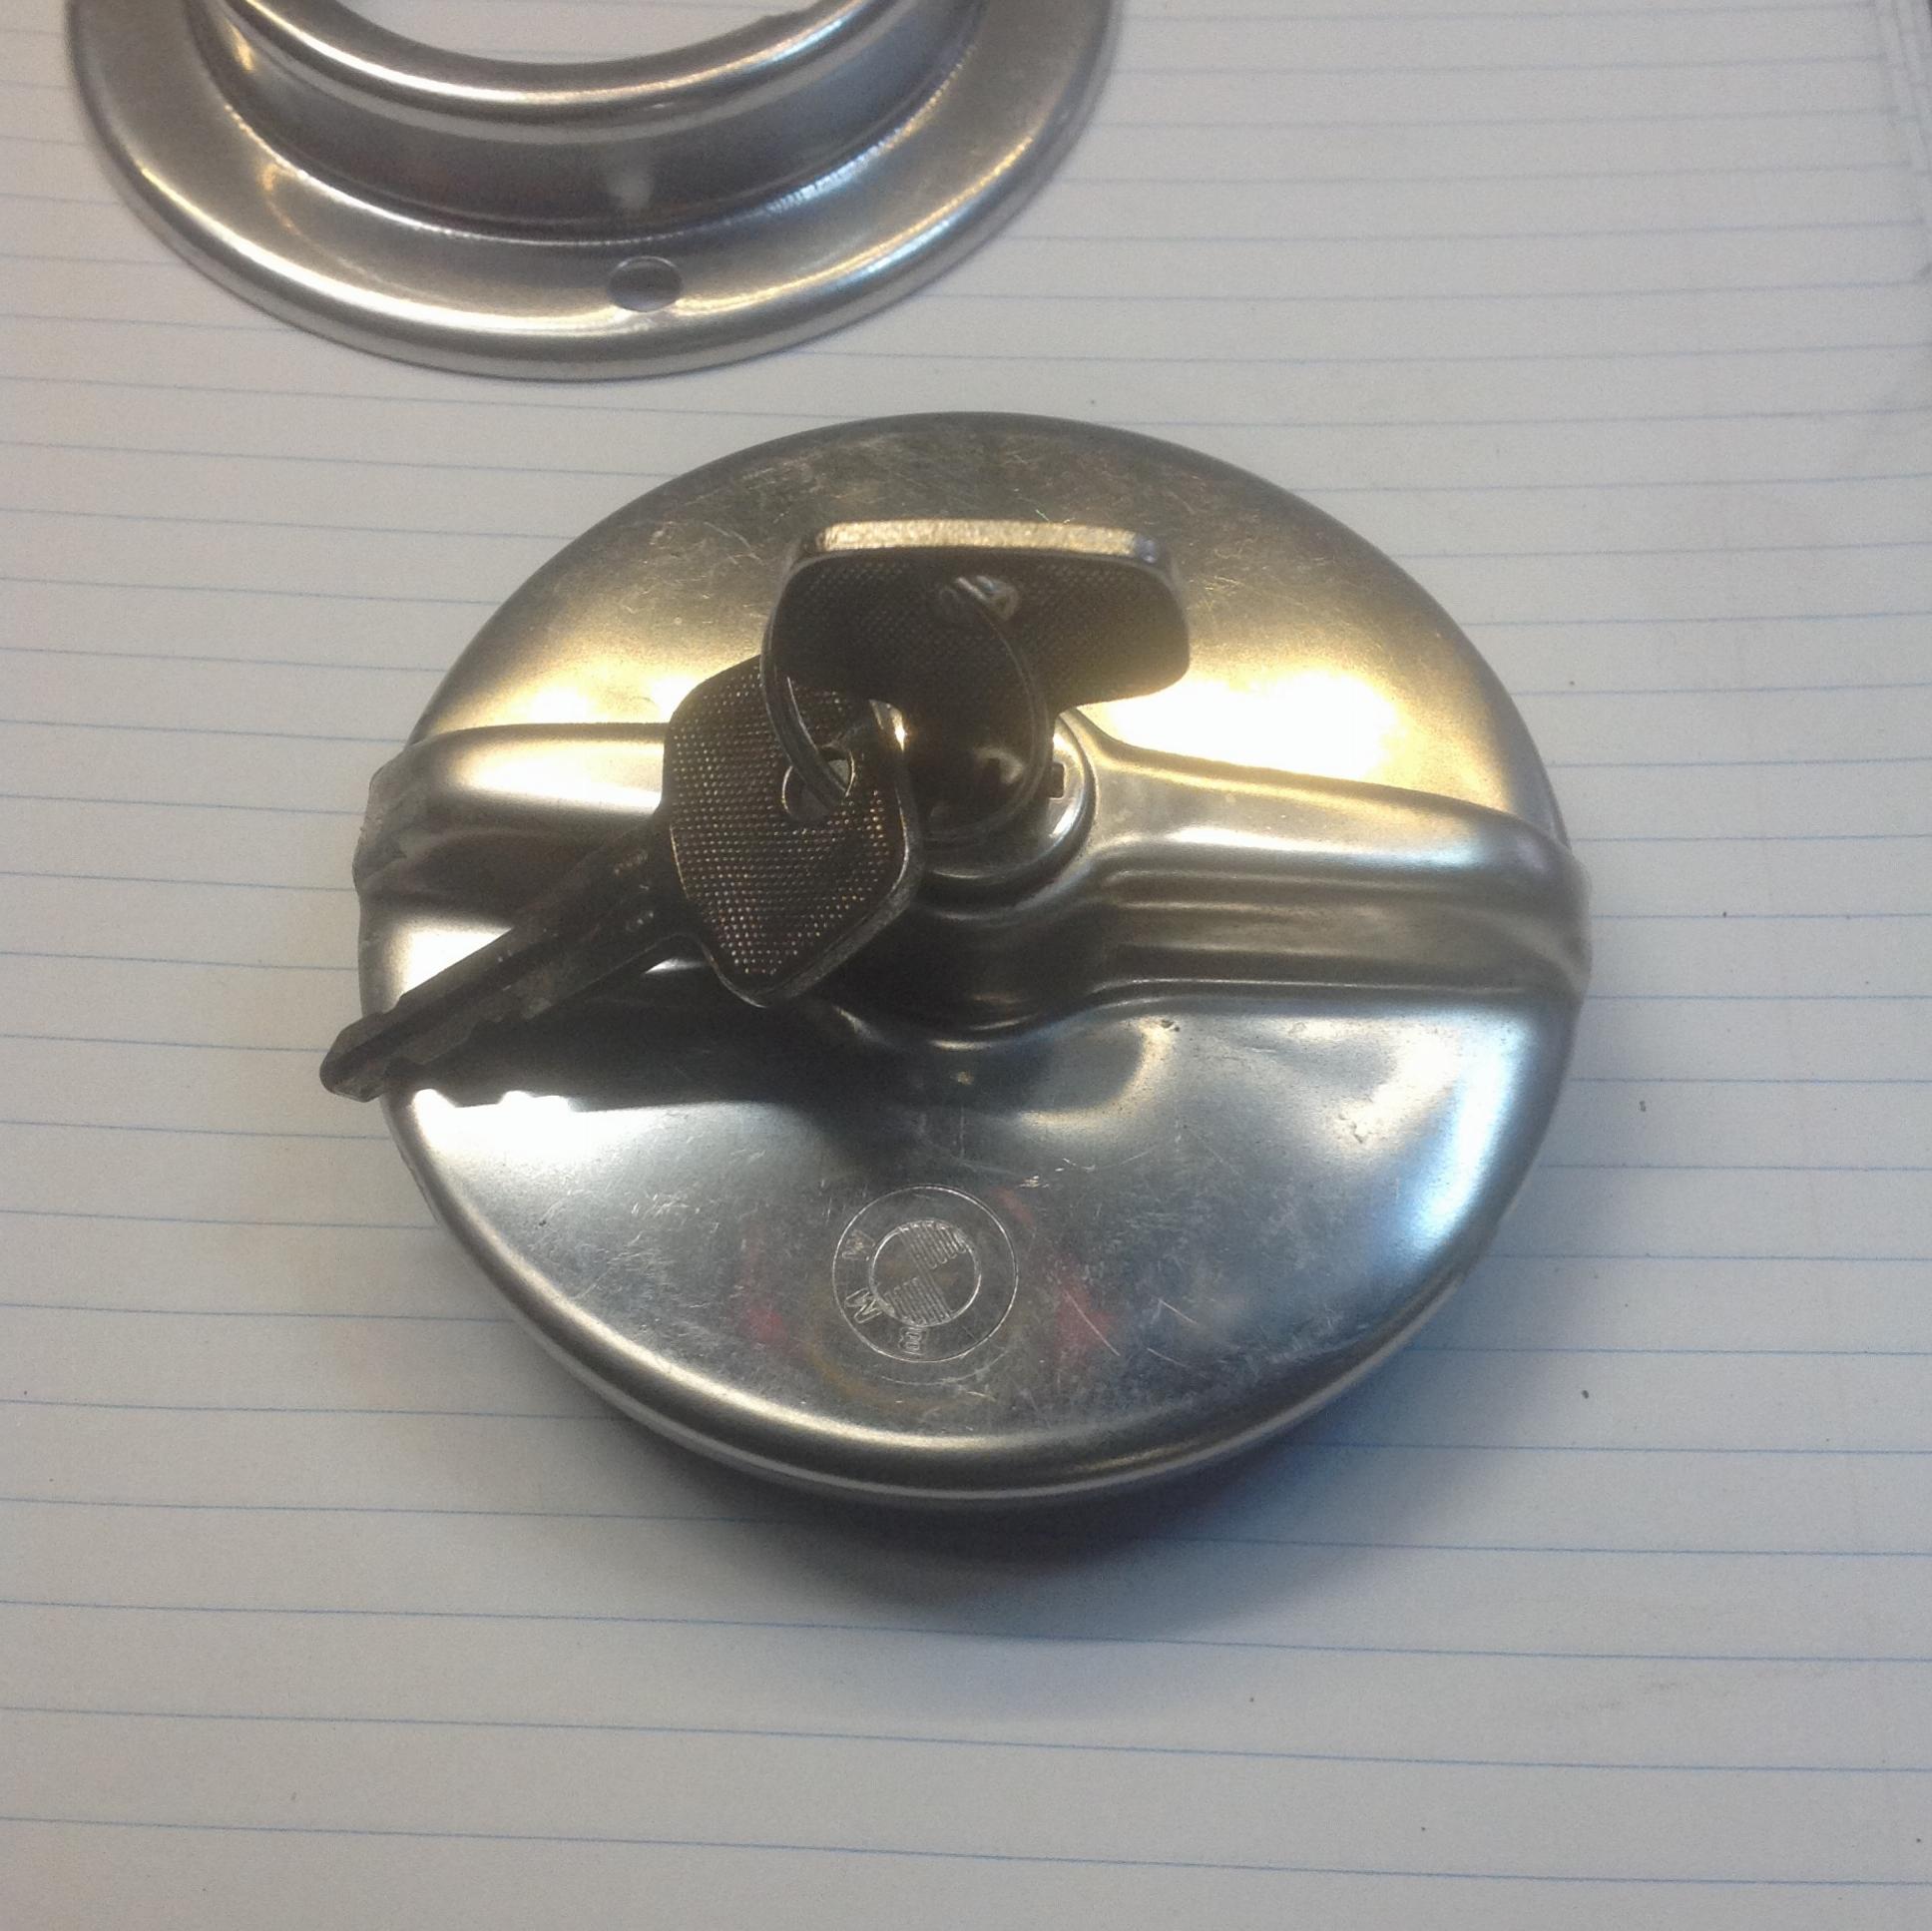
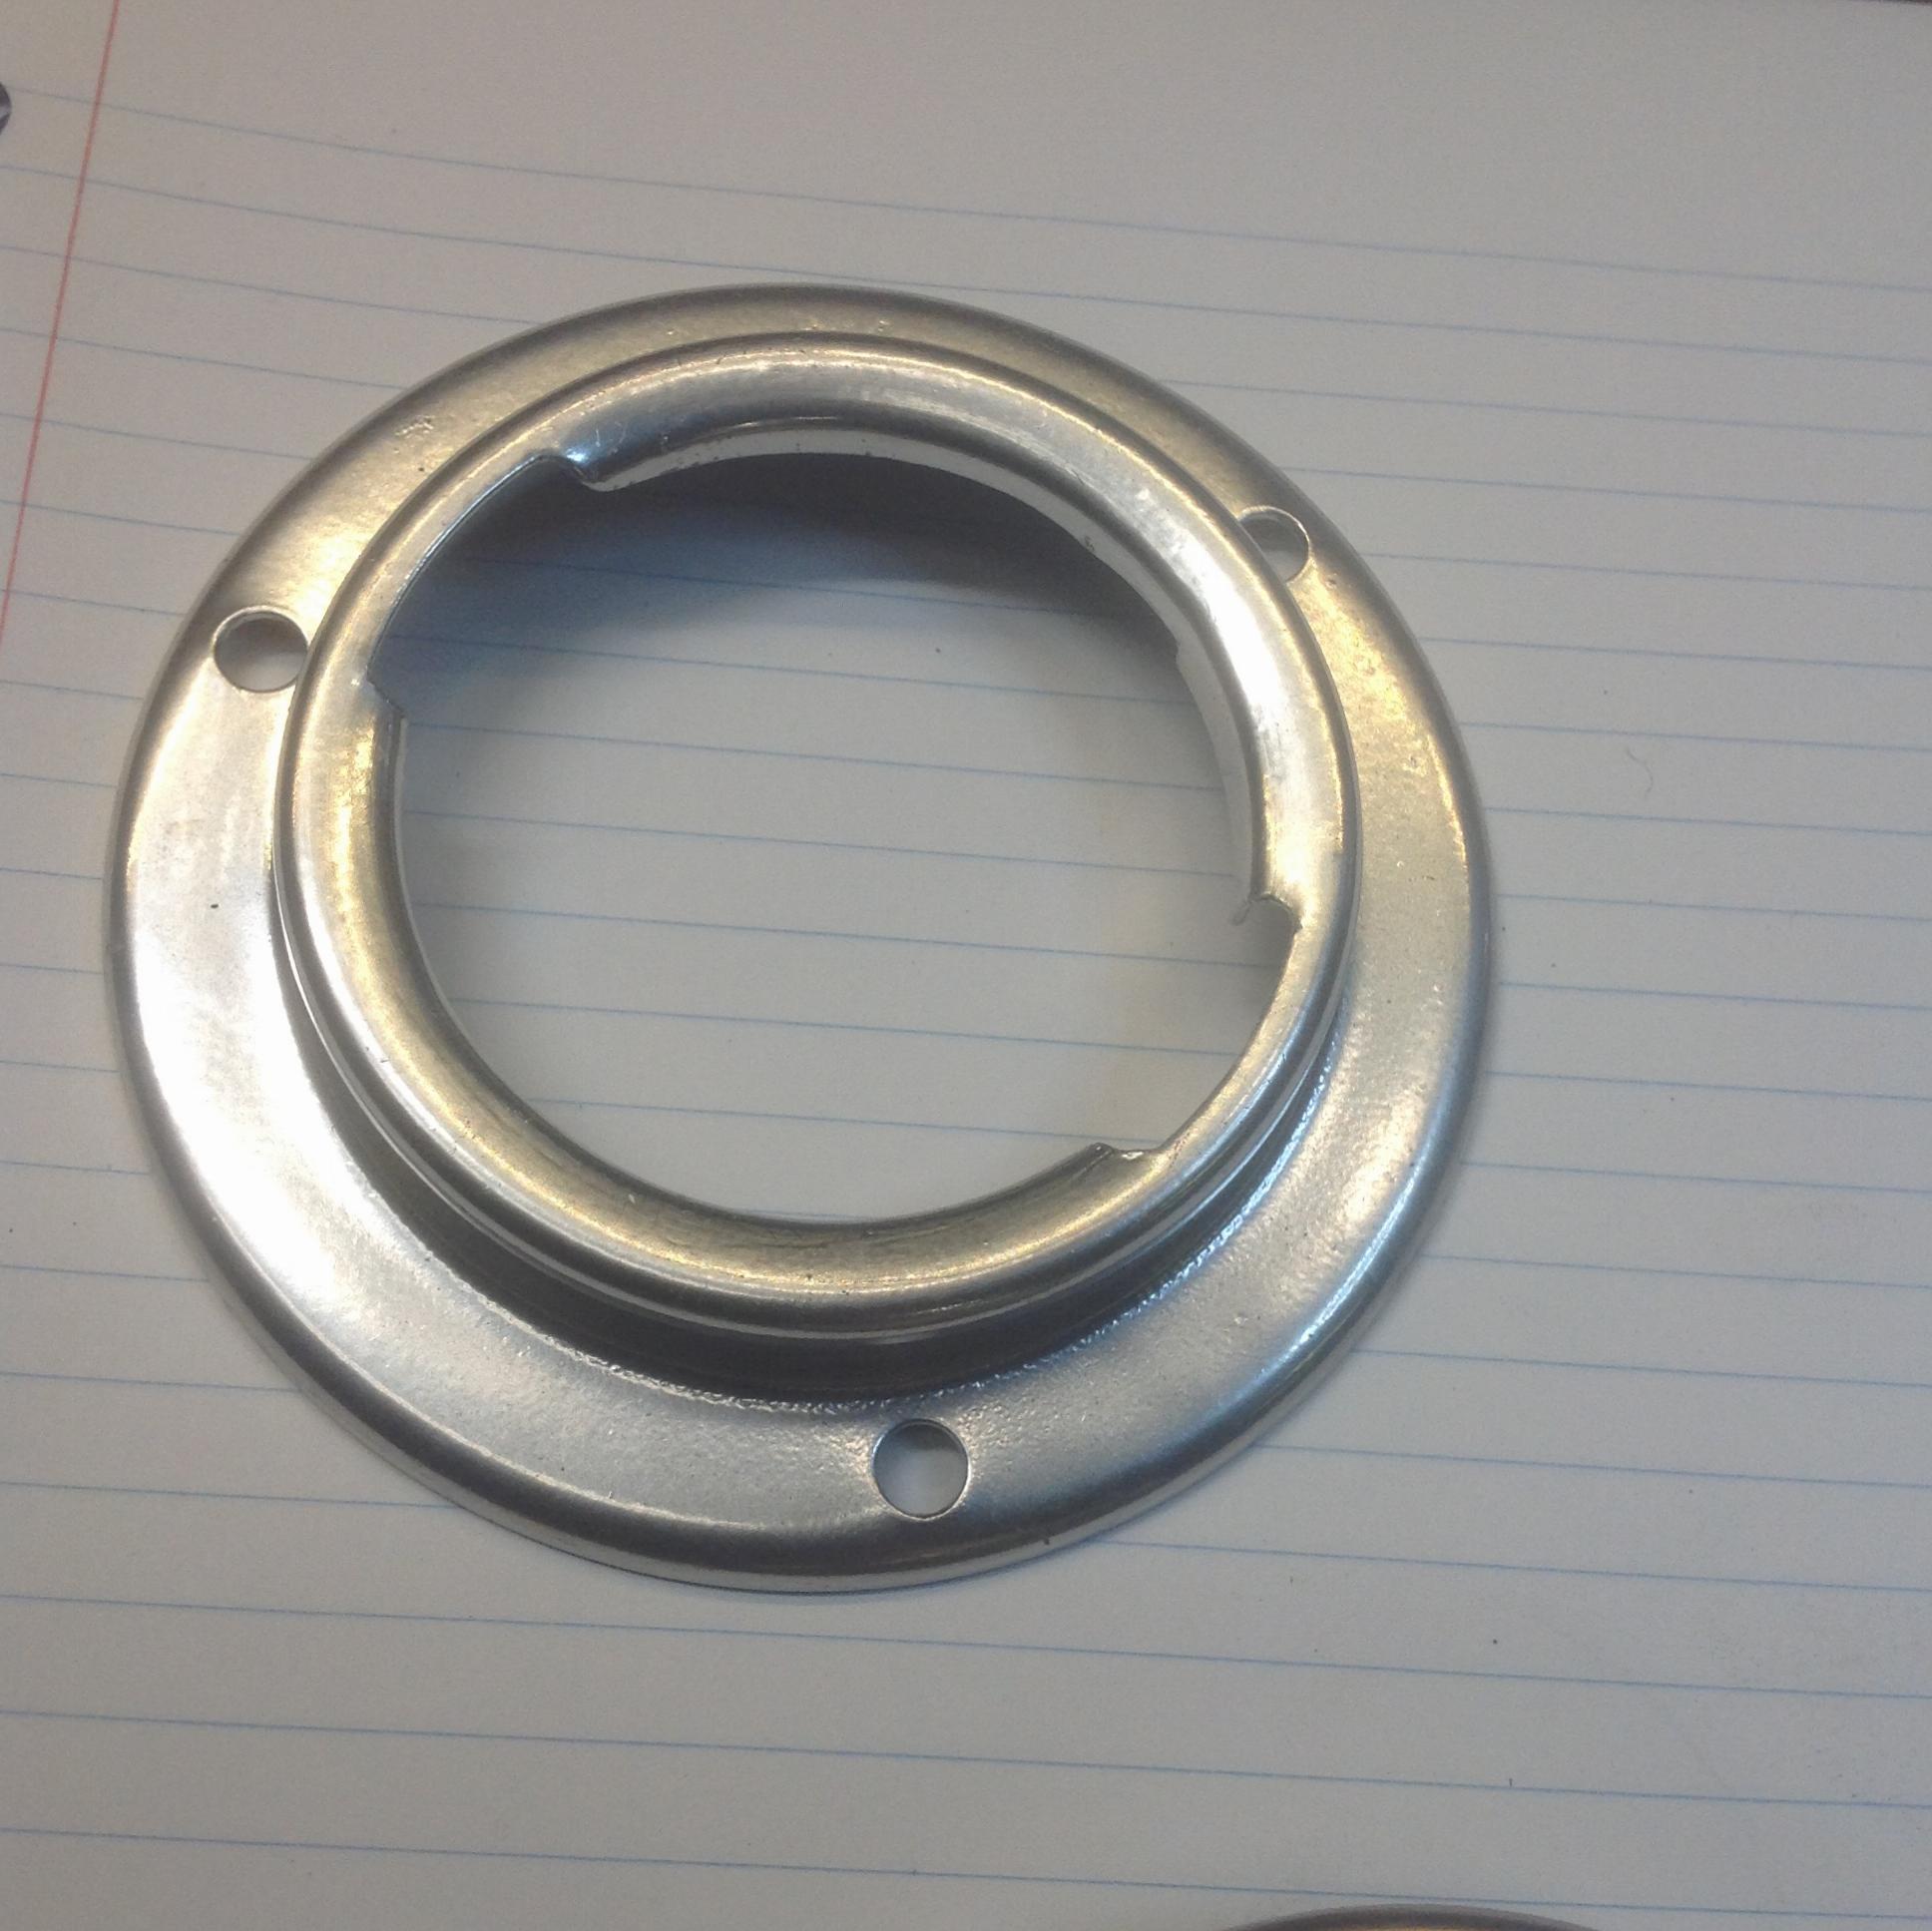
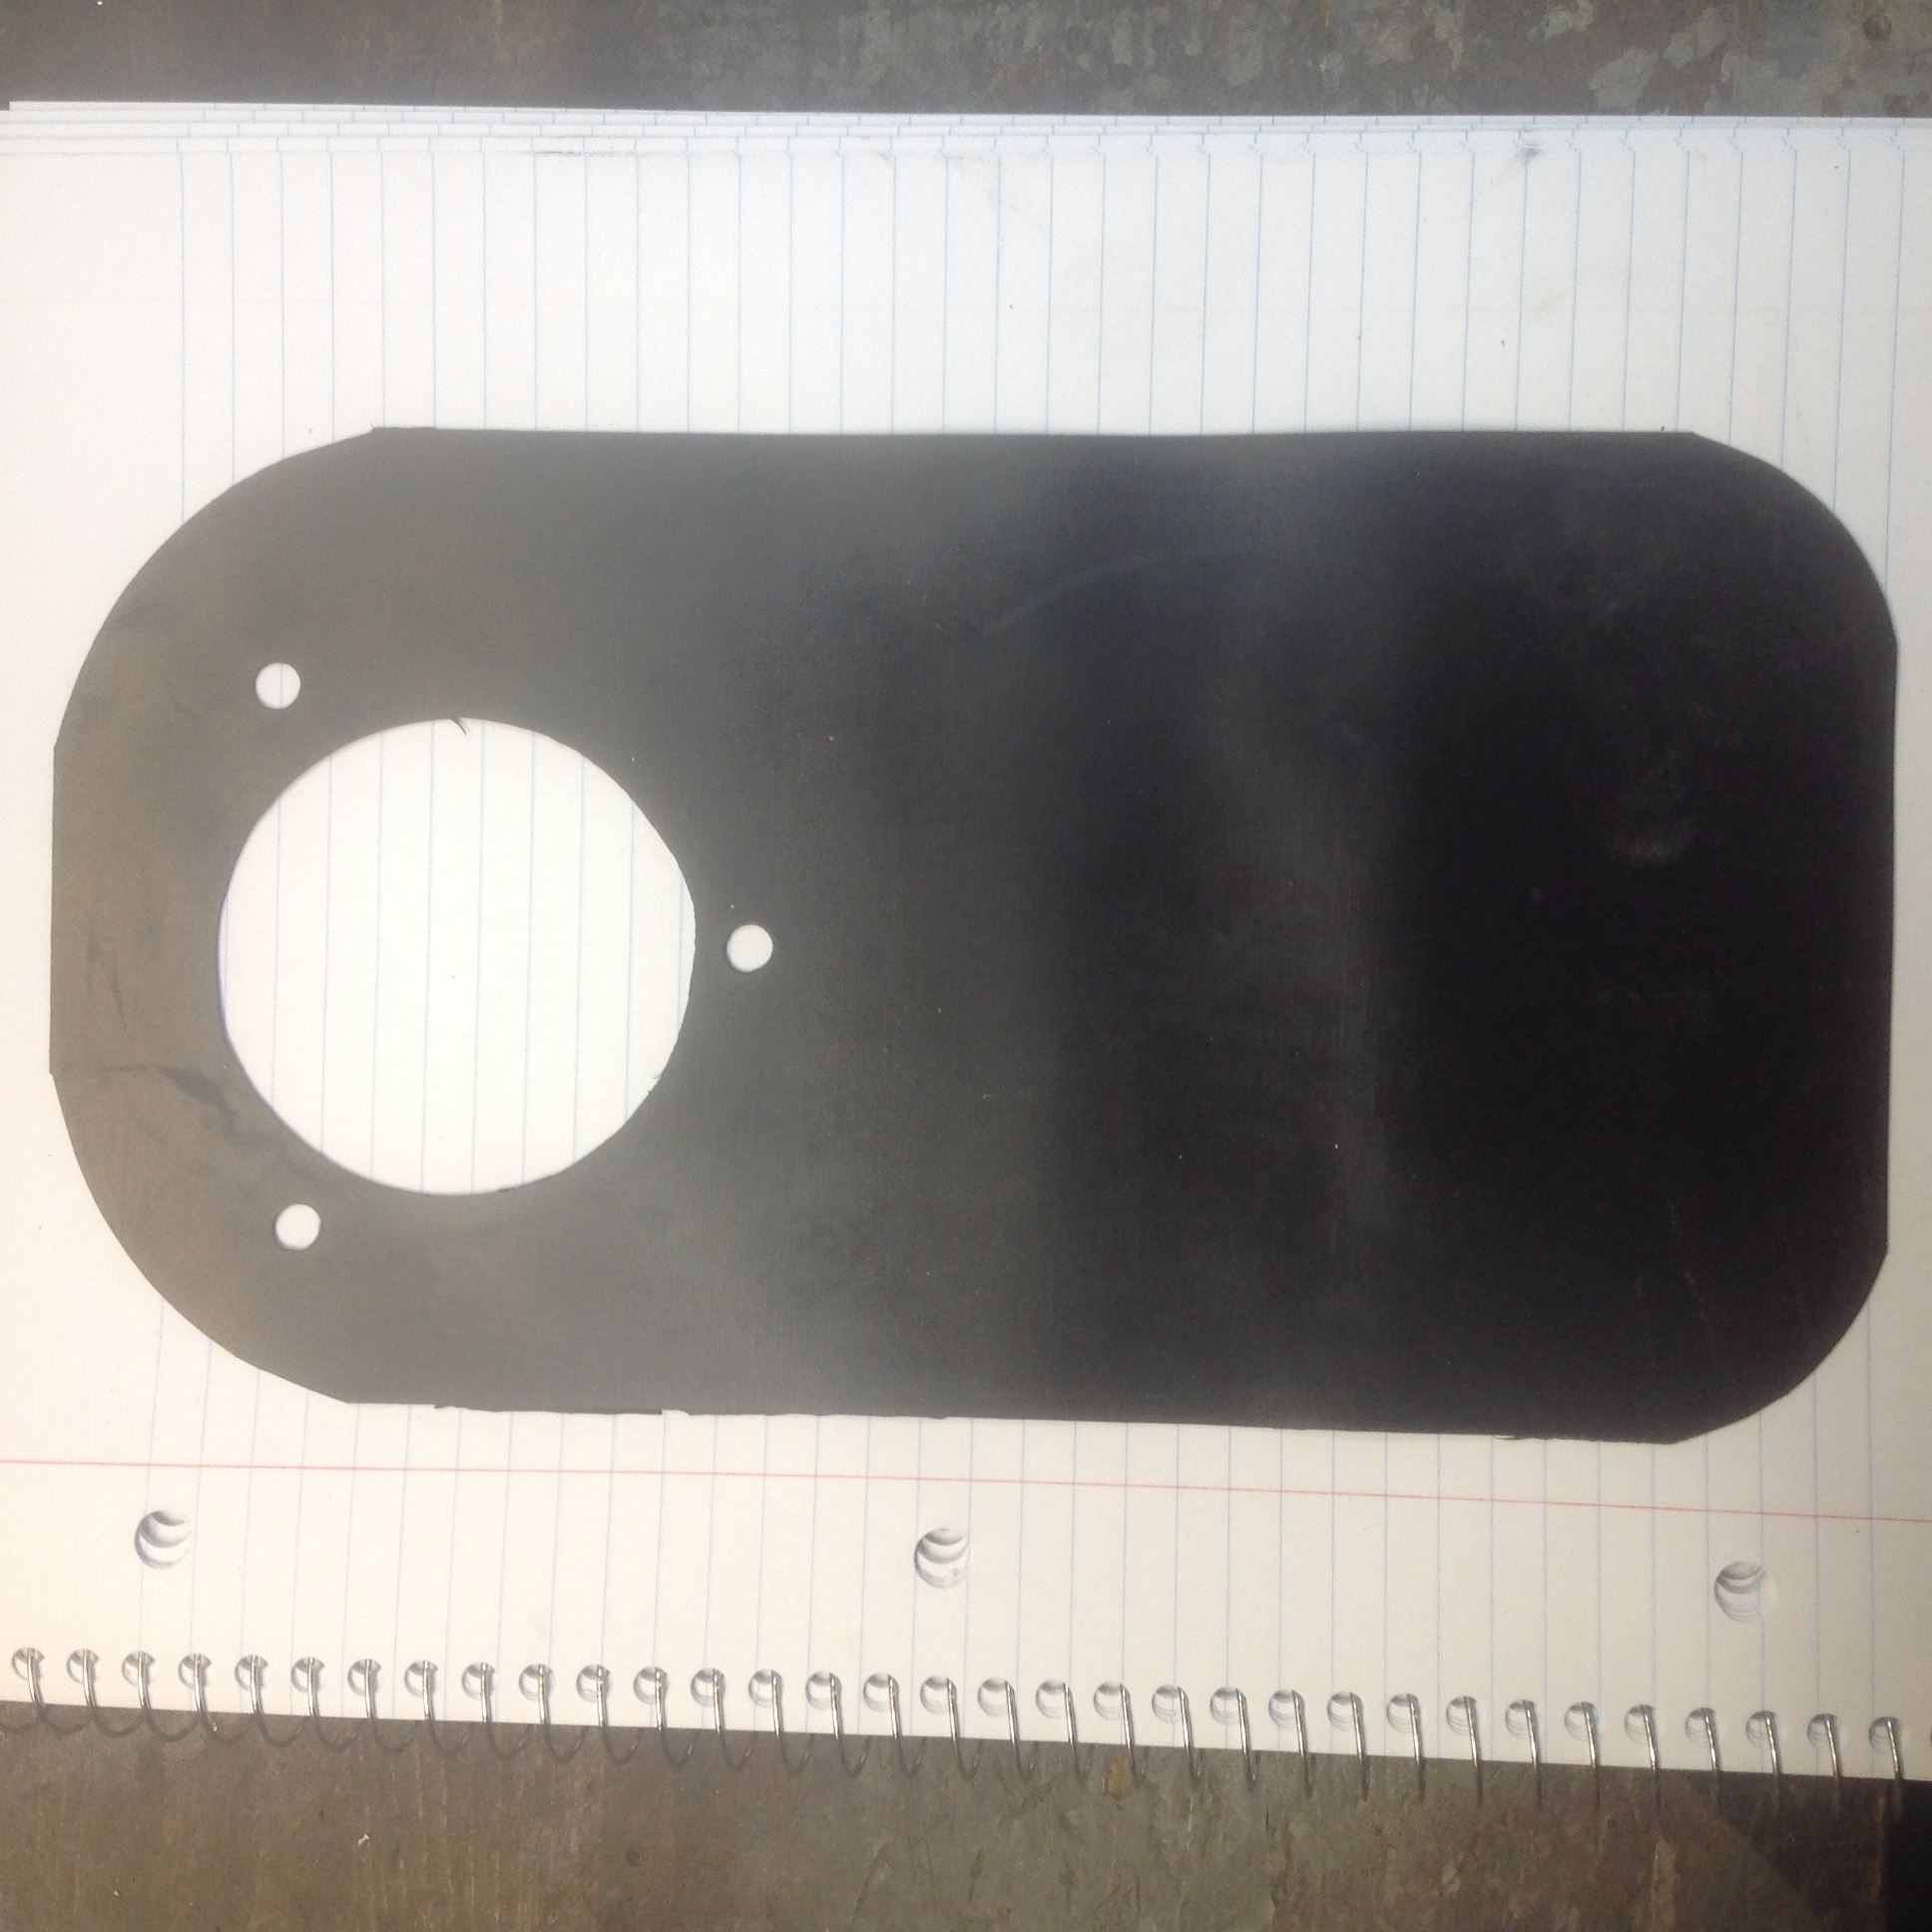
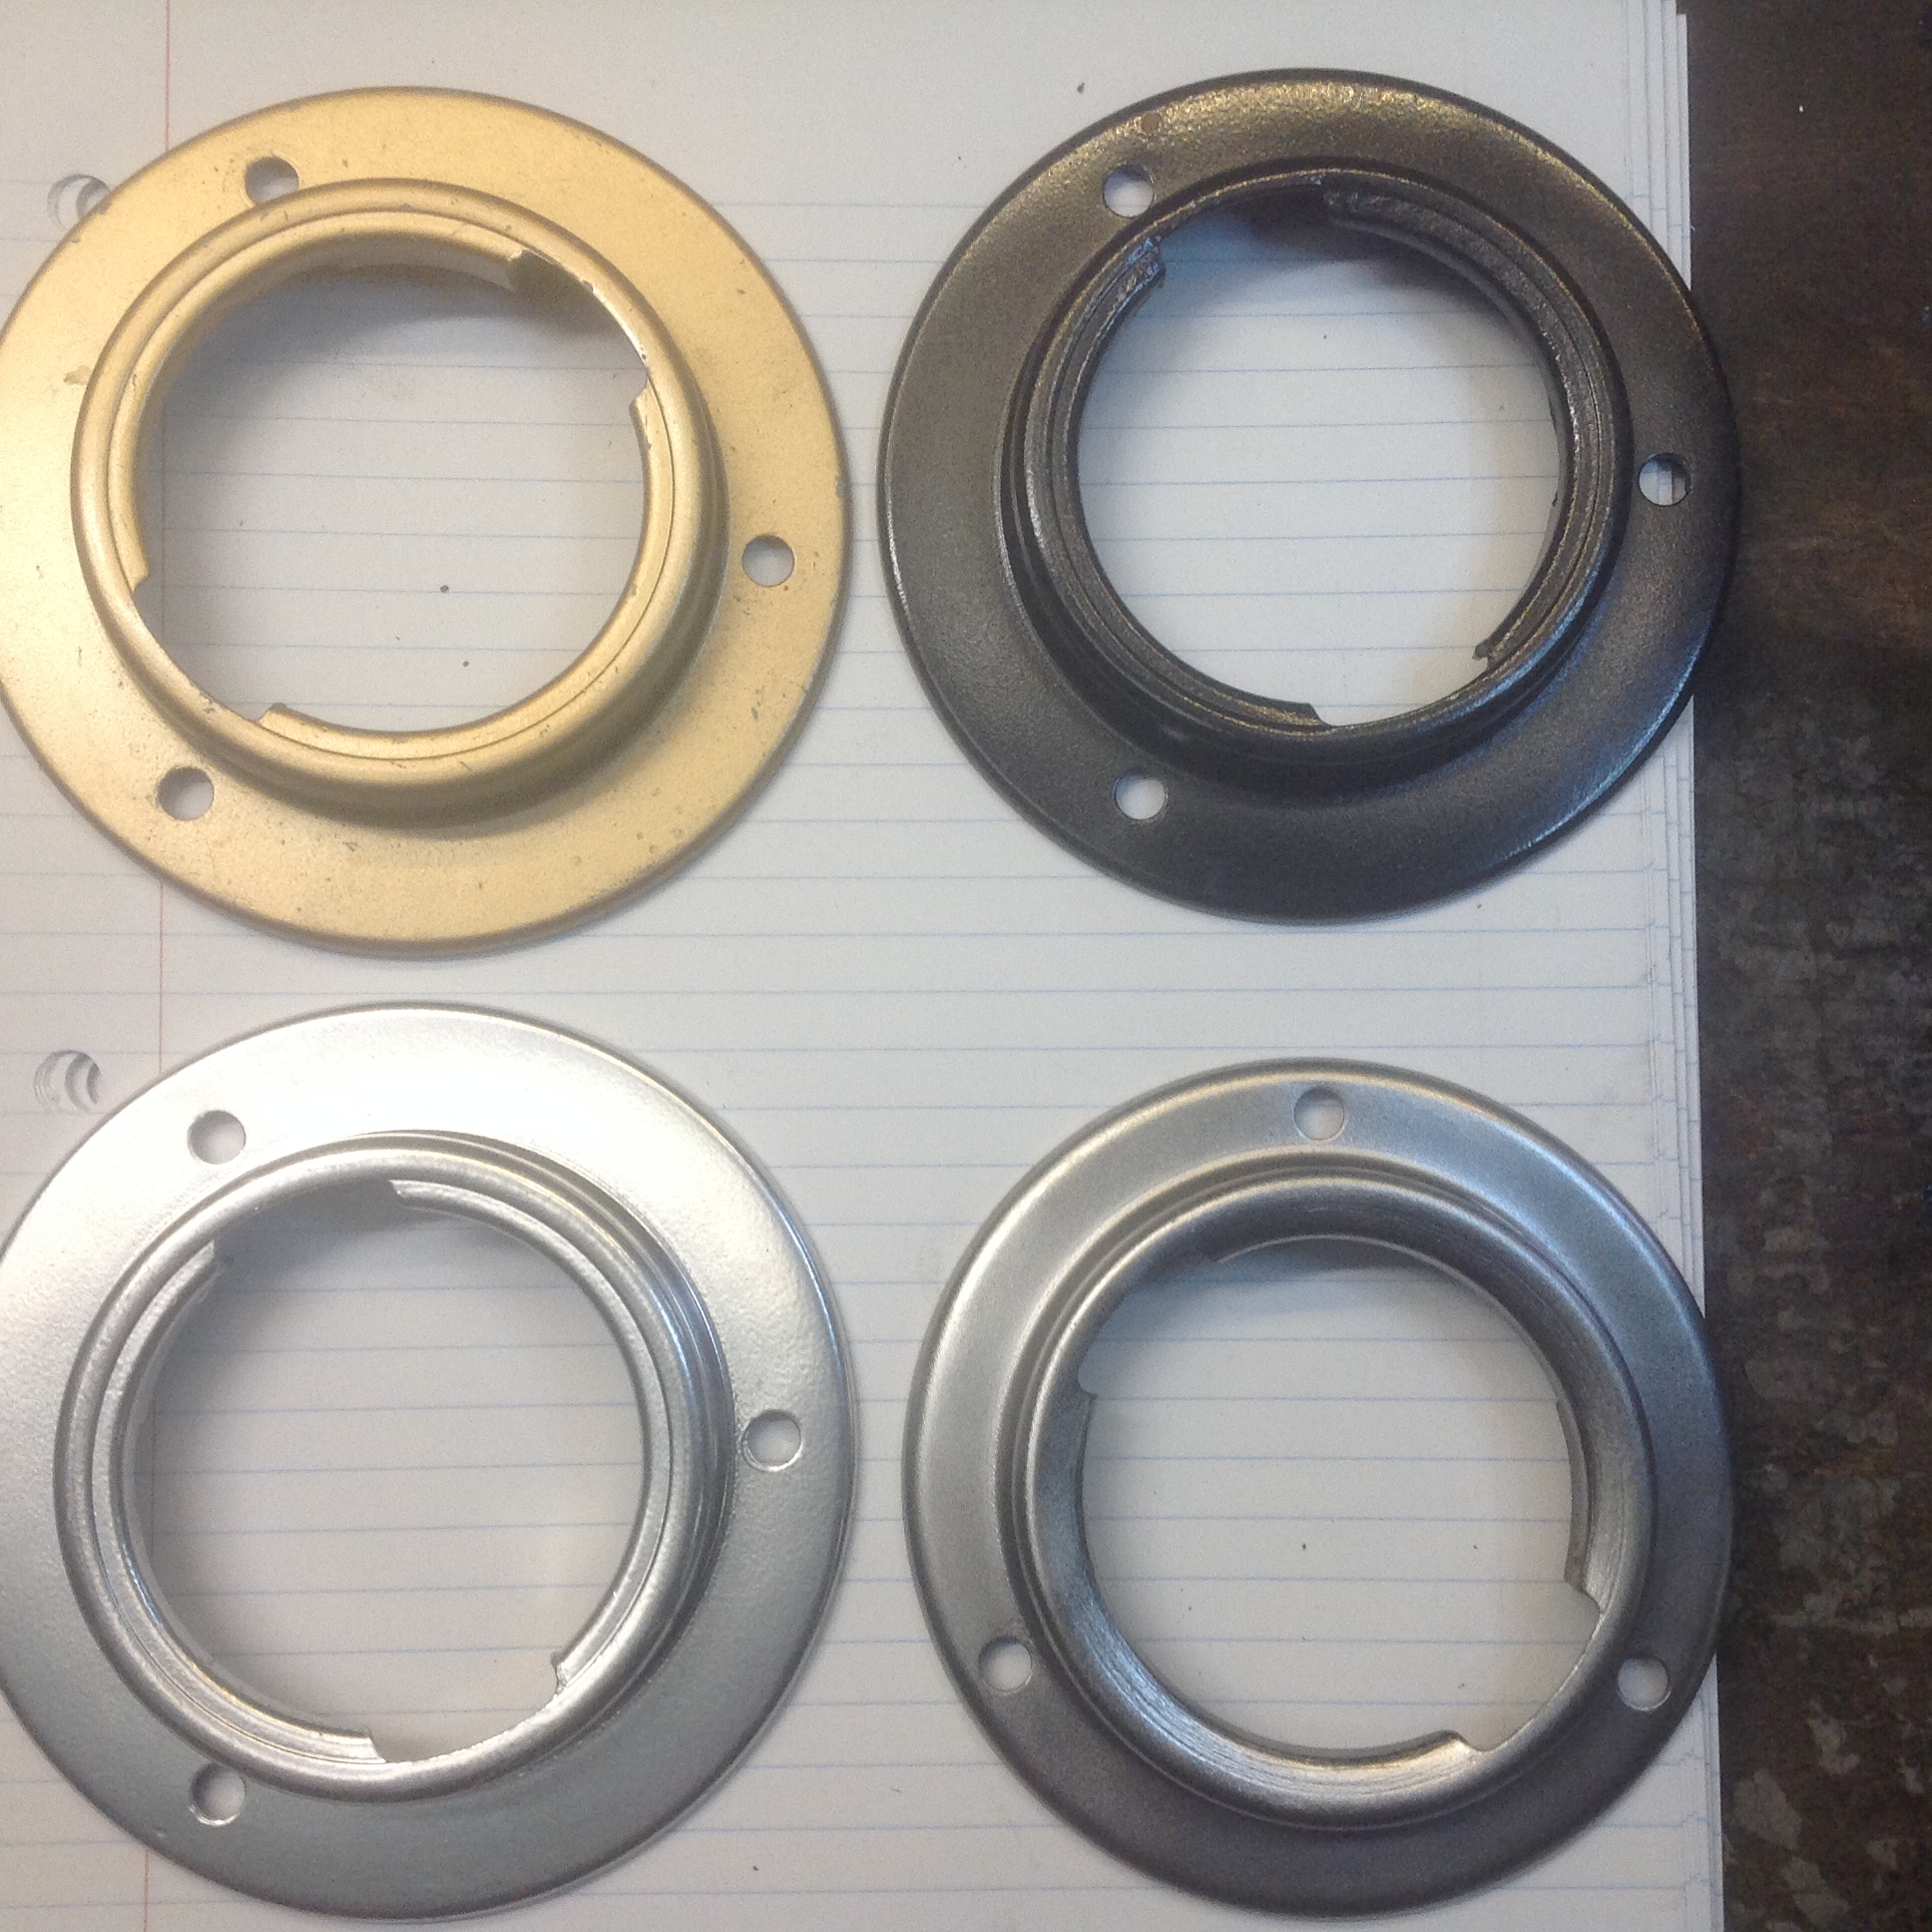
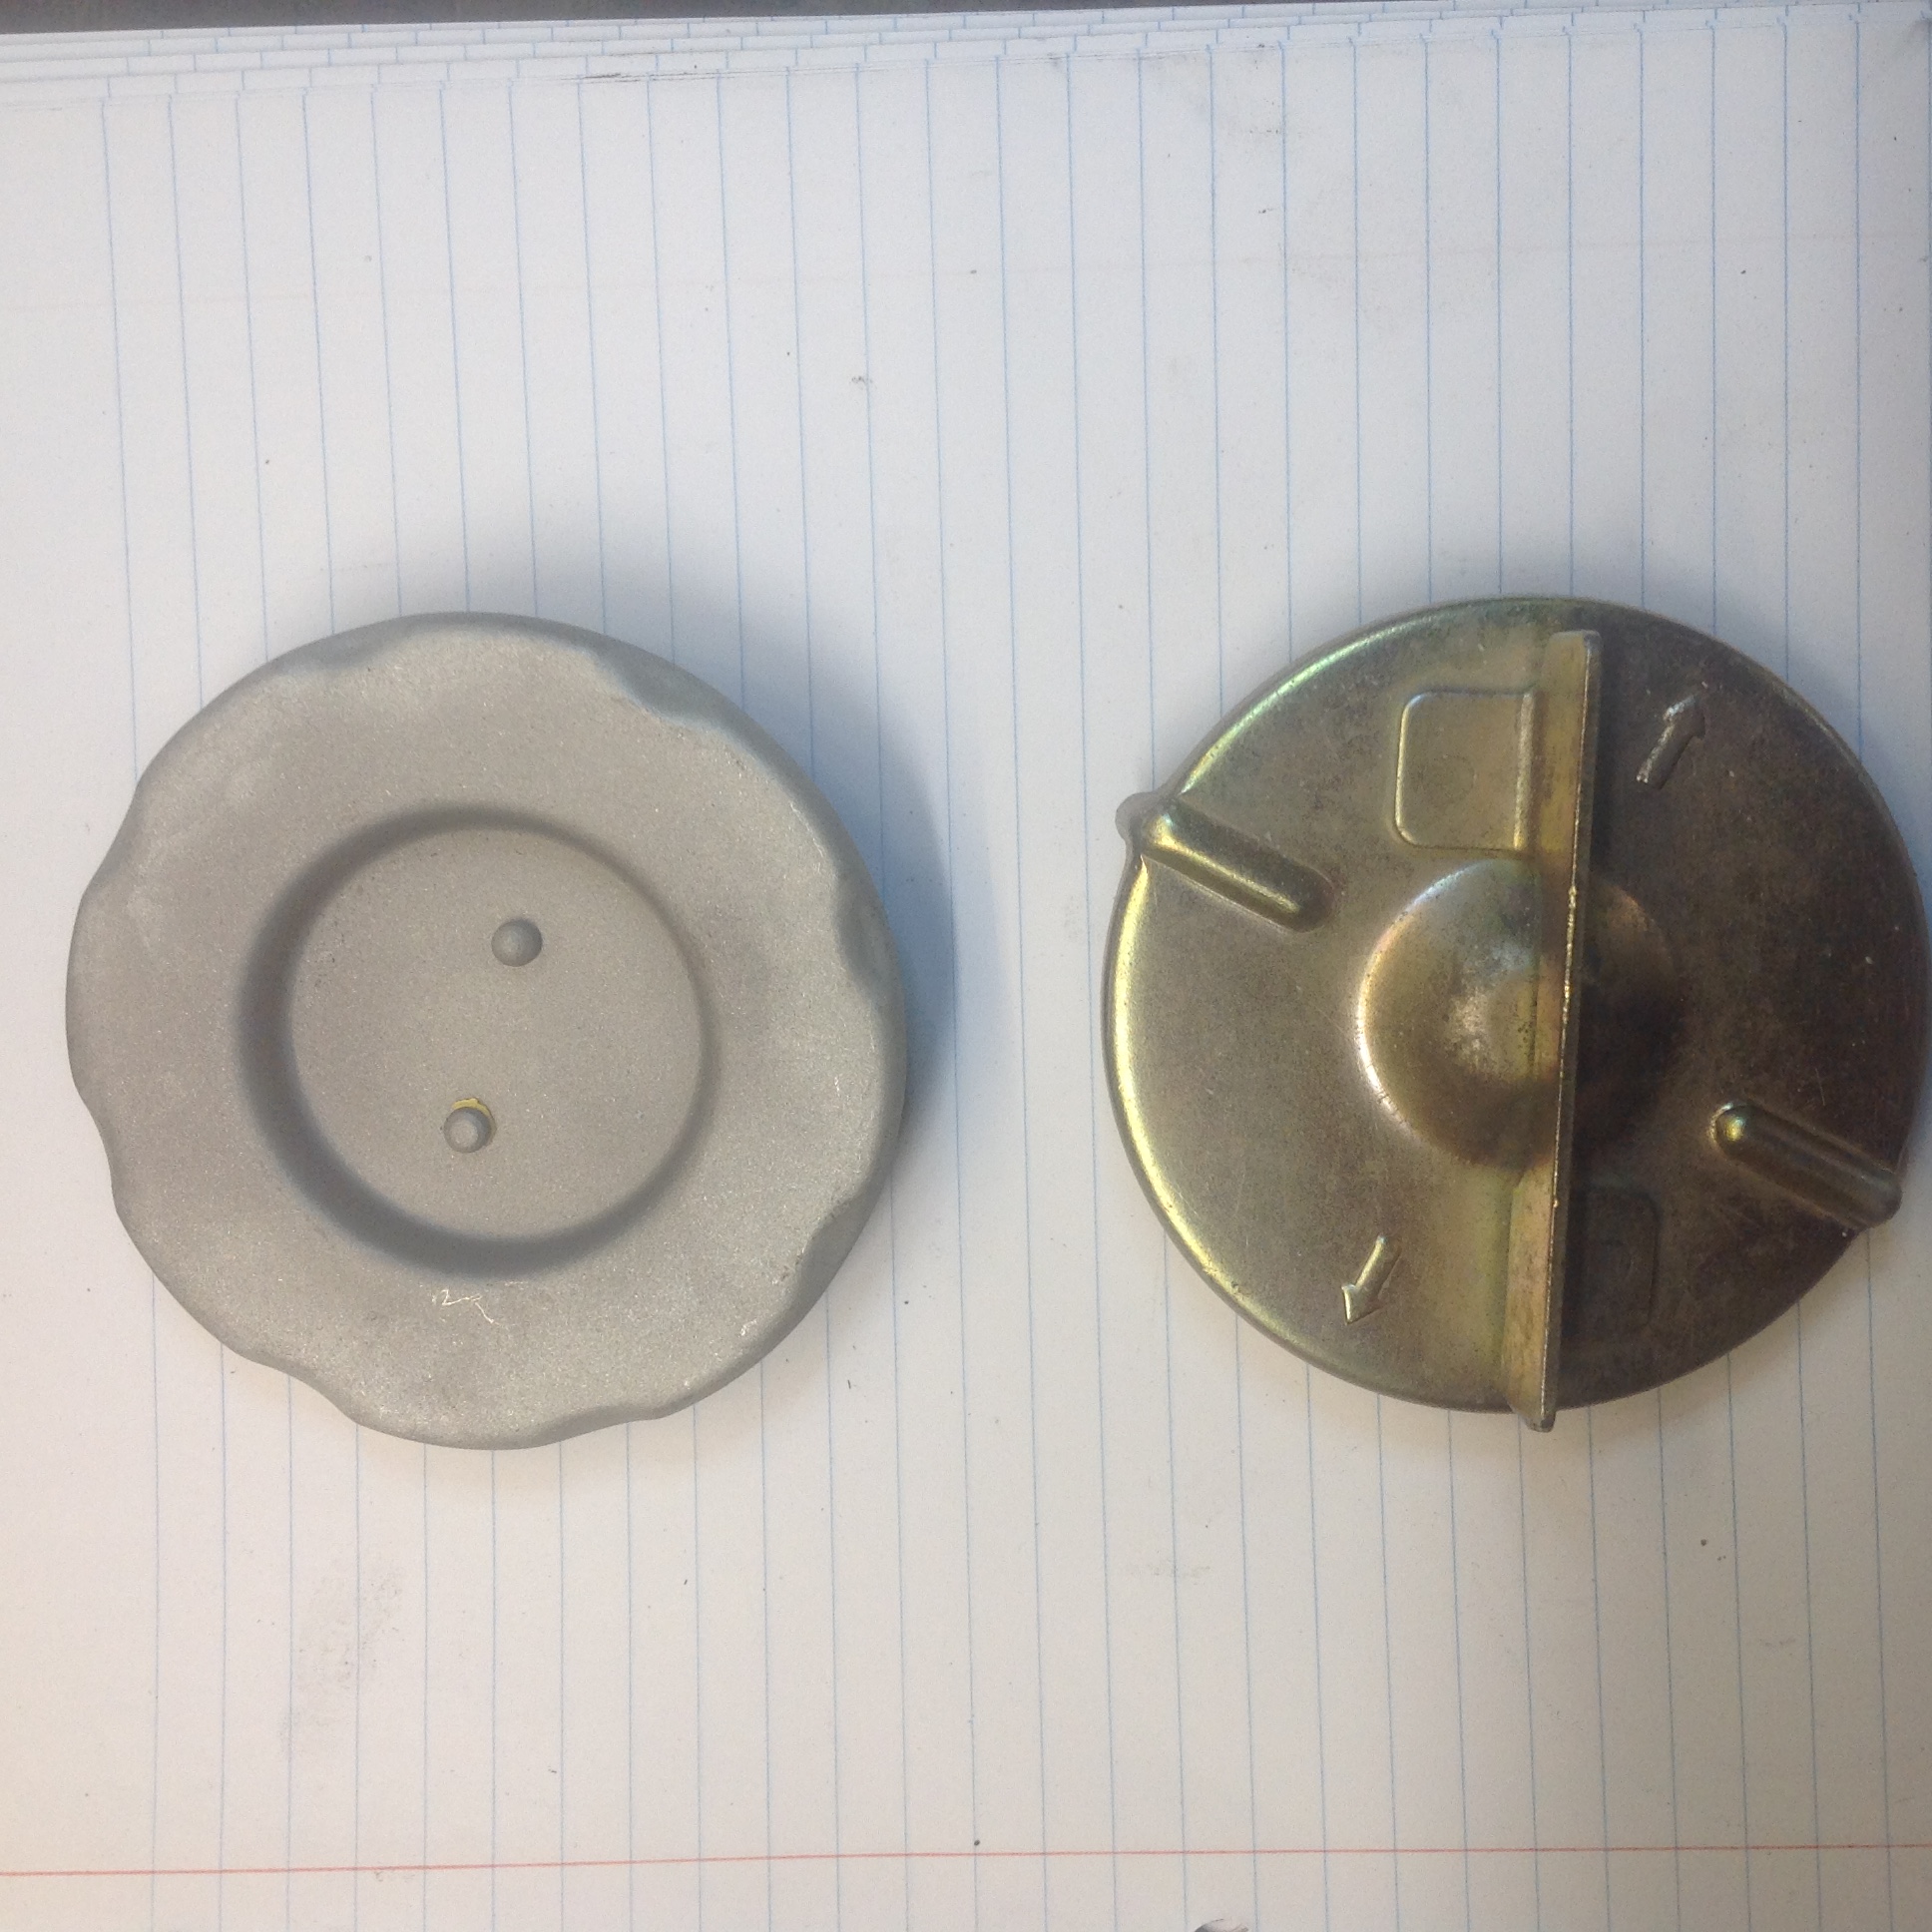
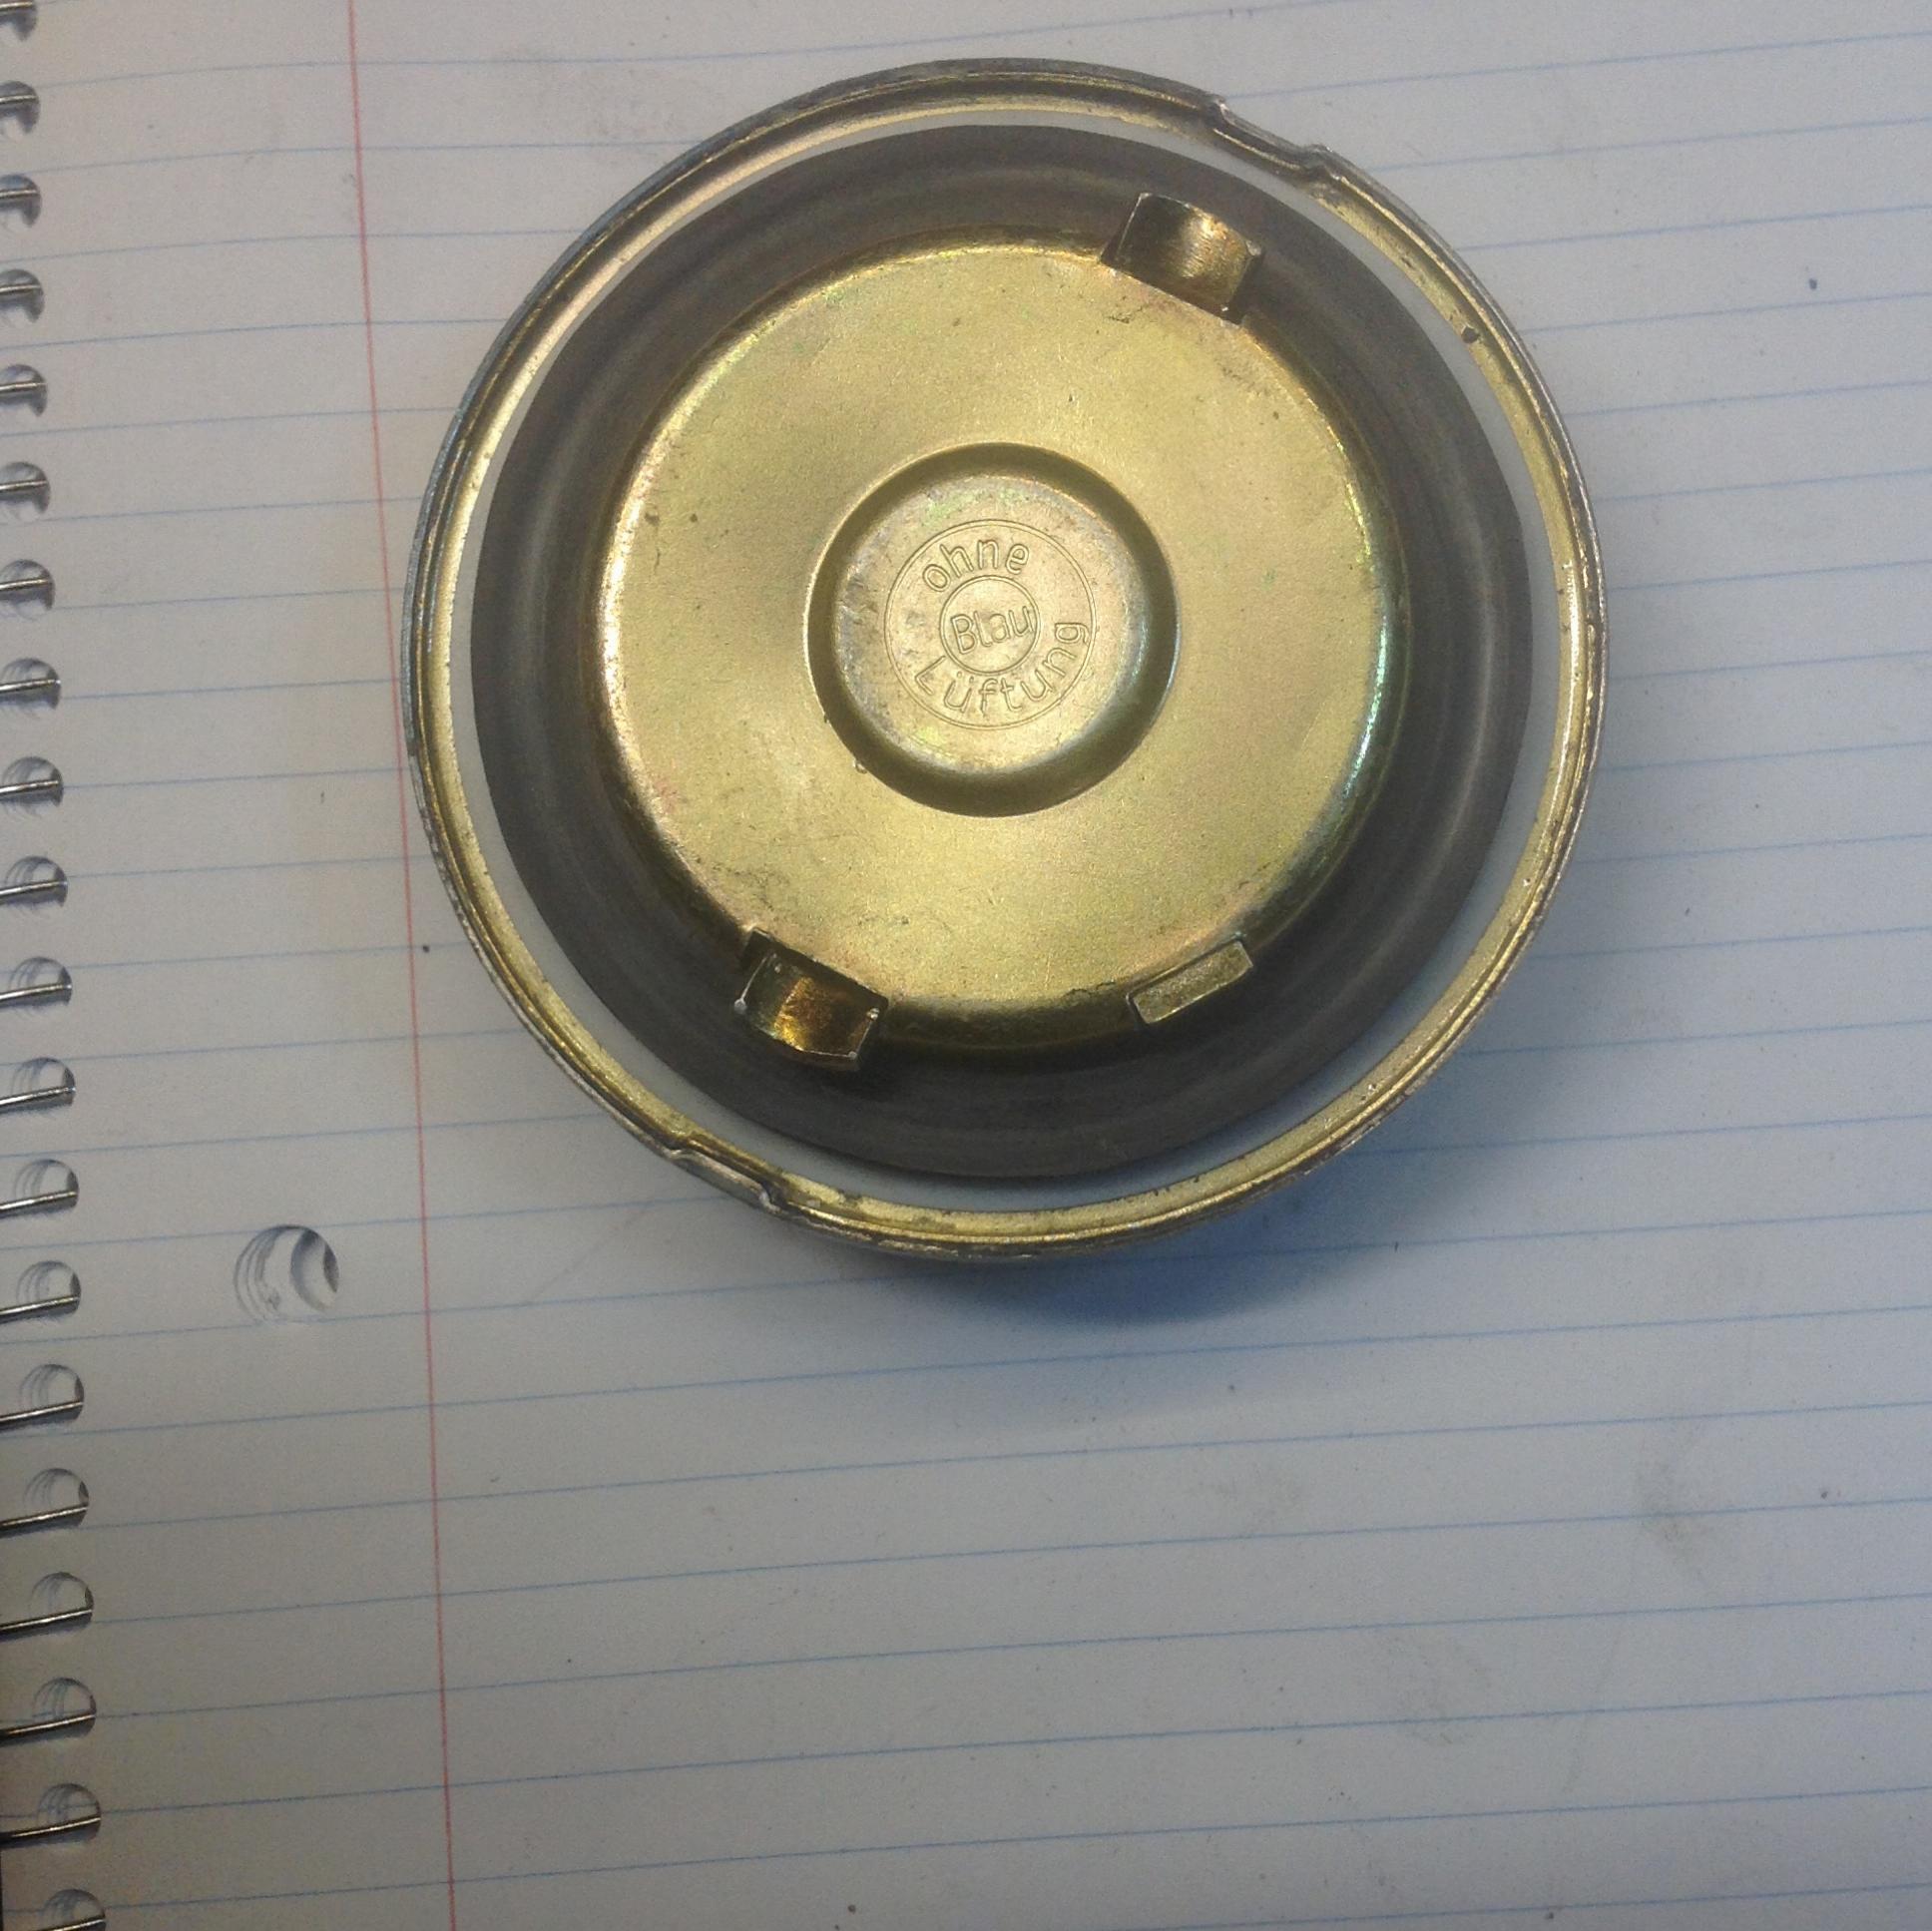
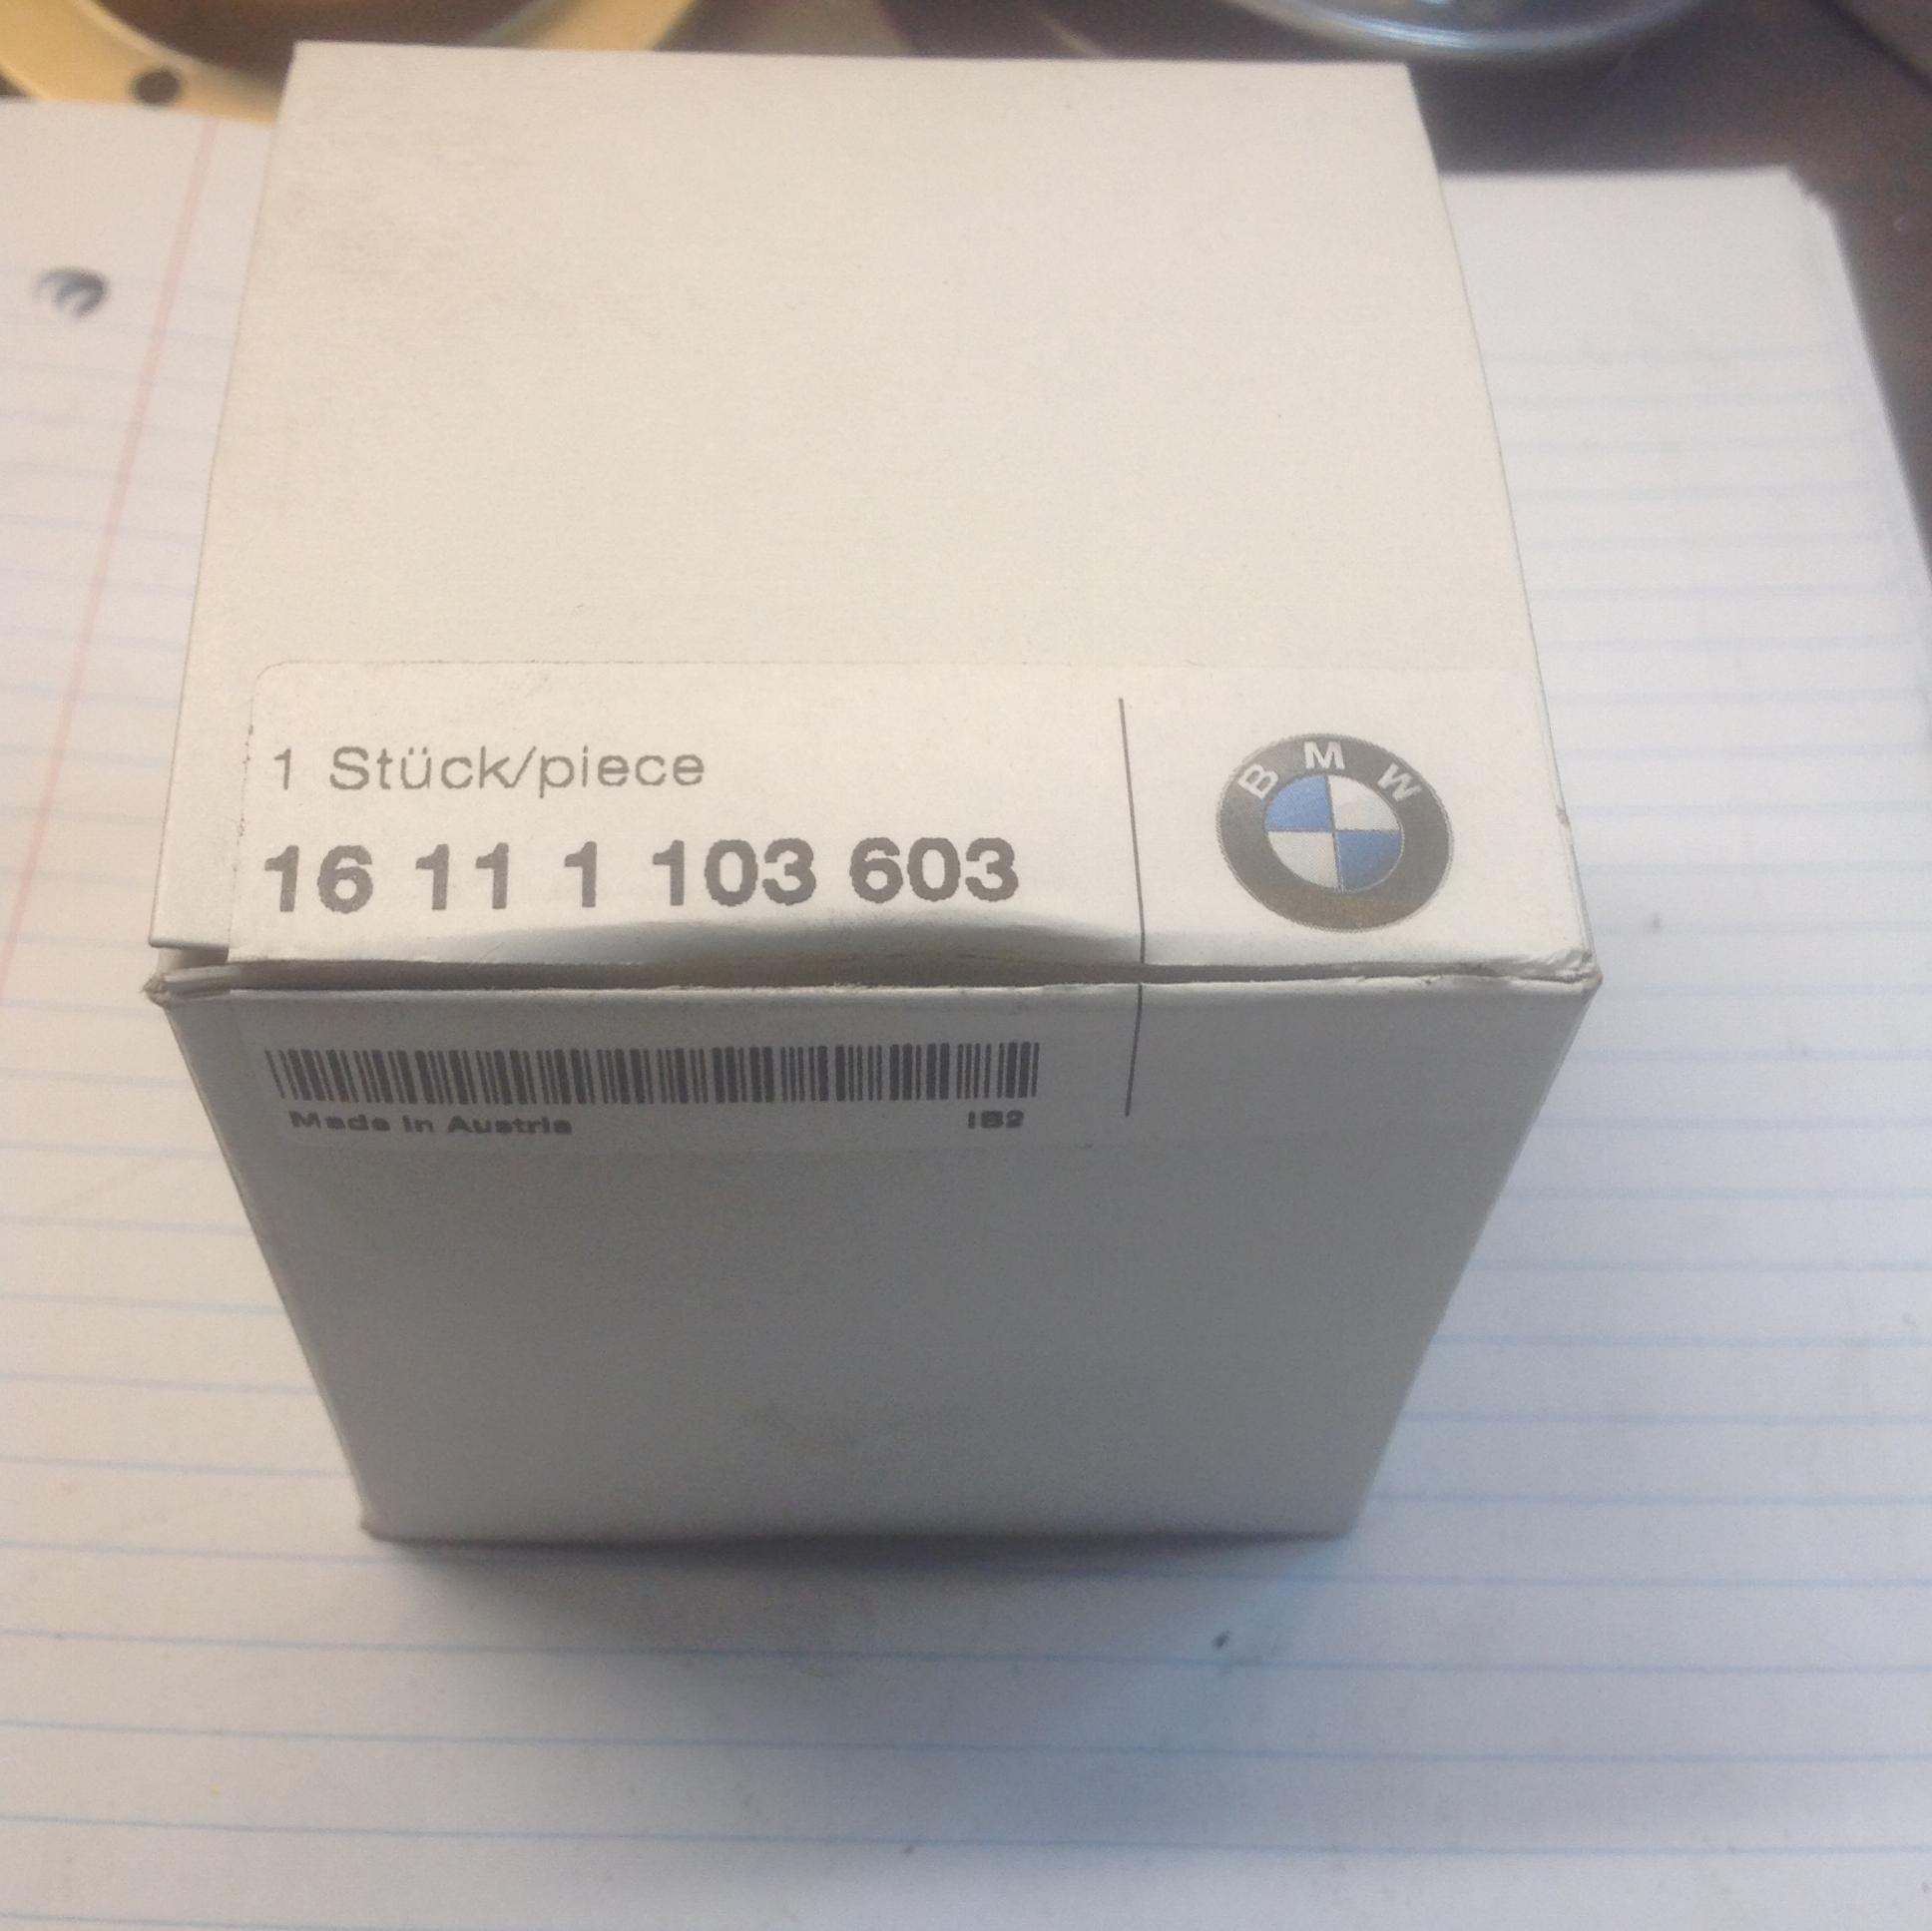
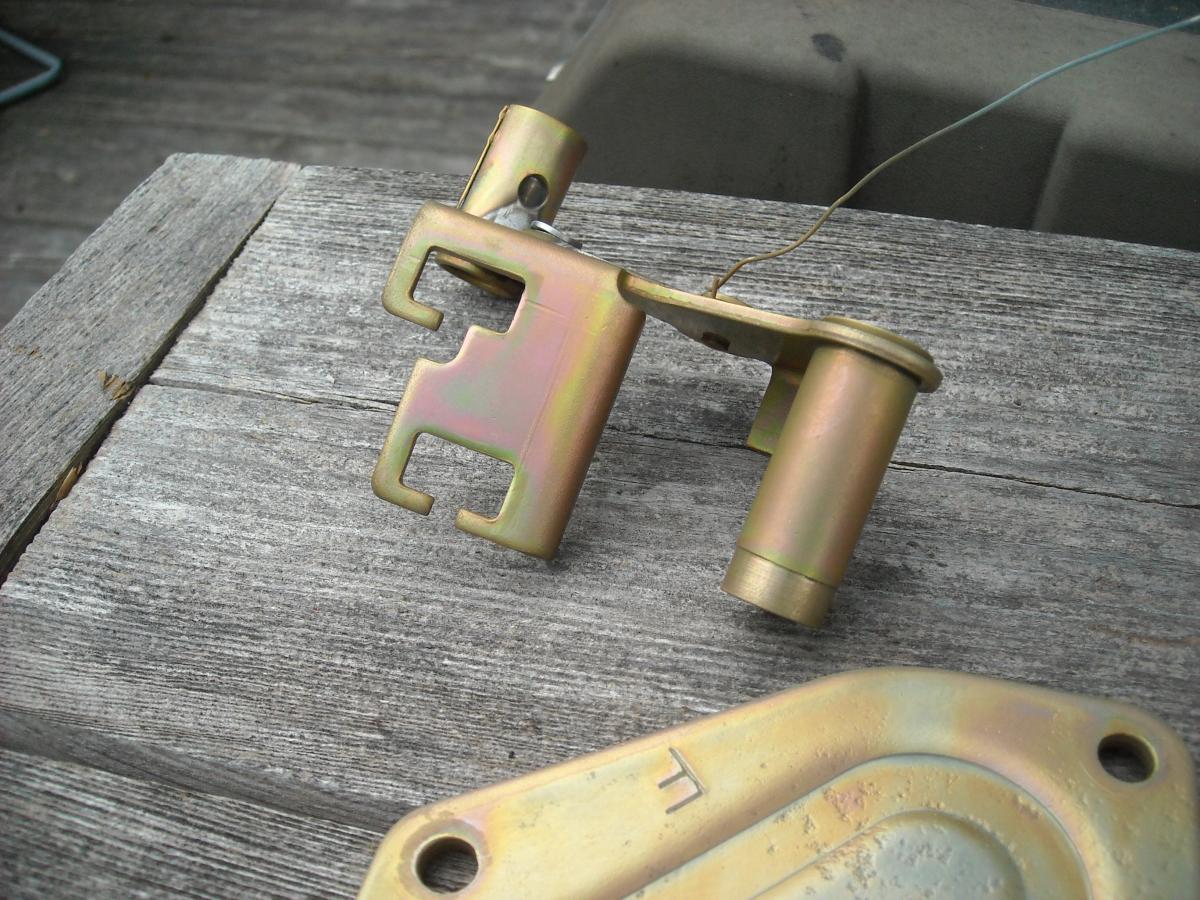
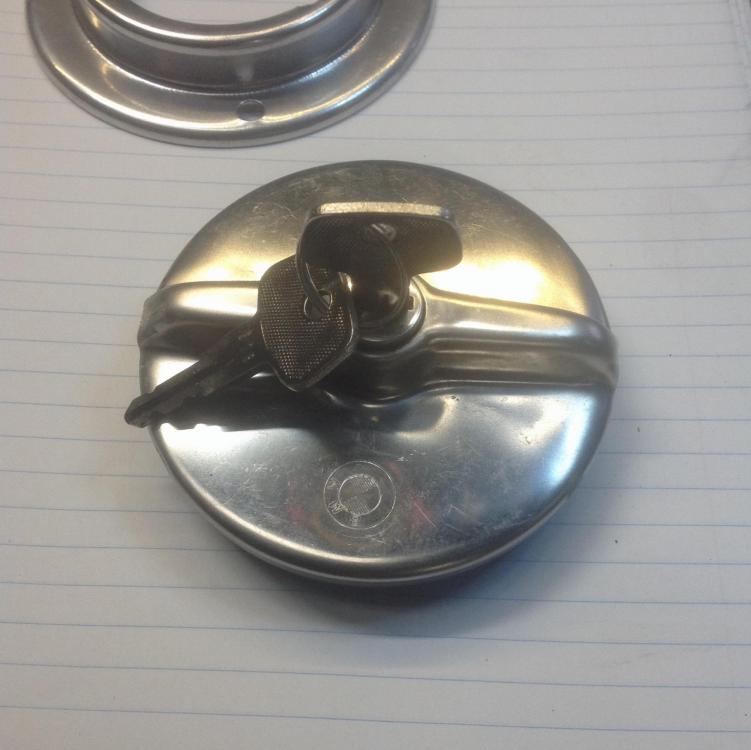
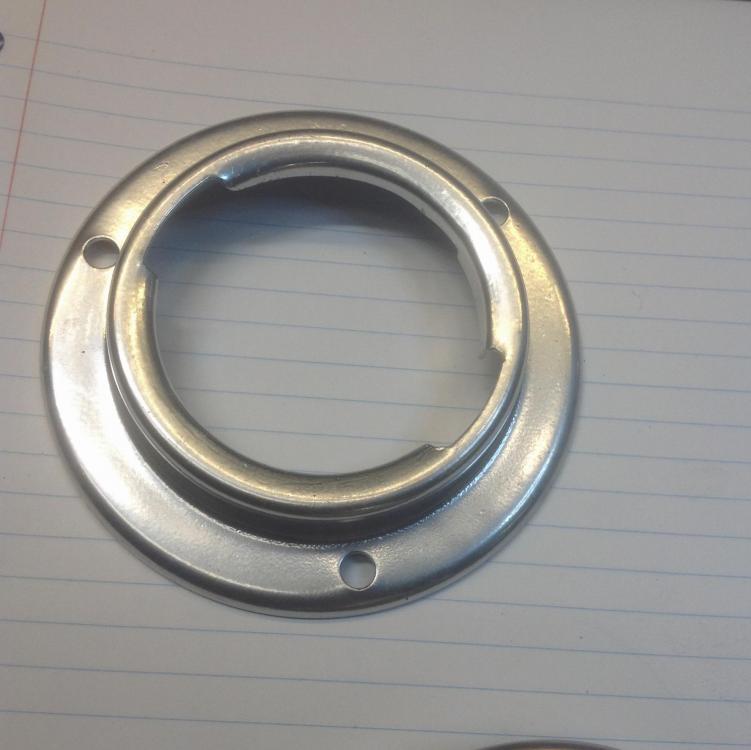
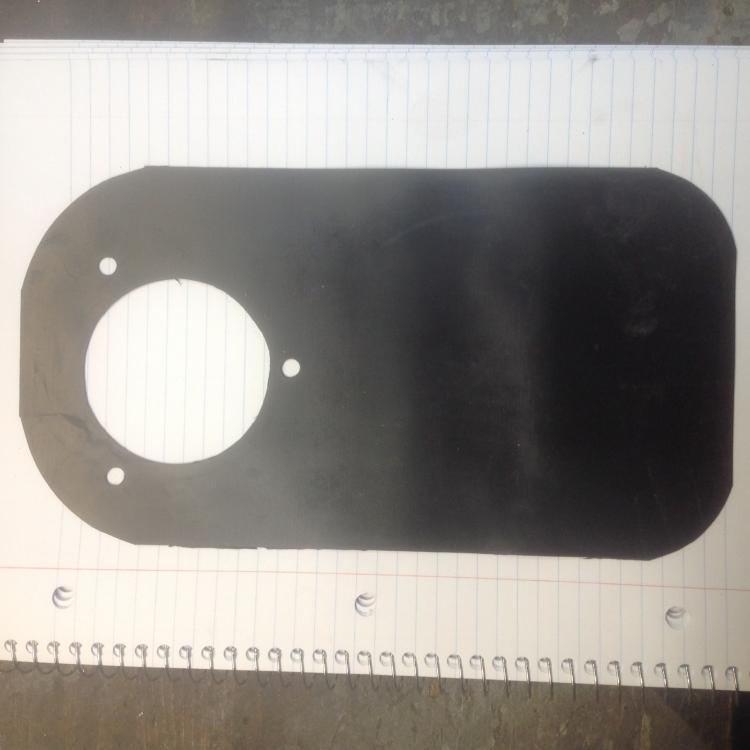
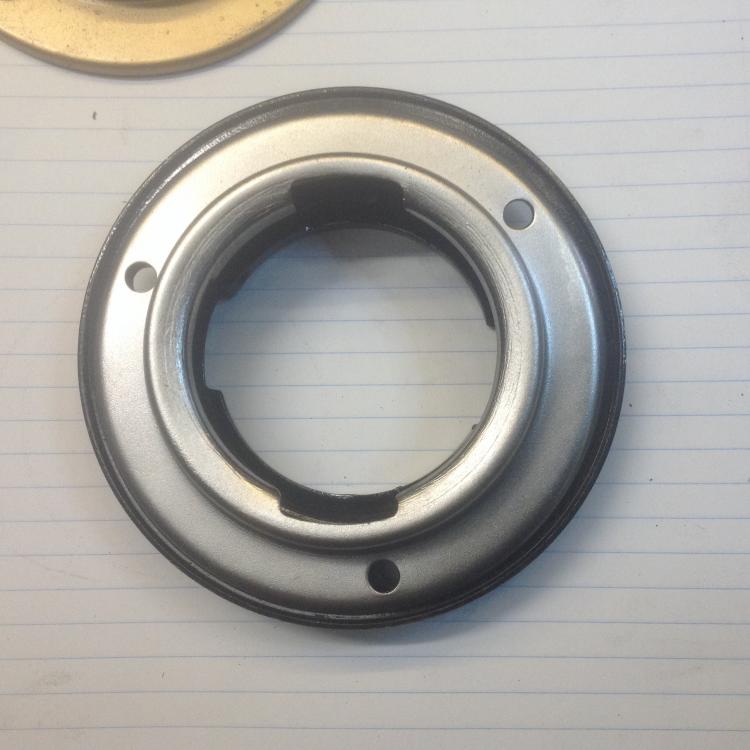
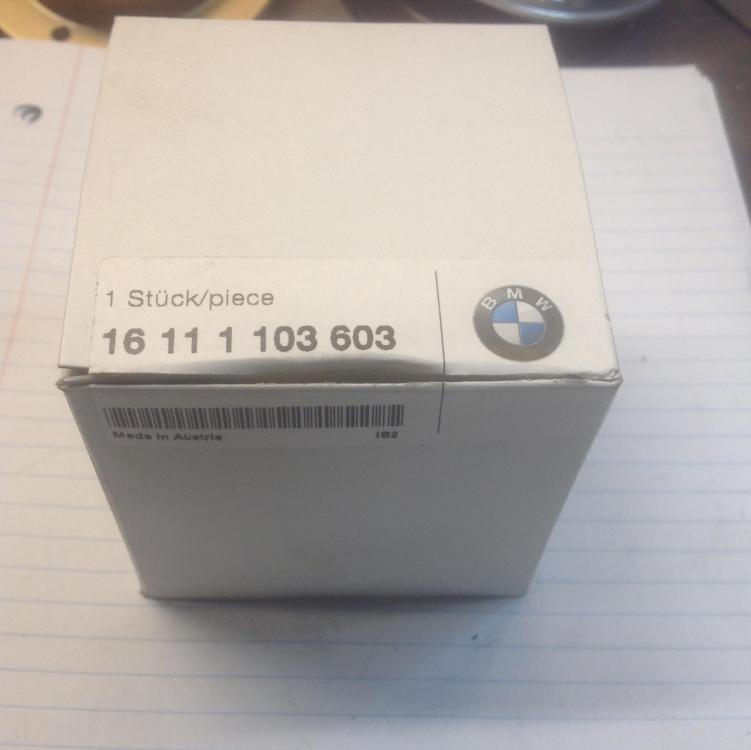
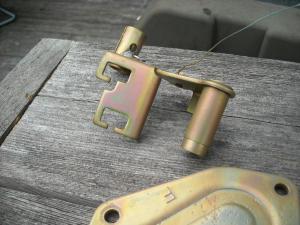
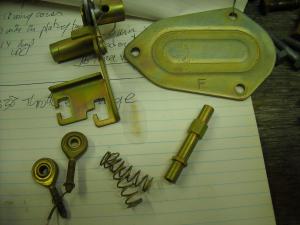
Recently a thread appeared that discussed locking gas caps, or more specifically the lack of a solution. The only known cap (from 70's BMW 2002) fits and appears to lock, but doesn't actually lock to the car. I was able to come up with a solution that modifies the fuel filler ring to allow the locking tab on the BMW cap to have a place to lock against. My locking gas cap solution works for the Z's up to the 74 260. The key is to look and see how many screws hold the filler ring to the body. If it has three screws, the solution is simple. If it has four, then the solution still works but is more difficult to implement. Note this solution does not work on the smaller caps found on 77-78 280's. I have a small collection of fuel filler rings that I have modified to work with the BMW locking caps that can offer for sale. I can paint, powder coat or have them CAD plated. I also made a pretty good deal on some of these locking gas caps. This allows me to offer a complete solution at a pretty good price. I'm asking $99 USD for a modified powder coated filler neck ring + new locking BMW cap with 2 keys AND a new hand made rubber gas cap protection flap. Shipping is on you. While supplies last. Here is what I am doing so can understand the value of what I'm offering for the $$. Sandblast the filler ring, weld on the lock stop blob in "just" the right spot. Do a little hammer work around the inside ID to open it slightly so the cap fits better. Powder coat. The new locking caps I just bought need a little shining up to look good, so a quick trip past the buffing wheel. The two locator tabs on these new caps are slightly long and don't fit into our filler ring as is, so grind off a tad of their length and dress them up. Test fit. Slice up a new rubber flap. Package and ship. You will have to use the flat rubber sealing ring from your old stock cap in place of the BMW sealing ring. It's too thin. One interesting note. There are two different outer diameters of the filler neck rings. Same bolt circle and same size where the cap fits, just the outer diameter of the mounting flange is different by about 1/8". Early and Late? The caps with the pie crust edge (early non-vented) verses the caps with the angle iron handle (late)? Anybody know for sure? If you care, let me know which one you want. If you have a 280 and have a four screw filler neck, you have to remove the entire neck and its one-piece upper hose tubing (see above pics) to do the "mod" to get the cap to fit. If you want to know what to do, let me know, I'll share a solution to add the "stop" to make the BMW cap work. If you're really desparate send me your neck I'll do it. I can supply the BMW locking cap or tell you where to get one. You can contact best by dropping me an email to z240@shaw.ca. Let me know if you have any questions. Pictures of the items in question follow.1 point
-
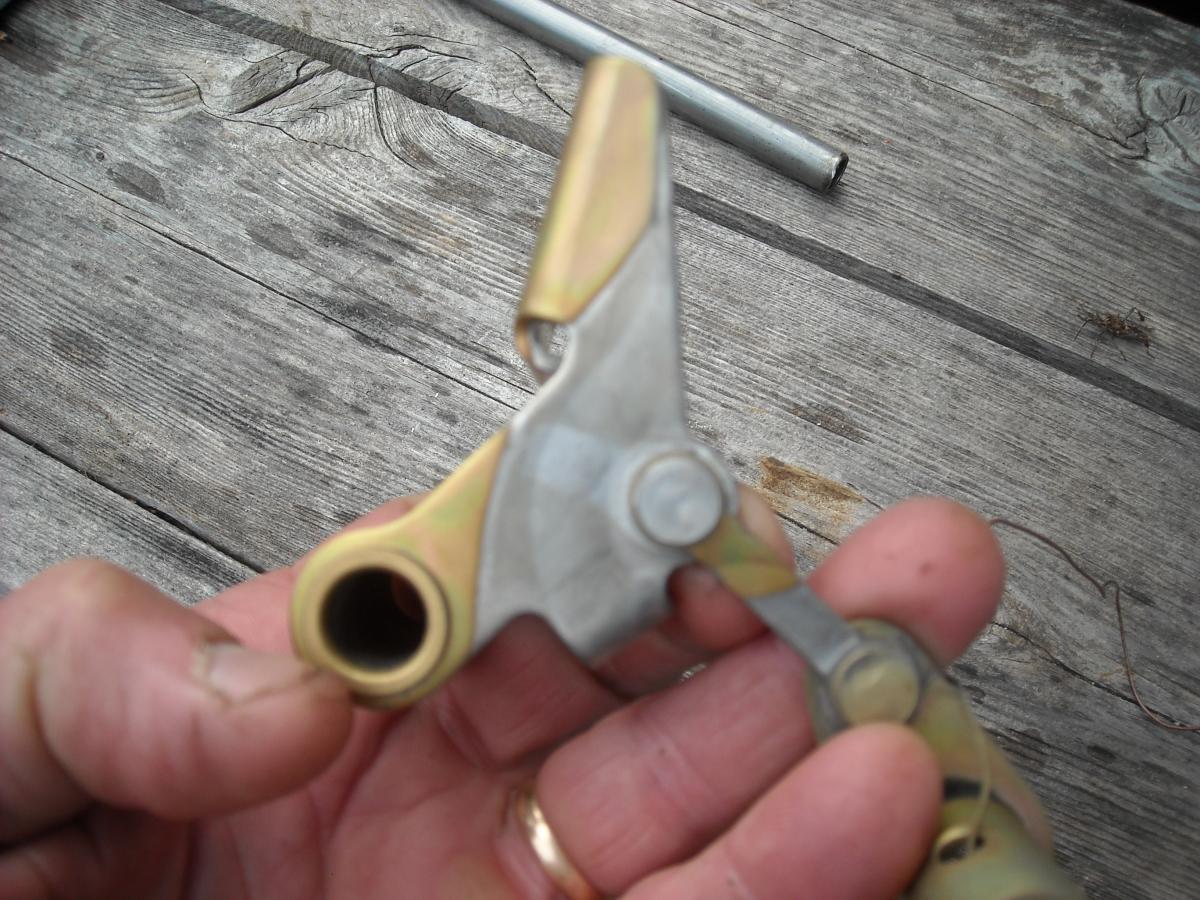
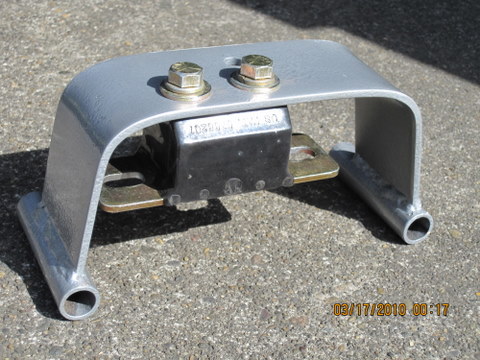
I recently did some work on my front diff mount and strap and here are my findings from the project. It was my first time messing around with these parts. Here is a pic of the old mount and original hardware. I'm replacing the mount because the rubber is soft and squishy. The original hardware holding the mount to the diff is hard to remove because the mount itself is partially in the way. It's much easier with the whole diff out of the car, but if you're trying to replace the mount without dropping the diff it's a pain in in the butt. I think you're supposed to remove the hardware using an open end wrench on the bottom and a box end up in the trans tunnel hump on the nut up top: I decided that since my original mount was already 75% split and squishy, that I would just split it the rest of the way and pull the bottom part of the mount off which allowed me to use a standard socket on the bolt head. In other words, I finished the destruction of my old mount to get to make getting to the hardware easier. Here's my old split squishy mount: When it came time to put my new mount in, I changed the mounting hardware scheme to socket head cap screws instead of the original hex head bolts. I don't know if this is old hat or not, but my custom hardware looks like this. Socket head cap screws on the left in this pic: So what's the big deal about using SHCS there instead of hex head bolts? The SHCS allowed me to use a hex driver on my ratchet like this: And tighten the bolts from the bottom like this. The hex driver clears the bottom plate on the mount so you don't have to deal with the original hardware anymore. If I ever have to mess with this thing in the future, it will be much easier to R&R. Box end wrench braced against the diff body to hold the nut on top and hex drive to tighten from the bottom, I found this much easier to work with than the original hardware scheme: I used 1/2-13 x 4 inch long socket headed cap screws. You could also use M12 SHCS if you can't deal with the English hardware on the Metric car, but since the English stuff is so much more prevalent and cheaper for me, I used Engilsh. I used the black oxide hardware below to test fit, but for my final install, I bought some new zinc plated hardware for corrosion protection. This pic was before I had the zinc plated parts bolts on hand:1 point
-
I was sitting at a stoplight a few minutes ago in my 240Z VIN #907 and heard a horn beep, looked over in the right lane and was asked if I wanted to sell the car. I remembered his car, I had pulled out in traffic just before him and pulled away a little. He asked if I wanted to sell it and I was reluctant but then asked how much and he offered $8,000. When I didn't seem interested he offered $11,000. I told him the car was special I would keep it. First stoplight auction I have been to. I have been driving this car in the summer over here on the West cost of California for various errands. Fun car to own.1 point
-
Anybody watching the Olympics? Didn't realize how far NBC was manipulating things until I got on the old interweb and saw that Usain Bolt had won the 100 meters (sorry if you live on the West Coast and were going to watch it). Even though it's not on NBC west coast until 9:25 tonight. Sunday afternoon, perfect sports TV time and NBC thinks nobody is on the internet, or gets the same out of a taped performance as a live event. Dinosaurs.1 point
-
Sorry about the lack of dream girls, I did put the filtering on as you suggested and finally got a stable rpm display on the real time display and I could adjust it with the pots so that is a step in the right direction. I have JP1 and J1 jumped properly and R56 and R52 turned counter clockwise 7 turns, I advanced R56 and 52 but didn't notice any changes in the signal on the screen. Then took it all out to the engine test stand and cranked the engine but still no signal showing from the real crank sensor. Still going to get a new crank sensor just to see if it helps. CM I guess you are Blackbird on the Megasquirt forums? For anyone else who might be following this thread I have another thread on the MS forums with more detail and logs, http://www.msextra.com/forums/viewtopic.php?f=132&t=63449&p=481201#p4812011 point
-
1 pointI'm glad to hear you were able to wire the starter after the information I gave you. Of course, you have to give credit to @Patcon for tagging me in the thread, otherwise I might not have noticed it.1 point
-
Kind of looks like Mr. Isky doesn't really give a squat about the old Datsuns. His money is probably in all of those thousands of Chevys out there.1 point
-
1 pointRemove the striker from the door jam and hold the door closed. Are the body lines in alignment? If not, then adjust the door by accessing the bolts inside the kick panel area. If the front of the door isn't flush with the fenders you can add shims to move the door out. Once the door is aligned you can install the striker and get the door to close properly. The window frame is a separate problem. Lower the window and remove the door panel (IIRC). Loosen the window frame bolts at the front, inside and back of the door. Fiddle with it to get all the gaps and alignment the way you want. Chuck1 point
-
It's a real Fairlady. The early US cars have the twist lock. Chuck1 point
-
Are you looking for original NOS or used? There are several aftermarket kits but that won't help if you are looking for the real deal (if you can still find a set).1 point
-
Already linked in Post 14. Not competing, just saying...let's not wear any ruts.1 point
-
1 pointProbably because you can get into some "serious dung" with that much power in a little car like that!1 point
-
1 pointWorse yet, it's a dung beetle. The ancient Egyptians held the Scarab (dung beetle) in very high regard to the point of worship. Don't know and can't imagine why.1 point
-
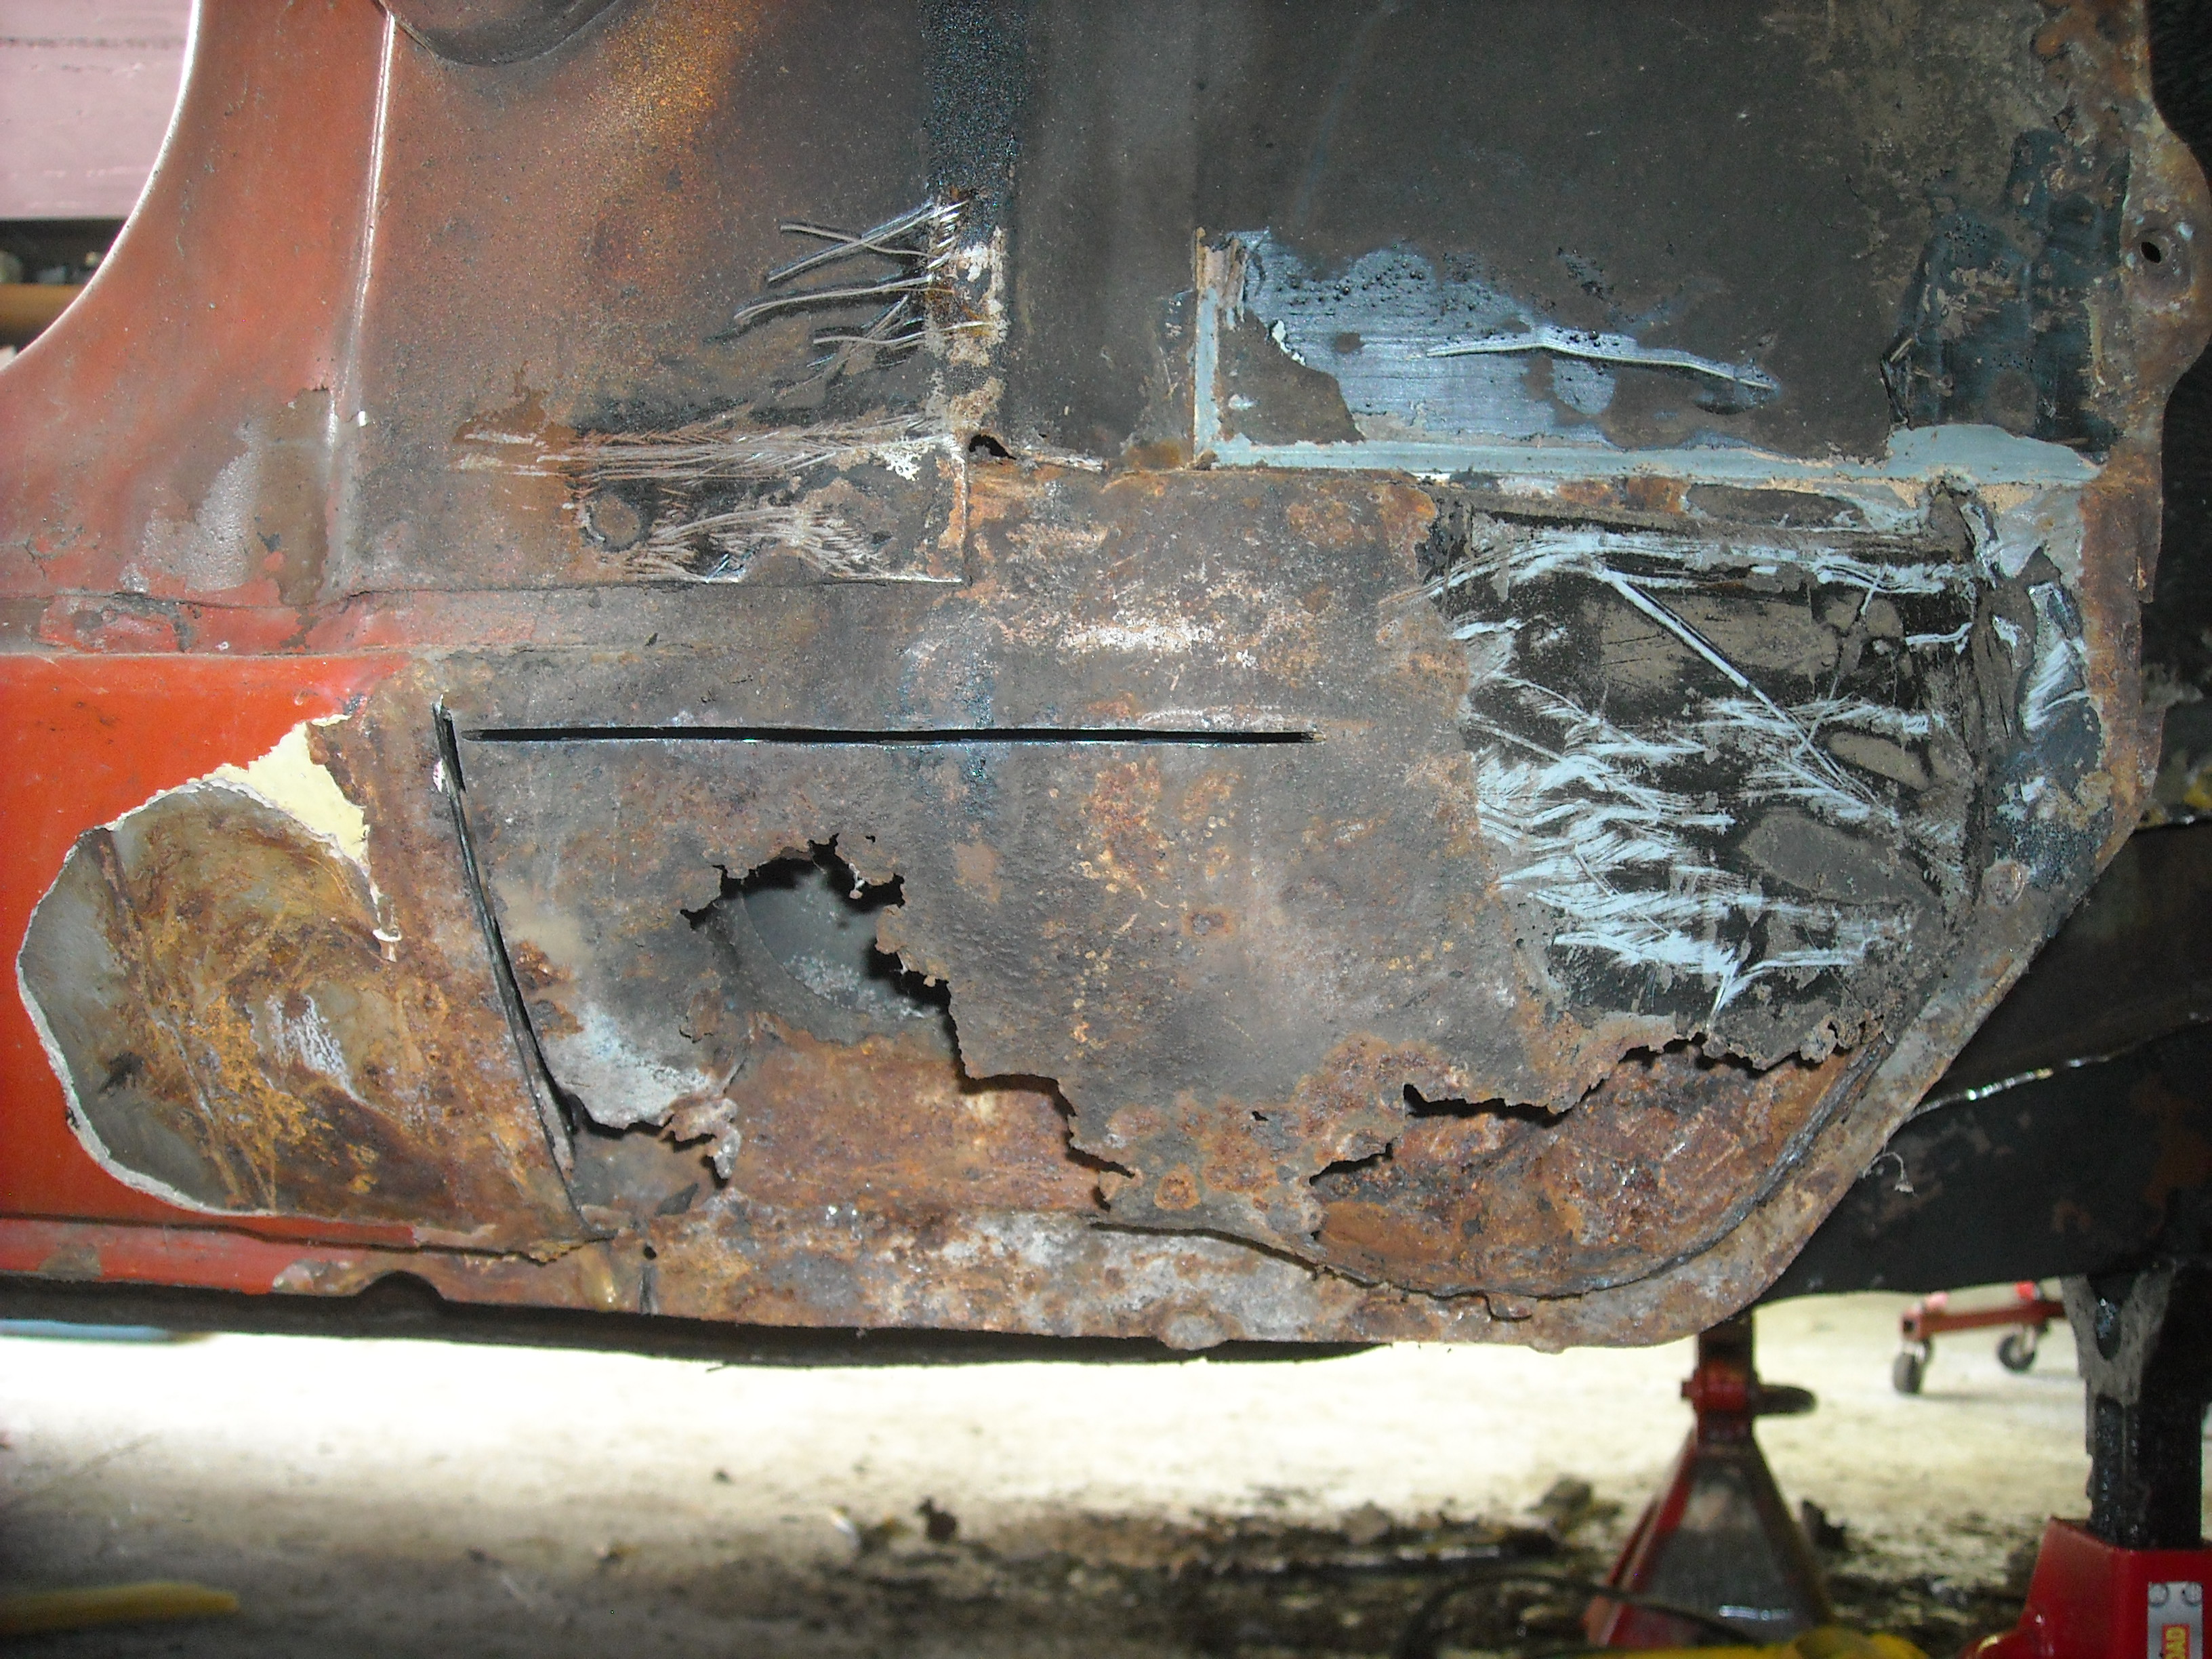
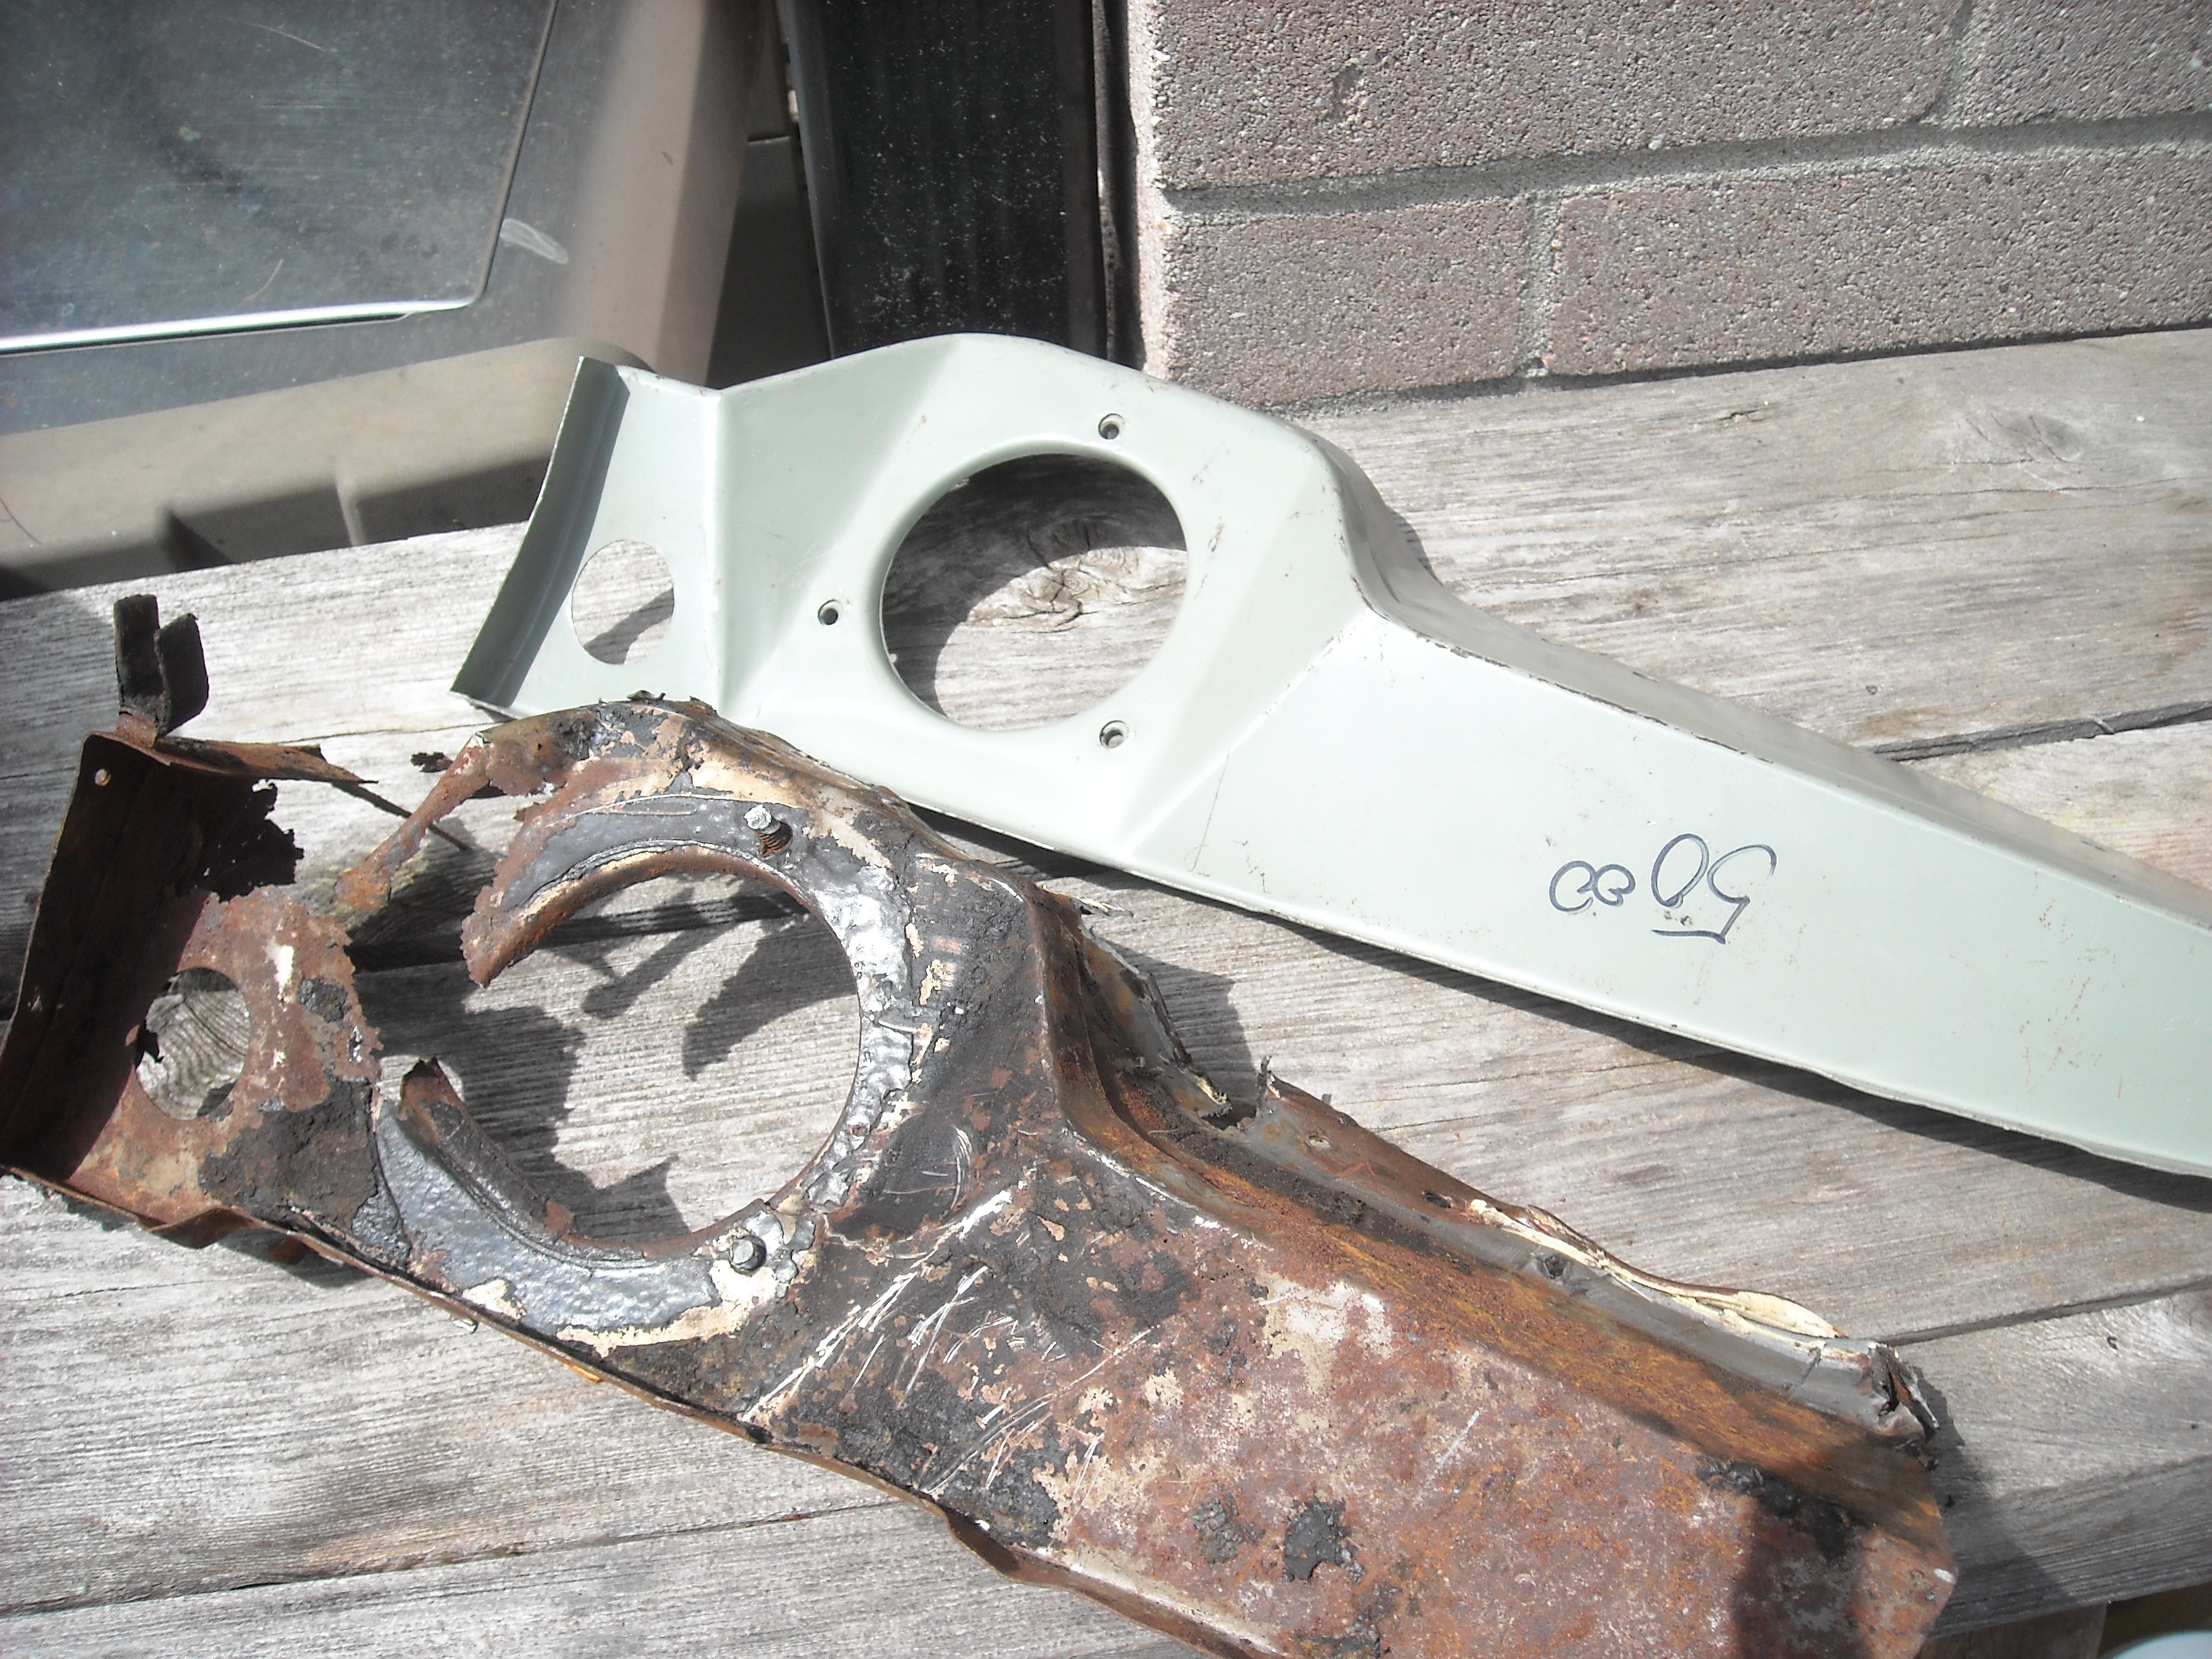
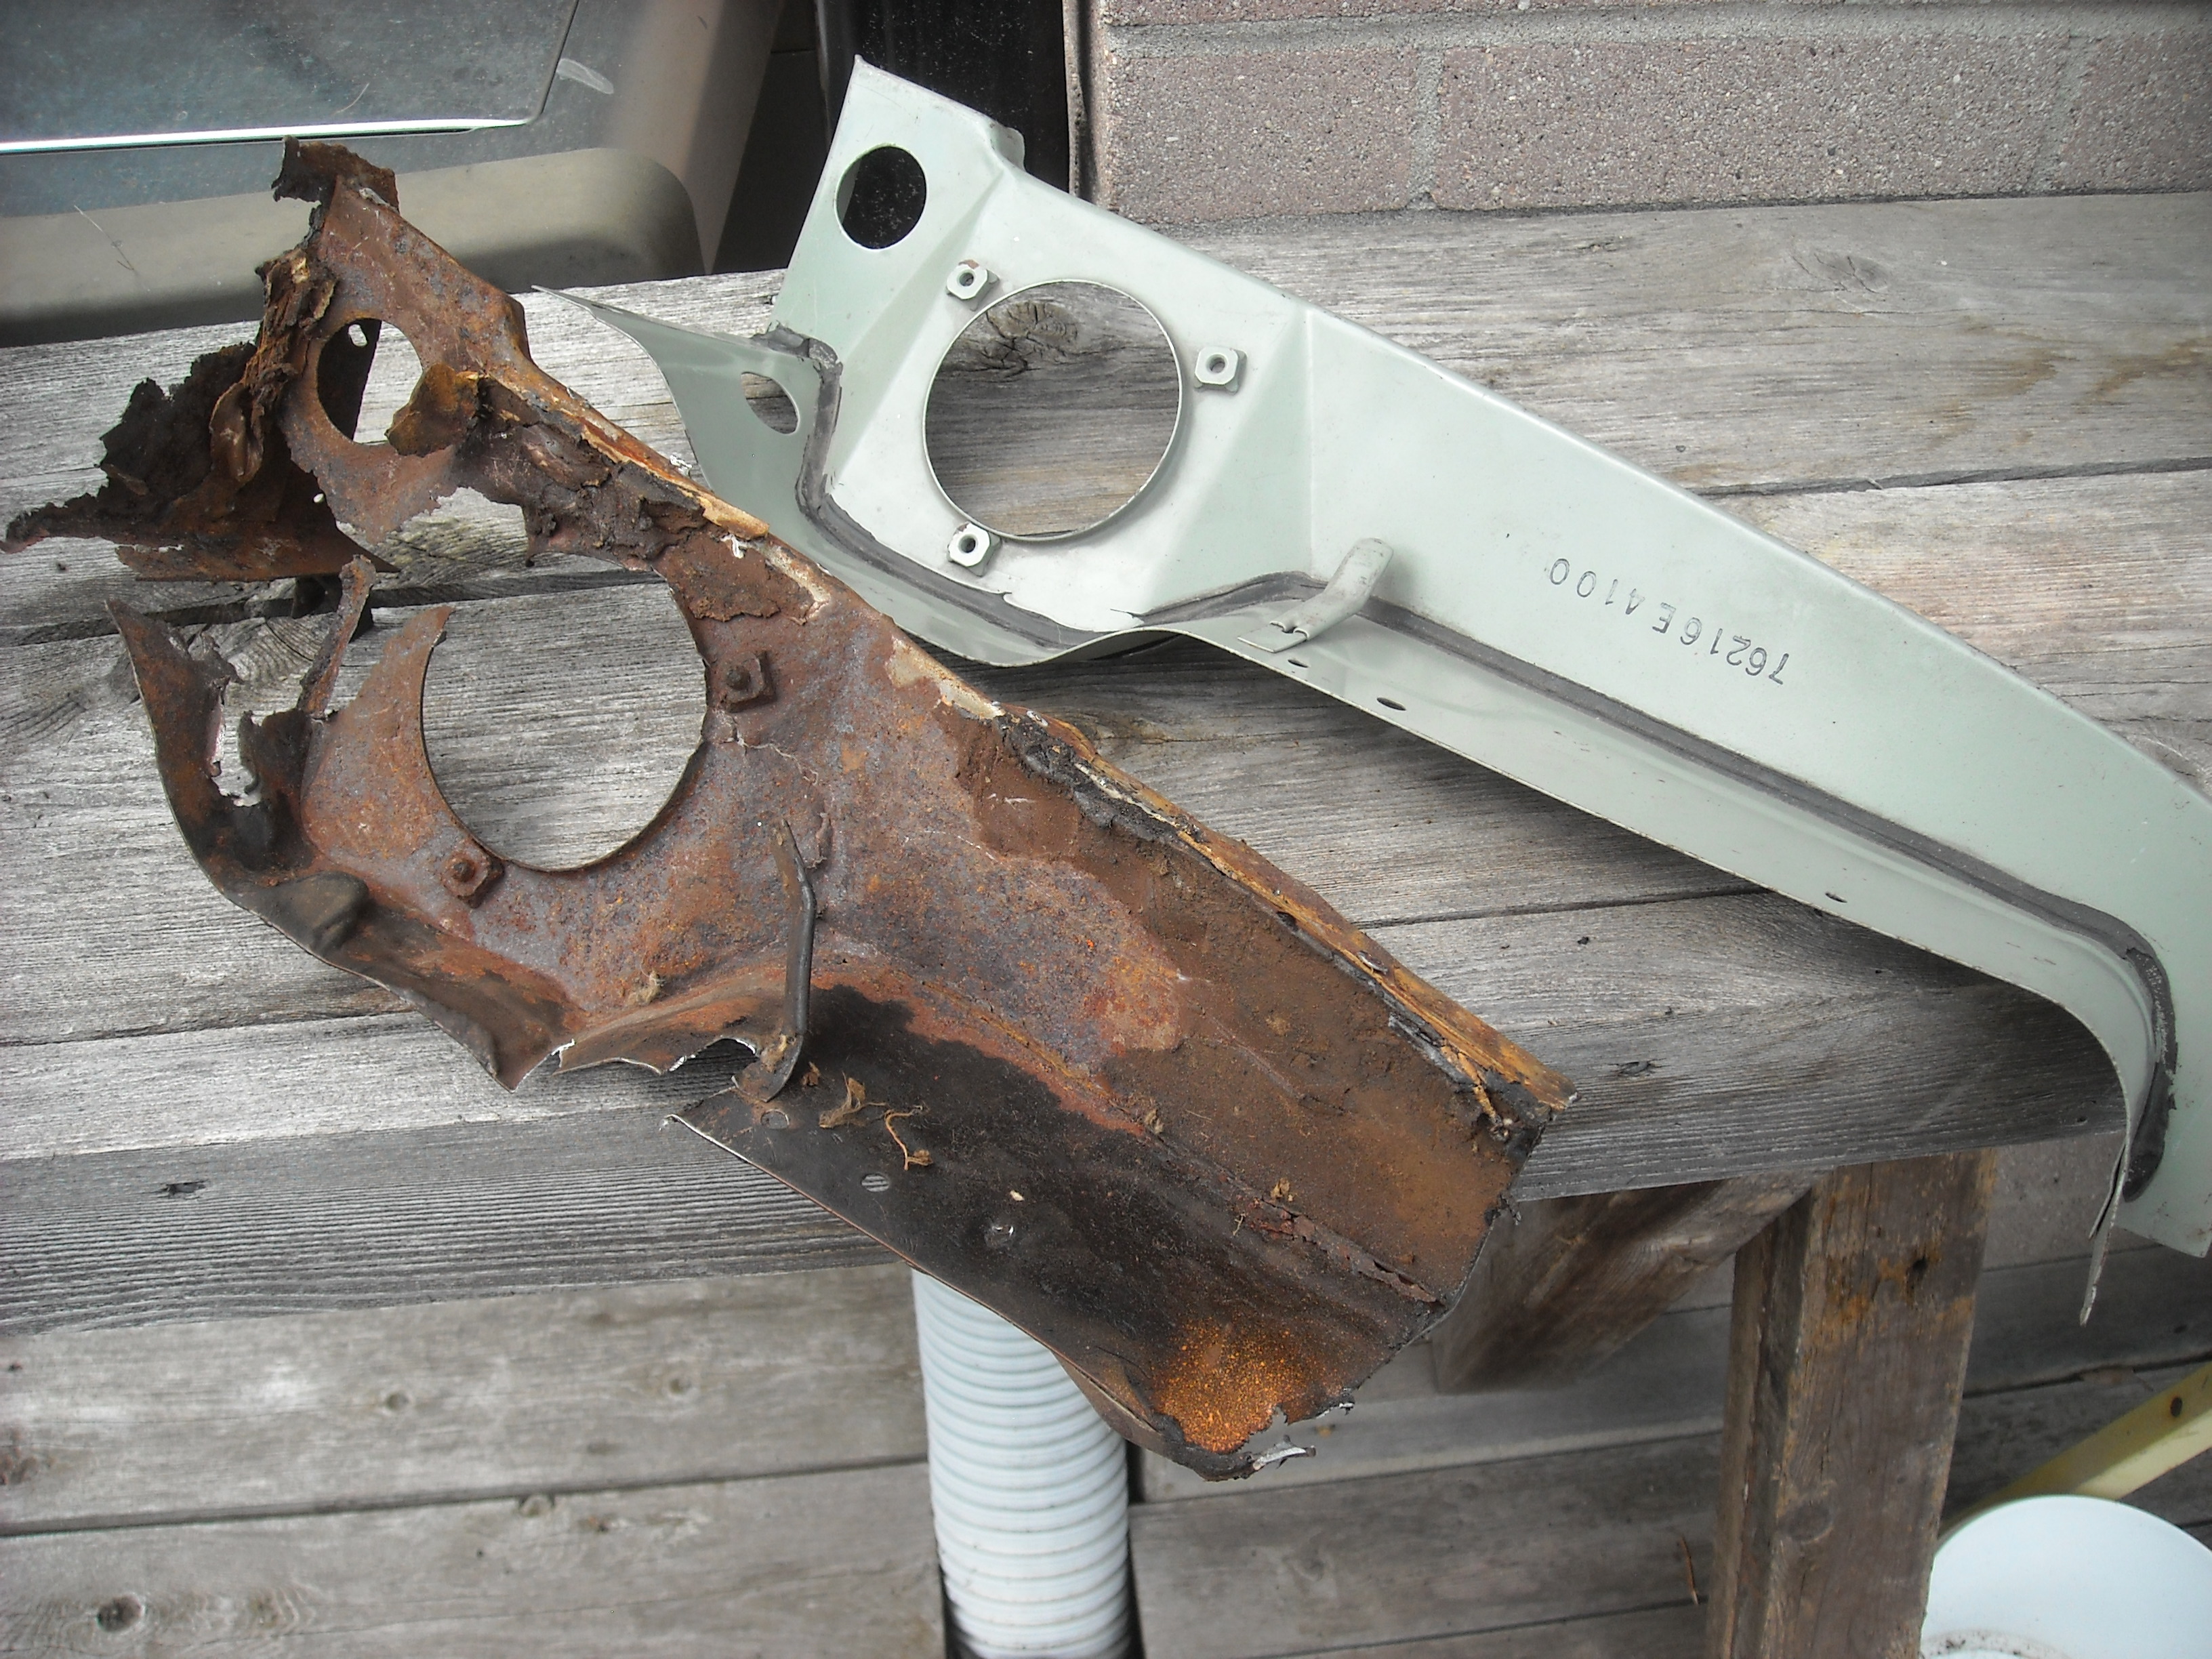
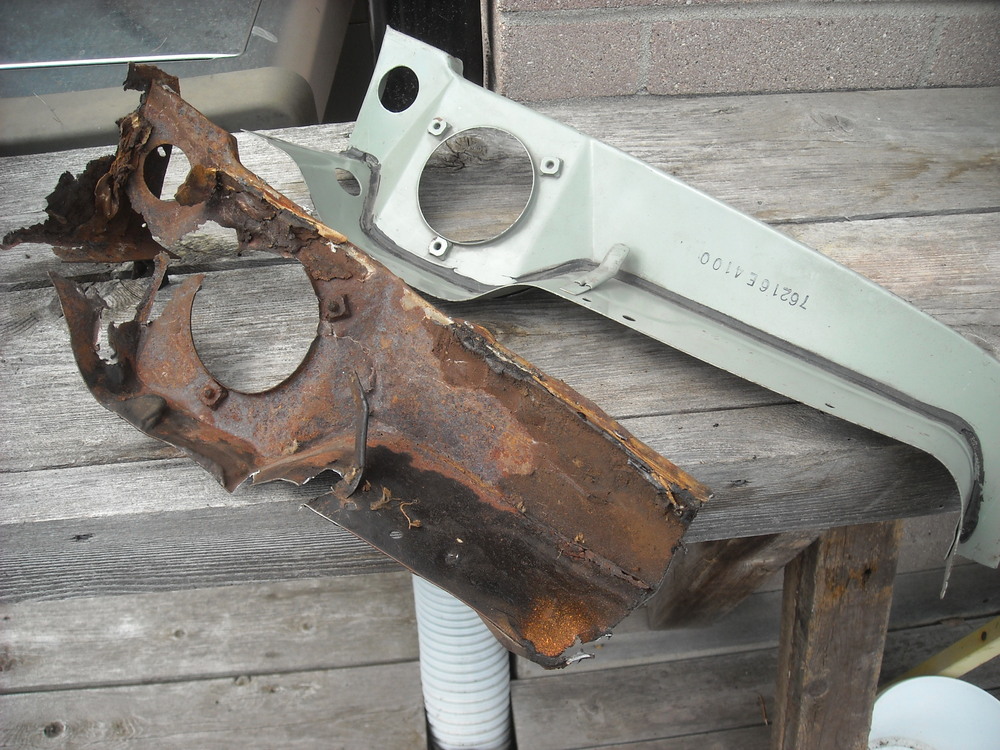
Got into the rockers and the panel the gas tank filler hose goes through today, luckily I spotted one at a Z swapmeet last year and bought it cause I was sure I would never see one again. $50 was cheap compared to what I just paid Tabco for some very simple punch out pieces, 2 rockers, a right rear quarter and hatch deck panel.


 1 point
 -
1 pointAttached is a scan of TS73-10. TechnicalSupportBulletin-TS73-10.PDF1 point
-
The leather one? Won't you need to apply conditioner on a regular basis? Or the timing belt? Probably only good for 80,000 miles. https://zcardepot.com/driveline/rear-axle/differential-arrestor-band-goto-240z-260z-280z.html?search=differential https://zcardepot.com/driveline/rear-axle/differential-diff-arrestor-band-belt-rear.html?search=differential I like the nylon strap. Same material as towing strap, it could be rated for 30,000 lbs. https://www.amazon.com/Smittybilt-CC330-30-Recovery-Strap/dp/B001CF4UXU I converted mine to metal.
 1 point
 -
1 pointI had a quick look at the TPP website and found some interesting info (assumed accurate) about zinc and cad plating and chromates... " Zinc plating is a soft, decorative, corrosion-resistant finish. Zinc protects the substrate by sacrificing itself and thus corrodes before the base metal. This means that zinc will protect even if the zinc coating sustains minor damage, such as scratches or small punctures because of the galvanic protection of the zinc; however, the zinc coating can be attacked or dissolved by ordinary liquids such as soft drinks and vinegar. The ultimate corrosion resistance of zinc is dependent on the thickness of the coating. To increase the corrosion-resistance of the zinc, a conversion coating is usually added. The primary use of chromate finishes on zinc is to retard or prevent the formation of white corrosion products on zinc surfaces." 'Attacked or dissolved by ordinary liquids such as soft drinks or vinegar' !!! I'm going to try this on one of the parts that I've already plated (poorly) to see what happens. Also: It looks like the max. target thickness for commercial/industrial zinc plating is 0.001". TPP has the following to say about cadmium plating (which they apparently still offer): " Cadmium plating is generally bright silvery white. Supplementary treatments for type II can be golden. iridescent, amber, black, or olive drab. The corrosion resistance is very good, especially with the type II finish. Cadmium plating is still the preferred metal over zinc, in the aerospace industry. This is partly due to its excellent adhesion properties for painting, and it can't be stripped off as readily as zinc. Cadmium is excellent for plating stainless steels that are to be used in conjunction with aluminum, to prevent galvanic corrosion. TPP offers the following chromate conversions for cadmium: Clear, Yellow, Black and Olive Drab. Parts with a hardness greater then Rc-40 shall be stress relieved prior to cleaning and plating, and should be given a hydrogen embrittlement relieve post bake." Interesting that there's no mention of post baking (re hydrogen embrittlement relief) in their discussion of zinc plating.1 point
-
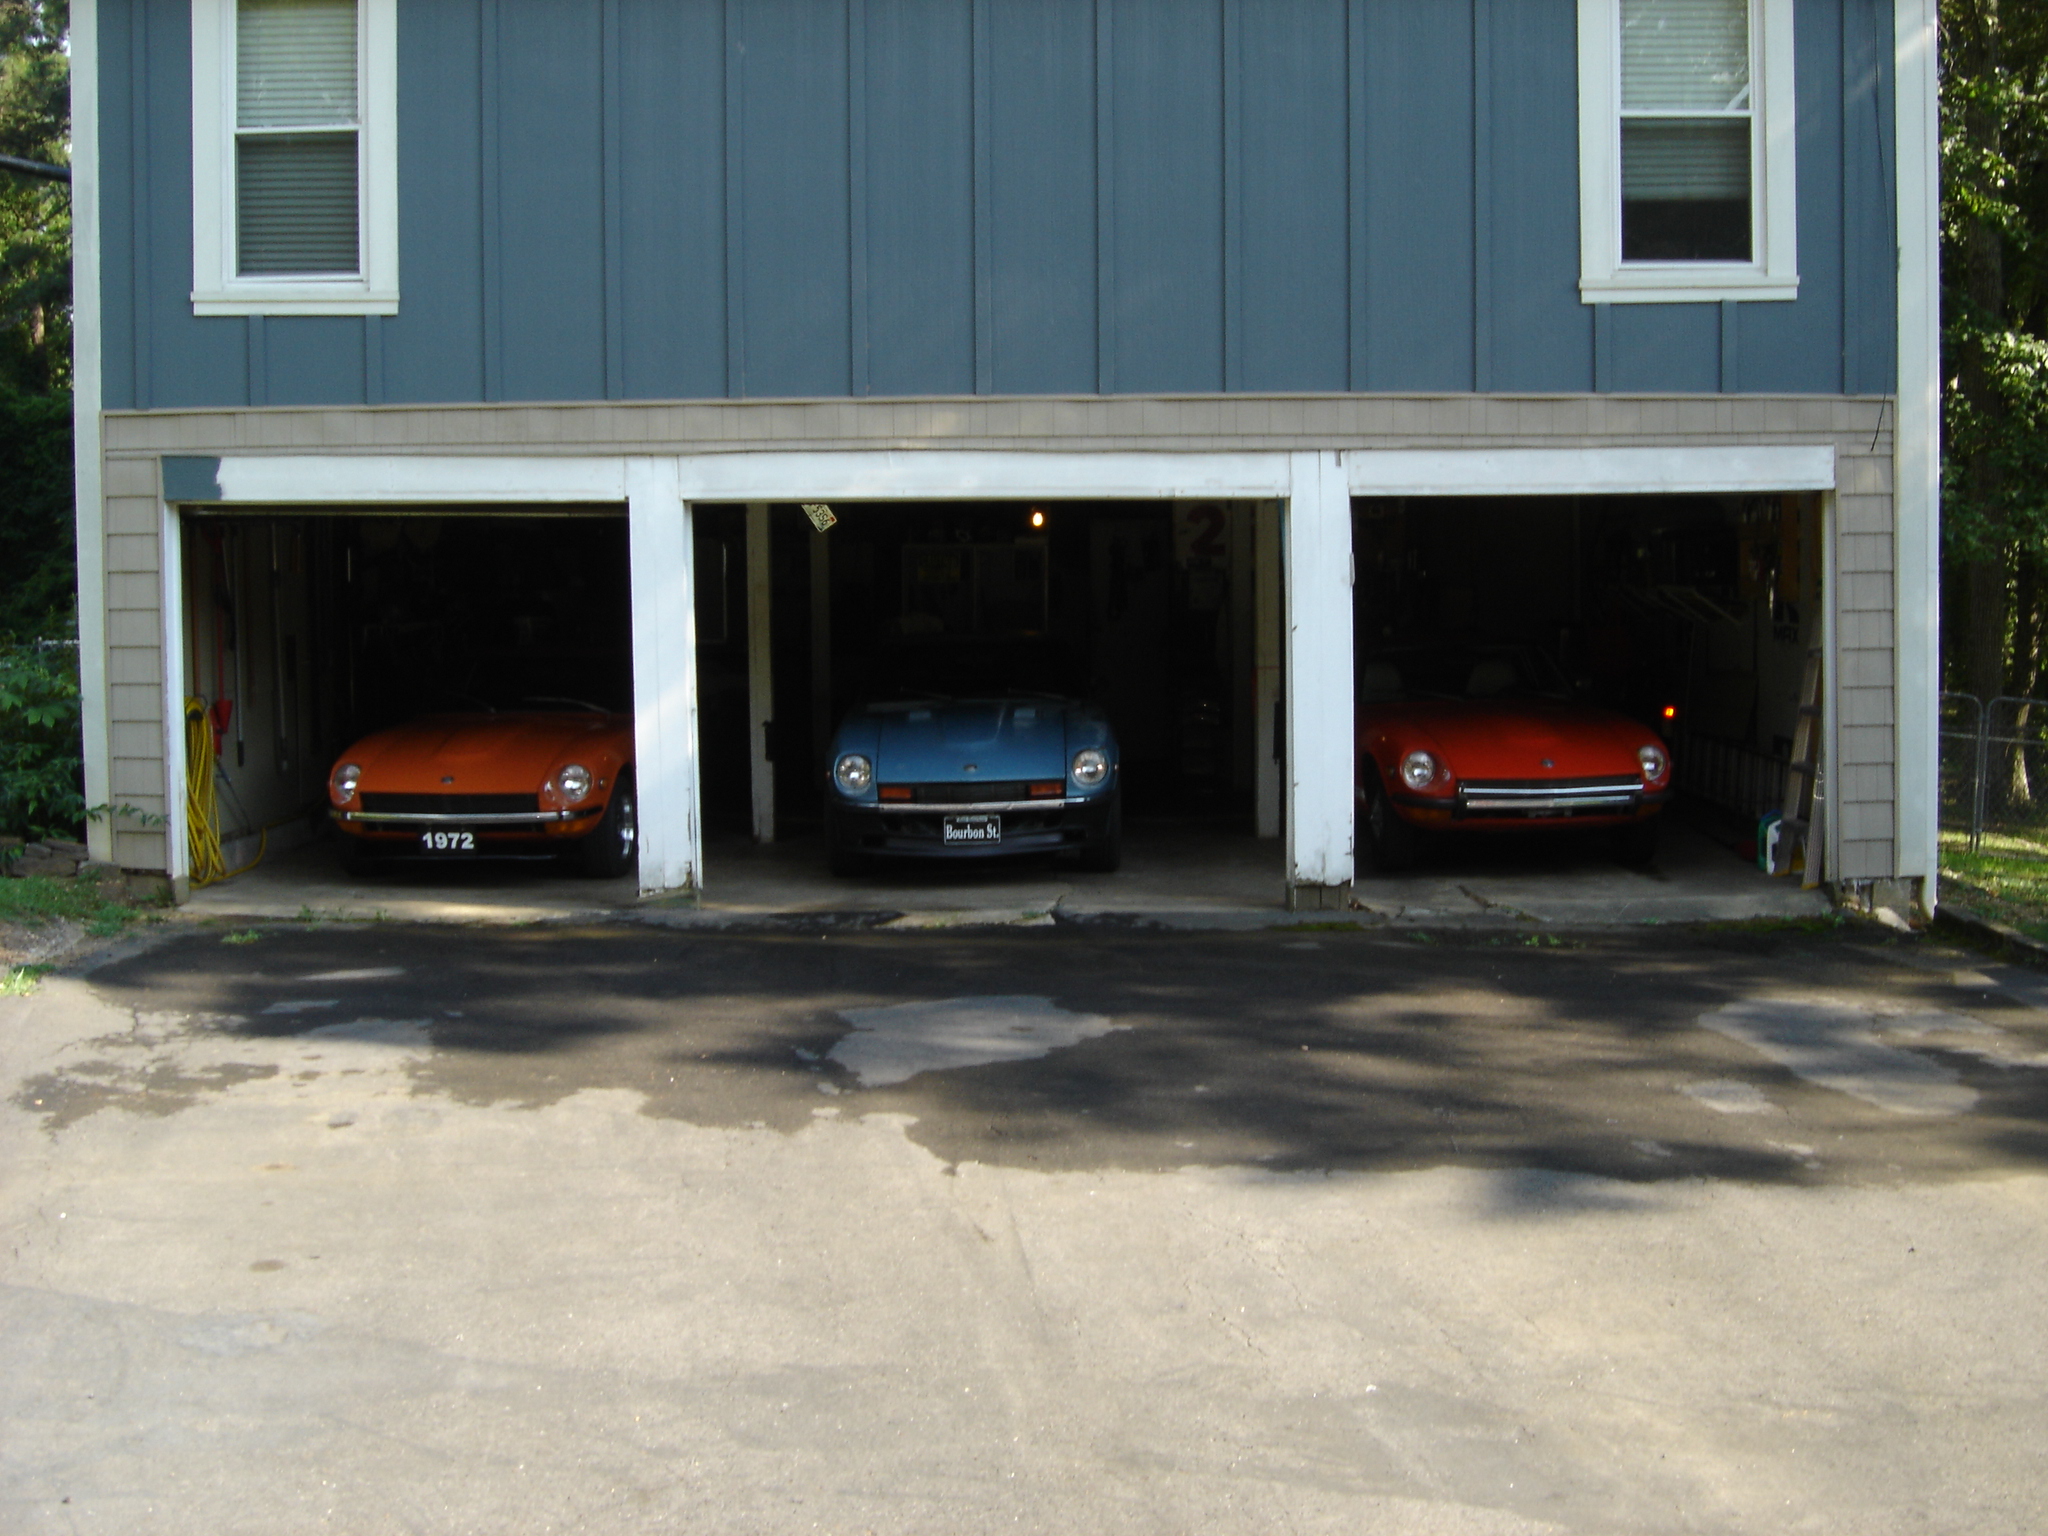
1 pointIt's been so hot this past week and my Camry sits in the heat. I must get rid of one of my Zs and free up a garage spot. 918 is staying, so either 110 or 305?
 1 point
 -
1 pointI'm wanting to do a building and fill it with my tools. $25 an hour for using it. Very popular in bigger cities but we need one here too. I have people that come to my house with their weedeaters and cord, they pay me $10 to wind it on the bump feed head. Takes 2 minutes but I am sick of people banging on my garage door at 8am Saturday. I get still get lucky sometimes and bring home "Scully's catch of the day" Friday night. I'd rather stay in the bed than wrap cord.1 point
-
1 pointI know it Blue. I hate doing this but there's more around here I can get. I just got sick of my DD sitting in the 100 plus heat. Father's Day I went to my Dad's church, buttoned up and tucked in, tie and all. When I got in that 200 degree car I made my decision. When I can add on there's more down here in the South and they have know idea what they're worth. Ive got my eye on a nice #112 '72 for $3,000. I'm looking for land now to put a metal building on. Baby steps!1 point
-
1 point
-
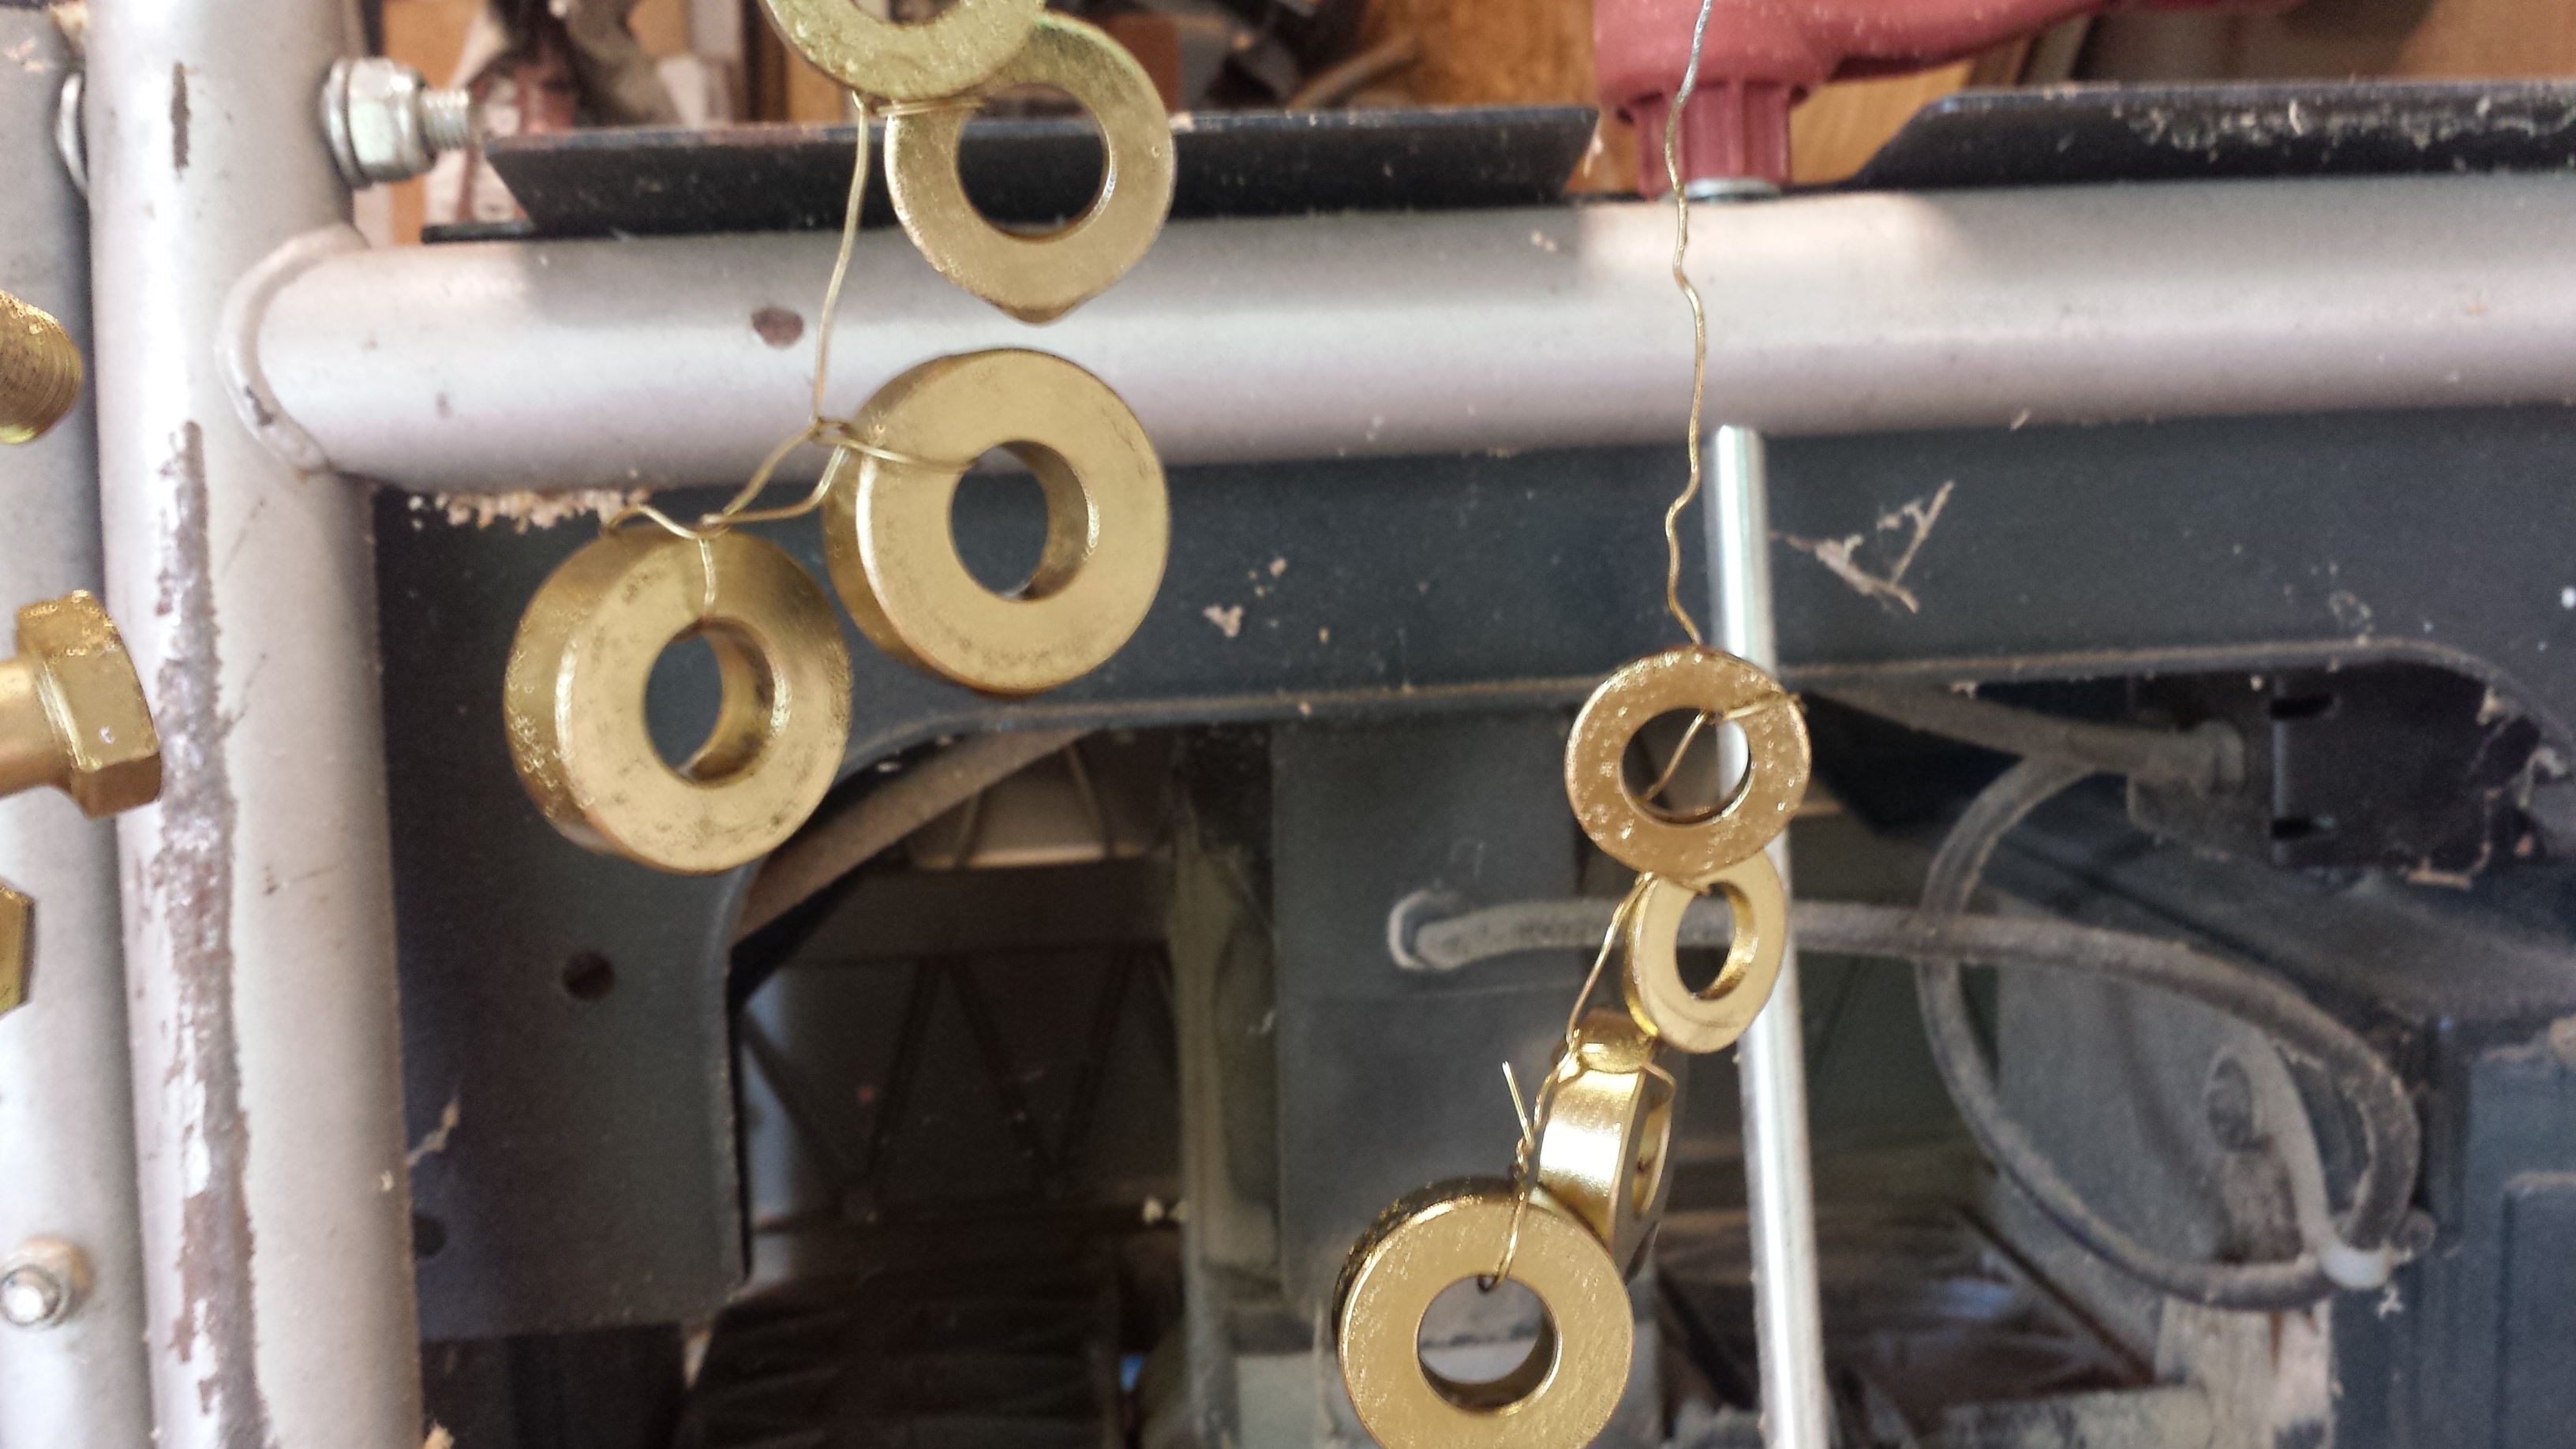
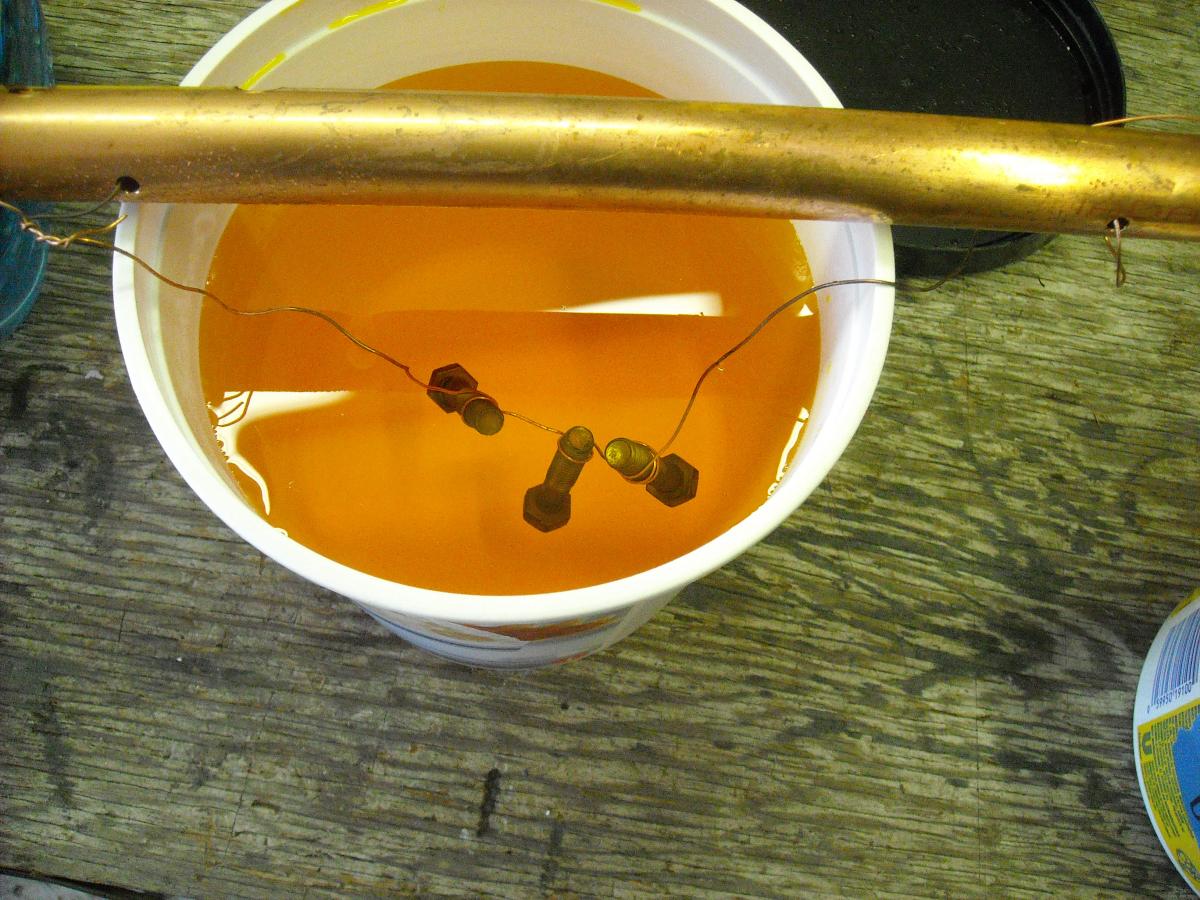
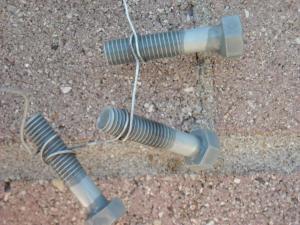
1 pointThis is after the yellow chromate I dipped the bolts for 25 seconds and the washers for 20 seconds Then I lightly rinse with a spray bottle. If you get too aggressive you can rinse the chromate off. Shake the excess off. If it puddles and beads it will make dark spots. For things that really matter I dry them with light compressed air to keep them even...

 1 point
 -
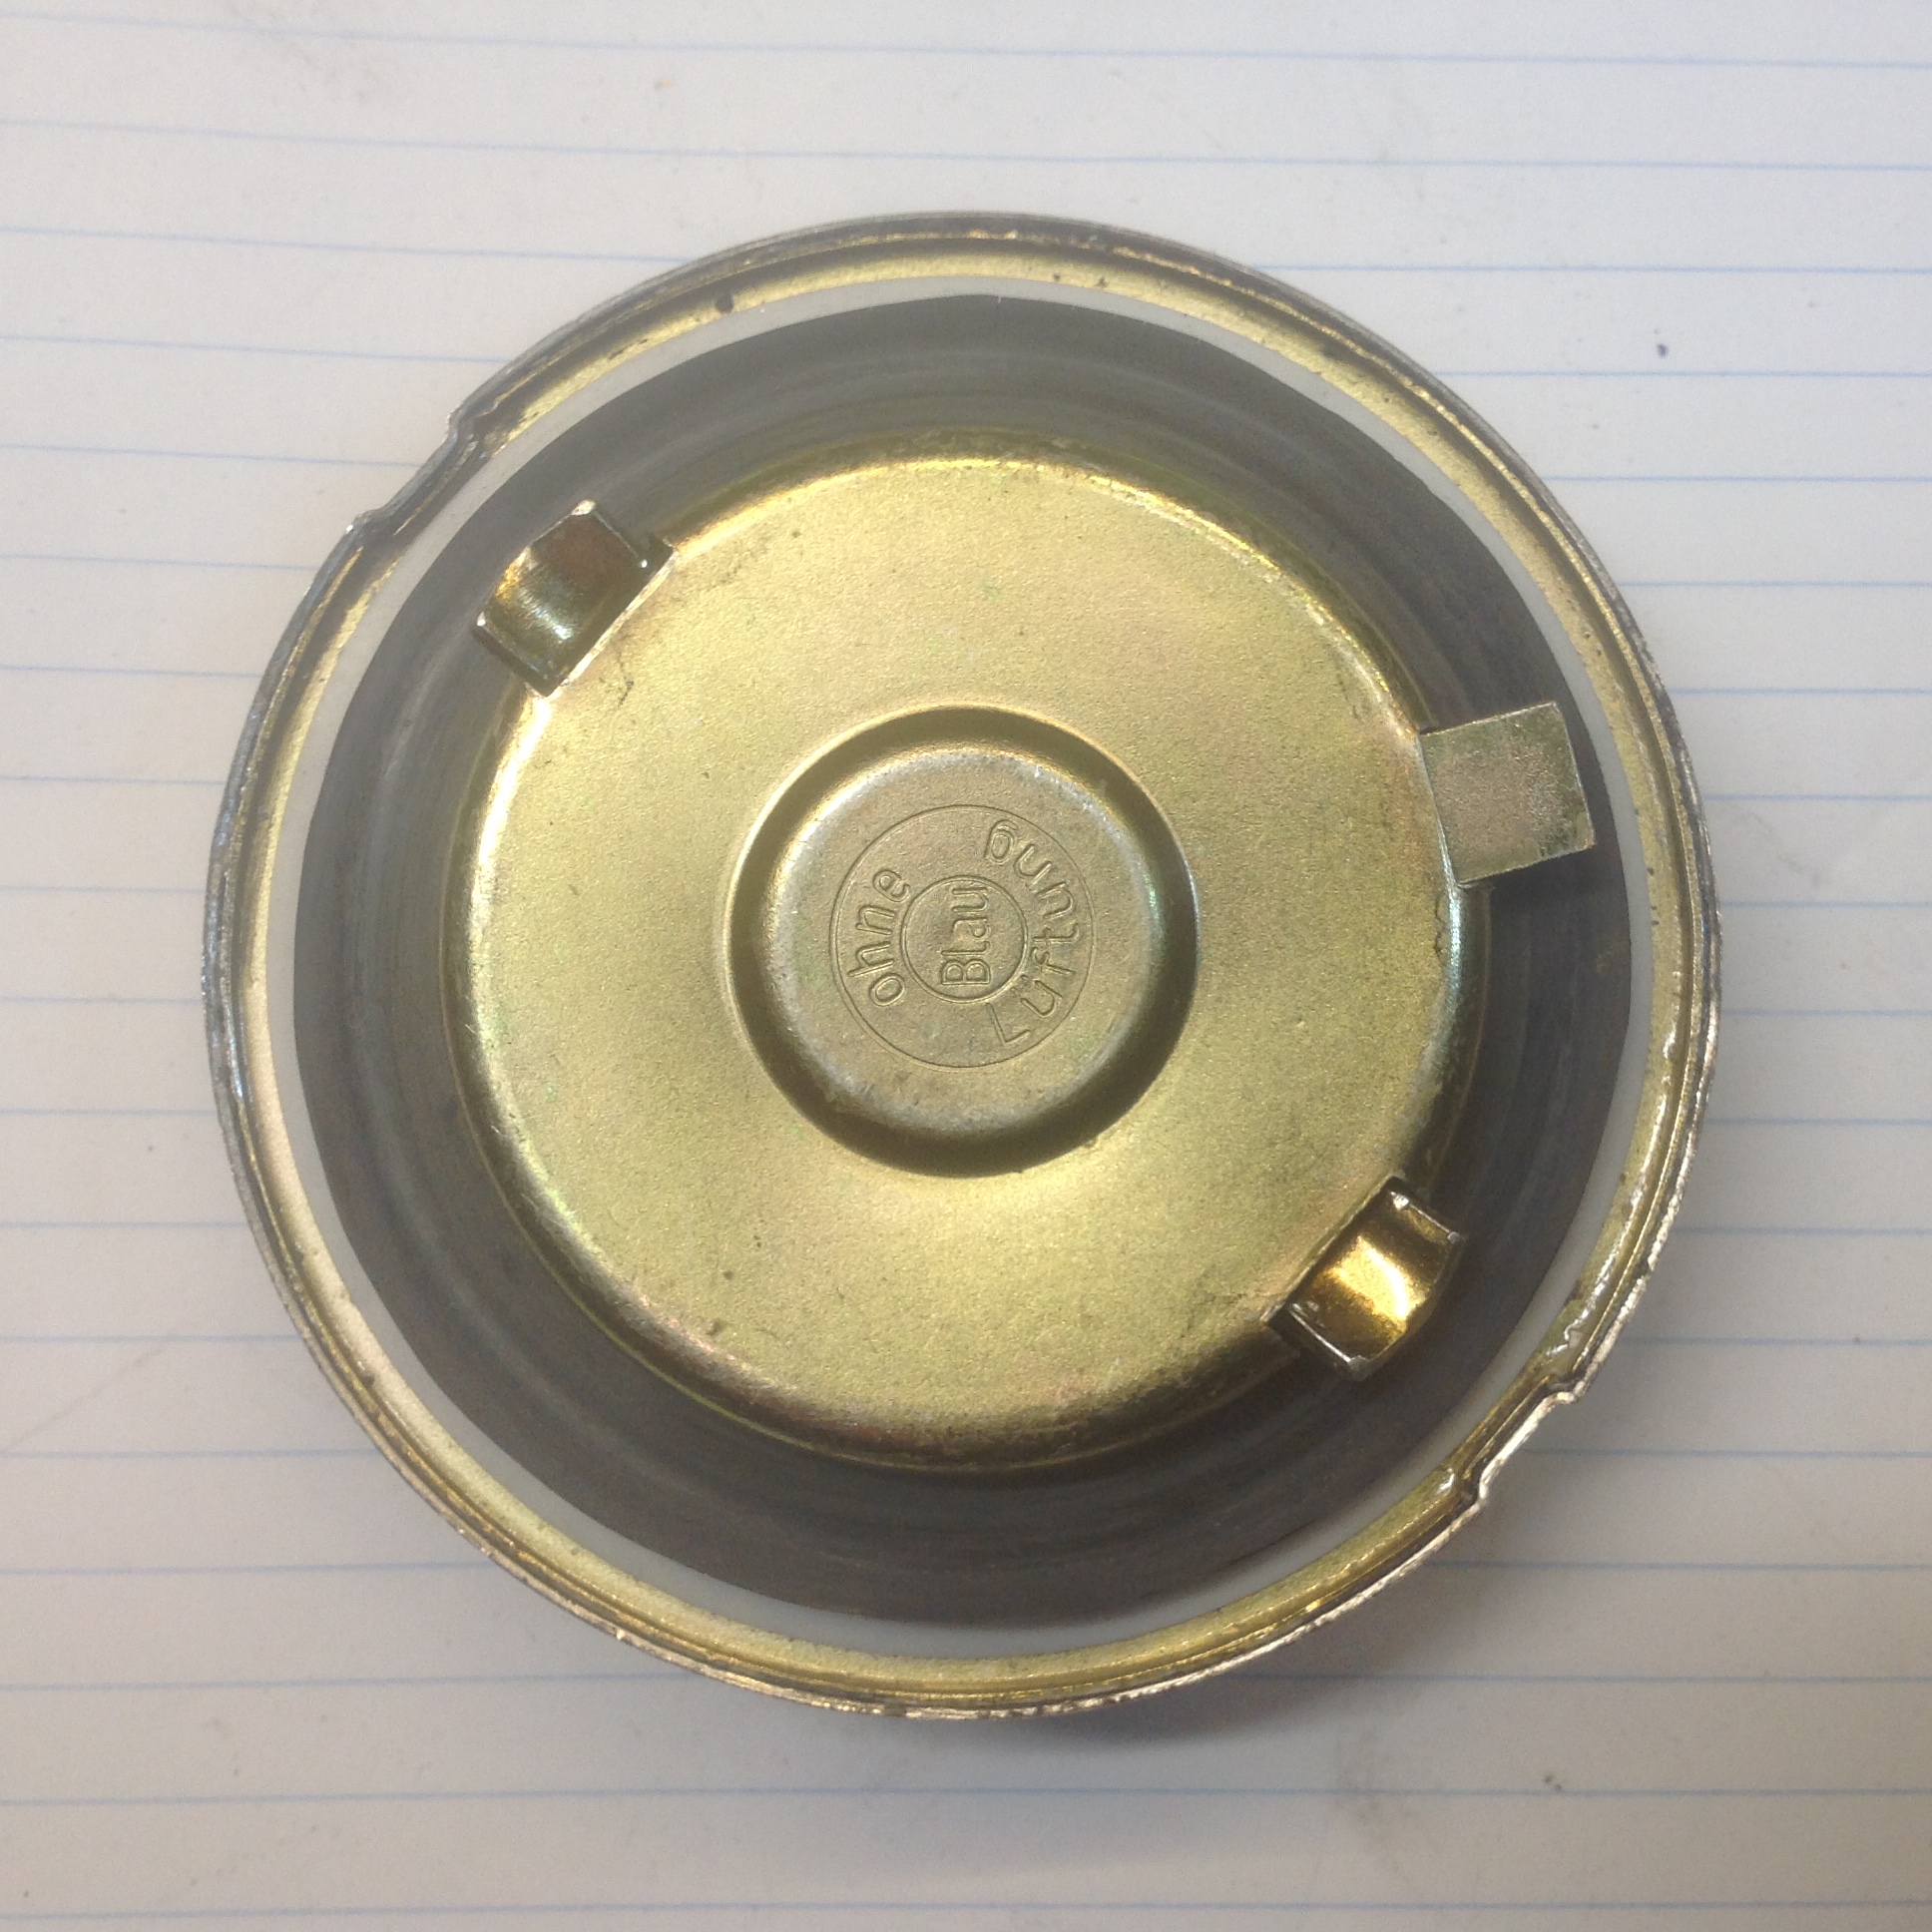
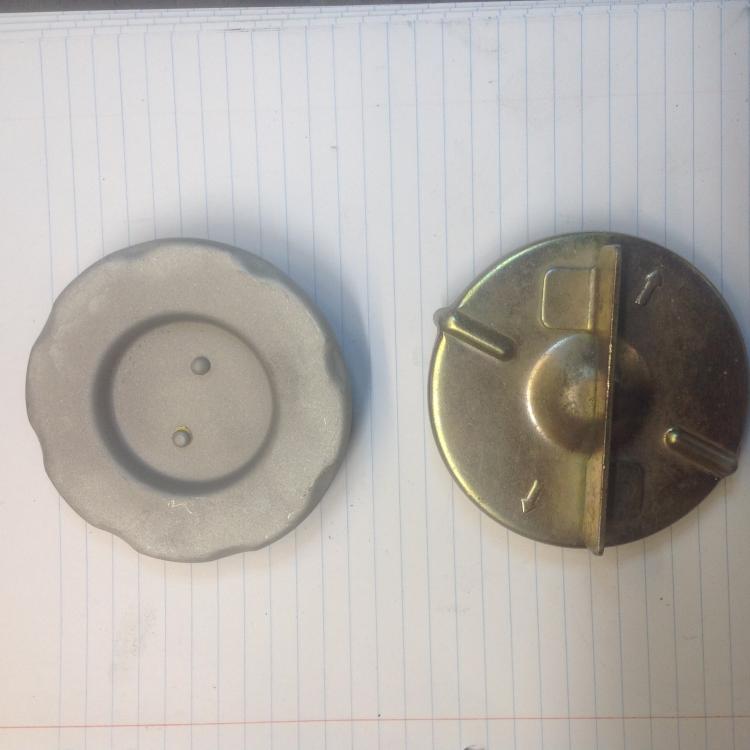
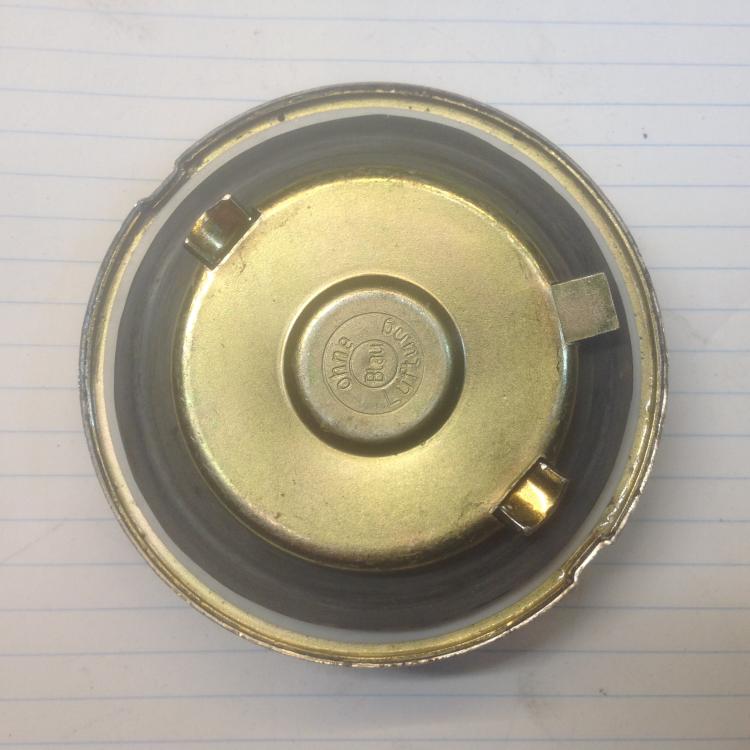
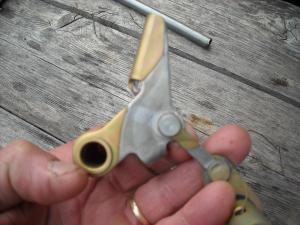
This is BMW locking gas cap. Unlocked. Tab at 2 oclock is retracted. Locked. Tab at 2 oclock is extended. Some fuel filler rings with color choices The back side with the welded on blob at the right spot to give the locking cap tab a place to lock behind The rubber flaps that I can supply. 1/32" thick new rubber.


 1 point
 -
1 pointThe pictures look good. Hard to see any flaws in those. Glad I could help...1 point
-
1 pointHaving a bill of sale might work in Canada and some states but it doesn't work here in PA. I have to give them the PO's title to get a PA title in my name. :-( Chuck1 point
-
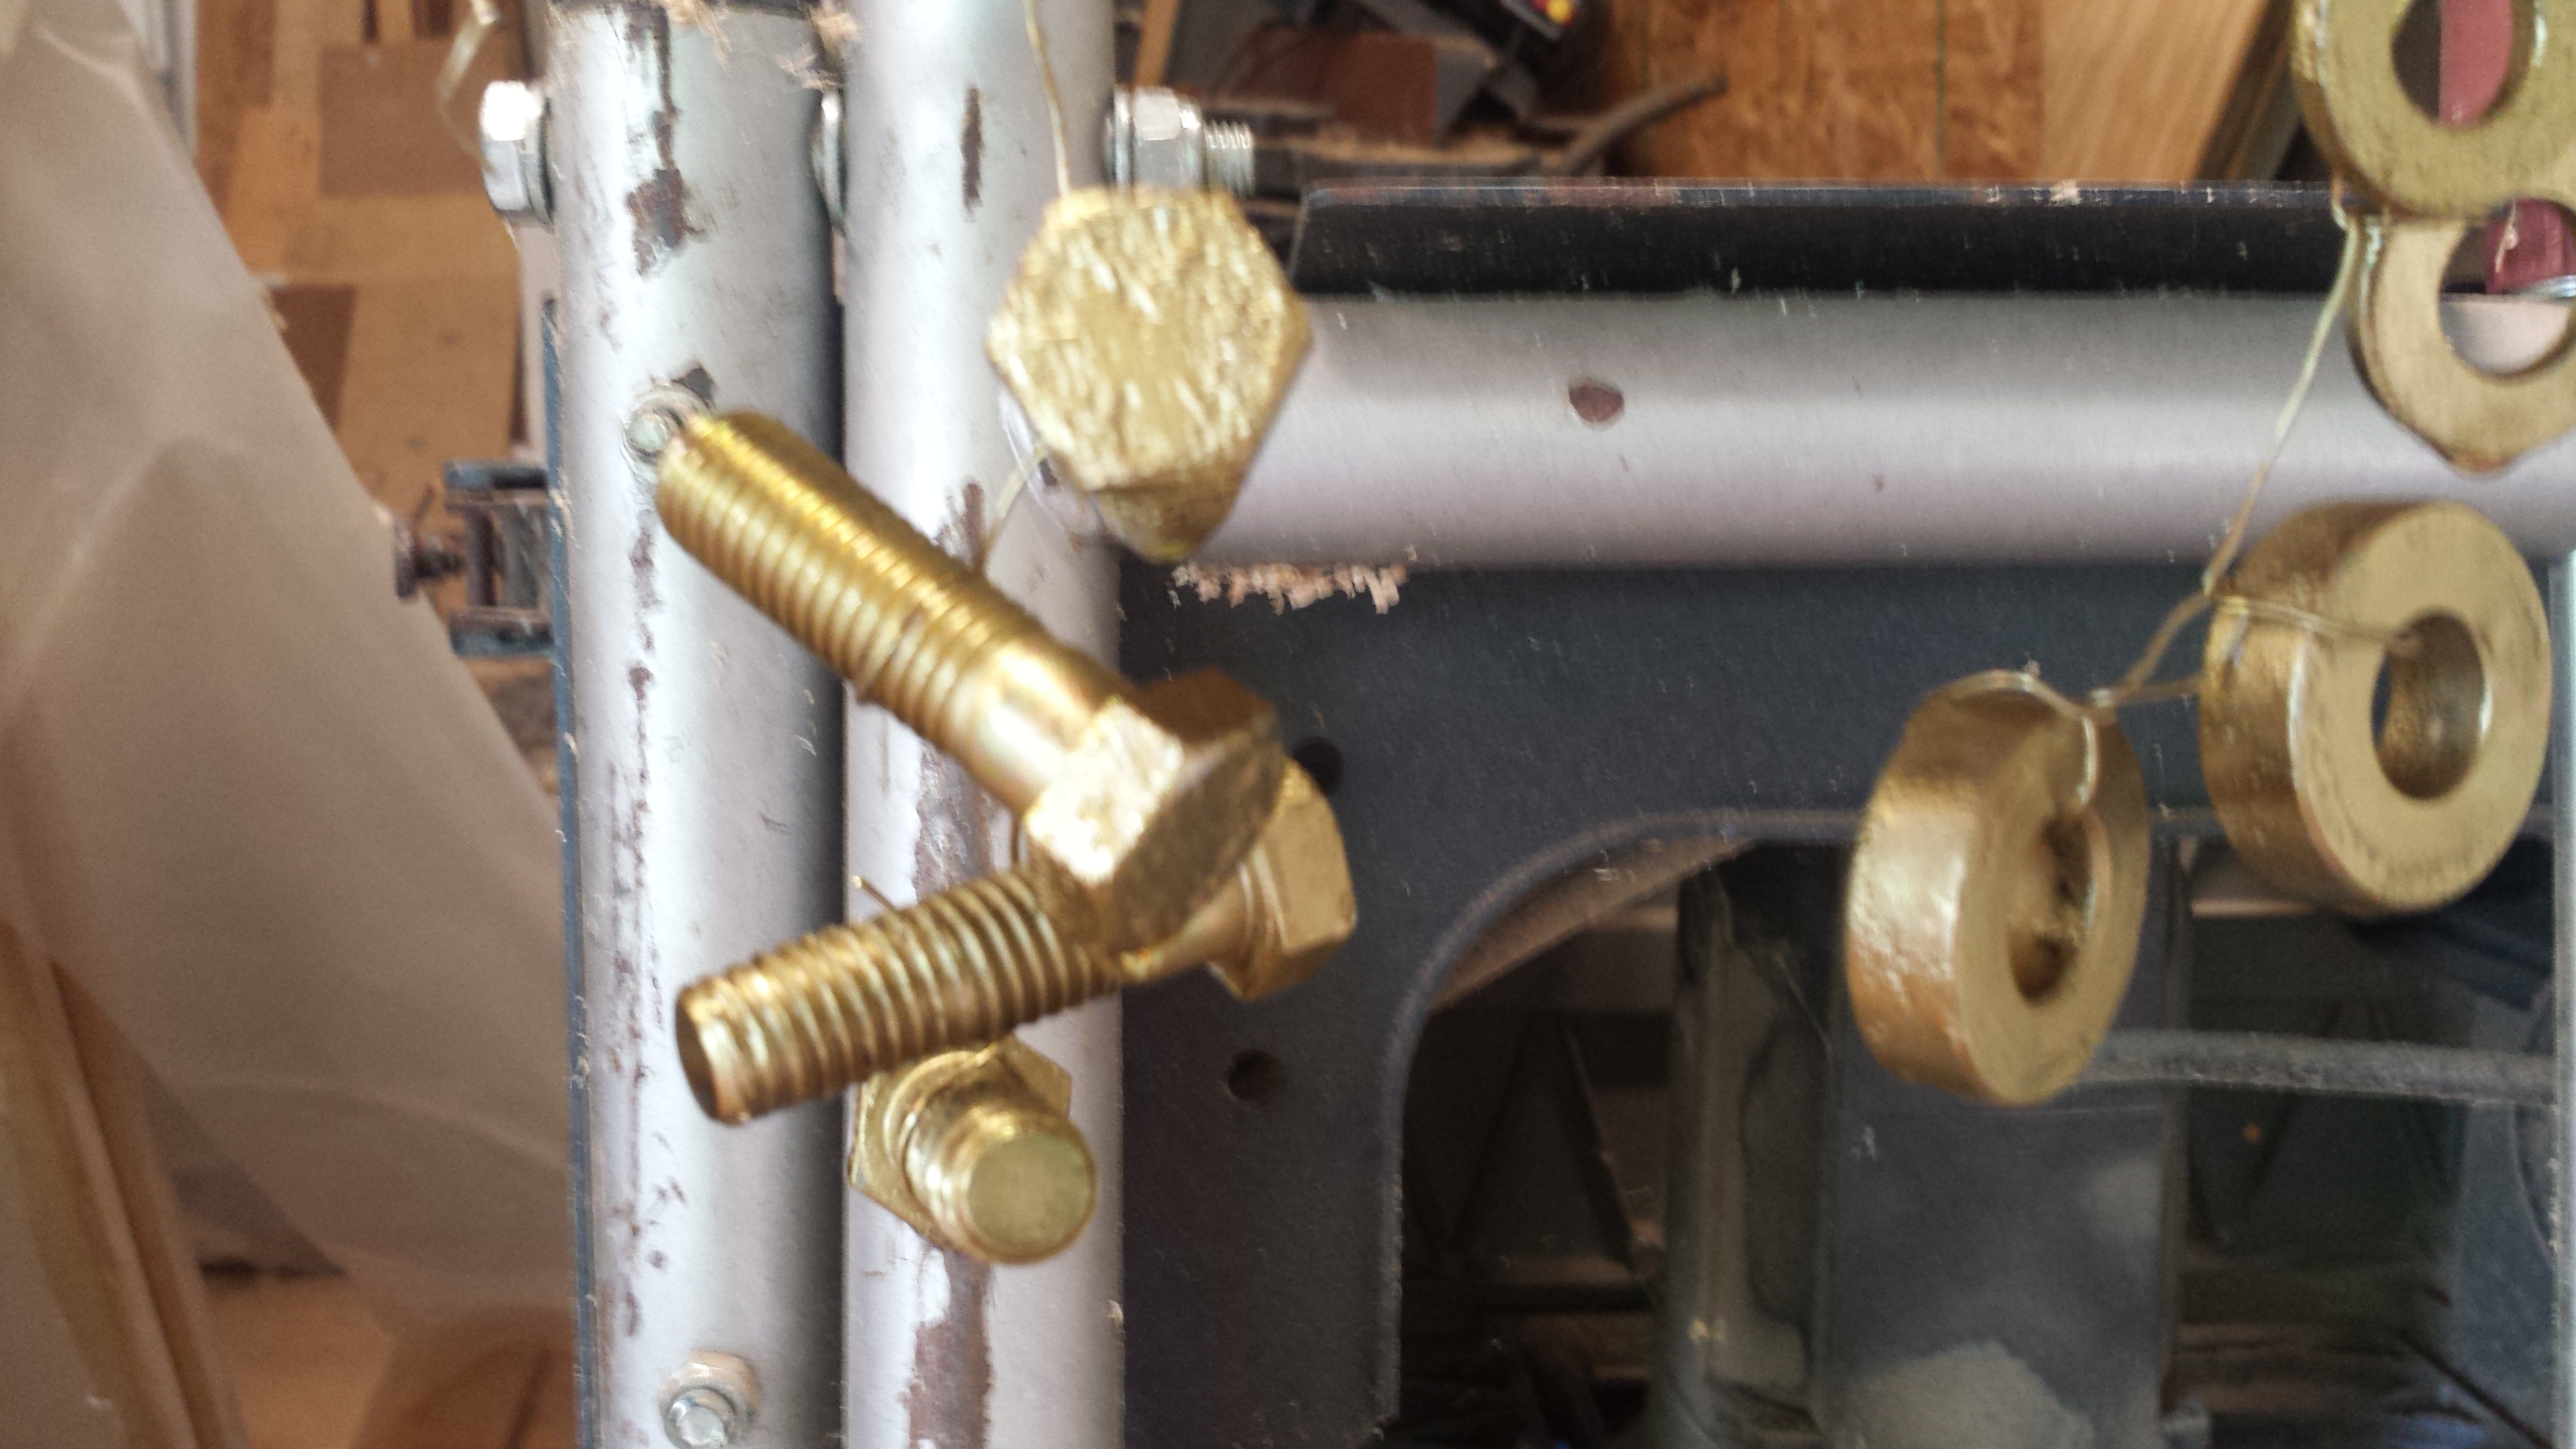
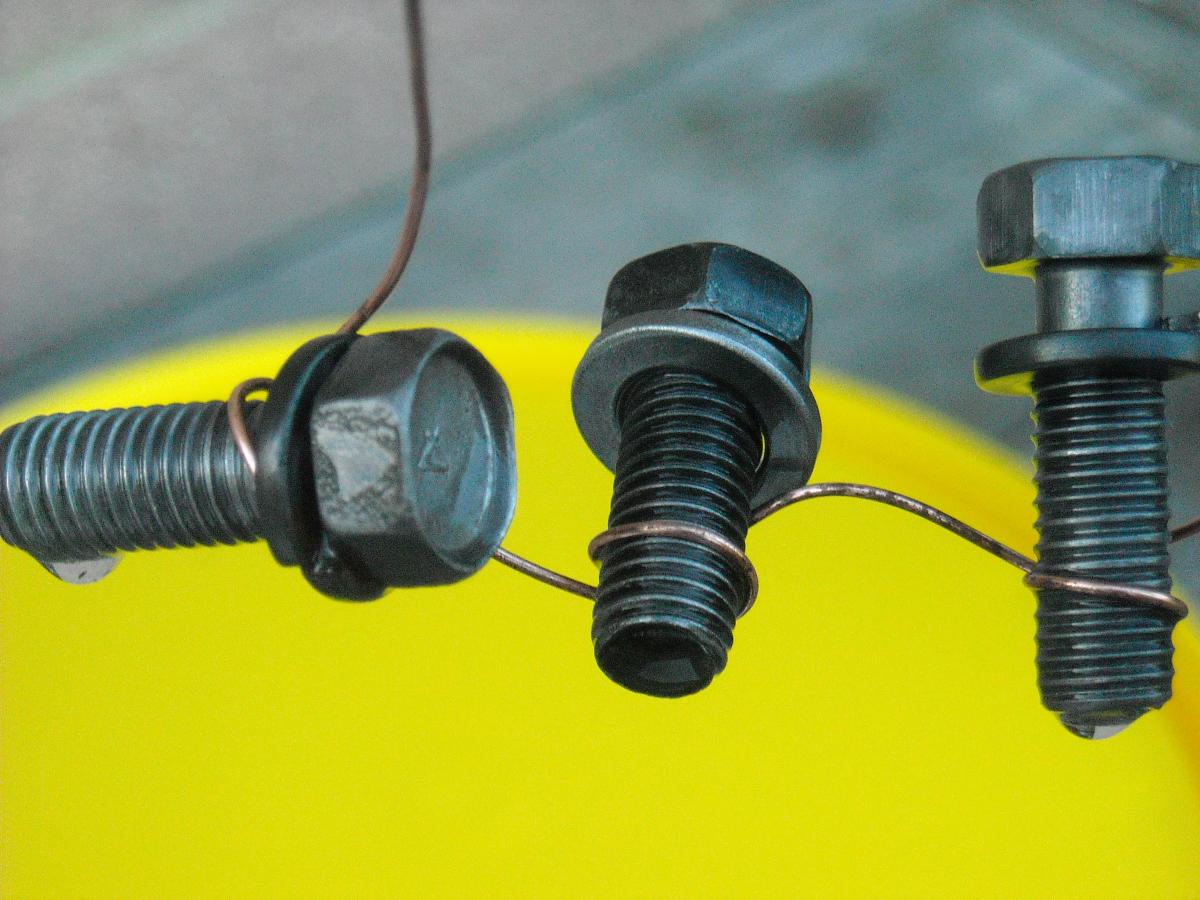
1 pointWell I did pick up the Caswell power supply, some brightner (that doesn't work) and some yellow chromate, the rest of the kit I hobbled together from reading all the links in this thread. When they say absolutely clean metal is essential they are not kidding, I started this morning and couldn't even get the zinc to stick, those are the pics of the black bolts. By 6pm I got the hang of it and produced a few usable pieces, on a couple of the pics you can see how the tinyist amount of grease was left in the pivot and it prevented zinc from adhering all around it. De-greaser and muriatic acid are a big help, hard to over do them. If anyone is interested I can list all the particulars. A big thanks to Namerow and Patcon. Chris


 1 point