Leaderboard
-
Captain Obvious
Free Member4Points10,081Posts -

wheee!
Free Member4Points4,607Posts -
ksechler
Free Member2Points544Posts -
charliekwin
Free Member2Points664Posts


Popular Content
Showing content with the highest reputation on 03/22/2016 in all areas
-
3 pointsJust to be clear, Charlie from Zedd Findings, the manufacturer of the floor pans has been awesome! He has responded to every question I have asked and is proactively looking for ways to improve his 76 floor pan forms. The quality of the pans are the best I have seen and the fit in all other areas of the floor is perfect. Cutting the ribbons into the pan and then bending to fit the tunnel has been very easy and I am confident I will have a perfect fit when I am done. Big thumbs up to Charlie for all his great products!!3 points
-
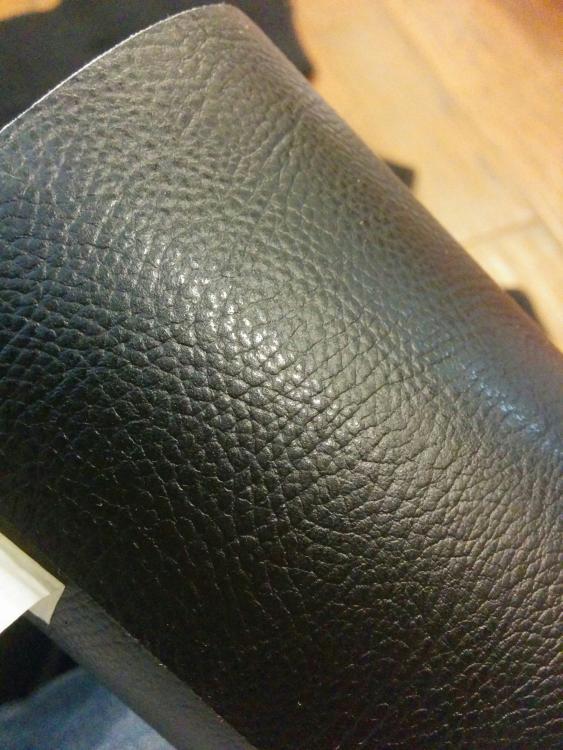
2 pointsVinyl was delivered during my lunch break. First impressions... Looks pretty nice. Touch won't fool anyone, but it does look nicer IMHO than the bare plastic. Reminds me a lot of the hard touch plastics used in economy cars. I'm optimistic that it'll make a nice, subtle upgrade for the panels without looking out of place.
 2 points
 -
2 pointsWow. Good luck to him! That's got to be a rare bird for the person who just has to have the real thing. Seems to me that I could pretty much "convert" my 77 glass to 69/70 JDM glass with a scraper blade and some acetone...2 points
-
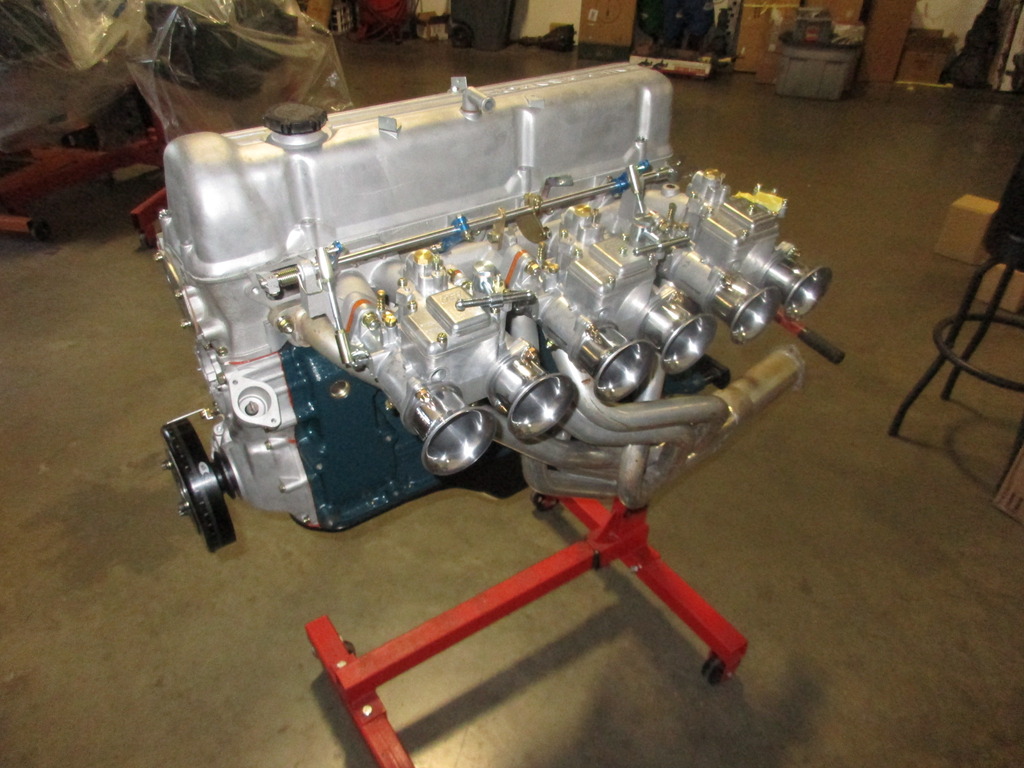
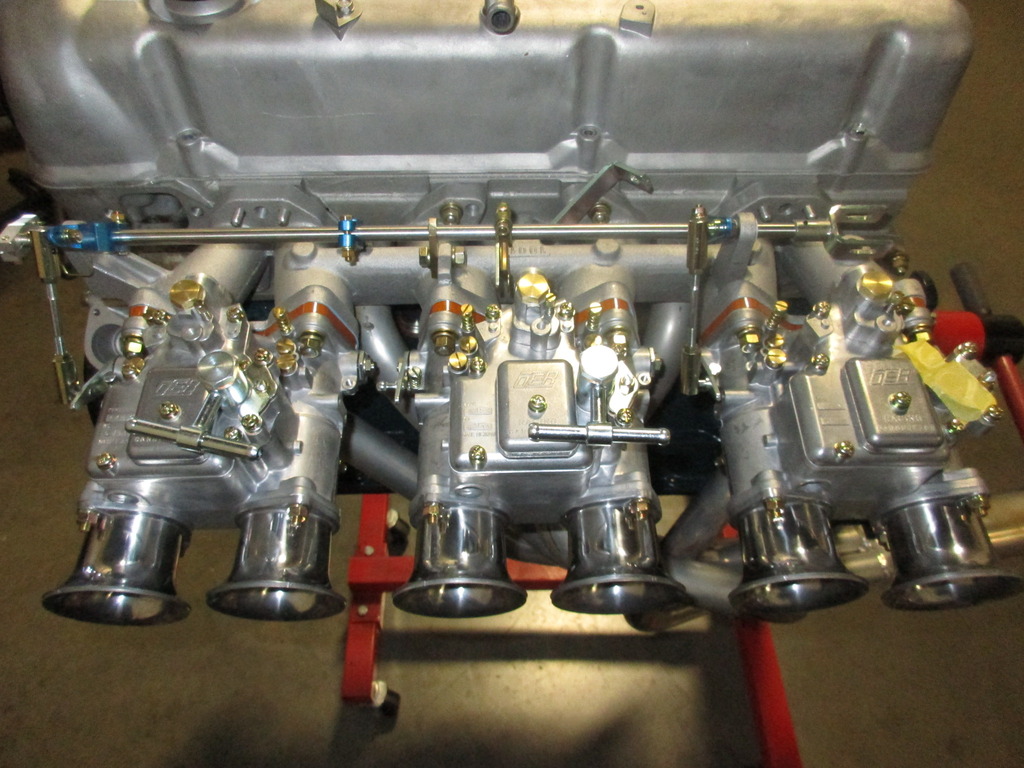
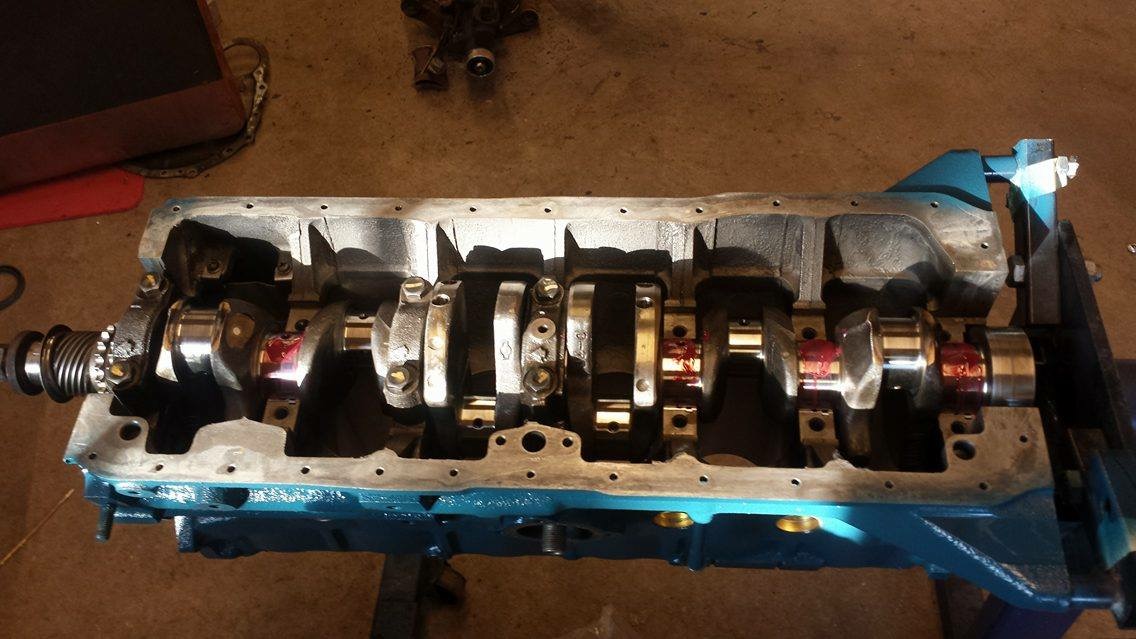
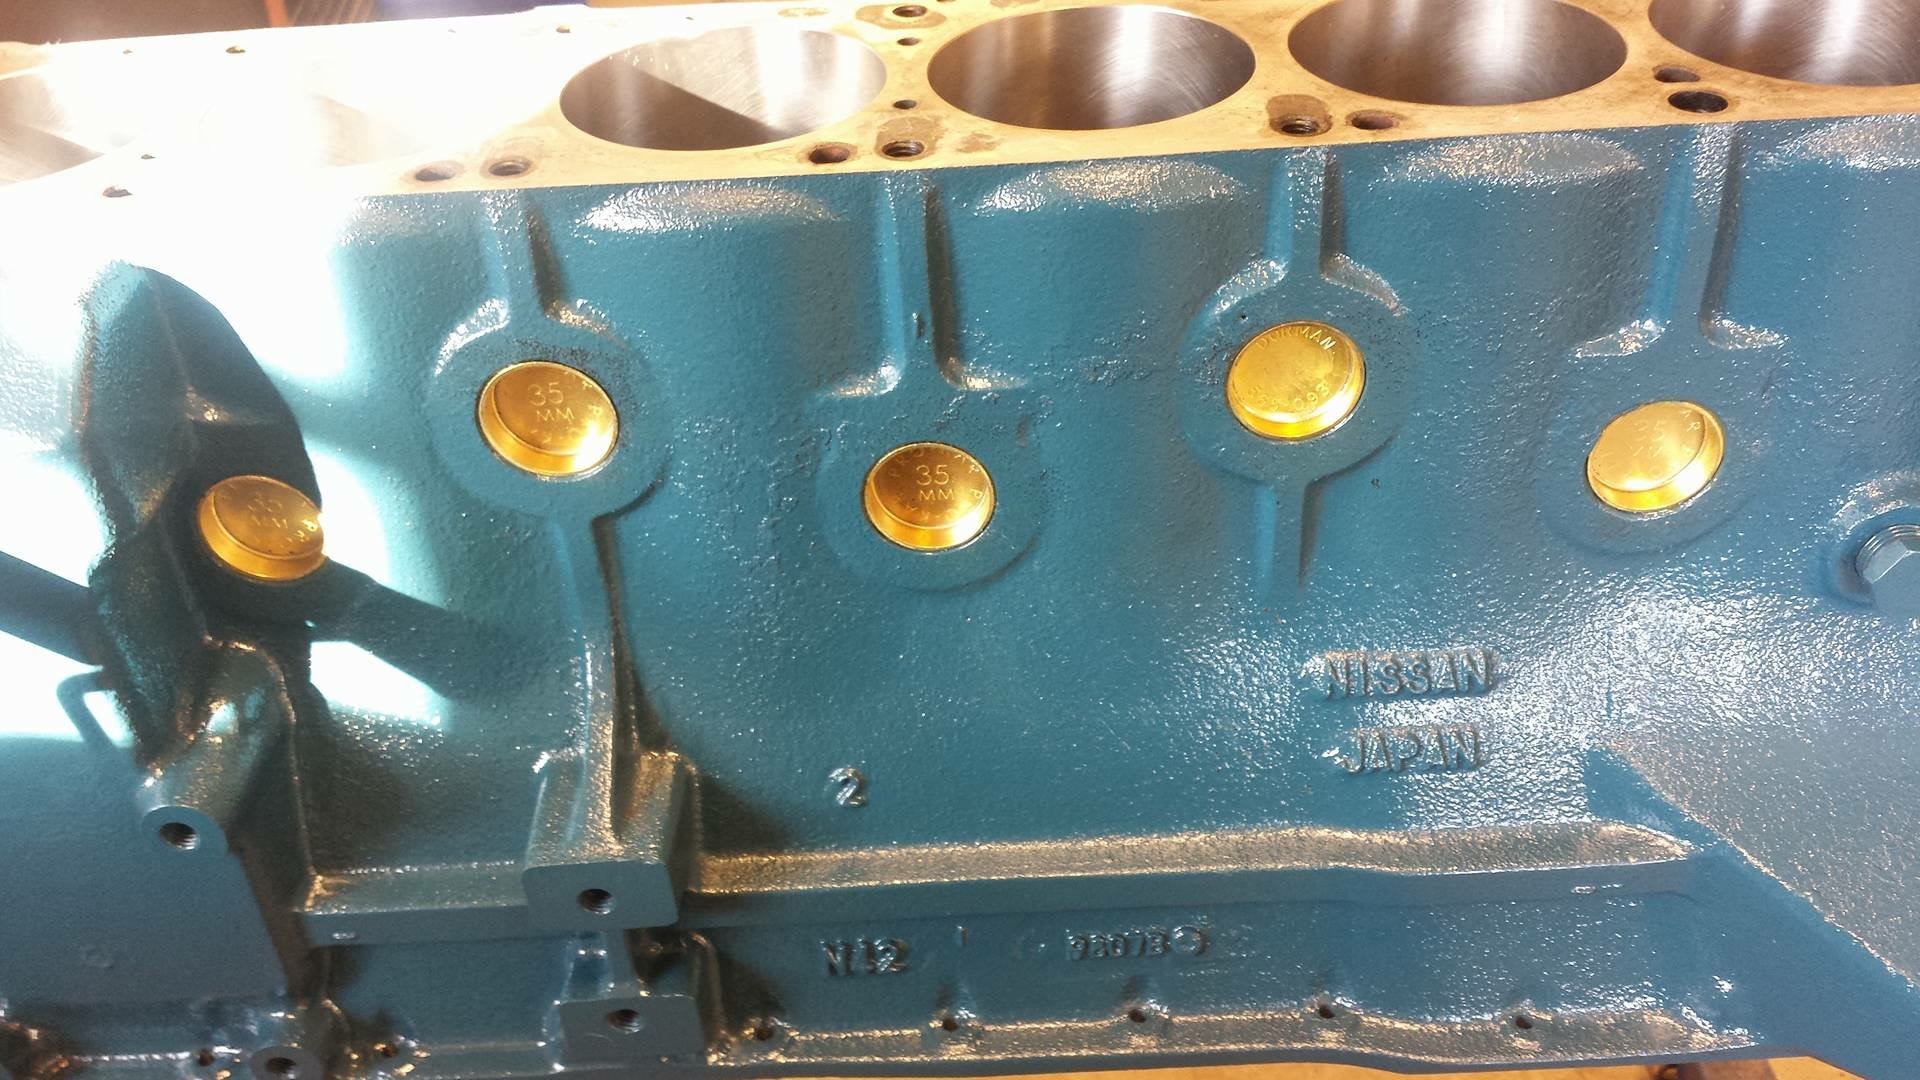
2 pointsHere are a couple of pictures of my motor. It is a Datsun Spirit STR stage III. I can't wait to get this project done.

 2 points
 -
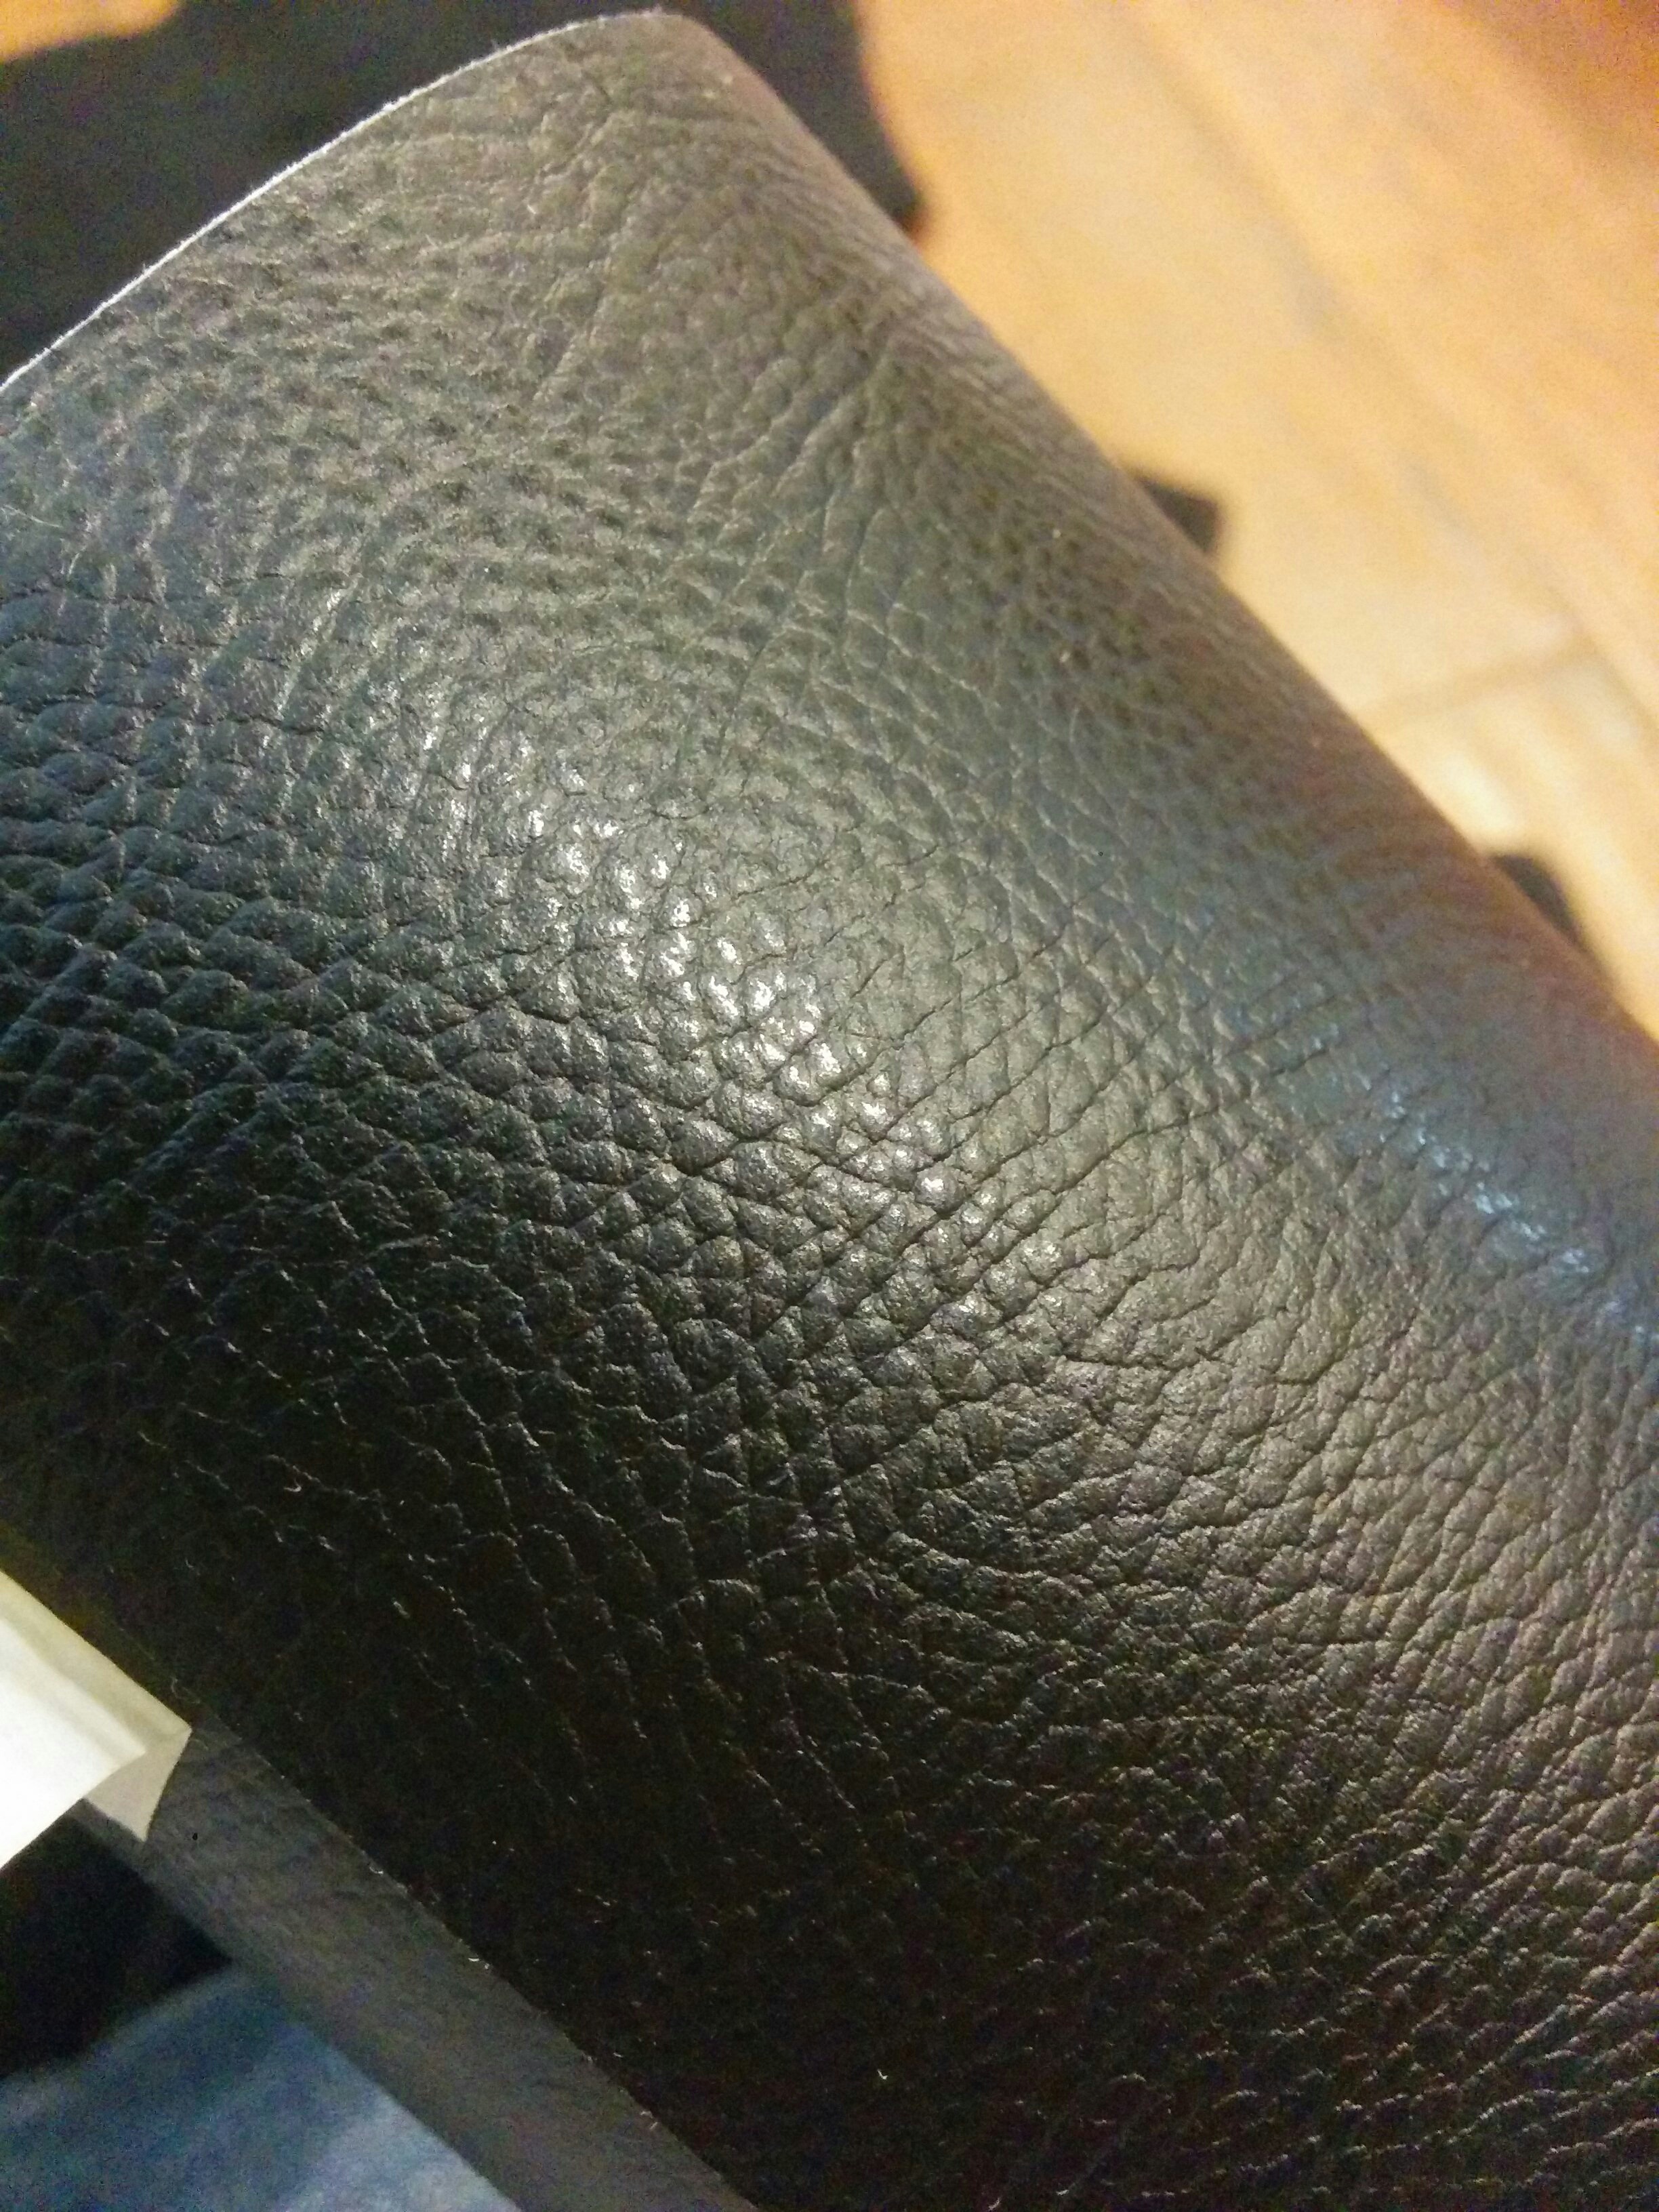
1 pointGot a message the other day of someone selling some black leather 350z seats and I couldn't say no. Well I could of, but the price was great. Being they had red stitching kind of sealed the deal- lol. they are power heated seats so I will have wiring to do plus some fab work. Looking forward to having some more flexibility and comfort in my ride. I guess there will be some 1st gen seats on the market soon! well I would have posted a pic but the upload keeps failing1 point
-
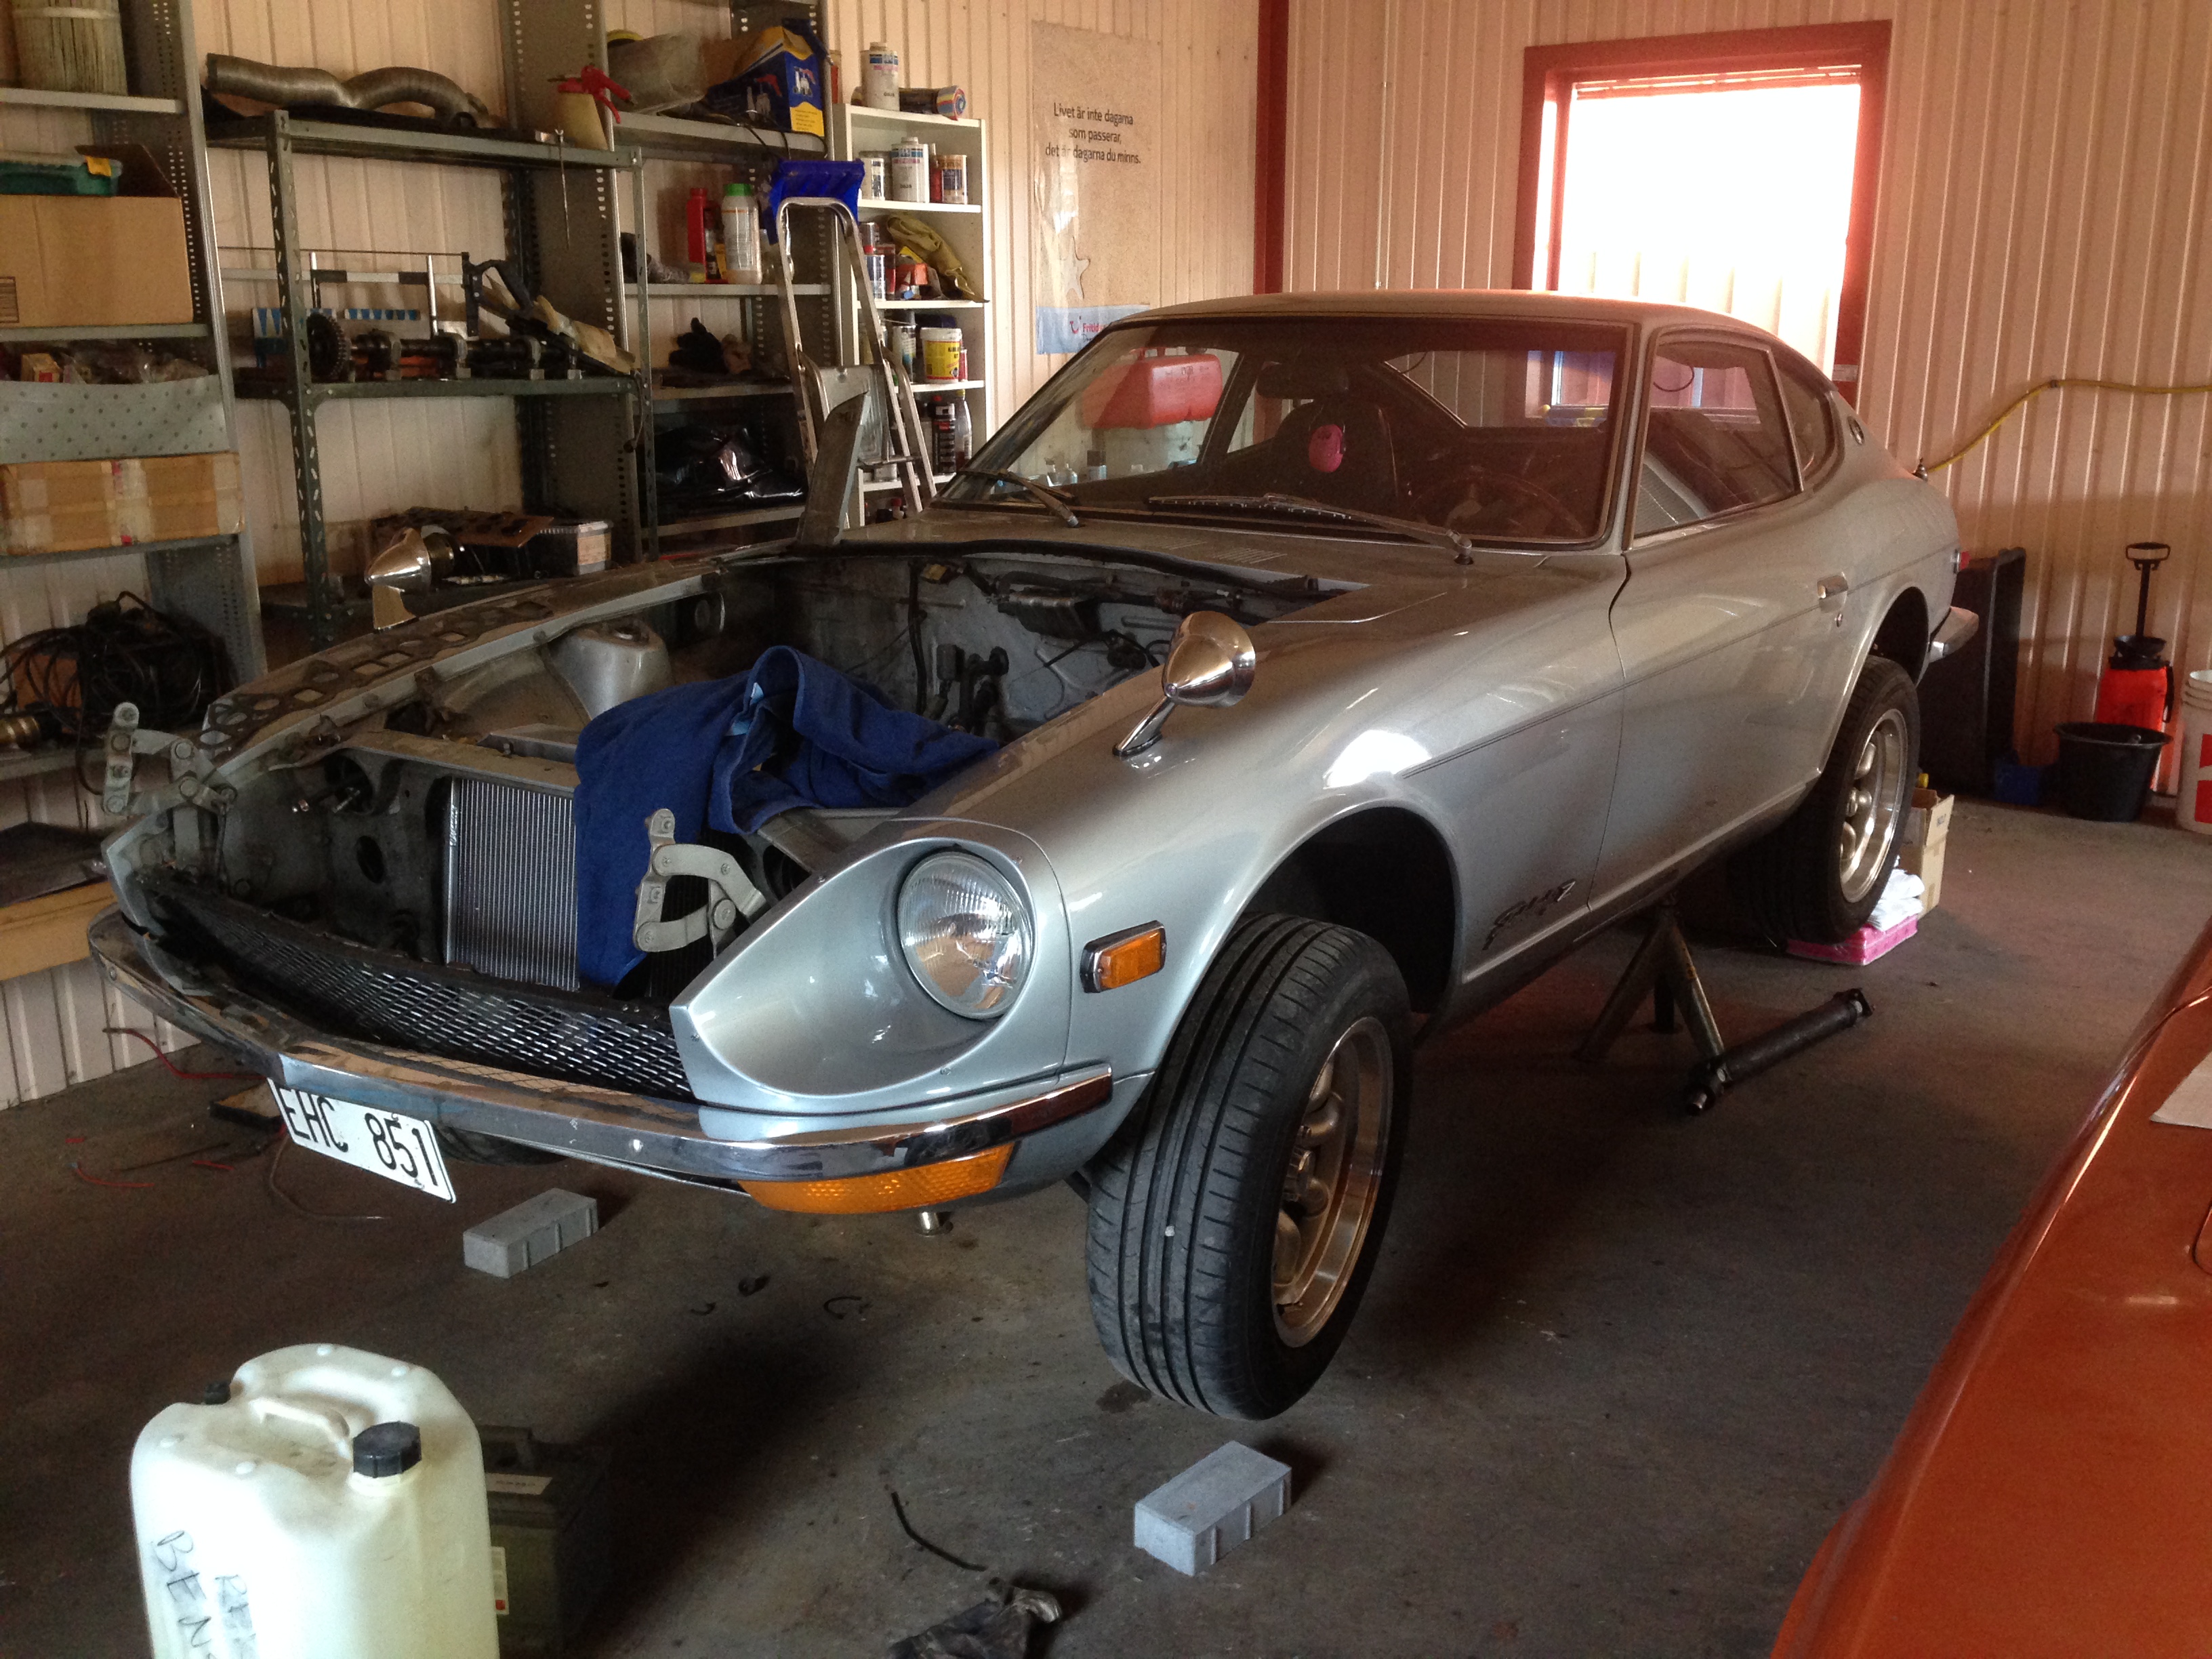
1 pointso i've been building this 280z for almost 2 years now. got it when i was 18. its come a long ways. ill include the picture of when i bought it and now pictures since there are too many in between haha IMG_20160320_114331861 by Evan Serilla, on Flickr IMG_20160320_113428368 by Evan Serilla, on Flickr 2016-03-19_01-08-32 by Evan Serilla, on Flickr 2016-03-19_01-06-57 by Evan Serilla, on Flickr2016-02-23_11-04-45 by Evan Serilla, on Flickr2016-01-21_09-57-40 by Evan Serilla, on Flickr well here she is. slammed on GC coilovers, only 1.5" at the rails haha. Did Carbs instead of EFI. Got me some cool wheels, crazy whale tail, plaid seats haha bolt action choke and a straight pipe. lots of stickers too haha, just because most are funny.1 point
-
1 pointHe probably doesn't have a thing considering the thread is 12 years old.1 point
-
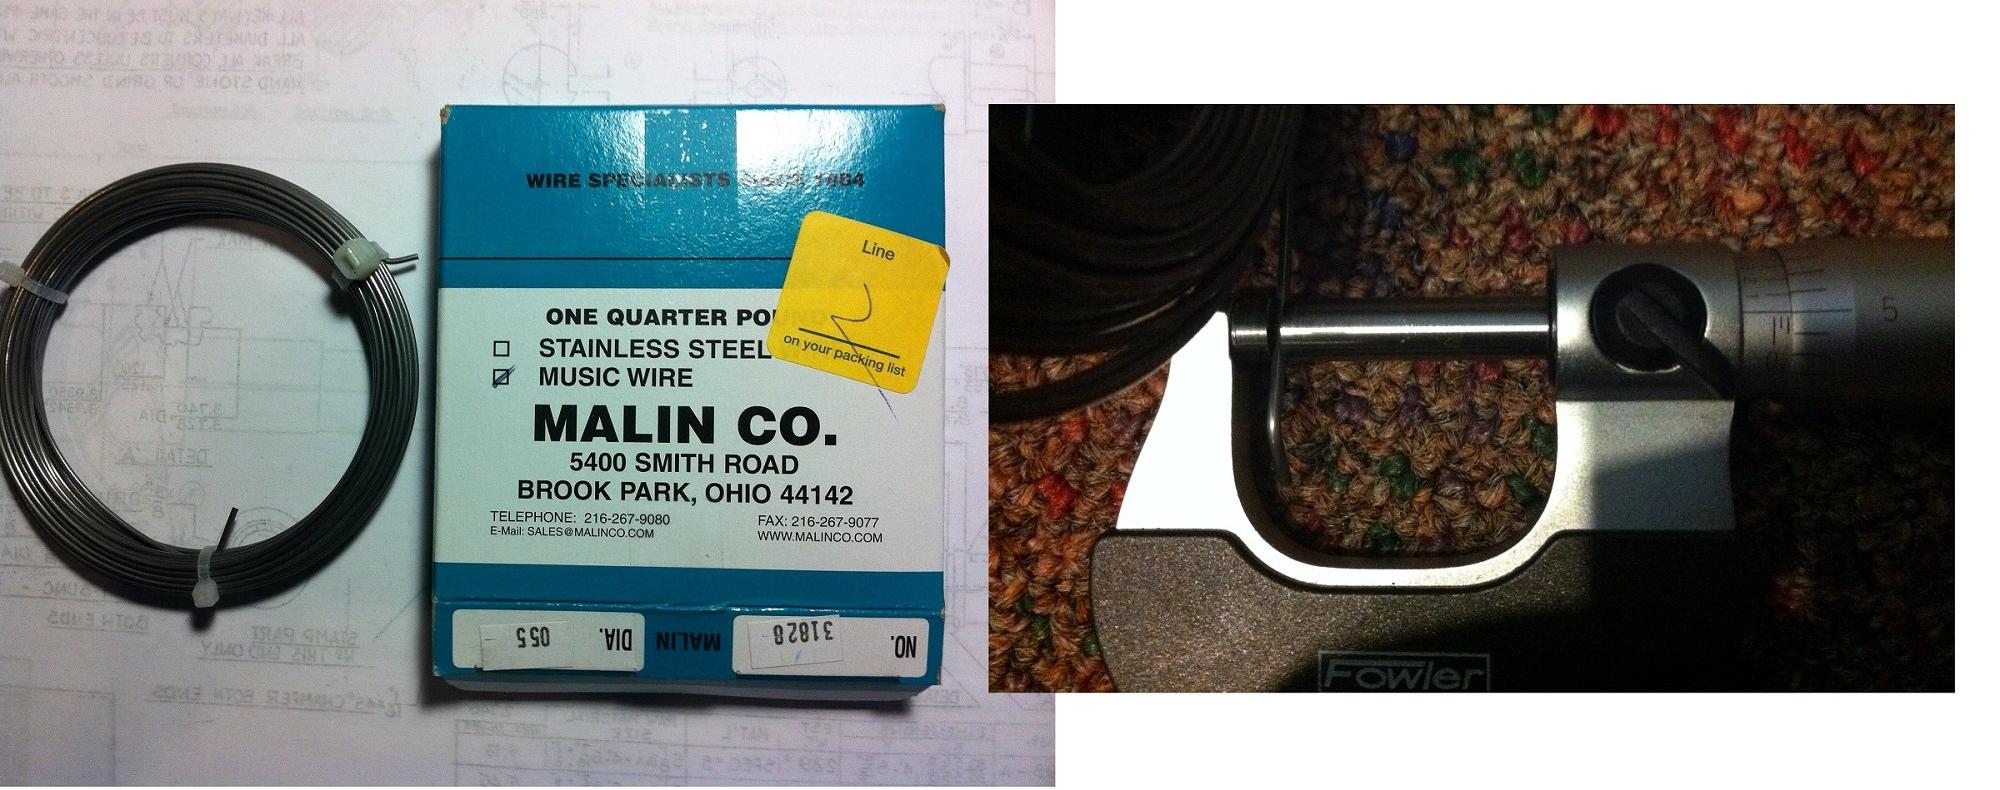
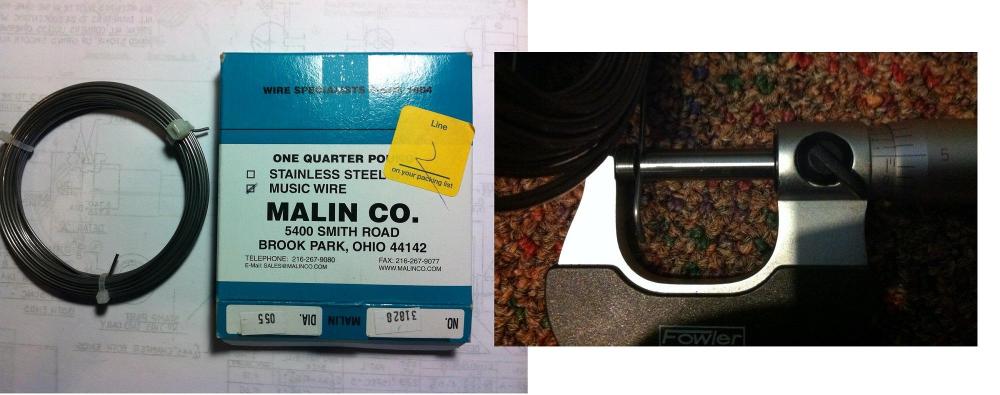
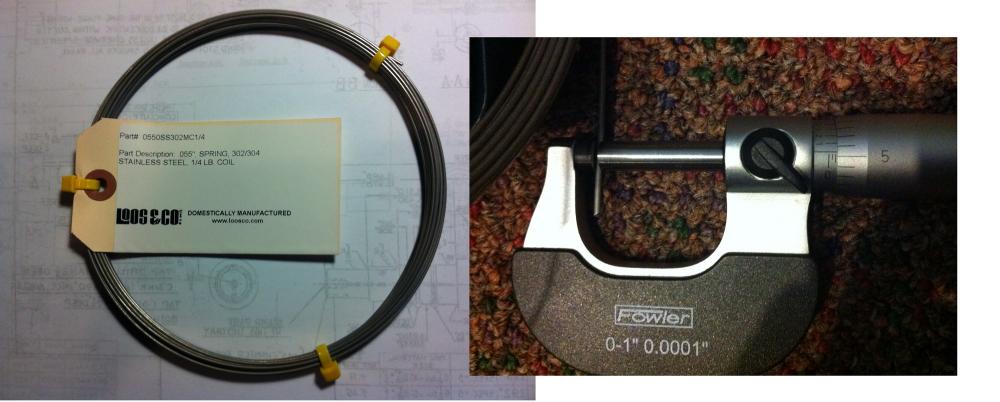
1 pointThis afternoon I received the .055 wire (both SS, p/n 9495K91 and carbon steel, p/n 9666K68) that I ordered from McMaster-Carr. Both wire types look to me like they will do the job and measured very close to 0.055" by micrometer. Both wires seem to have about the same spring back capability. That comment is a bit subjective as I just tried to feel the amount of effort it took to bend the wire until it would not flex back to its original state. When I compared the bending effort to do the same test on the original choke wire from my car, it took less effort to bend the wire to the point it would not flex back. I would say that the original choke cable wire has a lower ultimate tensile strength that either of the new wires. Hopefully on the weekend I will be able to test both of the new wire types in my car. FYI, For other Canadians trying to order from McMaster-Carr, don't bother unless you can order through a company or they will cancel your order. I first set up a web account with them and they sent me the message the next morning: "Due to the complexity of U.S. export regulations, McMaster-Carr accepts international orders only from businesses. This decision also applies to orders shipping within the United States, because it is based on the final destination of the items. We cannot accept this order or future orders." Luckily with one phone call I was able to add my company name to my web account and then I could place my order. All in all the service was good and I will use them in the future. Mike
 1 point
 -
1 pointIn my lifetime and experience, I have yet to put a definition to the word "odd"... it's the "normal" stuff that has me worried the most.1 point
-
Haha!! Glad to help! And just so you know that I'm not making this stuff up and do actually I live it with you... Here's my most recent expedition to frustration land. Dipstick from my kid's car. Snapped off in the block: Used a jigsaw blade in an exacto knife handle to cut a slot in it. An angled center punch to collapse it on itself a little, and an ezout to grab it and pull it out. See the remaining little stub of the SOB in the lower right: And here's the final result: You are not alone.1 point
-
When the simple mundane five minute job turns into hours and hours of misery and frustration. Been there. Done that. When you spend two hours trying to pull the wheel speed sensor out of it's rusty hole in the suspension and still snap it off in the process. When it takes an hour to get the crushed, mangled, and screwdriver speared remains of an oil filter off the block. When it takes two days just to get a frikin dipstick tube out of the block because it cracks off at the bottom. When it takes a week to change your thermostat because the bolts snap off. You are not alone.1 point
-
1 point
-
All those two screws really do is hold the injector upright and keep it from blowing out if there's a backfire, and add a bit of pressure to the seal. Not very accurately placed, the thick rubber insulator rubber allows lots of misalignment. Just saying, if you get to a point where you see it's not perfect, it may not really matter. If you go with later model o-ring injectors in the future you don't even really need the holders and/or the screws.1 point
-
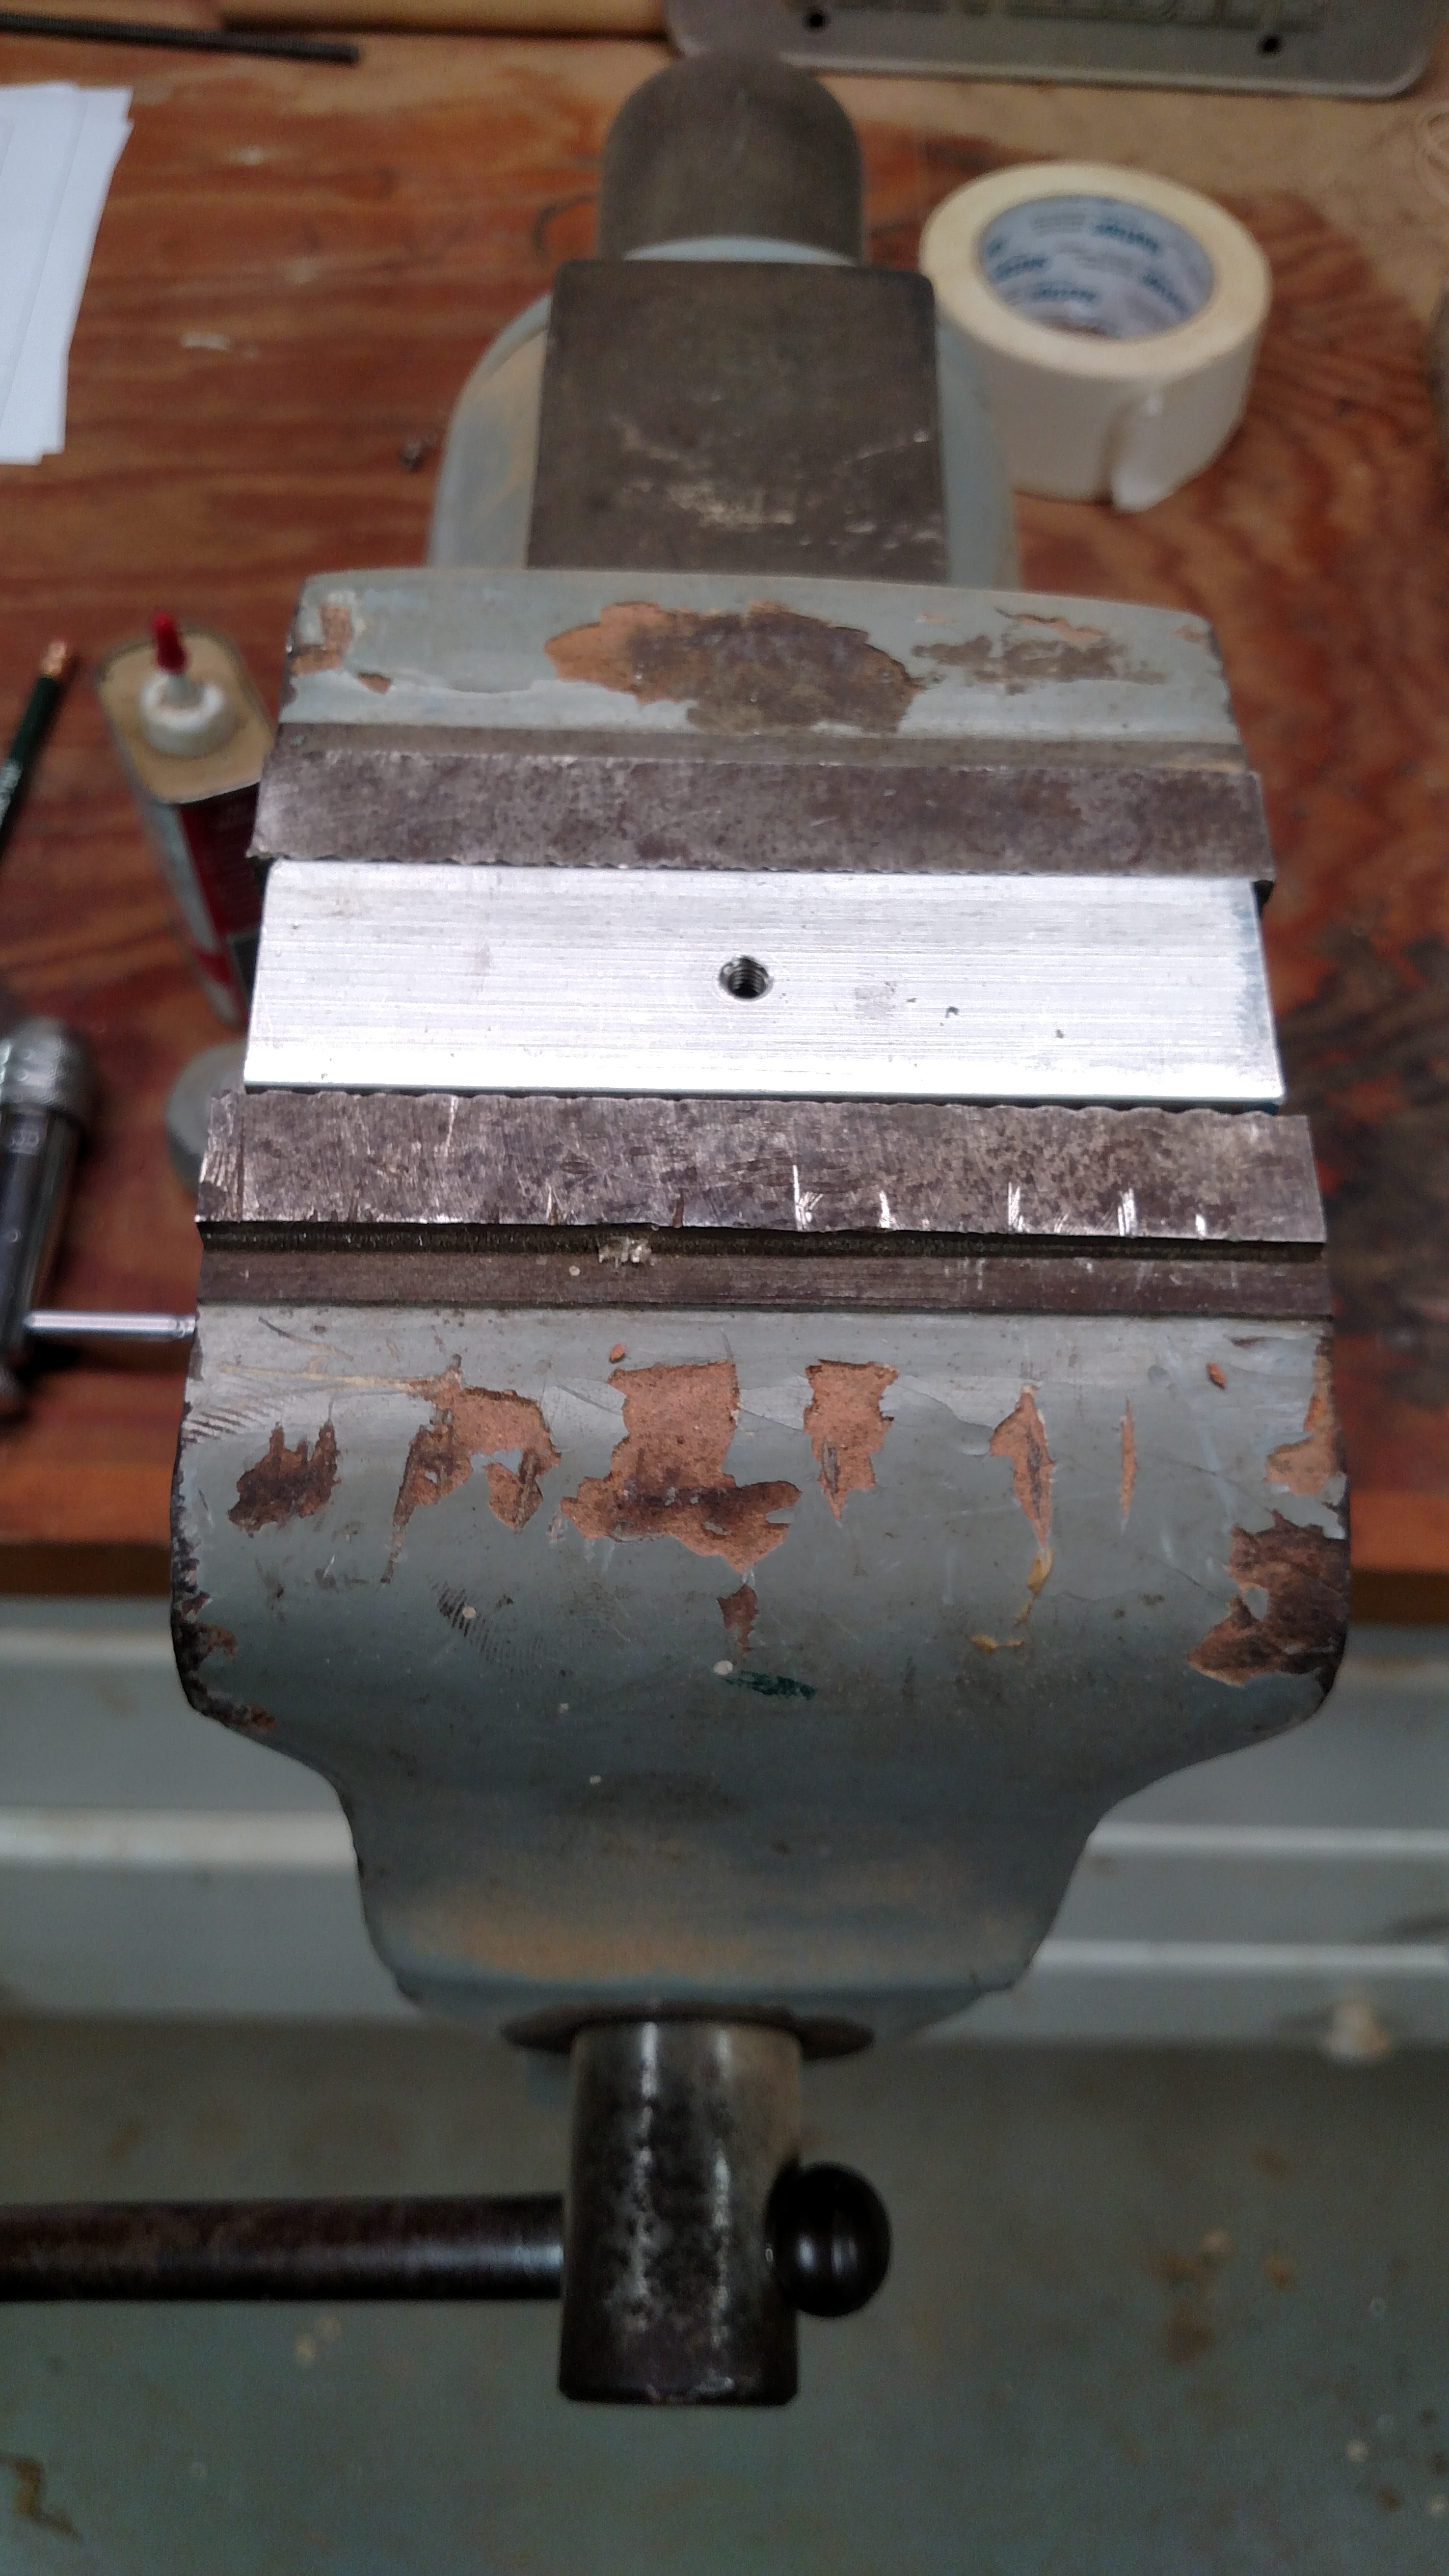
Been there, done that. Remove the staples holding the old strips, use pop rivets to attach the new strips. Push the fibers aside when inserting the rivets to get maximum penetration. Put a drop of black paint on the rivet to conceal it in the fibers.1 point
-
I would tap it and be done, provided you got enough epoxy in the hole. The epoxy is plenty strong enough to hold the load the M5's can take1 point
-
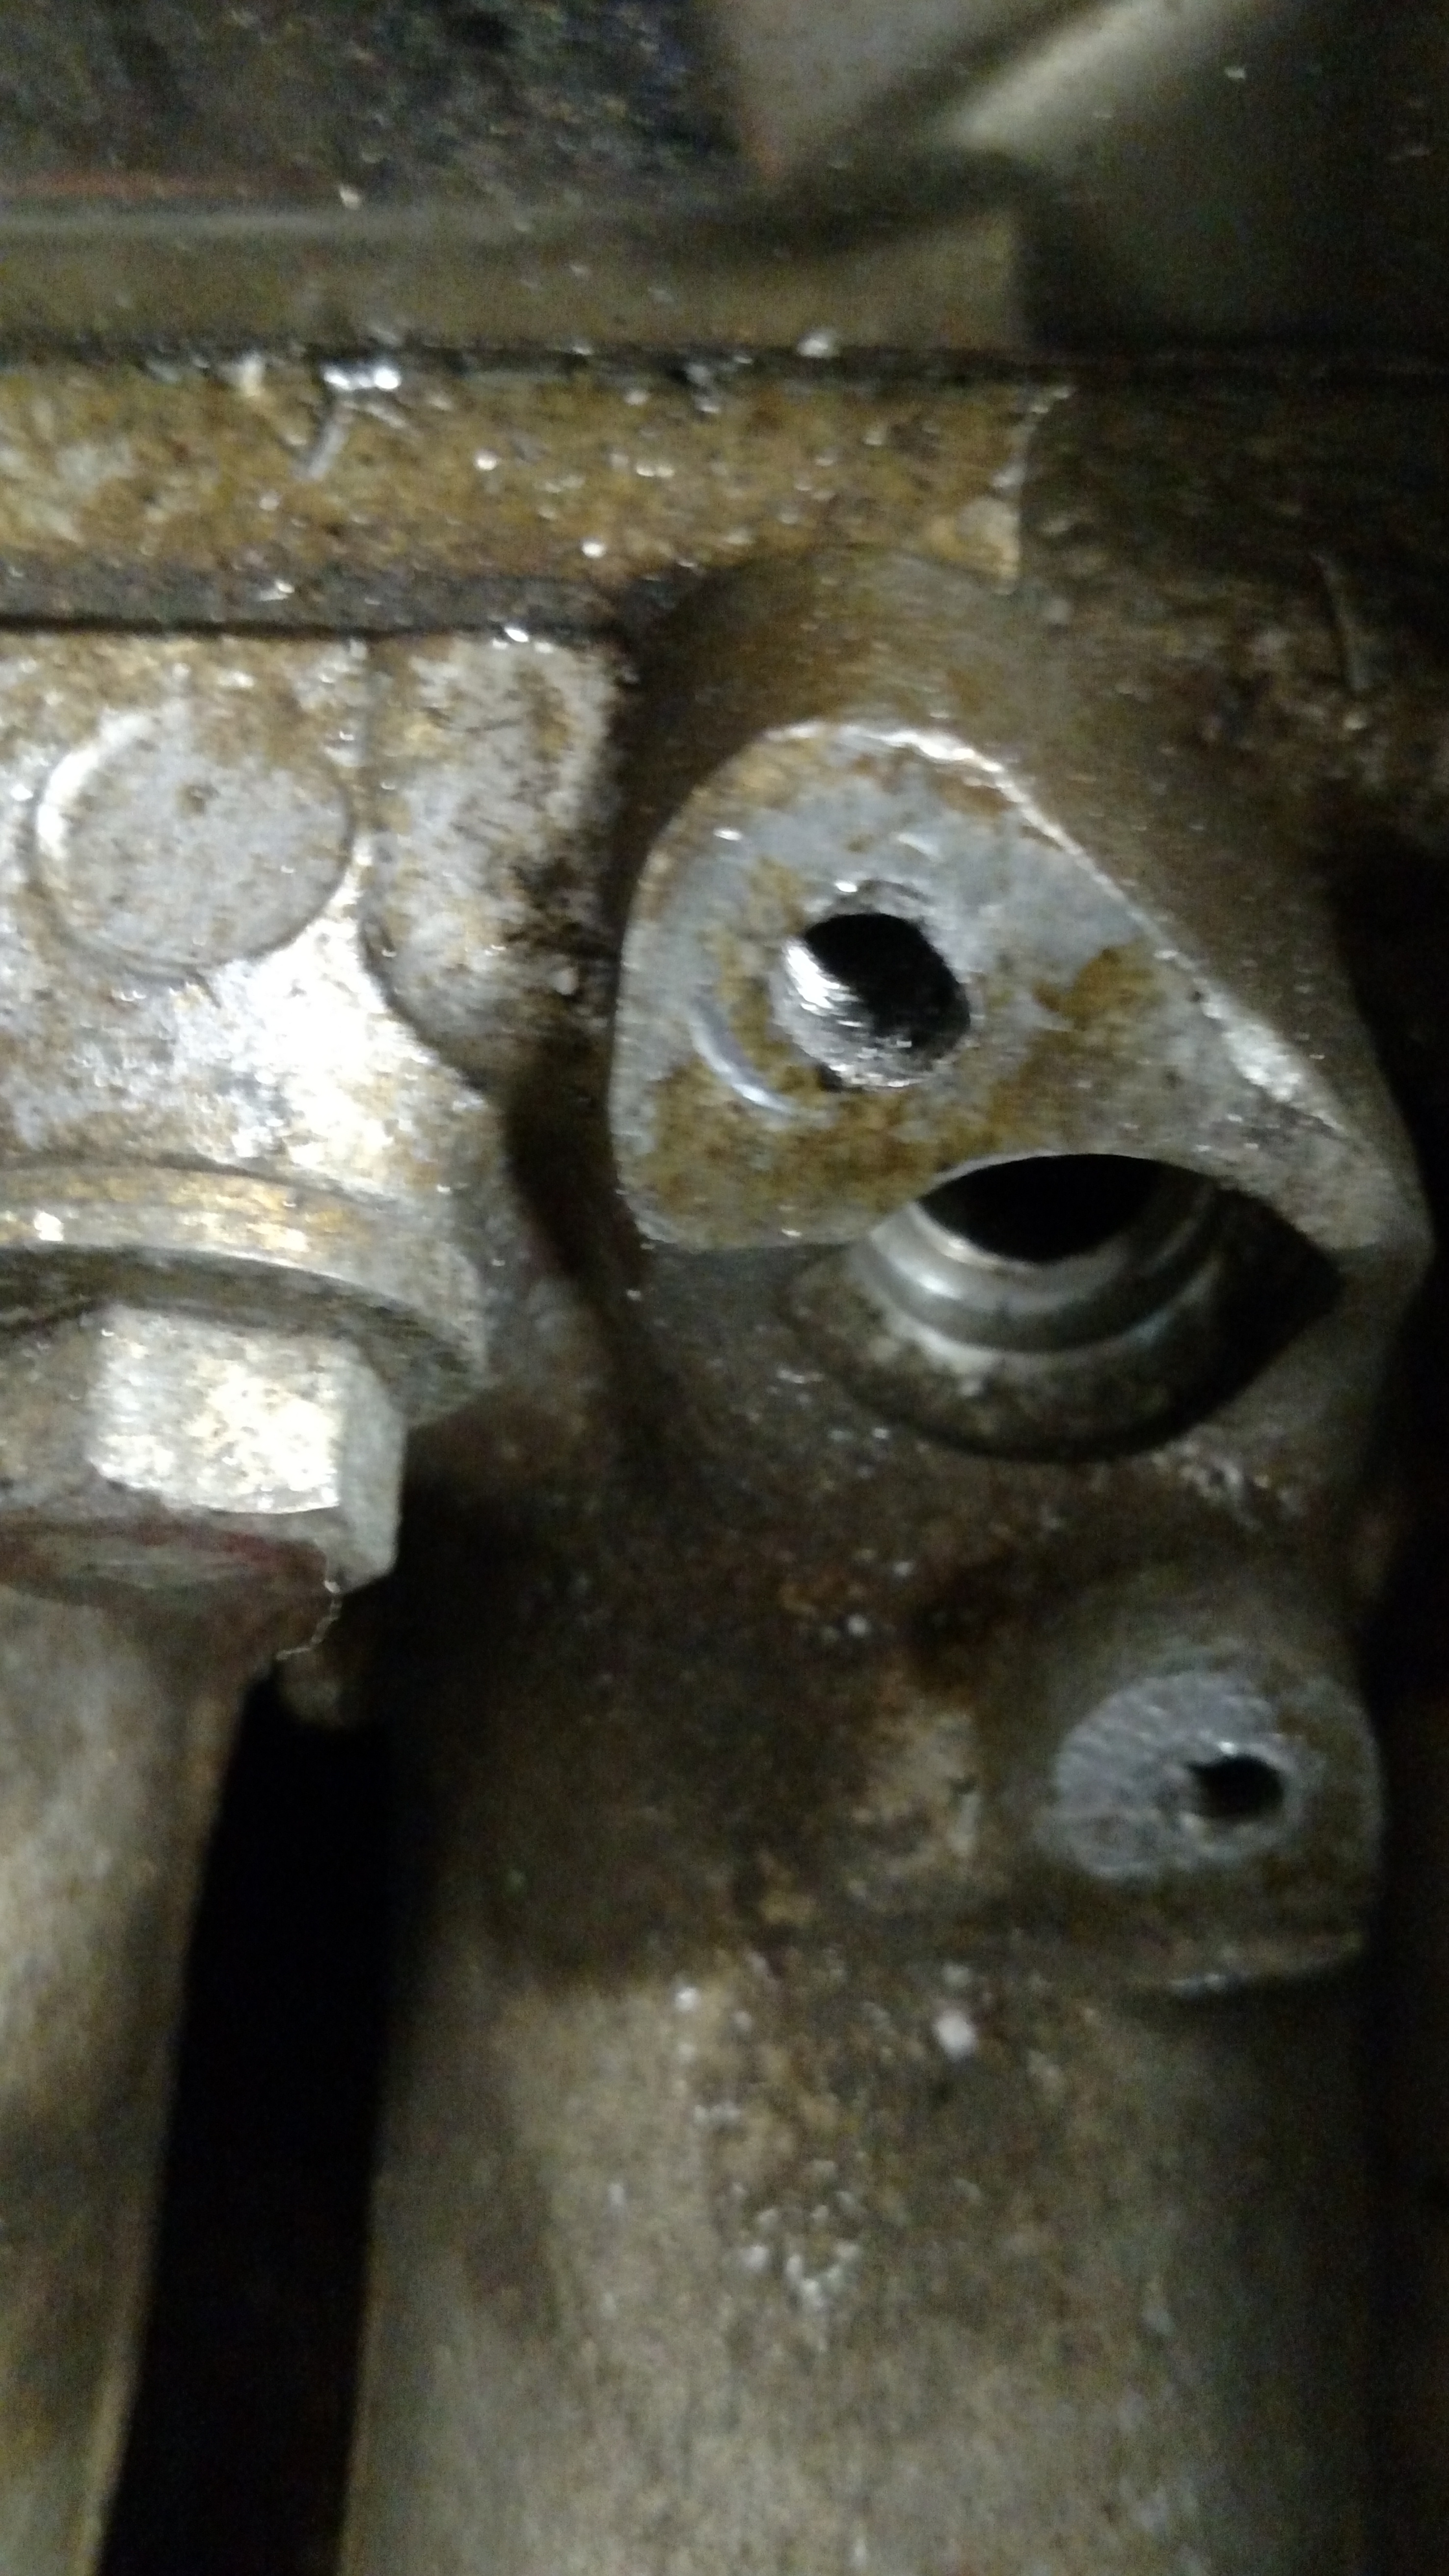
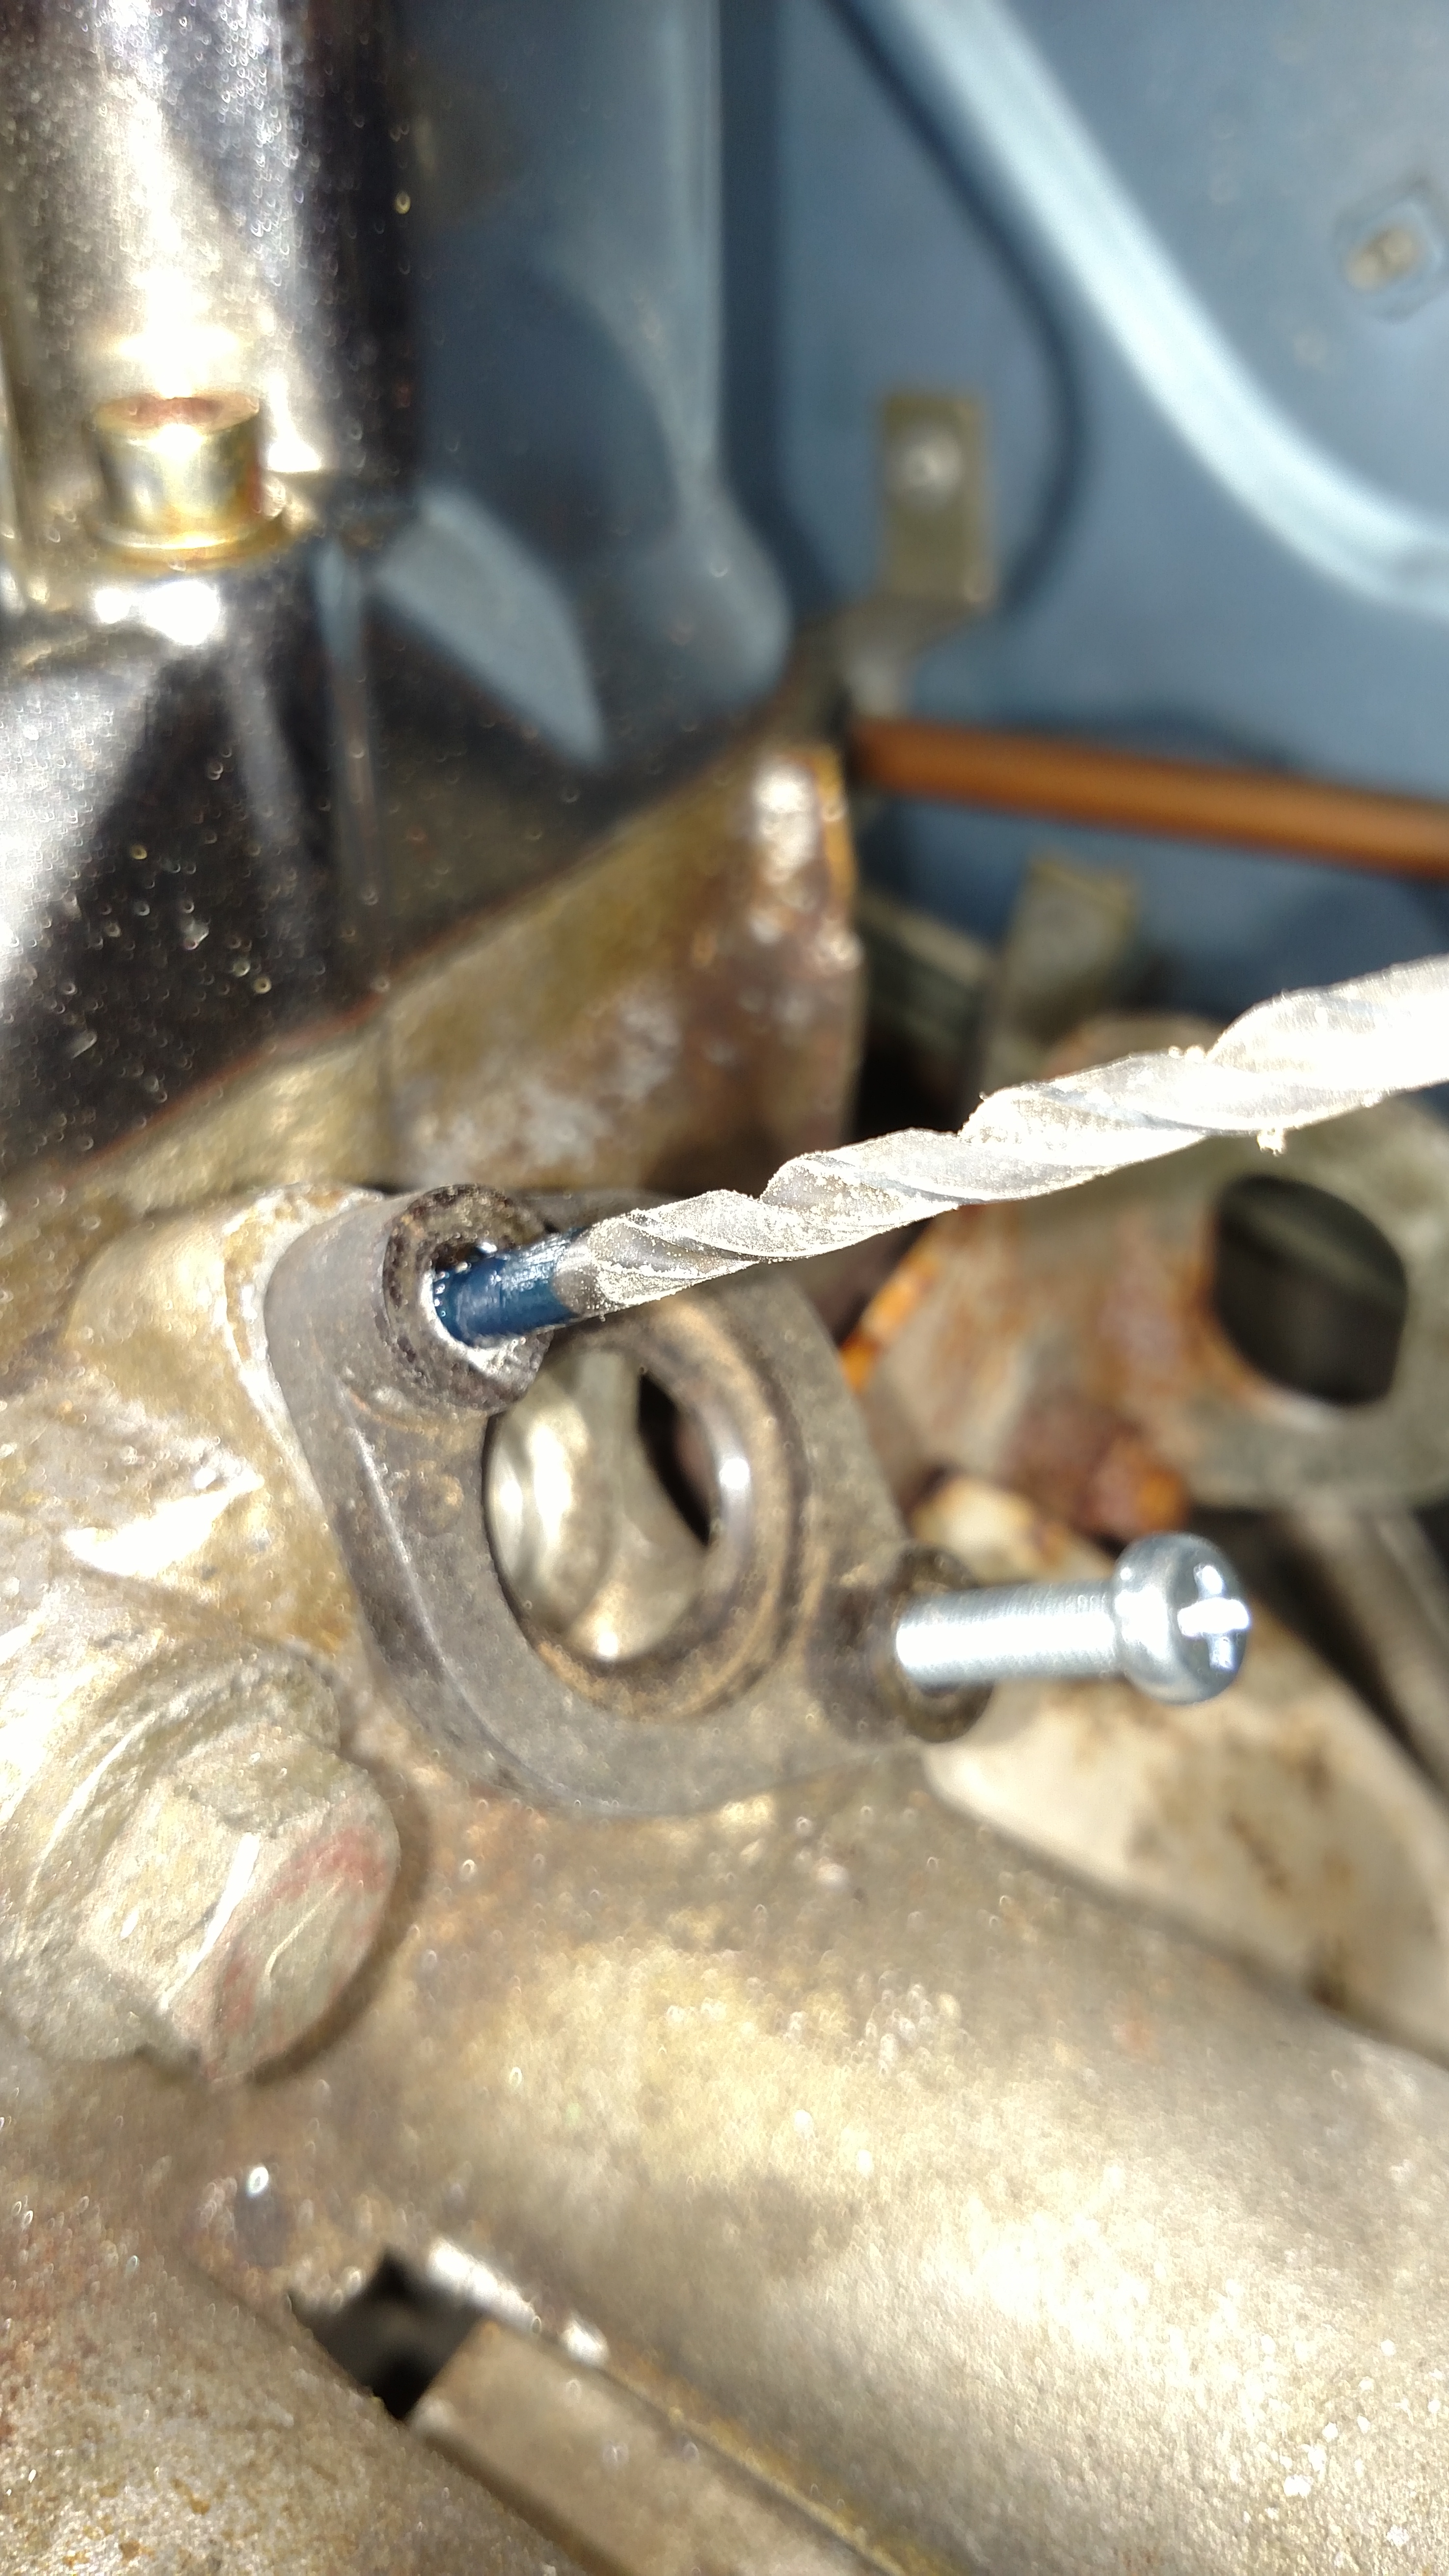
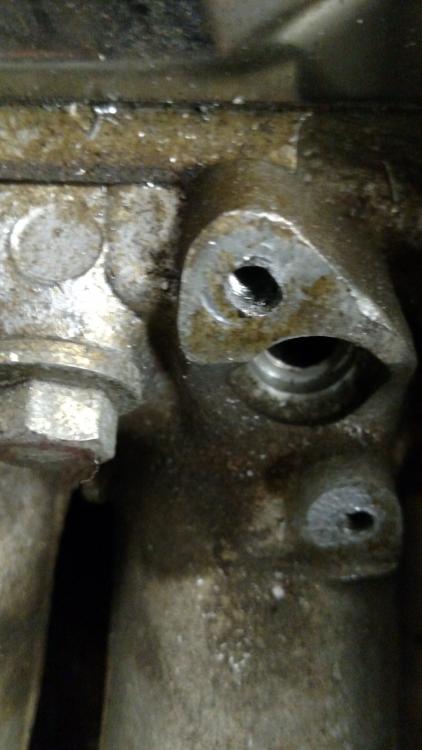
So I had a little time to play tonight. I practiced installing a helicoil in a scrap piece of aluminum. I'm glad I did. Because it takes a bit of finesse to get the insert installed all the way into the hole without prematurely breaking off the tang. And as we all know, finesse doesn't come naturally to me. Next I removed half the fuel rail and examined the bad hole. It's apparent that when I drilled out the broken screw, I didn't get the hole centered. This left a crescent shaped remnant of the old screw in place that pulled out when I tightened the injector. As you can see, this left an oblong hole. I decided I'd need a new pilot hole to start from. The last photo shows what I did. I filled the hole with J. B. Weld, coated the end of a drill bit with grease to act as a release agent, and pushed it into the hole. I used an injector base to put the bit in the right place, and used the other screw to eyeball the proper angle. I'll let that cure overnight and go from there. I wonder if I could just tap it for an M5 and be done. But for peace of mind I'll probably helicoil it anyway.

 1 point
 -
1 pointPrepped the frame supports for welding into place for support. The rails were cleaned and sprayed with Eastwood Frame Sealant1 point
-
1 pointIf it were me I would go fiberglass for the whole repair. I think you're right to use some resin to wet down the board first. I would use resin to make the initial repair to the crack and hold it close with screws or some weight over wax paper as a release sheet. Then back up the repair with some light weight matt. I think HR's recommendation for using the door as a jig is a great idea too. Once the initial repairs are done you can remove it and back it up from the back side if necessary. I get a magazine from Epoxy works and they do all kinds of projects with fiberglass and resin. It should do fine for all the repairs you need to make. At the holes I would thin down the board around the holes for the repair. That makes room for the repair material without too much overbuild. Whenever you patch holes in fiberglass you all ways try to make transition areas for the repair, same principle..1 point
-
1 pointThere are two different types of repairs required here: For the clip hole areas, why not approach this the same way that you would with a rust repair. That is, cut out the bad part and 'weld in' (glue) new material , cut to shape. Although it would definitely be easy, I'm not sure that a fibreglass repair is going to give the clip the right kind of surface to 'do its thing'. My idea would be to start with new, 1/8" masonite panel stock. Create a hole of the correct diameter (hole saw?), then use a small file to add the 'notch'. Now cut out the patch panel, complete with hole, and lay it over the door card so that the hole locations line up. Trace the outline onto the door card, then cut out that area. Now bond the patch panel into the cut-out area, using a fibreglass overlay on the 'back' surface. While I have not tried this myself (yet), I think it could work nicely. For the big tear, I agree that an f/g cloth-and-resin overlay will probably be the way to go. Here's an additional idea, though -- To temporarily bond the torn edges prior to applying the fibreglass, my notes include a comment from another CZCC member to the effect that a 'thin' cyanoacrylate glue used by model airplane hobbyists works well with the door card material. He referenced a brand called, 'Great Planes PRO CA' (packaged in the usual 1-oz eyedropper-style bottle). I'm not really sure how they manage to make this stuff thinner than plain old Crazy Glue, but it's promoted as having 'superior wicking action'. The label on the bottle says, 'Great for tight-fitting parts, tacking and CA hinges'. The Z owner in question said that he used it successfully to firm up 'mushy fibreboard around the holes' and reported that it resulted in an area that was 'super-hard and strong'. So: If you can figure out a way to press your torn edges together and flat, this glue might just do the trick. If you've got a spare piece of door card, maybe use that to experiment with first. Alternatively, try cracking a piece of masonite sheet and the use the glue to try to re-set the crack. Let me know if it works .1 point
-
1 point