Jeff Berk
Community Member
-
Joined
-
Last visited
Everything posted by Jeff Berk
-
Steve Bonk is on the Church of L Series facebook page a lot. I have his camshaft in my L28, well I had a set... It failed due to a casting flaw I think. He was going to take care of welding it and having it reground but the shop he uses is backed up and I've been without my Z waiting on the camshaft for going on two months now.
-
I don't think he's too terribly far away so I can just drive out there and measure its length. Thanks for the input
-
My 260Z started life with a 4-speed manual. In the early 1980's, a new engine and a used 5-speed was dropped in. The 5-speed began having problems and was beyond rebuilding. I tried to replace it with another 5-speed and it was too beat to be rebuilt. I attempted to get the 5-speed up and running with some components out of a 4-speed but the gear lash made more noise than my exhaust so I went with another 4-speed I purchased for $23. My car is in the shop for the next few months waiting on a camshaft (but that's another story) but in the mean time, this has popped up on facebook marketplace: Also have a (83) 2wd long tail fs5w71b 5 speed trans and a (85) short tail fs5w71c for a 4x4, $100 obo a trans. I e-mailed him and obtained more information. This hasn’t been out of the truck more than 4 months, been inside this whole time. I have a short tail from a 4x4 with 212k, and a long tail with about 70k on it. I used Lucas in the long tail and when hot 5th would give a little buzz as it went in, but first 35 years of its life it never went more than 35mph or even used 5th. It was a maintenance truck till I bought it. The seller told me that there may be a difference in the bell housings between the pickup and Z car; however, I have a couple of bell housings sitting around. Considering how rare 5-speeds are getting, would it be wise to pick this one up at $100? Note, I won't hold it against anyone if this transmission turns out to be another dud. Jeff
-
I think I paid around $50 or so for my junk-yard wheel and it wasn't even the Faux Wood variety.
-
I think you're right. I'll need to retrace the Z.
-
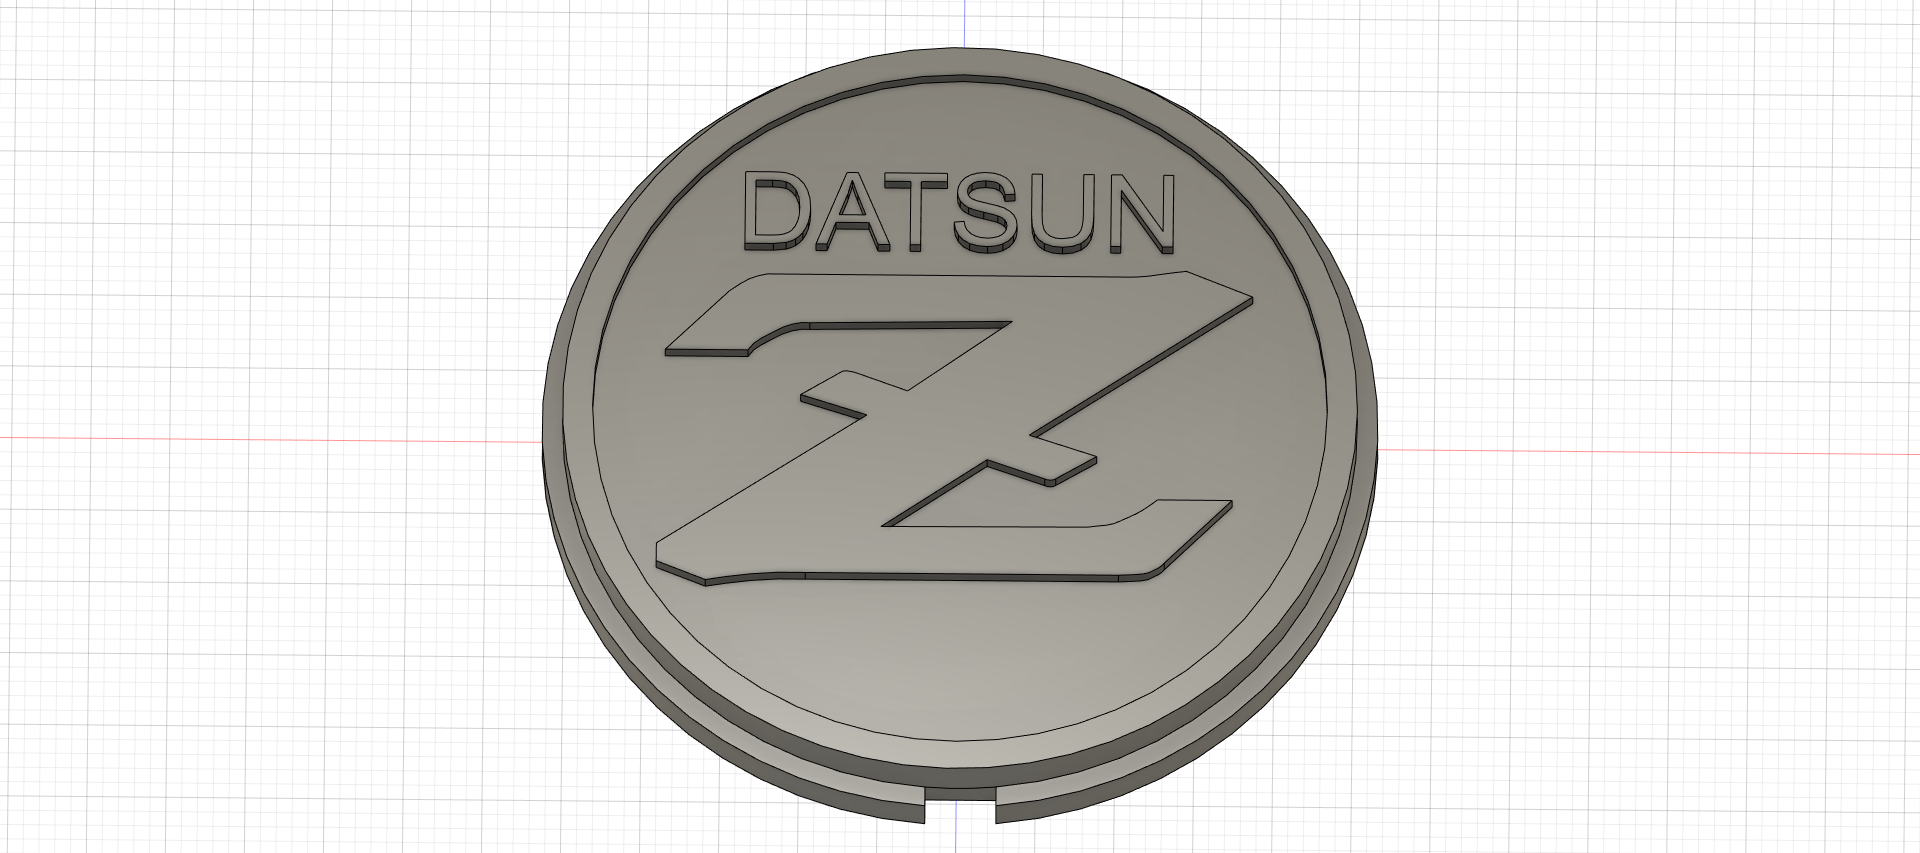
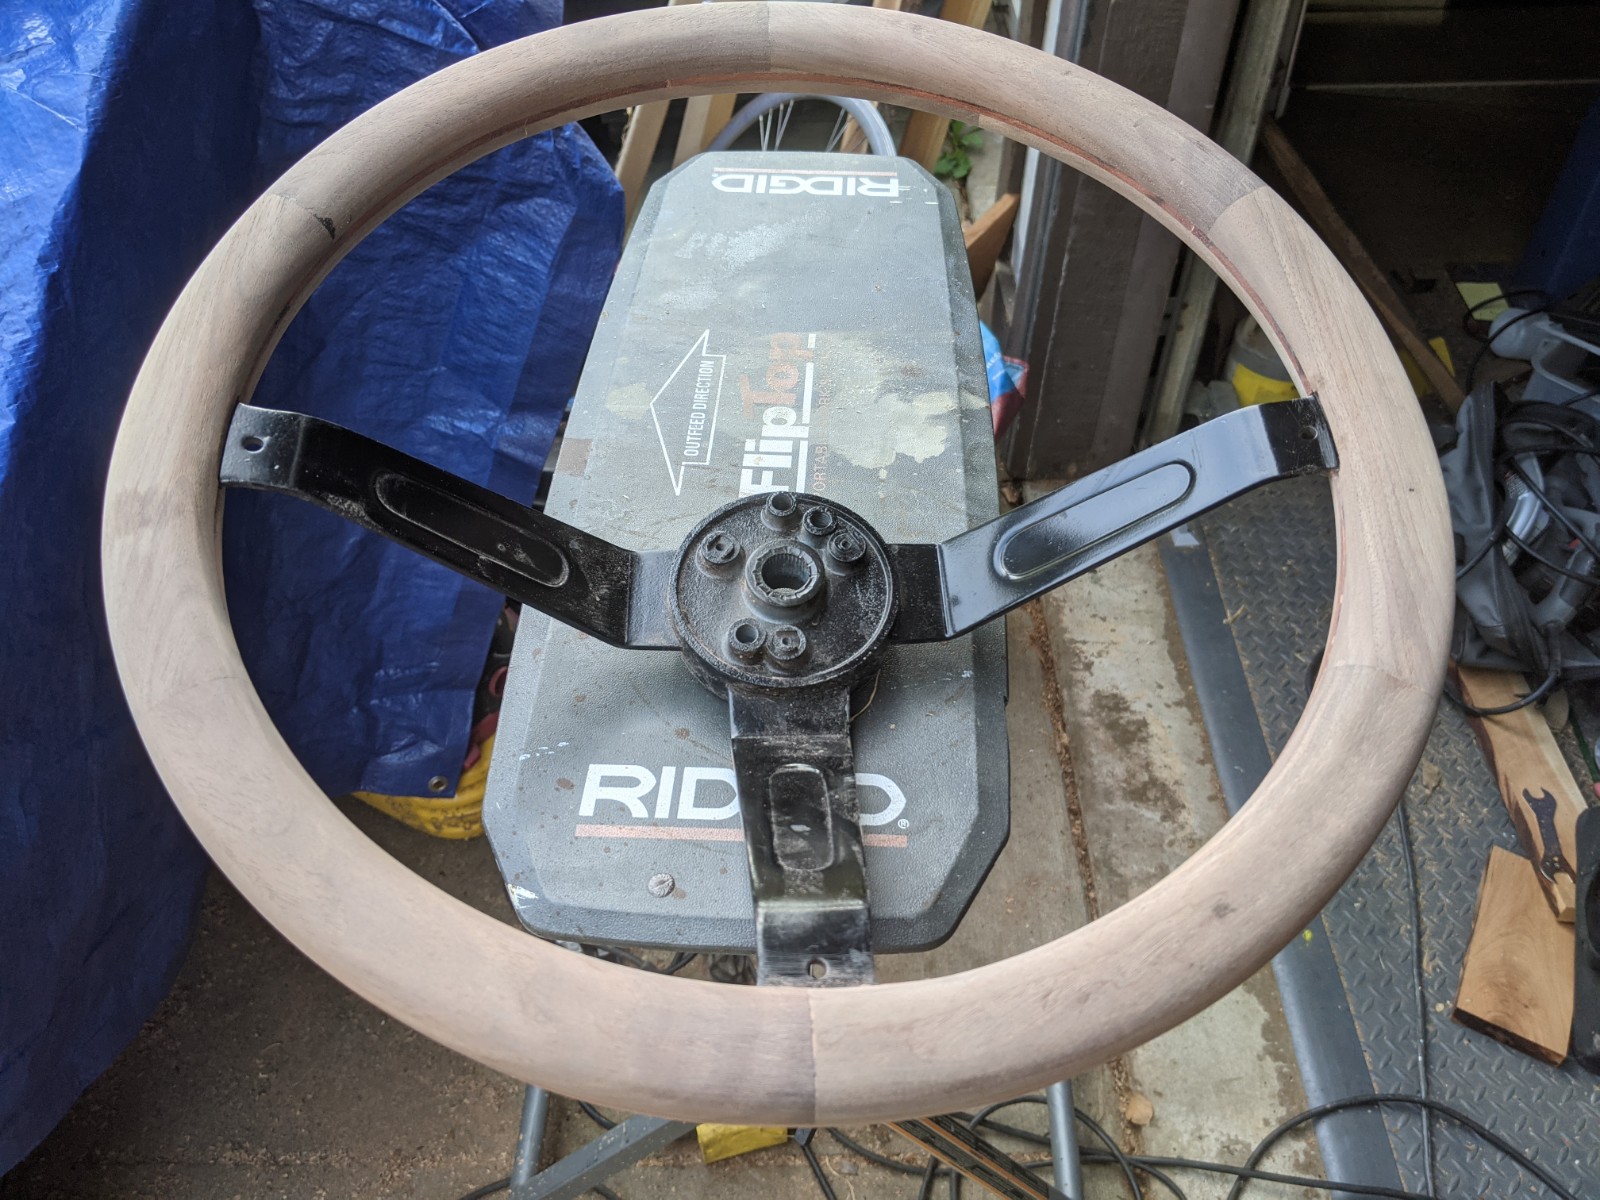
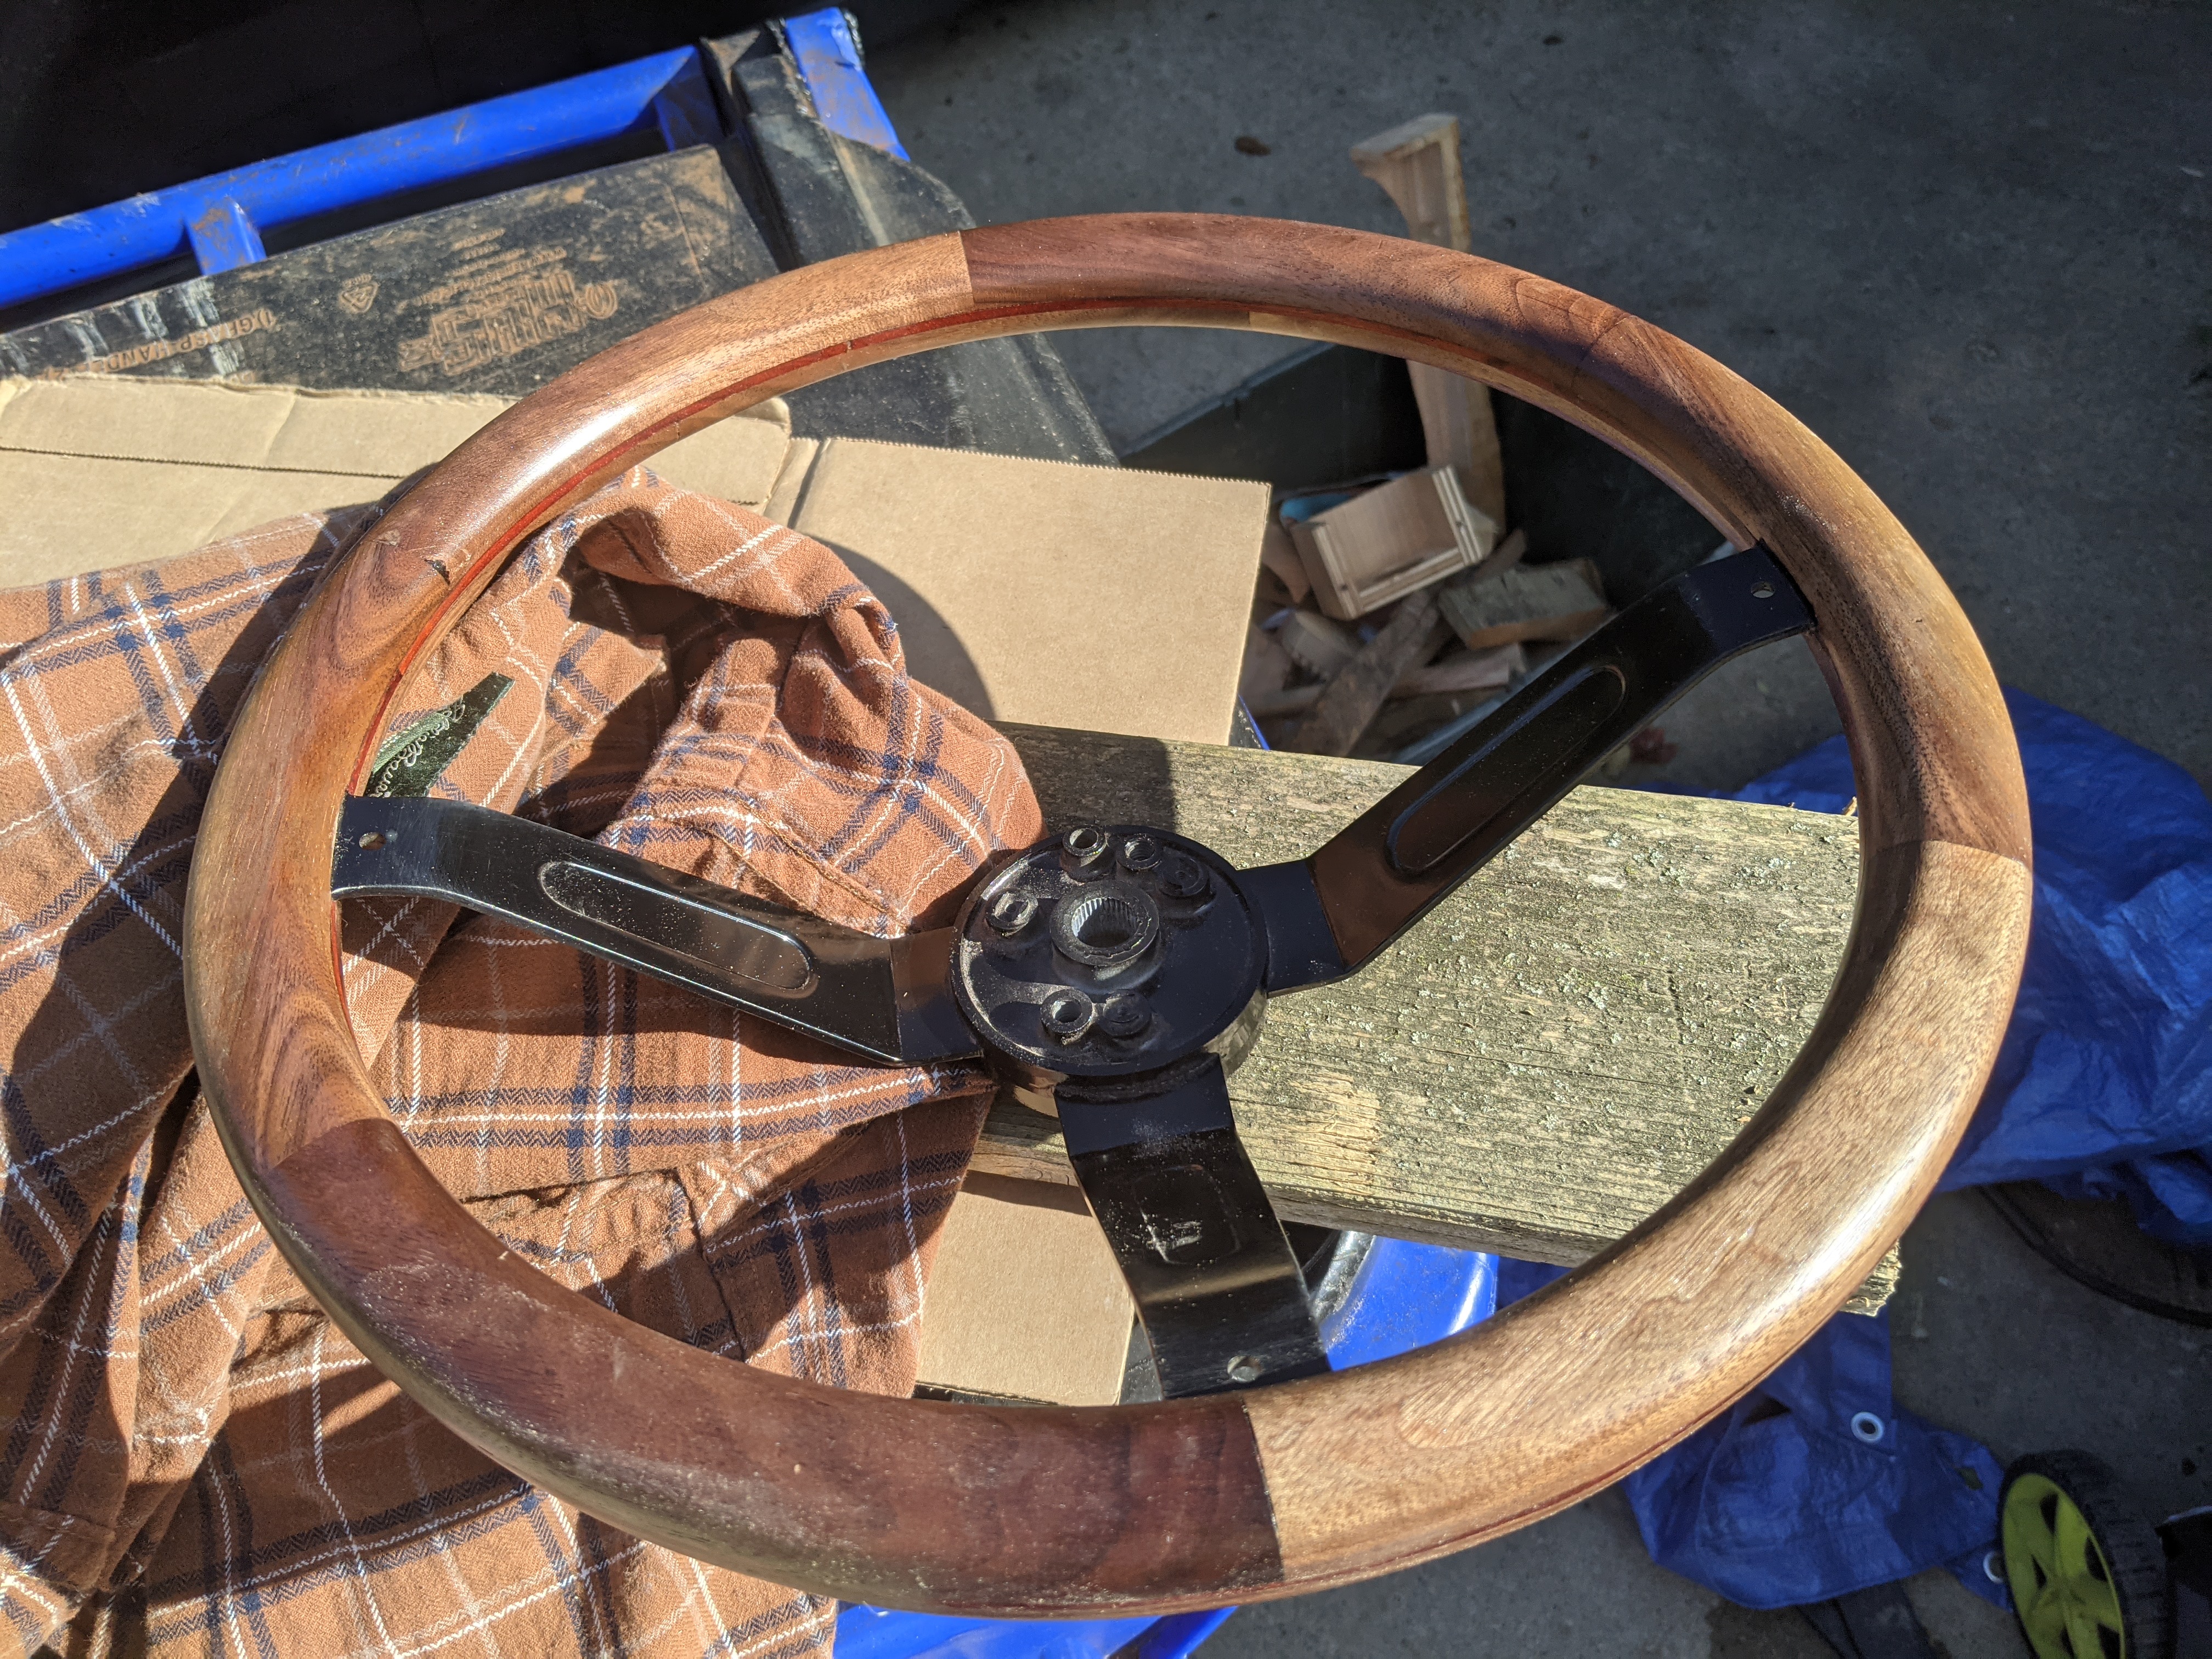
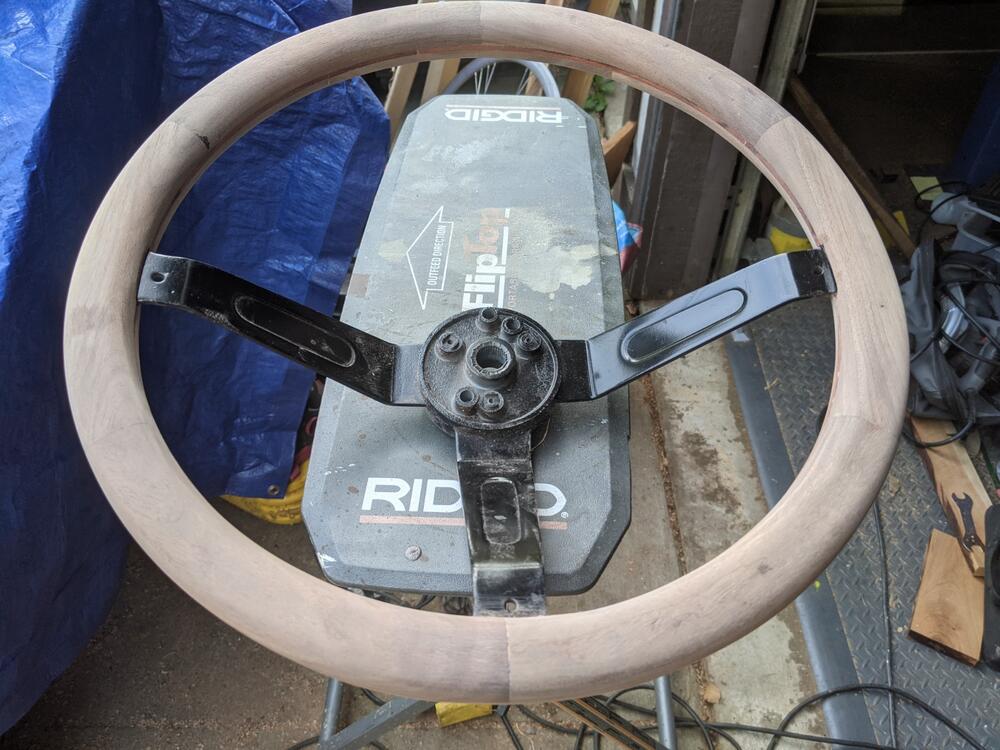
Dutchzcarguy... My intent was to make it narrower, but I liked the feel of it. This wheel is really heavy, I guess because of the epoxy. CO... I've not used the Haas mill yet but its available so its on my bucket list. I was disappointed when I pulled out the original steering hub coin and found it to be chromed plastic. My prototype is attached. If successful, I'll powdercoat it and then buff off the coating on the raised "Datsun Z". I've got Case Western Reserve University within 25 miles that provides community access to all equipment. Cleveland Public Library 30 miles away has limited equipment. Kent State University within 15 miles that plans on giving community access in the next few months. There is a third makerspace around 40 miles away but its too far away. These are all free except for materials and there are at least one more that requires a subscription to use. What I'm getting at, if you check around, your likely to find a community-access makerspace in your area.

-
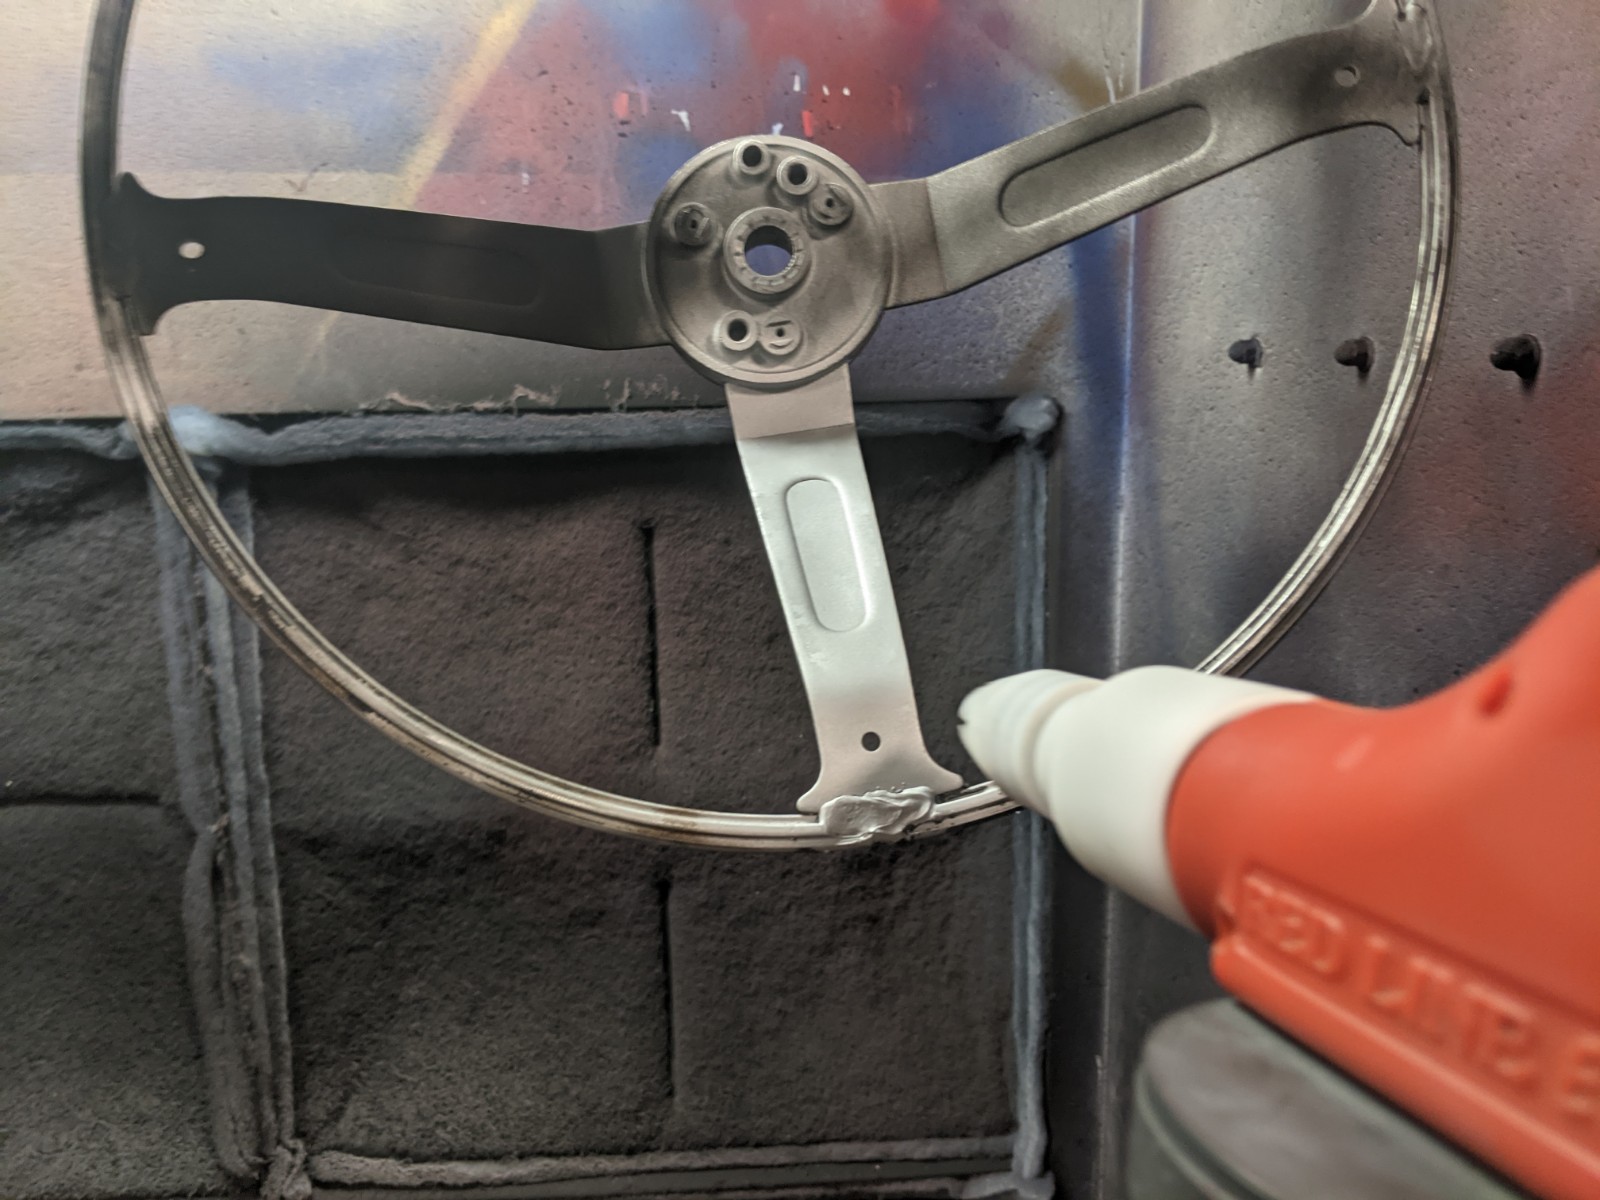
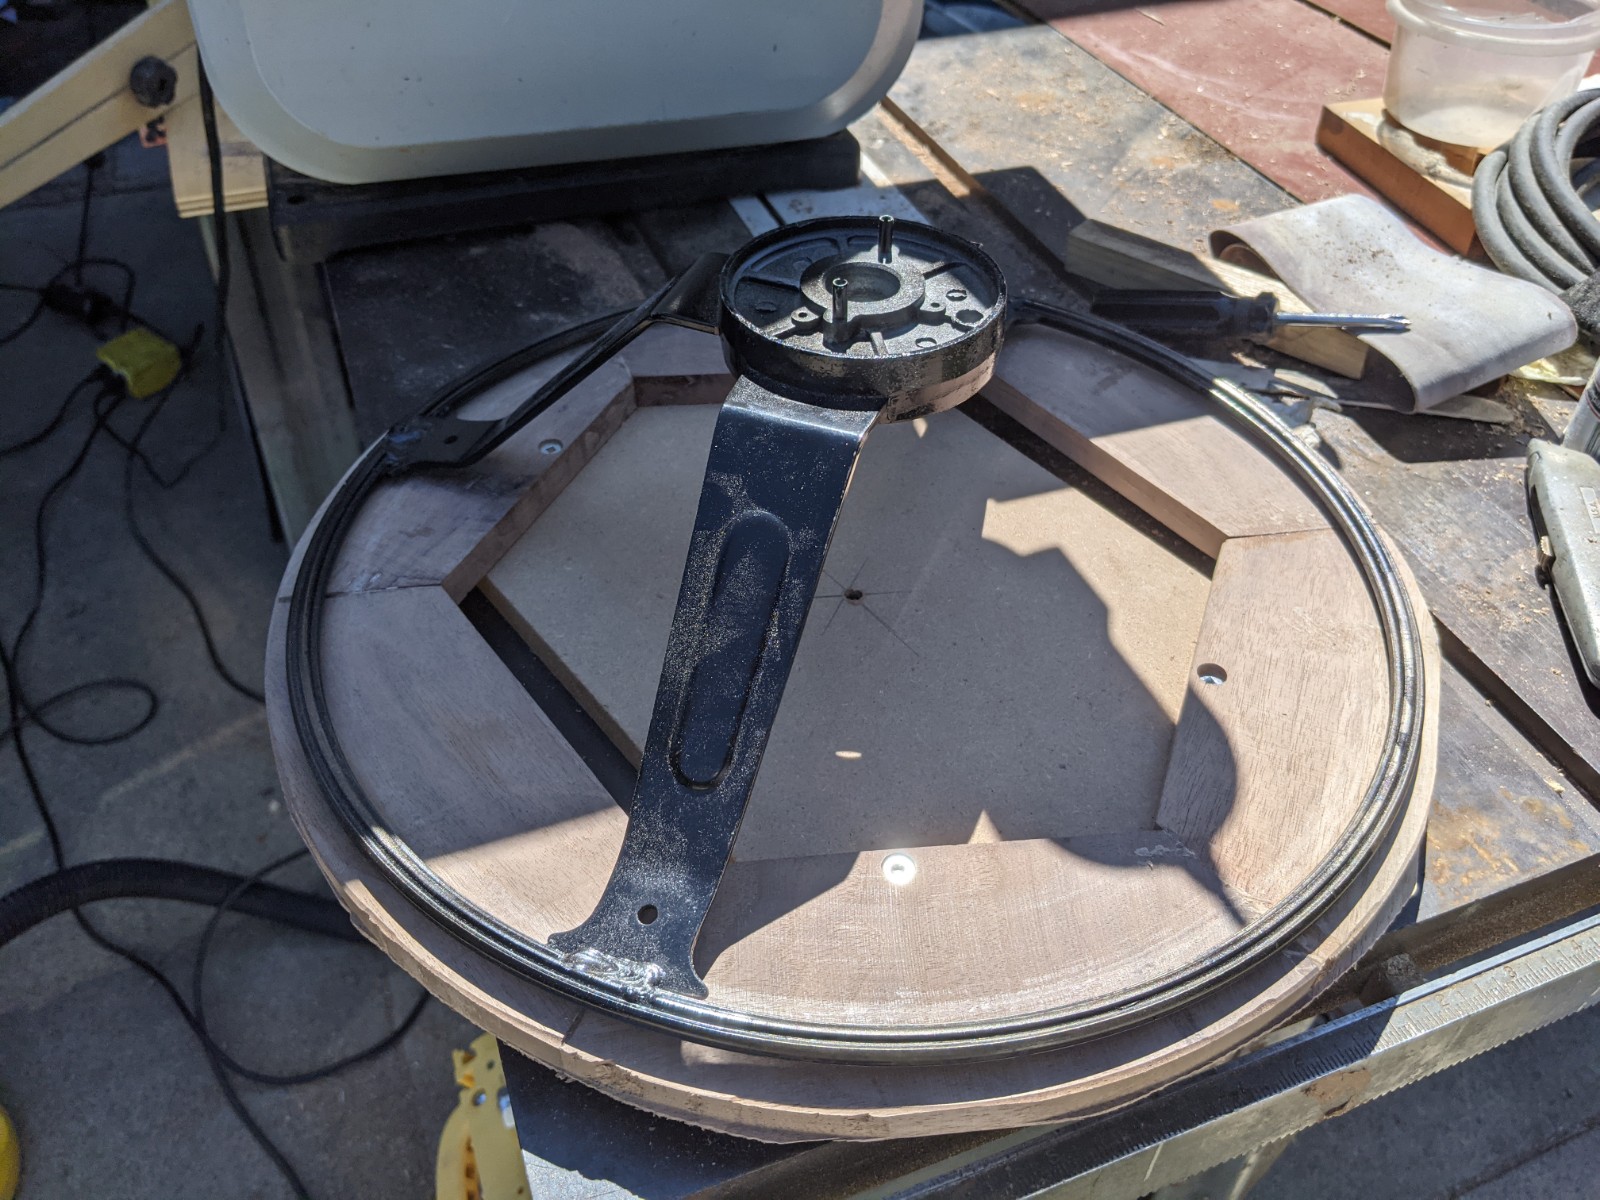
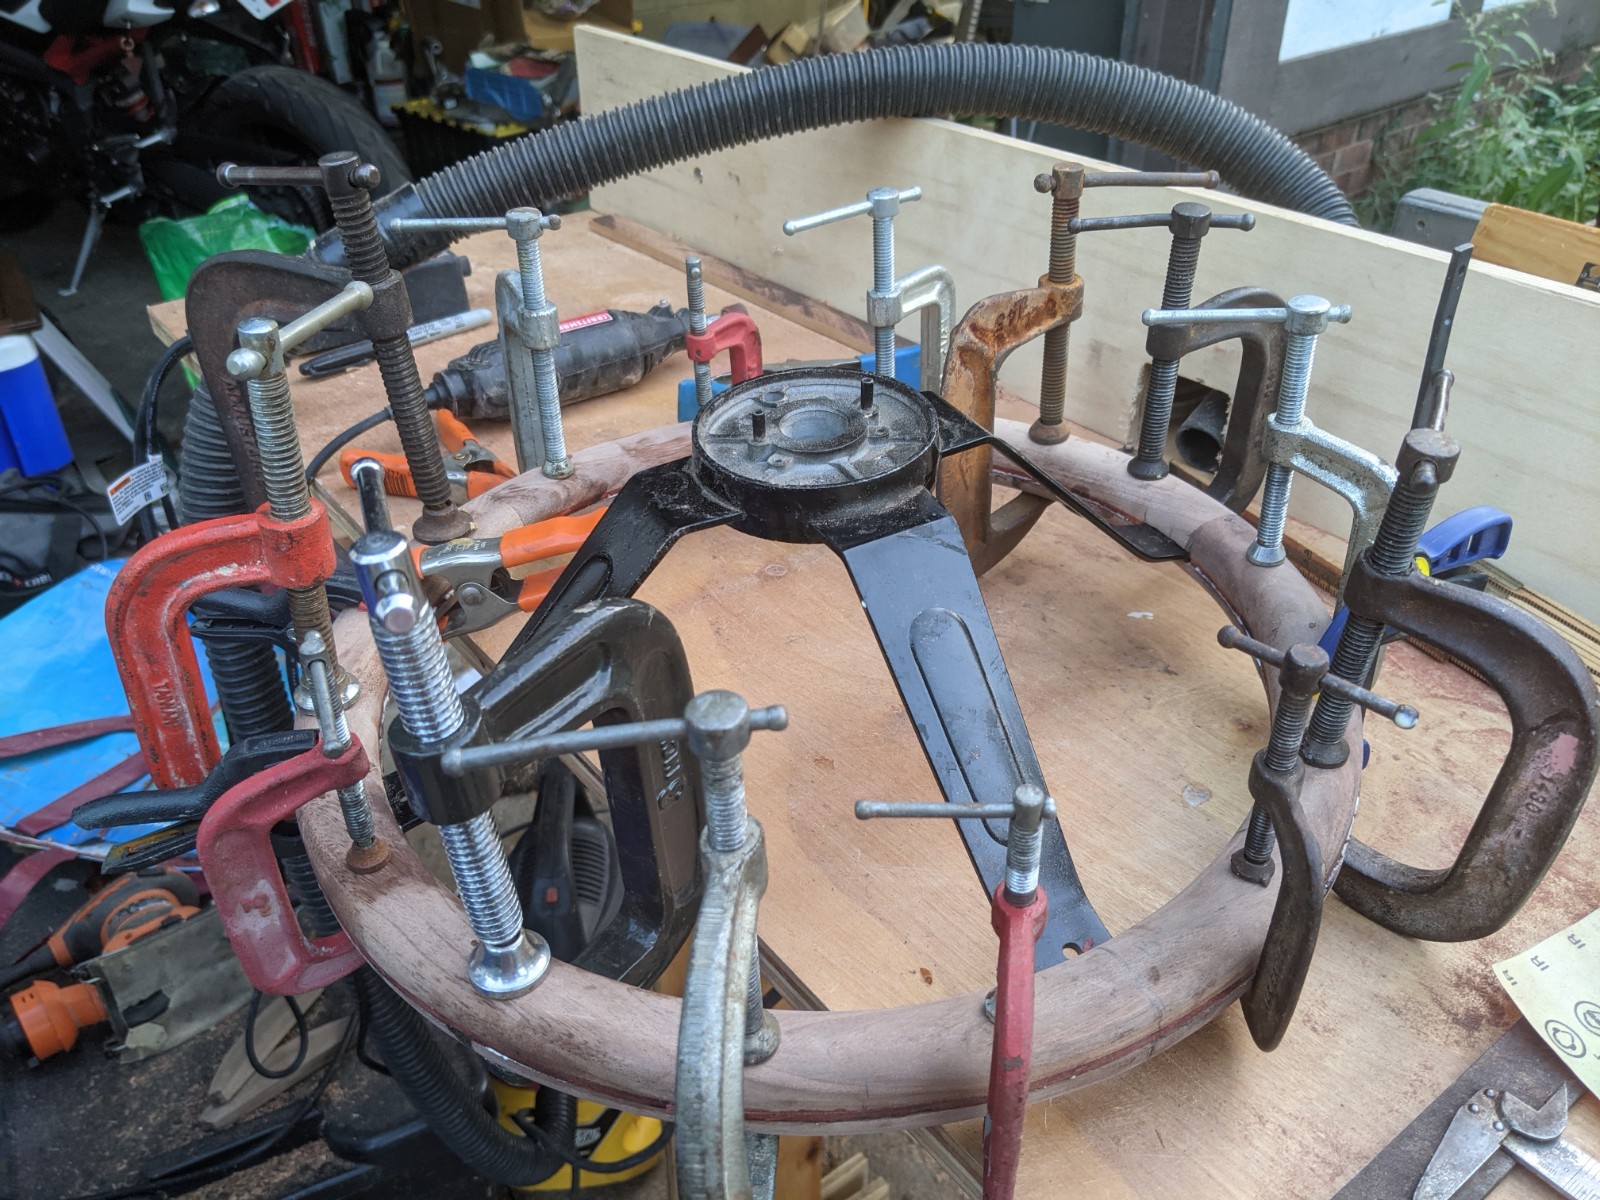
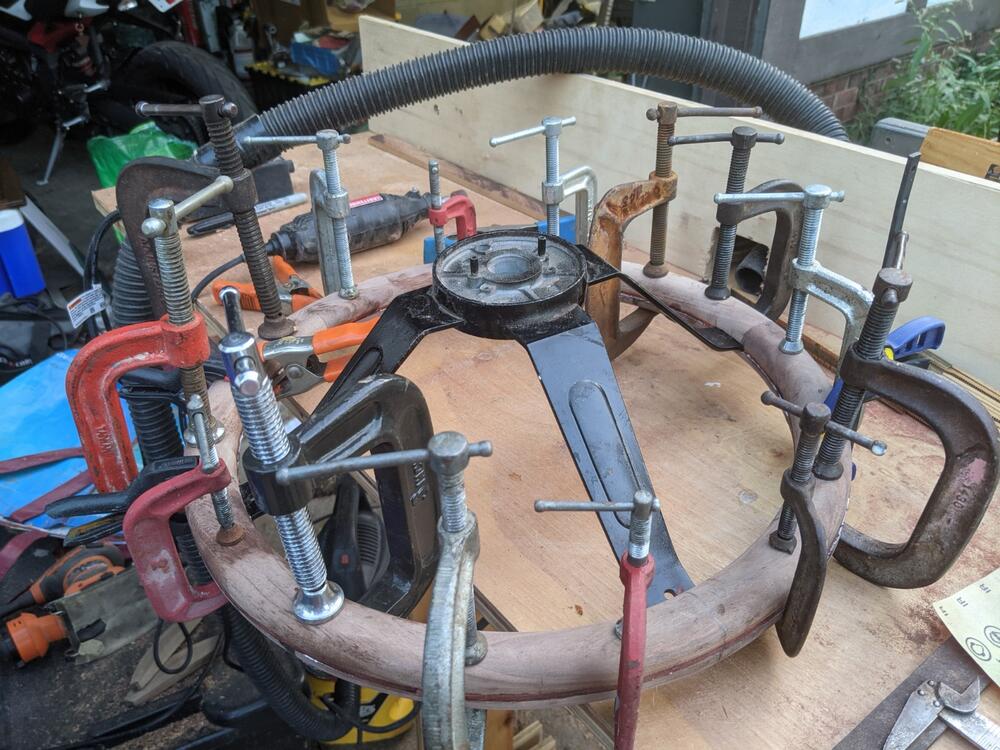
I've been working off and on to make a wood steering wheel from a donner. 1) I stripped the old foam, sanded and powder coated the steel hub and spokes. 2) Cut up some walnut that sat around for 25+ years, soaked it in Cactus Juice wood stabilizer under vacuum, then let it soak up the juice for a week before baking it. 3) Resawed the wood and created two hexagons from the pieces, glued them together. 4) Made a router jig to cut circles, then cut a grove in the wood for the steel rim to fit in, then used the jig to cut the outside and inside diameters. 5) Glued up the two circles, sandwiching the steel rim and a 1/8-inch sheet of blood wood (also treated with Cactus Juice. 6) Routered a round over on the inside and outside of the steering wheel. Screwed up once breaking a 1/4-inch router bit and ripping out a bit of wood. 7) Sanded, sanded, and sanded. 😎 Finished with wipe on varnish. Now I'm waiting on someone to train me in using a Haas Mini Mill to make a new center coin for the padded horn button.


-
When I made mine (no longer own), I had machined a pair of flats and they came in handy. Taking bits of various designs, I had used acme all thread and thrust bearings instead of NC thread and a used throw-out bearing. One last thing, I drilled and tapped both ends of the all thread so if one end became damaged, I could use the other end. This is one of those tools that hopefully you only need once. It would be great if one could just borrow the tool from a tool library.
-
I'm going to make one. Can't help myself.
-
zKars... What is the length of the loop on either side? About 8" (20 cm for everyone outside of the US)? I need to make one of those. Jeff
-
SteveJ: I like that belt wrapped around the seatbelt from the transmission hump. My car does not have this (yet).
-
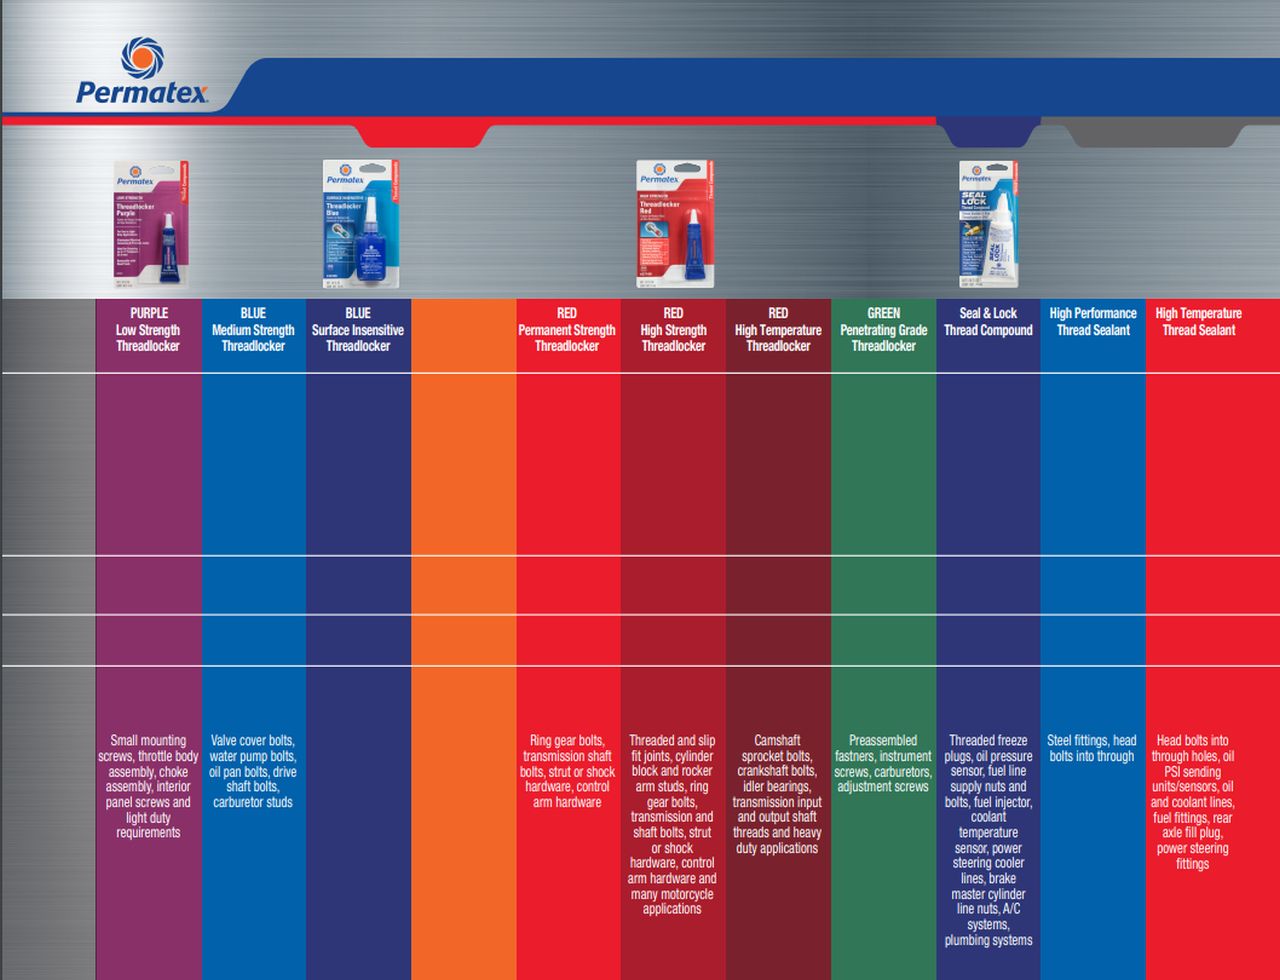
Don't forget about green and purple Loctite:


-
I'm looking into stabilized wood (see https://blog.woodturnerscatalog.com/2014/02/wood-stabilizing-v-2/ ) I found a piece of 20 year or so old black walnut that I might cut up and stabilize with clear epoxy. I'm taking photographs and will post the procedures in the future unless it is a complete fail. I plan on generally following the instructions posted on an MG forum. https://www.mgexp.com/article/diy-wood-steering-wheel-part-1.329
-
-
Your pictures I'm sure has made many of us very happy about the condition of our cars. You might need to visit this site in the future: https://www.millsupply.com/auto-body-rust-repair-panels/datsun/
-
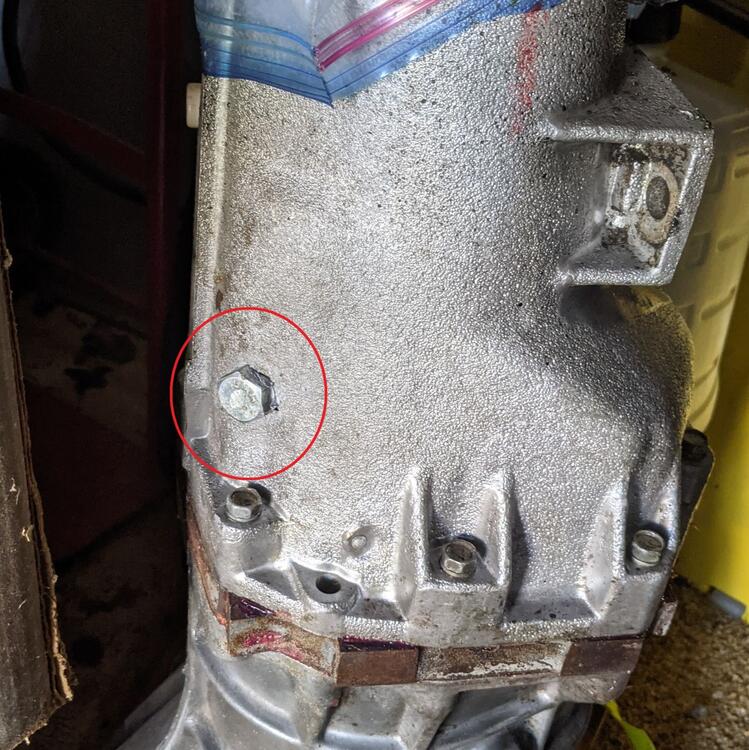
Here's what my transmission looked like after adding the access hole.
-
FYI... After practicing once on a junk transmission, I drilled an access hole so I could get a drift pin in there to drive out the wedge pin like ZKars said. I then tapped the hole I had made and threaded a bolt into it to seal it up. You just have to be very careful in locating where to drill on the outside. I'll add a photograph tomorrow. BTW I also tried to fabricate a small c-clamp to no avail.
-
Thanks for the pointers. I found several sets of instructions on the internet, each with their own variation on the techniques. I ordered a donner steering wheel off of e-bay and will try and source some wood for it from Woodcraft, a chain on this side of the Atlantic that specializes in wood crafting tools and has a great selection of interesting hardwoods. I'll likely create a steering wheel out of some scrap wood first so I don't make as many errors on the expensive wood.
-
I'd (and others I would think) love to see a writeup on how you made it. I can access a fairly complete woodshop with a CNC. A fairly detailed step by step done a few installments at a time would be great. I'd have to find a donner wheel first since I don't want to sacrifice my current wheel in case something goes wrong.
-
Amazing craftmanship! Any chance that you have pictures of the work in progress?
-
I also mounted a winch. In my case, I sometimes need to pull my car in and onto my 4-post lift. Pushing it up the lift ramps was too difficult so I attached a box hitch receiver at the other end of the lift. I have a small 12v winch that is welded to a hitch adapter. The winch can then be attached to the lift to pull my Z onto the lift. The winch can also attach to my Chevy Volt or my garden tractor with their box hitch receiver and run off their battery. I thought I was so original with my idea. I guess not.
-
Add to that "Spray each contact you check with DeoxIT or other contact cleaner". Be careful since the circuit is energized and you might need to have some spare fuses on hand.
-
I'm working on modifying my fuel delivery and need a reality check if anyone wants to comment. My current system has fuel going from no return to a return to try and control fuel pressure and prevent the fuel from becoming too hot while waiting in line between autocross runs. electric pump ==> mechanical pump (MP unable to keep up with the demand) ==> fuel pressure regulator (no return port) ==> "T" fitting ==> SU (4-screw) I was planning on switching to: electric pump ==> mechanical pump ==> fuel rail ==> SU carburetors front ==> SU carburetor rear ==> Fuel pressure regulator ==> return line ==> Fuel Tank fuel system.pdf
-
Siteunseen: I had to do likewise, then installed the relays to prevent further damage to the switch since the flip method only works one time. I'm assuming Shawn's switch is providing power since he didn't mention anything about headlights or parking lights.
-
Your thoughts are correct; however, your wiring has undergone several iterations of tinkering. There is a potential that someone did a little rewiring. Or, you could be right that all the other bulbs burnt out. I'd like to see how far the power is getting first. How original are you trying to keep this car? I ask because you might consider replacing your bulbs with LEDs (which is not as easy as plug and play).