zKars
Supporting Member
-
Joined
-
Last visited
Everything posted by zKars
-
For whatever reason, if you felt you had to remove the hinge to body bolts (blue), you could always draw around the hinge with a Sharpy pen to show you where to put the hinge back. I do this with the hood hinges all the time before I take the hood off. Clearly the red flat head red bolts are your best bet. Don’t try to take them out with a screw driver, get a Philips bit in a ratchet and socket to give you good leverage. They are tight. Make sure the bit you choose fits the Philips head tightly. Might have to use an impact type bolt remover to get them started. Even though the possible problems may be swaying you toward removing the body bolts, don’t...
-
Captain O, you have earned the right to now produce the sway bar end link Torque limiting position sleeve product (SBELTPS) and sell it to the masses as it clearly is both an excellent idea and a glaring omission in the original design. These things are used in millions of cars throughout the world, the market is massive. It will require custom bushings as well as the ID has to be slightly bigger to allow room for the sleeves. Millions of happy users will result and cars will handle better and make less noise from loose bushings, and preserve the holes in their control arms. At the very least, sell the idea to Energy Suspension and get rich doing nothing. You’re welcome.
-
sorry
-
Glad to help. I might have a few spares I could part with... They are easy to open and clean up.
-
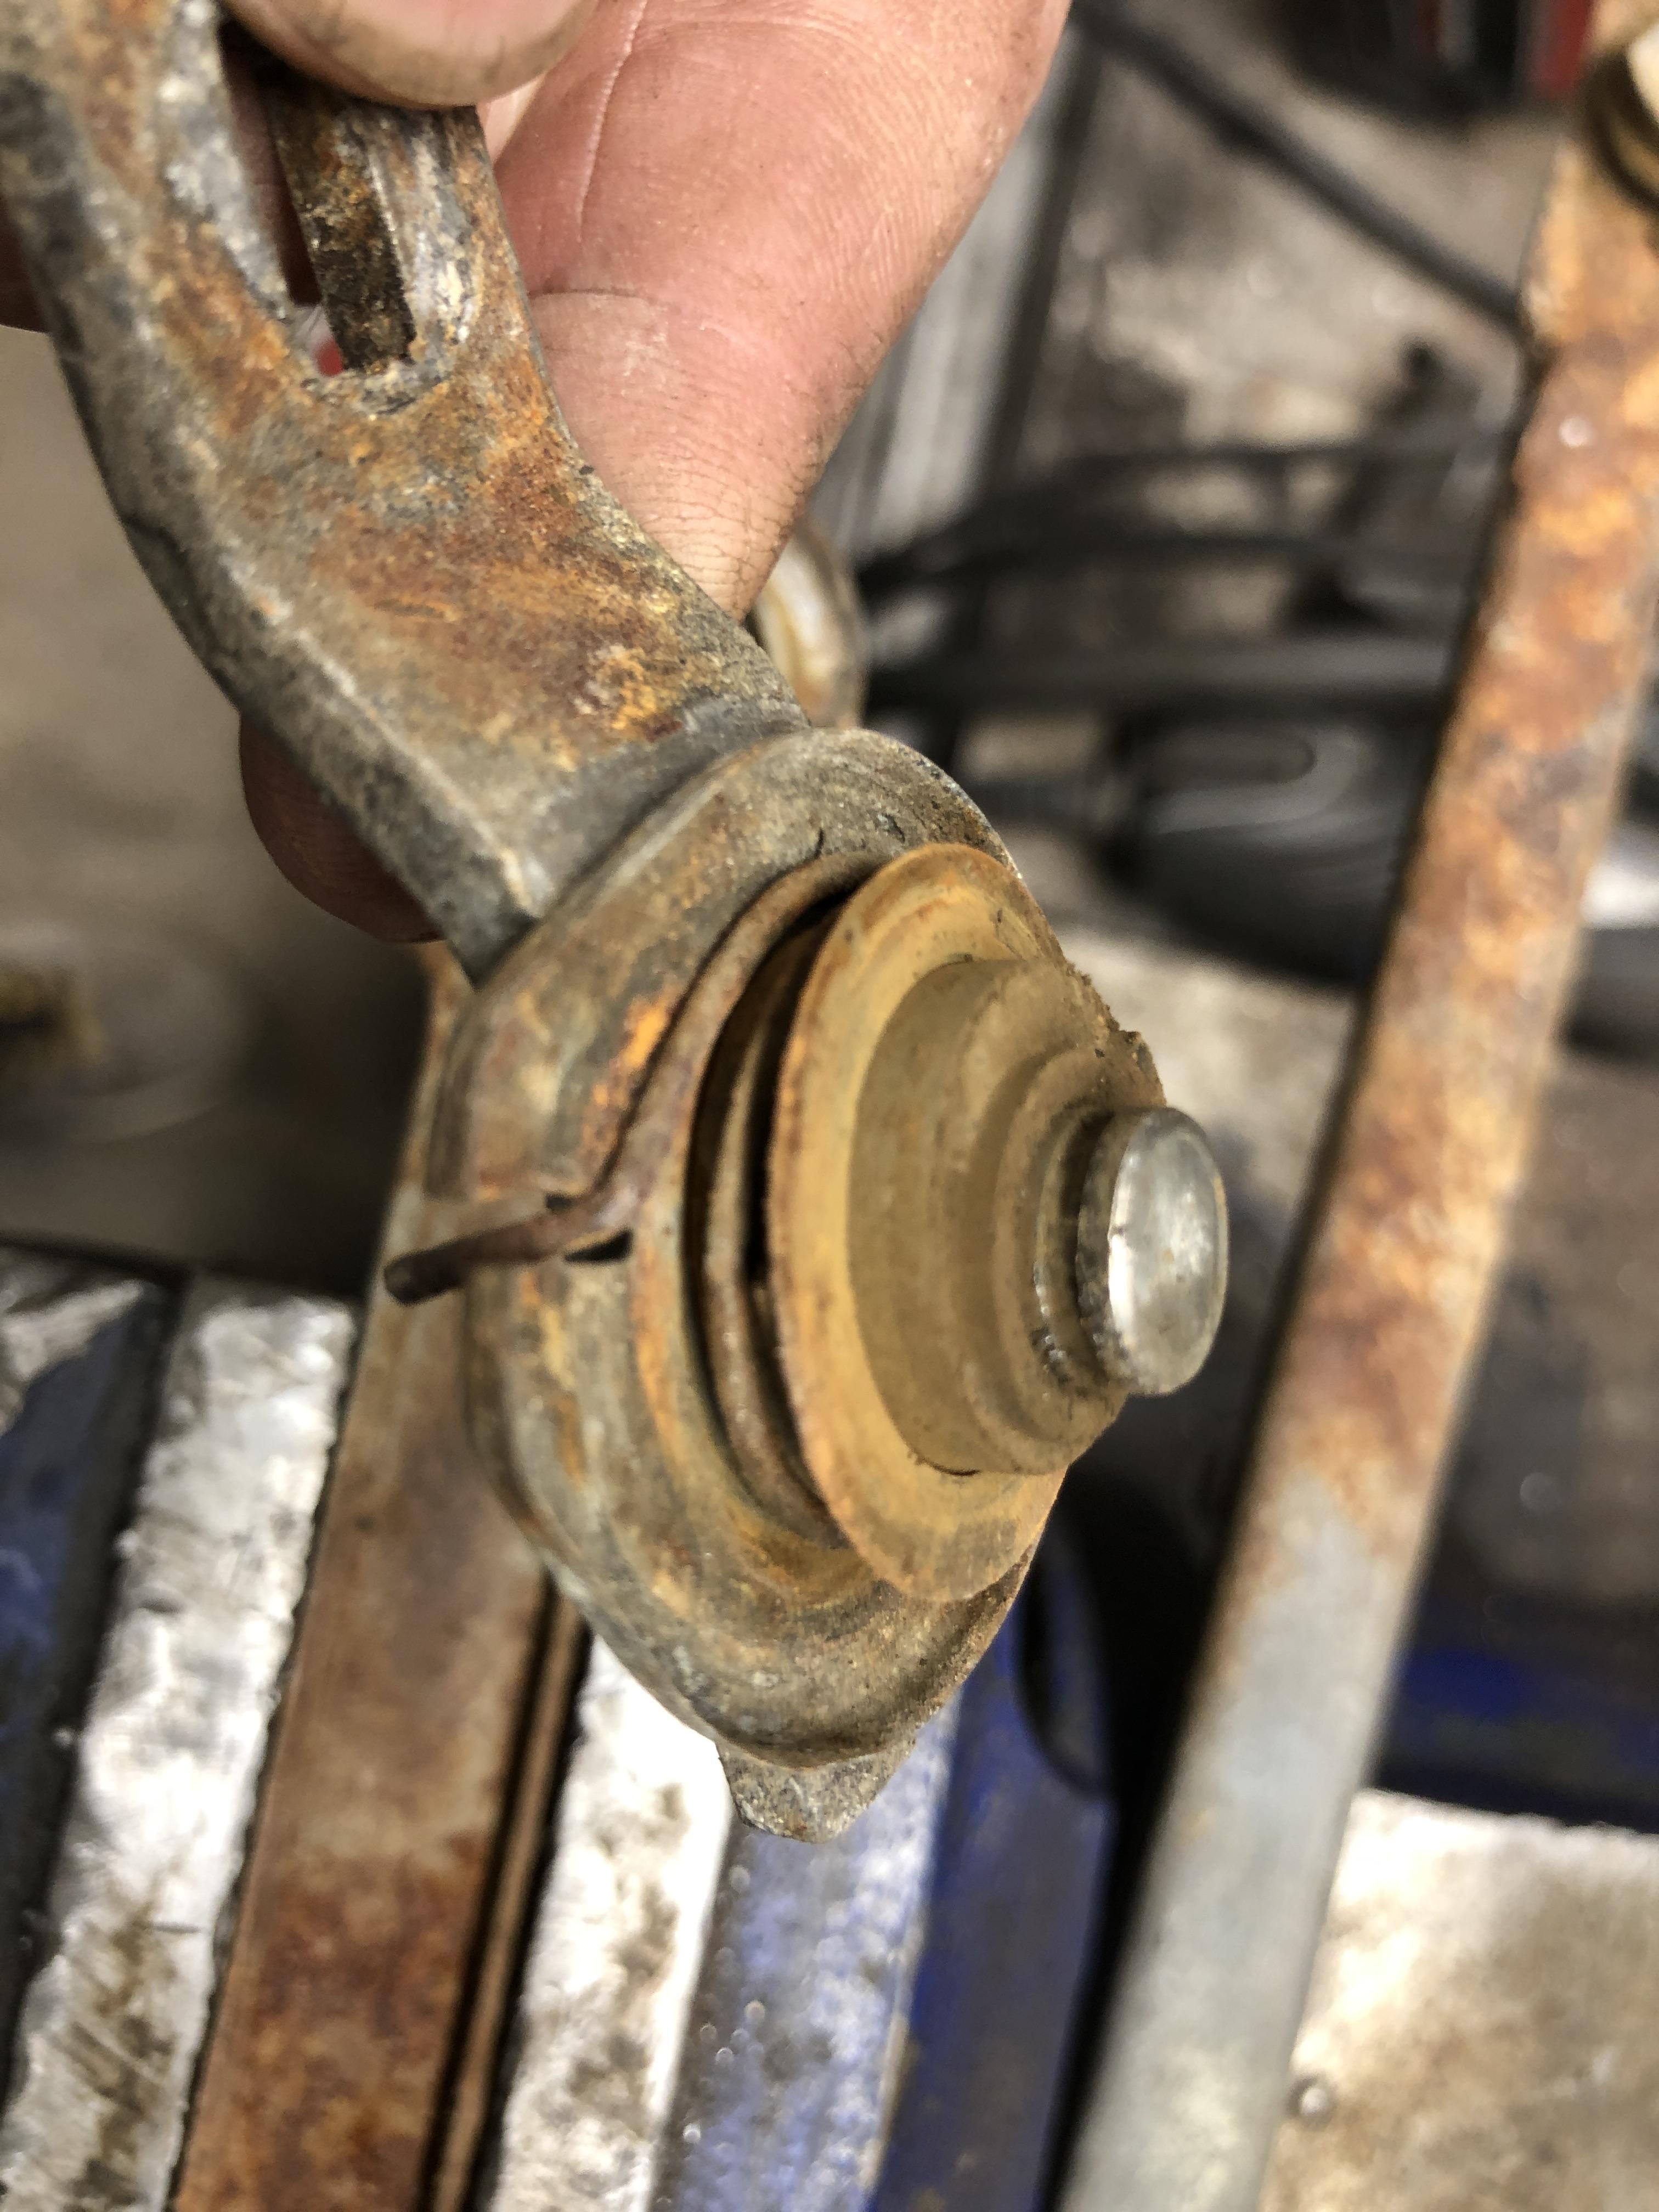
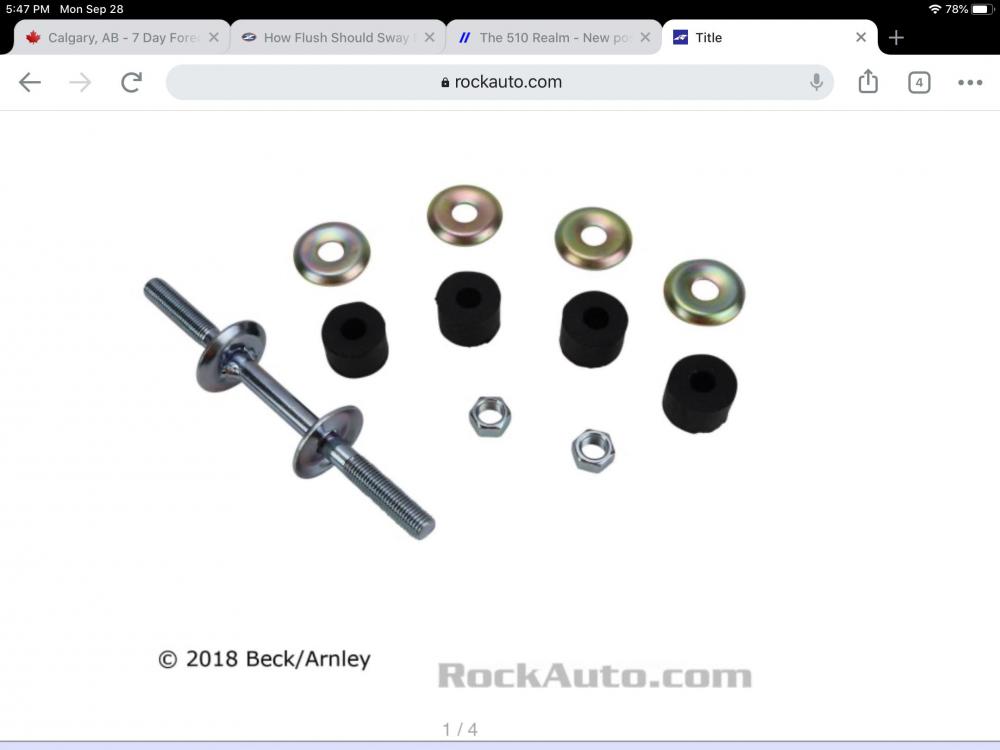
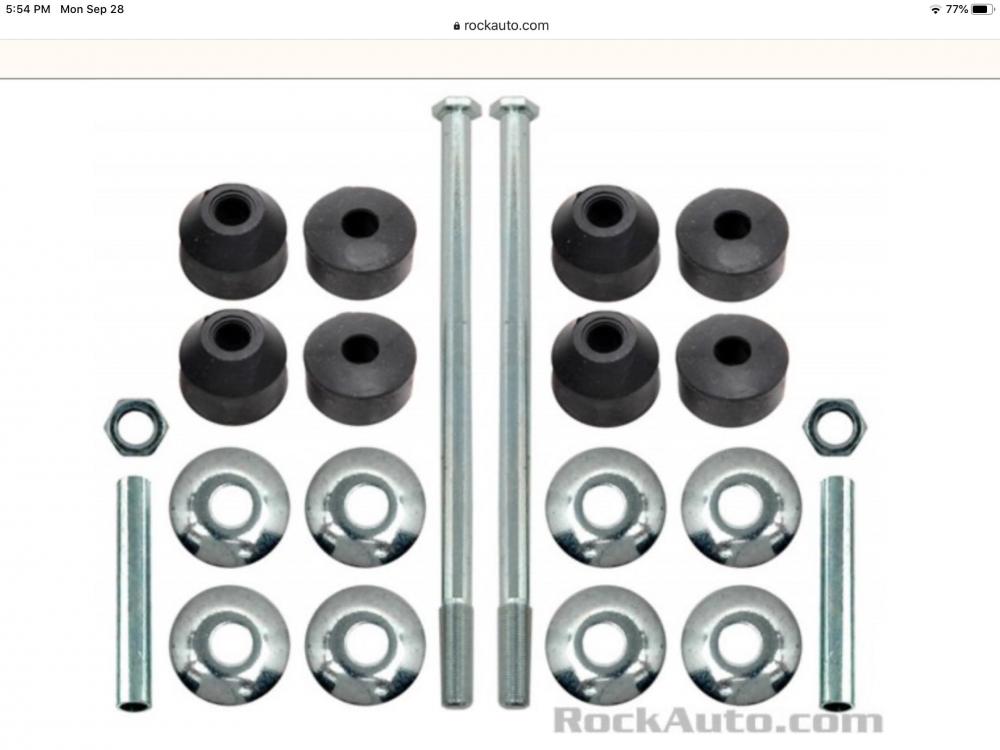
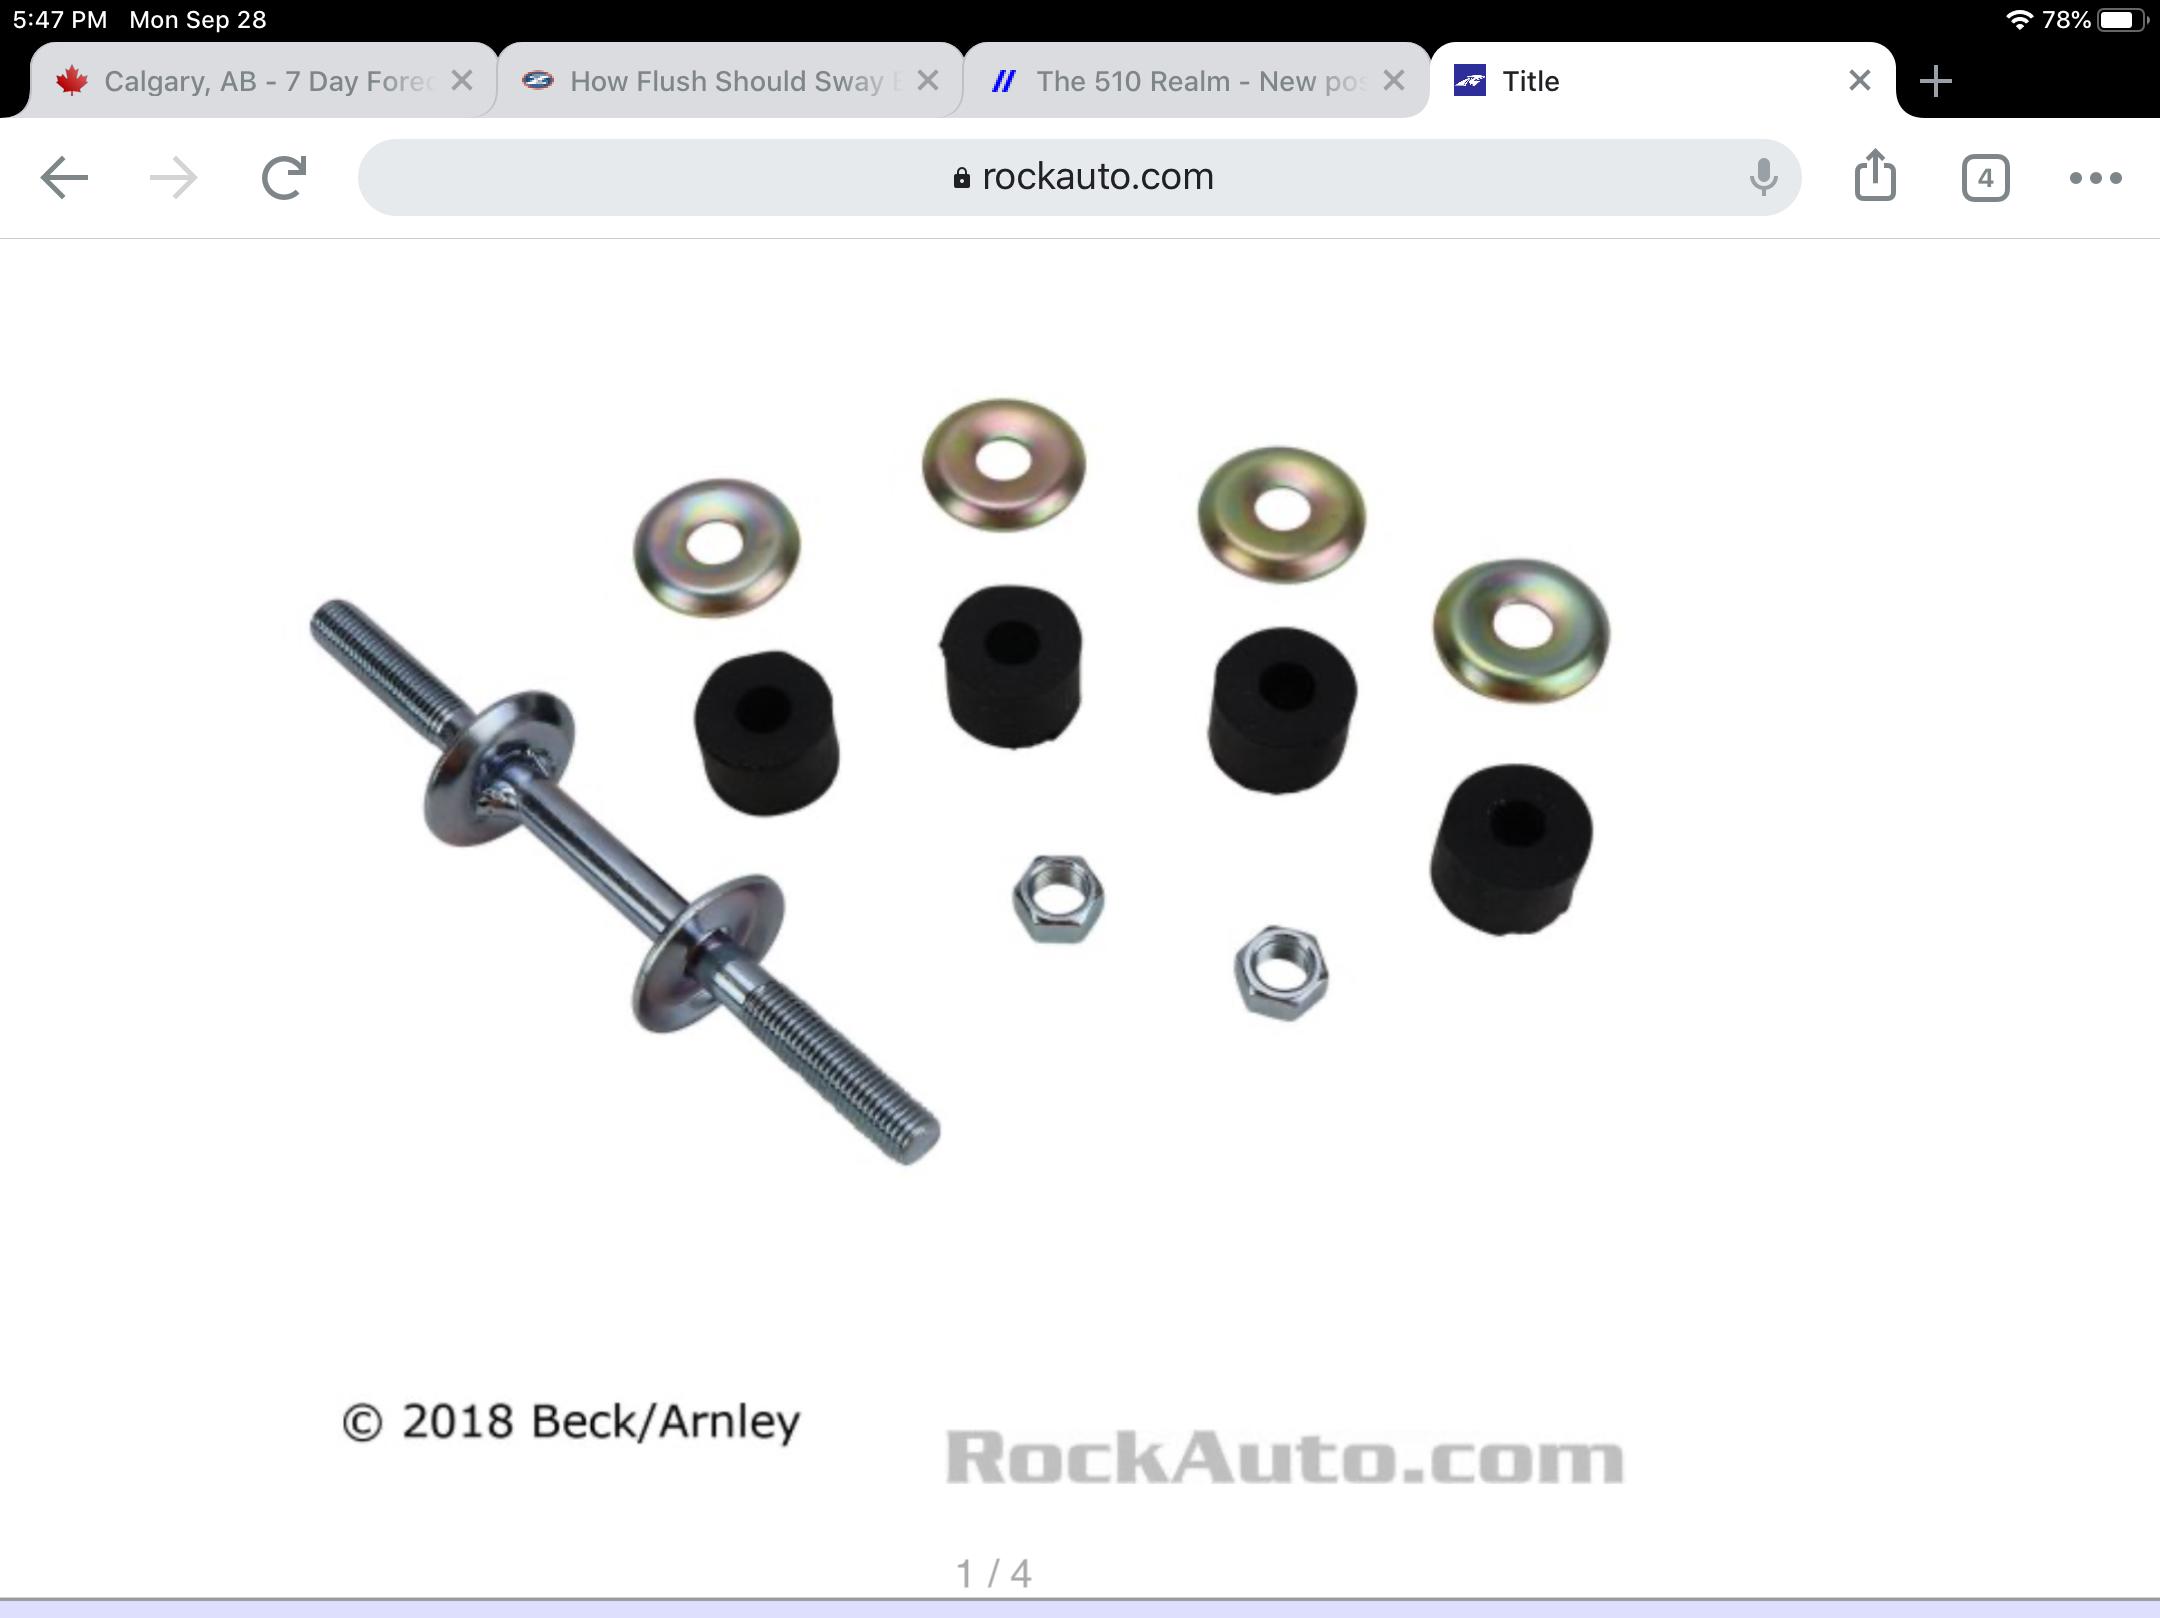
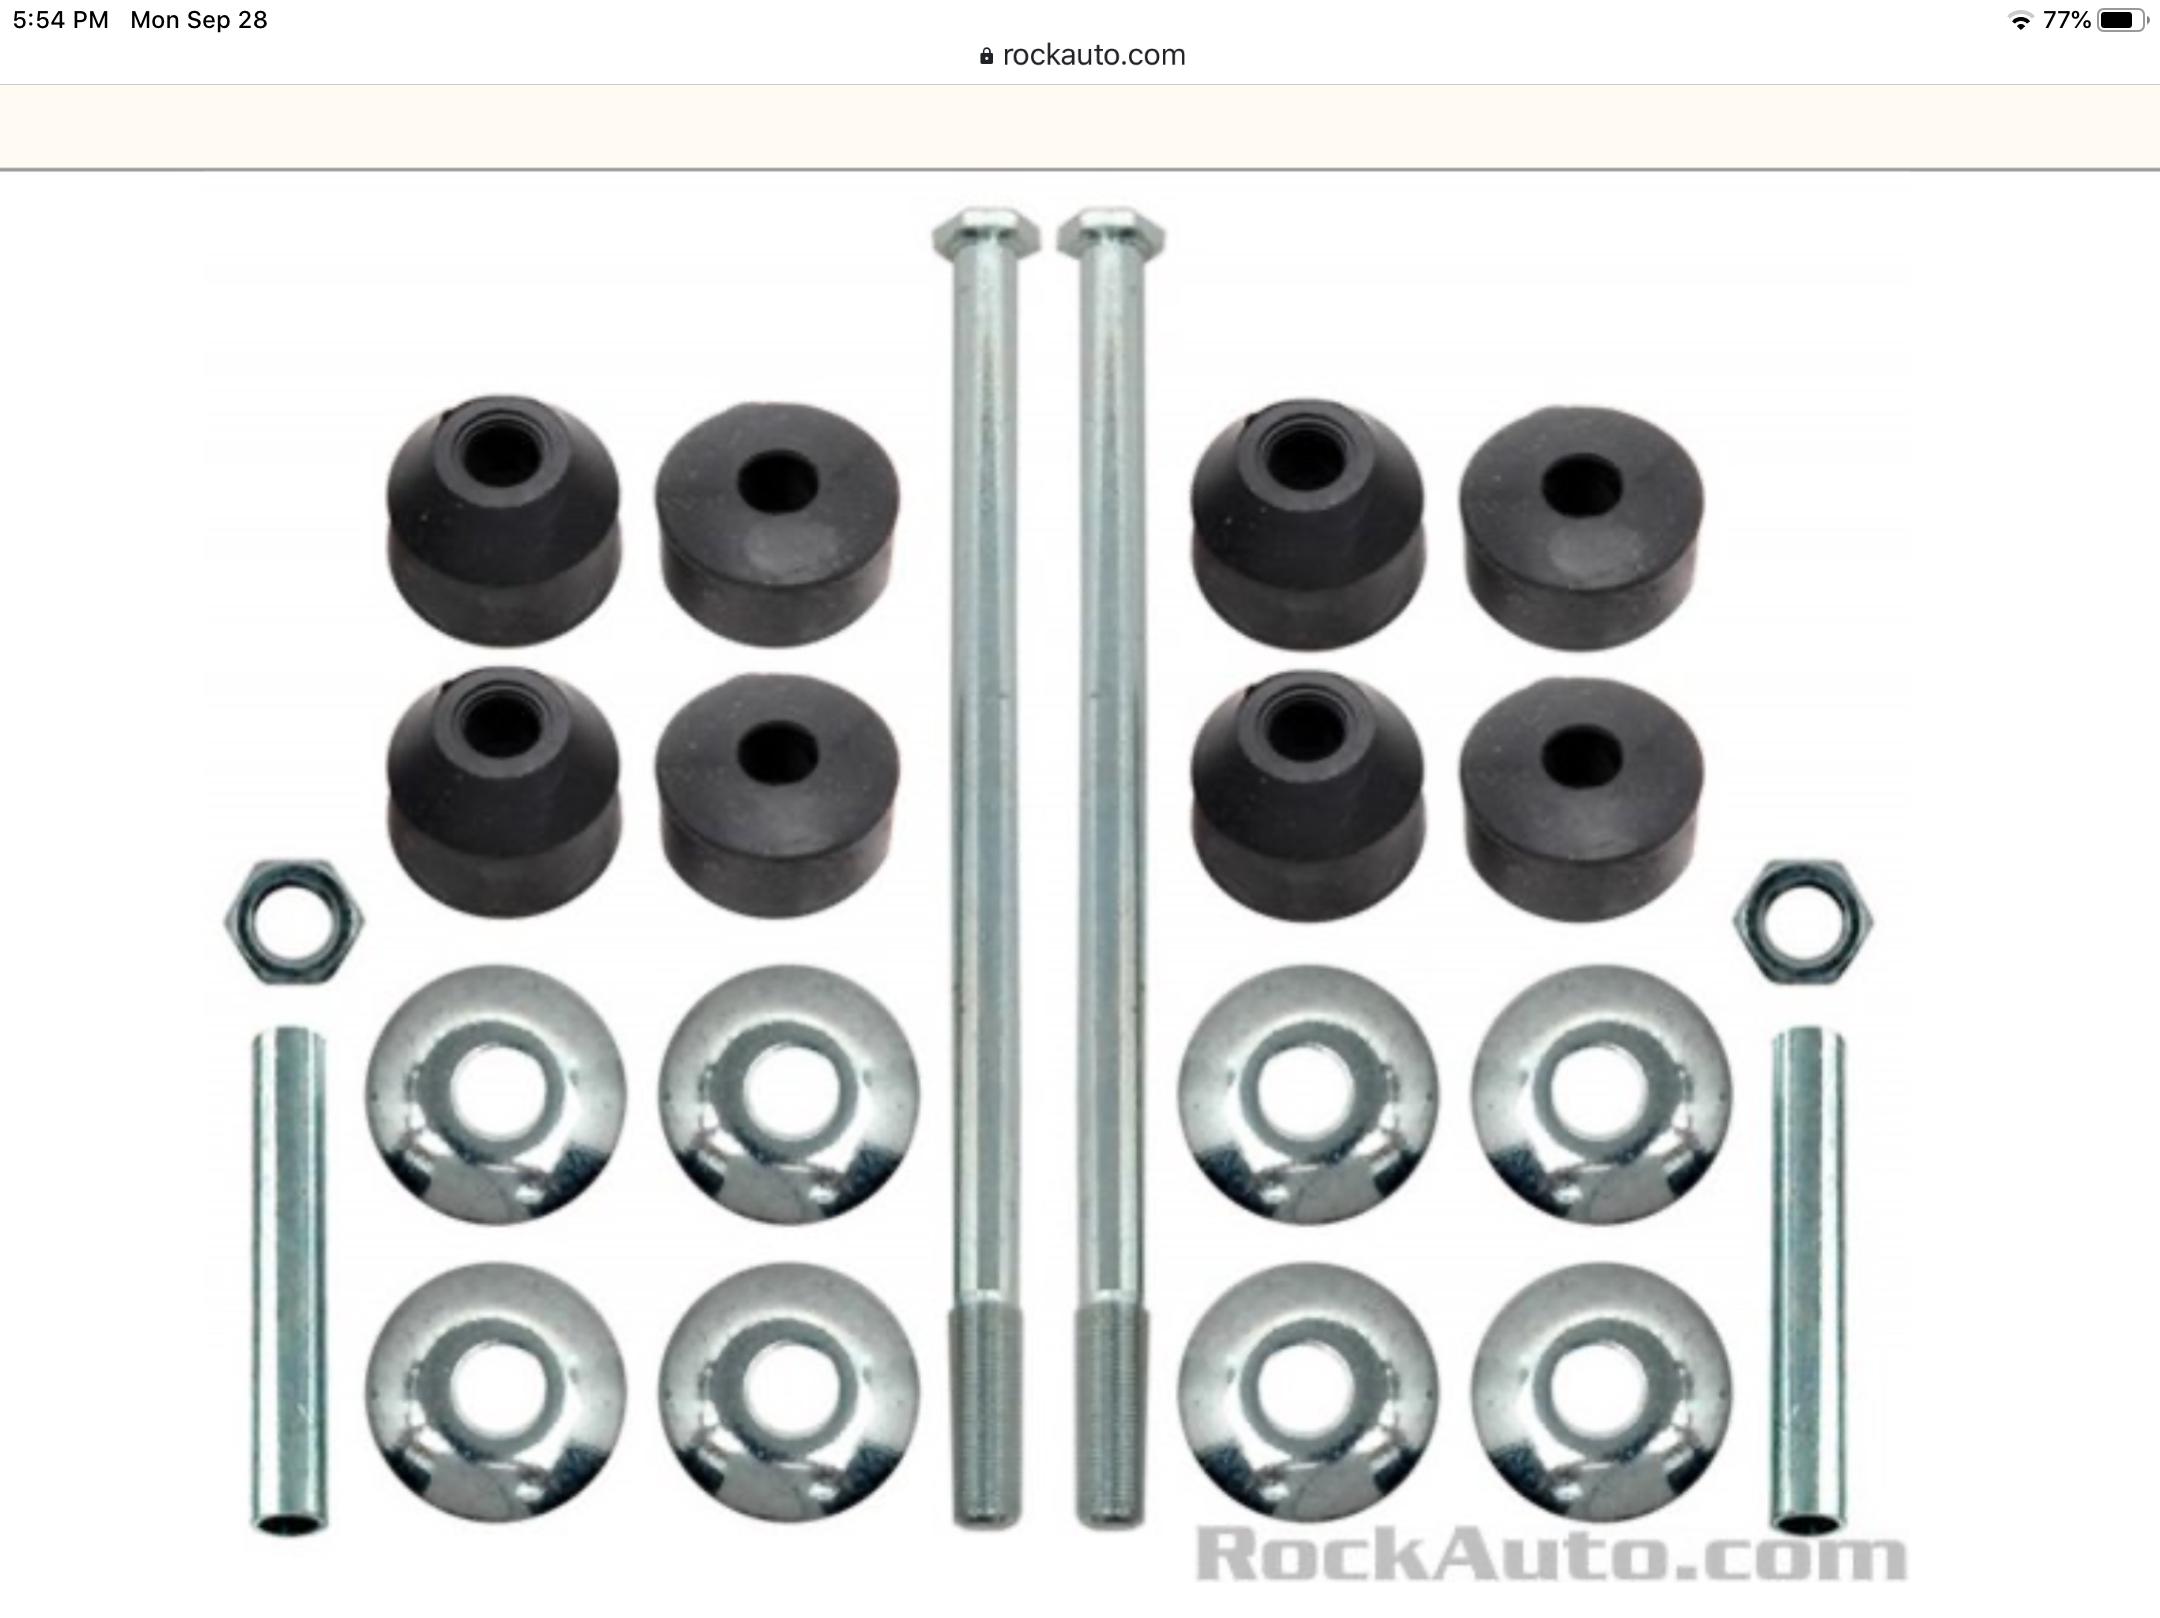
Interesting. I’ve never seen a metal sleeve that fits inside the ID of the bushings. Just the ones that set the spacing between the two bushing stacks. Stock end links that I’ve cut off, or any of the after market ones I’ve bought since have never had one. What you get is in the picture below. I totally agree there SHOULD be a sleeve to set the bushing compression, that would eliminate the guesswork of how much to tighten them, but that’s not the usual reality of what you have to work with. Tighten enough so bushings are compressed so that no metal to metal contact is possible and the bushings can still compress enough in use during travel. If your sway bar hole or hole in the control arm is all ovalized out, they weren’t tight enough.
-
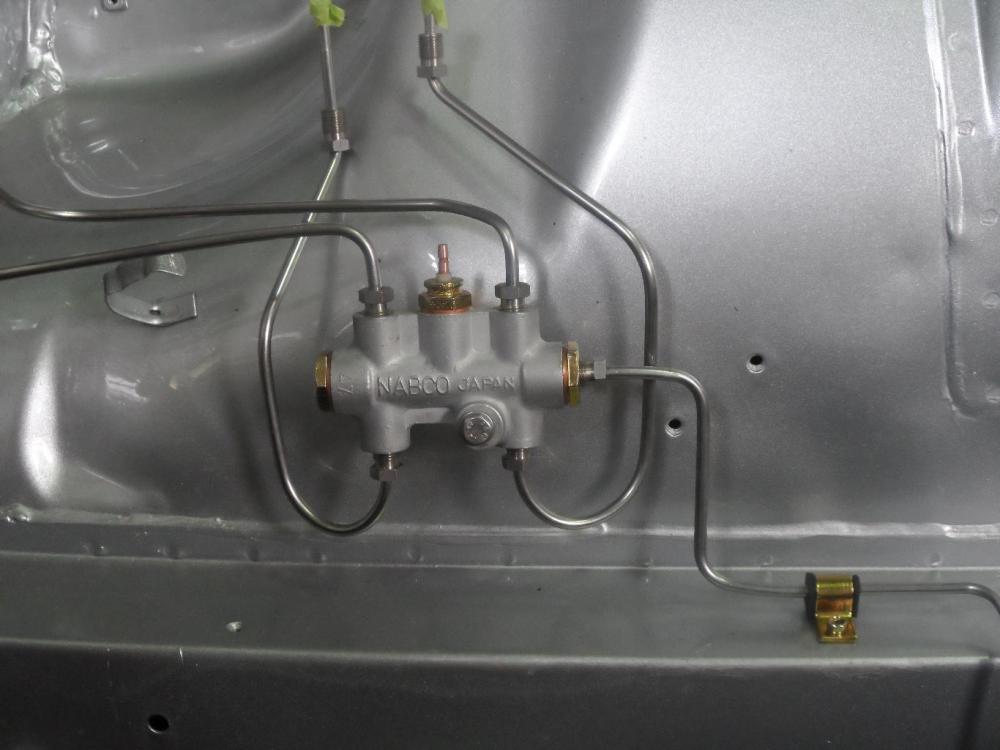
Dear Datsun Brethren I try from time to time to come to the aid of all manner and nature of Datsun people, and last weekend I had the good (cough cough) fortune to work on a 69 Datsun Roadster. It had leaking brake lines after replacement, and I was able to assist the owner with the repair. Something about "just tighten the nut more. It won't break"... But along the way, I discovered something that we need to be aware of as righteous Z owners. Chances are it will never happen to you, or me, but you need to know. As part of the trouble shooting, the owner of said Roadster brought a spare "Switch - Brake", you know, that safety brake light switch block on the fender well that turns on your dash BRAKE light if either side of the brakes loses pressure. We have discussed it's care and feeding previously. Here it is on a Z in case you visual learners need a picture. Here is the one he brought with him from his Roadster. I was questioning whether perhaps his ancient beast used DIN flares or some craziness and that might the source of his leakage, so he brought an example for me to examine. Looks da same to me as our Z part, right? We use the same one a 510 and I'm sure many other models, right? WRONG!!!! The tube nut threads on this abomination are some SAE nonsense, yikes 3/8-24!! Yes the horror of it all. SAE parts on a Datsun. As if having SAE seat belt bolts isn't enough of a embarrassment for most Datsun owners already. Now this comes as no surprise to any Roadster owner I'm sure, as they preach that the front half is SAE and the back half is Metric. Talk about fake news! Anyway, some day, some kind hearted Roadster-owning soul may offer us unexpecting trusting Z owners his spare "Switch-Brake" when we are at our most vulnerable, stuck on the side of the road (in Podunk Kansas of course), and yee shall be sorely disappointed and down hearted should you attempt to install it. Ensure he attempts to thread in both M10x1.0mm nut and a 3/8-24 before bothering to send it. It is true what is written... 46100-26001 is not the same as 46100-U5200 (maybe the insides are the same, doubt it though!) You've been warned, my job is done here. Go forth and merrily forget this nugget of truth.
.thumb.JPG.b3bce3a068ccddebf914b27a2093486b.JPG)
-
Recently discussed. 100% new. Not cheap, not stock looking. Likely to last forever and not fail at the whim of the rebuilt junk suppliers. “Oh we are so sorry the fifth one in a row failed on your, here’s another! Be happy!” Do I have to bring up the Podunk Kansas story again? https://www.autoelectricsupplies.co.uk/product/1114/category/218 They have alternators as well. Get a stock looking 120 Amp one wire and never look back again.

-
The grease rarely migrates anywhere. By design, it stays put. I love to make fun of people who fill the front spindle caps with grease to keep the bearings safe. What, there are little men with little shovels in there that will monitor the bearing grease and toss some at the bearing if they get a little dry? This isn’t a coal fed steam locomotive. More likely its to prevent outside dust and crap from getting into the seal area. It is not required. Maybe if you rally in the dirt a lot...
-
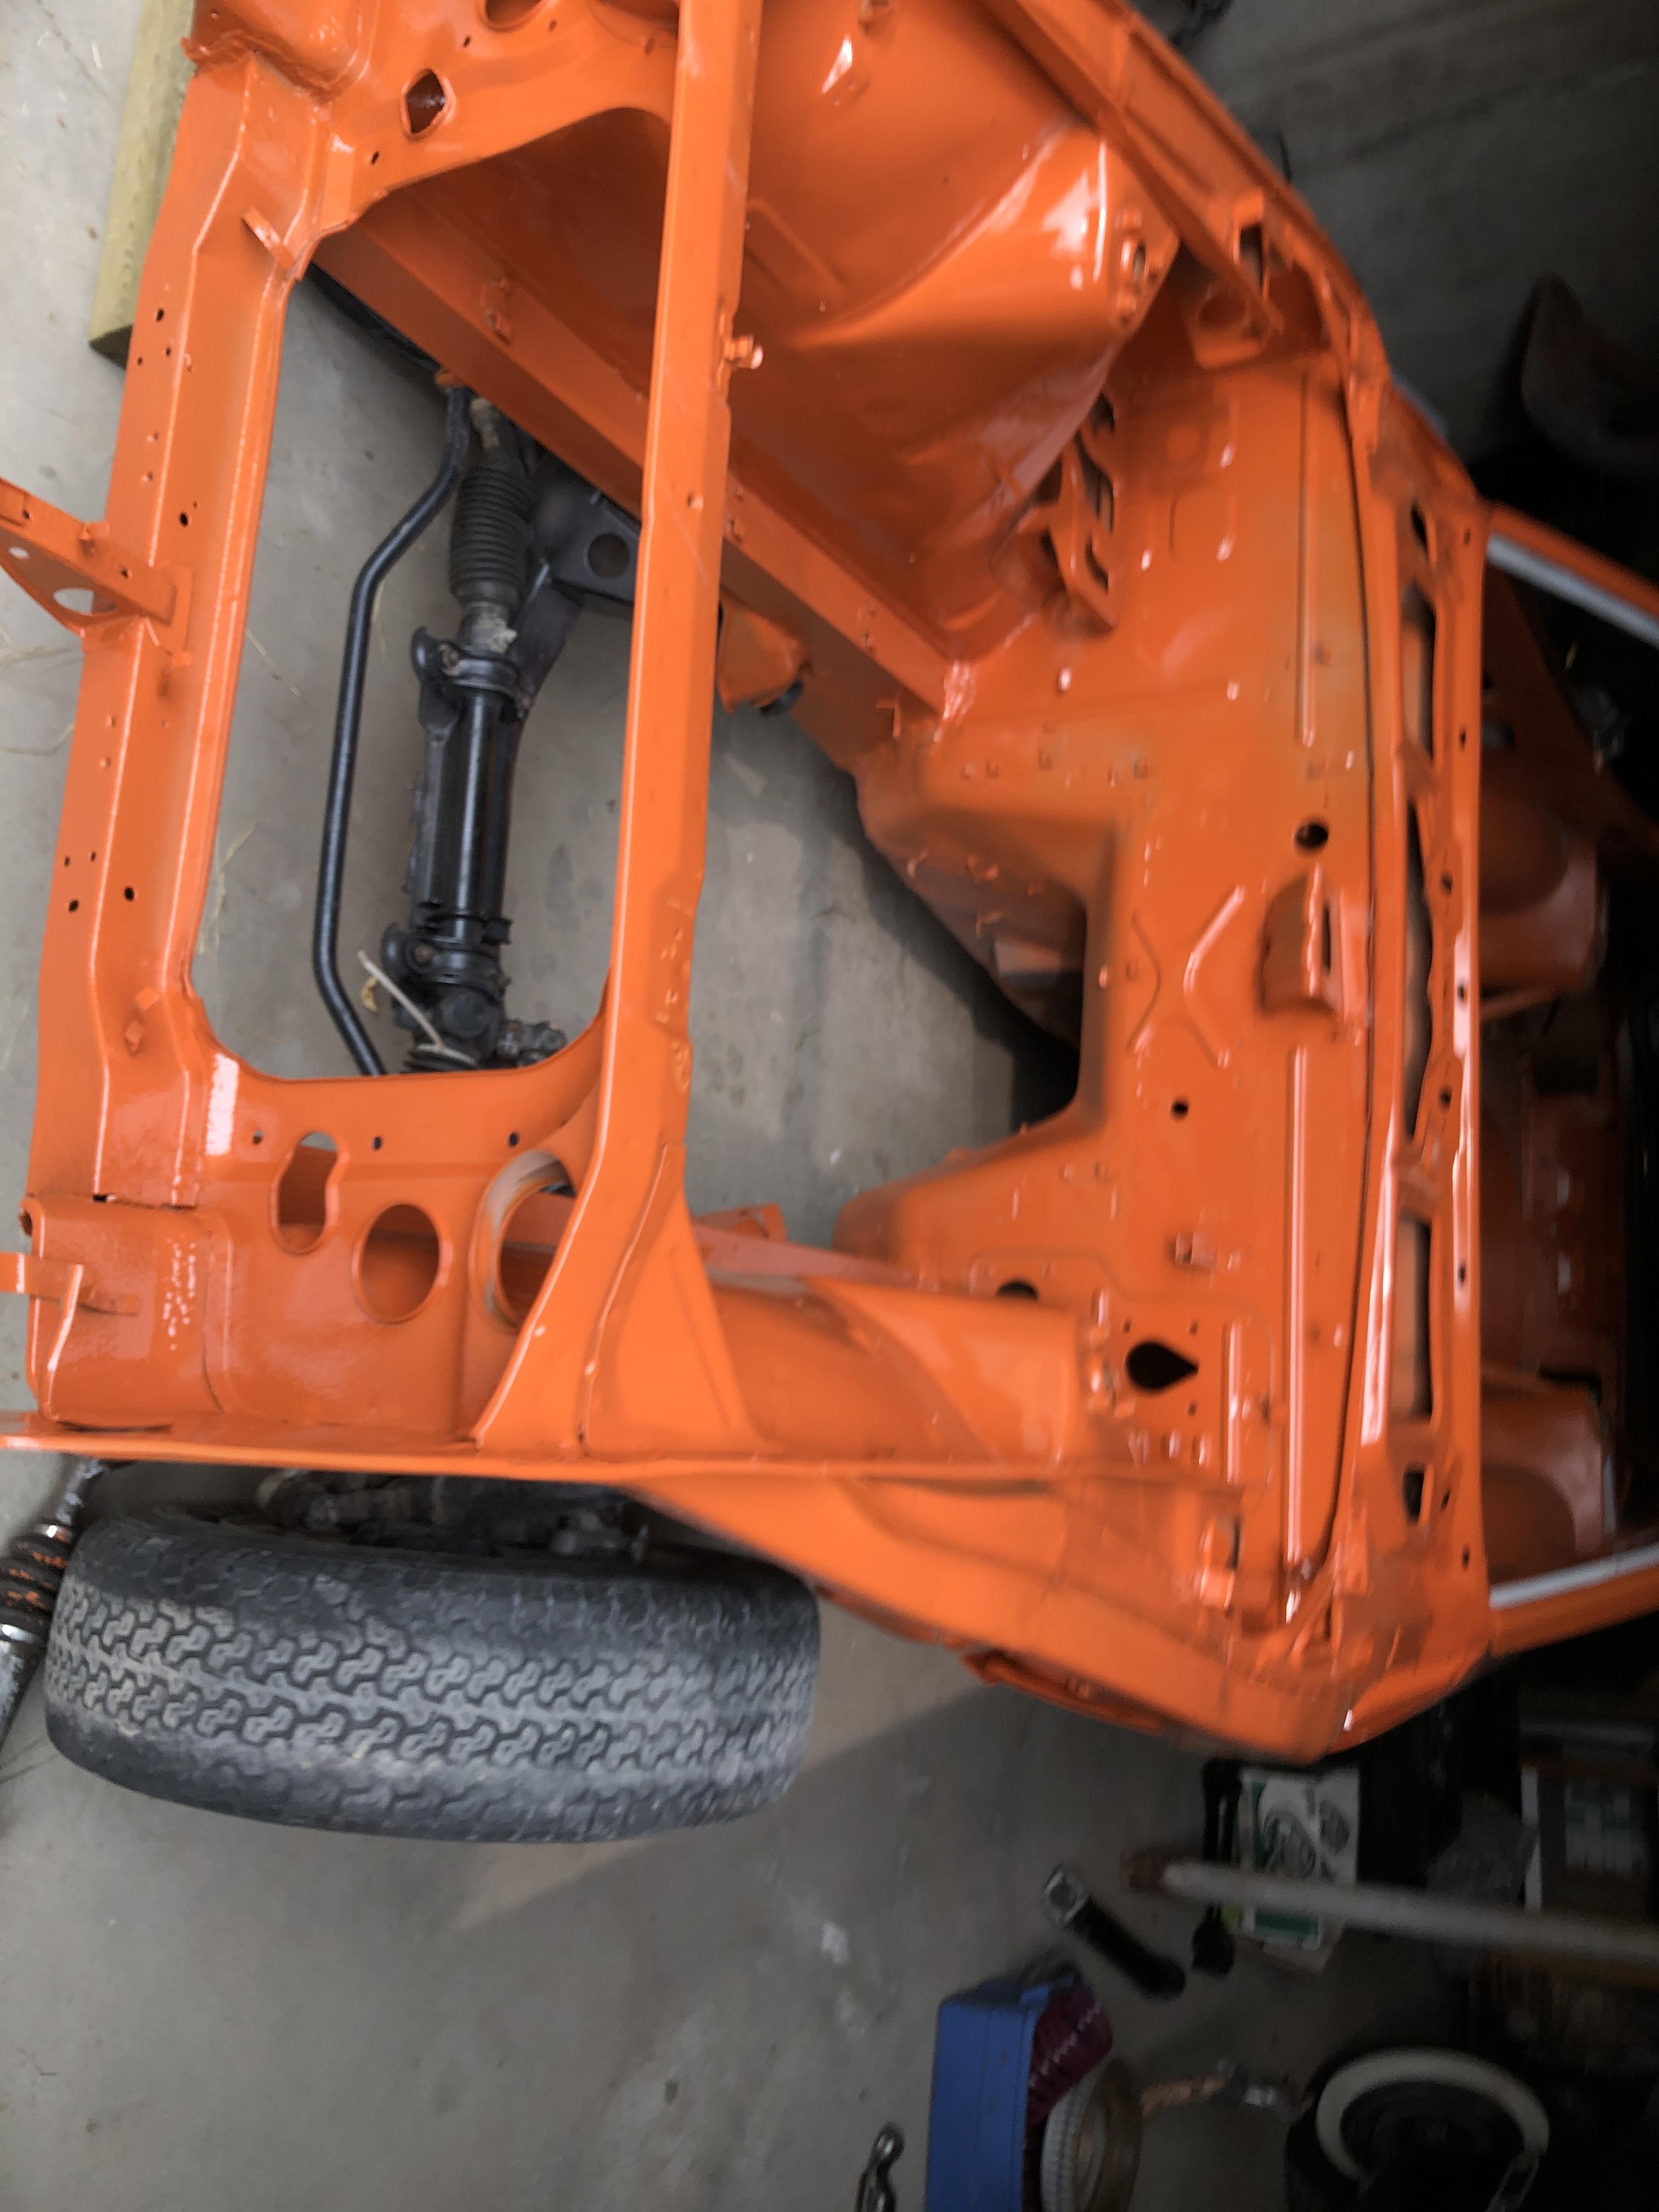
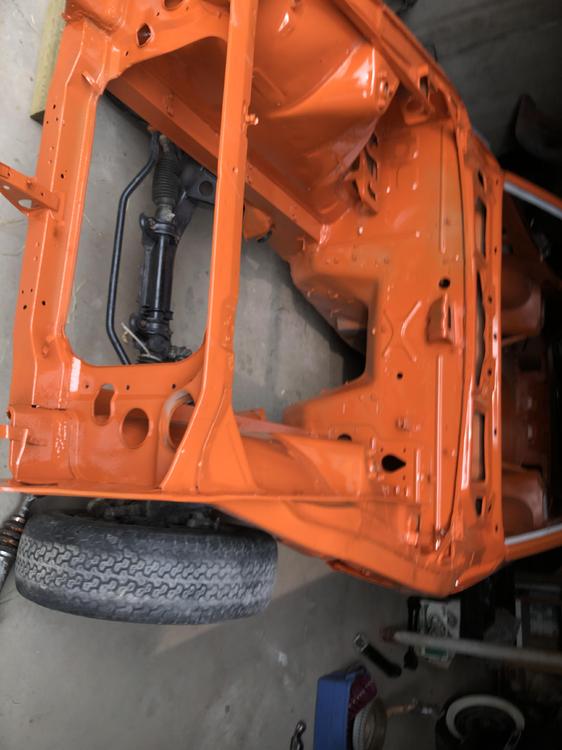
Let me know what you find out Richard. I can have my body shop guy tell me the exact mix he used. He has to mix some more too, there are couple things that need to get painted that didn’t get done.... Then you can compare to what your guy did. Here is a picture I took in crappy light (daylight at least) of the new paint job on the car. Same phone camera used for both at least. It is slightly less peachy than it was, and definitely more orange. Still not as orange as I think it should be but.... The pictures I see on my ipad here are really more orange than the paint really looks in person. The car was completed repainted from what the original body shop Used, that I commented on above. They used a 918 formula, they did not scan and try to match the paint that was on portions of the car. I had a chat with the shop owner about this, he told me, it greatly depends on the quality of the paint you select no matter how carefully you follow the code mix. Lots of experience, I believe his opinion. I have to go look if I have a tool bin door or something that is stock 918 somewhere.....

-
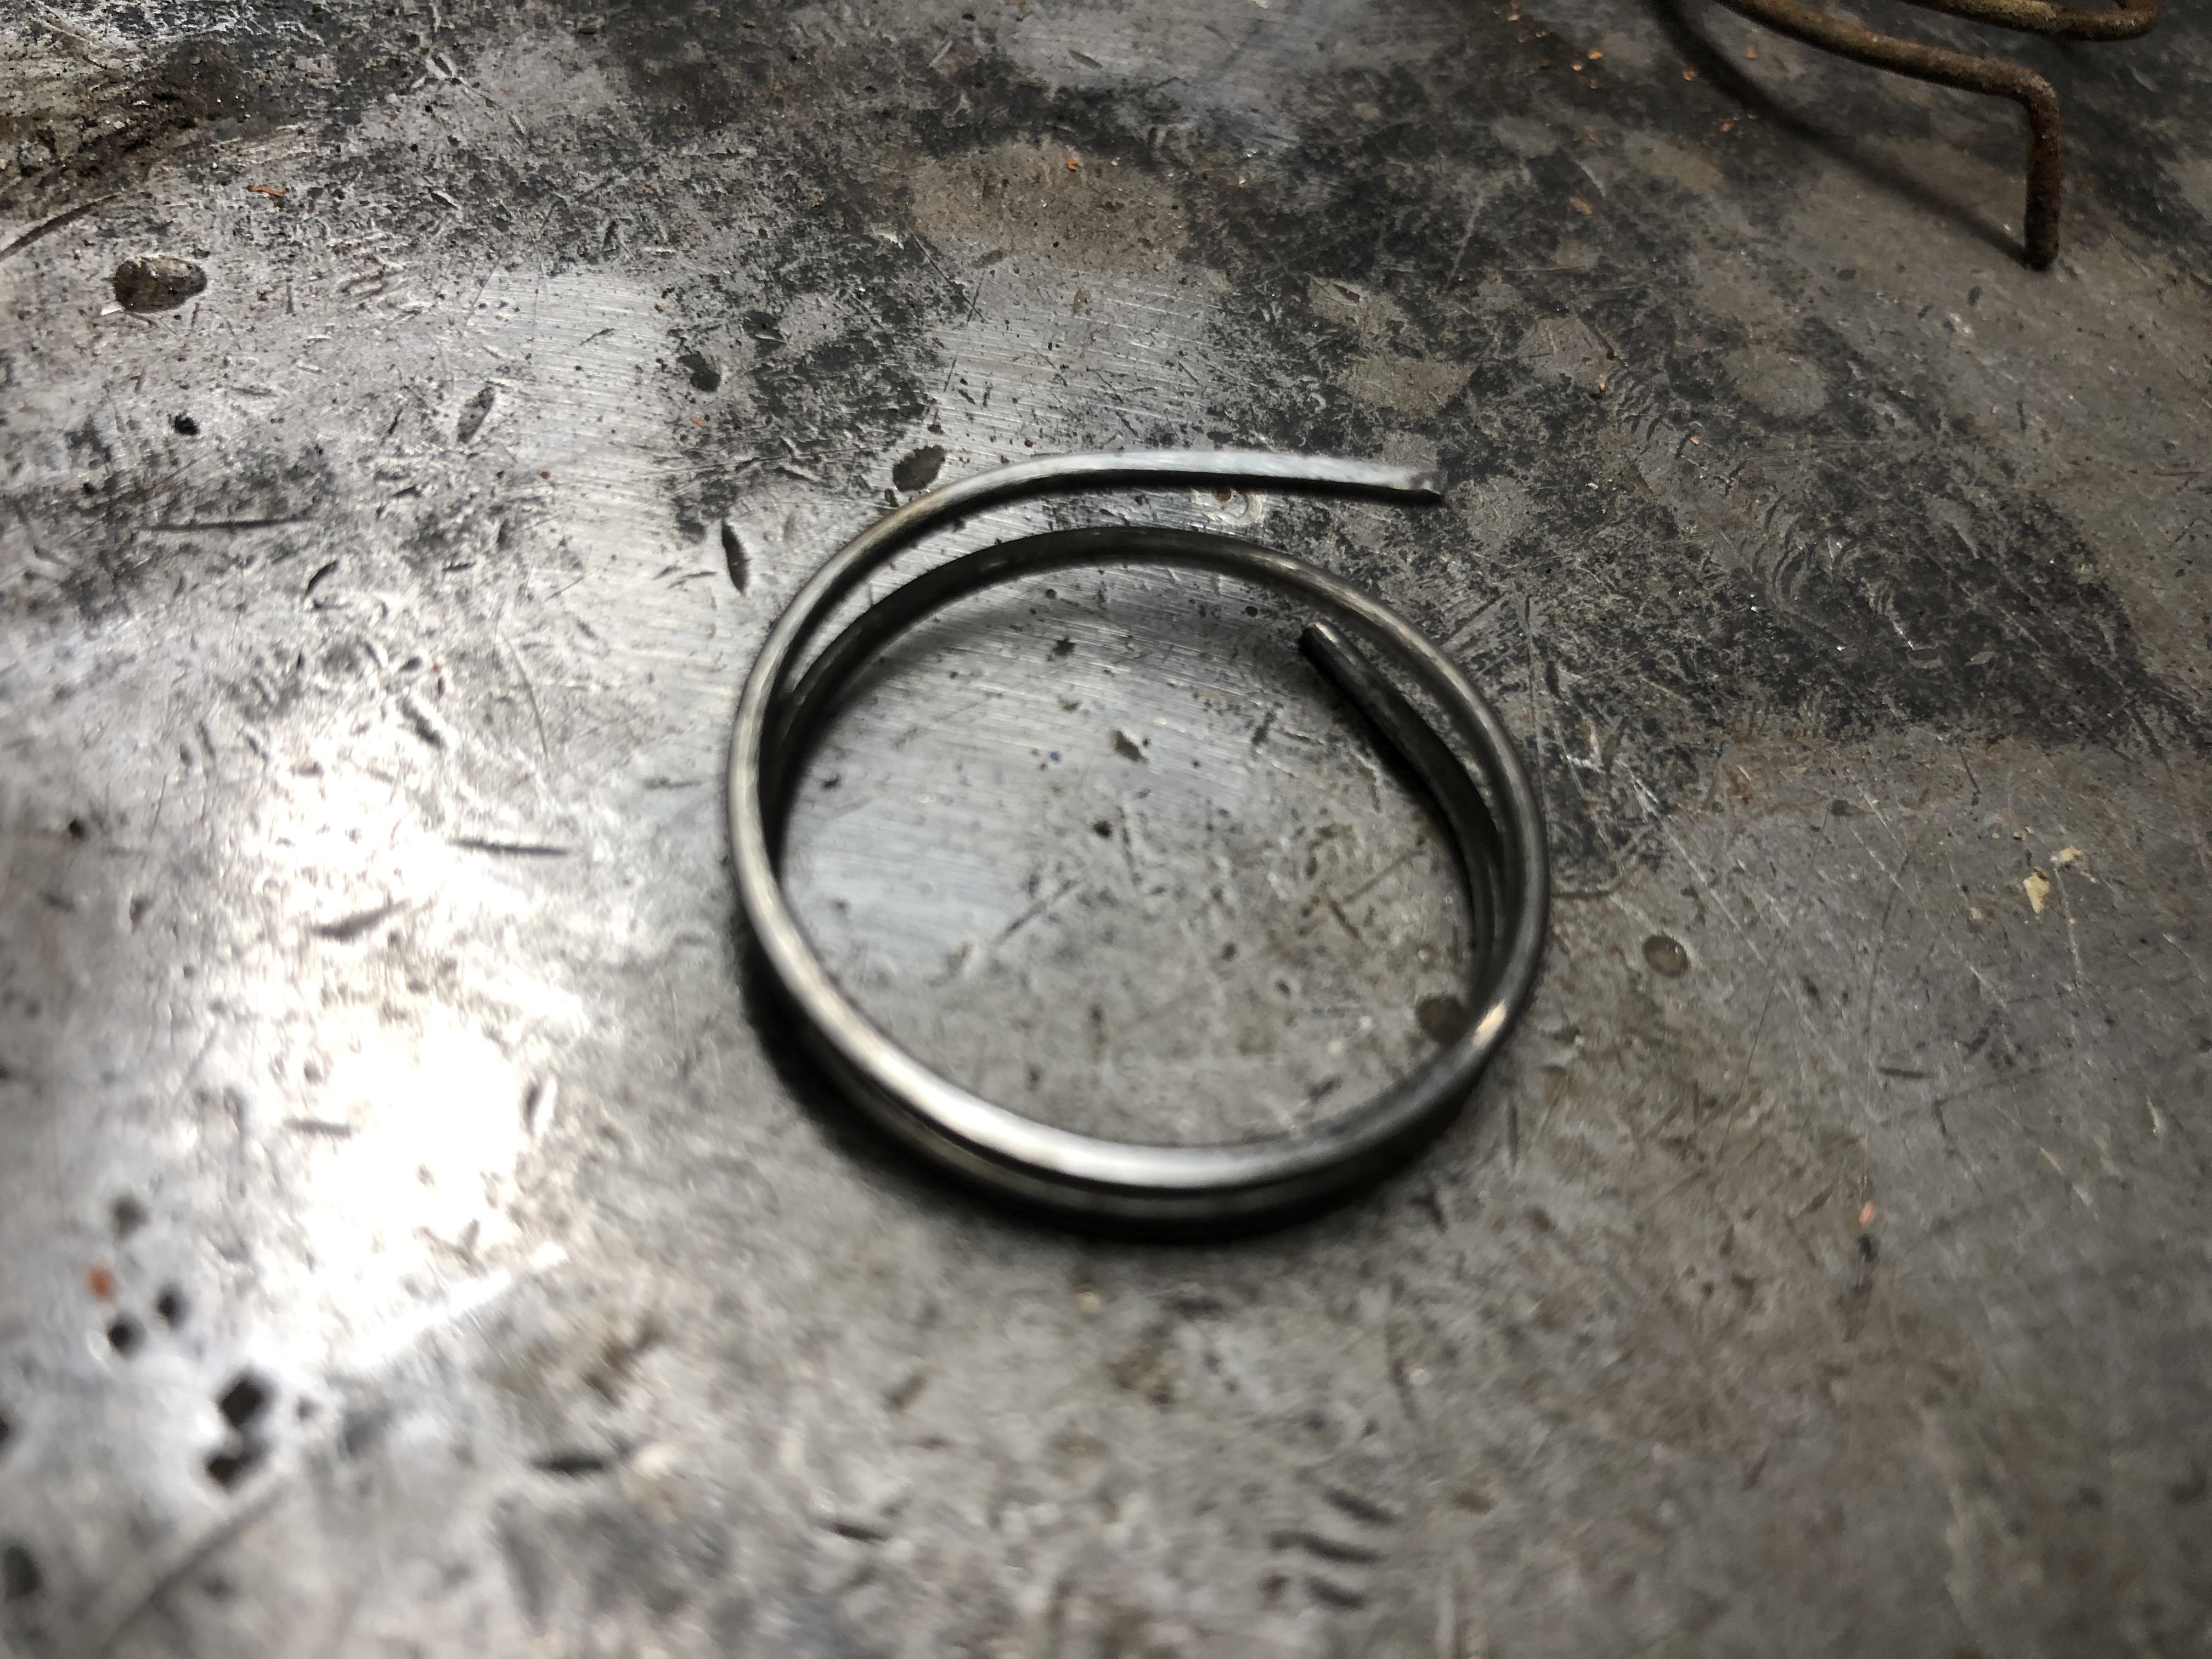
Glad you enjoyed today’s little treasure. Now off to google “How to make small coil springs by hand”
-
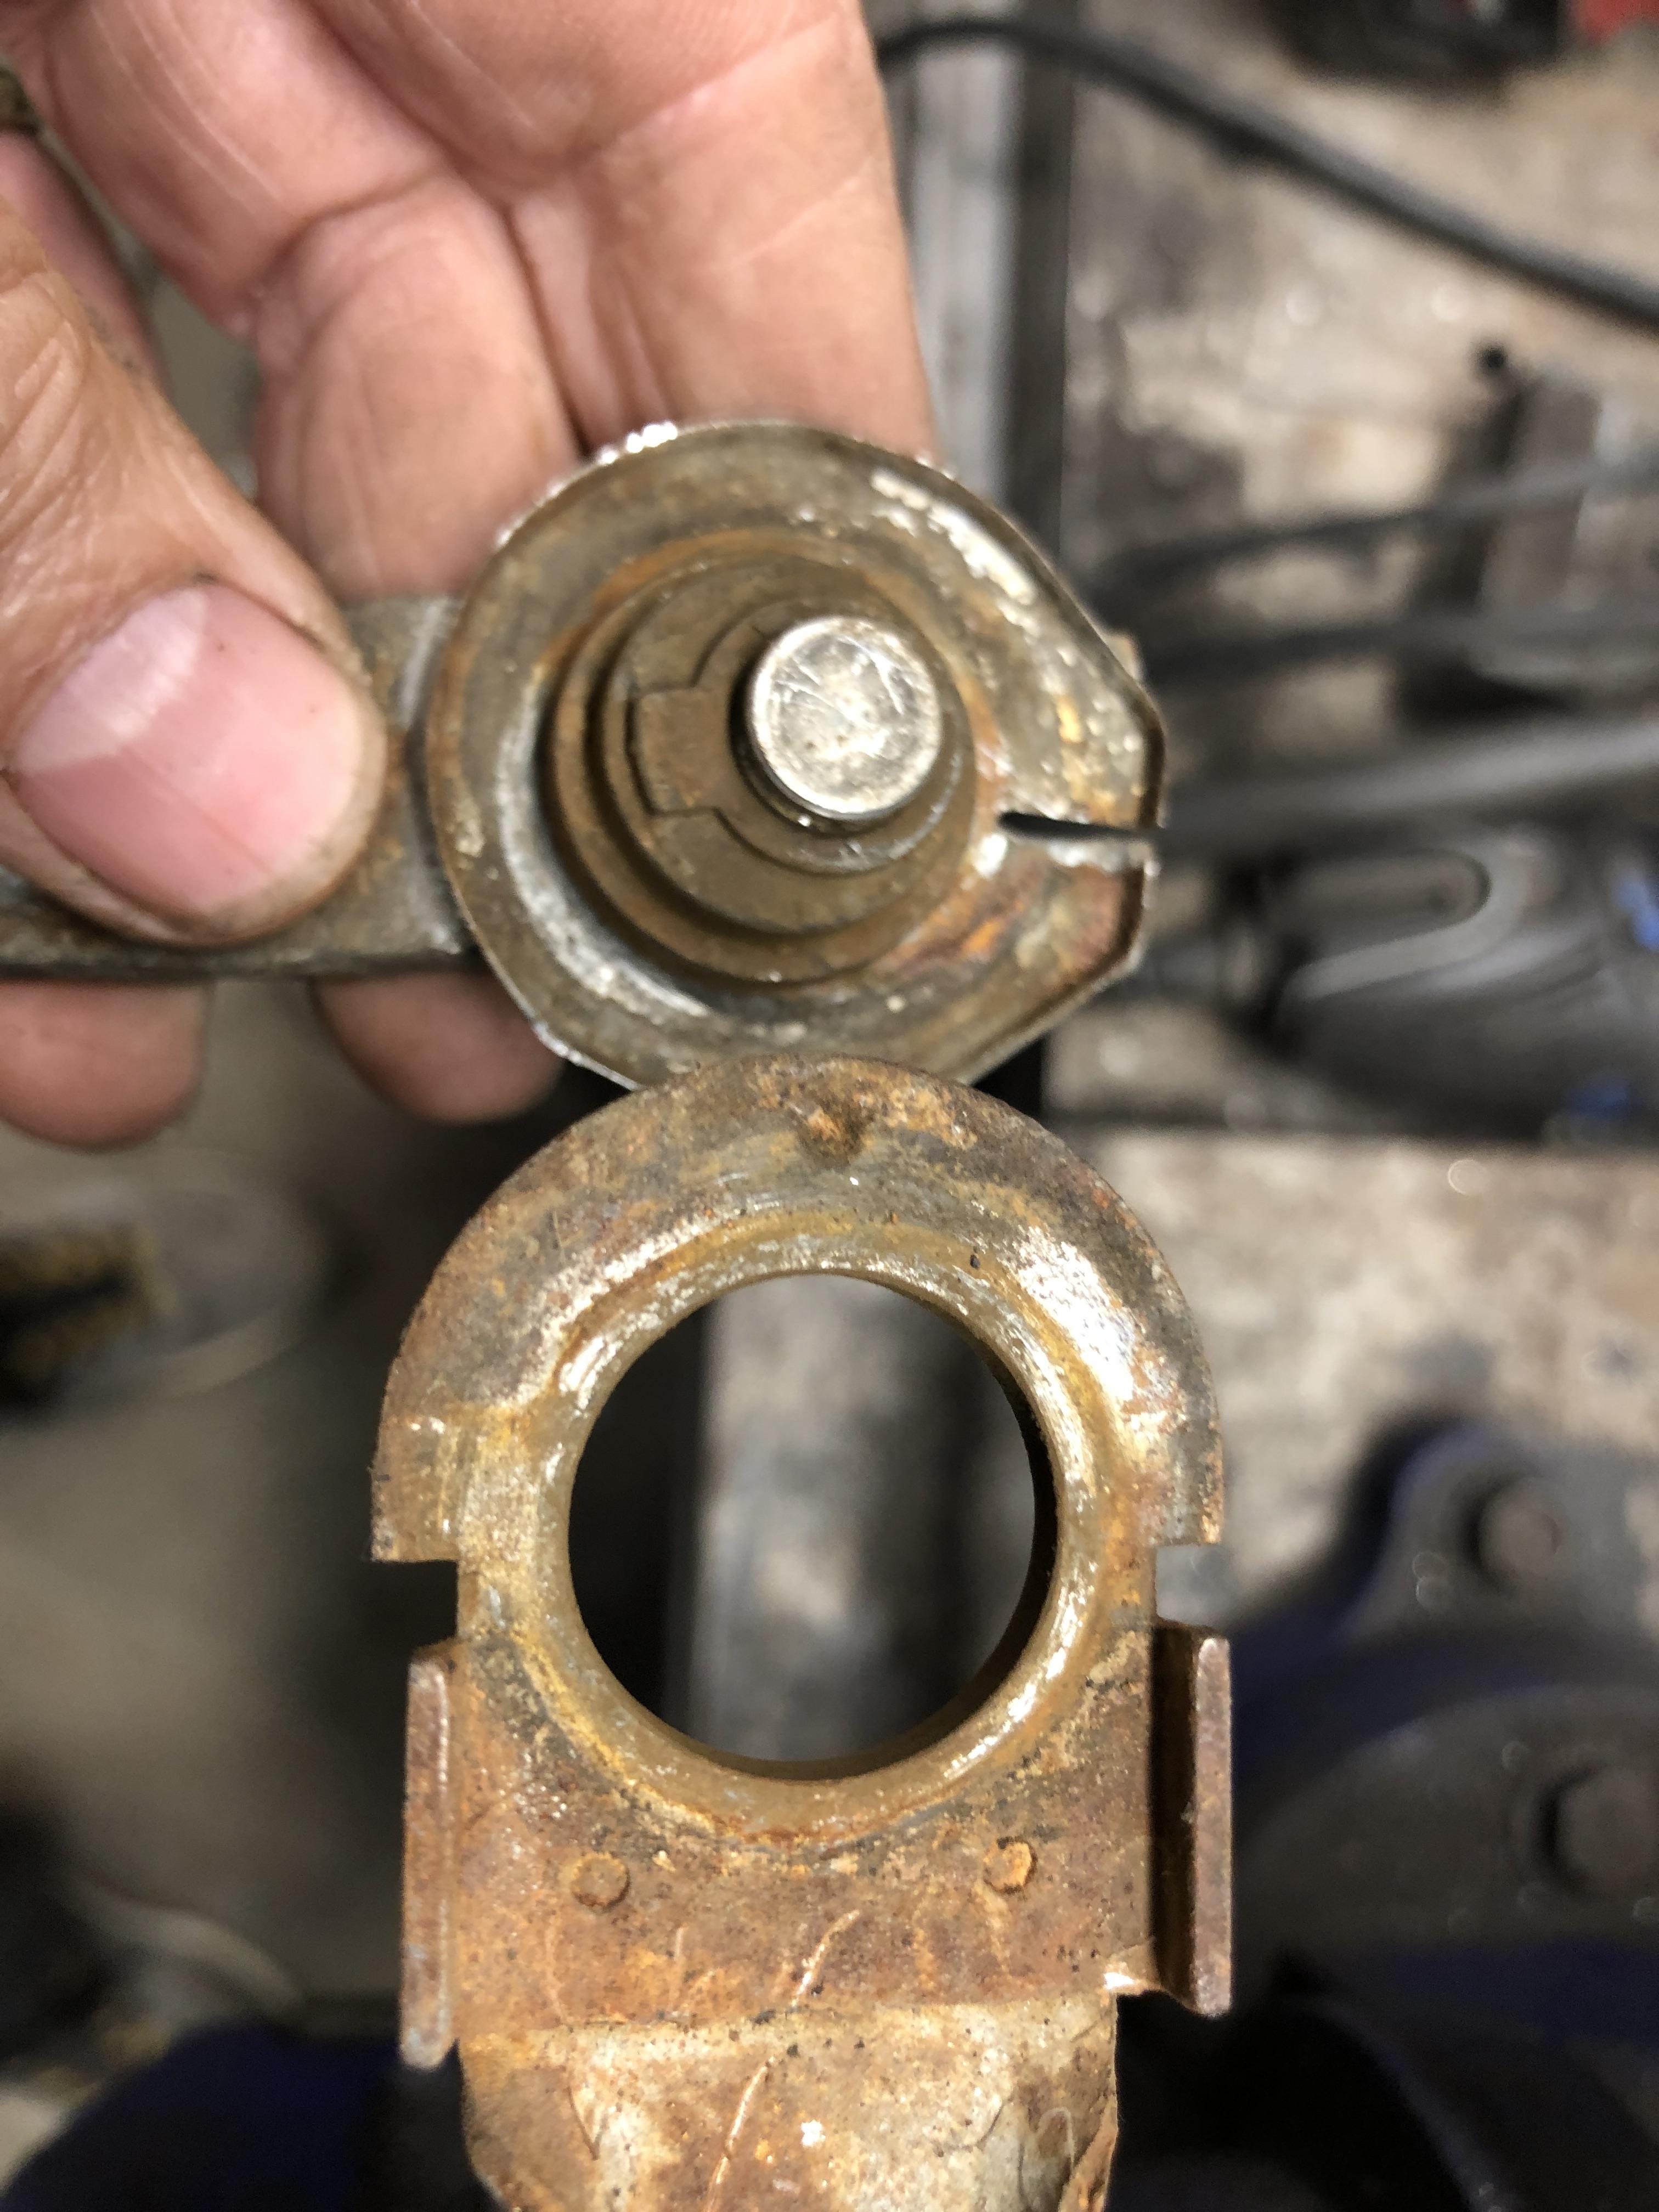
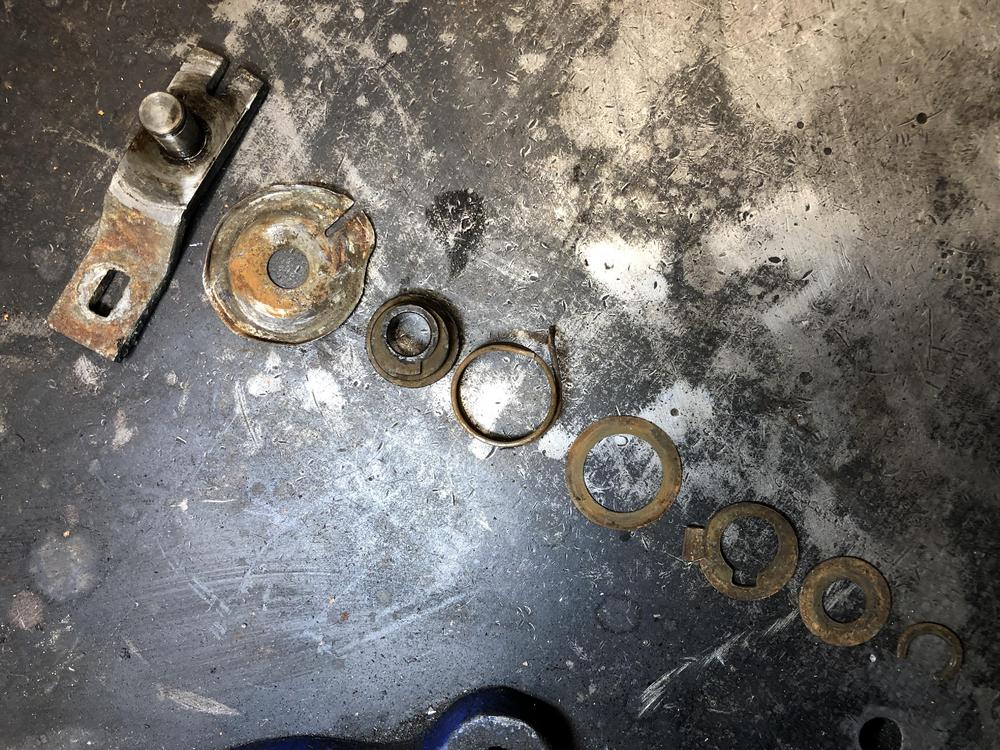
As I am today rebuilding another wiper linkage, I thought I would contribute some more detailed pictures of the fancy wiper park components for future posterity. Out of, ahem, "several" available wiper linkages, I have only a single one that has an unbroken spring. Thought I would include detailed pictures of it in hopes of some day creating new ones, as well as to show the assembly order and position of all the components Here is the little spring with oft-broken off hook engaged where it belongs Complete and broken example for comparison of where the break happens and how long the bent tang is Clever photography (ie move it around until you can see it), shows the shiny spots and wear on the bottom of the spring. All the bits and pieces in order from top to bottom. Top is defined as having the end with the (poor excuse for a ) snap ring/C-clip pointing up when you're taking it apart. I have used a real compatible sized E clip to replace that obnoxious soft C clip thing. This gives you a visual idea of how the eccentric cam part fits with the hole in the arm, effectively changing the arm length as the cam rotates. Another shot showing how the spring and the "millennium falcon" part with the slot are arranged in the assembly. Clearly this proves the designer of said space ship in the movie was a Datsun owner.


-
Found it! Better late than never I guess....
-
I feel a bit sad they didn’t pop the hood and show off the engine bay and make SOME noise about the performance objectives. If your audience is the enthusiast group they claim to be speaking to, then this should have been included. Maybe there is nothing under there..... The shape is pretty good. Except the face. Looks somehow childish or immature, or simplistic? Or something? Could use a bit more work for sure. But frankly, in the end, it’s the driving experience that will sell it to me, or not. It will have to evoke a memory of the 240z and just feel “right”, or at home, or something intangible that’s impossible to describe without being there to feel it. Maybe having a spritz of “old datsun plastic smell” that hits you when you first open the door and sit down. That would do it. Smell memories are the most powerful.
-
I'm impressed by the heartfelt personal presentation rather than a canned marketing pitch.
-
Seems “we” are staying stock so the one I have is off the table. Hmmm... I “could” chop the crossmember up and weld it back together with the center “offset” forward, that let’s me use the later isolator.... Done that to standard Z trans x-members to fit the T-5 transmission. Not exactly an invisible modification, but likely workable. Or, If it wouldn’t melt the rubber, I could weld/move/adjust the position of the diff mounting holes on a later isolator to let you use it. Very slow welding with rapid cold water immersion every 5 seconds of welding???? Where there’s a will, there’s a way; and relatives....
-
Just have examples.I can measure something


-
Here is an example for reference

-
Probably figured this out already, but M8x1.25.
-
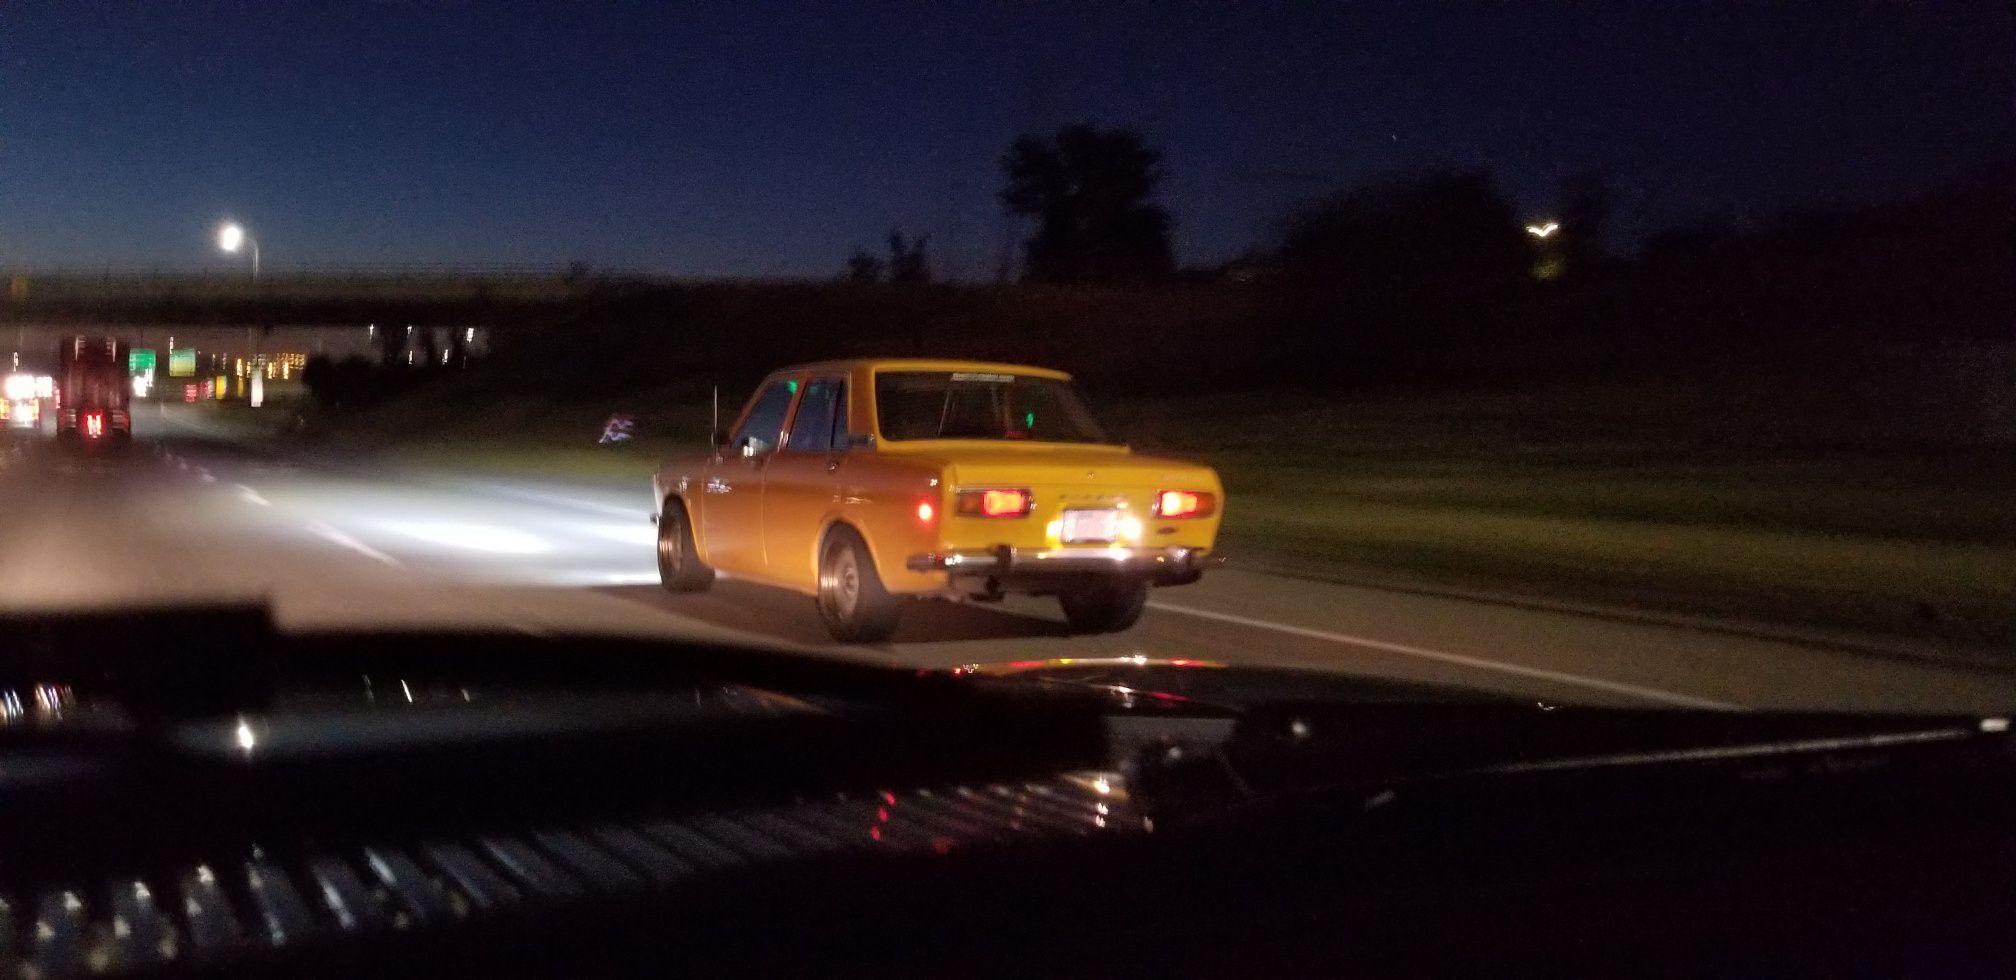
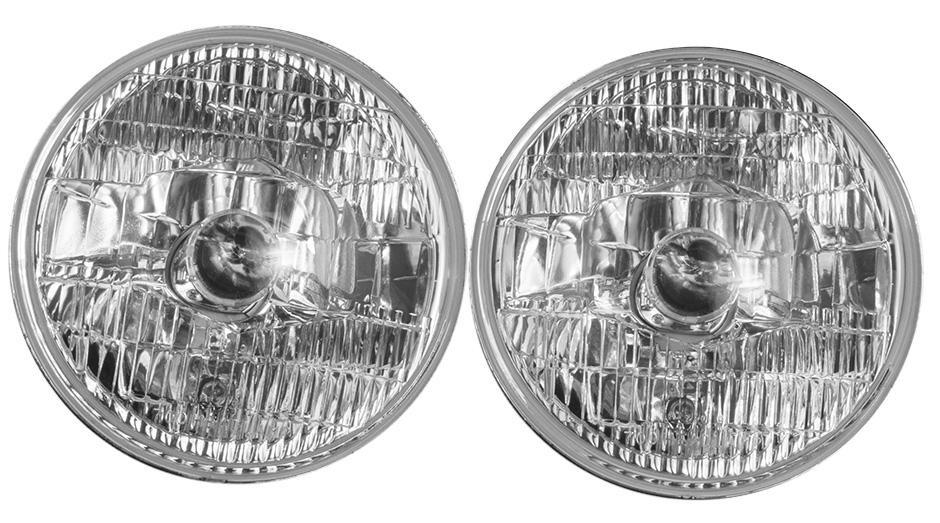
Go LED headlights, reduces the current requirements to the point where relays are barely required to protect our sensitive old headlight switches. either Dapper OE7’s or LED H4 bulbs in Hella or Bosch (or similar) housings is the way to go. Dapper’s OE7 (and OE5) lights are astoundingly good and look OEM. Bright white light and sharp cut off. 2.1 Amp each on low beam. https://www.dapperlighting.com/products/oe7 BTW the blurry photo is caused by extreme speed and distraction of the photographer by the beauty of the subject matter...

-
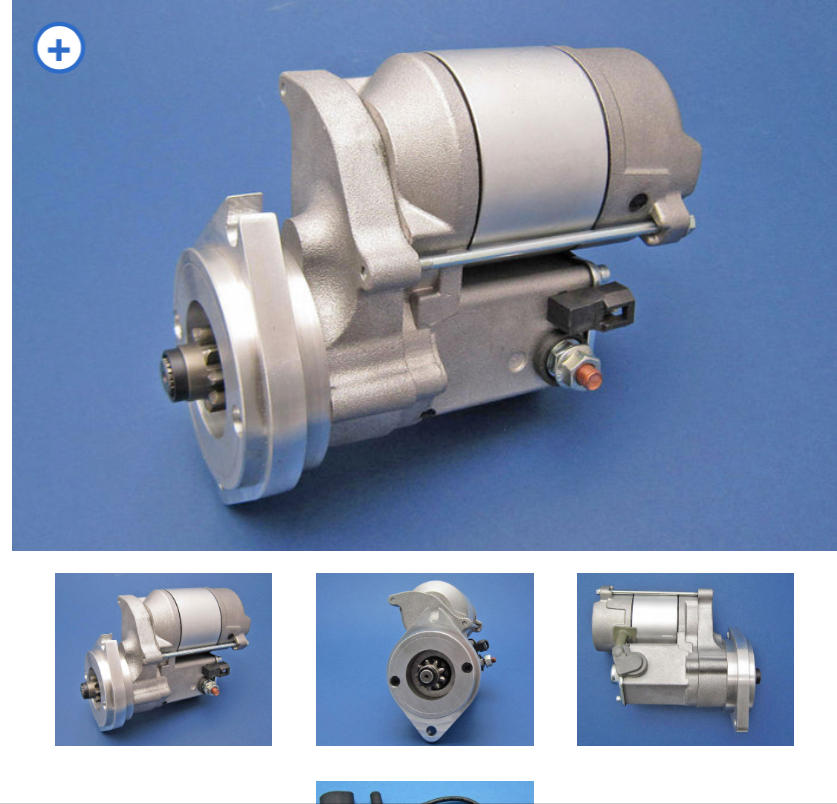
Excellent source of new alternators as well! Double Wow! I would give anything for an alternator and starter I can trust rather than the endless replacement cycle I seem stuck in .
-
Wow! Datsun parts on AES! That is some impressive starter.
-
No! Get the hatch to hinge bolts out. No hatch line up on re-install. Getting tight flat head Philips screws out might be a bit of a pain, but use a ratchet with a power bit, not a screw driver.
-
Or dream big and keep yourself up at night imagine what is possible... http://www.cooperindustries.com/content/dam/public/bussmann/Transportation/Resources/catalogs/full_line_catalogs/CBT_Catalog_2011.pdf
-
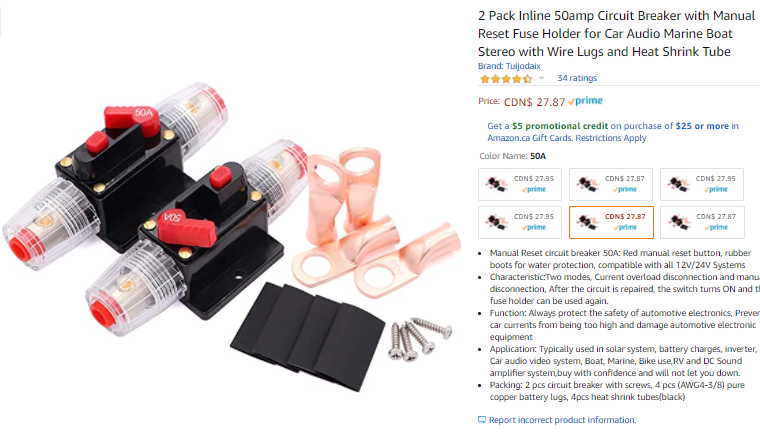
Pair of these? Price makes me wonder about quality.... But you get the idea
-
Here is a dual ANL fuse block with voltage monitor for you https://www.importel.com/product/00/SFMANLFB12PND/DB-Link-Mini-ANL-Digital-Distribution-Block-2-04-Ga.-In-2-48-Ga.-Out


.JPG.a9115607b4d36767dc0748b4ffe504d1.JPG)