Leaderboard
-
conedodger
Free Member16Points12,645Posts -
Captain Obvious
Free Member4Points10,111Posts -
ollie
Free Member4Points291Posts -
.JPG.cfcada9cf1c1b502df3f5f2f2ca3ff36.JPG)
SteveJ
Free Member3Points9,685Posts


Popular Content
Showing content with the highest reputation on 08/28/2024 in all areas
-
2 pointsI don't recall but: Are all the fuel lines new? What is the condition of the tank? If it were me, I would rig up a 1 gallon fuel tank in front of the radiator support. Use the system from the under hood fuel filter in. Drive it around in the cul de sac on that. If it doesn't act up it's in the rear section of the fuel system. Probably the tank2 points
-
1 pointThe seals I found did not come in a kit. The rebuild kit I bought had incorrect seals so after a lot more digging, I found the correct profile thickness as the ones in the kits were too thin. I'll have a look tonight for you. 3 to 5 psi is correct fuel pressure for mechanical fuel pump in our cars. Add heat and it sounds like your pump is really struggling.1 point
-
1 point1 to 3 psi cold? That's low to me, I think you're onto something. Of all the pumps I messed with, even new ones, it wasn't until I found the right seals for the reed valves did it finally resolve. Then I had to go back and fix all the bandaid tweaks I did the the SUs before hand, to get it semi stable. Runs like a champ now.1 point
-
1 pointI can tell you this, if you don't have exactly the correct white seals behind the reed valves they will leak air. I went through two separate rebuild kits and until I found the correct seals, the issues I had remained and they sound exactly like yours. If you can pull fuel pressure after the pump that would help...but low levels in your filters are telling.1 point
-
1 pointI'm going fuel pump too. The easy test is to pull it off and make sure it's pulling and pushing vacuum adequately. I went down an epic fuel pump rabbit hole and finally figured out the reed valve seal was the primary issue in all the ones I pulled apart. They have to fit perfectly and while I can't recall the exact size, I believe McMaster Carr was kind enough to sell me 100 as a minimum lot. I can have a look at the package later as need be.1 point
-
1 pointMy first guess would be a check valve issue with the fuel pump if it's a mechanical fuel pump.1 point
-
1 pointThat's what I have just done, I don't need now, but as its cheaper now, and I had no shipping cost (in with parts bulkier/heavier).1 point
-
Are you saying continuity by a meter tone or by a resistance reading of 0 (or almost zero)? Was the K18 relay plugged in? If not, did you just have the 1 jumper in between BY wires? Was the connector for the ignition switch connected to the switch, or was it off with no wires attached? The bottom line is that the BY wire is never grounded, but you have to make sure of your testing methods/conditions. If you don't control the methods/conditions properly, you can end up going down a rabbit hole. Been there. Done that. Many years ago I lost the fuse for the parking lights/gauge lights. In tracking down the short, I first guessed that it was probably around the gauges, and after unplugging the speedometer, the short went away. My method was flawed as the positive and negative wiring from the speedometer affected all of the gauges downstream. After realizing my mistake (and wasting about an hour or more), I resumed my search with a better methodology only to find that the positive wire for the light by the defroster switch (74 & later) had become detached from the socket. In other words, make sure you aren't shooting yourself in the foot.1 point
-
Preface your question with @stevej and he will get a notification. Easiest way to communicate with members. Unless he logs on he will not see it.1 point
-
1 pointIf it was me and not cost prohibitive I would order all 8 in stainless. The exchange rate is very much in your favor currently1 point
-
You only need to jumper the ones you did to get continuity. Everything else can be left disconnected.1 point
-
1 pointAnd if that doesn't work, you might be able to get the piece out with a drill like this:


 1 point
 -
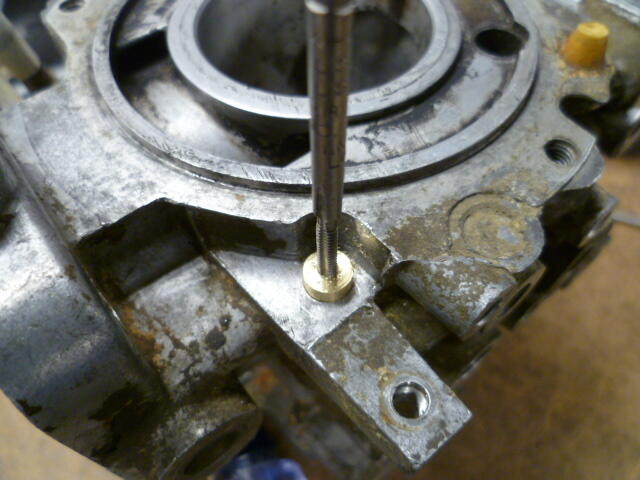
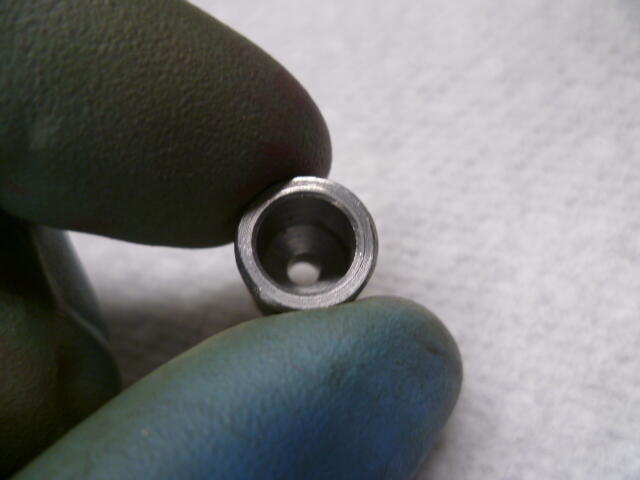
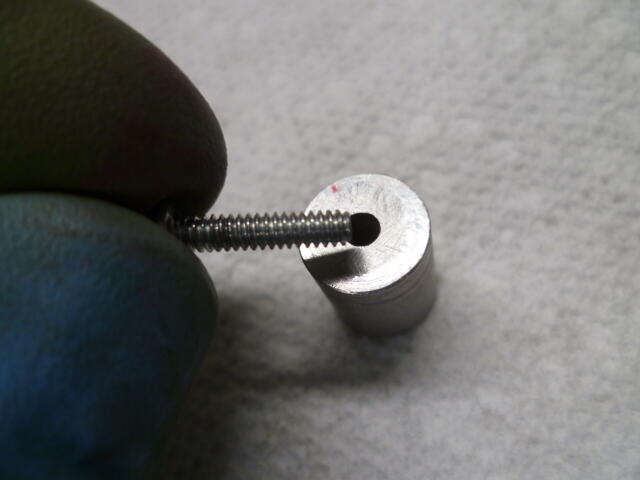
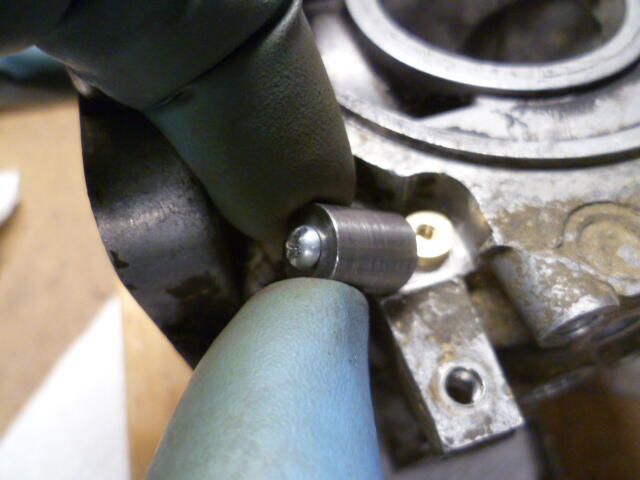
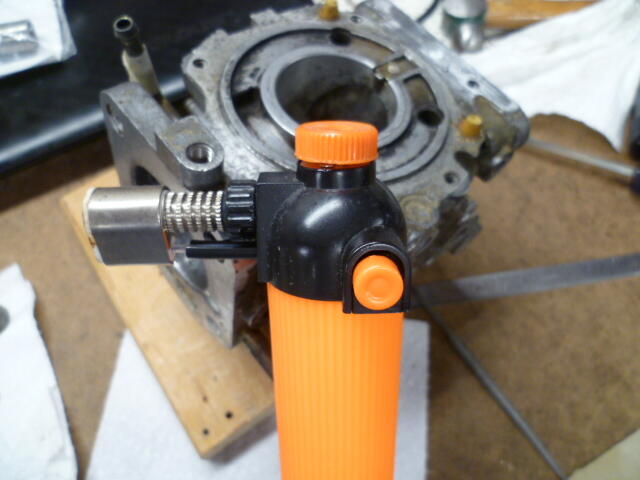
1 pointKats, Here's some pics showing what I would try: You're starting with something like this. This is a different carb, but the situation is the same: Tap some threads inside the hole. You may have to drill it a little first to the appropriate pilot hole for the tap. This is an English 4-40 tap, which is close in size to M3 x 0.6: Then I made a little puller adapter to concentrate the force in the perpendicular direction to pull the brass slug out of the carb body: Put it over the brass slug and carefully run the screw in: If everything goes according to plan, it should jack the brass remnant out like this: If it doesn't come out easily, maybe try a little heat from a small torch:


 1 point
 -
1 pointGotcha. Yup, the original seals probably came with the metal retainer ring already installed, and for that reason, they didn't call them out on the diagram. They were considered part of the seal.1 point
-
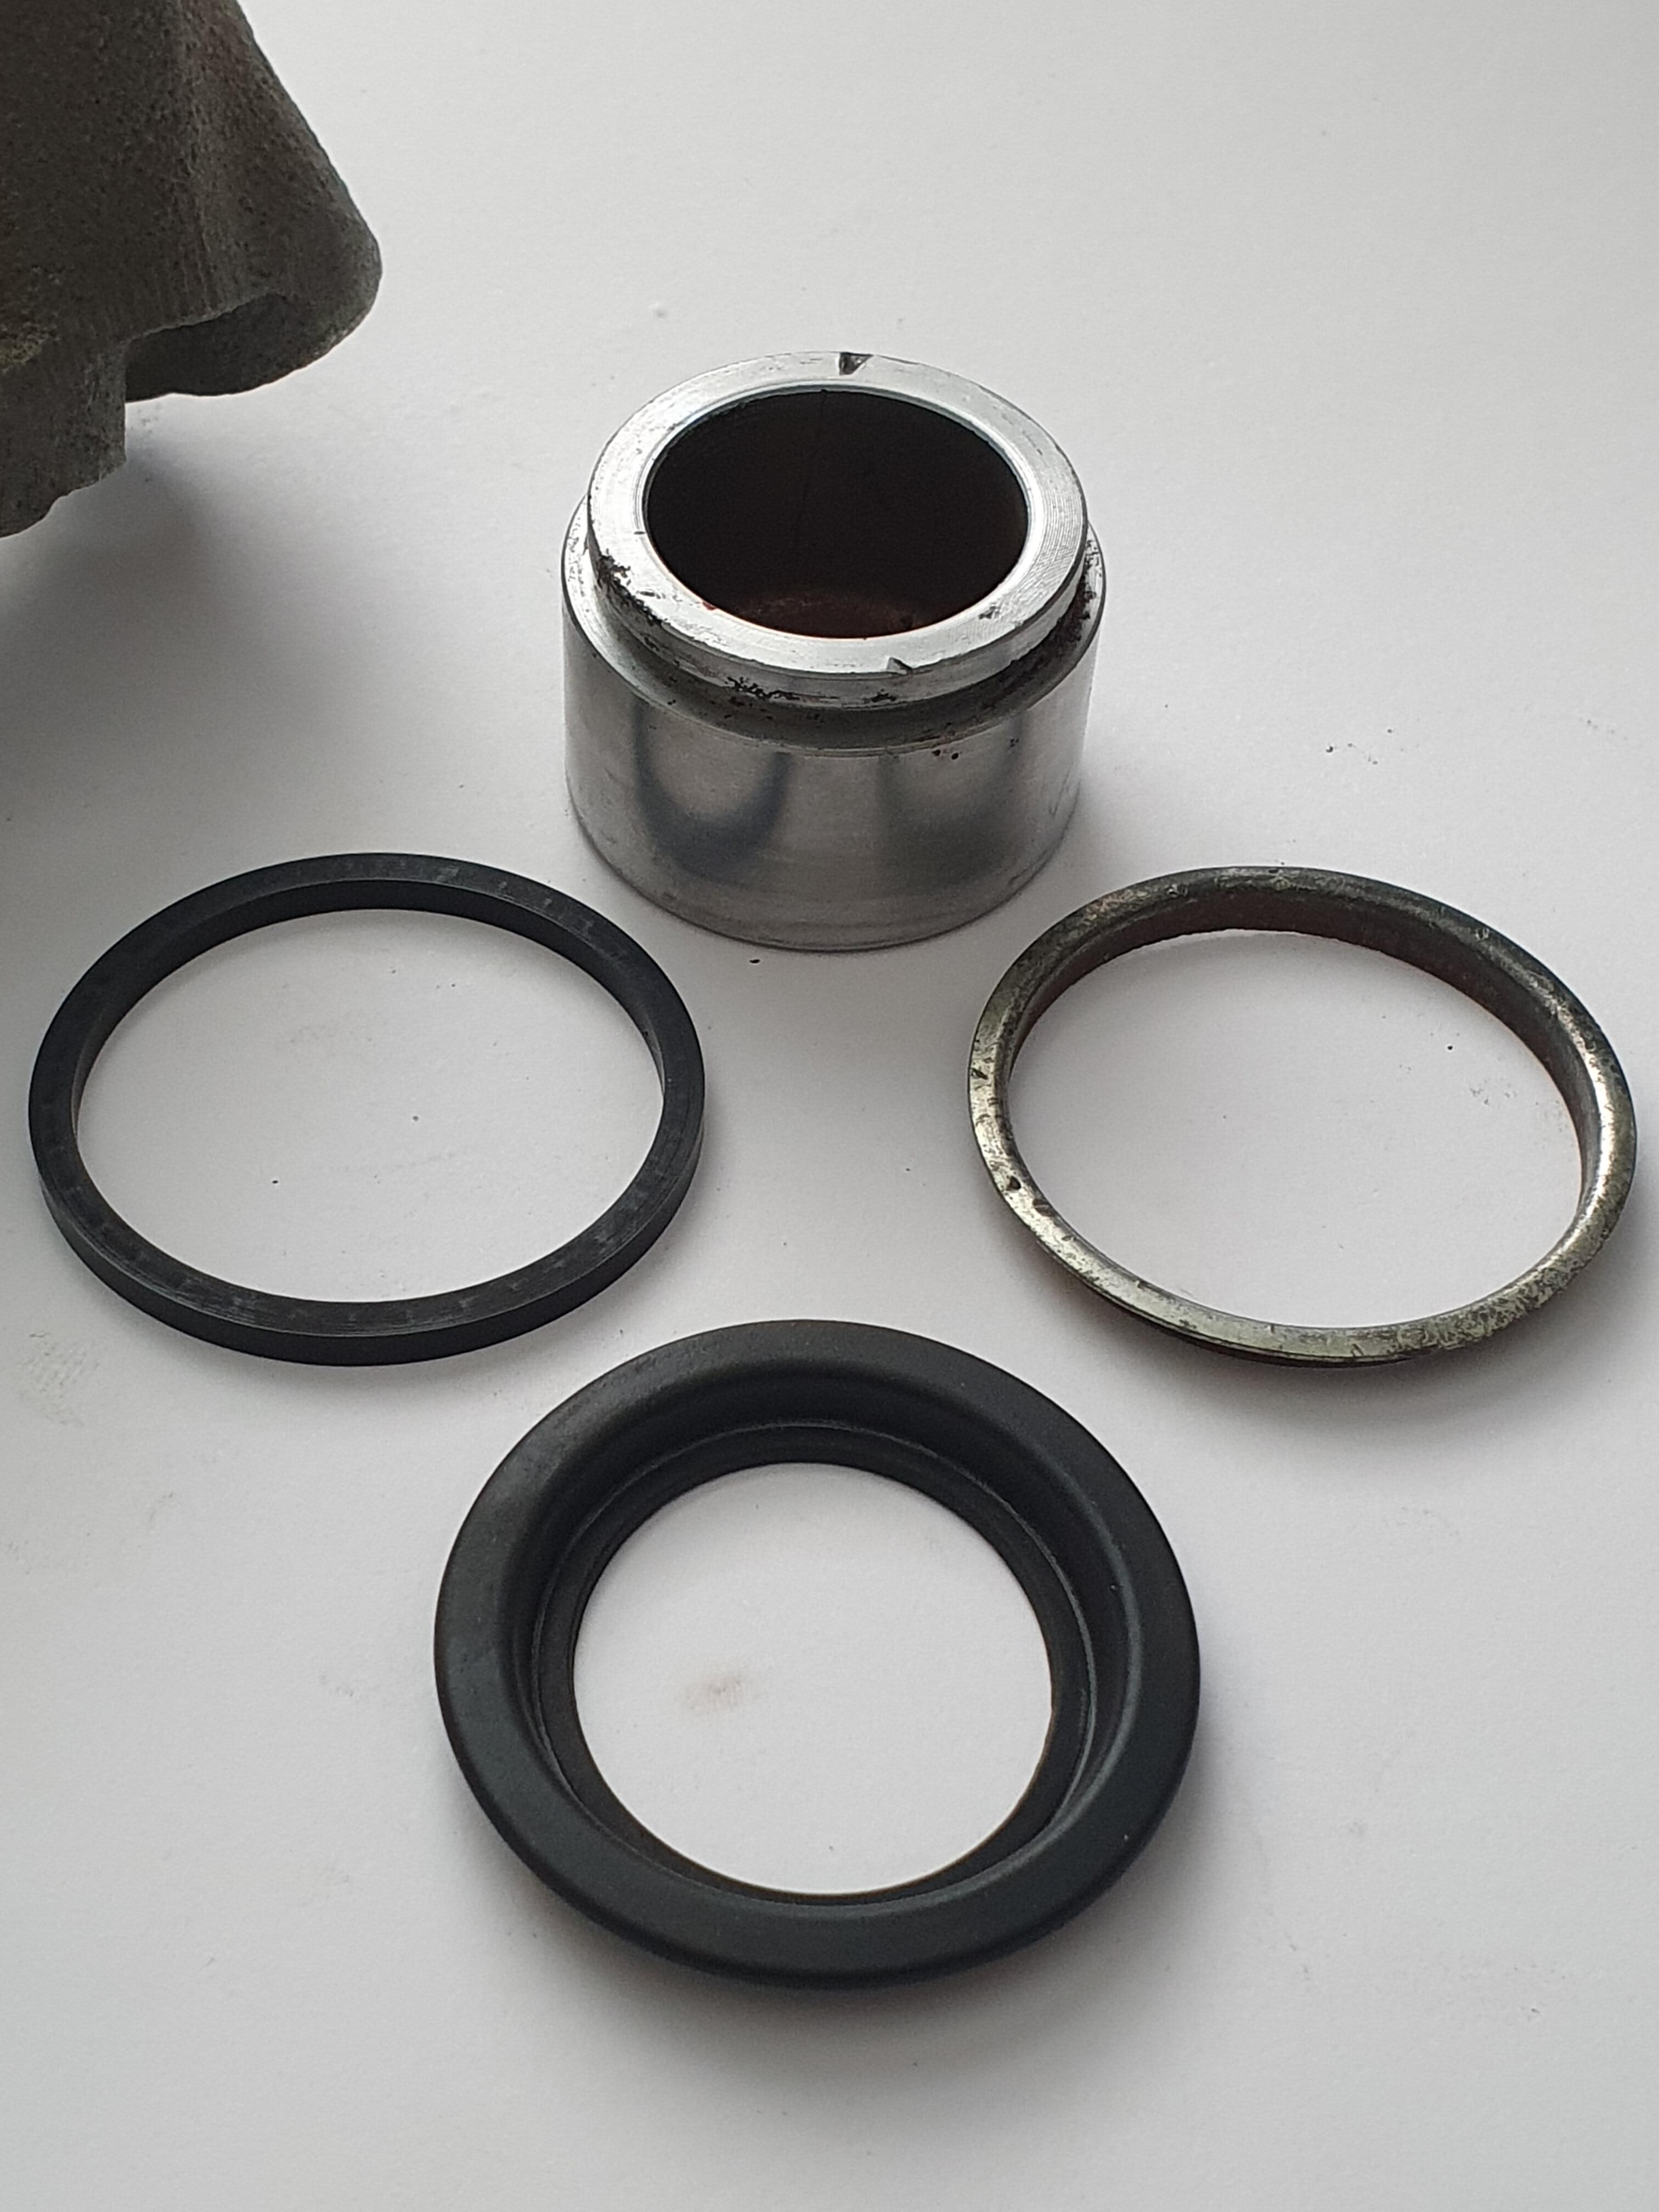
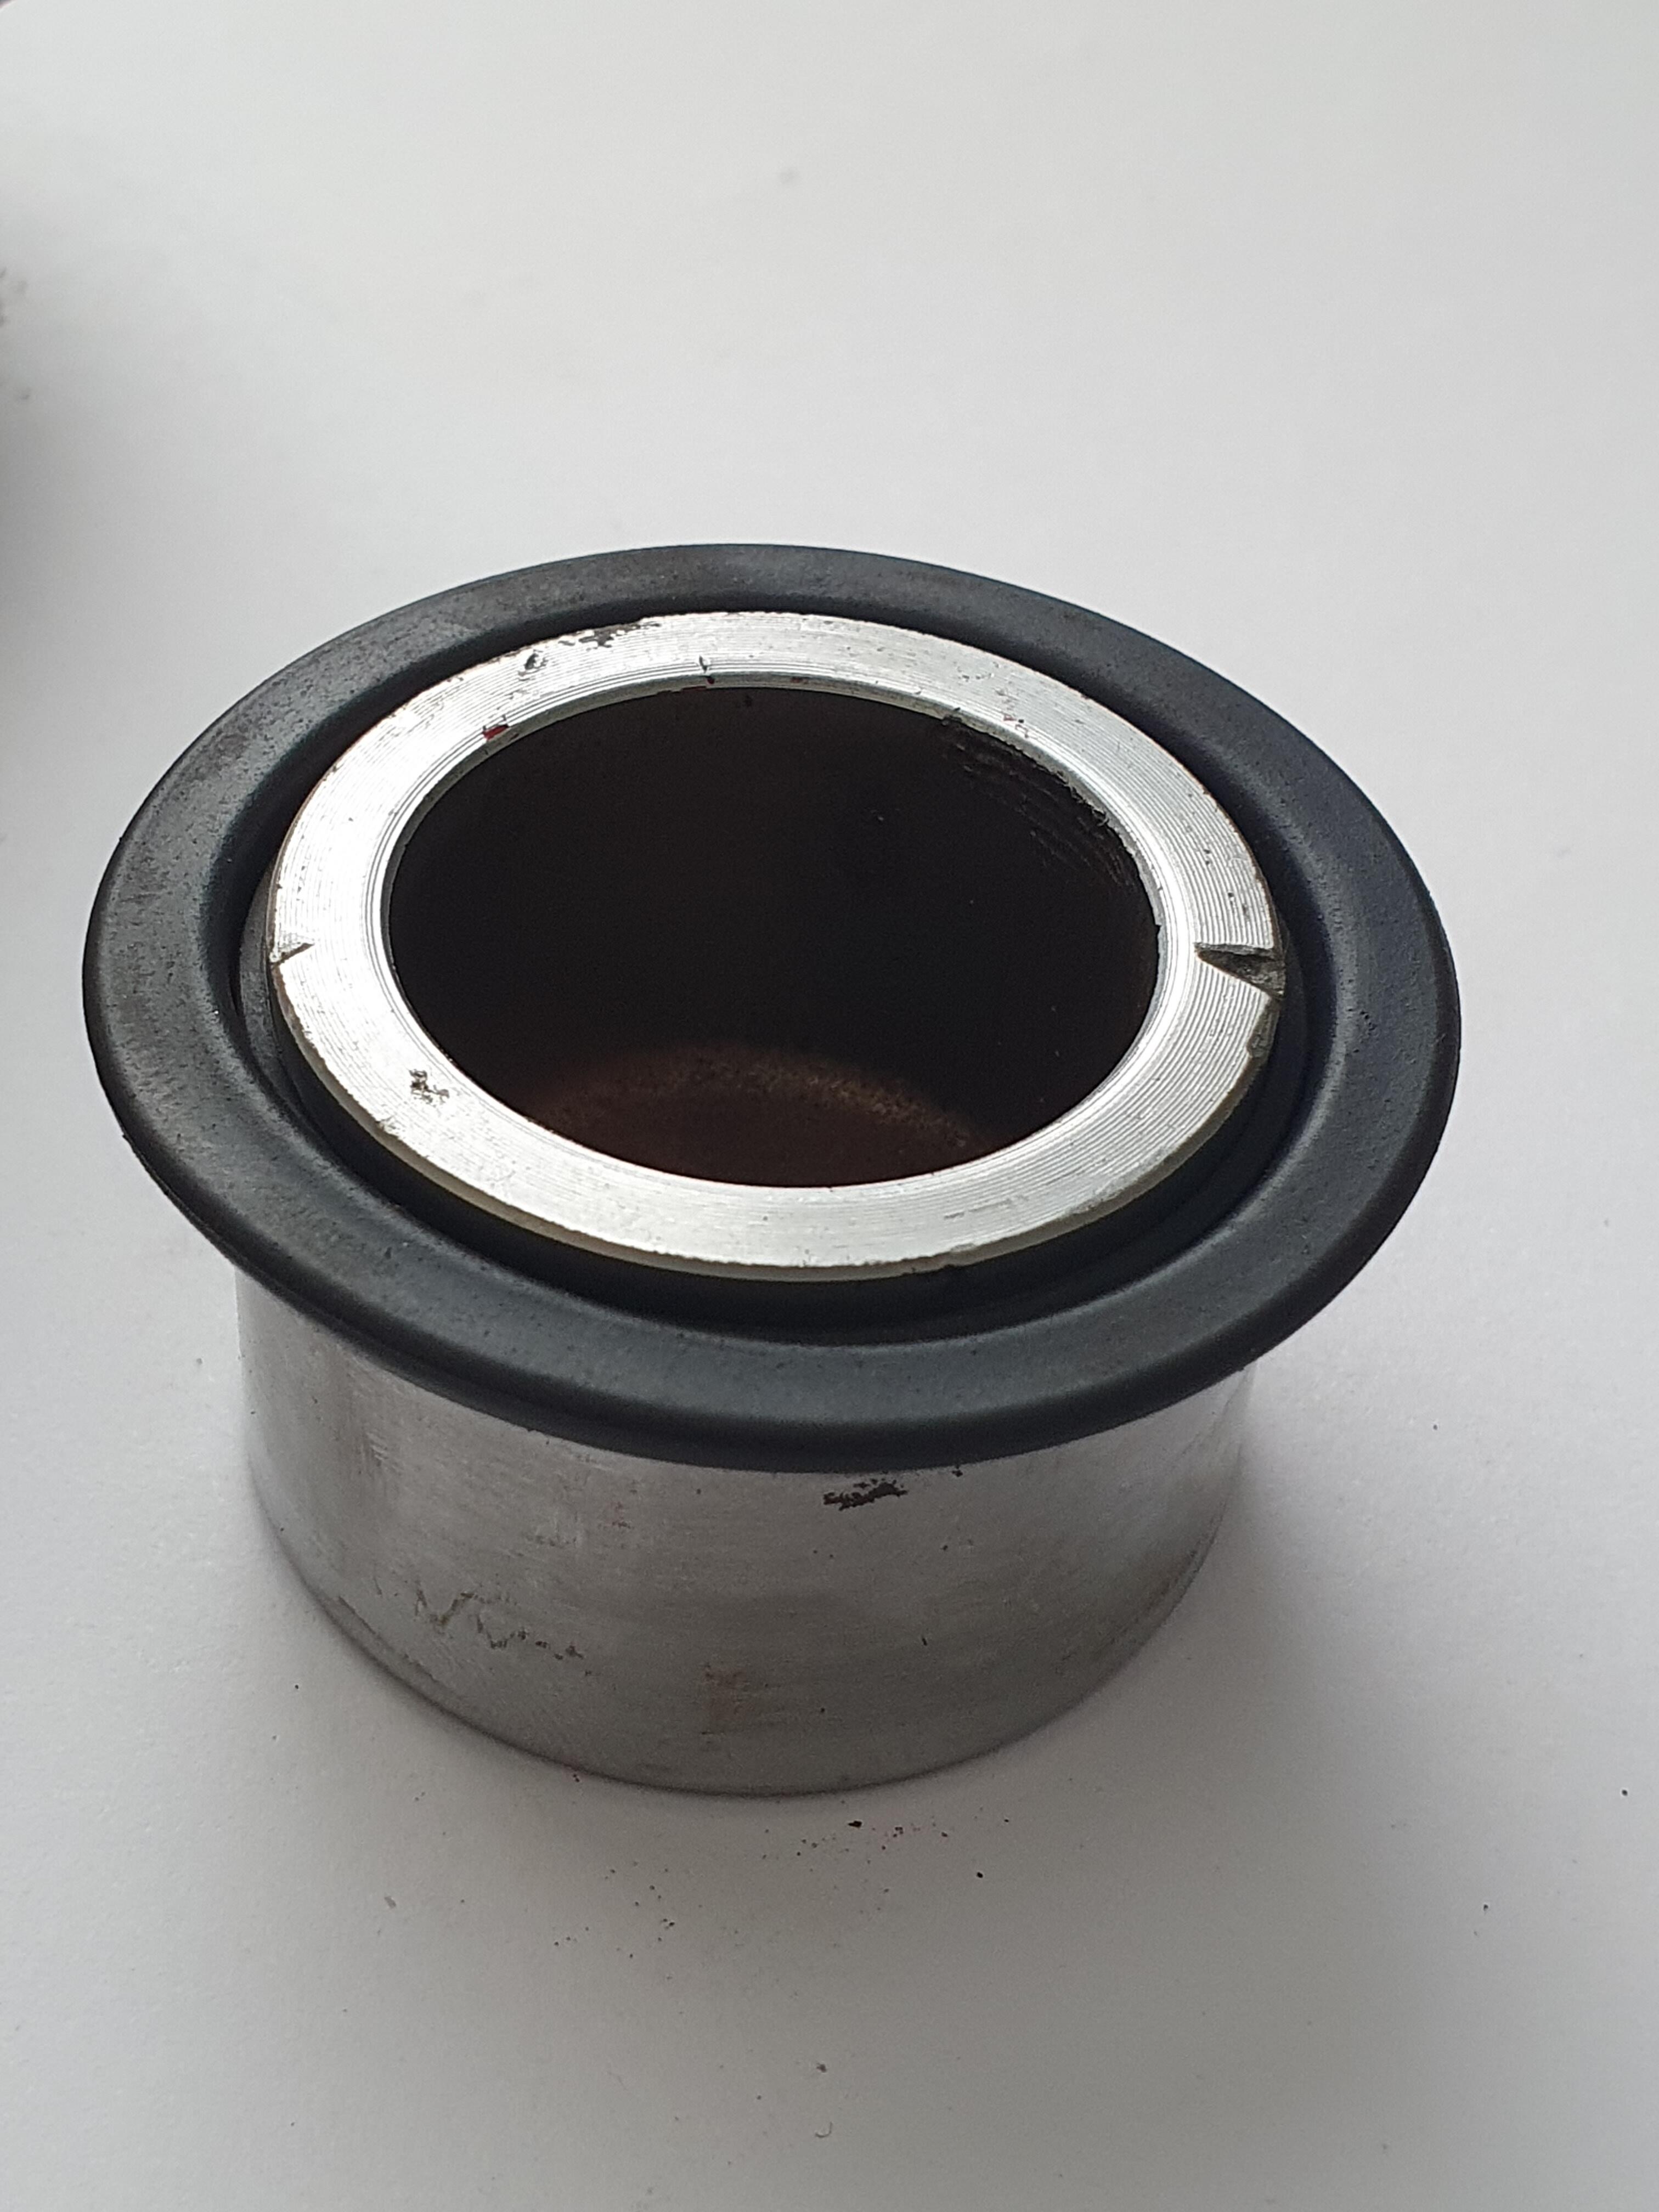
1 pointGood! Glad to hear the retainer rings were present after all. You're on top of it now, but just for posterity I pulled out some old used calipers and parts to take some photos of the component parts. Hopefully they are fairly self-explanatory. Raw caliper casting (dirty!), showing the internal groove for the main fluid seal and the small counterbore which the dust seal retainer ring fits into: And here's a (typically rusty...) retainer ring roughly sitting in the counterbore in the caliper casting: And here is the rubber dust seal, roughly installed on the lip of the retainer ring and with the piston in situ: The four component parts: Piston, rubber dust seal, steel dust seal retaining ring and rubber fluid seal: Note that the inner lip of the rubber dust seal slots into the groove in the piston, so it is fixed to both the caliper casting (via the steel retainer ring) and the piston, making a firm seal which still allows the piston to move: Hope that helps somewhat...
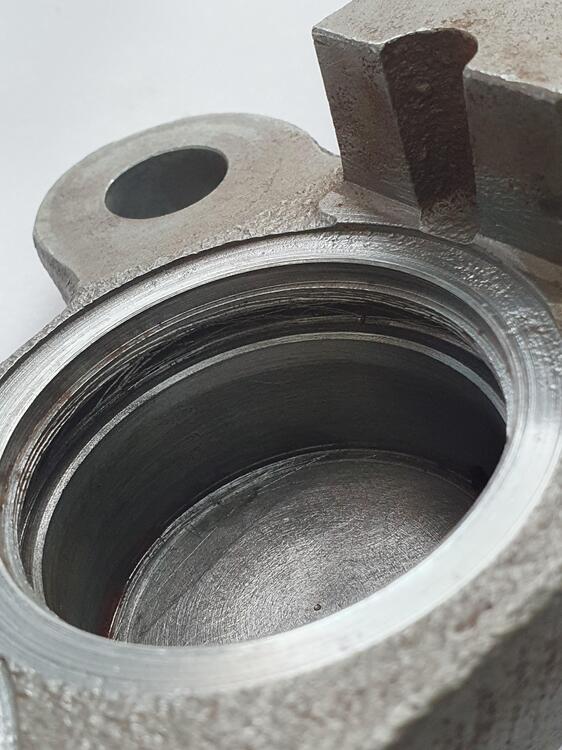
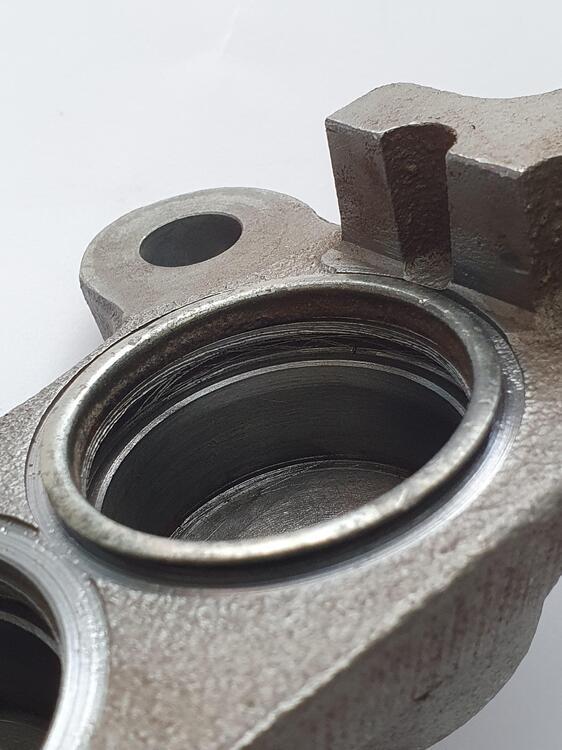
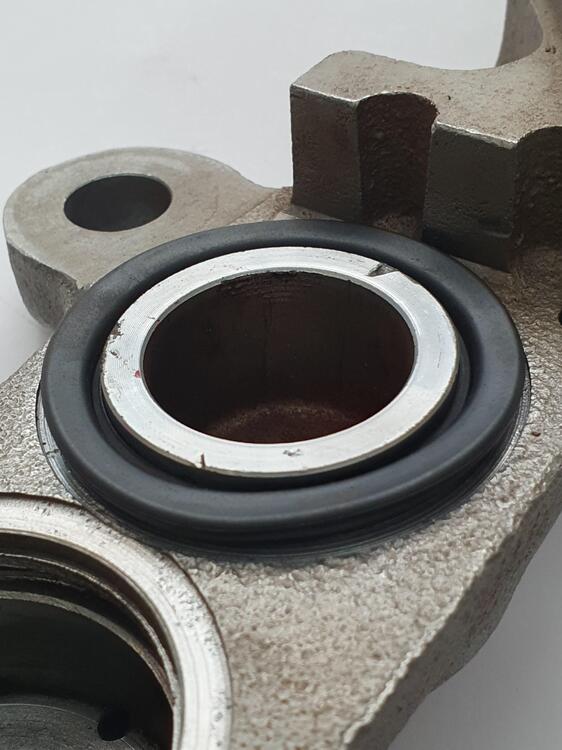

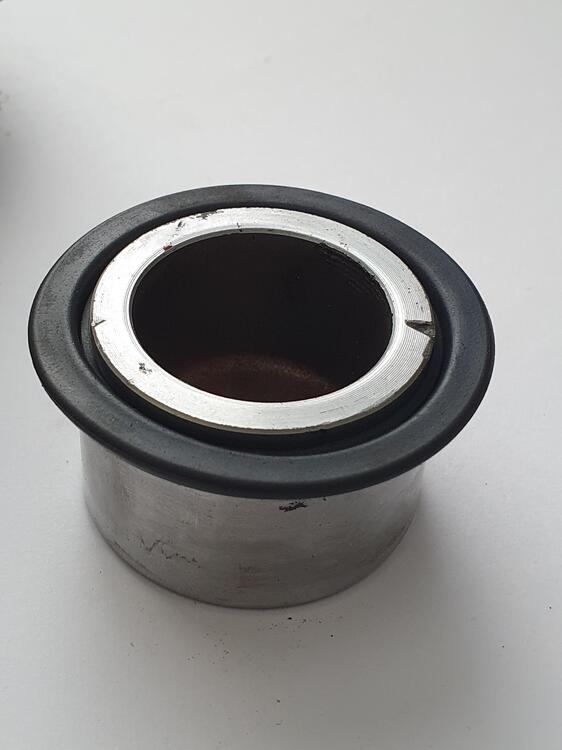 1 point
 -
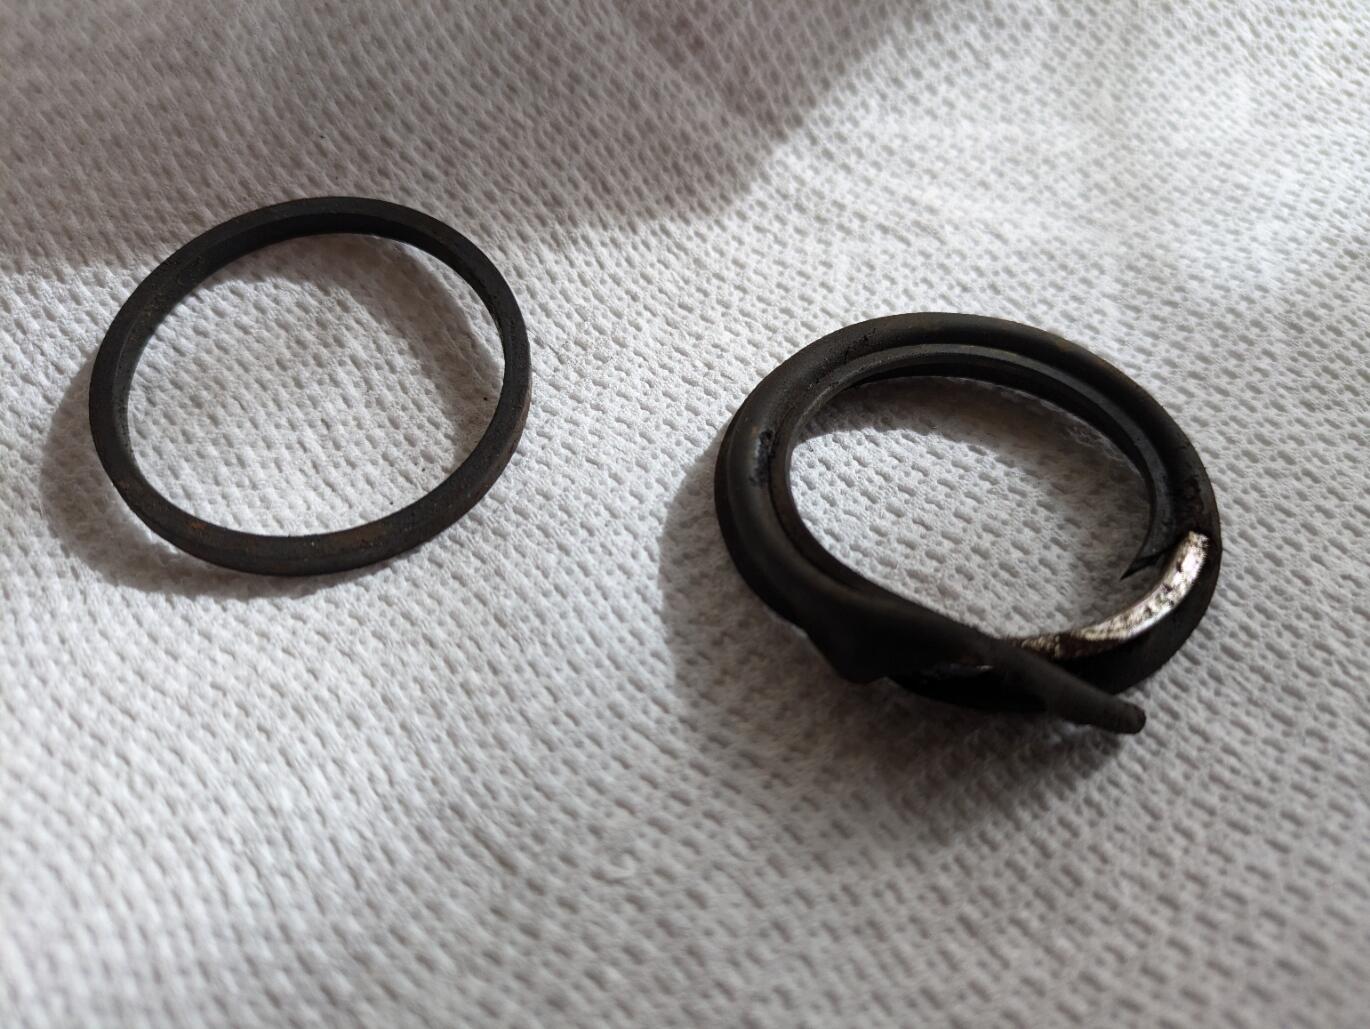
1 pointI'm impressed by all the responses. First, part 4 is labeled as a "piston seal". I included a photograph showing the old one on the left. On the right is the old dust seal with the metal ring inside. I mistakenly assumed it was a retaining clip. I need to clean them up but at least the couple I looked at this morning look serviceable. I am also assuming that the dust seals likely came with these retaining rings back when Nissan supplied them. I had to purchase an aftermarket set because that's all I could find. I really want this put together by tomorrow so I can register for my first autocross of the year this weekend.
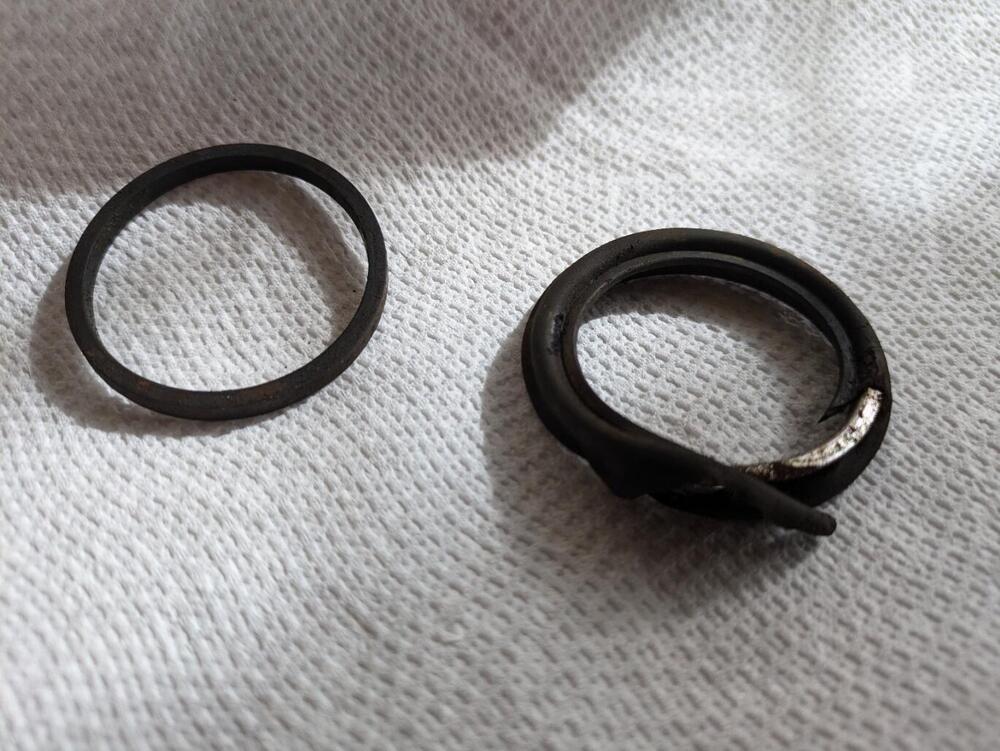 1 point
 -
1 pointWell the potential pinging concern due to the chamber design is a second order concept beyond my pay grade. I can't add anything credible to that. But yeah, there are all kinds of numbers on the internets for the compression ratio and chamber volumes, etc. The number I'm using for E88b (late) is 47.8cc. And that came from the internets somewhere as I did not measure that myself. But... it does result in a CR close to what is listed in the 1974 FSM. The FSM says 8.8:1 and when I run the numbers, I get 8.86 (with flat top pistons that do NOT crest above the deck). If I crest the pistons .020 above deck, I get a CR of 9.3:1. Point is... I'm skeptical about the L26 pistons cresting above the deck.1 point