Leaderboard
-
Jeff G 78
Free Member6Points3,007Posts -
Patcon
 Subscriber
 5Points11,142Posts
 -
HusseinHolland
Free Member5Points1,031Posts -
Captain Obvious
Free Member3Points10,081Posts


Popular Content
Showing content with the highest reputation on 11/13/2023 in Posts
-
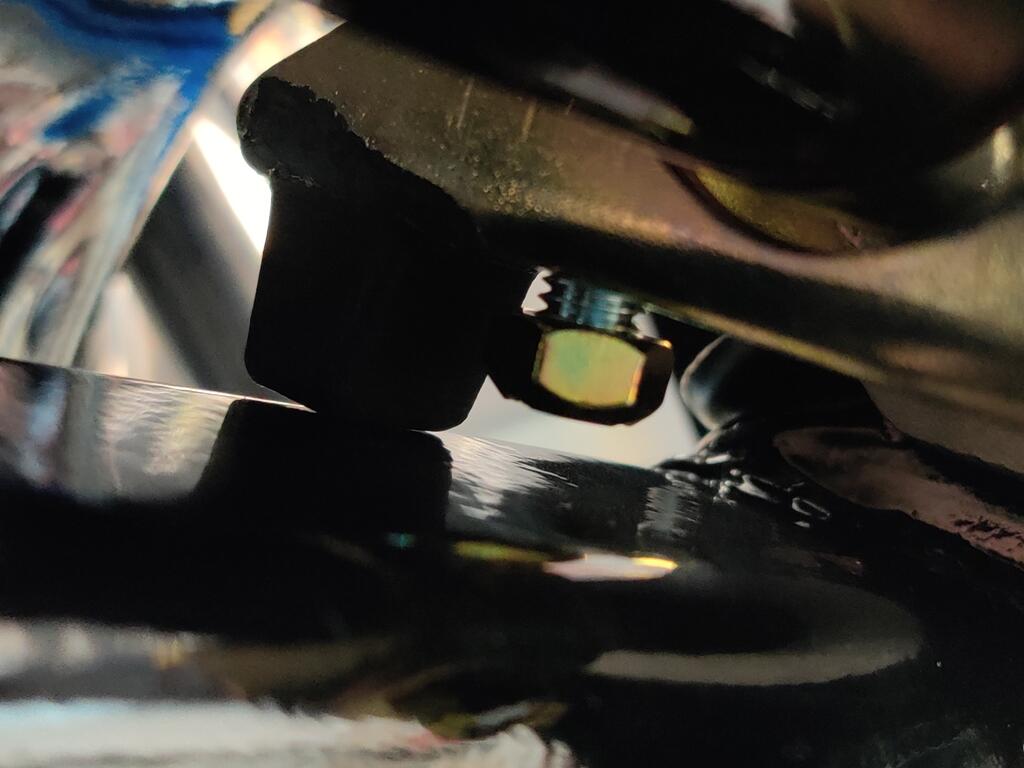
Hi folks: It's been a minute since I was on here last, but after much dithering the boys and I *finally* got our rebuilt harmonic balancer installed on our '74 260Z. My question is... How do you know it's seated where it needs to be on the crankshaft? It *looks* about right but is there a surefire way to know? Our latest video: Thanks in advance, MC3 points
-
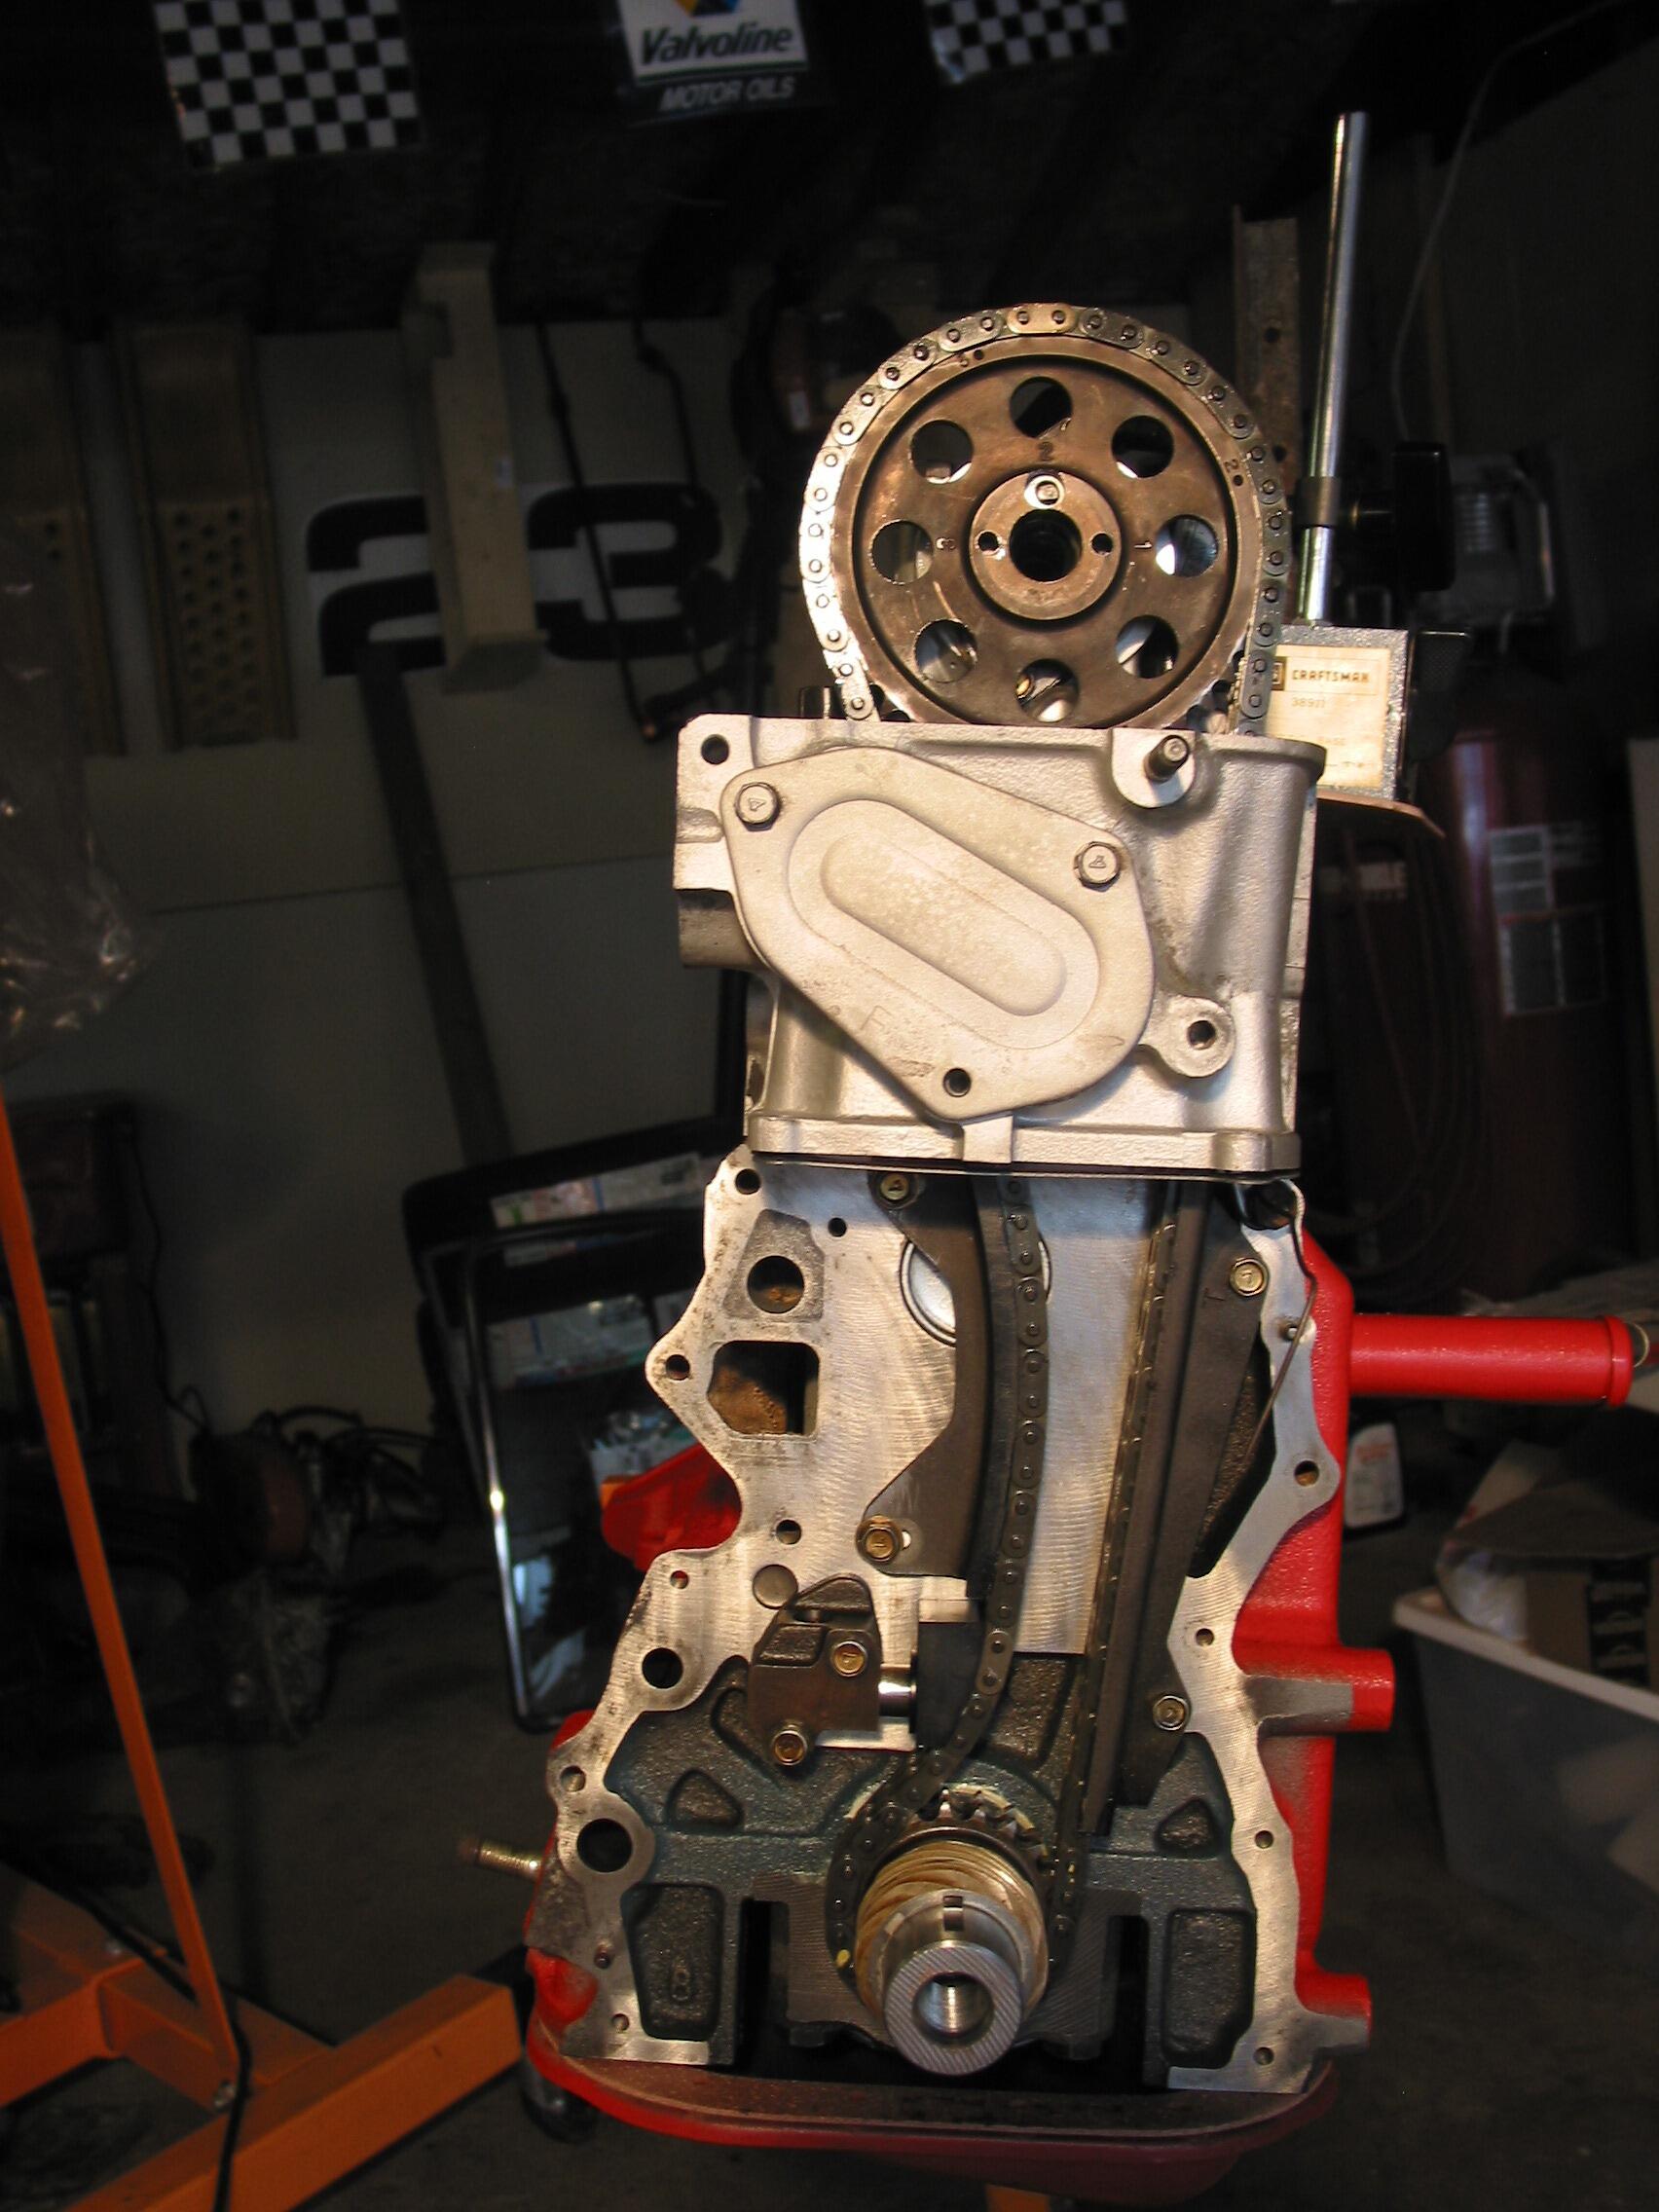
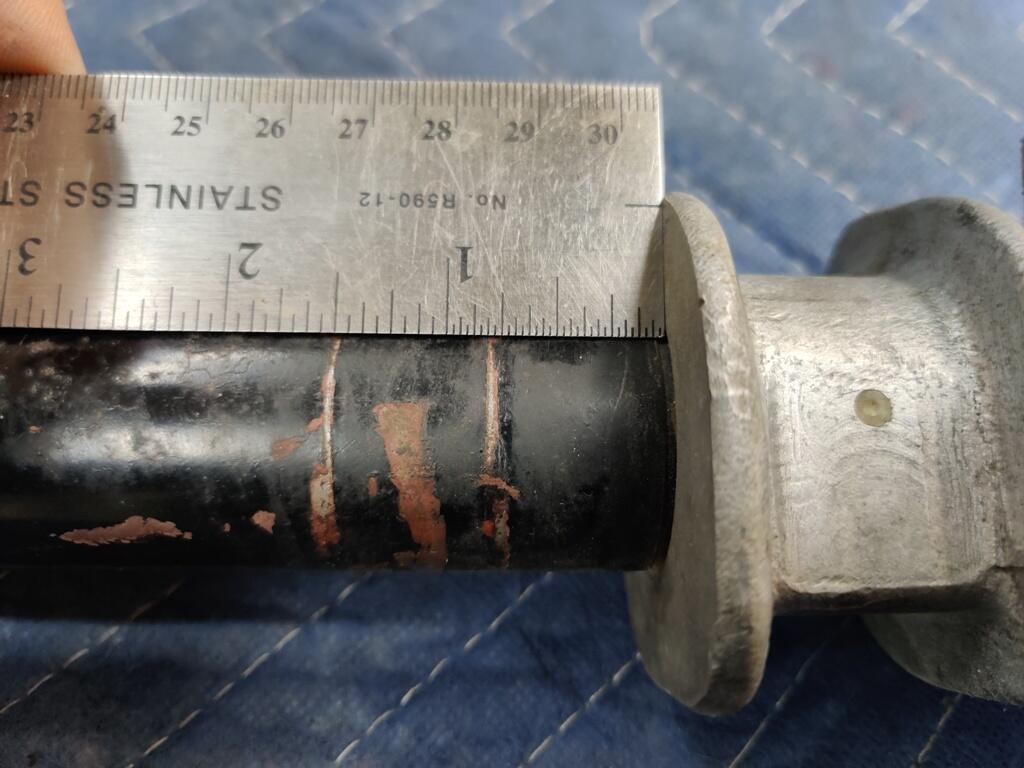
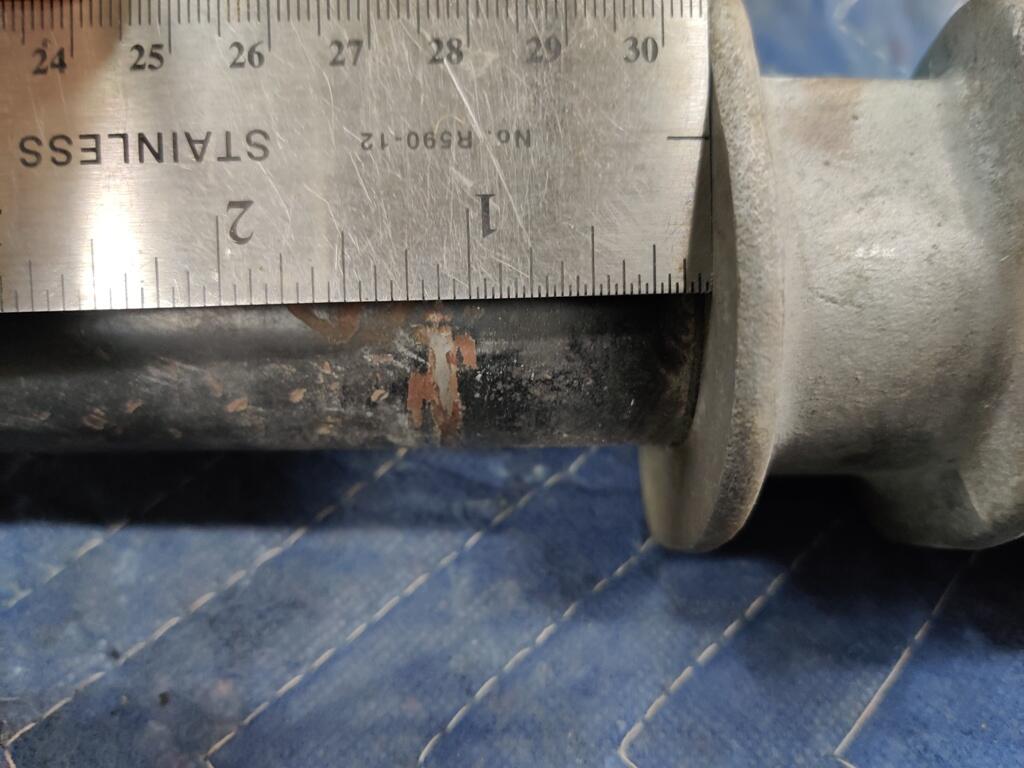
This should make you feel better. I found the picture of mine before I installed the new chain kit. Notice how much stick out I had. The only change was replacing the chain, gears, guides, and tensioner.
 2 points
 -
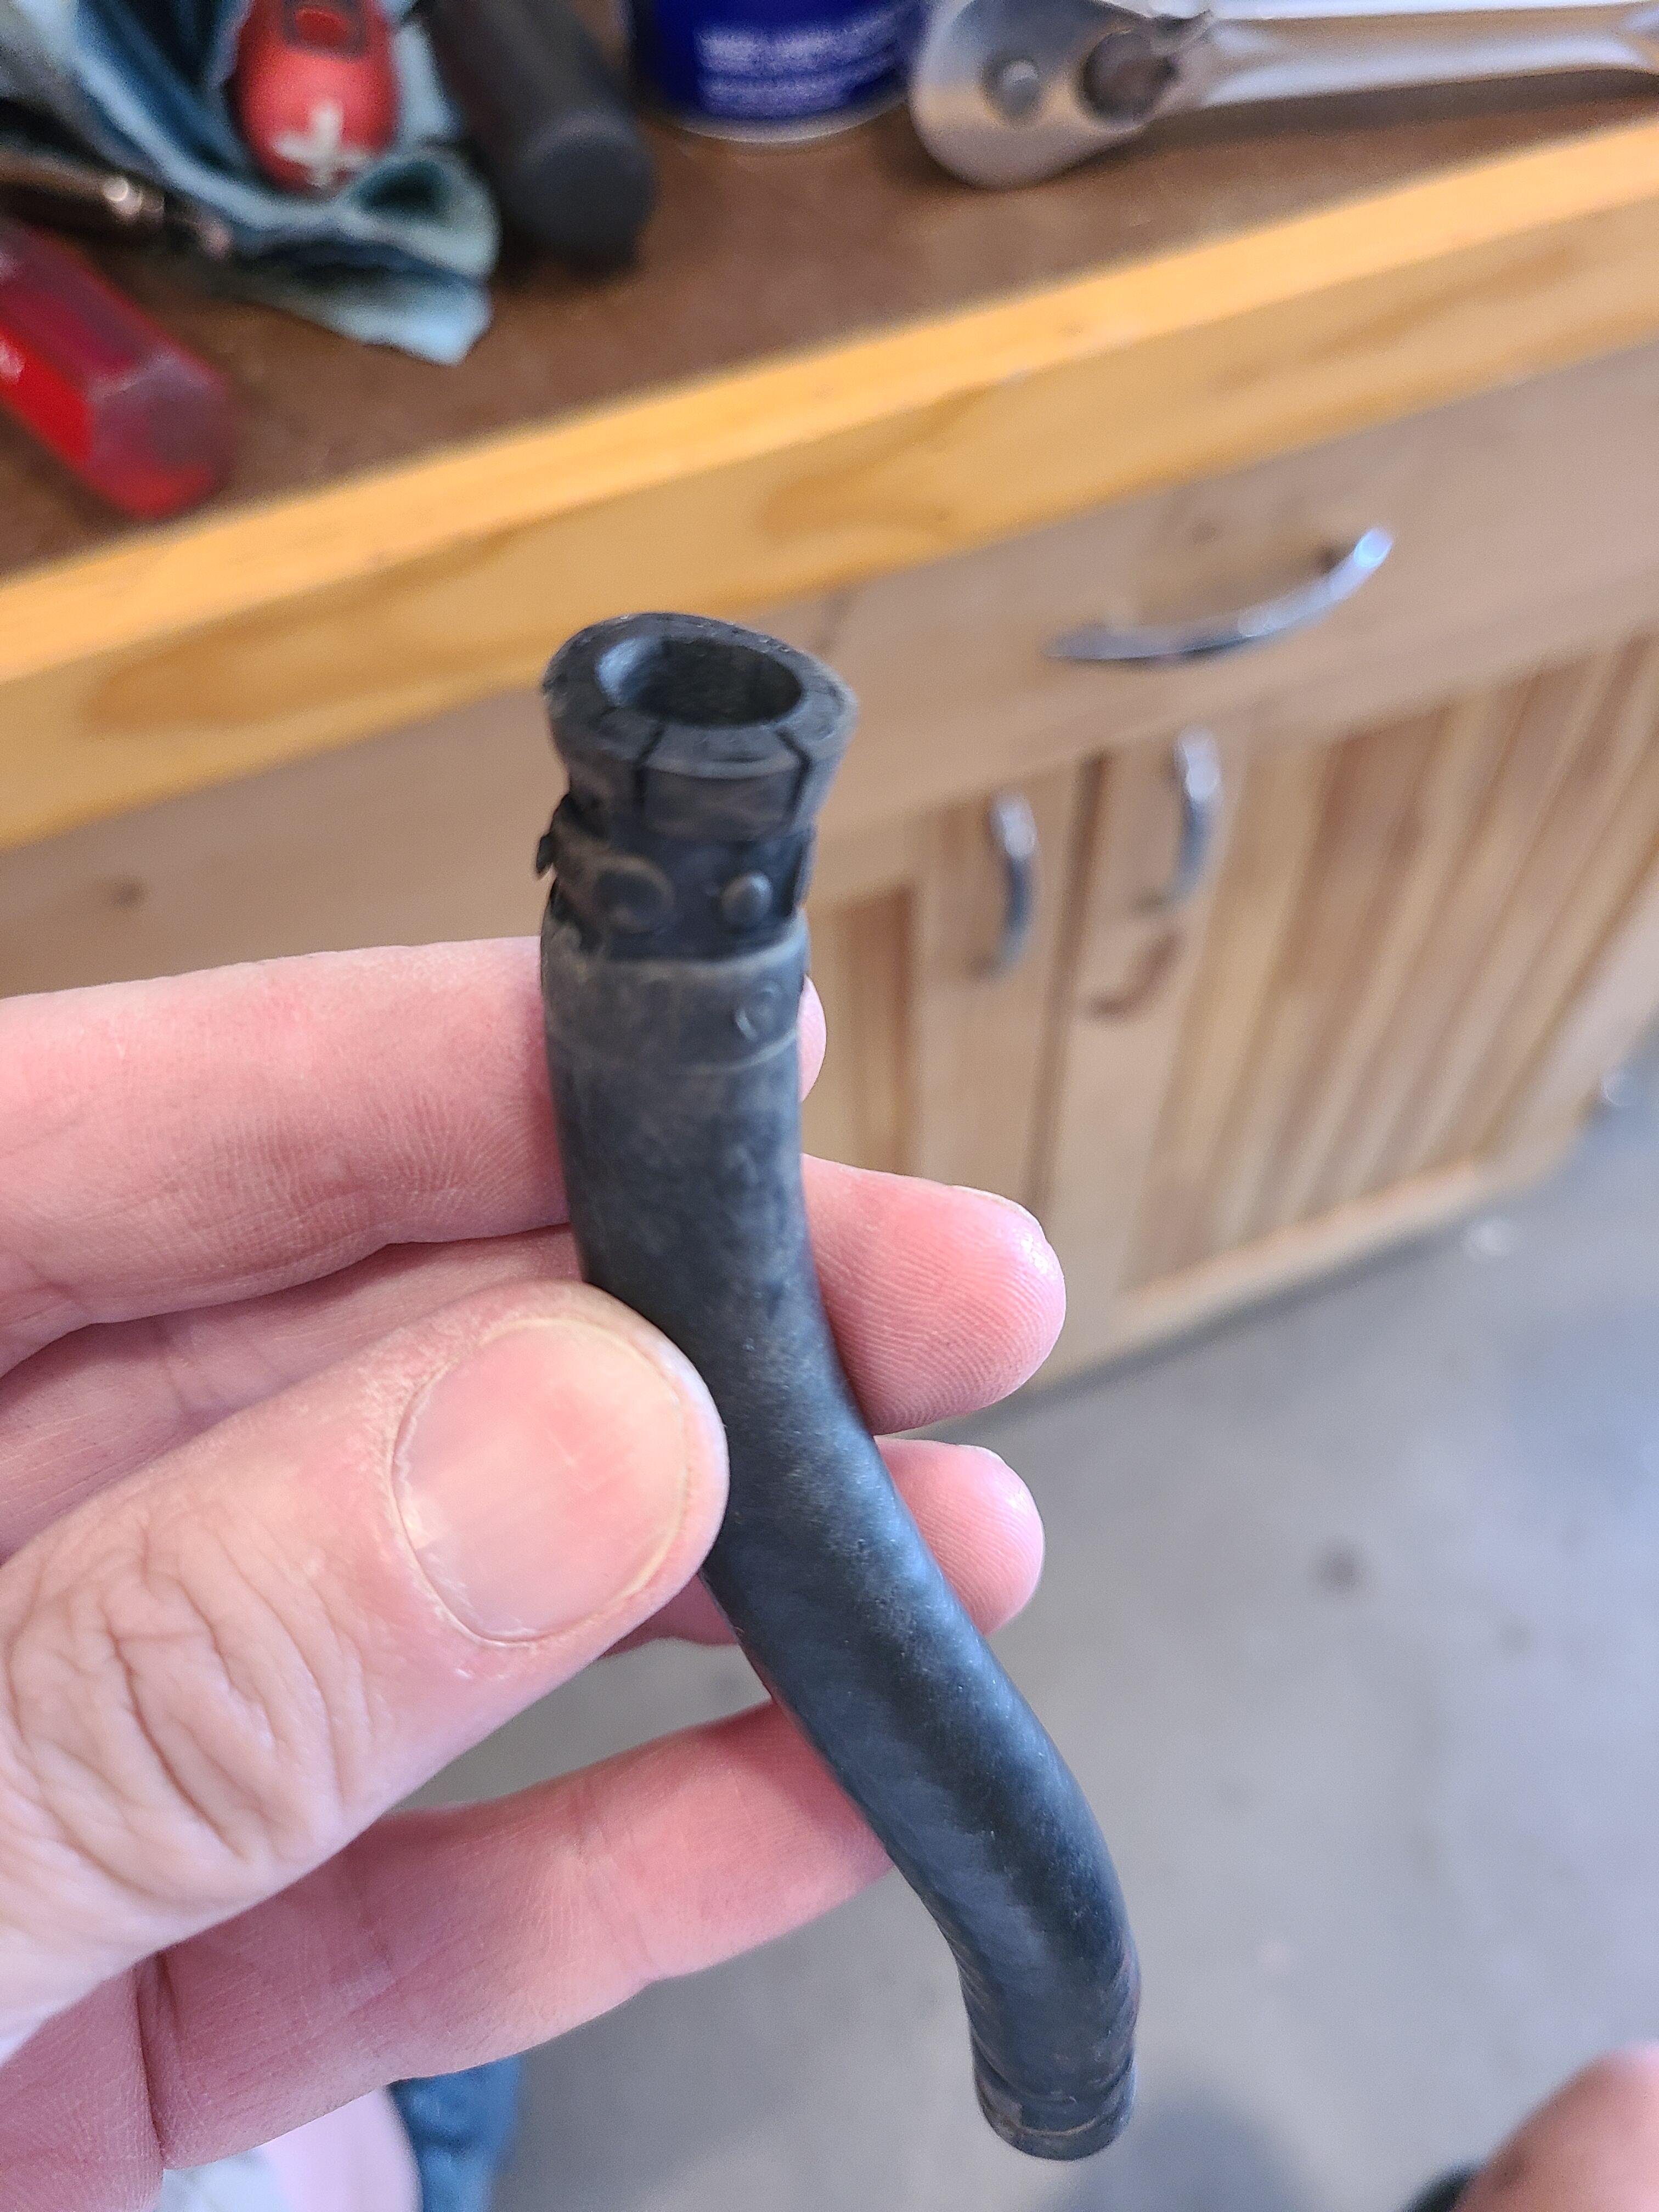
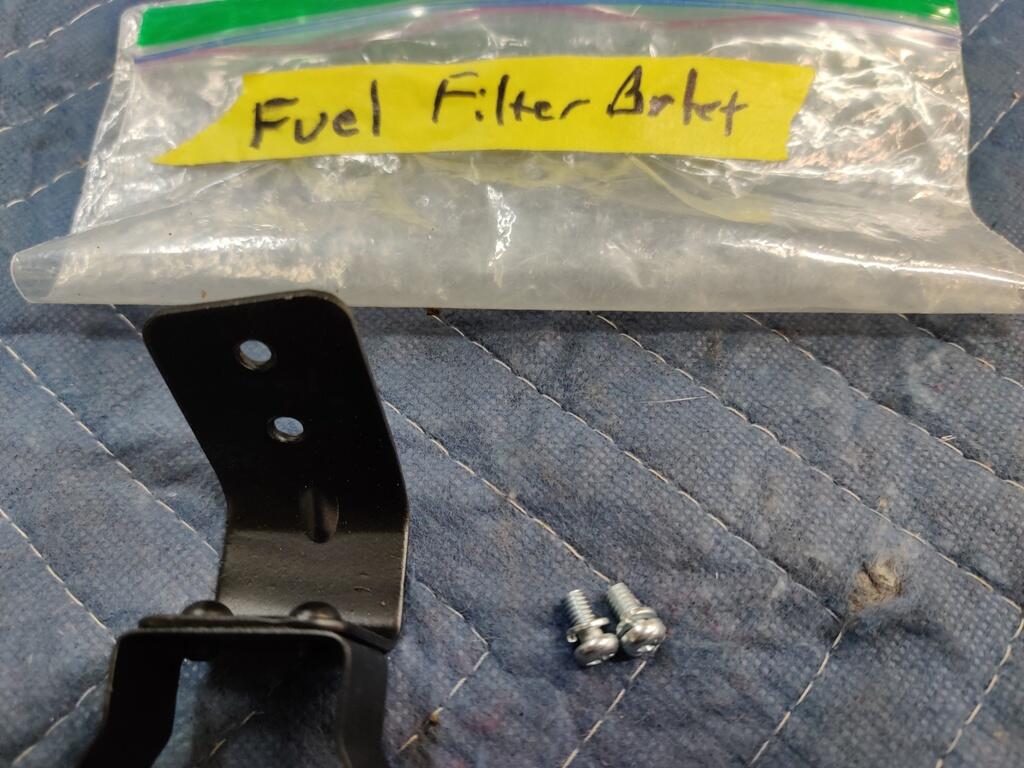
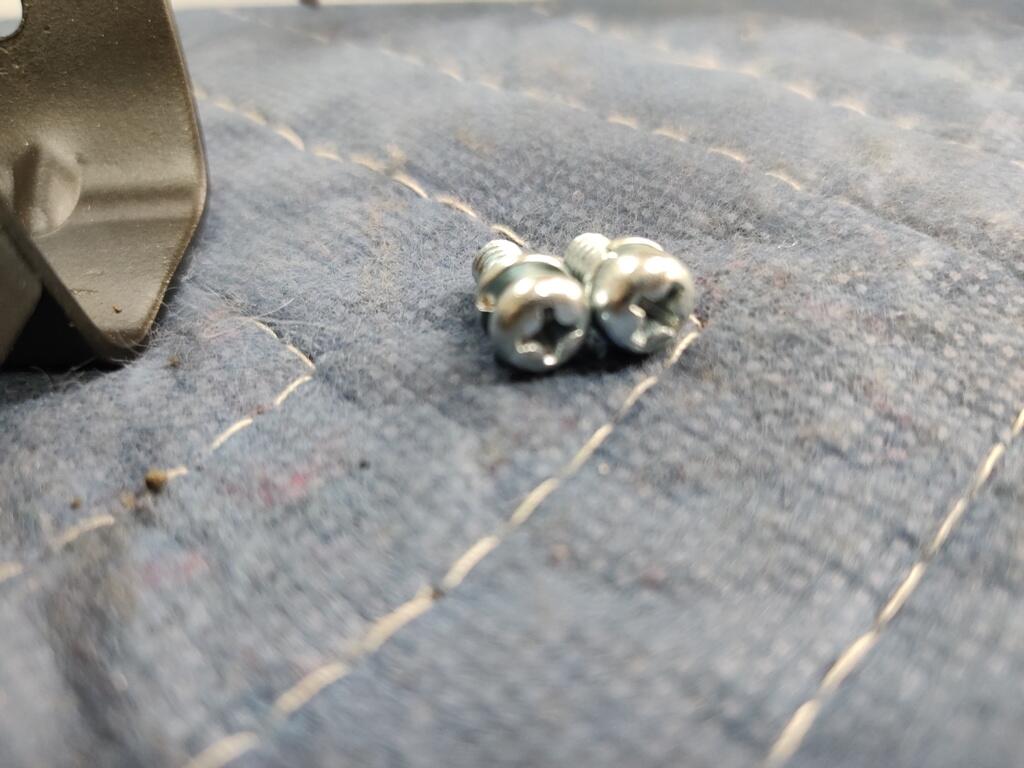
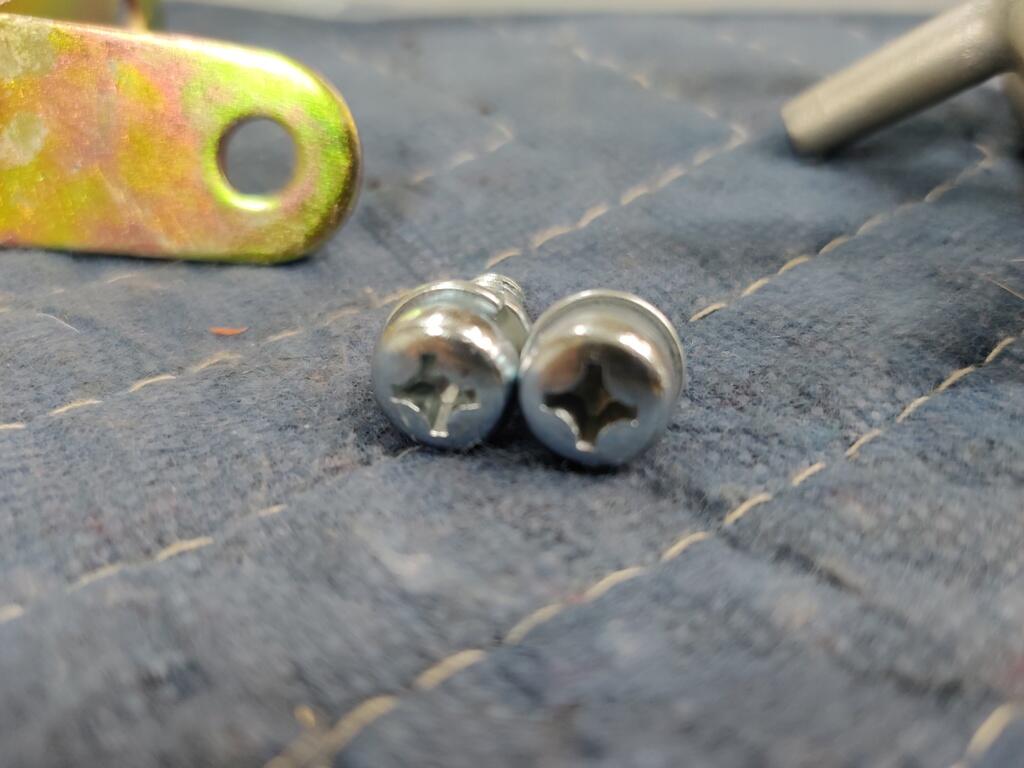
This is a reminder to check your fuel hoses on a regular basis. My '78 280Z started losing fuel pressure overnight, making it hard to start. I had previously installed a check valve in the supply hose between the filter and the rail, so it always fired right up prior to this. I wasn't sure if the check valve had failed, or if there was something else going on. I was also getting some fuel smell, so I suspected that there was a leak somewhere. Upon inspection, I found a wet spot on the hose between the chassis supply pipe and the fuel filter. The Gates hose, which was maybe 10 years old, was failing at both ends. I swapped the hose and all is well again. I'm not sure why this particular hose failed since it's one of the newer hoses on the car. I replaced all of the FI hoses about 15 years ago. One end had an OE wire clamp and the other end had a regular hose clamp. Both ends looked the same and both were leaking. Luckily, the leak was on the cold side of the engine.
 2 points
 -
From my experience with rusted floors on 70's era cars, it's ALWAYS worse than it appears. Looking at your pics, until all the tar is removed, you're not going to know just how extensive it is. Since they added undercoat to cover up shoddy repairs, you will likely also need to remove material from the underside to properly evaluate the repairs needed to the frame rails, since the work will always involve repairs to both sides of any panel junction (floor to sill, floor to frame rail, floor to firewall, etc...)2 points
-
2 pointsMy '77's were not painted. The replacements I bought from rockauto.com are unpainted also.2 points
-
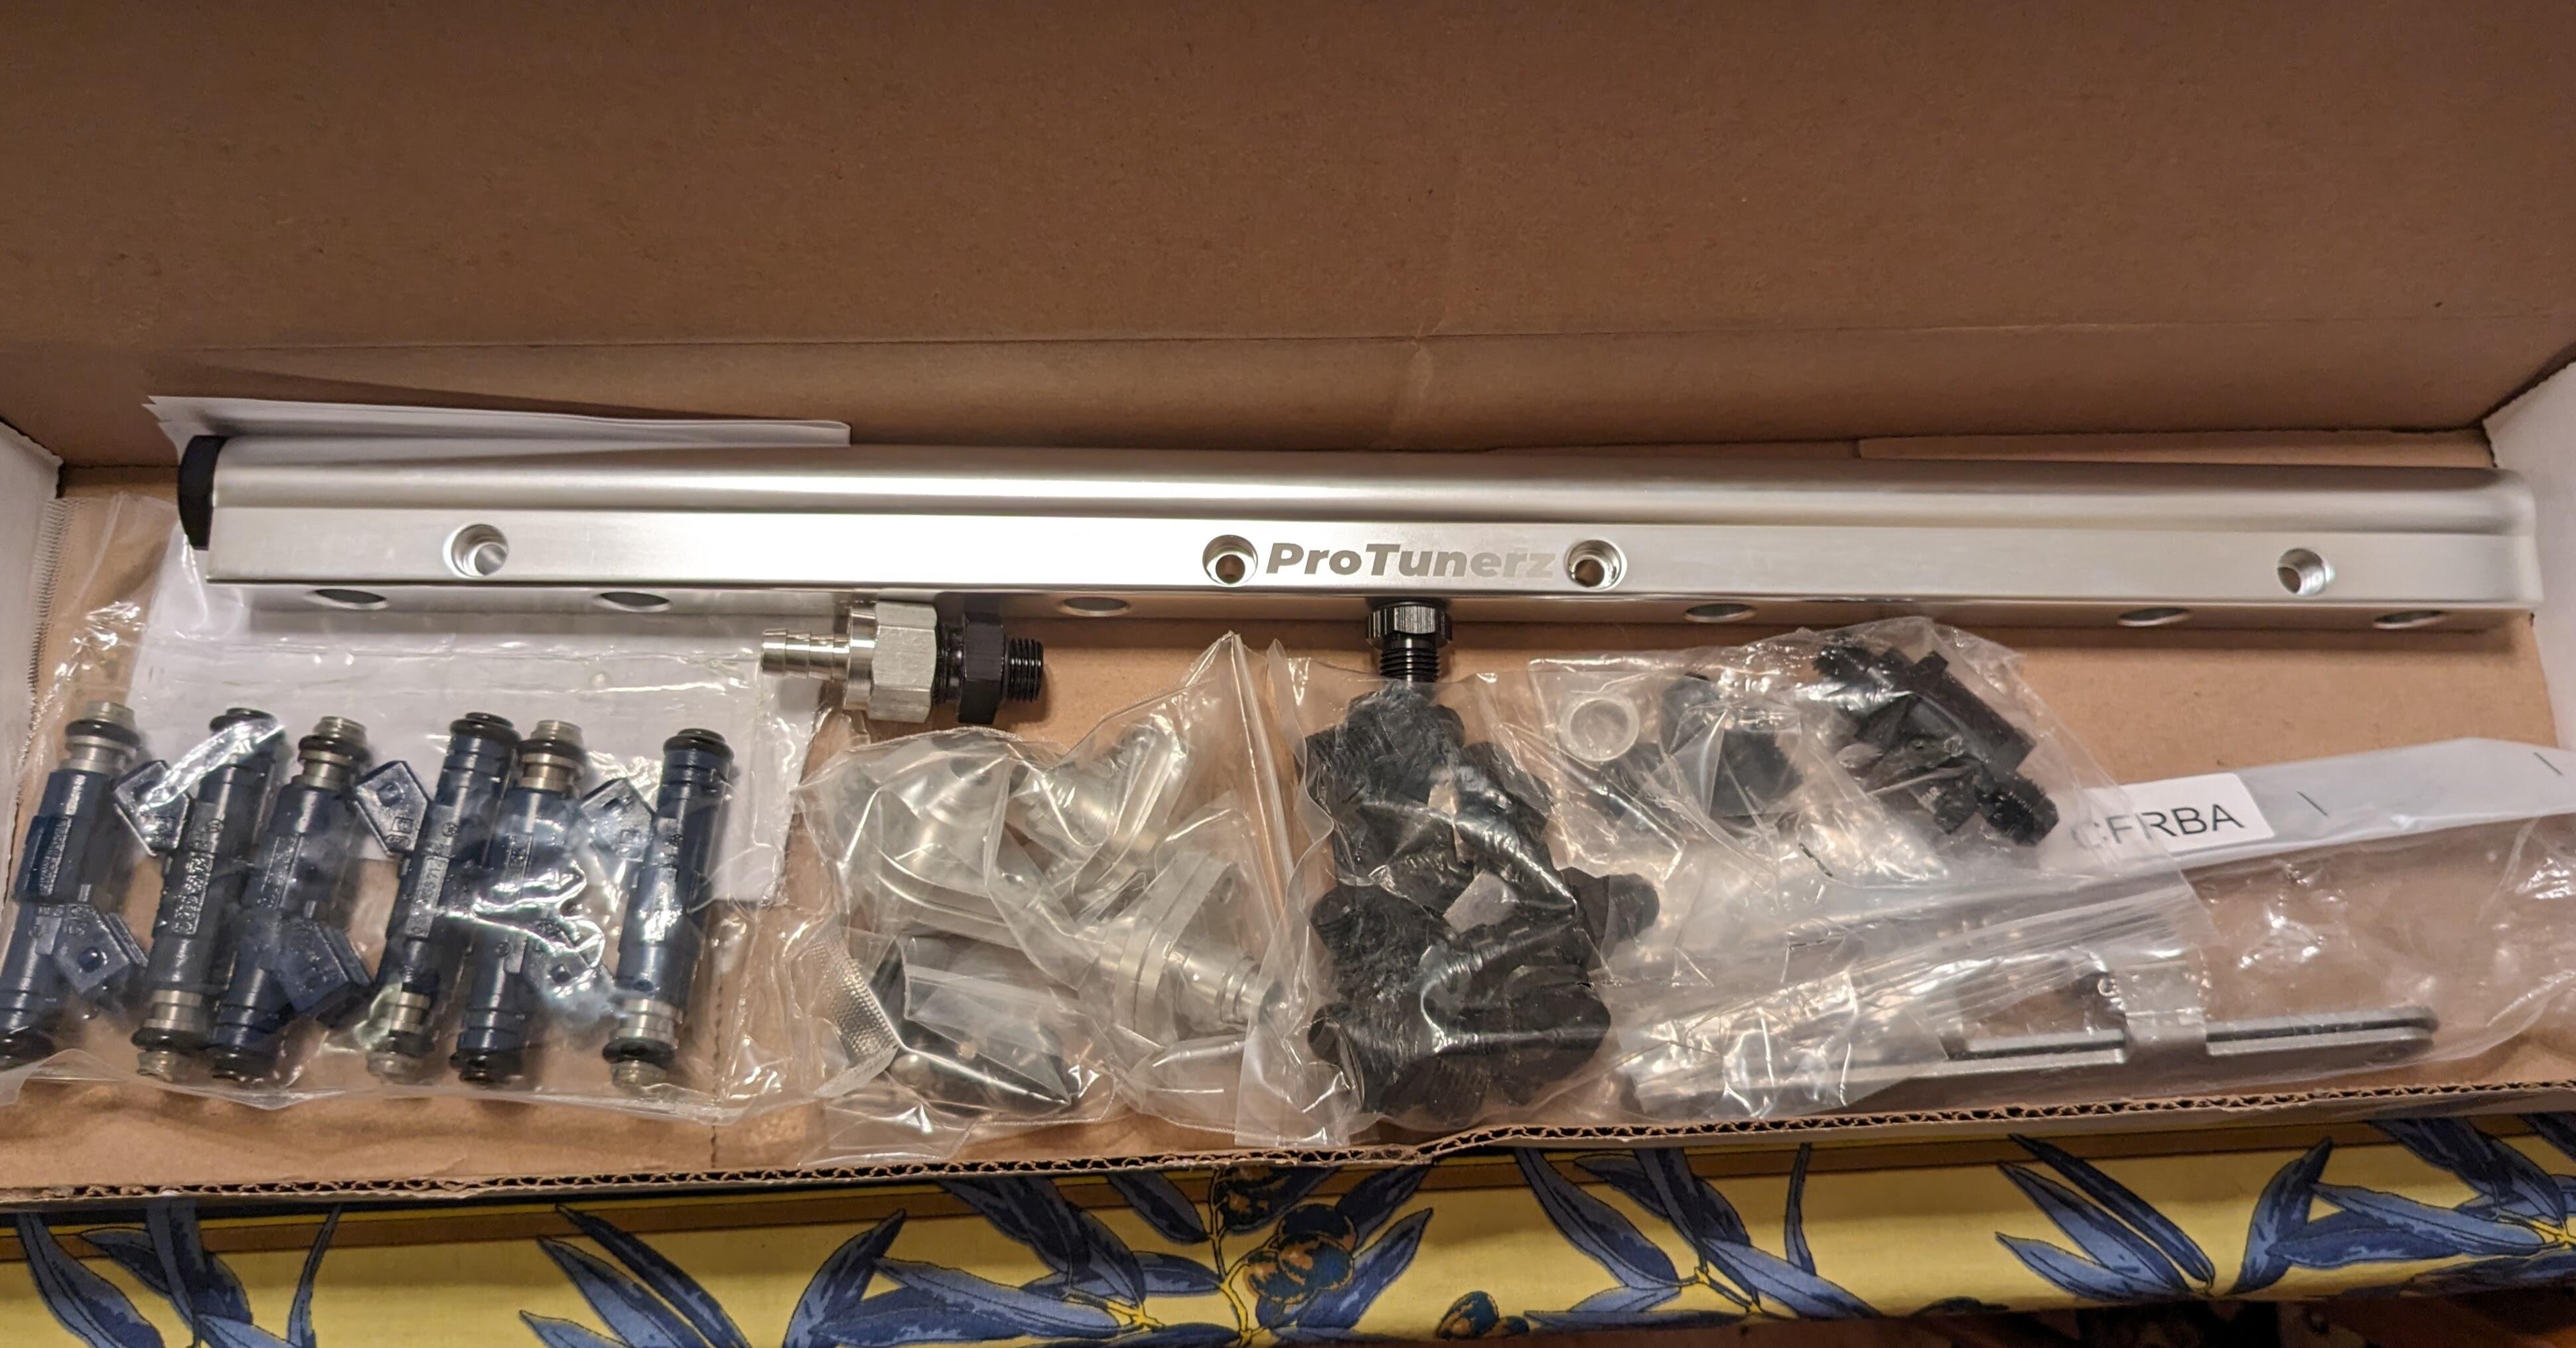
Been out of town since Wednesday - before that, I had the heat soak issue even though the ambient temps were in the 40's-50's. I'm going to make a heat shield, however since I have to remove the rail again, I decided to get newer injectors & a billet rail, and just get rid of all those thin metal tube rails. These came while I was away ProtunerZ rail & injector seat adaptors, 19.4lb/hr Bosch injectors 0280155712 (GM, Saab application)
 2 points
 -
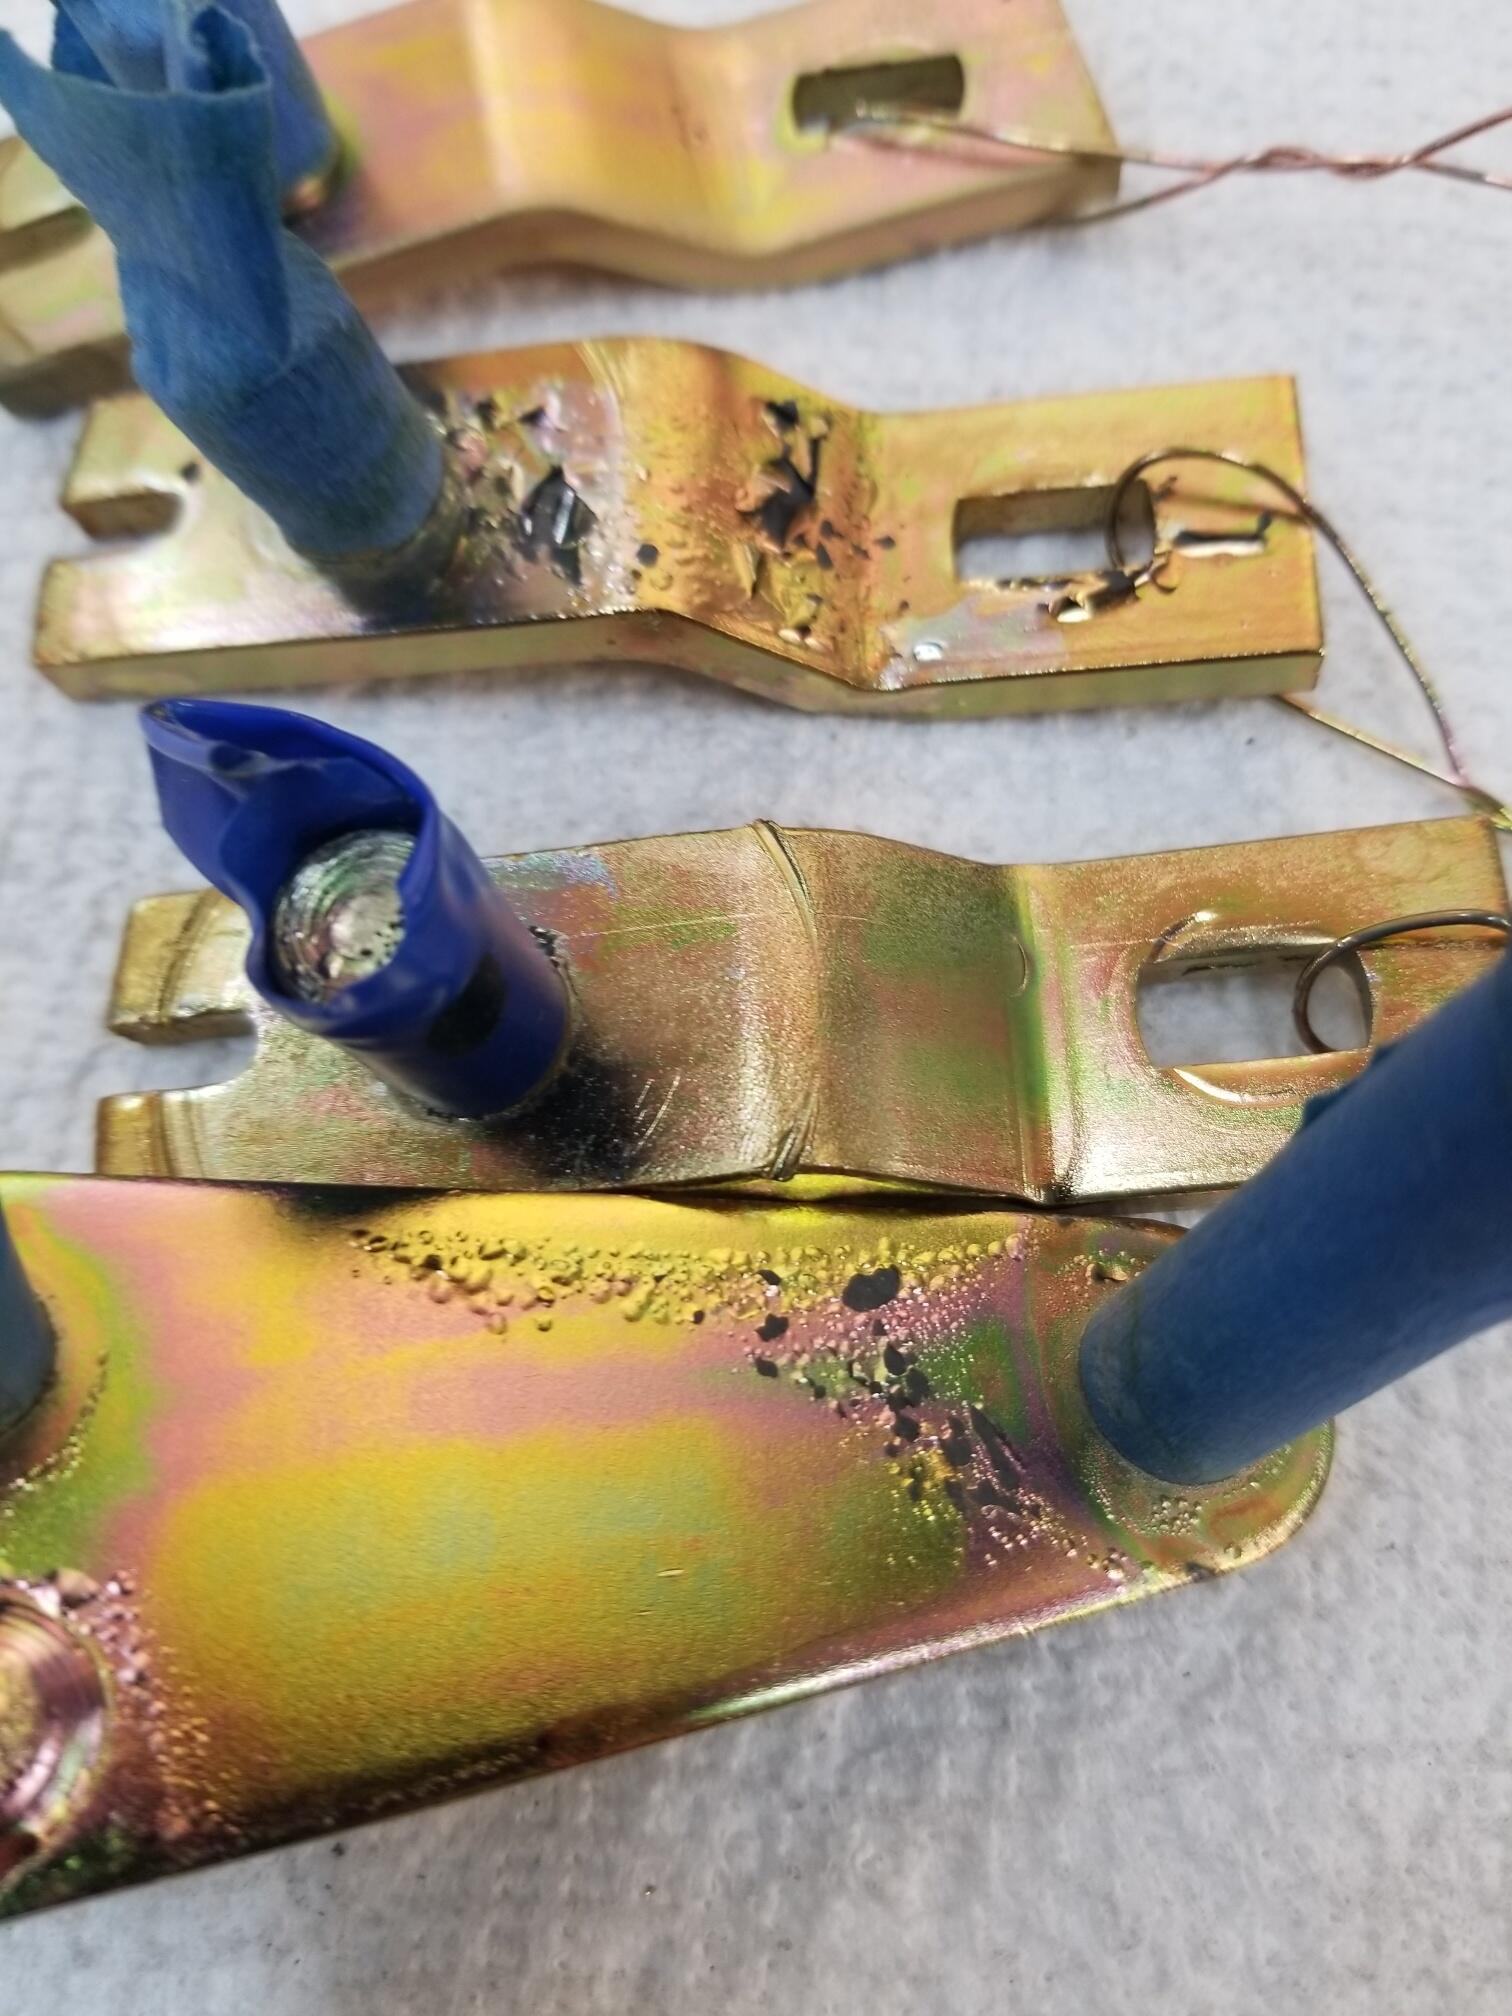
2 pointsHere is the plating from yesterday Wiper arms. I plated these myself because I had to wrap the chromed sections and I figure that was easier for me to do in house. It's always a challenge to get the tanks up and running when they've been sitting for a while These first few items blistered really badly. They didn't look this way until after 24 hours. I will blast them and replate later The later items seemed to have worked ok


 2 points
 -
2 pointsNice work! That wiring loom could have been a huge headache. Glad you found it friend.2 points
-
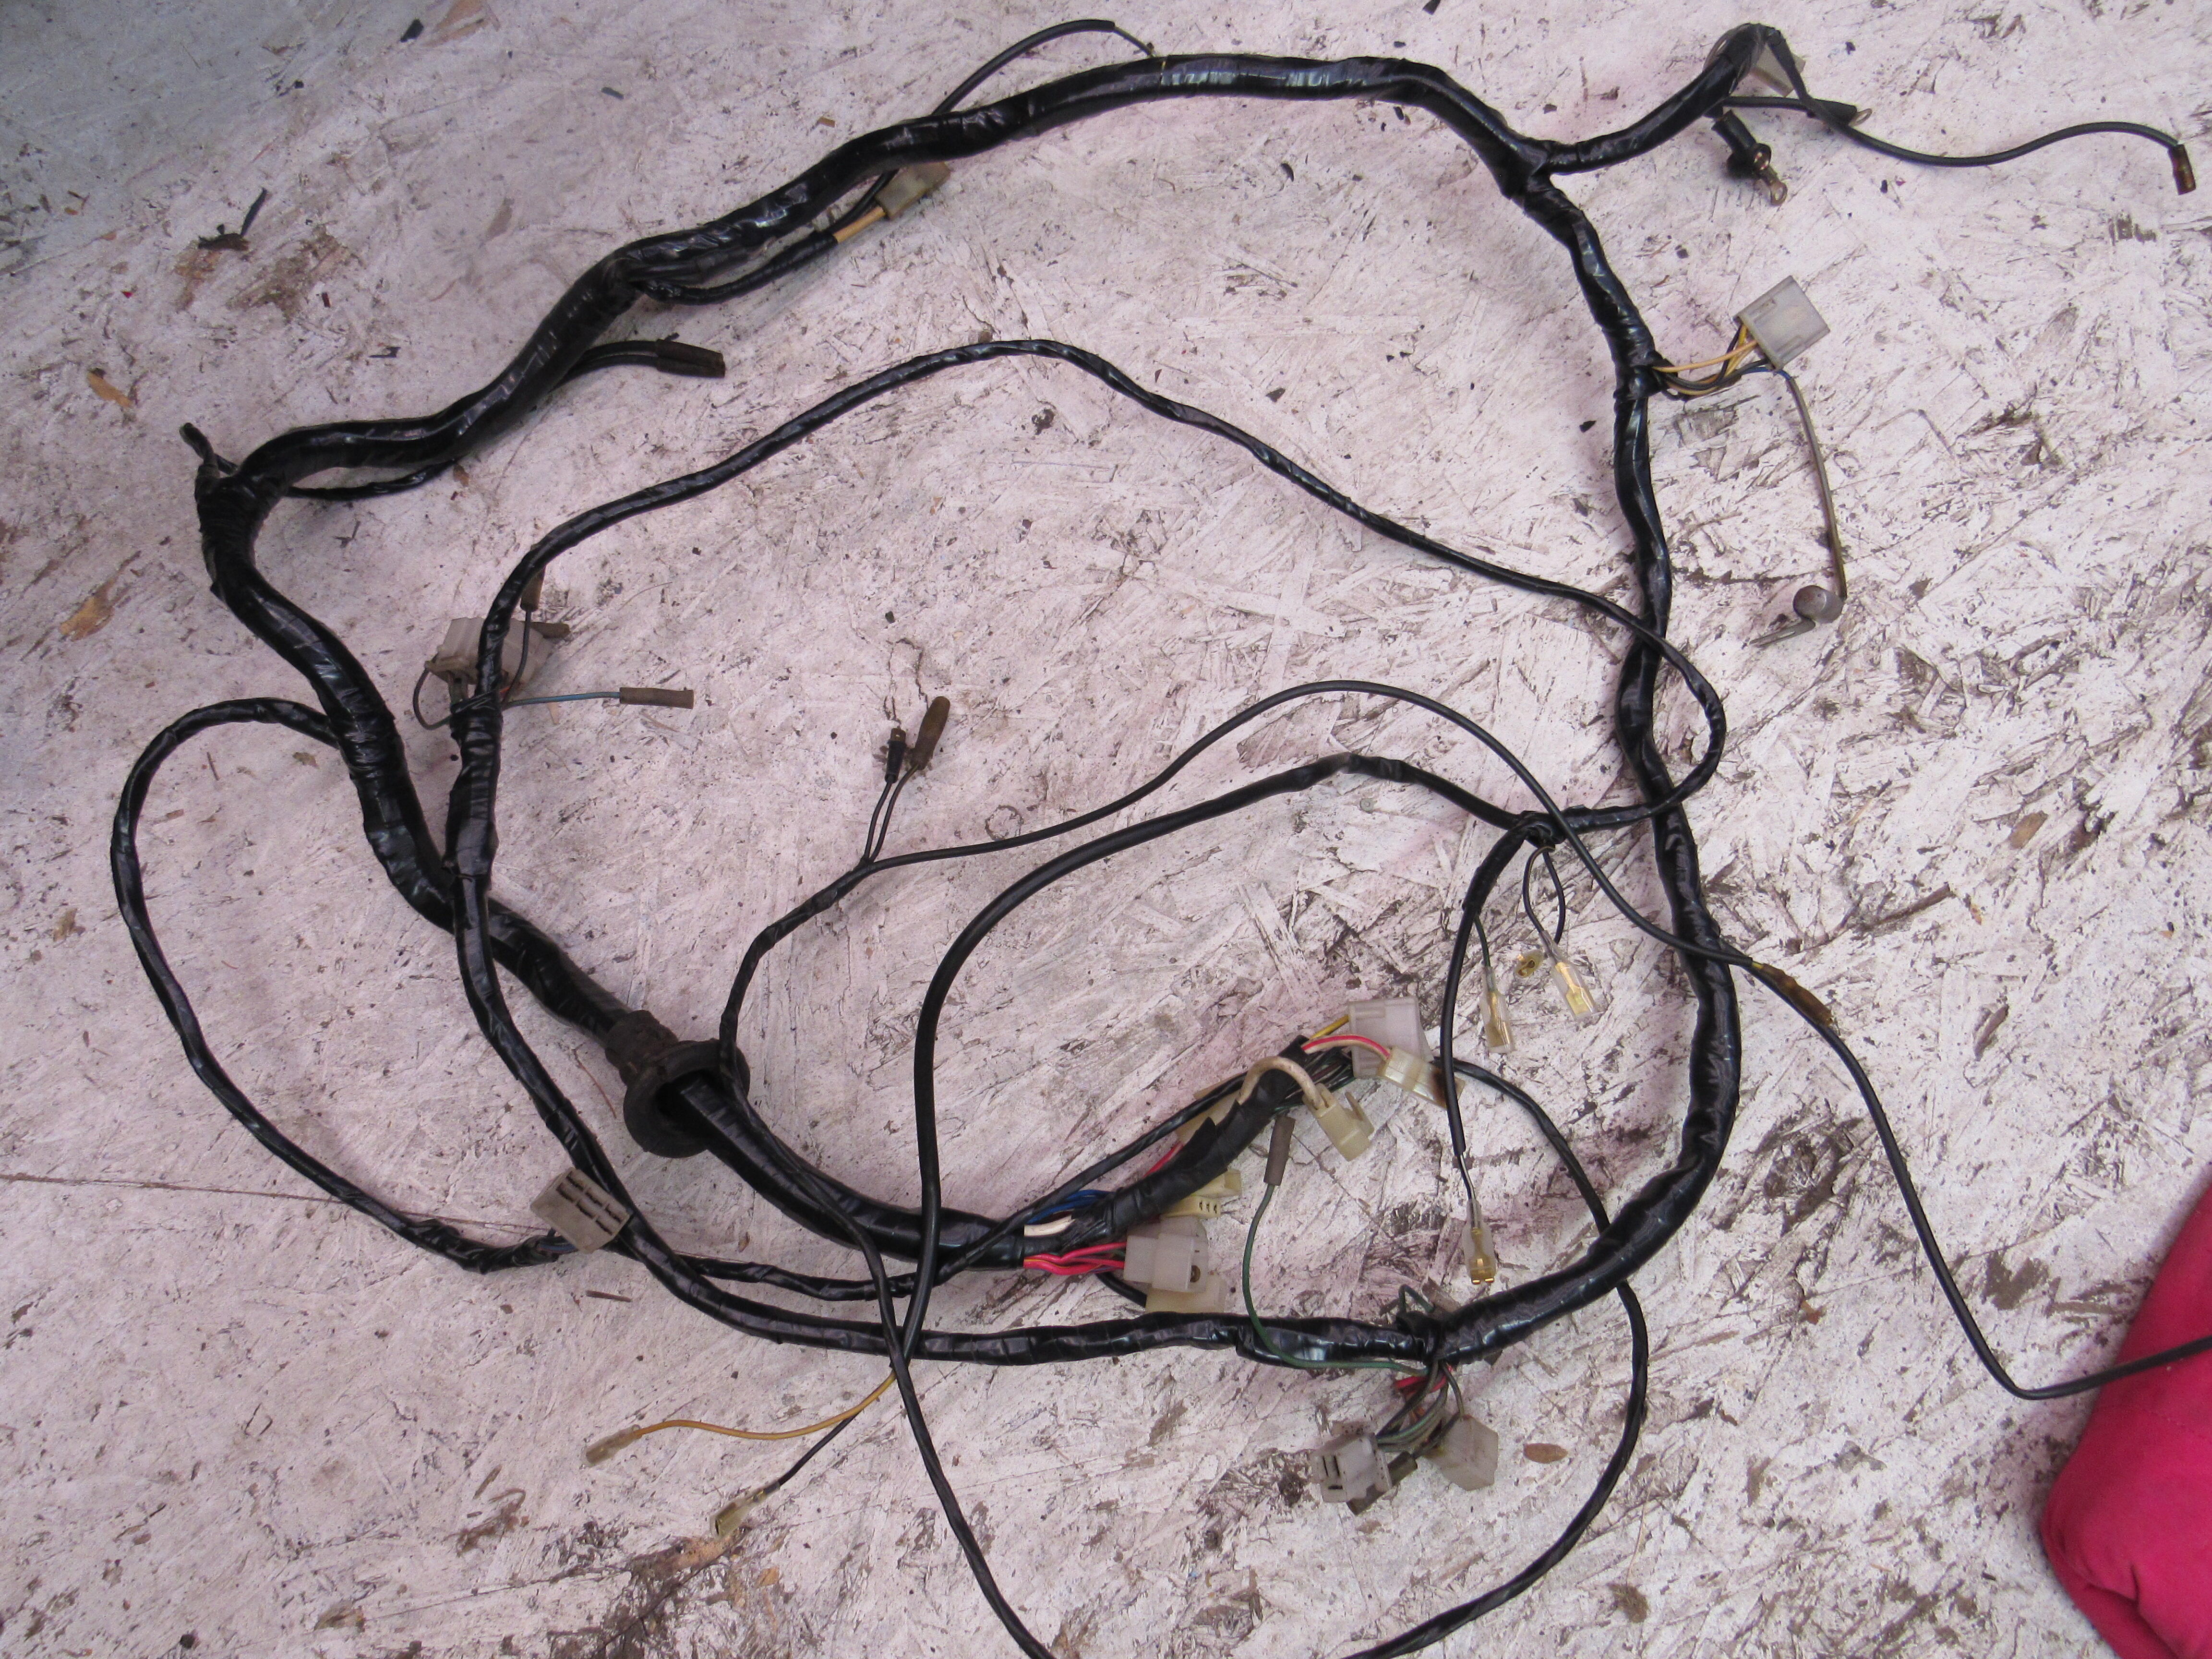
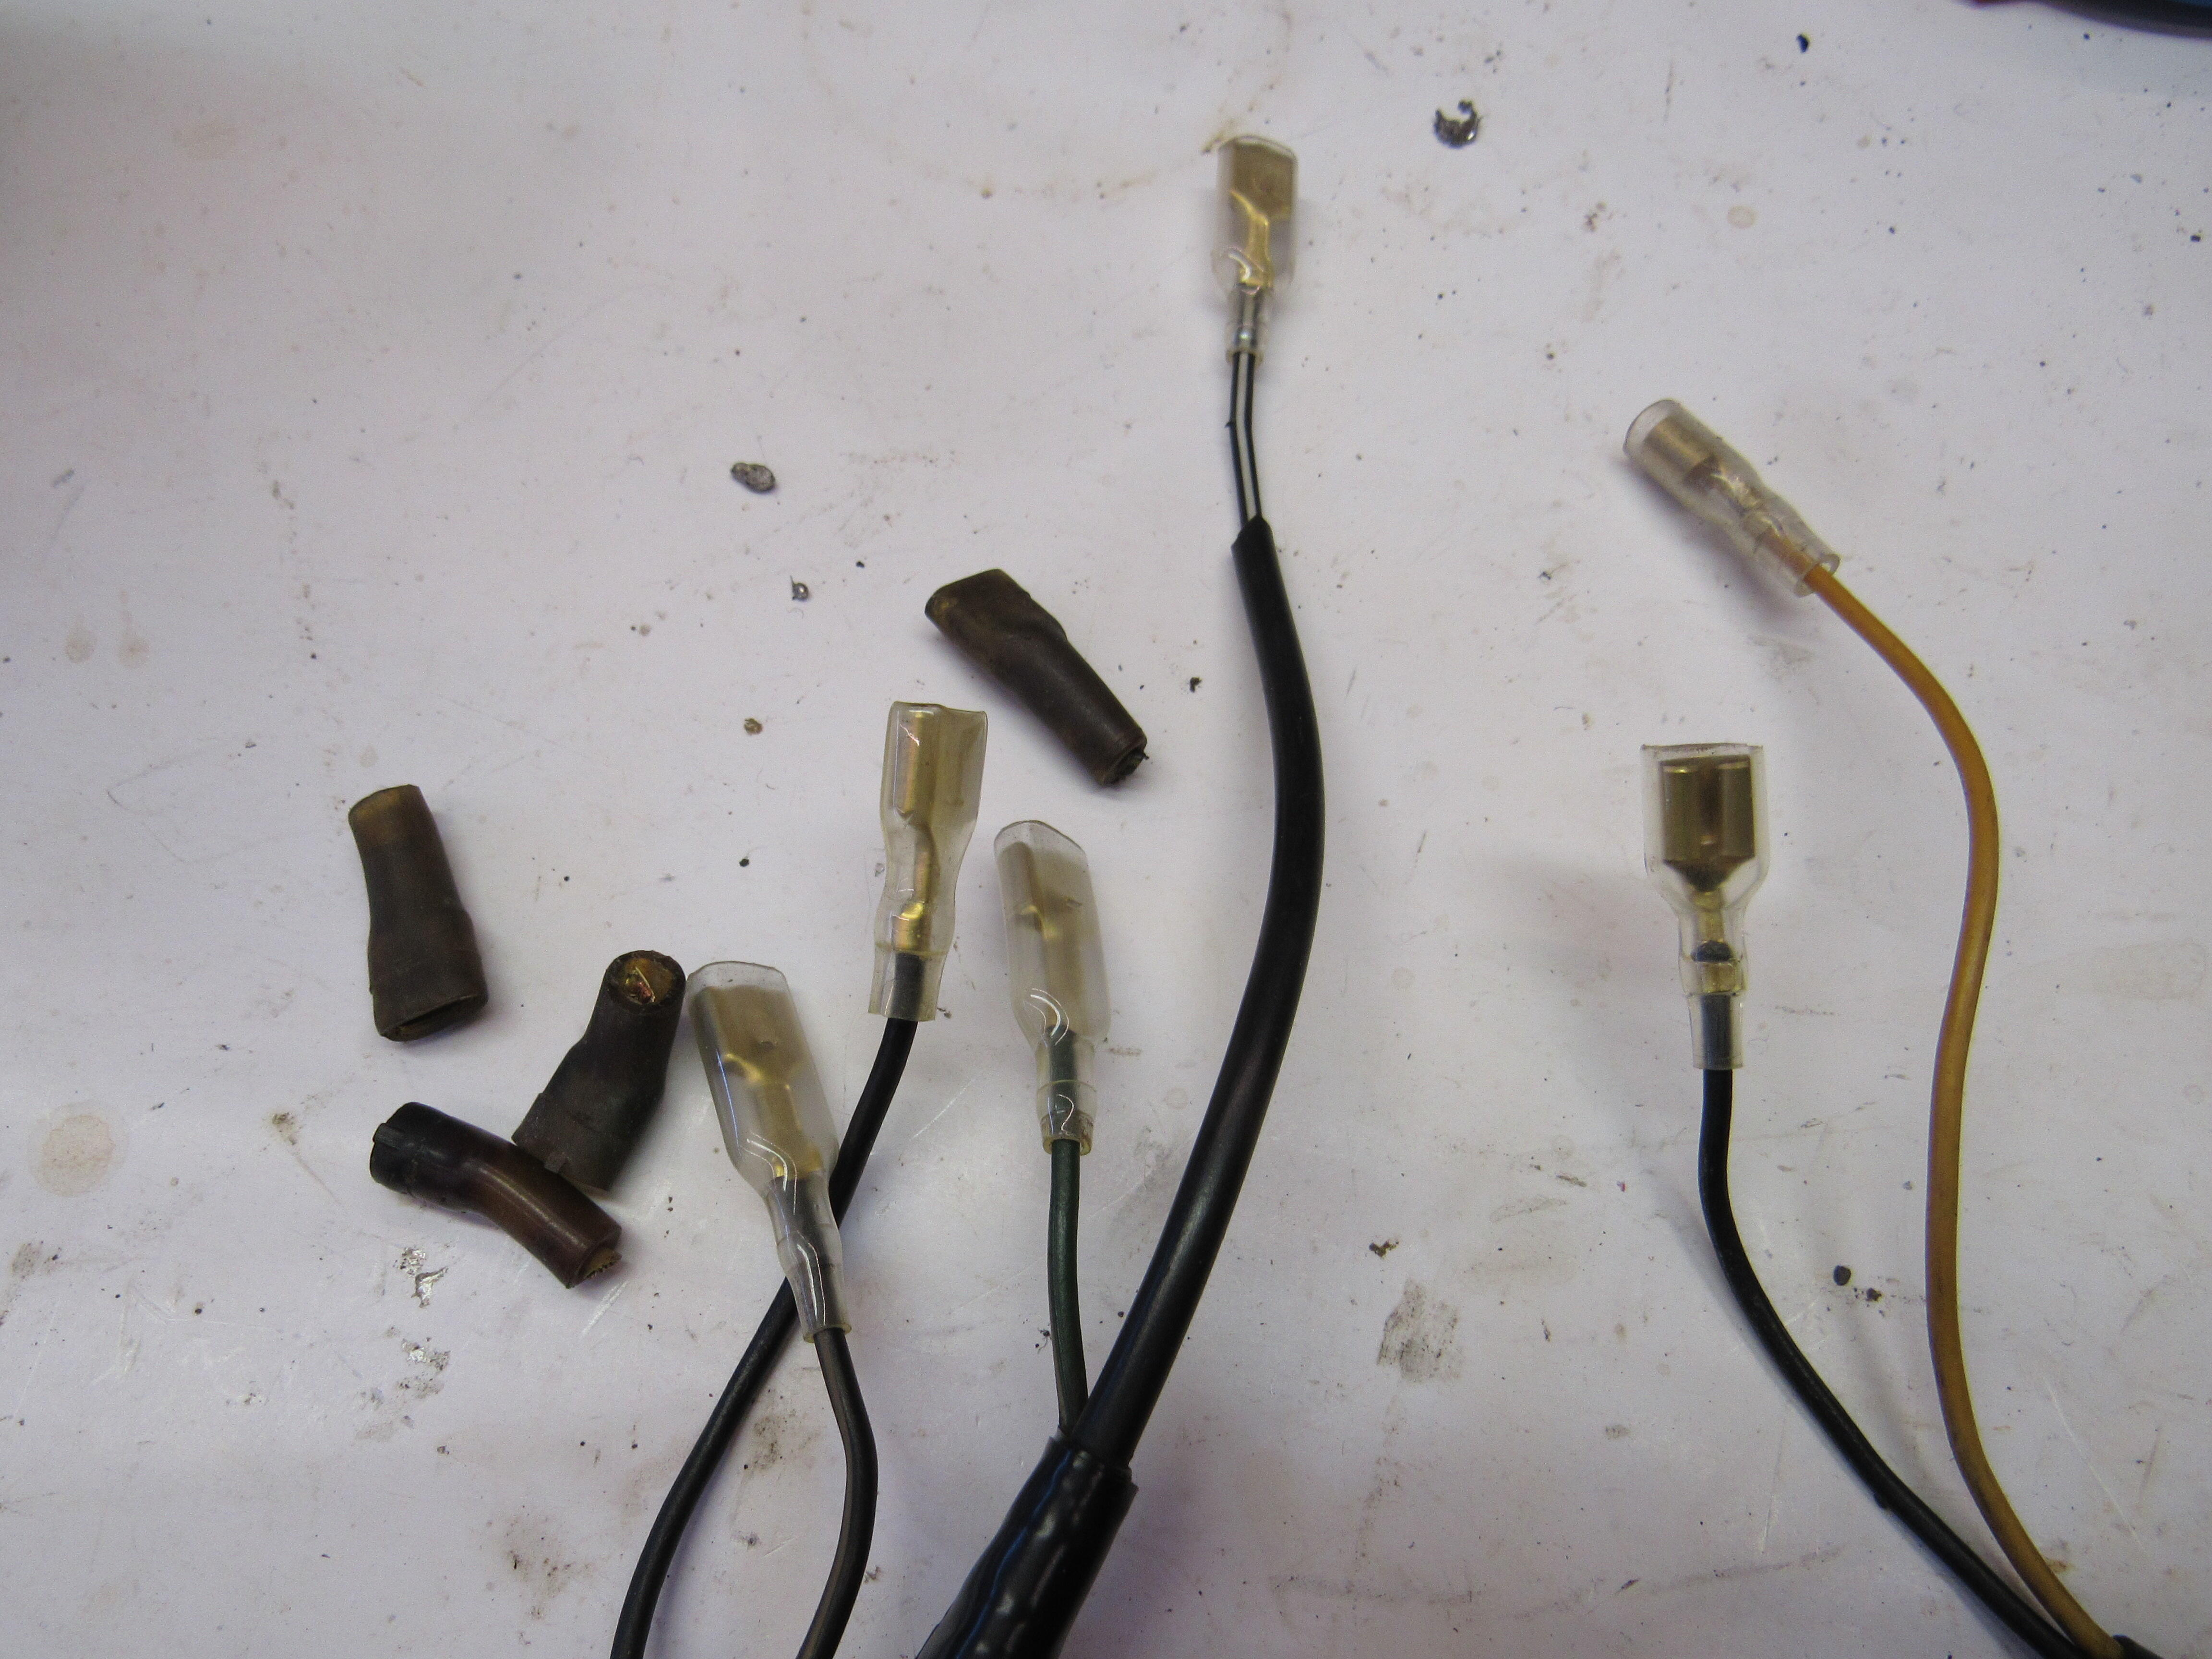
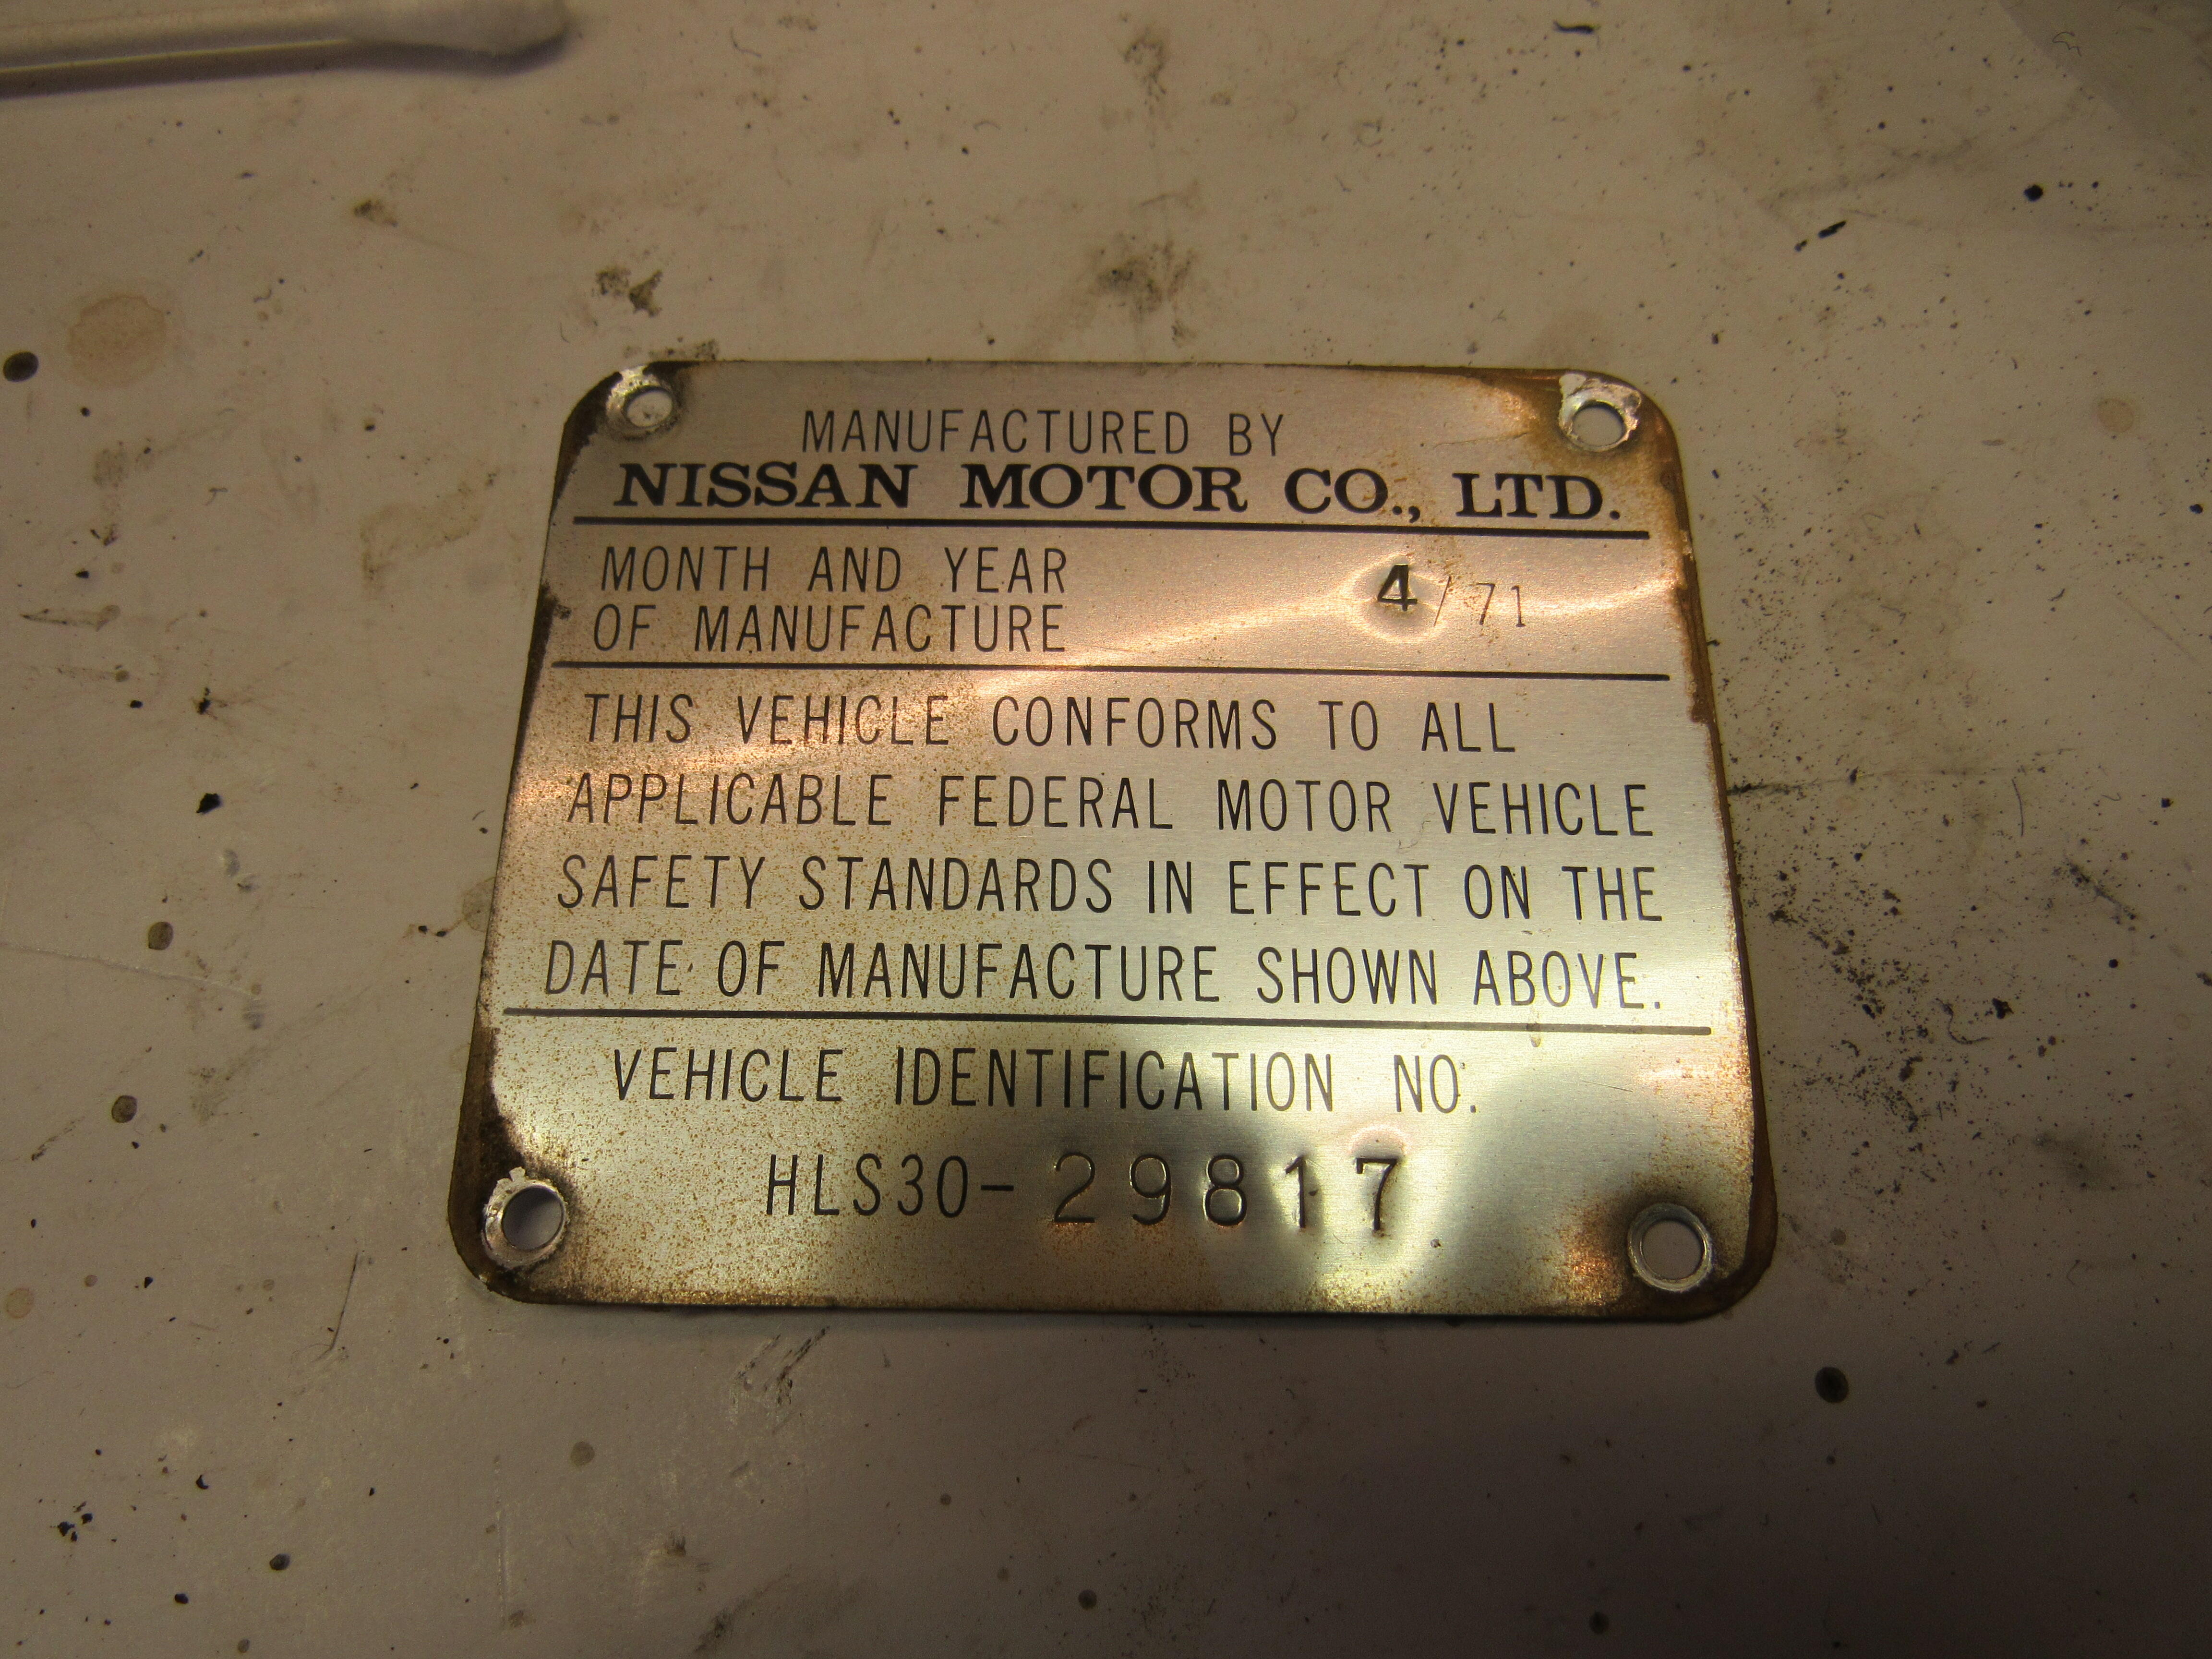
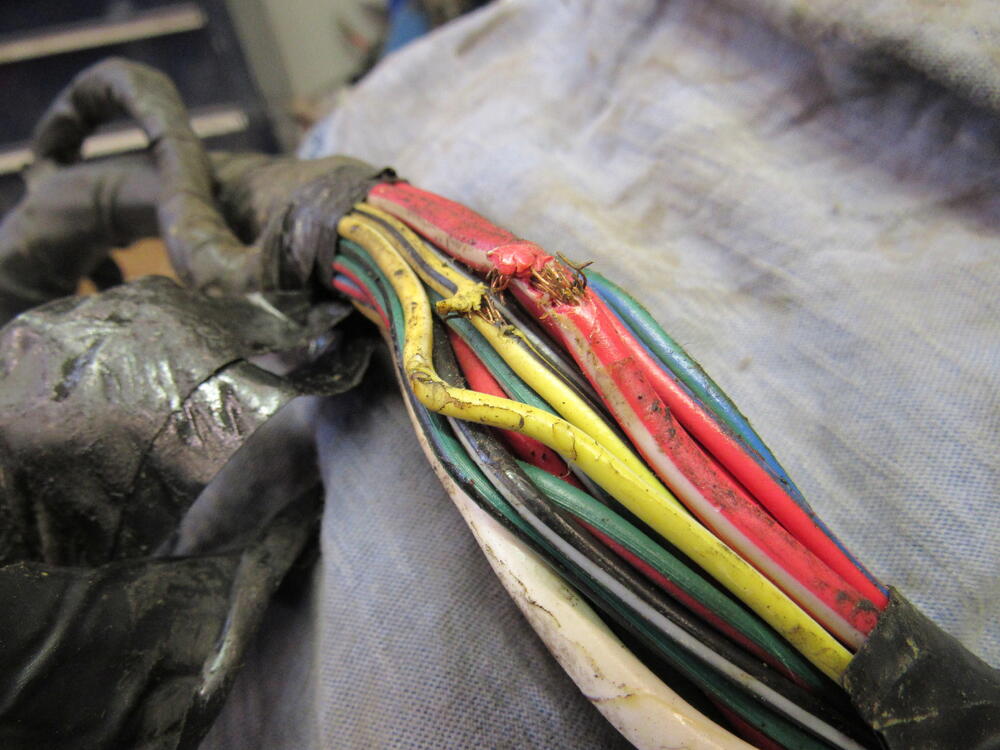
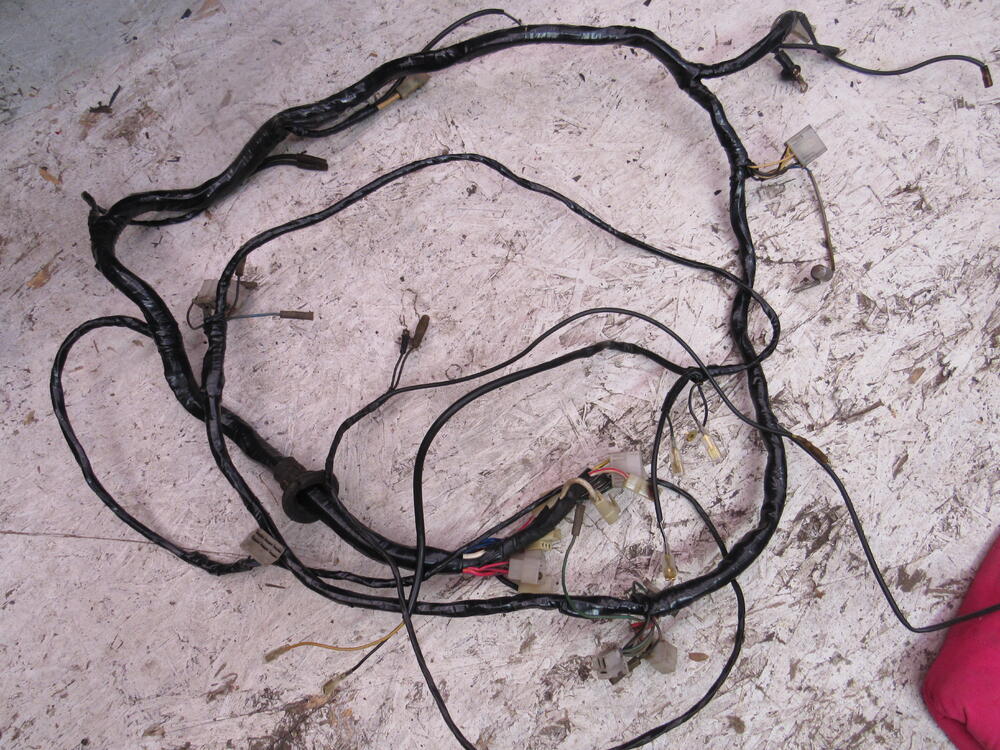
2 pointsI haven't powered it up yet, no speakers, blew out the dust and it looks pretty good. Tore down the heater and blower box, no surprises, filled the heater core with CLR and let it sit over night then back flushed. One melting event but there is still continuity so just cleaned it up with a brass brush. Laid out the engine bay wiring harness and stripped all the tape off to check for melts and breaks, only found a couple, the 2 breaks are right where the harness goes through the firewall, someone pulled the firewall rubber grommet off and let the wiring harness ride on the edge of sheet metal. I drilled out the VIN door tag, to remove the respray paint from the edges I applied a tiny amount of Aircraft paint stripper with a Q tip and rubbed it with 0000 steel wool.


 2 points
 -
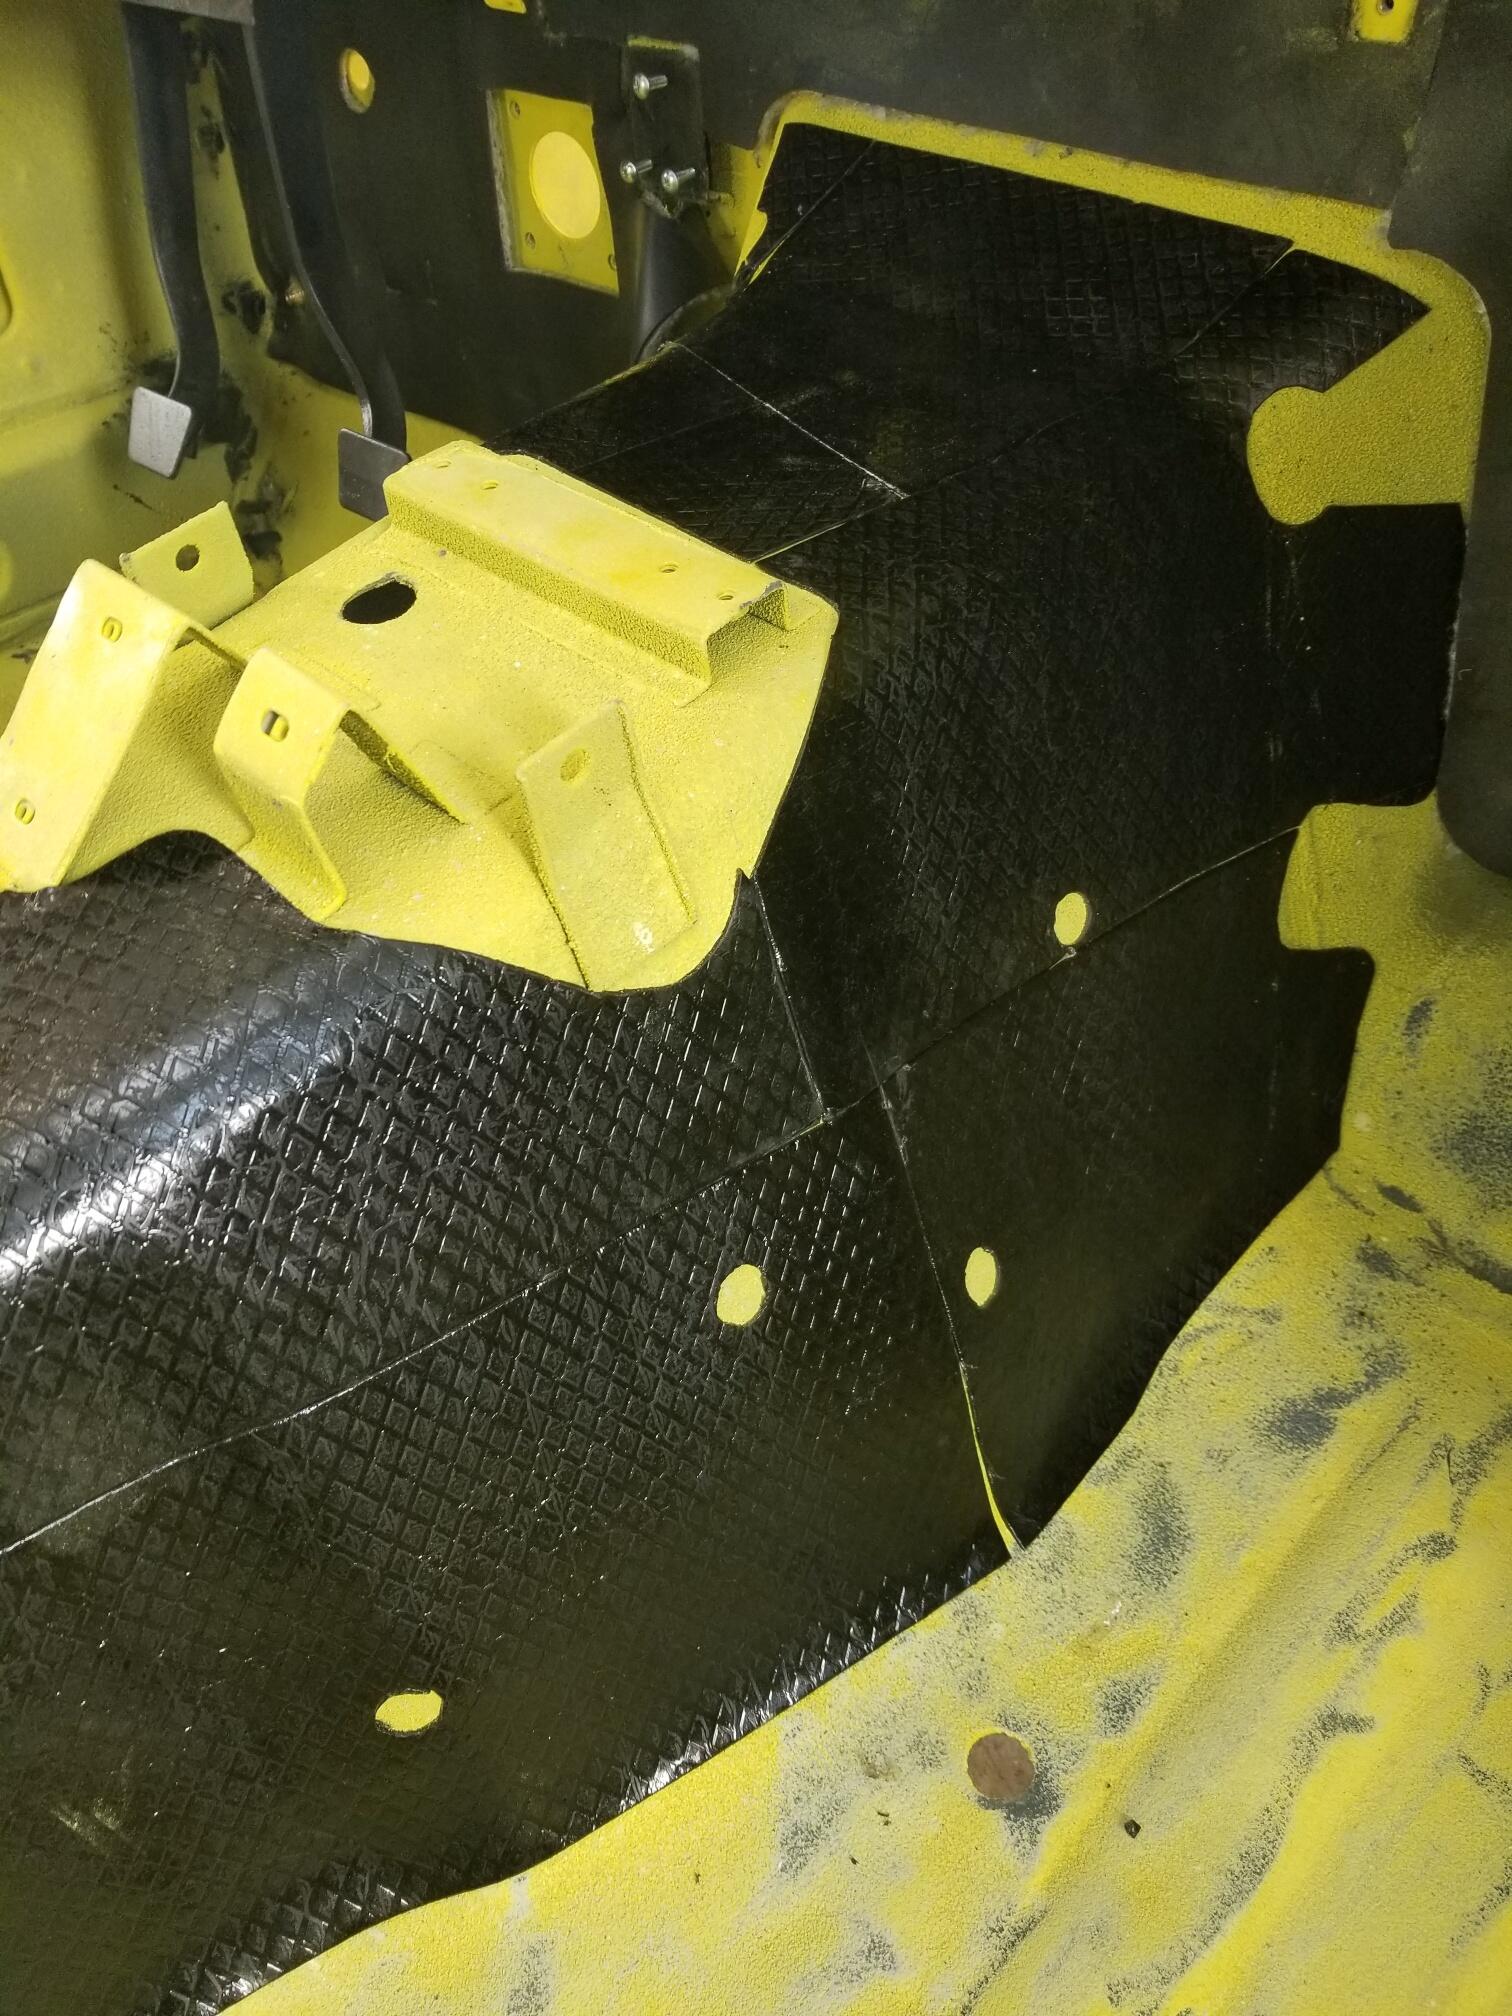
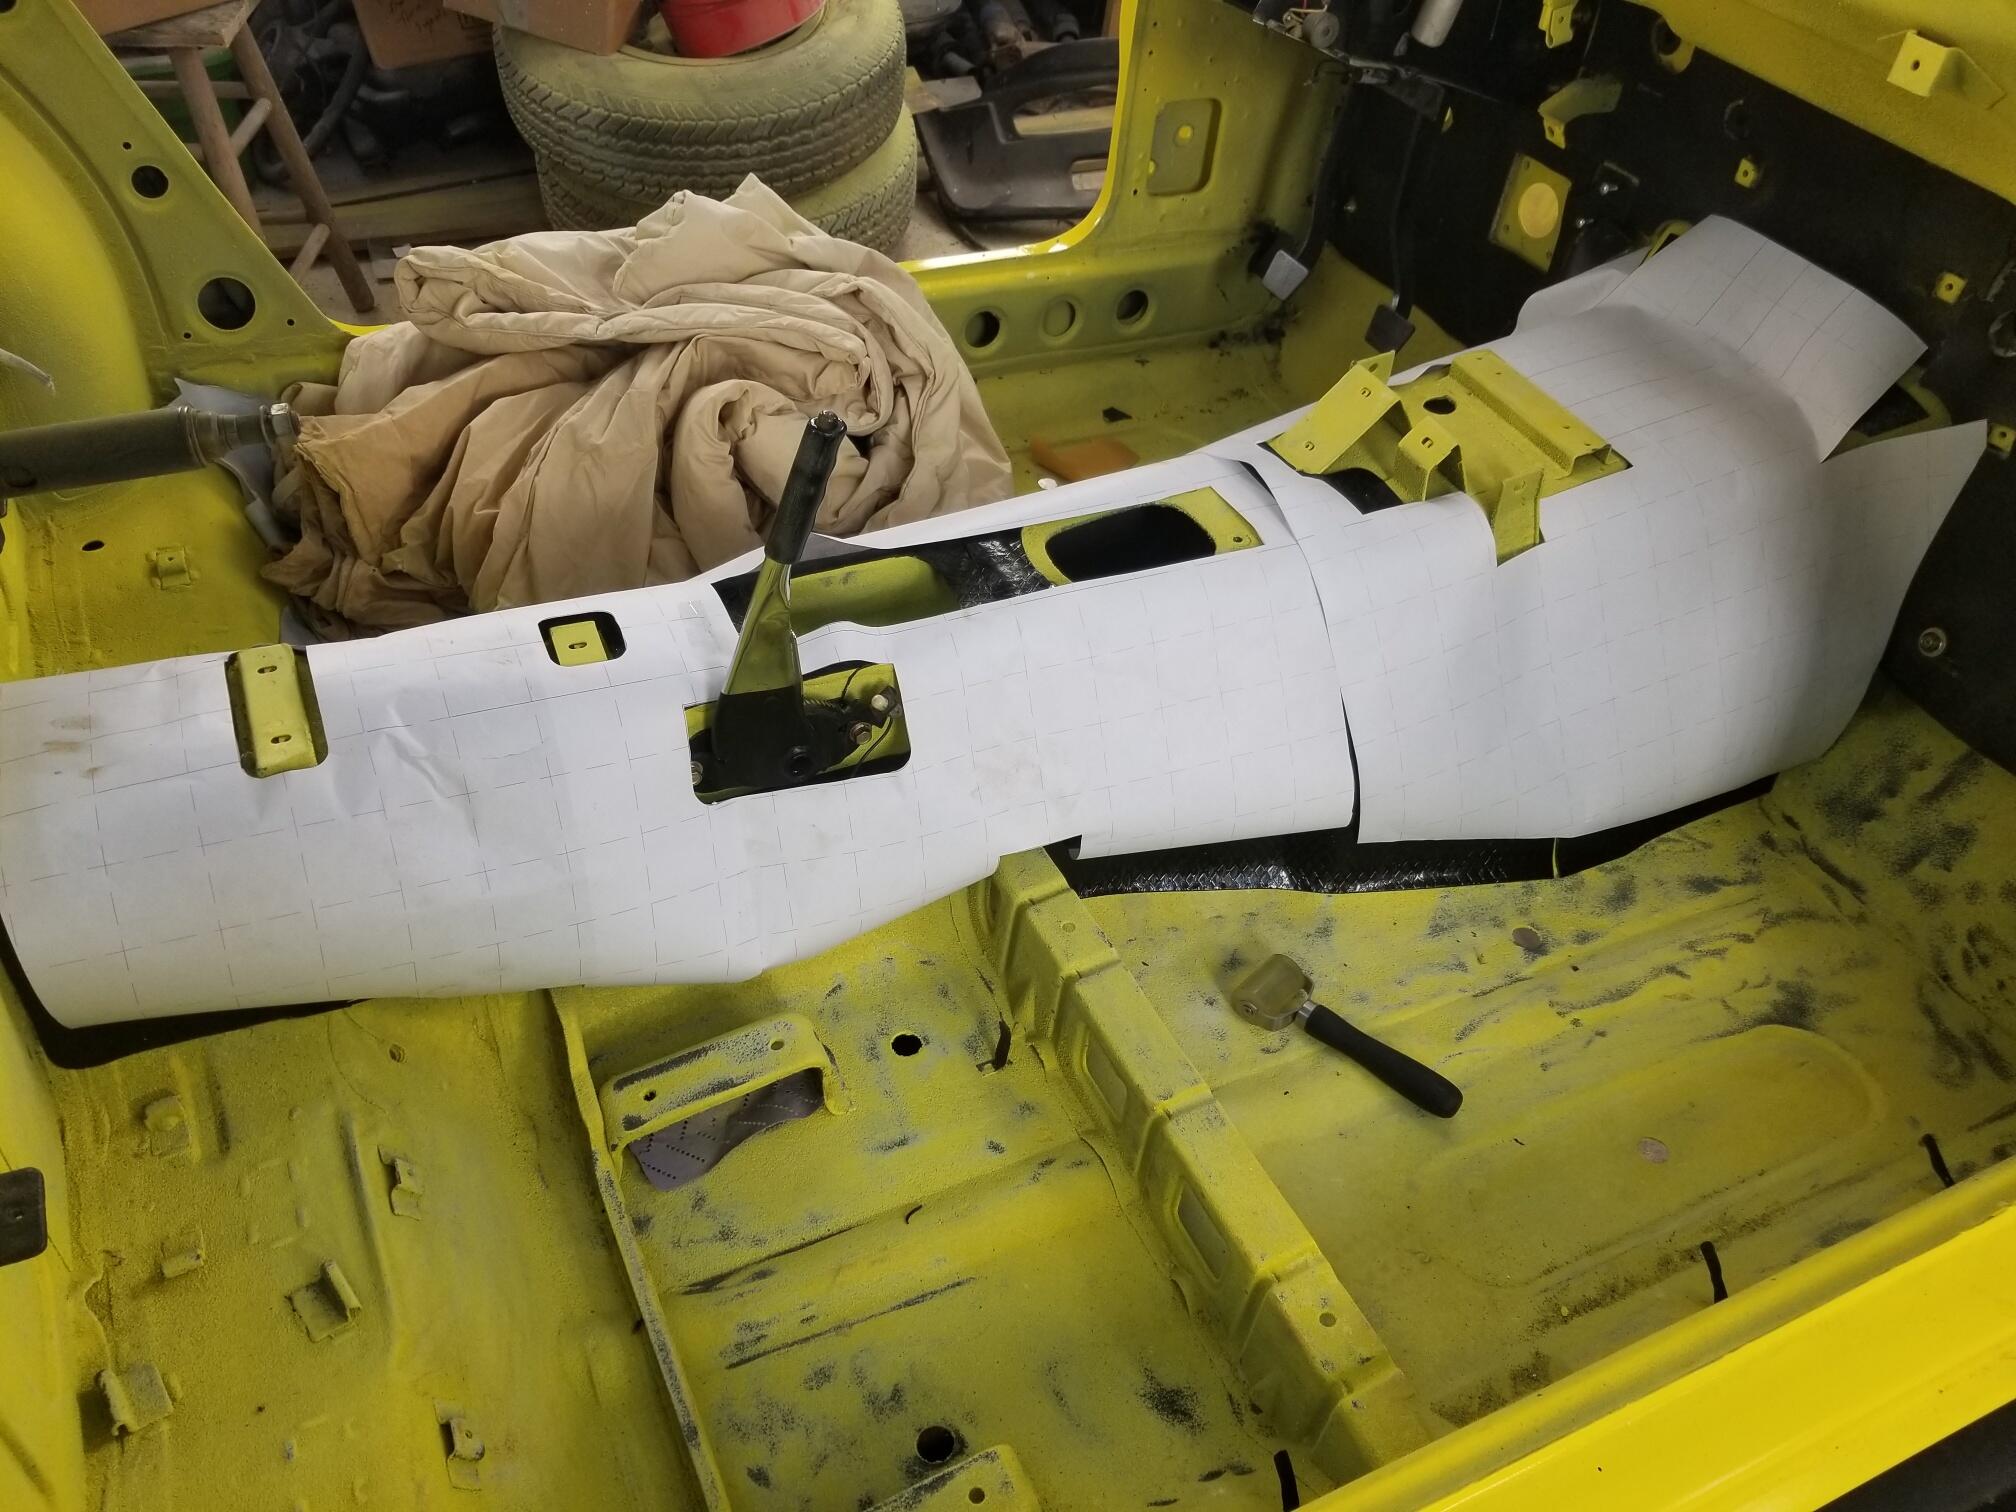
2 pointsI made a little progress today Here is what the tar mat looks like all peeled Here are my templates for the tunnel jute I also did a little plating on some wiper parts Not as much progress as I'd like but something...

 2 points
 -
Nice that you have a project to do with your boys, from your video it certainly looks like you have it bottomed.1 point
-
Yeah they cleaned up nicely. Either a coat of clear or even some wax spray. This was just a quick and dirty blasting-- I would probably need to do a little better job blasting and then solvent clean them really well to get a good surface for paint.1 point
-
That looks about as similar to what I have now. That brings a lot of extra relief to me haha. Thanks for sharing. Will share pictures tomorrow of my results.1 point
-
Well I blasted them and they look pretty good raw so I think I'll leave them like this. I'm attaching some before/after pics. Thanks for the quick replies everyone! I left piston/seals in place so I didn't have to mask the bores. I'll replace all that stuff tonight when I rebuild.

 1 point
 -
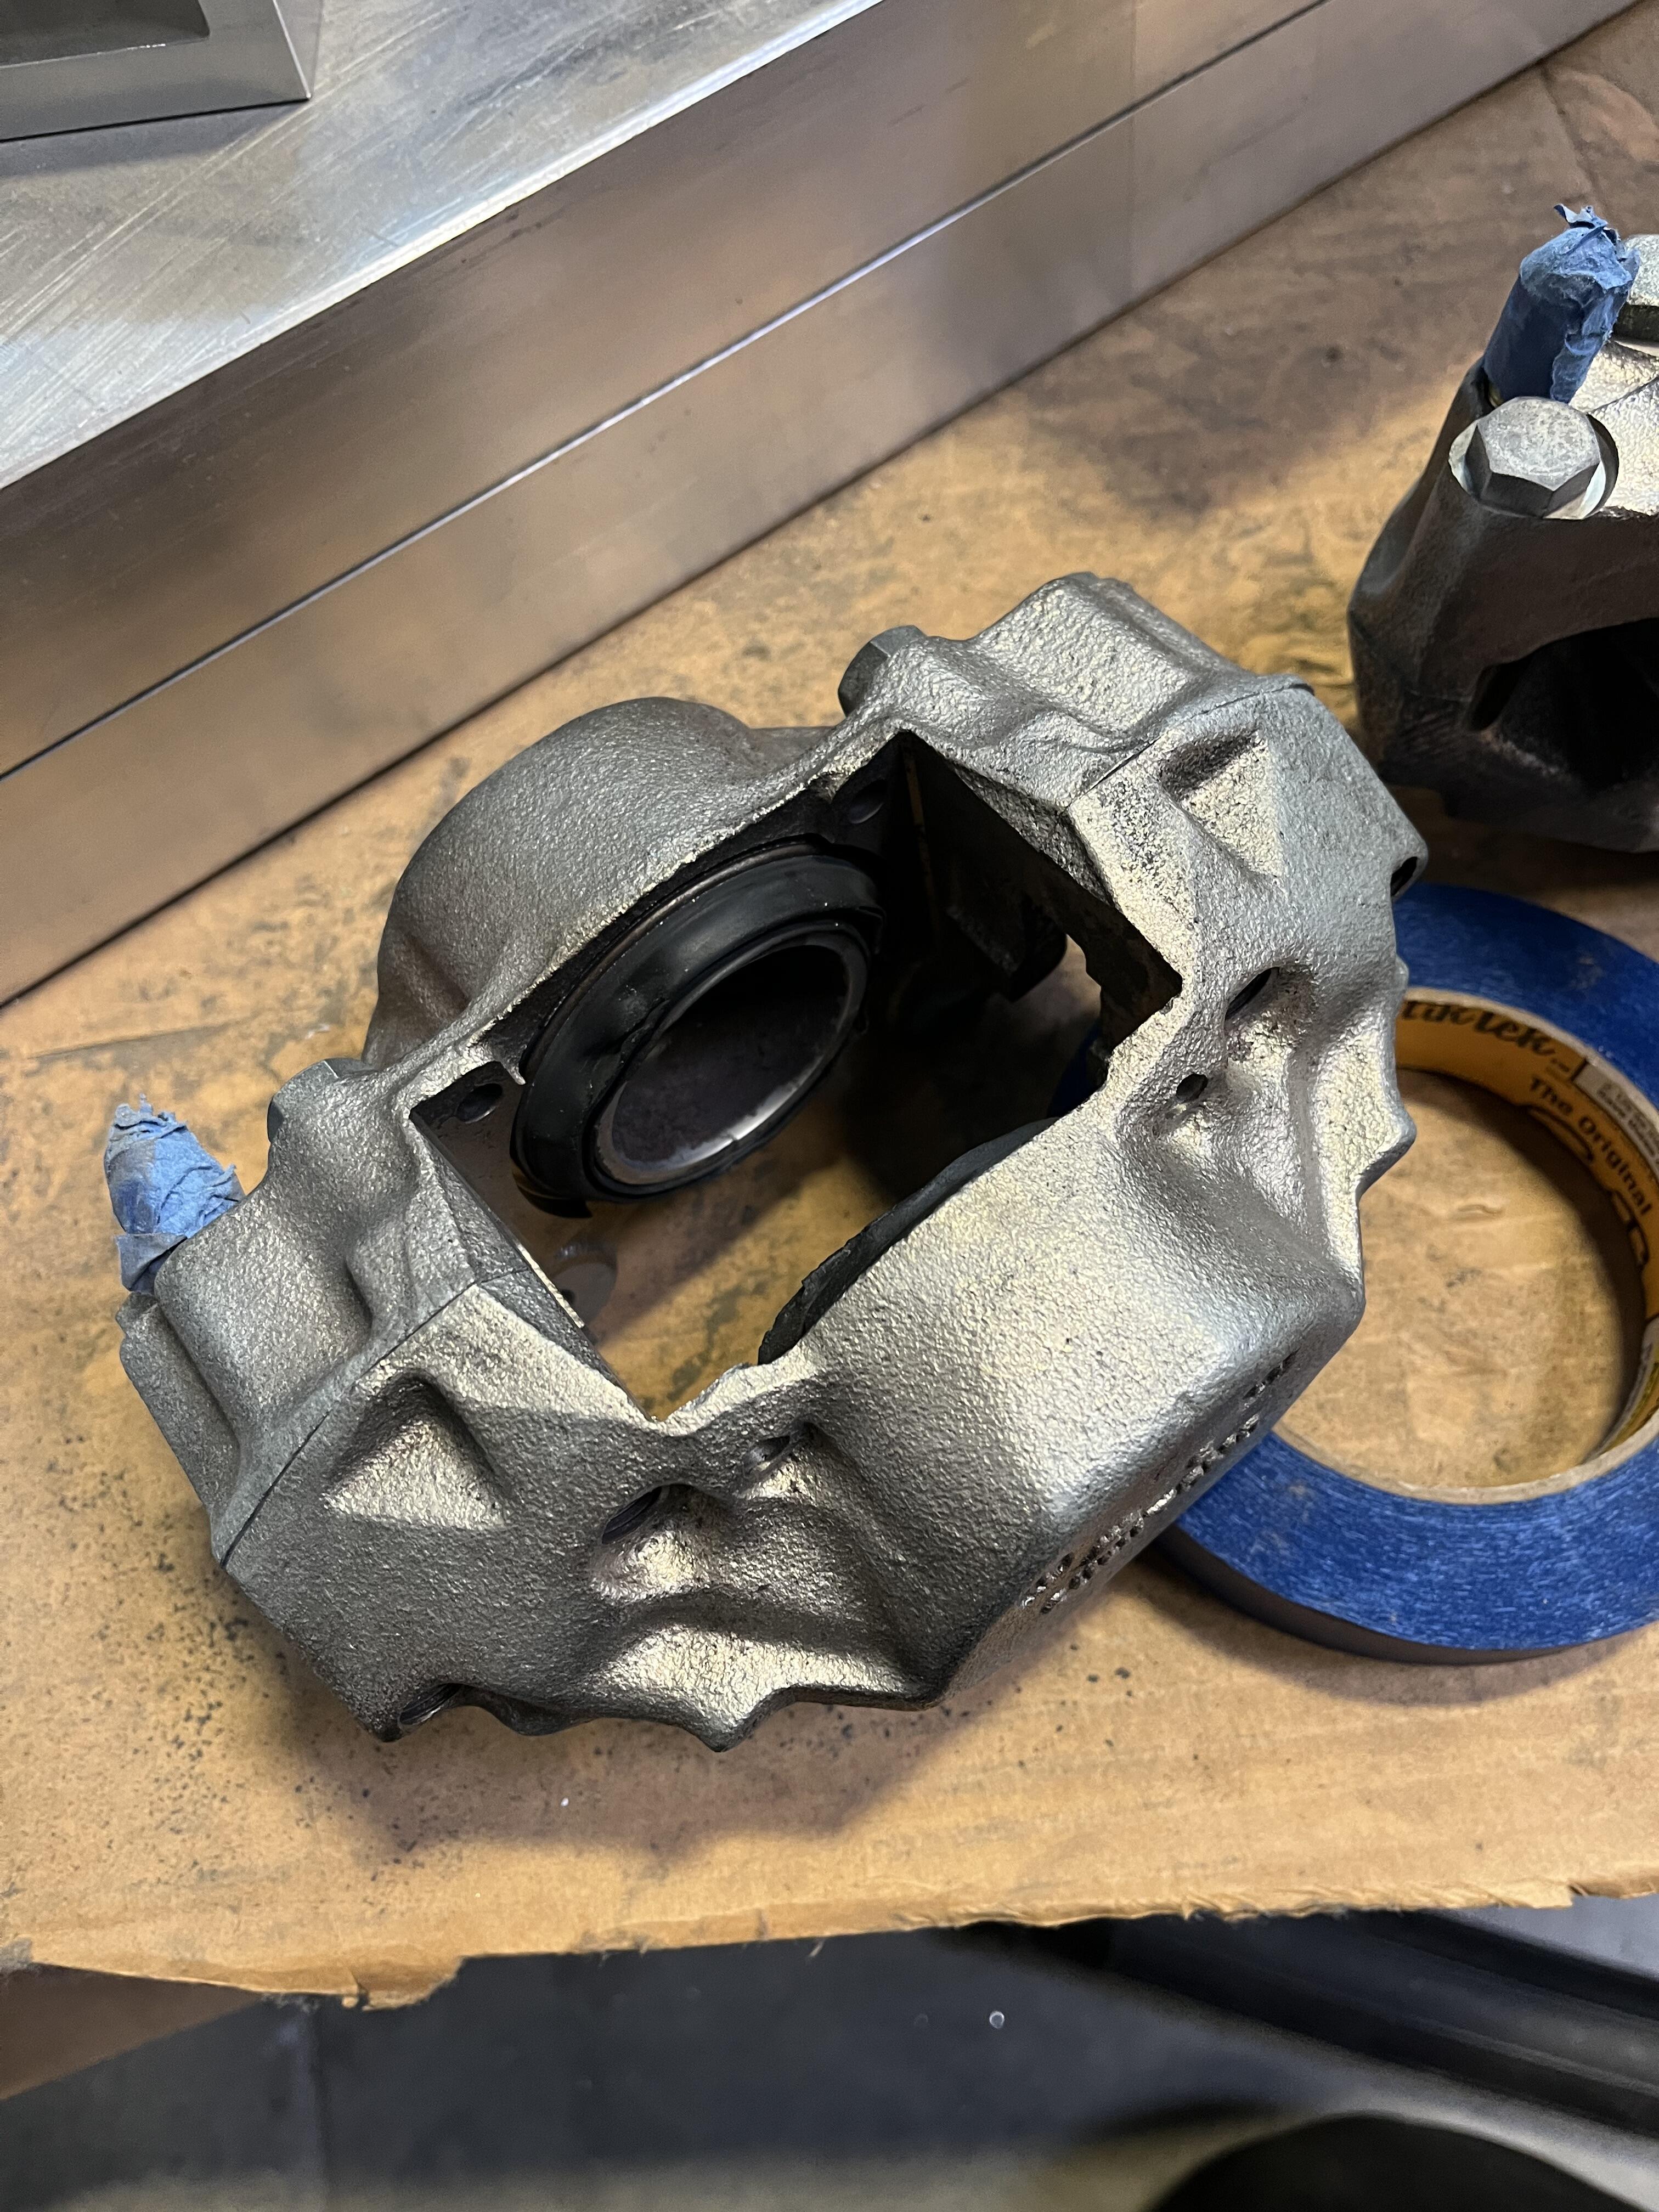
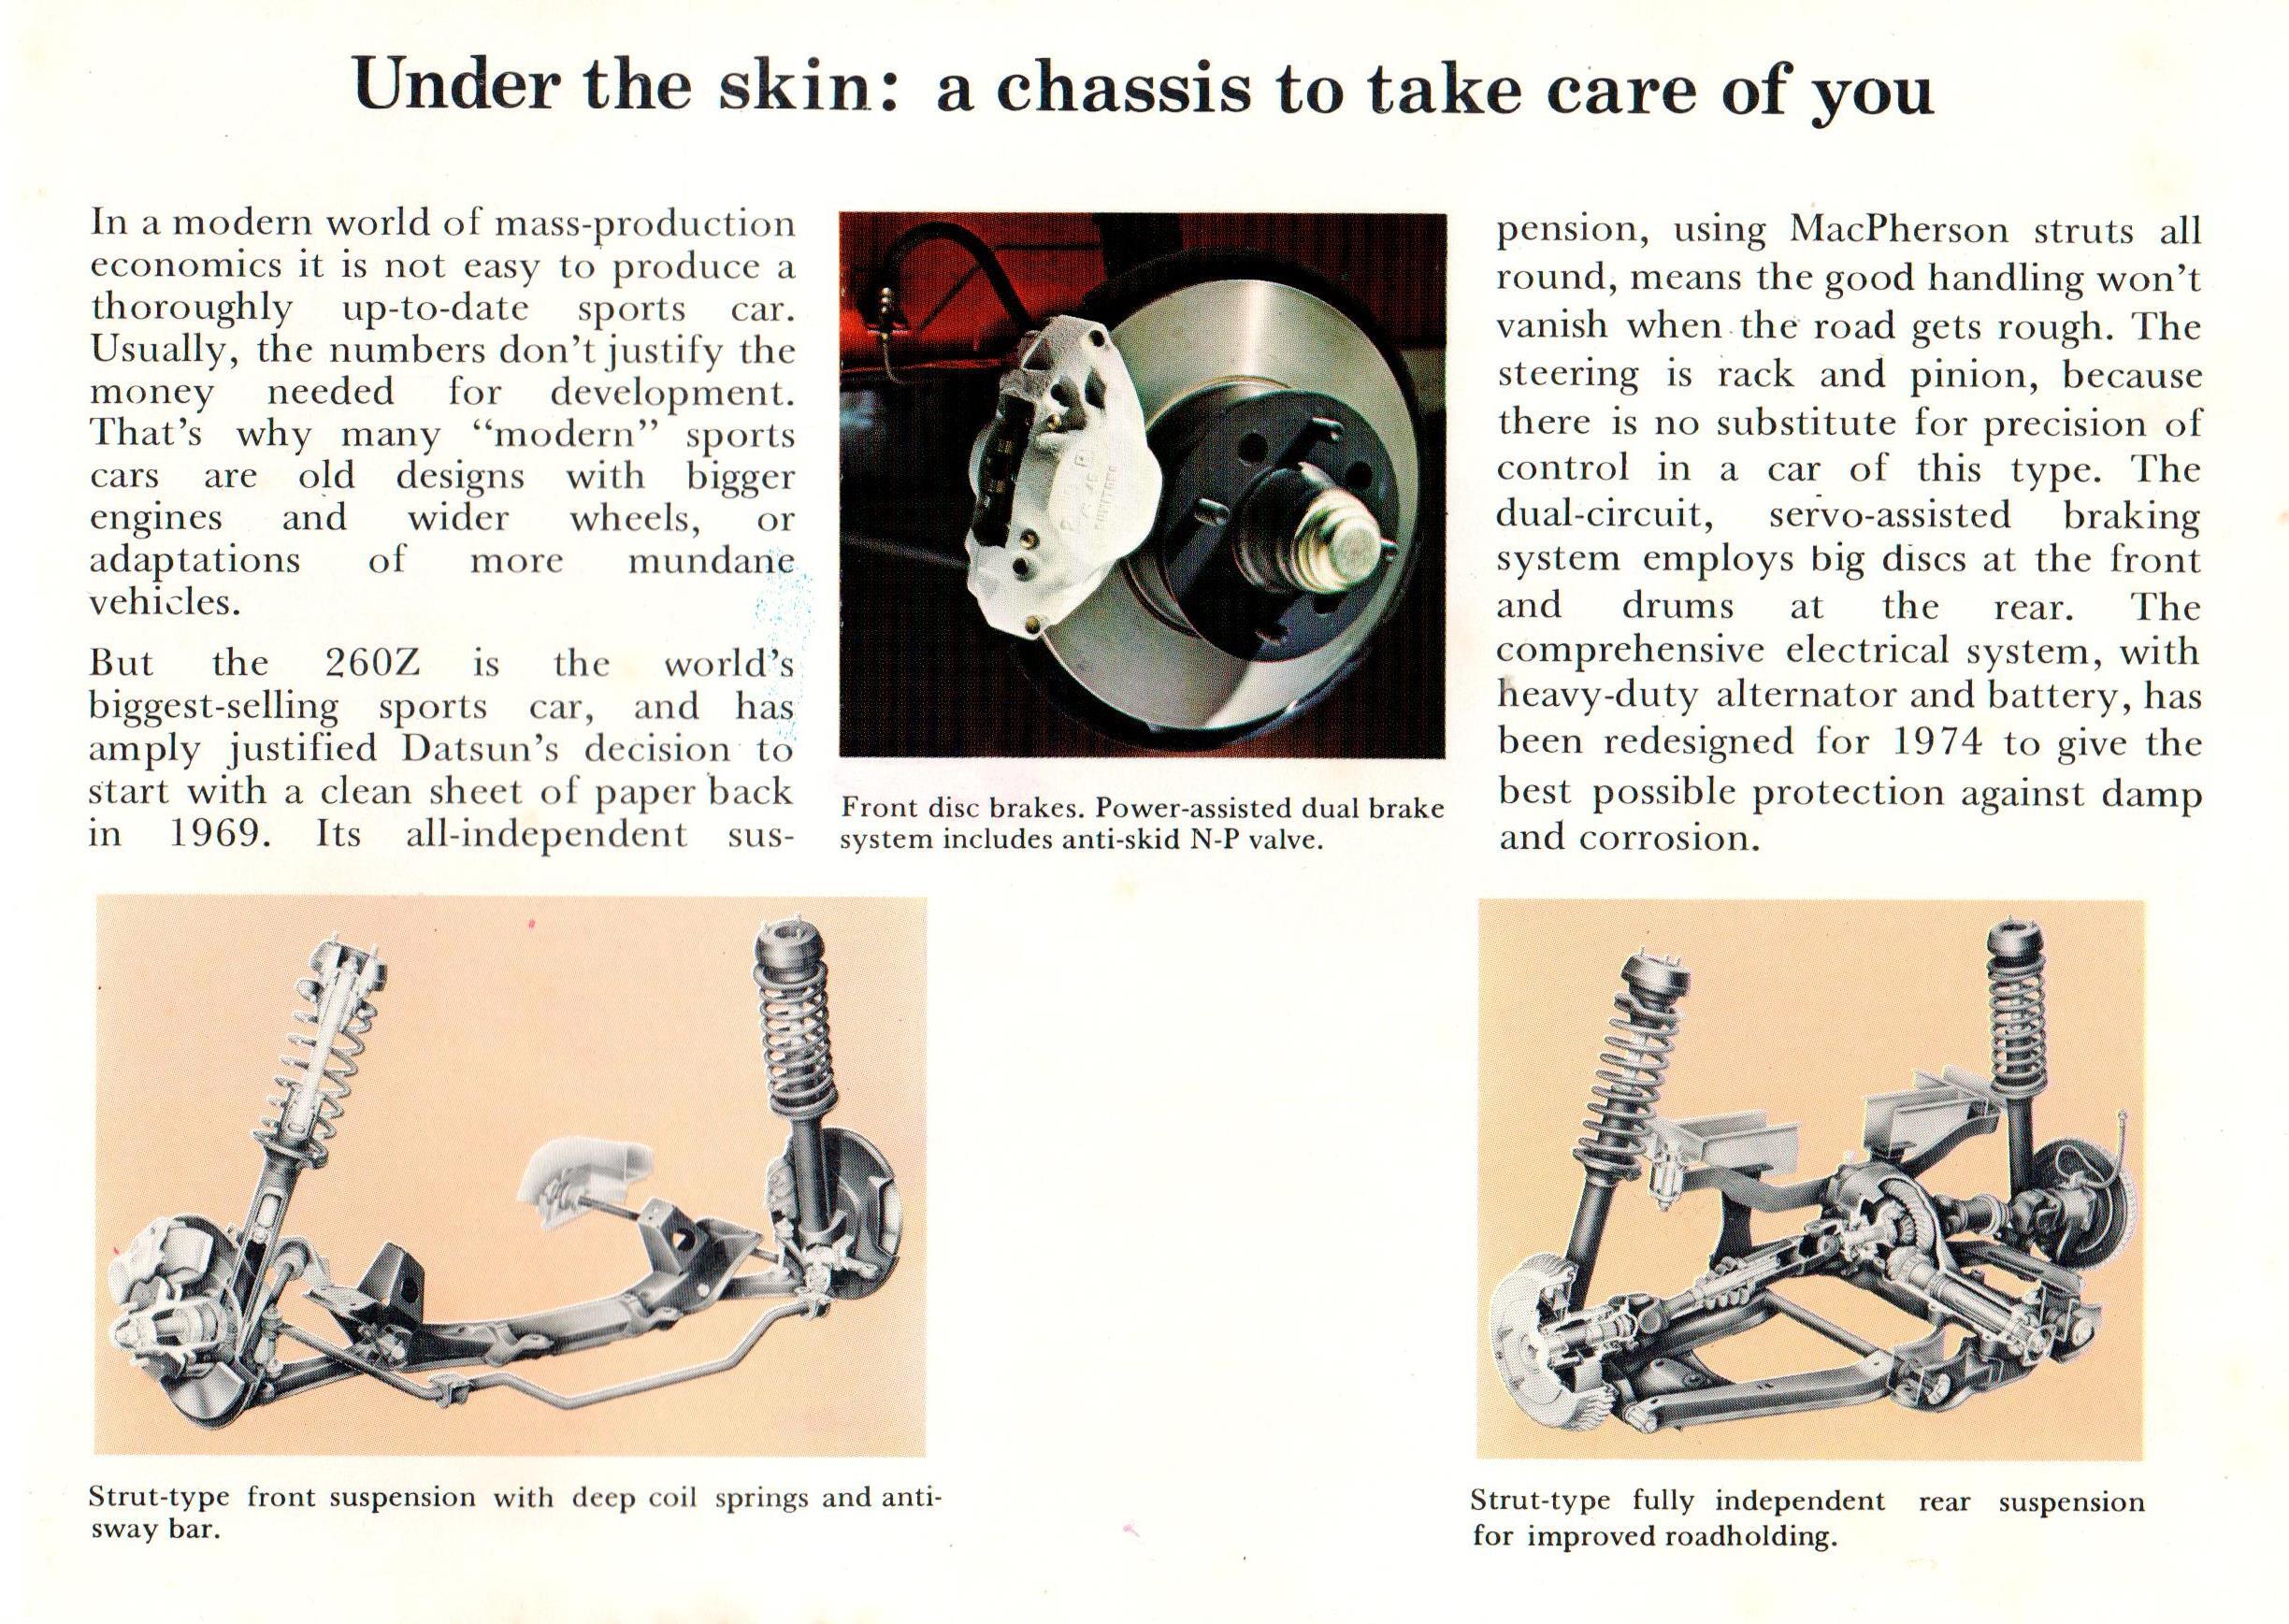
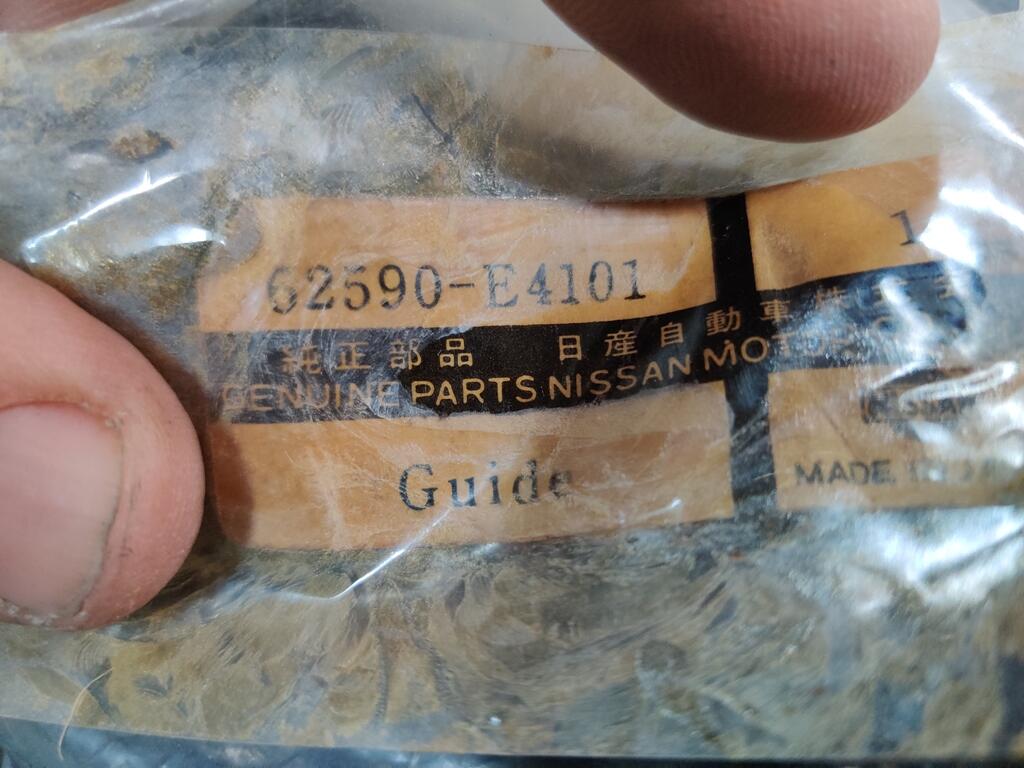
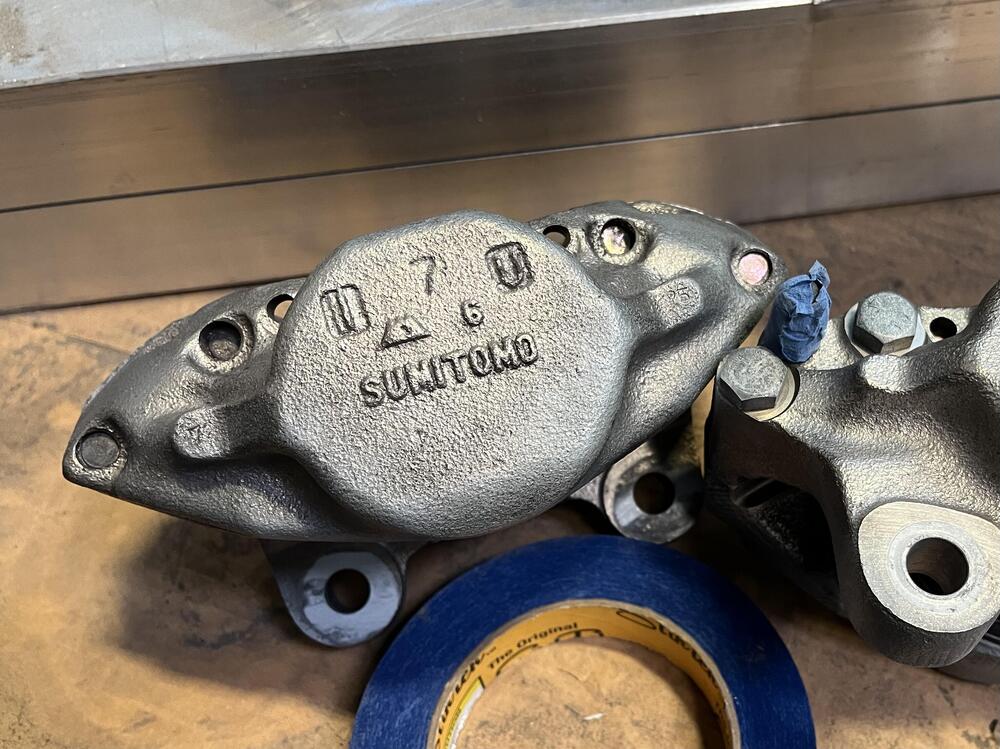
I posted this up before, but cannot find the link to that discussion now! Here is a picture from a 260Z brochure, along with some images of a NOS caliper. The flat grey finish matches between the brochure image and actual part.


 1 point
 -
1 pointNo singer just sells theirs. I talked to the MZR head tuner, he said they see about a 2% hp loss by running stack filters. So roughly 4hp, which is something I can live with.1 point
-
Has there been any updates on this project since May?1 point
-
The lack of the notch doesn't bother me, but if you really want the notch, there is nothing wrong with using the cam gear from another supplier. Just don't mix and match new and used parts. The gears and chain will last 100,000 more miles, so it's not like any of us are daily driving these cars enough to worry about the next rebuild for a street car. I've never used a zip tie on the tensioner, but it probably makes it a bit easier. I never really thought about it when I install the chain set.1 point
-
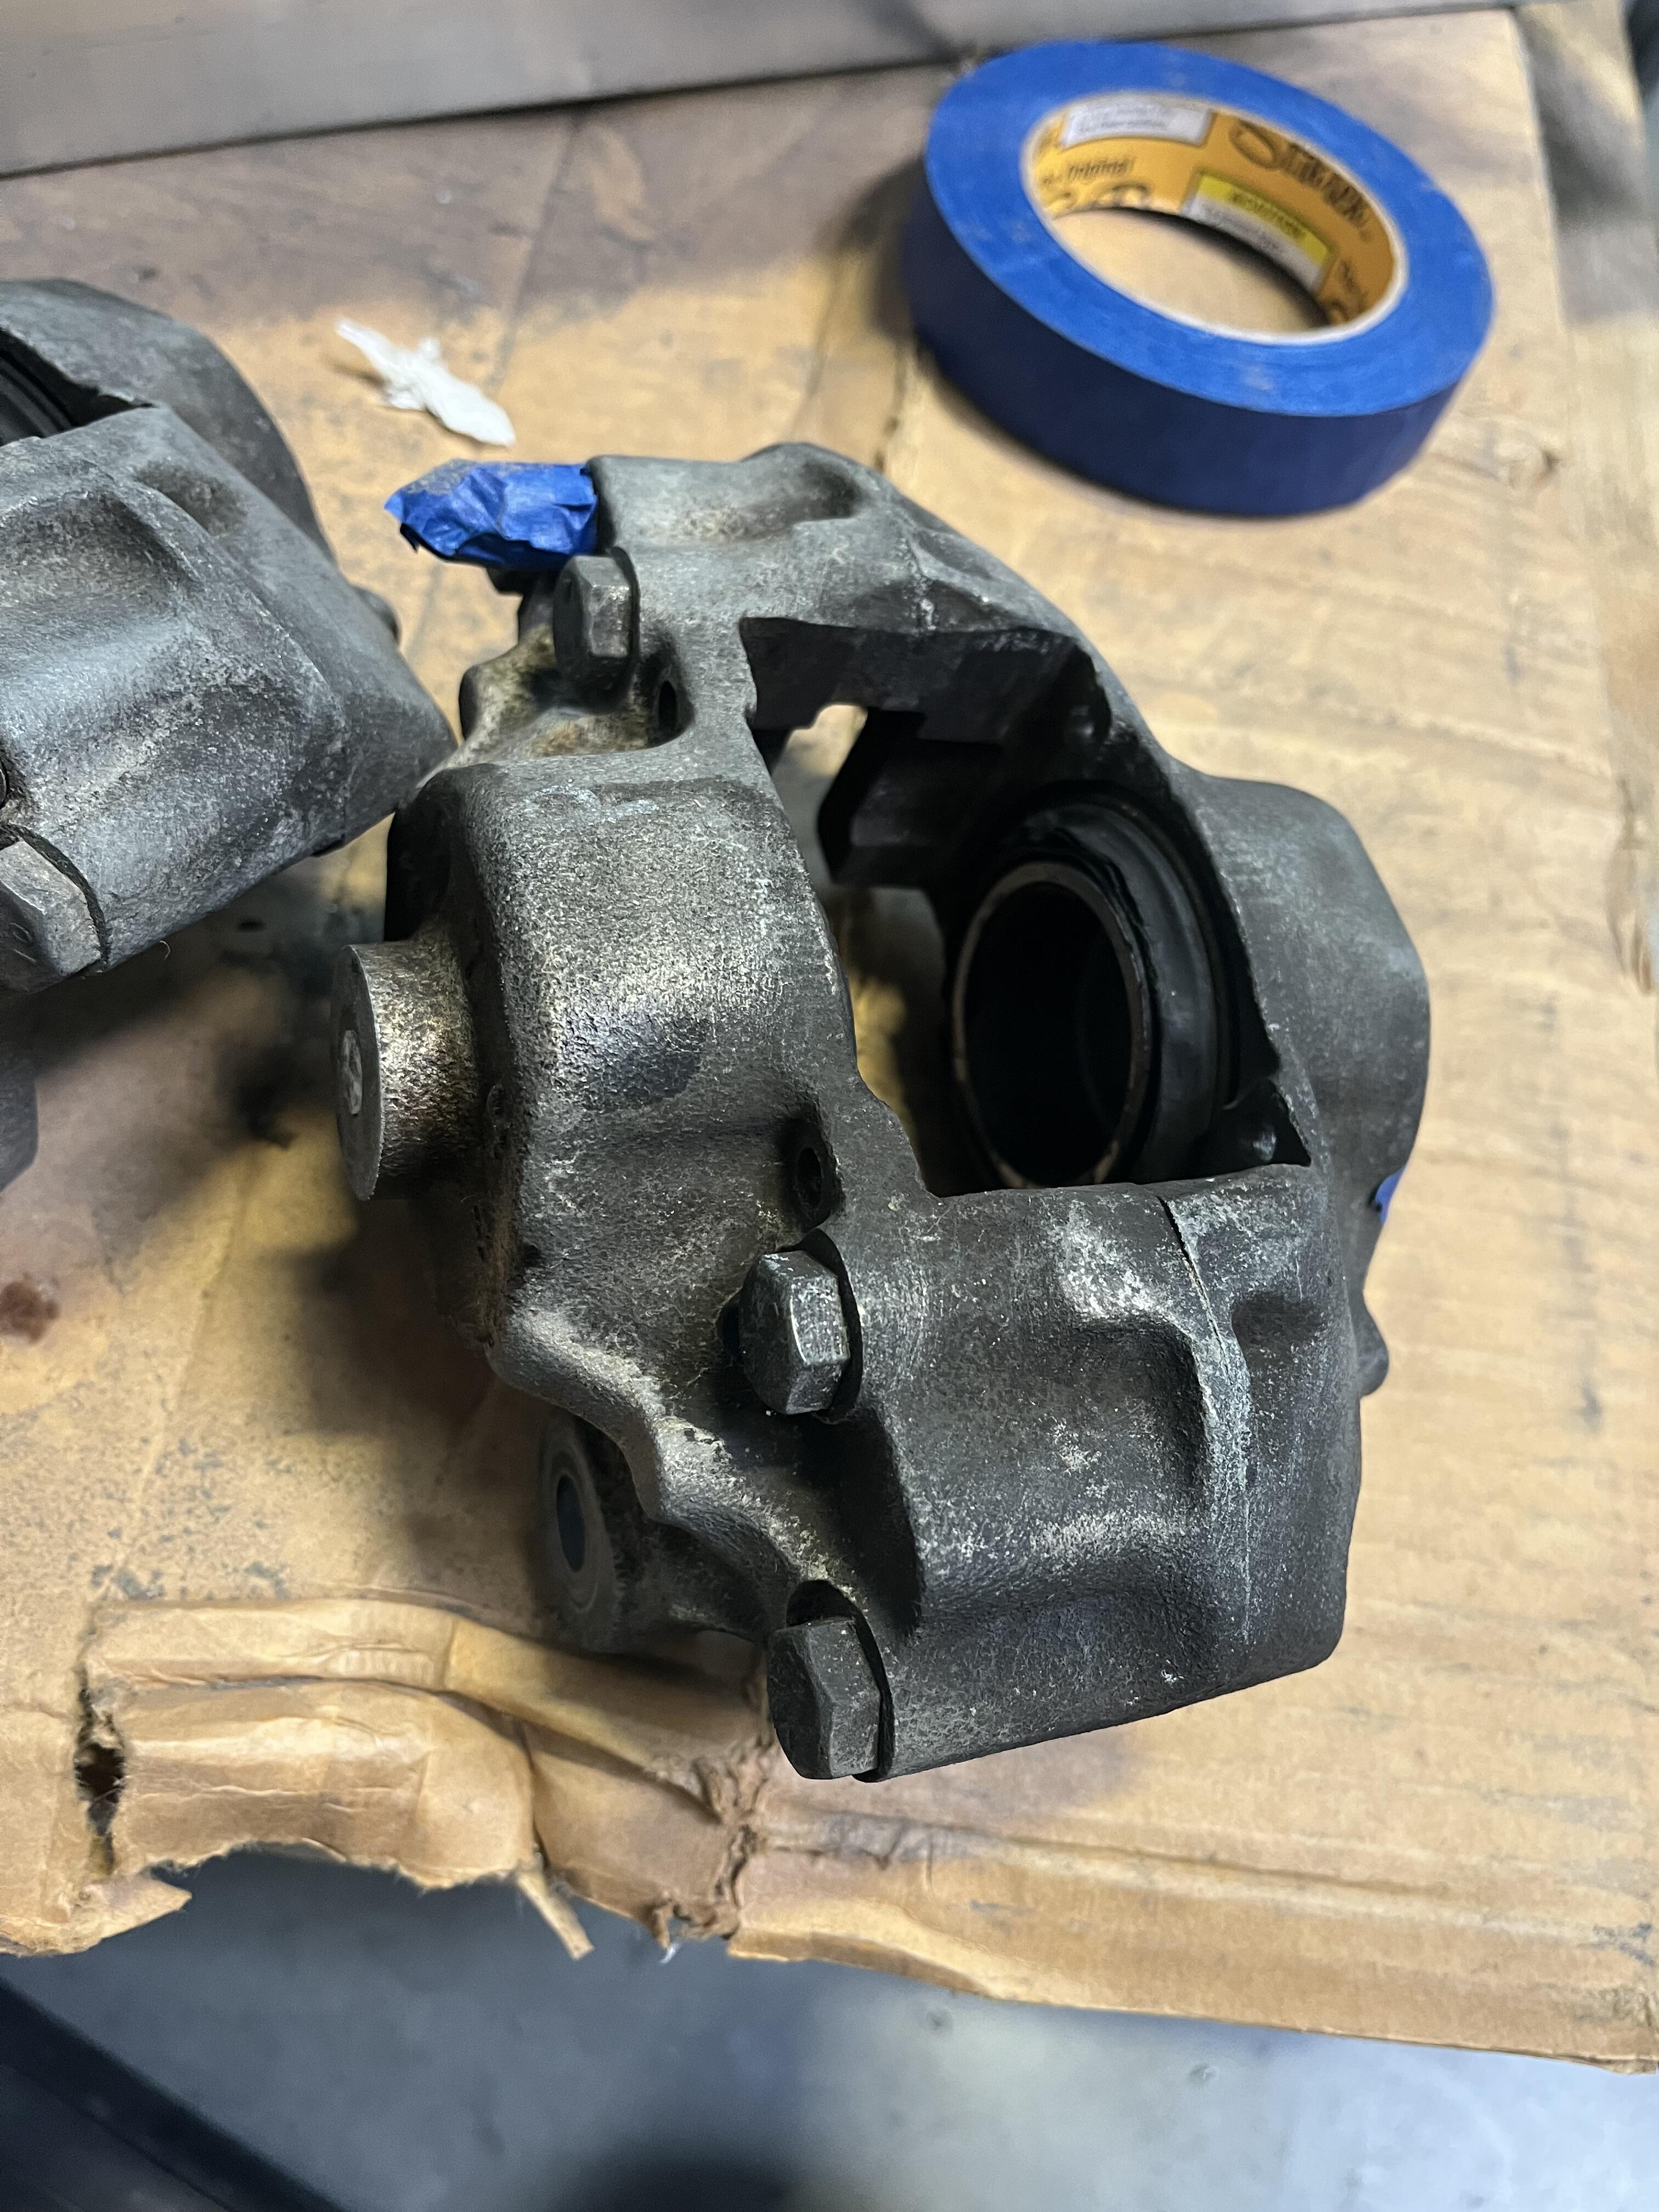
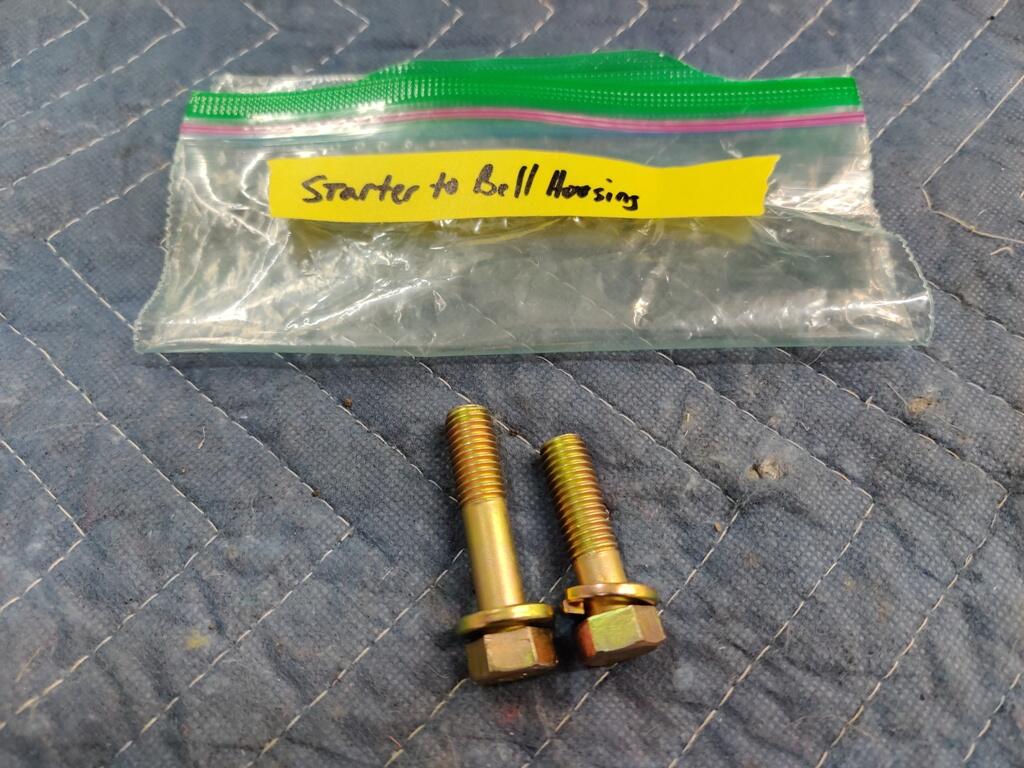
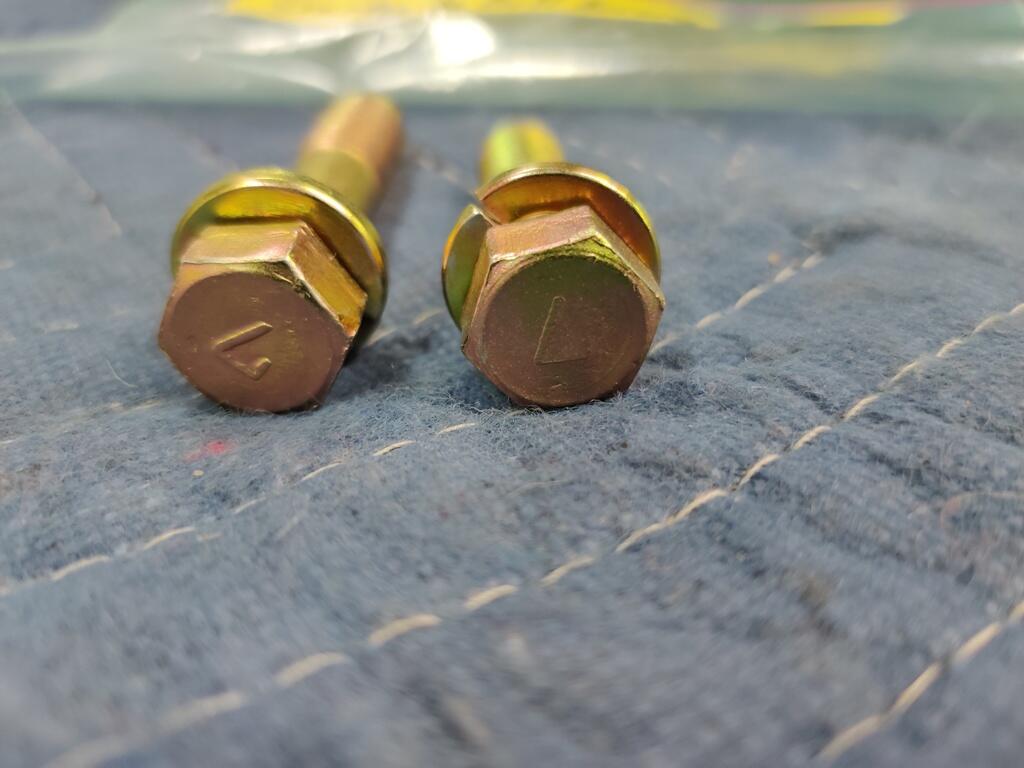
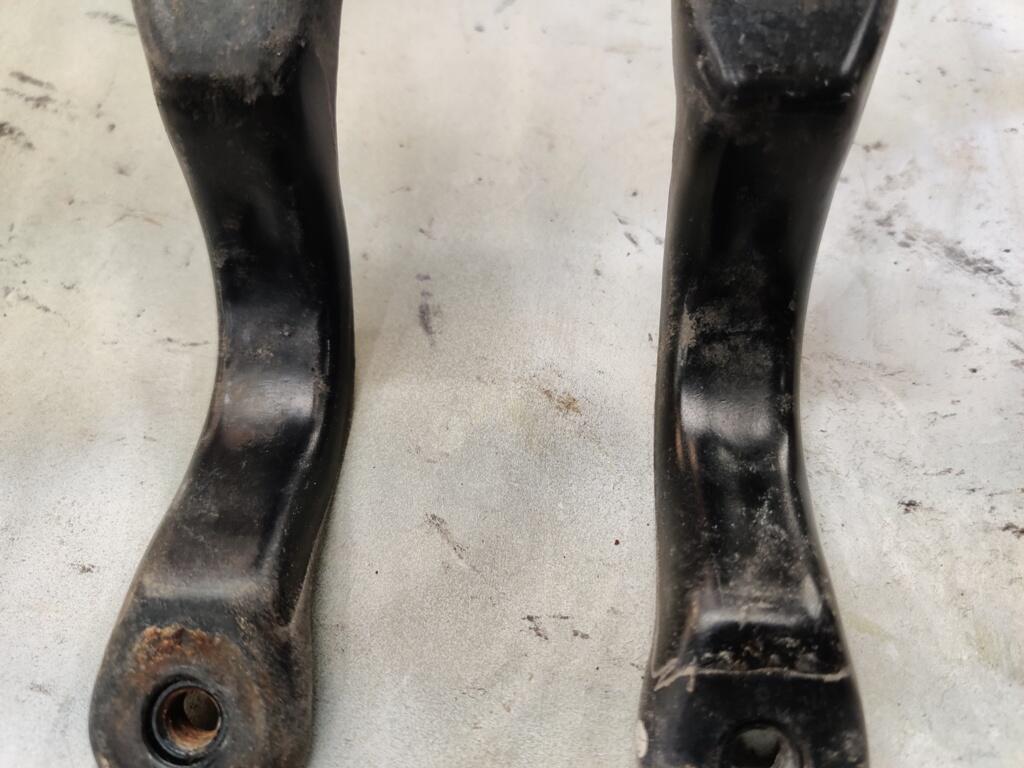
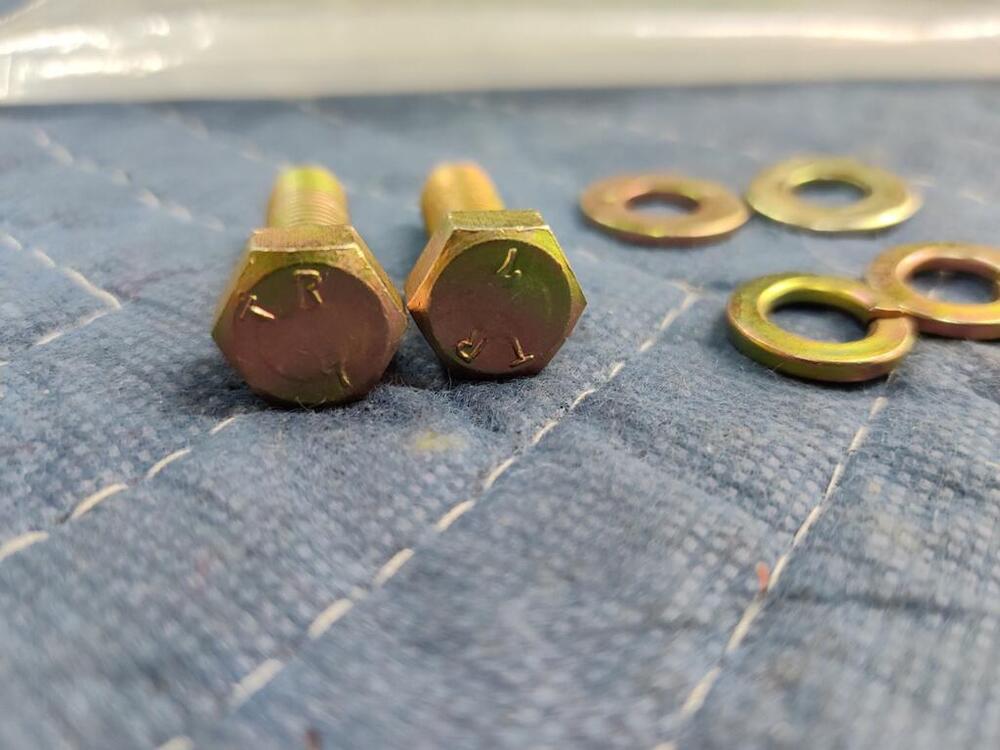
The ones I have appear to be NOS Tokico units. I was able to use the existing hard brake lines. Those levers can't be flipped and used on either side - they are side specific. I am stumped. I seem to recall seeing "L" on some of them before. It was only when I was taking pics before installation that I noticed, both of mine had an "R"s on them.1 point
-
I'm doing very similar configuration to what you did. I shaved .010 less than you did, but same P79 head and F54 block and also stock valves. I've got a second set of parts here, slack guide and tensioner. Maybe I'll throw them on just to see if they are any different than what I've got mocked up on the block now. In theory, if a manufacturer put a little extra plastic material on the end of the tensioner shoe or the slack side guide, it would change the positioning of everything. So I've got a different brand of both available.I I'll toss them on just to see how it looks. I think I have an OSK set here as well as an ITM. And sorry to the OP for the thread diversion. I know it's related, but still. Sorry for the sidetrack.1 point
-
1 pointI believe this is what @dutchzcarguy is talking about: https://history-computer.com/what-is-a-flip-flop-in-electronics/ You have the output of the circuit going to a relay (coil). The contacts of the coil are in the circuit that go to the circuit you want to pulse. Just make sure the relay is rated for well above the max power of the circuit. You don't want to weld the contacts.1 point
-
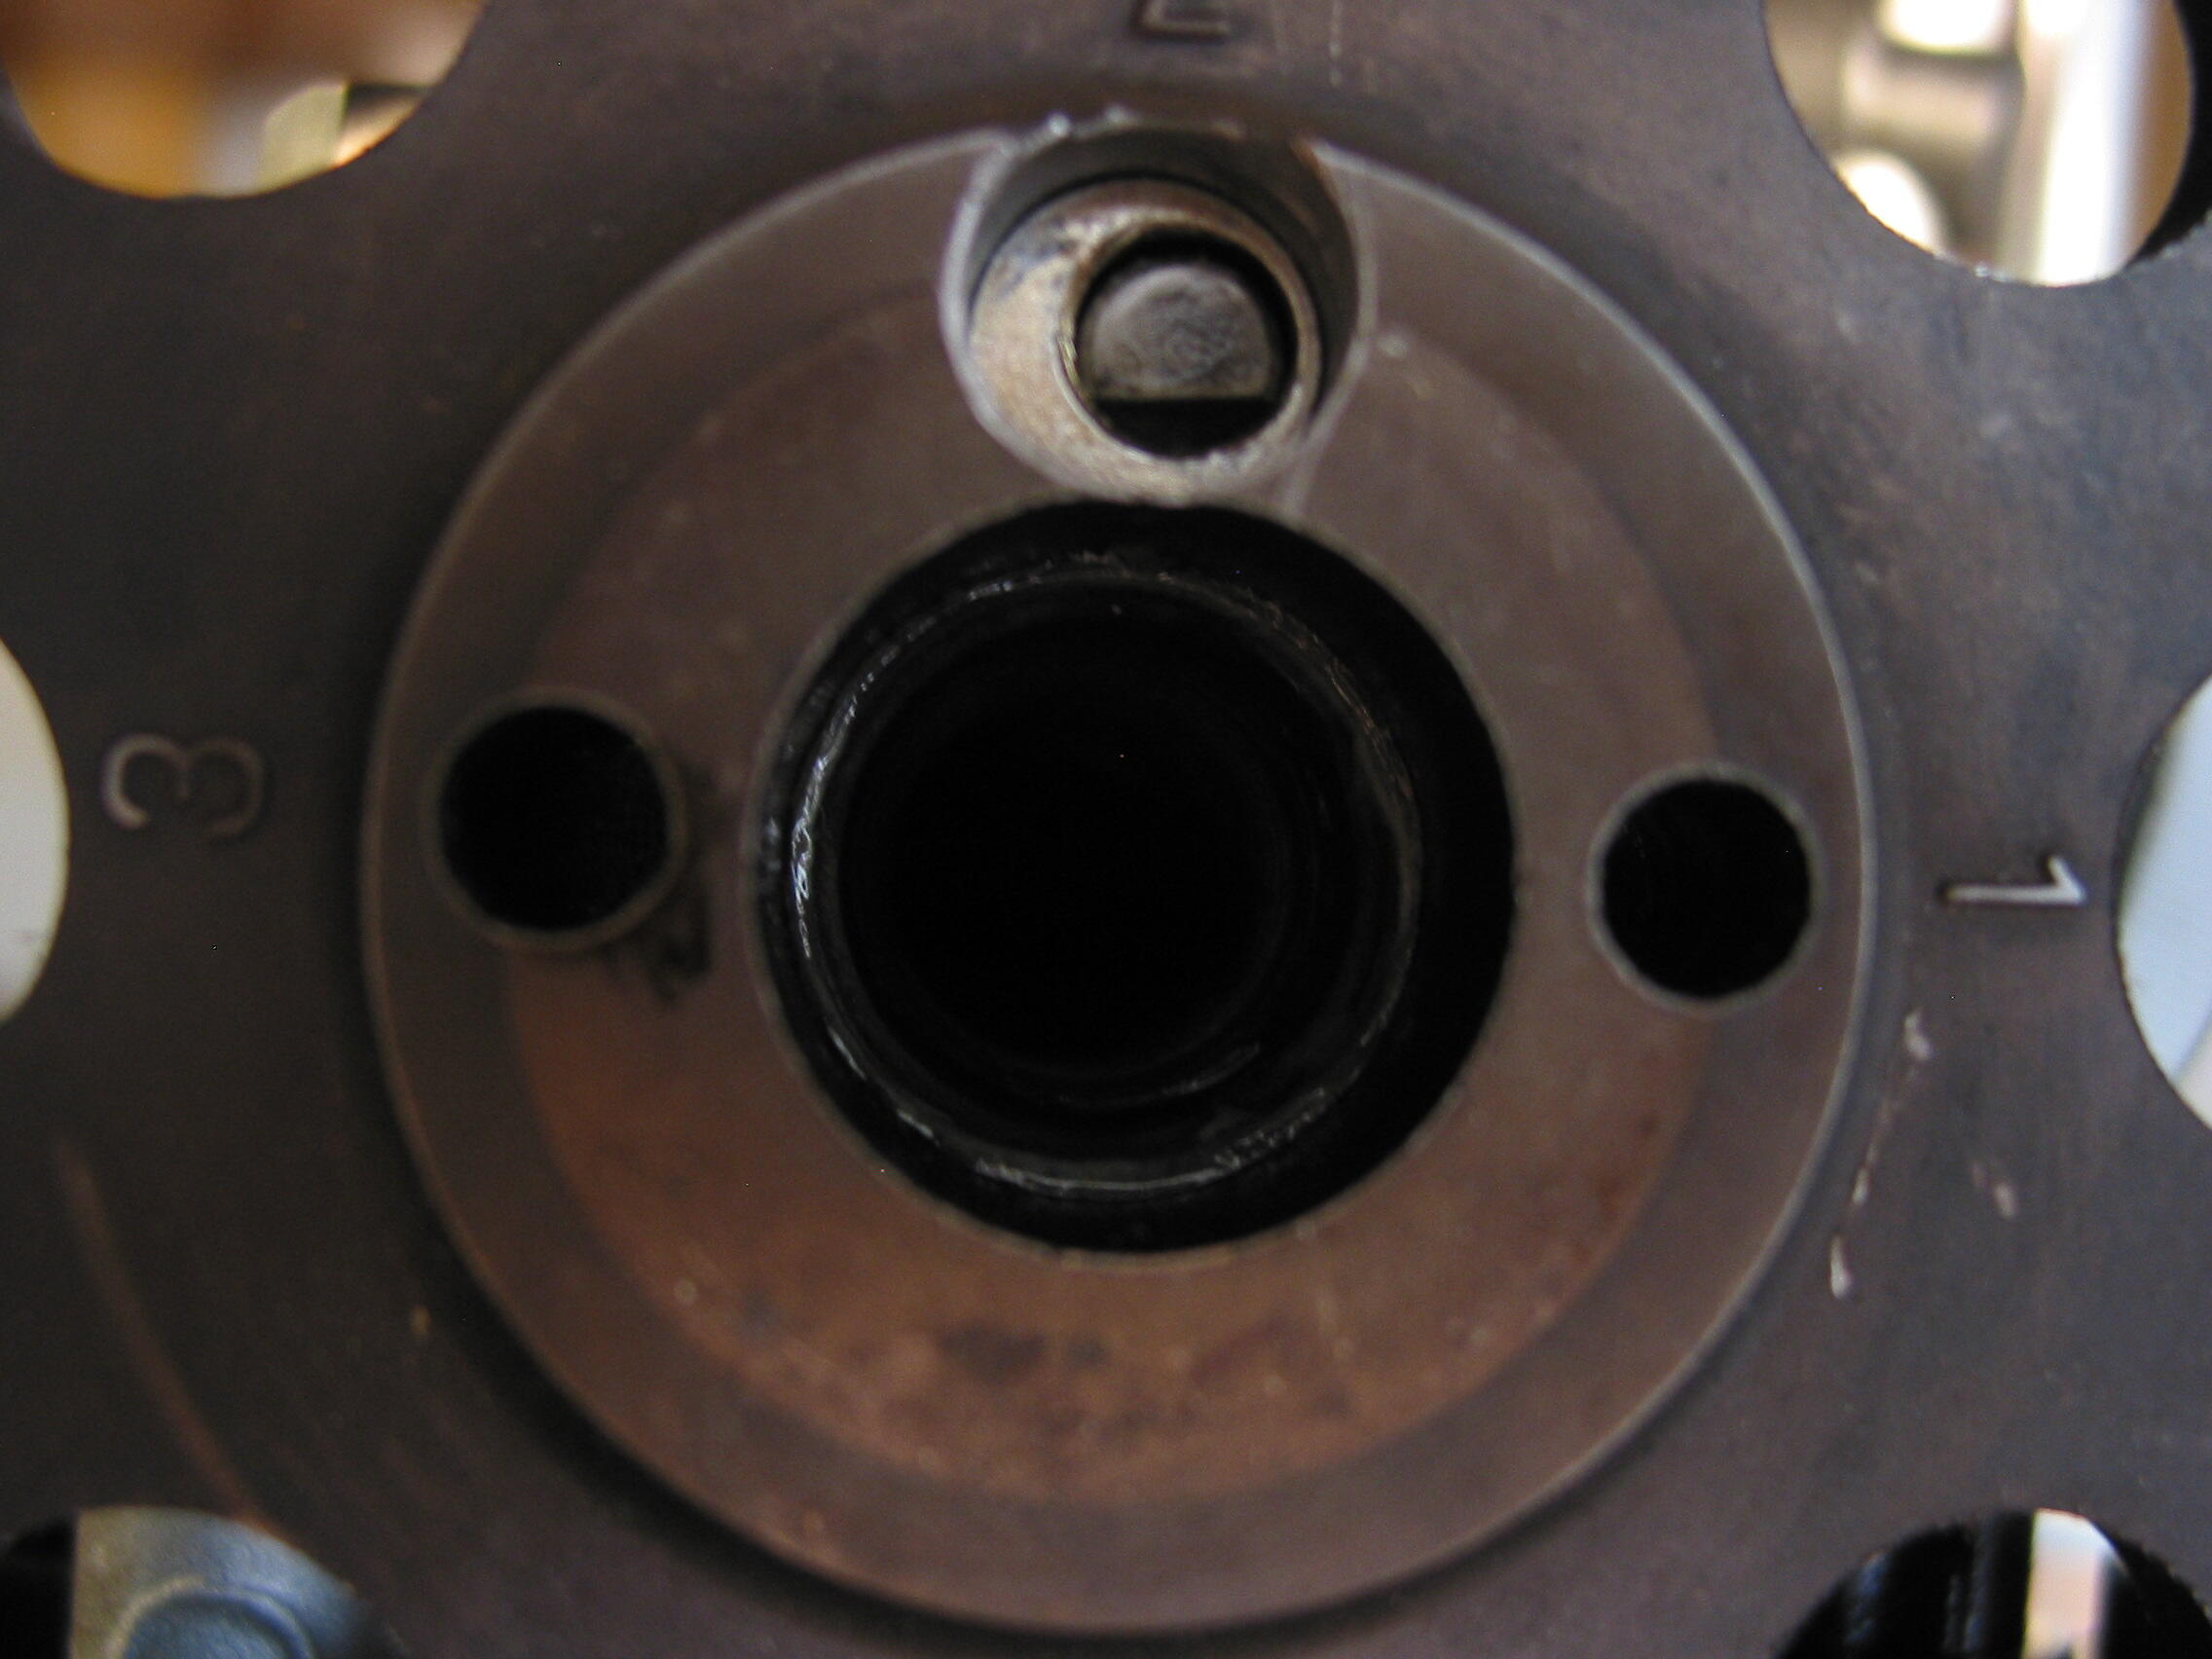
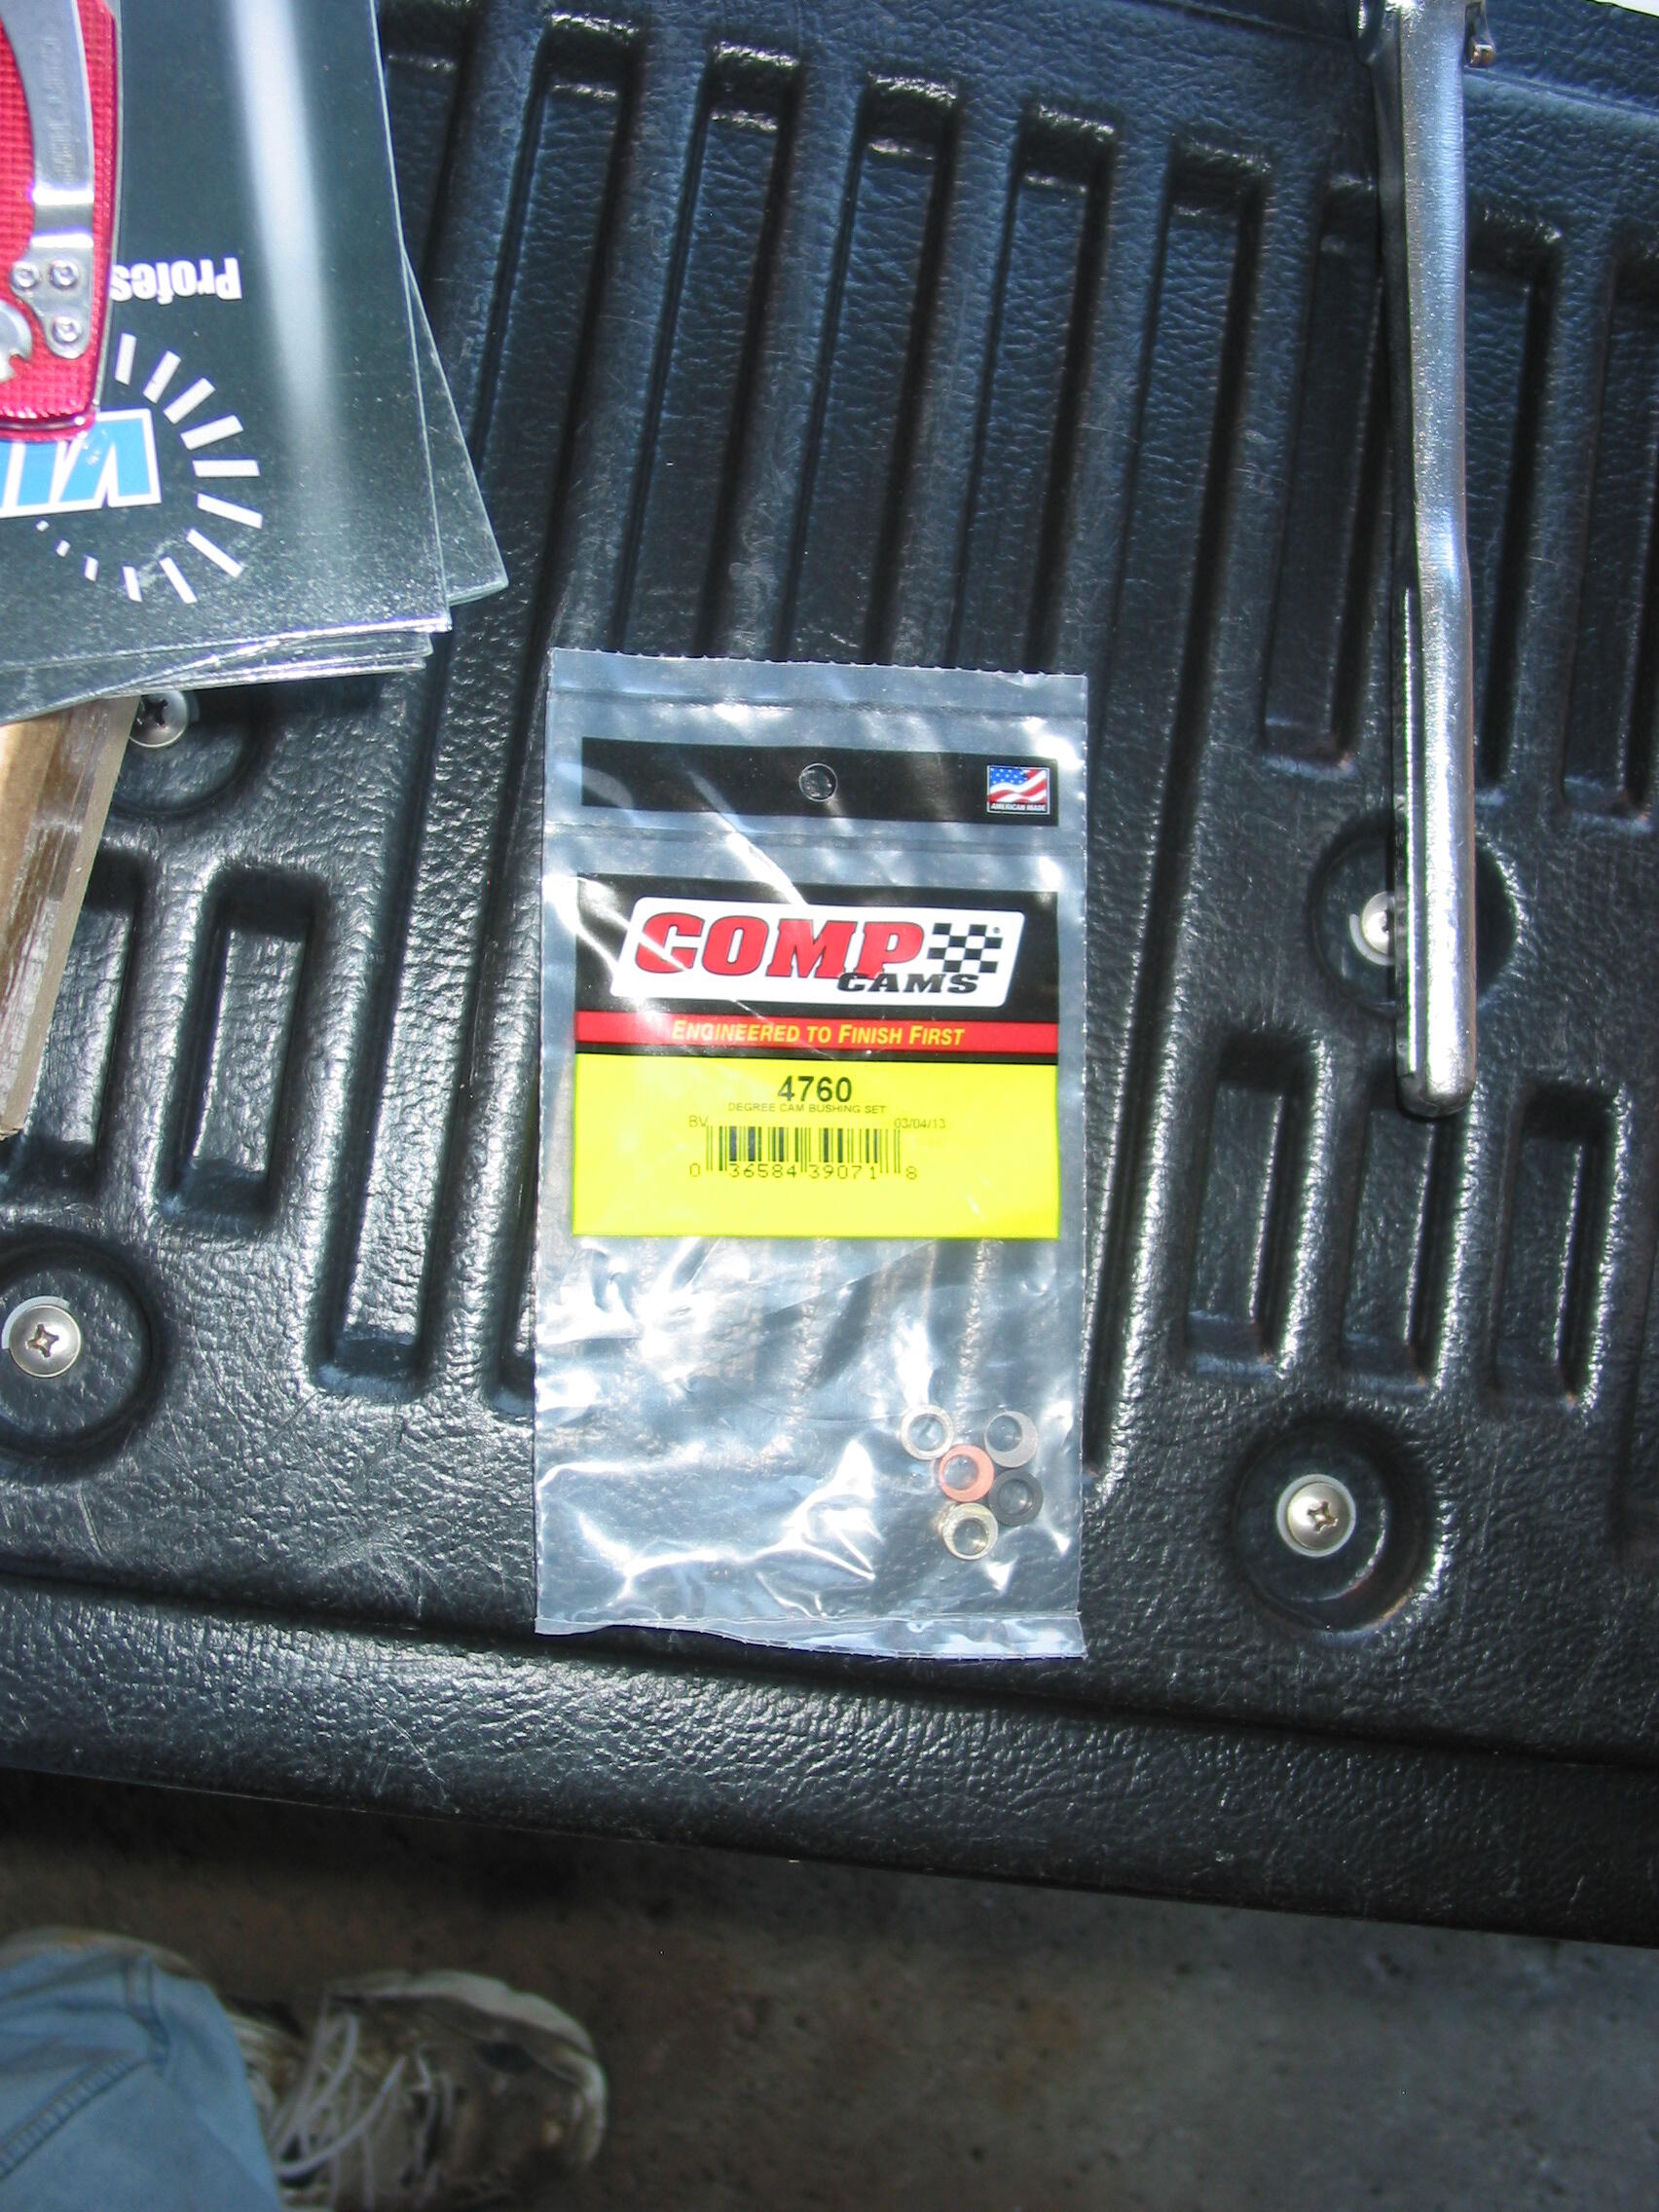
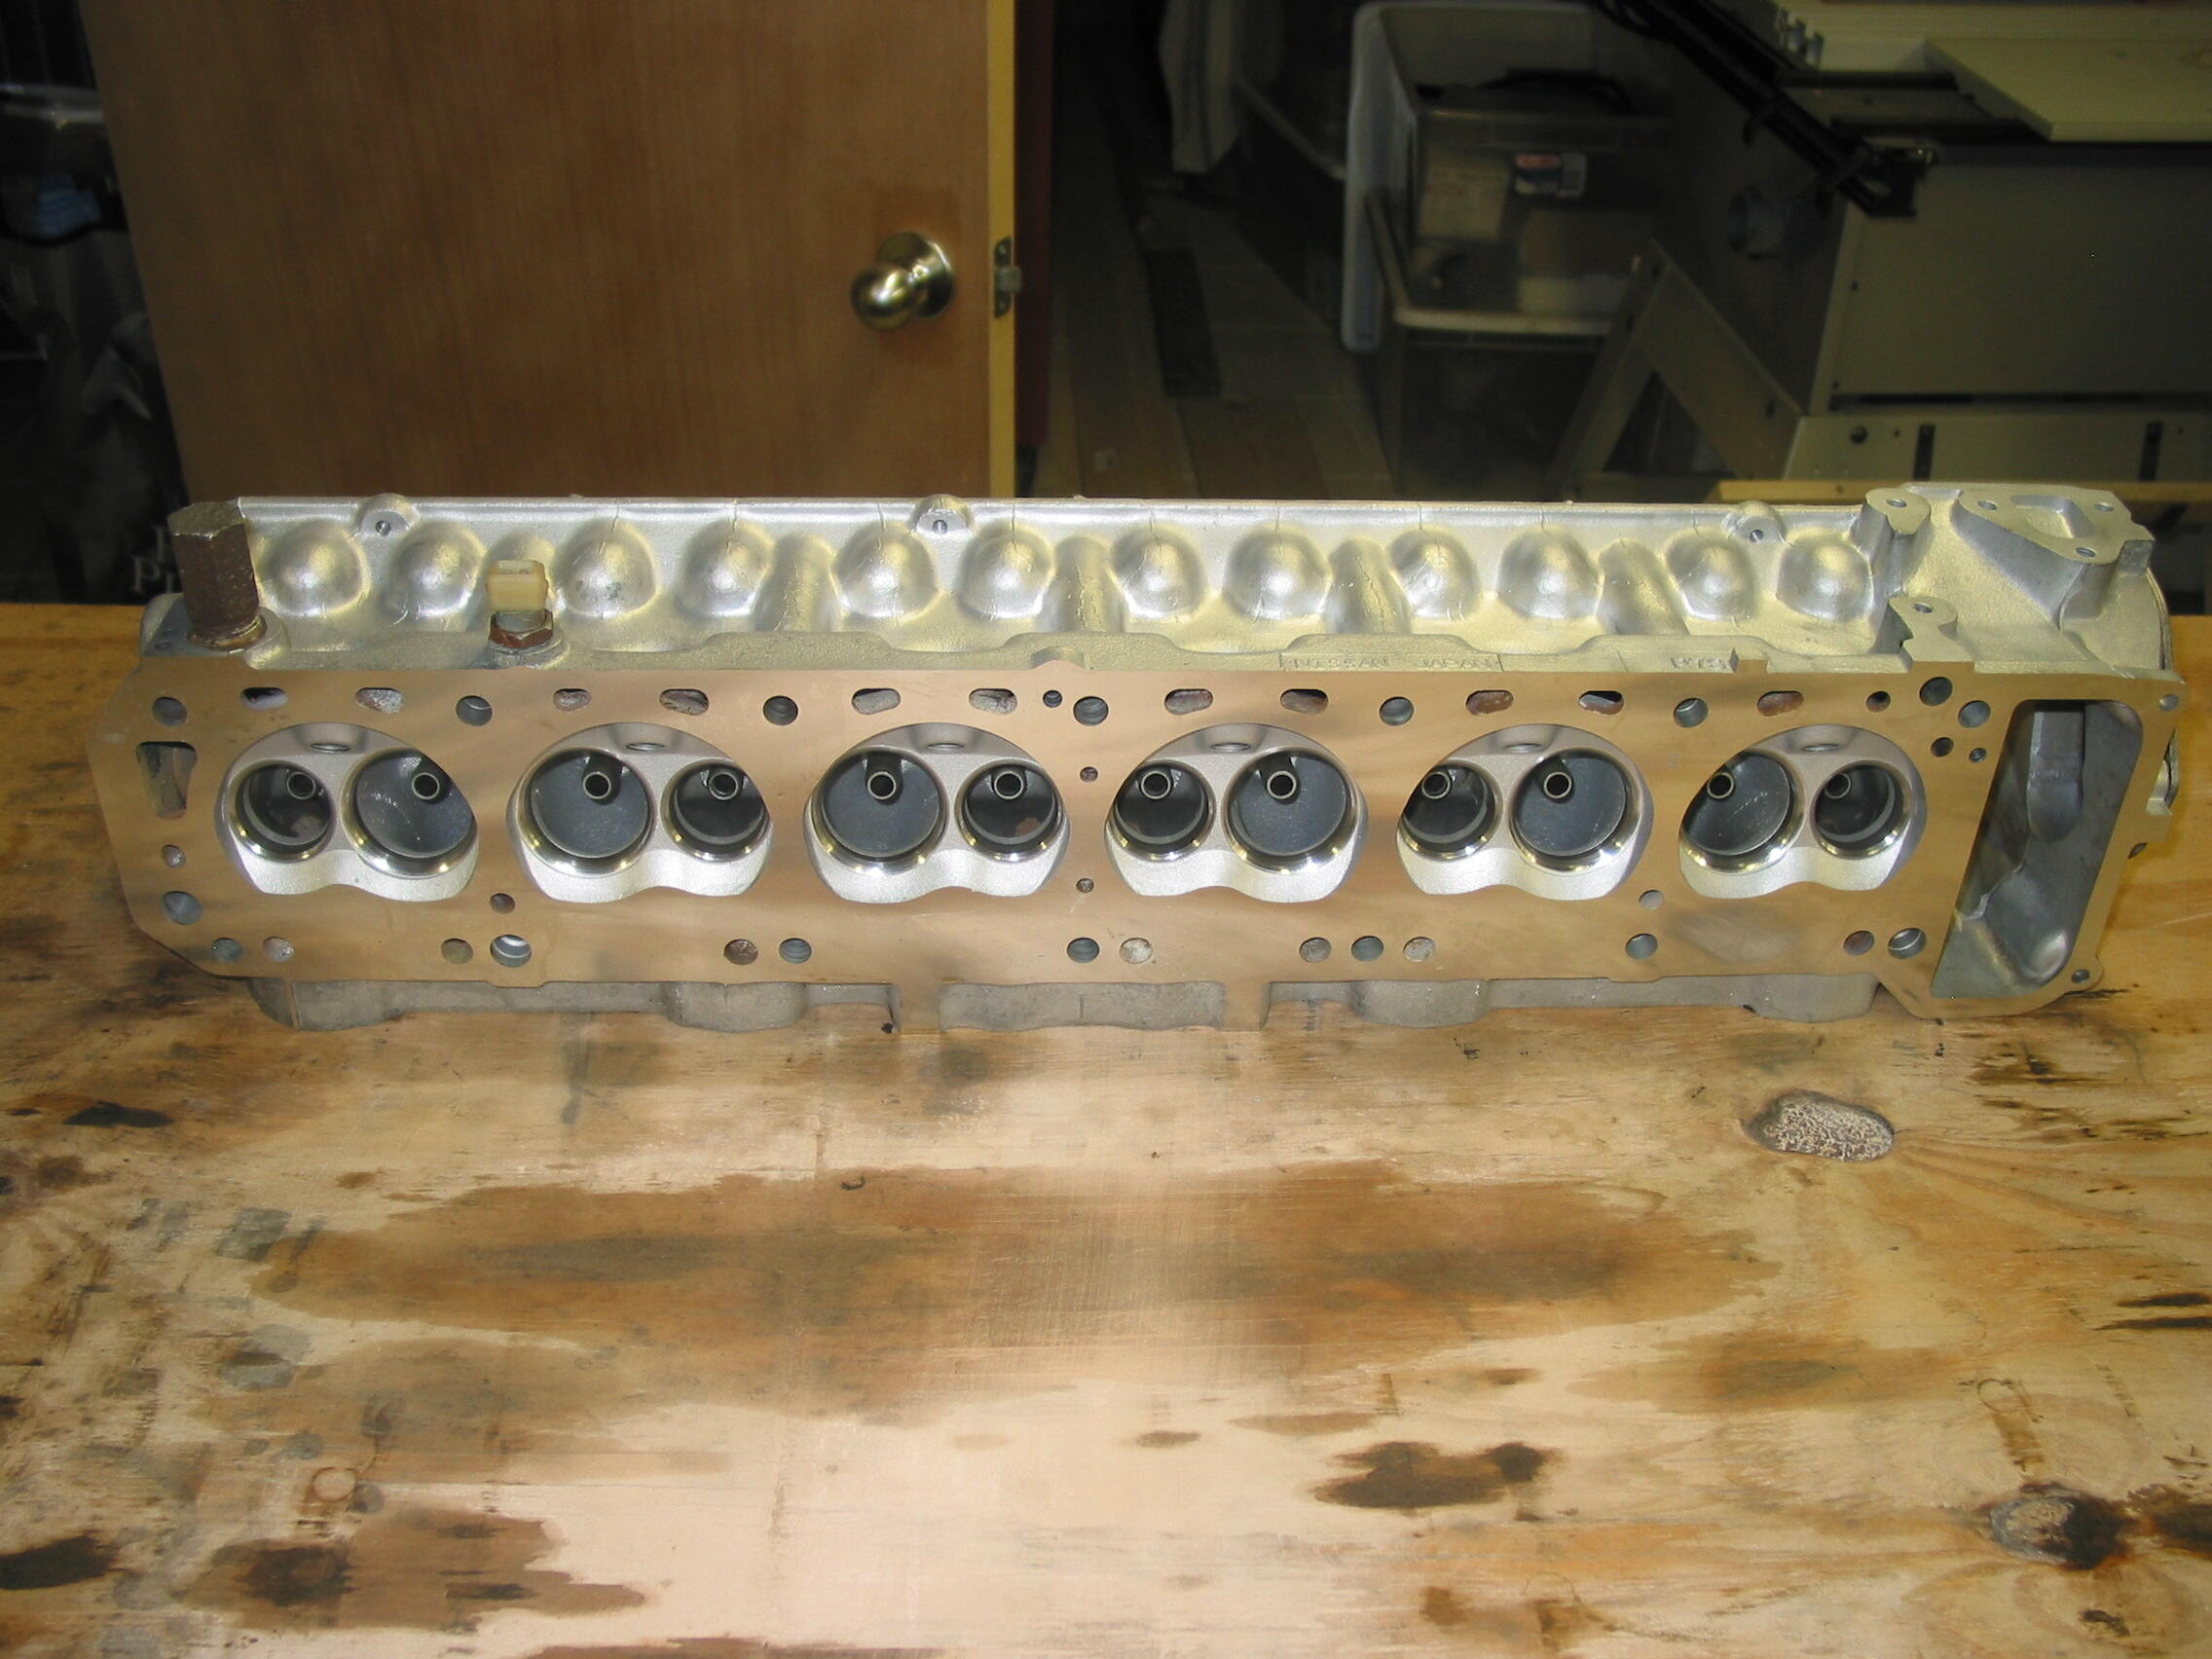
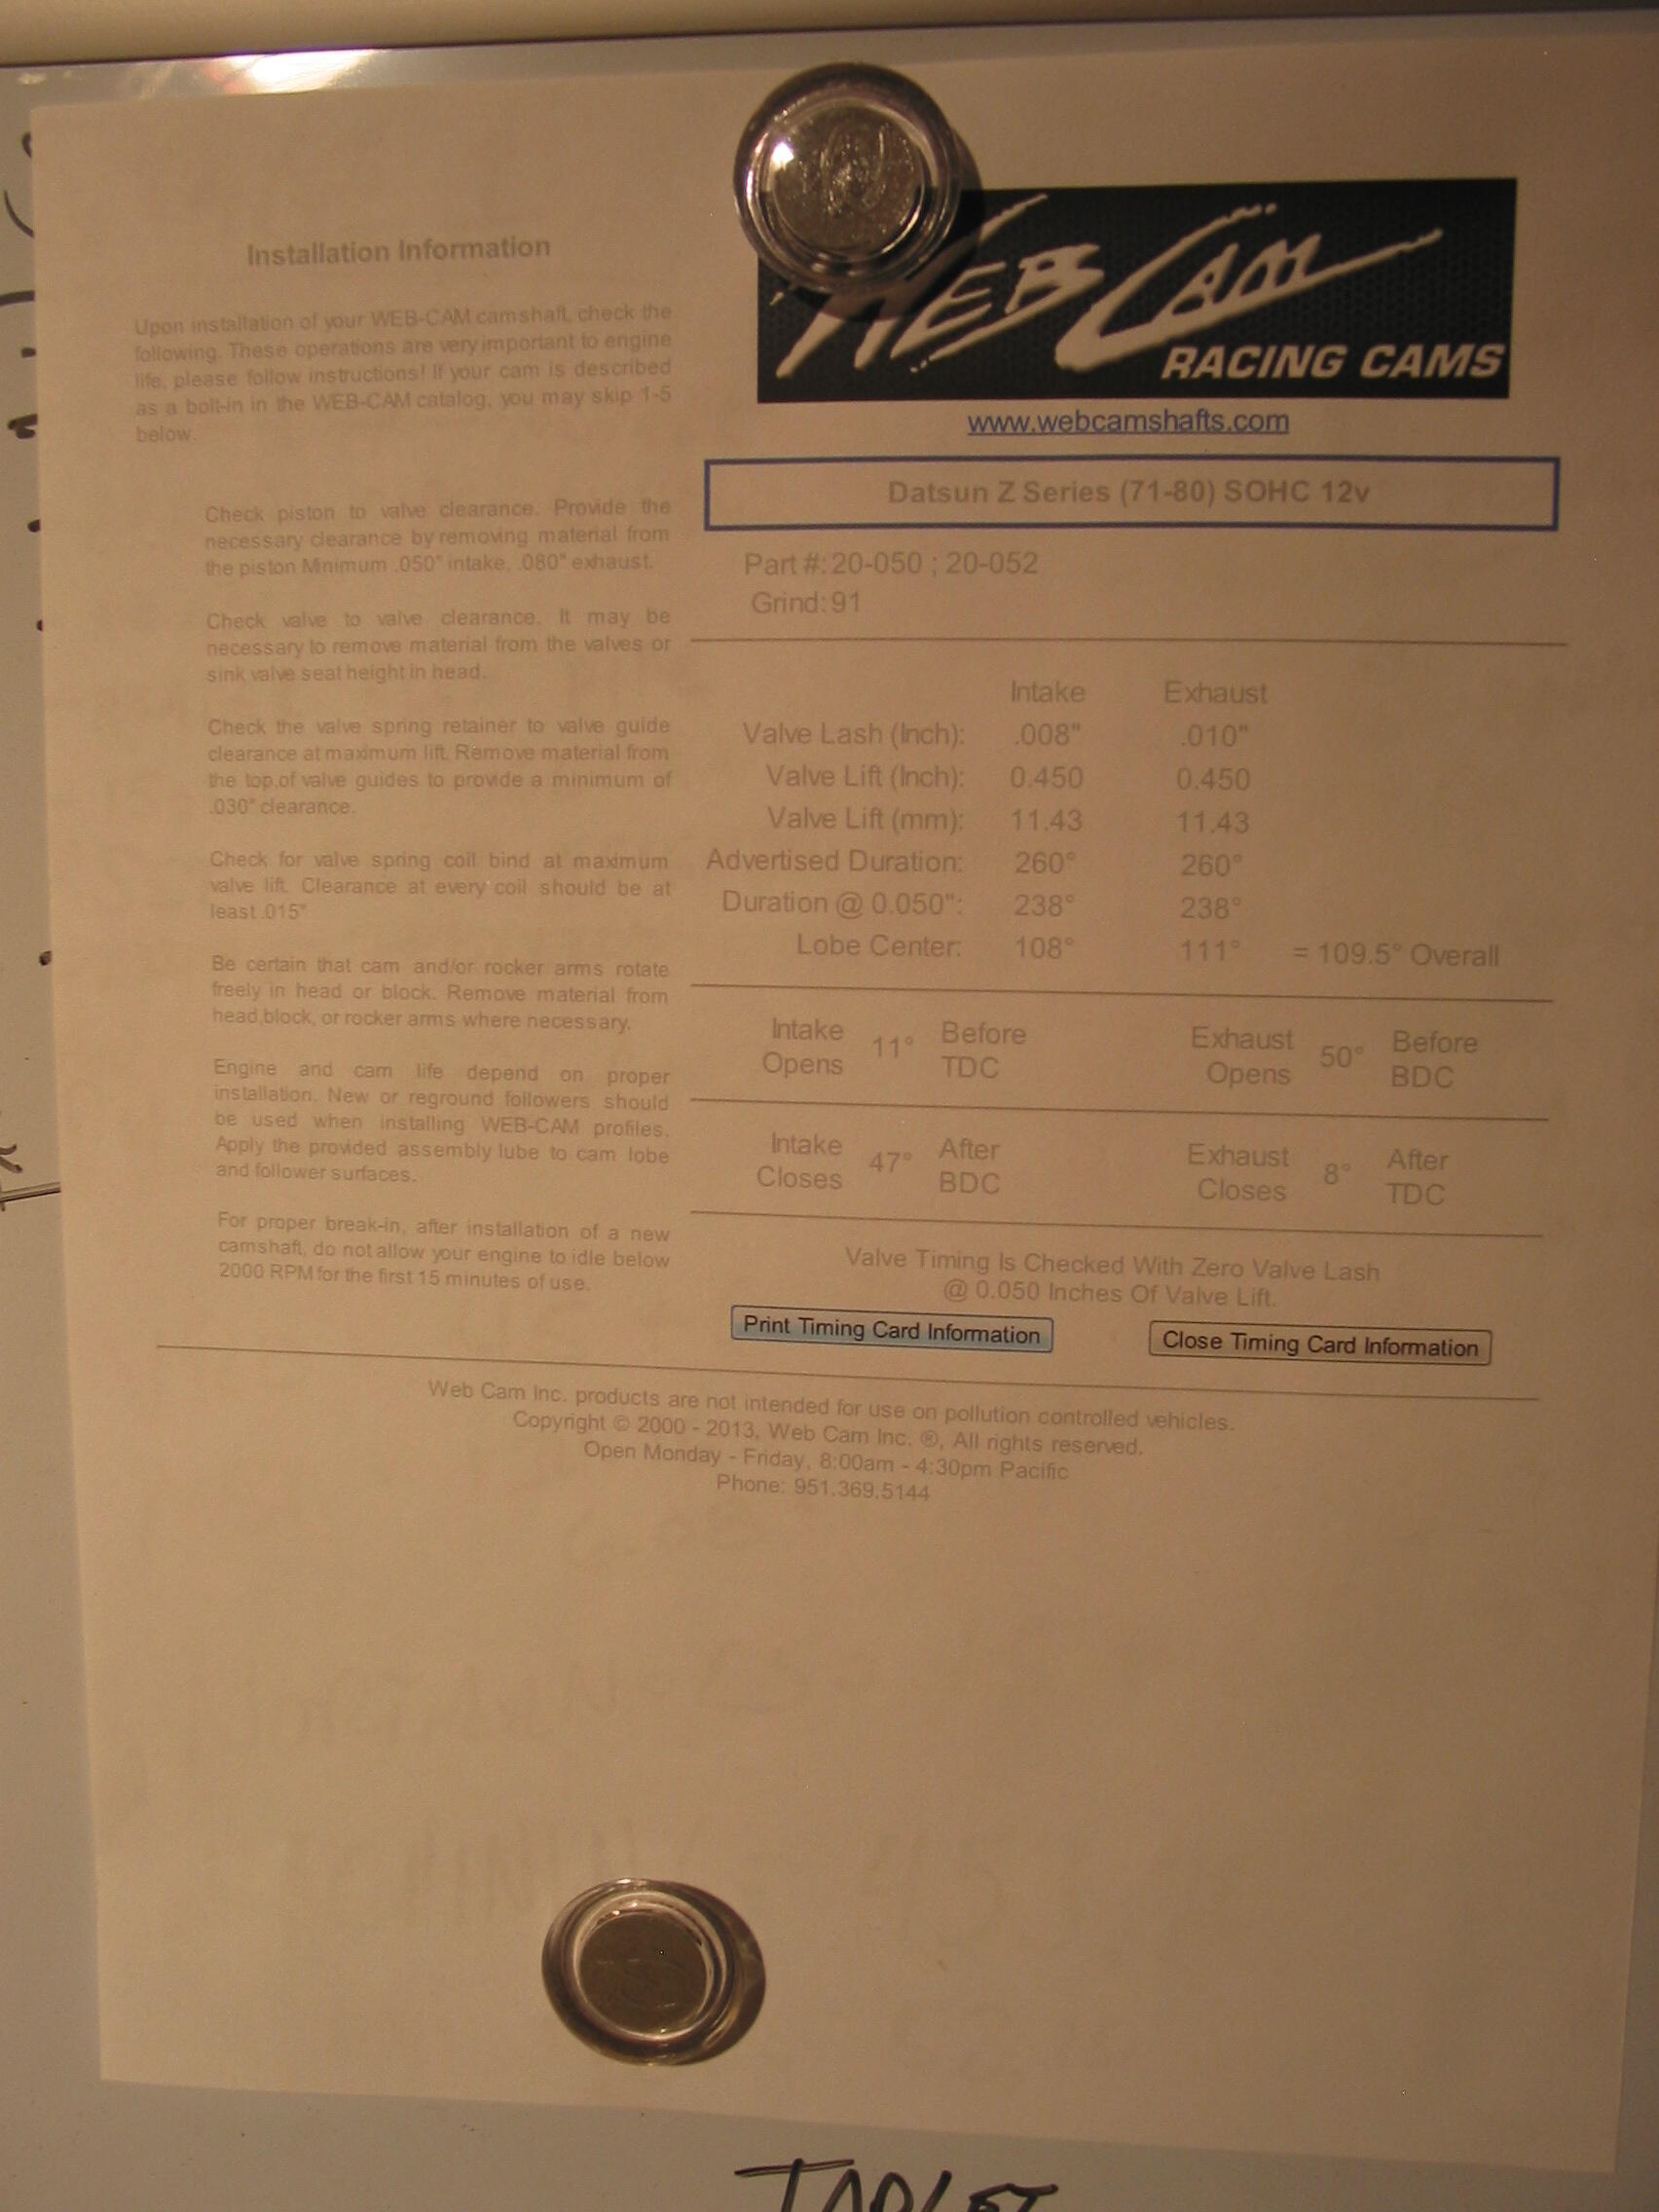
LOL. No spacers. P79 head shaved 0.050" on a F54 block and stock valves. I dialed in the Web Racing cam with a degree wheel an the GM bushings. The motor pulled hard to 7,000 RPM.


 1 point
 -
1 point
-
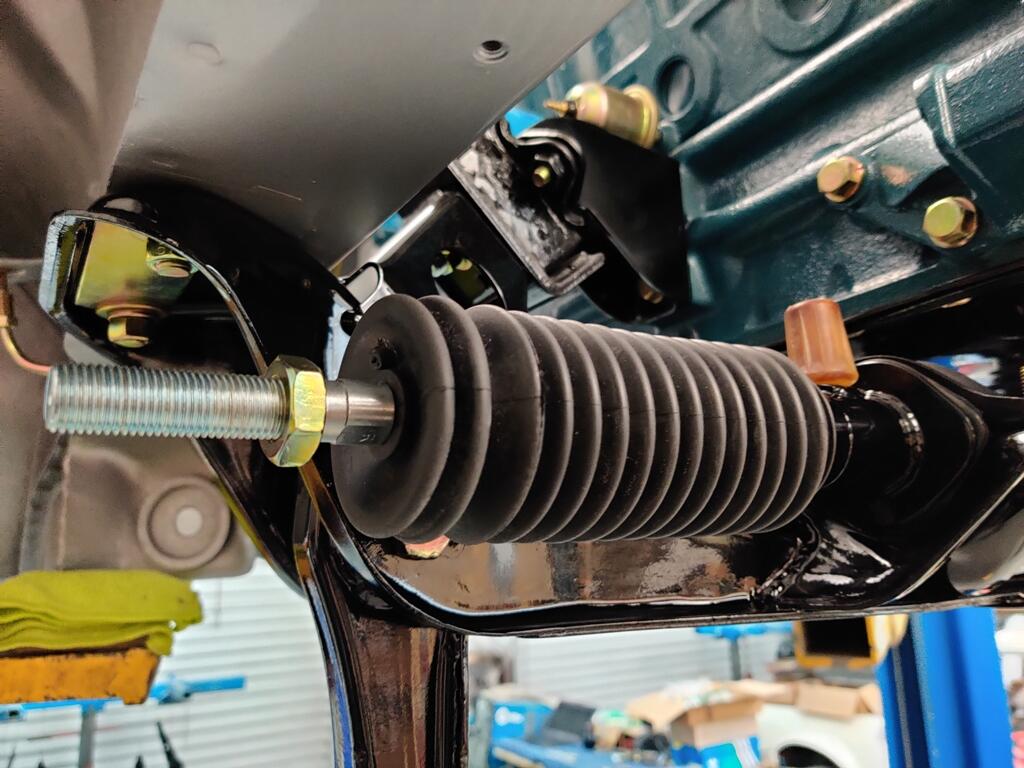
If you look closely, you can see that the steering rack retainer straps are not quite symmetric. I'm not sure we ever reached positive consensus about the correct orientation, but here's a couple threads that talk about it: https://www.classiczcars.com/forums/topic/48621-steering-rack-disassembly-and-refurb/?page=15 https://www.classiczcars.com/forums/topic/65616-putting-in-a-replacement-l-28/?page=11 I don't think there is a left vs. right, but I do think there is a front vs. back.1 point
-
@Ownallday sorry for leading you down the wrong path with my posts, I've edited them so others wont be misguided.1 point
-
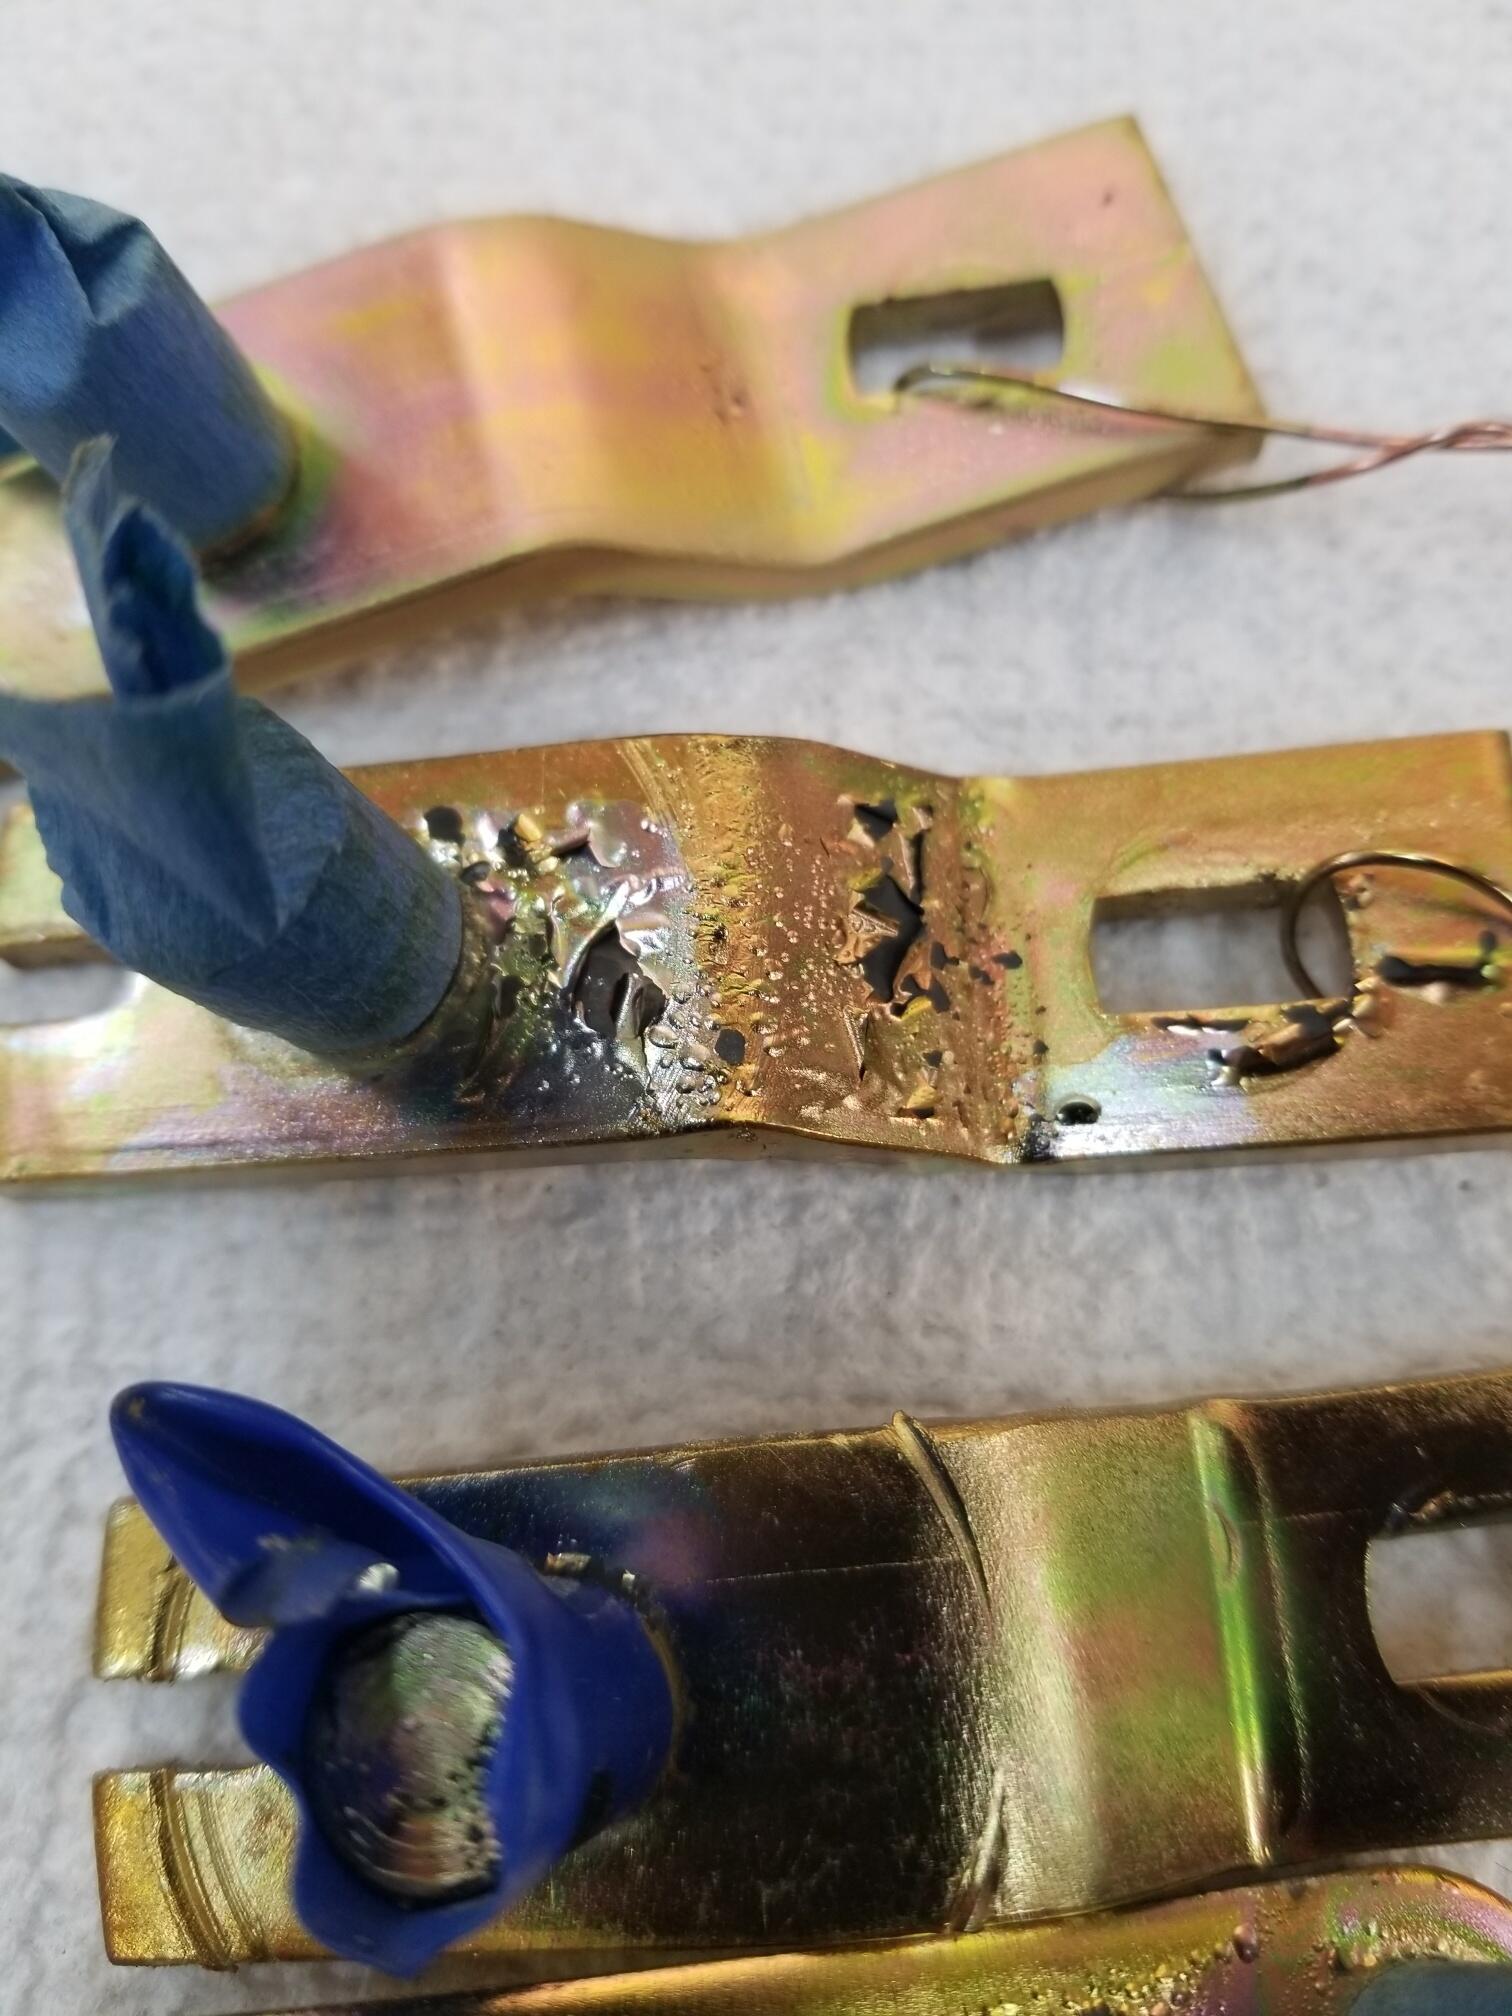
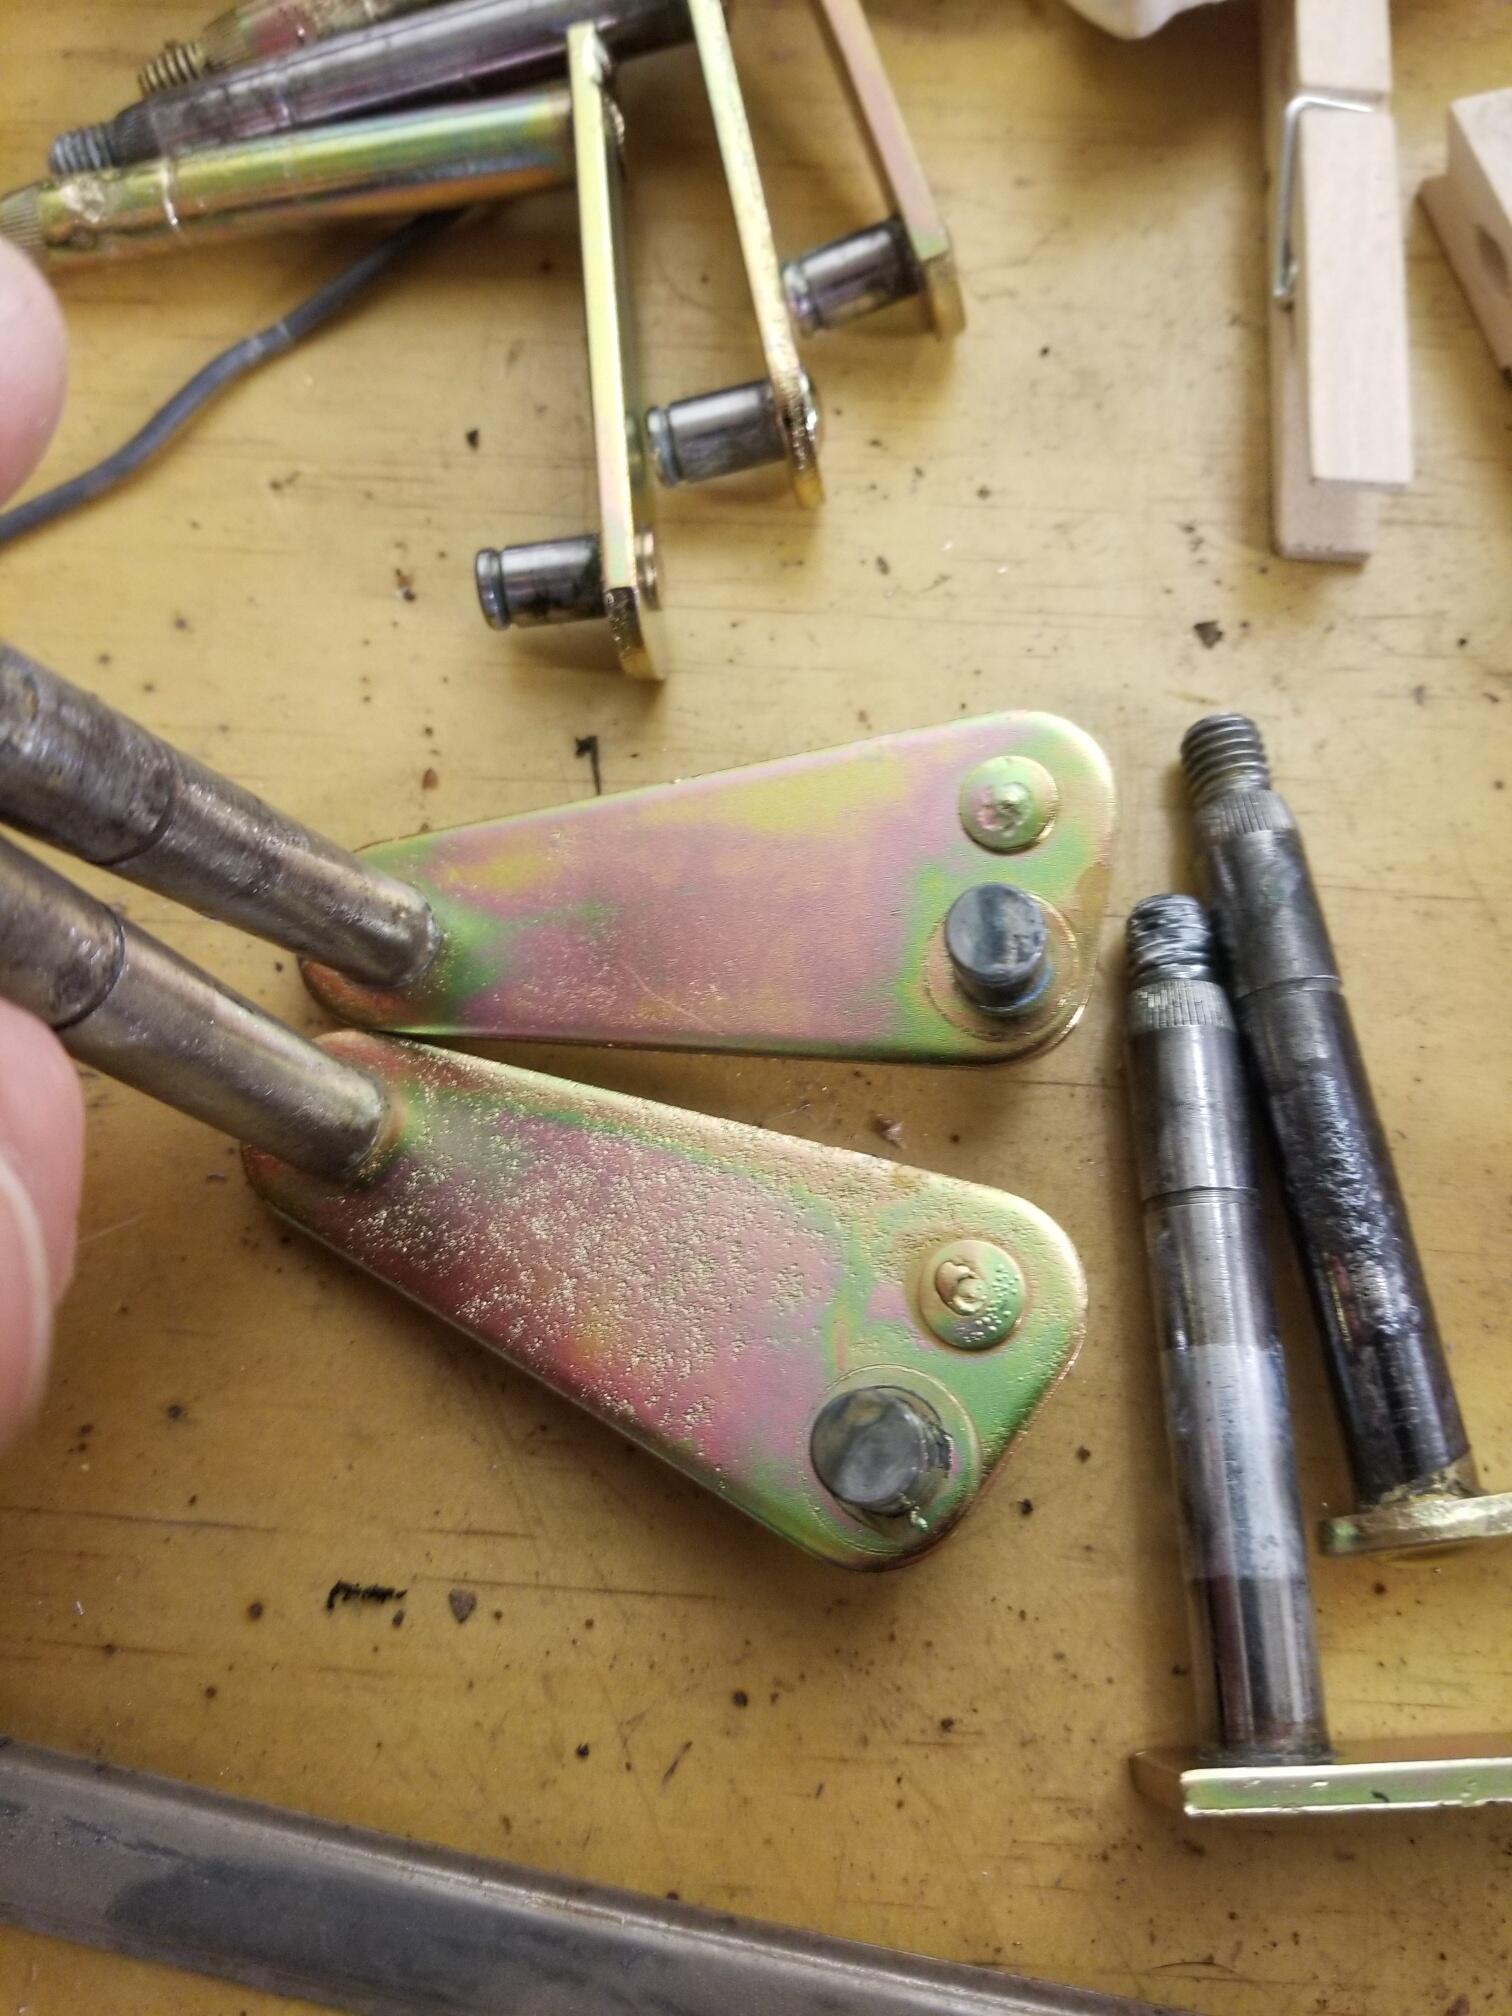
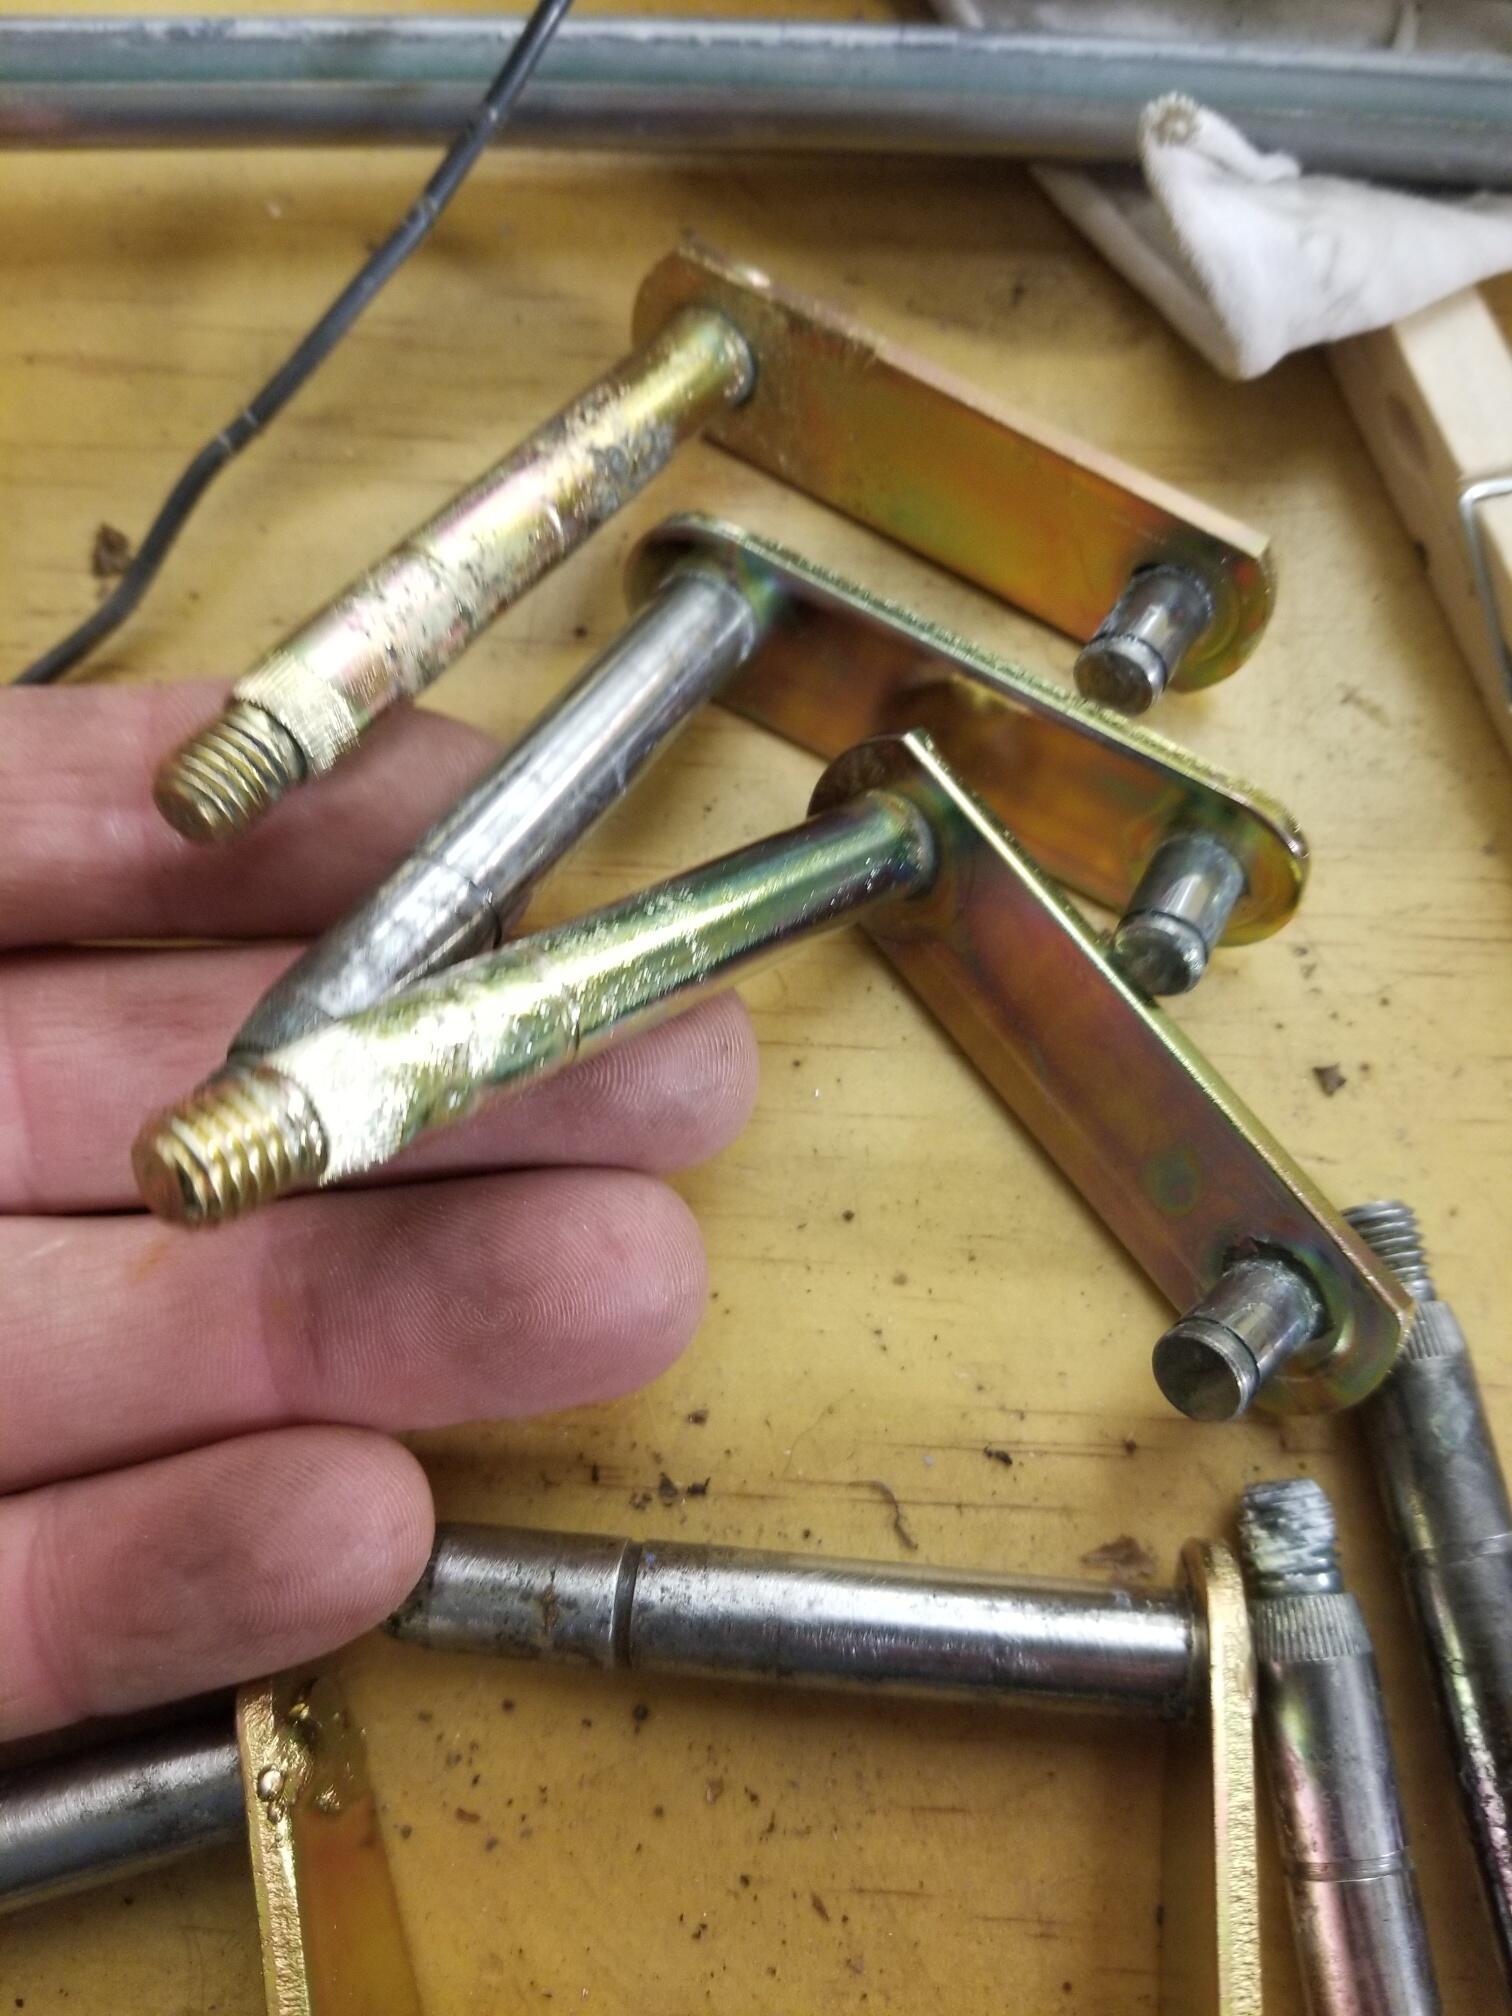
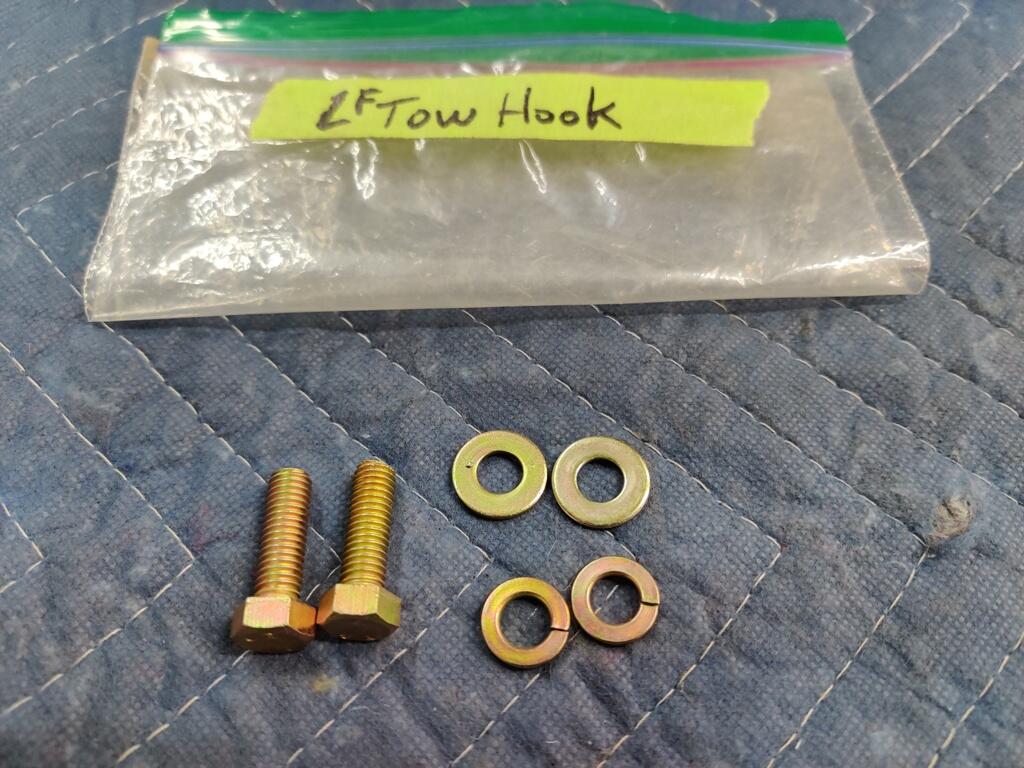
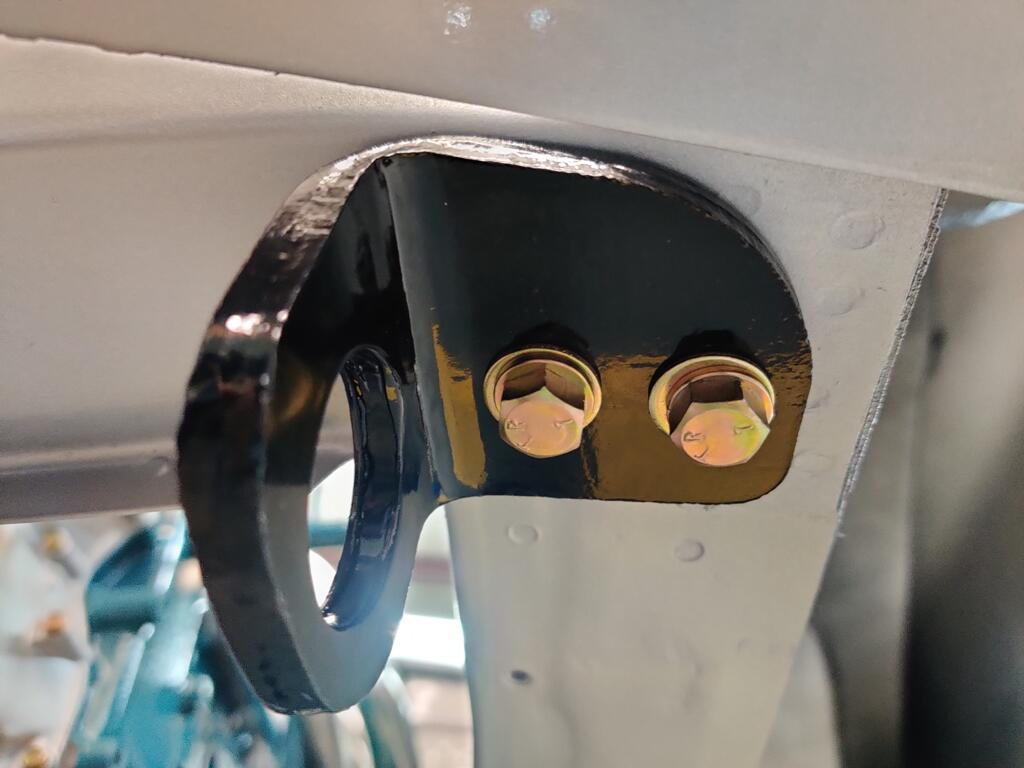
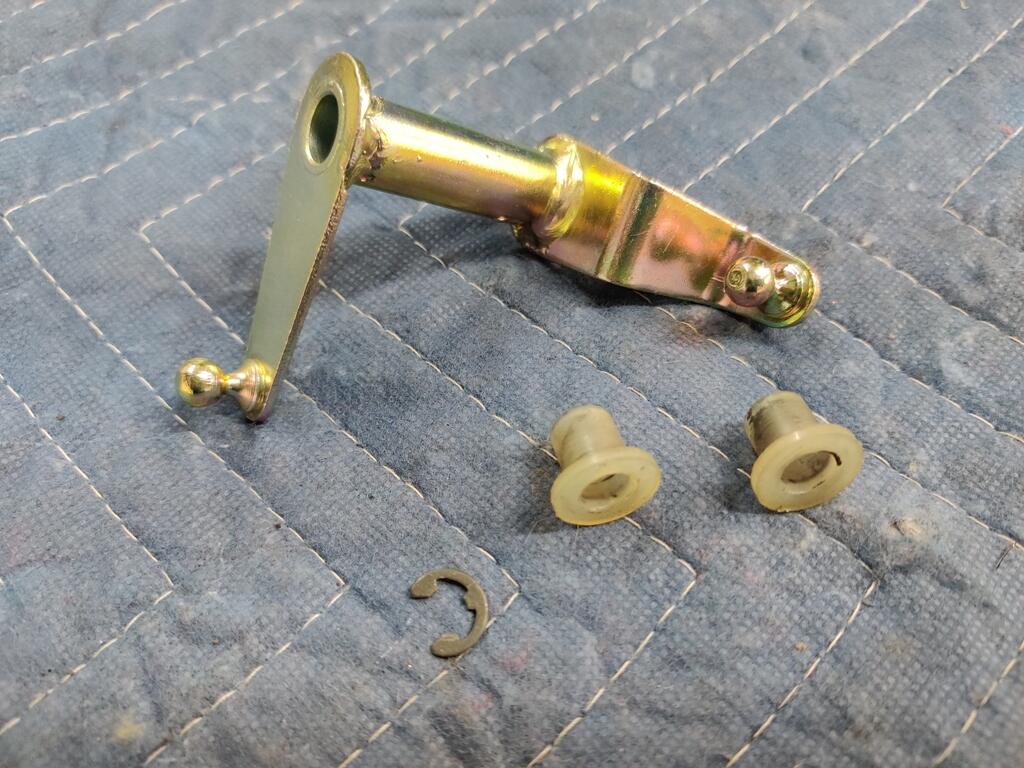
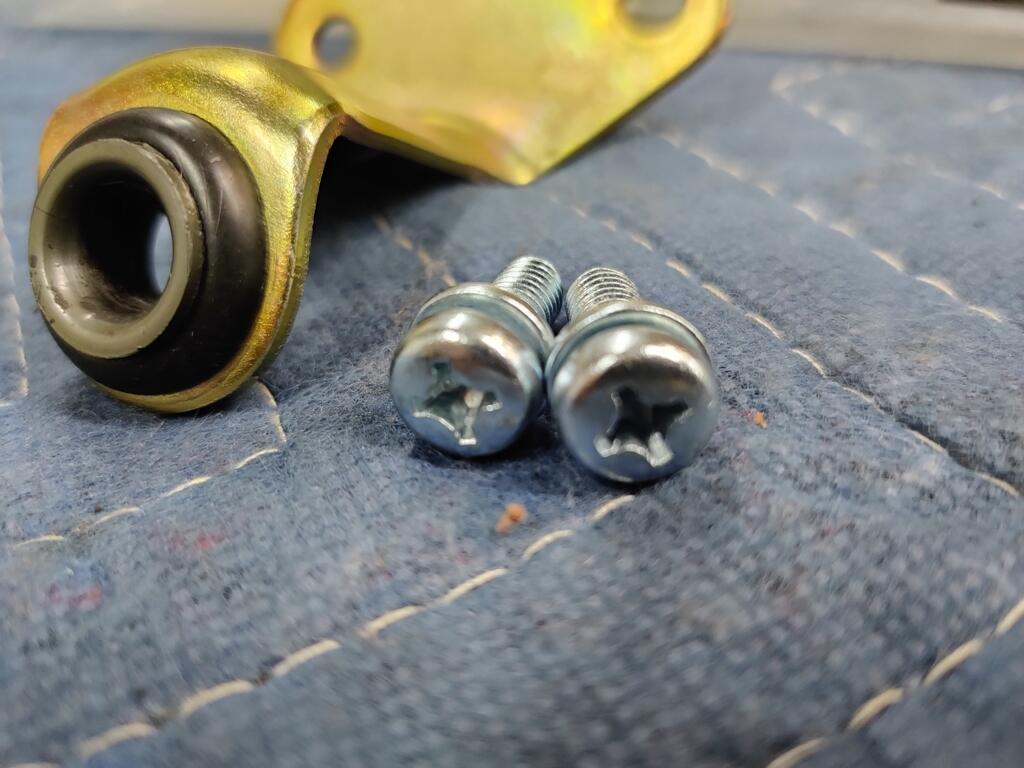
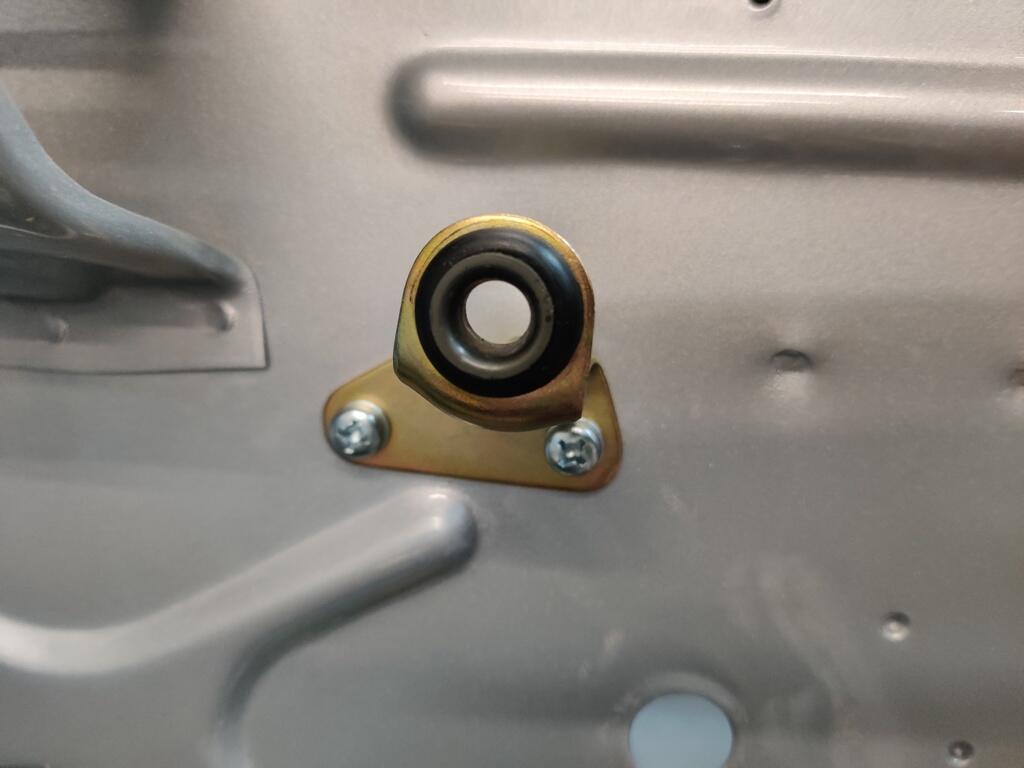
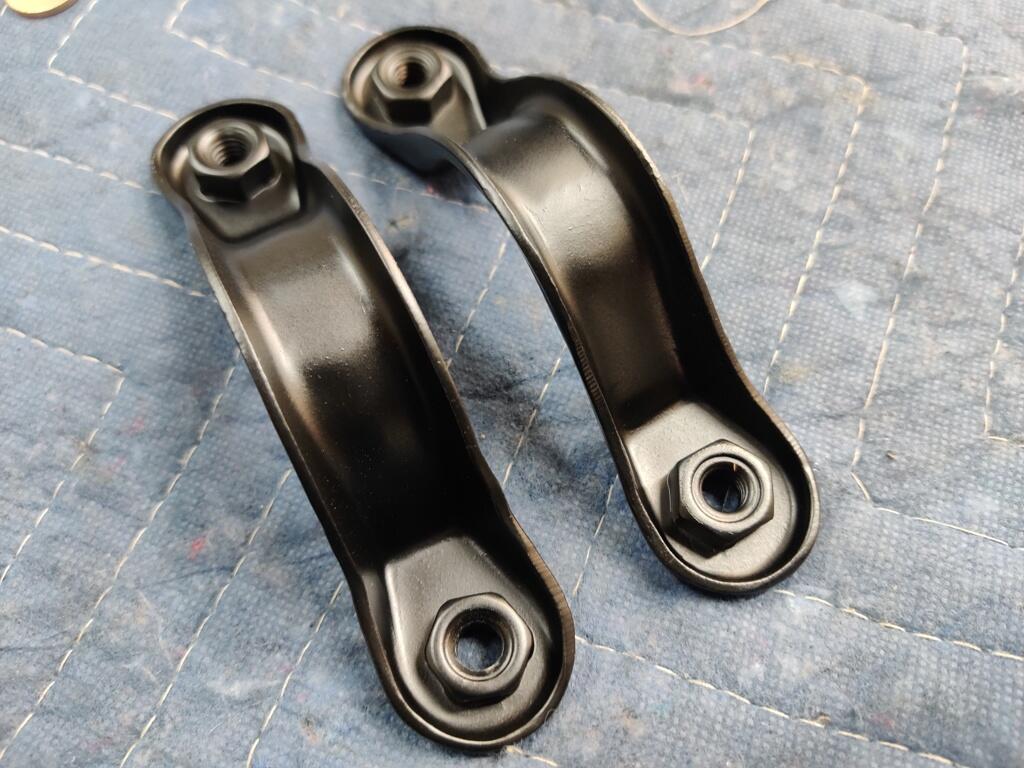
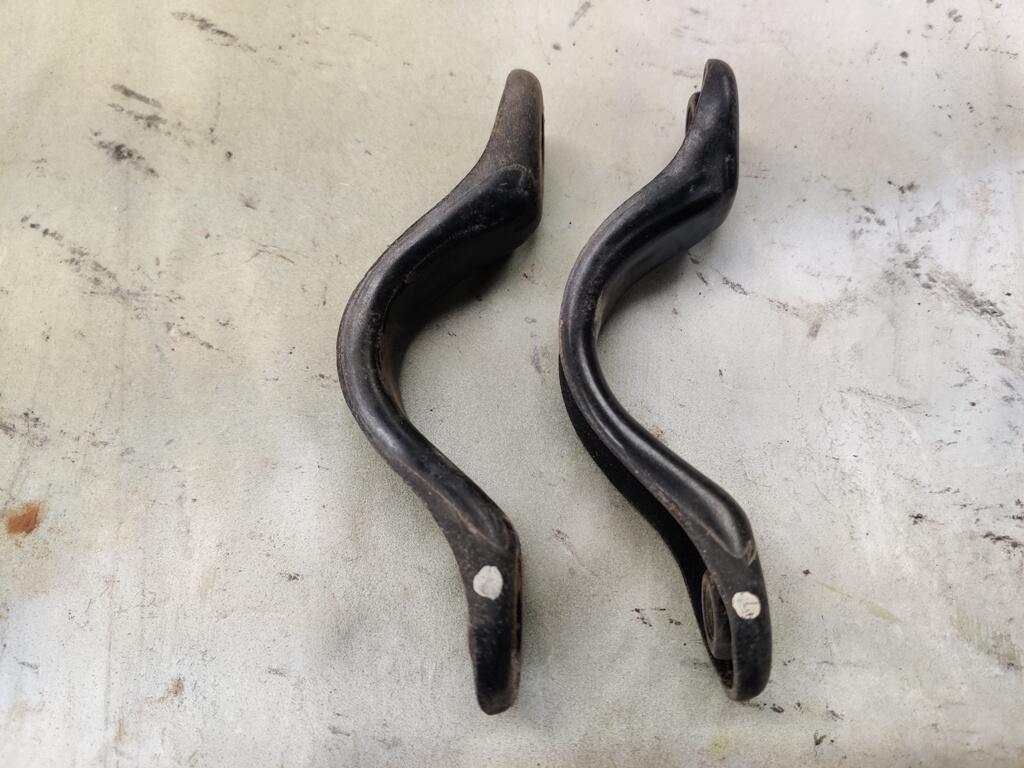
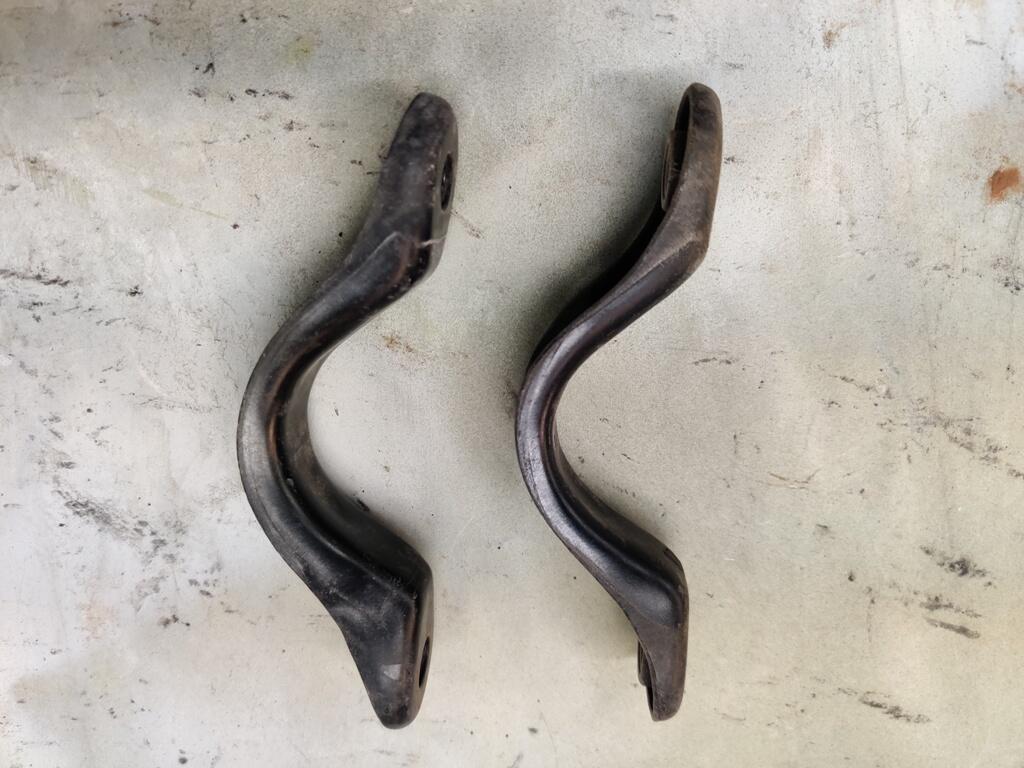
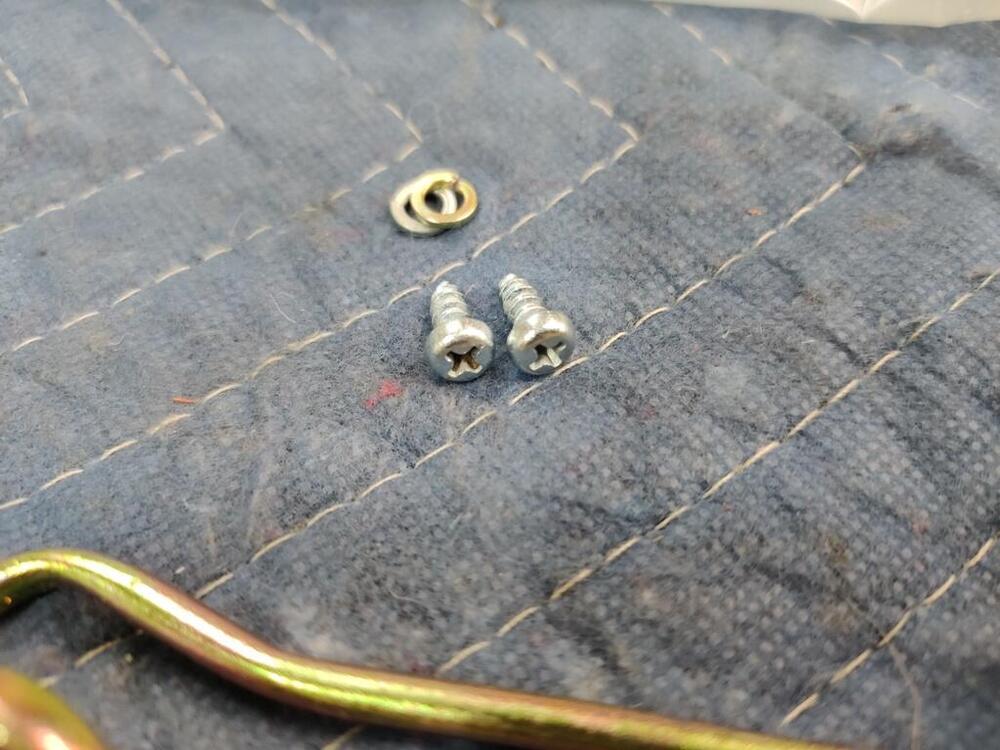
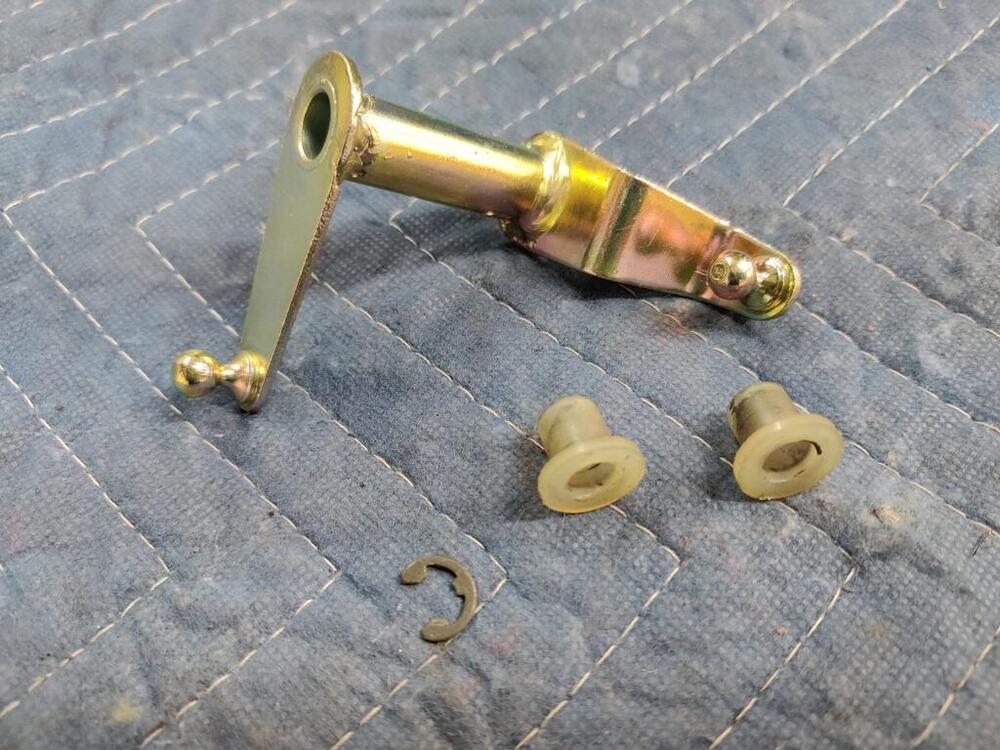
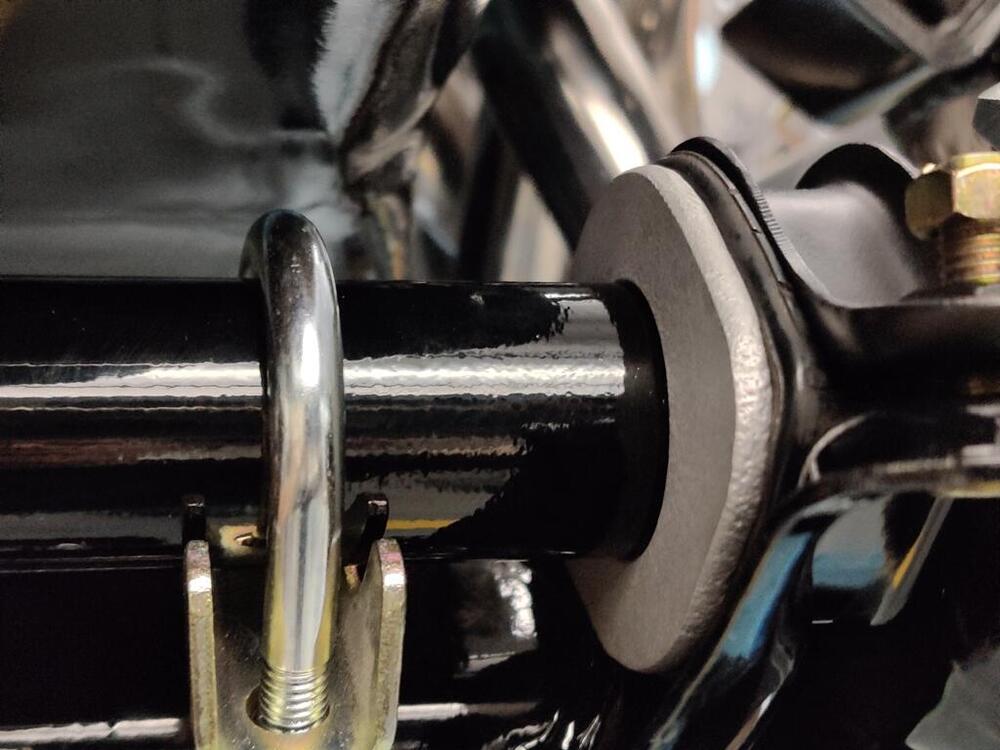
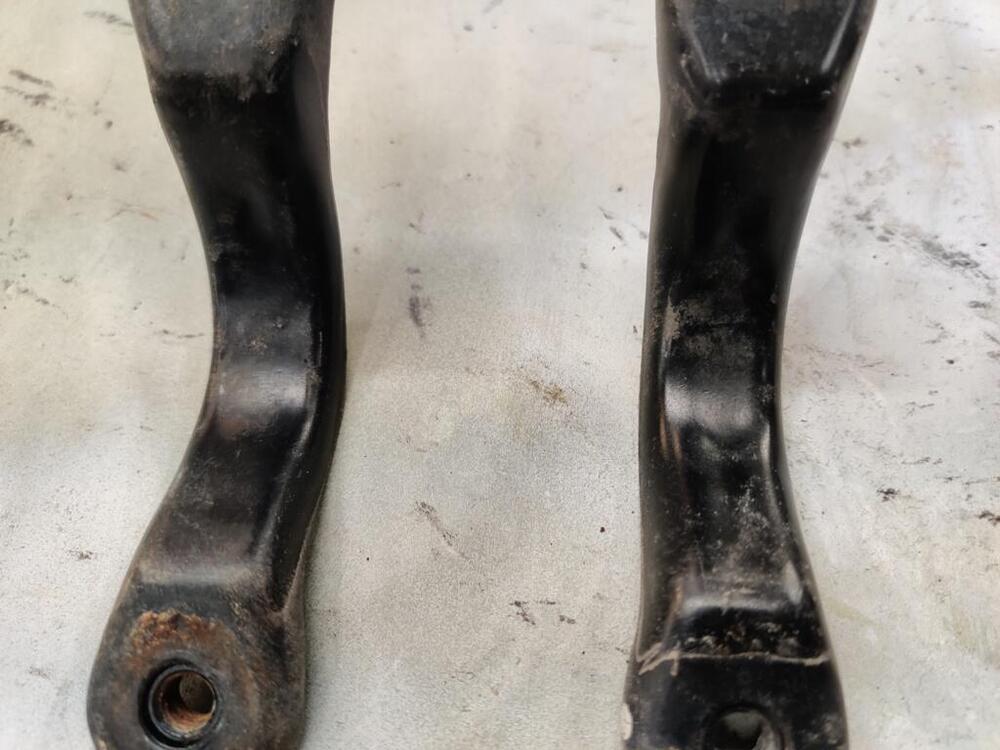
I put various parts on the car today. I am uncertain which of these tow hooks (third pic) is the right front. I think it is the one on the left out of the three: I was able to find a rubber grommet that resembled the original well. The fit with the plastic bushing was crazy tight. However, using some dishsoap made assembly possible.


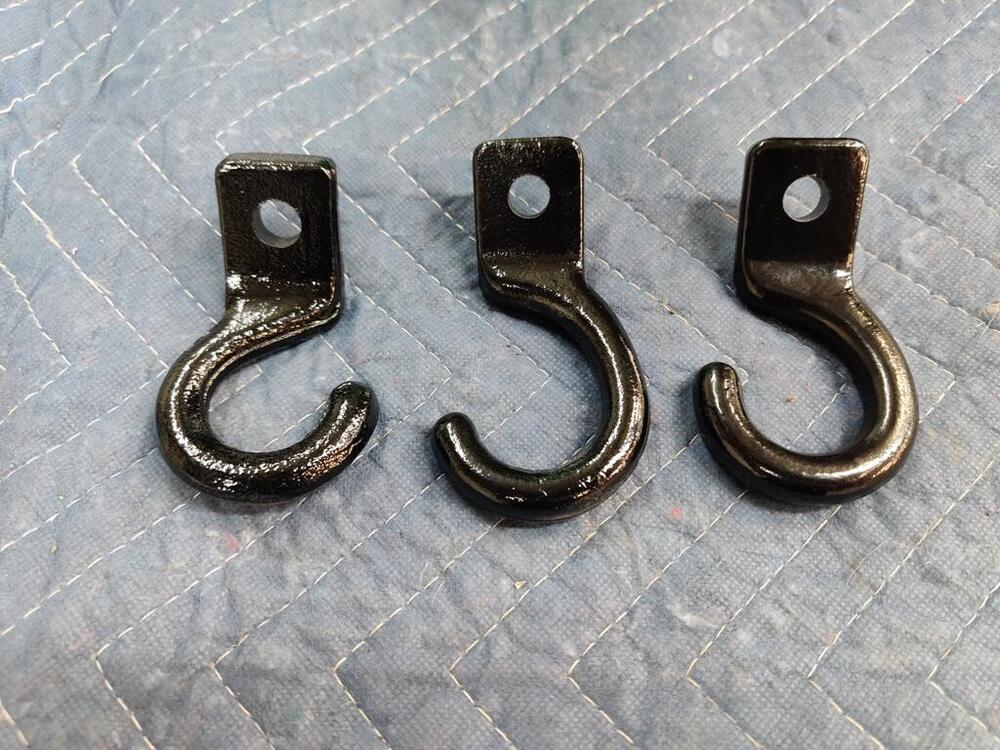
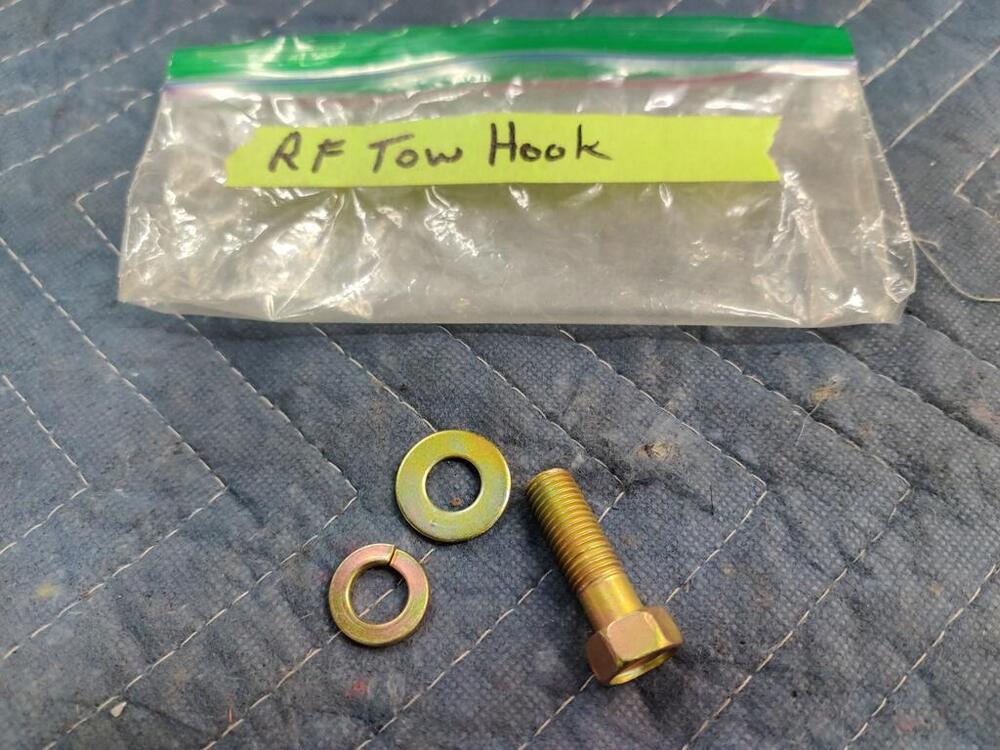


 1 point
 -
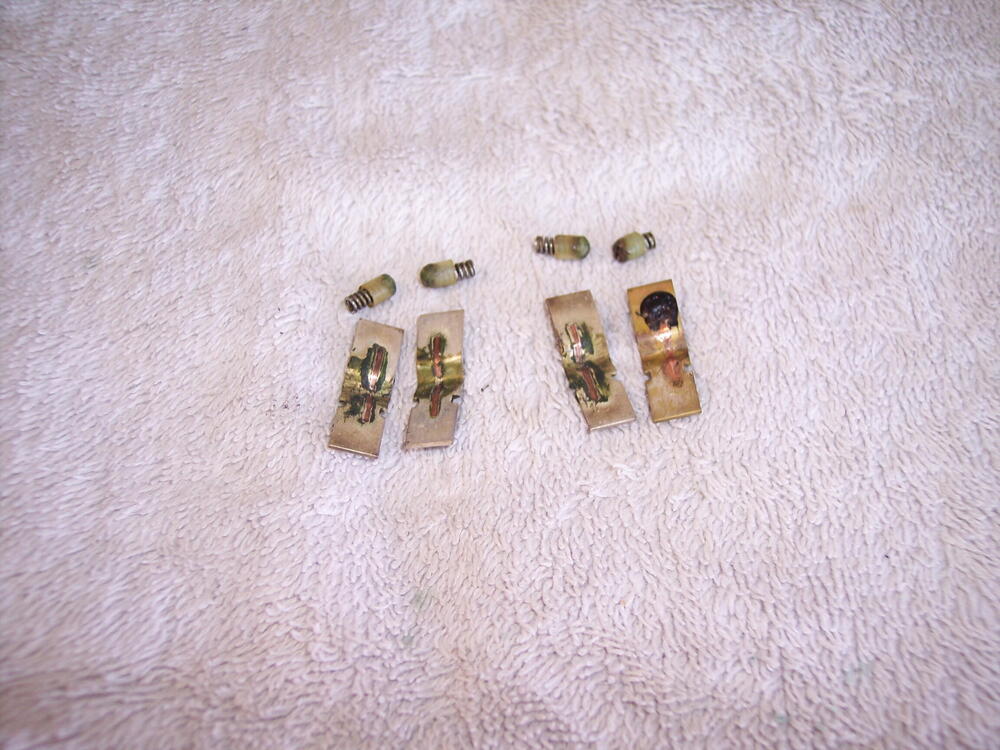
1 pointRockers and nubs, note the burnt/worn nub at the top right that needs replacing. Buildup on the rockers that needs to be polished out.
 1 point
 -
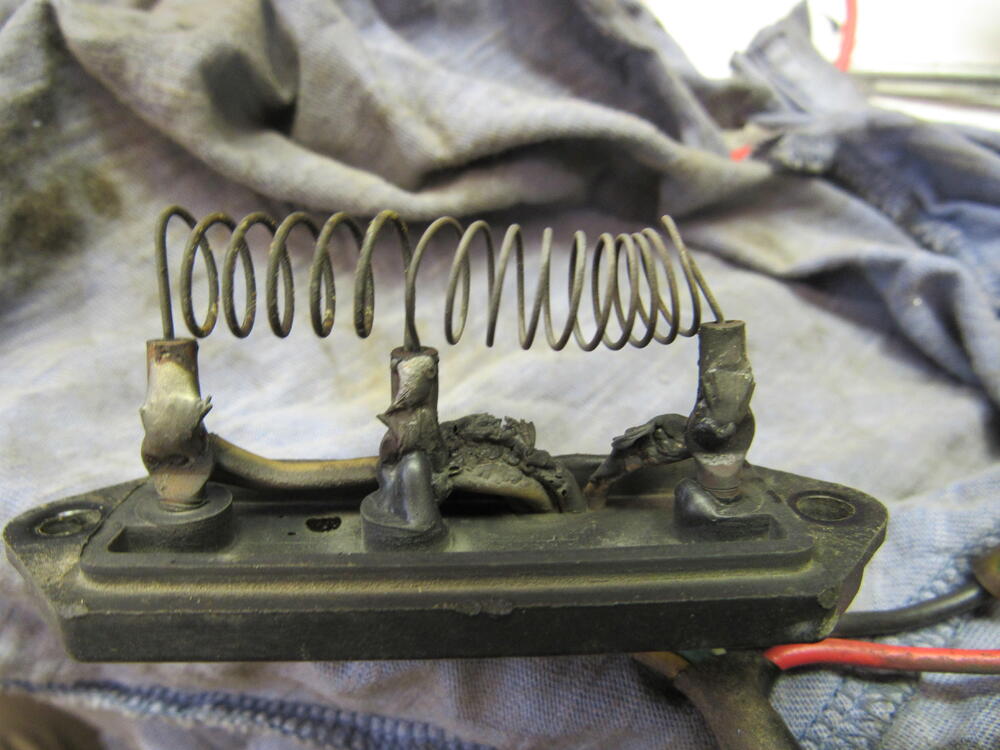
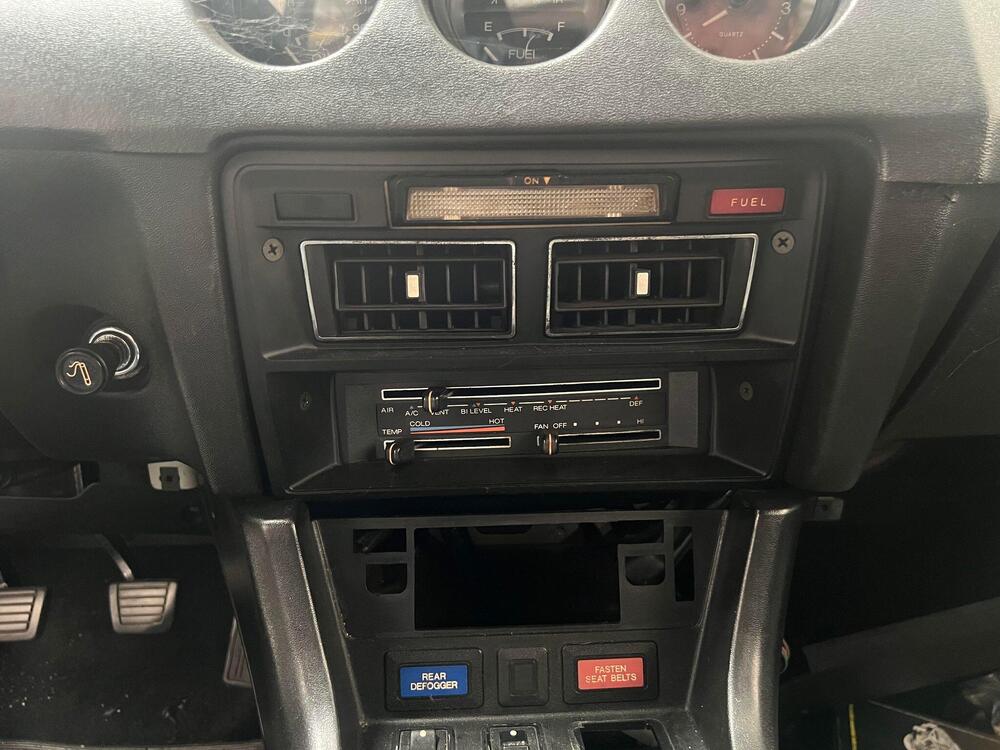
1 pointYou are correct. That is the control panel for factory AC.1 point
-
1 pointI believe I would count that as four, but a picture would do it more justice than me.
 1 point
 -
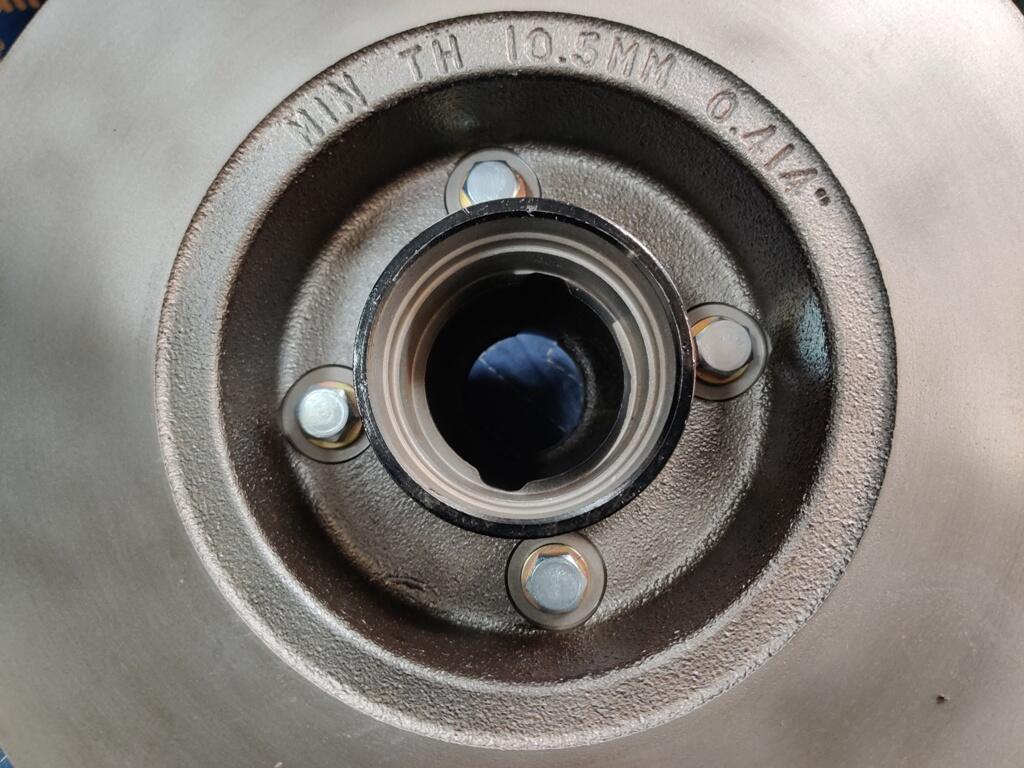
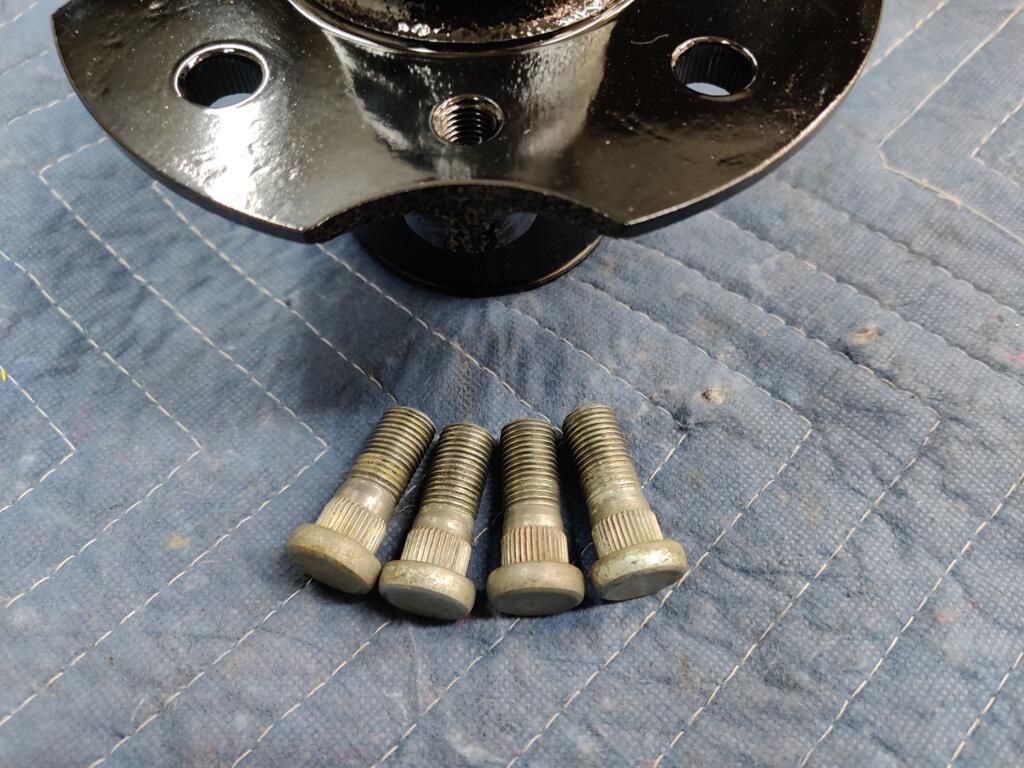
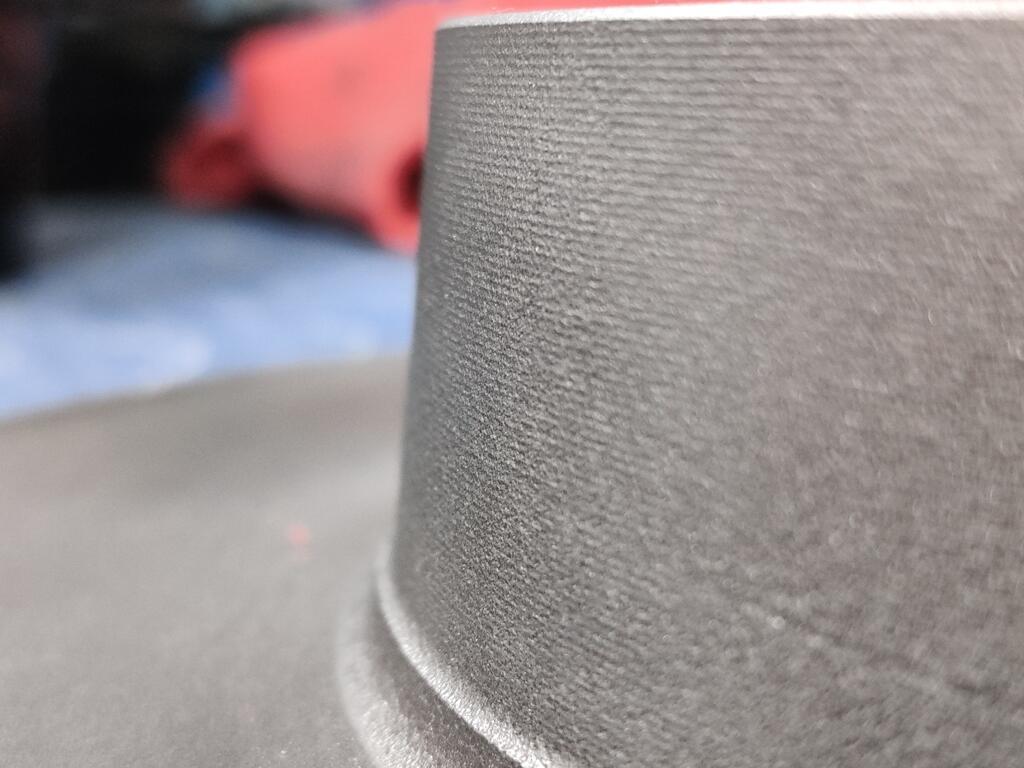
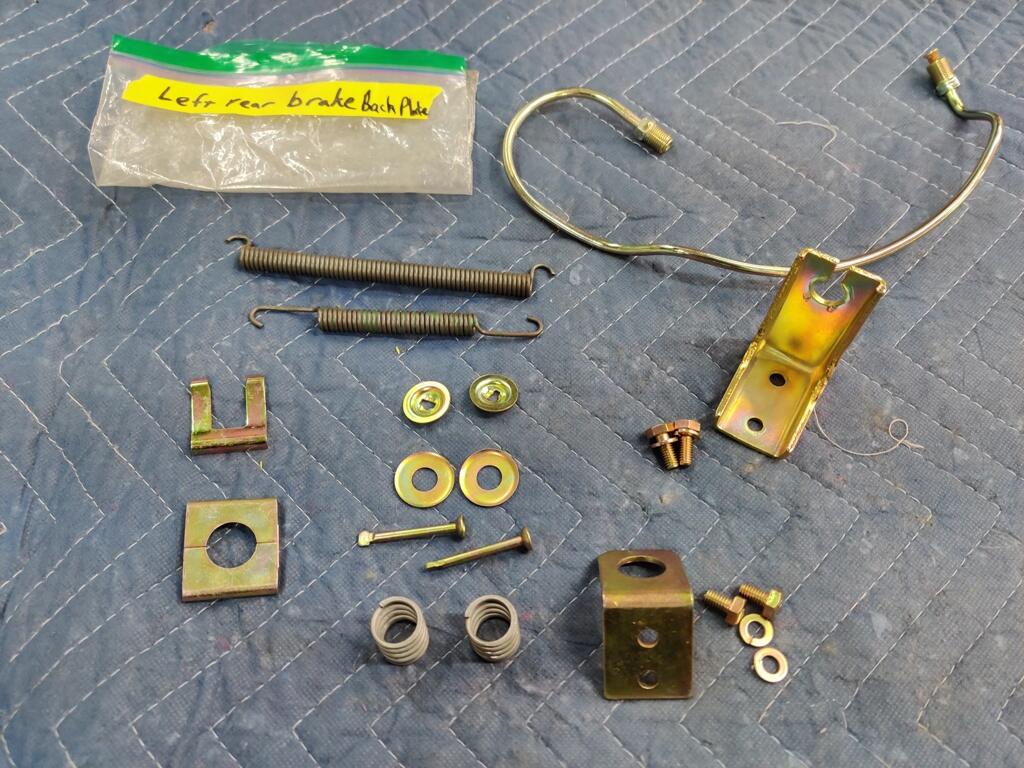
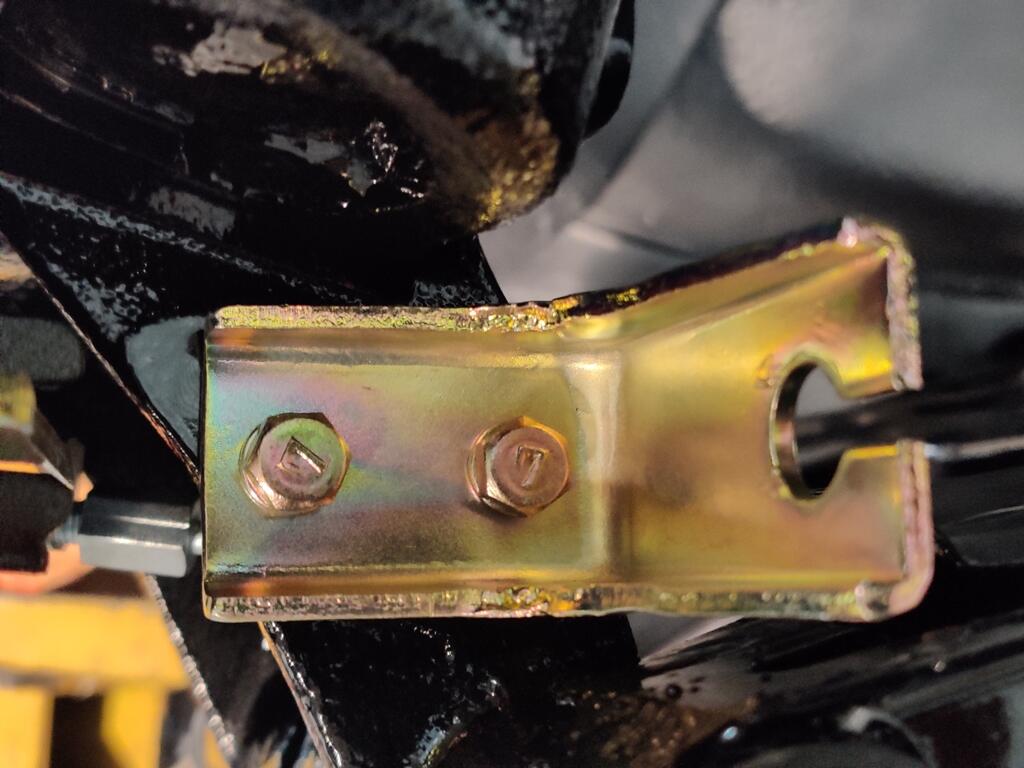
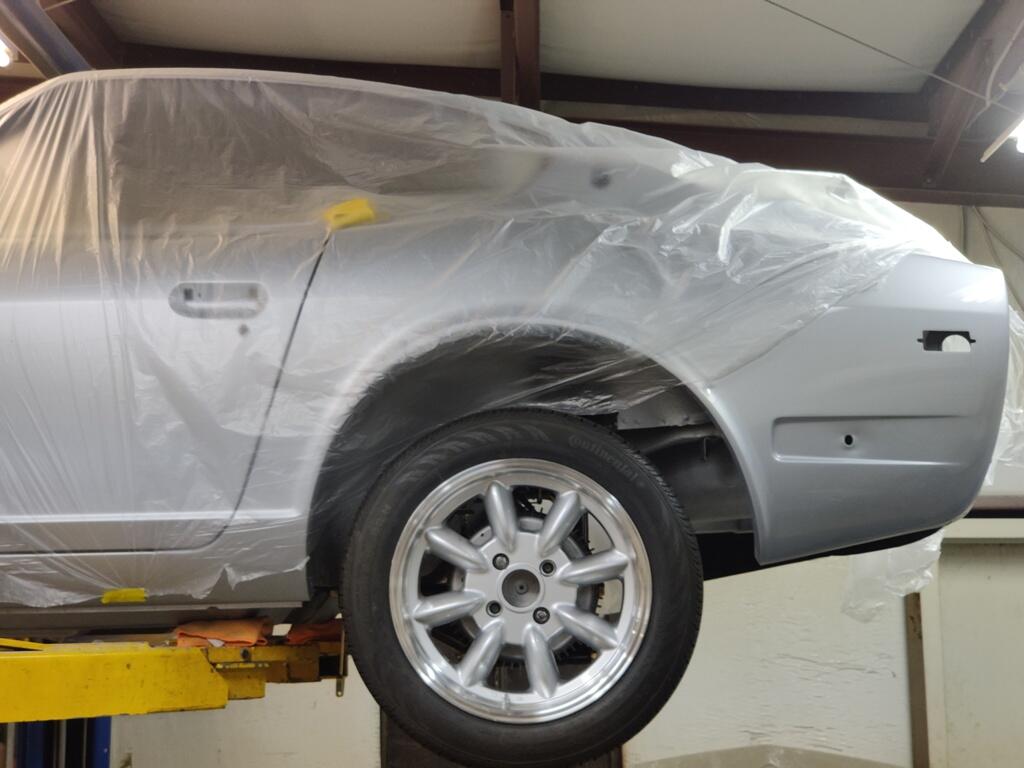
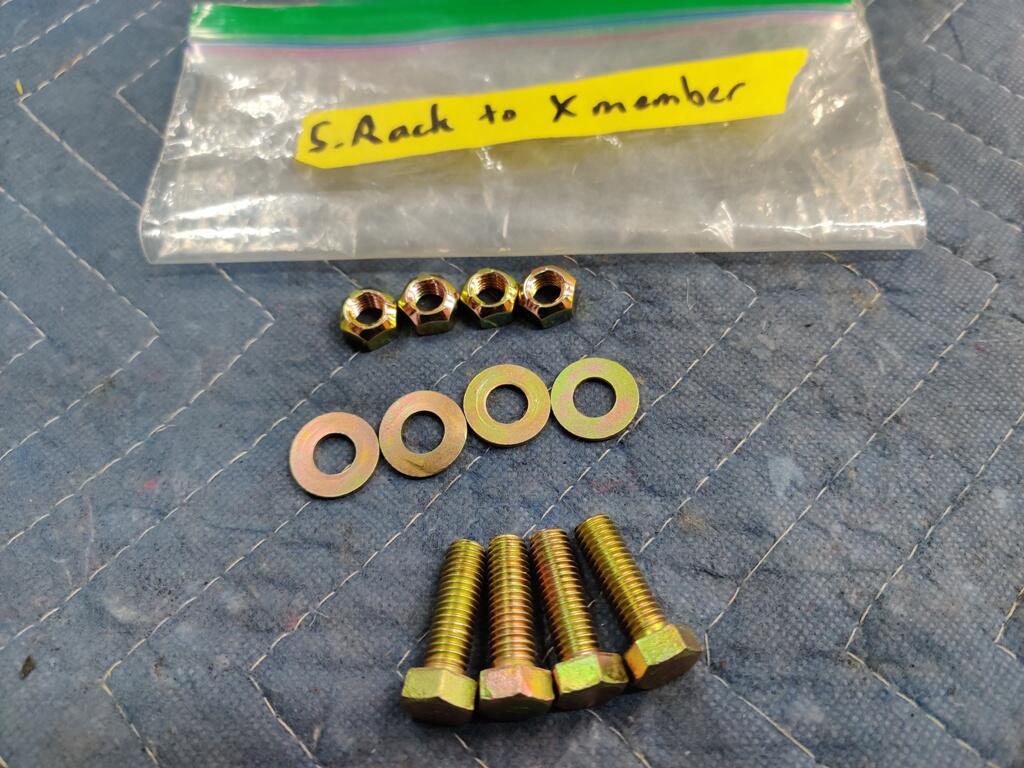
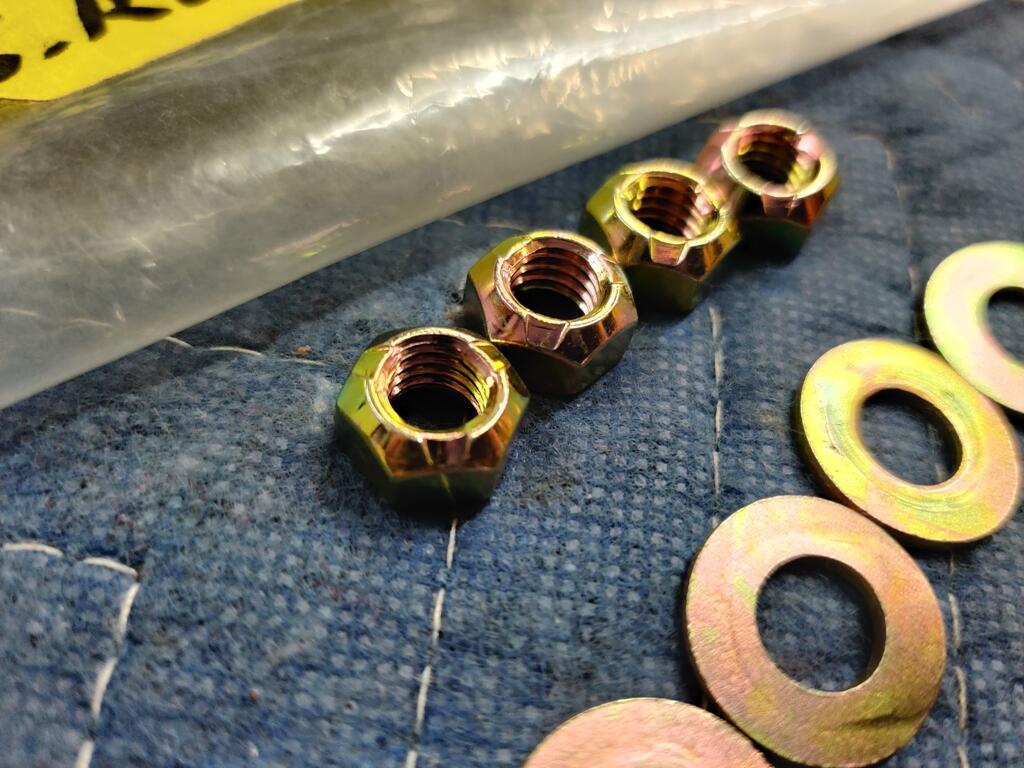
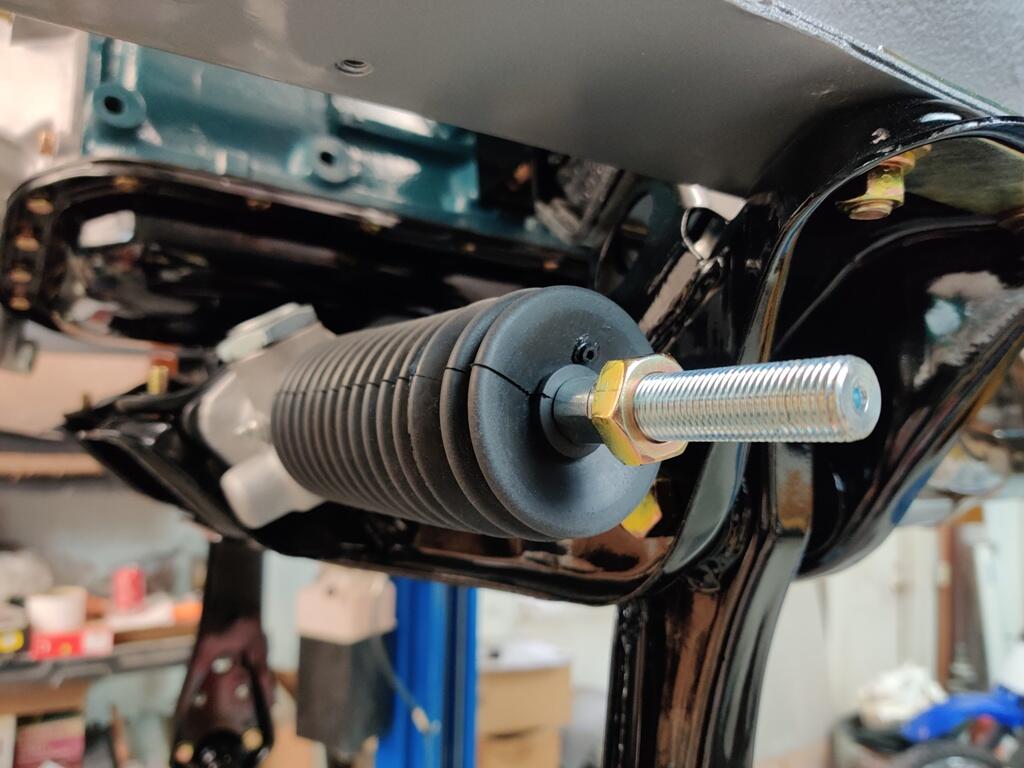
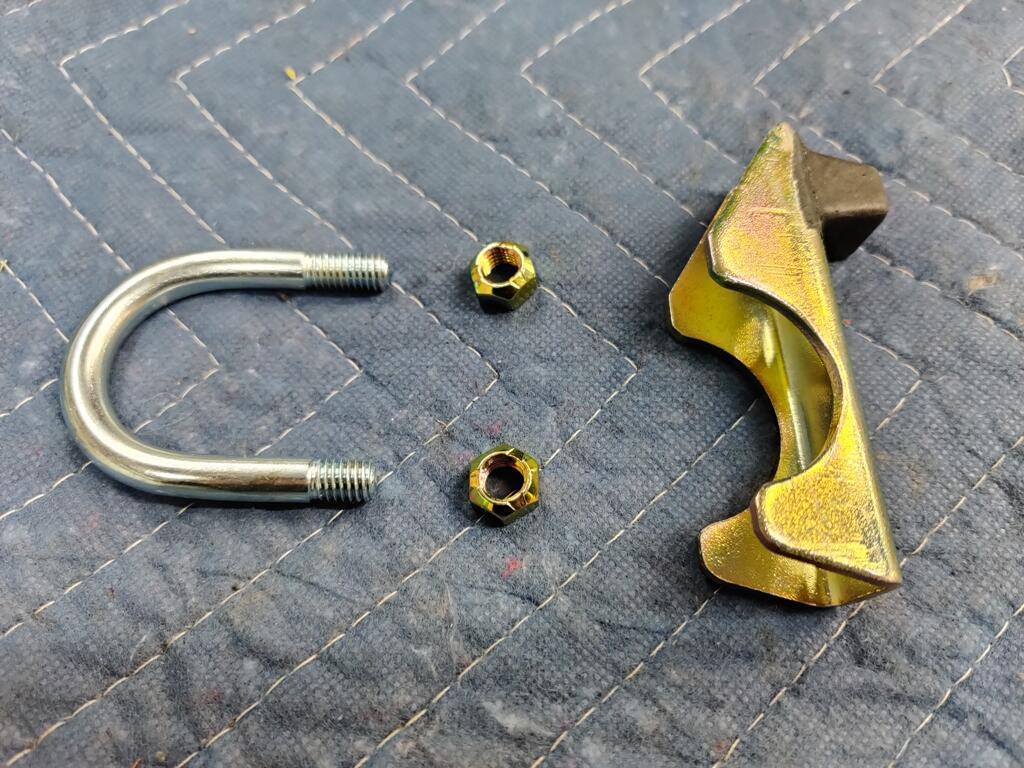
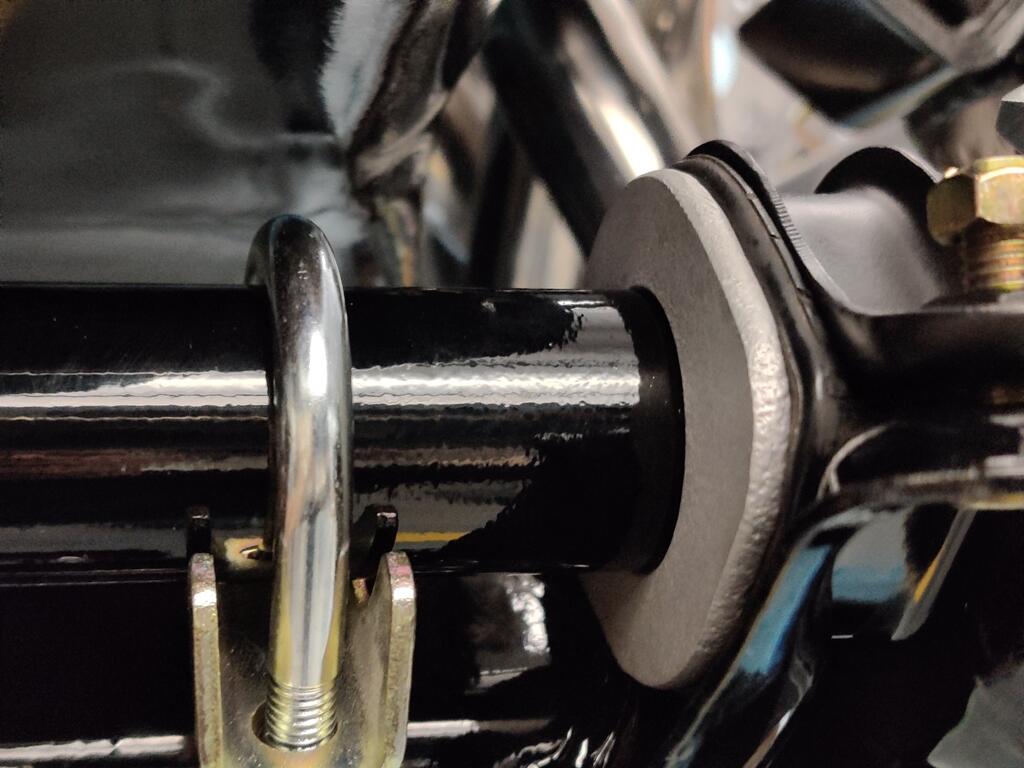
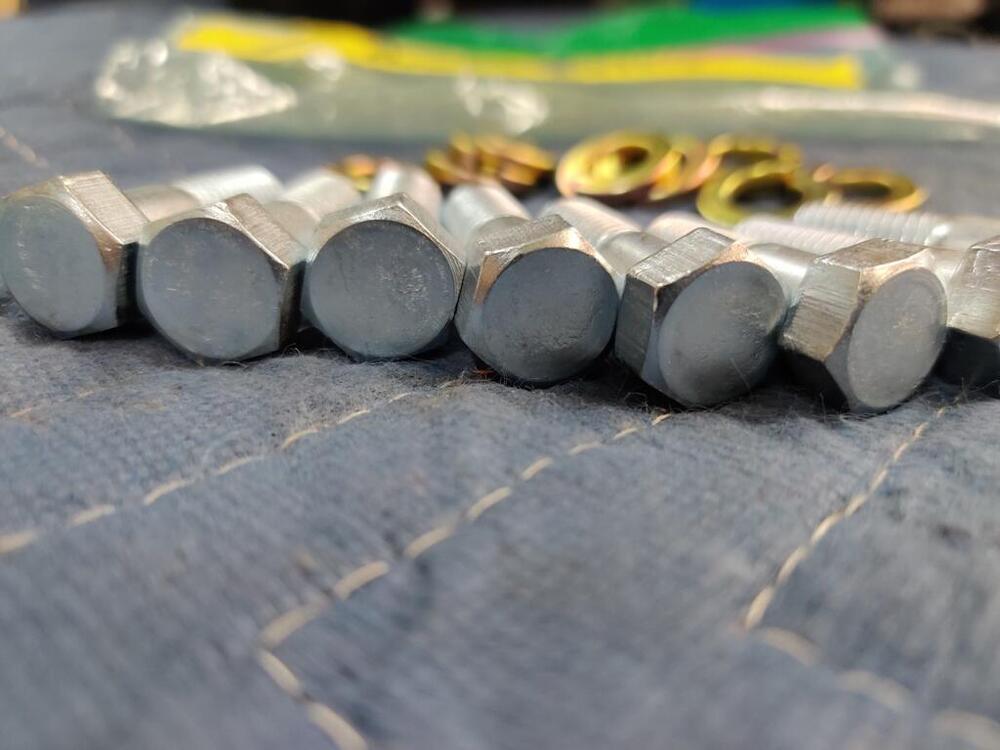
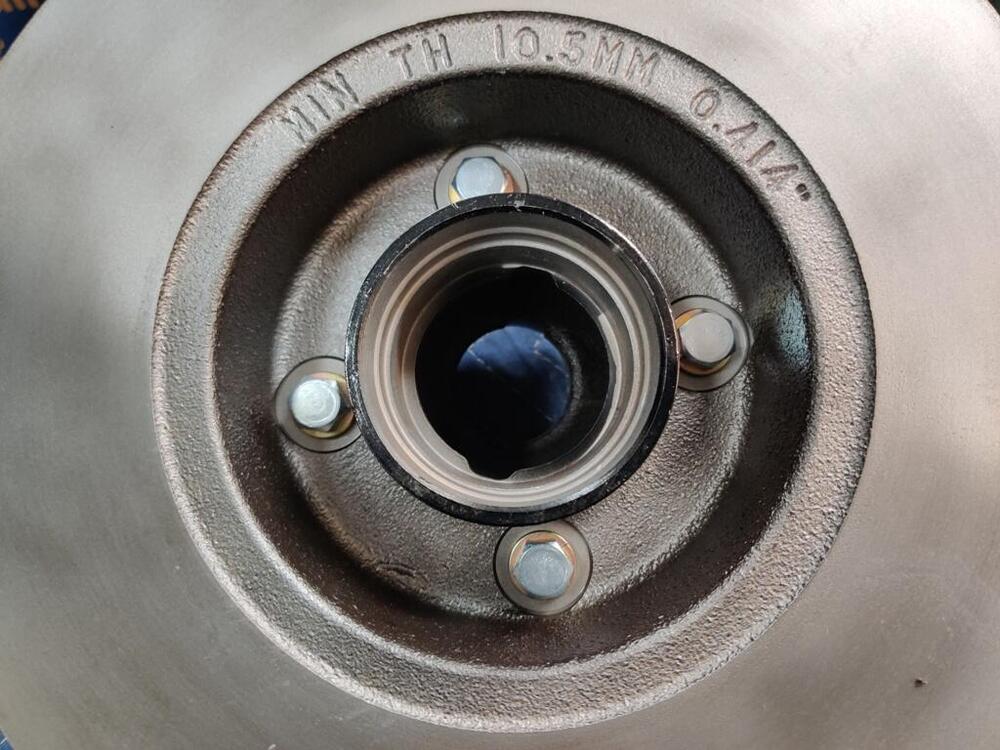
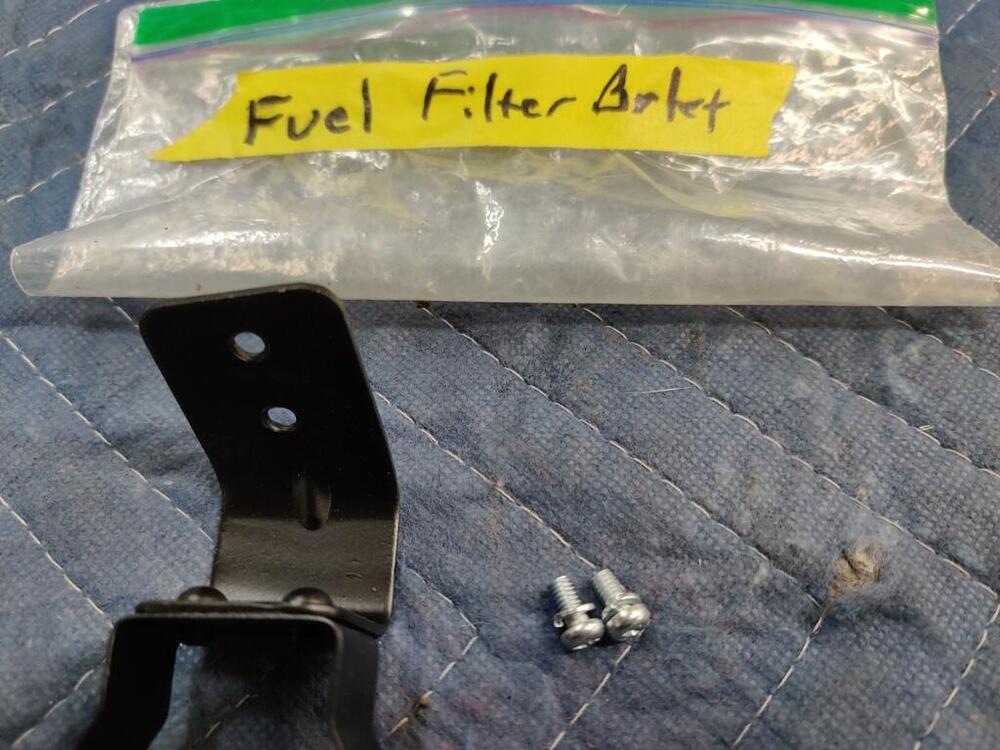
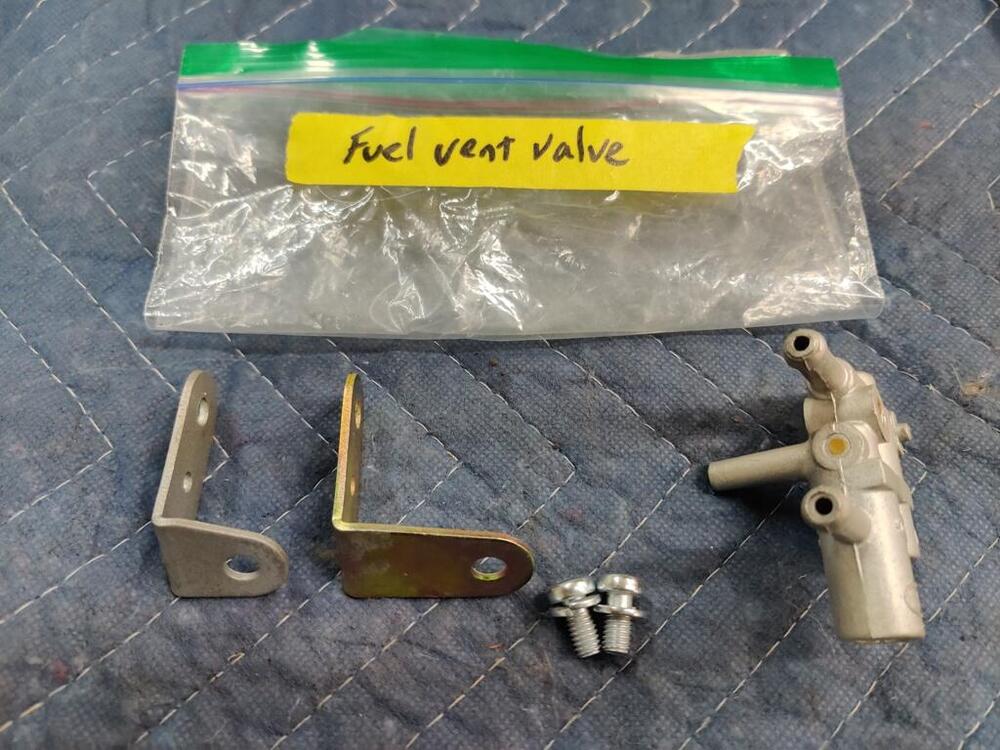
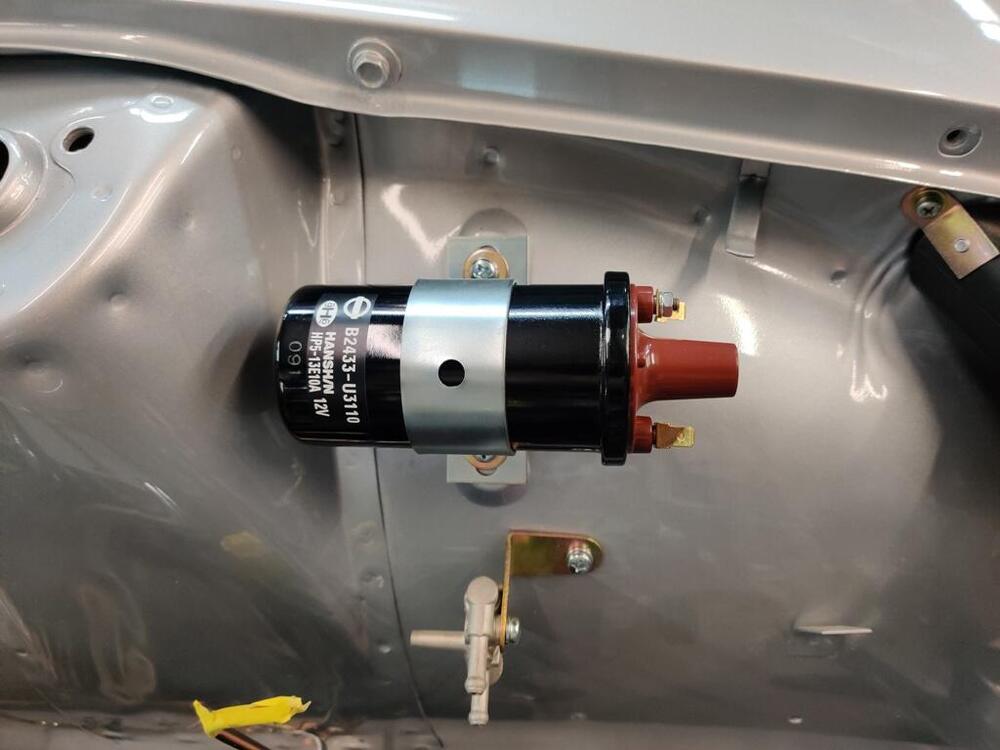
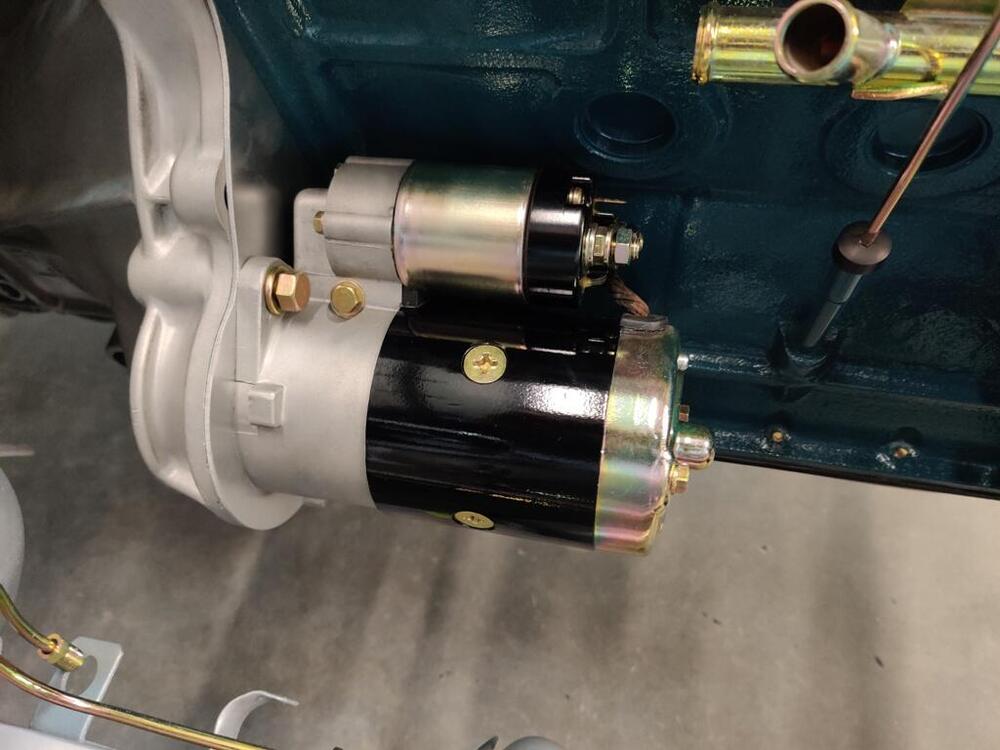
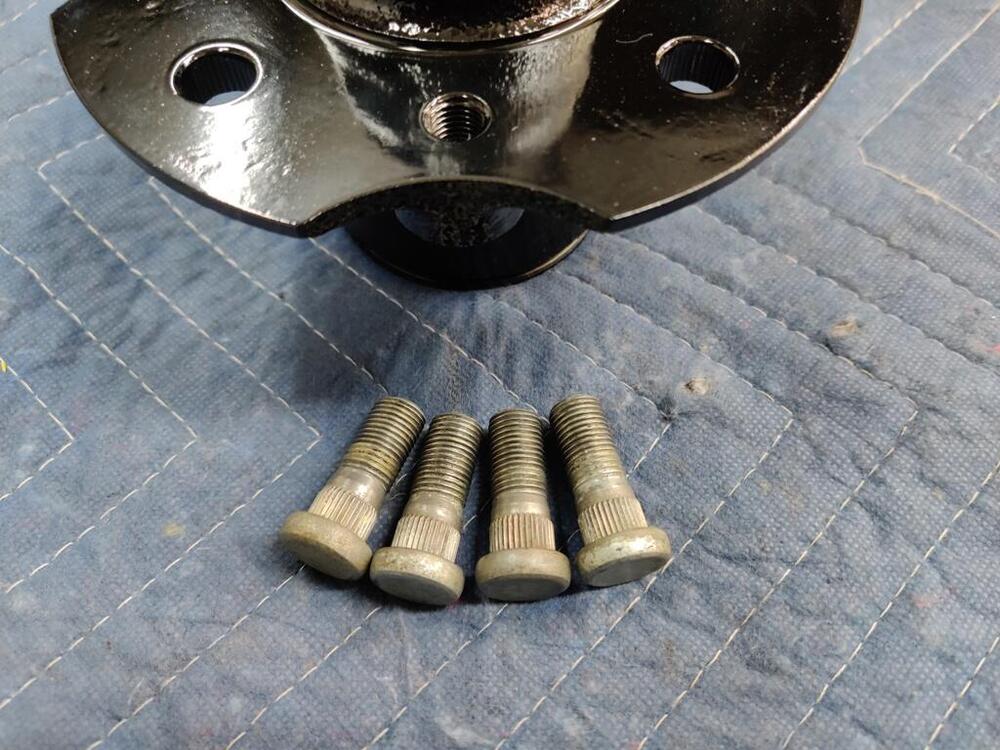
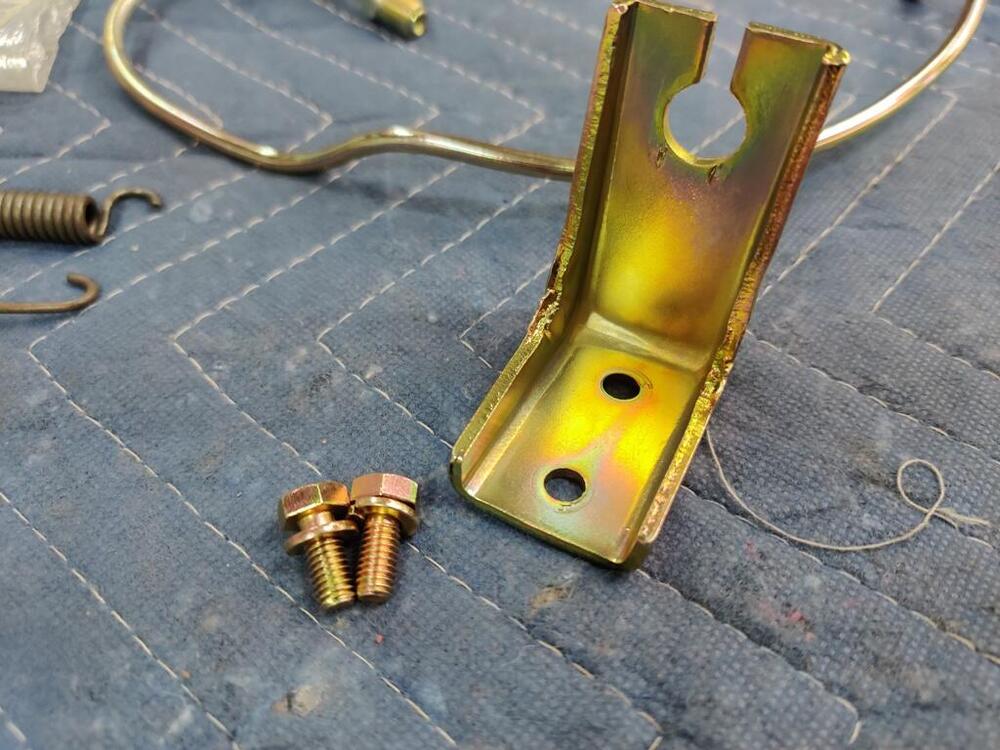
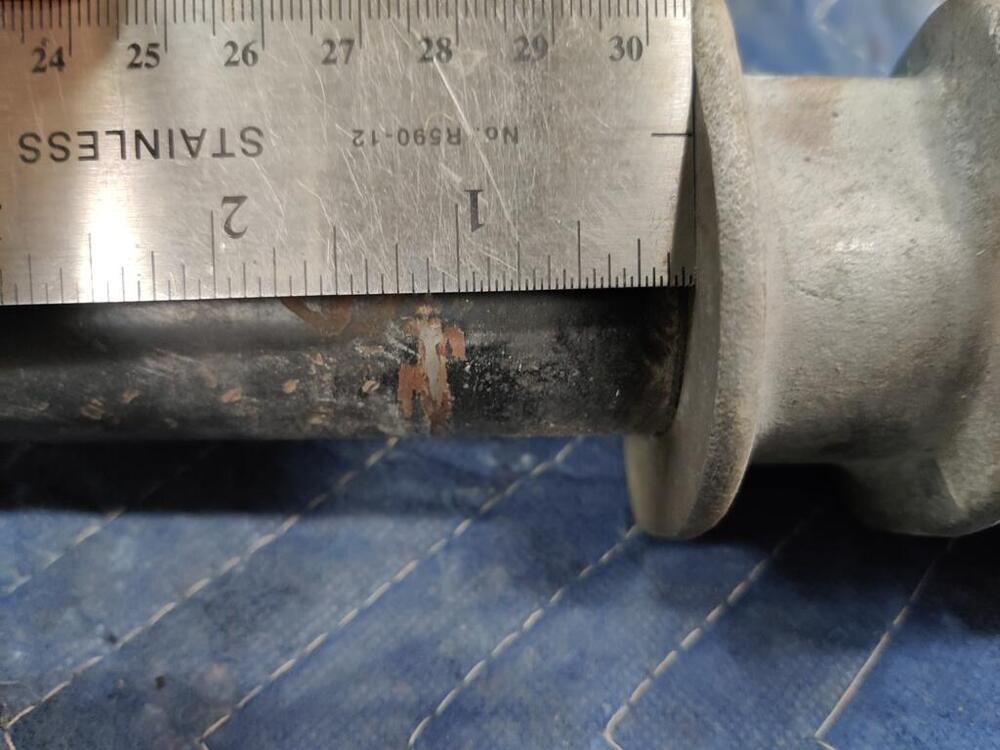
The 25 mm ones are challenging to use for the differential front mount cross member if installing new control arm bushings. I couldn't get the bushings to compress enough by pushing the arm into them to get the 25 mm bolts to start threading properly. I'll be able to use the two 30's I've got to get it started. Once it is close enough, I will use two of the 25 mm for the other two holes. I'll probably swap out the longer ones after the cross member is in place and move those two to the transmission crossmember. Then, it looks like I will have the right fasteners in the right locations. Working on the putting things on the car yesterday was very pleasurable. Not a lot of effort required, and was able to take my time and install parts that needed nothing other than taking them out of boxes and bags. I cleaned and installed front wheel studs into the hubs. I believe the front face of the hub came from the factory with a machined surface. I elected not to remove the paint on that surface. If I had a lathe, I may have dress it and clear coated. Oh well. The brake discs that came with the car are interesting. I note that the hat part is tapered - in the picture I have the camera resting on the disc surface. You can see the side of the hat has an angle to it. The quality seems higher than many I have seen. I believe these may be OEM, but there are no markings which confirm. I glass bead blasted the minor surface rust from the rotors and applied clear coat (spray can) to the front and back of the hat areas. I worked a little more on the rear brakes, installing the left wheel cylinder (anyone know why both left and right hand brake levers have a big "R" on them?), hand brake brackets, and the small sections of rear brake hard lines. I also tossed one of the drums on and a wheel, just to have a look see. Still waiting on brake shoes to arrive. I am also still waiting on the gland nut from Motorsport Auto. That is holding me up from putting together the front suspension. Next, I moved to the steering rack installation: For whatever reason, the steering rack clamp brackets were semi-gloss instead of gloss. Original finish pics - anyone know the correct orientation of the paint dots? Front/back, left or right? Steering rack brace. If you look closely at the U bolt, you will see that one side has more threads than the other. That longer side goes towards the front of the car. The brace is not clamped down yet in this third pic. Don't think it matters, but used an old rack to determine the location of this brace. Today, I will be adding items to the engine compartment.


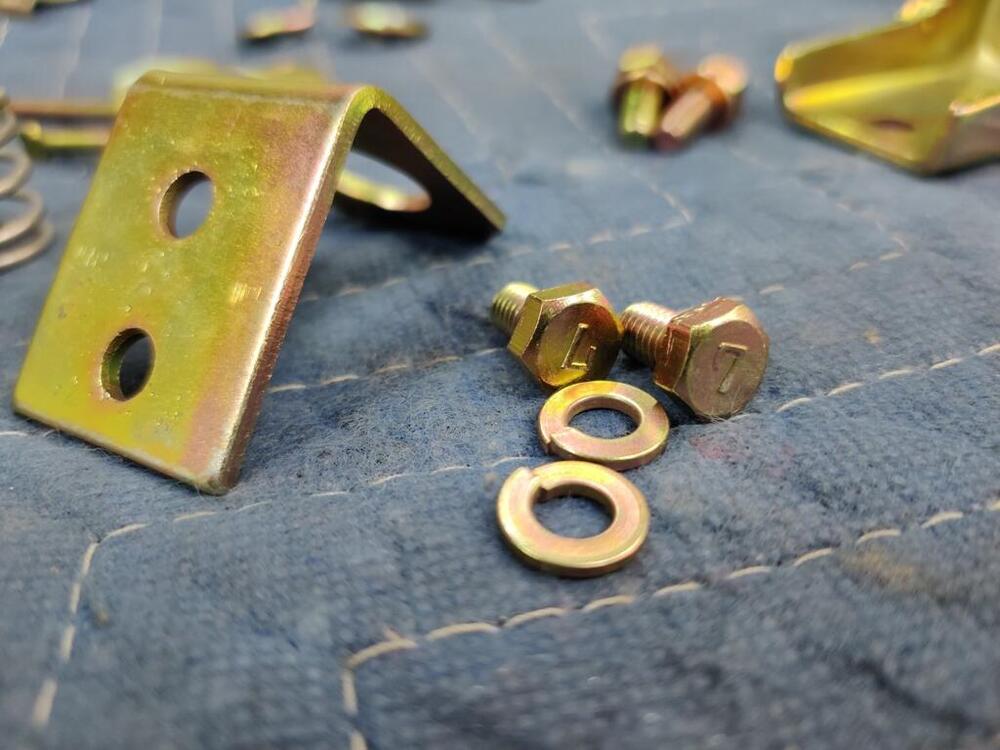

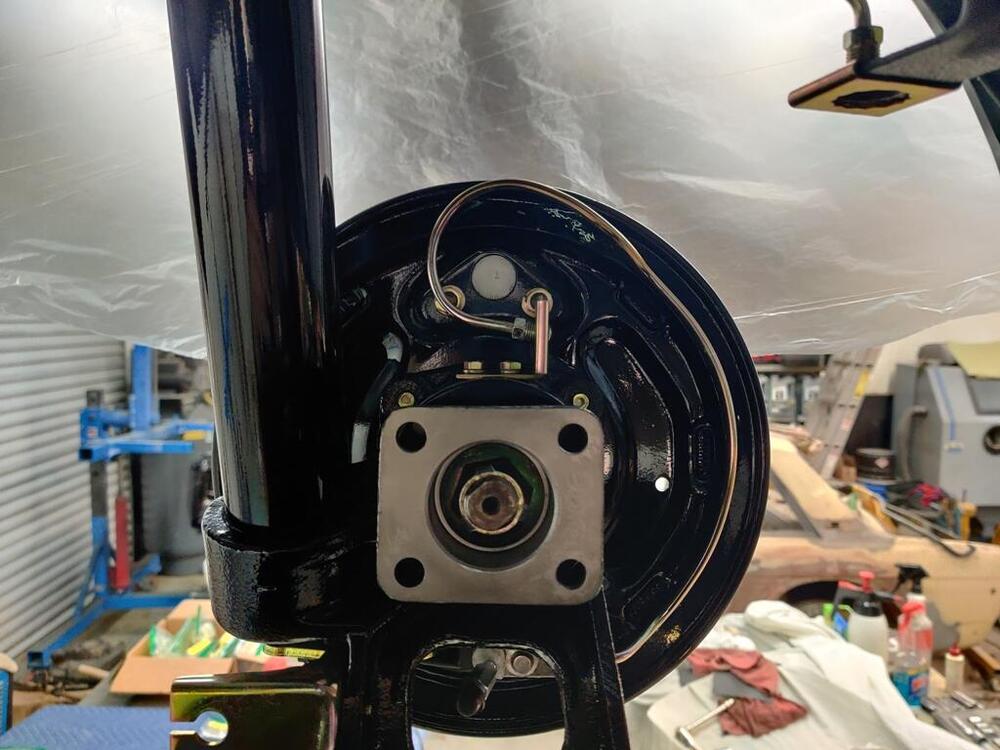

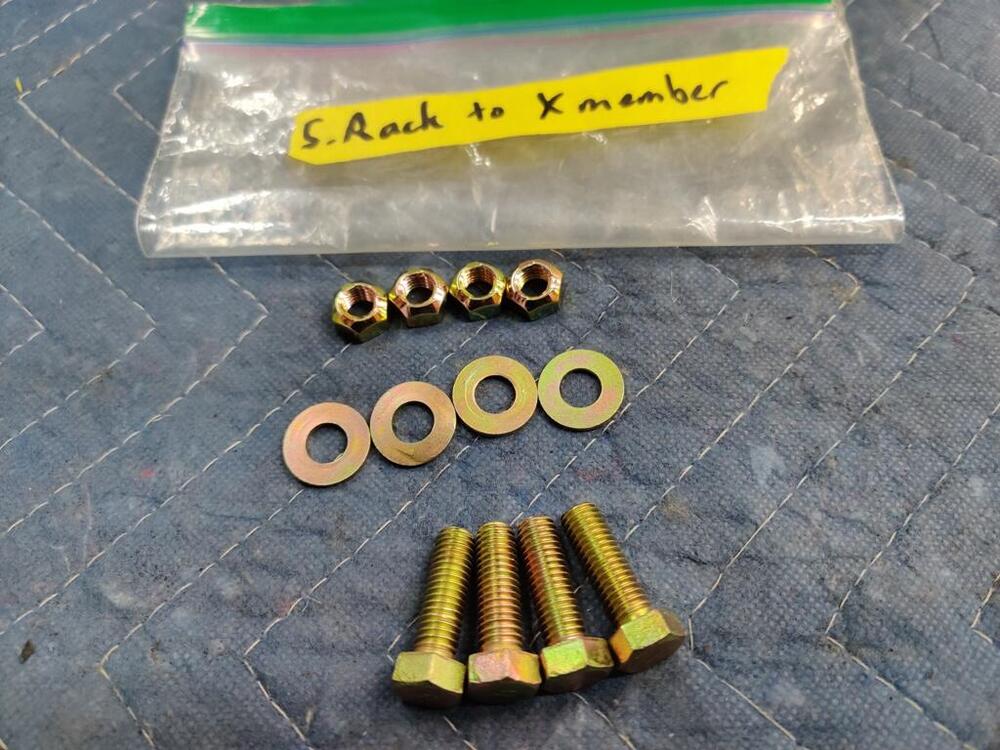
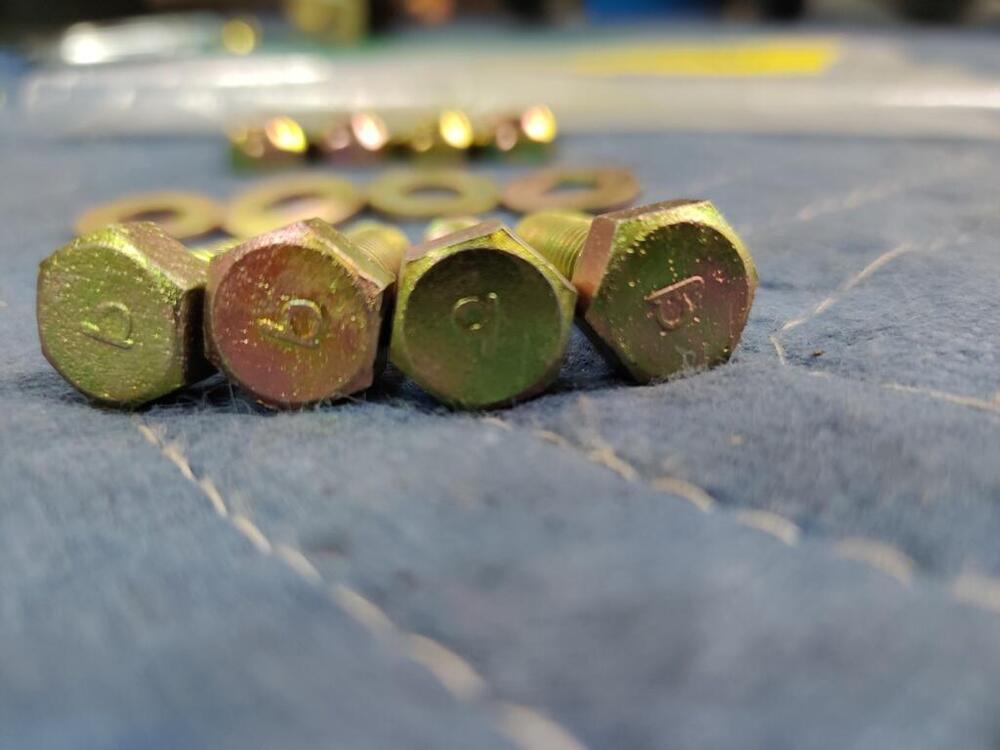
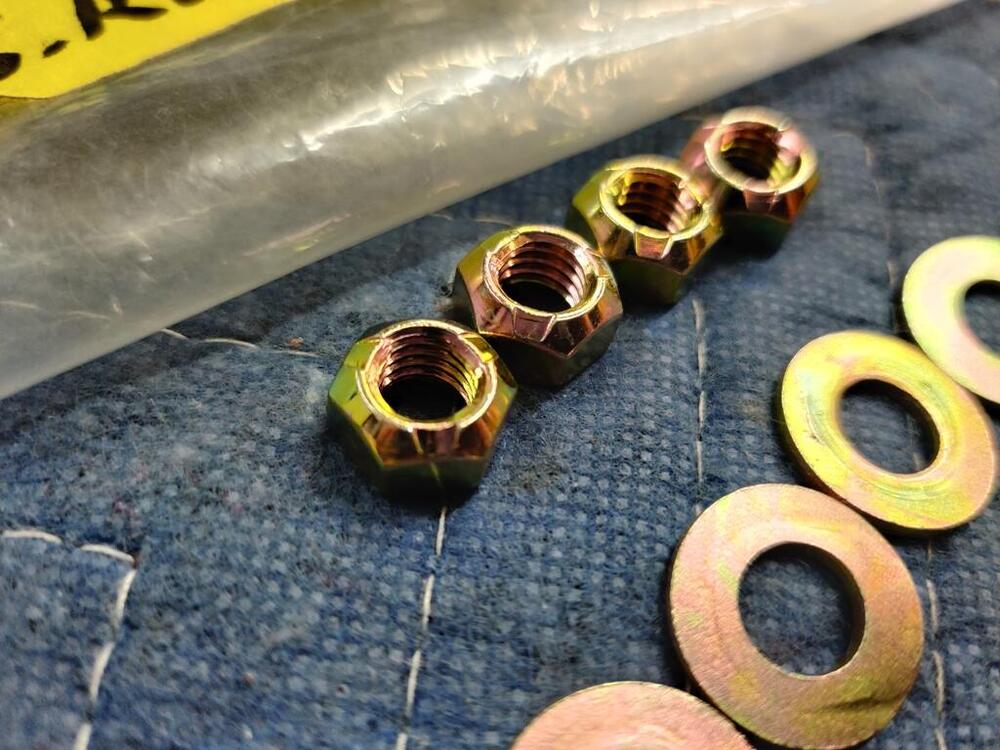

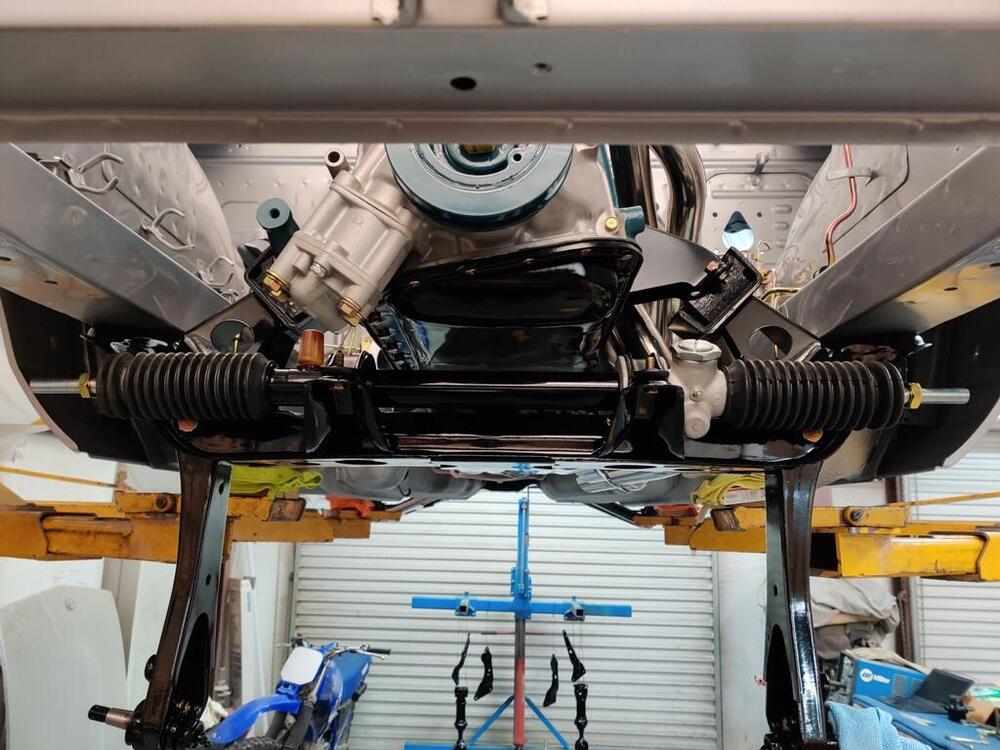
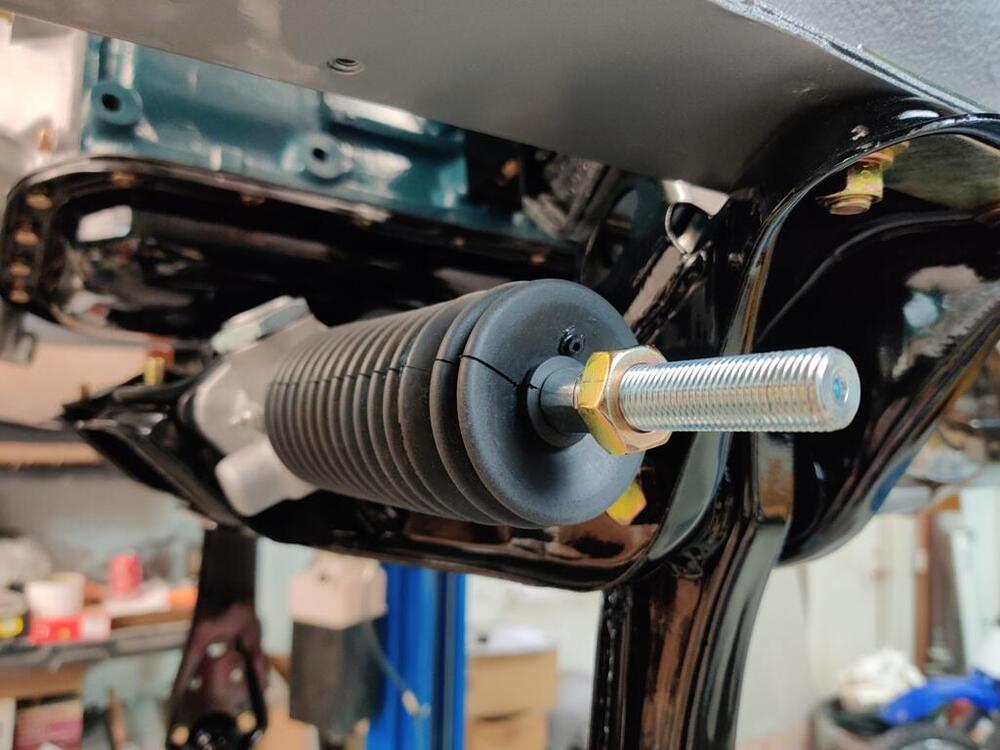


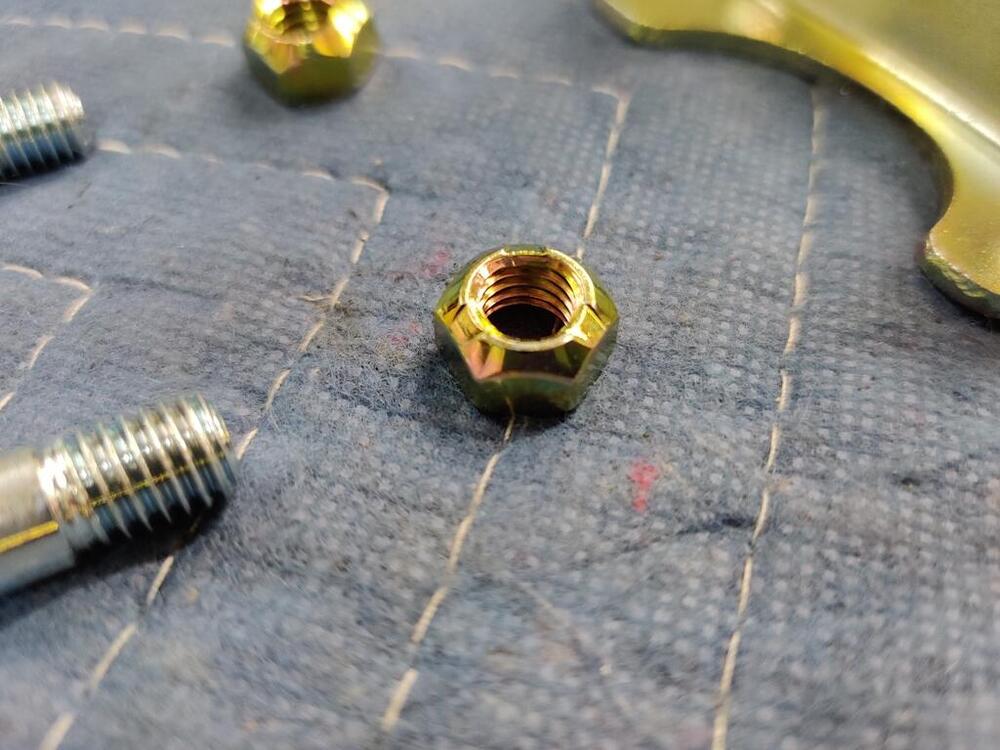


 1 point
 -
1 point
-
I think you have been running that thing way too rich. Lean that thing out more.1 point
-
@jalexquijano Yes, carb cleaner and a brass brush will be fine. Don't change to new plugs of a different heat range yet. Let's concentrate on one change at a time. Raise both nozzles 1/4 turn, drive it for a few days, and report back with plug pics and a performance report. I'm still curious if you're using anti-seize on the plug threads and what color it is, silver or copper.1 point
-
When it starts to run out of power at 4k, step on the throttle, and ease the choke on. If it's lean you'll feel the improved performance. It will also verify the lack of power is a lean condition.1 point
-
Thanks for the reply. It's a L28 with 1971 carbs and a early distributor with Pertronix electronic module. Also have the original nissan performance exhaust header. Any advice is greatly appreciated.1 point
-
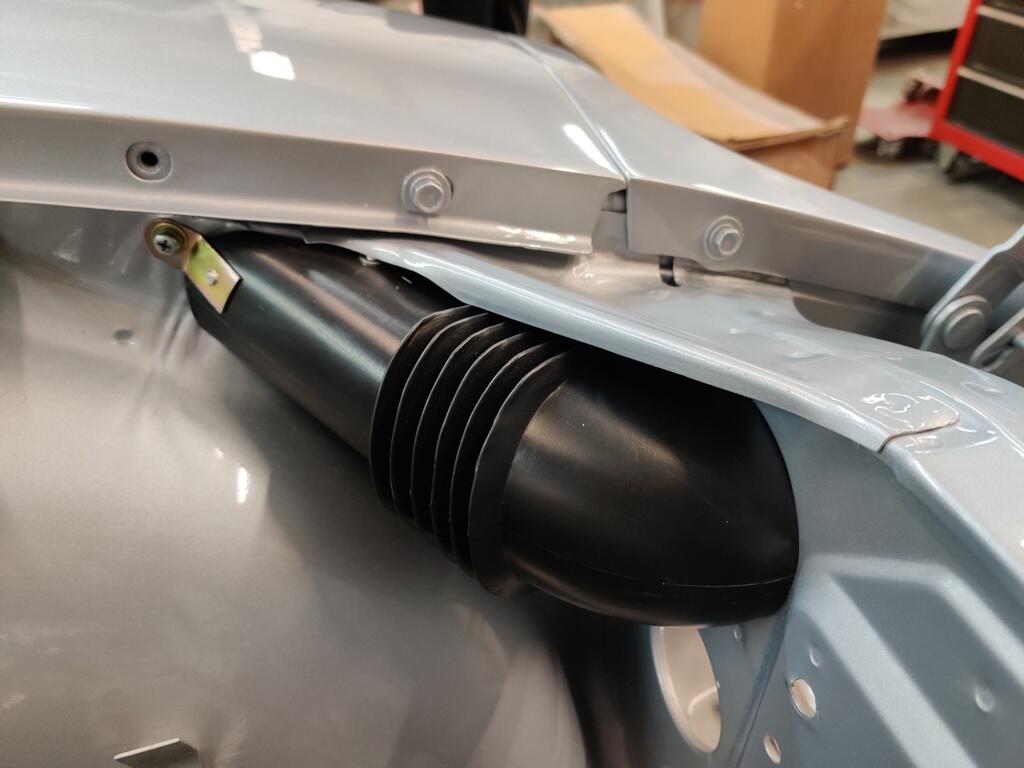
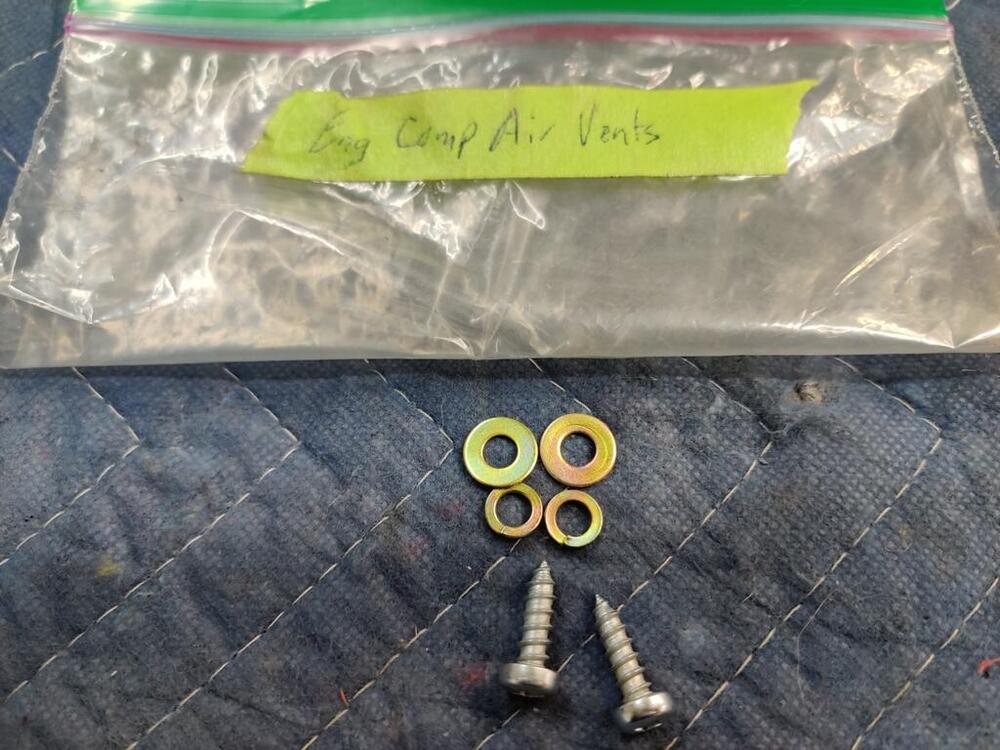
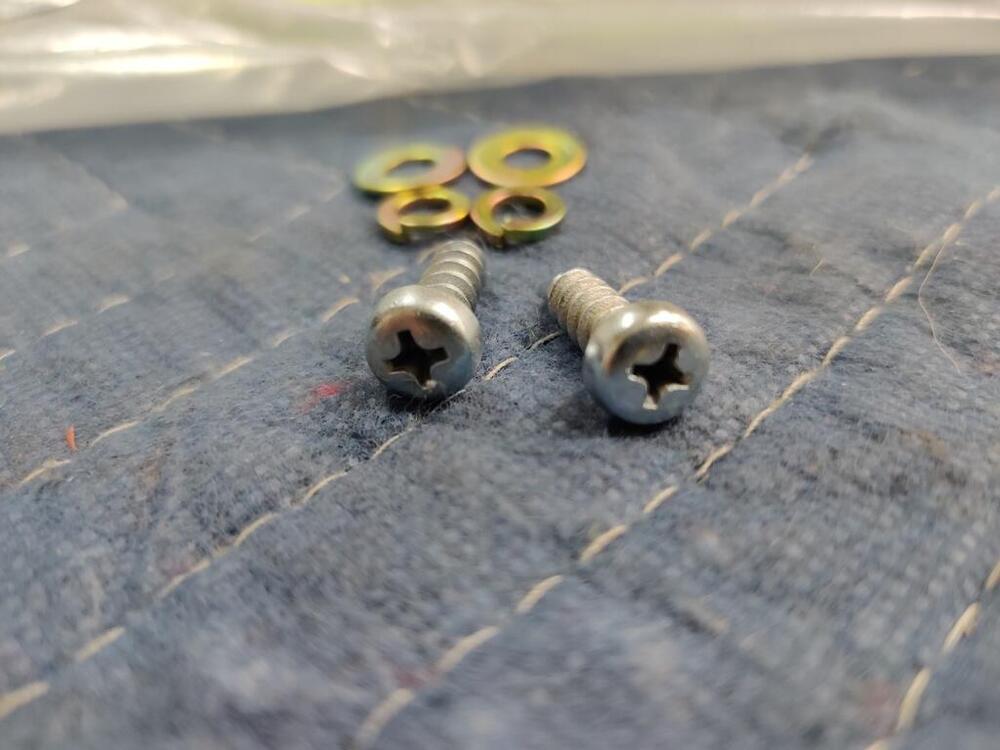
Interesting. Fiat has the same issue, since the 70's-80's EFI was also placed on a non-cross flow cylinder head. I added additional shields on mine to protect the injectors, which mounted in a similar fashion. The X1/9 had massive vents in the engine cover though, so that made a significant difference over my 75 280Z. Presumably this was in part the reason for the hood vents on later Z's. Thank you for the pics - seems the center 4 are more prone, unless they just said **** it- blow some air in the general vicinity & hope for the best 🤪1 point
-
1 pointThis sounds more like a carburetor problem. Flooring the accelerator removes vacuum advance from the equation. A tight spring in the vacuum advance canister would reduce timing advance. Low RPM would also reduce timing advance. I don't know much about the SU carburetors but it sounds like a jetting or needle placement or piston problem. Maybe one of the carb guys has some ideas. Edit - the behavior is what engines do when the fuel-air mixture is lean.
 1 point