Leaderboard
-
Matthew Abate
Free Member8Points1,204Posts -
Terrapin Z
 Subscriber
 2Points1,333Posts
 -
darom
Free Member2Points198Posts -
grannyknot
Free Member2Points5,158Posts


Popular Content
Showing content with the highest reputation on 11/07/2023 in all areas
-
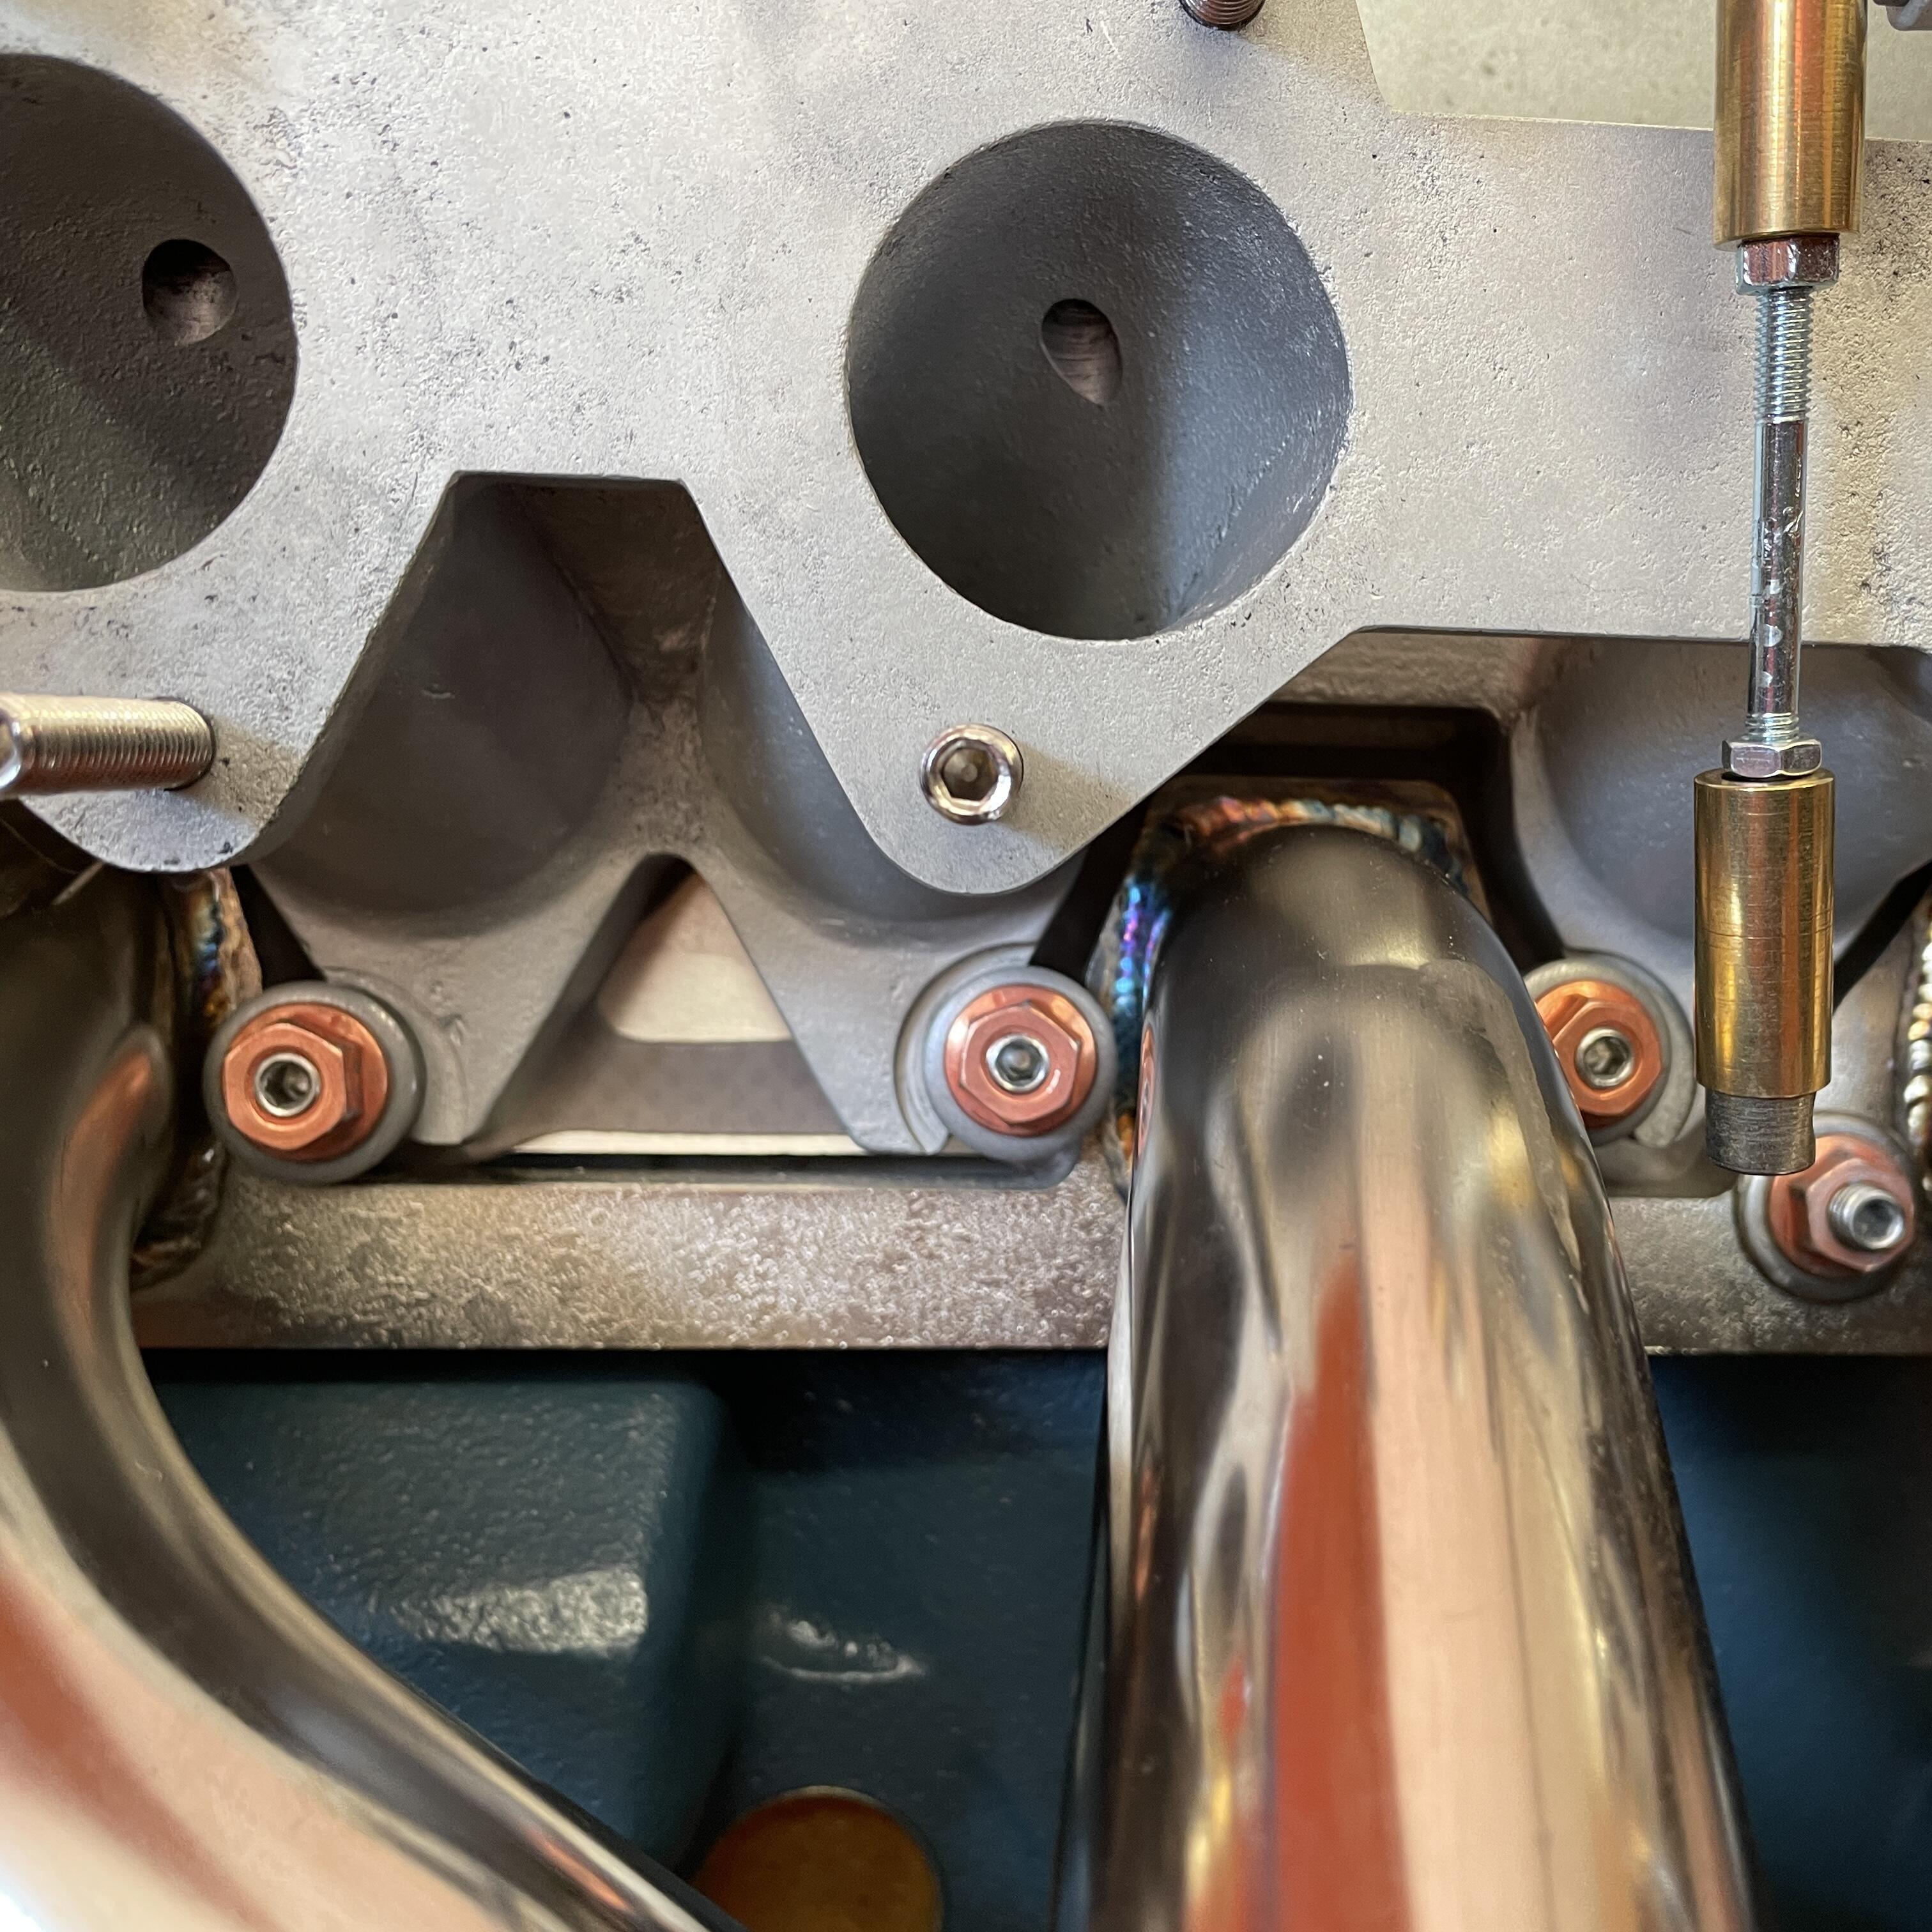
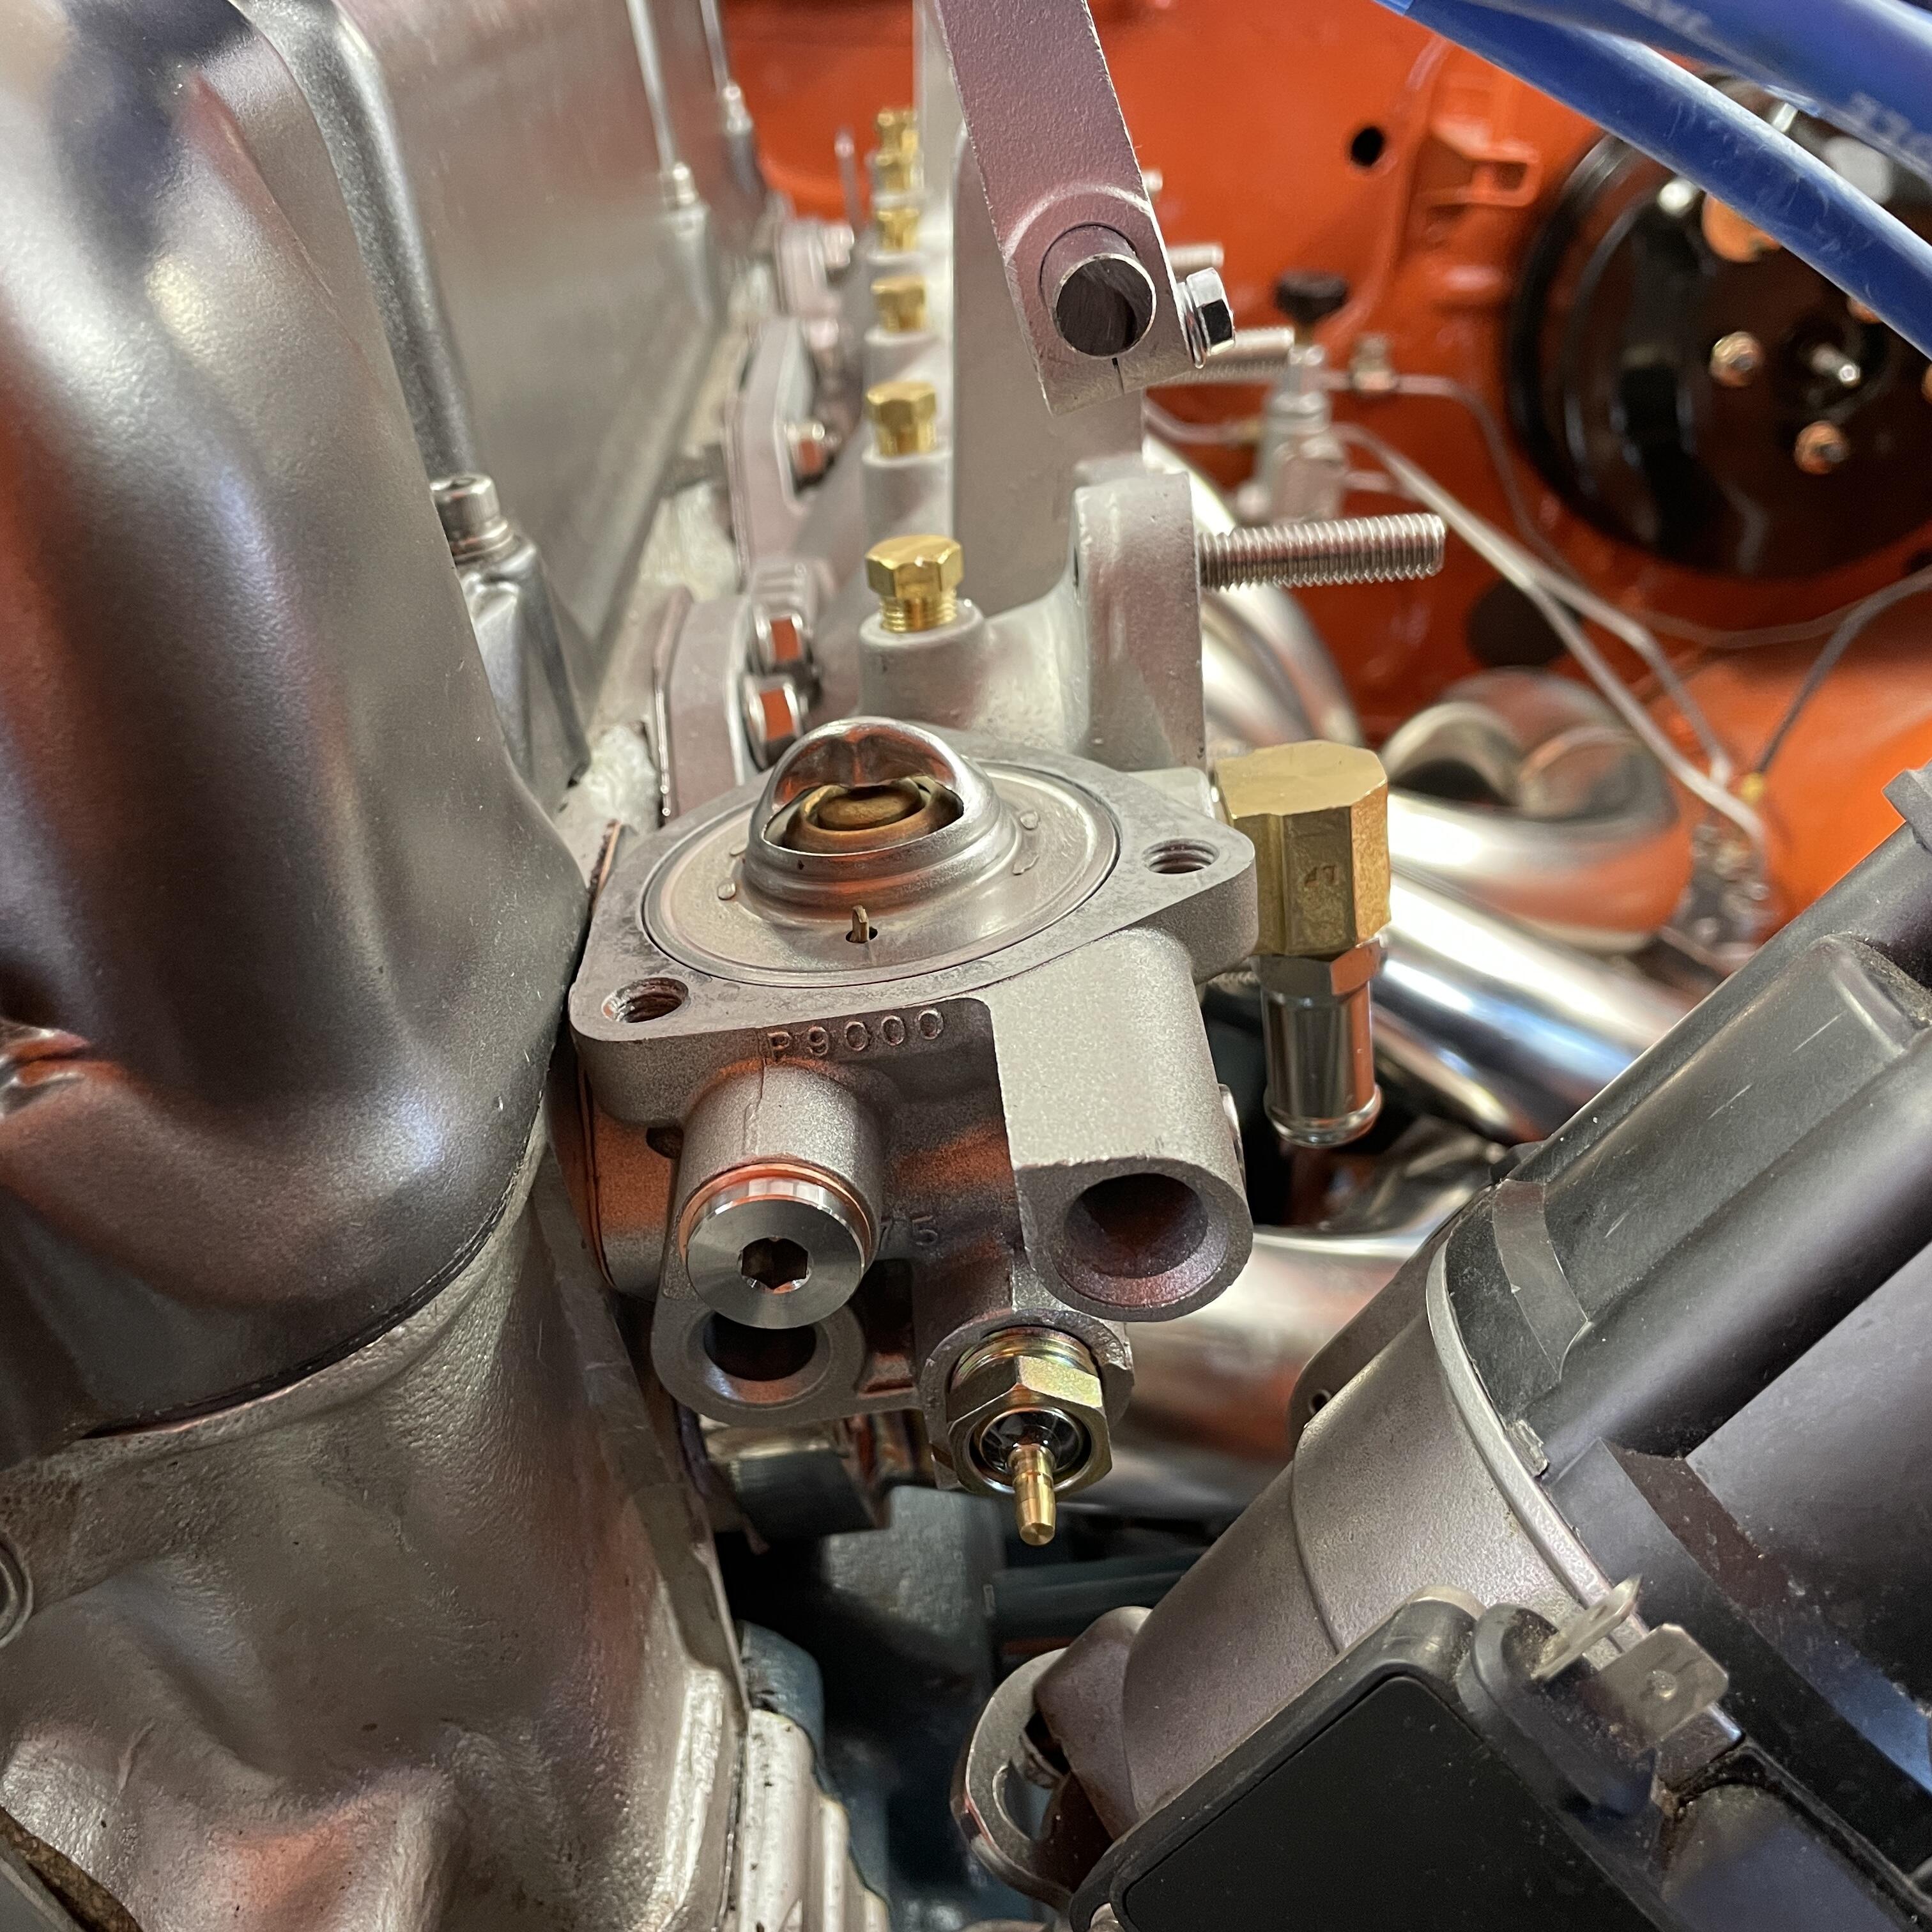
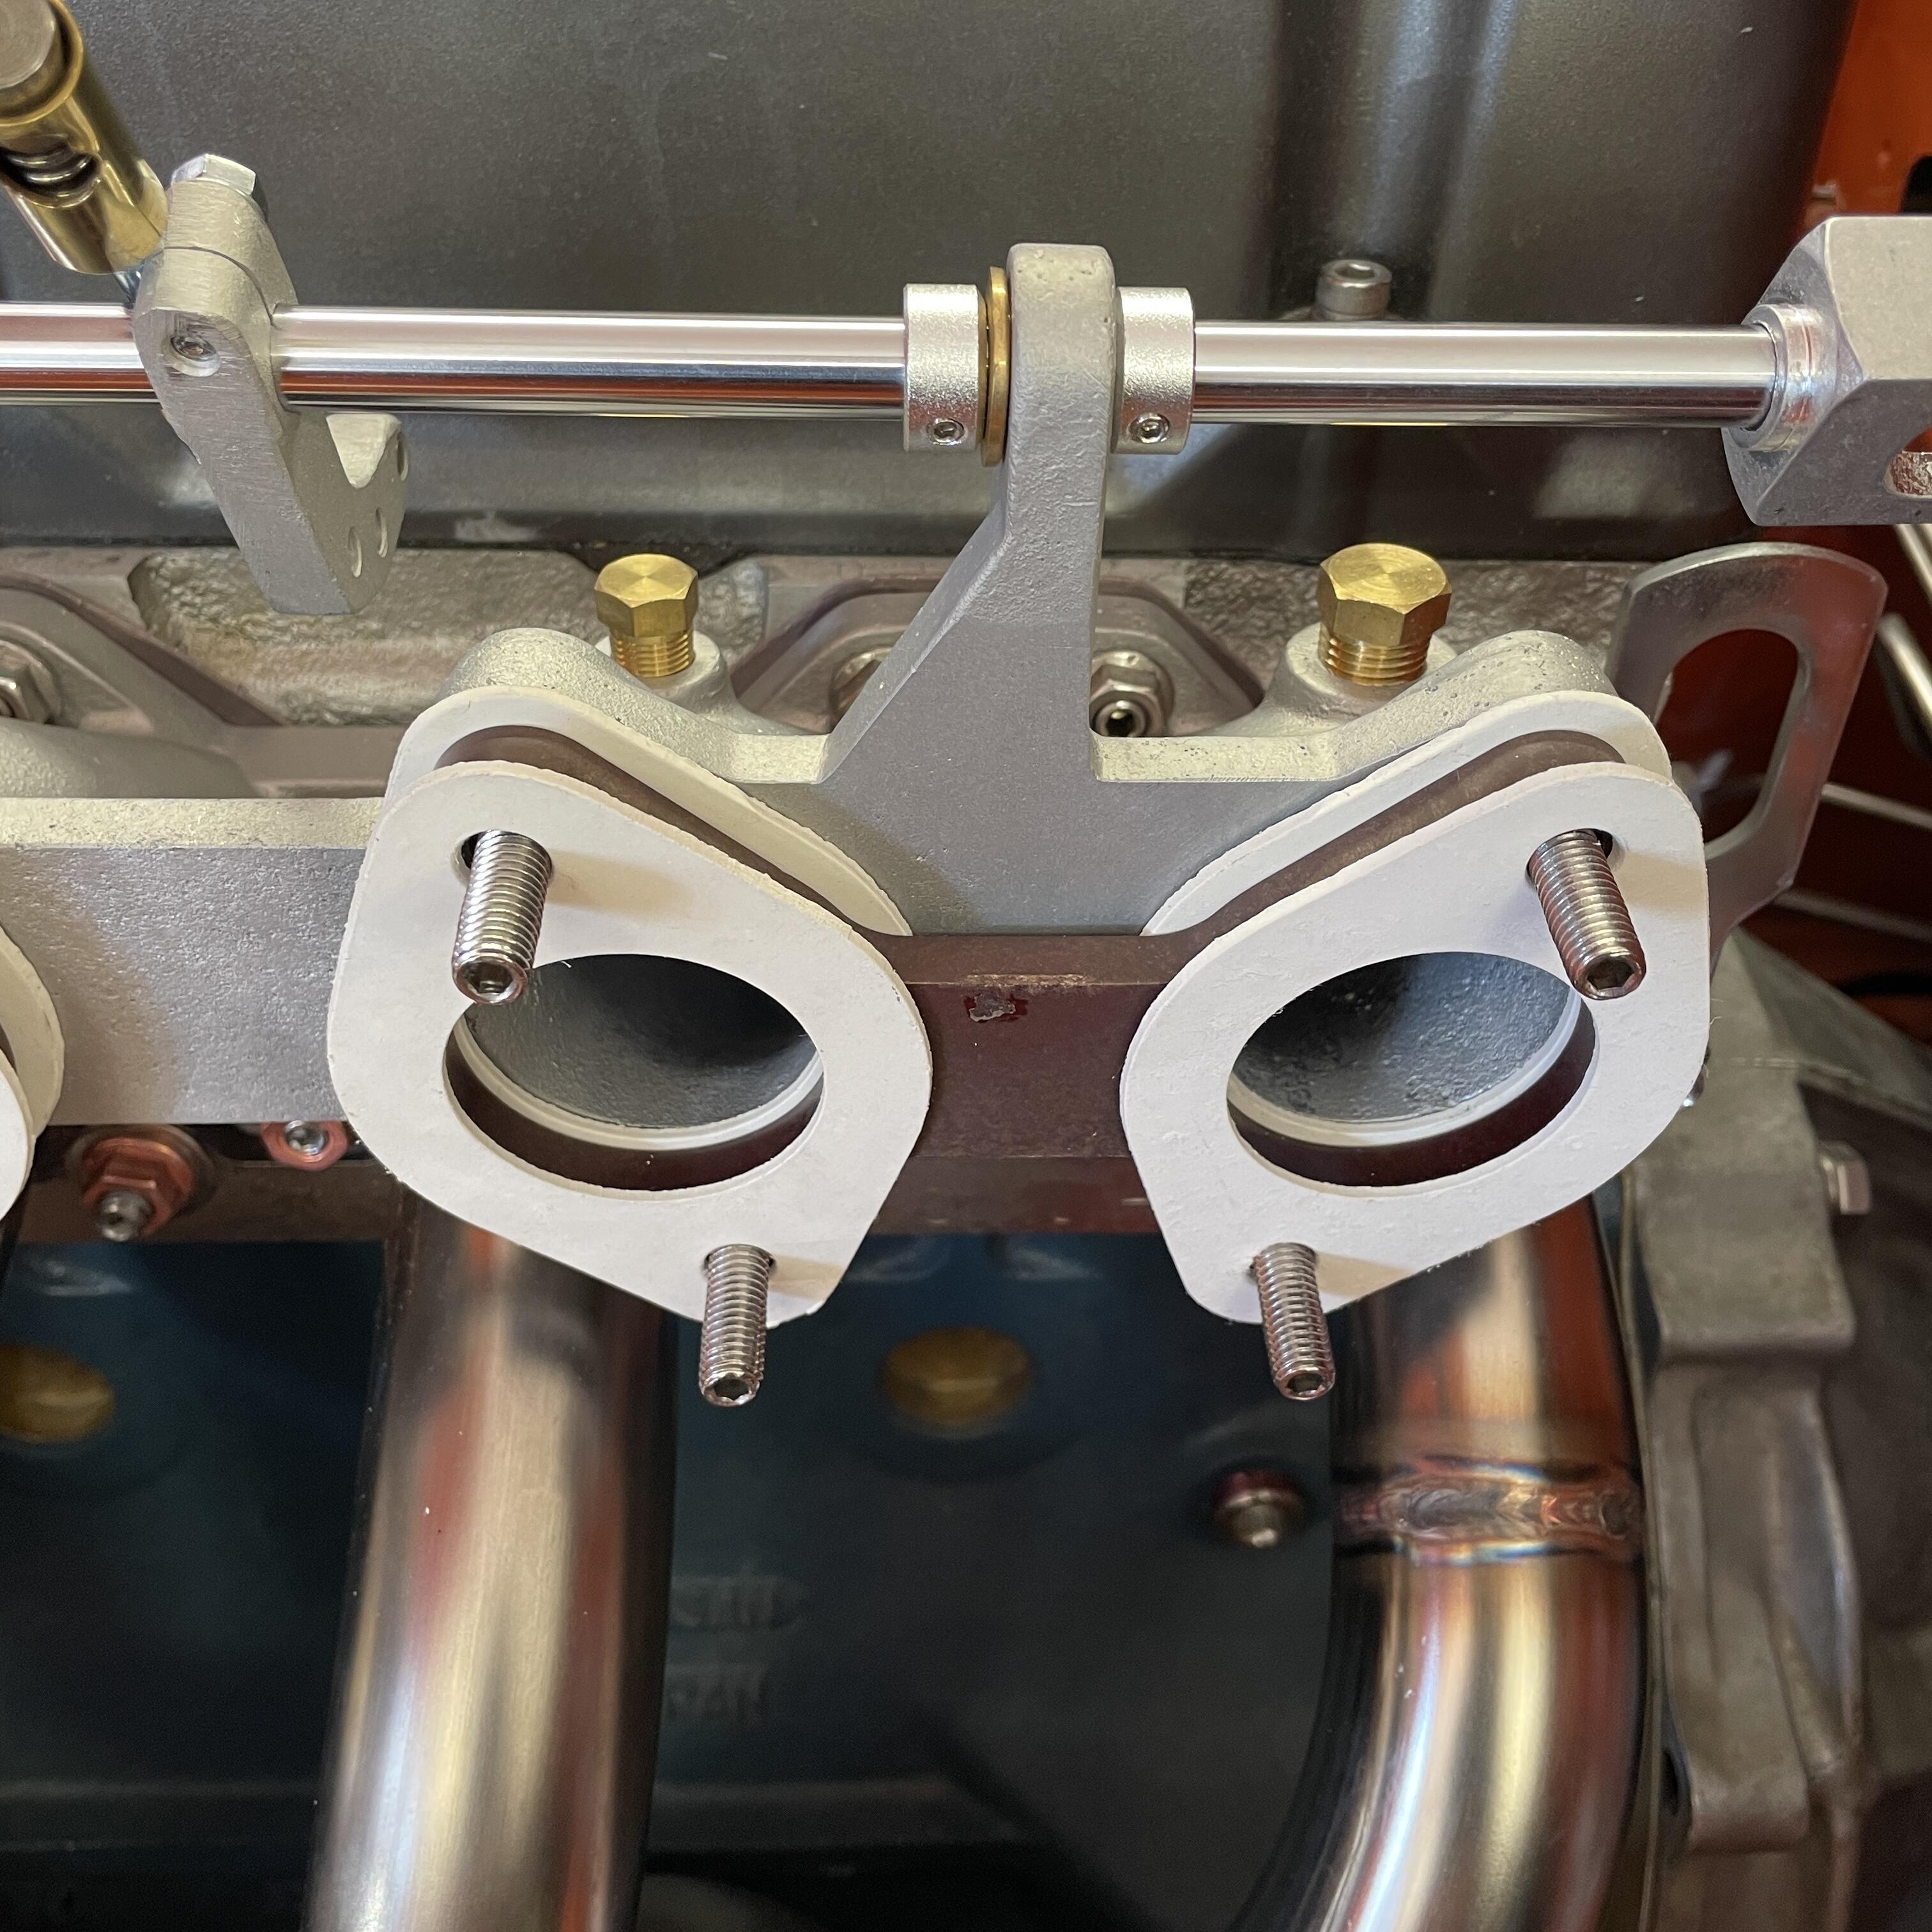
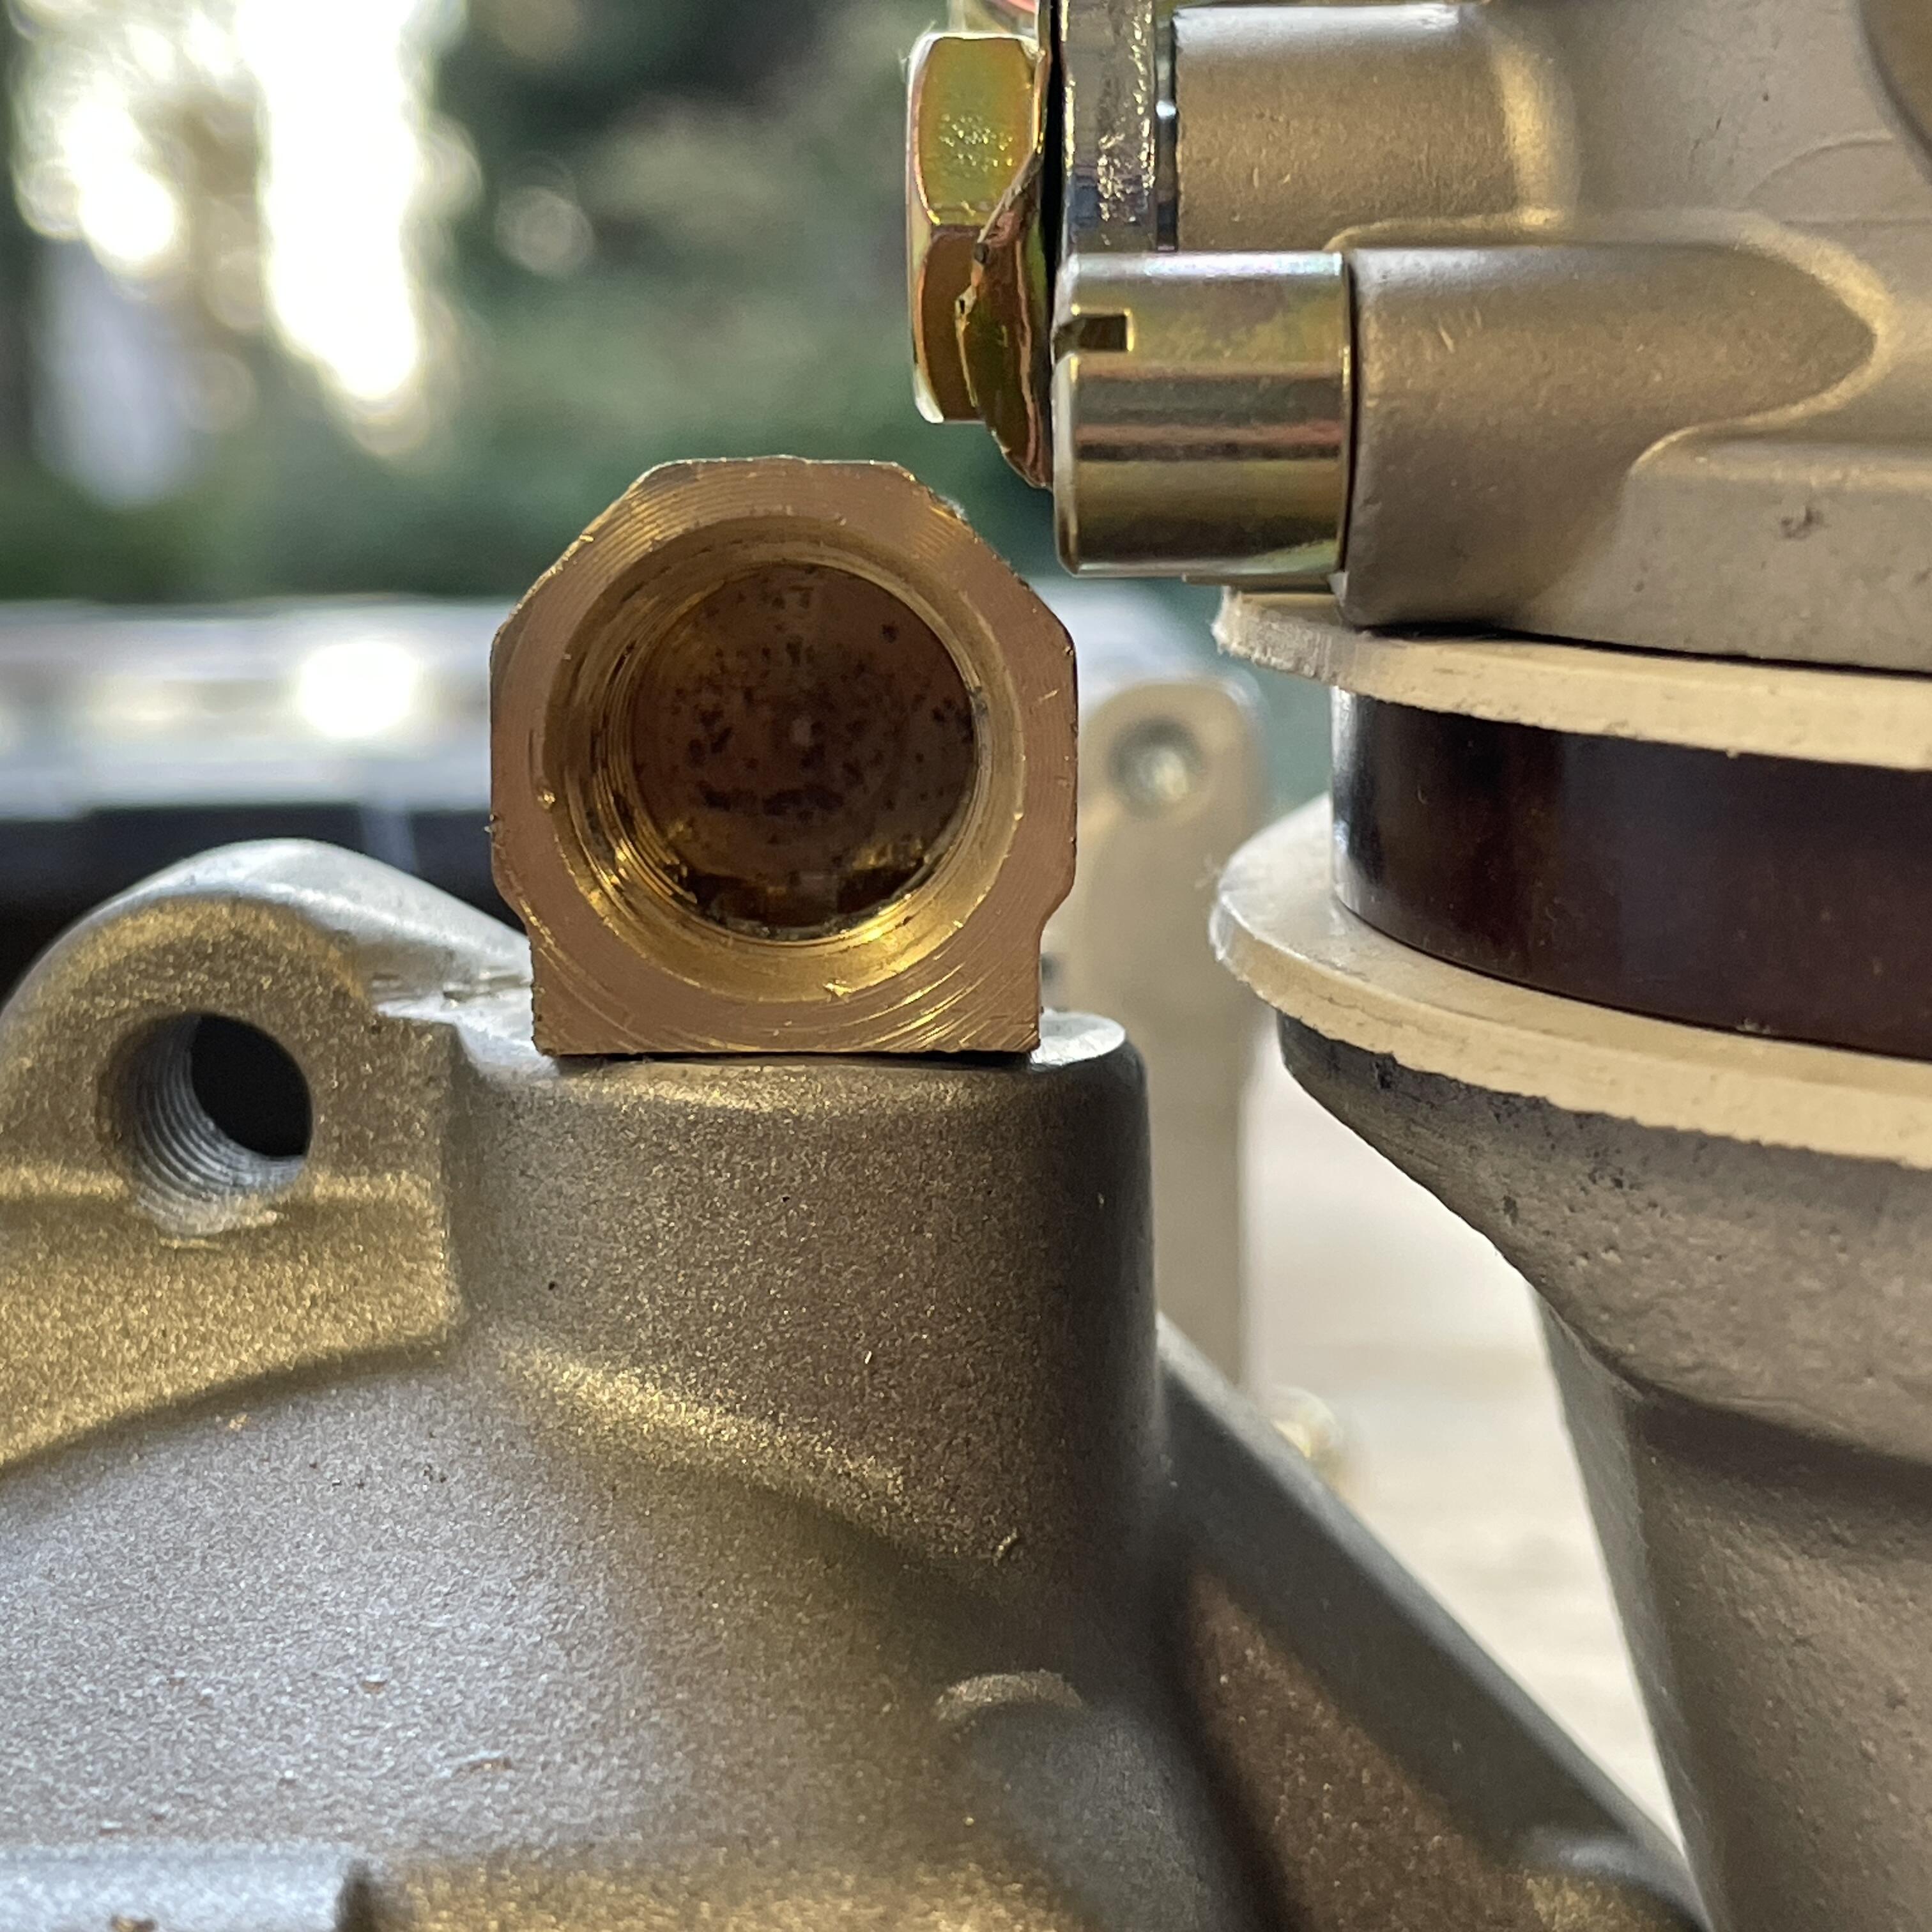
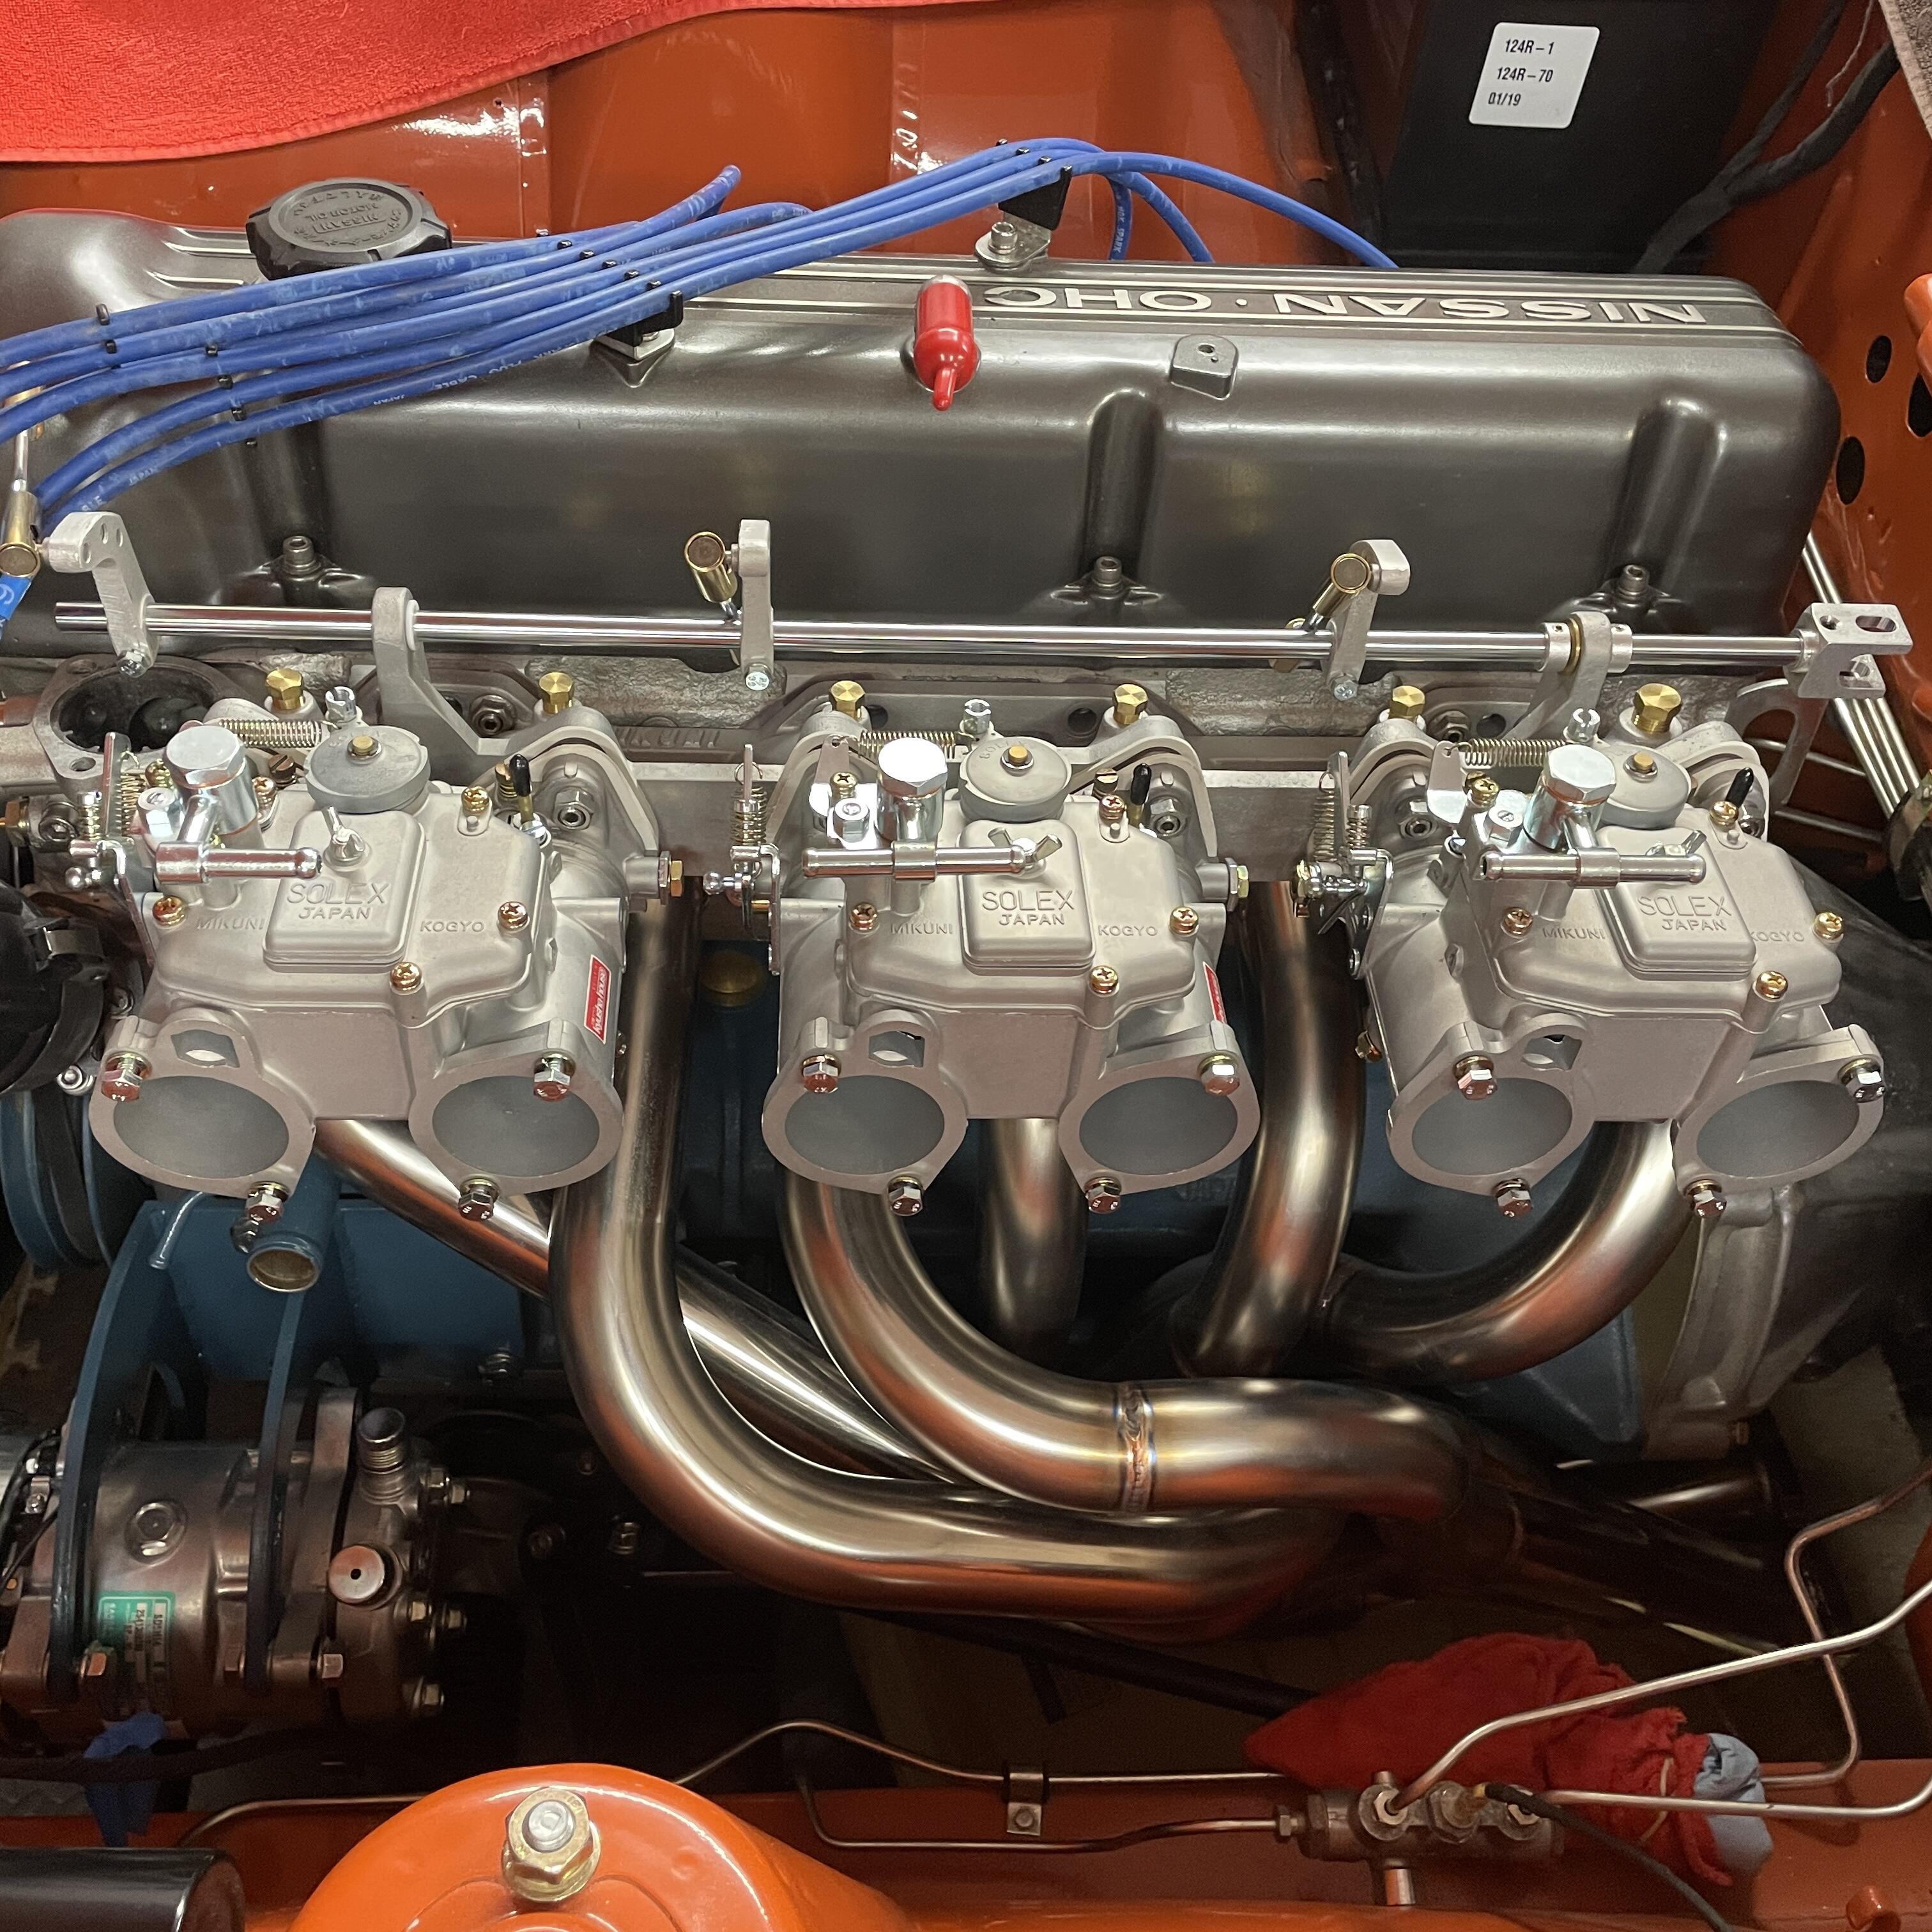
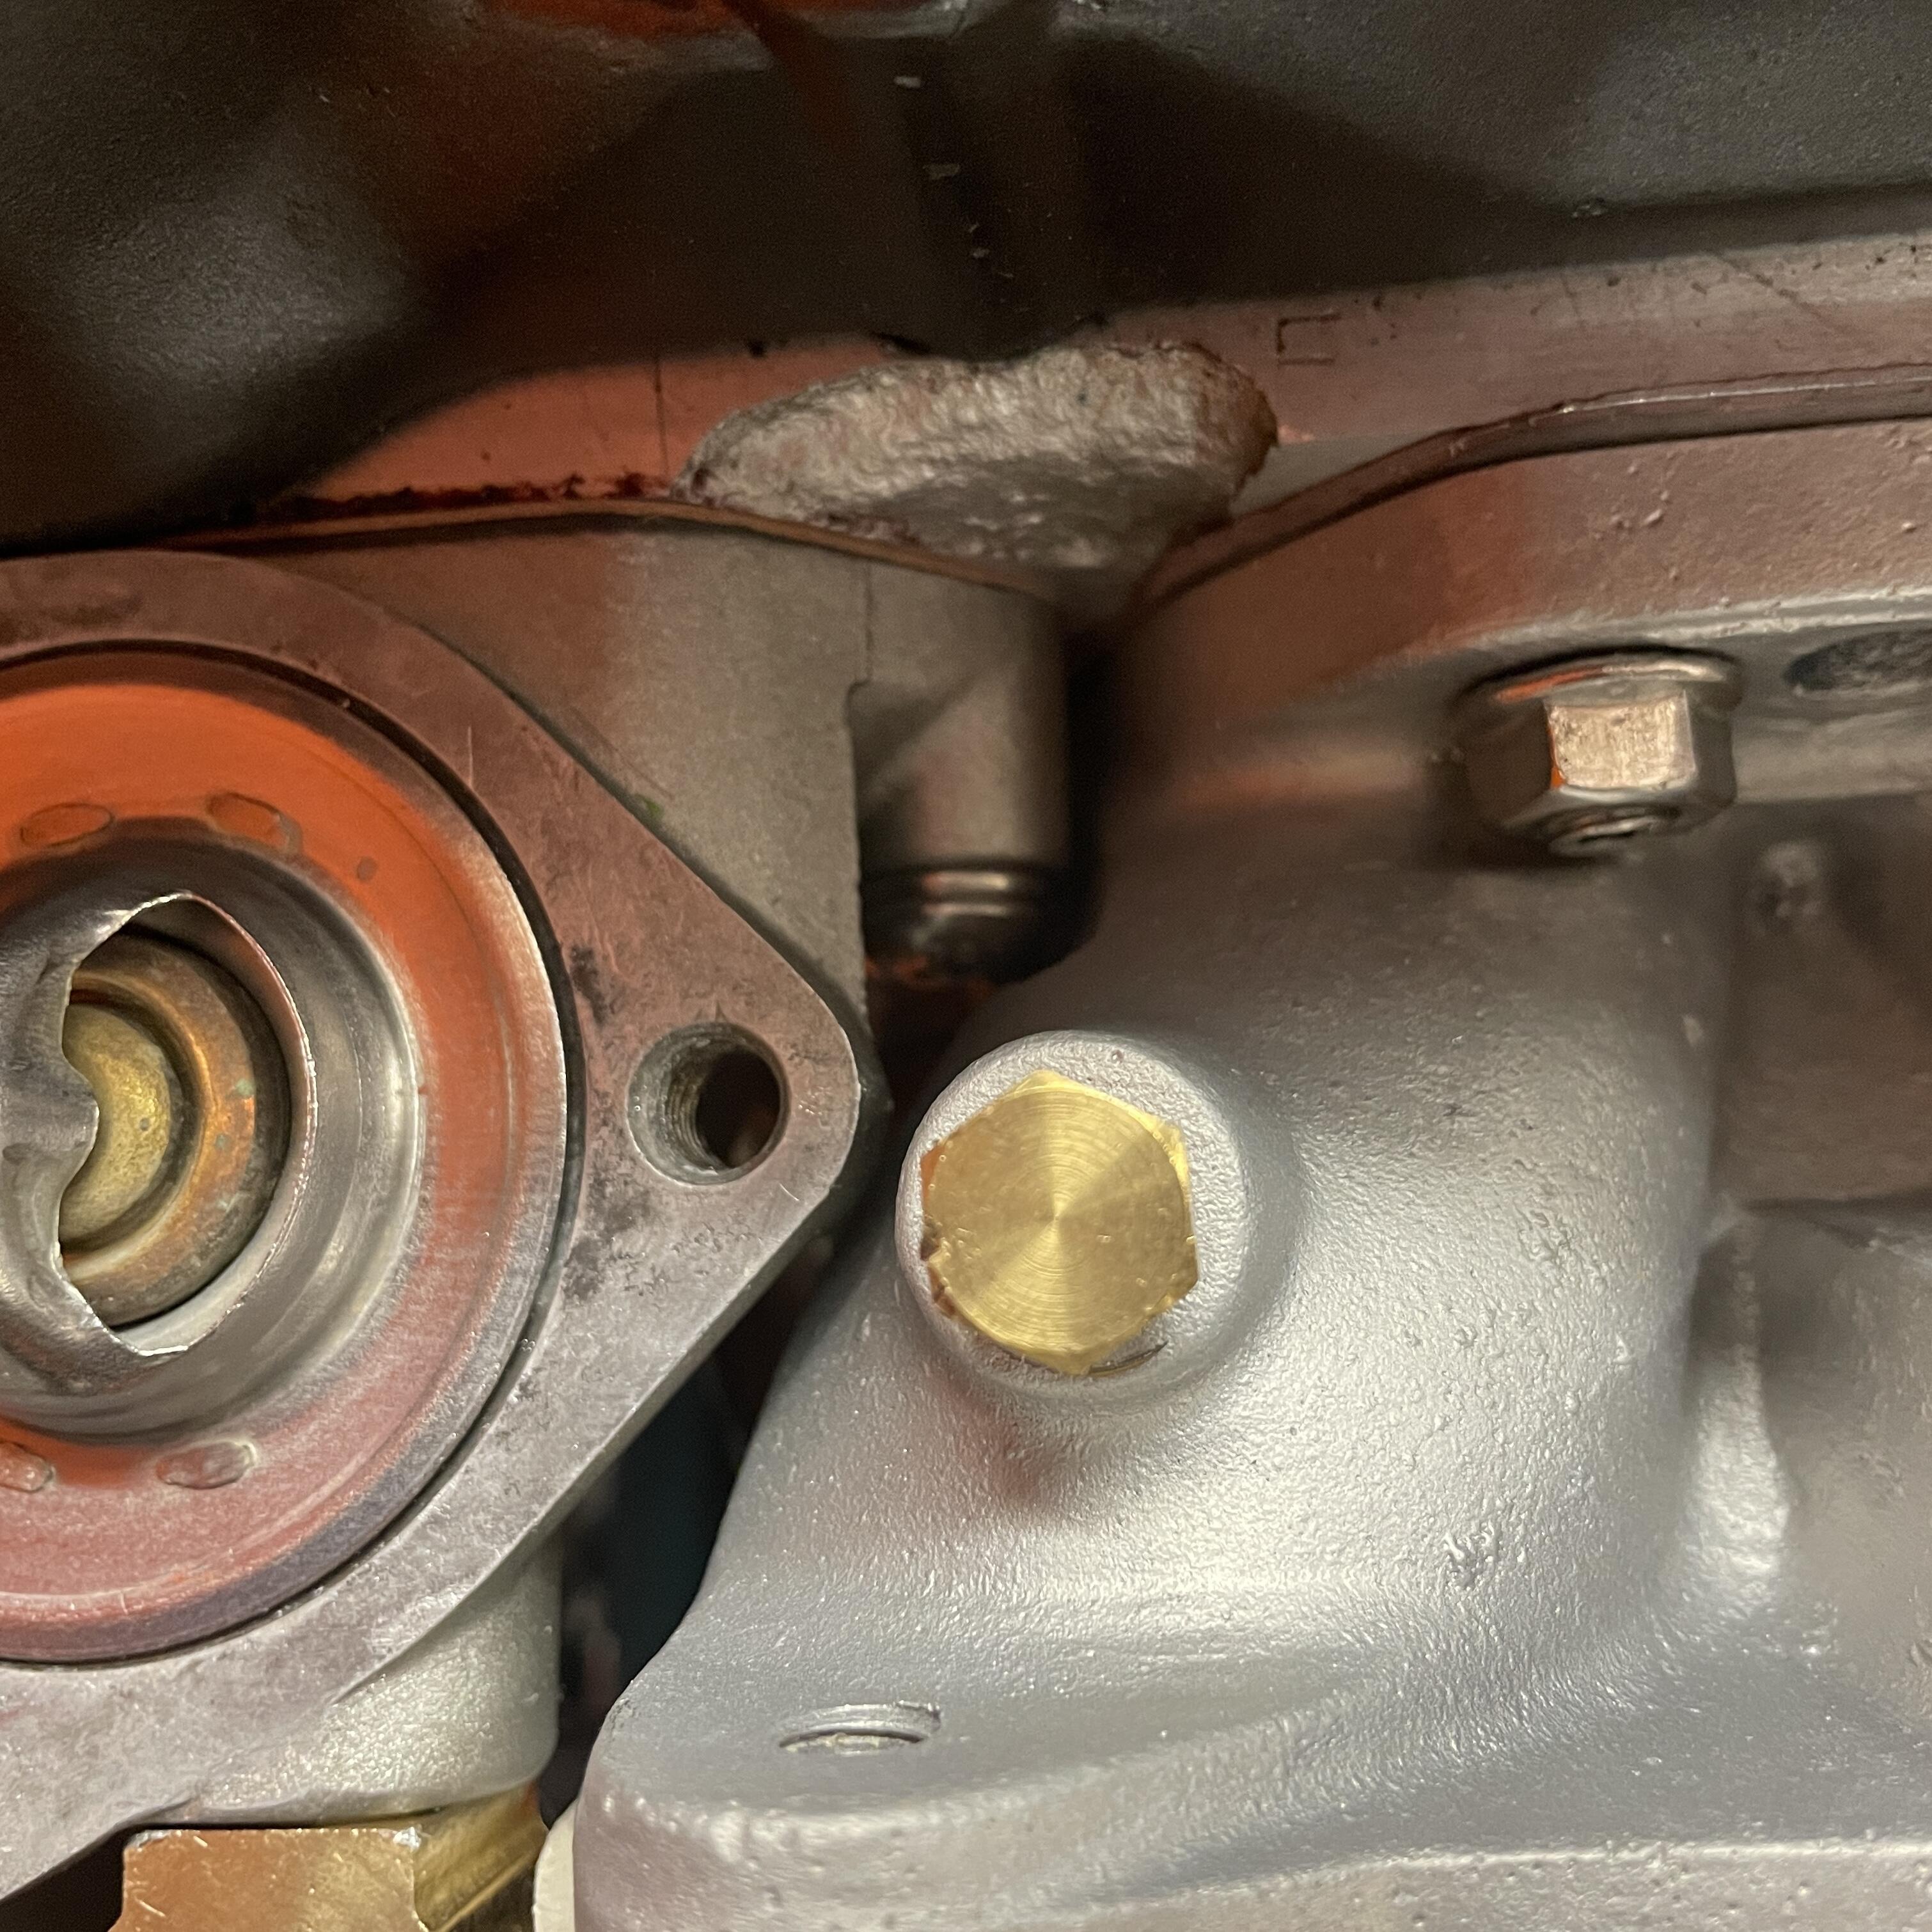
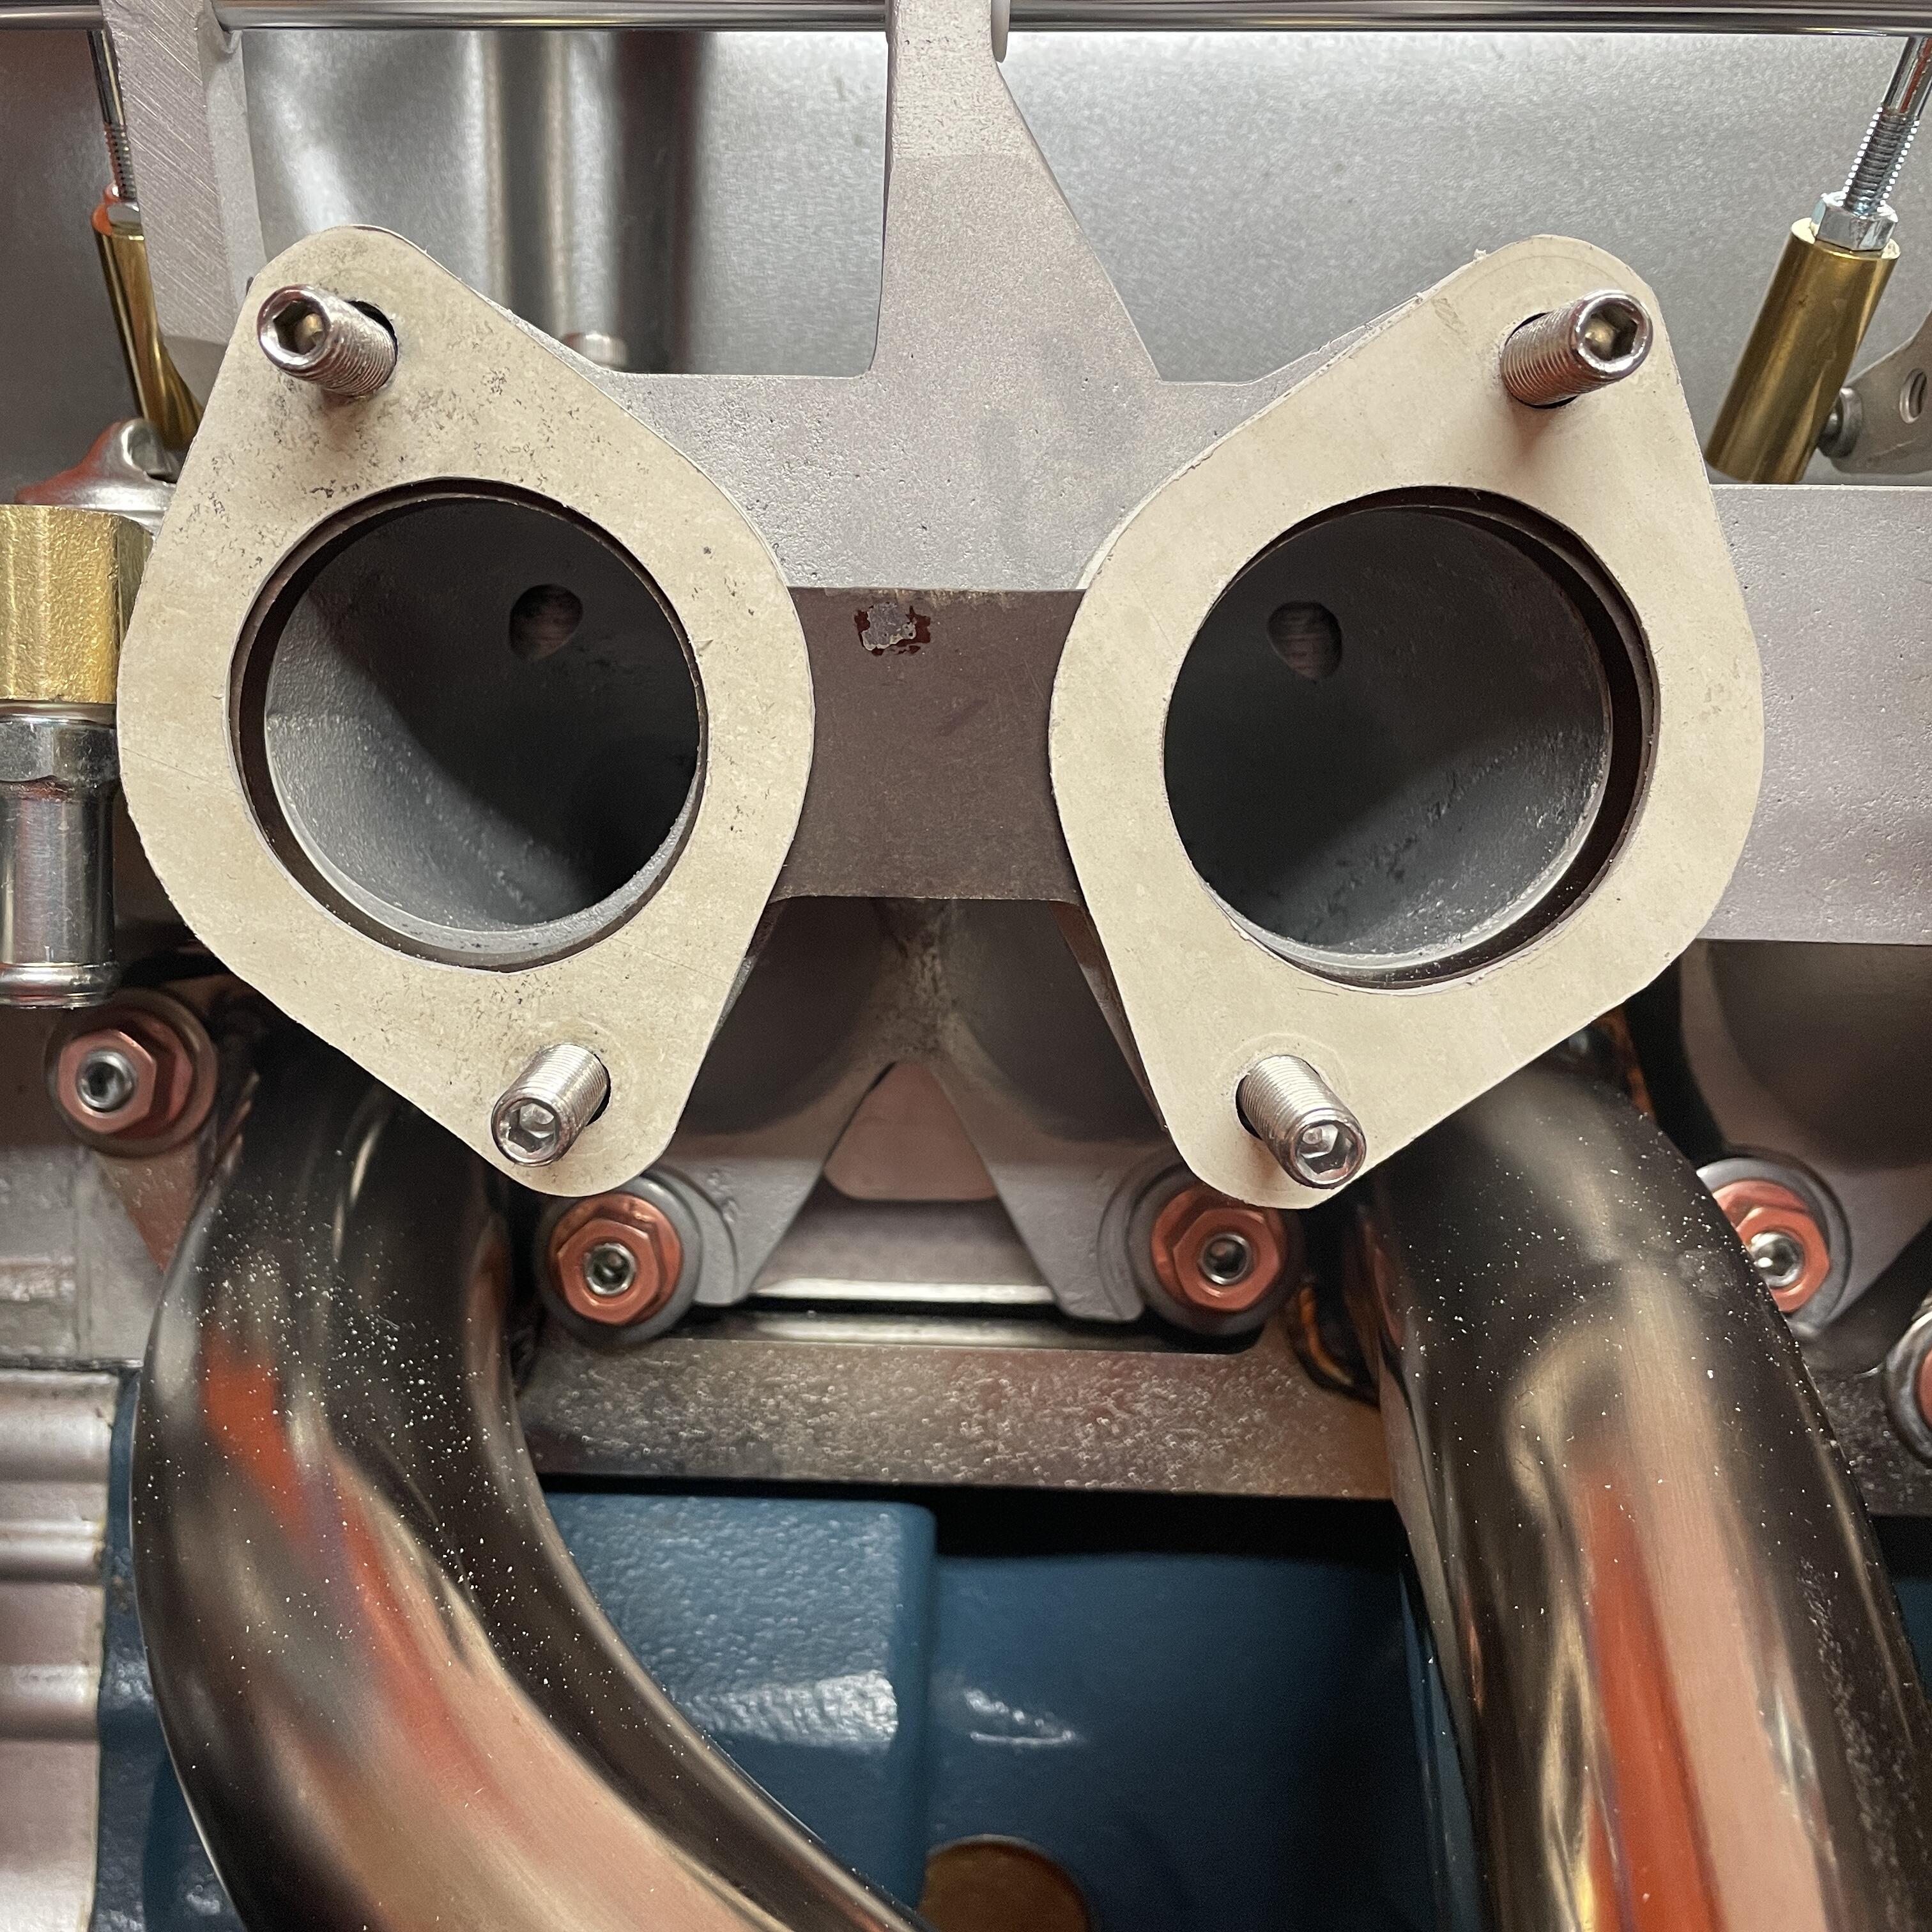
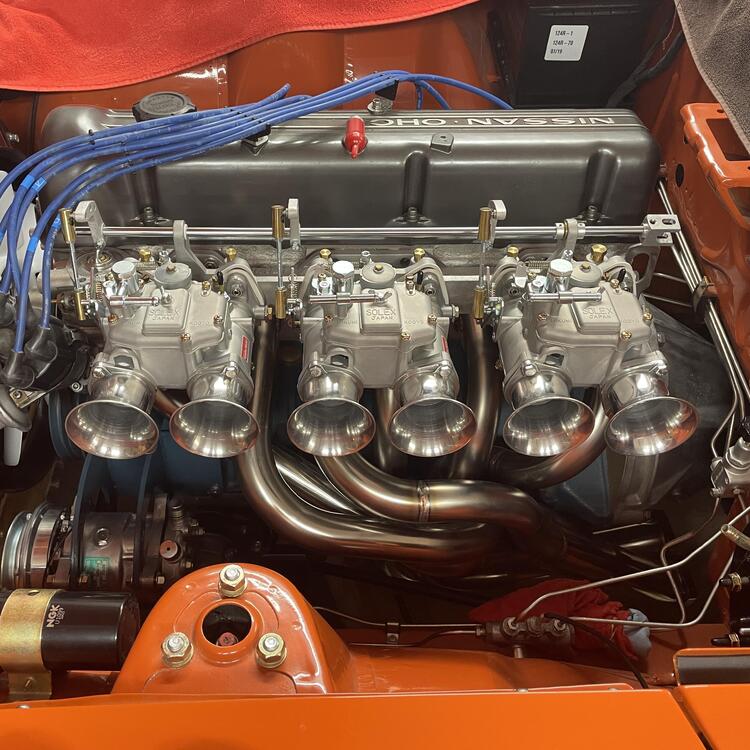
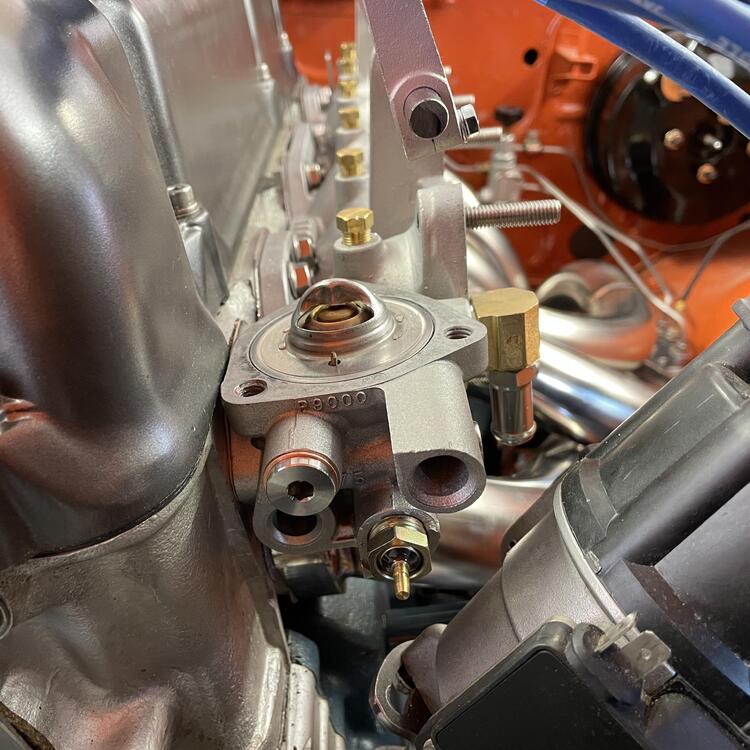
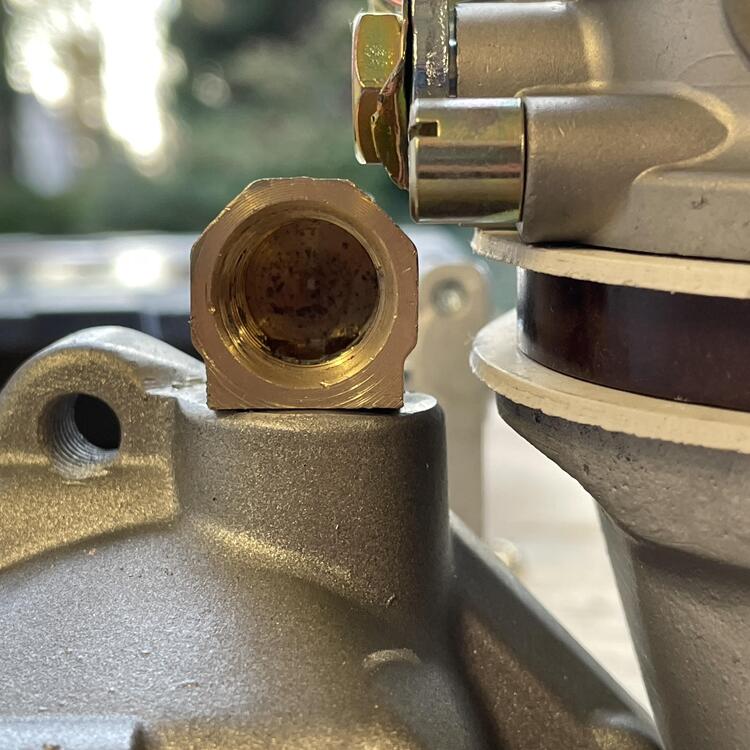
4 pointsMy Mikuni 44PHH carburetors are in. This. Took. Some. Work. They are fitted to a Mikuni short-runner intake manifold, which sounds all well and good until you try to fit it along side a 240z thermostat housing, which fouls the manifold. I had to switch back to the ZX housing. It doesn’t interfere with the manifold installation, but it’s cover sure does. Also, the water inlet for the coolant fouls the front carb and the throttle linkage. I want to retain a functioning heater, so I need that water pipe to work. I tried a bunch of stainless adapters, which were all much too big, but was saved by this little brass guy from Home Depot (a 90° 1/4 npt M to 1/4 npt F street / adapter). I still had to drill it out to increase the flow, as well as tap both the adapter and the thermostat housing and cut down the water inlet pipe to ensure a high rate of flow through the whole junction. I also replaced the thin black carburetor gaskets that came on them with VW carburetor base gaskets by EMPI from JBugs California Pacific. I was a little bummed to find out that they are white and not the grey in the photos, but I am pleased with how thick they are. That extra few millimeters helped push the carburetors away from the thermostat housing and gave me some much needed clearance. The gaskets are the perfect thickness for want I needed when it came to making clearance, but they aren’t an exact fit for the PHH carbs. They’re meant for VW solexes (so downdraft) and the bases are different, which meant I needed to trim them to no be sticking out a mile. They also needed to be opened up from 40mm to 44mm to not interfere with the airflow. On the left is one with the outline of the gaskets that came with the carburetors drawn in pencil. On the right is a trimmed gasket before final cleanup. In the next photo you can see that the holes are now the same size as the phenolic. They are slightly bigger than the carburetors and manifold, which I think is fine. If I have trouble I’ll make something from scratch that is custom to each port. The last photo just shows that they don’t stick out a mile anymore, even though I could probably trim them further. For the thermostat cover, I took a gamble on a NOS one for L20Bs and JDM C210 Skylines for $20 on Amayama. It looks like it uses the same gasket as the ZX, so hopefully it will fit. It looks just like the three-bolt ZX cover, except it doesn’t have the two extra bosses on the rear end, which hopefully means it won’t hit anything. We will find out when it arrives. Now on to the goodies: the carburetors are 44mm Mikuni PHH side drafts (I explained in an earlier post how I got them). They are on the previously mentioned Mikuni short intake manifold, held on with OEM manifold washers and copper flange nuts on the bottom and SS flange bits on top, and wearing 50mm Kameari velocity stacks. Next I plan to fit the heat shield and solve the water pipe routing problem. I have air filters but don’t expect to mount them until the brake and clutch master cylinders are in and the fuel routing is worked out.


 4 points
 -
2 pointsThe PCV hose was removed and checked, no cracks. The PCV valve is not stuck. Thanks. I am thinking my stuck open AAR might be the culprit, what bothers me is that pinching it I can completely shut the engine off. Basically, per Fuel Injection bible AAR provides more air when the engine is cold to increase the RPMs (speed up the warm up time). Once it shuts in 8-10 min, its function is over (there is still going to be some air escaping, but the amount is negligible). In my case, it is still open adding more air thus creating lean condition. I have a used AAR from a 300zx (?) with a removable cover. I can install it to test the theory.2 points
-
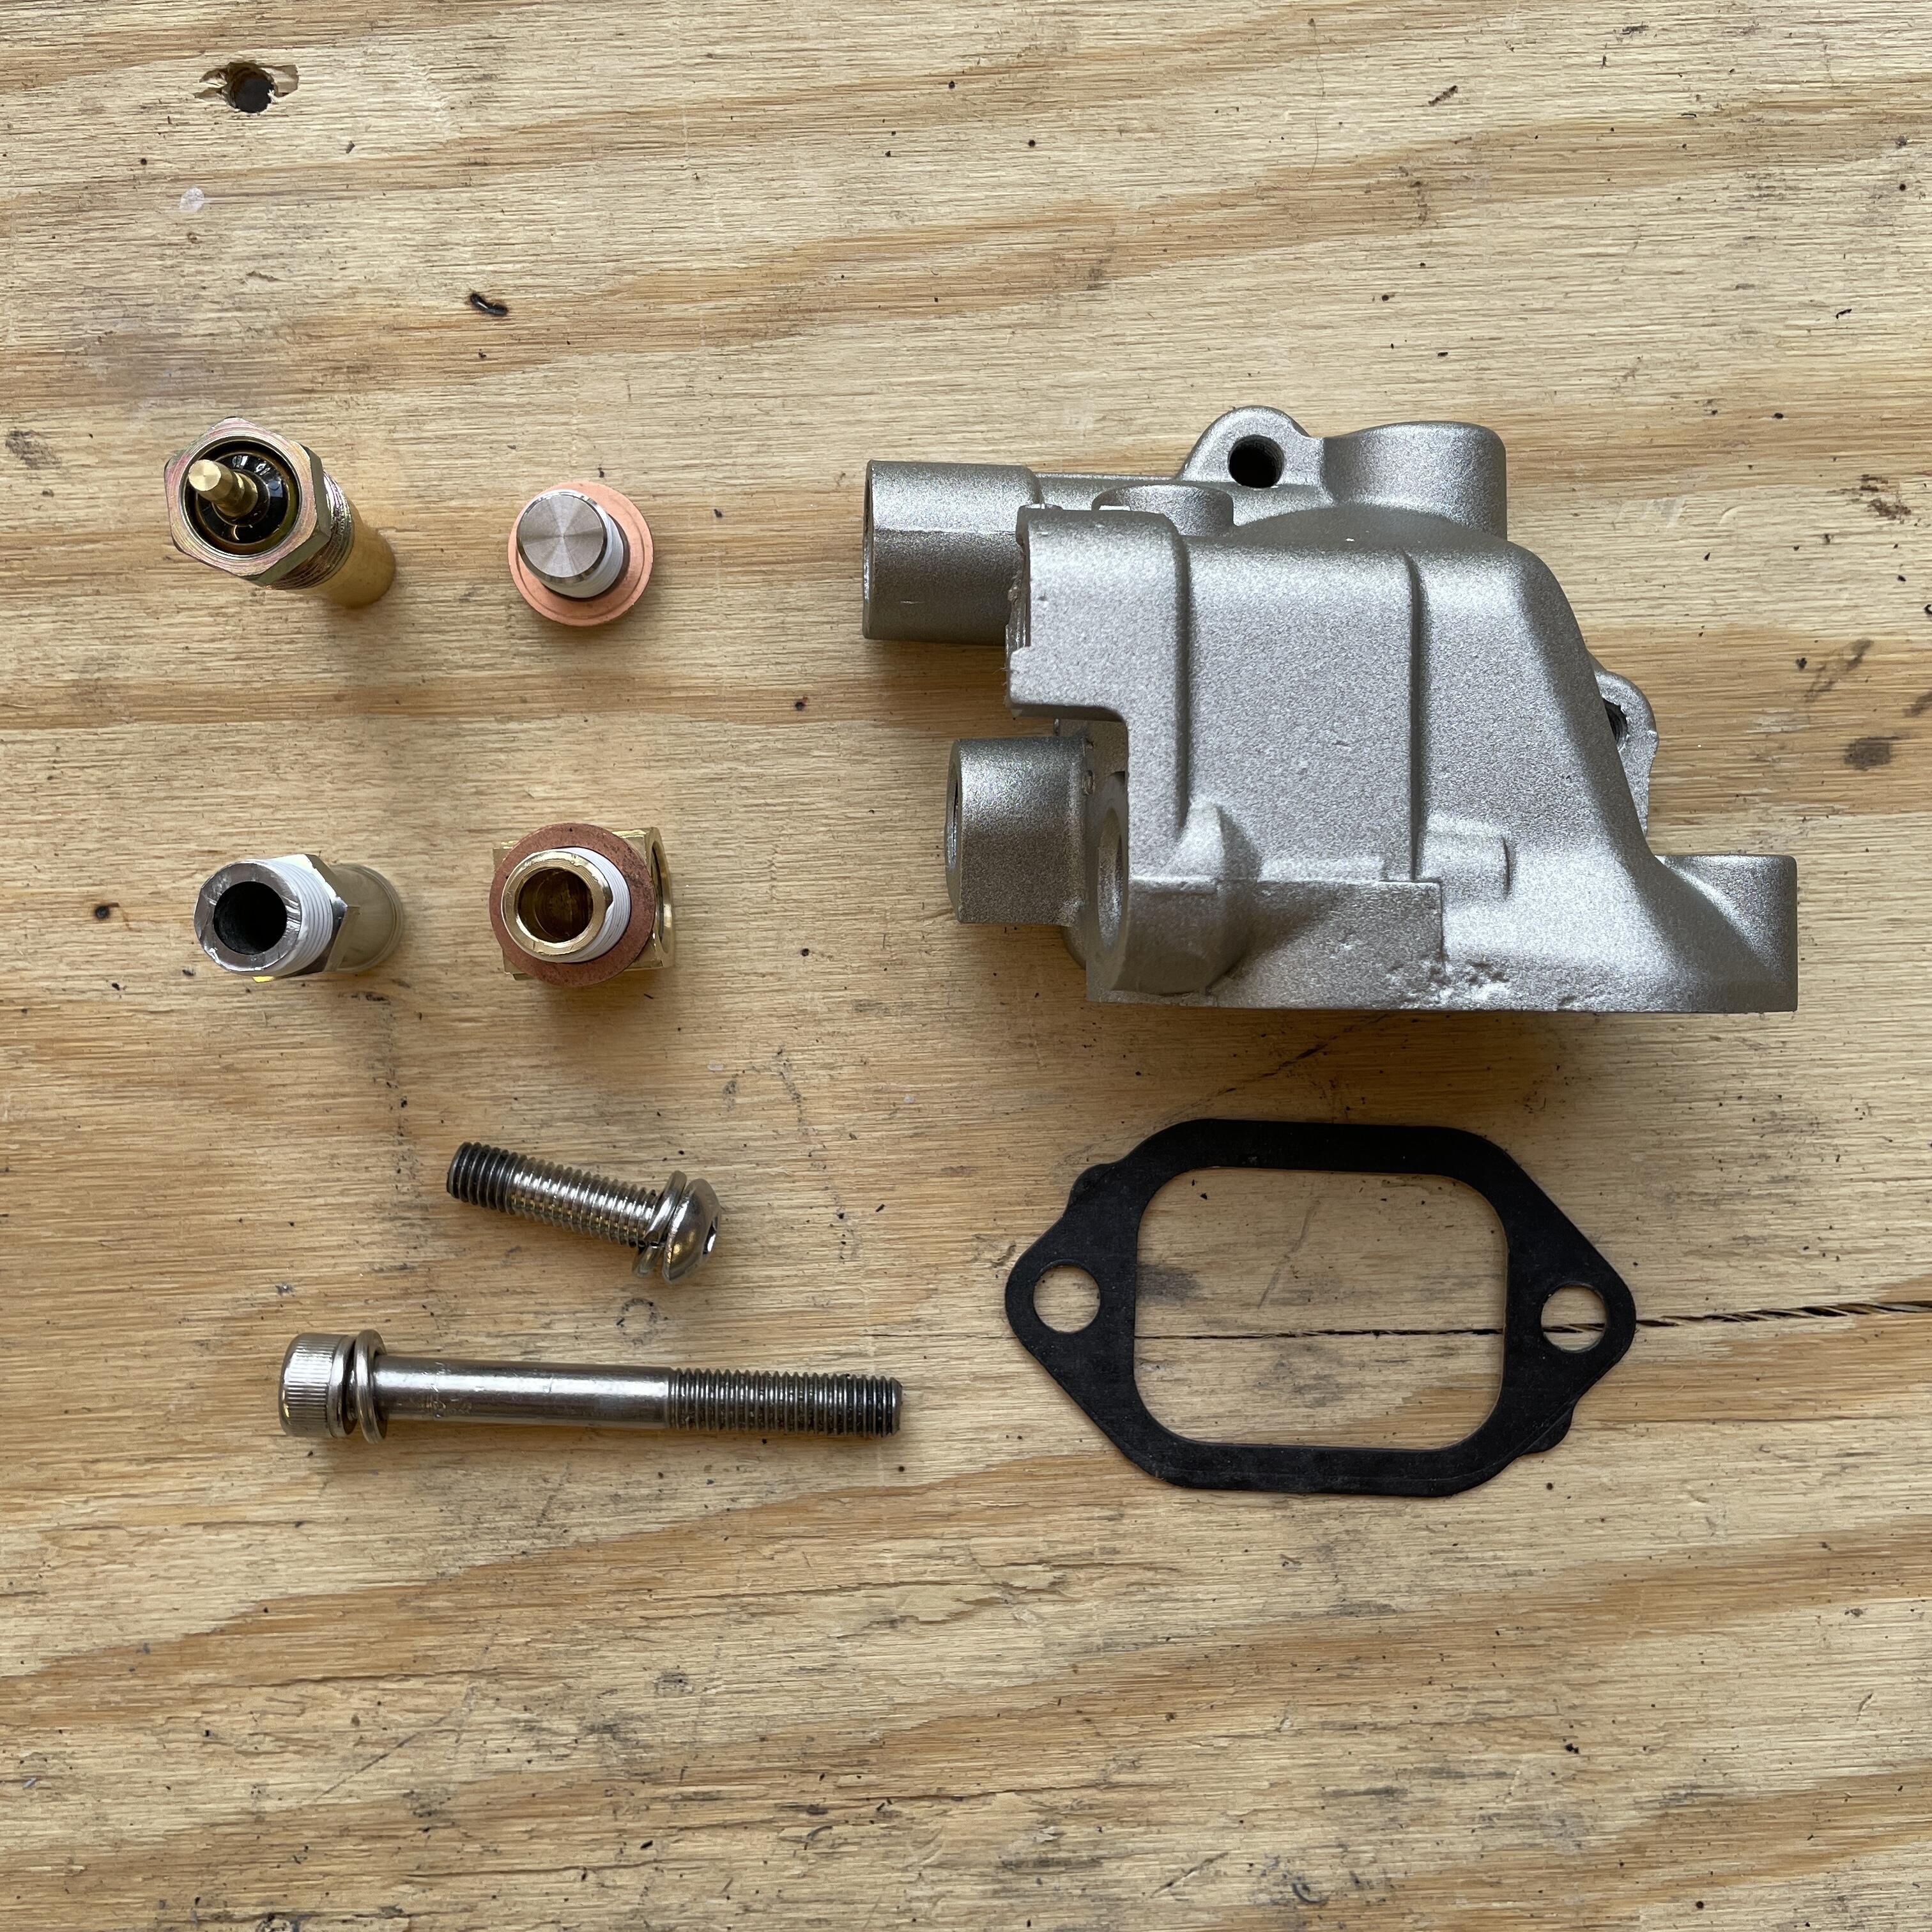
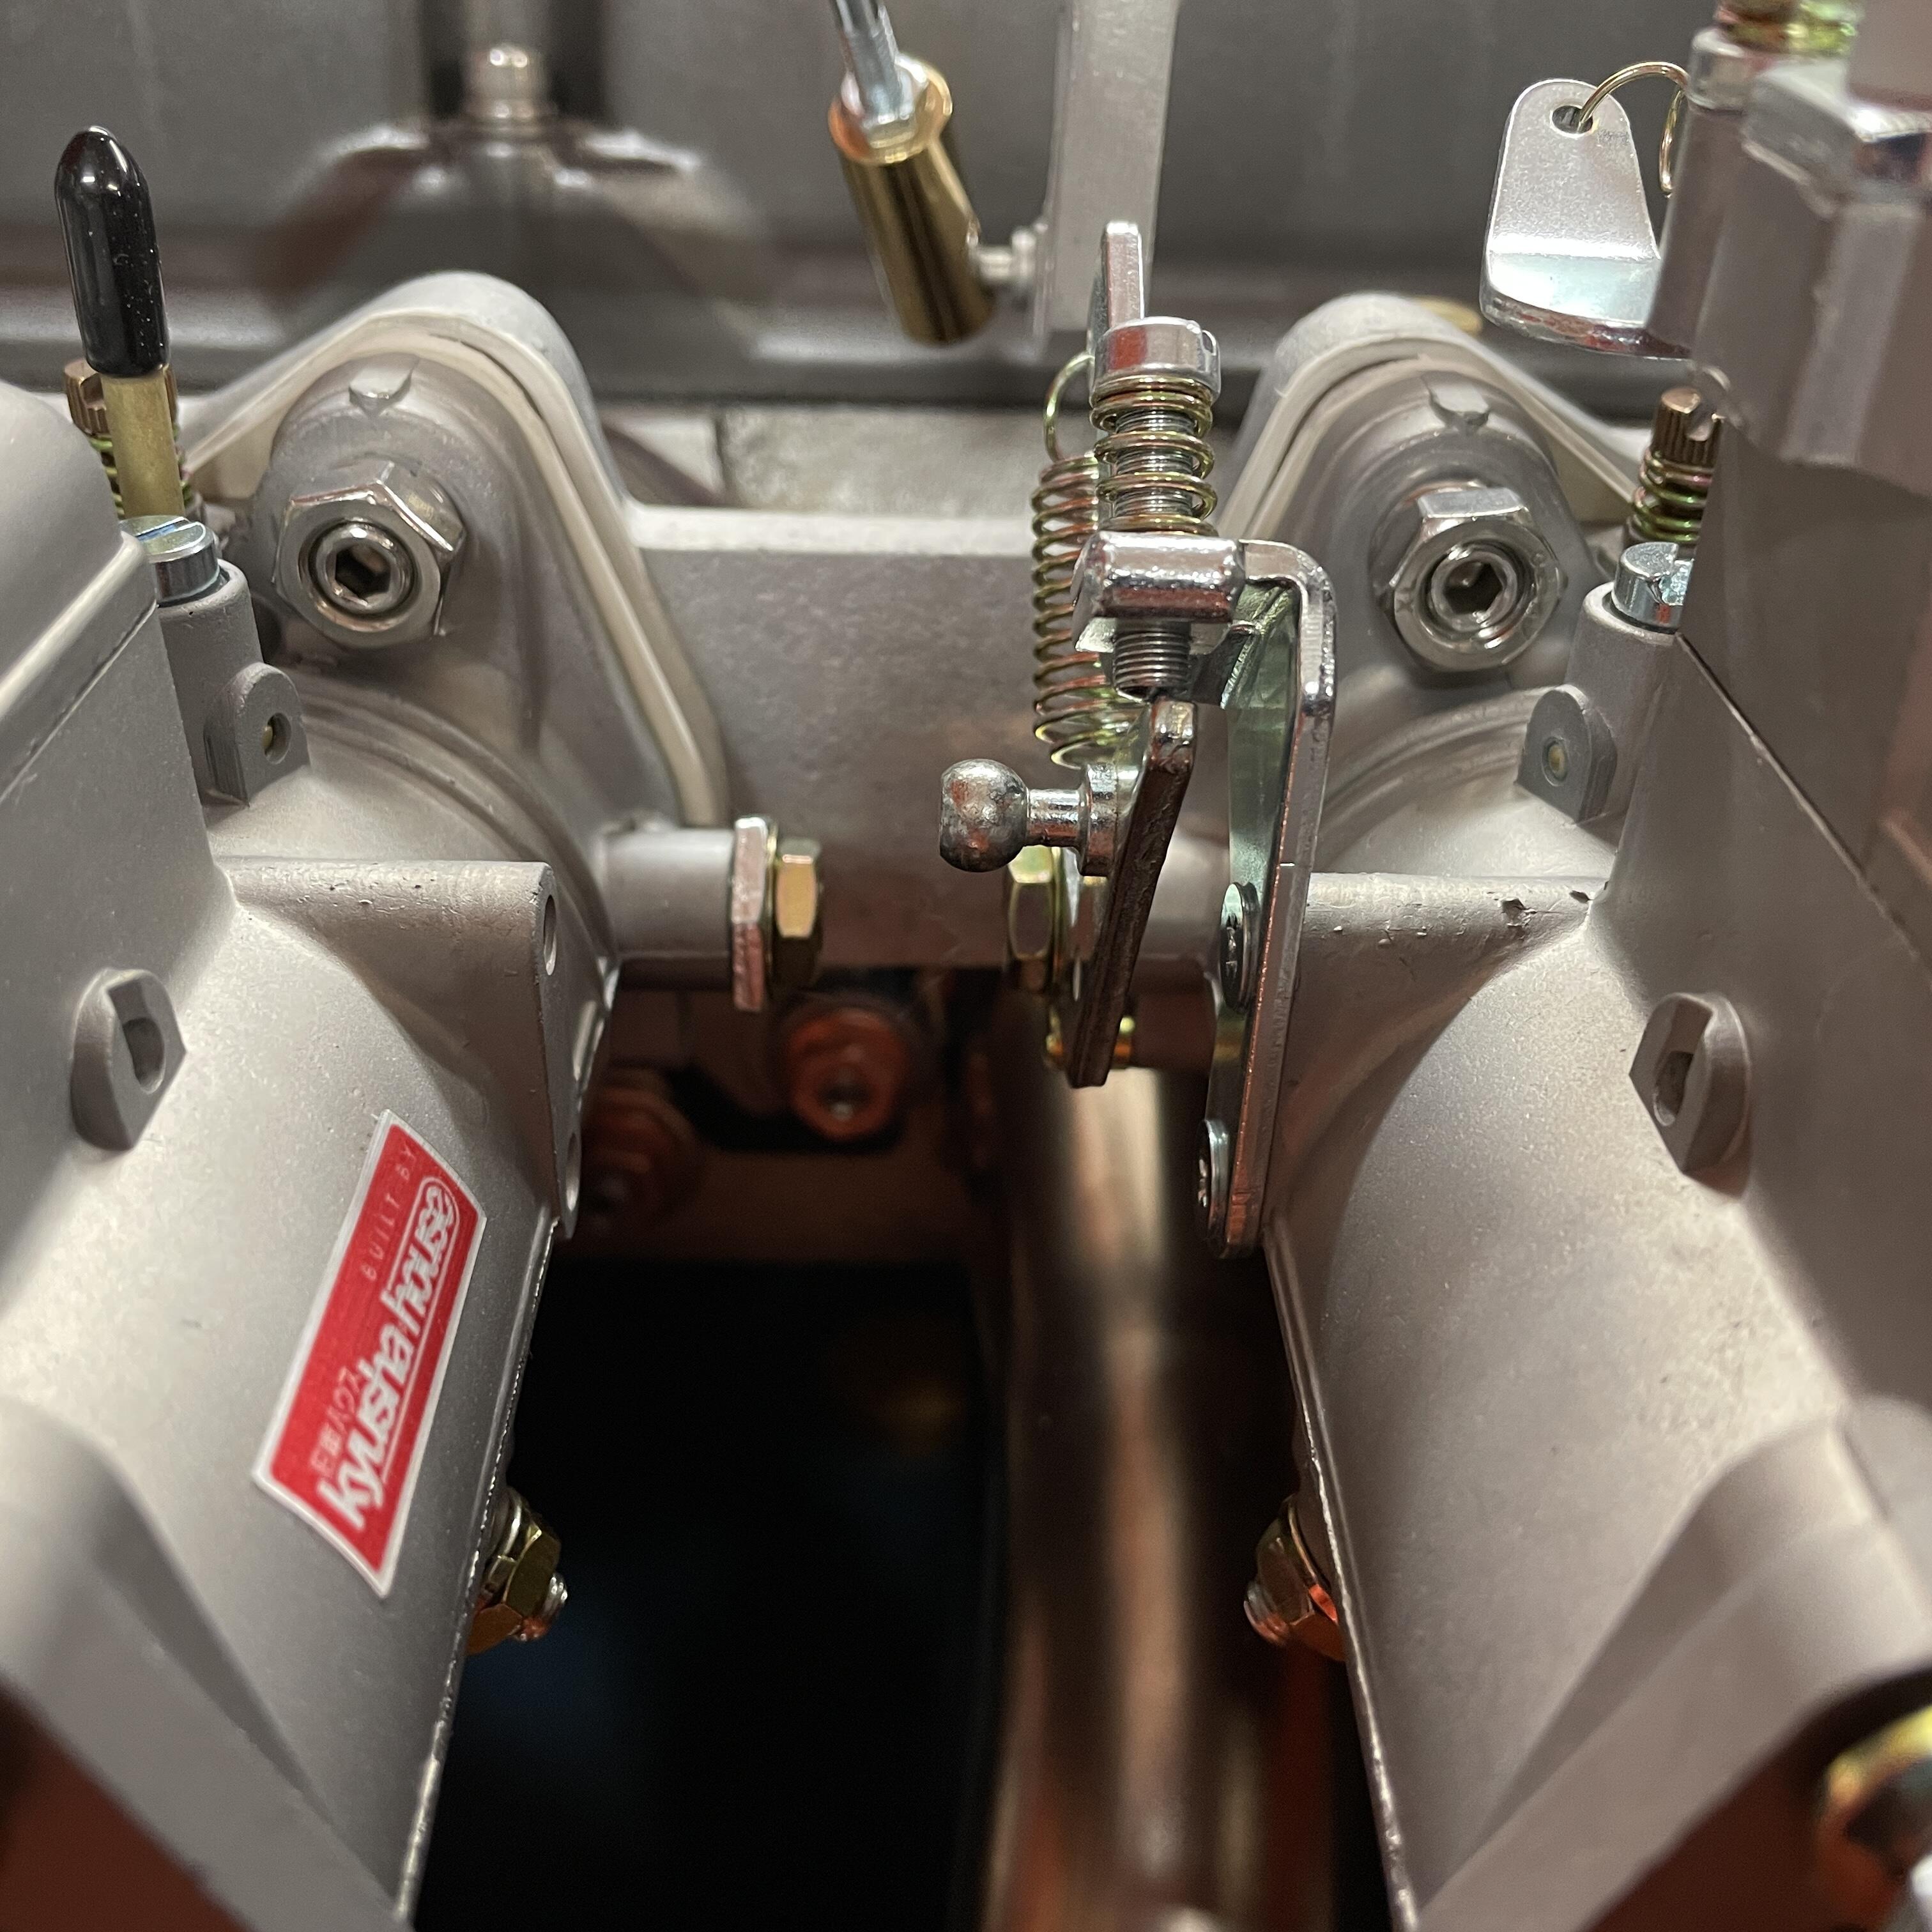
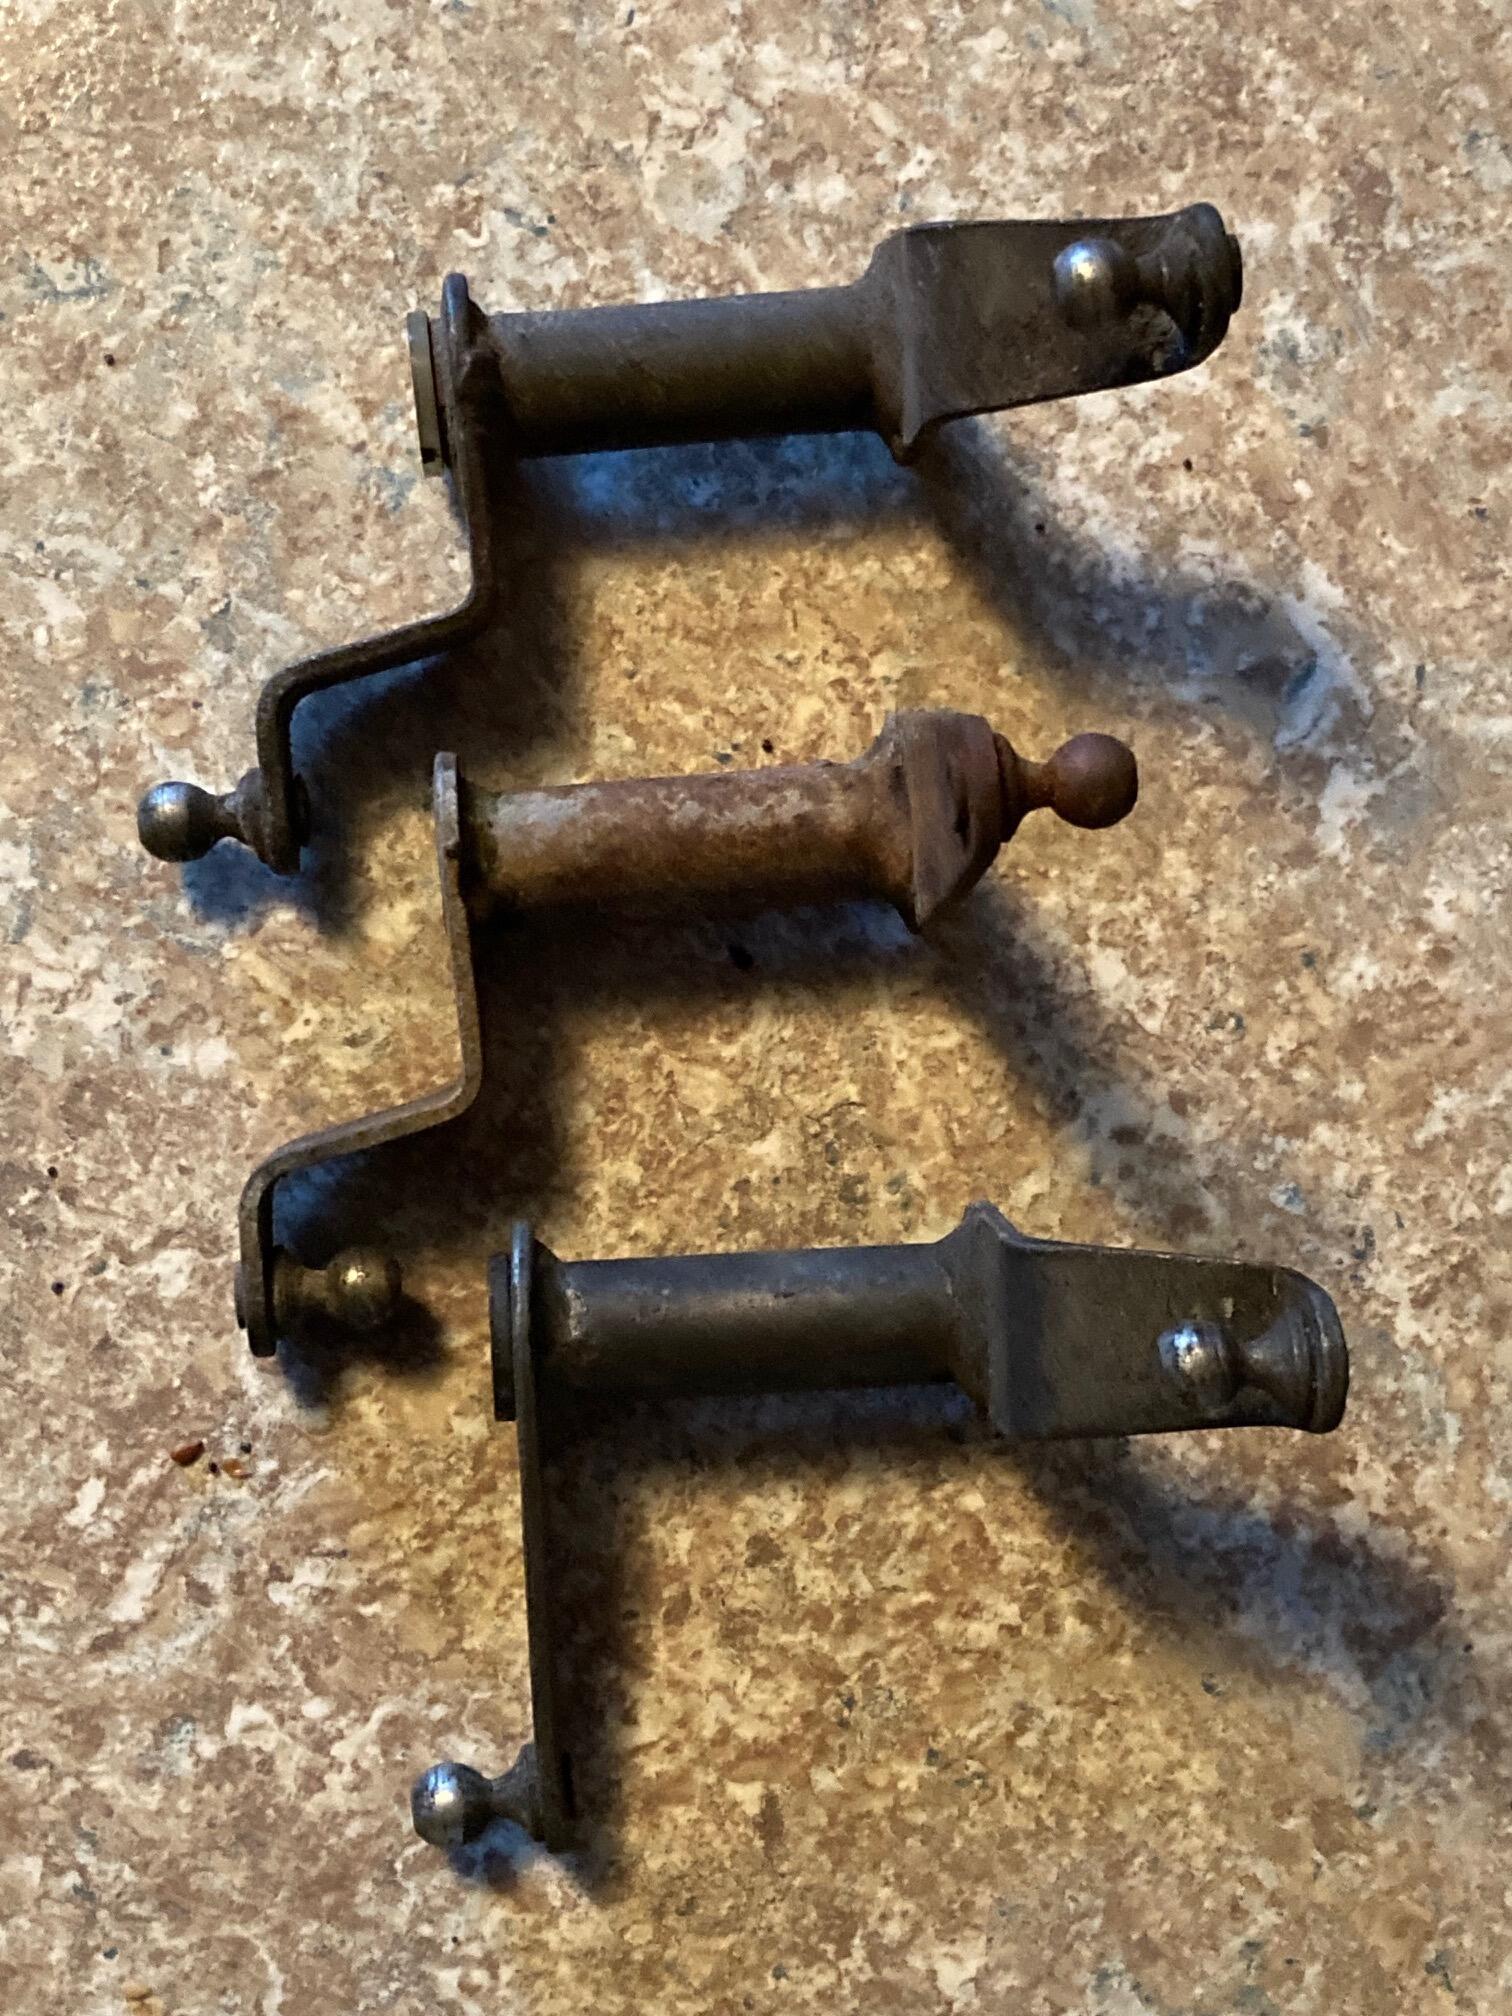
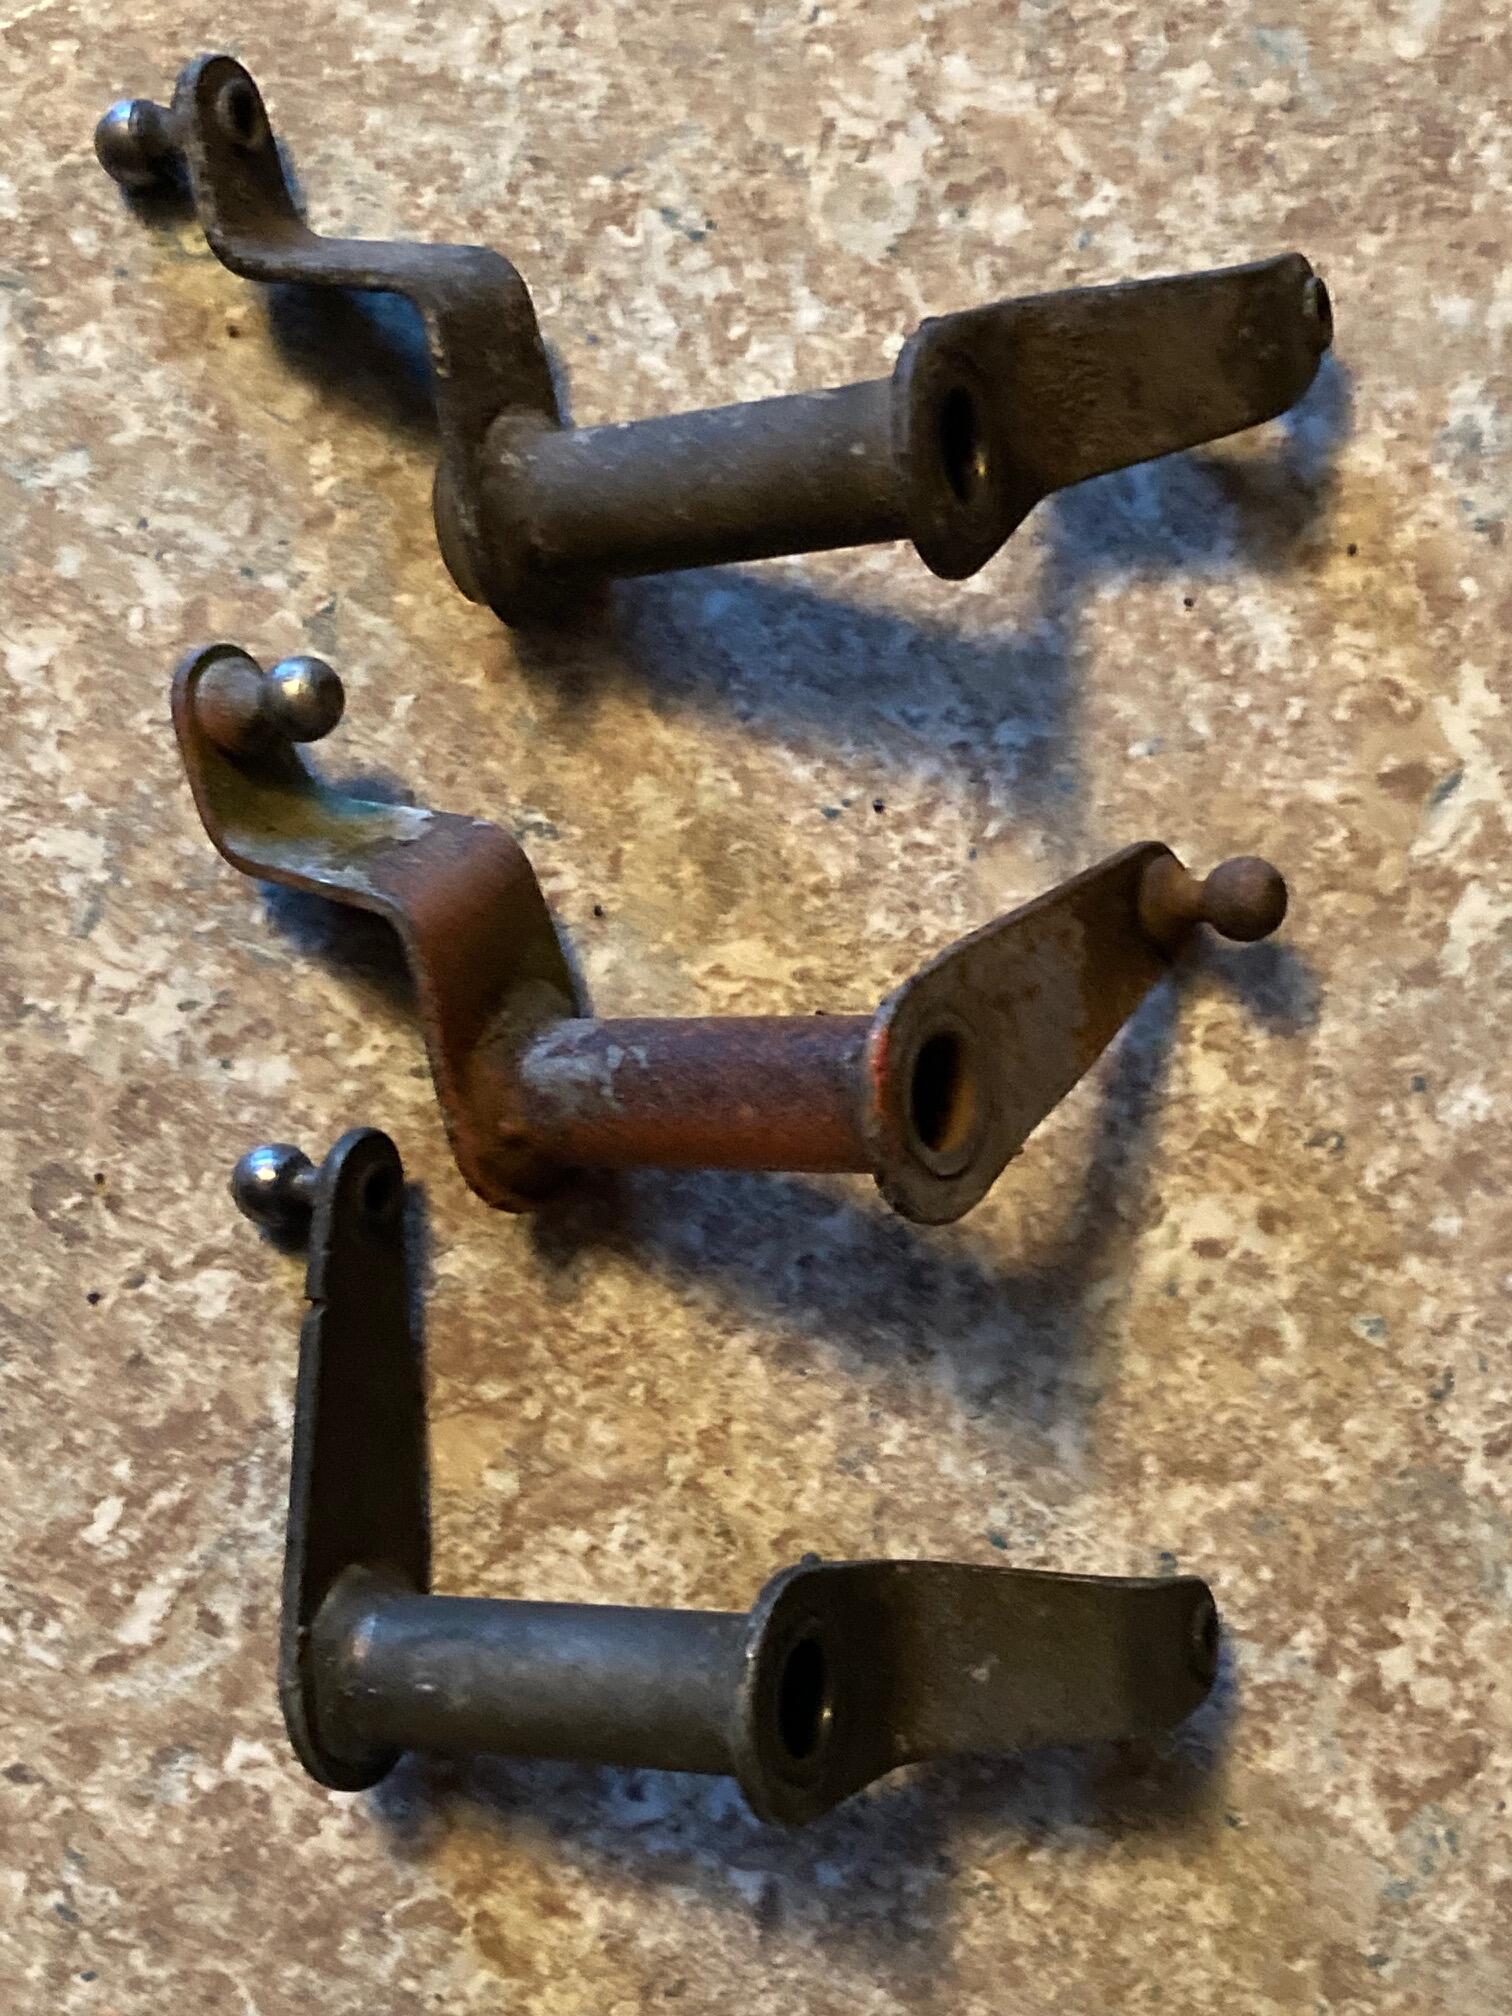
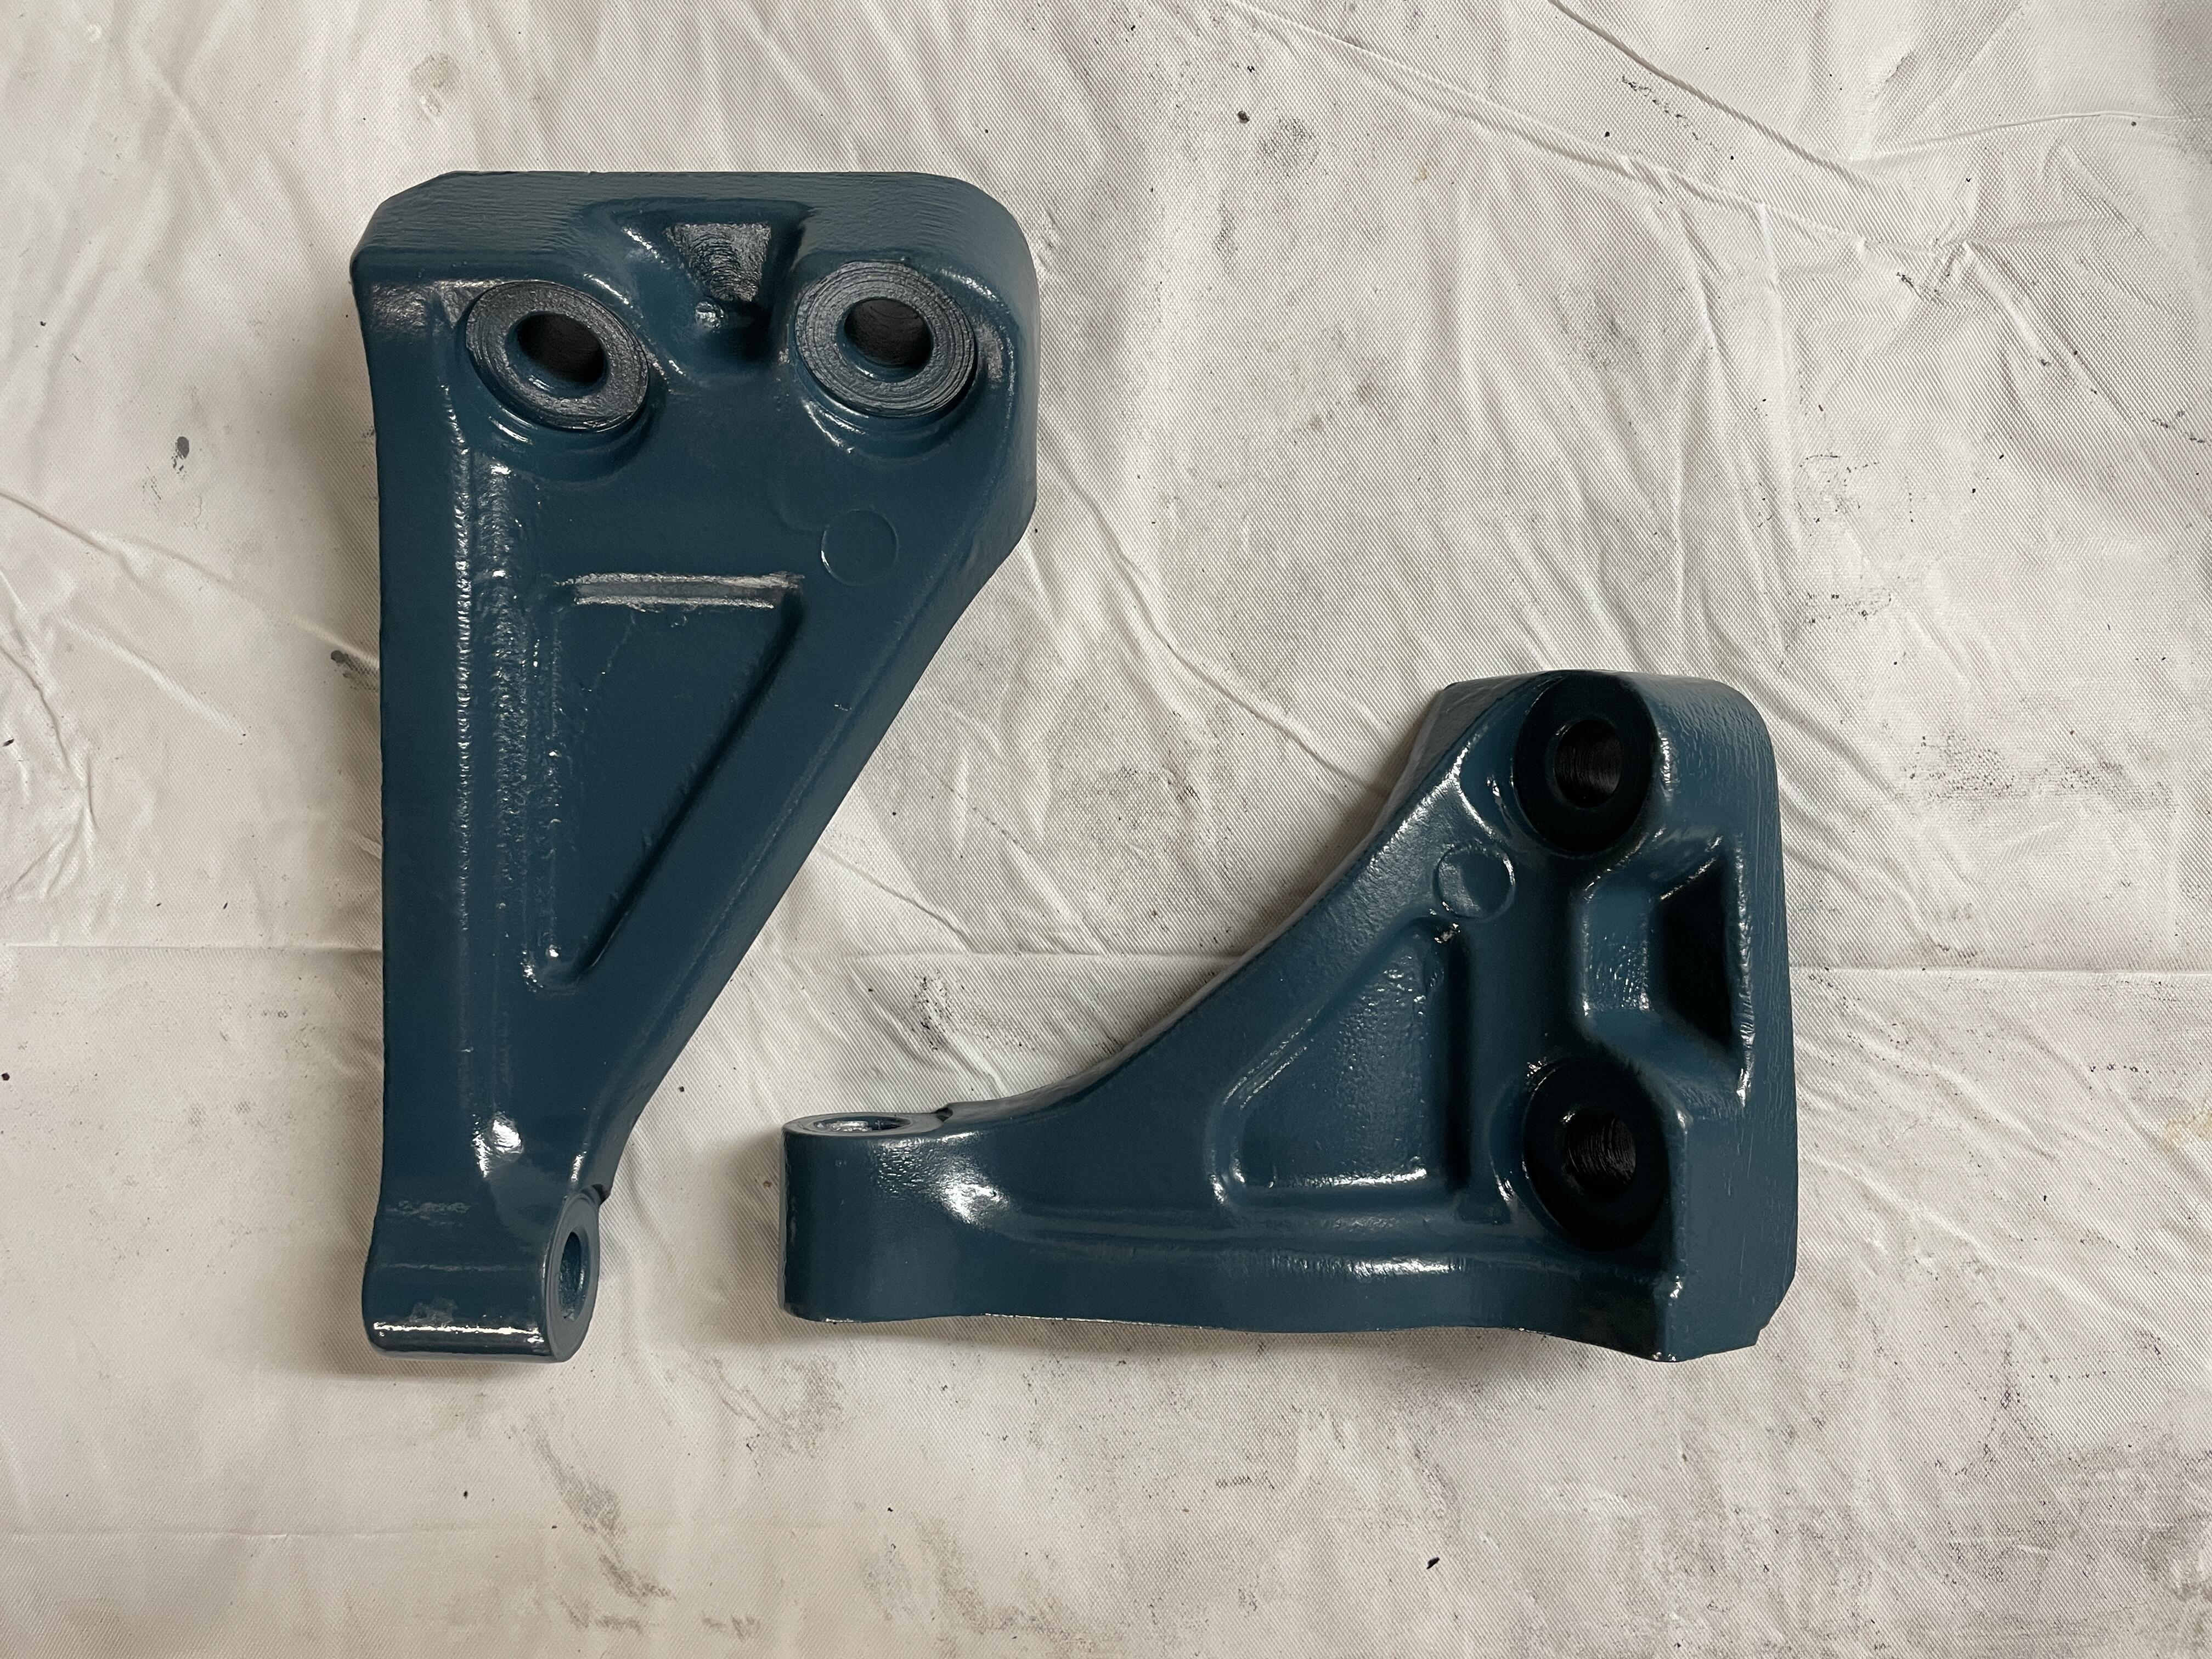
2 pointsInteresting, I have 4 different ones, the other one is the short shaft. In looking them up online, the pages all say they fit 70-78 ?? Yours looks like the top one, and that one I found listed online as for a 280Z. The bottom one comes up as the early 70-71 style. I can't even find the middle one. Maybe a Roadster or something other than Z. I did not look too hard.

 2 points
 -
2 pointsHey man, I just work here. If it's on the car I take it off and make it look shiny and put it back where it was, if you got a problem with the way the hoses are routed, you'll have to take it up with the owner.😉 I'm just talking about trying to polish out the minor scratches on the back glass, that streaking you see in the pic. Polishing won't do much to the sand pits on the front windshield. To get a pitted windshield clear again you would have to go down to 60 grit and grind the glass to the depth of the deepest pit then work your way up through 120, 220, 320, 420, 600, 800, 1200 then Cerium Oxide for polishing, just like making a telescope mirror. Not worth it, however, with an aggressive pad and heavy compound you can round off the sharp edges of the millions of pits and end up with a windshield that doesn't scatter as much light as it did before. It won't do anything to the depth of the pits but it can decrease the amount of scattered light/glare, most of that happens right around the edges of each pit. I did that procedure on the windshield of my first Z, I still had some Cerium Oxide left over from my telescope making days, glass is much harder than clearcoat so it took many hrs of hard work (I would never do it again) I could see the difference, there was less glare, but a new windshield is a lot less work.2 points
-
@jalexquijano I wouldn't adjust the floats yet. IMO the plugs should be a bit lighter colored. I'd reduce the number of turns down (raise the nozzles) in 1/4 turn increments and drive it for a few days then look at the plugs again. If and when you reach a point when the engine isn't pulling as strong as it did before the previous nozzle adjustment, accelerate up a hill, and ease the choke on, If the engine is running lean you'll feel the instant power surge with the added choke. The choke is just lowering the nozzle the same as the mixture adjustment screw.1 point
-
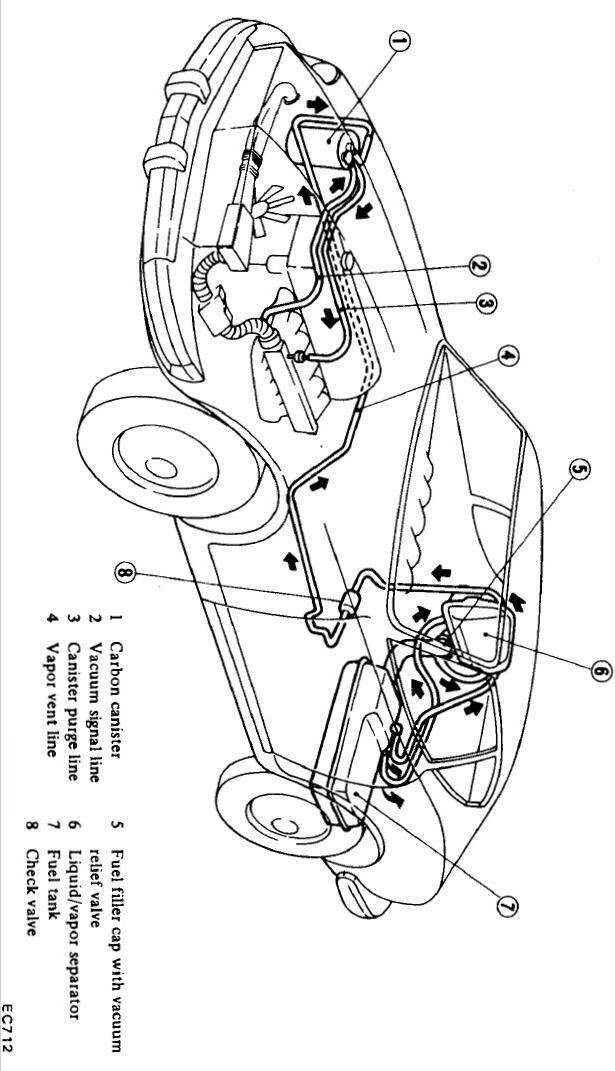
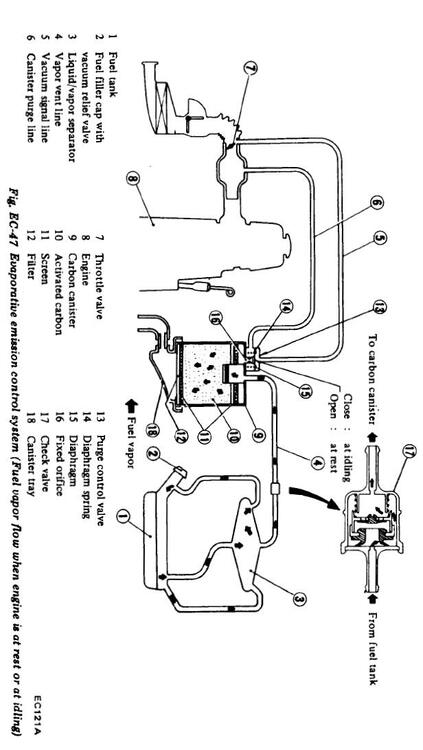
1 pointYes, it is normal. The only way to prevent any fuel vapors would be to chill the tank below the vapor point of all of the volatile organic compounds (VOCs) in the fuel. Since it isn't practical to refrigerate the fuel tank and the ambient temperatures in the summer are well above the vapor point of the VOCs, Nissan has the carbon canister to capture most of the fugitive emissions from the fuel tank. On the other hand, you have to allow some make up air into the tank to allow the fuel to flow to the fuel pump. That is why you need the two-way check valve. Here is how the purge system works in modern cars: https://www.samarins.com/glossary/purge-valve.html1 point
-
1 pointThe Mikuni studs can’t be much longer because they will hit the manifold when it’s tightened down. I might be able to add 5mm but not more. same story with the carburetor studs. Thanks. Yeah, they are a ZX thing. They were also used on some L20 configurations.1 point
-
1 pointThere really is just 2. The first 2 are the same. Second one supersedes the first one.1 point
-
1 pointcheck for vacuum leak by blowing smoke in thru a tube attached to the brake booster port on the intake manifold. use a stryofoam cup to block off the front of the AFM. you can have leaks around the intake/exhaust manifold gasket as well. Just look for smoke.1 point
-
1 pointThe "check valve" isn't a traditional check valve. The way it operates is that it passes flow both directions (unlike a "real" check valve), but the trick is that it passes flow much EASIER in one direction than the other. Here's some pics that help explain operation and location: Not sure why my pics are showing up sideways, but that's what I got.

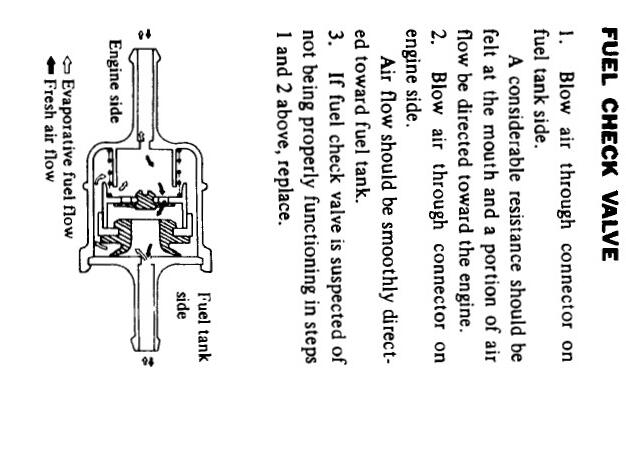
 1 point
 -
Why are you hiding the serial number? Seems suspicious. . .1 point
-
1 pointShiny is what it's all about! I'm not keen on that pollution control stuff getting in the way of my driving! It mostly looks like a bunch of vacuum leaks waiting to happen anyway!1 point
-
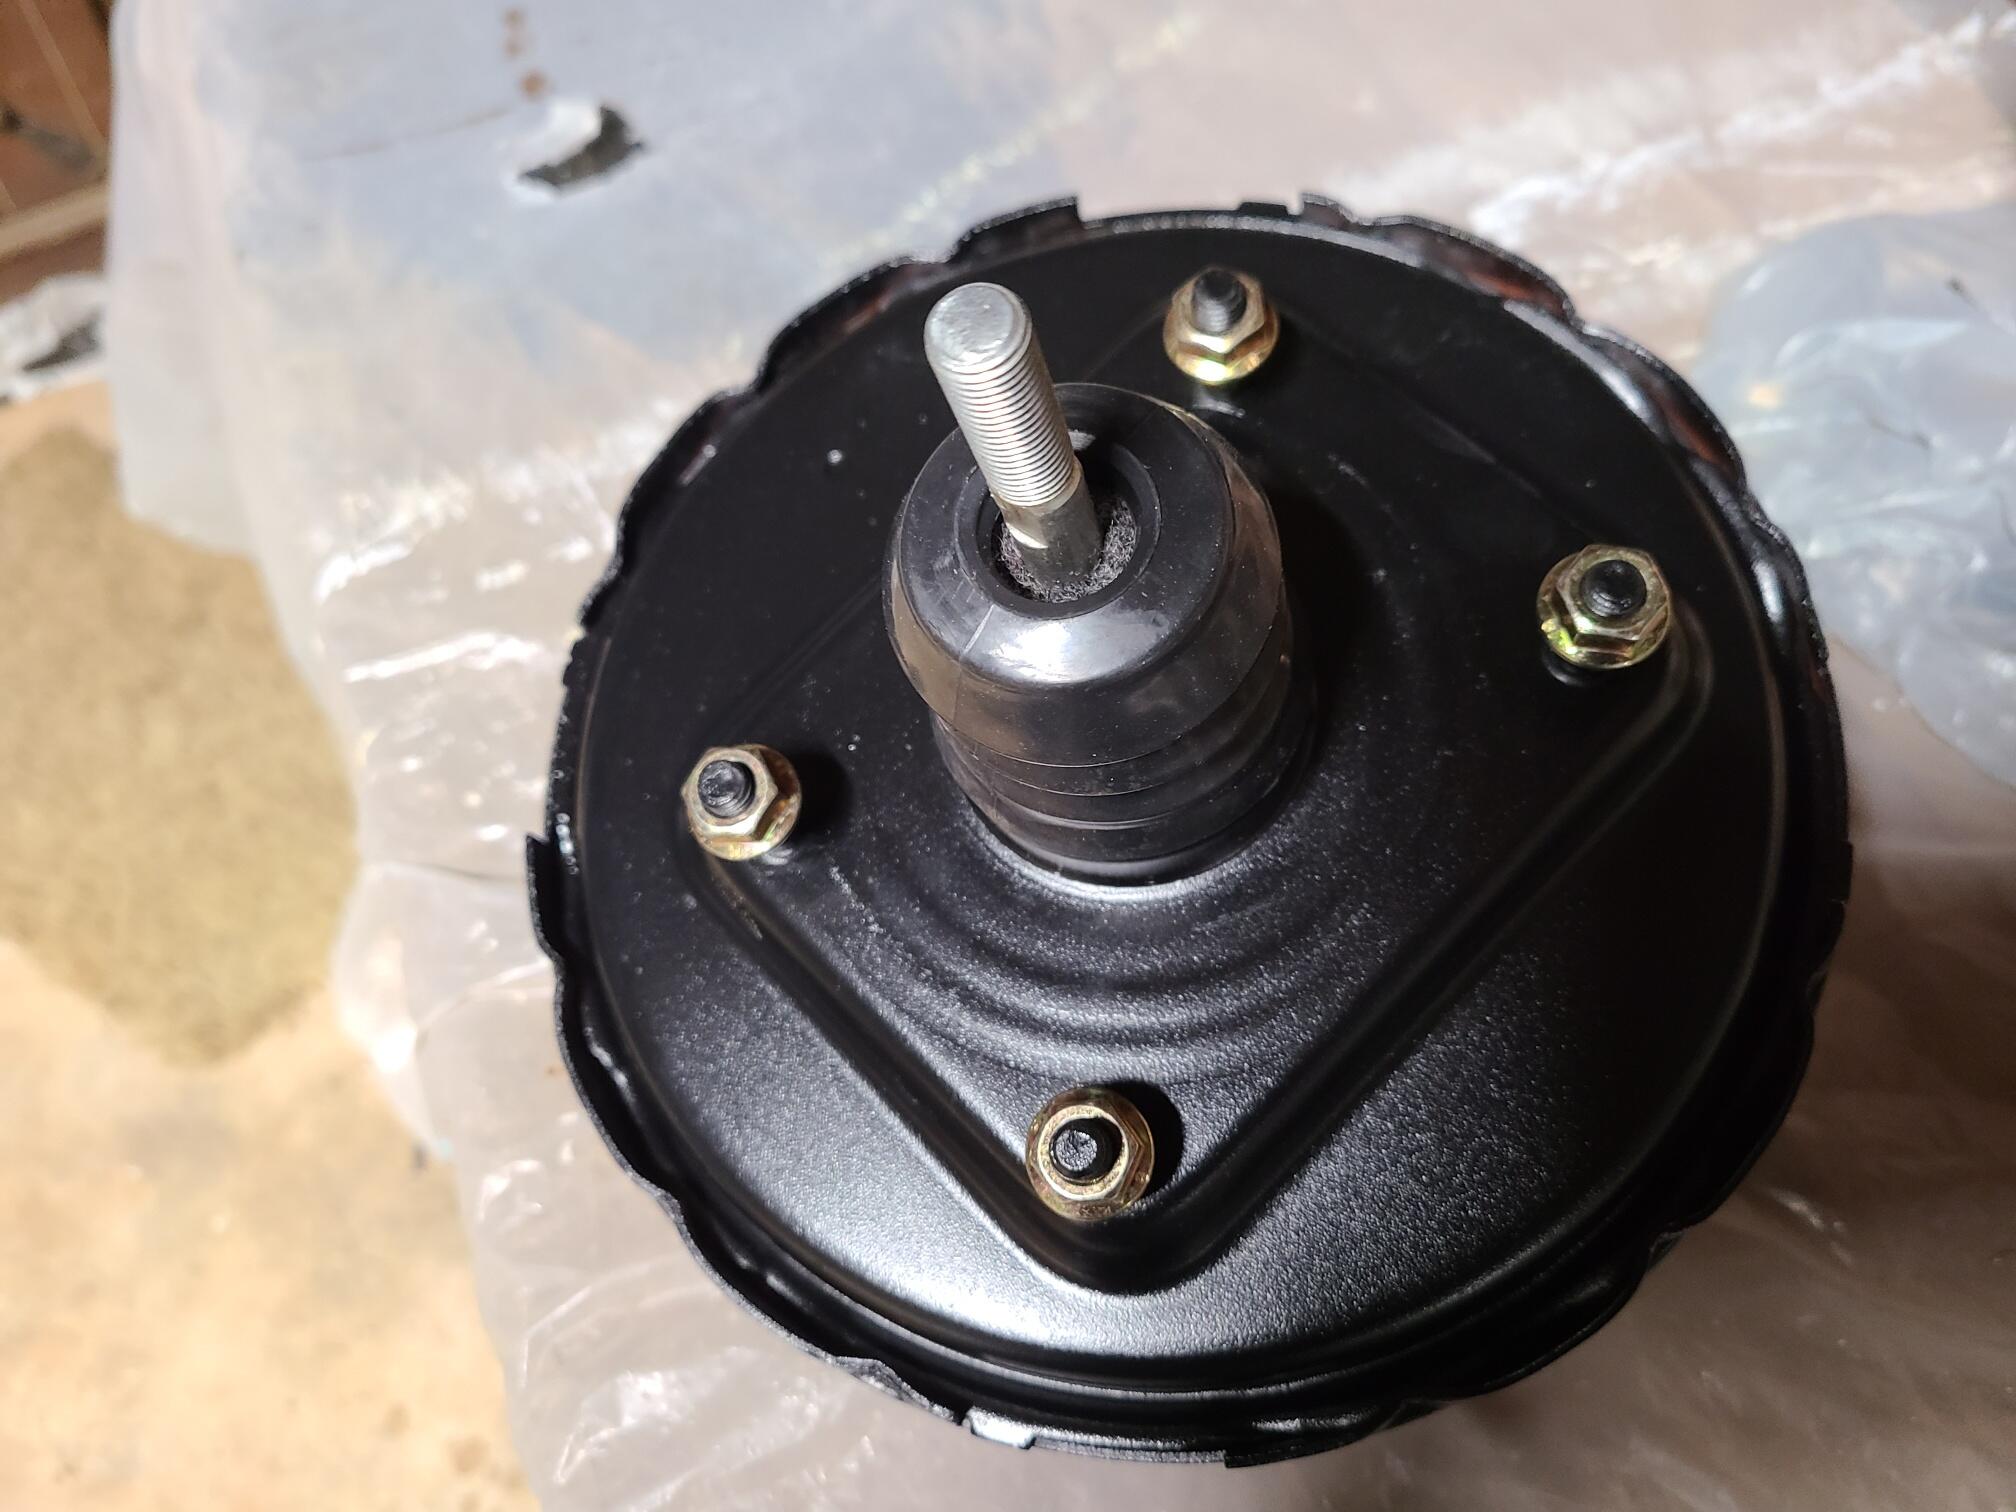
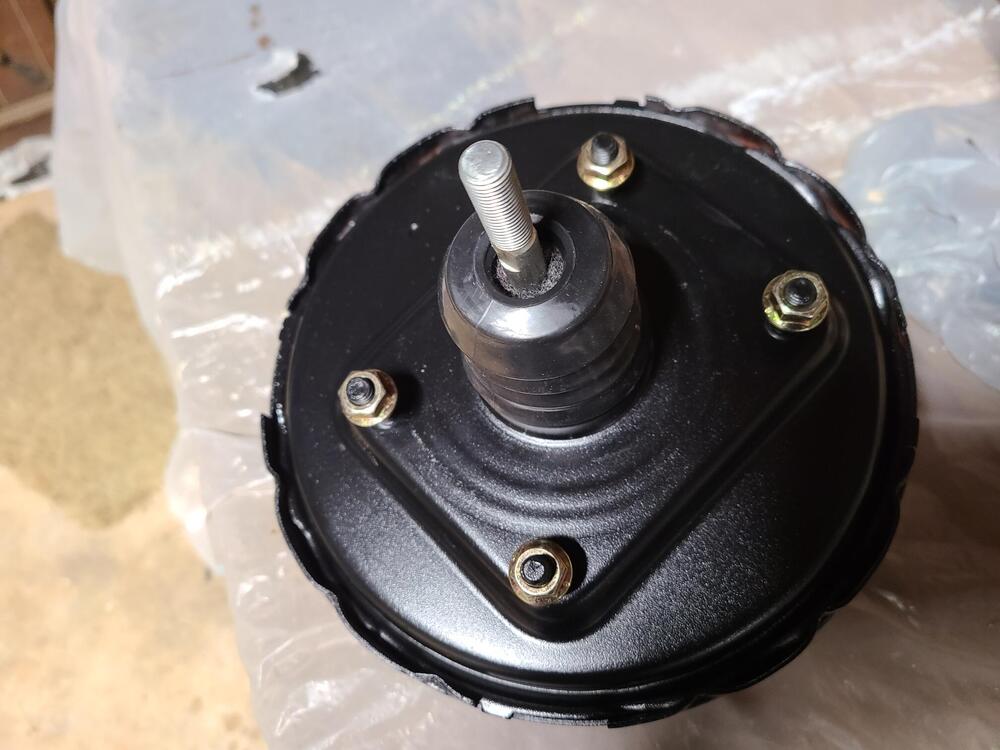
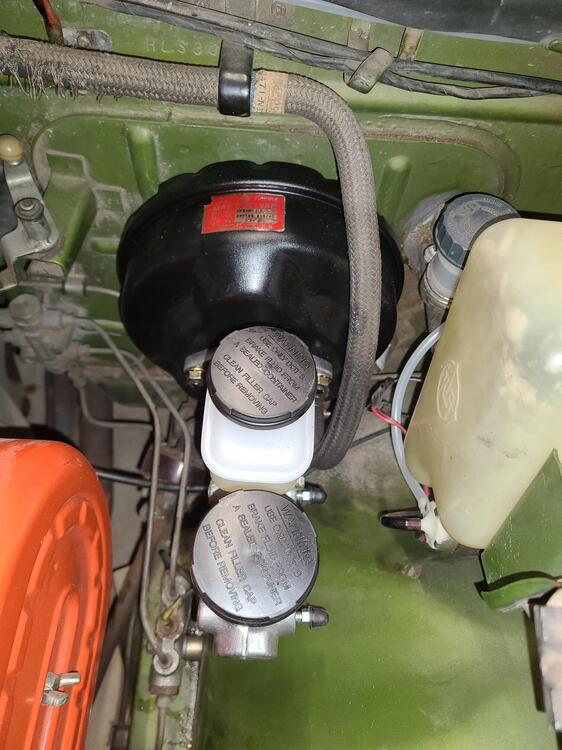
Installed the rebuilt brake booster and new master cylinder today. Booster was rebuilt by Harmon Classic Brakes. They sent back the parts they replaced, and surprisingly they look pretty good for 51 years old. It was time for a rebuild, as brakes needed too much effort and stepping on the brake peddle at a stop light caused the engine RPMs to increase. Also flushed out the old brake fluid.
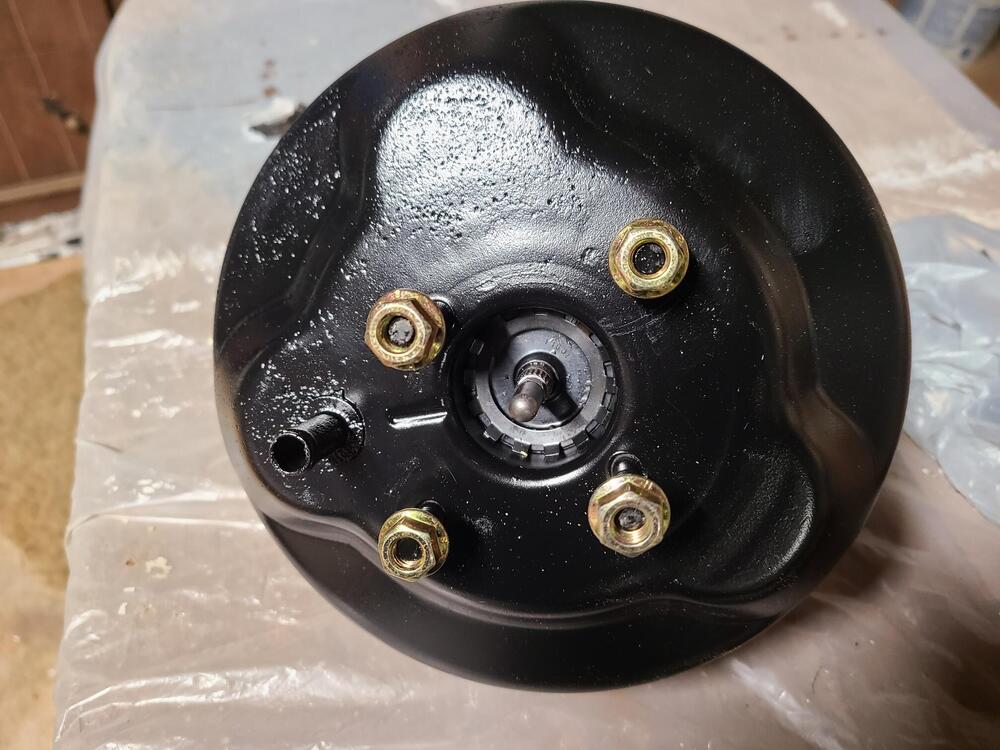
 1 point
 -
1 pointLuckily I have already removed most of the undercoating, so hopefully there won't be much mess. As far as rotating it, I've only turned it about 30 degrees with my son holding the door closed. Still need to empty some parts out, like fenders and misc light items. It's been a bit of a storage bin. Also I will need to tie the doors, hood and hatch closed. It will likely be a fee days before I can do the full spin. I will most definitely report back when I get to it.1 point
-
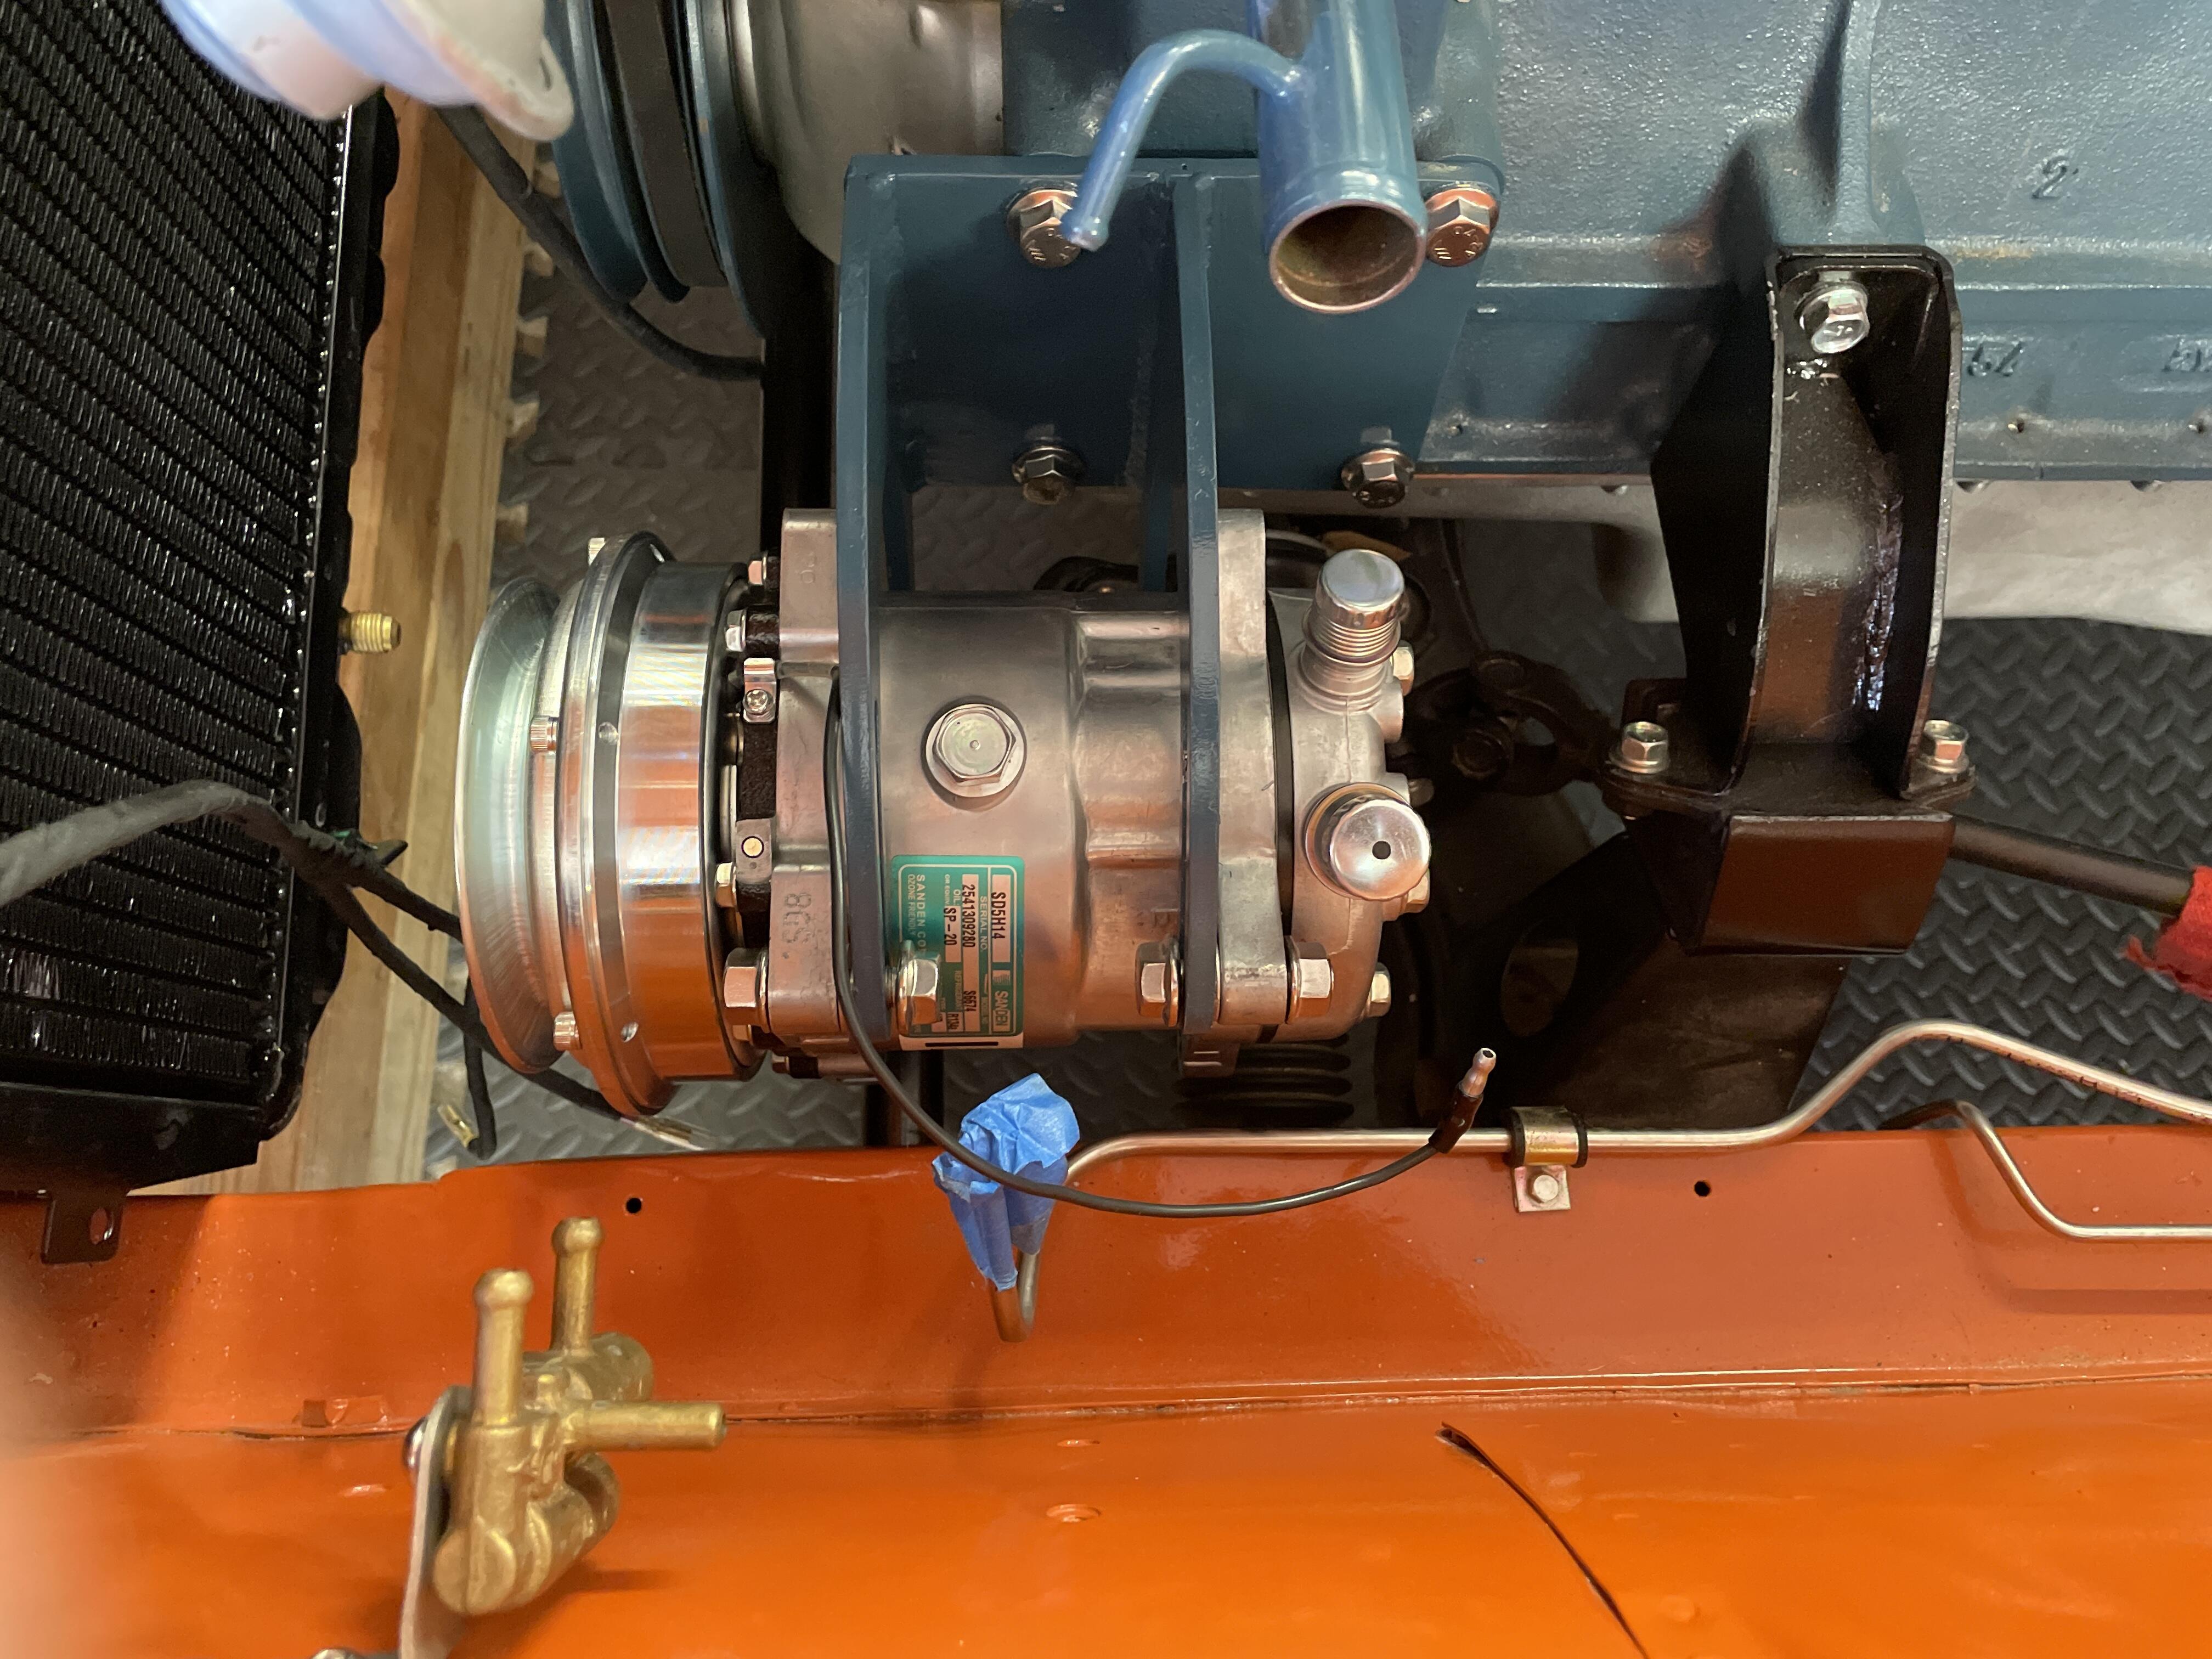
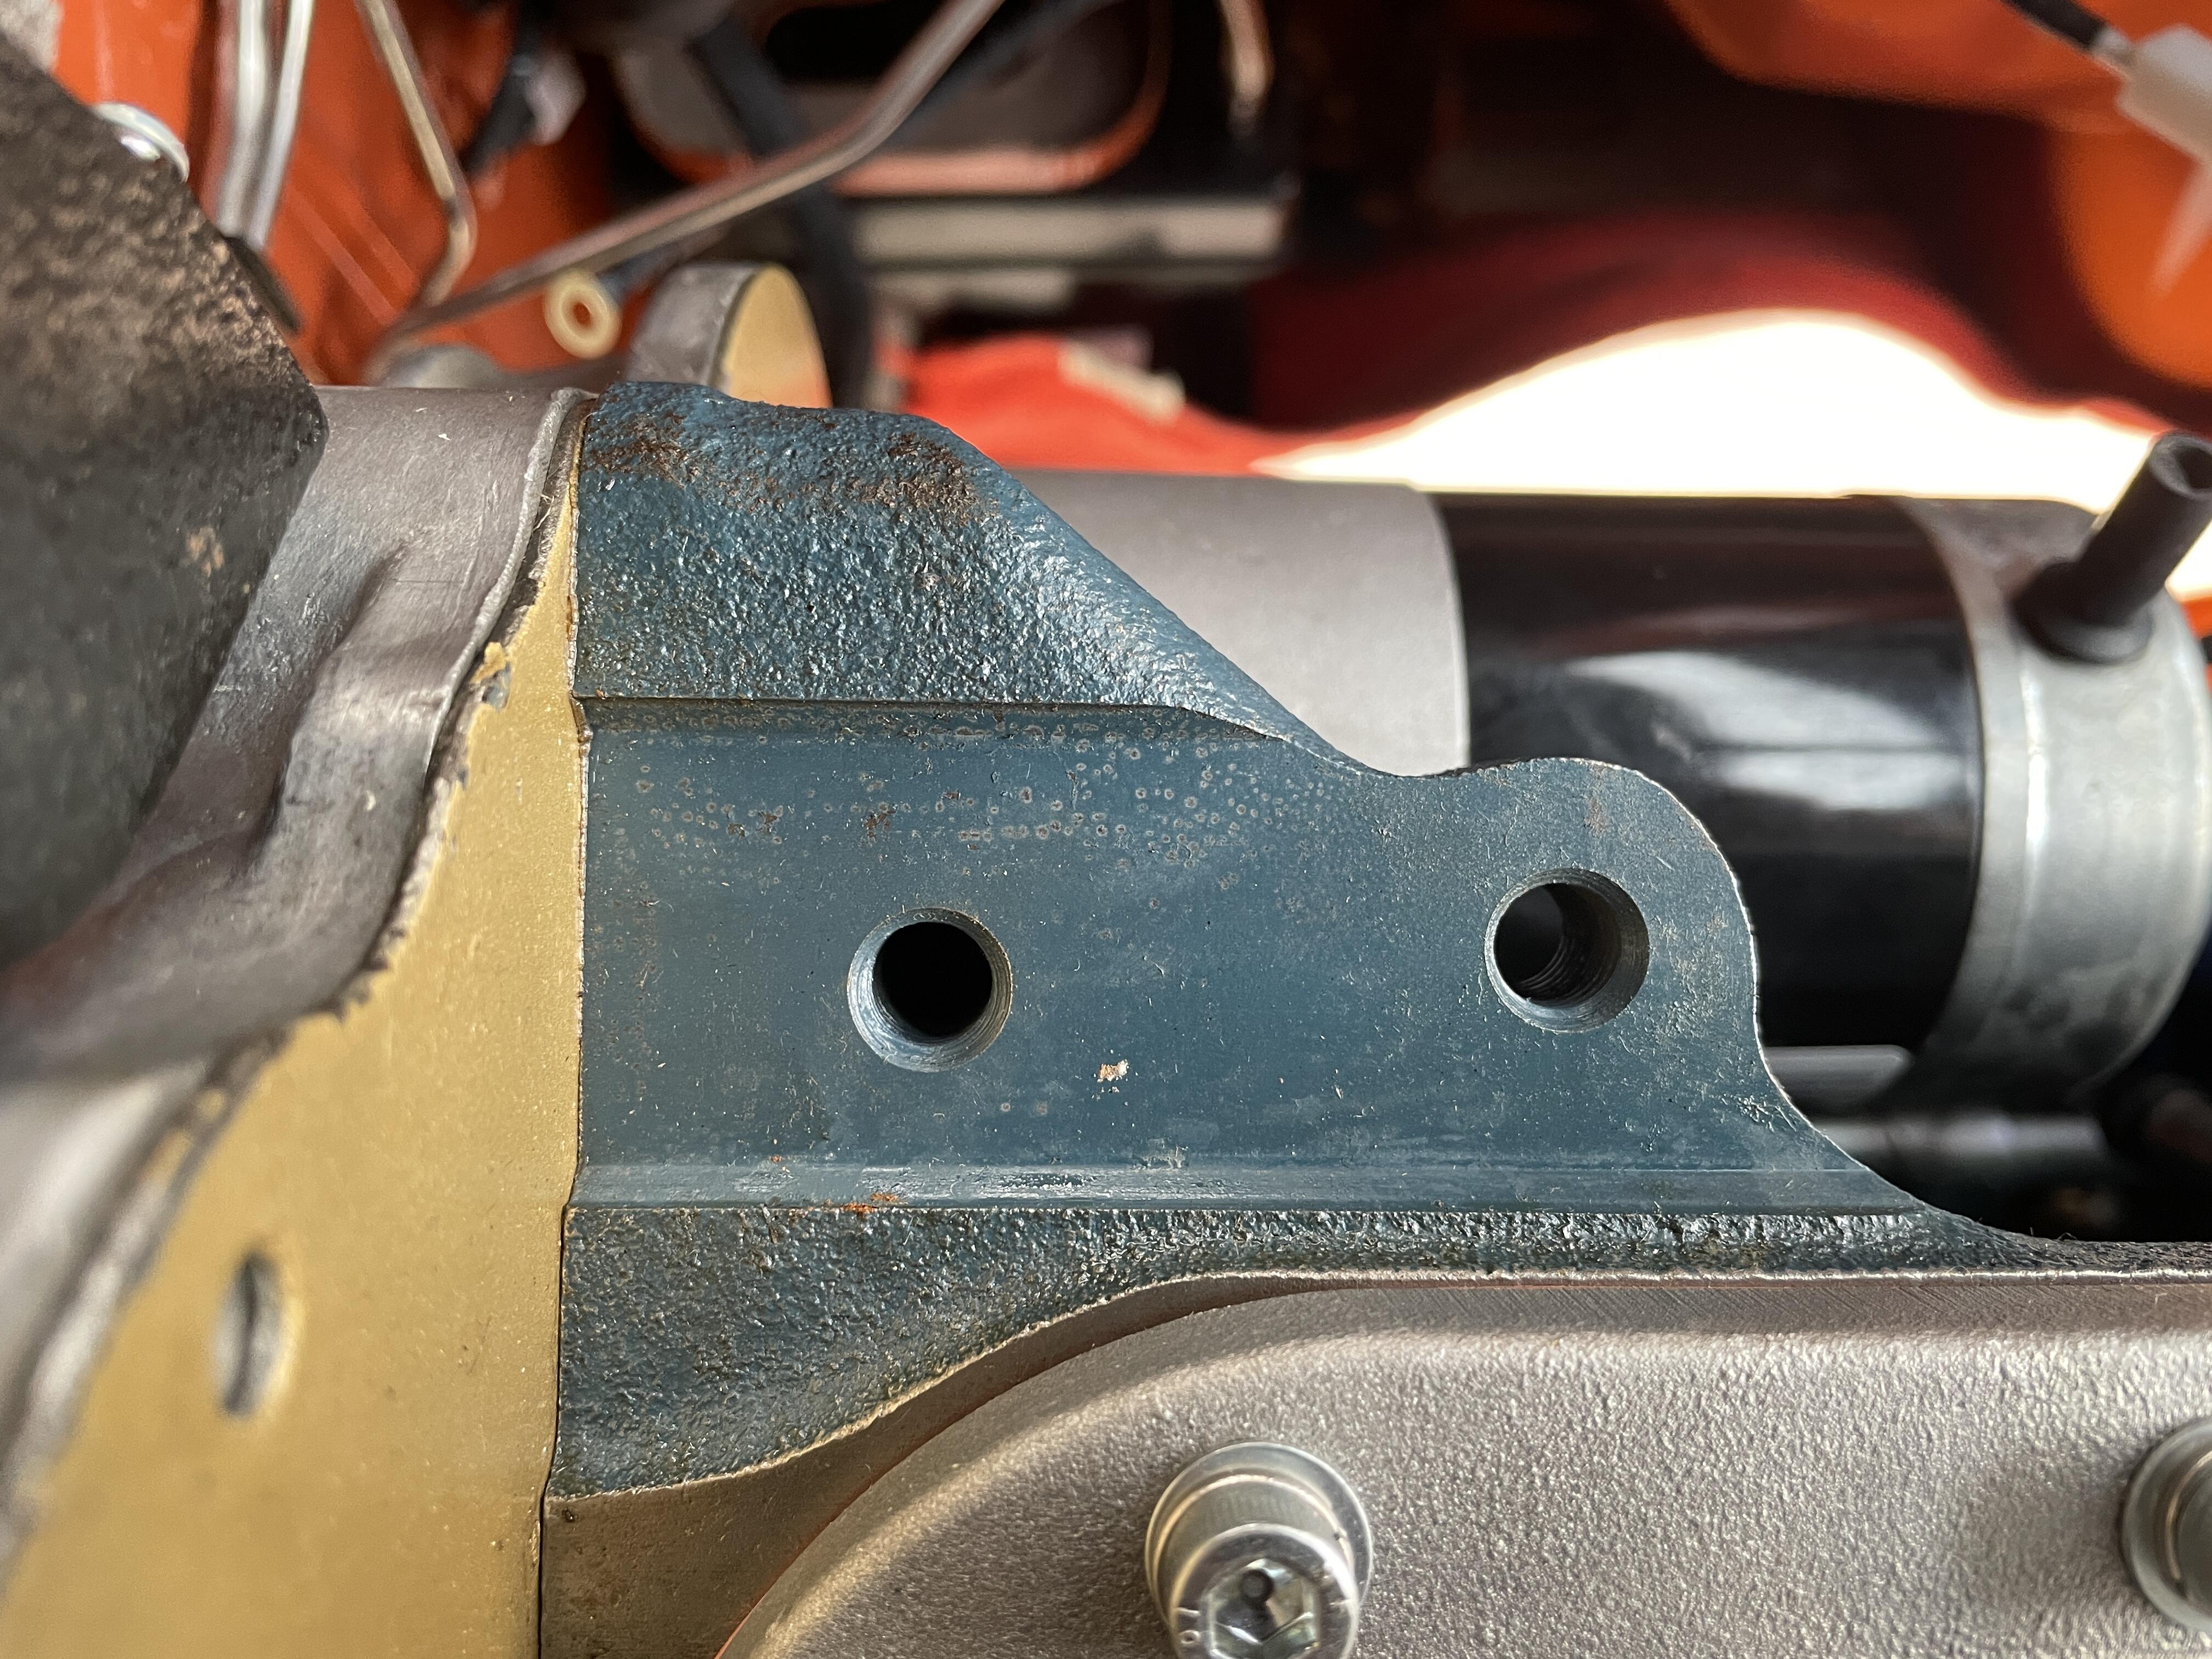
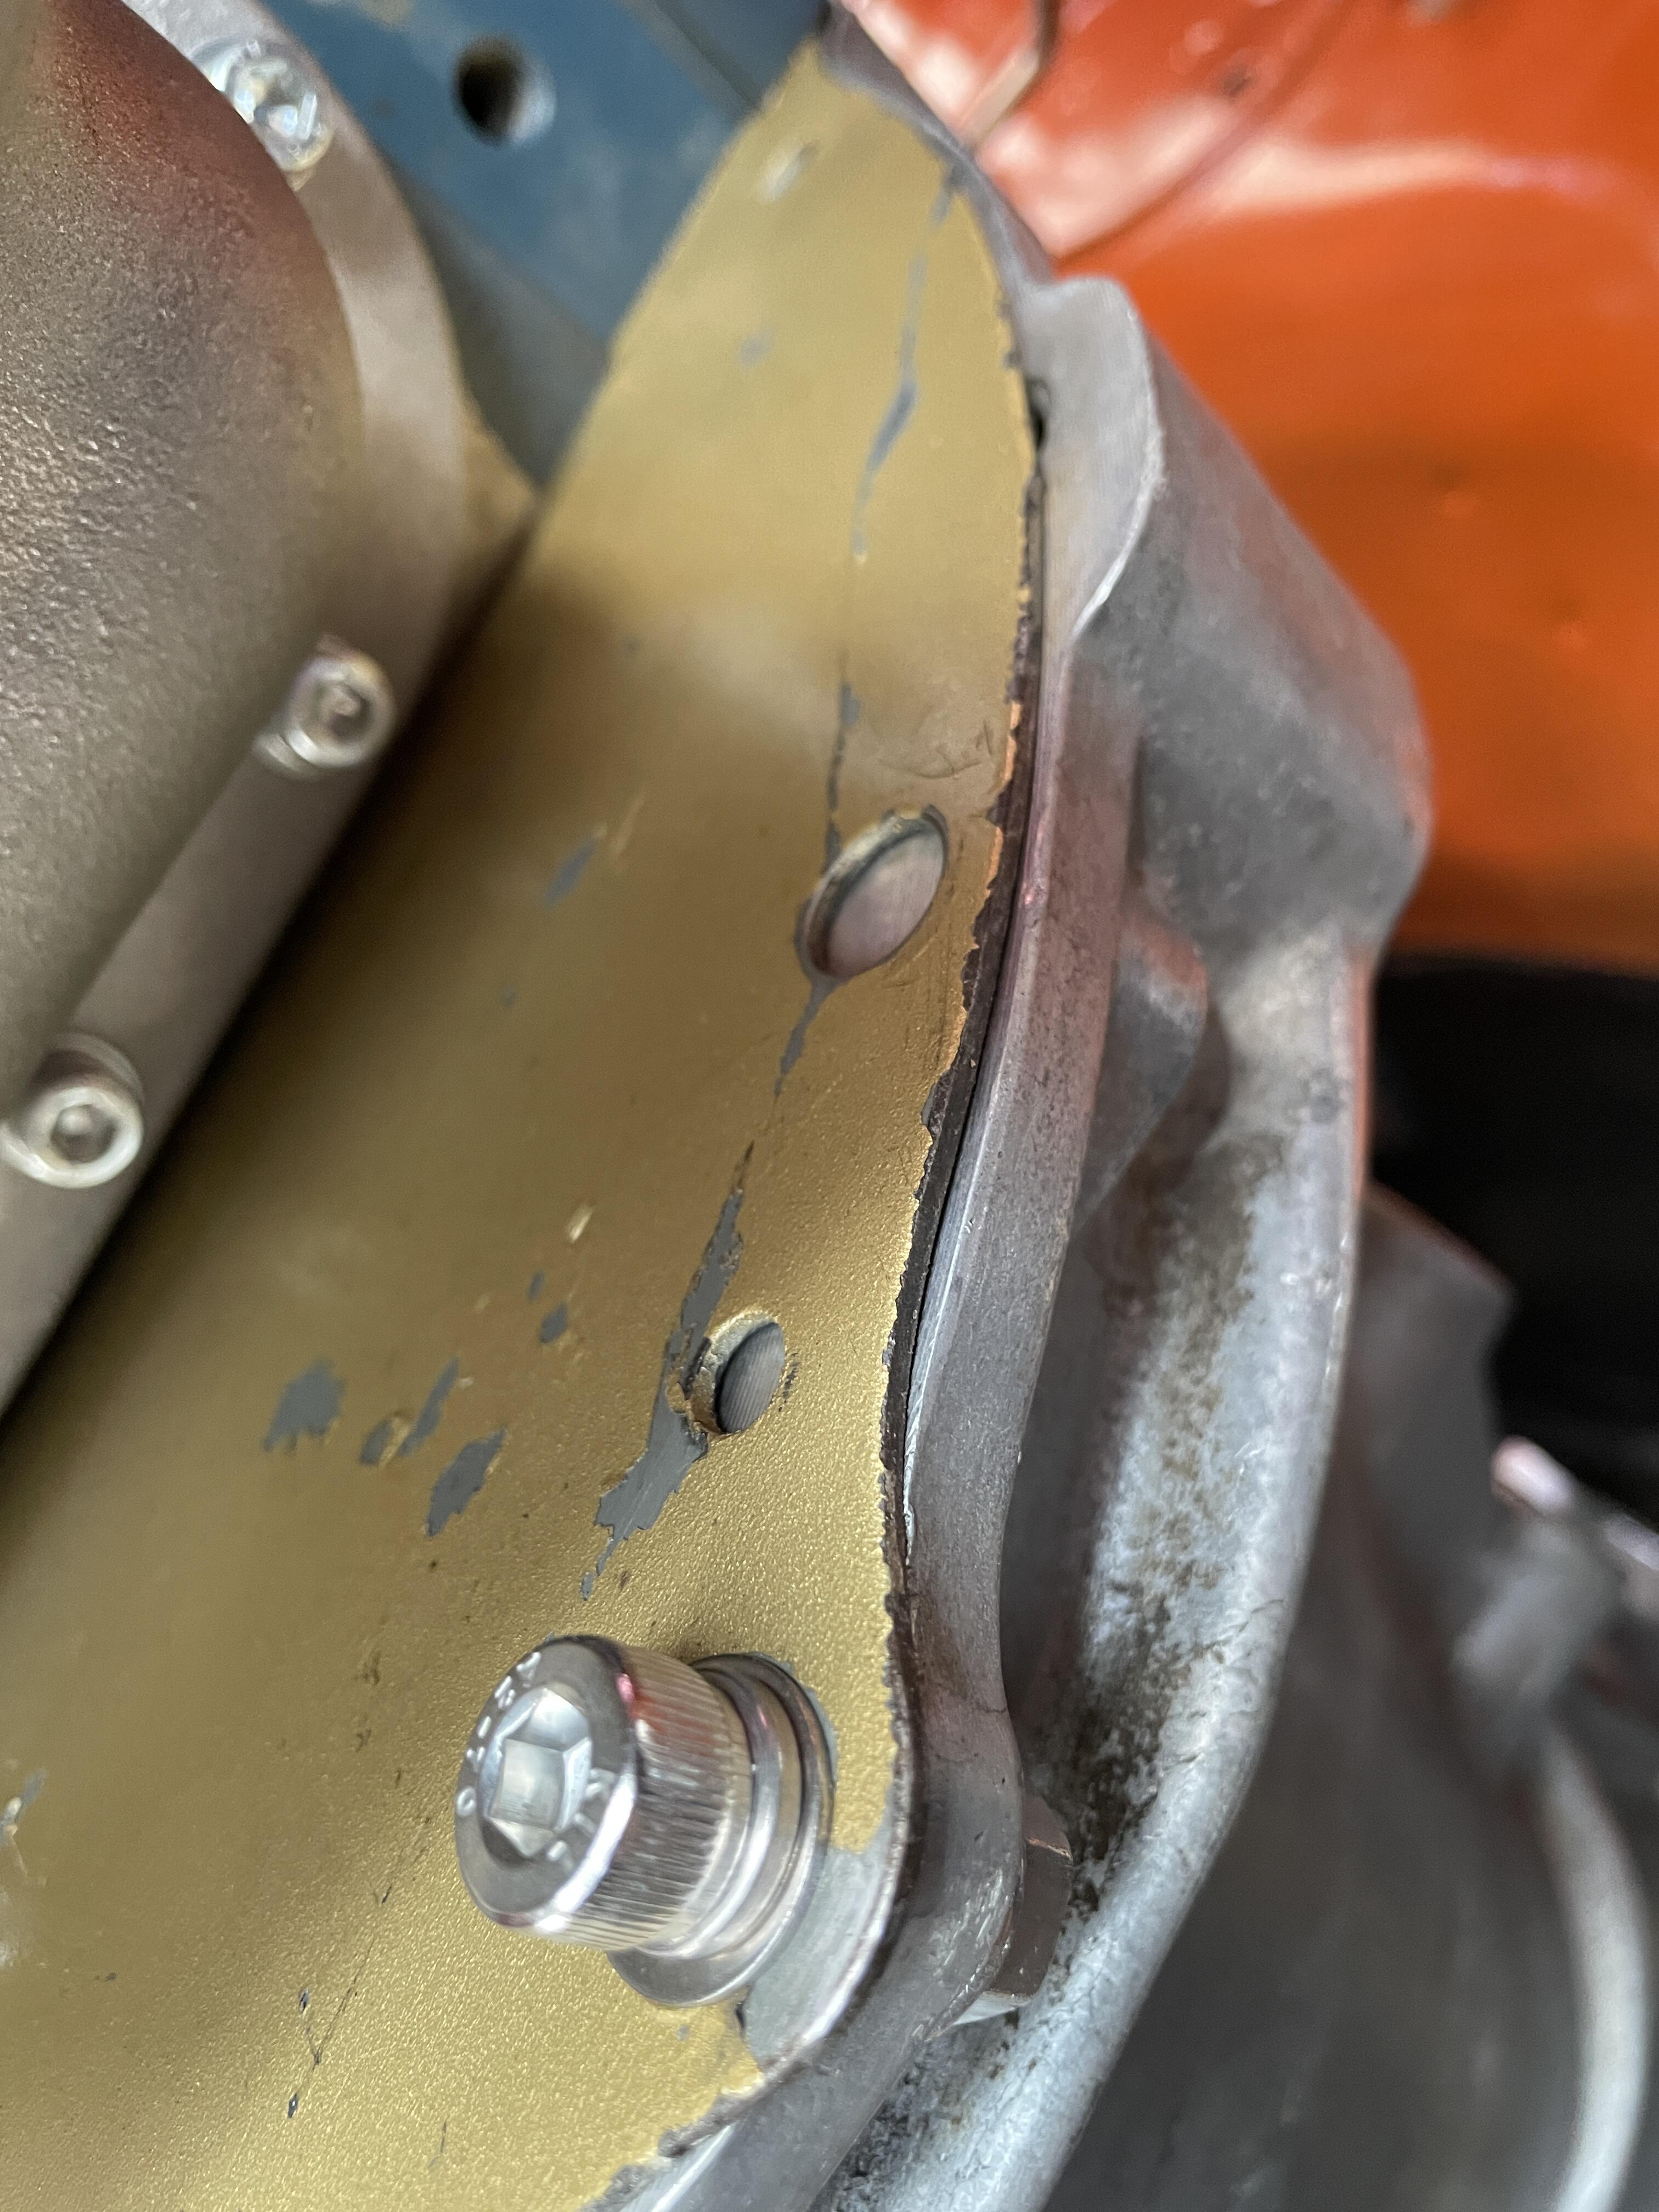
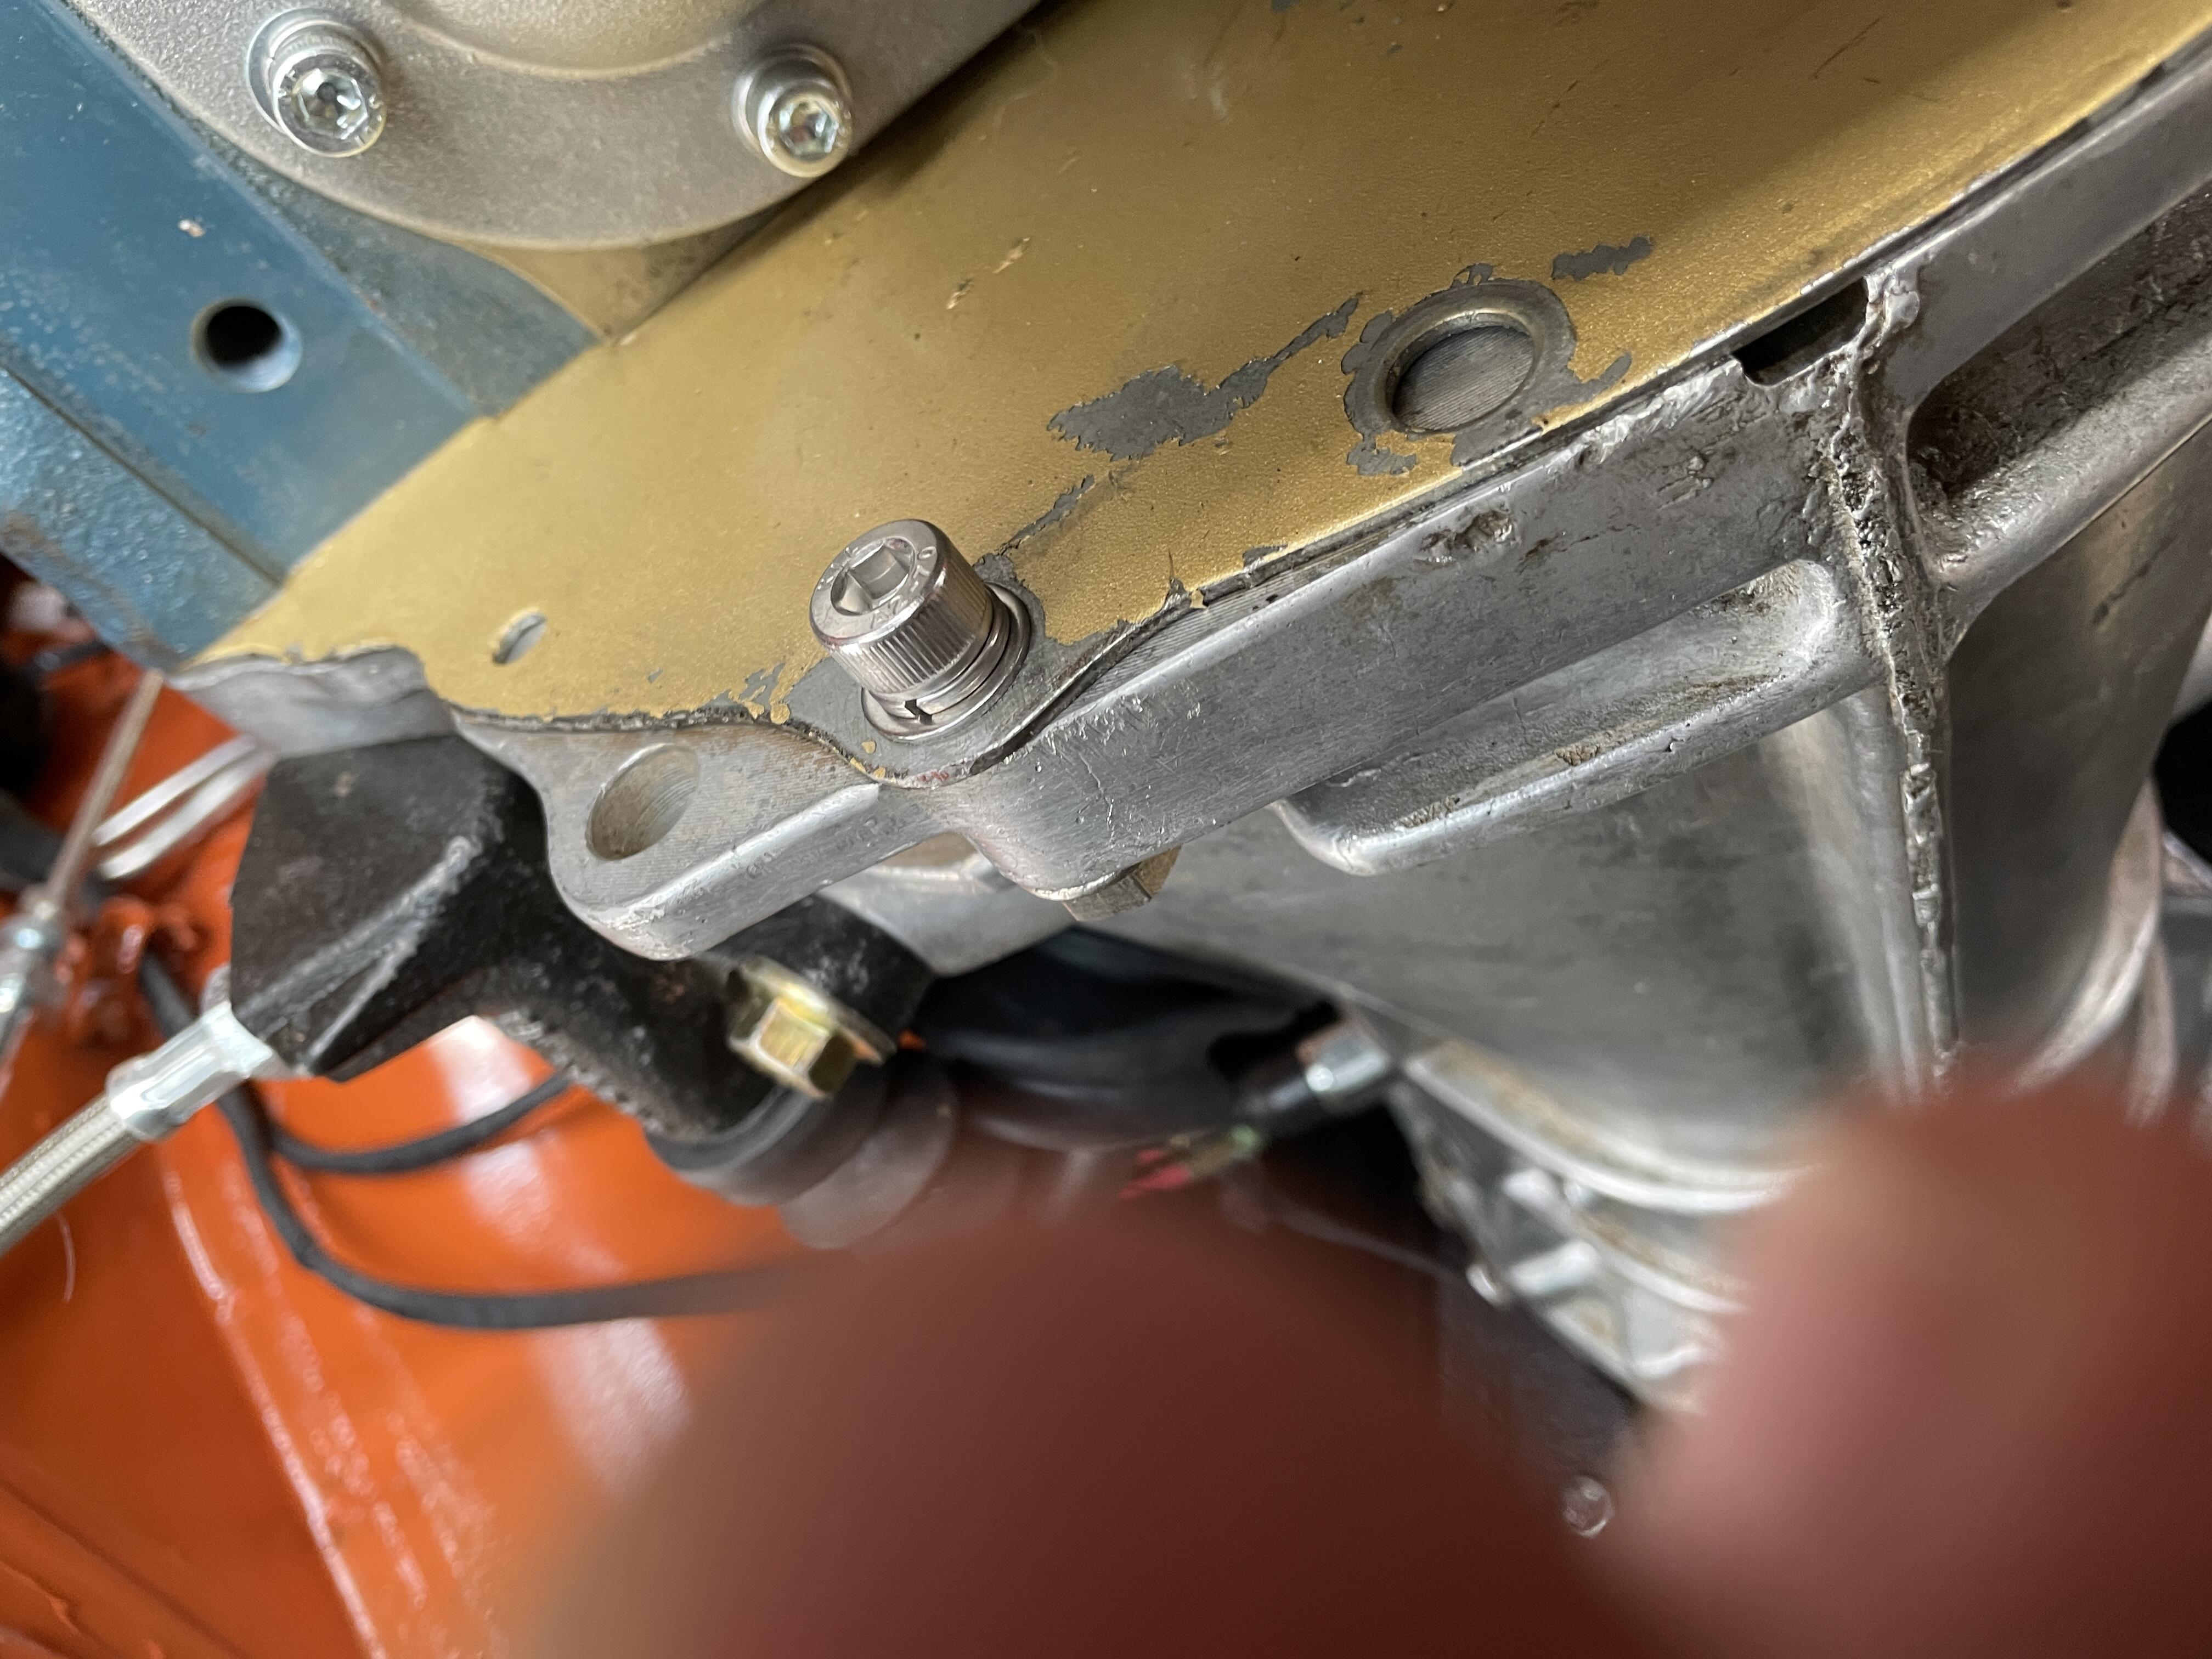
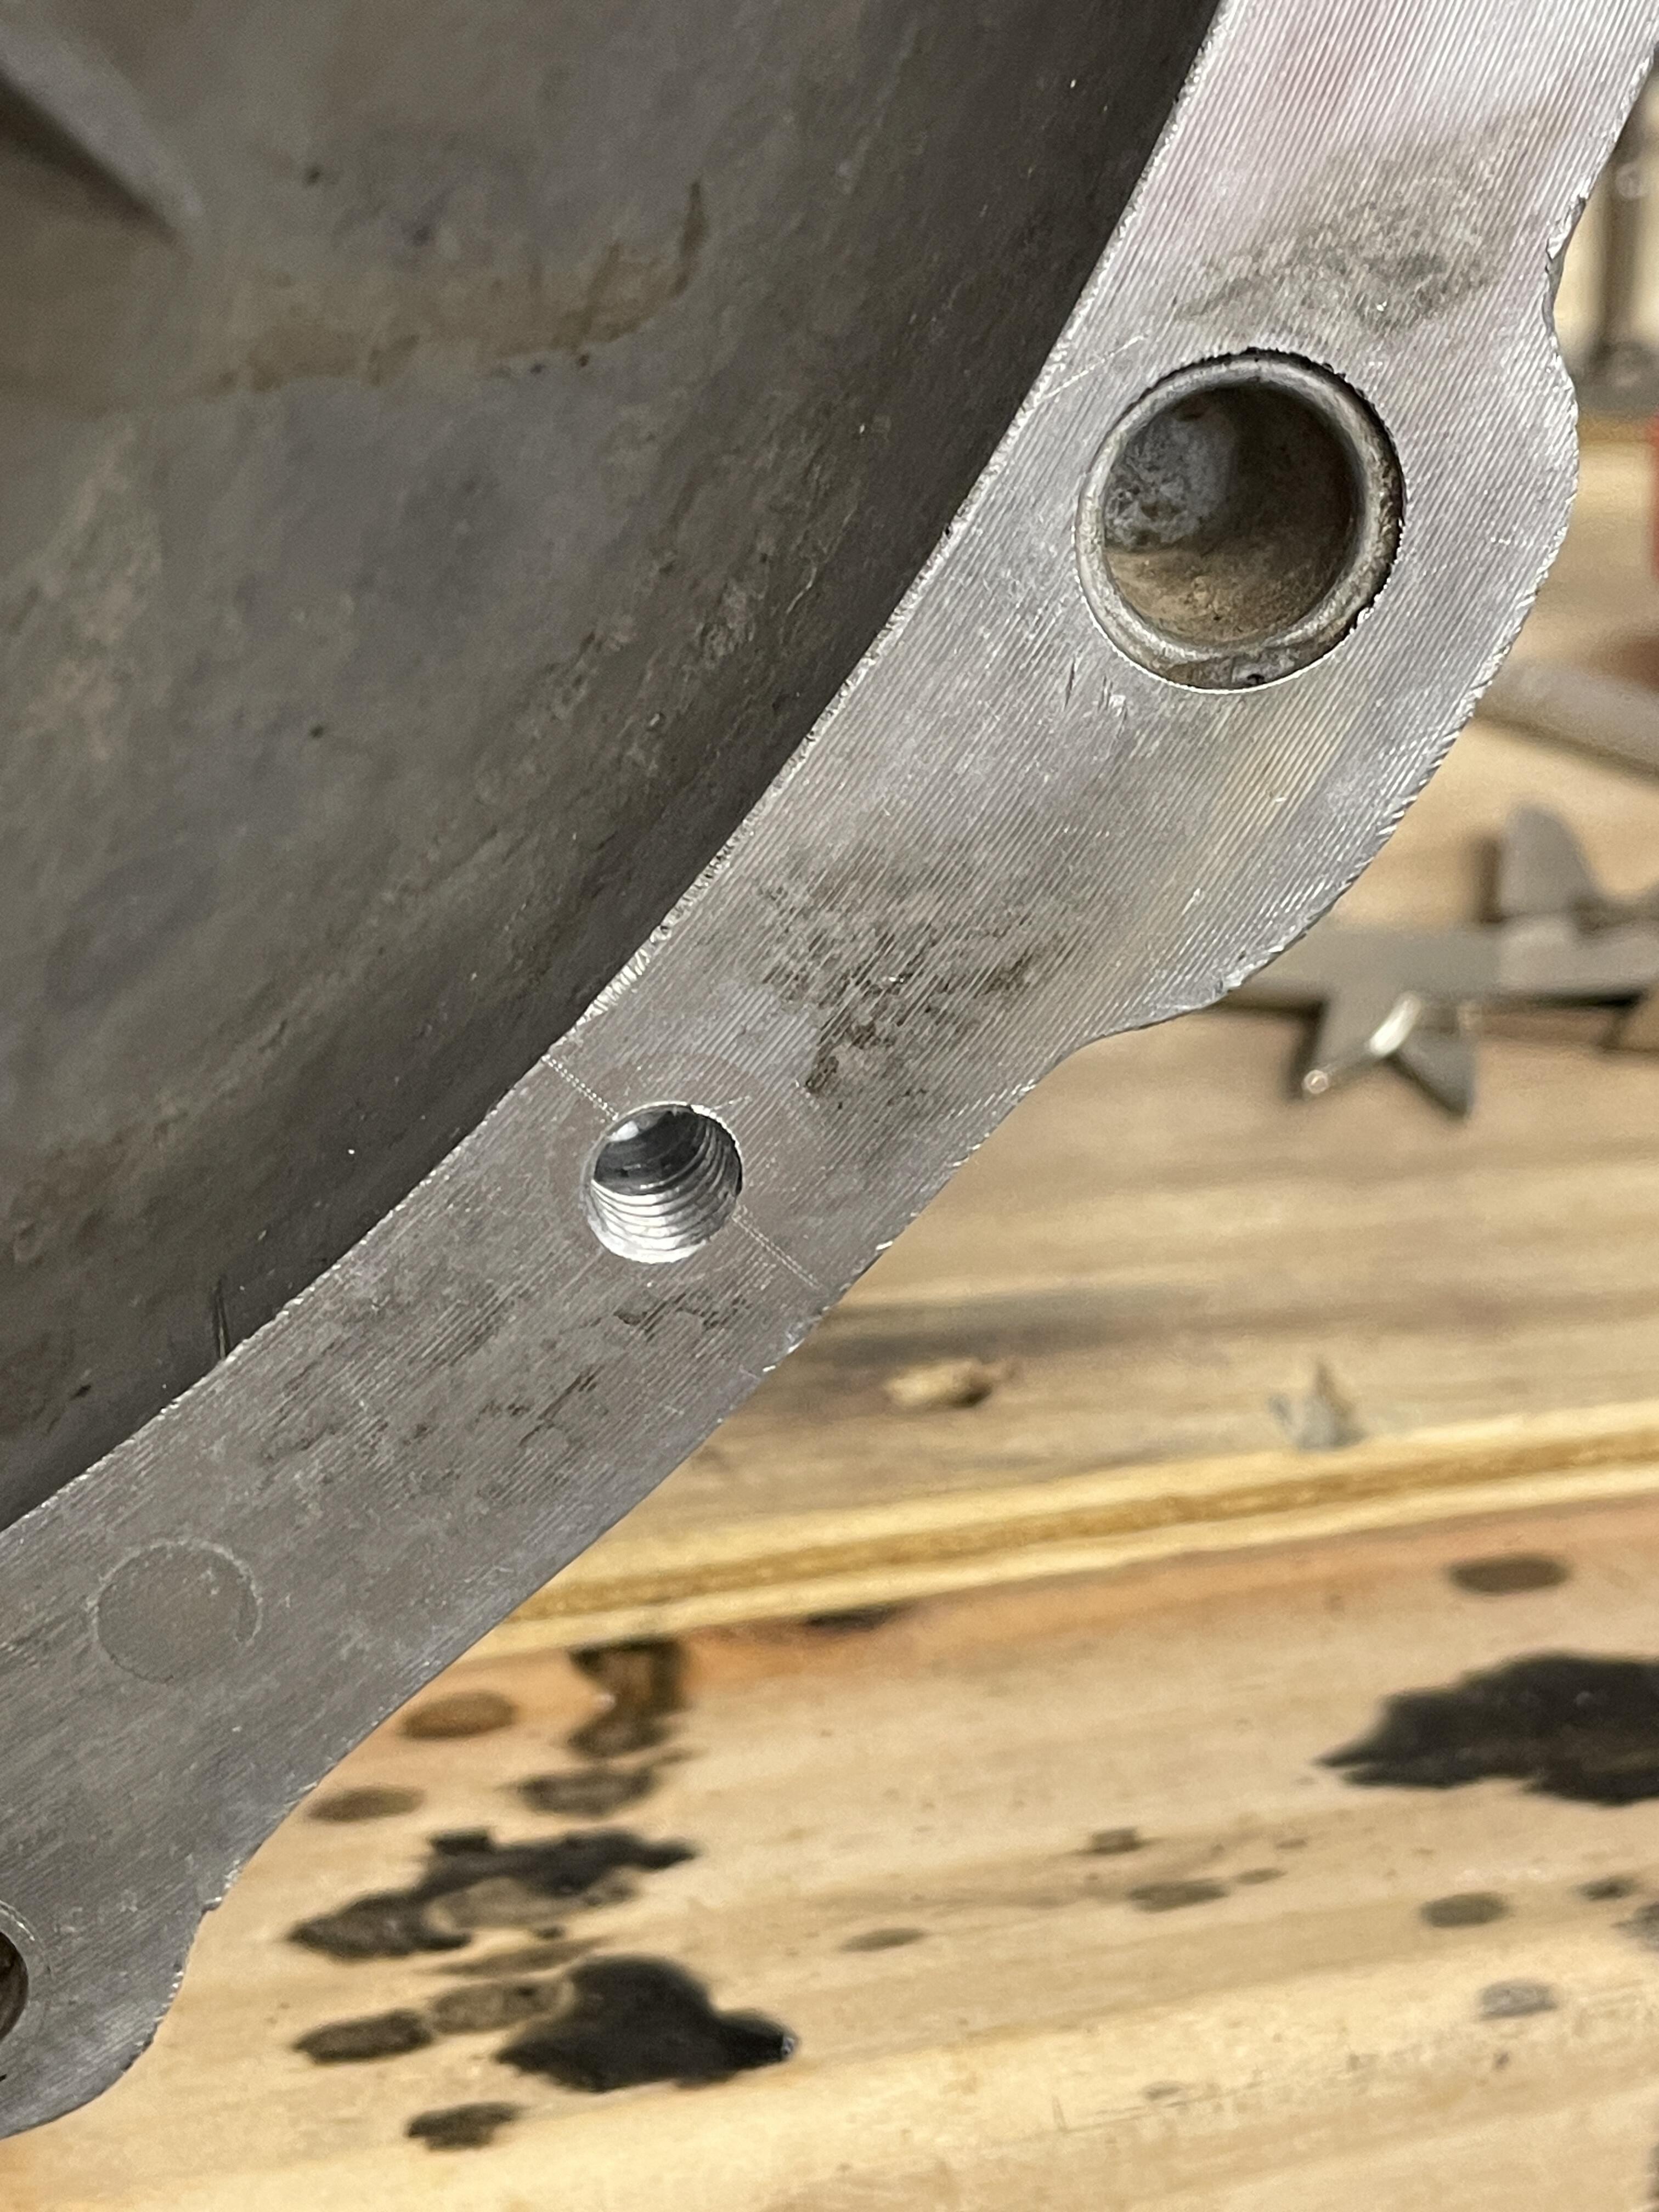
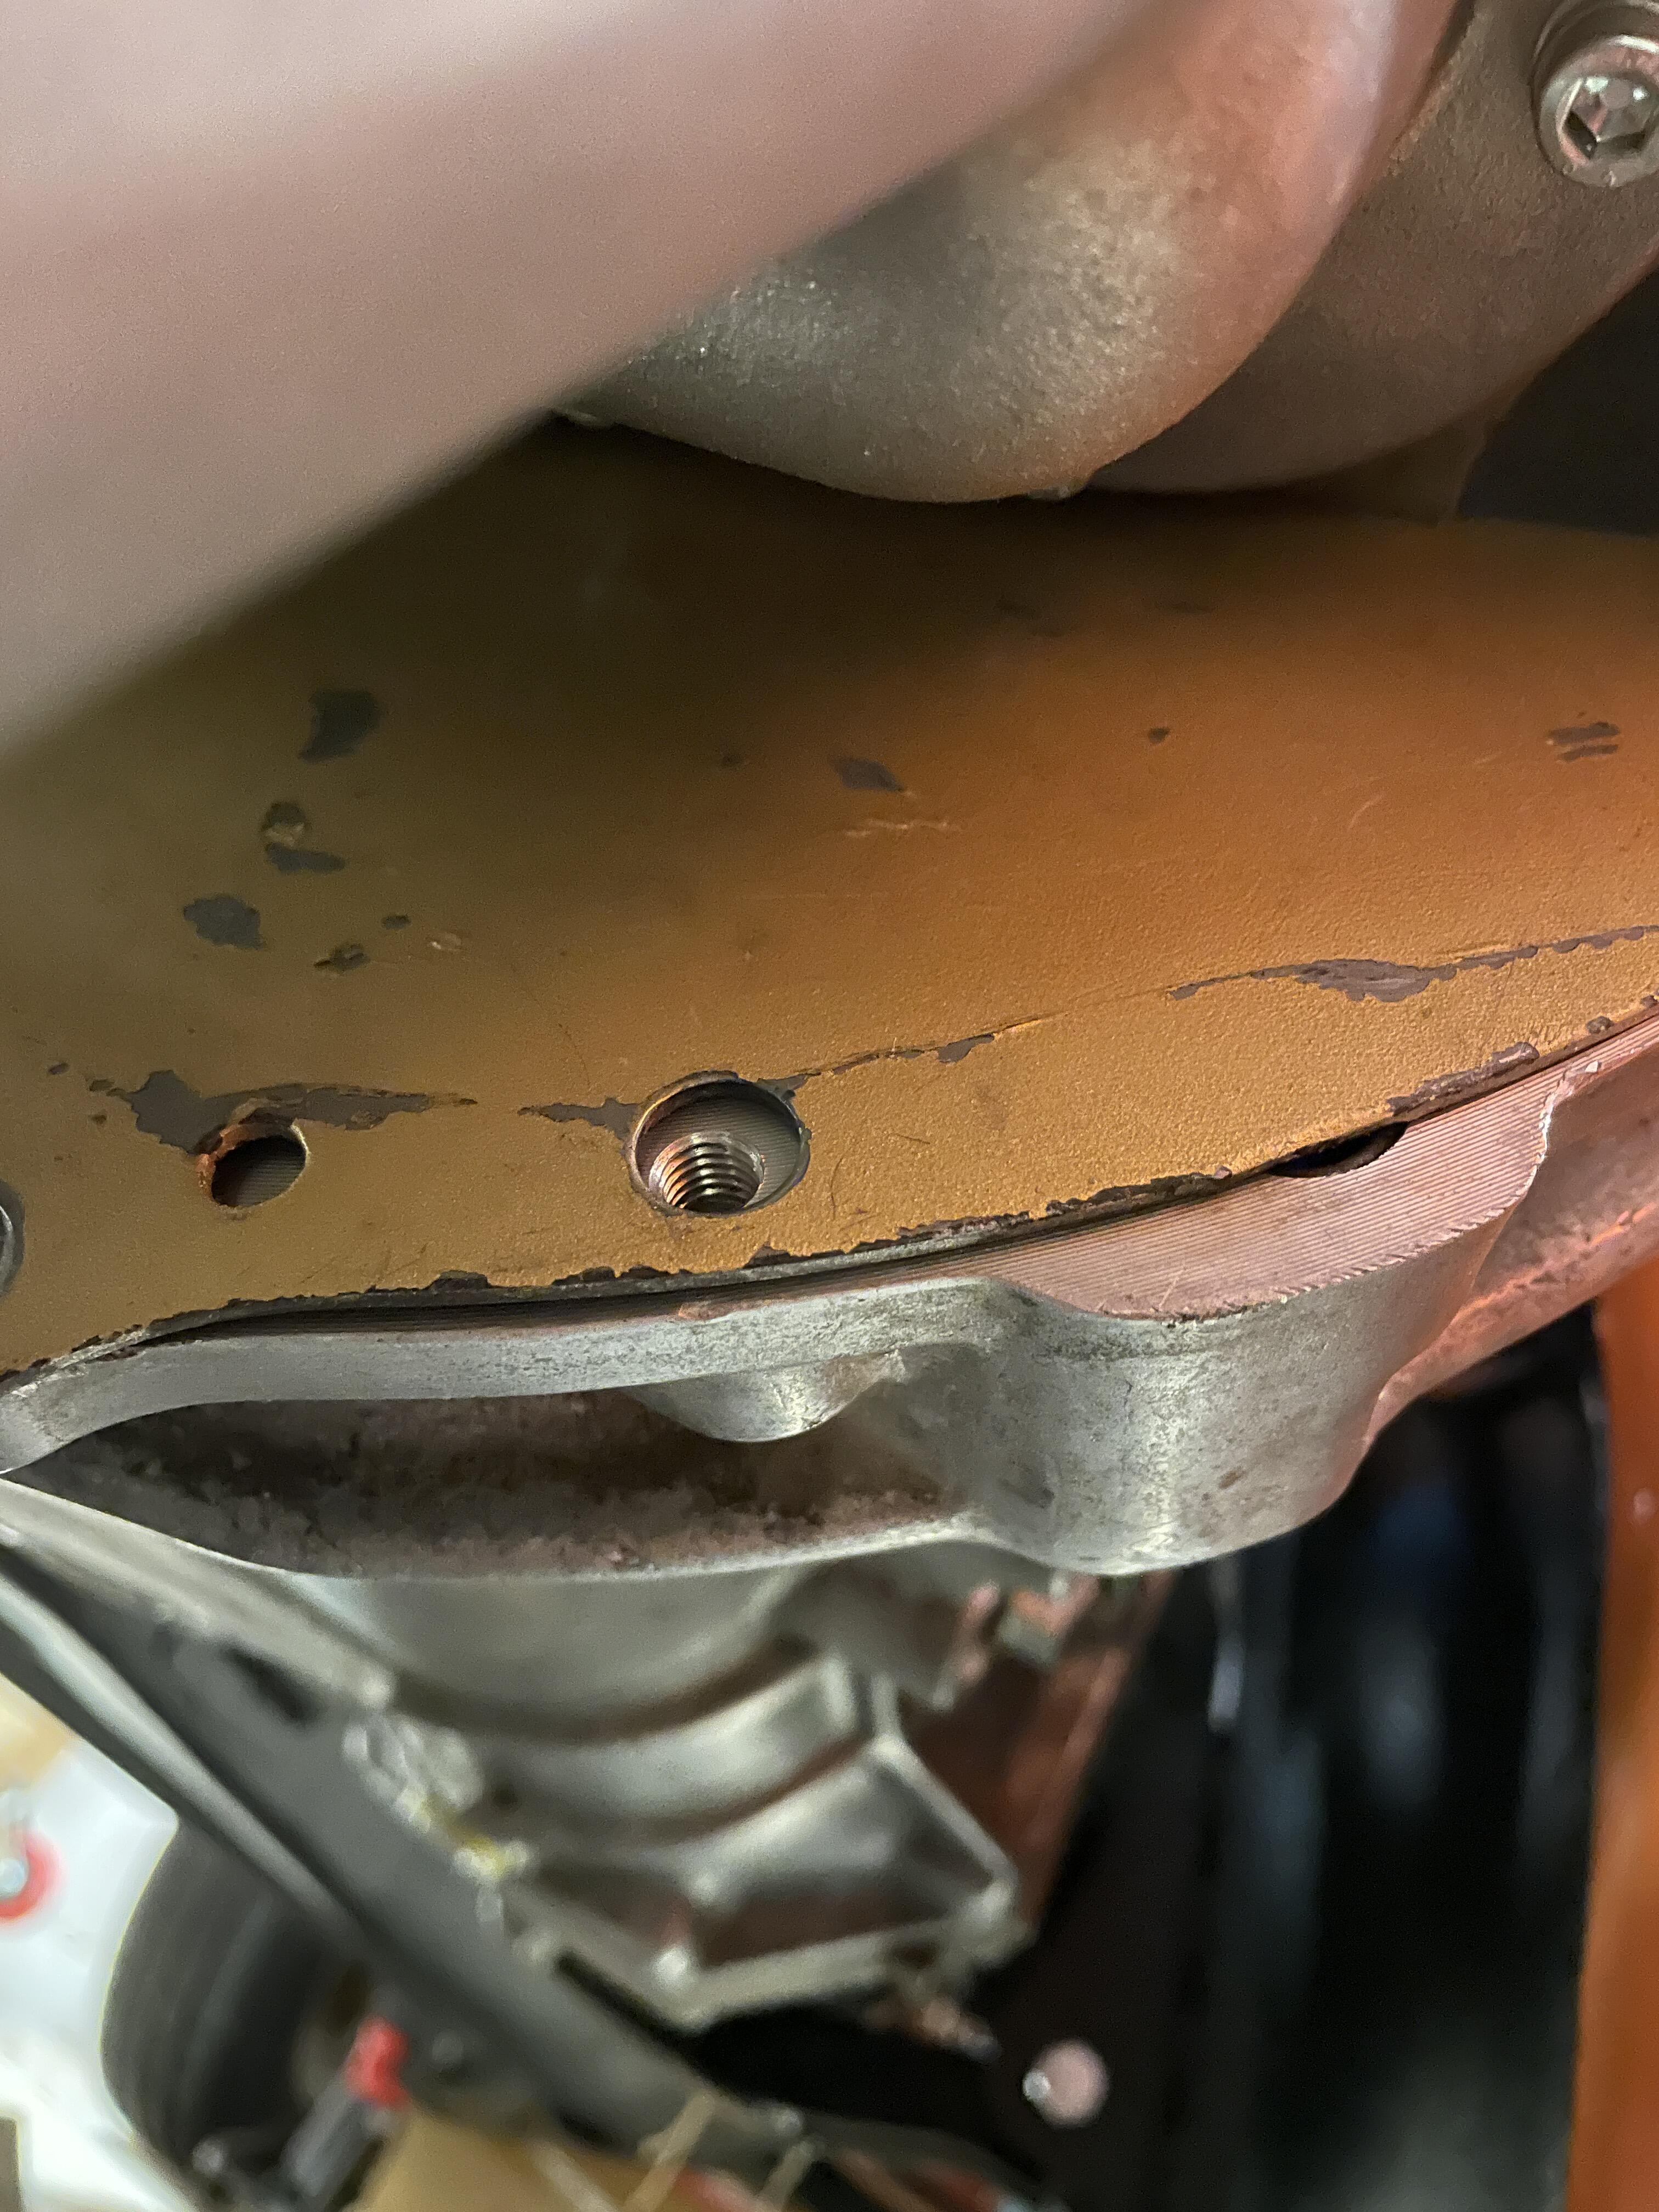
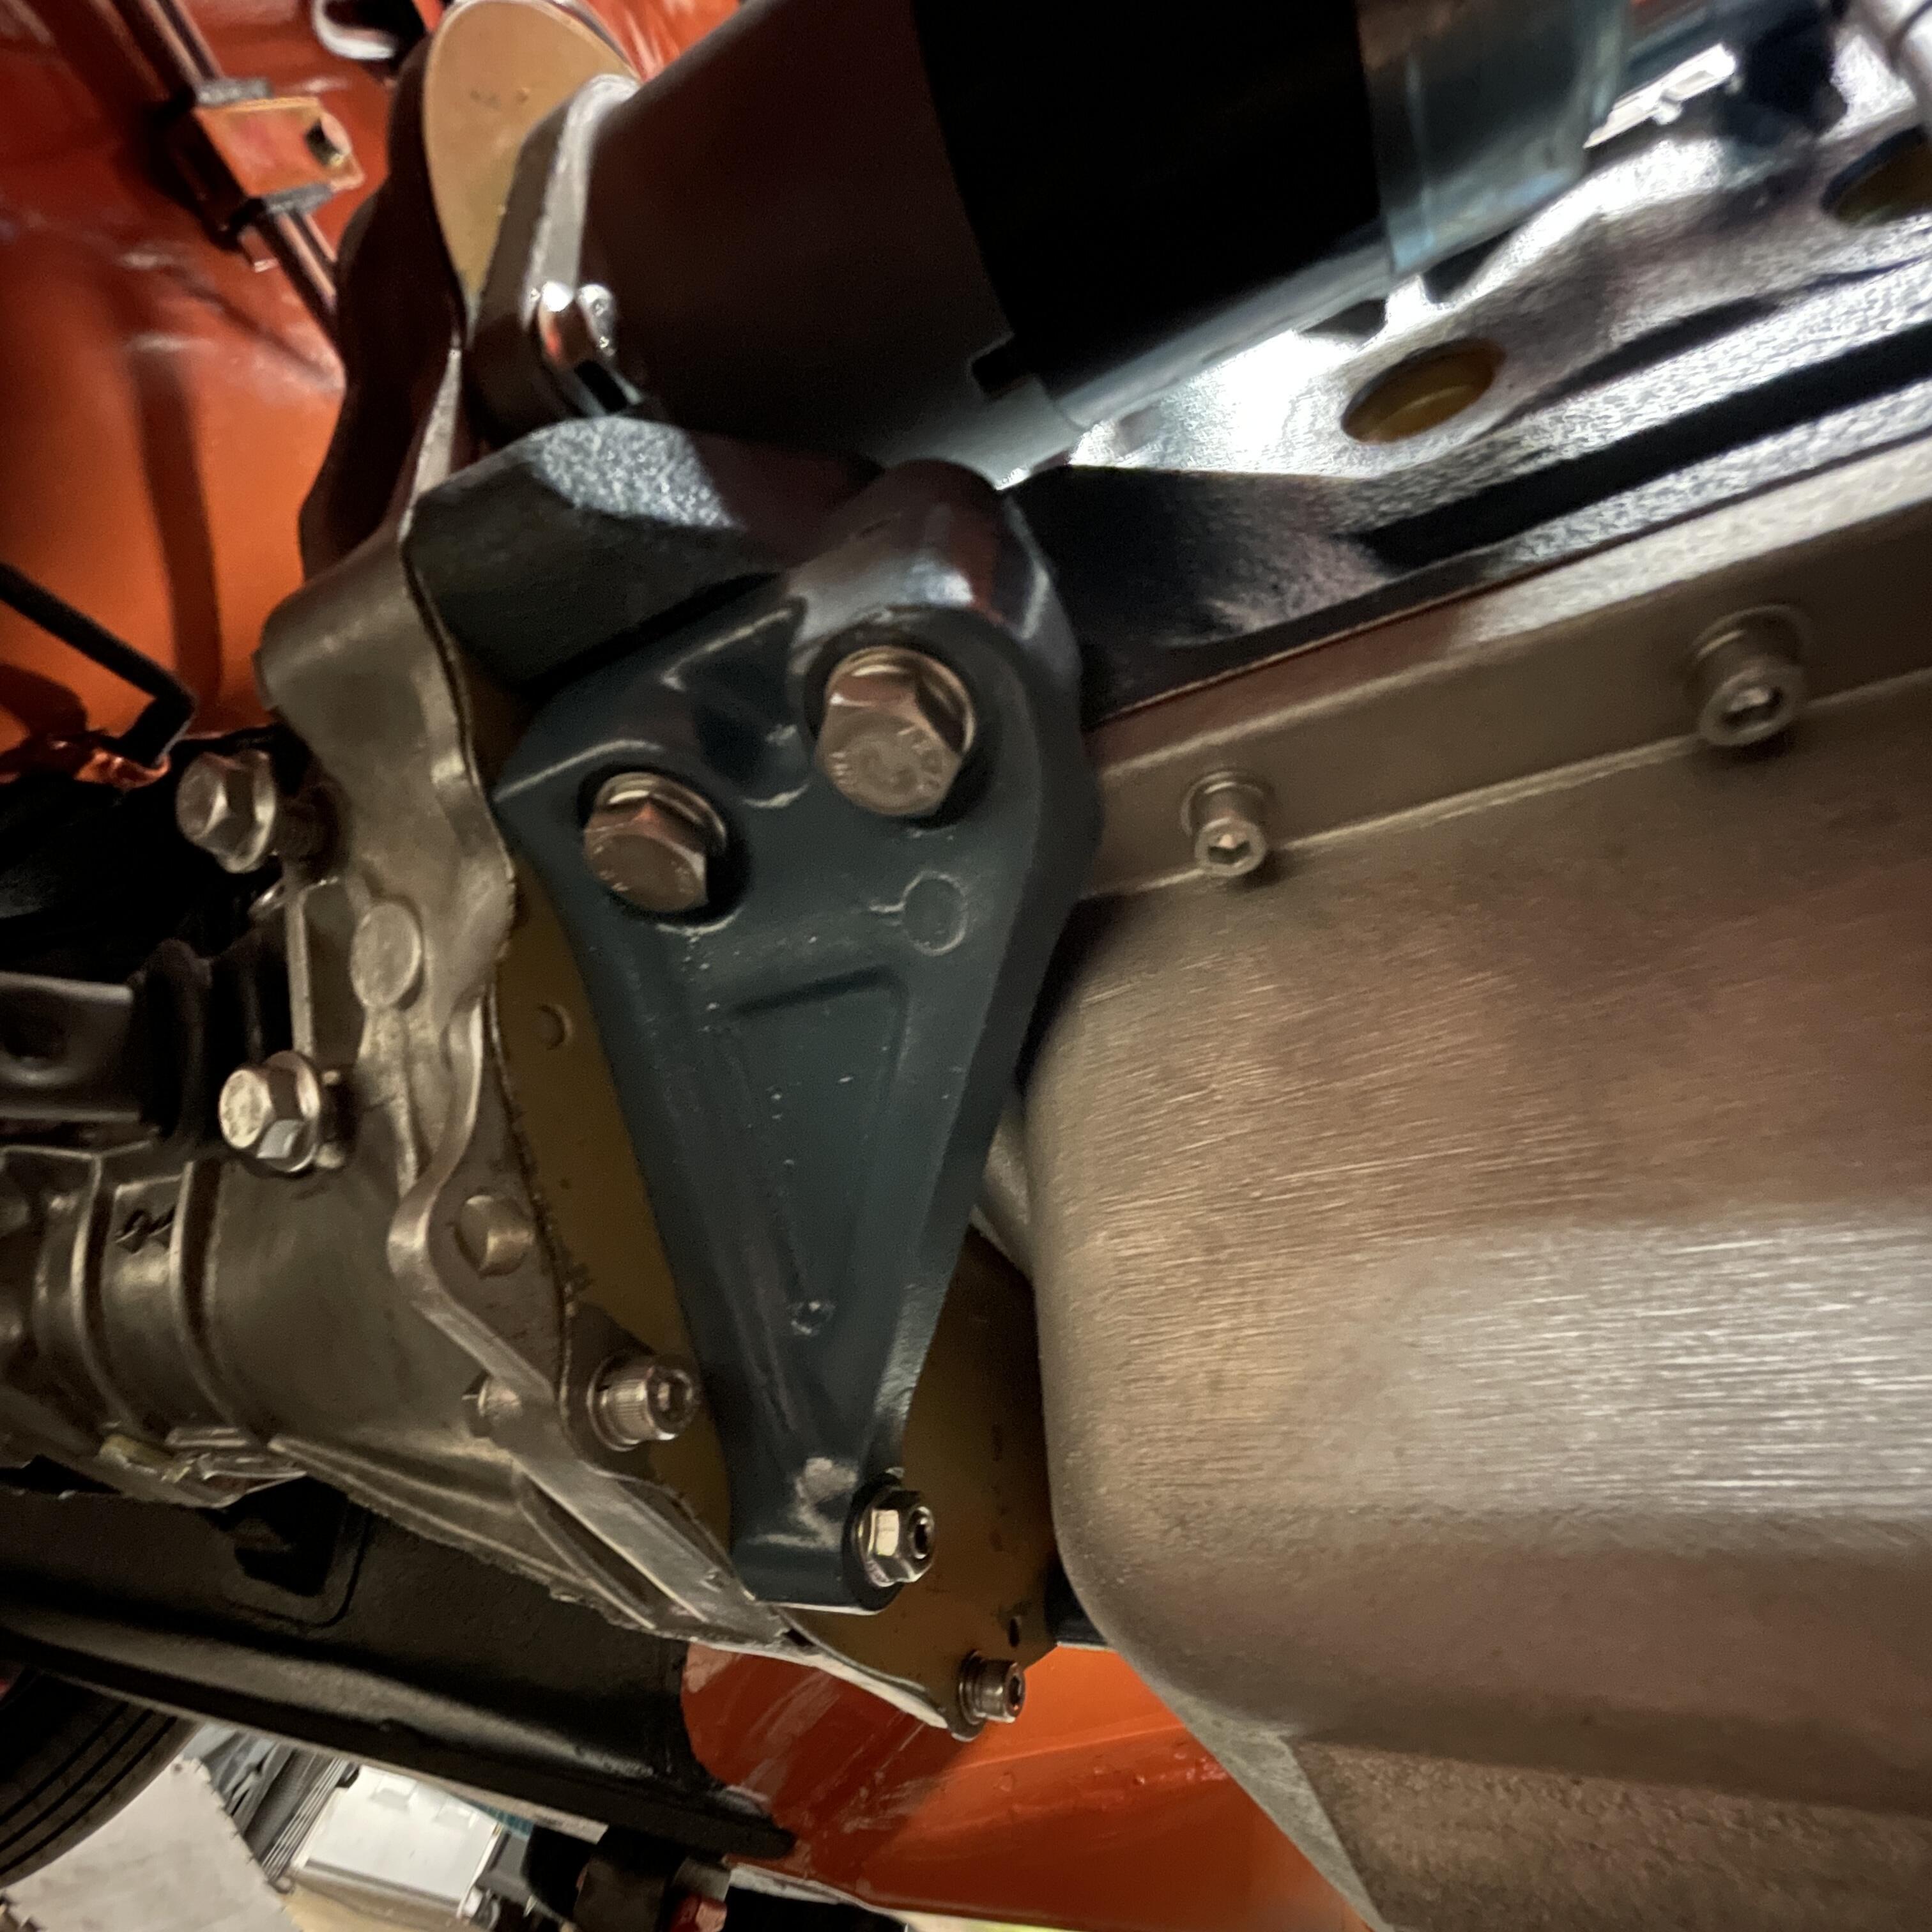
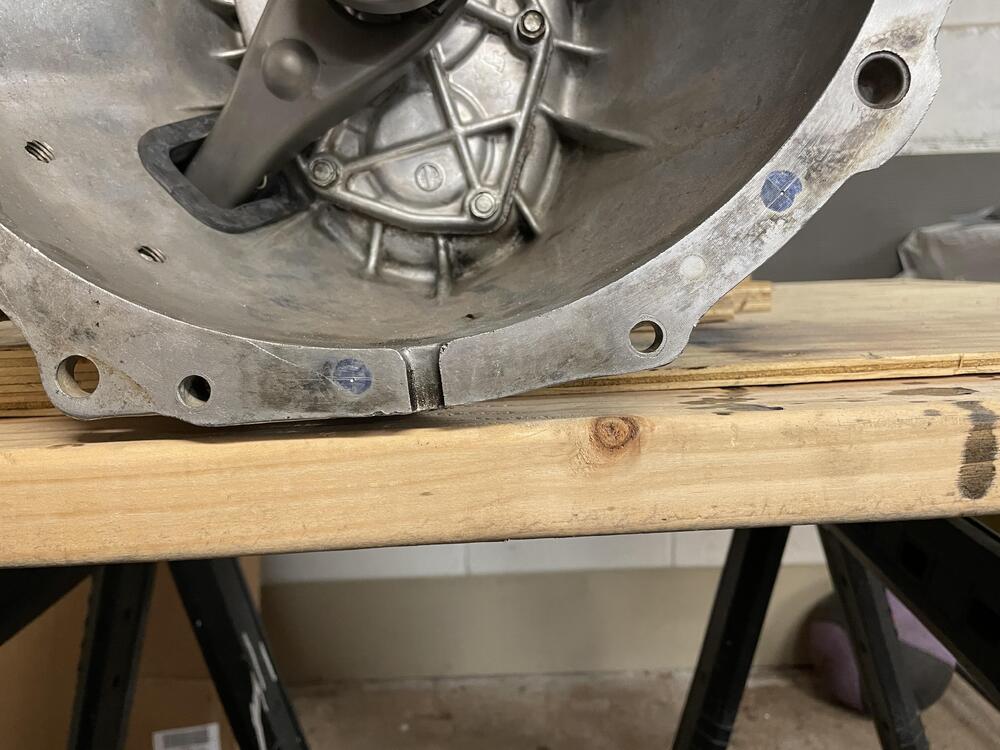
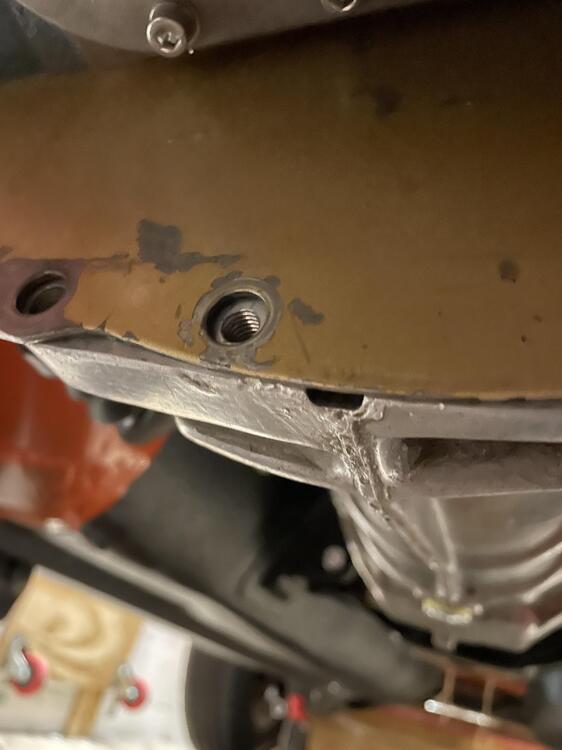
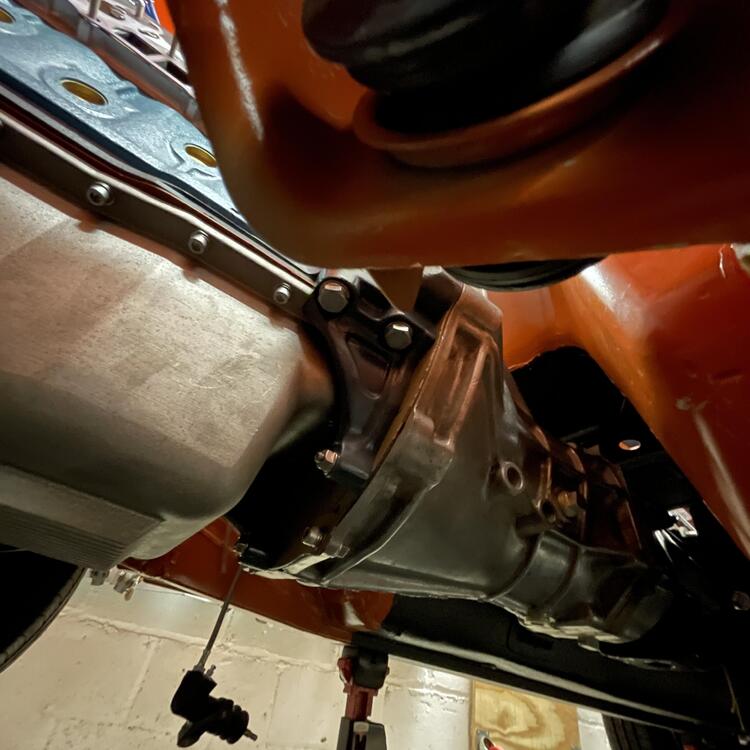
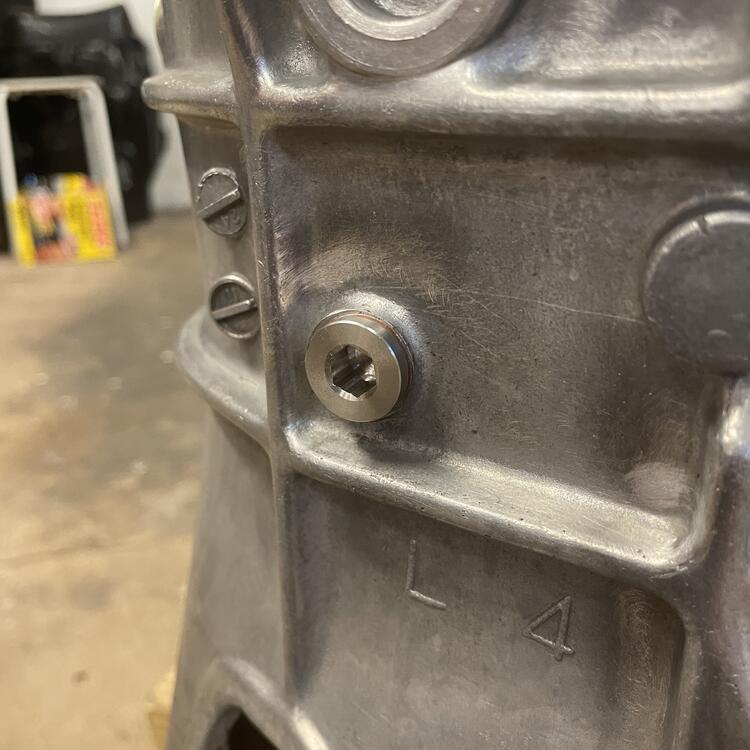
1 pointDid some stuff… Chopped up and rebuilt my compressor bracket to move it up and toward the block… I rehabilitated my transmission gussets and made them work on this 720 transmission. The gussets needed relief to accommodate the rear left corner of aluminum oil pan and the bolts. You can see where I carved that out in the process shot below where they are hanging on wires. I tapped the bell housing for m8-1.25 manifold studs and finished it off with flange nuts.


 1 point
 -
1 pointSo I wanted to be sure the motor was still viable. So I hooked it up to a battery sitting on a trailer and spun it over with a remote starter switch. It spun freely with no plugs in it. So then I wanted to try to fire it over. It didn't have any carbs or exhaust on it. I messed with it for a while. Tried three different coils and two distributors called SteveJ to make sure I knew what I was doing. I then put the matchbox dizzy back in and got it to run on ether. I have a set of Ztherpay carbs that are evidently from 2011 that still look surprisingly good. They were on this engine and I will clean them up and reuse them for now 20231007_172650_447749883773934.mp4 It lives!!!1 point
-
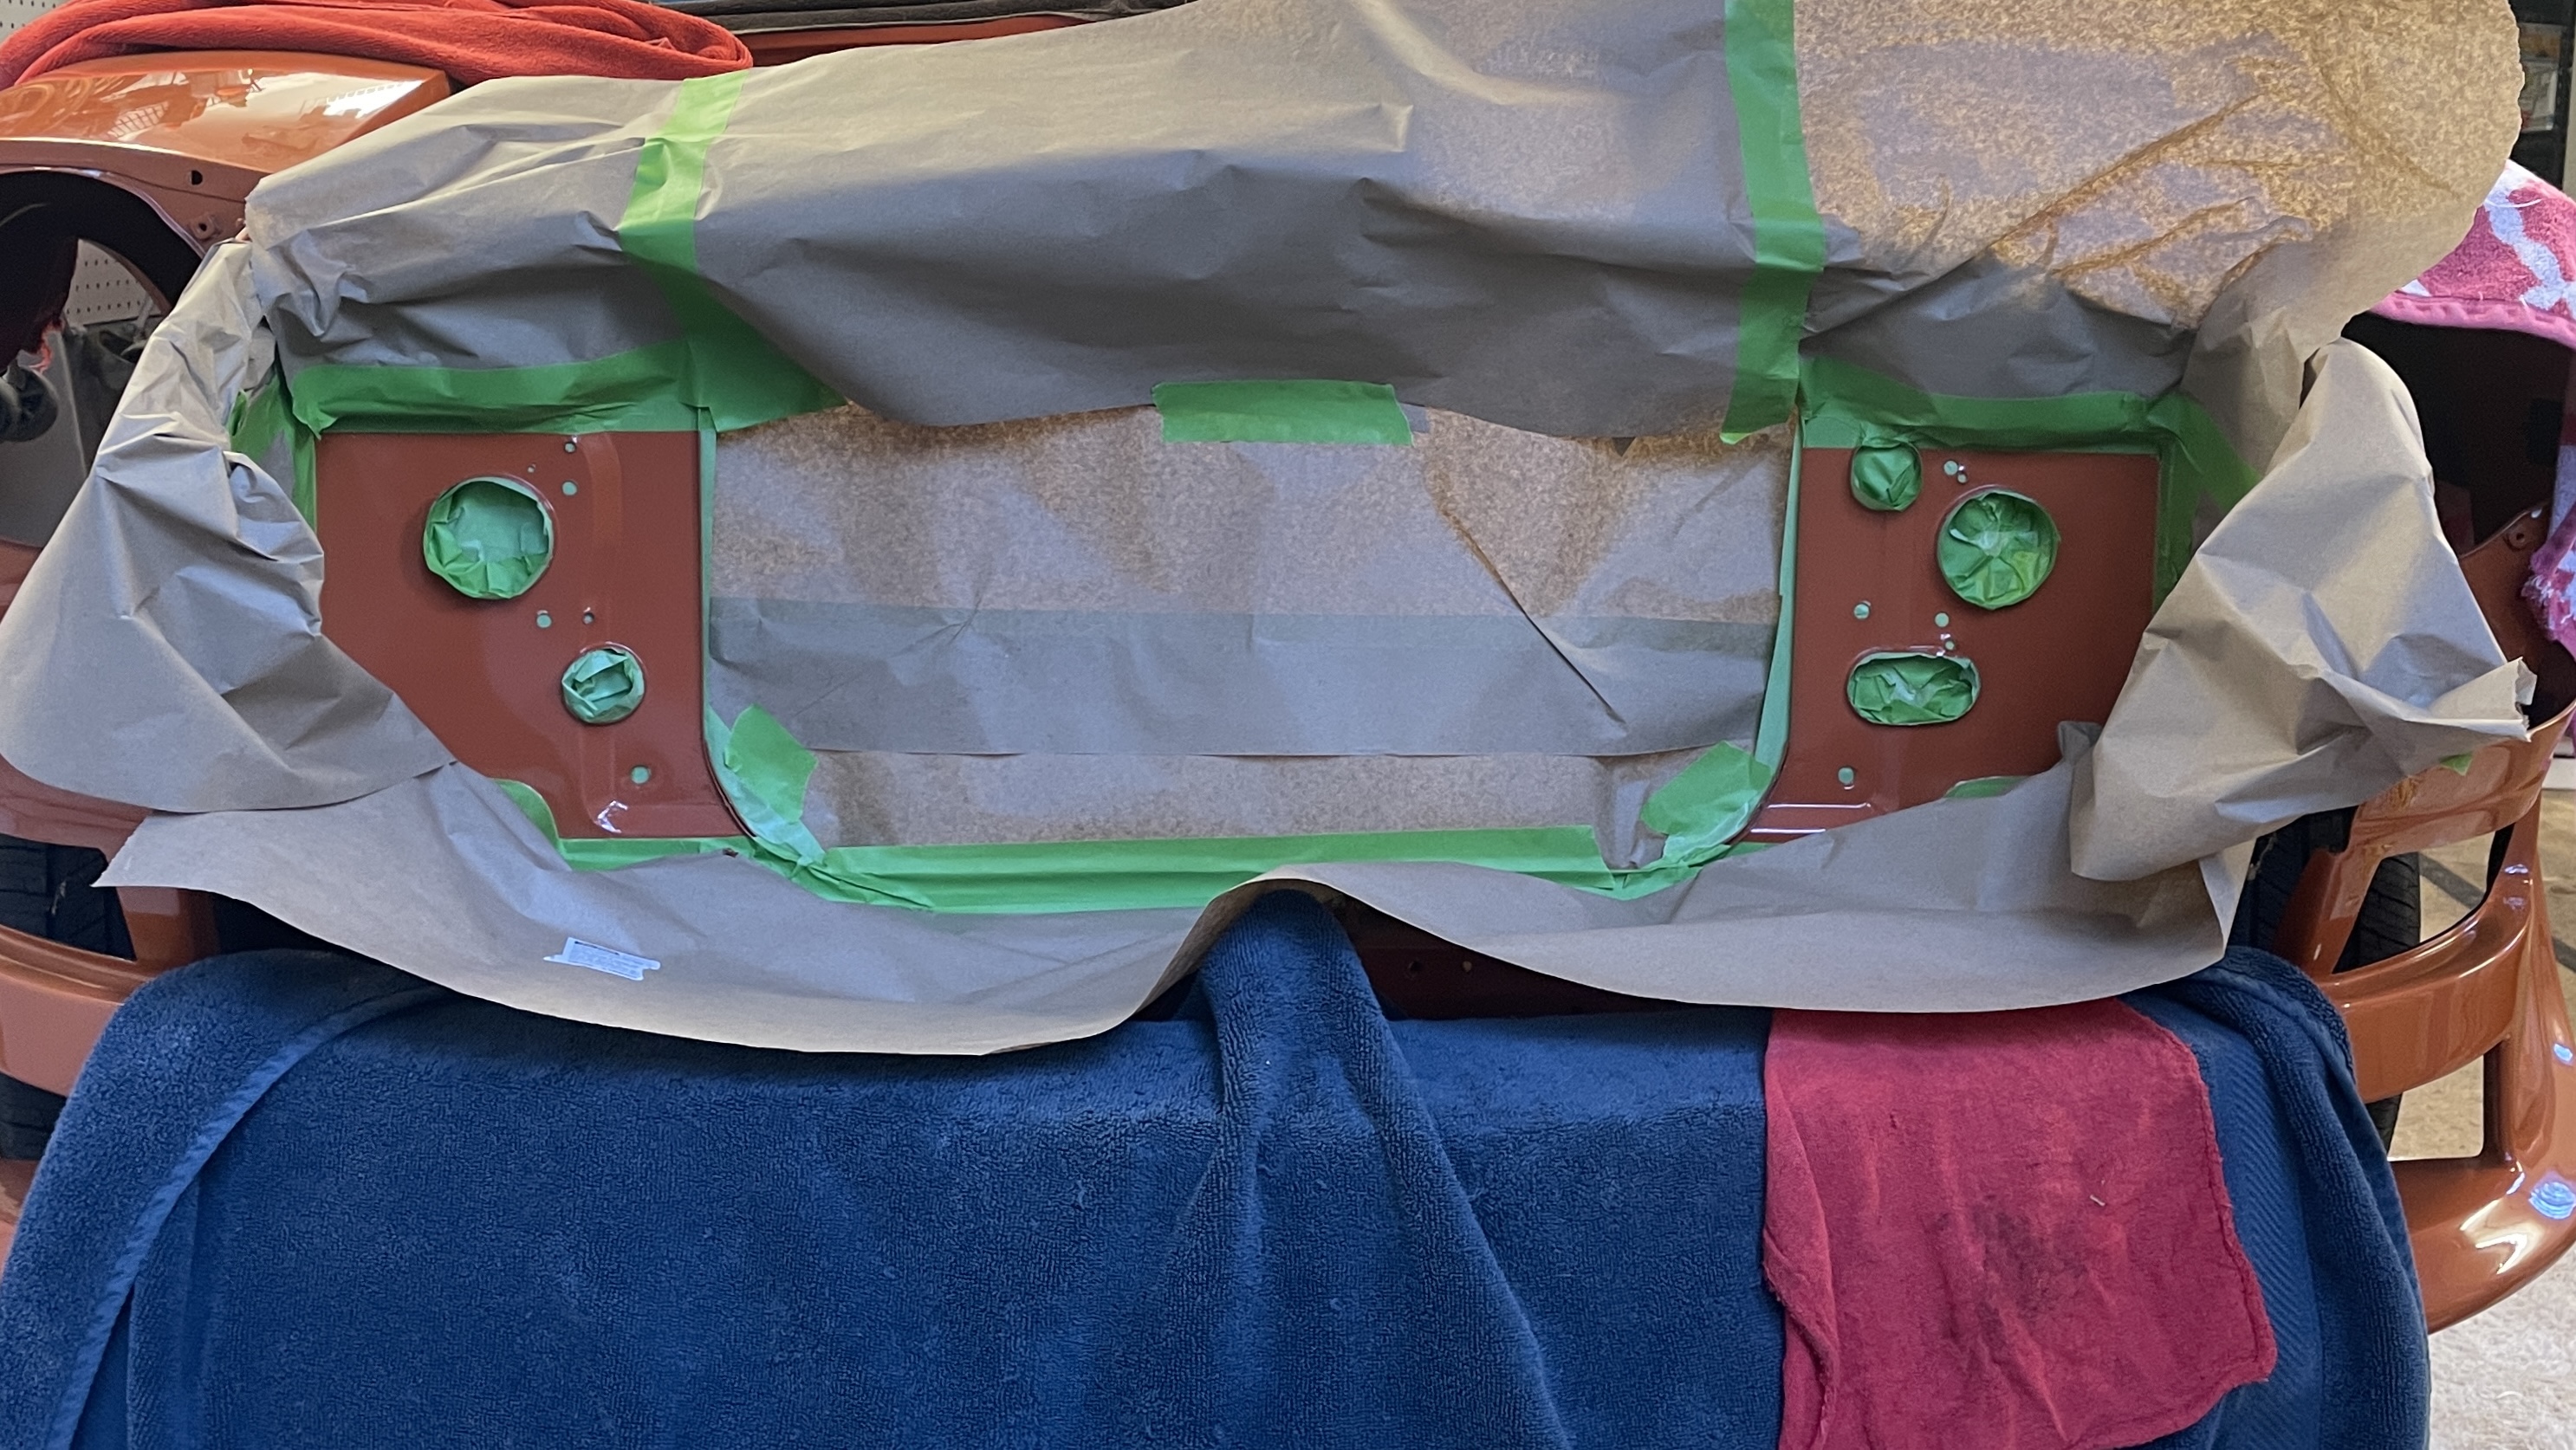
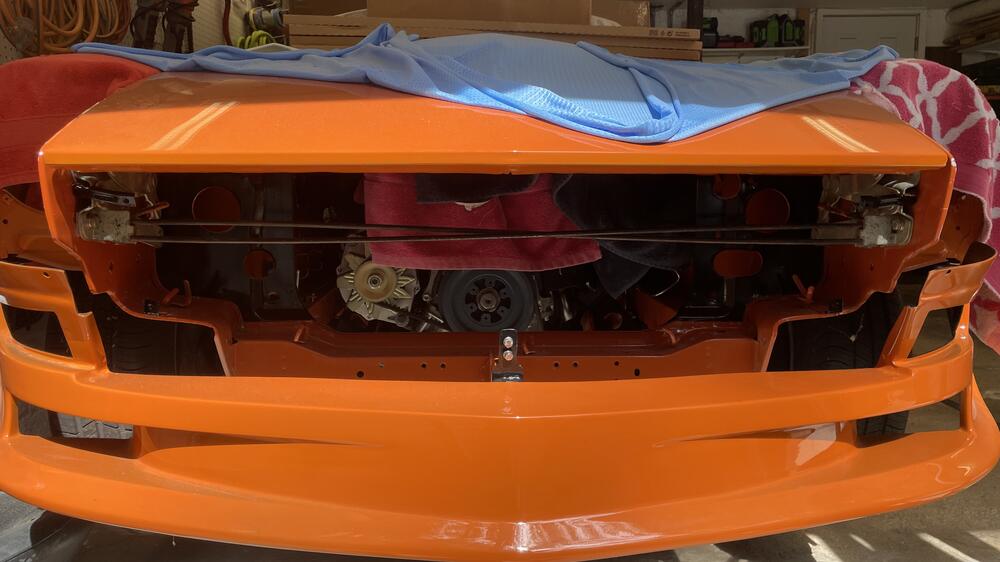
1 pointI blacked out the radiator bulkhead and grill tabs (thanks @Patcon for the thread showing how that’s done). Now I just need a 280z harness boot and I can put the engine harness in.


 1 point
 -
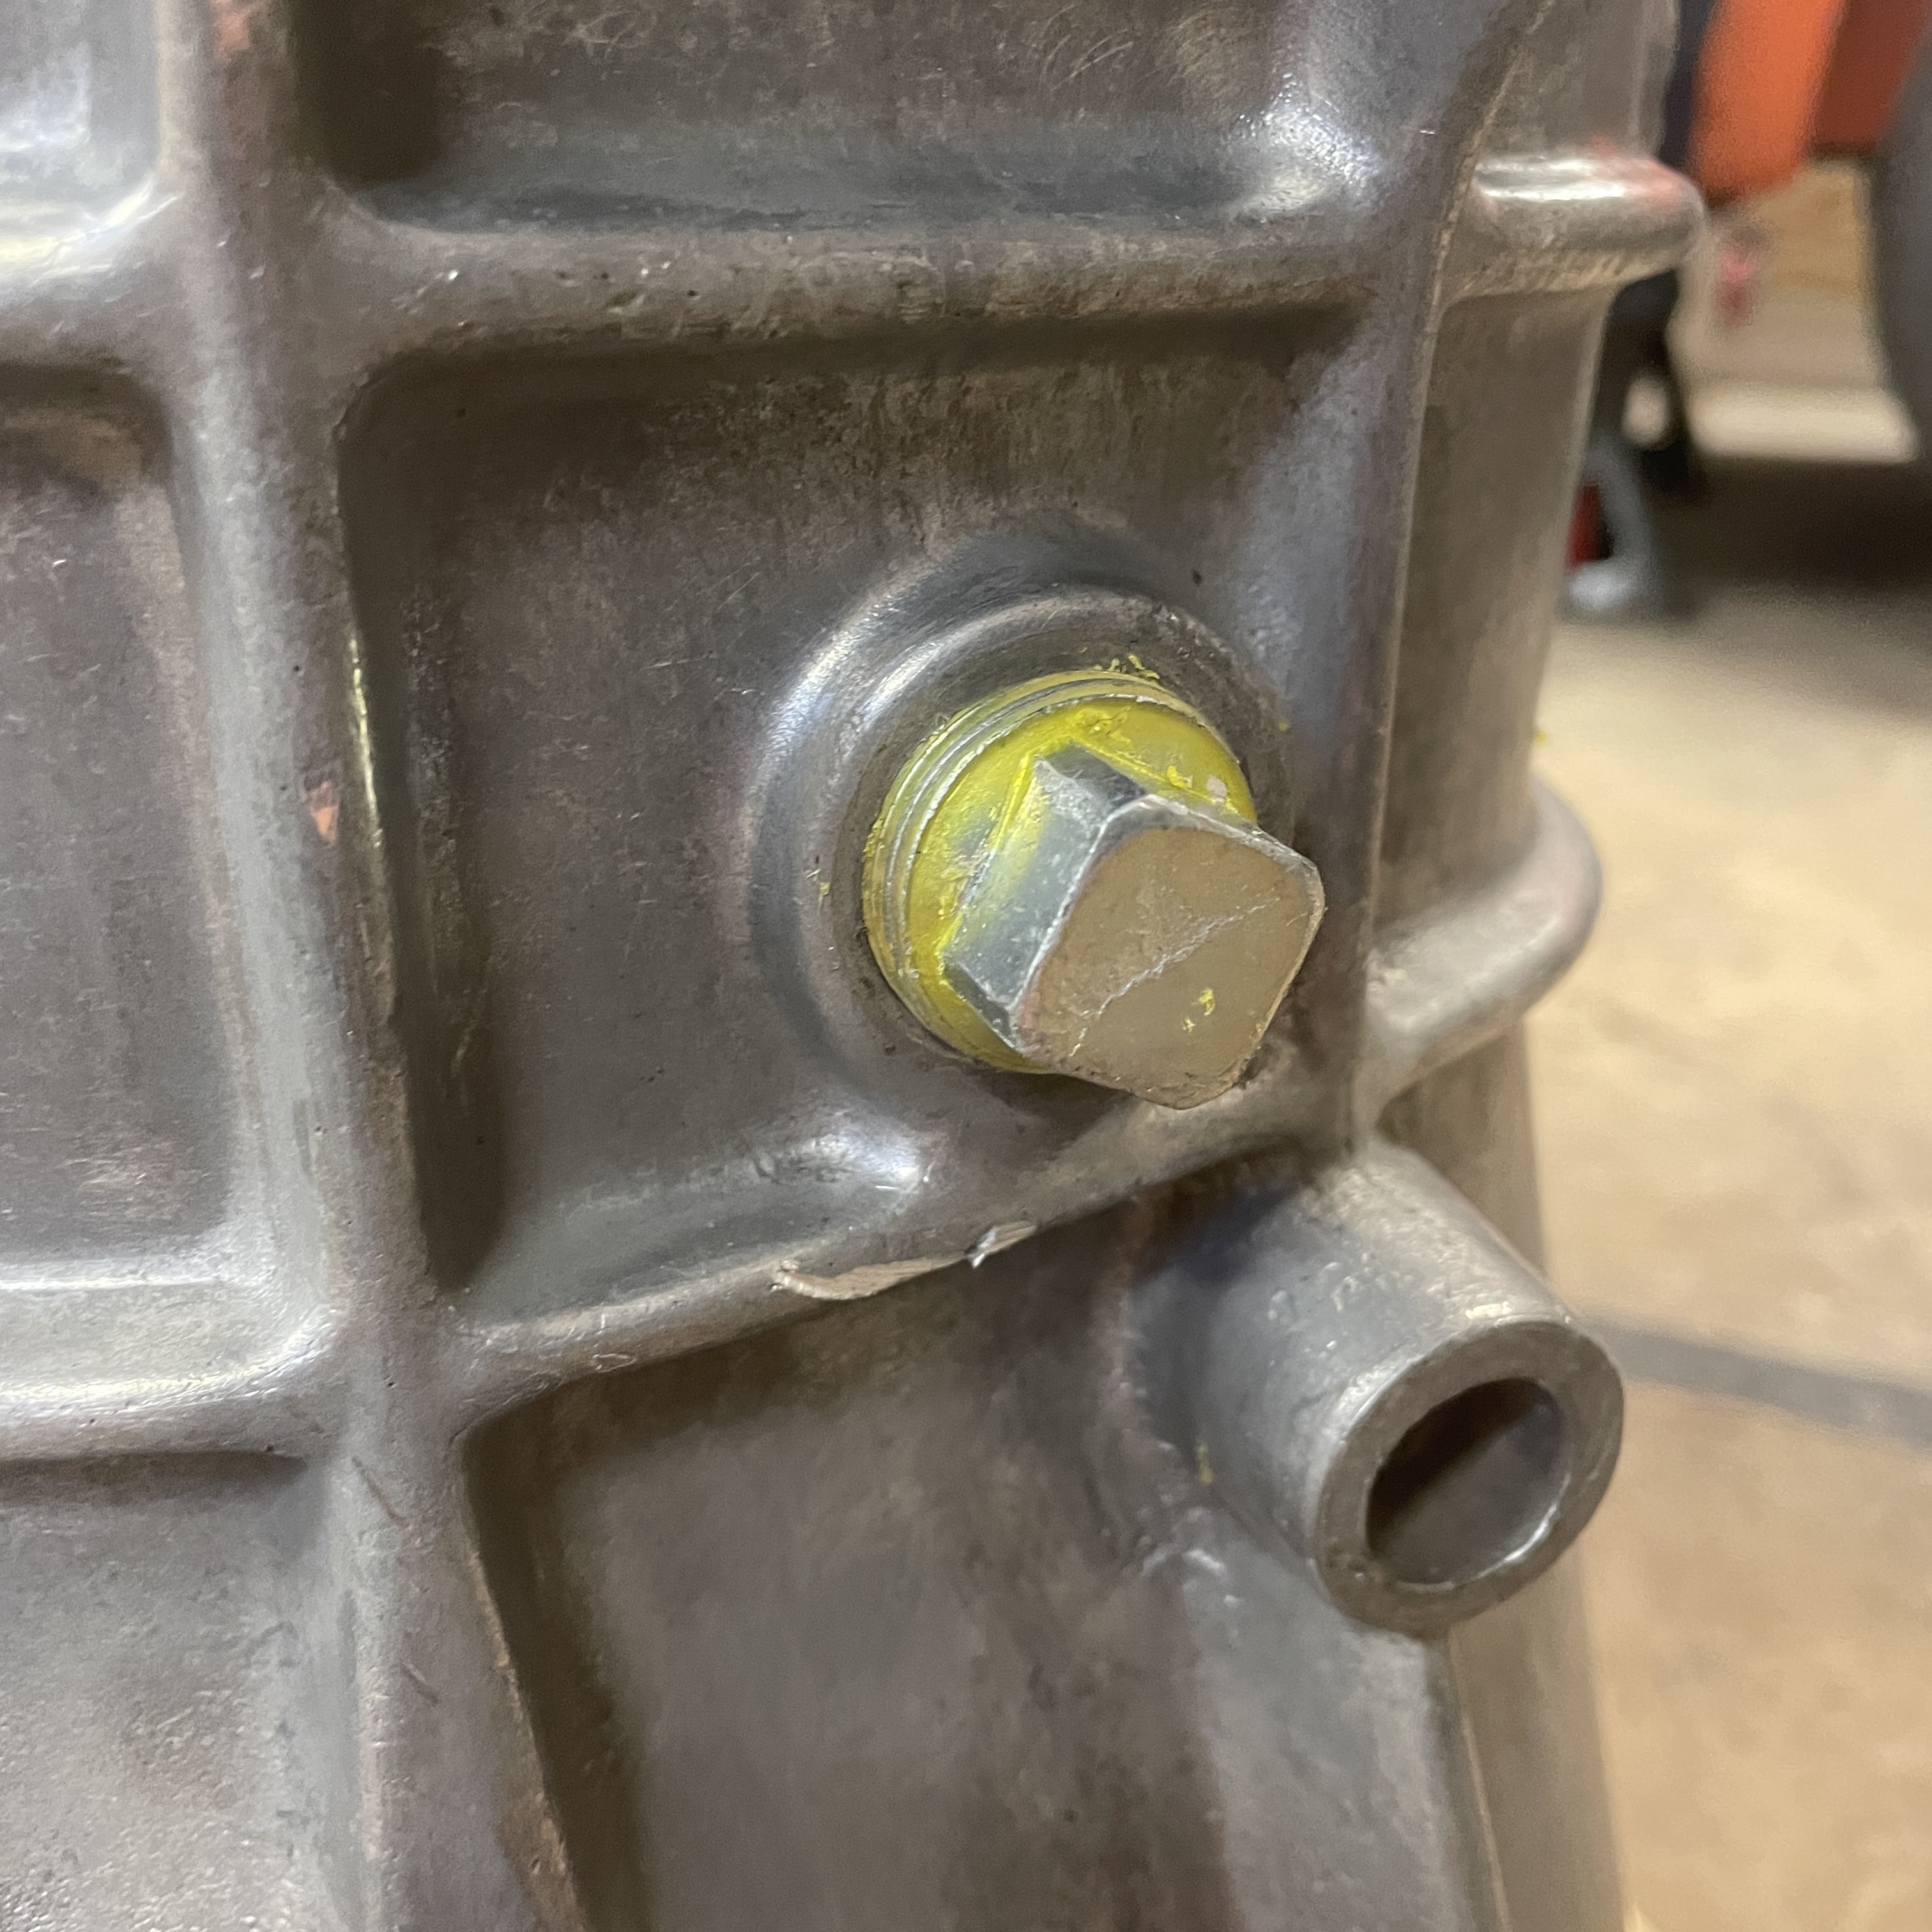
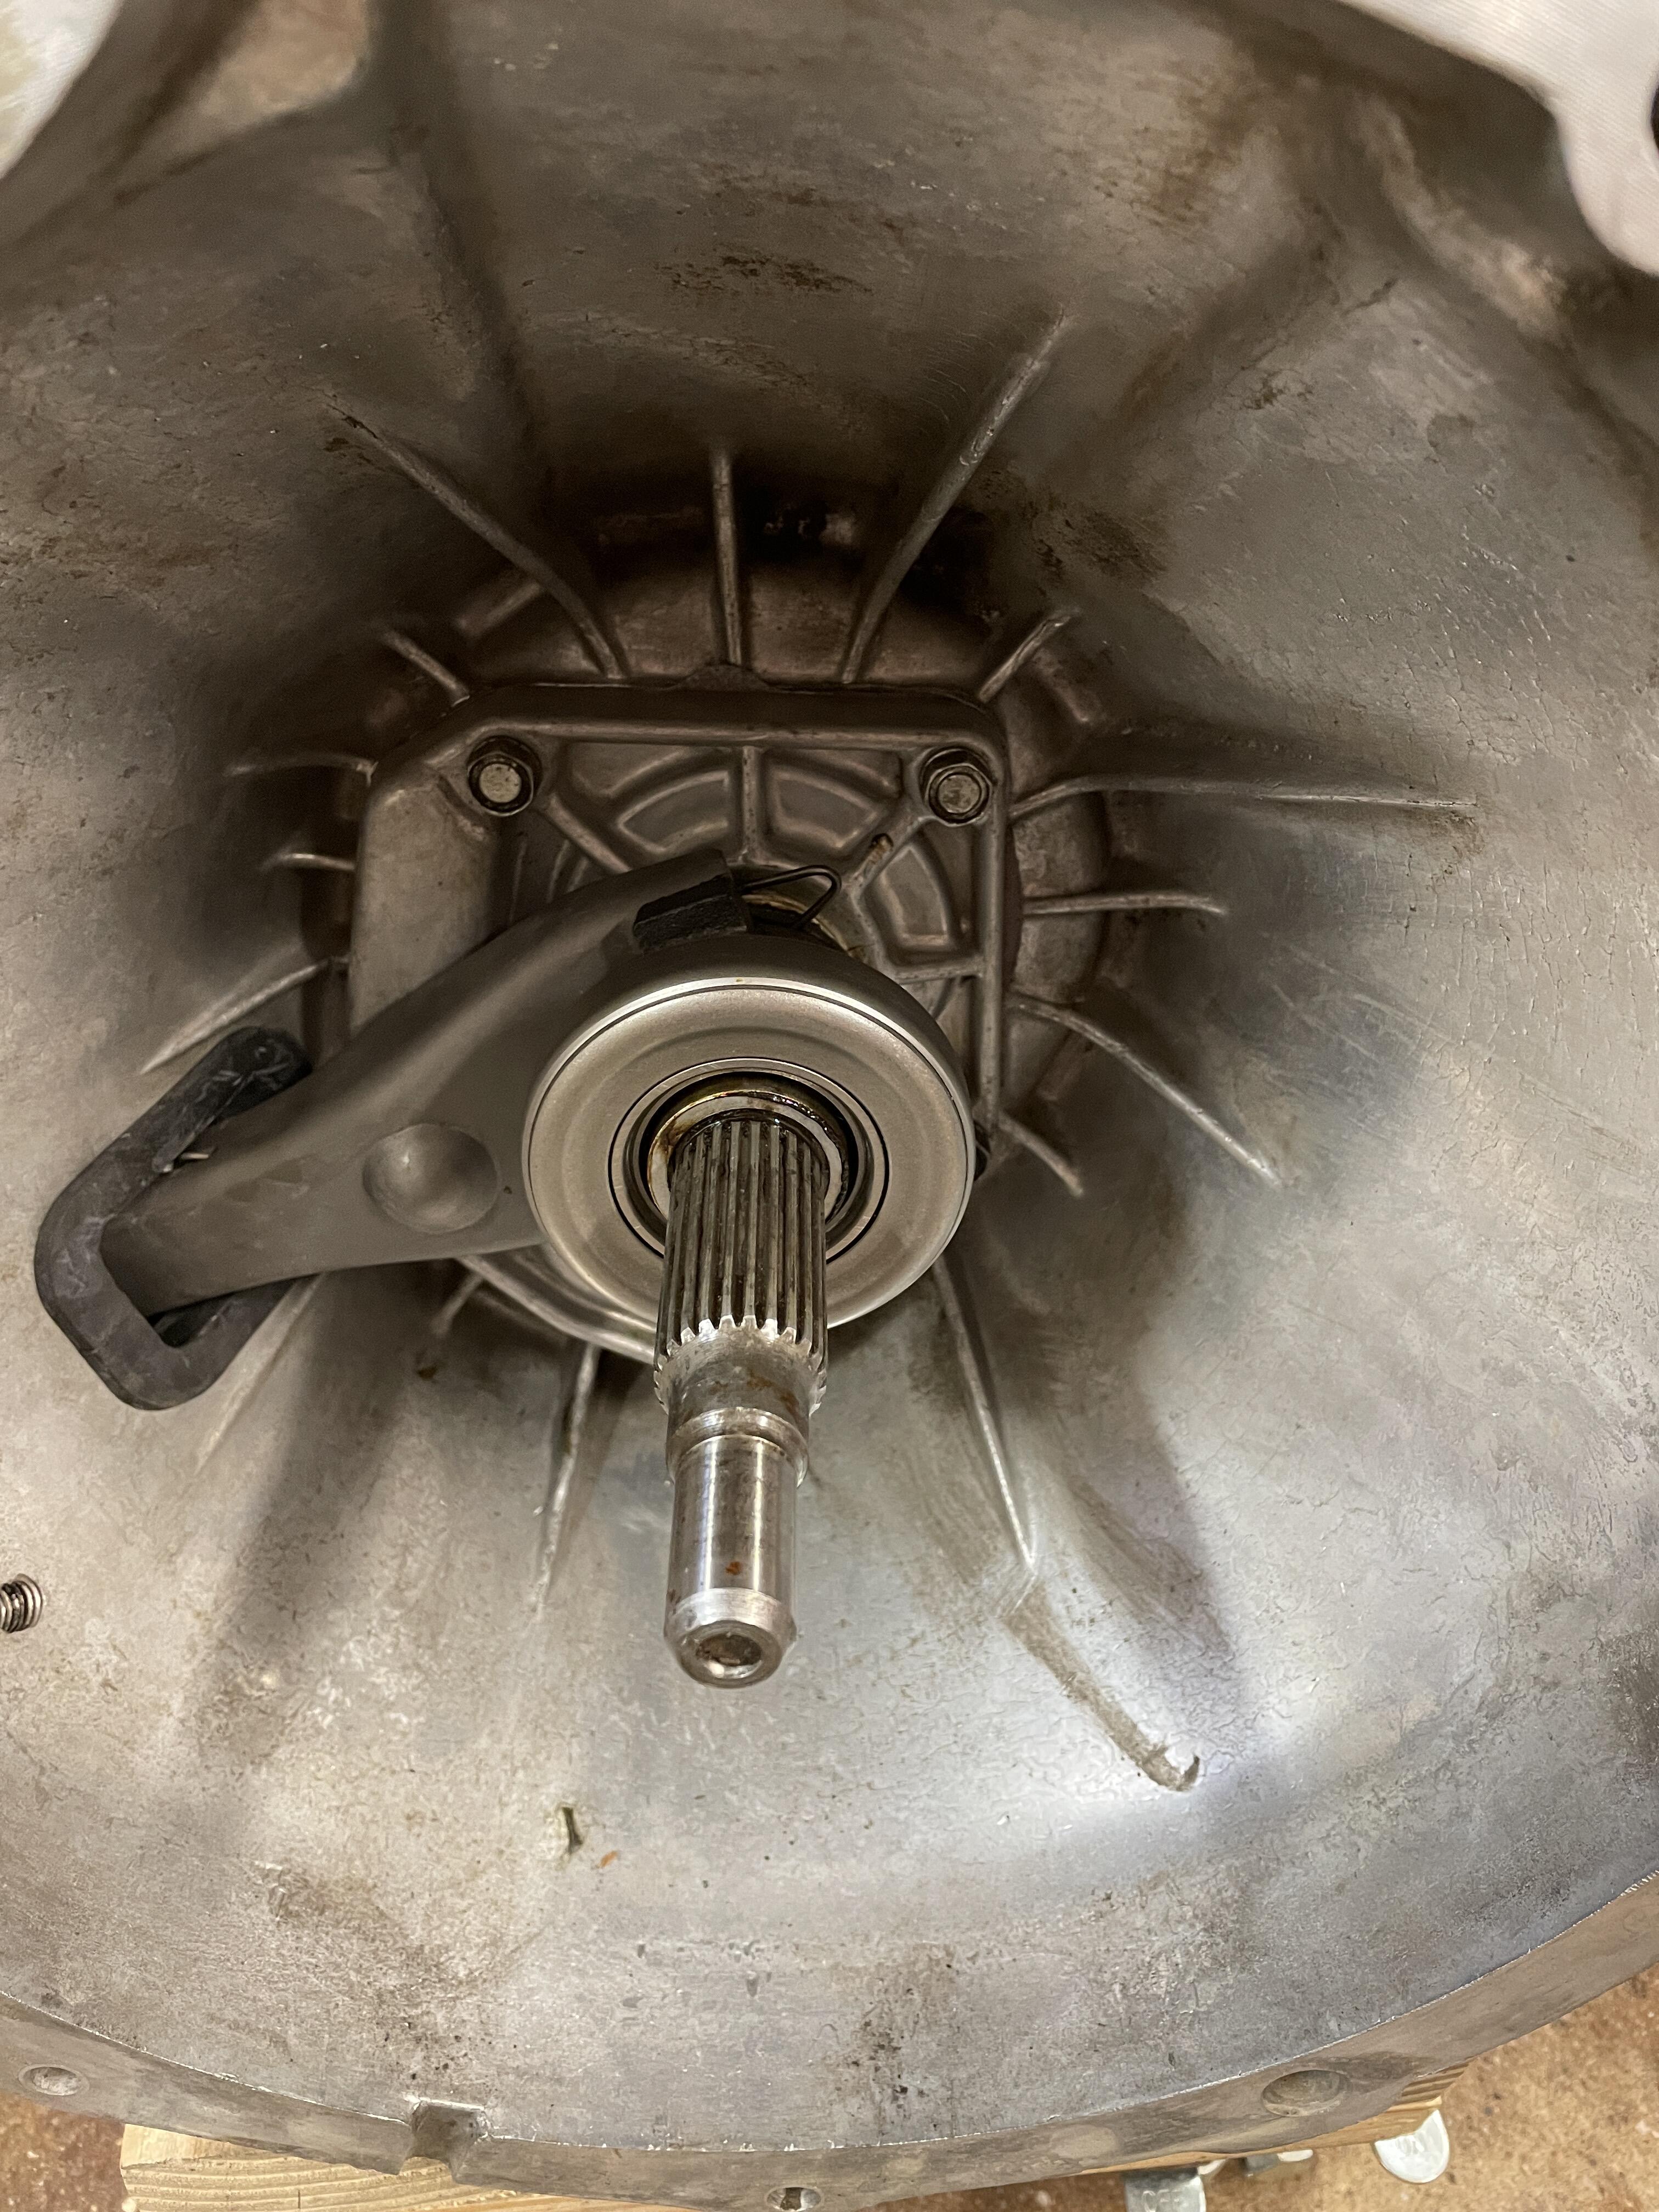
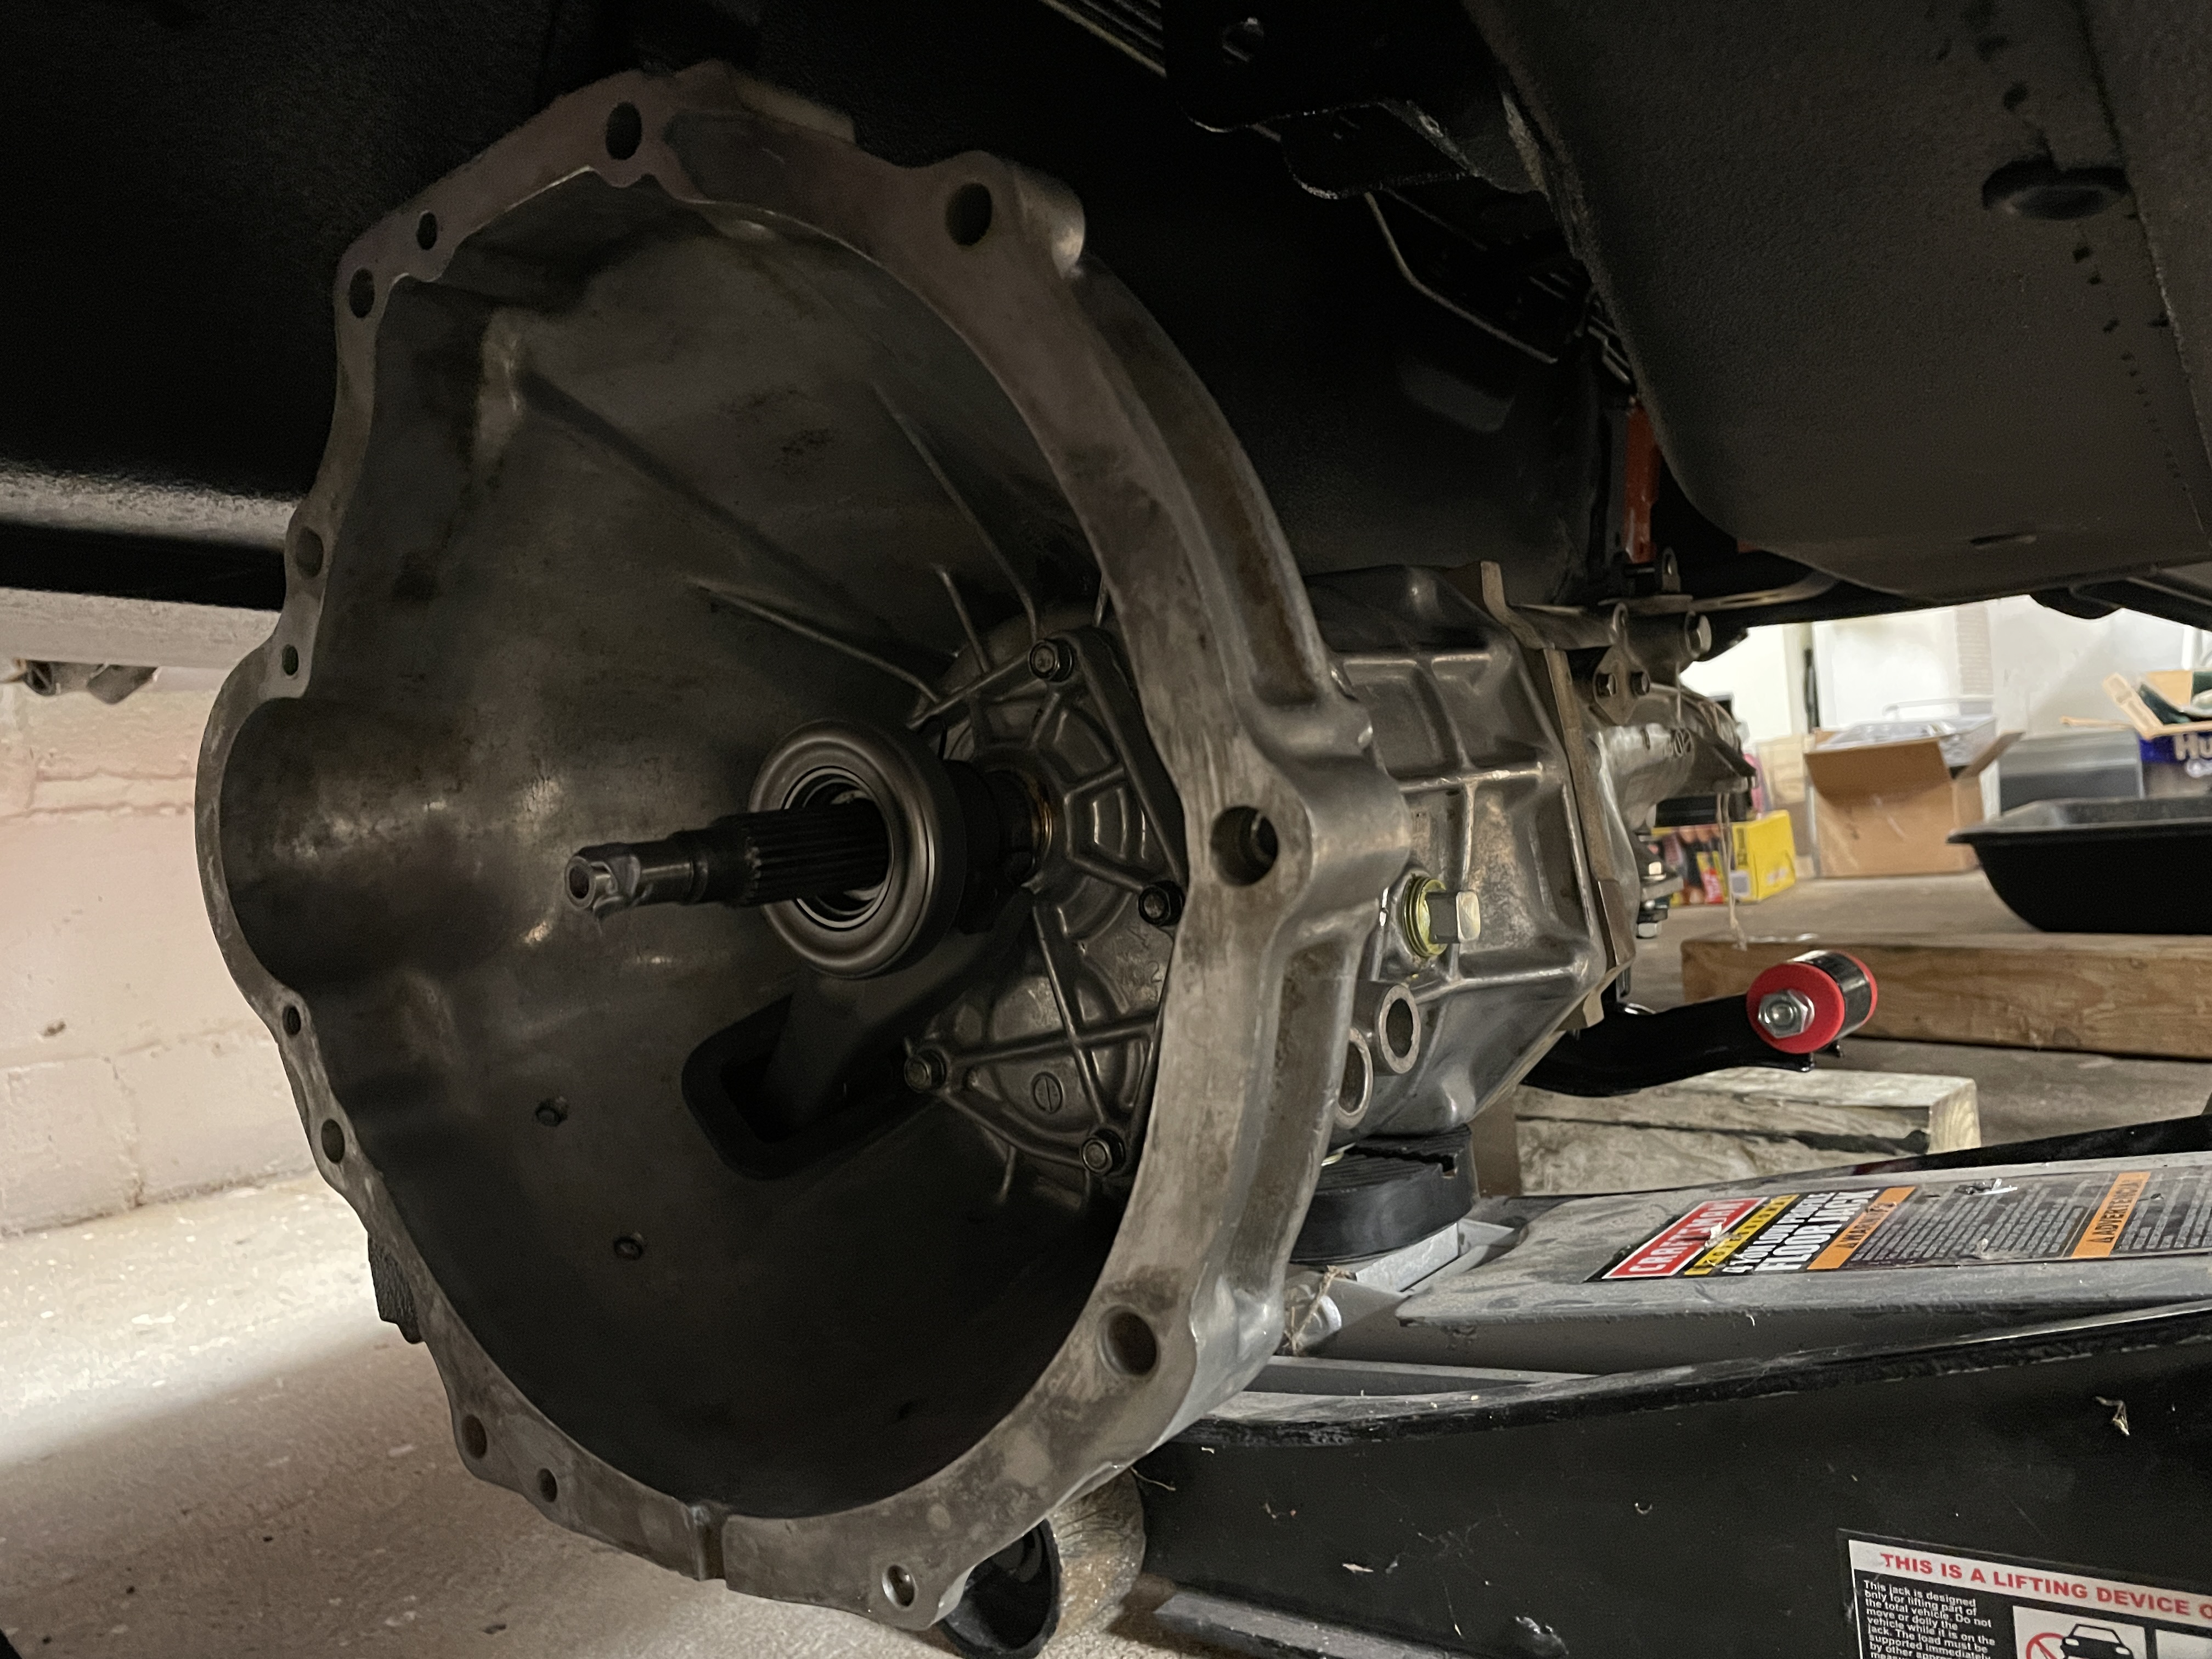
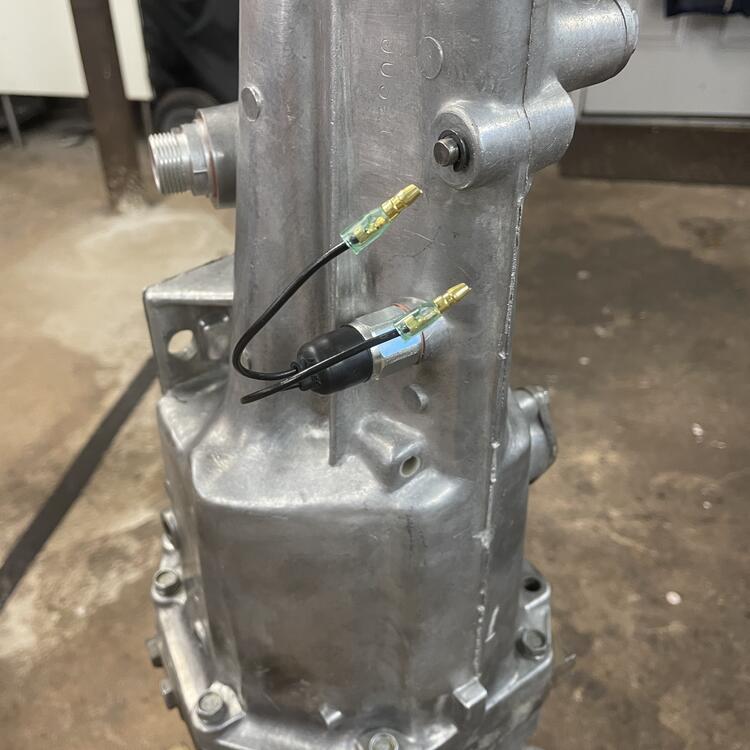
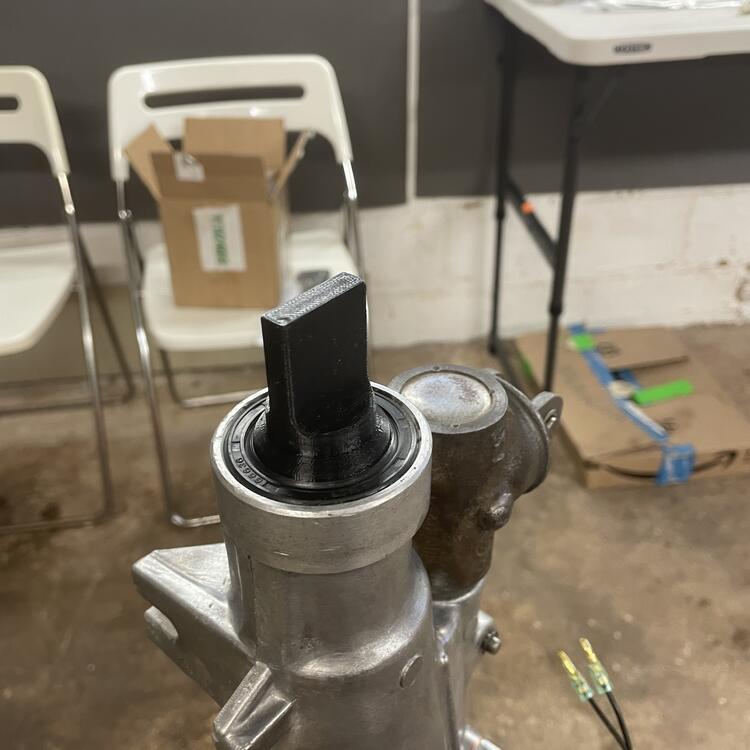
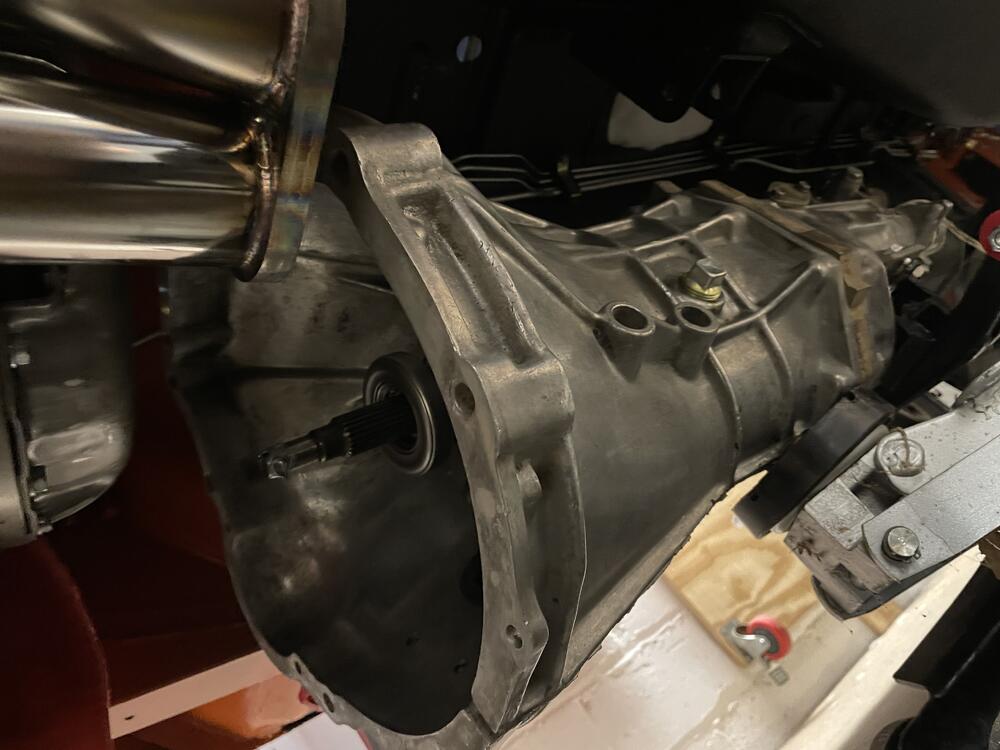
1 pointOkay. Big flurry of activity this week. As I mentioned, the SU intake system isn’t going to fit. I think I could make it fit with an aluminum spacer about a centimeter thick, but I’m not going to (or at least I’m not going to right now. I might do this as a personal project down the road.). I picked up some Mikuni N44PHH carburetors already mounted to an older style Harada manifold from Yahoo Japan, as well as a Mikuni Short-Runner intake manifold with ports on each of the six runners from a guy on the Mikuni Facebook group. After I get the carbs rebuilt and new linkage set up on the Mikuni manifold by Kyushu House (Dave Premo wasn’t available), I should be 75% to where I thought I was with the SUs. There are the questions of how I want to make the balance tube and what sort of filtration I want. I picked up the air box from the Z Club in the UK, so we’ll see how that works out. In other news, I installed my five speed! If you remember, this is a #1 case five speed out of a 1980 720 truck. I got it years ago from a yard in Idaho who pulled it back in 1983. When the transmission shop opened it up this summer they said it was nearly pristine, but I had them replace all the bearings and seals and springs anyway. I got that back at the end of October and refurbished crossmember, got a new mount and all the random bits, and installed a 280zx clutch release sleeve and the pinion for my 3.54 rear end. 👆🏻 That’s a delete for the Top sensor. 👆🏻 Output shaft plug until I put the driveshaft in. 👆🏻 240z vs 280zx clutch release sleeves. 👇🏻Installation with the wrong kind of jack. Yes I pulled the header to get the transmission in… at the last minute. And there’s the starter with a fuzzy photo of it installed. So now back to the electrical while I wait for the Mikuni stuff.


 1 point