Leaderboard
-
Patcon
 Subscriber
 10Points11,142Posts
 -
Captain Obvious
Free Member8Points10,081Posts -
conedodger
Free Member3Points12,513Posts -
HusseinHolland
Free Member3Points1,031Posts


Popular Content
Showing content with the highest reputation on 10/10/2023 in all areas
-
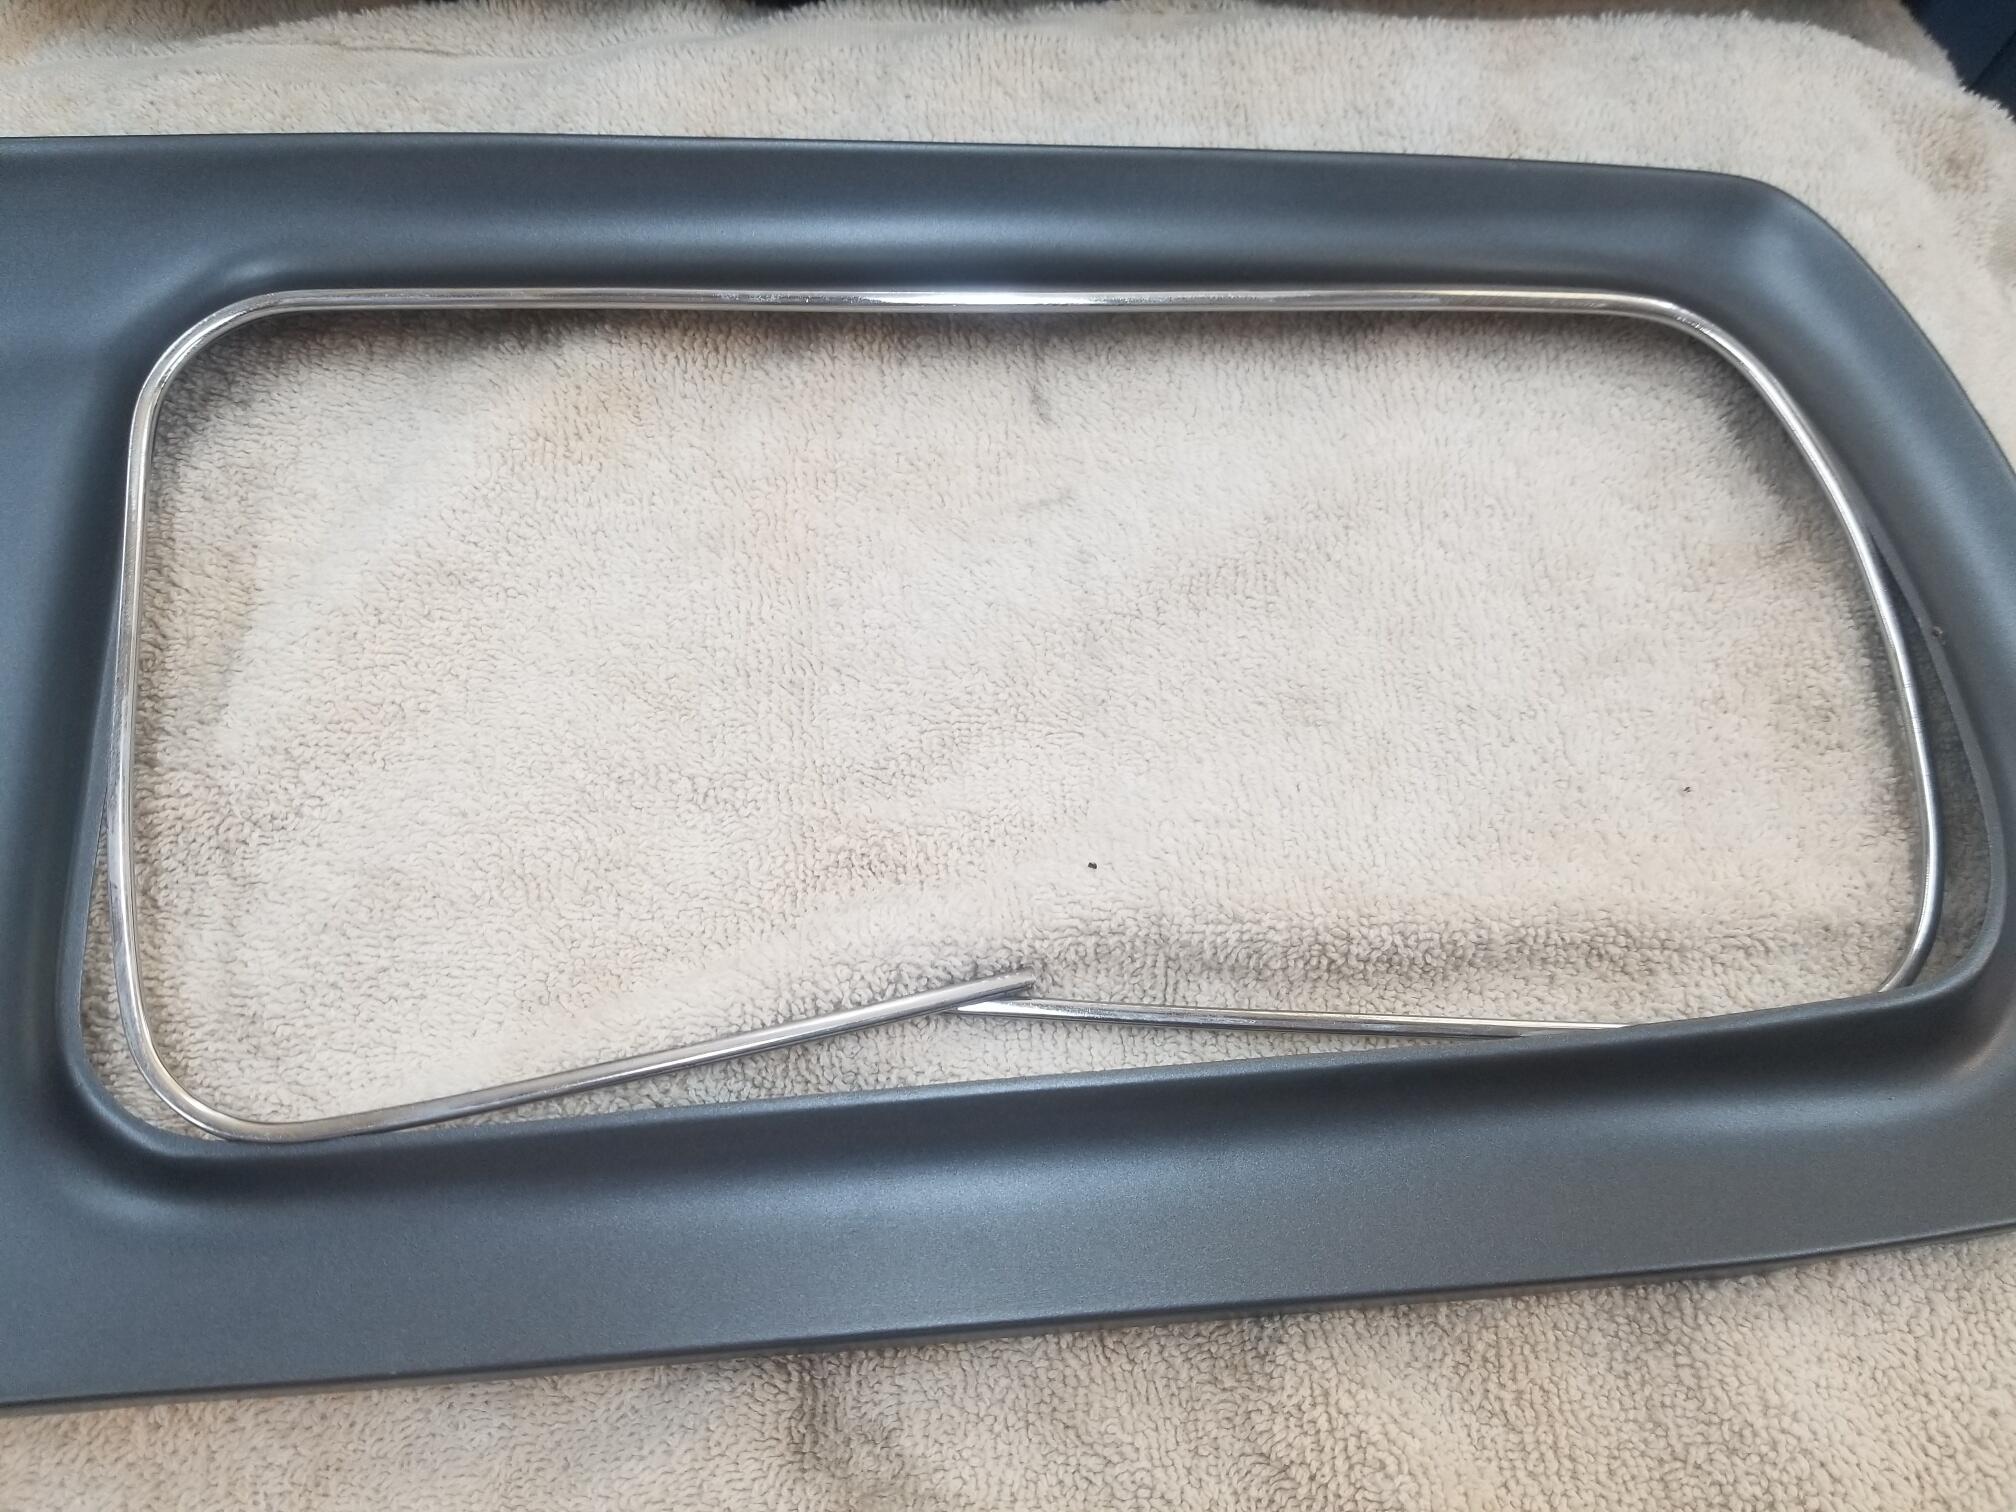
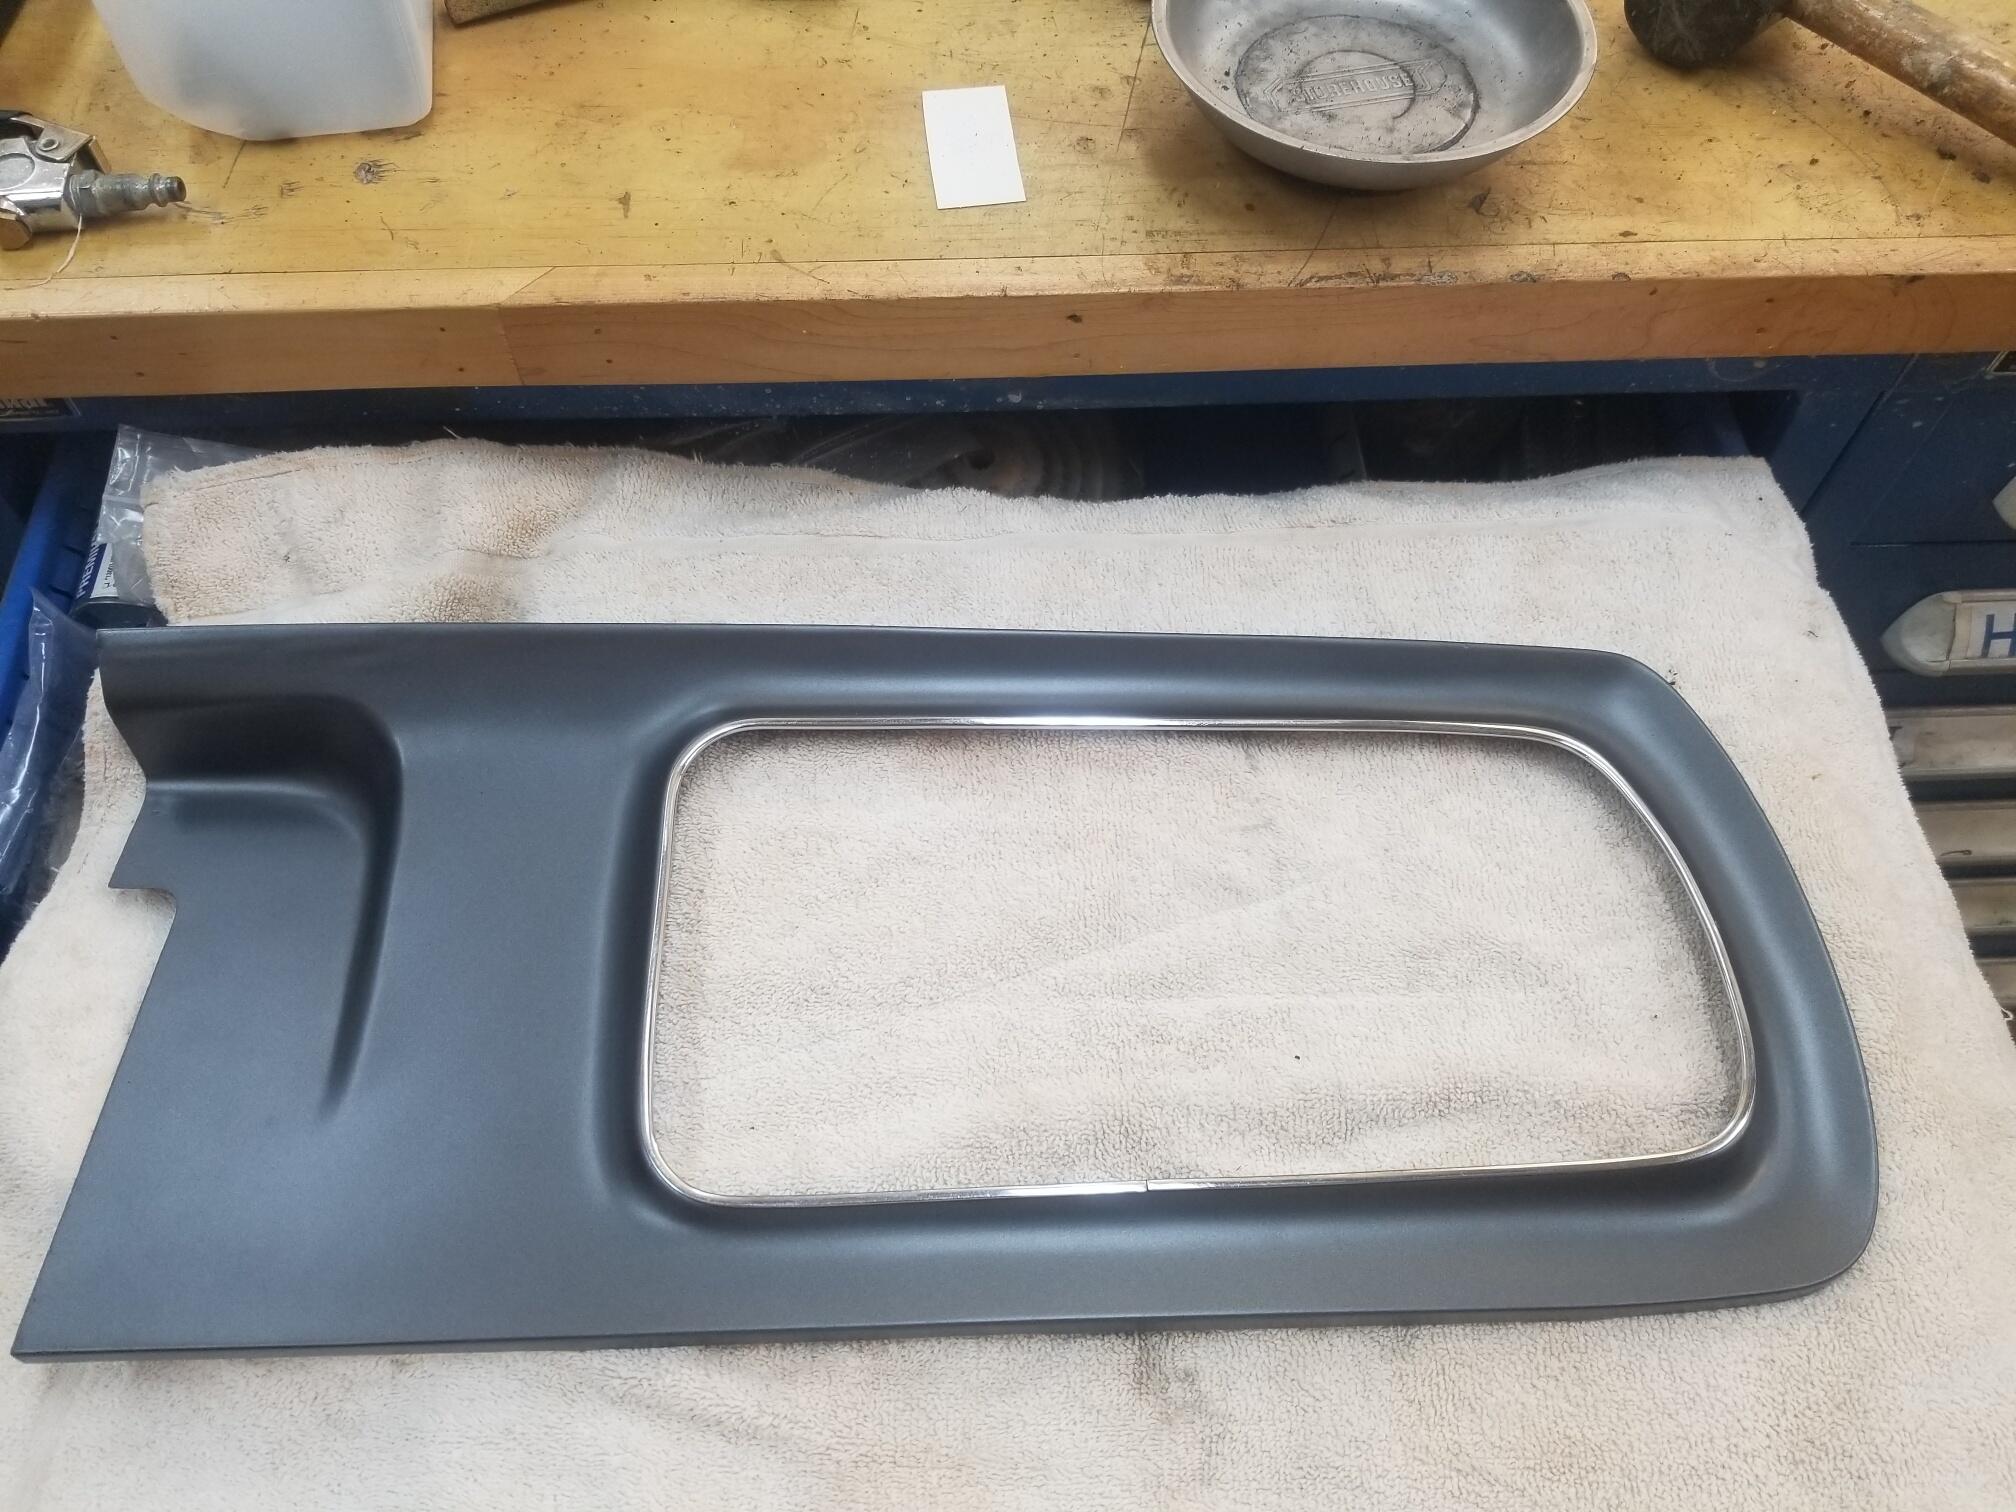
4 pointsI put the trim back on the rear finishers For the most part it went on by hand. I tapped it a little with a soft rubber mallet. Thanks so much to Jim for the excellent recipe! @jfa.series1


 4 points
 -
3 points
-
2 pointsAwesome work Charles. All the credit for the paint products selection goes to @CanTechZ who did all the testing to make this possible.2 points
-
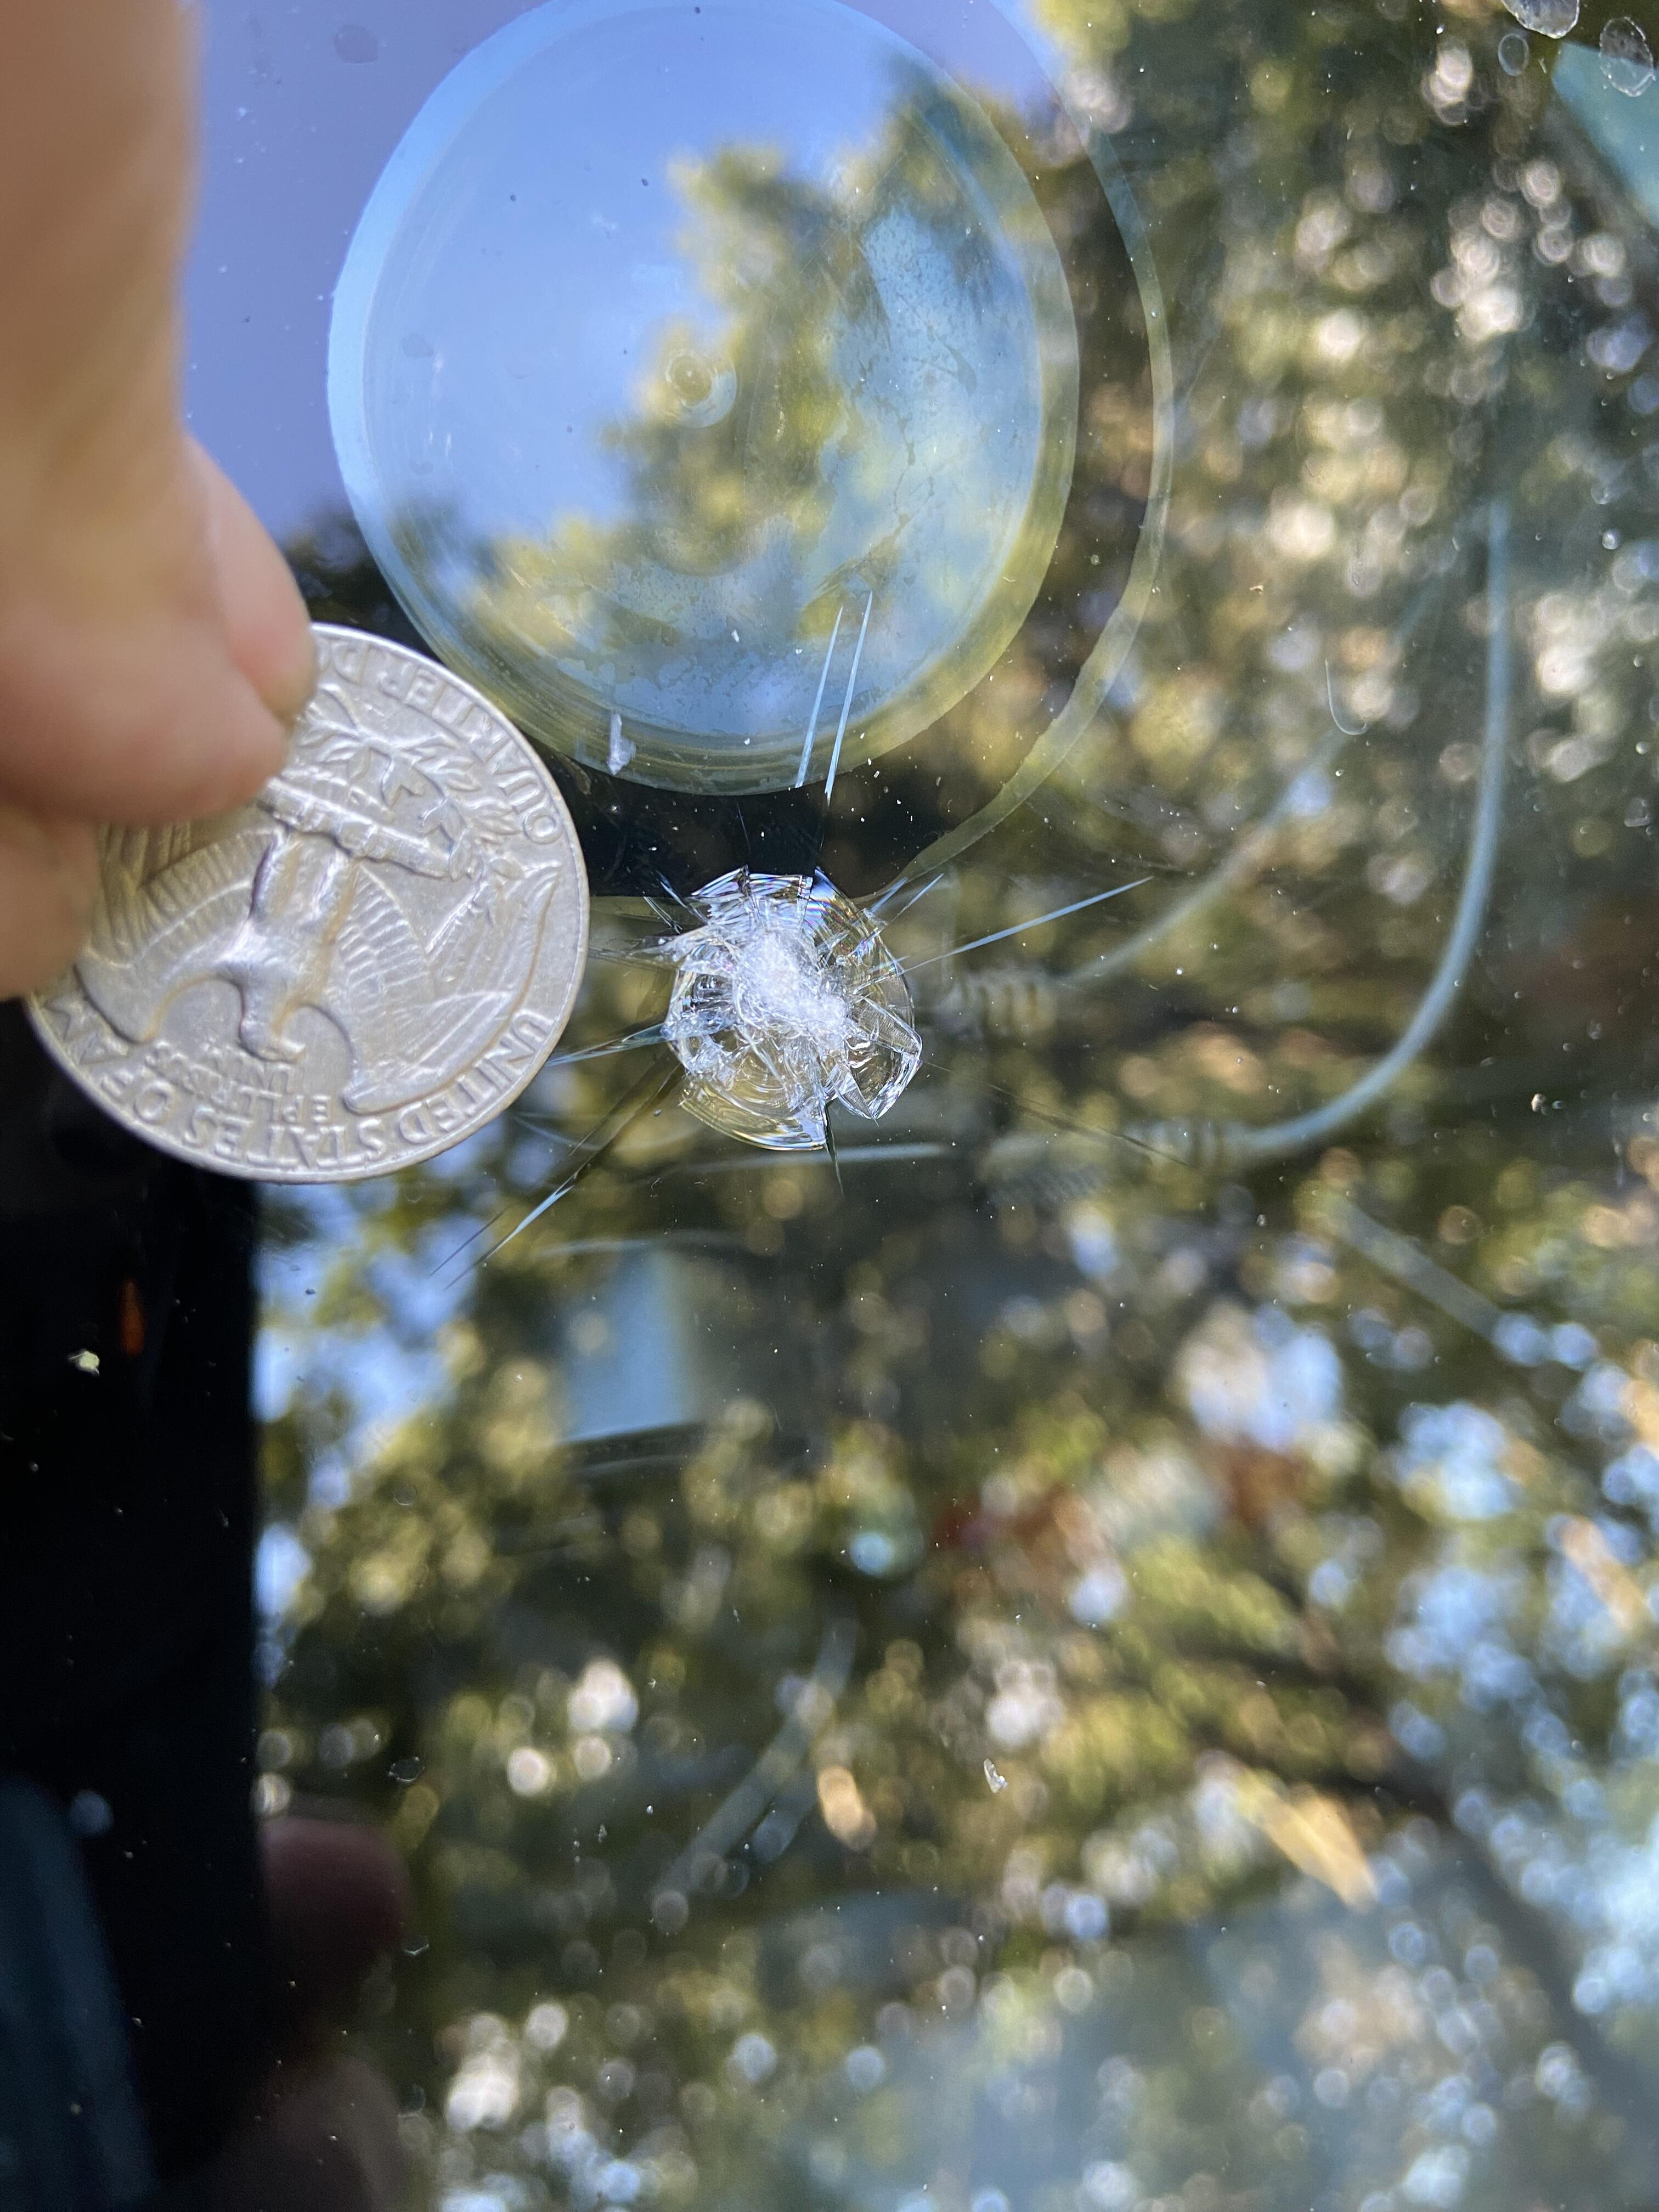
I've been very busy with work and have been quiet on this forum for while now, but I still read the posts and still glean important knowledge and laughs from all of you. To my pleasure my Z has run great over the past year without any issues, and as of late, been driving it about 3 to four days a week. It's turned out to be a good solid car. Today, while driving home, I caught nice rock on the windshield from oncoming traffic. I saw it coming and could do nothing.🥴 I'm hoping it's repairable so I'm taking it to a windshield repair place ASAP so it won't spread.
 2 points
 -
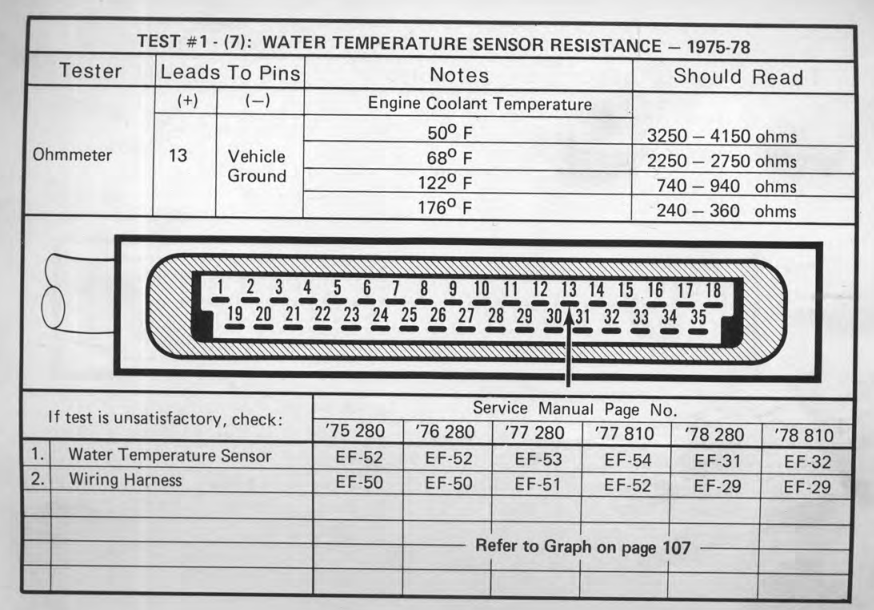
I'd check the coolant temperature sensor resistance. Compare to the chart from previous. Check at the ECU connector.
 2 points
 -
I believe it, the issue is that the condition was not present prior to all the recent work, hence the need to revisit the fuel & ignition work I did. I have not touched the AFM, except to rewire the connector, but that was back in the spring & I drove the car many times after that w/o issue. I'll consider making adjustments to the AFM clocking, but not until I've ruled out any issues I may have created.2 points
-
2 pointsYeah, really nothing to lose. Just soak them again in the citric and see what happens. I had some black staining on certain parts, but it was the higher carbon stuff. Things like that pulley worked fine, but I did find that the original zinc (assuming that's was actually going on) was thicker in some areas than others and took longer to come off.2 points
-
These cars are known to lean out with age. It's why some people add a resistor pot between the temp sensor and the ECU. Set mixture with the turn of a dial. @siteunseen2 points
-
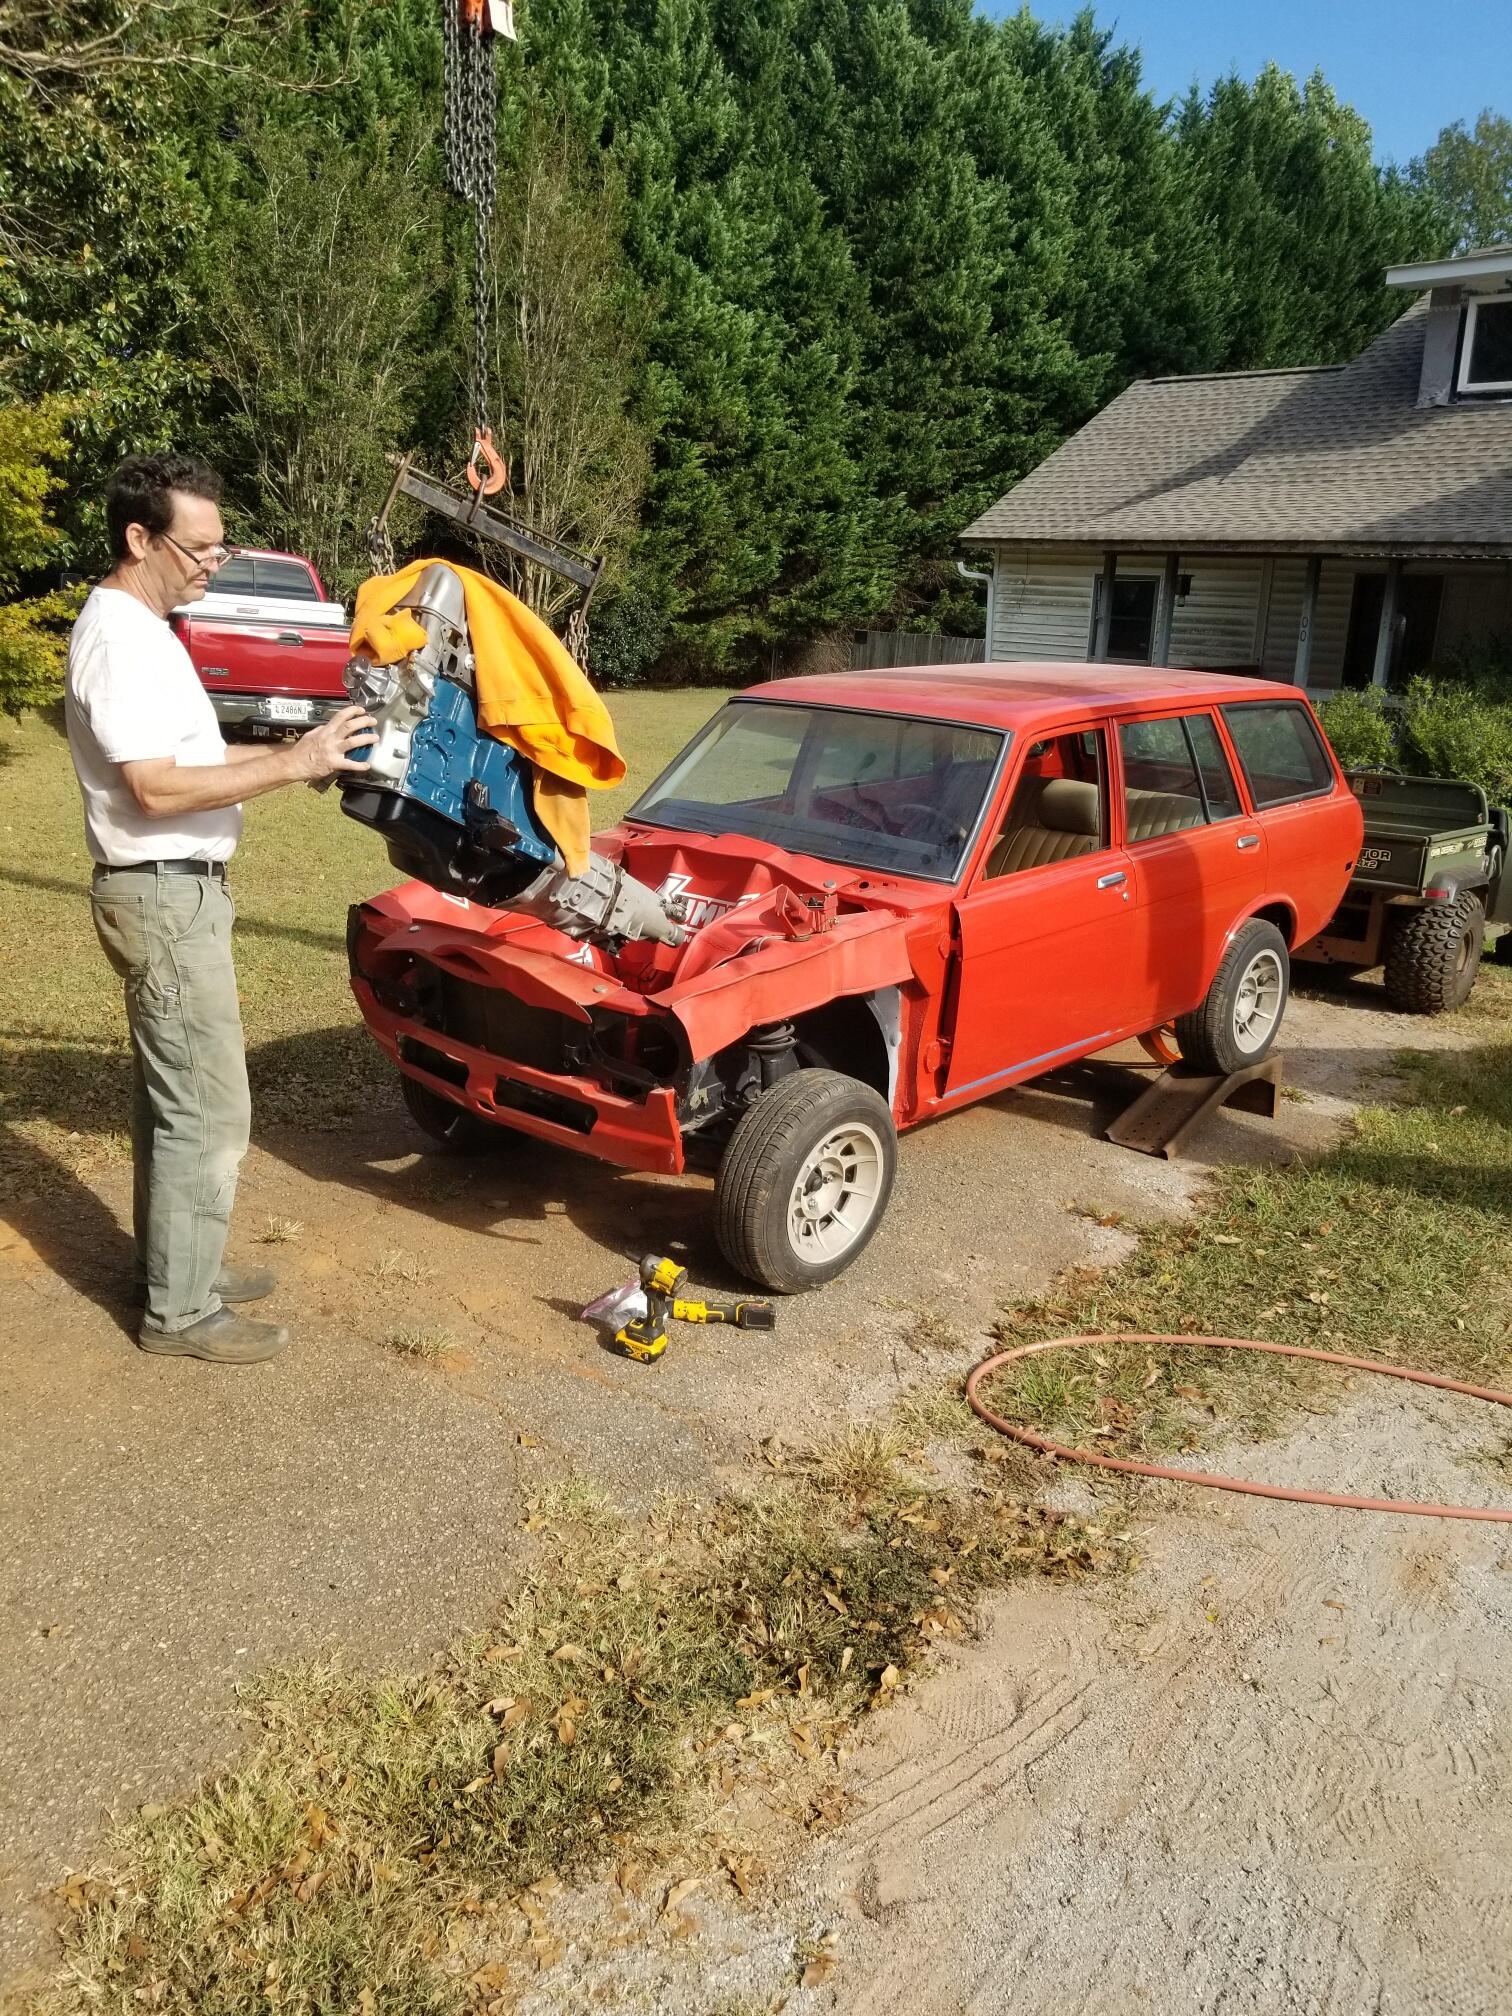
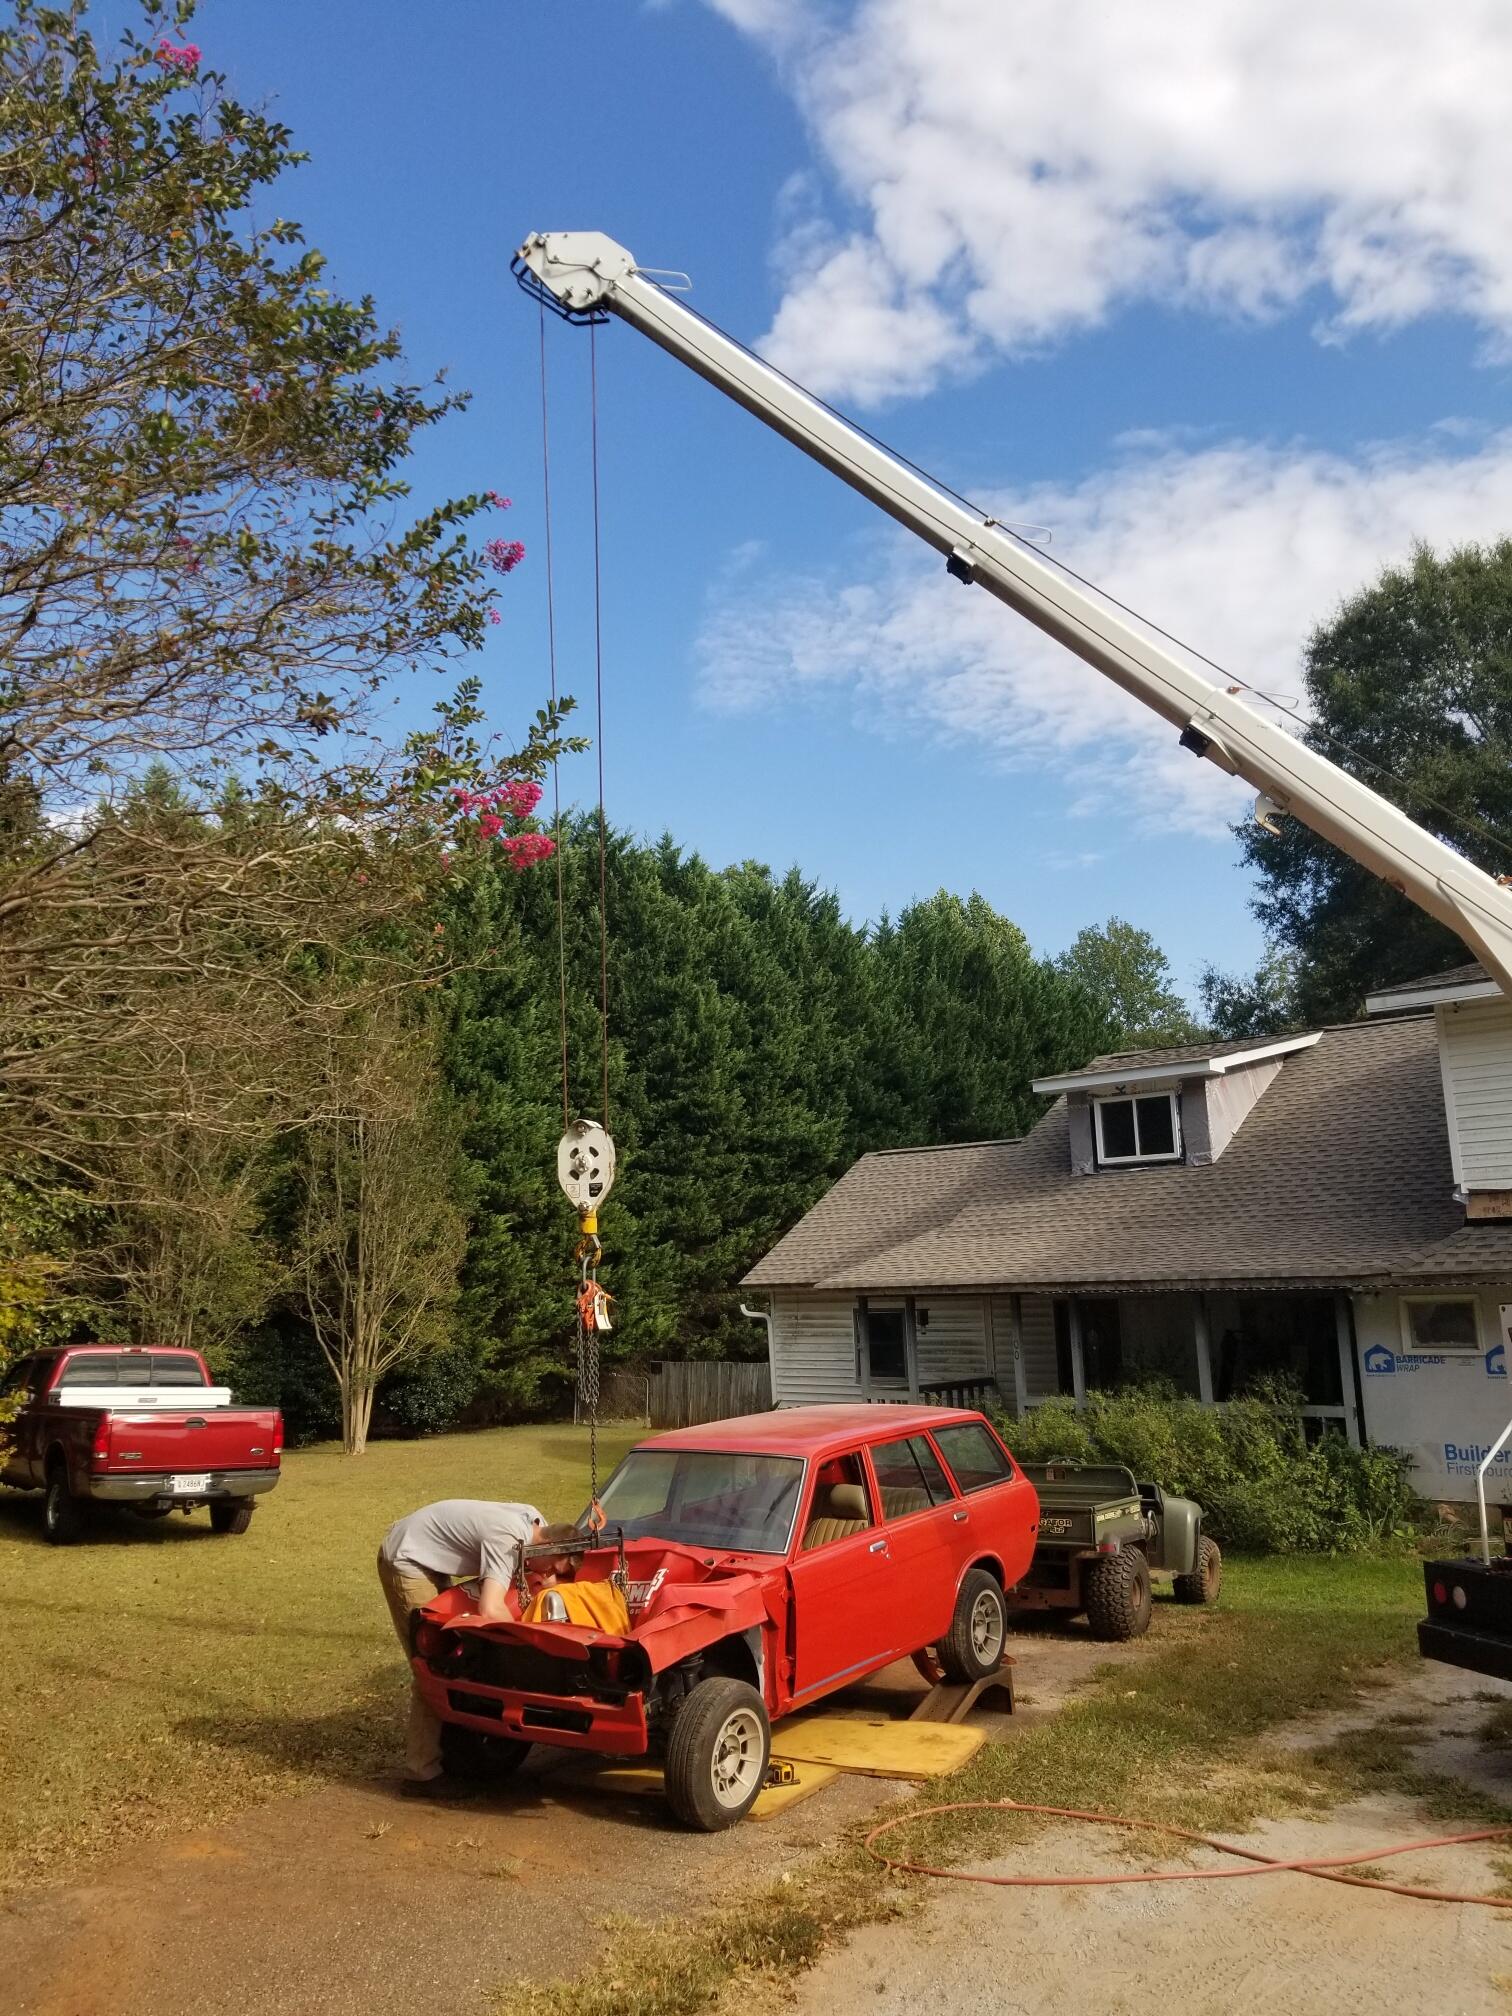
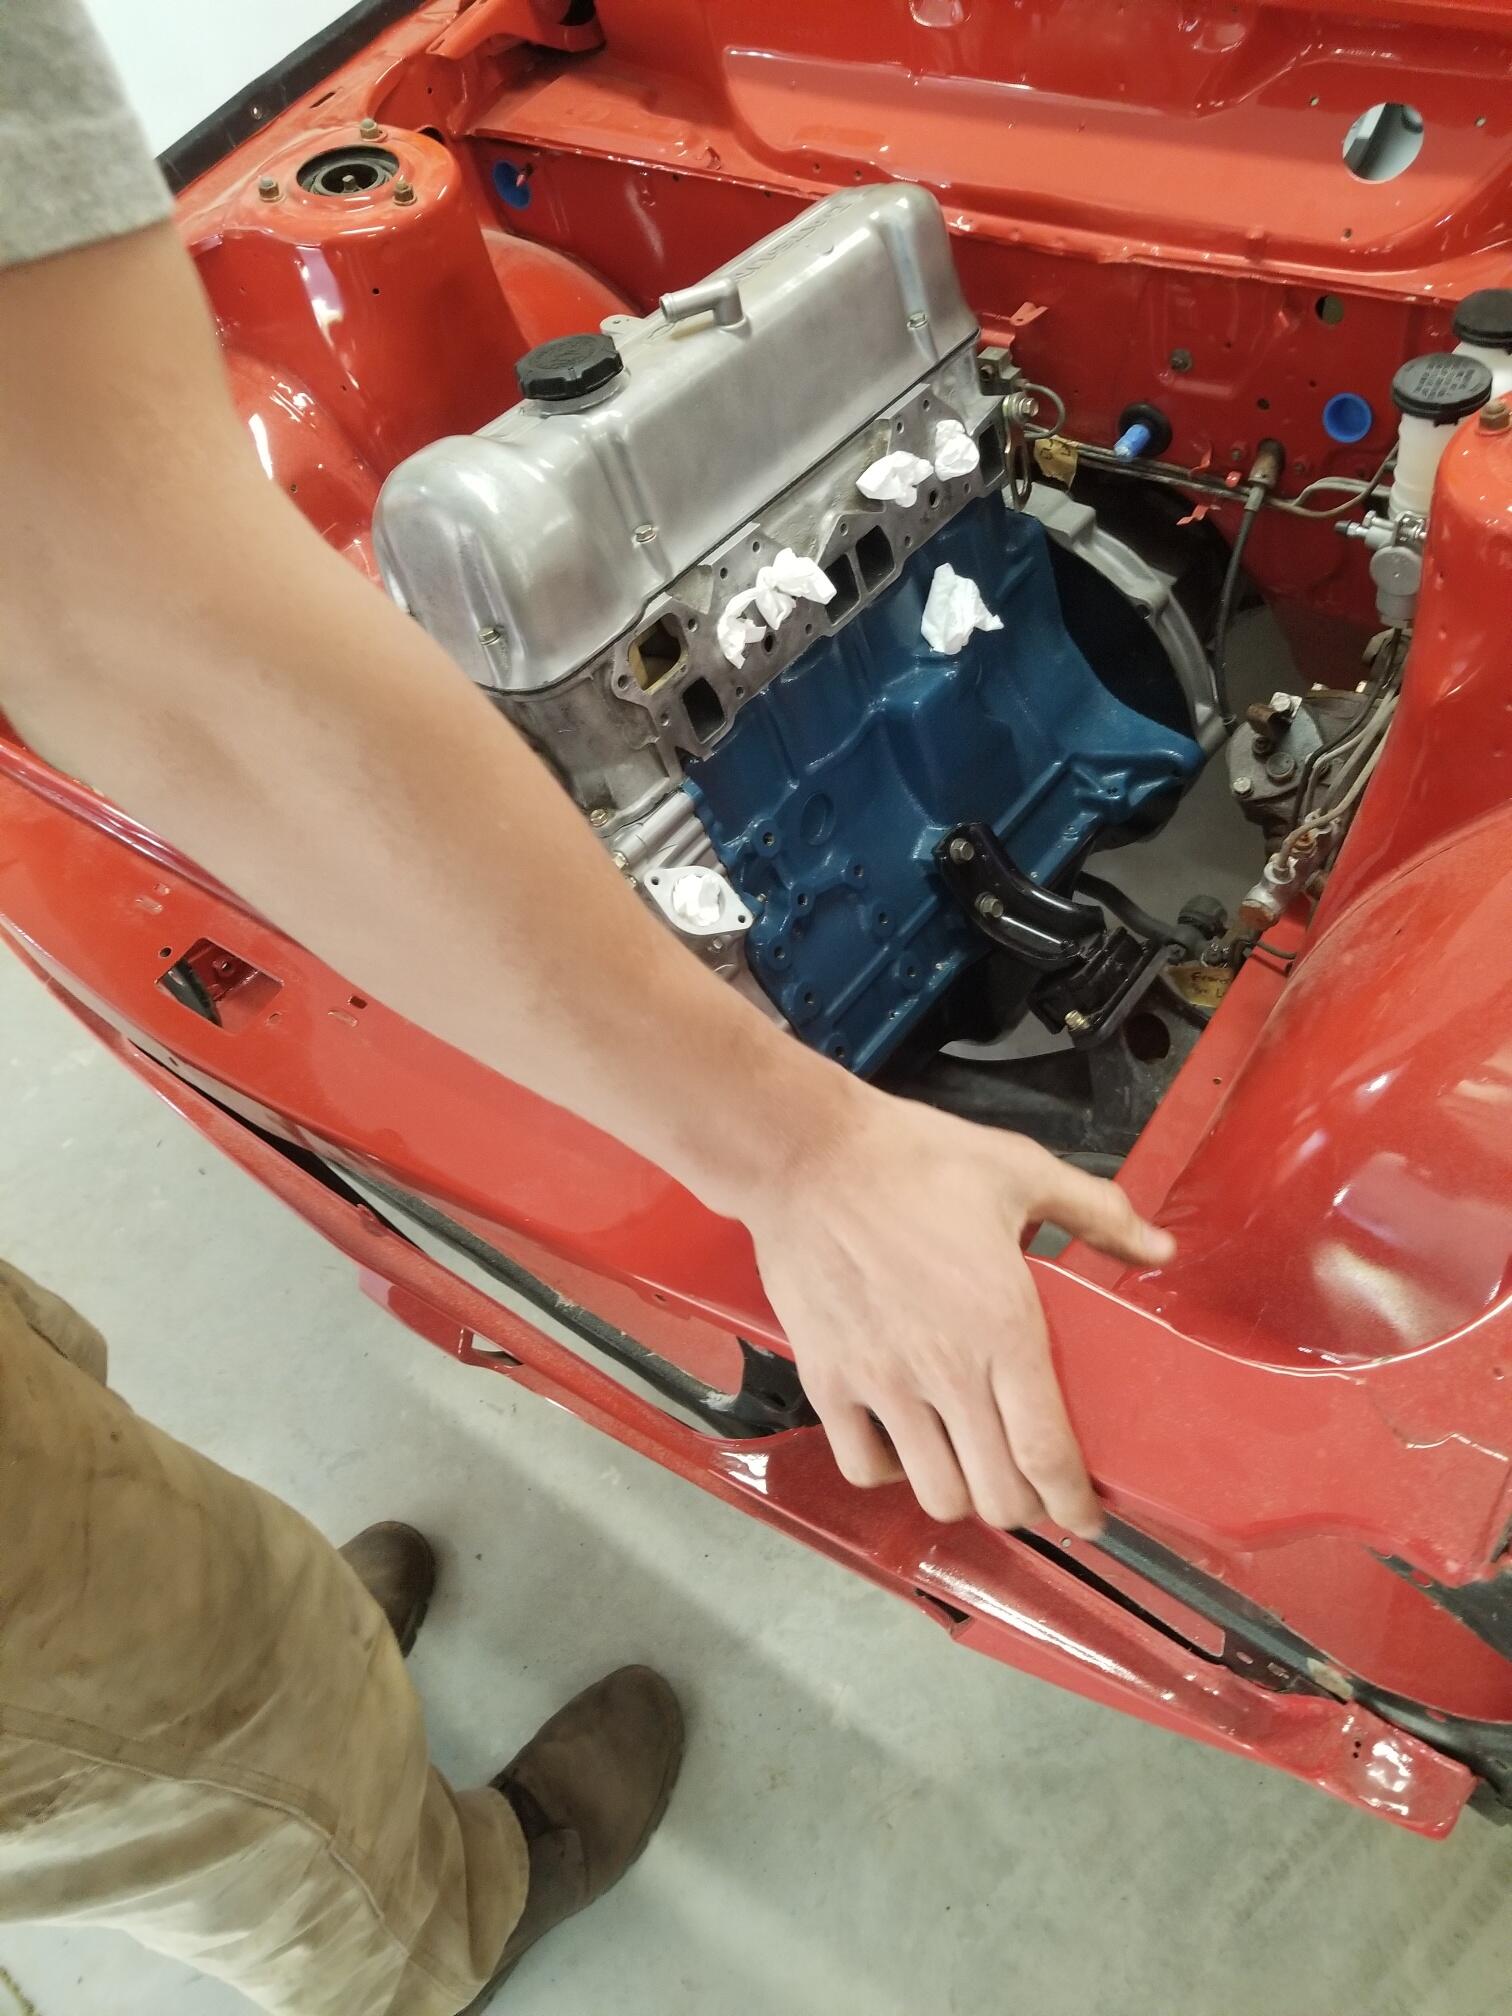
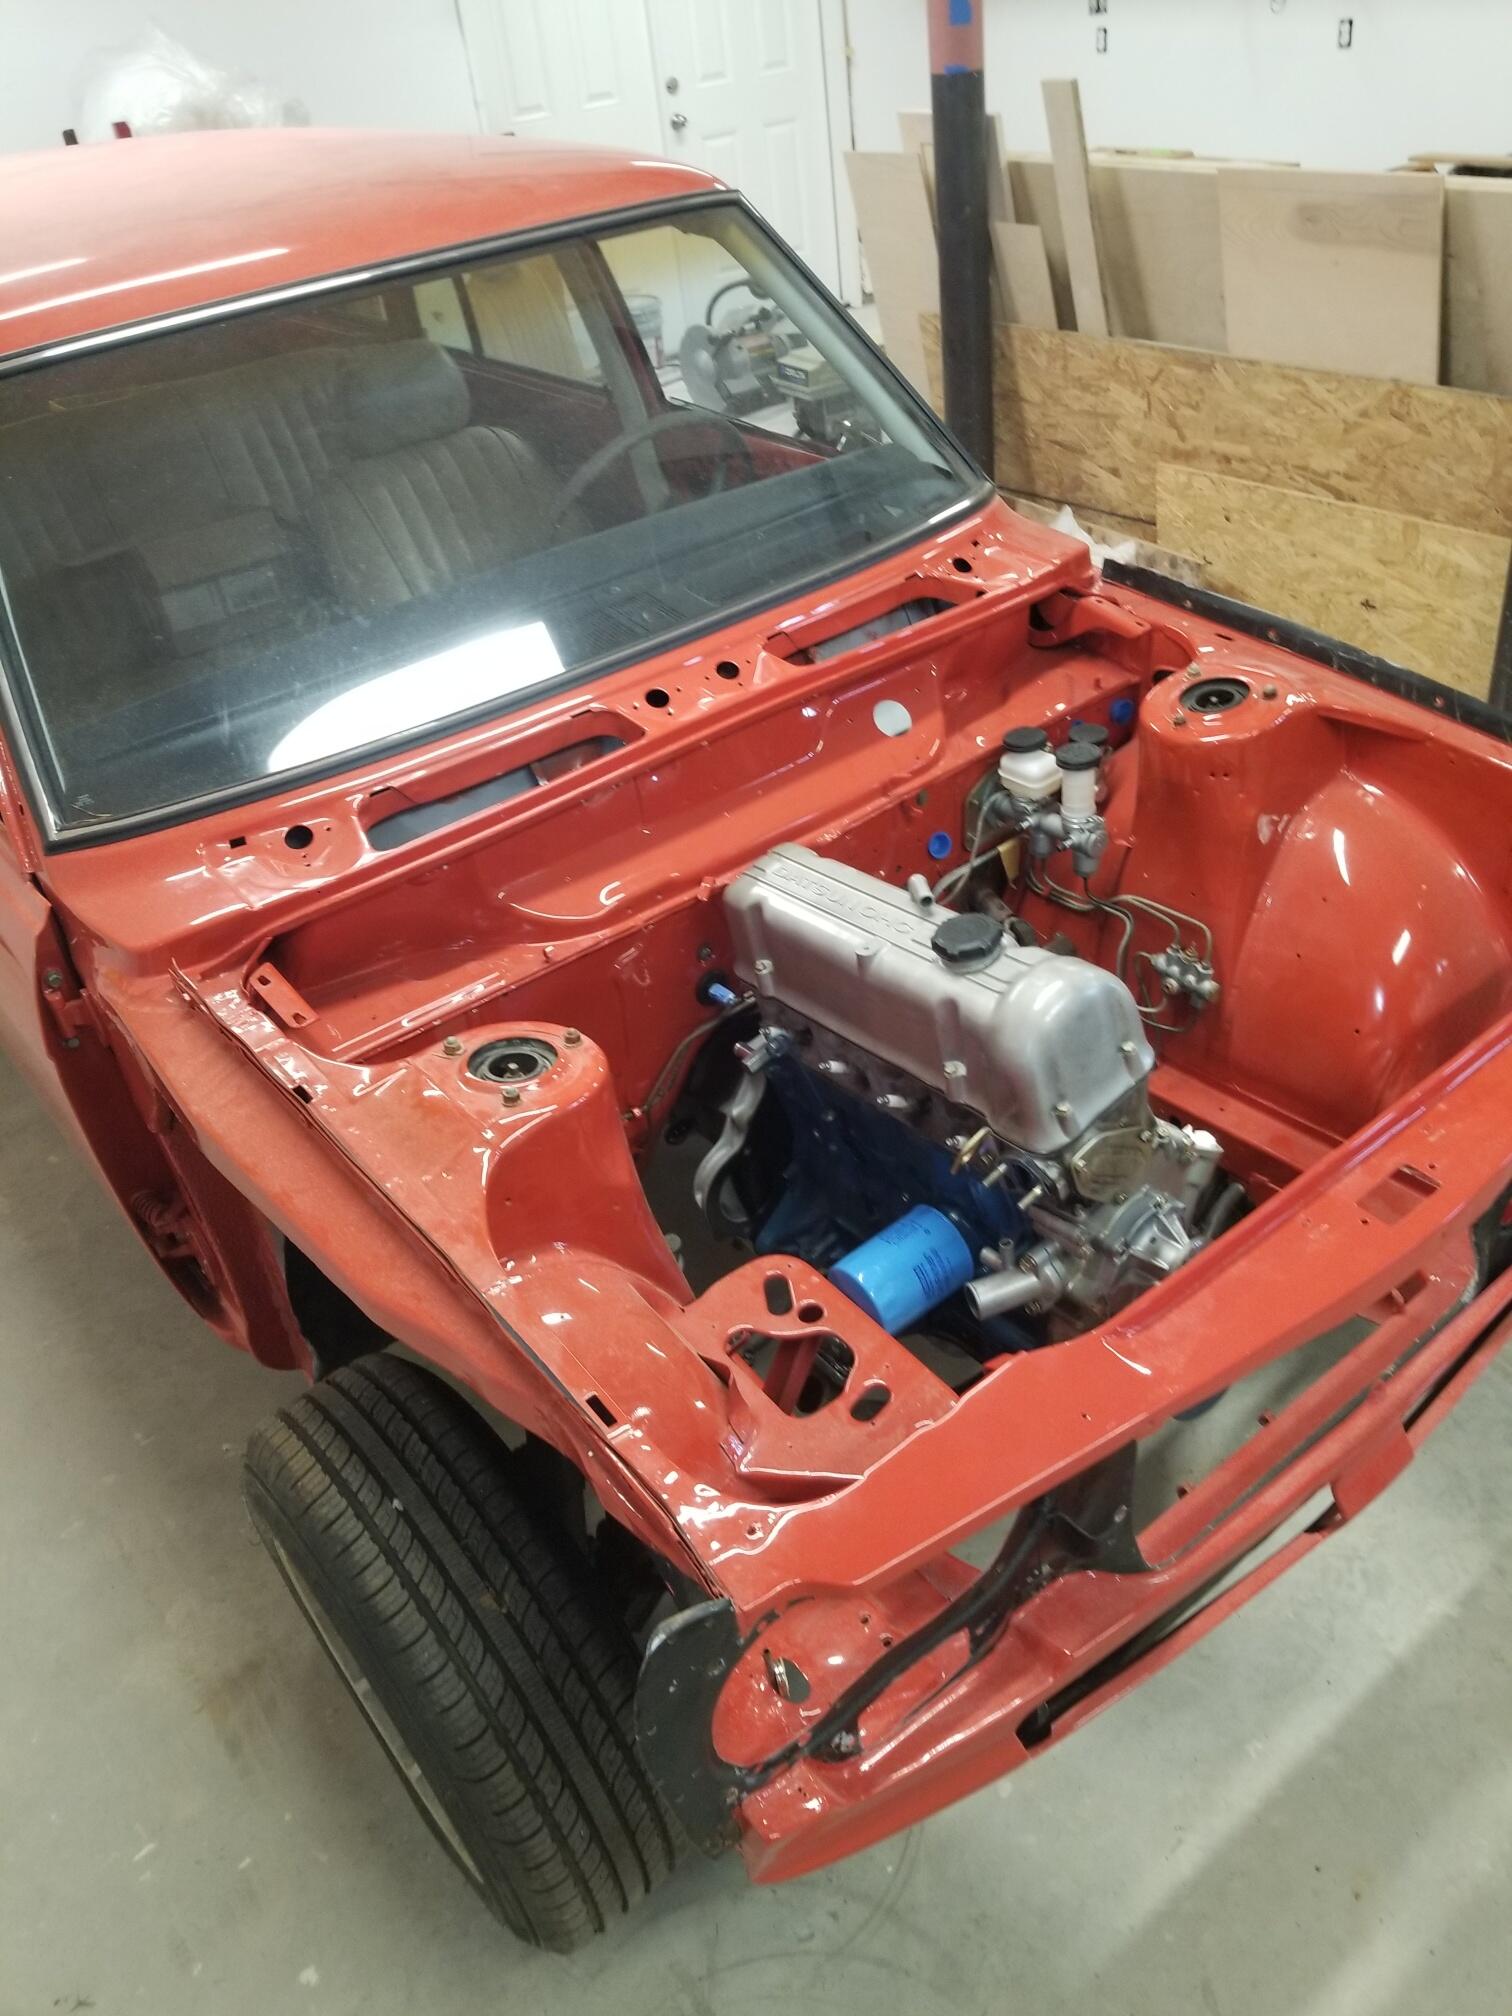
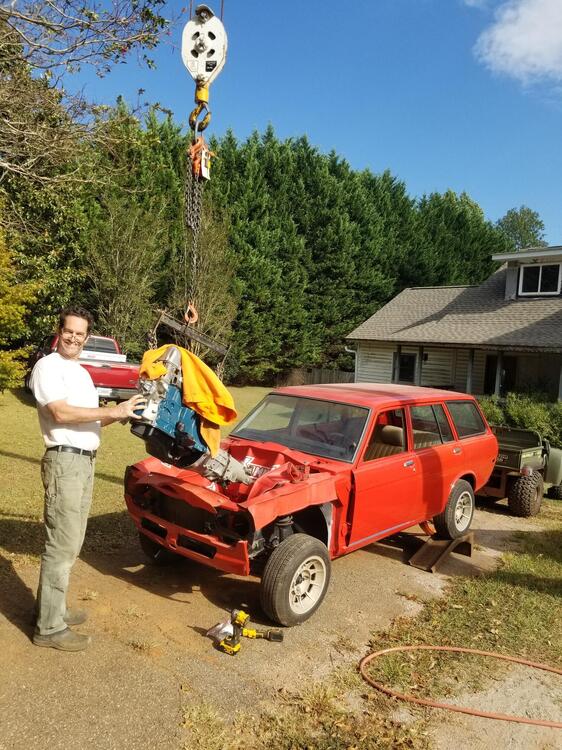
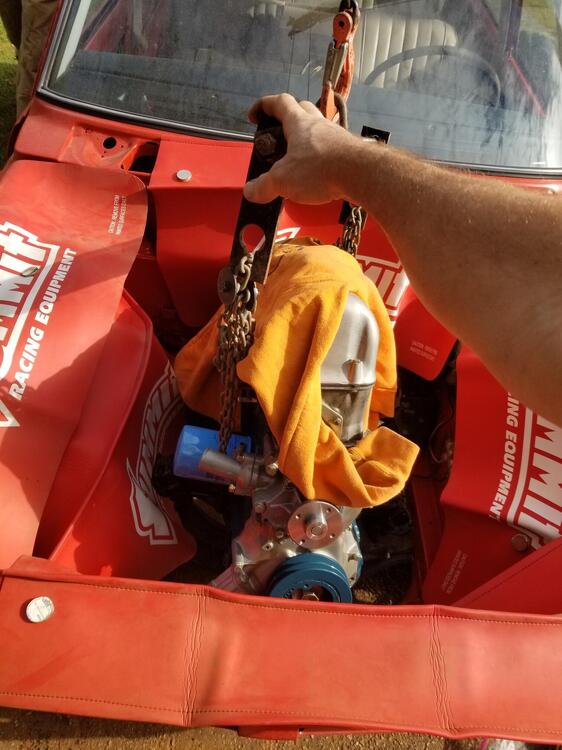
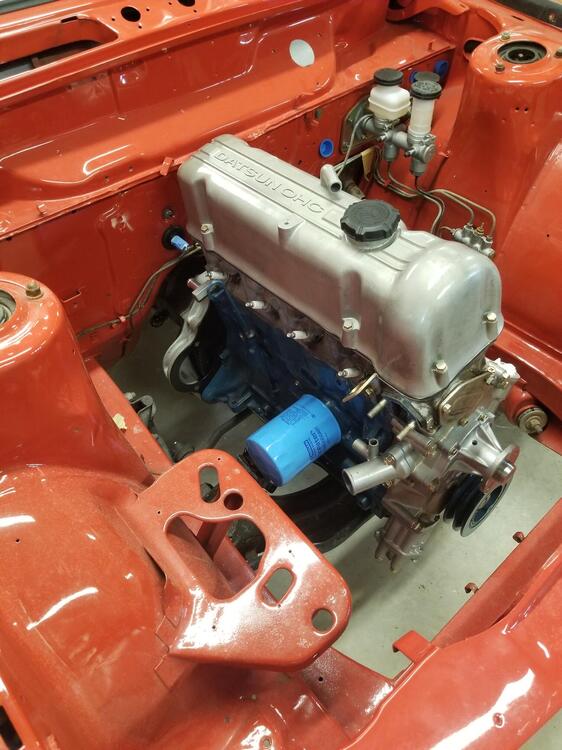
2 pointsWorked on the Goon some today First time outdoors in a while. It's filthy... So the engine is in and I will start trying to help him get some of the misc pulled together. One of the big things is fabbing up an exhaust. I also need to try to figure out the float levels. I'm not sure if I can set them to the same height as standard SU's?


 2 points
 -
I have a friend 3D printing a double flange adapter that tapers down from 70 - 60mm with two different bolt spacing templates. 1/4” thick flanges and 1/8” tube wall. Might use this as a template for a billet aluminum prototype. Unless we can find a suitable 3D material for strength and heat resistance.1 point
-
1 pointIIRC, some Z shift levers use a black rubber/plastic grommet at the top of the shaft. That would serve to fill in the gap that you have with your boot. Not sure where you'd be able to source the grommet. It may take a little patience and/or ingenuity.1 point
-
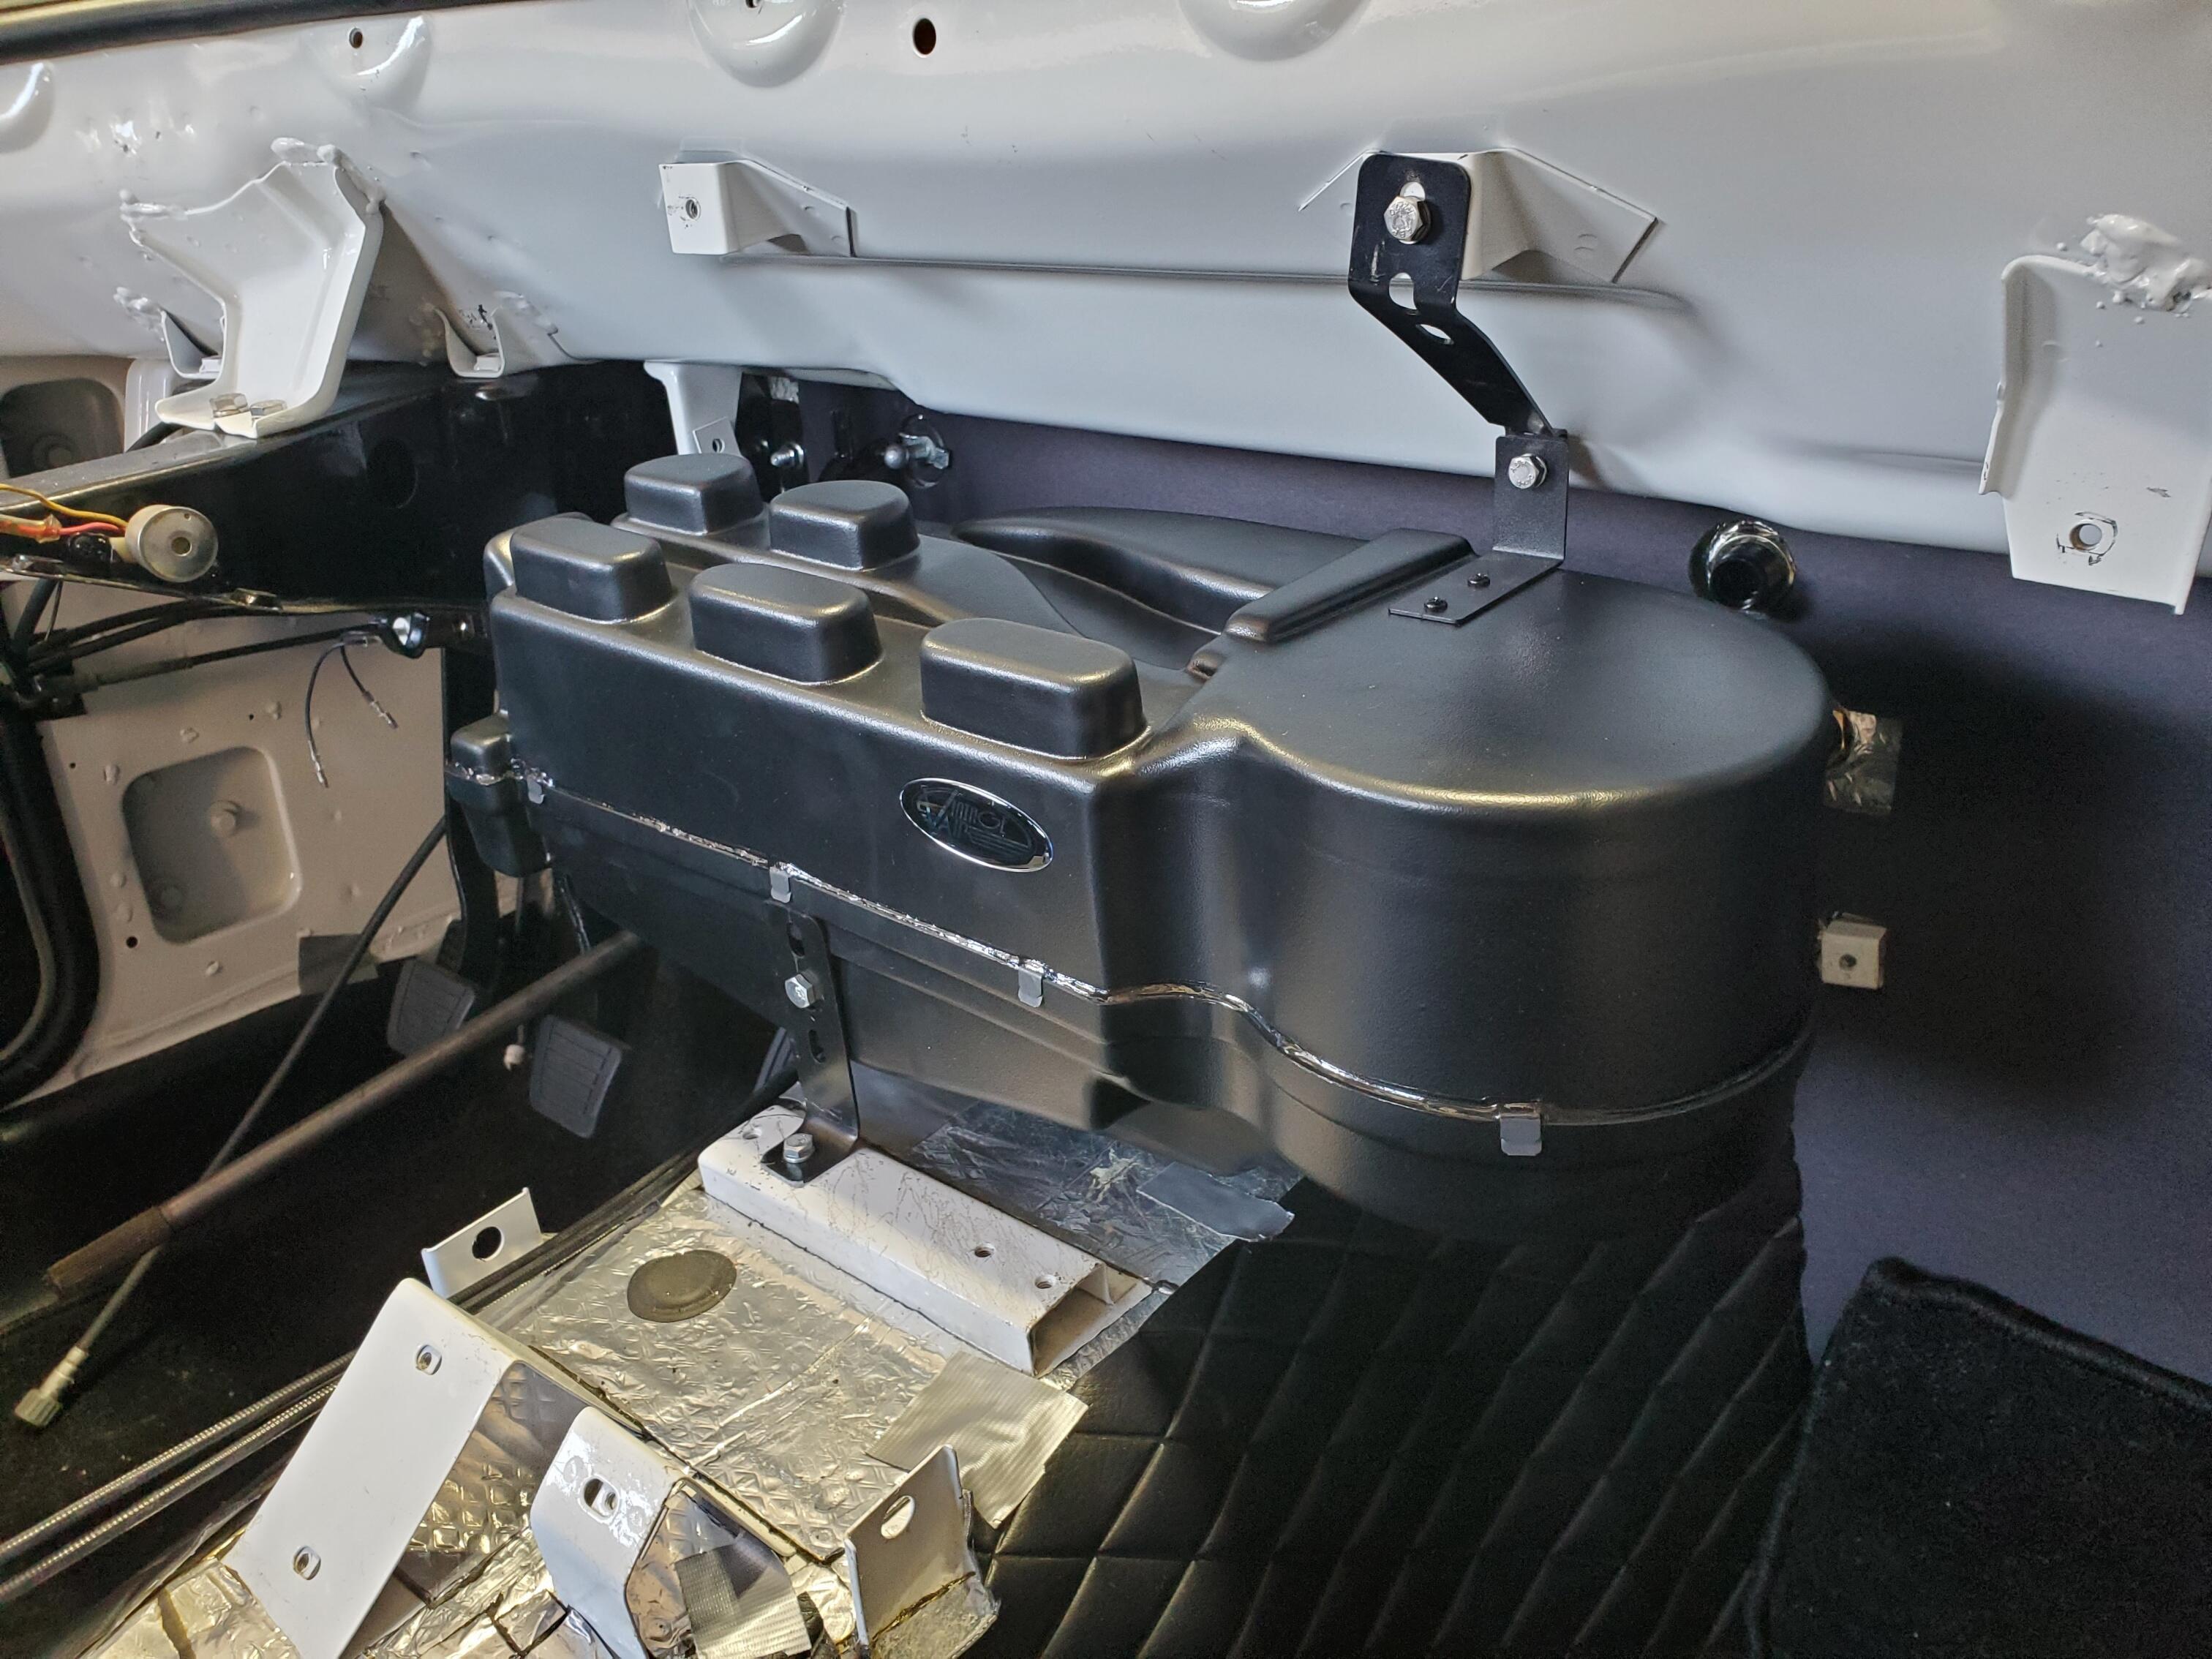
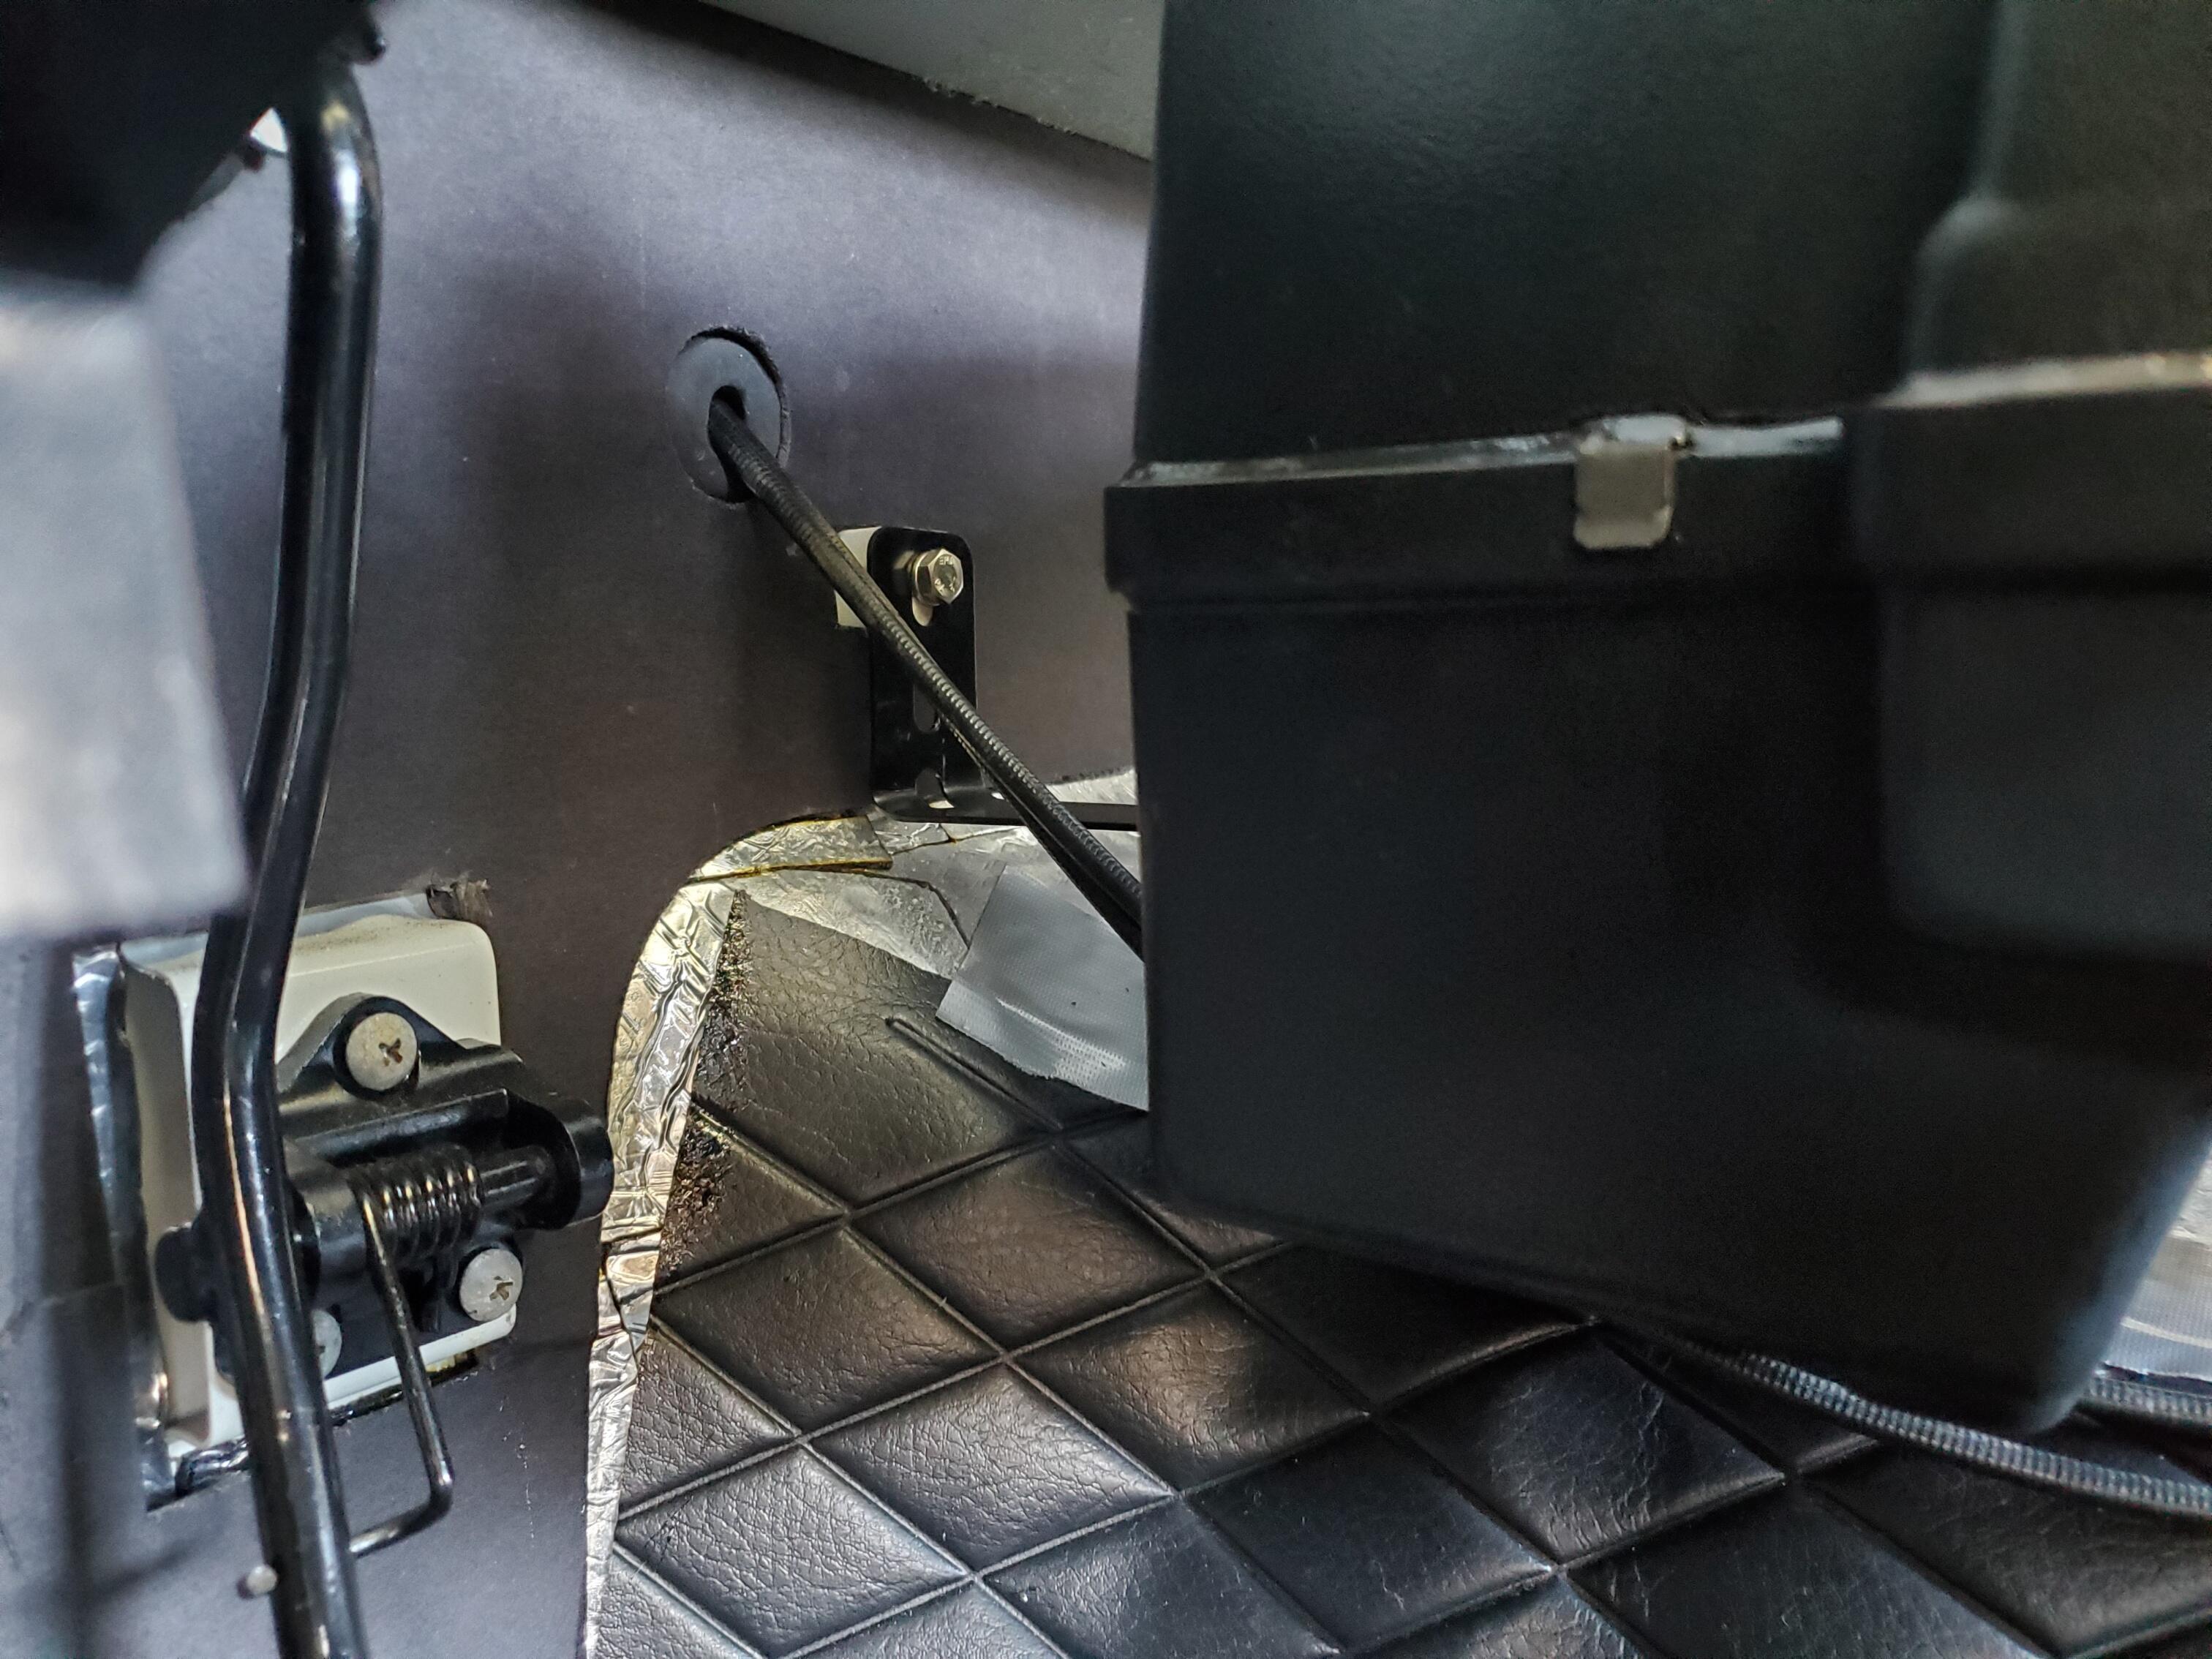
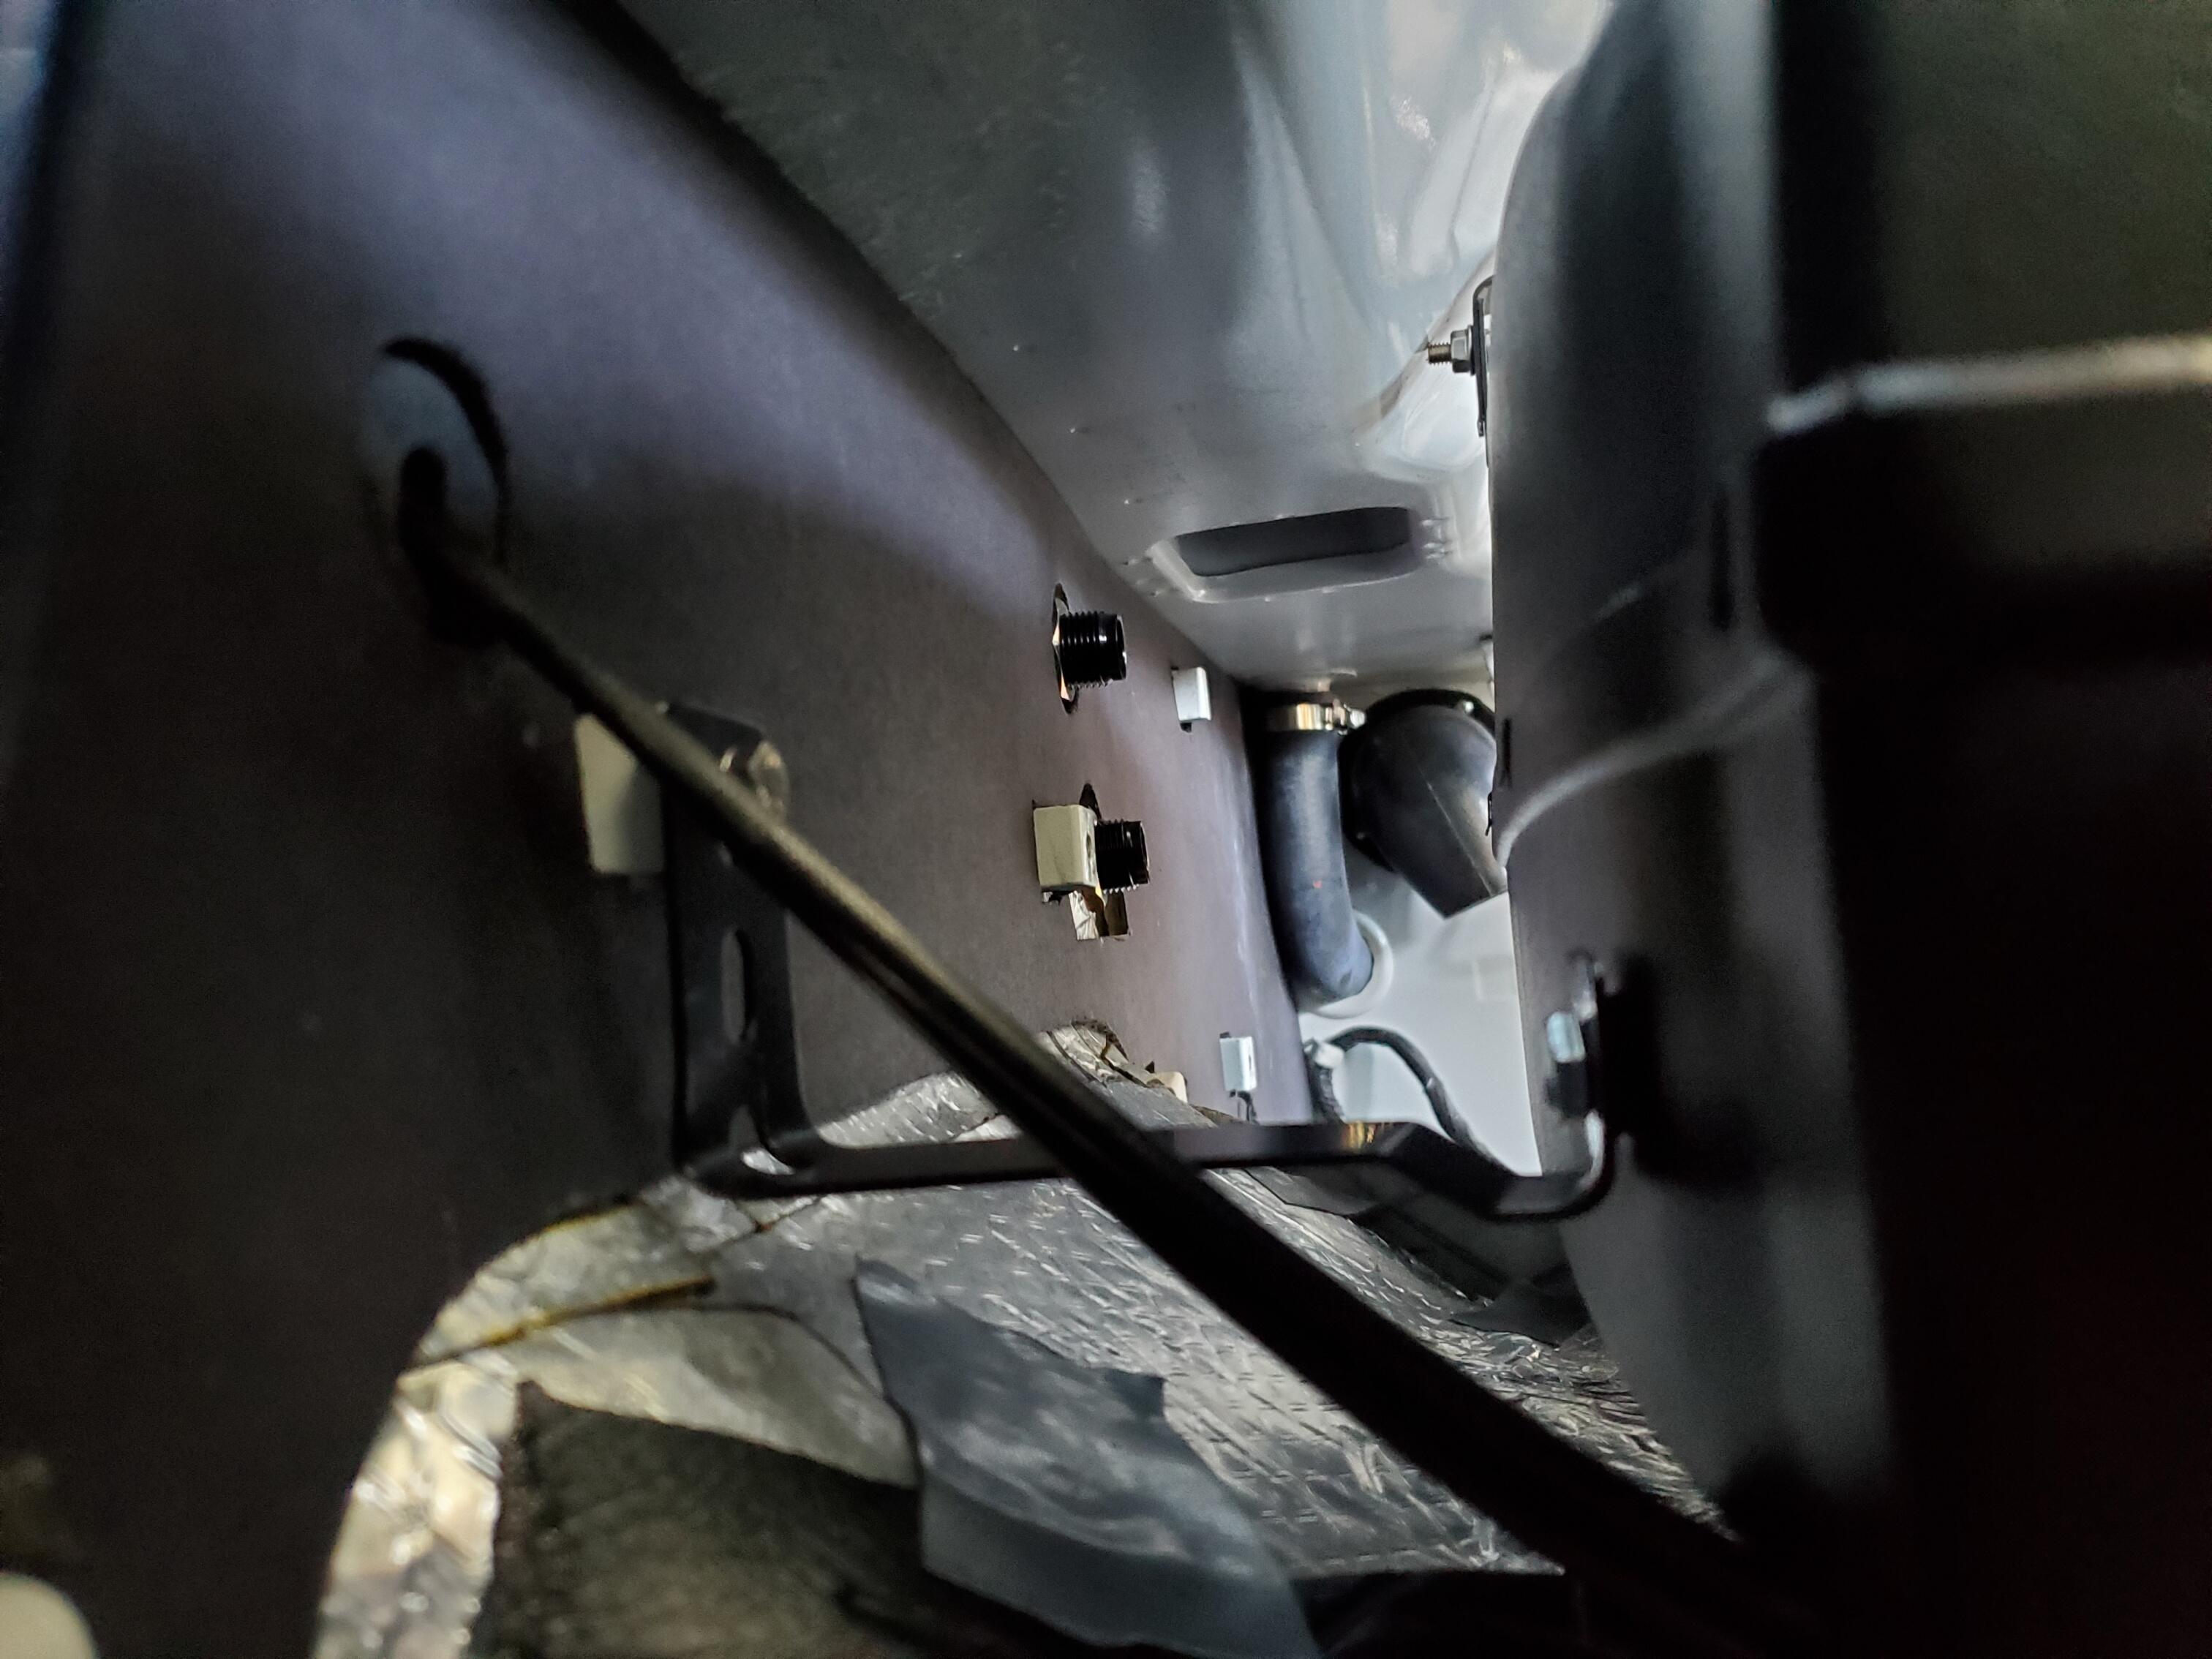
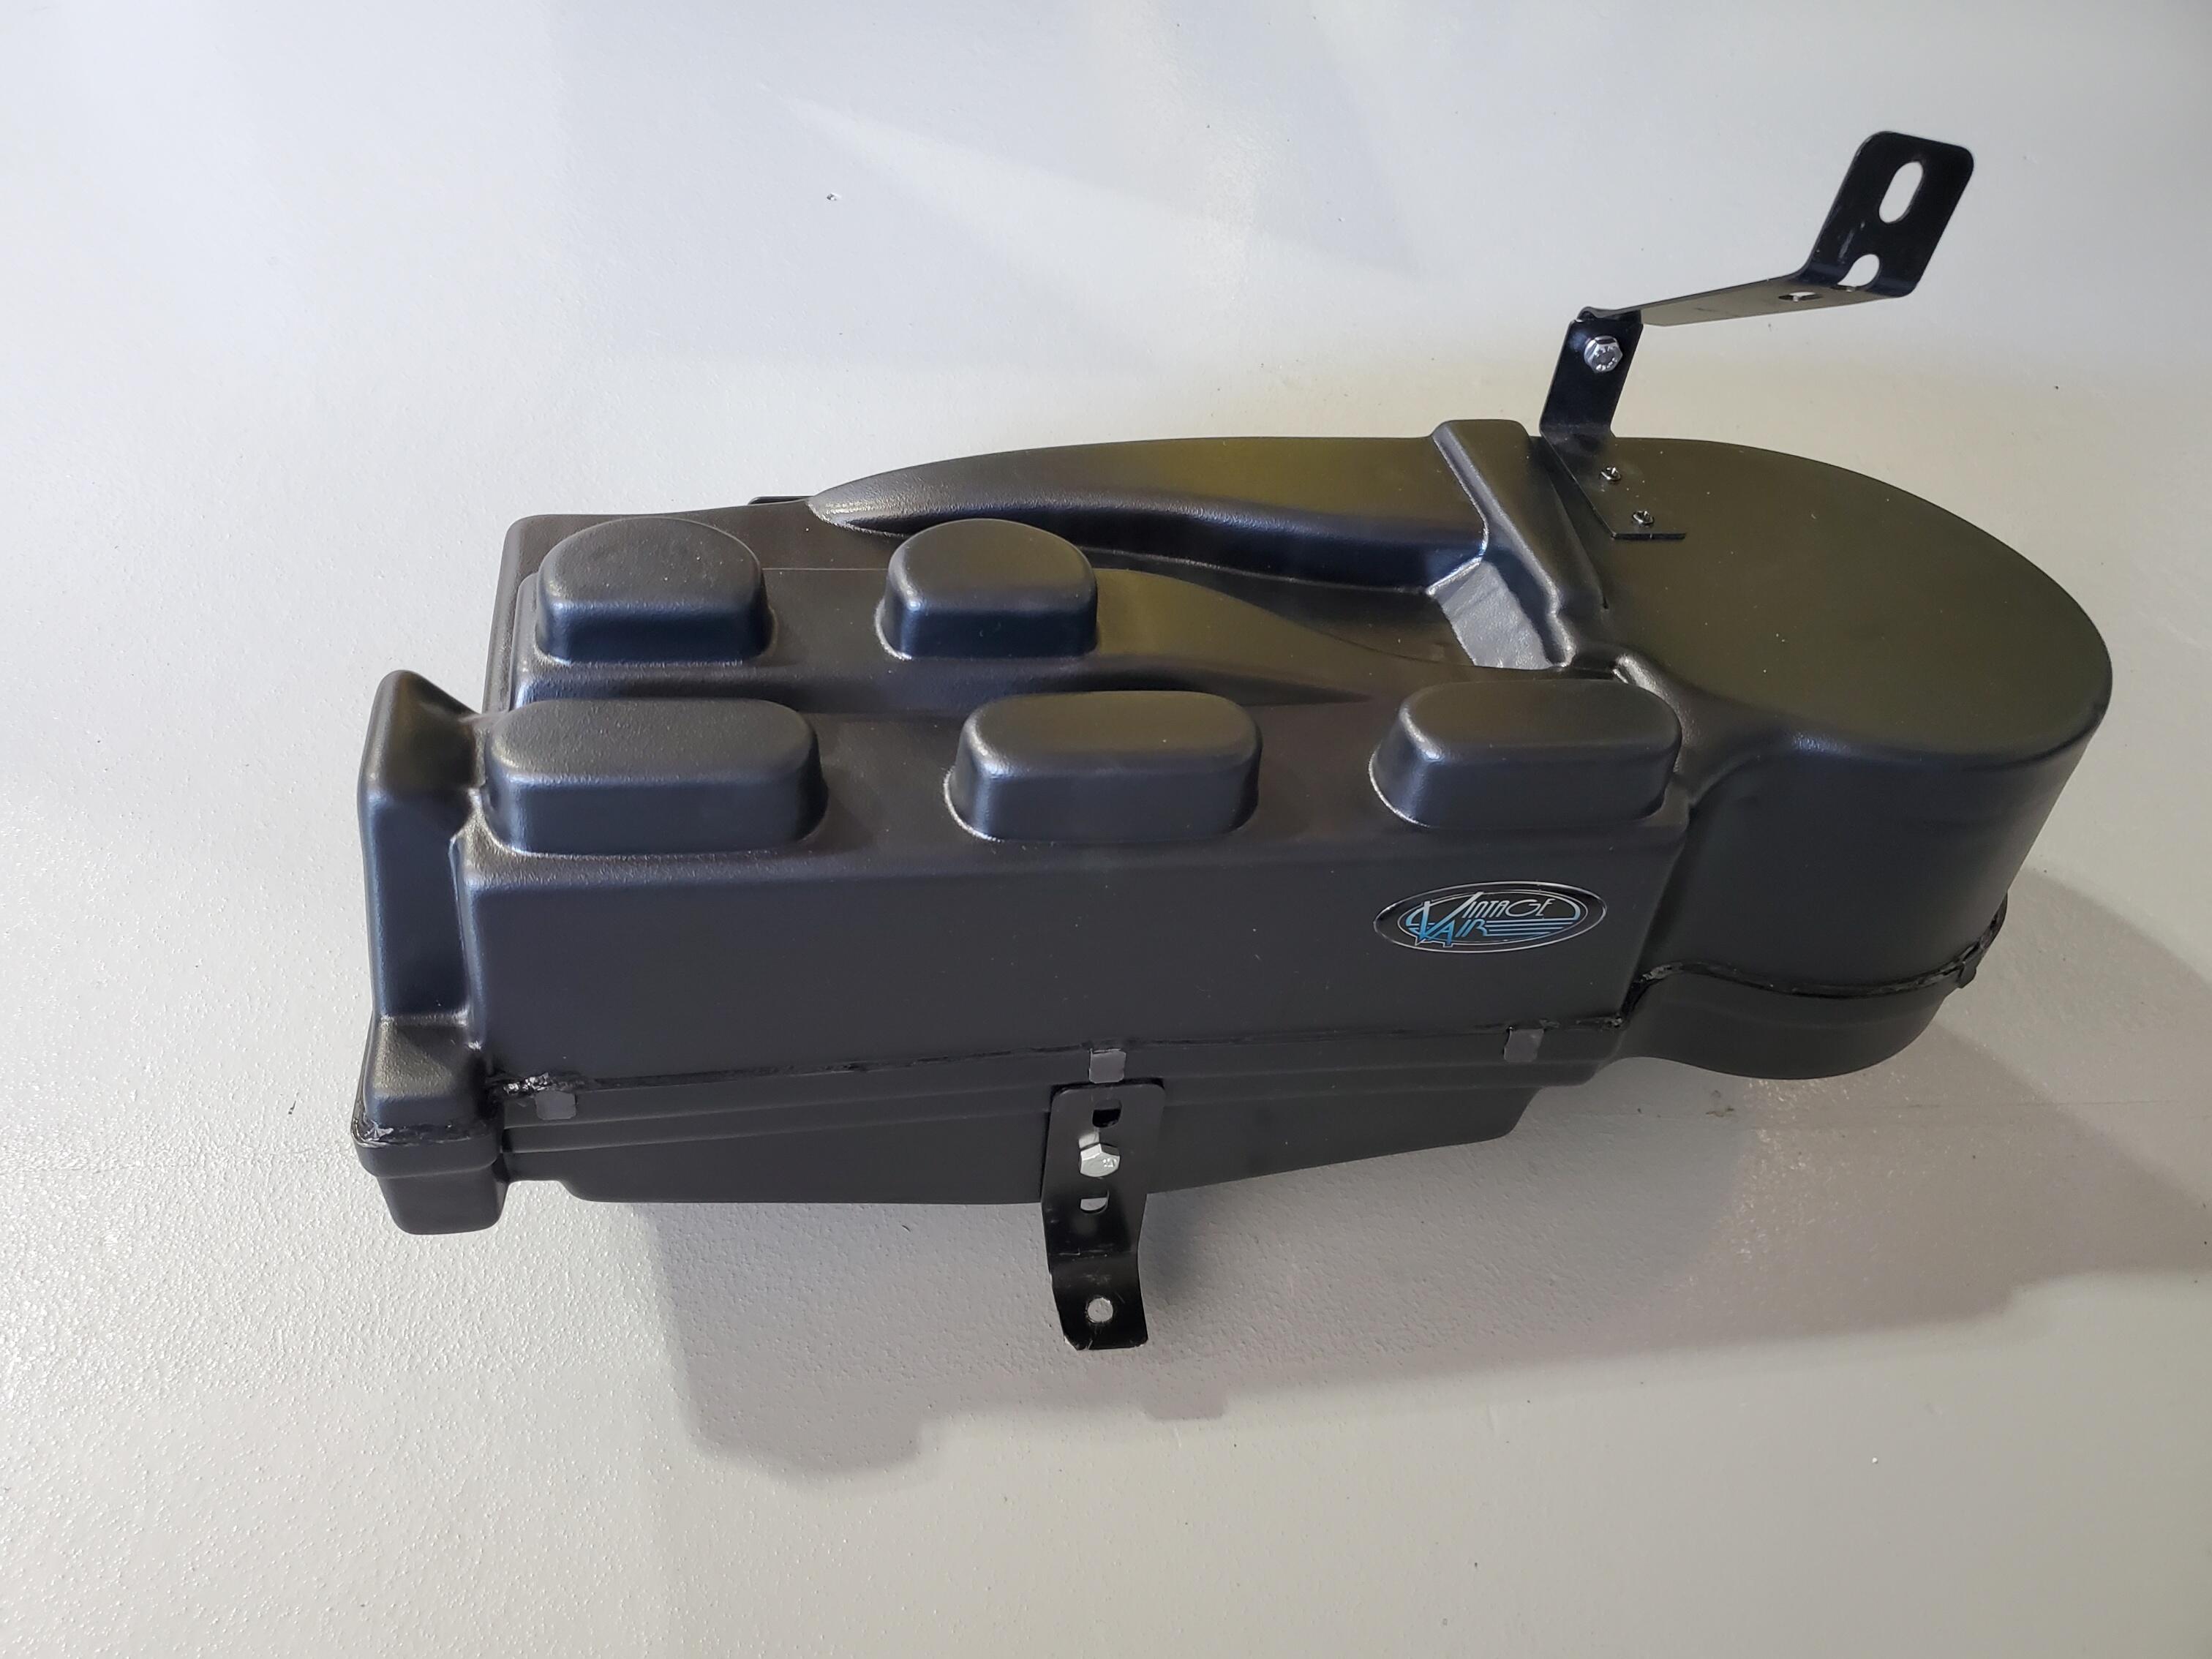
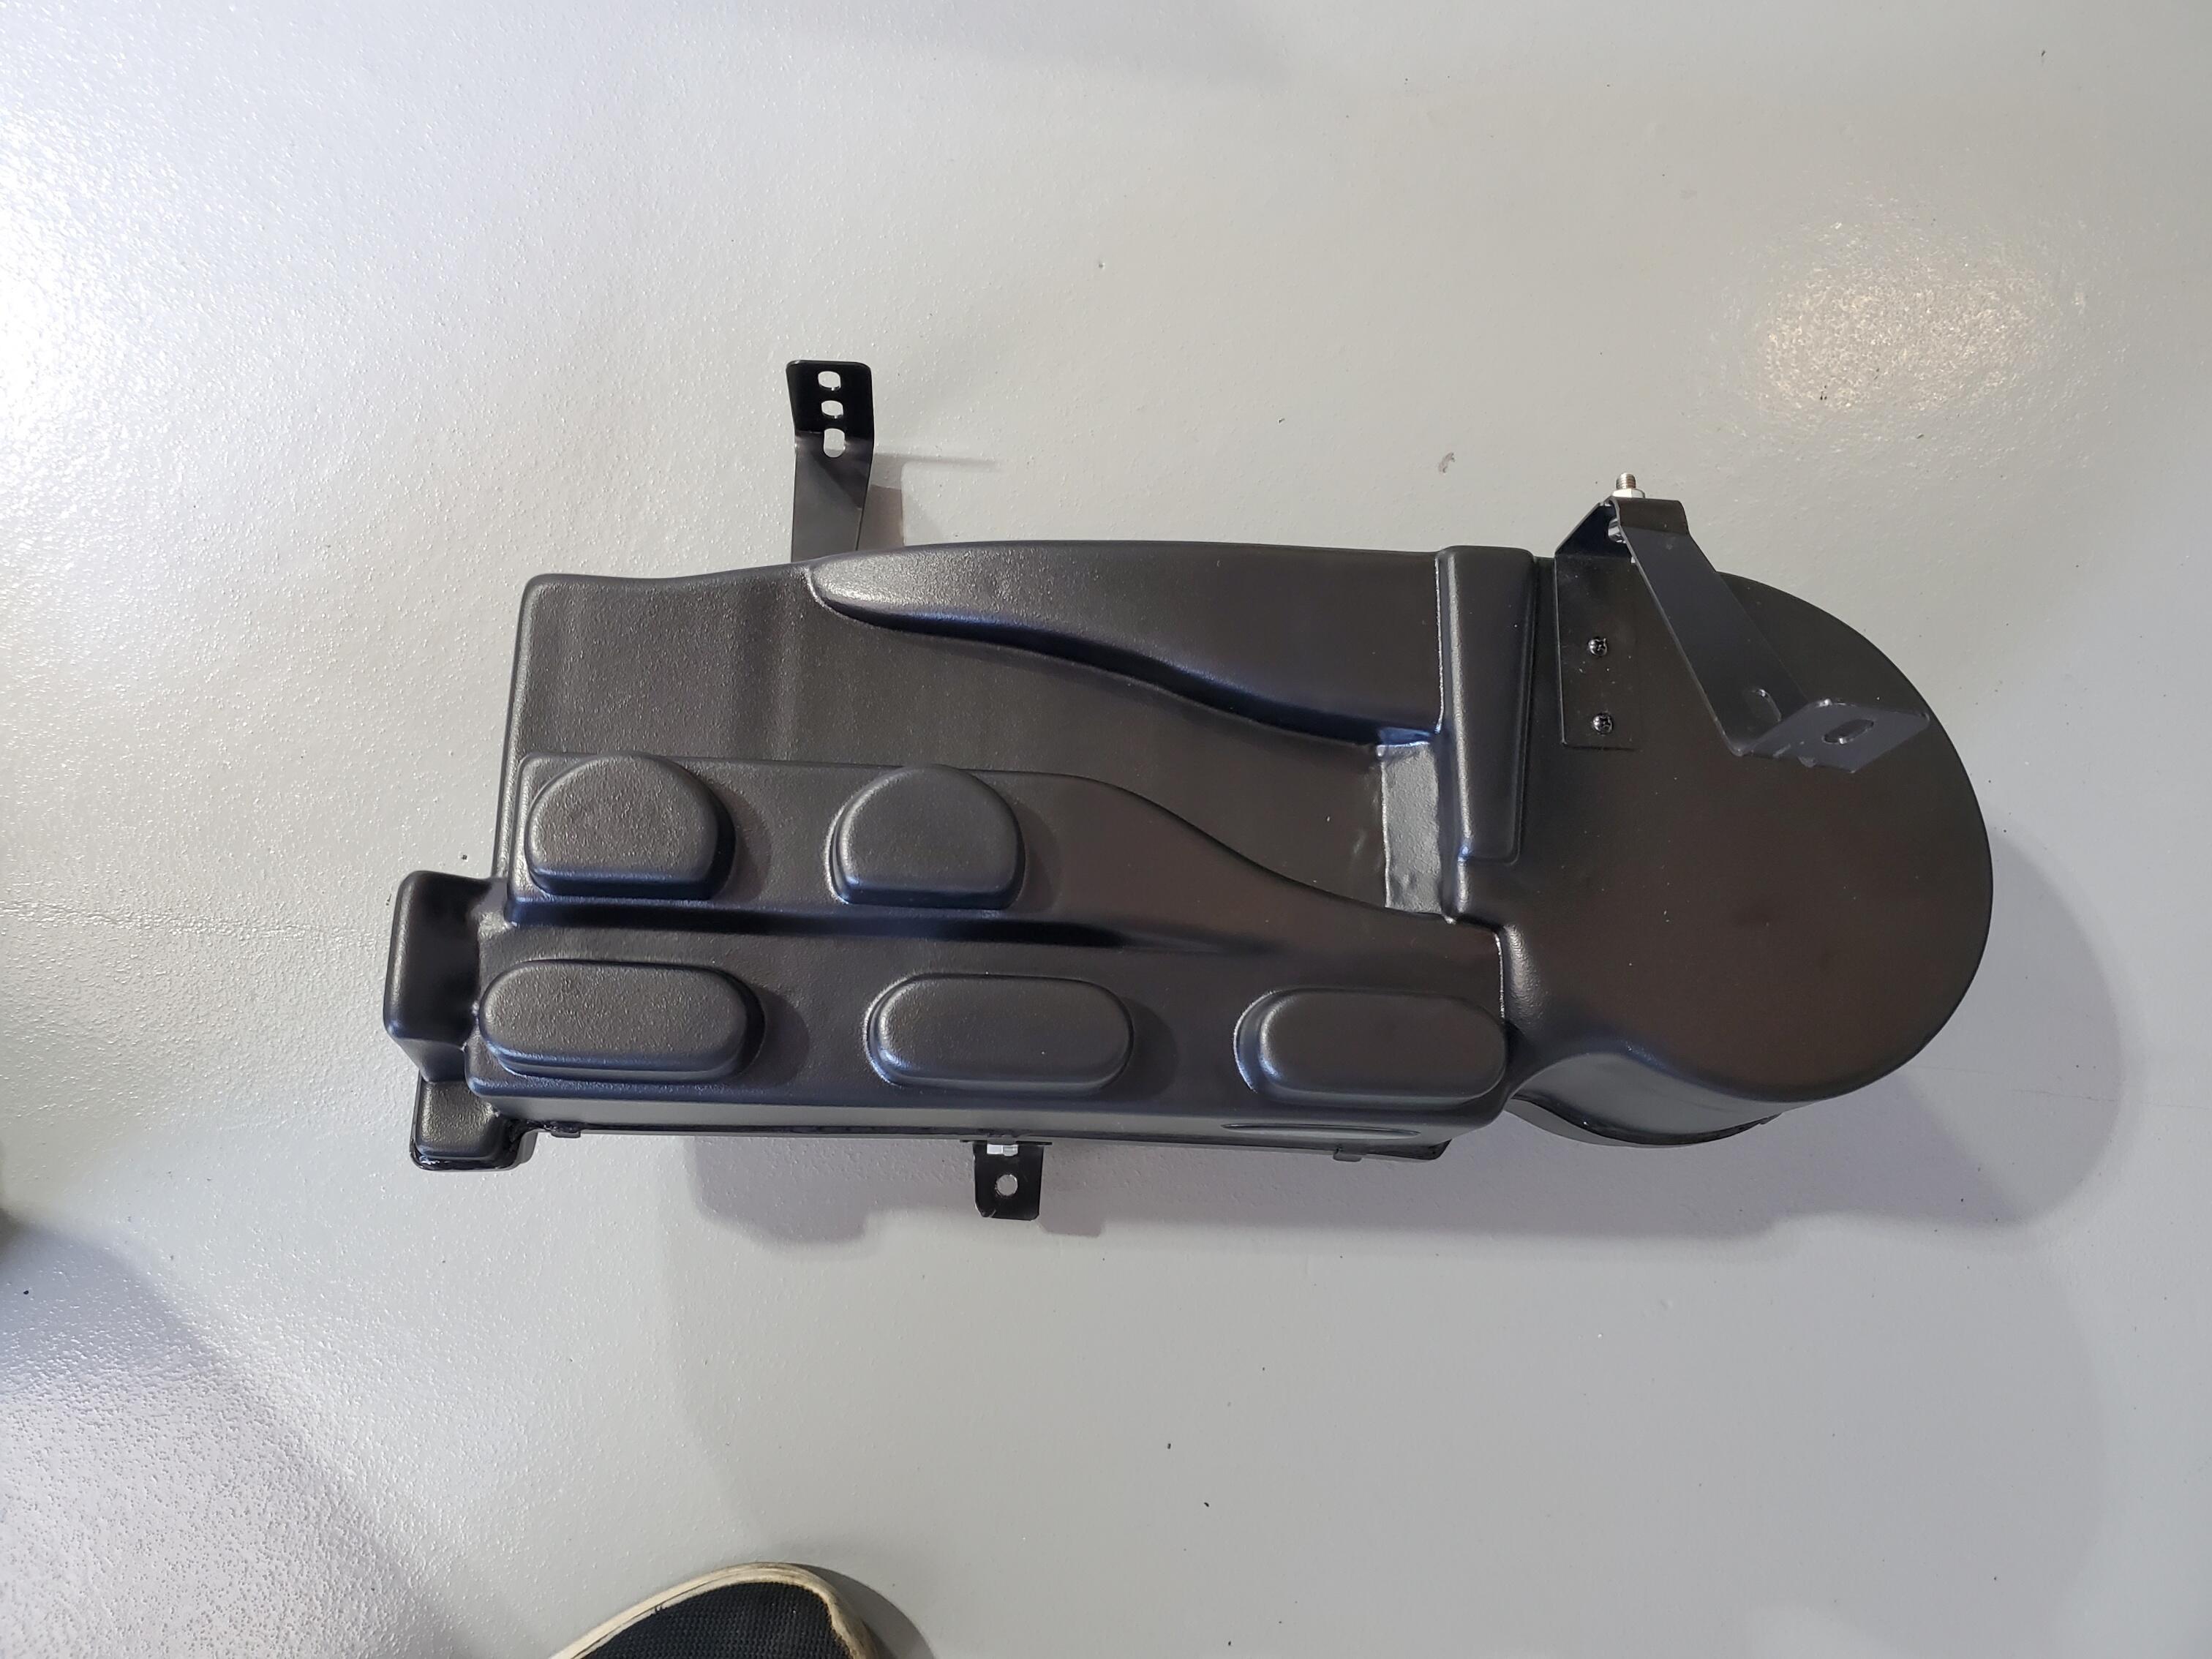
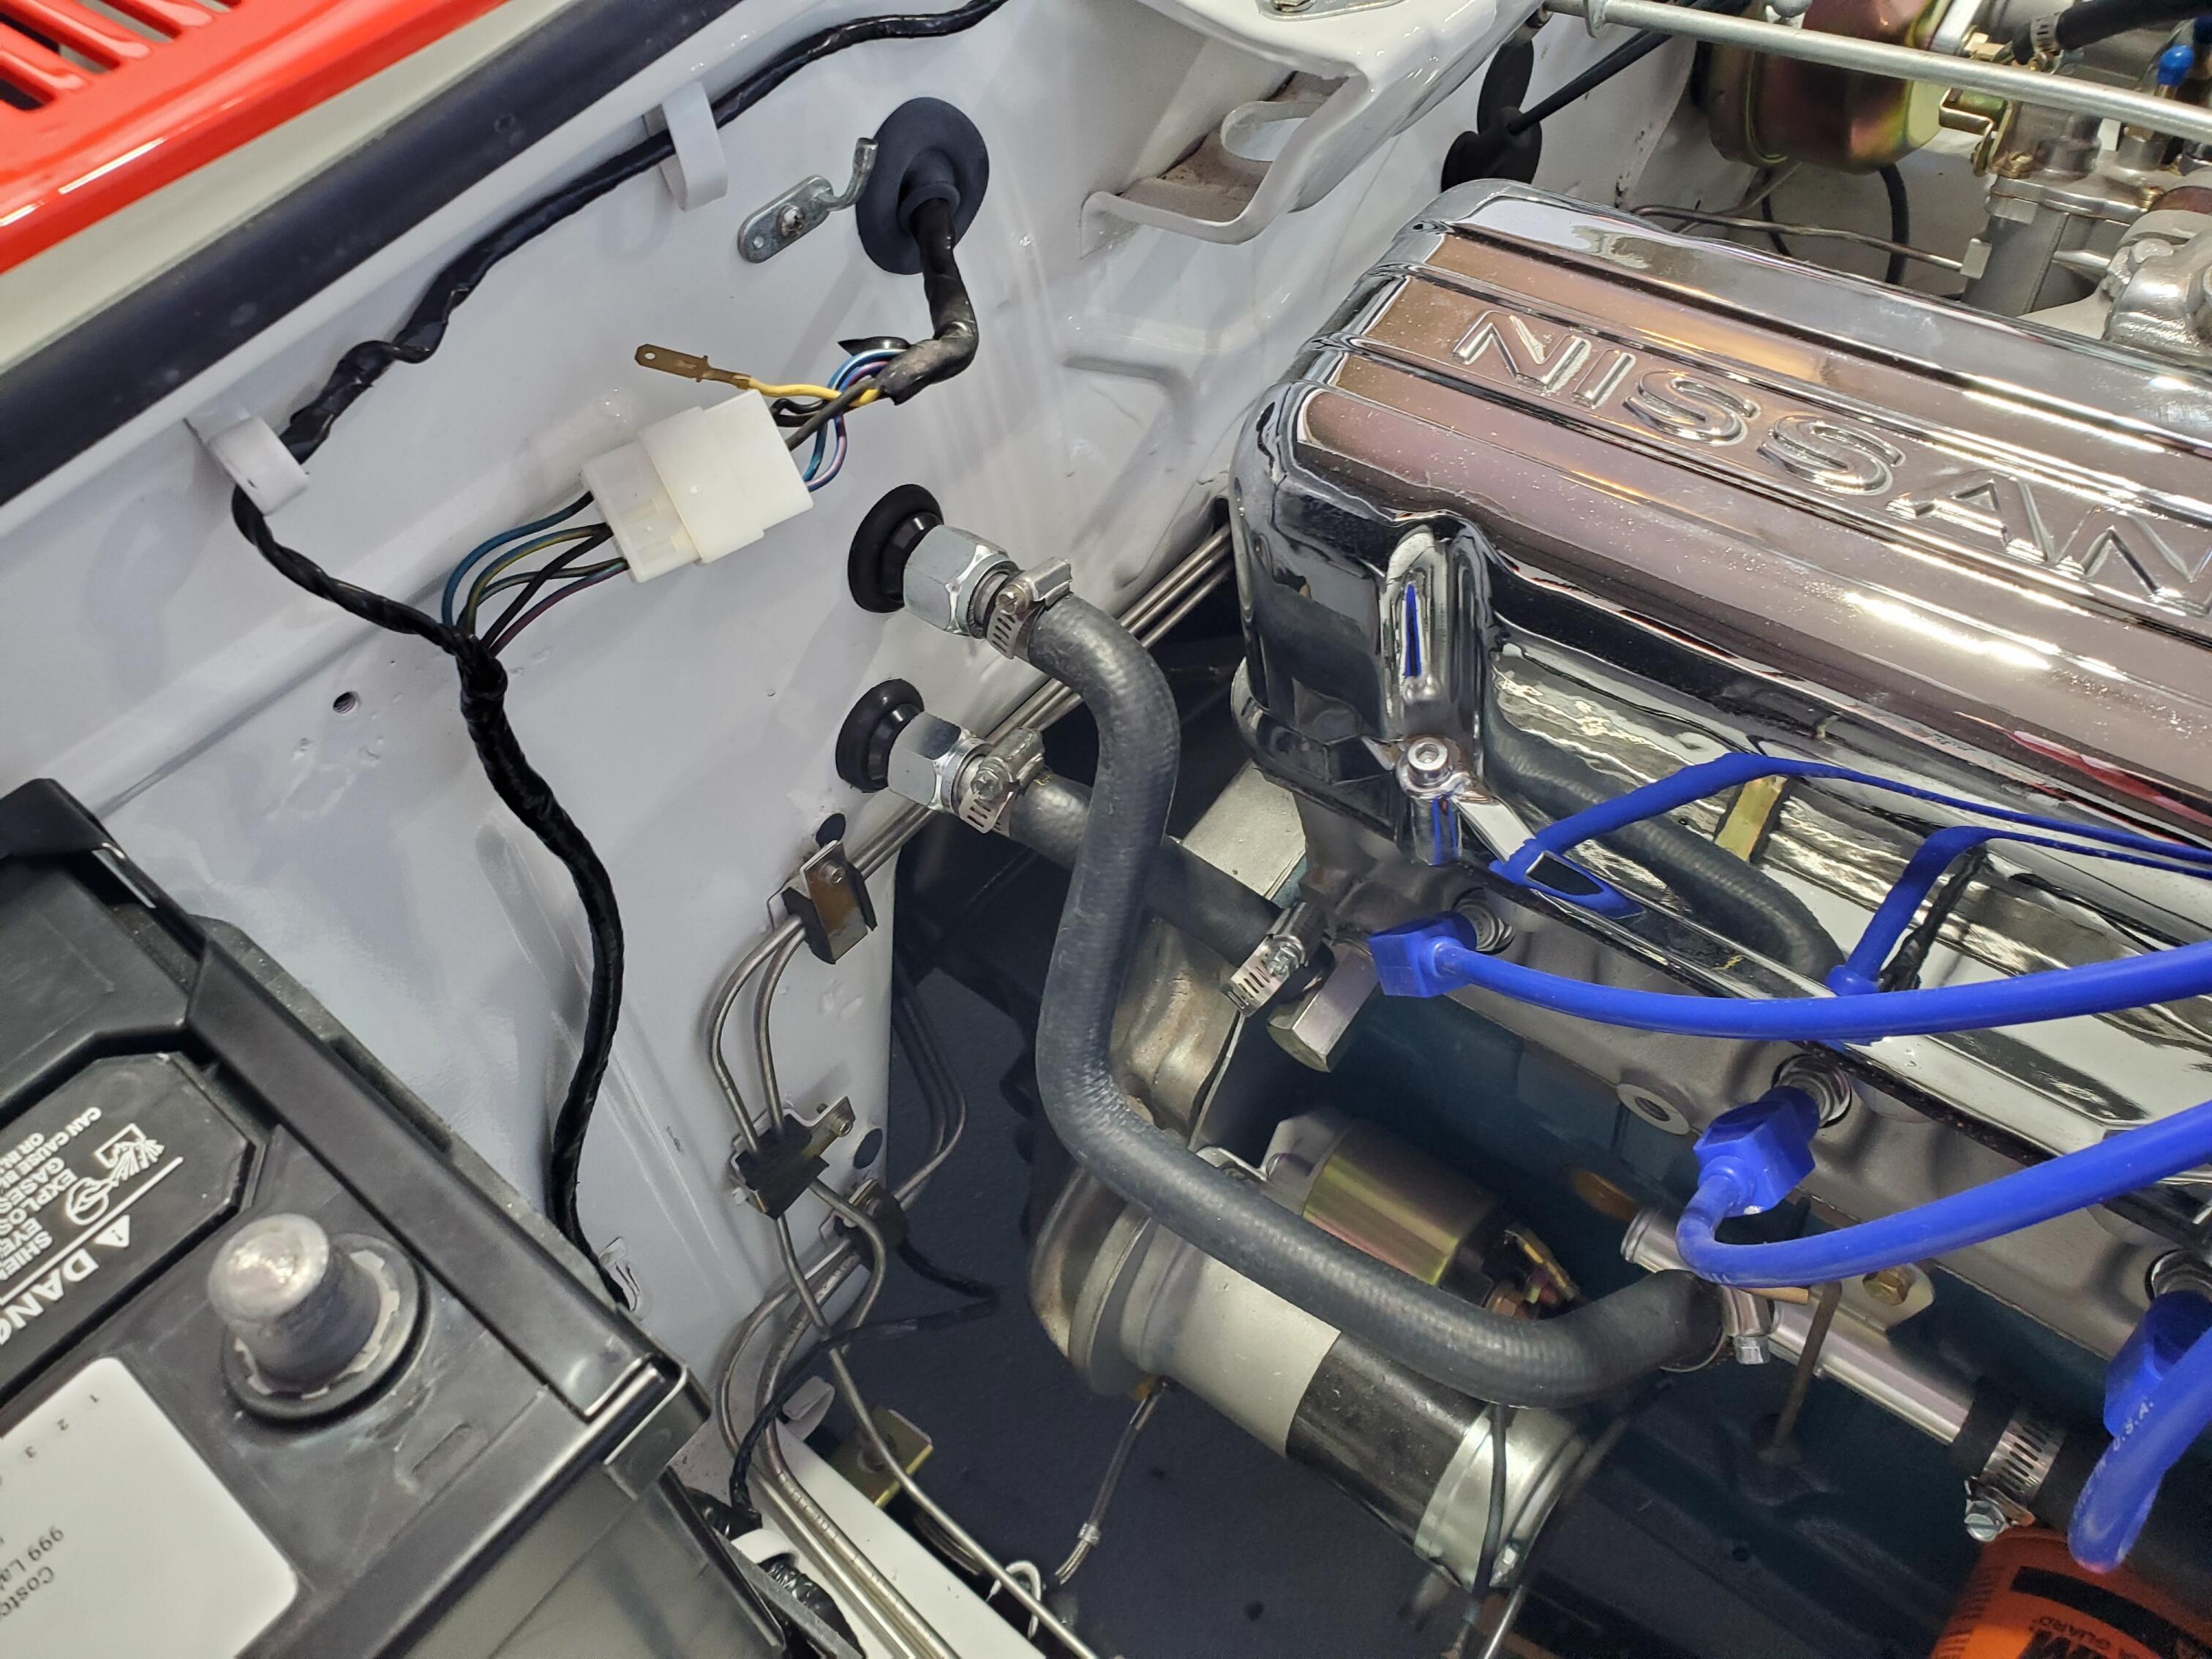
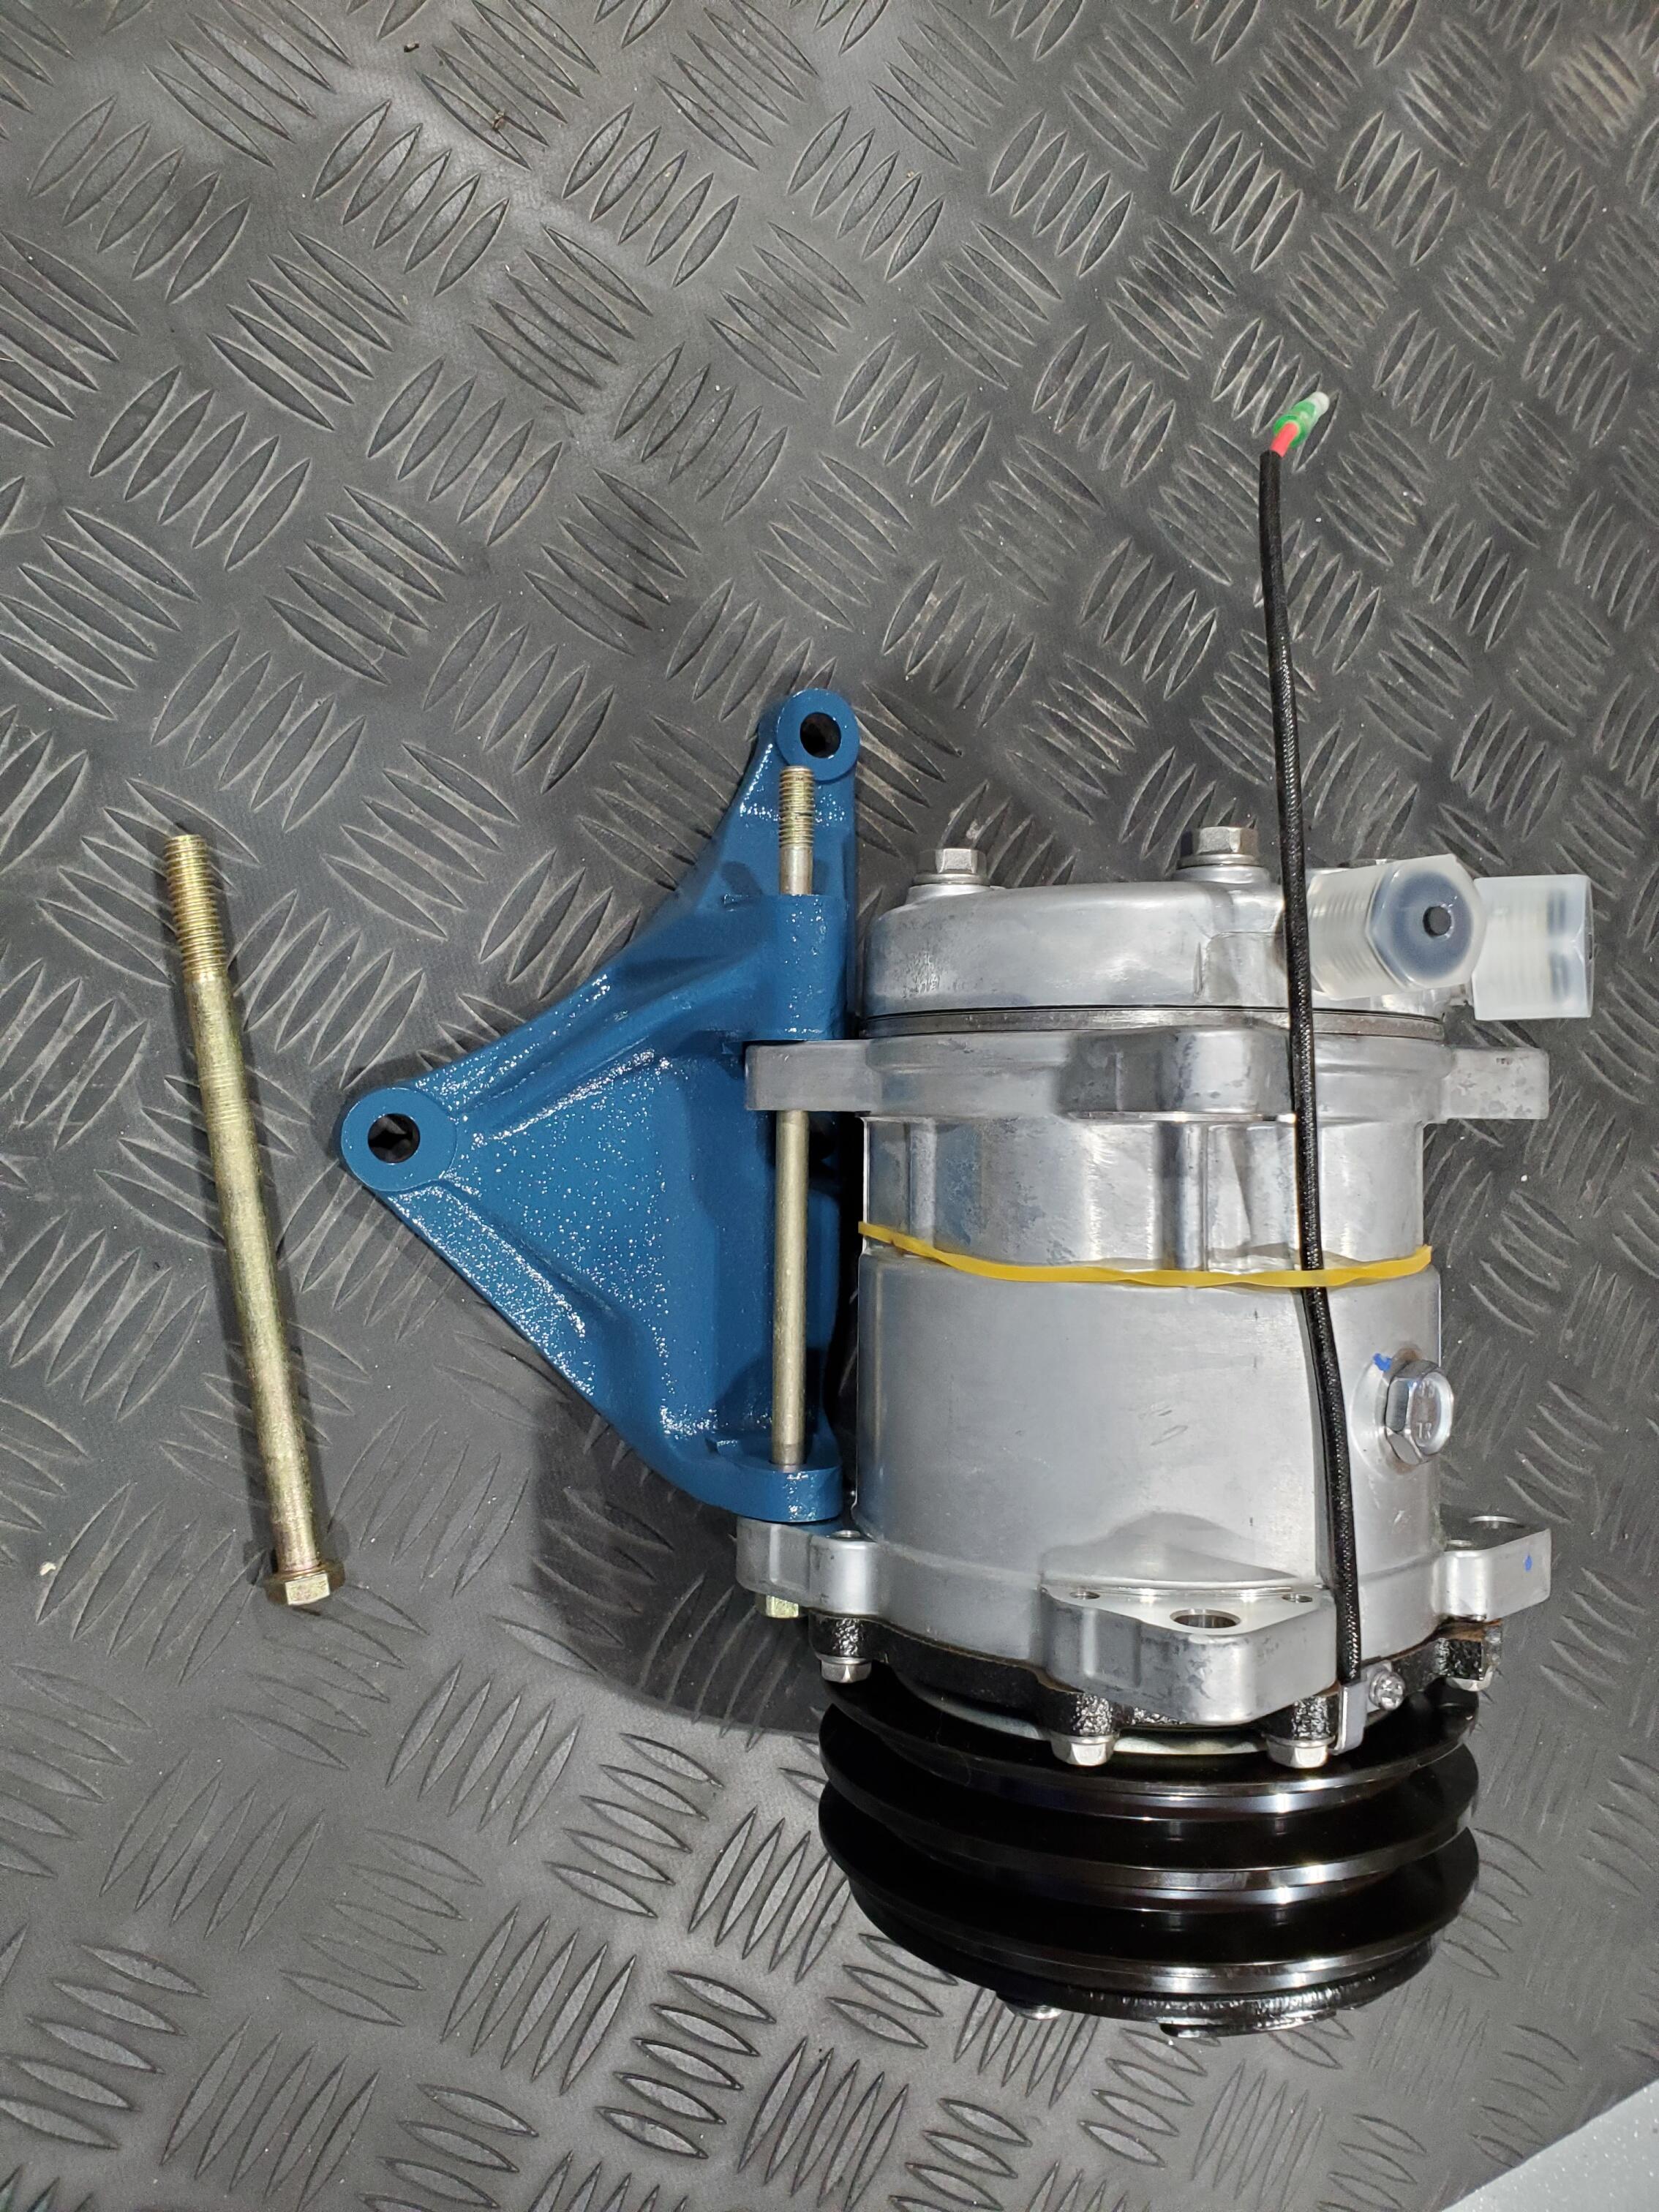
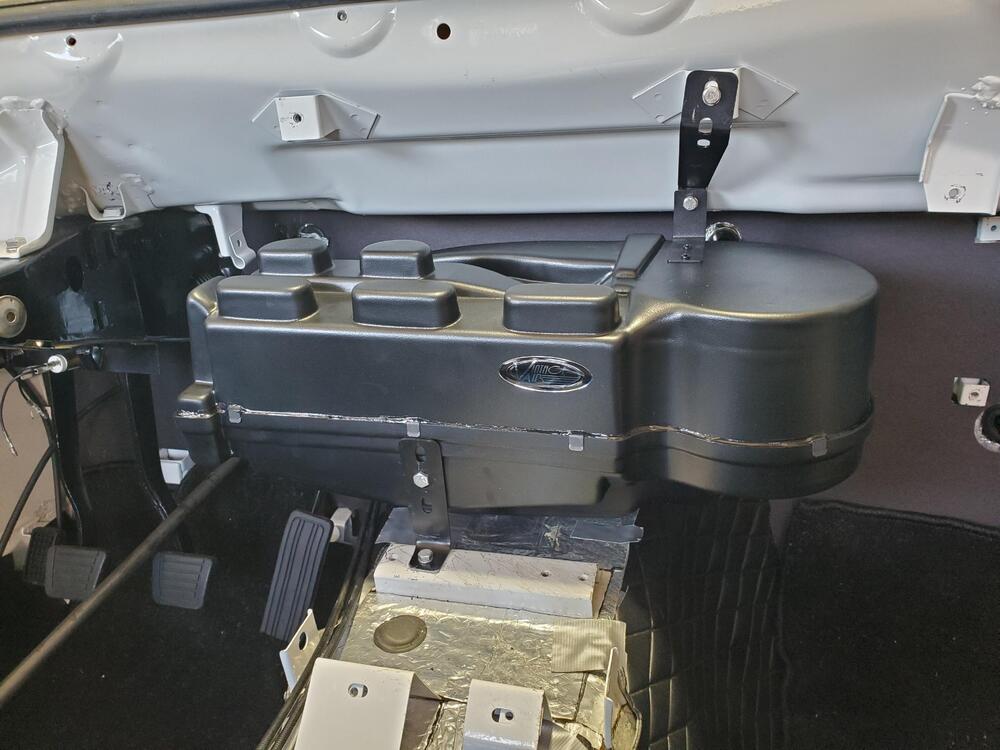
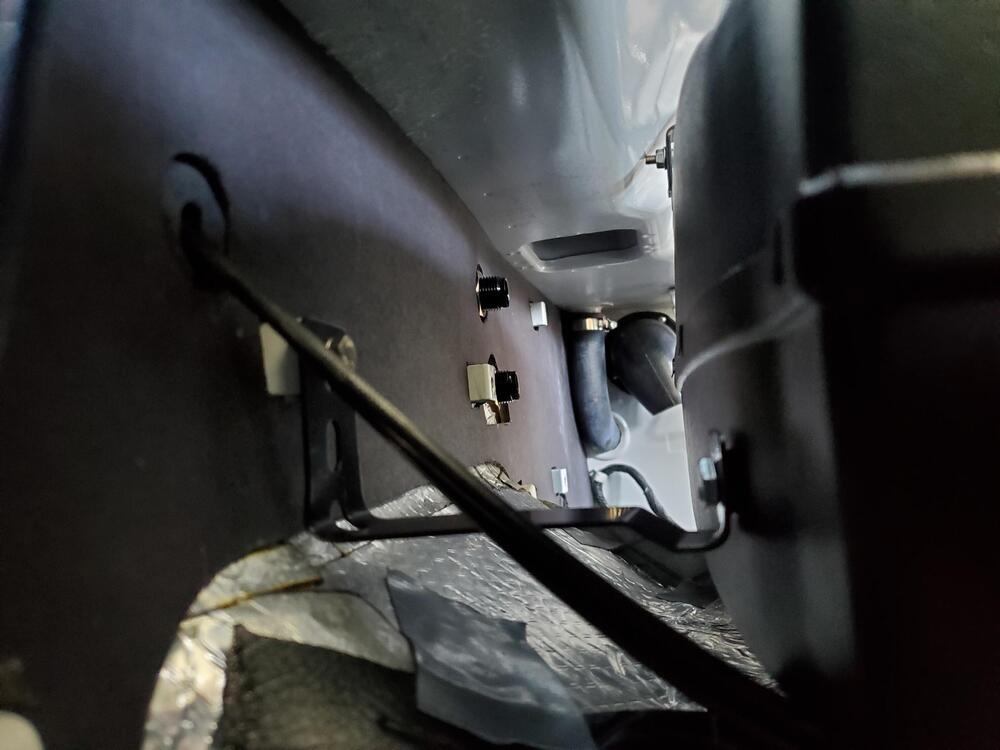
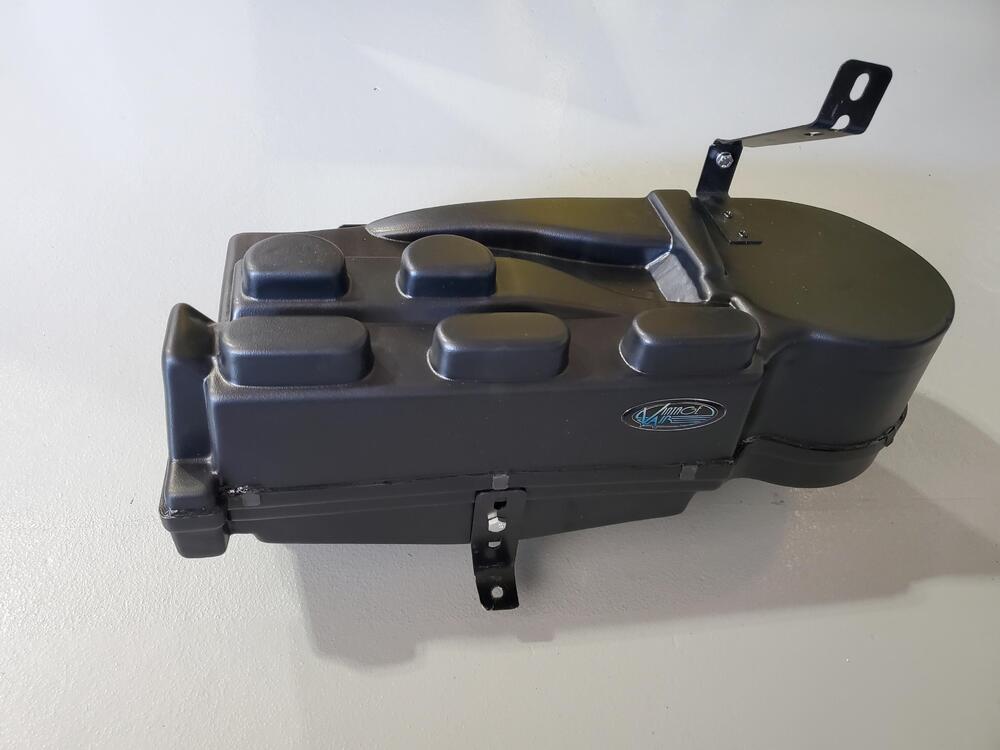
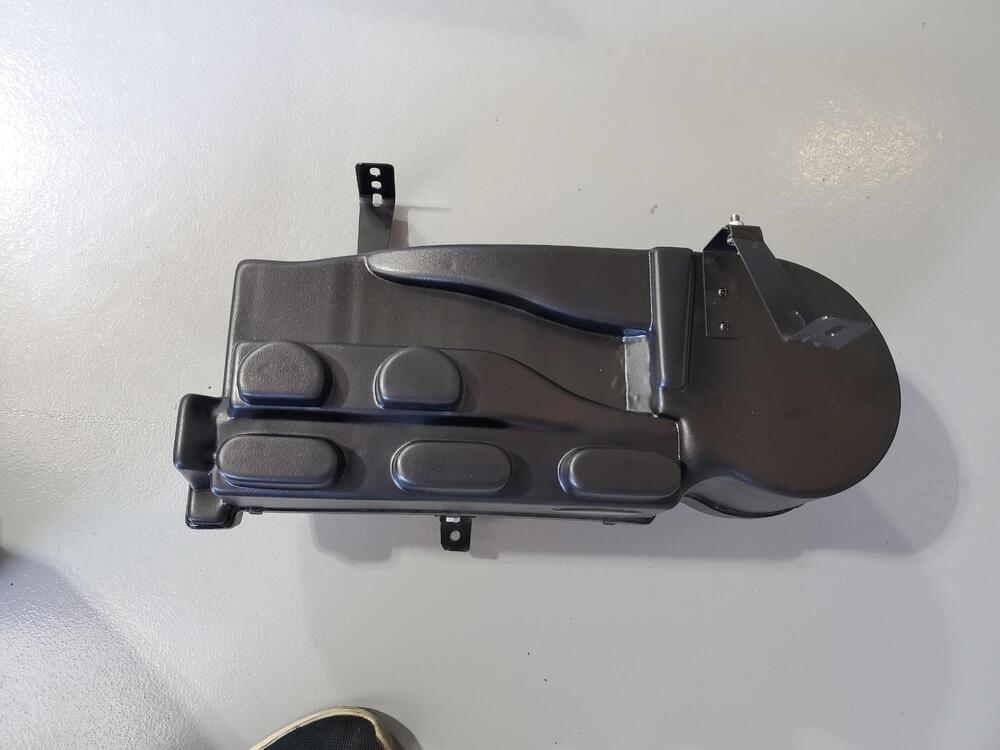
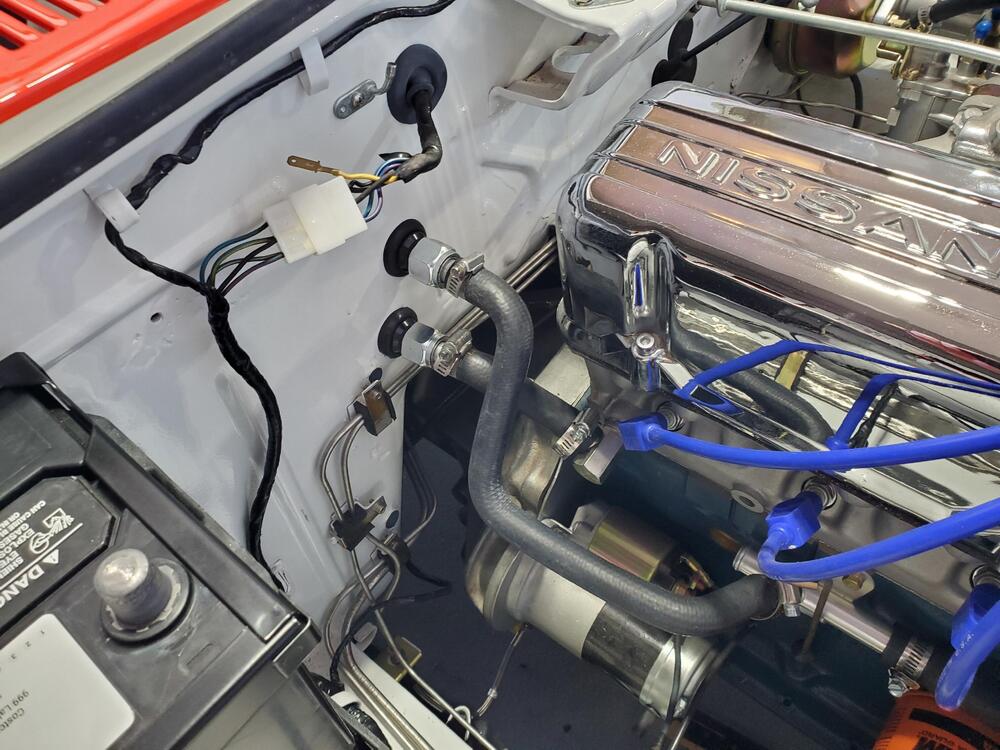
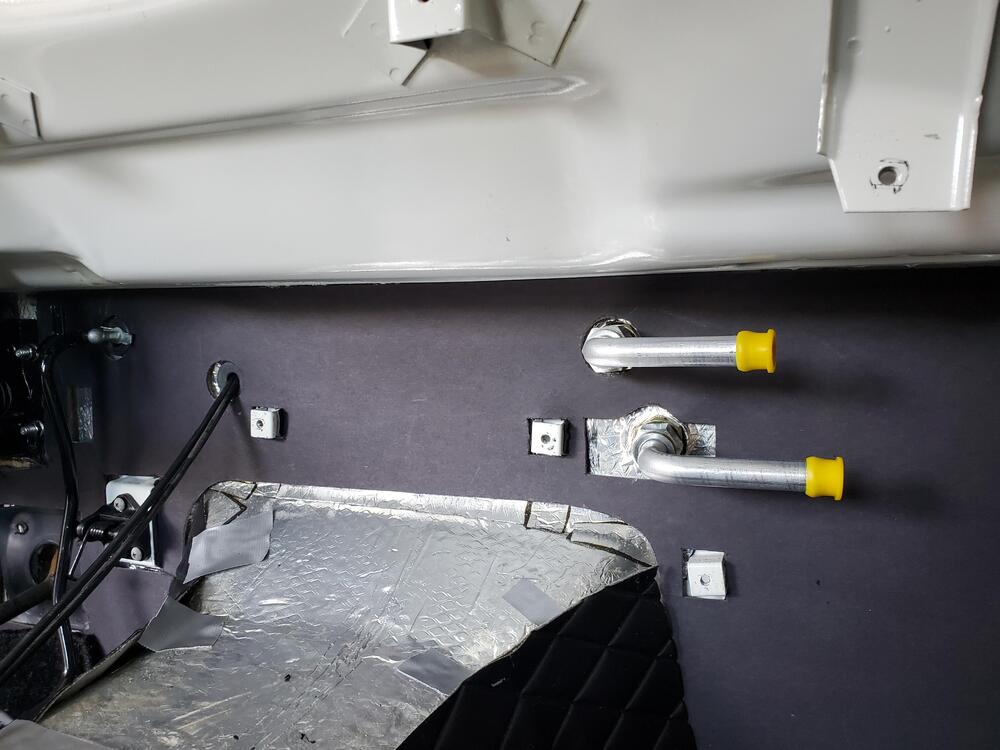
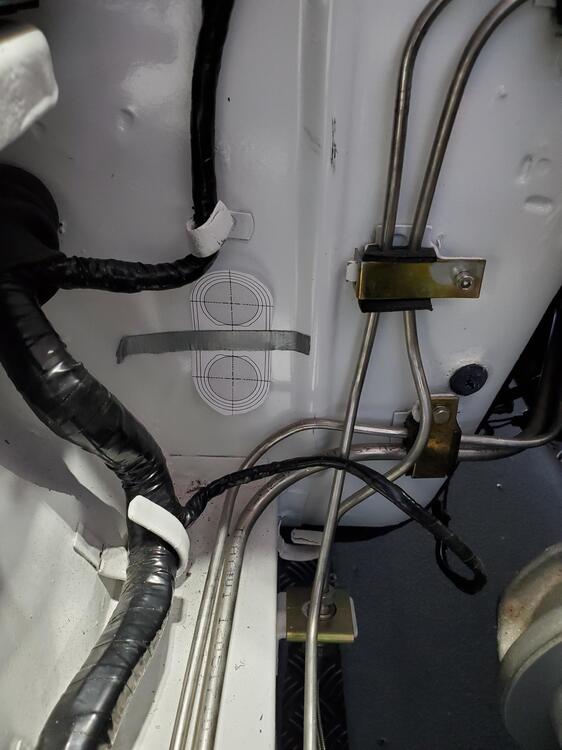
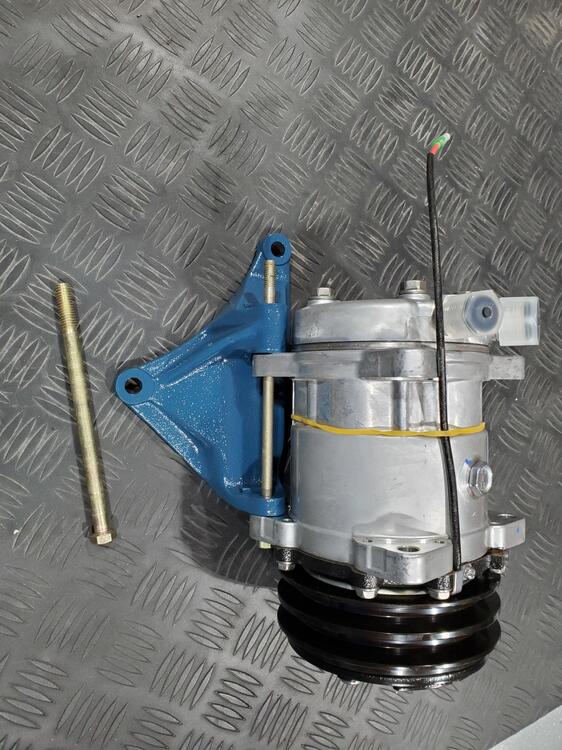
1 pointI was provided a light weight (about 1 pound) mock-up of the AC Evaporator with the kit to use for fabricating the support brackets. This is much easier to manage than the actual 15-20 pound REAL Evaporator unit. I fabricated the 3 brackets to support the unit as shown below. I installed the bulkhead connectors for the heater lines in the engine bay and adapter the hoses. I will do the interior heater lines next. I temporarily attached the right angle heater fittings on the interior just to see how they would look. Also did a quick verification putting the mock-up back in to make sure there was no interference with the heater lines . I marked a preliminary position for the AC lines with a cut-out from the bulkhead connector kit, but decided to go horizontal instead of the vertical shown here. Horizontal gives a little more foot room for the passenger and also keeps things fairly clean inside the engine bay. I grabbed an old smog pump bracket and found that it works very well in supporting the compressor. The bracket also lines the compressor pulley up perfectly with the crank pulley. I cleaned and painted it. You can see how things line up in the picture below, very nice. I will drill out the bracket to accomodate the larger bolt shown below, which is a bit beefier and happens to be the correct length. I will use an expandable arm similar to what is supporting the alternator for an upper support that will also provide a little adjustability. As I get farther along with this, I must say that I am actually starting to like this set-up. It is very clean under the dash and so far has not been difficult to install. (Hopefully I am not speaking too soon here). The AC Evaporator vent openings are all controlled electronically and seem fairly simple in their operation. If things continue to go smoothly, I may put this on more cars in the future. Pics below.


 1 point
 -
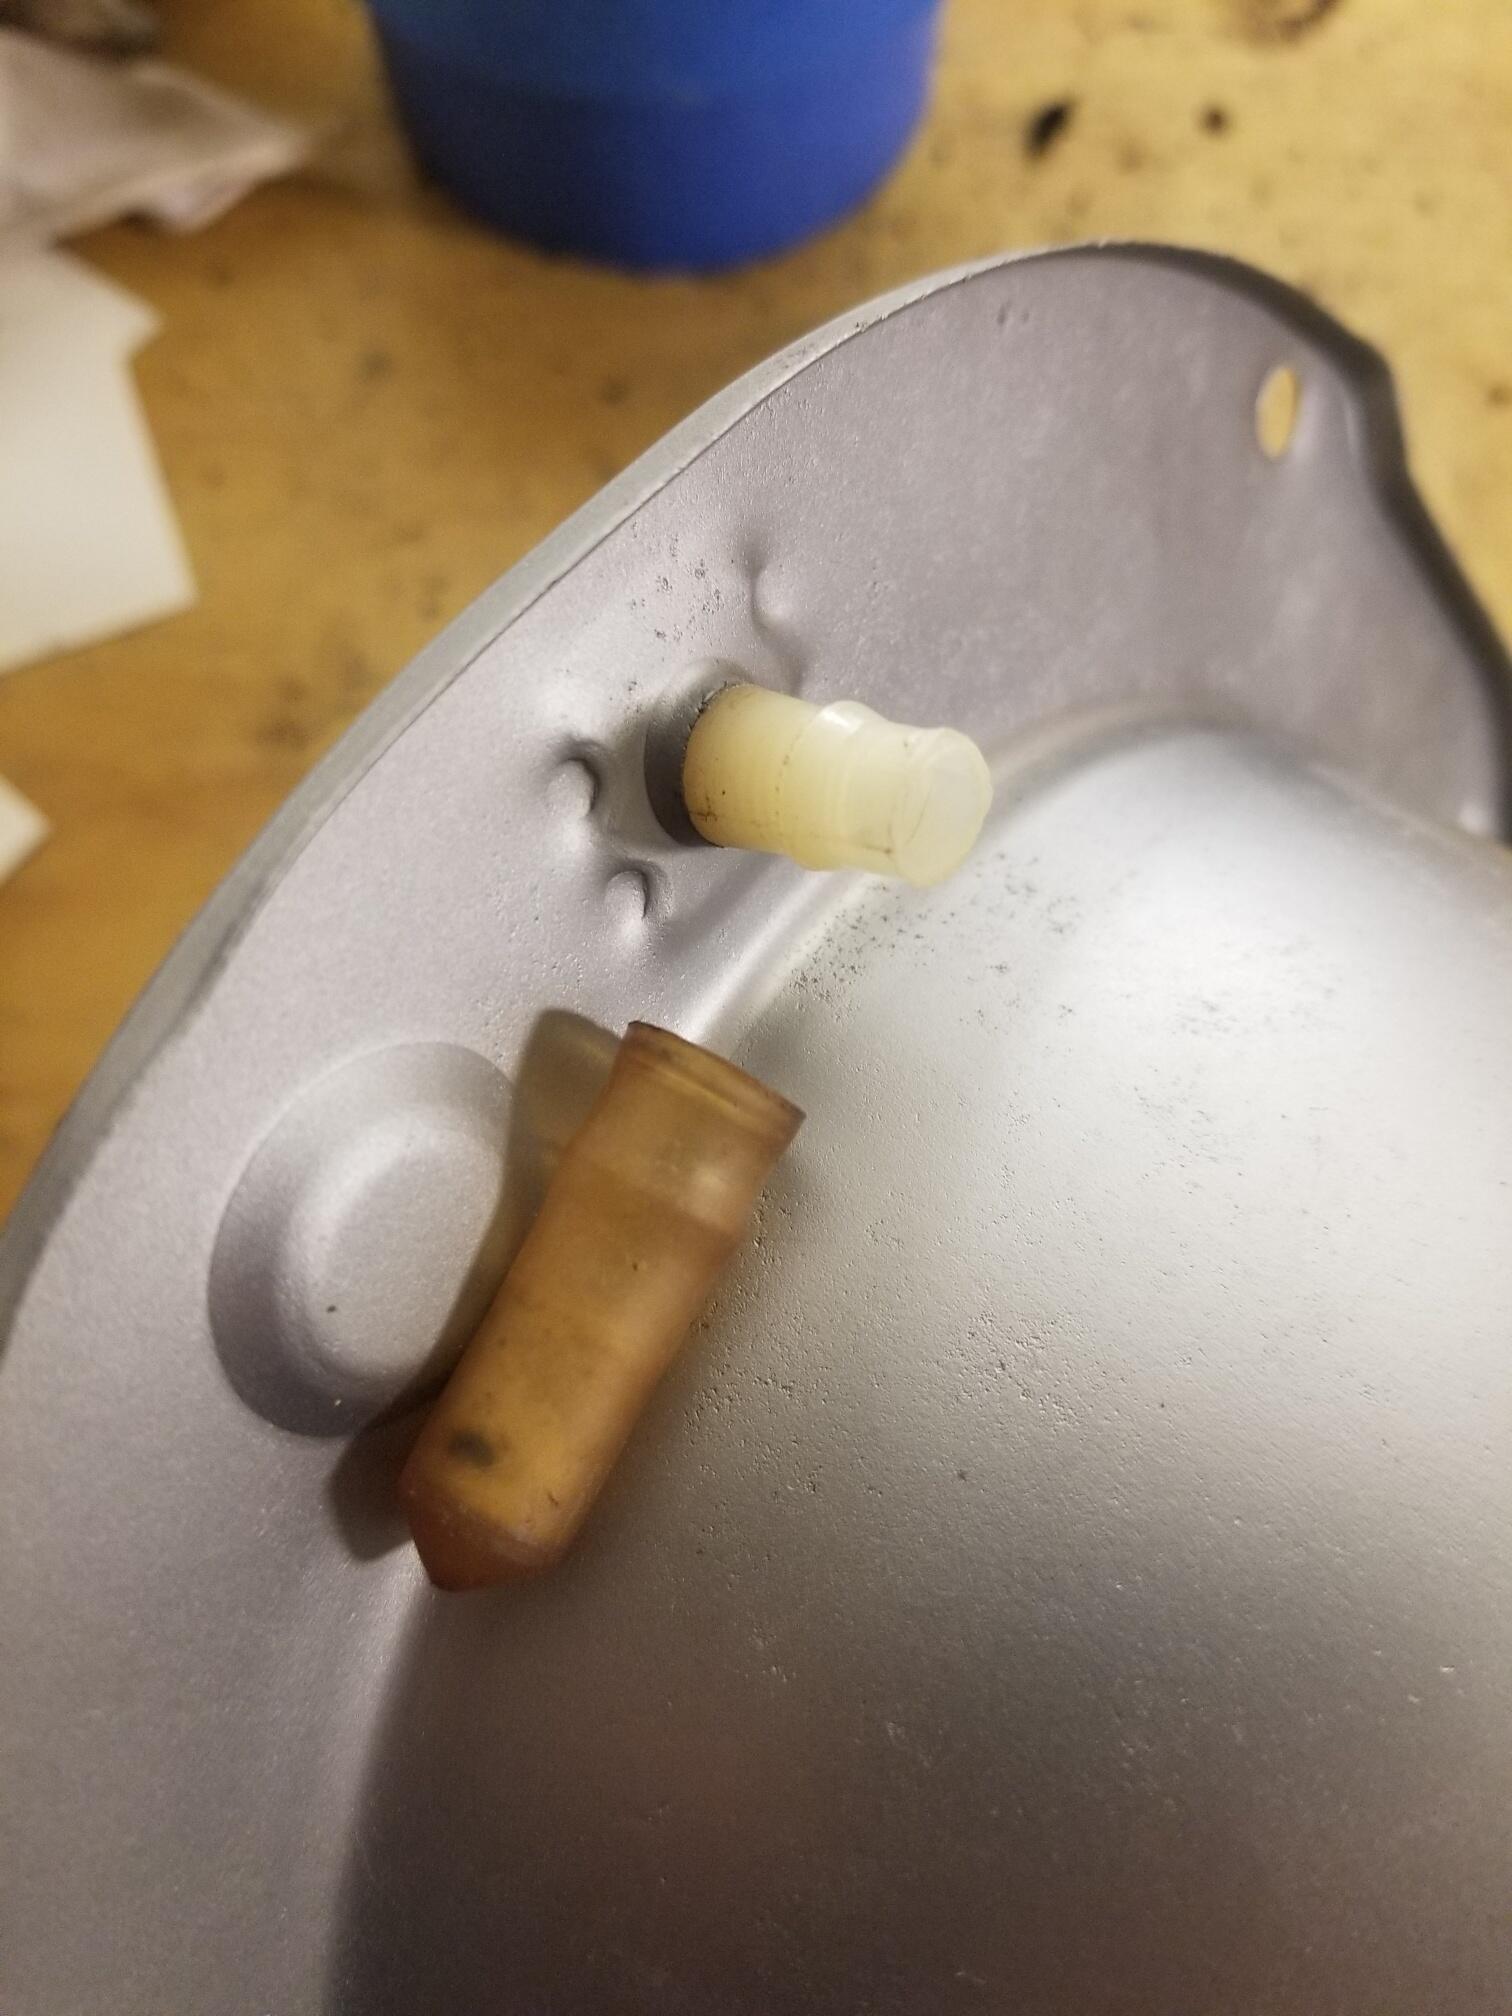
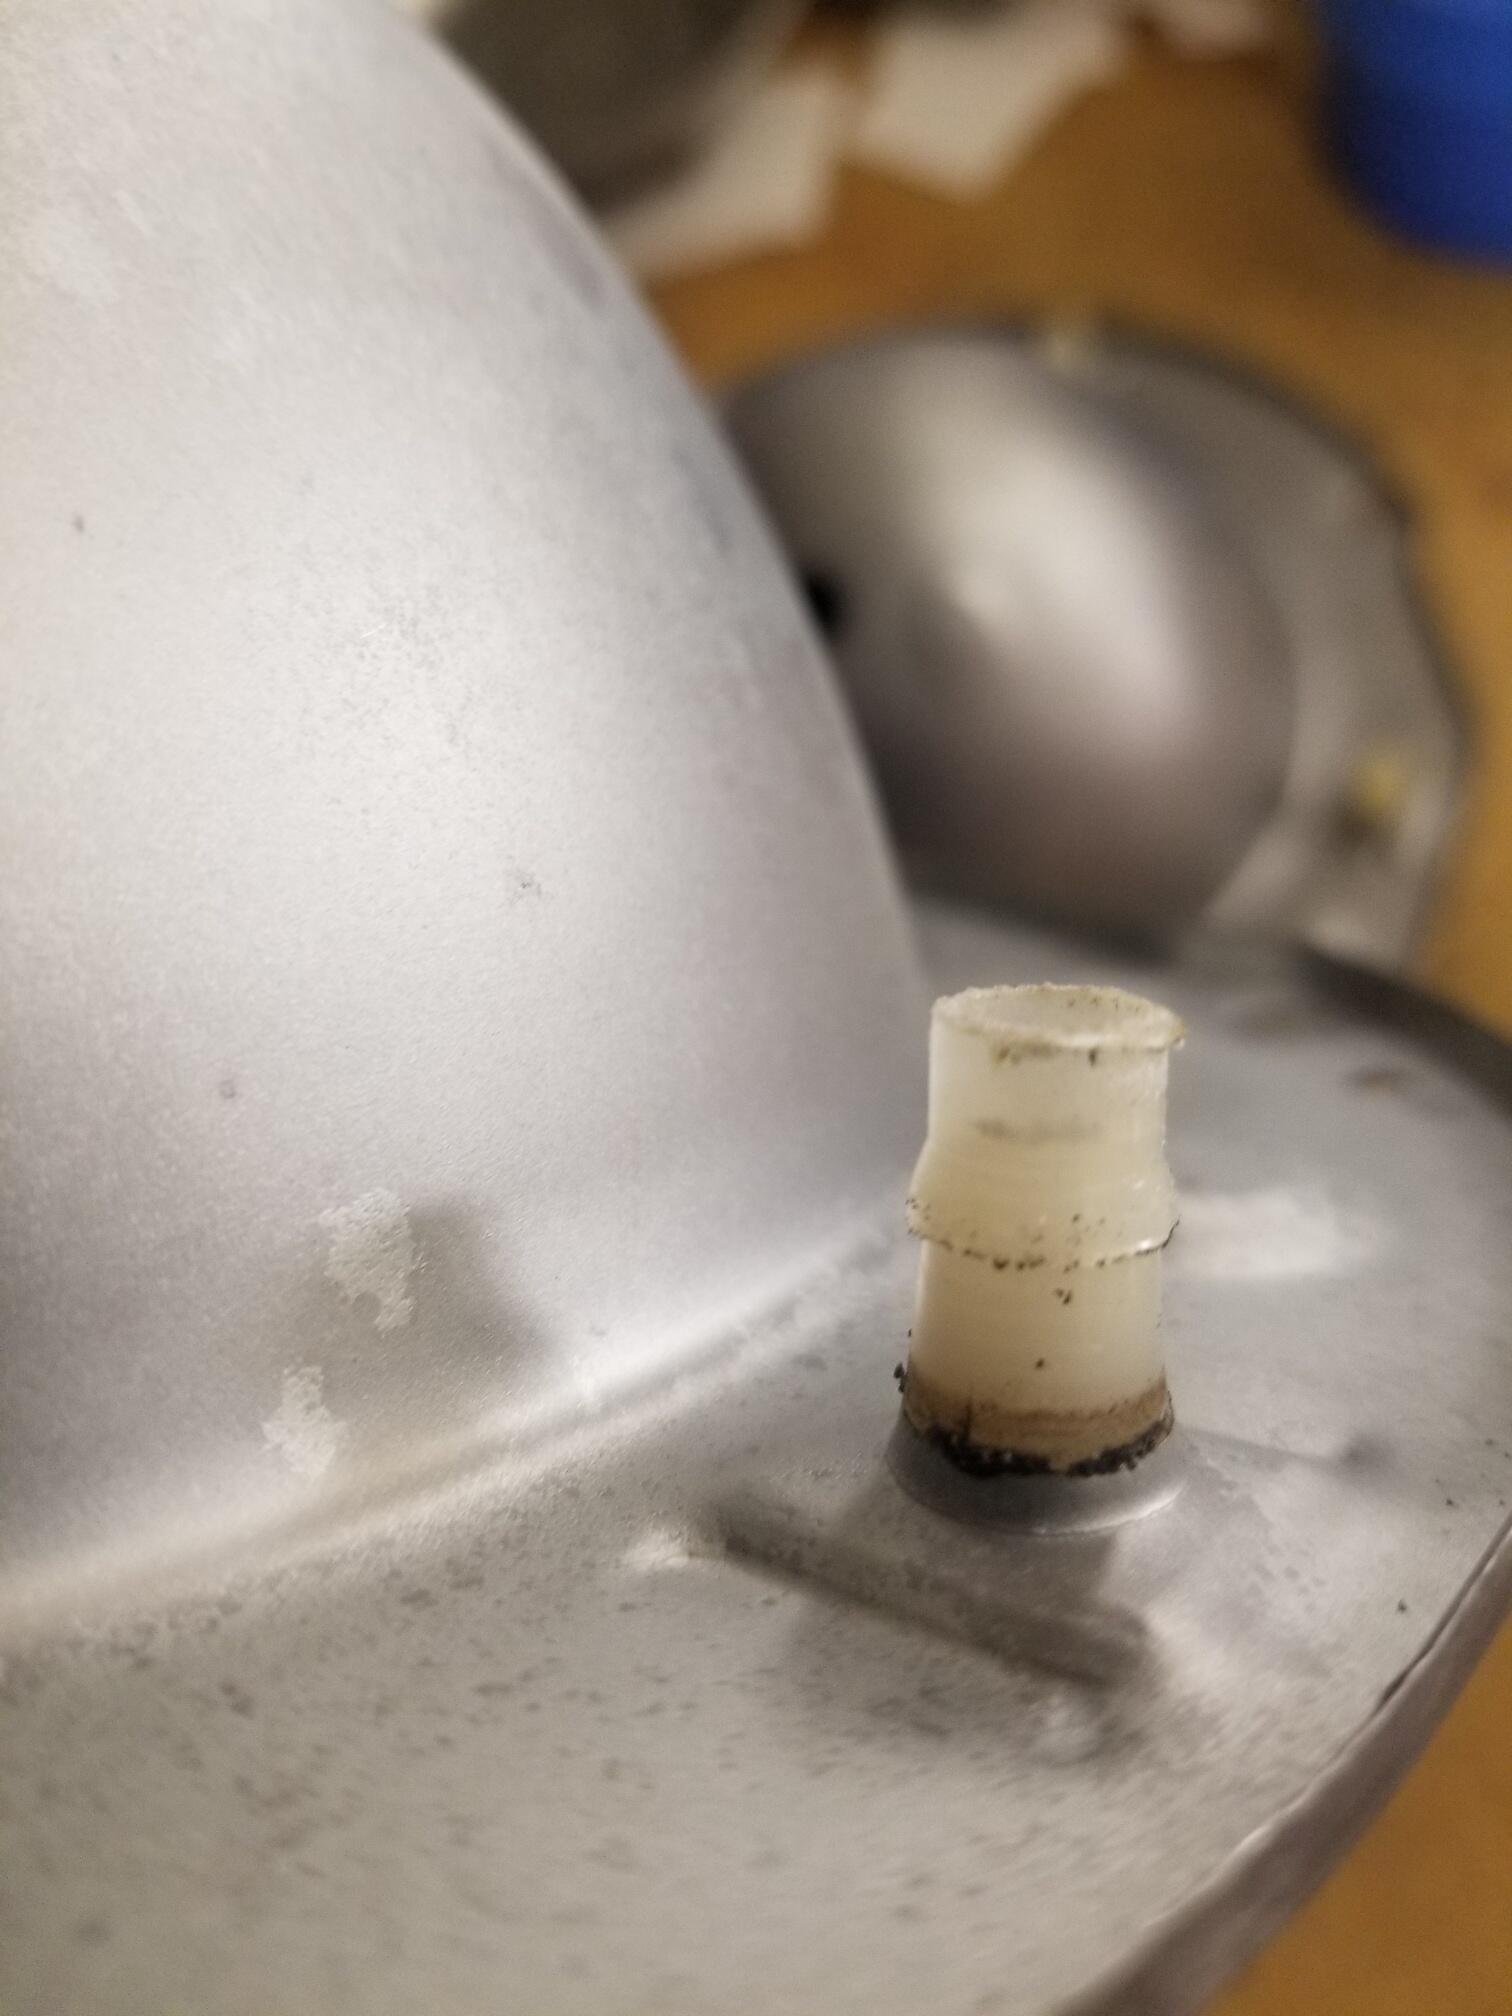
1 pointFrom my limited experience, I think that is leftover zinc from the original plating. I didn't look into it any from a chemistry standpoint, but when I was doing the citric acid cleaning, it seemed like the yellow chromate came off quickly (if there actually was any remaining), and then the zinc came off next at about the same rate at which light rust came off. So I'm thinking that if you would put those parts back into a citric acid bath again (maybe a fresh (warm-to-hot?) bath), I think those large darker patches might come off and leave you with a homogeneous surface.1 point
-
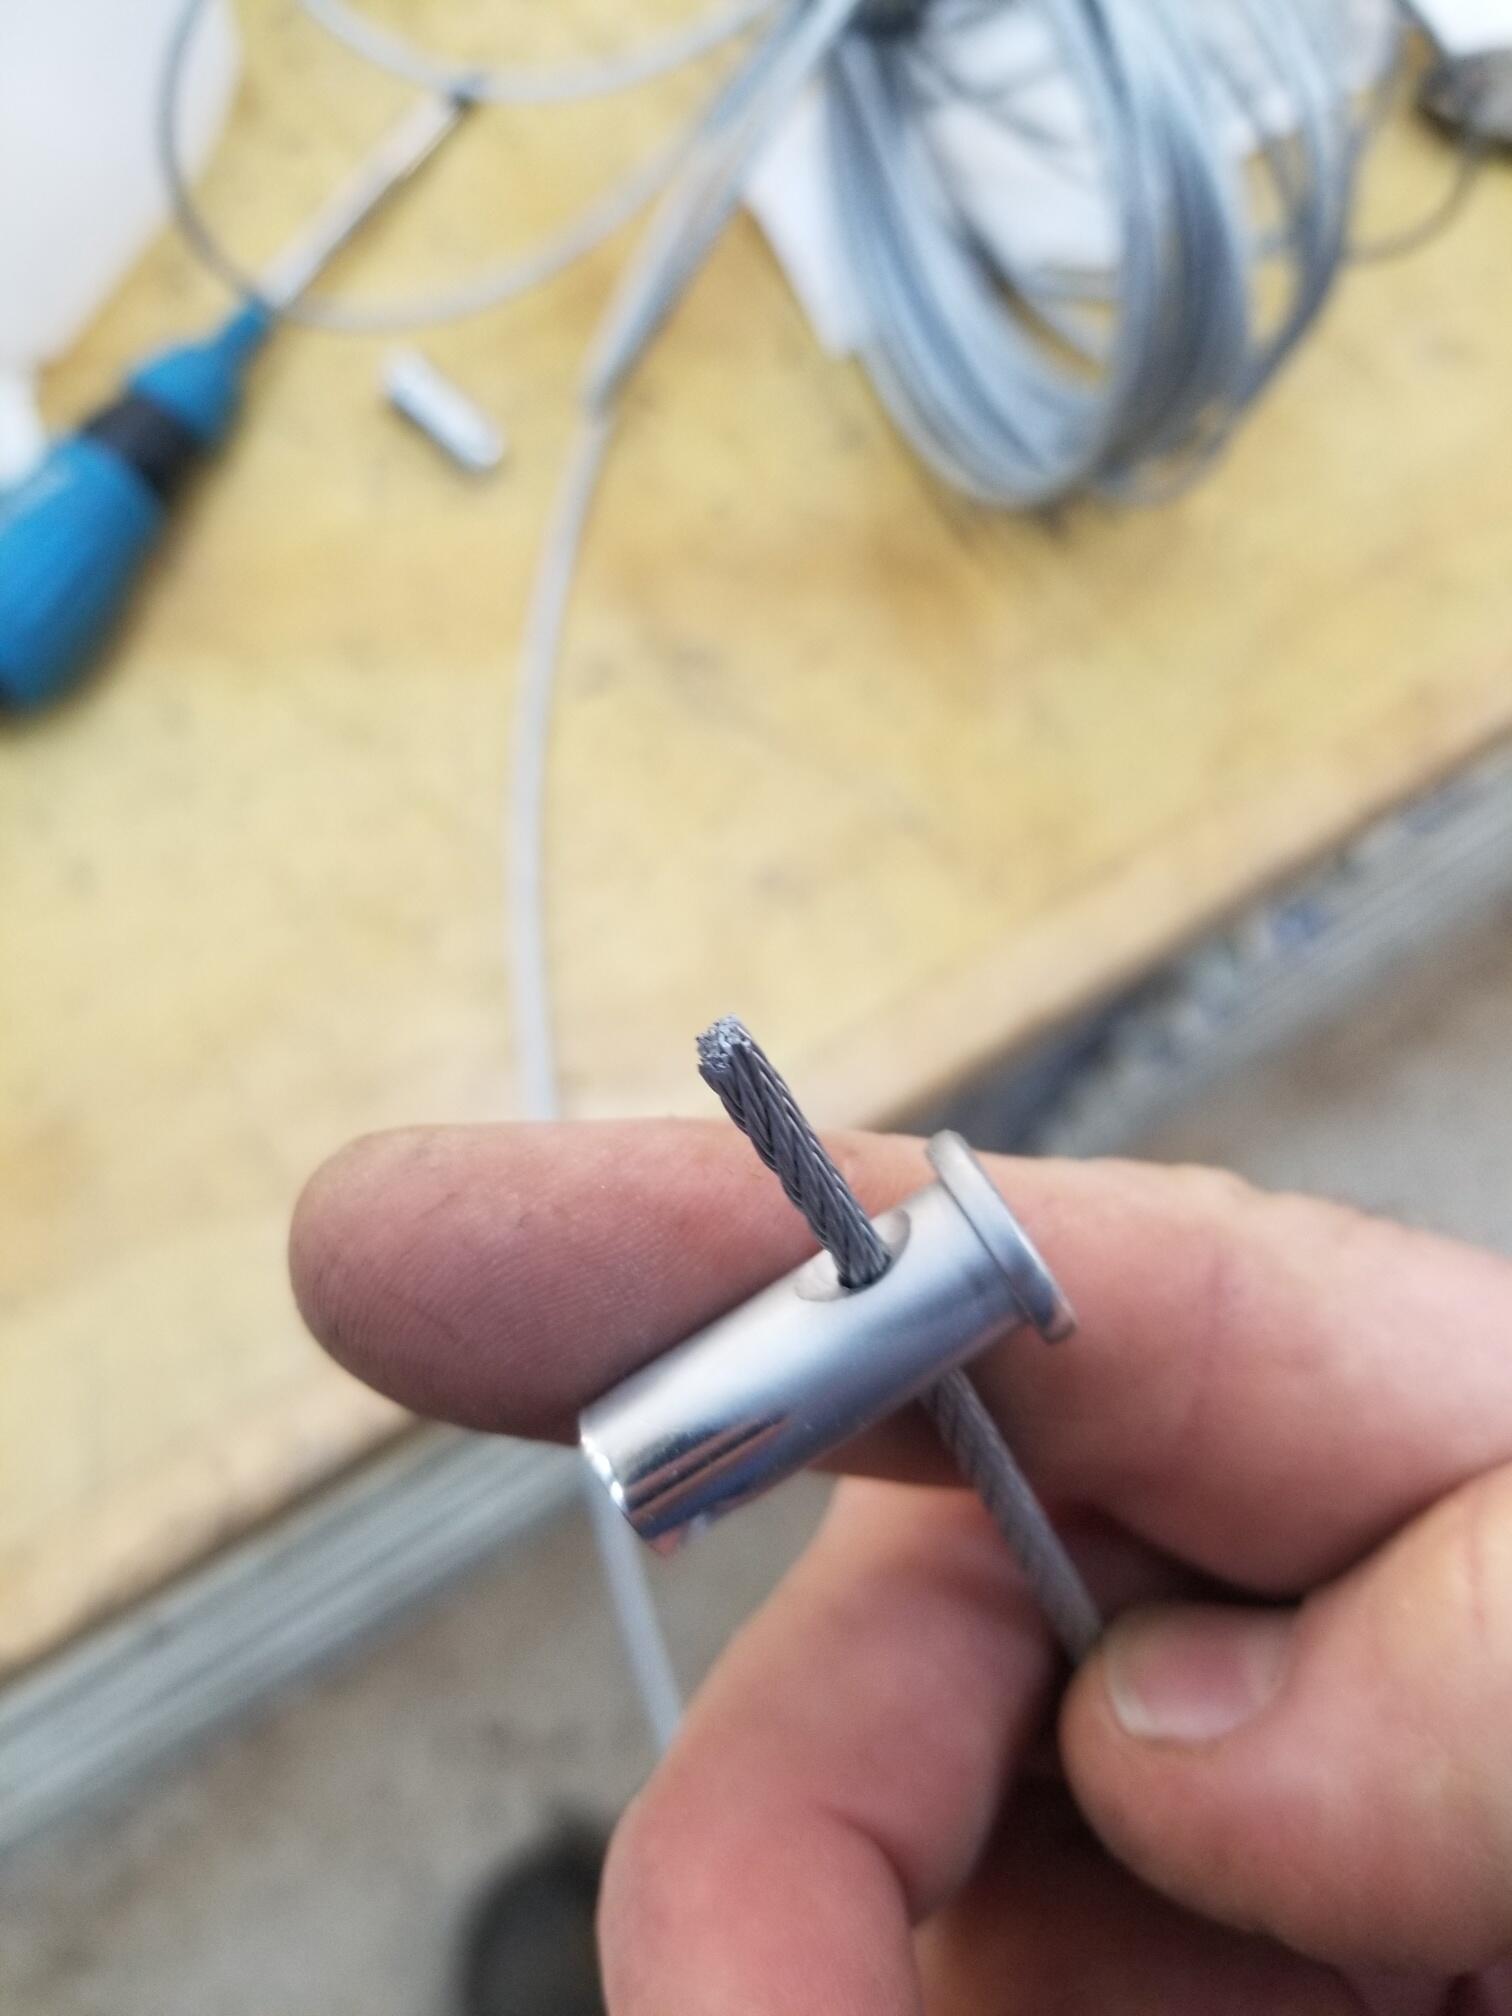
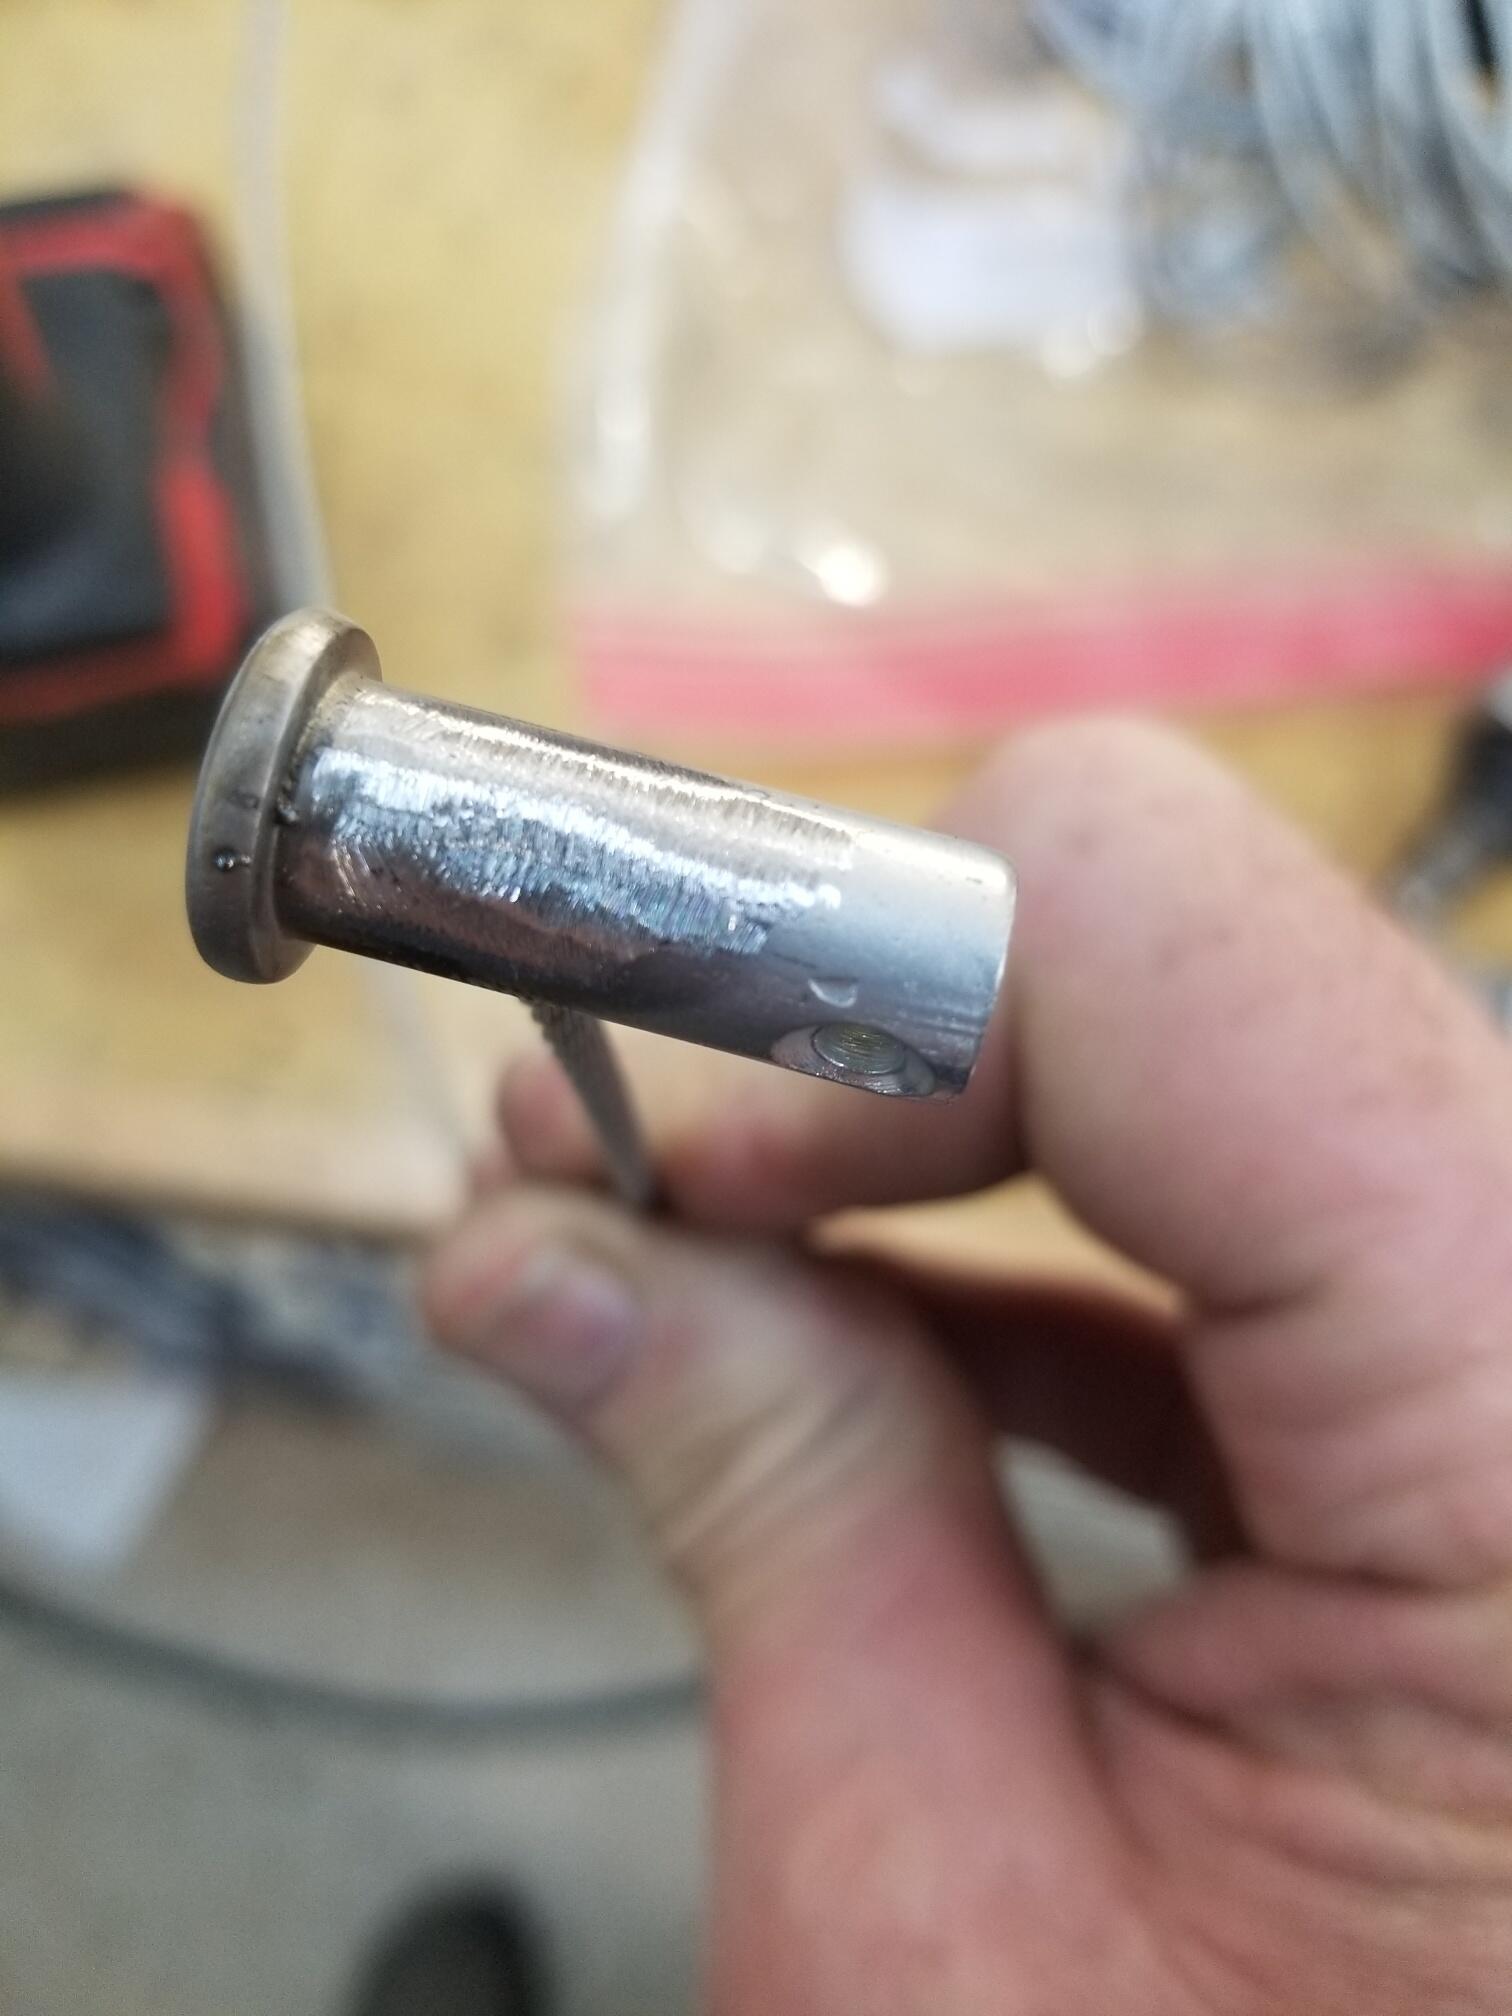
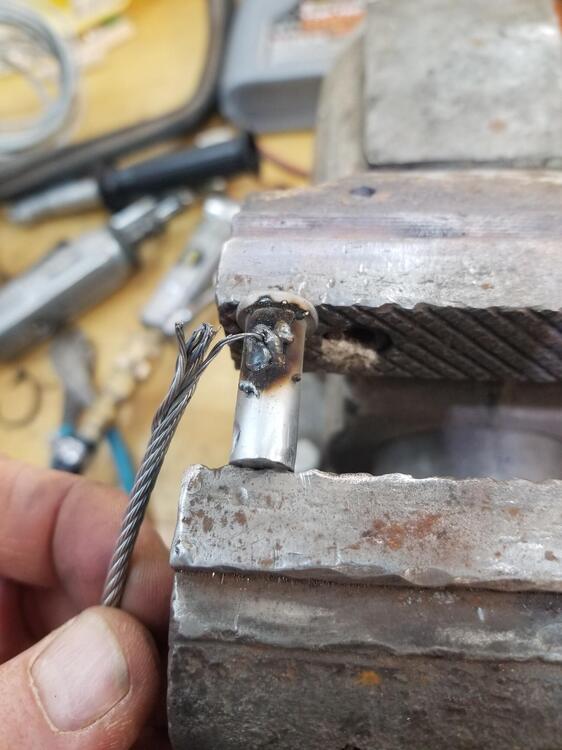
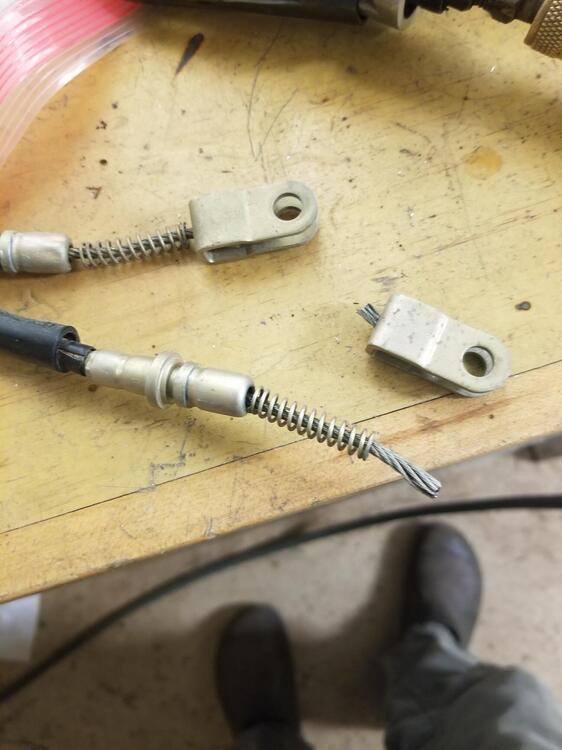
1 pointWhen you did it a second time, did you weld both sides of the pin, or just the far side from the cable? Also, did you consider silver brazing the cable into the pin? I think I would have tried that.1 point
-
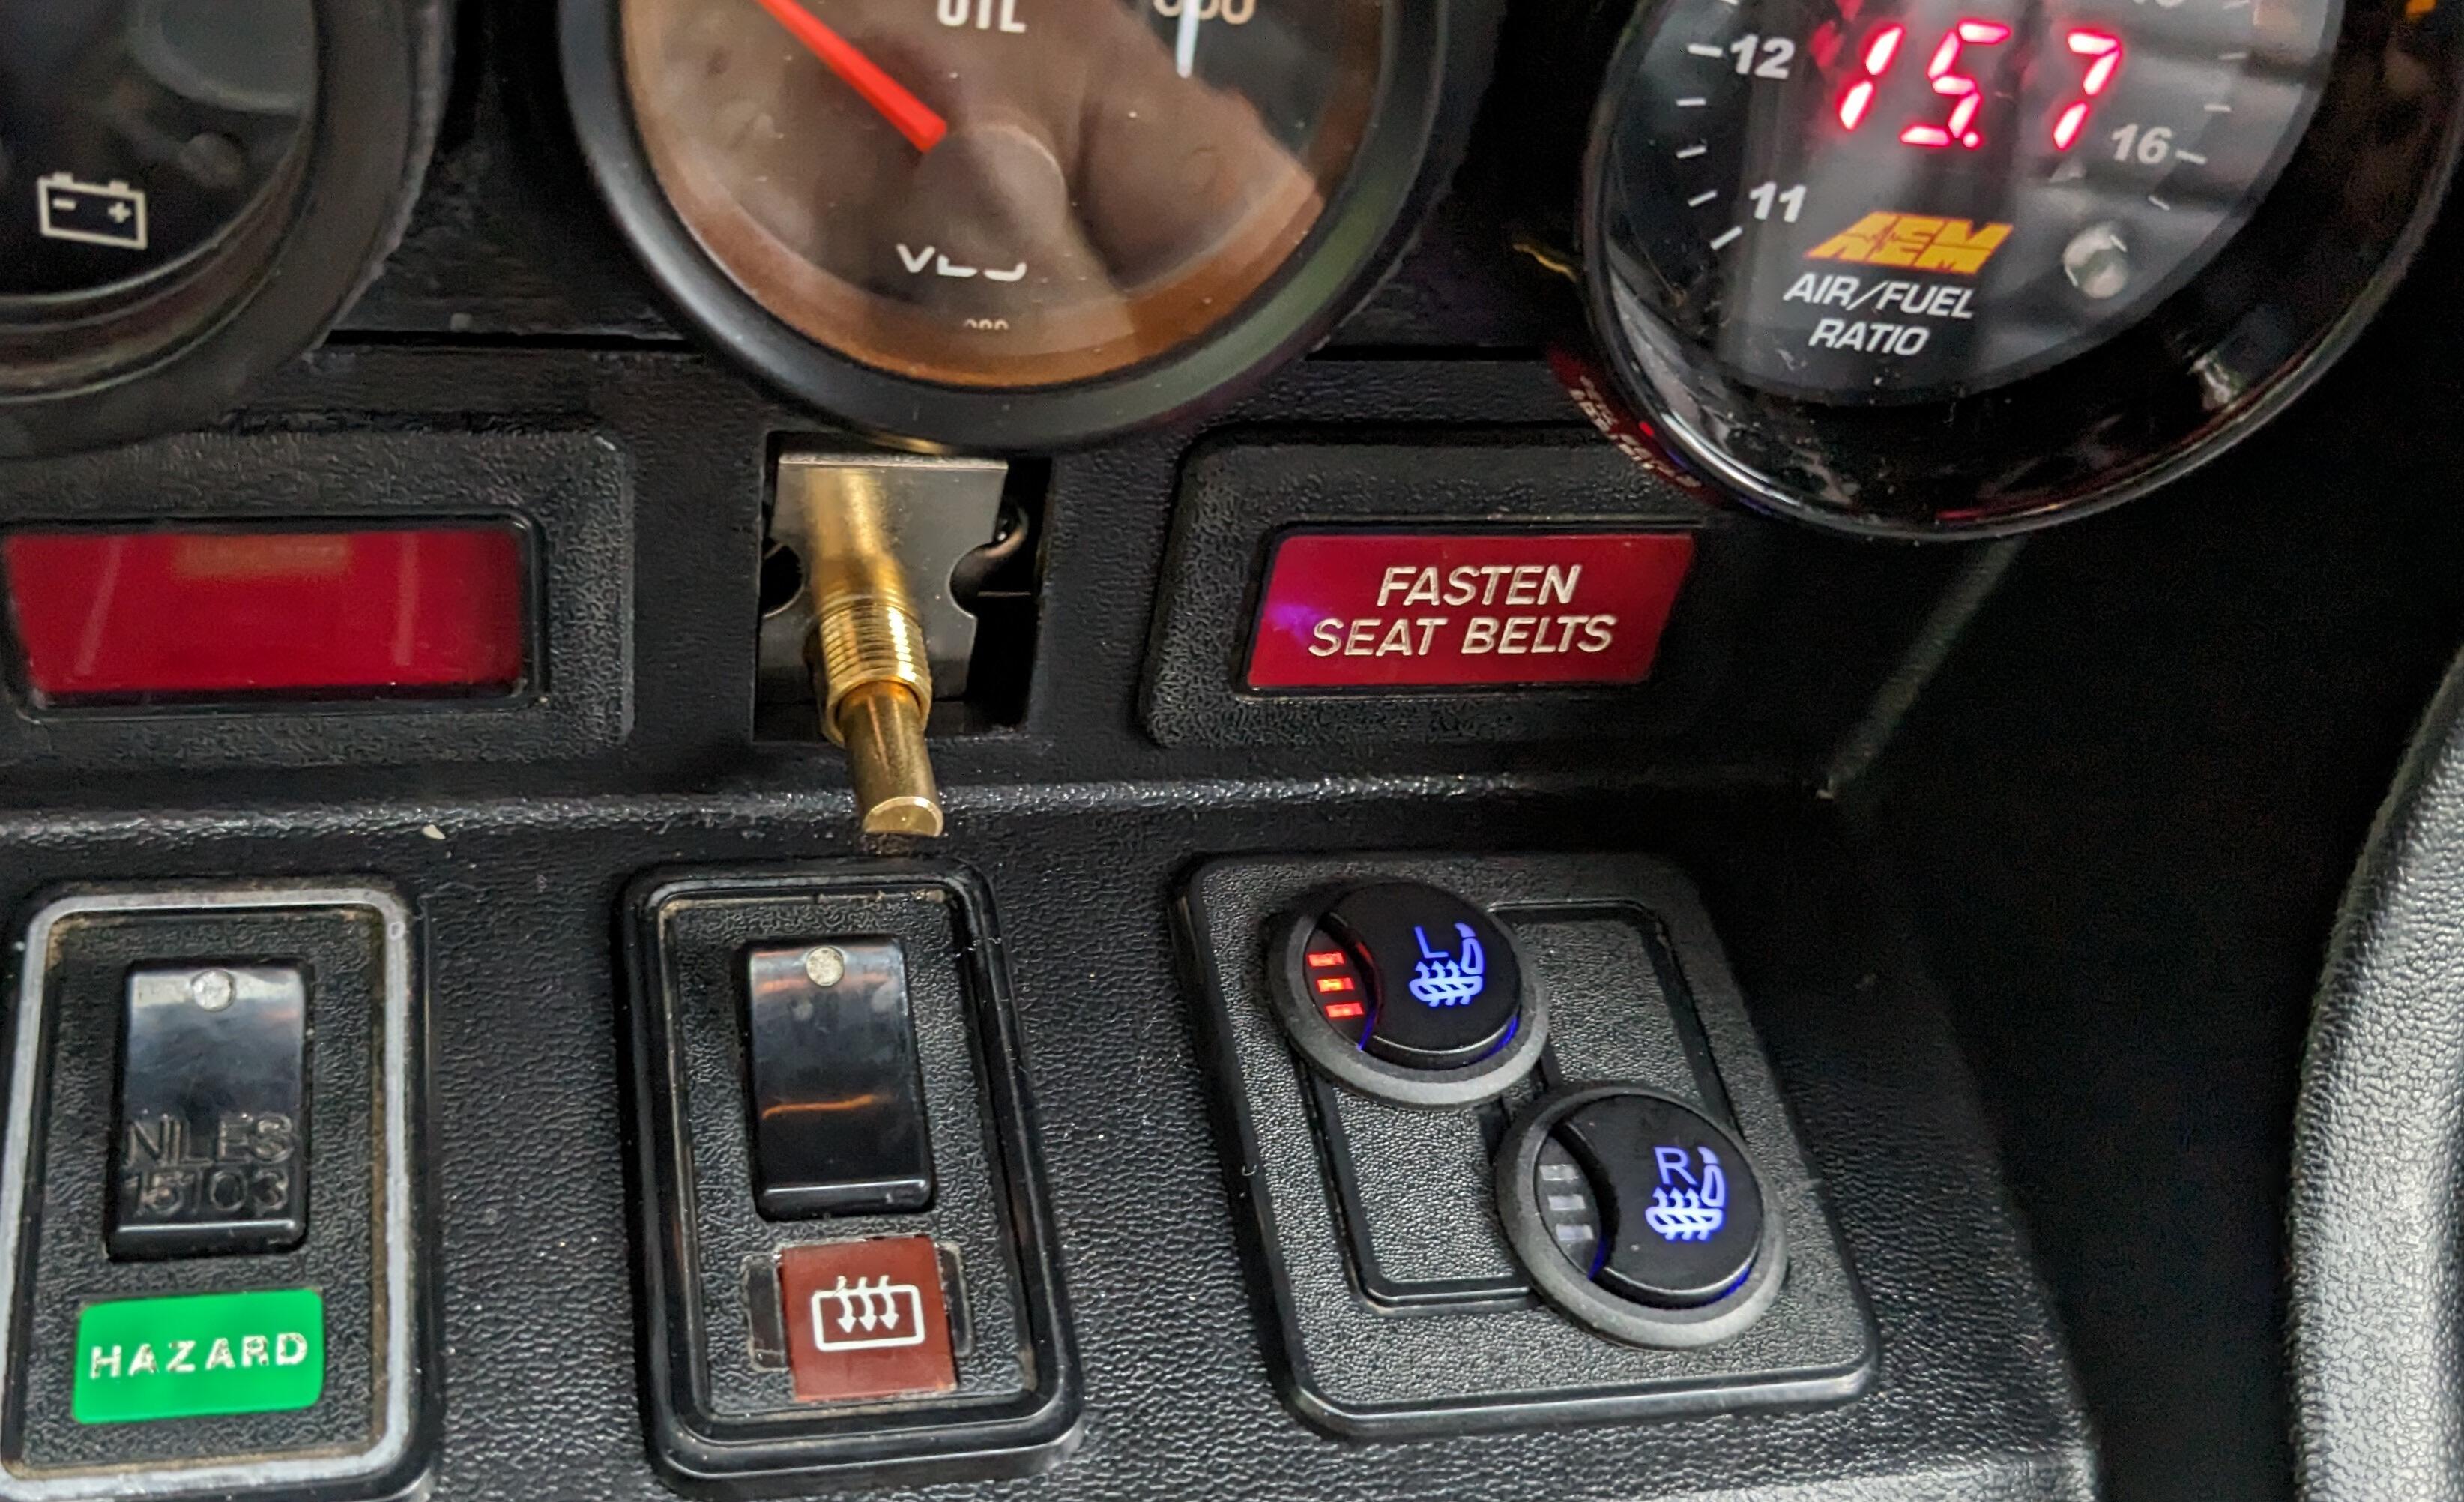
Now that I have the interior going back in, I finally installed the seat heater switches. Didn't want to drill holes in the console itself, so this was the next best option for me
 1 point
 -
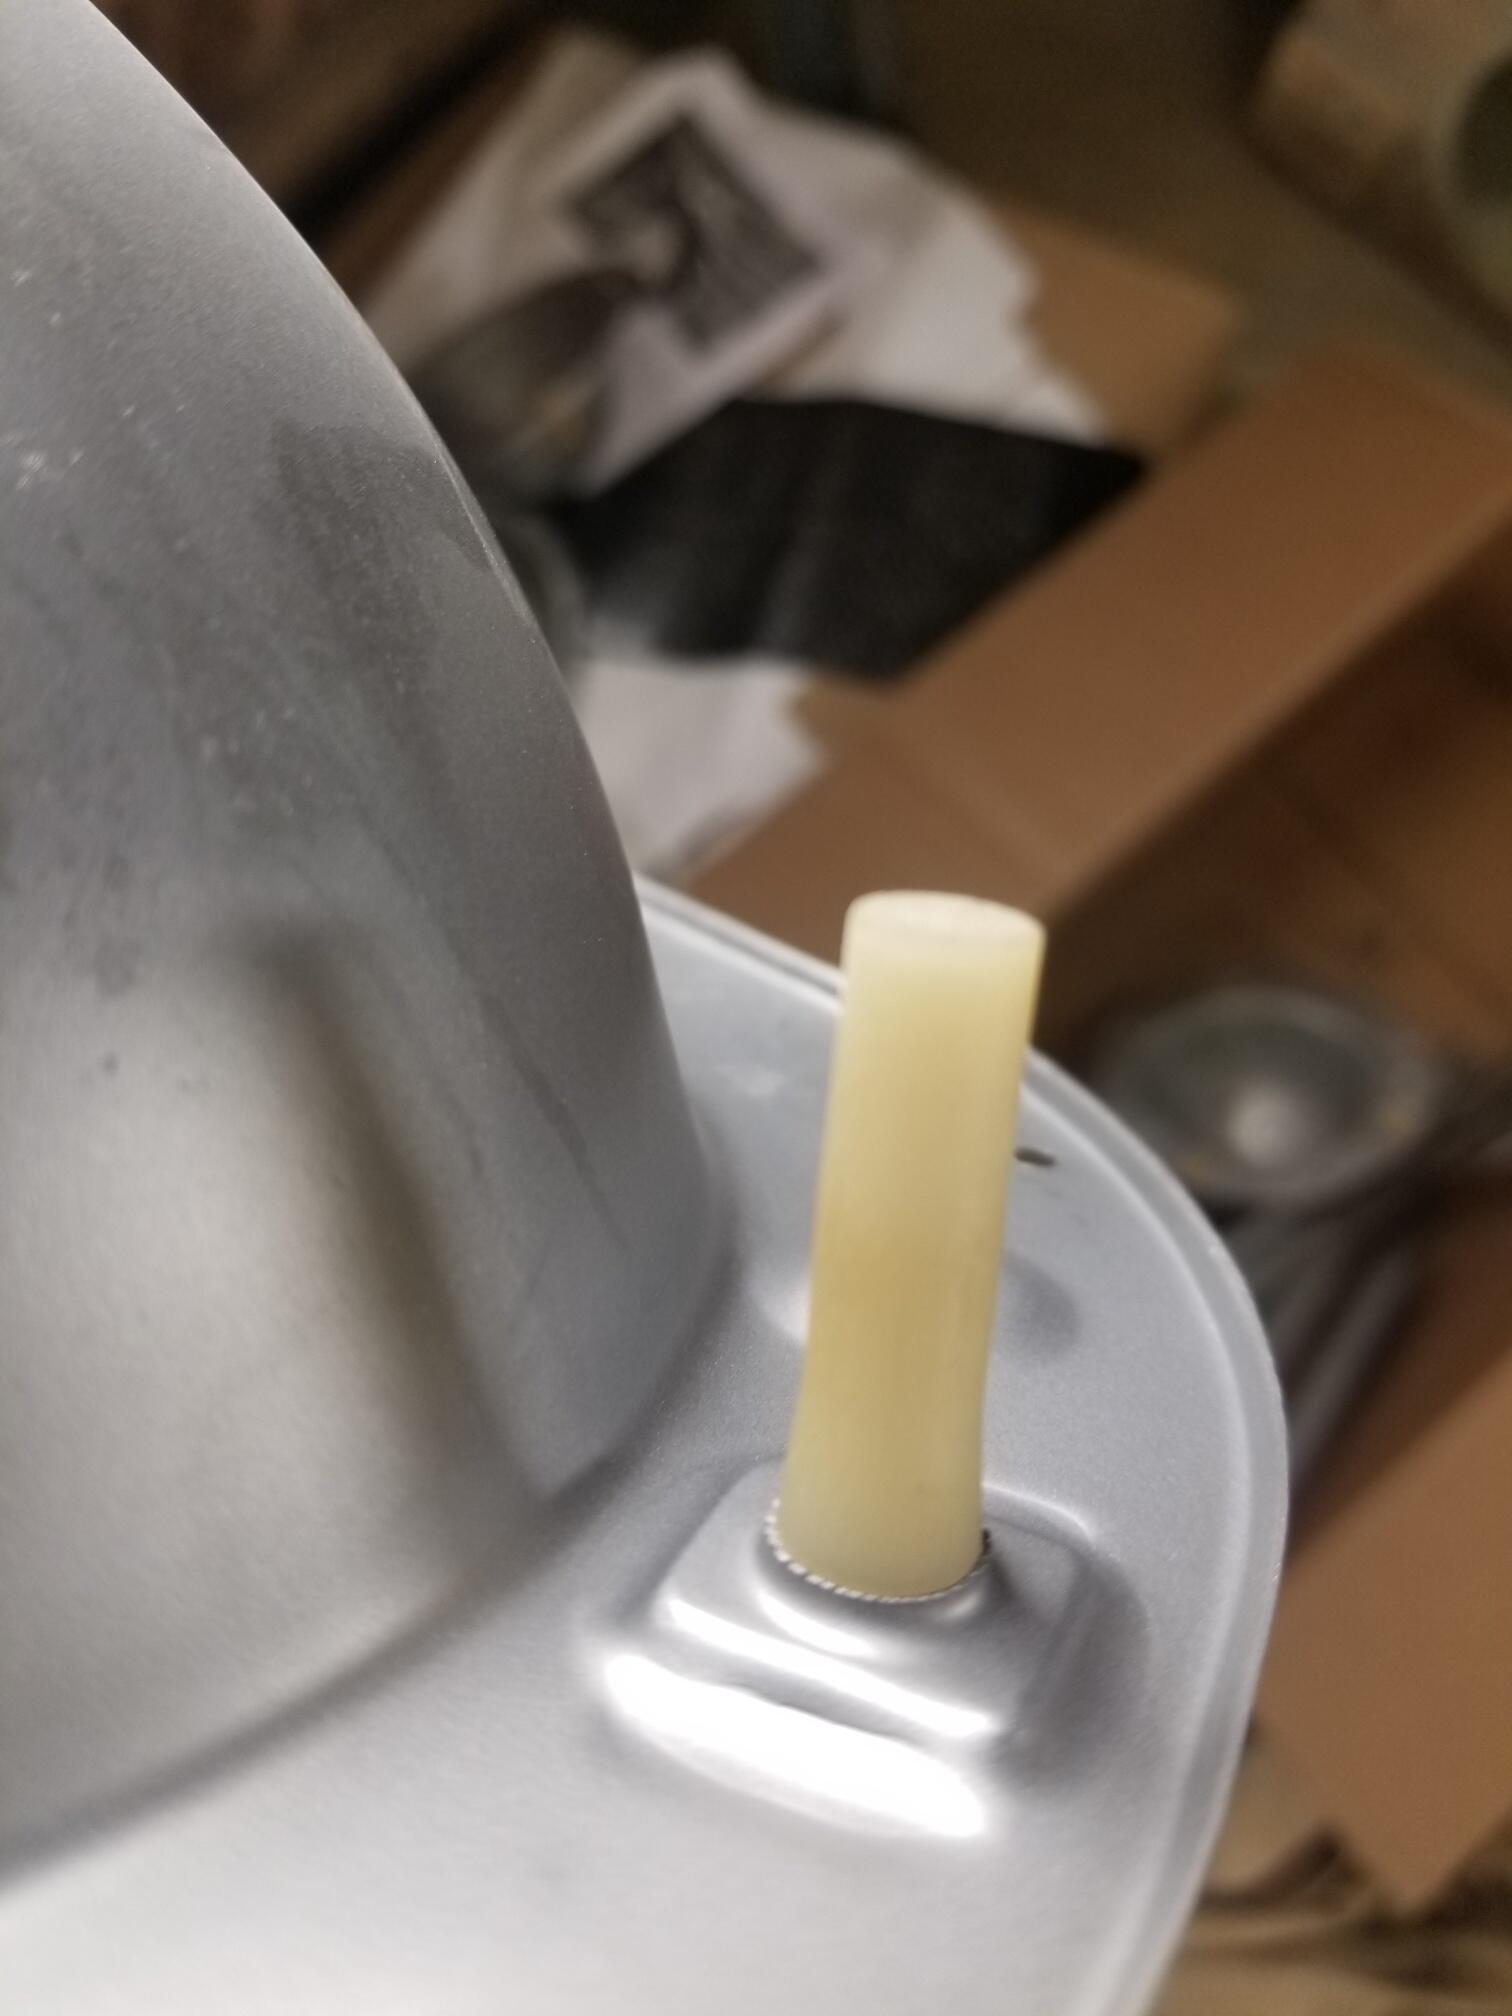
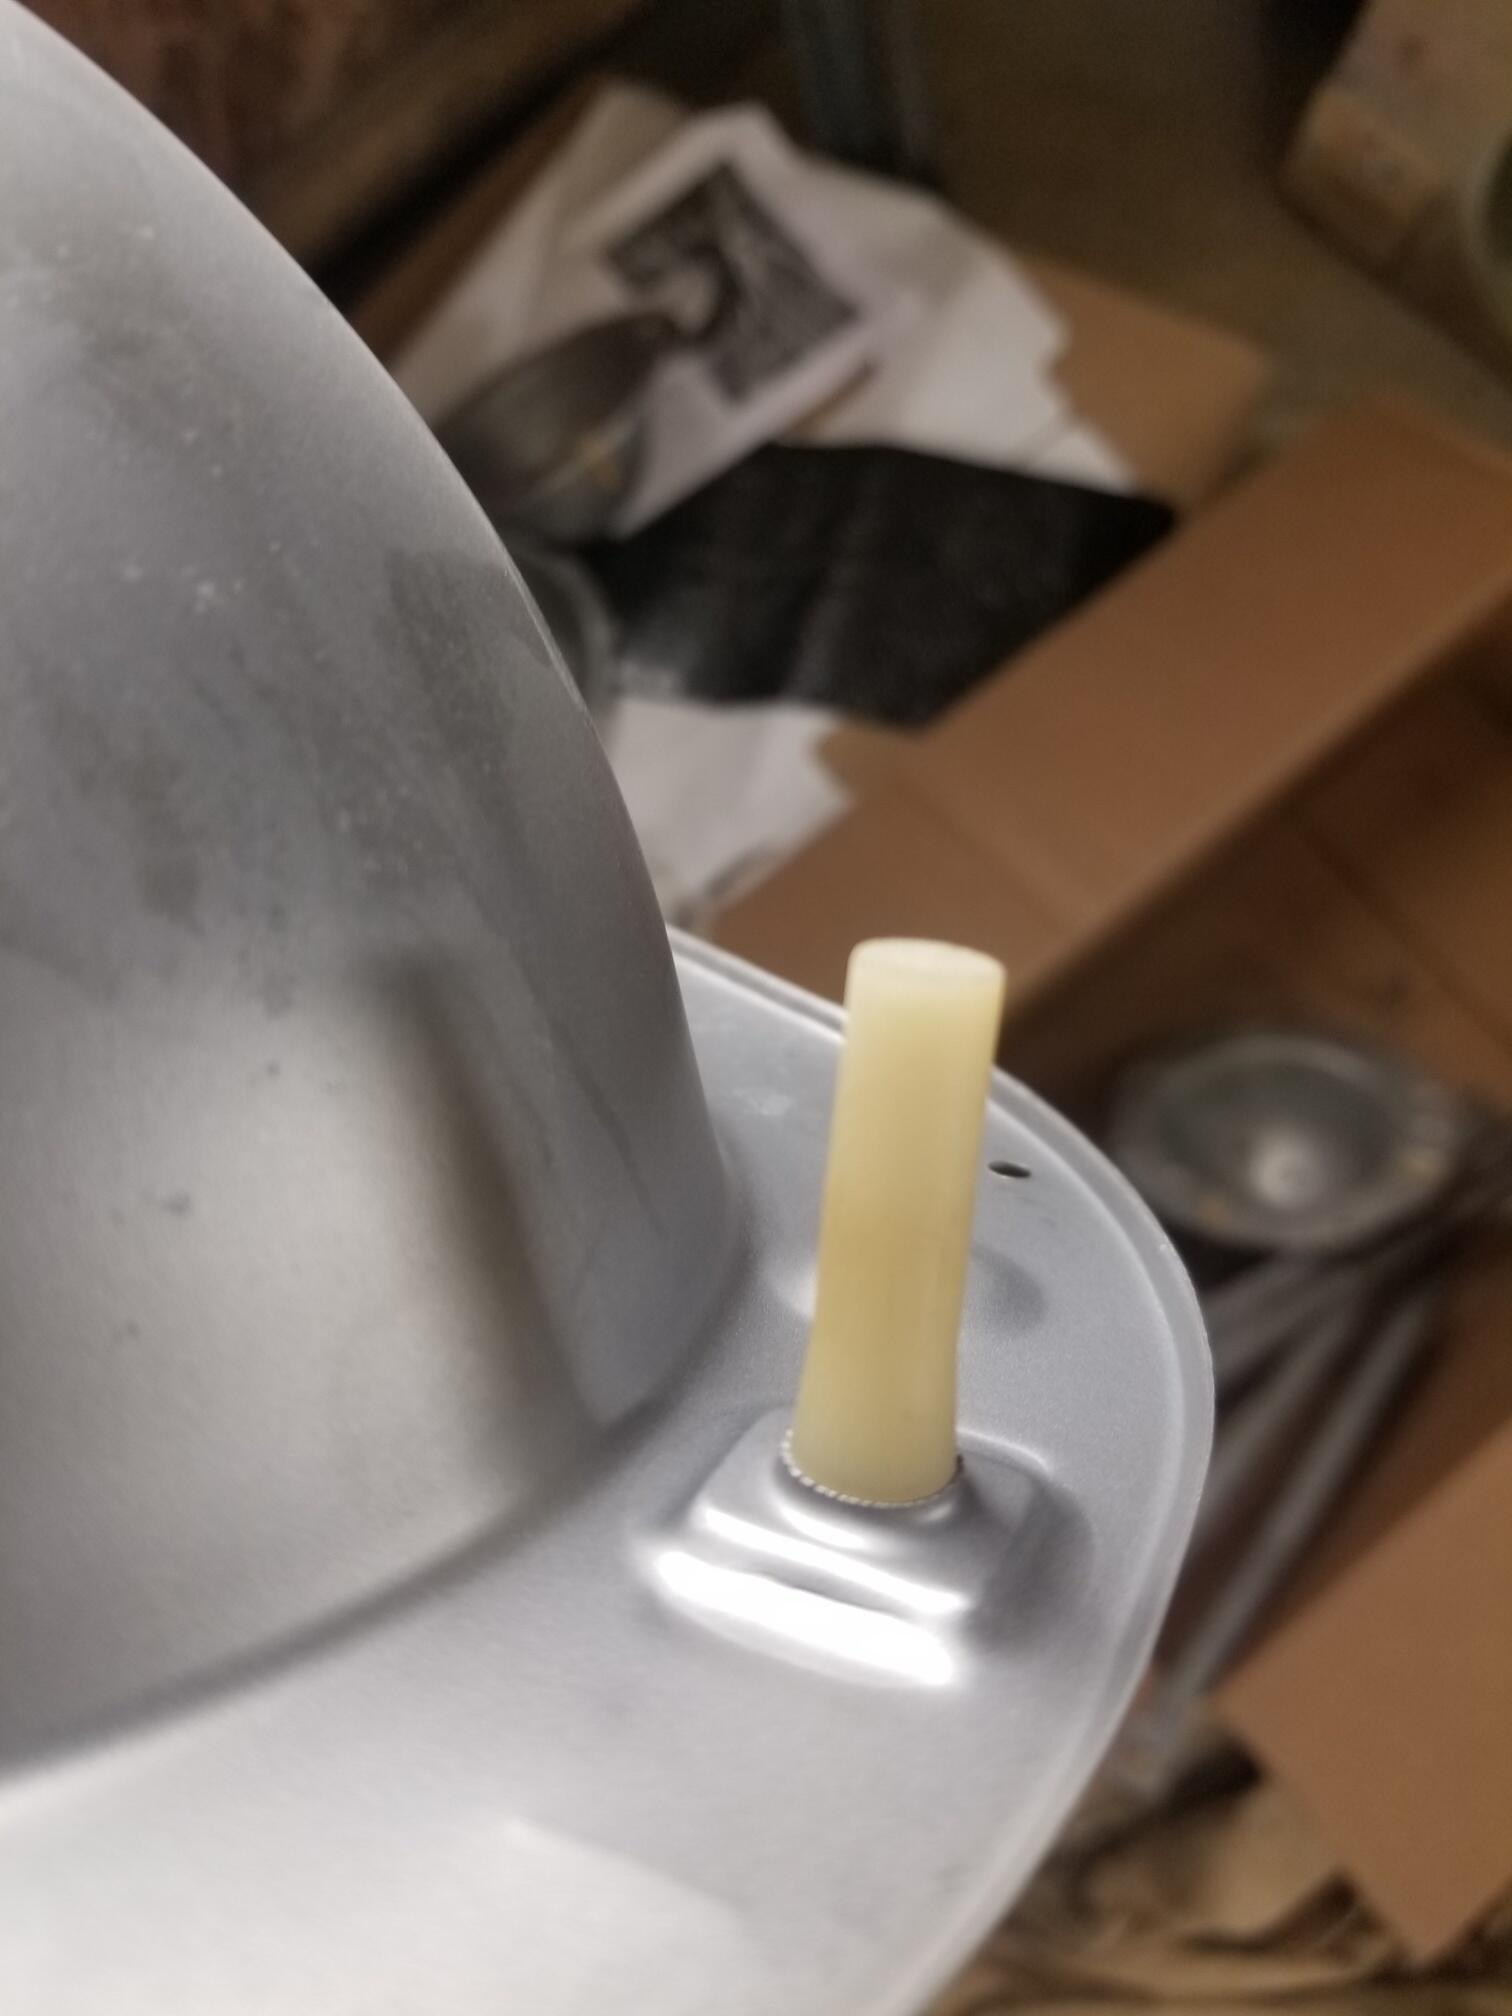
1 pointI worked on the headlight buckets some more A little heat and the caps will come off Then I noticed that the buckets were different. The older ones with the caps and then I assume a newer style that the plastic adjuster thing is all one piece. I tried to get some of these out of the buckets but that wasn't going to happen with out destroying them!


 1 point
 -
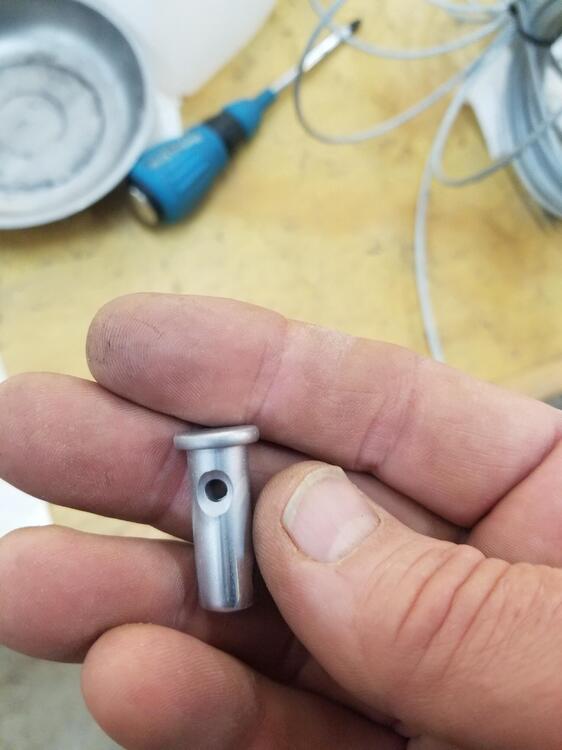
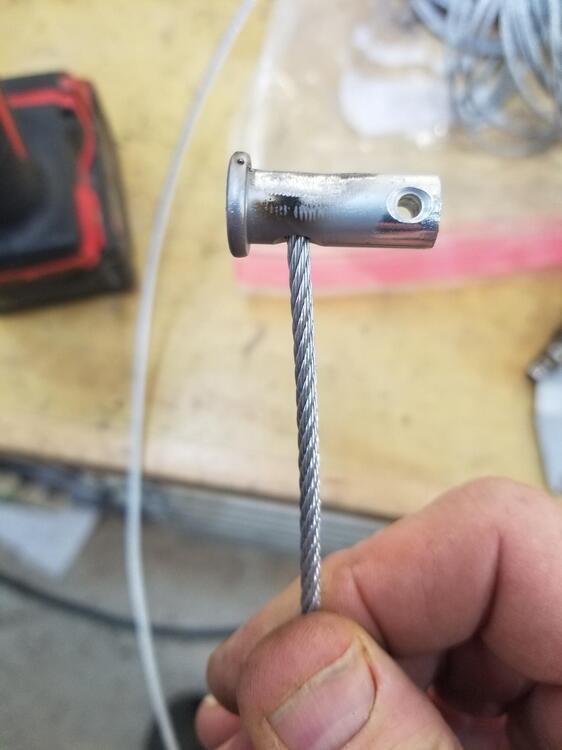
1 pointSo I started on the emergency brake cable redesign. I've been procrastinating on this So I pulled it back out of the car, which is a pain with the differential in place! Cut off the factory end Welded the pin When I welded the back side of the pin, I burned through the cable. So I had to redo it


 1 point
 -
1 pointI've always coated both sides with a thin layer of grease. I've cussed every paper gasket I ever treated with grease, but it was always when trying to remove it later. Never any leaks.1 point
-
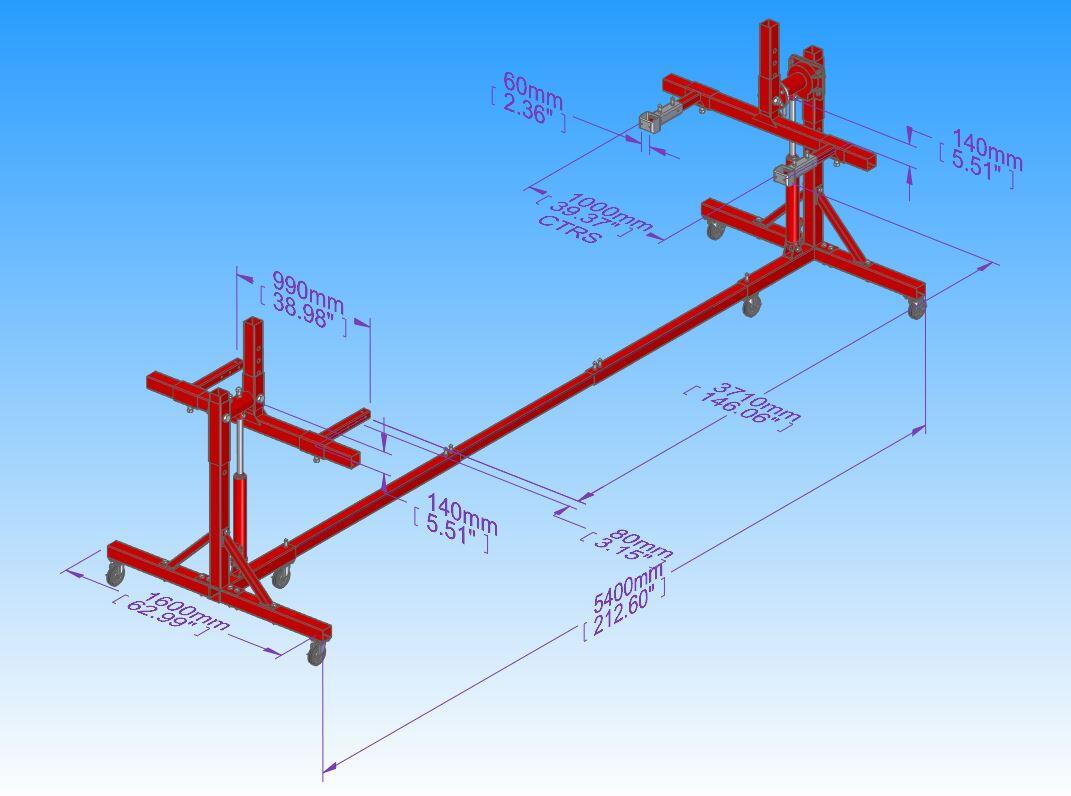
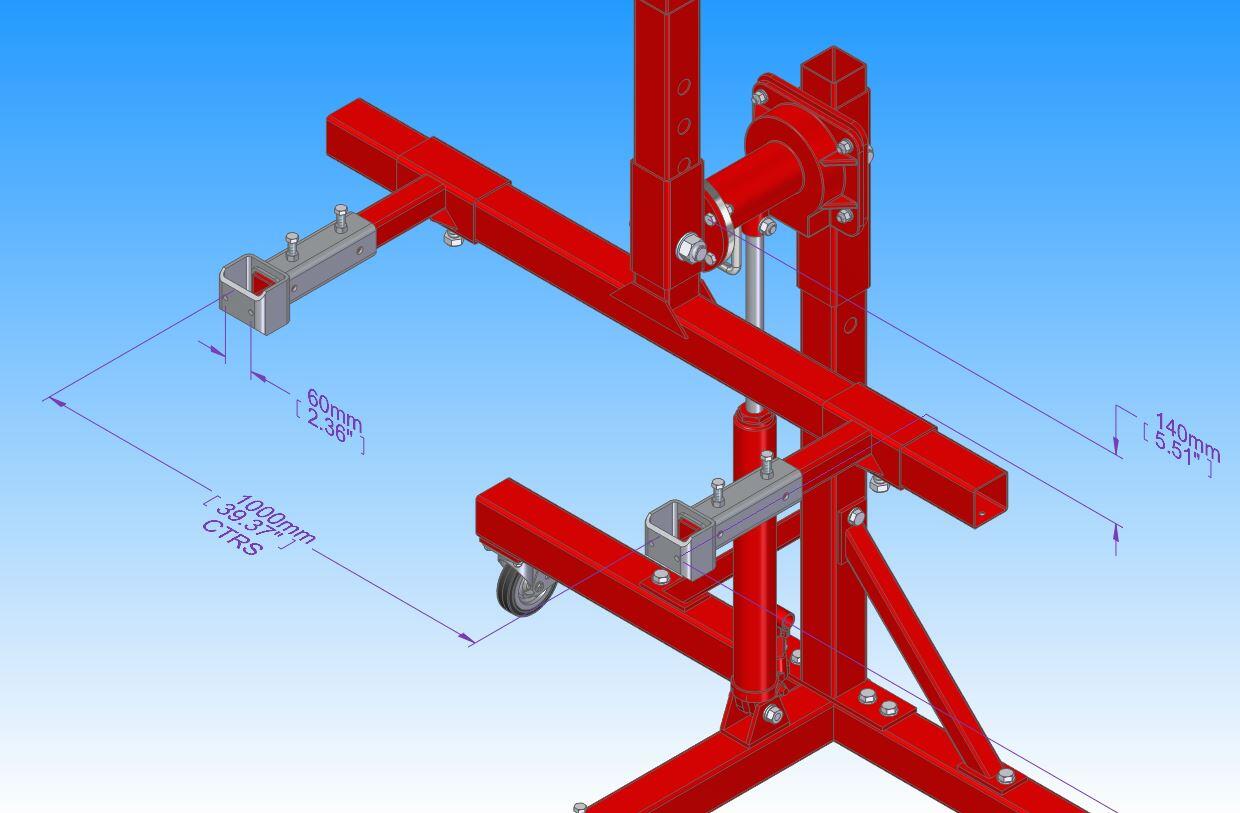
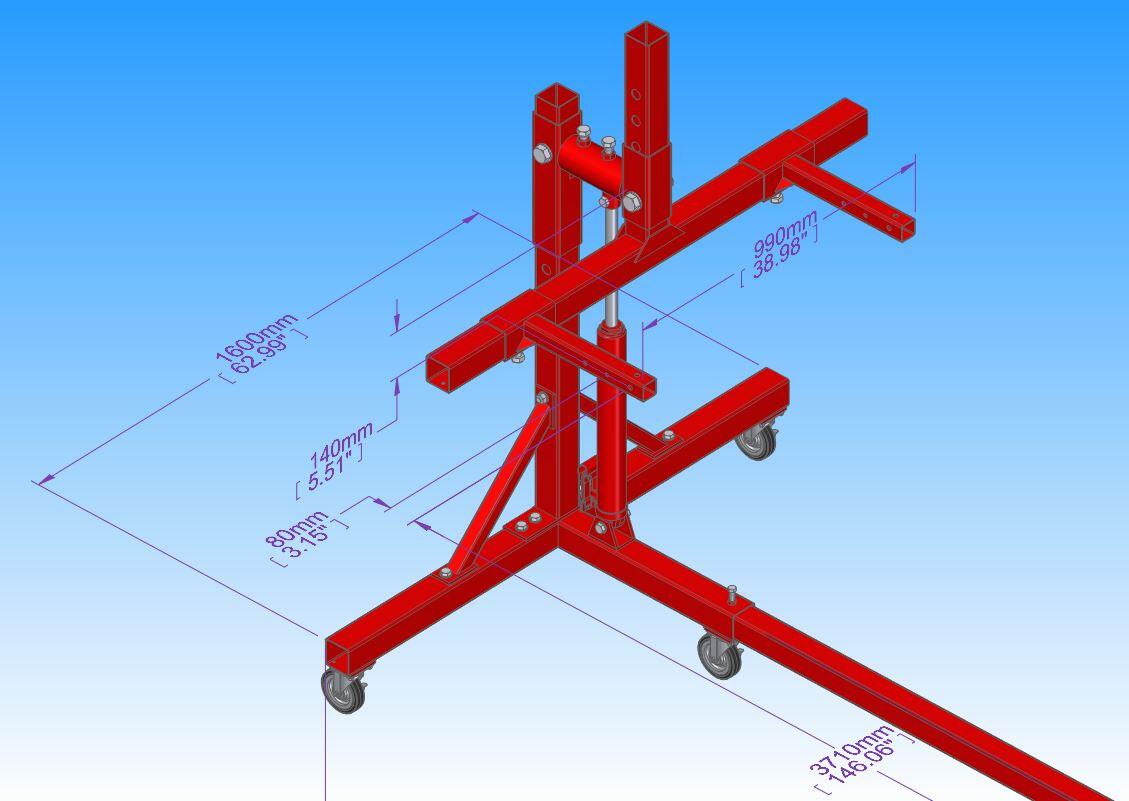
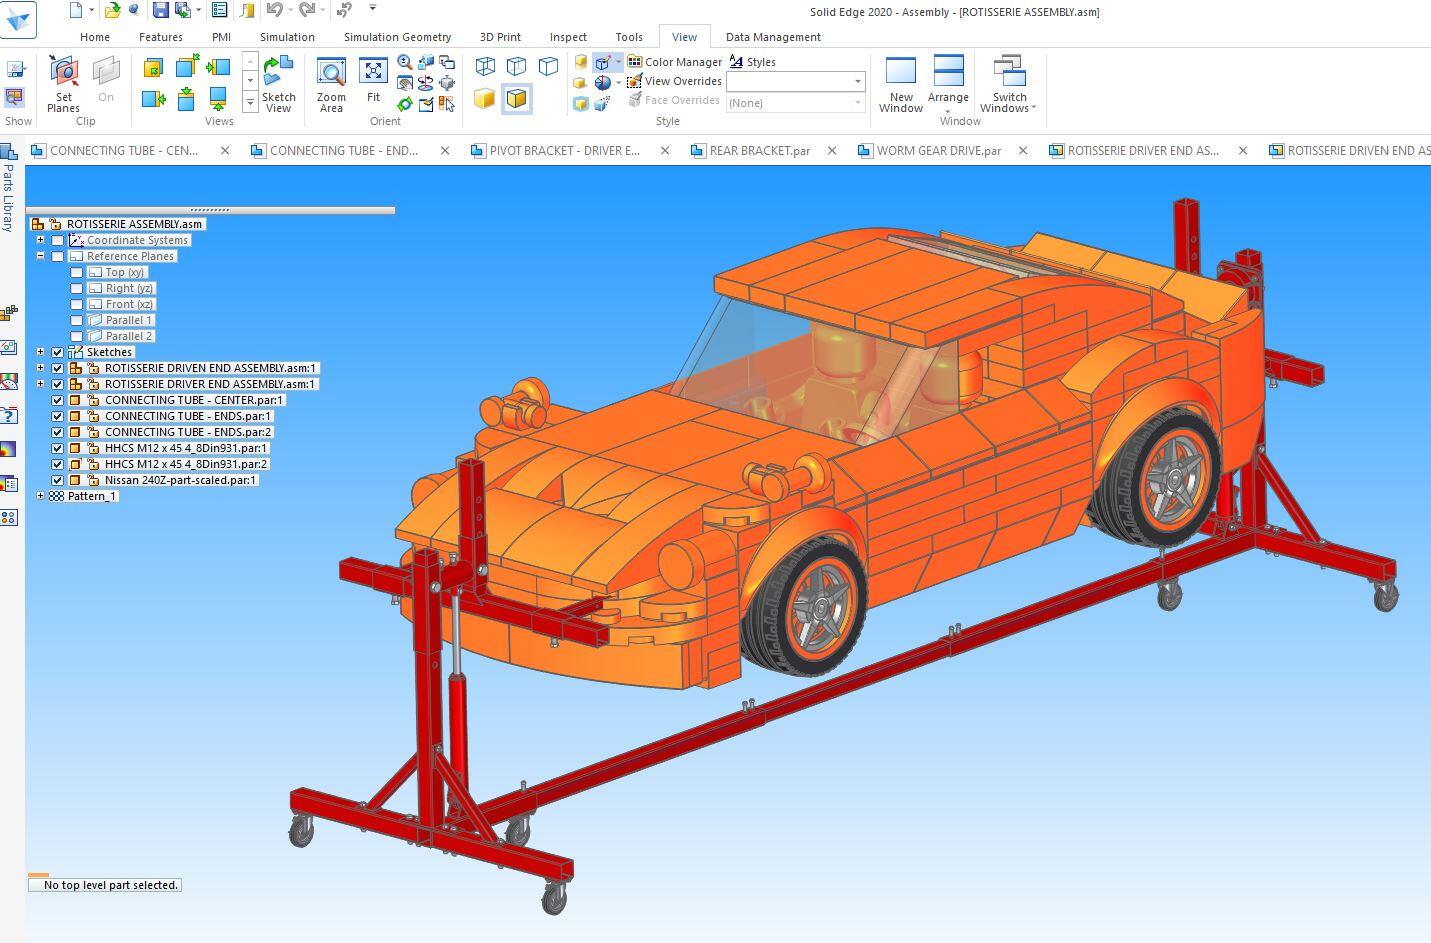
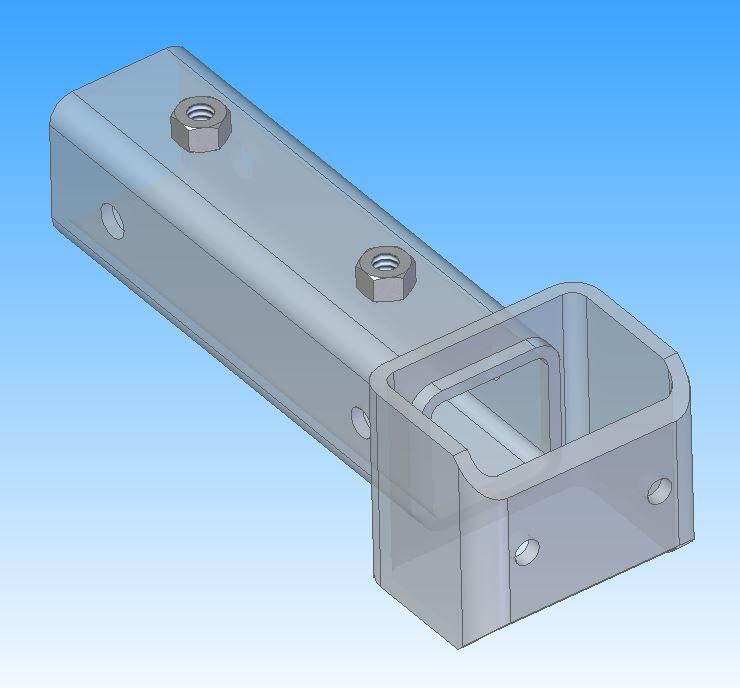
1 pointOver the weekend I measured up the rotisserie and created a 3D cad model of it, so that I could design the brackets for attaching the rear bumper mounts on the shell to the rotisserie arms. Here are a few images with the major mounting dimensions and an image of the rear brackets that I will need to fabricate. I will be chatting with my body guy soon to look at repairing the left side rear mount first. I looked for a 3D cad model of a 240Z shell but all I could find was a Lego one on GrabCad. I couldn't resist scaling it up to 1:1 and putting it on the rotisserie model.


 1 point
 -
I know it's a lot of reading, but take a look through this thread starting on about page 6 or so. There is also a bunch of talk about making adapters and such. https://www.classiczcars.com/forums/topic/64413-just-another-damned-z-car-project-thread/?page=61 point
-
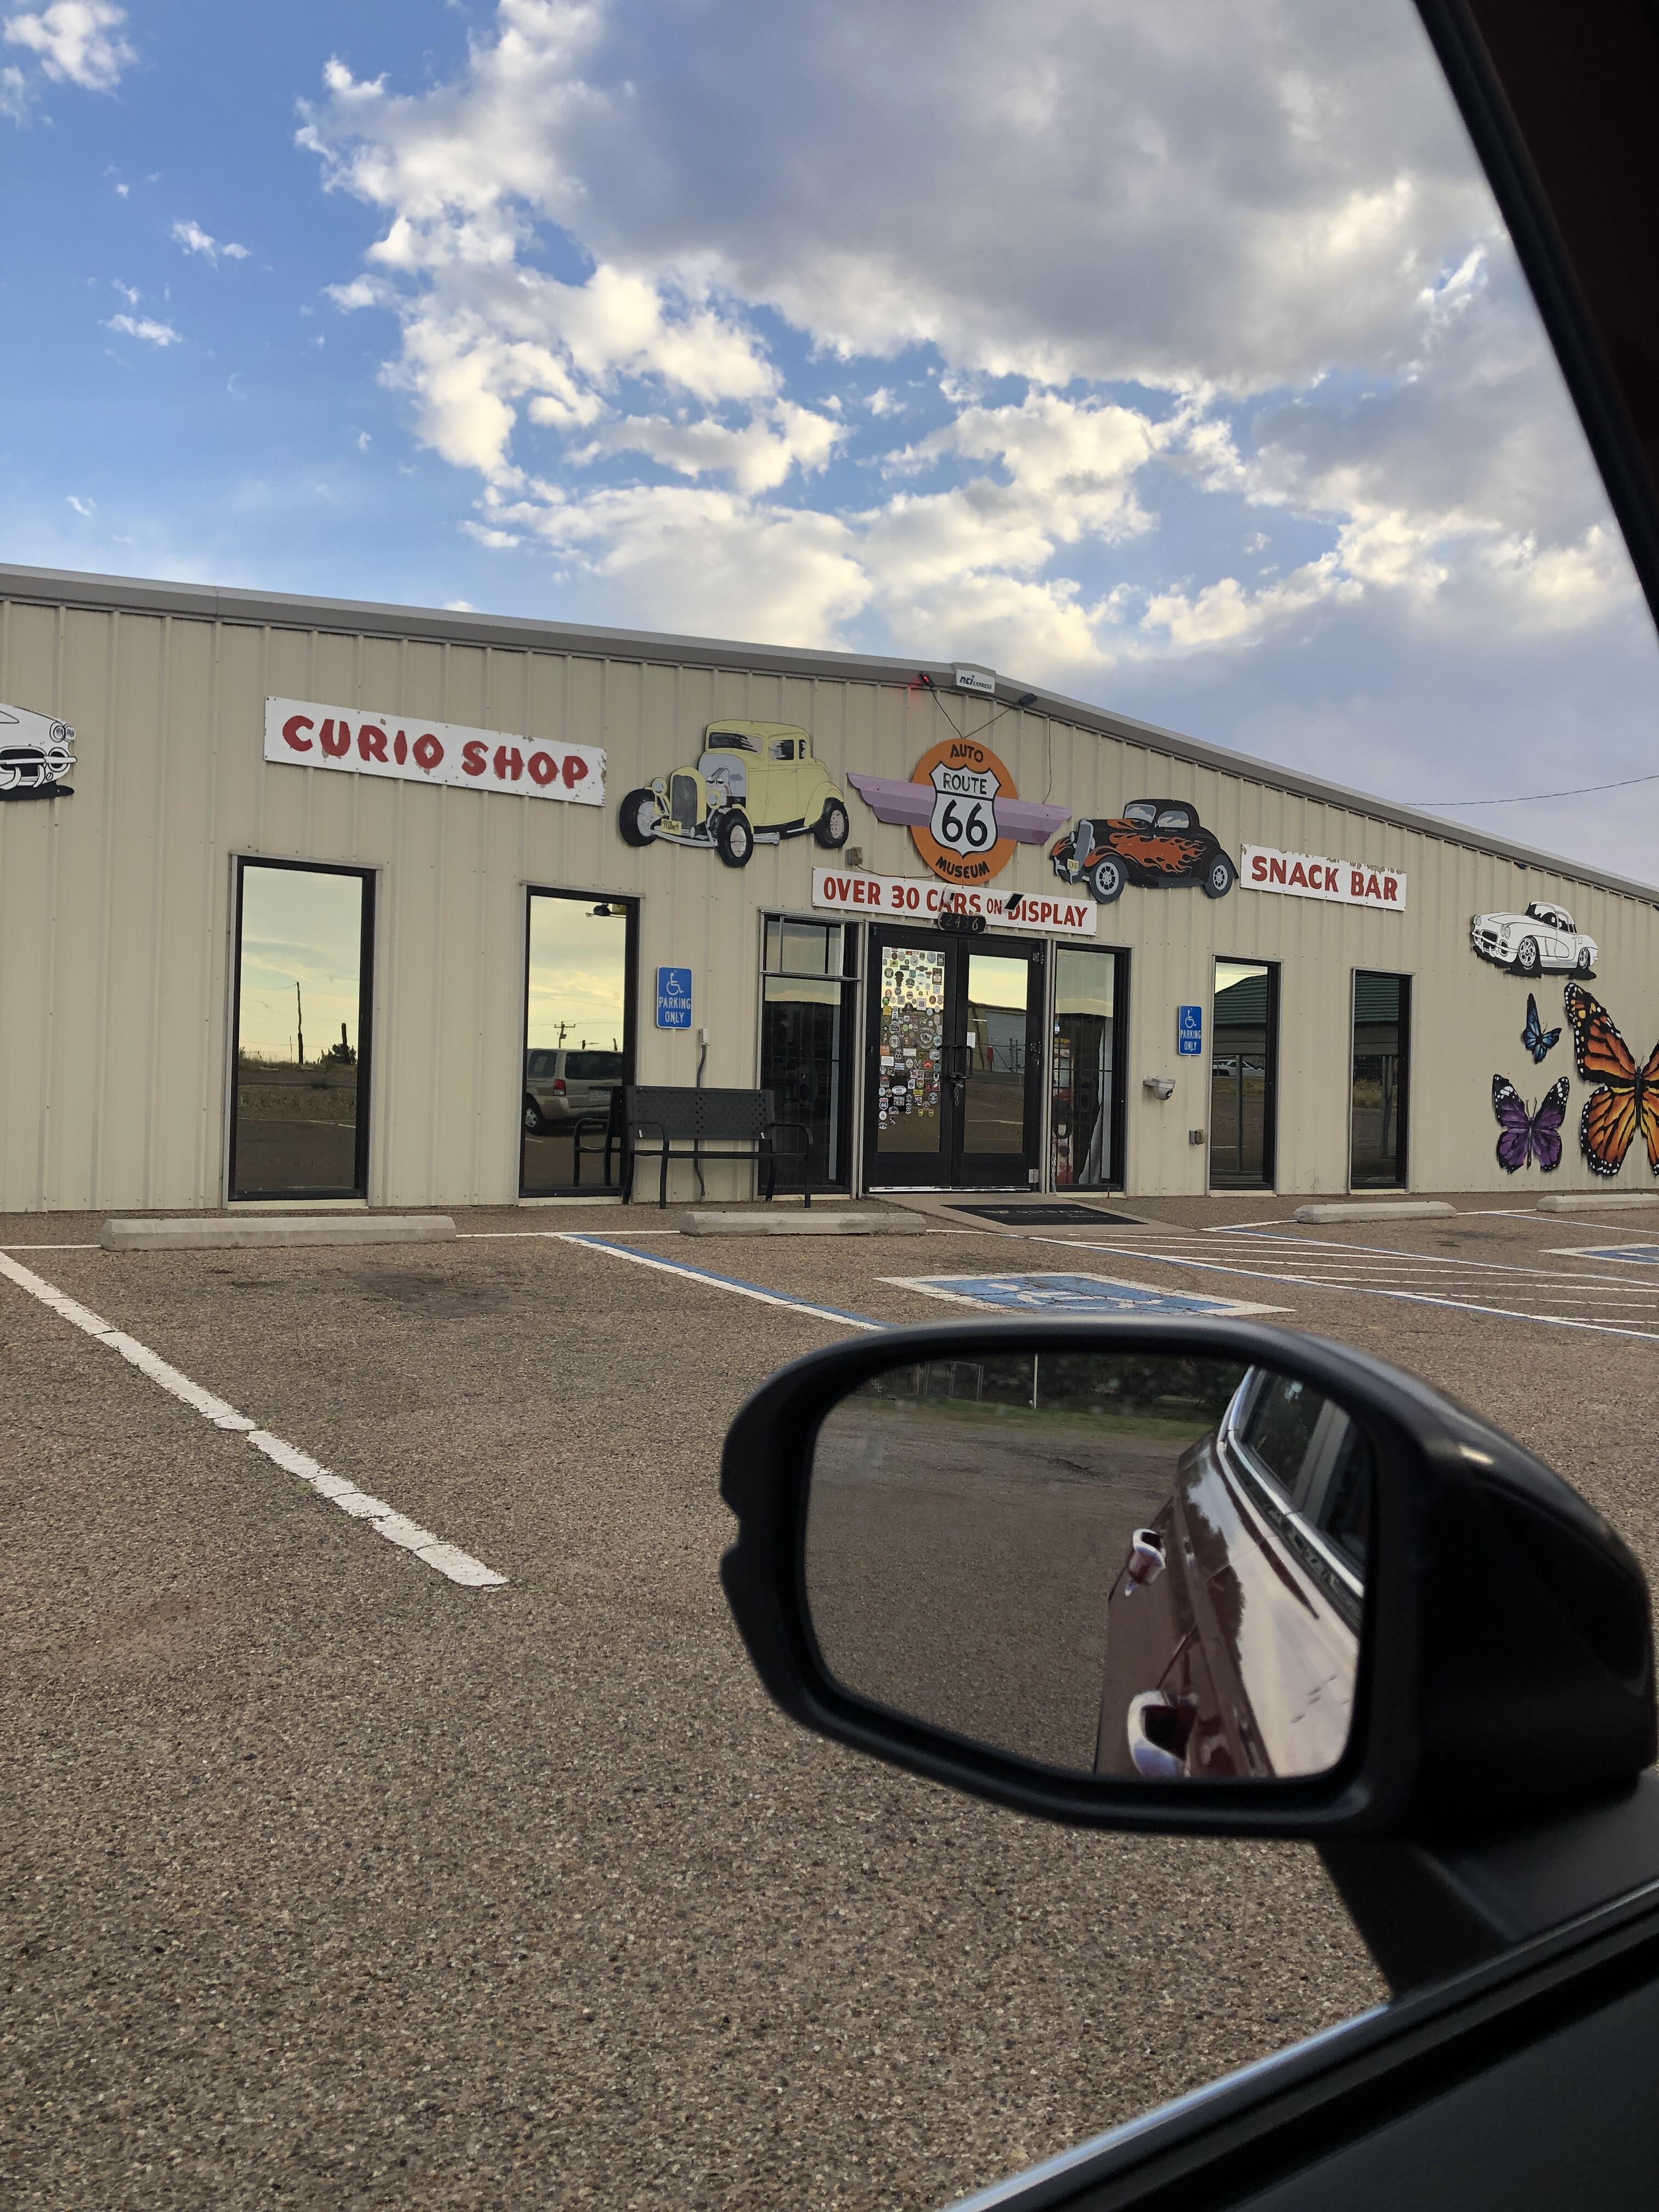
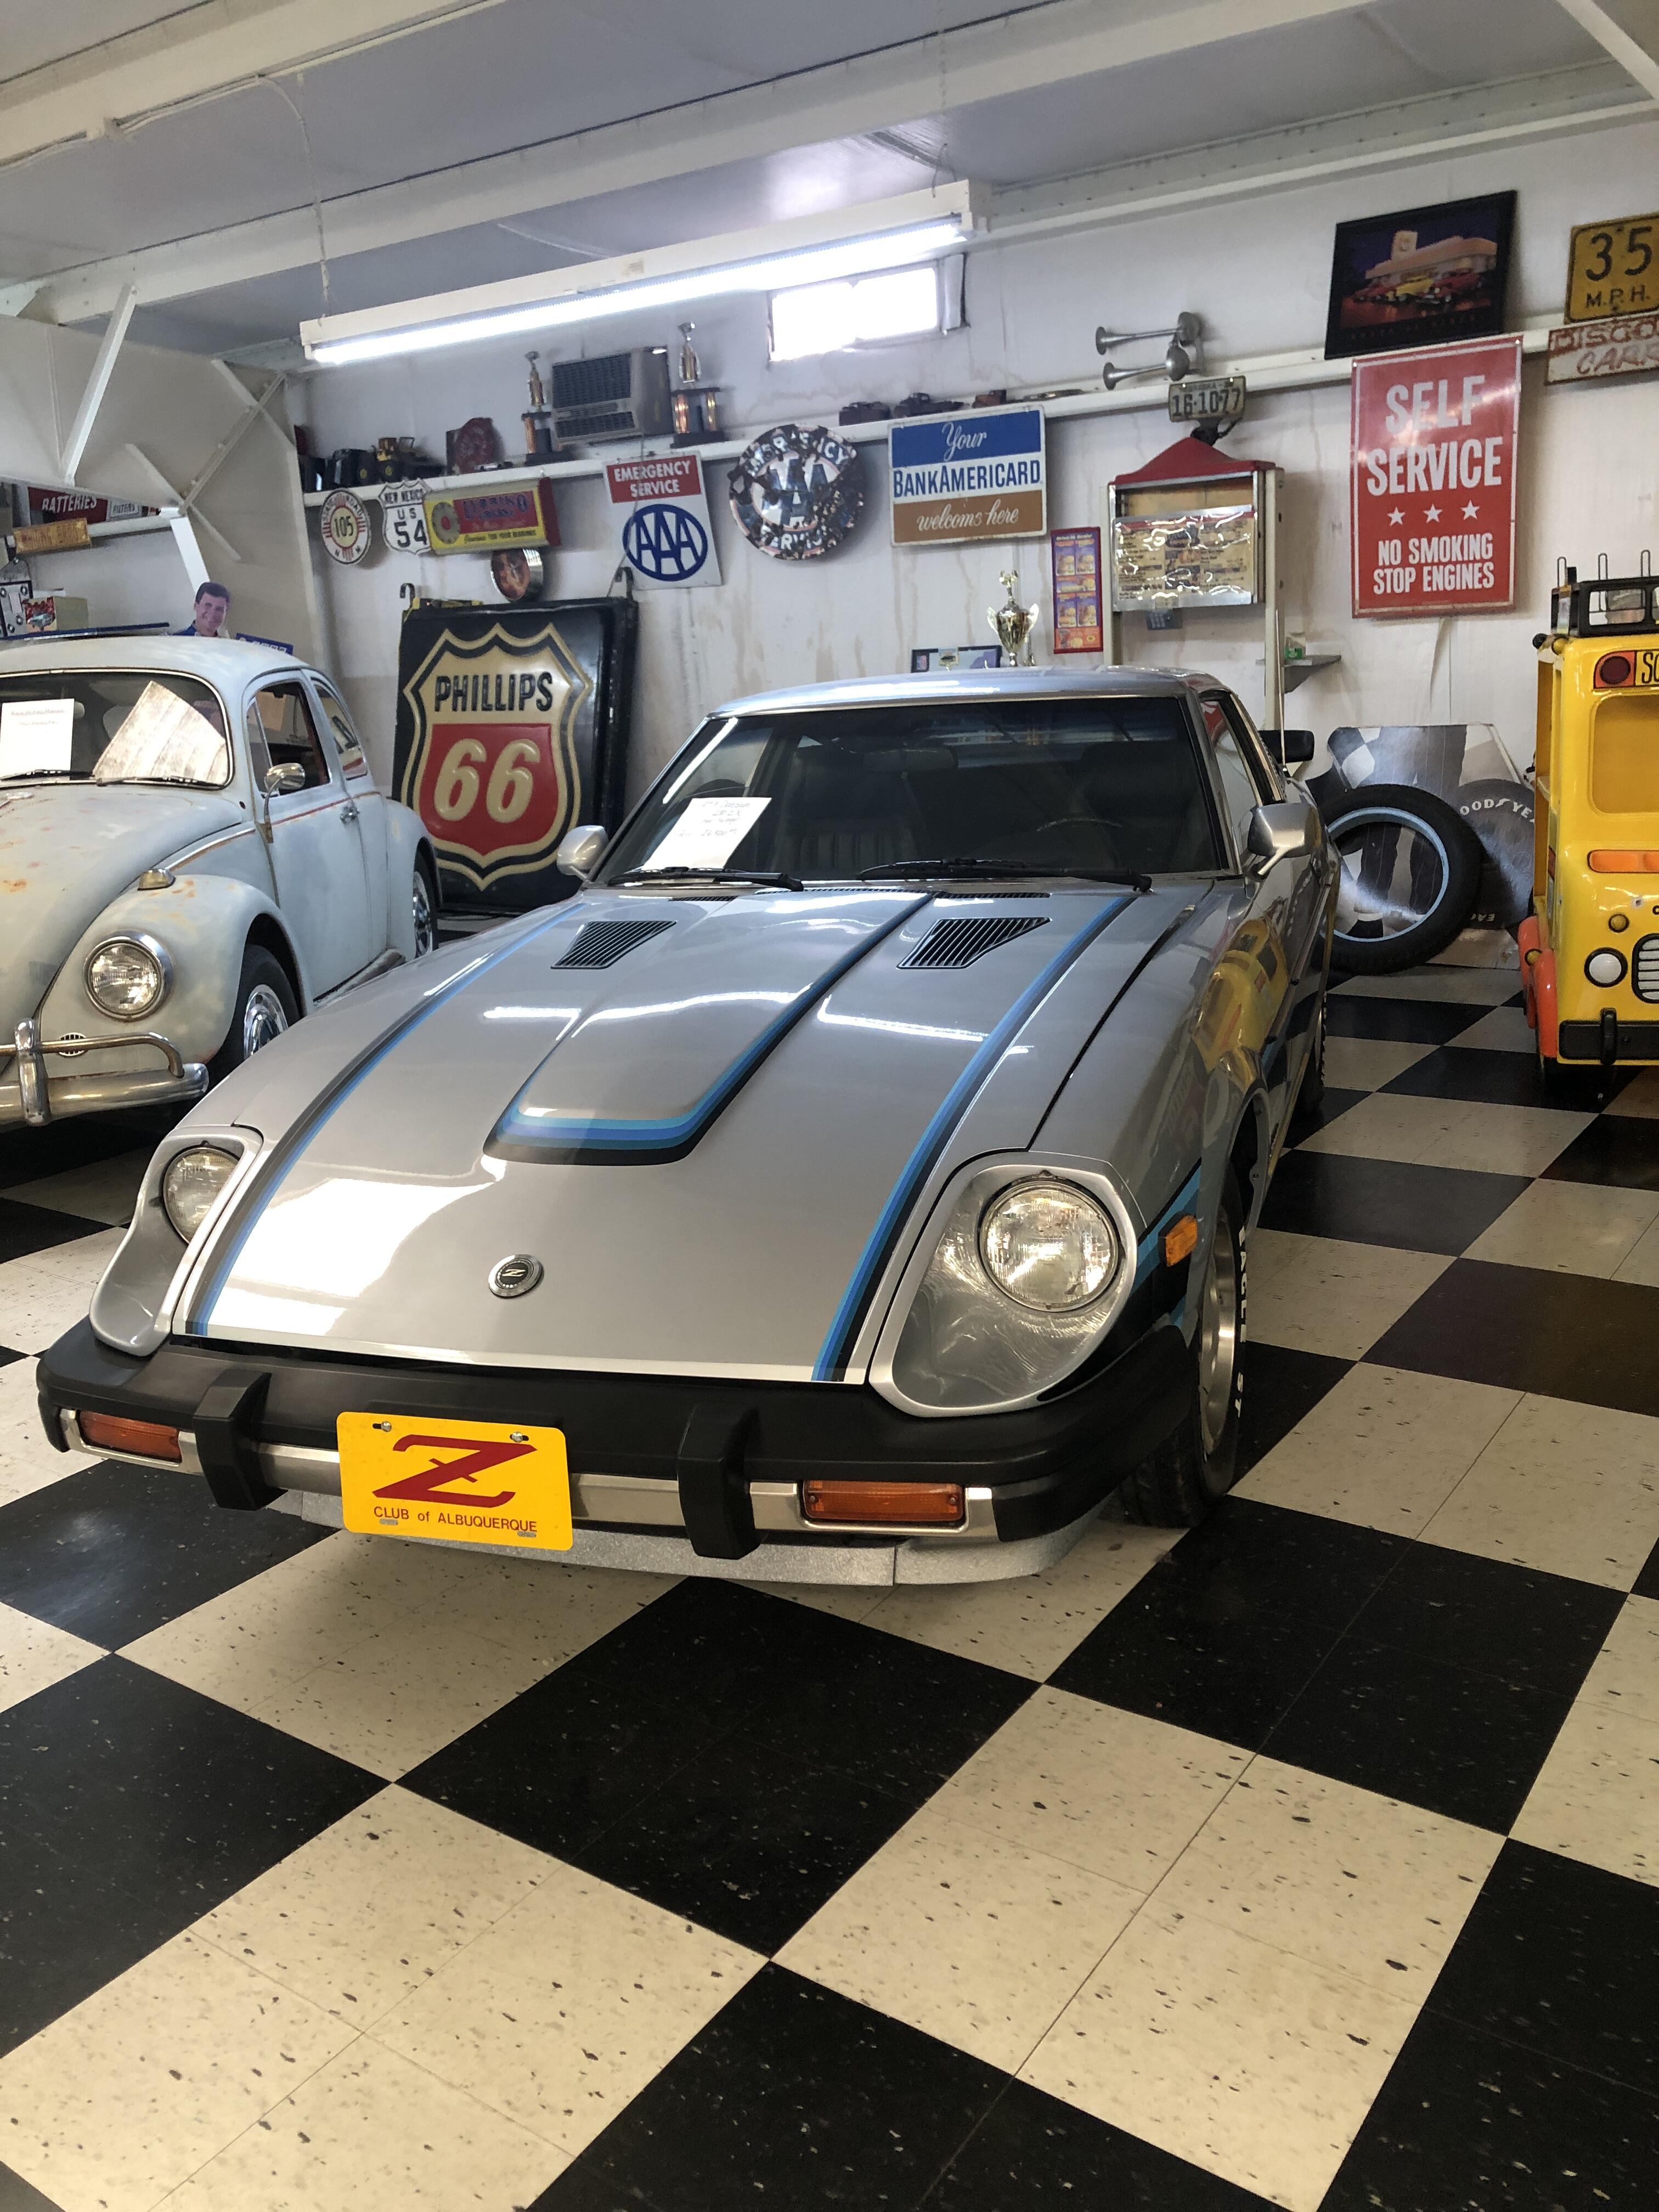
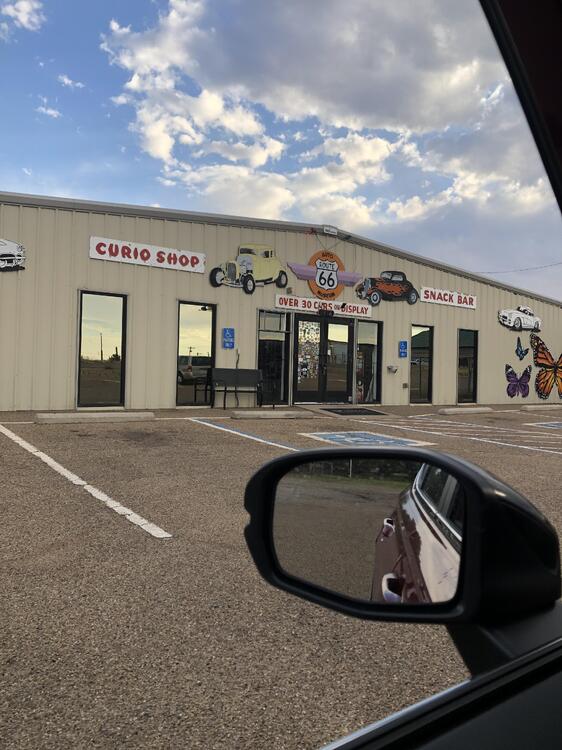
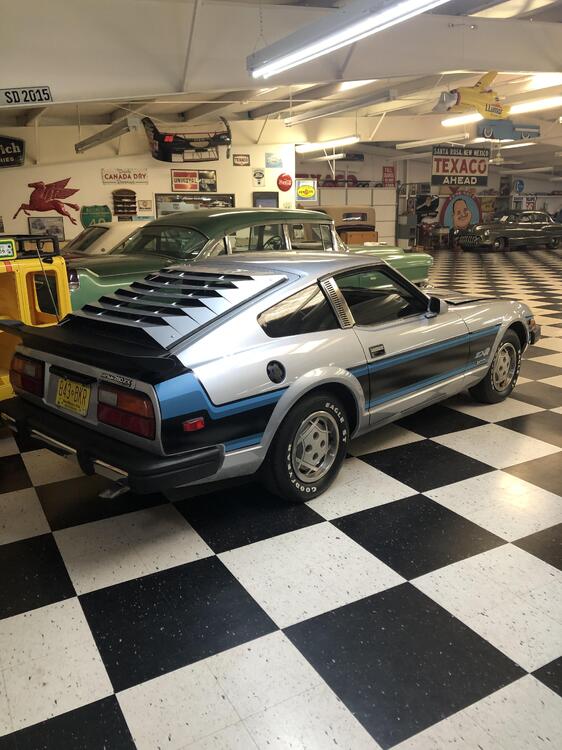
1 pointI just visited the Route 66 Auto Museum in Santa Rosa, NM (Link) and among the collections is a Datsun 280ZXR: Several other non-Datsun cars and one of the largest collection of Route 66 memorabilia I have ever seen!!! Enjoy. Keith

 1 point
 -
1 pointI don't recall seeing any restoration write-ups that have been specific to the centre console. I think you'll find (limited) discussions on the topic as part of broader write-ups on Interior restoration. If memory serves, the full-restoration thread done by CSCZ member @wheee! was based on a 280Z, so you might find some tips there. Most of the coverage that I remember deals with repairing the consoles for earlier 240Z models, which were prone to cracking where the choke lever assembly attaches. Perhaps it would help if you provide some details about the condition of your console, which will help us to understand why you think you need to replace some of the hardware. As for the removal/reinstallation process, the Factory Service Manual (downloadable for free from the 'Resources' section) should be your first pint of reference. SEM 'Landau Black' paint is generally considered the go-to paint for reconditioning the Z console. Most members use a 'chrome' pencil to restore the trim highlighting. Cracks can be repaired with cautious use of the ABS plastic cement used for plumbing. If its a long crack, you should probably reinforce the back side with a secondary layer (an old credit card or hotel key card works well for this purpose).1 point
-
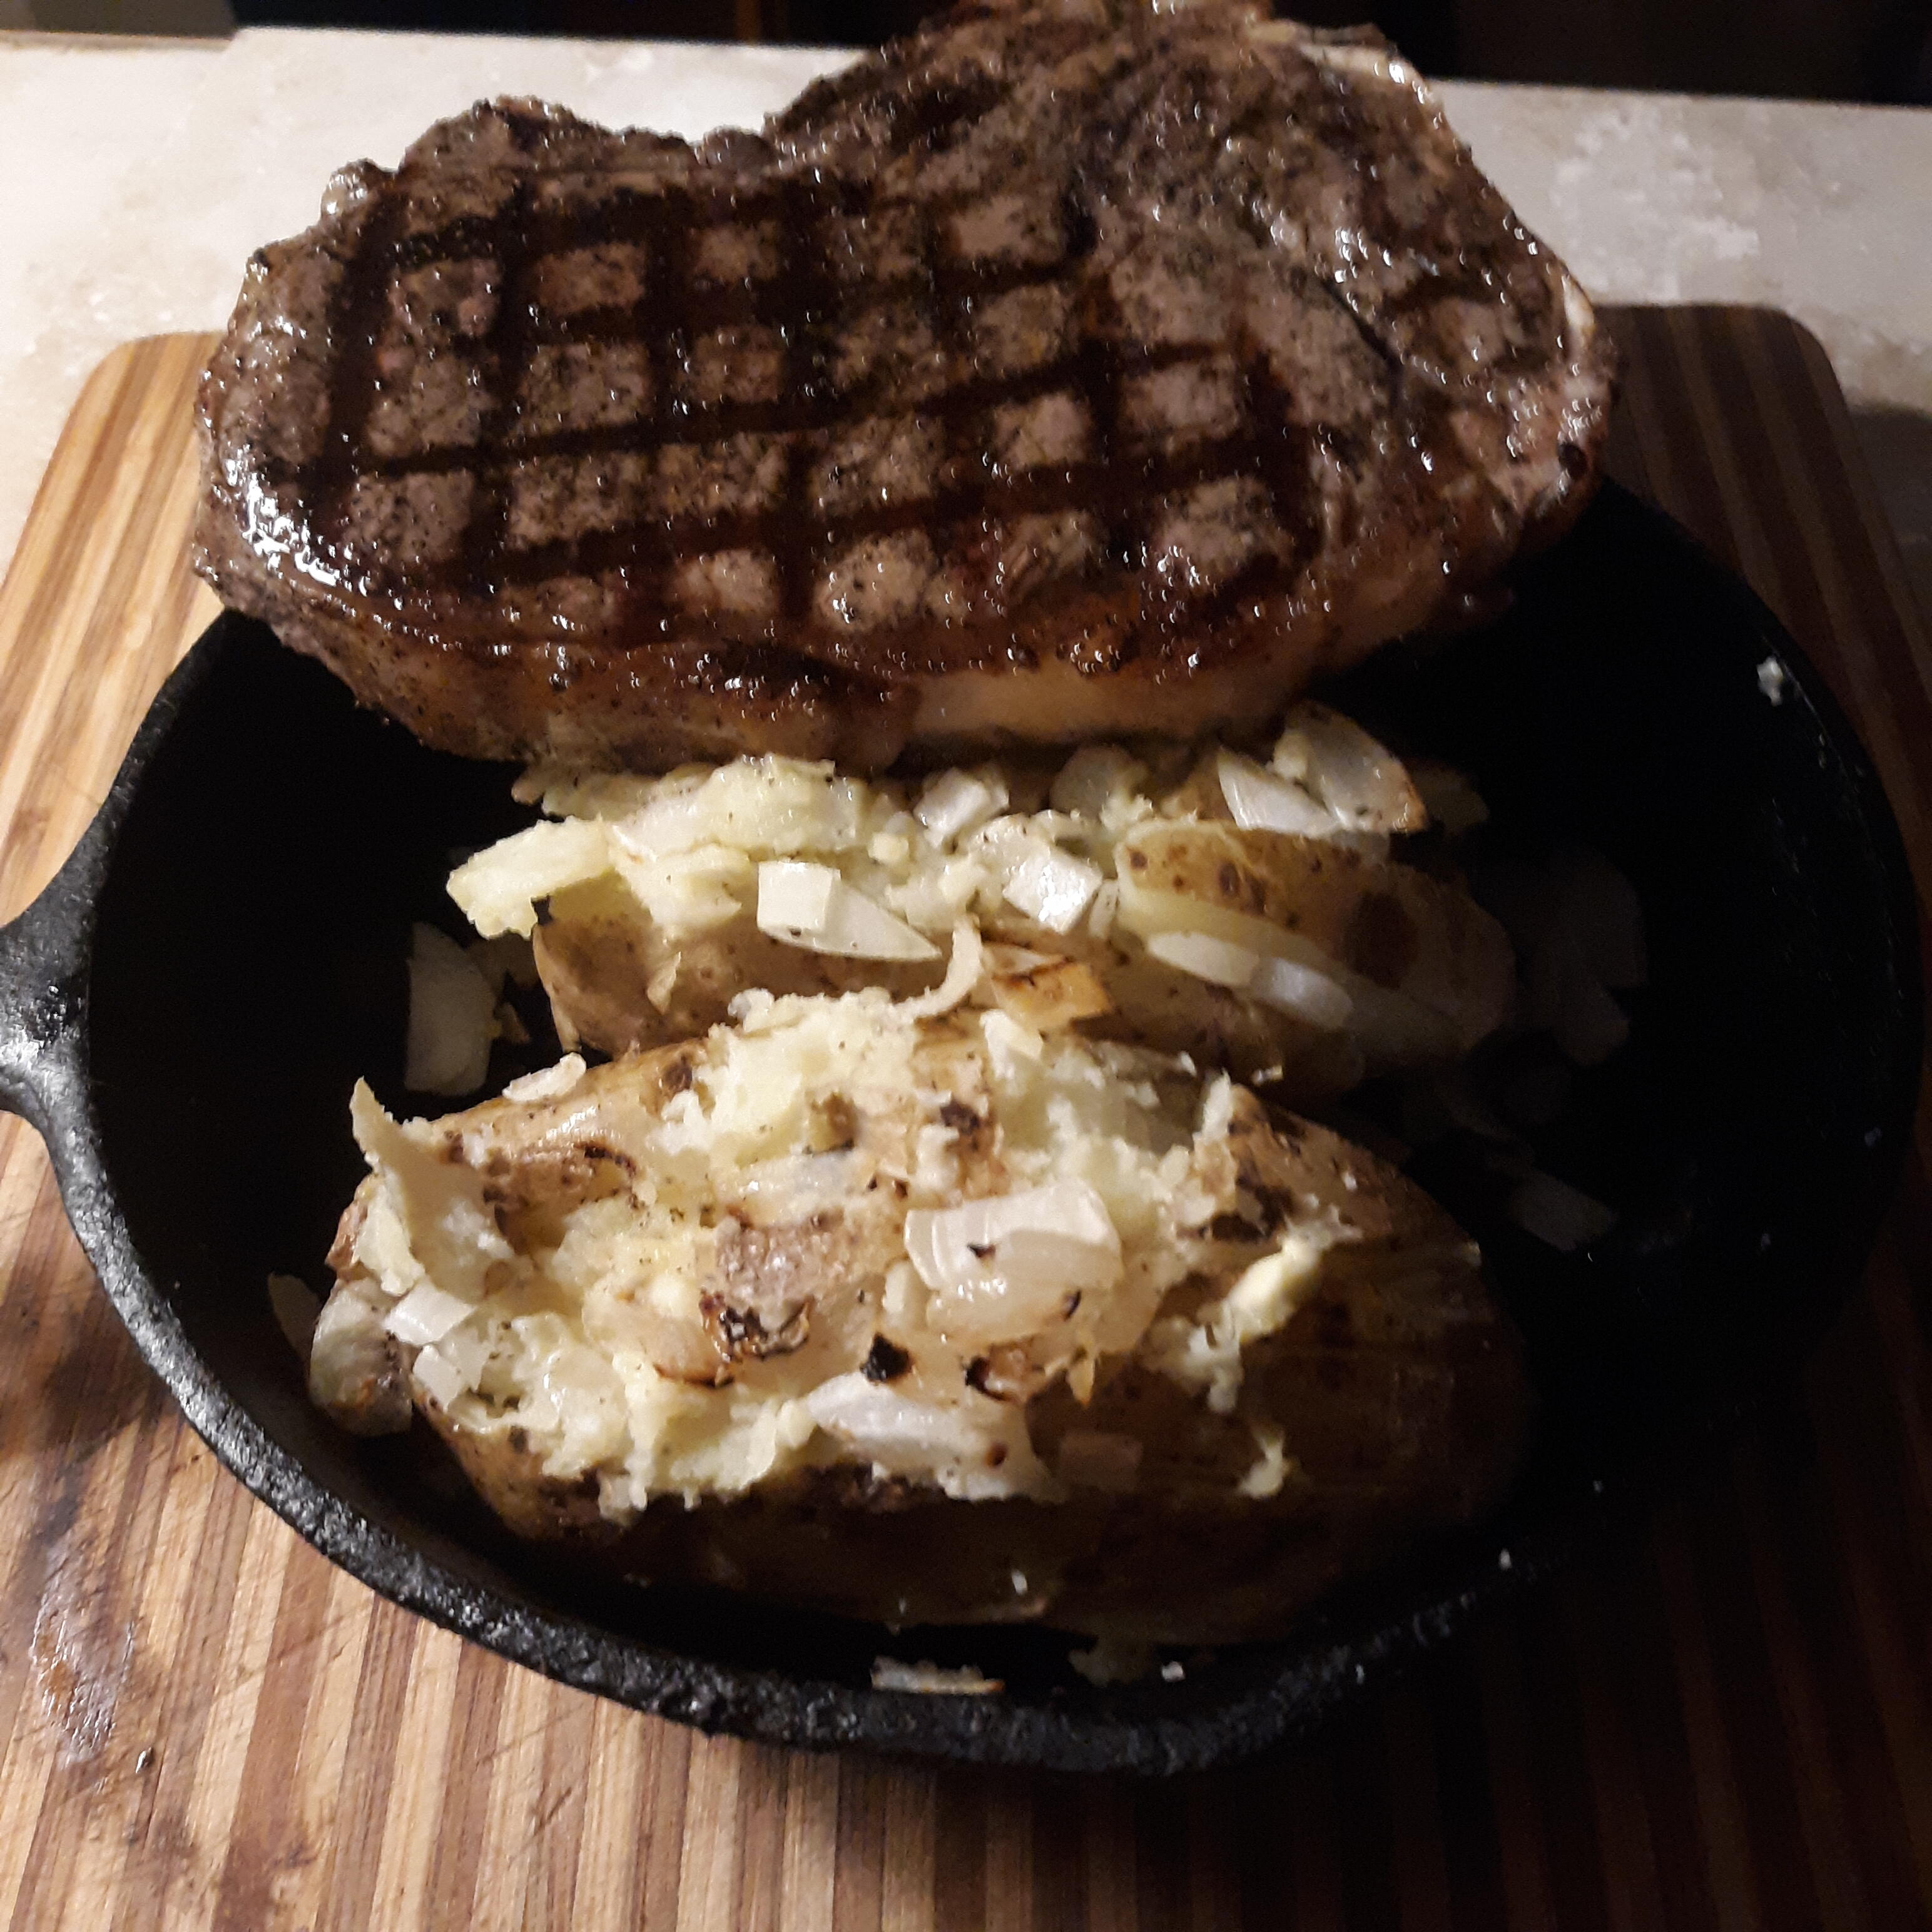
I drove my '72 to the local grocer's and picked up some supplies. I do today what I plan on doing the New Year. Hopefully I want have a heart attack.
 1 point