


Leaderboard
-

Zed Head
Free Member10Points19,236Posts -
AK260
Free Member4Points999Posts -
jonbill
Free Member4Points458Posts -
HusseinHolland
Free Member4Points1,031Posts


Popular Content
Showing content with the highest reputation on 07/08/2023 in all areas
-
5 pointsThe FSM gives an indication, if you assume that the draftsman put the drawing in the correct positions.
 5 points
 -
4 points
-
3 pointsLet's make some equine hamburger - https://www.zhome.com/History/ZCARPICT.htm
 3 points
 -
Yes, on originally installed u-joints. The assembly is too small to have clearance for the zerk fittings, so after assembly and lubrication, the zerk is removed and a plug inserted. During routine service, remove the plug, install a zerk, grease the joint, remove the zerk and replace the plug.3 points
-
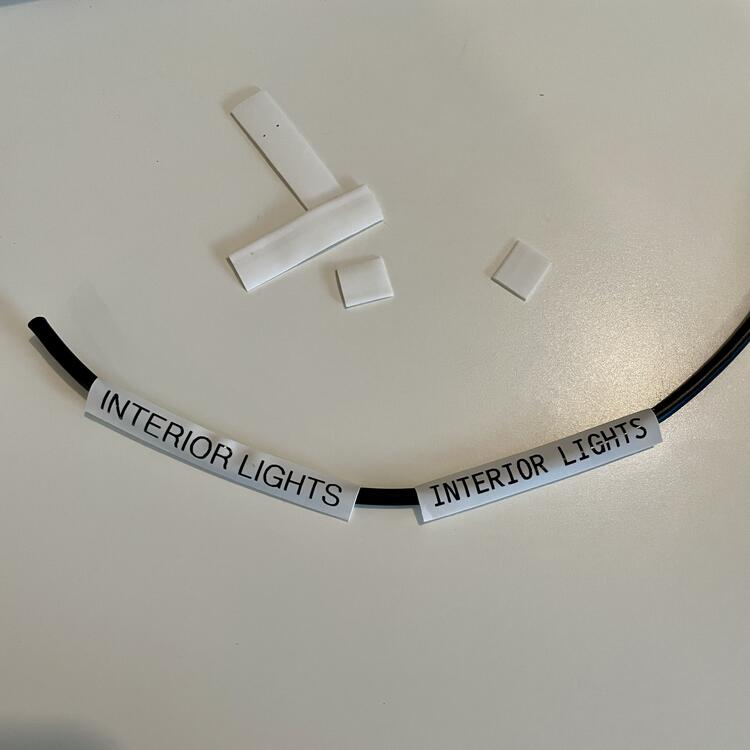
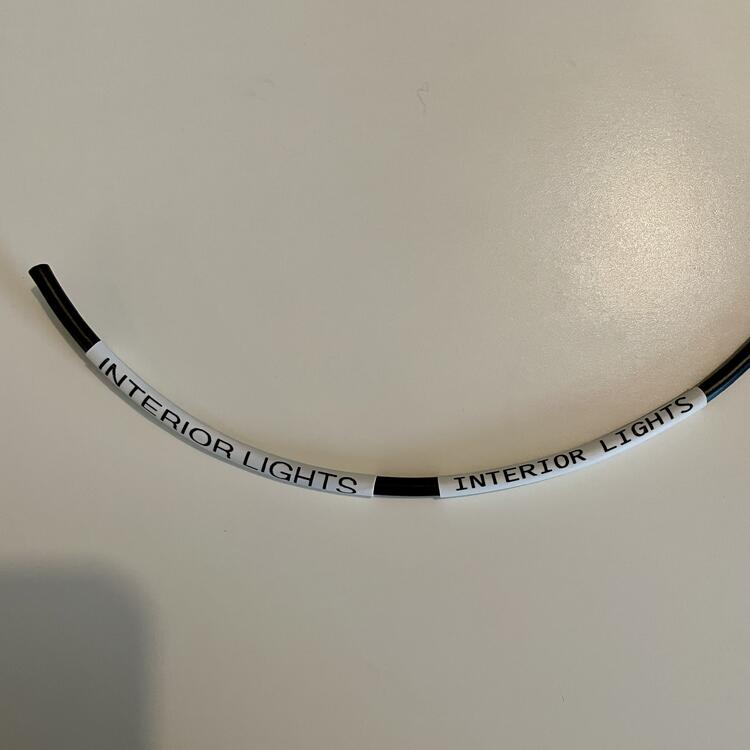
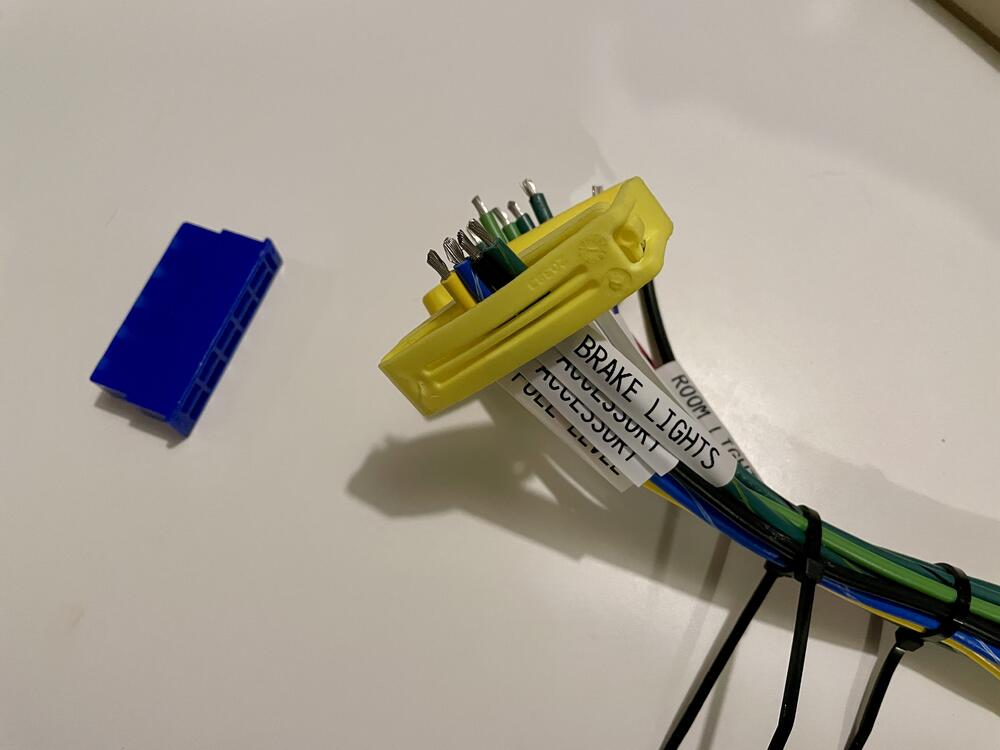
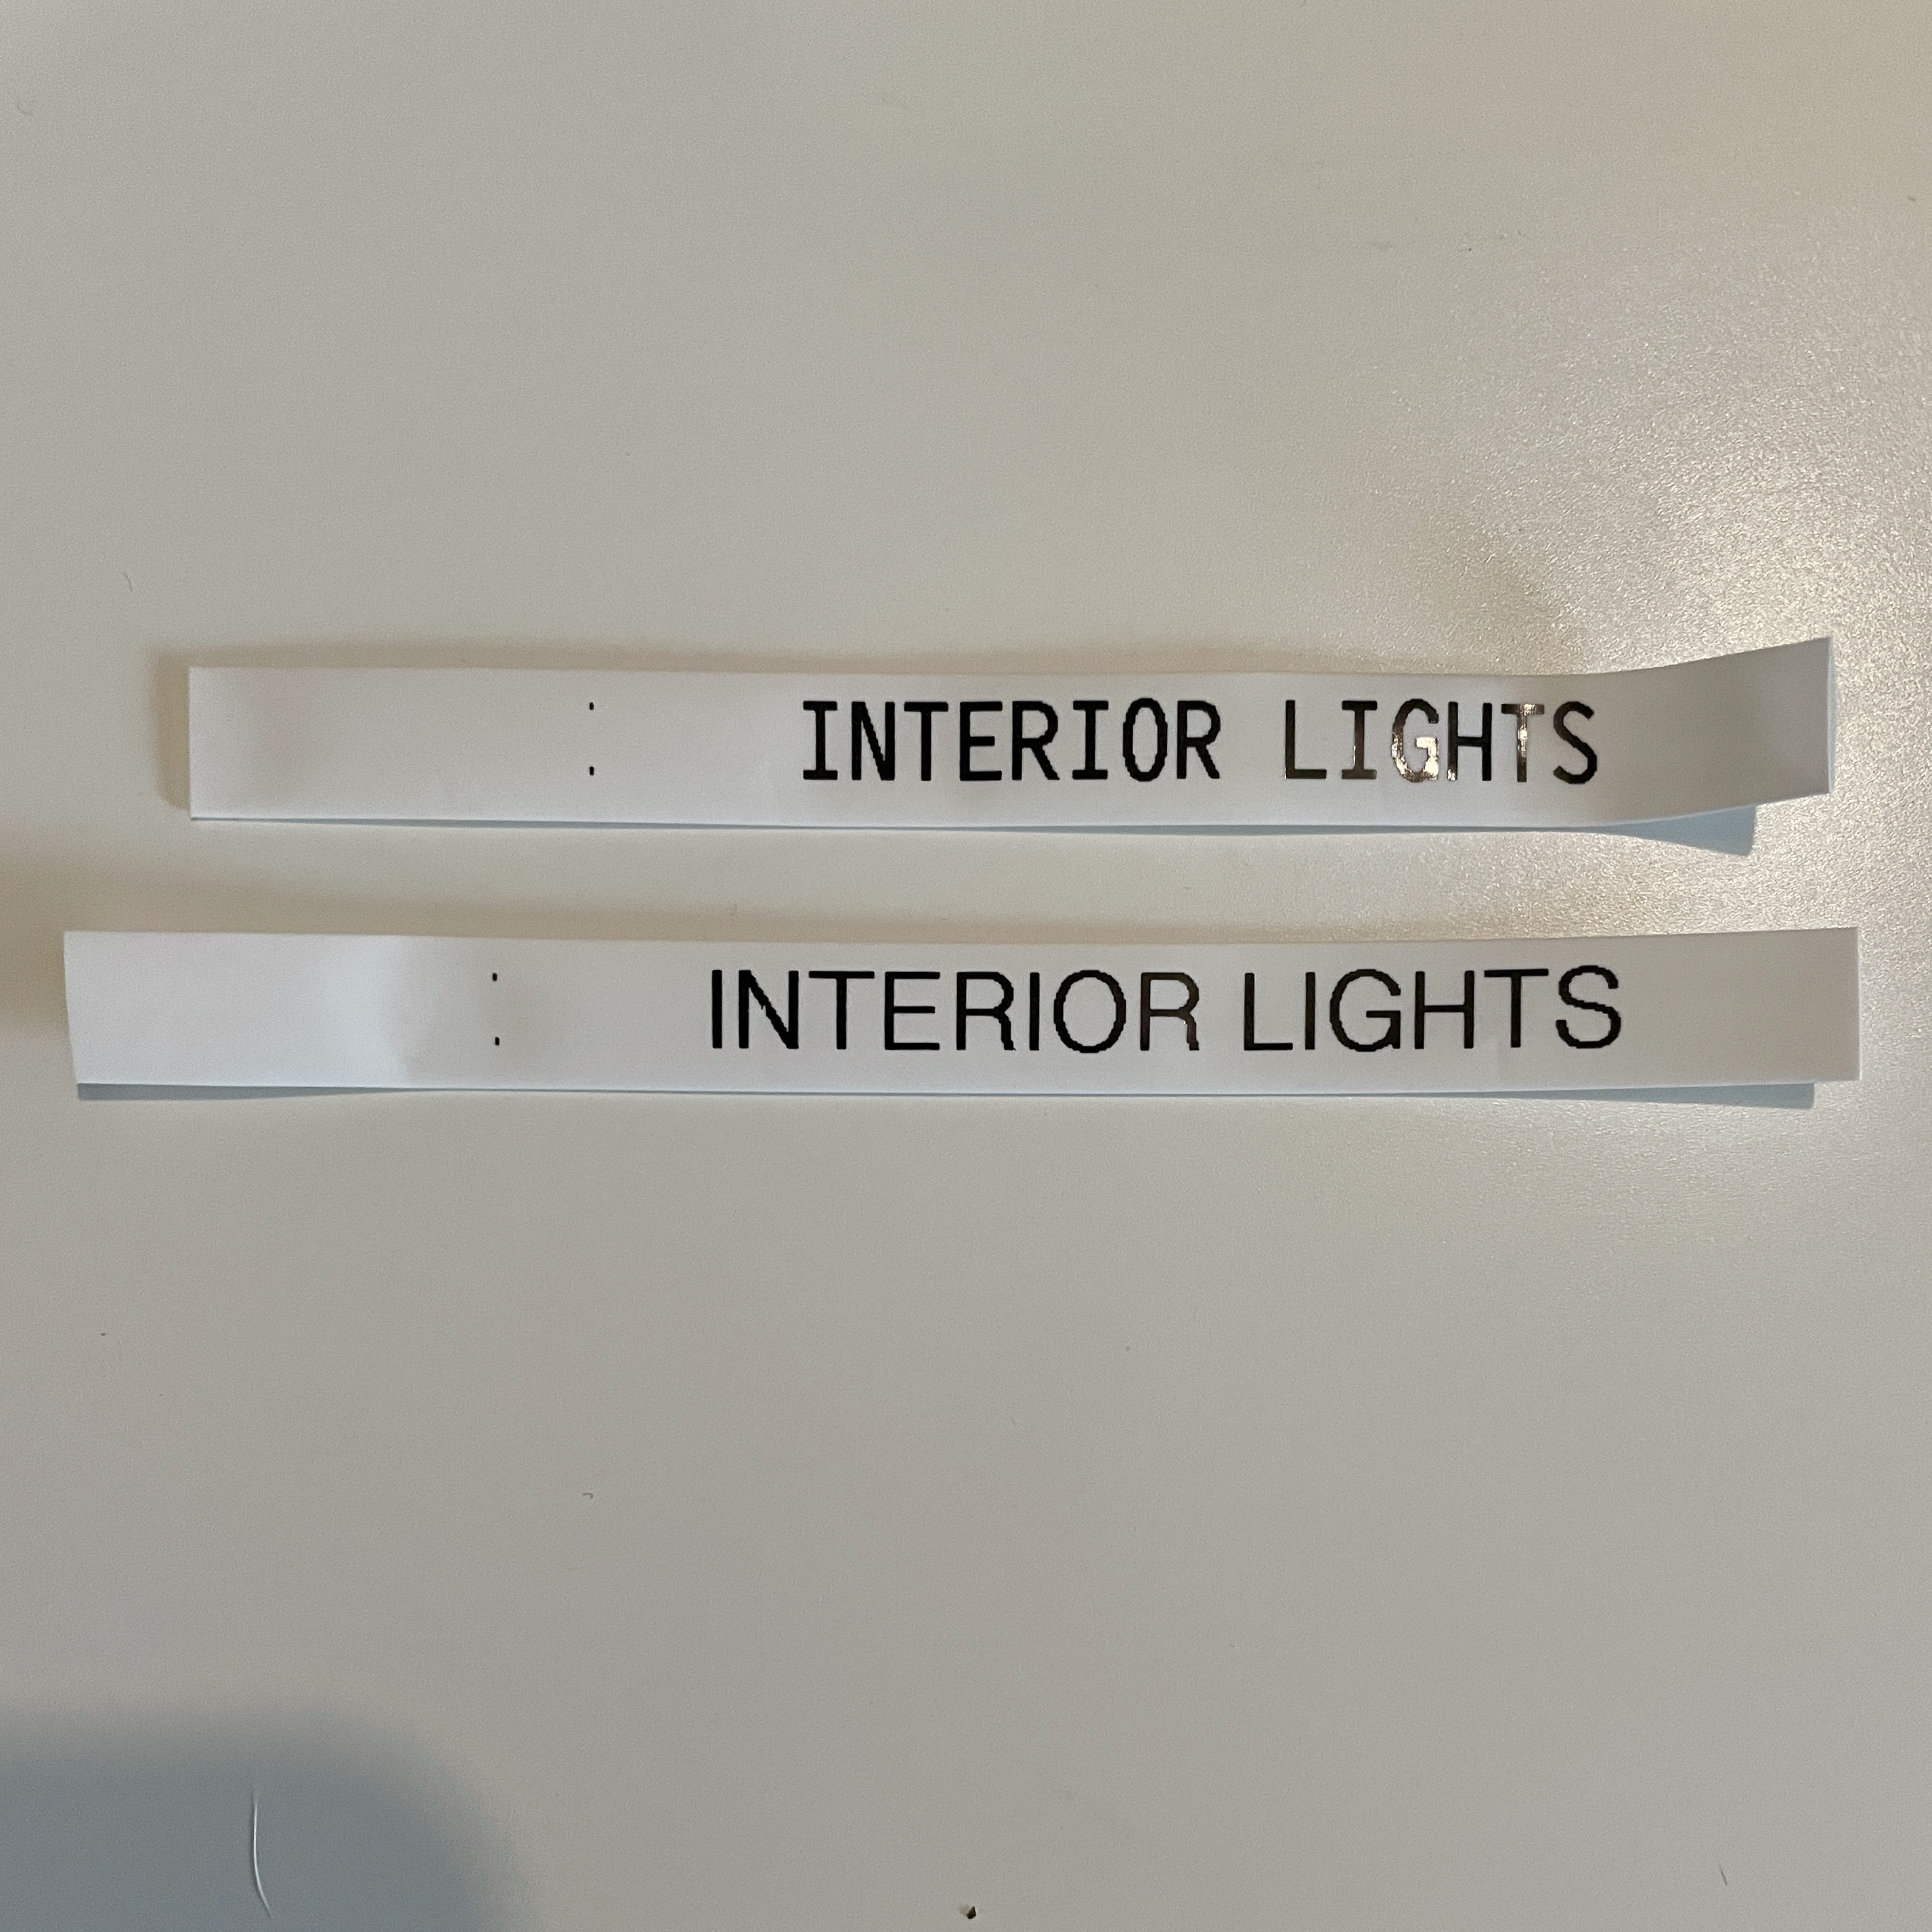
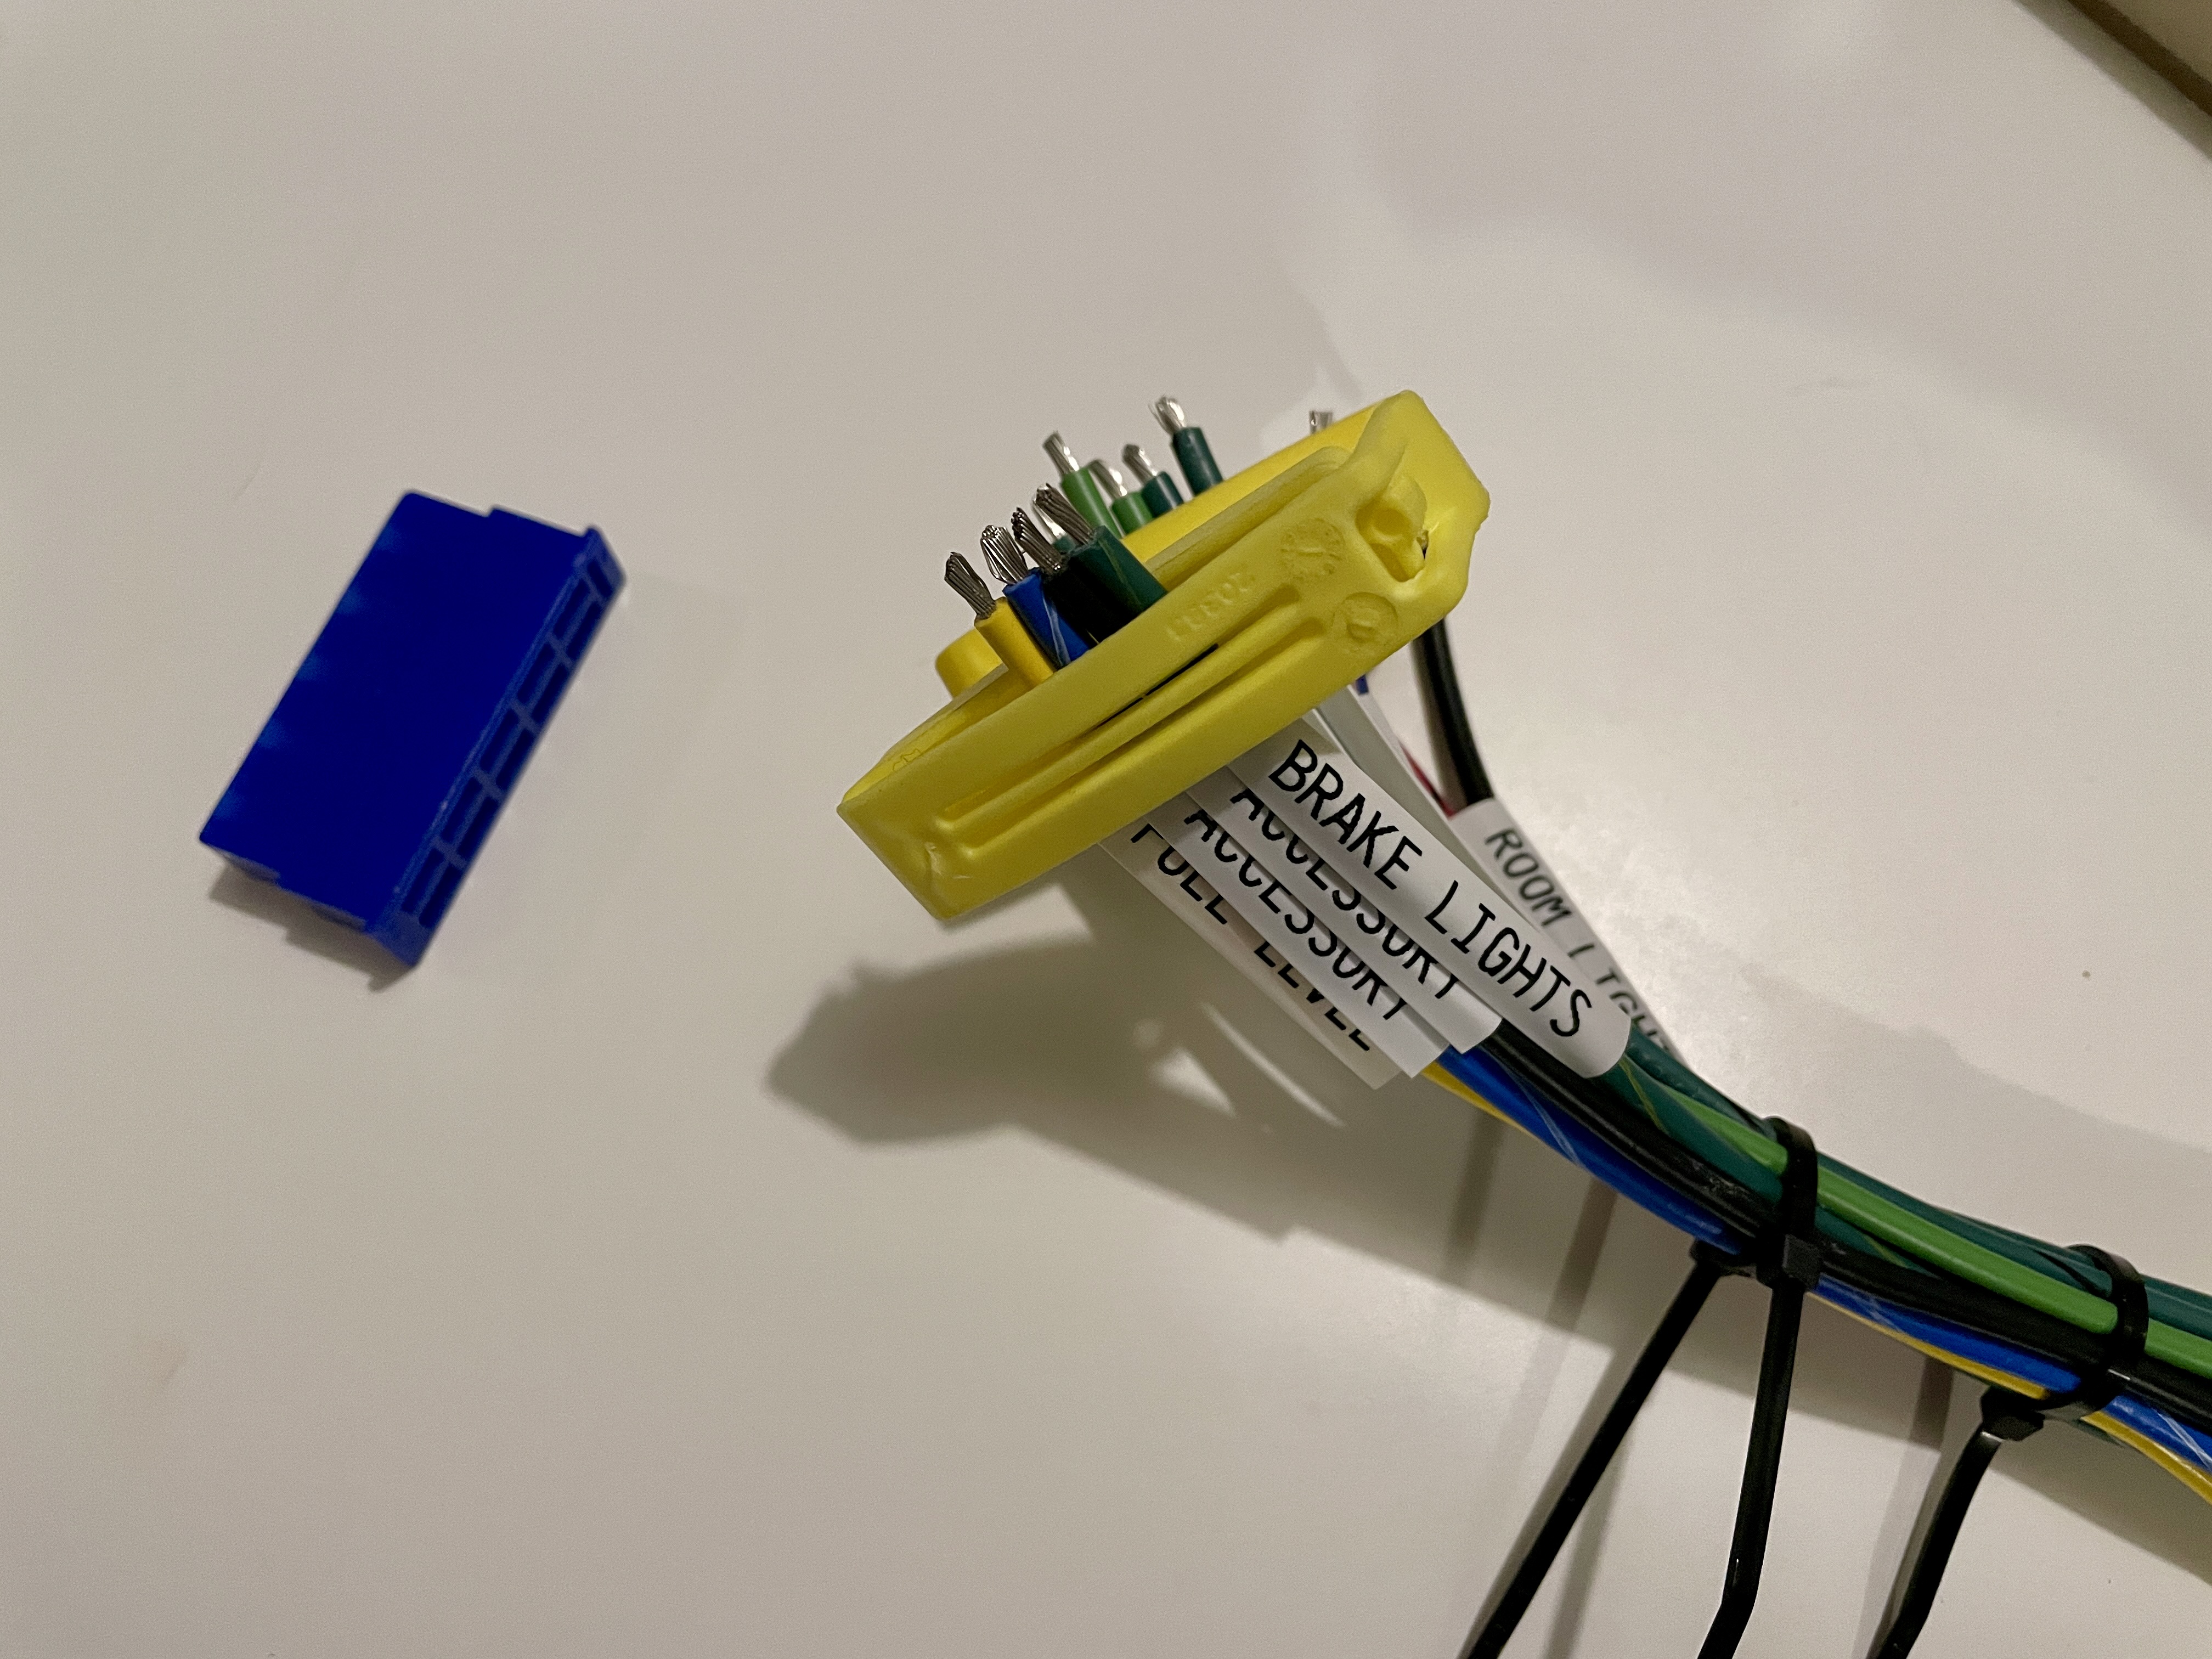
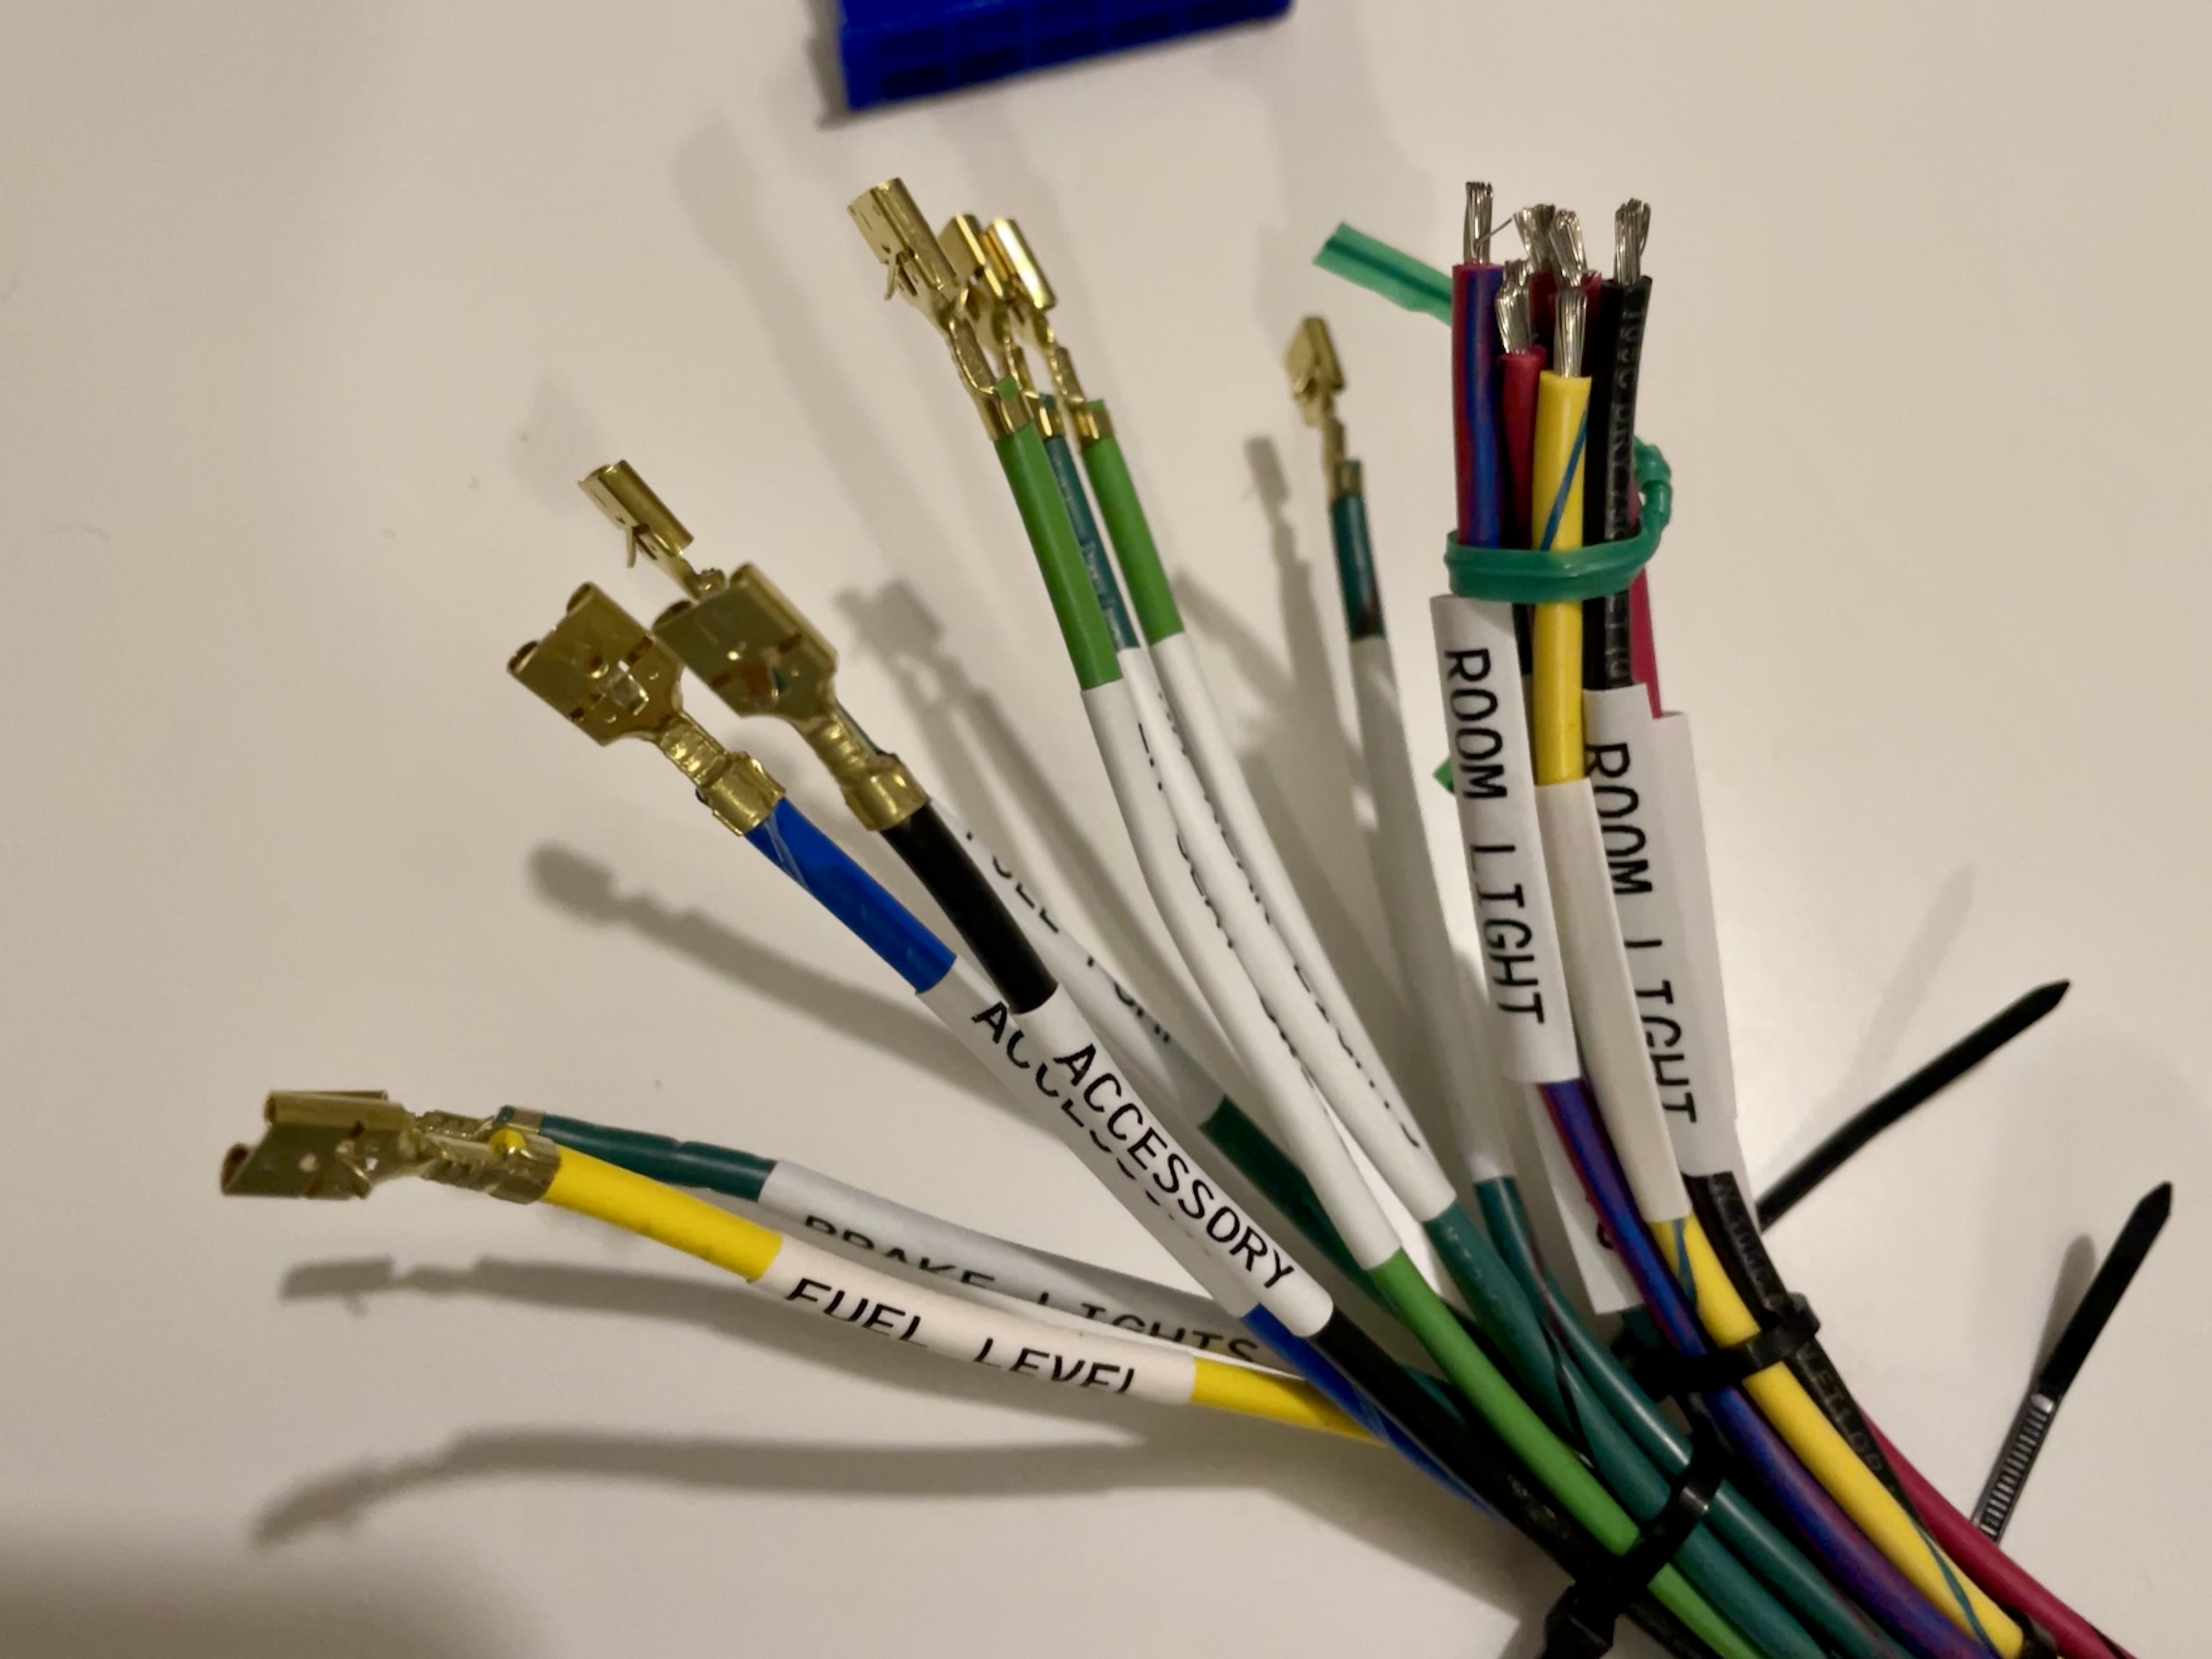
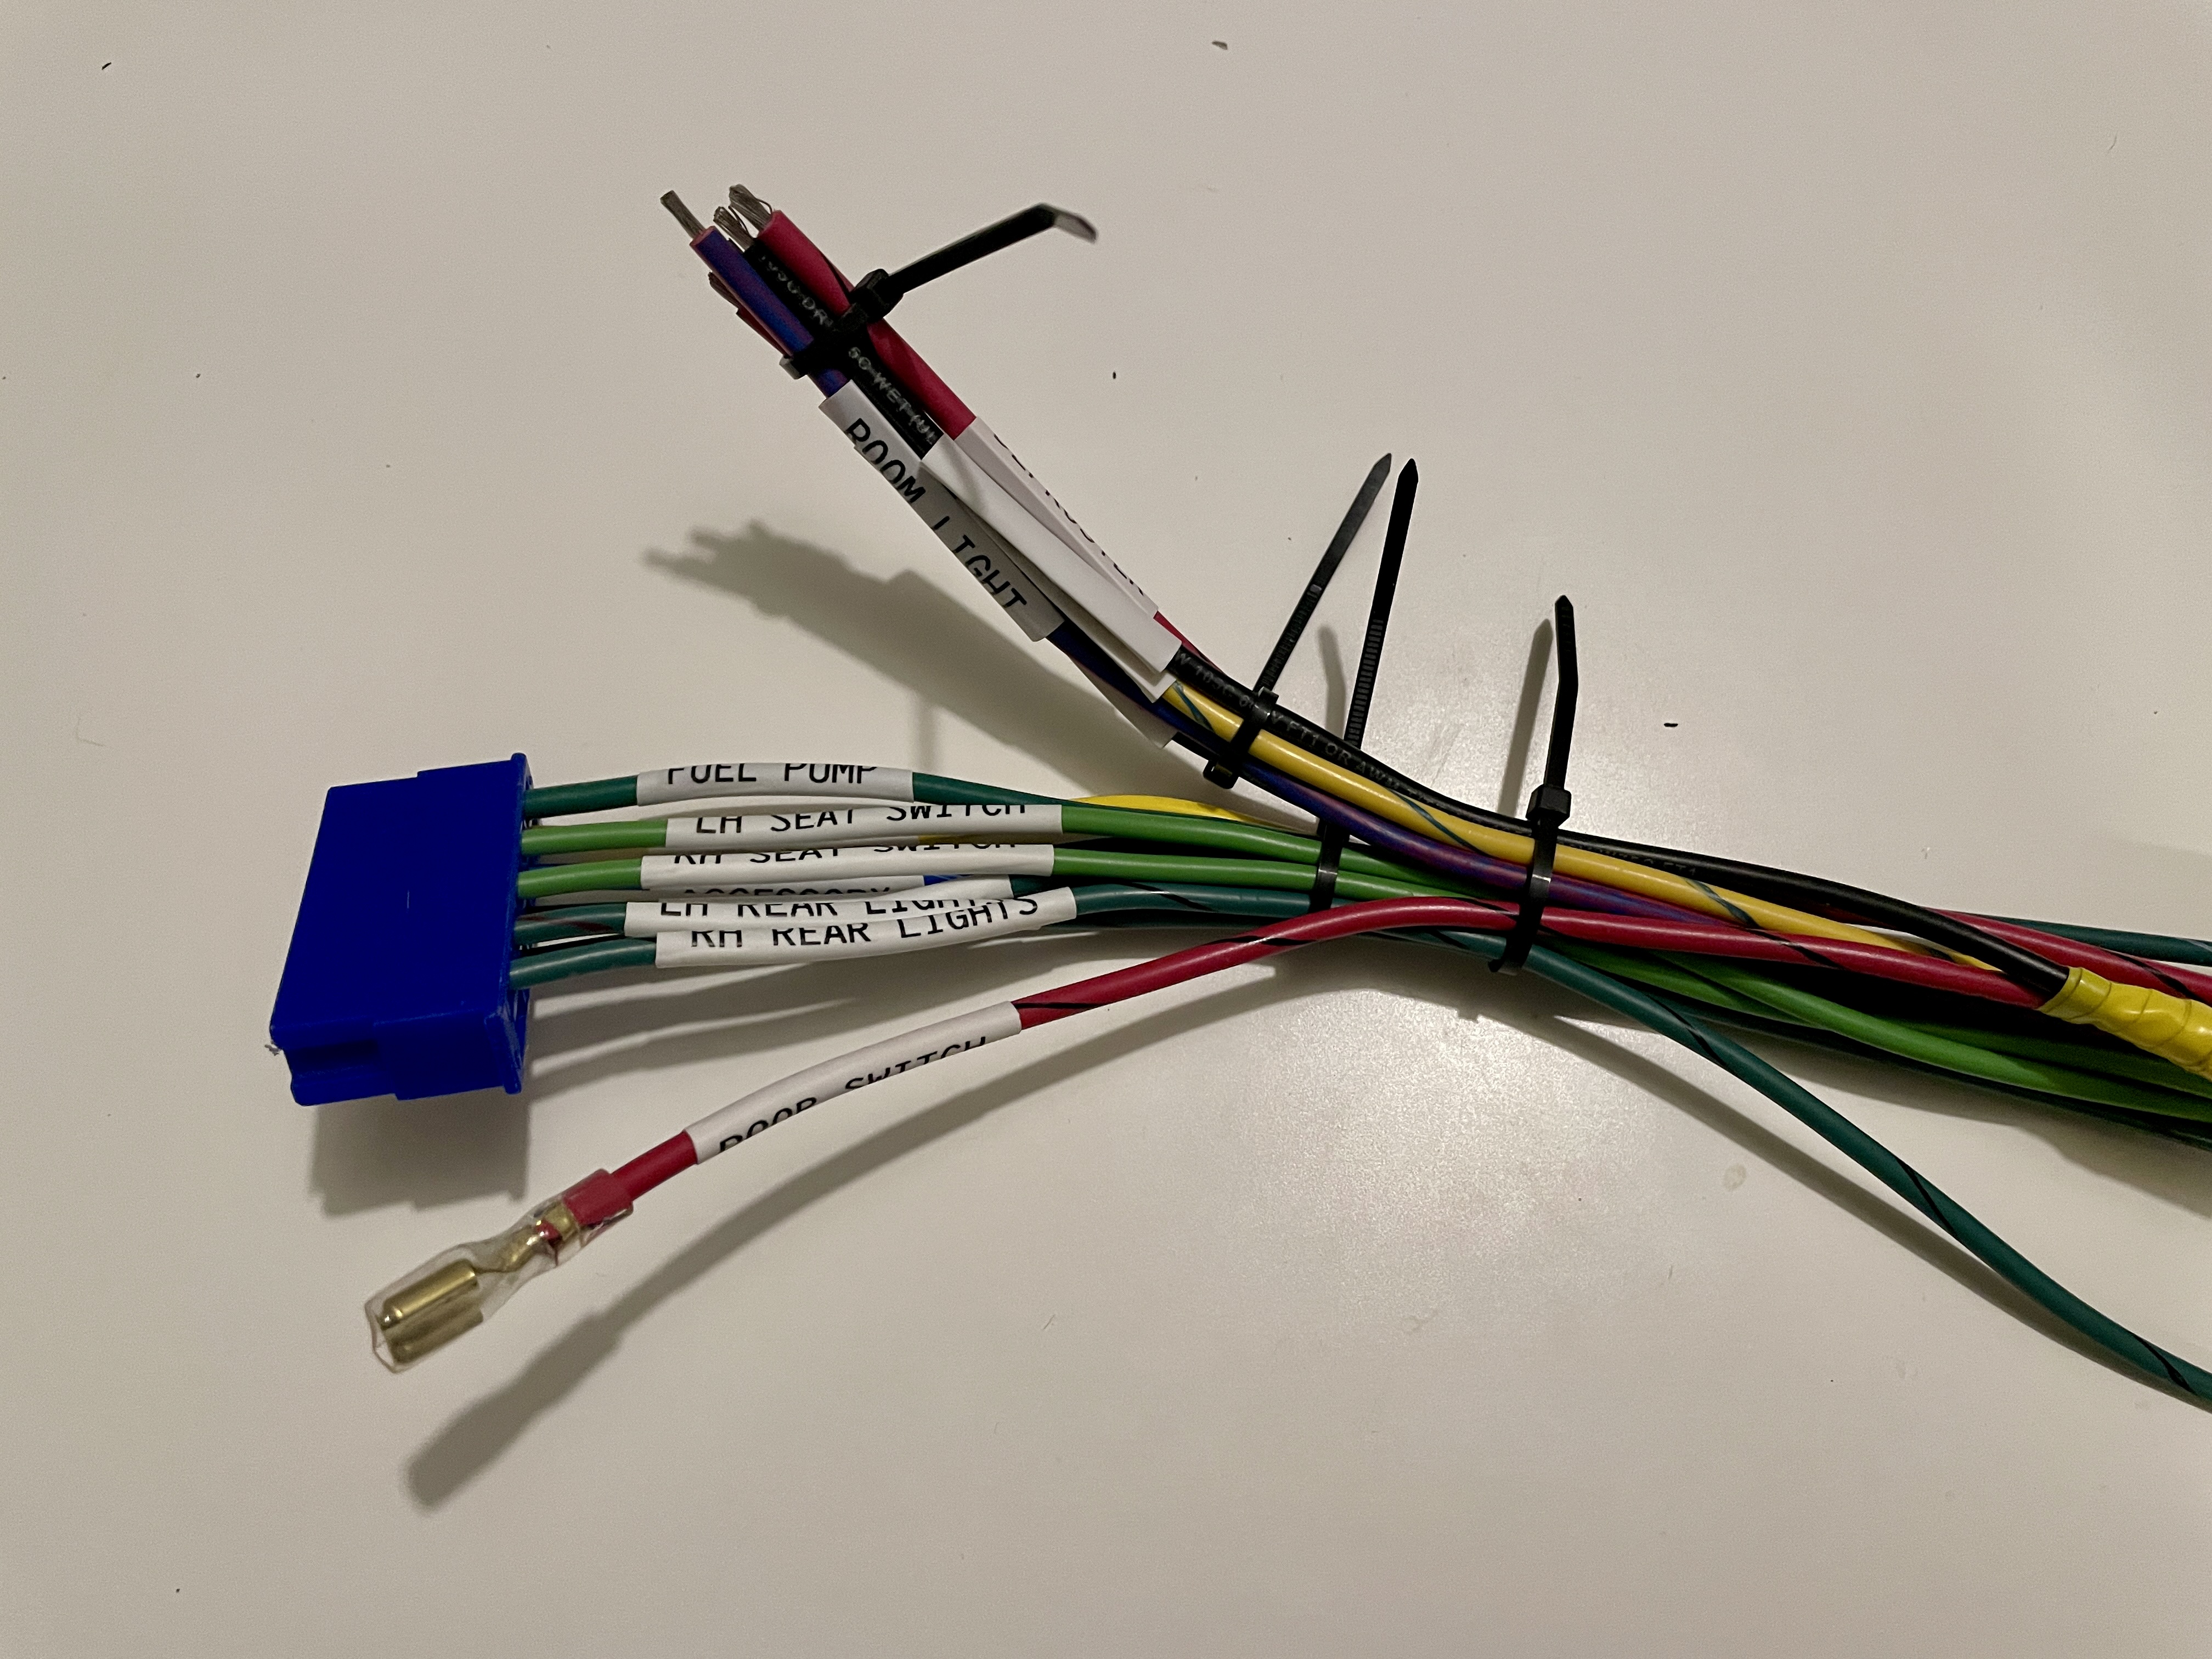
3 pointsI’m well and truly in it now! I put the OEM color coded connector onto my new custom body harness, so I’m committed. No problems really other than putting the first terminal on upside down so the label wouldn’t have been visible. It was a pain to get off so I know my crimps are good. 😁👍🏻 Now I know not to shrink the labels until after the terminals are on the wire and properly aligned to the connector. The shrink wrap labels are what I’m really showcasing here, though. I got this trick from a guy I knew in the IT team of one of my past jobs. They would label all of their Ethernet cables like this so they didn’t have to chase wires later. These HSE label cartridges are what was holding me up. I had ordered 5.8mm, which looked really clean and tidy but is too small for this marine wire with it’s crazy thick insulation, so I had to order some 8.8mm. But it’s a breeze to put on. The only thing I would improve is making the label maker print on both sides, which is too much to ask for low end office equipment. Heres my test fit with the 8.8:


 3 points
 -
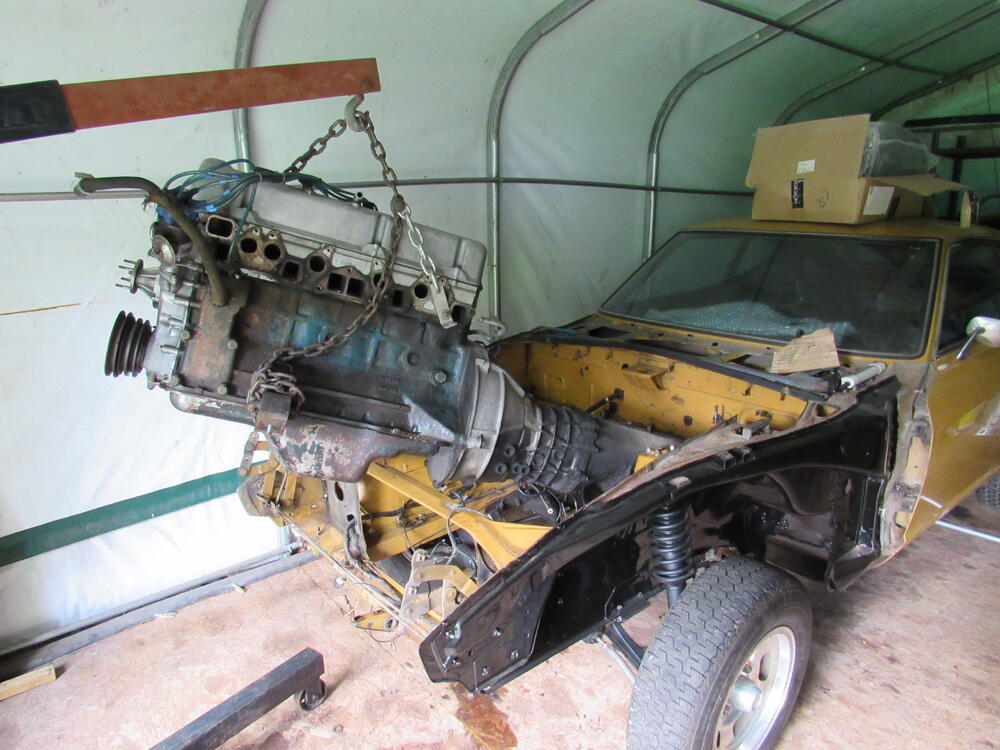
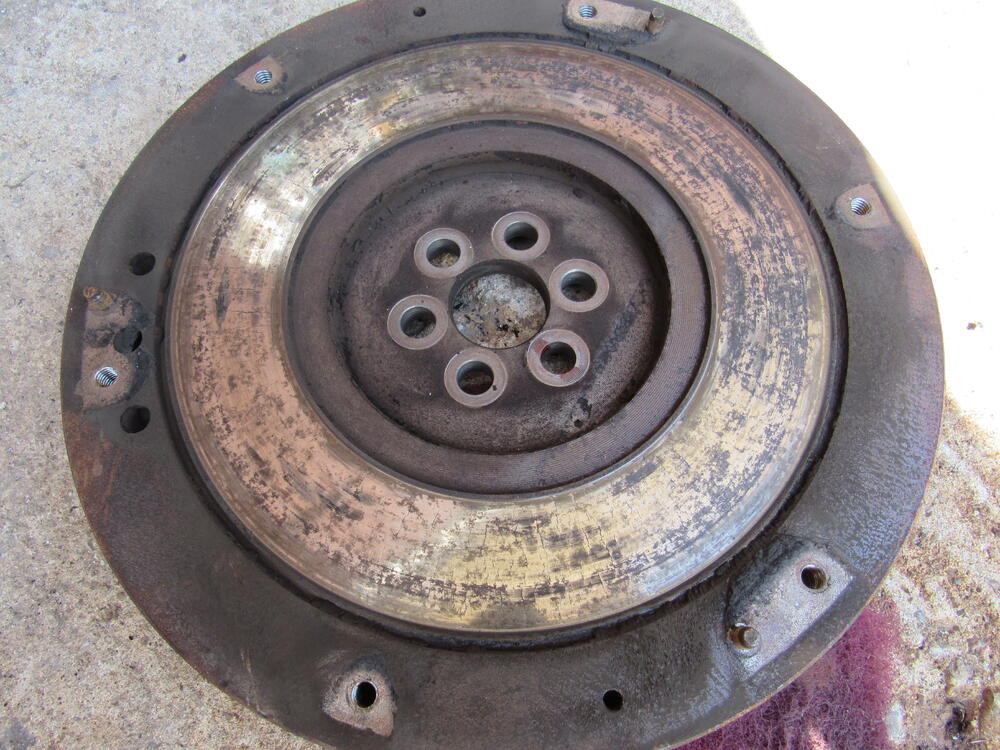
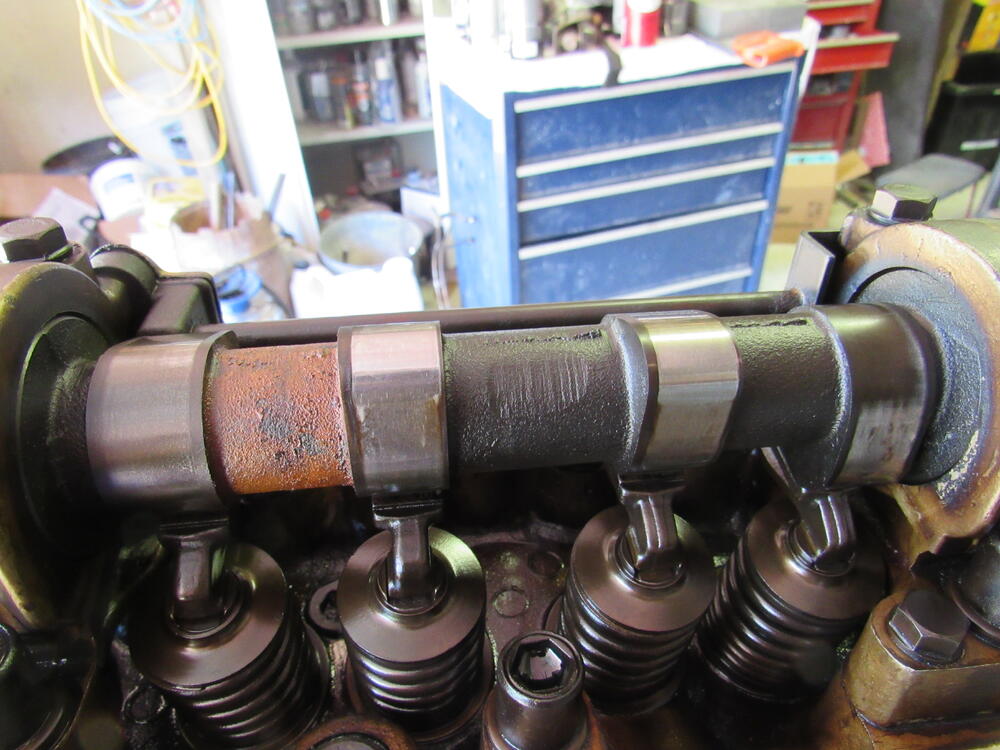
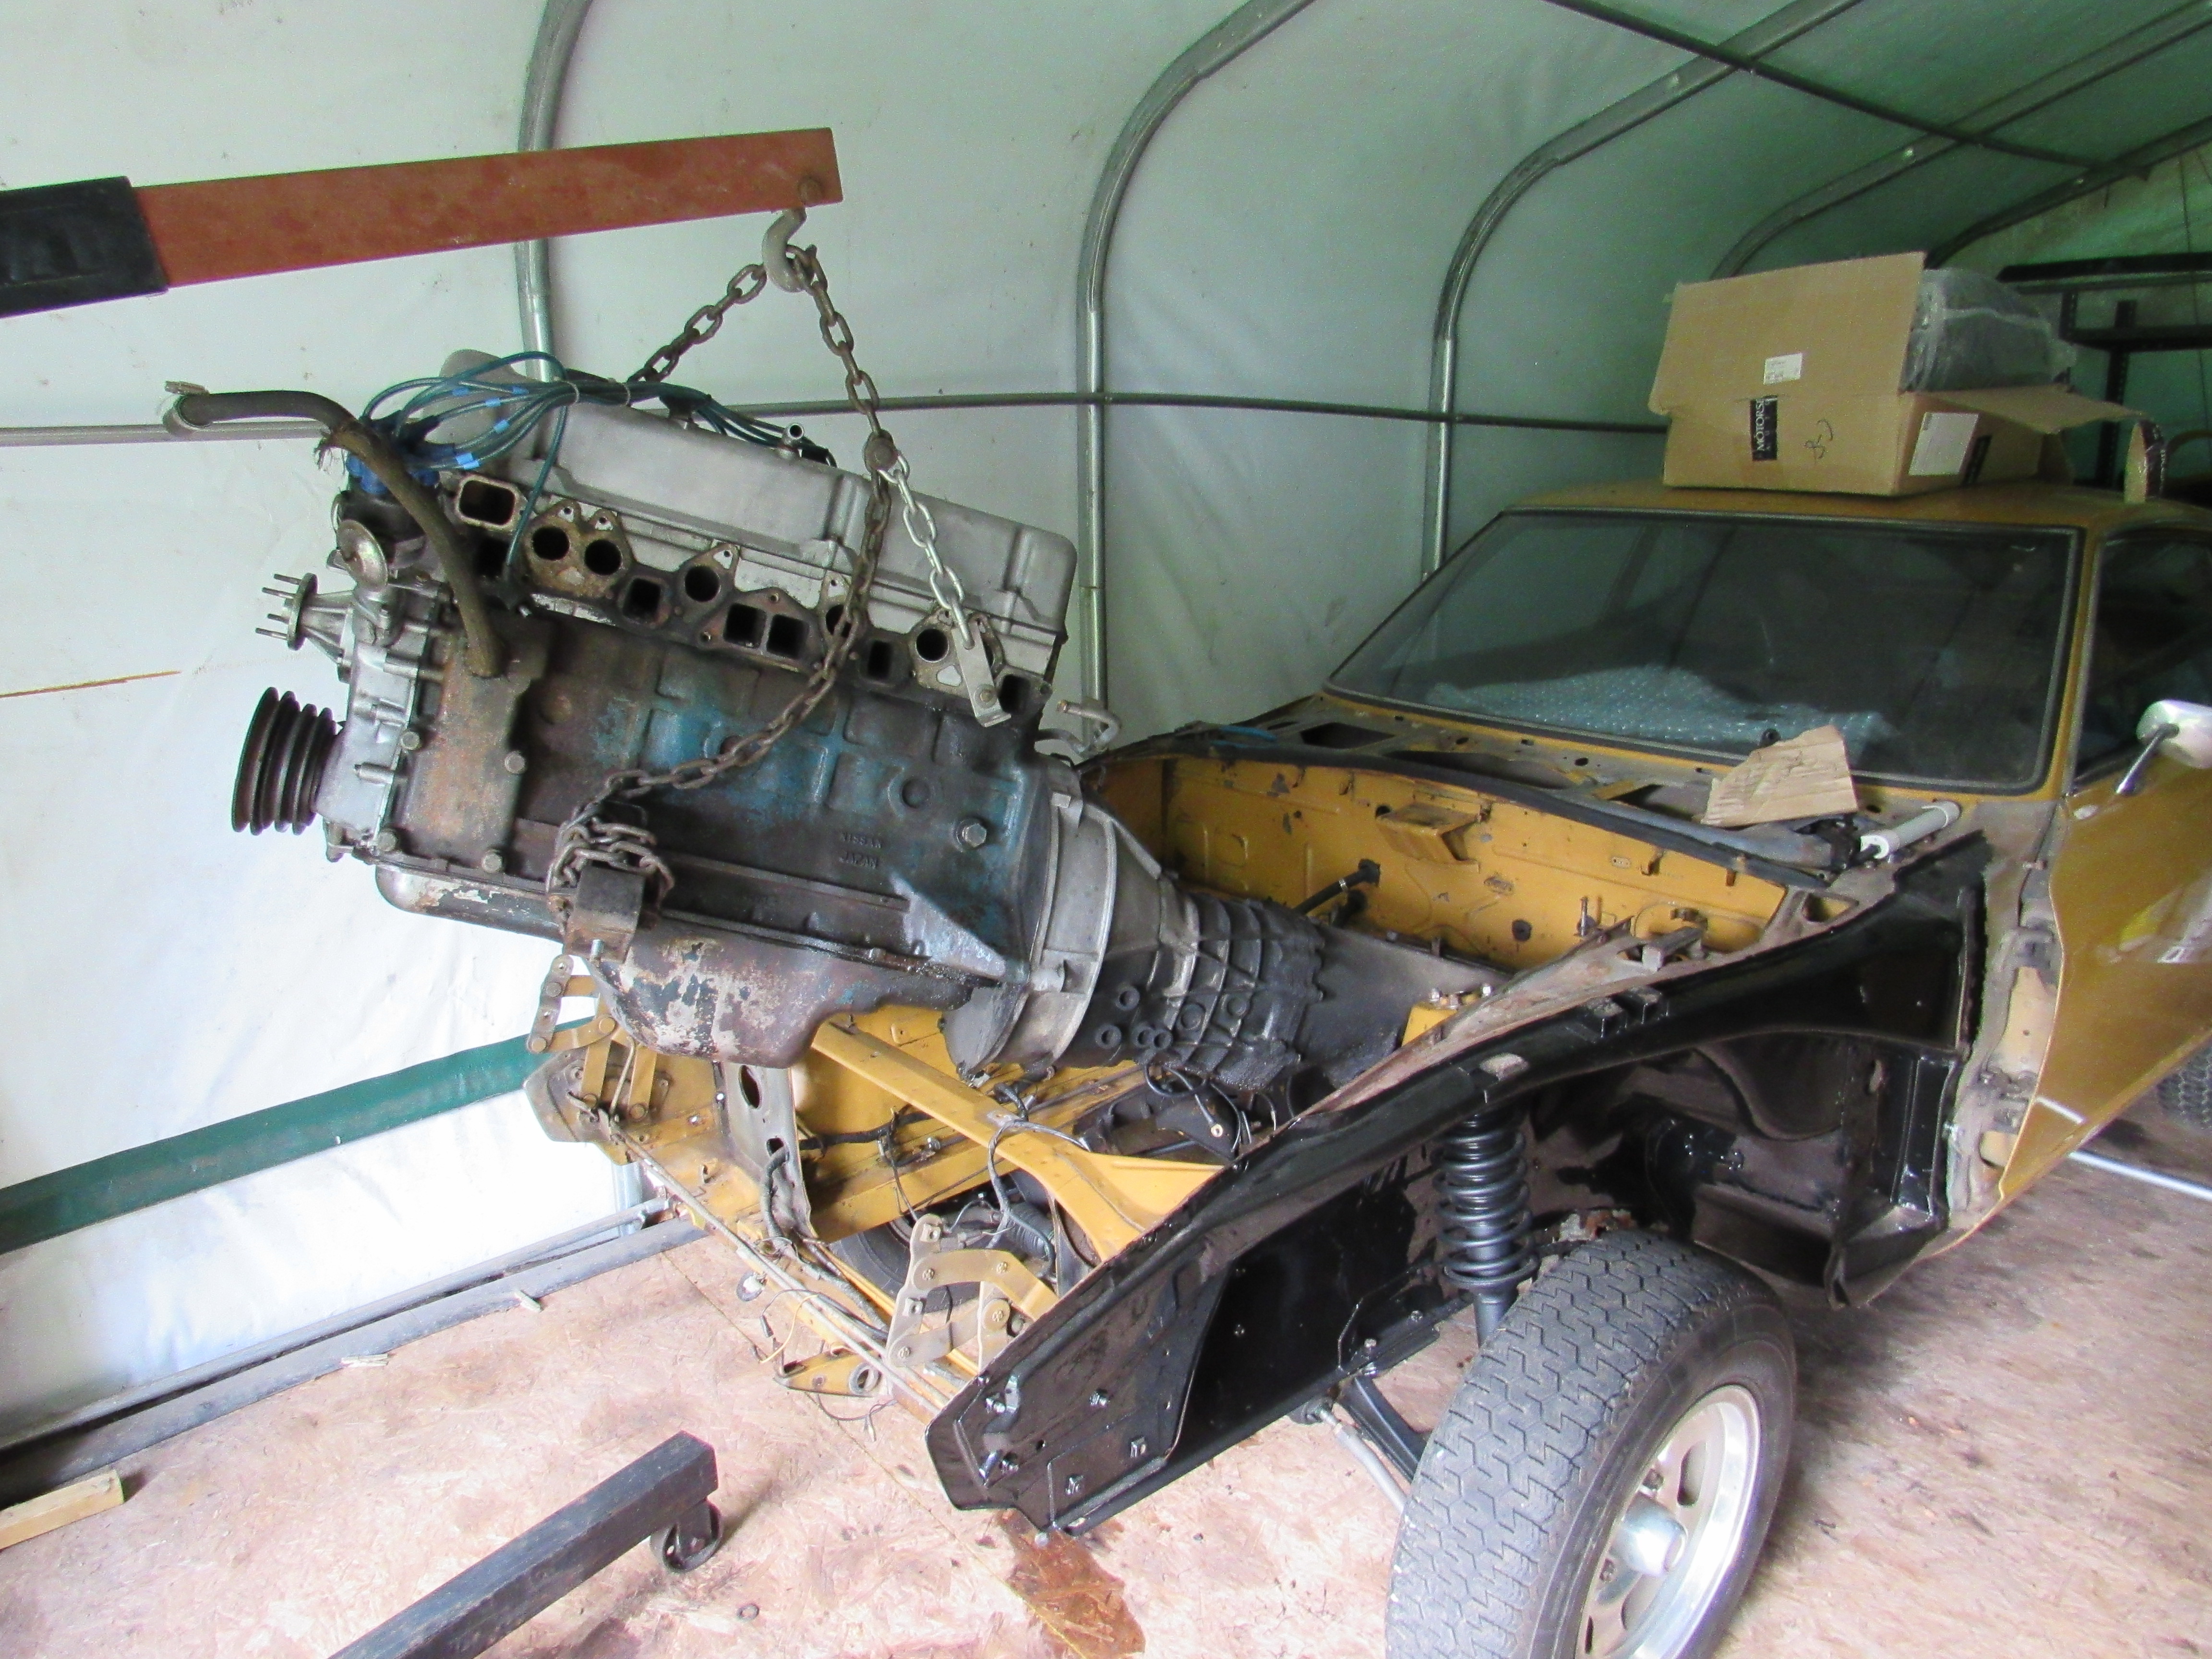
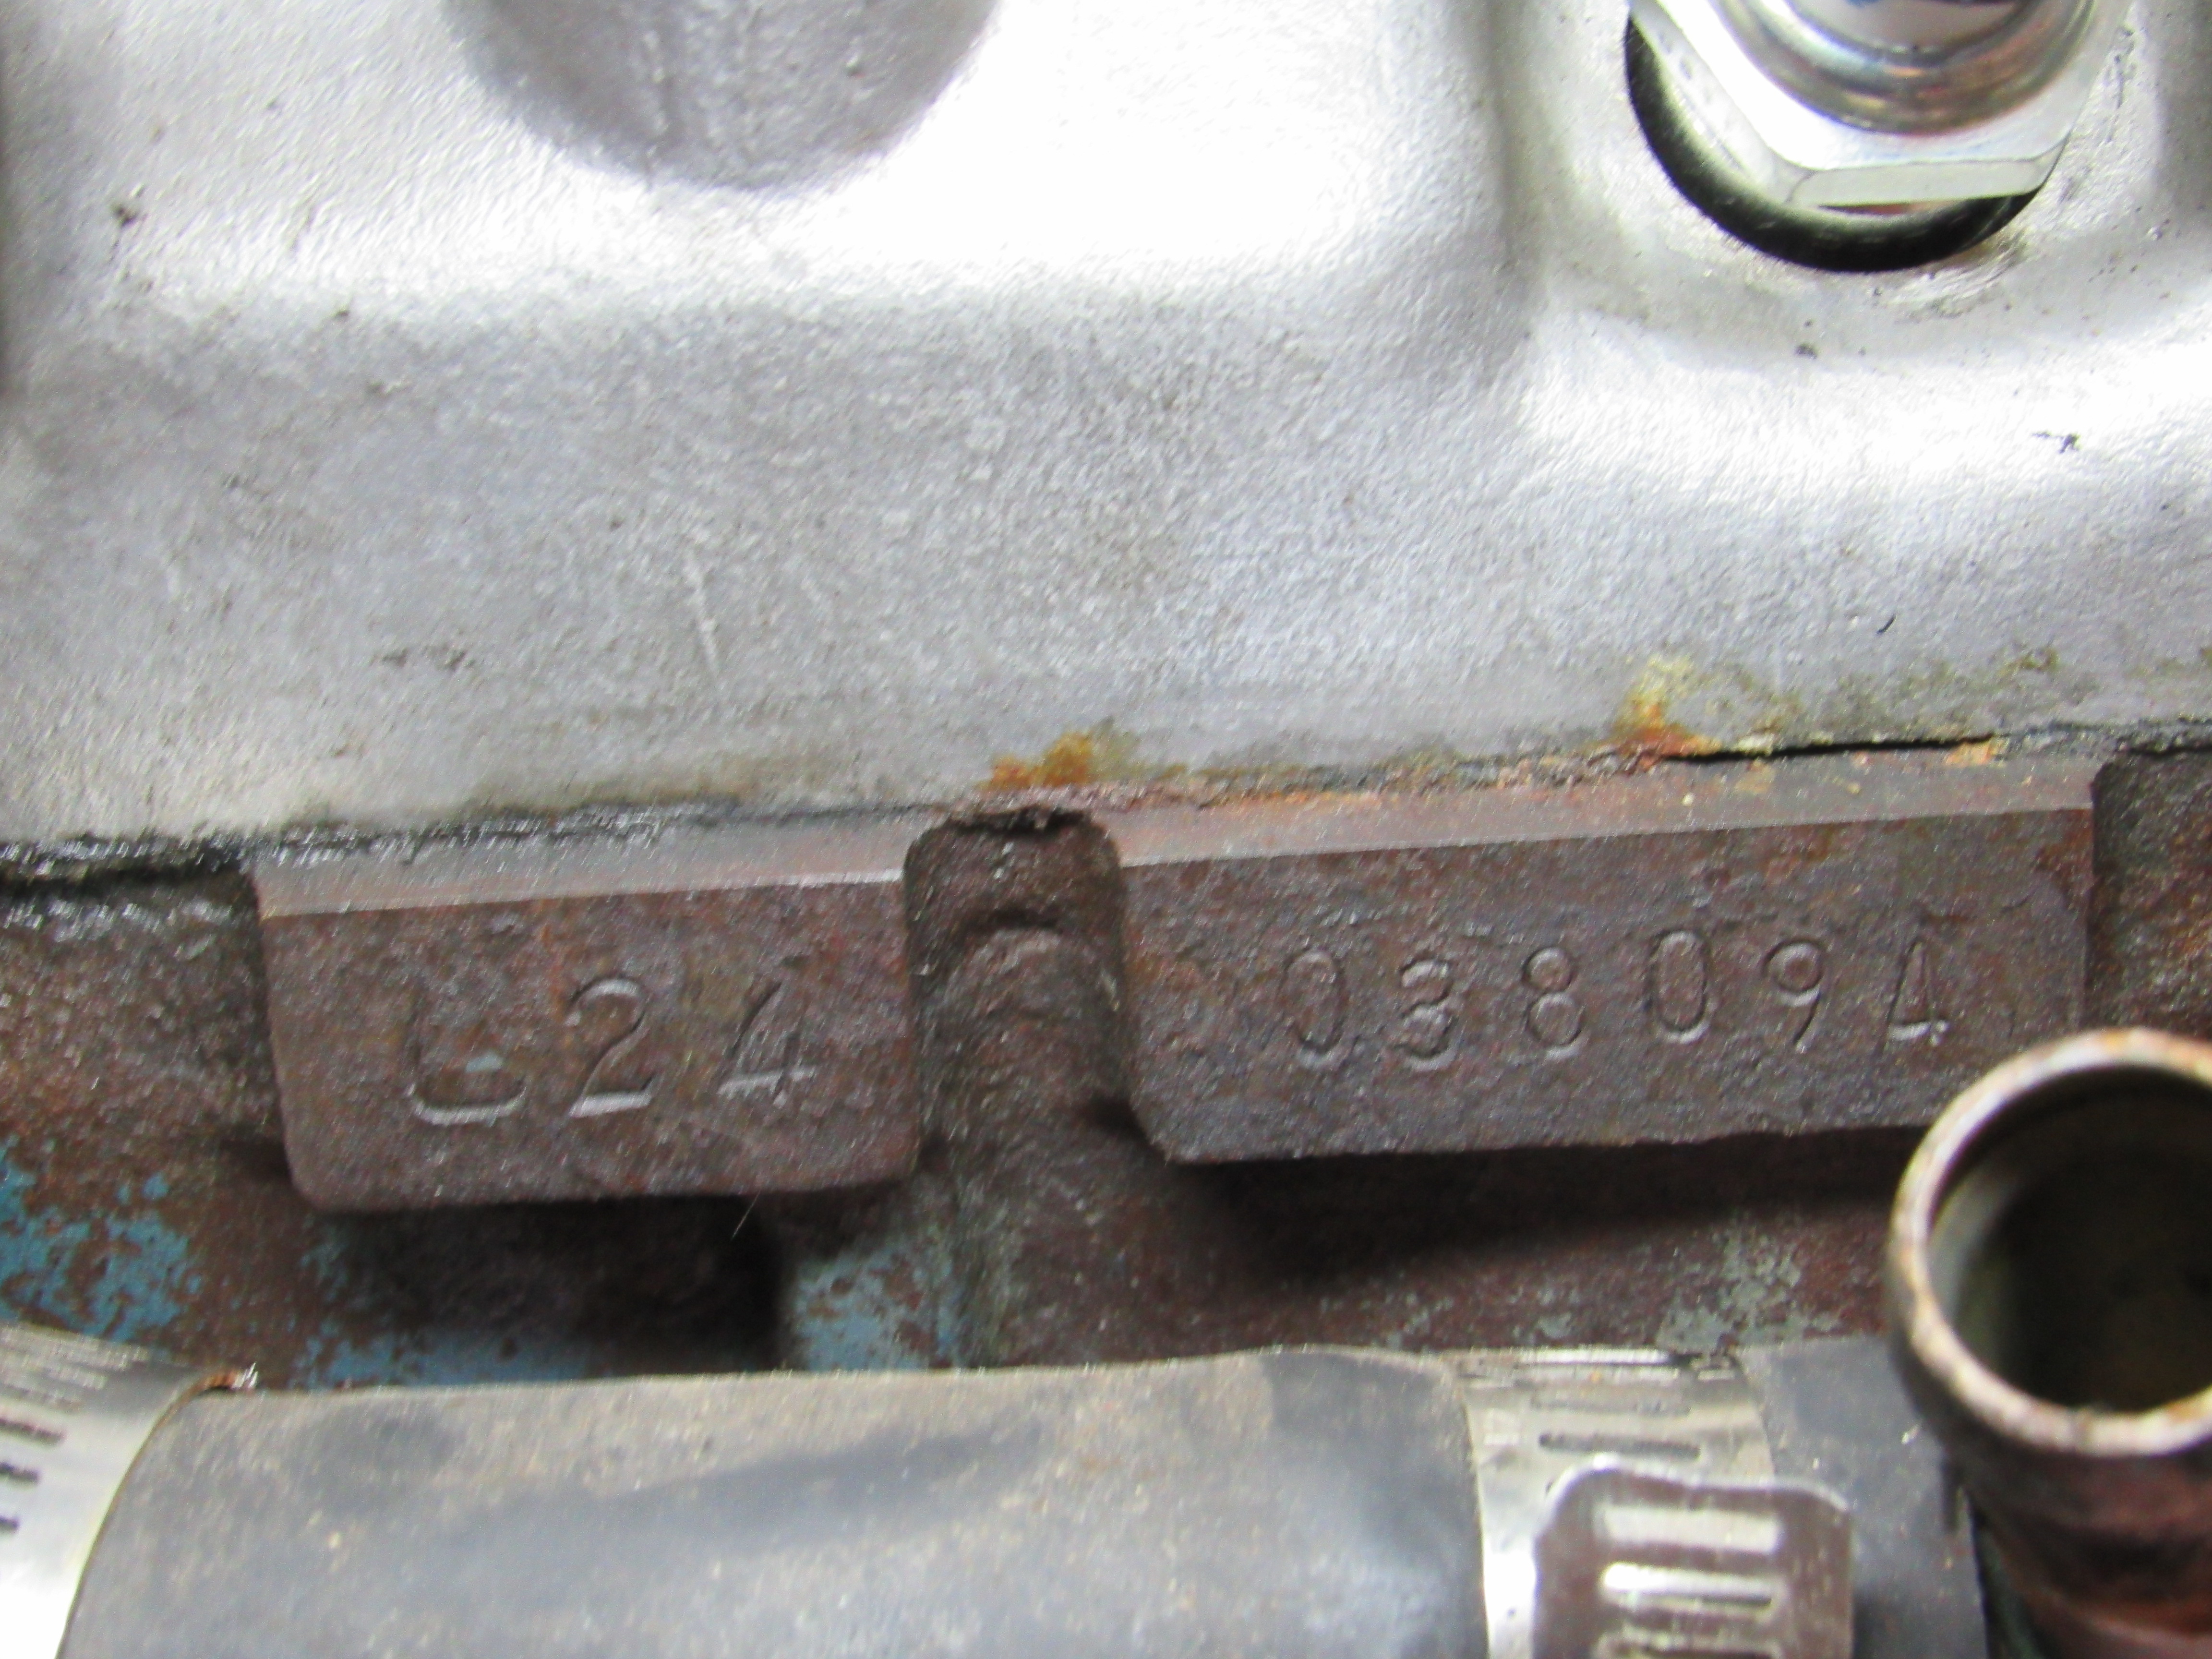
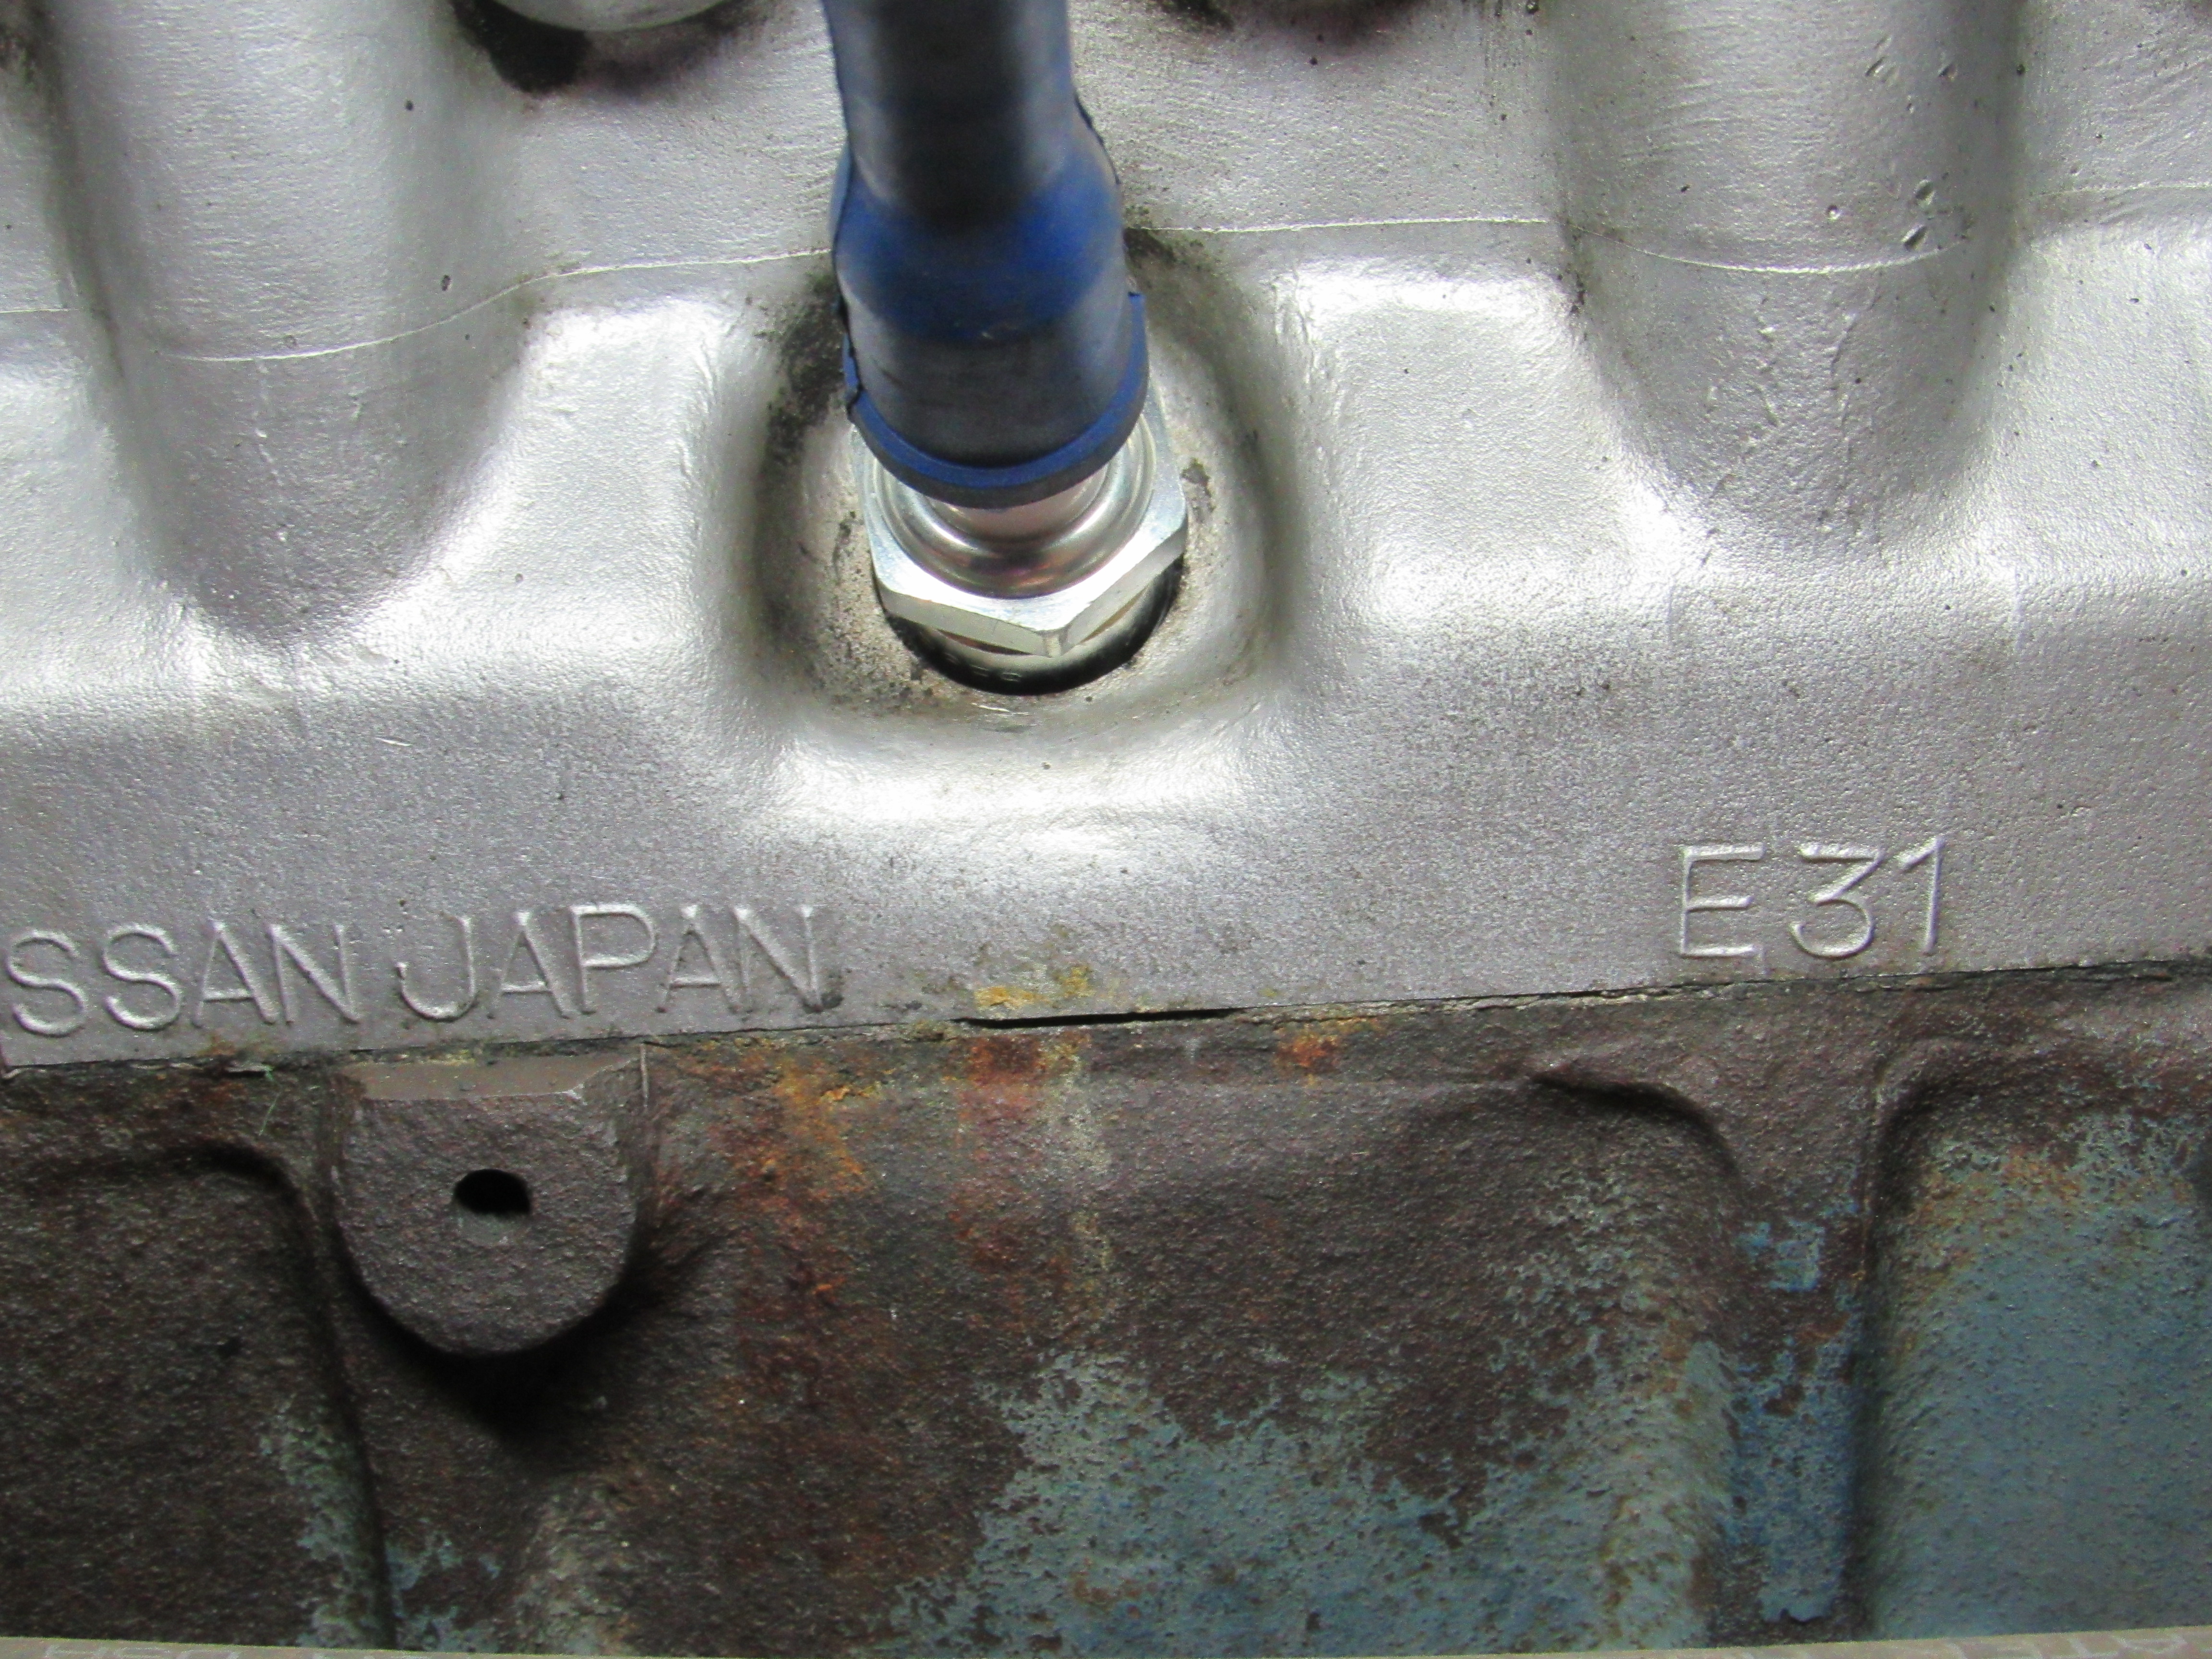
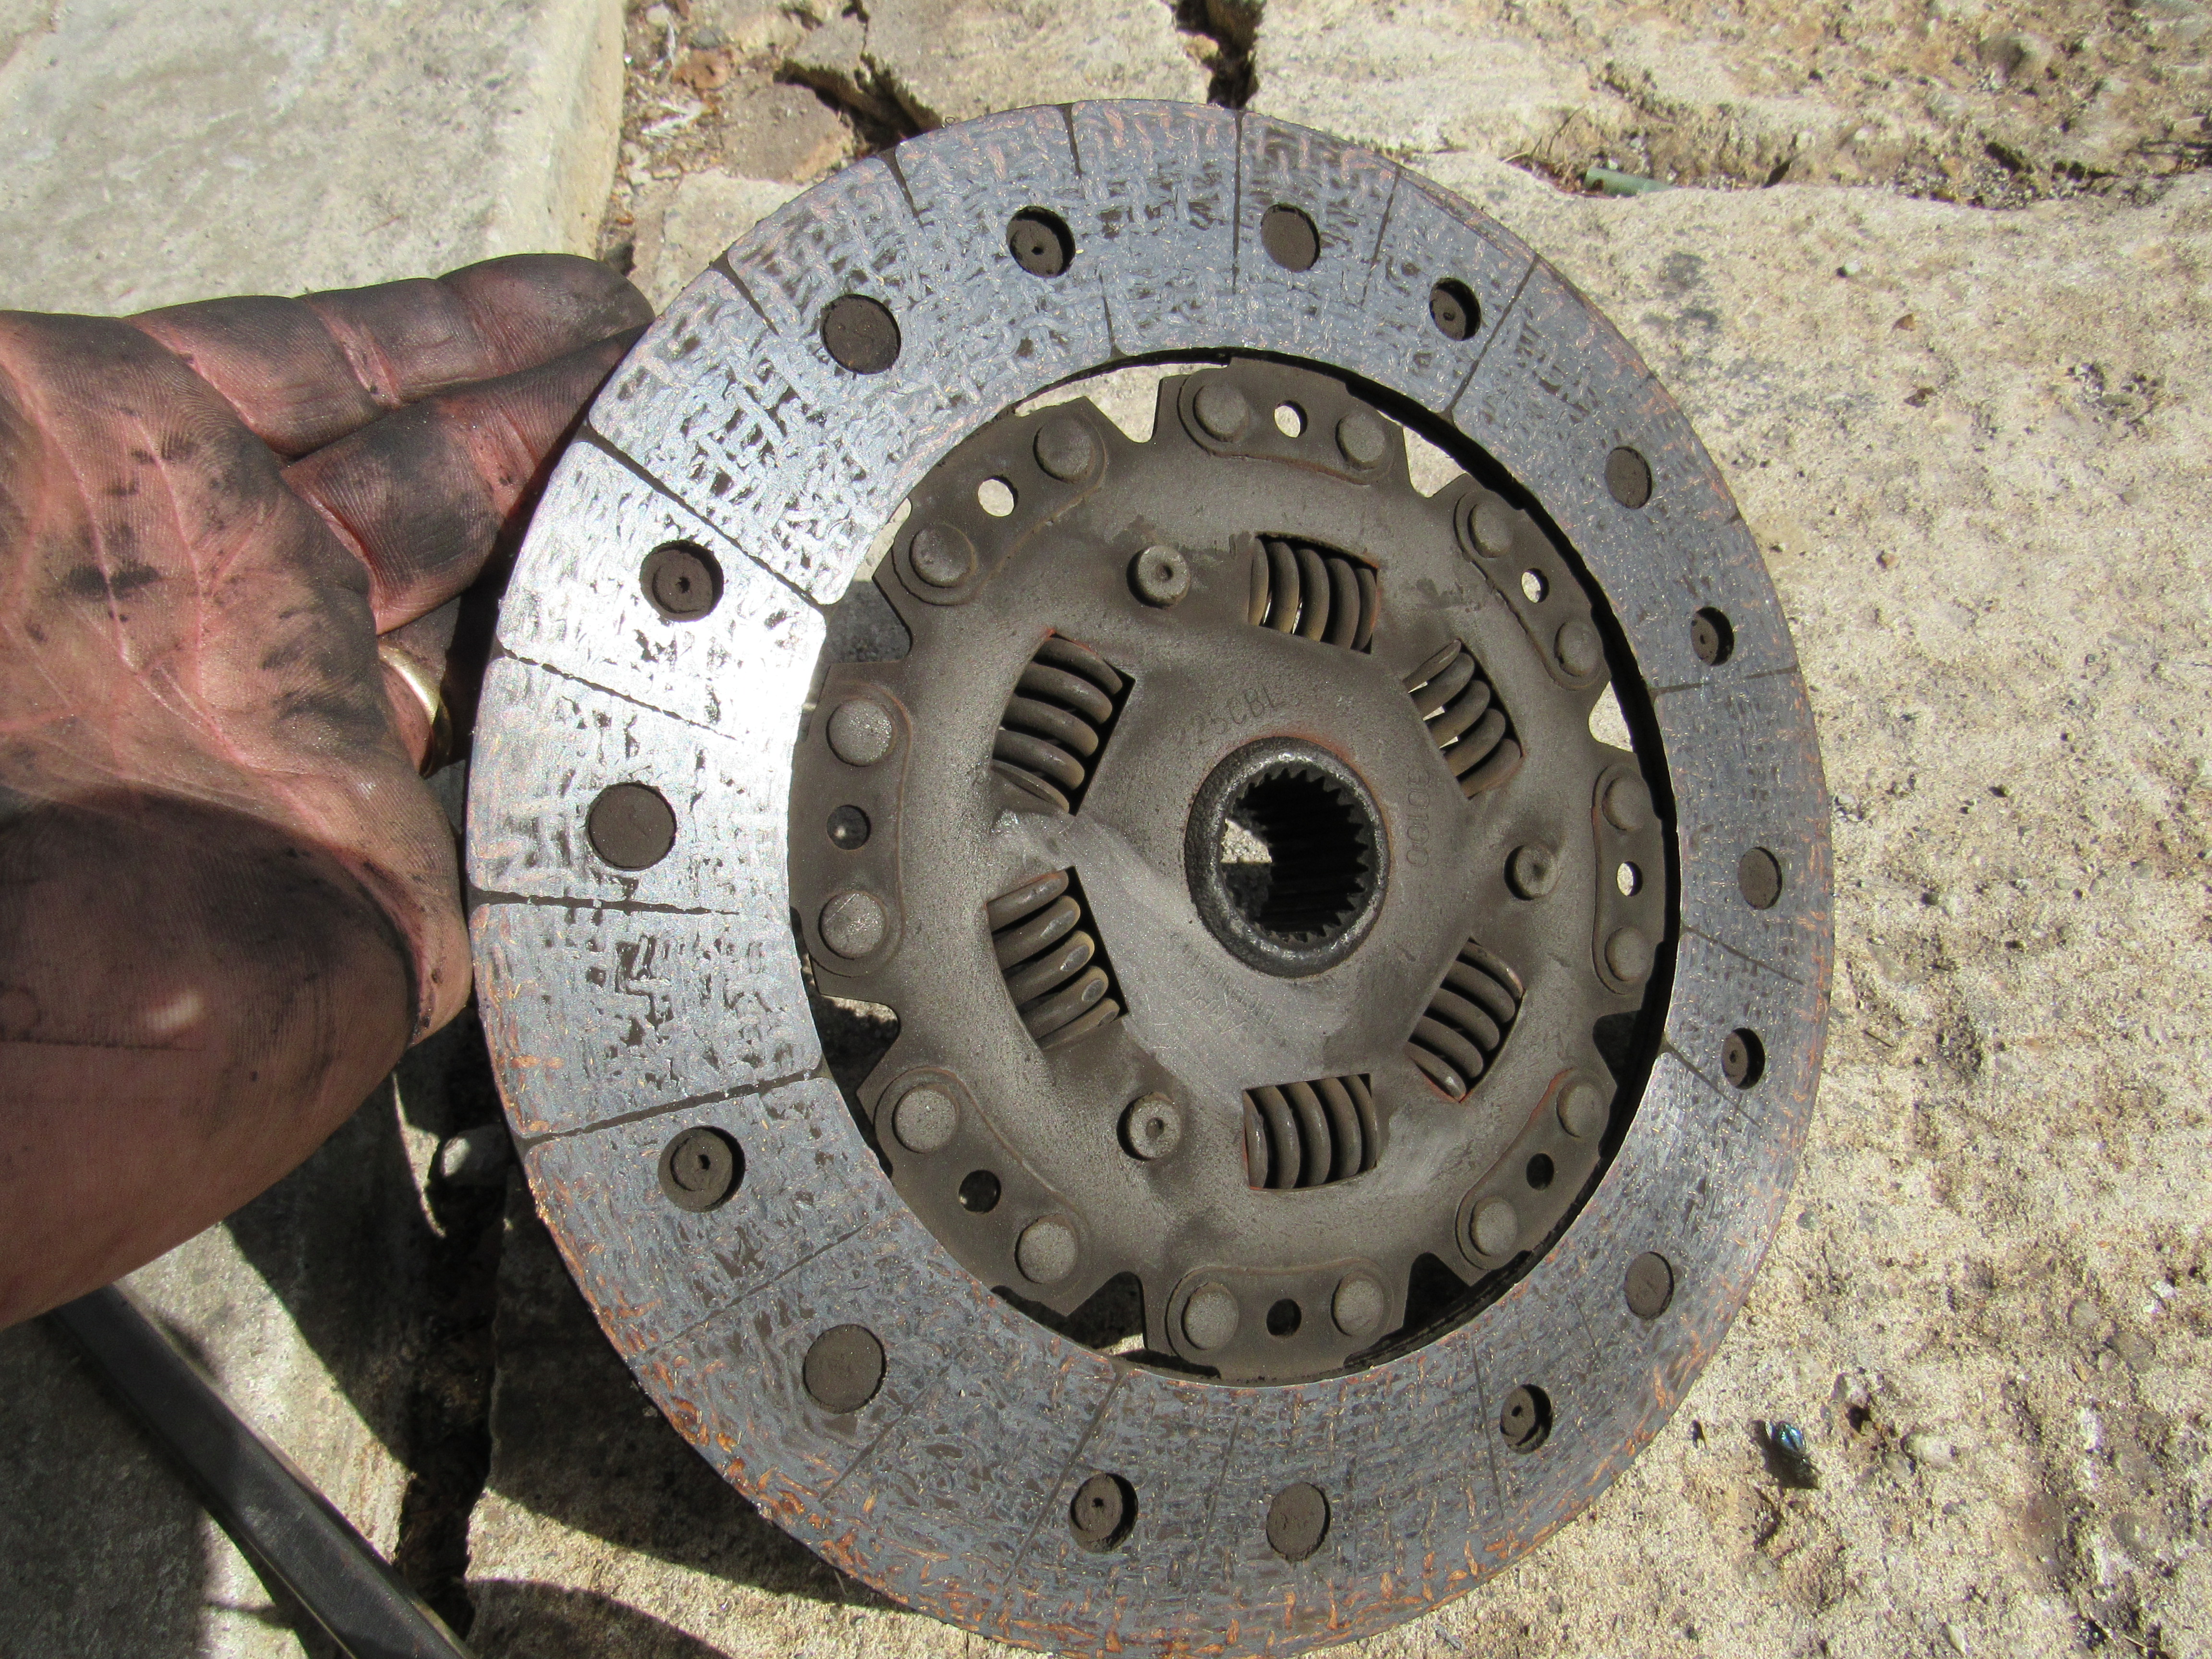
2 pointsI got the engine and trans pulled this morning, up to the shop on the engine stand. Dave, looks like you got your moneys worth out of the clutch, the release bearing was kind of crunchy, not sure the flywheel can be saved either. All the lobes on the cam are in very nice condition, no real wear, underneath 50+ years of grease and dirt is some of the assembly line marker paint.


 2 points
 -
2 pointsThis is also a good resource for comparison of needles http://www.mintylamb.co.uk/suneedle/2 points
-
2 pointsSome time back I found a site that has a "0.100" SU needle search interface". Teglerizer.com/cgi-bin/needle100db.cgi. If the page appears blank, scroll down to the bottom.2 points
-
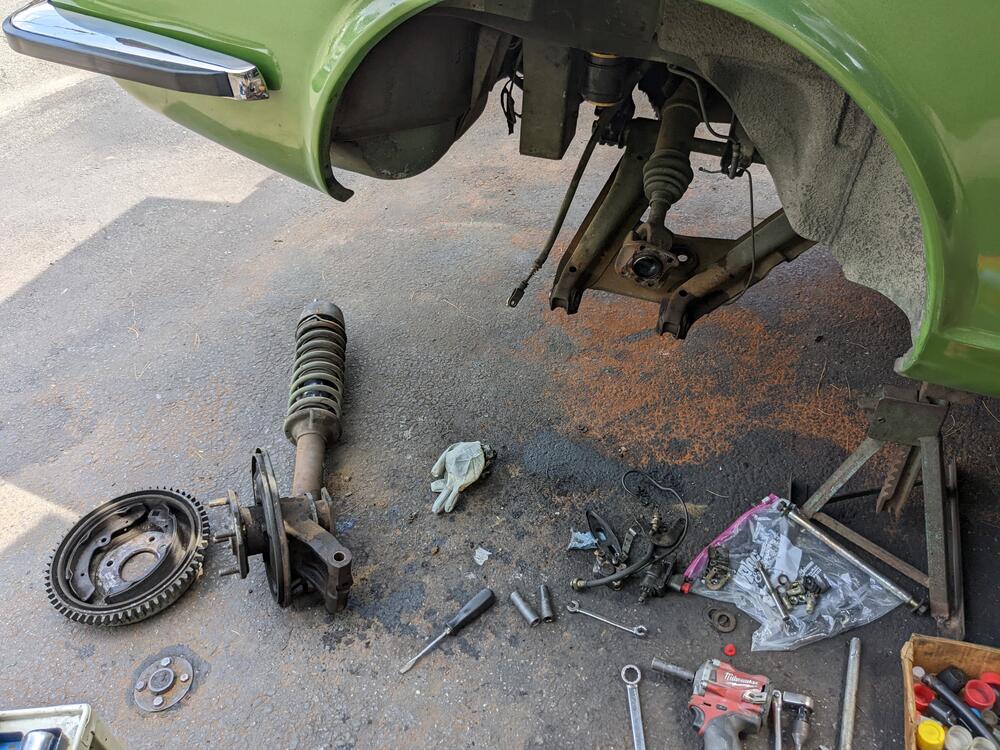
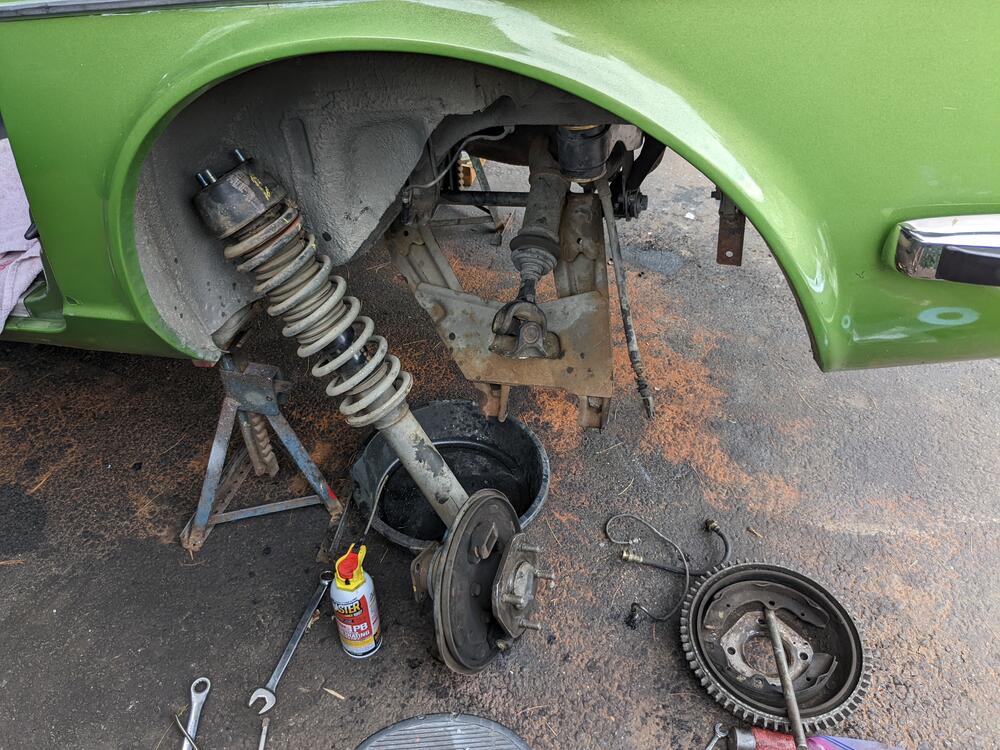
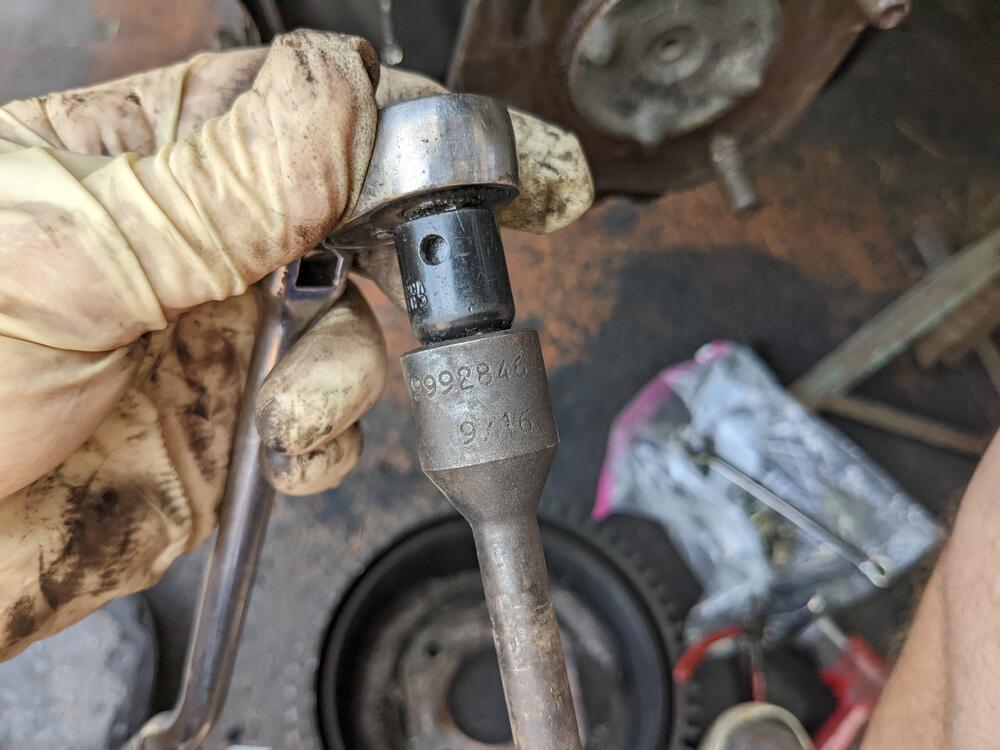
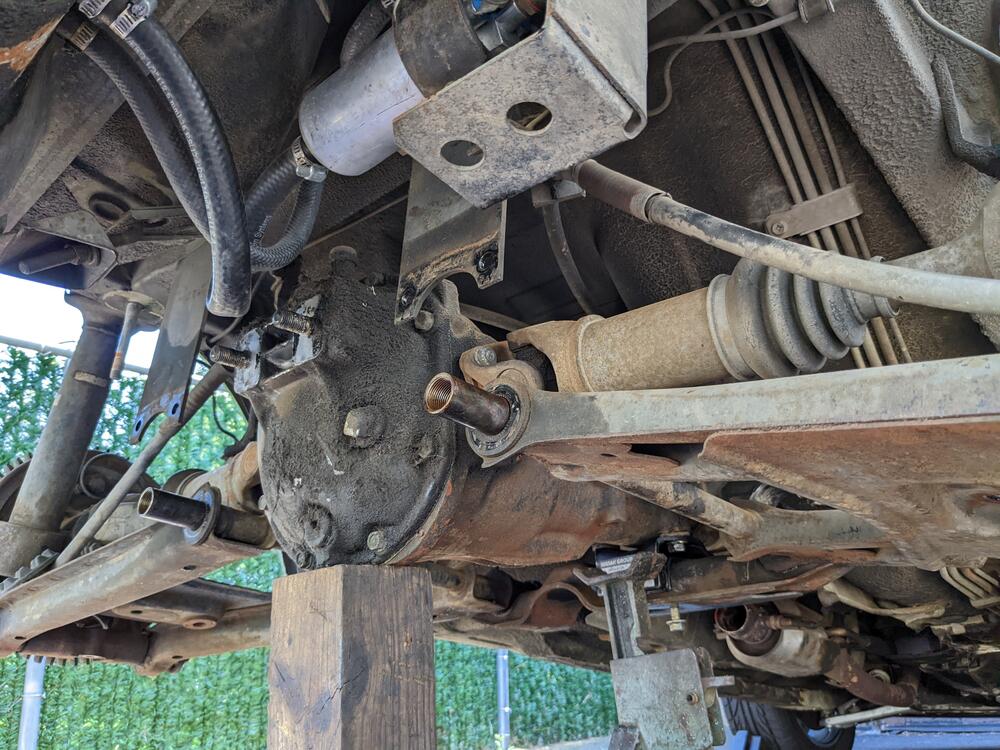
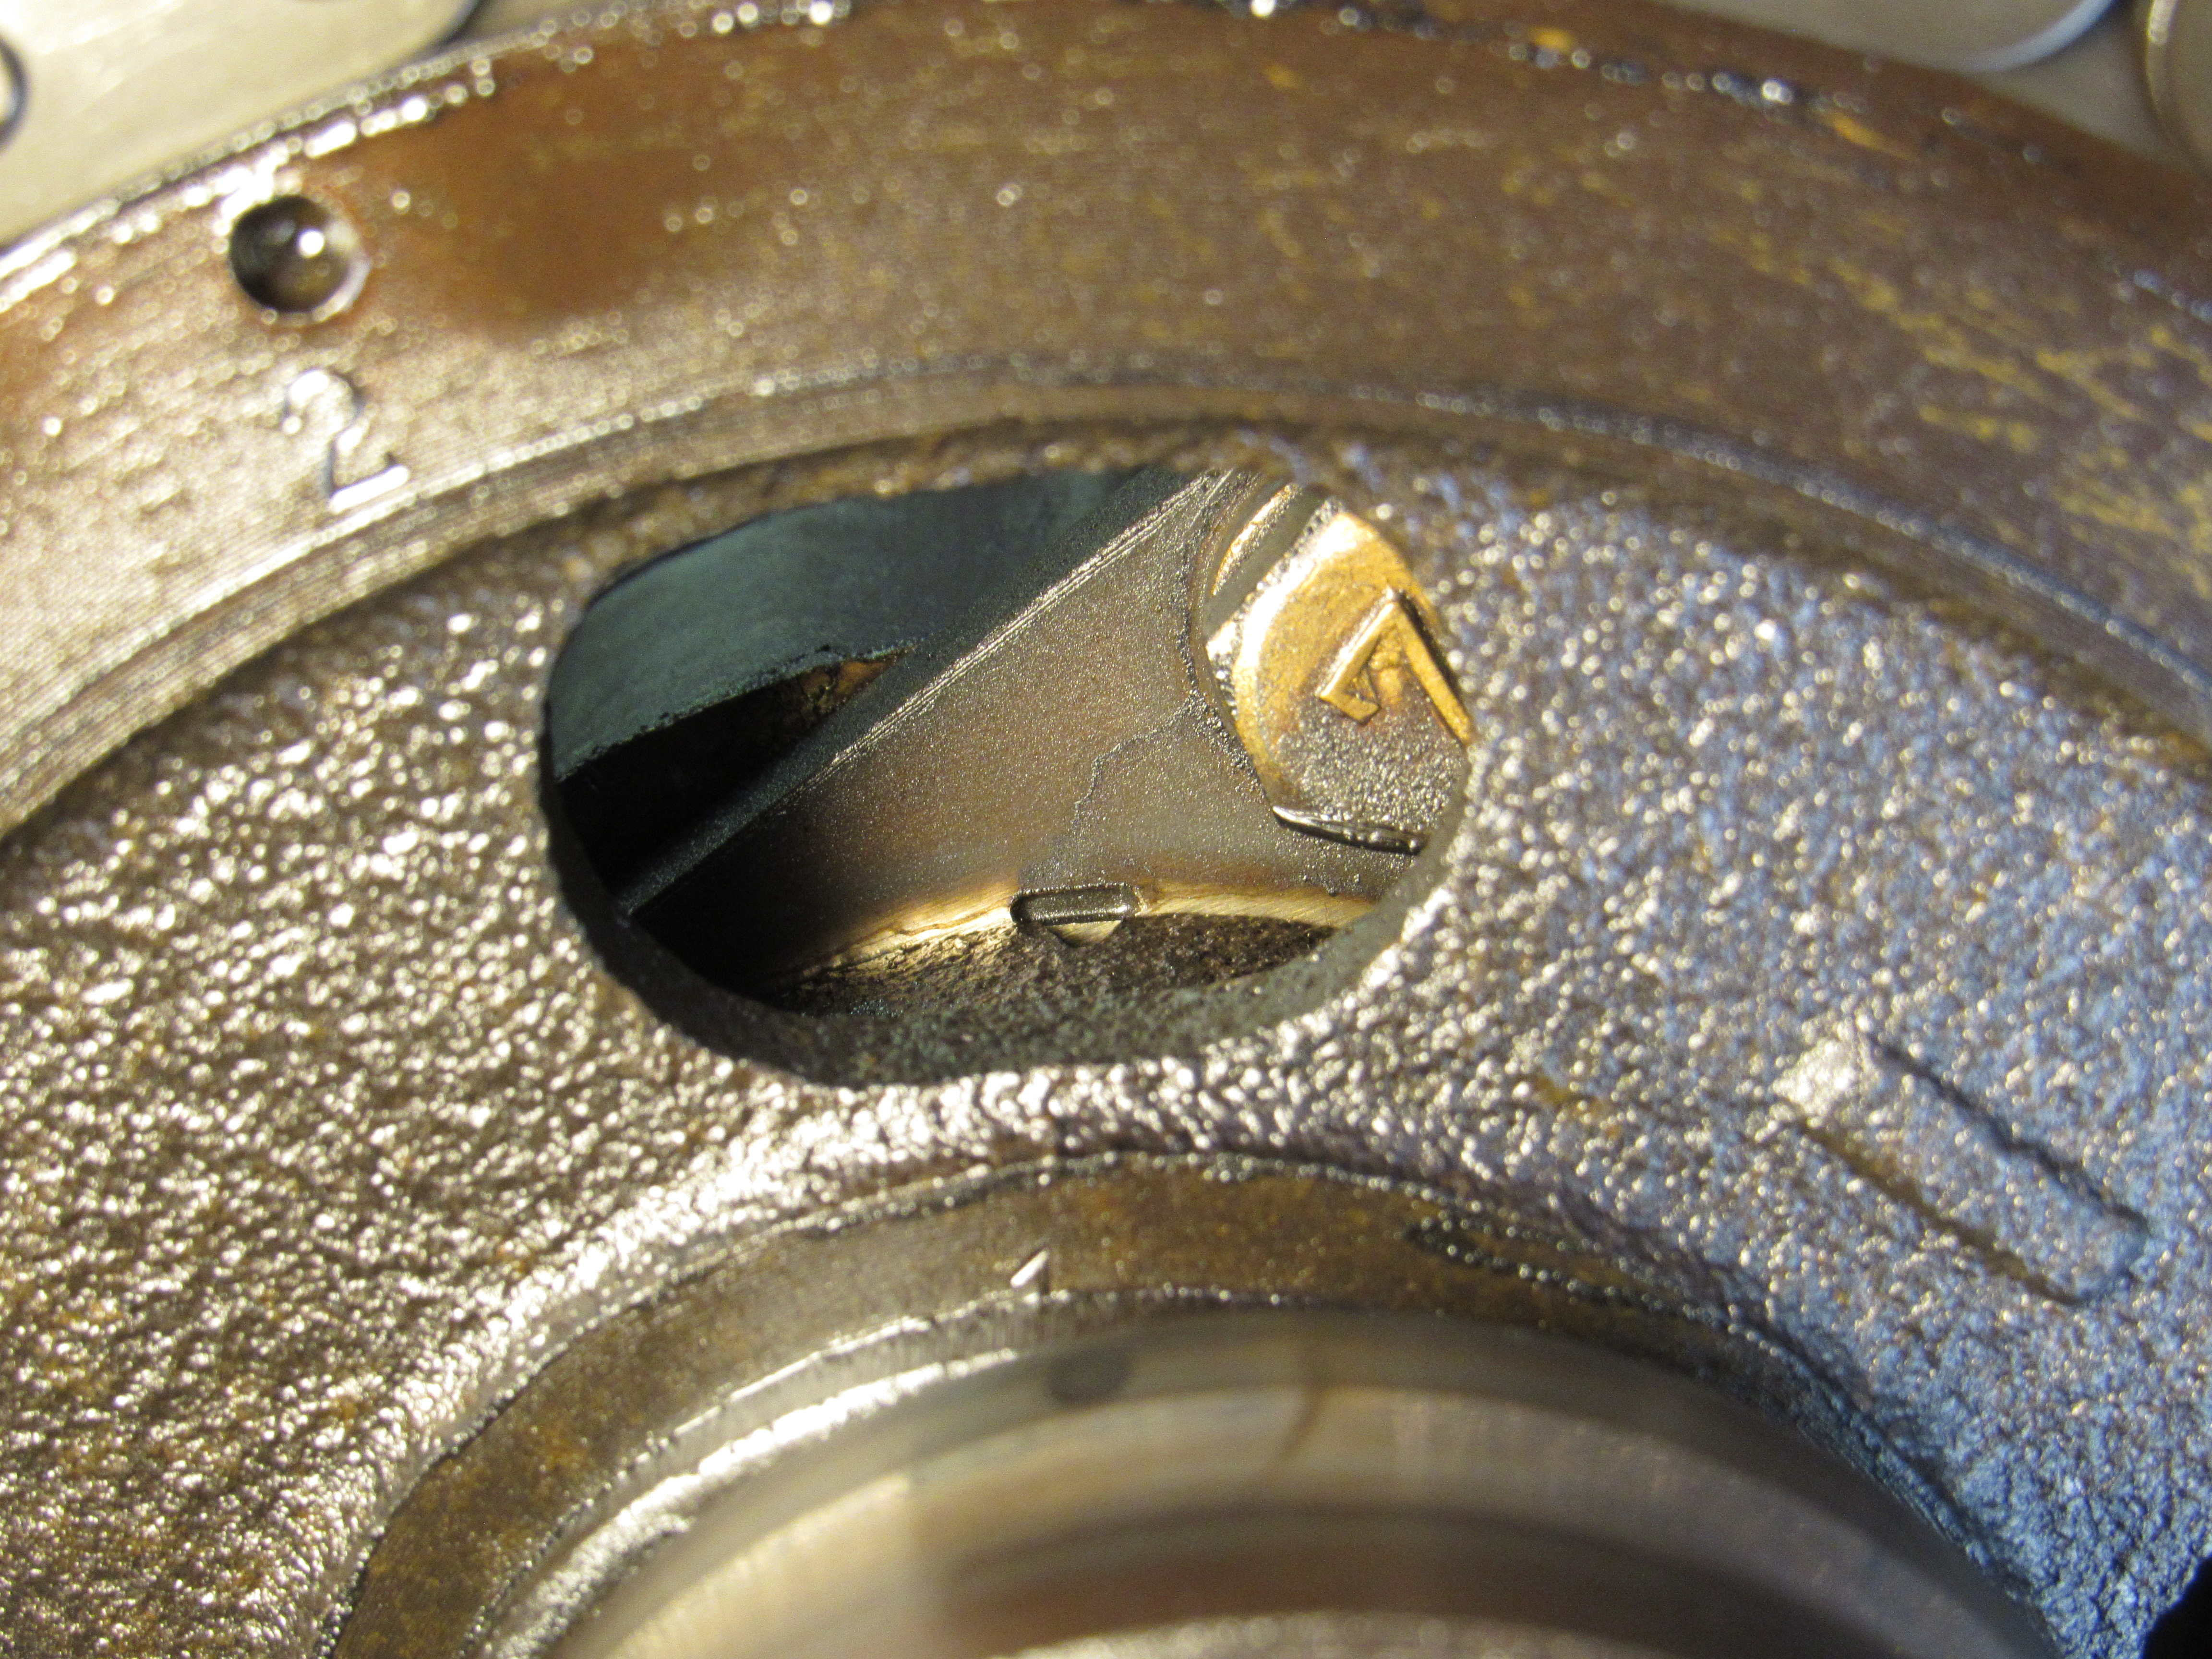
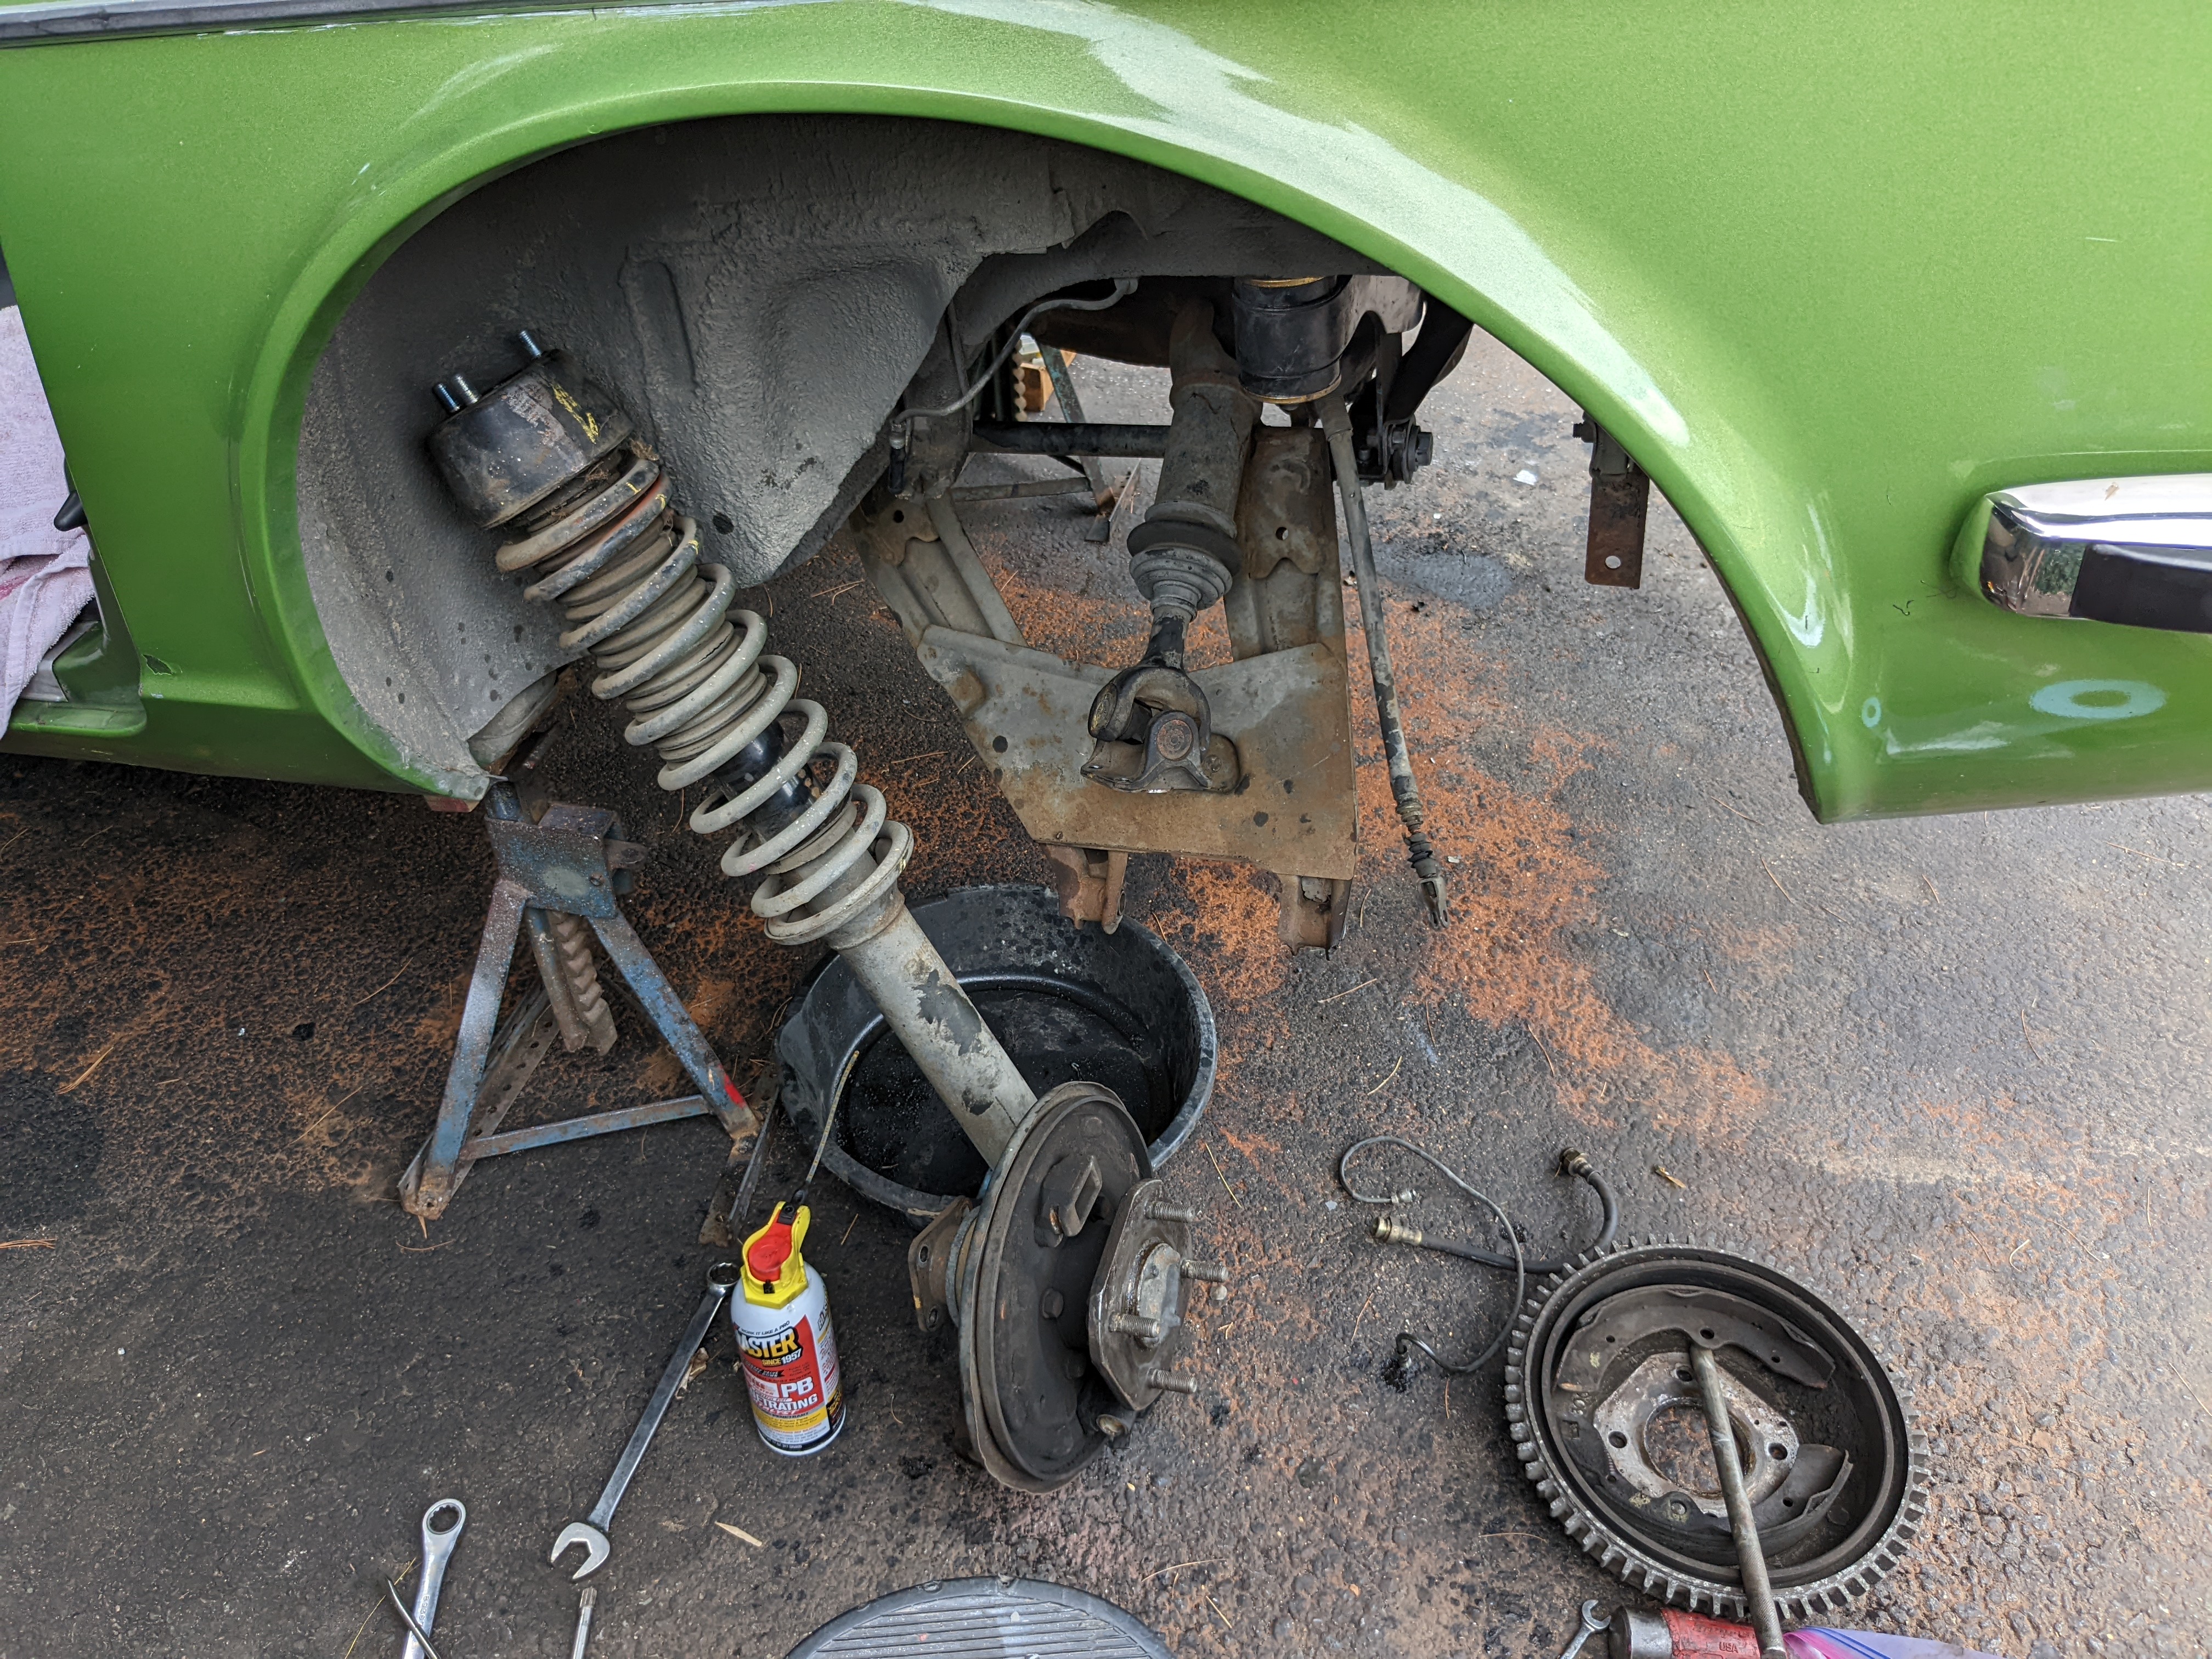
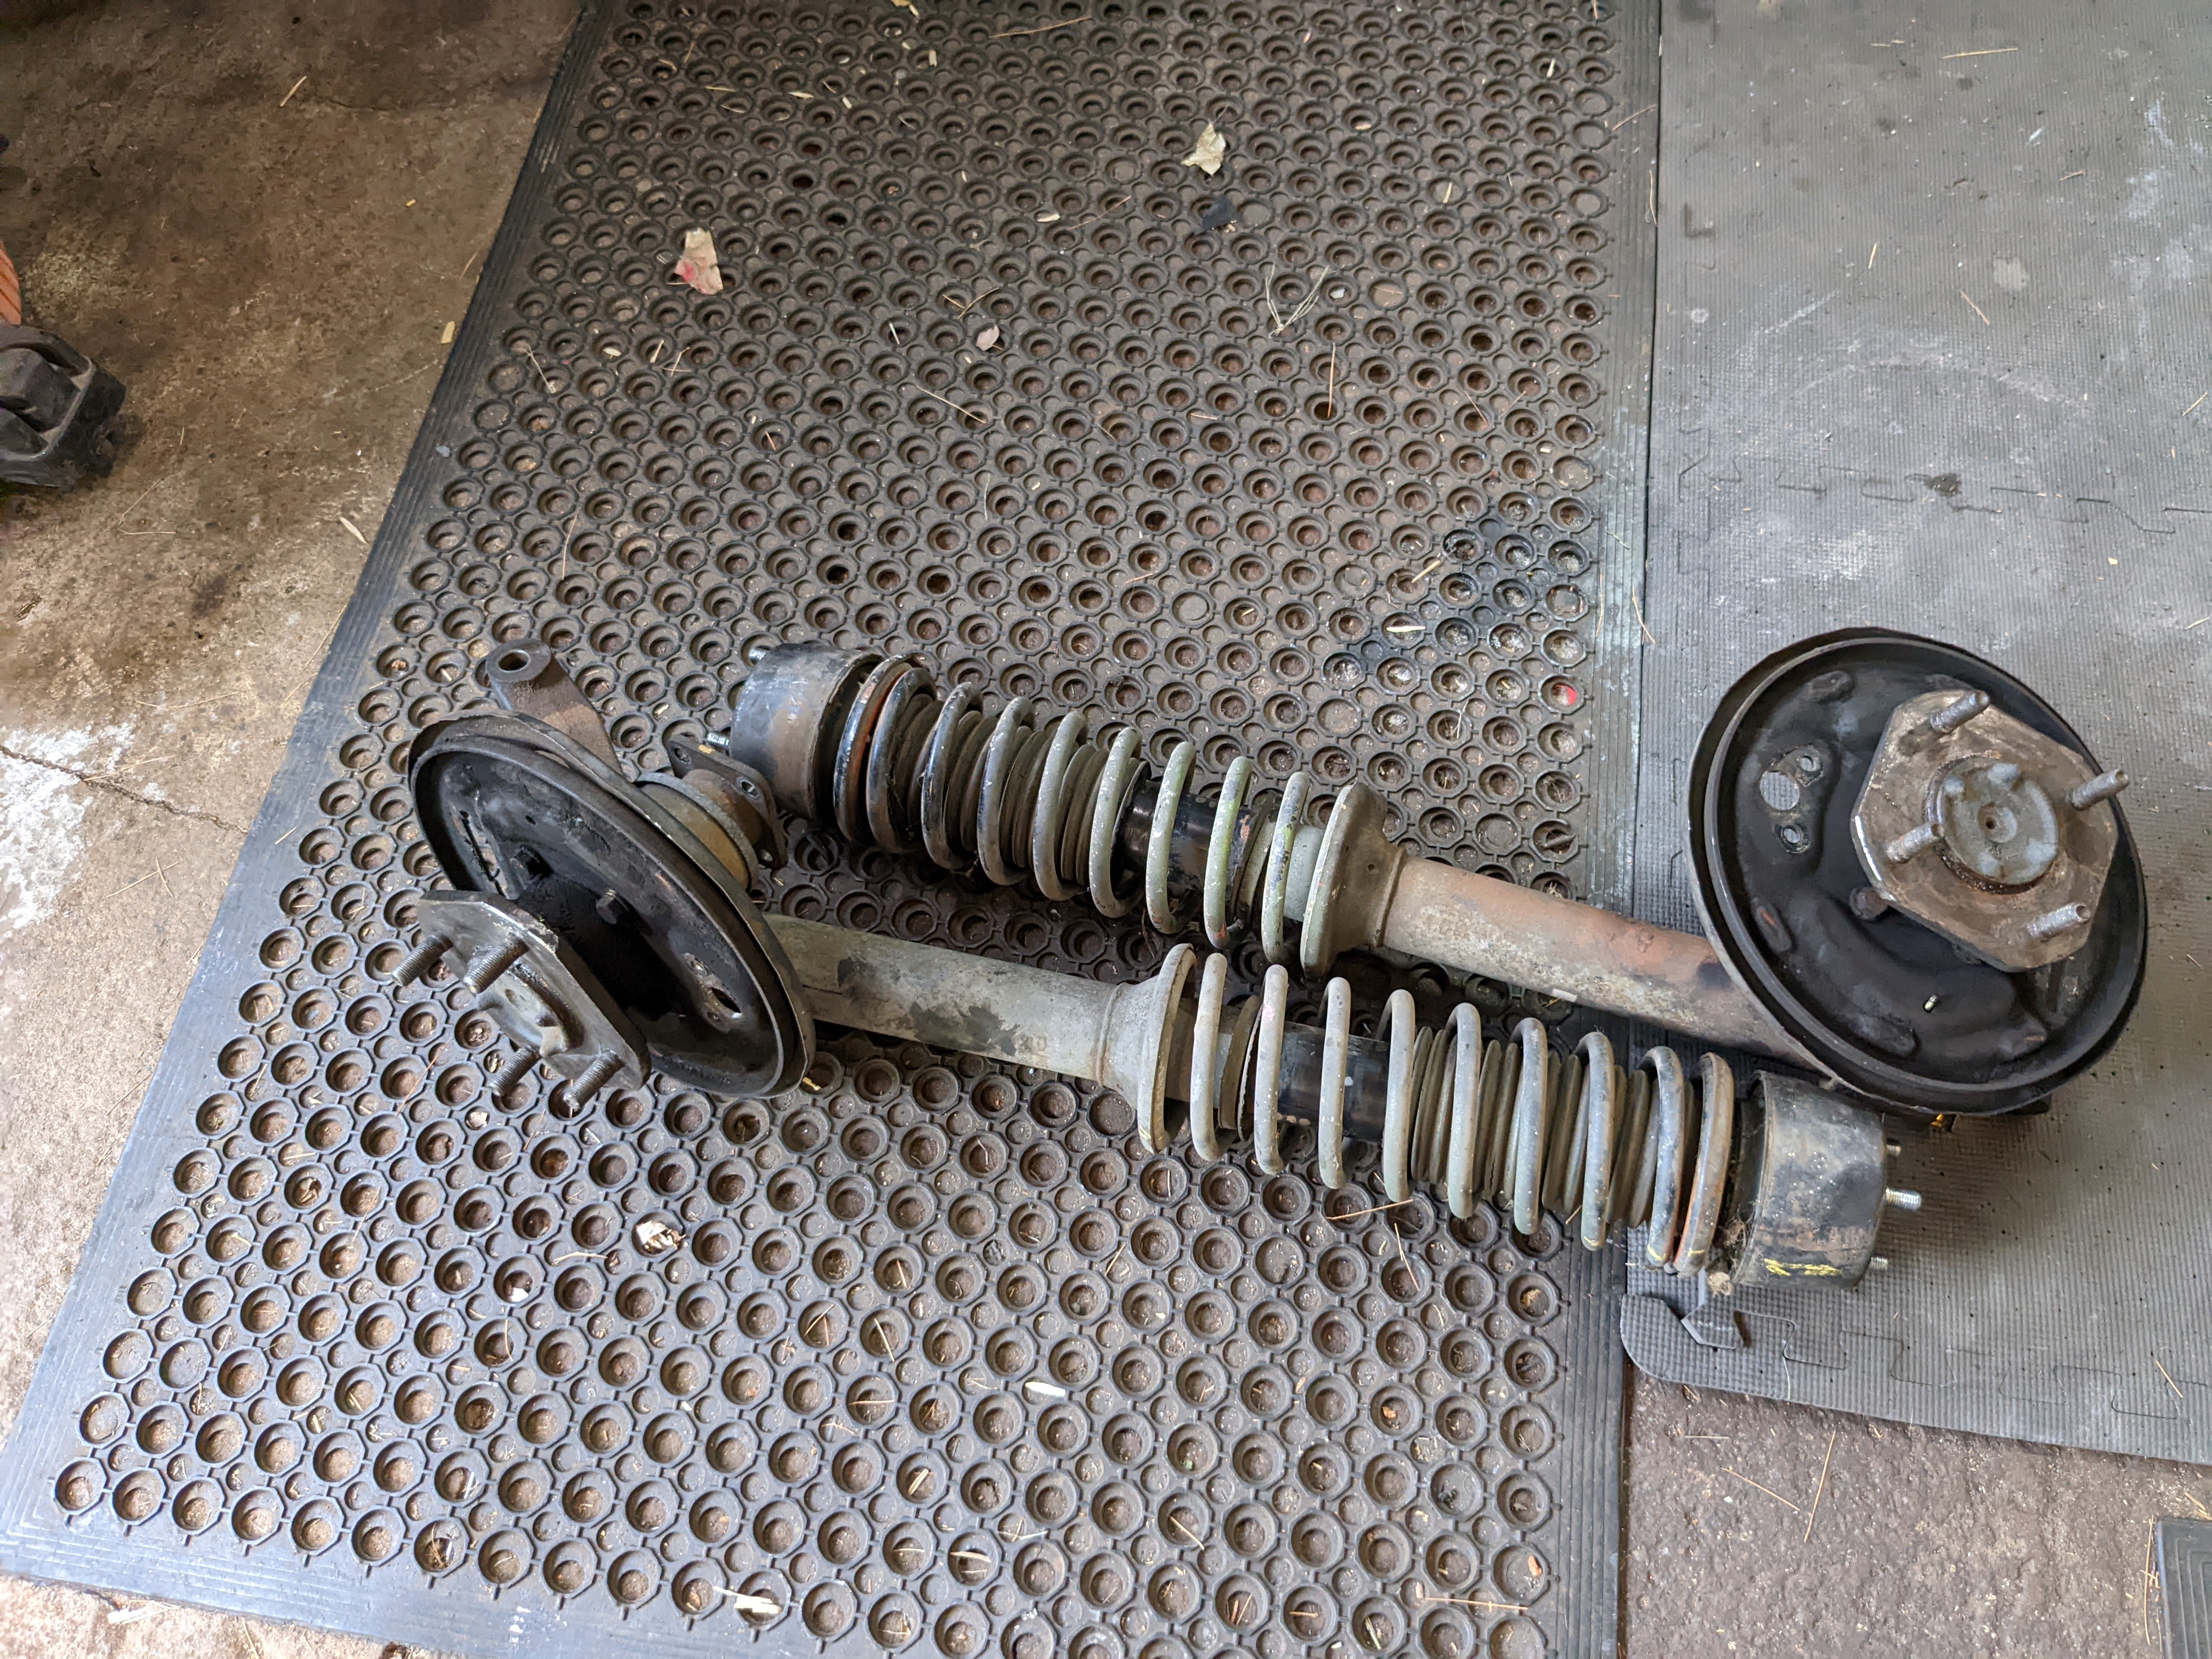
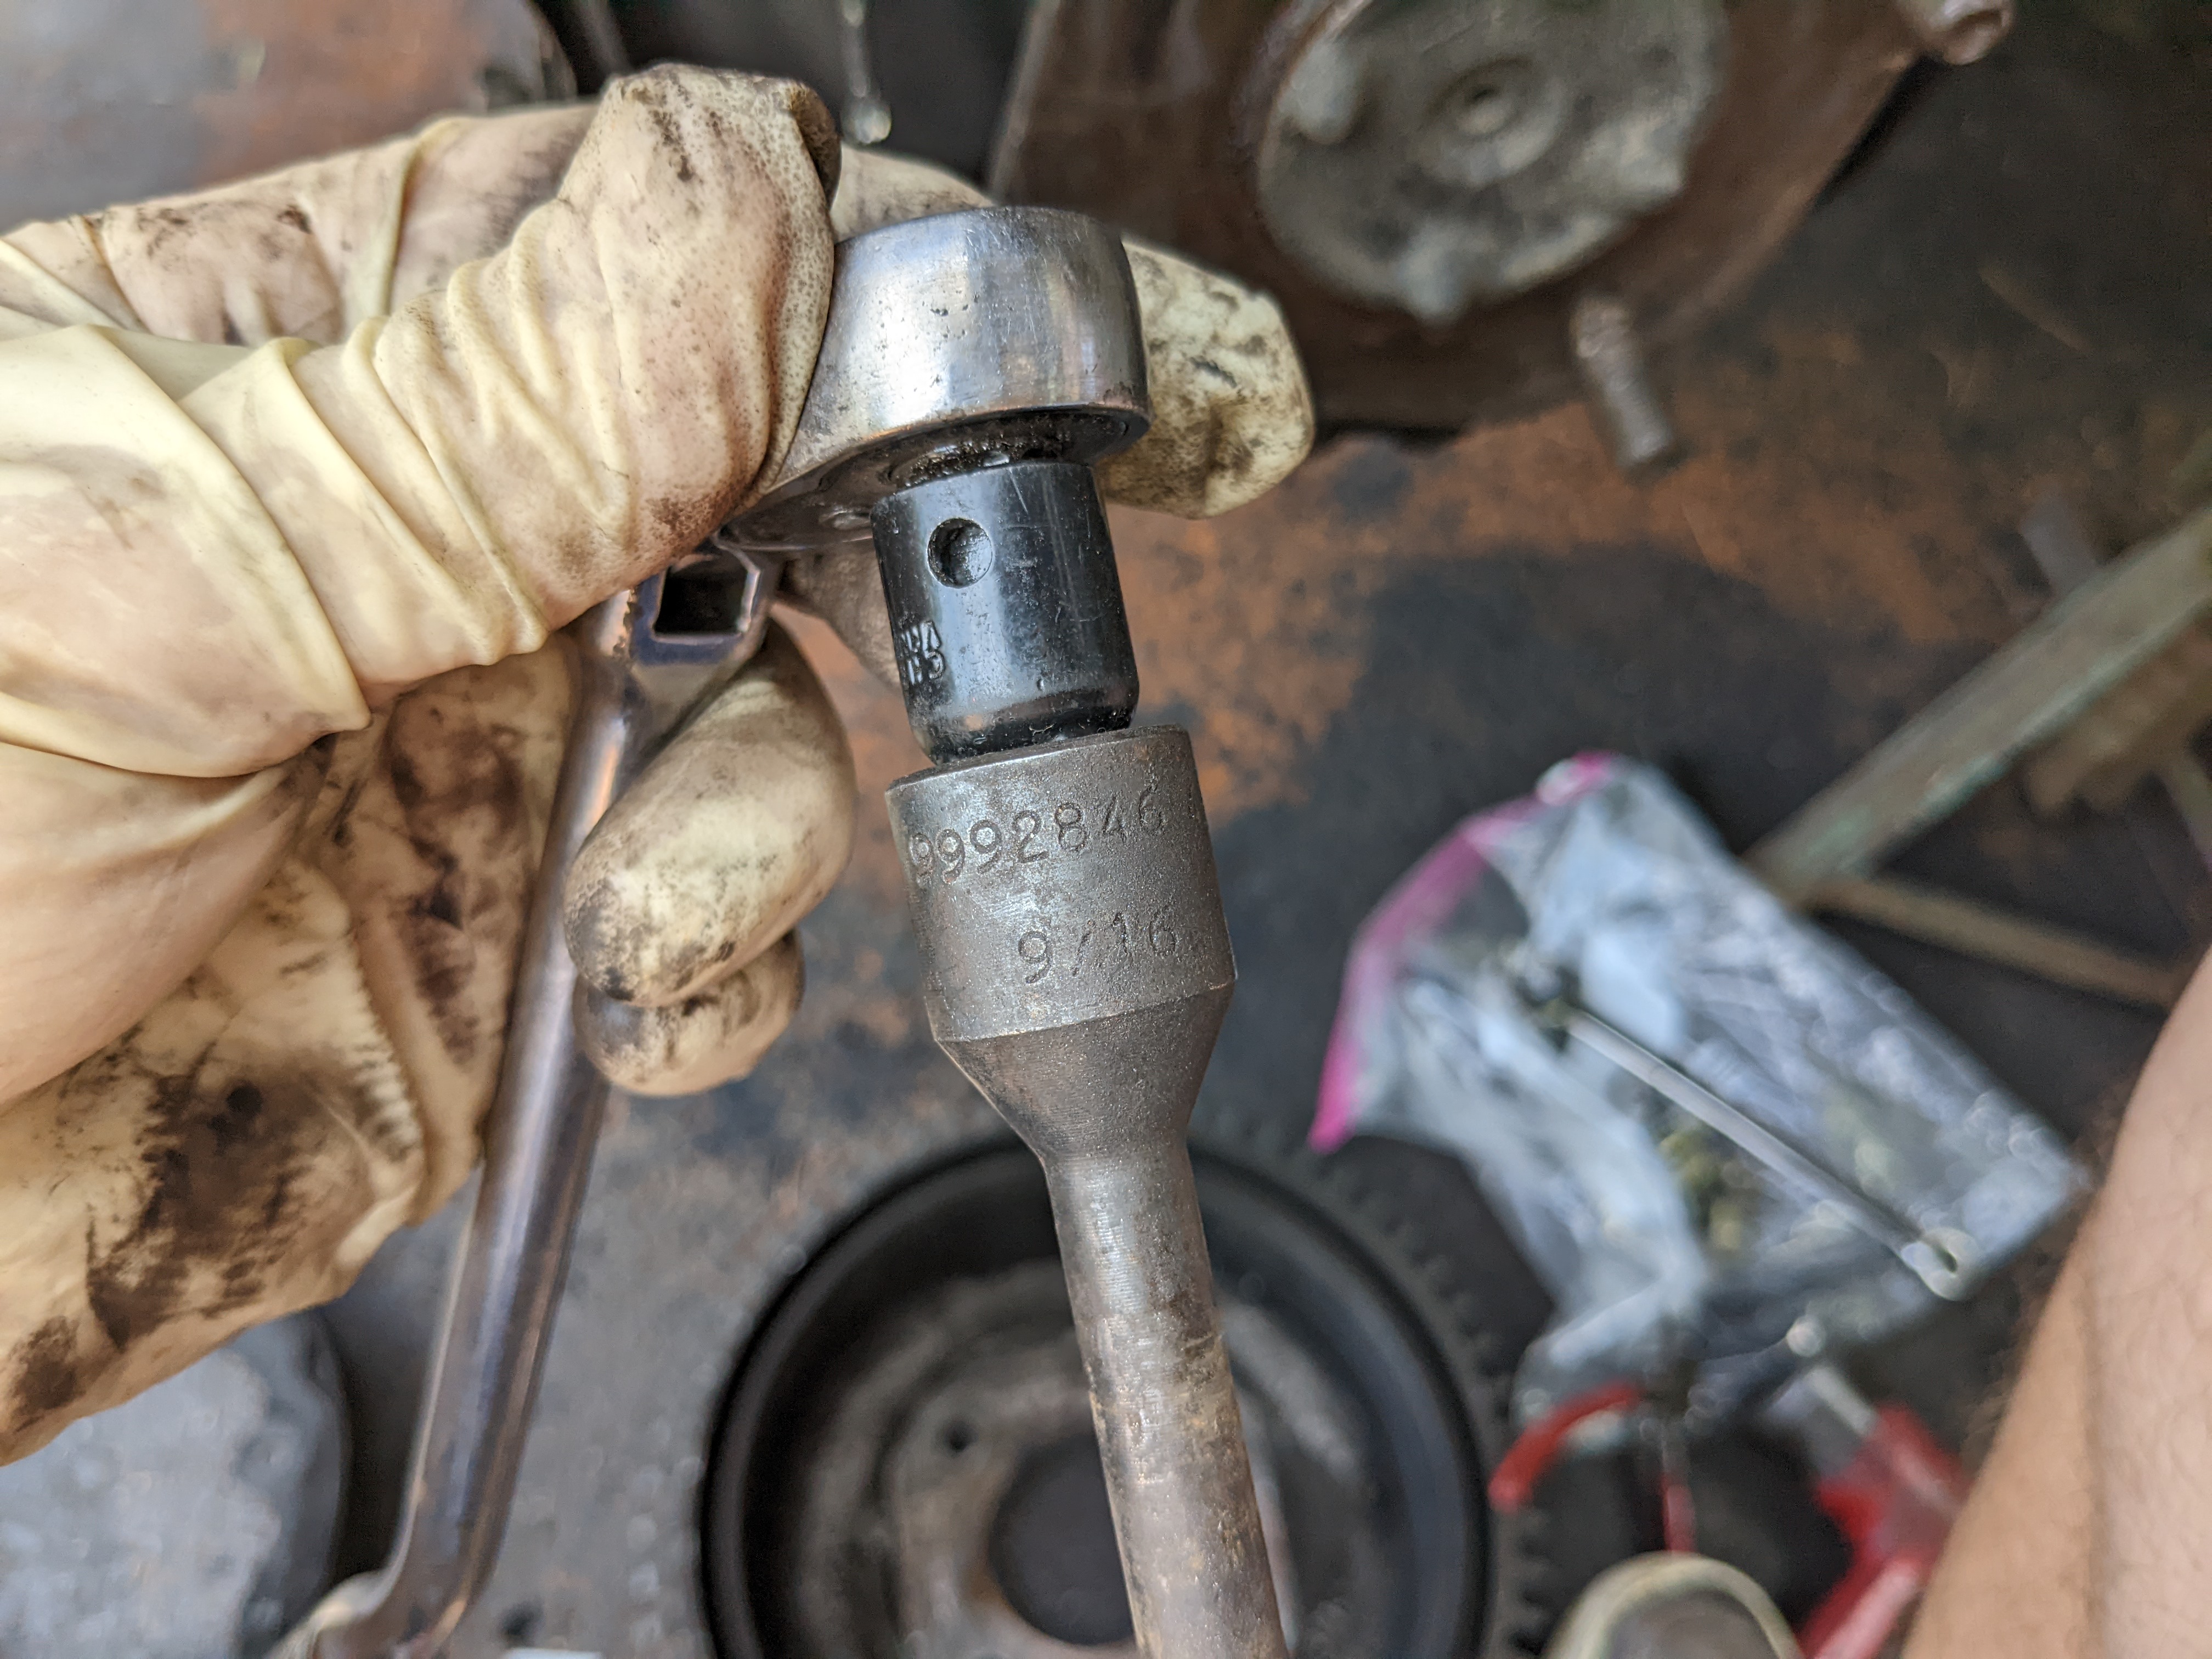
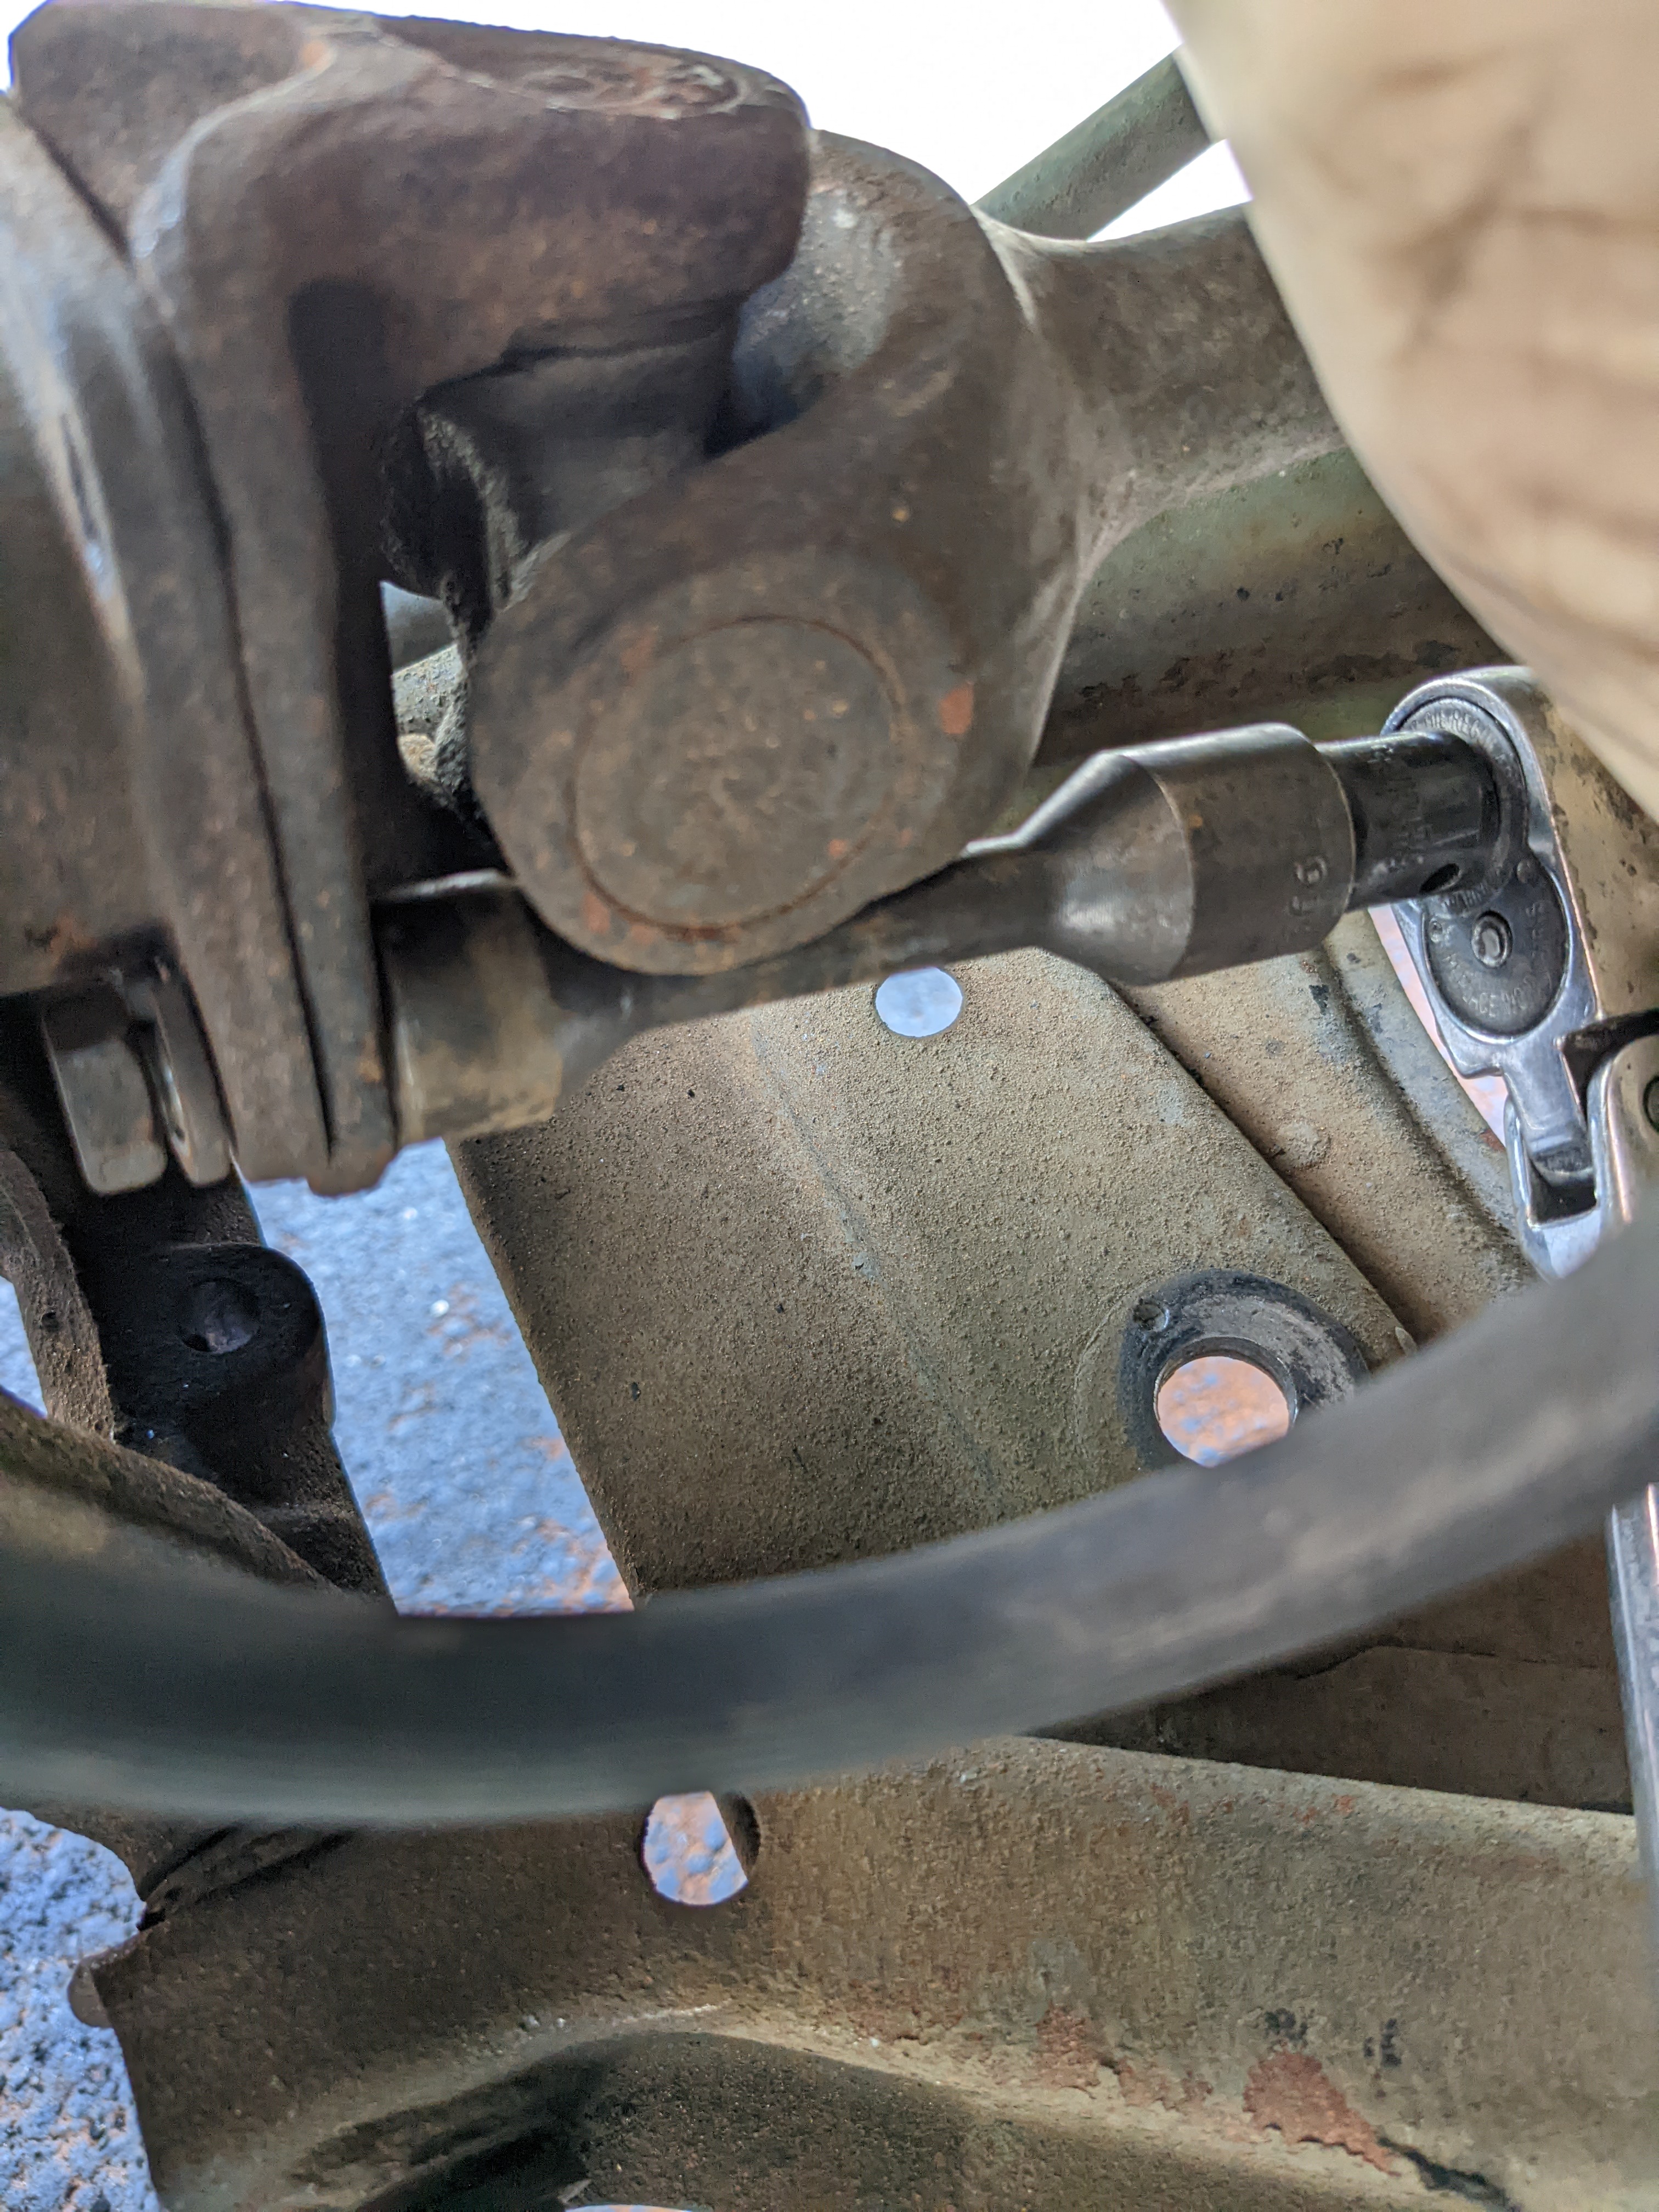
Dropped the struts/hubs after work, no drama. All drum brake parts removed. I don't want to hack up the back plates, so I'm going to pull the spindles. This Volvo tool (999-2846) intended for old RWD prop shafts fit the Z U-Joint Hopefully I'll have the hubs apart tomorrow, and replace the strut inserts and coil springs


 2 points
 -
2 pointsA good discussion here https://www.classiczcars.com/forums/topic/43876-n49-n54-needles/ The N27/54 needles don’t appear on SU needle charts as I believe (and happy to be corrected) they were not SU needles, they were Hitachi / Datsun needles. As mentioned above, the best bet is to mark and measure them at 3mm intervals (stations). I did this with my modified SM needles to model them on excel and compare to other off the shelf (SU) needles. It only takes 10 mins to do and then you can post it here for anyone else looking in the future too! :p I then went a bit nuts and tried to video what positions where in use at what loads / RPMs ;)2 points
-
2 points
-
1 point
-
1 pointRacers reversed the maker lamps to lower the drag coefficient, worth another 0.1 seconds per lap.🙄1 point
-
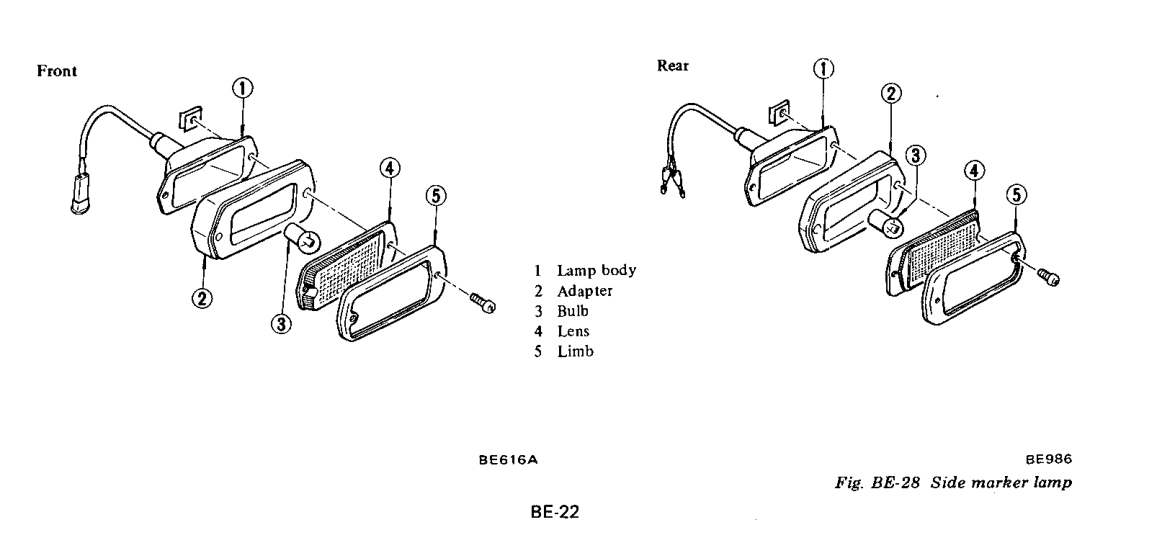
1 pointOne of those amusing "lost in translation" situations. Perhaps one of our Japanese speaking forum members with a copy of the Japanese Parts Manual could fill us in on other possible translations of the bezel part name. Decades ago I bought a small tent that was made in Japan and the instruction manual for setting it up was entitled "Erection Instructions".1 point
-
1 pointCorrect. The wider part of the marker lens will face the front and rear of the vehicle respectively to compensate for the tapering body line. My understanding is DOT requirements is to have the lenses be as flat as possible when you are looking at the vehicle sideways.1 point
-
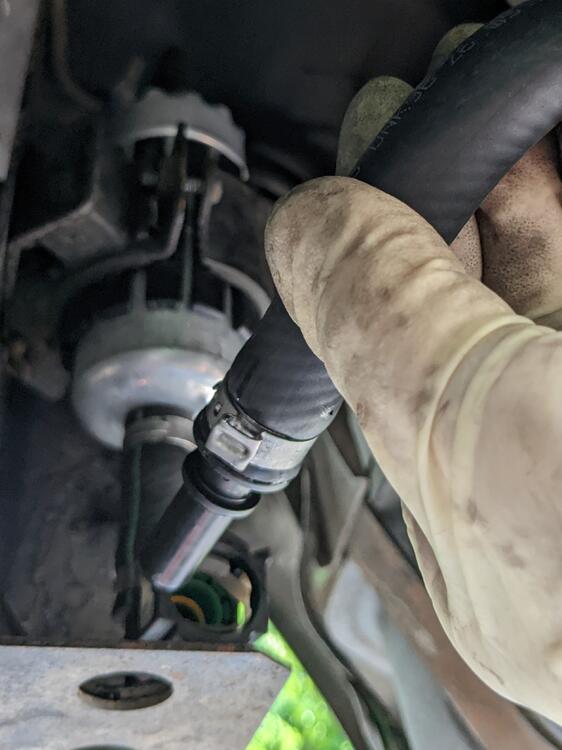
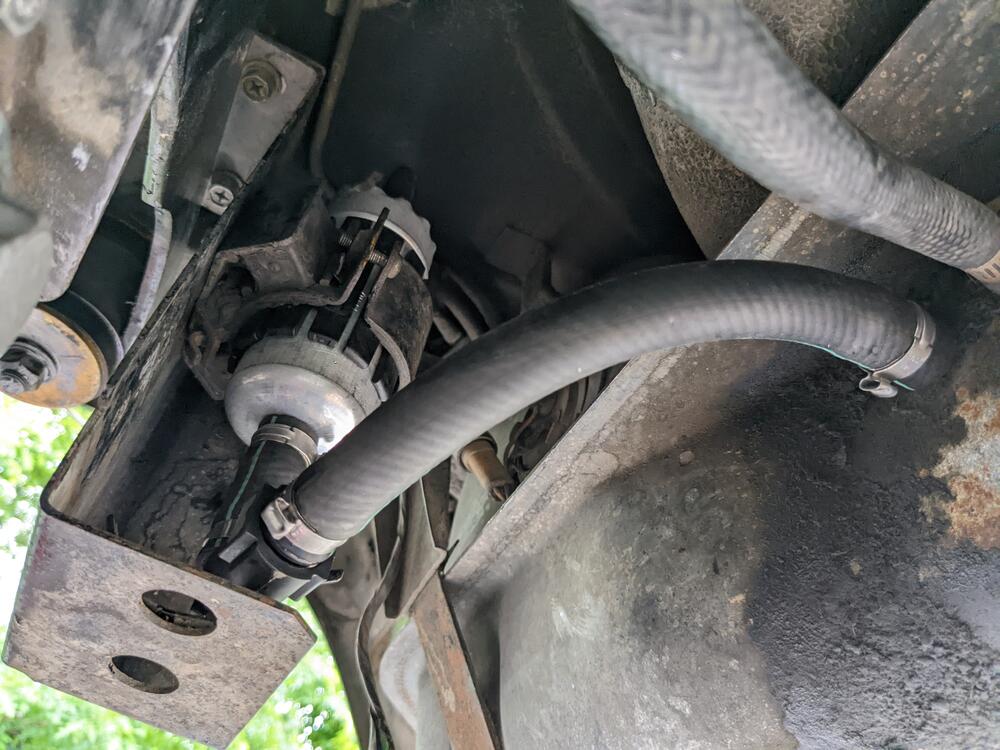
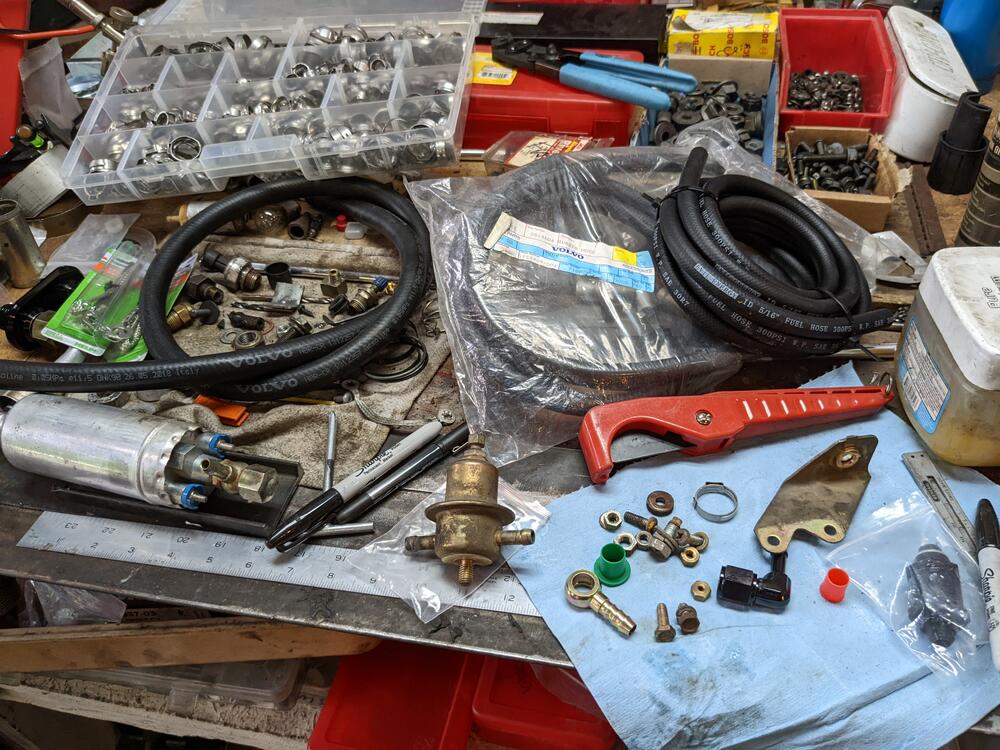
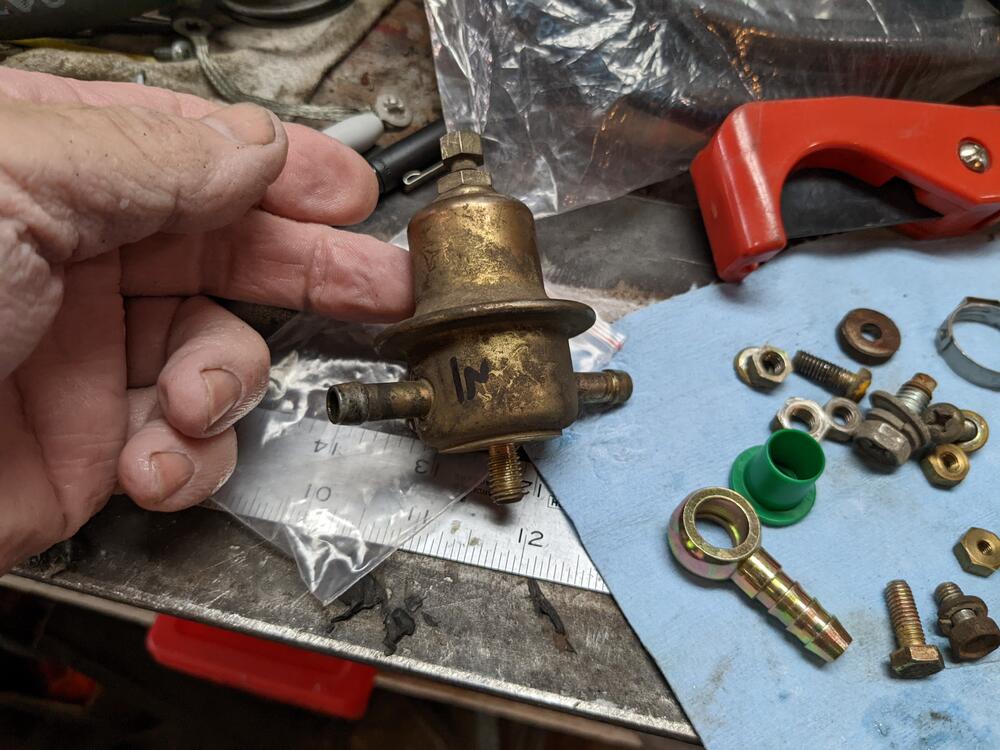
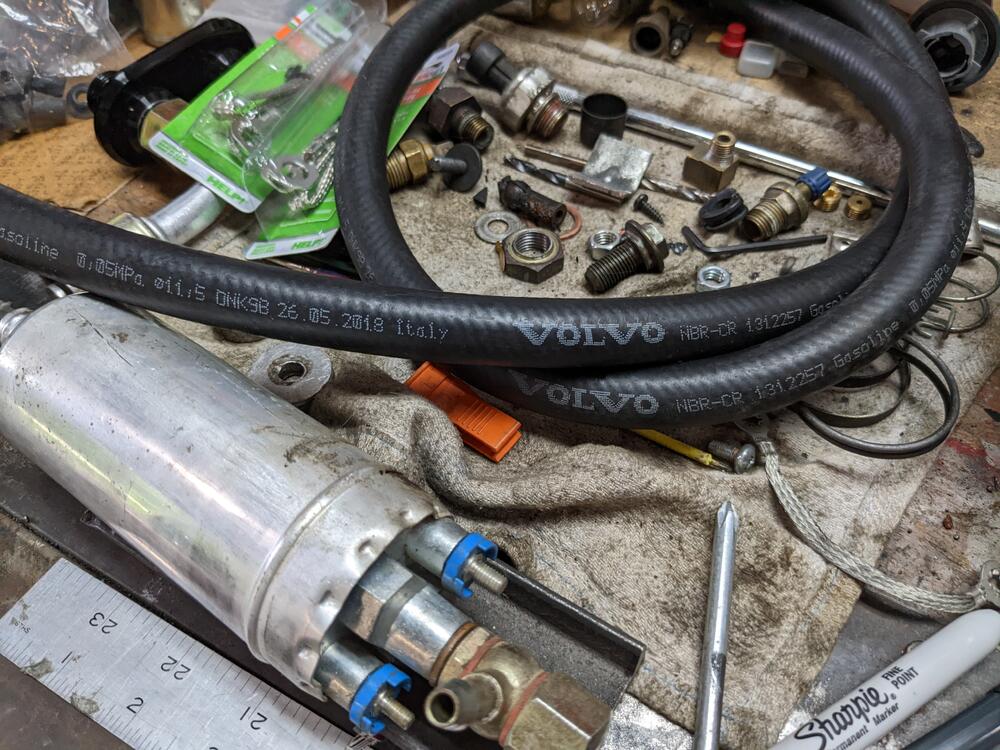
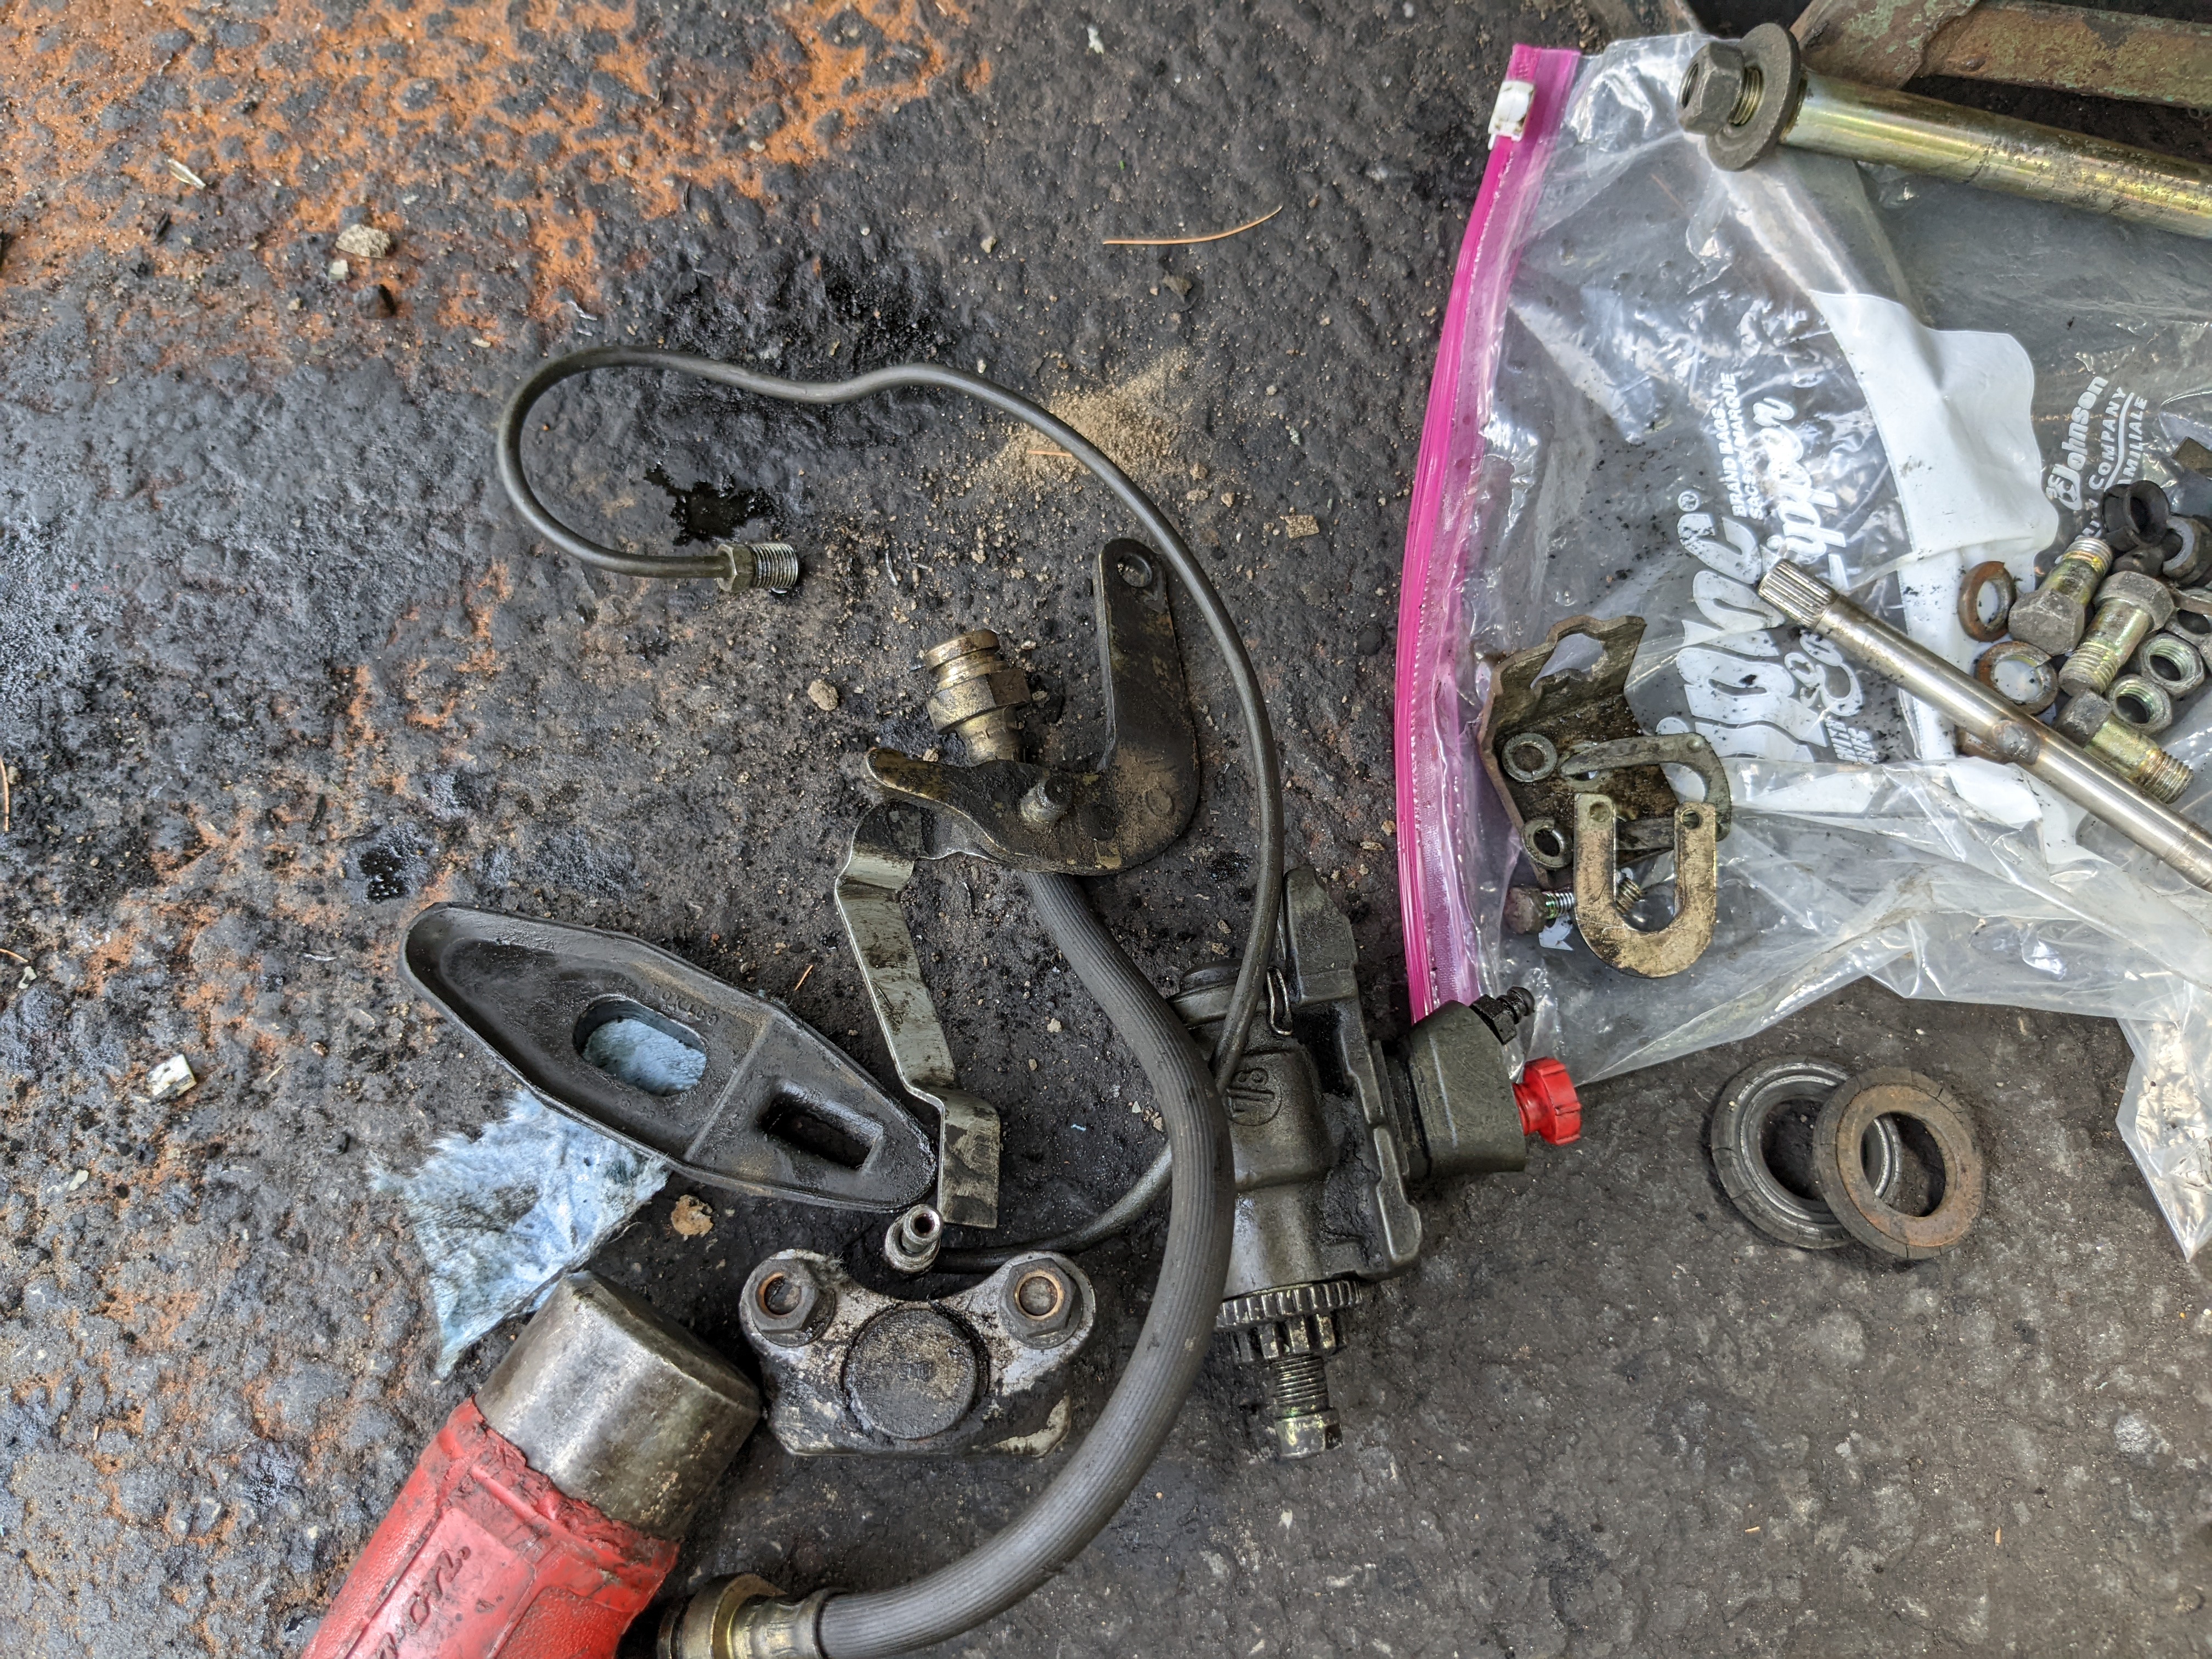
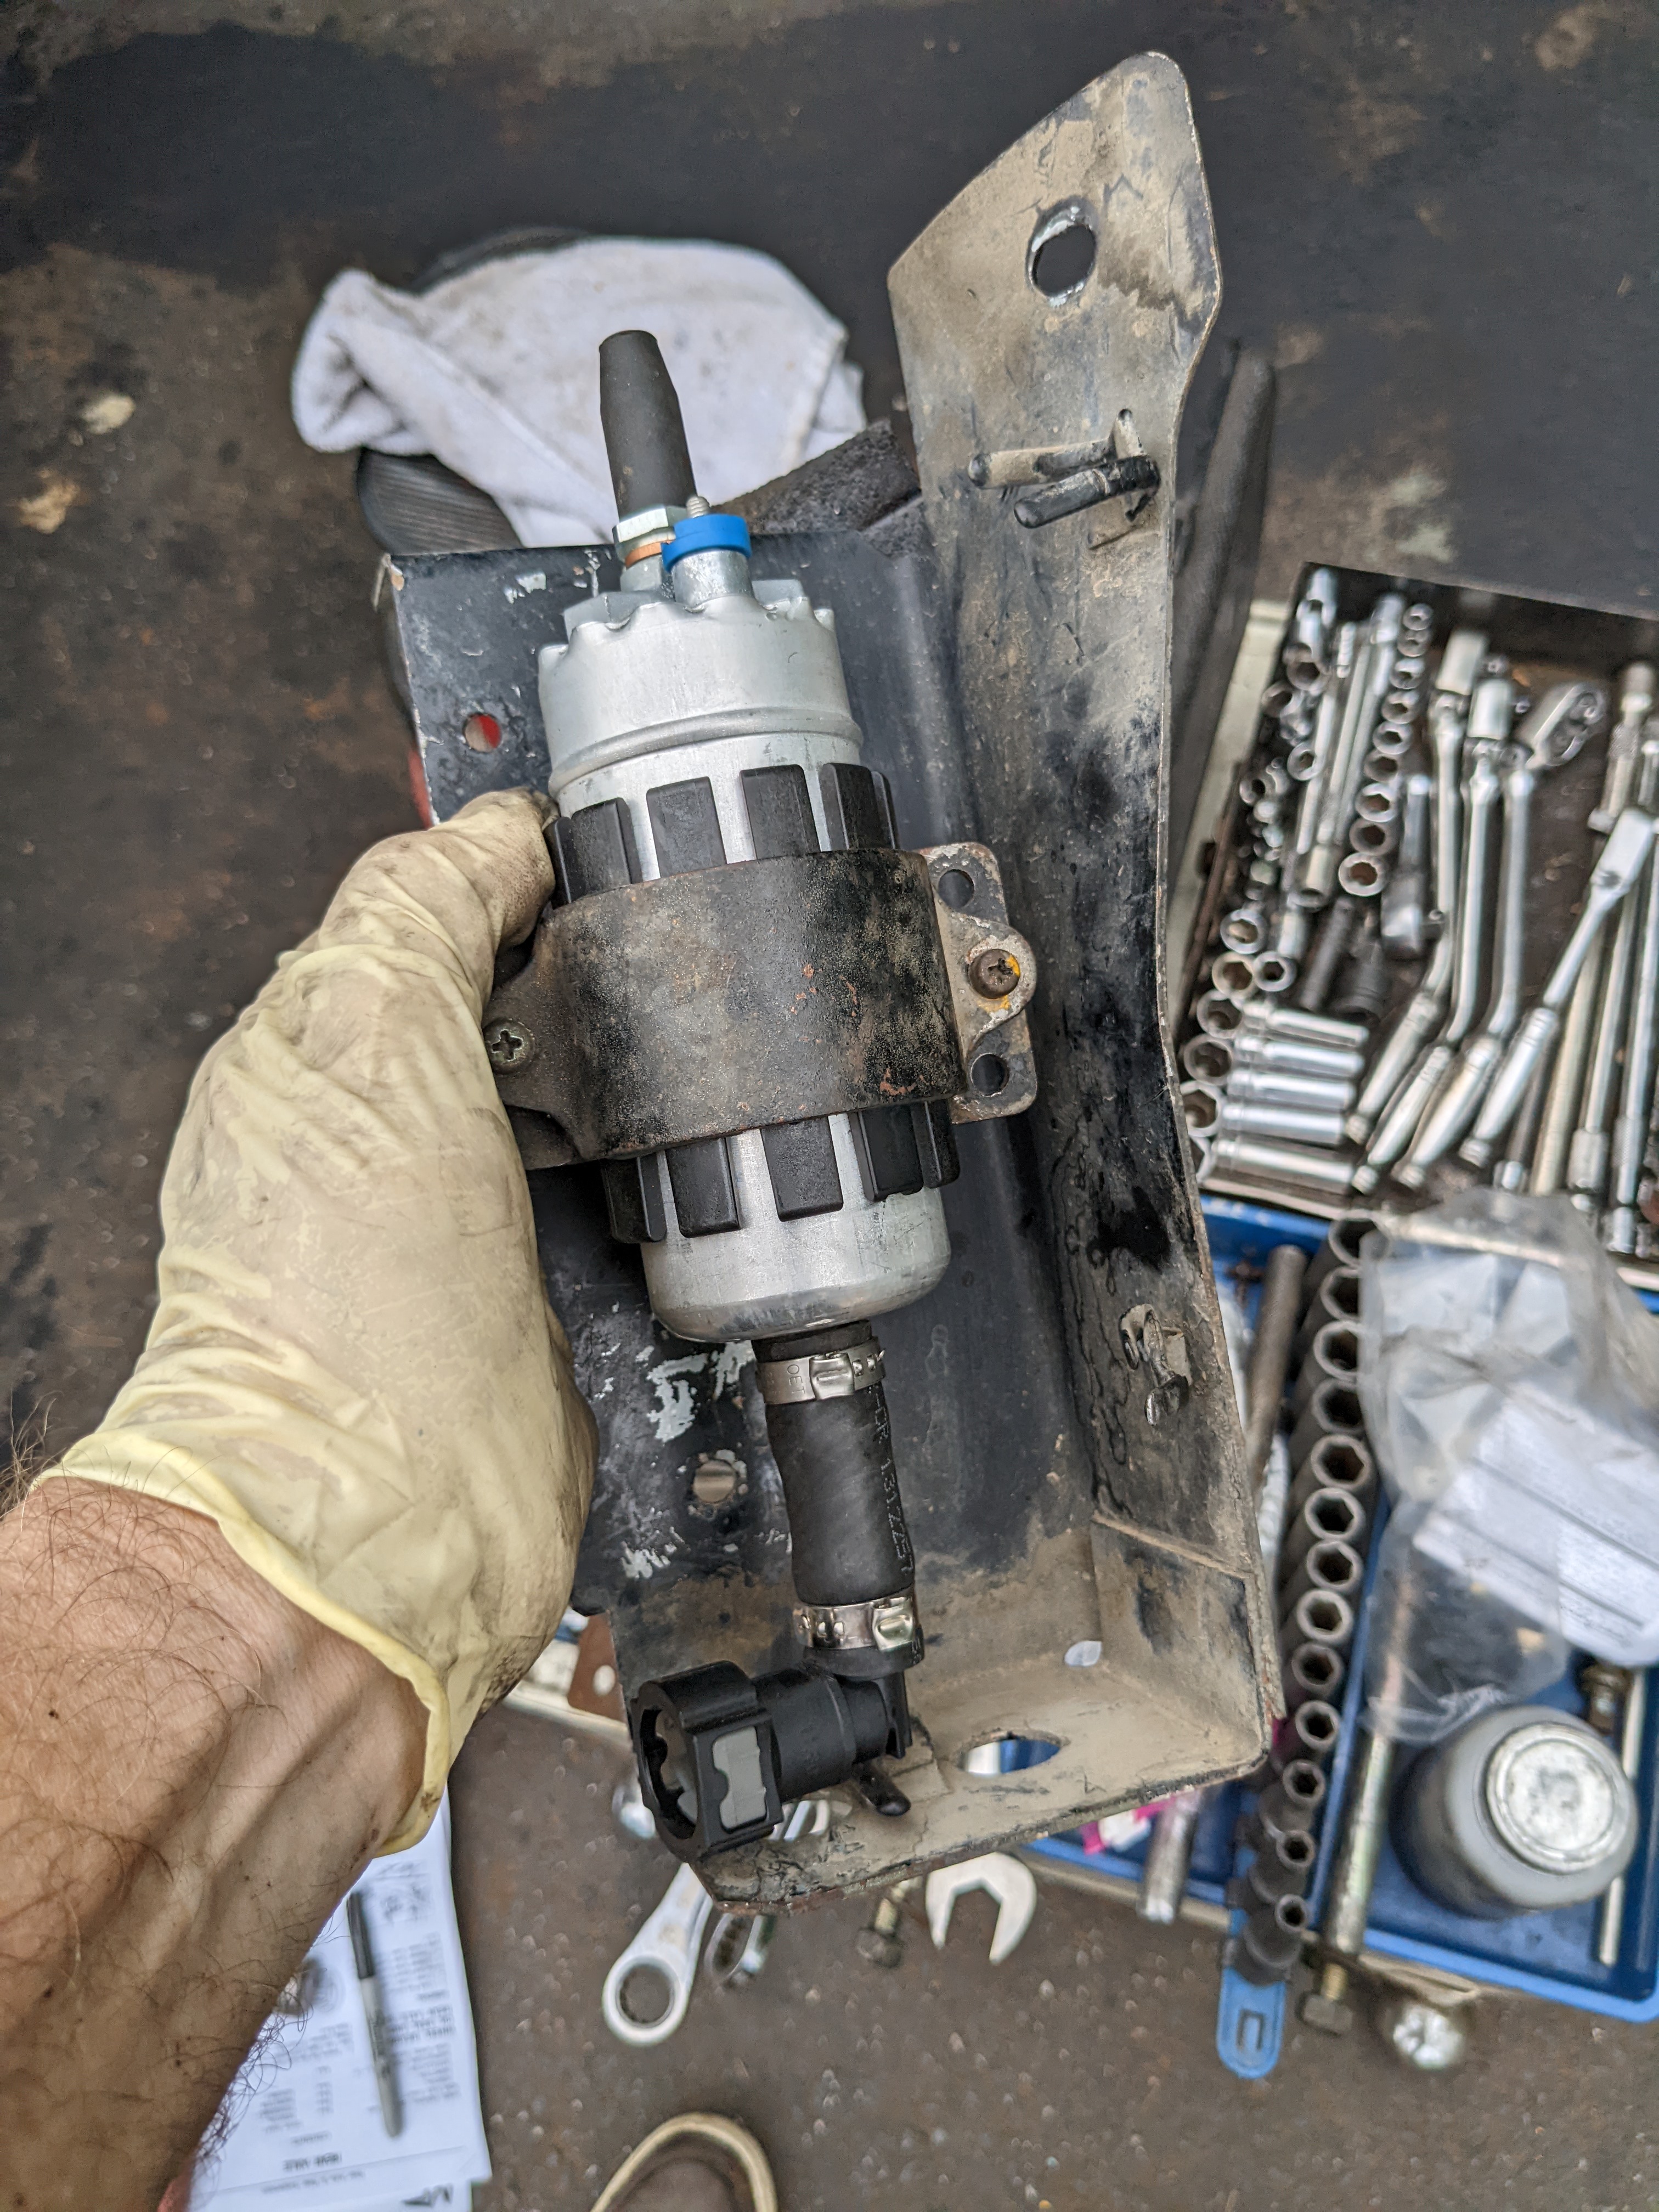
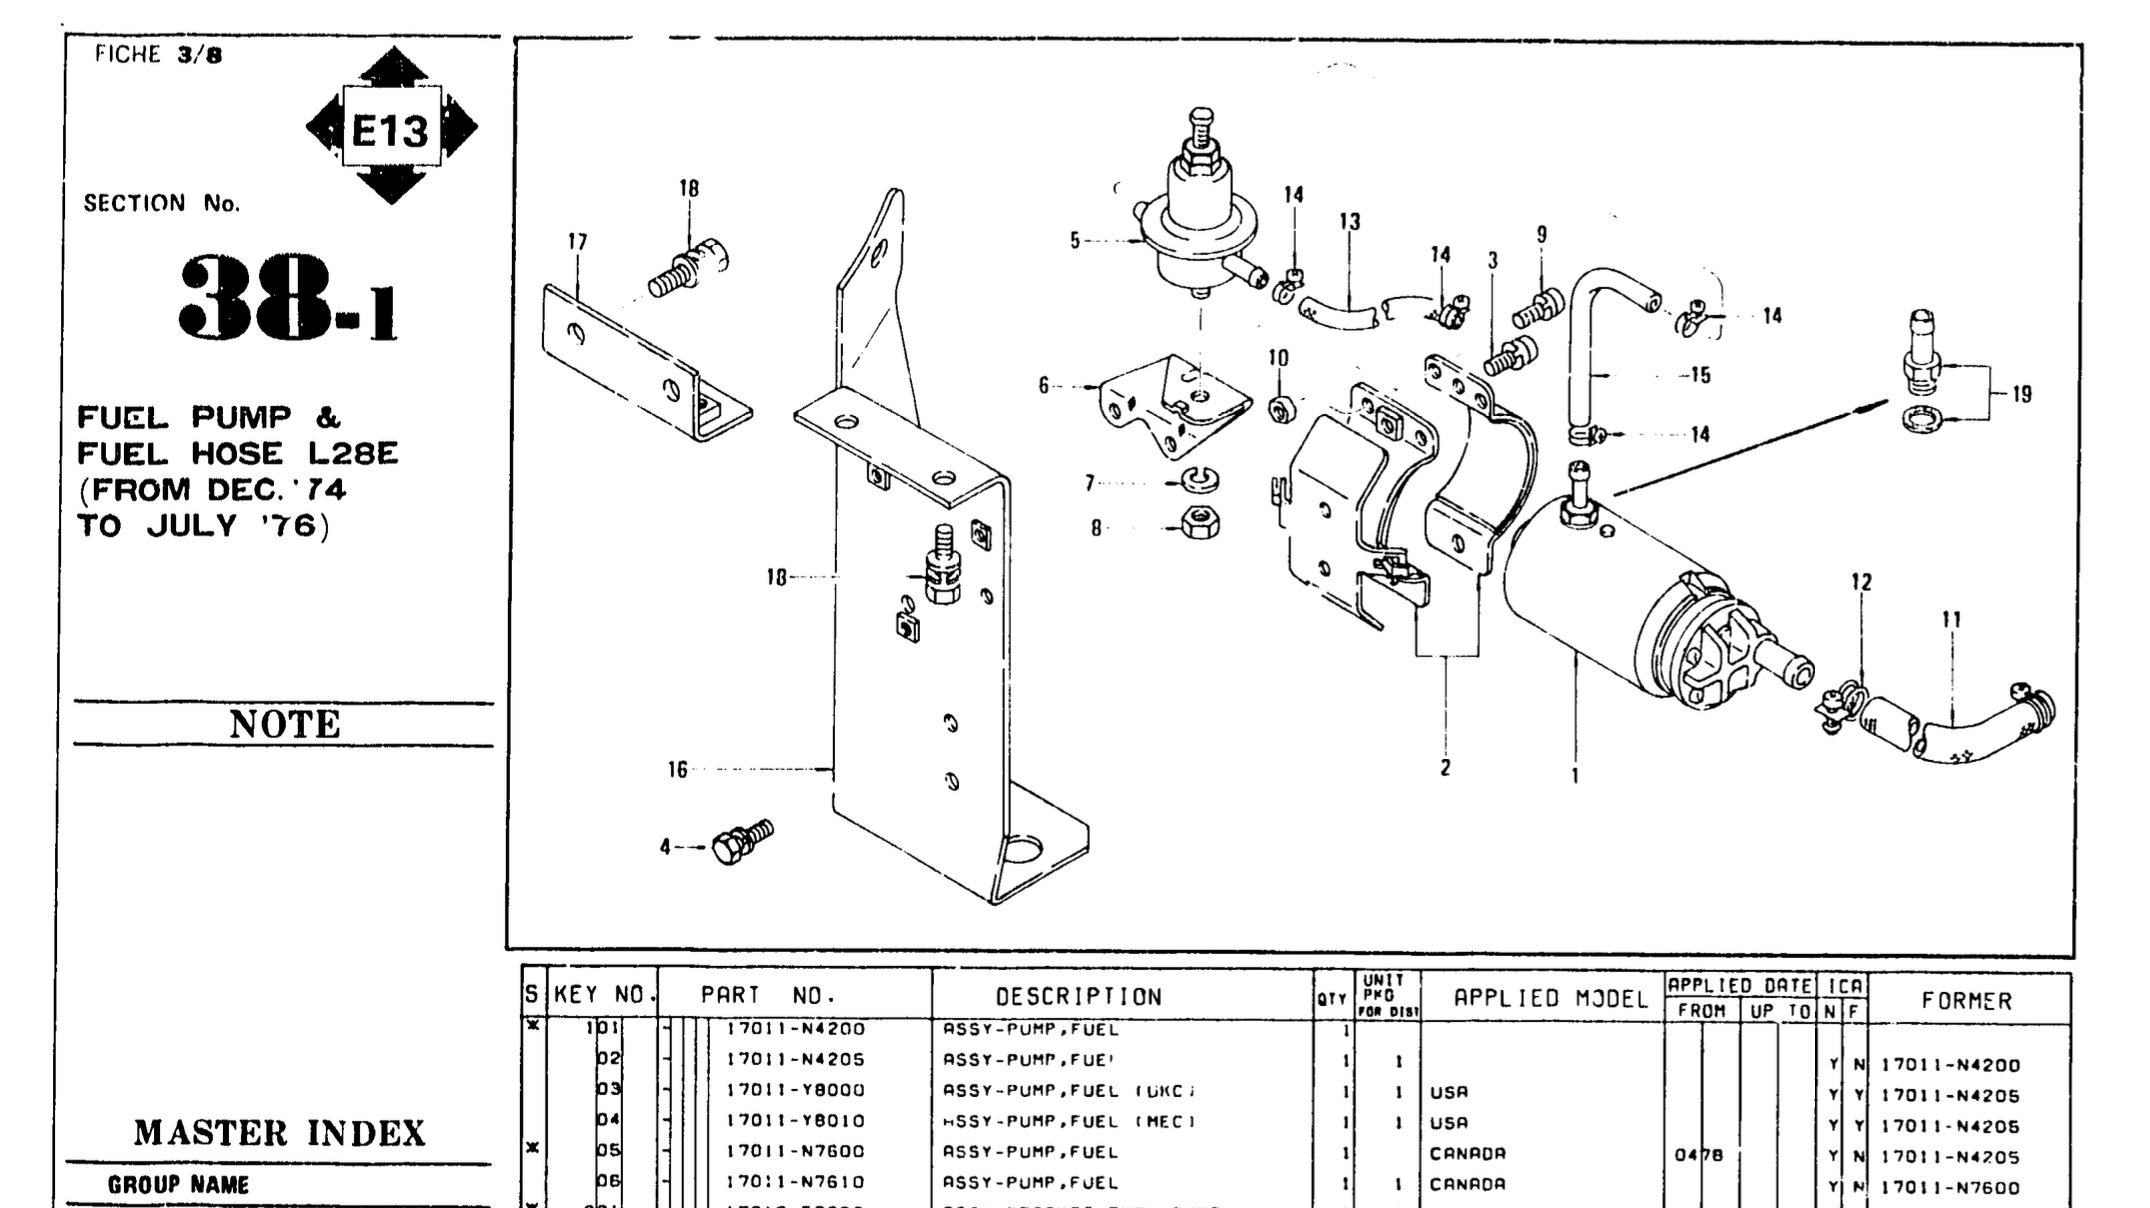
Dropped the (aftermarket) fuel pump & feed hose today. I don't like the way the pump is fitted either. Original schematic of layout redrilled the mount plate to rotate & move the (new Bosch) pump up & out the way somewhat, adding Quick -Release fittings, to get rid of the large loop on the low pressure suction side Volvo fuel hose 1312257 11.5mm ID sold by the meter . I was going to put an inline filter here, however both versions I purchased were less that 3/8 OD, probably close to 5/16 Have to fit the pulse damper above. I won't need it with the VQ35DE install, so I'm going to make it easier to remove

 1 point
 -
1 pointFlamin' Hot @ about the 8:30 mark - Interesting movie about the Flamin' Hot Doritos flavor chips.
 1 point
 -
It's a good time to grease the u-joints on your half shafts. There are small slotted plugs in the Zerk fitting holes.1 point
-
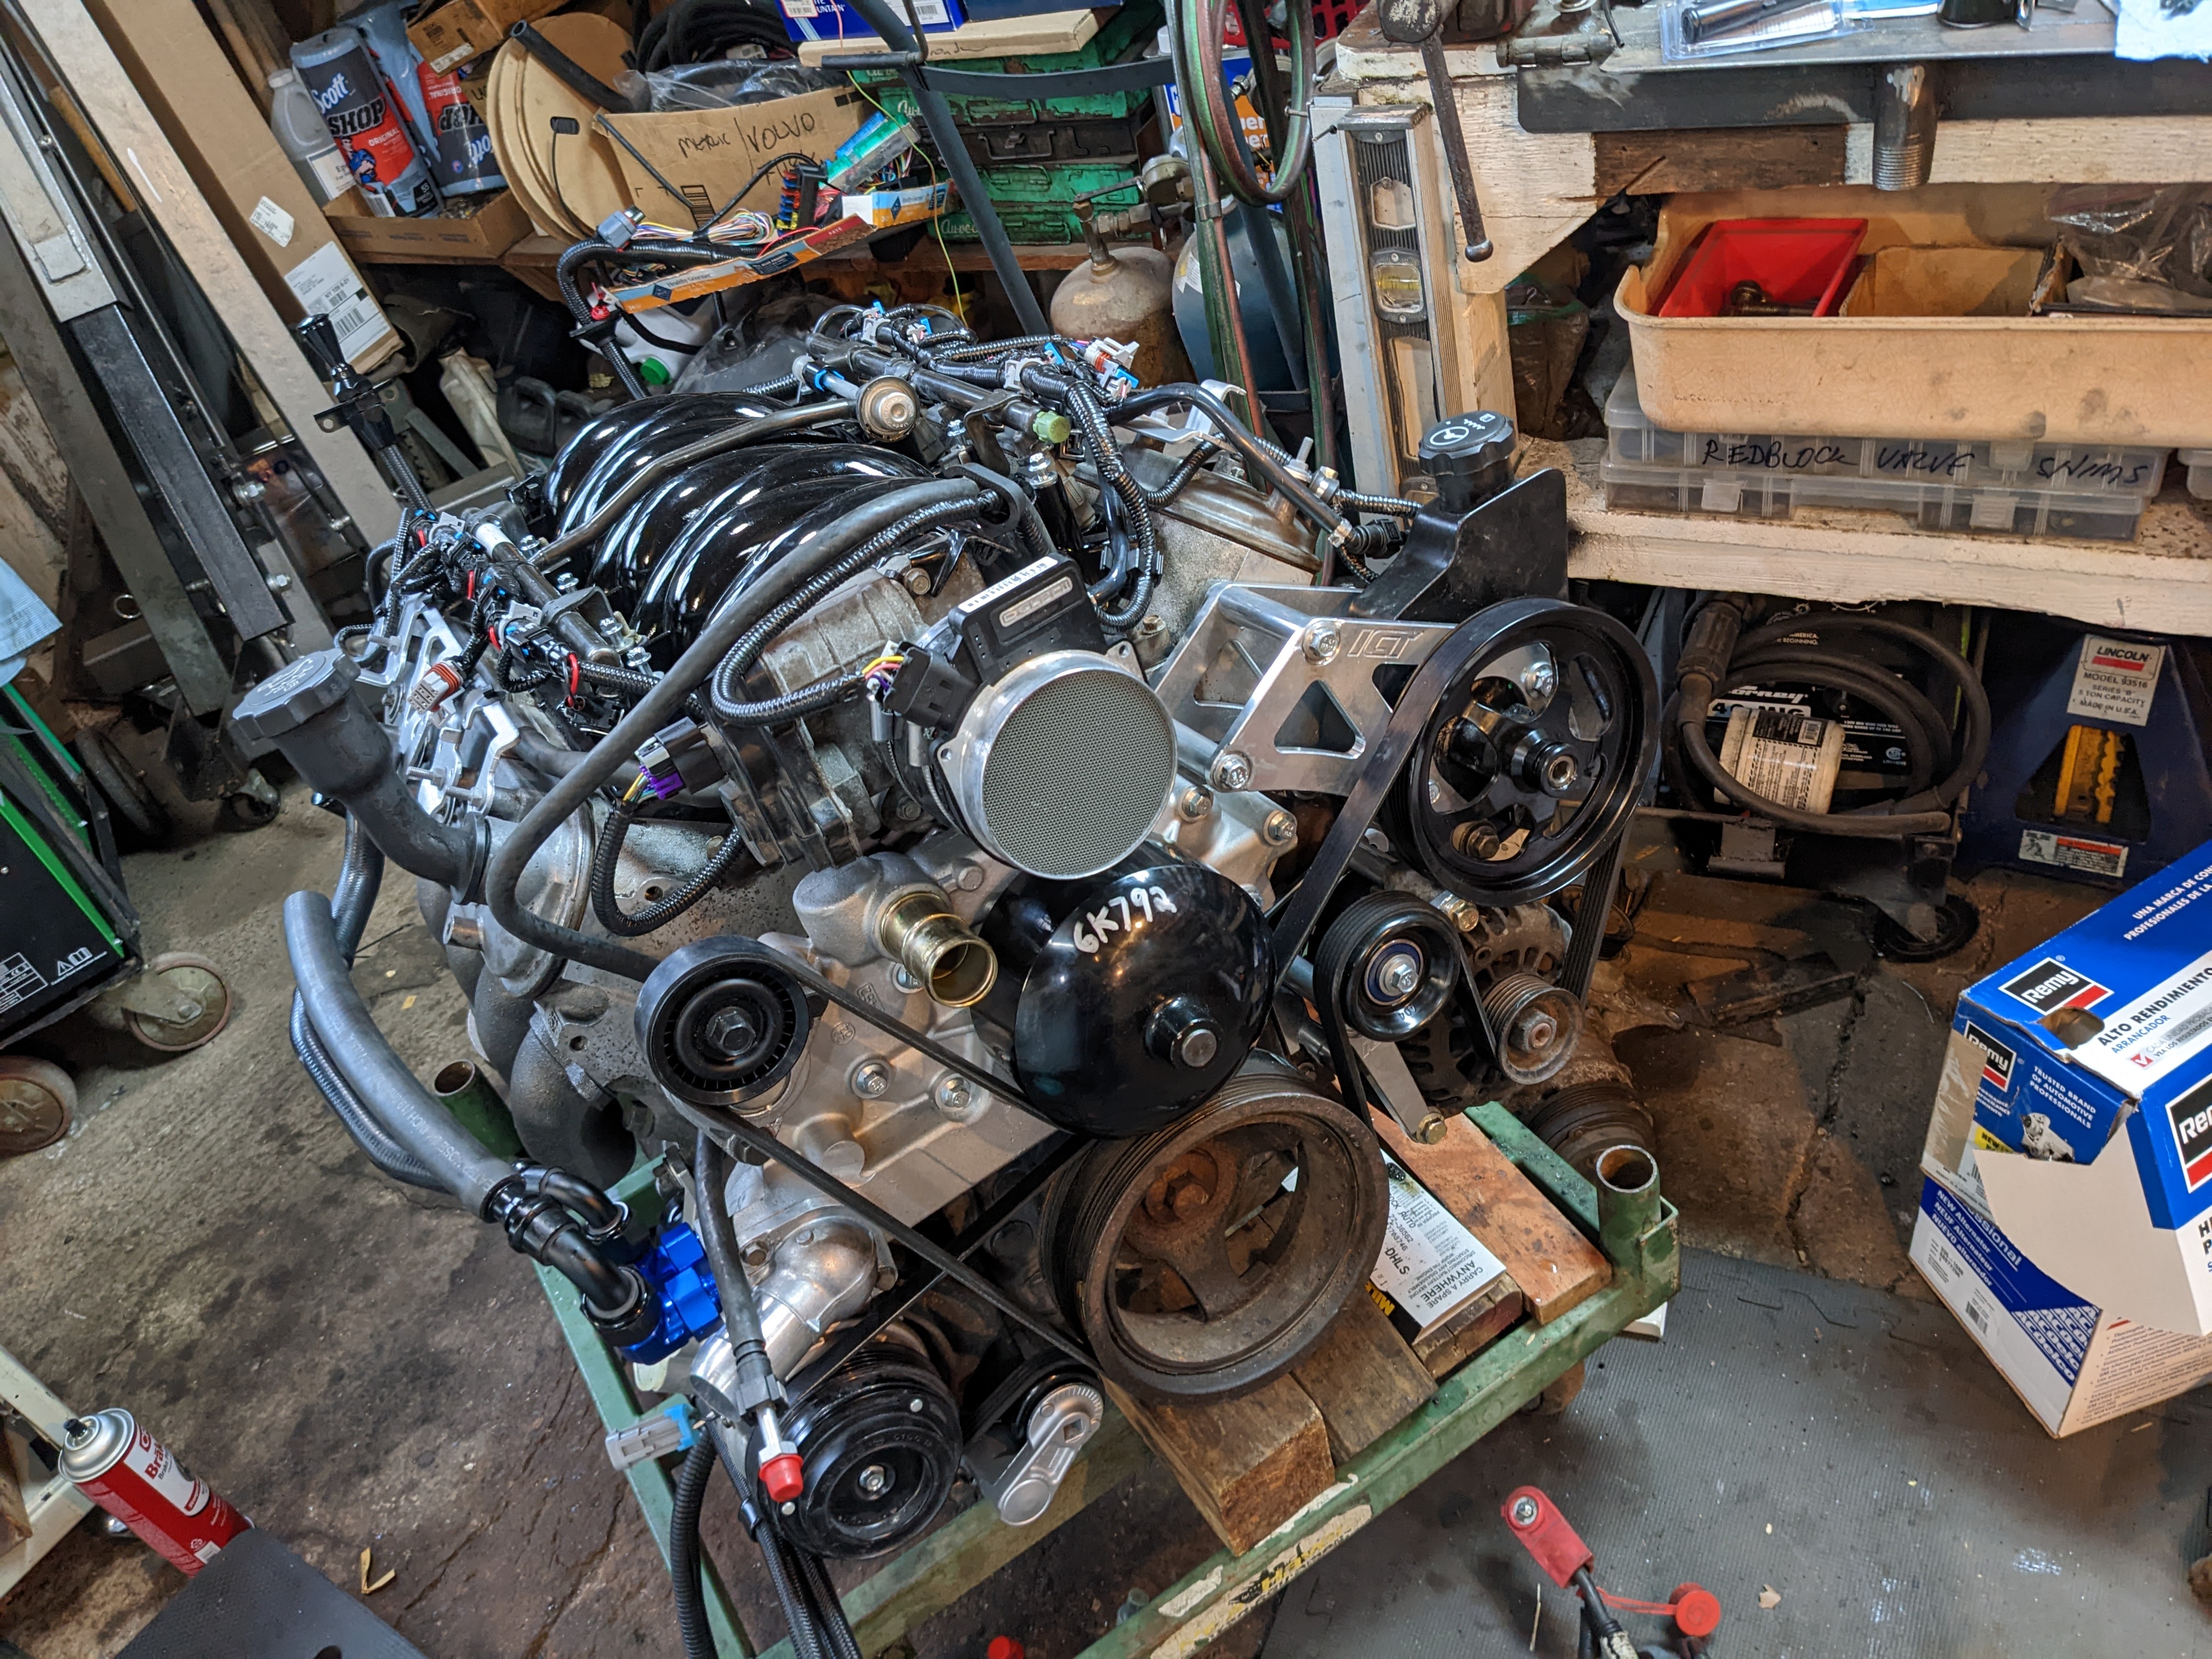
The Chevy V8 (LR4) & 4l60e trans are going in the Volvo wagon I made into a pickup truck last year. I just need the Z safe to drive for now.
 1 point
 -
1 point
-


Important Information
By using this site, you agree to our Privacy Policy and Guidelines. We have placed cookies on your device to help make this website better. You can adjust your cookie settings, otherwise we'll assume you're okay to continue.