


Leaderboard
-

siteunseen
Free Member5Points15,115Posts -

CW240Z72
Free Member4Points229Posts -
Patcon
 Subscriber
 4Points11,142Posts
 -
Mark Maras
Free Member4Points3,719Posts


Popular Content
Showing content with the highest reputation on 03/04/2023 in Posts
-
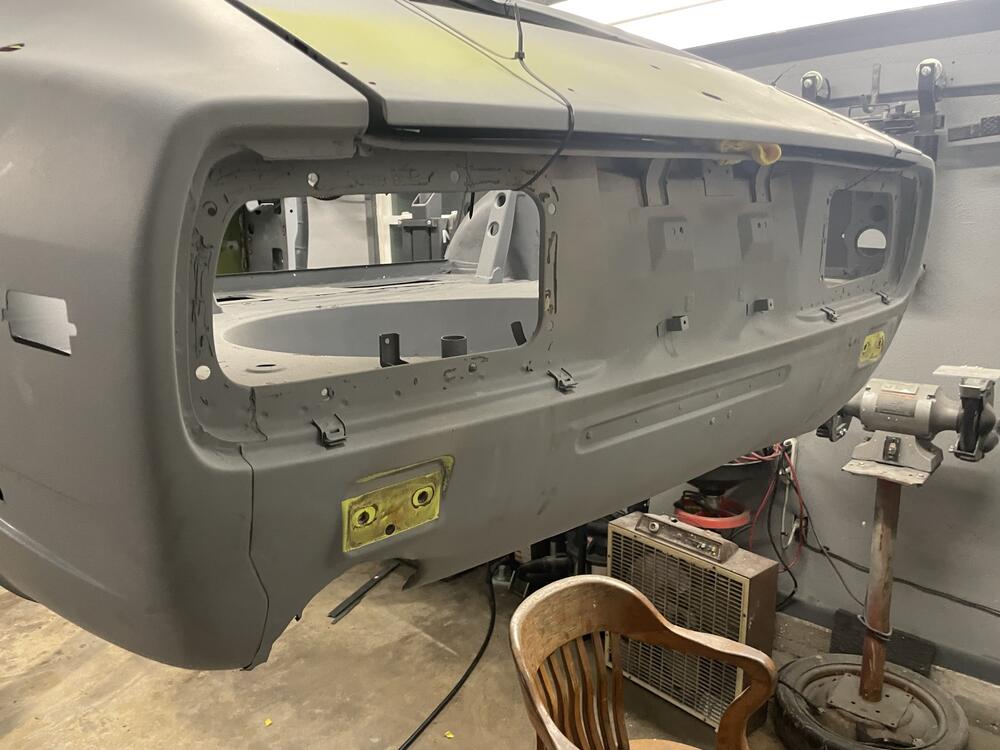
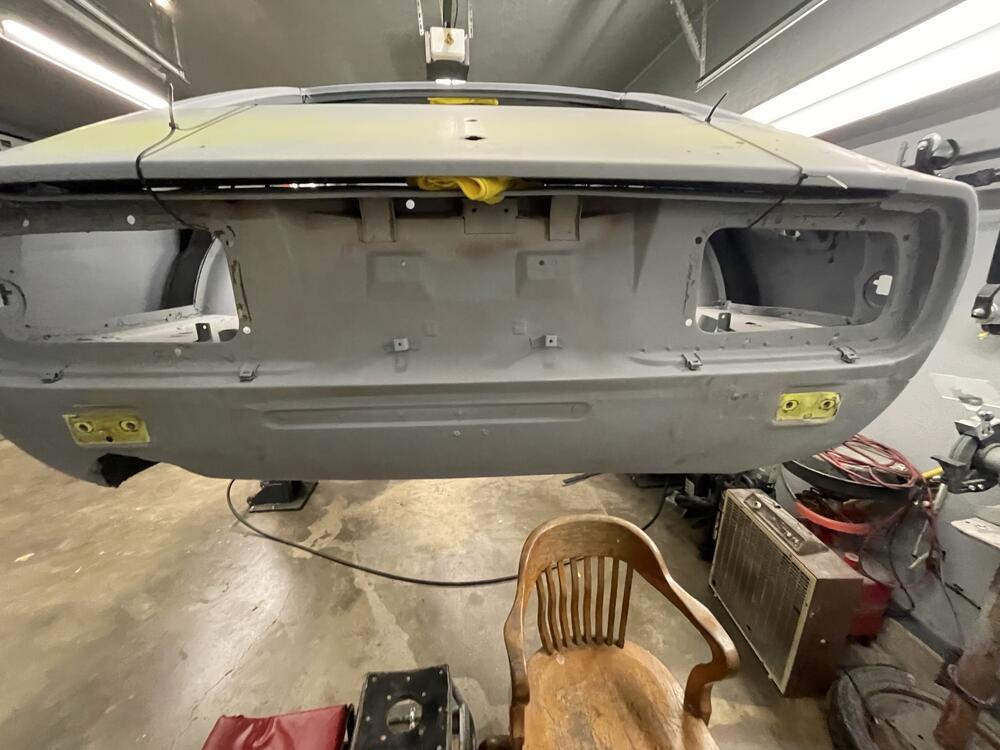
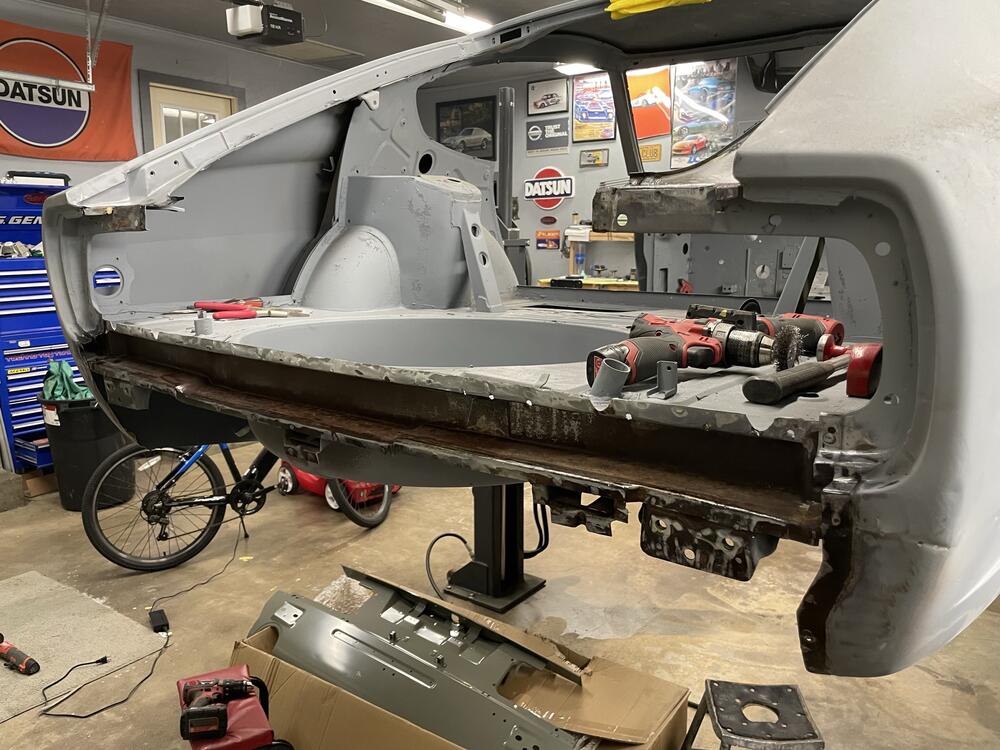
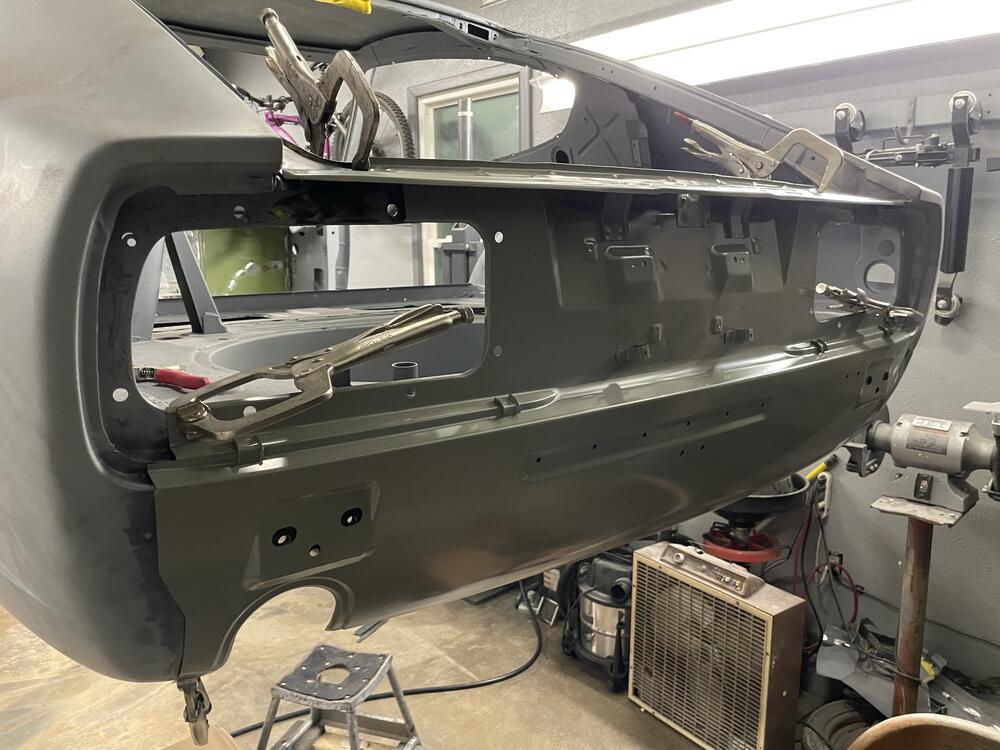
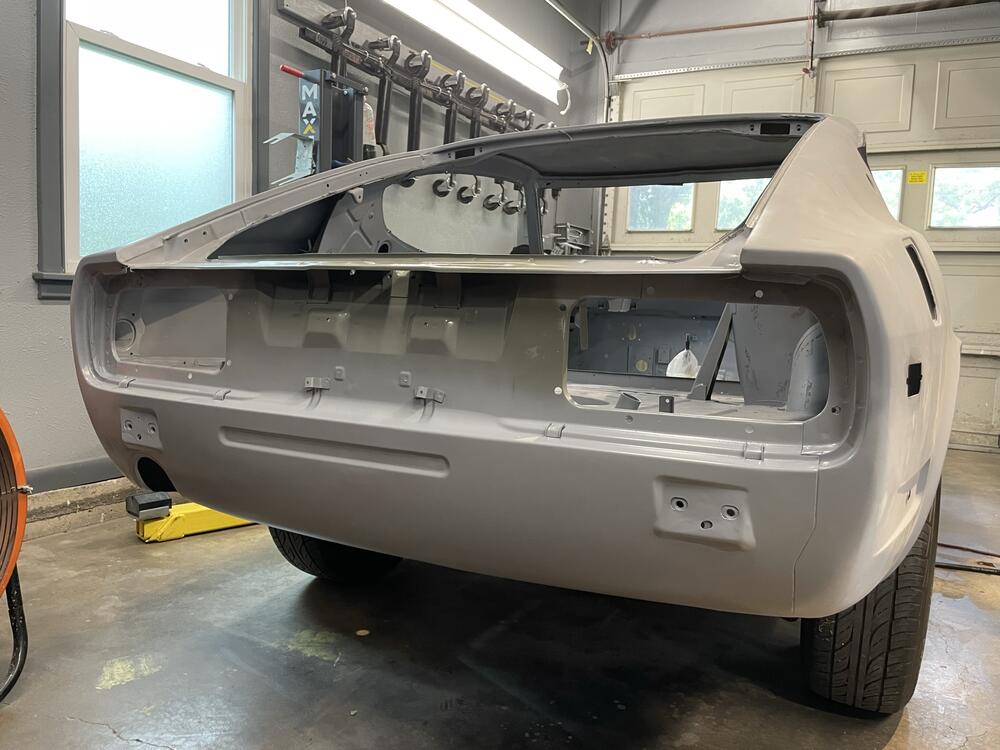
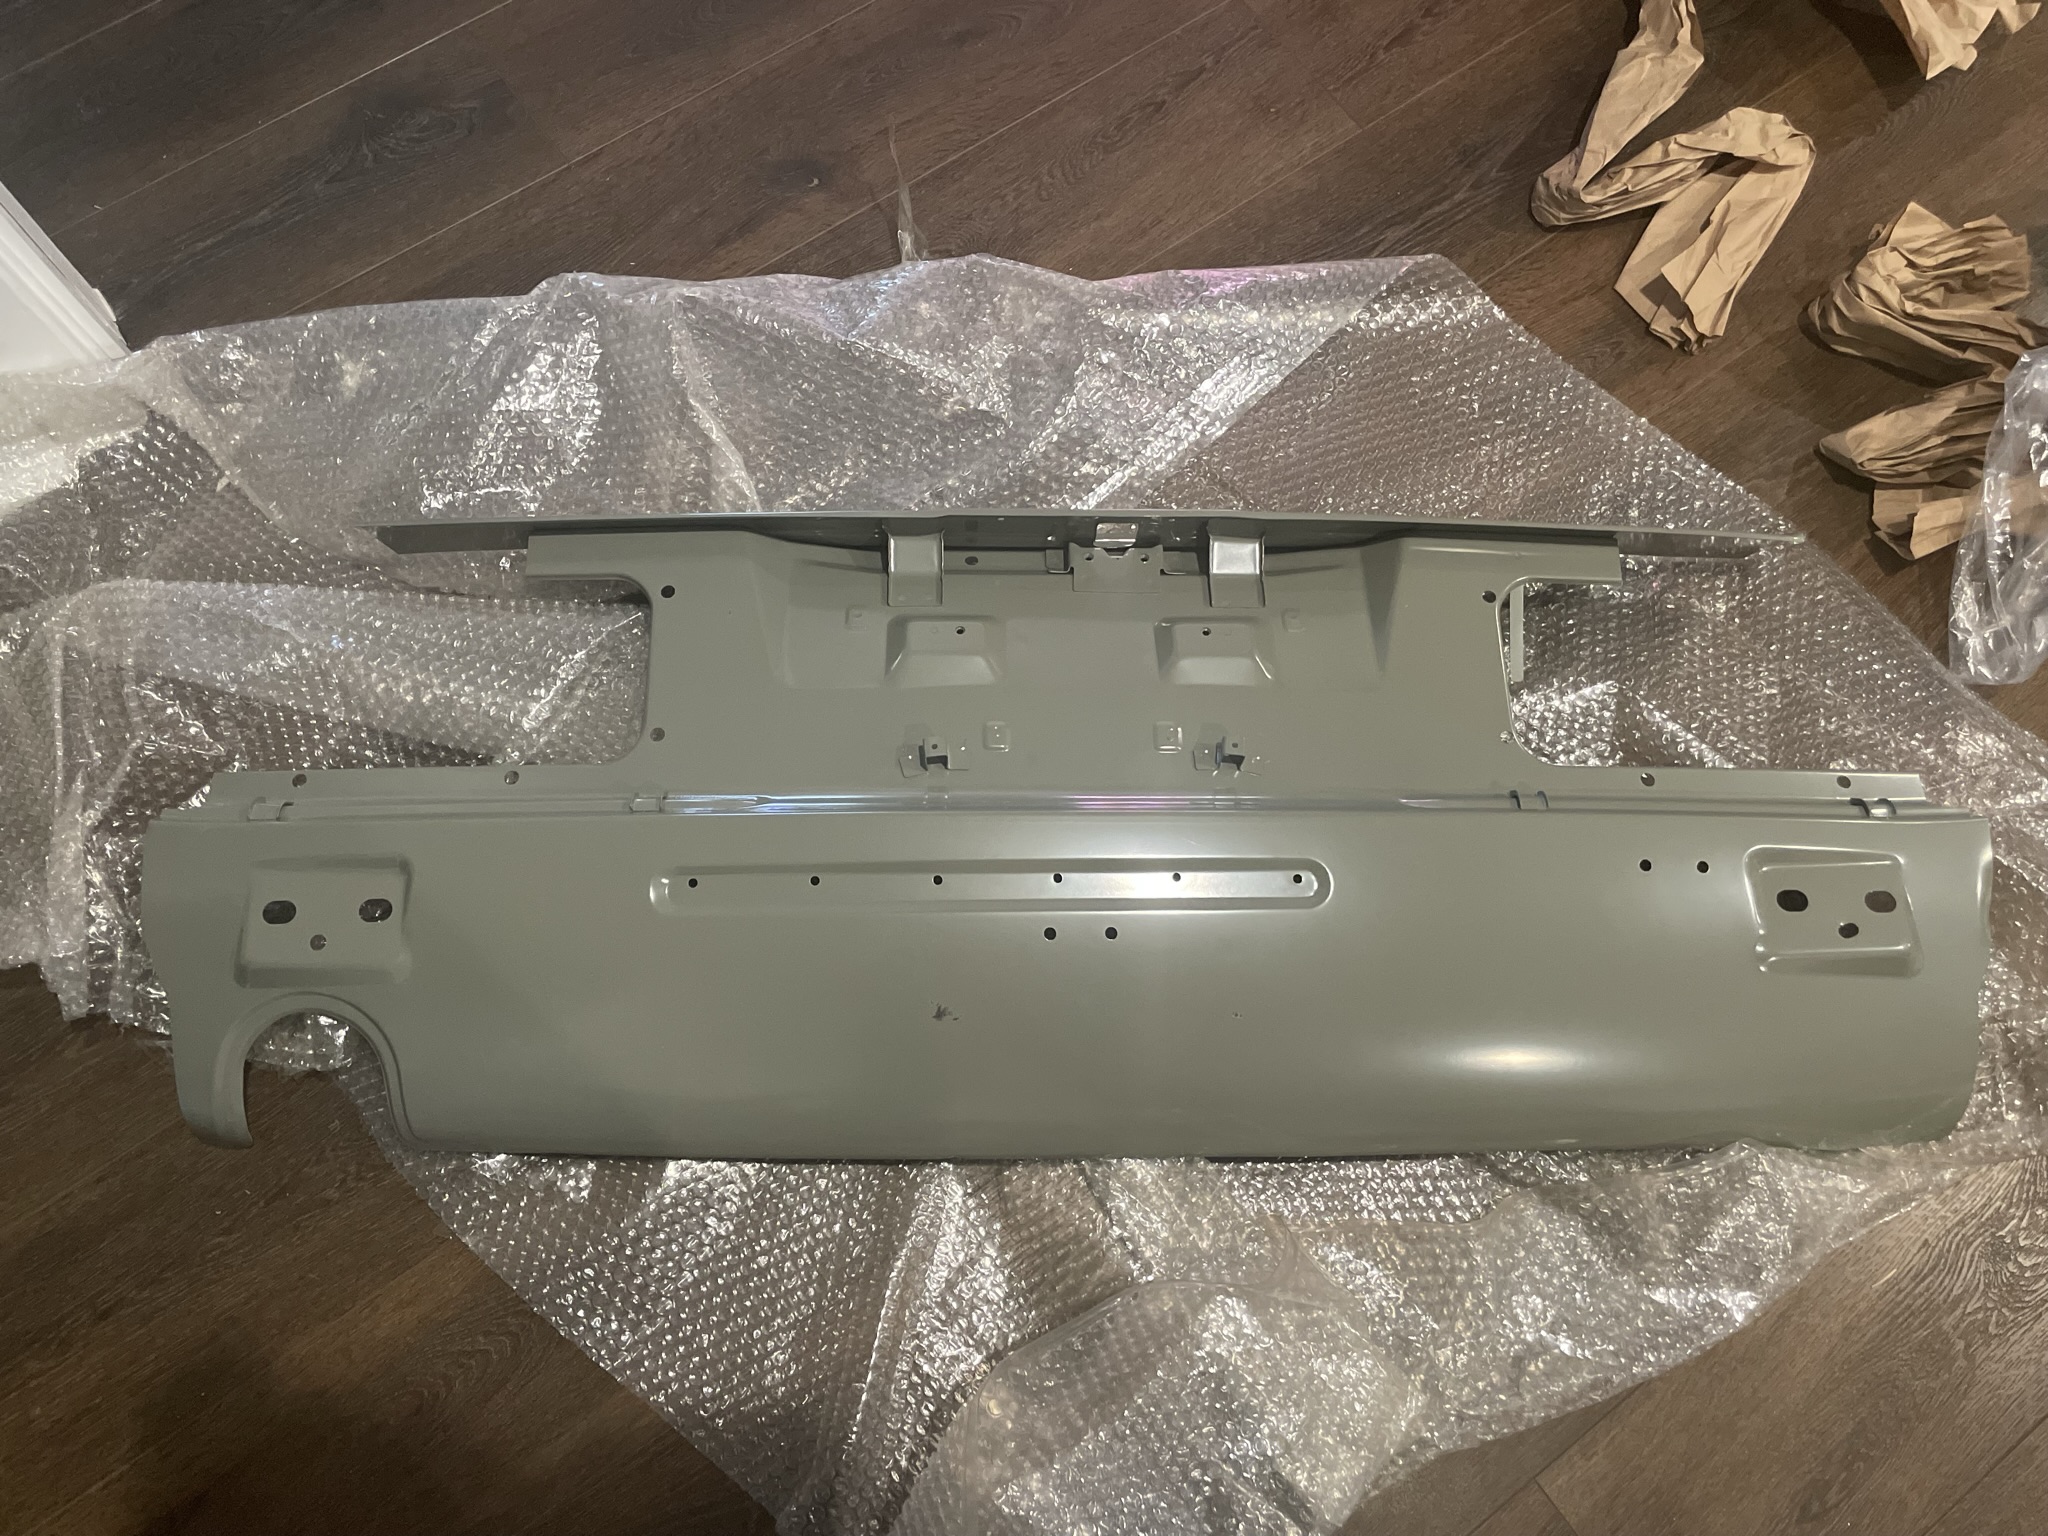
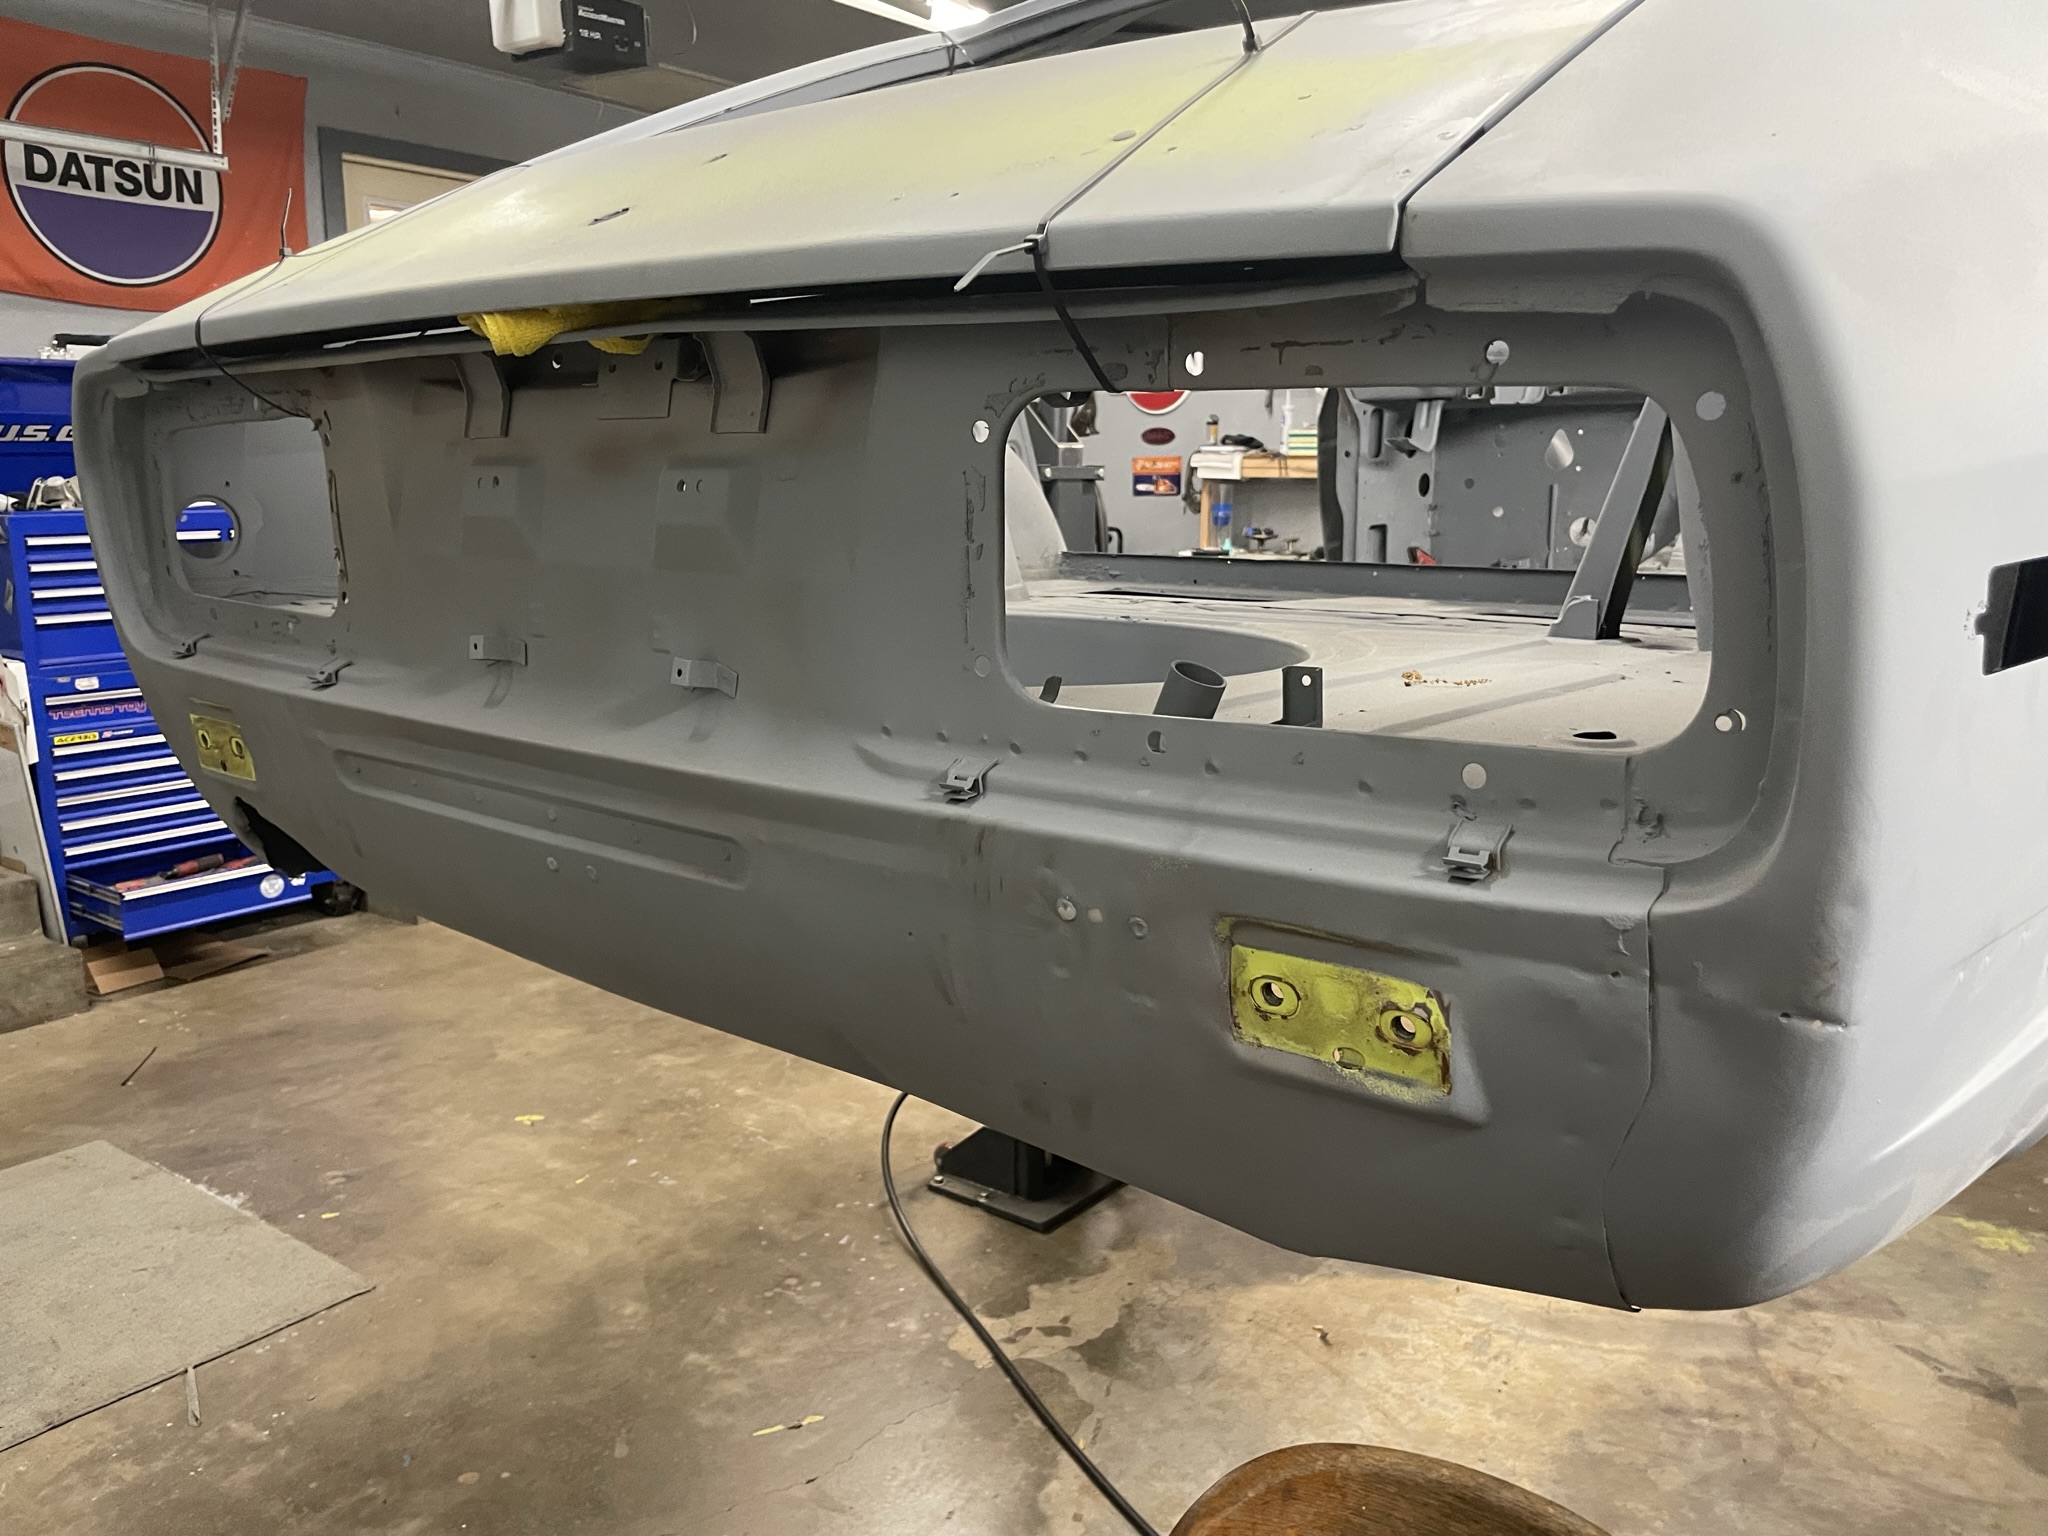
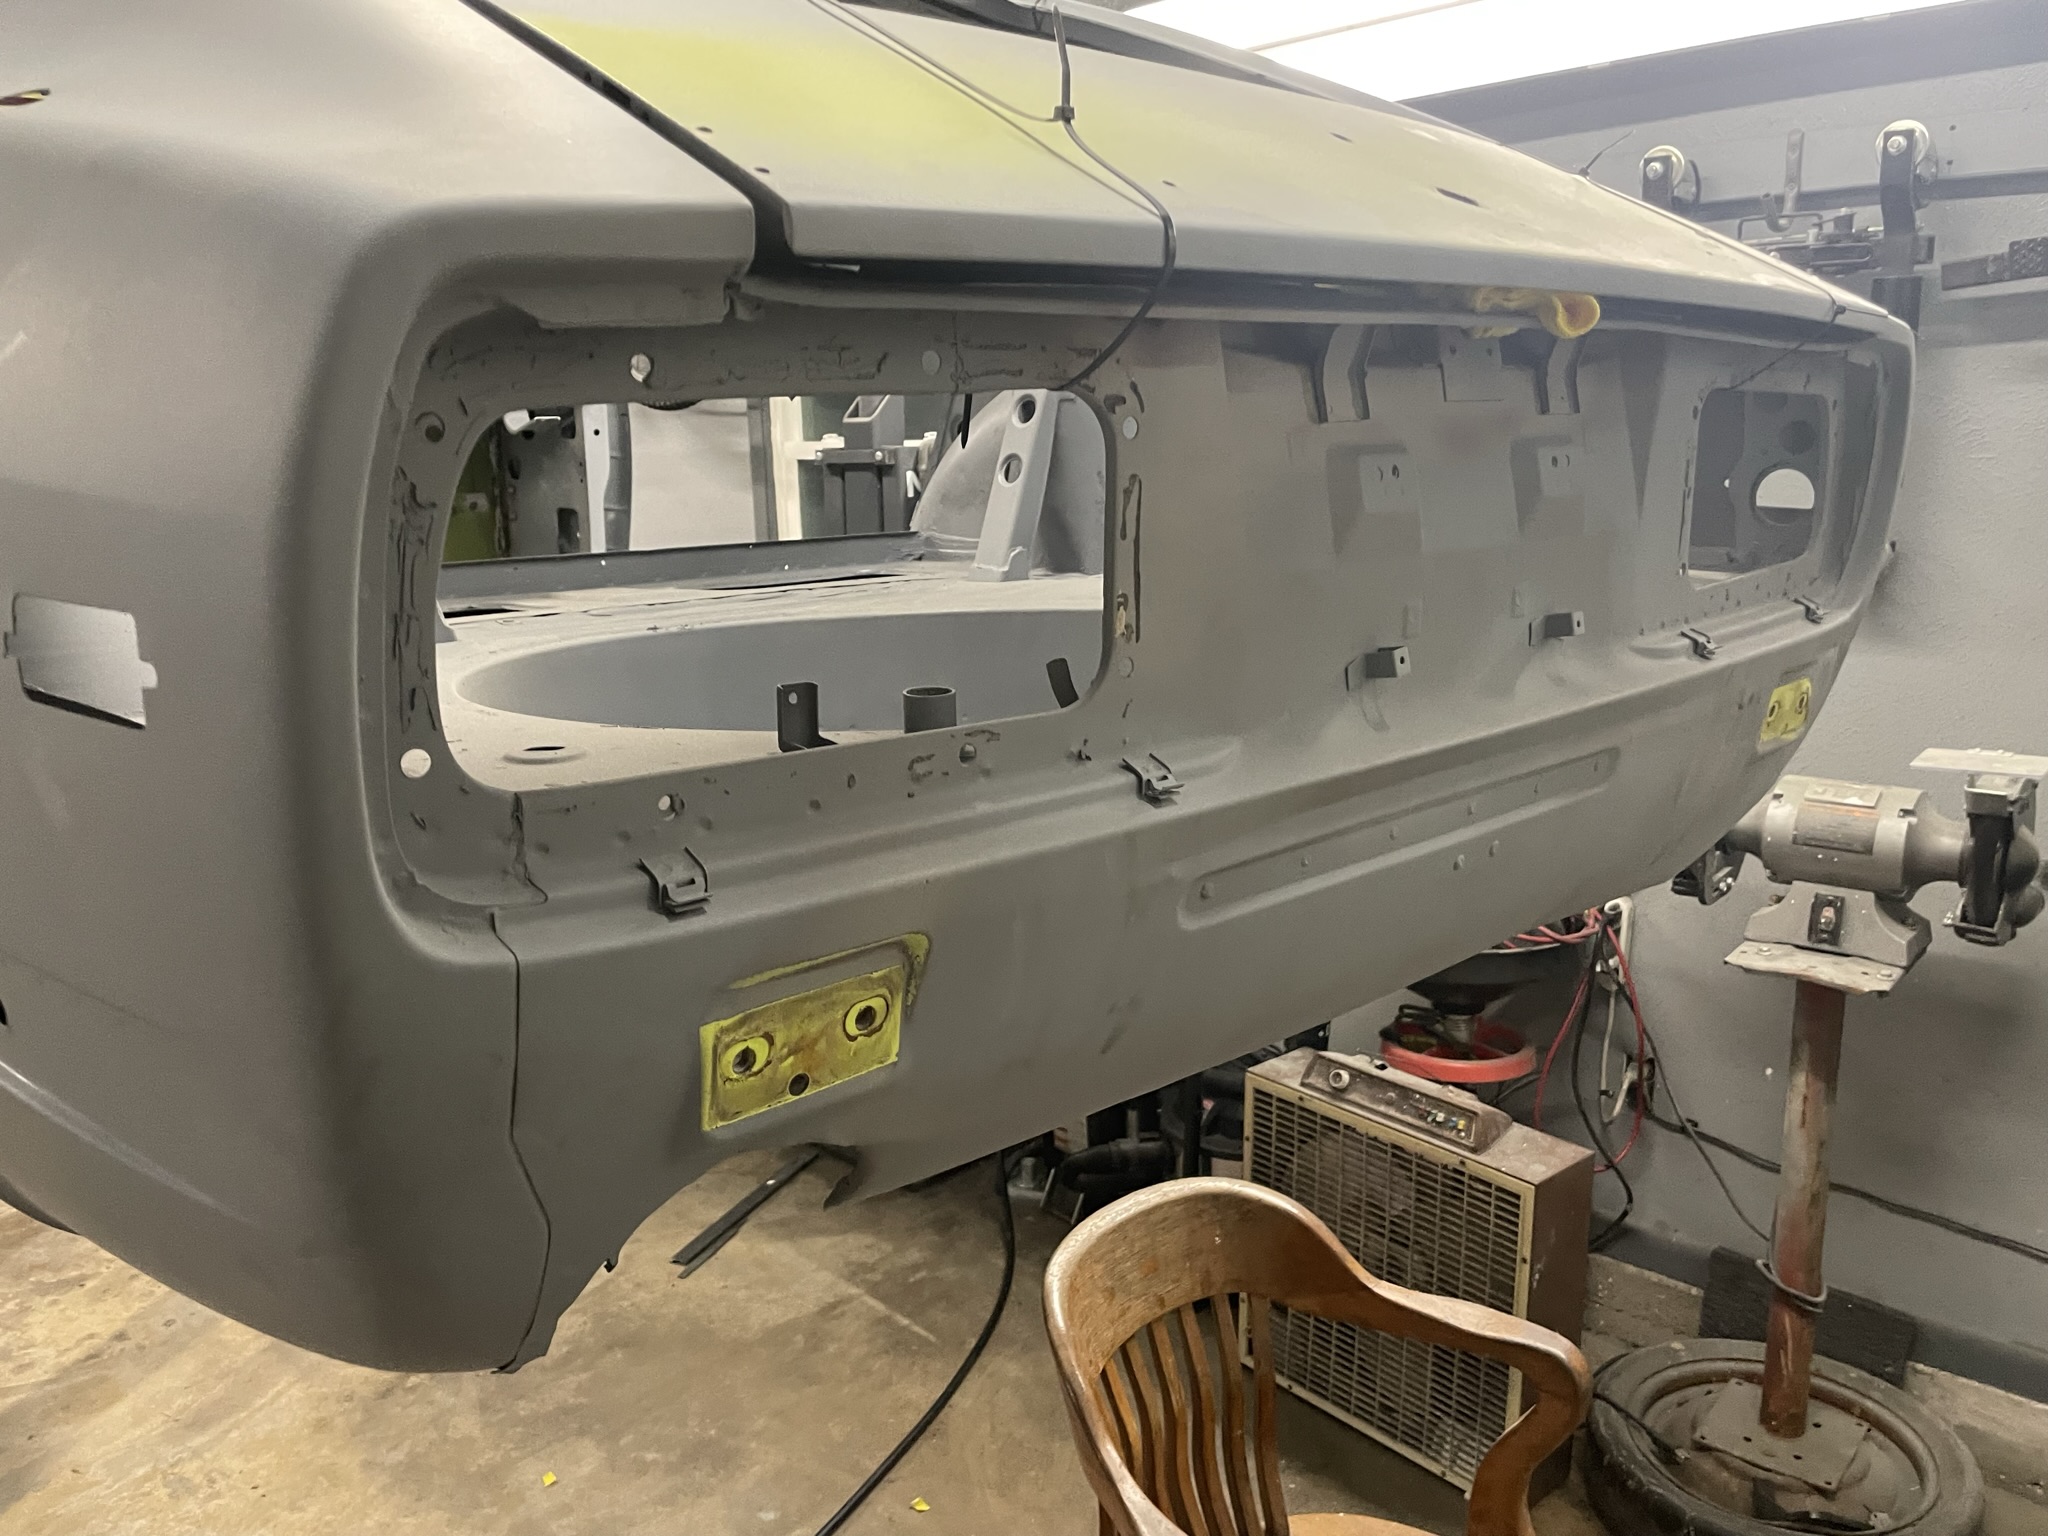
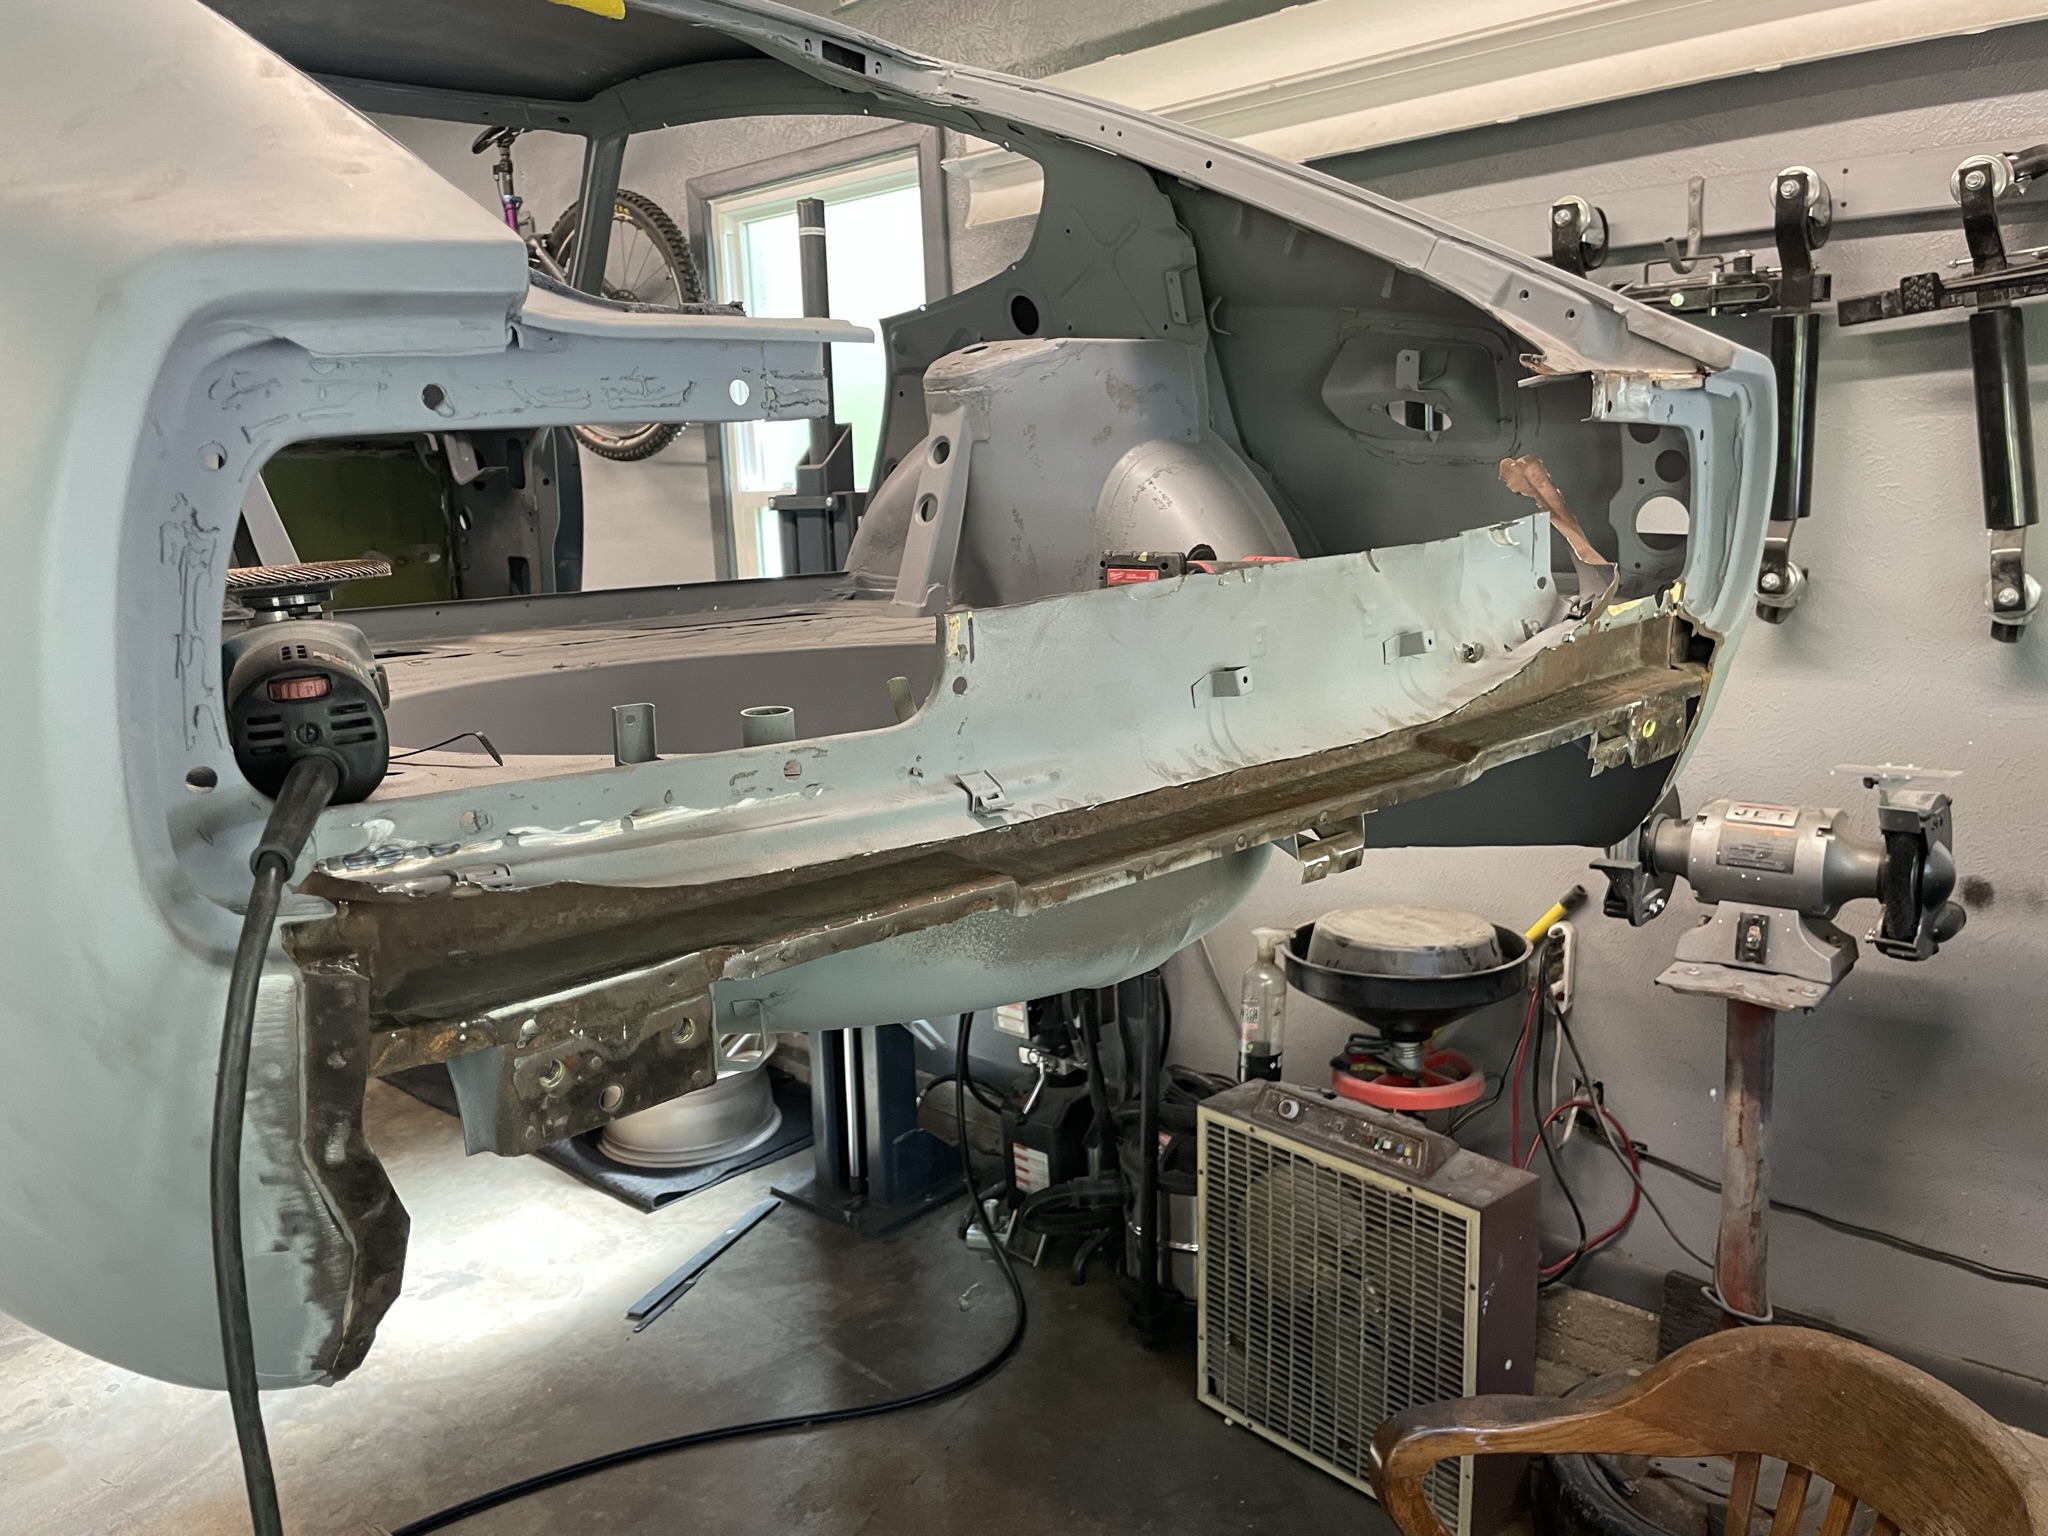
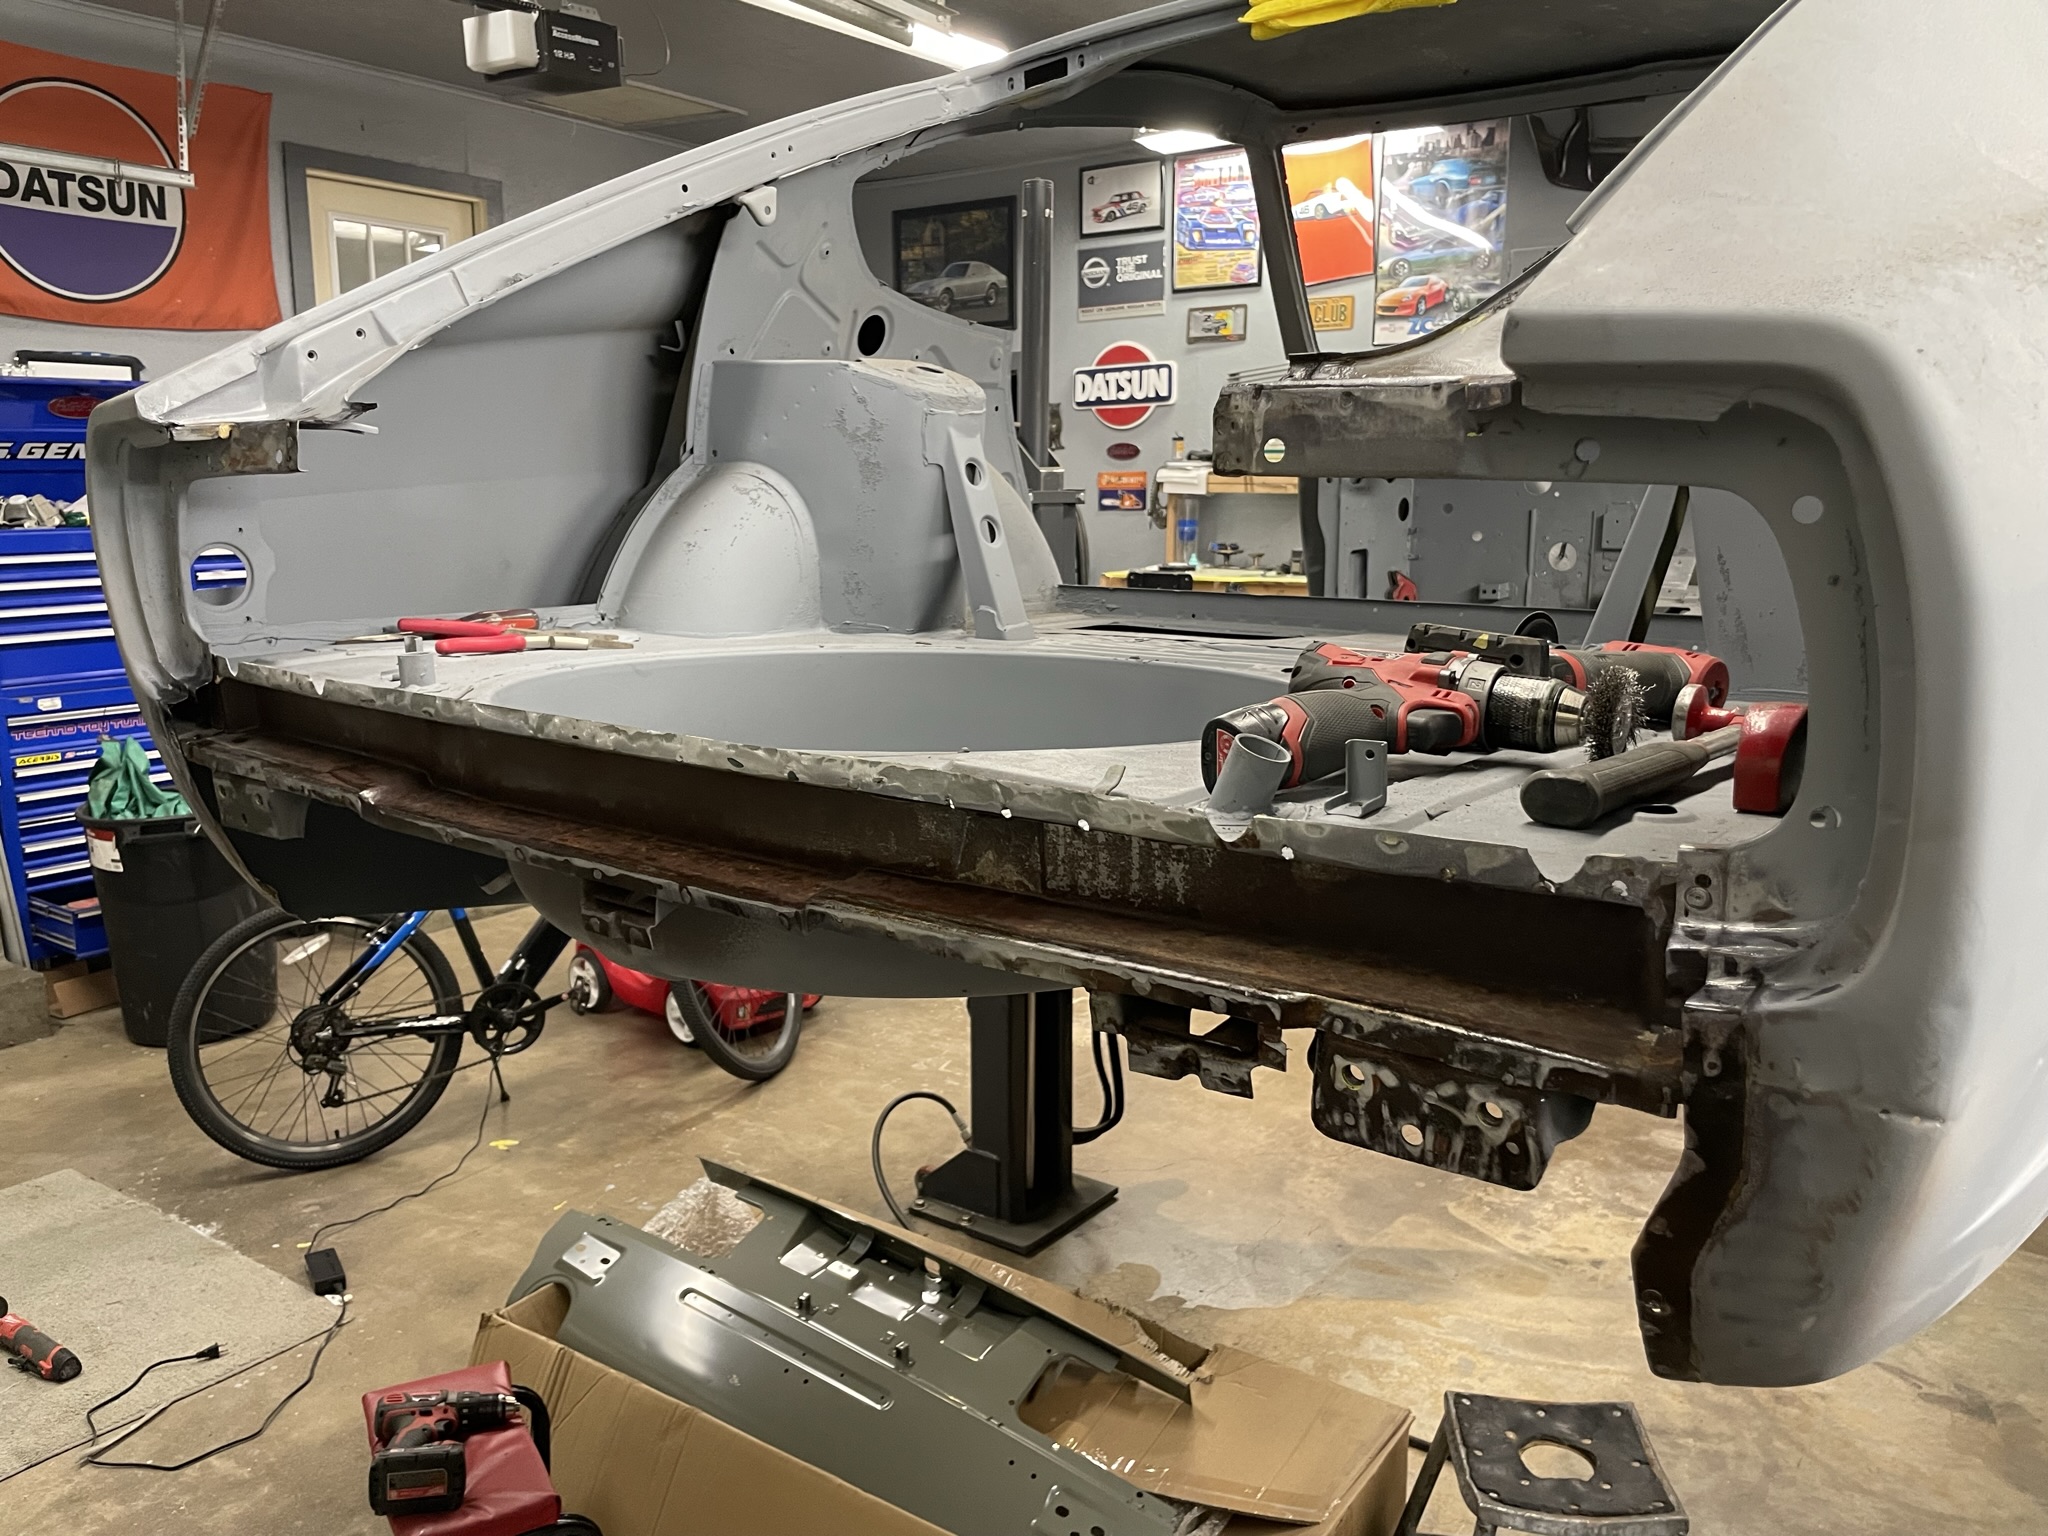
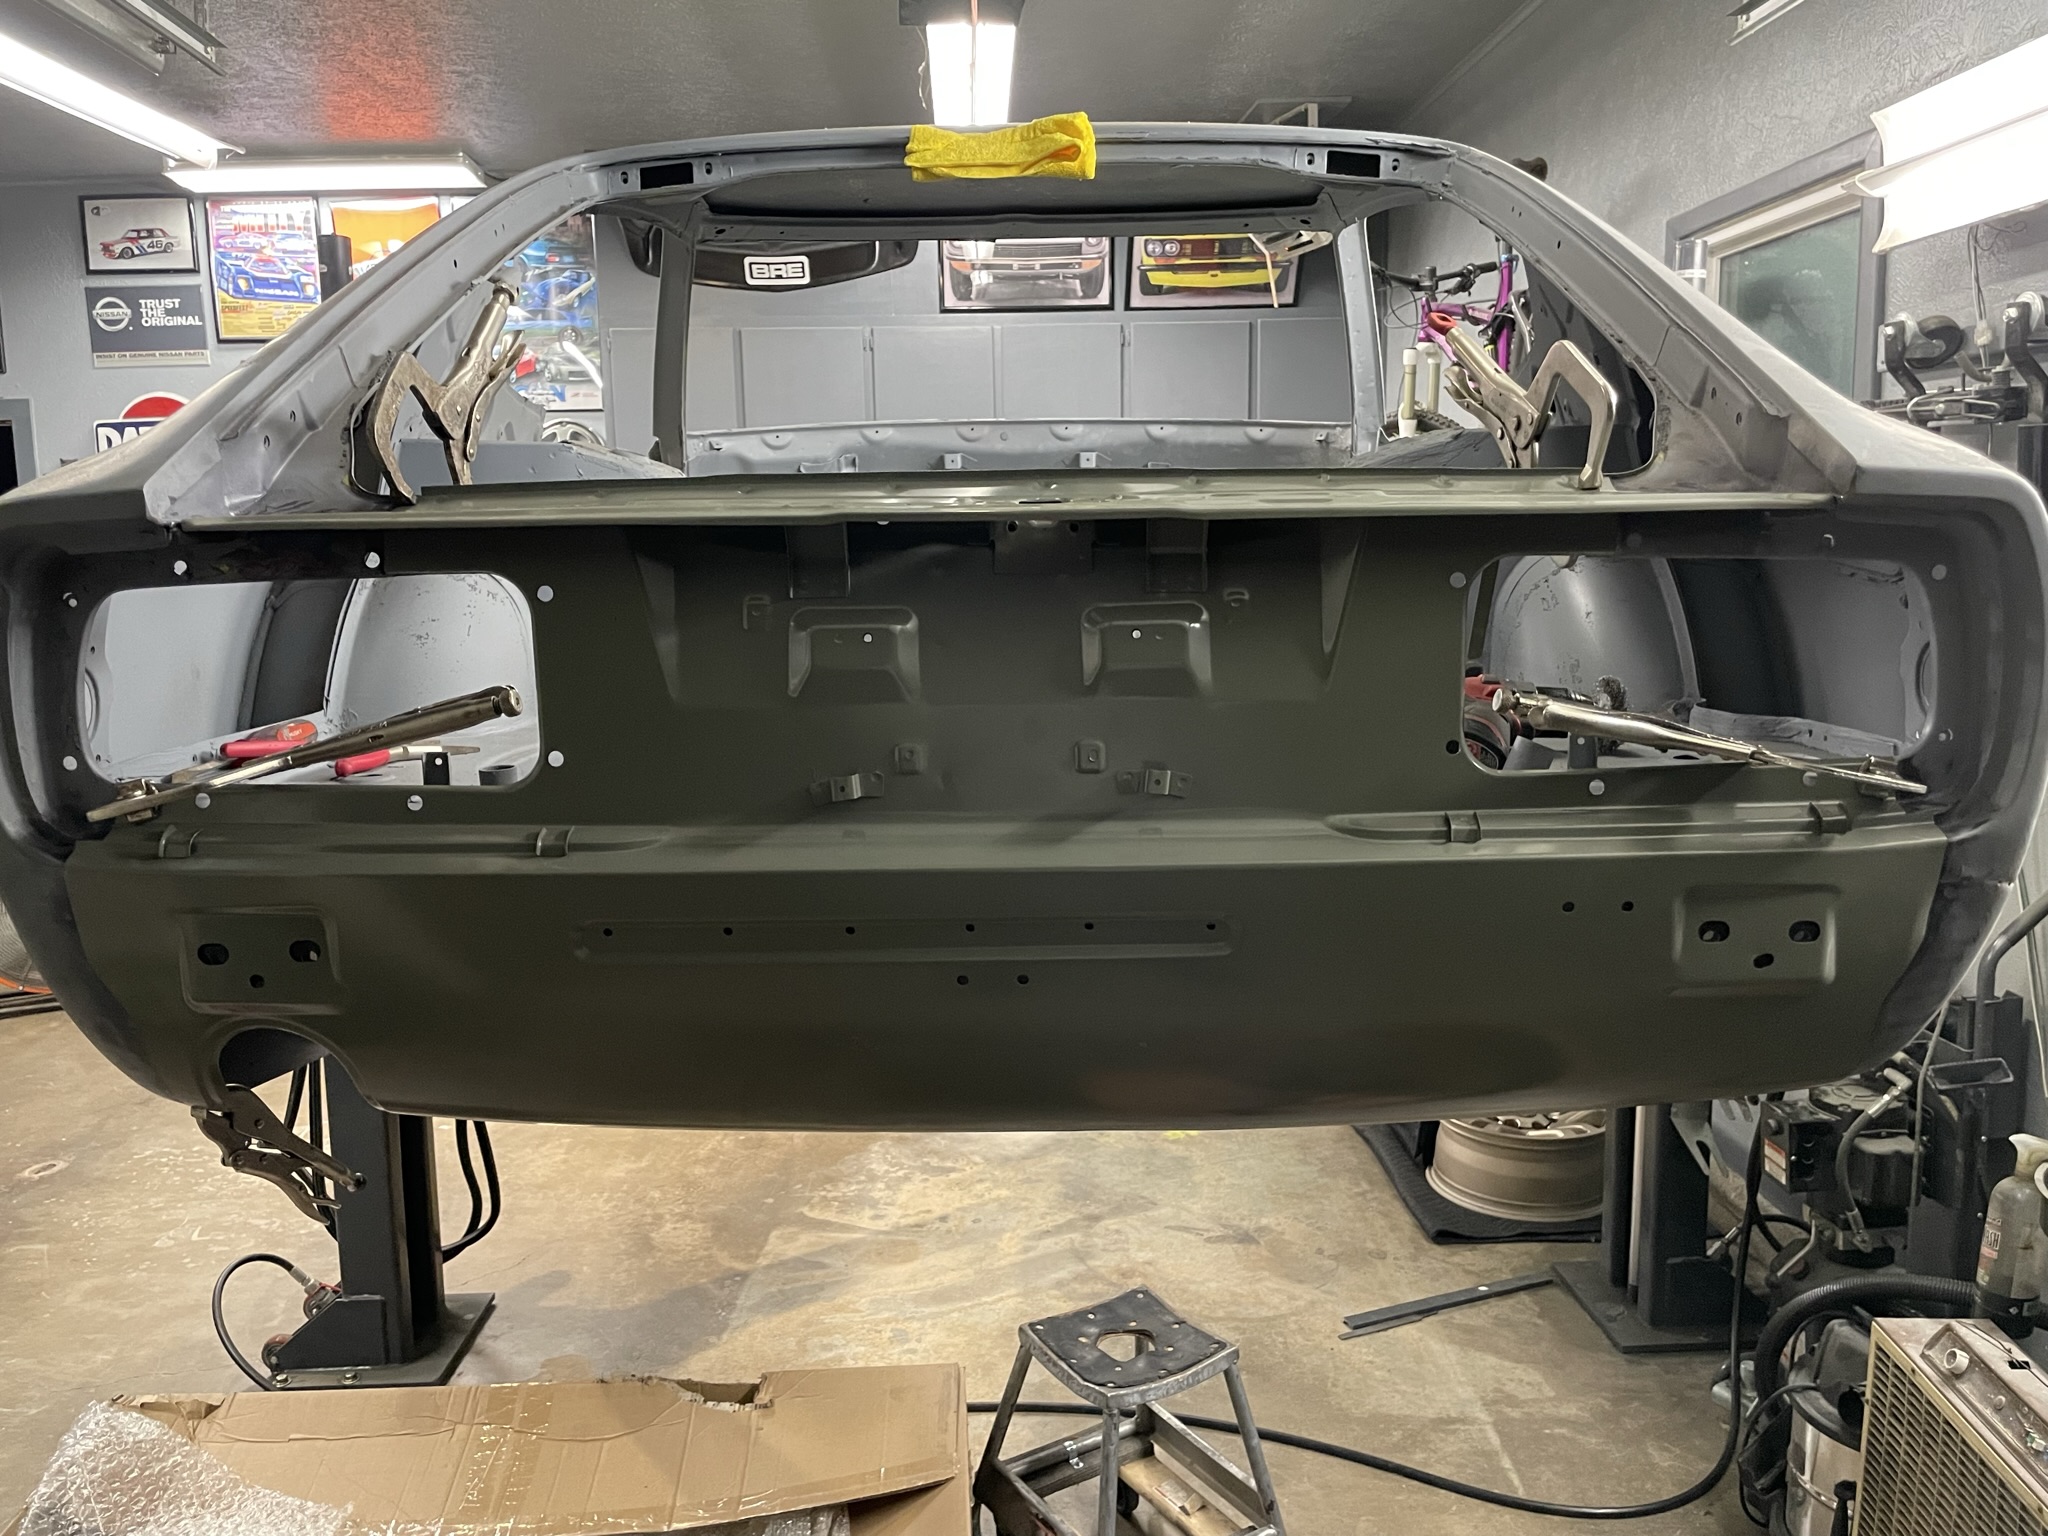
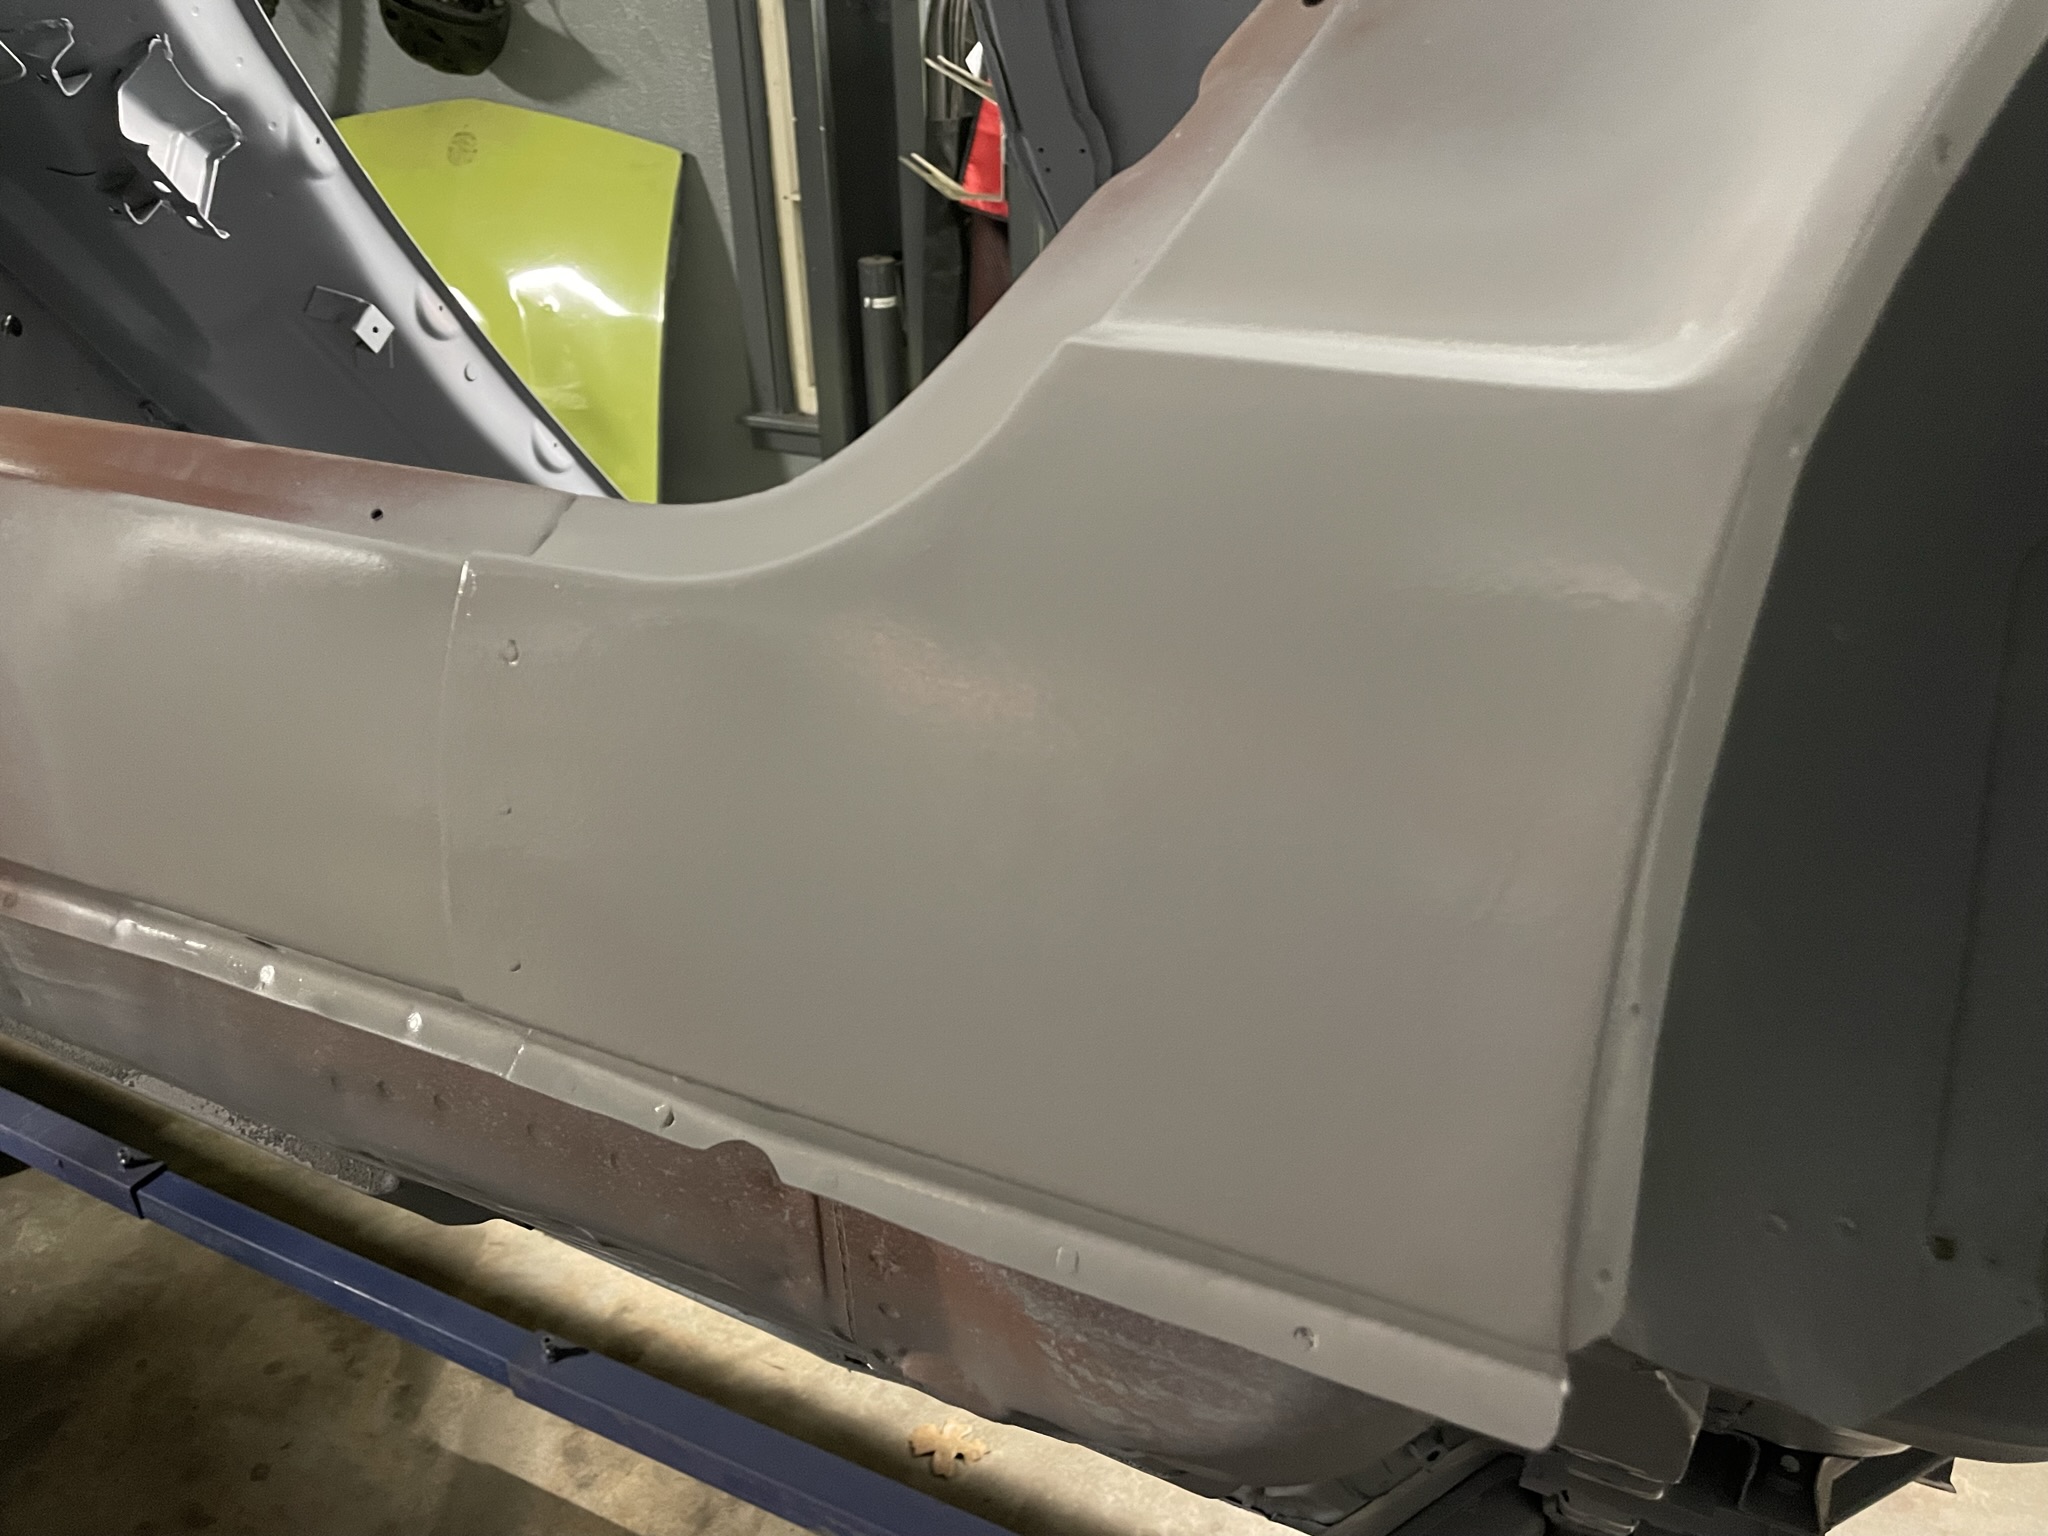
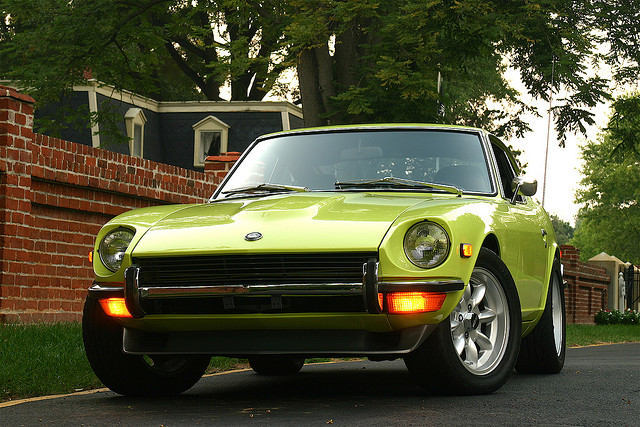
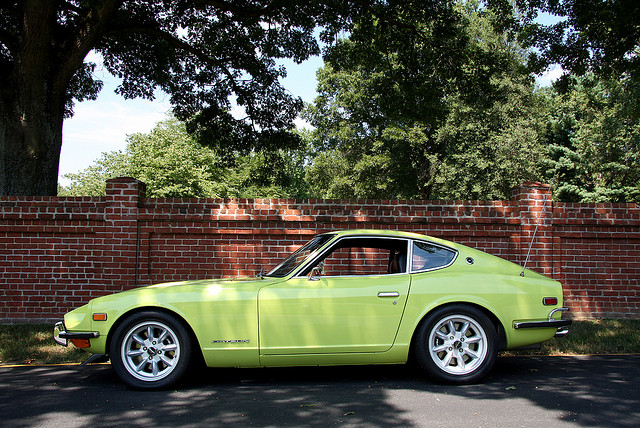
3 pointsLast of the major metal work was replacing the tail light panel. The original panel had seen better days with the center section pushed in from the rear bumper, some damage around the RH quarter, and at some point someone cut the panel around the exhaust tip for a larger muffler. Rather than fixing each of these areas, replacing the entire panel from Resurrected Classics was the path taken. Overall the panel was a nice piece. Had the right amount of crown across the surface, all the wiring tabs were placed corrected and it fit well to the existing metal with some trimming. Overall removing the existing panel wasn't bad. Just take your time and ensure each spot weld has been drilled out. First fitment of the panel. I'd say out of the box it was 85-90% there in terms of a direct fitment. Biggest job during this was ensuring the seam between the quarter panels and the new metal lined up. While they didn't fit perfectly from the factory, I think we got the new panel pretty close with a bit of trimming.


 3 points
 -
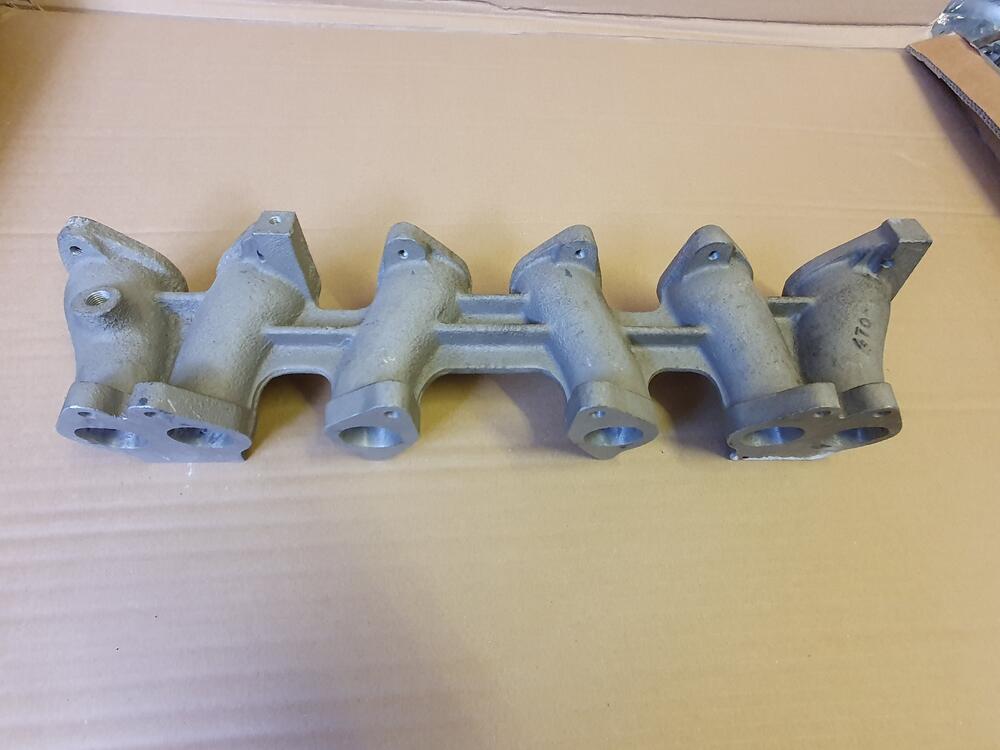
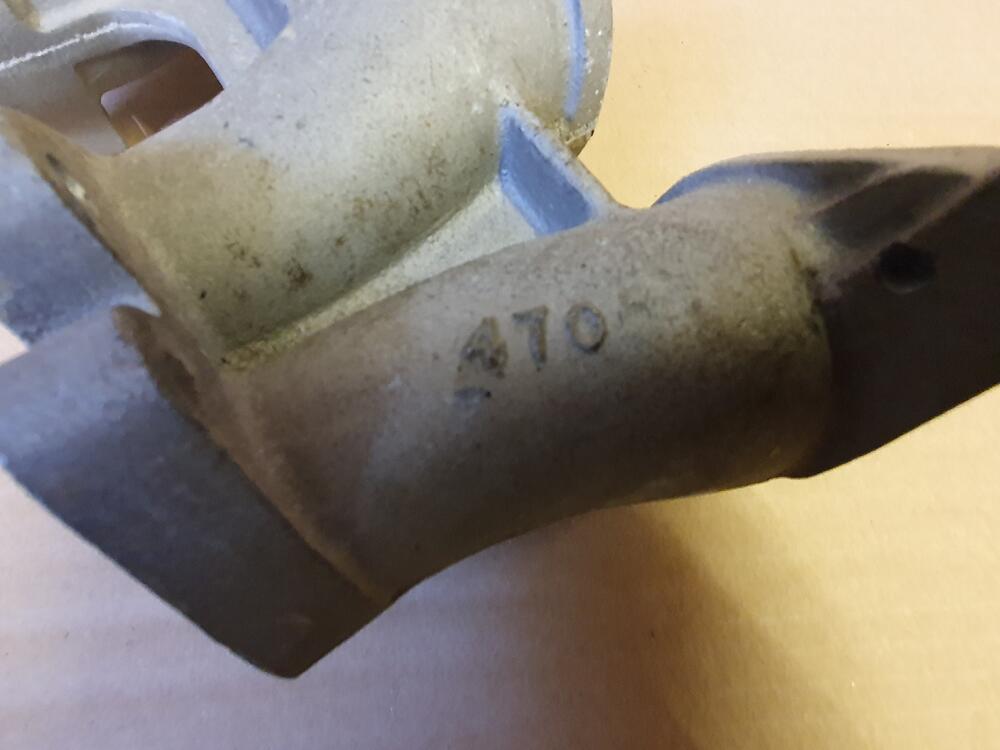
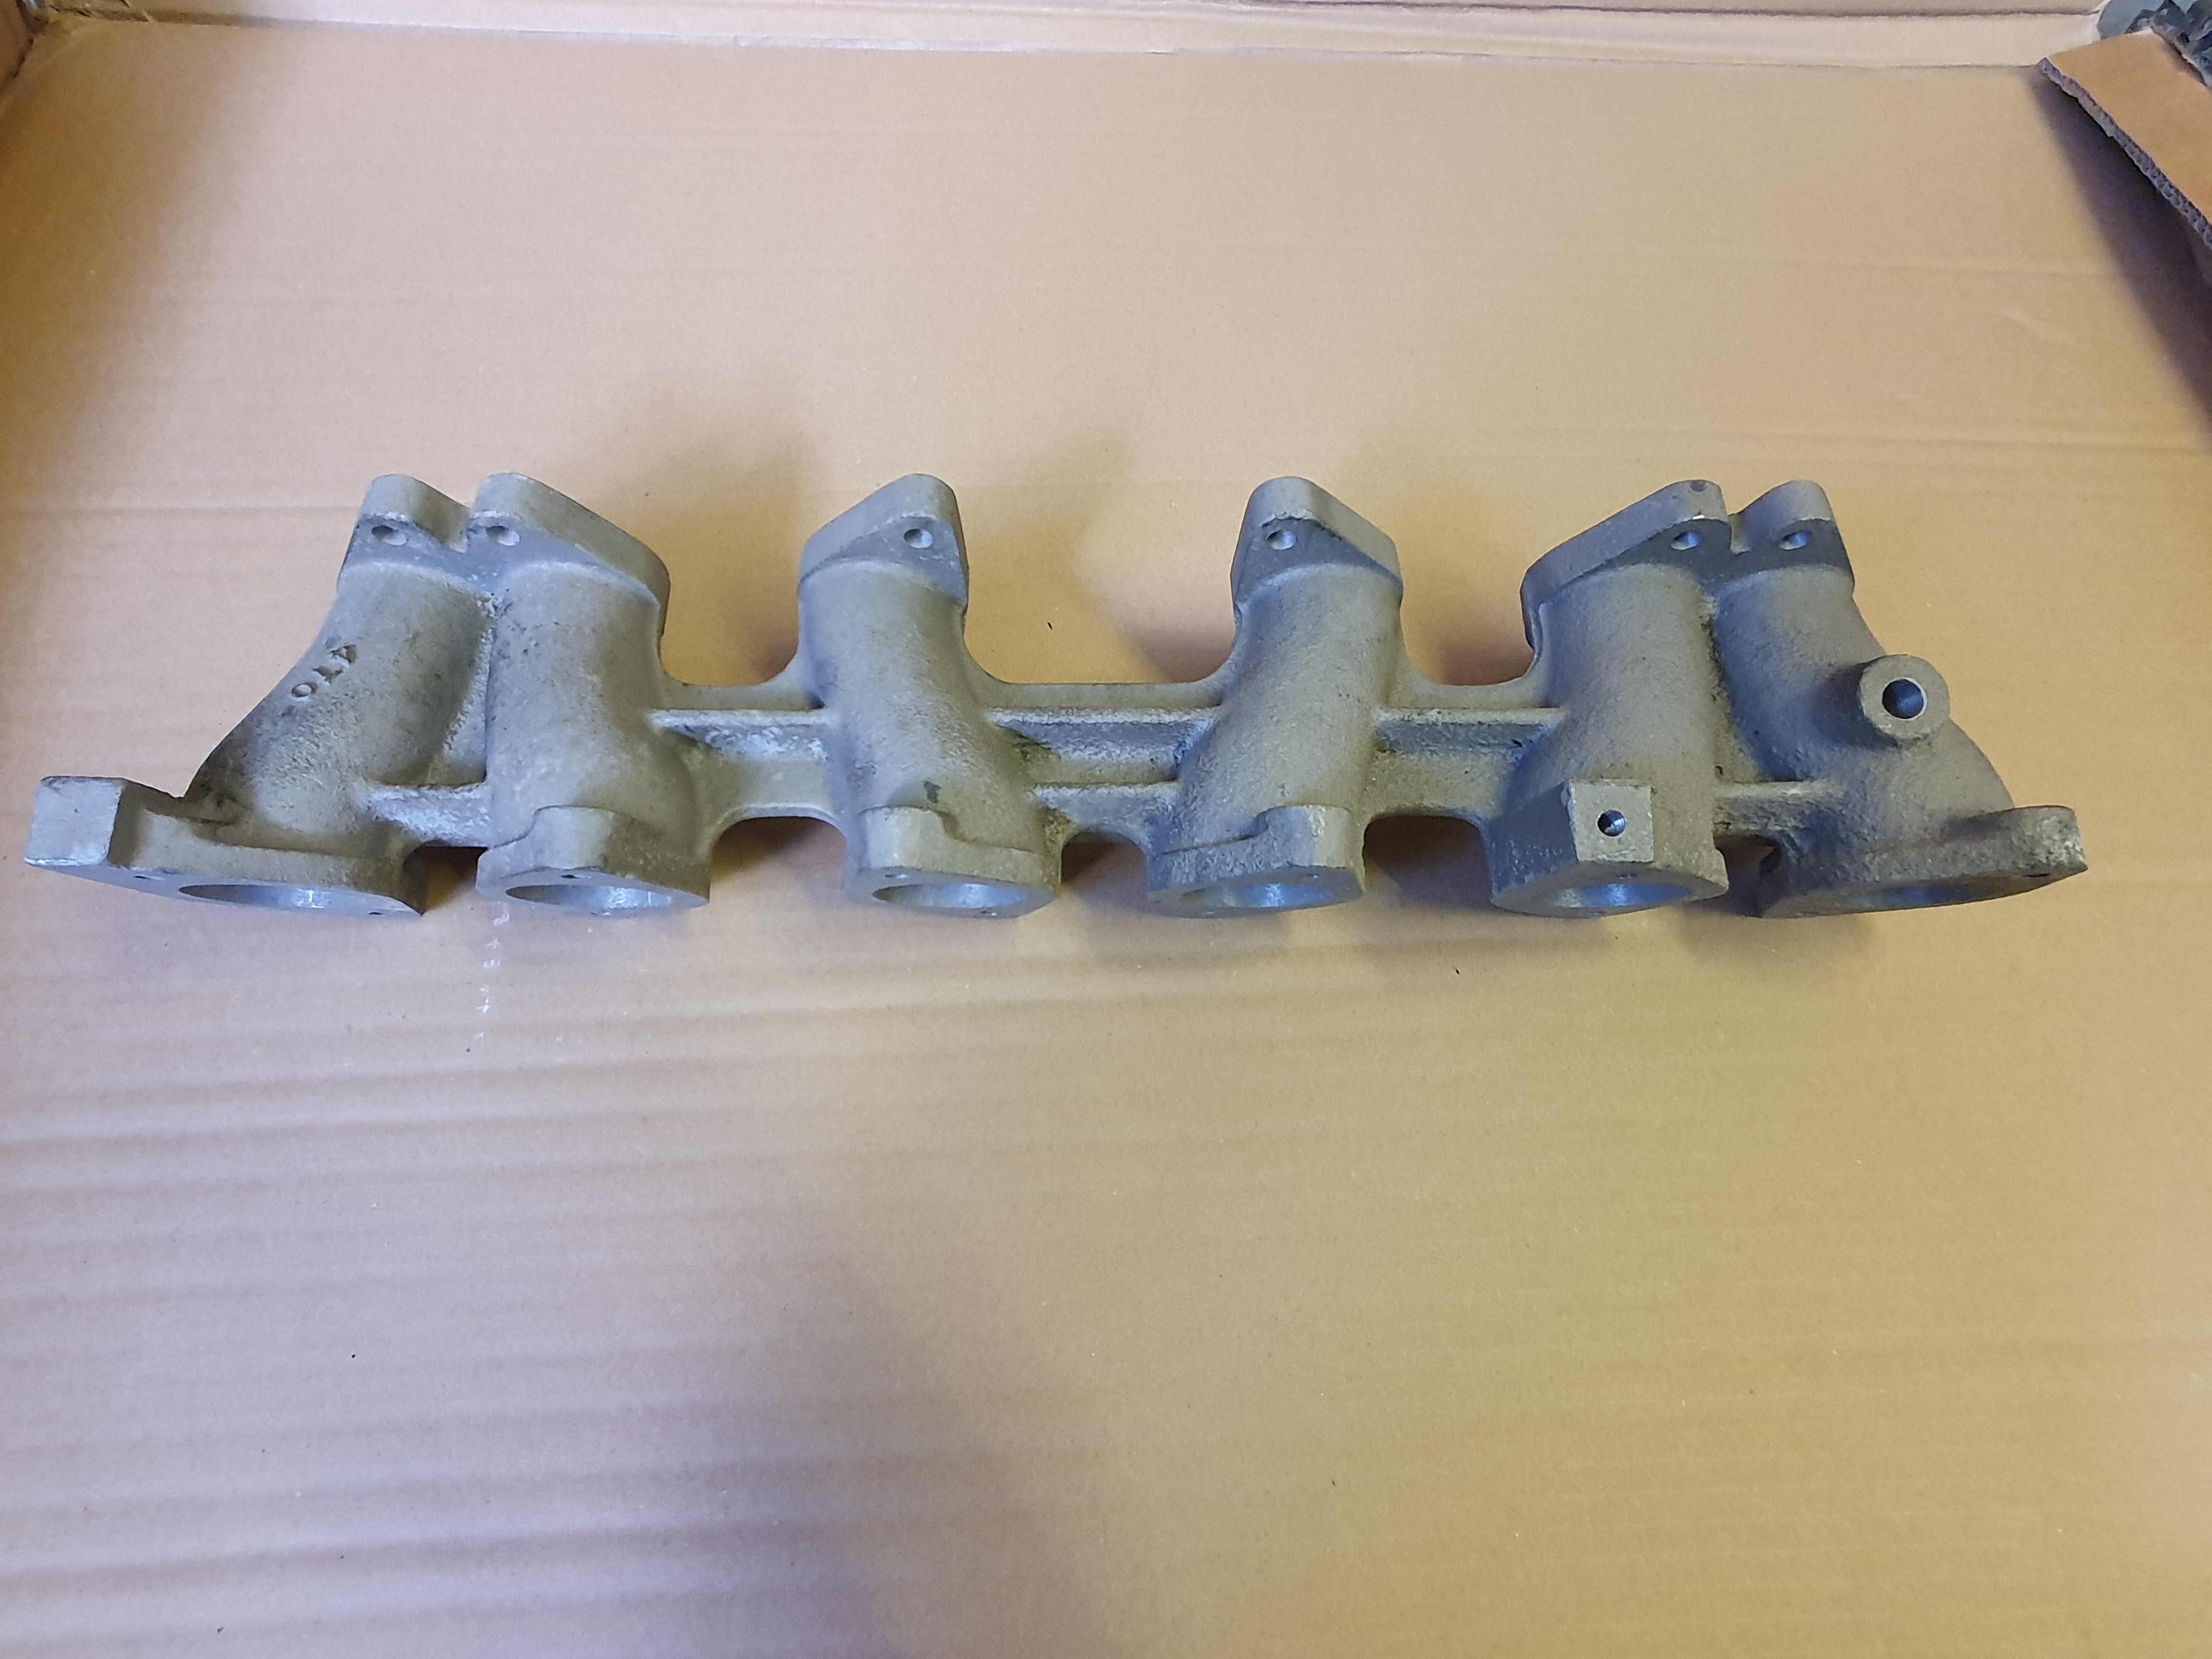
Yes! You've got it. Definitely 'Conversion & Tuning Centre Ltd' of Brixton, South London. I didn't see the 'C T' logo cast into the manifold in your previous post. Very distinctive. The only other big London-based specialist supplier of carburettors, inlet manifolds and conversion kits from that early 70s I can remember was Chris Montague Carburettor Co. in North London (my side of town), and which I am old enough to have been a customer of. Gone now. They really knew their stuff. I bought my John Passini-authored Weber 'bibles' from them in the late 1970s. My *guess* is that Mangoletsi may have cast some manifolds for C & T London with their logo on them. It probably would have been too expensive for C & T London to have commissioned their own castings with such a relatively small market already covered by Mangoletsi. I would say - judging from the photos - that the C & T London version looks like a neater casting than my '470' Mangoletsi, but that may have been down to batch quality differences? Having said that, other '470' manifolds that have passed through my hands in the past (often from period 'Samuri Conversions' cars) are equally poor castings, so they seem to have been pretty consistently poor. Could C & T London have insisted on a better casting, with their name on them? Seems feasible. Just as an aside for your friend; if he uses this 40DCOE-24 setup on an L24-based engine he might want to try changing to short (10mm) accelerator pump rods and 0.45 accelerator pump jets, as used on the 40DCOE-18. I have recommended this a few times for others with positive results. The Nissan L6 seems to 'like' a short, sharp accelerator pump action on the DCOEs. John Passini covered the topic in his books. Recommended.2 points
-
It is a lot of money for the school and a little bit for the Datsun. Several people contributed directly to the school as well.2 points
-
That's a lot of money for Datsun. Amazing what prices have done in the last 10-15 years!!2 points
-
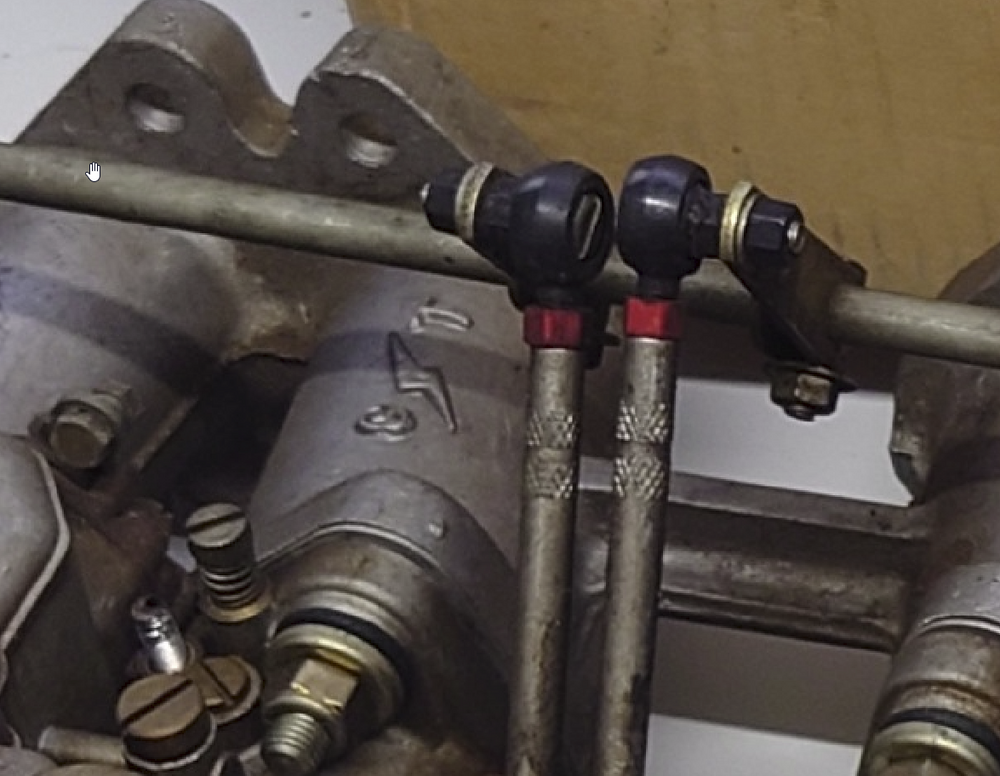
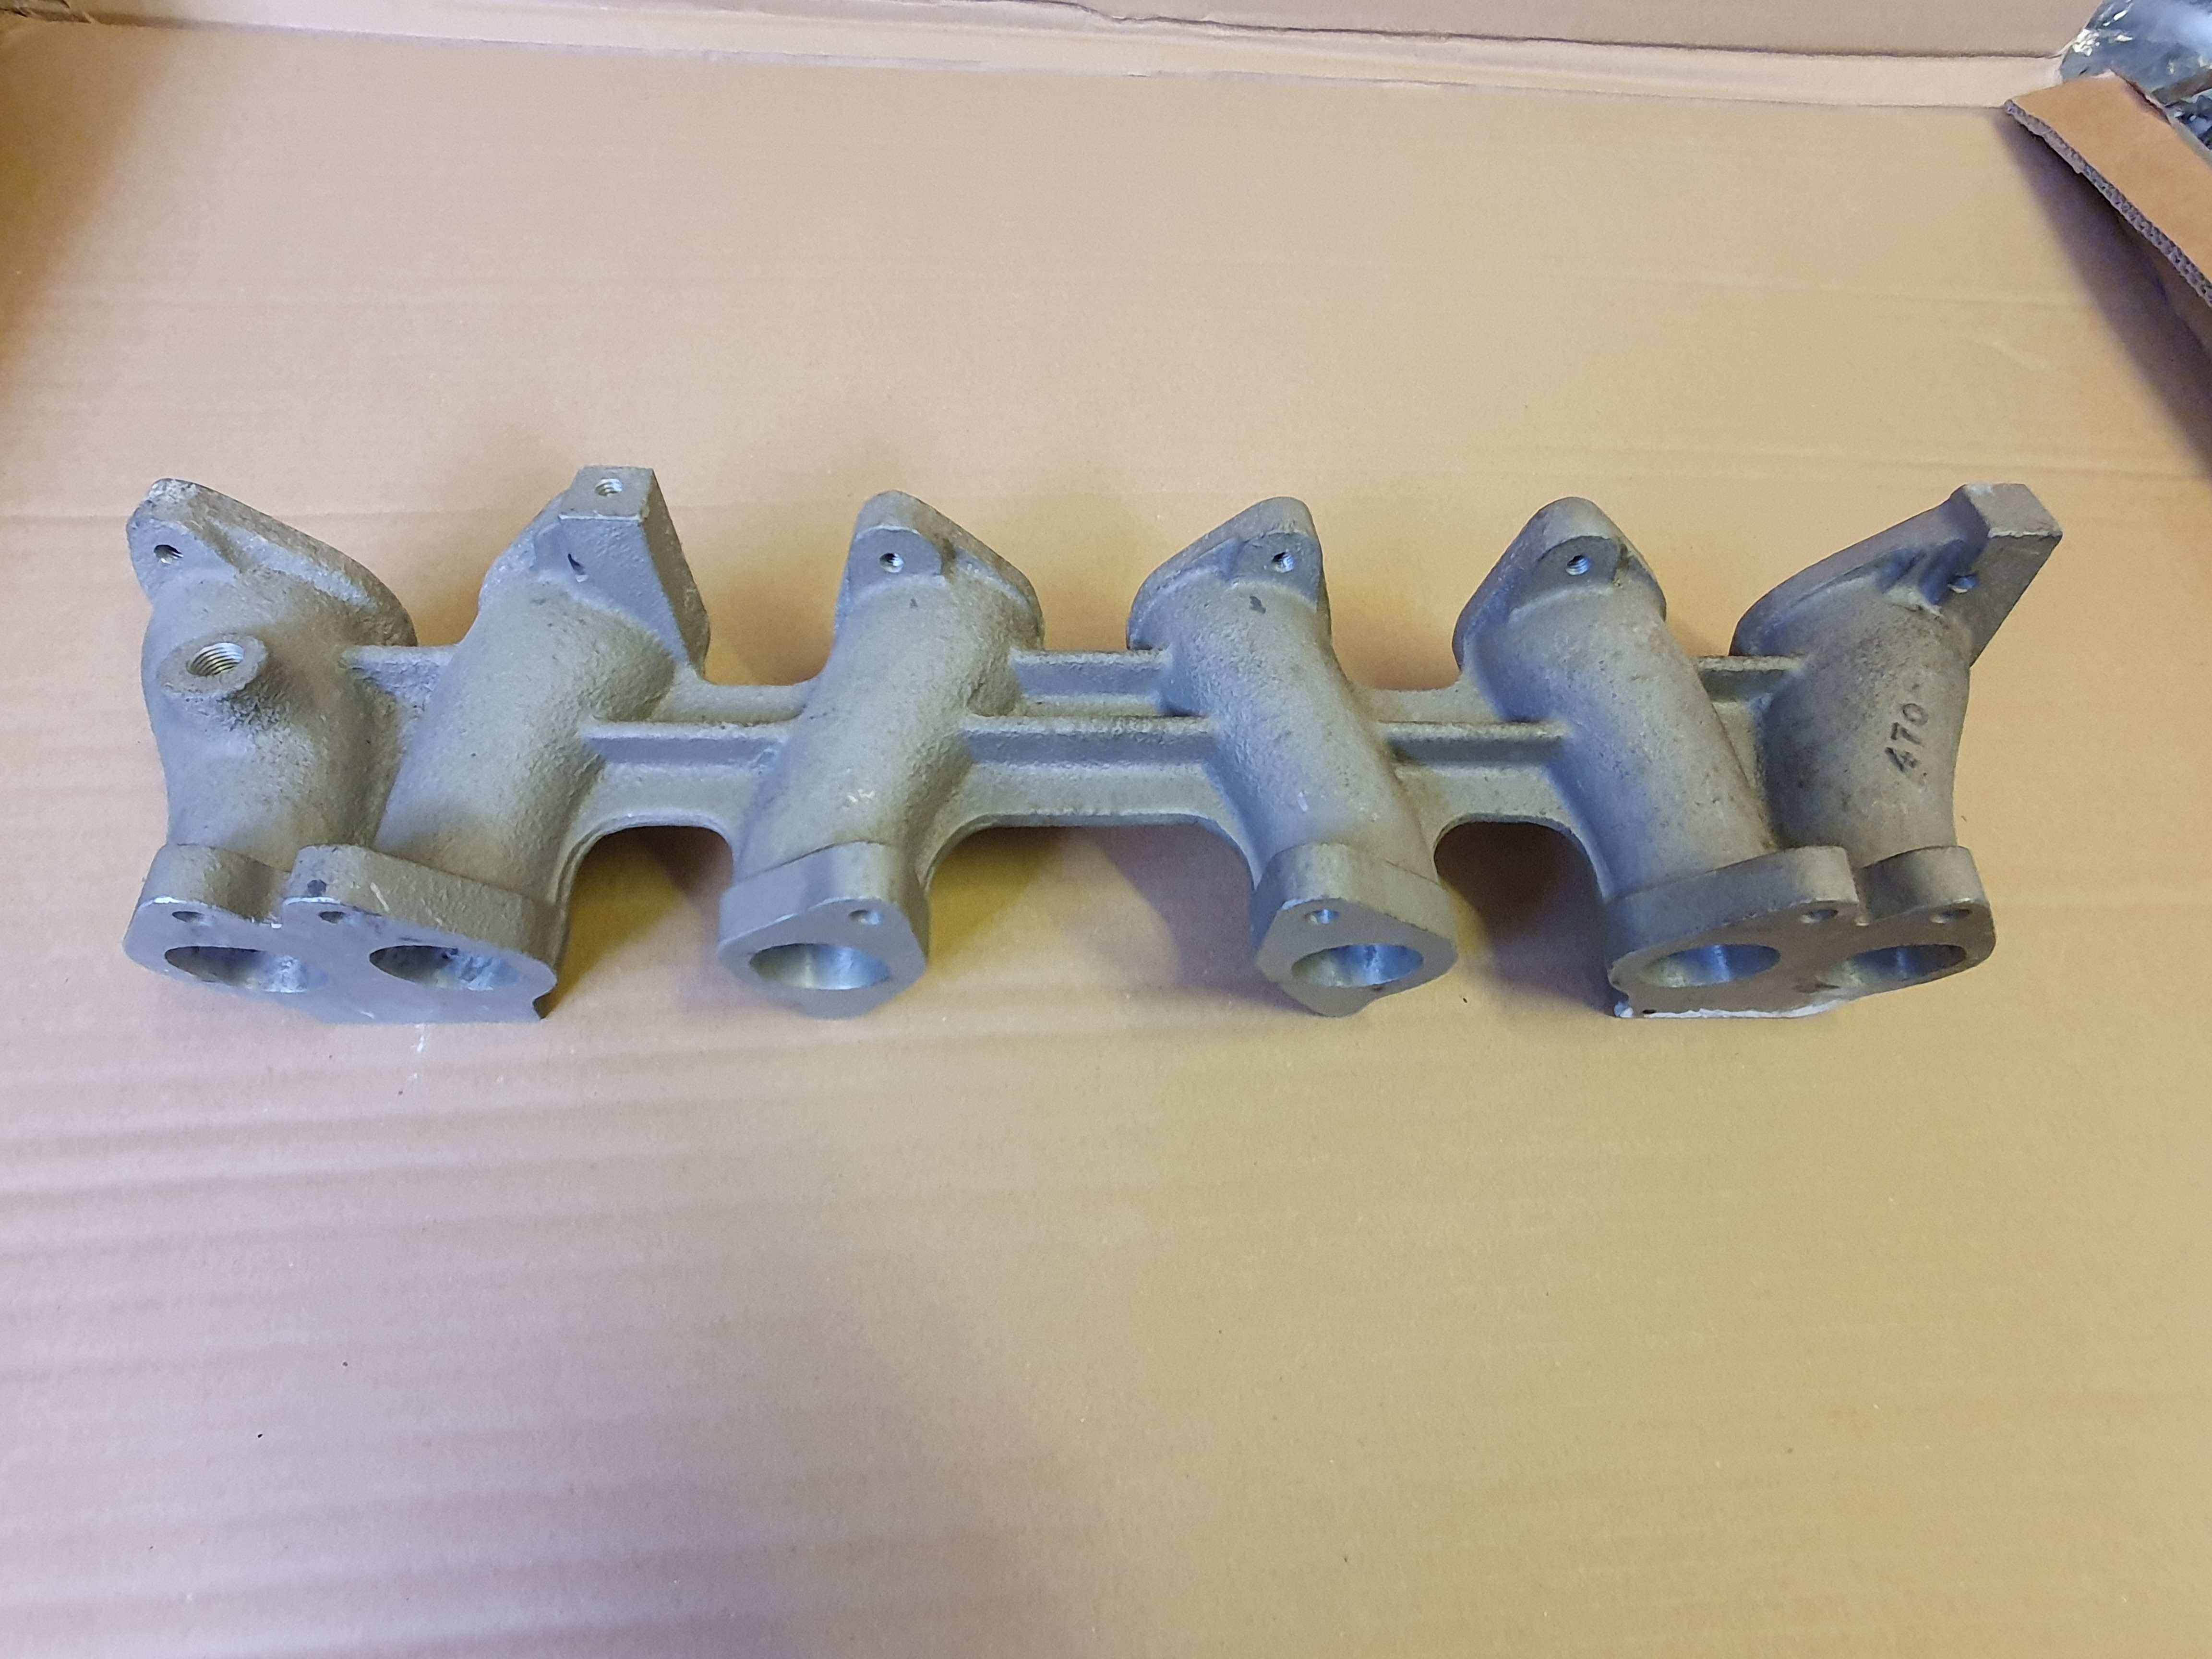
A cool part of DSSA history. Thank you for showing it to us. Intriguing! I'm surprised that they chose to use 40DCOE-24 series carbs. Weber's own recommendation as a conversion 'road' kit for the L24 engine was three 40DCOE-18 series and the 24 series was actually only offered as stock (factory) equipment on the 1600cc ALFA Giulia Super. The 24 series had 27mm chokes and 0.35 pump jets, whereas the 18 series had 30mm chokes and 0.45 pump jets. The 18 series also had an accelerator pump stroke more suited to the L24 than the 24 series did. My best guess (take that for what its worth) is that they sourced the 24 series carbs from ALFAs and/or already had them available. The manifold is a new one on me. I can't ever remember - even as a Londoner - seeing the name 'LONDON' cast into a manifold. Your illustration from the Janspeed catalogue shows the '470' casting that - I have always been told - was cast and supplied by Mangoletsi. Janspeed, and others, often supplied the Mangoletsi manifold with their conversion kits. I wonder if the 'LONDON' manifold was also something cast by Mangoletsi for a specific customer? However, I can't think of any L6 specialists in the London area or using the London name. Curious. Here's a Mangoletsi '470' casting manifold that I have in my loft, for comparison. Casting quality is - I have to say - fairly rough:

 2 points
 -
2 pointsThanks for the replies. I have found a couple of instances when the parts manuals didn't match what I thought was correct. I guess the FSM is the better document. I only use JIS hardware, and let me tell you, I have had to replace a lot of hardware that wasn't correct! I took a ton of spare hardware and had it replated along with other stuff. Between that and Belmetric it has been invaluable.2 points
-
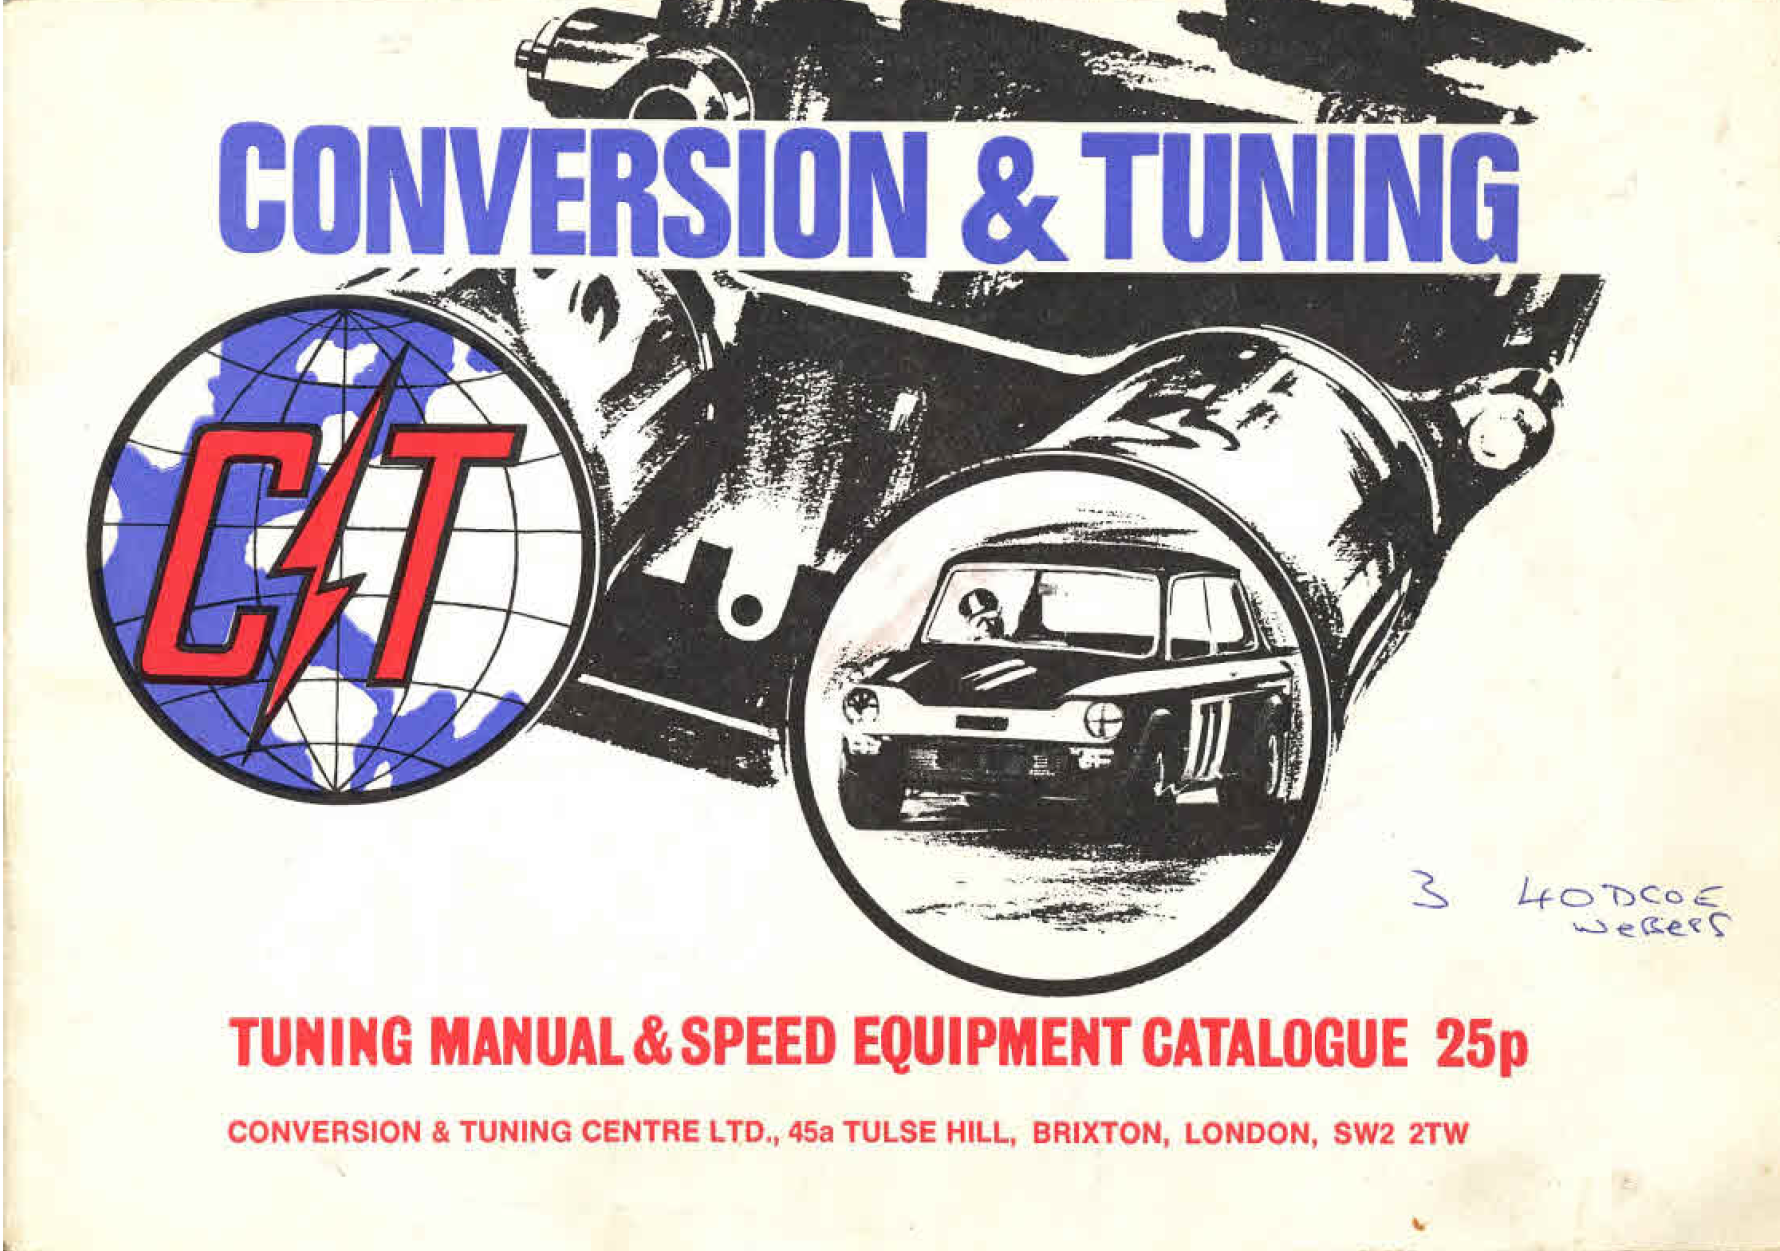
2 pointsso even when you stand in front of your car the left fender is.. on the right.. Right? 😉1 pointHey Wally... you mean the left side.. (we (tech's) ALWAYS look at it from the driverseat.) so your driversdoor is always the left door (england..shut up!! hihihi... yeah yours hangs on the right side..) But even the left fender is in england on the left side..1 pointA little Update: I found this Post wich mentions the "C/T & London" casting marks refer to a London based company named "Conversion & Tuning", of which i've never heard before: http://www.turbosport.co.uk/showthread.php?t=211869 this page has a short background information about it and an 1971 catalogue with lots of company photos and background information. the logo seems to match: https://mk1-performance-conversions.co.uk/conversion_tuning.htm Unfortunately this 1971 brochure does not contain any Z-related stuff (maybe they just added it later to their lineup), but the catalogue features some other Datsun related parts, so it seems highly likely that it must be this company.
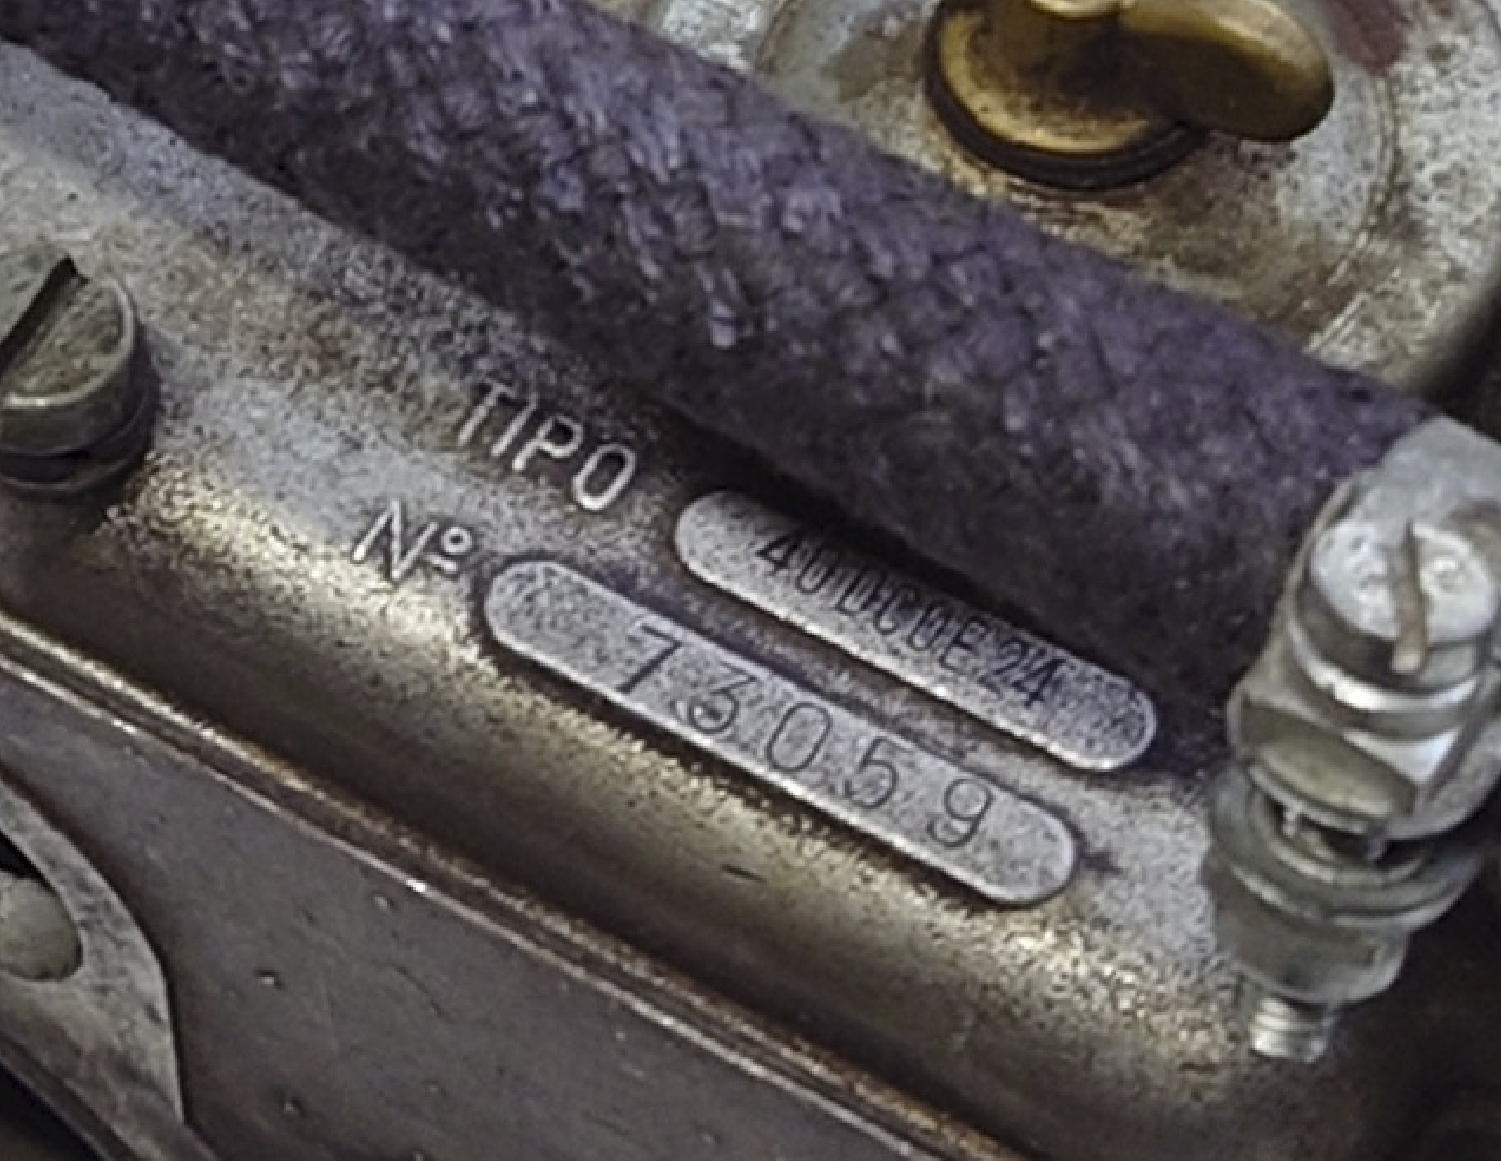
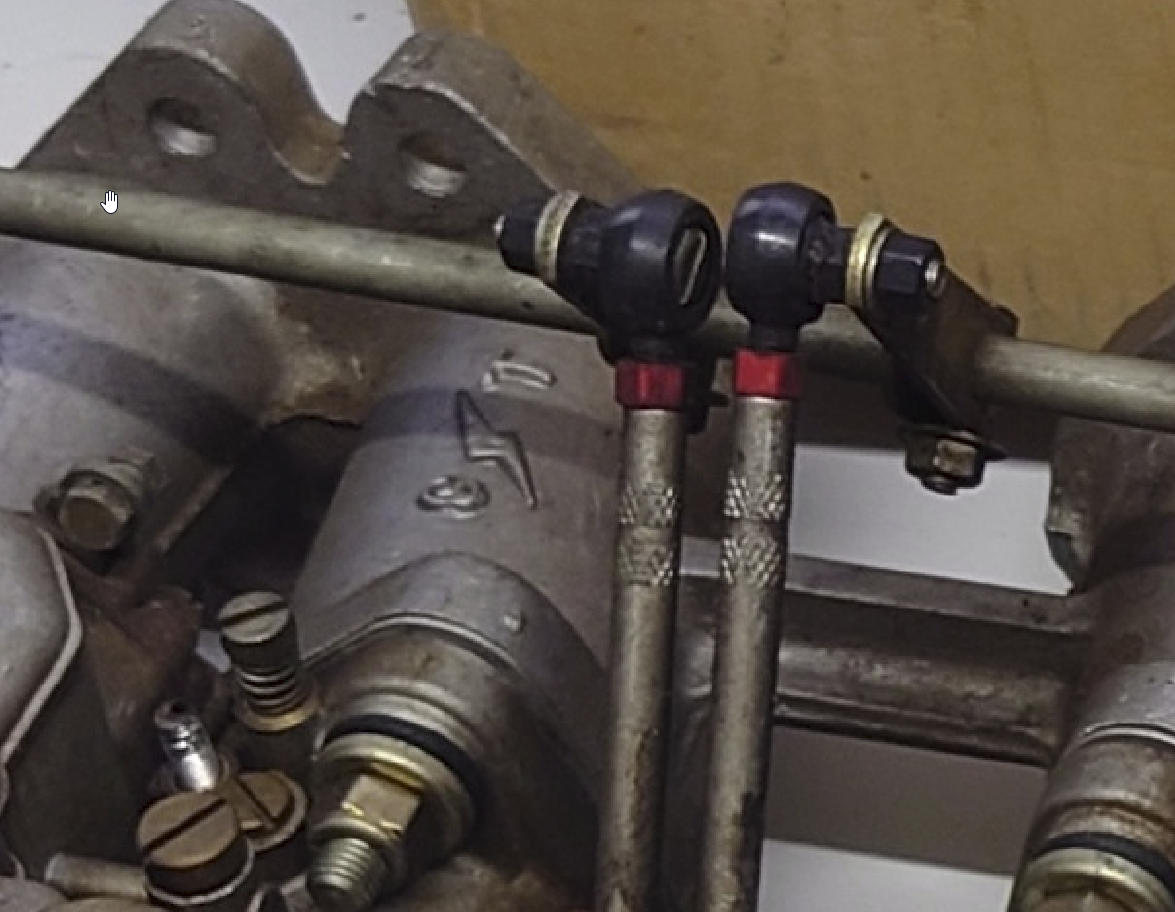
 1 pointHmm very interesting. thanks for your inputs Alan. Here' are two more closeup pics. First a detail of the carbs, clearly visible as 40DCOE24: Secondly, the casting marks on the other top-side of the manifold, saing C / T. It may look like a "G" in this photo, but i verified in some other pictures and it's definitely a "C". The casting quality is not that "rough" as the one from Mangoletsi / Janspeed in your pictures (which looks exactly as what is in the Janspeed 1981 catalogue). But the one in the DSSA setups looks like somebody refinished the casting on the bottom side with a coarse file or something. My friend is trying to contact the previous owner to get some more details. I'll keep you updated.
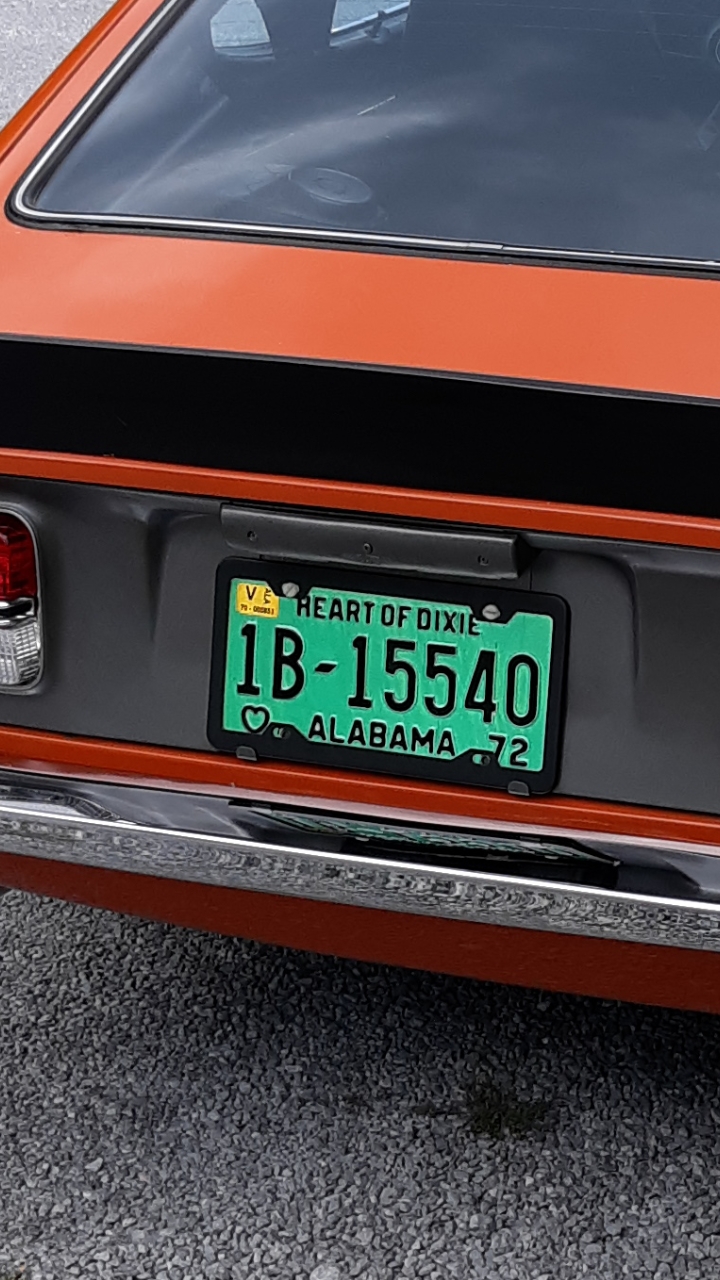
 1 pointIf plugs were torqued correctly (11-15 ft lbs) there should be no issue with stripping threads, unless they’ve been in for several years.1 point1 pointI found this at a yard sale last weekend, $5 and it is flawless. My birth year but if someone in Alabama has a '69 automobile I'd consider letting it go for a "year of manufacture" which is legal in many states. I have a '72 plate on my 240. I took the tag frame off I remembered, looks better to me.
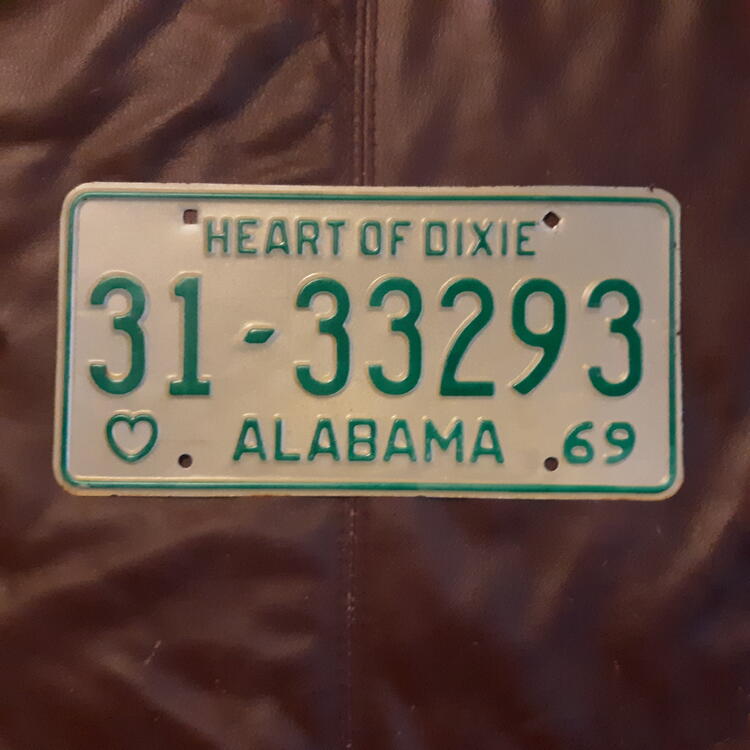

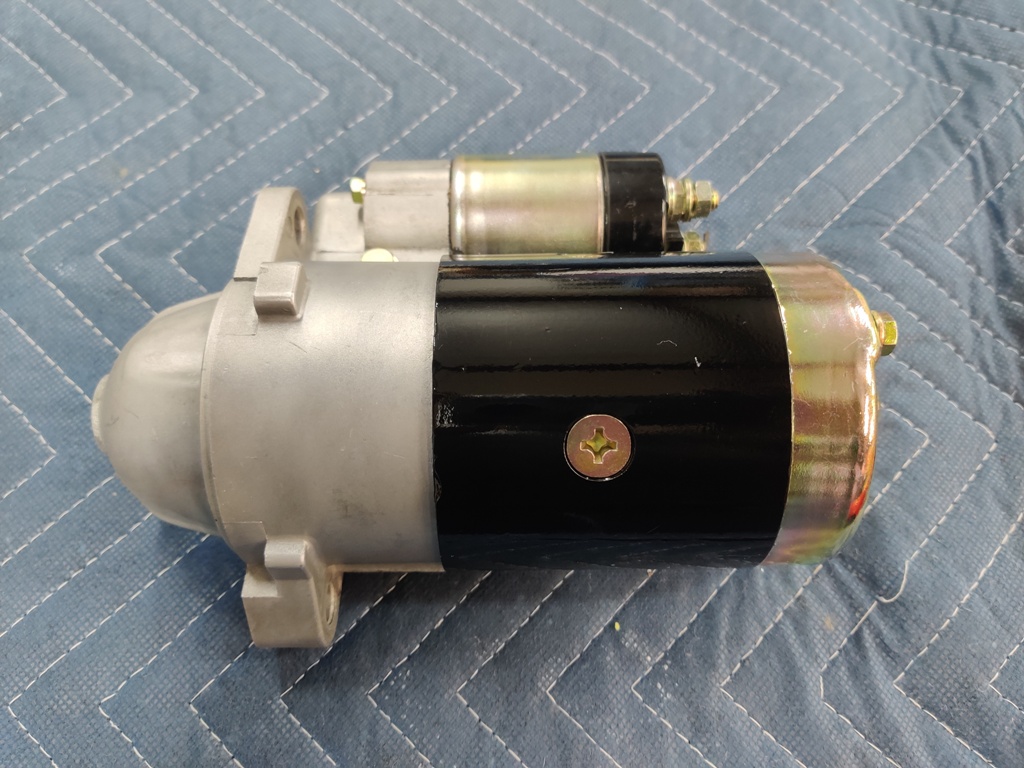
 1 point1 pointI've seen some nice collections displayed as art in guy's offices. My dad had 1957 until he lost his man cave when my lovely mother divorced him. He was so angry he left them up on the walls and the property was sold. I was too young to realize the value. He used them to repair rotted gutters and holes that squirrels had eaten into the sofits. I've been late to the hobby but never throw mine away and buy them at yard sales and trade day events. One day after I'm gone hopefully the new owner will keep it going. I've picked the nephew I want to get my stuff but it'll be a problem. He has 3 other brothers.1 point1 pointI agree with Mark, I don't like to remove steel spark plugs from an aluminum head when hot. Too much chance for thread damage. I also agree that a remote starter makes this an easy job. You don't even need to turn the key on and it can all be done without getting into or reaching into the car.1 point1 pointThere is a fuse that is on the supply wire to the charge lamp circuit. Seems like the most likely place to start. Does the Brake light light up when you turn the key on? That is the other part of the circuit. Don't forget to check your grounds too.
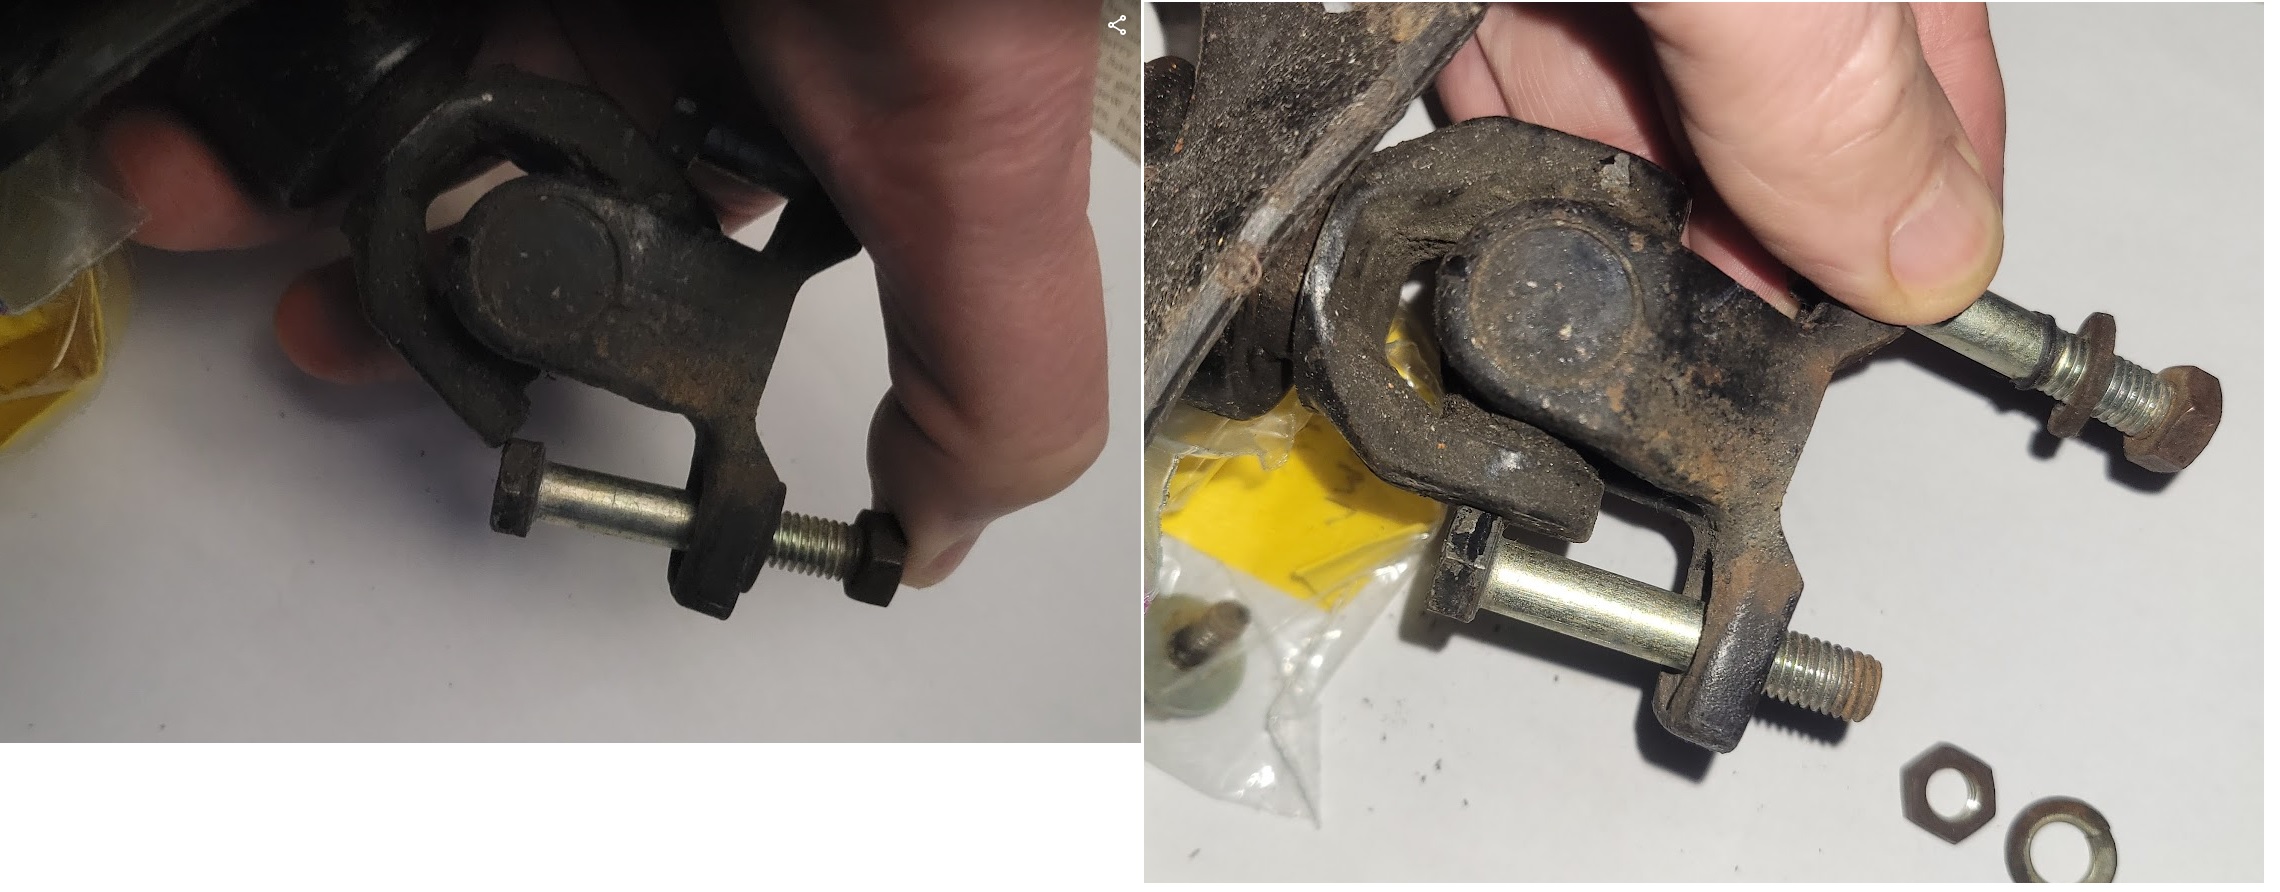
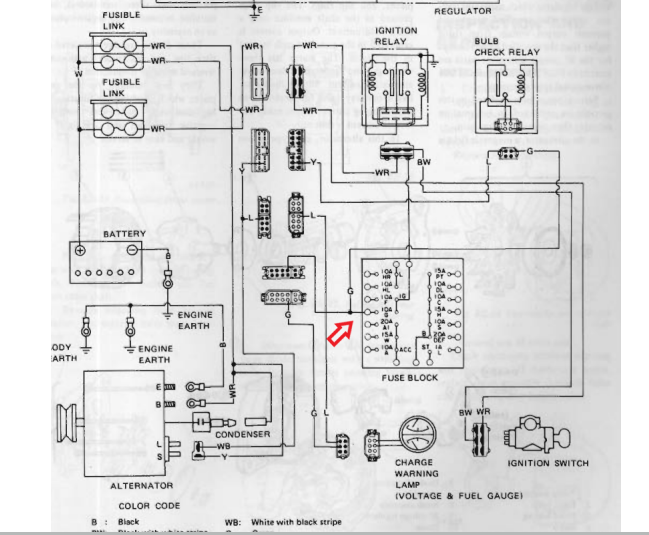 1 pointI don't like to compression test a hot engine because I don't like to remove spark plugs from a hot engine. However if the plugs come out easily it's better to test the engine when it's warm.1 pointI bench tested the rebuilt starter tonight, and unfortunately, it didn't go as planned. The motor started spinning at a nice speed but then slowed. I thought, "that is odd... and not right". So I tested it again - brief amounts of juice and it would repeat the same behavior. So, about on the fourth test, I kept current applied for a bit longer, and I saw a bit of grease or oil bubble up off of the back bushing. I stopped immediately. I wiped the drop of oil that formed off with my finger and detected that the backend of the armature and the bushing were quite hot. Yeah... So, I took the starter back apart and long story short, made another round of using the 320 grit lapping paste on the front and rear bushings. When I reassembled, I checked that the pinion gear rotated nicely by hand. Then I torqued the fasteners, checked pinion gear rotation by hand one last time, and bench checked again. This time the motor spun very nicely and didn't slow down at all. I checked for heat at the front and the back and only detected a small amount of warmth, not hot at all. Would have been a problem had I mounted it on the car without checking!1 pointNote, battery should be fully charged to allow full cranking. Also, remember motor should be hot, so valve train is seated. Then remove the plugs.1 pointRemove the coil wire, remove the spark plug wires and spark plugs, get comfortable in the seat and turn the engine over (wide open throttle) with the starter until you see oil pressure on the gauge. It shouldn't take long. Then proceed with the test.1 point1 pointI am putting my steering column back in. Wondering which way the coupler bolts go. My pictures prior to taking the car apart show the nuts towards the steering rack. When I look at the parts diagram it shows the nuts towards the firewall (#30,31,32). Just trying to figure out where my nuts go 🙂
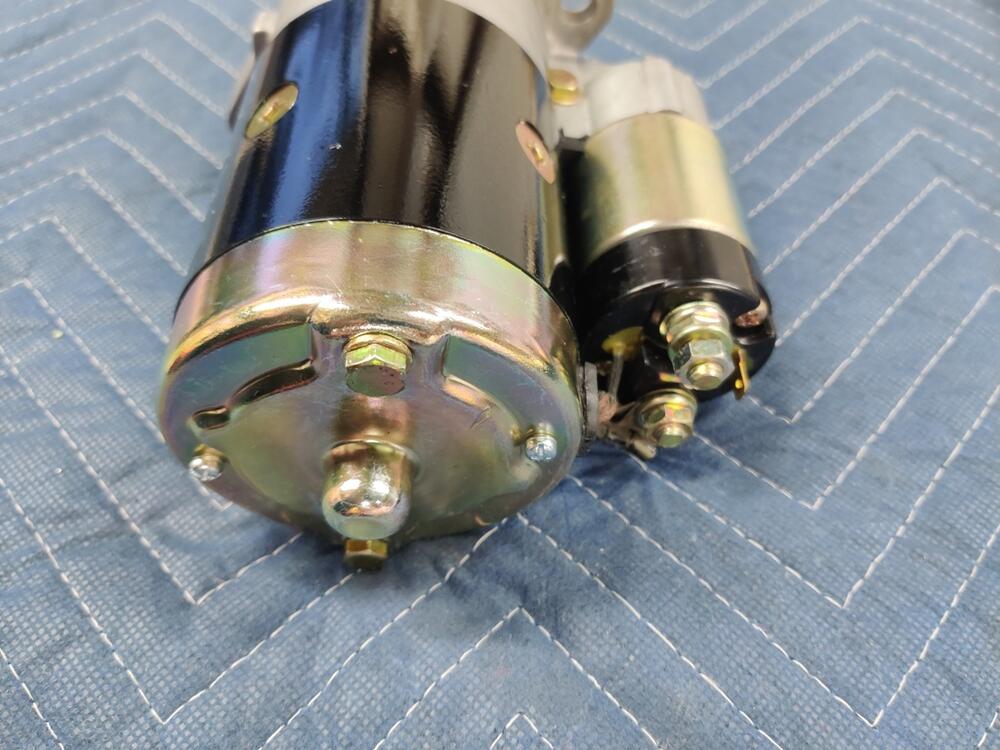
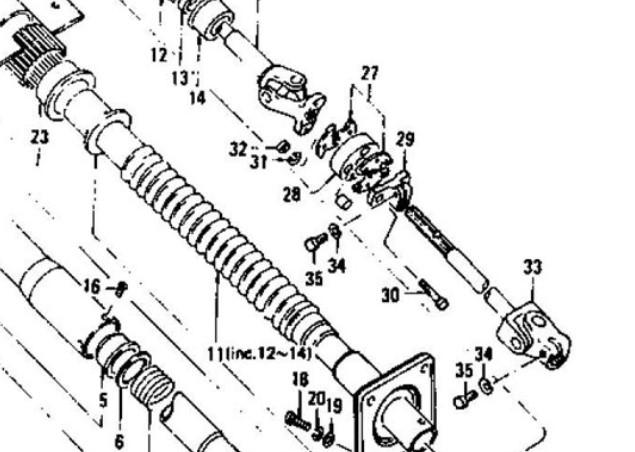 1 point1 pointFYI on these bolts, two of them are quite fussy to remove/install and would be impossible to do in the OE orientation if you don't use the correct JIS head bolts. If DIN bolts with larger hex heads were substituted they would need to be reversed. Not that anyone should be making substitutions when it comes to steering bolts. Just my two cents worth.
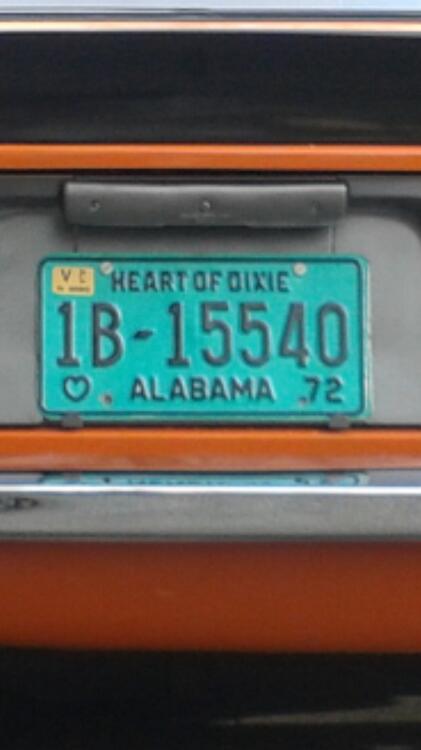
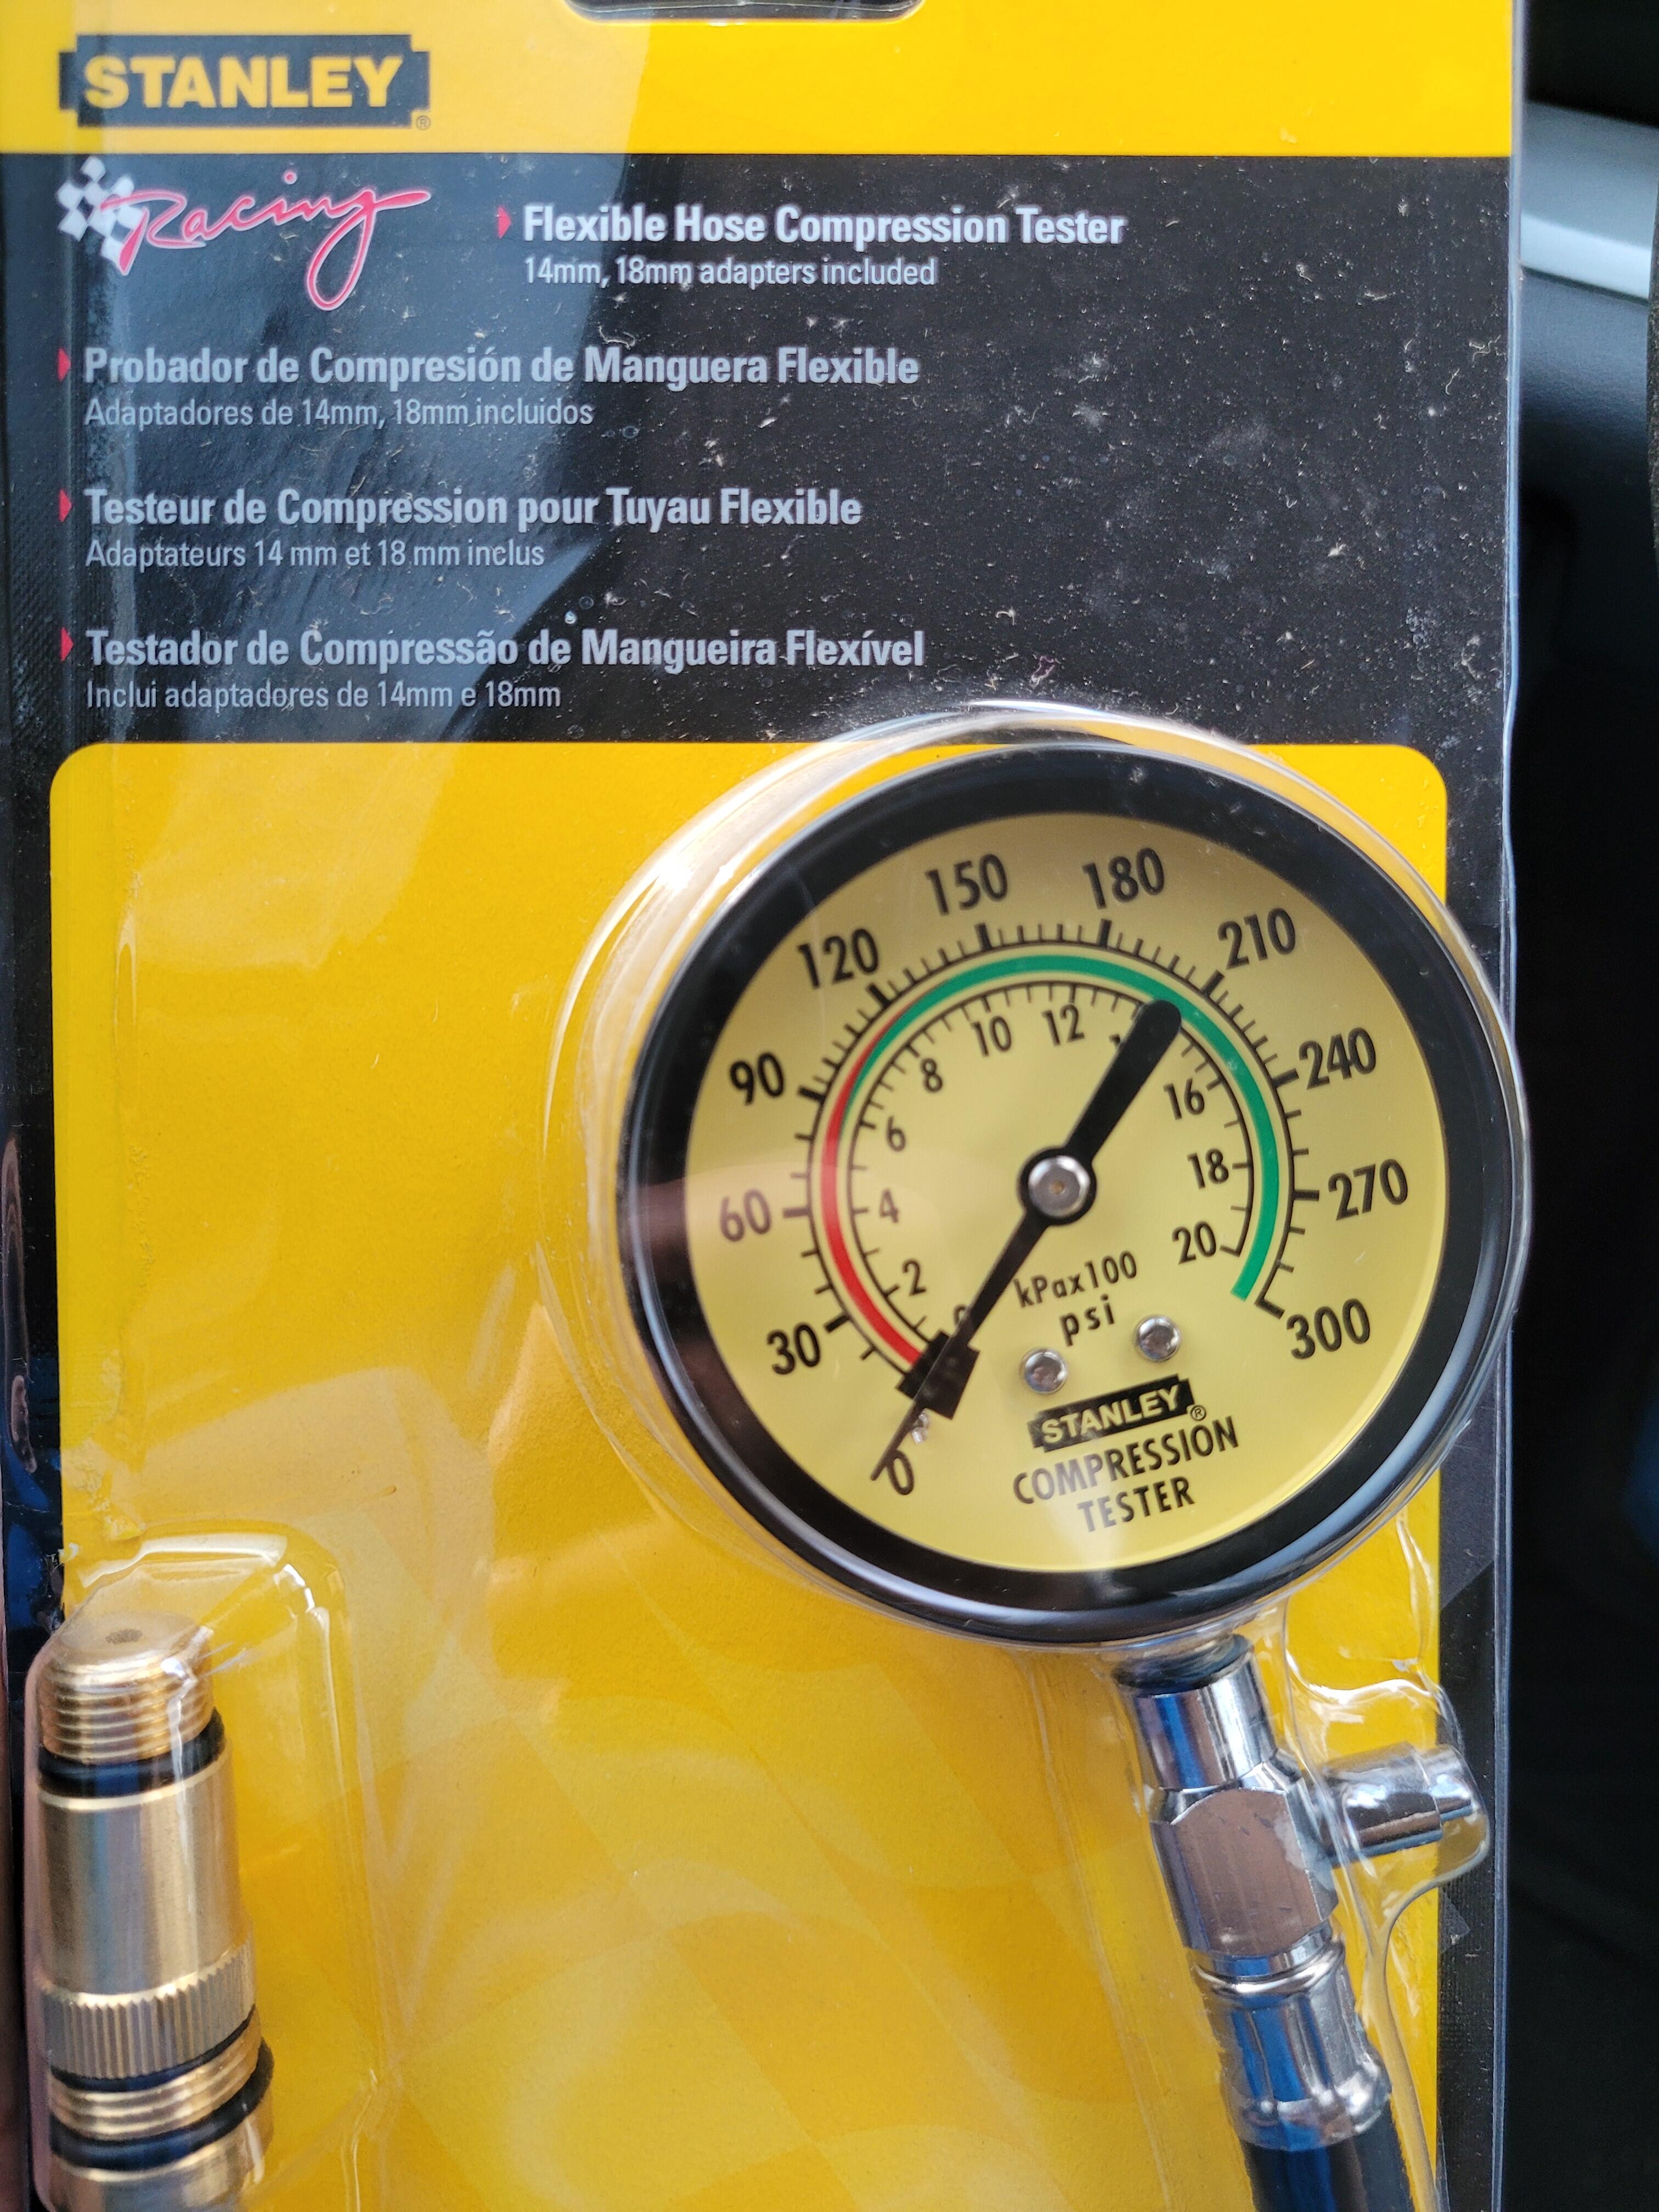
 1 point1 pointI found front and rear plates from 1960 something in the ceiling of my garage. The guy that built the place was a mechanic and must have thrown them up there. Anyhow I traded both of those to Dr Tag in Georgia for a pristine 1972 Alabama tag, did the initial pay and paperwork now it's like a vintage tag. I won't have to pay another nickel for that car's plate nor the '77 280 which has the standard vintage plate as well as my '87 hardbody pickup. They get me for way more but I jab them when I can.1 point1 point@wal280z THE guru for that type stuff. I have his upgrade "from the junkyard" Cadillac parts. How are you Wayne? Long time no speakie. Hope you are good.1 pointJust bought this one. Hope it does the job following your instructions.
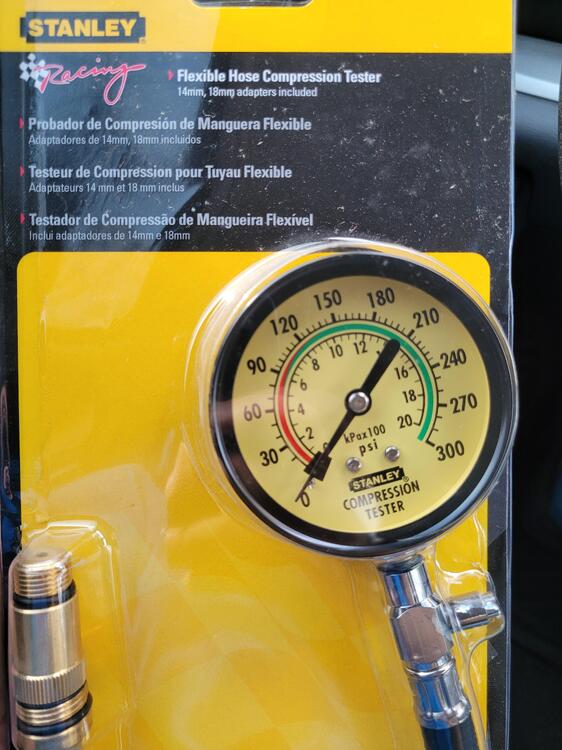 1 point$104,000 with 5 days to go. $150,000 is my guess. You want to play?1 pointBut first recheck the compression with the throttle wide open.1 pointHad new injectors installed in the 1990 300 ZX. Also, proud to say my grandson Greyson is sticking it to the competition. Here he is over the years 😀 Proud grandpa!


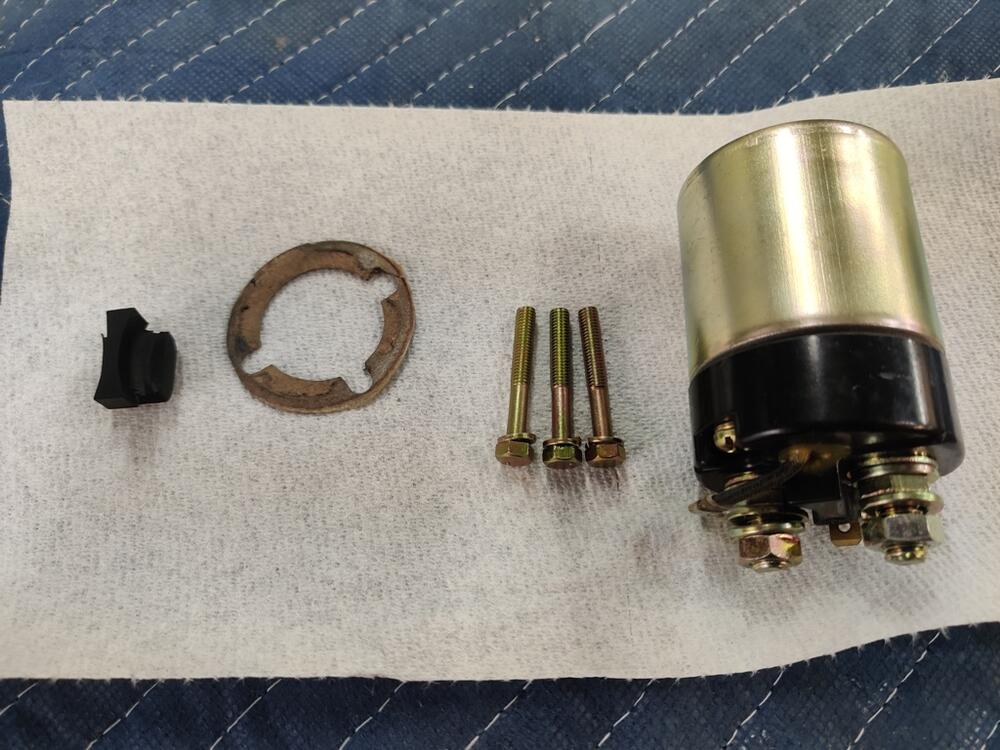
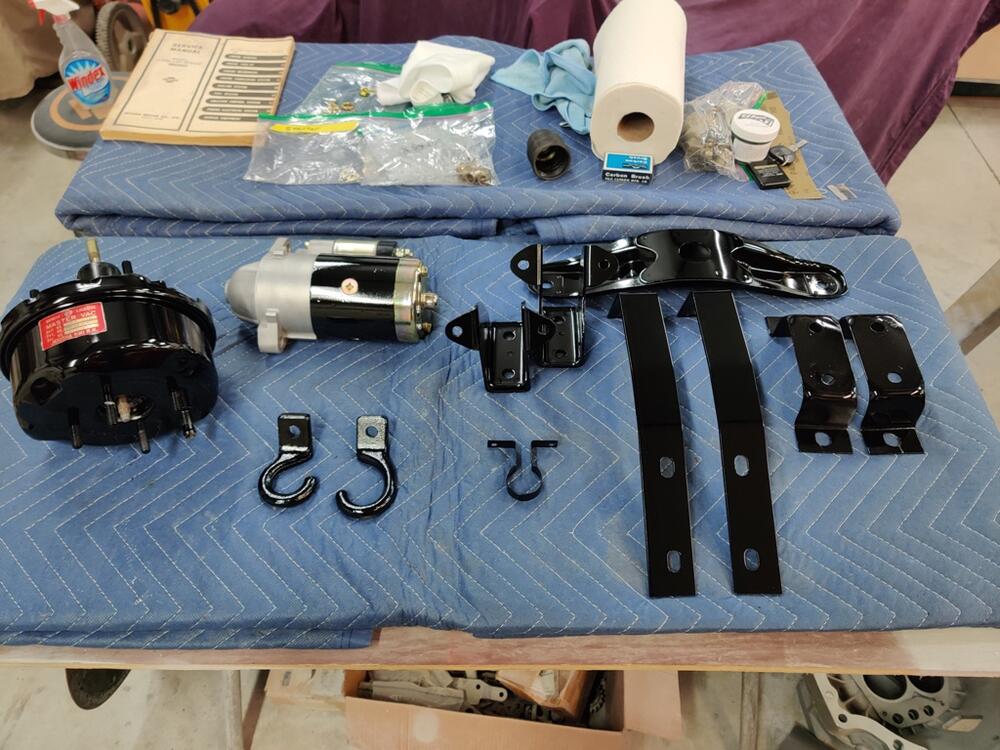
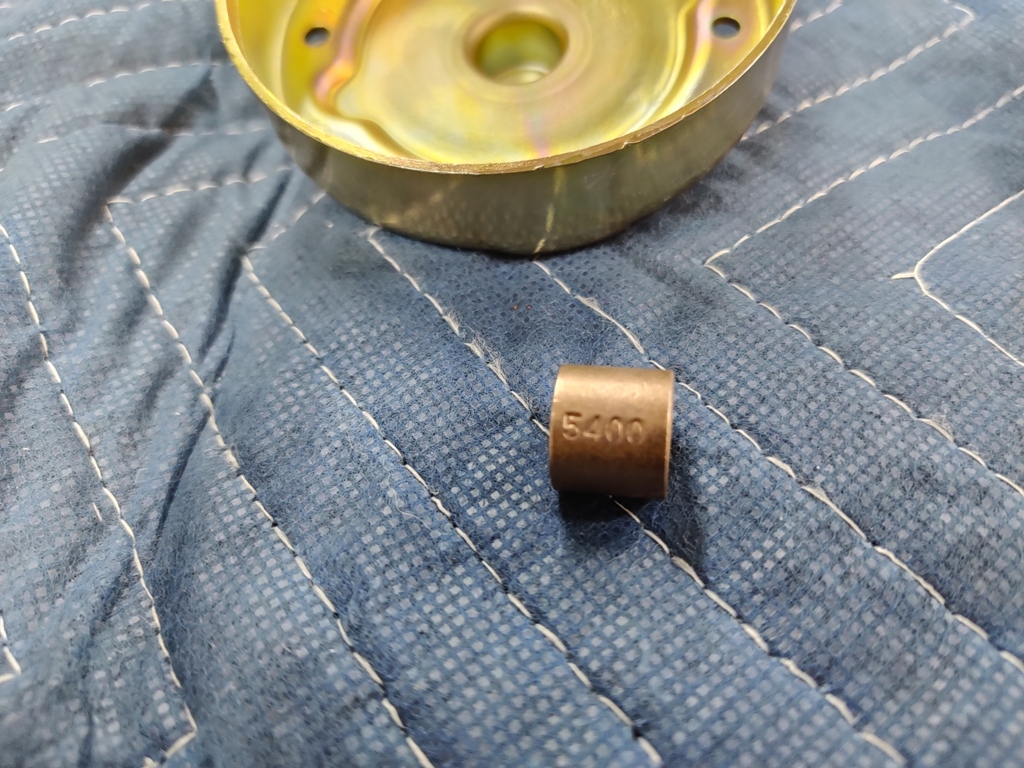
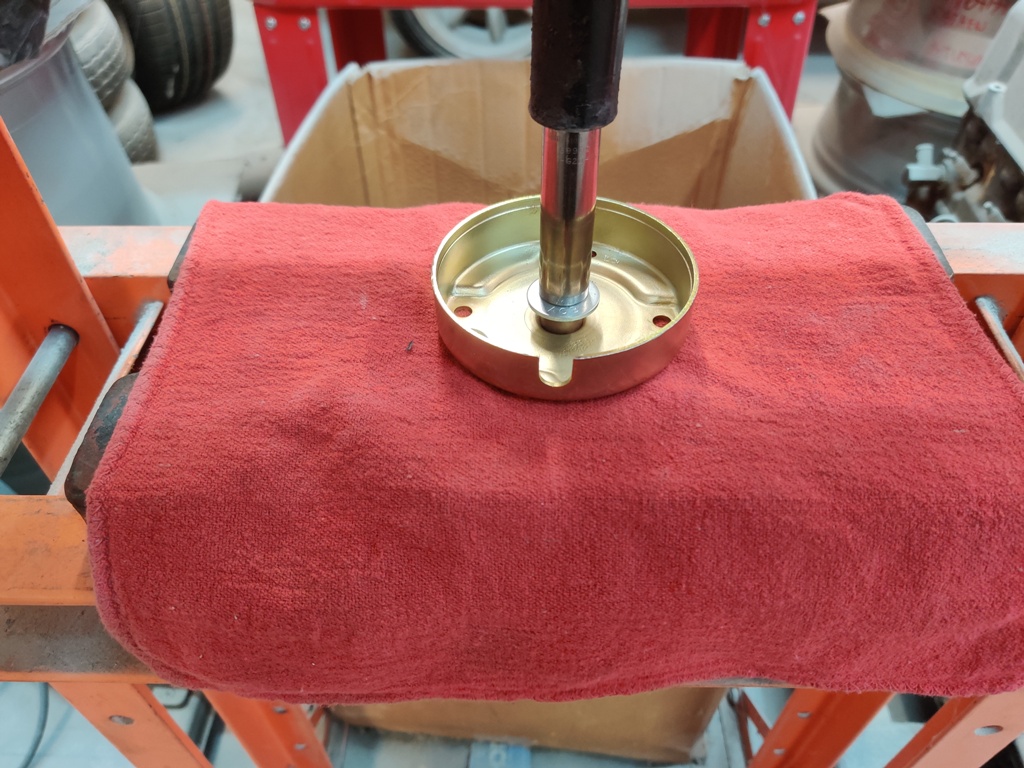
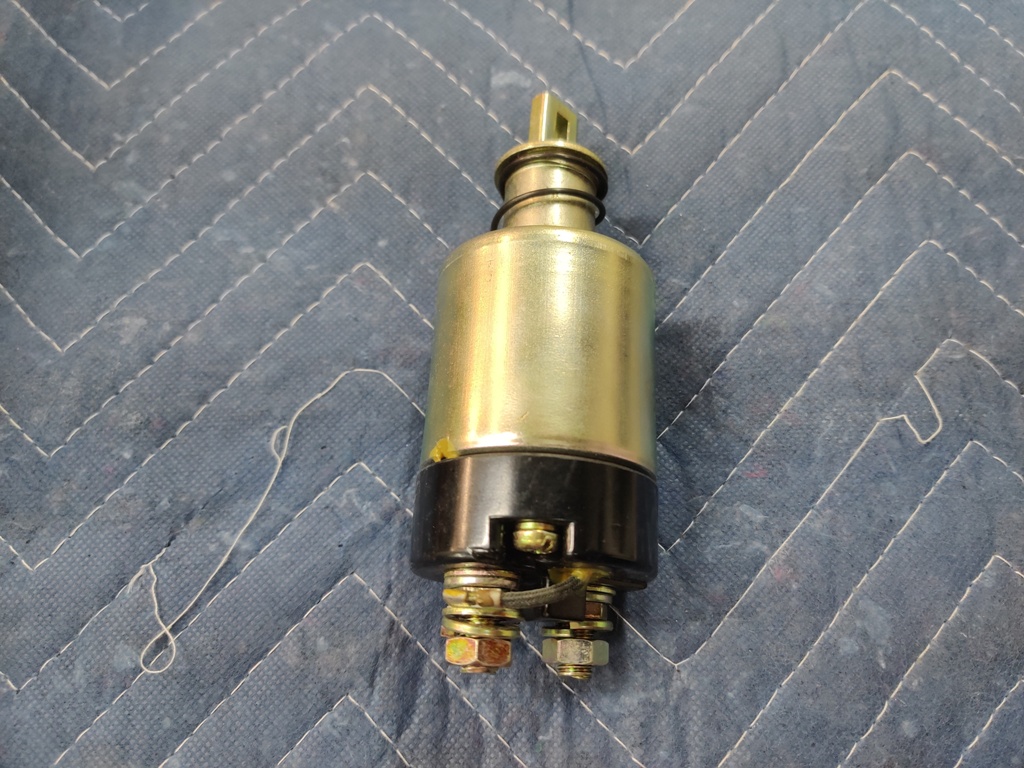
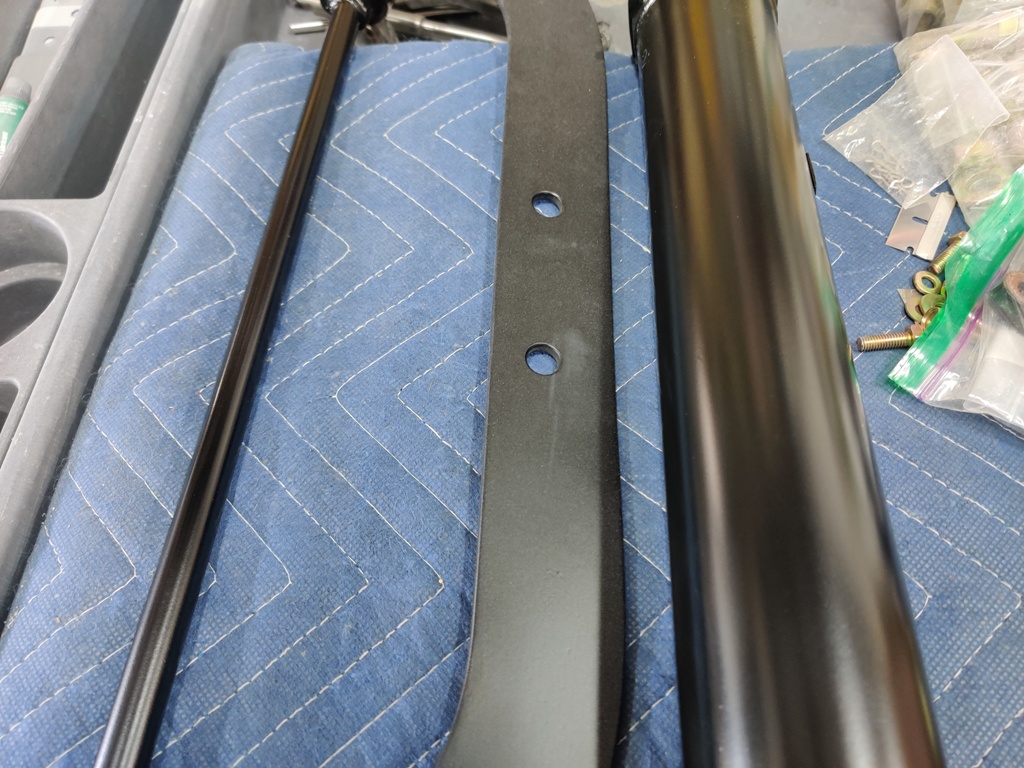
 1 pointSo, it looks to me like the spikes on the seat frames need to be straightened and the orientation should be 90 degrees from their mounting location. So, they should be sticking out straight... for those who want to know. Over the last few evenings, I painted a few items black, and waited for them to dry, and then worked on assembly of the starter. For the starter, I used new bushings for the front and the rear. Here is the front: The bushing is a light press fit. My measurements showed it was about .002" larger on the OD than the starter front cover "well" that the pushing presses into. After it was pressed in, I used a reamer to get the ID to a size within factory specification. I went through two bushings here because, I thought the reamer would "self center and ream straight. That ending up being laughable. Using a drill press would be sufficient, however, I don't have one yet. It's one of those tools I just haven't committed to investing in. So, I rigged up a contraption that helped with my drill angle on the second bushing and got somewhat lucky with reaming straight. For the back bushing, I did not have a suitably sized reamer and used a "paste" to get the bushing to size. The bushing ID was very close, but using the 320 grit paste and the armature to get the clearance to spec was arduous. I've never installed and sized bushings for an armature before. After decades of sitting in my parts bin, I was finally able to install the NOS solenoid. If anyone needs a box for their loose factory part, let me know. 🙂 Compared to body work, the pace of progress on this kind of stuff makes me laugh - the sense of accomplishment per hour spent is off the charts. Another note about the gloss level of the black parts - steering shaft on the left mustache bar in the center, and main driveshaft on the right: As I said before, the mustache bar has too much "flattening agent". But looking again at these three parts, I think the steering shaft and main driveshaft had a little too much also. I will respray the mustache bar, but I am ok with the other two. It's not going to kill me that a few parts are a tad bit dull. Other parts that I have painted black thus far include the motor mount brackets and transmission mount bracket, the bumper brackets, the brake booster, and the bracket for the one way valve for the booster. The next round of painting parts black will be a slog, starting with blasting, then priming, then painting. All kinds of assembly will be possible after that.


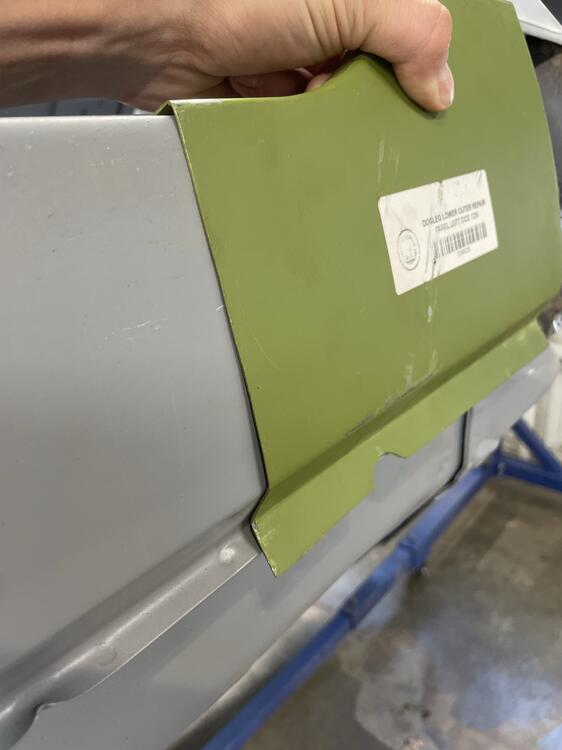
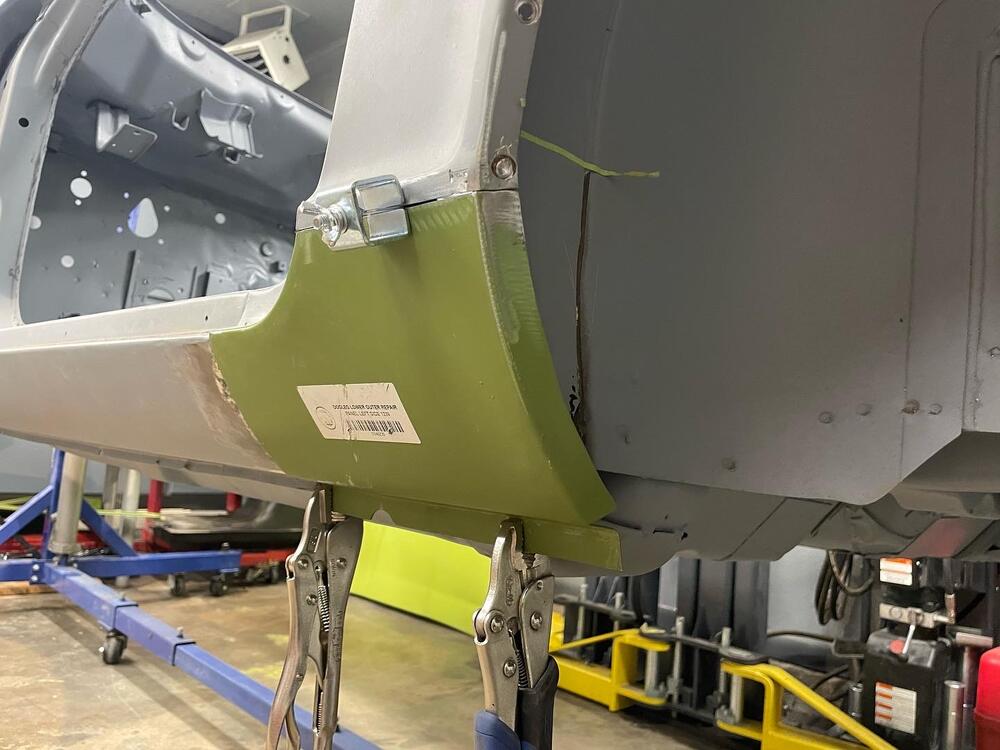
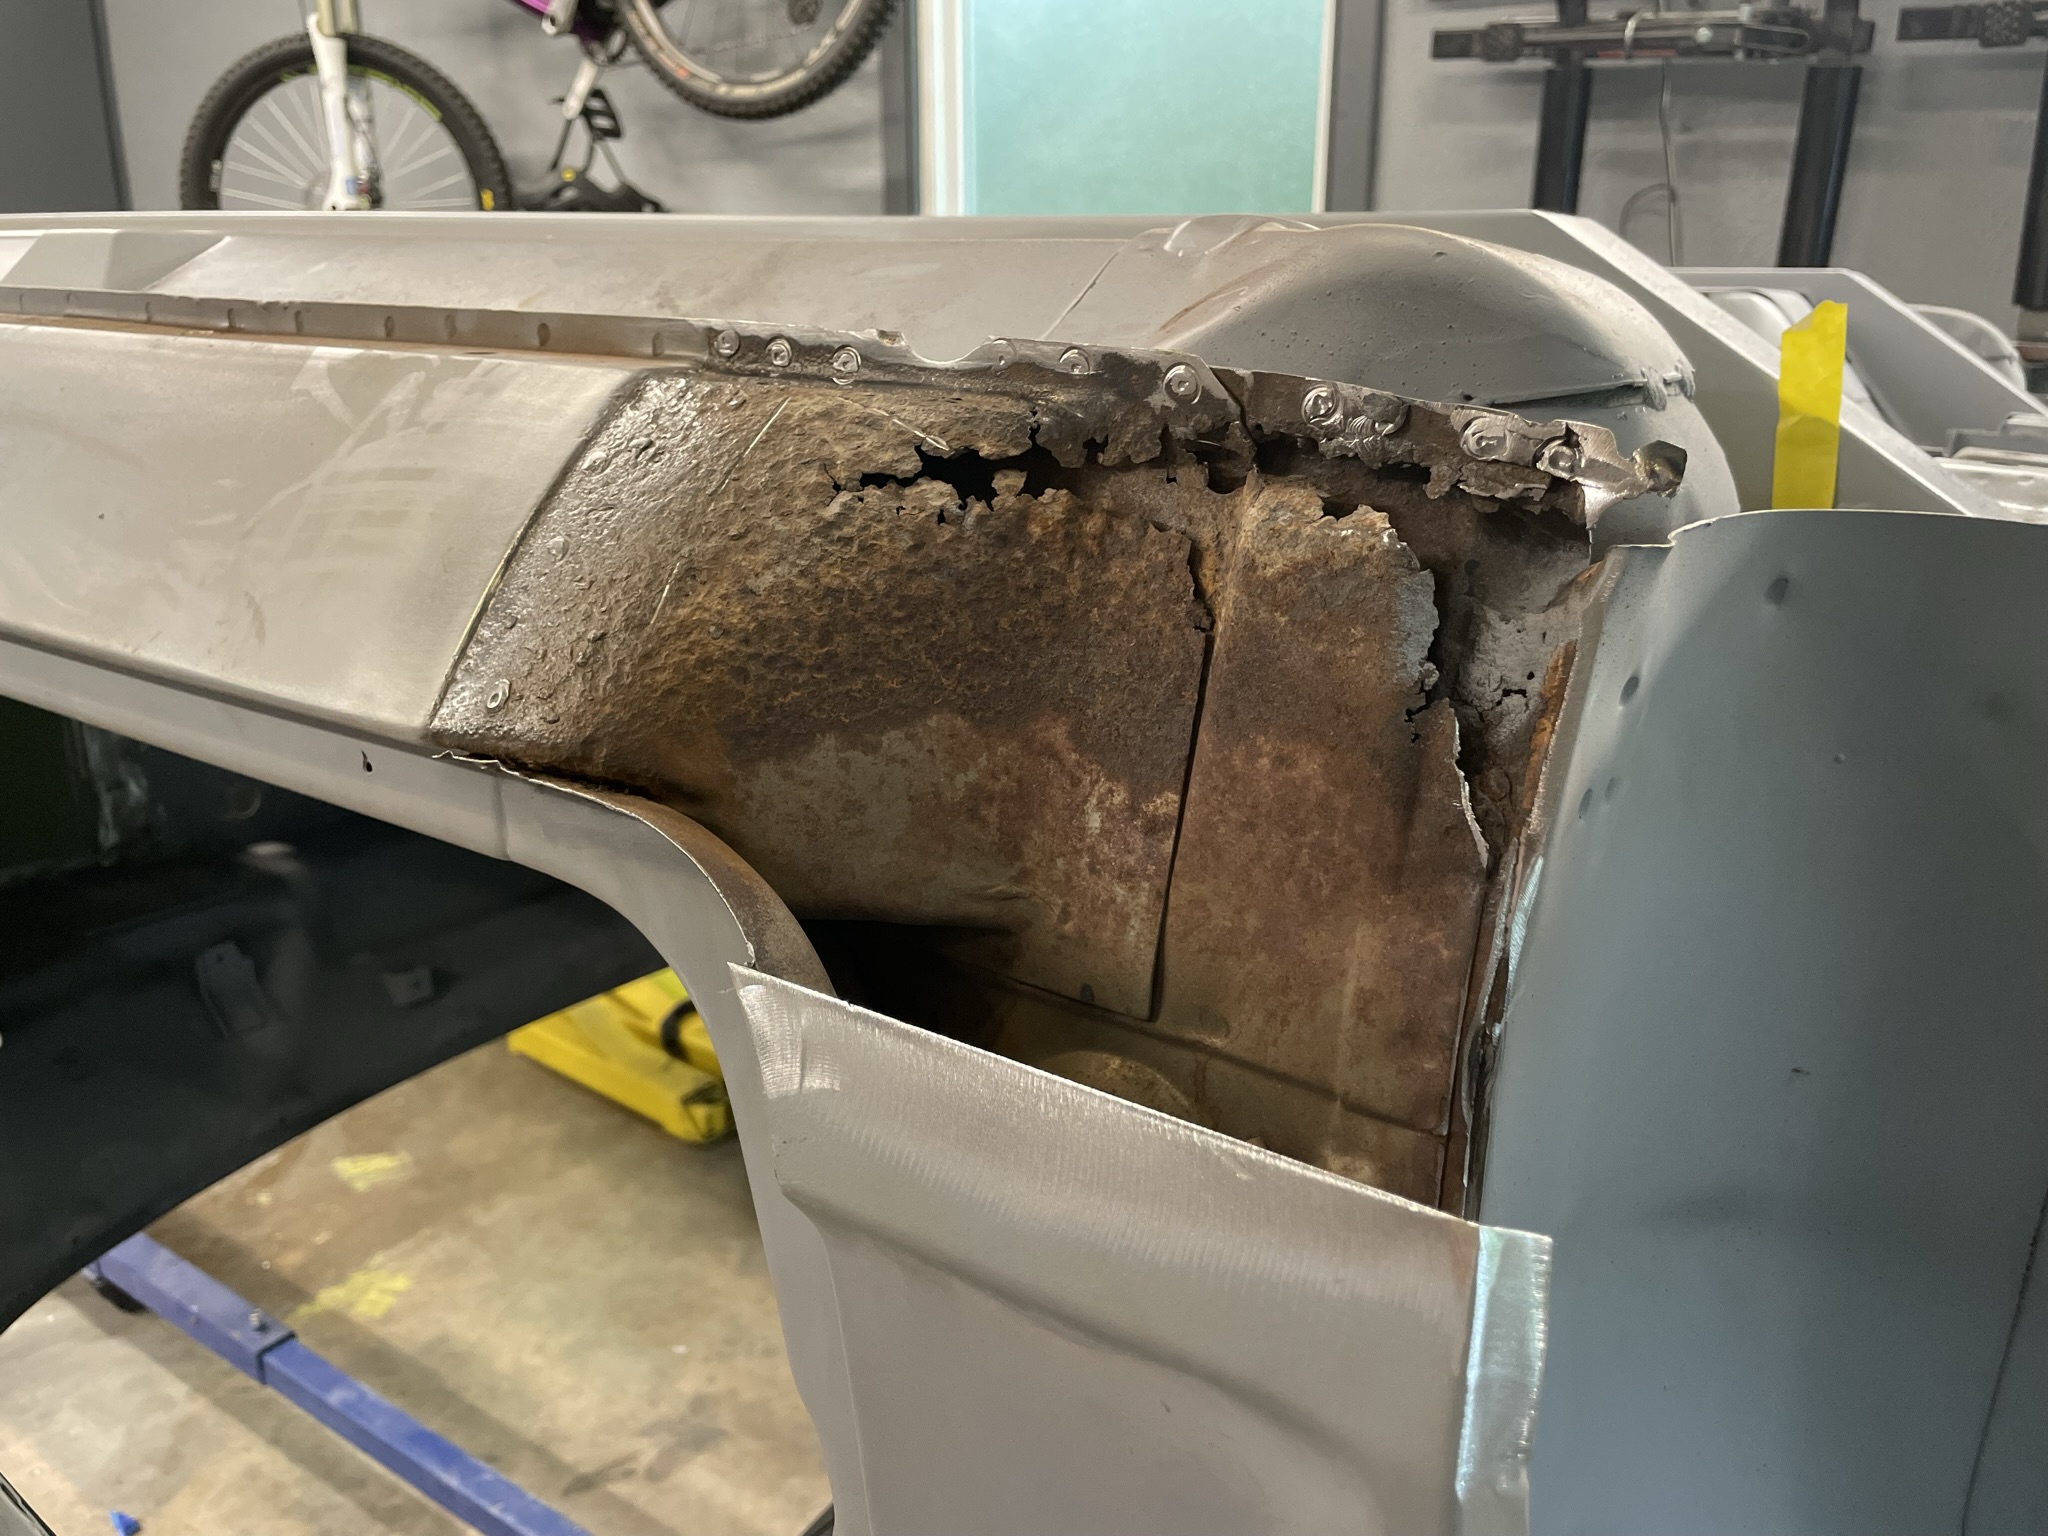
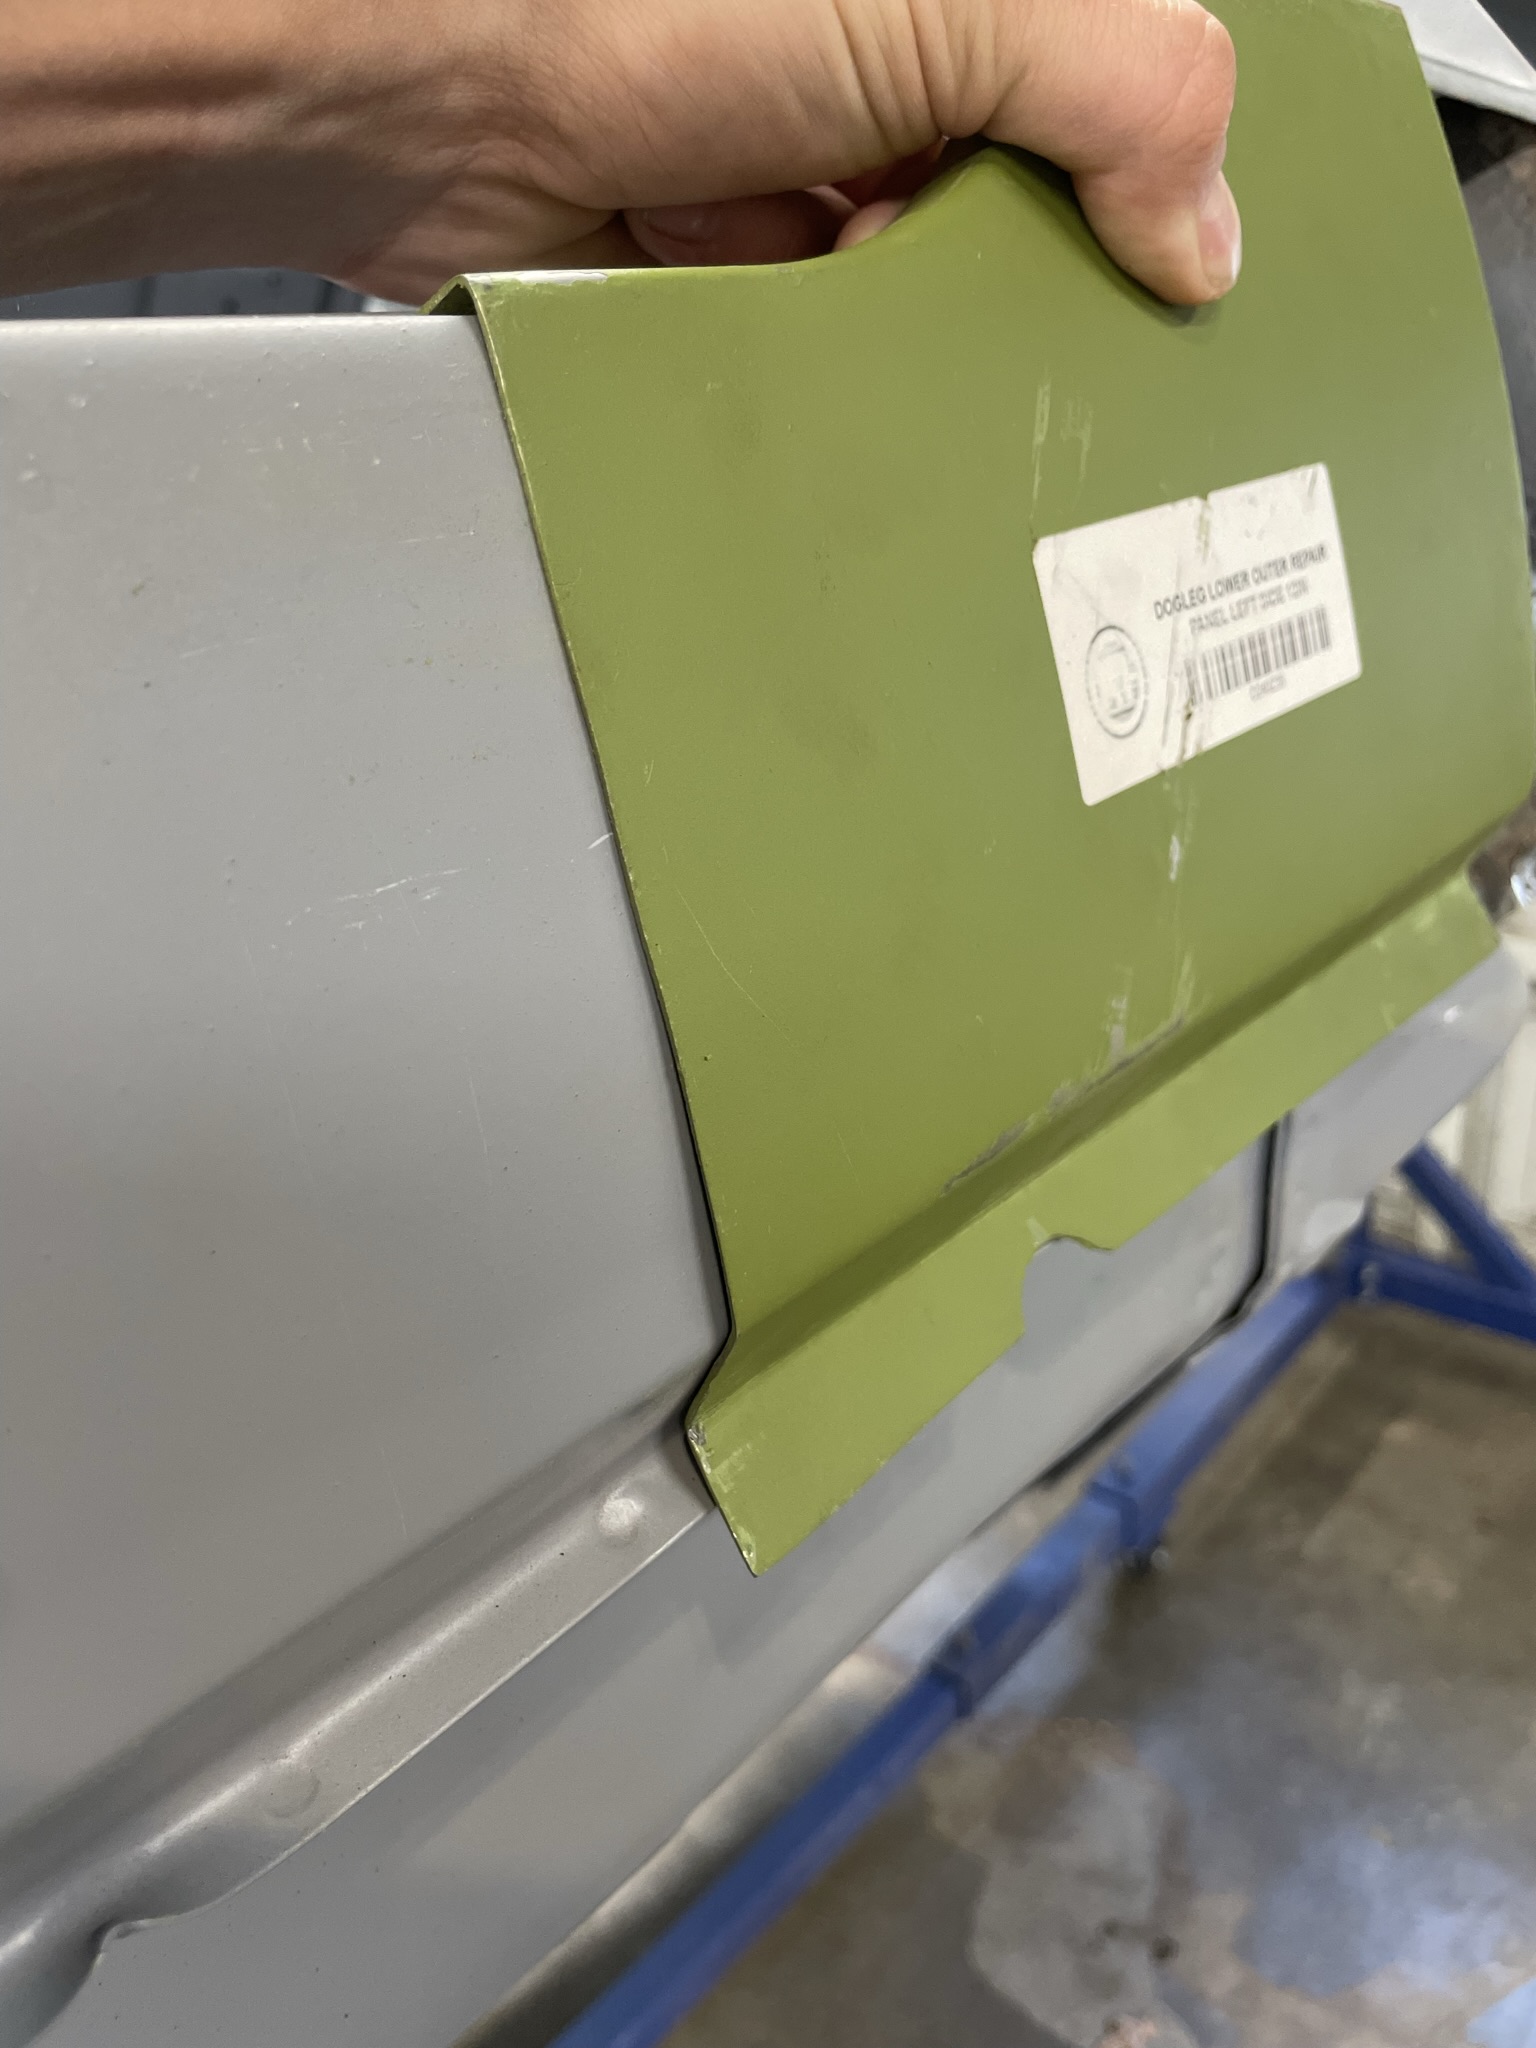
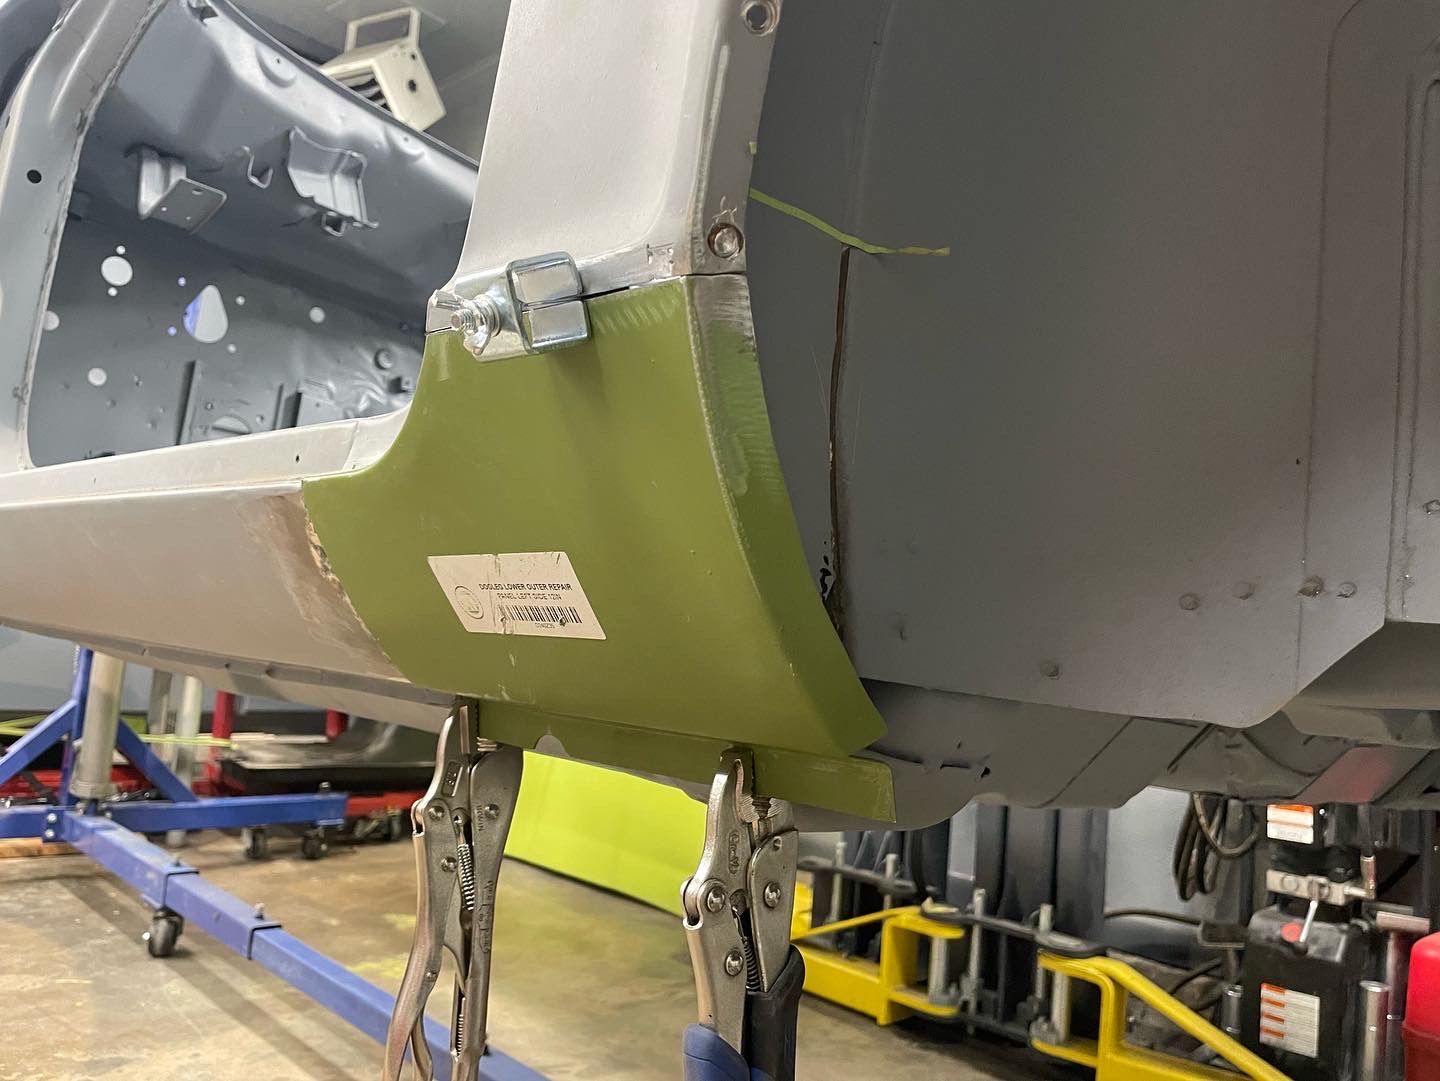
 1 pointThe L28ET ECCS uses the O2 sensor rarely (unless you're doing a lot of freeway cruising at a constant speed). It's effectively used only to trim fuel economy during cruise. At idle, under load, at low RPM or high RPM the ECU is just reading its maps and ignores the O2 sensor. Don't make the assumption that the ECCS is smarter than it actually is. There is no Throttle Position Sensor - It's just a switch that "senses" idle. And there's no brilliant use of the O2 sensor in controlling fueling or any other engine function. It's only a small step smarter than the EFI of the N/A engine. The CHTS is just the EFI engine temp sensor mounted in a smarter place. The ECU only polls the sensor under very specific conditions - fairly narrow RPM and Load values. When the ECU IS in closed loop mode it varies fueling until a RICH condition is reported, then it cuts fueling slightly to get a lean signal, rinse and repeat in a fairly continuous pattern as long as the "cruise" conditions exist. It tries to keep the exhaust output just on the edge of the lean/rich flip of the sensor (so, close to stoich). That's what the Green LED is telling you when you have the engine in a cruise configuration and the ECU is attempting closed loop.1 pointI think you’re on the right track doing these things your self. As my post#79 I recommend a leak down test after you get accurate compression readings. We are here to help.1 pointThe only thing I can add is I remove the plugs and turn the engine over until I see oil pressure, then test. When I didn't start with oil pressure #1 would read low the first time and higher on the second test. Good luck.1 point1 pointBoth dog legs on the Z needed the same rust/damage repair. Fortunately the Klassic Fab pieces were a very close fit to the existing metal, both for the inner structure and outer body panel. The panel itself had slightly longer flanges which worked out great for trimming them down to fit the car. I also had to replace a section of the inner wheel well in the process. Overall not a bad job to do. I need to finish up the "spot welds" around the perimeter to make them appear more authentic.
 1 pointThis just popped up on BAT. https://bringatrailer.com/listing/1985-nissan-300zx-27/ Built on a 1985 300ZX 2+2. Who owns and drives something as gaudy as this?1 point1 pointBaT owned '73 240Z on the block for charity. Lot number 100,000. Should be interesting. https://bringatrailer.com/listing/1973-datsun-240z-229/
 1 pointMy first Z has a story, less about the car, and more about the guy I bought it from. First, the car. HLS3041924, build date 8/1/1971, originally red with black interior. In 1979 it began a life as a road race car, running ICSCC and SCCA events in the Pacific Northwest, with a Conference log book. It was in pretty sad shape when I got it, having 8 or 10 layers of paint, and 10 years of thrashing around road race courses in Oregon, Washington and British Columbia. It was lime green on the right side, bright blue on the left, and had an orange stripe down the middle. The guy I bought it from is the story. He had a reputation as a rolling chicane, never doing well with the car. Some time before he decided to sell the car he had gotten divorced. It was a pretty messy affair. His ex wife had been messing around with his best friend, who was also the mechanic for the race car. She got the house, and the kids, and was shacking up with the now ex best friend. Oh, and the house was next door to his parents house. Oh, and she had a restraining order against him, and wouldn't let his see his kids. So he couldn't see his kids, and couldn't visit his parents because they were too close to her. The day I looked at the car to see if a deal could be made, he was edgy. Wearing a windbreaker, I noticed one pocket hanging very low, as if it had something very heavy in it. Indeed, at some point during our conversation, he mentioned the ex wife, ex friend, parents, restraining order, and mumbled something about having a solution, and patting the extra heavy pocket on his jacket. We made a deal, I returned the next day, paid him, did paperwork, loaded the car up and went home. A day or two later I saw a news story about some guy in Puyallup that had gone to his ex wife's home, shot her, their kids, her boyfriend, and then himself. I was about to dismiss it as more of the crazy stuff that is always in the news in Pierce County when they mentioned his name. It was the guy I bought the race car from.0 points


Important Information
By using this site, you agree to our Privacy Policy and Guidelines. We have placed cookies on your device to help make this website better. You can adjust your cookie settings, otherwise we'll assume you're okay to continue.