Leaderboard
-
Captain Obvious
Free Member5Points10,081Posts -

kats
Free Member5Points2,215Posts -
ZNate
Free Member3Points51Posts -
HS30-H
Free Member3Points5,509Posts


Popular Content
Showing content with the highest reputation on 08/30/2022 in Posts
-
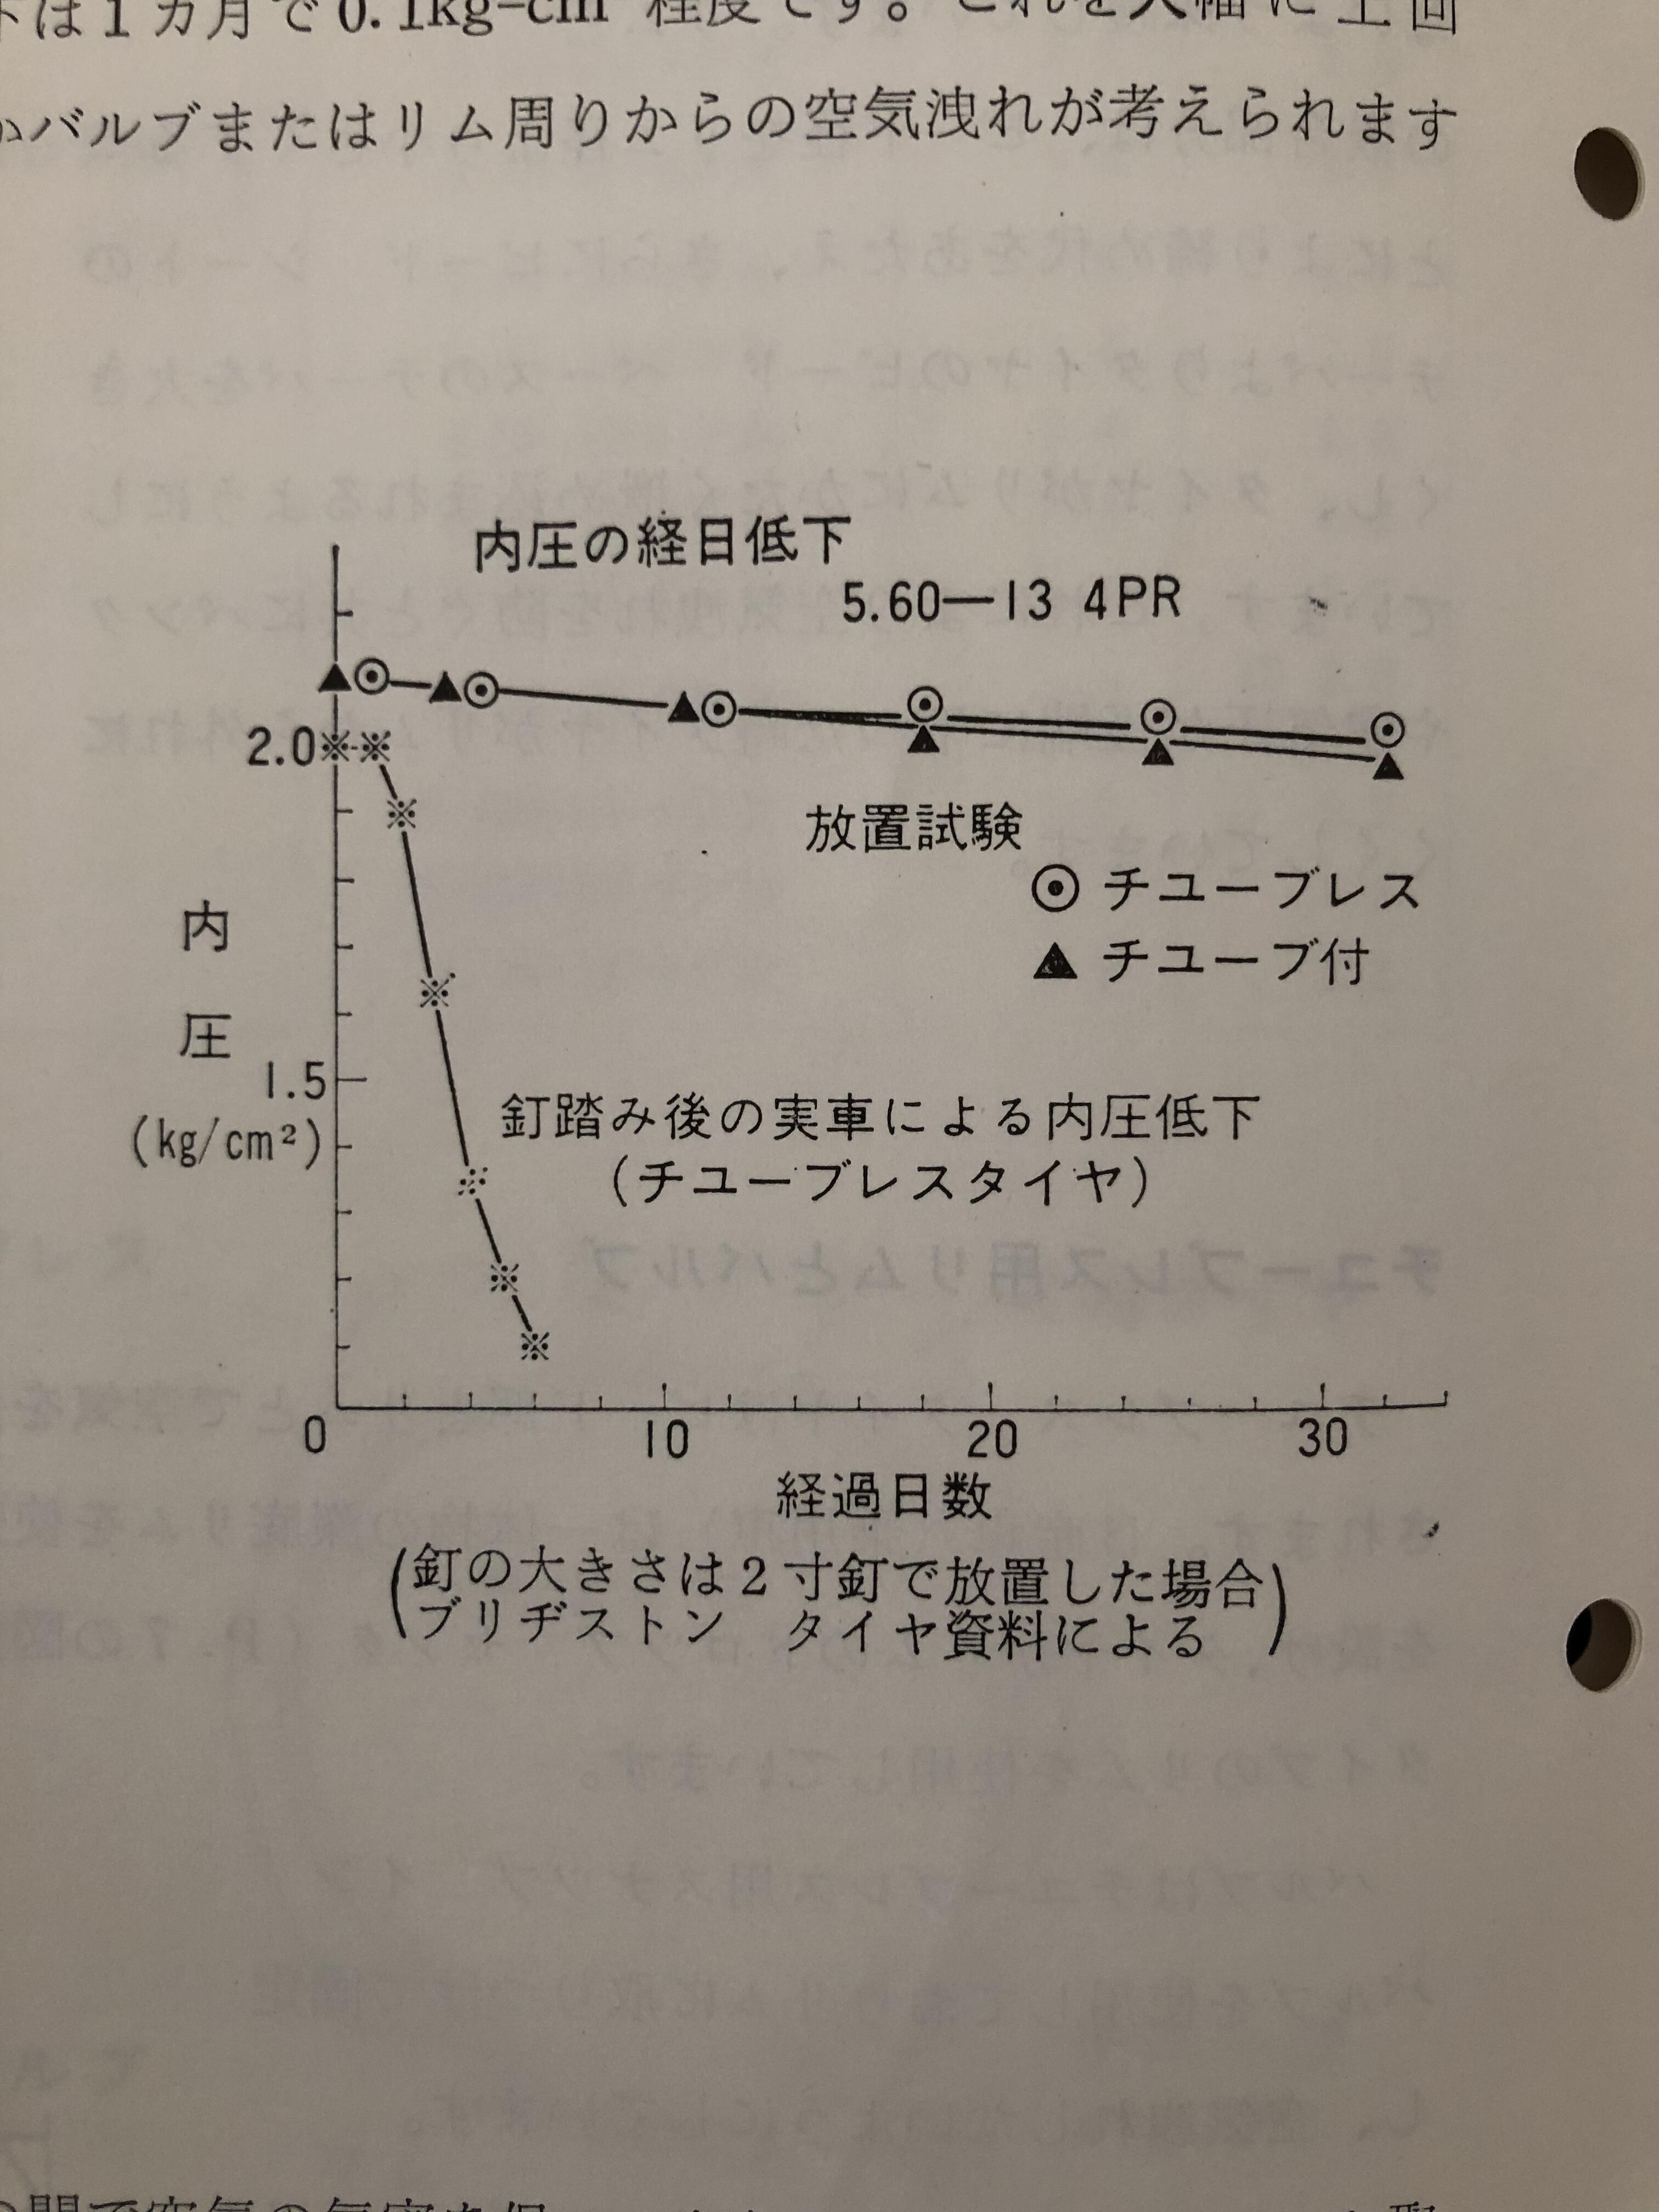
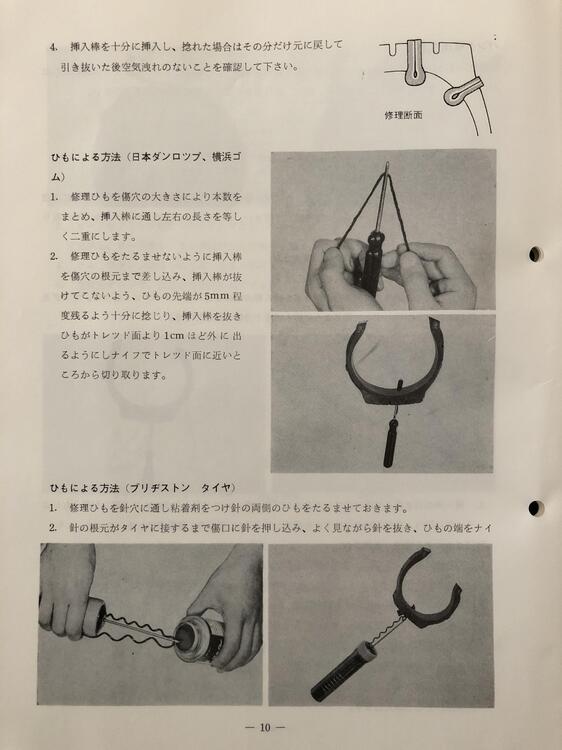
An interesting book , ‘Service information about Tubeless tire ‘ March 1970 , Nissan Moto co.ltd. Like Alan said ,Nissan was pushing Tubeless tire more than before . This book describes so many advantages of Tubeless tires against tire with tube , a figure is showing air leak of Tubeless vs Tube . Another figure is showing the reason of punctuation, at that time Japanese road was not good condition, it said nails were the highest cause of the punctuation. And an interesting thing is , service for punctuation a several method for each of tire manufacturer . Sorry for off topic . Kats


 3 points
 -
3 pointsI’m back in business. Installed my rebuilt Cardone distributor and the engine fired right up. Very easy to set timing and adjust my new ZTherapy carbs. Had to install my old Bosch coil wire because the new NGK wire would not fit tight on the Flamethrower coil. It looks like the wire does not push deep enough into the coil, plus the boot has a rib inside which limits the wire insertion. Will work with it and see if I can make it work. So happy to have my car back on the road. Appreciate everyone’s advice along the way. Nate3 points
-
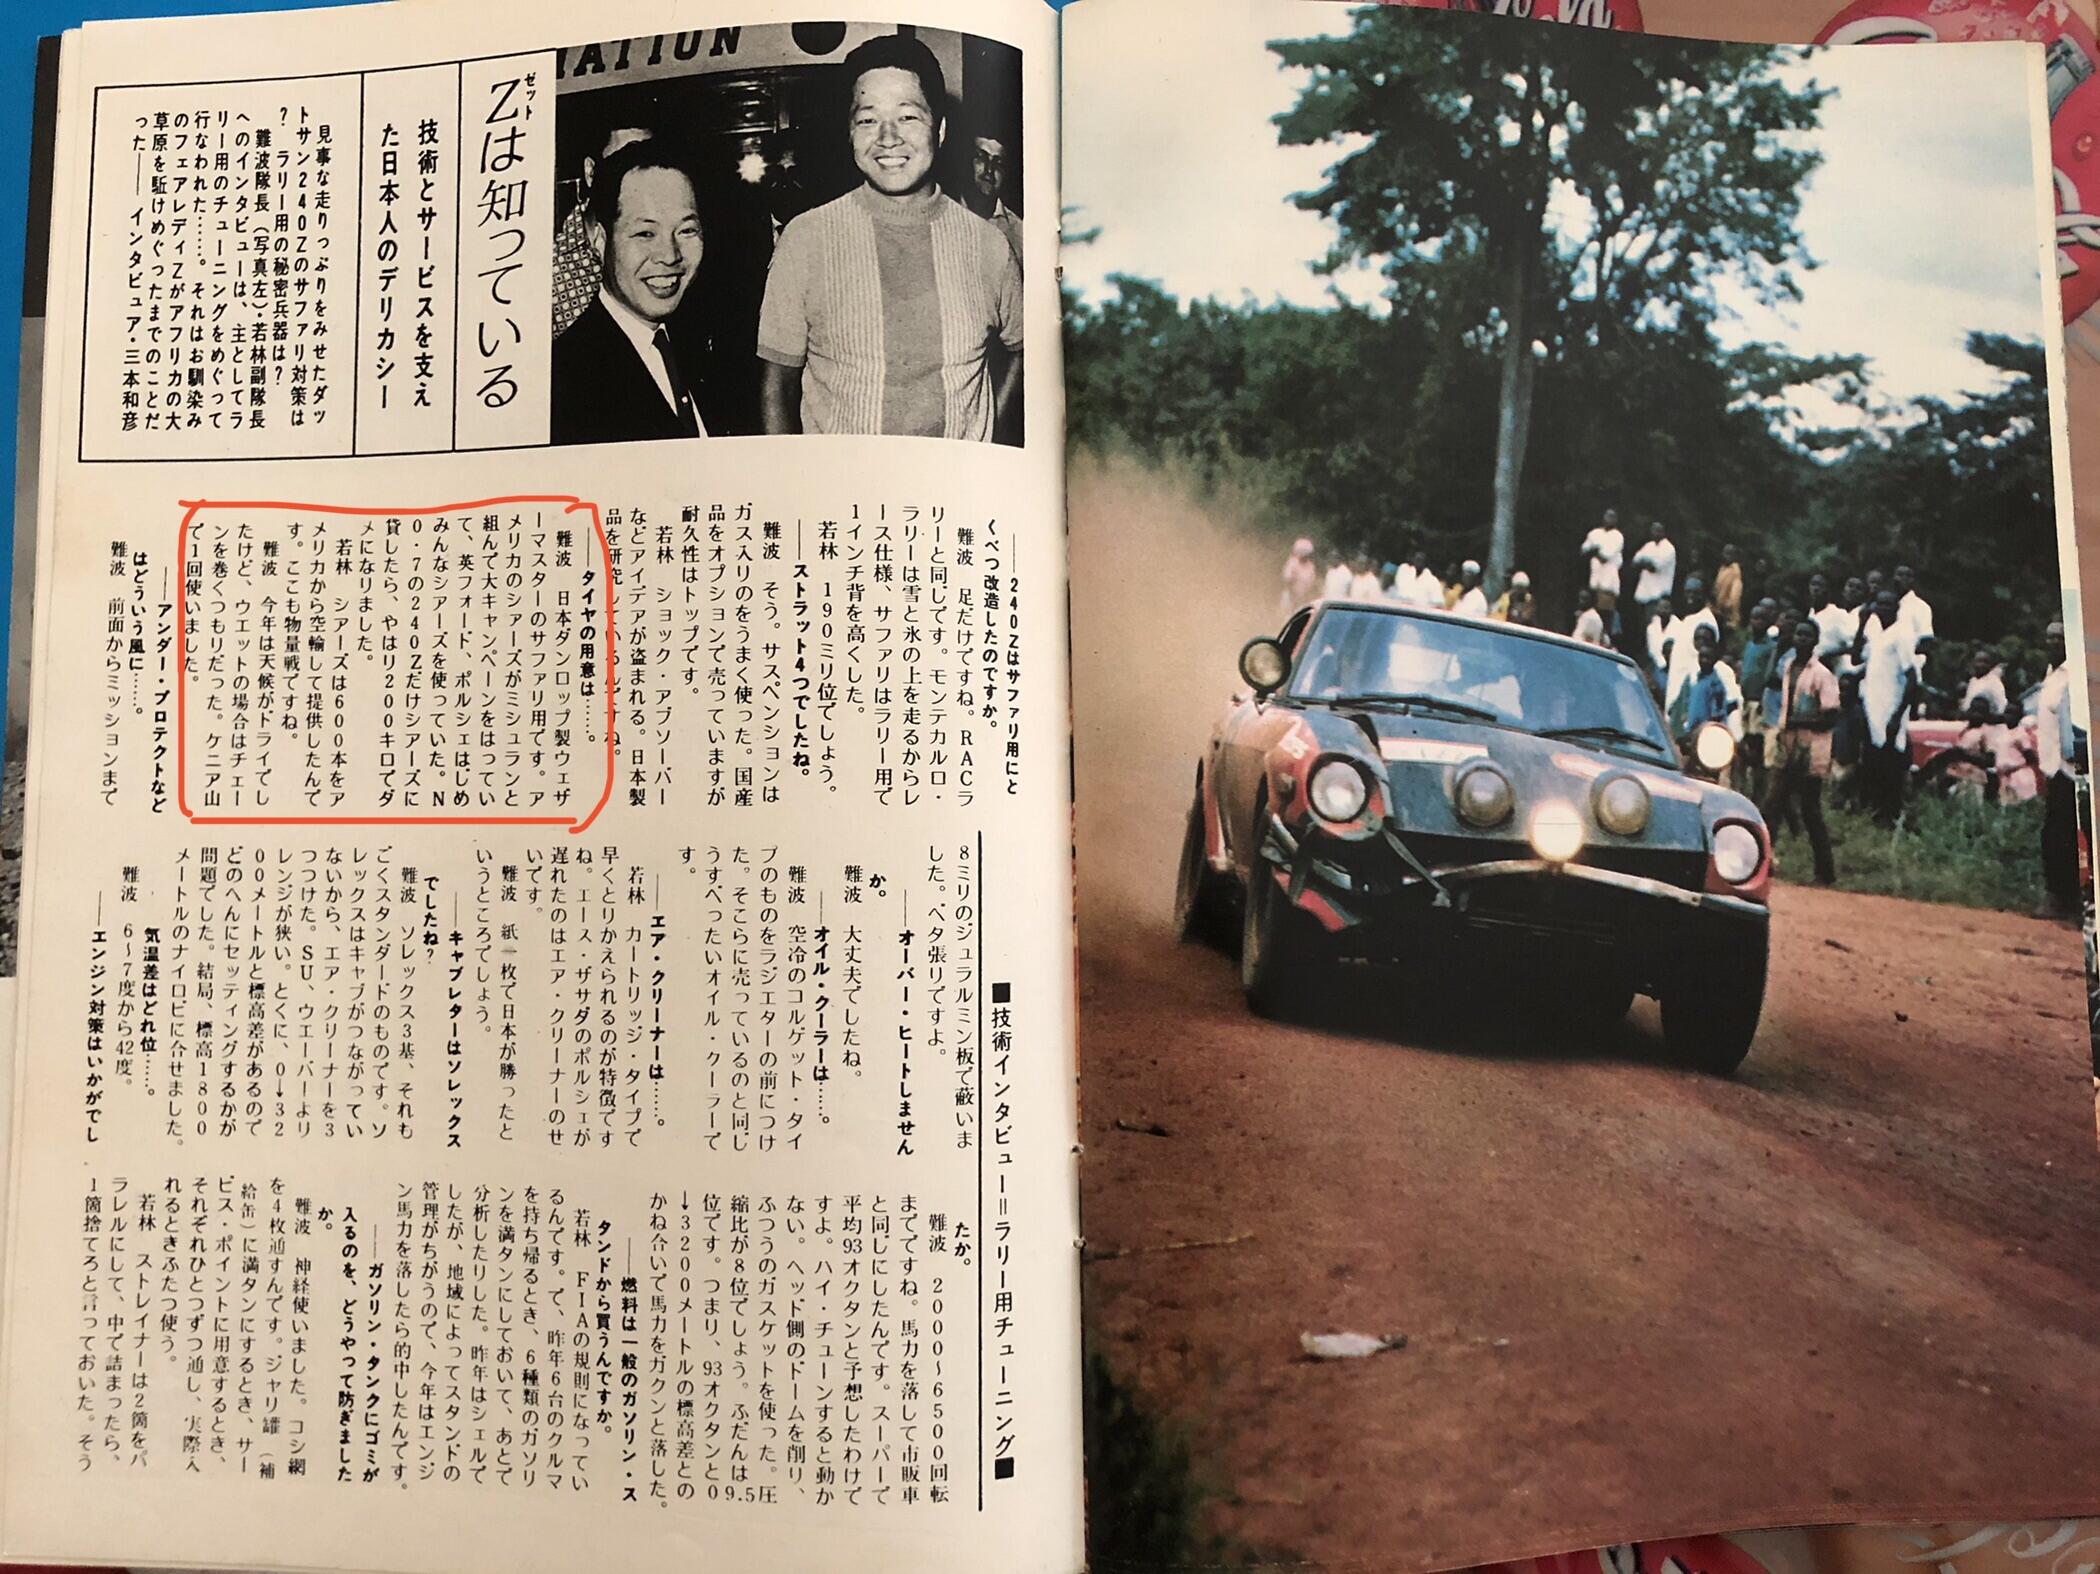
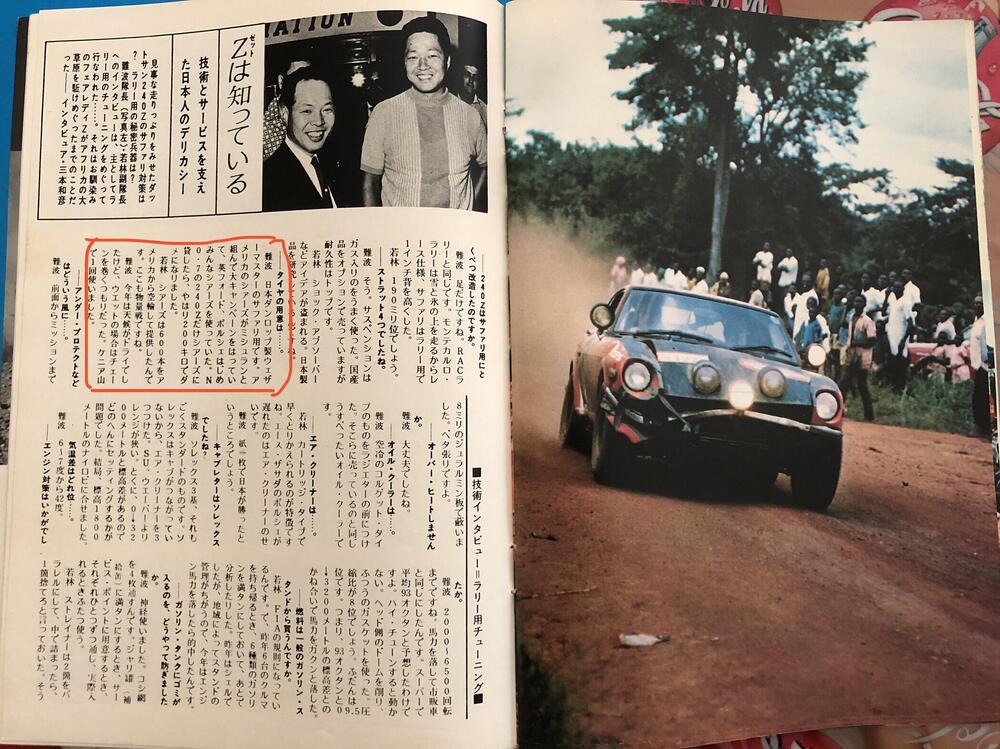
I agree about the period Japanese magazines. They are very technical and the access to major players such as Namba san and Takashi 'Waka' Wakabayashi san gave a great behind-the-scenes insight. I still think they held back on some of their activities though. Always lots of secrets! Auto Technic magazine's 'Rally & Rally' special editions were superb. See if you can seek out the 74-11 edition. The European magazines did get hold of some cars to test. Autocar magazine (UK) were allowed to borrow Rauno Aaltonen's 1970 RAC Rally car '695' after the event, and clearly it was very tired. Not surprising really. The journalists didn't seem to know too much about the spec of the car and the team probably didn't tell them much either. There are some mistakes and misapprehensions in the article. Echappement magazine (France) tested Aaltonen's 1971 Monte Carlo Rallye car '985' and it is a little light on detail and spec but has some great photos. Autorevue magazine (Holland) got hold of '988' (just after it had been used as a Recce/Fast Service chase car on the 1971 Monte) and similarly it is a little light on detail, with some nice photos. I think the team staff were playing their cards close to their chests with regard to some of the details of the cars. Perhaps understandably.2 points
-
2 pointsI’ve found pretty much the same issue with about a dozen non-working horns now, and it relates to corrosion in the power connection terminal where it passes through the body of the horn. You can clean both sides of it thoroughly inside and out, even by sand blasting, and it will look like a million bucks but will not pass current. The corrosion between the touching mating surfaces of the metal bits that make up this insulated pass through connection are severe enough to insulate. I have had to grind the head off the rivet and separate and clean ALL the metal contact surfaces to get it to work again. The rest of the horn internal parts are rarely the issue.2 points
-
These are the best magazines to know about the works rally car for me. They contained the best interview for the depth of works rally car spoken by the general manager Mr. Namba and the team manager Mr.Wakabayashi. I am curious about were there any magazines available which described about Nissan works rally cars just like those Japanese publications outside of Japan ? If not , some one should interpret it because a lot of information there. I would like to try but will be a huge homework. Kats


 2 points
 -
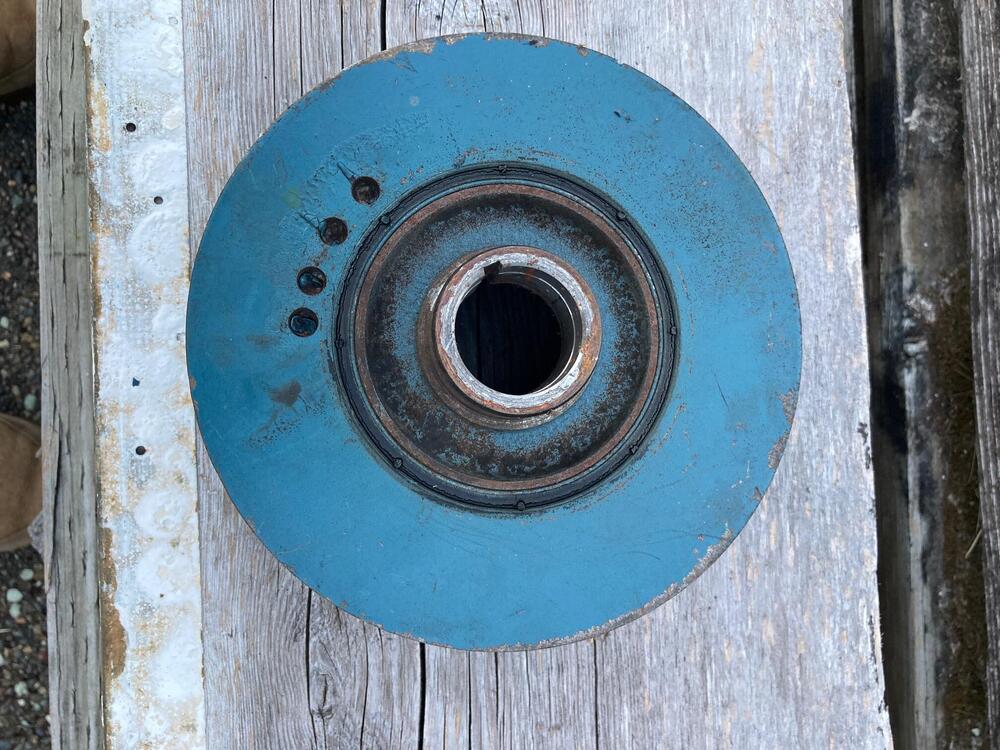
2 pointsI got an idea... the front oil seal rides on the snout of the balancer, right? I'm thinkingif it were broken before you took it off, wouldn't it have leaked oil like crazy out the front. With that in mind, I'm thinking it broke when you pulled it.2 points
-
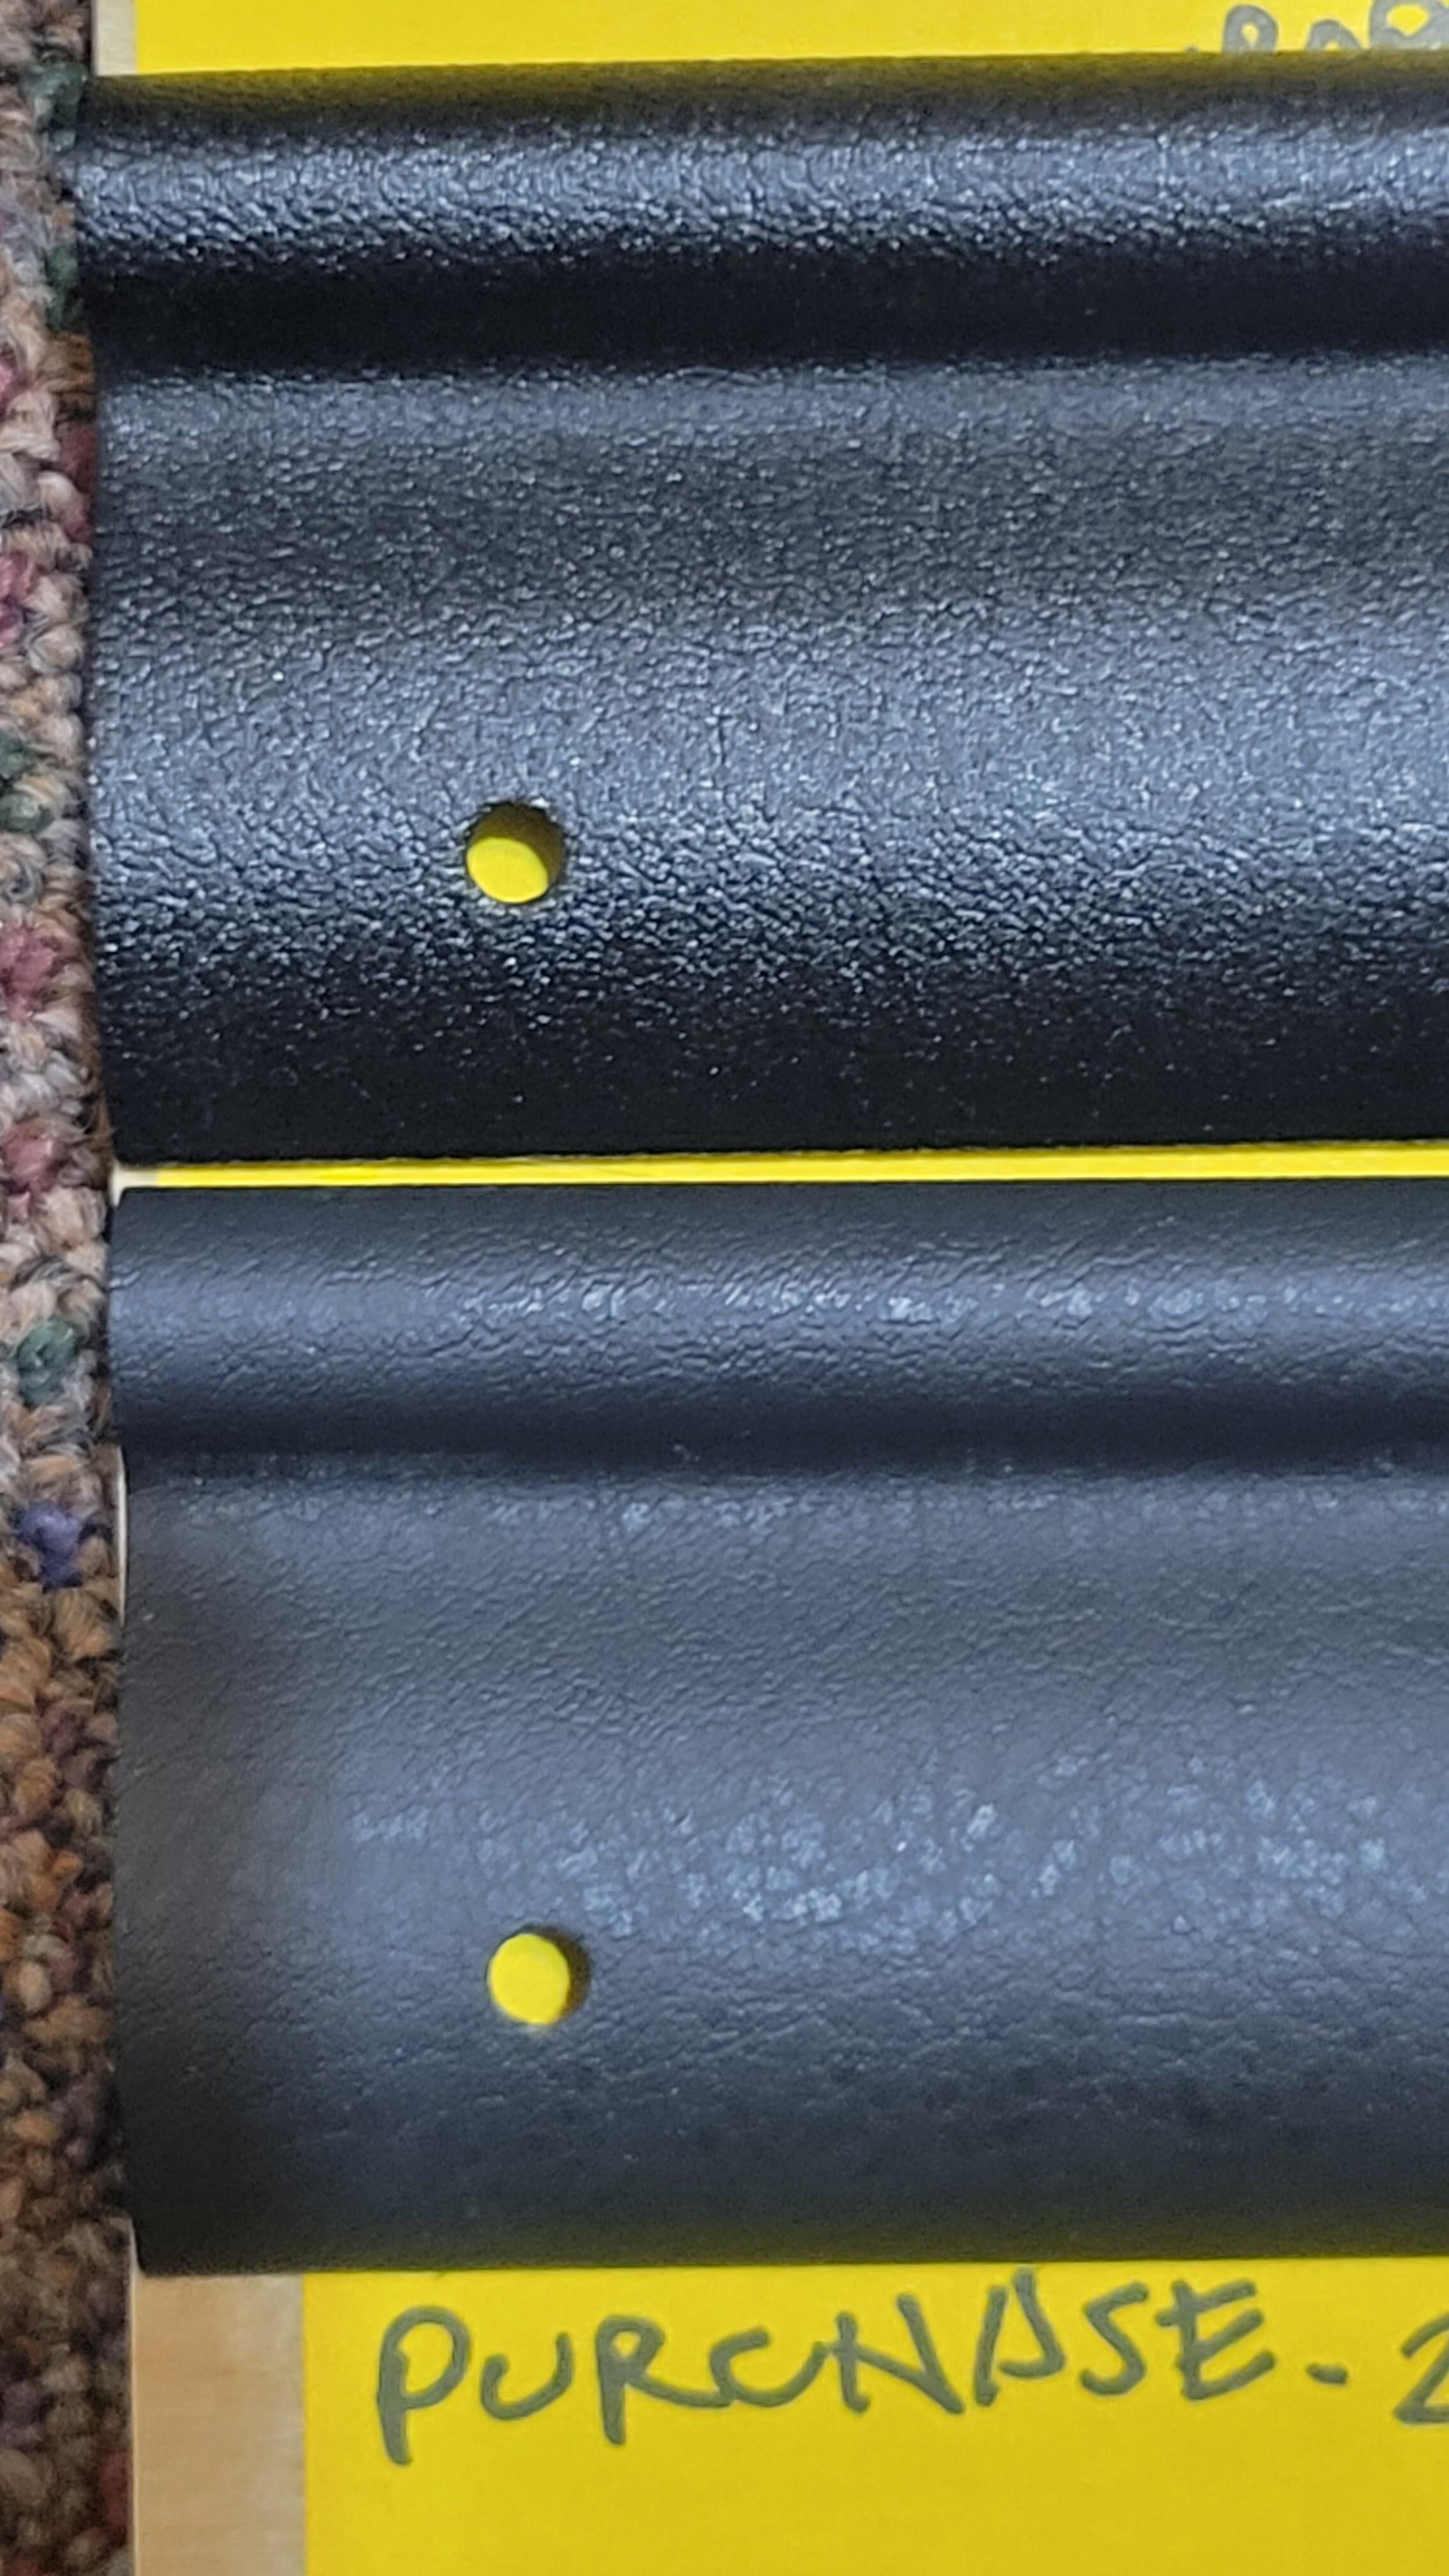
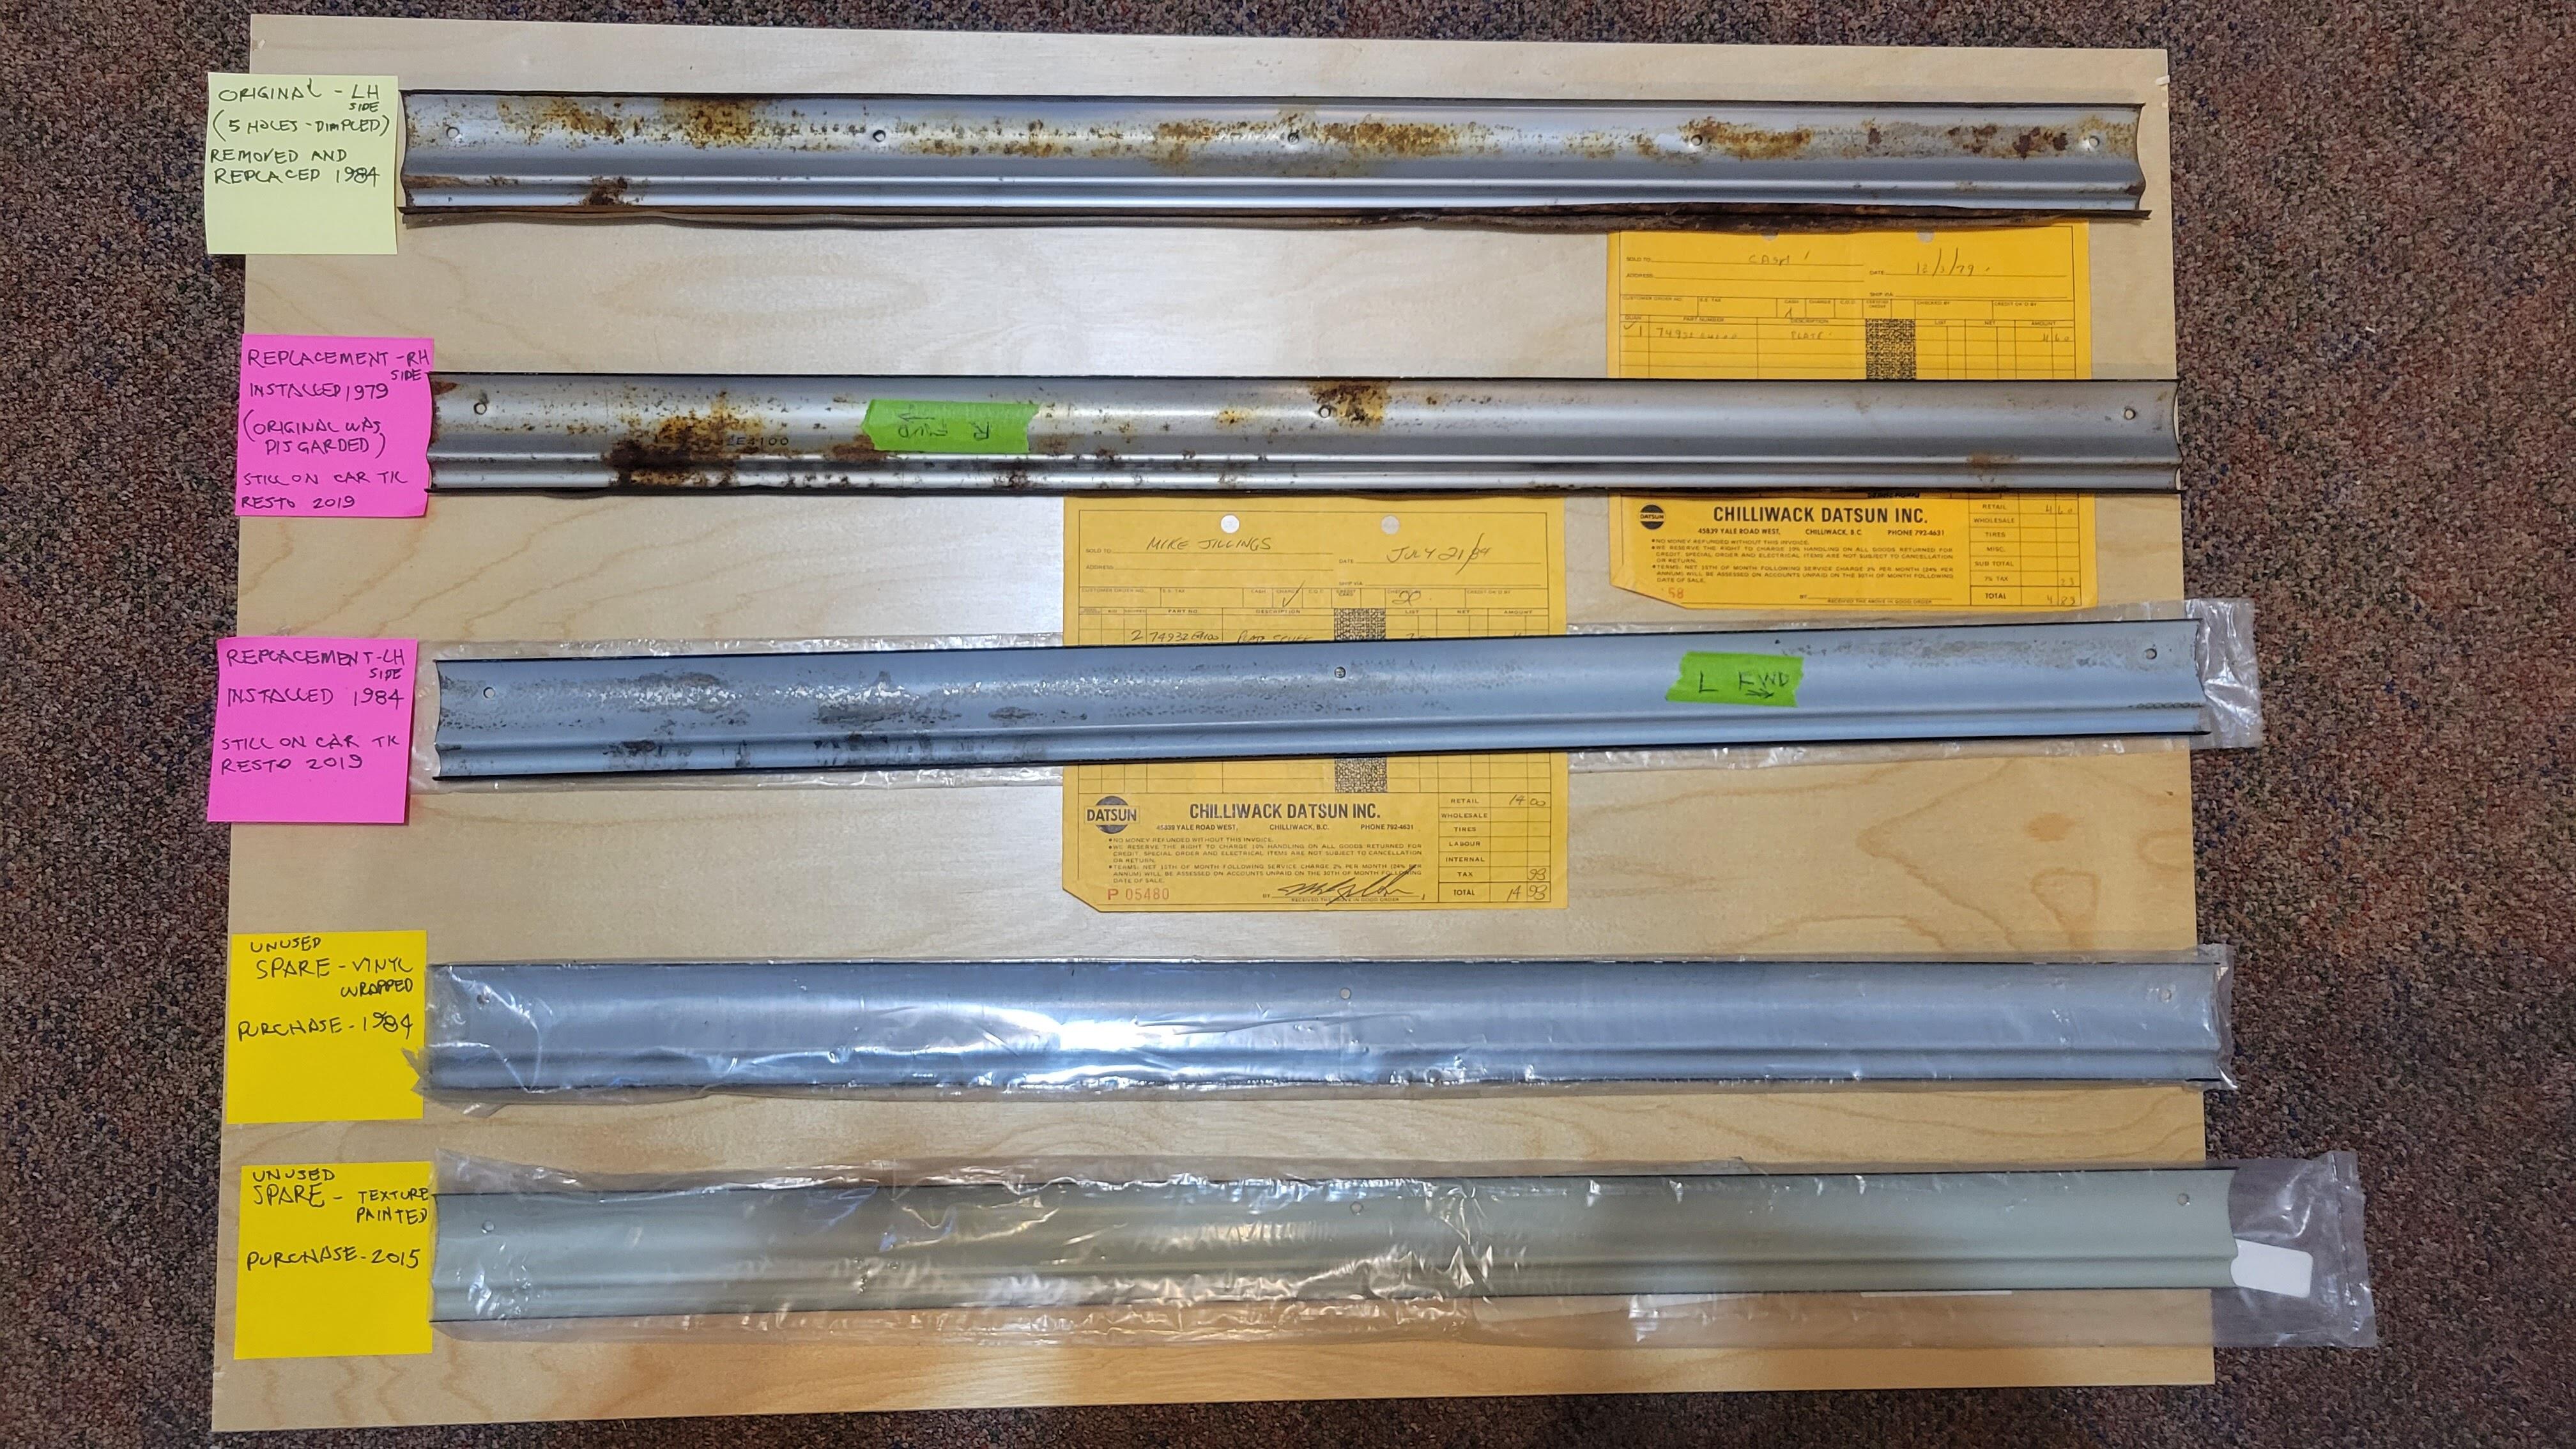
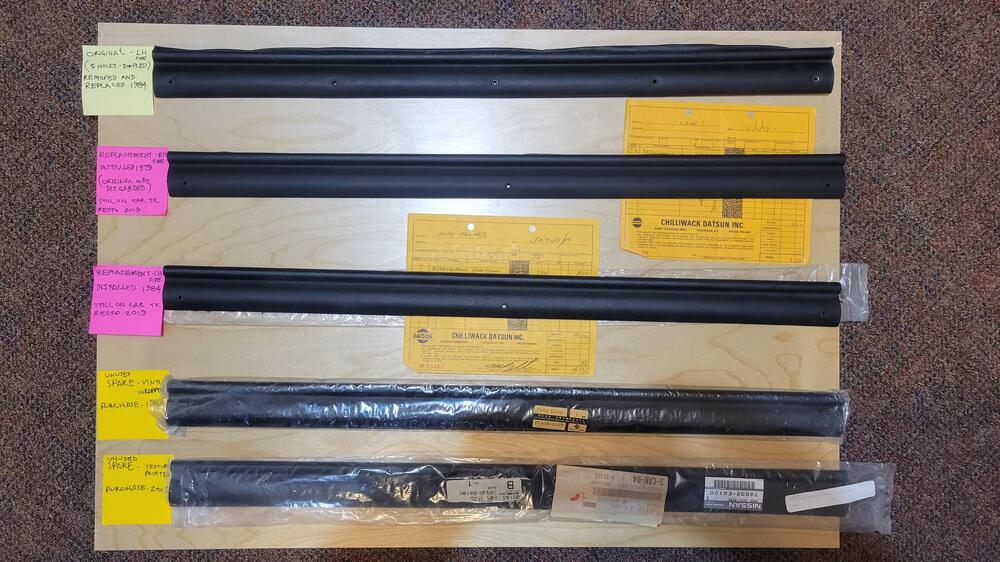
Here is a close up picture showing the difference in texture and color of the old and new scuff plates. I purchased the old vinyl wrapped one in 1984 and got the newer texture painted one in 2015, neither one has been used. Another interesting fact about the early ones is that they first came with a five hole pattern, and the holes are dimpled. I still have a rough five hole one that I saved when I put on a replacement in 1984. The inner rockers on my car, both have five holes to match. For reference here is my collection. The two with pink tags have been on my 7/70 car from 1979 and 1984 respectively, until I removed them for my current restoration.

 1 point
 -
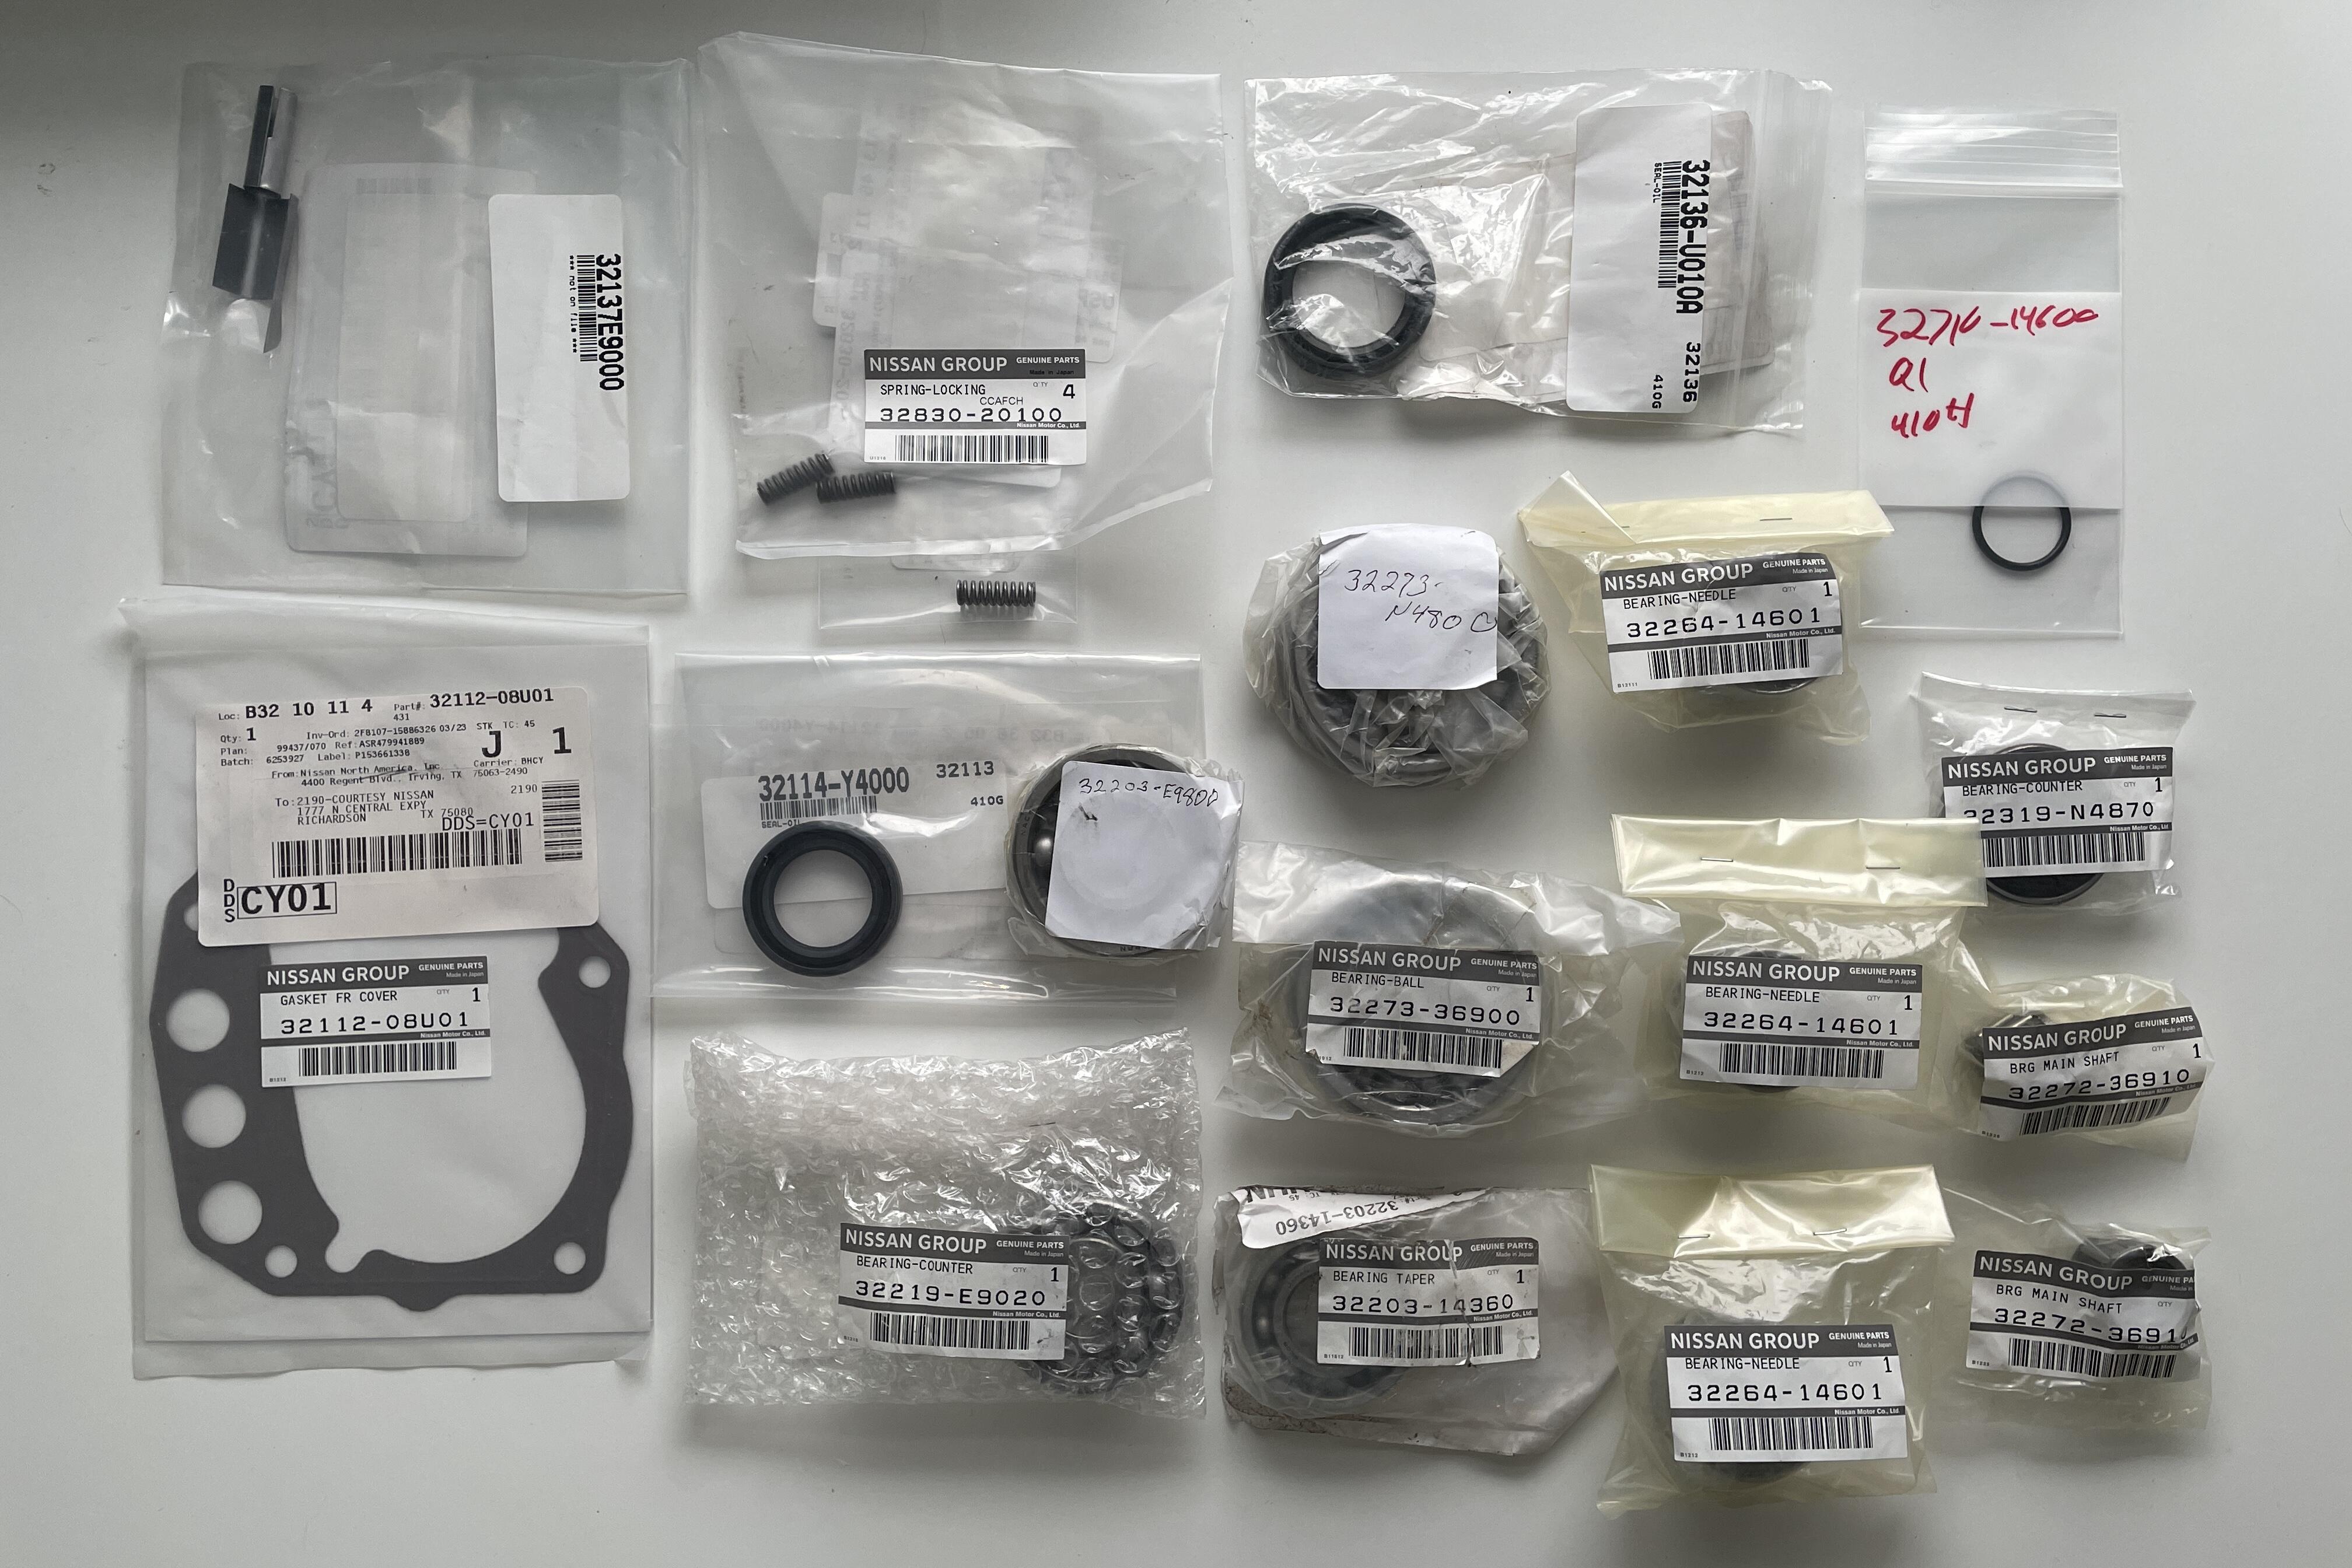
1 pointSide Project: I was able to find Nissan OEM versions of everything I need to overhaul the five speed. Luckily, I don’t need synchros, although you can still get them OEM from Courtesy Parts and the handful of Nissan dealers I called. I had to use a handful of places to get all of these, and I’m not 100% certain two of these are OEM despite reassurances from the retailer, but it wasn’t difficult to get it all in hand. Maybe 30 minutes on Google. I dropped these off at the transmission shop yesterday. I have no idea how long it is going to take for him to get it done, but I’m hoping to have it back by the end of September. Here's my parts list: - 1x Main Input Shaft Bearing (PN 32273-N4800) - 1x Main Input Shaft Bearing, Adapter Plate (PN 32273-36900) - 1x Main Input Shaft Bearing, Extension Housing (PN 32203-14360) - 1x Pilot Bearing, Input / Output Shafts (PN 32272-36910) - 3x Needle Bearing, Main Shaft Gears (PN 32264-14601) - 1x Counter Shaft Bearing, Front (PN 32219-E9020) - 1x Counter Shaft Bearing, Adapter (PN 32203-E9800) - 1x Counter Shaft Bearing, Rear (PN 32319-N4870) - 1x Reverse Idler Gear Bearing (PN 32272-36910) - 1x Front Cover Gasket (PN 32112-08U01) - 1x Oil Gutter (PN 32137-E9000) - 1x Front Seal (PN 32114-Y4000) - 1x Rear Extension Seal (PN 32136-U010A) - 3x Checking Spring (32830-20100)
 1 point
 -
1 pointI must need my glasses checked, as I see a multitude of similarites with zKars images in post no.8. On further digging, it looks like the HJG38 is for some models in the P510SSS, and the B210 range, though could well just be a needle difference for these two differing cc's as the bodies look the same. According to the Datsun 1200 site, this could be the Nissan Competition set-up, as it is without the advanced idle mixture set-up (IMS) (between the base of the carb dome and the manifold flange it just has a blanking plate, no pipework) and has a banjo fitment bolt for a metal drain tube on the fuel bowl (instead of a barbed fitment for a pipe to go to the air filter housing). It could be that the Nissan Competition (USA) is standard for Europe. I see references to these sometimes being single carbs on some engines, but nothing found to support.... More digging....1 point
-
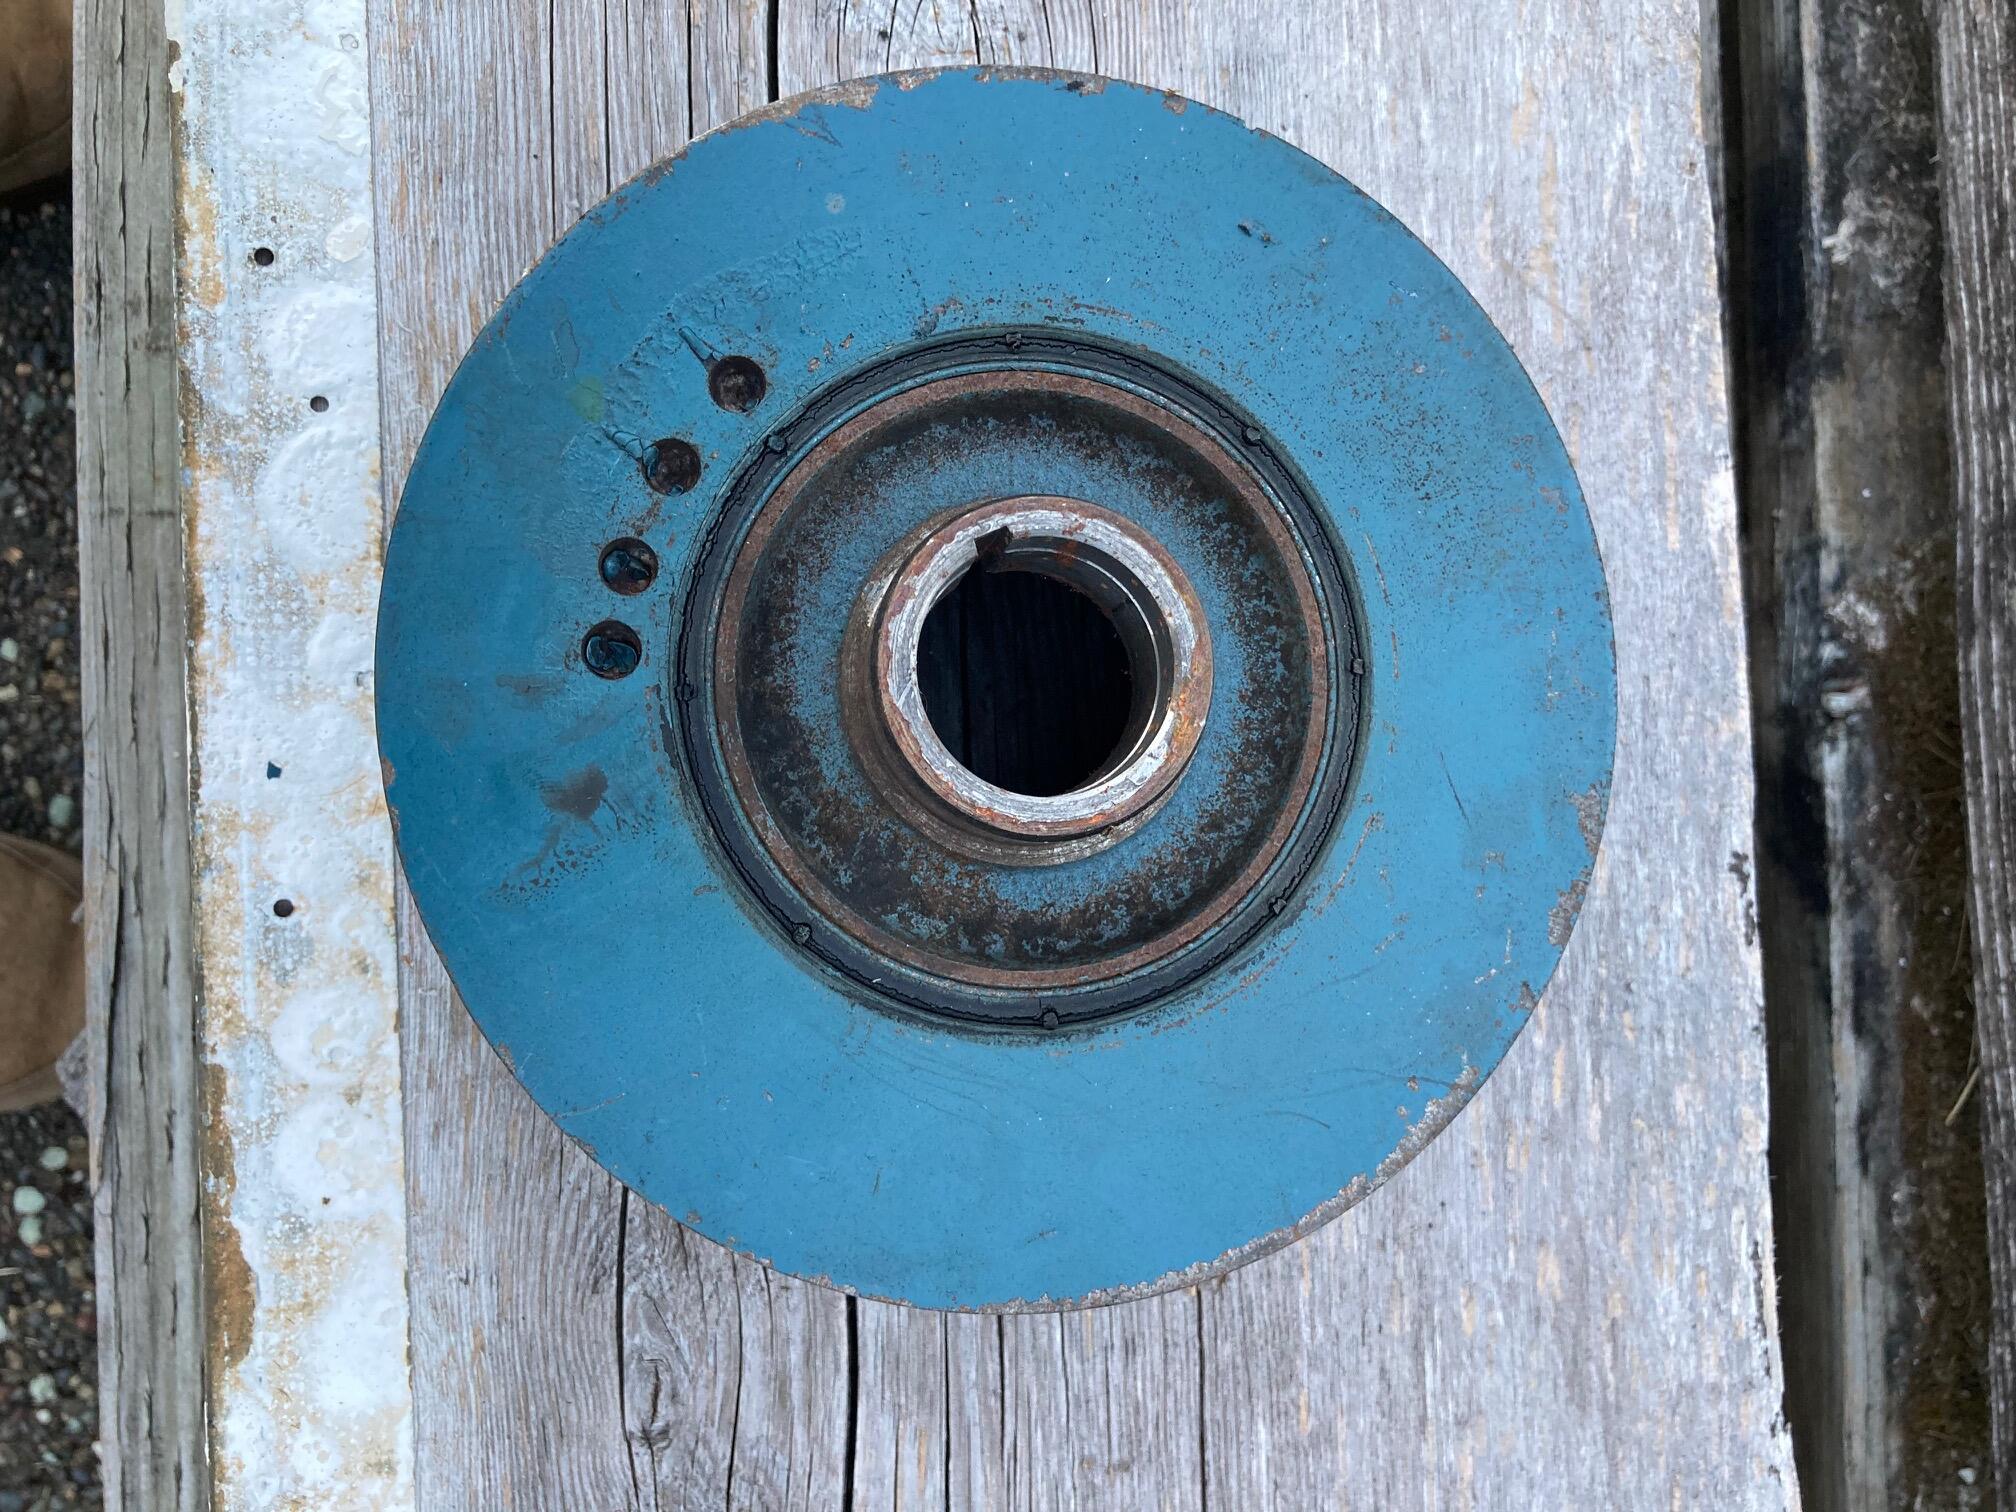
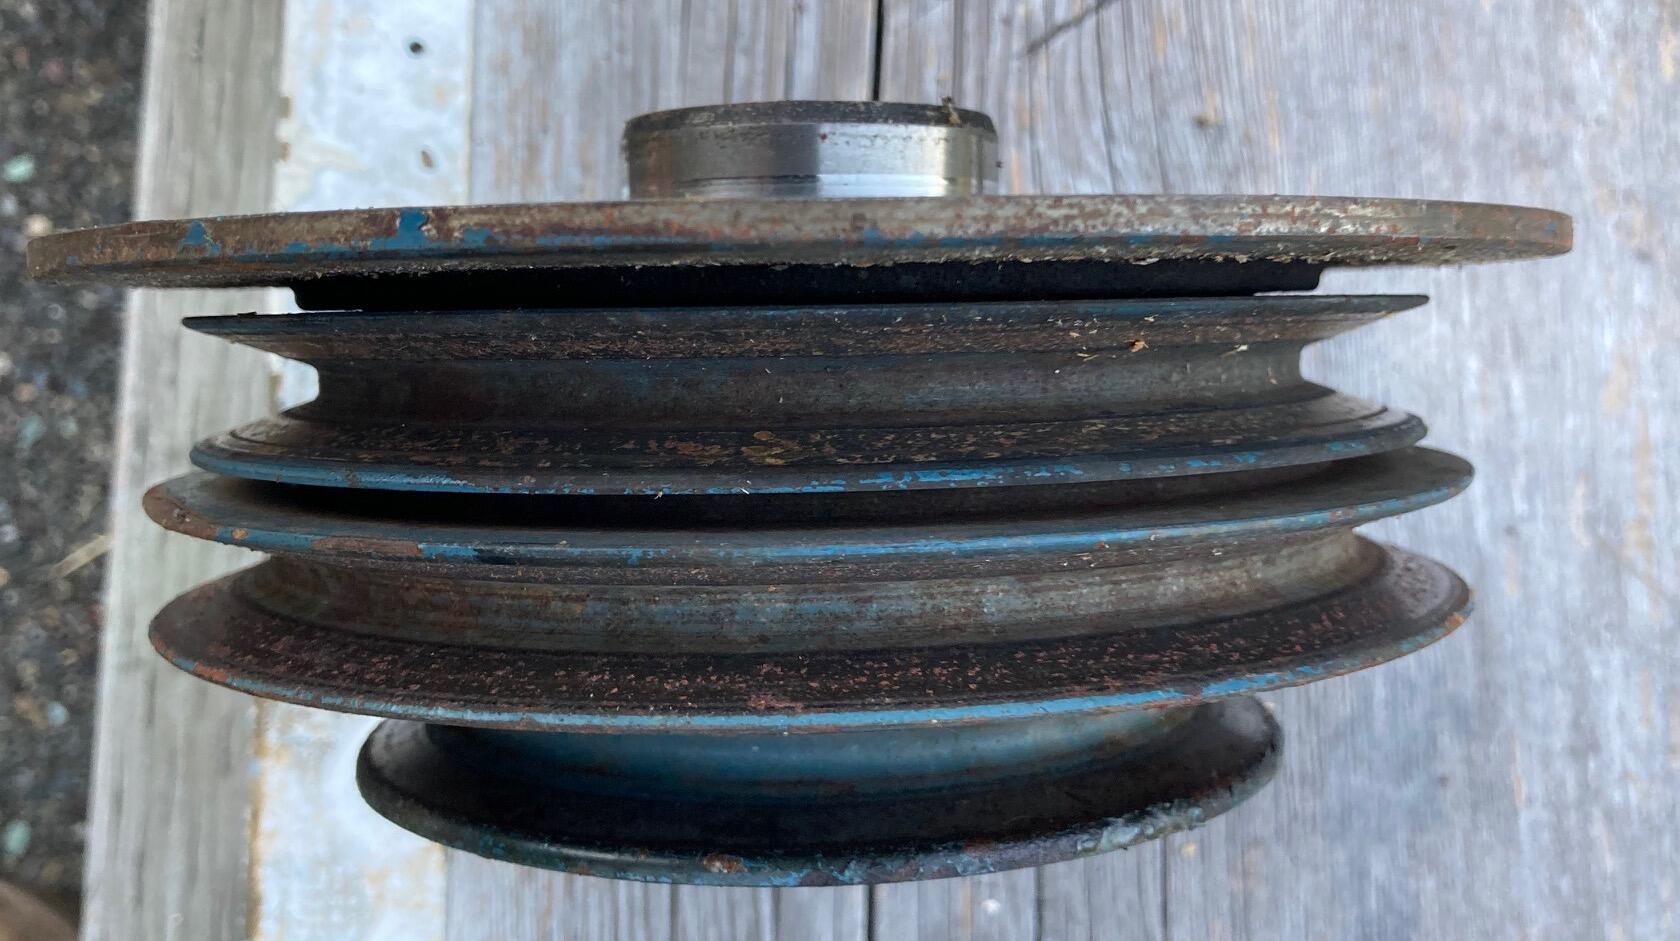
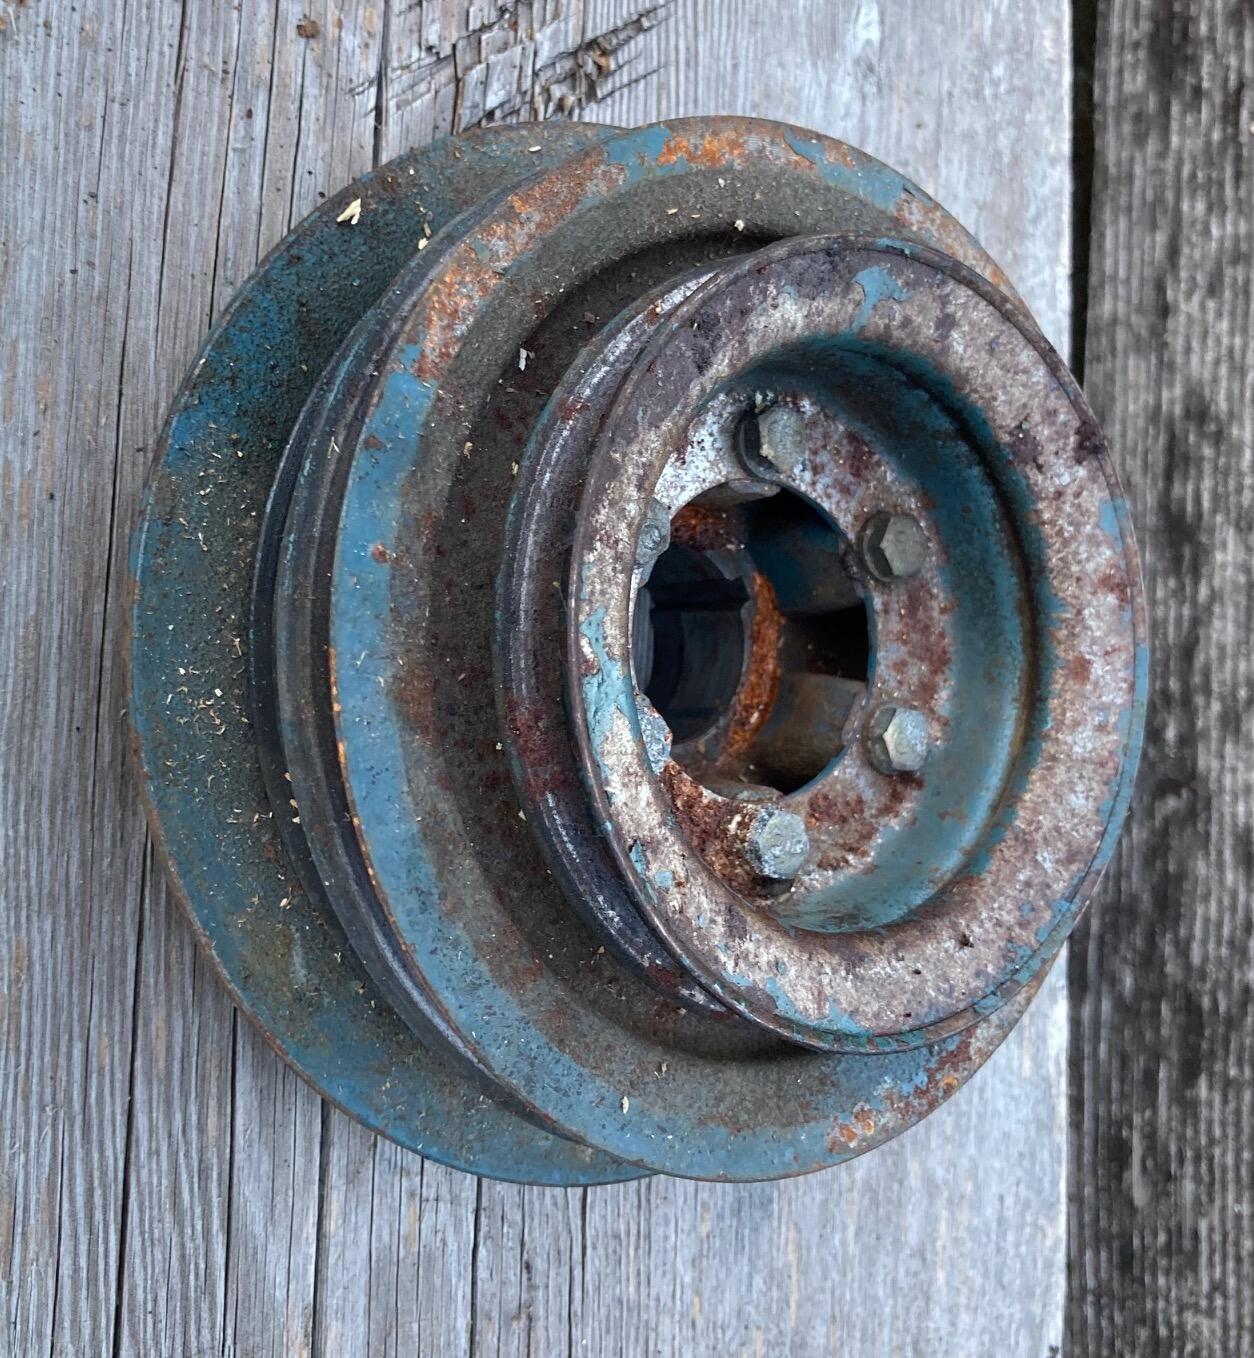
1 pointI think it resembles this one. It is a two pulley that was for the ZX with power steering. The third pulley is a bolt on for the A/C. IIRC.
 1 point
 -
1 pointAlso.. when i look at the ebay pulley.. how well would an old part like that "balance"? In the last pic of that old balancer you can see the "goo" come out of it and that should work after 40+ years... i have my doubts.. better buy a new one? They are around.. How important is a good balancer anyway? comes to mind... why are they so expensive?1 point
-
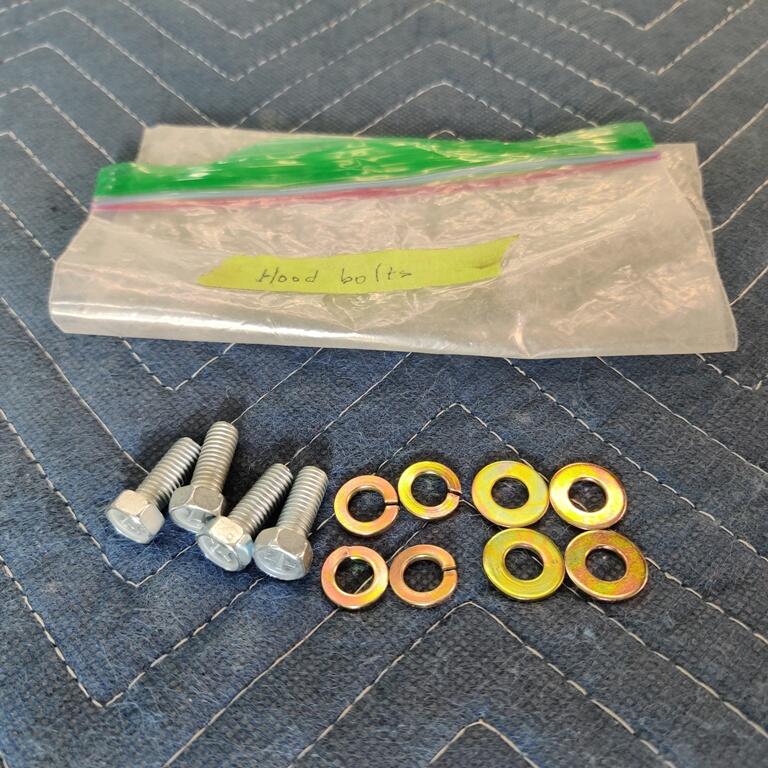
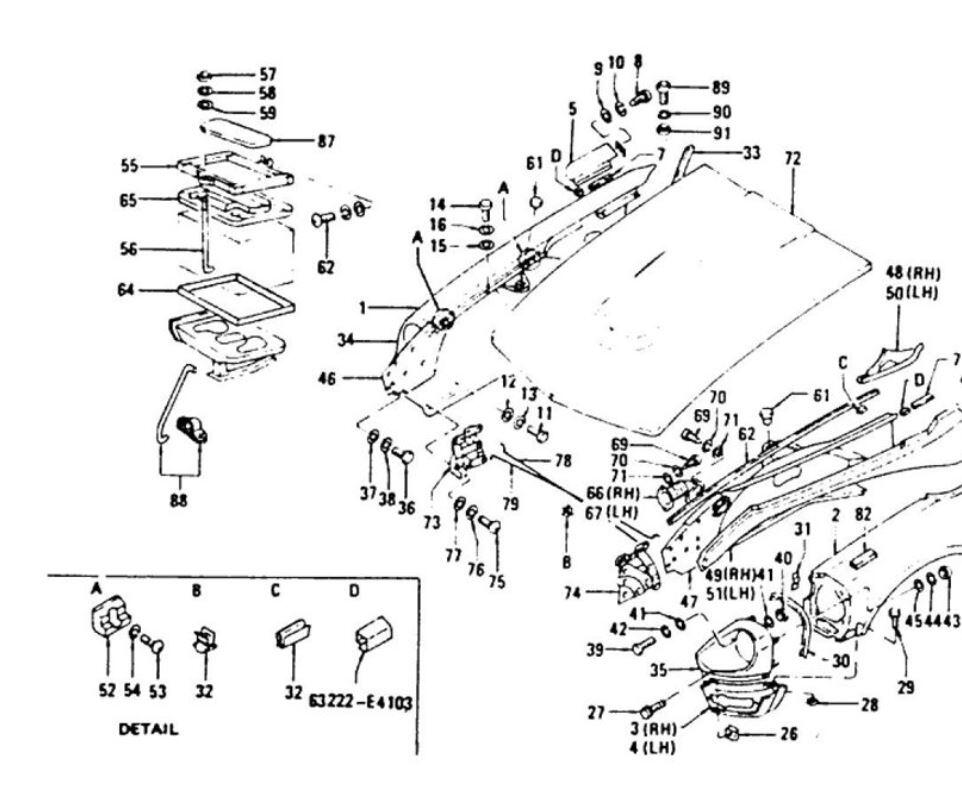
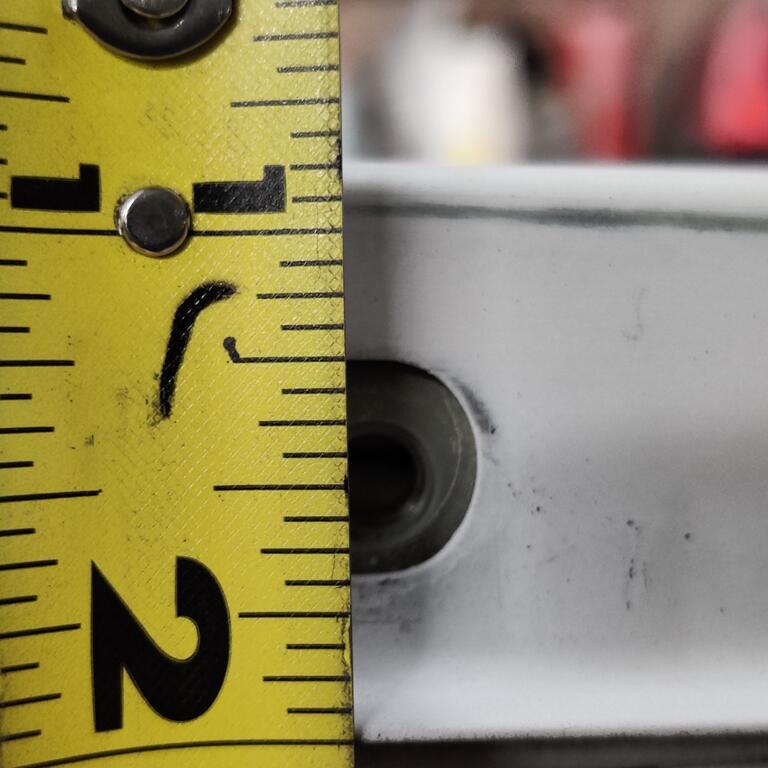
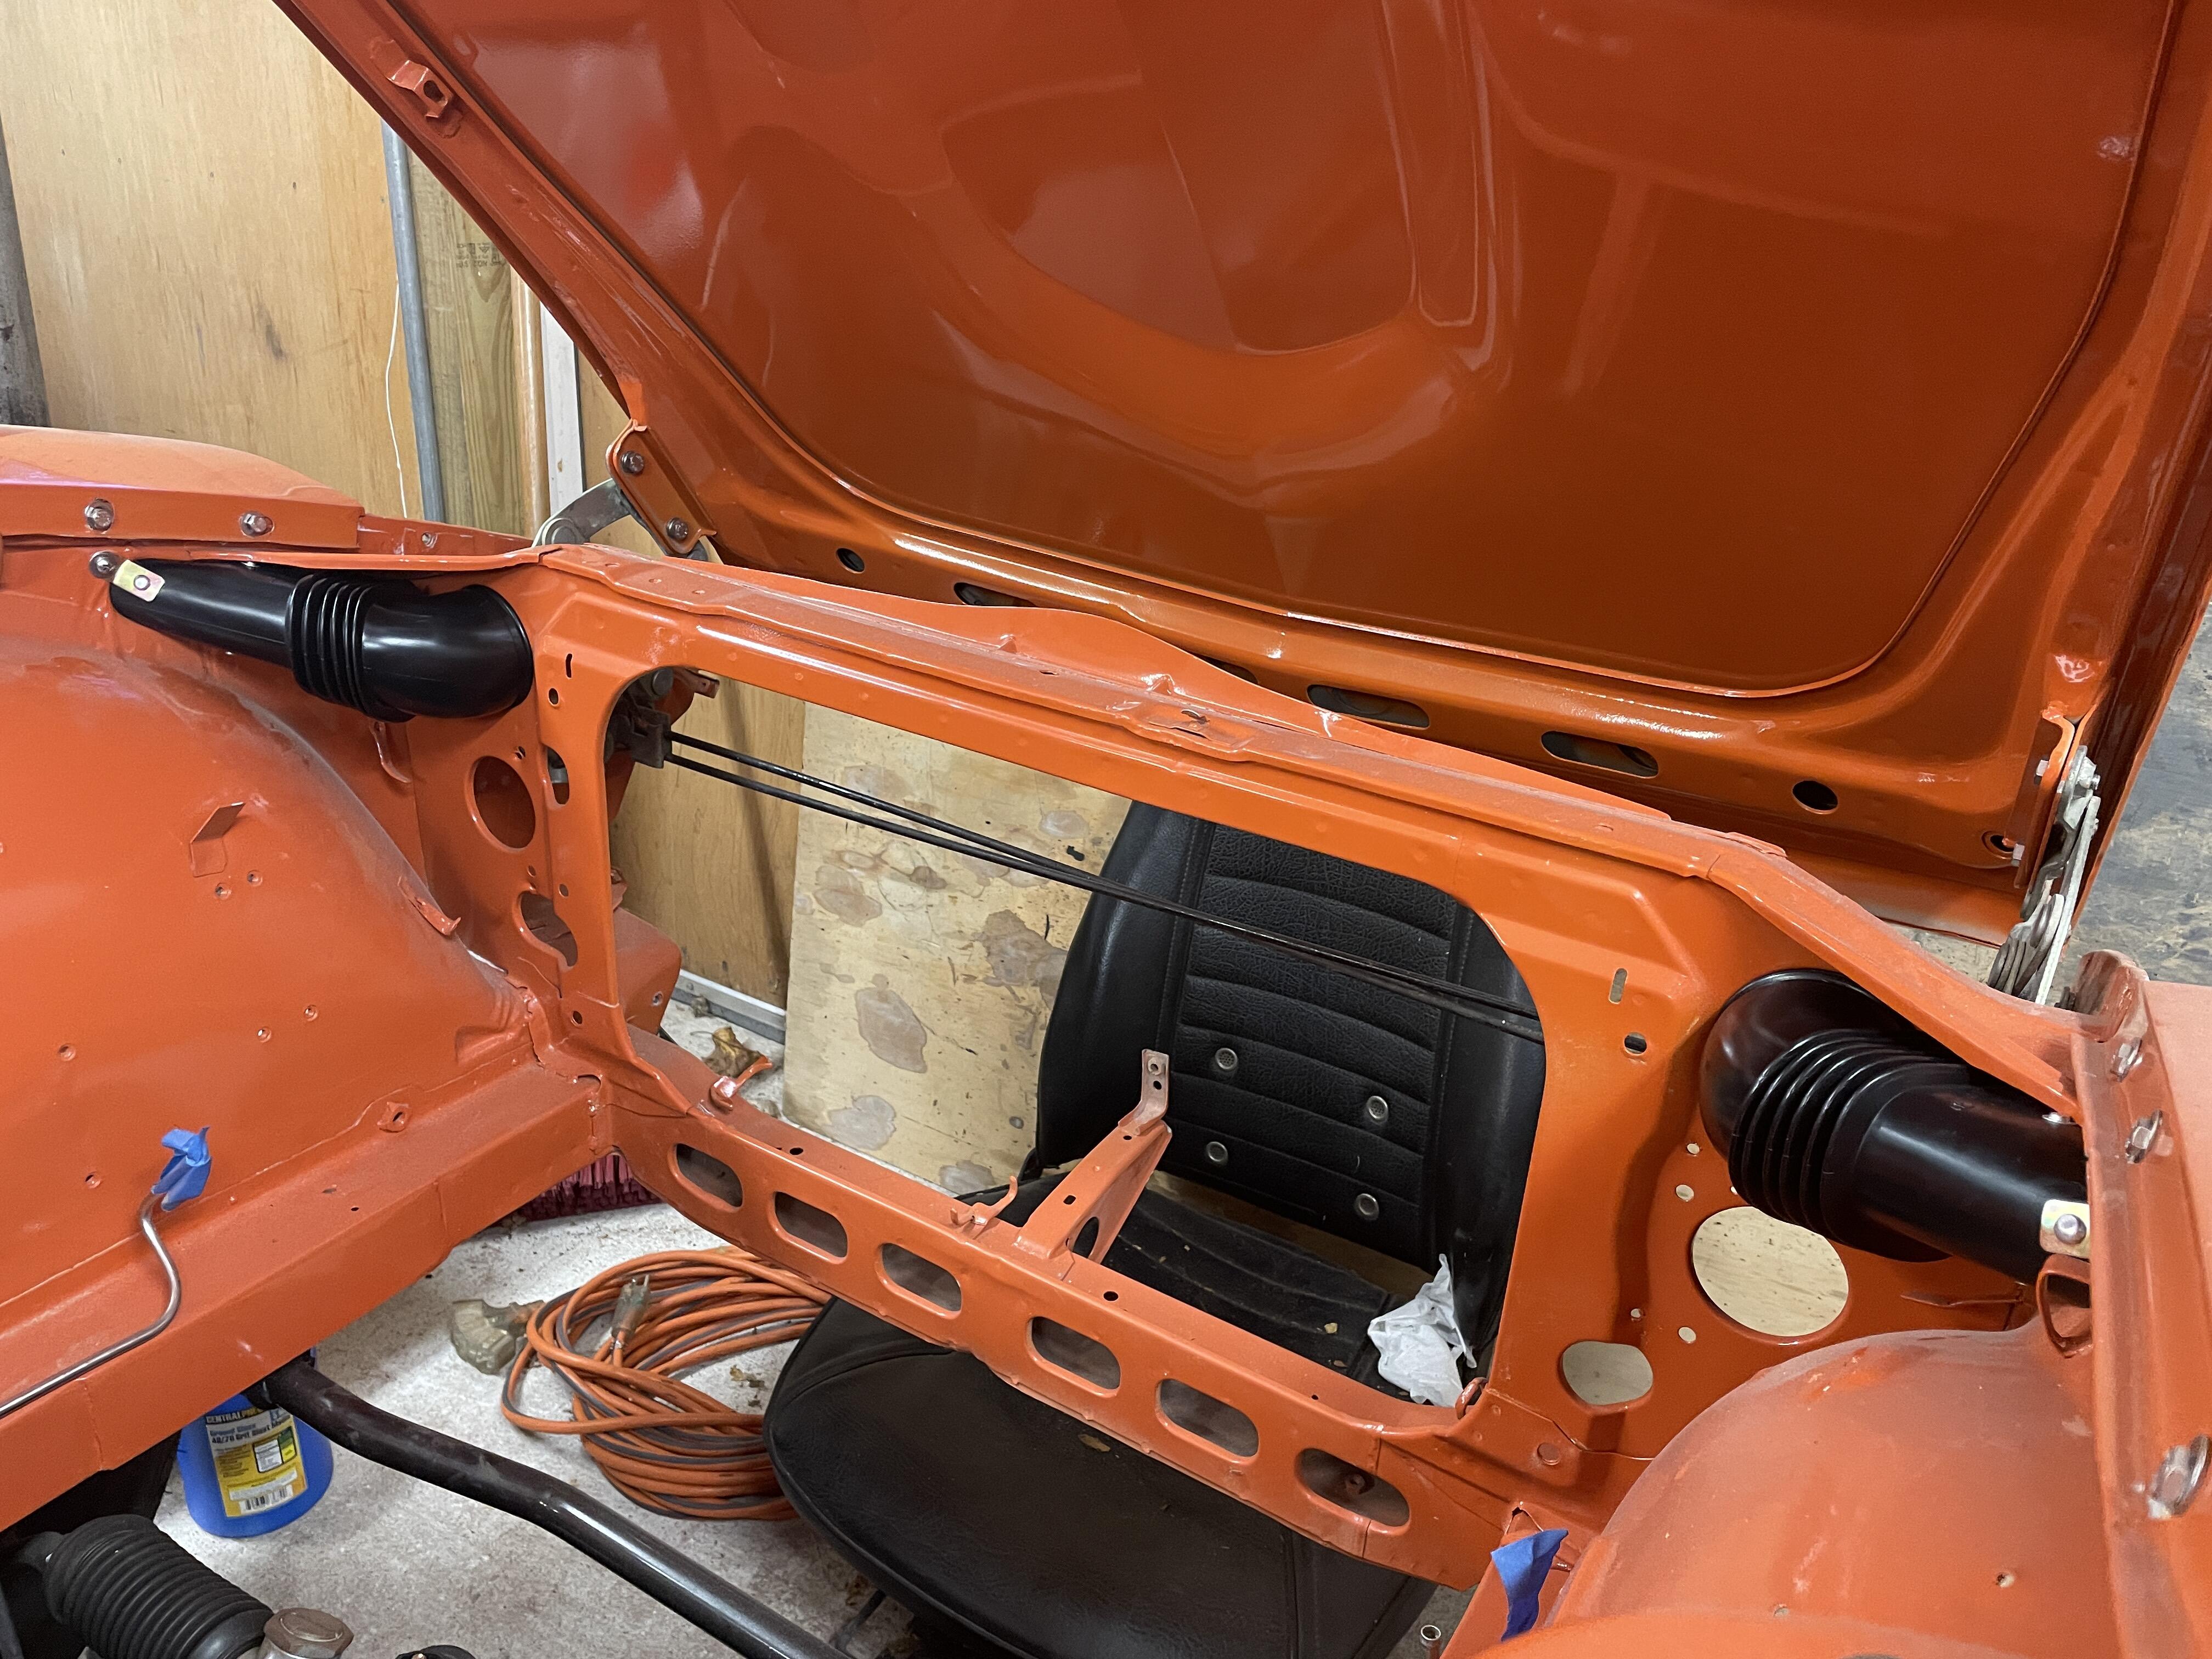
Realizing that a key next step in the body work for this car was to determine the final fitment of the top, inside edges of the fenders, I proceeded with mounting the hood over the weekend. In order to do that, I had to first modify the angle brackets connecting the car at the bumper bolt locations to the rotisserie. I had to cut a small section from them to get freedom of movement for the mounted hood hinges. With that out of the way, I proceeded to struggle mightily with aligning the hinges and getting the hood to "sit down" all the way. I didn't take pictures of them, but it is important to note that the "hood - bumpers" (reference A in the drawing), don't just align the hood laterally in the engine bay opening. They are POSITIVE stops for the hood depth - caps added for emphasis! I put them on before final adjustment of the height of the fender inner edges, and they were keeping the hood from shutting enough! Suffice to say... you must leave those off when aligning the hood and fenders, and add them later (as Nissan did after the car was painted at the factory). Hood hinge and hood bolt for documentation purposes: On to details about the chore of aligning the fenders with the hood. After adjusting the hood and fenders as well as possible within their "ranges", the left fender was sitting up higher than the right, a little more in the back (note the inside surface of the fender inner flange can be seen from this angle in the first pic, and less so toward the front of the car in the second pic. Well, I couldn't push the inner edge of the left side fender down any further, as it was at the full range of adjustment using the bolt hole openings on the fender inner edge. That was odd, because I wasn't having the issue with the right side fender. So, I began to compare the two: Left side vs. right side - in that order: It is a little hard to see, but perhaps you can make out that the left side fender has about 1 and an 1/8" from the 2 on the tape to the top surface, while the right side fender has about 1 and a 1/32" from the same 2 on the tape. To get the driver side fender inner edge to align with the hood surface properly, I had to open up the slots in the fender. I did this by using a die grinder and protecting the opening with a flat steel plate: After a few rounds of this on the fender bolt holes, I was able to push the fender down enough to align with the hood properly. I then tightened those inner fender edge bolts for the last time and locked in the fender top surface position. Of course, I then had to "touch up the body work on the fender top surfaces on both sides. I keep learning my own lessons over and over again: 'don't do body filler work on these panels until they are in final position'. Tonight I scuff sanded the inner surface of the hood to ready it for primer filler. The tops of the fenders, and inspection flaps are also ready for primer filler. With any luck, those will be final coats of primer on those areas - more panels are reaching the point where I can switch to wet sanding with 240 grit. After that, I should be able to progress to 400 and then 600 to finish out the sanding process.


 1 point
 -
1 pointYeah, and I'm wondering of the stubbornness to remove was related to the failure. Either it was stubborn to install and took excessive force because there was a problem. Or it was stubborn to remove because it was cracked and wedged on or bent or something. I guess I wasn't saying it was an easy question to answer. I was suggesting studying the crack and the situation and trying to figure out if the crack was new or had been there for some time.1 point
-
1 point
-
1 pointSo the first question is... Did the damper crack on it's way out as you pulled it, or was it already cracked before you pulled it? I think that's what Zed Head was alluding to. It would be interesting to have the answer to that. As for the gouge on the back side, didn't you say your timing pointer was chewed off? I think you may have figured out what happened there. It's not the first example of a cracked damper, although the other ones I remember were damaged upon insertion. Improper insertion. If yours was damaged when they put it in, and wobbled because of that damage, it would explain a lot. Wouldn't help pay for a replacement, but would at least explain what happened.1 point
-
1 point
-
1 pointOn HBO's Tokyo Vice, there's a Z driven by a detective. Light bar is on car next to Z, thankfully.
 1 point
 -
1 pointYou don't need the diodes. What I gave you was a very simple way to wire. You said you aren't using the GW wire for the tach, so all you would need to do is land the GW and BW wire at the same place in the engine bay or replace the terminals on them now for a male/female bullet. Why do you want to do 10 times more work?1 point
-
And I have already demonstrated that your flawed design won't work and should be consigned to the trash heap. But what would I know? I only work with these kinds of circuits for a living.1 point
-
even cars from dry states that dont have much visible rust are rusting on the inside, so for me i want to ensure the internal structures are done, i don't want to take shortcuts and then have rust pop through my new paint job a couple of years later.... do it once, do it right.1 point
-
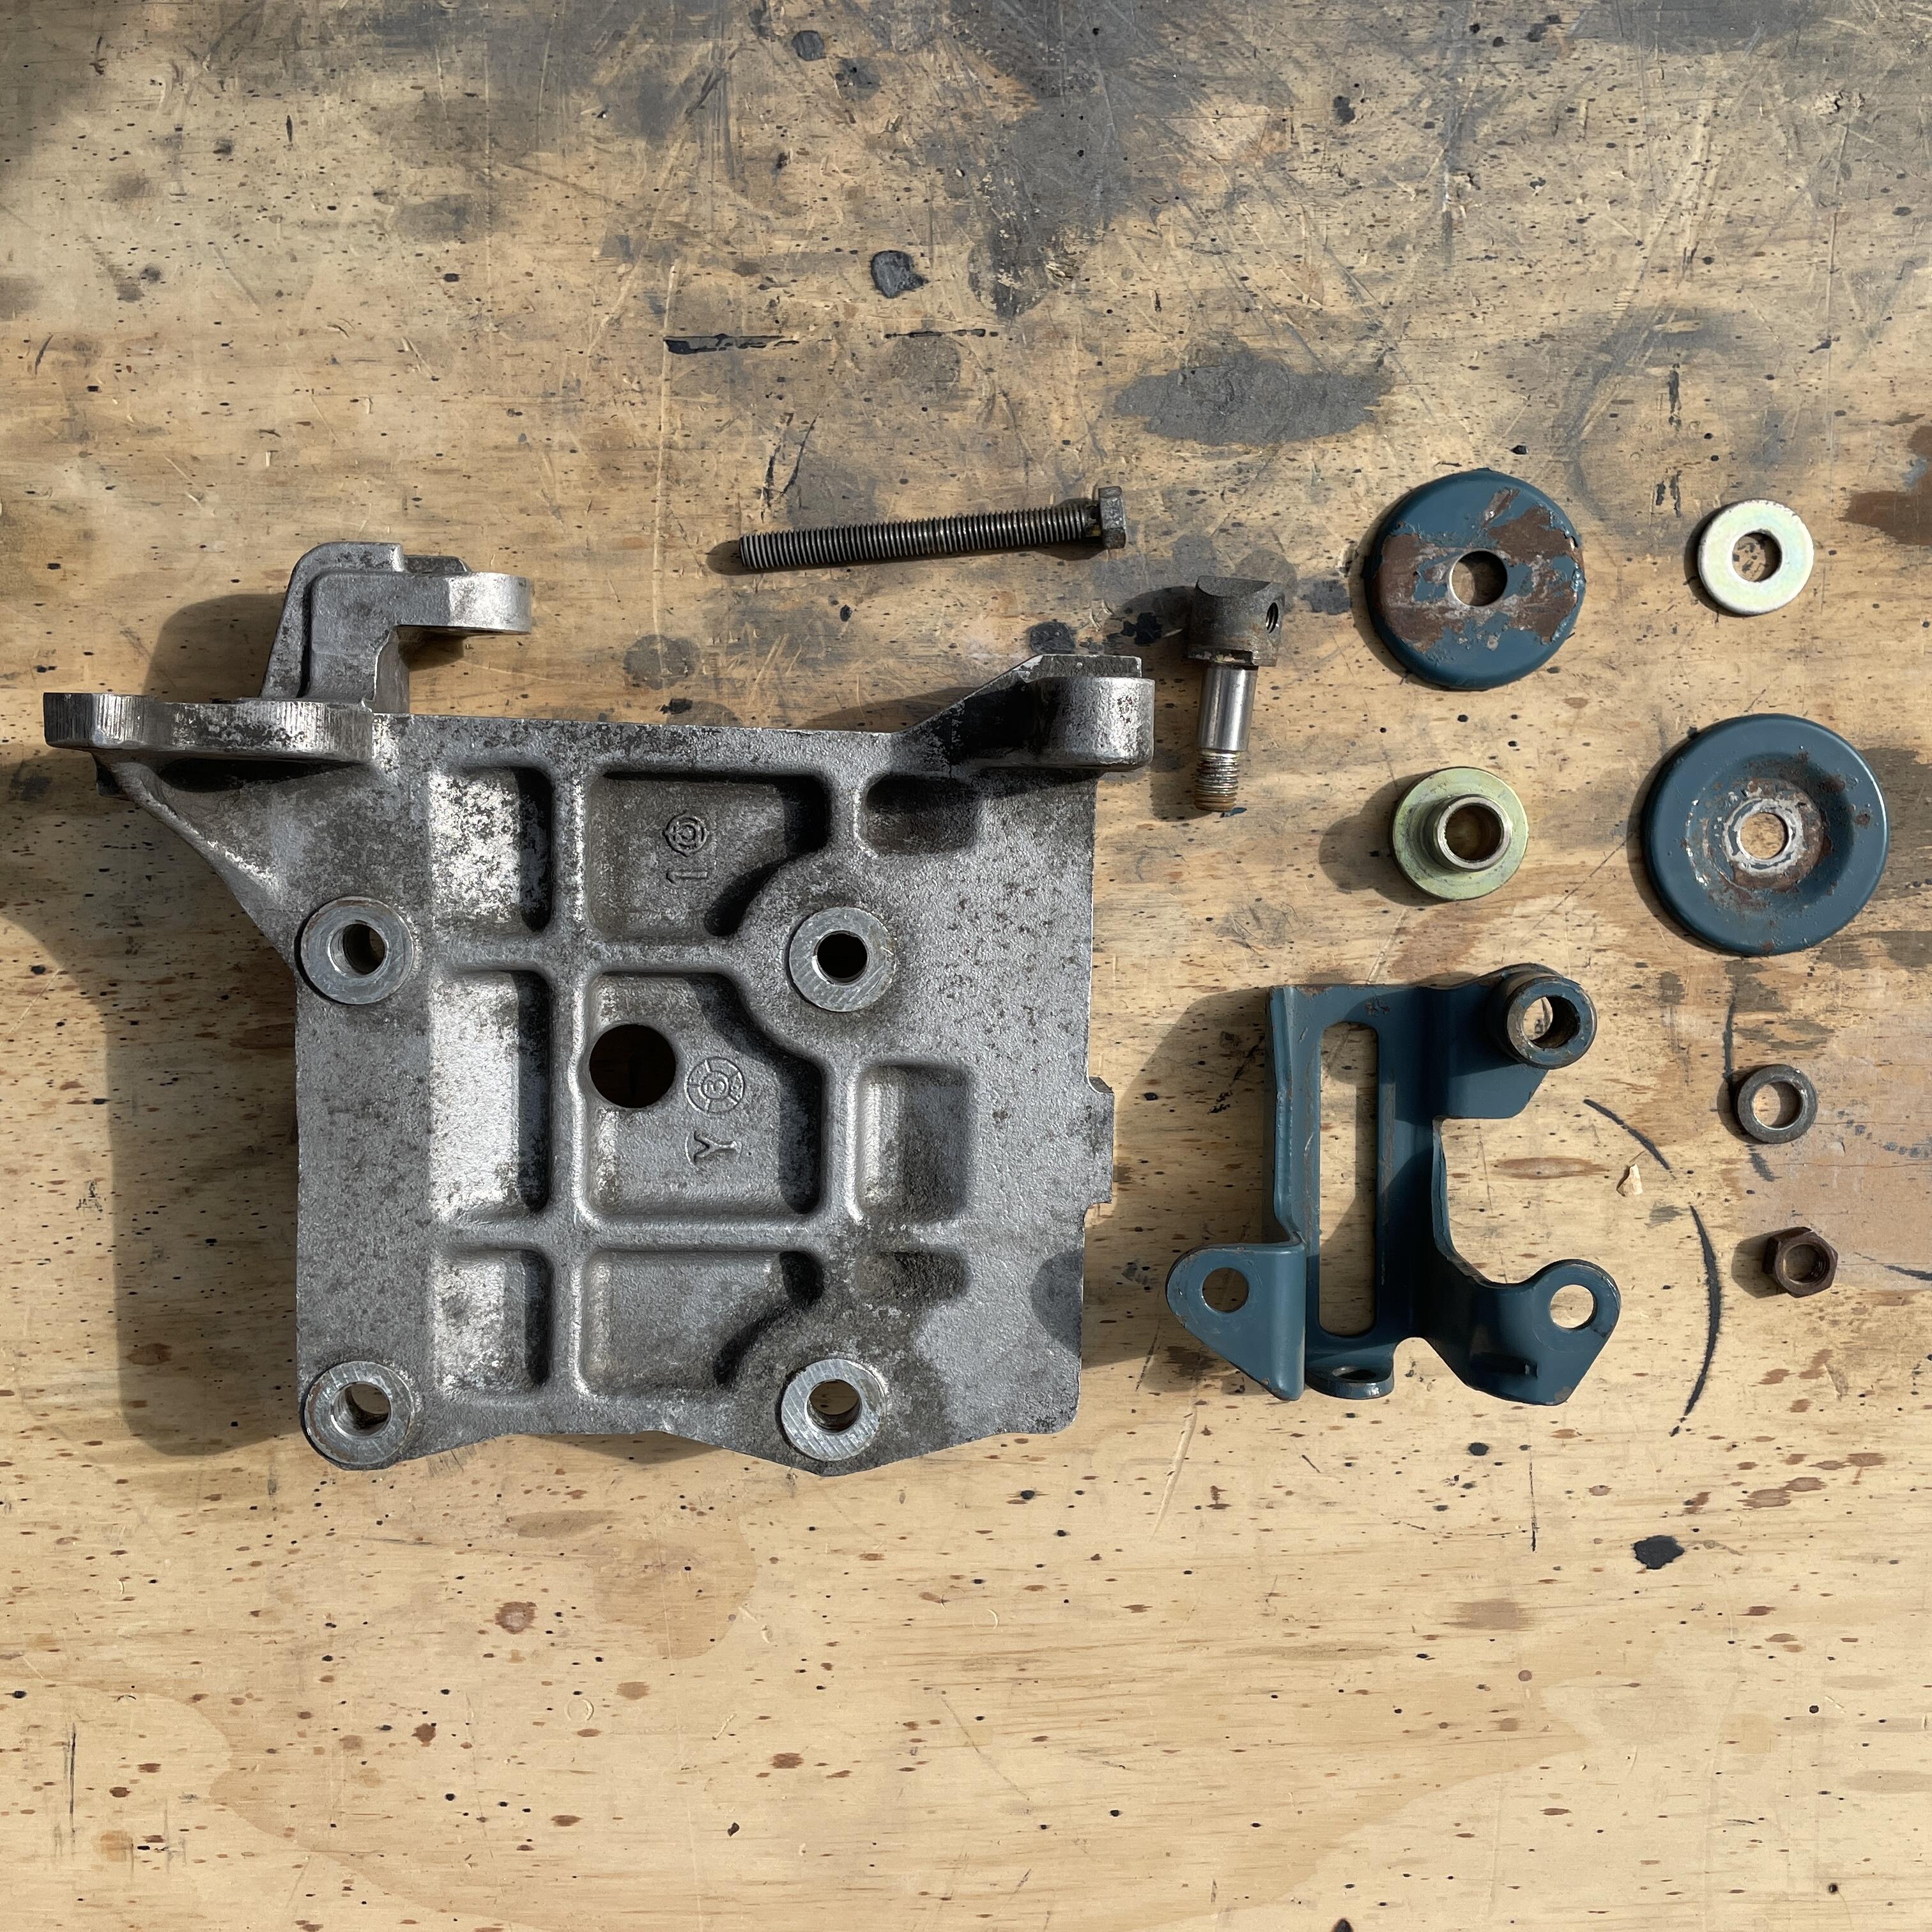
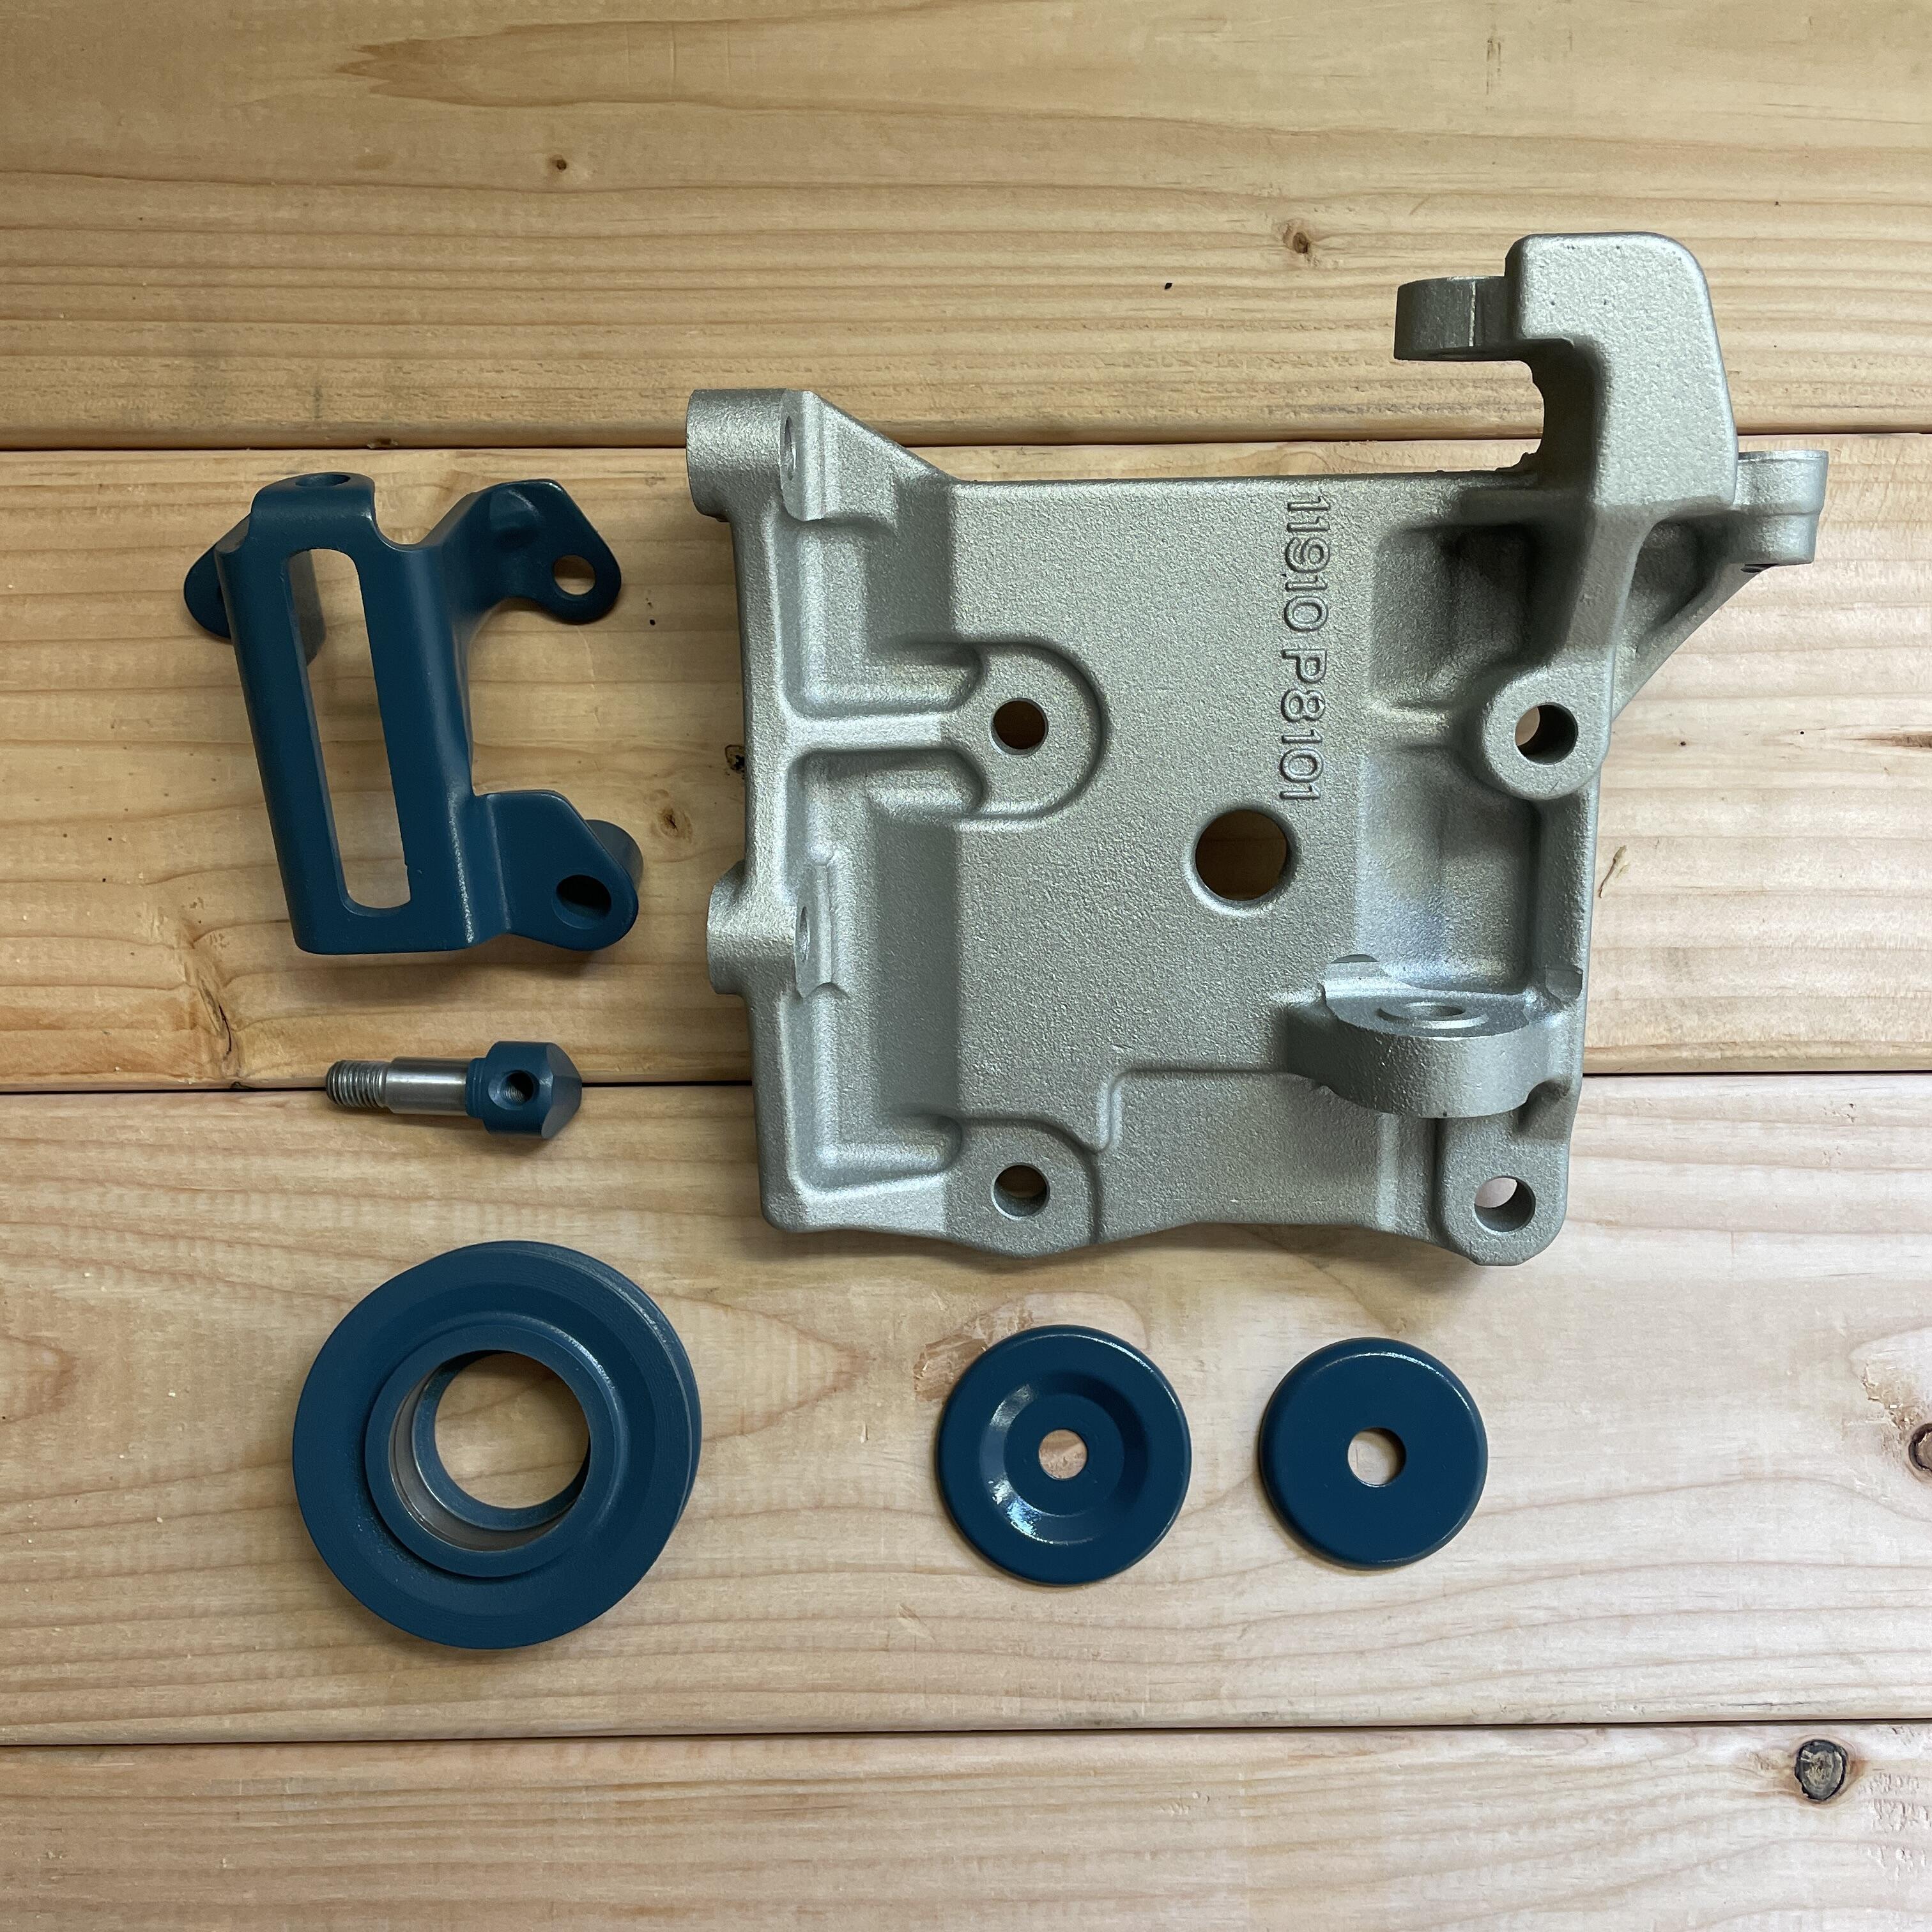
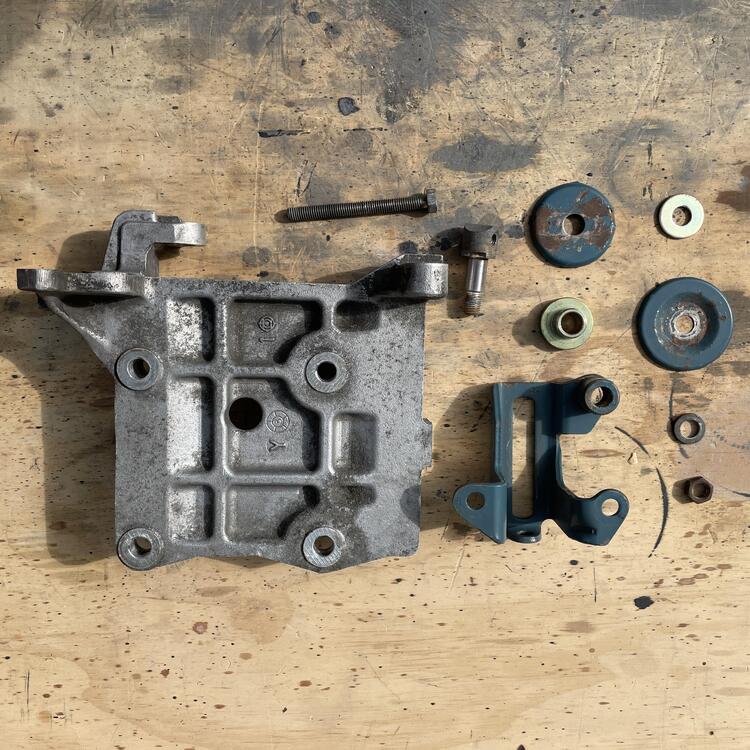
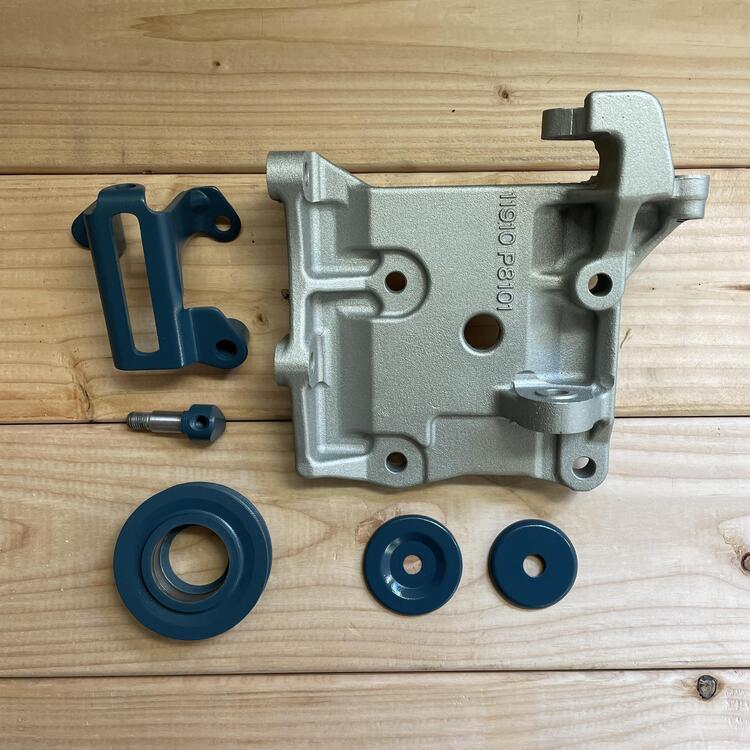
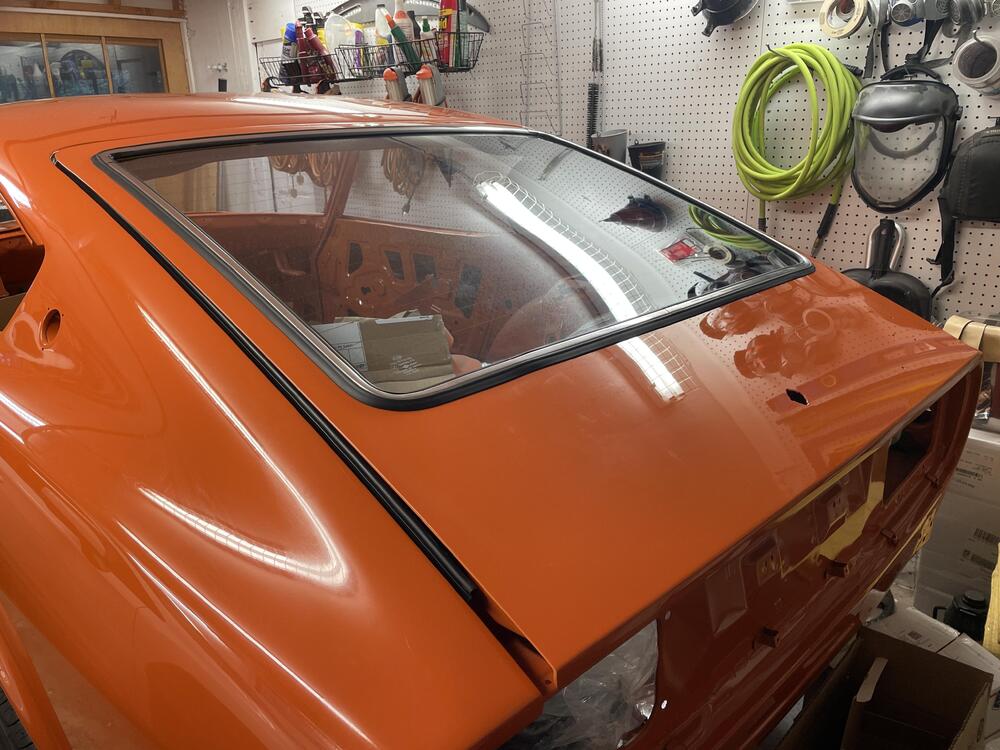
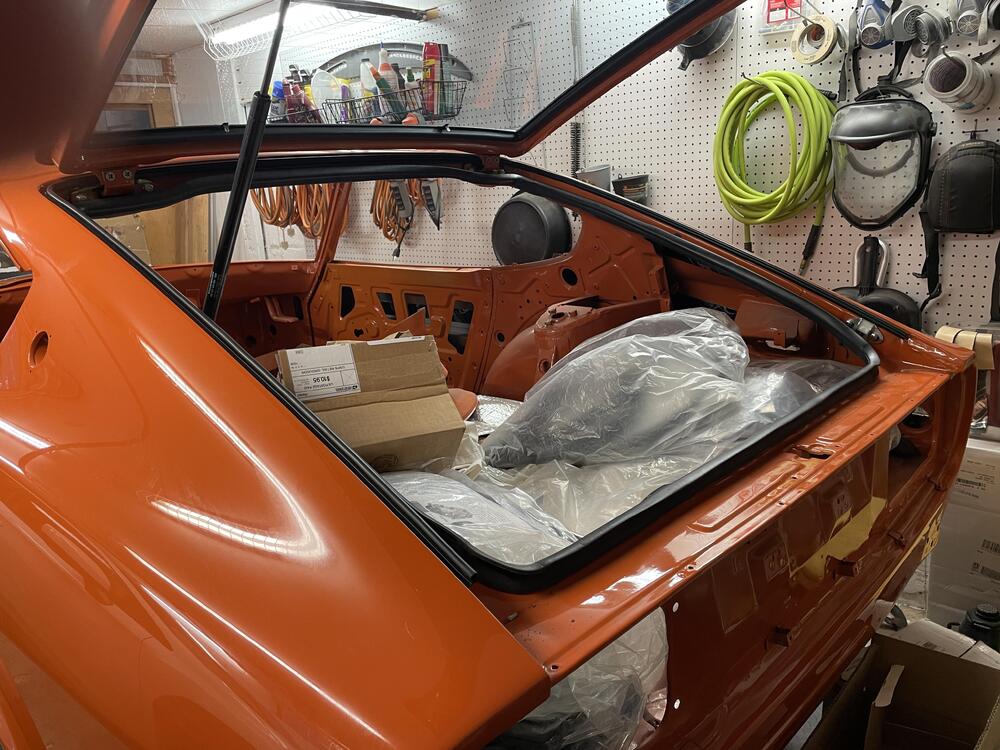
1 pointSome updates: Fresh air intakes ZX AC Bracket ZX AC Bracket after sandblasting and paint That same ‘78 280z rear glass with an OEM rear window seal to fix this gaps in the corners. This was a major PITA to install. Super tight. I also noticed a scuff in the shape of a Z logo. I think there was a sticker or paint on the glass and they didn’t take care getting it off. Gonna have to polish guy. Inner and outer (1970 version) weather strips

 1 point
 -
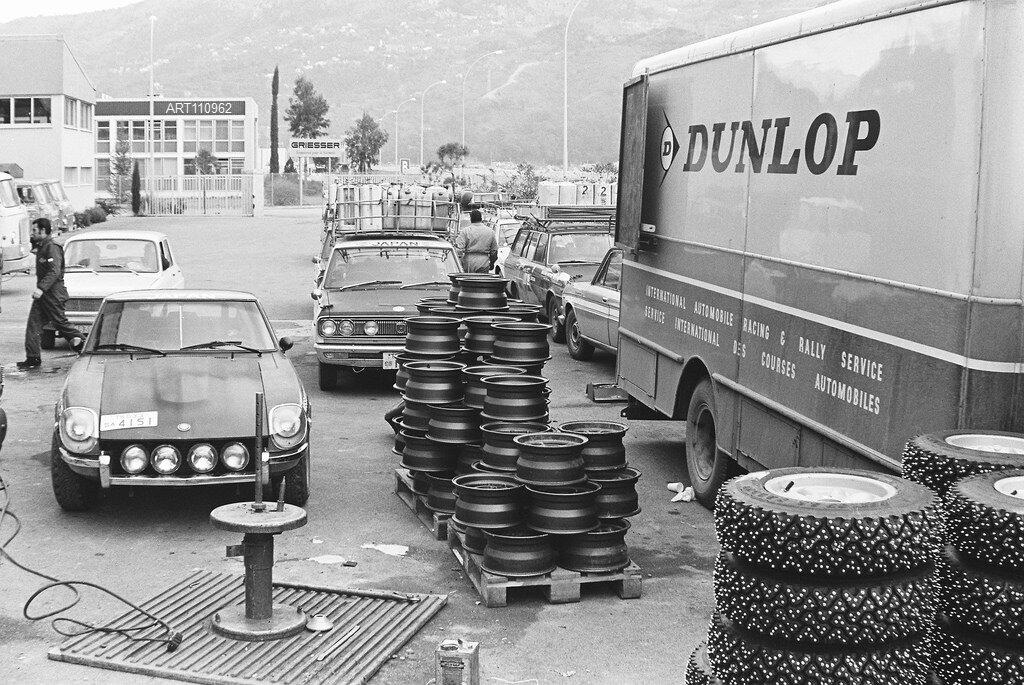
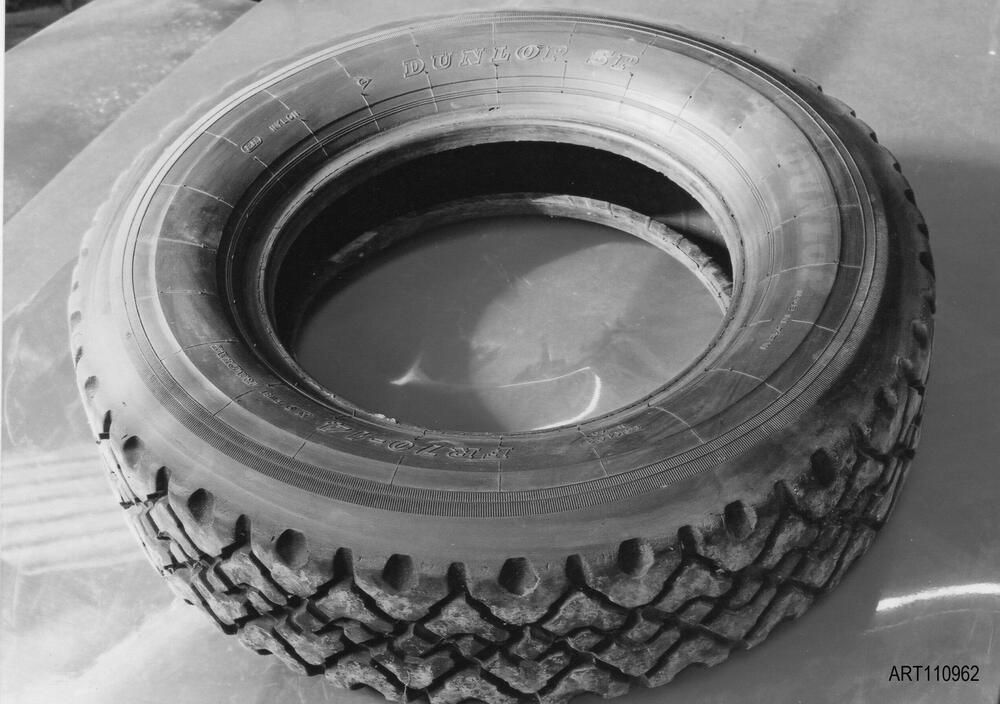
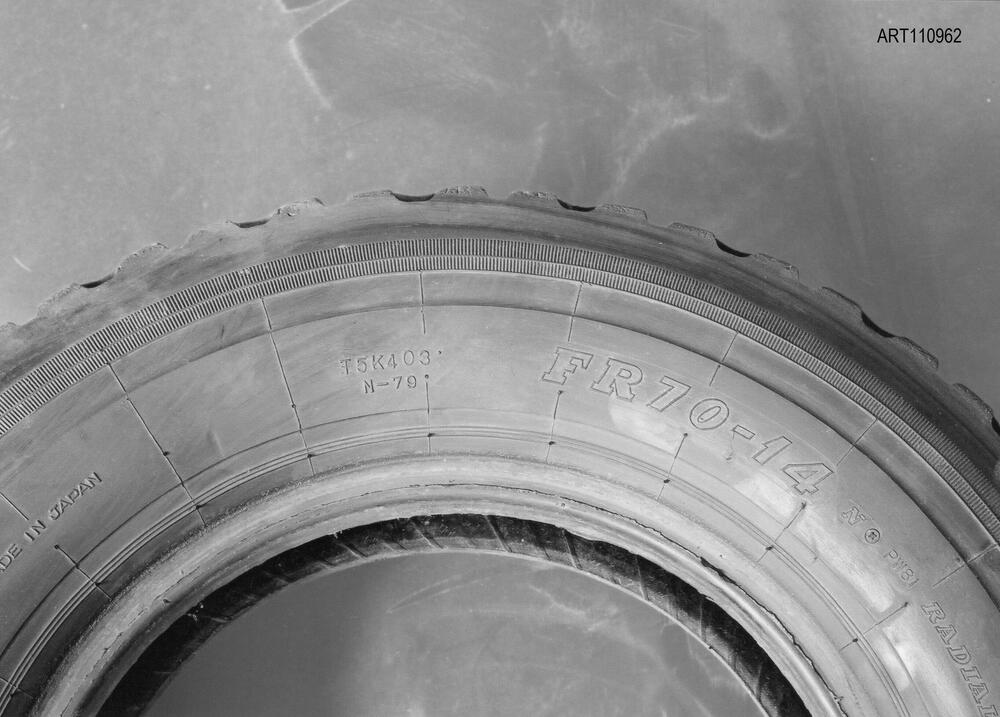
It's surprising the tires are that porous! Also that is a lot of wheels on those pallets!1 point
-
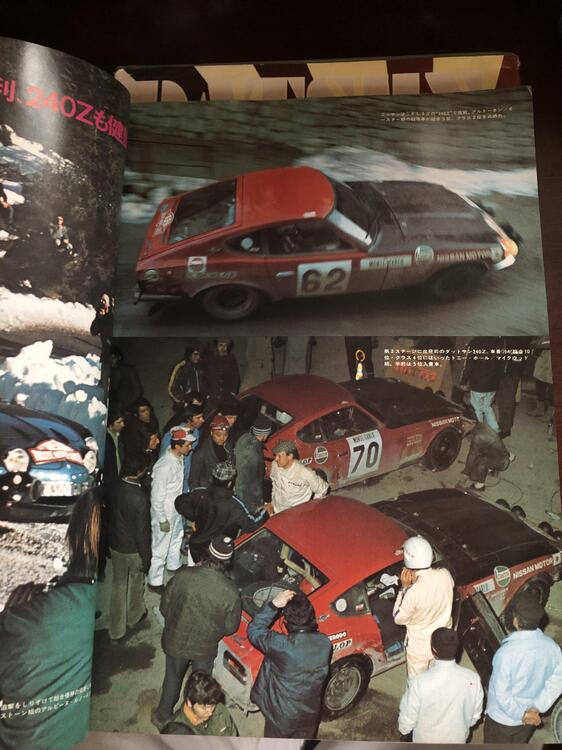
That period of Japanese Dunlop radials - especially the 'SP Radial' series, which was a key branding product for Dunlop Japan on road cars - was designed to run either with and without tubes. There are some good technical articles covering them in the period Japanese specialist press (especially Auto Technic and Auto Sport magazines) and they were certainly pushing the 'Tubeless' philosophy. However, for sure the Works team were running with tubes some of the time. It probably made puncture repair turnaround faster at remote servicing. I use tubes in my original Kobe Seikos when fitted with Dunlop CR65s, but it is the tyres themselves which let the air out! They are supposedly a Tubeless design, but I see no harm in using tubes. Old Magnesium wheels can become quite porous, so best to inspect and treat on a case-by-case basis. Generally speaking I tend to suspect the rubber is at fault rather than the wheel unless the wheel is a repeat offender. The Japanese Dunlops had a really good reputation in period. Nissan's Works team manager said they could not have done so well on the Monte (against rear-engine, rear-drive/front-engine, front-drive cars with their inherent traction advantage) or won the Safari without the Japanese Dunlops. In fact one or two of the UK-based drivers 'acquired' several sets for their own personal use...
 1 point
 -
1 point
-
At 65k he should have let it go. Don’t think he’ll see that offer again for a long while.1 point