Leaderboard
-
Patcon
 Subscriber
 8Points11,142Posts
 -

Zed Head
Free Member3Points19,238Posts -
Captain Obvious
Free Member3Points10,081Posts -
conedodger
Free Member3Points12,516Posts


Popular Content
Showing content with the highest reputation on 07/16/2022 in all areas
-
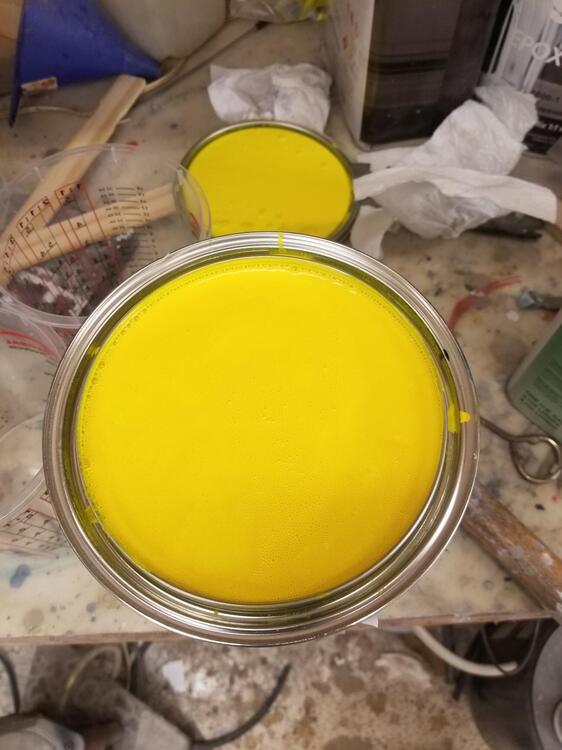
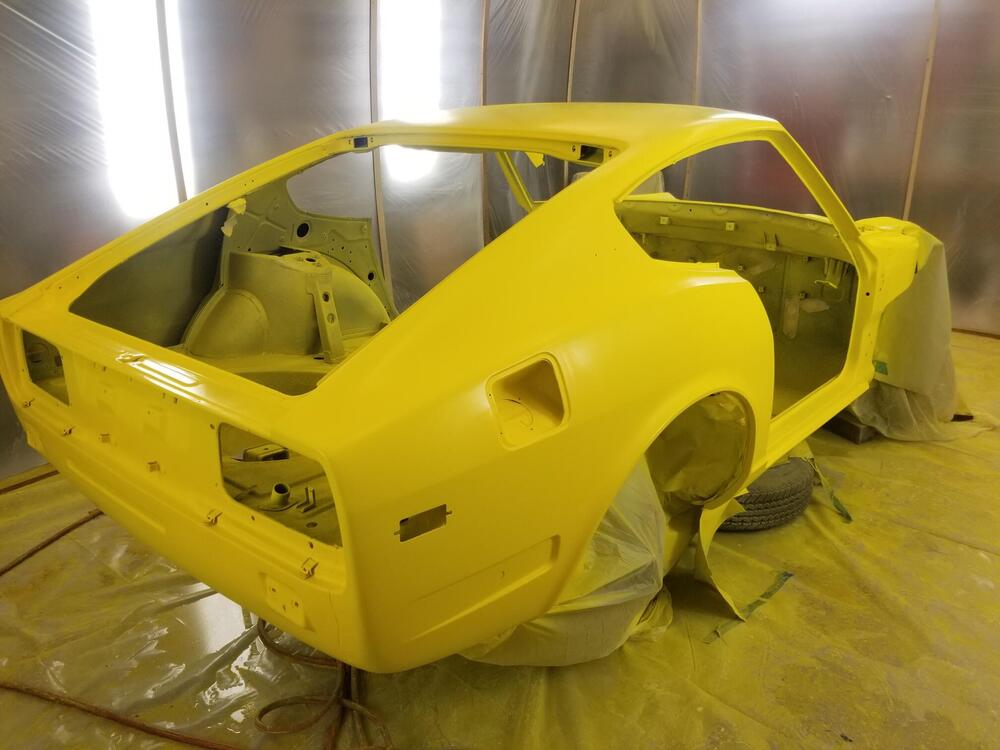
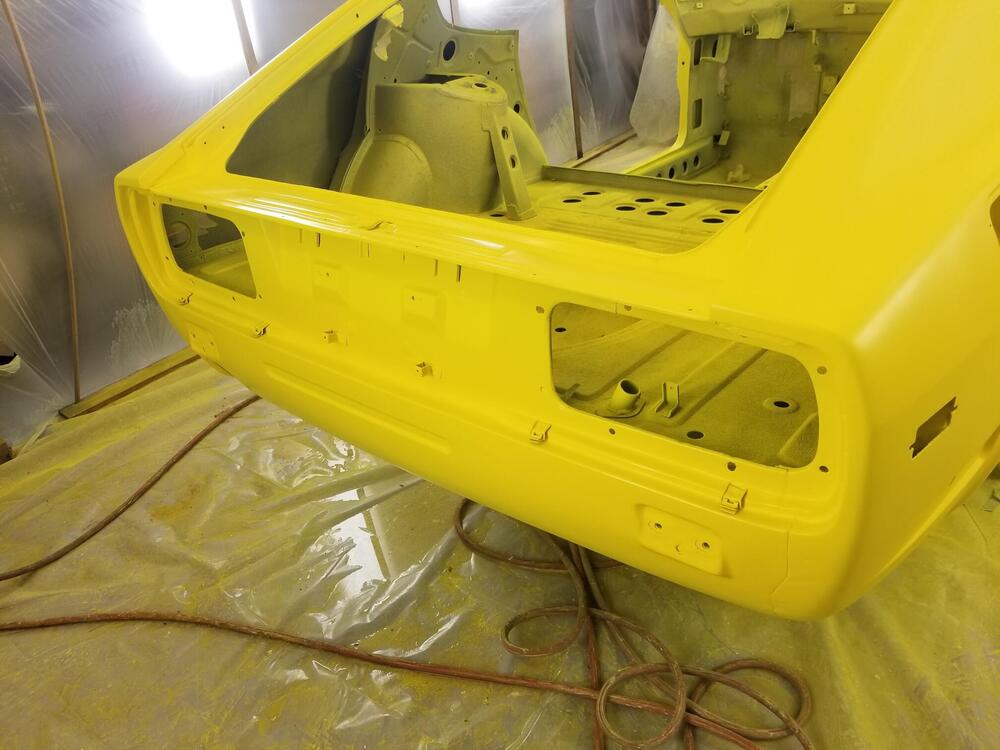
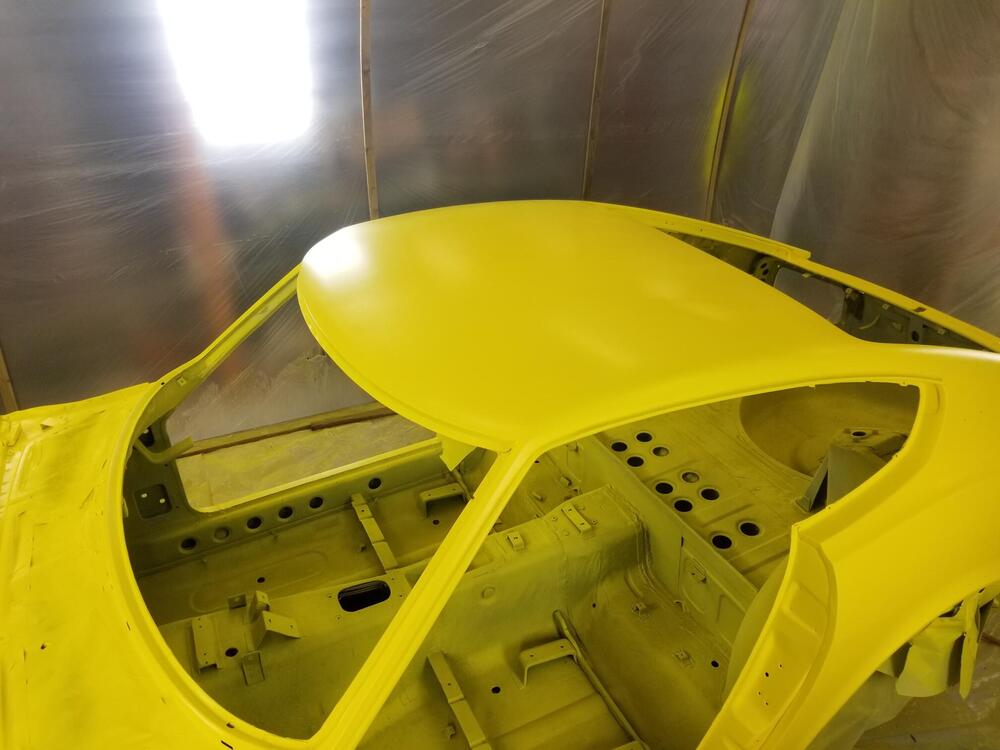
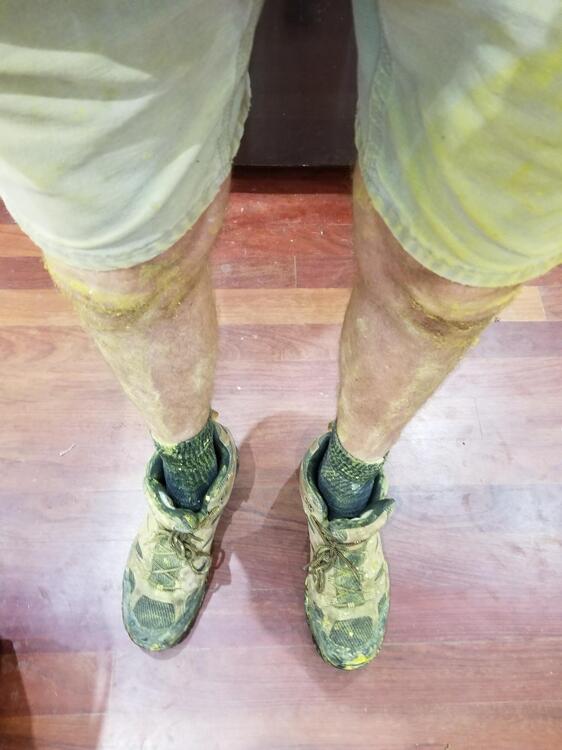
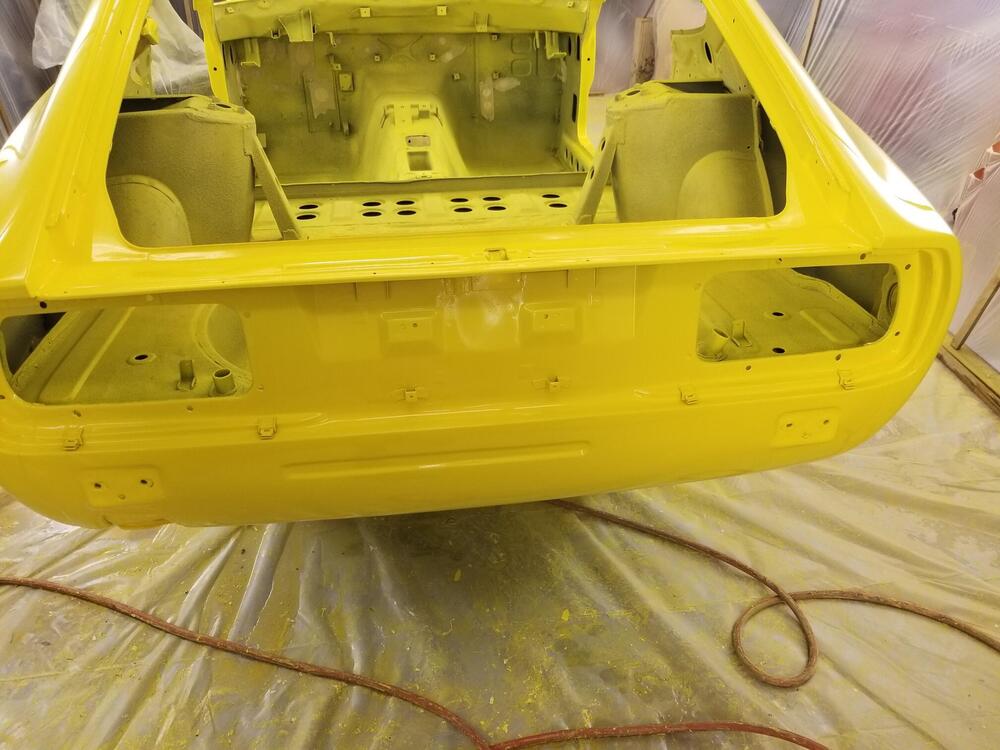
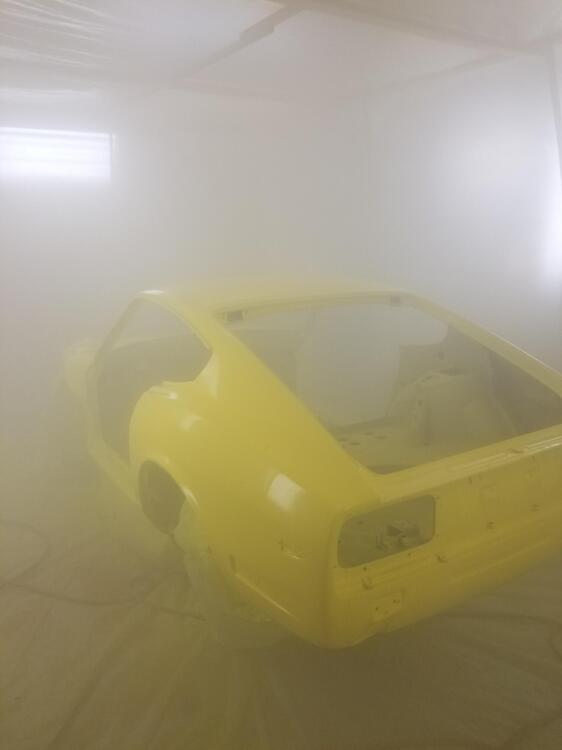
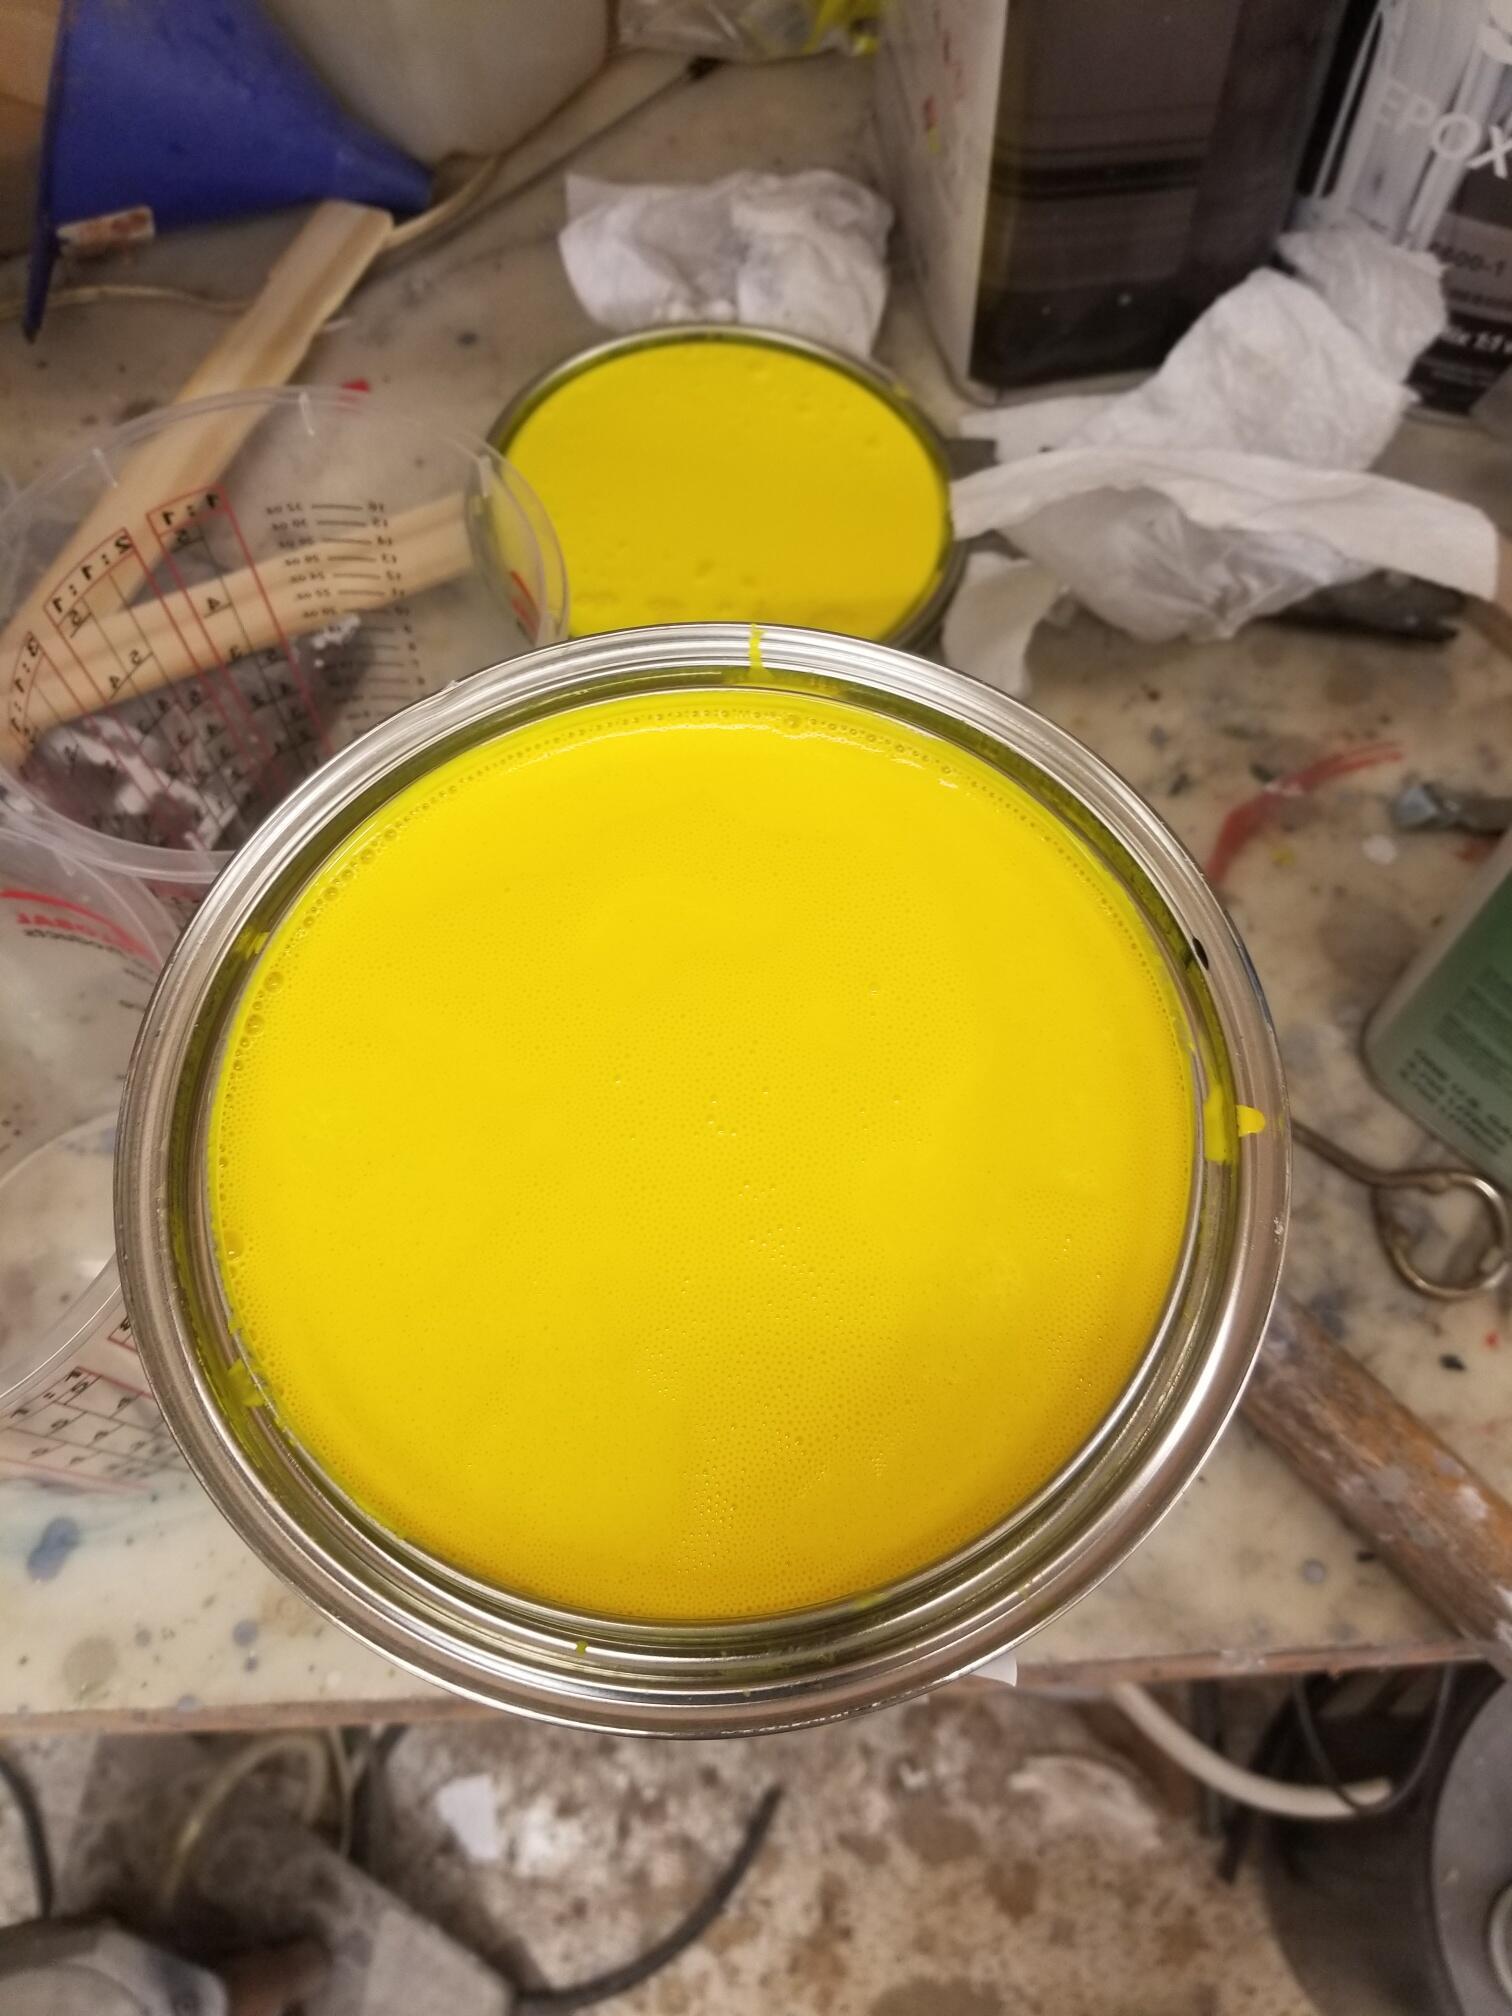
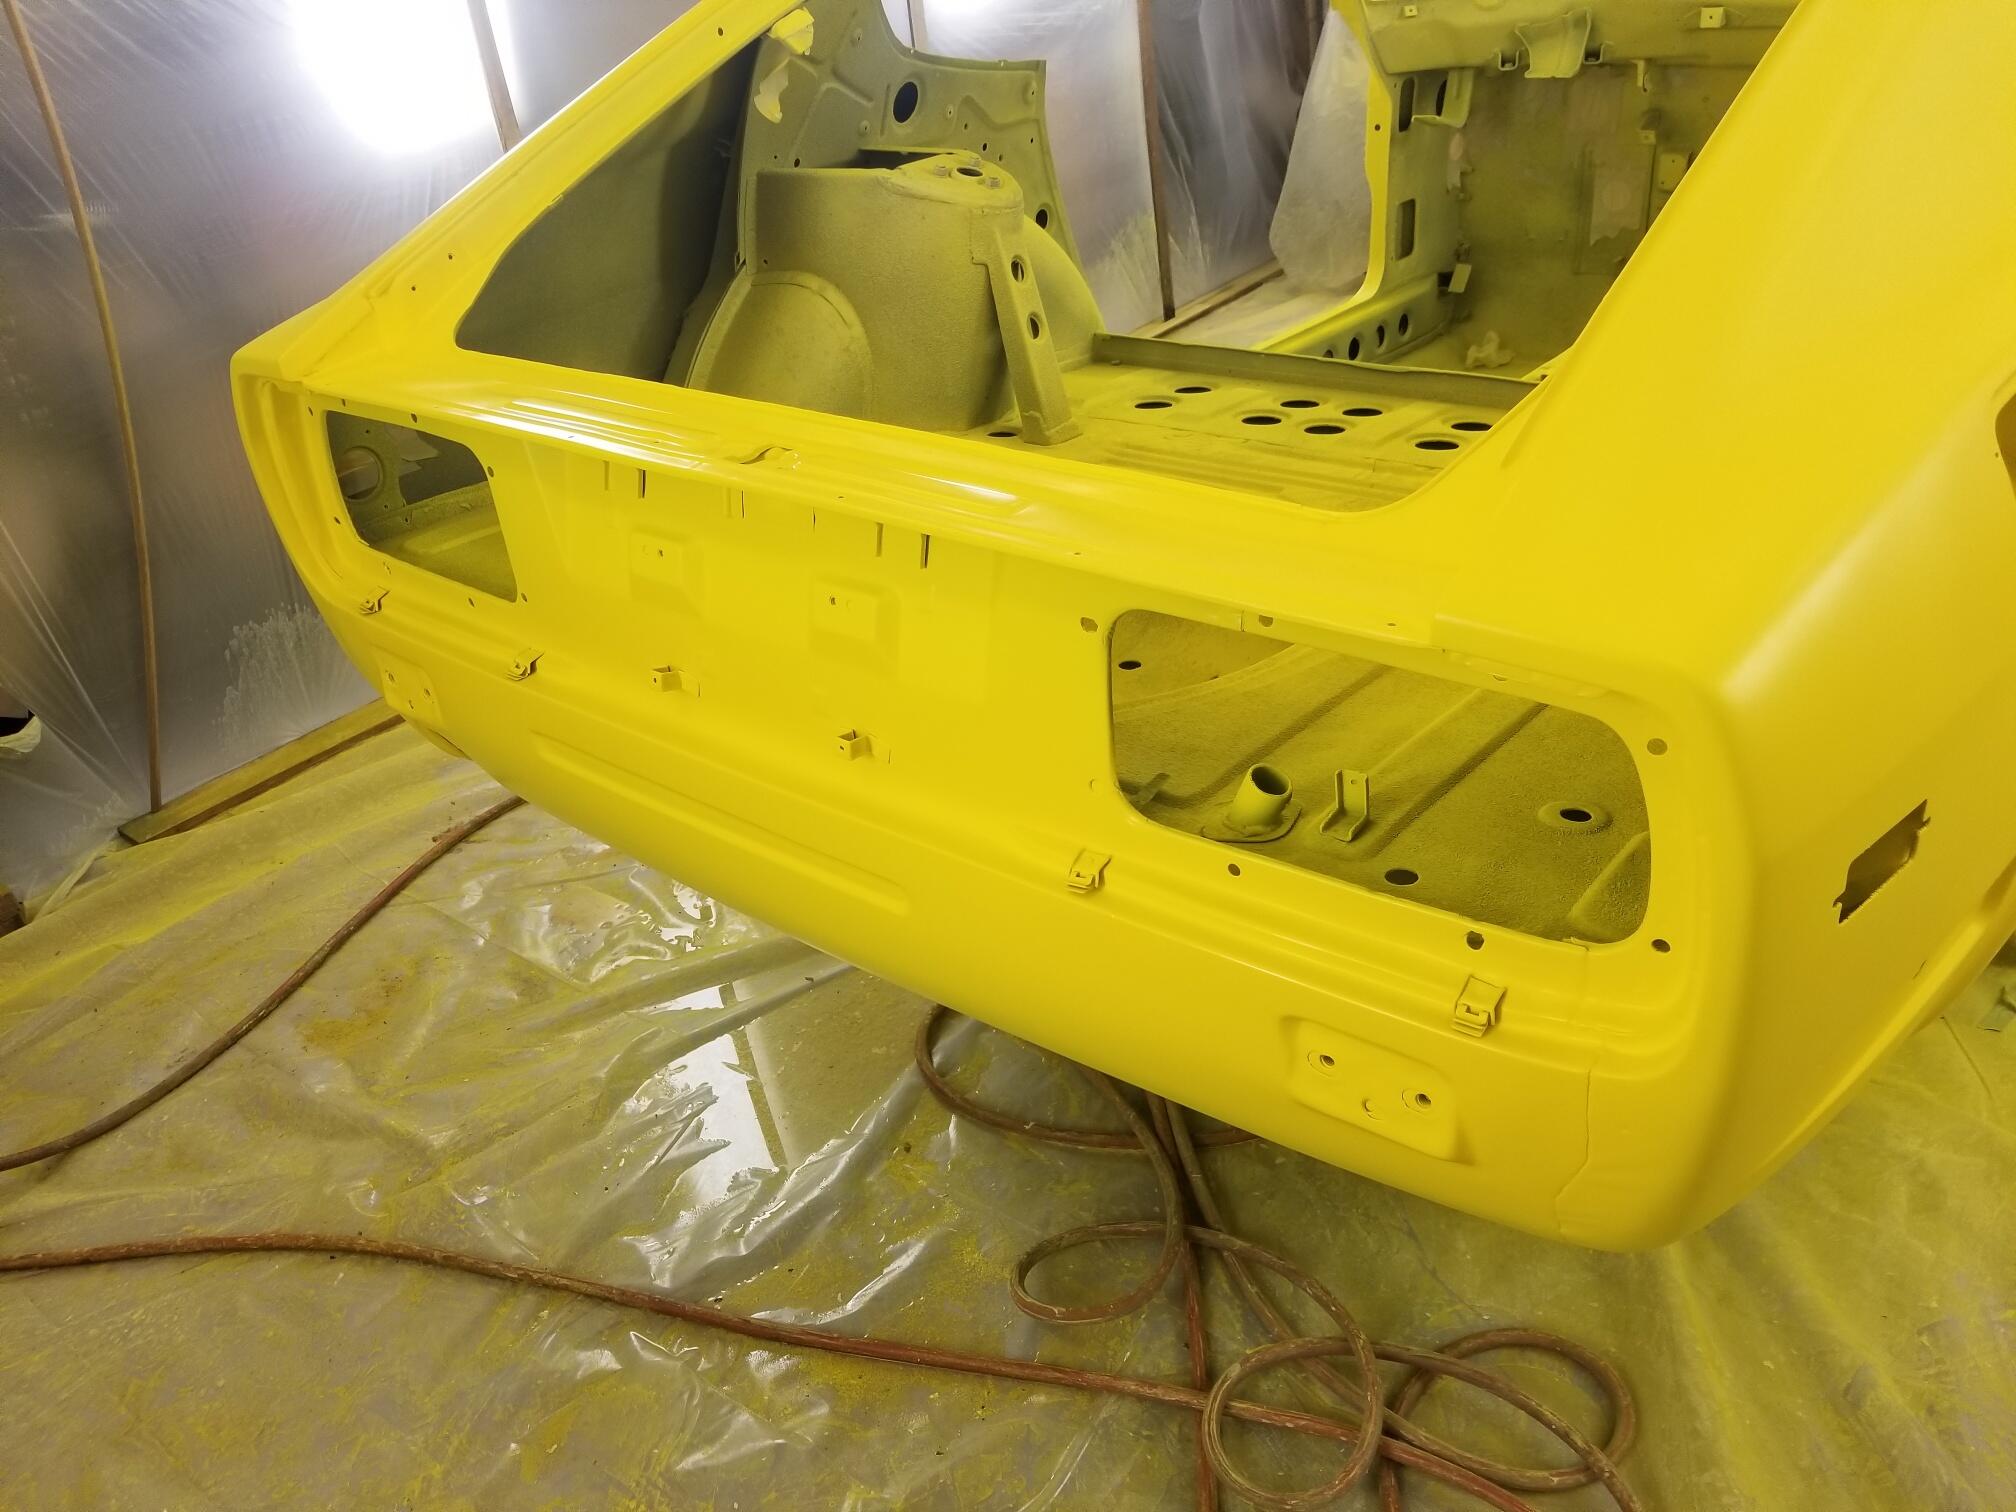
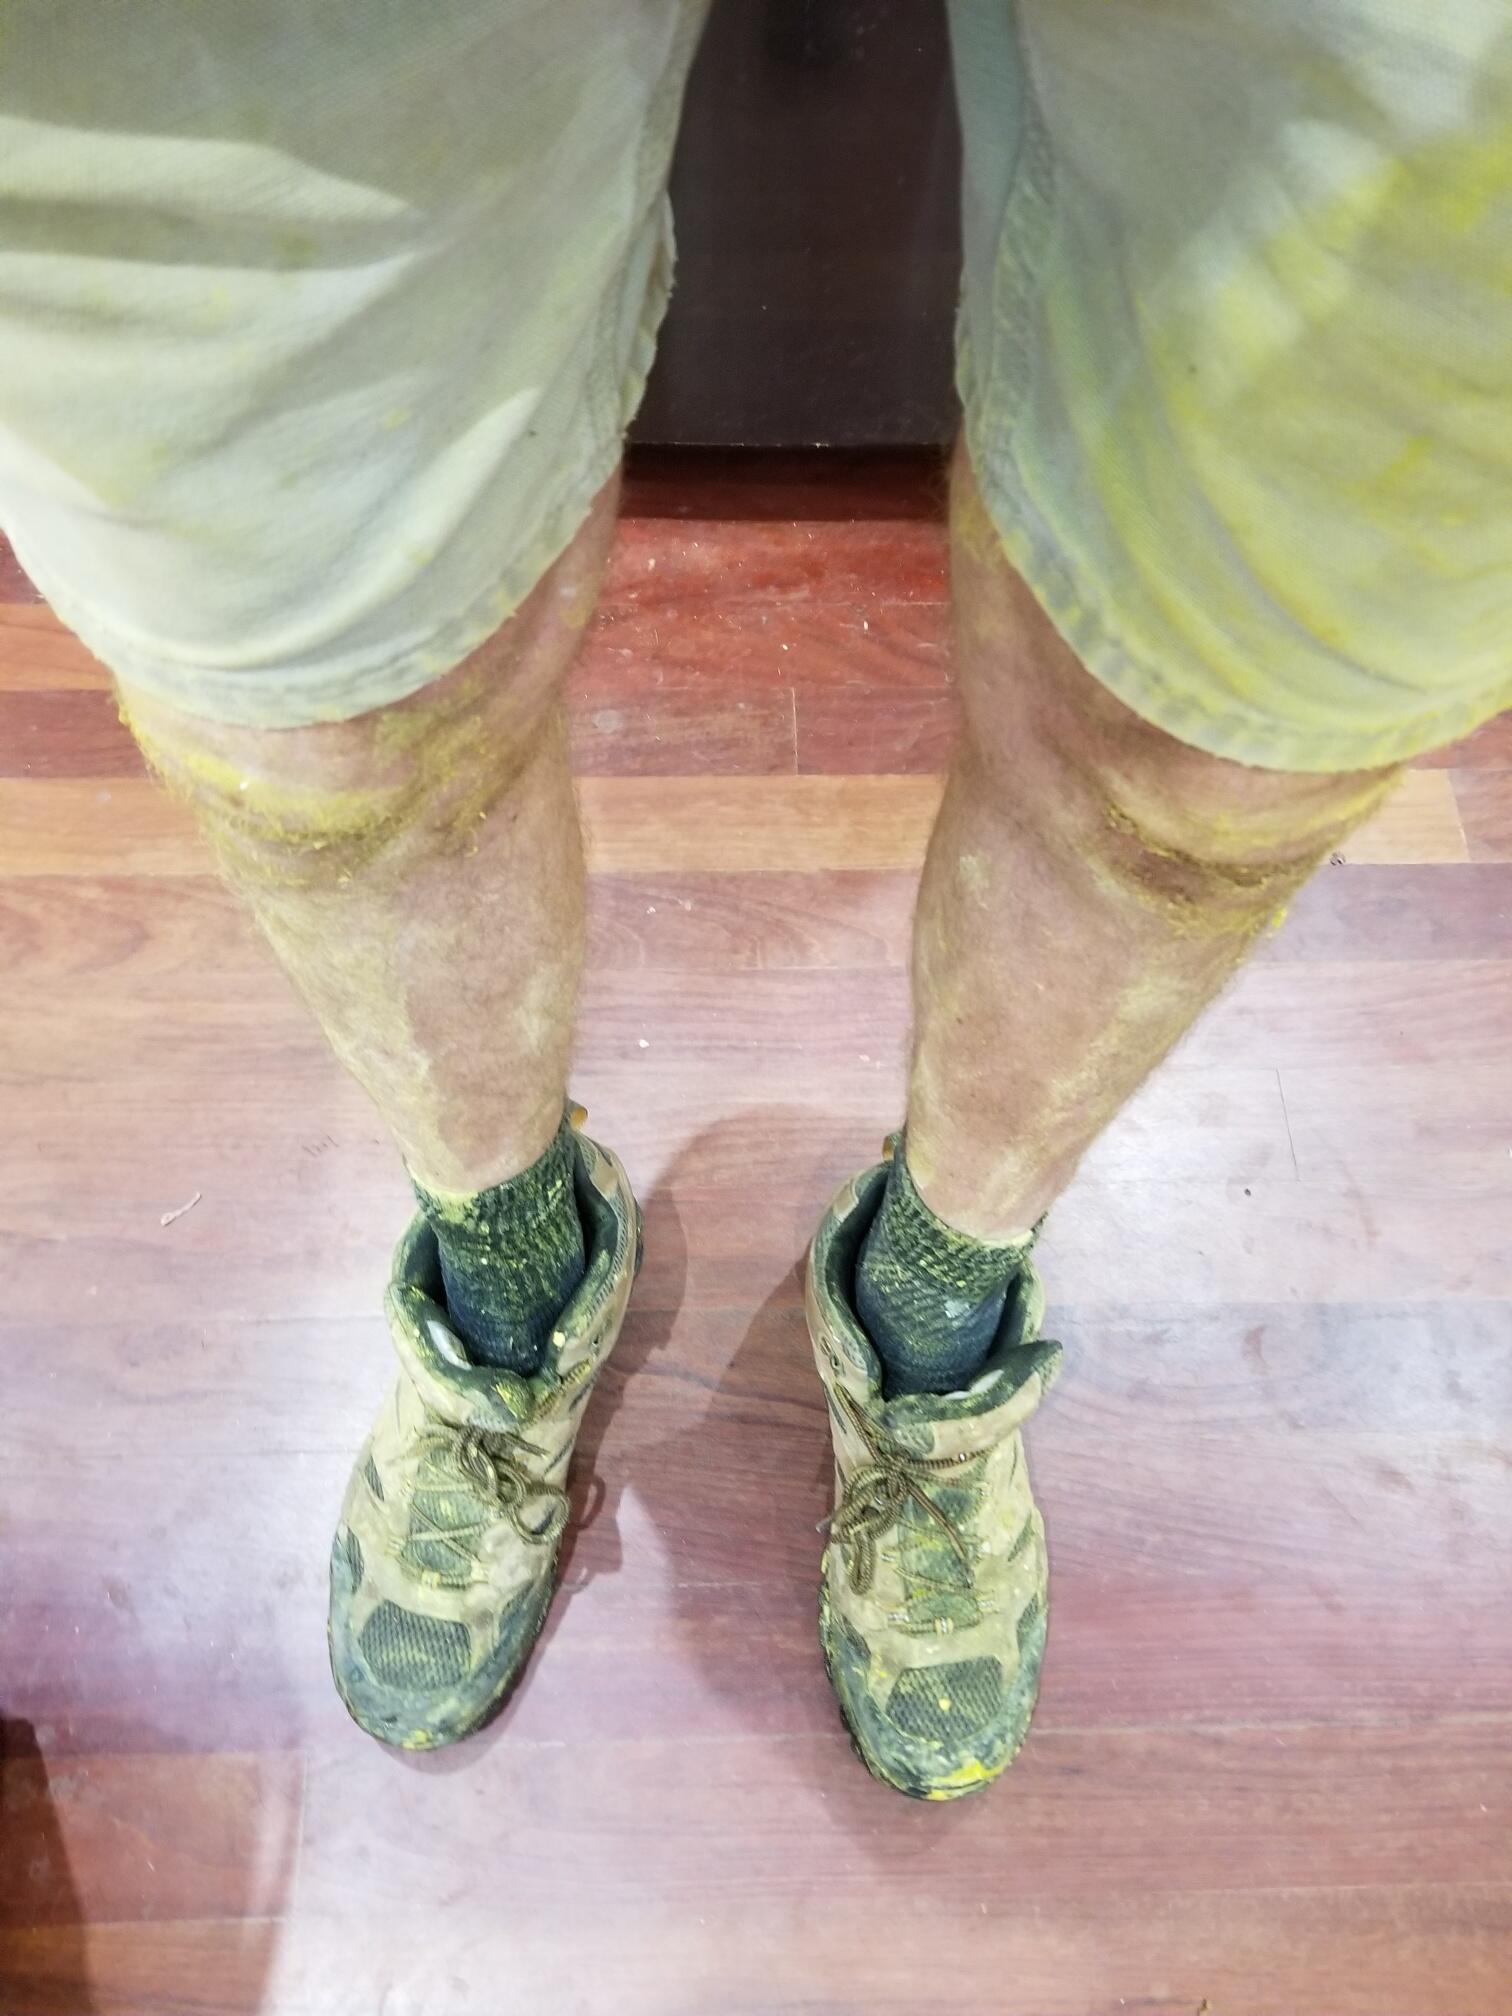
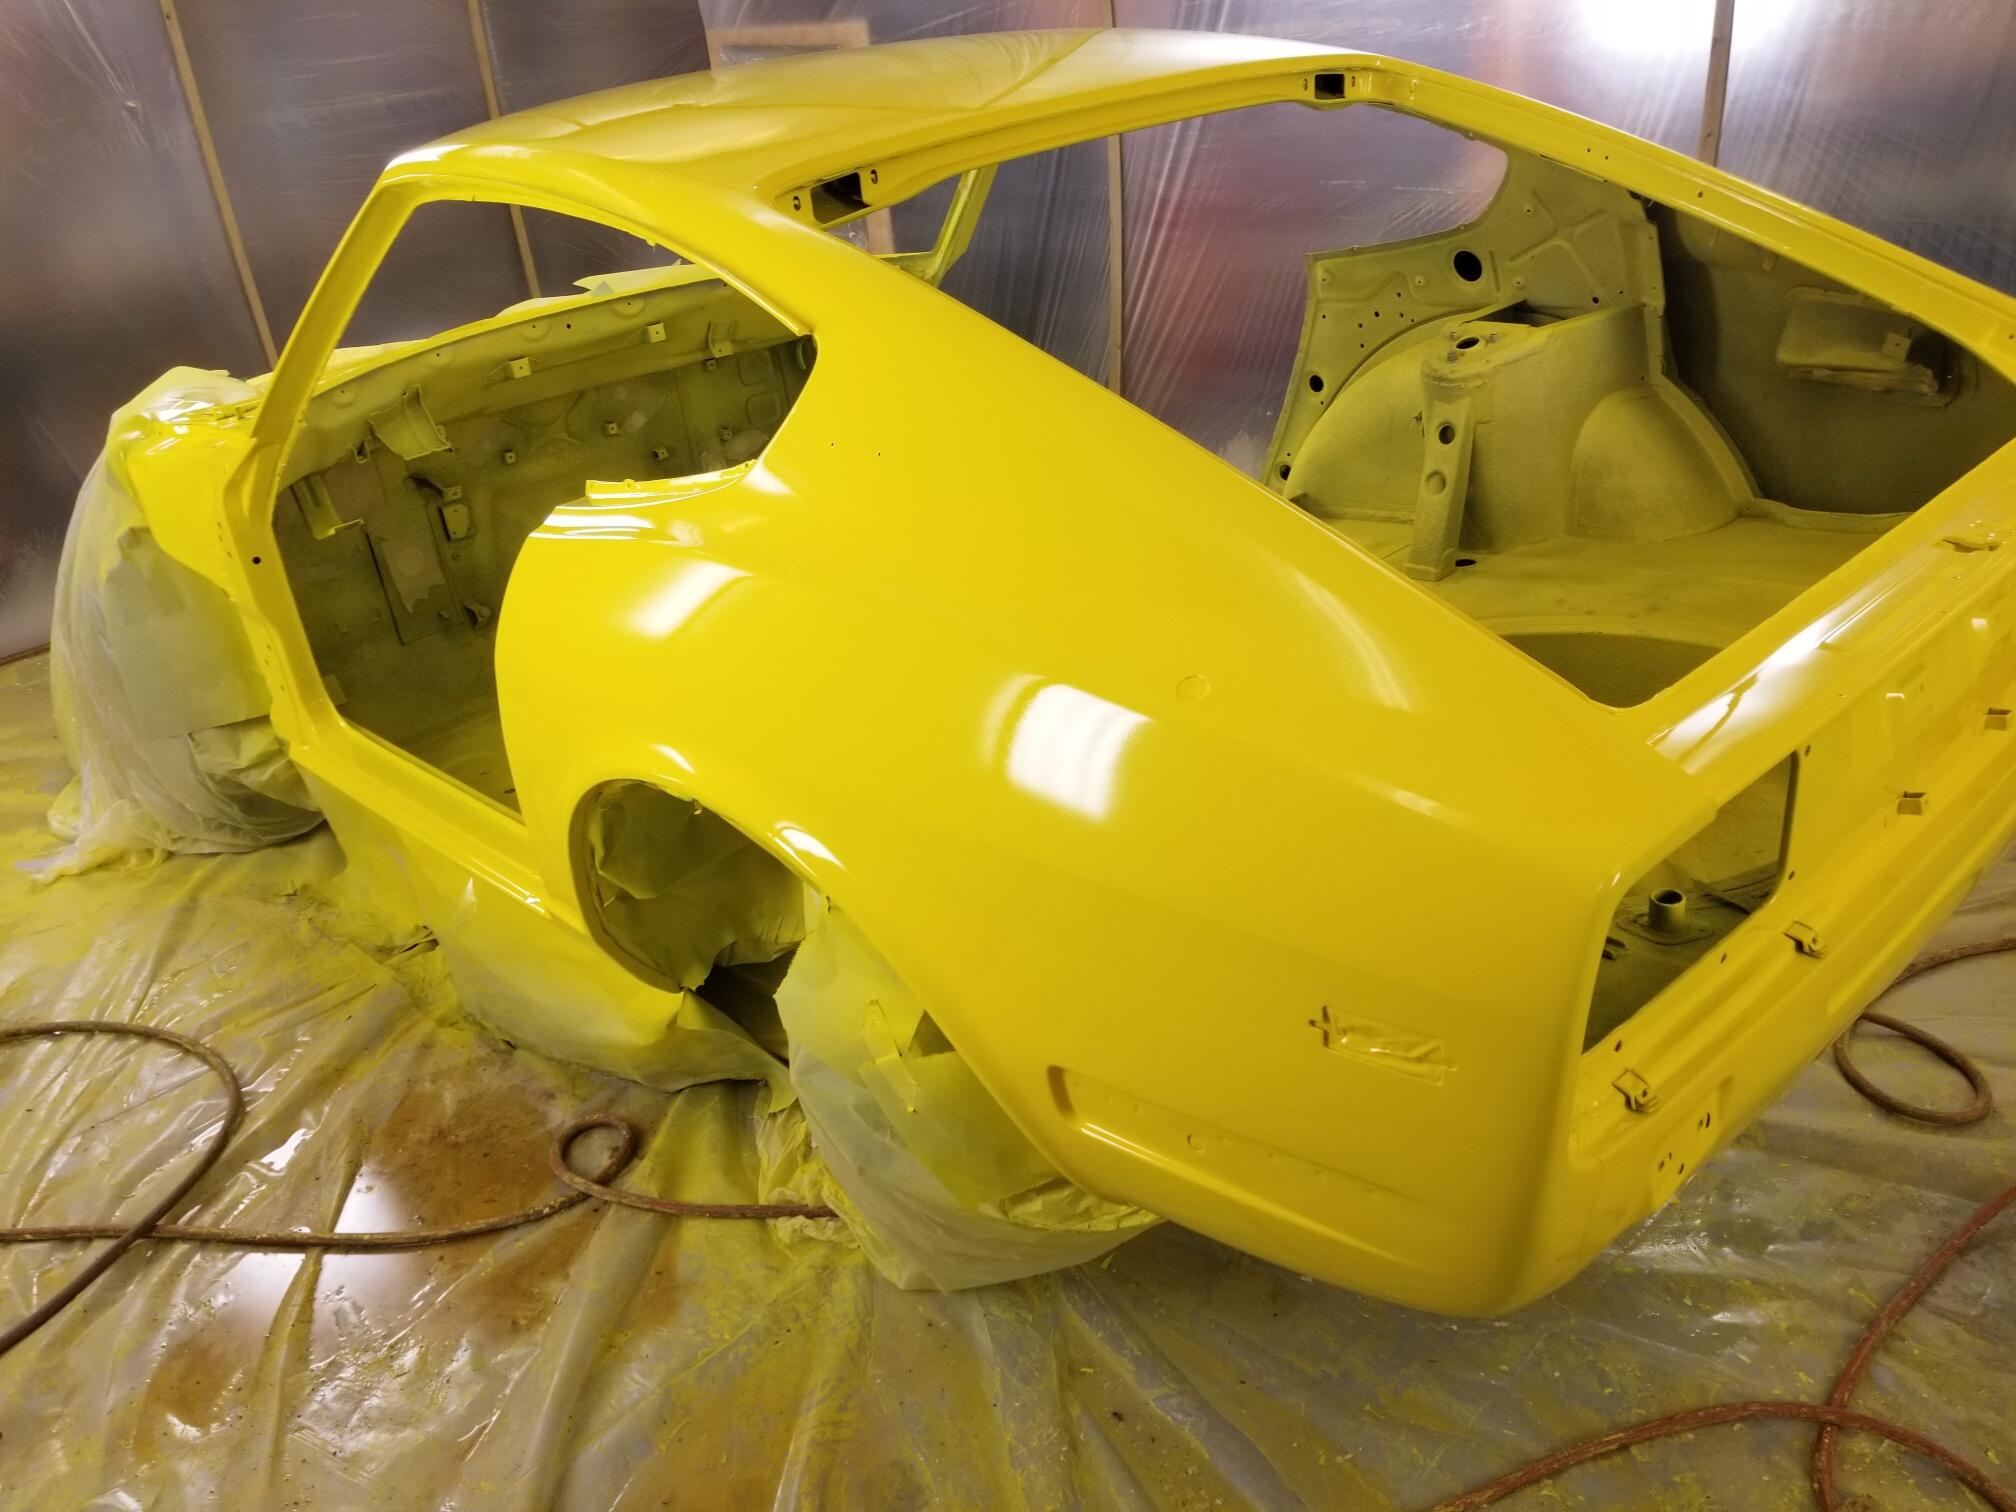
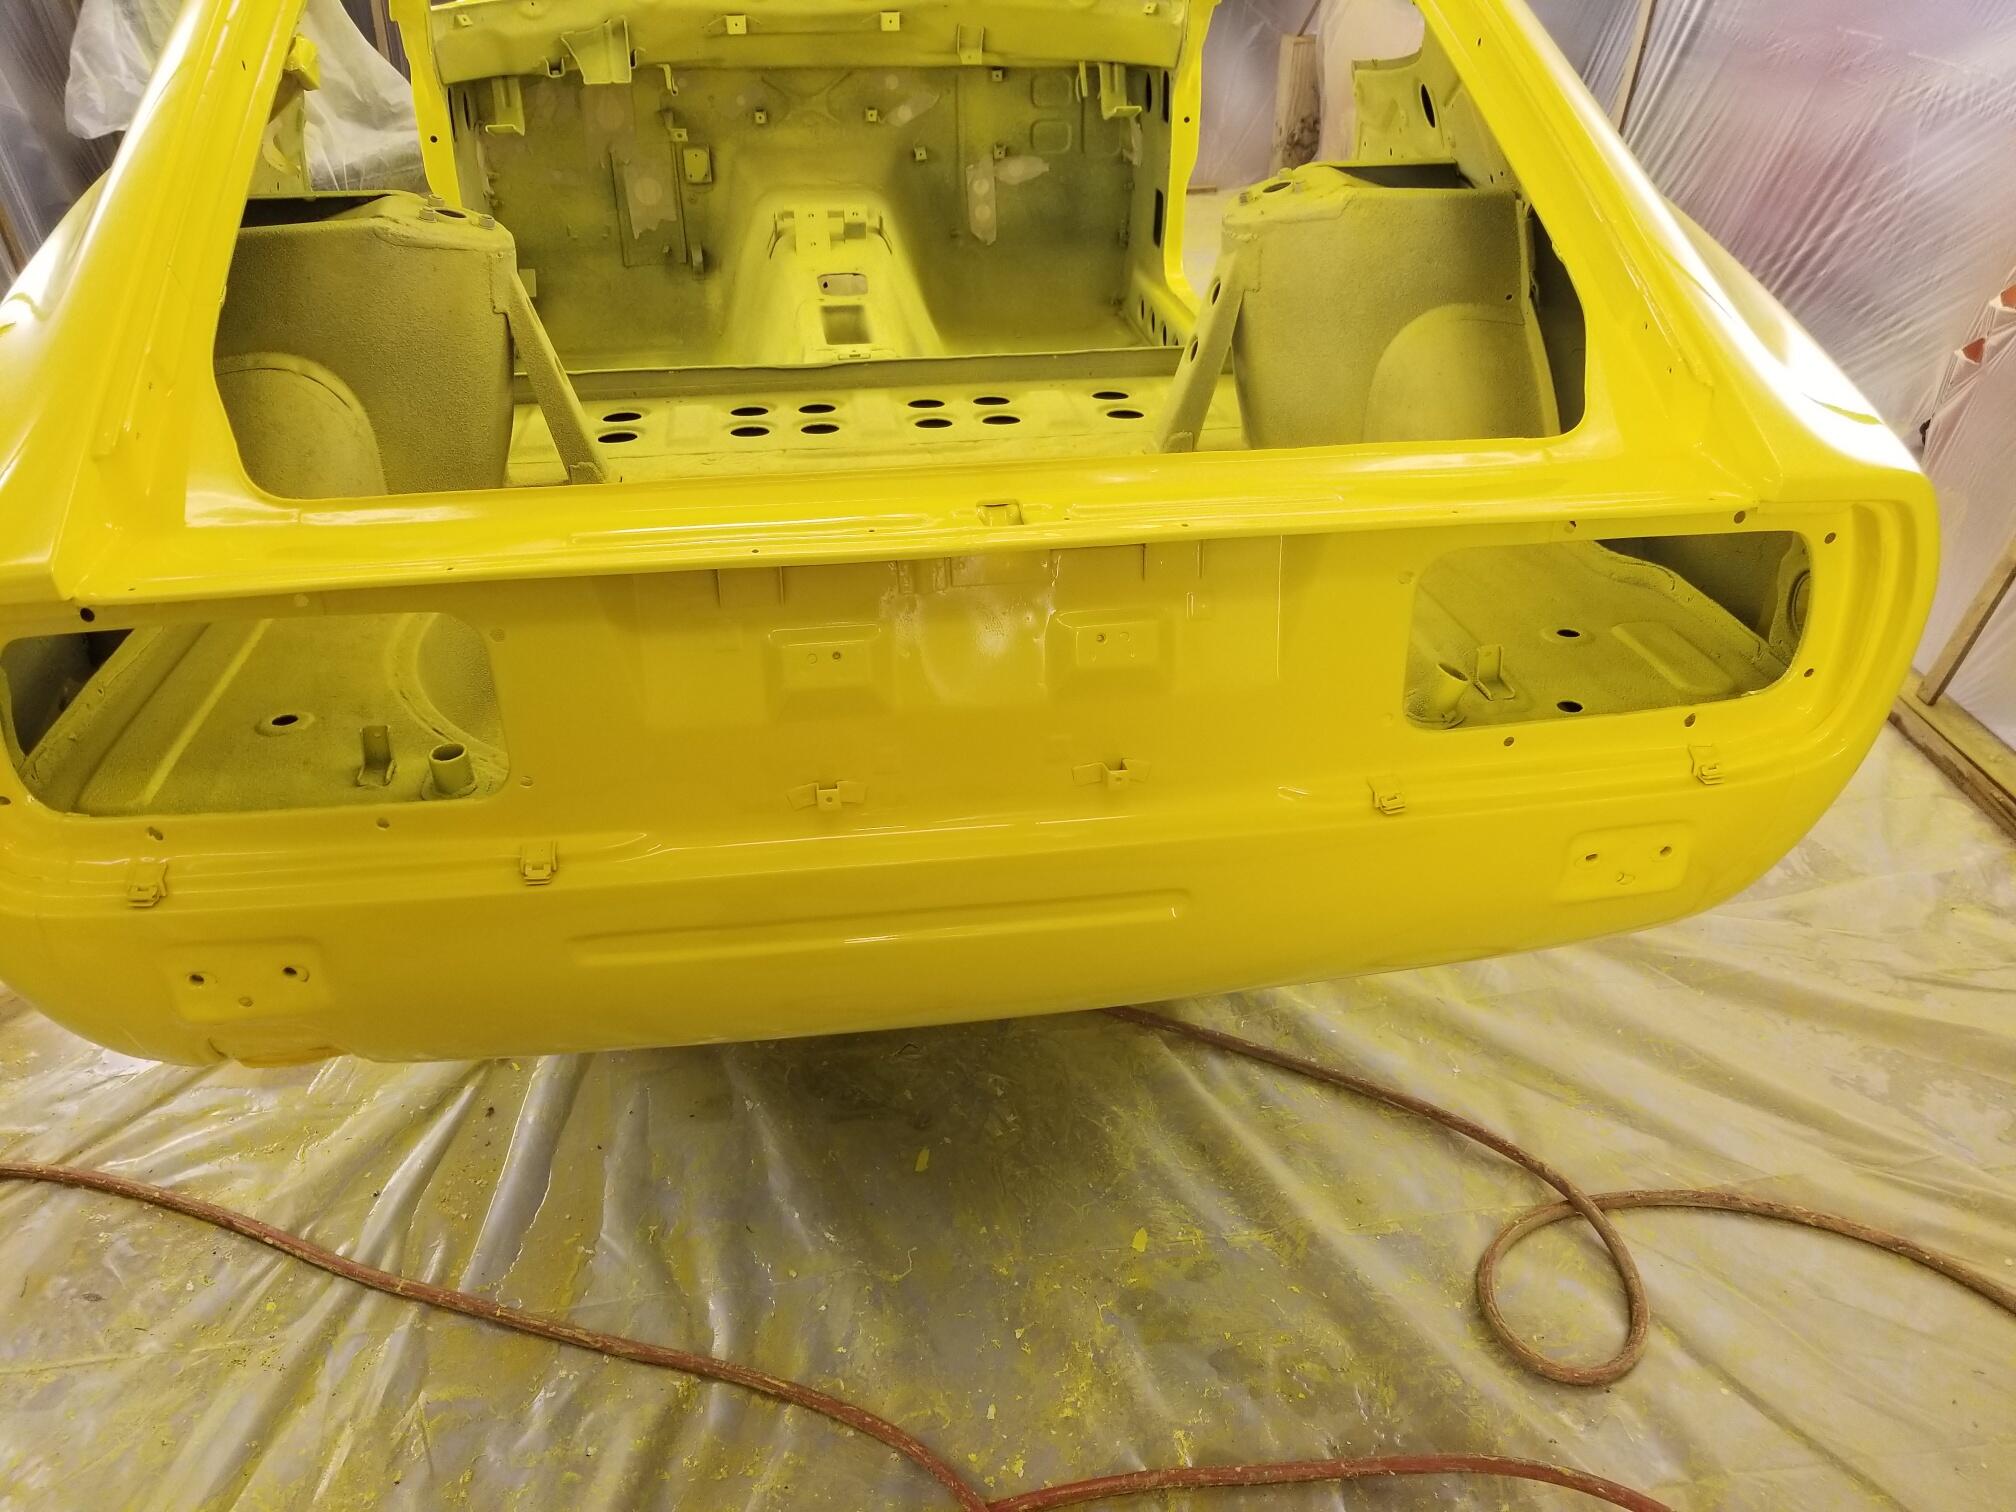
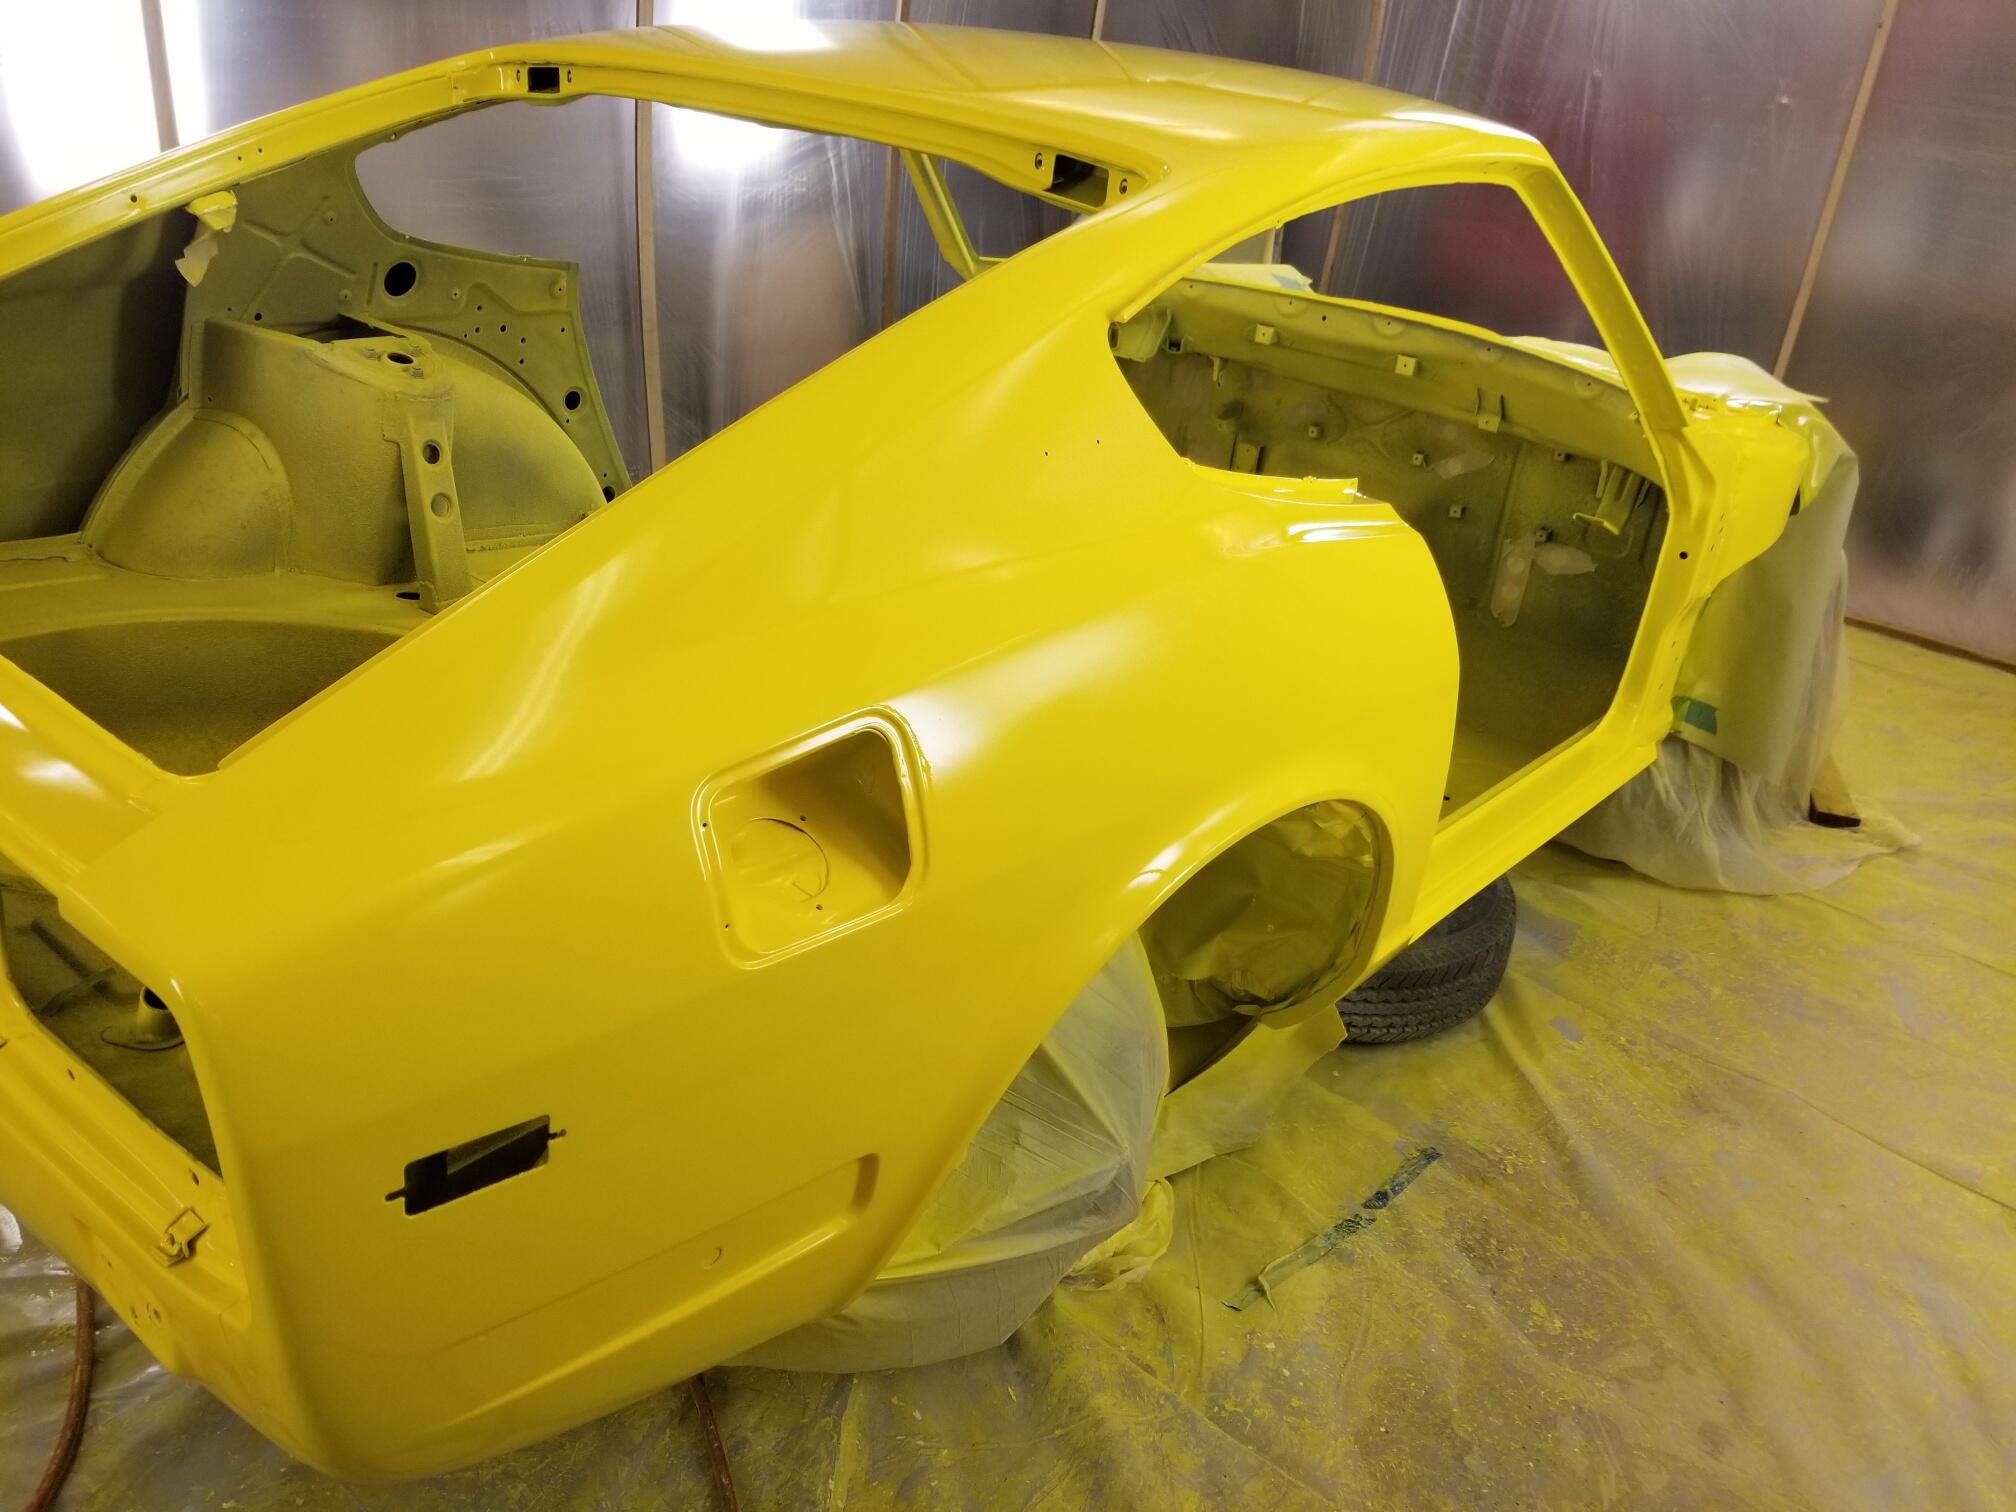
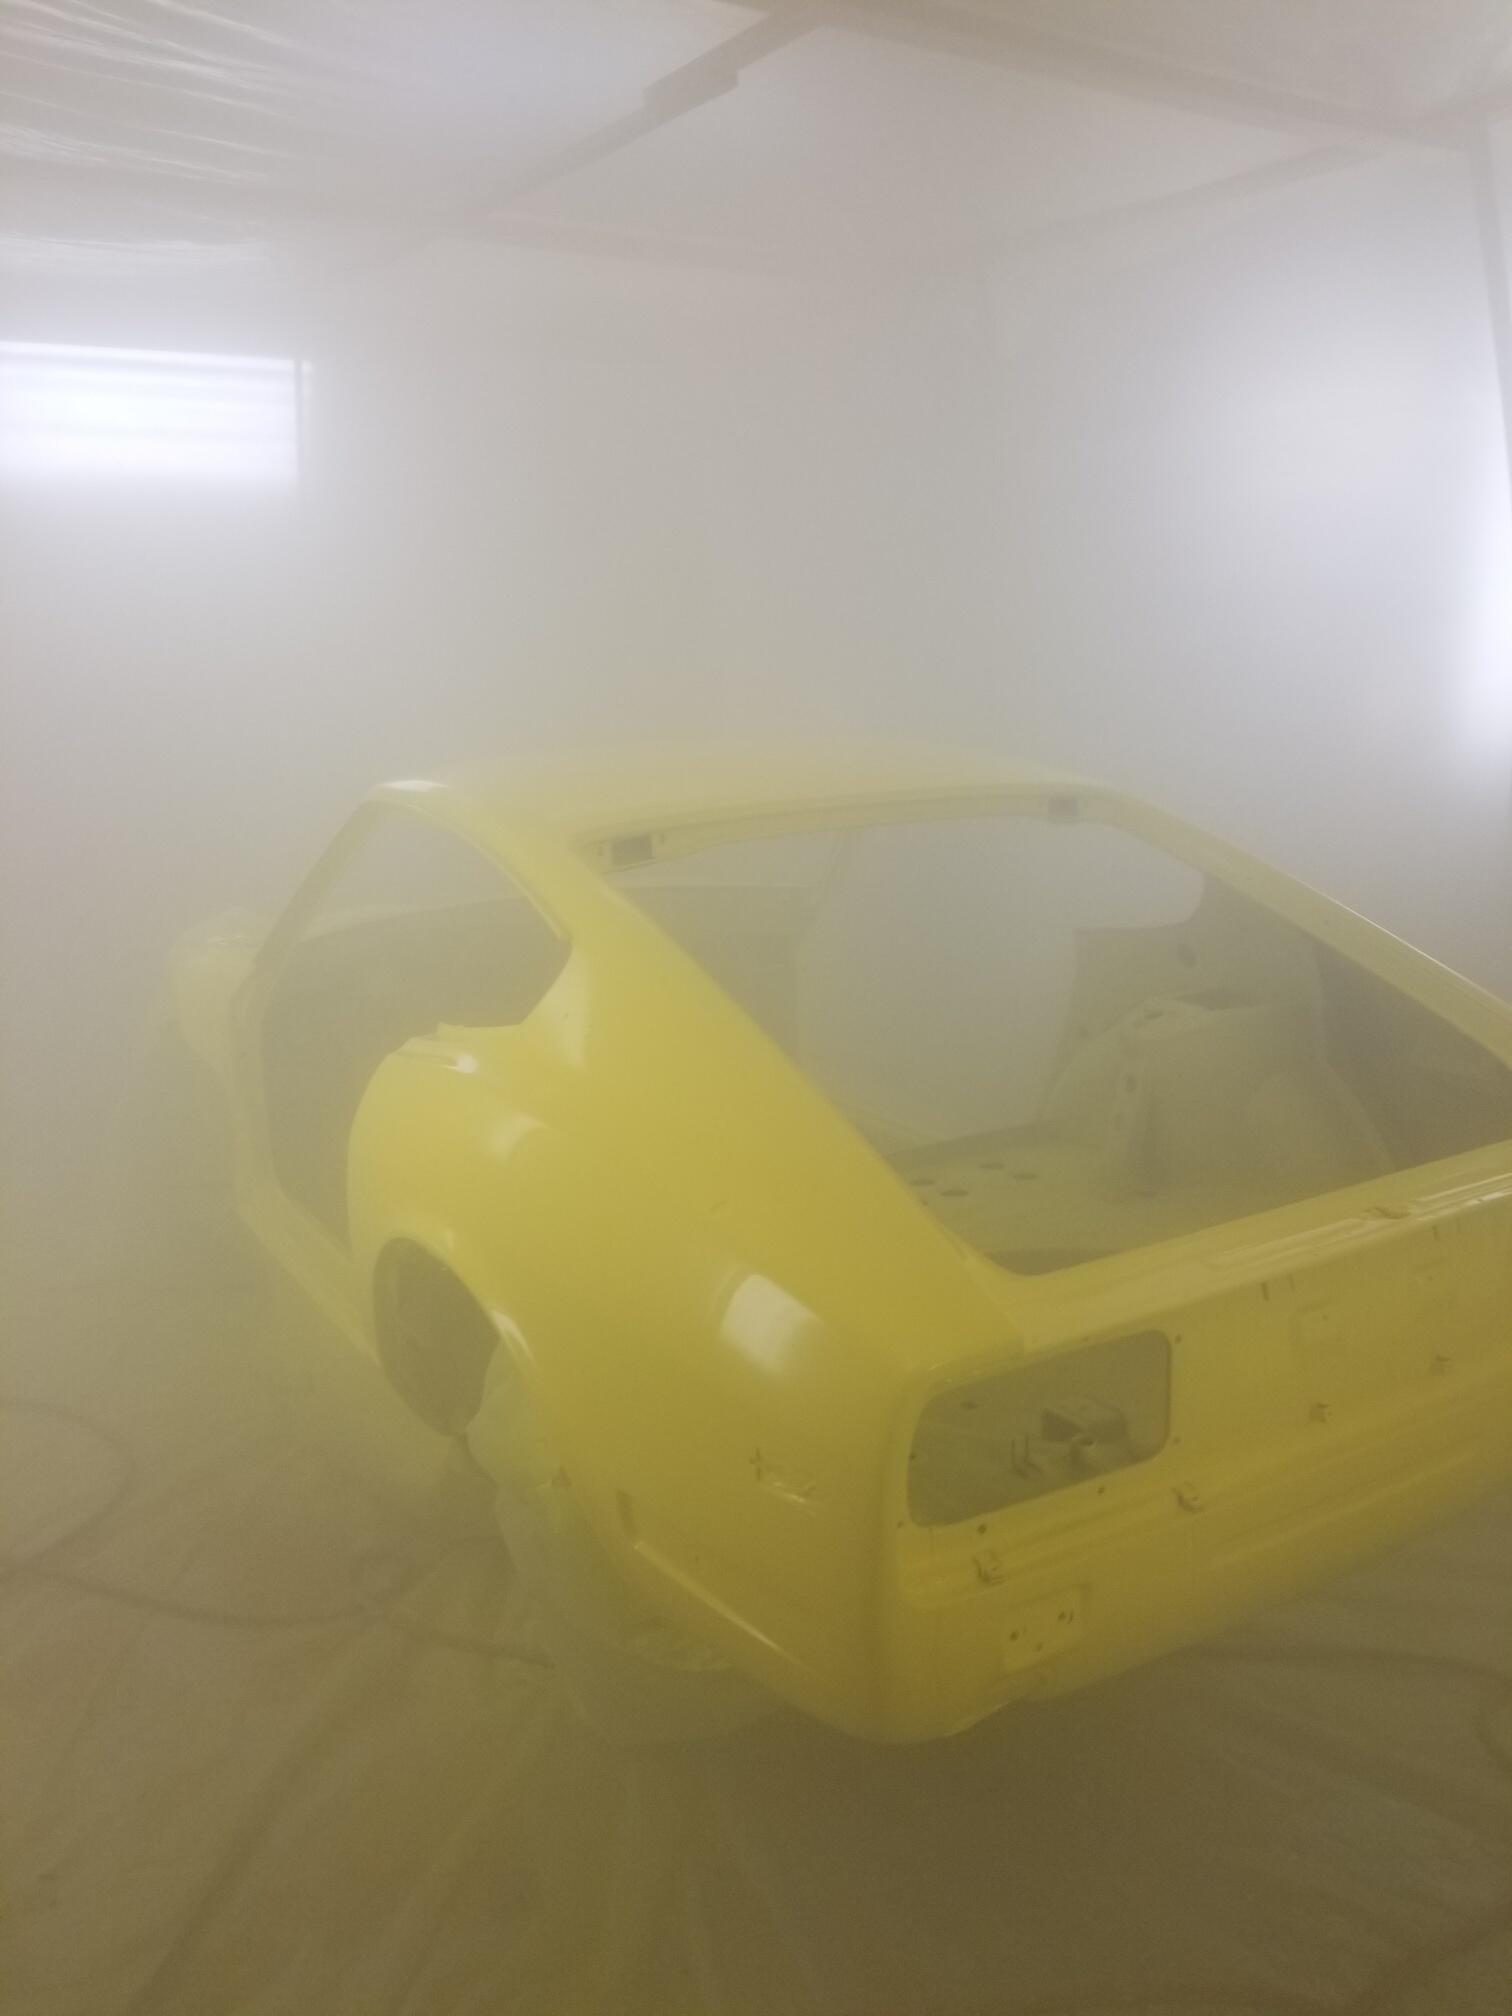
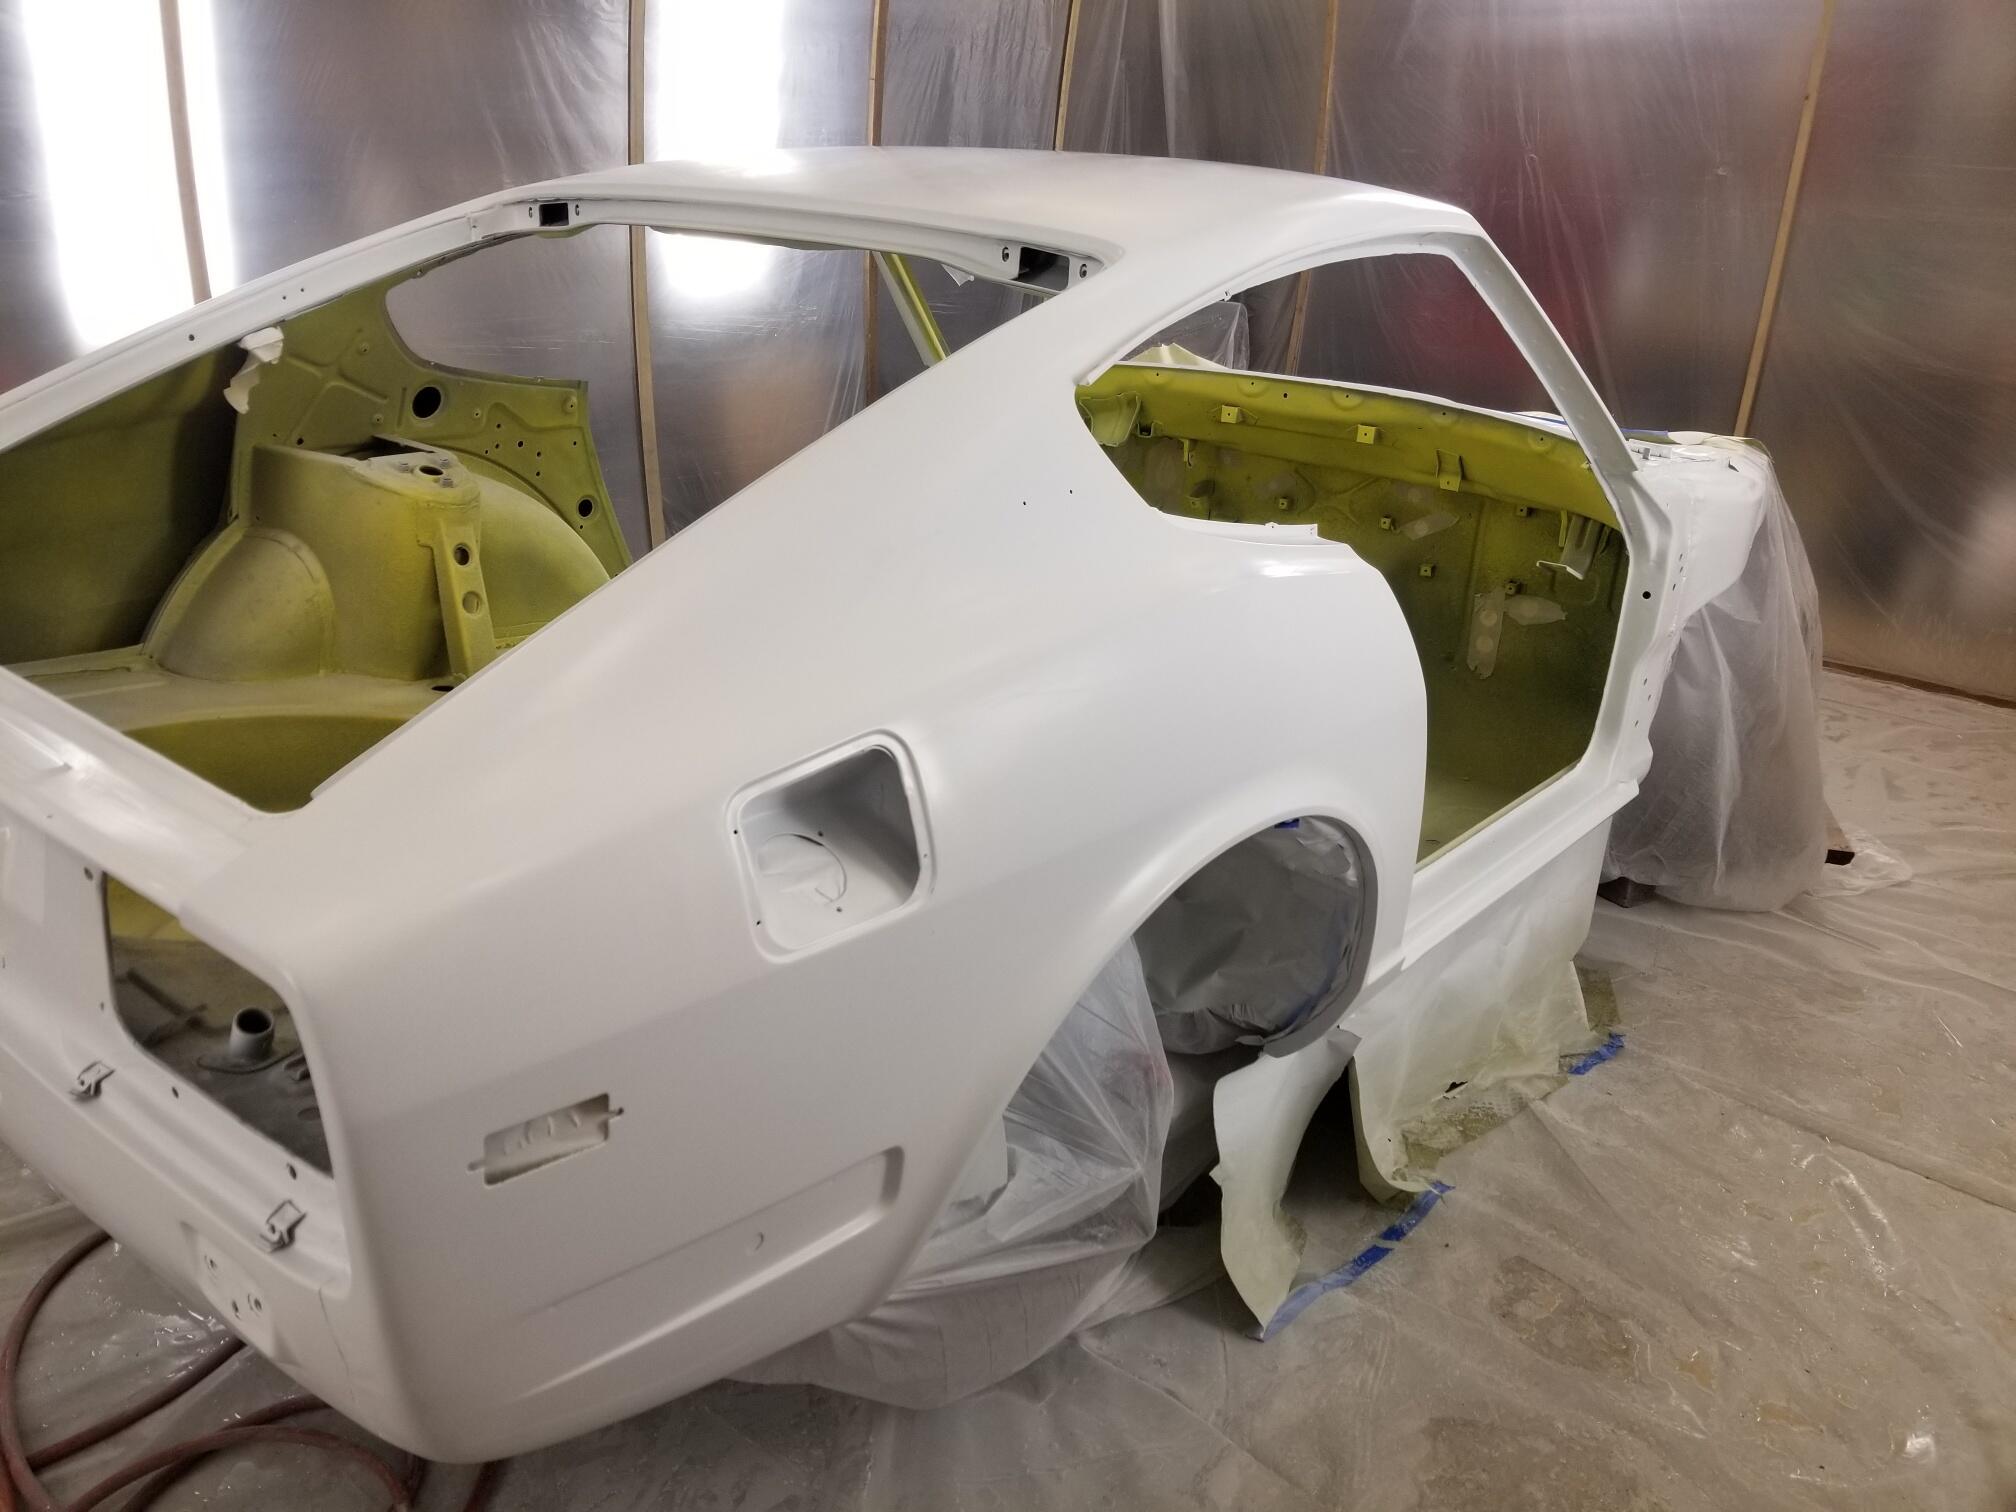
3 pointsToday A bright gallon Here is the yellow basecoat I think that was 3 coats of base. There were some areas that had a little gray show through and they were super hard to get covered with the yellow. It's just so transparent! 3 coats of clear. Overall, not too bad but one of my cans of clear had a little rust on it and it ended up in the mixing cup. the paint screens didn't get it all. So there are a few brown specs in the clear. I will have to cut them out. Hopefully I won't have to reclear. It's progress though. My booth didn't totally work the way I wanted. My intake fan filter ended up clogging with exhaust paint overspray coming back in another door of the shop. At the end the booth was pretty foggy! Don't light a match!! I probably should have worn my Tyveck suit but it was already hot in the booth... Colour!!!!


 3 points
 -
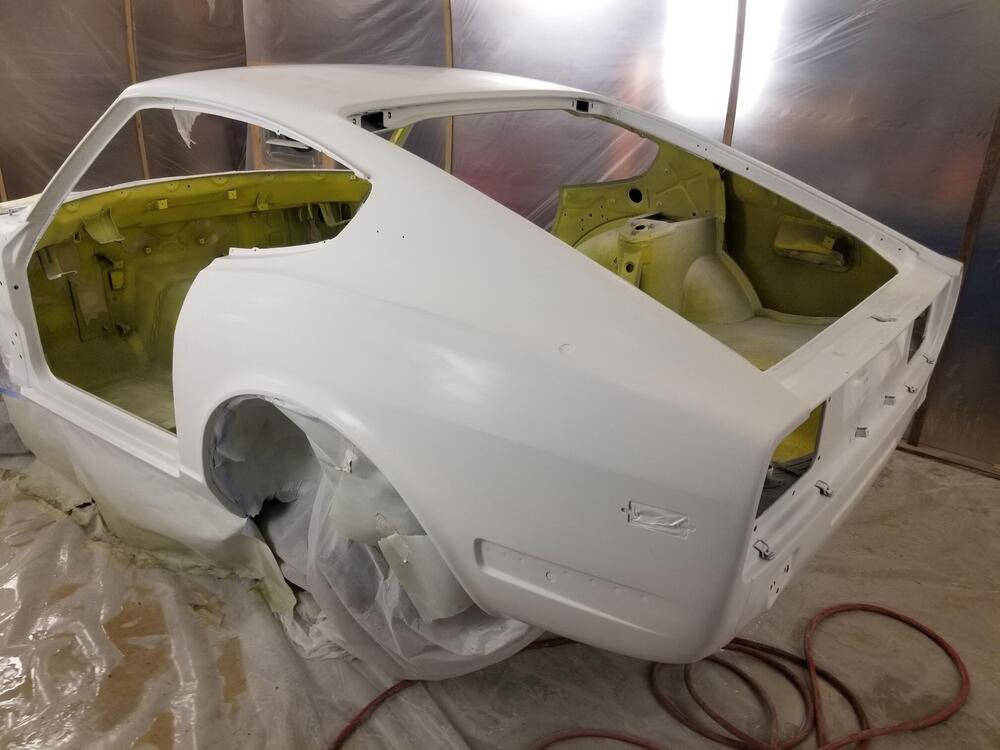
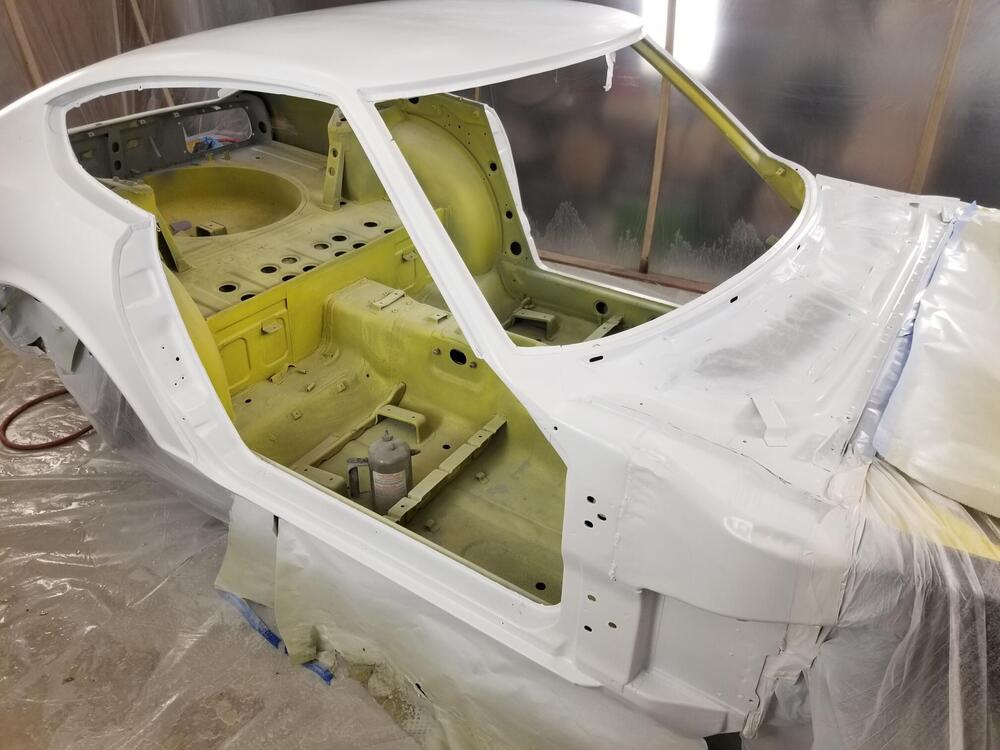
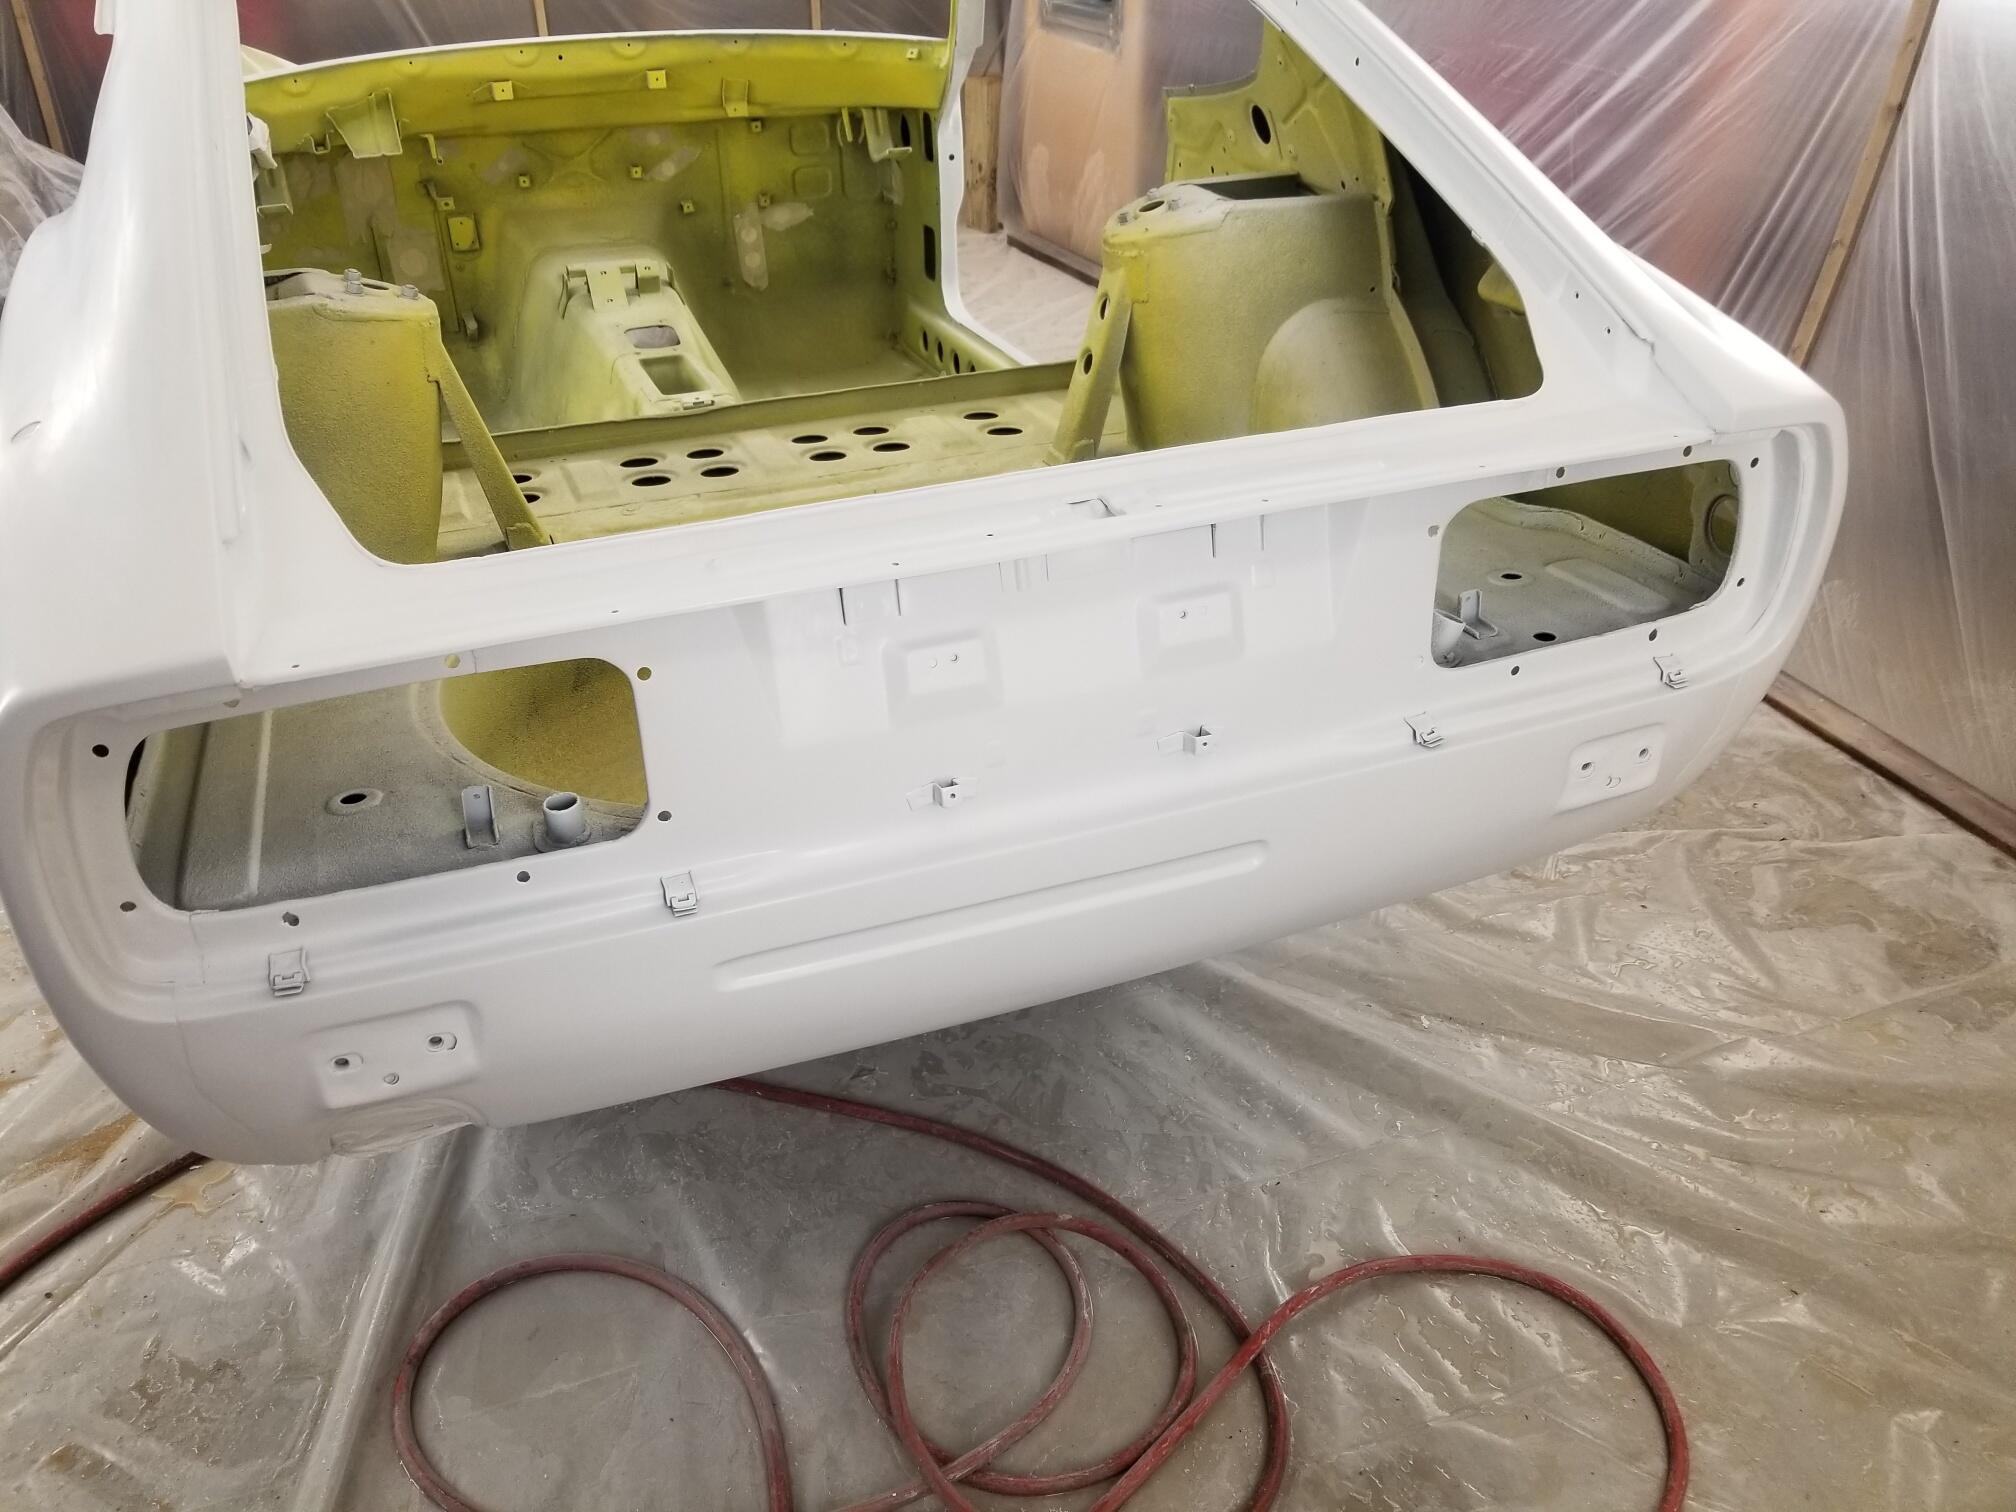
2 pointsSo yesterday Shot some white basecoat There was still a little trash in the paint. No idea where it's coming from. So I worked those areas with a little 600 grit and then degreased again and tacked the car


_resized.thumb.jpg.5de577a3426af1269f51dfa40a830092.jpg)
 2 points
 -
HAhahaha... Bart .. i have seen MUCH worse MUCH worse!! When i bought my 240z in 1998, for a few bucks.. it had a "bottom" made out of angled iron and a floor of.. both 2,5mm steel!! It was welded in on a few spots and made watertight with... glassfiberrrrr!! Terrible!! I took it all out and when i was done there was about 50 kilo's of steel lying on the floor! Now.. surprisingly the car was faster already hahaha!! (I made my own new floor of 1mm steel and it's still in great condition as it was all made with special steel.)2 points
-
1 pointYou could probably pull from the top of the open block with a pump like that.1 point
-
1 pointOr use a little harbor freight aquarium pump with tubes to either end of the block1 point
-
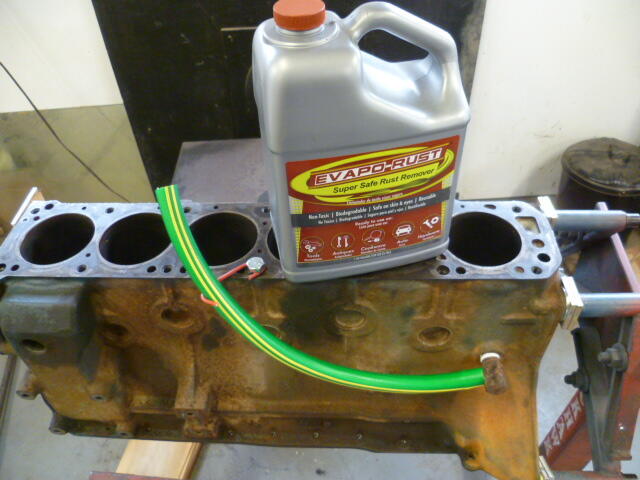
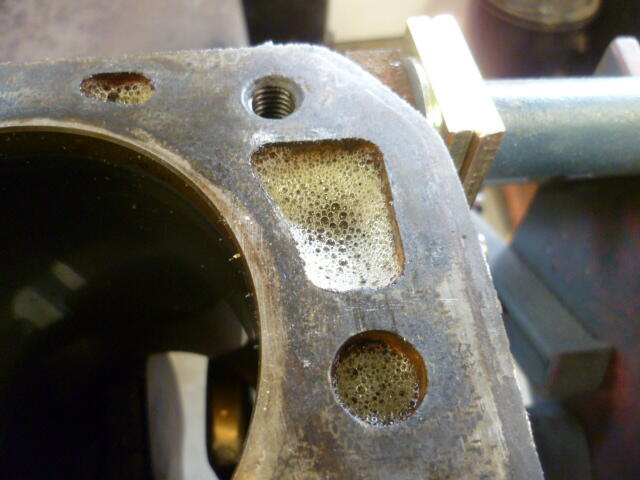
1 pointIt turned out "just OK", for a number of reasons... First of all, evap-o-rust works better at warmer temperatures and I was doing this at the end of December in a wood stove heated shop. Because of that, the temperature of the block was cold. Like Pennsylvania December night cold. I had the wood stove cranking and had the air temperature in the shop up to a comfortable working temp, but that big chunk of cast iron was still pretty cold. Second, I would have liked to have left the evap-o-rust in there longer. Like overnight. But I was afraid that once the stove burned down, it would lose all effectiveness, and/or even freeze. So I had to limit the process to just a couple warm-ish hours. Third, we did two blocks and the first one we treated with phosphoric acid after the evap-o-rust and it turned out well, but boy did it stink. So I couldn't bring myself to do that a second time in a closed December shop, so the second block (mine) didn't get the phospho treatment. Bottom line.... I give mine a "5". I think if it were warmer and I left the evap-o-rust in there longer (24 hours) and then also treated it with phospho after, it would be an "8". Still not as good a hot tanking, but for a block that's not that bad to start with, I think it would suffice.1 point
-
We have some mountainous areas near us and I have found the stock brakes to have a lot of fade on long downgrades. I hate the idea and smell of burning brakes. That's where the brake upgrades appeal to me1 point
-
If you want better brakes. The standard setup properly rebuild with Porterfield R4-S pads and shoes will work fine. I have been using them since 2014 and never had issues for street use. If it is for looks, then there are plenty of "upgrades" out there. Getting the front to rear balance right is the biggest challenge you will have to deal with. I have no experience in racing zeds.1 point
-
1 pointThanks everyone. I have one now. Local Nissan dealer was able to find one. It took a month, but what the heck - it's taken a decade to restore the car!1 point
-
1 pointI am unfortunately not going to make this one either. It's just not in the cards.1 point
-
1 pointAnd about your block rust: I've got the nipple on the side turned slightly downward to facilitate draining after the evap-o-rust had time to work. And you can see the piece of wire fashioned into a hook to hold the hose up until I'm ready to drain. Don't shake the shop!! Filled to the brim: I didn't take any pics of the water pump hole cover at the front, but it's bolted to the block to cover that hole that leads to the front cover. Doesn't have to be fancy. Just something to keep the liquid from leaking out that hole.
 1 point
 -
1 pointI think I could pass with a stand-in copy? We could put a couple close together and do the "shake and bake"?
 1 point
 -
1 point
-
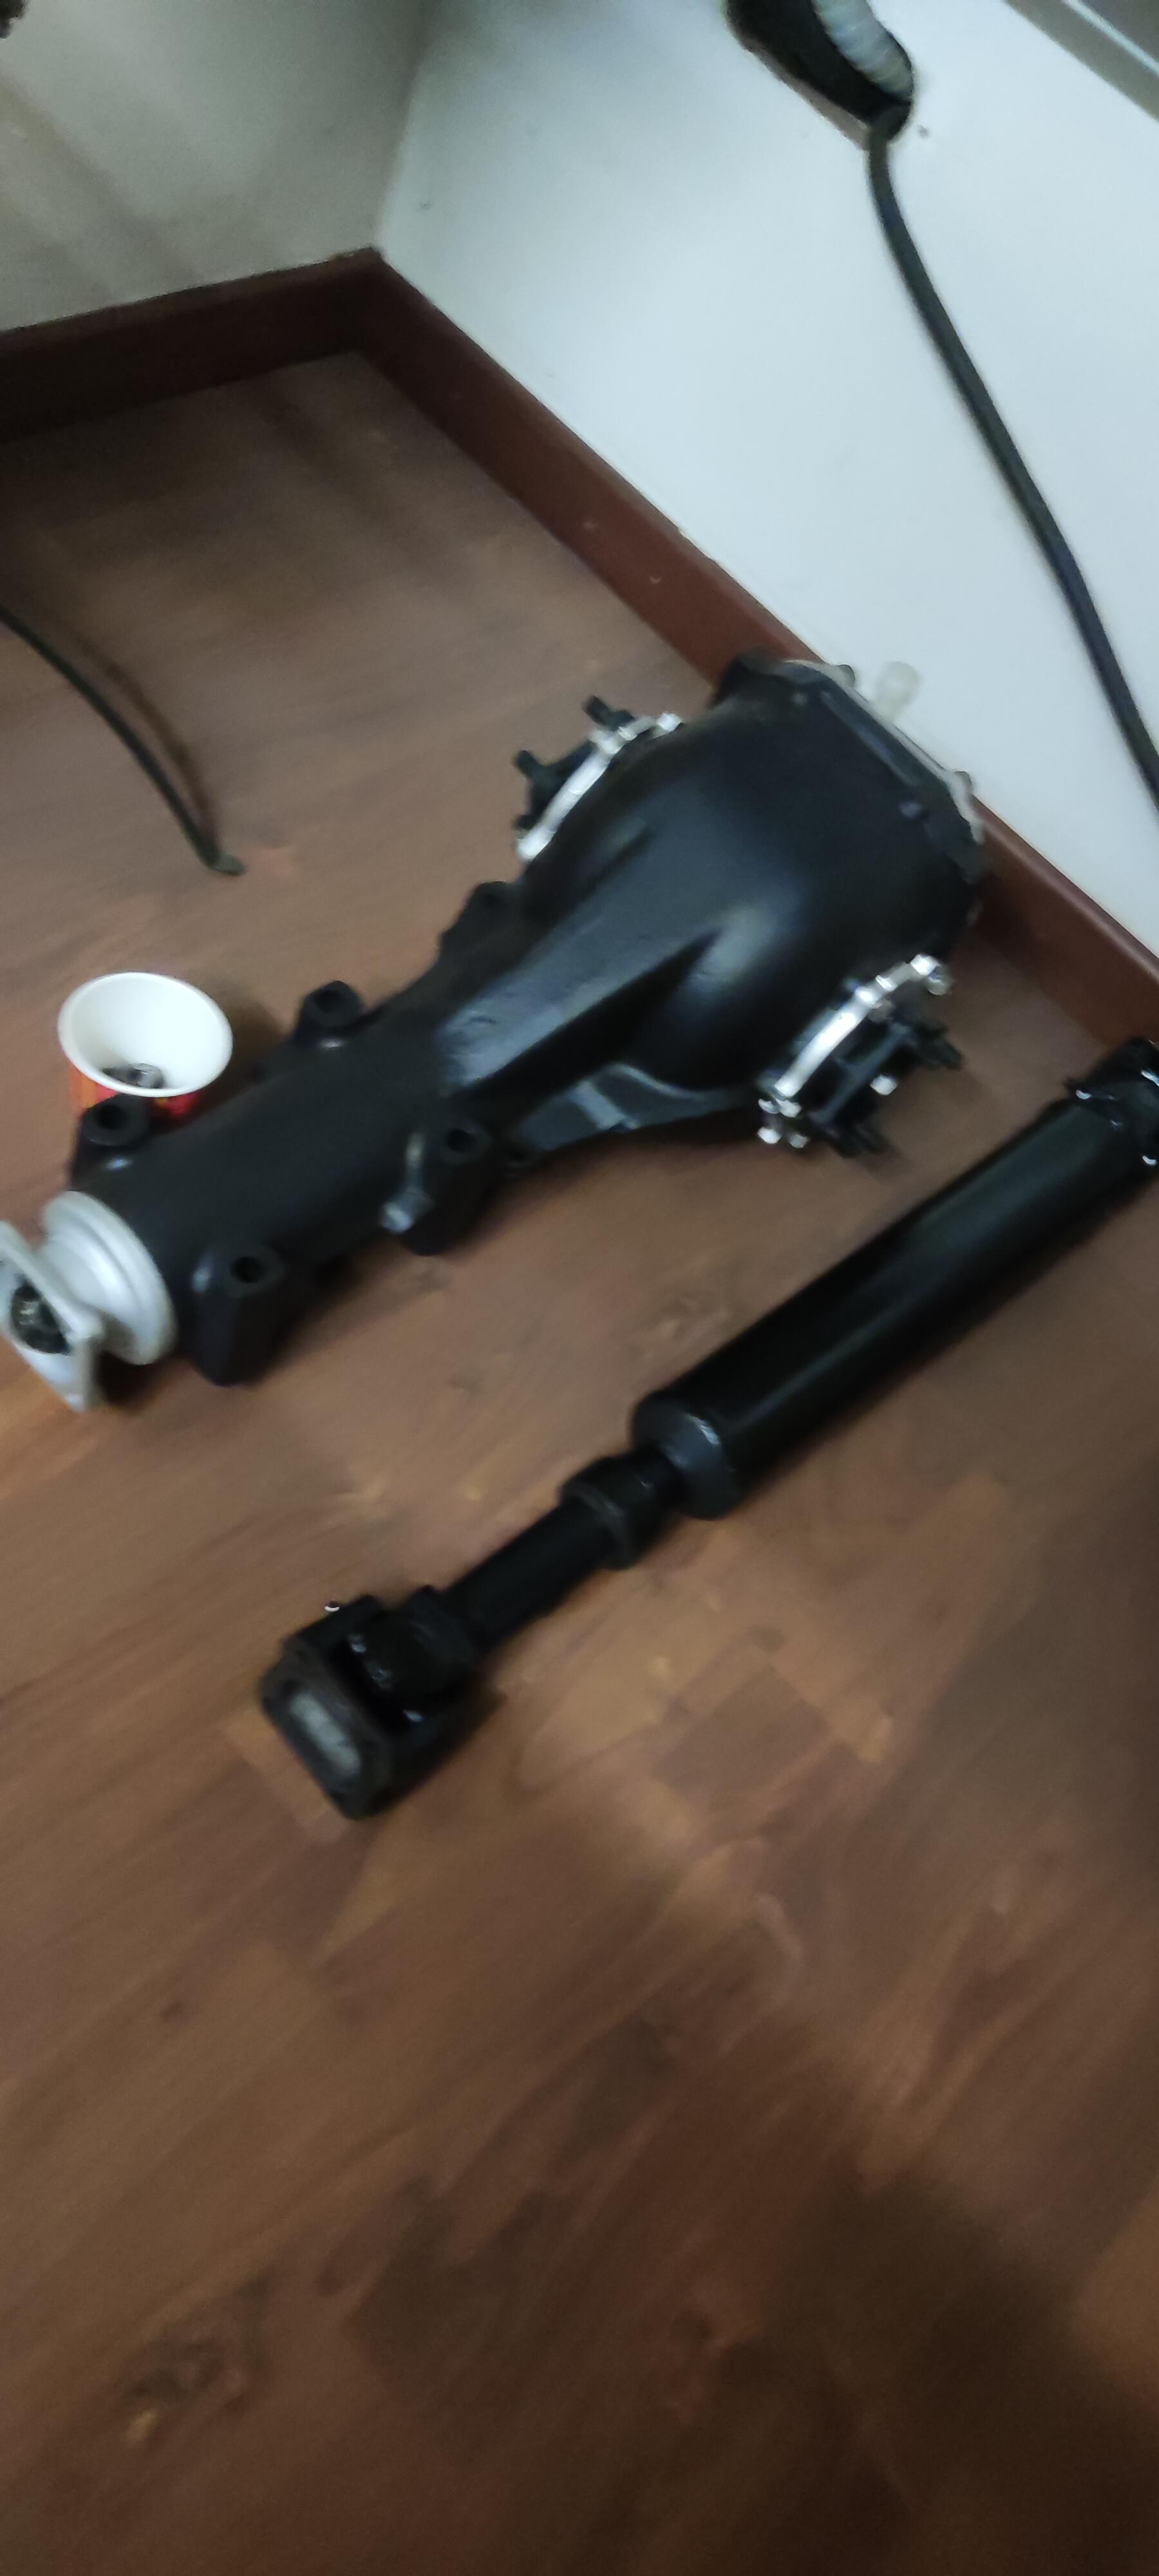
1 pointCurrently I have the diff and the driveshaft for the euro version 240z ready. Still working on the transmission, need to find parts first. ( FS5C71A )
 1 point
 -
Once the wheels lock up there is no "faster". Unless you go with wider tires. Then you might not be able to lock them up without more force. A bigger booster will give more force, it's a multiplier. A bigger MC will create less force it's done for volume, to get rid of the travel in the pedal. I'm just teasing out the details. cgsheen's story is a good one showing both feel and fade as concerns. But also in a competition setting. He chose pad and shoe material to achieve his goals. He also probably adjusts the system to remove all play in the linkage and air in the lines, so pedal feel is high and tight. I'd guess. I just saw a brake question on another forum and the guy was asking opinions about "caliper covers" and slotted drilled rotors. That's a whole different angle, the look.1 point
-
Due to a NASA (supposed to be) weekend on stock brakes (which lasted about 2 track sessions with the instructor) I started out with the 4-piston non-vented mounted on stock disc. (just the caliper change and I can't remember the friction material - probably semi-metallic back then) The "butt dyno" couldn't really tell the difference between this and stock. Disappointed, I installed the Z31 vented rotors with the 4-Runner wide calipers (stock master and booster) - friction was either semi-metallic or ceramic, can't remember. I noticed a good improvement in braking and a large improvement in fade and heat dissipation. A short time later, I installed Porterfield friction material on all four wheels (stock drums in back). These pads grip about the same as an OEM with normal street traffic, when they warm up they get VERY grippy and do not fade. Goldie likes to hill climb (L28ET builds a lot of torque) and coming back down the hill is much less dicey with this particular friction. At the bottom I still have full confidence as these grab better at the bottom than they did at the top and I've yet to experience fade. I've been on this setup for 7-8 years and I daily drive my 260Z. I still use the stock master. My youngest son did the same brake swap on his 1975 280Z but replaced the master with a 15/16 280ZX master cylinder. I'm sure there's some difference, but I've never really been able to tell when I drive his car.1 point
-
What is the goal? Better pedal feel, less force required, racing performance? Can't say what's better unless you define what you're trying to achieve.1 point
-
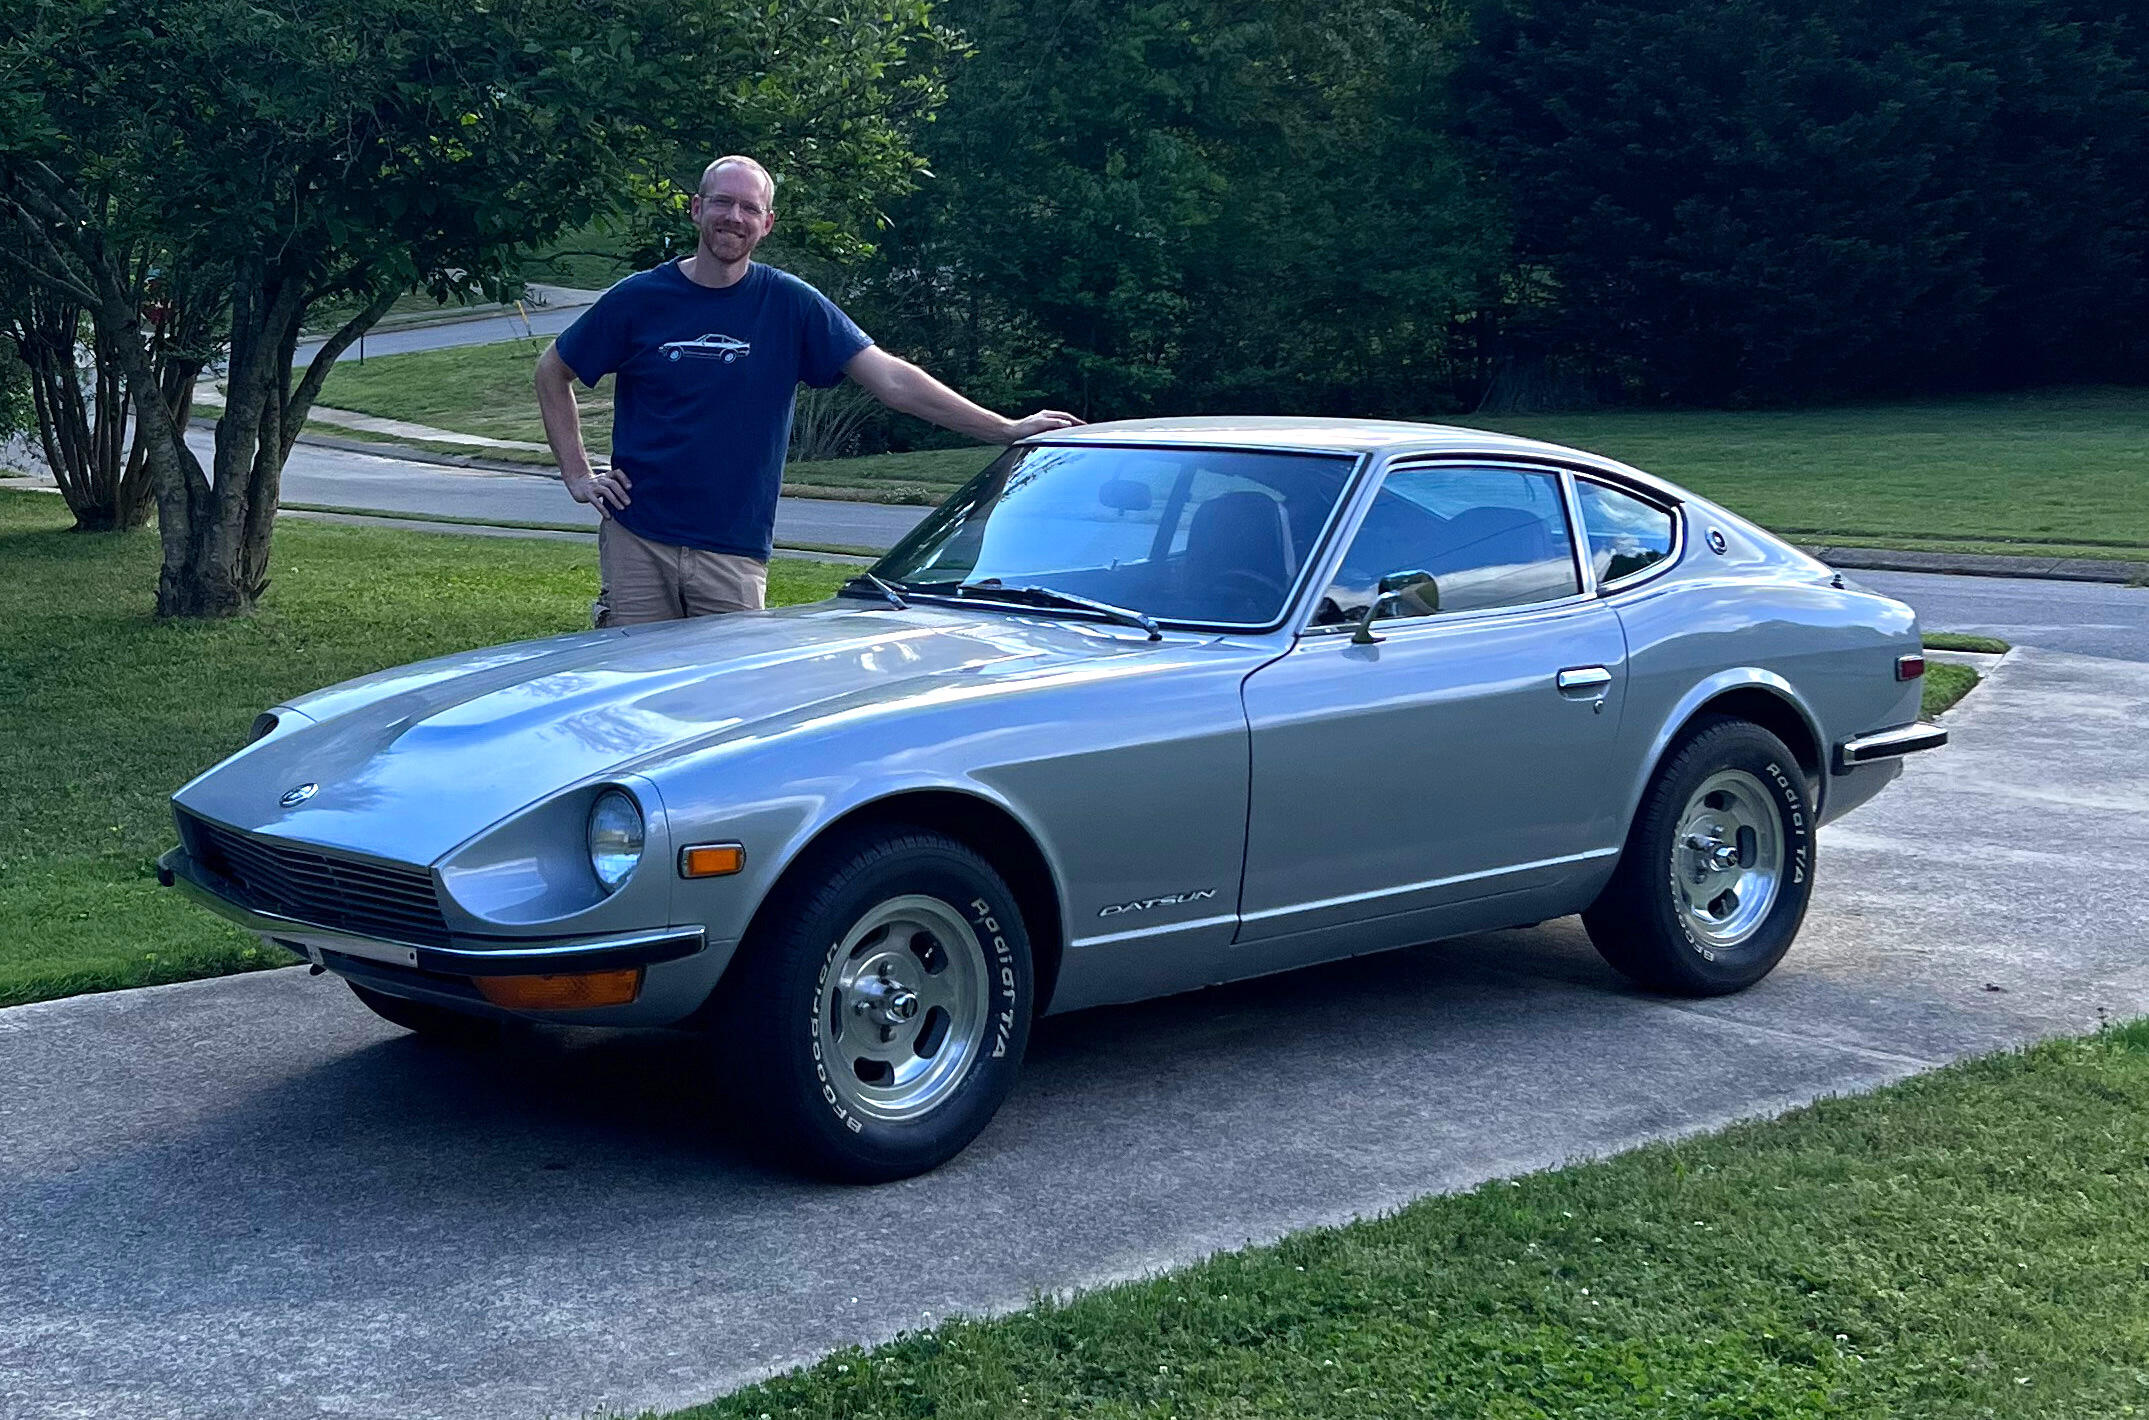
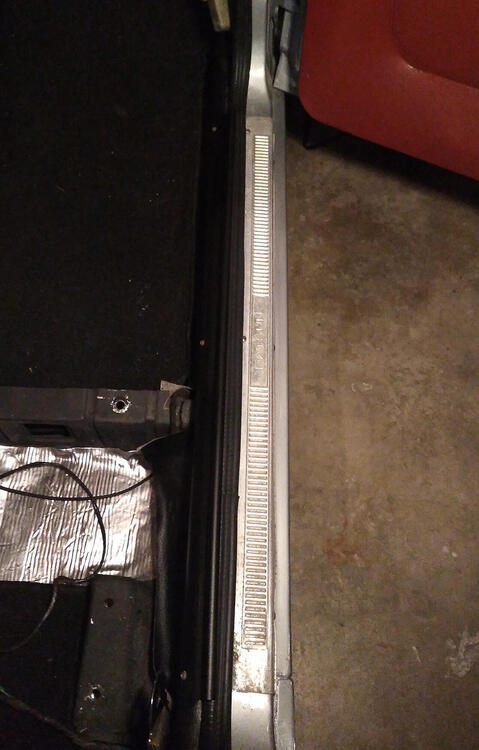
Some more progress, some with pics and some without: Seat belts bolted in. I have some M3 x 0.6 screws on order for the mechanism covers for the seats. Carpet-style dash cover added. The guy who was going to sell his crack-free dash backed out, so I'm going to have to go to Plan B (or C or D). New handbrake boot installed. Found the shift pattern emblem for the top of the shift knob, reattached. Realized I connected the wiper motor arm 180 degrees off (it's nice when the wipers go DOWN when activated), fixed. Driver's door adjusted. It took a really hard slam to shut before; it's better now, though still not as good as the passenger door, which is 100% PERFECT. Need a bit more love. Inner and outer door sills on (thread here) I did my best to clean the outers, but they still have some "patina." I'm OK with it for now. Still working through some electrical issues, as detailed in this thread. Drove it around the neighborhood last night, and it's like a different car compared to when I first got it back on the road in mid-2020: Then, it could barely make it up the (shallow) hill in front of the house, and it was misfiring all over the place, no brakes, etc etc. Now, it brakes and turns very well, and has only some slight misfiring when warmed up, all of which I'm hoping to dial out when the Colortune arrives and I get it timed perfectly. And once I get all the lighting operational, it will be fully road-worthy. So excited. Finally persuaded my wife to take a pic of me with the car. Here's your intrepid scribe next to the car that will have been in the family for a full 50 years come October:
 1 point
 -
Now comes the REAL WORKOUT, getting the rest of the cover on. I placed the foam back in place and for the better part of an hour and a half I pulled, tugged, and persuaded the cover on. This is where the plastic would have helped a lot. In the end I got it on but took plenty of breaks in between. Looking back on it I am thinking I should have glued the foam to the seat back, especially around the edge where it is supposed to sit on top of the seat round bar. Next you will be securing the material down with the tangs just like on the bottom cushion. Originally the seat had the front of the cover laid down first and then the rear of the cover placed over it. The original cover did not have the extra little flap on the back to cover the tangs so I went the opposite direction, I put the rear of the cover down first and then the front. My thought was since more pressure would be on the front of the cover I would want to tangs working in a direction to secure it. To start you need to straighten your tangs again if they are not. Starting at the center and with the reinforced edge of the material for the back pull it over the tang, cut a small slot with your utility knife, and push the material all way down. This went fairly well and I was pleased with how the back looked. The front of the cover put up a real fight and I employed the help of my wife to hold the seat down while I pulled up on the front of the cover and eventually hammer down each tang as I went along. As you can see the material does not wrap around the sides 100%. I believe a few factors contribute to this, first the foam and seat covers are made by two different companies. Second, everything is new and while flexible its’ just not flexible enough. However the exposed area will never be seen once installed. If you have a method of making yours fit better by all means try it. I did not want to remove the cover after all the work to get it on and attempt to trim the foam back so I left it as-is. Stand back and marvel at your work. The home stretch! Locate the holes for the bolts that attached the hinge hardware and cut a small X over them. Push the material down as the material will split and hug bolt holes. I started with the bottom cushion fitting everything a little loose at first. I also would only cut one hole at a time, once I cut I would install a bolt in to it. Once all the connecting points on the hinges were bolted in place I tightened everything down. The end result is a fully restored seat for your Z car ready for many miles and years of enjoyment. Overall I am very pleased with the covers, foam, and work I put in to it. The area on the side of headrest is not as tight as I would like it to be. Adding more foam here might be a possibility the next time around. When it sits in the car on a warm day it may help as well. If you have any questions feel free to reach out to me and I will do my best to answer them.1 point


_resized.jpg.0fae711a767a3bfb80f96d05b2470d0a.jpg)