


Leaderboard
-

Zed Head
Free Member10Points19,238Posts -

Racer X
Free Member5Points1,877Posts -

siteunseen
Free Member4Points15,115Posts -
Captain Obvious
Free Member3Points10,081Posts


Popular Content
Showing content with the highest reputation on 03/14/2021 in all areas
-
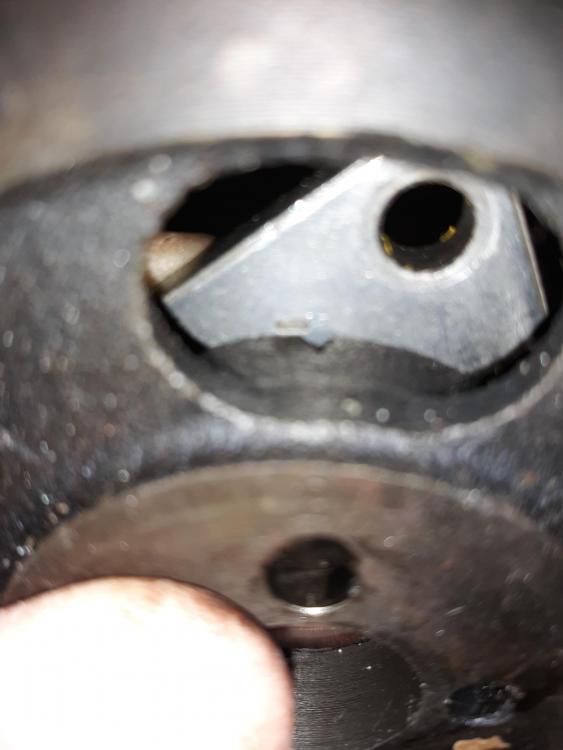
Not clear why a person would distort the line of the cylinder, the three passages, that the spindle pin passes through in an attempt to make a poorly designed aftermarket piece of polyurethane fit. These aftermarket urethane parts sellers just looked around the car and made shapes that looked similar to any rubber that they found. I'd focus on modifying the aftermarket parts to fit the original design of the suspension components. The Nissan engineers put a lot more time and effort in to that than the PU parts guys did designing those little PU bits. Edit - No offense intended to any opinions ventured so far. I've just spend some time wondering "who designed this thing" in the past.3 points
-
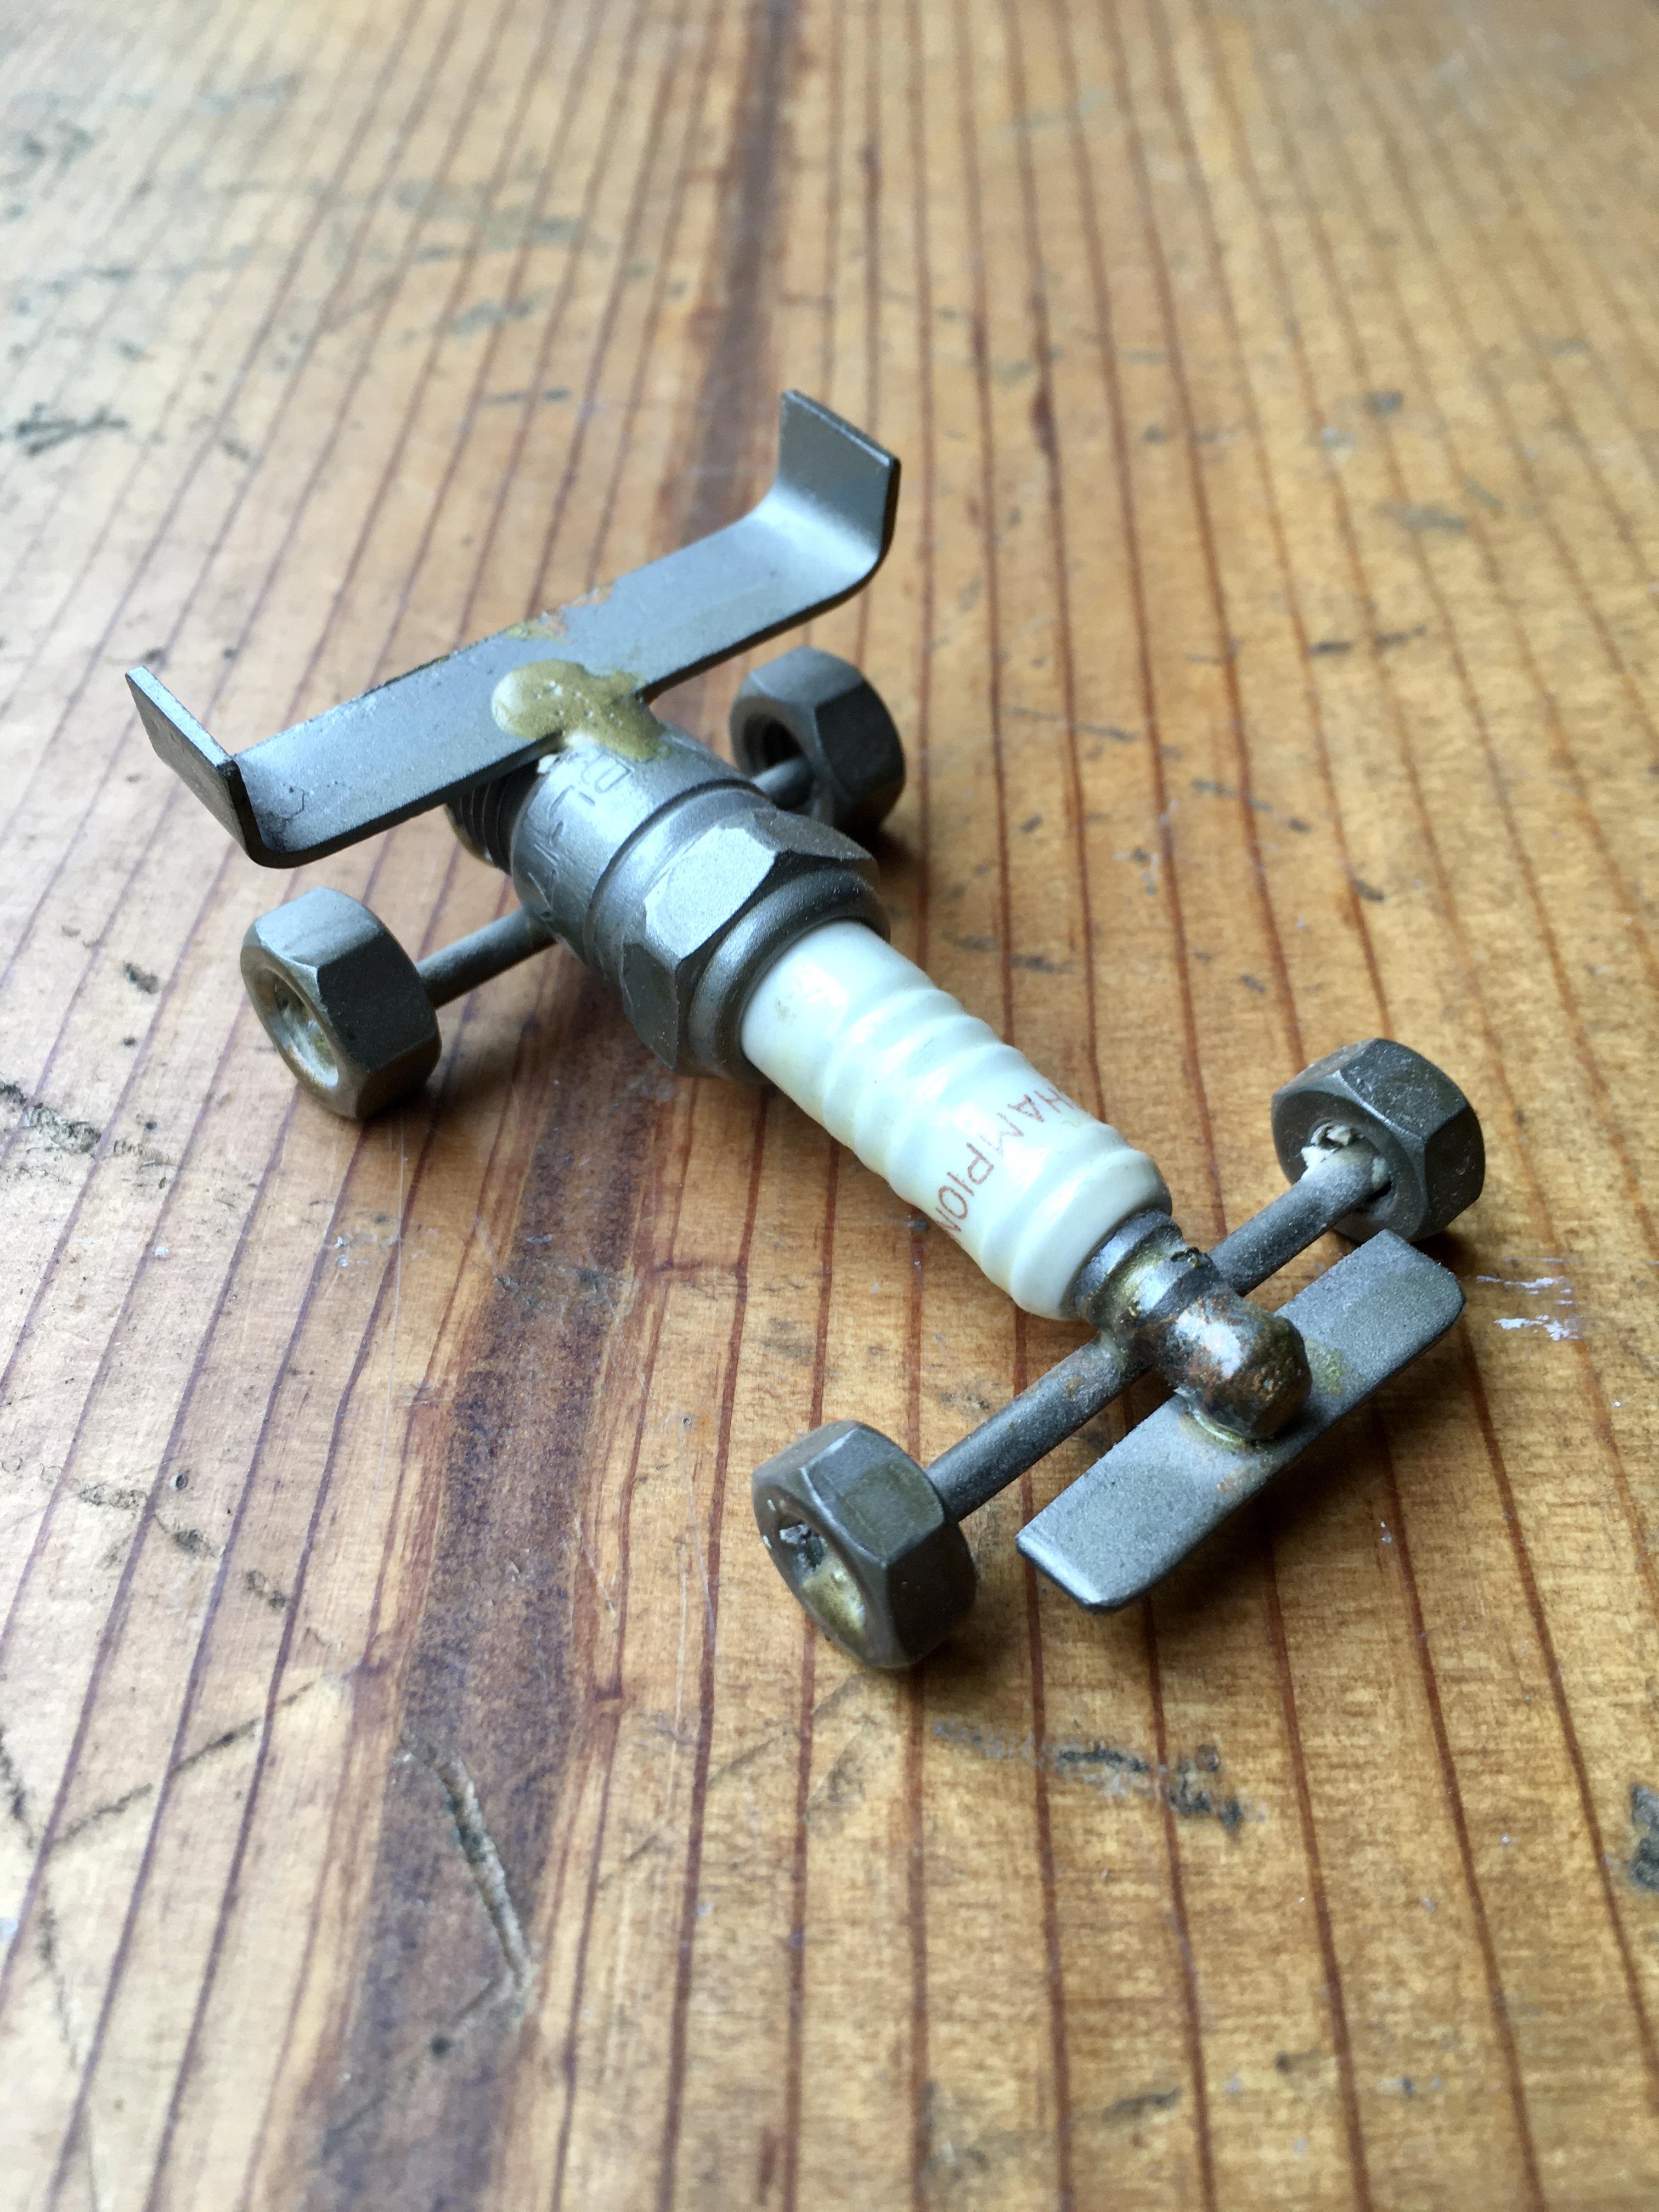
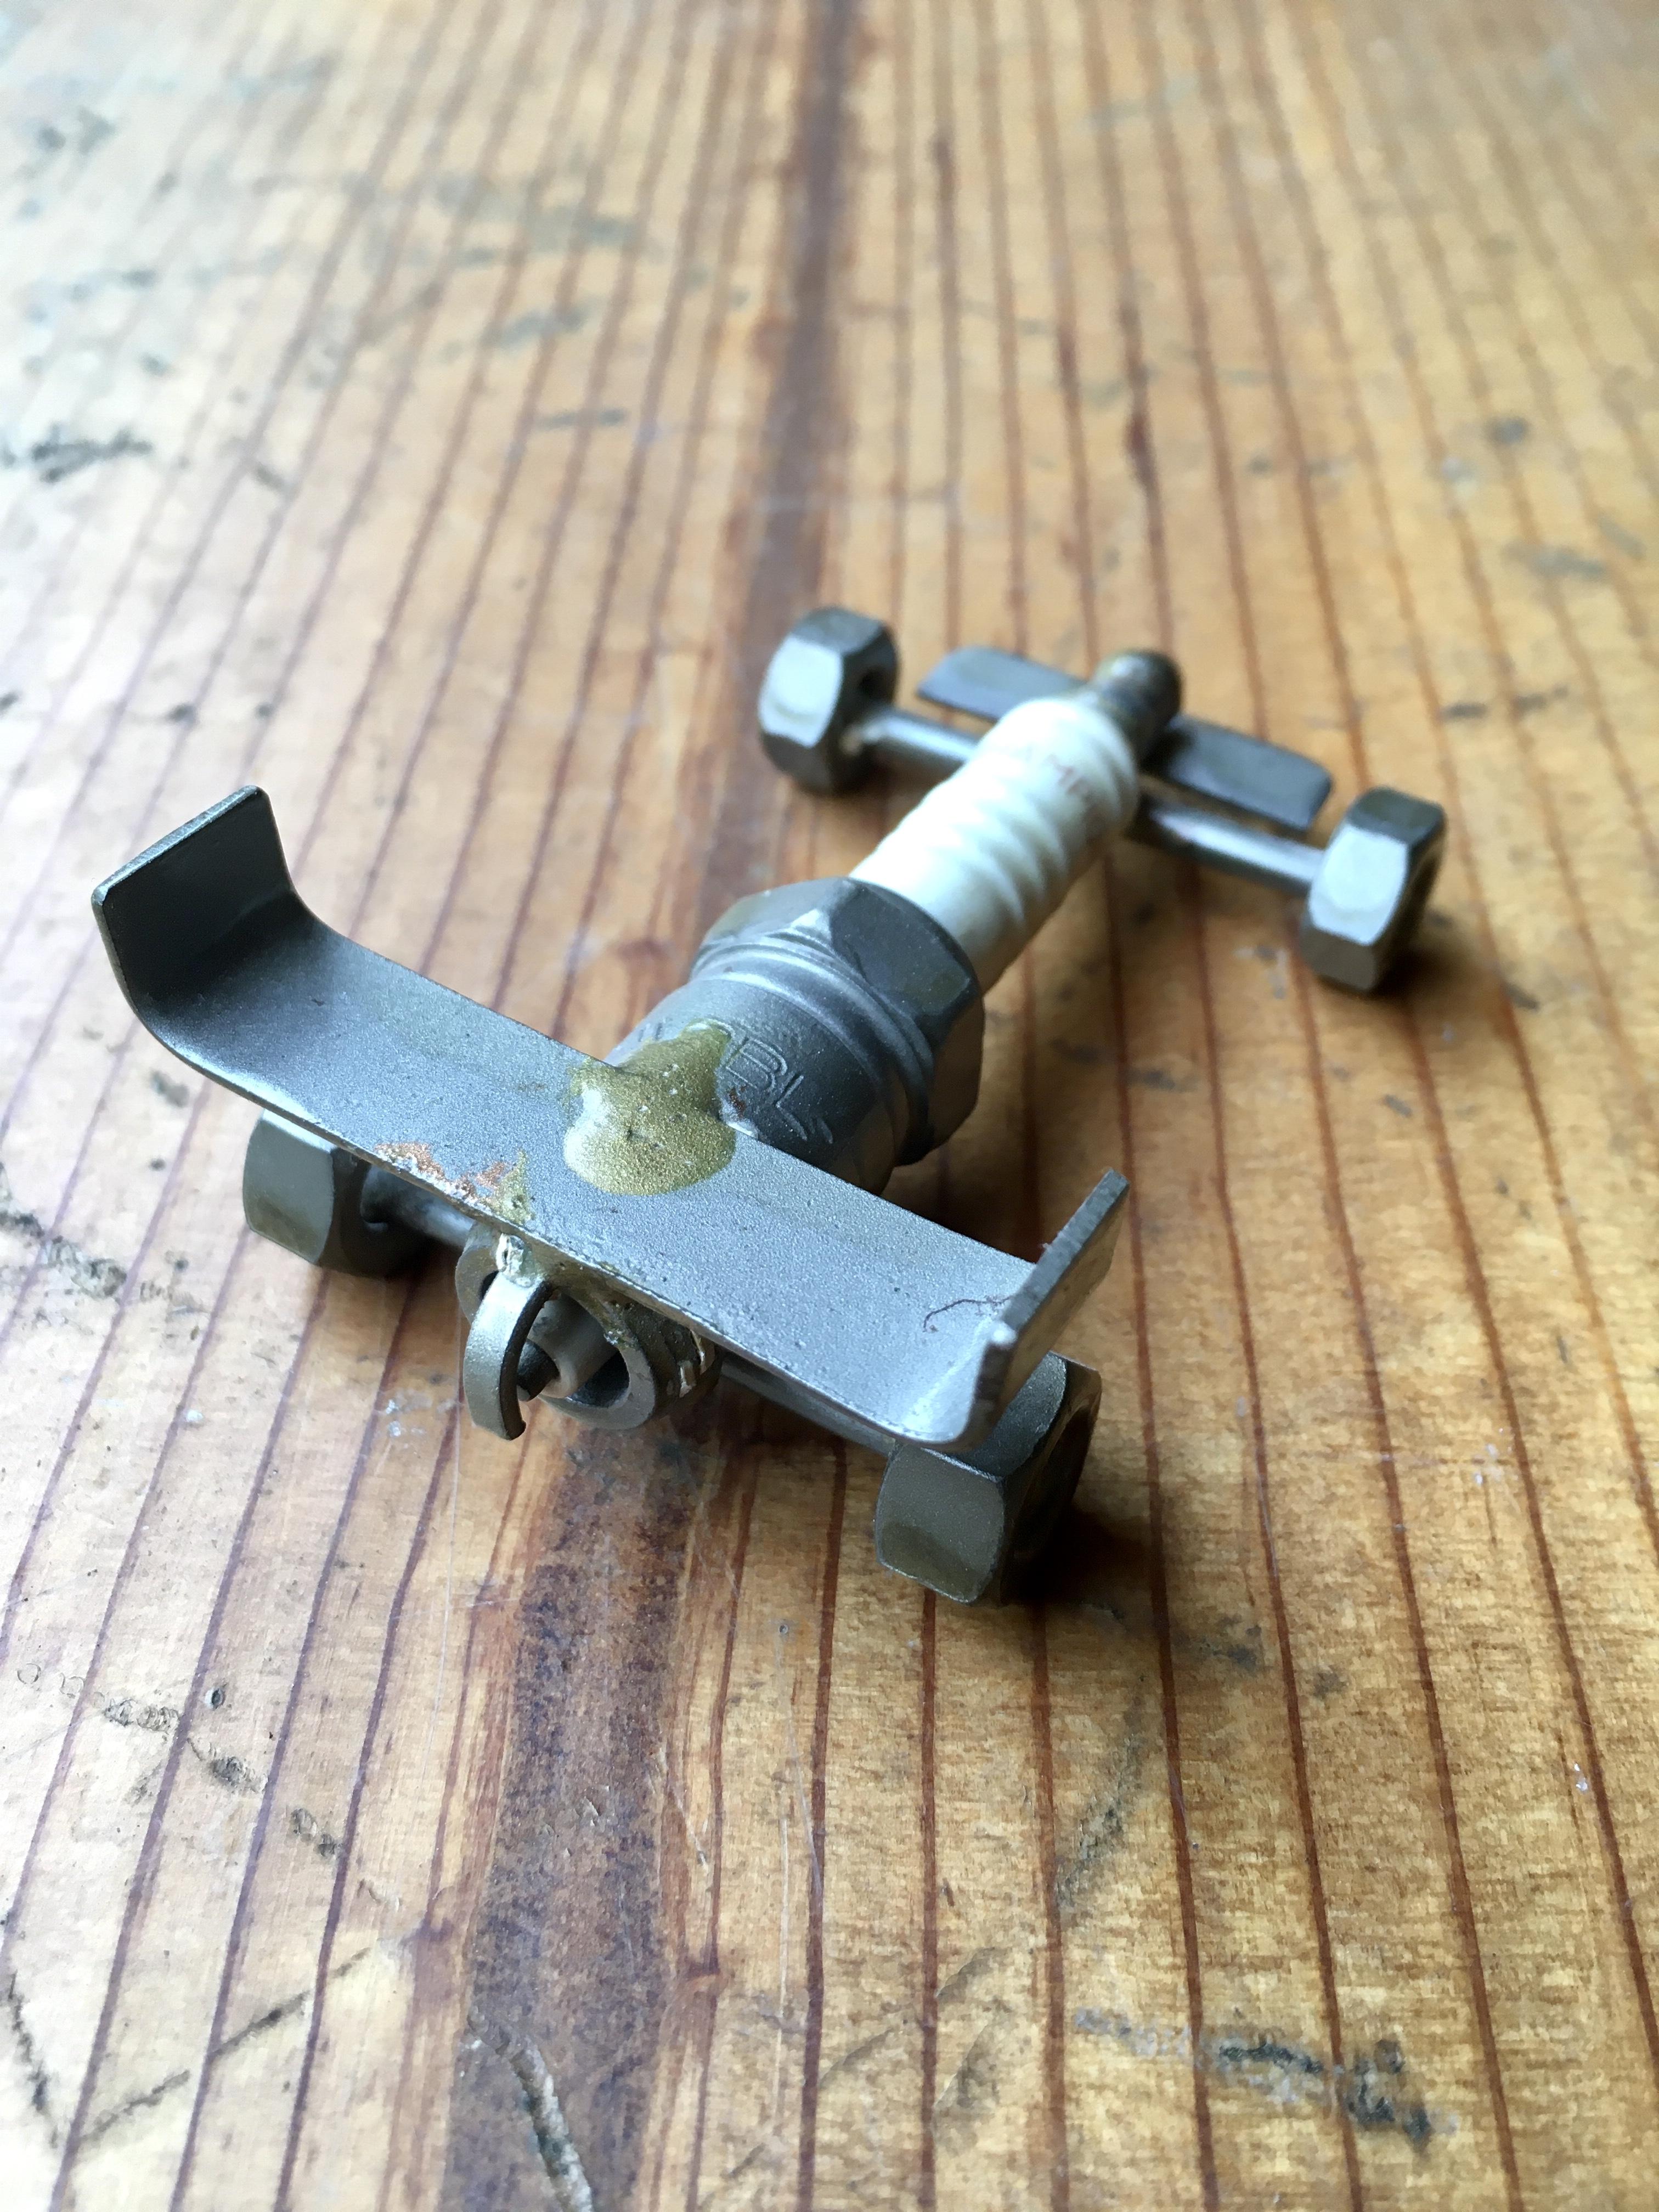
@Shawninvancouver, the battery negative cable should have two wires, a large diameter one (4 or 2 gage) that goes to one of the starter mounting bolts, and a smaller diameter wire (10 gage) that goes to a bolt on the firewall near the battery. Grounding is very important, all grounds must be clean and tight. Given the amount of corrosion in the photos you have posted, it would be a good idea to go through every ground and clean them up, and ensure they are tight on reassembly (don’t overtighten and break off the fasteners). When using your multi meter, use the alligator clip lead for the negative, connect it directly to the battery negative terminal (assuming the battery is connected correctly). using the sharp probe on the positive lead, push the point hard into the point you are testing for voltage. For simple continuity tests, use the pointed probes on both leads to contact testing points. I wrote earlier that the thing on the side of the distributor is a condenser, and what you need to do there. By the way, have you repurposed the old spark plugs yet? Full disclosure: The spark plug I used for this one is a tapered seat plug that actually came out of a late 1970's or 1980's era Chevy 350. I replaced several hundred over the 30 years I worked on the fleet at a public electric utility. I made dozens of these things on my lunch breaks, gave all but this one away.

 3 points
 -
2 pointsHi everyone, Richie G here recent owner but long time lover of Z cars. Child of the 70s and my first introduction to the Z car was a friend who had an original 240Z (not sure which year I was so young). When I turned 18 (1989) I bought my first Z a 84 300ZX that was rather rough but I loved it. Babied it for 10 years then needed to sell it as i moved to CA for work in 99. Here we are over 20 years later and the wife let me buy my dream car, that original 240. I just picked up a beauty, matching numbers fully rebuilt engine with interior restored. Has a few cosmetic things here and there but nothing major to deal with. It will be the little things I get to enjoy restoring myself 🙂 It just got dropped off yesterday from a long haul Connecticut purchase and I haven't even driven it yet 😞 Hoping to get out today if the weather lets up a bit. As I'm inspecting it I noticed a drop of oil (assuming )under her way back in the mid section (about where muffler connects to pipe) so it must have come from the pull into the garage. Haven't gotten under her yet to fully take a look though. I'm hoping it's nothing major. Which leads me to my question, anyone on here know of a decent Z mechanic in the Sacramento / Roseville area I can take it to? I want to have it once overed making sure everything is mechanically sound, tuned, etc before I really start enjoying it. I'm somewhat mechanically inclined but I recently had back surgery and I just can't spend too much time down under or in her just yet. I really appreciate any help someone can give. Richie
.thumb.jpg.39f741e4ff2812d5a2e2b4738233bbb3.jpg) 2 points
2 points -
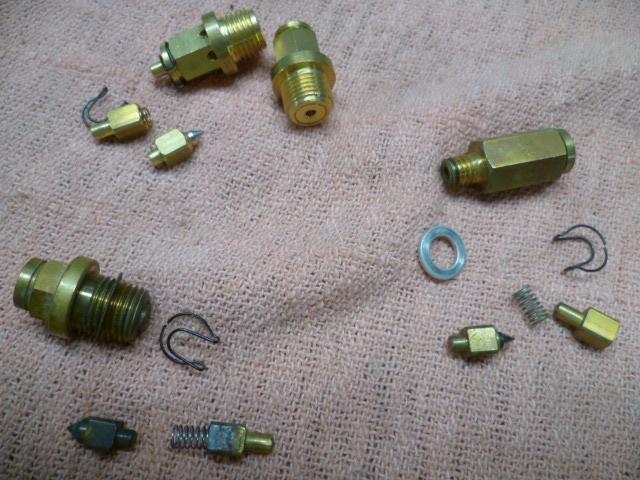
2 pointsGotcha. Here's a pic of some float valves where you can see the guts. There are a bunch of different styles floating around out there made by different manufacturers, but most of them are the same concept. It's been many moons since I took that pic, but I think the ones at the top are aftermarket flat-top, the one on the bottom left is OEM flat-top, and the one on the bottom right is OEM round-top: Not claiming that it's an all inclusive list, but I've seen sticky valves from: 1) rubber tip turned to gooey gum from incompatibilities with today's fuel 2) corrosion on the brass bits (note some of that starting on the one in the lower left of the pic) 3) broken spring 4) Crud built up inside the valve interfering with the movement of the guts 5) insufficient fuel line pressure to overcome the cracking pressure of the valve In any event, happy hunting and I'm glad you found the smoking gun!
 2 points
 -
When you finally get spark squirt some starting fluid in to the carburetors so that when it starts it can suck in all of the pine needles, leaves, and squirrel nuts.2 points
-
What happened to the the small gas can? You can put a 2 gallon can up front, run the suction hose from the pump into the jug. Easy peasy.1 point
-
Experience. Hook the coil up correctly. With it connected directly like you do to the battery it stays powered up all the time. When hooked up correctly, you turn the key off it takes the power away from the ignition, and the car shuts off.1 point
-
Check the exhaust manifold temperature, one end is probably cold. Front or back.1 point
-
The front carb fuels the first 3 cylinders. Rear carb fuels the back 3 yo.1 point
-
1 point
-
OK.. to all - here is what happened = hopefully helps other starting a car after many years. 1. changed ignition coil 2. changed balast resistor 3. new plugs 4. sanded points and cleaned in distributor. put some gas in the spark plug hole and presto.. UP AND RUNNING. check water line for radiator a few mins later and the out put was dry,.. stopped motor - water pump ok/ how do you fill the cooling system? just fill up rad? backfill it? also - dash shows voltage.. does that mean alternator ok?? put new radiator in. water leaking out of arear where water returns to rad so looks like water circulating ok ran for a about 15 mins.. car warmed up a bit.. run1.MOV1 point
-
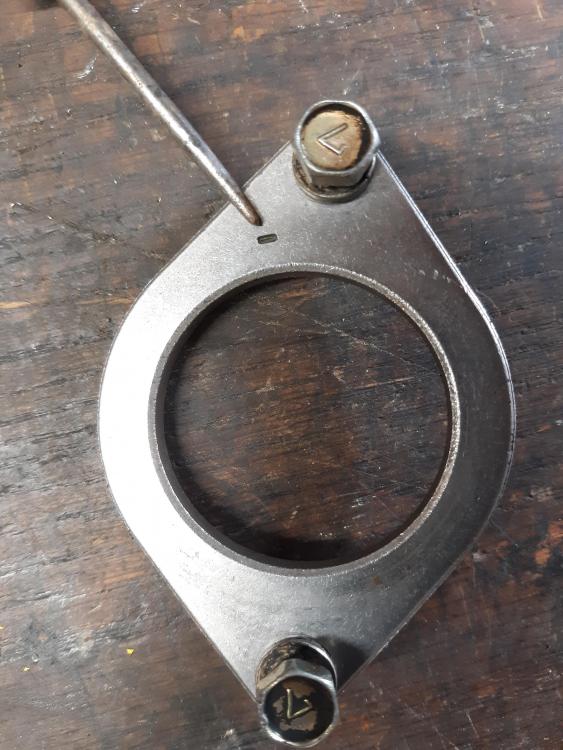
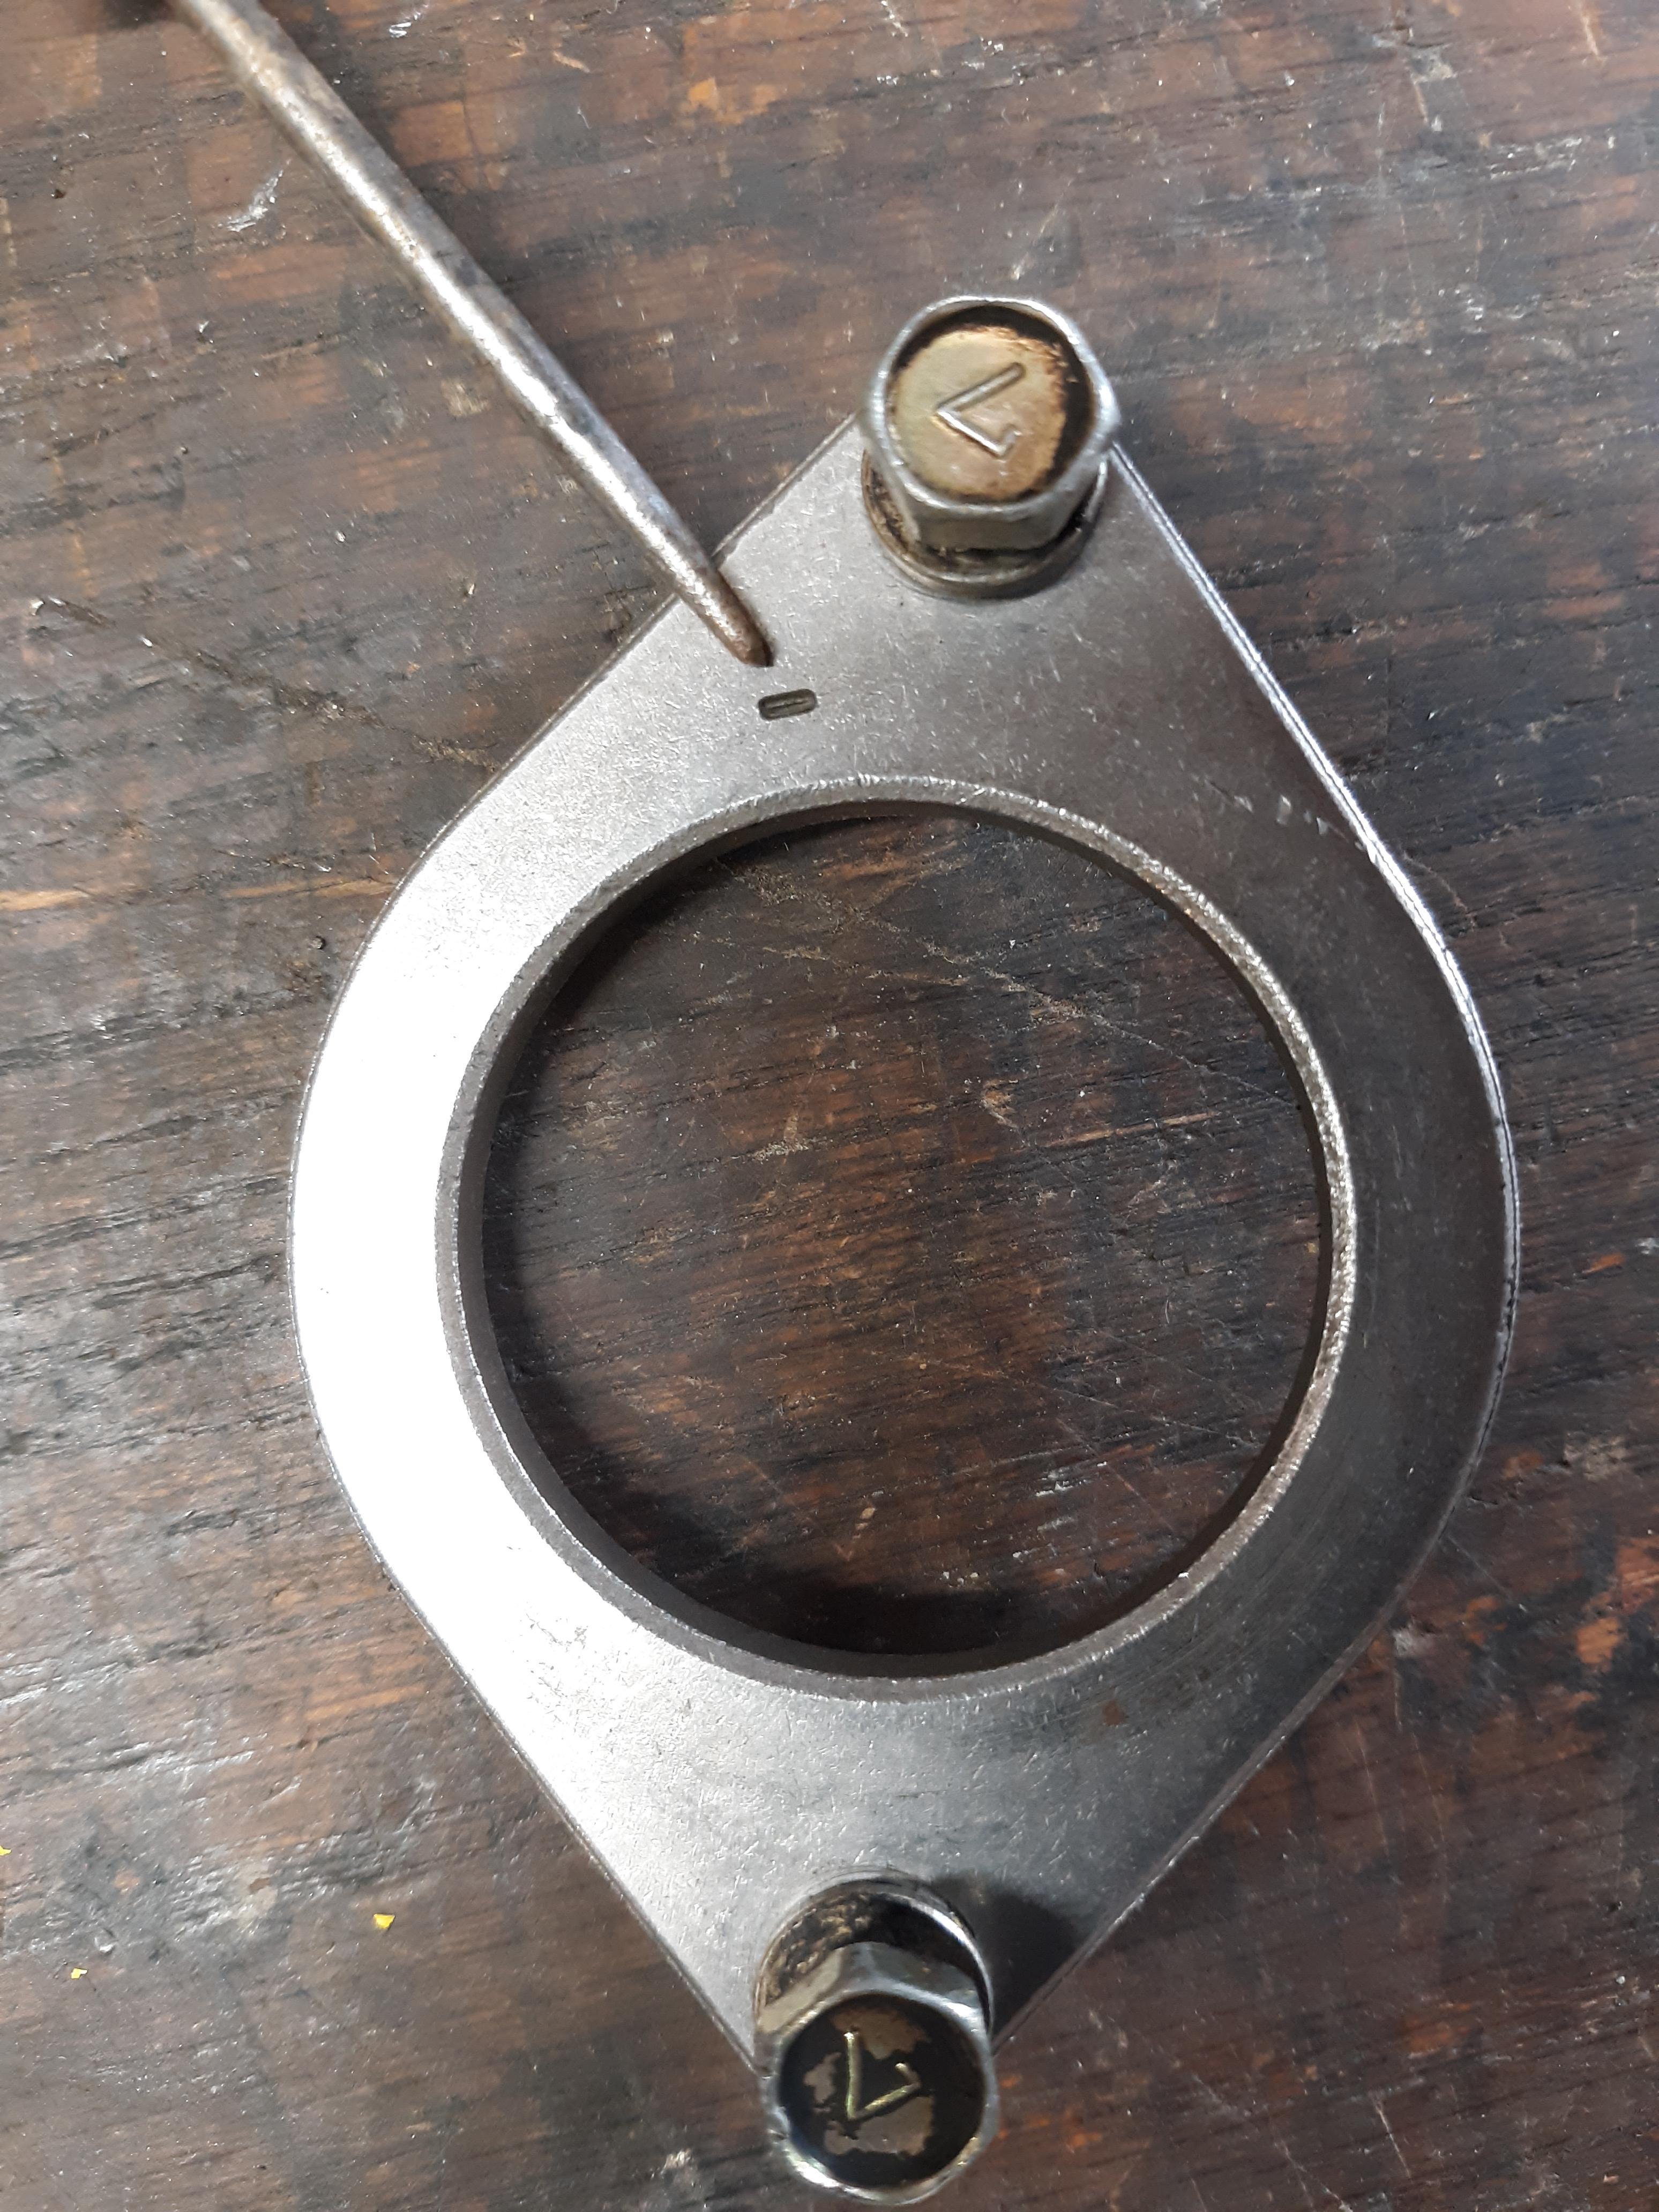
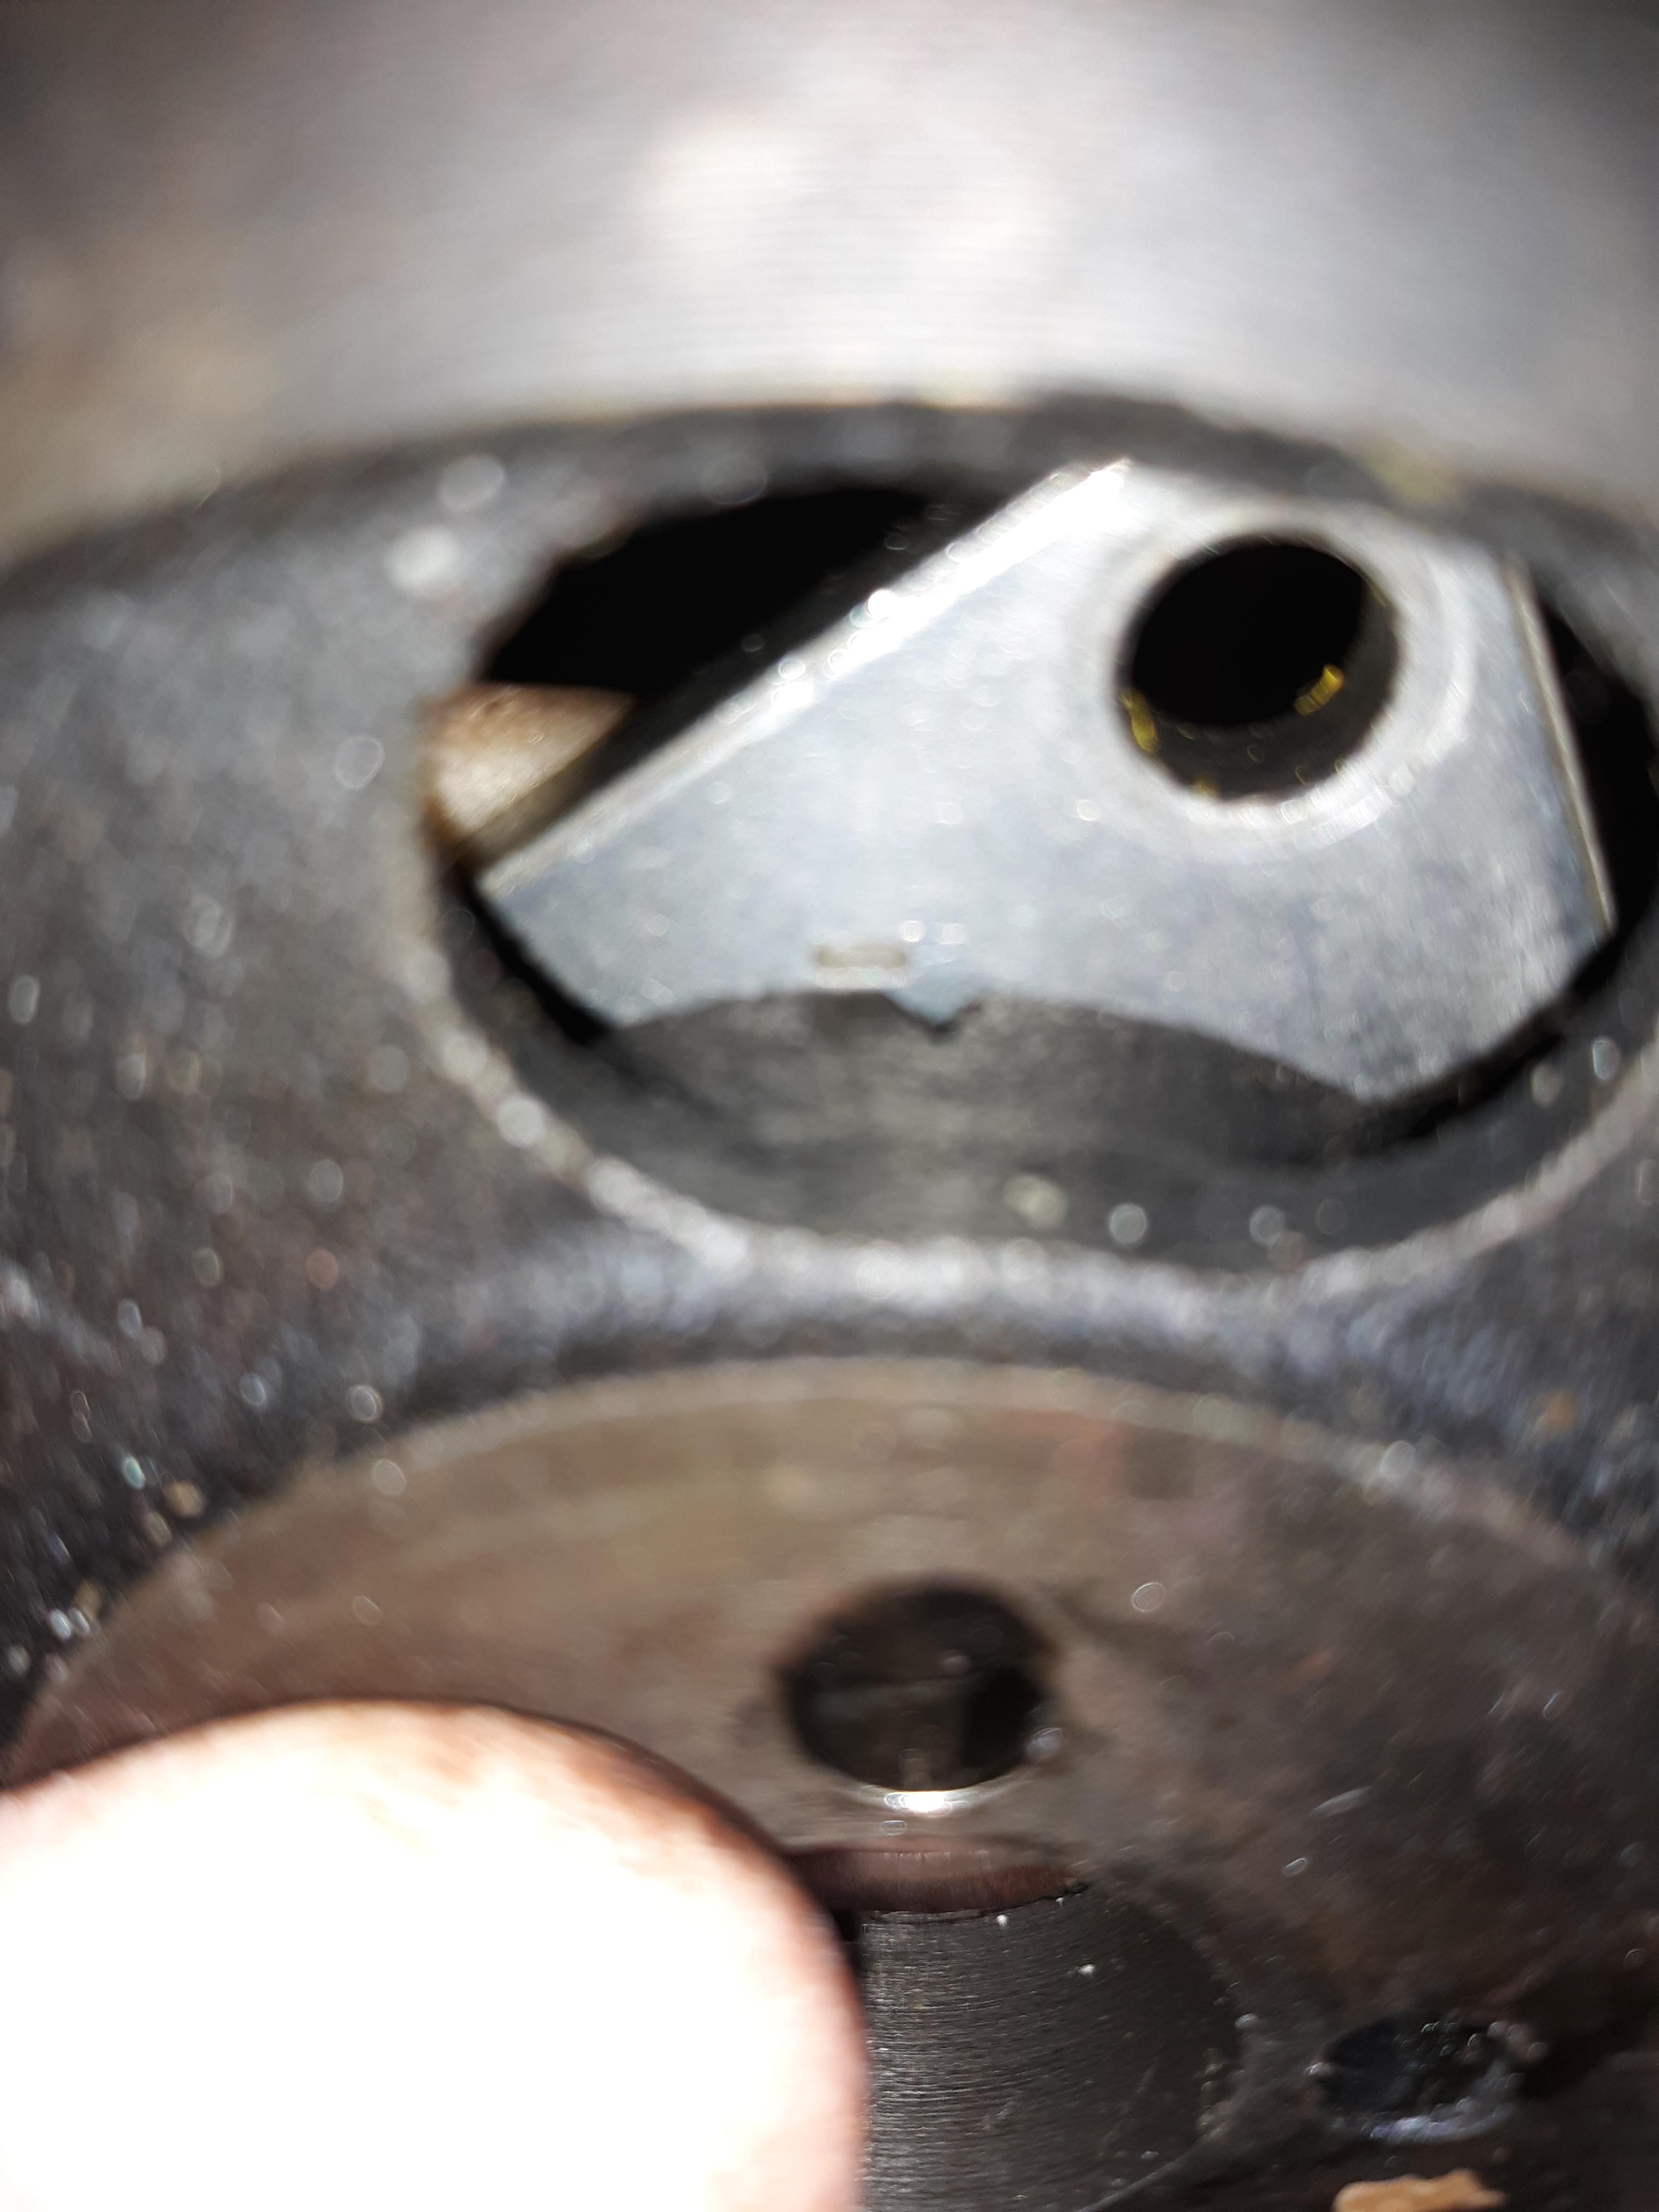
1 pointThat doesn't look right to me. The line should be counter clockwise before the top bolt on the cams thrust plate. And it should be a little to the left of the sprocket notch.
 1 point
 -
1 pointThanks! I'm dying to get my first spin, at home with the little one waiting for the wife to return. It's like waking up before your parents xmas morning and sitting by the presents lol.1 point
-
1 point
-
I am sure that the condenser on the points needs to be connected, it is part of the points. The two other two, voltage reg and coil are used for noise reduction, but the points will not work in the one on the dizzy is not hooked up. As well the wire to the spade connector must be connected. I will look at my car later, but I think it is a wire that comes from the neg side of the coil.1 point
-
1 point
-
@TerriZ I am still slowly working on completing it, typical life is getting in the way saga. Here is the most up to date link on progress. https://forums.hybridz.org/topic/128834-z-envy-race-car-champ-car-series/ You can message me here https://www.facebook.com/magnofarms1 point
-
More discussion on the issue, including the "floor jack spread" approach.1 point
-
I just went through this last weekend on my 260Z race car. Start by making sure the bushings are fully seated. I used a big clamp with a socket on the outboard side so the steel sleeve wouldn't stop the compression. This also makes sure the sleeve is slightly outboards. Once both are compressed as much as possible, grease the bushings to help the knuckle slide in and place a VERY thin putty knife on each side and then work on getting the knuckly into place. Mine were very tight, but after a few attempts, they both went in. Getting the spindle pins in was a pain in the arse too. Everything has to be lined up perfectly before the pins will go all the way through. Finally, rotating the pin to the ideal position for the wedge bolt is a bit tricky, but not too bad. Good luck!1 point
-
1 point1 pointJust an FYI, when you go to install the new spindle pin, be aware that the notch is not in the middle of the pin. Ask me how I know! 🙄1 pointIf you have your friend spin the engine while you watch the points you'll see how they open and close. Here's a video. Go to about 1:30.1 pointOne probe to either the plus or the minus terminal and one to ground. You can also open and close the points by hand with the center coil wire close to ground and you should see a small spark at the points and a big one at the center wire. In your picture the points are closed. Just reach in there and open them up. Each time you open them you should get a spark at the center wire terminal.1 point1 pointI'm certainly no expert on the collector value thing, so keep that in mind, but here's my thought on the matter. Here's my quick list of what I would look for when buying any Z, including a 240Z: 1) Has it been molested into a rice rocket JC Whitney abomination with fender flares, lowered, RB motor, fender mirrors, roll cage, fuel cell, go-faster stickers all over it 2) Rust 3) Rust 4) Rust 5) Does it have a sunroof, or is it an automatic 6) Rust 7) Rust 8) Is it a half finished torn apart molested project mishmash of different cars and years 9) Rust 10) Does it run and drive. At all 11) Rust 12) Does it have an interior. At all . . . 374) Does it have a 4-speed or a 5-speed. Like I said, I'm no expert, but that's my list.1 point1 point1 point

.jpg.64dad8b15b01236a2fbd8aec443fb07f.jpg)


Important Information
By using this site, you agree to our Privacy Policy and Guidelines. We have placed cookies on your device to help make this website better. You can adjust your cookie settings, otherwise we'll assume you're okay to continue.