Leaderboard
-
Captain Obvious
Free Member7Points10,081Posts -

siteunseen
Free Member6Points15,115Posts -
conedodger
Free Member5Points12,513Posts -
Mark Maras
Free Member3Points3,719Posts


Popular Content
Showing content with the highest reputation on 09/16/2019 in Posts
-
5 pointsTake a lot of pictures as your take it apart. Don't force the old bolts, they'll snap in a heartbeat. 50/50 acetone and transmission fluid is the best penetrating oil I've ever used. A quart of each will last forever. Buy a spray bottle and mix it as you need to. When you ziploc bag stuff write what it is on a piece of paper, not on the baggie. It'll rub off. Get some thin cheap wire, phone wire for me, and use it to tie bolts into their part. I'll try and add if I can. You're about to have some fun finally. AND the engine stand rotates a lot easier if you take the weight off the front, rope from the ceiling or a floorjack with a stick of wood. Be really careful though, they'll slide out on your foot! The wire I'm talking about is to keep the different length bolts in the right holes. The water pump, front cover, oil pump... Buy a gallon of lacquer thinner, $10, put it in a five gallon bucket with a tight lid. You'll soak a lot of stuff in that then blow the crud off easier trust me.5 points
-
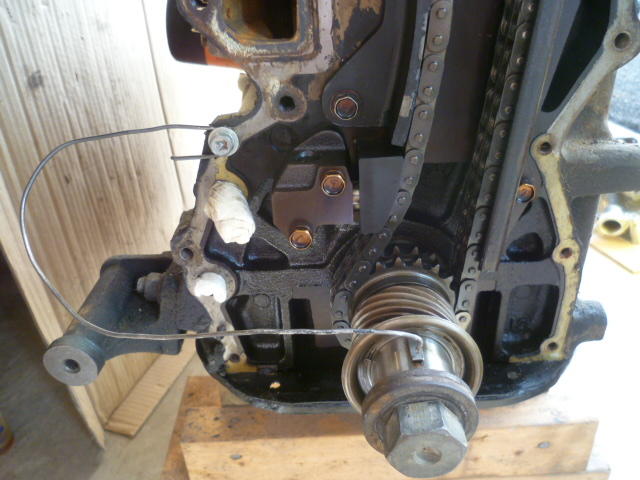
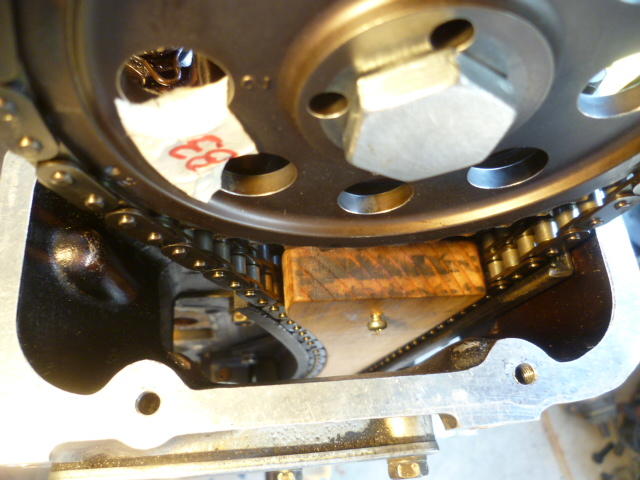
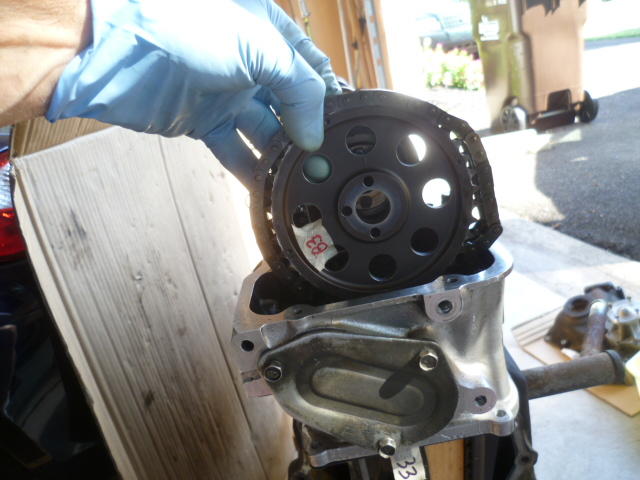
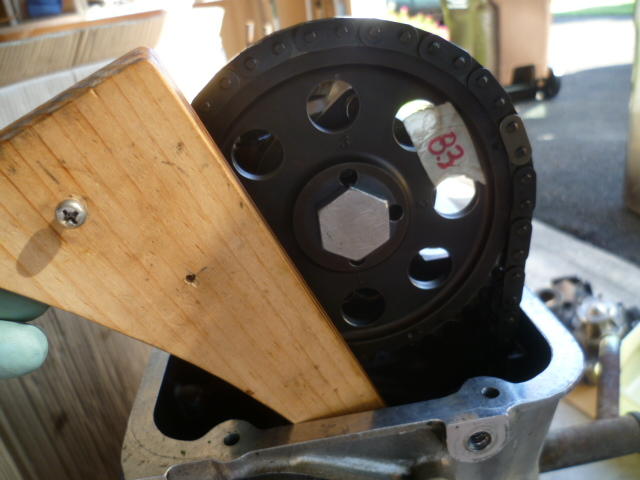
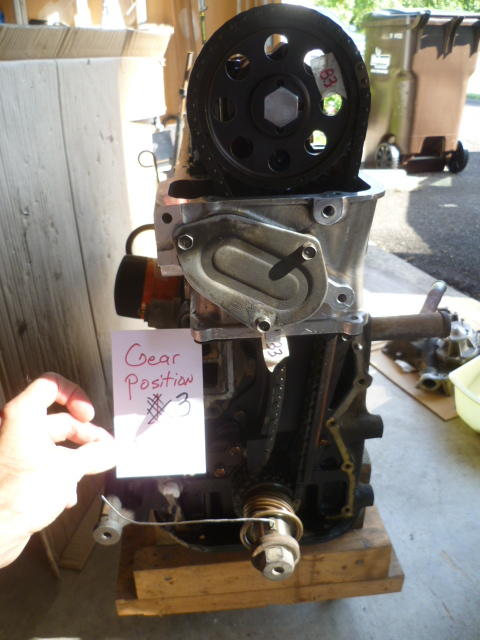
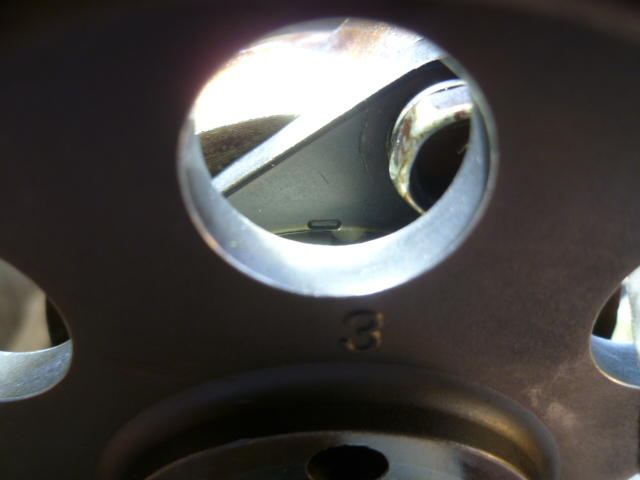
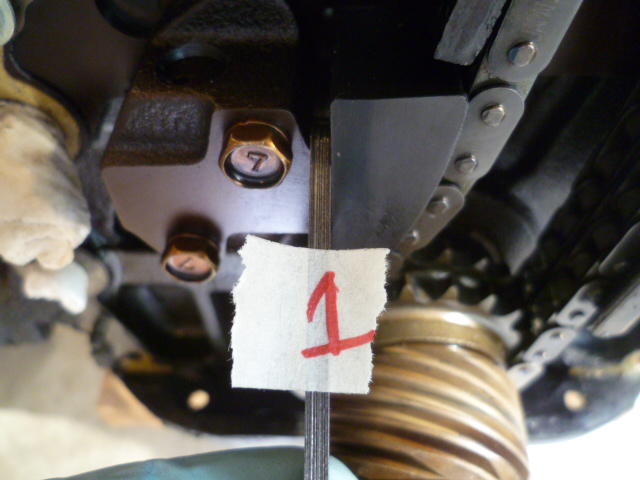
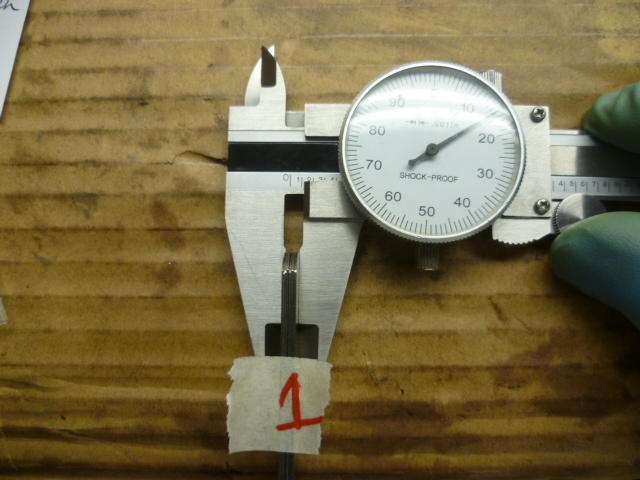
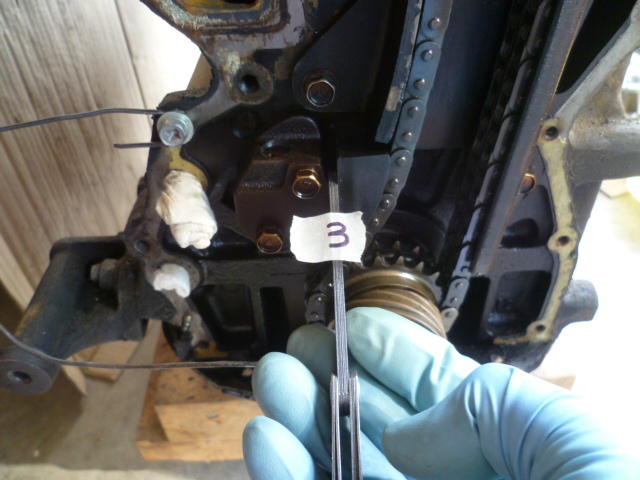
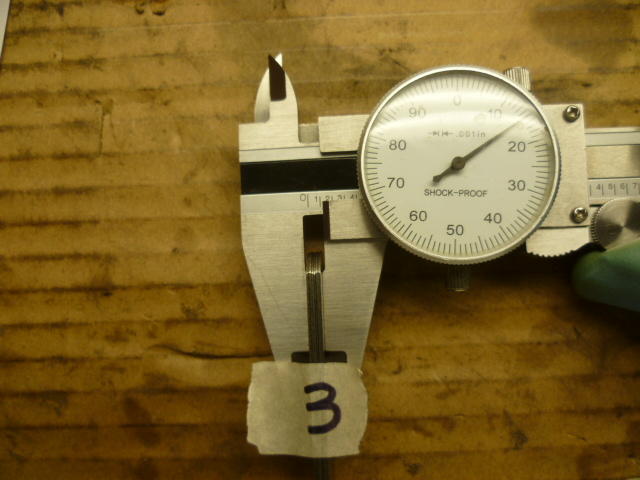
4 pointsI'm not confused at all, and the proof is in the pics. System with cam gear in position 1: I rigged up a little wire pointer to indicate TDC. Doesn't have to be exactly dead nuts on TDC as long as it's the same spot each time: Here's the timing marks in position 1: Then I used my chain wedge tool (just like if I were doing this in the car). Tool wedged down into place: Take the cam gear off: Move the gear to position 3 and take out the wedge tool: Here's the system in position 3: Here's the timing marks in position 3. The valve timing has become advanced compared to position 1. Exactly as one would expect: Now... For the chain tension. I used a feeler gauge to measure how far out the adjuster is. This is position 1: Measuring the feeler gauge, the tensioner is out about .115 with cam gear in position 1: Repeating the measurements for position 3: End result? The adjuster protrudes the same amount regardless of the cam gear position:

 4 points
 -
3 pointsJim, this is slightly off topic, but as it is my topic, I’m going to take a little license here. I have always loved your car. But now having actually read the small print in your signature lines, I am totally smitten. I’ve owned mine since 1980, but I’m the second owner. I am grateful to the original owner who bought just about everything in the Datsun Competition Catalog and then sold it to me to “save his marriage” (it didn’t work). Your car and you are on my short list of best Z cars I’ve seen! I’m also a IZCC member from back-in-the-day, but I’m not on the OO list and I’m about member 2500? Thanks for sharing your knowledge!3 points
-
2 pointsThis post has me thinking. (And that's a dangerous thing.) I noticed that in my fuel injection conversion, the car runs fine at first, and it acts up after it gets warm. I currently have the system dead-headed. I'll try insulating it first, and then if it still acts up, I'll add a return to the fuel rail. Thanks for the inspiration, @siteunseen.2 points
-
1 pointFinally got my F54/P79 engine in my garage. I’m going to start tearing it down for a complete rebuild to install in my 77z. Has 164k miles on it and is a guaranteed engine. Was a deal $408 out the door, no core. I might need some help as this happens so wanted to start a new thread for anyone wanting to guide me along. Sent from my iPhone using Tapatalk1 point
-
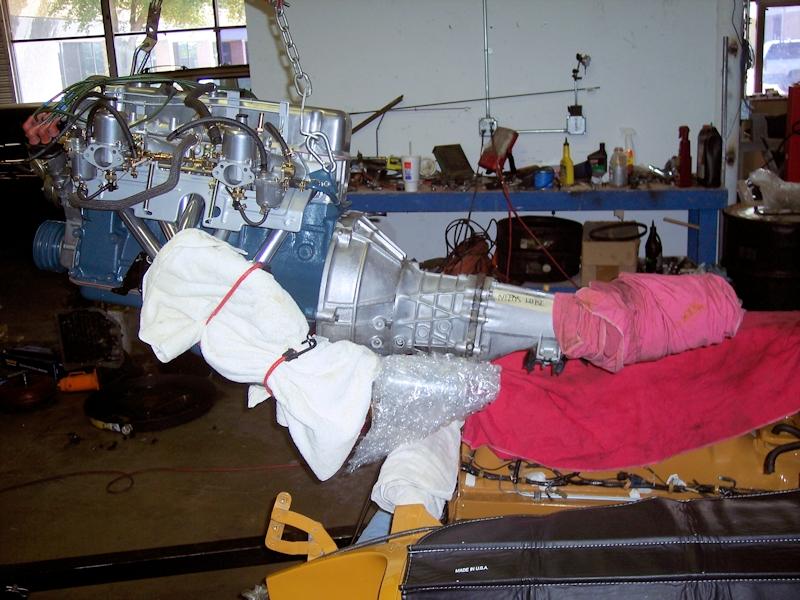
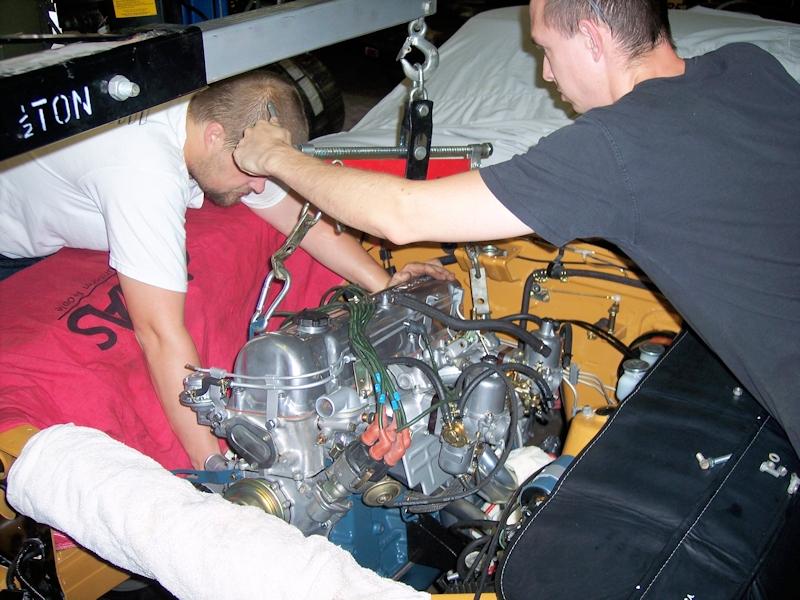
1 pointSo I’ve had my Z since 1980 and in that time, it’s had 4 colors, original white, Porsche Guards Red, Chevrolet Hugger Yellow and now back to white. I recall 4 engines. The original, two that I built (stockish with compression bump and balancing) and now the Rebello motor. The motor is still out because I decided to repaint the engine compartment and it exceedingly tedious. I’m down to the firewall now though, so we are getting close. My question is, can I stab the engine in with the headers and intake installed? I’ve always done them after it was in. Pictures for interest...

 1 point
 -
1 pointThat's great info, thank you. If anyone out there has experience rebuilding these transmissions please correct me. I spoke on the phone with a guy in PA who gave me the same part number for the synchros. 32604-P0100. The trans takes four of them. He also said the main bearings sometimes get confused because one has a snap ring. The part numbers were National 207 and 207L. It looks like there are two counter shaft bearings and 5 needle bearings. Three of the needle bearings are the same. I may try to rebuild this by myself....1 point
-
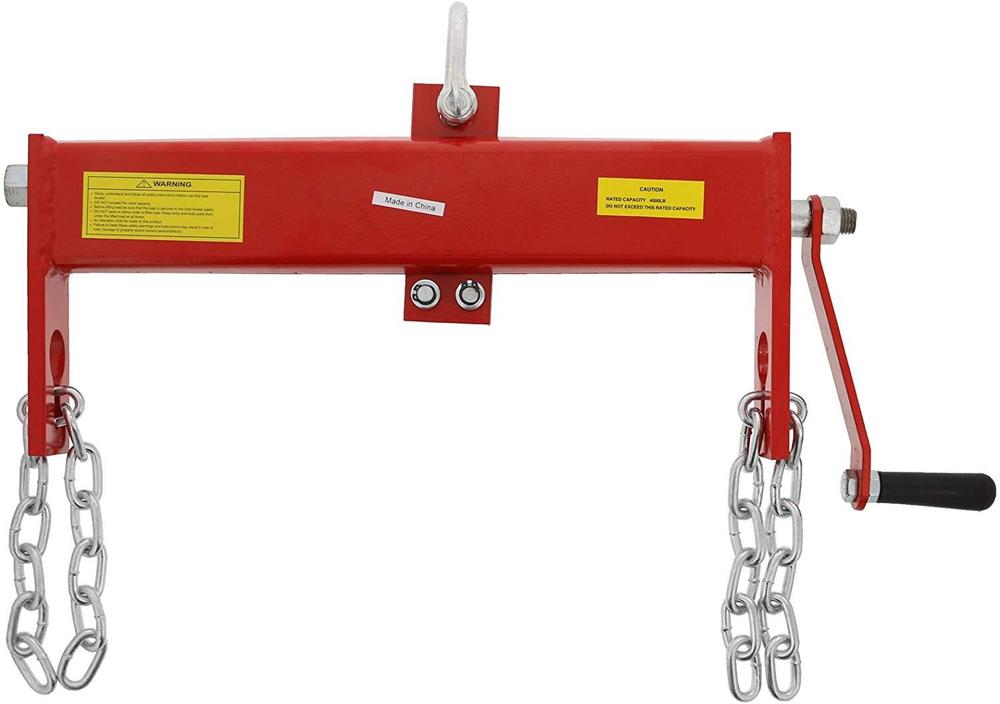
1 pointYou can do it, no problem if you take your time. I also used one of these to tilt the engine as it's installed.
 1 point
 -
1 pointJust did mine last night with intake/exhaust installed. I wrapped a heavy tow strap around the transmission bellhousing, and the area just before the transmission, being careful to spread the load. You just have to watch the roll of the engine, because it'll want to rub against brackets and things bolted to the driver's side firewall. Sent from my Coolpad 3310A using Tapatalk1 point
-
1 pointI'd start with #1, the wobbly crank pulley. It probably has slipped. It shouldn't wobble. I haven't had one come apart under power but there are some horror stories out there about the damage that can happen.1 point
-
1 pointThat model number on ZCarDepot is different than the aftermarket one I tried using but it looks very similar, ie. has the OE look. The specific model that I've had problems with is a GMB brand, and the number on the box is 550 8040, I still have the box with the top half of the pump sitting in it. I'd definitely spend a little time checking the fuel pump as your problem sounds eerily similar to mine. If the fuel filter is going dry, it's got to be either no fuel coming from tank (ie. no fuel, blocked line, etc.) or fuel pump not drawing fuel.1 point
-
1 pointI'm probably over simplifying (or complicating) this but unless the physical distance between the cam gear and the crank gear changes, the slack in the chain remains the same. The slack will change temporarily while adjusting the cam timing unless the cam is rotated a bit.1 point
-
1 point
-
1 pointThanks everyone, turns out it was in fact a clogged fuel pump filter. I swapped it out with a new one and the problem disappeared. I need to figure out where the sediment is coming from as the fuel tank was recently restored and cleaned. Thanks! -Michael1 point
-
1 pointI found it worked a little easier after I removed the torsion bars. Loosen everything. Remove the torsion bars. Then close it. That will take all resistence out. Then reach in there and tighten everything down. Then reconnect the torsion bars.1 point
-
Thread locker is reasonable. Blue should work. You could also cut a few slots in the edges of the washer and create your own locking tab. i'd do both. The problem with a second nut, a jam nut, is that it will need to be locked also. What if it comes loose and works its way off? You could try to find a big self-locking nut, Nylok-type, as the second nut. Probably expensive.1 point
-
1 pointJust think if you could stretch the chain so that only 10 links were between the cam sprocket and the crank sprocket rather than the ~42? You would have 32 extra links now on the slop side and it would be quite obvious. I am talking about tension to put sprocket back on when advancing the cam ON THE CAR. I have done it about 10 times and it "seems" like there is more tension. This is what @siteunseen described. It is relative and not real. I have also put sprockets on 4 times when rebuilding engines and it is no problem as the tensioner and guides are not in place. Of course the tension on the chain varies as the engine runs when the valve springs compress and unload but we never discussed this. Our discussion is on advancing the cam timing. When you hand crank at the snout with a 27mm socket, you can feel the variations due to the valve springs.1 point
-
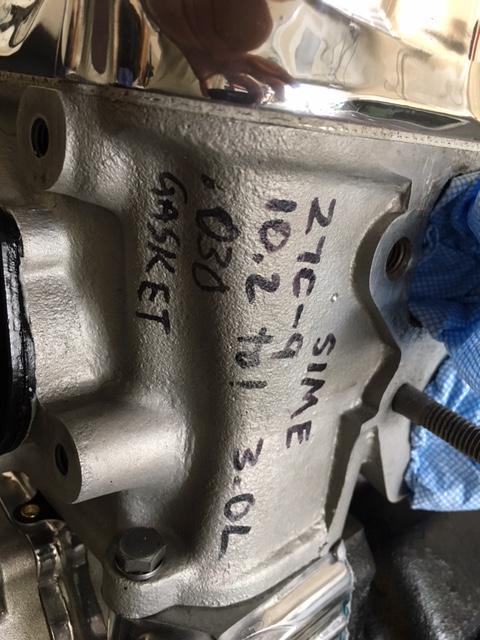
1 pointRut roh! Well as I said, I've not proven my calculations to be correct, but with a .049 (1.244mm) thick head gasket and .005 off the block I get 11.54:1 I get 502.45 cc uncompressed volume and 43,55 cc compressed for a result of 11.54. Remember, I'm just a guy with a spreadsheet. You got any airports near you? LOL!!1 point
-
1 pointIf the adjustment suggestions don't work for you, I have a good pair of hinges that I'll be happy to sell.1 point
-
1 pointI disagree completely. I do not believe it depends on the perspective of the viewer. I say that the tension on the chain is independent on which cam index hole 1-3 is used. Would you believe me if I took some pics? I'll put the gear in position 1 and take a pic of the tensioner. Then I'll move the gear to position 3 and take another pic of the tensioner. My belief is that the tensioner will look identical in both those pics. I say the plunger will be the same distance out regardless of what hole the cam gear is in.. If I show you, would you believe it then? What say ye? Haha!! @240260280 I challenge thee to a geek-off.1 point
-
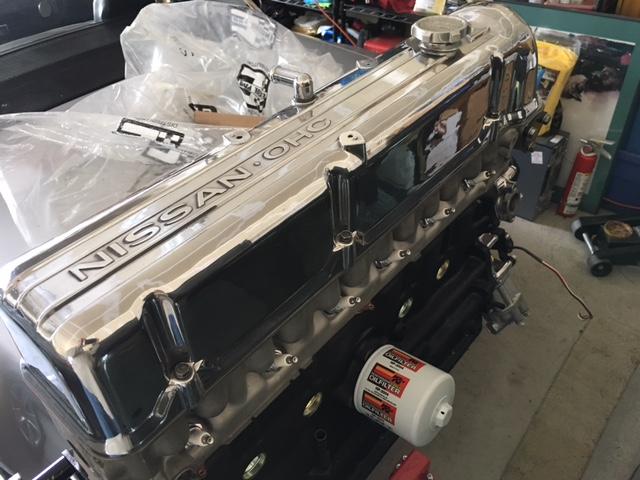
You'll save time and end up with a better looking valve cover if you remove it first. If you leave it on you'll end up cleaning whatever polishing compound you use from adjacent parts. Besides, it's probably time to check your valve adjustments.1 point
-
1 pointSo it's not the fuel pressure. I finally set up the fuel pressure gauge (electric - not hanging out from under the hood) and did a test run. The fuel pressure read 15 PSI on the gauge. After just over 5 miles, it started doing the usual routine of acting like it's not getting enough fuel. However, the fuel pressure stayed solid at 15 PSI. I bumped up the fuel pressure to 18 PSI and tested again. Not much changed, but I started playing with the choke lever, and that did relieve the symptoms to a small extent. I have the driver for the USB cable, so the next test will be with data logging.1 point
-
1 pointFuel pressure raises when above 131F from what I've read so far. Seems like the FPR would open up and recirculate the fuel if it was hot enough. Vapor lock, "vayre intressting".1 point
-
1 pointWell the MN47/54 ran today for the first time . Talk about nervous . 11.25:1 sounds pretty good out the tail pipe. This cam sounds pretty radical too. Only ran it long enough to move my car out of the way, but wow- can’t wait !1 point
-
1 point


.thumb.jpg.e9c1401d1fce1ad1a819e5ad8d6a1809.jpg)