


Leaderboard
-

siteunseen
Free Member9Points15,115Posts -

240260280
Free Member8Points4,442Posts -

Diseazd
Free Member5Points3,362Posts -
grannyknot
Free Member5Points5,158Posts


Popular Content
Showing content with the highest reputation on 02/06/2019 in Posts
-
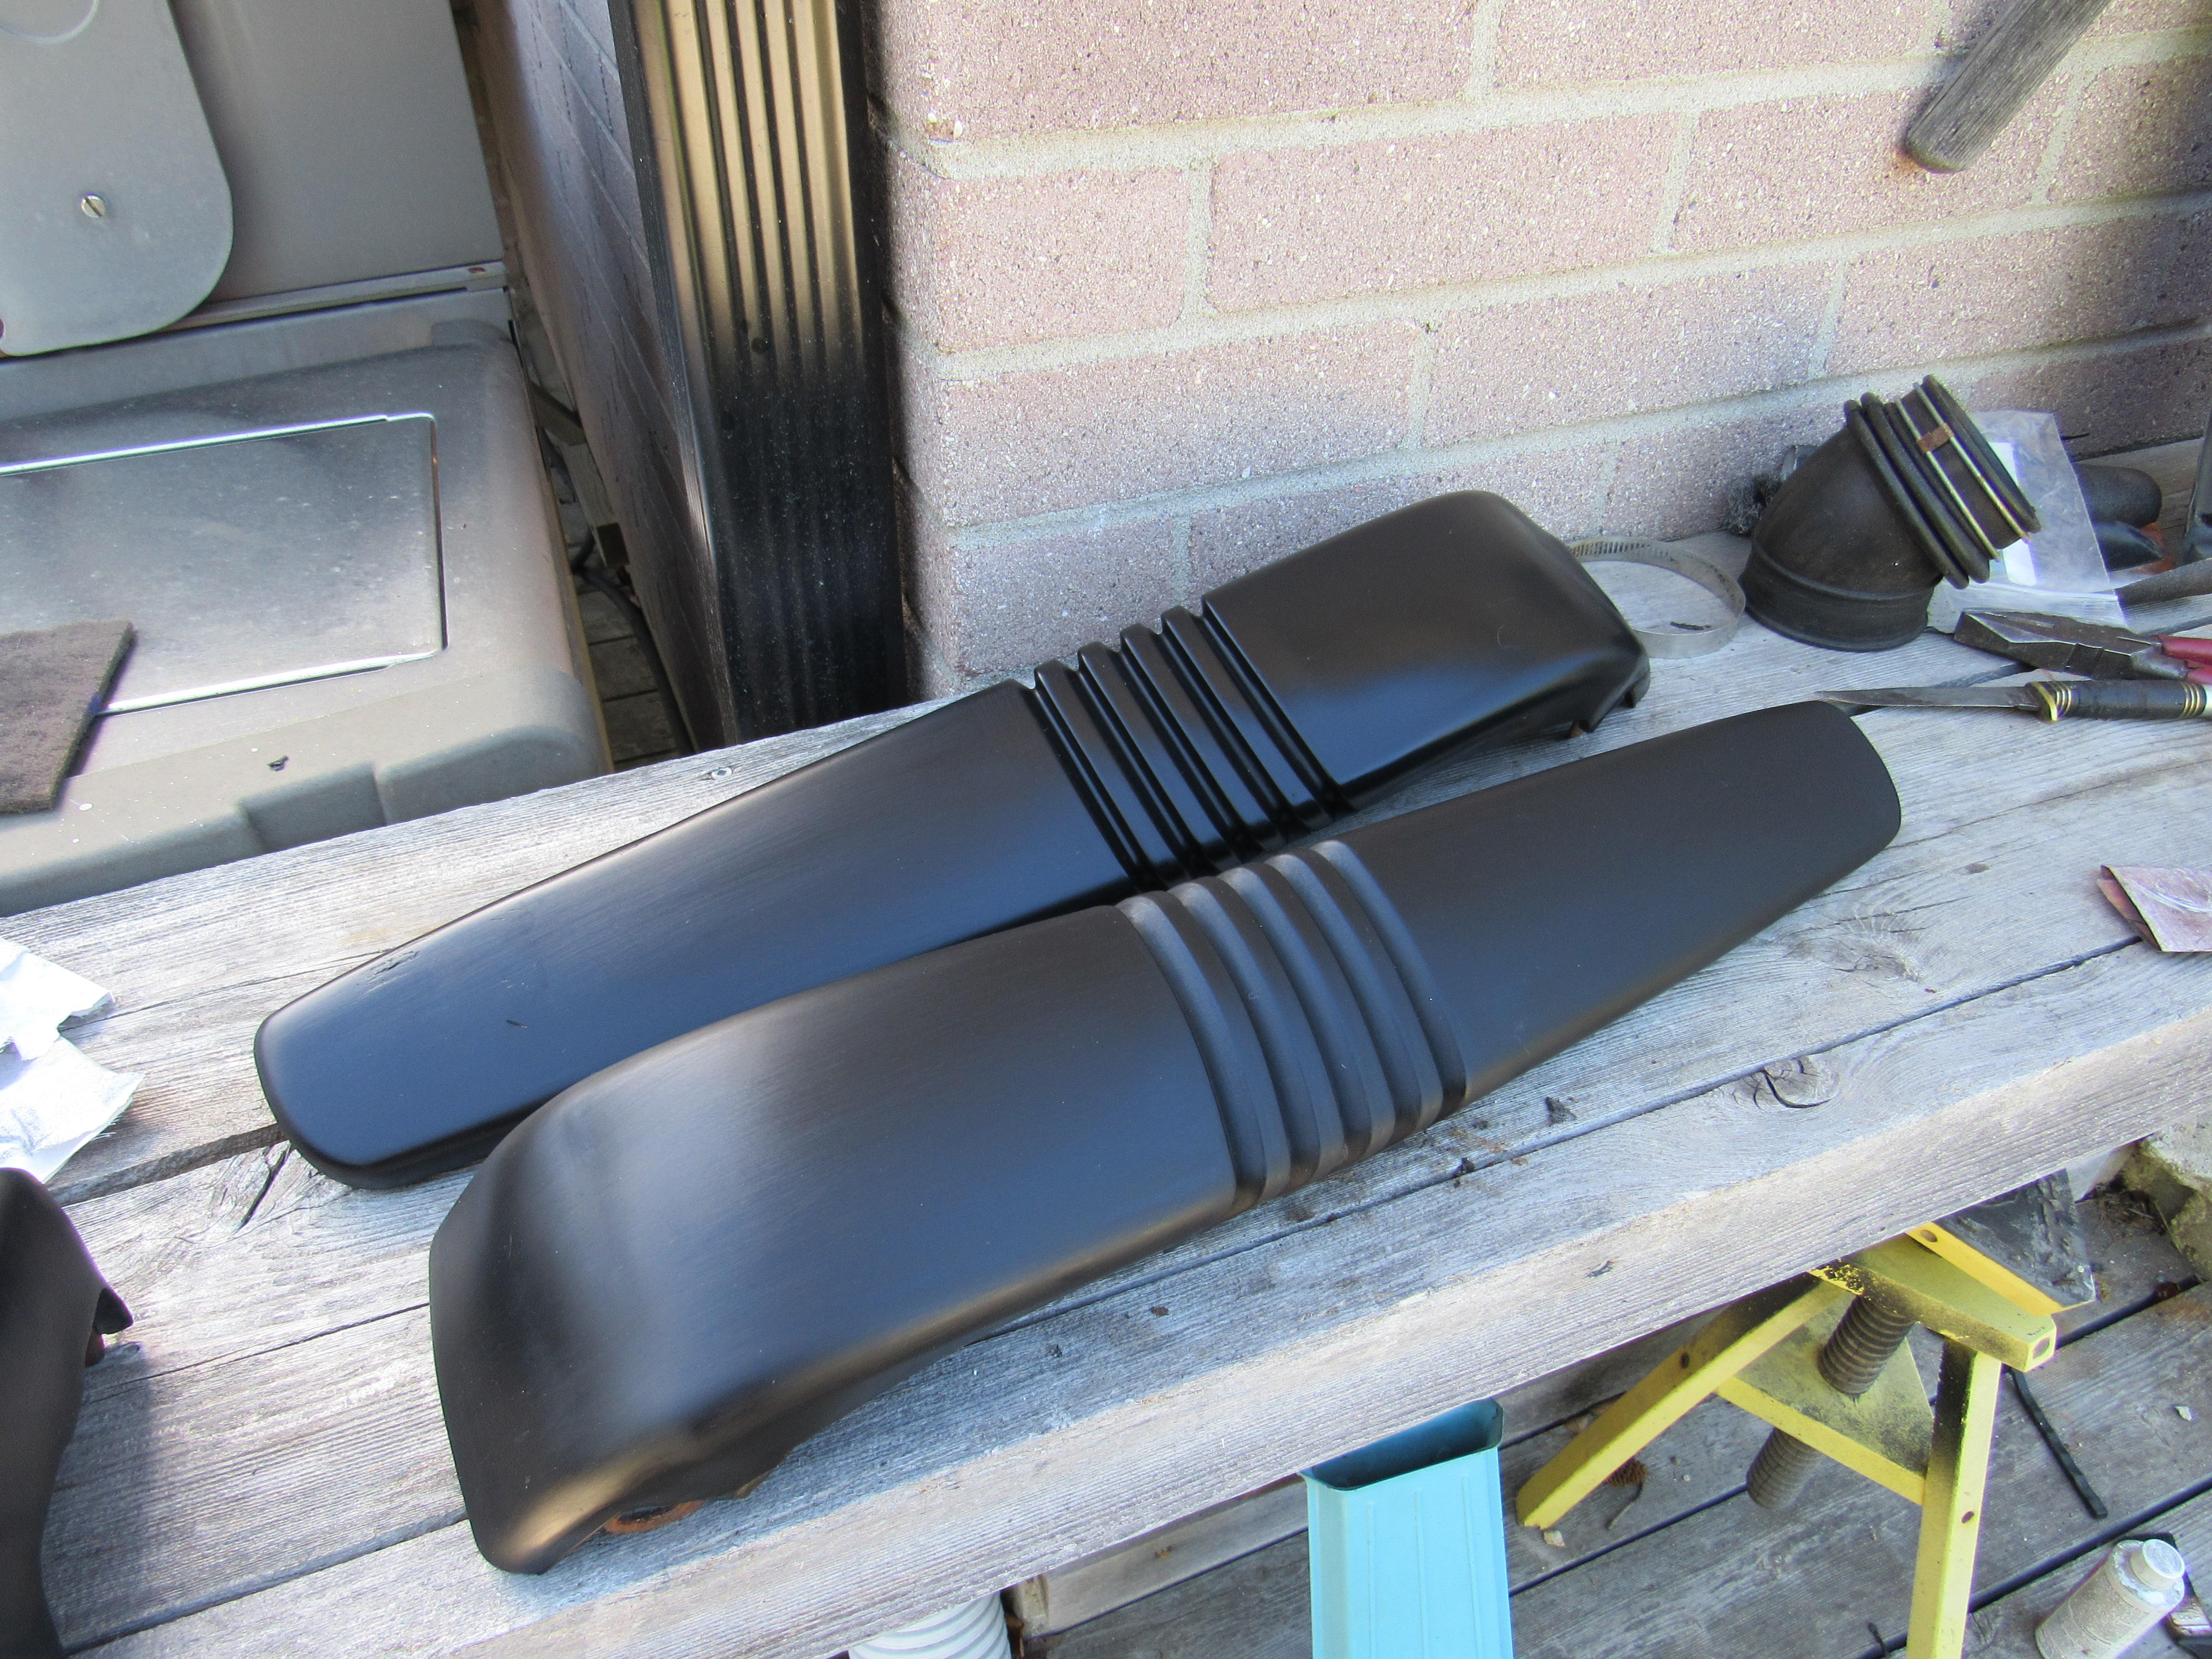
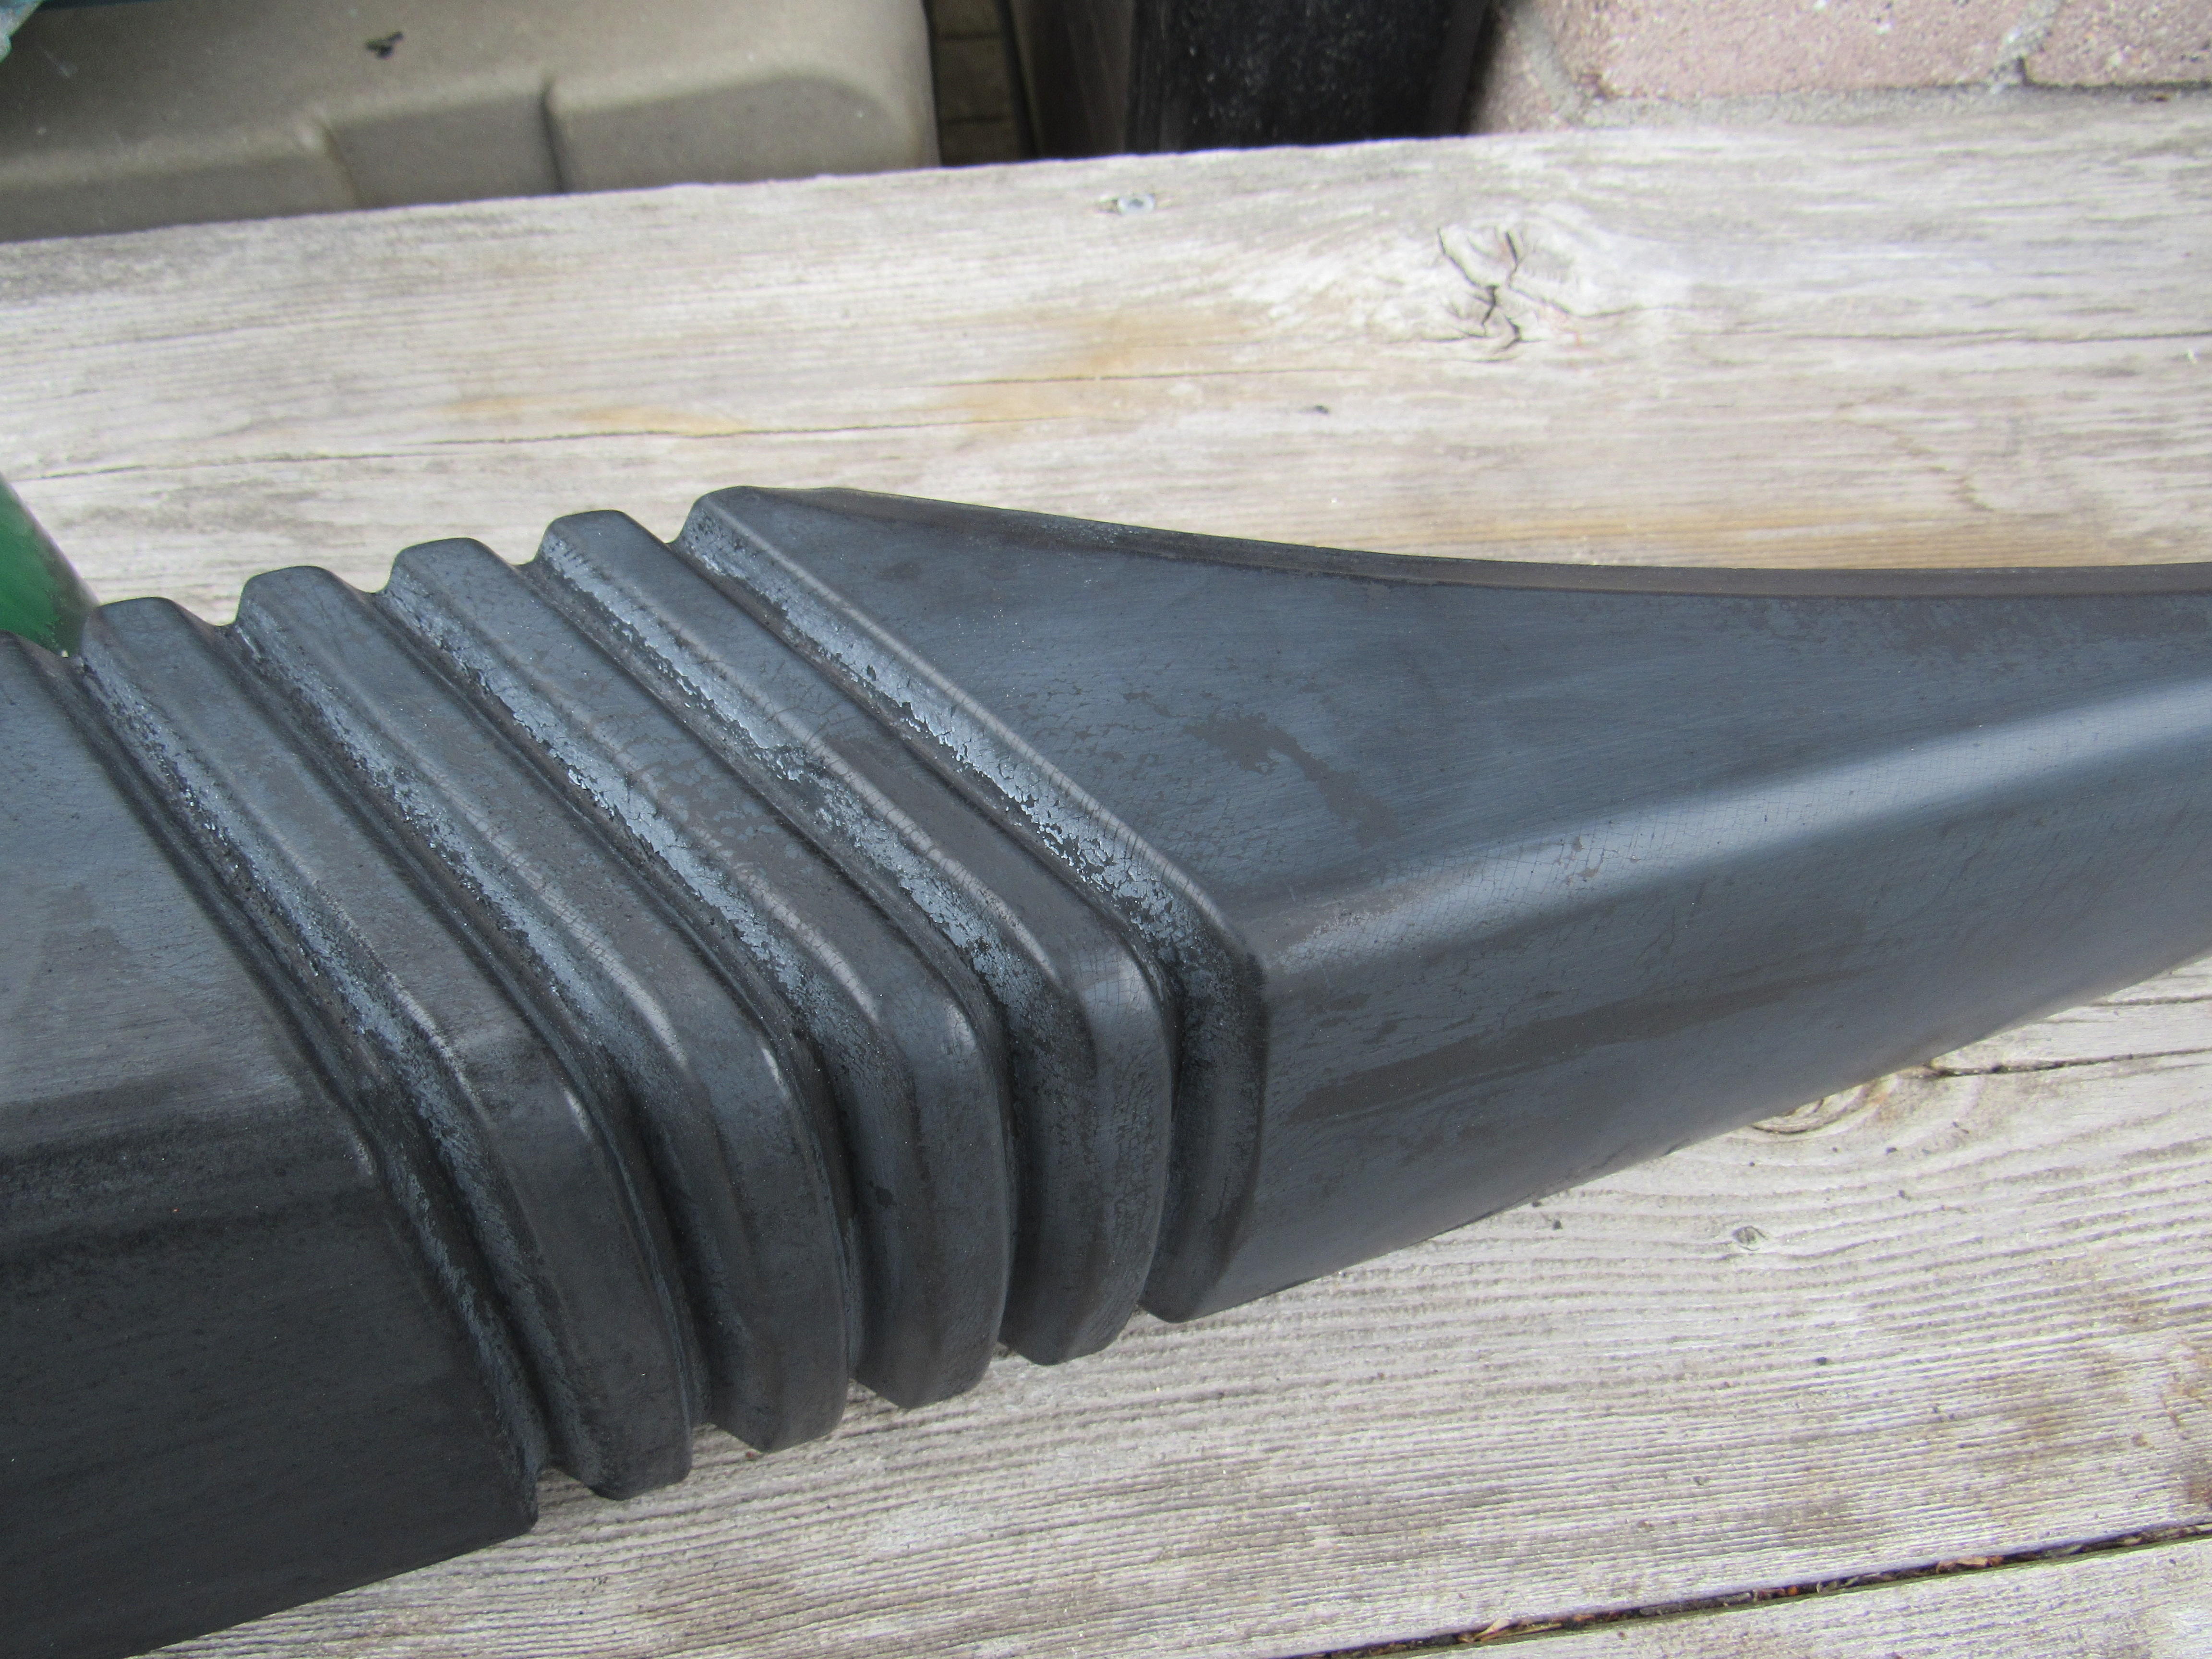
5 pointsGood work, I also like experimenting with different refinishing techniques, I have had some success with sanding lenses down and then lightly buffing on a wheel but it is SO easy to melt the plastic that I've stopped that and use compound polish now, much safer. I'm will try the clear coat method now, SEM has a very good clear. For rubber refinishing I use a Grey 3M Scotch pad until all the hard oxcidized rubber is removed and the surface has a flat appearence then a couple of coats of AutoGlim tire dressing.

 5 points
 -
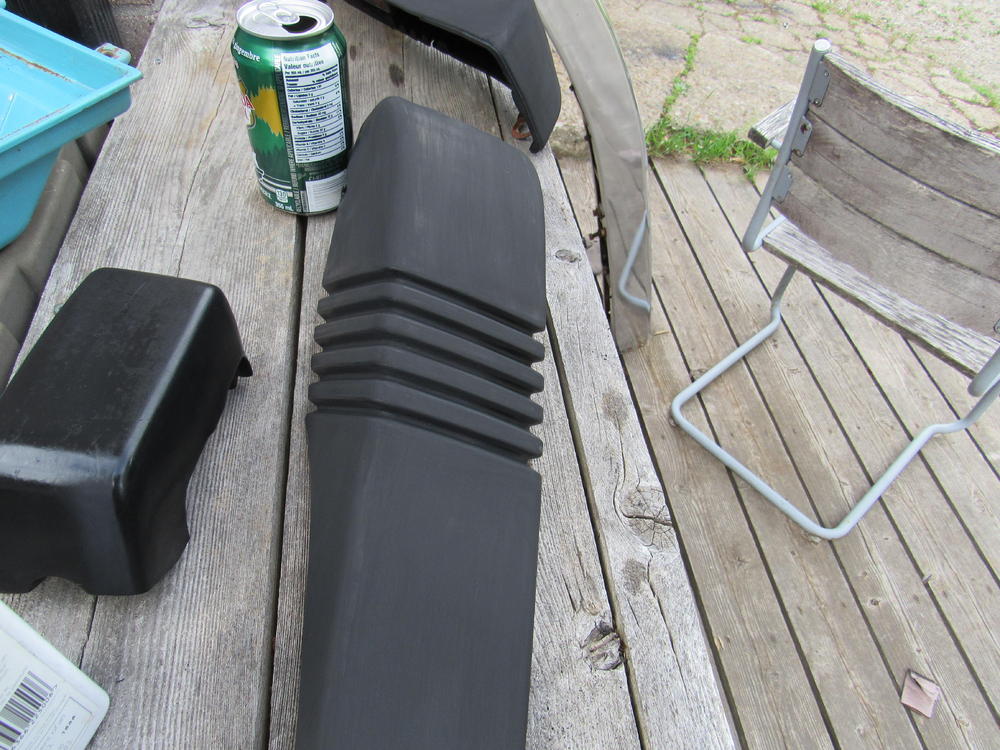
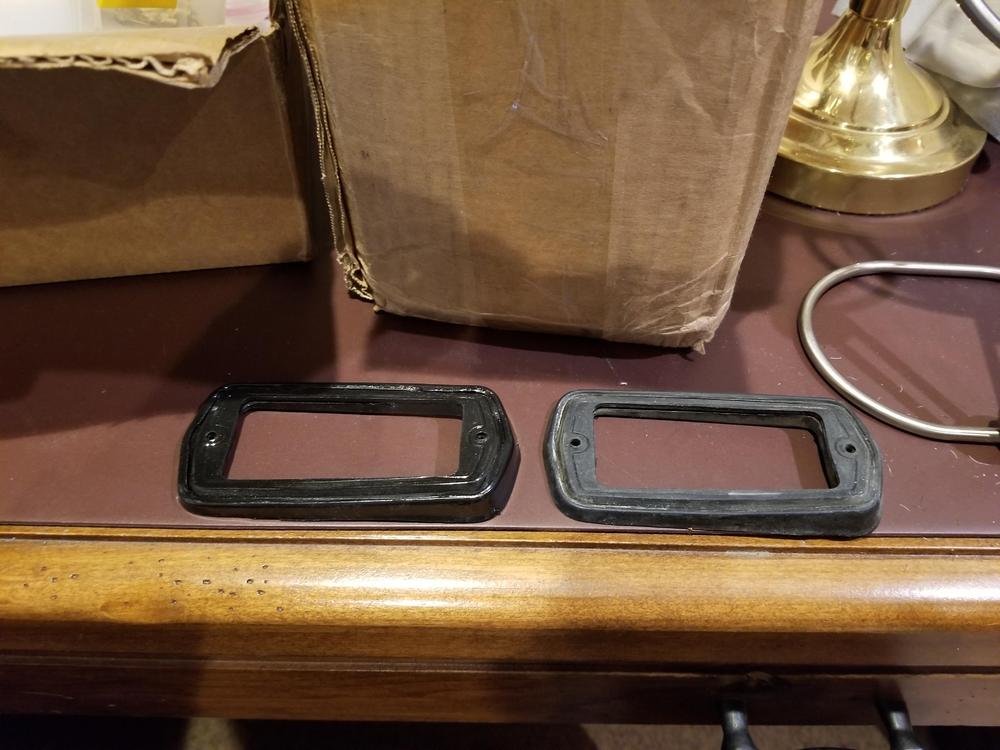
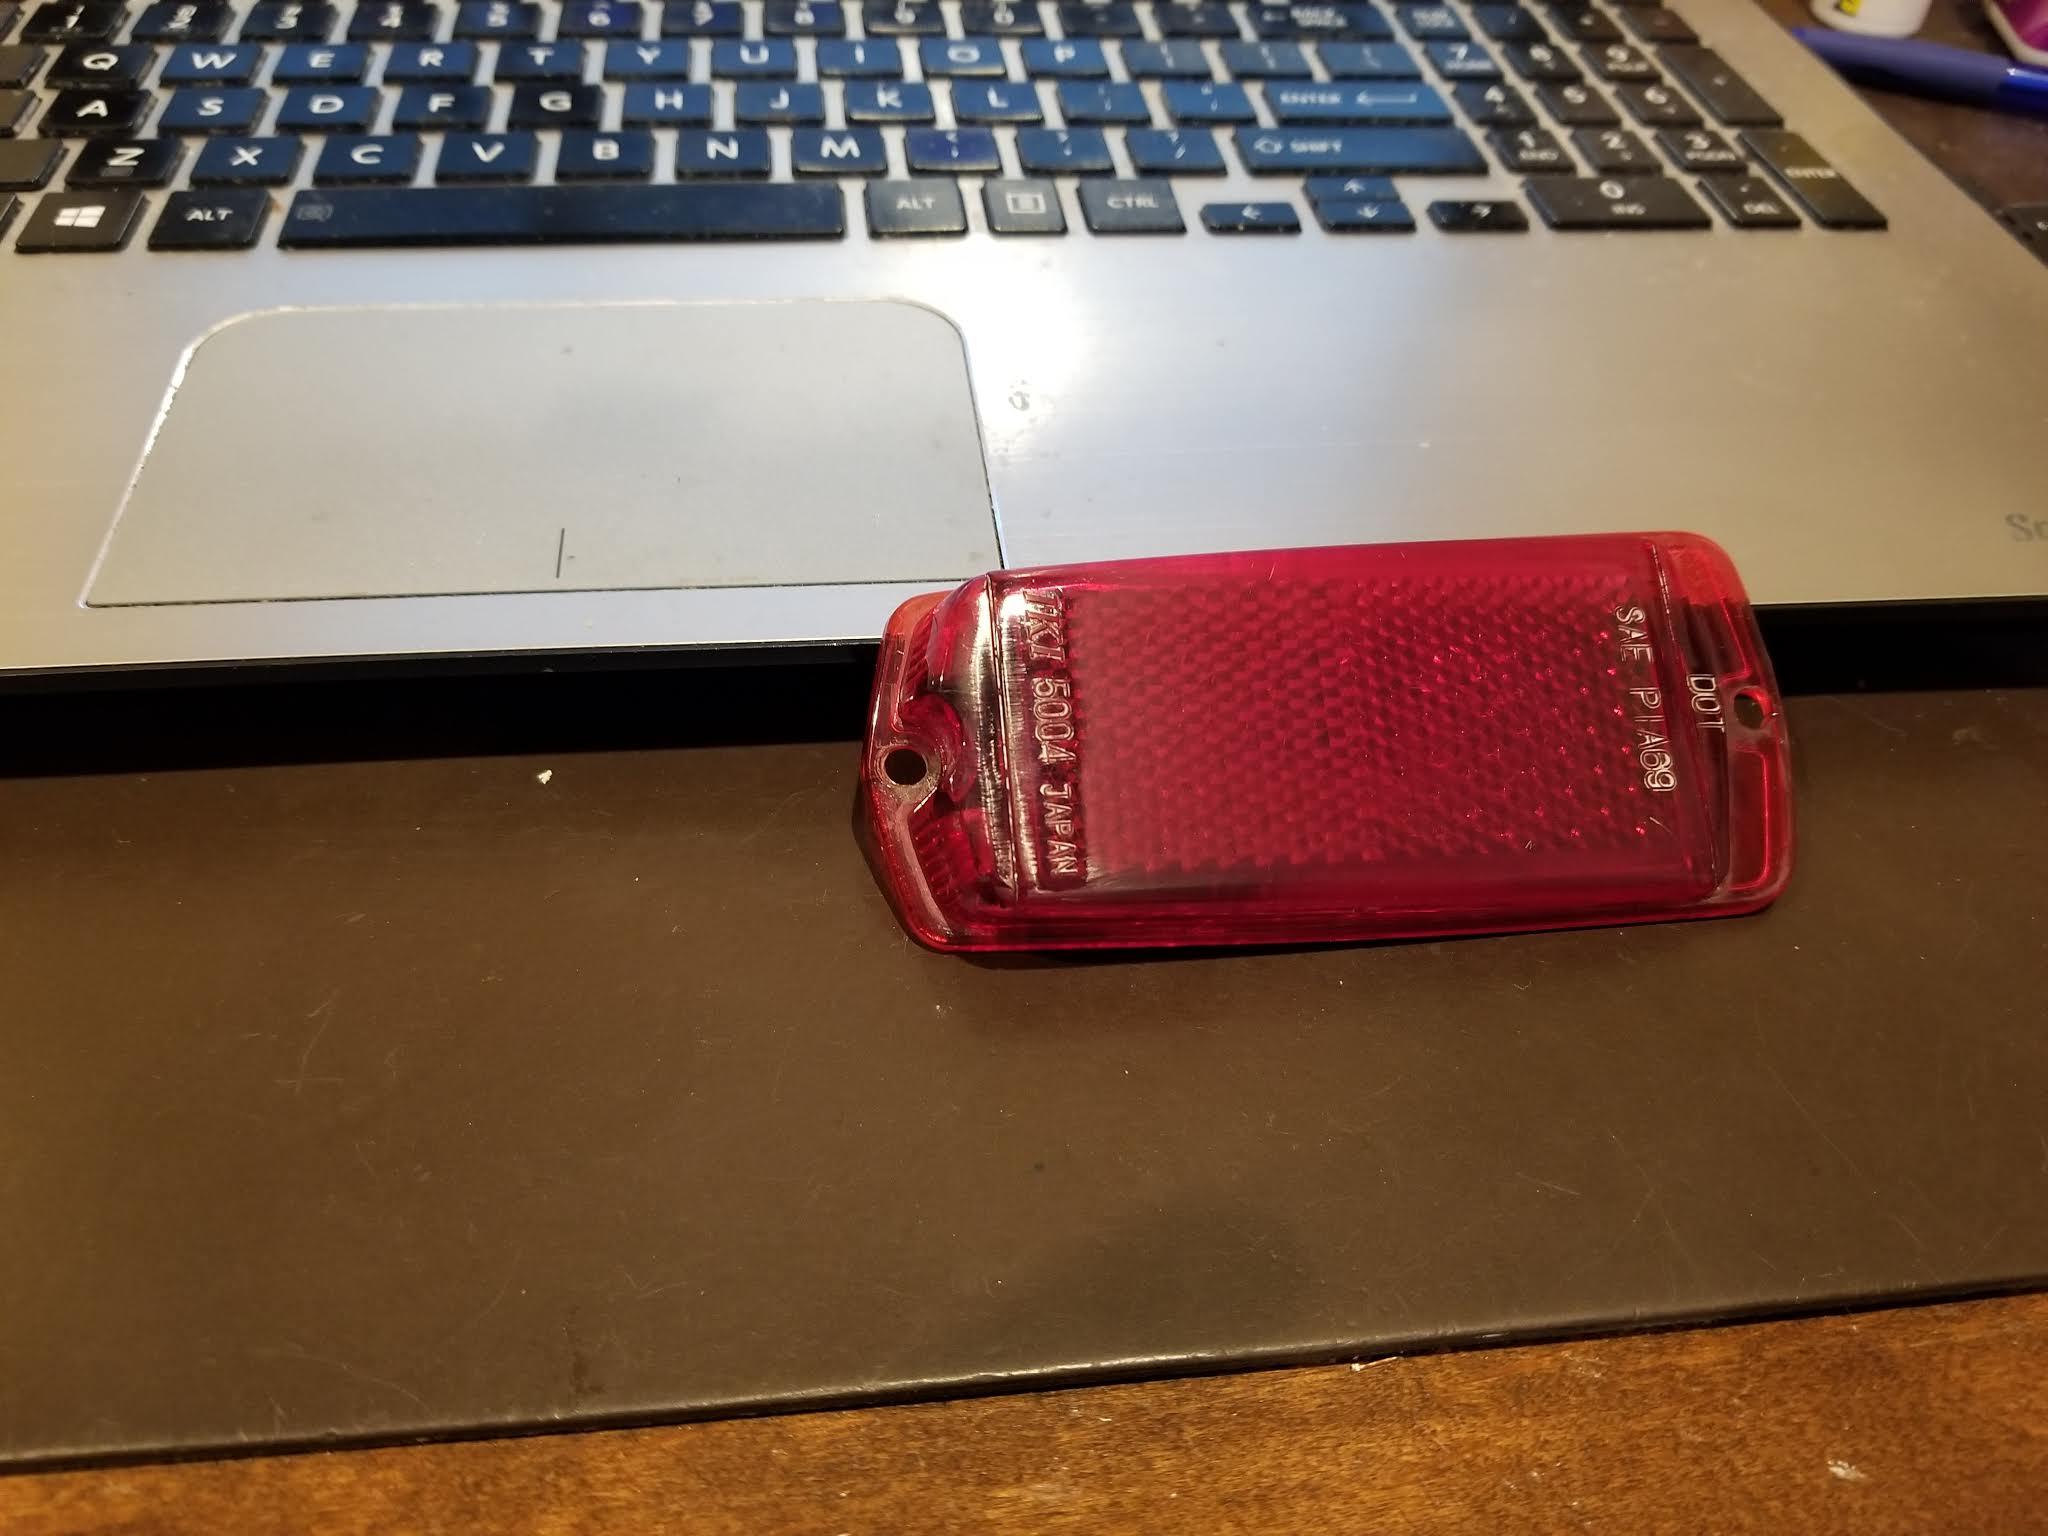
5 points5 points4 pointsThanks Zup for coming through with a door......awesome folks on this site! I’ll start a thread for this project next week. It ought to be fun! Thanks again Zup for going out of your way to help a fellow member. Guy4 points4 pointssuccess. Tried the banging, no joy, used a bolt extractor, the drill bit that came with it was a perfect fit, so I tried the bolt extractor, got it to bite used some vice grips to hold it and then bang on them (think slide hammer) still nothing. then I just took the same drill bit and tapped it into the center body (went pretty deep) seemed to catch on something, used the vice grips and in a process of banging, twisting I heard it free up. hook back to the tester and buzz away. put it back on the juice (see the video) pulled a vacuum and it would suck up the PB blaster. I could control the flow by turning it on and off. going t let it soak in the PB blaster for a while with it running. Will try the remaining 2 that are stuck and eventually use cleaner and spray to check spray pattern.4 points4 pointsWhen I got my car the engine hadn’t run in 18 yrs. It was locked up big time. I pulled the plugs and poured Marvel Mystery Oil in the spark plug holes and let it sit 24 hrs. Tried to hand crank it was only moving a small amount. I cycled the wrench on the cam bolt turning it both CW then CCW. It would move on a few inches. Poured more in and let it sit another 24hrs and the next day it hand cranked right over. I also put assembly lube on the cam lobes before cranking with starter. She runs fine now and compression is in the normal range. So don’t be rushed...take it slow and work it back and fourth over time or you risk damaging something in there like a piston ring. Sent from my iPhone using Tapatalk4 points3 pointsI saw somthing on the web that showed the restoration of a plastic lens. I think the youtube was done by chris fix. They did something I had not seen before - clear coating plastic – so I thought I would give it a try. Side marker lens' are fairly inexpensive and available so if I screwed it up or if it just flat out did not work it would not be a total disaster. My rear side markers were scratched and they were moderately oxidized. Unfortunately, I was so excited to try something new that I did not take a “before” picture. I did think of a picture after I had sanded the reflectors. Below is the image after wet sanding with #600, #1000, #1500, and #2000 grit. If you decide to do this you can skip the 1500 grit, its just not necessary for this type of project. After sanding I cleaned it with Eastwood Pre Prep. Then I sprayed an adhesion promoter for plastic (I am happy with the results that I get with SEM products (sand free), but there are others as well). I then sprayed clear using a VHT spray can that I had left over from another project. A couple of light coats and then 2 medium wet coats. The trick here is to try to get the clear to flow without causing any runs. If you do get a run or noticeable orange peel you can always sand it with #2000 grit, and polish and buff, or you can always start over with #600 grit, #1000, #2000 and re-clear. Anyway, below is an image of both reflectors with clear coat. You will have to trust me on this - the picture does not measure up to the actual result. The lens look like brand new. For some reason, lighting, reflections, who knows what the picture just does not measure up. One caution - do not touch the lens for at least 24 hours. The clear coat needs to cure (harden) before you handle it and definitely do not rush to assemble it. Of course, if a little is good why not do more – so I cleared a rubber gasket just to see if it would take the clear. The next image shows one gasket cleared and one without the clear coat. Normally I would not even try to paint rubber without the right product, but the gasket took the clear and it is a big improvement. If anyone has used a specific product line please let me know what adhesion promoter worked for you on rubber. I am amazed with the results. Now, I don’t know if any of the products that I used will ultimately do harm to the plastic reflectors or whether these results will hold up for any length of time, but at this point I would have to say the results were terrific without spending a great deal of time and without requiring a lot of technique, and with very little expense. Bottom line: I would certainly recommend this process. My expectation is that the clear will hold up over time and the only real danger to the plastic could be the adhesion promoter. Next time around I would leave out the adhesion promoter and only sand with the #600 grit and then clear. If that was not smooth enough perhaps sand with finer grit after the clear coat and then buff. Of course, I would like to hear from anyone that can tell me what the long term expectation should be and whether or not I should expect the lens to deteriorate. Hope this helps - good luck


 3 points3 points@jonathanrussell Excellent post on how to go forward from here. @outlawswine @siteunseen Thanks for the kind words. My 73 was in a very similar condition to yours when I started. Dings down both sides of the car, crappy Weber downdraft carbs, lots of non-original stuff and it barely ran at all. For sure follow @motorman7 He is restoring a 73 to original (better than) condition. His photo essay is definitive in proper restoration and is a true inspiration to anyone with a Z and a desire to make it better. While he is doing it "stock", many of his examples of work areas would apply to any basic refreshing. If you really want to go extreme you could revert to the "boat anchors" and join our small bunch of aficionados. (just kidding-----well---- sorta)3 points3 pointsThanks Gavin , it could be AU market car . Does AU market car have a set of “ lowered coil springs “ like Euro cars ? The car looks slightly lowered at front , the gap between the tire and the fender .Optional item chosen ? This morning I took my 240ZG as a commuter to an airport. In a cold rain dawn , but comfortable cabin . Kats

 3 points2 pointsMy my my how the world turns. Before I carried Zup's "pay it forward" mirror assembly to get the glass removed for installation into my car's housing I stopped by my local Nissan dealership to ask what he thought. The parts manager has taken me in like a bastard child of his. He looked up the mirror and wrote down the part number. Said they had 23 in Memphis if I broke Zup's and needed one, $115 plus tax was my price. I declined and he suggested the same glass shop I was going to use for the removal. They still have it. I just got a call from the parts guy, somehow he mistakenly ordered a mirror. Said he wrote down the P/N on his order pad and at the end of the day it got ordered. So now he has a brand new mirror assembly but if he sends it back he has to pay a restocking fee which we don't need to do. He's taken good care of me over the past few years for parts on my old Zs. I told him to keep it, I would buy it to keep the owner off our arse. $90 plus tax. I'll put the new one on when I fix the lock so I can go to see Arkansas's Jims at Chunkey Monkey's in Branson.2 pointsI'm not trying to sell you my wires. I put that up for you to see how long mine were and show how you can tuck them under the battery tray. Any auto parts store should have a 24" negative battery cable.2 points2 points1 pointHey guys. I'm new to the Z car world. I inherited a "barn find" '73 240 this week. It was my grandfathers and it has been tucked away in his barn for 25 years. I had actually forgotten about the car. Anyway, it is mine now and I'm trying to figure out what to do with it. Should I restore it or just sell it. I don't have a tremendous amount of time to work on it so I'm kind of torn on what to do. It is completely all original. Interior is in good shape (needs a good cleaning). It only has 35k original miles and only a few spots of surface rust. I gave it a wash and it looks pretty solid. Planning on pulling the plugs tonight to be sure the engine will rotate. Anyway, looking forward to chatting with you guys. Here she is all cleaned up.....
 1 pointOK, she is safely back home. The paint looks amazing, better than the pictures. Looking forward to finishing up the underside and then installing parts. The air intake ducts look amazing. Too bad no one will see them.
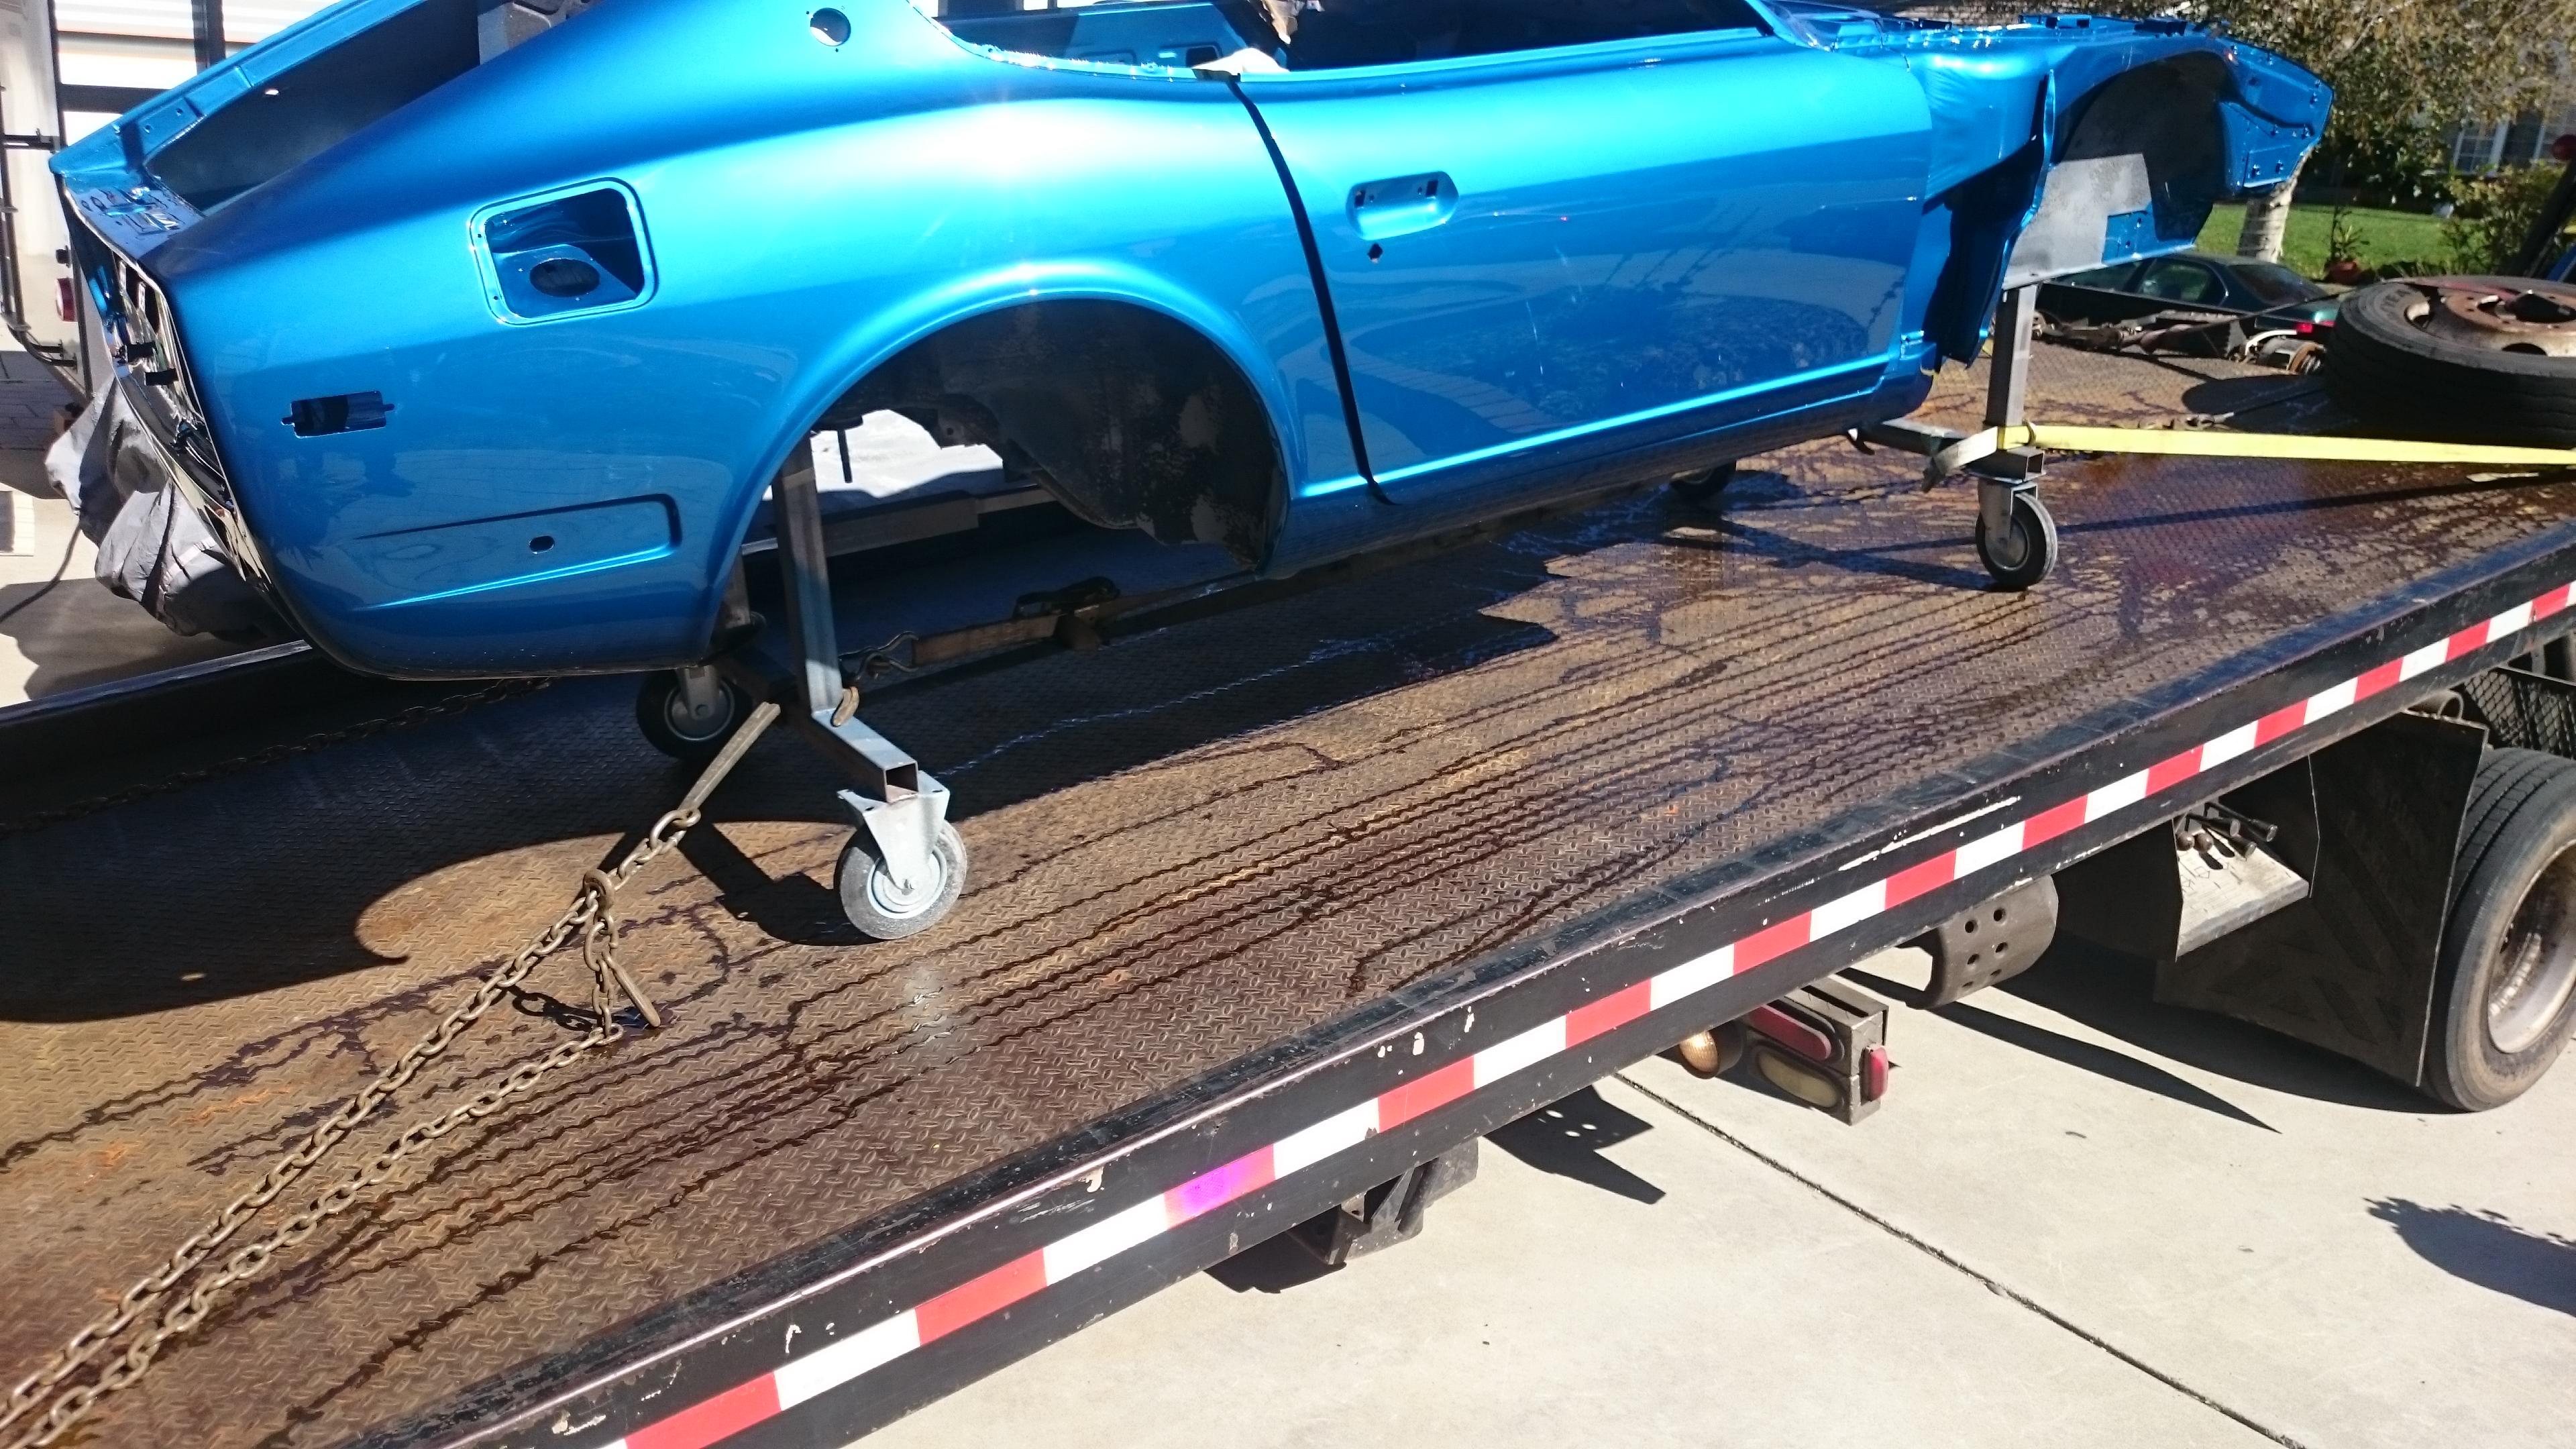
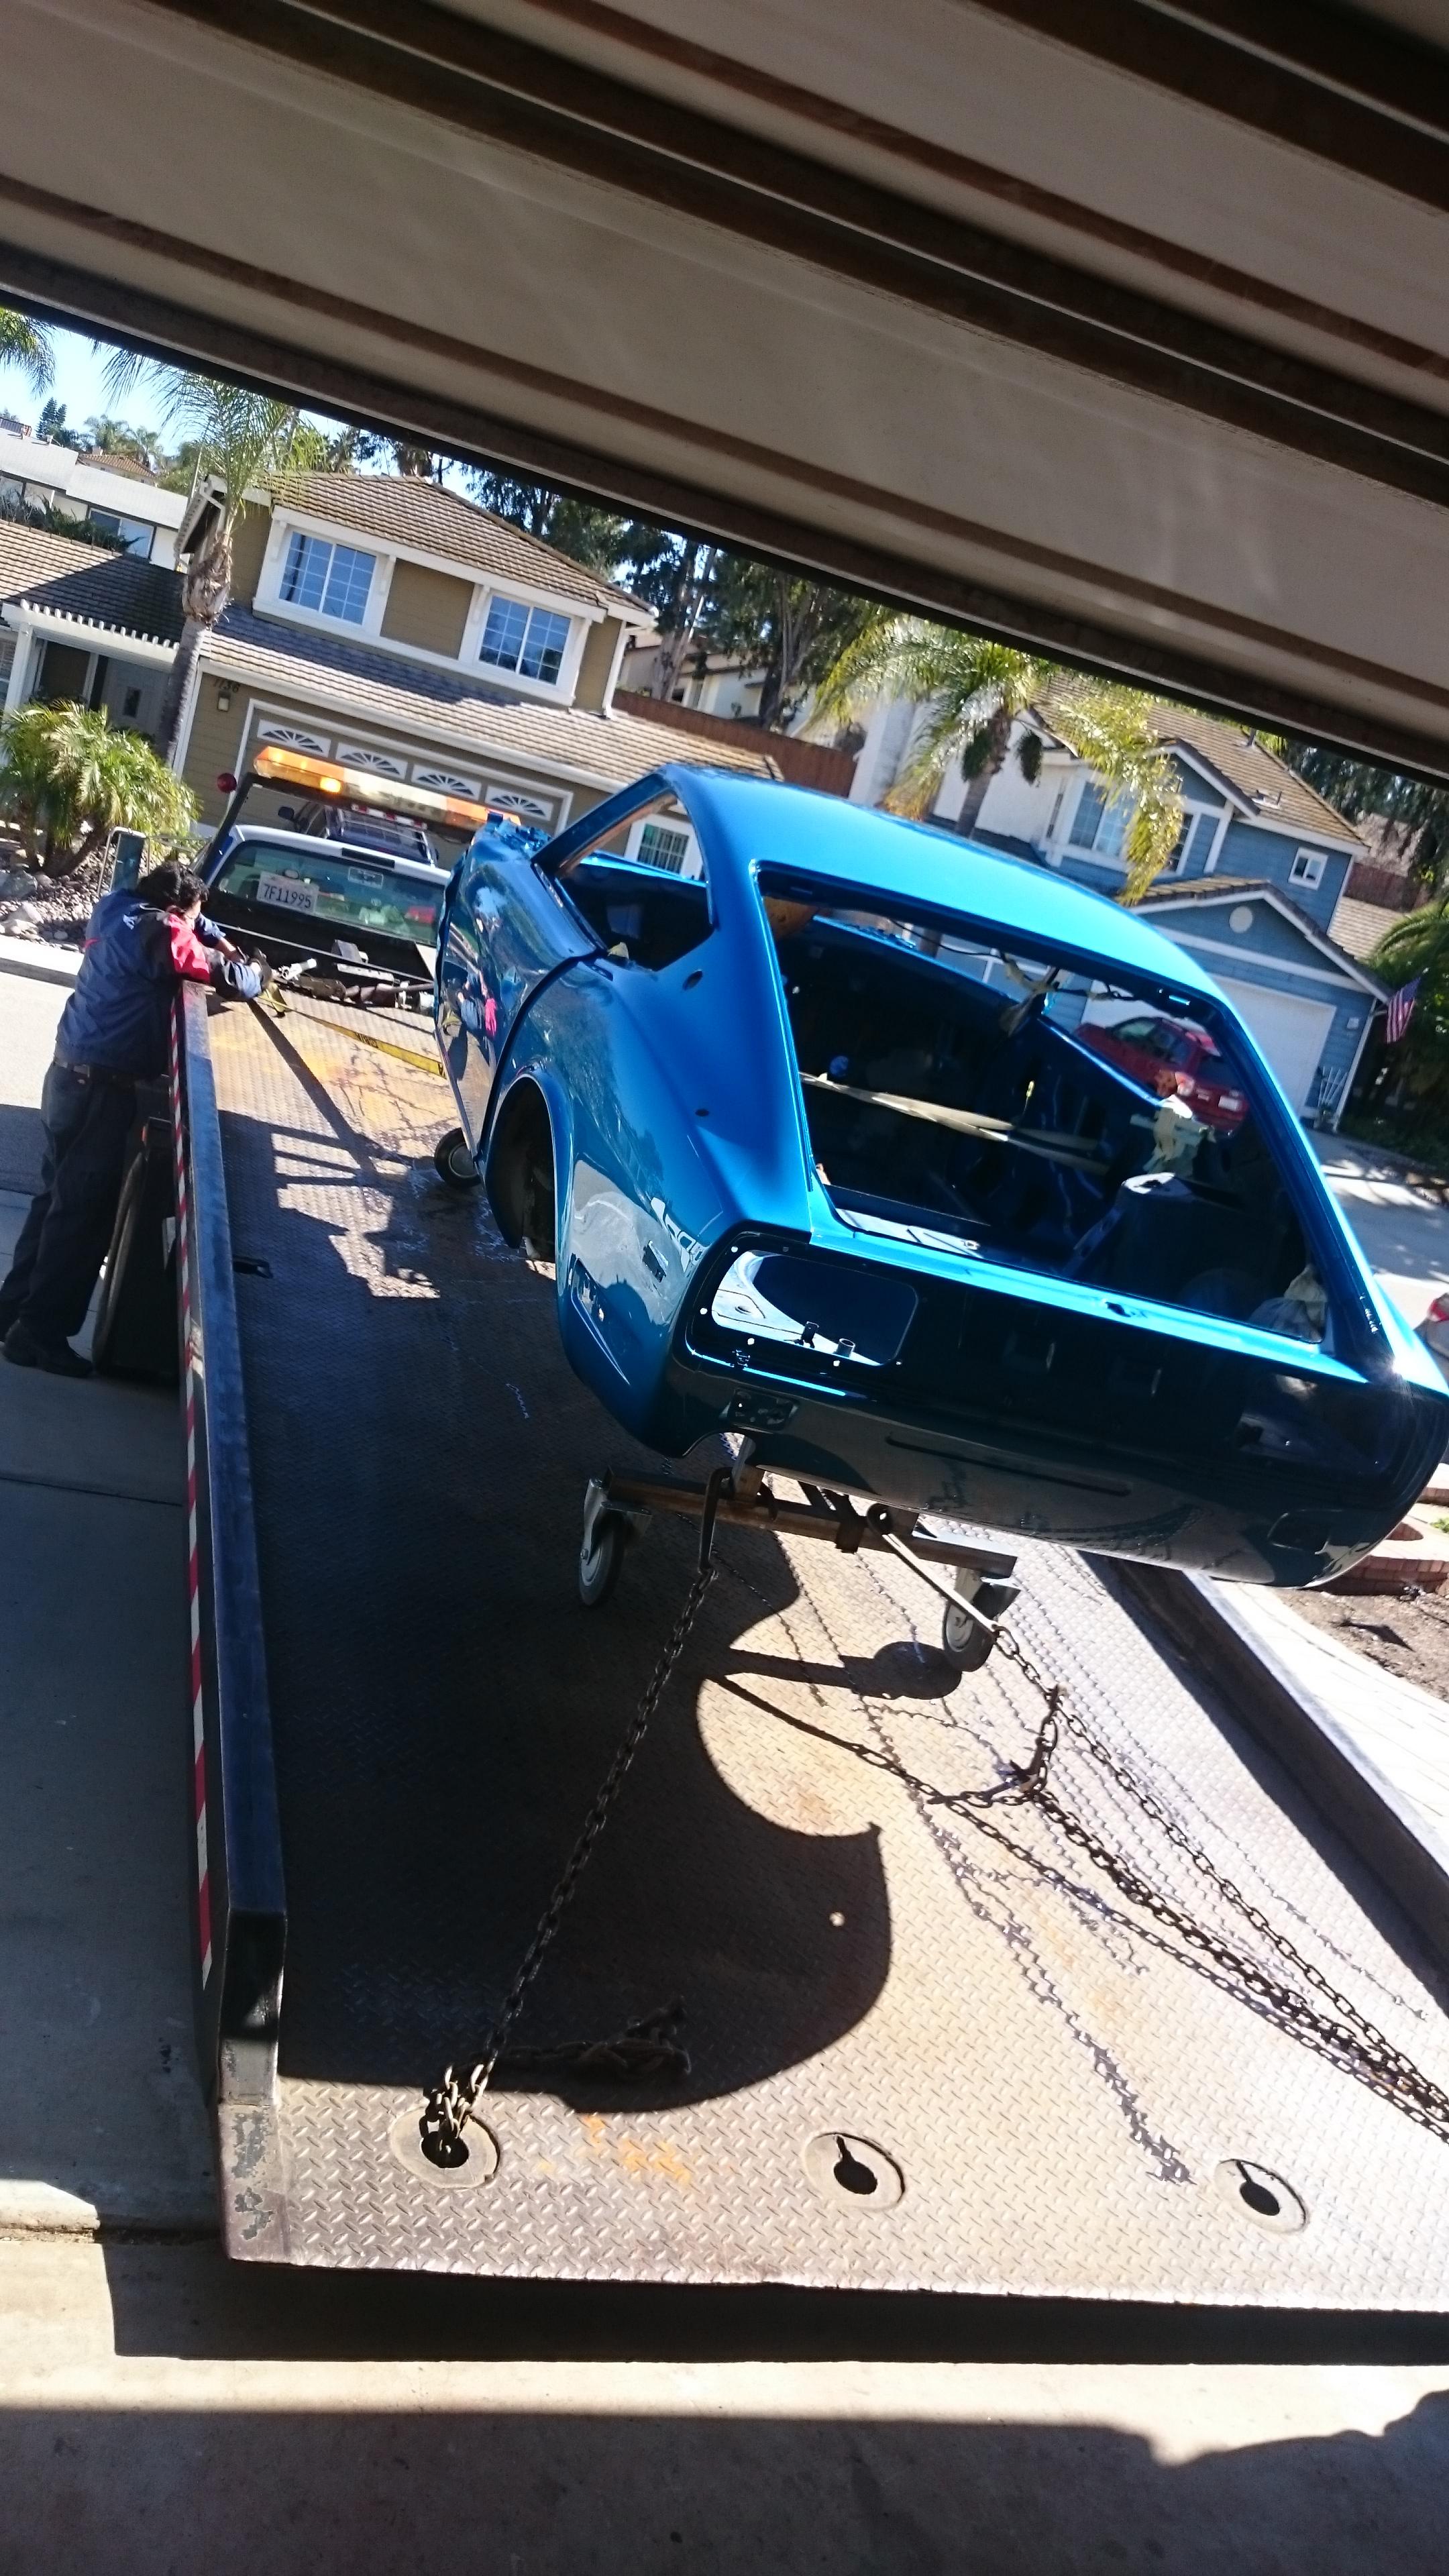
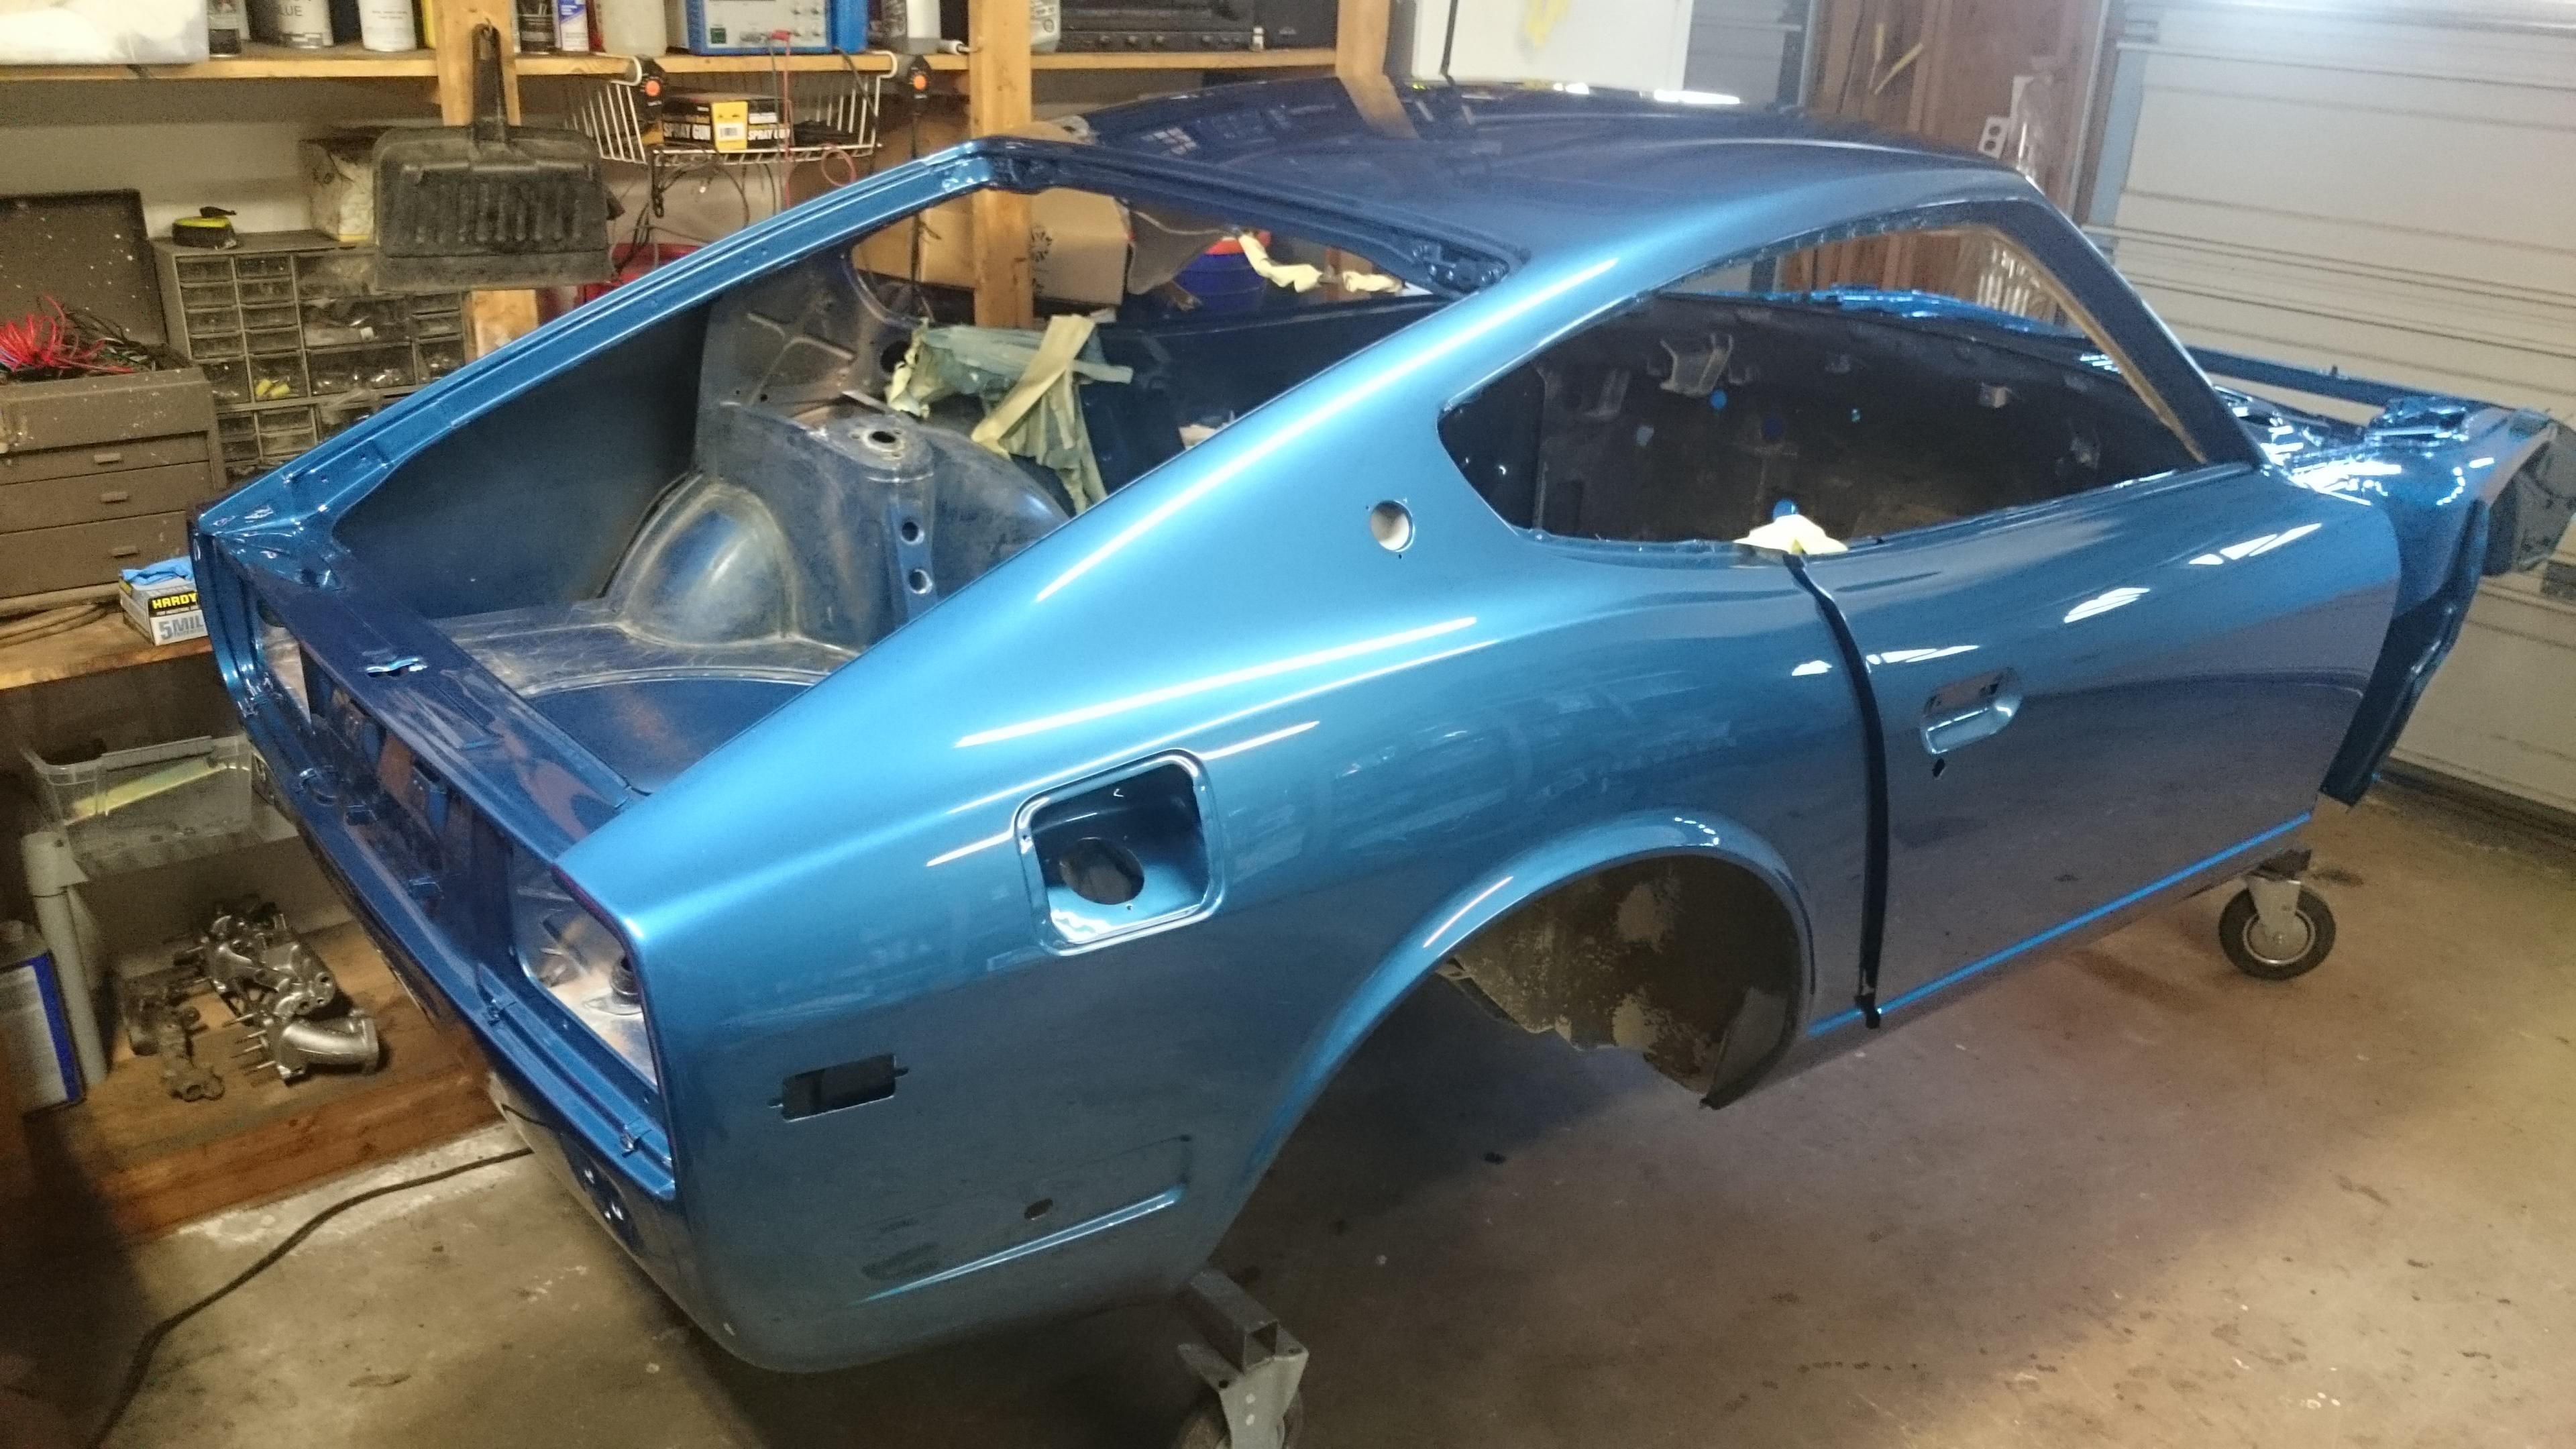
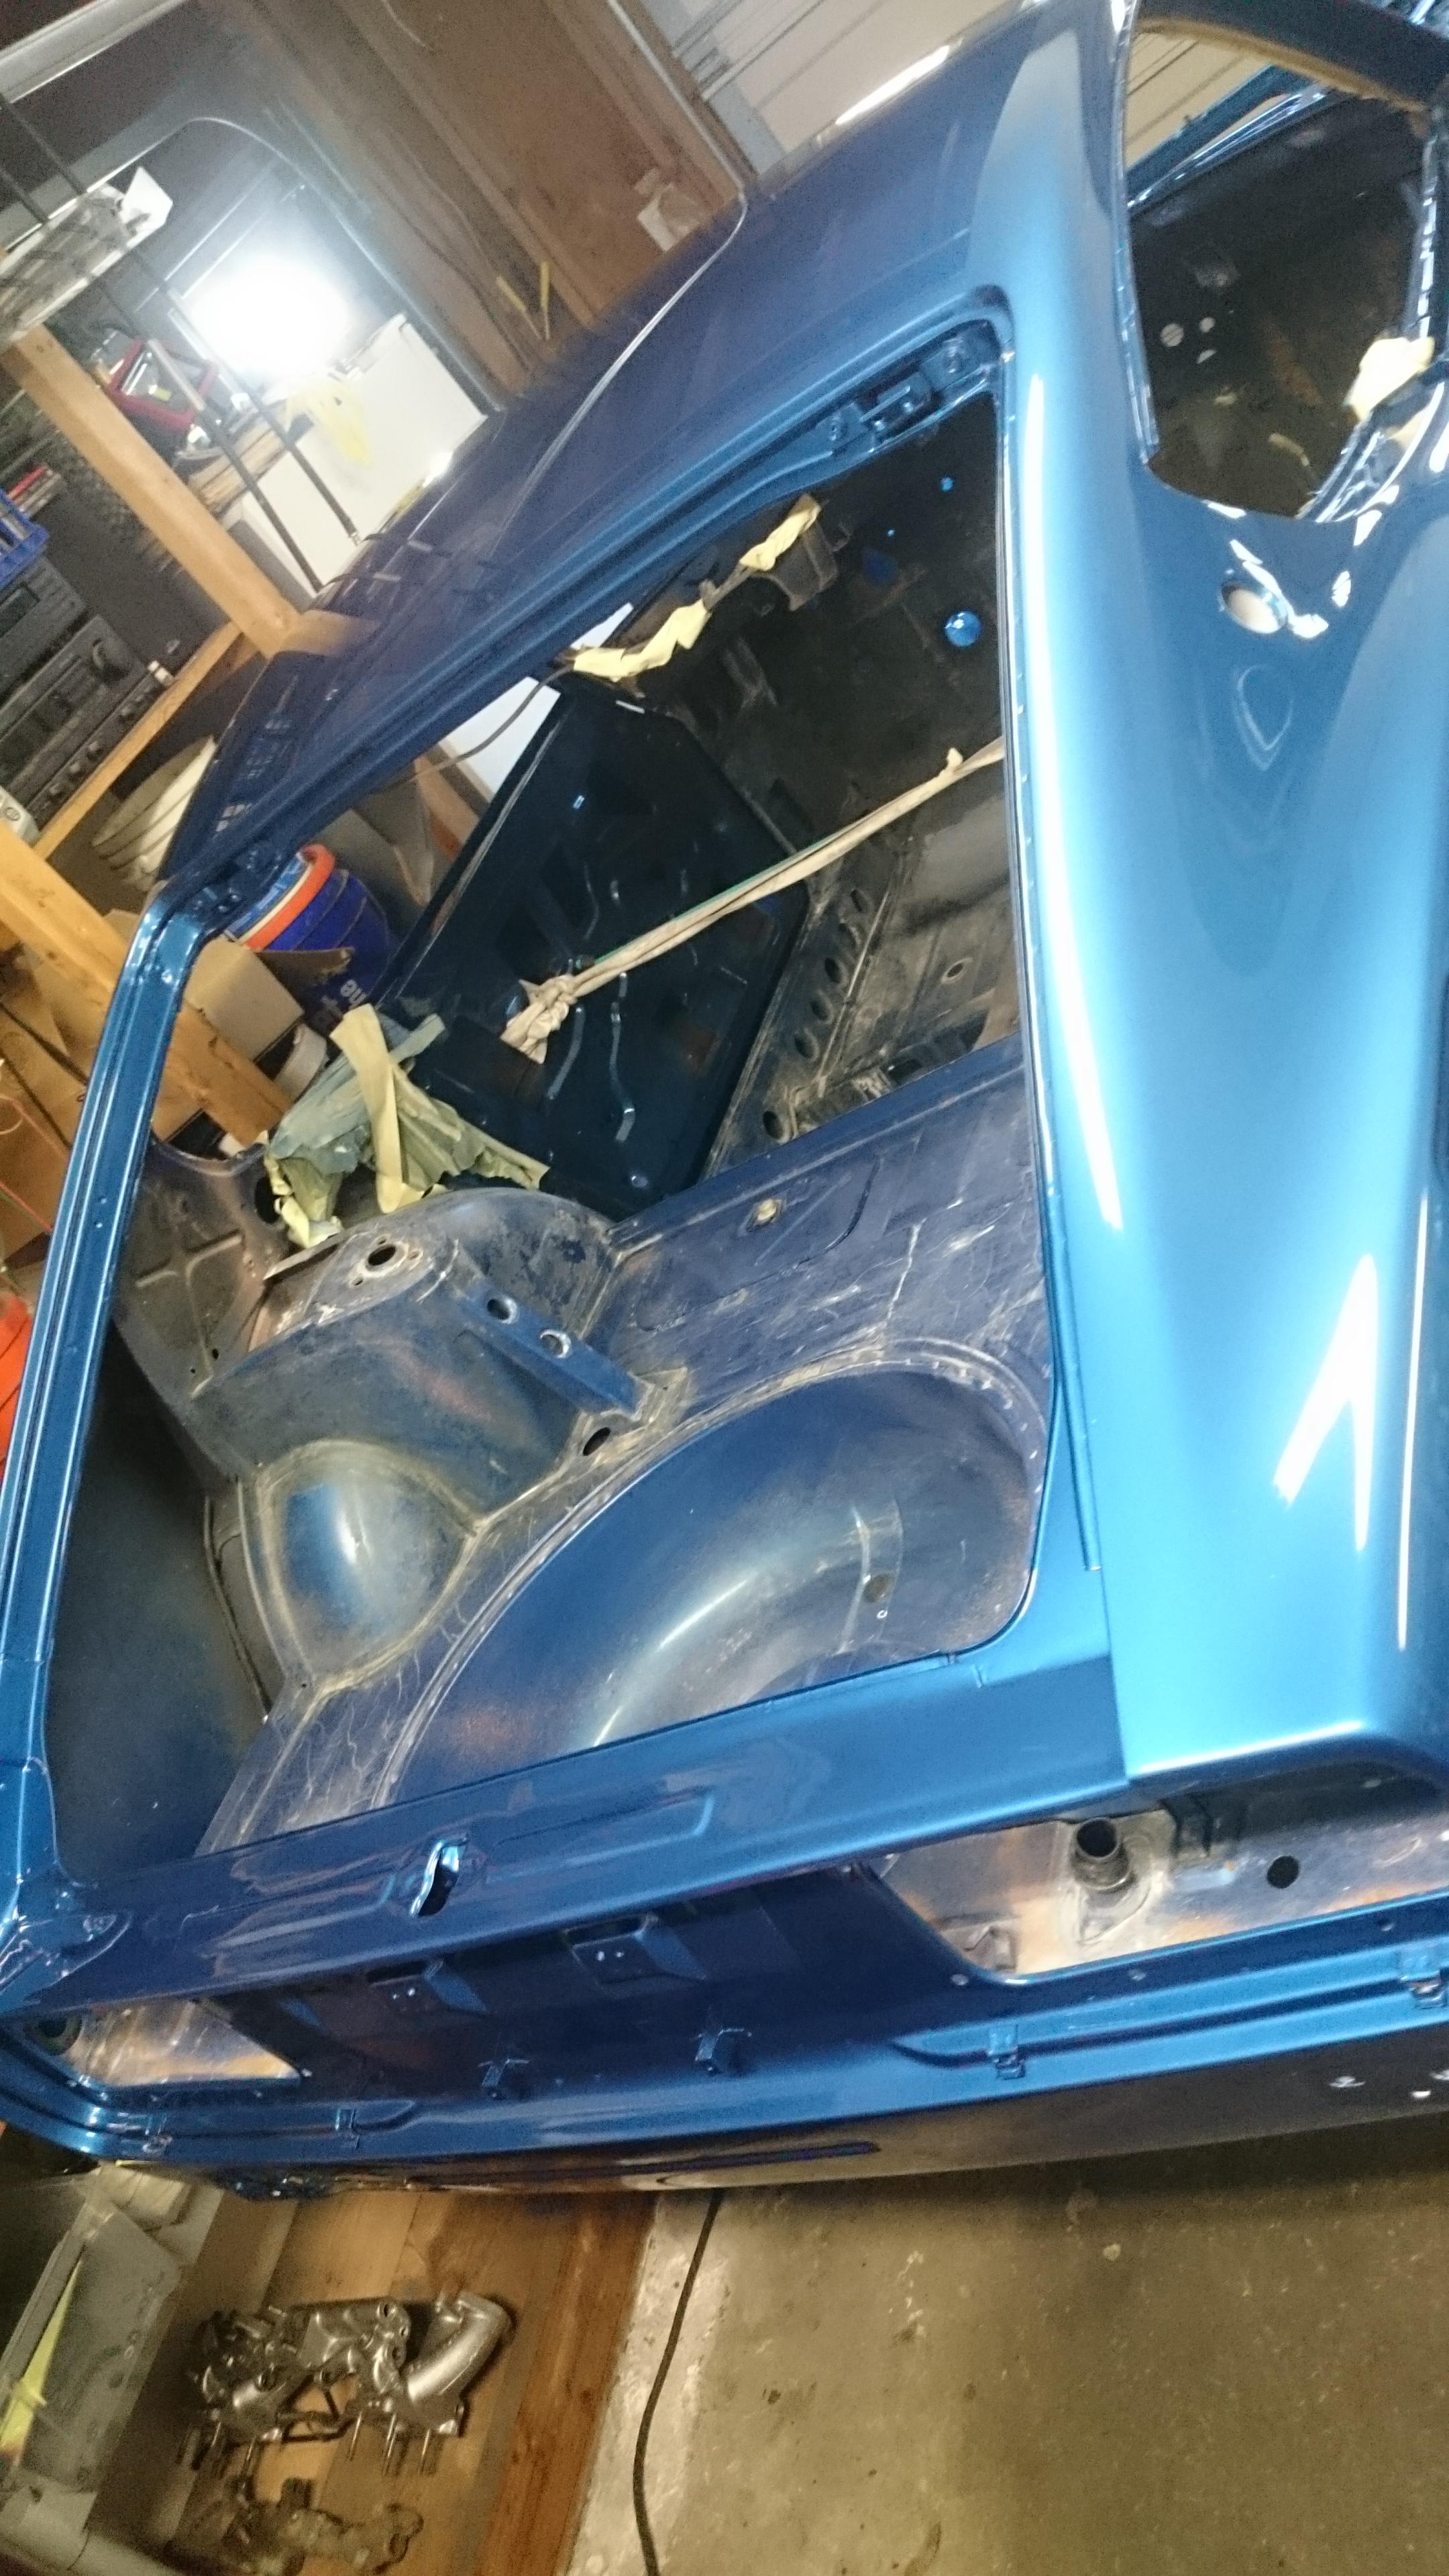
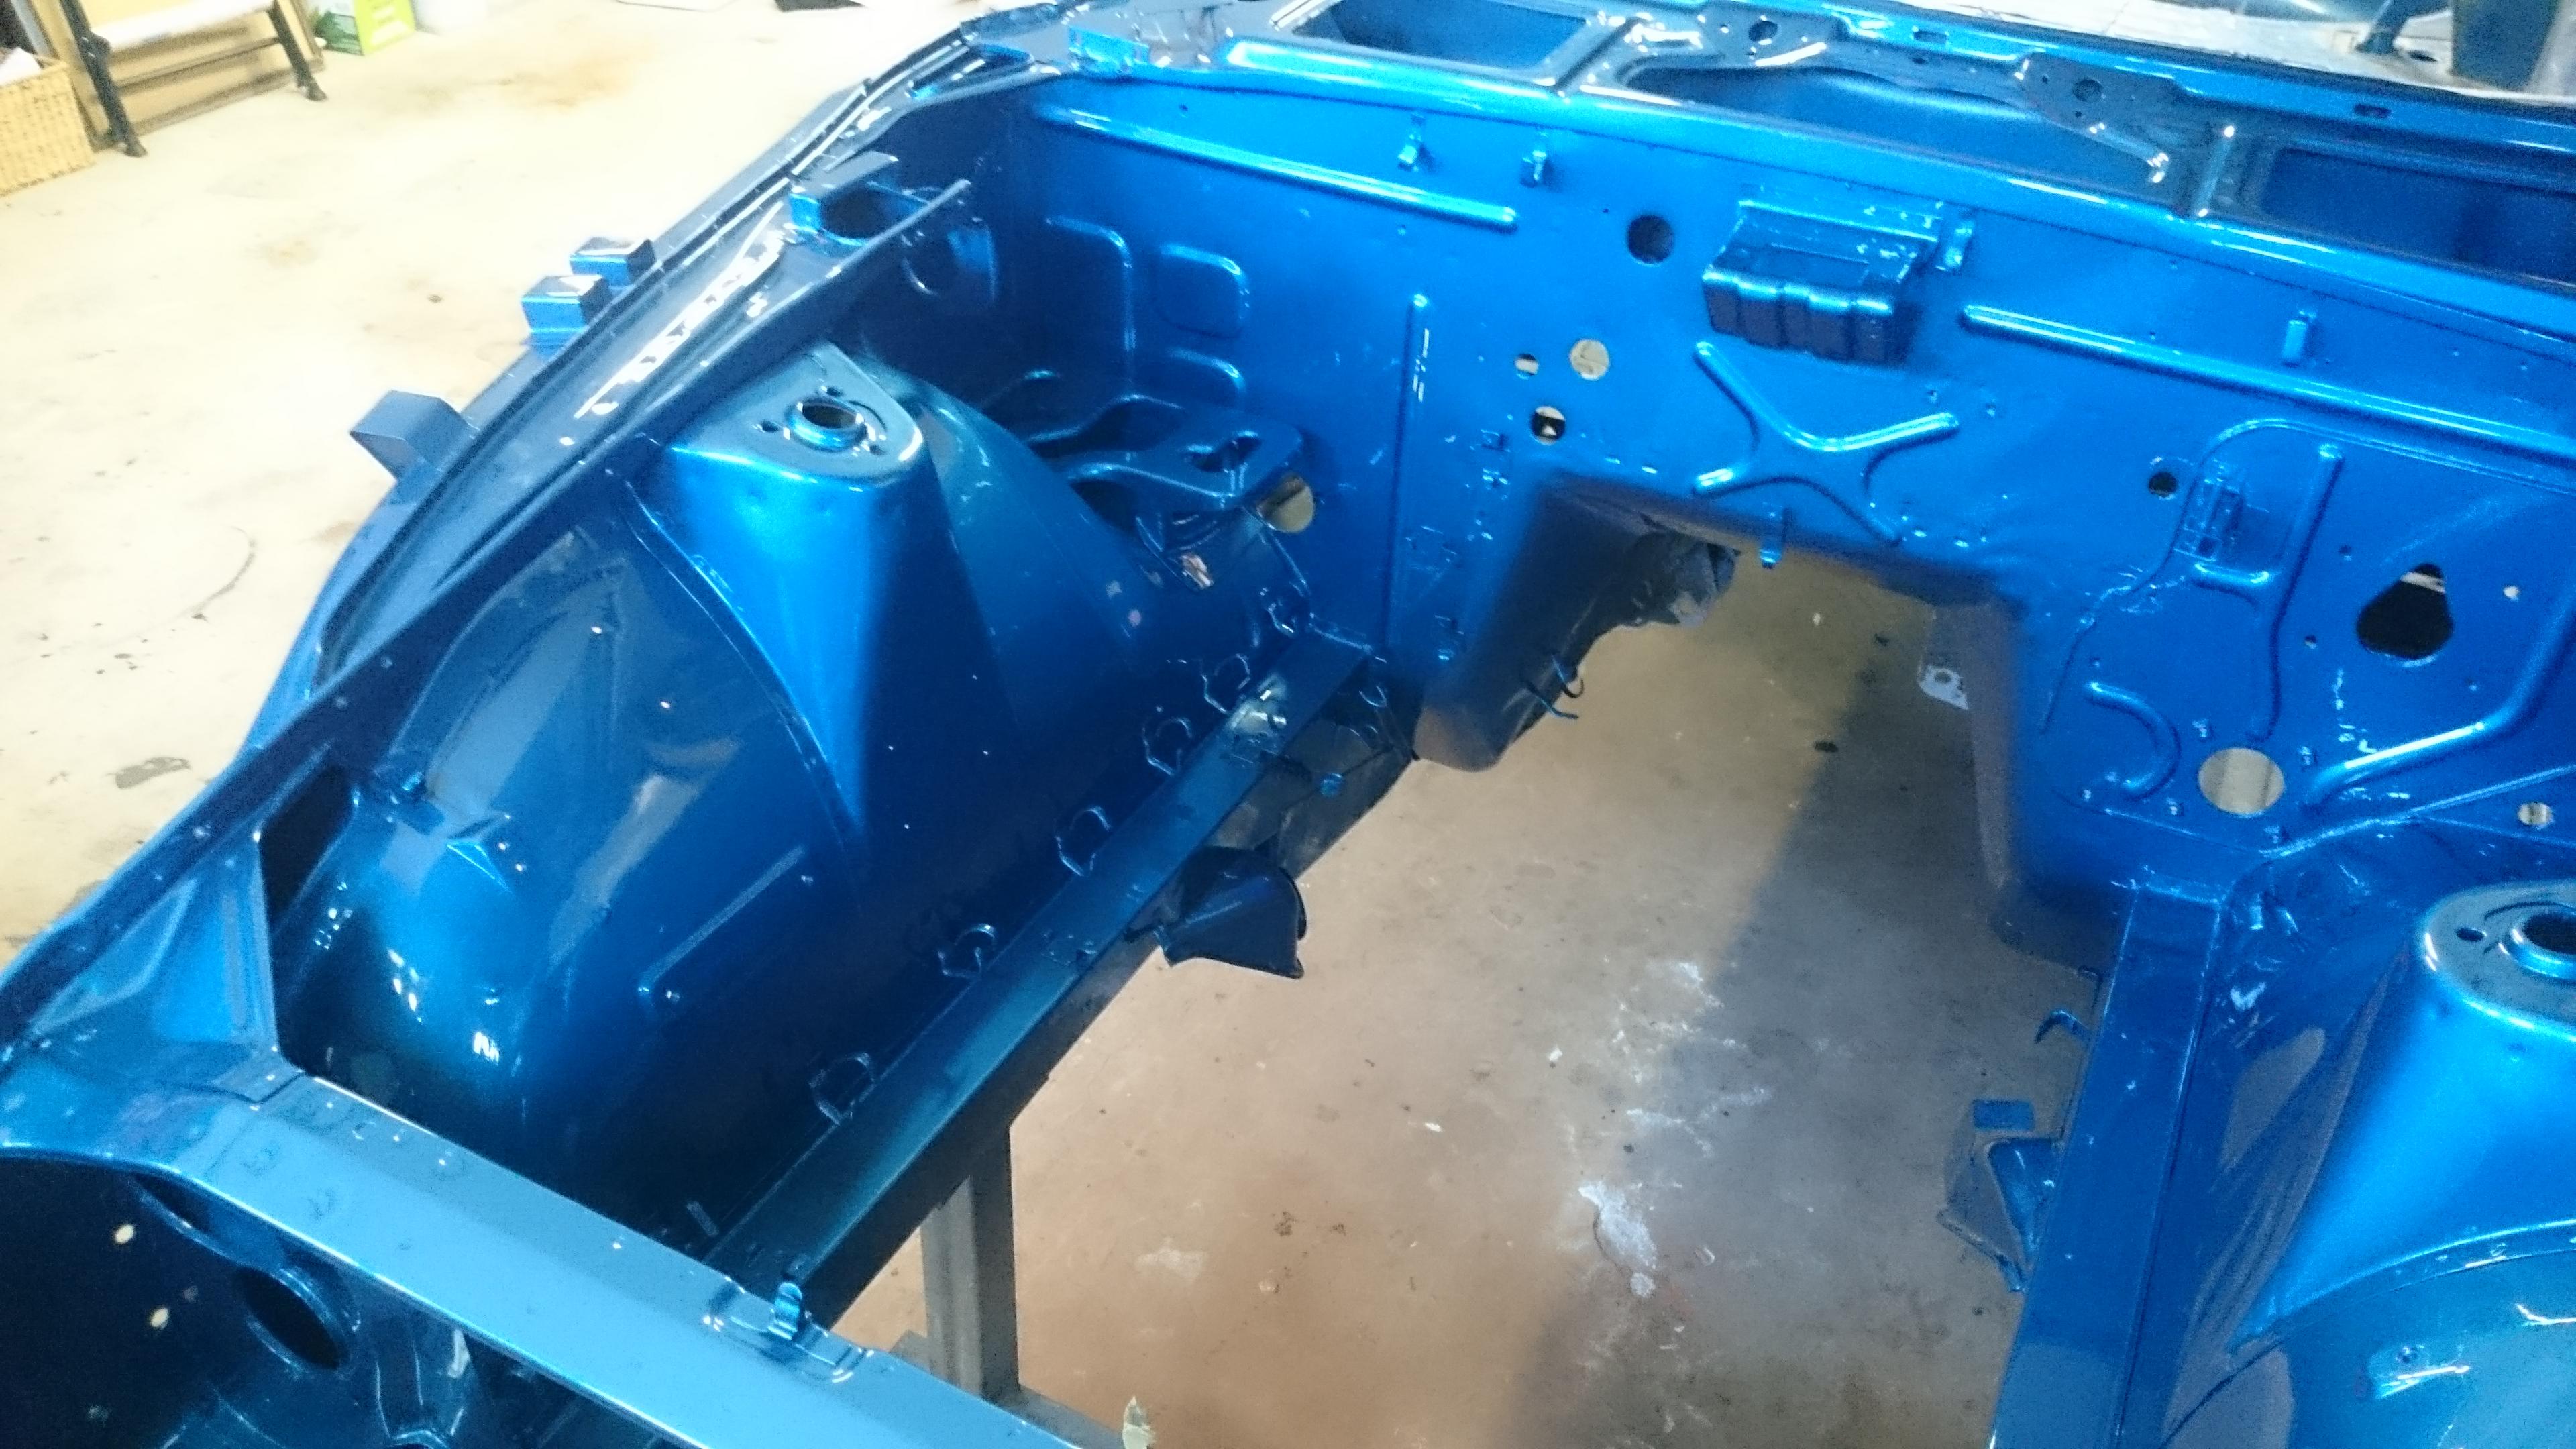


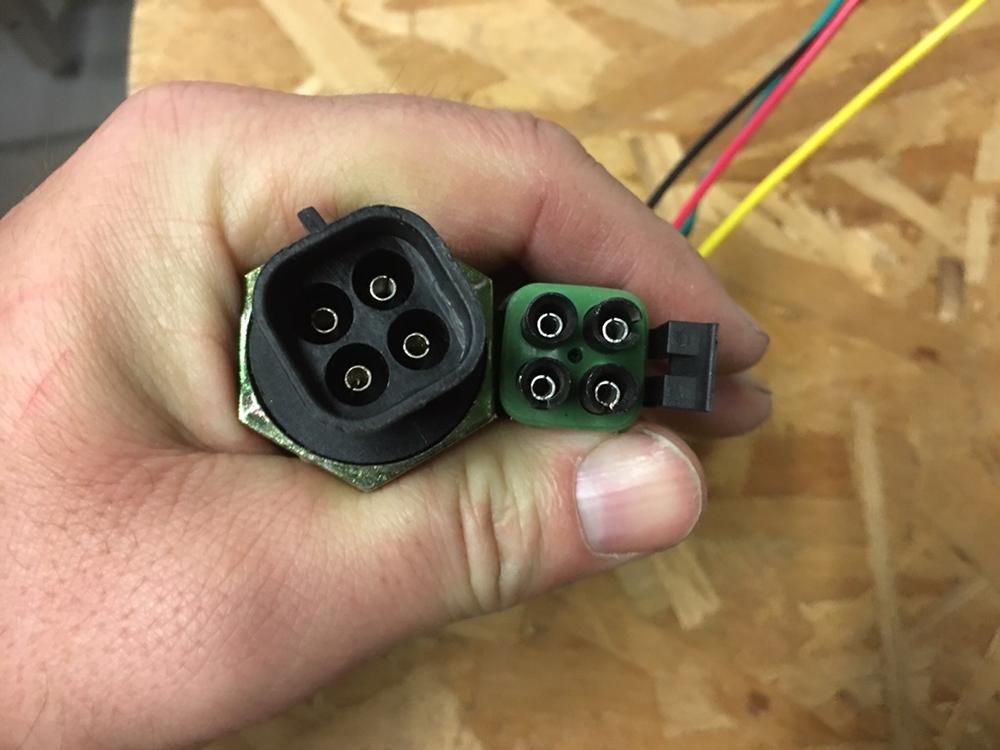
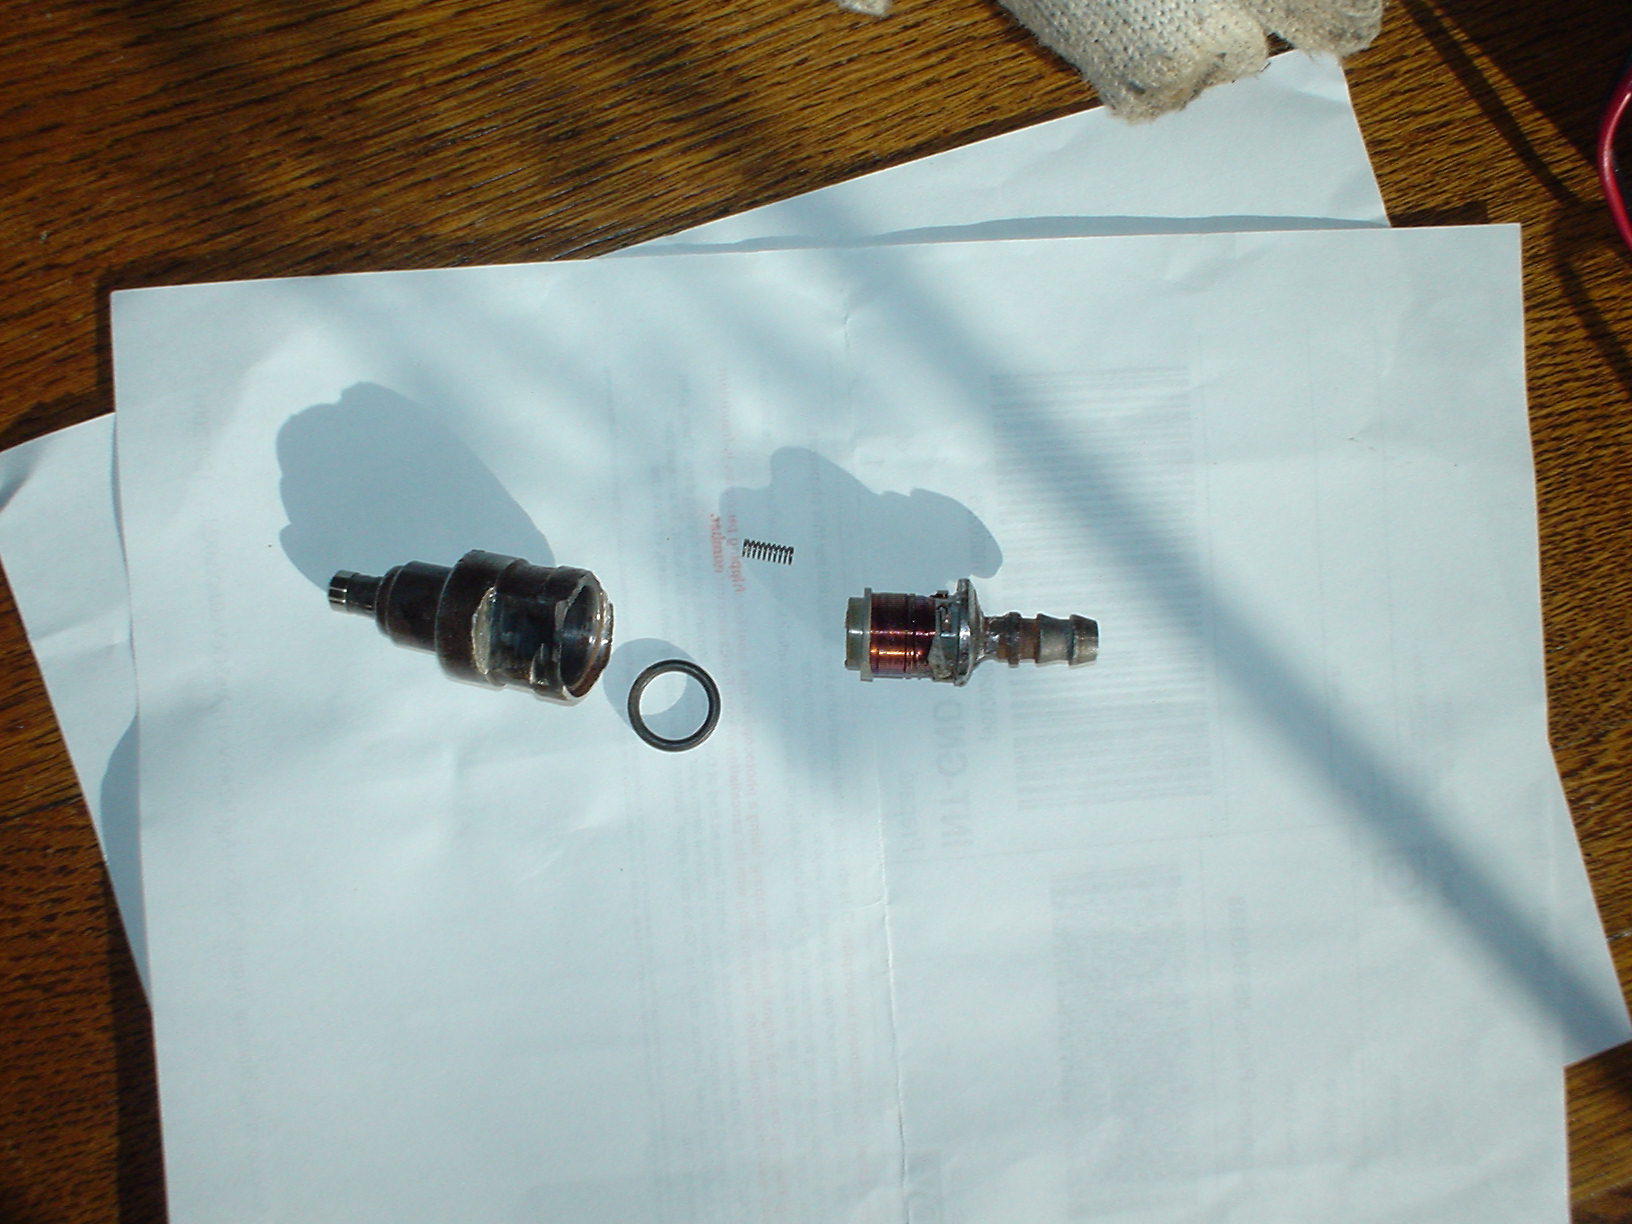
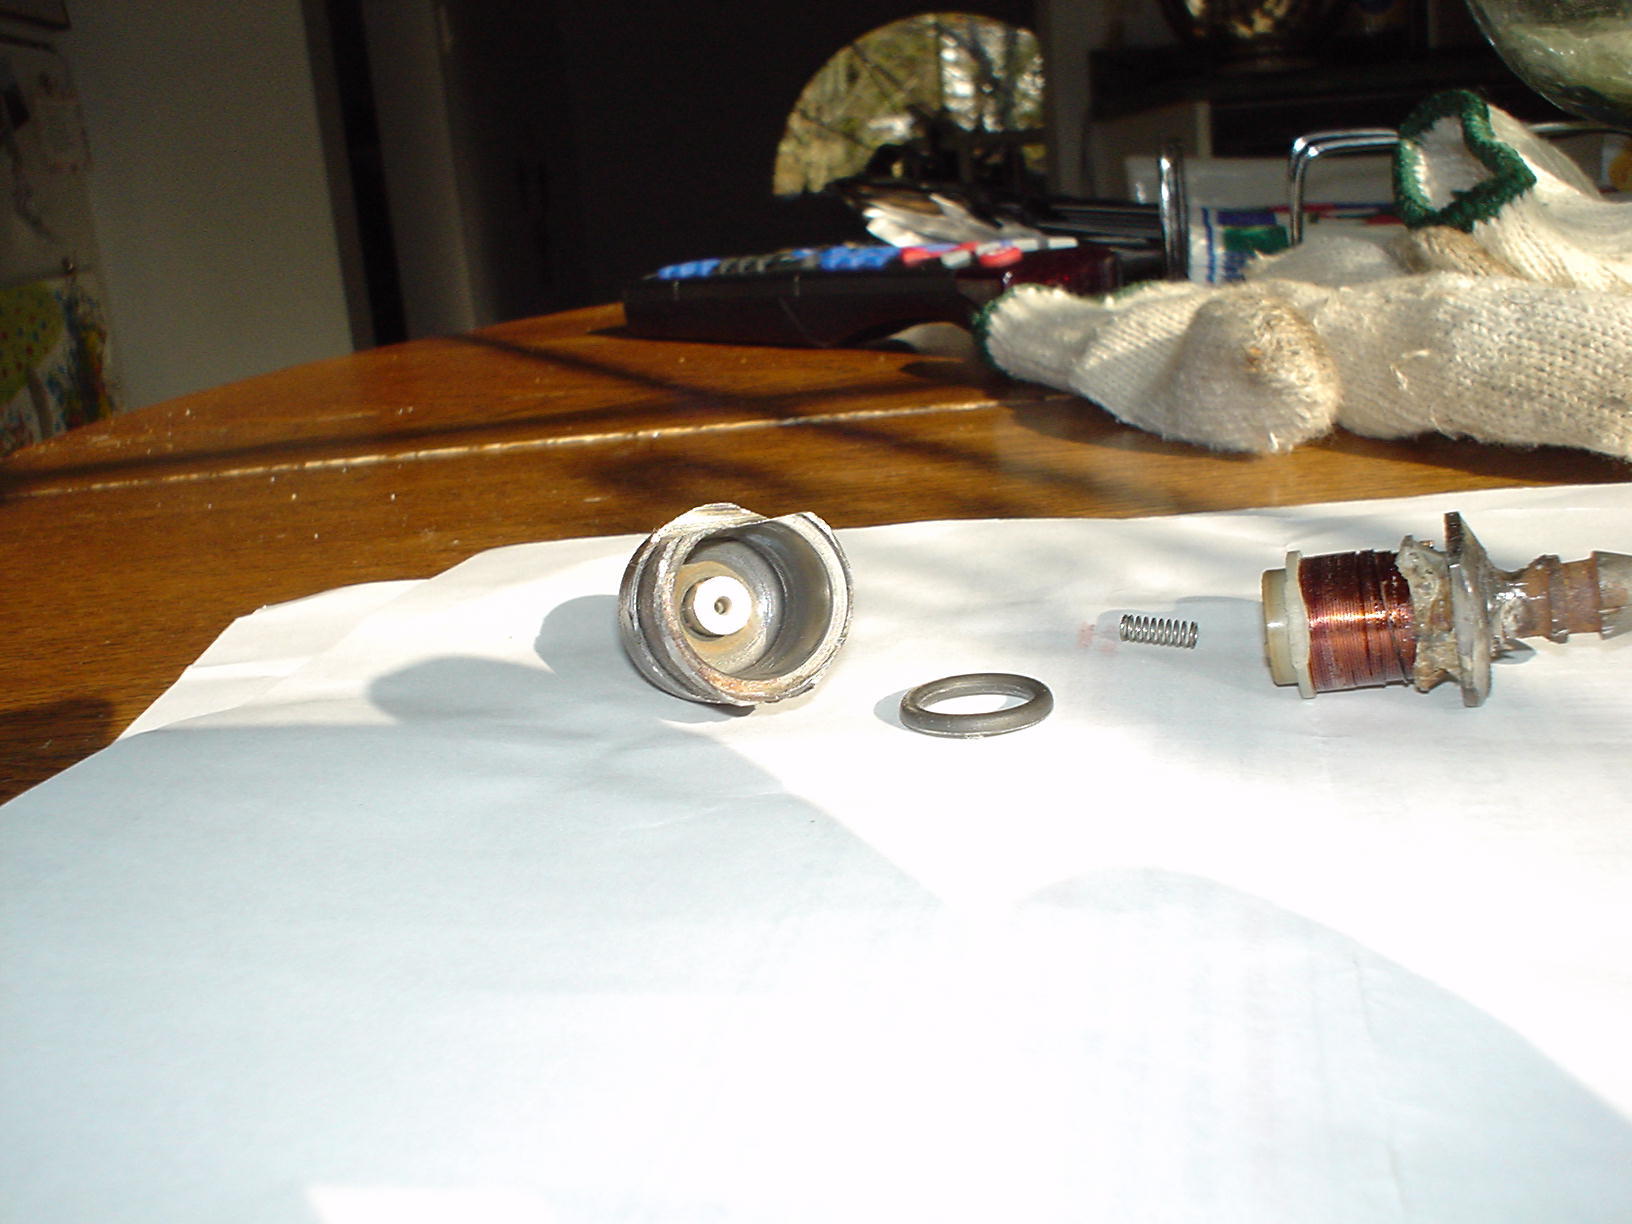
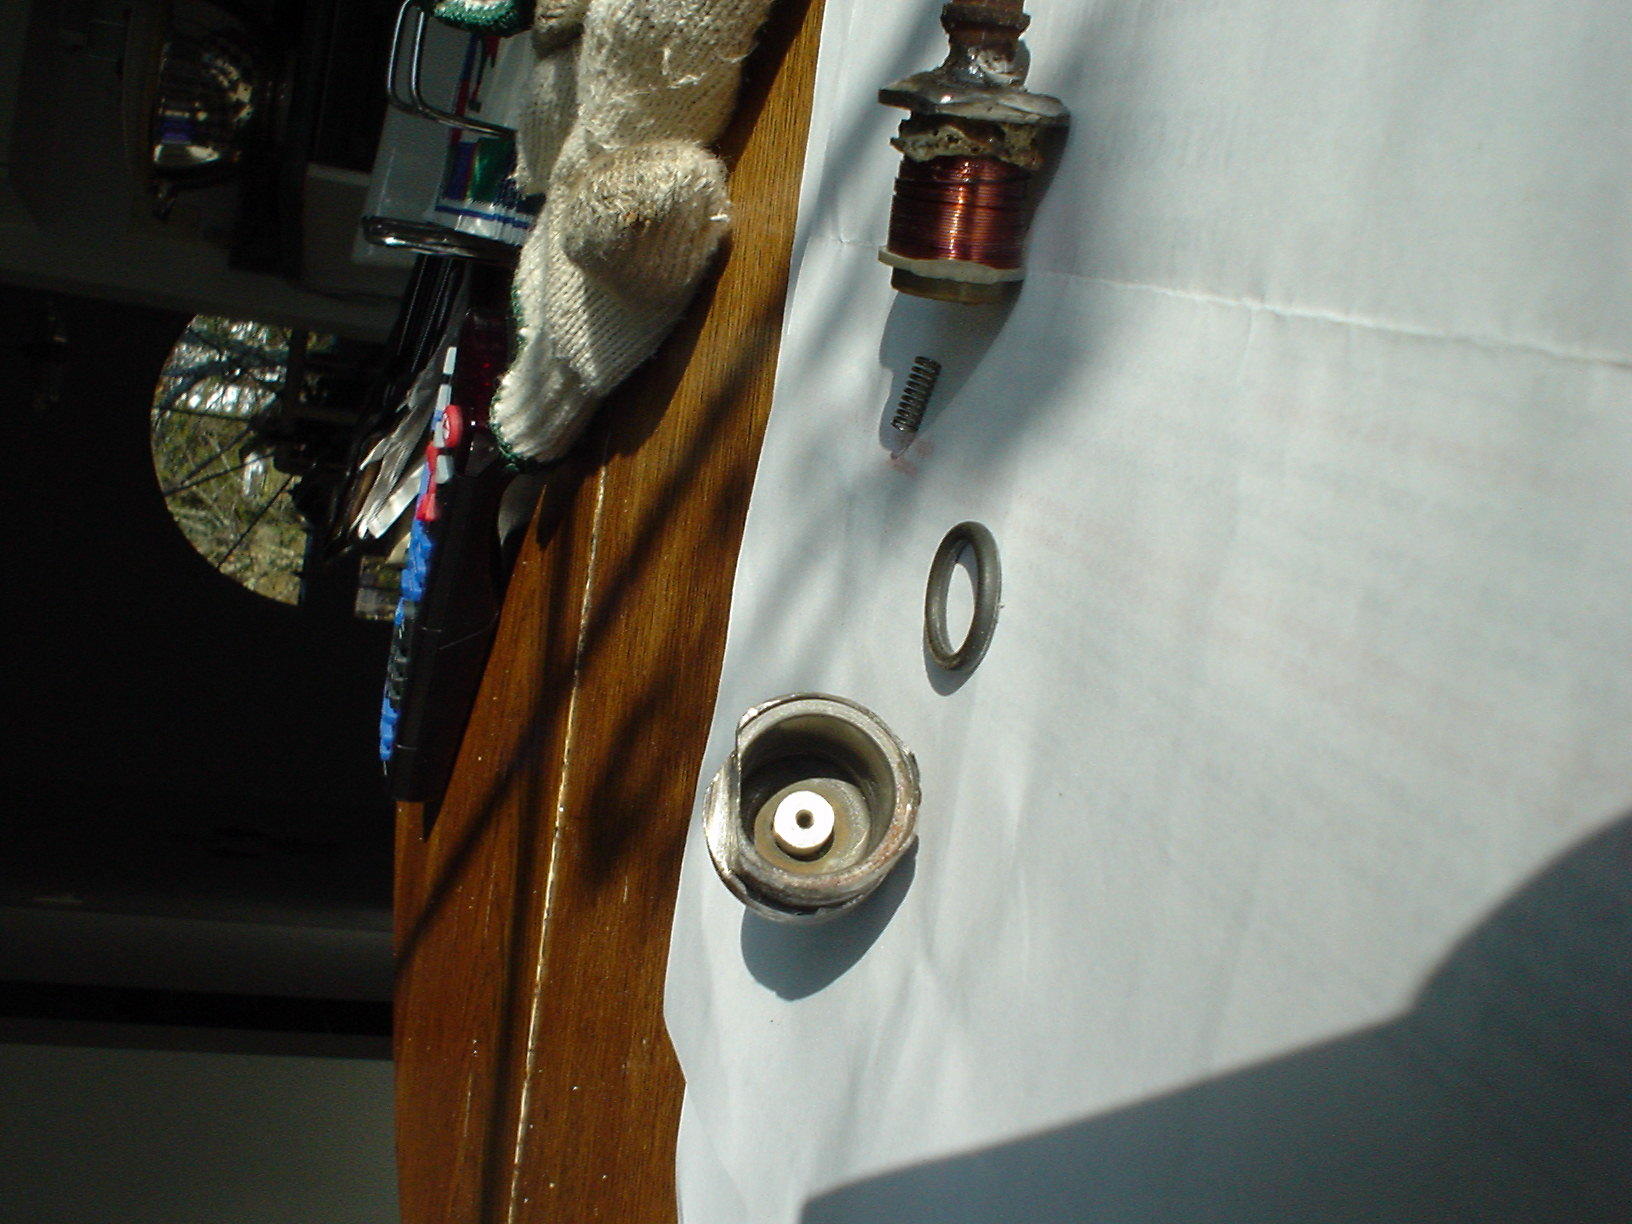
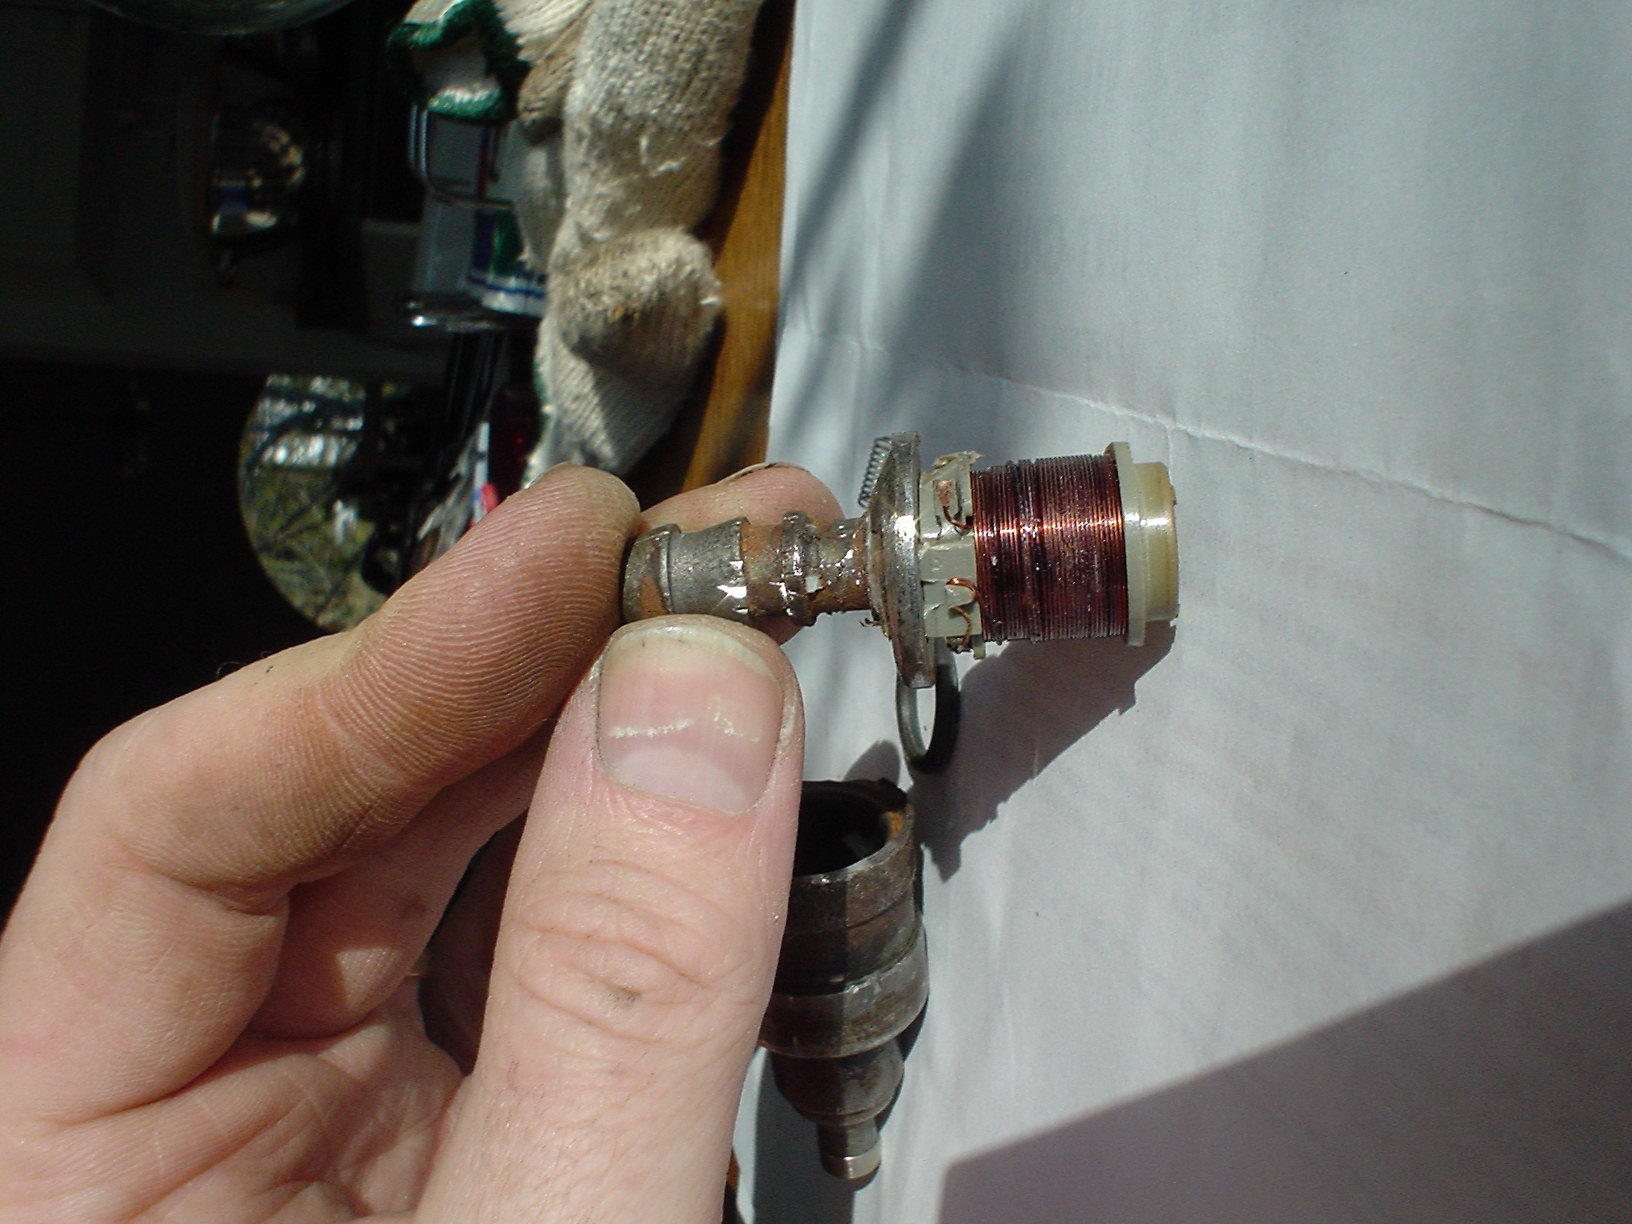
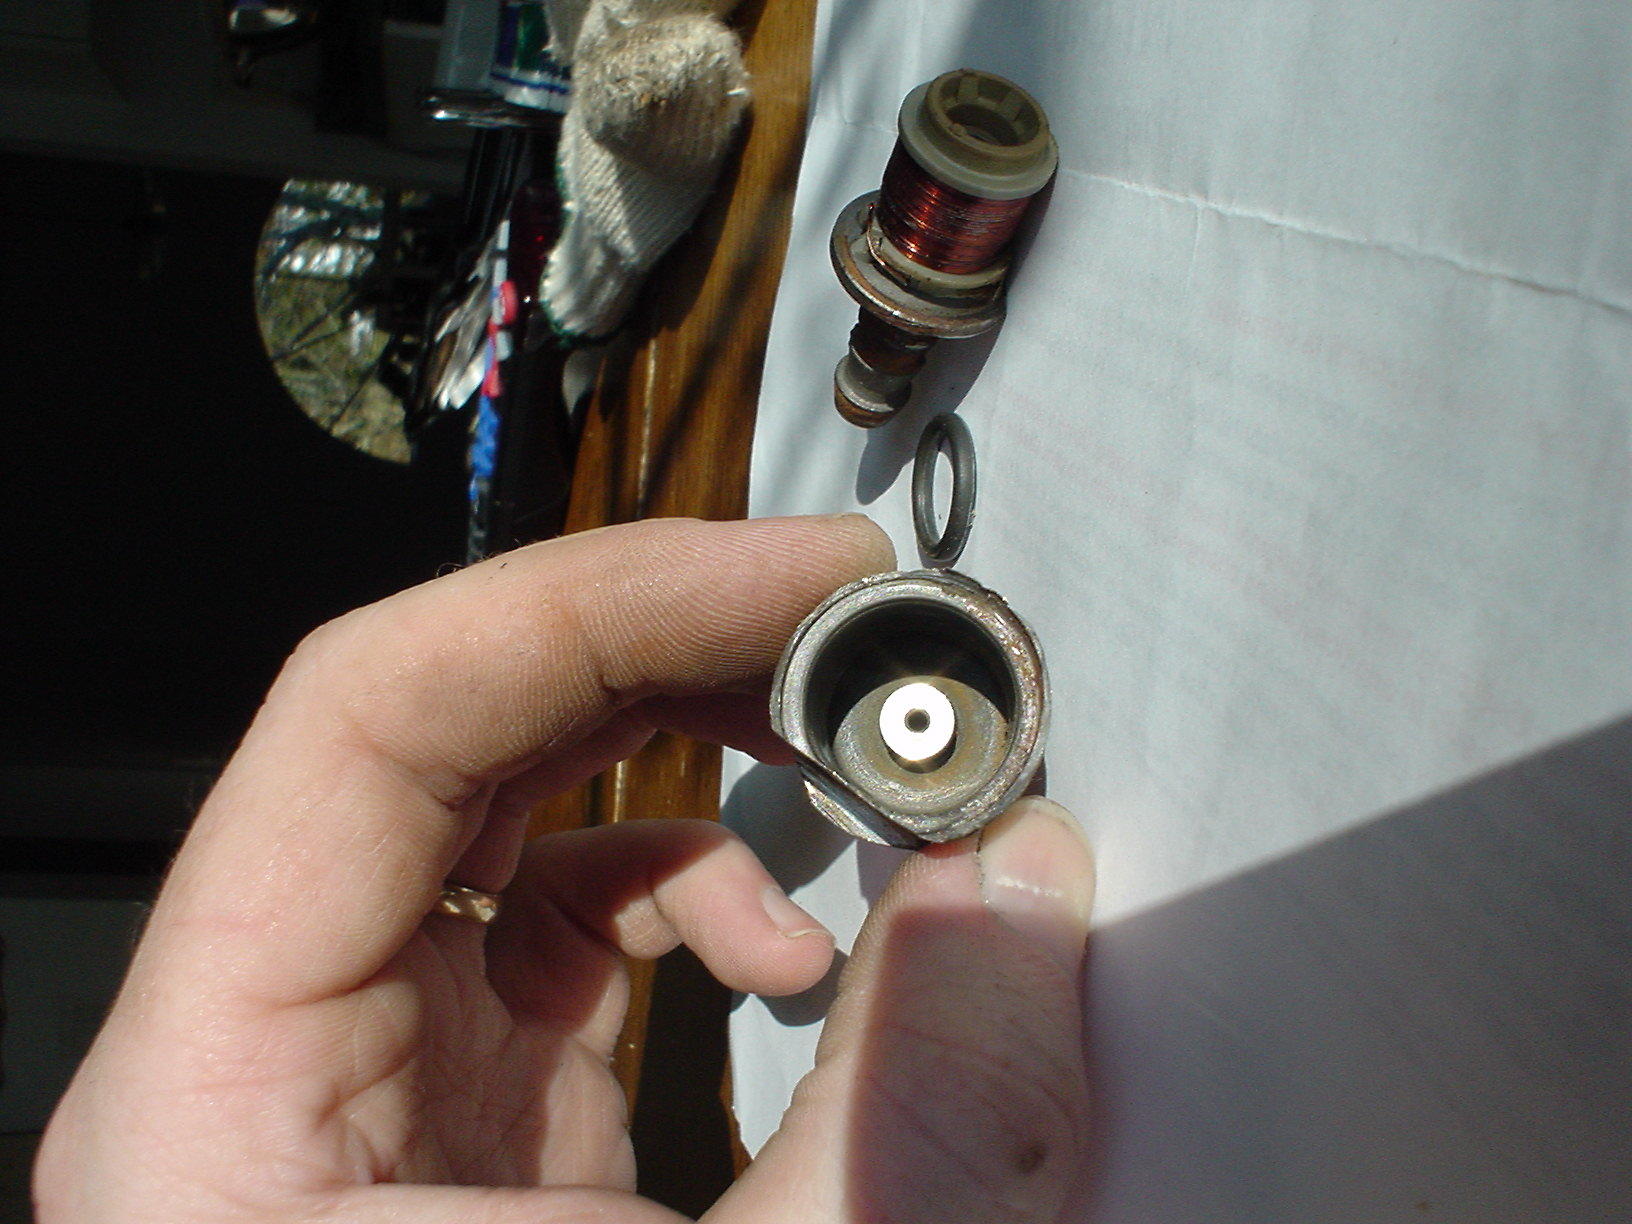
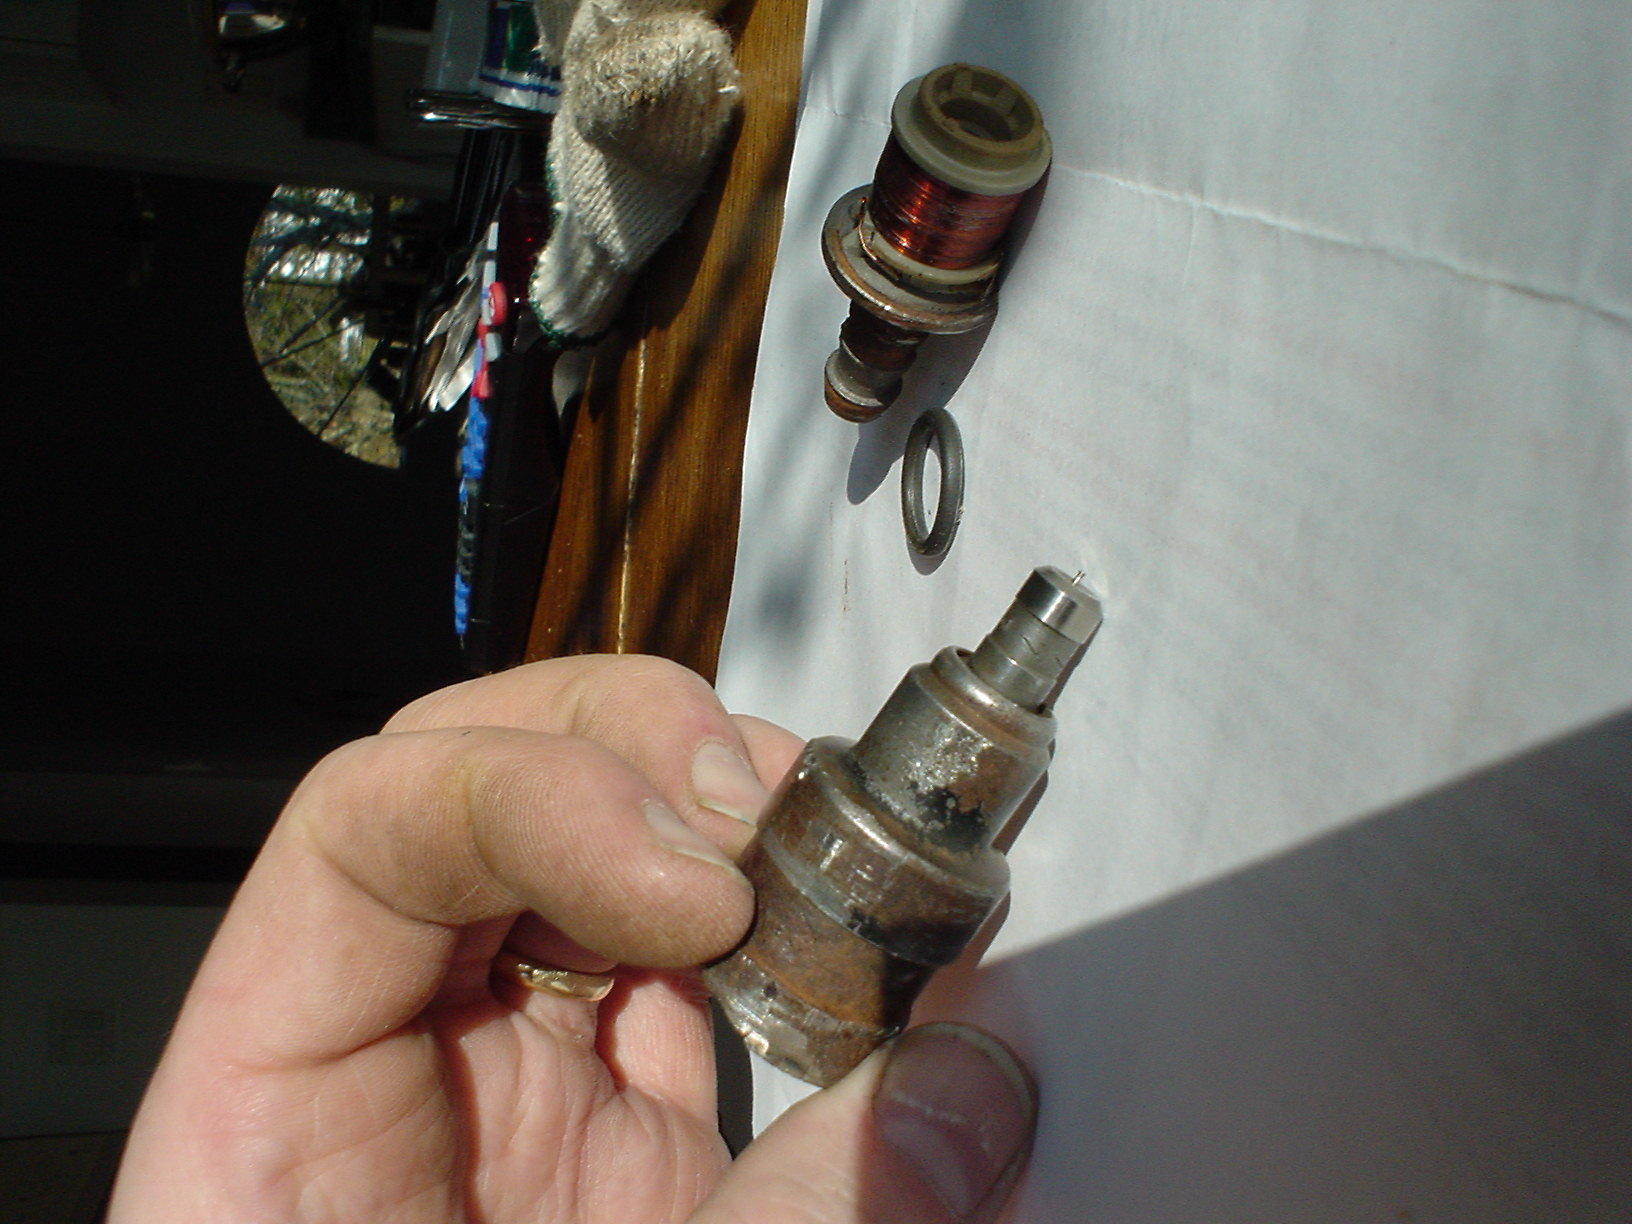
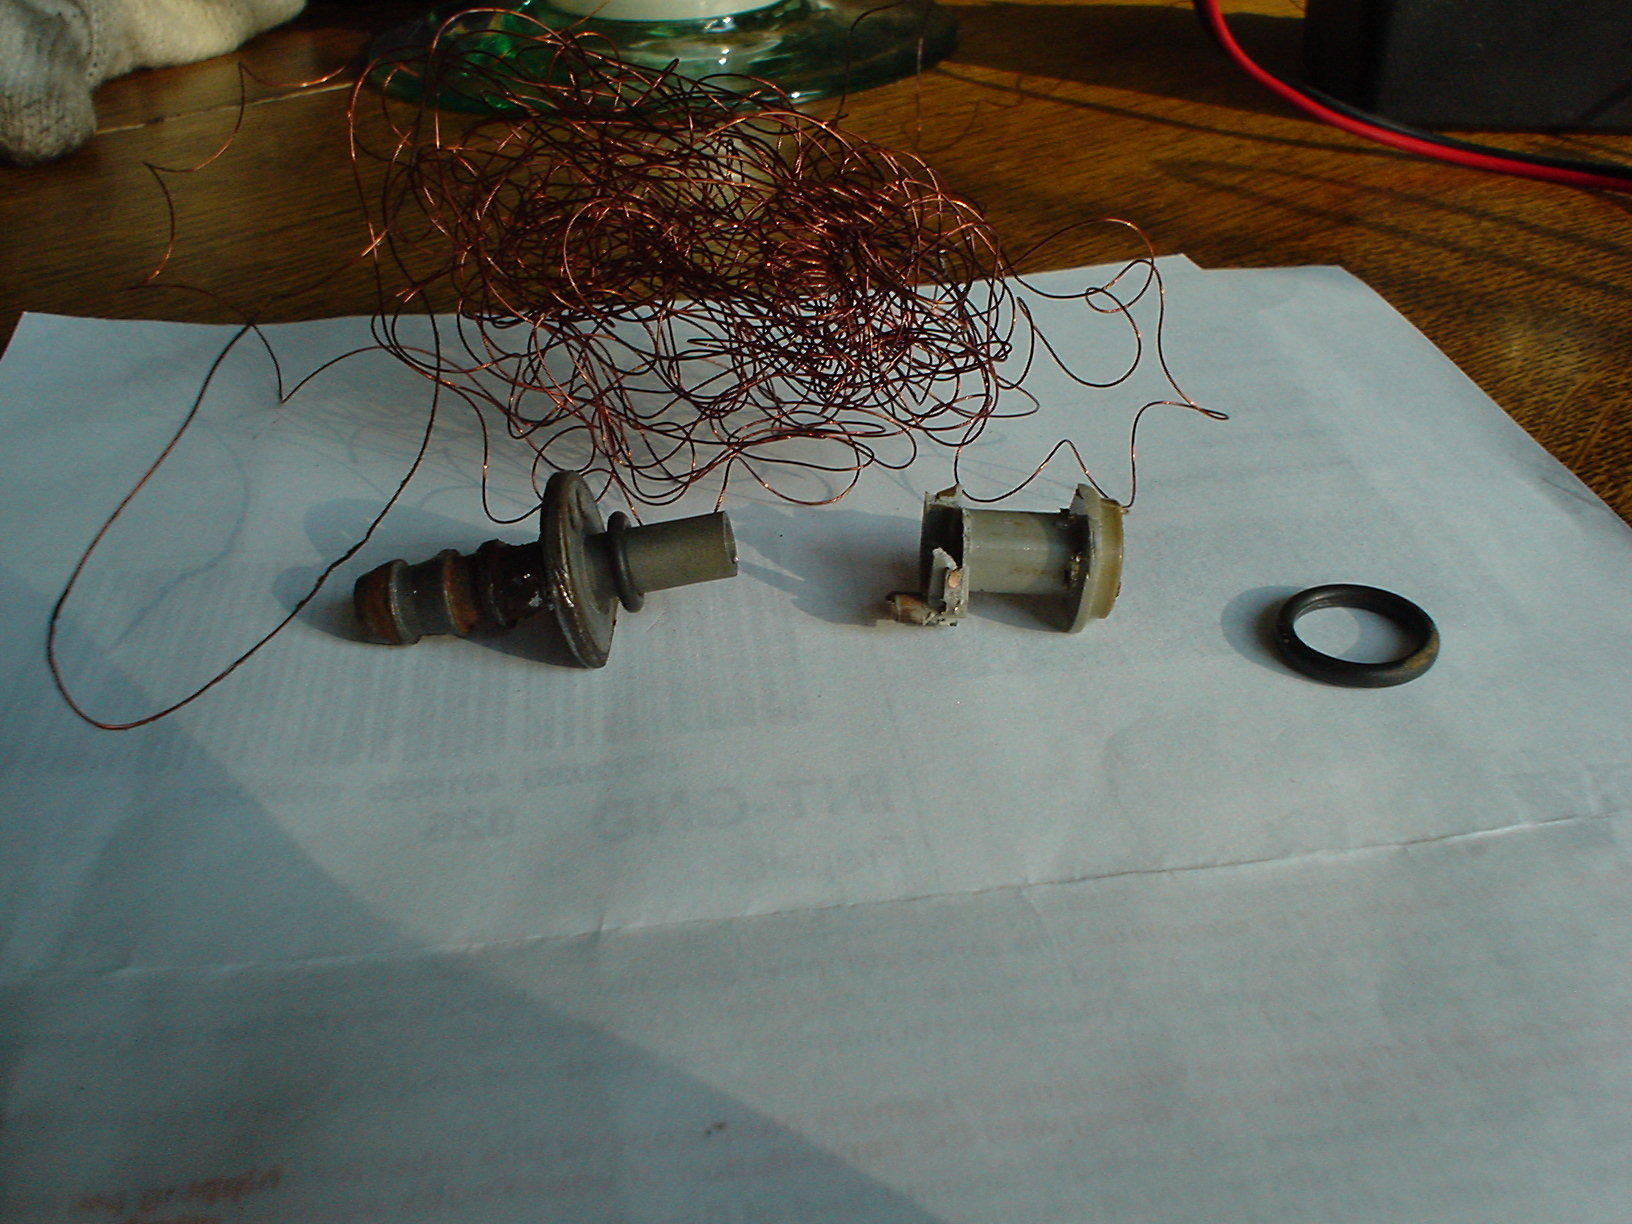
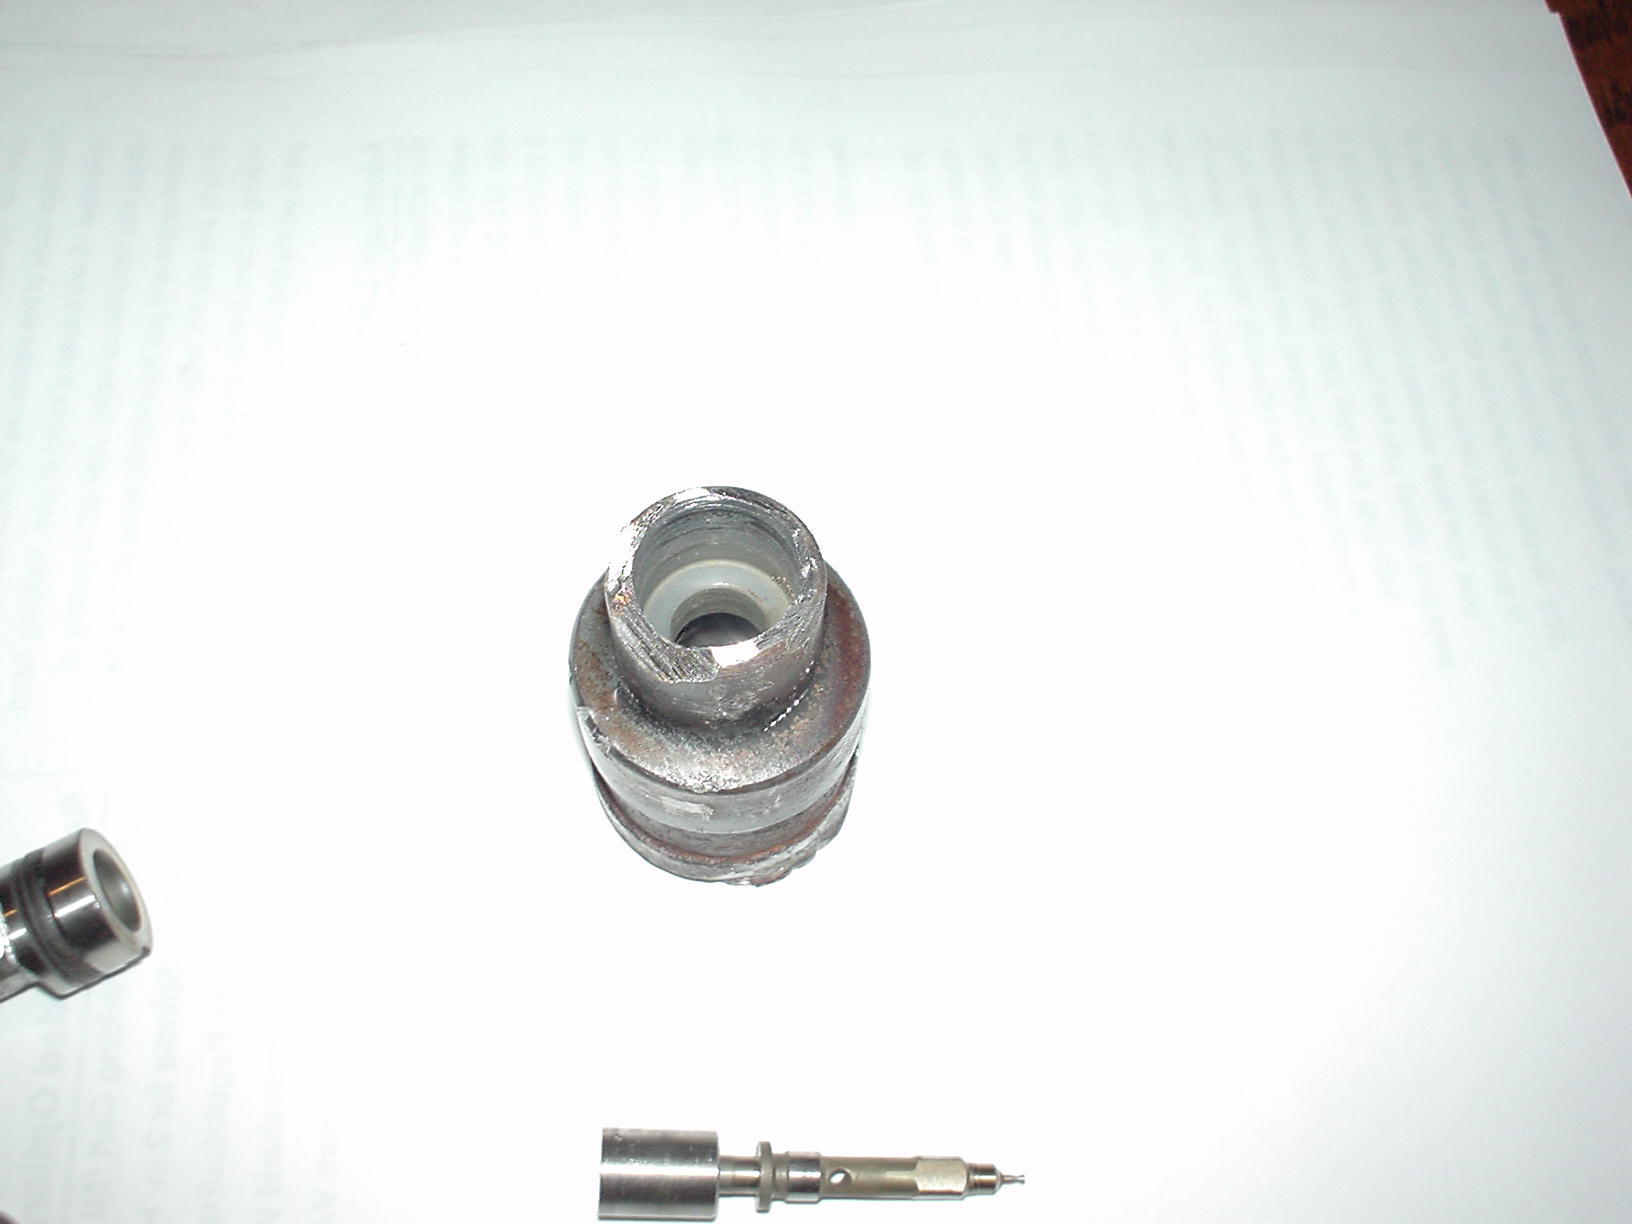
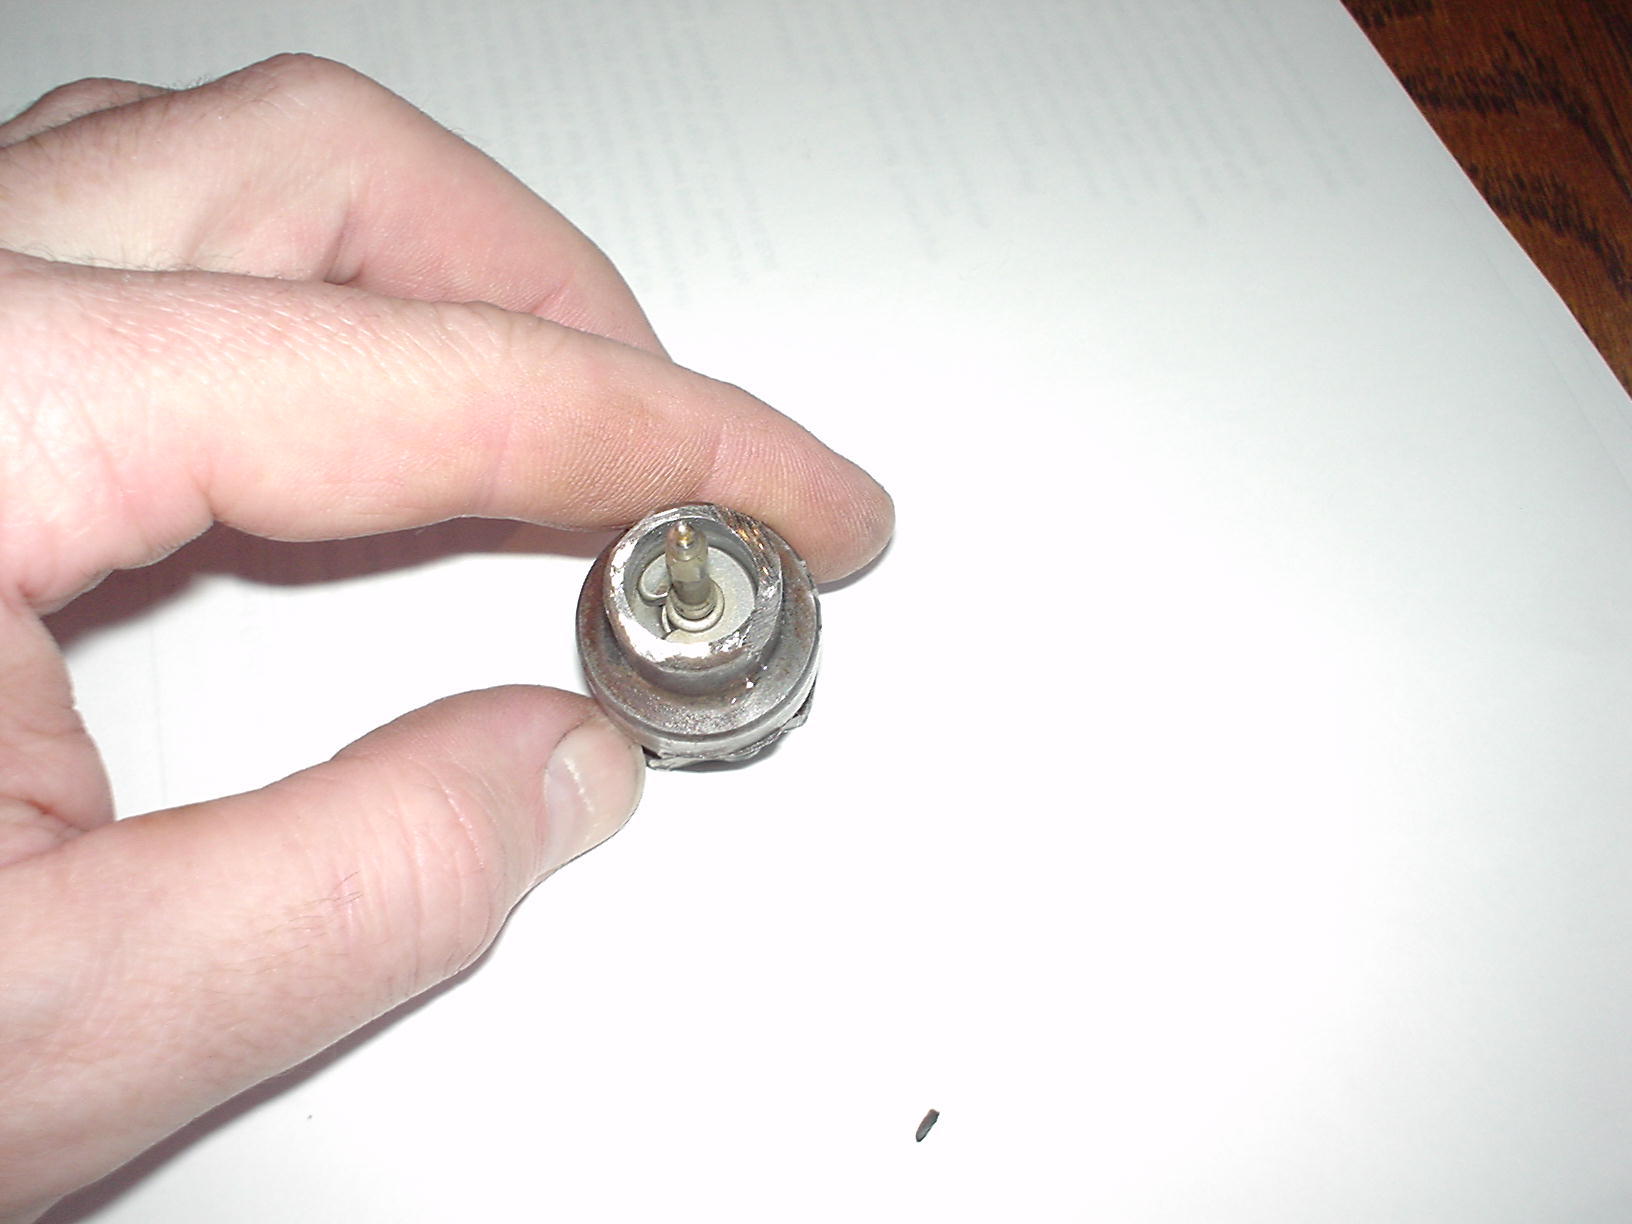
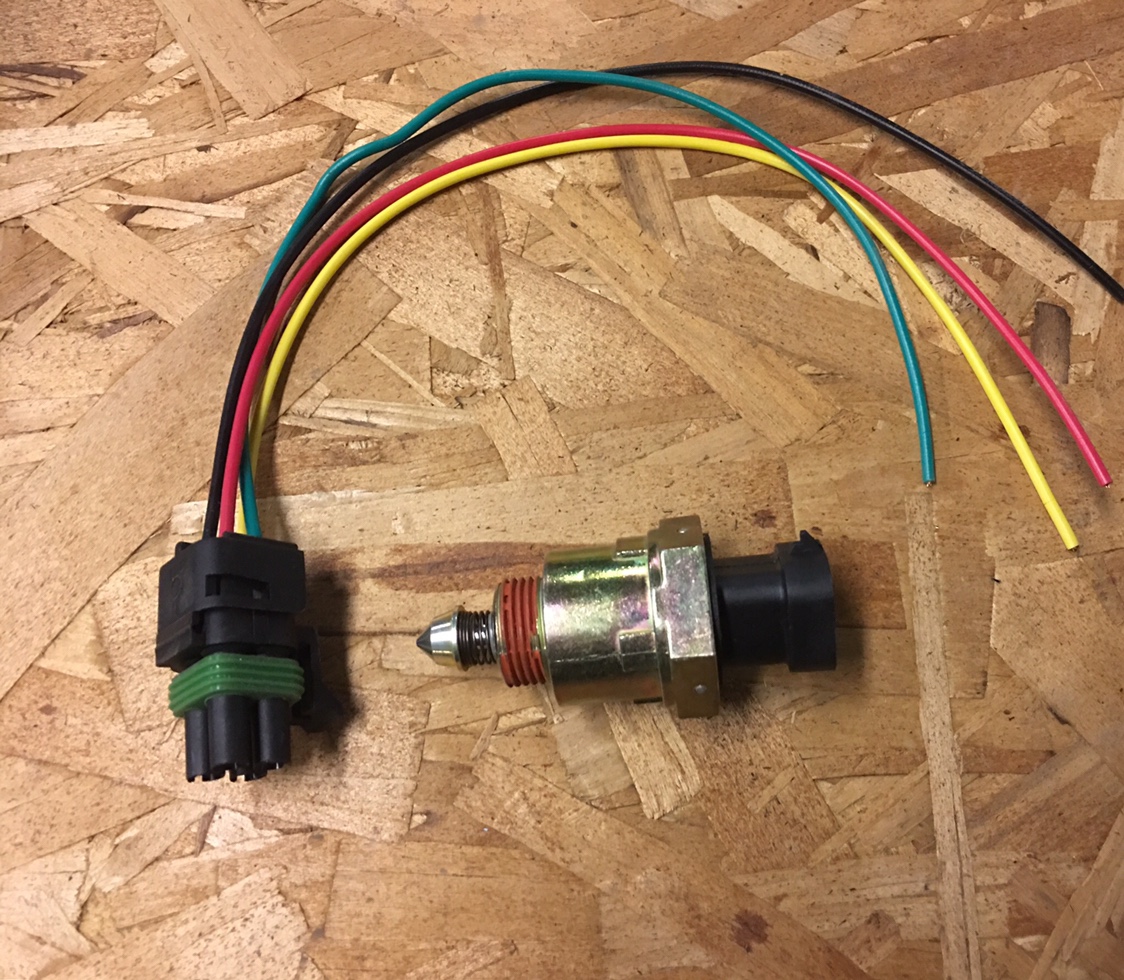
 1 point1 point1 point.... and some deliveries are not... Received the harness for the GM style Idle air Control Valve and they pinned it with female pins! Arrrgh
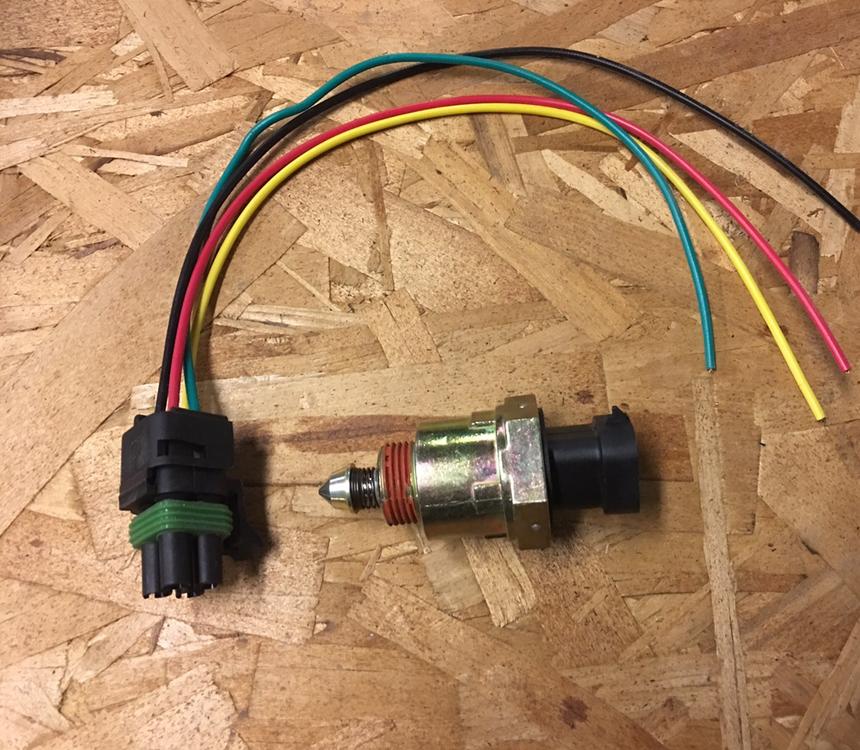
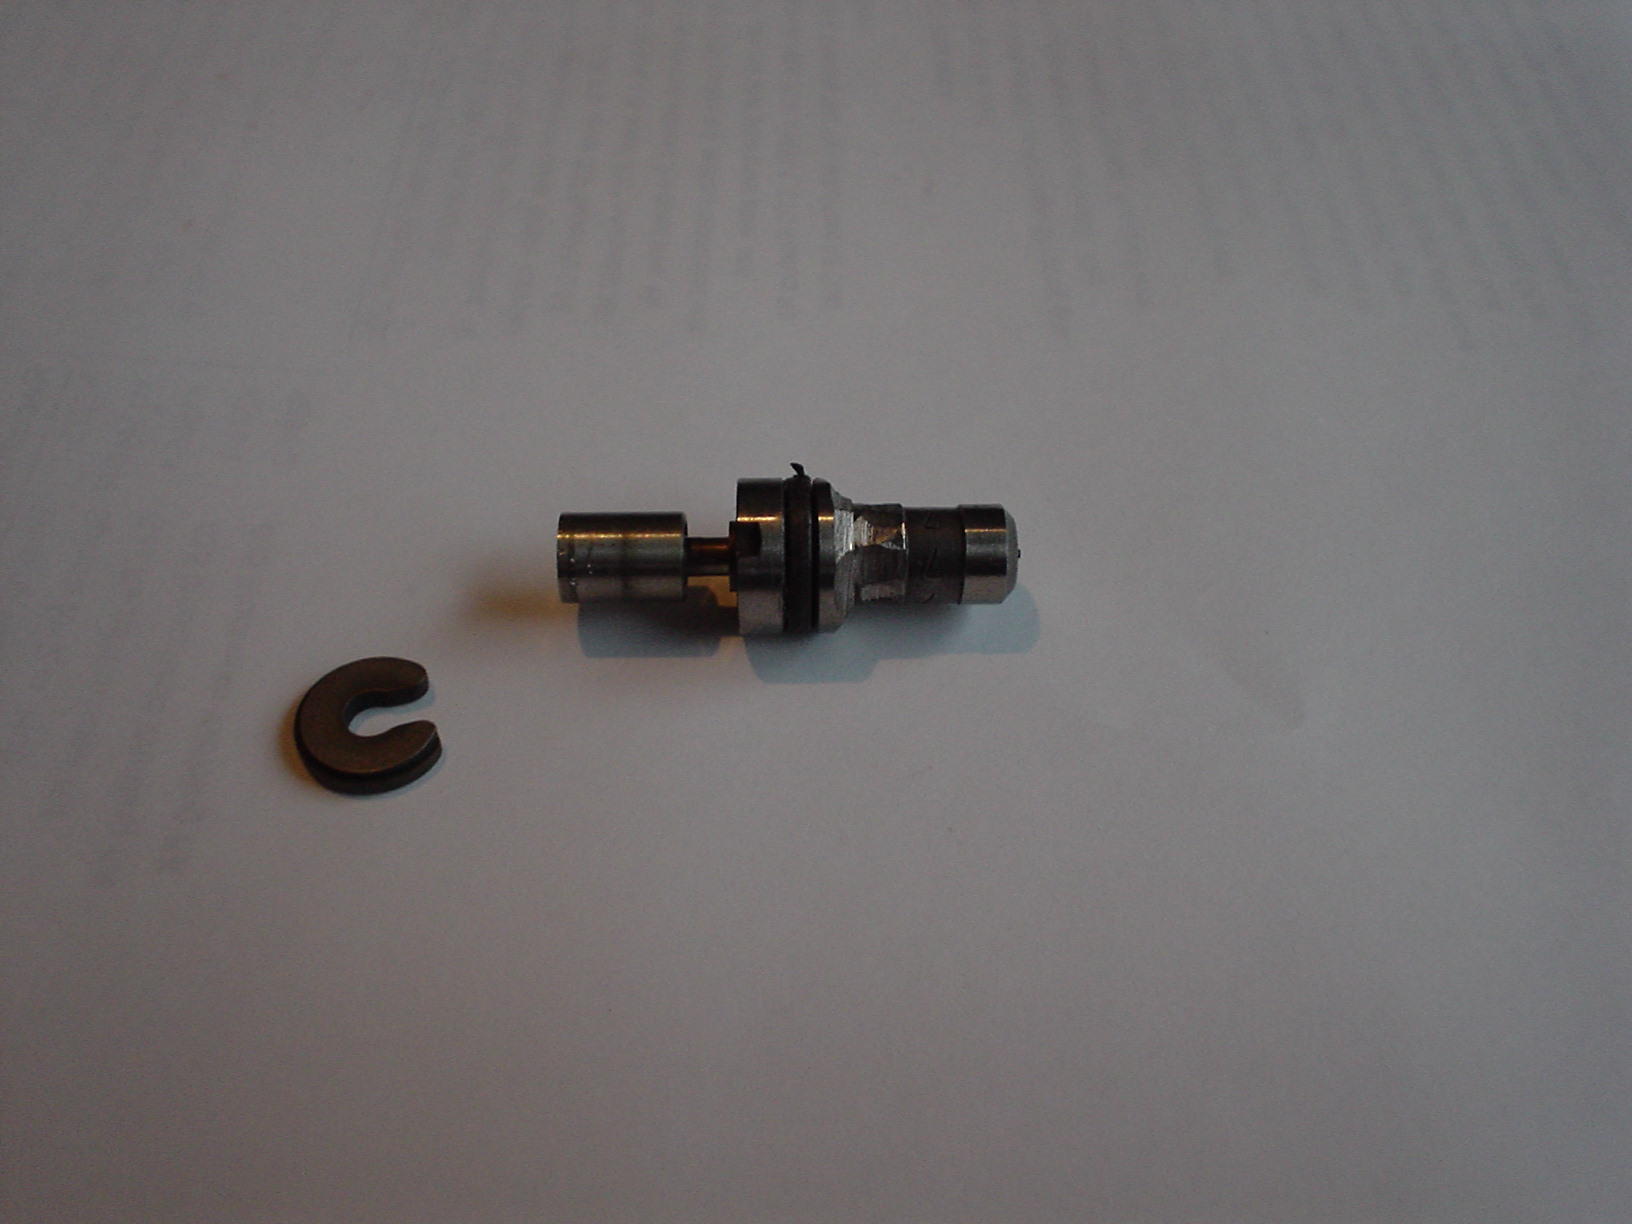
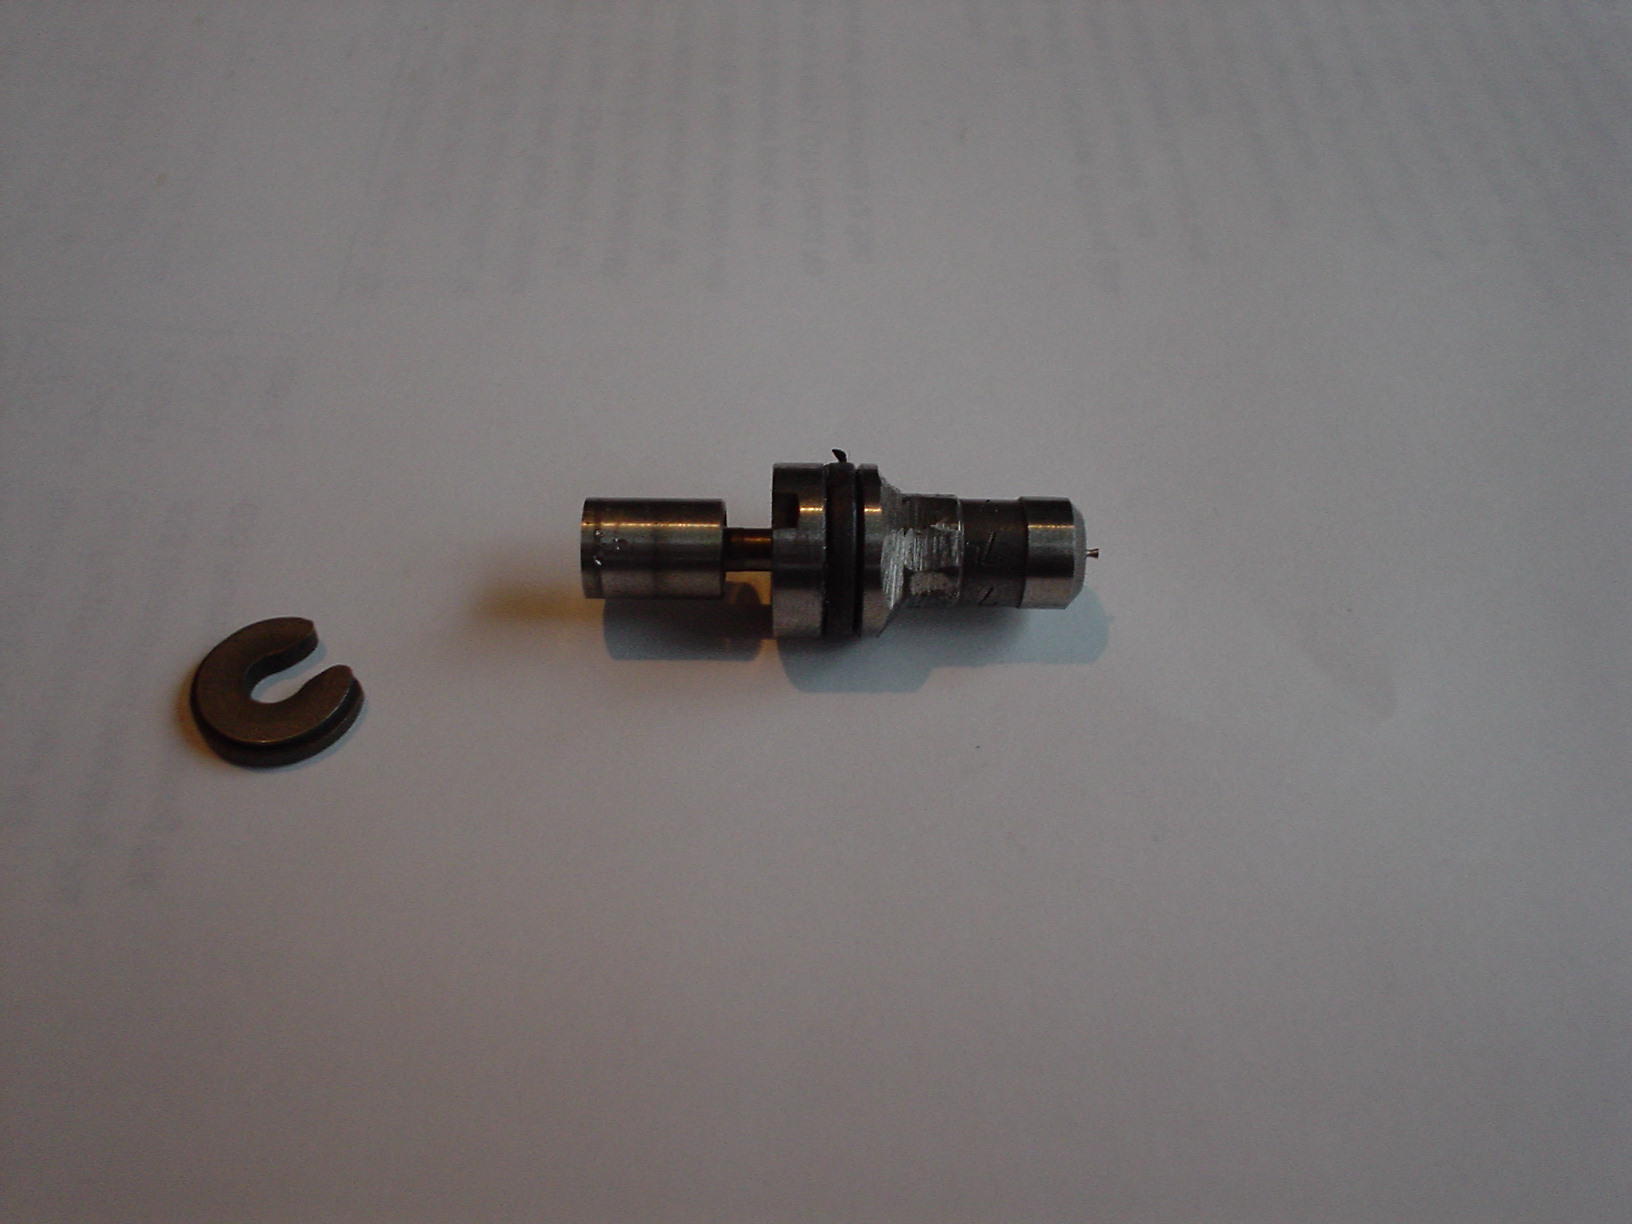
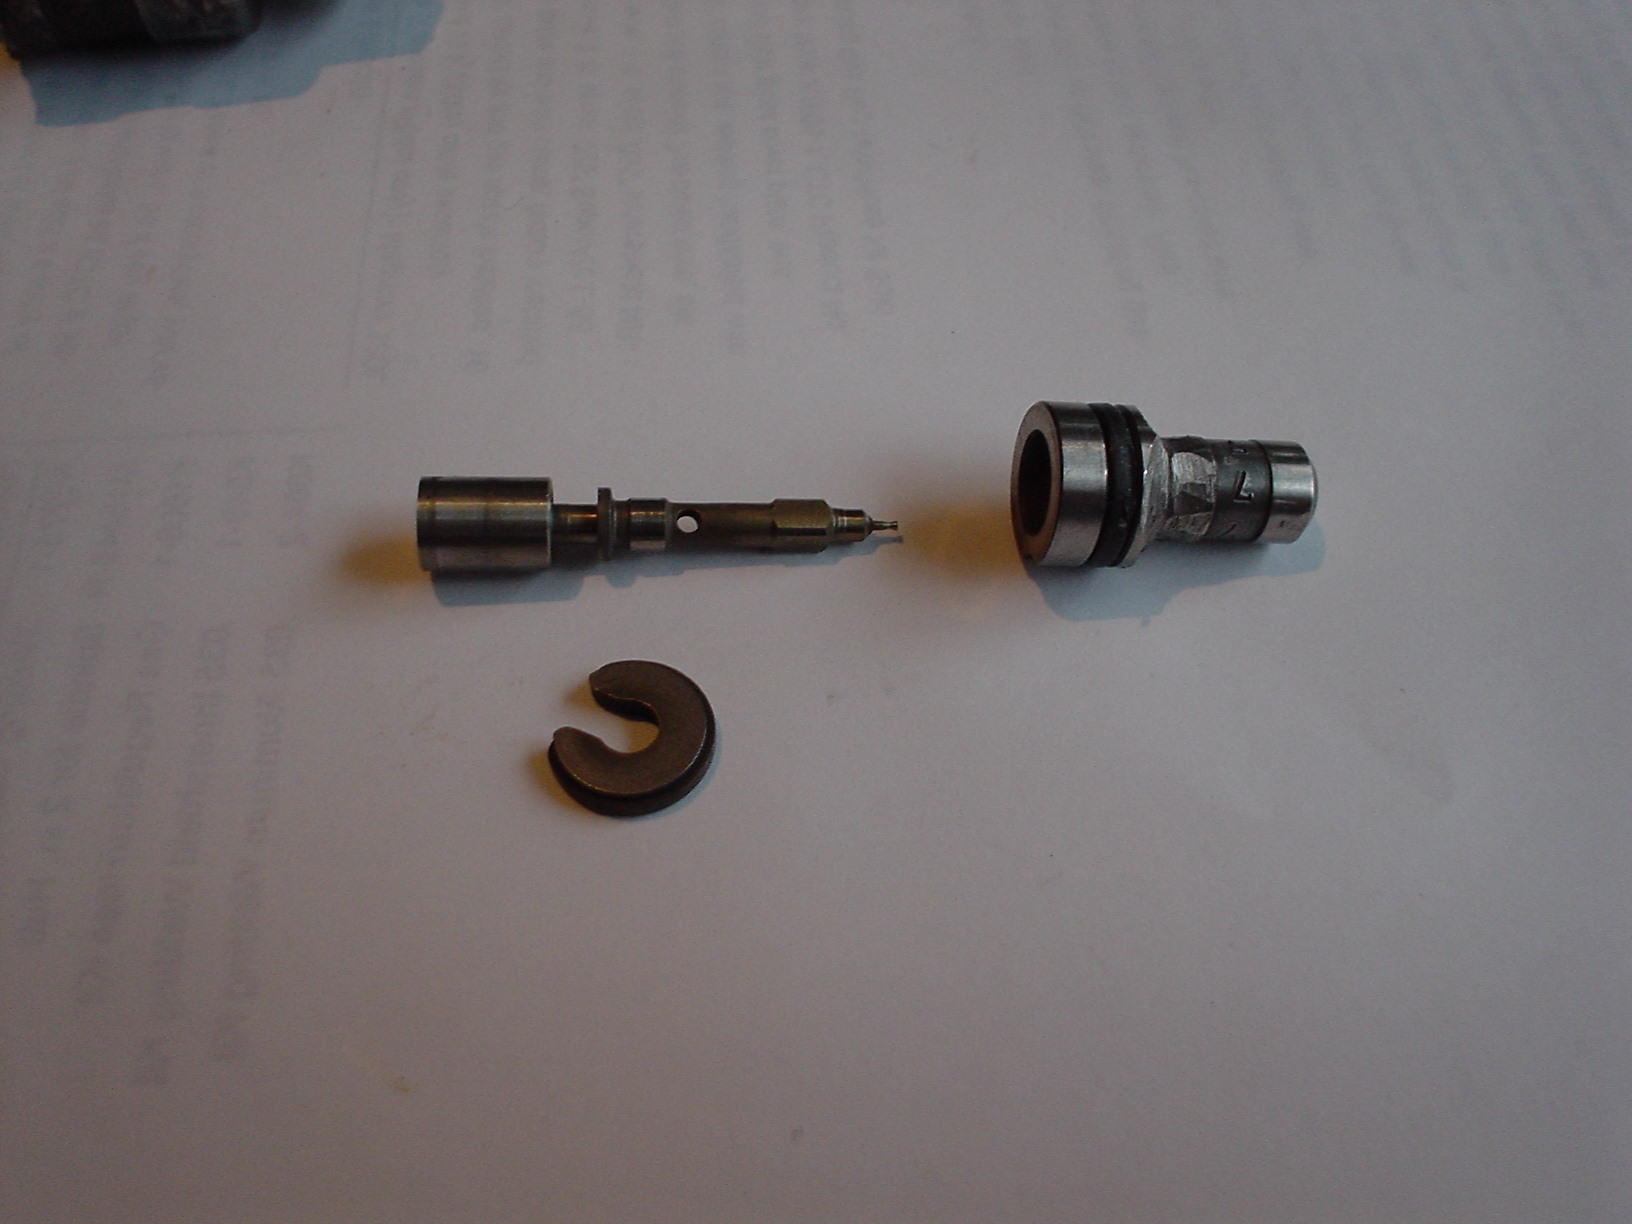
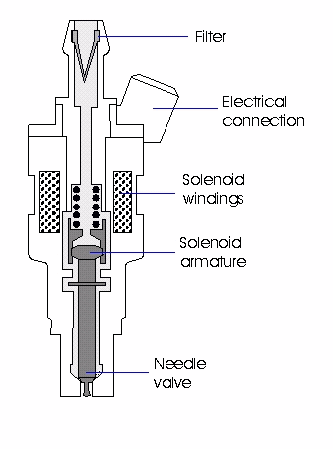
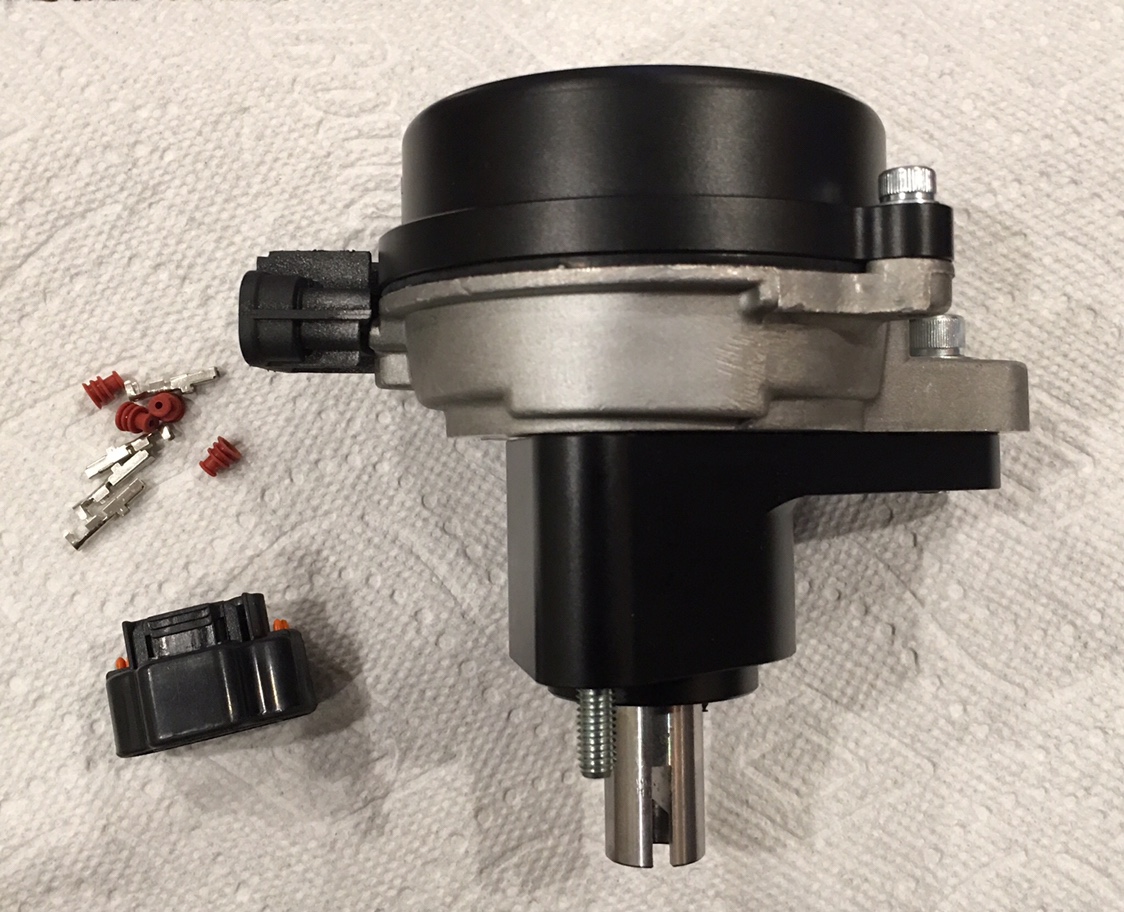
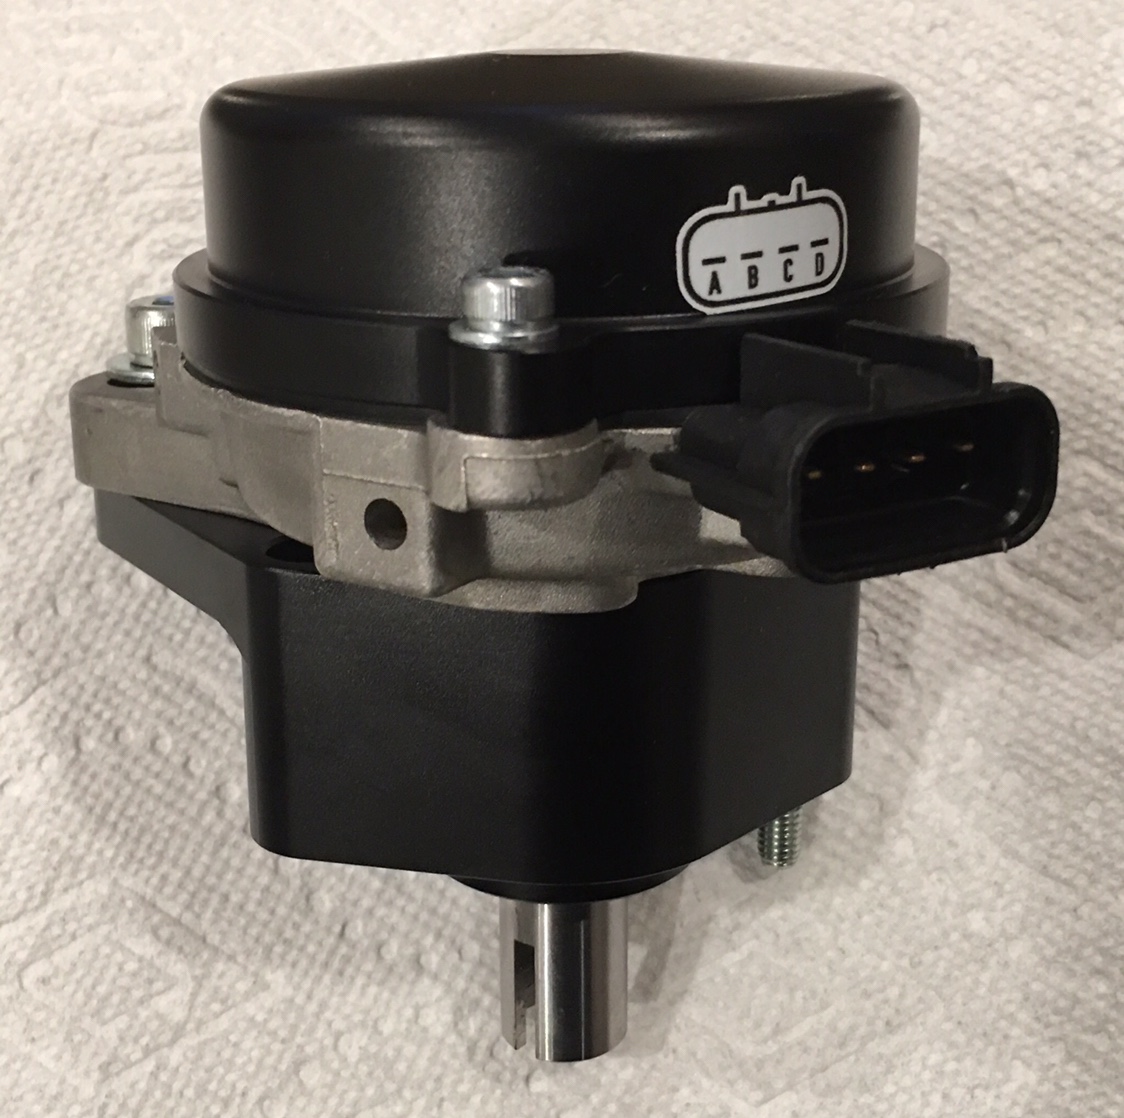
 1 point1 pointGrannyknot – I also have tried to buff with a Dremel but had the same experience – melted part of the lens. I am going to go back sand the burned lens and see if I can get something I like using the clear coat. Thanks for the tip regarding the rubber. I have used the SEM clear, just out of it right now, and you’re right it is good, but I have not been disappointed with any of their products. Great results on your restoration of your plastic. Hard to believe that those old brittle pieces can be brought back to new – nice job. JFA – you’re a better man than I – I used a one inch wheel on a dremel and I still scared it. I think my biggest problem was the speed, had it turning to fast, but I just don’t have the touch to buff plastic, that’s why I try to avoid the runs and the orange peel, and when I can’t I develop my skill at rationalization. “Its only a side marker”, “No one will ever notice it” and so on. In the past I have always been shamed into buying a new lens. Once again, thanks for the responses. Regards, ron1 point1 pointI went to MSA's website and they are testing now with results coming soon. https://www.thezstore.com/page/TZS/CTGY/classic20b04 Click on the "test pilot" page.1 point1 point1 pointMy old Mopar friend cleaned his 56 Fury lenses with steel wool and shot them with clear years ago. No adhesion promoter and they still look great.1 point1 point@Joseph@TheZStoreThis is awesome news. Have you guys installed in one or more cars and tested on street and track? If so, a write-up by drivers describing the characteristics and other setup elements (which springs, anti-roll bars, etc) would be really helpful. If not, any chance this is being considered?1 point1 point1 point1 point1 point...and deliveries are fun! The new Crank Angle Sensor from One Six Industries!
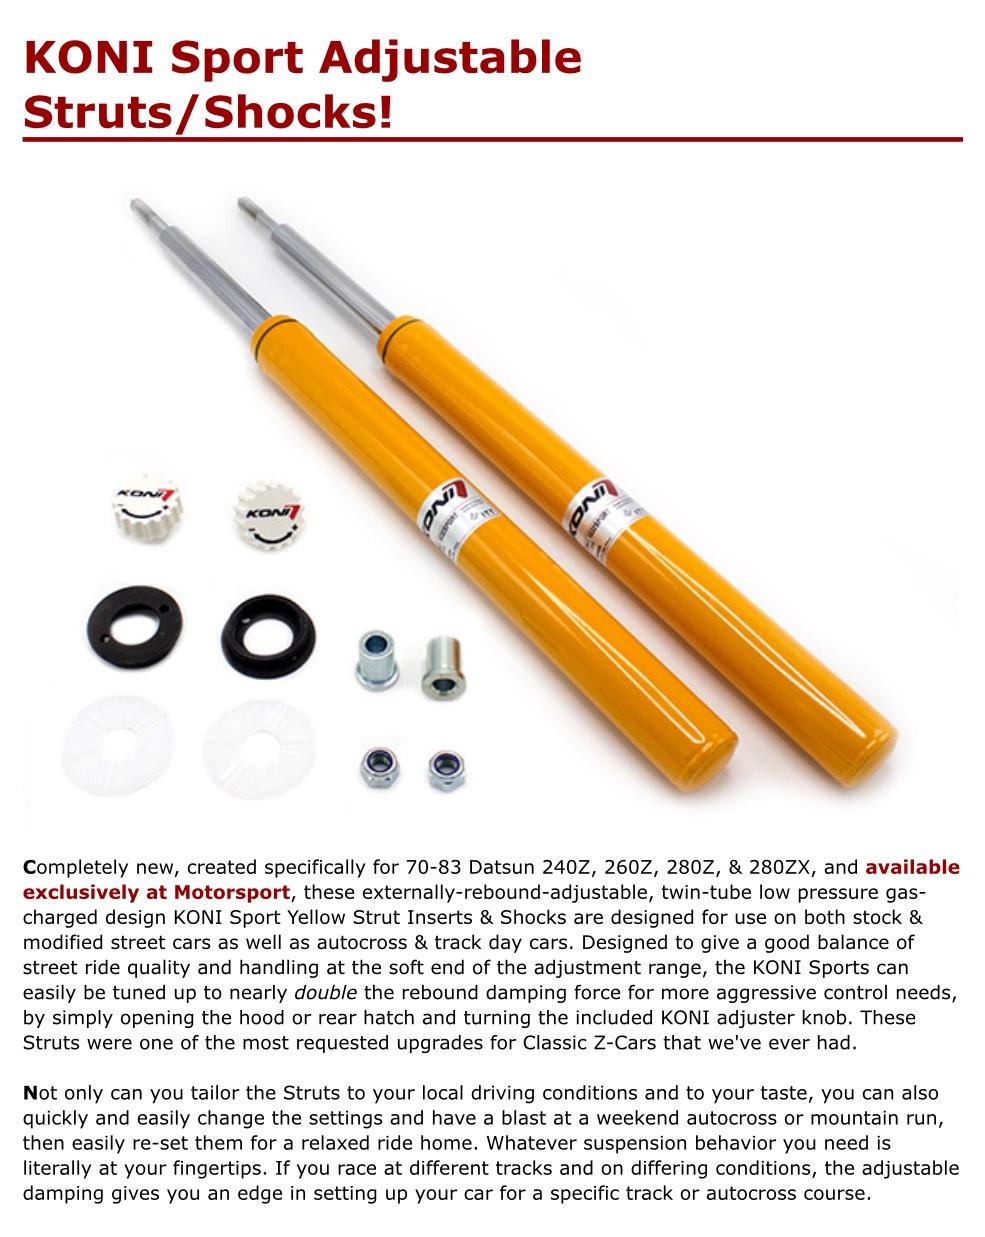
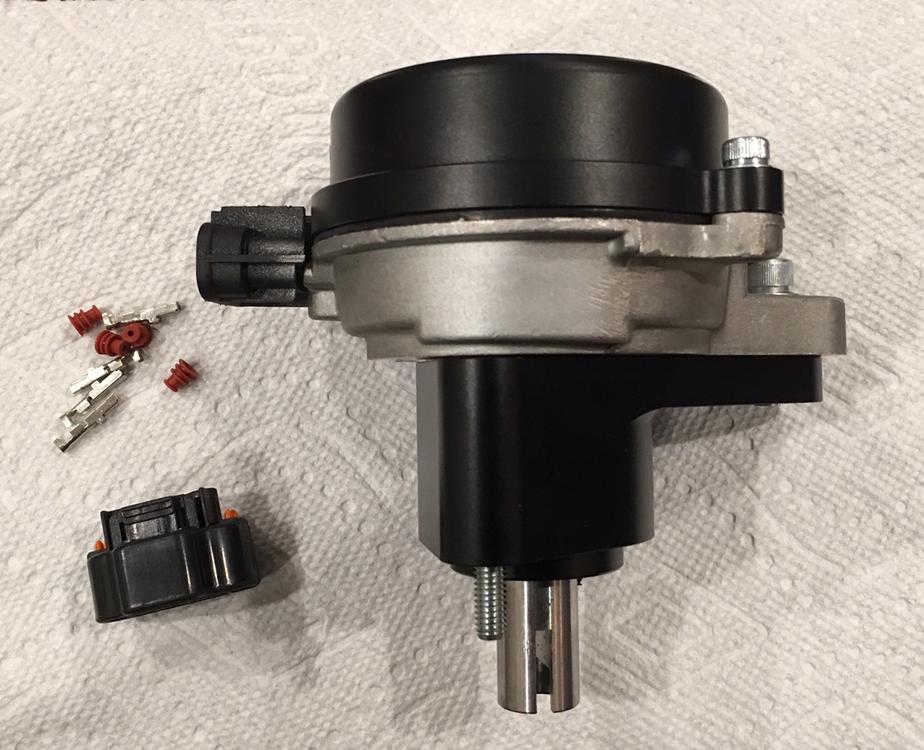
 1 point1 pointThe new Fusible links will be here tonight and I'll put them in. I'll get back to everyone when I get this in and test it and let you know what happens.1 point1 pointI will have to look in the AU parts manual Kats to see what the part no. is for 260z springs. I am not sure of the spec, but I believe it's similar to European.1 pointI was at that race in Atlanta, with my favorite girl, eating leftover turkey and cranberry sandwiches from Thanksgiving.....on the Esses......seeing the Z’s crushing the other competition has never left my memories. I went out and bought a Z soon after. The rest is history.......John Morton and Pete Brock should get a commission for every Nissan I’ve bought since!
 1 point1 point@outlawswine A small thing, many of these threads get broken links in them months or years later when the pictures are no longer hosted where ever (photobucket sucks) If you upload them to the site. The administrators will make sure they last and others can learn from these threads with the pictures still present...1 point1 point1 point1 pointIt is interesting that the lash pad marks are in different places in the total rotation. To me this means that for some period of years the car would sit for a long time untouched and then someone would try to start it, rinse, repeat.1 point1 pointLooks good to me. I think I see where lobes were sitting on the rocker pads? No big deal though, that'll wear right off when it's running. Spray bar looks good, springs are all in place, you have a nice car from what I can tell. That 'rats nest' of crap around the carbs will clean up nicely and look much better. @Zup will be your new hero. He has a '73 we all kinda claim because it has won so many awards while wearing a Classic Z Cars "club jacket". Jim's (Zup} '73...
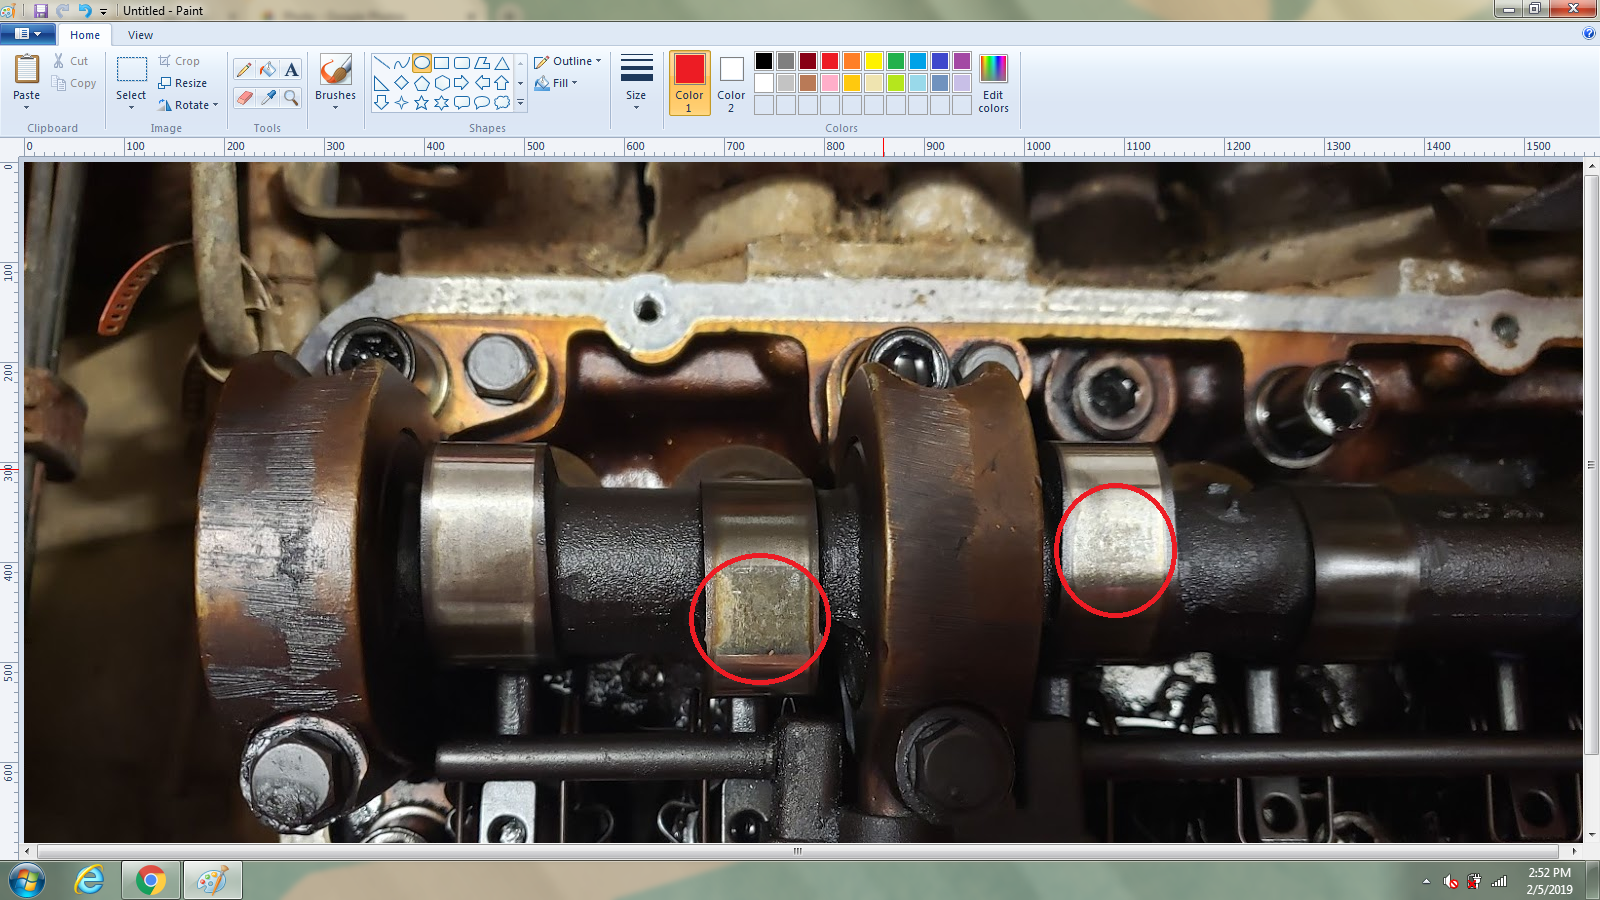
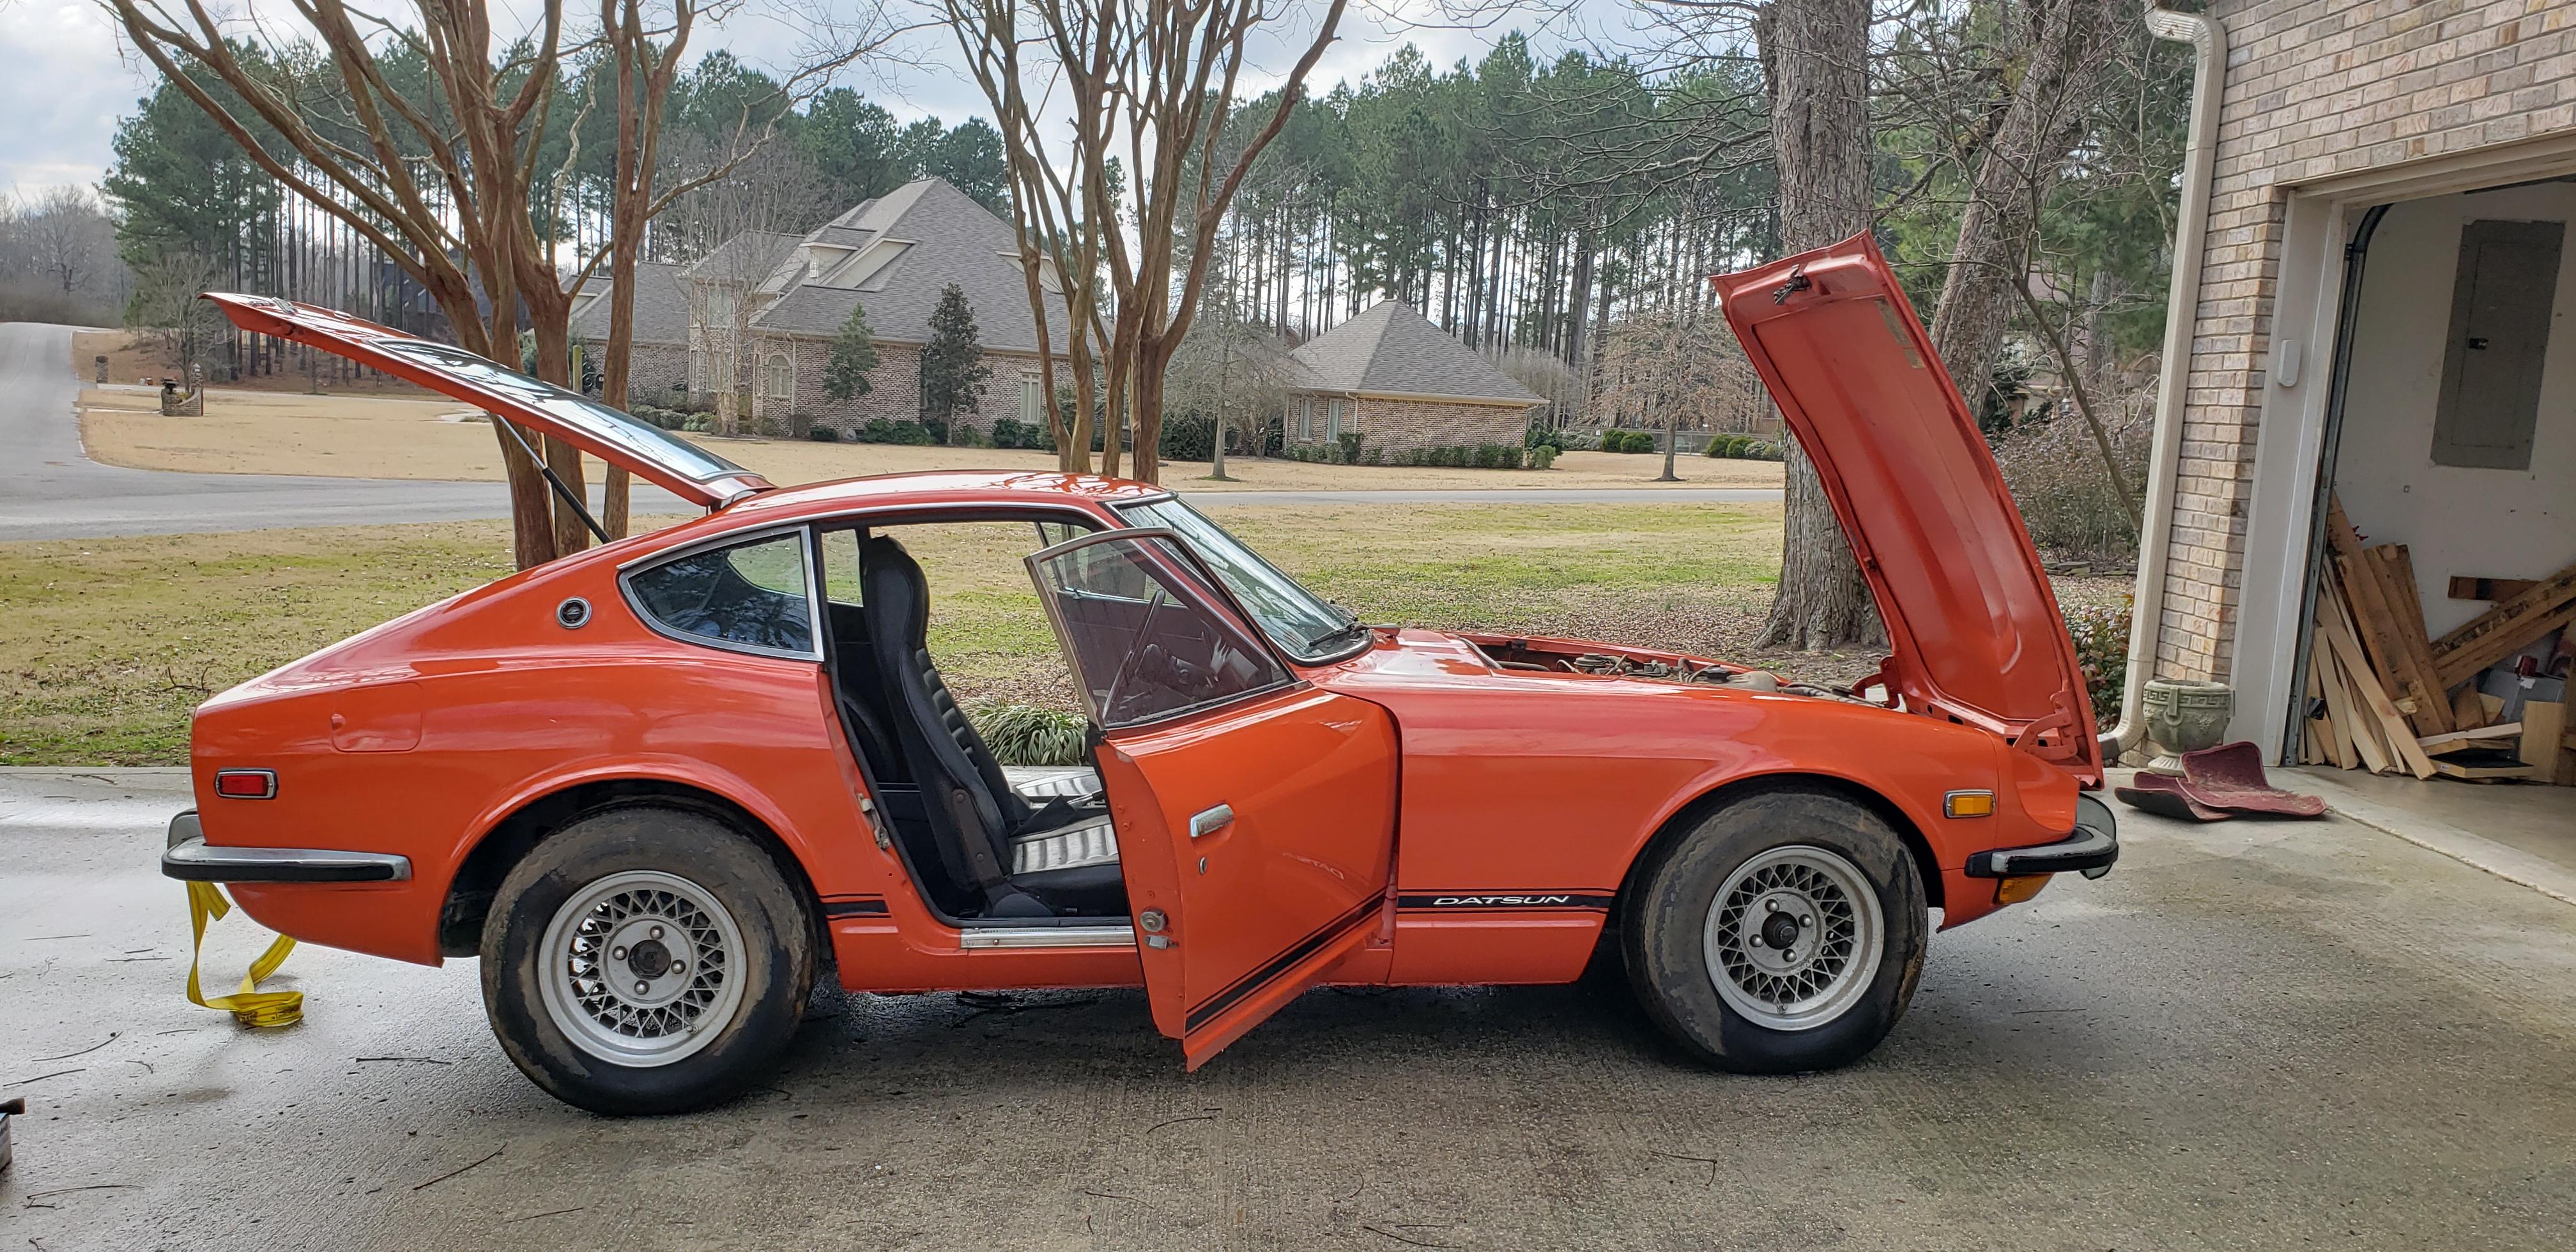
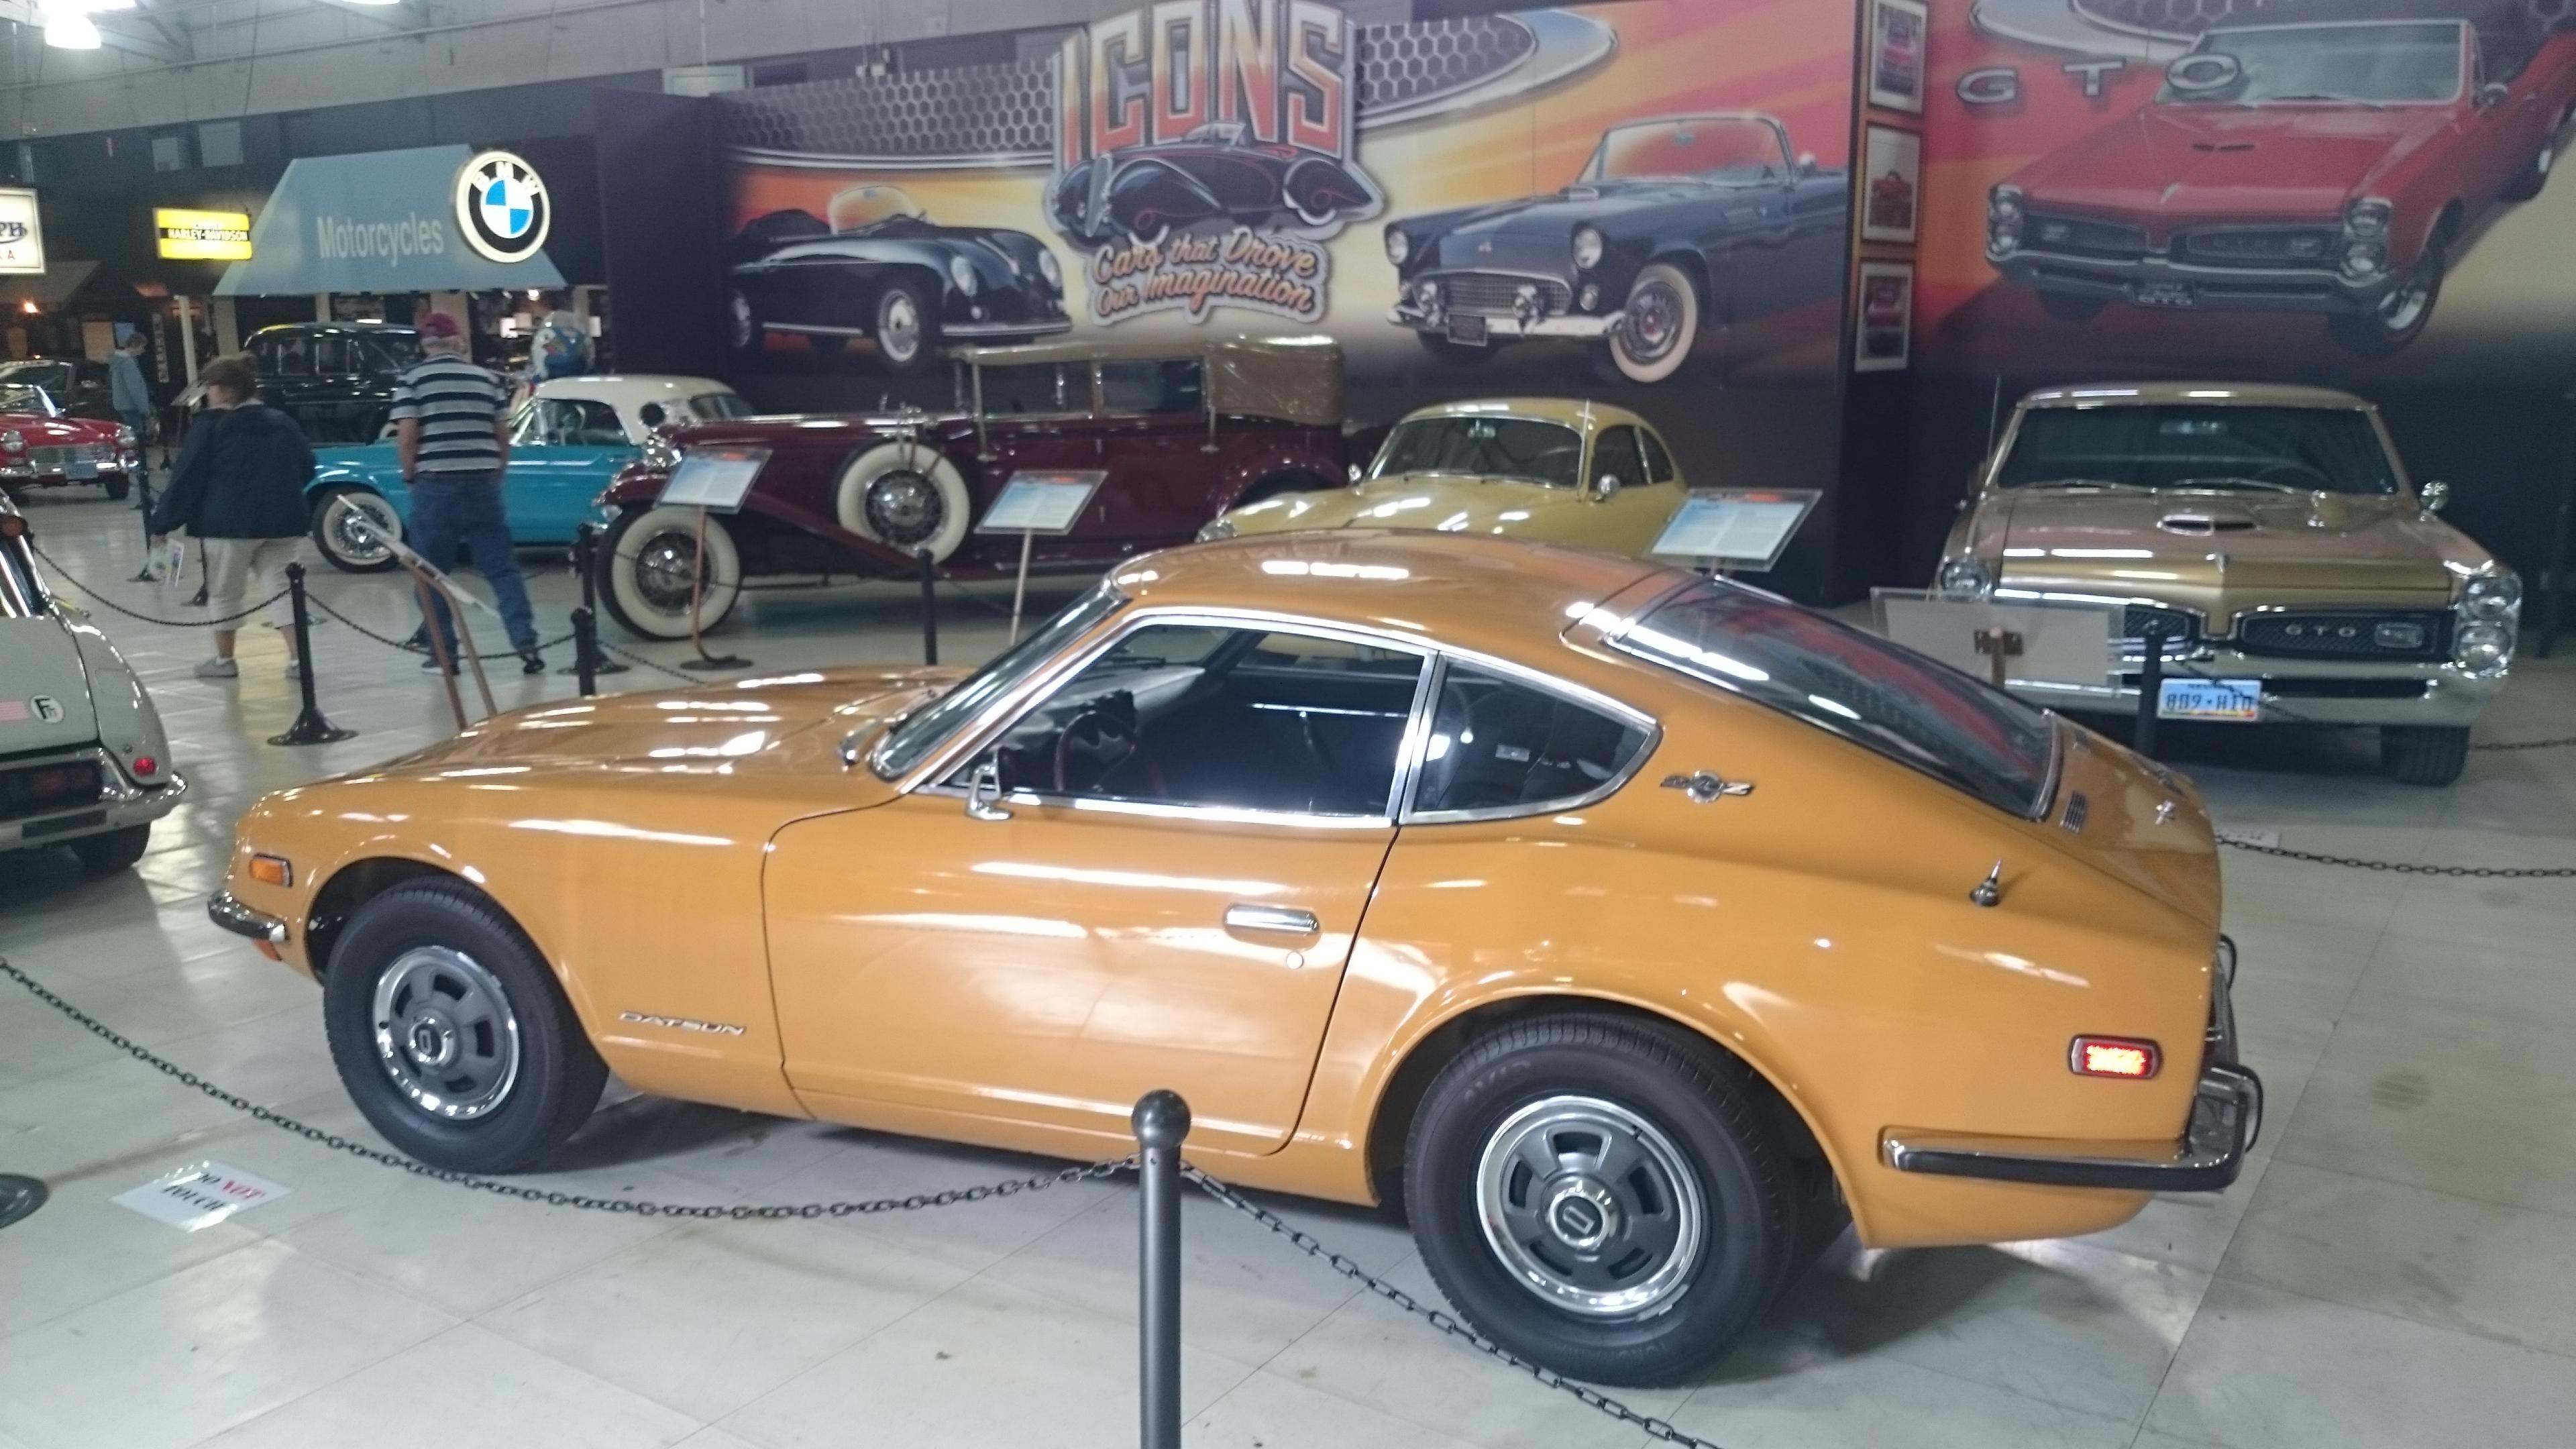
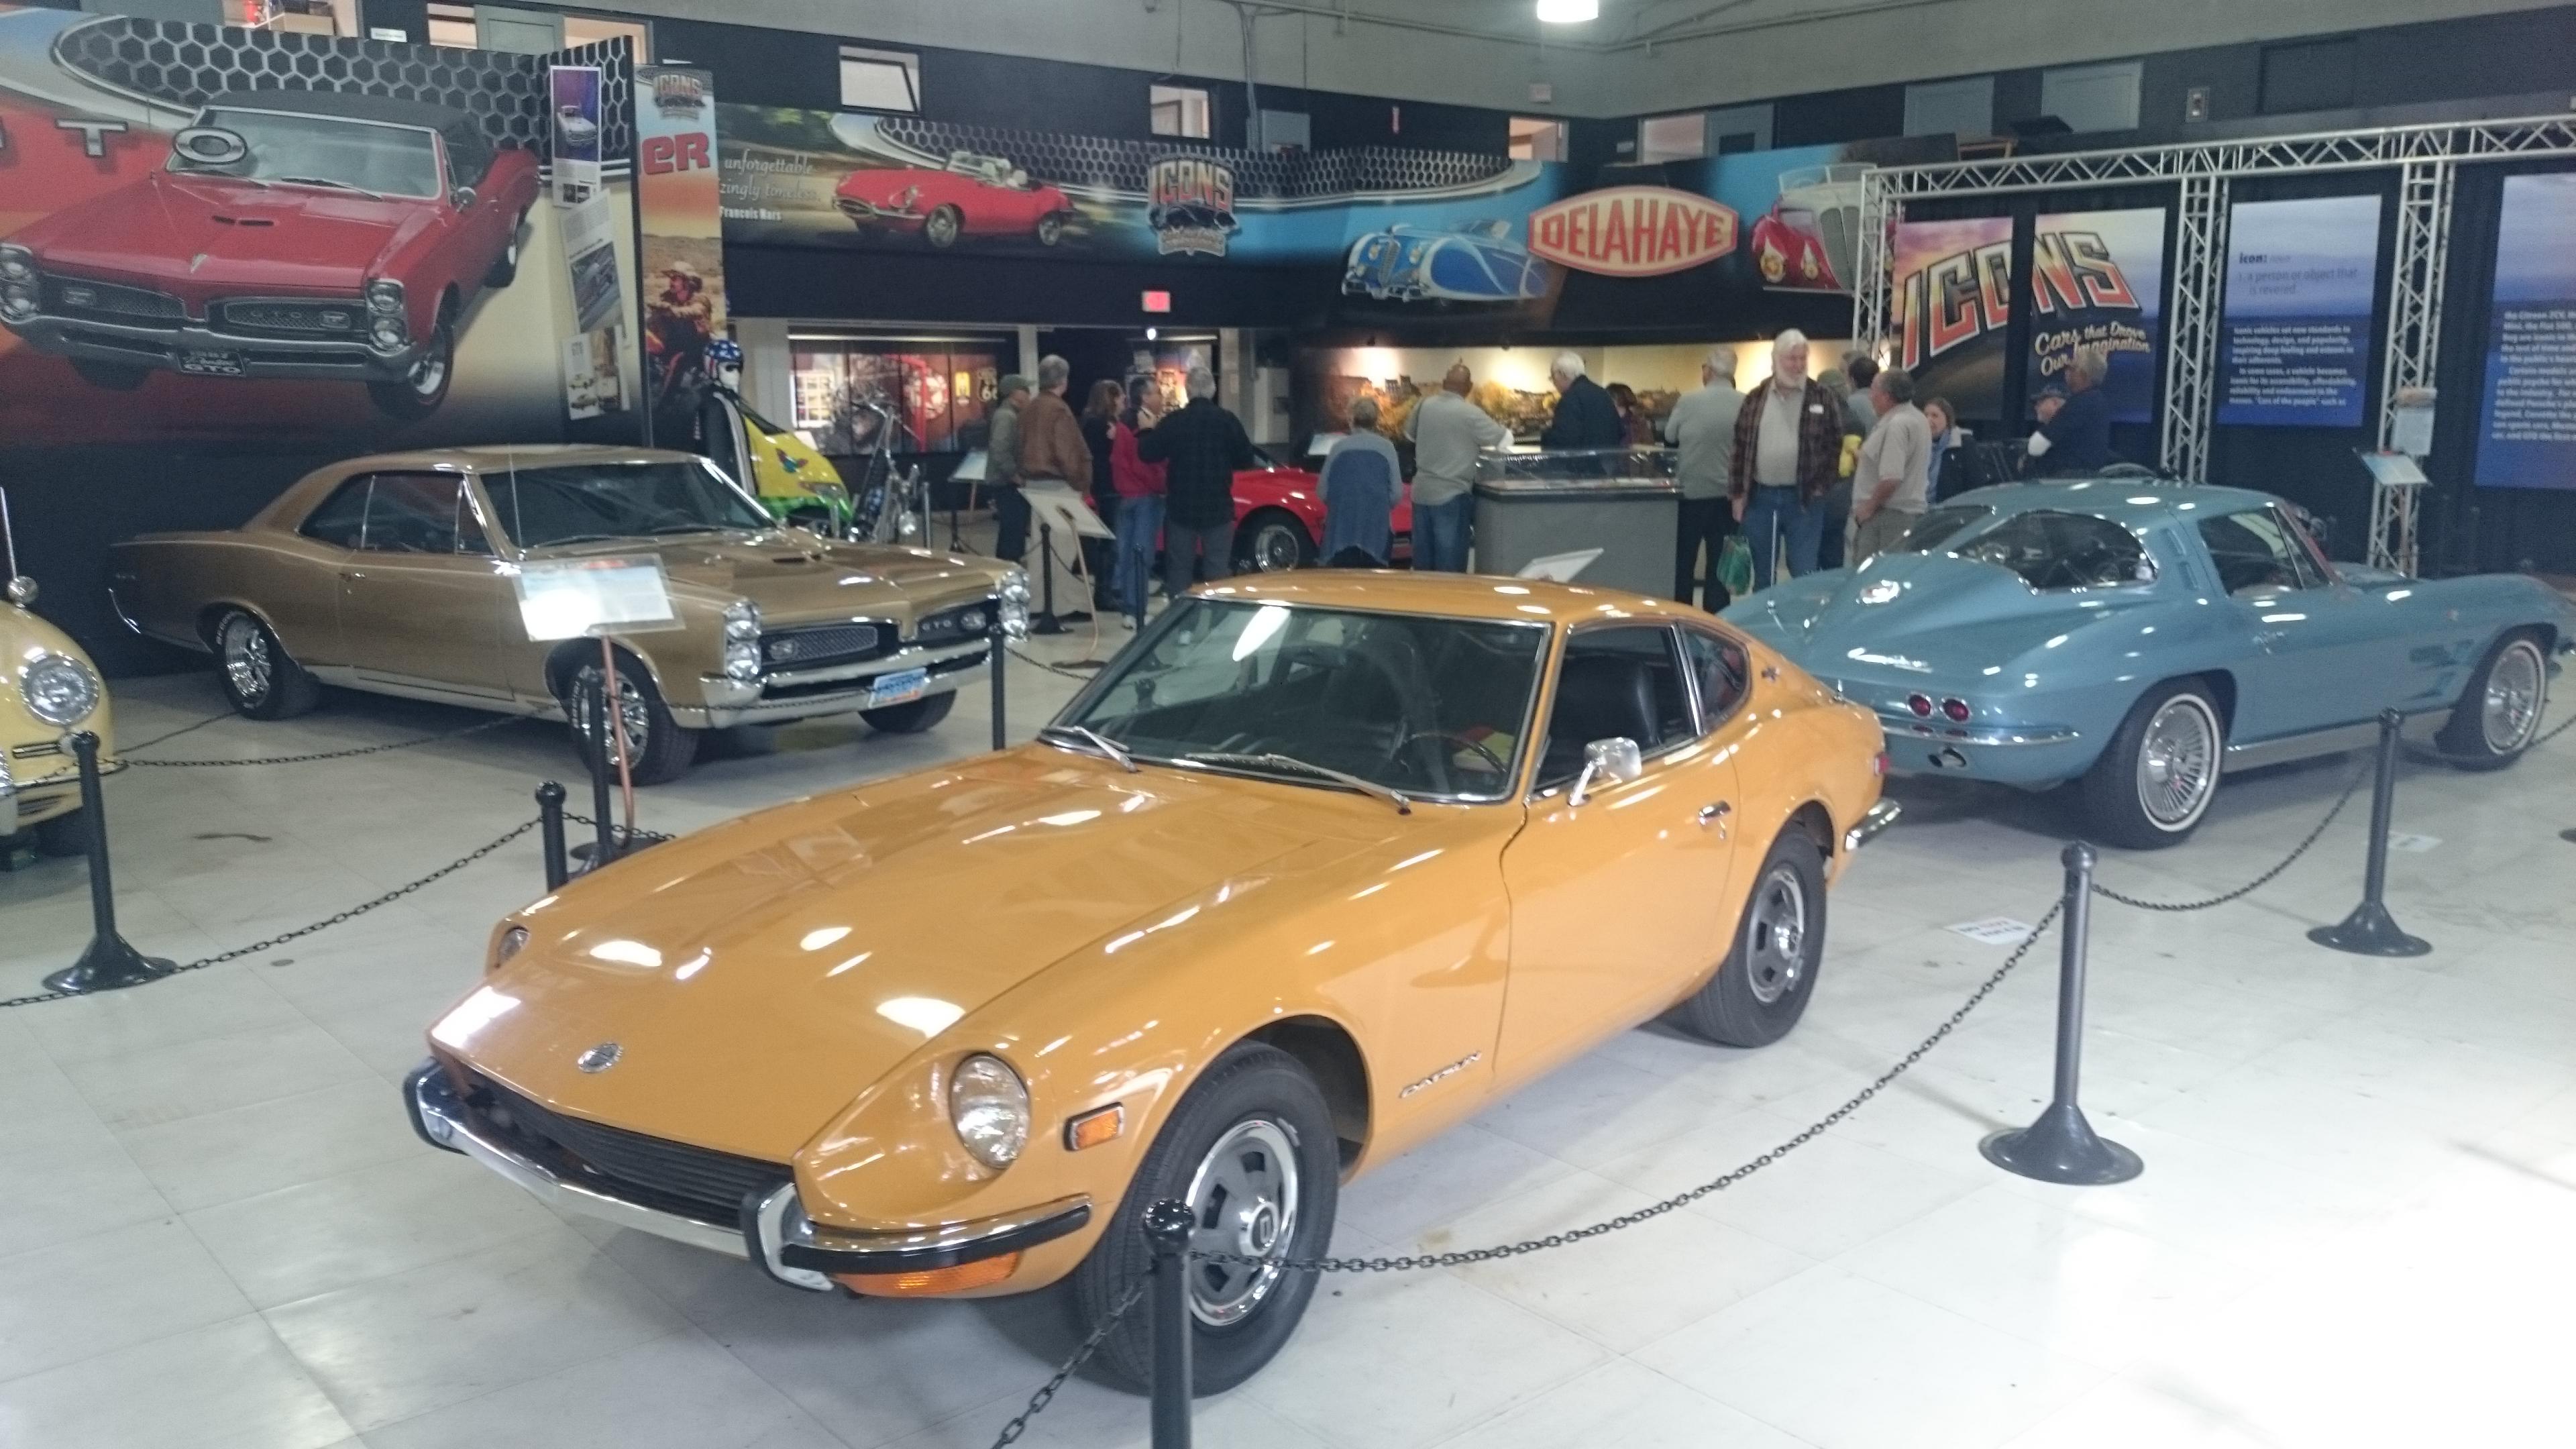
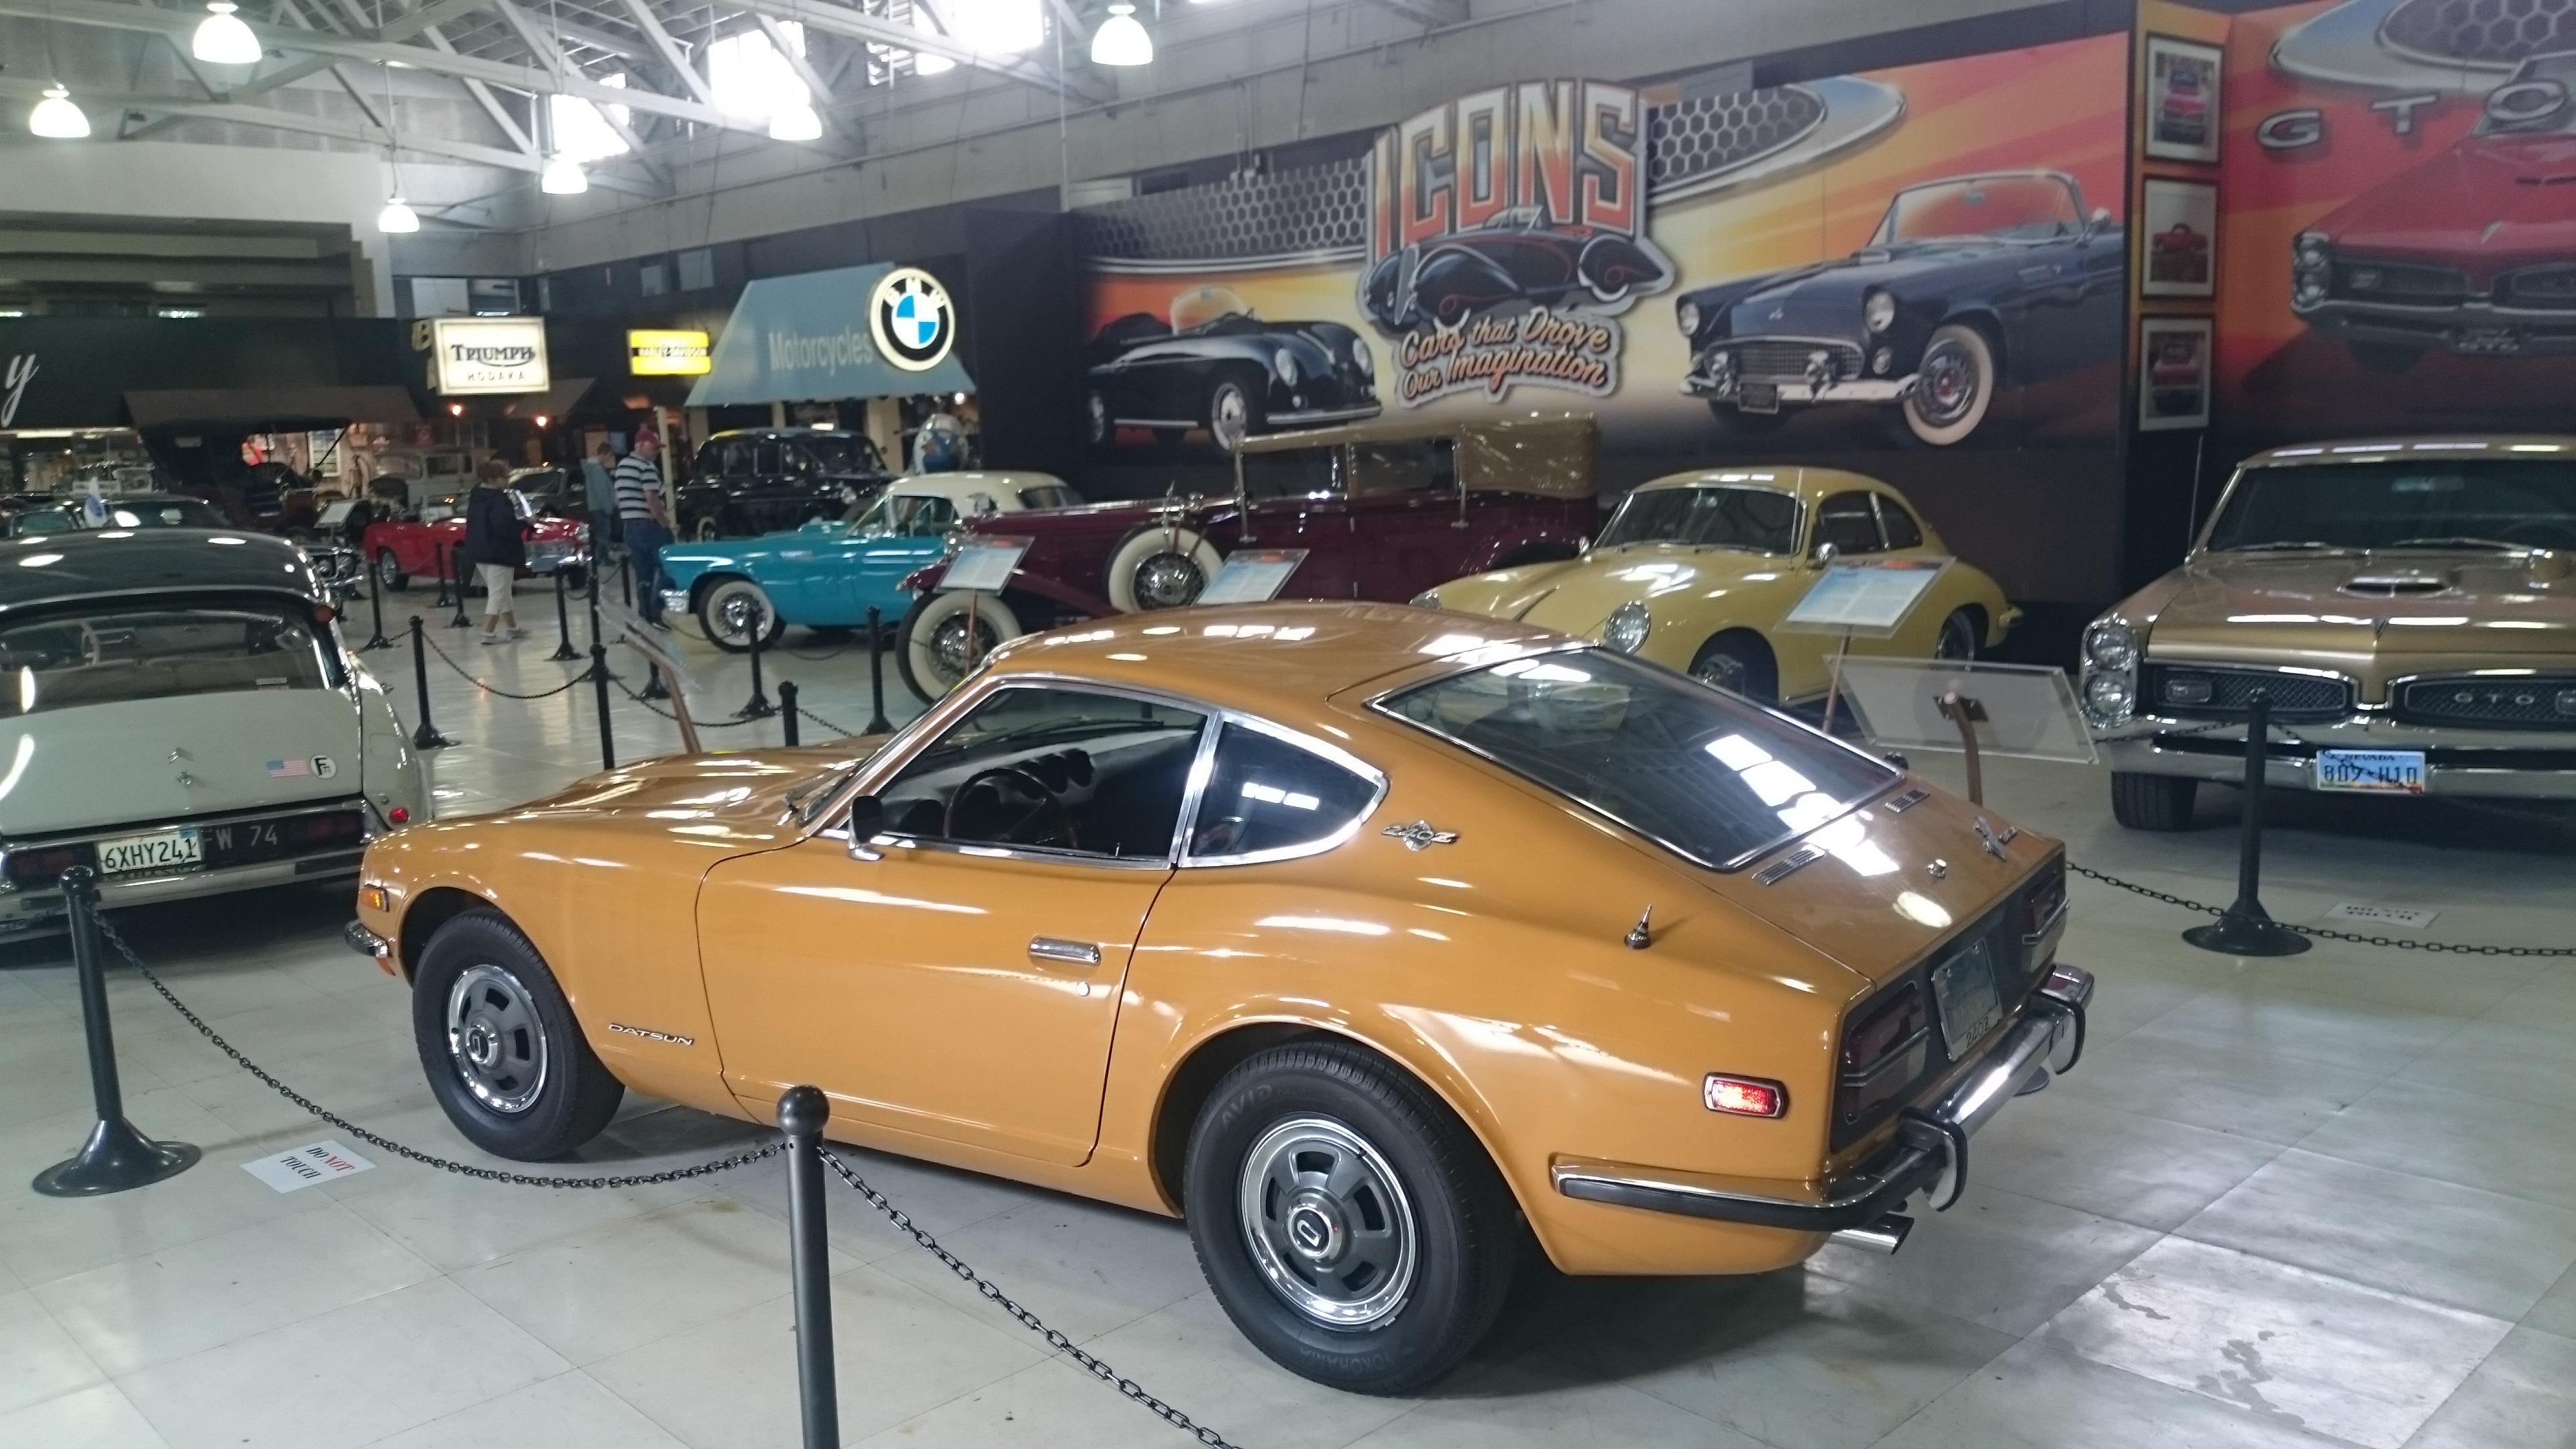
 1 point1 pointAwesome find. Personally, I would suggest getting it cleaned up and running safely and then drive it and see whether you like it or not. If yes, then do some more. If no, sell it. I would resist the temptation to take it apart and dig too deep. Do things like.... -Thoroughly clean interior...remove seats, carpet, clean, reinstall. - Drain, fill fuel tank. Go with ethanol free in my opinion. -Get the engine turning and running. Change engine oil and filter. Pull valve cover and inspect camshaft, rockers, etc. Don't adjust anything. Search and you will find threads on reviving an engine that has been sitting for a long time. - Pull the carb domes and carefully clean chambers (don't bend needles when you lift off piston), float bowls, etc. I suggest that you don't adjust anything. Be careful with the floats and the metal tabs they rest on. You don't want to change how those tabs are bent. Clean the needle jets and chokes. No need to remove the carbs from the manifold though. Add dampening oil (lots of places online to help you determine how much and what weight). - Change plugs, and make sure cap and rotor are okay. - Make sure the small vacuum hoses that connect to the timing advance work. - With luck, the above will get it running. After you get it running, tackle other things before driving. -Check timing, adjust. - Change diff and transmission oil. - Flush, bleed clutch master and slave. I would be surprised if these work without replacing. - Get brakes working. You are probably going to need to replace / rebuild everything. I would be surprised if you don't need to replace master cylinder, front calipers, and rear drum cylinders. Hard to predict whether the booster will work but you can drive without it. Just watch out for vacuum leaks caused by defective booster. If booster is broken, until you get a new one you can block off the vacuum line. - Check suspension for safety...ball joints, tie rod ends. Grease both until new flows out. - Flush antifreeze and make sure the car warms up and maintains temp. If not, dig in a bit. I would be surprised if the radiator isn't clogged. Basic stuff though- radiator, water pump, fan clutch, thermostat, temp sender for gauge. While you are at it, replace water hoses in engine bay. I would wait on the heater hoses until all of the above is working well, or until you really want to frustrate yourself. - Buy new tires, balanced, alignment (just front toe on these cars when stock). Above should get you a car that you can drive and decide whether Z's are your bag or not. One thing to watch for though. Usually cars that get put away get put away for a reason. A blown head gasket is a common reason. Hopefully not but just watch out as you get the thing running and driving. I am sure I left off lots of things that others can help fill in. I guess my key suggestion though is ...... don't start taking it apart and don't adjust stuff until you determine that something is out of adjustment.1 point1 pointSame thing I said last night. My wife just looked and me and said: What are you up to now?!1 point1 pointI should update the title of this thread to 'Z cars at the Concours and Museums'. My '70 is now on display at the San Diego Auto Museum. They have an exhibit that started Feb 2, 2019 called "Icons, Cars that Drove our Imagination" : https://sdautomuseum.org/exhibit/icons The Roadster is at the Petersen Museum: https://www.petersen.org/1969-datsun-1600-roadster/ Love that free storage!

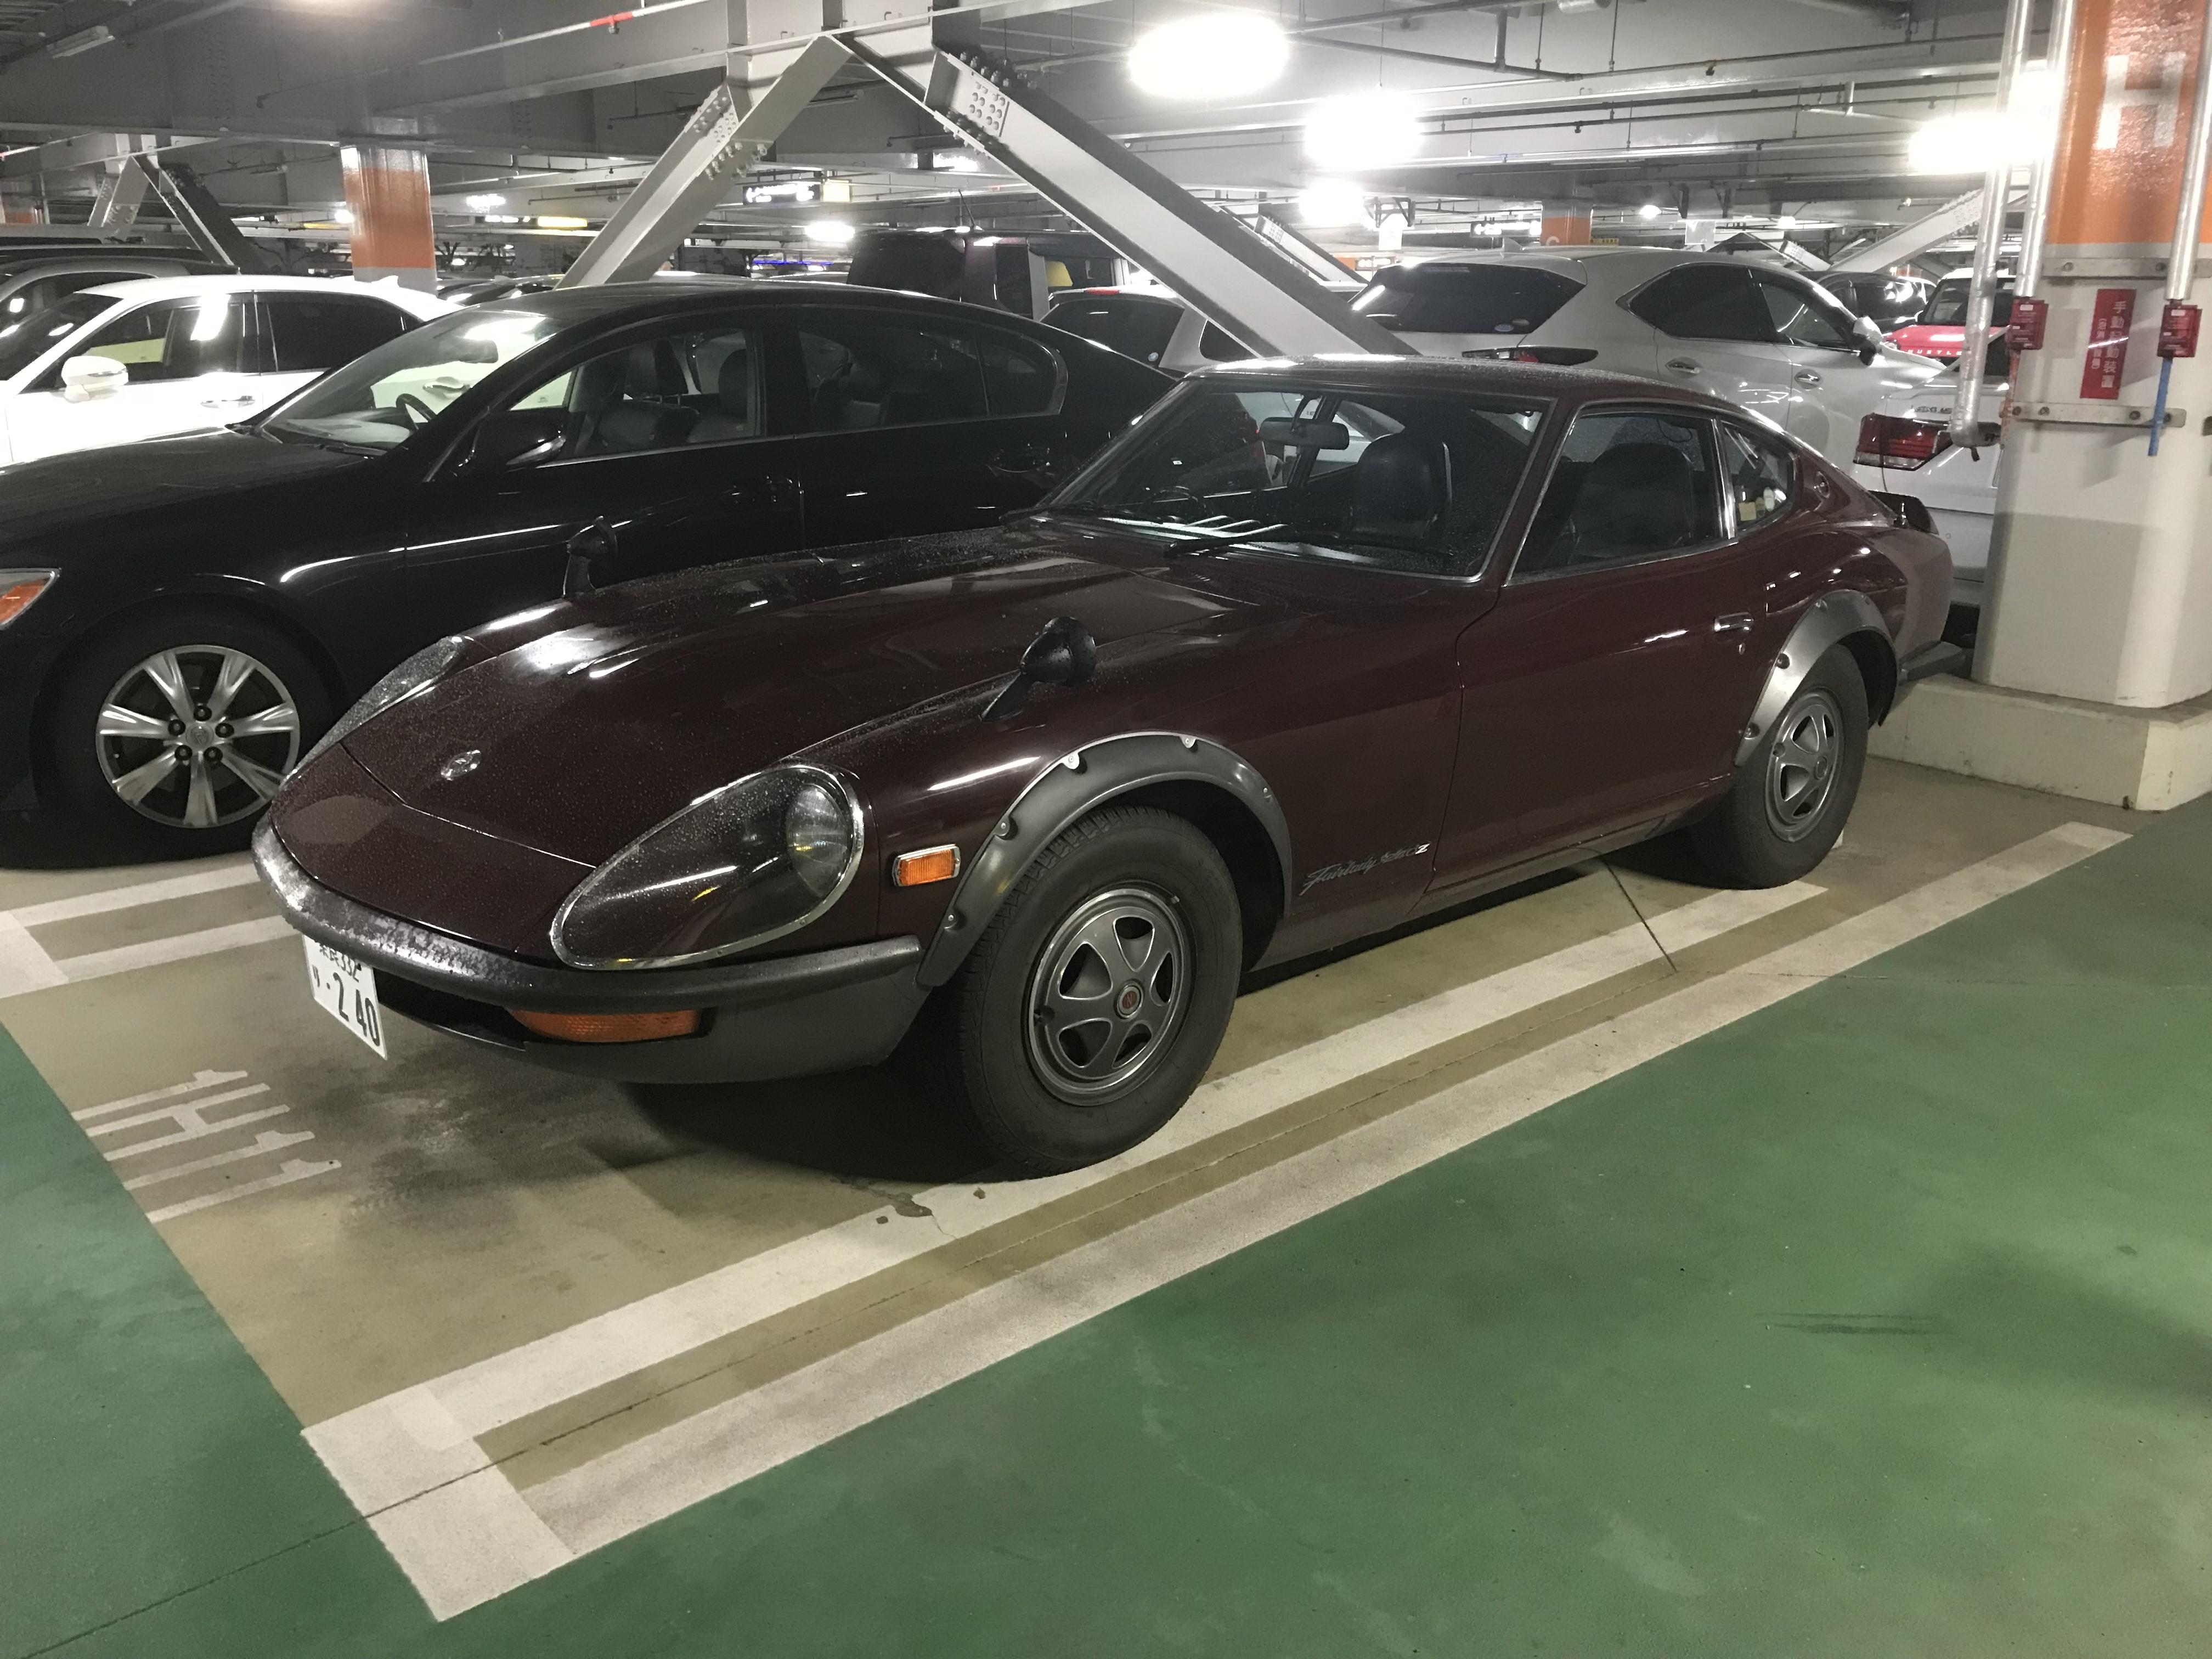
 1 point1 point1 point1 pointHi Gavin , I still don’t get what they are joking about, let me review it again. Today I have a question, what country was this red car be exported? The red must be #110 , RHD 260Z , And interesting turn signals and , it even got the fuel filler door knob !! This crisp and clean exterior make this car looked so beautiful , I wish we could’ve have this car in Japan . No exterior mirror , front grill, bumper over riders are my favorite features . Kats
 1 point


Important Information
By using this site, you agree to our Privacy Policy and Guidelines. We have placed cookies on your device to help make this website better. You can adjust your cookie settings, otherwise we'll assume you're okay to continue.