Leaderboard
-
Patcon
 Subscriber
 4Points11,142Posts
 -
zKars
Subscriber3Points3,770Posts -
Mike W
Free Member2Points453Posts -

siteunseen
Free Member2Points15,115Posts


Popular Content
Showing content with the highest reputation on 12/04/2017 in all areas
-
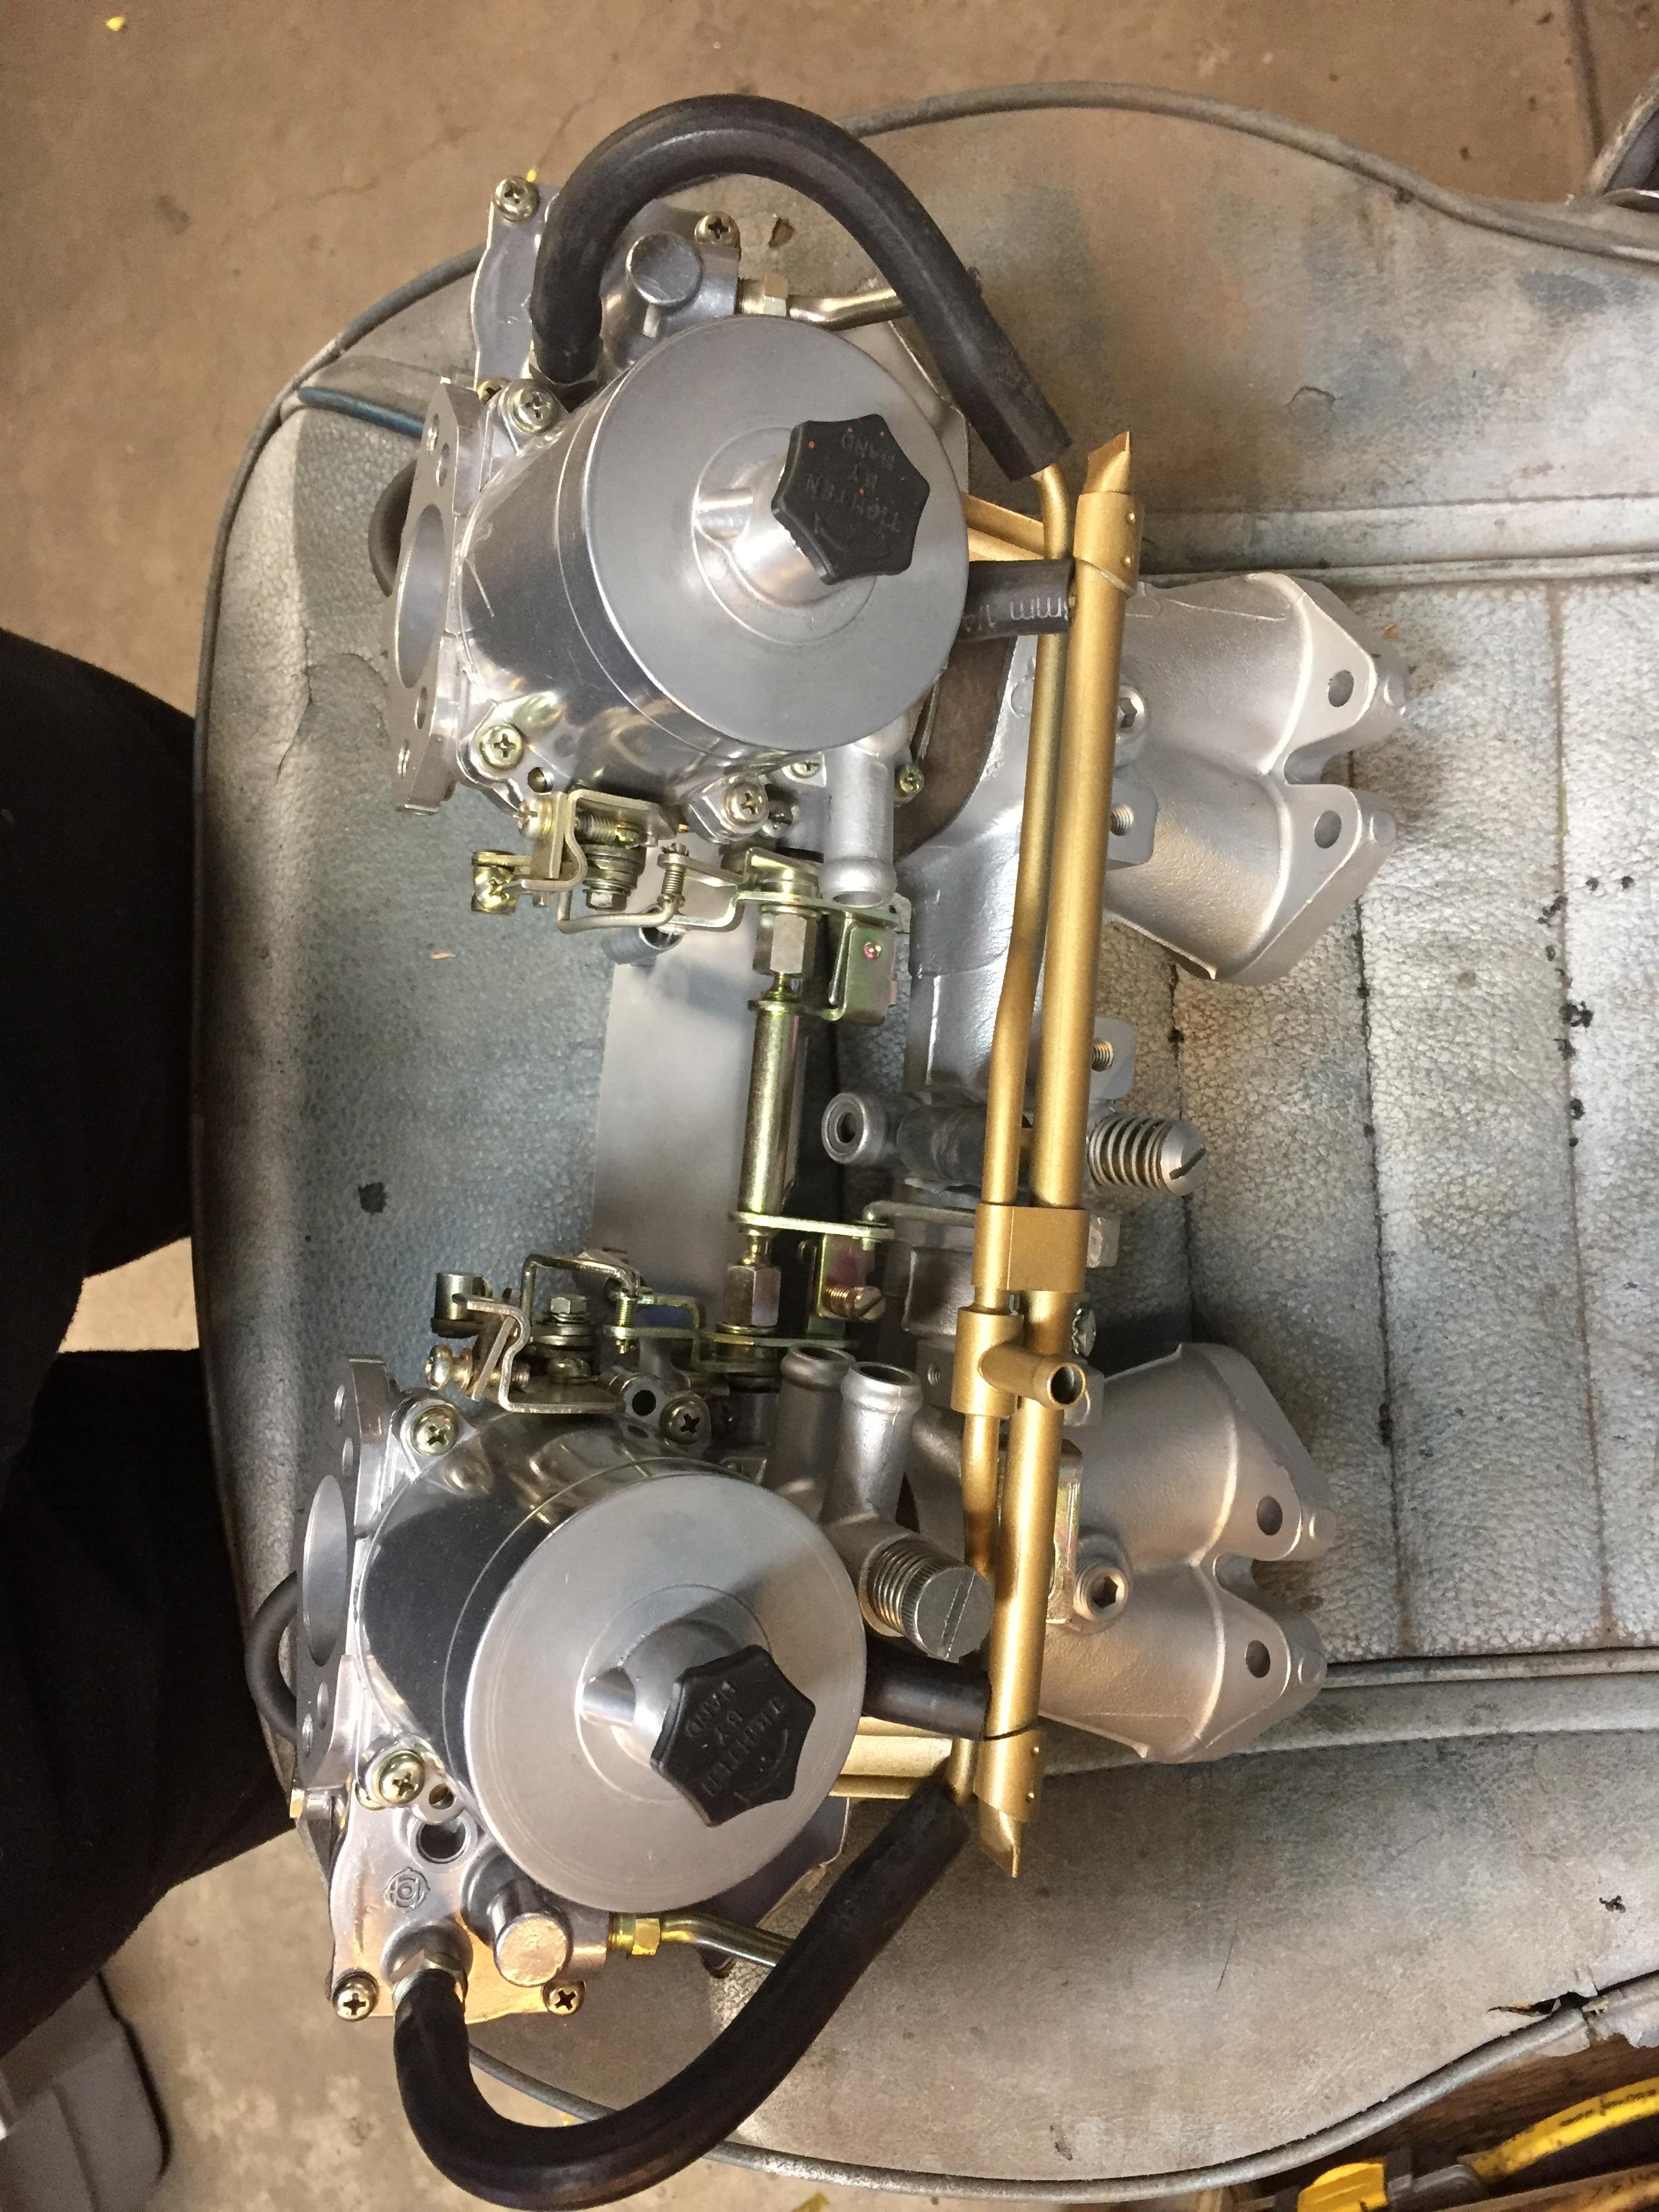
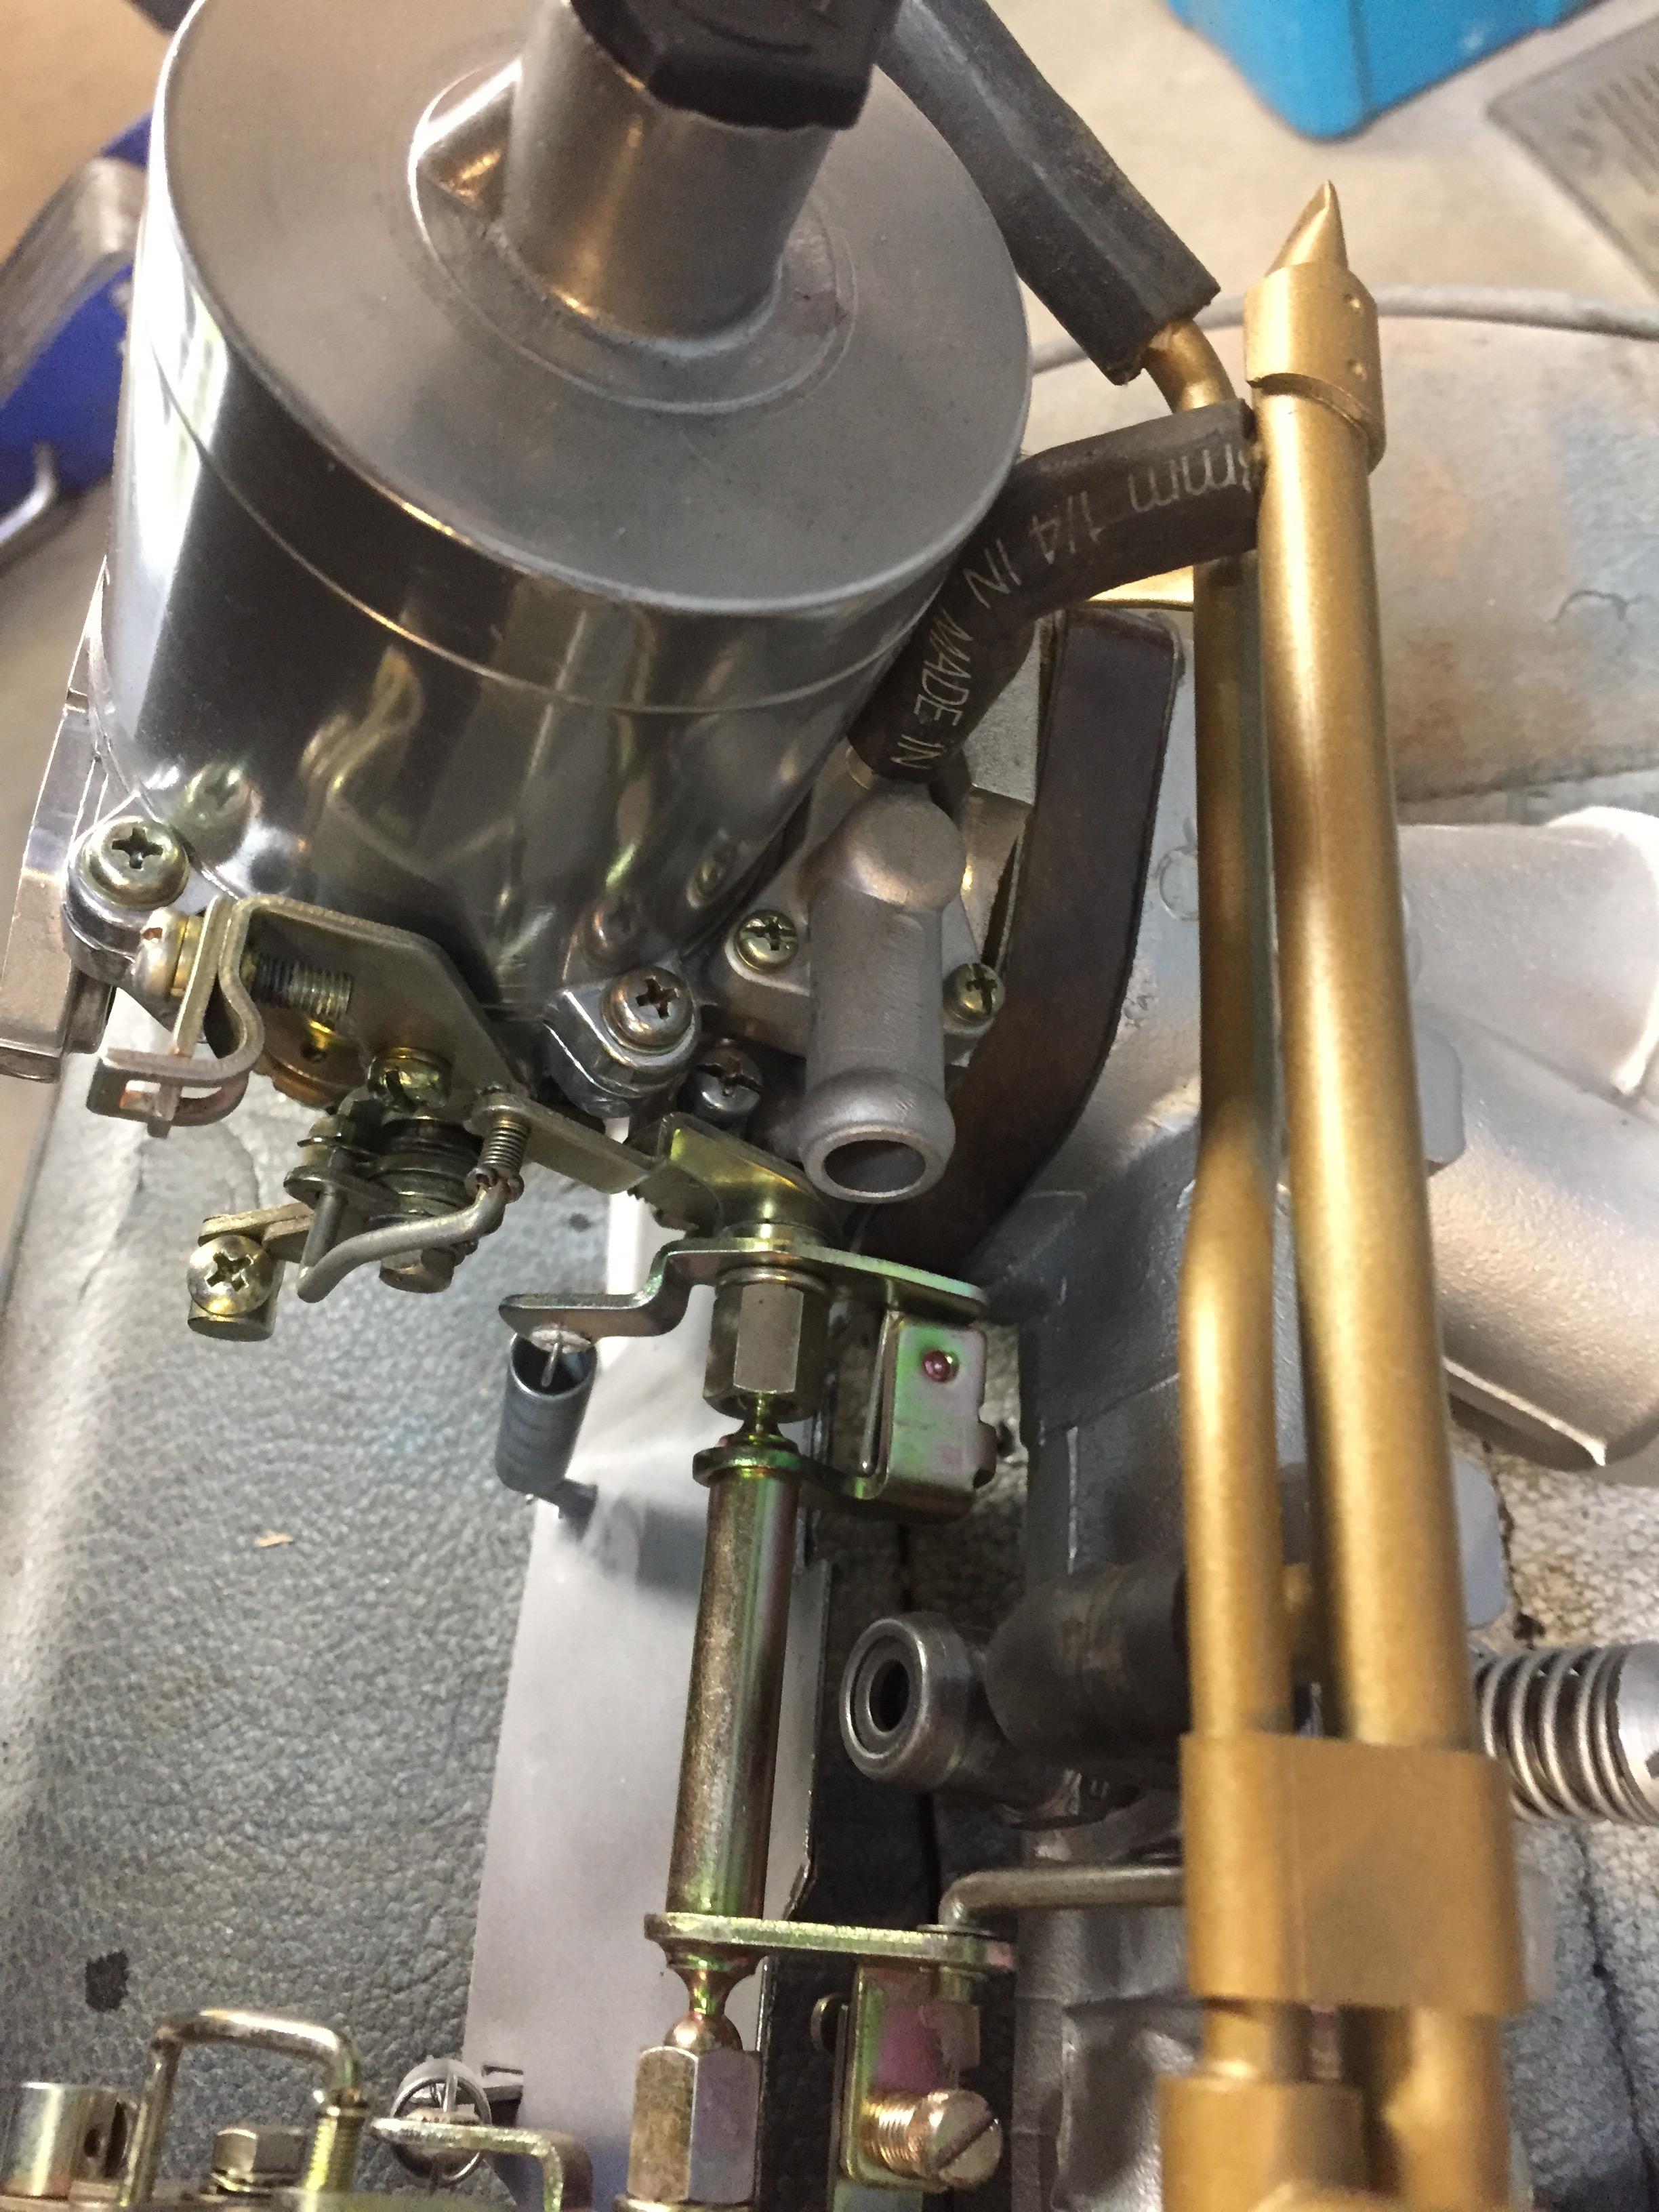
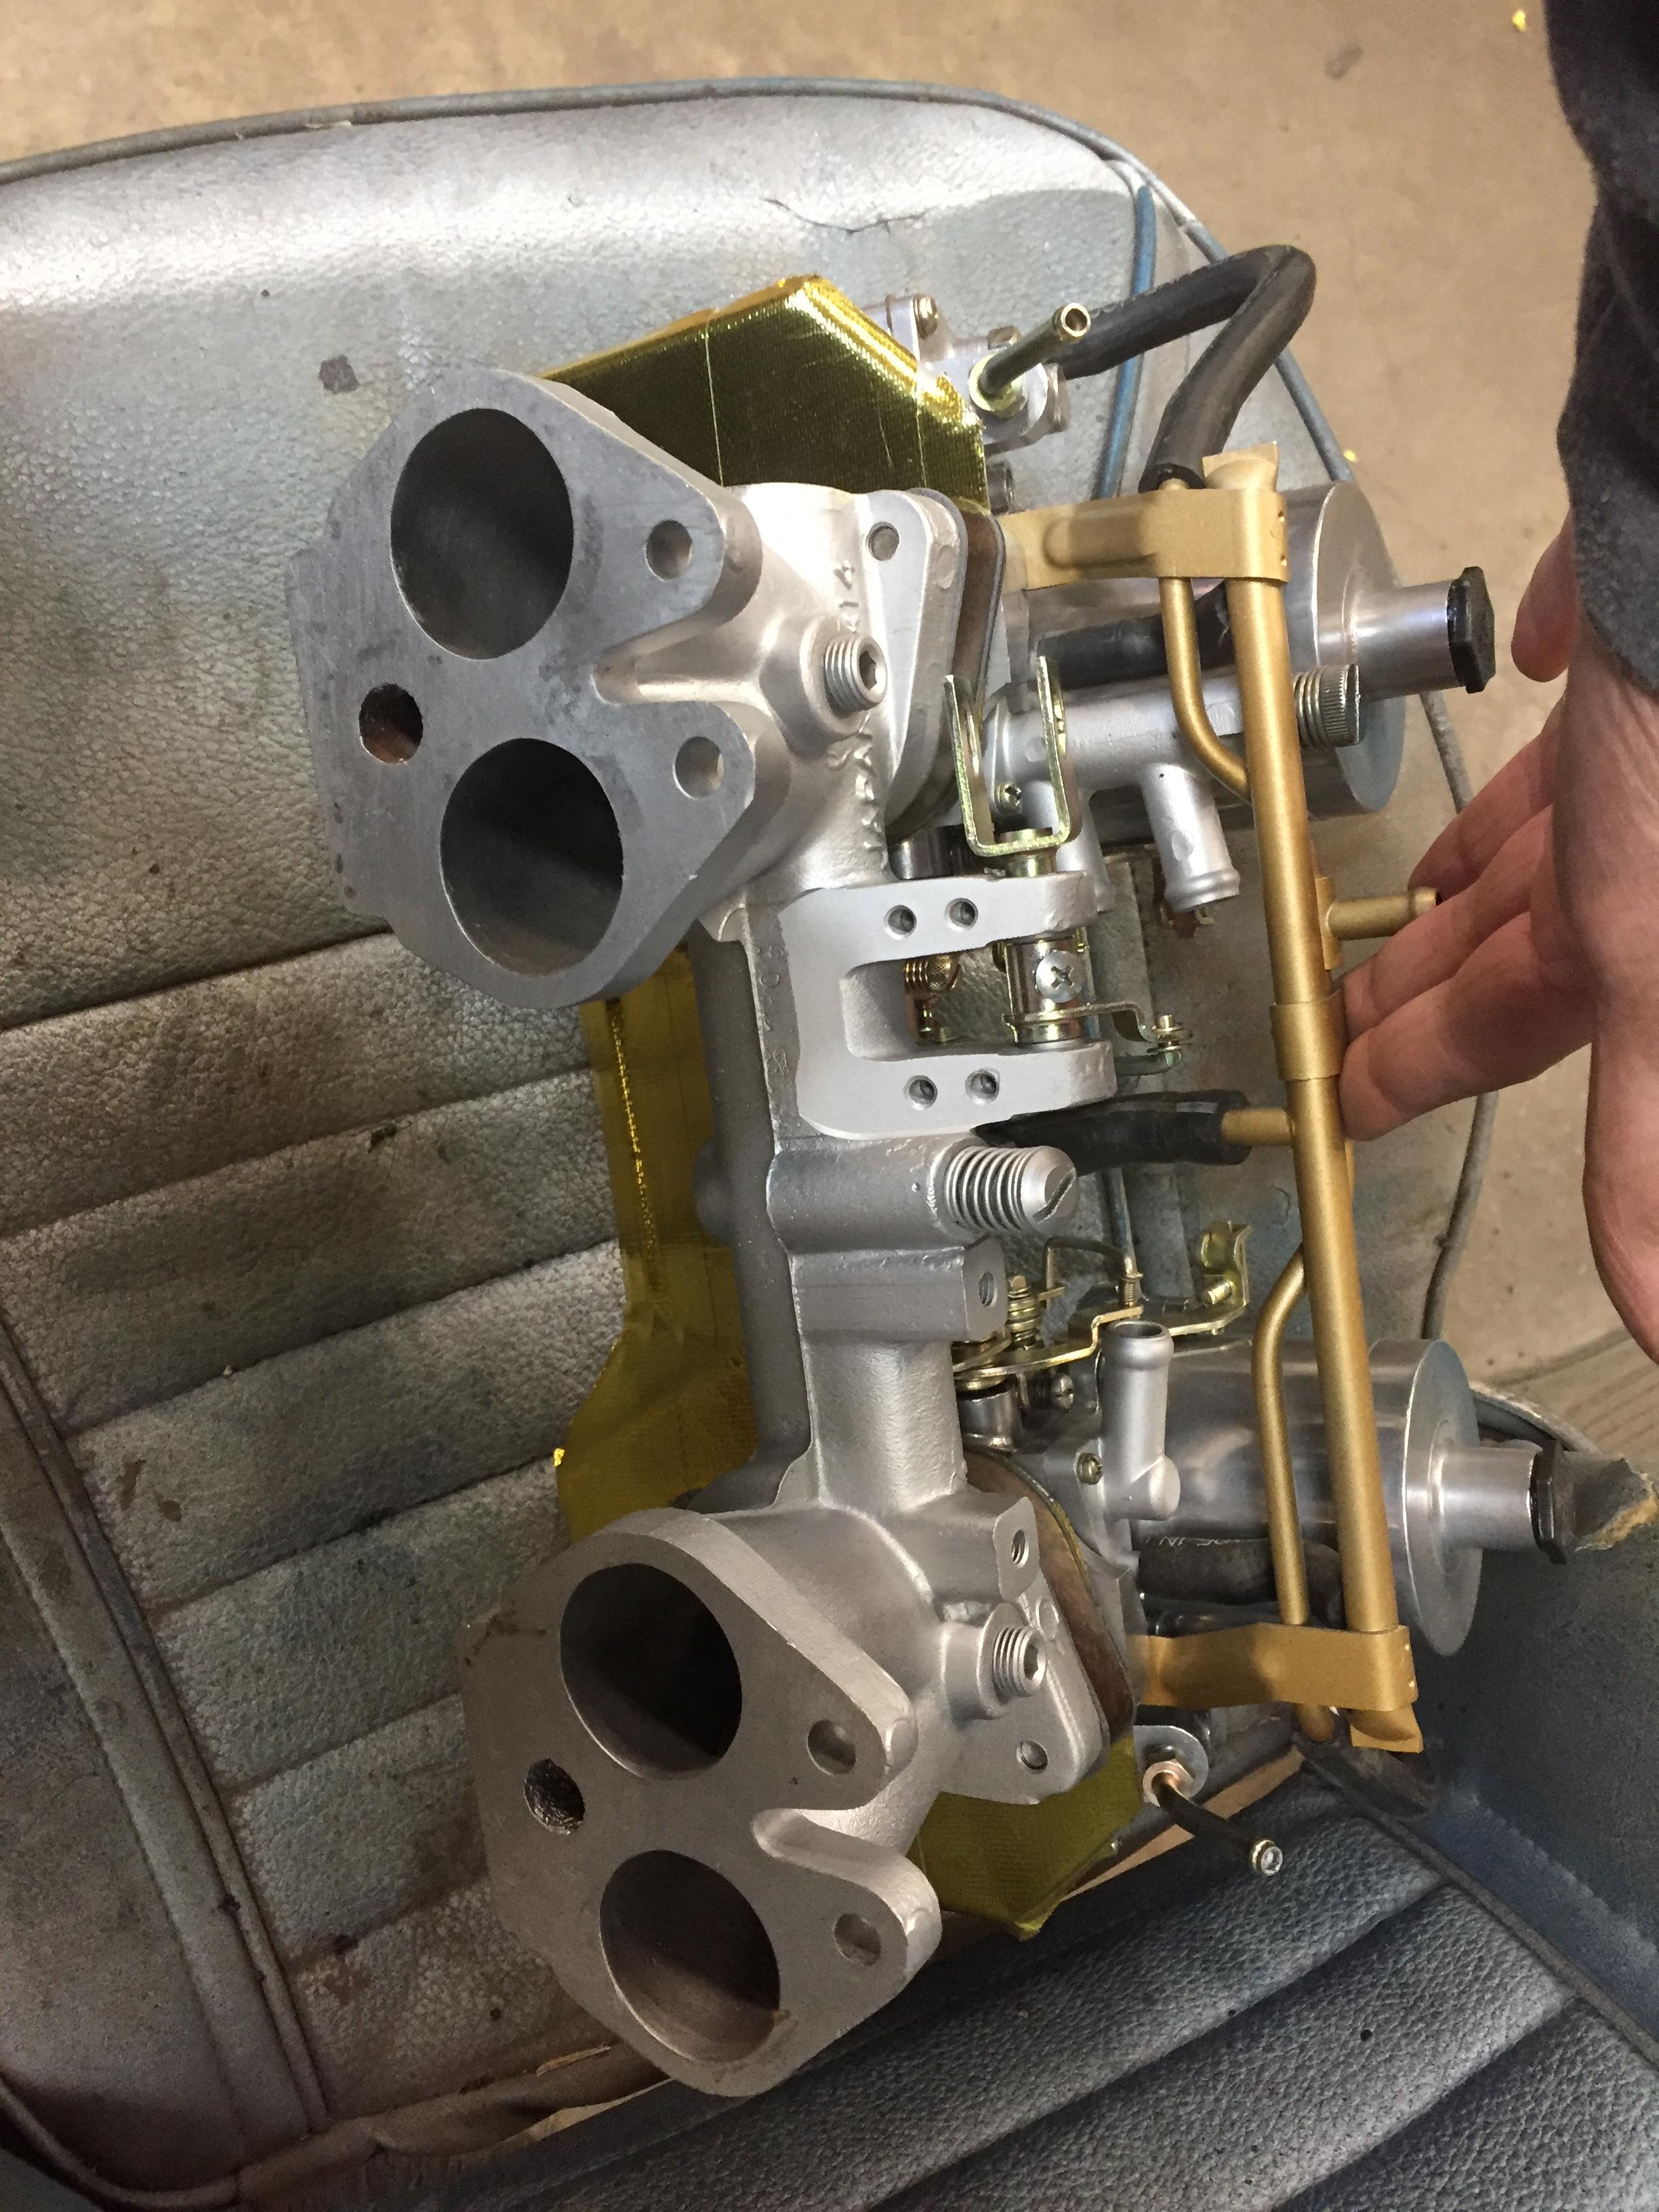
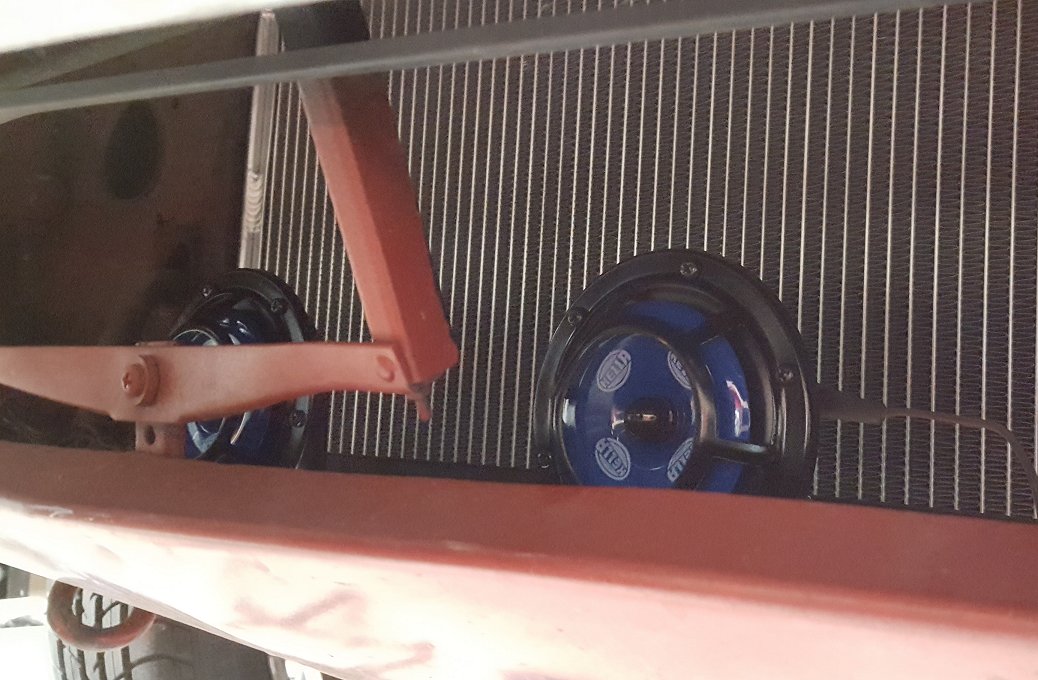
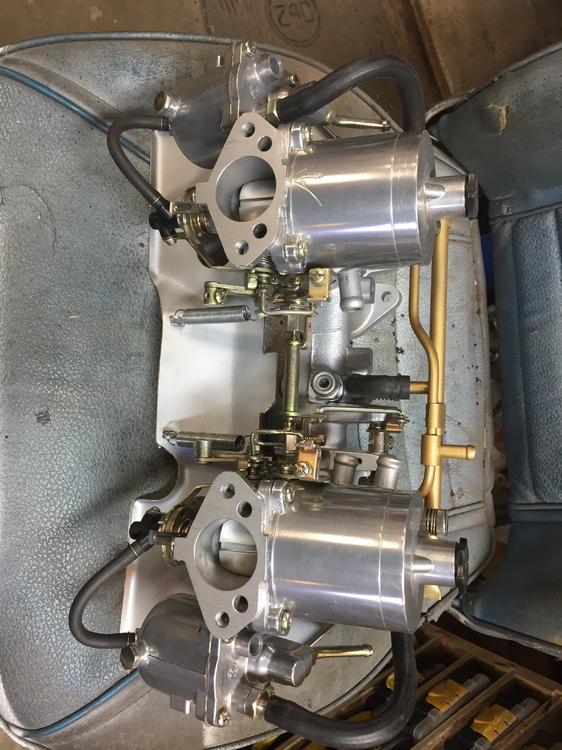
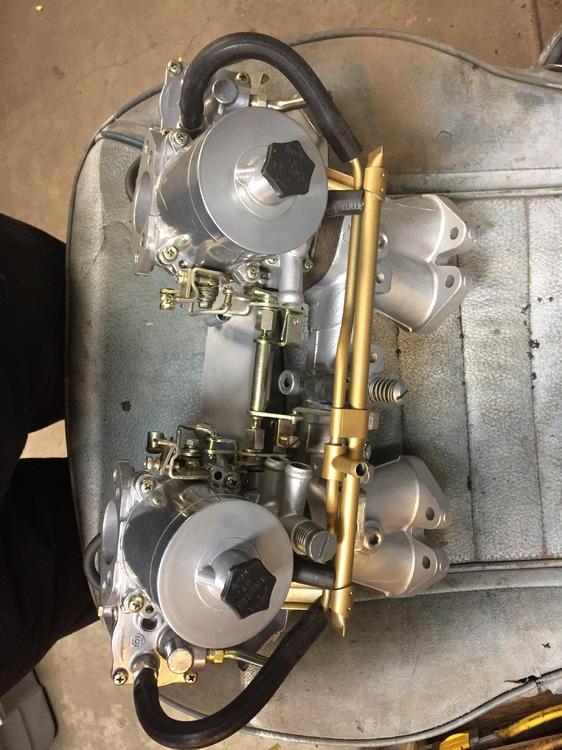
3 pointsHere are a few more pics of the air manifolds that connect the idle speed and idle mix plumbing. The bowl vents also have their own tube on the manifold. They join and come to the outlet that is sticking straight up. You need to connect that to the air cleaner to put the correct reference pressure above the fuel in the bowl. The large (9/16) ports that point toward each other are the idle mix that are not hooked up yet. A fresh air line, again from the air cleaner, feeds the upper large port, which then goes past the orifice screw, then down to that carb and over to the other. The smaller inlets are the idle speed bypass that are connected to the tube manifold, then runs into another adjustable orifice screw that feeds into the balance tube.


 3 points
 -
2 pointsI used the upgrade kit from Arizona Z. Very good quality and they were easy to work with. Very pleased with the performance as compared to the stock brakes. Probably not the cheapest solution but it was brand new and in the limit performed extremely well. You will need to consider the following: 1. If you are running the standard 14 inch rims, they will not fit over the big brake kit. I have been told that 15" will work, but in my case I went with a 16" Konig rewind. You will also need to consider what you will want to do for a spare tire. I ended up getting a donut spare I believe from a later model Nissan Sentra that had the correct bolt spacing and also fit into the spare tire well. It easily fits over the bigger brakes. 2. At least with the Arizona Z kit, you will need to decide what to do for a emergency / parking brake. The Arizona kit as standard, does not include a replacement for the e-brake. They do sell a mechanical caliper which can be used to replace the OEM e-brake, but they only provide the caliper itself as well as a different mounting bracket. I had to design a method for connecting the e-brake to the brake handle and this was not straight forward. I have been meaning to do a write up on my implementation of this for some time but just haven't gotten around to it yet. If you decide to go in this direction, let me know and I'll get the write up done. Hope that helps. Mike.2 points
-
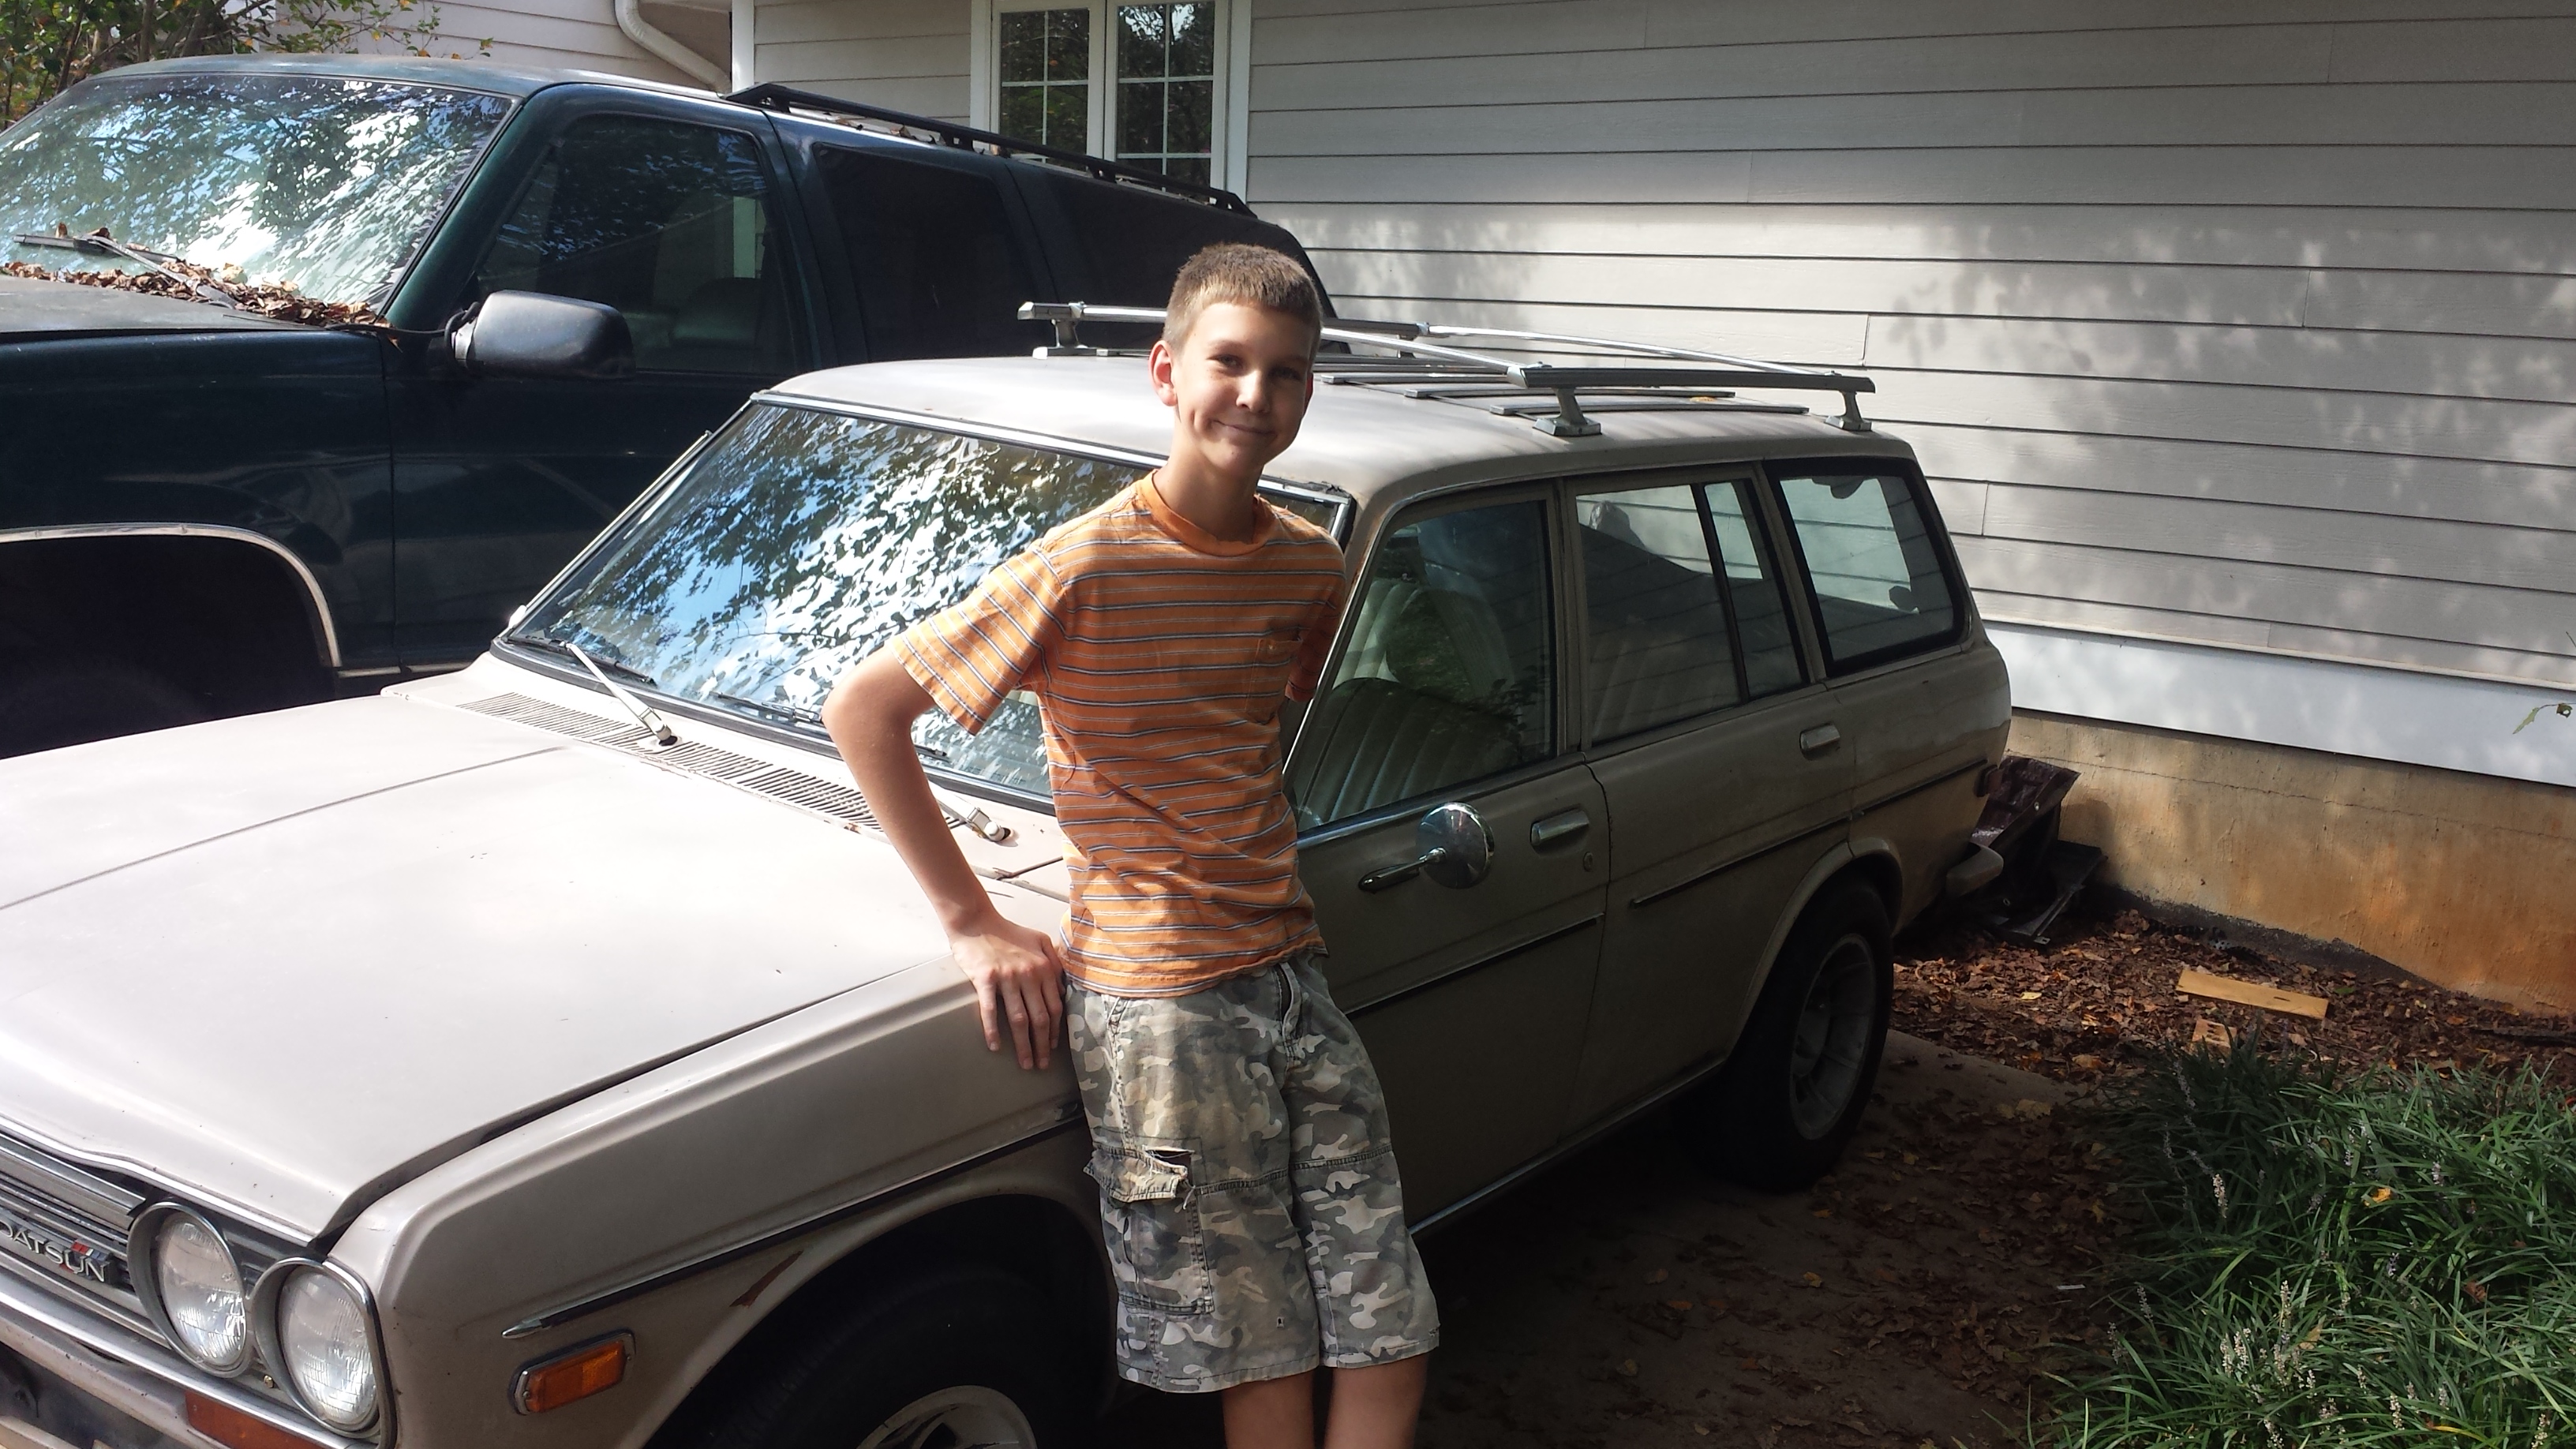
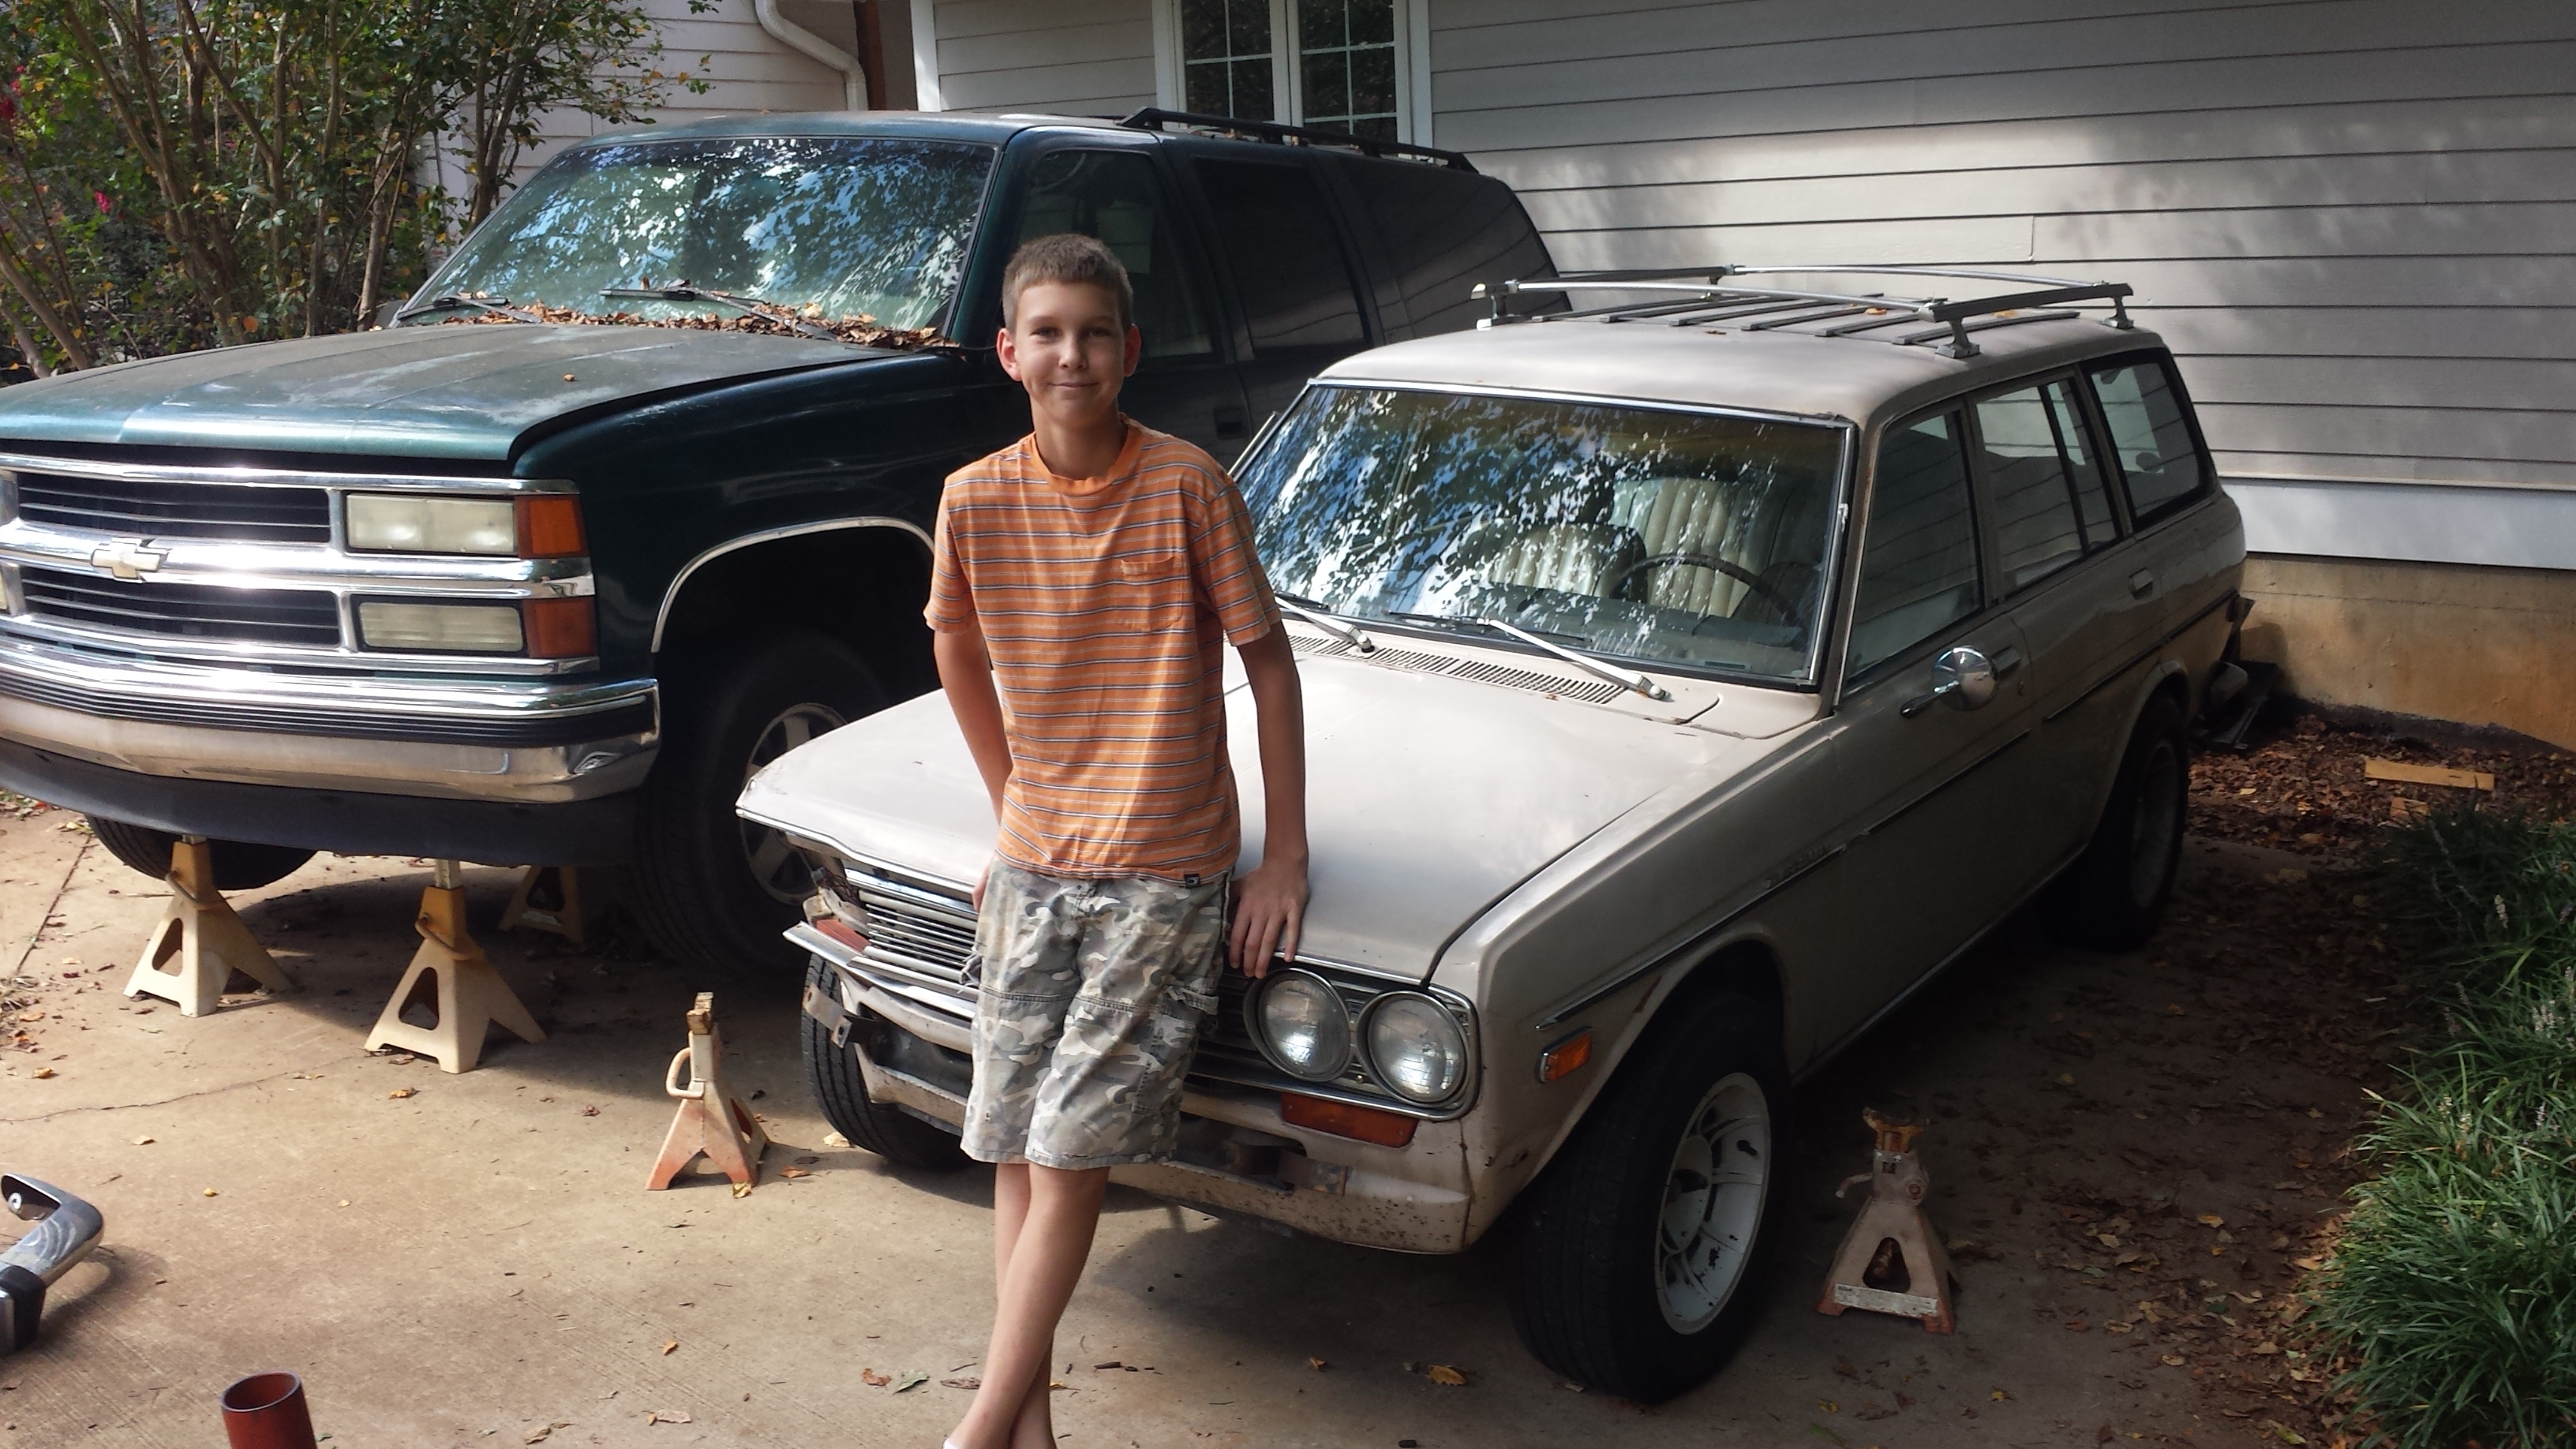
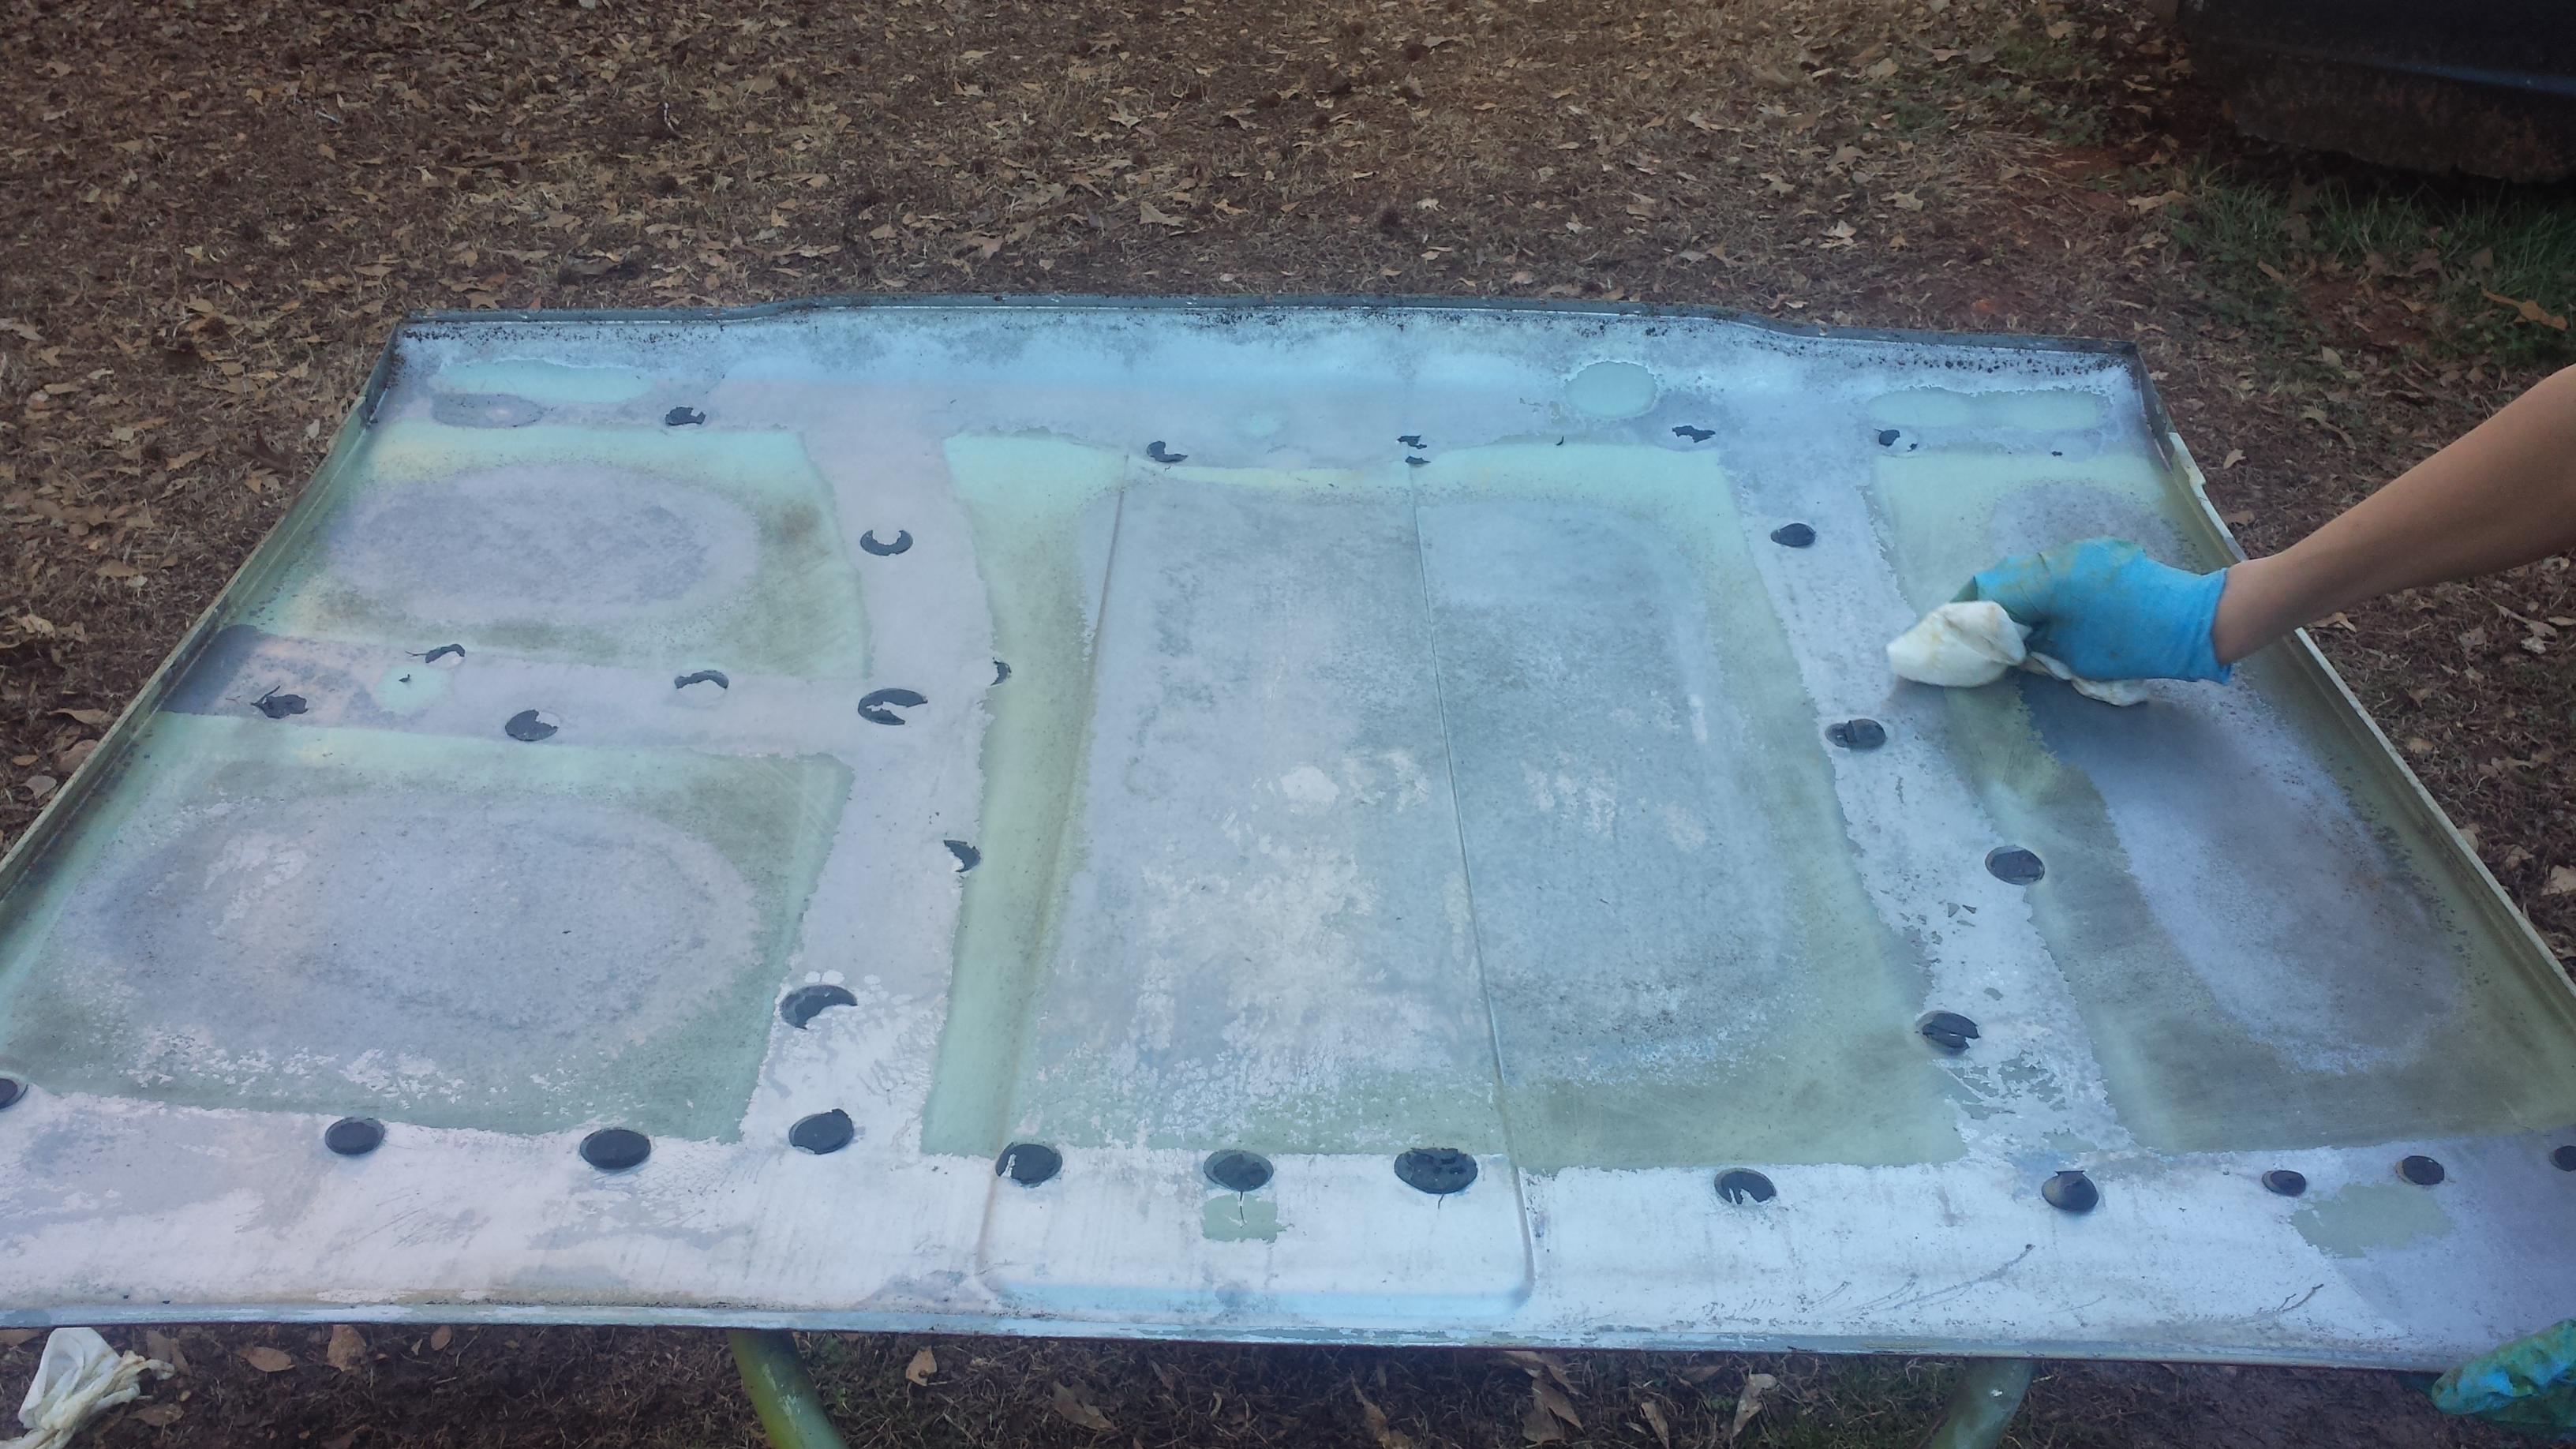
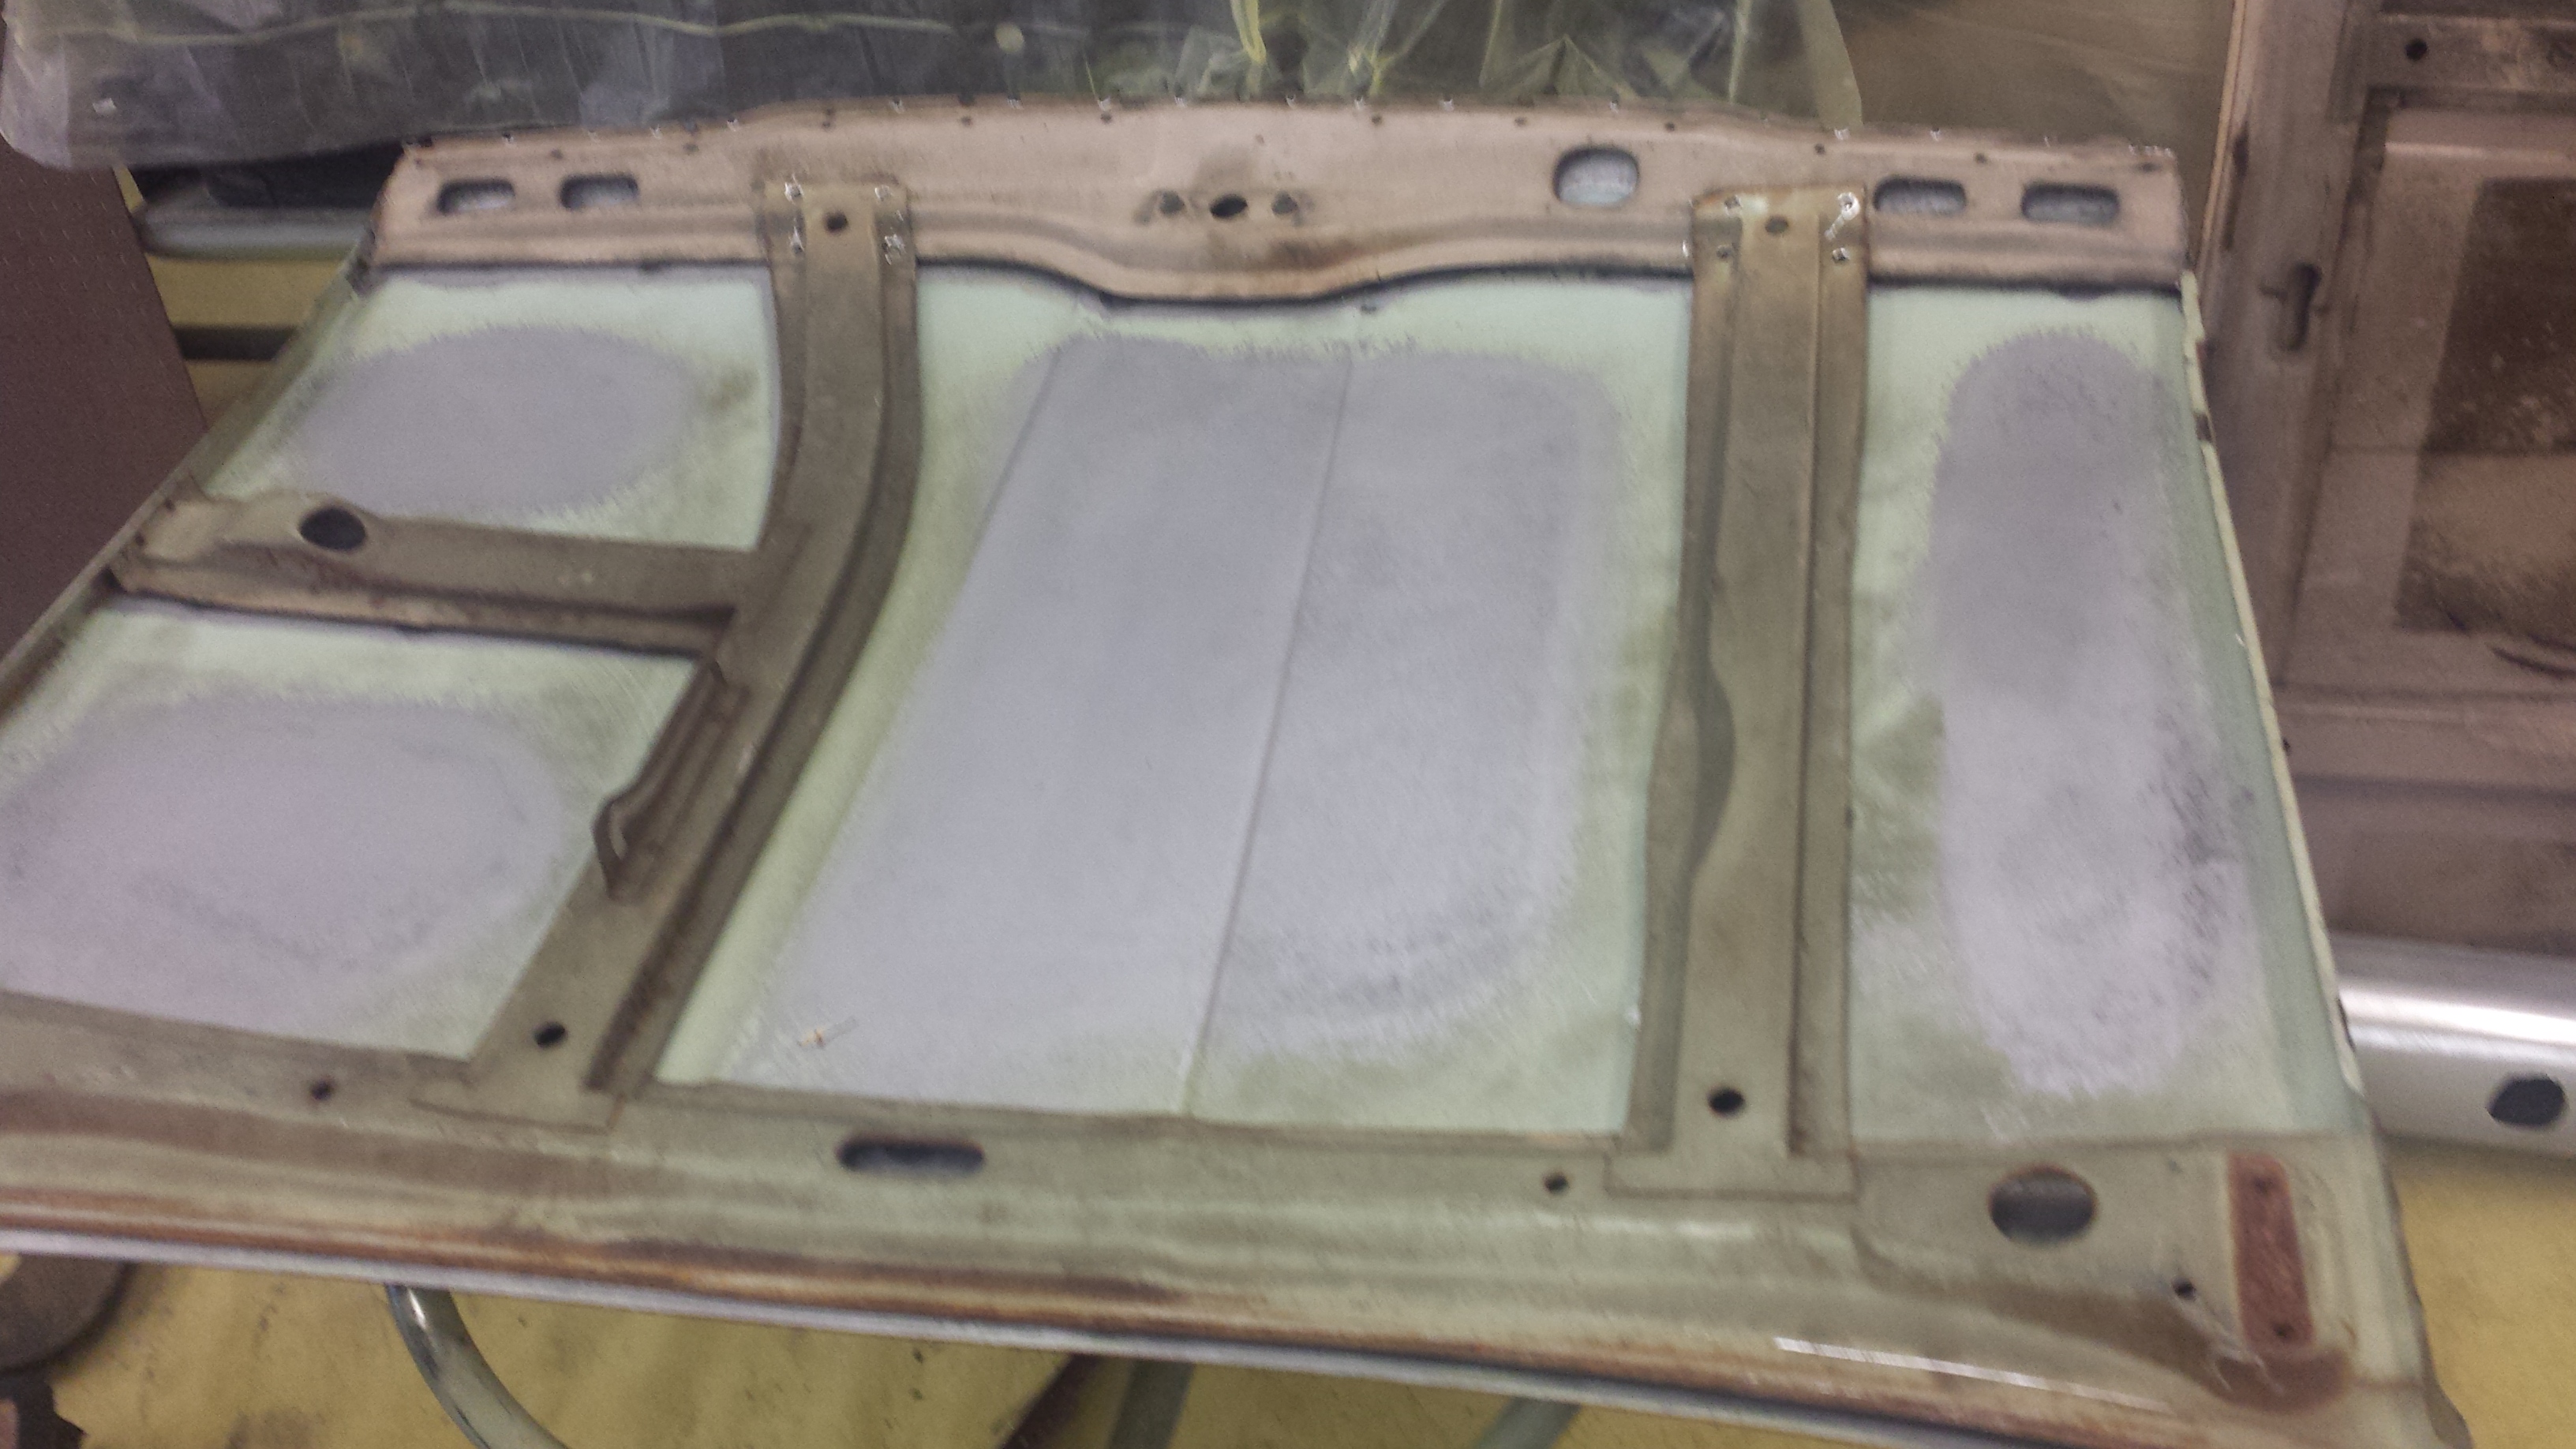
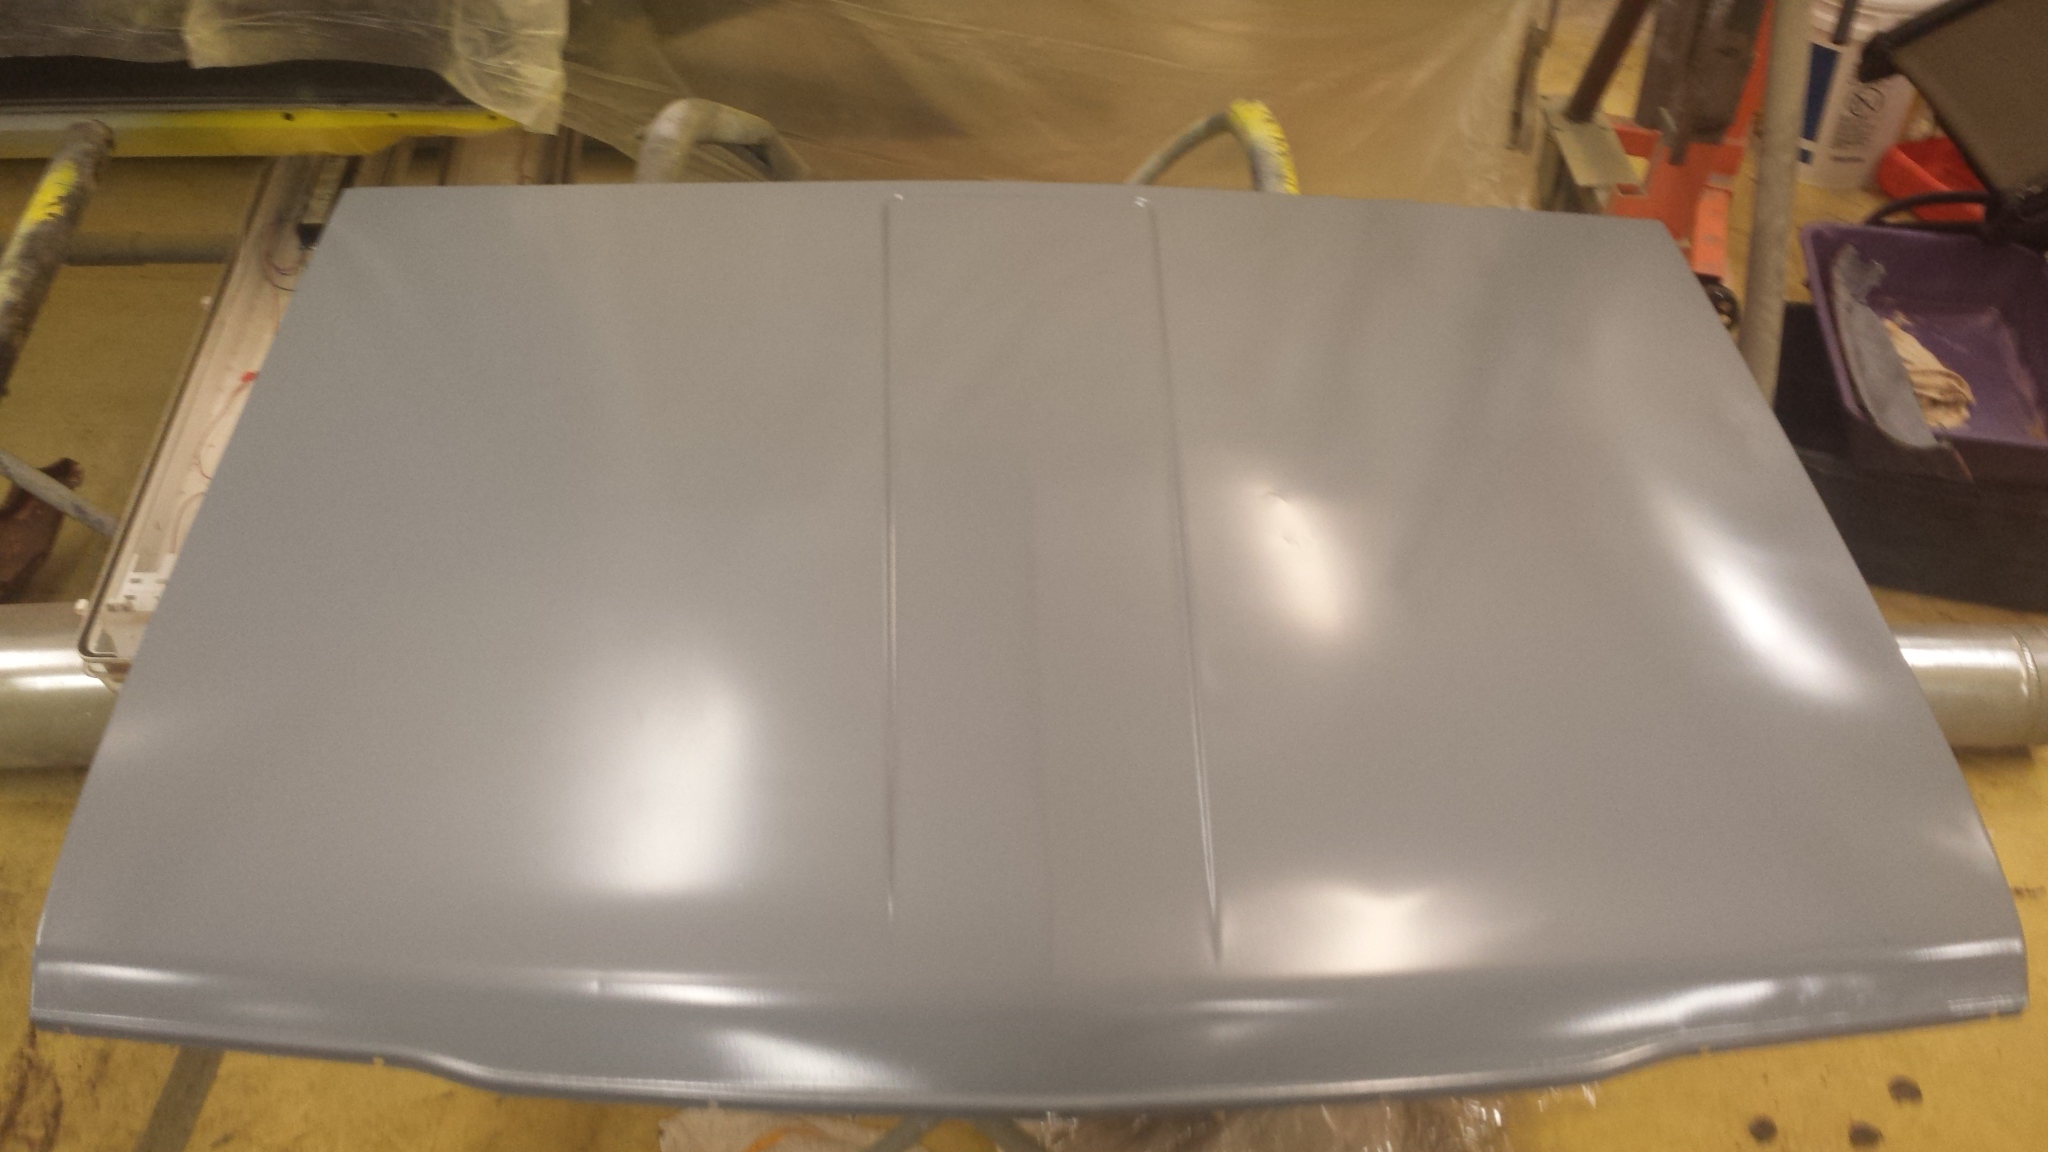
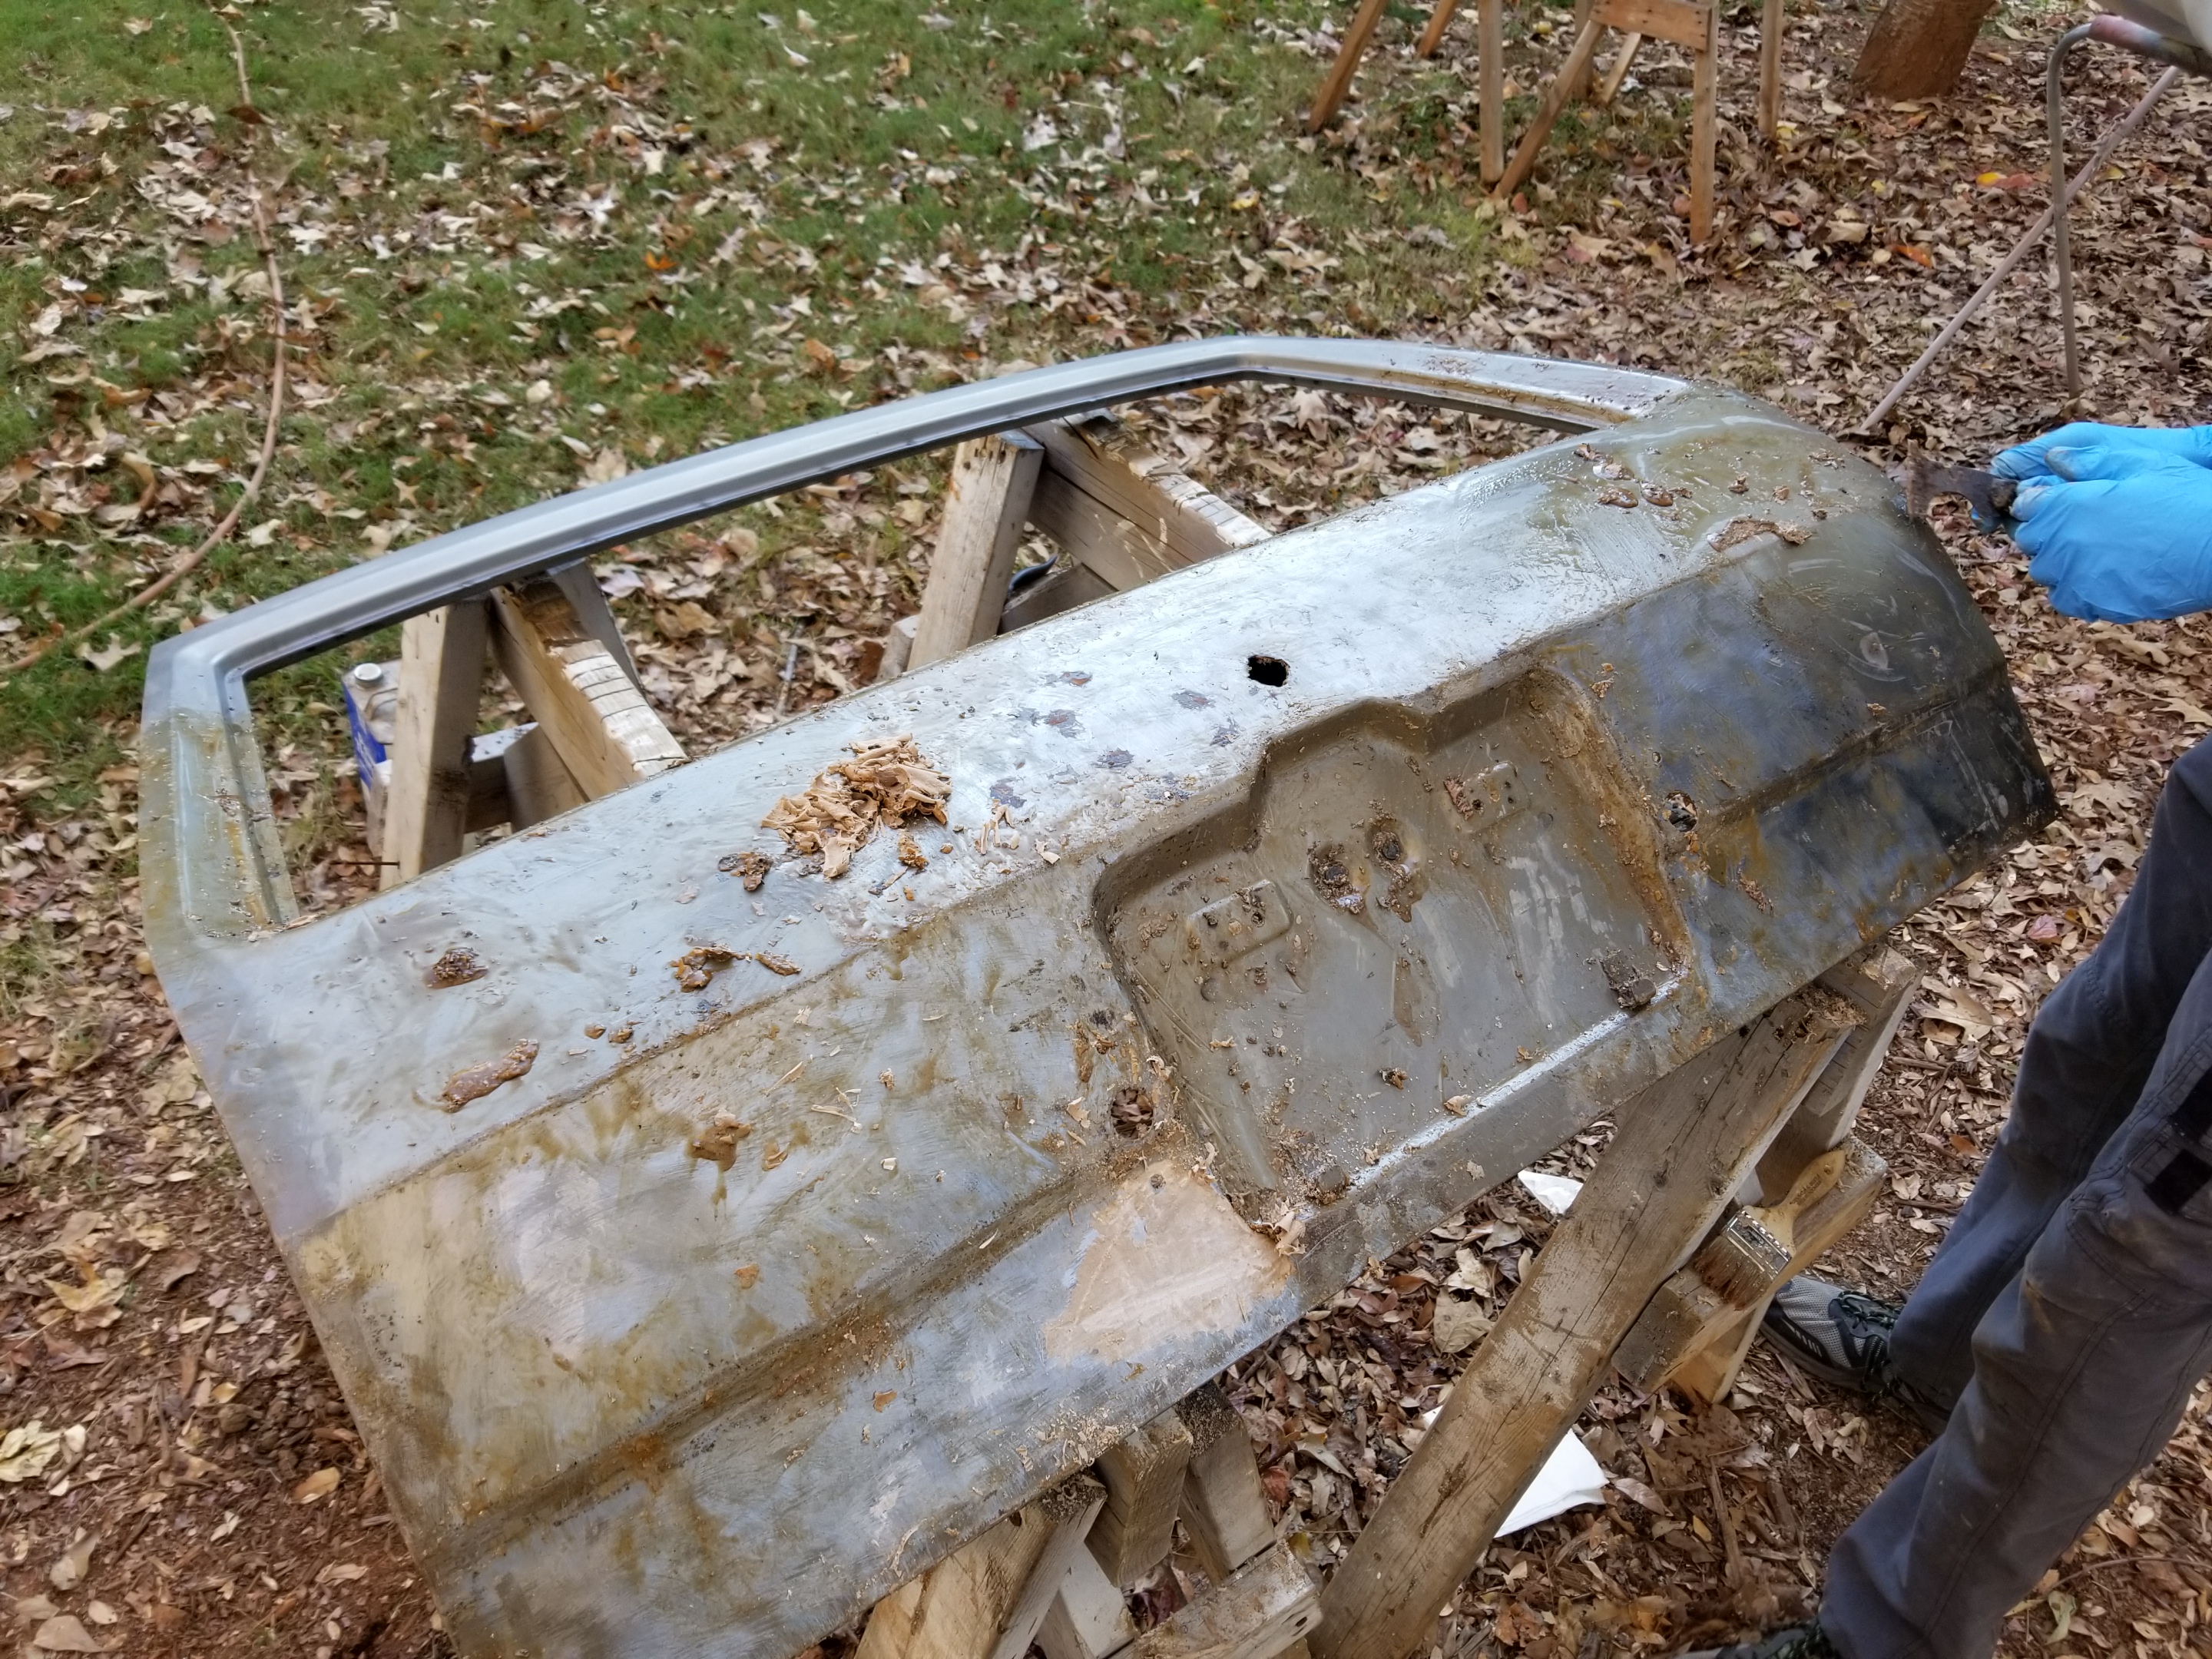
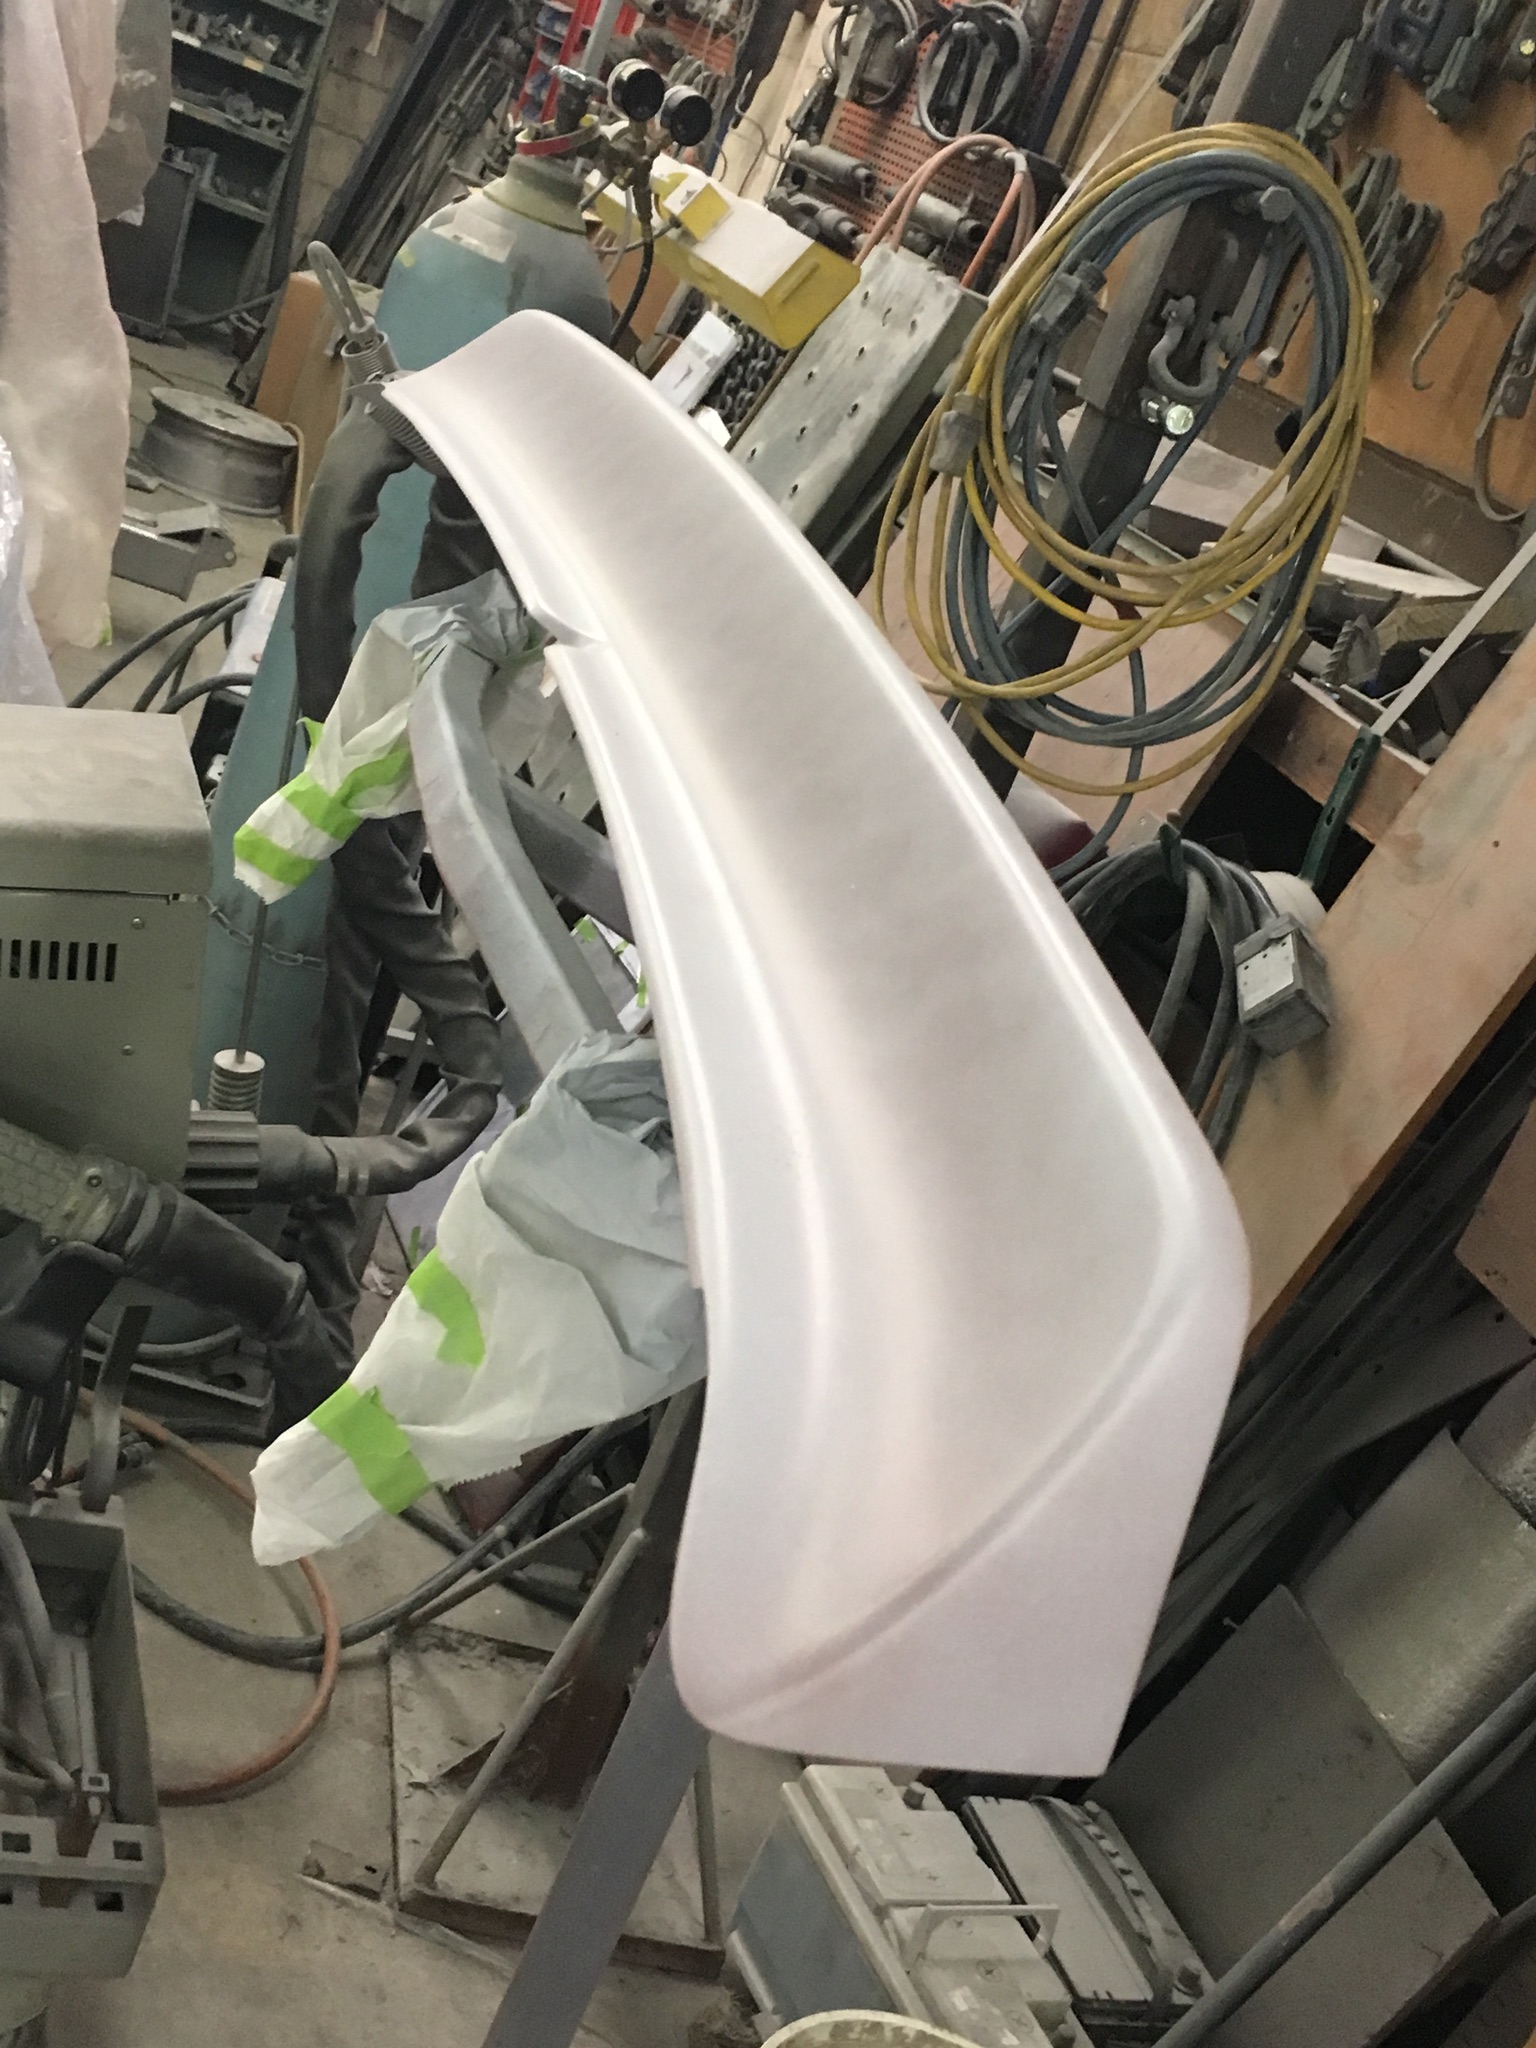
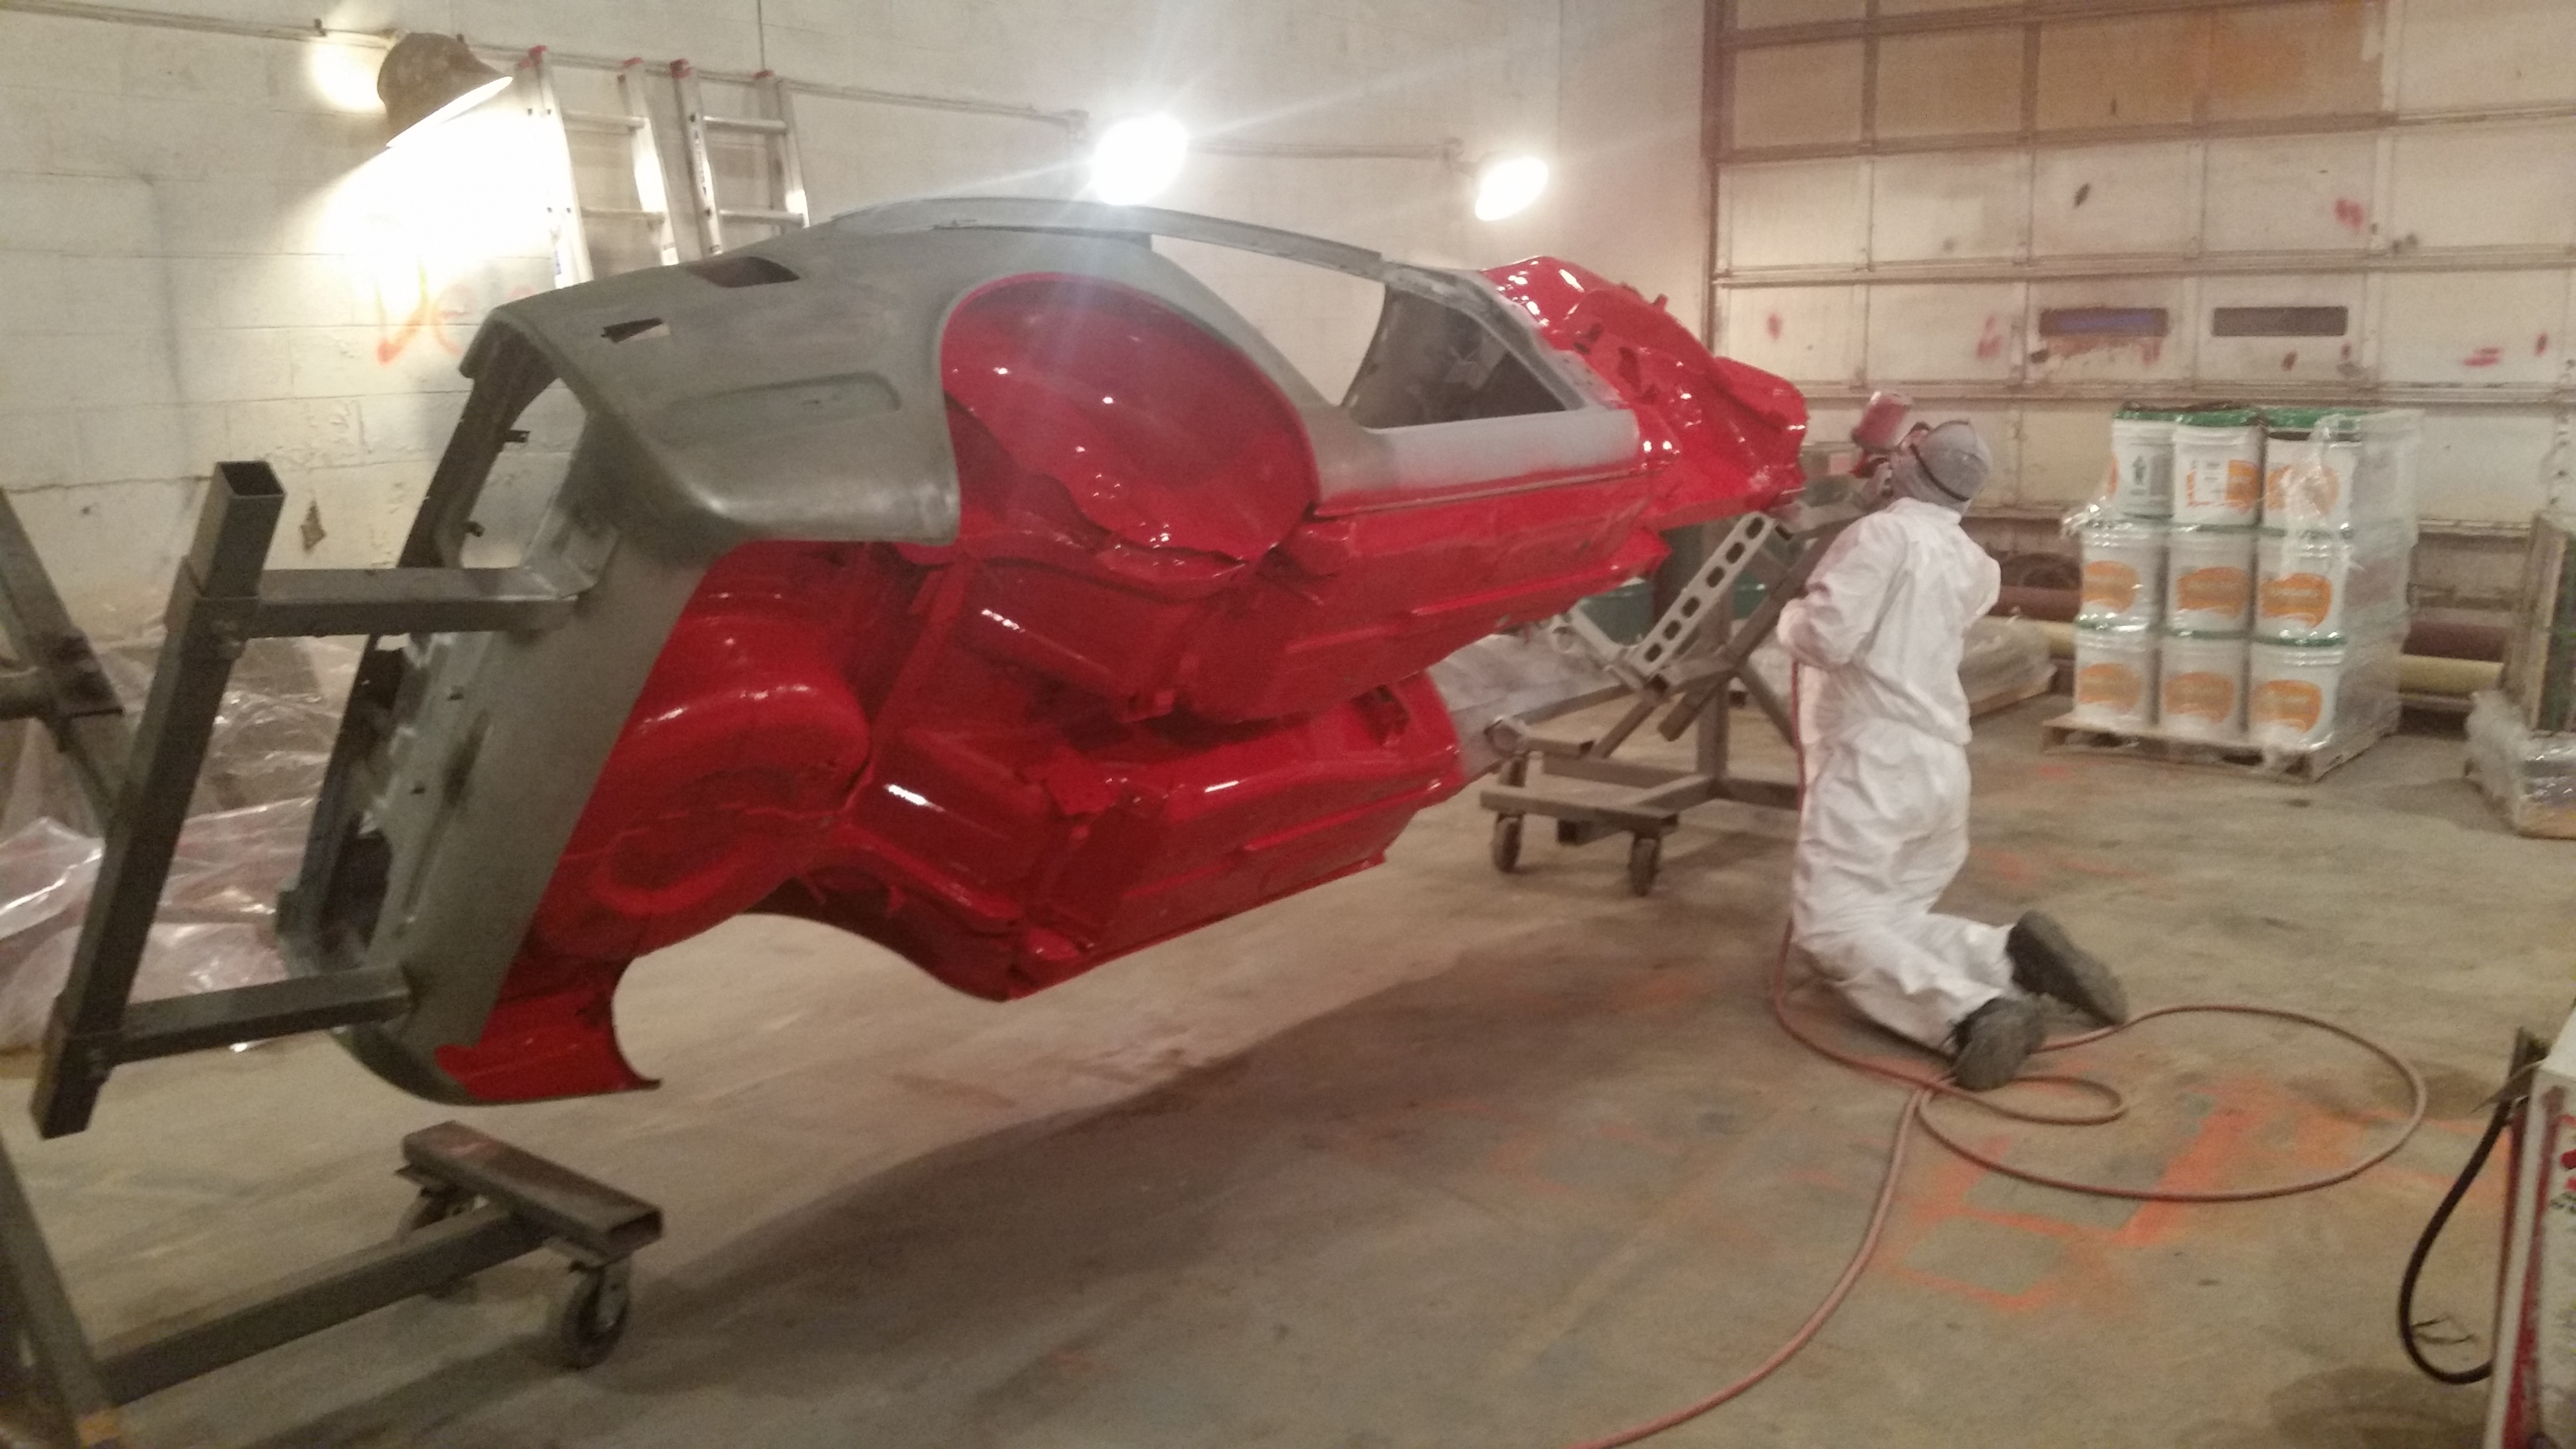
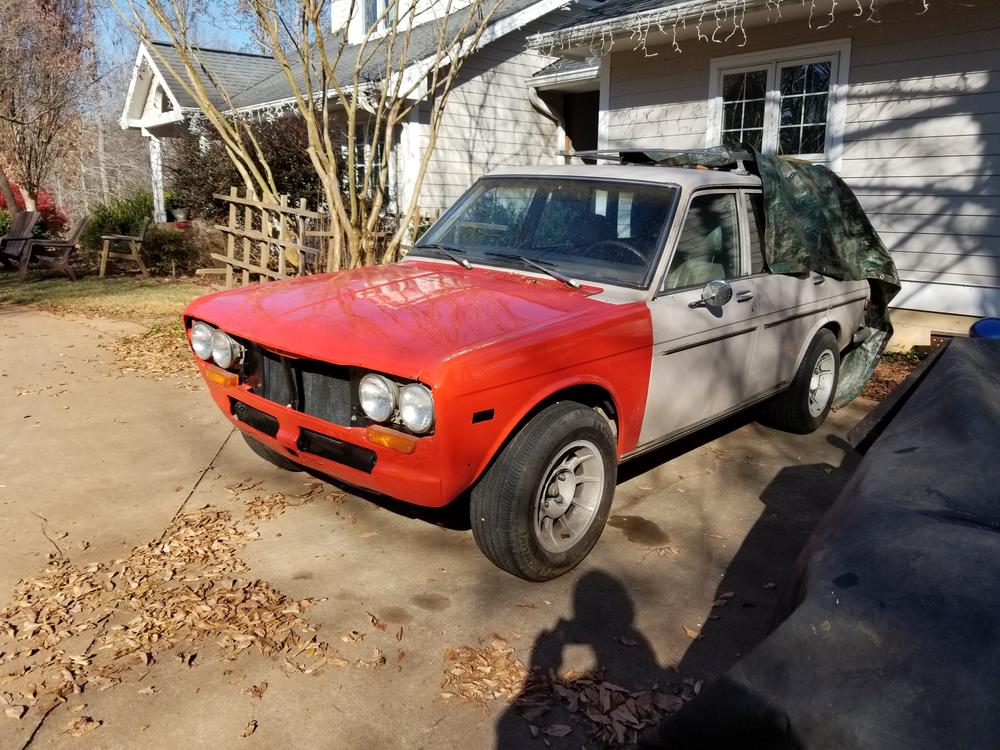
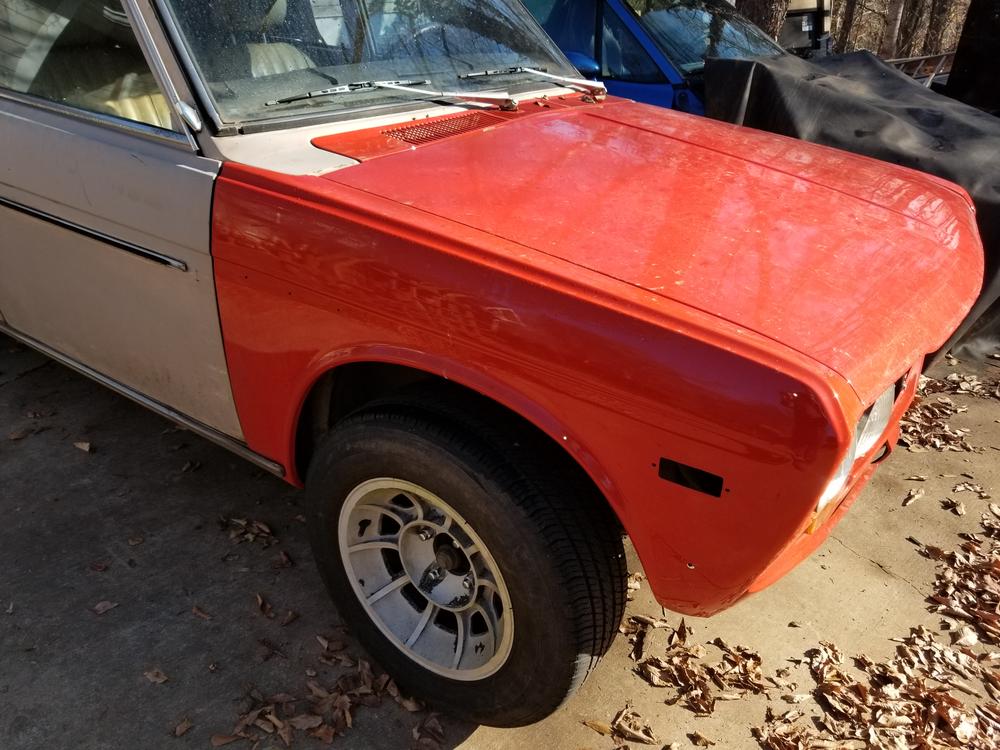
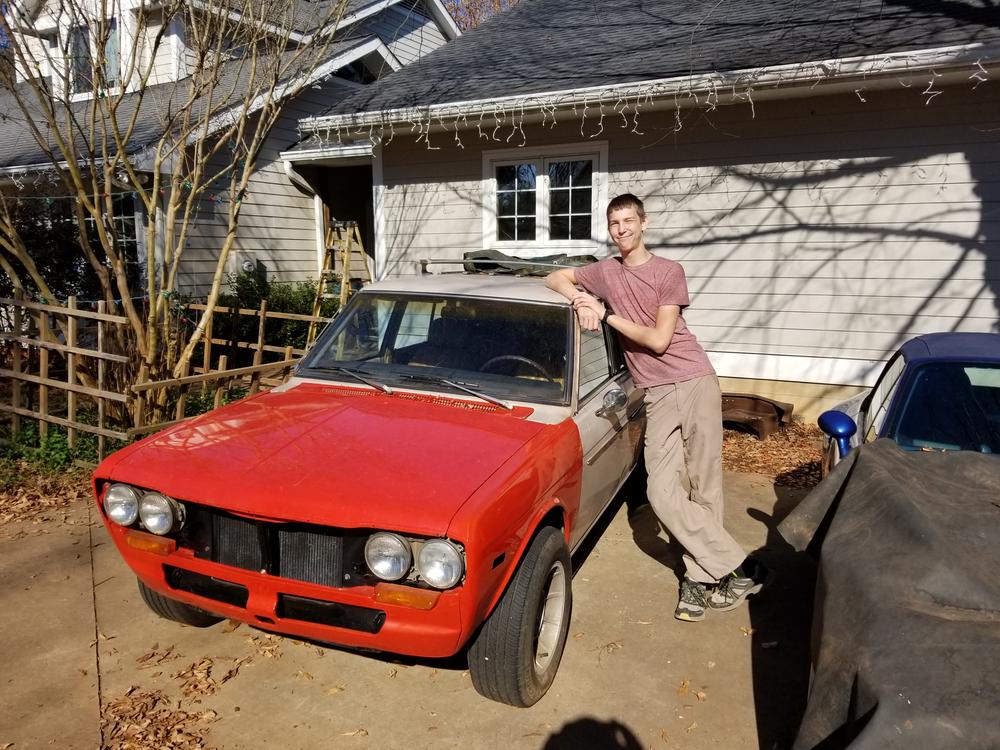
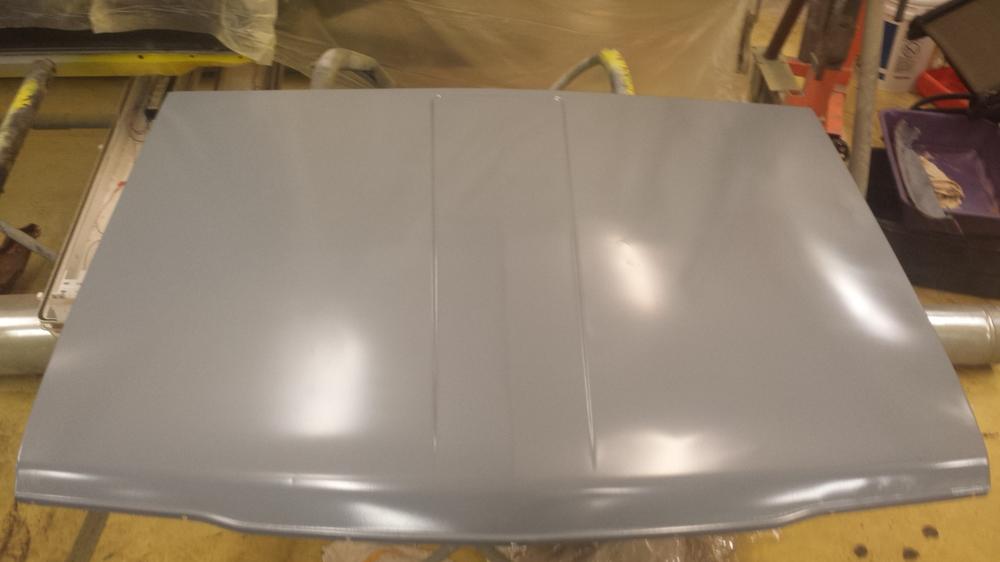
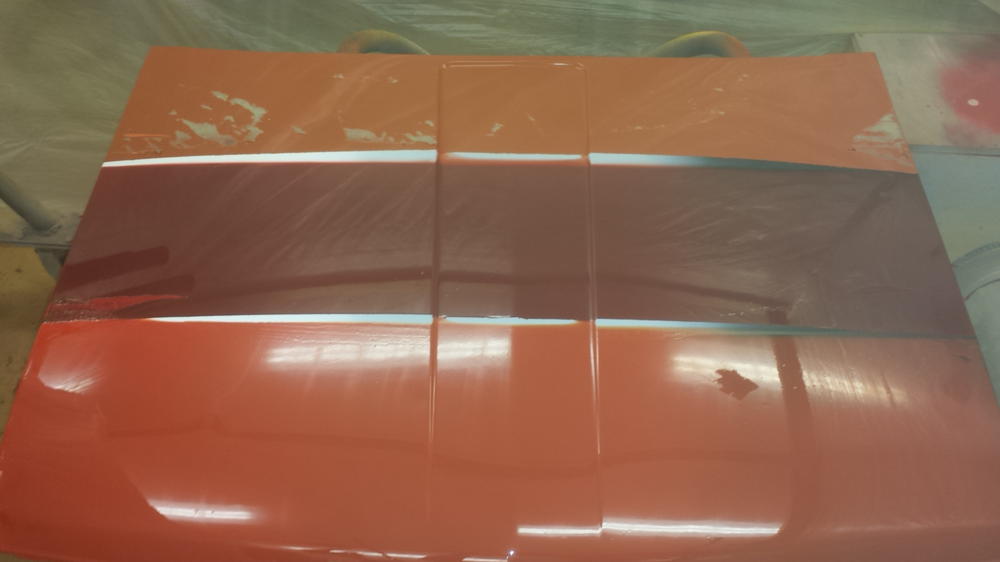
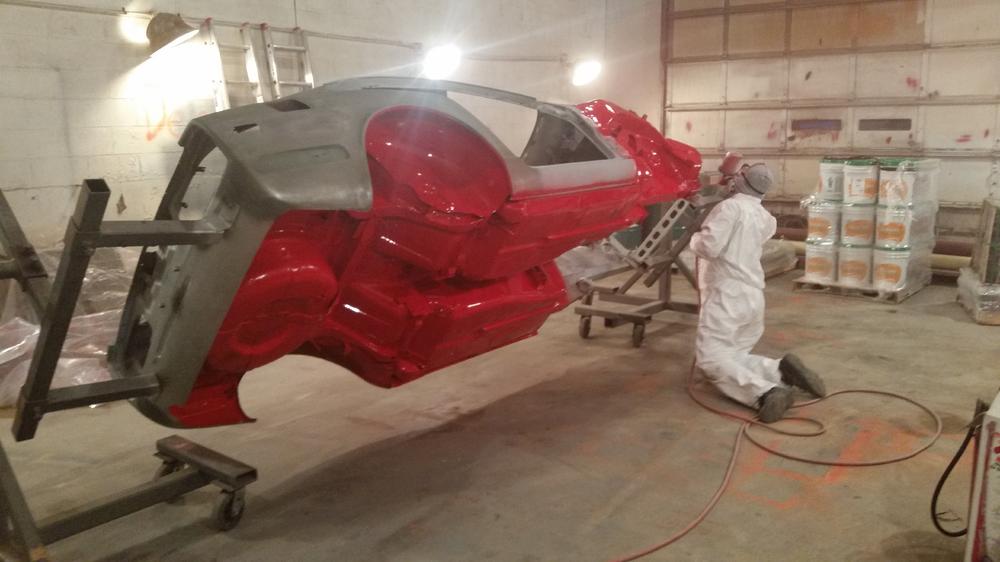
2 pointsThis is how it currently sits. It runs and he has been driving it to work some. We have had a loss of power problem recently. I took the carb off and checked it and we don't seem to be loosing fuel flow. So I suspect water in the fuel. So we added some gas dry. We have the hatch off right now and we are working on getting it changed over to orange. We are doing all the individual panels one at a time then we will pull all the remaining glass and spray the body of the car and have the headliner redone and reinstall the glass. WE can get away with this because it is a solid color and if you shake the paint well, the colors should match ok. This way he can drive the car as we paint it. Instead of breaking it down for years like I have done with my projects. Plus it has the added advantage of being the only car like this for 100 of miles. So if he acts stupid I will probably hear about it.. He has also grown some in the time we've had the car...
 2 points
 -
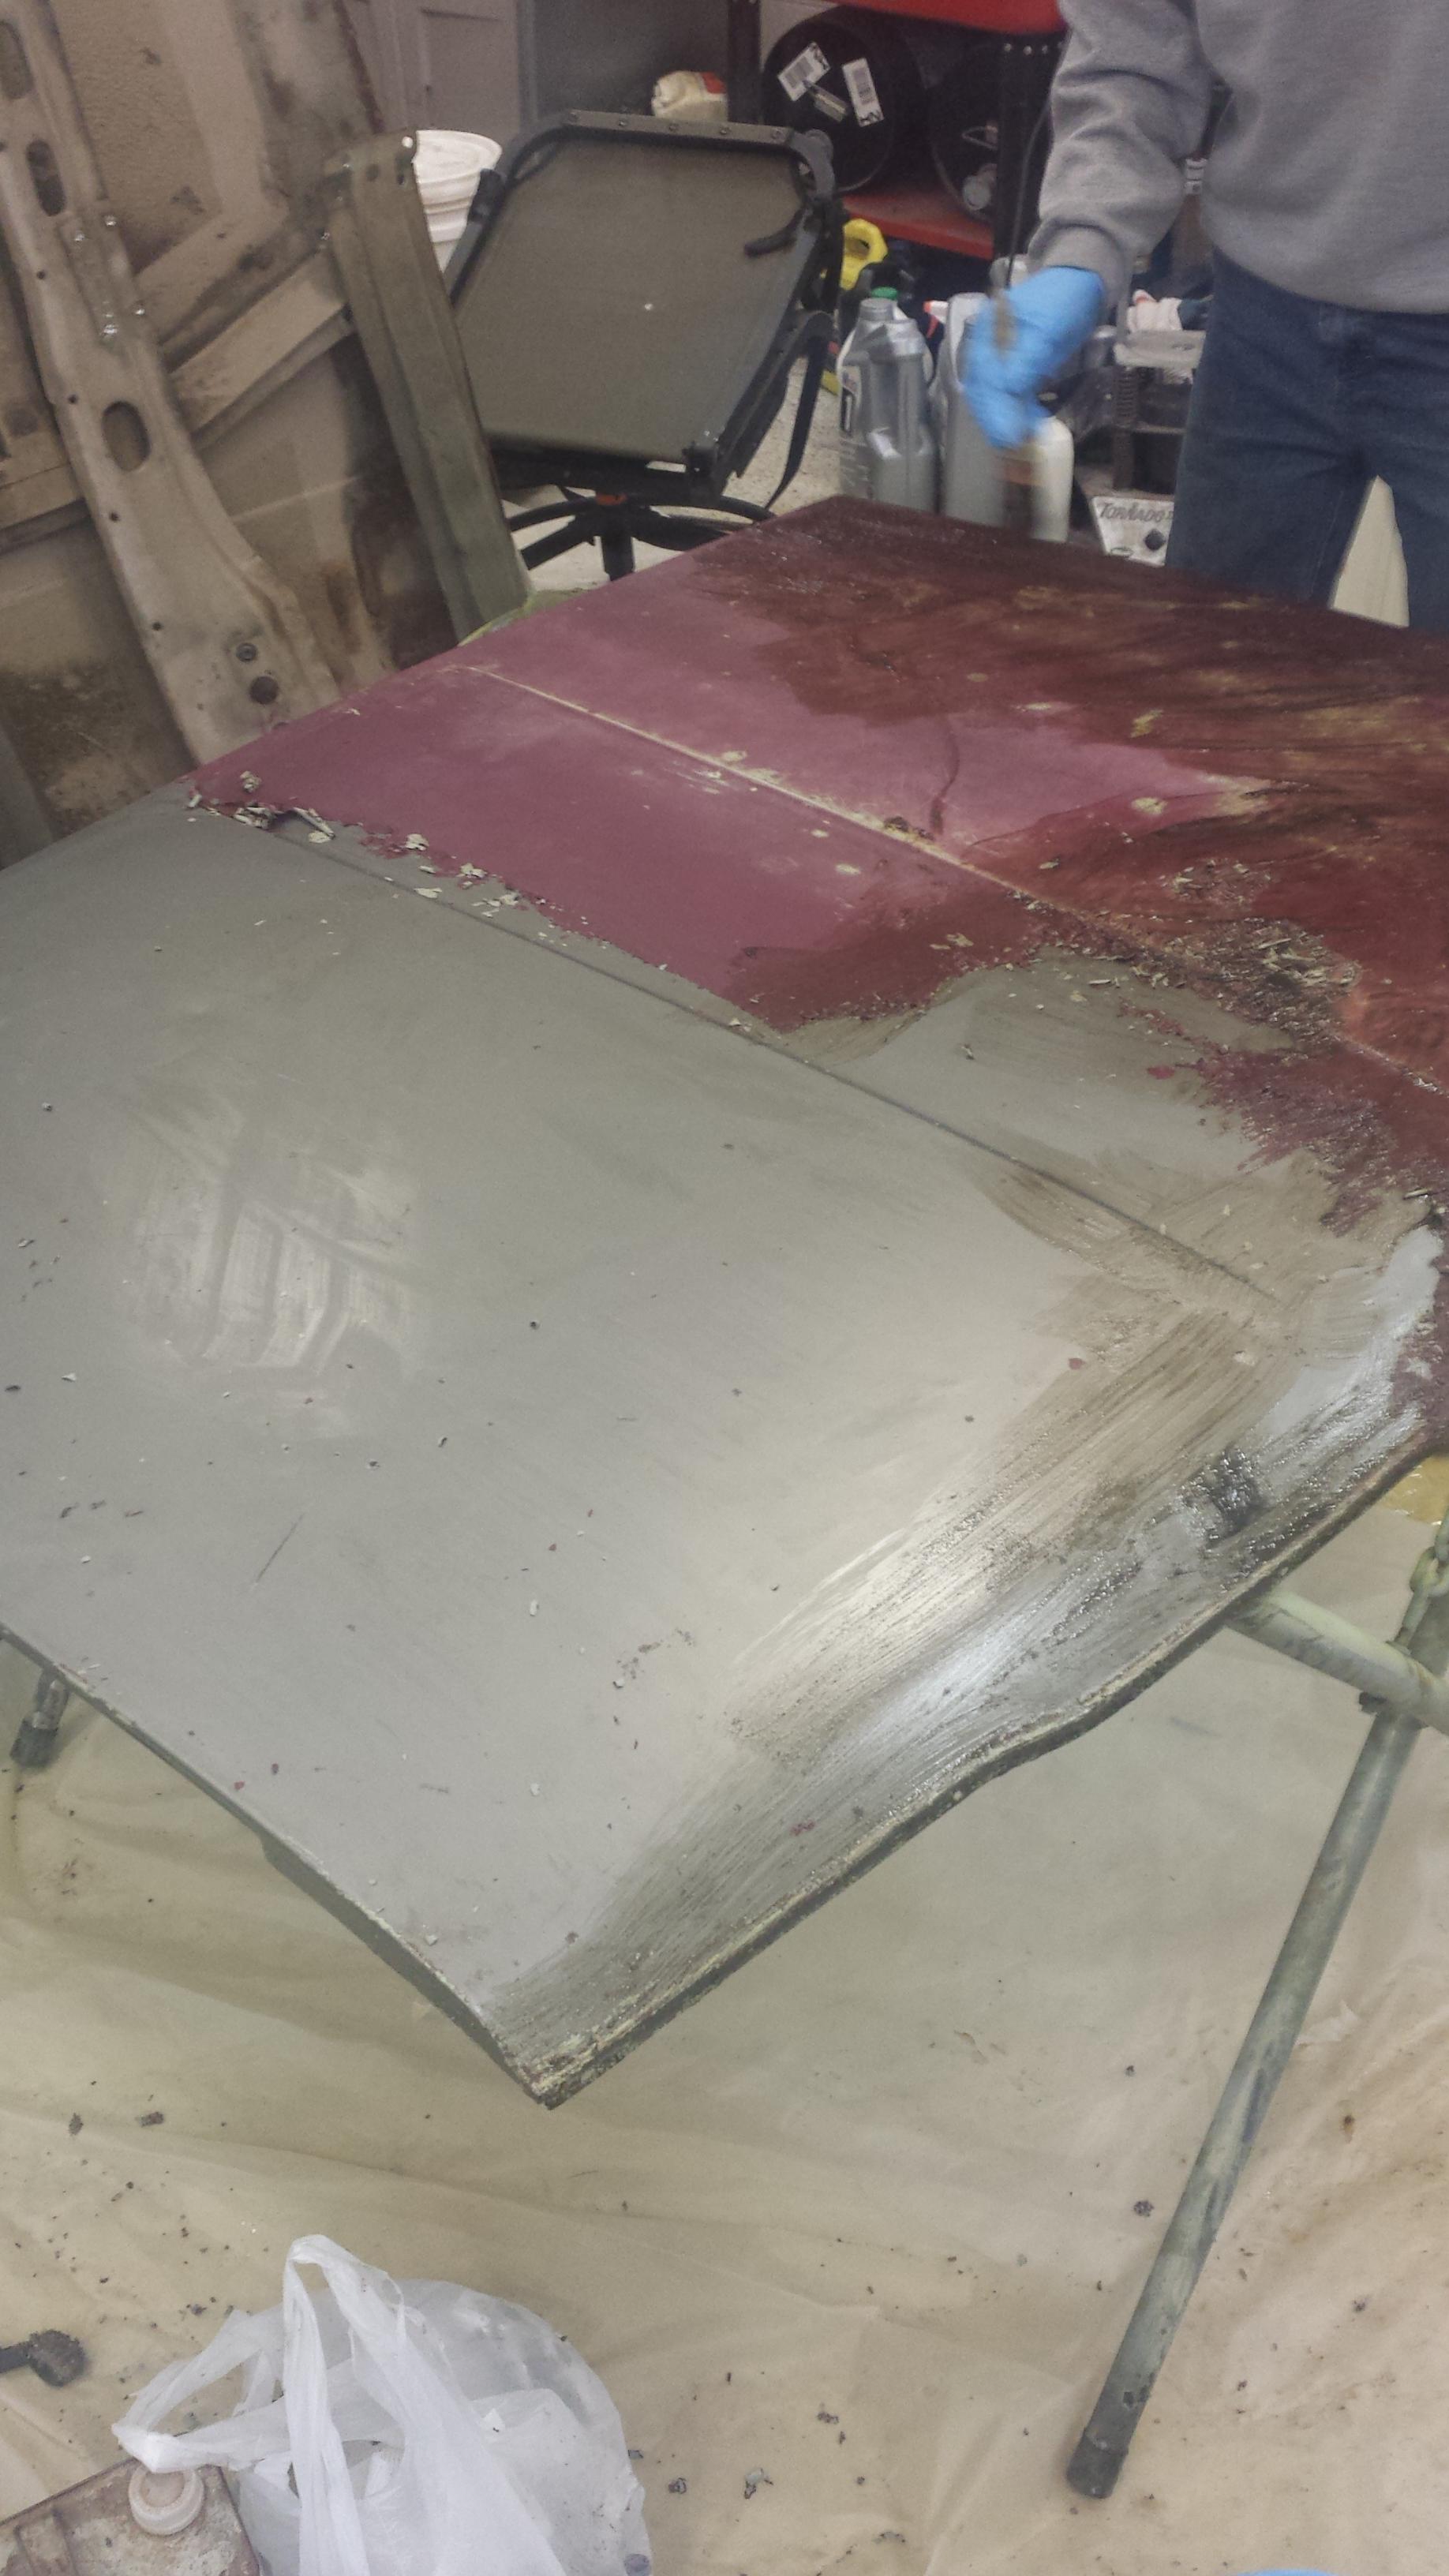
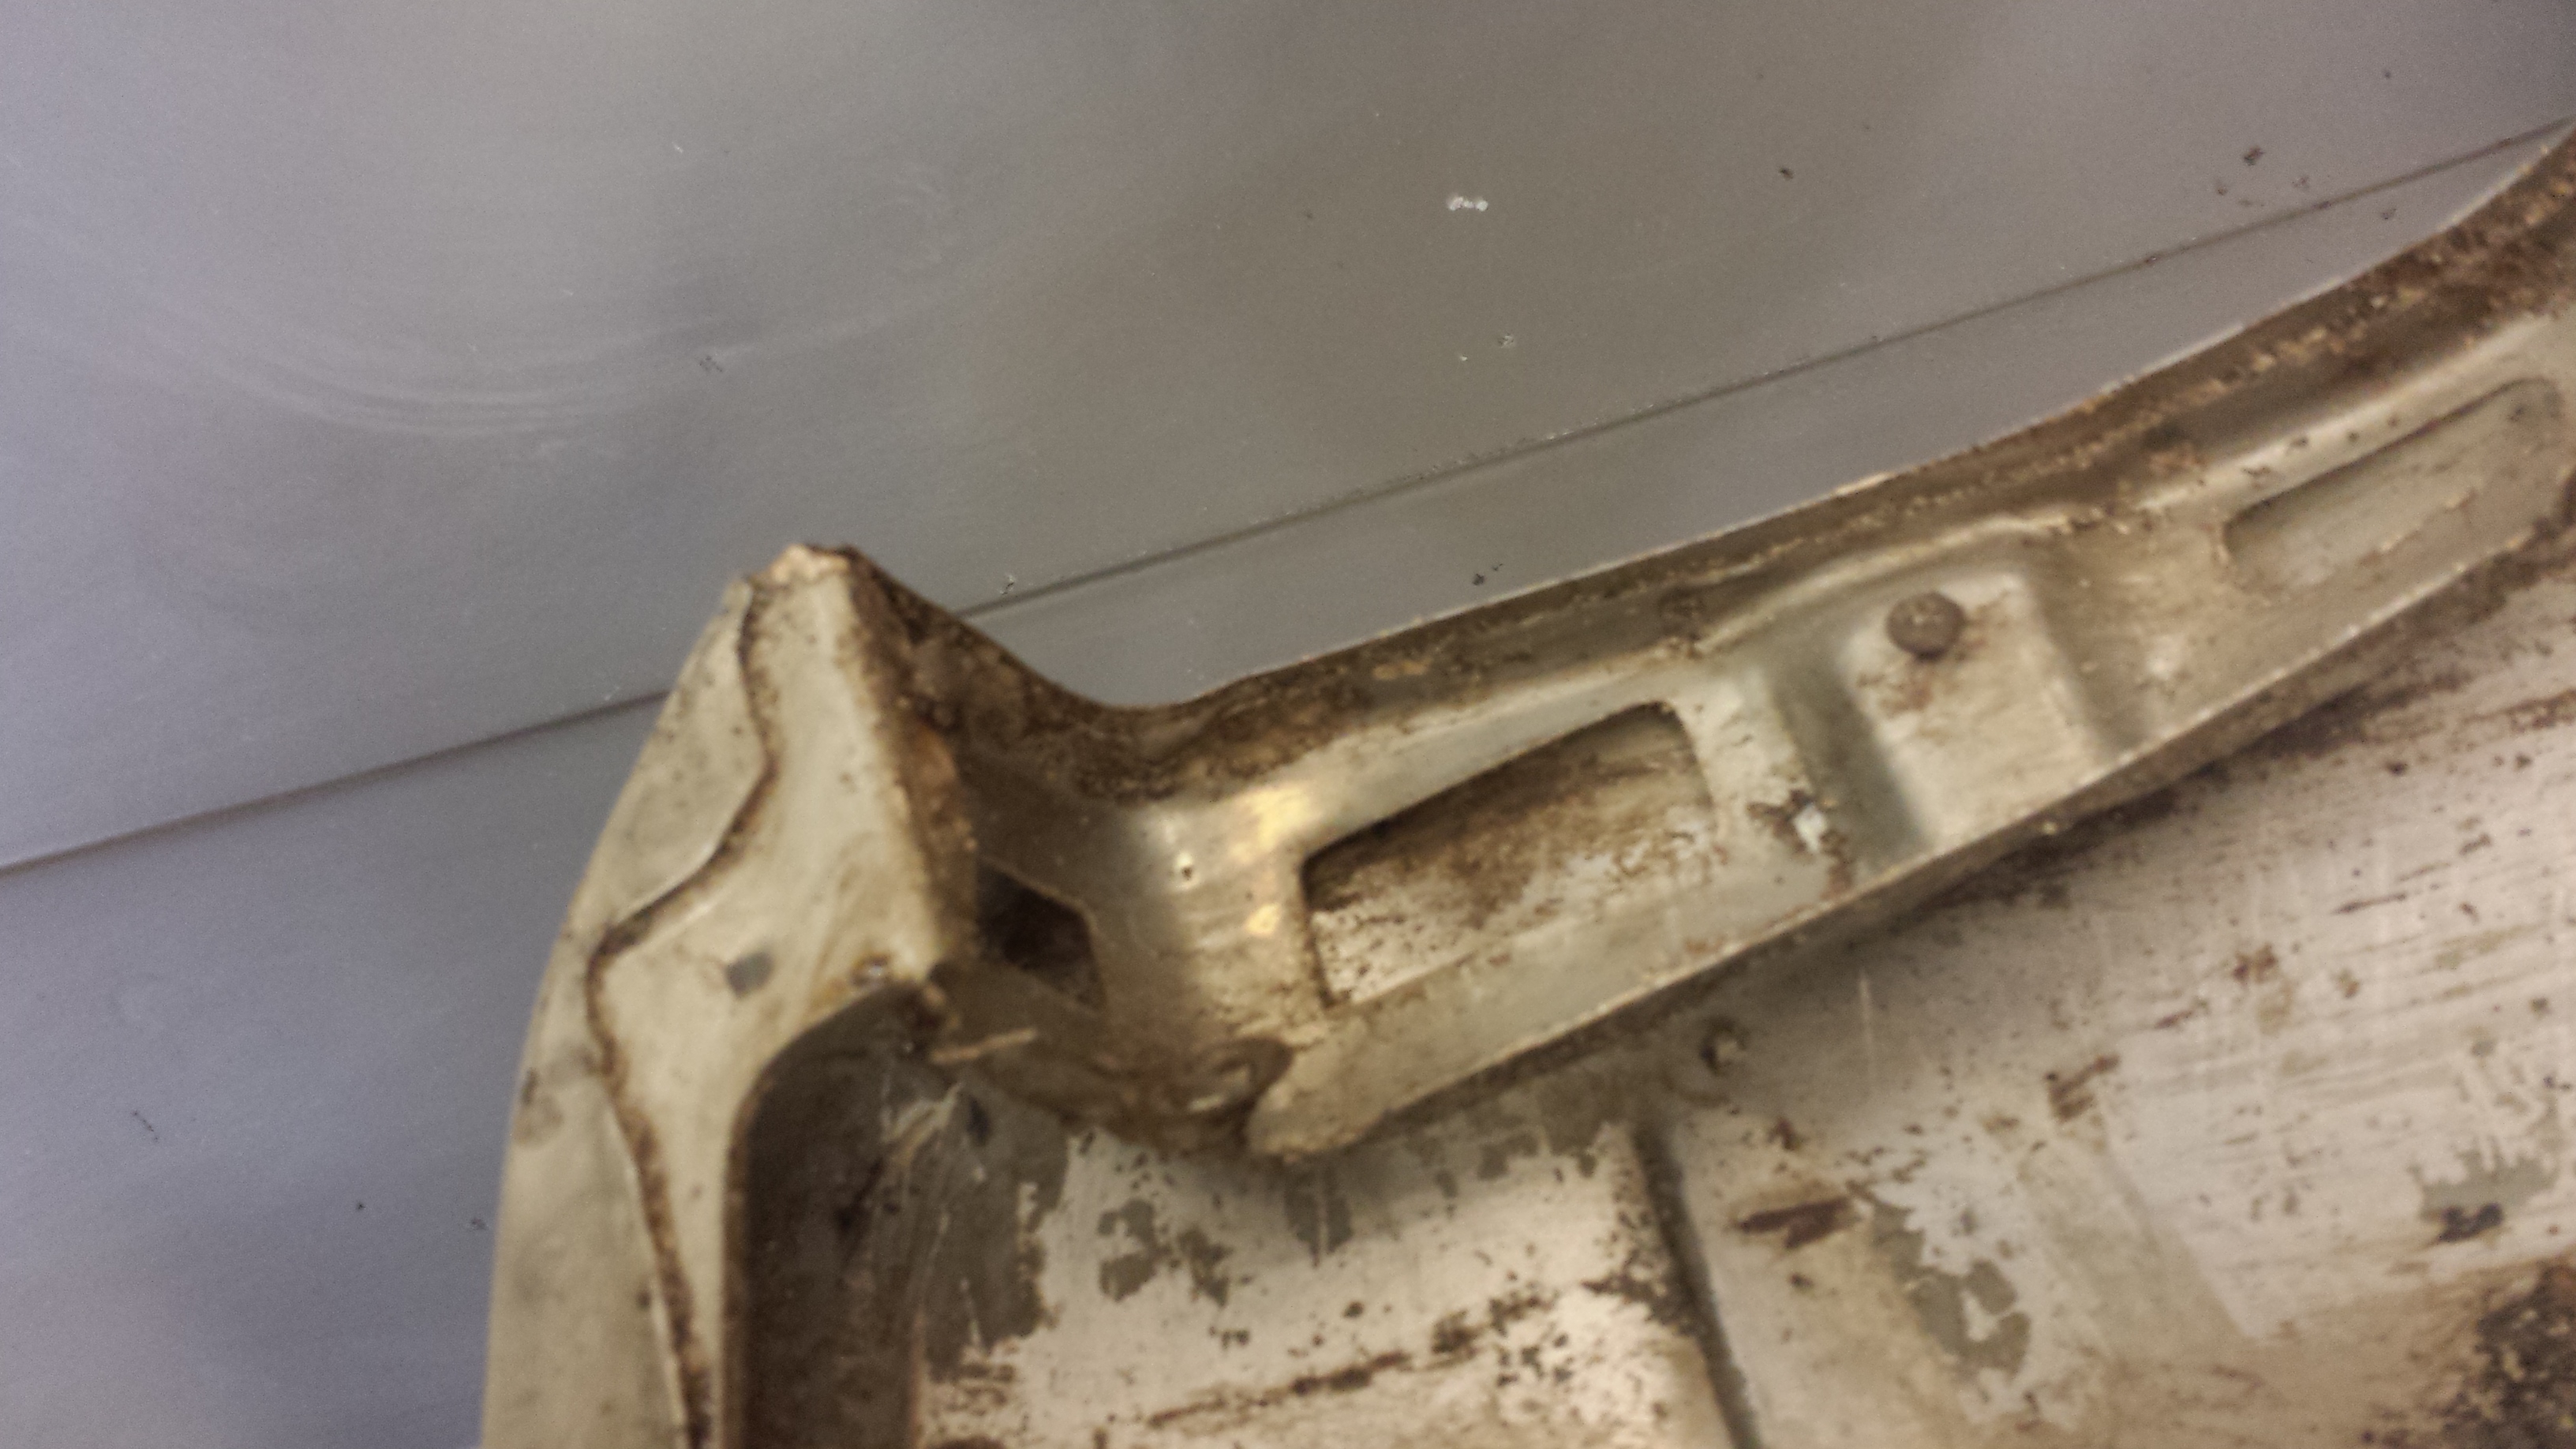
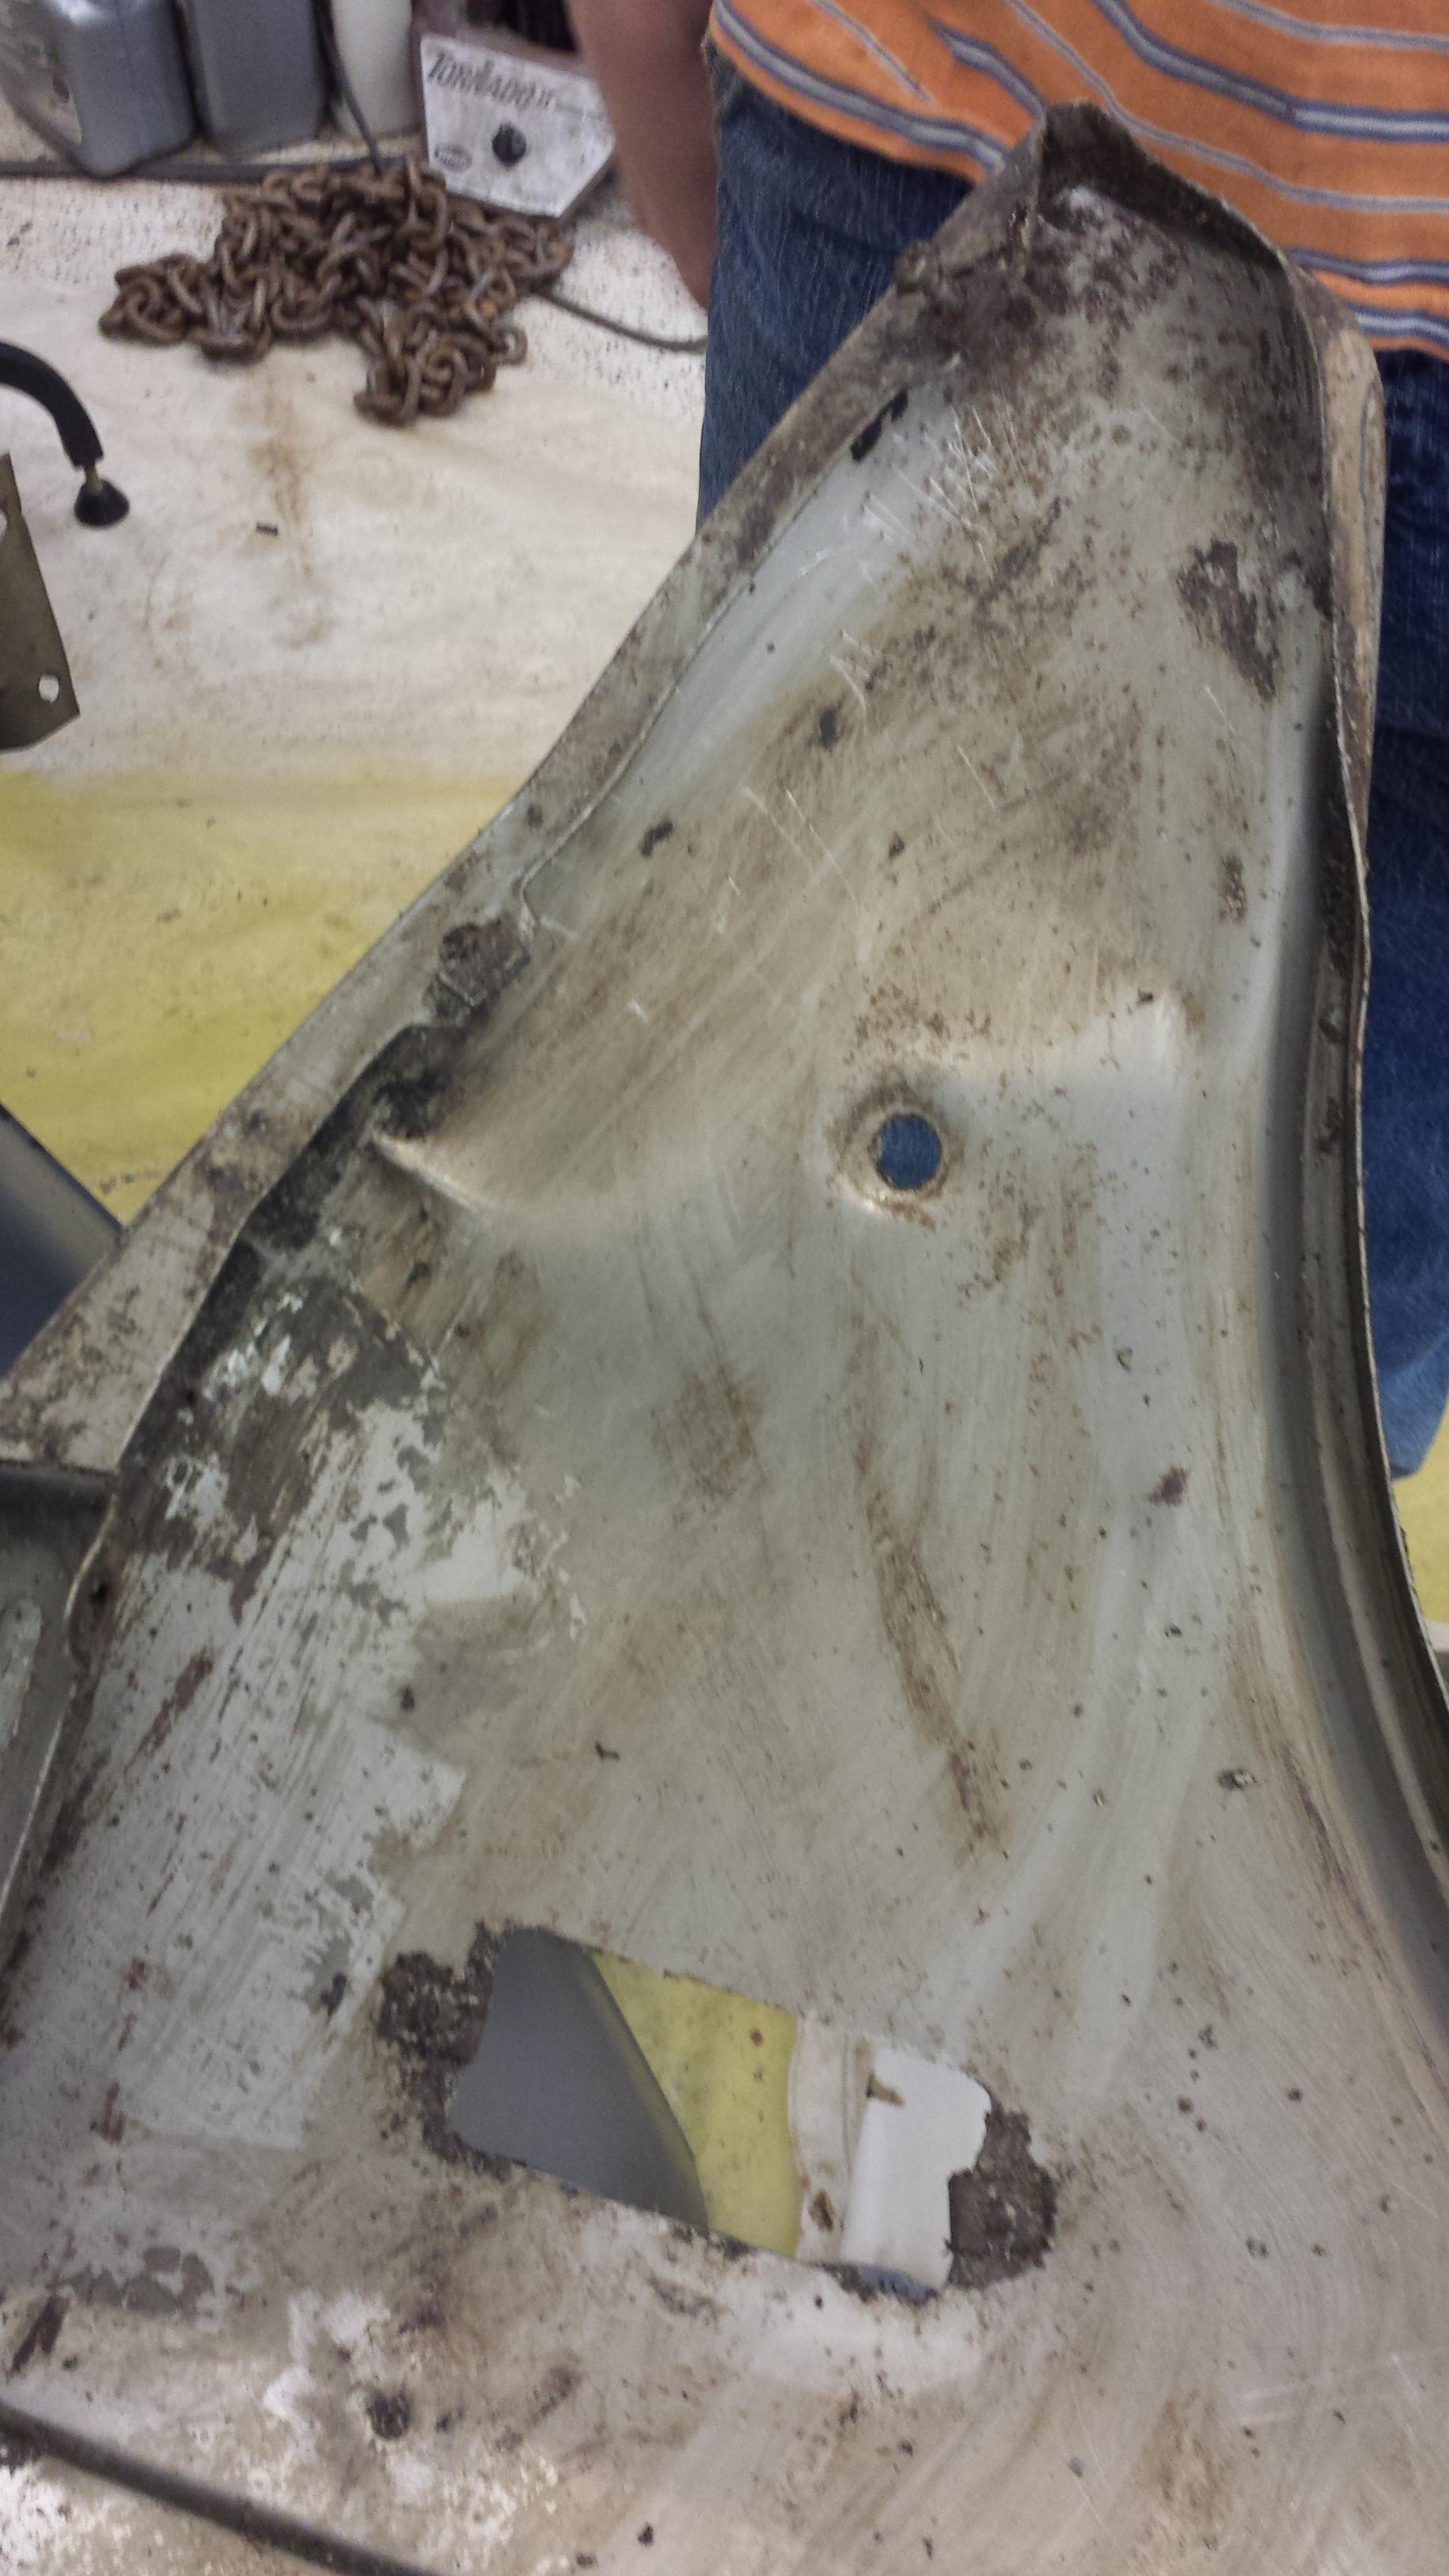
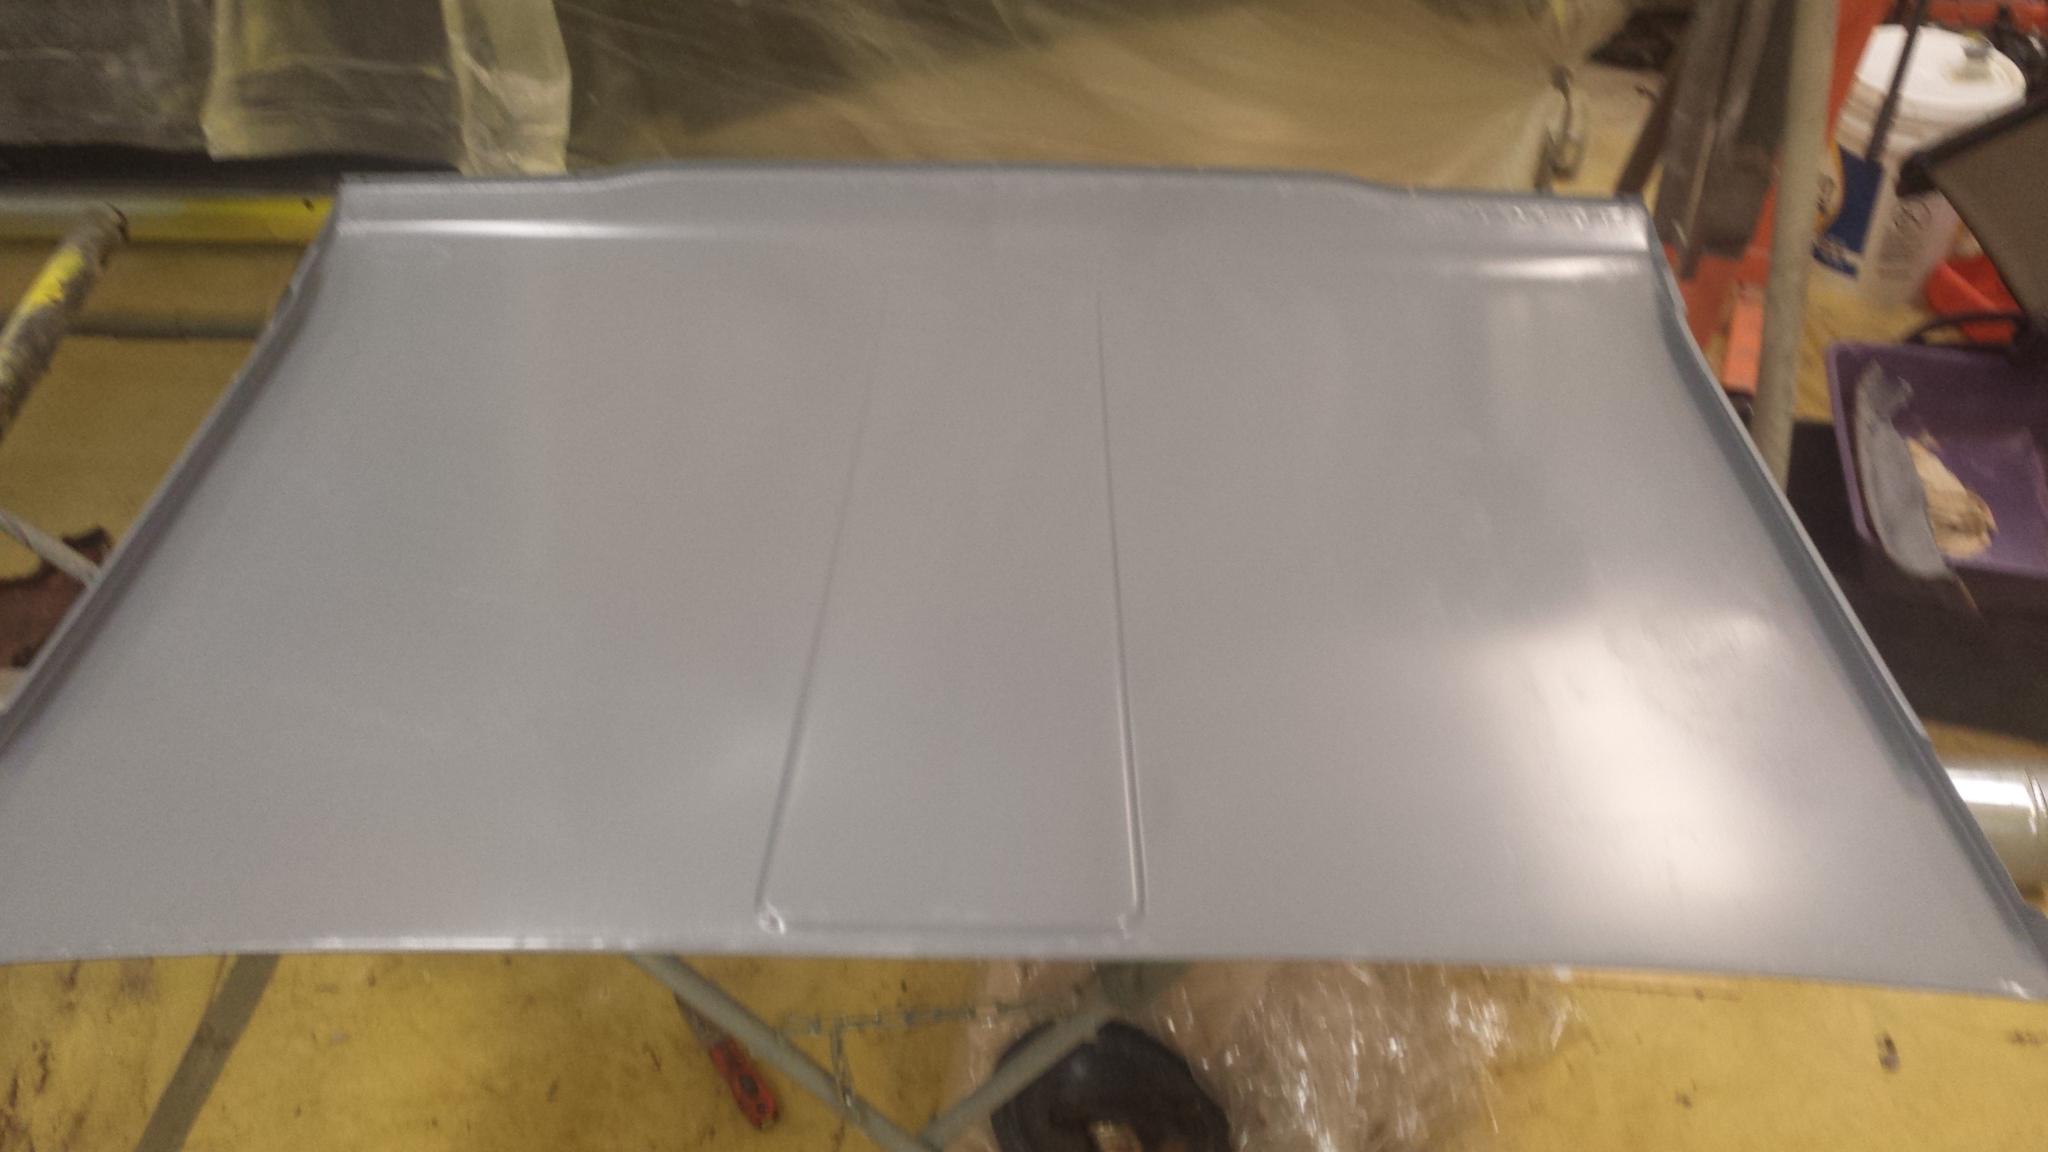
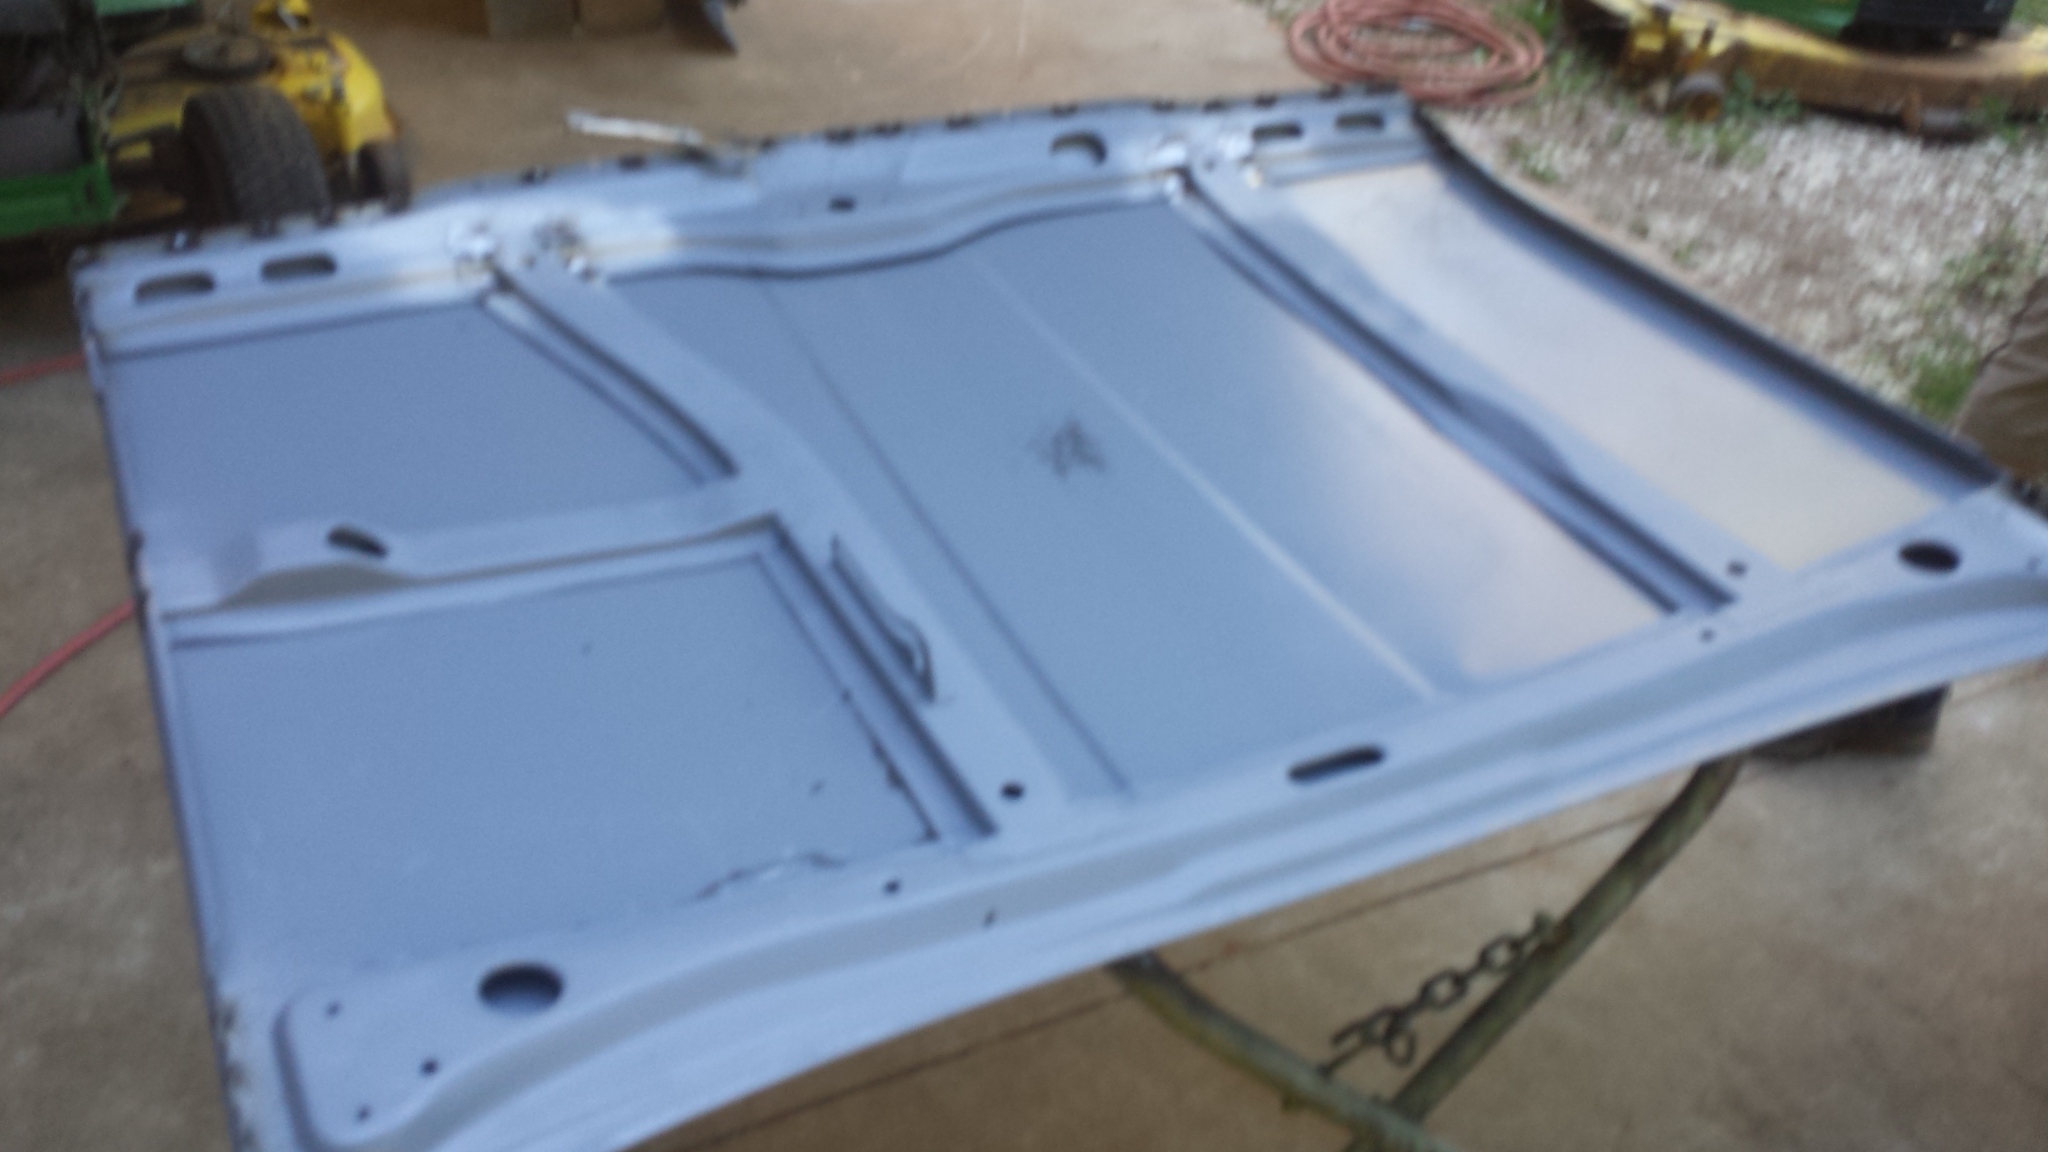
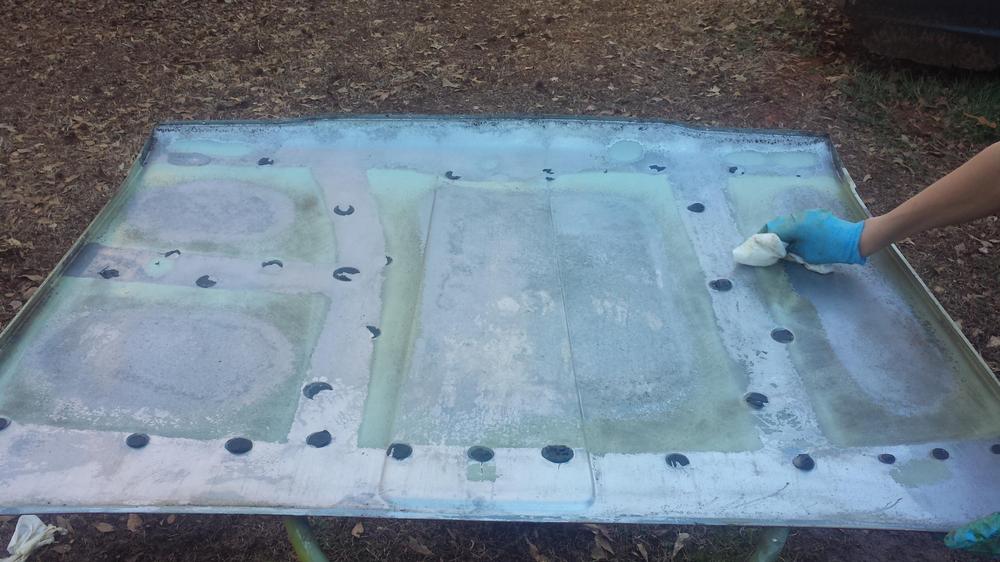
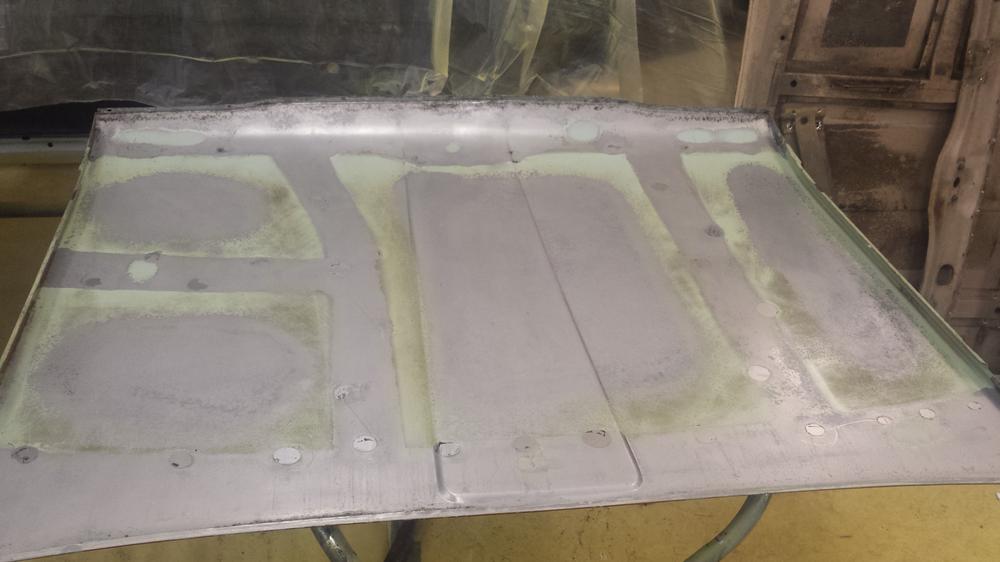
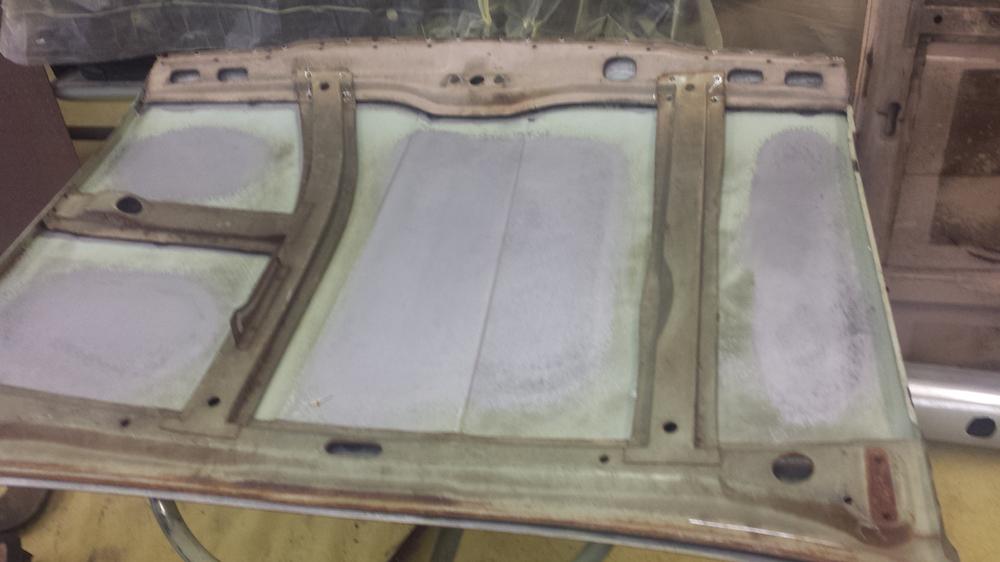
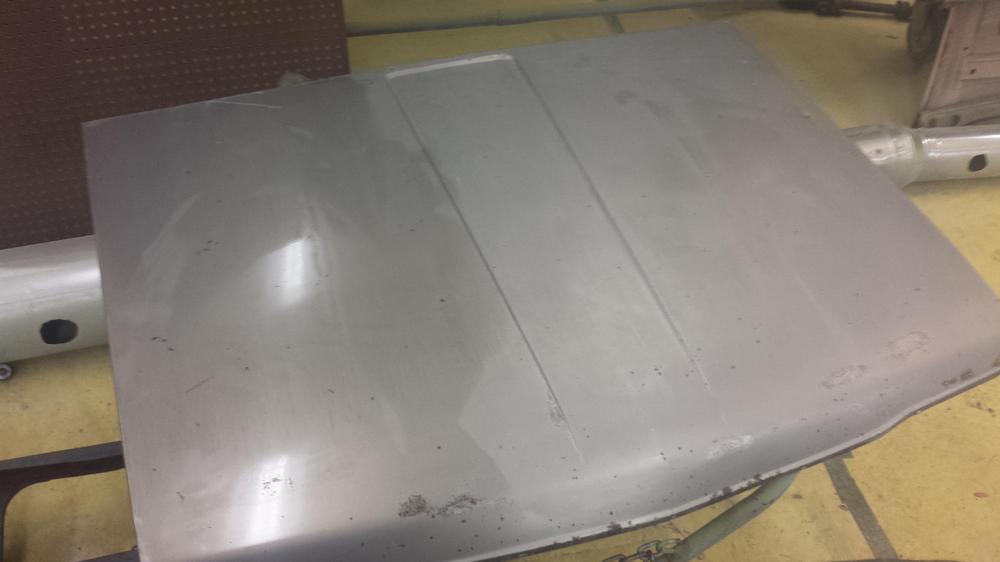
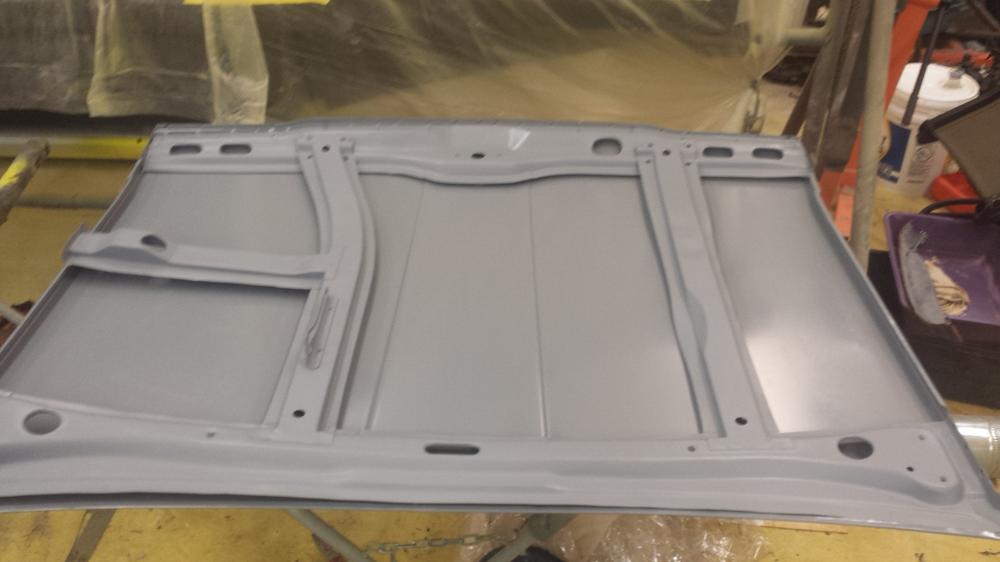
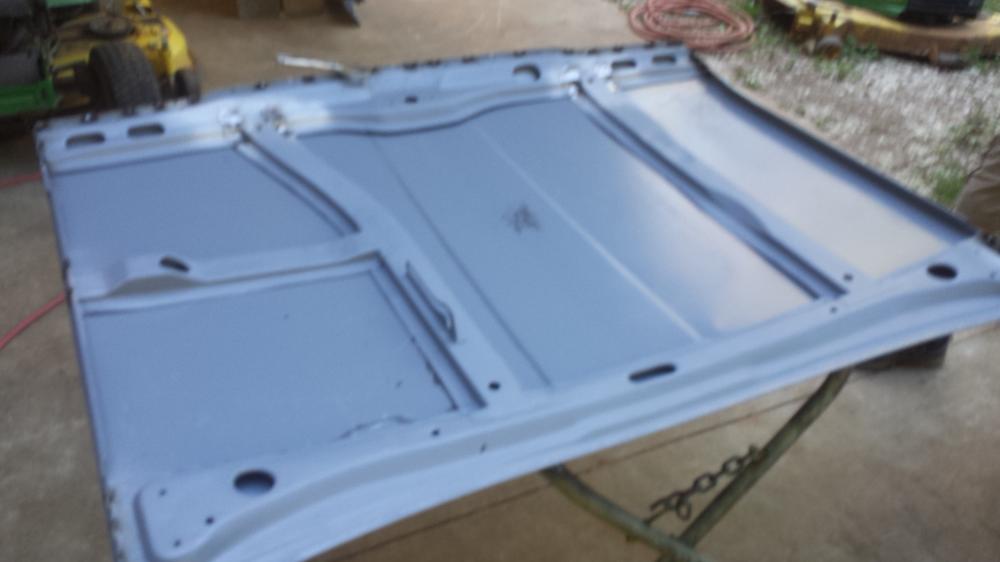
1 pointWe bought a 72 510 wagon for my son about a two years ago. It had been hit on the front right and it took us a while to get that straightened out. Lots of pulling, shrinking and welding We rebuilt the hood out of two different hoods there are some more pictures of this on the forum, but I don't know where... We are changing the cars color from an Ivory type color to one of the factory orange colors. Last weekend we pulled the hatch and started reworking it but there was some bondo on there, so that required a good bit of metal work and even after that there is still a lot of filler on the panel I will try to post up some more picture tomorrow


 1 point
 -
1 point
-
1 point
-
If you use the "Snail" flow tool, it is designed for single cylinders (Weber DCOE typically) so the flow from the 3 combined cylinders drawing from each SU carb on a 240z makes it "pin" easily at >2000 rpms. Some of these snails have a hole in the side that can be exposed to reduce the air through the meter at high rpms. (see the hole in the side below). You may have to punch a hole in the inner rubber to make it work. Just rotate the inner rubber to close any hole you make.1 point
-
1 pointThe AZC rear brake kit is very nice and will work well with a 15/16th master cylinder, but the additional rear park brake system is currently not available and after over a year of inquiring, I am beginning to give up hope that they will be making them again....1 point
-
1 pointThe tube that runs around the back is larger diameter than the tube that runs through the intake manifold. If you run a hose from the thermostat housing around to the heater Y-pipe you're going to be sending more coolant around at all times, bypassing the radiator, than the stock intake heating system would when it's thermostat is open. A way around this is put a restrictor in the line. Maybe jamming a socket inside the hose would work.1 point
-
1 pointThanks, I just needed the "Hoover" to help me come up with the right search terms1 point
-
The work you did on the throttle plate looks great. Well done! So you think the edge taper angle on the replacement was different than the original? Workmanship... Glad you went back to the original.1 point
-
1 pointSomeday I'd like to get this one from zcardepot.com https://zcardepot.com/disc-brake-conversion-rear-disk-240z-260z-280z-1331.html here's some conversations you could read https://www.google.com/search?rlz=1C1BOFA_enUS494US494&ei=cWklWoaSNofx_AbOkKWwBA&q=zcardepot+rear+disc+conversion+classiczcars.com&oq=zcardepot+rear+disc+conversion+classiczcars.com&gs_l=psy-ab.3...7908.13226.0.13699.17.17.0.0.0.0.169.2075.1j16.17.0....0...1c.1.64.psy-ab..0.16.1967...33i160k1j33i21k1j33i13i21k1.0.5CSX_hdkky01 point
-
1 pointI need to work on my computer skills was not able to find mechanical section just looking at my options trying to build a solid but more powerful engine I thinking I need a ZX engine to rebuild for my 240 thanks for your help.
 1 point
 -
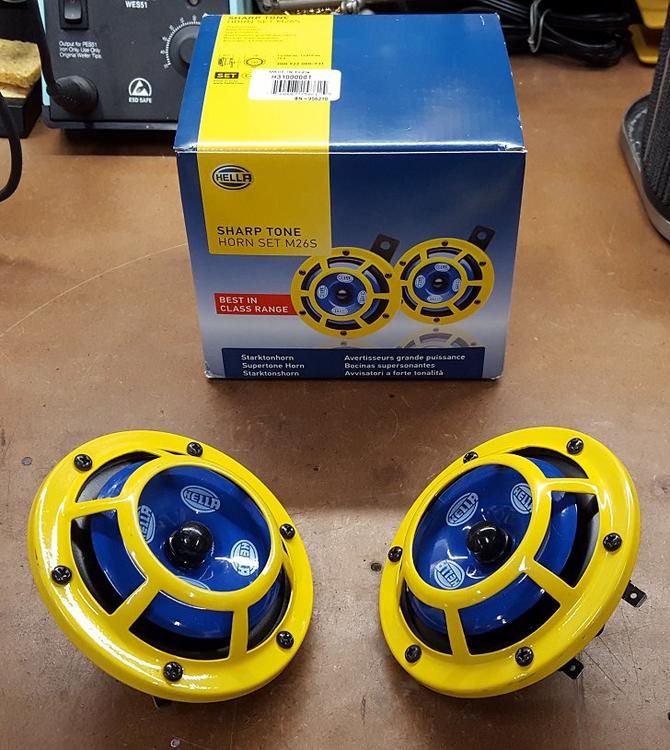
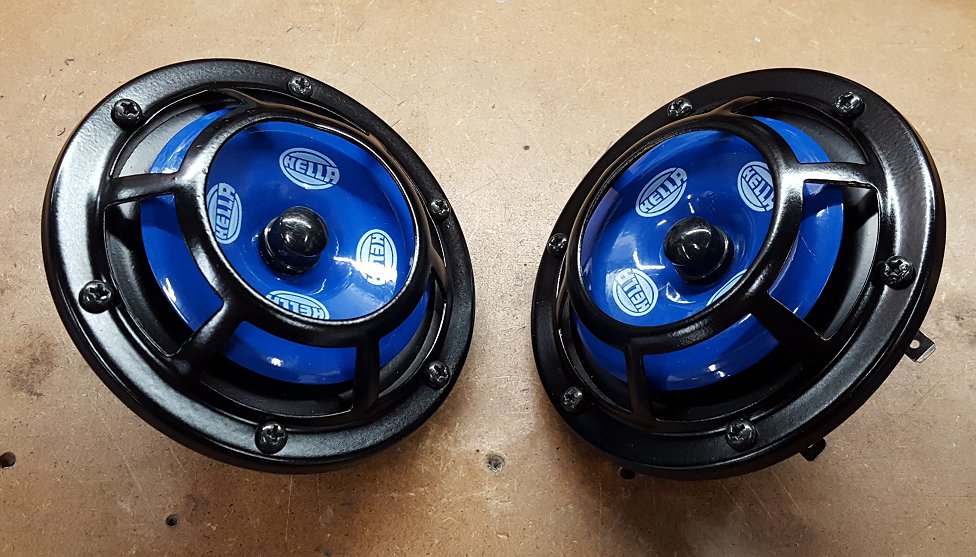
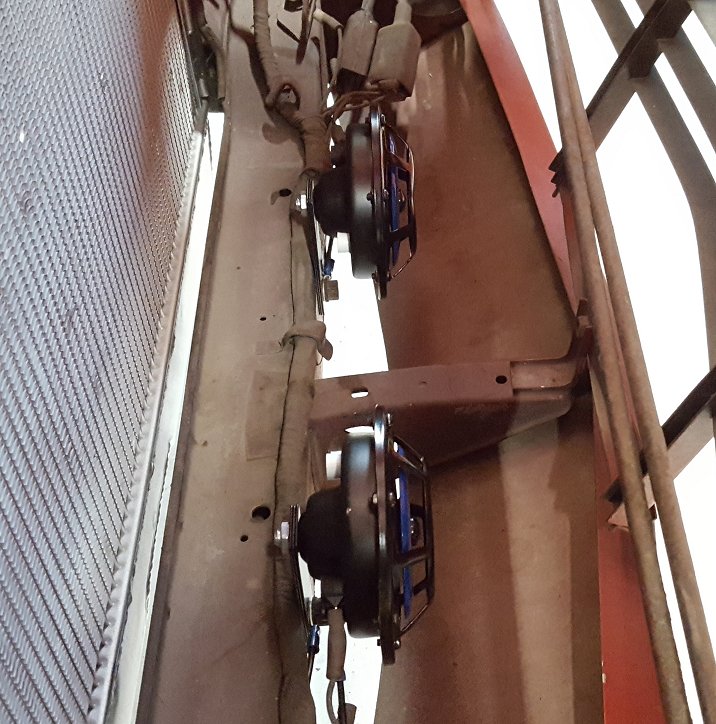
As previously mentioned one of my horns was not working properly and I have purchased a restoration kit for them. I want to get the car on the road as soon as possible so I decided to run some after market horns for now. After some research and YouTube comparison videos I settled on some Hella Sharp Tone horns for $27.99 shipped off eBay. Don't let the name fool you, they sound like modern loud vehicle horns. They come with yellow cages on the front which would make them stick out from the rest of the car so a color change was in order. After a once over with some steel wool to knock the shine off the paint I put two light coats of satin black on them. Painting conditions were not ideal this weekend and but they look much better and on the car you don't really notice them, which is the point. With the horn button pressed everyone in the immediate area will take notice!
 1 point
 -
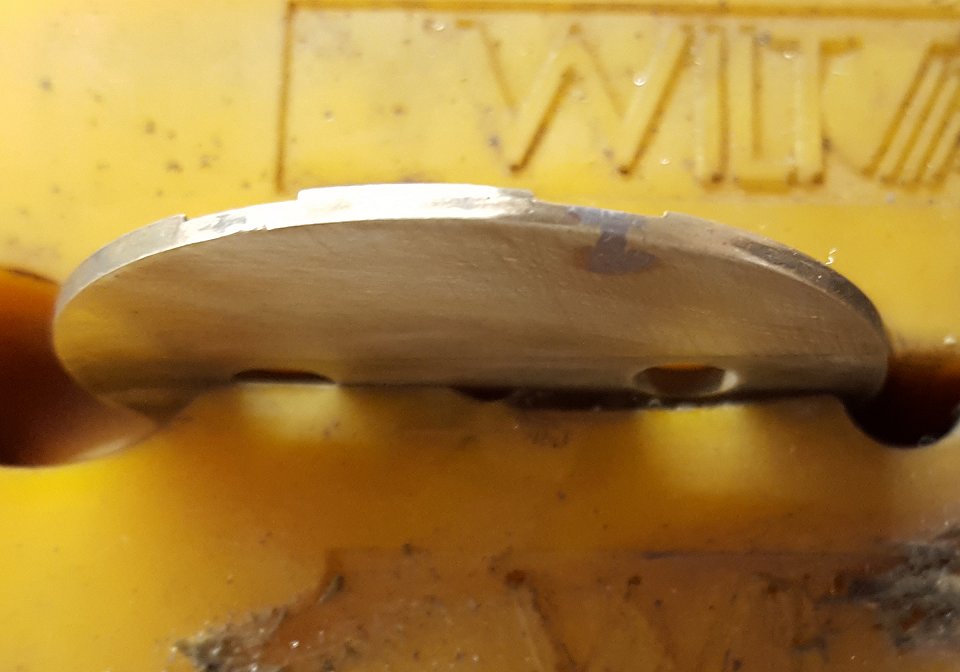
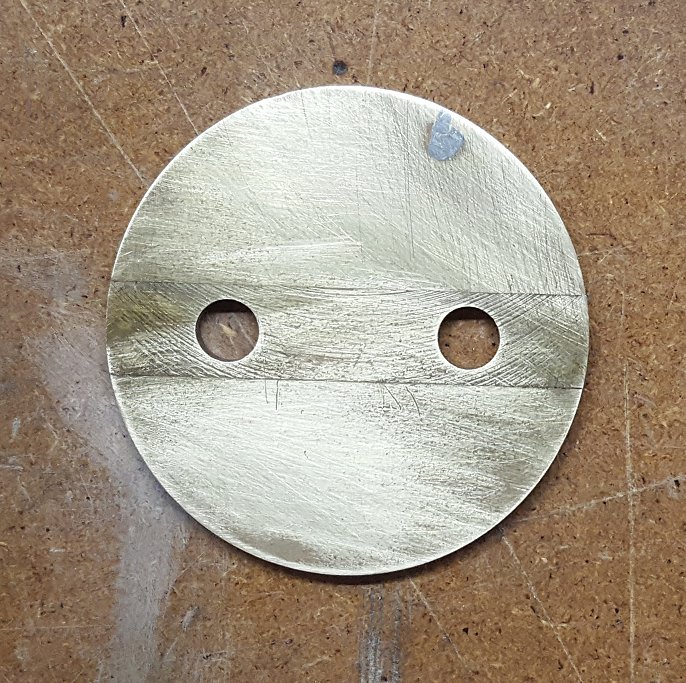
Per everyone's input and suggestion I took a stab at filling the hole in the old throttle plate. Using my soldering iron and some rosin flux paste I let it really cook in the crevice the hole. With it still hot I added solder to it. Once everything cooled I started sanding the solder down with some 600 grit sand paper. I followed the up some 1000 grit and then some super fine 0000 steel wool to clean up the plate. The surface is super smooth despite the visible scratches. I paid attention to maintain the taper of the edge of the throttle plate so that I only flattened the solder and did not disrupt the angle of the taper. All in all it came out better than expected. I really kick myself for not doing this first as it would have saved me $15 and 2 weeks of time. Oh well, need to take more changes in life! I swapped out the throttle plates and after studying the new one some more I could see the taper on the edge was not as steep as the taper on the original. I checked the bore for any grooves and could not see or feel any. With everything re-installed and buttoned up I fired the engine back up and at idle I am getting a solid 5 on my sync-meter across all six bores. Throttle response all seemed the same as before but I rest easier knowing the right part is in the carb.
 1 point
 -
1 pointAnd there they were! Right across from the stem, TOPY 2-72, same build date as my car so I'll say it's the OE. Thanks Chuck.1 point
-
1 point@newzowner Just a note on gas for your Z... The Maverick at the Washington Parkway exit (Exit 13) sells non-ethanol fuel. I'd recommend you run that in your Z. The non-ethanol fuel stores way better than fuel with an ethanol mix, won't attract water the way ethanol mixed fuel does and is less corrosive on the fuel line rubber sections.1 point
-
@Jeff, From your sig... 300ZX coast to coast when you're 50! Enjoy the trip. If you turned 50 today I would have had my drivers license for over a year already when you were born. My first 240Z was a '73 that I bought brand new for my 22nd birthday present to myself. It was my daily driver for 20+ years until it rusted to death from Utah winters. I still wasn't tired of the car so now I have the '71, but it's no longer required to be a daily driver.
 1 point