Leaderboard


.JPG.cfcada9cf1c1b502df3f5f2f2ca3ff36.JPG)

Popular Content
Showing content with the highest reputation on 08/21/2017 in all areas
-
1 point
-
1 pointthe return in just an open tube, should respond well to mechanical clearing as well.1 point
-
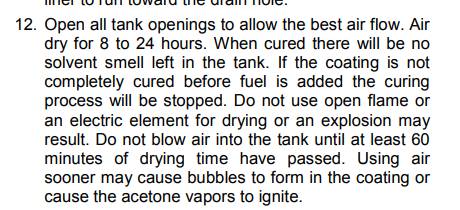
1 pointMaybe people are confusing Red-Kote with one of the other tank sealers. Red-Kote is just a fuel resistant polymer dissolved in a prayerful "polar" solvent. MEK evaporates very quickly. 8 - 24 hours is the dry time, for a whole quart of Red-Kote. http://damonq.com/techsheets/red-kote.pdf Edit - meant "powerful" but "prayerful" actually seems more appropriate. Spell-correct. Edit 2 - took a bunch or words out.
 1 point
 -
1 pointMore like Black Friday.... I still need the other half of my undercarriage order from TTT for Christmas!1 point
-
1 pointThese guys have done yeomans work helping you through this! I will chime in now, if it were mine I would let it dry as long as I could before reinstalling the tank. If you can run a fan to move air through the tank, do that too.1 point
-
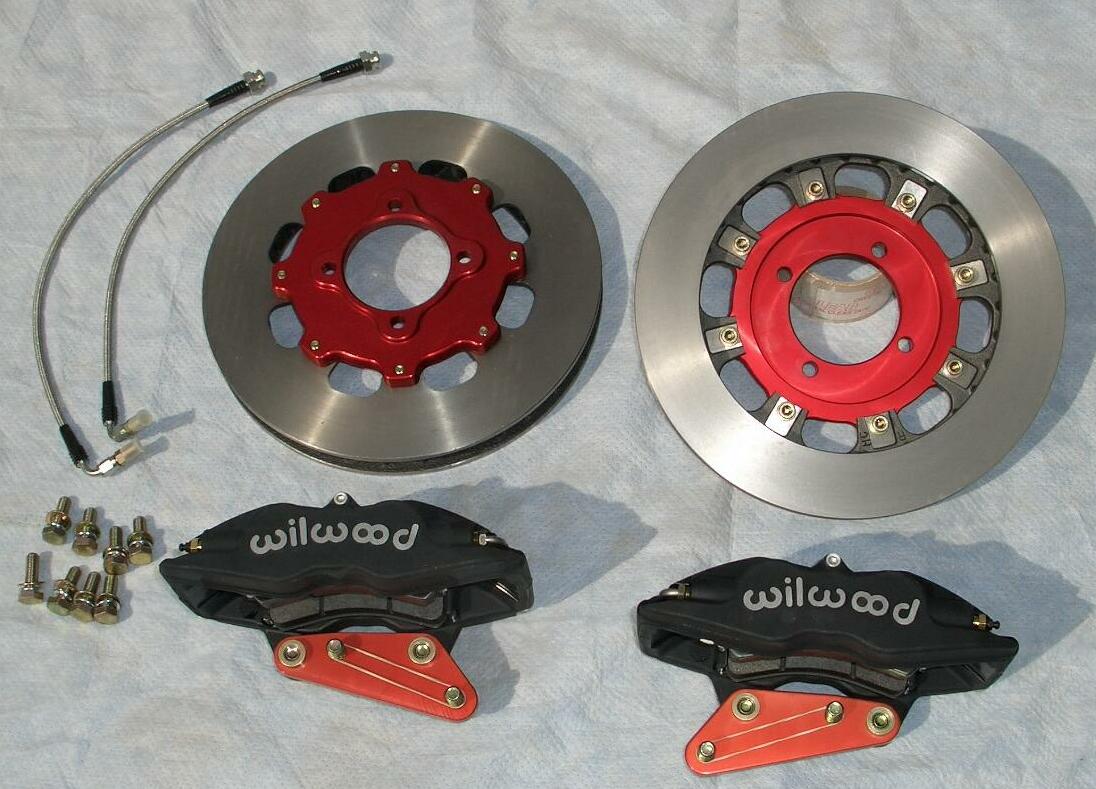
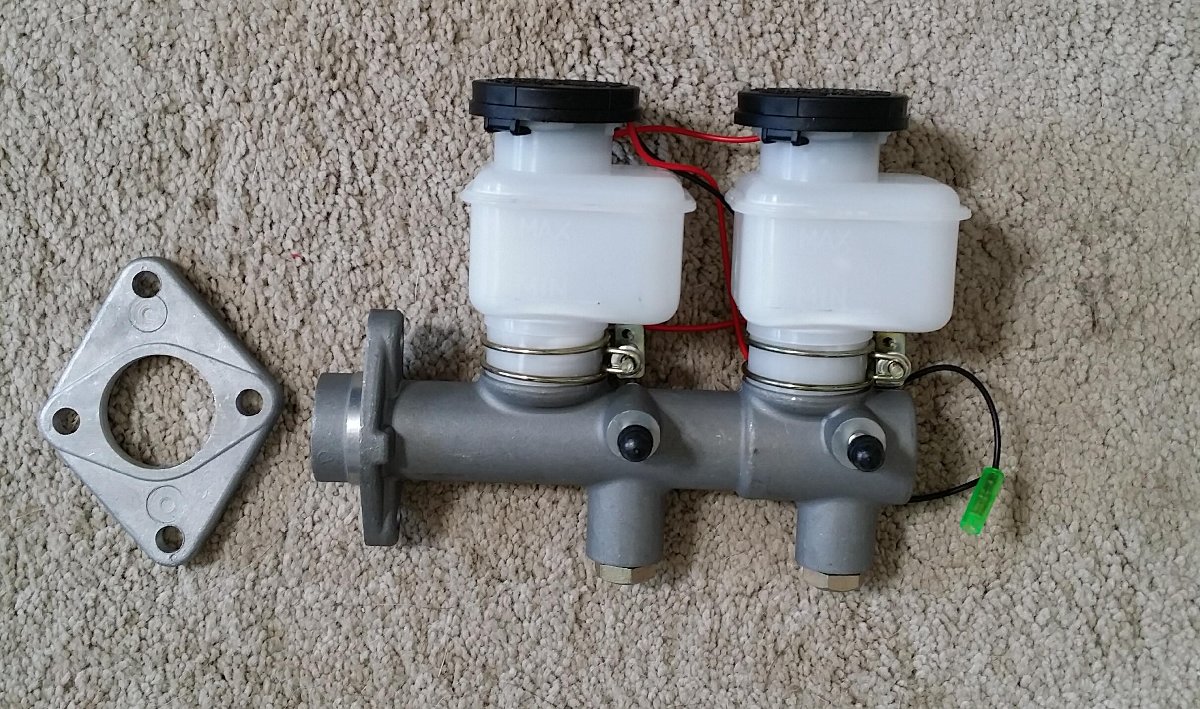
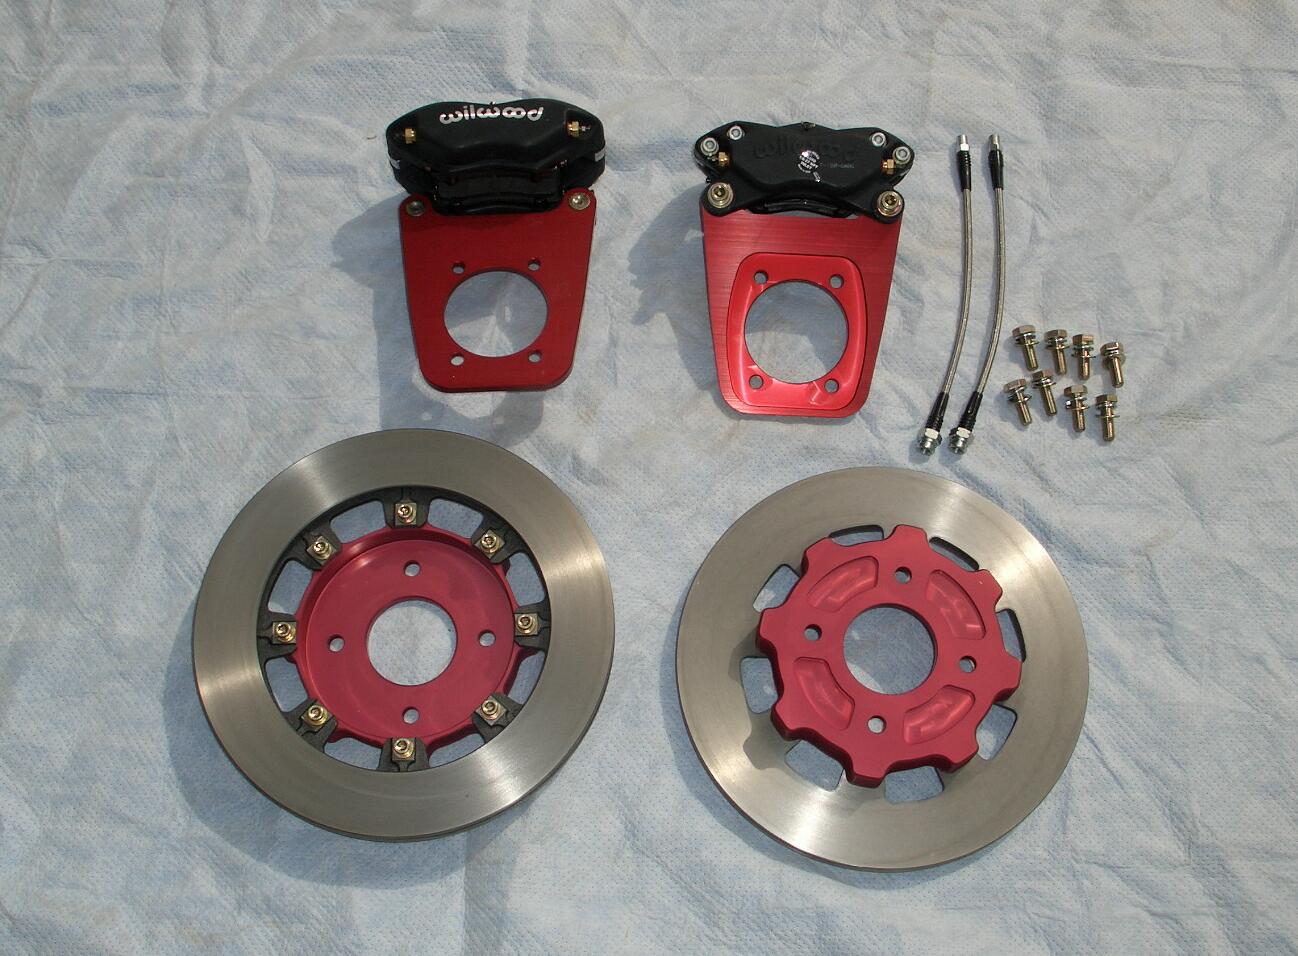
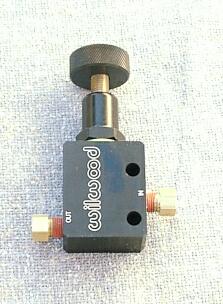
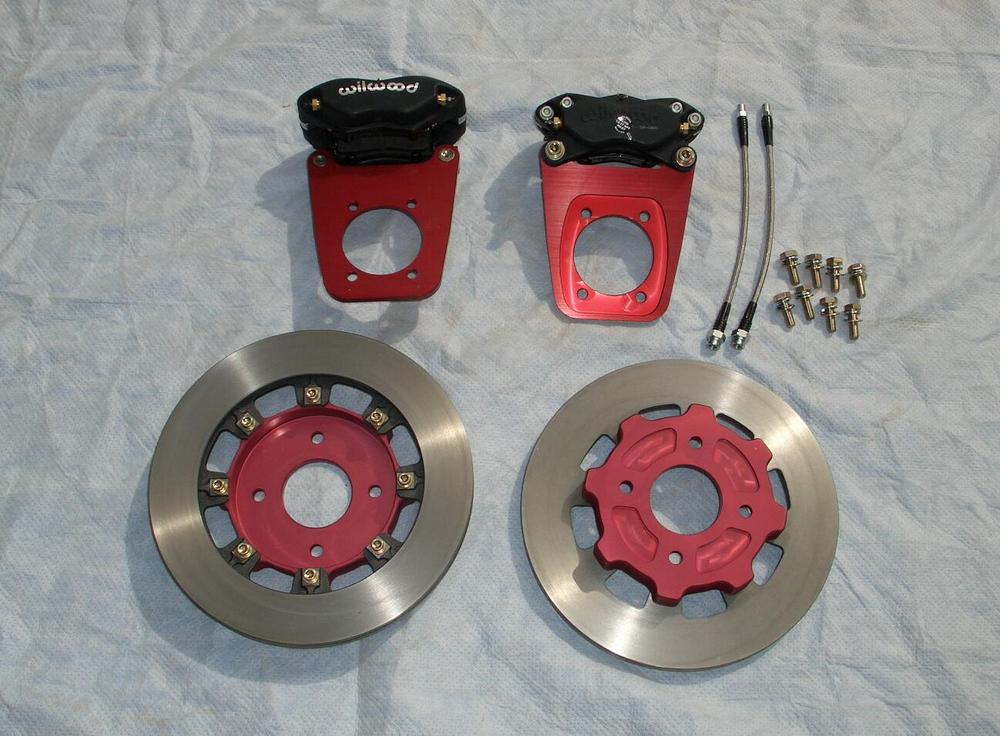
1 pointWell my order has shipped! Let's hope it arrives soon... Front Brakes Rear Brakes 15/16 MC Prop valve Mustache Bar Dog legs Shortened steering knuckles with drop adjust Turbo oil pump


 1 point
 -
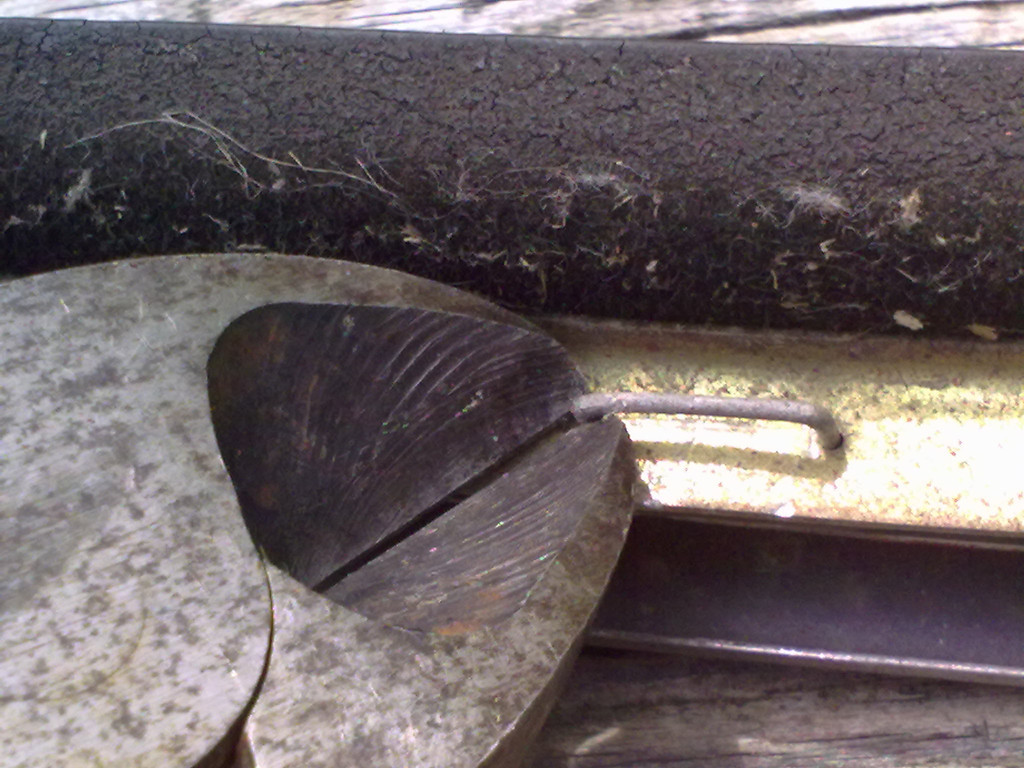
1 pointjust make sure it will gravity feed out of the tube before you reinstall the tank. Or just hook up a hose and see if you can pour gas thru a funnel INTO the tank thru that now cleaned hose. what ever you do you need to make sure it flows freely. You should take your time and make sure it works, no rush, this will fix the car. one more thing when you do re install use a SINGLE G3 see thru fram filter as a prefilter (tank to pump). Make sure you have a NEW fuel filter under the hood. when you get the car running again check ALL the hose fittings for leaking gas, esp under the hood. Use FI rated hose after the pump, before the pump not under pressure. I use FI for all just to make it simple. I had a bit of a hard time getting the right size fuel lines IIRC down around the tank/pump area. check for leaks several times, after every drive, at least for a several cycles. ALWAYS carry a fire ext with you rated for gas fires in the car.1 point
-
You've got me tempted. Let me think about it. Might order one last setup. I'm going to have one large collection of mains/airs/chokes/accel pump jets to get rid of when I'm done.1 point
-
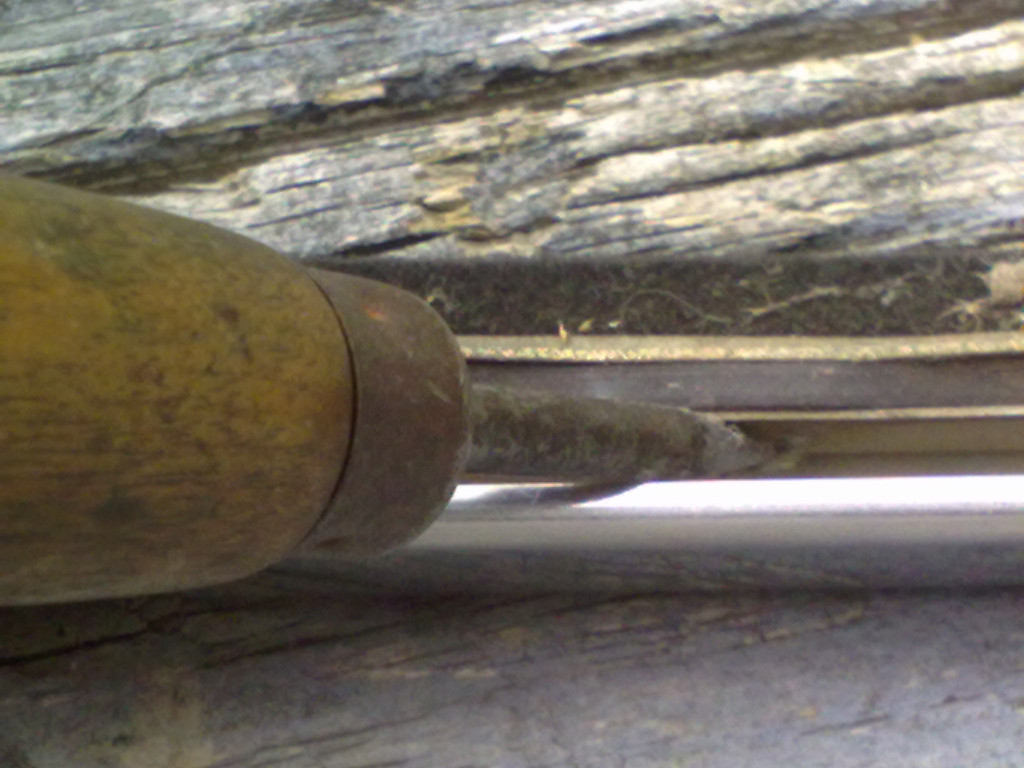
1 point+1 on the solvent down the tube. And when you blow air down the tube be sure to keep your face away from it and wear eye protection!1 point
-
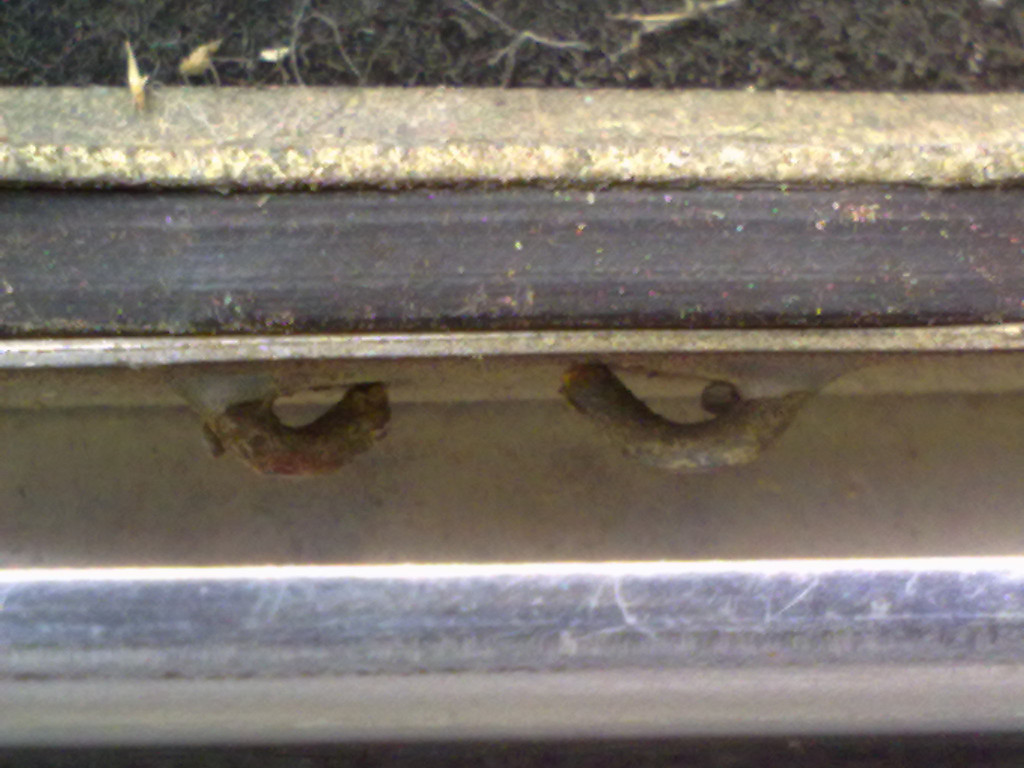
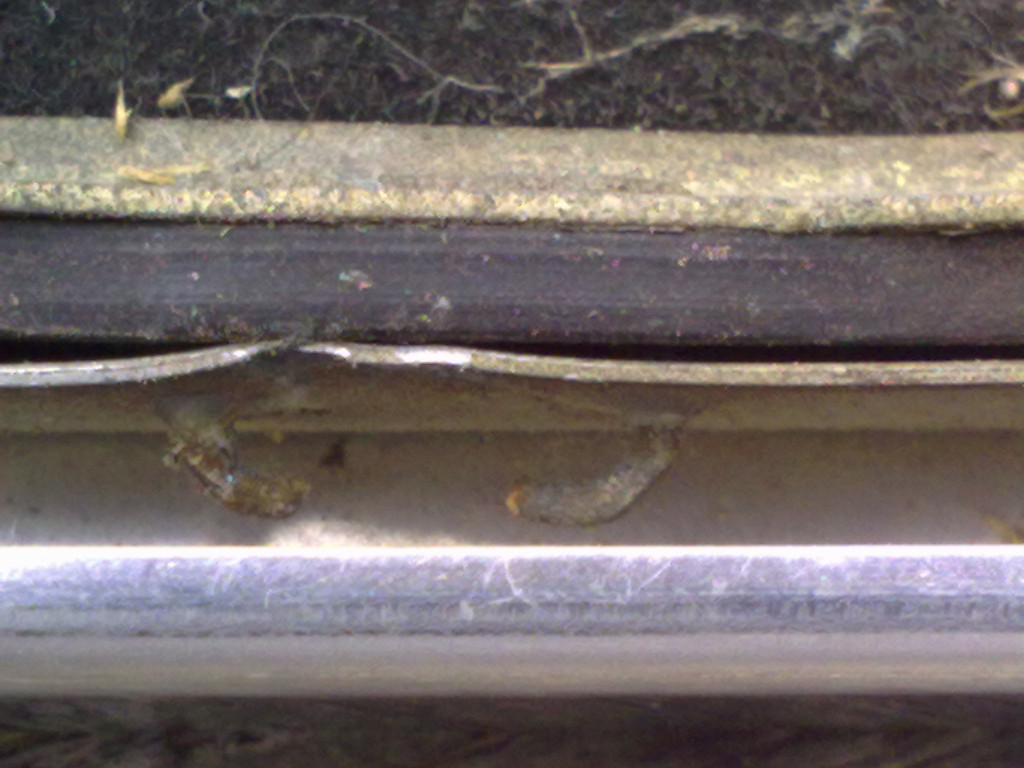
1 pointThere's a screen on the inlet tube. Some call it the sock. That's what gets clogged by the sealer, it has small holes. It was referenced in that Hybridz link I posted. The solvents are referenced in the RedKote instructions. He's one trip to the hardware store away. Pour some in the inlet tube, wait a few seconds, blow it through with the air nozzle. Won't hurt the inside of the tank liner, the amount is small. It will just be absorbed.1 point
-
1 pointDidn't realize that that was from a running engine. You need to write more words. Fuel pressure looks good. As Dave says, the problem is before the pump. Probably just a clogged screen/sock on the inlet tube. You could tilt the tnak so the clogged sock is low then fill the inlet tube with mehtyl ethyl ketone (MEK) or acetone. It will dissolve or soften the material on the screen. Then blow it clear with your air nozzle. You can get the solvents at the hardware store. It shouldn't take much at all.
 1 point
 -
The FSM says "after facing the punch mark on the top of the upper column shaft".1 point
-
1 pointIf you come up here, you could take her to the Georgia Racing Hall of Fame (https://www.facebook.com/georgiaracinghof/). No visit to this area is complete without it. Just ask @240260280 or @Captain Obvious. That place really outshines the Georgia Aquarium and World of Coke COMBINED!1 point
-
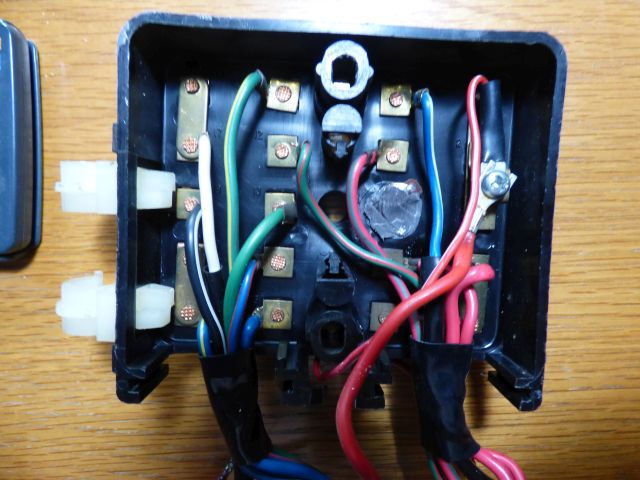
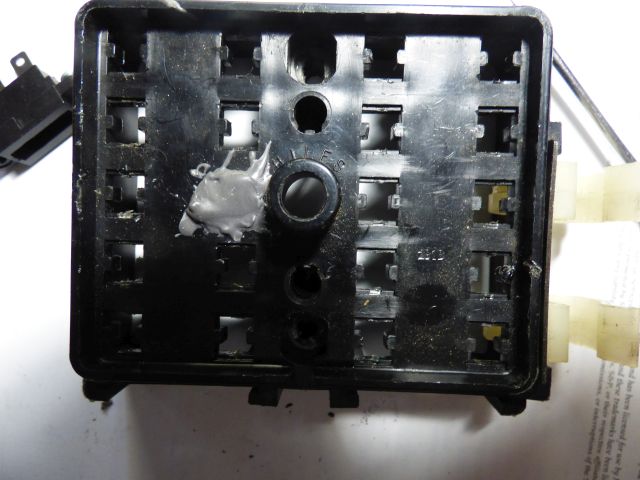
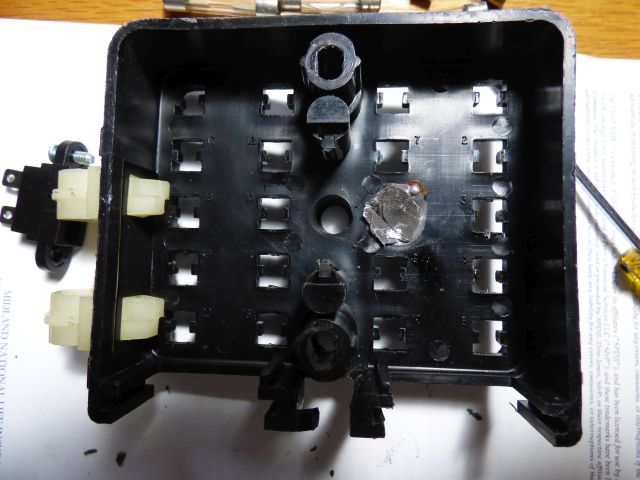
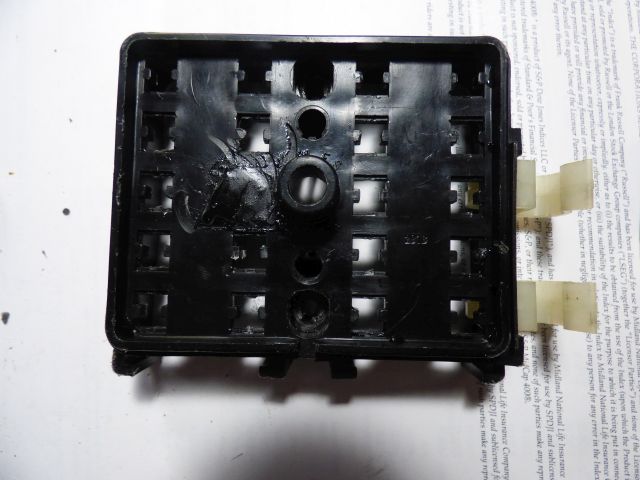
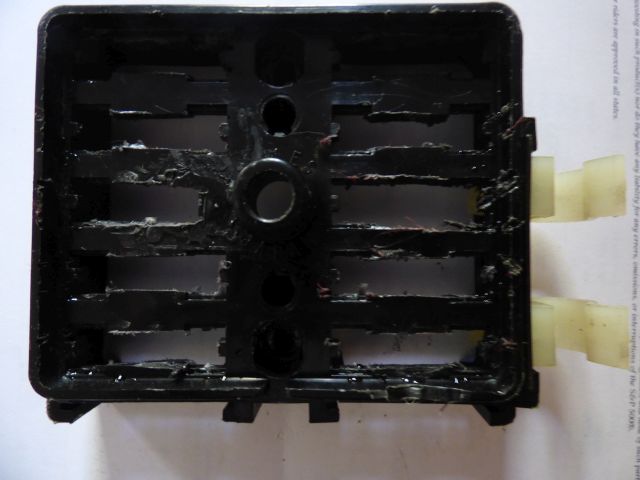
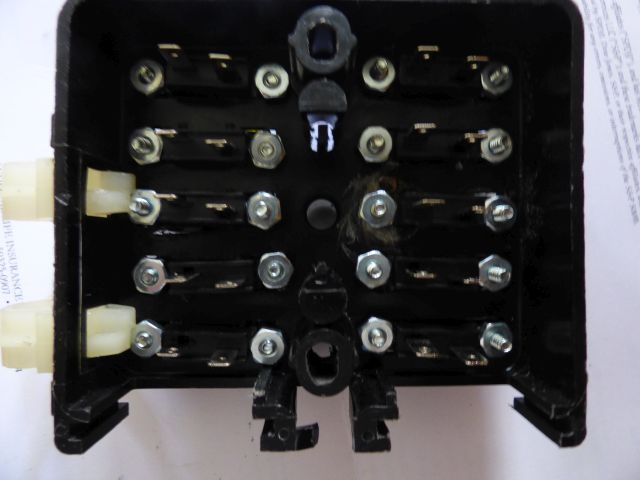
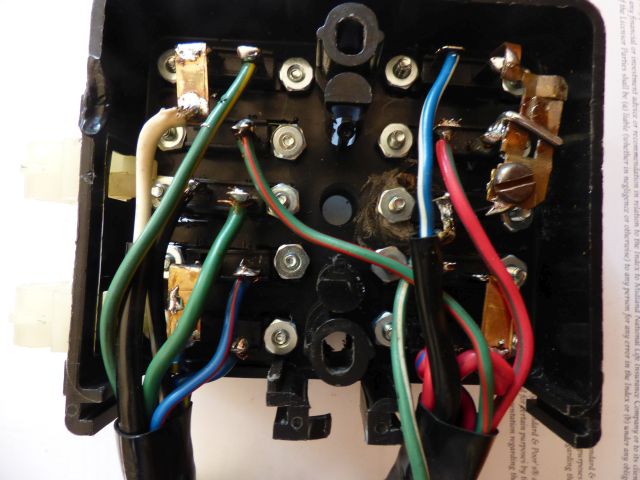
I undertook this fuse box upgrade this weekend. I had ordered the fuse holders back when @Phil Z first posted this. Just now was motivated to do it. My fuse box had the typical melting of the parking light fuse. I installed an inline fuse pre-1980, and installed LEDs a few years ago to lower the current draw. My first step was to take photos of the existing wiring and also make a key to where each wire goes. Next I removed the fuse clips leaving a bare box, then repaired the hole from the melted fuse with JB Weld. Semi-ground down the JB Weld and coated it with black satin paint. Like Phil I used a dremel to cut slots for the fuse holders. I cut the first one too wide, so after that cut them slightly smaller than needed and filed them to the right width. I had some 6/32-inch machine screws in my stash, some 3/8" long and some 1/2" long, and they were the correct diameter. Drilled out the holes as needed and installed the fuse holders and screws. Nissan didn't leave any spare wire length, so I pried open the clamp holding the insulated part of the wire and cut off the old fuse holders to give me all the length I could get. To connect the source side of the fuse block where two wires were common, I tore apart an old plug and soldered those across the terminals. At the three common connectors the stock box has a screw terminal. To duplicate that I smashed an old duplex outlet and soldered the parts across the three terminals. Ugly but effective. I soldered the wires on, checked for continuity, and re-installed it in the car. So far everything works like it did before. As Phil said, the fuse box cover still fits. Thanks to Phil for coming up with this upgrade.
 1 point
 -
1 pointOne set starting at $899 + $50 shipping from Thailand and the other set starting at $1,500 and $30 shipping from Georgia, I know which set I'd bid on unless I decided on a set of aftermarket covers from Japan for a much lower price. Dennis1 point
-
Amazon, Amazon, Amazon - bought the fuse holders from Amazon. You need 10 and they have 10. $6.99. I think 1/2 inch long screws that fit through the holes in the fuse holder, washer and nut on the back side. Take photos of the wiring before removing it from the current holders. I popped out all of the holders while still attached to the wires. I took a Dremel wheel to cut through the plastic just wide enough to fit the fuse holders in place. The screw holes should line up with the holes that were left from the original fuse holders. Once all 10 are in place, then you can start soldering wire for wire to the terminals on the new fuse holder. The battery wire is the hardest to do because it has to connect to 3 of the fuse holders. Easiest way is to strip the wire long enough and tin it with solder before soldering to the 3 fuses. When you install the blade fuses you will still be able to use your fuse box cover. If you have serious melting of your current fuse holder, you will need fix that problem as well. Picture of the front side only and the fuse holders from Amazon. Phil Smith1 point
-
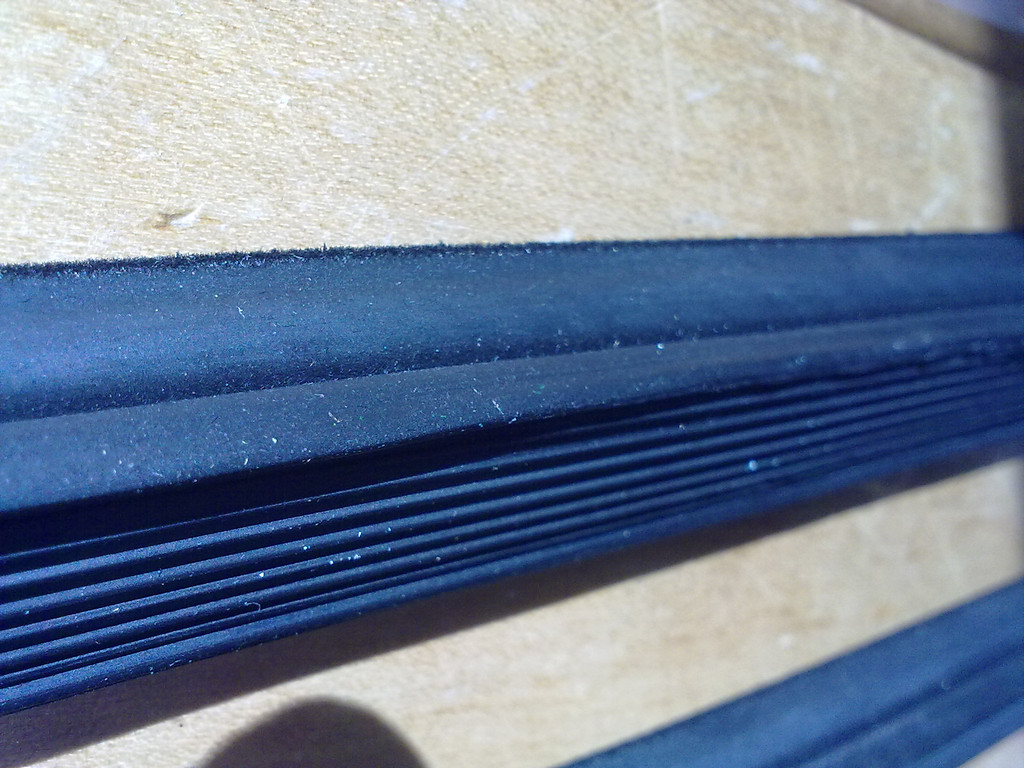
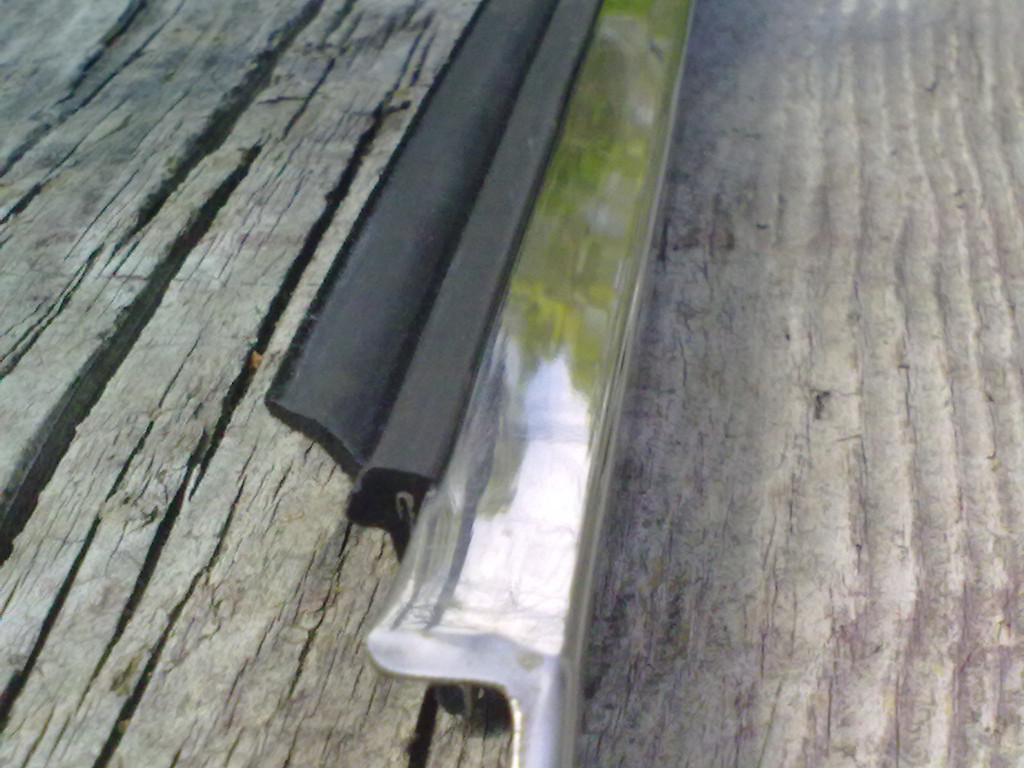
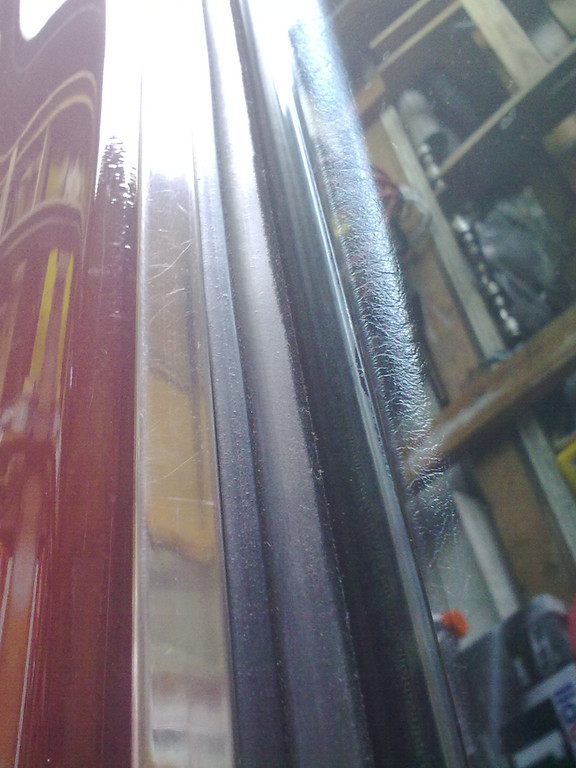
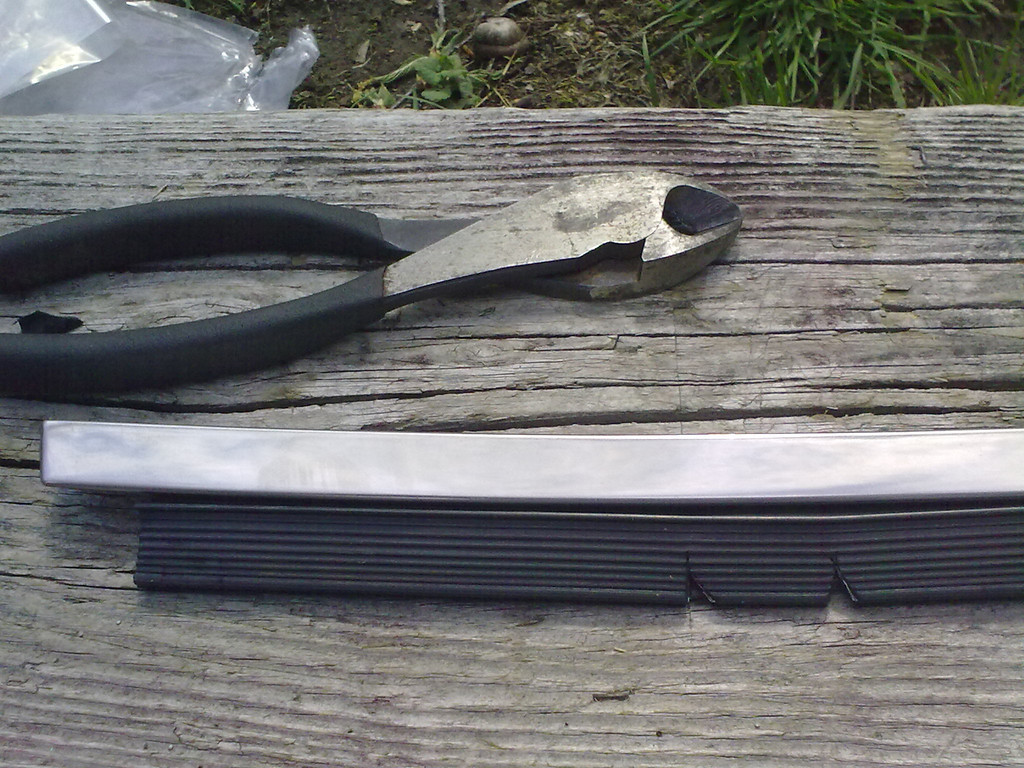
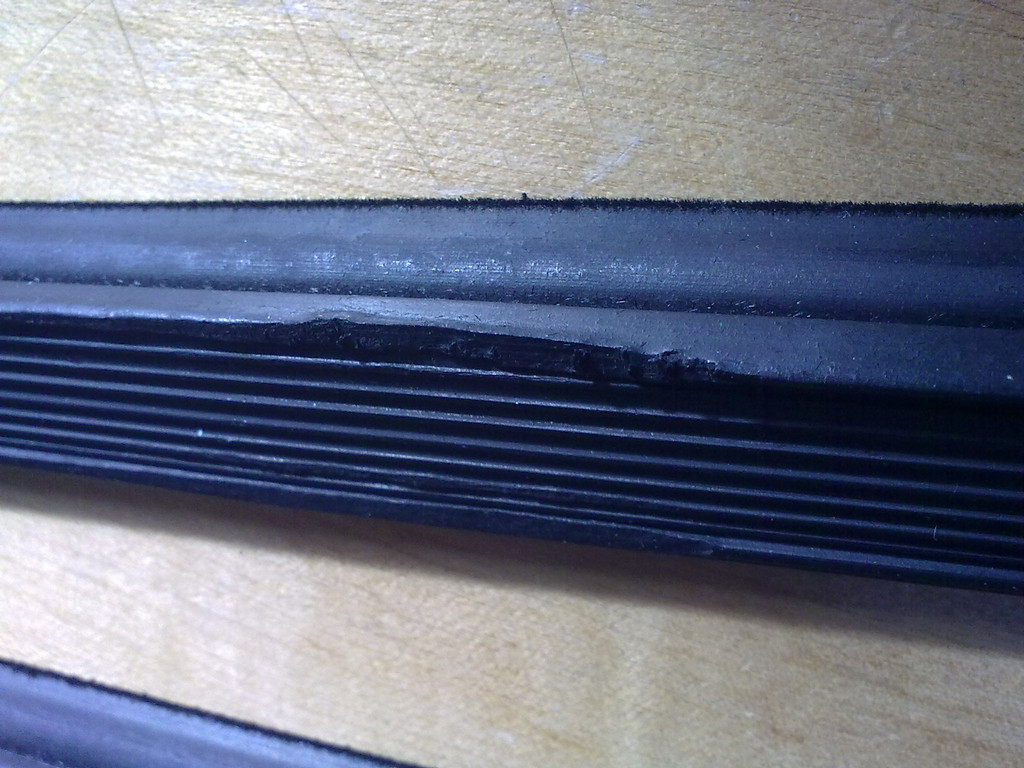
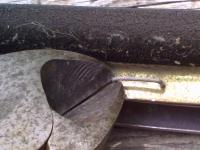
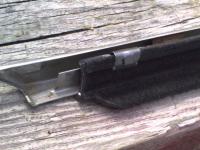
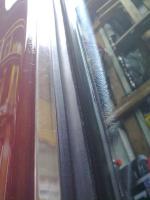
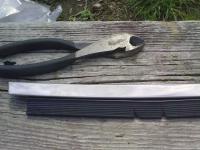
1 pointI received and installed the squeegees today. I would give them a 75 out of a 100 score. Considering they are about 1/3 the price of new molding strips, that's not bad. Also, one of them had a small gouge in the rubber that would be visible. I am not one to return things due to my lack of patience, so I used them anyway. 1) Remove the moldings from the car by prying on the rear portion with a plastic putty knife. Pull it up and work forwards by hand. (careful not to drop the window roller into the door. A magnet will retrieve it :stupid: ) 2) Use an awl to bend open the staples, and raise them up. 3) Snip the staples with a cutter. 4) Line up the new rubber strips at the back of the chrome molding, note where the original strips began. 4b) TIP: To match the slight curve of the original chrome molding, snip the new rubber strip as shown, in one or two places. (photo 5 below) 5) Press on the retainer clips, longer side of the retainer should go inside the molding channel. 6) Trim the angle into the forward edge of the new rubber to match the originals. 7) Reinstall onto door. 14) Why don't these instructions come with the strips????? Comments: The window stays up tighter now and does not drop down while driving at all. When the window is partially rolled down, it does not rattle over bumps. With the windows shut, the door closes with a more solid sound from the window being more tightly held in place. Looks fine to me. It took about 1:15 to do both sides. A few more retainer clips would be nice and make sure you don't place them over the OEM molding clips inside the chrome trim. Keep all forces in check. Don't strong-arm anything or you could dent your moldings. Hammer on the new clips with a hammer's wood handle, while holding the assembly in your other hand. Gentle!


 1 point
 -
Well my driving season is over for the year, I guess I was just having too much fun at the track, think I spun a bearing on the crank, really horrible sound. Everything was great, car was performing perfectly, brakes were holding up and I even passed a Viper. Then that sound happened so limped off the track and called the flatbed. Hopefully I will be able to save the crank, I'll let you know when I crack it open.0 points