


Leaderboard
-

Zed Head
Free Member3Points19,093Posts -

JLPurcell
Free Member3Points1,670Posts -

siteunseen
Free Member3Points15,073Posts -
Mike W
Free Member3Points453Posts


Popular Content
Showing content with the highest reputation on 05/06/2017 in all areas
-
Well, the carb tune is done and I'm back home. The engine is an L24 bored .40 over, a Schneider 270/280 (MSA stage 3), MSA header, 2 1/2" exhaust with turbo muffler and twin baffle tips. The Mikunis are 40mm with short ram horns, and K&N air filters. Altitude was about 5400ft (about the same as here at home). Here's the results of the dyno tune: Sent from my SAMSUNG-SM-G870A using Classic Zcar Club mobile2 points
-
2 pointsCaptain - If that happens you have really big problems. The Alamo is in San Antonio.2 points
-
2 pointsAhh, the VR. Was hoping thats all it was. It's the cheapest of the two. Glad RedBird is fixed again Jai.2 points
-
1 pointYou're very welcome my friend. The famous Slick character tried to get Cris Gonzalez and his team (my go to paint/body genius) to work for him for free because he was so famous. They blew him away and that was the last I heard from him. Fortunately I'm sure.1 point
-
1 pointHere's a sneak preview of some of the merchandise that we will have available at the ZCON convention store this year. You have to be here to get them so don't forget to register at zcon.org.
 1 point
 -
Boy oh boy! Thank you CanTec. Wise men/women say "You won't know if you don't ask" I'll bug yall to death!1 point
-
Jerry - thanks for posting the link. I sent to a local buddy (also a Jerry) who is restoring his one-owner '72. Jim1 point
-
On my 7/70 the way you are describing sounds basically like how I have done it in the past. When I unhooked the heater cables I only pulled the heater control panel out enough to allow installation of the radio so that the routing of the cables was not disturbed to much. Then I hooked up the wiring and installed the rear screws on the radio loosely into the chassis brackets. After that I placed the metal backing plate onto the radio and repositioned the heater control panel over the front of the radio, then installed the radio plastic face plate, installed the four heater control panel screws and put the nuts and knobs onto the radio and tightened the back radio to chassis screws. Then finally re-hooked up the heater control cables. It was many years ago so hopefully I didn't miss any thing.1 point
-
Ok awesome. And yes the fuel did spill out and had a hard time filling. I will take a look when I get home and hopefully I don't get covered in gas Sent from my iPhone using Classic Zcar Club mobile1 point
-
1 point
-
There are two transmissions in the CL ad, a 4 speed and a 5 speed. Can't believe how prices are rising. I'll have a gold mine in my garage pretty soon. Hoarding might pay off.1 point
-
Head's up. If you are going remove the passenger side rear panel, be careful as it can snap if you don't take a couple things off before hand. The rear deck is raised and you will have to also remove the small deck panel on that side first. I highly recommend removing the window strut metal flange also. The one on the body over the panel. It makes it easier to take the panel out without too much flex.1 point
-
1 point
-
1 pointPretty sure it was like this one from advanced auto. It's nice and white but the dome lense is so thick and opaque it just isn't strong enough. I could research a little more and get a brighter one for the dome and use that bulb in the map light? Thanks Greg.1 point
-
1 pointShe got a solid state VR from Rockauto. It was pretty cheap on close-out.1 point
-
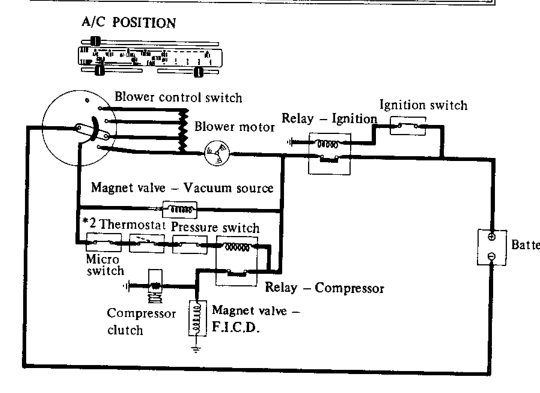
1 pointDid you get one of the old timey mechanical VR's? Or sold-state? From Rock Auto? I don't see that anyone measured voltage at the AC compressor power wire. That would be good to do. The compressor clutch grounds through the mounting points, apparently, actuation comes when power is applied through the wire. There's two relays involved. But you can start at the end of the line and work back. 2nd edit - I had wrote something about the blower motor then second-guessed myself. but it looks like the blower motor is in series in the circuit that actuates the second relay. It's an interesting diagram. Still, test at the end and work backward.
 1 point
 -
1 point
-
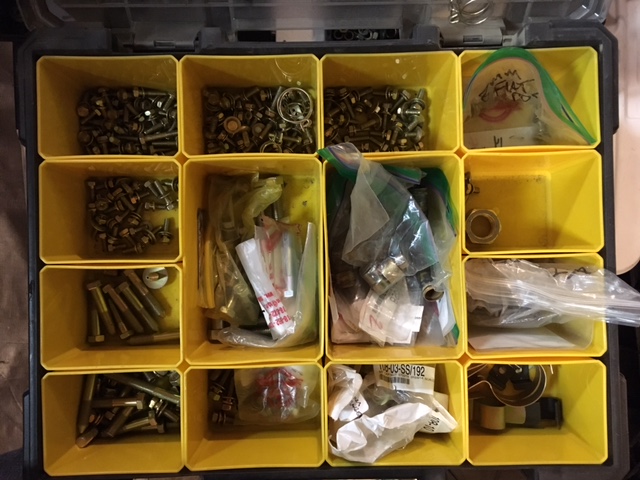
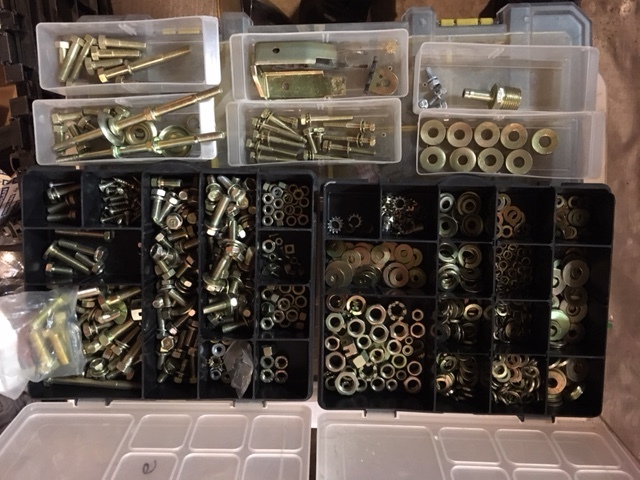
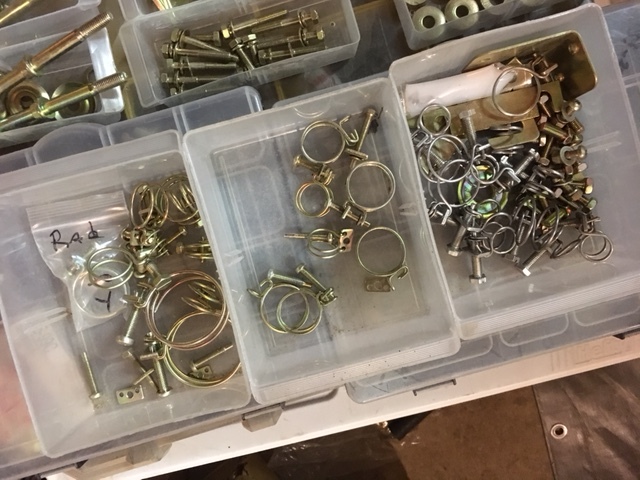
1 pointI forgot to mention my hoard of nuts, bolts, and brackets. When really board I wire brush nuts, bolts, and brackets from parted Z's and FJ40's and have them plated. I also have a tendency to buy a bag or two of JDM nuts and bolts from time to time.
 1 point
 -
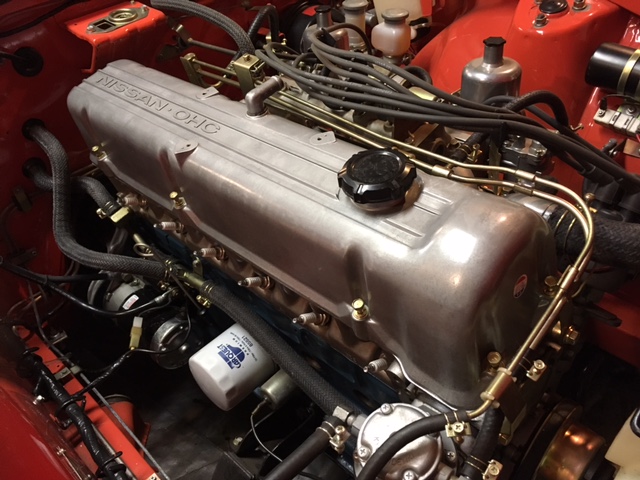
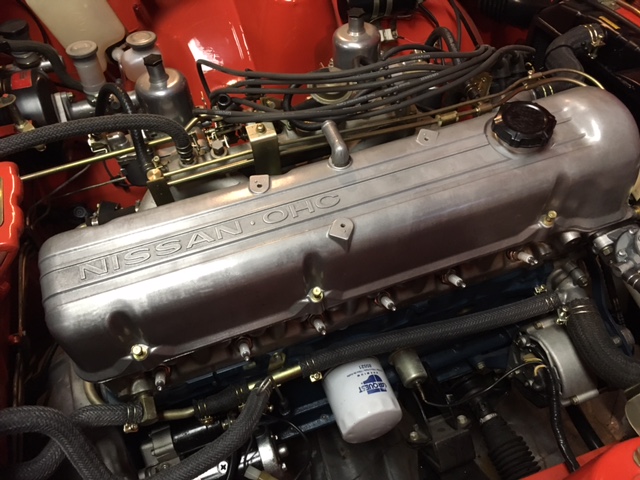
I unrestored my valve cover! My valve cover was over restored. I polished it again and then blasted it with walnut shells. That gave it a nice original casting look without that over restored look. I like the results. Of course then I applied the P2 sticker to the front.
 1 point
 -
1 pointOne way to check the ac is to see if there is a low pressure / high pressure switch on the dryer. If there is unplug it and stick a jumper wire in it. If the compressor runs then it is a refrigerant level issue. Don't run it like this very long. Low refrigerant can damage the compressor. If there is no LP/HP switch run 12v to the AC compressor and see if it runs. If it runs, let it run for a second and see if it cools...1 point
-
1 pointJust got back from Jai's. Replaced the Voltage Reg and all is well. Voltmeter is steady, the headlights don't pulse and the turn signals came back. I even got her dome light working. I'm not an electrical kind of guy and probably less of a AC guy. That being said, I checked it by hand and her A/C compressor is not locked up. It does not come on when switched. I did check the connections at the switch and compressor and they looked good. Remember, this is an aftermarket unit that was installed last summer by a local guy. My hair did not get caught in anything. On a side note it seems that RockAuto has changed their shipping method. You could really get hammered by the shipping costs when you ordered multiple items and they all came from "different" warehouses". This time it all seemed to come from one place with no A,B,C,D origins with DHL being the initial carrier.1 point
-
http://www.zcar.com/forum/10-70-83-tech-discussion-forum/406009-fuel-percolation-3-screws-su-carbs-bowls.html Quote: Originally Posted by princejqman In addition to the stock heat shield which was installed in the car by the Factory originally, i have mounted a Stainless Steel heat shield extension that reaches the bottom of both 3 screws SU Carburetor float bowls. However, the fuel percolation is still present. The gasoline in my country, Panama, has no ethanol so this should not be happening. The heat comes directly from the manifold and thus there must be away of lowering that amount of heat so it does not affect the fuel that is inside the float valves and that will evaporize and consequently shut the engine down. Other owners only throw out ideas such as swapping metal fuel rail with 5 inch rubber hoses or driving with the lid off? Is this really going to help and avoid the car idle becoming lumpy at traffic jams which leads to a sudden shut down of the engine? Wouldnt it be better to find a way to lower the temperature at the stock manifold? How about ceramic coating the stock manifold? It's been fun but I'm done. You have graduated to my Ignore List.1 point
-
1 point1 point1 pointHere's the reply from the seller on ebay. "Yes, these will fit the 240Z. These are not in the Vogtland catalog because we are exclusive distributors of the springs. Vogtland cannot sell these to any other outfit hence the reason they are not in the catalog. The photo is just generic. What you will receive will be a perfect fit for your 240Z Thanks"1 point


Important Information
By using this site, you agree to our Privacy Policy and Guidelines. We have placed cookies on your device to help make this website better. You can adjust your cookie settings, otherwise we'll assume you're okay to continue.