Leaderboard
-
jfa.series1
 Subscriber
 4Points2,733Posts
 -
notWes
Free Member3Points33Posts -

kats
Free Member2Points2,215Posts -
Jason240z
Free Member2Points489Posts


Popular Content
Showing content with the highest reputation on 04/09/2017 in all areas
-
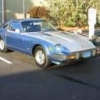
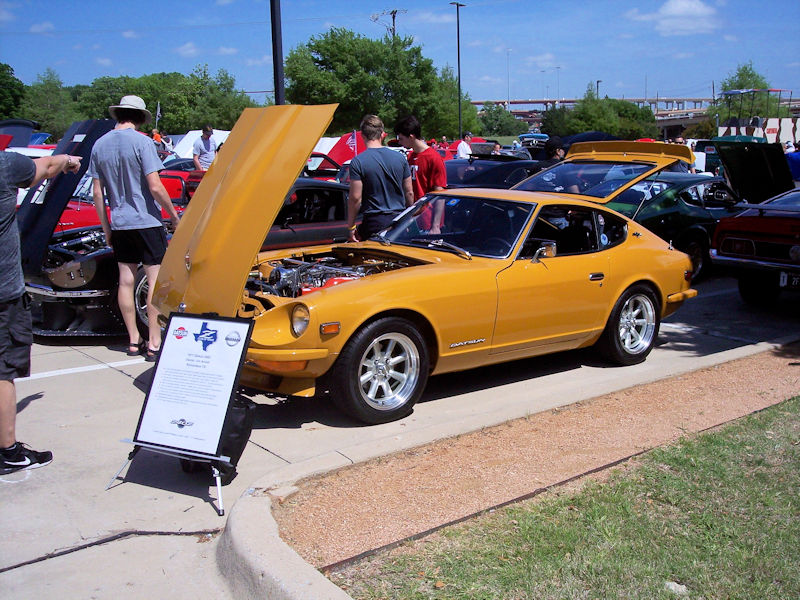
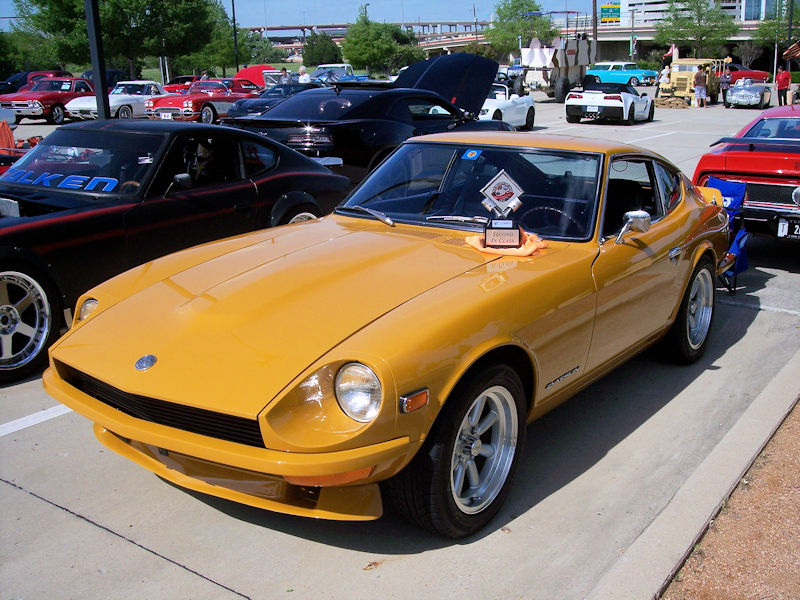
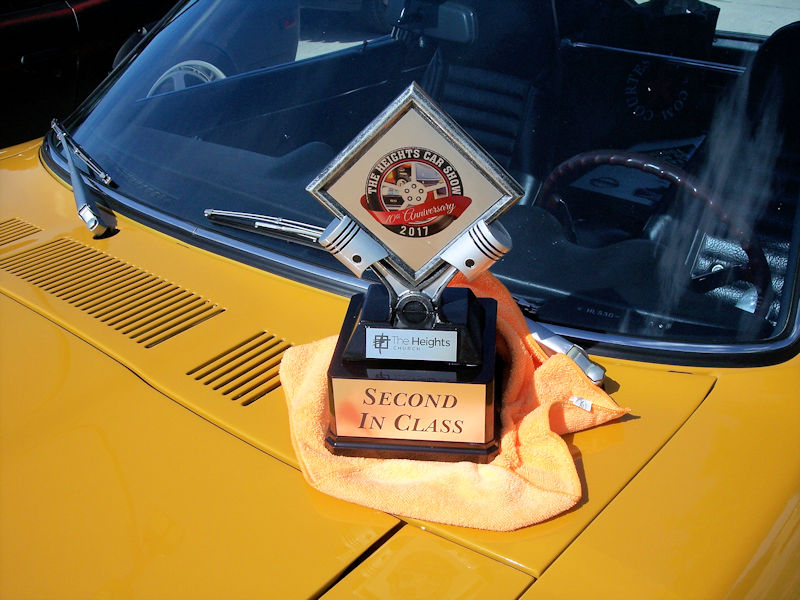
Went to a local car show today. Over 400 cars and trucks, some pretty amazing vehicles. Only two classes for imports: pre-1970 & 1970 and later. I pulled a second place award behind a 2017 Holden Commodore (brand new car). I guess you could say we bracketed the class at the extreme ends. Extremely windy, temp in the low 80's, great show and lots of great company.
 4 points
 -
I've decided to buy the Z! After receiving a very thorough overview from norcal z, I was able to make a confident decision. As he mentioned the car will require some TLC. But seeing as I'm in it for the long haul, perfection looks very attainable and I look forward to my future with my fellow enthusiasts! In due time you will see me appearing all over the forums with lots of questions and findings. Thank you to everyone who has shown their support, I am so excited about this pleasant community here. A very special thank you to norcal z for his phenomenal attention to detail and insight during my purchase process. Couldn't have made the decision without you Gary! Sent from my iPhone using Classic Zcar Club mobile2 points
-
That does seem to comprise all the best elements of the various markets. Those skinny wheels(by modern standards) look great. Looks light on its feet. Just needs to be Orange or Safari Gold. Were the various european specs considered factory 'specs' or importer models?2 points
-
I've been doing a bunch of suspension work to my 77 this off-season and part of that work has been on my steering rack. I suspect this is old hat for lots of people, but it's my first time this deep into the rack and I've been trying to take pics of the interesting spots along the way. This whole project started with the rack mounting bushings. My previous owner installed polyurethane bushings on the rack mounts and they didn't look like right. The project snowballed from there, but let's start with the bushings. On the pass side, the bushing looked too narrow for the mounting slot on the rack and after some digging on the forums, it appears that the width of the P/S rack mounting slot got wider on the later cars. It appears that he used an early kit on a later car. Here's a pic of the bushing he put in. You can see the gap where the mounting slot is wider than the bushing: The solution appears to simply use the correct year bushing kit. Here's my replacement bushing installed. It was a tight fit. I even had to put a little silicone grease on the bushing and tap it into place with a plastic mallet. Much better fit: I've seen pics of this before from others, but for posterity, here's the older narrow style compared to the newer wider style: And on the driver's side there was a large gap where the bushing didn't wrap around the rack properly and was pinched by the mounting strap. Here's a pic of the driver's side bushing. You can see the gap and notice the deformation on the left side from not fitting into the mounting strap correctly: Problem was... When I first installed my replacement bushing, it was no better than the one that came off the car. I had the same problem and couldn't get the bushing to wrap around the rack far enough and I ended up with a huge gap where the ends were supposed to meet. After looking things over, I came to the conclusion that the replacement poly bushing wasn't designed properly. The rack has a smooth radius fillet on the inside corners at the bottom of the slots, while the bushings have squarer corners molded into them. As a result, the bushings don't fit comfortably into the slots. Here's a shot of the shot in the rack. Note the smooth rounded fillets in the corners: And here's a shot of the bushing that's supposed to fit in that slot. Note the inside corner that is much sharper than the receiving slot in the rack: Thankfully the poly was hard enough that I was able to cut it with a new very sharp fine tooth file. Using a file I was able to round the inside corners of the bushing to better fit the rack. Here's a shot after I rounded the corners: Finished filing both sides of the bushing and tapped into place with a plastic mallet. Note how much smaller the gap is once the bushing fits snug in the slot and slides all the way to the bottom of the groove without hanging up on the corners: That's what started the project. I'll post more pics as the work progresses.1 point
-
These cars and their engineering continue to amaze me. Keep in mind my L28 is bone stock less an aluminum radiator+electric fans, K&N cone filter, headers and exhaust. Yesterday I really put her through the paces for a good 2 hours.. add on top of that 2 more hours of driving to and from.. the last 40 minutes coming home she was really tired.. starting to hesitate, stumble. I thought the timing might be off Today I fired her up to take her to the driving range and see how she felt today and drove like a champ. Just needed a night's rest Had a big grin the whole time Sent from my iPhone using Classic Zcar Club mobile1 point
-
1 pointStumbled over this today. This should help enable any Z owner. http://www.cheatsheet.com/automobiles/the-datsun-240z-one-of-the-greatest-sports-cars-ever-made.html/?ref=YF&yptr=yahoo1 point
-
Hi Kats, Great! You are a codebreaker! Yes, I have the same set of Nissan ten-year report books as you. However, they are so big, heavy and complicated that it is very hard work to go through them. I found some treasures but I am sure there is so much more in there to be discovered... It's great to have all the K-section sub department codes in one place. I am going to cross-reference them all now.1 point
-
As far as I'm aware (and I'm hoping if I'm wrong I'll be corrected) the 'Entreposto' HLS30s were built that way at the factory in Japan to Portugal-specific models. The factory may well have supplied certain parts in the car (headlamp covers?) to protect them during shipping, perhaps? All other 'European' models (HS30U, HLS30Q etc) were certainly built that way at the factory, so not the same situation as dealer add-ons and local market showroom 'options'.1 point
-
1 pointWow....At first glance, I thought that was a long neck Bell's Two Hearted IPA ( not a jack) in front of the brake rotor. Looks good Cliff....but, disappointed that it was a jack.1 point
-
EDIT: Thanks to Patcon for the notifications to us locals! I might not have seen this thread in time to offer assistance.1 point
-
I did meet with the seller of this car yesterday, gave it a look over, test drive and responded back to notWes. The car needs work, no doubt, but it has a solid foundation to work with; some minor rust bubbling in only a couple of spots and some other minor paint imperfections that will require a complete strip-down and repaint later. Similarly, there were some minor mechanical issues that will need attention, but it can be driven and enjoyed right now as the seller has been doing. I thought that the seller presented the car honestly and accurately, although he isn't as knowledgeable (or, fanatical?) as most of us are about z cars. Since the auction has ended early this morning, hopefully notWes will stop back in here to let us know.1 point
-
1 pointAre they really from Pakistan? There was a big kerfuffle about Nike soccer balls being assembled by Pakistani kids, a few years ago. Maybe they moved on to seat covers.1 point
-
1 pointto follow up. the "baby doll" is now idling good with the timing at +/- 13* the popping is now intermittent, which i think is from mis-fire on # 1 & 3 plugs. putting the timing light on one wire at a time shows a consistent spark on all but those 2. that narrows it down to cap, rotor and wires. i have a new set of wires, so i think it has to be the cap and/or rotor i would like to thank all of you for the advice and help.1 point
-
The 1976 diagram by Saridout, here, is excellent. The other unlabeled diagram is unknown, but here's a 78 link, 2nd one, I remember from the past. It should be inthe Download section. @Mike http://www.classiczcars.com/files/category/1-wiring-diagrams/ The FSM's are here - http://www.classiczcars.com/files/category/13-280z/1 point
-
What's that? Come on. When are you going to ask me for help to get you a job down in God's country?1 point
-
3+ hours of cruising the twisties, straights and back country roads of North Texas with the Cowtown Z club - awesome day! Sent from my iPhone using Classic Zcar Club mobile1 point
-
You guys are great here. Receiving tremendous help Sent from my iPhone using Classic Zcar Club mobile1 point
-
1 pointI really like those. Machined from aluminum, did you anodize after wards?1 point
-
I think the closest Wurth product I have to the PF620 is Wurth W-Sol, which is naptha / white gas based. The only thing is W-sol is a lot more aromatic, or at least smells more like a stronger solvent than Final Wipe does. PF620 lists "VM&P NAPHTHA" in its MSDS... not sure why it smells different. Final Wipe... wouldn't call it pleasant smelling, but it's delightfully tolerable compared to the others, which is also a reason I like using it. haha. It's got its own type of smell. I haven't tried W-Sol on vinyl, but I know for a fact that it removes cosmoline type wax rust-proofing VERY well, which is why I never gave it a go on vinyl. I'm hesitant to do so.1 point
-
Regarding the Sem Color Coat---yes, Satin Black is the best match to original. I've used ProForm Products and like them---right up there with Wurth. I haven't used the PF620, but it sounds a lot like Naptha spirits, which I have used as you did with the PF620, and it behaves the same. Naptha will not harm paint, vinyl or rubber when used sparingly and not soaked.1 point
-
ProForm Products has two types of cleaners that I use. One is a very strong PF621 Wax and Grease Remover. If you use too much of it or leave it on painted surfaces, you will see paint on whatever you use to wipe it. The more gentle one that I use for preparing and cleaning just about everything is PF620, Final Wipe. It's what you're suppose to use prior to painting, in between primer and paint coats to remove tacked on dust, and can even be used on painted surfaces after they've been cured for a day or so without harming them much if at all. It works well on vinyl if you get a bit of contact cement or spray glue build up and doesn't seem to damage the vinyl used in this reproduction kit. Infact, if there are any areas where you needed to use heat on the vinyl that slightly glossed over, you can use the final wipe and it seems to normalize the contrast between shiny and dull areas, but it doesn't seem to dull the area that are already like that. I really like it. For the old glue, just wet a cloth with the PF621 and dab some on the glue, then use a dollar store tooth brush (for some reason the 2 pack of toothbrushes with the rubberized grip from the dollar store don't melt in the solvent like the full acetate ones do) and work in circles to move the glue around. The glue will just clump up and ball up on the tooth brush. Wipe it off the toothbrush to prevent further smearing the glue around the rest of the piece, and continue. It didn't seem to harm the rubber backing on the side-sill material, and actually made it a bit more rubbery. I'm sure if I left a big puddle on there, it would do some damage, but cleaning it with dish soap afterwards makes it nice.1 point
-
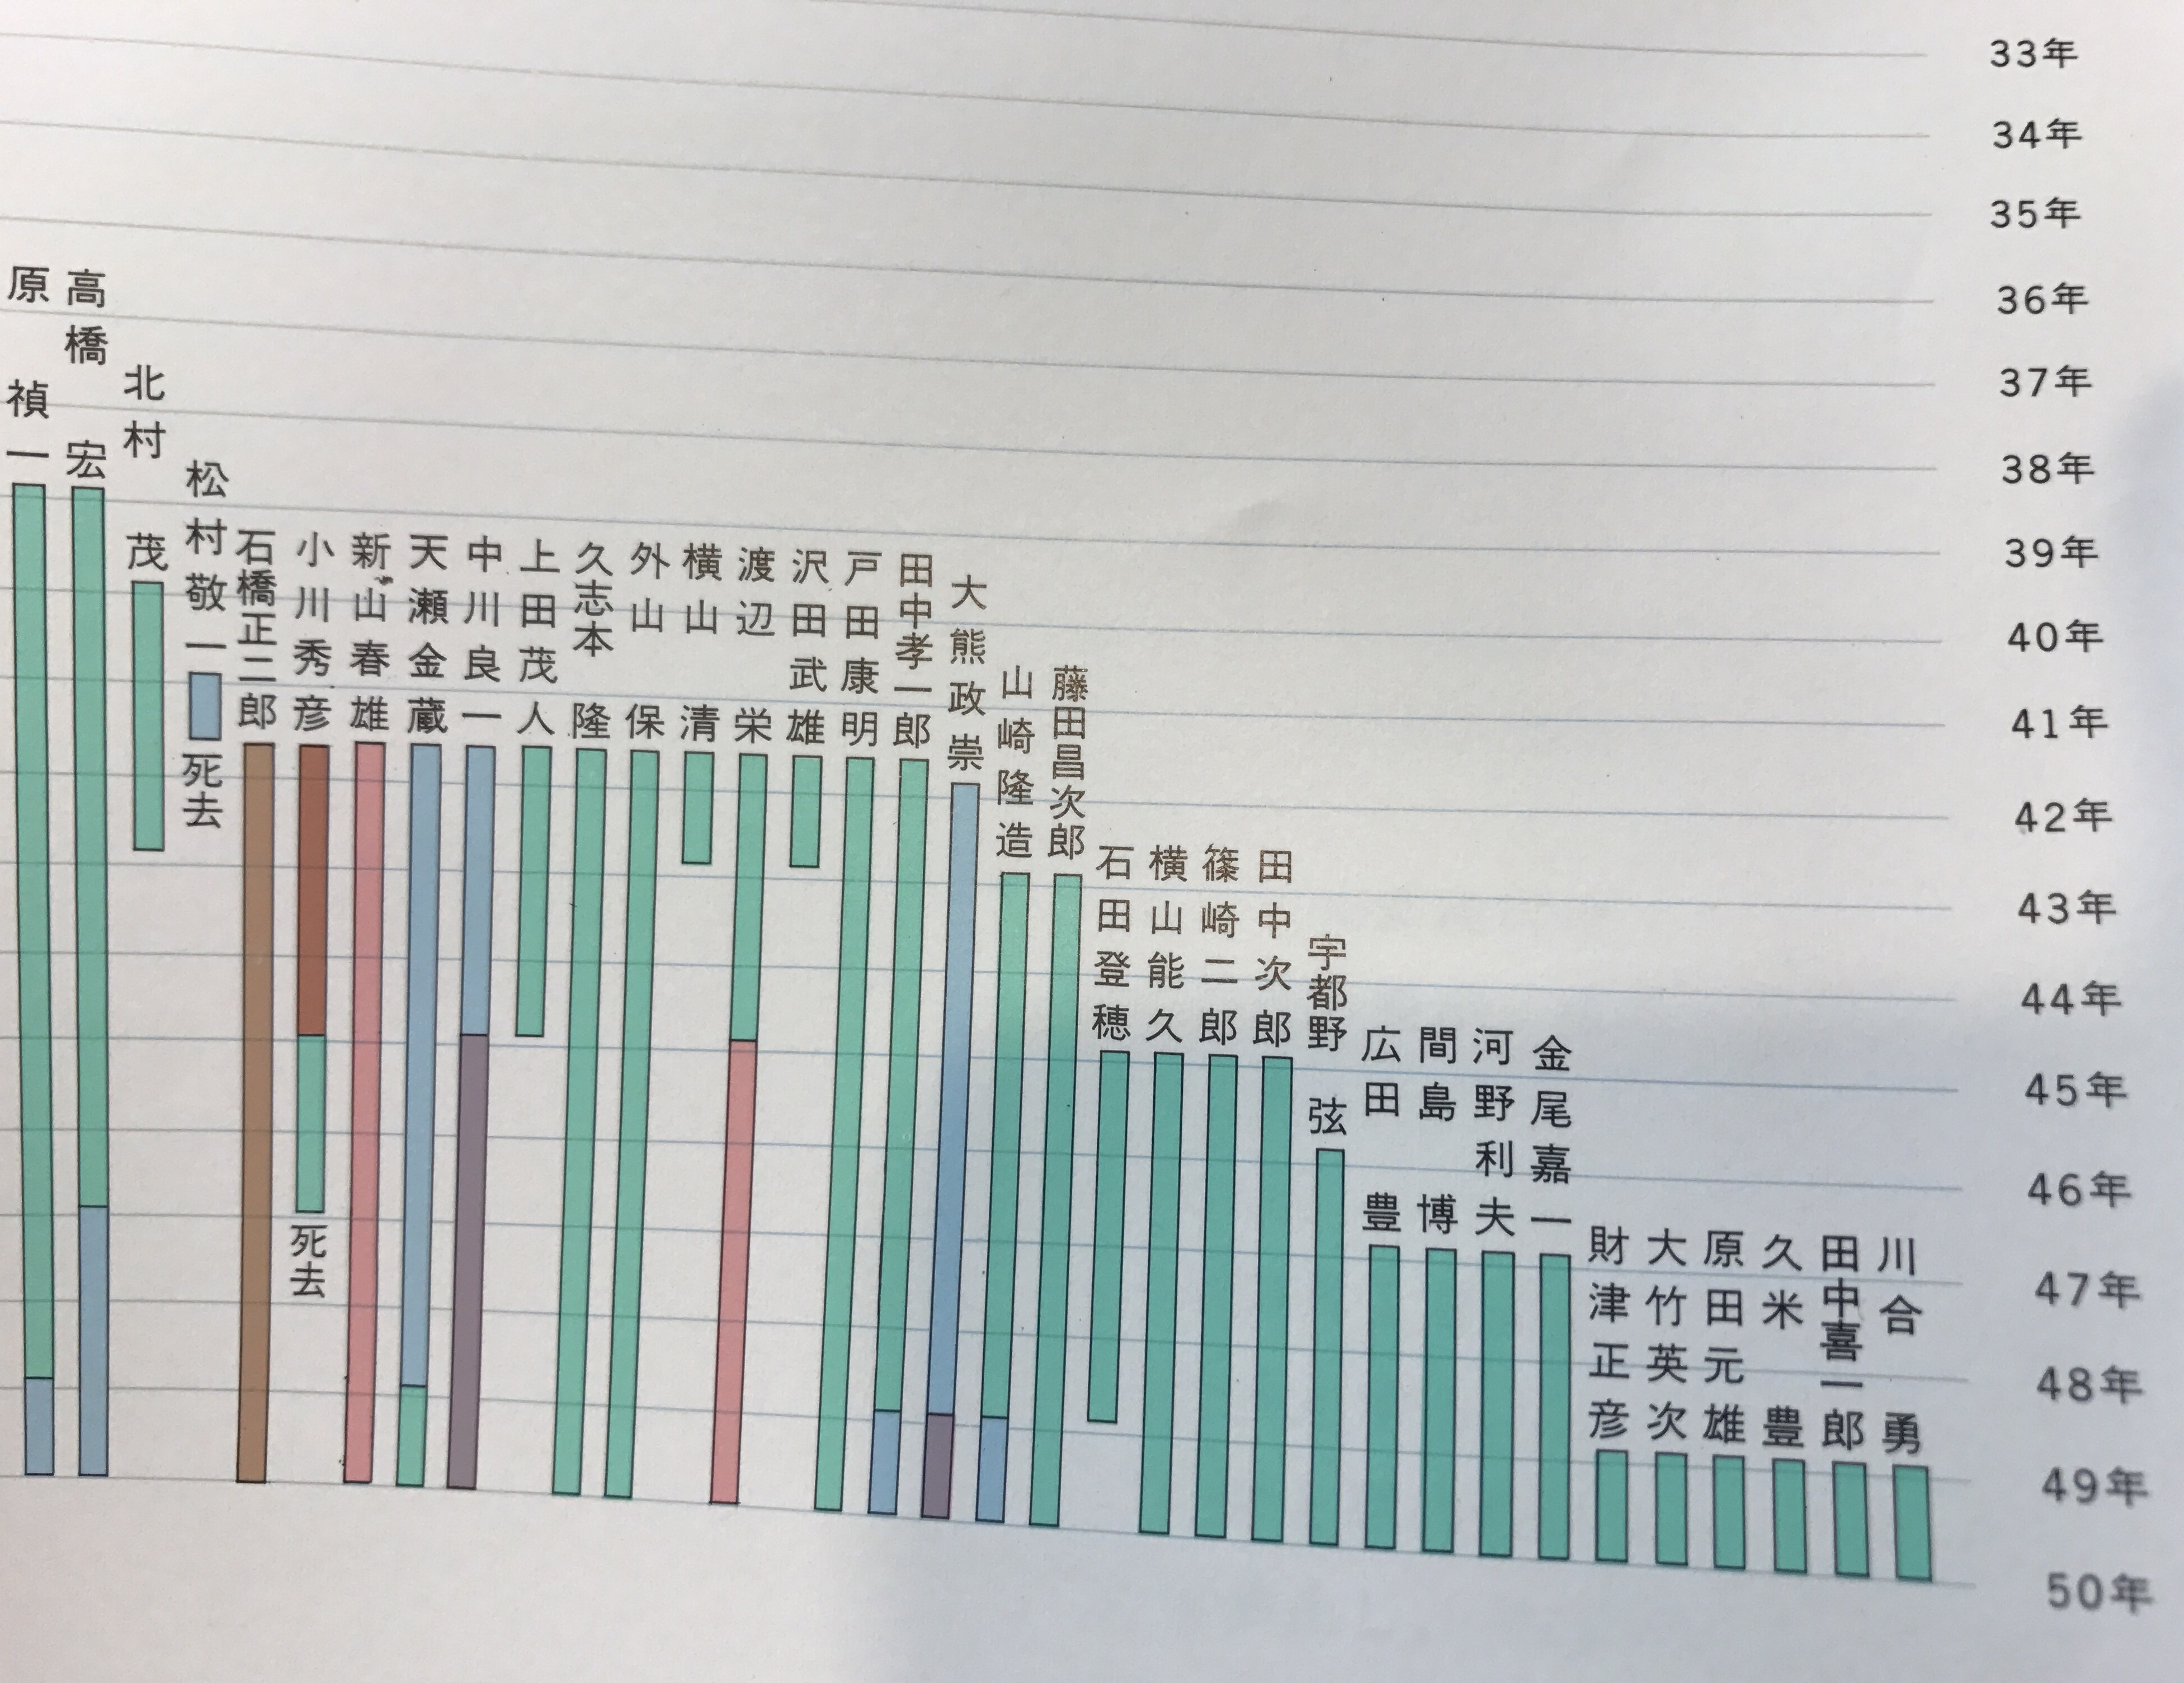
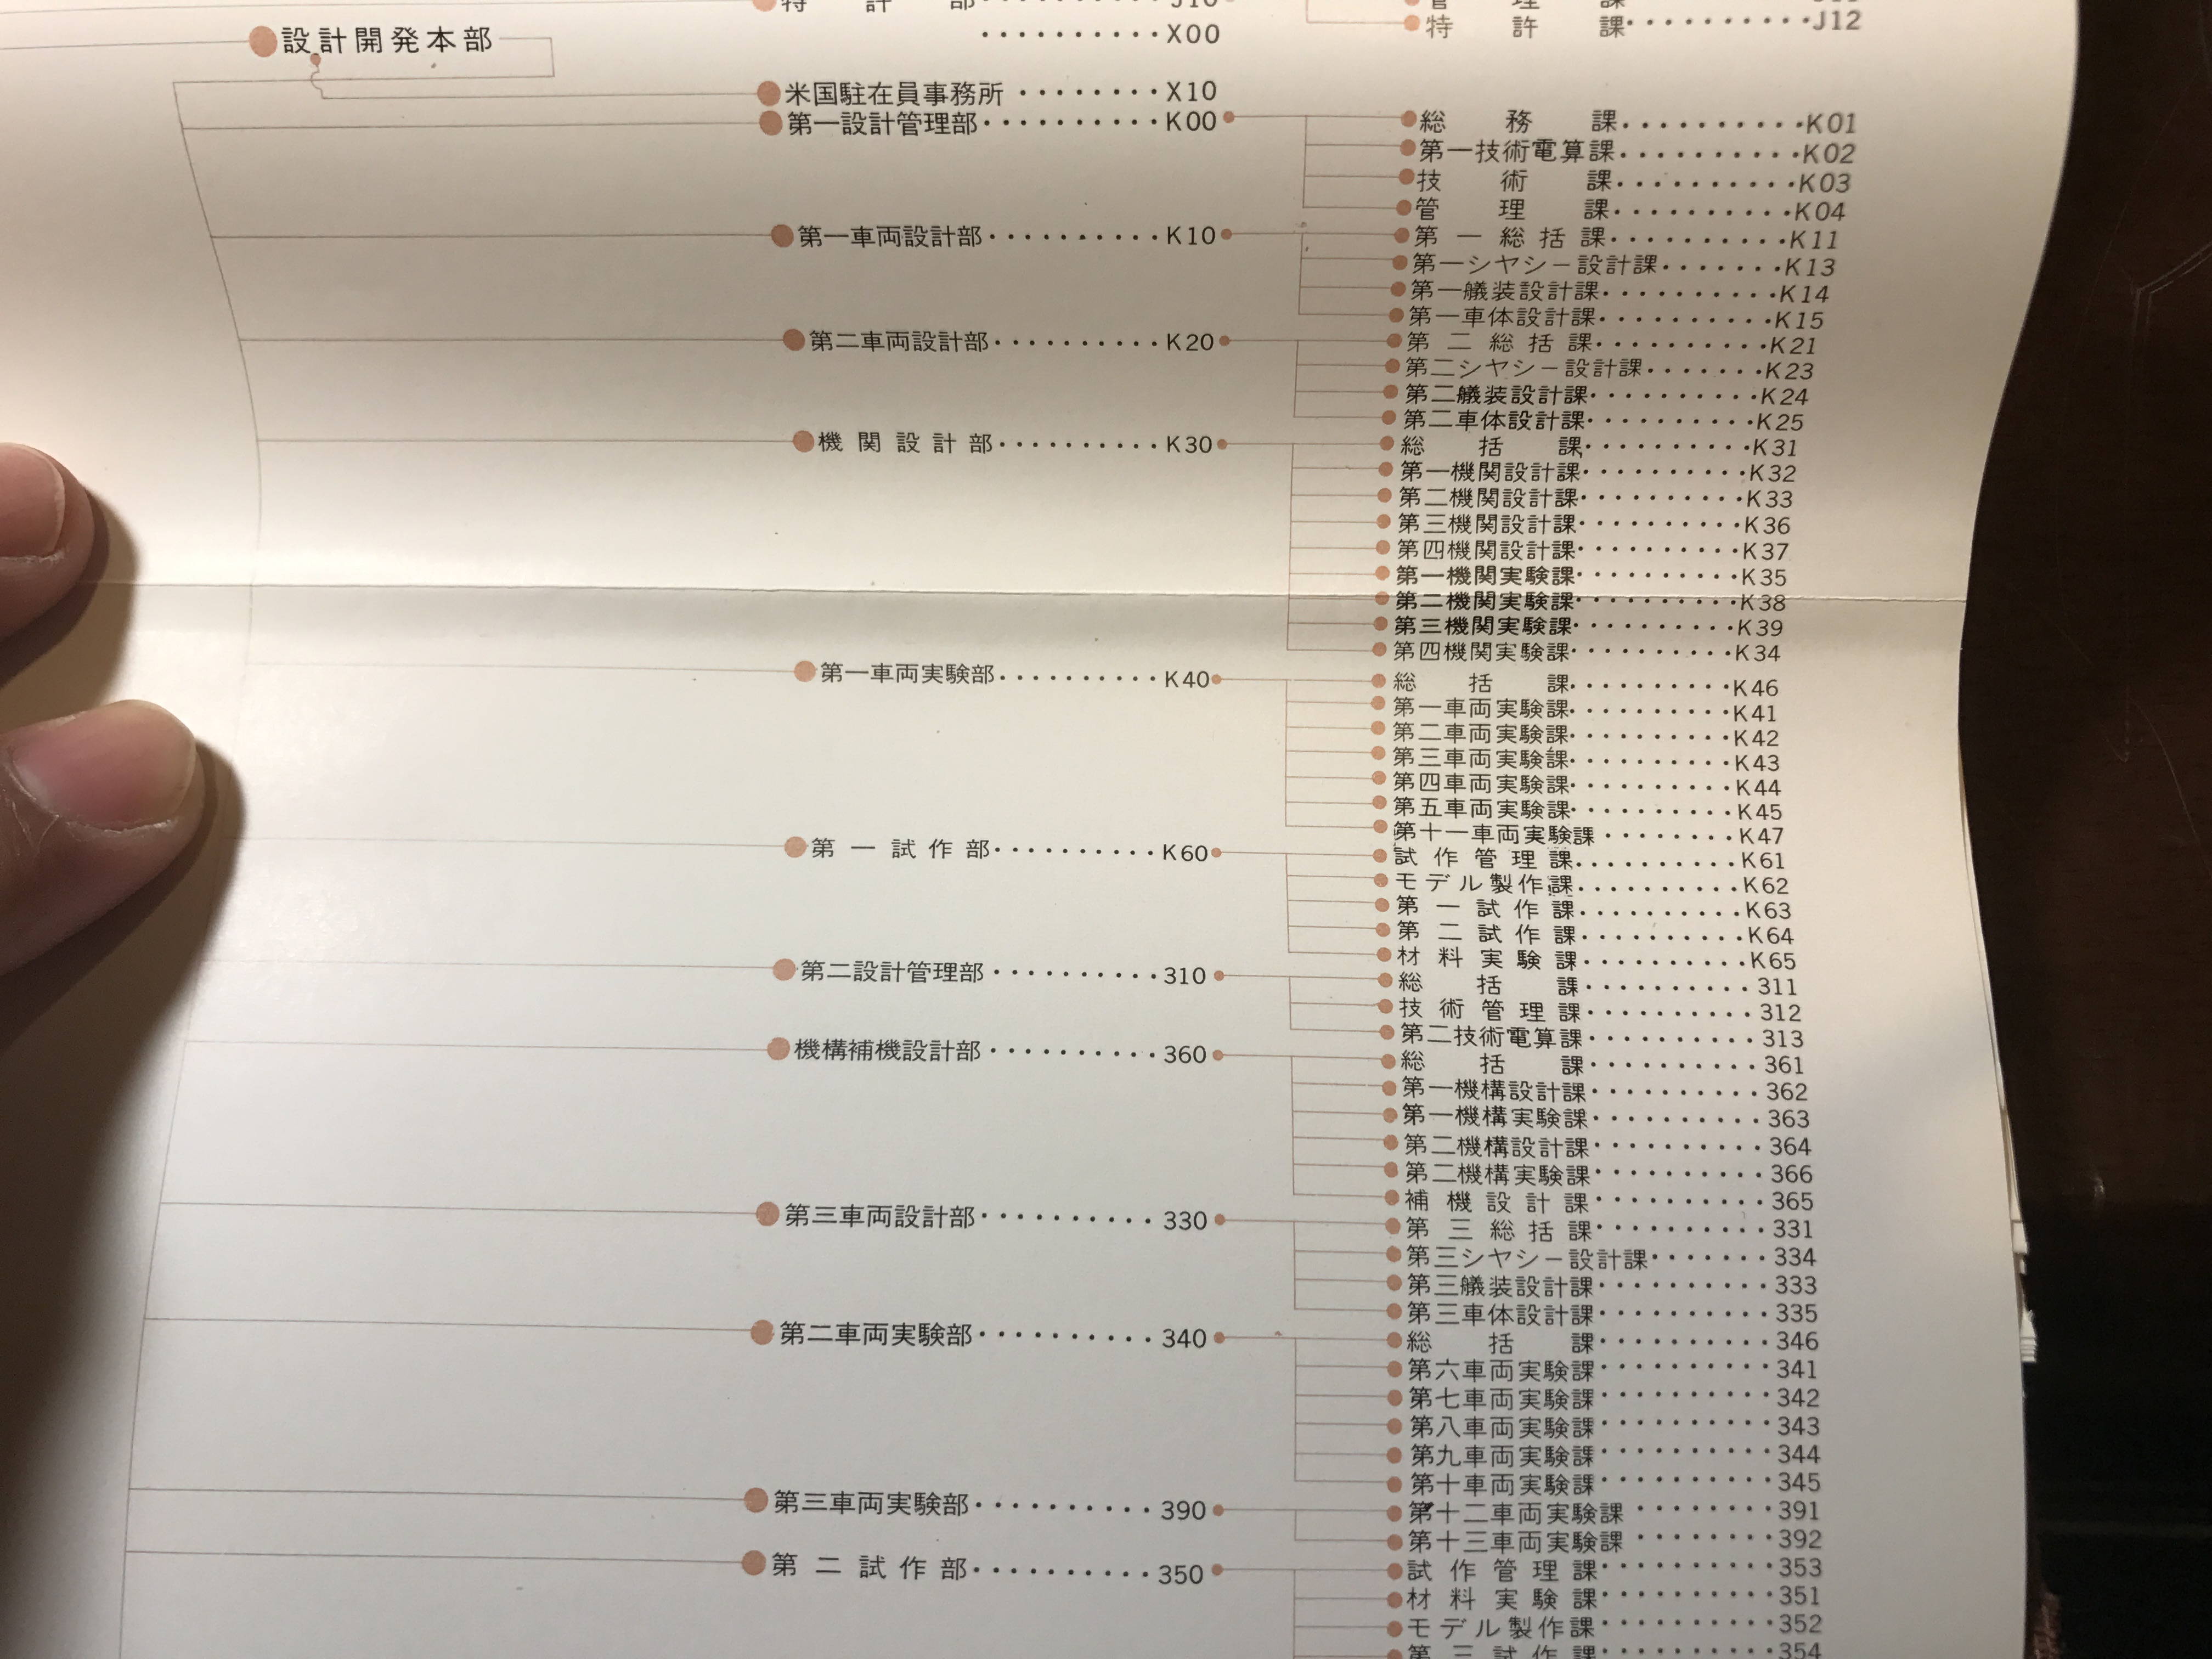
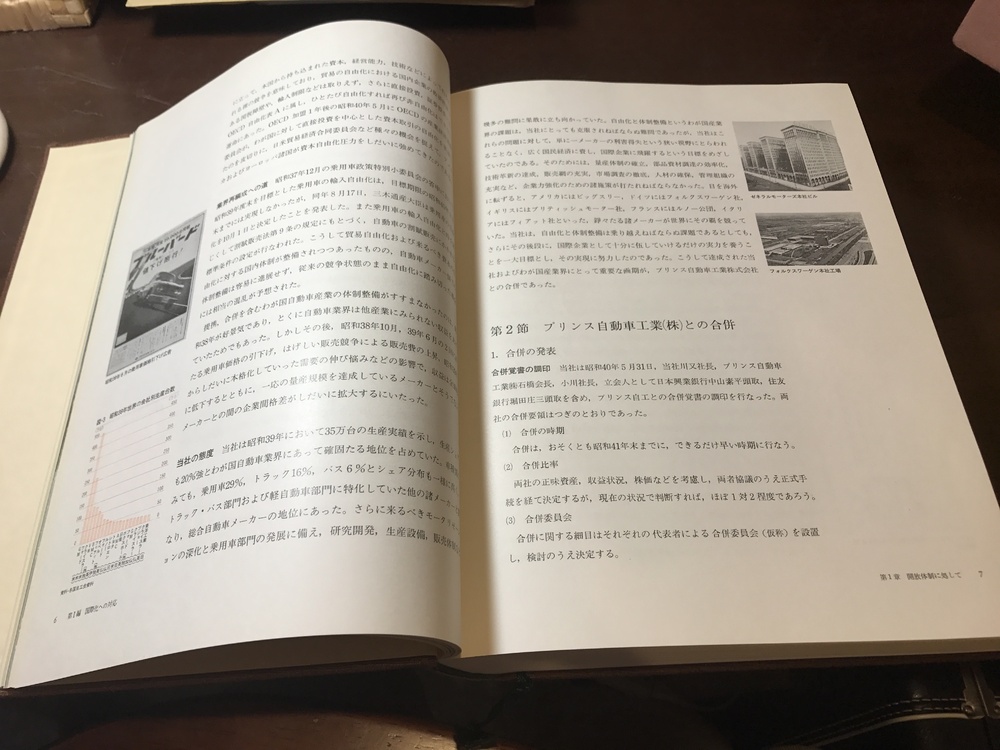
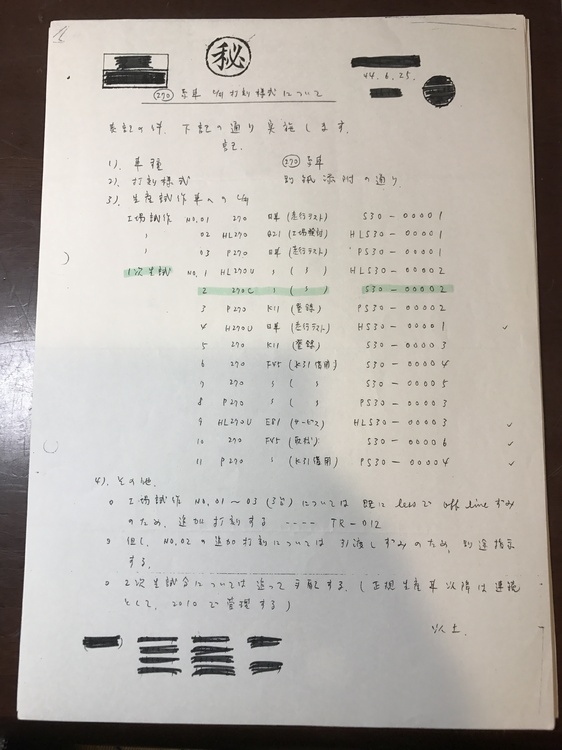
Alan, you pointed out Takahashi - Tori Shimari Yaku (director) on the top left of the test report, I found him ! In the colored figure, the very left is Mr.Hara (director) who was also very important the birth of S30, Mr.K and Mr.Matsuo and other designers and engineers are all saying very good memories about him.Mr.Hara was a car guy, I guess. Next him is Mr.Takahashi , we have no idea about him. The third picture is Mr.Hara.


 1 point
 -
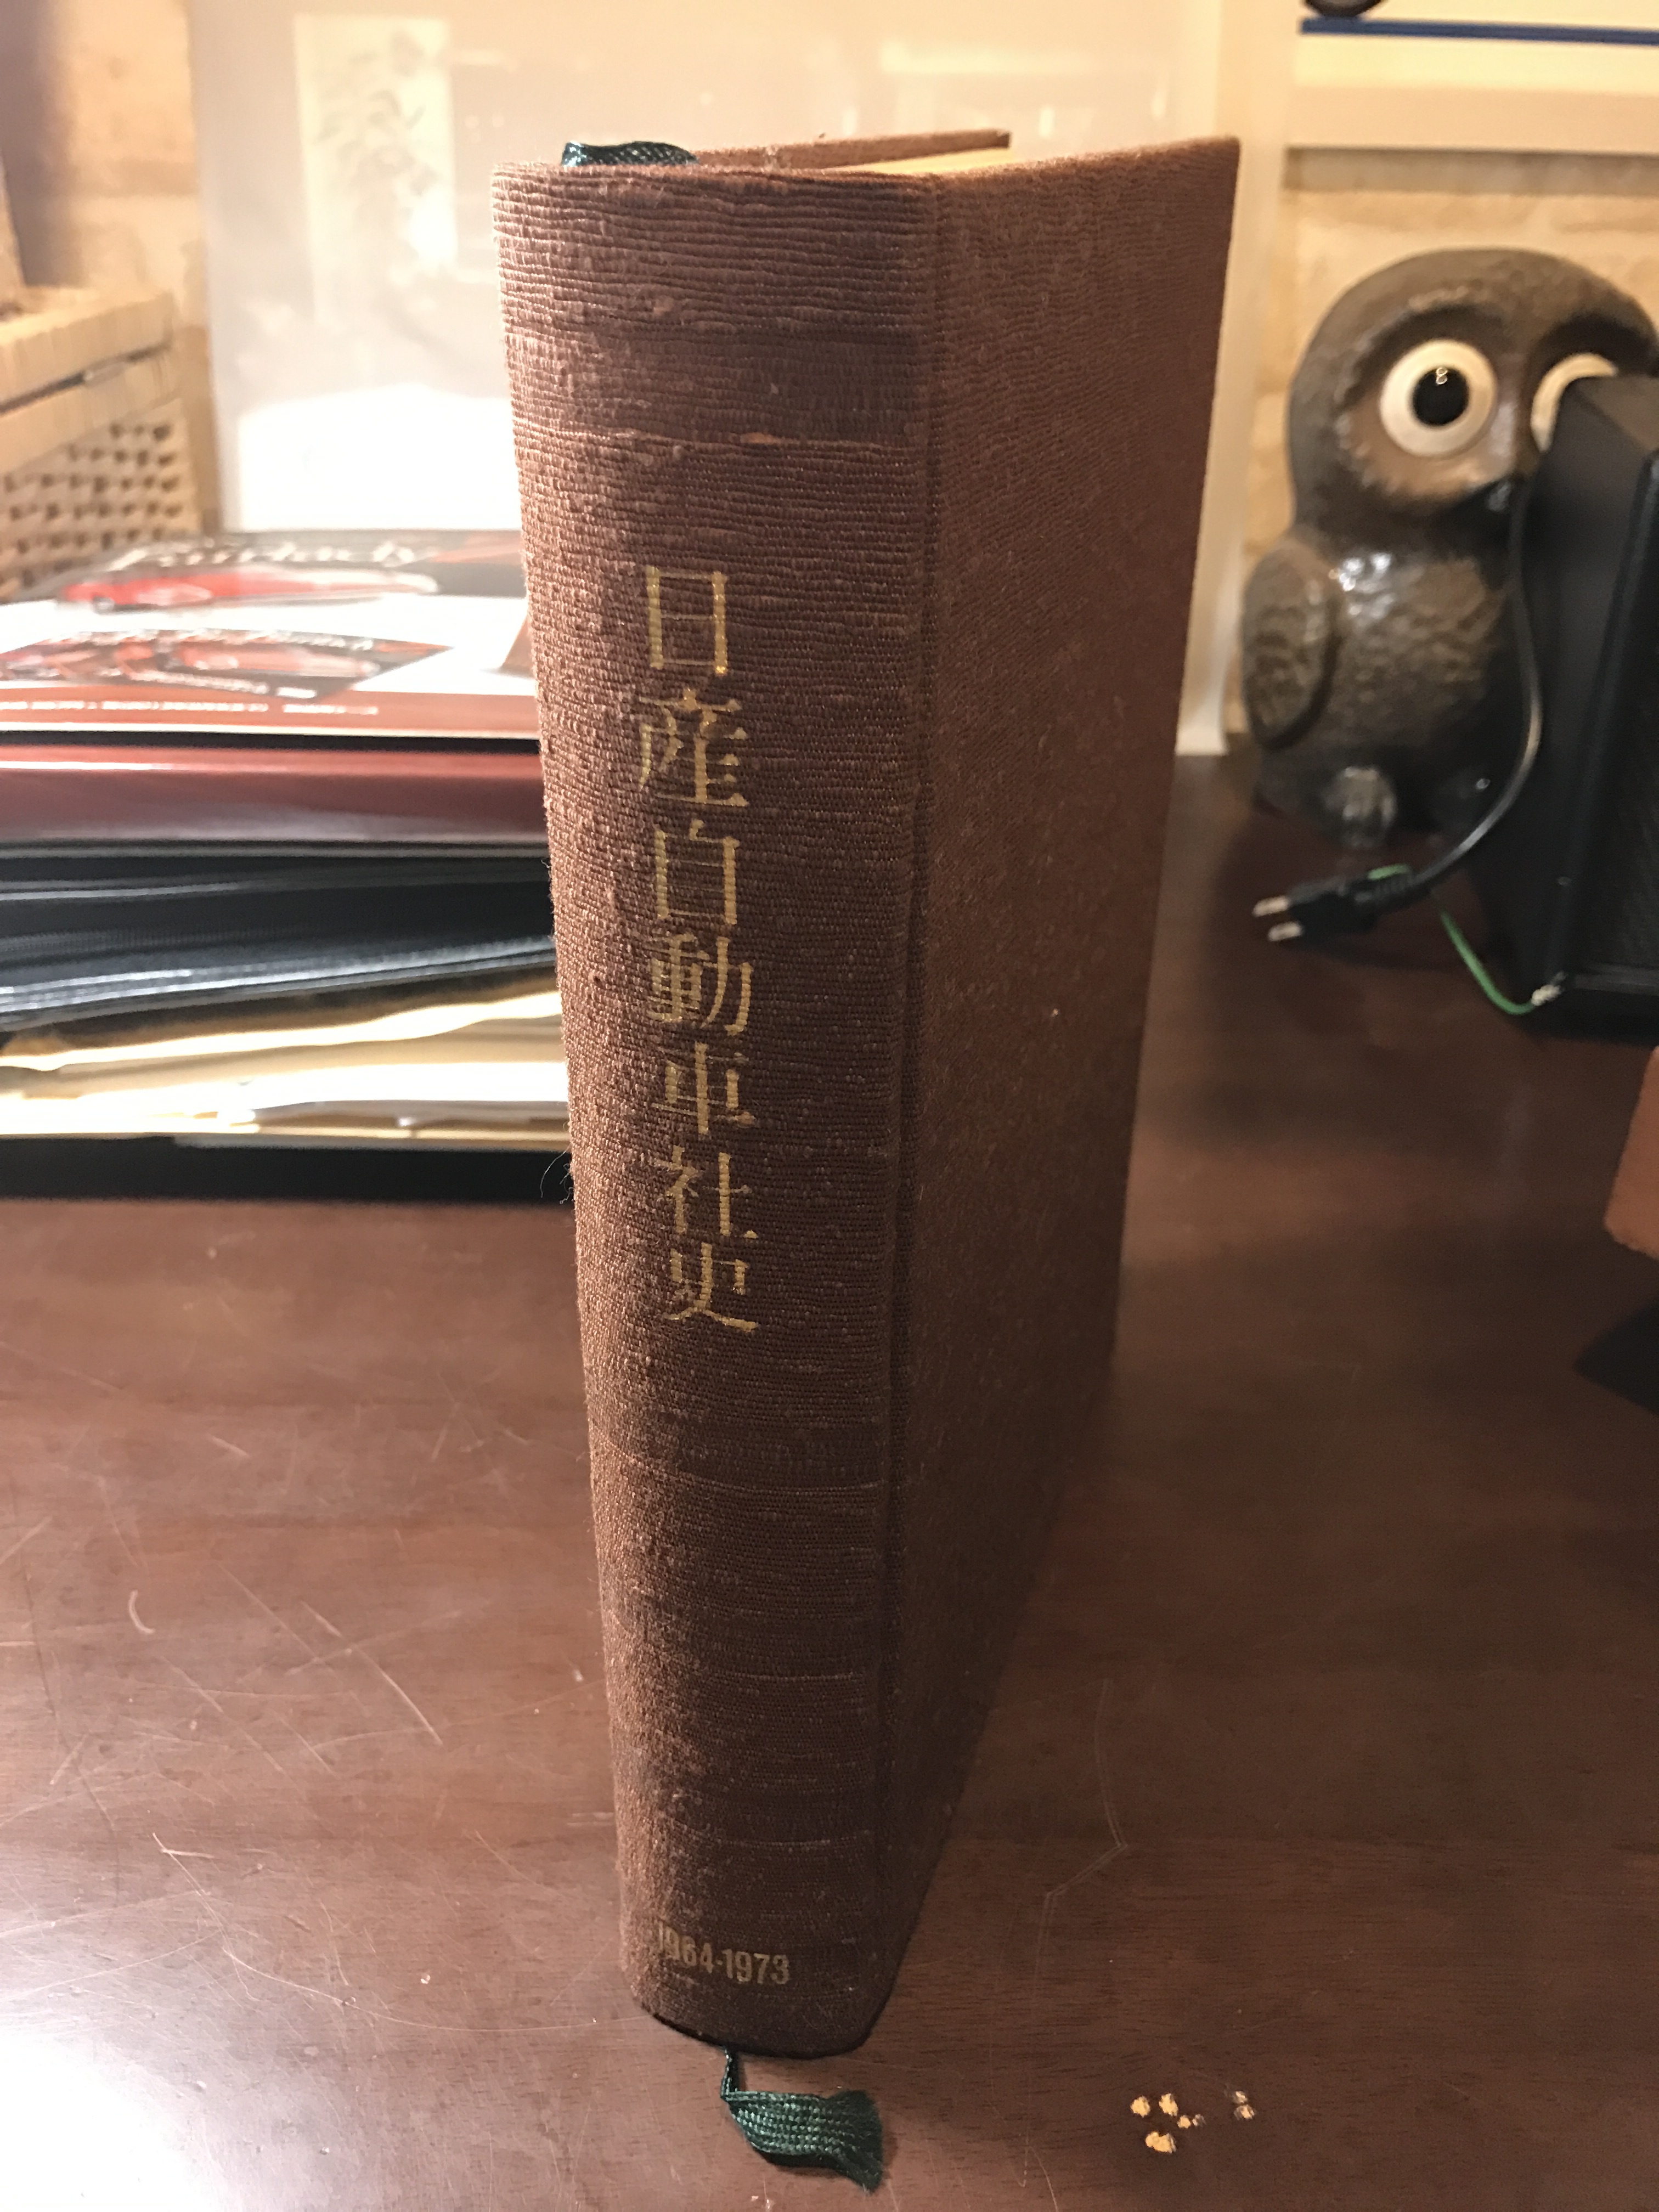
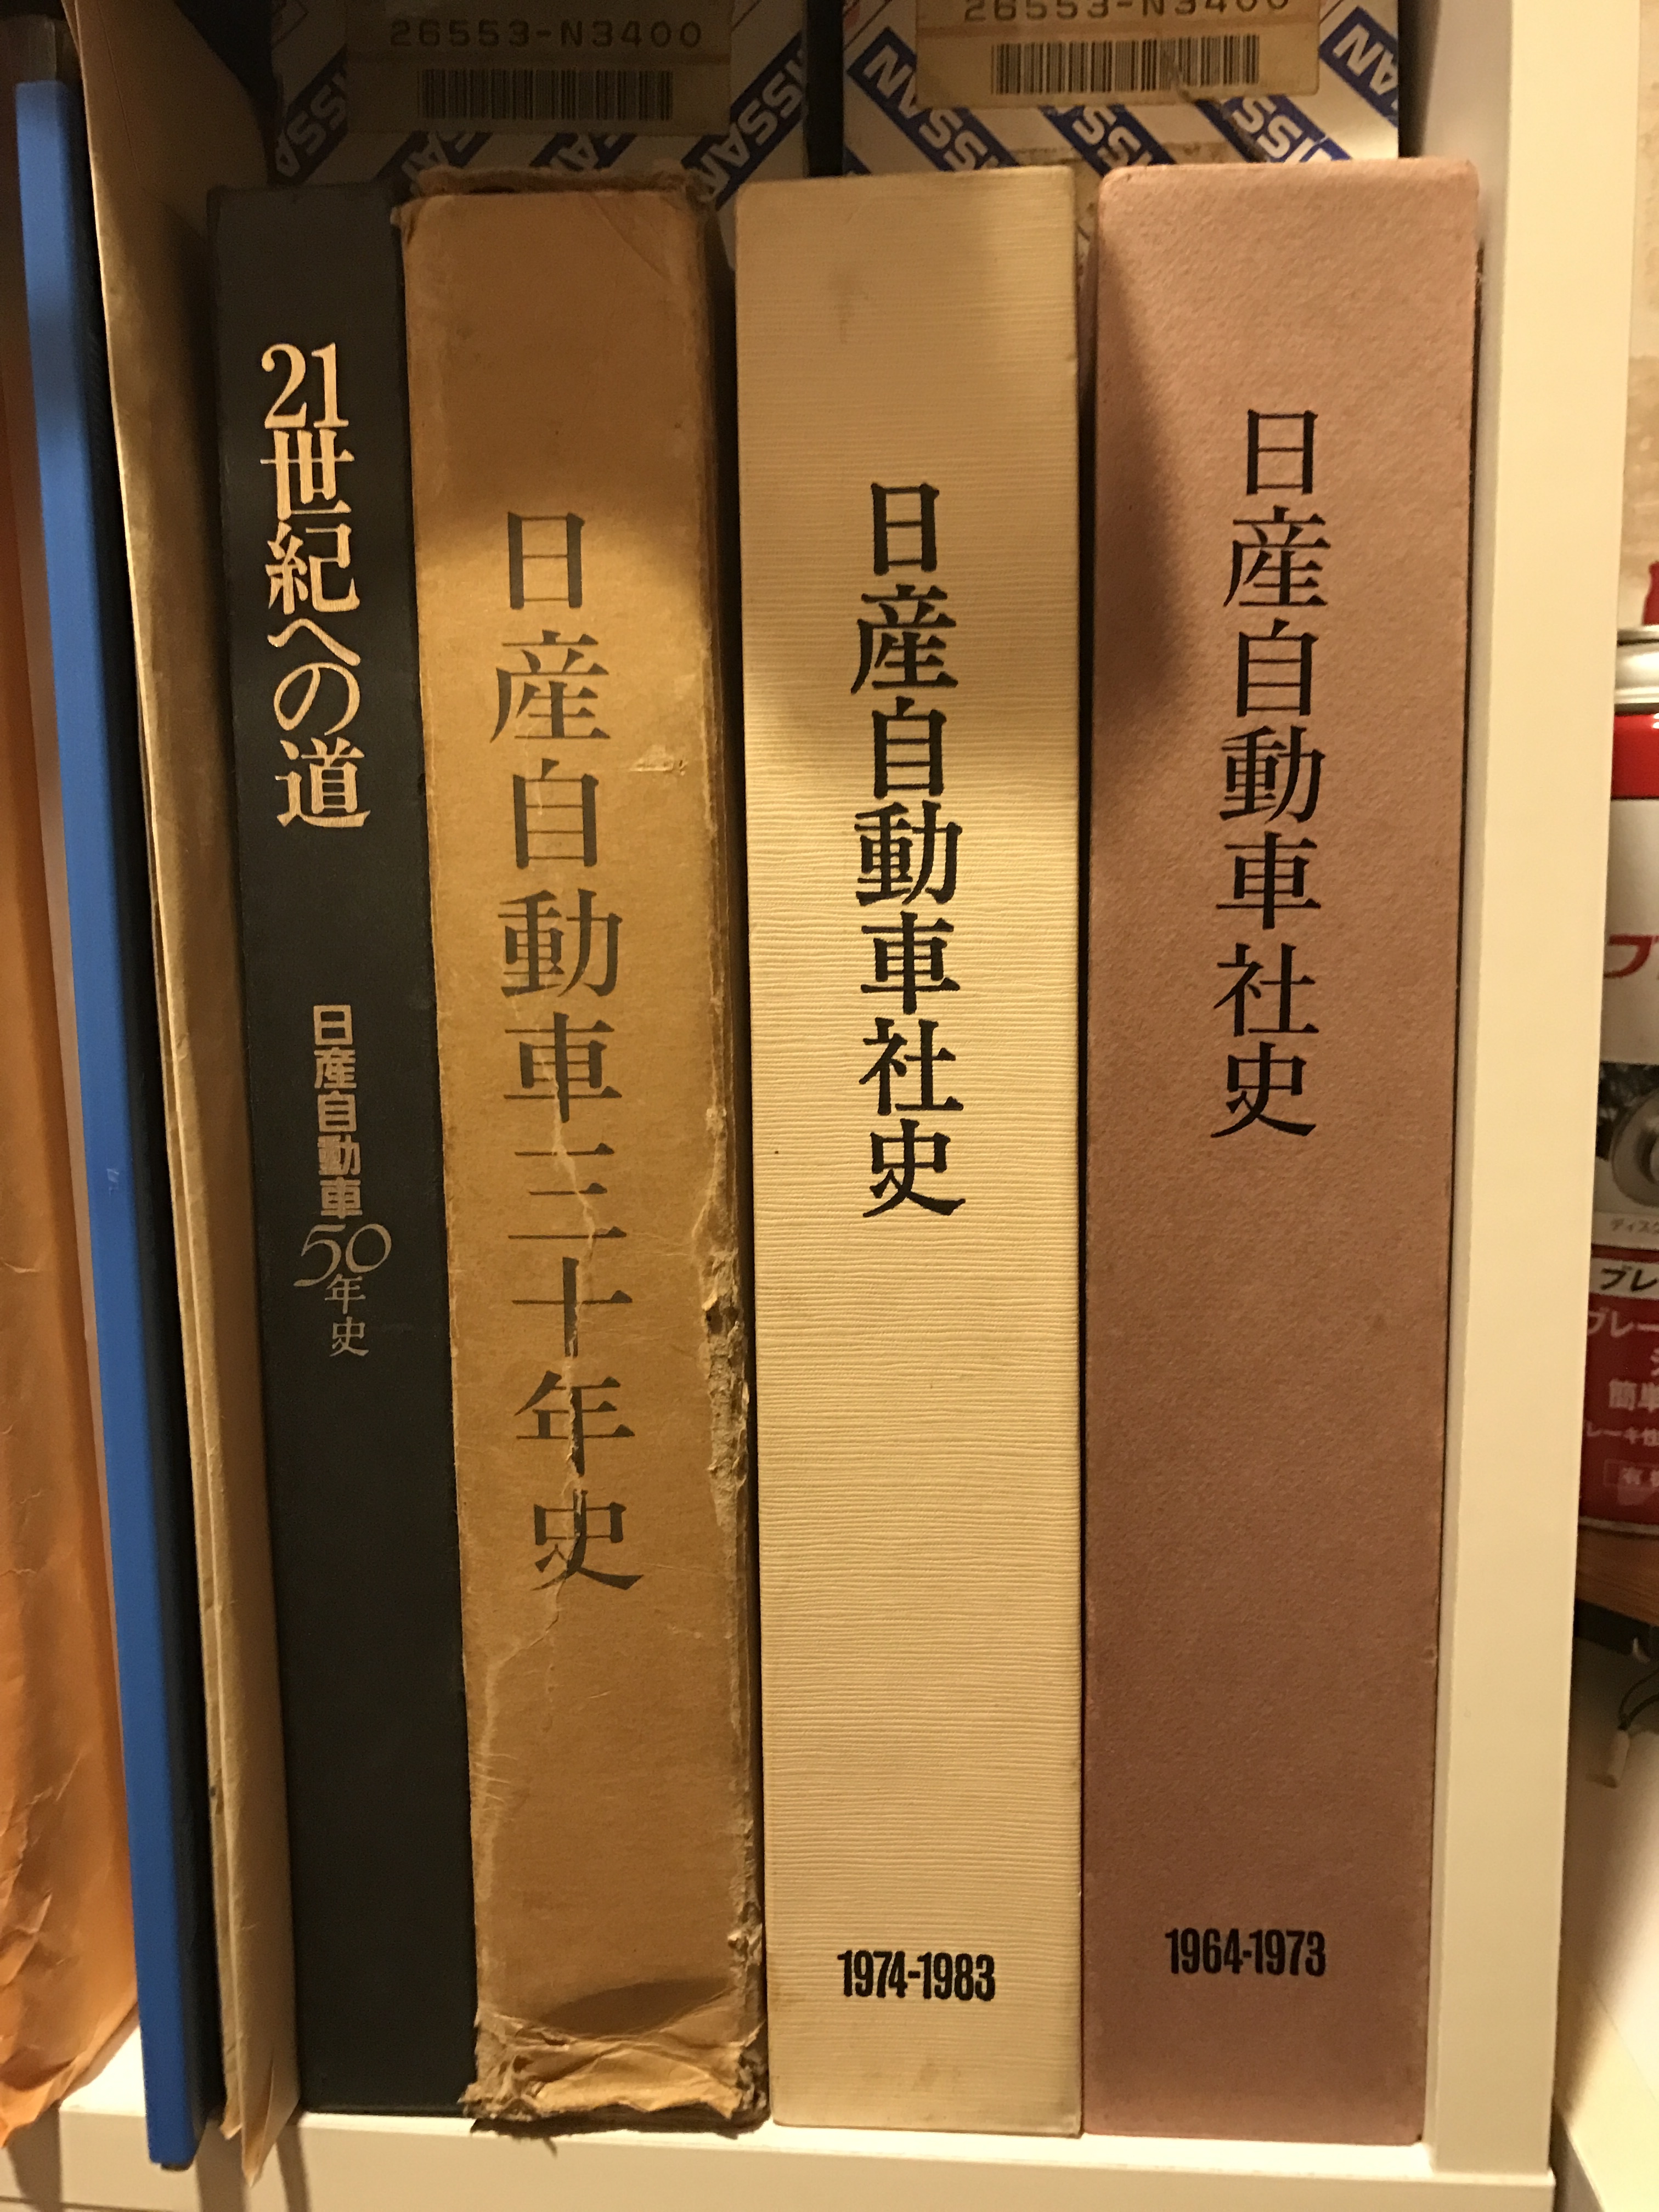
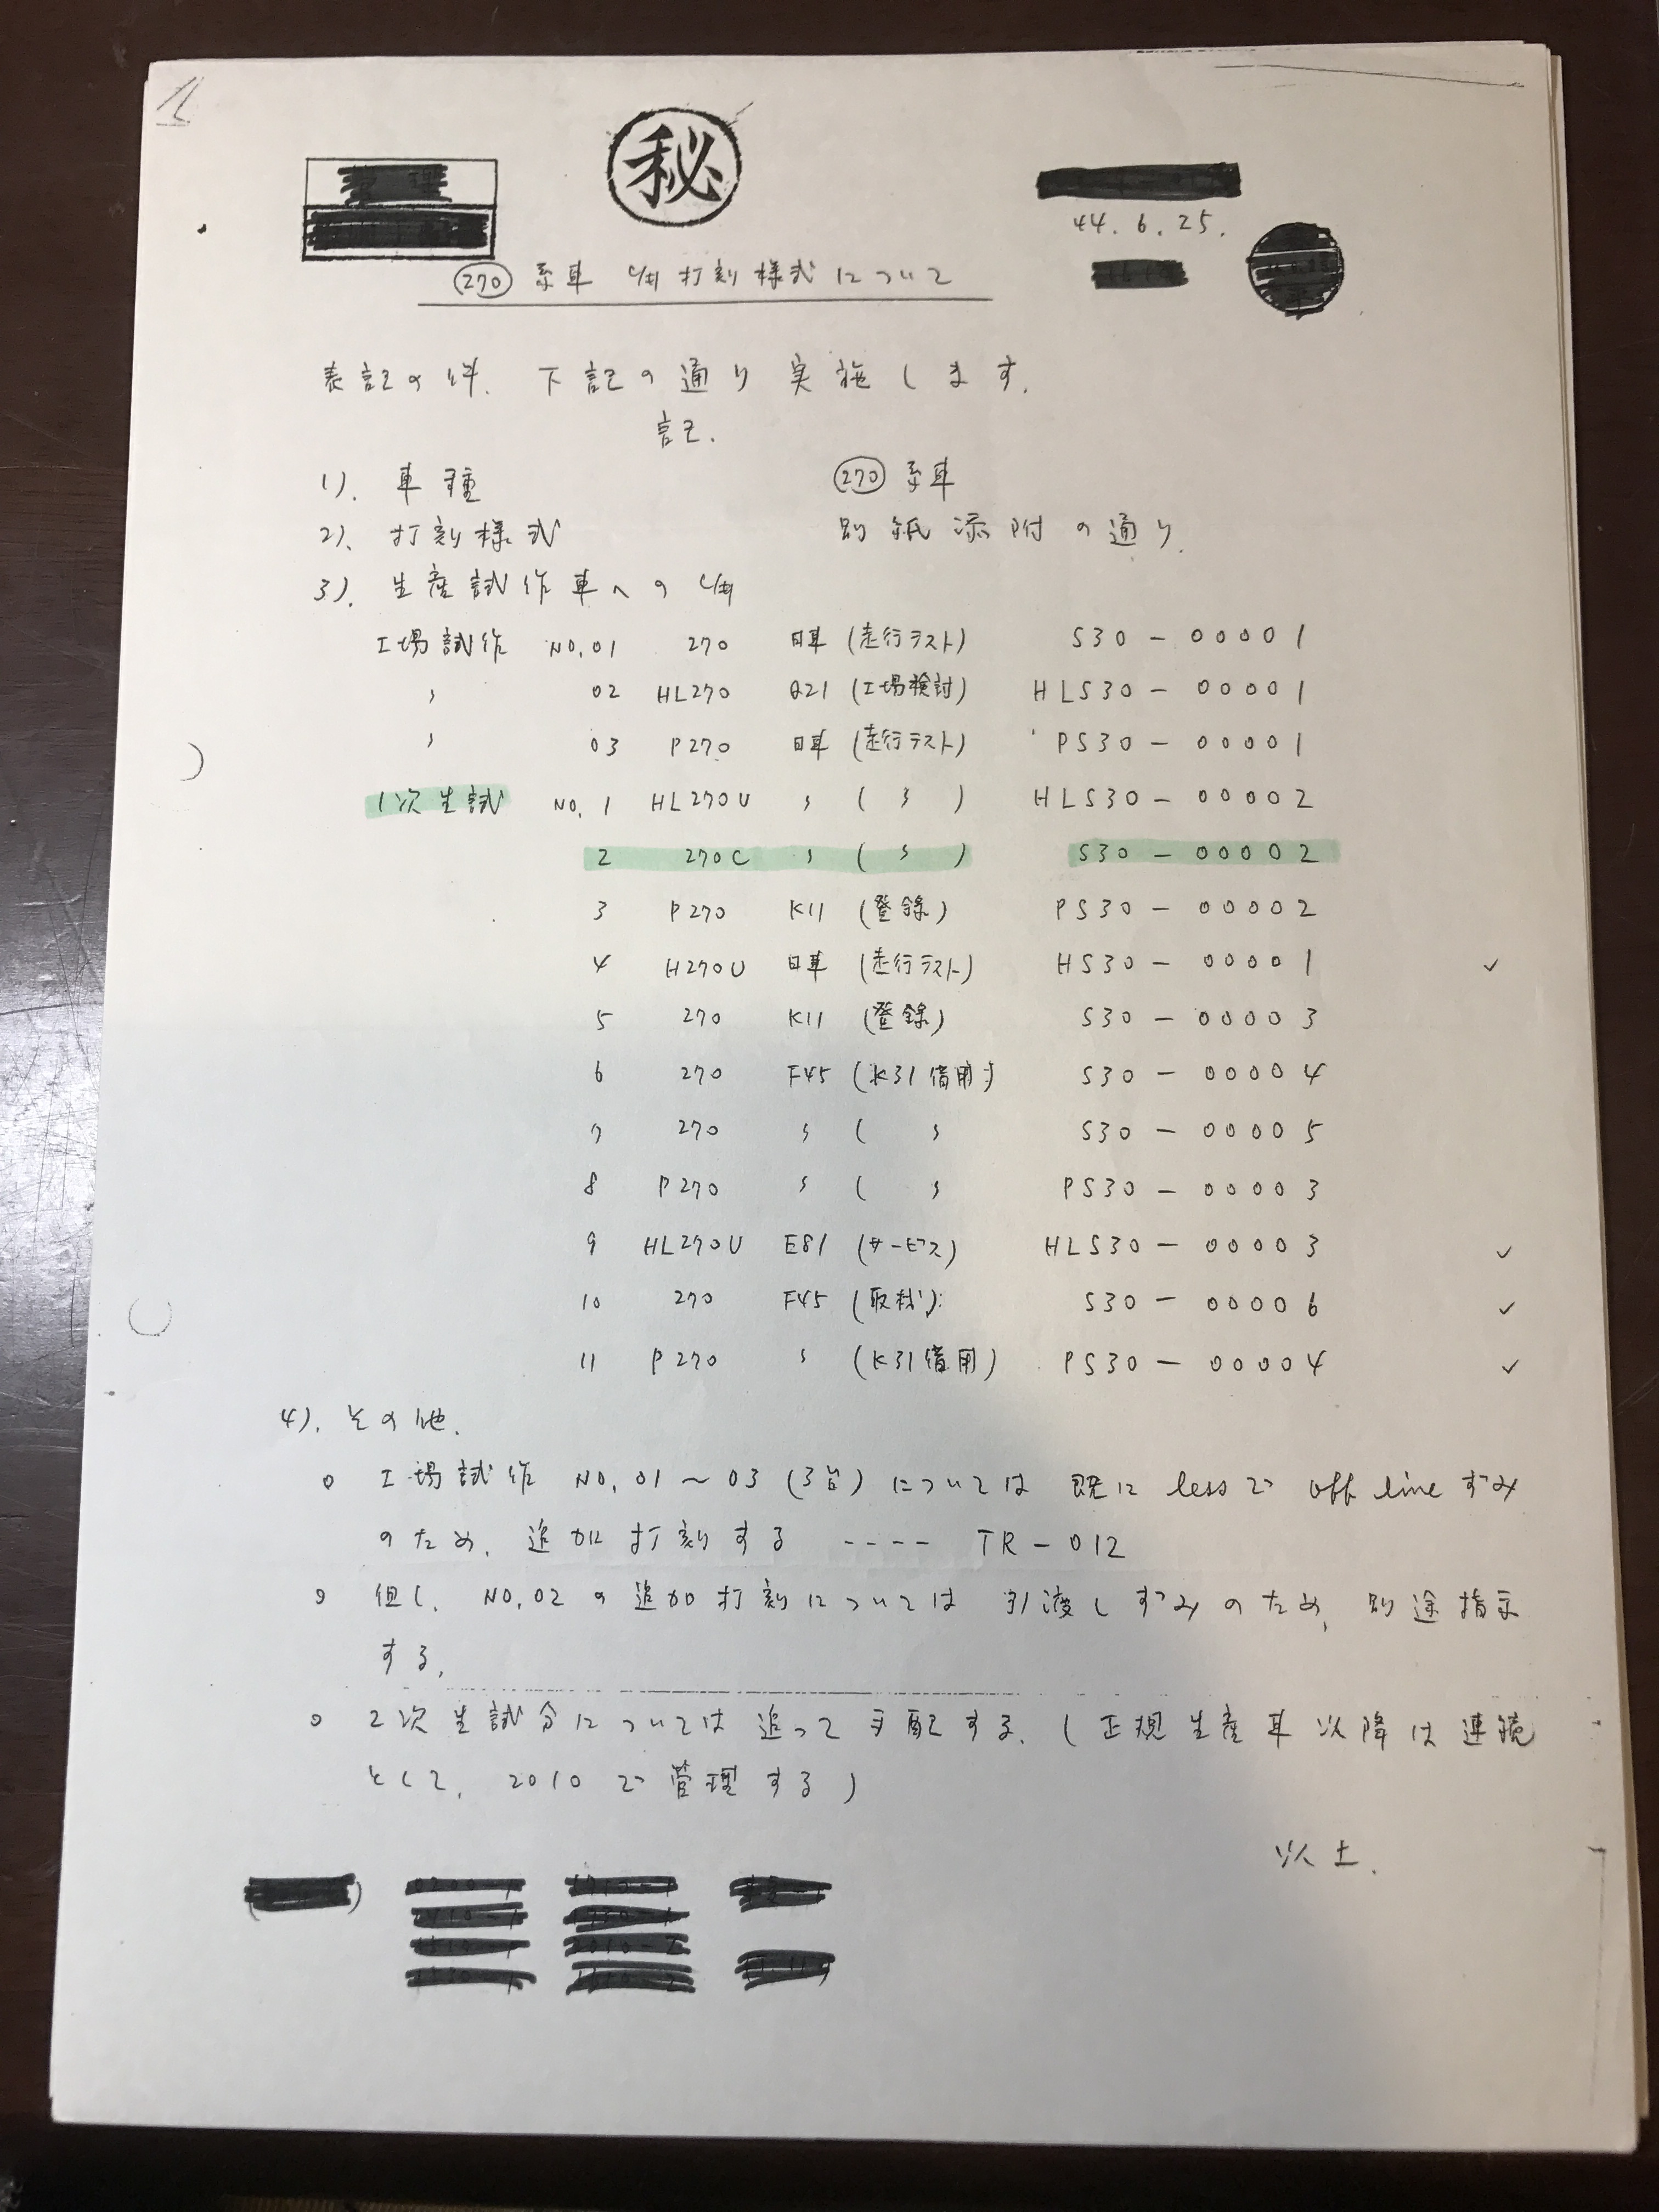
Before that, I found new today, about a department code(ID) , we talked about it before in another thread, very first S30 prototype making sequence . Each car has each department to belong, we did not know what "K11" means. Now I see K11 is Dai Ichi Soukatsu Ka (general affairs section No.1) in Dai Ichi Sharyo Sekkei Ka (Chassis layout/ mechanical design department No.1 ) I have Nissan footage books( Alan you have them too) ,this 1964-1973 has a lot of interesting information. Please see the attached pictures. Kats

 1 point
 -
Here are a few: Held on well after the guy I sold it to killed it:1 point
-
Gnosez where can the one piece be bought? Sent from my iPhone using Classic Zcar Club mobile1 point
-
1 point
-
Ken, As the old saying goes......."very carefully":) It's really not difficult. First, you have to remove your tail light assembly from the housing. I've had good success just soaking the assembly in the sun for a few hours, enabling me to gently pry the lenses away from the housing. Others have soaked them in warm water for awhile, and report equal success. After you've separated the main pieces, you'll have access to the mounting pins on the tail light strips. This is the only challenging part......you need to remove the nuts that secure the lenses to the tail light strip without breaking too many of the posts. I've had success just using needlenose pliers and gently twisting them off the tapered mounting pins. Once these are removed, the taillight stip is easy to separate from the lens. As for cleaning off the adhesive "goop" that secures your lens to the housing body, I found that rubbing baby oil on the lens facilitated the quickest removal of the adhesive. (little trick I learned from the old lady.....and she doesn't even own a Z) Mike1 point

.thumb.JPG.21f1724e227b22b6d5306af2d3267f40.JPG)