Leaderboard
-

Zed Head
Free Member2Points19,328Posts -
bartsscooterservice
Free Member2Points1,900Posts -
EuroDat
Free Member1Points3,312Posts -
conedodger
Free Member1Points12,645Posts


Popular Content
Showing content with the highest reputation on 02/11/2016 in all areas
-
2 pointsSomething more cool I want to share with you guys. I bought an old 2 stroke fuel pump from an auction, the tank was solid ( surface rust but not trough, every rubber dryed out offcourse ) but it stood there in a garage storage for like 25 years. It's from 1978 and the brand is Bereila, which is actually a Dutch brand. And they even stil exist today, so I managed to buy spare parts from them to restore this beauty ! I could go right into a museum now.. but I will actually use it to fill the scooters for my work. But I will make sure it stays in good condition I might want to sell it in a few years, who knows.. I am addicted in restoring this old stuff ! Anyhow.. here are the pictures from how it came in, and how it is now.. And how it is now:2 points
-
site, yeah at first I was thinking "oh damn" I need to shrink it but now I like it. By all means copy it. I like the close-ups. The stock hood will be going back on her in the near future.1 point
-
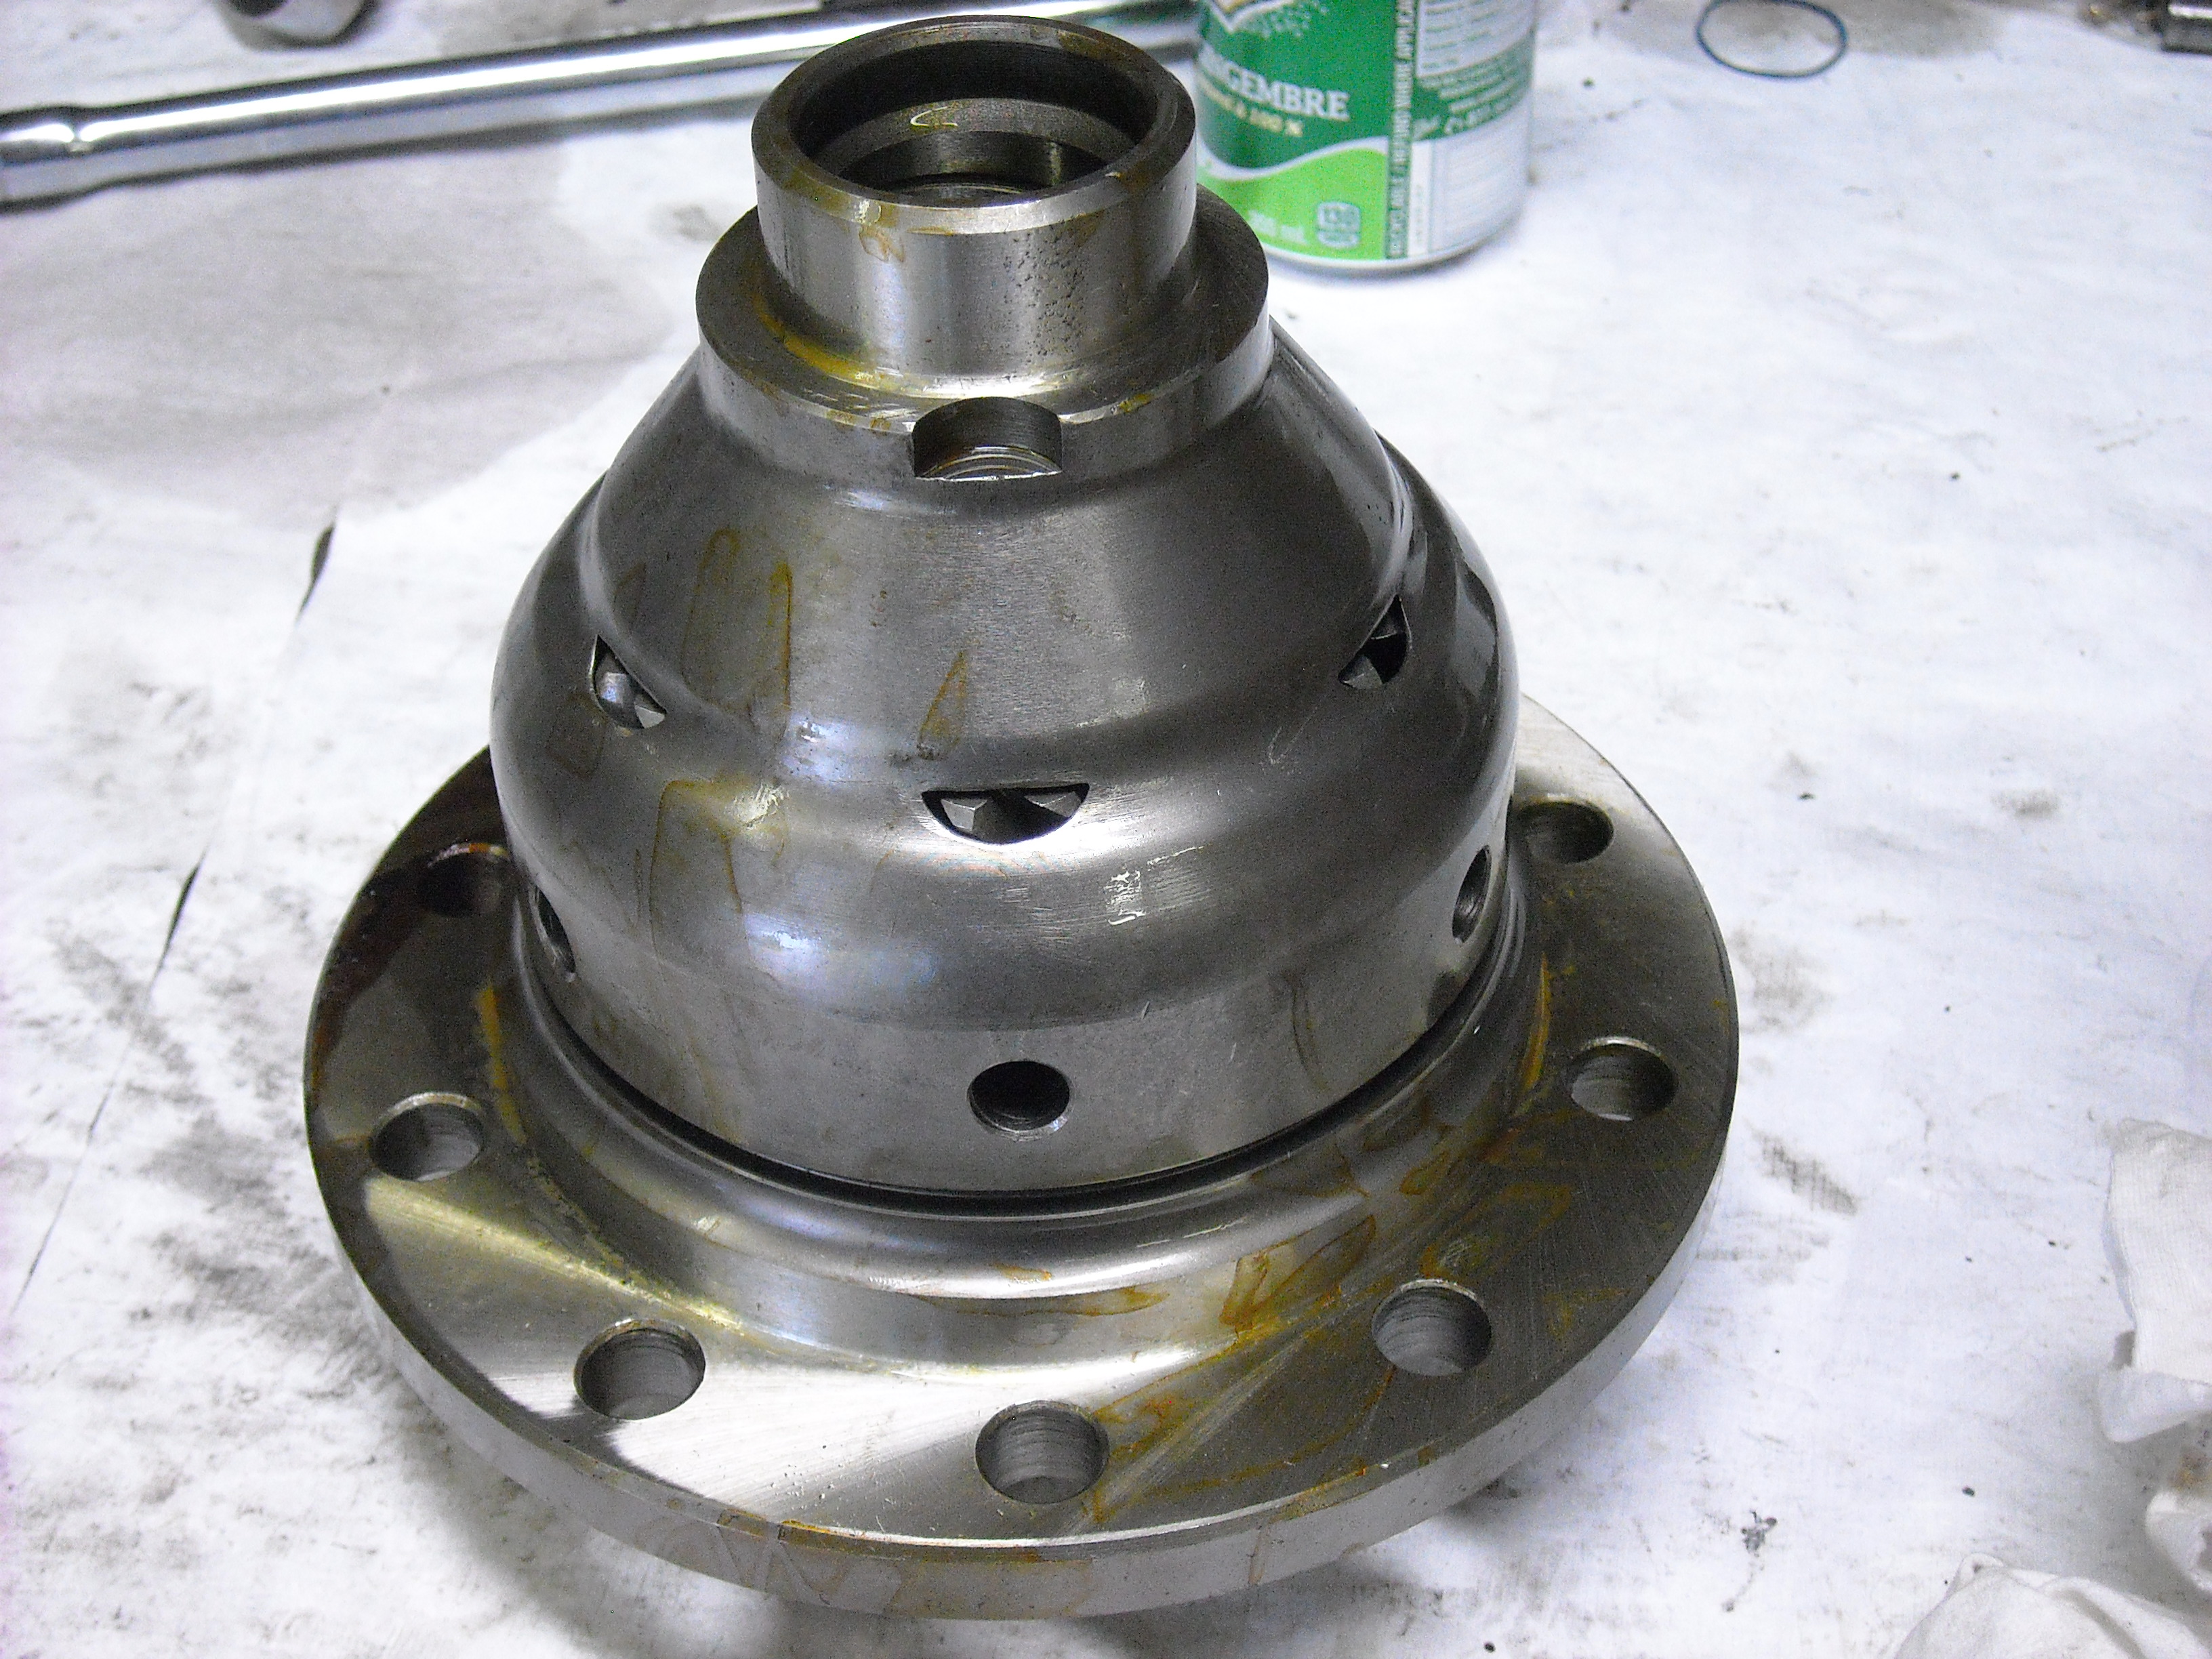
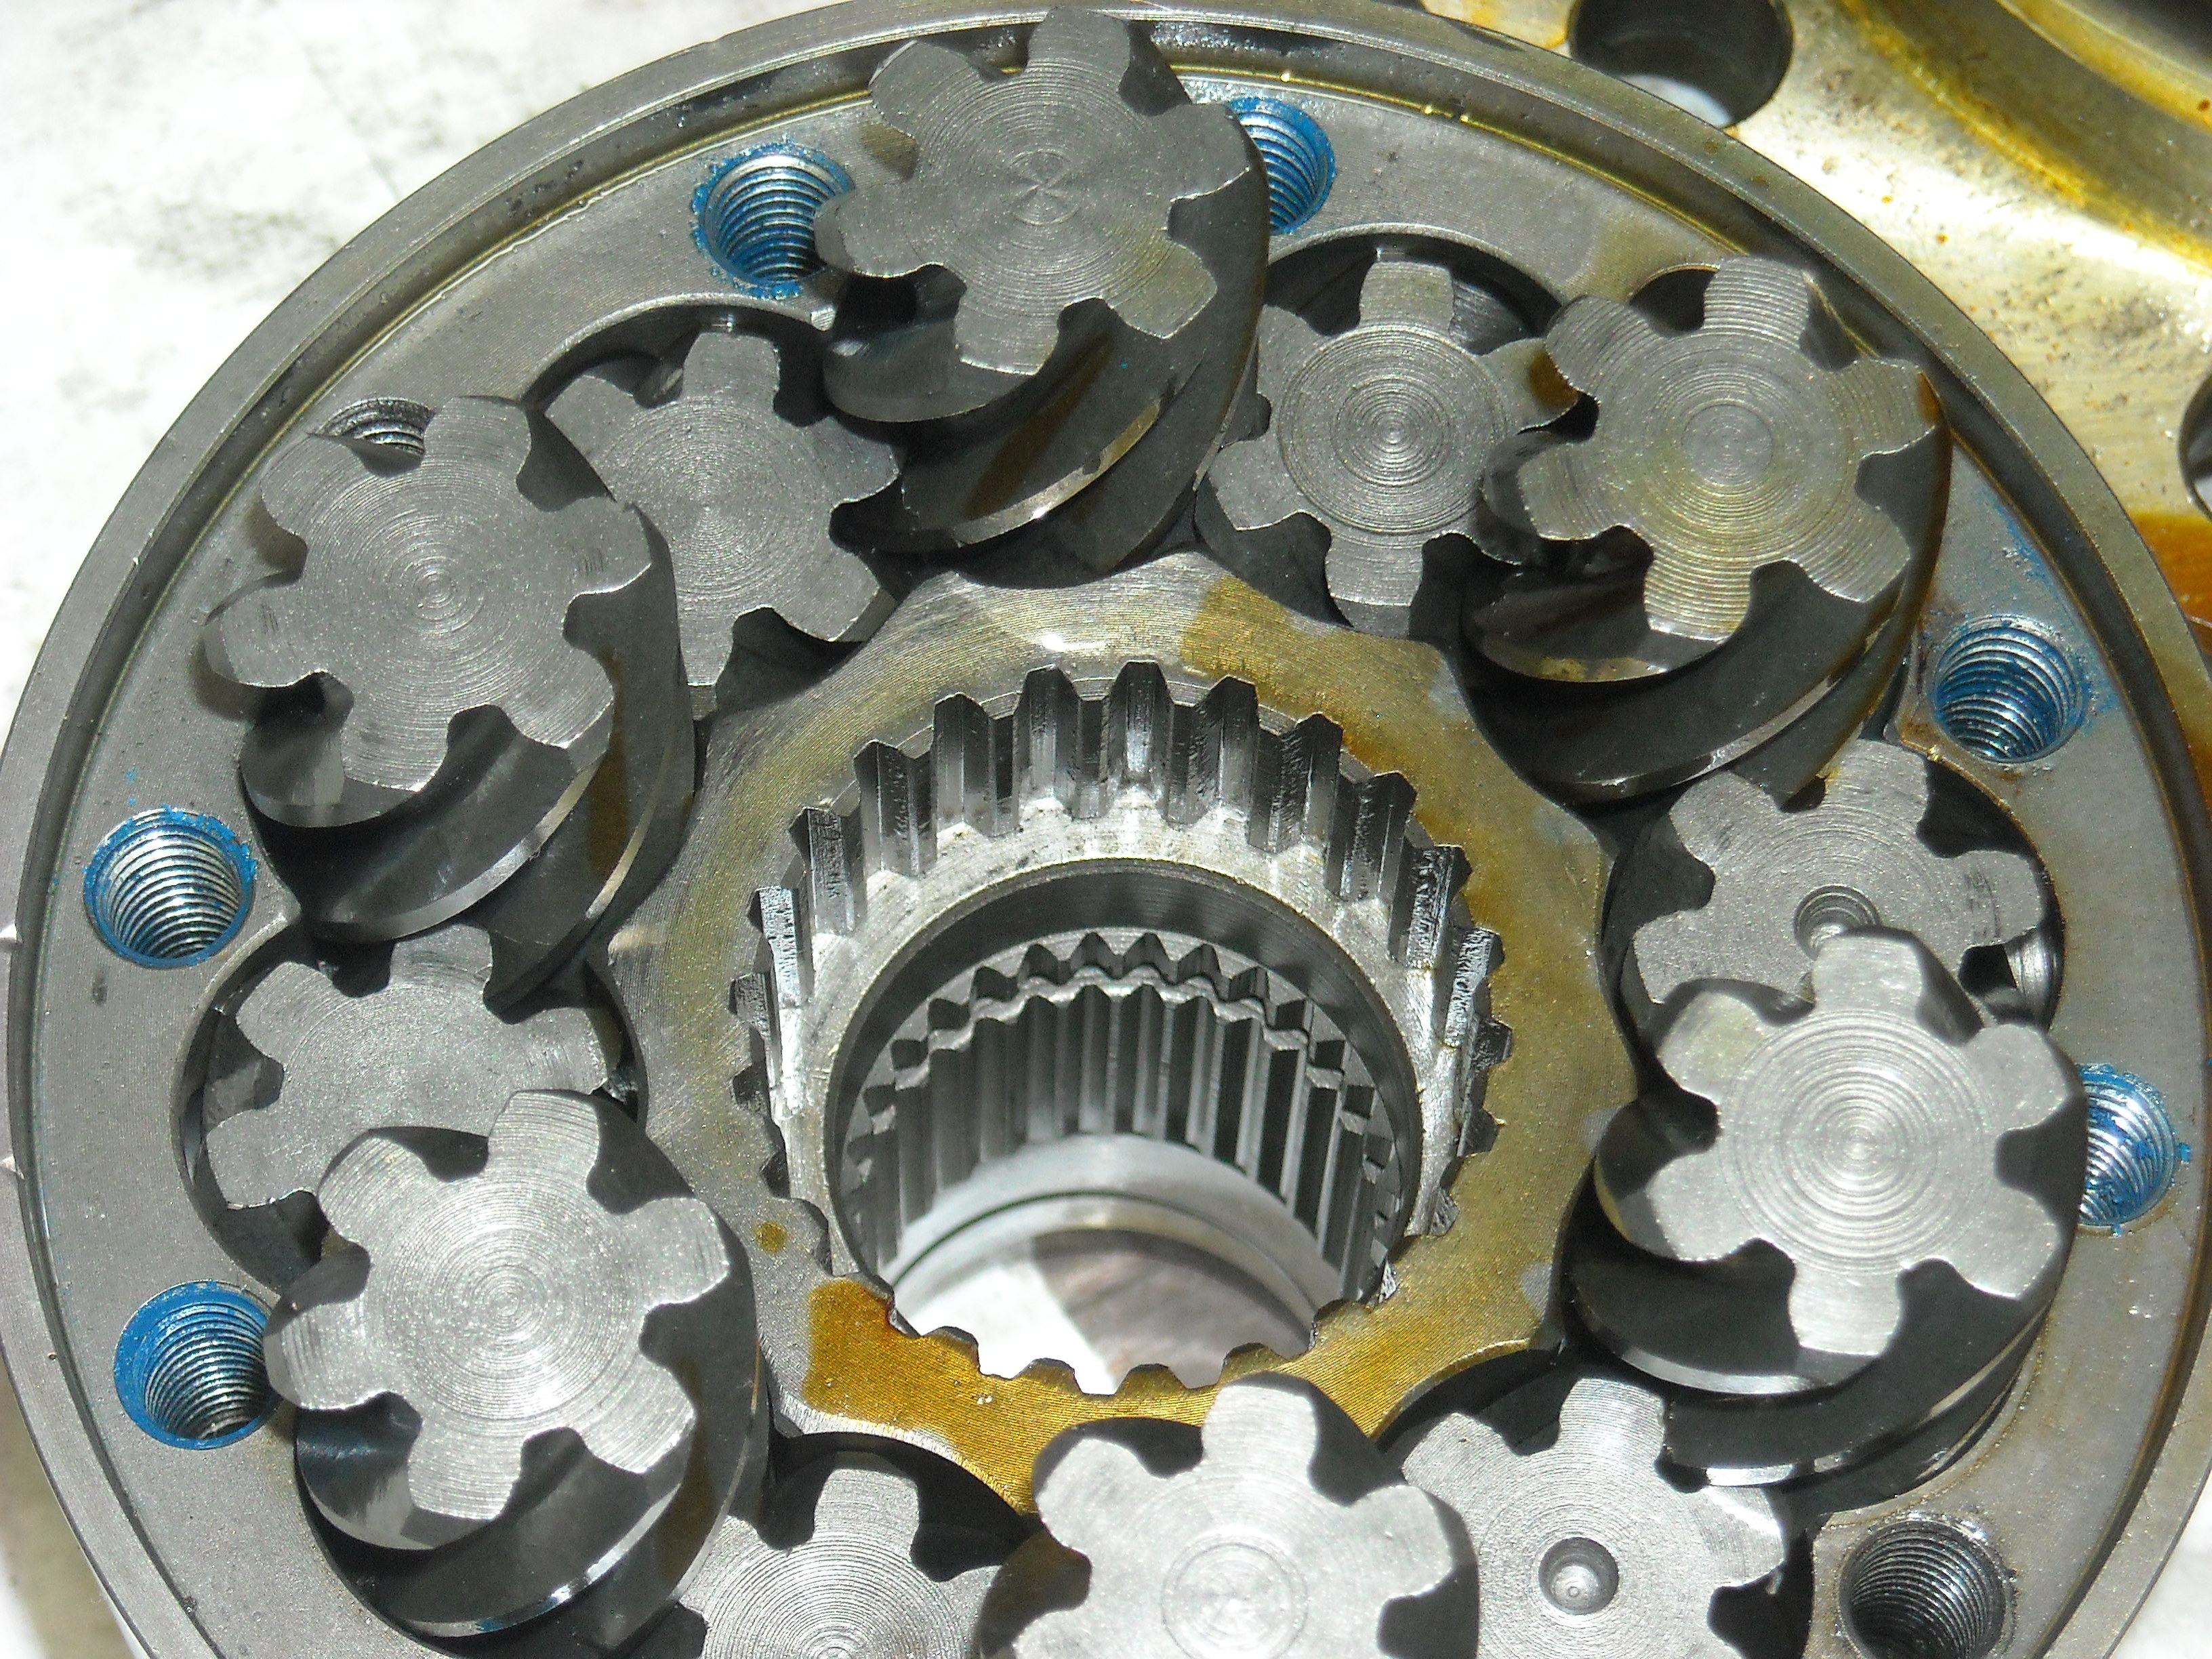
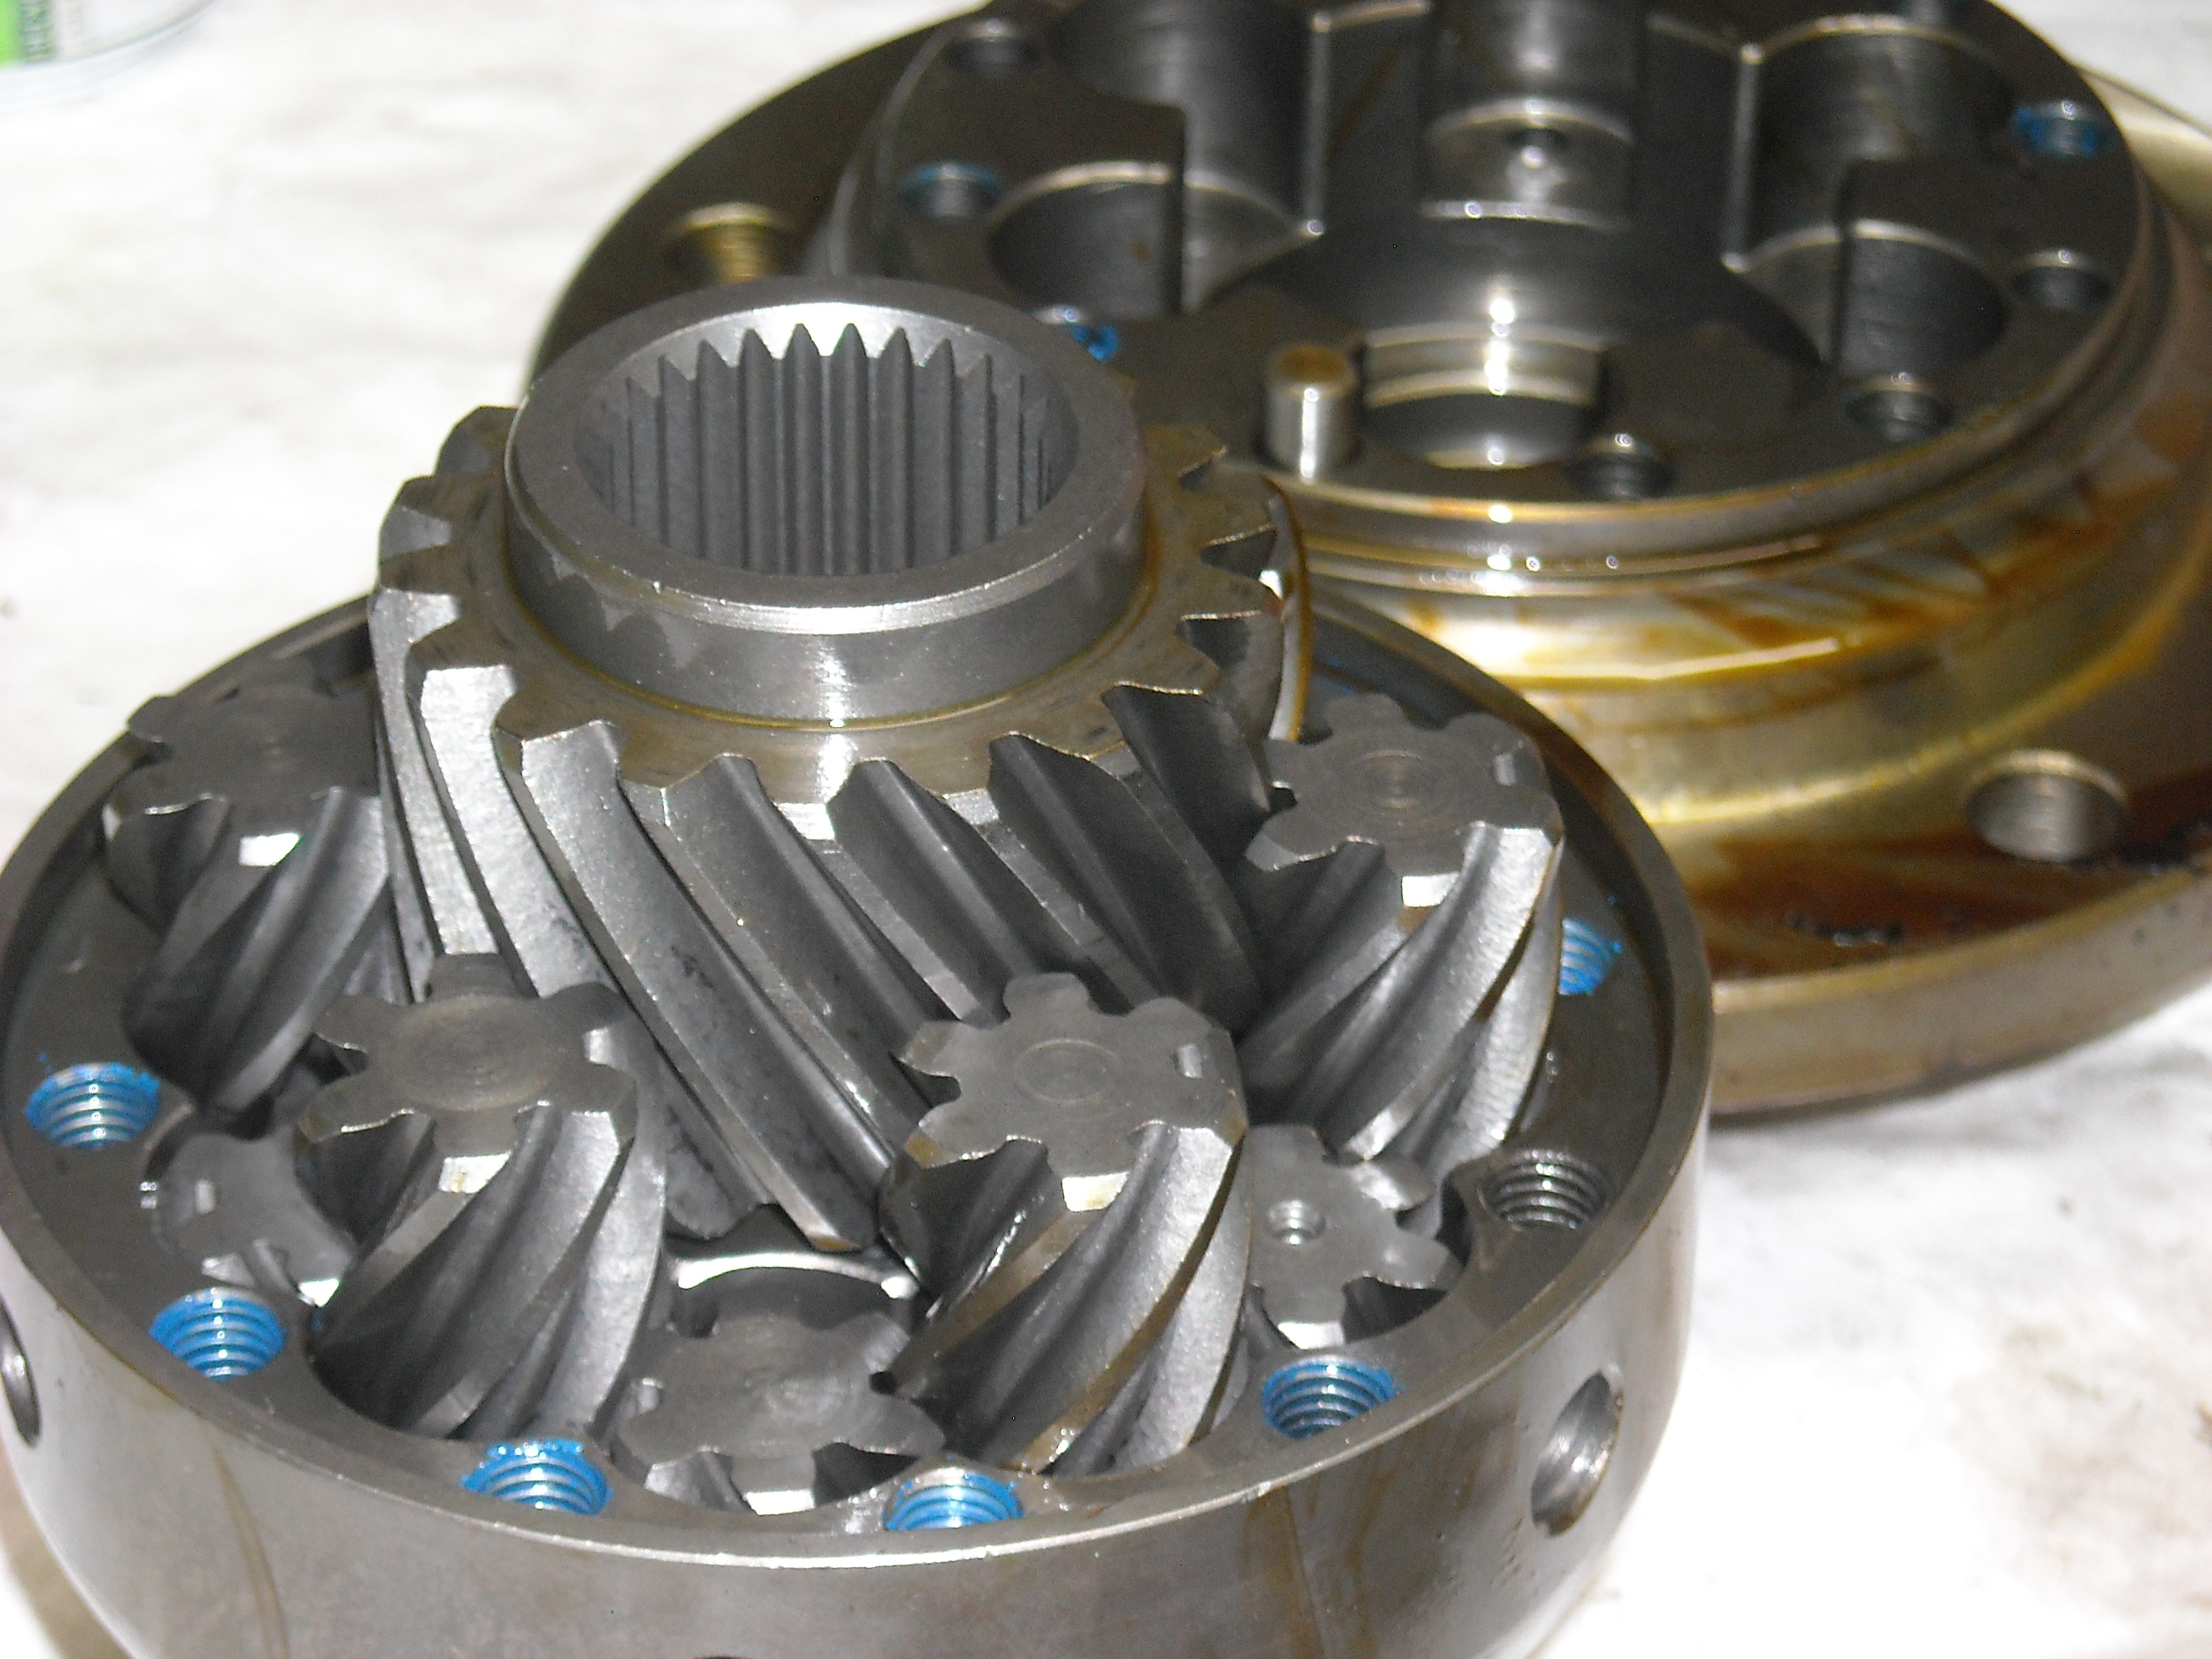
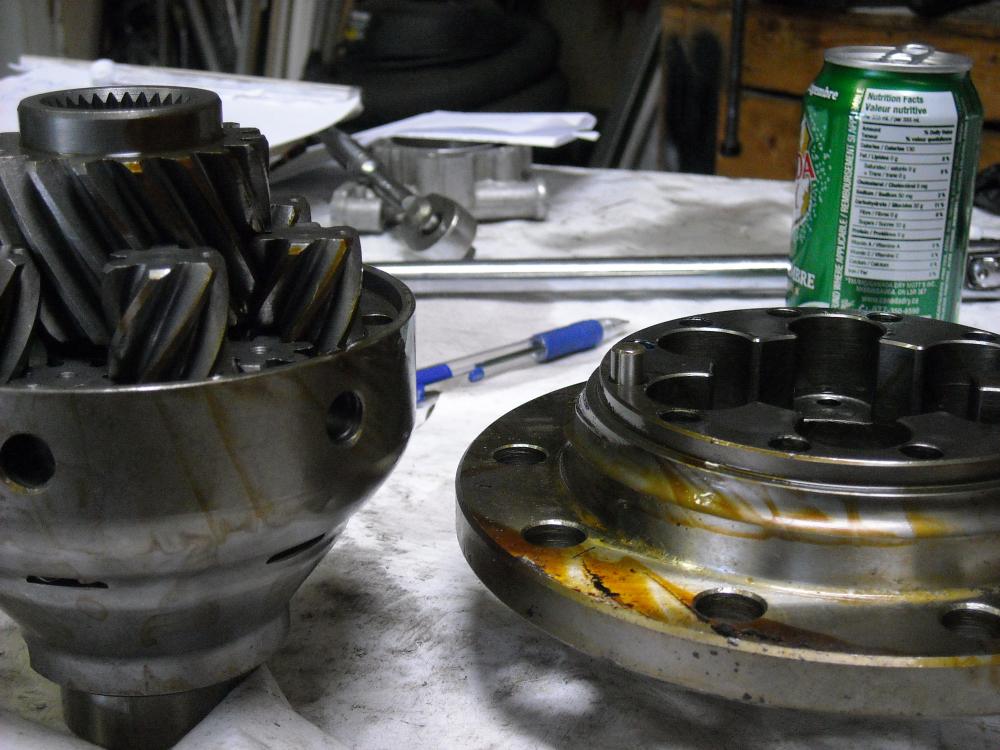
Oh it's still happening, just trying to get the 1970 Z finished and ready for sale in the spring, when that is gone I'll have some money and space to work on the ///MZ. I was just looking at this lovely 240Z, http://www.speedhunters.com/2016/02/os-giken-power-americas-exotic-240z/ I'm having a hard time believing those numbers, 376hp, 281 ftlb torque at rear wheels from a 3.3L with carbs. Granted, you have a team of very talented guys and probably a bottomless budget and I suppose the torque number could be accurate but the hp sounds a bit puffed up. This engine that I'm using is the same configuration with 3.5L and FI through 6 independent TB and could get near that hp without a turbo. Rossiz, these pics of the OBX limited slip diff are for you, I had to disassemble it and clean up the hardened on lube they use at the factory, flip the gears 180 degrees and replace the soft cone washers but it's already to install in the R200 diff now. Chris


 1 point
 -
1 pointIf I recall right the front case is easy to remove. No need to mess with the shifting mechanism, just remove the circlip on the input shaft bearing (under the front cover), remove all of the bolts that hold the back to the front through the adapter plate and tap the front case off. The back end will be loose and can create a gap but it can just be held on by hand. Here's a link that describes a fairly common front case swap. Your front case half to a newer gear set. I did the swap and never separated the back end, only the front. http://zhome.com/ZCMnL/tech/240SX5spd/transmission.htm I know that EuroDat replied also but my internet is crapping out so I'm just going to hit Submit Reply.1 point
-
I was part of the previous discussion. My racecar was a nightmare. It would run great for 30 minutes and then start acting up. At first, it would break up at high RPM and then after a bit more time, the engine would misfire at lower and lower RPM until it wouldn't pull at all on the straights. We changed everything including fuel pump(s), ignition, exhaust, heat shielding, carbs, etc. The only thing that worked was ditching the steel fuel rail and replacing it with rubber hose. The heat was transferring from the head into the fuel via the rail mounts. Once we made the switch, we have never had a minute of trouble with vapor lock.1 point
-
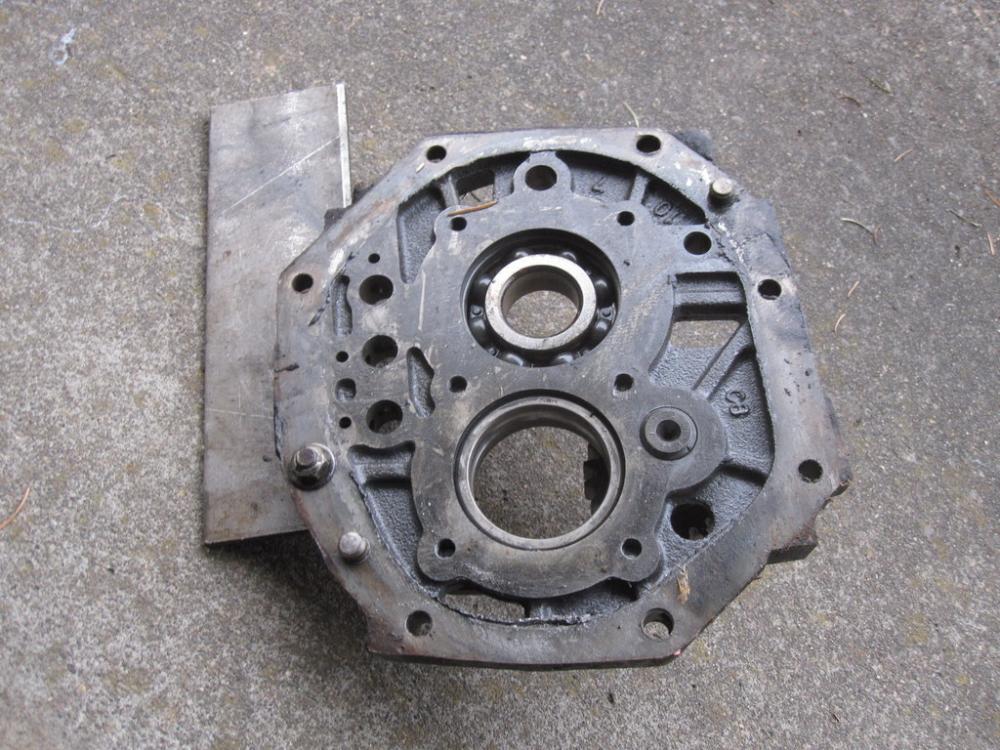
1 pointHere's a shot of the adapter plate stripped down with just the outer race. If you have space and some ingenuity, the tear down and bearing replacement shouldn't be terrible. The manual calls for special tools and large presses but people manage without them.
 1 point
 -
1 pointGoogle Crane PS20 for the coil. That was most recommended by other forum members when I did mine. I think it's 1.5 ohms, works great compared to the yellow brand I had on another car. It overheated and leaked oil in a few months. You'll need a zx cap and button, they're bigger. You will have a larger plug gap also. I bought all my stuff from amazon.com, best prices at the time.1 point
-
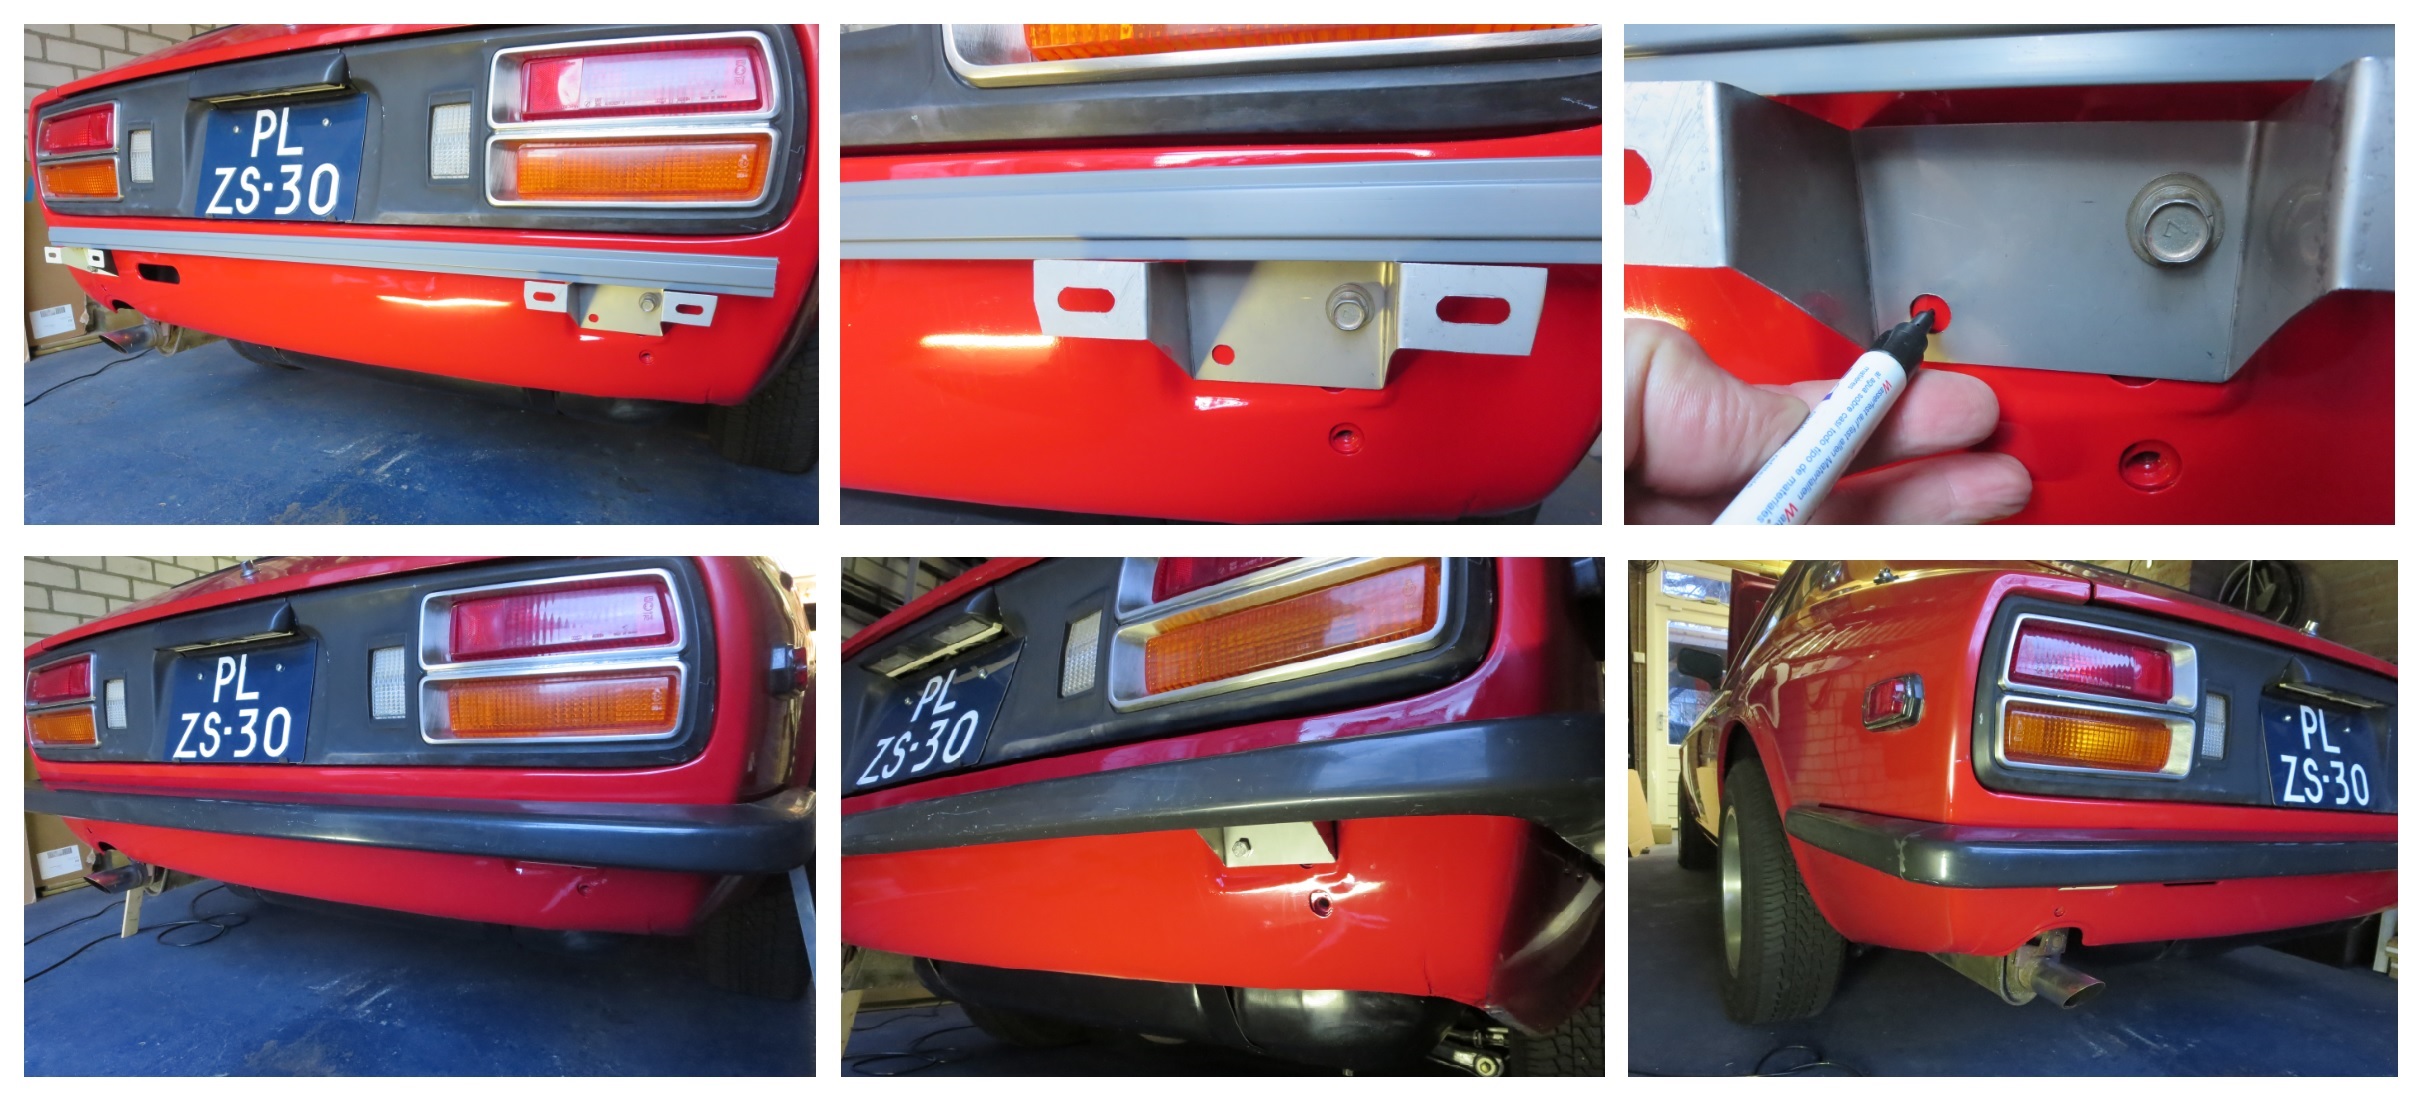
Fitted the test brackets today. Thanks to CanTechZ and Grannyknot for the measurements. Their measurements made it easy and took a lot of the trial and error out of it. Here are some photo's of the fitting. The first row is measuring where to drill the hole for the right side bracket. My 280Z has the later valance panel with the strange vertical row of bolt holes. I need to finish some drawing work and then I'm ready to make some propper brackets. If anyone is interested, let me know. I already have three plus myself.
 1 point