


Topics Last 30 Days
Showing topics, images, events and files posted in for the last 28 days.
- Past hour
-
 If someone is looking for an original Bosch version of the 280Z auxilary air valve here is one in NOS condition. Its for a 1976 Porsche 924, but it's a very similar system. Marktplaats≥ Lucht by-pass regelaar Porsche 924 ('76-'88) — Motor en...Lucht by-pass regelaar Porsche 924 ('76-'88)Lucht by-pass regelaar Porsche 924-Porsche 924, 2.0liter-Voor koude start regeling (lucht)-Bosch-Getest en
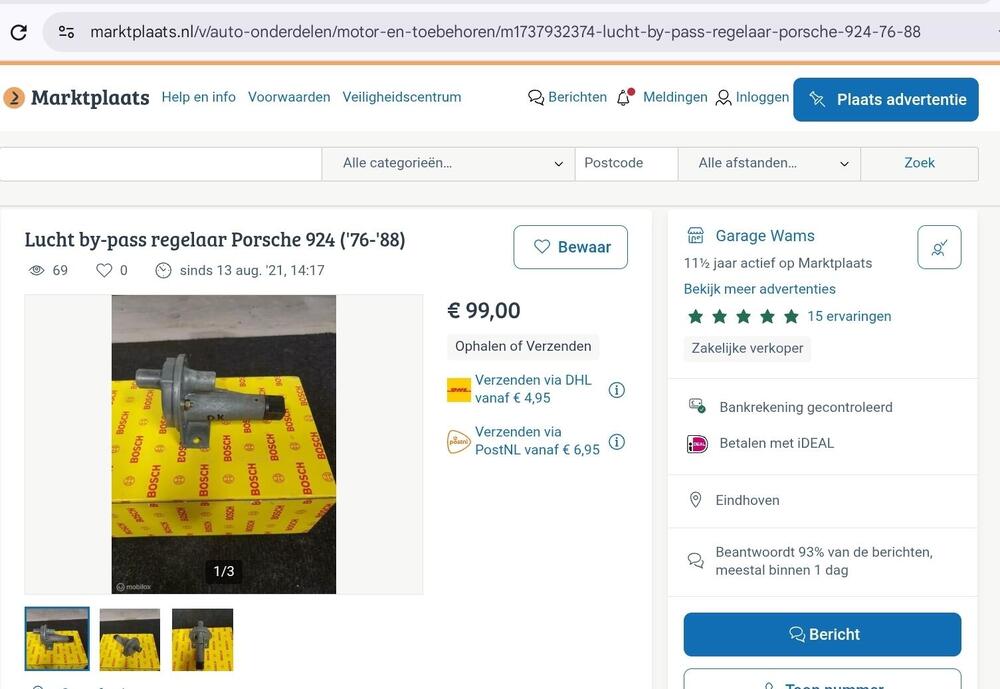
- Today
-
 I haven't messed with that flasher, but I have a couple ideas... First, yes, it is completely conceivable that the electronic flasher is susceptible to polarity issues. I'd certainly make sure you have it wired with the load on the "L" pin and power on the "+" as shown in that diagram. I found a couple other pics of that flasher from other vendors, and the mounting tab is not electrically connected in any way. So forget about the below. Second, does that "two wire" flasher need to be mounted with it's tab attached to ground? In other words, is it really a three wire flasher, but they don't count the third wire because they might be making a ground connection through the mounting tab? Just some ideas.
 -
 They definitely were. Did that cause the brakes pads to tighten on the rotors? There was some brake dust everywhere. I ended up doing 3 things at once, flushing the brake fluid. Disassembled the calipers, and repack and set the wheel bearings correctly. The wheel bearings heating up may have caused air in the brake fluid to expand and tighten the brakes, I don't know. I just finished it off by adjusting the pedal to the floorboard distance, it was 7", now it's 8". Same with the clutch pedal, it was an inch off. Then set the master-vac push rod length to 3.5mm below the flange surface. I had backed everything off while 15 miles away trying to get home, not knowing what was going on. Things are looking good now.
 -
 So I just did these seals on a manual transmission. The large Oring seal seals the drive body to the transmission case. I'm not sure the little top hat seal would seal anything out. The small square sided seal goes inside the speedometer gear drive body. It seals the speedometer cog shaft. If this seal gets hard or goes bad, liquid leaks up into the cable housing until it finds a way out. Usually a crack in the speedo cable housing. I replaced mine and the floor under the car has stayed dry. I will have to check the fluid levels again soon to make sure it's still full but I believe those two seals are the solution
 - Yesterday
-
 Gang - I'm also in a classic British car restoration forum and they had a really cool thread idea that I wanted to bring here: Did you buy your Datsun brand new and you still own it to this day? If so, please post the oldest photo of you & your car in this thread, and maybe write a little story about what prompted you to buy it at the time! * Also welcome in this thread are stories & photos from Z owners where another family member (parent, grandparent, etc) bought the car new and it has stayed in the family until present day Looking forward to reading your story! I know @jfa.series1 has one!
 -
 I was given one of those years back for Christmas! That went straight in the can!😂
 -
 Darn it, you locked in my grammar error. One the. It has the same mileage now as when it had dual filters. That's good, for the engine.
-

 I am about to start on the task of adjusting the profile my Hitachi SU needles (I have SM needles installed). I read this thread in preparation: https://www.classiczcars.com/forums/topic/59153-modified-su-carb-needles-for-l28/ @240260280 has detailed knowledge on the subject which is impressive! I wish I had the tools and knowledge to do what he knows should be done. Instead, I am thinking about rigging up a camera to record a video of the piston movement under certain real world scenarios. For that recording, I am thinking of putting black marker lines on the piston that equate to the station positions on the needle. For the real world scenarios, I would like to record a series of various part throttle applications. I am hopeful that I can locate a specific range of the needle that will need to be modified. Very generally, I believe I have good AFRs at idle, and cruise (at 50 mph for example), and at wide open throttle. On the other hand, I have lean or very lean conditions at part throttle and during closed throttle deceleration (accompanied by popping in the exhaust). I will be making some more AFR reference runs before I attempt to modify the needles to confirm. But then, I am hoping to record the videos, and remove a miniscule amount of material from the "pick up" needle stations. The segment of the needle I need to modify should be confirmed by reviewing the video. Anyone have additional recommendations or thoughts?
Looks like I never finished this thread. I replaced the front yoke and took the propeller shaft to a local shop for balancing. It was there opinion that the shop that did the shortening of the prop shaft did not balance it. When I went to install the shaft into the transmission, the "slop" (the amount I could push the yoke radially) was a lot. As an estimate from looking, I'd say I could move the yoke in any direction about .020". So, that is about a mm of movement radially. It might have been a bit more than that. So, I decided to replace the bushing that is in the tail shaft of the transmission. Looking back on it, I think the bushing developed wear because of the driveshaft being out of balance for the first 500 or so miles I put on the car. I think that the bushing was sacrificial - meaning made of softer material than the yoke. Anyway, after putting the new bushing in (removal and reinstallation of the transmission was required), the new yoke was tight (no discernable movement at all radially). With everything back together, the vibration that caused me to start this thread is gone!
I am about to start on the task of adjusting the profile my Hitachi SU needles (I have SM needles installed). I read this thread in preparation: https://www.classiczcars.com/forums/topic/59153-modified-su-carb-needles-for-l28/ @240260280 has detailed knowledge on the subject which is impressive! I wish I had the tools and knowledge to do what he knows should be done. Instead, I am thinking about rigging up a camera to record a video of the piston movement under certain real world scenarios. For that recording, I am thinking of putting black marker lines on the piston that equate to the station positions on the needle. For the real world scenarios, I would like to record a series of various part throttle applications. I am hopeful that I can locate a specific range of the needle that will need to be modified. Very generally, I believe I have good AFRs at idle, and cruise (at 50 mph for example), and at wide open throttle. On the other hand, I have lean or very lean conditions at part throttle and during closed throttle deceleration (accompanied by popping in the exhaust). I will be making some more AFR reference runs before I attempt to modify the needles to confirm. But then, I am hoping to record the videos, and remove a miniscule amount of material from the "pick up" needle stations. The segment of the needle I need to modify should be confirmed by reviewing the video. Anyone have additional recommendations or thoughts?
Looks like I never finished this thread. I replaced the front yoke and took the propeller shaft to a local shop for balancing. It was there opinion that the shop that did the shortening of the prop shaft did not balance it. When I went to install the shaft into the transmission, the "slop" (the amount I could push the yoke radially) was a lot. As an estimate from looking, I'd say I could move the yoke in any direction about .020". So, that is about a mm of movement radially. It might have been a bit more than that. So, I decided to replace the bushing that is in the tail shaft of the transmission. Looking back on it, I think the bushing developed wear because of the driveshaft being out of balance for the first 500 or so miles I put on the car. I think that the bushing was sacrificial - meaning made of softer material than the yoke. Anyway, after putting the new bushing in (removal and reinstallation of the transmission was required), the new yoke was tight (no discernable movement at all radially). With everything back together, the vibration that caused me to start this thread is gone!- Last week
 http://www.zcarblog.com/wp-content/uploads/2025/06/IMG_4916.jpg Last weekend was beautiful and sunny in the Bay Area, perfect for a quick drive in Sora, our 1967 Datsun 2000 roadster. I joined Geoff in his 1963 Lotus Elan and Glenn Chiou in his Honda Civic Type-R (FL5). http://www.zcarblog.com/wp-content/uploads/2025/06/IMG_4906.jpg We met in downtown Saratoga and admired Geoff’s recently acquired 1963 Lotus Elan S1. It’s sporting 26R-spec wider bodywork and interior pieces. http://www.zcarblog.com/wp-content/uploads/2025/06/IMG_4968.jpghttp://www.zcarblog.com/wp-content/uploads/2025/06/IMG_4856.jpg http://www.zcarblog.com/wp-content/uploads/2025/06/IMG_4844.jpg The hardtop is the most sharp-looking I’ve seen on a 60’s roadster (this is not a coupe!) and those are real Knock-on wheels. Dyno tuned at Z Car Garage. We’ll take a deep-dive into this English gem in a full report coming to zcarblog. http://www.zcarblog.com/wp-content/uploads/2025/06/IMG_4901.jpg http://www.zcarblog.com/wp-content/uploads/2025/06/IMG_4853.jpghttp://www.zcarblog.com/wp-content/uploads/2025/06/IMG_4923.jpg http://www.zcarblog.com/wp-content/uploads/2025/06/152340015382449247.jpg We headed up HWY9 to the Vista Point where the skidpad hosted some great hardware as usual, including these two Porsche (993) 911 Turbos. The Arena Red car had 195k miles and the Polar Silver car sported Advan GT wheels and Andial-built GT2-spec engine. http://www.zcarblog.com/wp-content/uploads/2025/06/IMG_4890.jpghttp://www.zcarblog.com/wp-content/uploads/2025/06/IMG_4898.jpg http://www.zcarblog.com/wp-content/uploads/2025/06/IMG_4892.jpg Vanity plate award goes to this BMW 1M: http://www.zcarblog.com/wp-content/uploads/2025/06/IMG_4924.jpg Geoff was happy to see a fellow 7-owner. This one clearly powered by a Hayabusa motorcycle engine: http://www.zcarblog.com/wp-content/uploads/2025/06/IMG_4927.jpg http://www.zcarblog.com/wp-content/uploads/2025/06/IMG_4915.jpg An NC Miata wearing Nissan Skyline R32 GT-R wheels…we thought it looked great! http://www.zcarblog.com/wp-content/uploads/2025/06/IMG_4931.jpg From there we drove down HWY9 to Boulder Creek and headed home via Bear Creek Rd. There was an usual (and welcome) number of Pre-War “Ragtime Racer” cars out and about! http://www.zcarblog.com/wp-content/uploads/2025/06/d6v42-e1749689734267.jpeghttp://www.zcarblog.com/wp-content/uploads/2025/06/IMG_4952-e1749689768840.jpg http://www.zcarblog.com/wp-content/uploads/2025/06/IMG_4972.jpg Enjoy the sights and sound of our 60’s sports cars in this video: At home, Geoff kindly indulged my obligatory driveway photos. My family also witnessed a car that’s actually smaller than the Datsun Roadster! http://www.zcarblog.com/wp-content/uploads/2025/06/IMG_4975.jpg Sora performed admirably, making many people smile this weekend. Enjoy the photo gallery below and Do It In A Datsun! http://www.zcarblog.com/wp-content/uploads/2025/06/IMG_4908.jpg View the full article
 What a fantastic shot! That could be a poster.
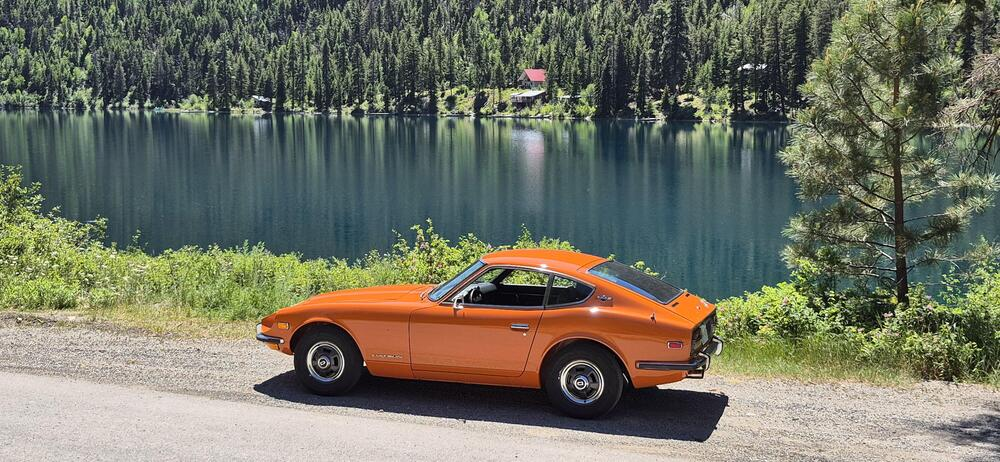
 Thanks... the New Z is awesome to drive... however I only have 800miles and need 400 more miles to brake it in. Once broken in , I can rev above 4000 RPM and drive it in a more spirited fashion.
 Yes I know. I started tearing mine apart in in 2016 and finally started reassembly about a year ago. I still have a lot to do though. John
Namerow, thanks for the input, and also thanks for the work you had done previously with the wiring. Your previous work helped me with the diagram that I've been working on. So for the comments above... First, the horn. I understand the desire to have an actual switch depicted on the diagram. And in one of my earlier revisions, I actually did have one in there. But then I took it back out because I decided that I wanted to conform more closely to the original scheme depicted in the other areas of the combo switch. By that, I mean... There aren't any actual switches shown for any of the combo switch functions. Not for the headlights, the wipers... No switches for anything. Instead, "connection" is indicated by the existence of the dot. I though it would be closer to Datsun's original scheme to have a dot connection to ground when the horn is pushed. Next, the wipers. I haven't dug into that system at all, and I'm kinda hoping that I never have to. I turned mine on and the arms move, and that's hopefully all I need to know. So, with that said... Are you confident in the switch connections you have laid out? If you are sure, I'll change the diagram to what you indicate. As for the letters in the second column, I'm in the same boat as you... I think I knew at one point, but don't remember. I'll look into it. And lastly, you are correct about the change of wire colors on the combo switch side of the connectors. Problem is that situation exists all over the car. They got better with that in the diagrams for the later years, but for the early cars, the colors on the diagrams are the "colors of the harness". I'm sorry, but I'm in no position to add all the connectors for all the devices that plug into connectors and indicate the wire colors on both sides of those connectors. Haha!!! Thanks for the help!
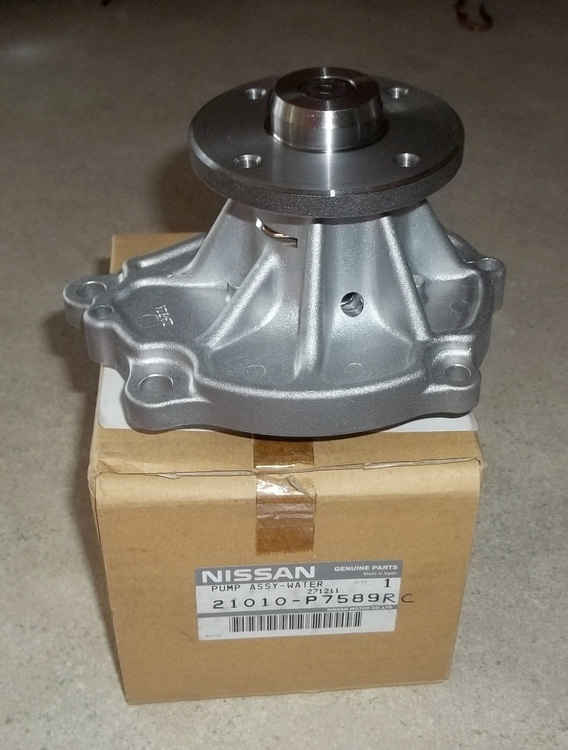
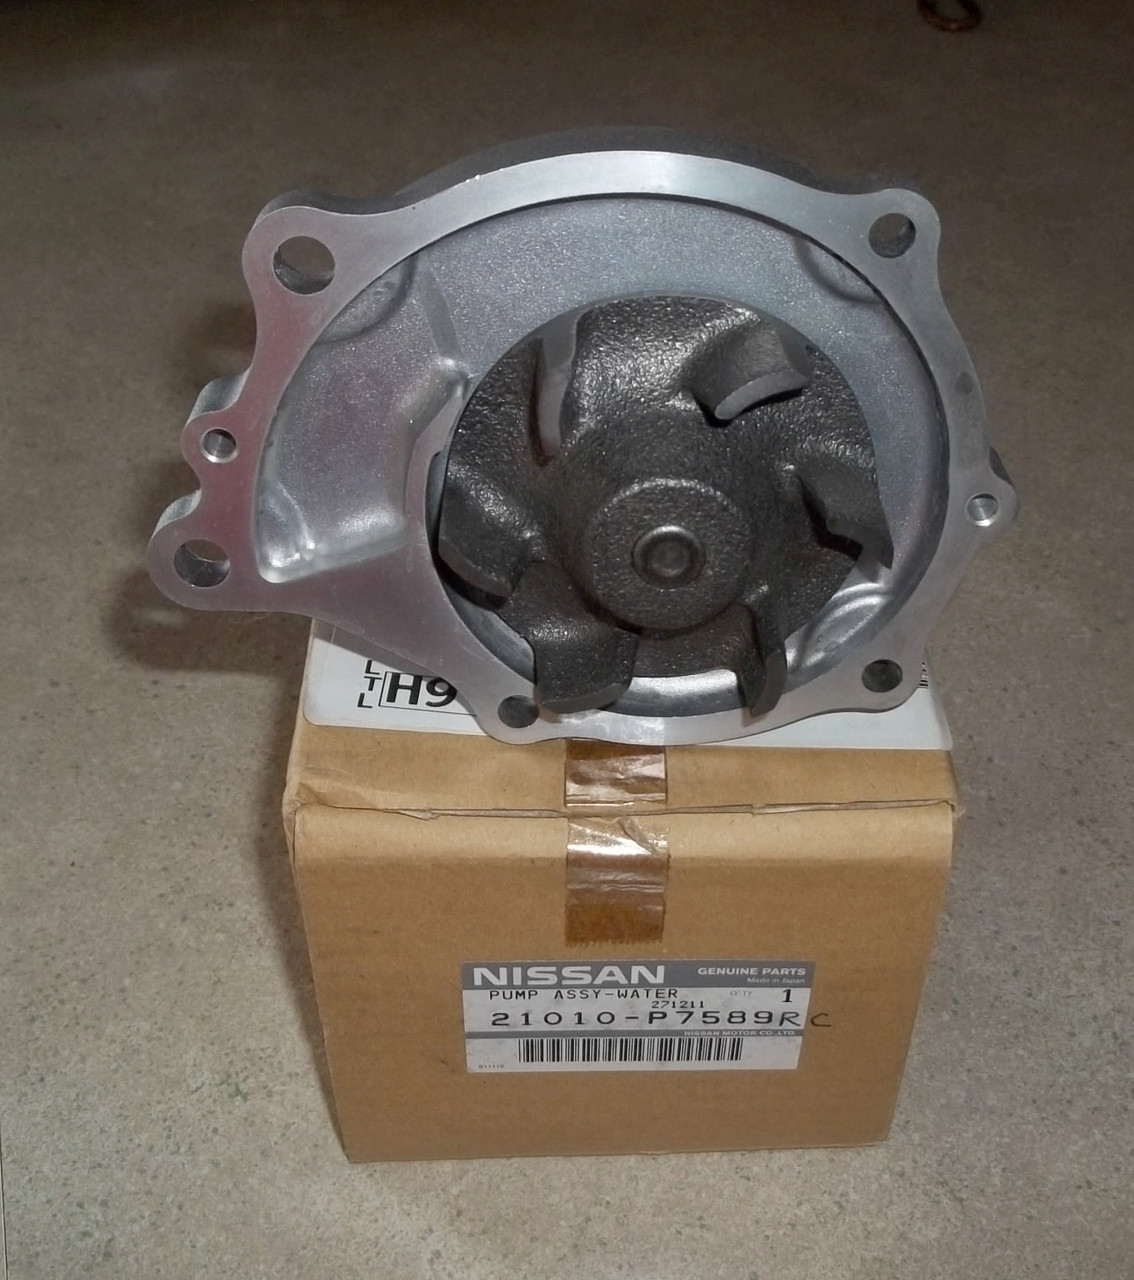
I think both those GMBs are aftermarket and agree that an Aisin with the cast iron impeller will be as close to OE that you'll find today unless you can find one using the part number on this box.
Yes I know. I started tearing mine apart in in 2016 and finally started reassembly about a year ago. I still have a lot to do though. John
Namerow, thanks for the input, and also thanks for the work you had done previously with the wiring. Your previous work helped me with the diagram that I've been working on. So for the comments above... First, the horn. I understand the desire to have an actual switch depicted on the diagram. And in one of my earlier revisions, I actually did have one in there. But then I took it back out because I decided that I wanted to conform more closely to the original scheme depicted in the other areas of the combo switch. By that, I mean... There aren't any actual switches shown for any of the combo switch functions. Not for the headlights, the wipers... No switches for anything. Instead, "connection" is indicated by the existence of the dot. I though it would be closer to Datsun's original scheme to have a dot connection to ground when the horn is pushed. Next, the wipers. I haven't dug into that system at all, and I'm kinda hoping that I never have to. I turned mine on and the arms move, and that's hopefully all I need to know. So, with that said... Are you confident in the switch connections you have laid out? If you are sure, I'll change the diagram to what you indicate. As for the letters in the second column, I'm in the same boat as you... I think I knew at one point, but don't remember. I'll look into it. And lastly, you are correct about the change of wire colors on the combo switch side of the connectors. Problem is that situation exists all over the car. They got better with that in the diagrams for the later years, but for the early cars, the colors on the diagrams are the "colors of the harness". I'm sorry, but I'm in no position to add all the connectors for all the devices that plug into connectors and indicate the wire colors on both sides of those connectors. Haha!!! Thanks for the help!
I think both those GMBs are aftermarket and agree that an Aisin with the cast iron impeller will be as close to OE that you'll find today unless you can find one using the part number on this box.
 What numbers are you looking to see? I do not know how to decipher the numbers on the glass. Thanks, Dennis
 Sorry for the delay in getting back to you. JE Piston Manufacturing started business in the early 1900's. They are known for their exceptional forging and machining quality. Thank you for your response. Mike.......datsun79z@aol.com
Very creative! Have you tried it to see how well it holds fluid?
The stop screw catches the front piston like this: And the rear piston position is established by the retainer clip in the back: So the distances between those two reference locations and the "forward-most" seals on each piston is what's important. It looks like the front piston is really close, but the rear one is not. Might be "close enough", might not.
Sorry for the delay in getting back to you. JE Piston Manufacturing started business in the early 1900's. They are known for their exceptional forging and machining quality. Thank you for your response. Mike.......datsun79z@aol.com
Very creative! Have you tried it to see how well it holds fluid?
The stop screw catches the front piston like this: And the rear piston position is established by the retainer clip in the back: So the distances between those two reference locations and the "forward-most" seals on each piston is what's important. It looks like the front piston is really close, but the rear one is not. Might be "close enough", might not.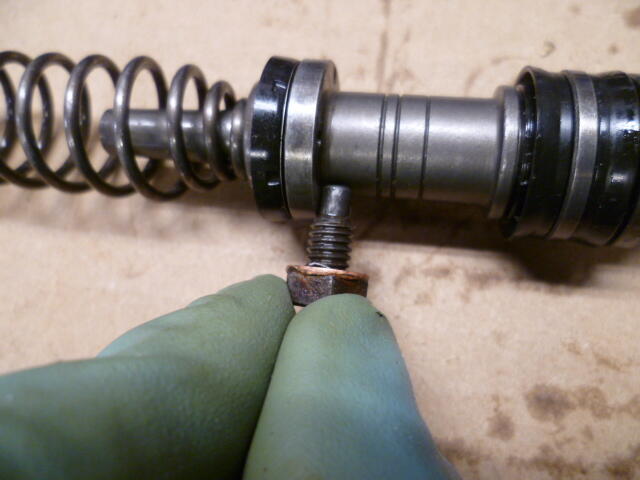
- Earlier
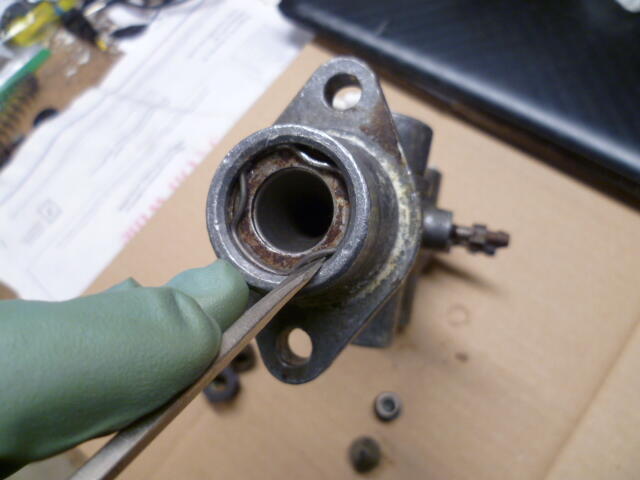
 I was able to get these out with a small hook. I think the corrosion was holding them in. Once I got it open I found out I have the wrong rebuild kit. I have 46020-C6126, which is for the Tokico . This is a Nabco, which uses totally different residual valves. I think the kit part number is 46011-P6525.
 Find a weather resistant maxi fuse (or ANL fuse) holder if you are planning to mount the fuse holder where the current fusible link holders reside. I also suggest using ferrules on the wire ends to improve clamping force on the wires. You will need to find a ferrule crimper that can handle the wire sizes (relatively easy to find on Amazon). Here is an example of a marine ANL fuse holder: https://www.crutchfield.com/p_867FUSEDIS/Wet-Sounds-WWX-FUSE.html
Good luck, and just let us know if there are still unanswered questions.
Perfect. I just couldn't see the bottom washers in the other pics. Looks great.
Find a weather resistant maxi fuse (or ANL fuse) holder if you are planning to mount the fuse holder where the current fusible link holders reside. I also suggest using ferrules on the wire ends to improve clamping force on the wires. You will need to find a ferrule crimper that can handle the wire sizes (relatively easy to find on Amazon). Here is an example of a marine ANL fuse holder: https://www.crutchfield.com/p_867FUSEDIS/Wet-Sounds-WWX-FUSE.html
Good luck, and just let us know if there are still unanswered questions.
Perfect. I just couldn't see the bottom washers in the other pics. Looks great.


Important Information
By using this site, you agree to our Privacy Policy and Guidelines. We have placed cookies on your device to help make this website better. You can adjust your cookie settings, otherwise we'll assume you're okay to continue.