


.JPG.cfcada9cf1c1b502df3f5f2f2ca3ff36.JPG)

SteveJ
Community Member
-
Joined
-
Last visited
Everything posted by SteveJ
-
You'll probably need to buy one off ebay and get it rebuilt if you don't already have a distributor. Not enough rebuildable cores were sent back, so the supply dropped.
-
Actually, I only know the two women who were inside: Anna (Randy's girlfriend) and Gayle Brock.
-
It is for positive crankcase ventilation. There should be a hose going from that to the PCV valve at the balance tube. They are parts 3 & 5 on this page: https://www.carpartsmanual.com/datsun/Z-1969-1978/engine-240z-260z/emission-control-device. Hose: https://www.thezstore.com/page/TZS/PROD/15-6211 Valve: https://www.rockauto.com/en/catalog/nissan,1972,240z,2.4l+l6,1209169,exhaust+&+emission,positive+crankcase+ventilation+(pcv)+valve,5052 If you plug the PCV, you risk pressurizing your block and finding out how weak your oil seals are.
-
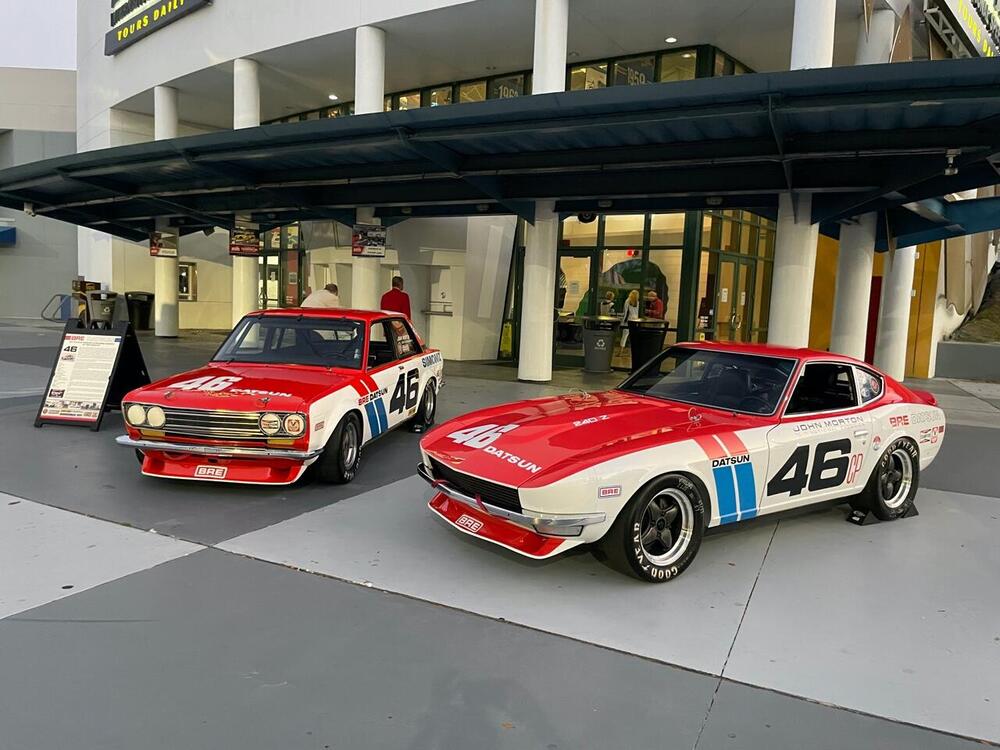
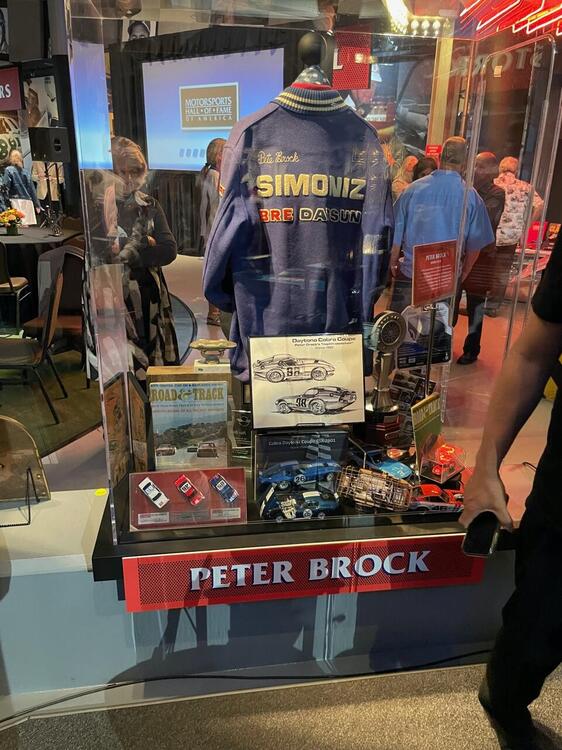
Courtesy of Randy Jaffe The black tie ceremony is tonight.


-
And don't forget to perform this test as illustrated in the FSM. I think if you get liquid, the test indicates failure.
-
I had a few minutes to spend in the garage this evening, so I ran a quick load test on the alternator. With the headlights on and fan on HIGH, voltage went from about 14.4 down to 14.0. It does have an electric fuel pump and GM ECU for the fuel injection, so the load would be comparable to a 280Z at idle. The real test will be for me to take it on a drive. The old VR/alternator would start out fine, but the voltage would decay as the trip went on, to the point that it was around 12.8 on the voltmeter at idle...No charging, but no draining.
-
OTOH, pushing in from the vent line would indicate whether or not there is an adequate seal on the filler cap. Unless the tech had the right adapter, that could have been the source of the leak.
-
And if you have an air compressor or tire inflator, you can use it for the air source. Just make sure you dial the regulator down on the compressor.
-
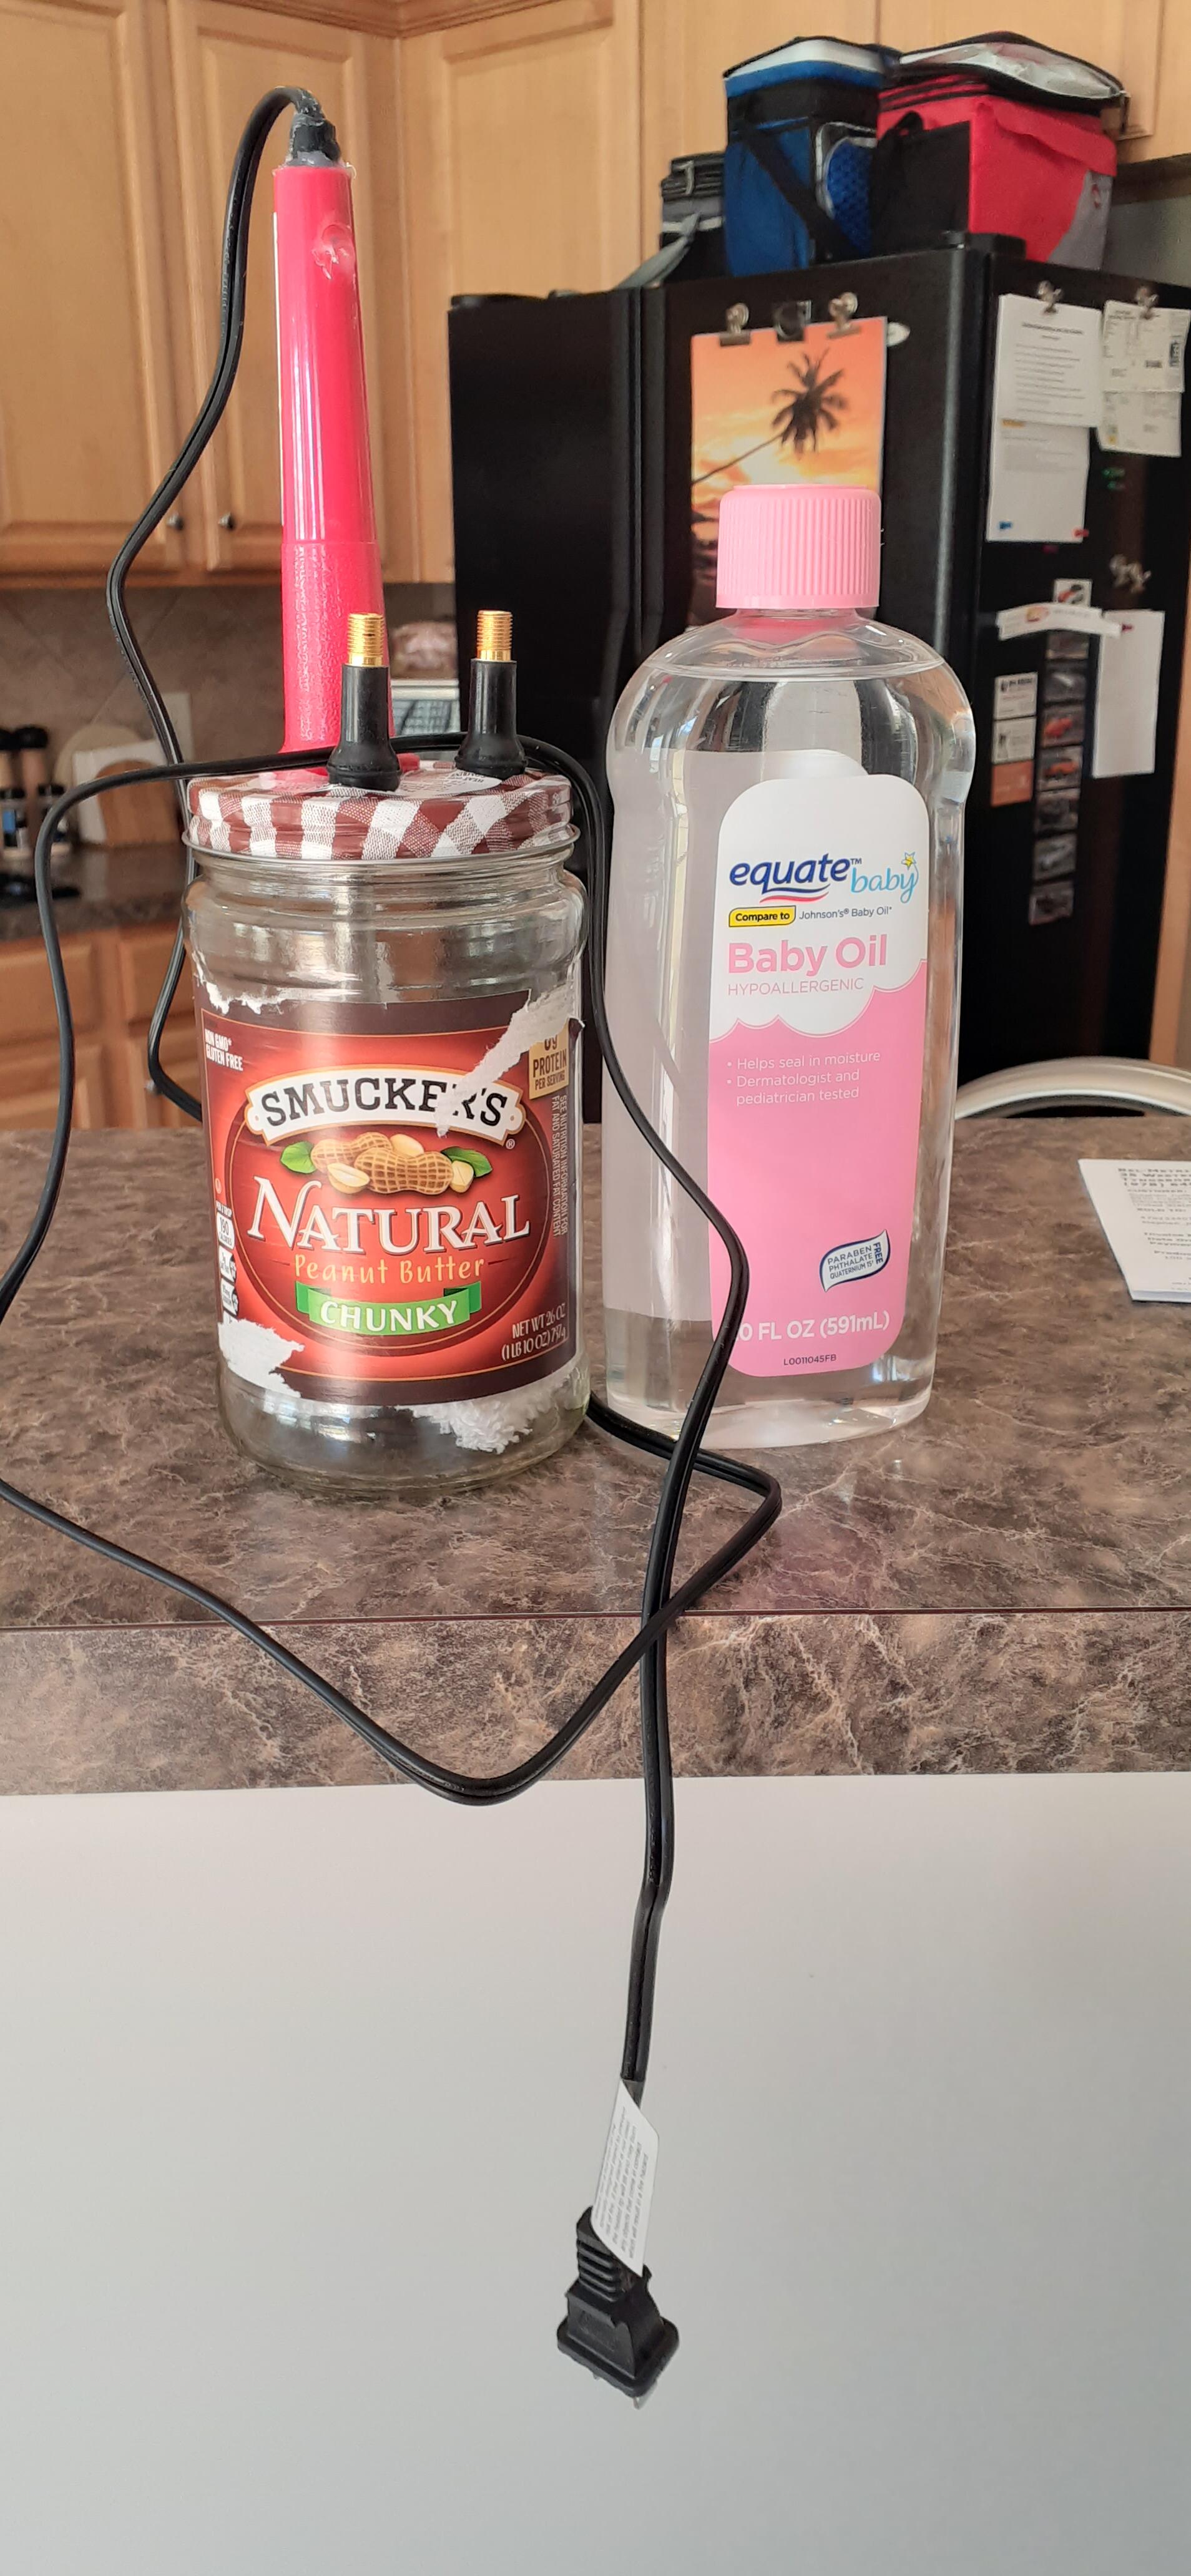
I made my own smoke machine, too. Buy some tire valve stems, and remove the valves inside. I bought the soldering iron at Walmart.

-
Make sure the relay is good. Make sure you have good grounds for the horns, that is no paint under the mounting point, since they ground to the chassis. Make sure the wiring up front isn't corroded. You should have seen how bad it was on my 240Z when I went to get her back on the road last summer. Make sure the grounding is good between the horn button and the steering column. (Added) Make sure the fuse is good.
-
@maximus35 - Next time you get to hunt for the customers. You can't expect me to drag them to you. 😉
-
http://www.zzxdatsun.com/ - If it's not in his catalog, call him.
-
PM sent with a possible source for you.
-
Mike, don't let math enter into the argument. I have costed out the materials to make some parts, and I understand exactly what you mean.
-
It sounds like you're in a tricky position unless you can tie the radiator support down to the floor or at least to something heavy.
-
Do you think you could fit in a set of spring compressors like this to get the suspension to compress? https://www.harborfreight.com/macpherson-strut-spring-compressor-set-63262.html Photos of how you are trying to do it would help with getting suggestions. Is the engine in the car? When I replaced front bushings a lifetime ago, I used a floor jack to lift the control arm into place. The car was on jack stands on the front. The rear wheels were sitting on the ground.
-
Not fast enough. The alternator is spinning better this morning than it did yesterday. Perhaps with no load, it was the field providing the resistance to movement. Anyway, I'll move to some in situ experiments and check the P terminal on the 240Z's alternator.
-
So I turned the alternator with a drill and probably spun it faster than it should go. The bearings are shot. All in the name of science! I would see peaks around 6VAC on the P terminal, so it is definitely unrectified. The FPR signal for the brake warning lamp check relay is probably the way to go.
-
I thought it might be unrectified. The first test is to see if it registers DC voltage on a voltmeter. I was also going to test it with a SPDT relay. If it pulls in the coil and holds, it works. I might even play with using a diode to make it a pulsed signal if it is sinusoidal. I could even do a test rig in my 240Z to see if it holds up for some trips. I could rig the contacts for the relay to a taillight socket with an LED bulb to see if it stays bright. A dim LED would indicate the contacts are cycling. Anyway, I've put a DC coil in an AC circuit before. The sound isn't pretty. Good point on the FPR. That sounds like the preferred solution if the P terminal doesn't pan out. The only advantage of the P terminal is that it you wouldn't have to do much outside of back the pin for the yellow wire out of the the T connector and put it in a single pin connecter.
-
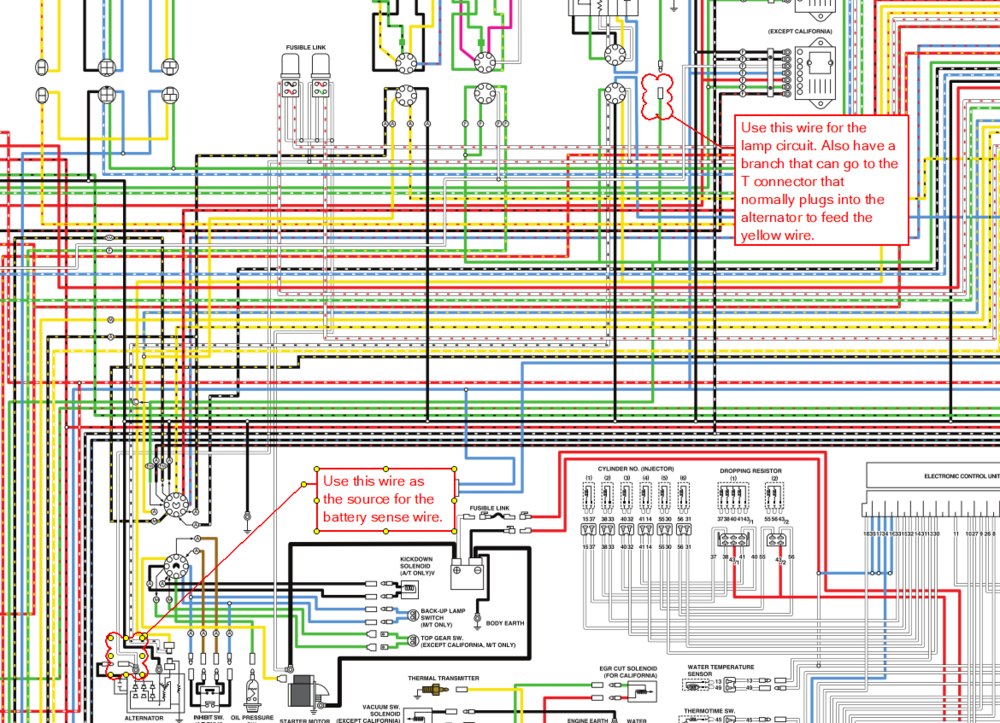
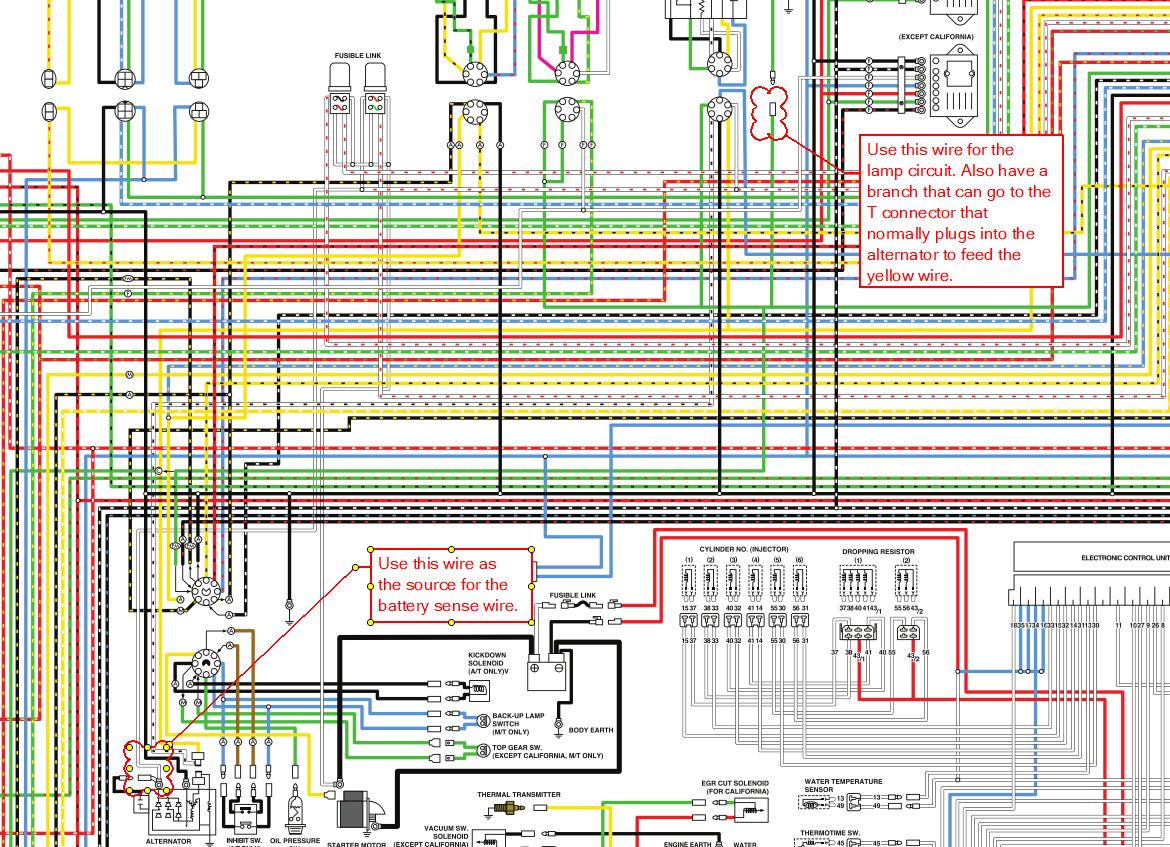
Here's how the brake warning light circuit works in the 76: The green wire (ignition on) goes to the brake warning light in the speedometer. It comes out as green/yellow. There are 3 branches for the green/yellow wire. One branch goes to the brake pressure differential switch. The switch grounds the circuit when there is a problem. The second goes to the parking brake. The wire is grounded if the parking brake handle is lifted. The third branch goes to the brake warning lamp check relay where it goes through a normally closed contact that connects the wire to ground. The relay coil is energized by the neutral from the alternator, opening the contact when the engine is turning the alternator fast enough. The benefit is that it does light up if the engine stops turning when the key is on, as @Captain Obviouspointed out. This wouldn't be a plug-and-play solution, but here is one idea: Connect the yellow wire to the switched source. At the brake warning lamp check relay re-wire the circuit so that the yellow wire goes to the 85 and 87 contacts of a time on delay relay. The 86 contact would be grounded, and the 30 contact would go to the same pin on the brake warning lamp check relay that the yellow wire formerly connected to. The warning light would come on for a few seconds when starting the car and go out. The downside is that it would not respond to engine dying. Solution 2: Connect the yellow wire to the switched source. Replace the oil pressure sending unit with a 78 style. Run the normally open contact at the sending unit to the brake lamp warning check relay and put it on the ground for the coil. (If the relay is grounded on the chassis, the relay would need to be replaced with a modern SPDT relay.) The green/yellow and ground wires would stay on the normally closed contacts. At least the old functionality would be maintained. Solution 3?: (I'd have to do some testing.) ZX alternator only Connect the yellow wire to the P terminal. Done. I'll see if I can't bench test #3. I have a spare internally regulated alternator handy. I'll need to give it the lamp and sense signals and spin the alternator with a drill to see if I can get good voltage out the P terminal.
-
I didn't service the u-joints when I should have. It tore up the yoke, so I just replaced it with a 280Z driveshaft.
-
I've used a 280Z driveshaft in my 260Z for almost 6 years. I guess you can't believe the BS you read on the internet.
-
I think you're right, Bruce. So, it would take more modification, like using a 78 oil pressure sender to get a signal that the engine died.
-
I looked at the brake warning light circuit. The relay is energized by the neutral. I'm not sure why it is important to have the brake light illuminated on only while the alternator is turning. Do you know? According to the wiring diagram, there is a white wire that goes to the alternator. That should be the source for the sense wire. There is also the green wire near the VR that goes to a condenser. That should be the source for the lamp wire. That could also be connected back to the yellow wire for the brake light relay. It wouldn't be quite as simple as cutting some wires and splicing, but it could be made to work with the ZX alternator or Frontier alternator. Unplug the old voltage regulator to prevent problems, and you're done.
-


Important Information
By using this site, you agree to our Privacy Policy and Guidelines. We have placed cookies on your device to help make this website better. You can adjust your cookie settings, otherwise we'll assume you're okay to continue.