.JPG.cfcada9cf1c1b502df3f5f2f2ca3ff36.JPG)

SteveJ
Community Member
-
Joined
-
Last visited
Everything posted by SteveJ
-
14 AWG will be fine.
-
The connection to the blower will need this connector: http://www.vintageconnections.com/Products/Detail/79
-
Thanks, I don't recall seeing that issue discussed.
-
One of the tangents that I travelled down when I was cleaning up was researching the company that made the VR, Furuhashi. I actually found someone selling a new Furuhashi 260Z VR online.
-
Thanks for the suggestion @Zed Head& @Dave WM, I'll try that soon. I think I played with putting the lights on, but with LEDs everywhere, that isn't much of a draw. I'll have to turn on the wipers, blower motor and stereo to add some load. Stay tuned.
-
If the brake check warning lamp works with the ZX alternator, I don't see why it wouldn't work for the Frontier alternator. I should note that I did not have any backfeeding issues with the Frontier alternator like the 240Z has with the ZX swap. Since I didn't experiment with swapping a ZX alternator in first, I would have to study the wiring diagrams in more detail to see if the black/white wire in the 260Z that I used for the switched source is wired differently than how the similar wire is in the 240Z.
-
Do we ever? 😉
-
Are you thinking it's documented wrong in the parts manual and FSMs?
-
At least it's not as challenging to change as when it's under the dash.
-
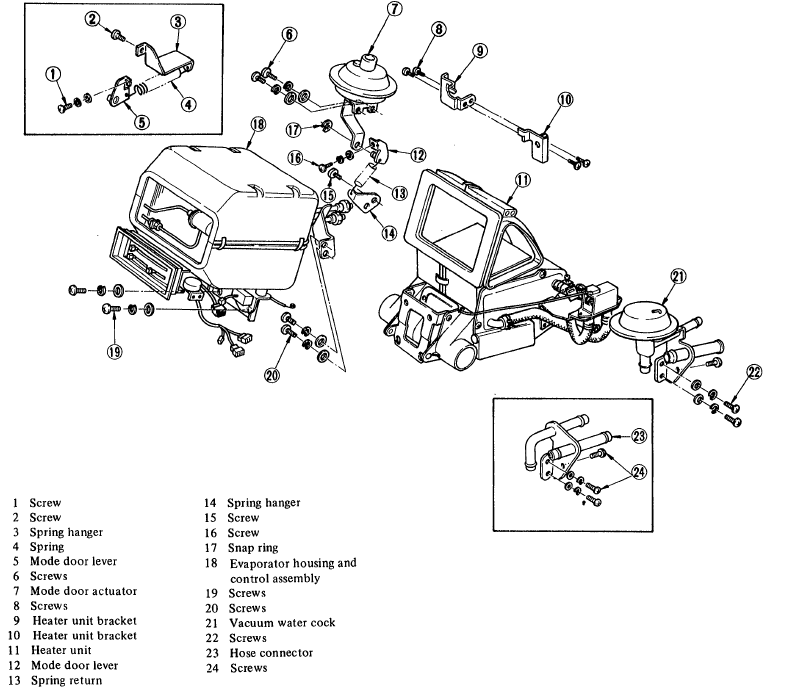
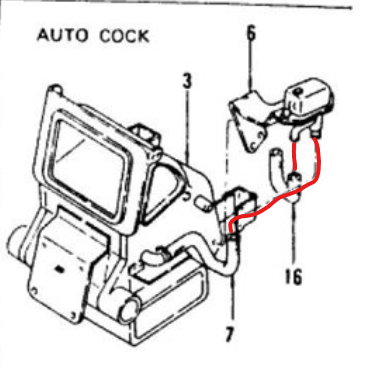
This is from AC-59 in the 77 FSM. You can see the U shaped hose connecting on the opposite pipe from where you have it. The U shaped hose is part number 16 in the image in my previous post.
-
I looked at the 77 FSM and the parts manual. http://www.carpartsmanual.com/datsun/Z-1969-1978/electrical/car-heater/from-aug-73 I think you have it backwards. This is from the parts manual with my enhancements in red.
-
Yeah, I had the same issue when I looked at the thread on my phone, too.
-
I just like the flat sides on the ones I found on Amazon. I'll have a set in a couple of days.
-
So, @Zed Head, it appears as though it's not that difficult to do this swap, despite what we've seen in other threads. It's mostly having the knowledge about what should connect to what. It only took me 20+ years to be fully comfortable in that realm.
-
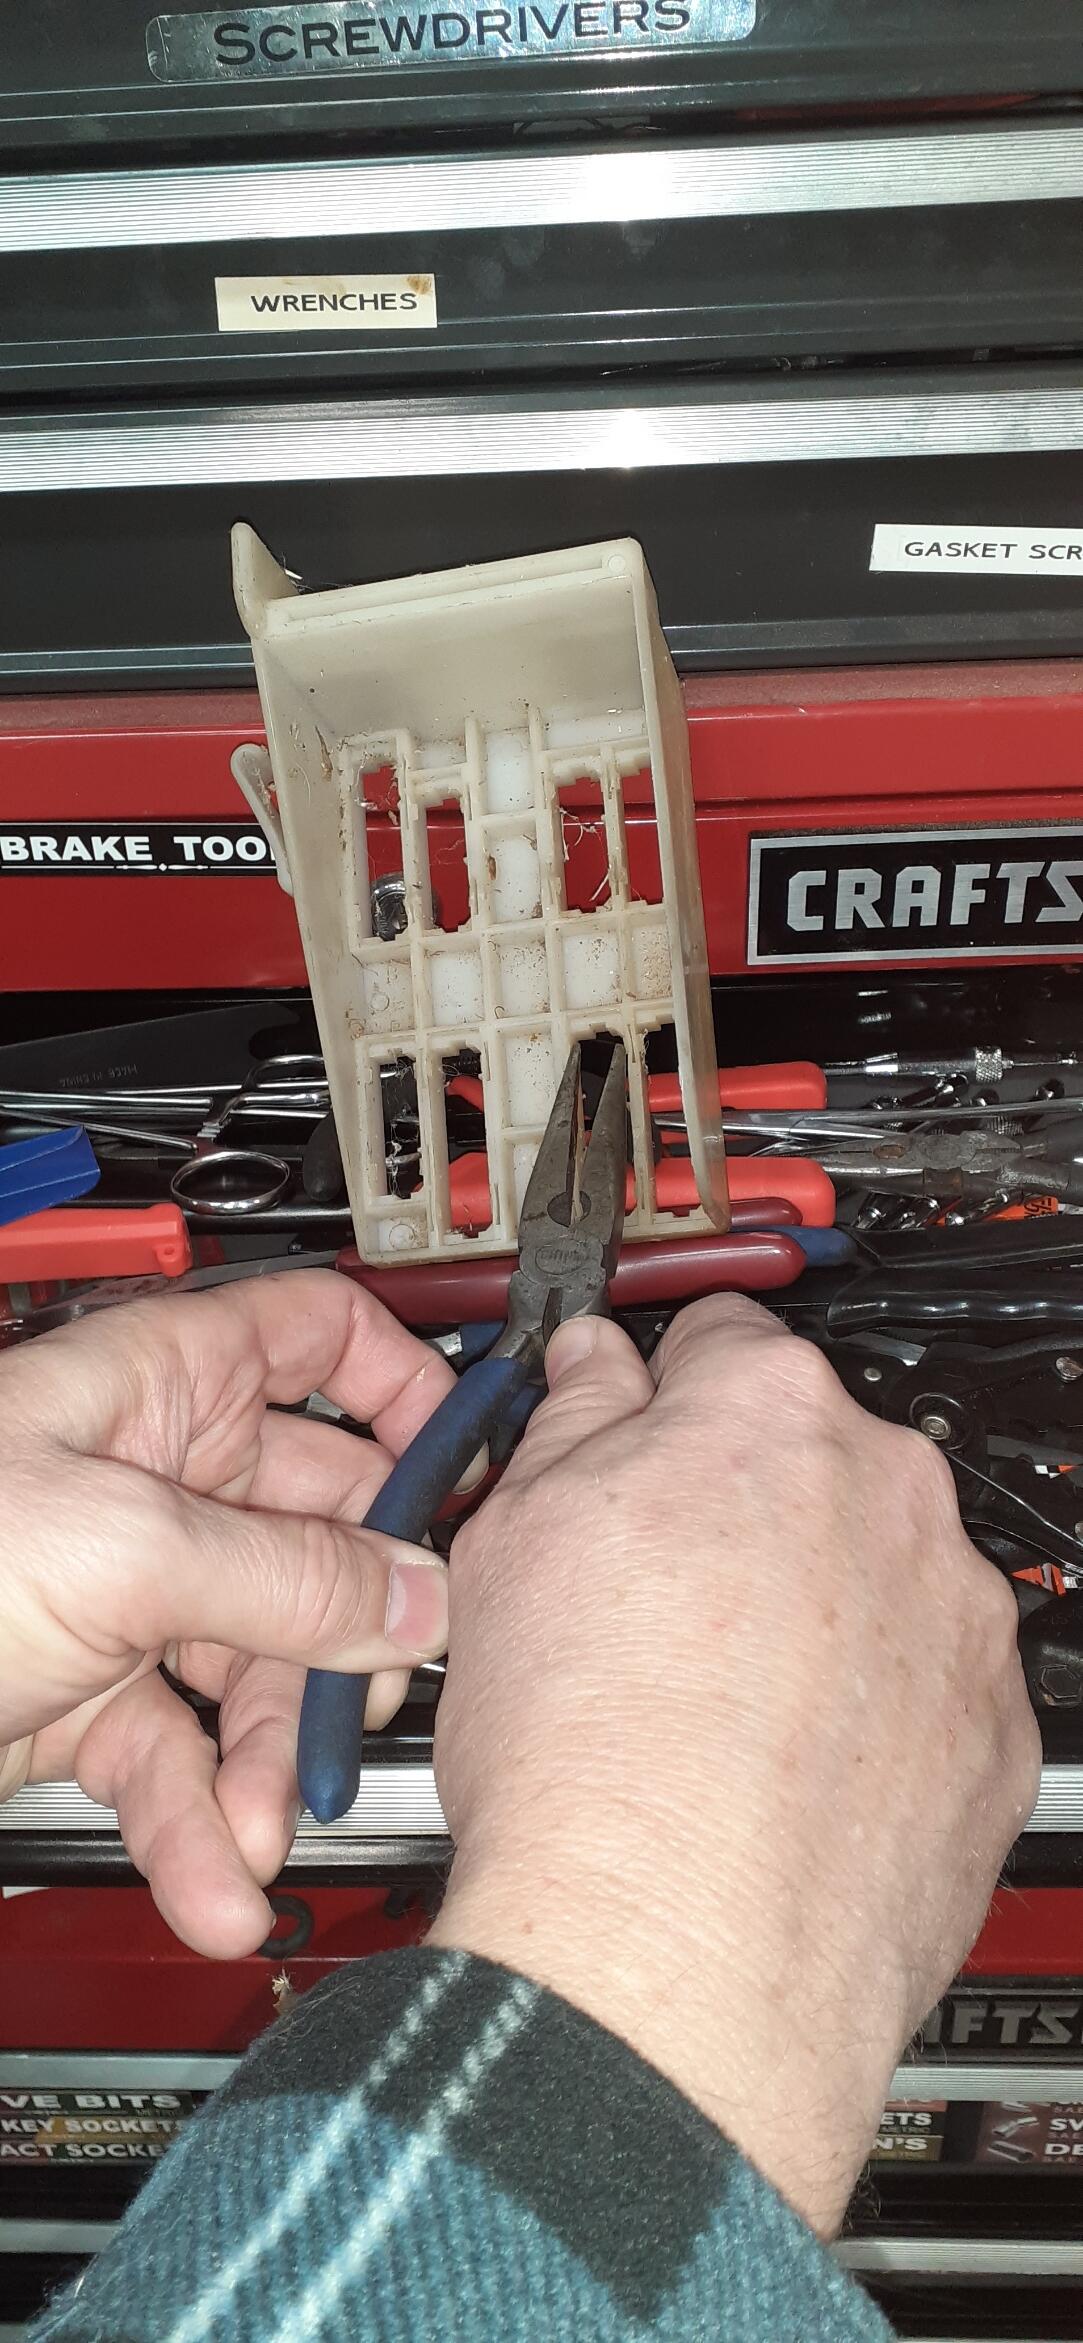
Okay, so it's these tabs holding it in. The one on our top right is the clearest. You'll need to push out the sides a little to separate the tabs. Have you tried some long-nosed pliers pushing against the sides on top, pushing on the other side to get the connector past the tabs? I tried to take a photo of that, but it doesn't look like it would work well. You may be able to use the pliers to squeeze one tab at a time and push past it. Or a tool like this may be able to facilitate my first idea: https://www.amazon.com/SPEEDWOX-Installing-Gearshift-Automobile-Transmission/dp/B07QWTB149

-
That looks like a 73 wiring harness.
-
How about posting a photo?
-
The video is finally ready to watch.
-
Here's an Amazon link: https://www.amazon.com/dp/B07ZMN2B59 You can find them on ebay, too. Just choose the 2 wire harness: https://www.ebay.com/sch/i.html?_from=R40&_trksid=p2380057.m570.l1313&_nkw=frontier+alternator+harness&_sacat=0
-
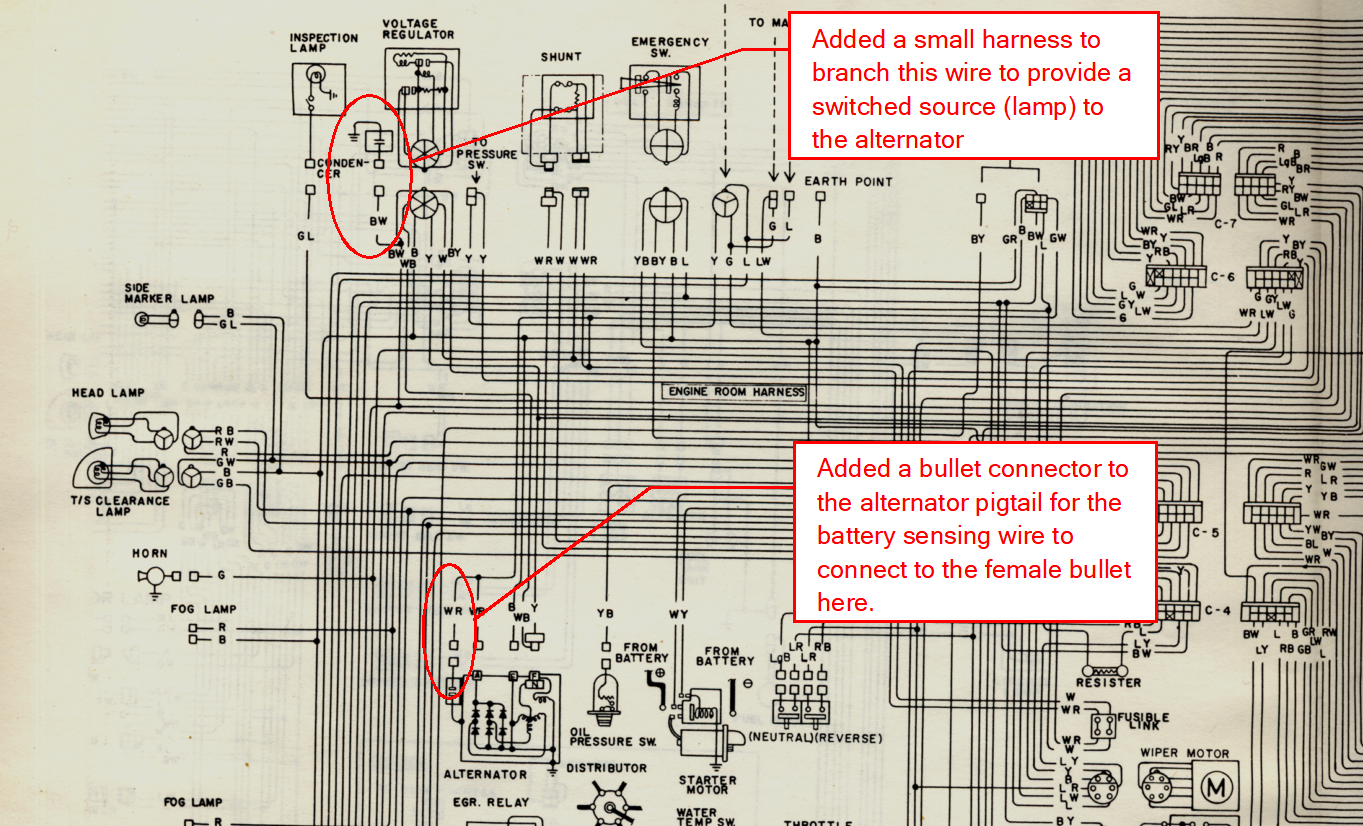
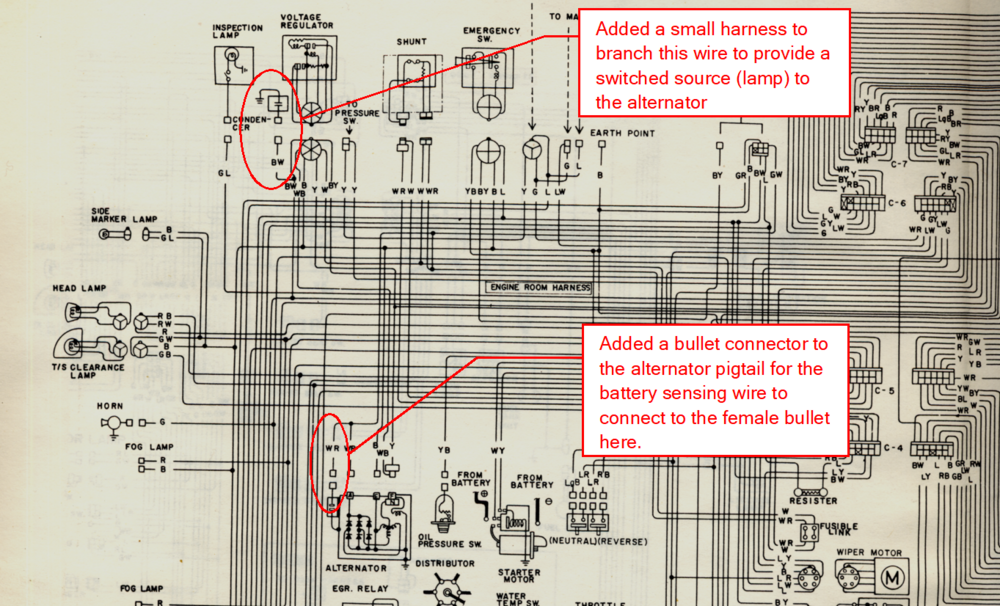
From the wiring diagram to show where I got the sensing voltage and the switched source: The black/white wire is below the voltage regulator in the engine bay. The white/red wire branches off the 10 AWG white/red wire that goes to the positive post on the alternator.
-
Covers are available from MSA: https://www.thezstore.com/page/TZS/PROD/12-4355. Make sure you create an account at MSA (http://www.zcarparts.com/) and enter your ClassicZCars member number to get a 10% discount on a lot of different parts. You can find your member number by going to your profile on this site. It's in the URL.


-
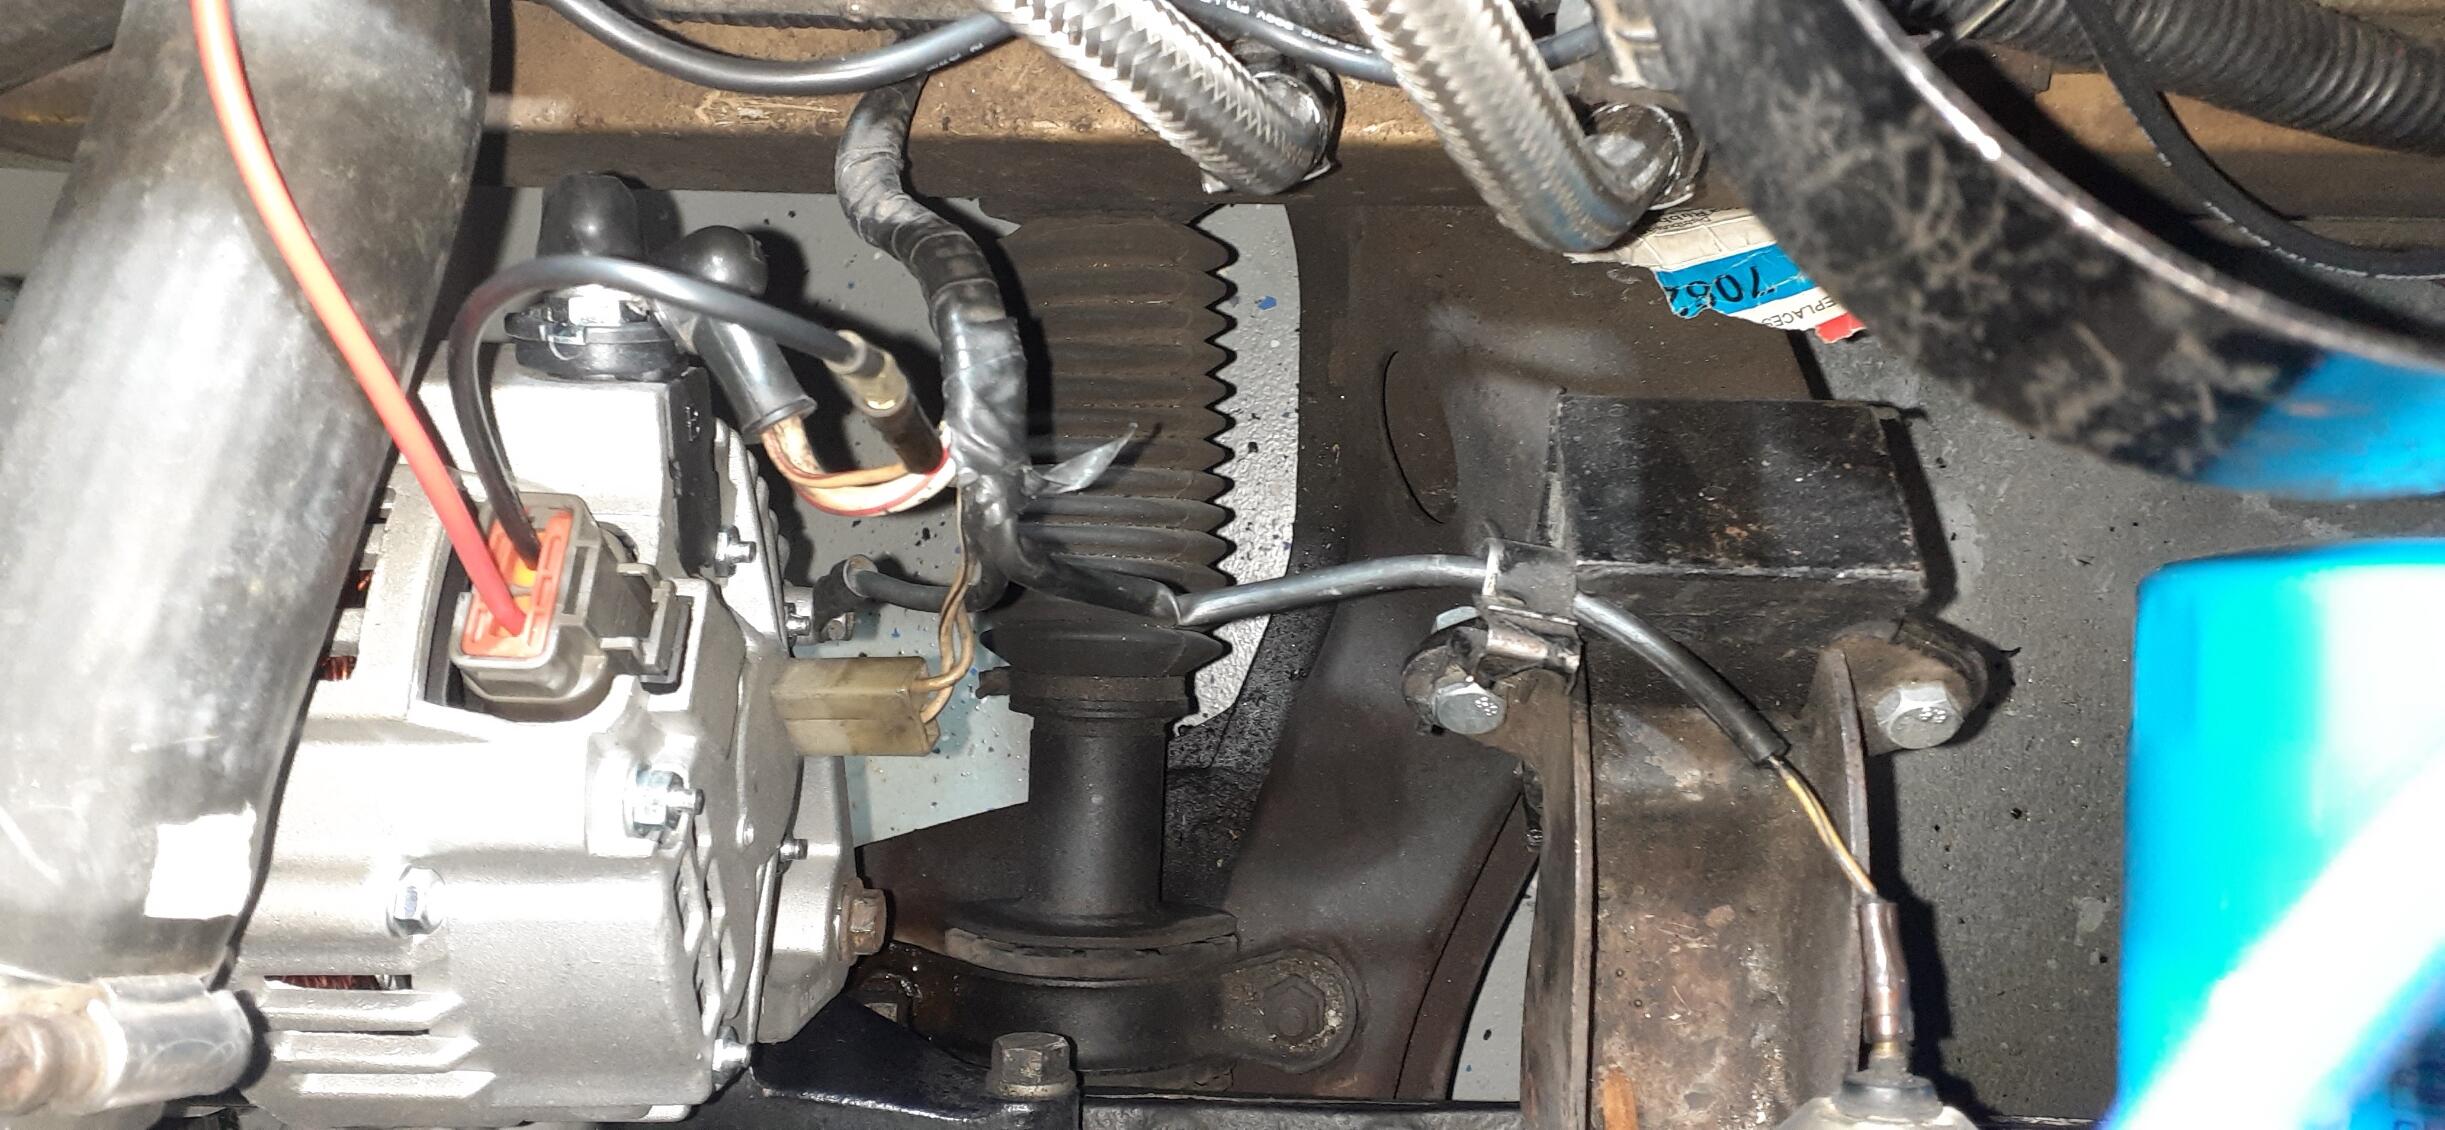
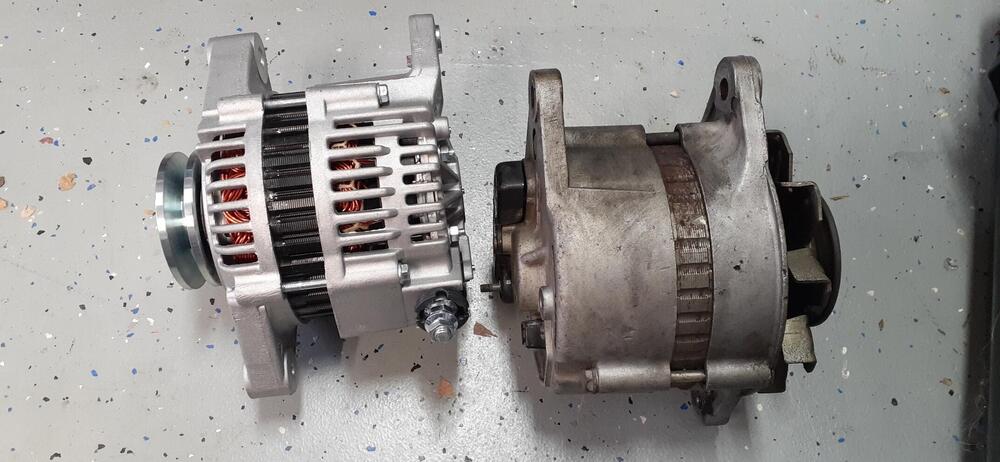
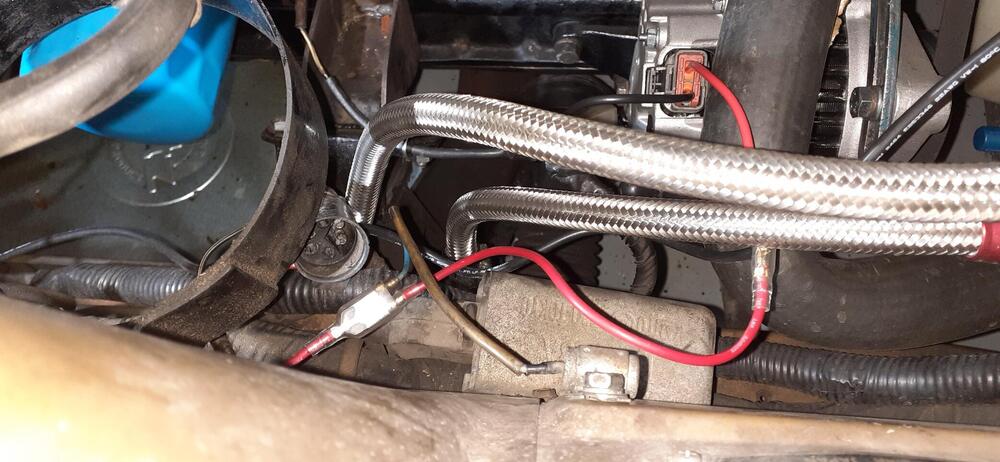
I haven't been happy with the charging system in the 260Z for a while. At startup, the alternator output was fine, but after a while of driving, the voltage would drop down to only 12.8VDC many times. It was time to explore options. Since I converted the carburetors into throttle bodies for the Patton Machine GM TBI fuel injection, I wasn't using the neutral (yellow) wire from the alternator for the fuel pump relay #1. That meant I didn't have the limitation a stock 260Z owner would have. (Of course, I could have worked around that one if needed.) Because I like experimenting on my projects, I decided to look into the Nissan Frontier 70A alternator. Since I didn't feel like paying ZCarDepot $150 for their setup, I searched RockAuto and found a new SKP for $86.79 (minus 5% discount and plus tax and shipping) alternator for a 1999-2004 Frontier 4 cylinder. On Amazon, I found the pigtail for the alternator $10.99 + tax. I took out the old voltage regulator (still a points style - Sorry, @Dave WM, I didn't try to adjust it first. It looked bad on the bottom to me.) and found the bottom side full of helicopter seeds and somewhat corroded. I tried some different bullet lugs to see if I could connect wires to the engine harness to run to the pigtail. That was a no-go. However, I found some alternatives. The white/red wire to the alternator positive had a smaller white/red wire with a female bullet to connect to a condenser on the old alternator. I would prefer to have a different sense wire, but it would work. Then I noticed that the condenser at the VR was connected to the black/white wire. There was my switched source. I would just need to make a small jumper harness to connect the pigtail and condenser to the black/white wire. For the most part it was a matter of removing the old alternator and installing the new one. I did have to replace the lug on the white/red wire because the positive post on the new alternator was much larger. That was no big deal, though it took some time to enlarge the hole on a 1/4" lug to make it fit on the M7 (or M8?) post. I shot some video that I need to edit that may help others with the swap. I'll see how it turned out and post a link. Here the Frontier alternator with the 260Z externally regulated alternator. Here's how the wiring looked when I was done with the installation. Here's the pigtail on the alternator going to the positive post for sensing voltage.

-
Yes, I tried two different "mama bear" door seals. That was due to the delivery times. They both pretty much seem the same to me. I don't have a preference between the two, but I haven't taken the car out, yet, to see how well they sealed. At least I'm not seeing gaps like with the 3/8" bulbs. The second link has choices for 30 or 40 feet. That can be handy. You just have to be patient for delivery.
-
Thanks for updating. It may help someone in the future with a similar problem.
-
I received the other "mama bear" door seal today and got it installed on the passenger side. It's a little different from the driver's side, but you'd have to look close to notice. Here's a link to it: https://www.amazon.com/dp/B00NELWRJ4 Now I have to drive the car to see if it is better than the Kia Sportage seals on the 260Z. (I think it is.)