
Zed Head
Community Member
-
Joined
-
Last visited
Everything posted by Zed Head
-
But notice how they distinguished their product from common "poly". Not all poly's are the same. Somebody noticed and seems to be trying to meet a need. " Whiteline Plus bushings provide the softness needed for street driven, low vibration, noise and harshness characteristics, while displaying extreme abrasion, tear and cut resistance, and near-zero compression set at a lower durometer reading of 70-80 (versus most poly bushings 100+ rating). In addition, Whiteline Plus polyurethane bushings are able to be bonded directly to the metal shell, which provide a method of flow control giving the bushing the characteristics of soft ride while on smooth roads, and when under cornering pressure cause the bushing to become firmer for improved suspension performance. "
-
Pretty sure the Datsun EFI hose is 8mm. 7mm will be tight. The ad copy doesn't say it's used as high pressure hose either, to be sure. MFI systems have vacuum and vent lines too. Just saying... Here's their 8mm fuel hose. Have to say that most shops give the pressure rating. Not a great web page. http://www.partsklassik.com/p-306-8-mm-smooth-fuel-hose.aspx 5/16" is the non-metric analog, n case you search around the internet other options.
-
You saw that the guy on zcar had a bad ECU after all? http://www.zcar.com/forum/10-70-83-tech-discussion-forum/396890-280z-troubles-again-8.html#post2668378 I just took my bad 76 ignition module apart. The area under the transistor looks cooked, along with a component or two nearby. Would be nice to know how these things really fail. This one would repeatably fail after revving to over ~3000 RPM. Might be a good test case. Who knows, there might a $3 fix instead of going to ZX or HEI modules.
-
The VIN only shows on the Salem ad, not your original Multnomah County ad. He might just be a newbie to internet sales, hence the first attempt with the old-school soap on the windshield. I think he's only changed the ad once, probably after looking around the CL ads. Looks like a nice car. Somebody might travel for that one.
-
The VIN is 3211, it's on the upper right of the CL ad. The one I posted. He missed it in the other.
-
Something weird going on. Could be the old bait and switch. I'm a cynic at heart, can't help it. http://salem.craigslist.org/cto/5774183394.html
-
So we don't reaaallly know if the original ECU was bad. It didn't get warm/hot like it would in extended usage. Can't blame you for being safe, but your spare ECU might only be good for a few miles.. Ignition modules are typically heat sensitive when they go bad.
-
Looks like it even has those vents on the hatch that mean different things to different people. Seems a little too good to be trueish. @Mark Maras
-
I wonder if you have the wiggly connector issue. There's a fair record of sporadically bad ECU's out there. I'll see if I can dig some threads up. Here's one. The guy hasn't been around for a while. http://www.classiczcars.com/forums/topic/34229-280zzx-ecm-tech/ Some wiggle the connector comments - http://www.zdriver.com/forums/280zx-s130-forums-77/resoldering-ecu-31290/ Of course, all of these people and me included could just have been doing random things and the act of taking the ECU apart and putting it back together was what "fixed" the problem.
-
Maybe the lock bolt is just there to keep the spindle pin from falling out if a nut comes loose. Maybe the spindle pin nuts aren't even really necessary. Hmmm....
-
Brass tacks and all that (whatever that means, I've never really known). Dave had a problem, he swapped ECU's and the problem went away. In the interest of avoiding distraction and unnecessary excursions maybe re-installing the "bad" ECU would be worthwhile. If the problem follows the ECU, it's the ECU. Right? Just saying...
-
He removed the CSV entirely and nada. That's a good point about two transistors. Maybe I replaced mine for the wrong reason and the problem is still there. My dinking around might have moved something. Although if one transistor is sticking its injectors open there might be enough fuel to go around. I replaced the transistor because I thought the symptoms were similar to bad ignition modules and also thought that's why they failed. But I could be wrong there also. Sometimes I just try stuff and it works, but the reason why may be unclear. Can't remember if the transistors are split n to two and four like the dropping resistors or if it's three and three. It's been discussed before. I think that CO knows. There are so many things that add injector open time. Any one of those circuits could be bad, I'd guess.
-
Spare parts are cool. Can't have too many. I had a similar situation but I was testing my spare. It was bad itself and killed the engine dead. There's actually quite a bit on this forum about the rich ECU problem. There was a guy called Night Train or Mad Dog (Boone's Farm maybe?) who suggested re-flowing all of the solder at the connector pins. He said that wiggling the connector cable while driving could fix it temporarily. Other people kick the ECU to knock things back in to shape. In my case, I replaced the transistors and that fixed it. There seems to be more than one cause. Edit - I also have a spare known-good ECU, and ignition module, behind the seat.
-
Wow, that's a lot of money. So glad the guy taking the pictures for that BAT ad wasn't naked.
-
That is correct, you're just pushing the air out and if the end of the tube is in the fluid no air should get sucked back in. Bubbles that don't make it all the way out could get sucked back though. So clear tube is advised so that you can see the bubbles. Another consideration is to have the front end of the car lifted so that the bubbles will be up by the bleed port. Be the bubble.
-
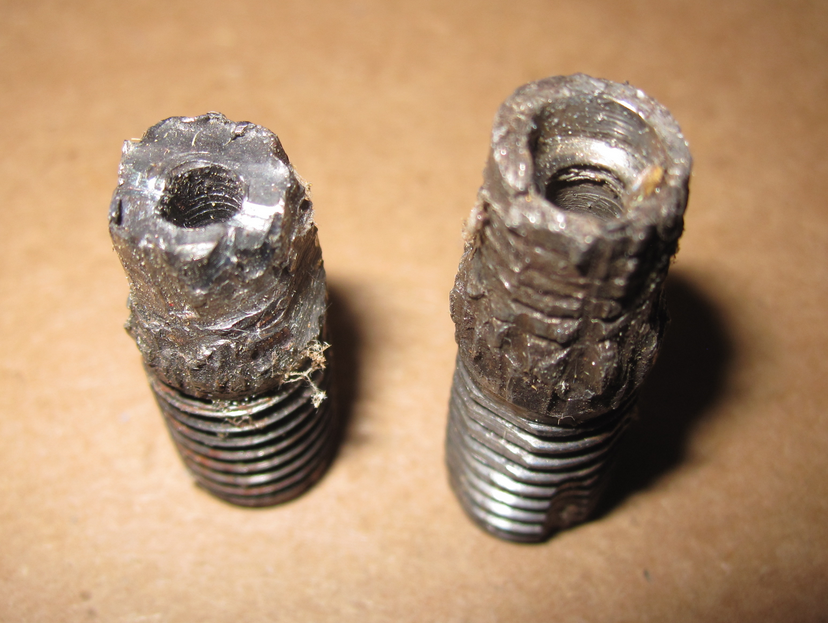
People have replaced the spindle pin with a 5/8" bolt and not had obvious problems. So the lock pin is apparently not necessary. It would be interesting to assemble all of the metal parts but leave the rubber out (you'd have to remove it from a factory bushing or replicate the inner and outer sleeves from metal tube) and see how it all fits together. Under driving conditions the rubber certainly flexes allowing the metal parts to move. The question is how far they move and how the loads are distributed. I'm guessing that there are three areas of load transfer - the ends of the spindle pin and the lock pin. The metal of the casting is probably much more rigid than the stamped sheet metal of the control arms. The spindle pin is drawn and worked steel. It's a puzzle.
-
I meant friction as the "locking points". Friction at the contact points locking it in place. I think it's just rough cut steel edges riding on each other. With lots of leverage due to the diameter of the part. Blue has the good pictures. You might even be able to "pick" each contact point with a piece of shim stock or similar to let it slide.
-
If a press made it easier to assemble it might also disassembly. Get the pressure off the locking points so you can trun the pieces.
-
Head bolts, cam tower bolts, front cover bolts, all the same issue. Steel bolt in aluminum substrate. Metal stretches and compresses. It's elastic. The high end head bolt guys use a stretch calculation for their tightening. So many degrees of turn equals so much force exerted, based on bolt stretch. It's just one of many things that might work. Probably comes down to what operations you're comfortable doing. The welder likes welding. the chemistry guy likes adhesives, the machinist-type might like the drill and tap idea. You could probably paint the inside of the head at the crack with glyptal and be fine. I don't even really know what glyptal is but race engine guys coat the inside of their blocks with it. Apparently it sticks. http://www.glyptal.com/
-
A thought that popped in to my head a day or two ago - drill and tap a hole through the cracked piece in to the meat of the head, countersink the loose end, and pull the crack closed with a small screw.
-
In principle, yes, the pin end threads are meant to lock the inner sleeve solidly to the casting. So, extending the concept, the casting, pin, inner sleeves, washers and nuts all become like one solid piece of metal, capturing the control arm ears. But I think that the ends of the pin do see a strong tensile force at times through the washer, nut and threads. One ear of the control arm presses on the washer, the other ear presses on the casting. The ear of the control arm pressing on the washer stretches the pin, and the lock pin sees the load. Everything has some degree of elasticity. I didn't really spell that out up there, not sure I was even thinking of it clearly. But it is there! I pondered this long ago when I was looking down that casting hole with a rat tail file knocking down the lock pin hole deformation so I could get the pin back in. And there's the leverage to factor in when the control arm gets twisted, which it does under acceleration and braking. Constant twisting and levering, opening up that sleeve/casting interface, stretching and releasing the pin. It looks like a great idea on paper, not knowing how loose everything will really end up when all of that rubber is inserted between the metal pieces. Best laid plans. Anyway, that's my theory. Morning coffee.
-
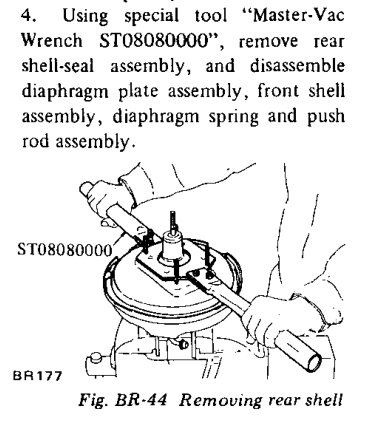
"No brown"? Euphemism? You need a special tool, I think.
-
I think that it's driving forces that cause the deformation. When the spindle pin is locked, the pin and the casting become essentially one piece. The loads of the wheel are transmitted to the transverse links (aka control arms) through either contact with the casting on one side or the nut, washer and pin on the other side. The pin gets loaded back and forth and that load gets transmitted to the casting through the pin. That's where the deformation comes from, I think. That's why some spindle pins slide right out and some don't. They both got torqued to the same spec at the factory. If you leave out the lock bolt then the pin slides back and forth in the casting as loads shift. Hard to tell what the engineers intended when they put that package together. Maybe the lock pin is mainly for manufacturing ease, or maybe it has am automotive purpose. Who knows.
-
Three heat sources are there - conductive (what you're talking about above), radiative (anything hotter than the fuel line will radiate heat across space to the colder object), and convective (hot air blowing over colder objects and losing heat energy). They're all in play and hard to tell which way the heat is going, in or out, or which one is more powerful. I feel nerdy now... At the other end of the circuit, the return line in to the tank, the fuel is bringing heat back from the engine bay. The tank contents warm up over time. Could be that deadhead systems don't benefit from insulation and return systems do. Or the size of that orifice is critical for more than just pressure. Cool fuel. Didn't someone mention insulating the mounting points of the fuel rails, somewhere back in this thread or another. That could remove the conductive path. Interesting topic. I've put lots of thought in to the EFI analog. I have insulation for both convective and radiative heat sources, heat from the exhaust manifold, but left the rail (aluminum) uninsulated so that it could lose heat from the injectors. The convective effect seemed to be pretty large, lots of heat coming up from the hole in the center of my exhaust heat shields. Tiny hole, lots of channeled hot air. How about a radiator for the fuel?
-
They're in the Service Manual. Engine Mechanical, Specifications.