Zed Head
Free Member
-
Joined
-
Last visited
Everything posted by Zed Head
-
 Chromed? Seriously, post the link, let's see what you got.
 -
-
Don't forget heat. Even a little causes enough expansion to make a difference.
-
-
-
You're assuming that the pressure is dropping. But engines can surge with no fuel pressure change. You have an electric fuel pump, powered by the battery, not connected to what the engine is doing except for the vacuum reference (if Jenvey even uses one). That's why measuring pressure is important. Disconnect the vacuum reference when you're measuring to be very sure. The engine will run richer but it will remove any questions for you. Edit - actually it may not. You might have a surge caused by the air-fuel ratio. Still though, the numbers will tell you something. More detail than your description would help a lot also. A video would be great. " it holds back momentarily and surges back and forth " Here's some Jenvey stuff - http://www.jenvey.co.uk/products And Link - http://www.linkecu.com/
-
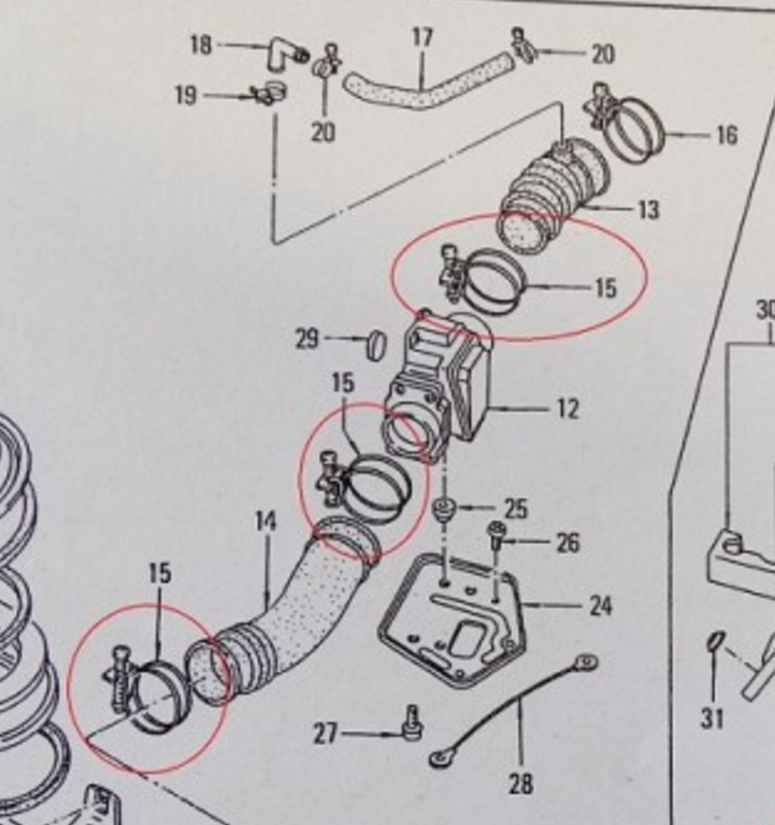
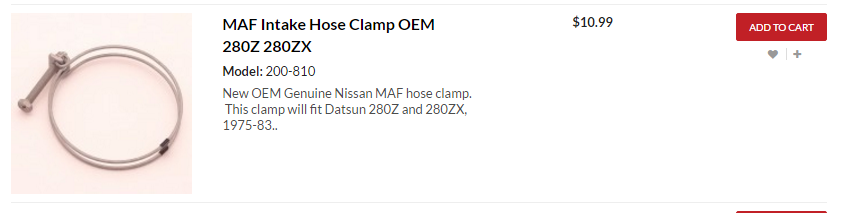
You expect a lot from the world. Doubtful that you'll find an esoteric item like these big hose clamps, already chromed for you. Buy what you want and have them chromed, I'd say. Looking for a set of chromed 280Z EFI air intake system clamps is a bit absurd. If you decide to do the chroming, the first link gets you 75% of the way there, as far as starting pieces. 3 of 4. 3 x #15. Practicin' ma words.

-
Send him a message and make a suggestion. Tell him about the AFM-MAF confusion also. https://zcardepot.com/information/contact
-
Not sure if you're making a joke or making fun of zcardepot's typo. Looks like what you asked about in your first question.
-
This guy really needs to advertise more - https://zcardepot.com/fuel/fuel-injection?page=2
-
Ticking is normal, to a certain extent. Only jumping in to save you some money, before you order parts. If your lash is correct now, it will be the same after you swap out parts. It's the lash that allows the ticking.
-
I think that he might have been talking about this post. Click on the "S30 Manuals..." and it will take you to another page, Then click on "Download this file", then click on "Fuel-1973...". It should apply to 1972 also. Heat is heat. Lots of good information in there.
-
I know that Nissan did change the doors for 77-78. Not sure exactly how the panels would change but the window mechanism, door latching, and general seals all changed. You can't put a 77 door on a 76 body. I'd imagine that the various holes, for attaching the panel, and window regulator handles, door latches, etc., changed too.
-
The thread has a patina...

-
-
"Mapped injection" implies fuel injection although I've never heard it described like that. So you have a high pressure fuel system. I would put a gauge on the system and see what fuel the pressure does. Don't assume it's a tank problem And I would not sit still on a rolling road. It sounds dangerous.
-
He apparently cleans up used parts and sells them as rebuilt. Another "out" - define rebuilt. It's not a skills issue. He's been running this operation for years and has no scruples, apparently. Seems to be just a dishonest scammer. People try to give him the benefit of the doubt in various threads around the internet (trying to believe these were honest mistakes or the fault of the customer), but if you read enough of his responses you can what he's doing. Deny, deny, deny until the customer gives up, or takes a small sum just to end the pain. The heart of his business isn't producing parts, it's finding people that don't know his past. . Here's a recent thread from ratsun. Some of the posts are painful to read, a bit juvenile, but the end story is the same. http://community.ratsun.net/topic/66882-dont-do-business-with-california-datsun-formely-datsun-parts-llc/page-1
-
Just for the record -
-
Thanks for the follow-up. I think that I see Al's pattern now, and you kind of have to admire it. Throw out a few good parts to get some people on your side, to vouch for quality, as bait, then make the big profits from selling the junk. Here's a link to the California Secretary of State's site. A phone call might give some insight on how to proceed for those who feel they got ripped off. http://kepler.sos.ca.gov/ People need to see the trickiness of his warranty. It's full of outs for him, when things get expensive. WARRANTY AND RETURNS: Parts are sold with a 30 day money back guarantee if the terms set below are met. All returns, refunds or exchanges are processed once the original item is returned in unused condition. Engines and Heads are guaranteed against excessive smoke and oil consumption, and inadequate oil pressure. Oil/fluid leaks, fuel components, engine cooling systems, and exhaust systems are not covered by this warranty unless proven that they were a result in the part purchased. In order to make a warranty claim on an engine or head, you must provide a record of the date installed, type of vehicle installed in, mileage, and engine number. In addition, failure to do any of the following things voids the warranty. (i) Install a new water pump, and thermostat at the same time the engine or head is installed. (ii) Change the oil filter and oil prior to starting the engine, change the oil after the first 600 miles, and change the oil once every 3000 miles thereafter. (iii) Flow-check the radiator and repair it if necessary. (v) Front and rear main seals were be replaced on engines. All engines must be installed by an A.S.E. certified mechanic or other licensed professional shop for warranty to be valid.
-
Actually, I thought I was sounding like a jerk. I almost put the phrase "unless you're building a full-scale model of a car" but thought it sounded wrong. But, that appears to be what you're doing, in essence. So, the discussion about performance and the reasons for Emissions distributor differences are kind of irrelevant. But, matching the advance curves of the distributors, past and present, using a machine DOES confirm that you got the parts right. If the parts you put in don't generate the same curve, how can they be considered the right parts? Studying the curves, if they're available, can also tell you something about the springs used. The two slope curves must be produce by two different spring rates. If the curve for the D612-52 is single slope then the springs must be identical. So that's a clue. I was just trying to get to the basic point, and help you get there. I copied your original question just to get back there. As Chickman pointed out, the distributor may have been messed with over 40 years, and I also mentioned, what came over on the boat may not match what Nissan described in the Service Manuals. So you kind of have to decide what you're reproducing, the intent or the reality. Anyway, plenty of information here. A plot of the D612-52 curve would be great, if anyone has one. Alright, the coffee's wearing off now. Carry on.
-
My point is that there is no point in going back to what Nissan did originally. Points or pointless distributor. There is no benefit. The cost/reward ratio is way off. The only reason to do it is to be able to say that it is just like the factory said they made it. If you could dig back through your collection of information and show the advance curve for the D612-52 distributor, that would be worthwhile. Then Careless might be able to get the parts to match the curve. If you're not going to match the curve, then what are you doing? Where do dial-back timing lights come in to the discussion?
-
By Nissan's methods of the time, you were supposed to test your distributor curve on a machine. So matching spring appearances, or slots, or weights won't really get you there. If you really wanted to you might find an old timey shop with a machine and take your FSM advance curve page over and have it replicated. But the curves were designed for old timey gasoline, with no ethanol and with tetraethyl lead anti-knock additives. So, aside from appearance, there's not a whole lot of point to building an exact old distributor and matching the old distributor curves.
-
I think the truth is that when people get ripped off they feel like fools and don't tell anyone. Besides that, the people that are pissed on this forum have valid reasons, which you haven't addressed. Nobody's making things up here.
-
Did Al ever handle the situation with Darryl? It's been eight months. His name is coming up again. The usual "I got a part that worked so he must be okay" drivel.
-
Ran across some old odd chrome treatments in the 69-72 TSB. For those who like the shiny stuff. Interesting L24 clutch cover mods too.