Leaderboard
-
Yarb
 Subscriber
 5Points1,935Posts
 -
Patcon
Subscriber4Points11,142Posts -
Captain Obvious
Free Member4Points10,081Posts -
Namerow
Free Member4Points1,551Posts


Popular Content
Showing content with the highest reputation on 04/29/2024 in all areas
-
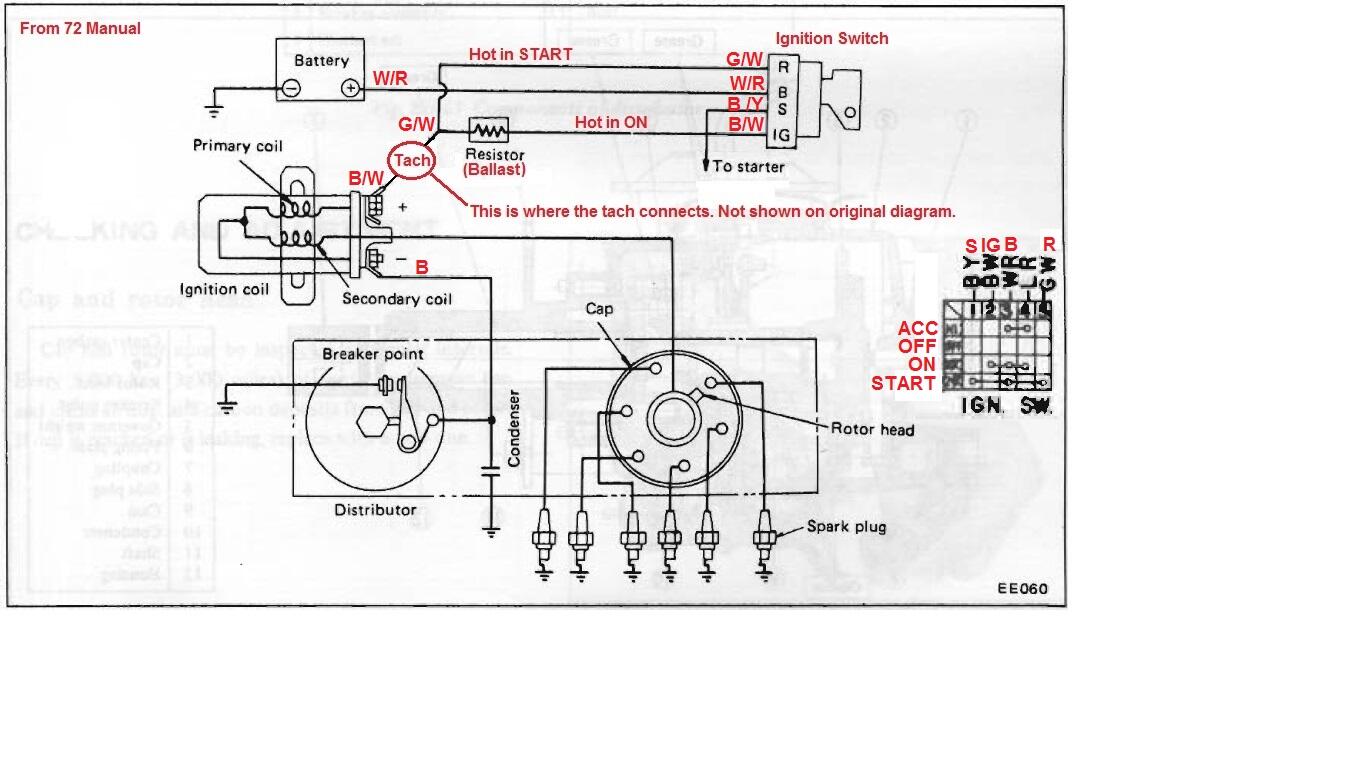
3 pointsBoth the G/W and B/W are involved in the ignition. Here's the wiring diagram for the ignition system. This was originally created from the 72 manual, but 73 is the same:
 3 points
 -
Nice photo essay. Well done. If you or anyone else has the opportunity, a similar presentation for the rocker panel area would be a great assist for other restorers.2 points
-
2 pointsGood question. Perhaps they're used to secure the special finisher plate used on cars with the automatic transmission? The cutback in the tunnel sheet metal was a common solution for those who installed 5-speeds. As it stands, you may find that your knuckles come close to colliding with the dash trim when you select 1st, 3rd, or 5th gear. One solution is to fabricate a modified shift lever with a 'S' bend down low so that the upper part of the lever is moved about an inch to the rear. This will also allow the sift lever to better align with the outer shift boot. The 'extra' plate is, I believe, just a doubler sheet, used to provide a little extra stiffness for this region of the transmission tunnel (otherwise weakened by the cutout for the shift lever).2 points
-
Did you happen to follow my suggestion on checking the harness with a meter along with the schematic?2 points
-
You need to check voltage at the horns and also windshield washer pump. Use a digital voltage meter. Not a test light! Report back with a voltage when pushing the horn and spraying the pump. Unplug the device and test the harness ends w the DVM2 points
-
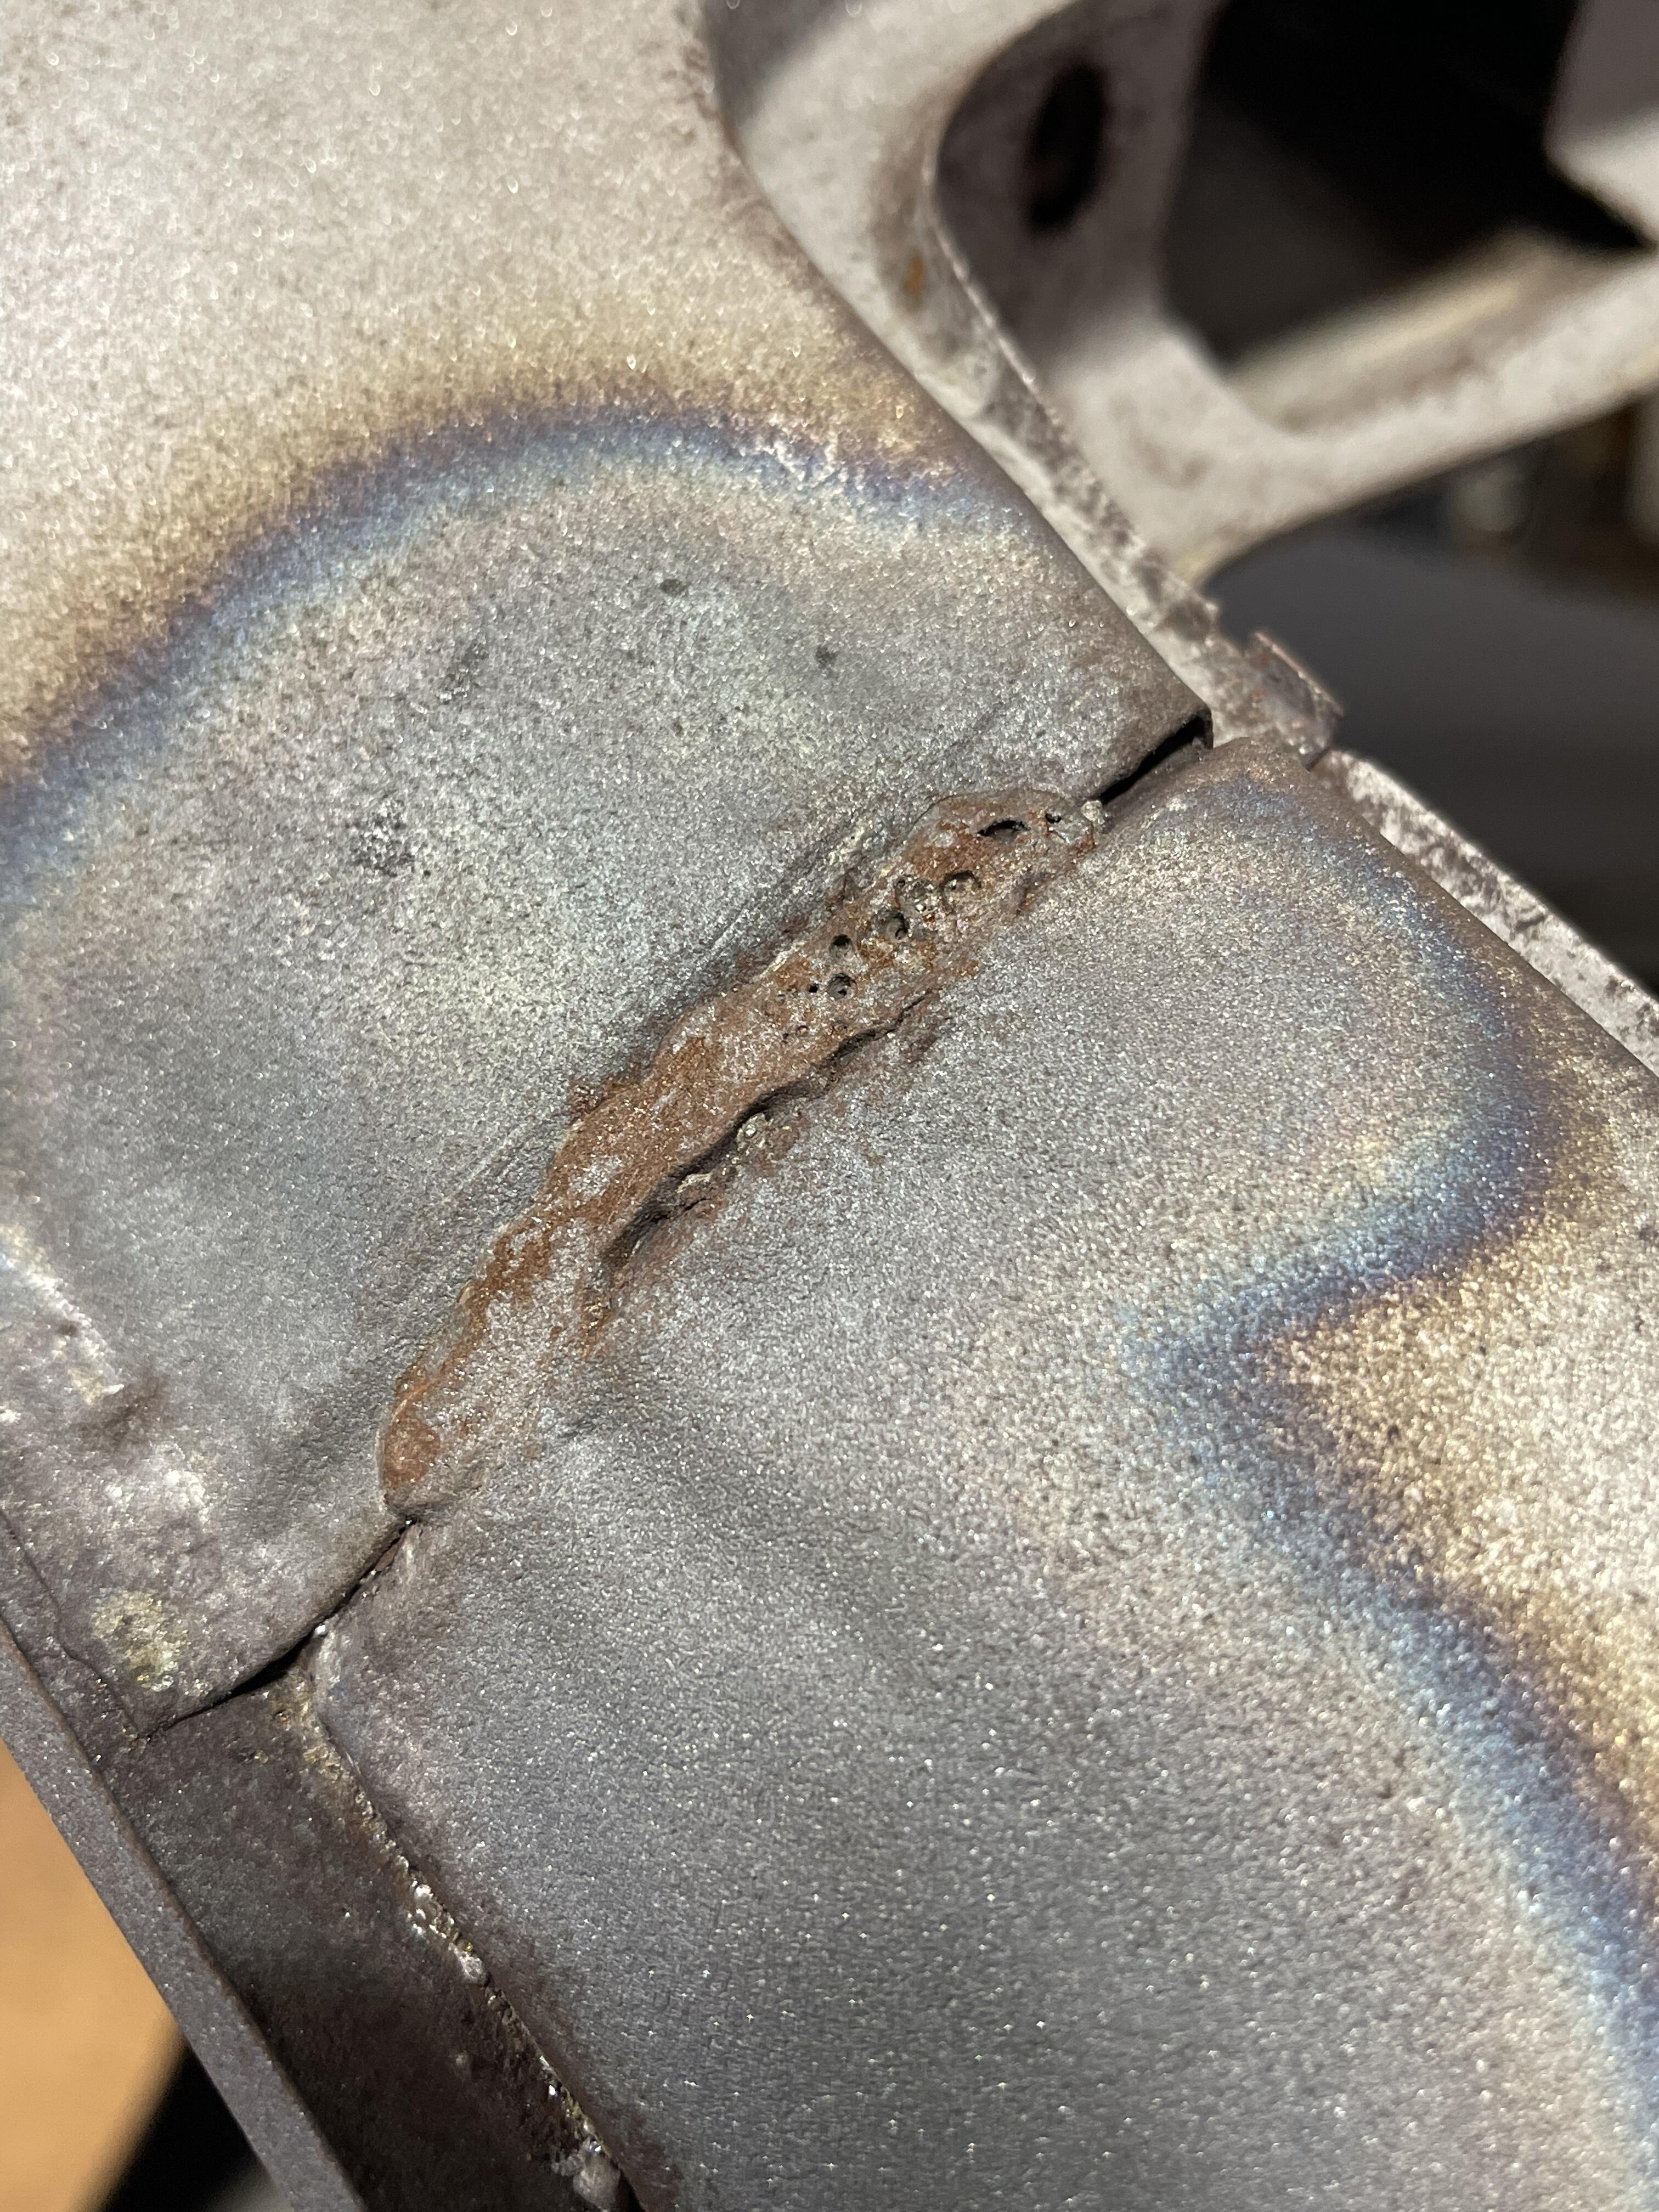
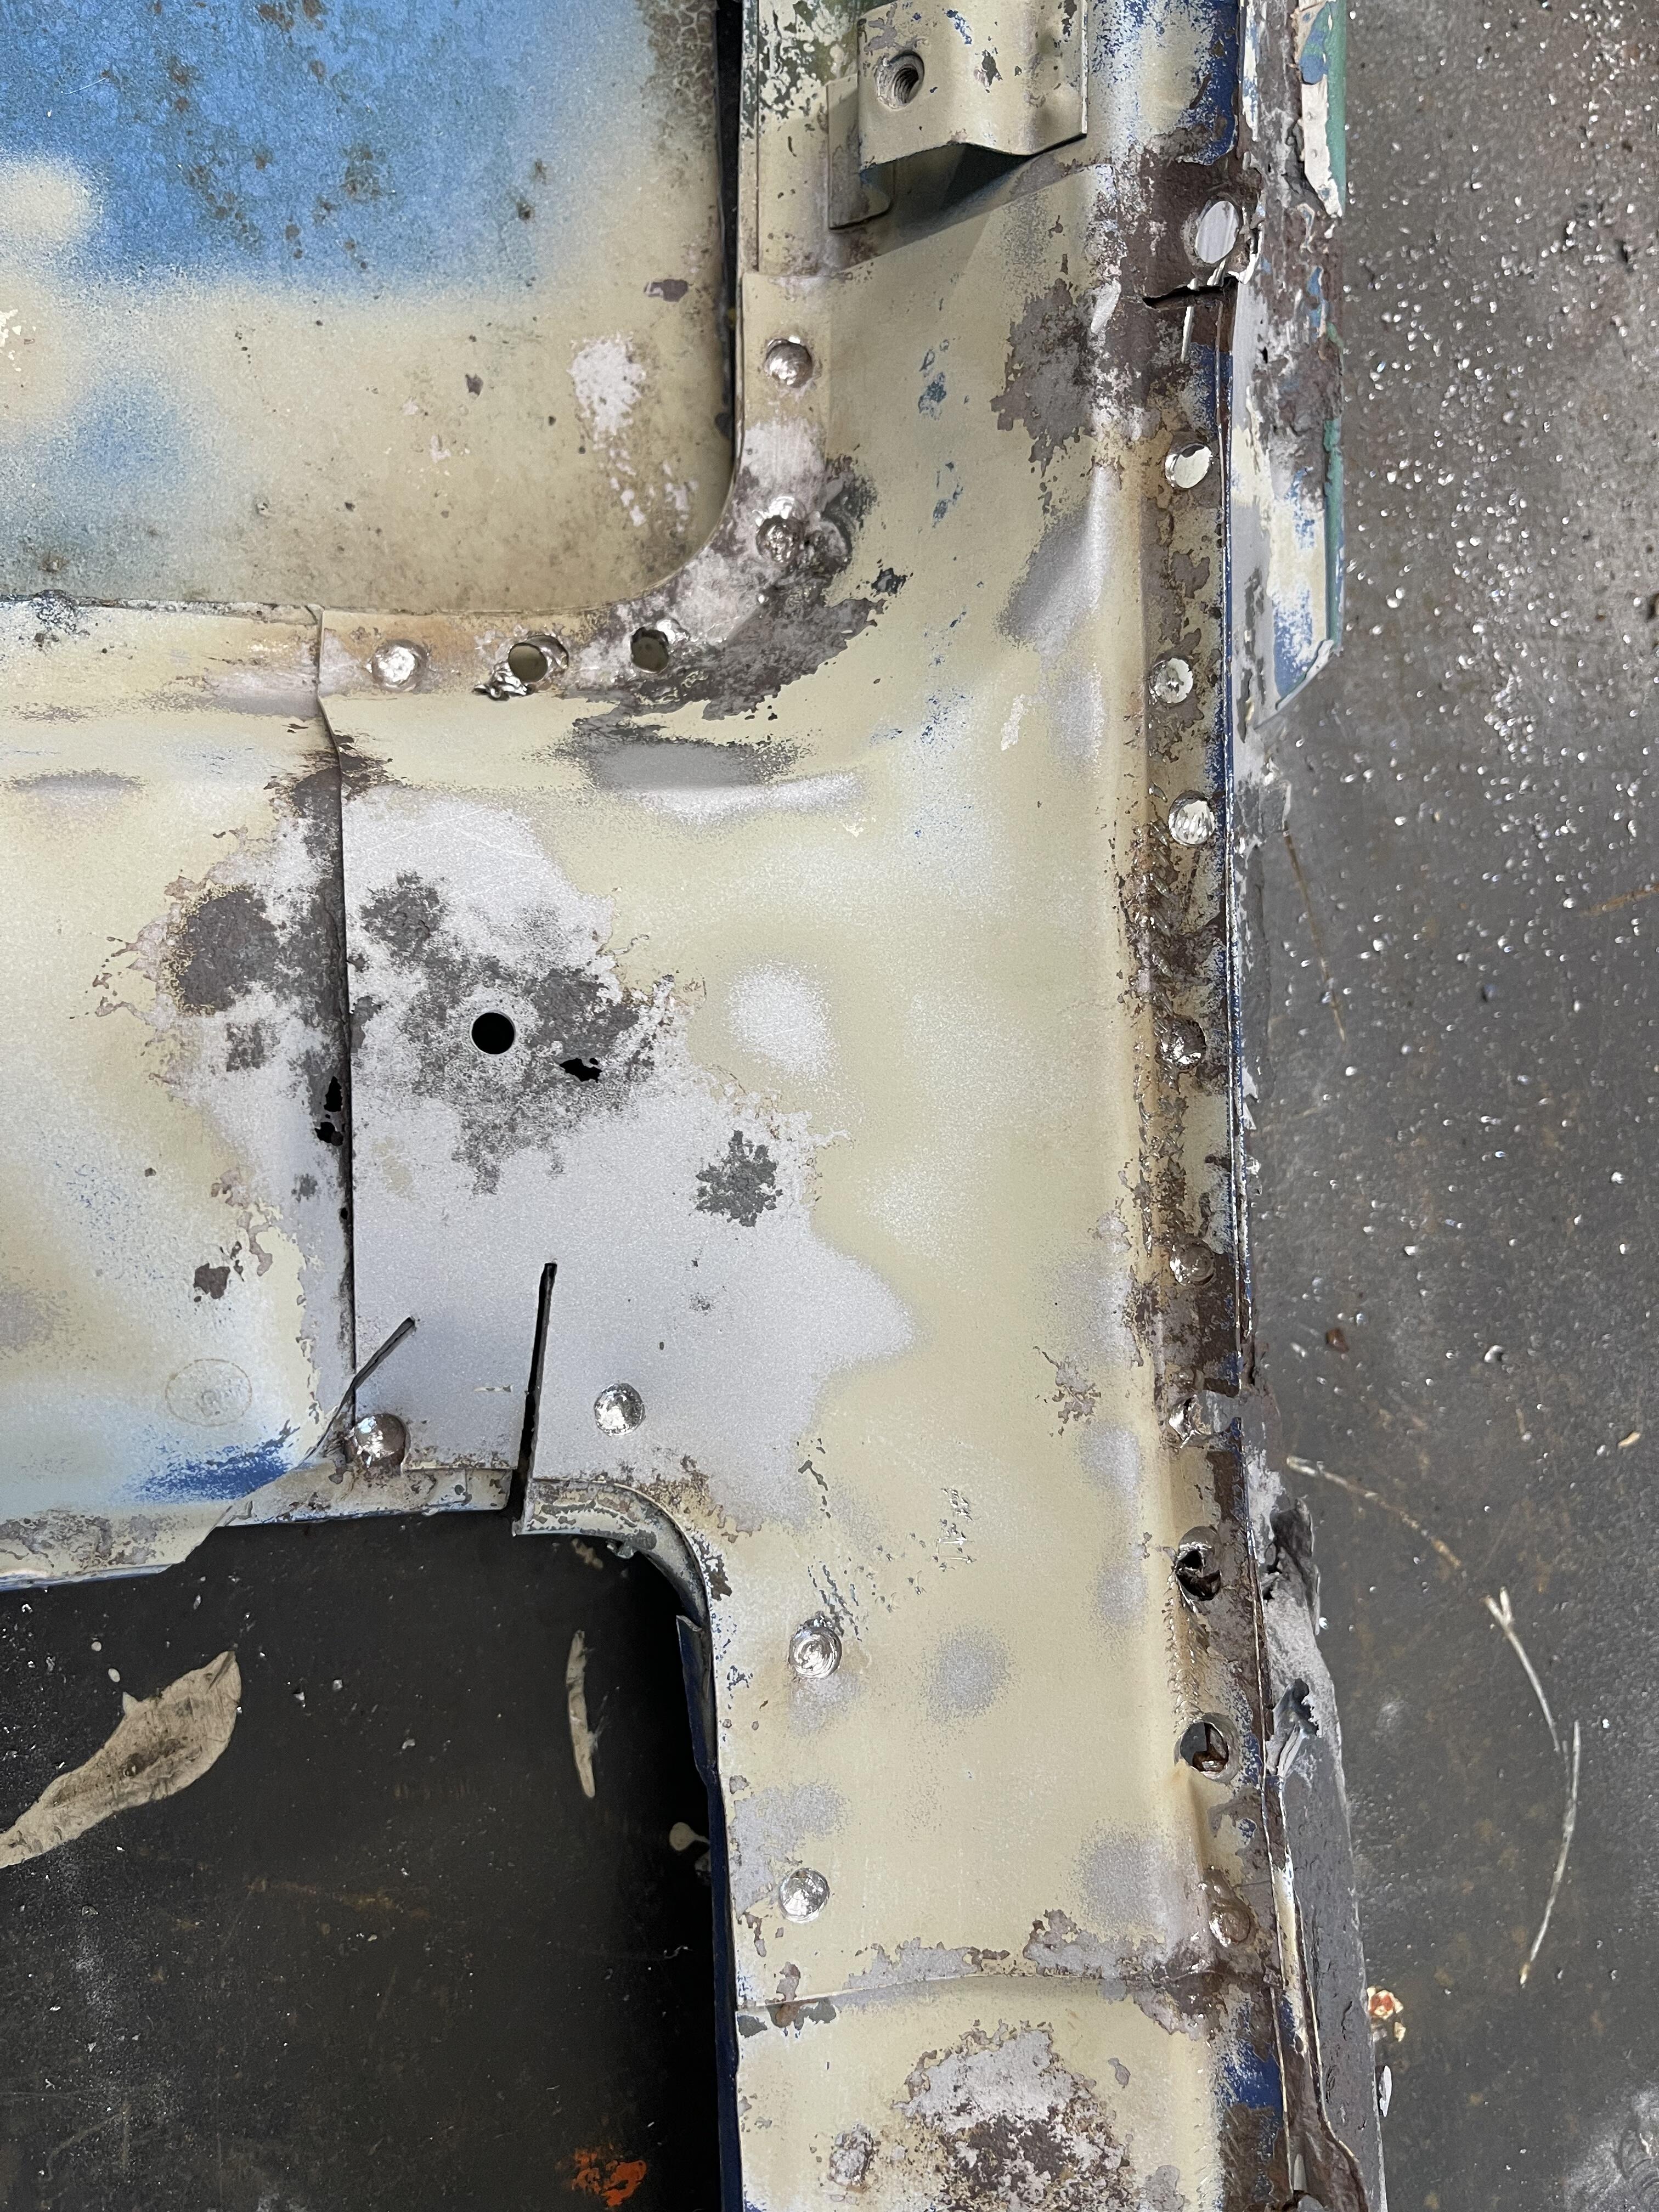
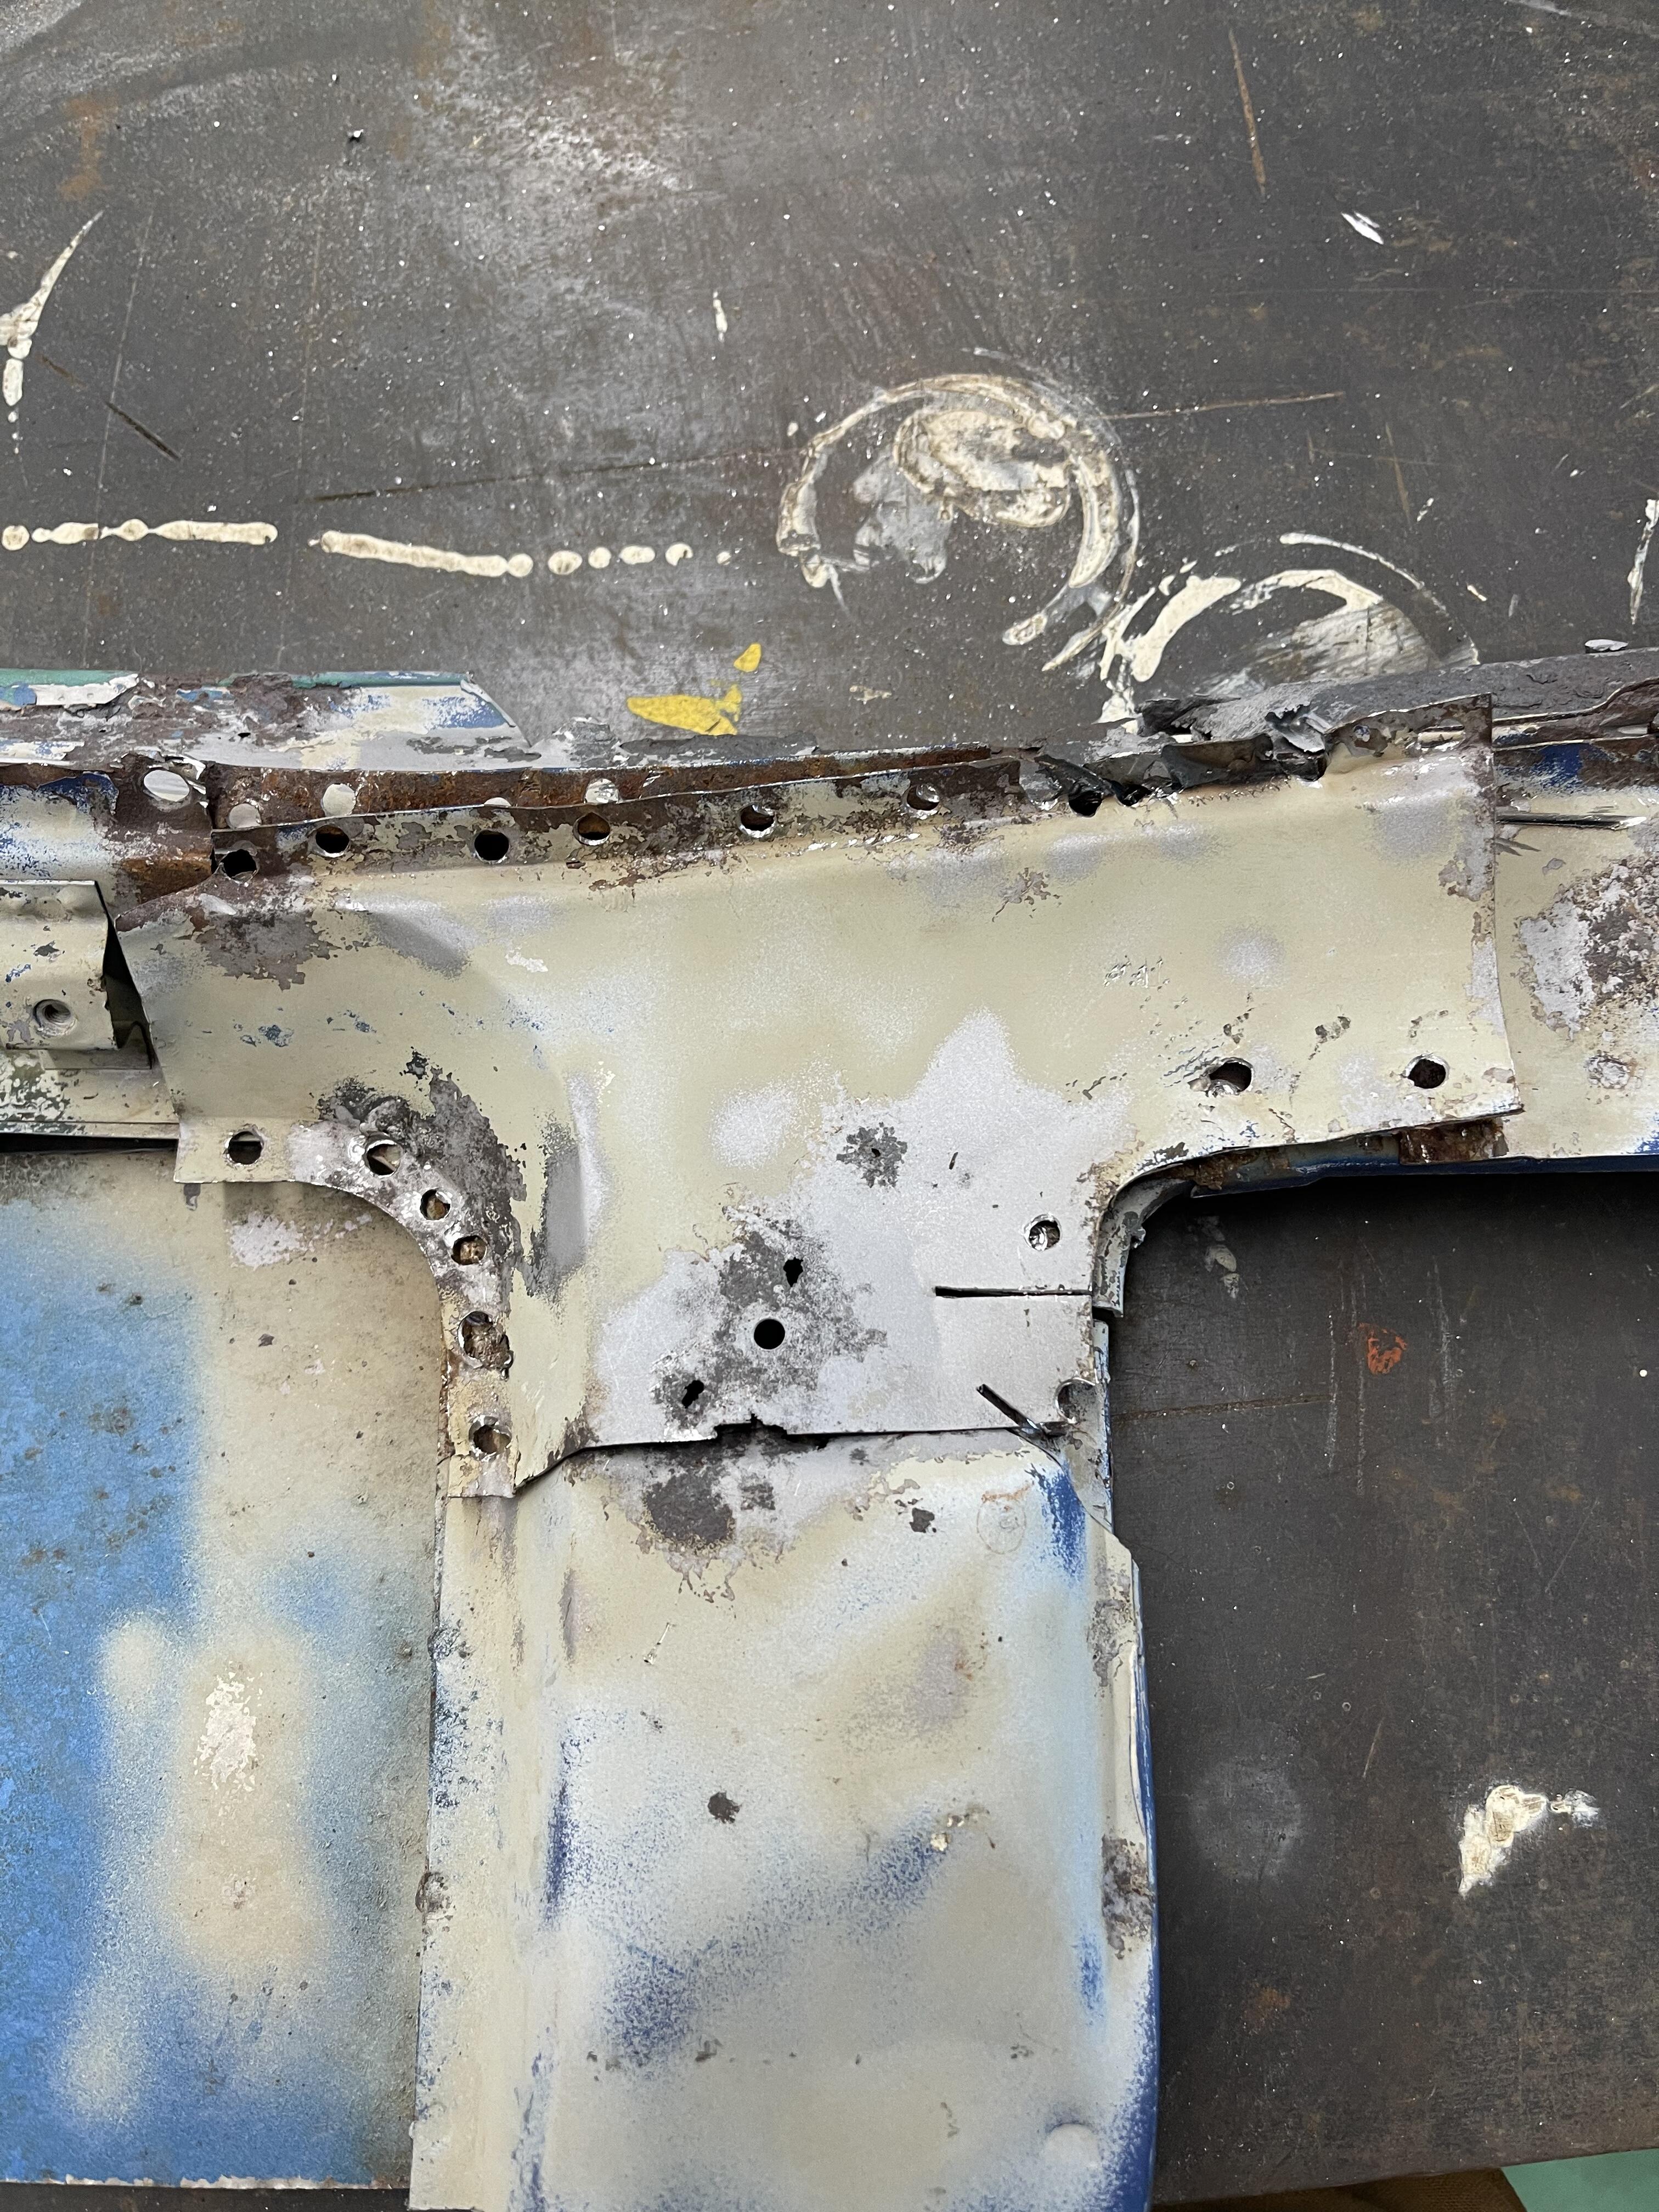
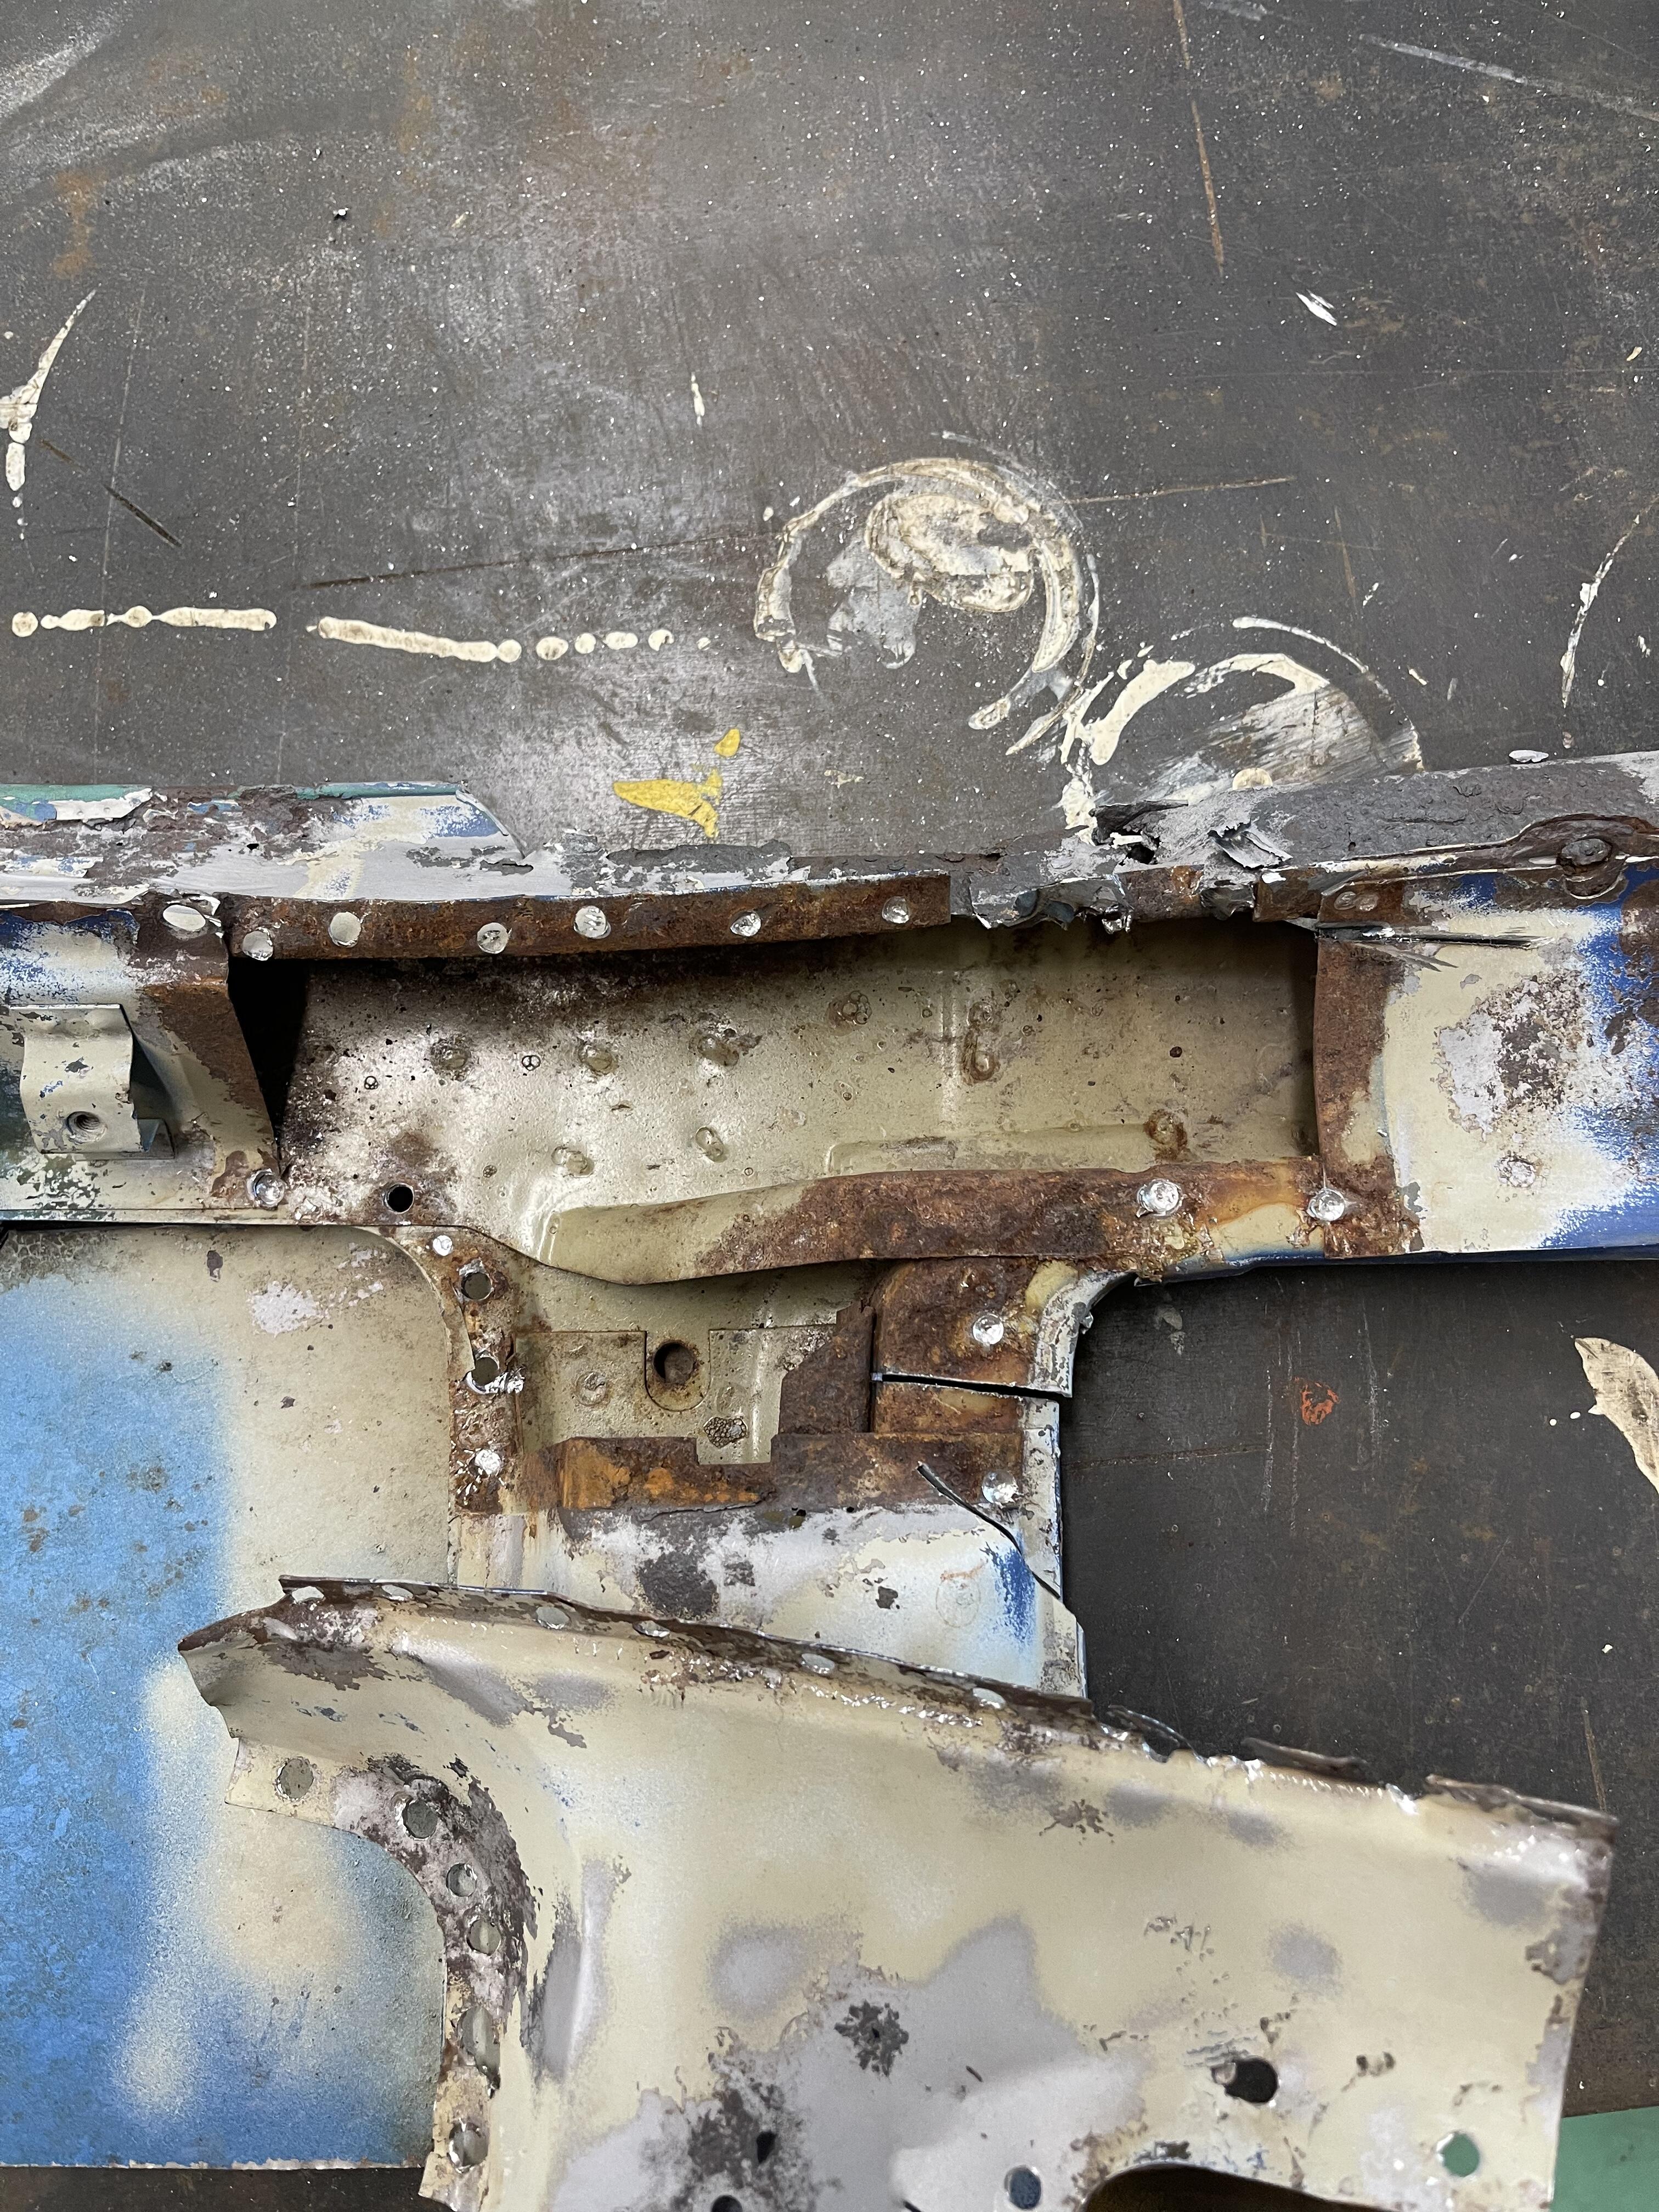
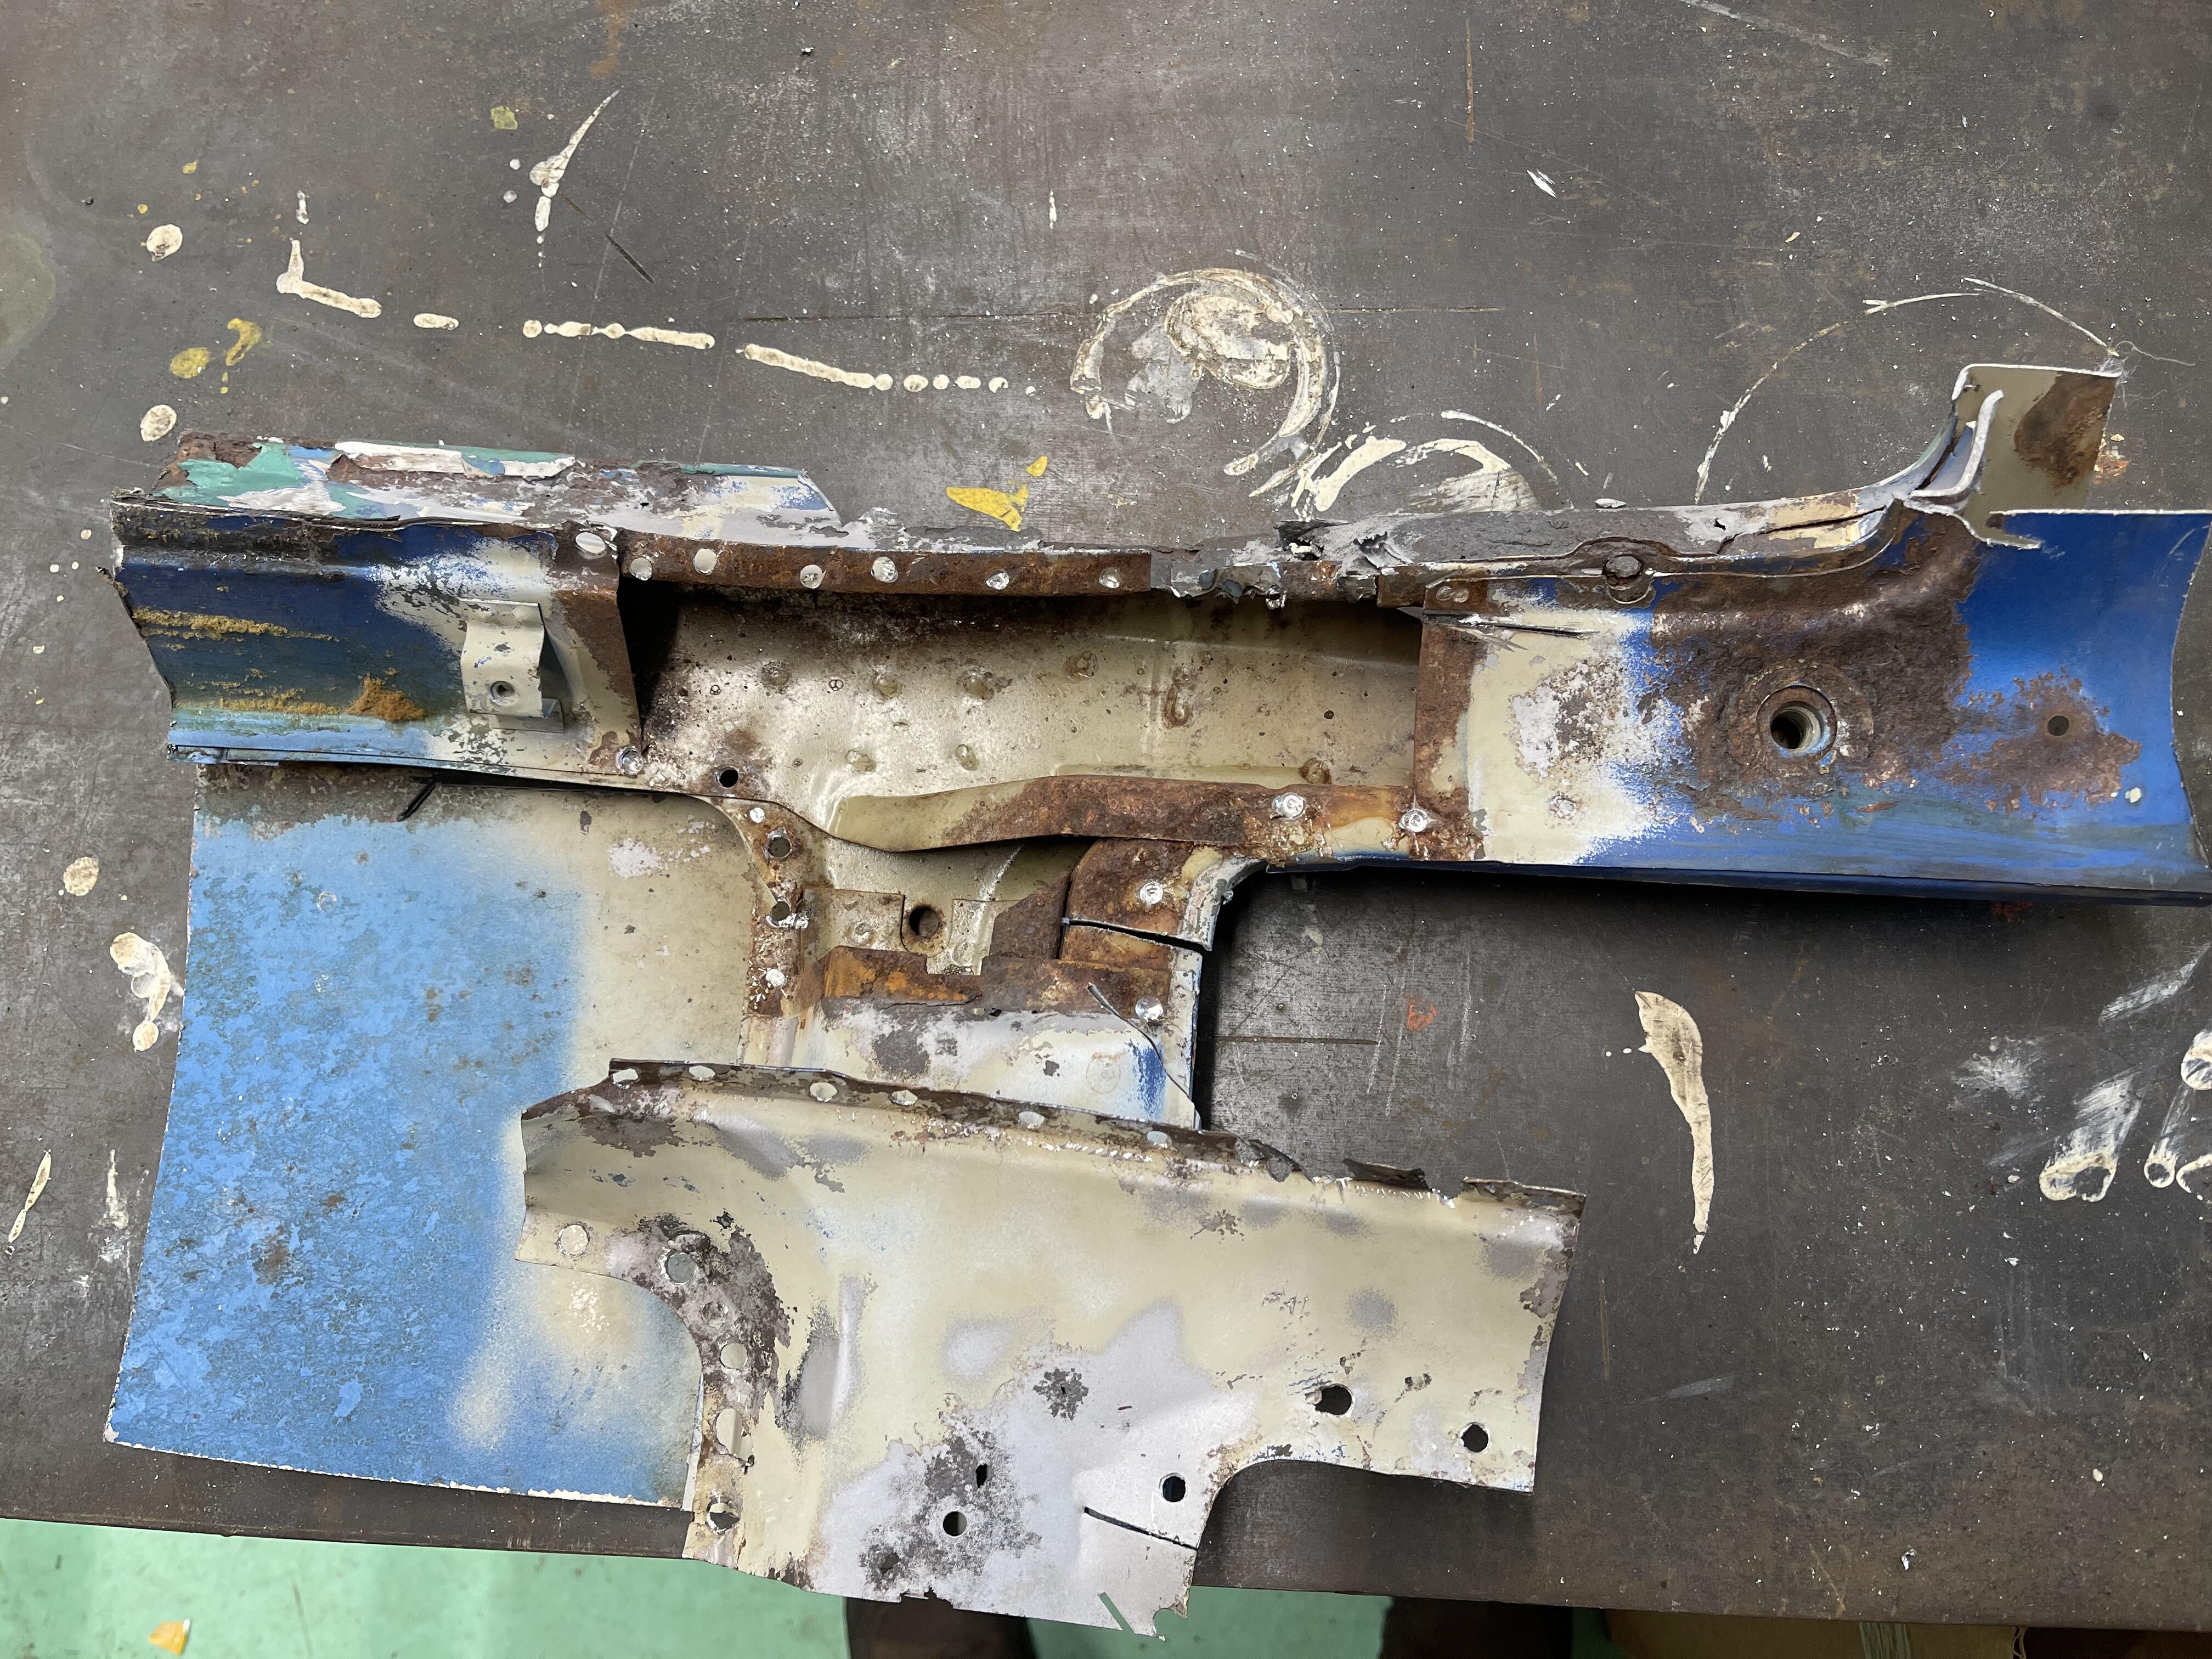
Attached via stitch weld for sure, then “hidden” with the lead filler spread over and smoothed. Properly shaped wooden paddles for the front and rear, and the self leveling tendencies of molten lead, smooth and flexible. Pulled apart the interior side of panel junction at corner of rear roof area…. 6 panels held in place/reinforced by a “t-plate” of sorts…. All spot welds in this area.


 2 points
 -
1 pointIf "power" is coming out of the center wire of the coil - that is "spark". You're still not describing where, exactly, you are looking when you say "no spark". When testing just the coil and points you should remove the center wire from the top of the distributor cap, leave it connected to the coil, and do your spark test. Place the end of the wire close to a grounding point, like the intake manifold, close but with a small gap for the spark to jump. Then do whatever you're doing to look for spark, spinning the engine or opening and closing the points by hand. The spark from the coil passes to the center of the distributor cap and is picked up by each spark plug wire electrode as the rotor turns inside the cap.
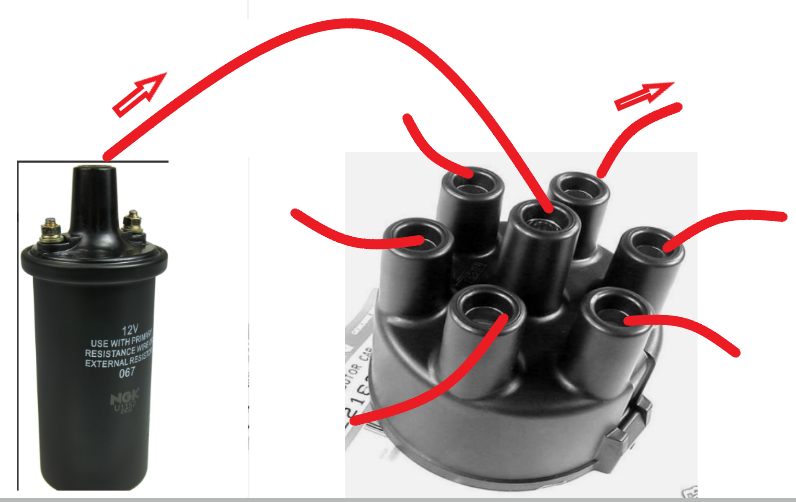 1 point
 -
If your pump fails the electrical test Yarb recommends and your pump is dead, replacements are available on Amazon: https://www.amazon.com/ACI-177510-Windshield-Washer-Pump/dp/B000CEN2OK/ref=sr_1_4?dib=eyJ2IjoiMSJ9.8sIz-JyDouorpuyV73LJGApCXSnIcESJdEAuzfZjL6rENSgwS7oSiVl-b-R0qZM-bxU_wHyiykdwdDs76tM6YTm9JSfu6l8nX3Ws9itlpXw.qIJ1MJ9DZAz_O78dgBolSY0D-EDnP4-JmyLTOHvDdLo&dib_tag=se&qid=1714416653&s=automotive&sr=1-4&vehicle=1971-67-2284-20-----14492------1&vehicleName=1971+Nissan+240Z1 point
-
Did you test it with jumper Leeds straight from the battery?1 point
-
1 pointHonestly, with all the hacked up wiring and splices and stuff, I can't tell if yours is even close to correct or not. But my assumption (based on the fact that it won't spark coupled with the cut up wires and splices, etc) is that your ignition wiring is not correct. Can you strip the G/W and B/W mystery wires back a half inch and check voltages to body ground? Negative of meter on body ground and positive on B/W. With key off, on, and start. And then do the same thing for G/W. Off, on, and start. What happens?1 point
-
There are posts available here on the forum that are larger. Hopefully someone will chime in and point you in that direction. There is no easy fix if you can’t bug it out with a meter.1 point
-
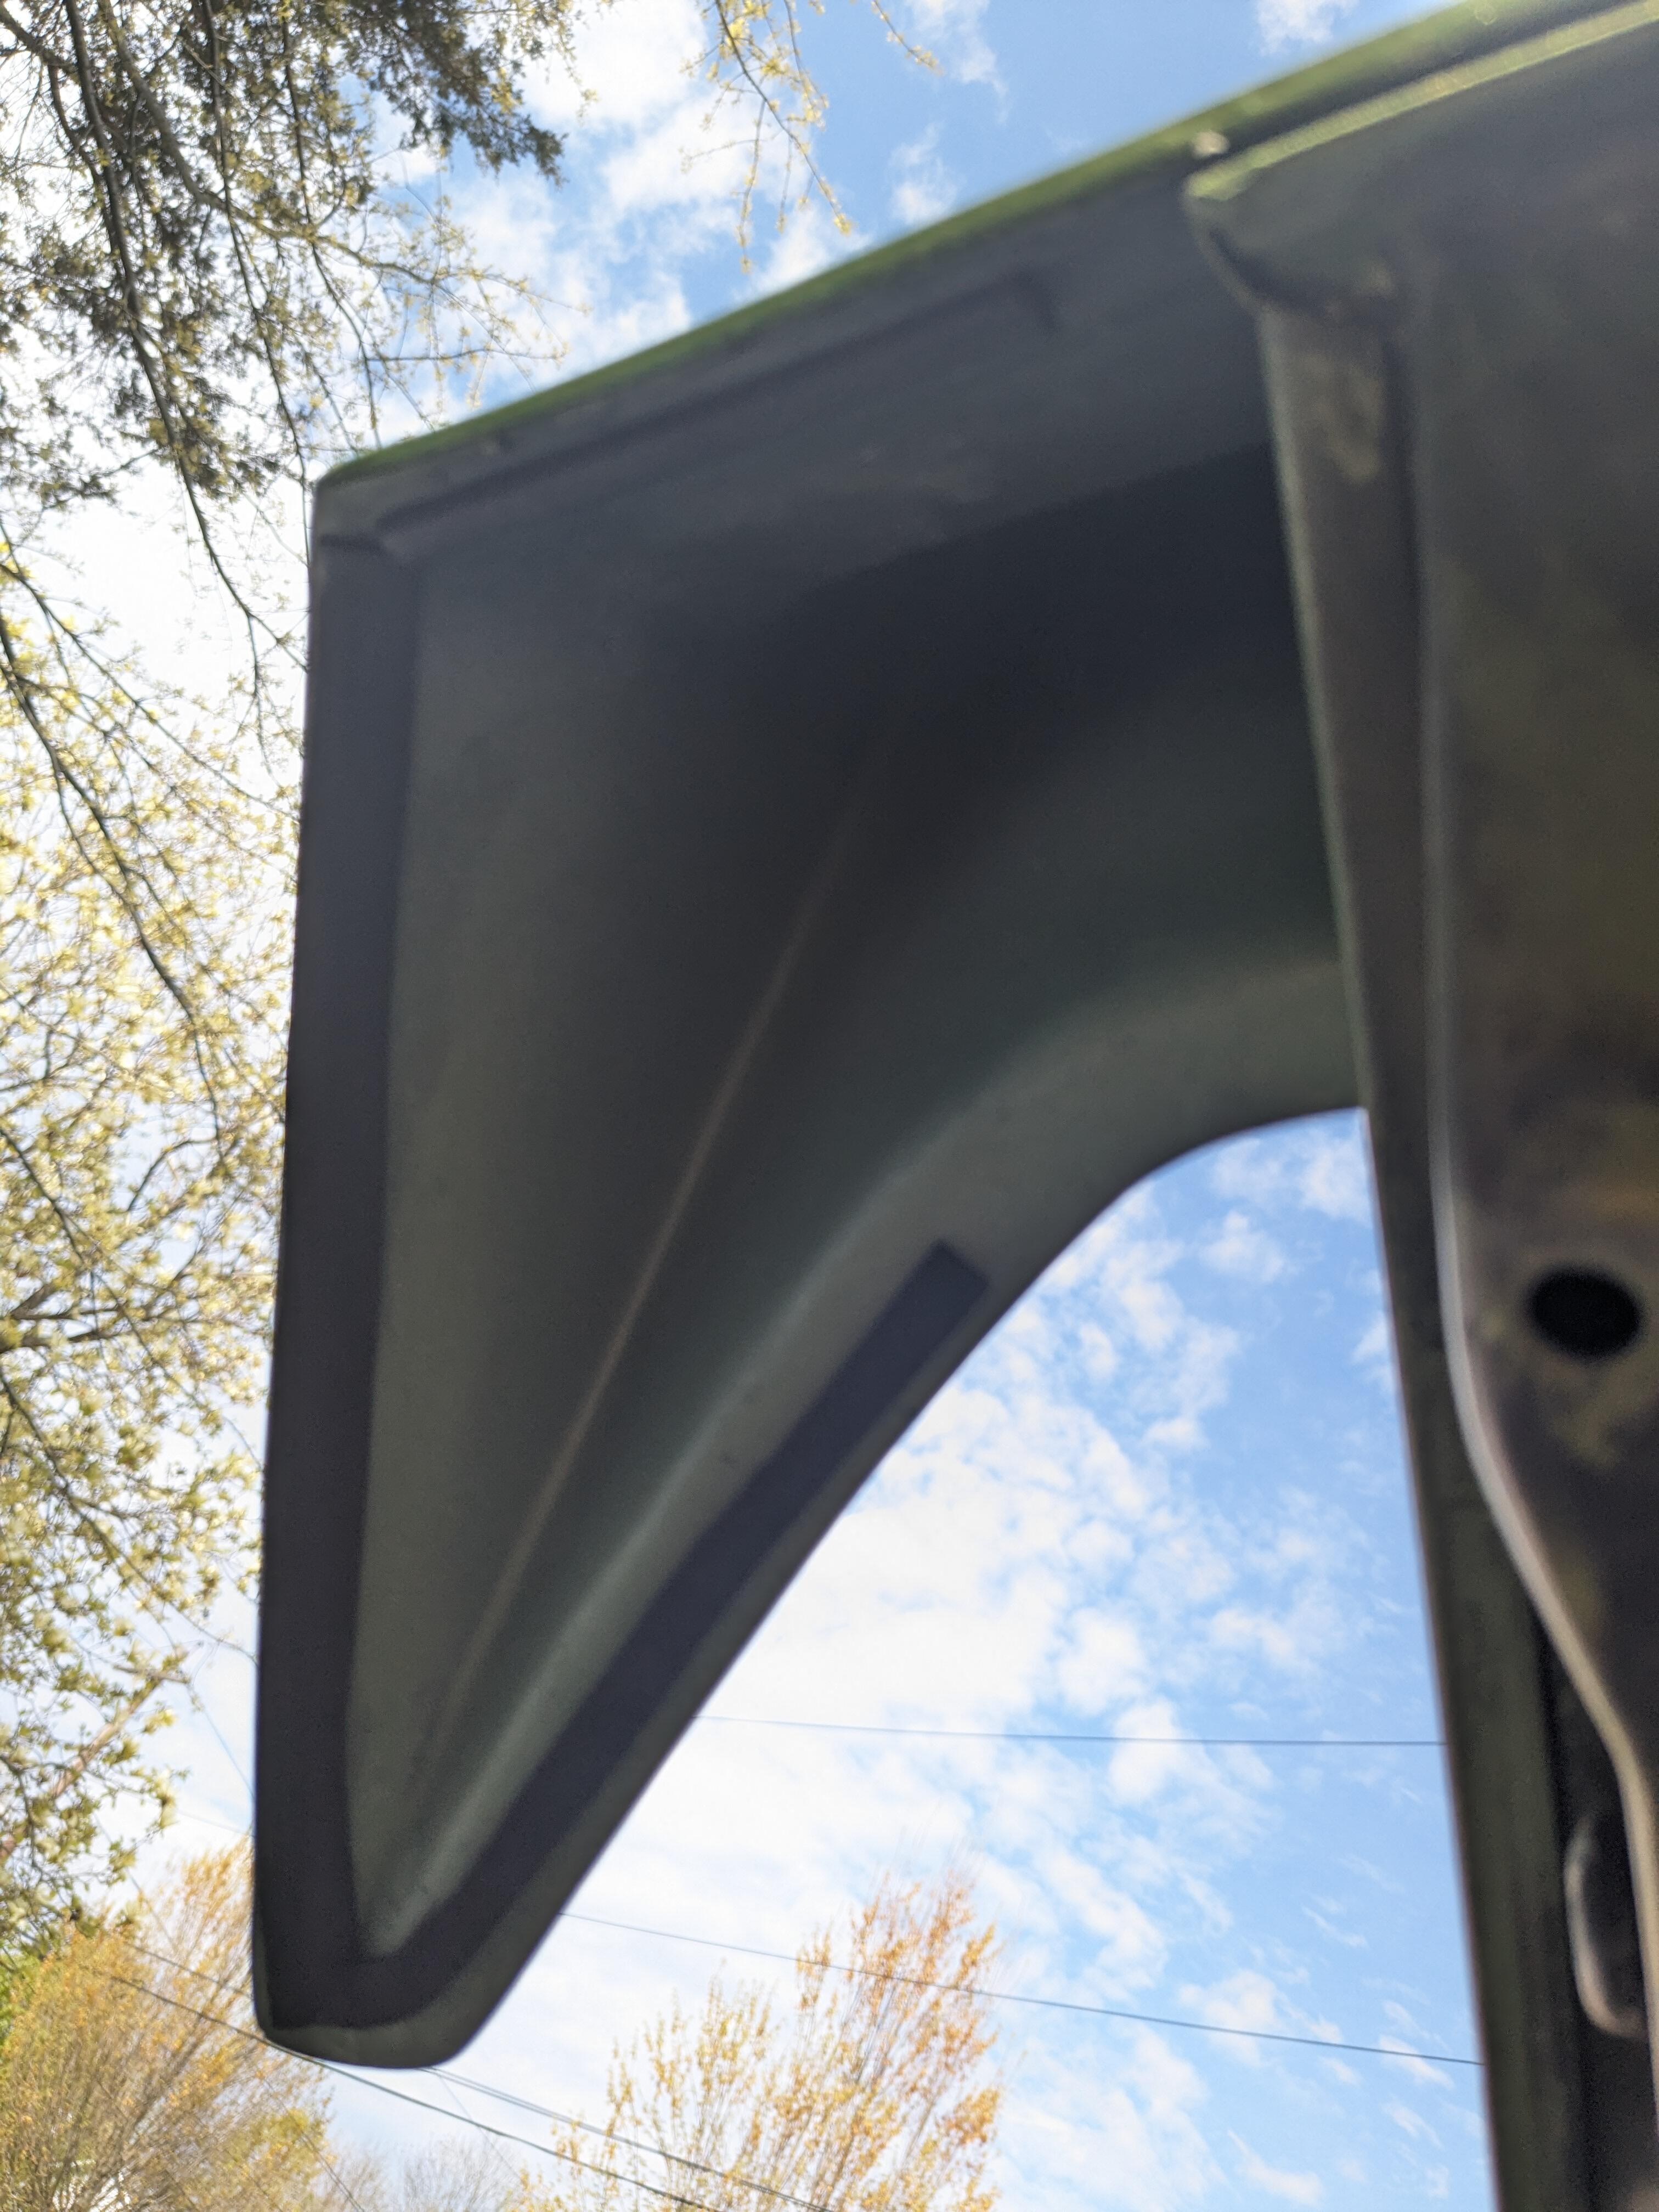
1 pointI'm covering all surfaces that will touch on both the car and the seal, you have to be quick, which is another reason why I only do half of the seal at a time. I can't understand why this seal is always made so it is a little smaller than it needs to be, you have to stretch it to fit and all it wants to do is pull away from the gutter. That's one of the things I like about using the Kia door seal for the hatch, you don't have to fight with or stretch it and you still get a good seal.1 point
-
1 pointSlow down... No the alternator is not needed for short duration running if the battery is fully charged. Don't throw parts at it. That's expensive and the person before you probably tried the same. Some one will post up a diagram of the early ignition system for you to check off of. Do you two disconnected wires go into the dizzy?1 point
-
1 pointWell if you are done with laughing, take a look at this comedians answer.. hahaha...1 point
-
Right on the money! Feel dumb now, didn't even occur to me that the automatic was an option 🙃1 point
-
1 pointWhen is the last time the car actually ran. From the pics it looks like it was a very long time ago. Give us some history first please. Thanks1 point
-
Yes, there is a lot going on right there. One of the main issues is similar at the rockers. To work on the inner pieces properly you have to "peel the onion" and take the overlapping panels out of the way. Increasing the work dramatically! That's alot of spot weld drilling to even get a fairly small panel off.1 point
-
1 point
-
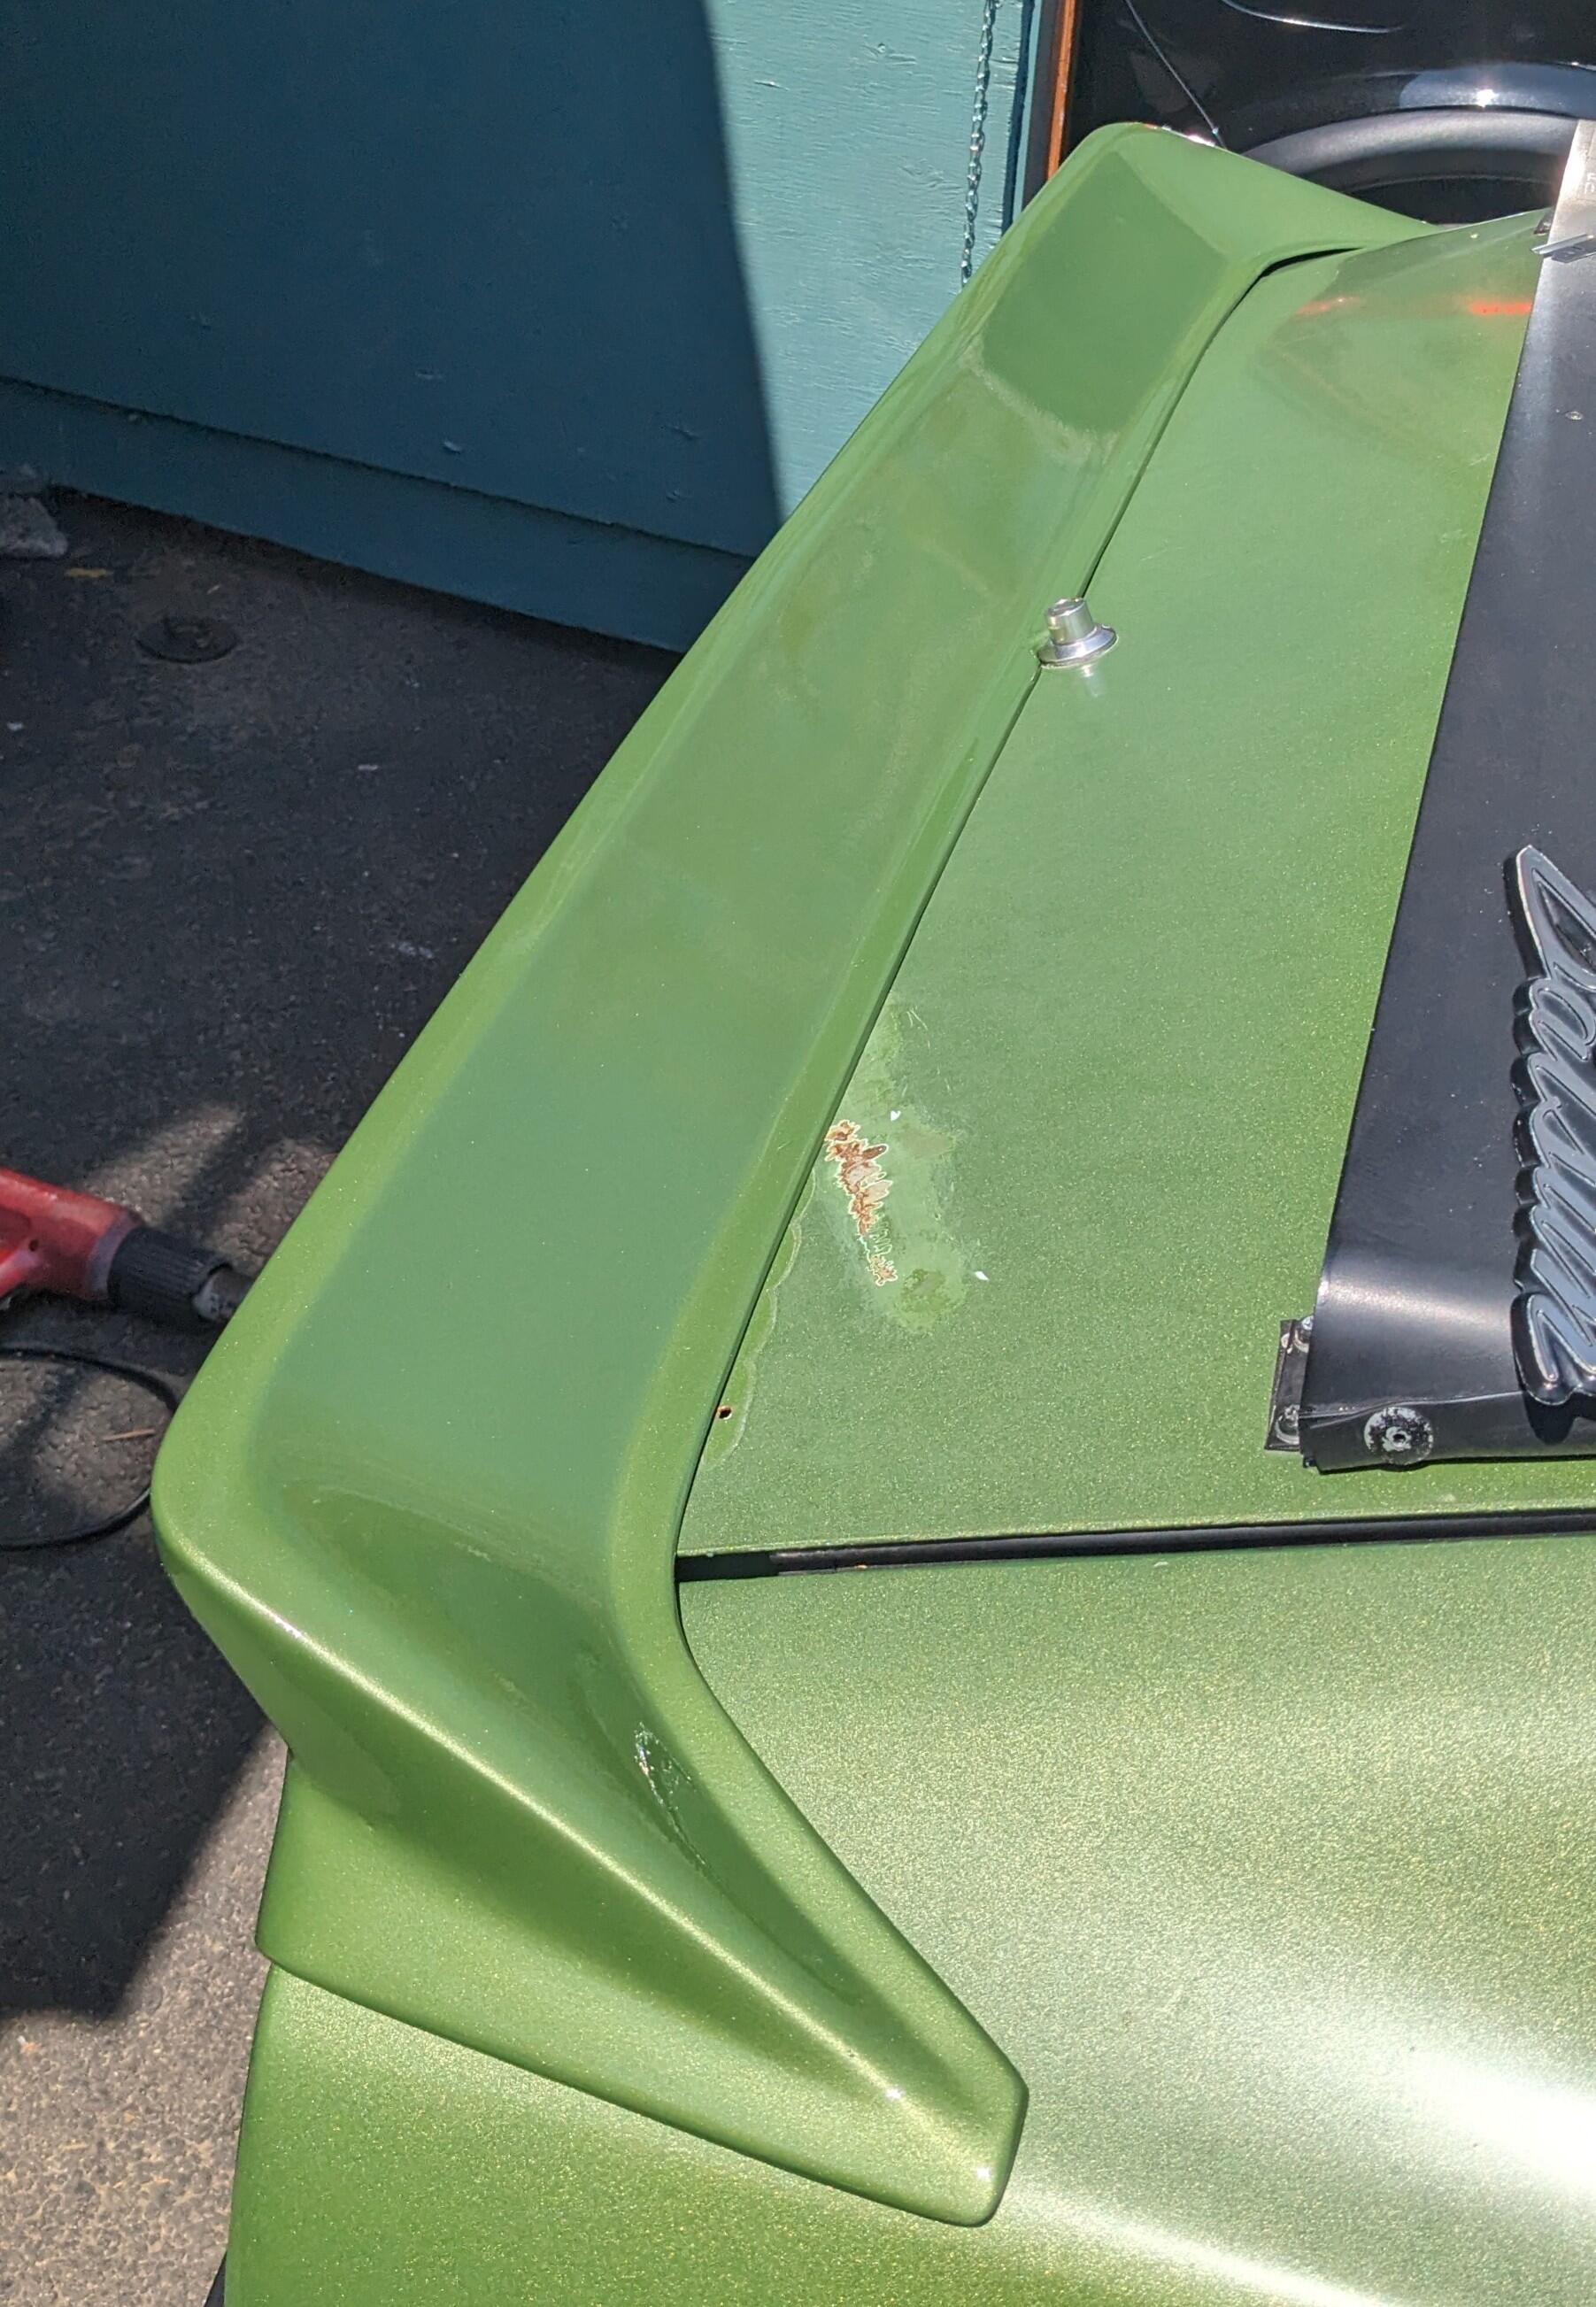
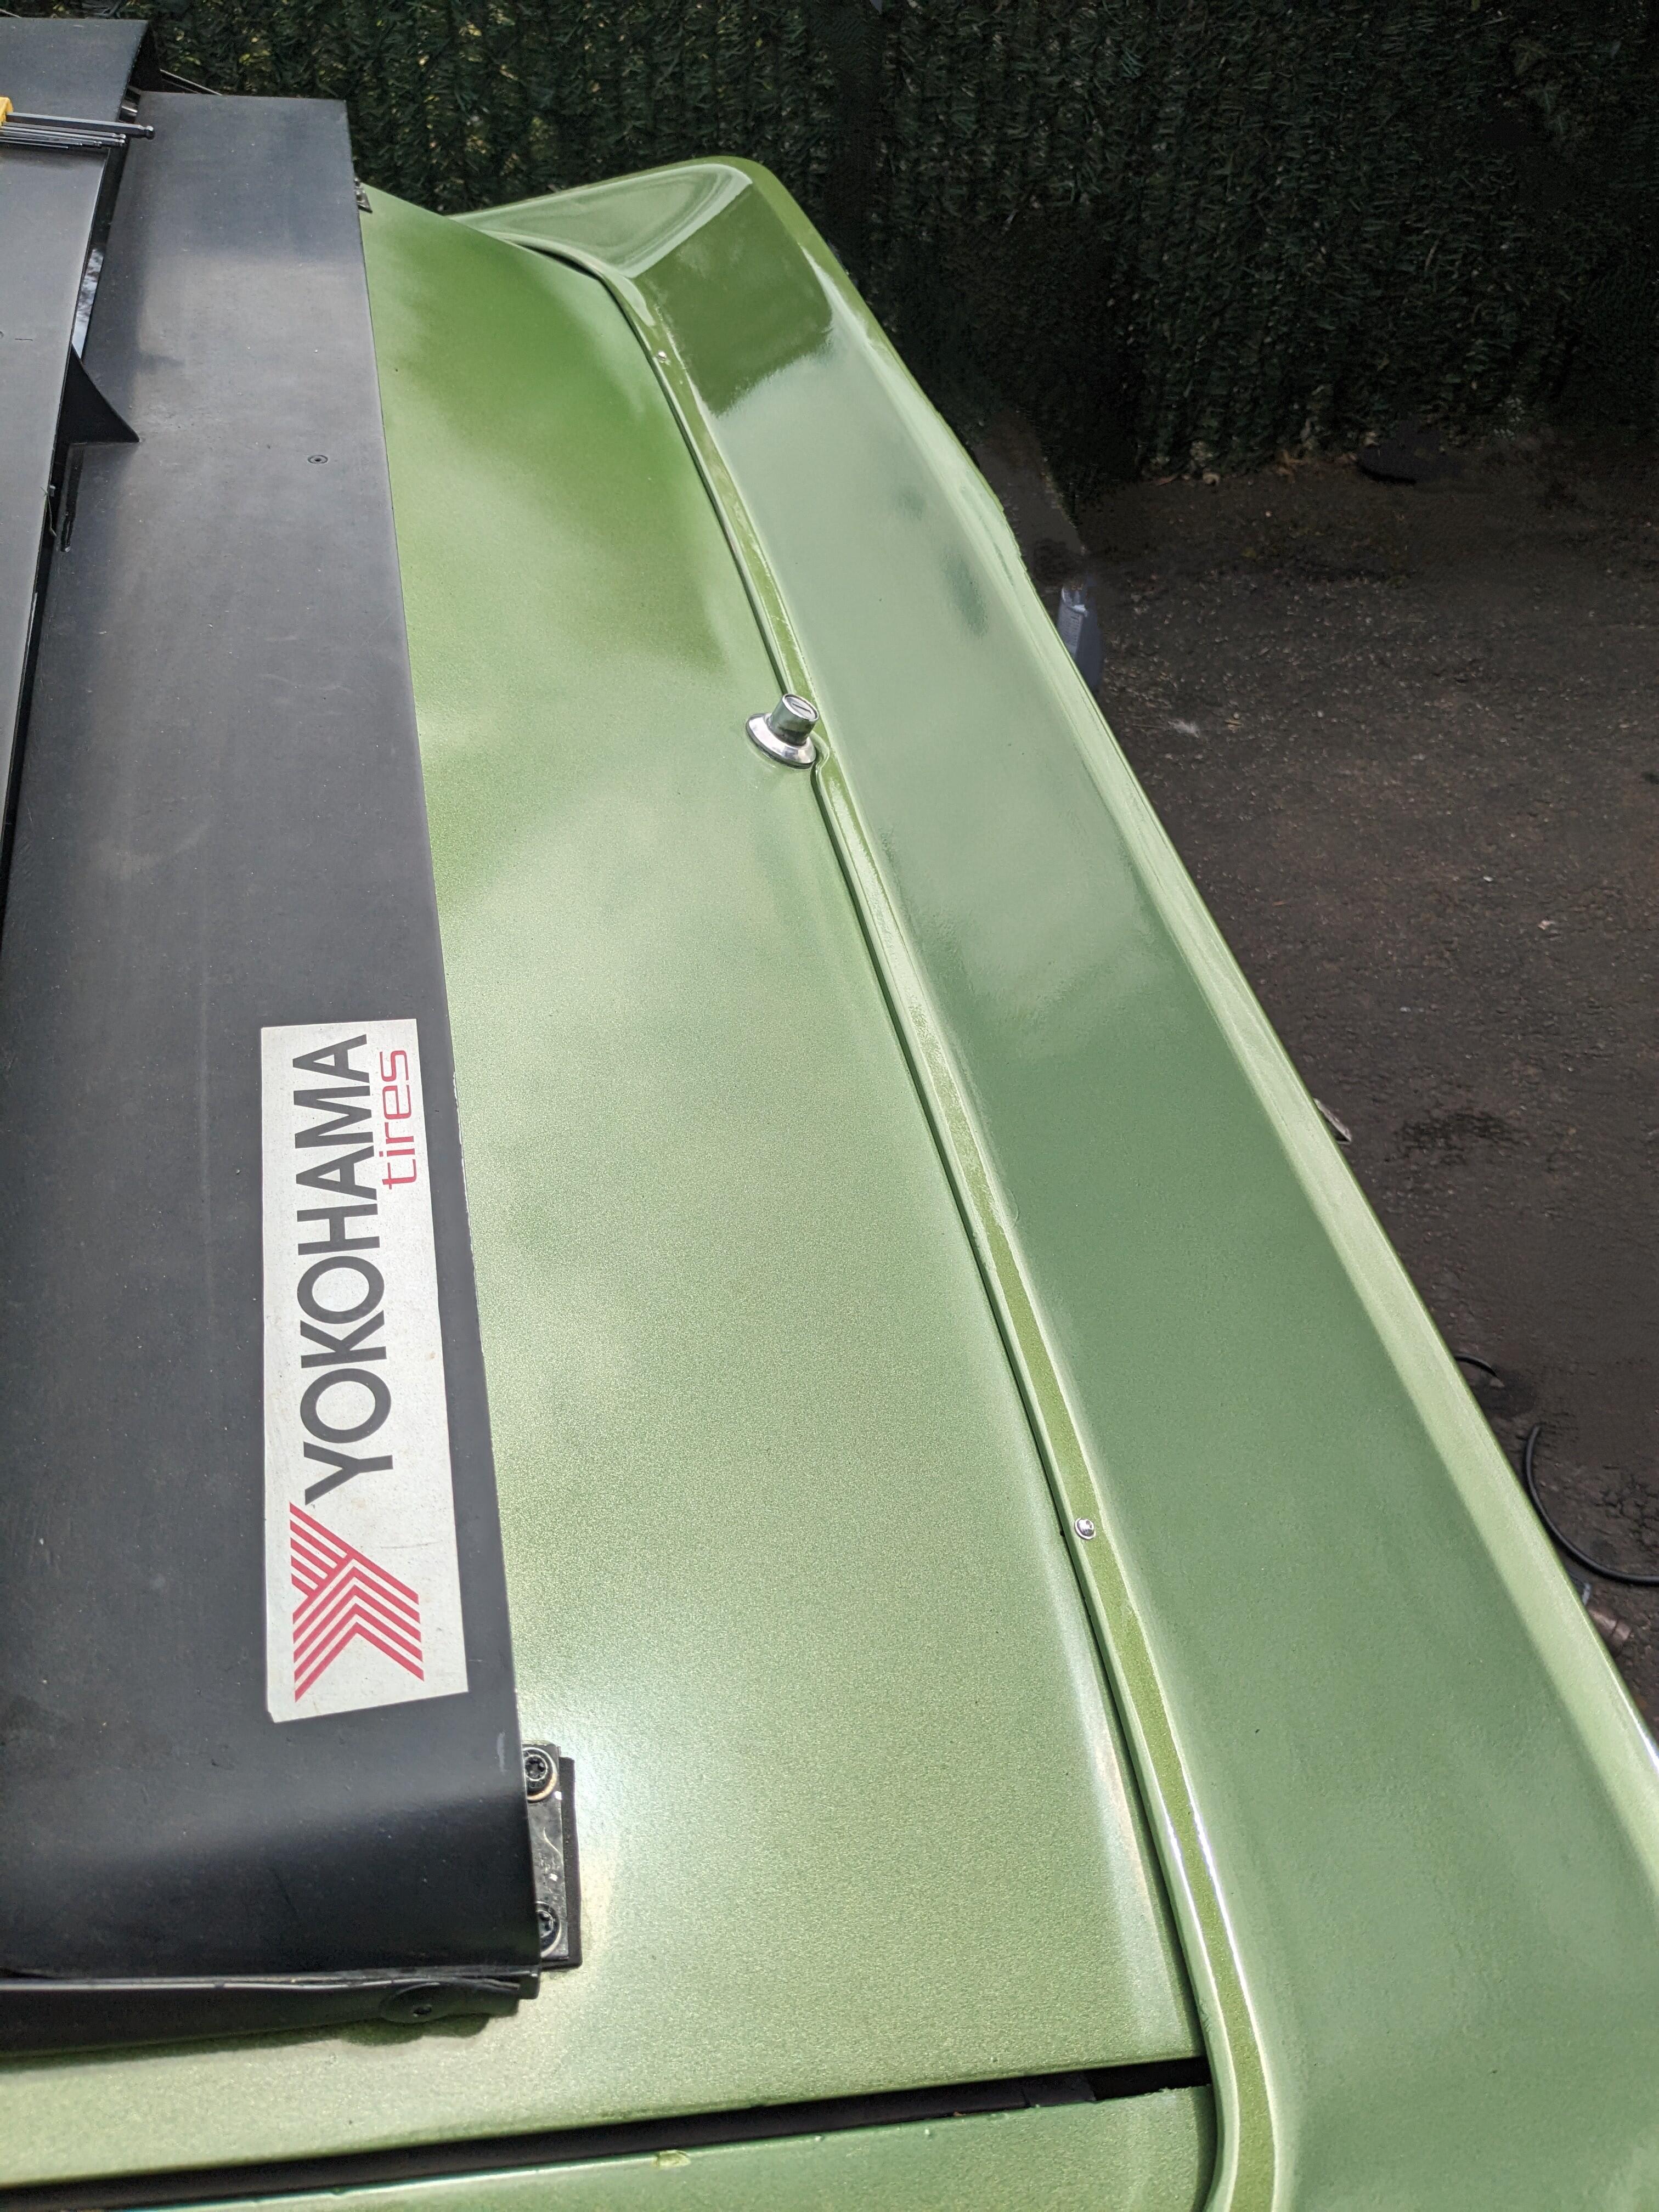
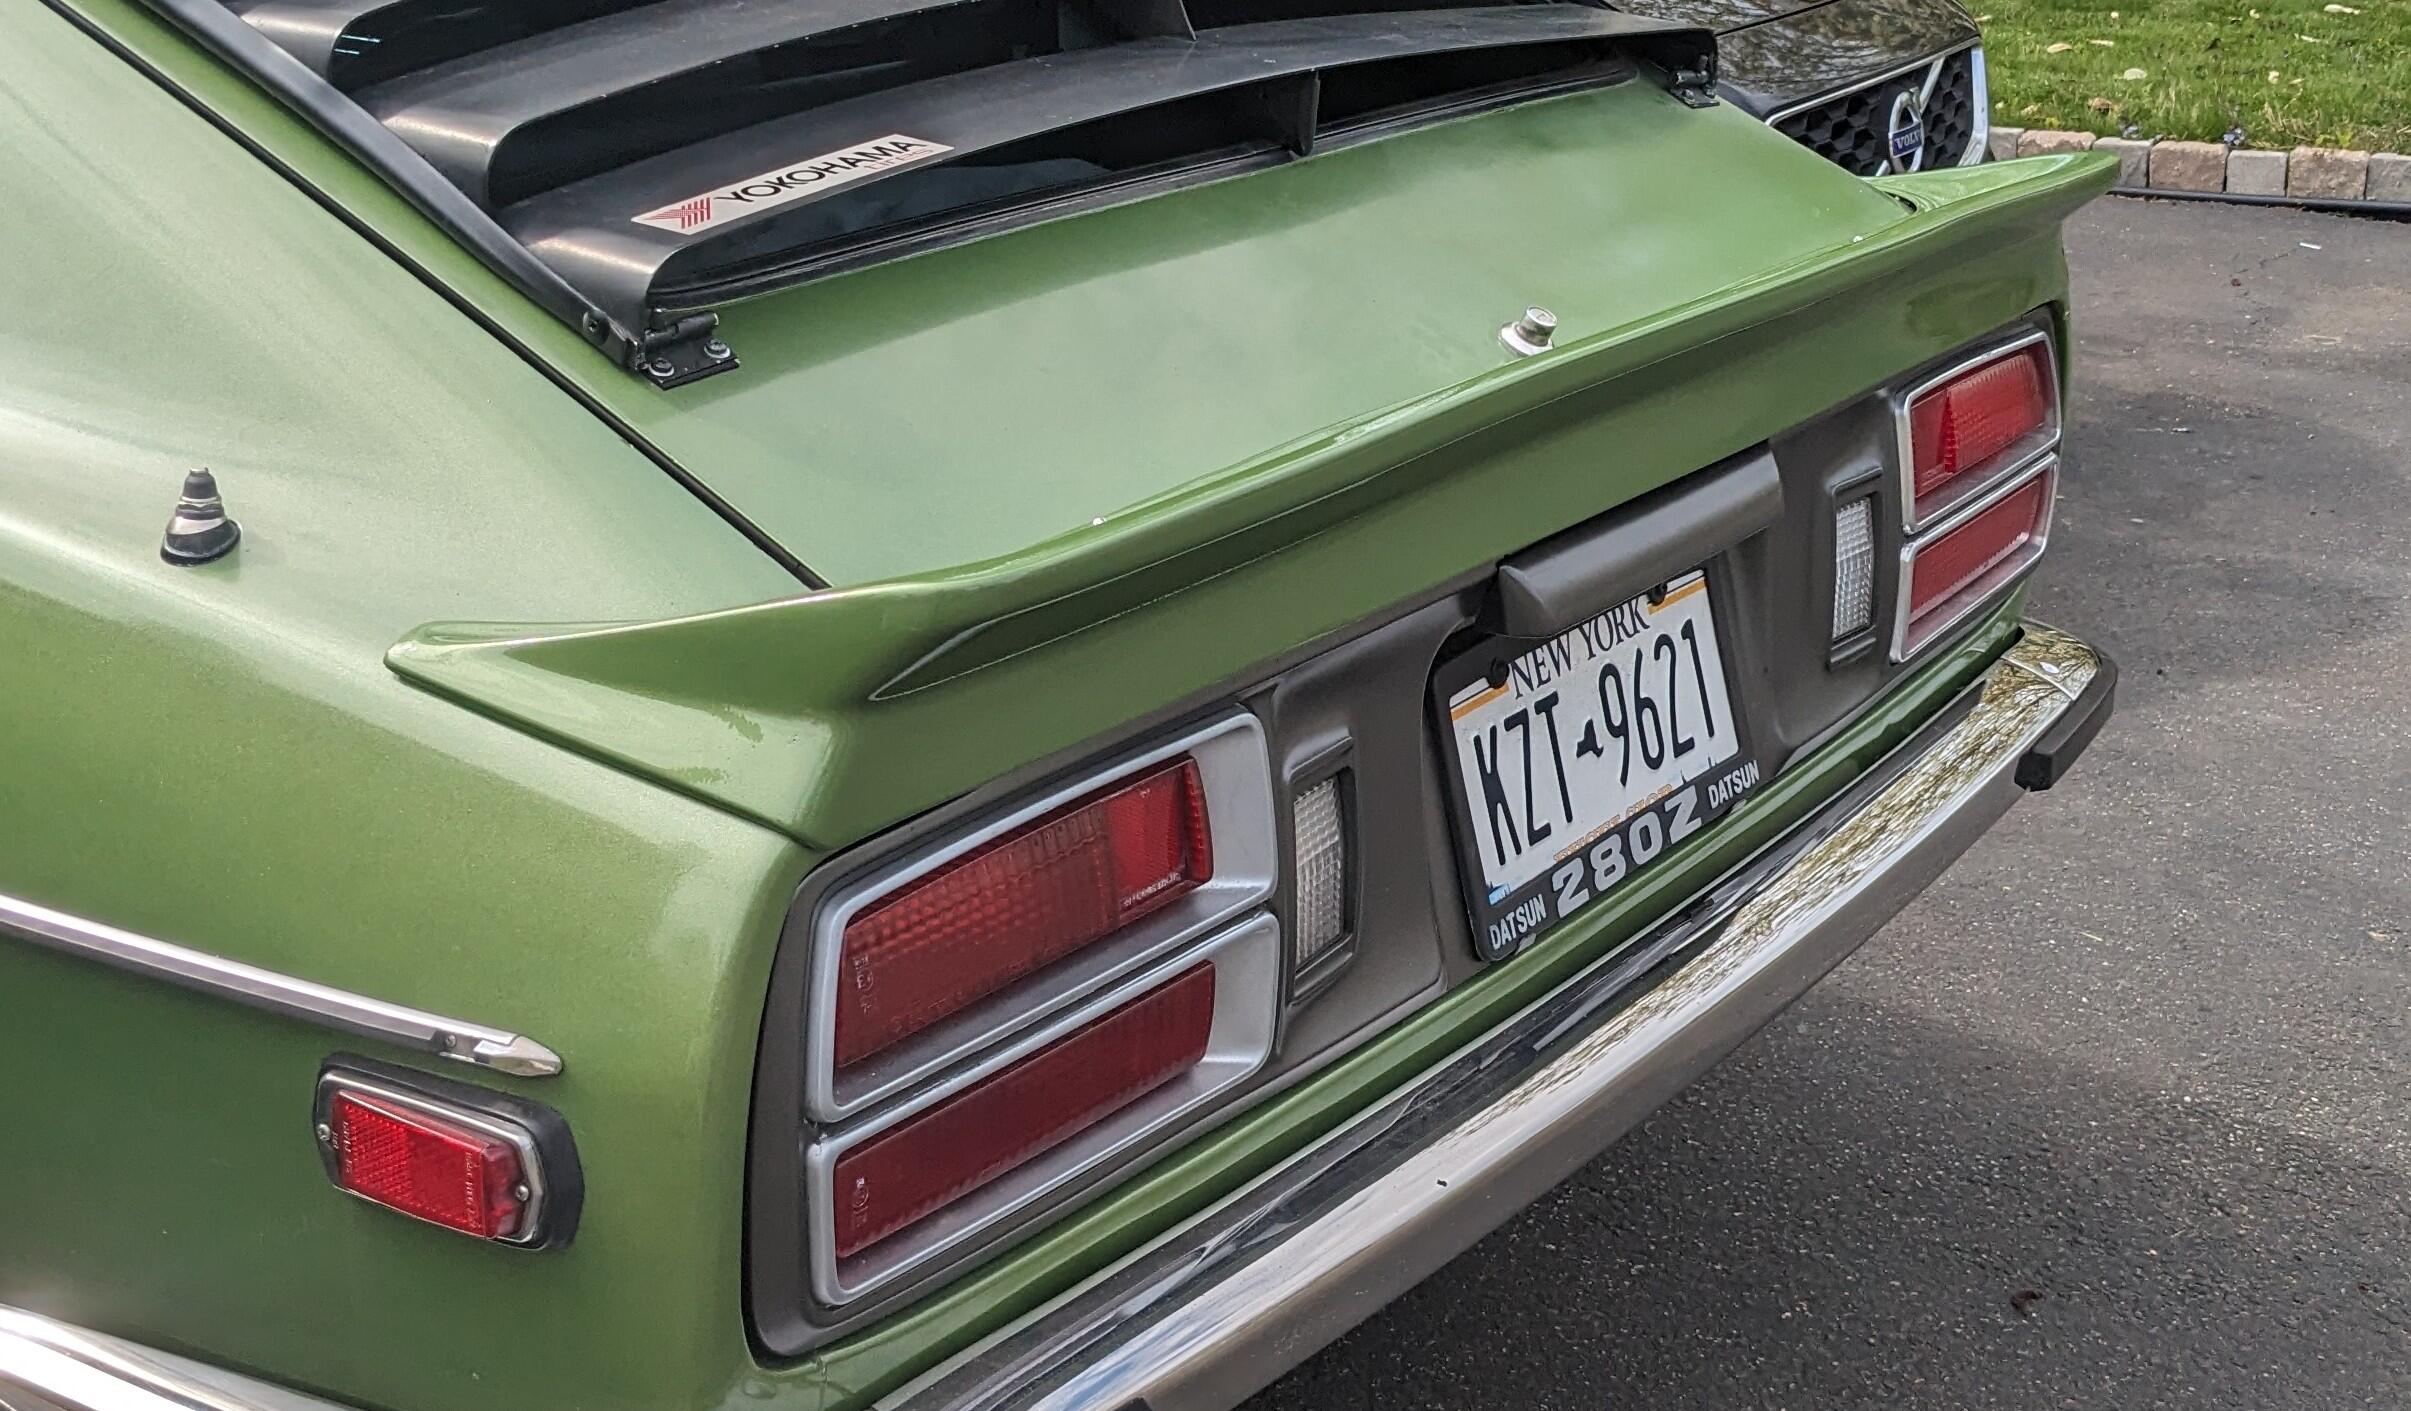
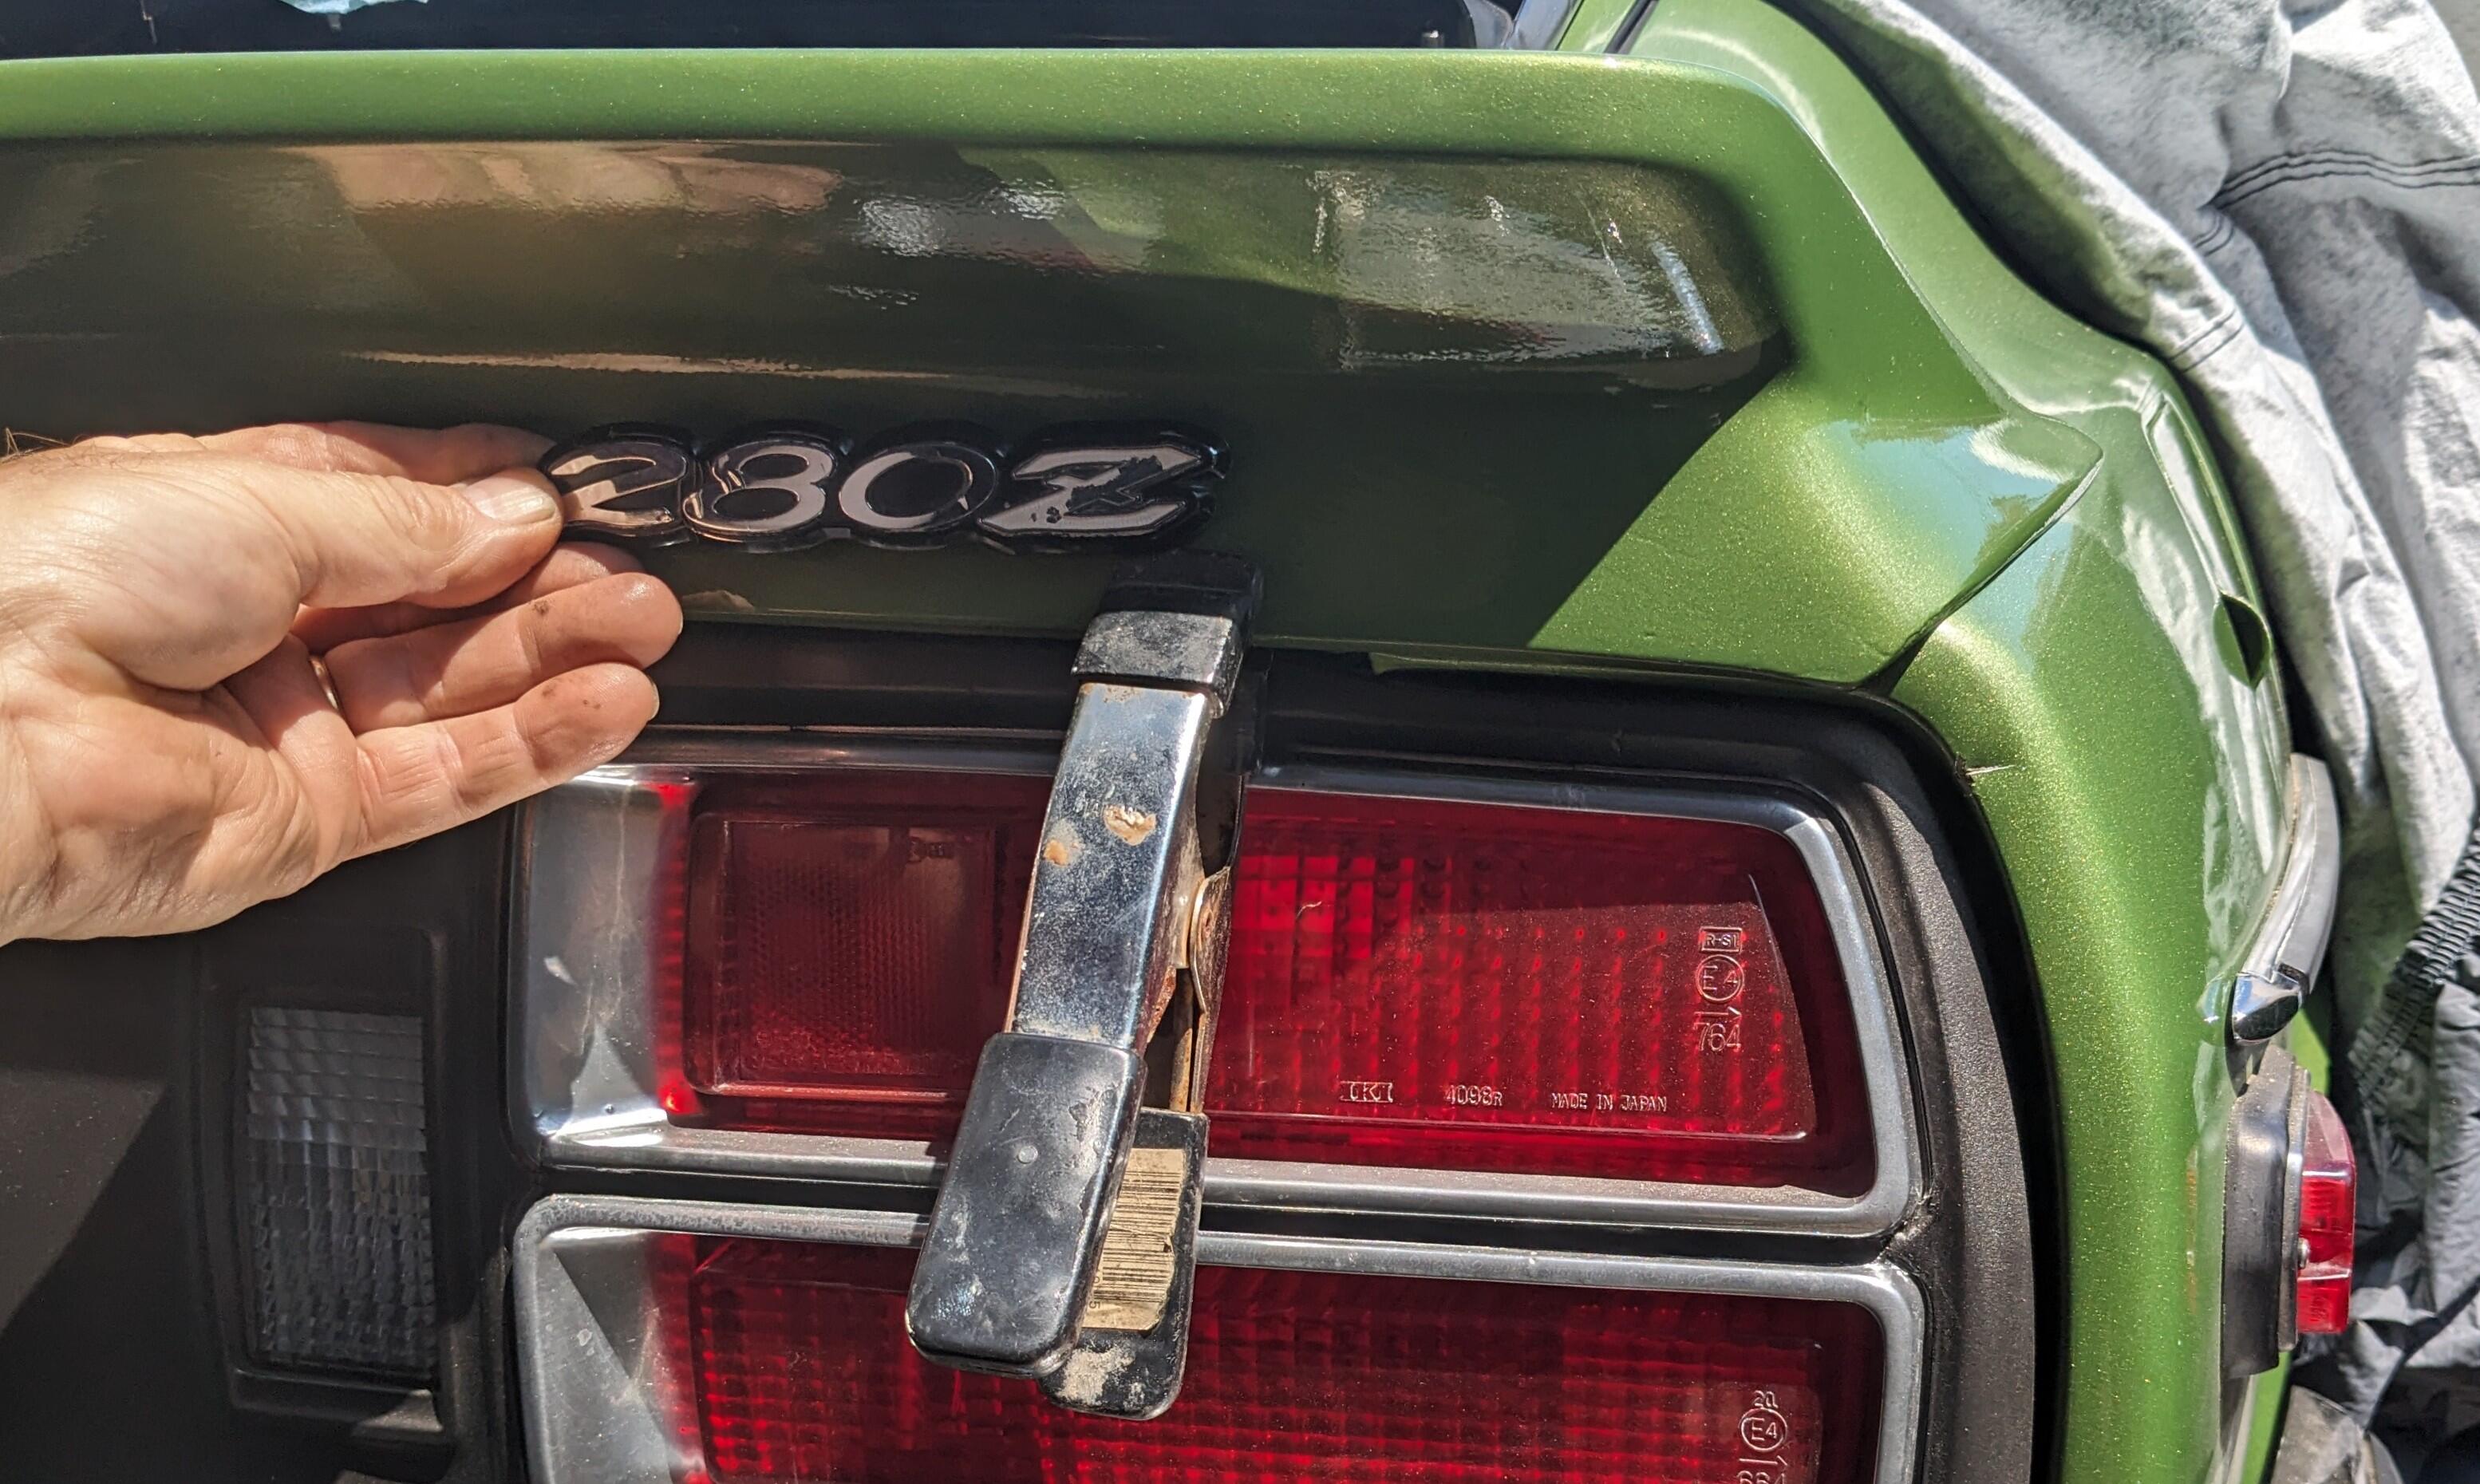
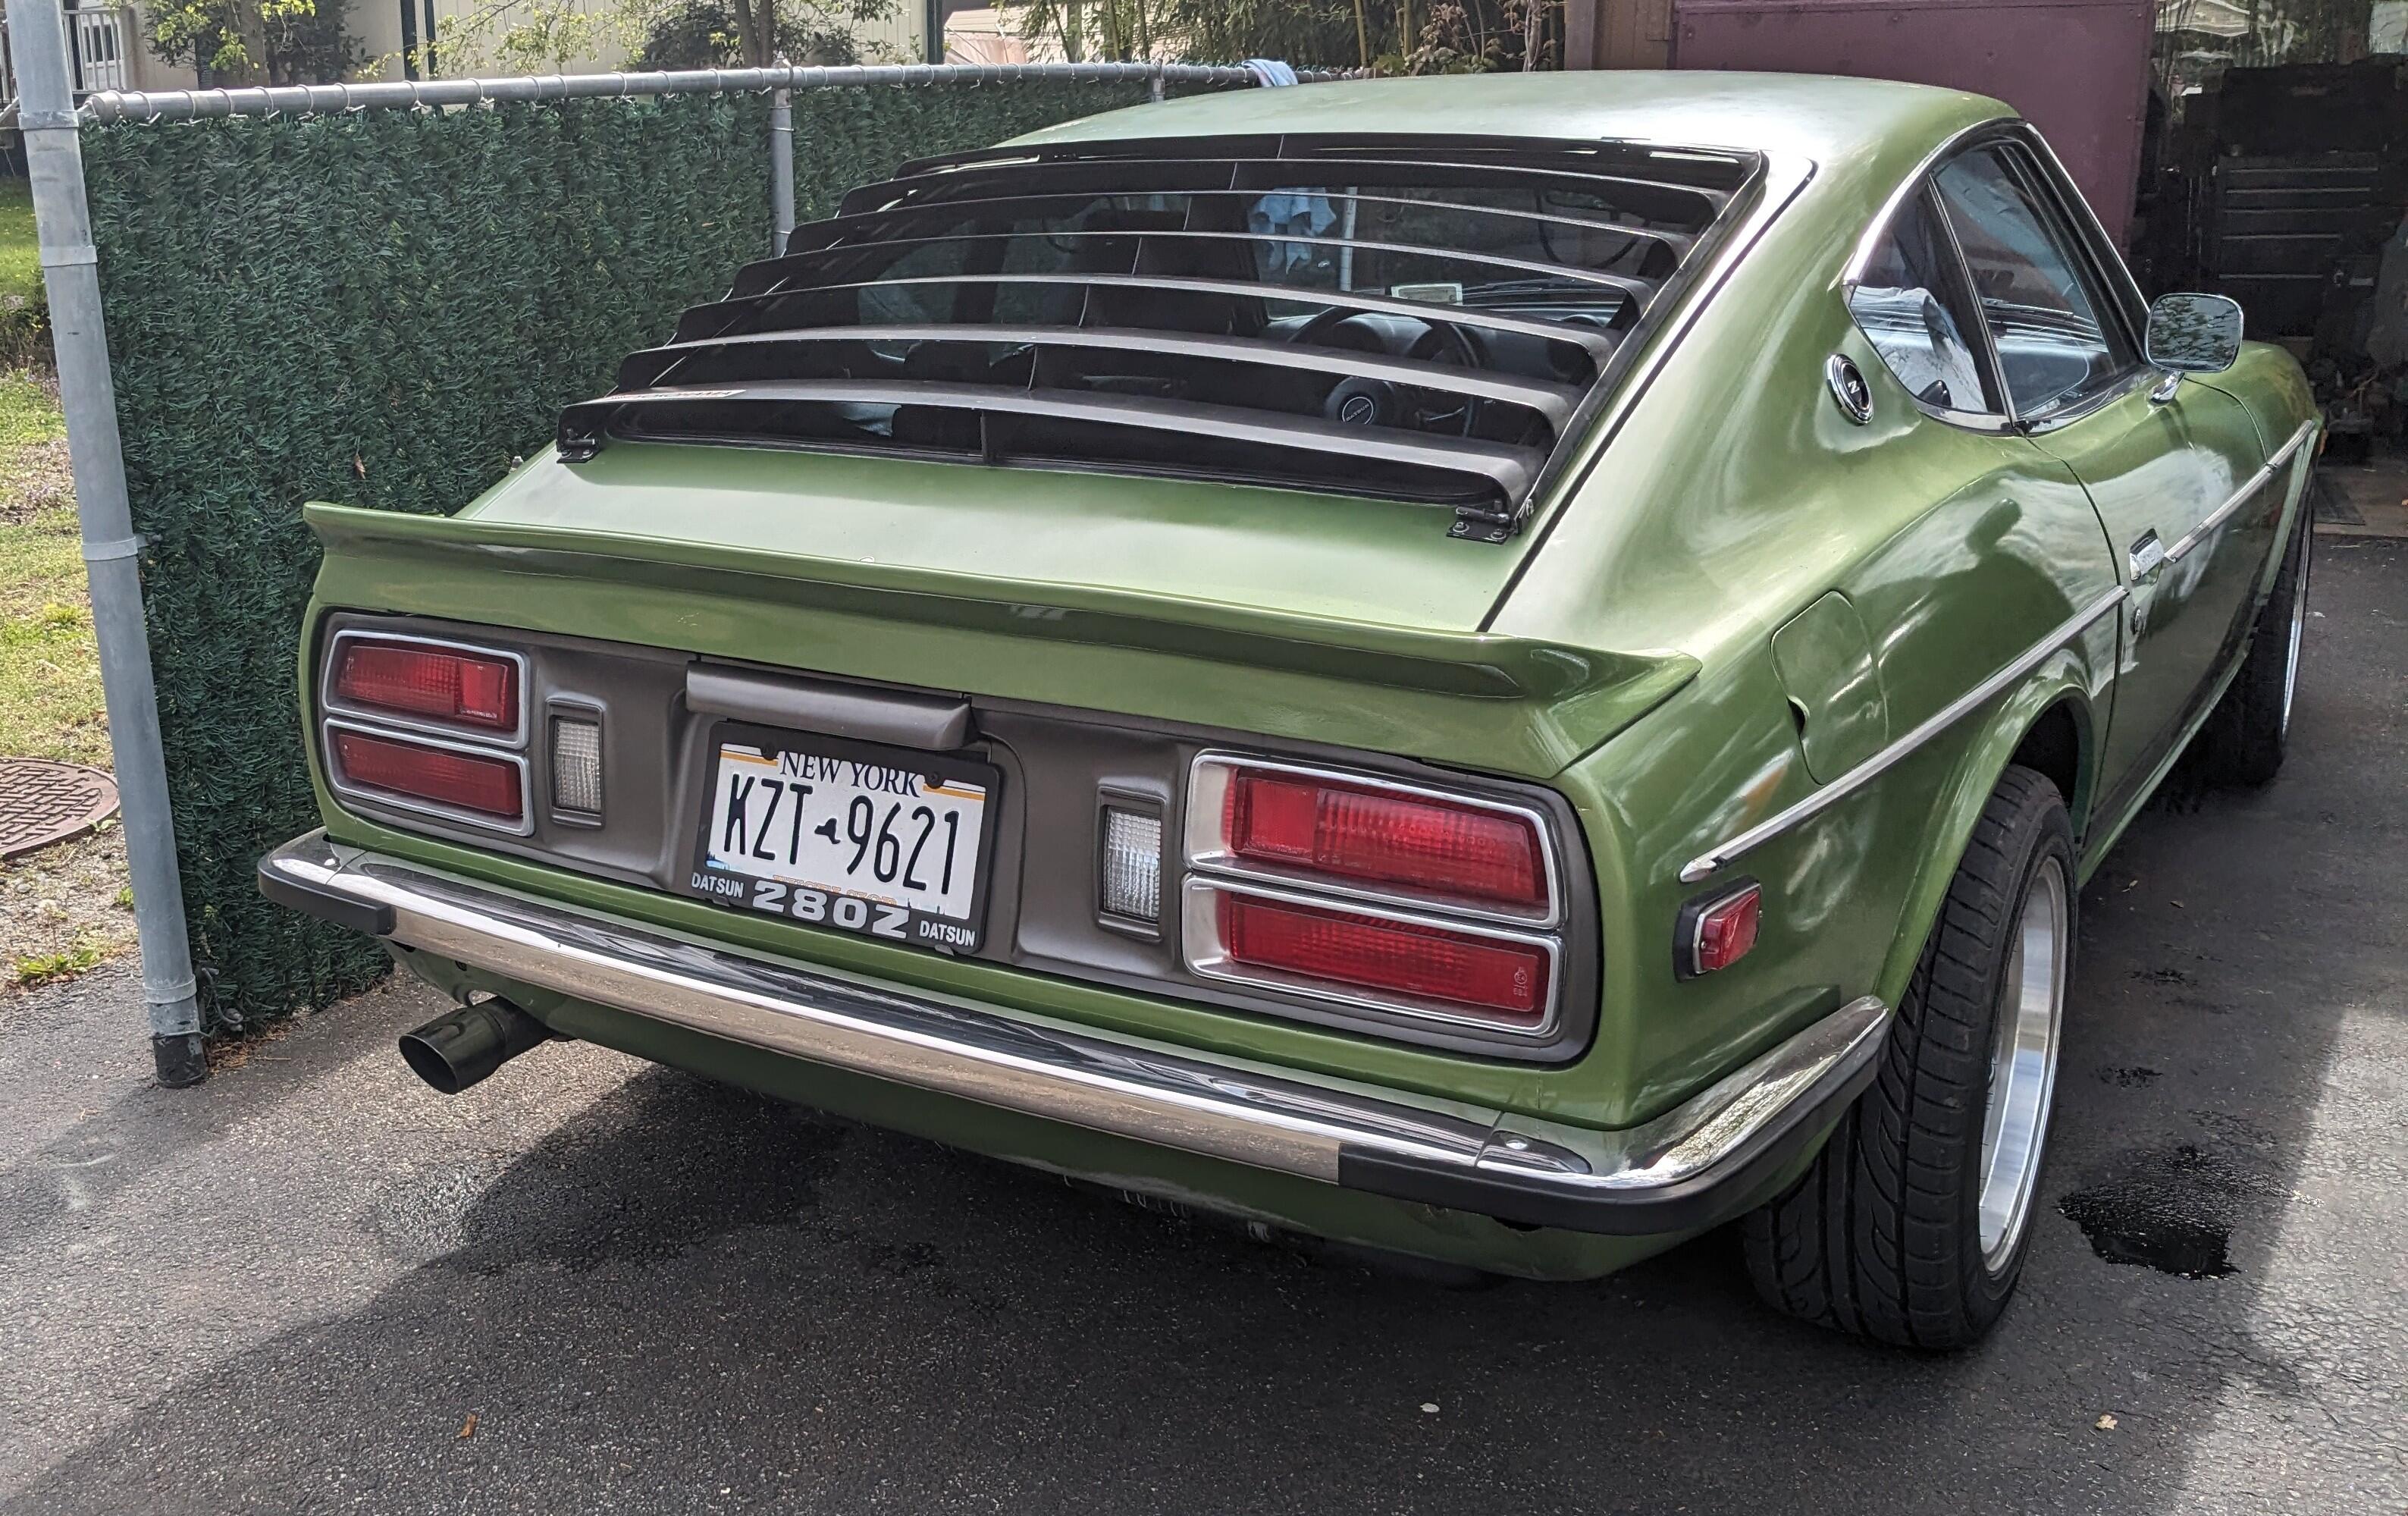
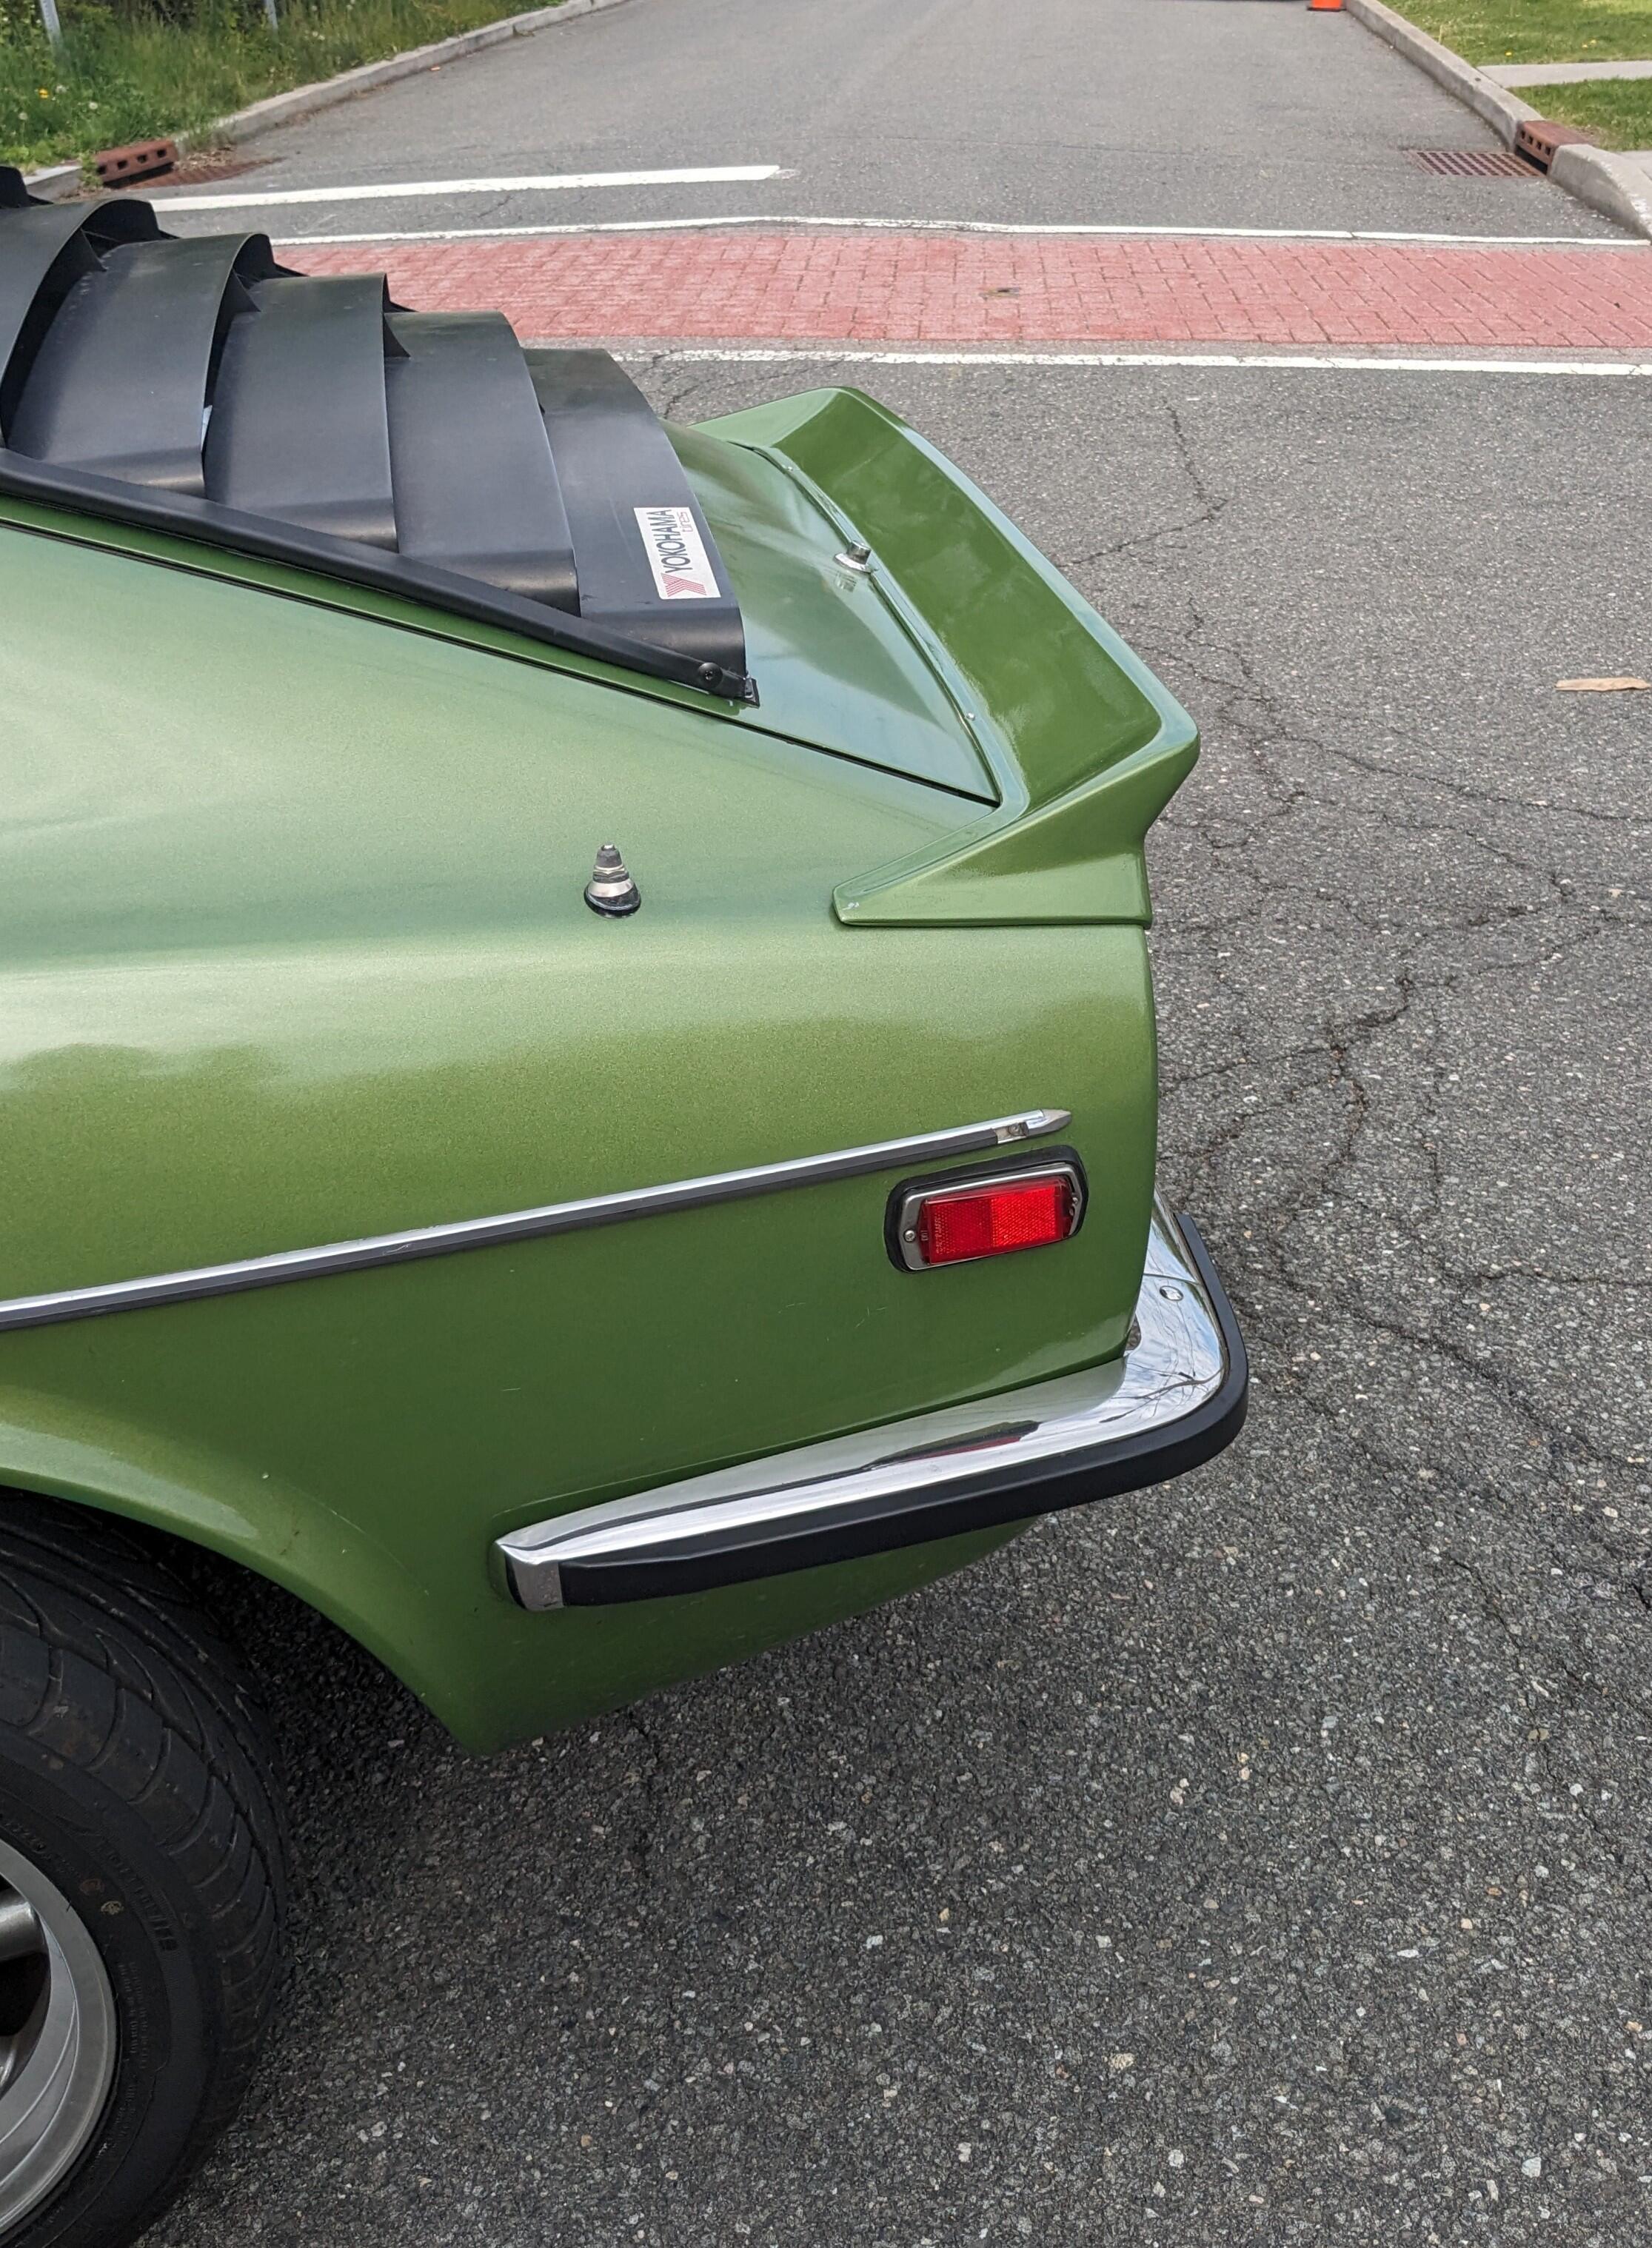
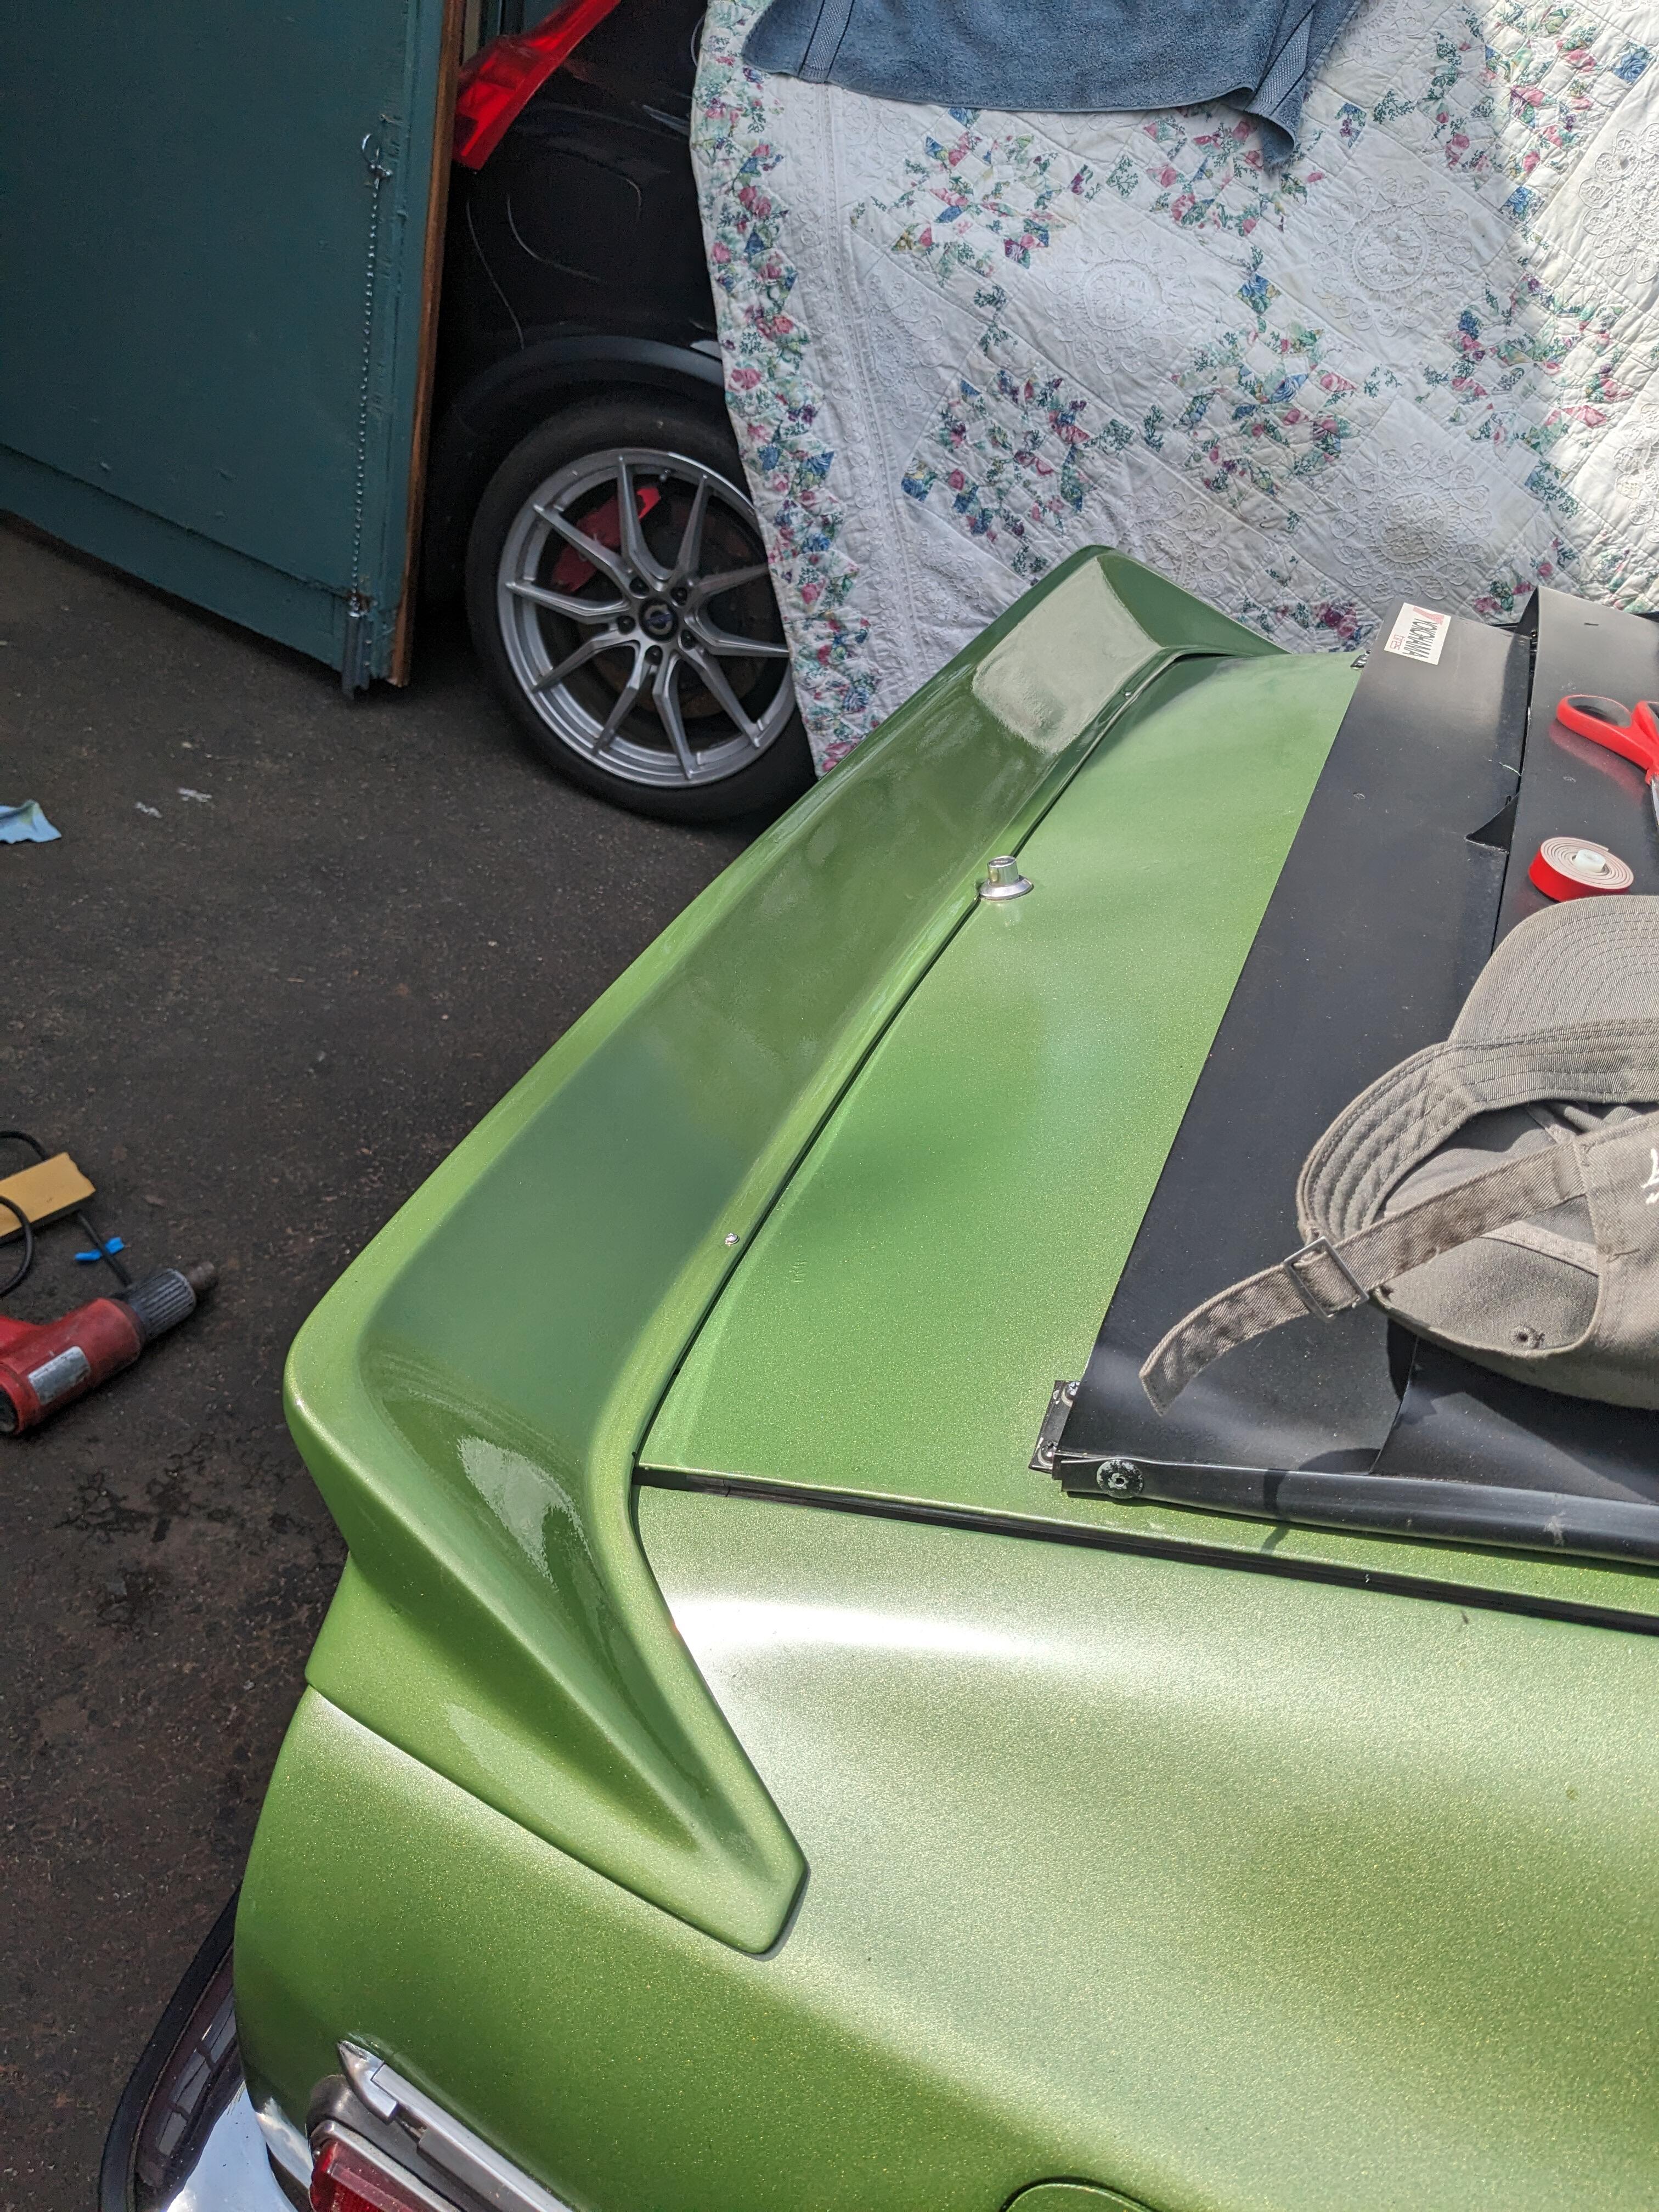
Plenty of sun today, so I clamped the rear spoiler to the hatch along the back edge & let it bake awhile. That actually resolved much of the misshapen issues, added a clamp on top which pushed the wave that was present on the right out. Had to address the paint under the emblem also After paint repair The directions say to drill & use two sheet metal screws in the forward outer region, after the spoiler is taped in olace. I used the existing inner "280Z" emblem mount hole, drilled out for an M4 riv-nut, and did one on the other side to match approx 5" in & 3" up from hatch lip, prior to adhering the spolier. Those helped me align the spoiler and adhere the back edge to the hatch lip knowing that the placement was correct in relation to the lock. I added closed cell foam to the outer fender overhangs as per the instructions (although not provided ) Need to add the 280Z back Also heated & shaped the lower spoiler edge to minimize the wave that was present
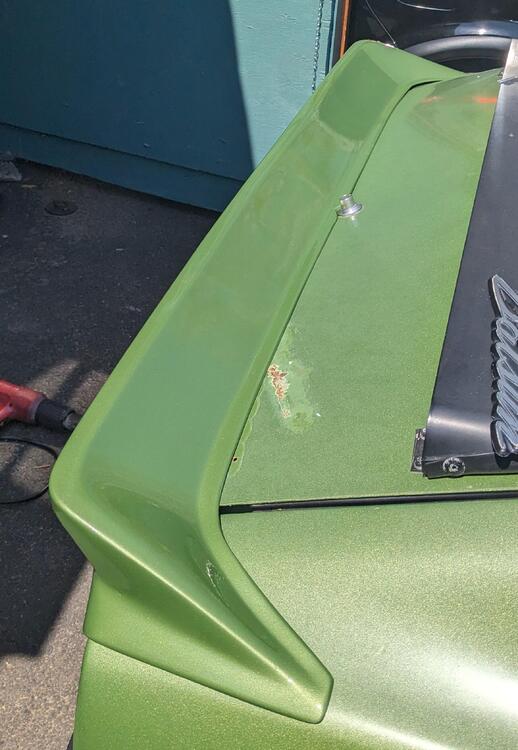


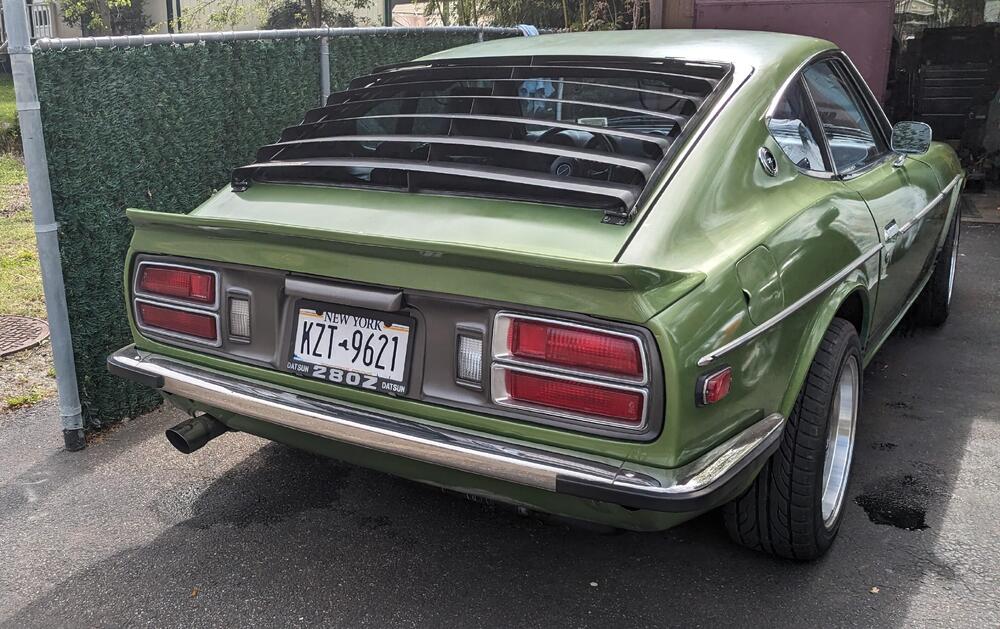

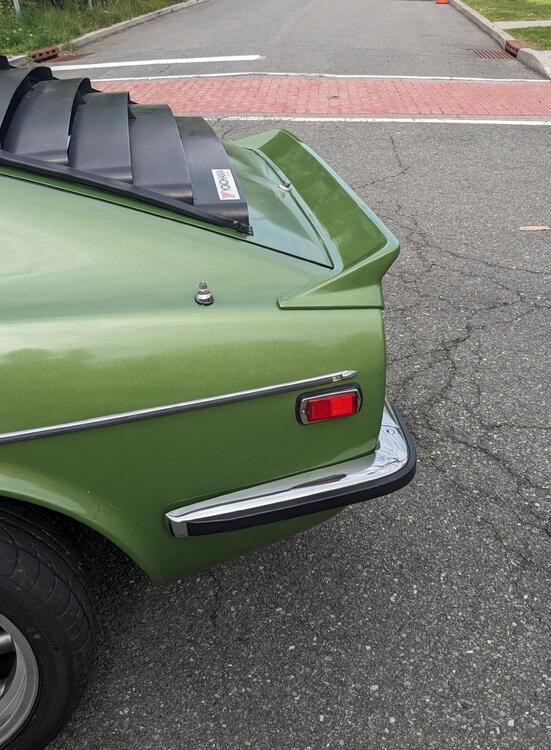


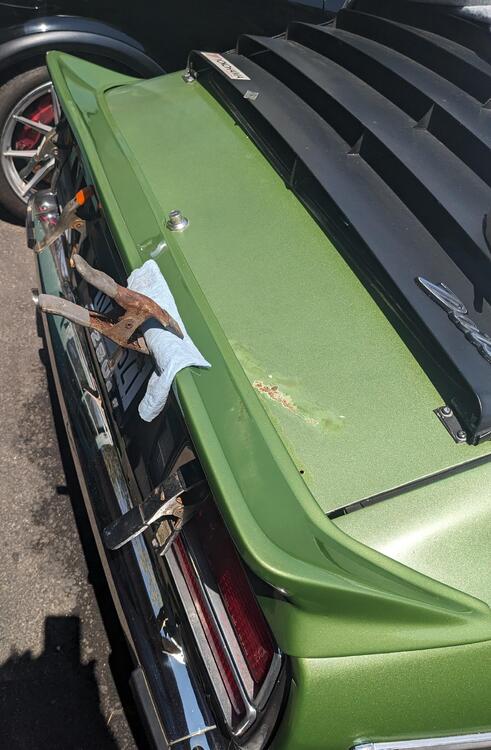 1 point
 -
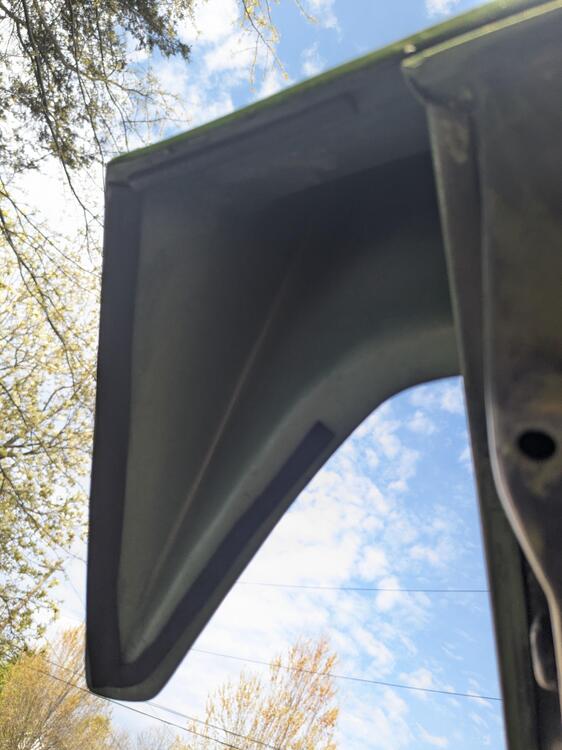
I always considered that the seat adjustment handles were located inboard and angled out so they wouldn't snag clothing on those exiting the car. If they were on the outside rail and angled inward, they would hook coats, long dresses (of which there were few in 1971), and anything dangling during driver or passenger egress.1 point
-
I wholeheartedly concur. It was another stinker. Unfortunately my stack of poor, bad or total garbage books on the subject of 'our' cars is so tall that it I had to apply for planning permission from my local council.1 point
-
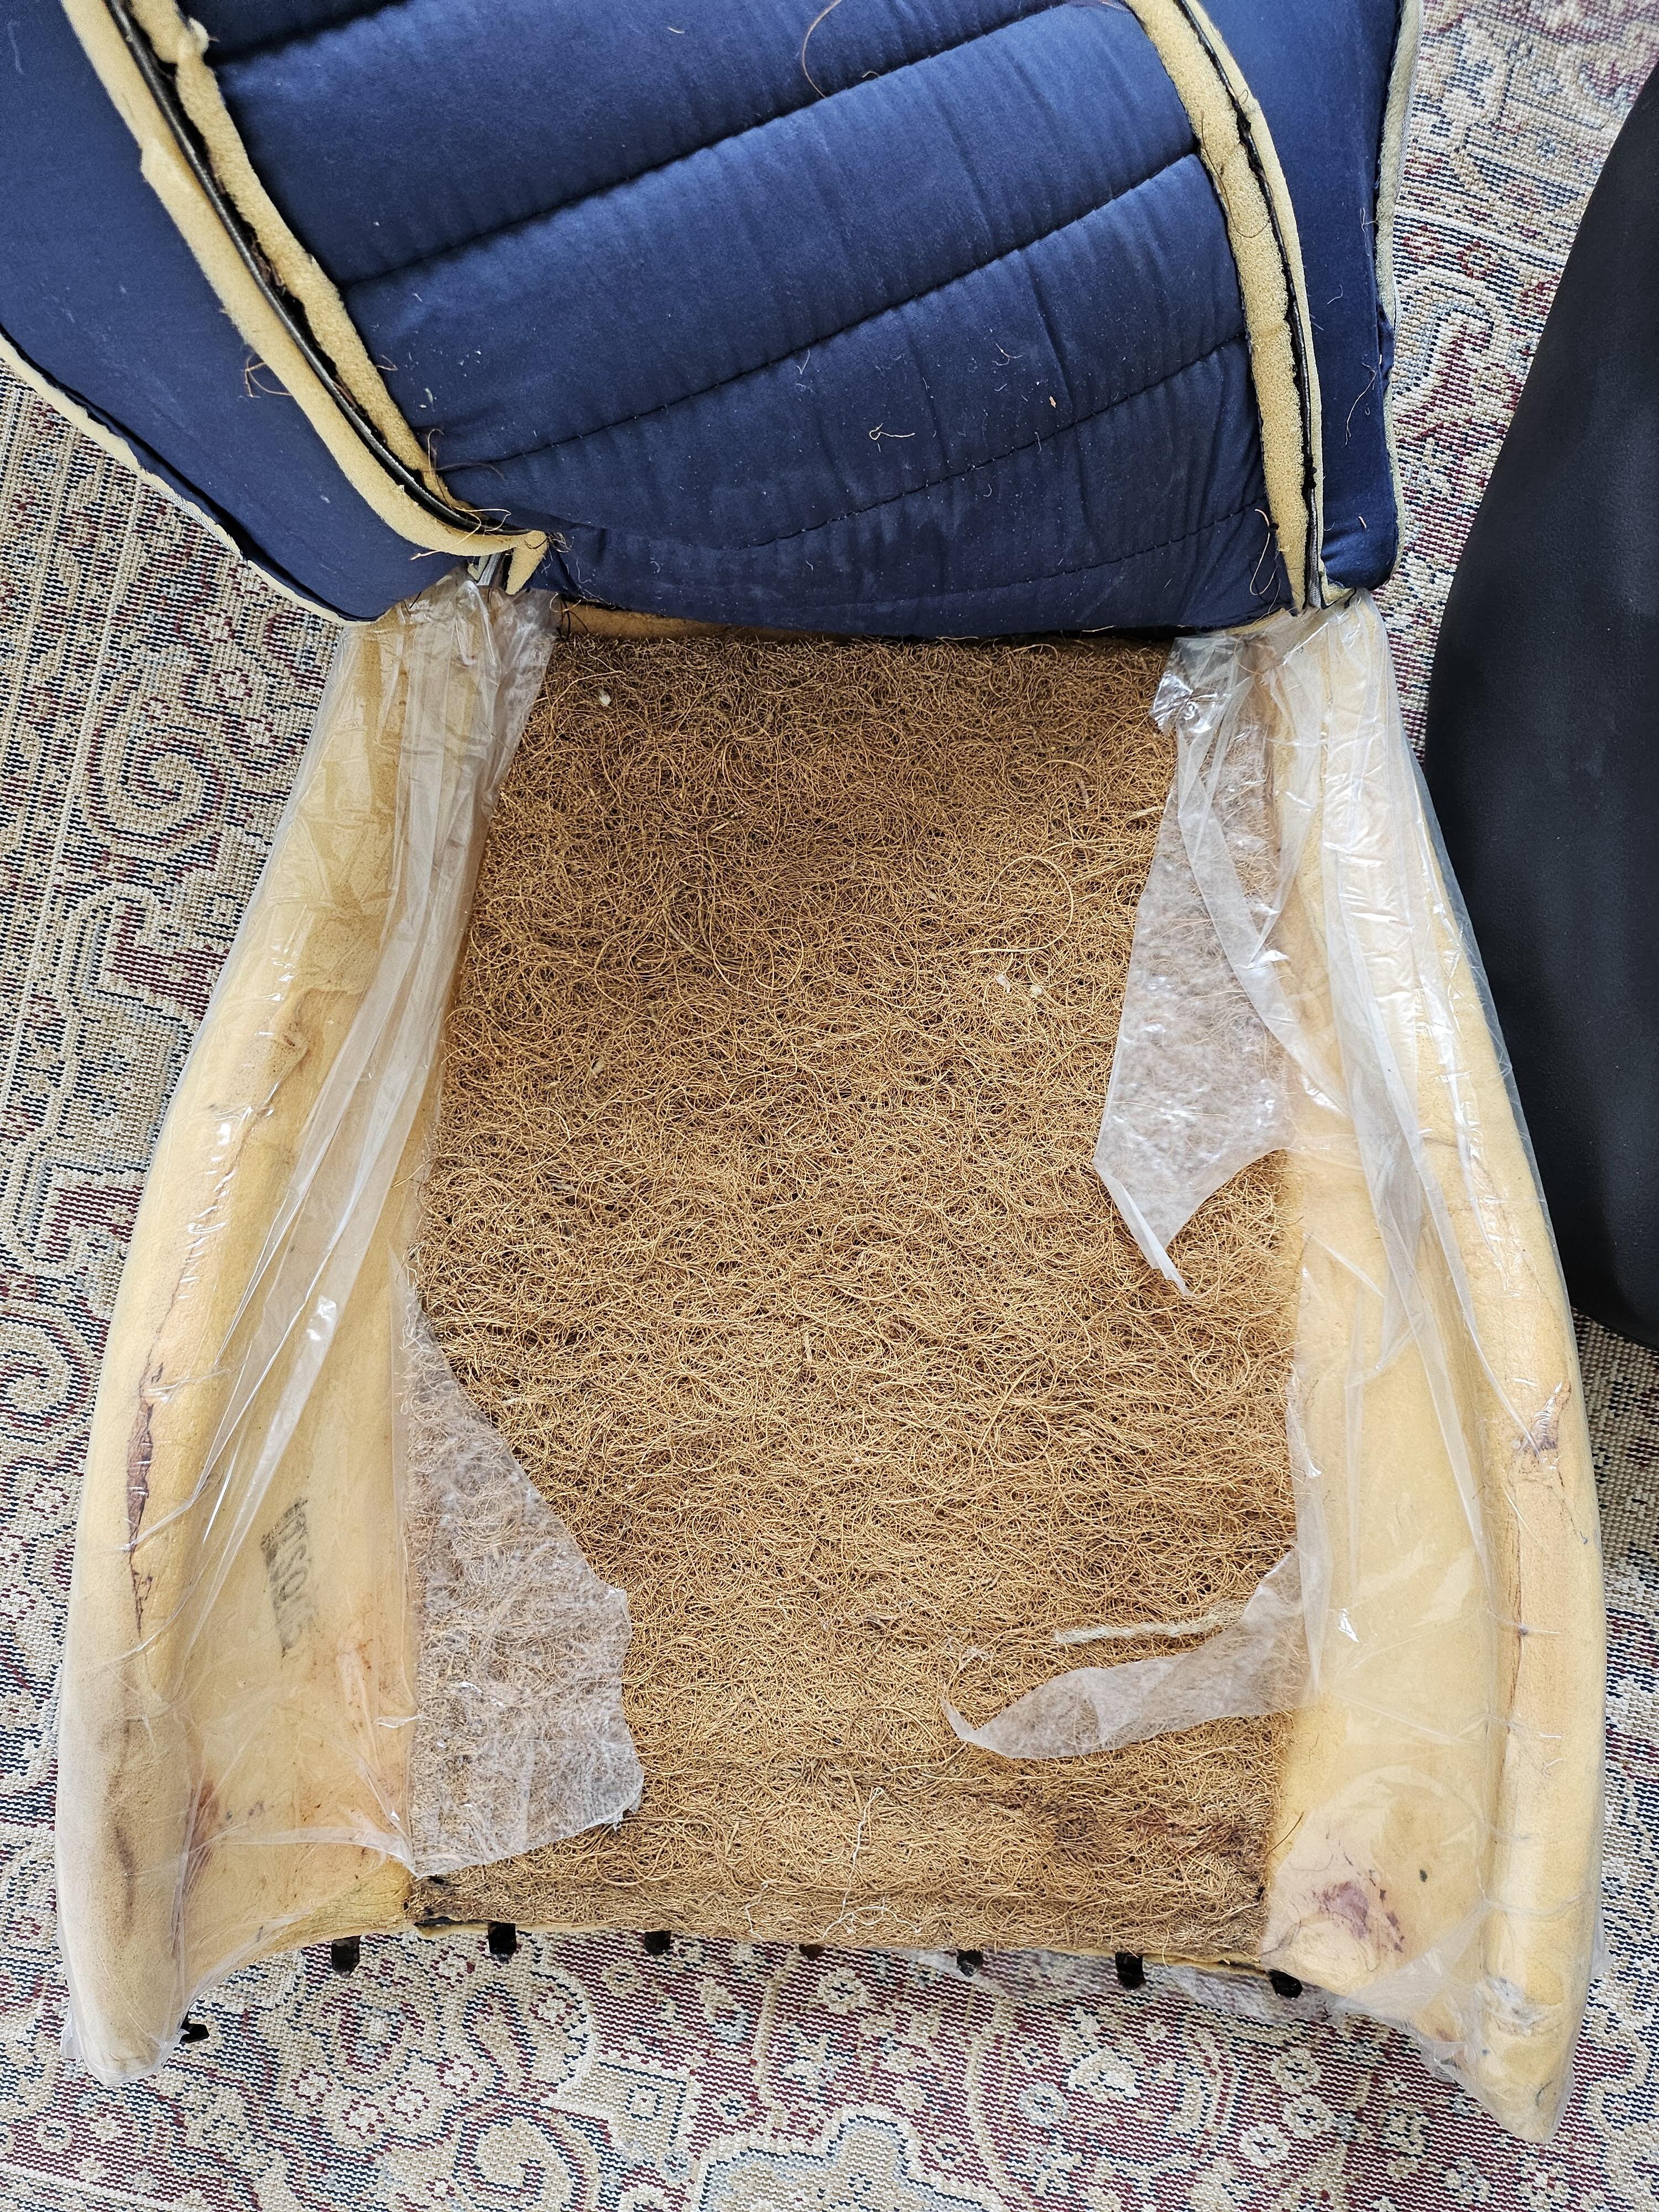
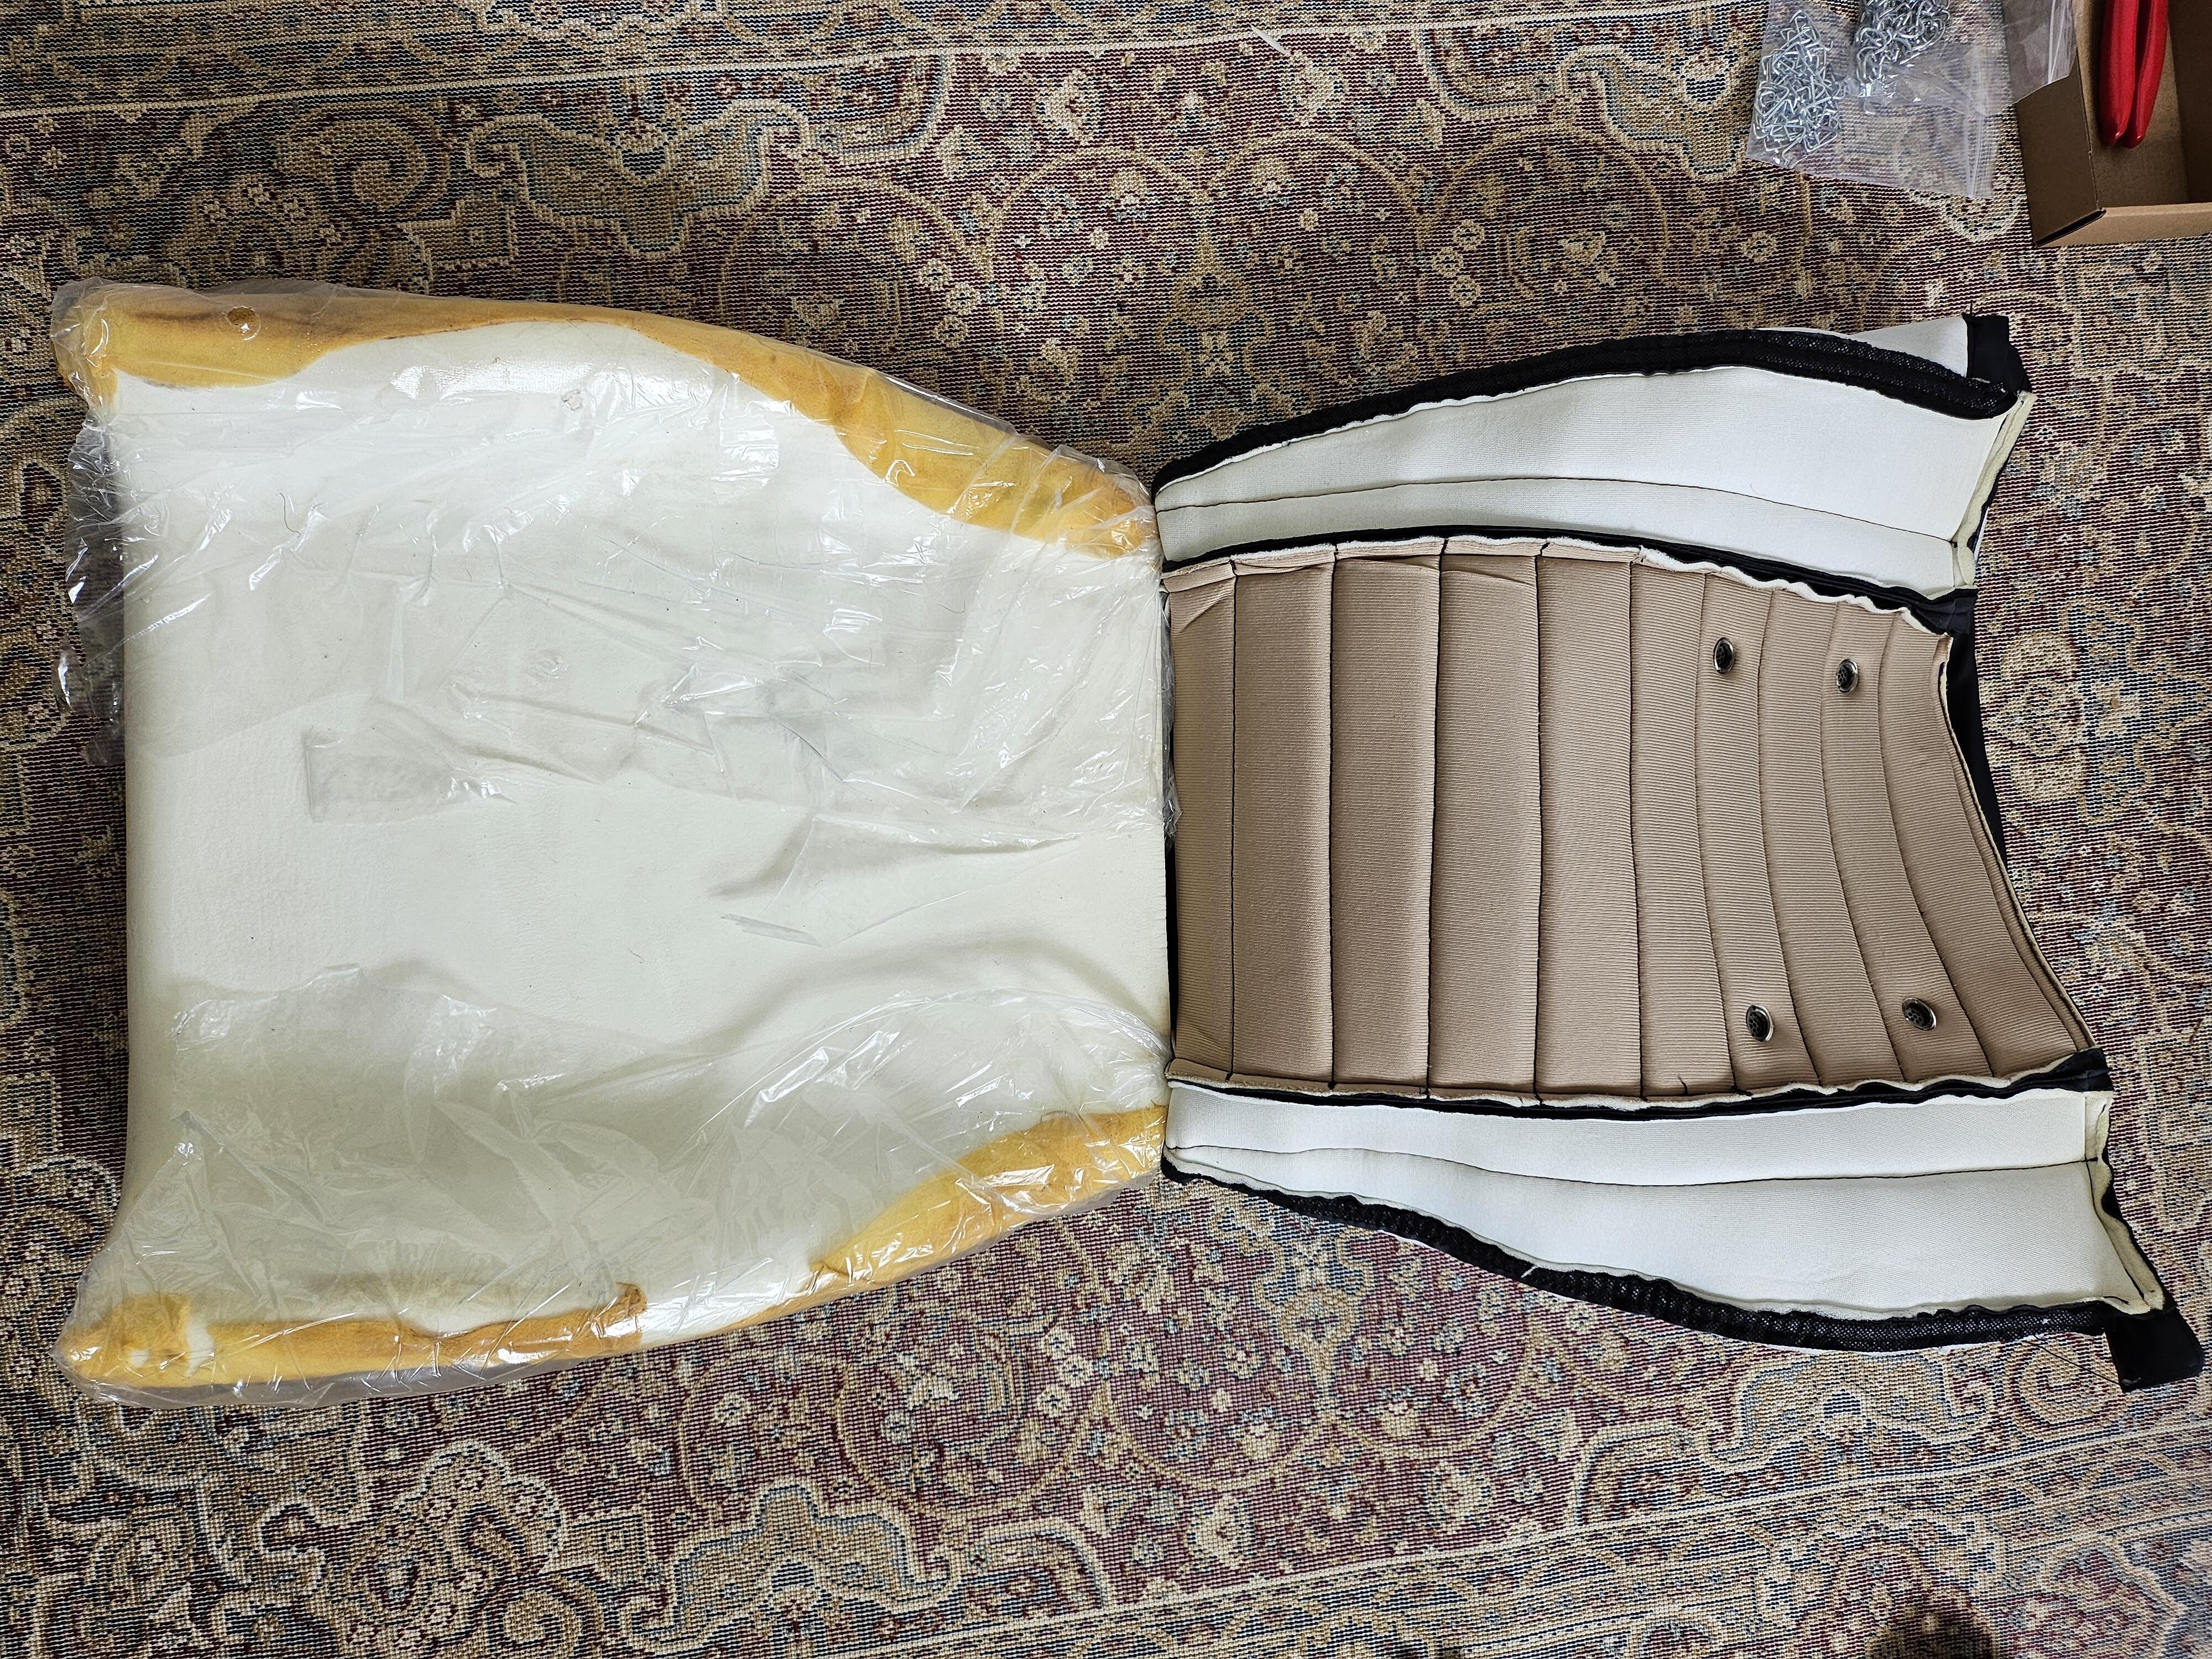
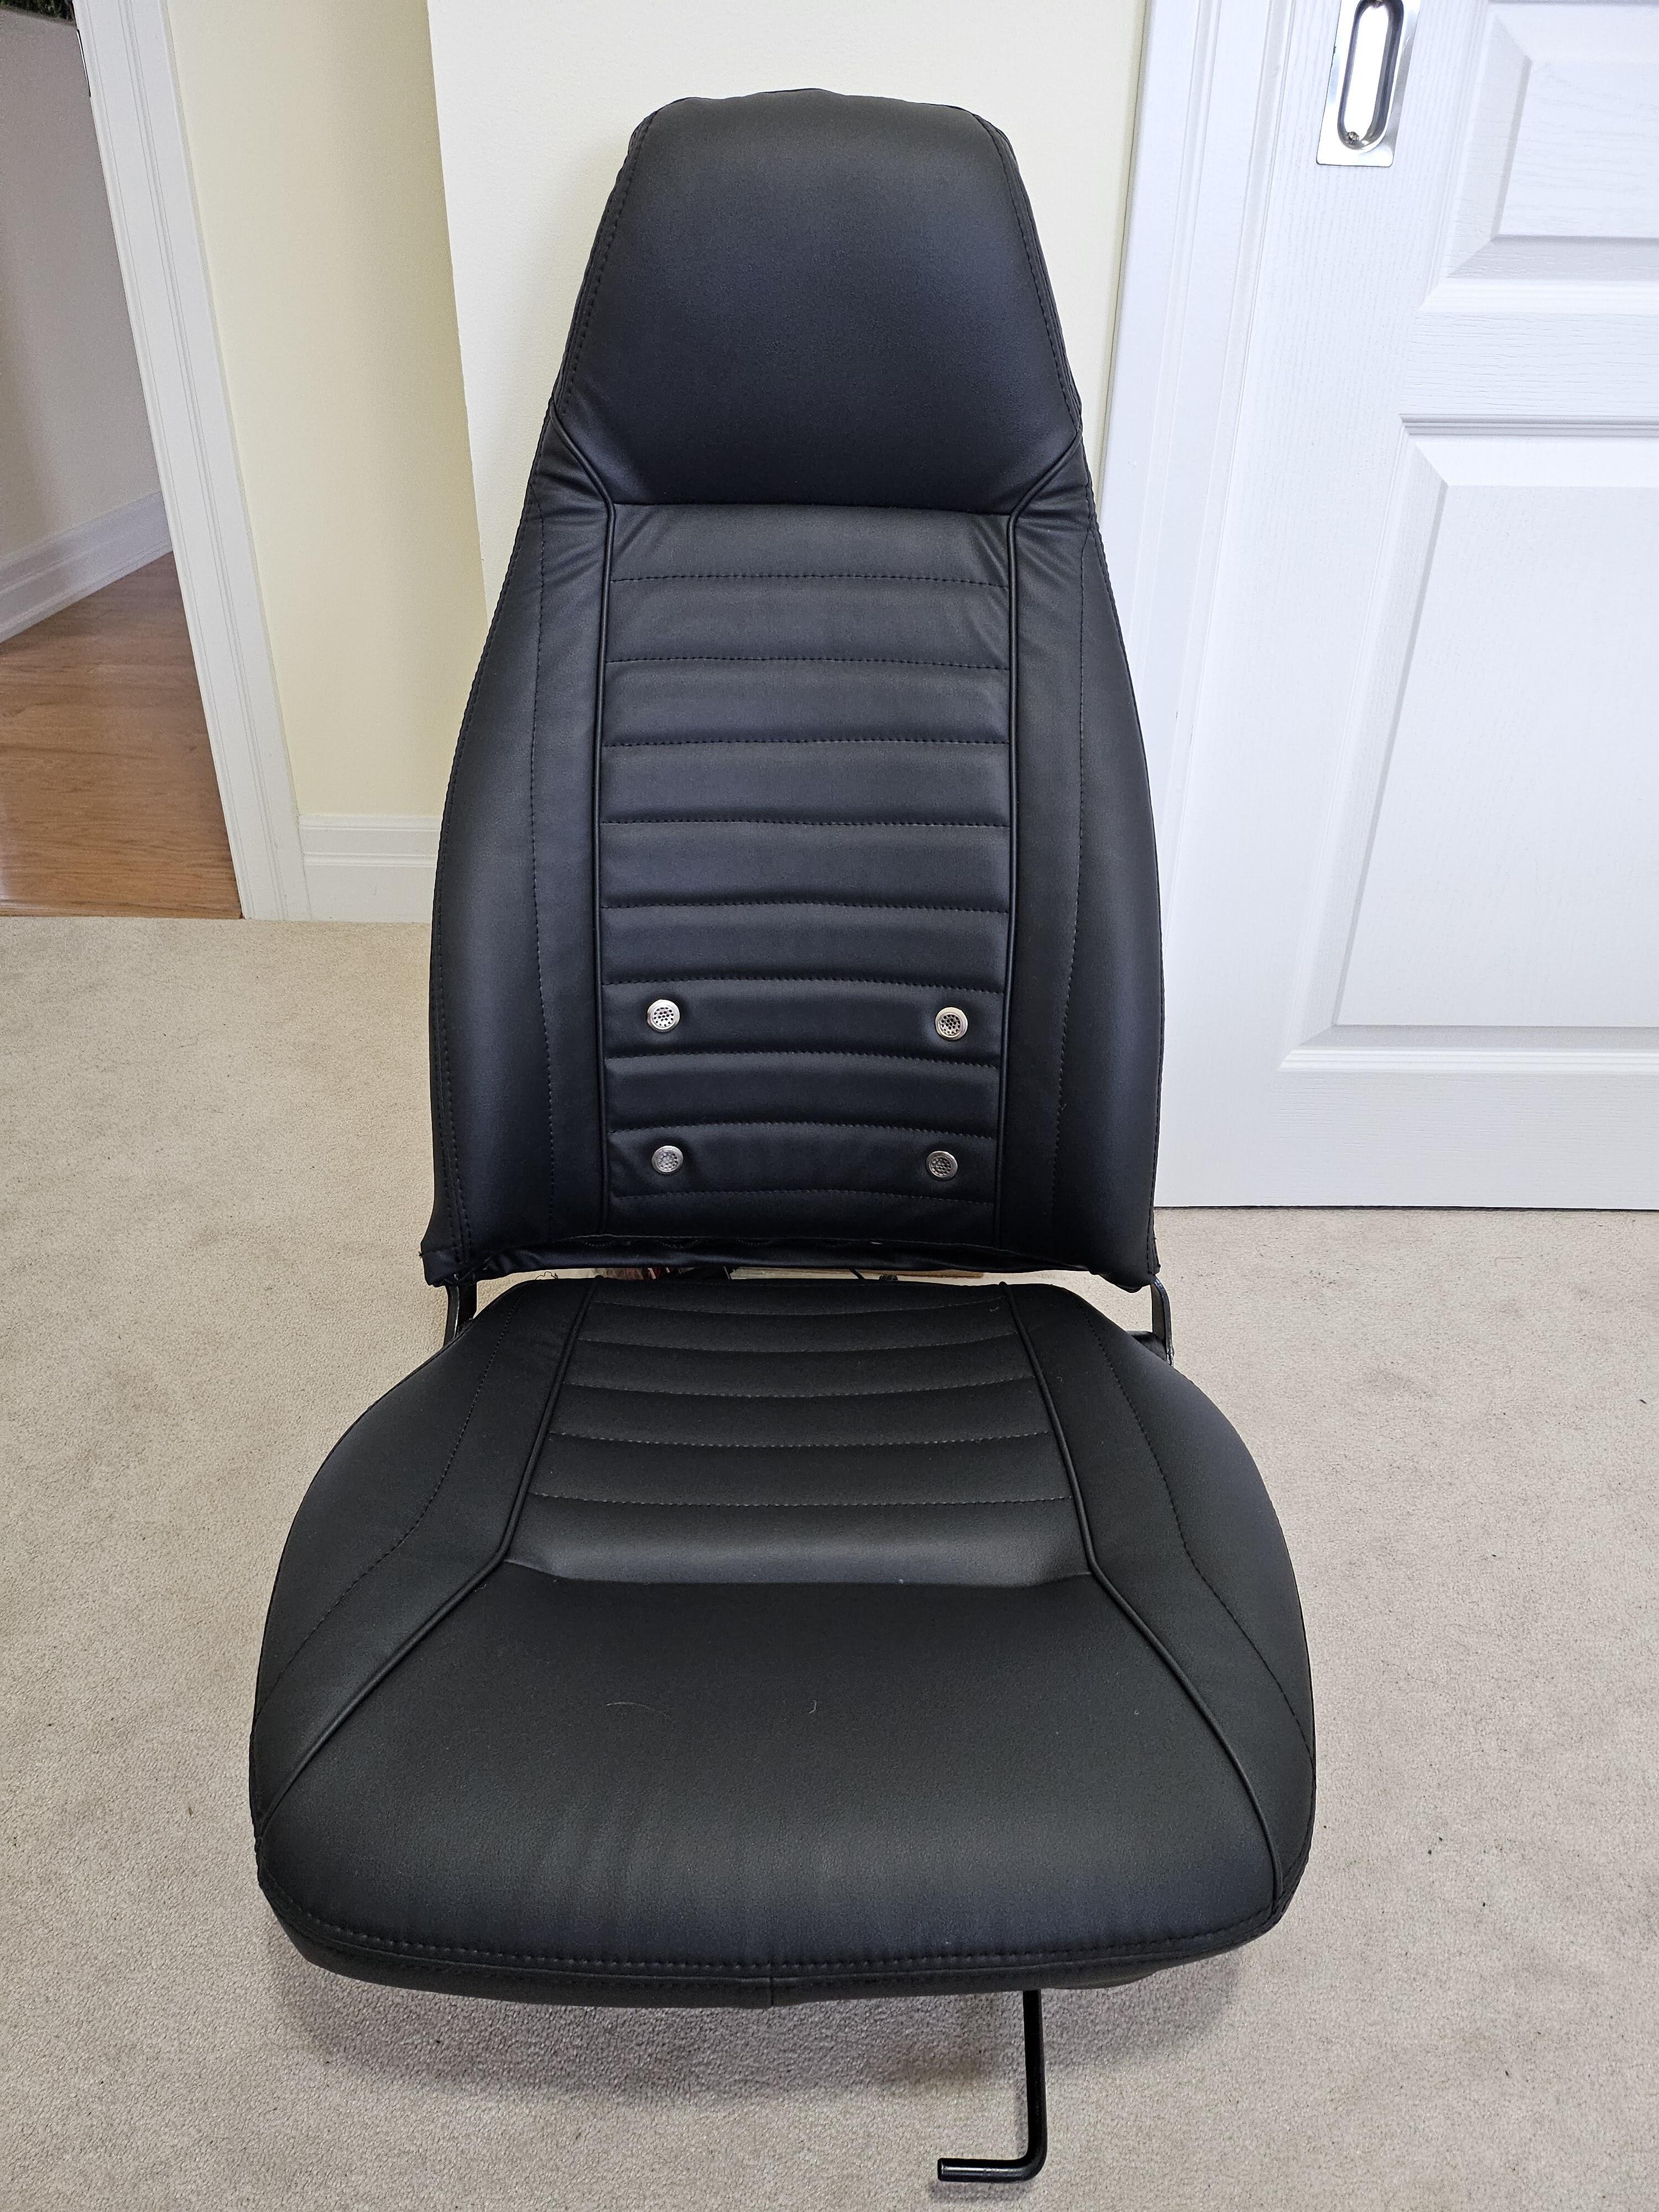
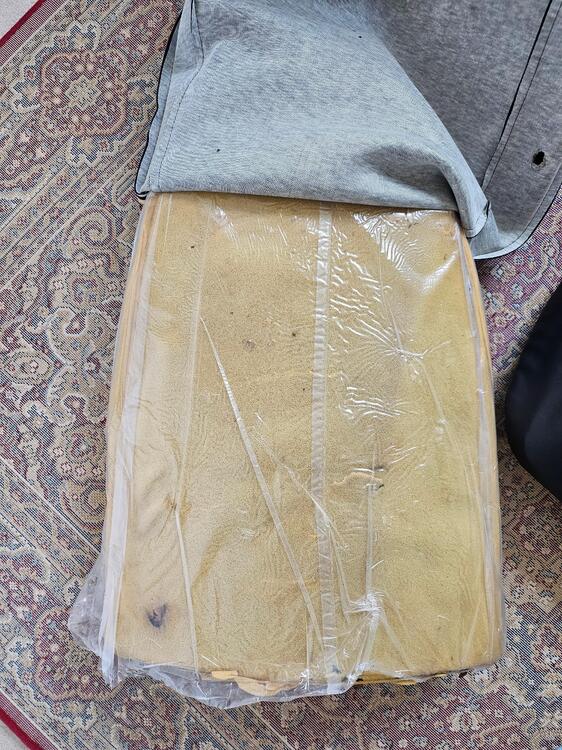
I just re-covered my passenger seat with the Interior Innovations cover that I bought from @KenFirch a while back. I purchased the replacement foam from Interior Innovations as well. I wasn't really looking forward to the job. It sounded like it was a bit of a pain, but it went very well and didn't take me more than a couple of hours. I thought I'd add a couple of things to this thread that might help people doing it in the future. My car is a 1971 240 (the one @grannyknot has been working on in a current build thread), but the seats seem to be from a 280Z. They have the metal "springs" in the seat bottom rather than the webbing. They've been recovered previously (the covers were obviously not original), but the foams seemed to be original. A couple of things made the job easier, as described here. There was a thin sheet of plastic covering the foam of the seat back. It seemed to be professionally made to fit the seat, but I don't know whether it was something that came from the factory. It was a little worse for wear, but I was able to reuse it. I was also able to leave the very thin layer of foam on the metal seat back. It was wrapped around and over the edges of the foam on the front of the seat back, but I was able to peel it off. I first glued the edges of the new foam to the metal seat back. I used Lepage Multi-Purpose Spray Adhesive and it held very well through the rest of the work. The plastic on the top of the seat back made it easy to slip the top of the new cover over the seat back down to the point where I needed to hog ring it to the metal back. Once I'd done that (more on that in a minute), I was able to very easily roll the rest of the cover down over the rest of the back. When using the tangs to secure the front and back of the cover to the bottom of the seat back, it was easy to pull the material down far enough. This was probably because it could slide easily on the plastic sheet. I was able to hog ring the cover to the metal back through the slot without too much trouble. I first used plastic cable ties to pull the wire on the metal seat back and the wire in the seat cover insert together, then used the hog ring pliers I bought to add the hog rings. I was going to cut the cable ties off afterwards, but decided to simply trim them instead. I can't see them doing any harm, and they're providing extra holding power. When I did the seat bottom, I first used the tangs to pull the cover down tight on the foam and metal seat base. Once I'd done that, it made the job of attaching the hog rings much easier because the foam was quite compressed. I used the cable ties again, which made it very easy to attach the hog rings. I do kind of wonder whether you could do this job with the cable ties and not bother with hog rings at all. Maybe they'd wear through over time. So I would suggest using a plastic wrap over the seat back, attaching the seat bottom cover using the tangs before doing the hog rings, and using cable ties to pull parts together when installing the hog rings. I'll be doing the driver's seat over the next few days, so I'll get a chance to do this again. Hopefully it will go as well as this one did.

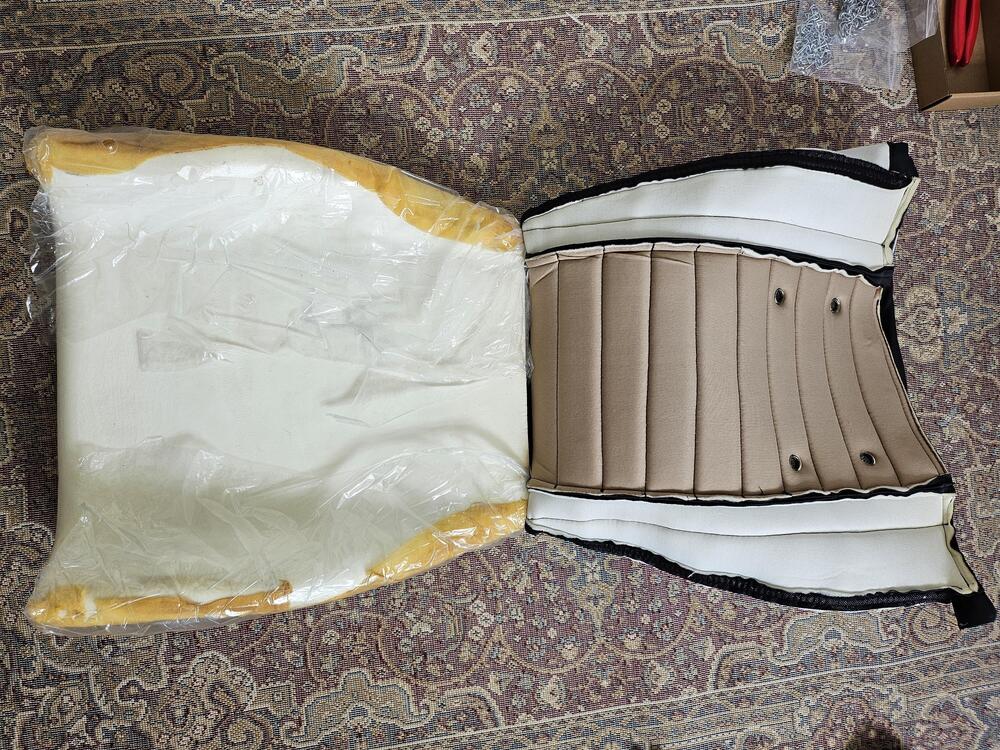
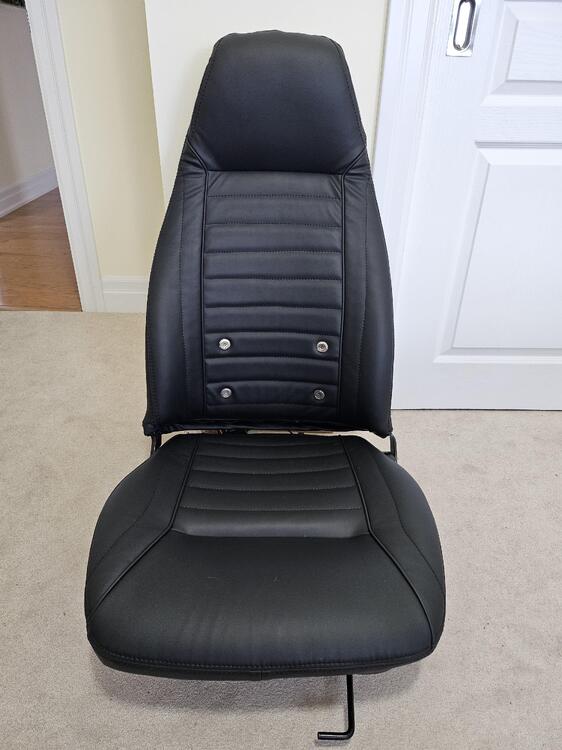 1 point
 -
0 points