


Leaderboard
-
conedodger
Free Member16Points12,513Posts -
inline6
 Subscriber
 7Points1,282Posts
 -
.JPG.cfcada9cf1c1b502df3f5f2f2ca3ff36.JPG)
SteveJ
Free Member6Points9,646Posts -

Av8ferg
Free Member5Points1,538Posts


Popular Content
Showing content with the highest reputation on 04/08/2024 in all areas
-
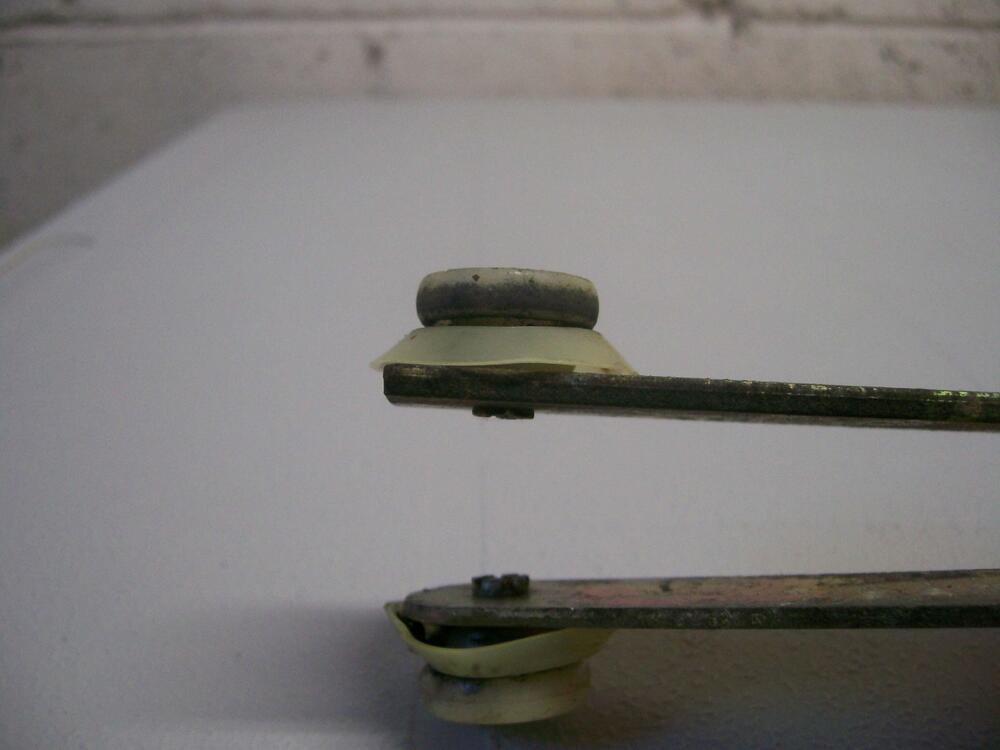
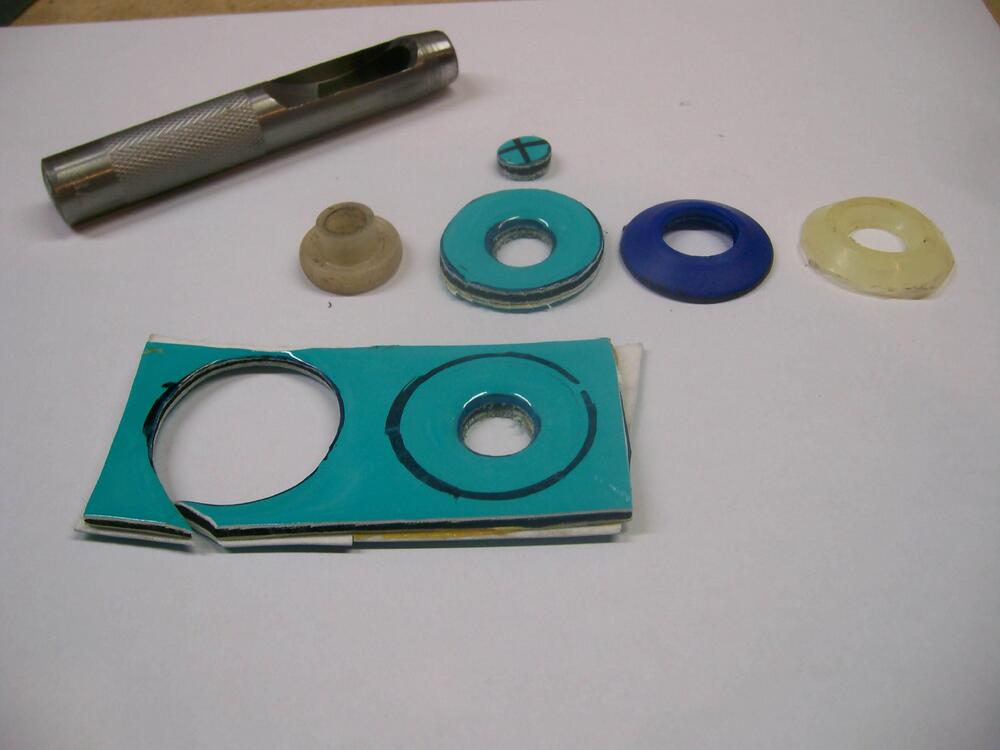
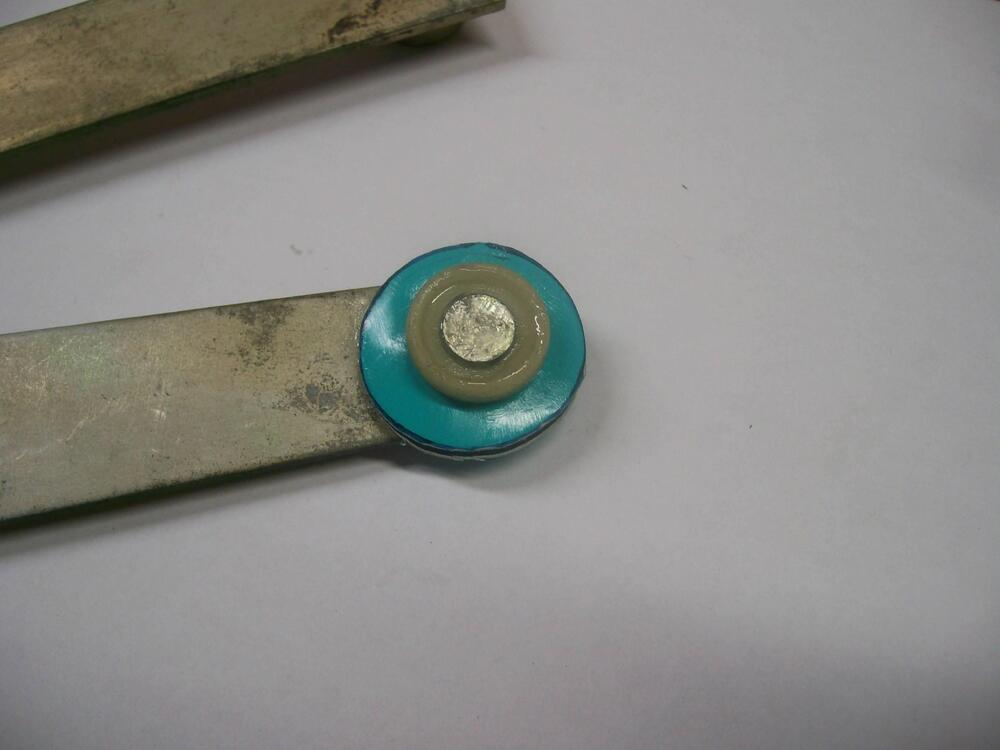
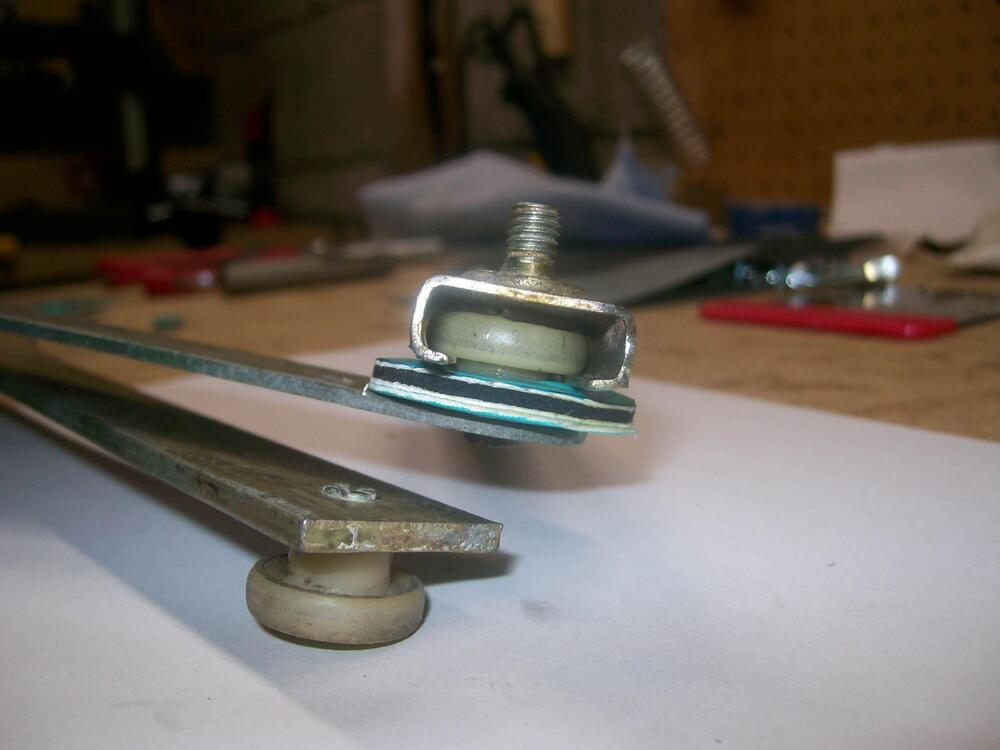
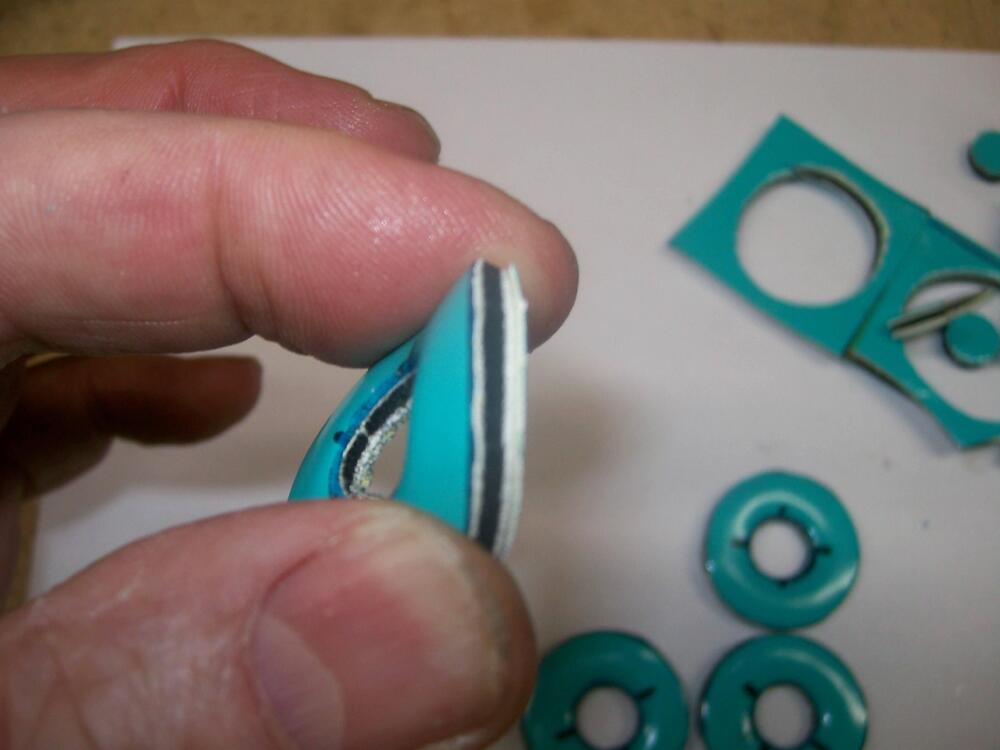
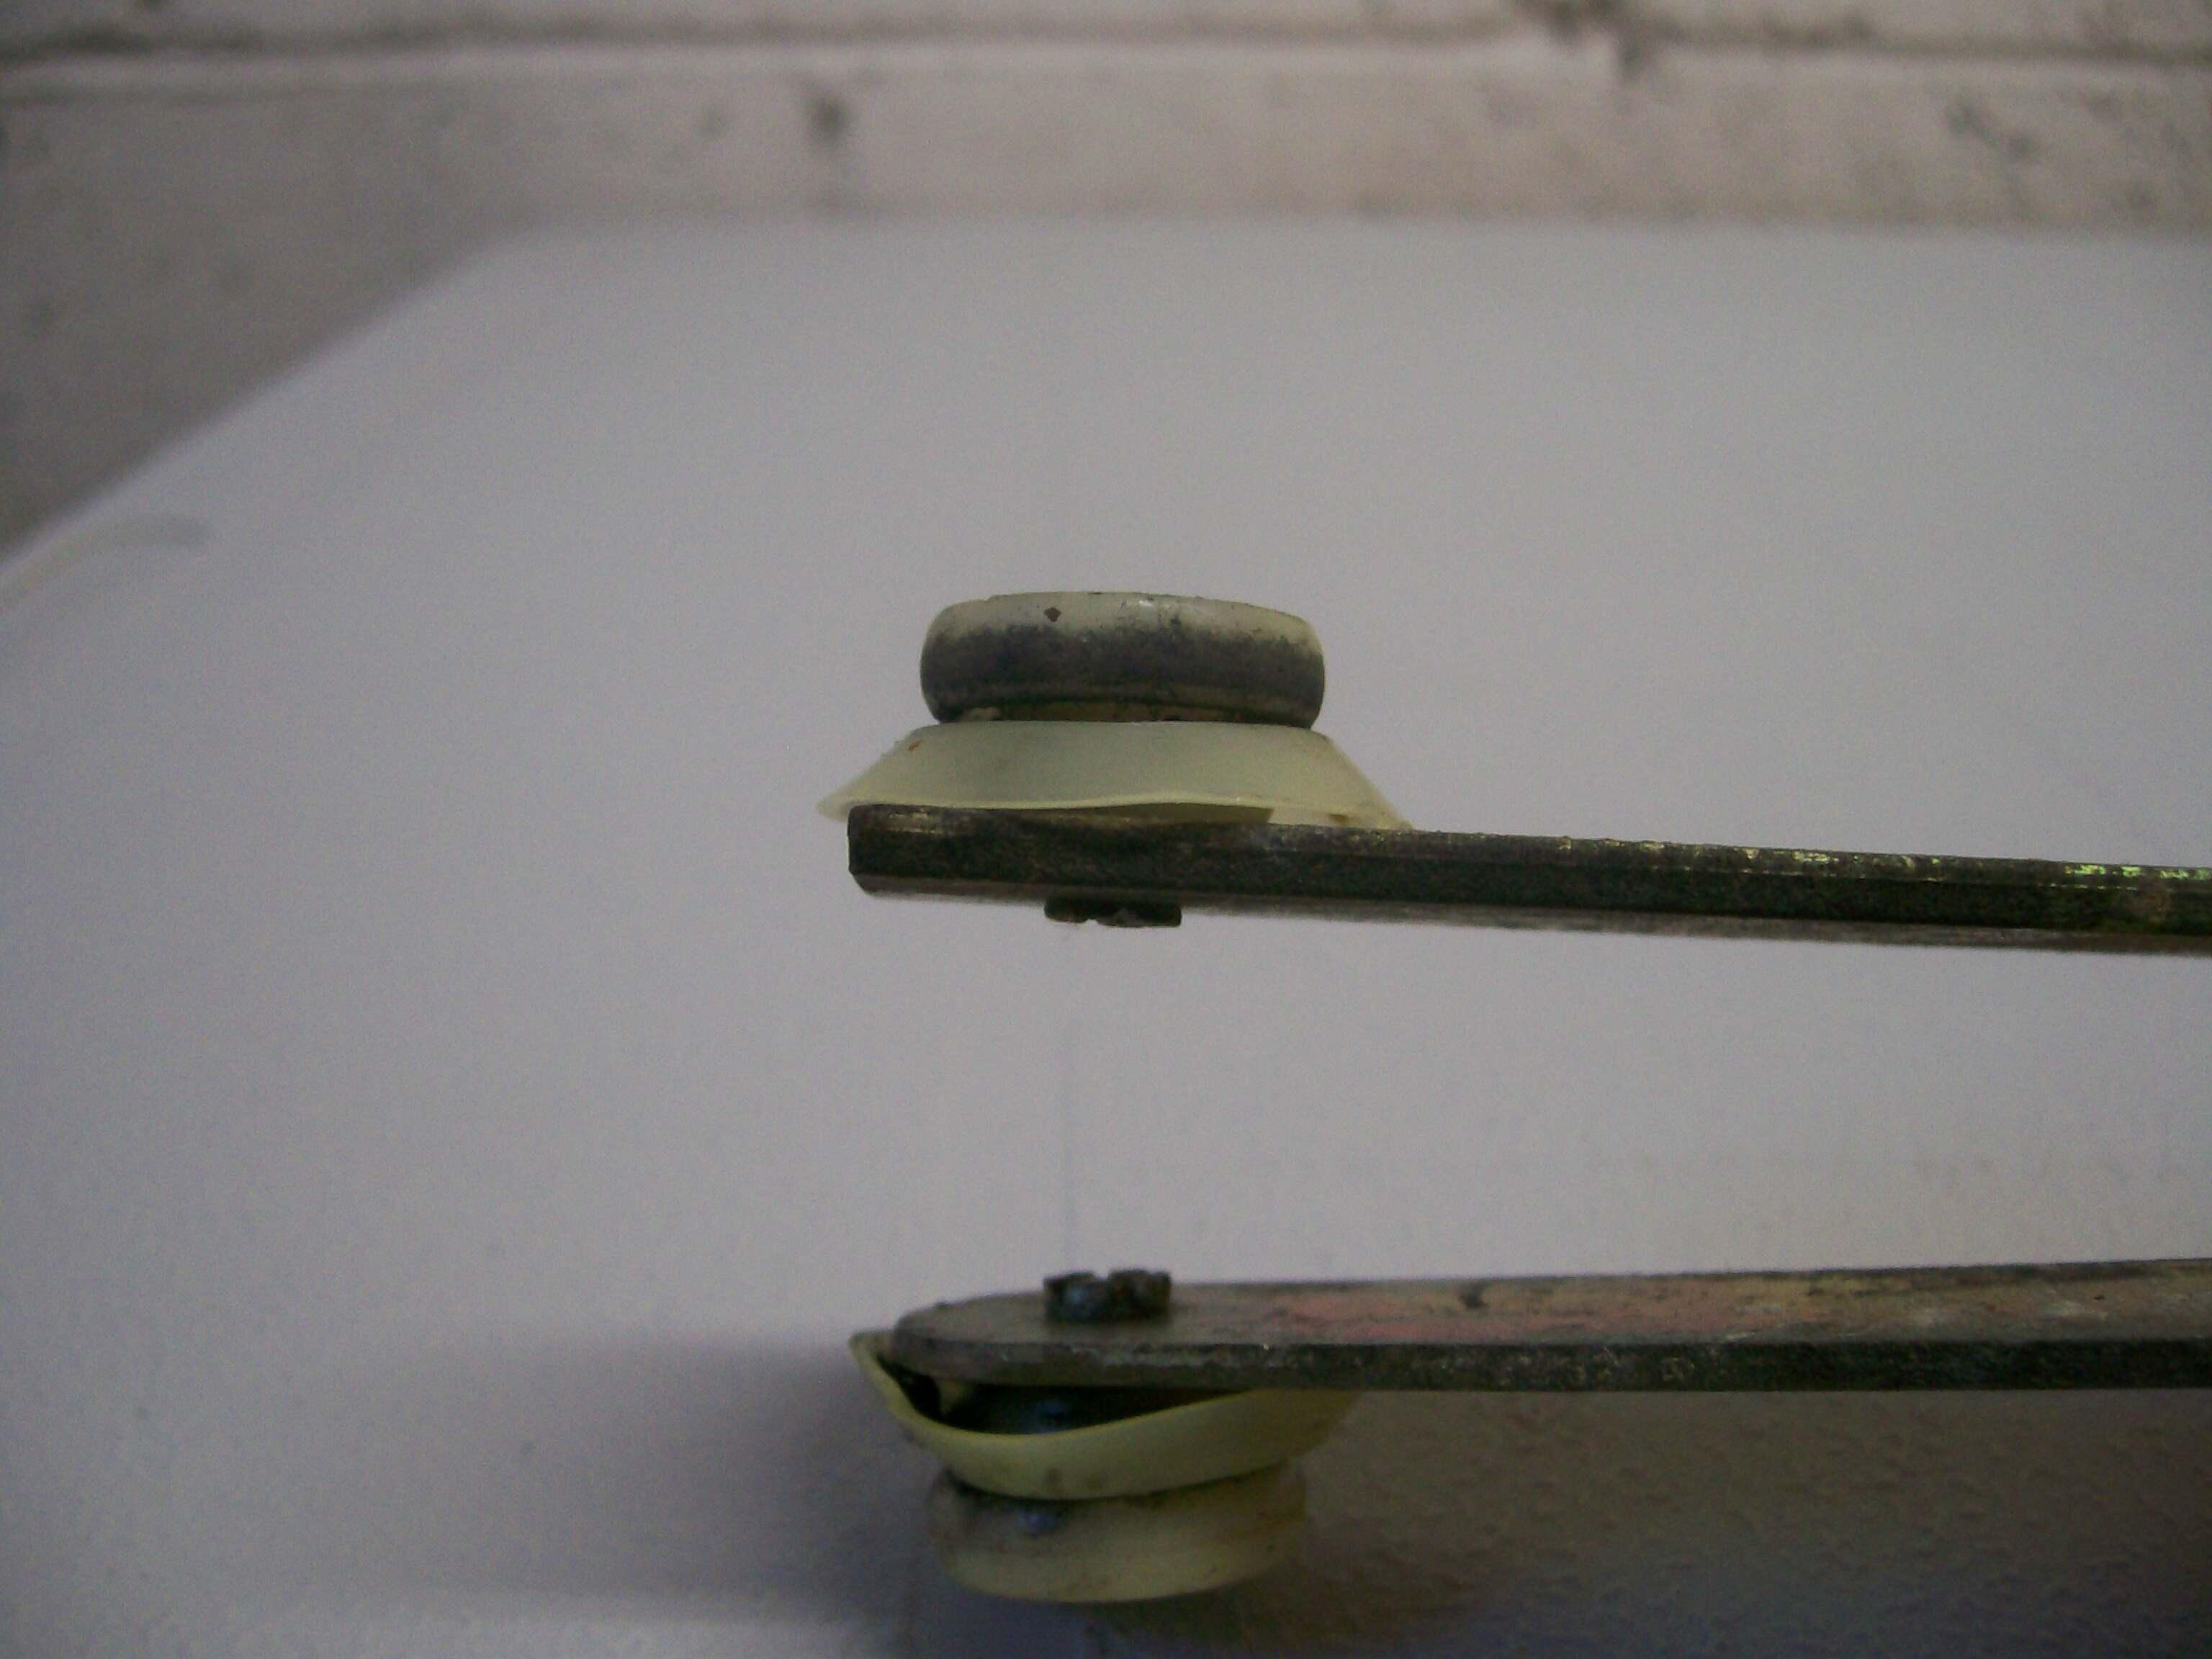
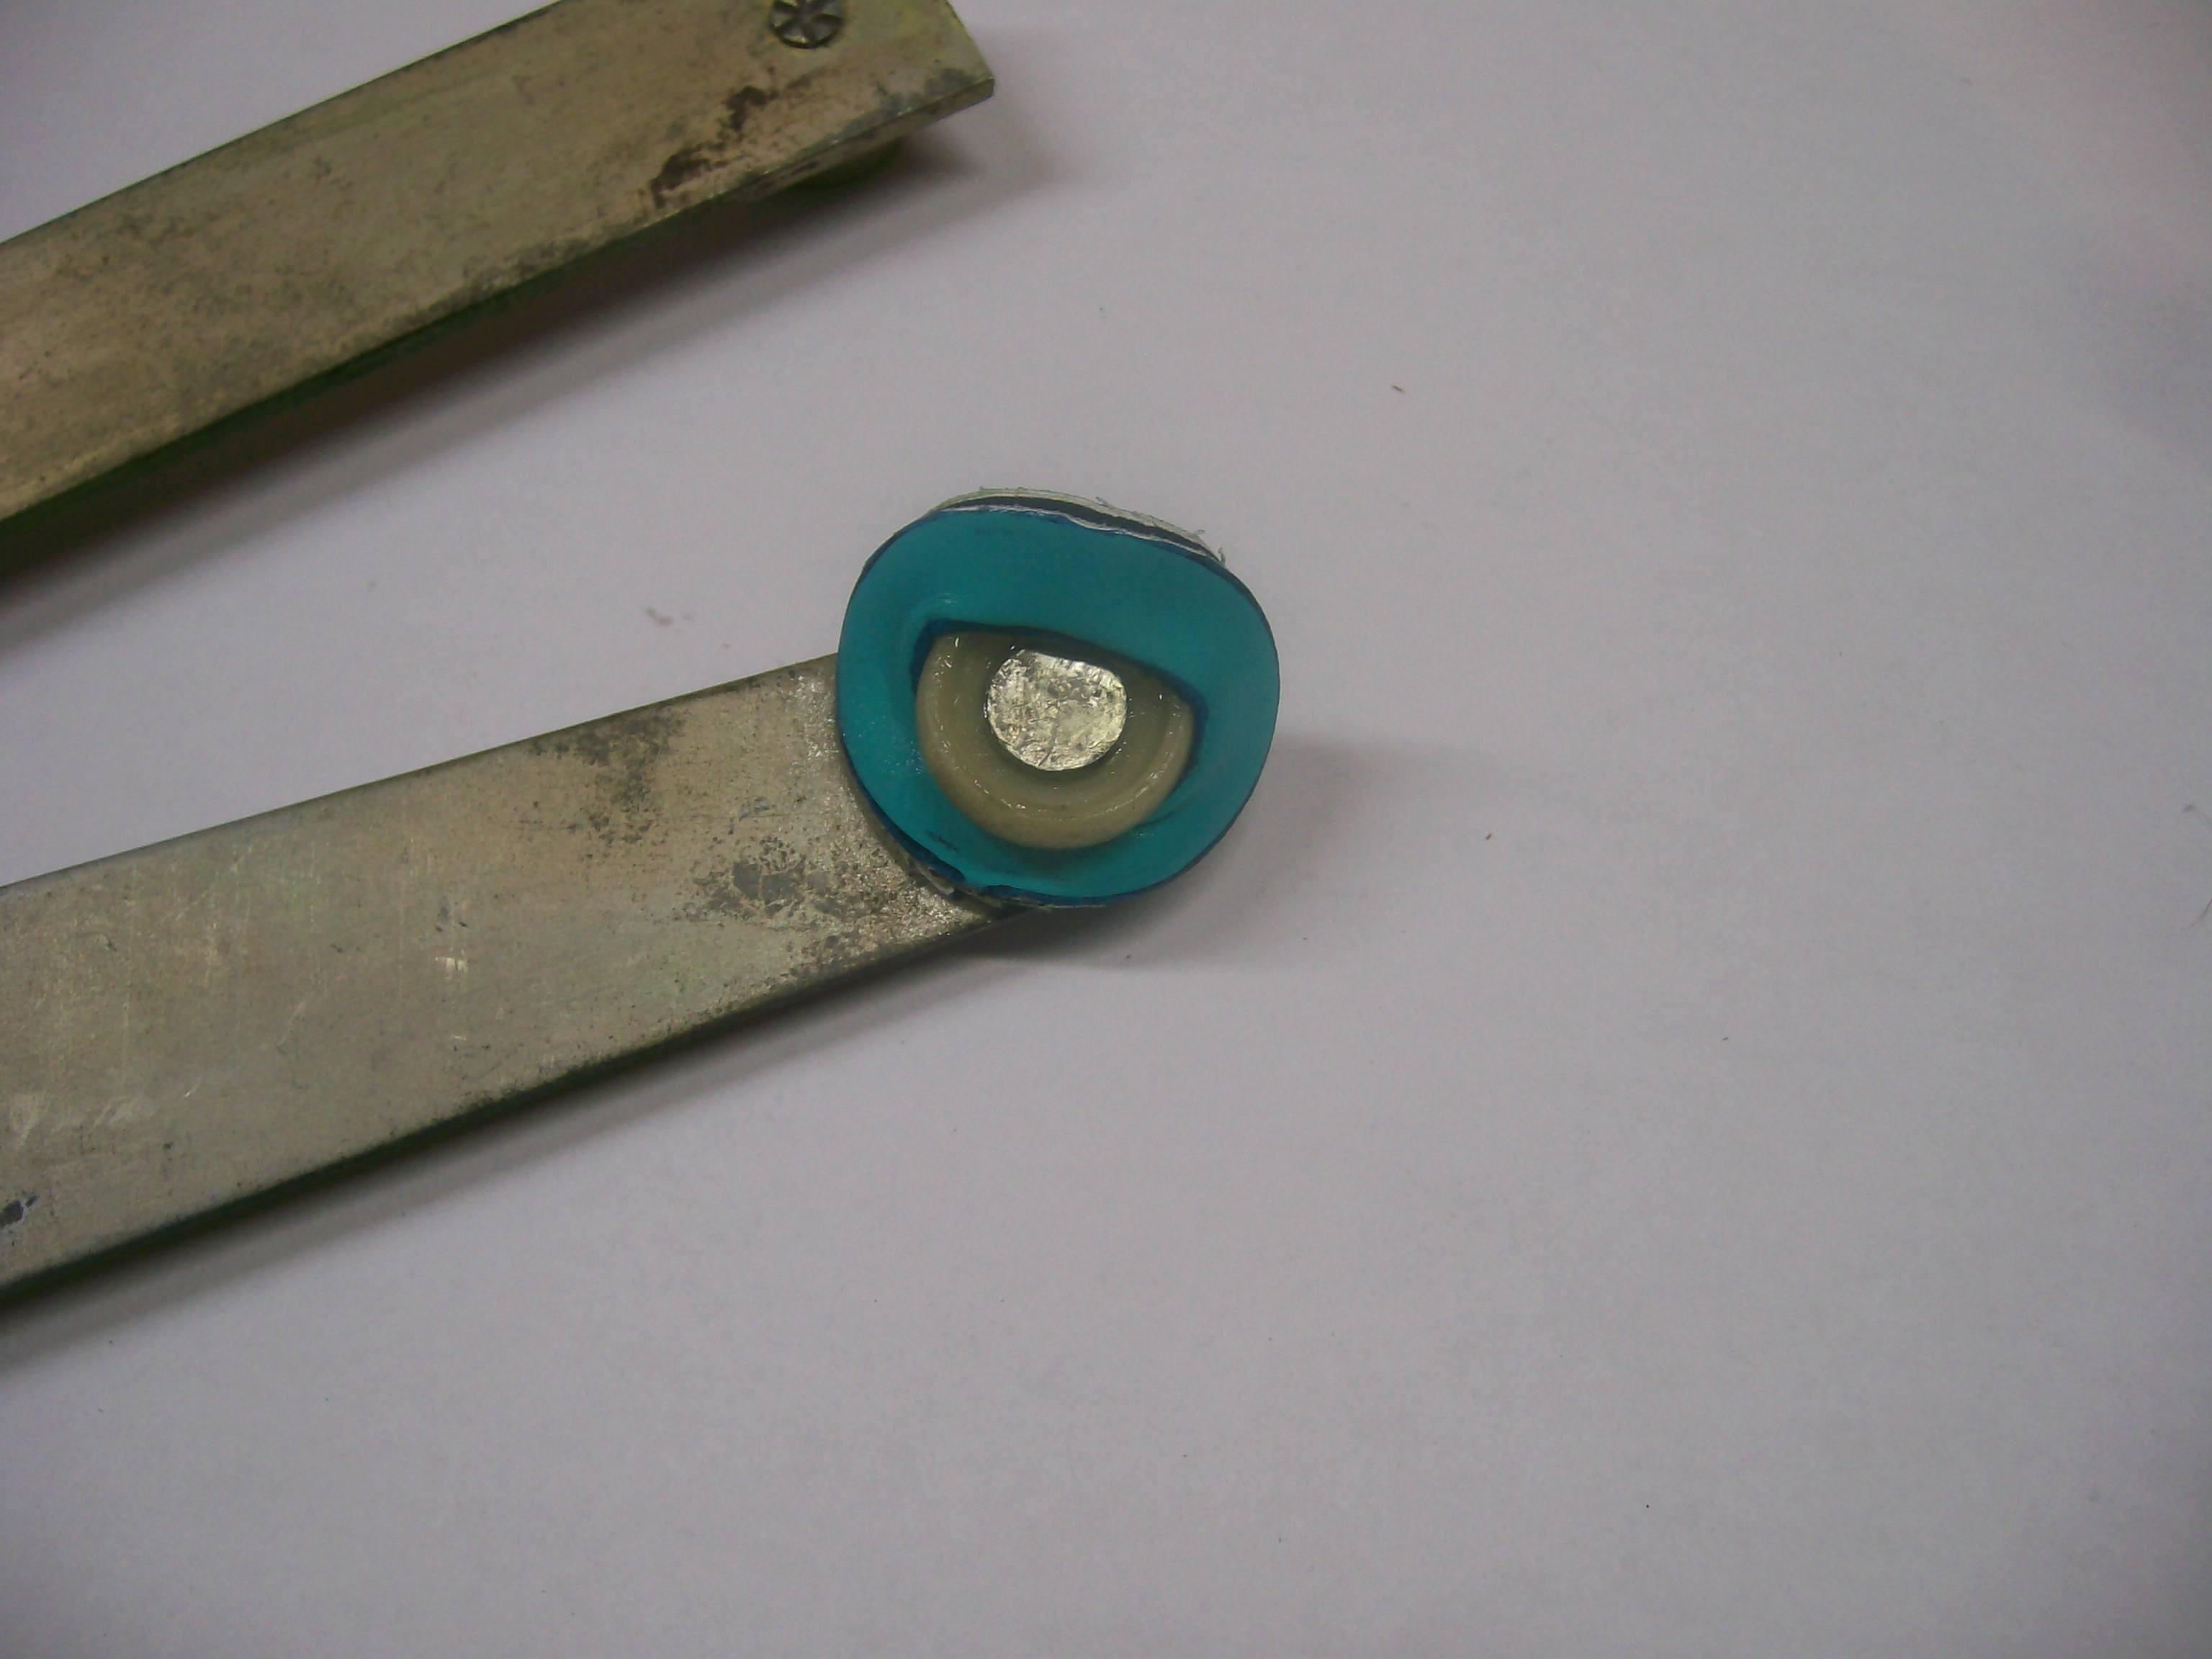
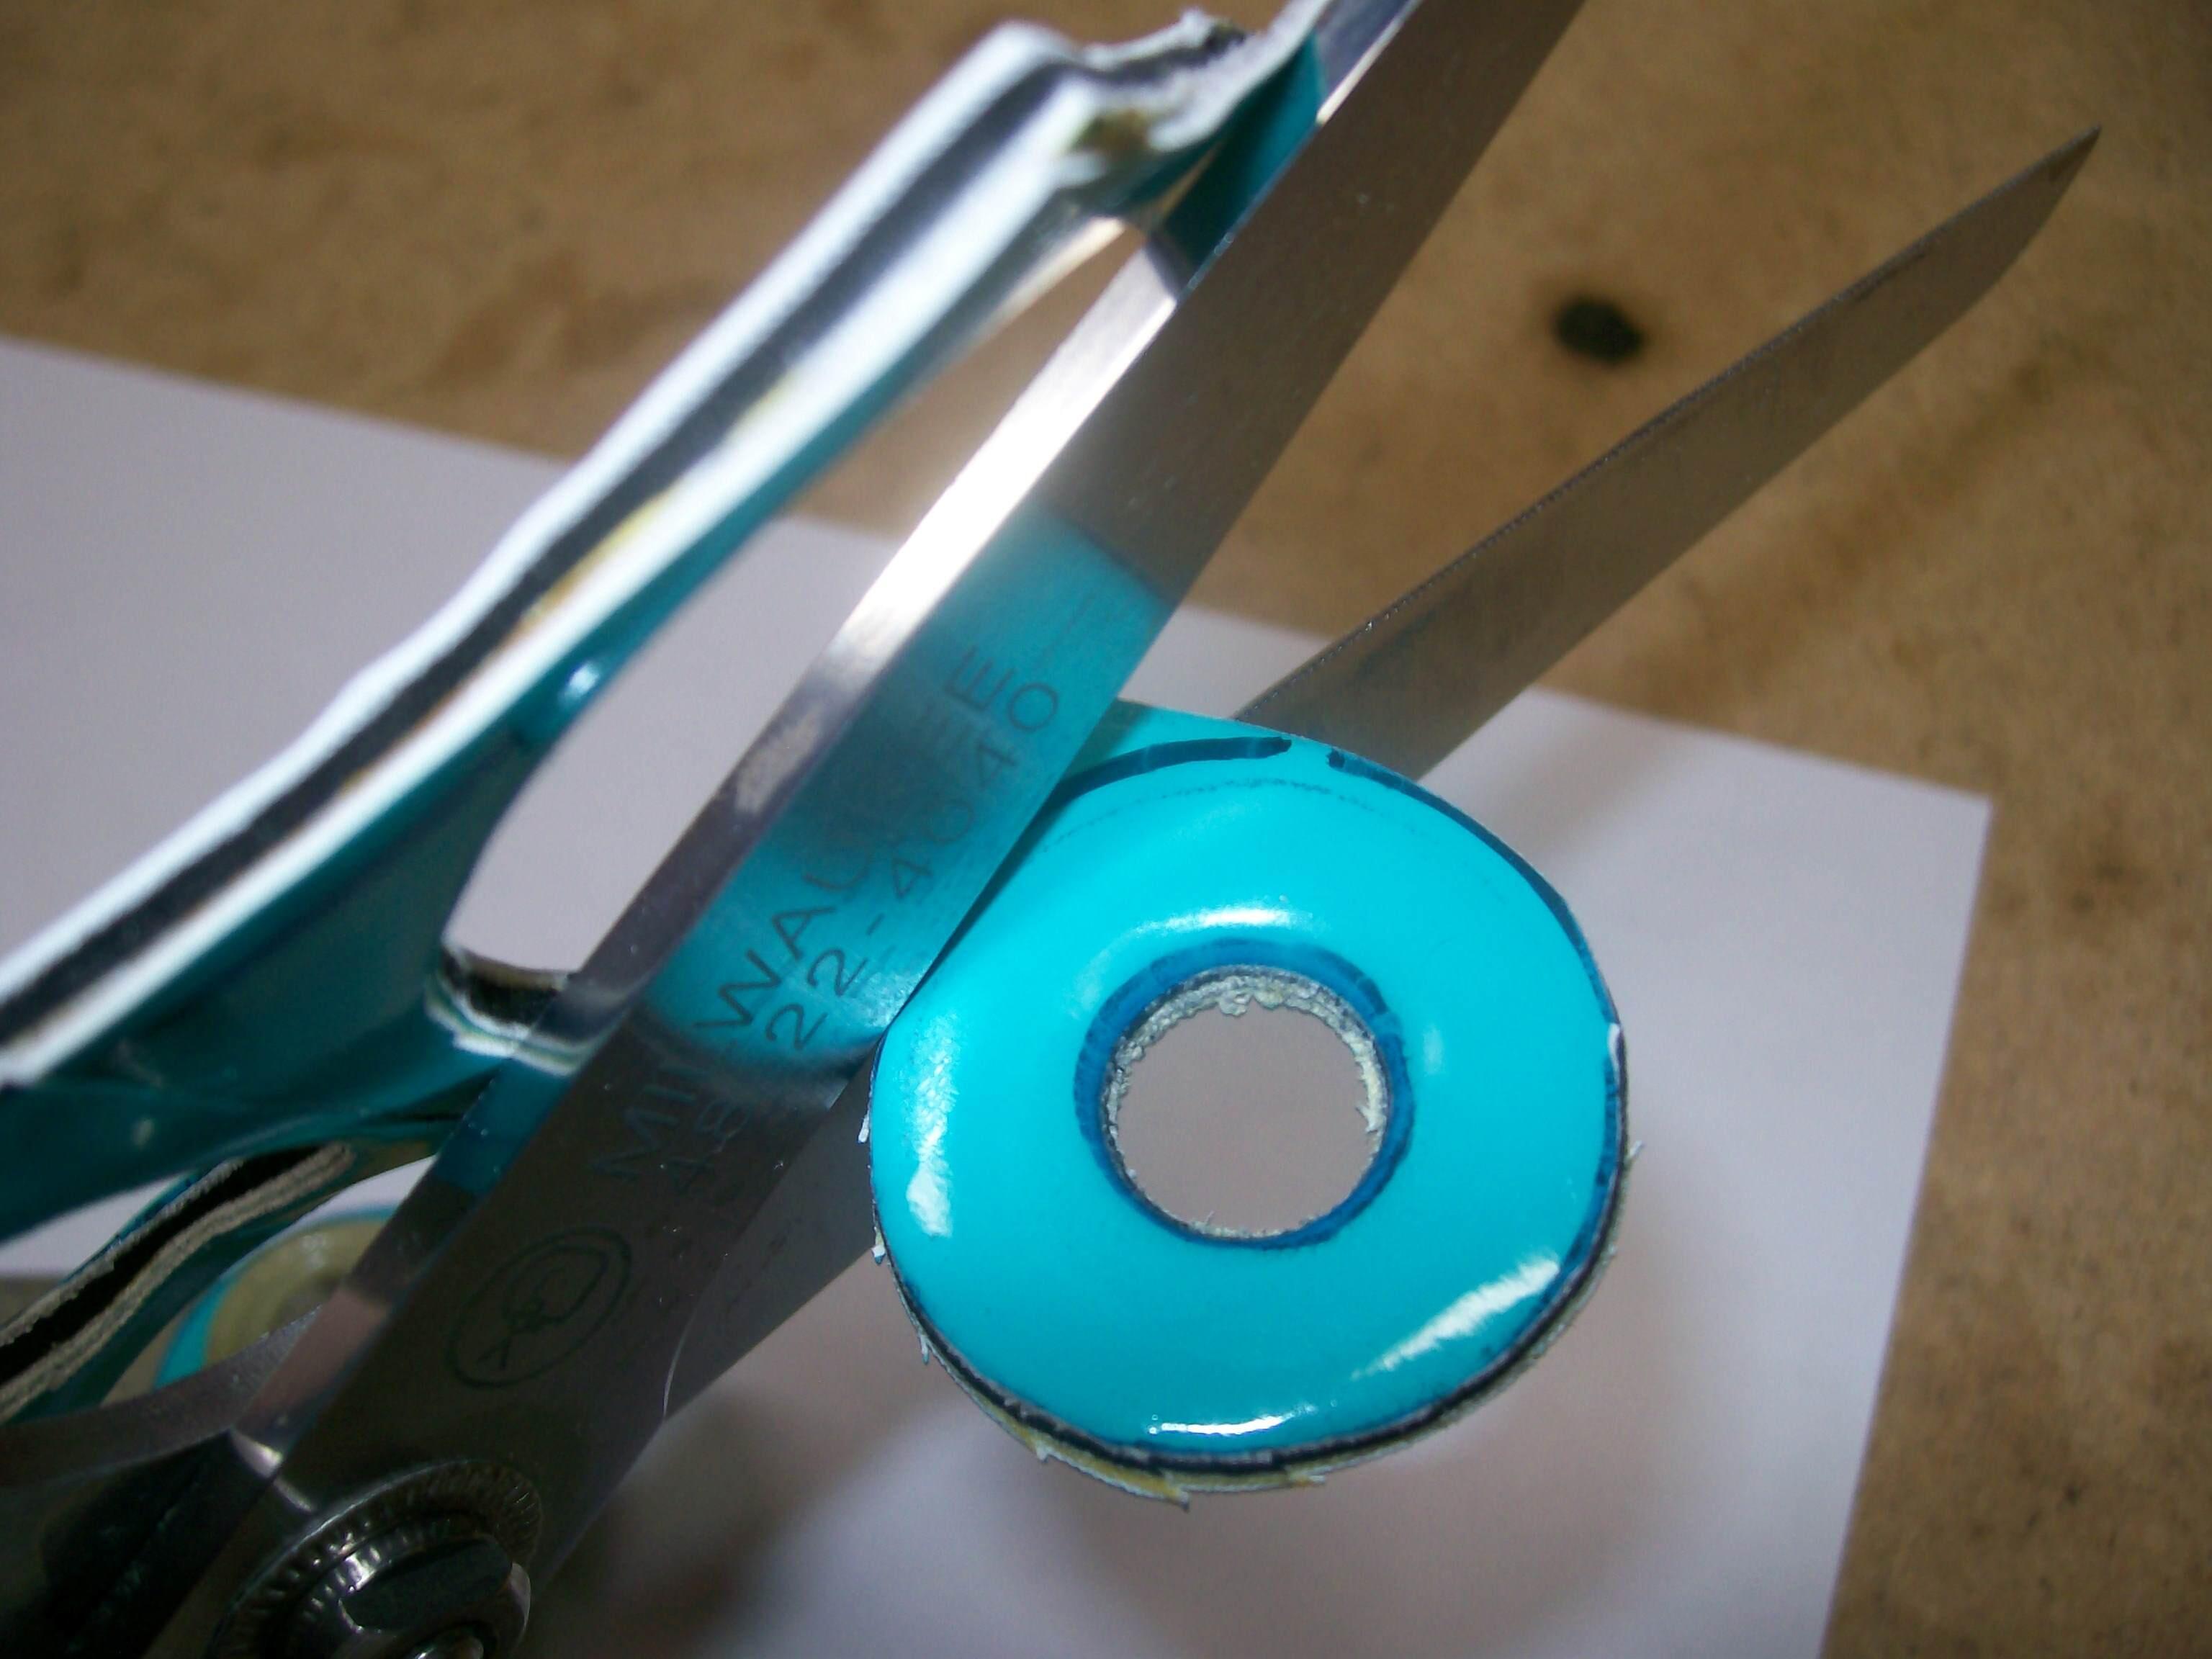
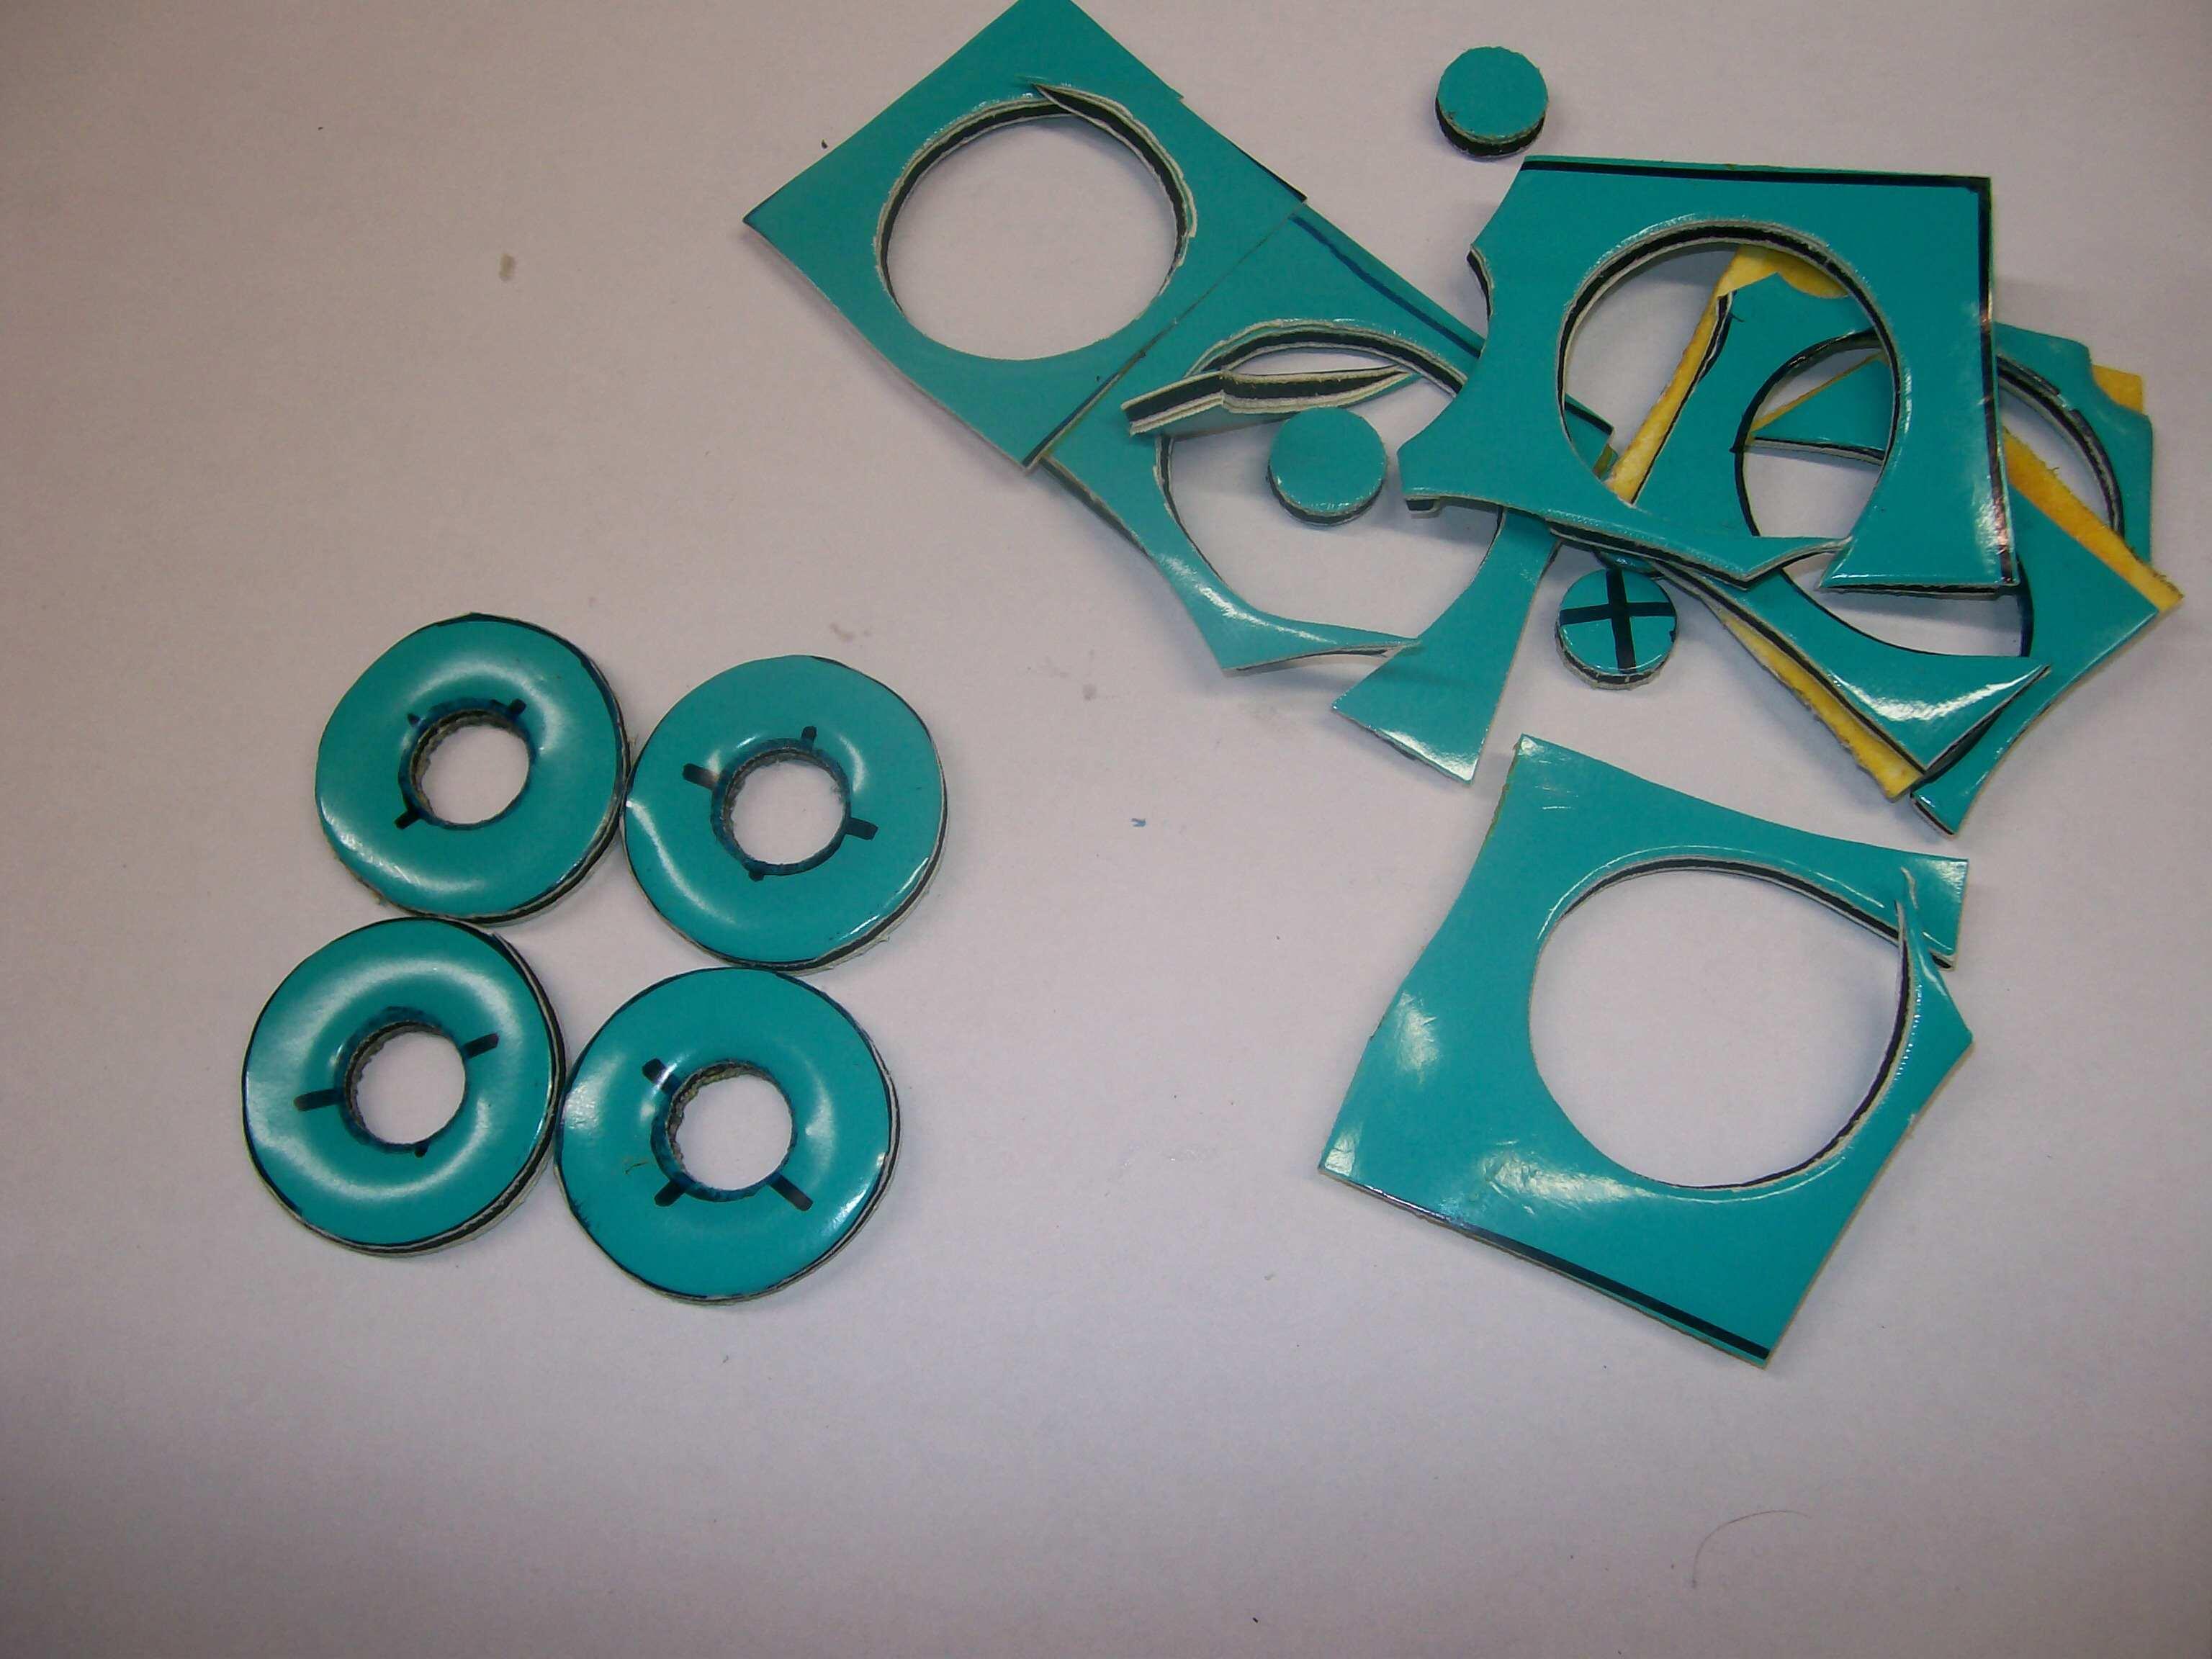
The rollers on my guides were fairly wobbly, so I decided that the flexible washers were providing not just a preload but also a self-steering effect for the rollers... The tarp grommets definitely take up the clearance slop, but they're not flexible... I decided to take a different approach. A search through my 'this may come in handy some day' box of materials produced a small sheet of nice, shiny, thin-and-flexible vinyl. I already had a sheet of closed-cell neoprene foam, ~ 3/32" thick, that I'd used earlier as a gasket material when restring my Z's heater. Using weatherstrip adhesive, I glued up a composite sheet with the vinyl on both faces and the neoprene as the core, ending up with something that was both stretchy and slippery... From there, I used a hole punch and scissors to create a set of washers... The new washers were stretchy enough that they could be pulled over the nylon roller... Once in place, they gave me what I was looking for...


 5 points
 -
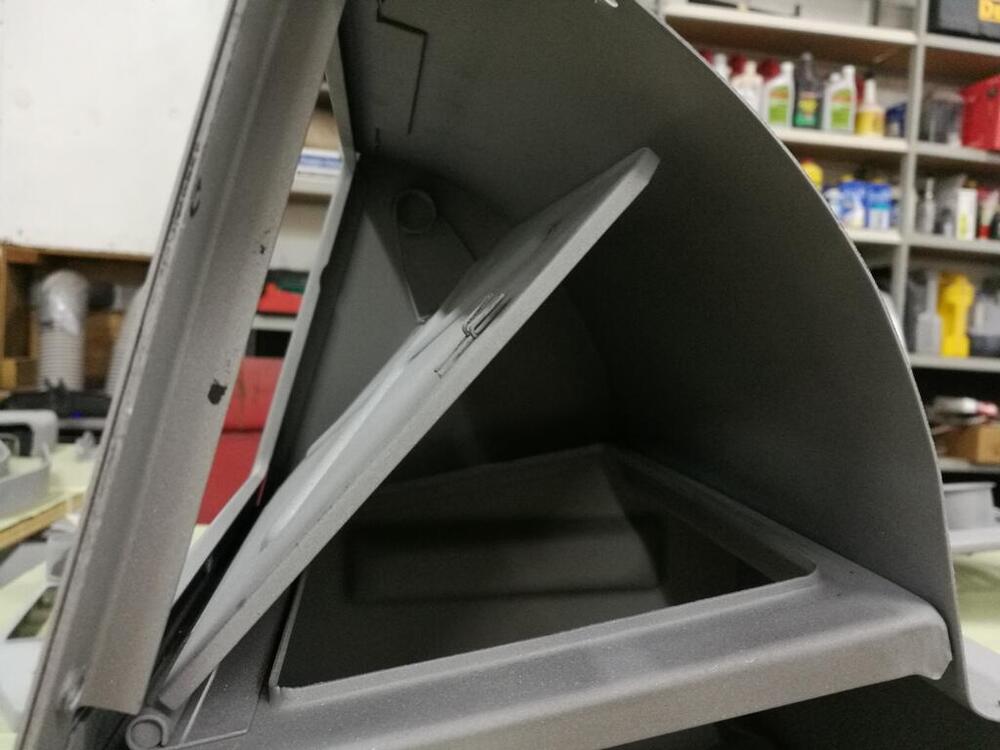
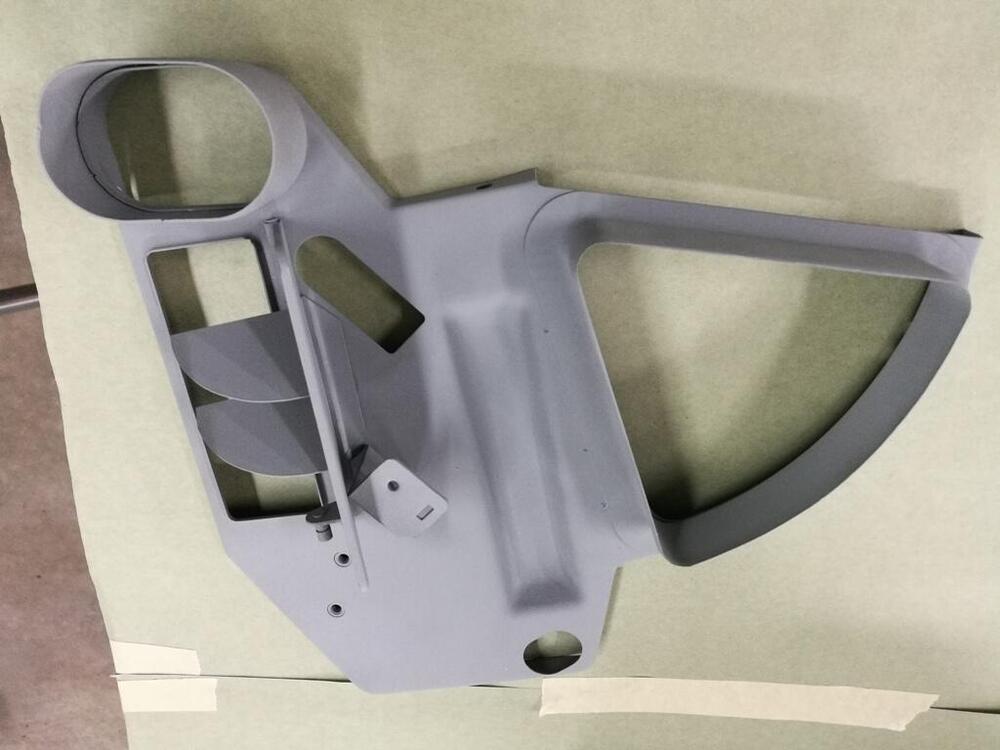
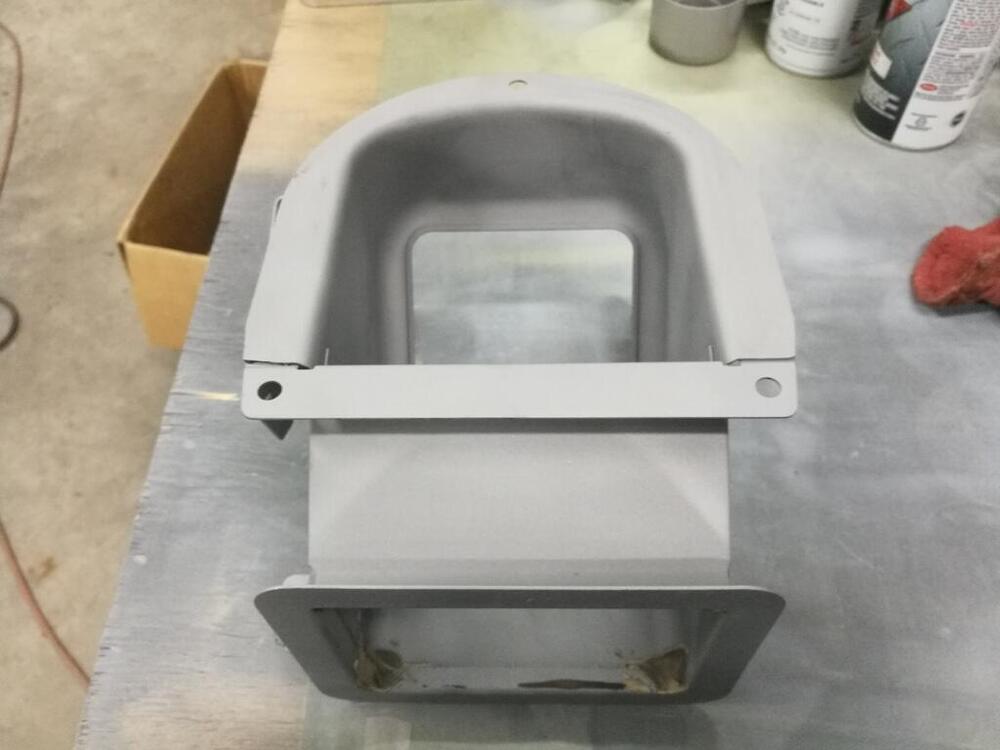
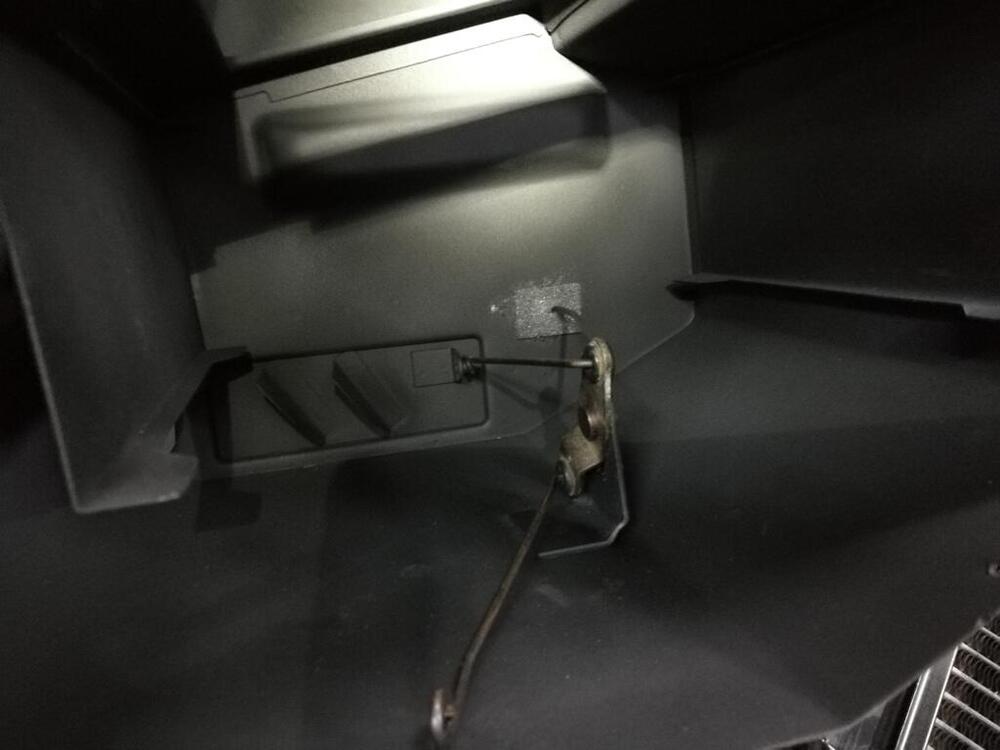
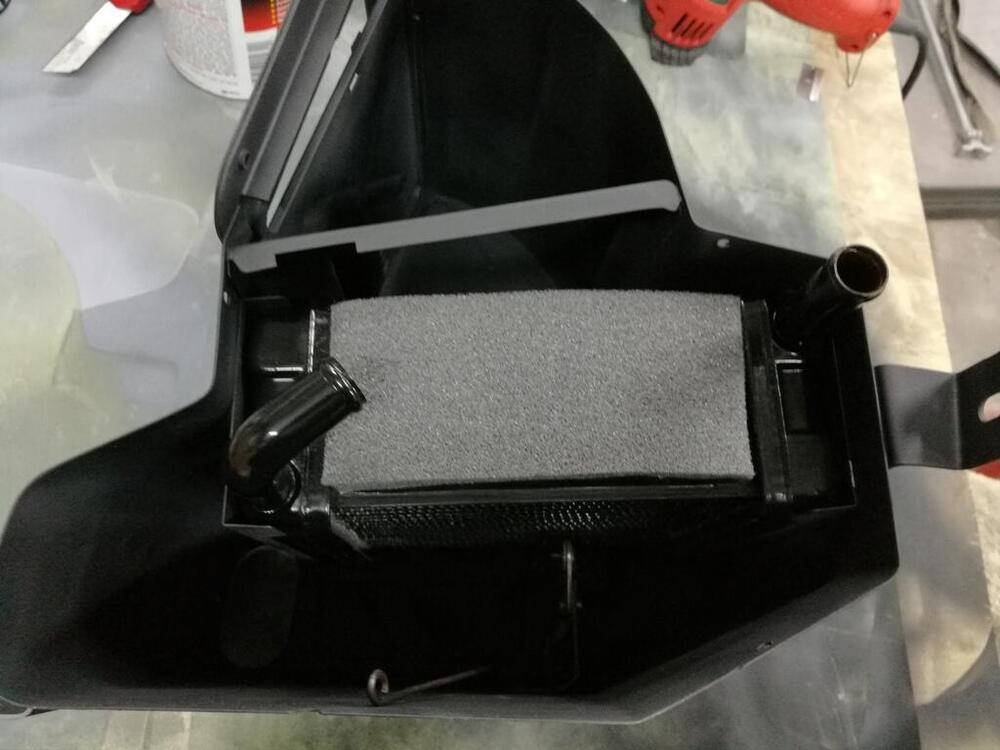
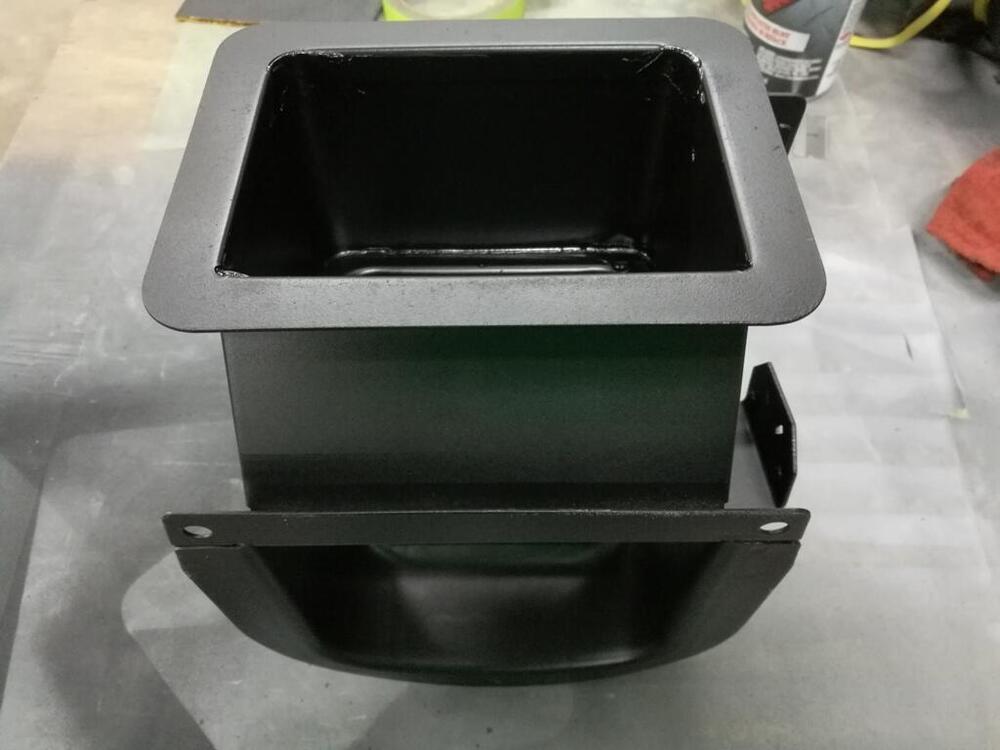
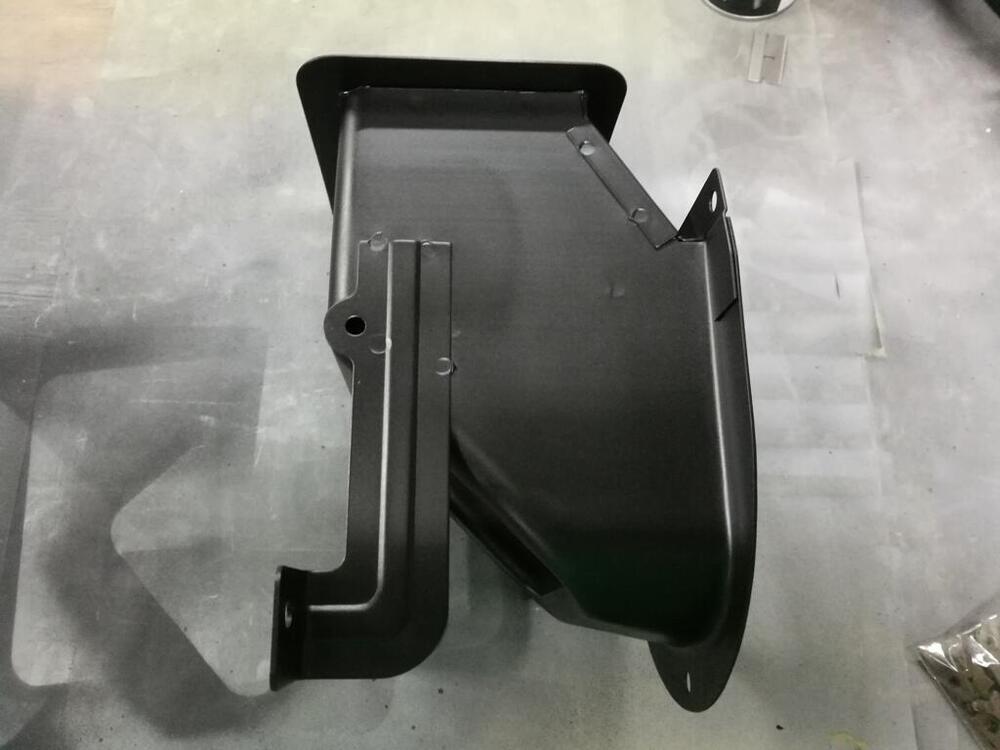
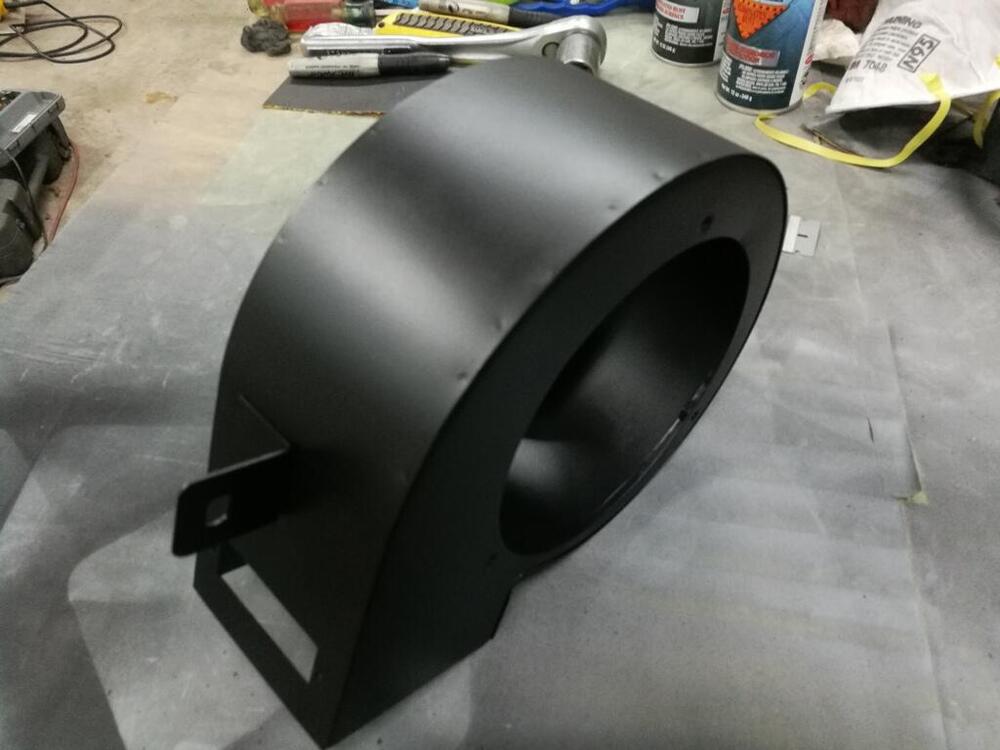
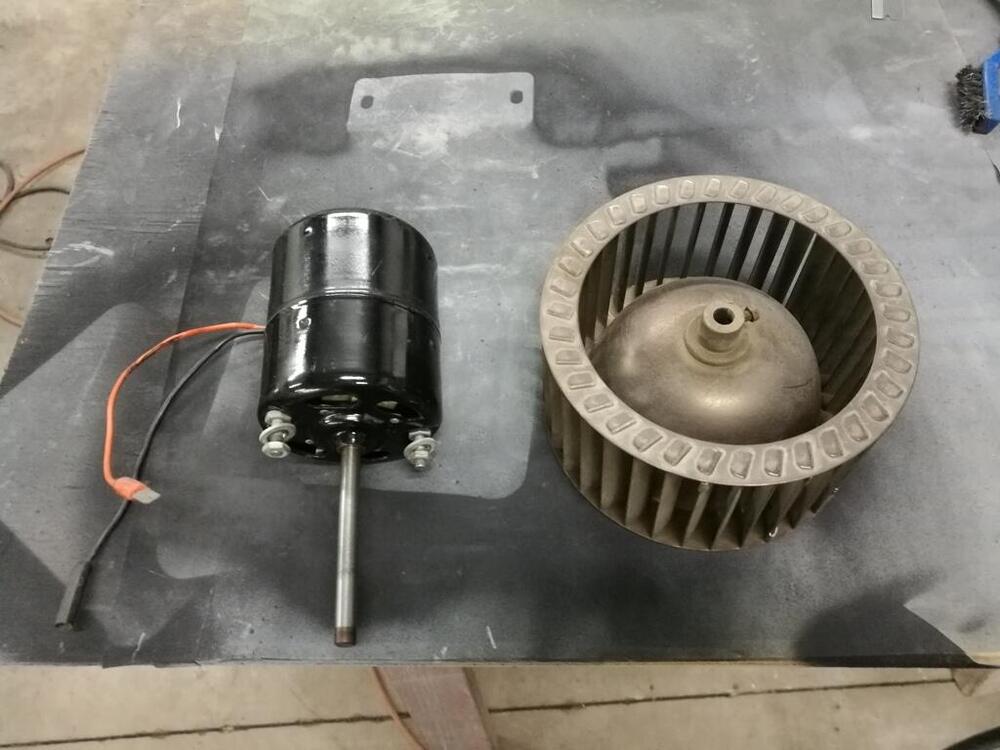
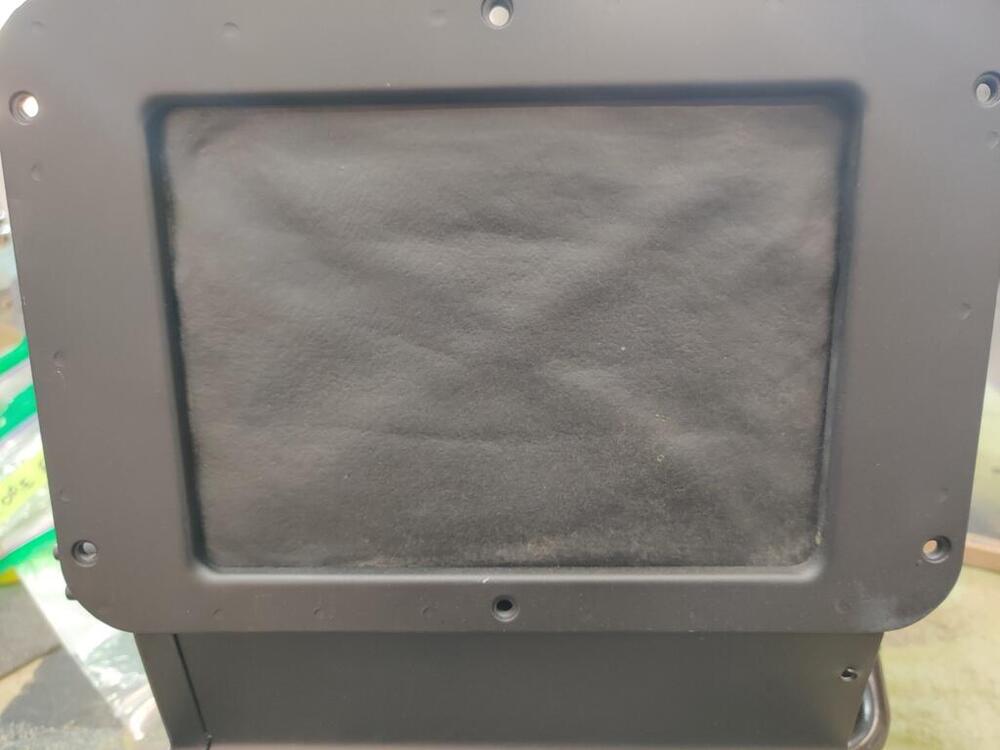
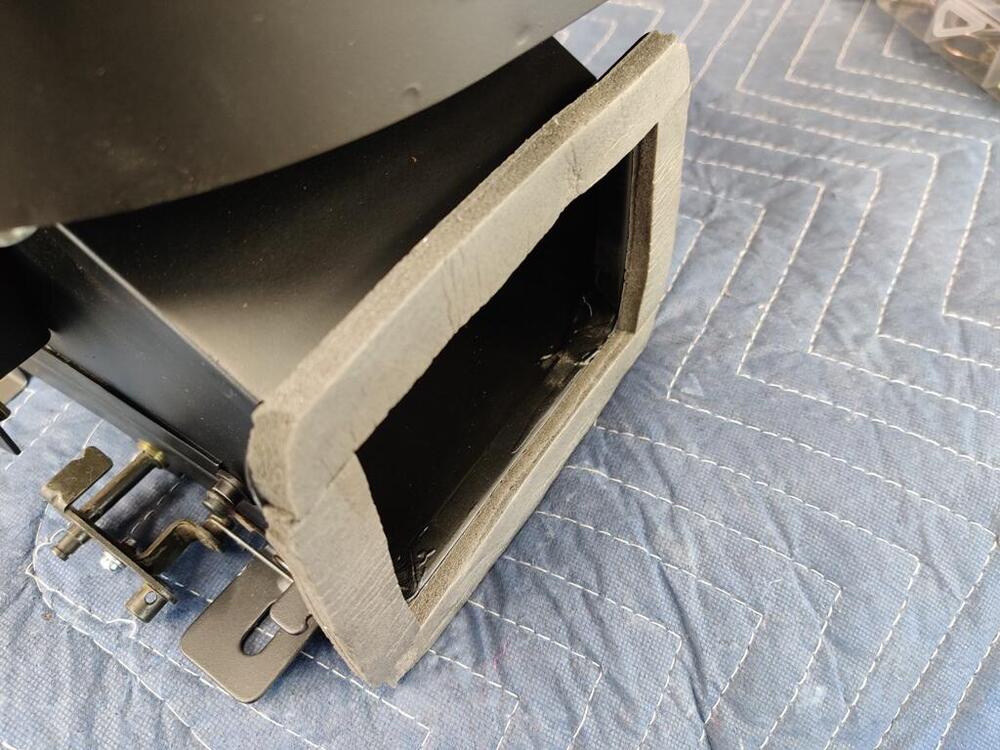
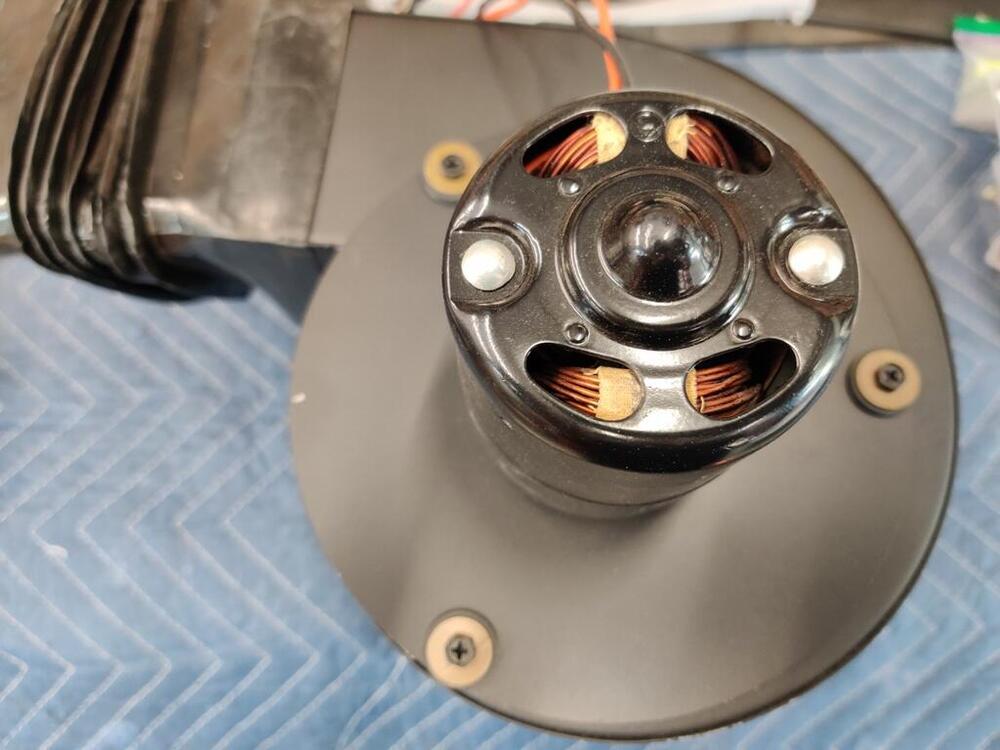
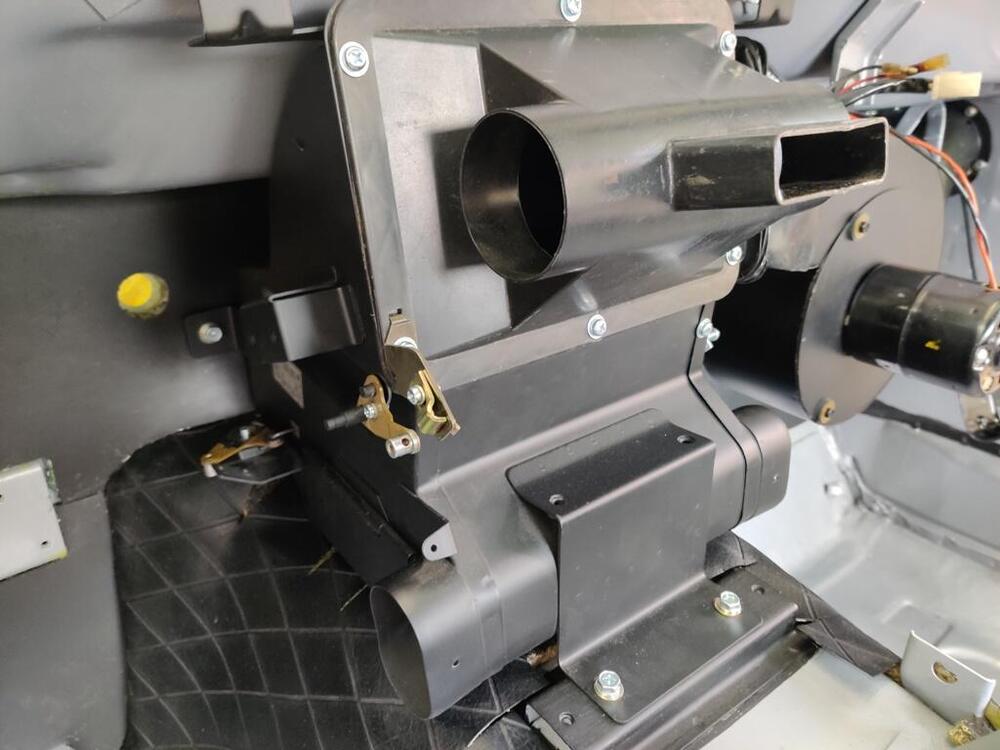
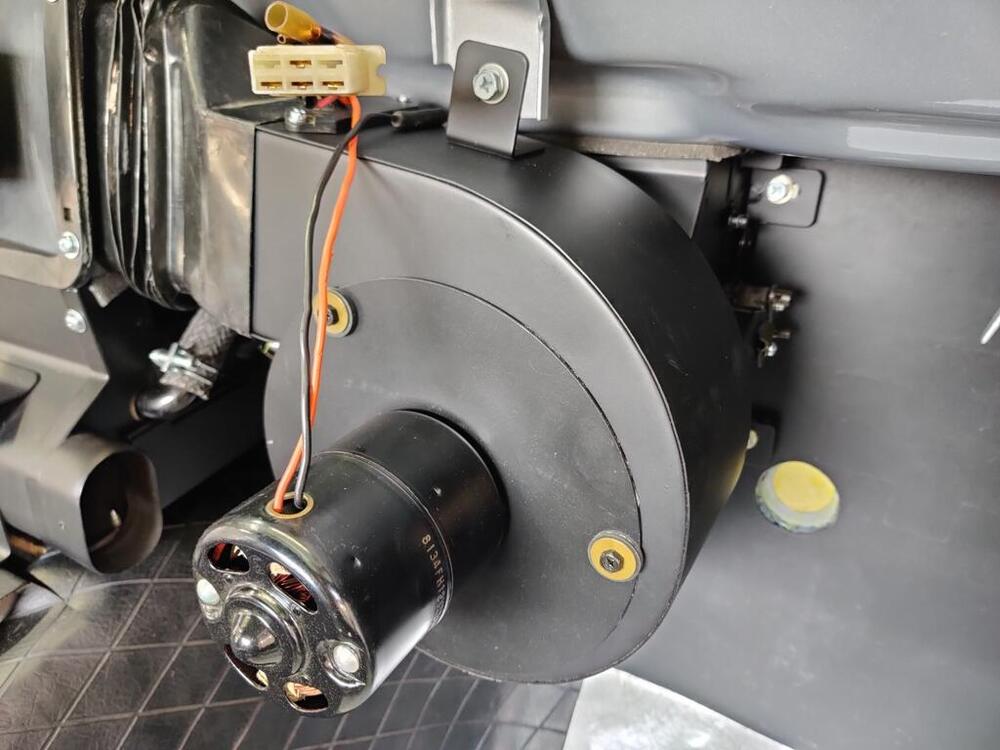
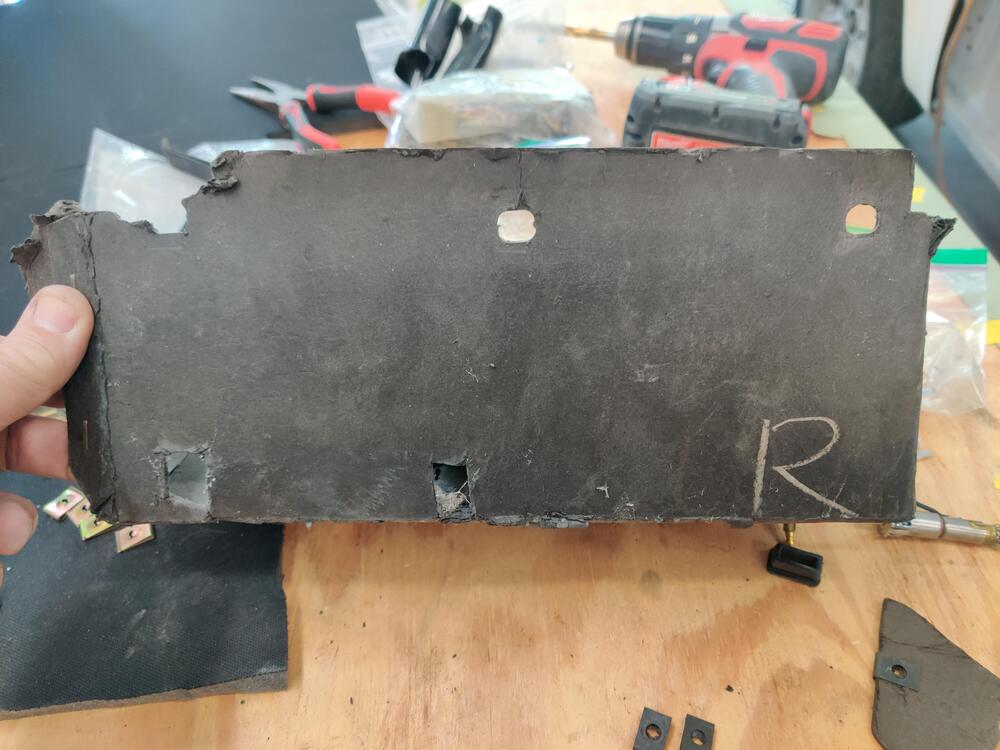
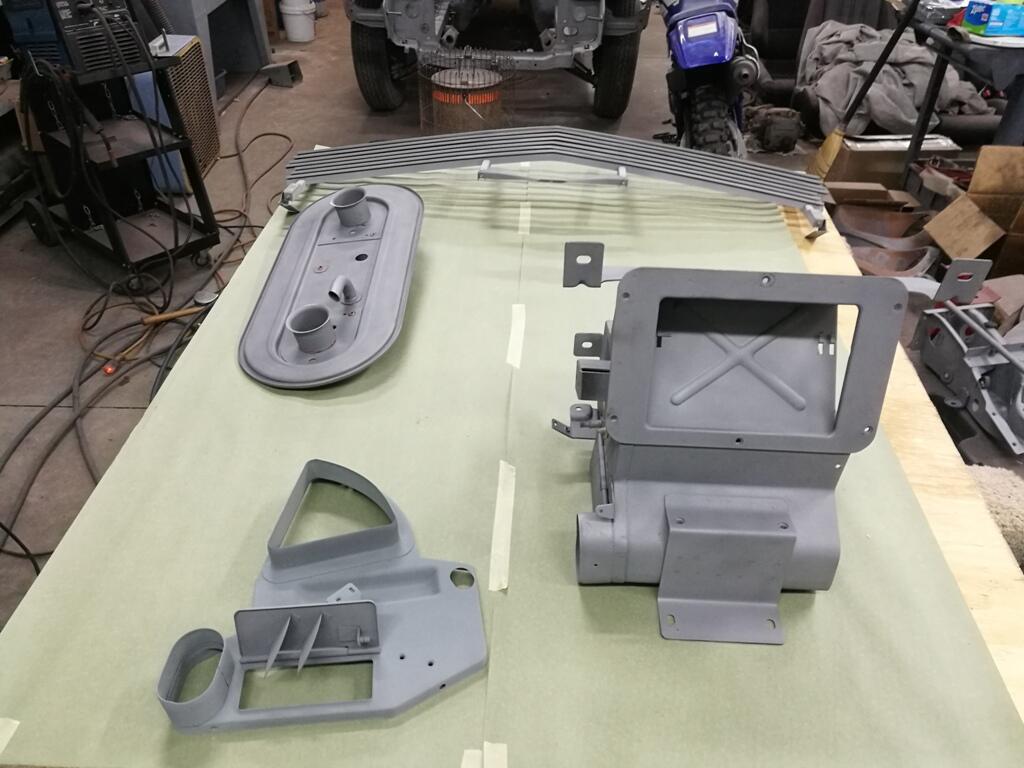
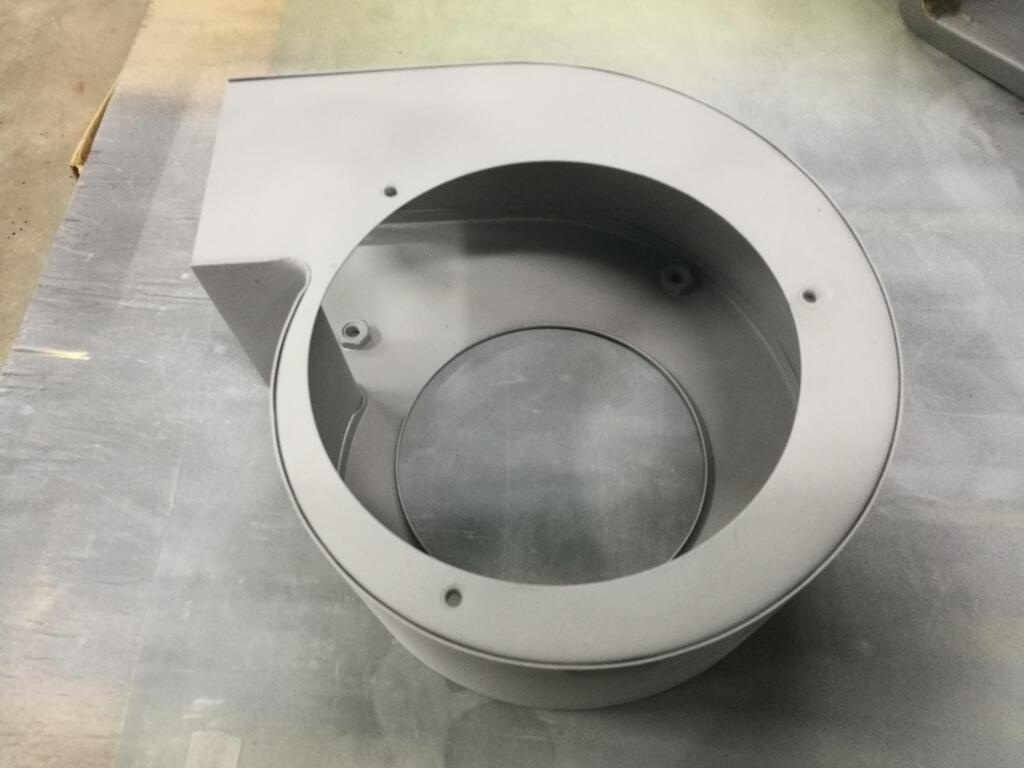
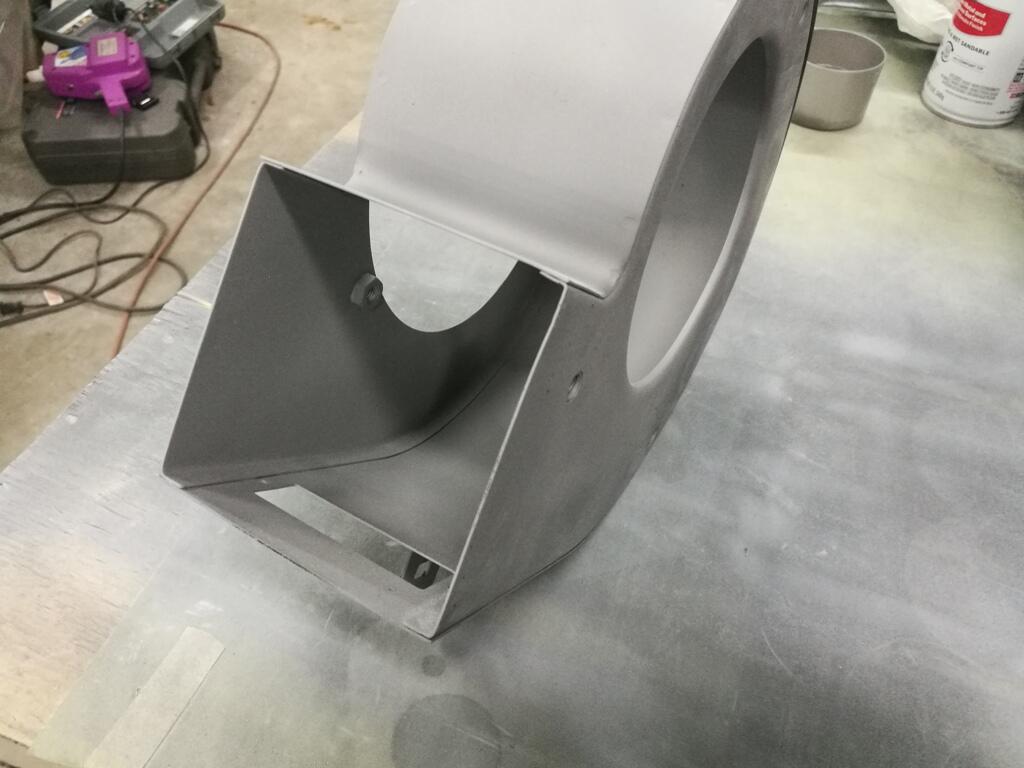
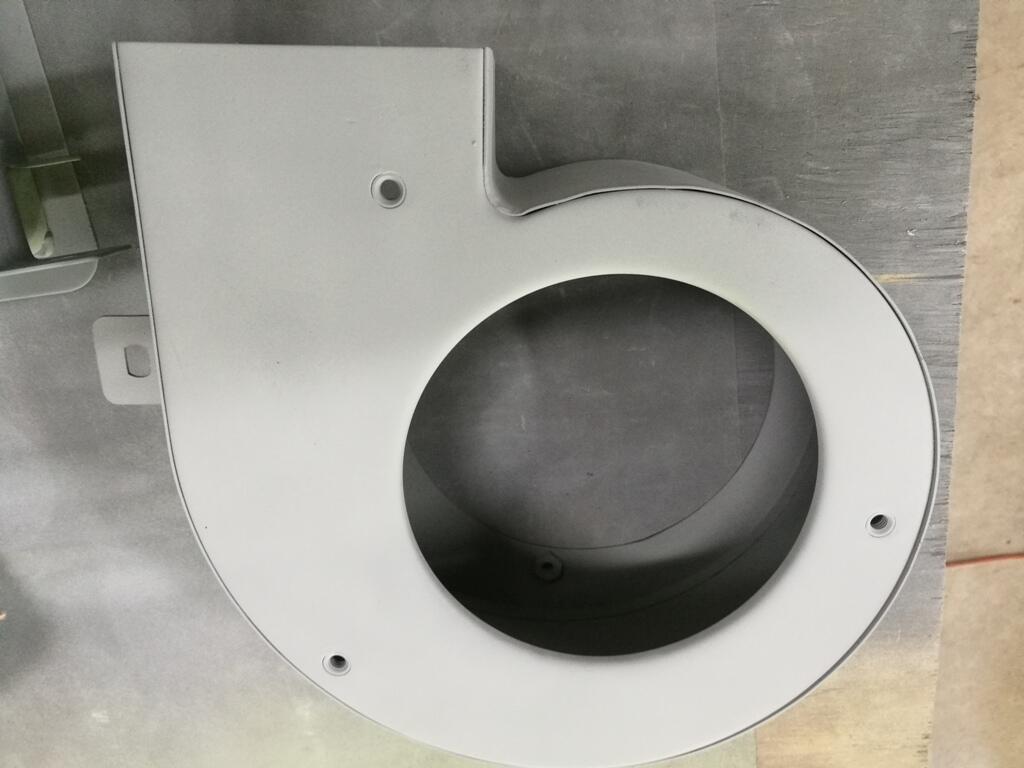
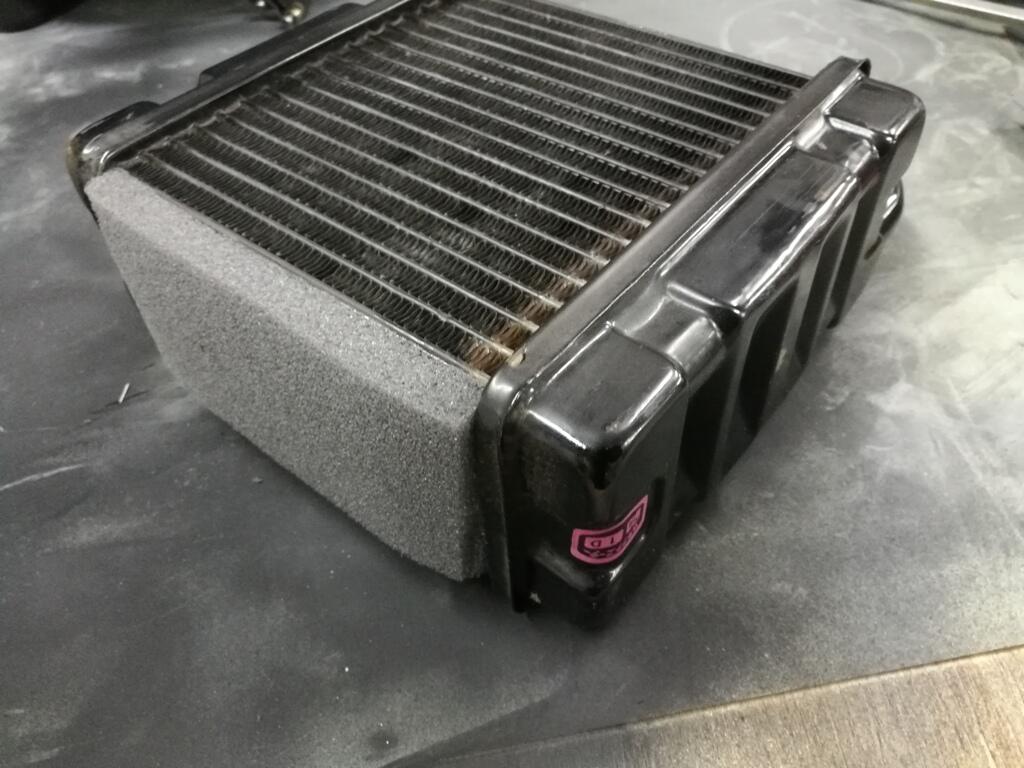
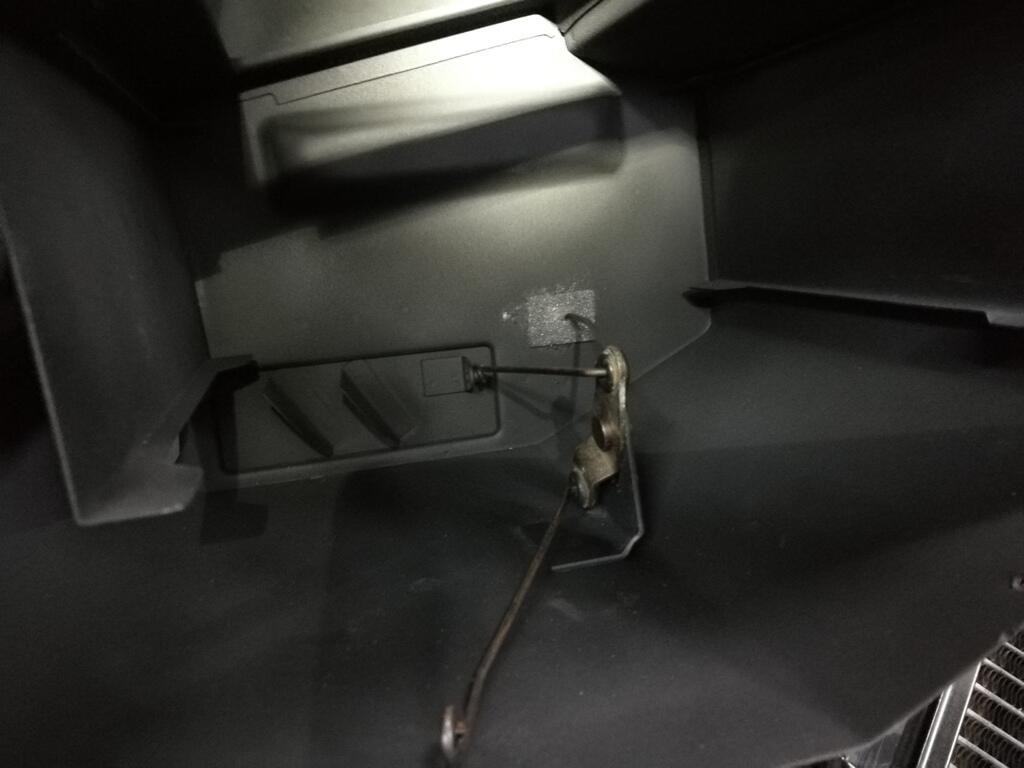
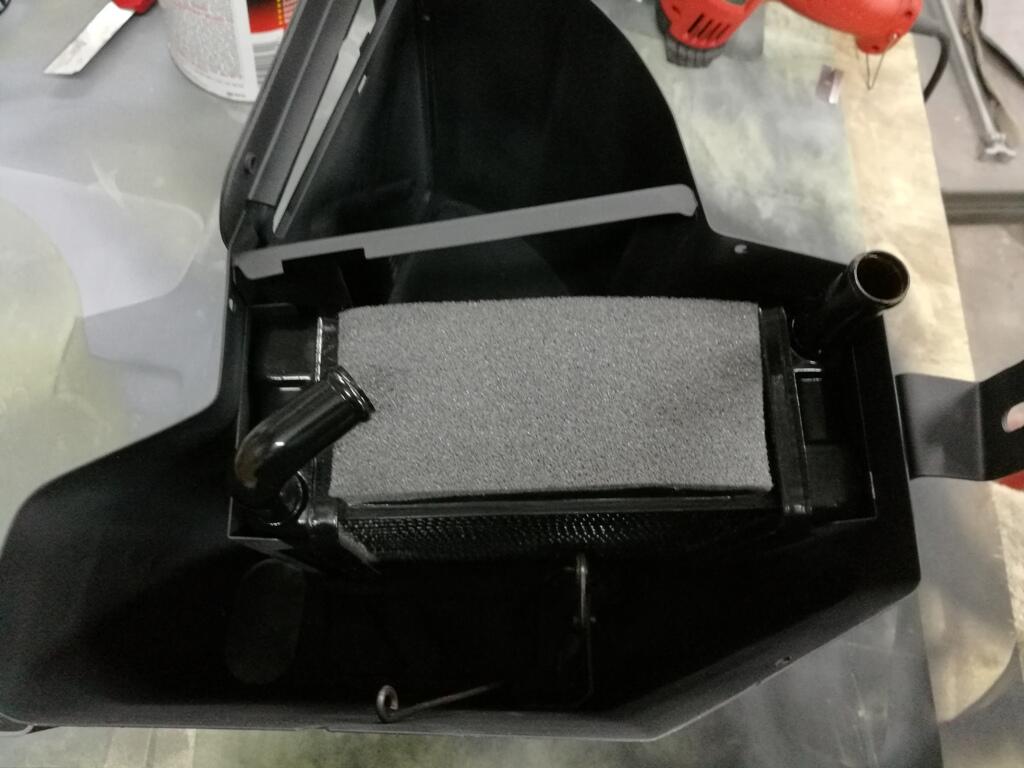
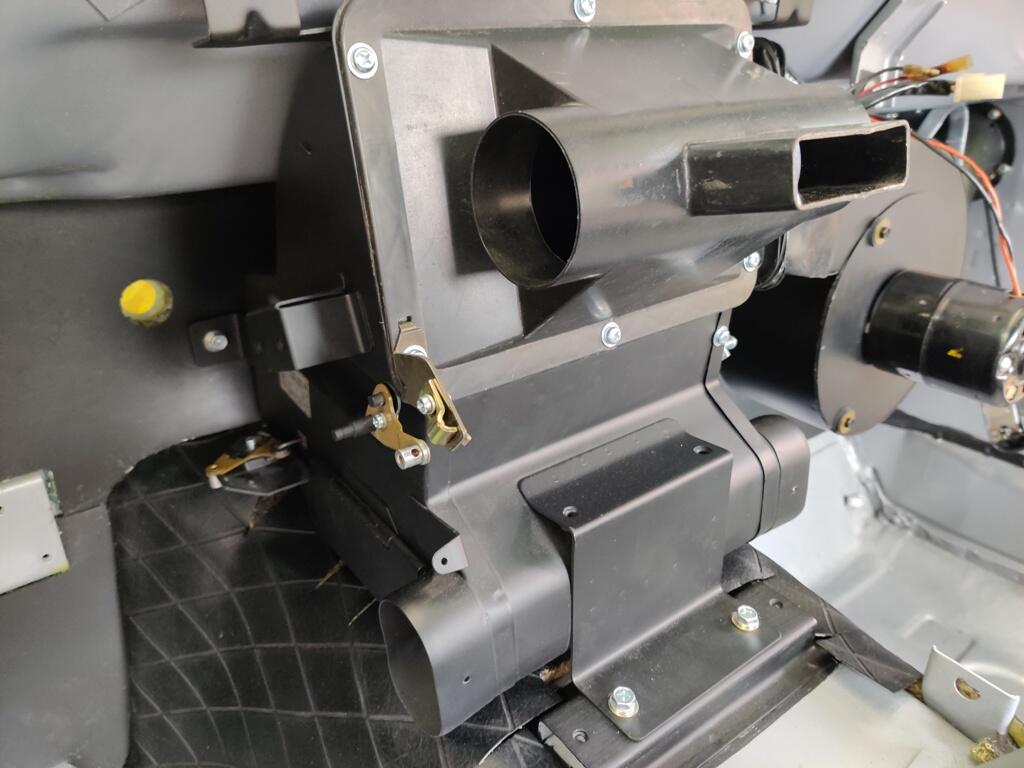
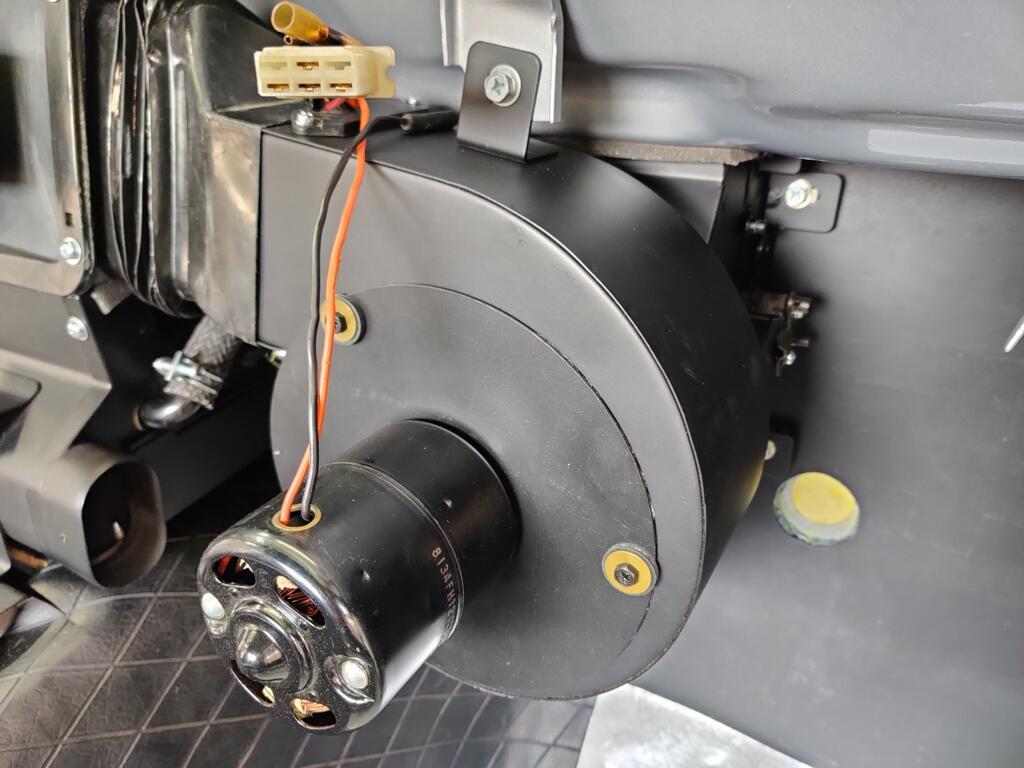
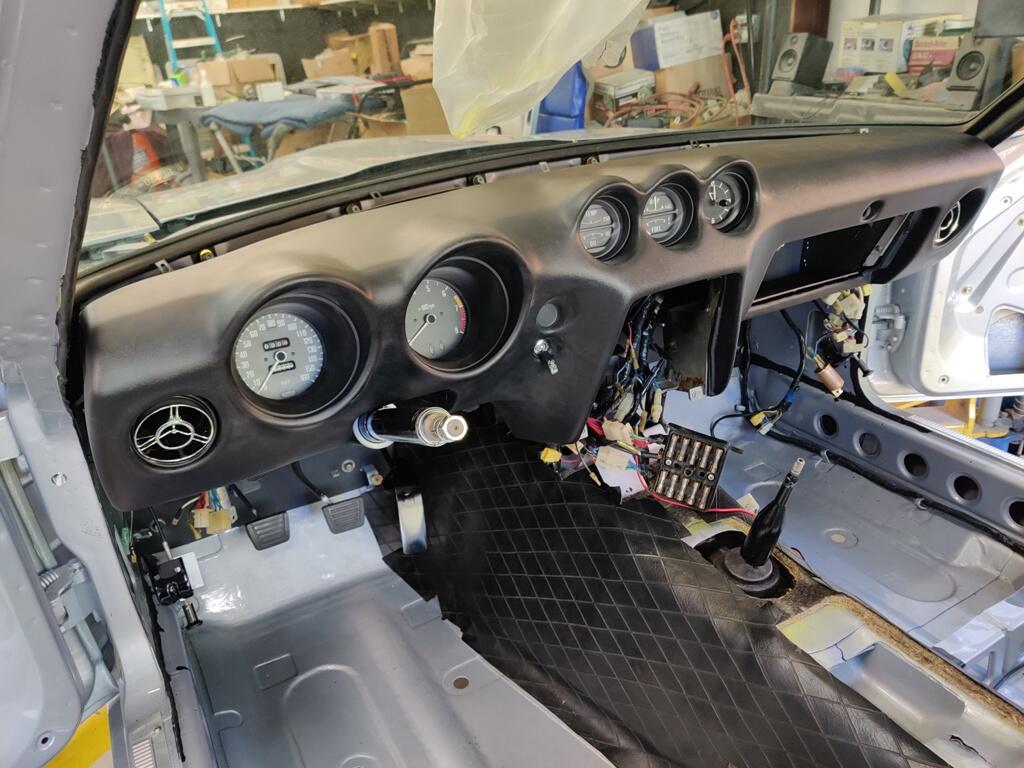
It's been a while since I posted an update. I went on vacation for a bit. However, I made some progress this weekend and a bit last as well. I put the heater box back together. Some of these pics are old, as I sand blasted and painted the heater box early on in the restoration. And, I worked on getting everything back in the dashboard. For the side vents, I purchased NOS chrome ones, and managed to track down vent housings that have the vertical "rib" that keep the chrome vents from rotating all the way sideways. Both vent directors fit nice and tight. I also installed an aftermarket glove box. Some are better than others, and this one is a nice. The original had an R on it, written with what looks to me like a white grease pencil: Putting the steering column in was a pain! For a while, I felt like I had been beat up, as all the hard and sharp edges of the seat brackets and weld flange on the top of the rocker panel were digging to me. Next time I have to spend time upside down on the floor I am adding some temporary padding!


 5 points
 -
4 pointsI got the starter installed, 20 min job, and yes Zed I needed a longer bolt. Had them in my stash (45mm M10x1.50). What a night and day difference between this starter and that garbage AC Delco reman. Sounds totally different and I can tell is spinning faster also. Sounds like a modern starter. The AC Delco had a annoying whine and everyone always asked me if that was normal.4 points
-
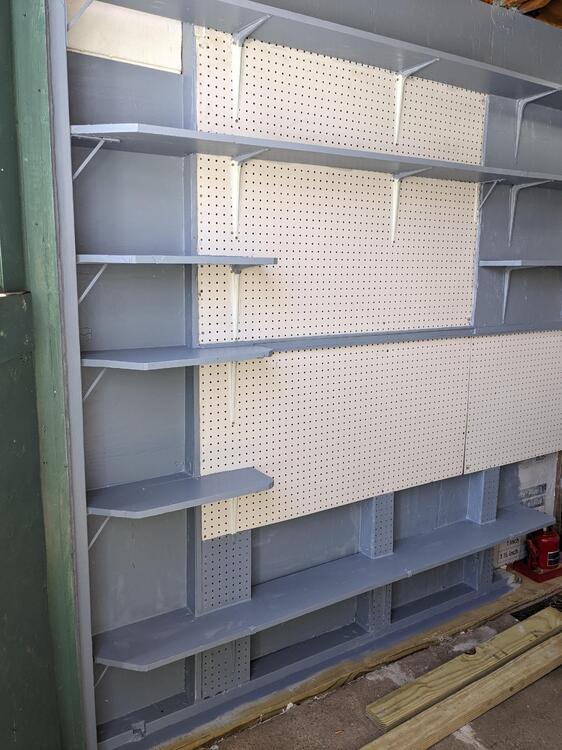
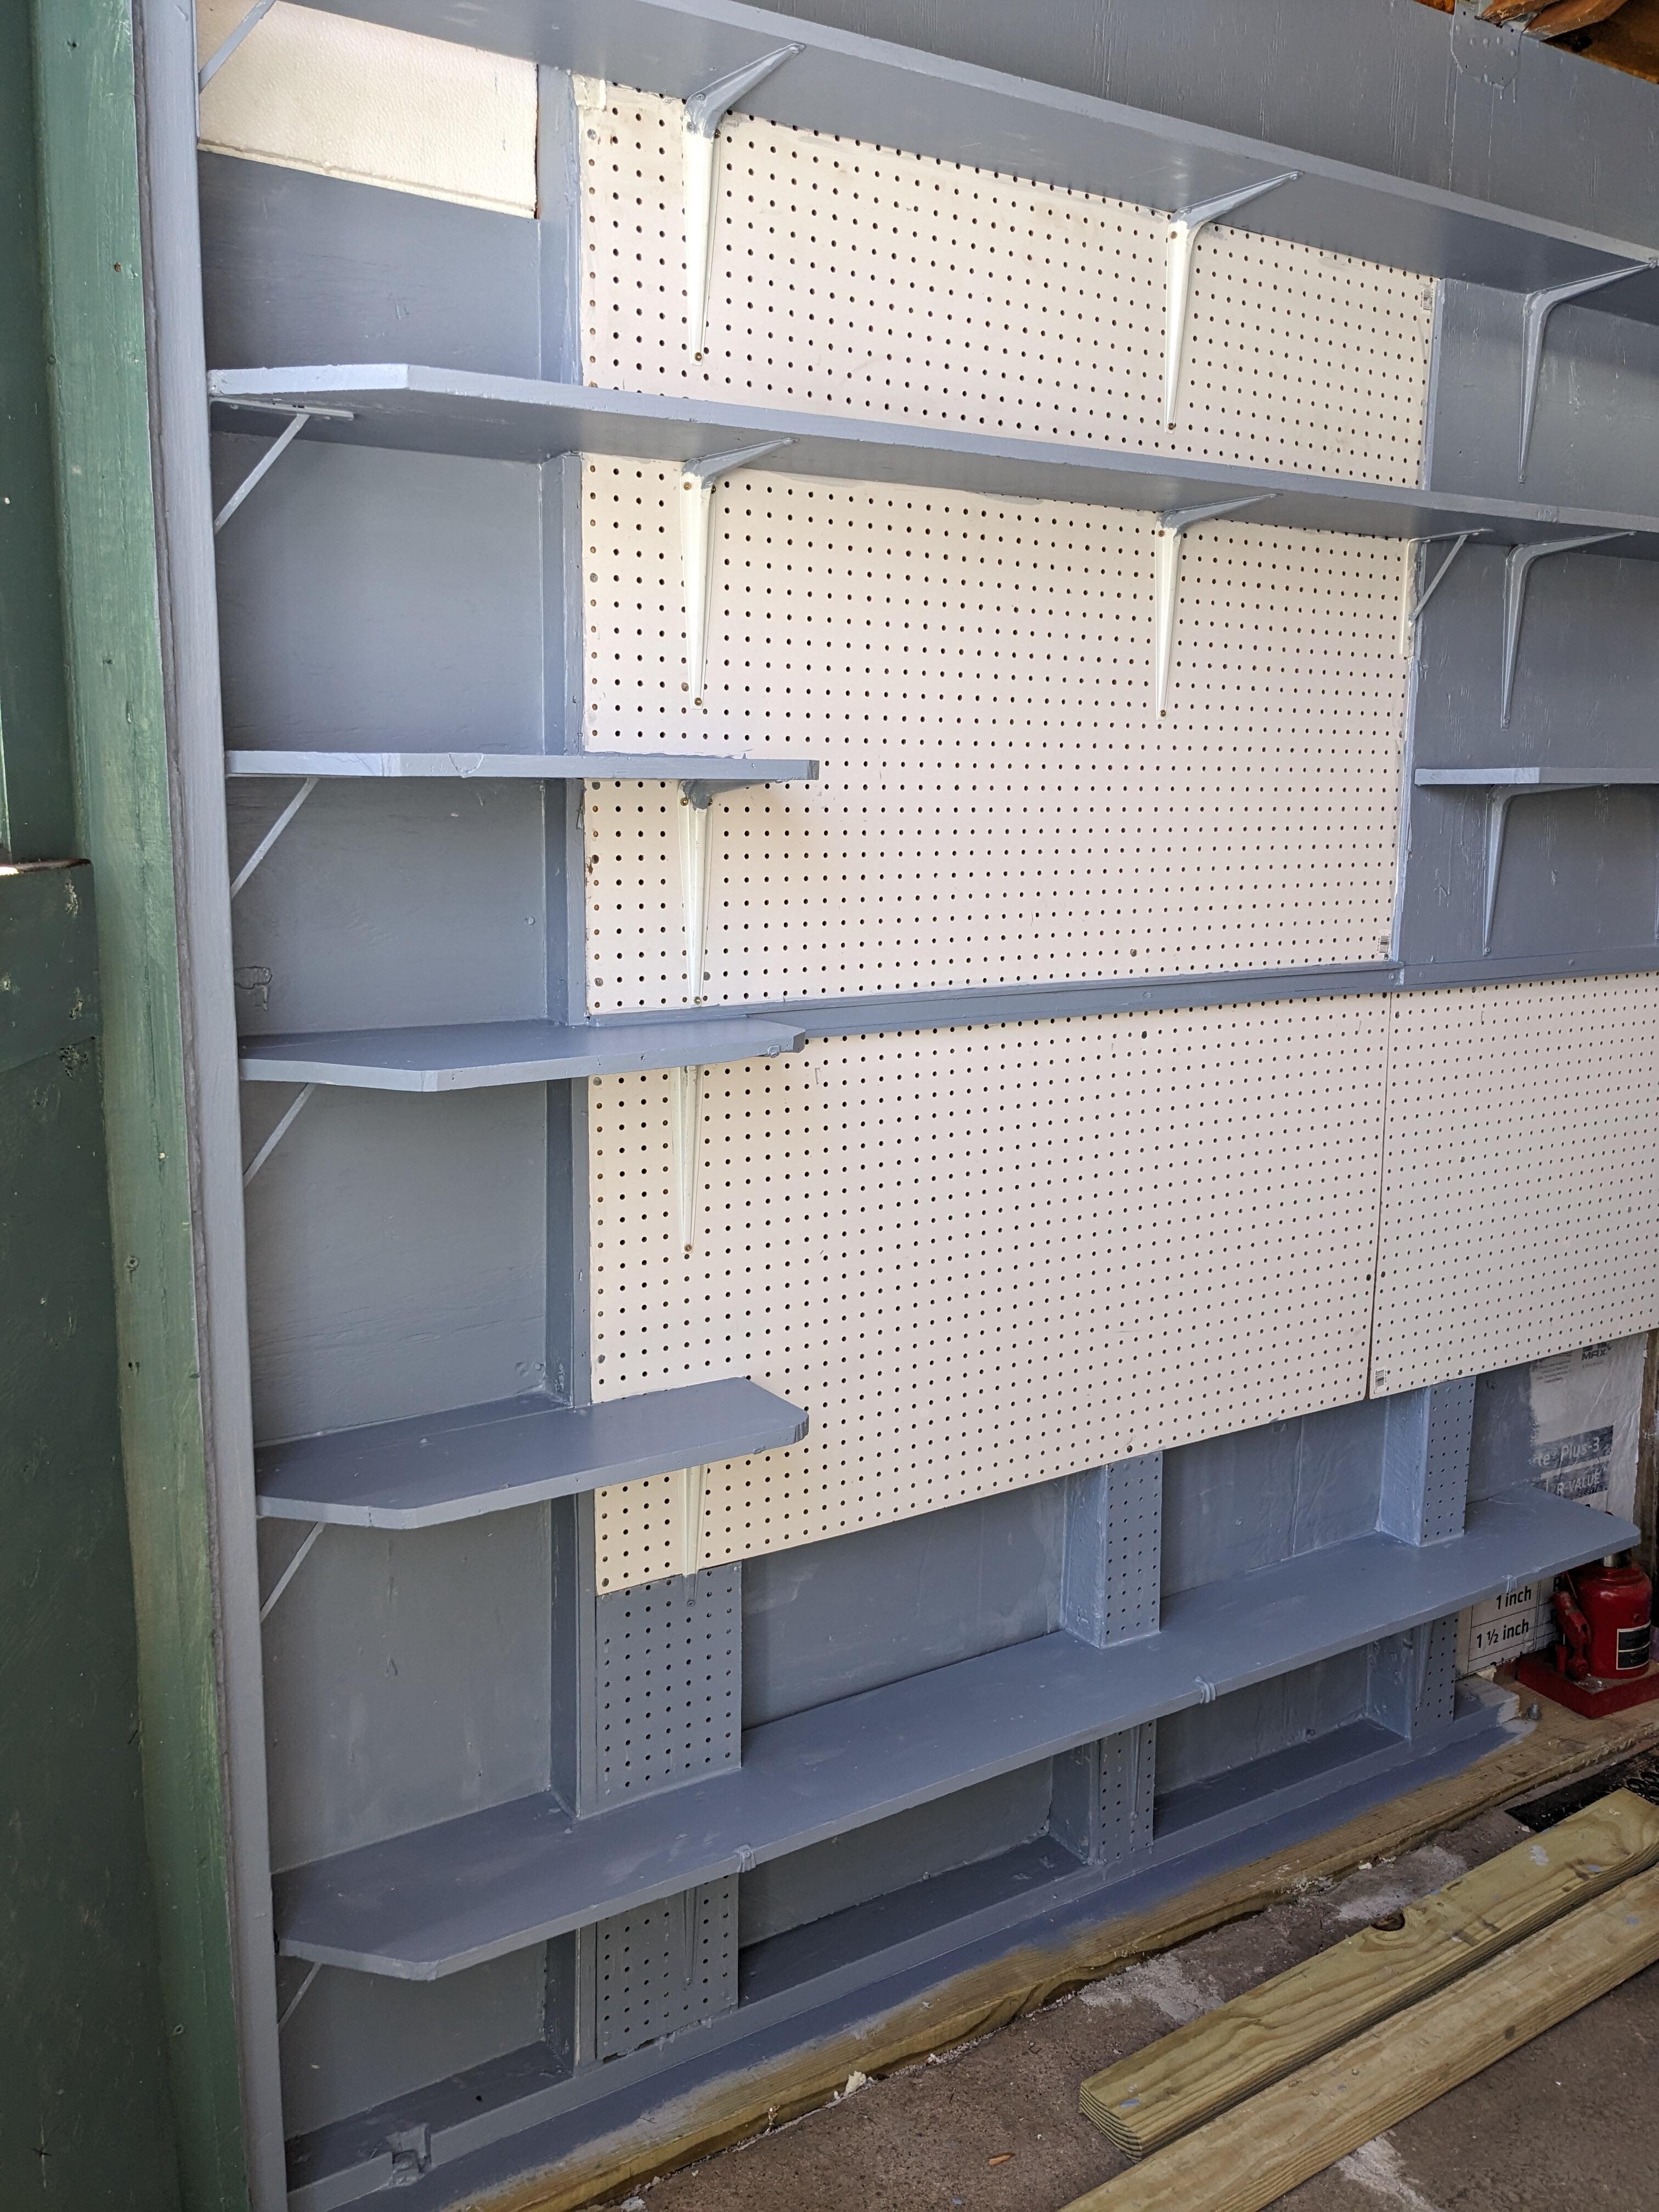
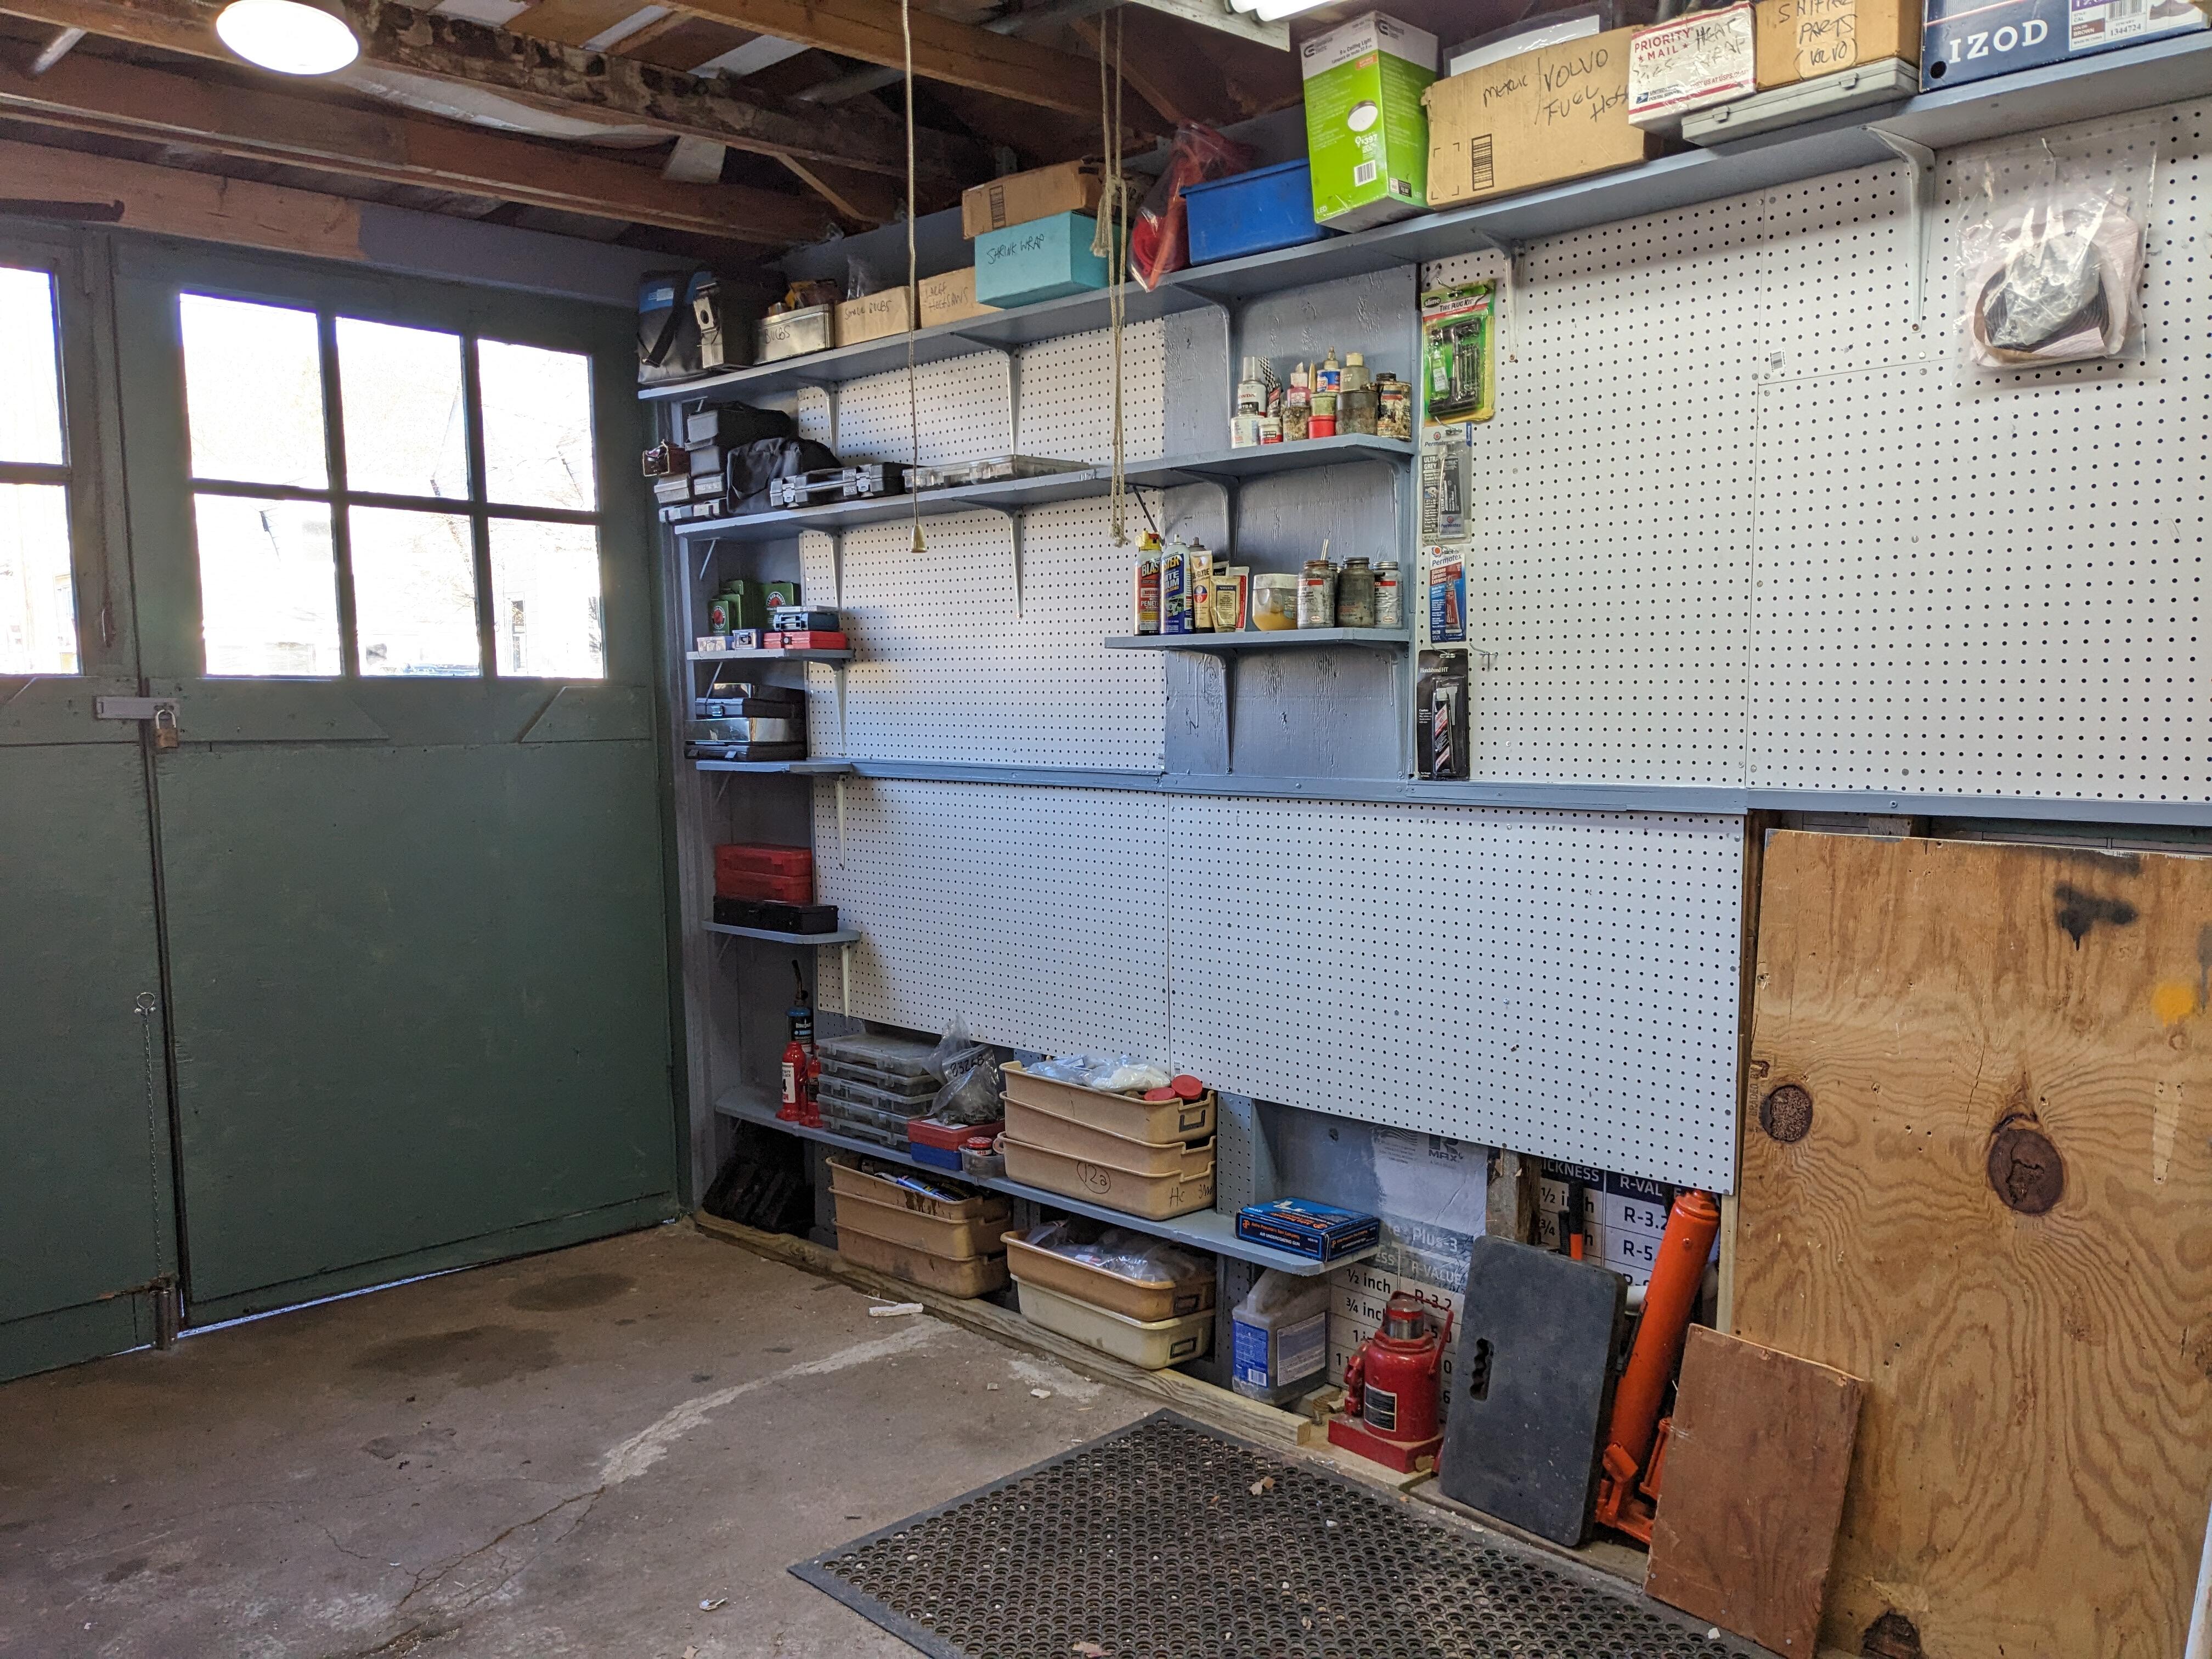
4 pointsThe vast majority of the doors I’ve worked on do not have the backing washers on the rollers anymore, but work just fine after some lube and adjustment. As long as the rollers roll smoothly and the tracks they run in are clean and not collapsed or bent (seen some very strange bent and/or collapsed front guide tracks……) Yes and lots of old grease in the form of congealed wax. I use anti-seize as the new grease. Doors are going to get dust in them and that will get trapped in the grease, but…… Love the solution of the slippery and slip-over-ly-ness of the composite washers! The rattling in doors when being closed surely would be reduced with these in place.2 pointsAs soon as you lay under the dash, you realize you forgot the first tool you need, or its under your back and you cant reach it. Great work!2 pointsMany thanks. It truly is. This morning I had time to get a top coat on the shelves. I mixed a slightly lighter grey - the earlier version I felt was too dark for the sides Started putting stuff on them this afternoon. I'll be rearranging crap for sometime

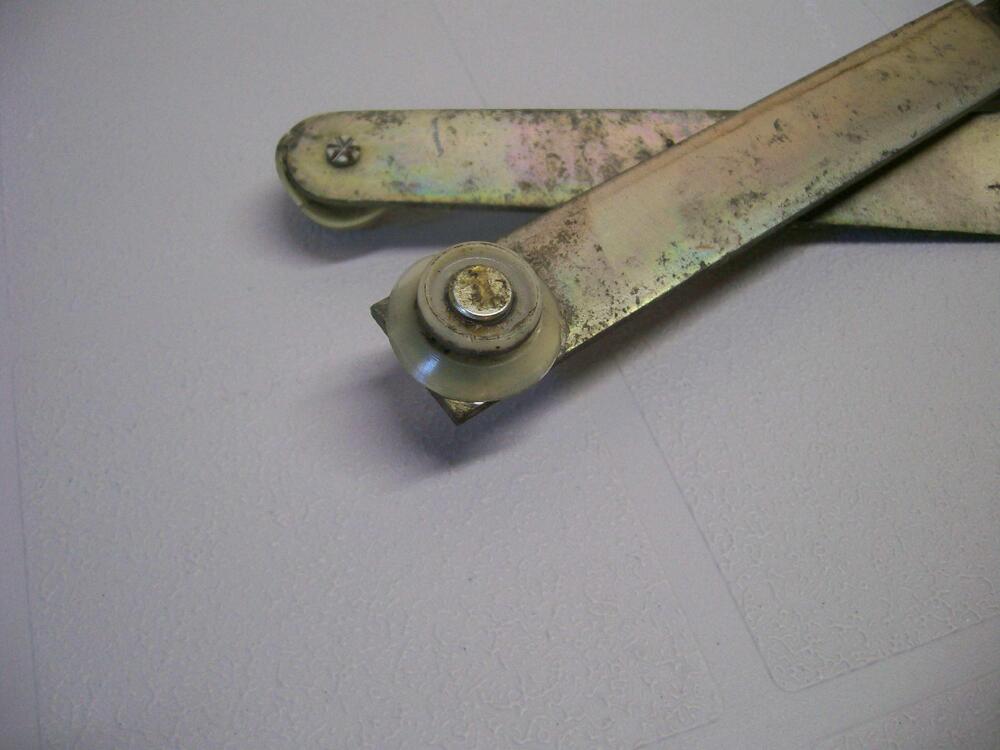
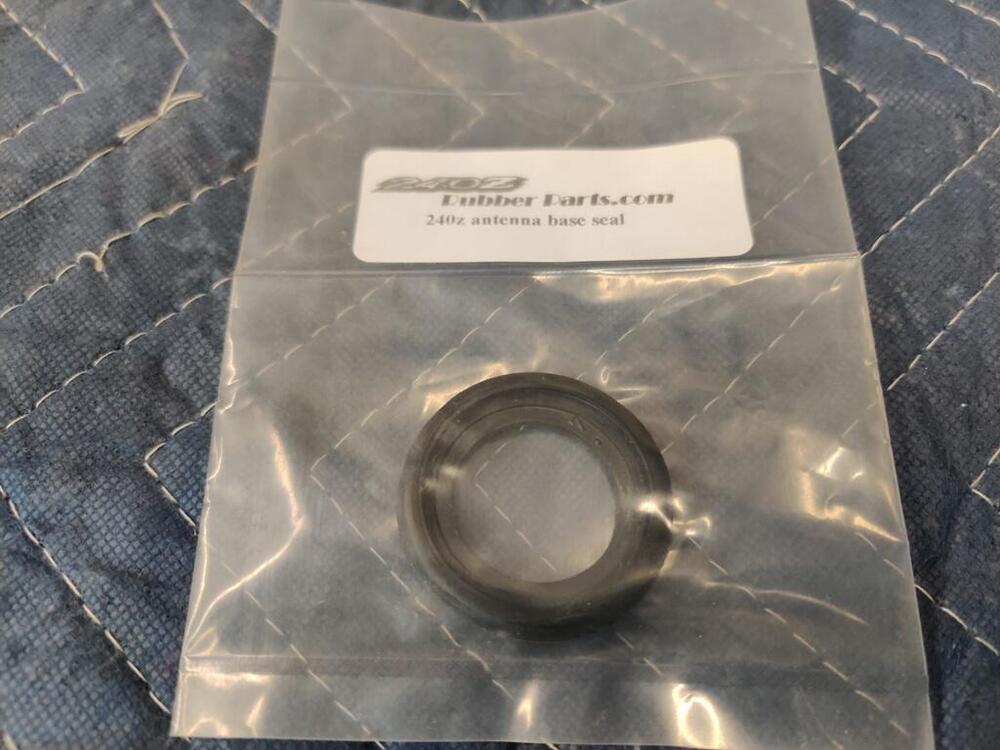
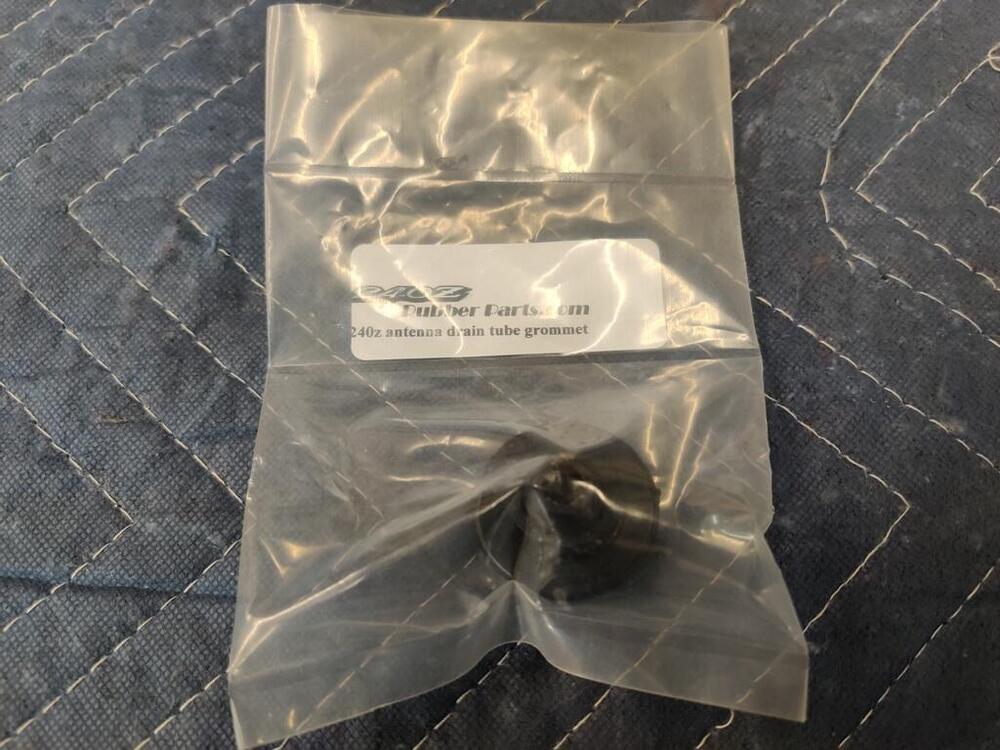
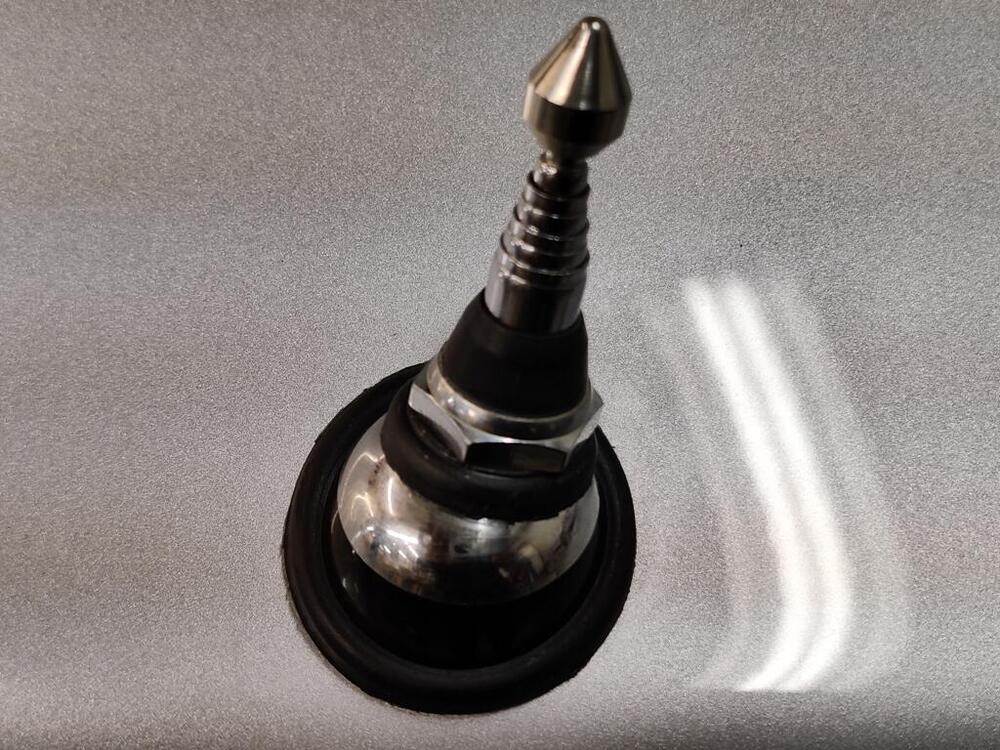
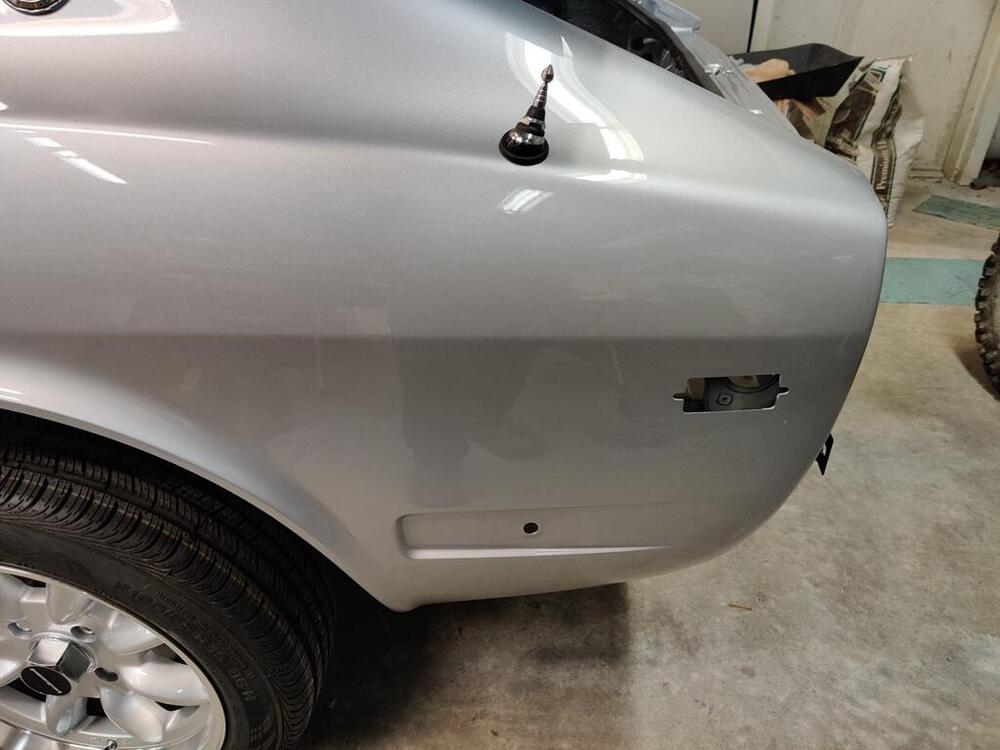
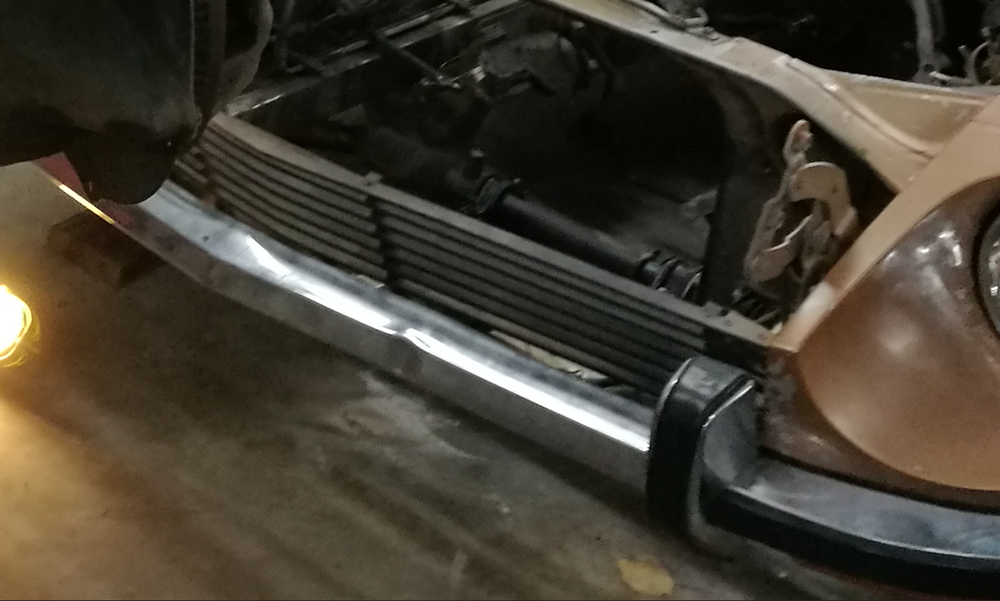
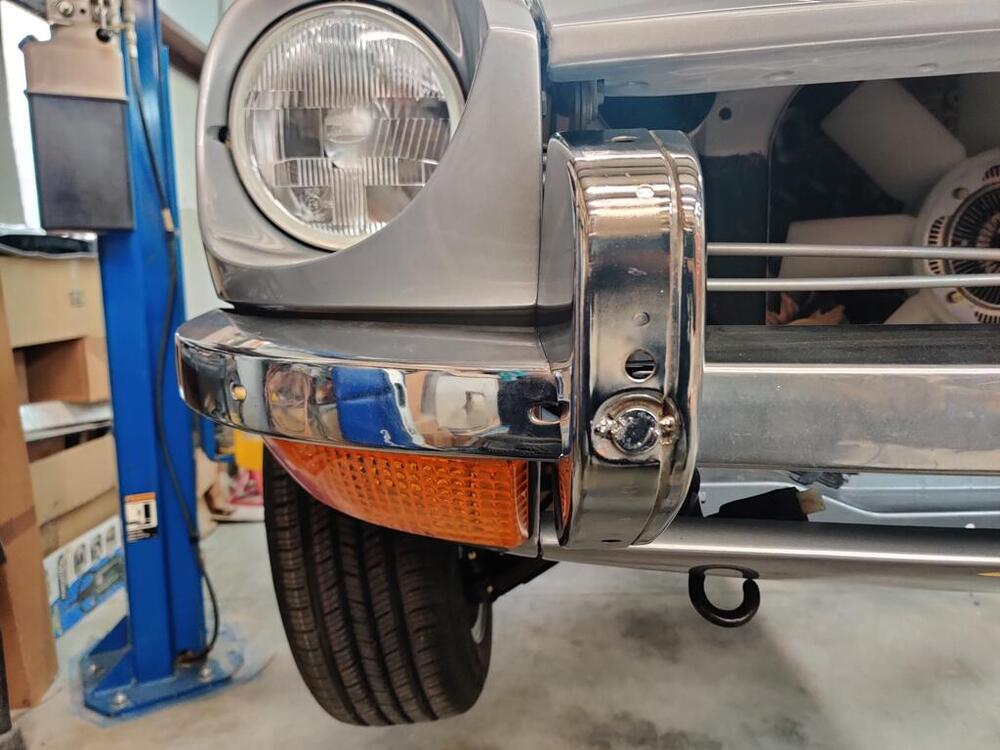
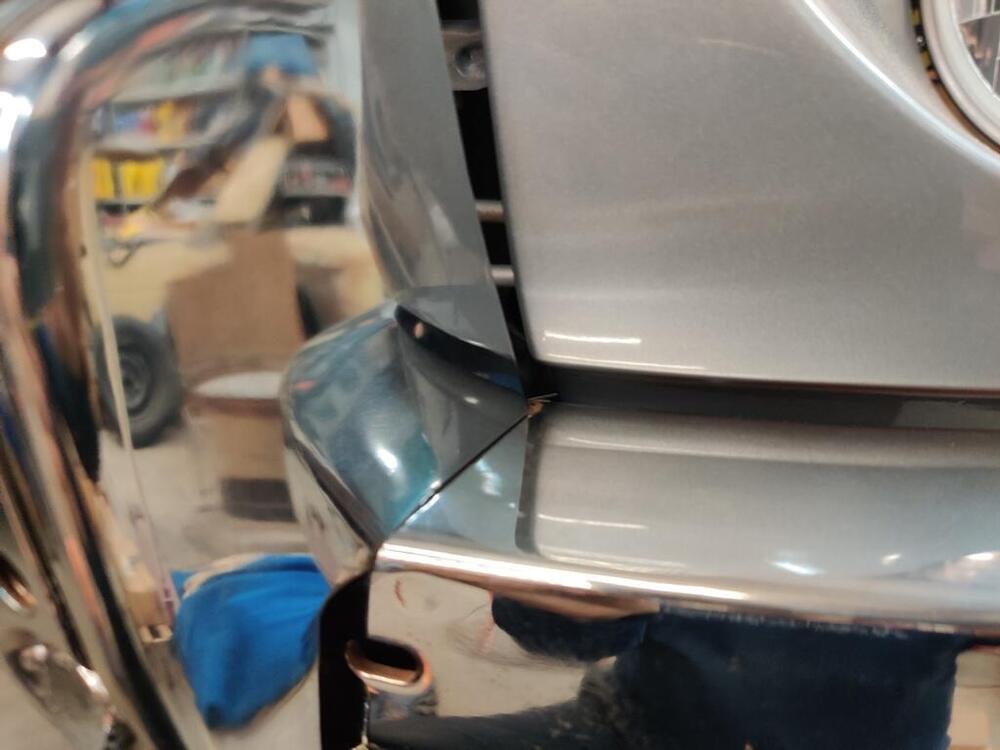
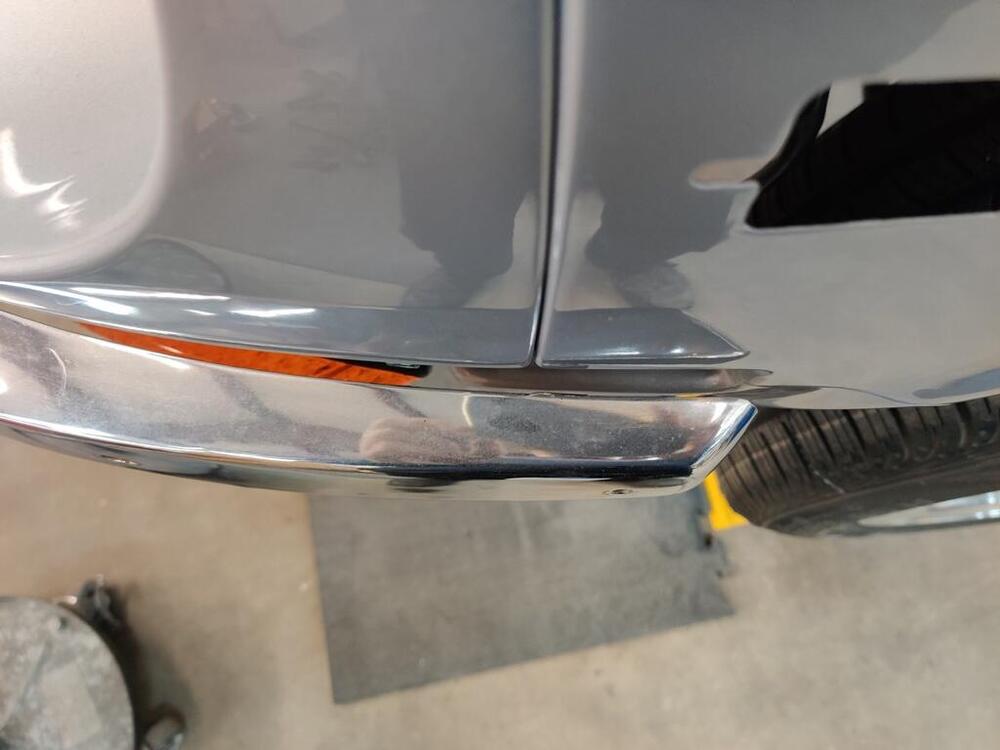
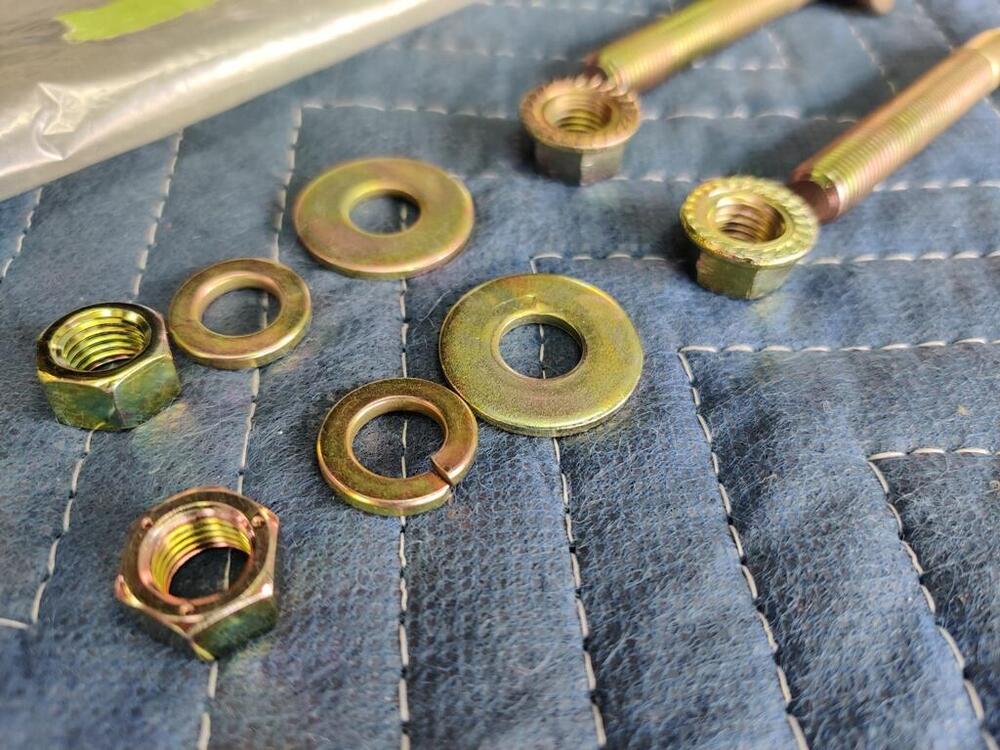
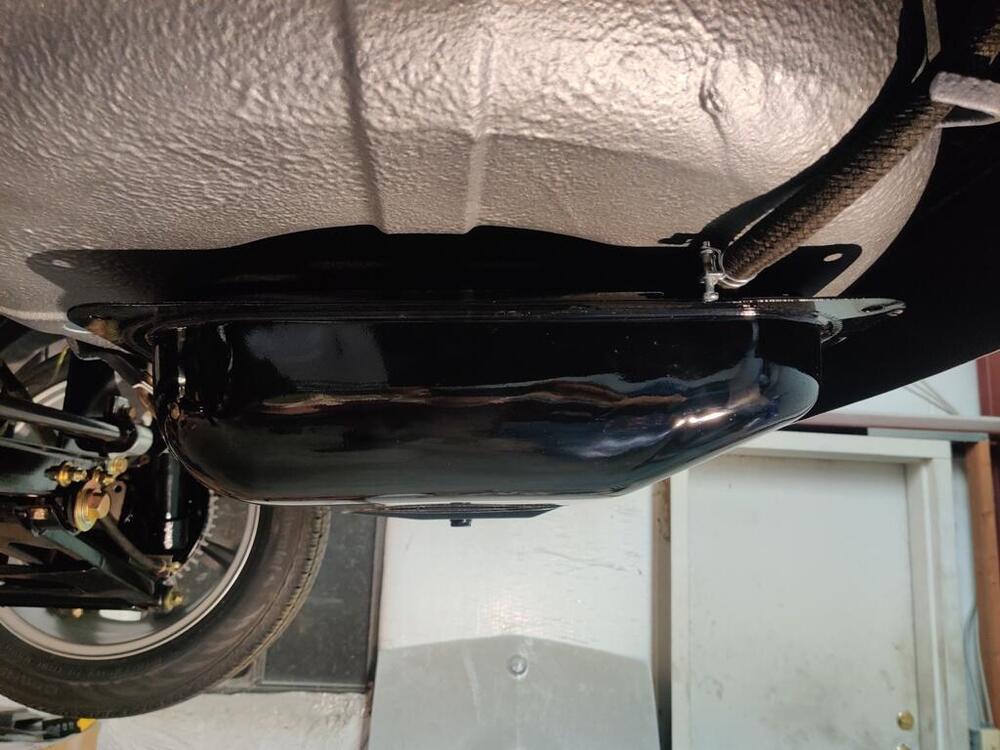
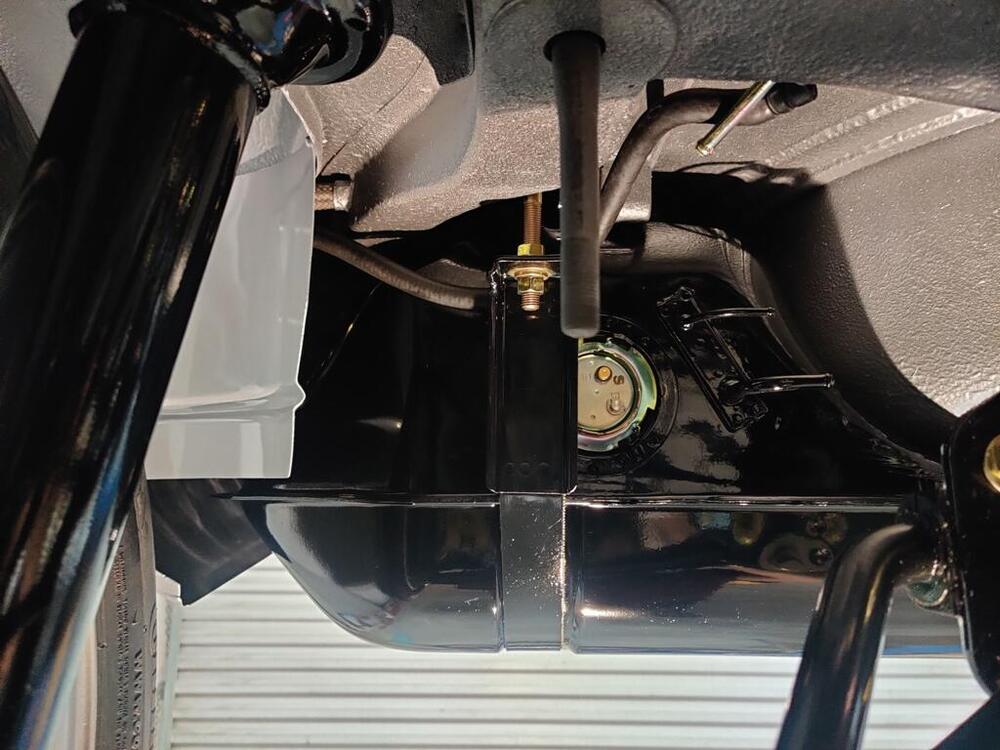
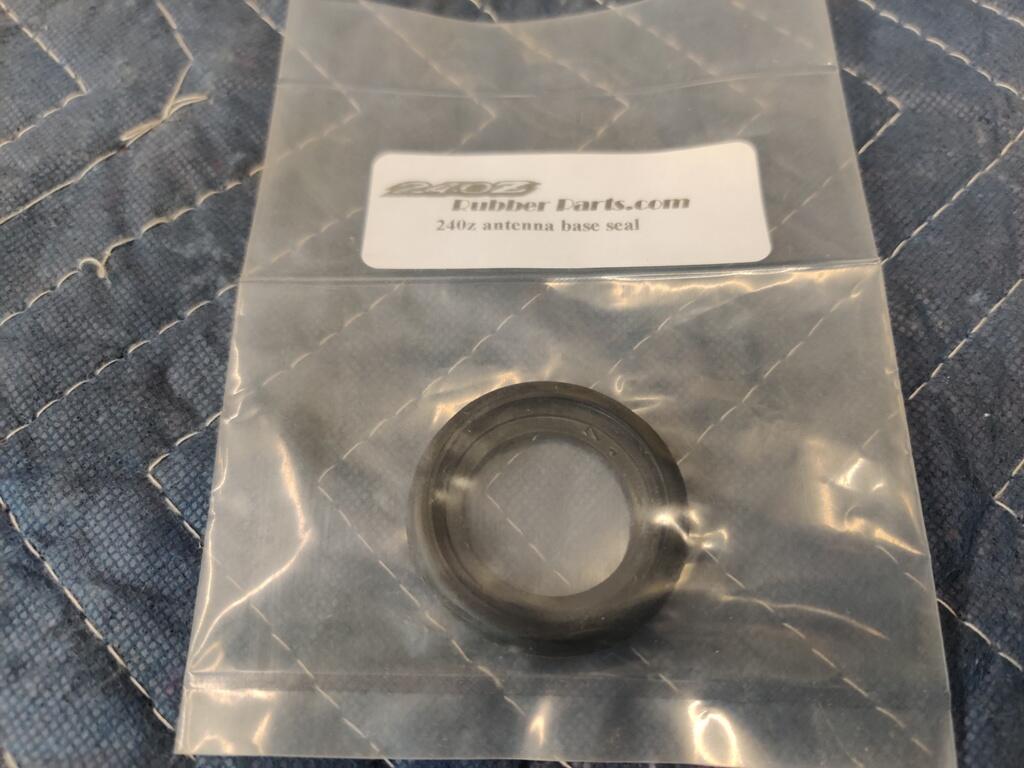
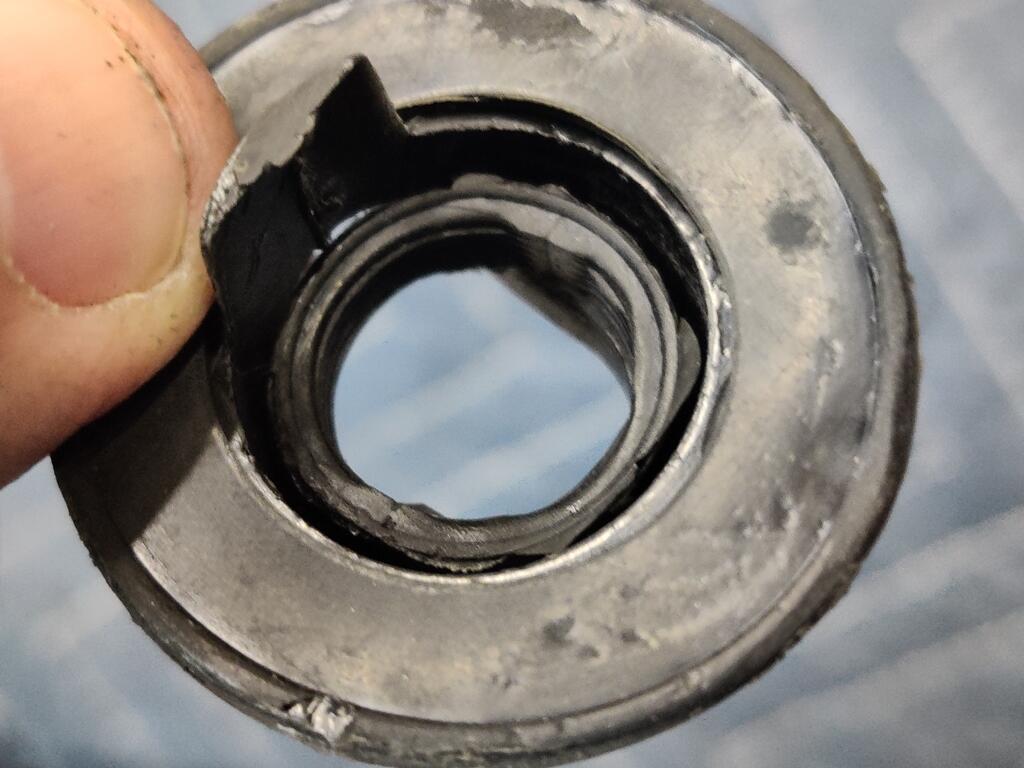
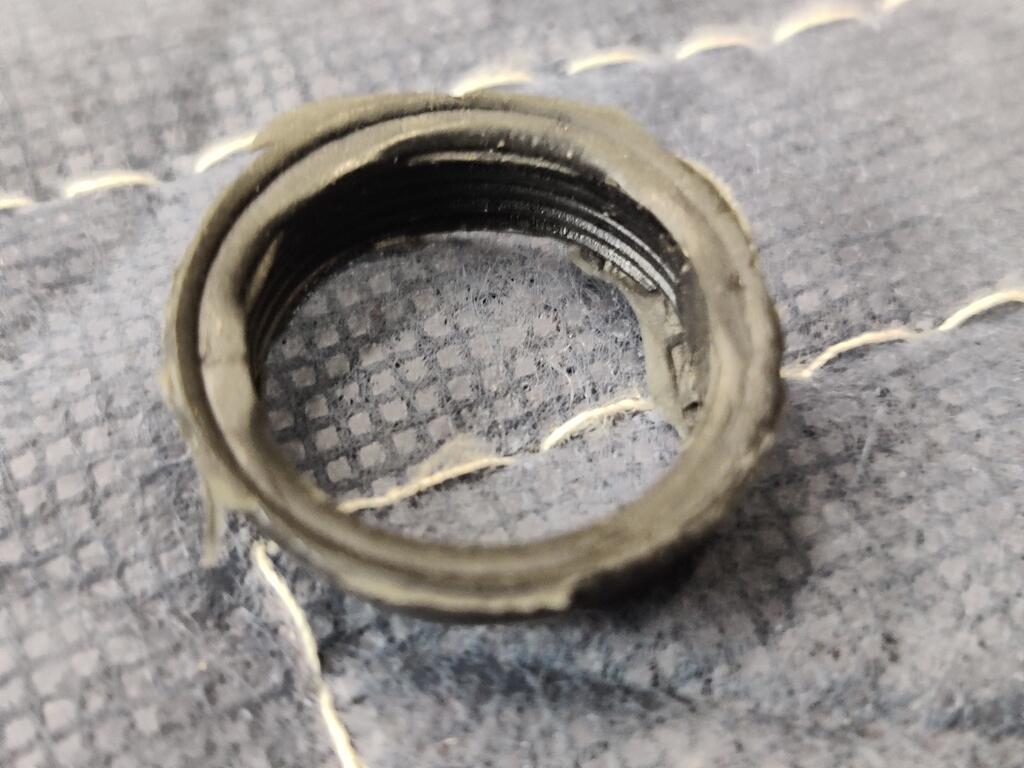
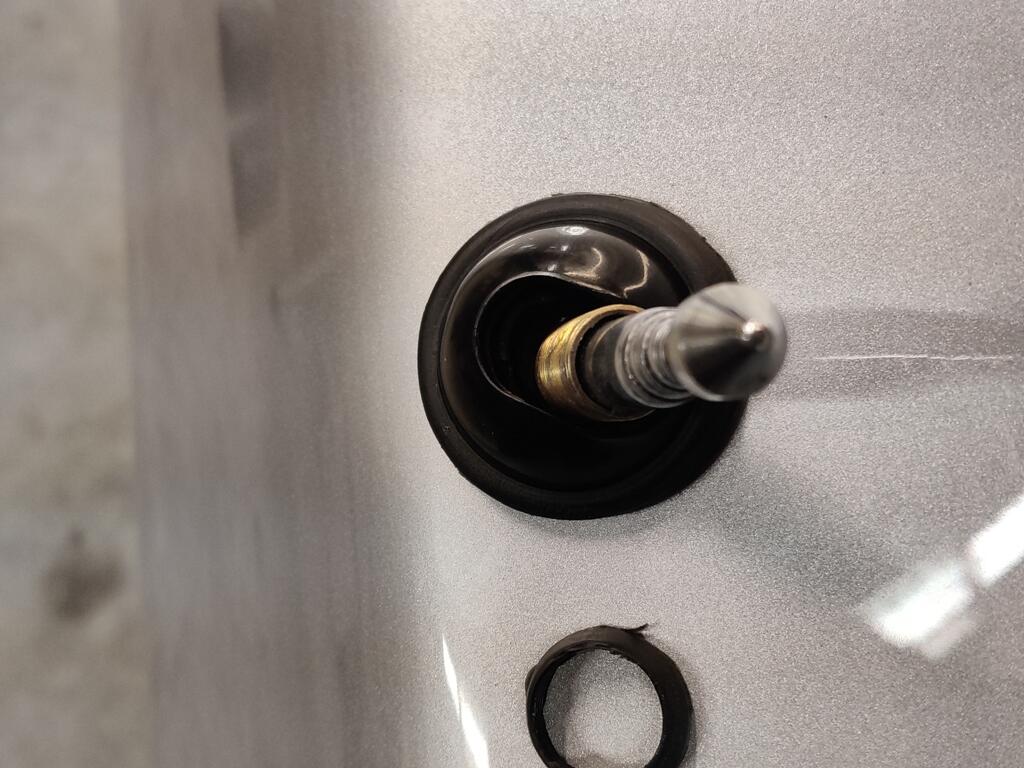
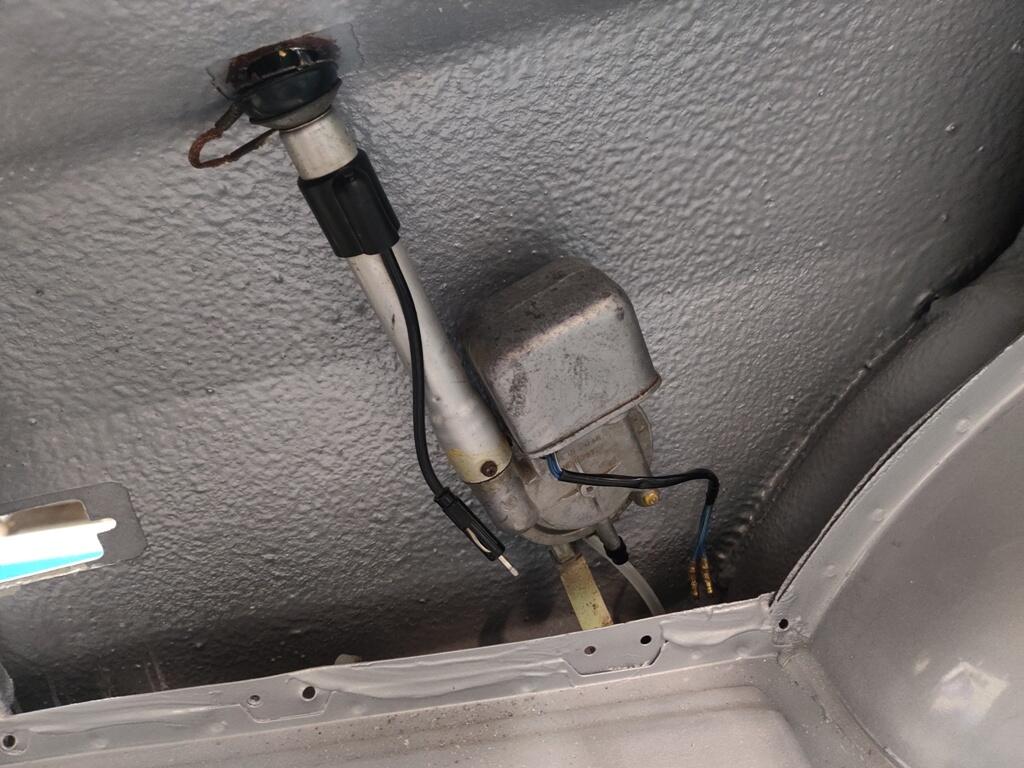
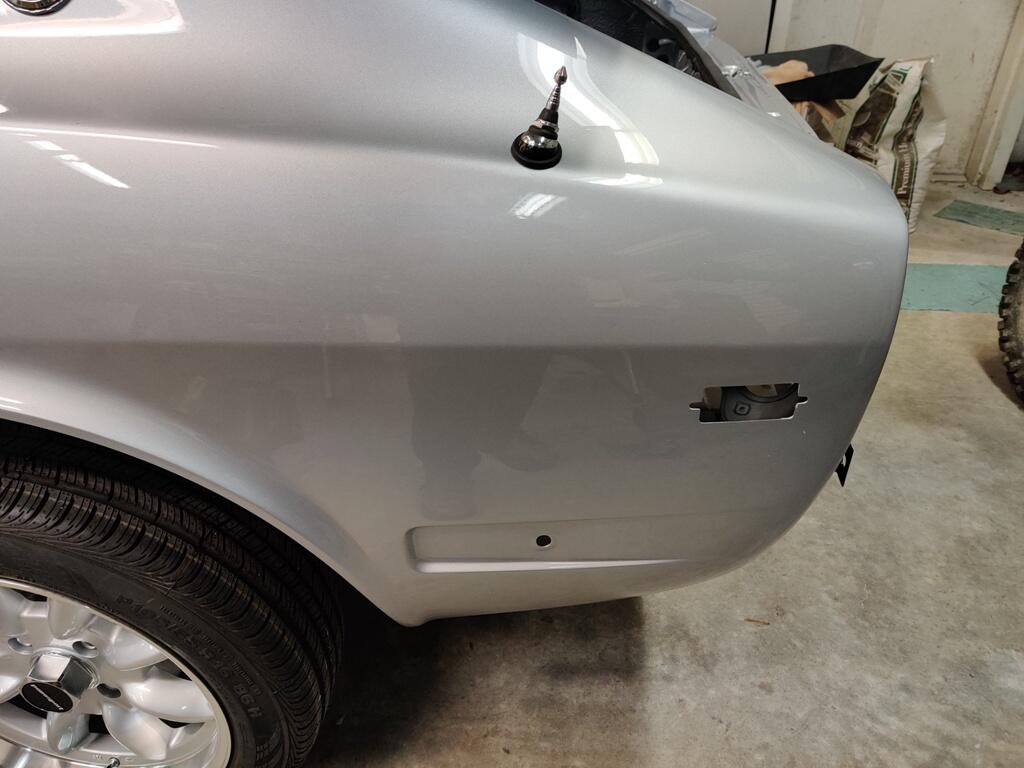
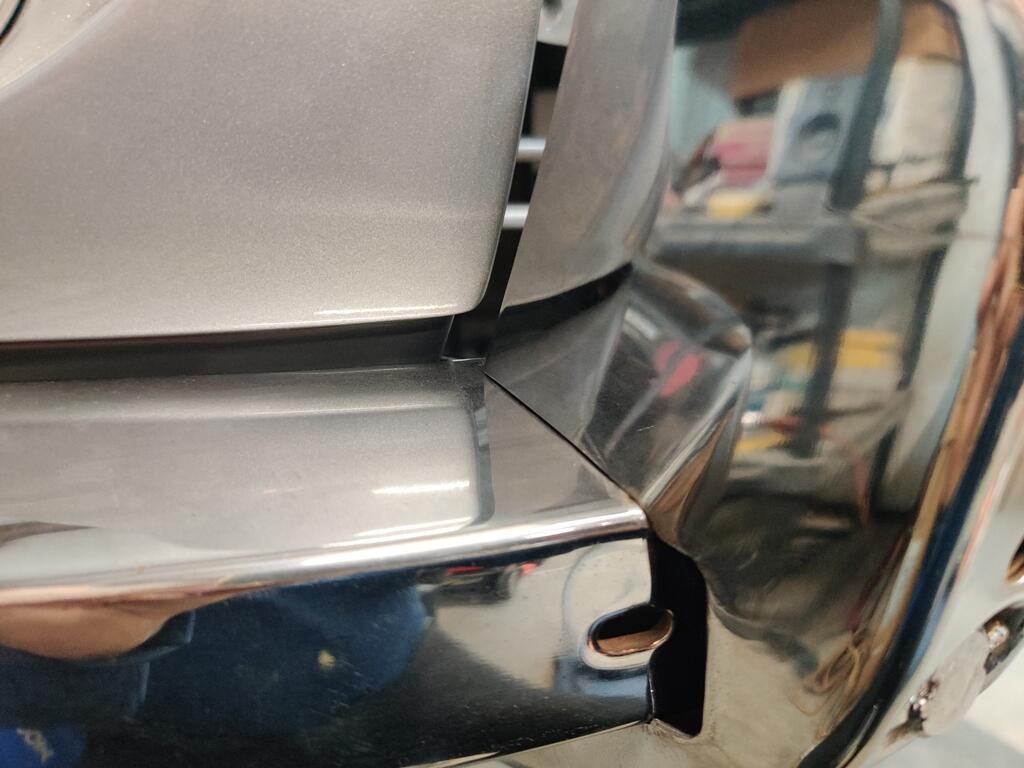
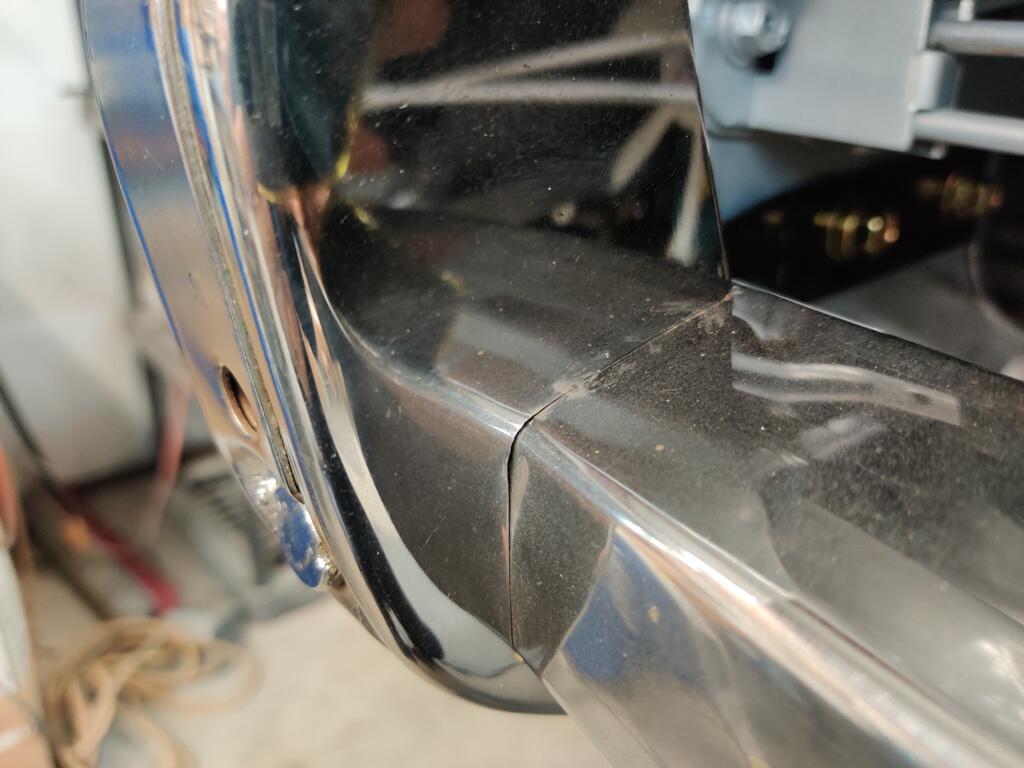
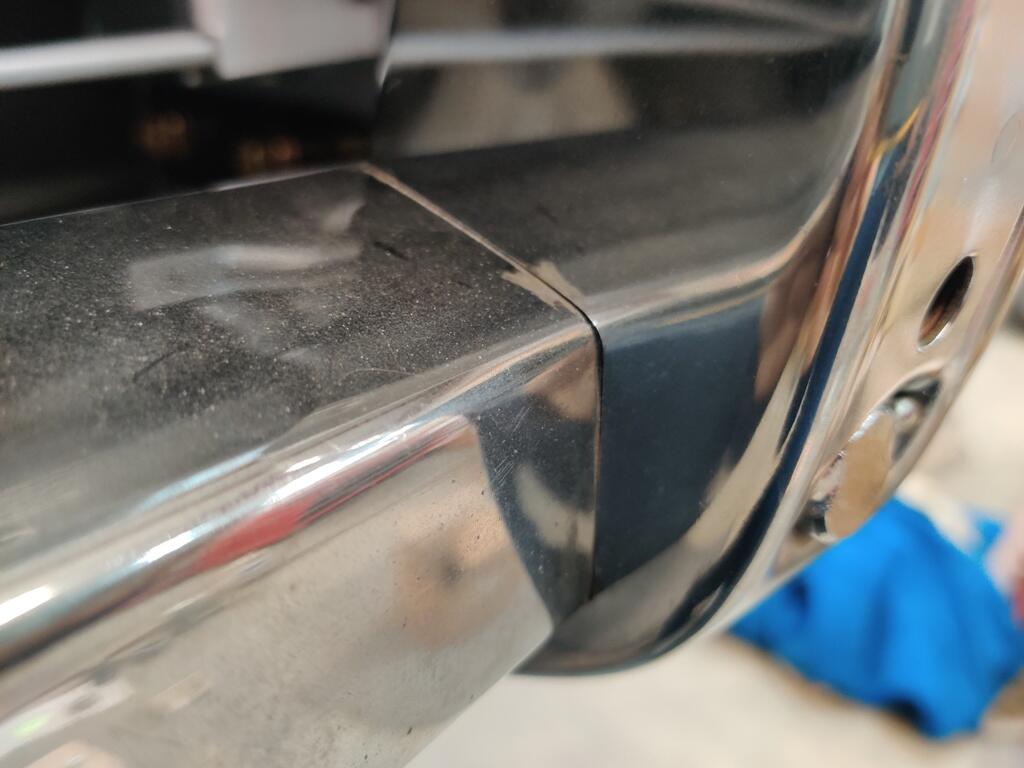
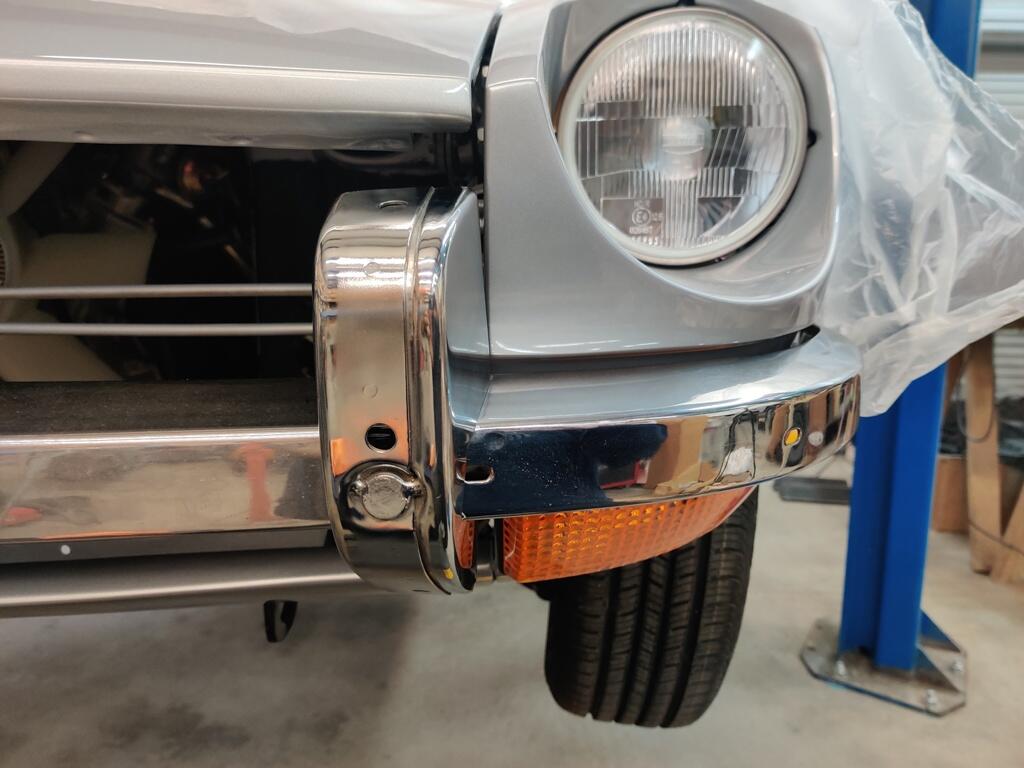
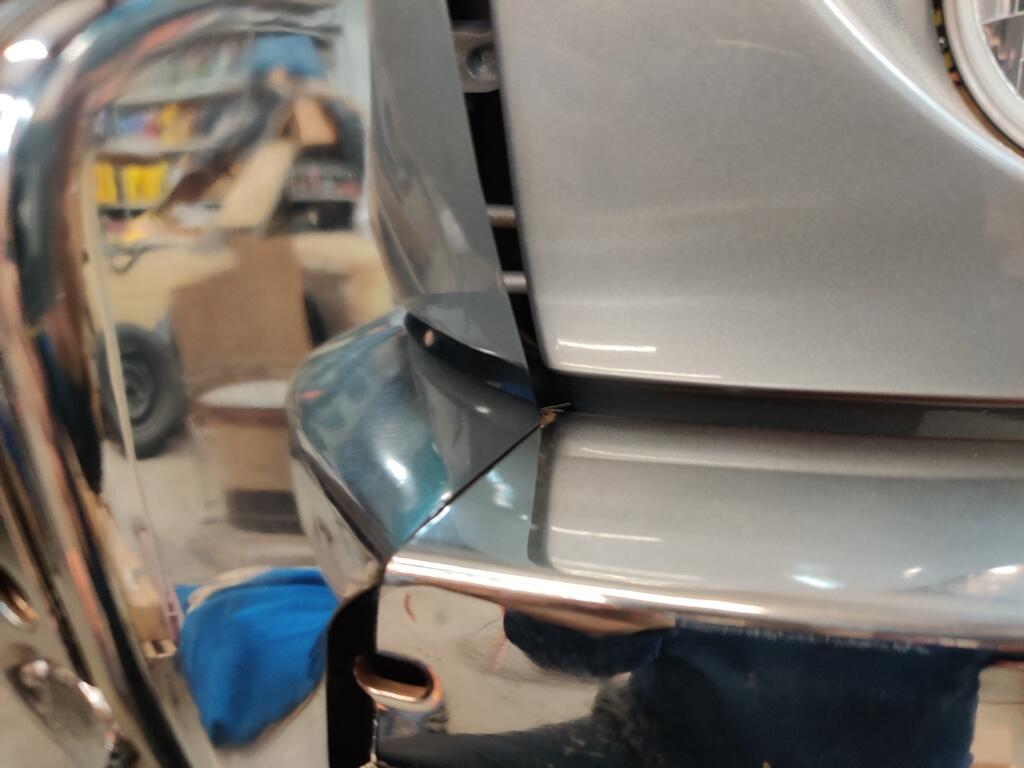
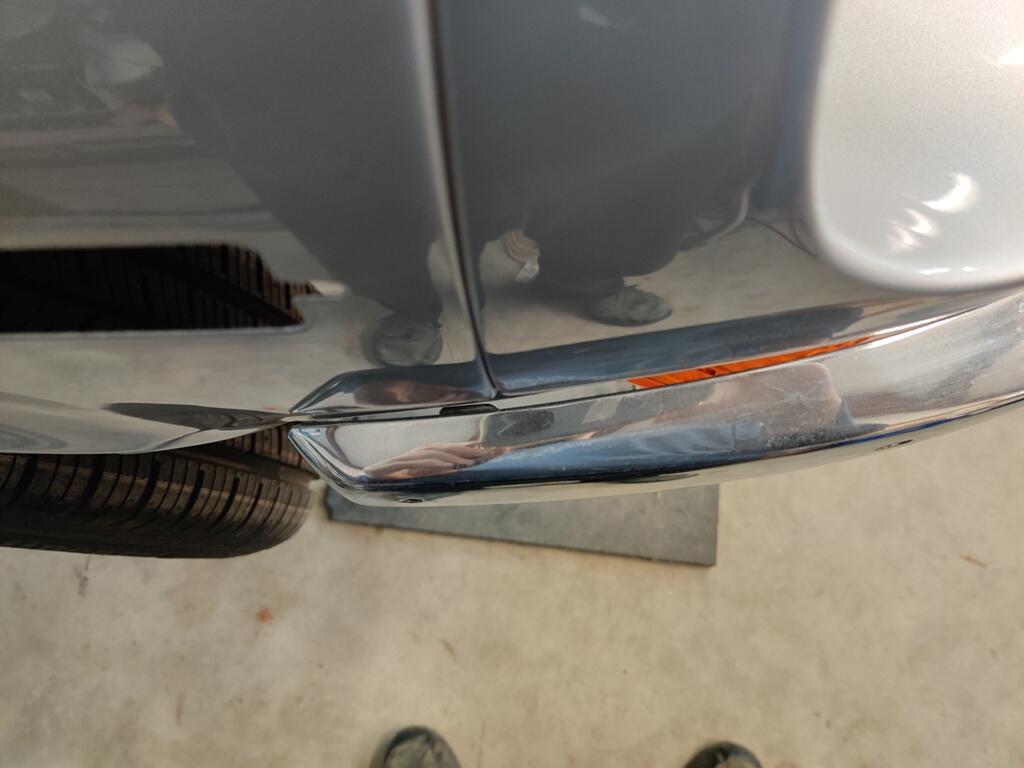
 2 pointsSo I did what I originally suggested and just started taking bolts out of the door guts until everything collapsed (gently) inside and then fished out the pieces. At this point I have all the window parts out of the door shell. That was the easy part. I looked the regulator over and found maybe a little bit of bend tweaking? Not having a known good "gold standard" example here, it's hard for me to know what is an intentional bend vs. what is the result of previous reefing as @zKars indicated. So I did some very minor modification adjustments hoping that I was moving things in the correct direction? The only other thing I found of real interest was some torn up flexible washers behind the plastic roller wheels. Reference the tarp grommet mod by @240Ziggyhttps://www.classiczcars.com/forums/topic/47753-window-not-lining-up/?page=2 I'm not convinced that those flexible washers really do anything other than act as an anti-vibration dampener, but I have to decide if it's worth the risk that they do more than just that. So other than that, of course, I've got old dried up grease that was more like candle wax at this point. I will clean all that out and replace with new. What are the thoughts on those flexible washers? I say all they do is take up the slop and keep stuff from vibrating. What say Ye?2 pointsLooks good and it will probably help you in the future. You need a column with results though. More detail too, like brand of injector, etc. Maybe even cost but you can keep that private. I had a spreadsheet for a while for my car. Realized the nickels and dimes had added up in to the thousands for the whole car as a project. $20 here, $50 there. Doesn't take long. Don't look if you think your hobby is inexpensive. It's probably not.1 point1 pointI agree, I’m confident this is a better starter than any reman you’ll find out there. I’m pretty happy with it.1 pointIndeed No Harbor Freight stores, but those pliers are also for sale here…😄1 pointI've found putting mine on ramps to raise the front and a pillow or two on the door sill is really helpful. After watching the video I think I'll use two milk crates to lay on from now on. Thanks for sharing that @SteveJ1 pointThanks for the input. I was thinking the same thing as you... All you really need is something compressible to take up the gap, and I really like what you came up with. Especially the part about being able to stretch it over the nylon roller so you don't have to take all the rollers off. Only thing I'm still not convinced about is the real necessity for the existence at all, other than vibration prevention. You said your the rollers on your guides were fairly wobbly and that the flexible washers helped steer the rollers. I'm skeptical. The forces on those wheels can be high enough to bend the metal arms of the regulators. There's no way a little piece of flexible plastic is going to do anything to steer those wheels under that kind of load. I'm thinking that those wheels are gonna go where those wheels want to go whether there is a flexible backing washer or not. That said... If I can figure out something here that is similar to what you did, I'm gonna copy it. Really necessary or not.1 point1 point1 pointThanks guys. Those bolts on ebay are "close" and are "fit and function" correct, but not quite "form" correct though. I'm finding that much of the older hardware from the early cars is non-captive washers. Makes sense that as the car sales took off and production increased, Datsun quickly switched to easier to assemble hardware (with captive washers), but that's not the case for the early cars. I could certainly use newer style hardware. but I'd really like to have a bolt like what was originally used. No captive washers and no indent on the head. A little dirty, with patina, and unrestored would be a bonus.1 pointGood luck with the auction, looks like great fun drive.1 pointPatcon- I think the issue was the key way on the old cable was worn down - I can't say for sure what solved it. But since the cable was the last new item before it started working that must have been the final fix1 pointUnless they changed things, Group Harrington bumpers are stainless.1 pointNear the end of my time in the garage today, I started to put the antenna on the car. I started by finding all the relevant parts from 240zrubberparts.com: After some trial and error, I got things assembled, but I do not know where this seal (first pic of three) from the antenna mount kit goes. It kind of fits inside the top, plastic part of the ball, but kind of doesn't either. It appears to have threads on the ID, but they don't match anything. Also, the ID is too large to make sense anywhere that I can see. I sent an email to Steve at 240zRubberParts to see if he knows. I ended up leaving it out for now. The antenna doesn't fit very well to be honest. Where the antenna goes through the body, it is very much an angle. As a result, the round metal concave/convex washer that seats on the grounding strap contacts the underside surface of the quarter panel before the nut on the outside is fully tightened. This causes the plate with the sharp points (other end of the grounding strap) to not seat properly on the underside surface of the quarter panel. Unless I am missing something, I will likely take it apart again and do some grinding on the concave/convex washer to create clearance where it is hitting the body. That will allow the stack to tighten properly, and should allow the plate with the sharp points to fit properly (flat against the underside surface of the quarter panel for its full circumference). For most of the day, I battled with the bumper and the bumper brackets. I had already put many hours into the front bumper because it had some damage. Here is one of the pictures from when it was on auction at Bring-a-Trailer: And here is one I found from the disassembly stage: The impact to the bar looks superficial at first glance, but in addition to the dent, the bar was pushed in a bit for a considerable portion on either side of the dent as well. So, in addition to straightening the dent, I had to pull the bar back forward. And some heat shrinking was necessary as well. Anyway, where I picked up today, the bumper was fitting snug on the right side of the car and too far out on the left side. Every time I bolted the bumper to the brackets on the car, the bumper was slightly offset to the left side of the car. I determine the cause to be that the slots in the front of the bumper brackets were limiting the side to side movement of the bumper. The bumper studs were ramming up against the sides of the slots. To correct, I had to remove the bumper brackets from the car and tweak them in my vice so that the slots "moved" toward the right side of the car. Shifting the slots to the right side allowed the bumper to shift to the right as well. I also used a hand held belt sander to improve the fit of the bumper uprights to the main bar. After several hours examining, bending, straightening, grinding, a little more hammer and dolly work on the bumper, etc. I got it to this point: Finally, the bumper is centered and I don't have to apply excessive pressure on the left side of the bumper to bring it to its proper mounting location. I have a bit more work to do on the rear bumper, and then I can package all of the bumper pieces up and send them off for re-chroming.
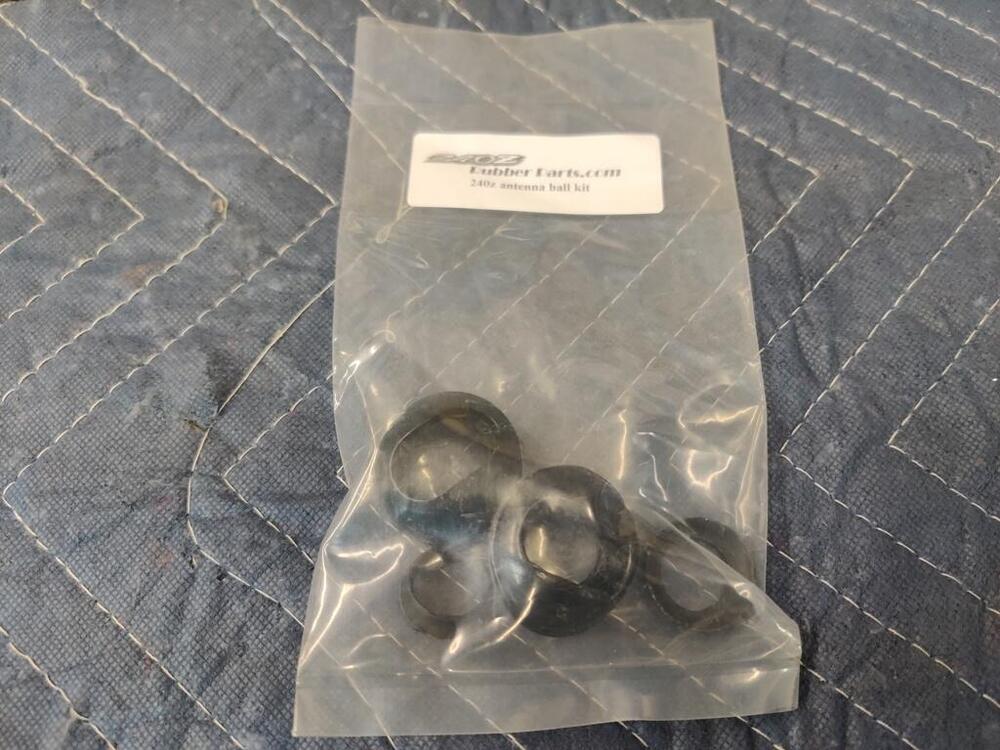


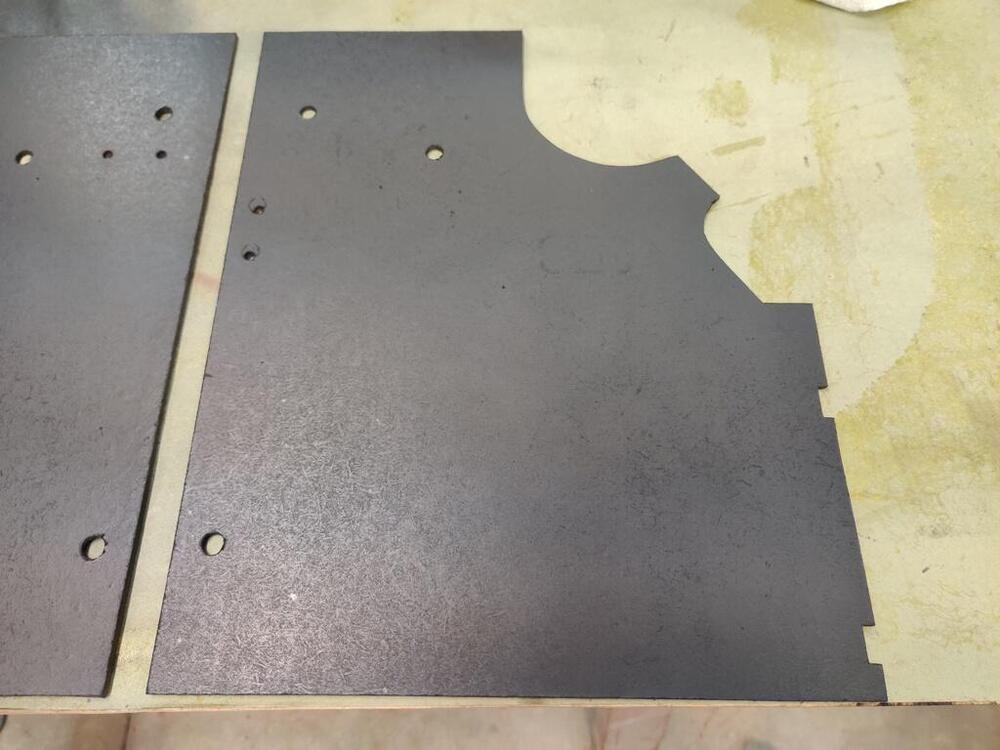
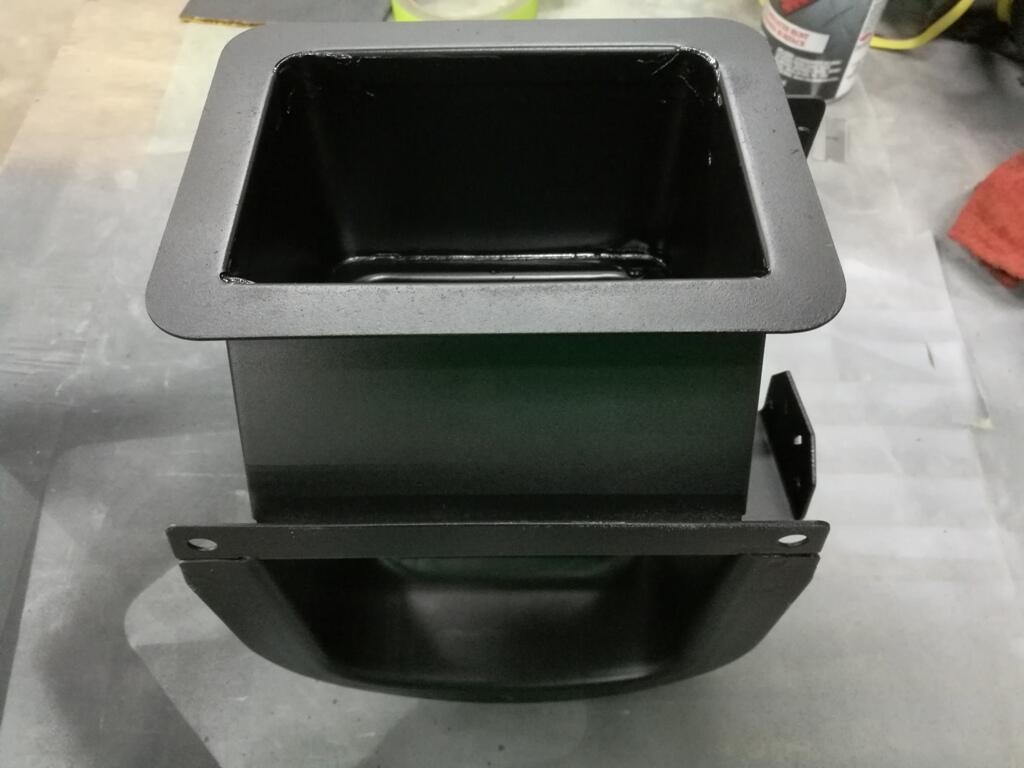
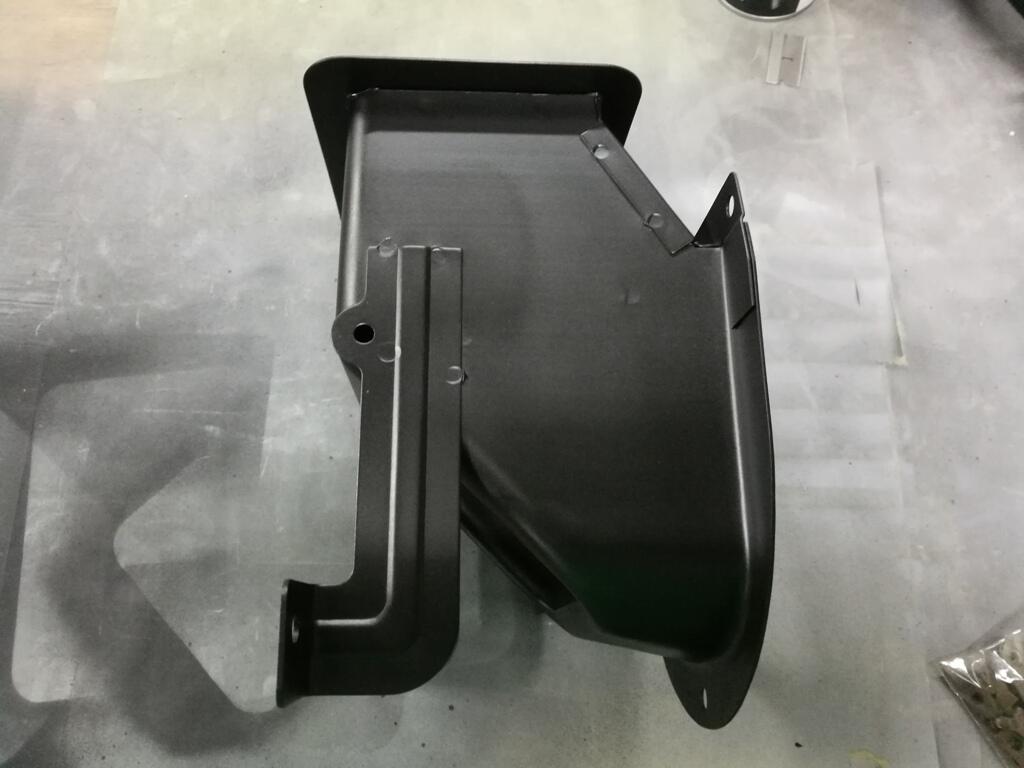
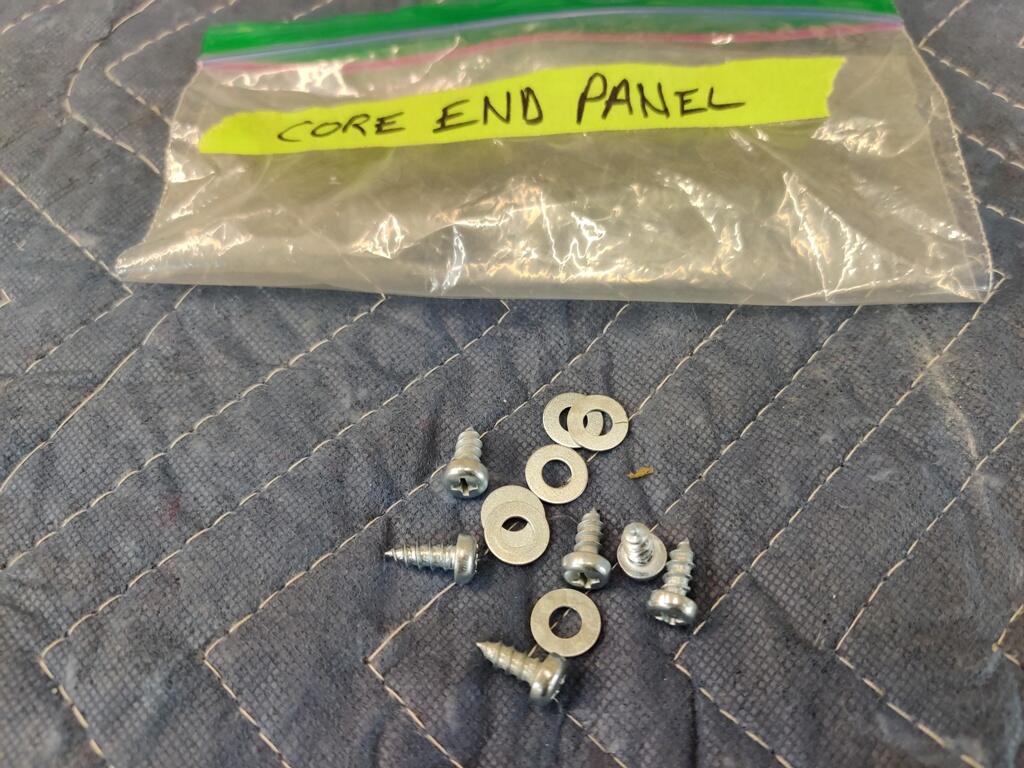
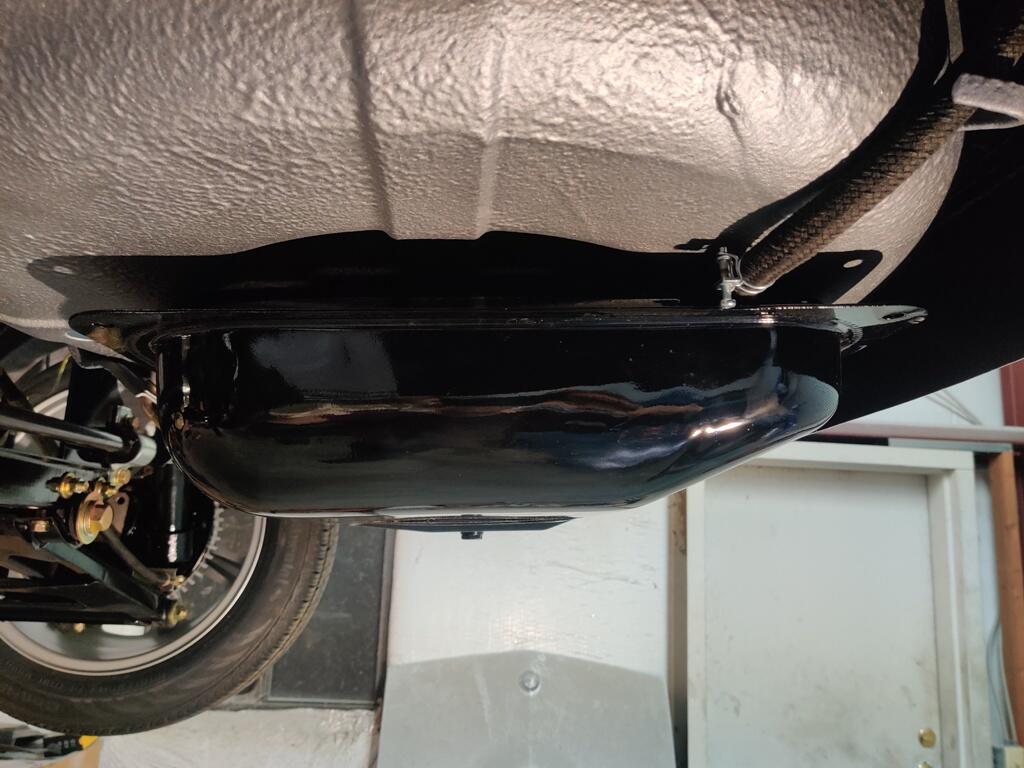
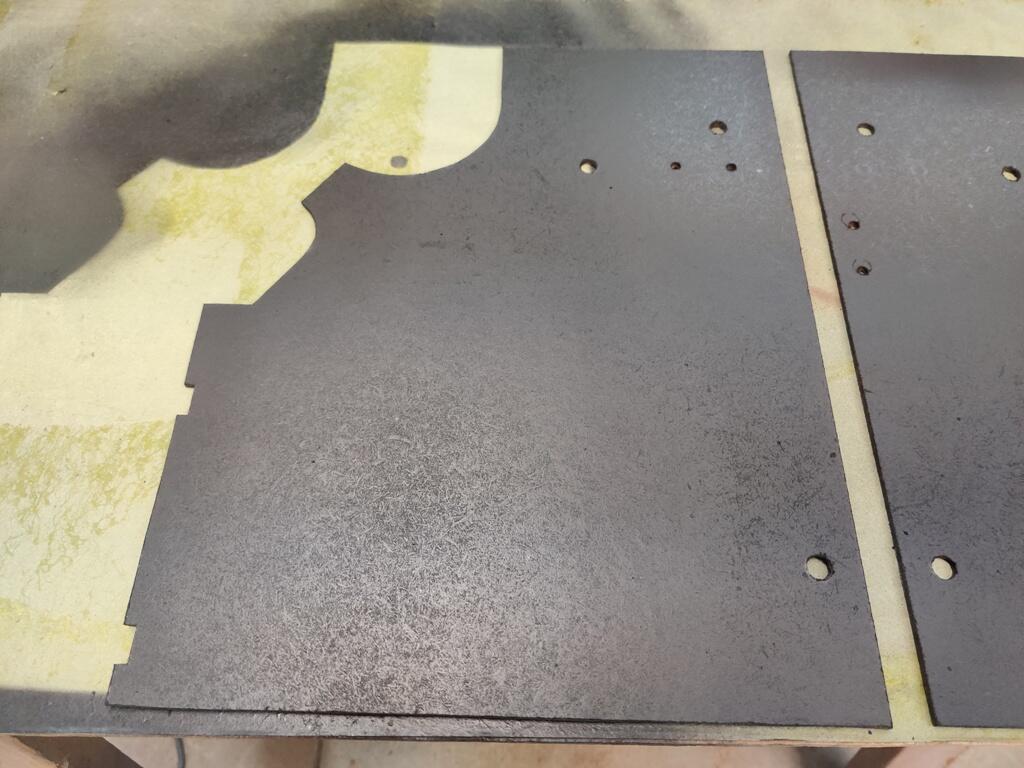
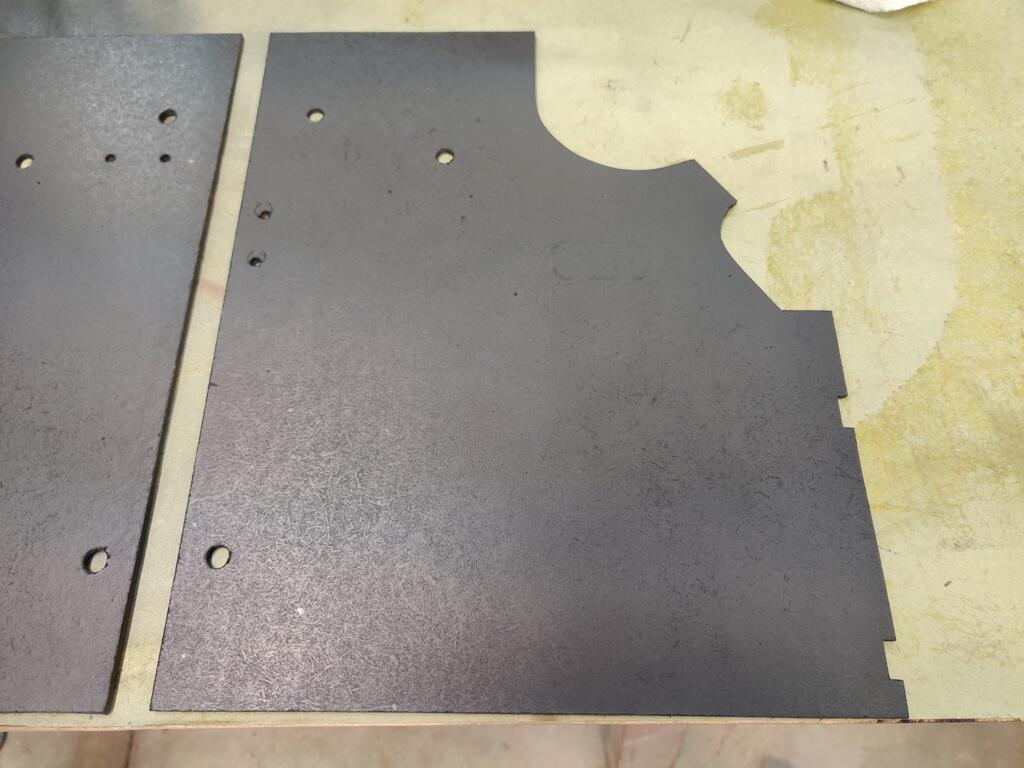
 1 pointThis past weekend, I only had a few hours available to work on the car. I finished up the kick panels and I installed the gas tank. Installing the gas tank by oneself is quite the challenge. Since my main fuel hose is 53 plus years old, I had to heat it with a heat gun to get it to be flexible for the installation. Heating it, and then trying to lift the gas tank into place and secure the tank straps... is difficult to do by oneself. On the third try, I was successful! And, since I knew from previous experience that without protective padding in various places, everything gets scratched to hell, I made sure to protect everything by taping into place (covering the bottom edges of both the tail light panel and quarter panel) pieces of thick padding. This protects from bumps and scrapes while attempting to maneuver the tank where it needs to go to feed the inlet to the main hose. The finished kick panels - note that the factory finish is flat black - not semi-gloss black: Gas tank:
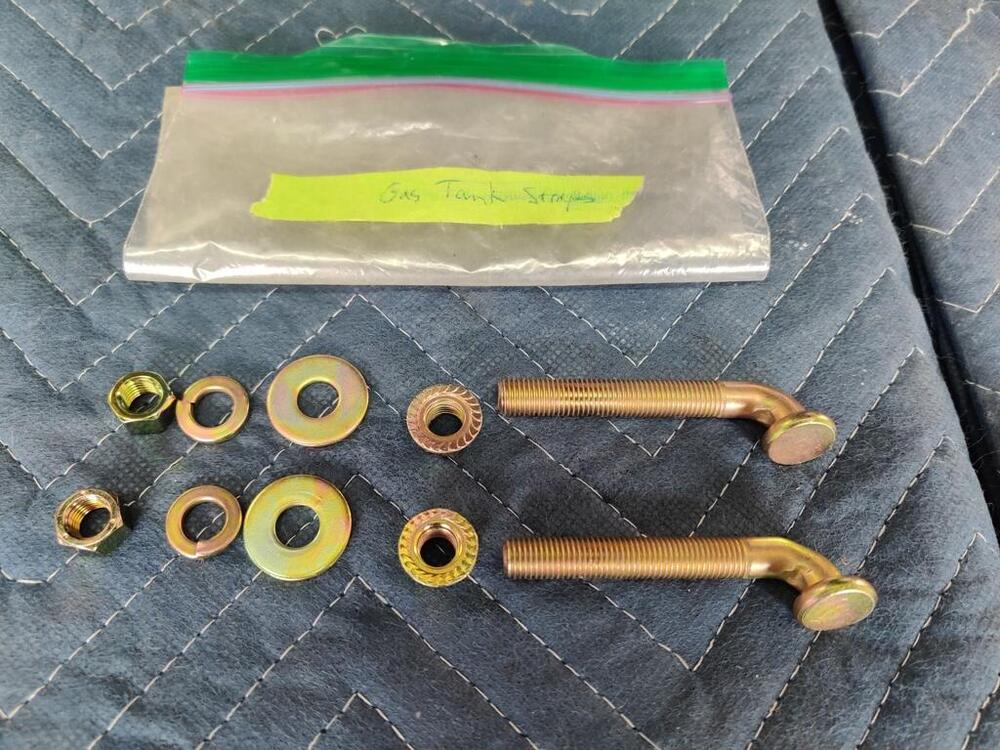


 1 point


Important Information
By using this site, you agree to our Privacy Policy and Guidelines. We have placed cookies on your device to help make this website better. You can adjust your cookie settings, otherwise we'll assume you're okay to continue.